/


Текст
Contents
CHAPTER 1 WHY CMAKE? 1
1.1 The History of CMake 3
1.2 Why Not Use Autoconf? 3
1.3 Why Not Use JAM, qmake, SCons, or ANT? 4
1.4 Why Not Script It Yourself? 4
1.5 On What Platforms Does CMake Run? 5
CHAPTER 2 GETTING STARTED 7
2.1 Getting and Installing CMake on Your Computer 7
UNIX and Mac Binary Installations 7
Windows Binary Installation 7
2.2 Building CMake Yourself 8
2.3 Basic CMake Usage and Syntax 8
2.4 Hello World for CMake 9
2.5 How to Run CMake? 10
Running CMake’s Qt Interface 11
Running the ccmake Curses Interface 13
Running CMake from the Command Line 15
Specifying the Compiler to CMake 15
Dependency Analysis 16
2.6 Editing CMakeLists Files 17
2.7 Setting Initial Values for CMake 17
2.8 Building Your Project 19
CHAPTER 3 KEY CONCEPTS 21
3.1 Main Structures 21
3.2 Targets 24
3.3 Source Files 25
3.4 Directories, Generators, Tests, and Properties 26
3.5 Variables and Cache Entries 27
3.6 Build Configurations 32
CHAPTER 4 WRITING CMAKELISTS FILES 33
4.1 CMake Syntax 33
4.2 Basic Commands 34
4.3 Flow Control 35
4.4 Regular Expressions 42
IV
4.5 Checking Versions of CMake 44
4.6 Using Modules 45
Using CMake with SWIG 48
Using CMake with Qt 49
Using CMake with FLTK 50
4.7 Policies 50
Updating a Project For a New Version of CMake 53
4.8 Linking Libraries 57
Specifying Optimized or Debug Libraries with a Target 59
4.9 Shared Libraries and Loadable Modules 59
4.10 Shared Library Versioning 64
4.11 Installing Files 66
Installing Prerequisite Shared Libraries 76
4.12 Advanced Commands 82
CHAPTER 5 SYSTEM INSPECTION 85
5.1 Using Header Files and Libraries 85
5.2 System Properties 87
5.3 Finding Packages 92
5.4 Built-in Find Modules 93
5.5 How to Pass Parameters to a Compilation? 95
5.6 How to Configure a Header File 97
5.7 Creating CMake Package Configuration Files 99
CHAPTER 6 CUSTOM COMMANDS AND TARGETS 103
6.1 Portable Custom Commands 103
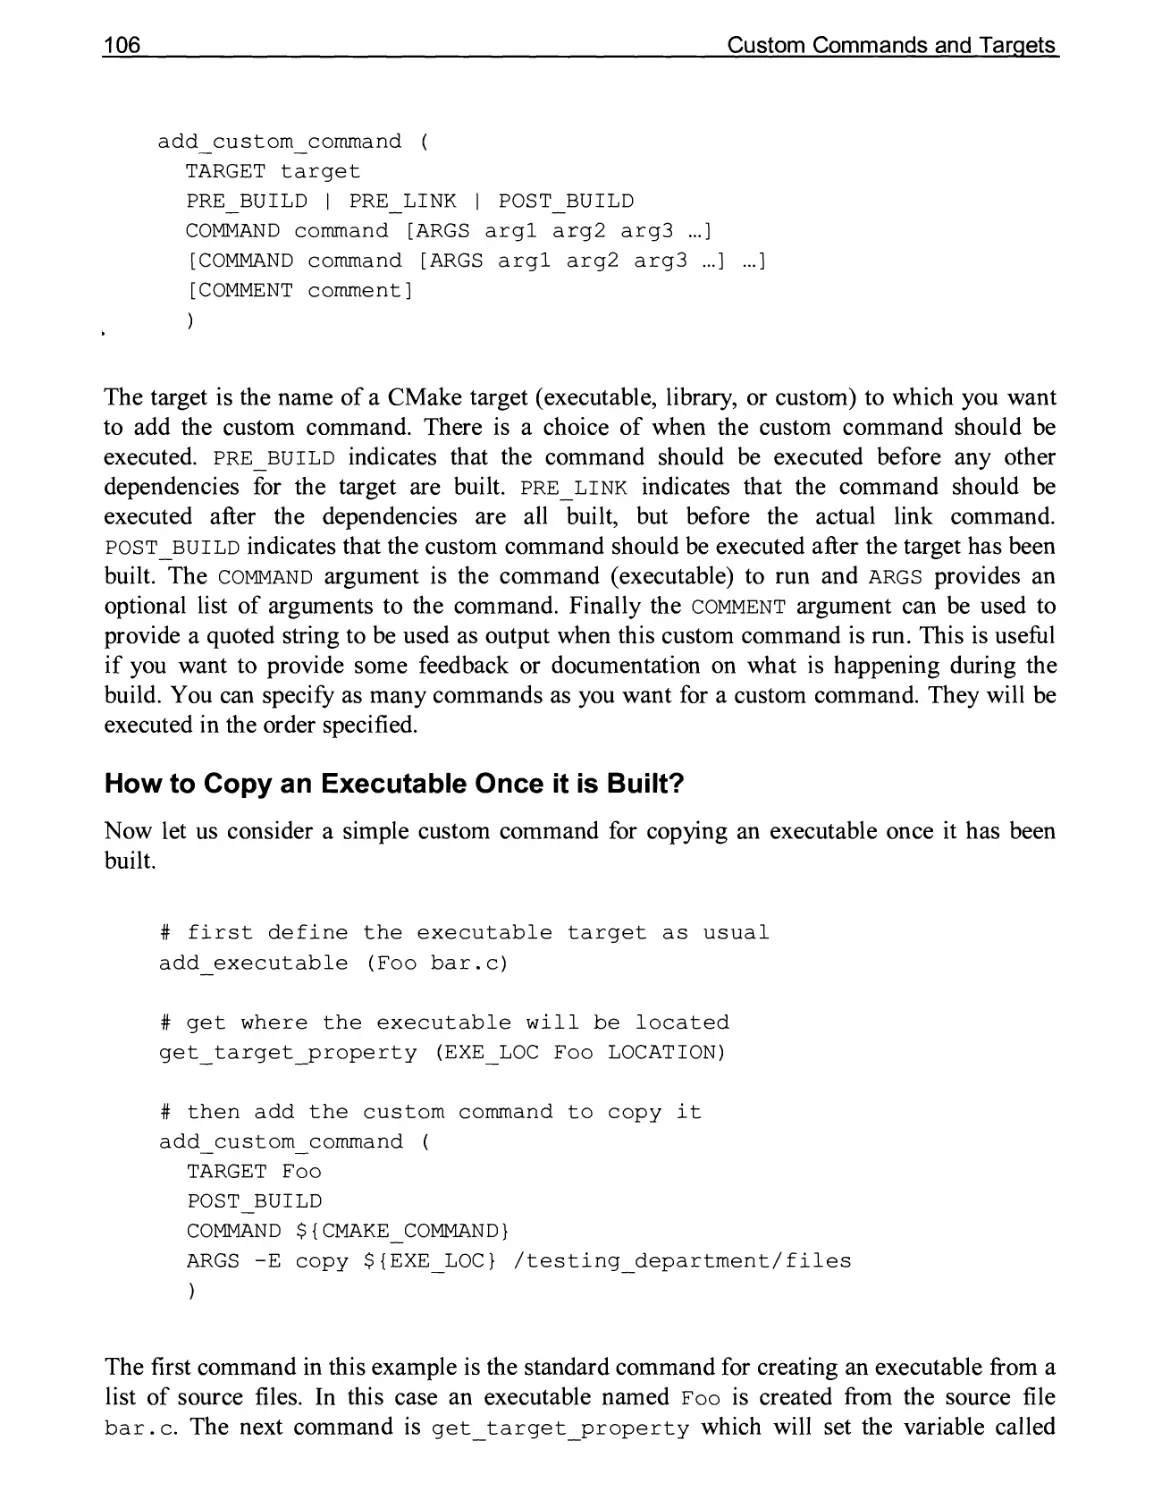
6.2 Using add_custom_command on a Target 105
How to Copy an Executable Once it is Built? 106
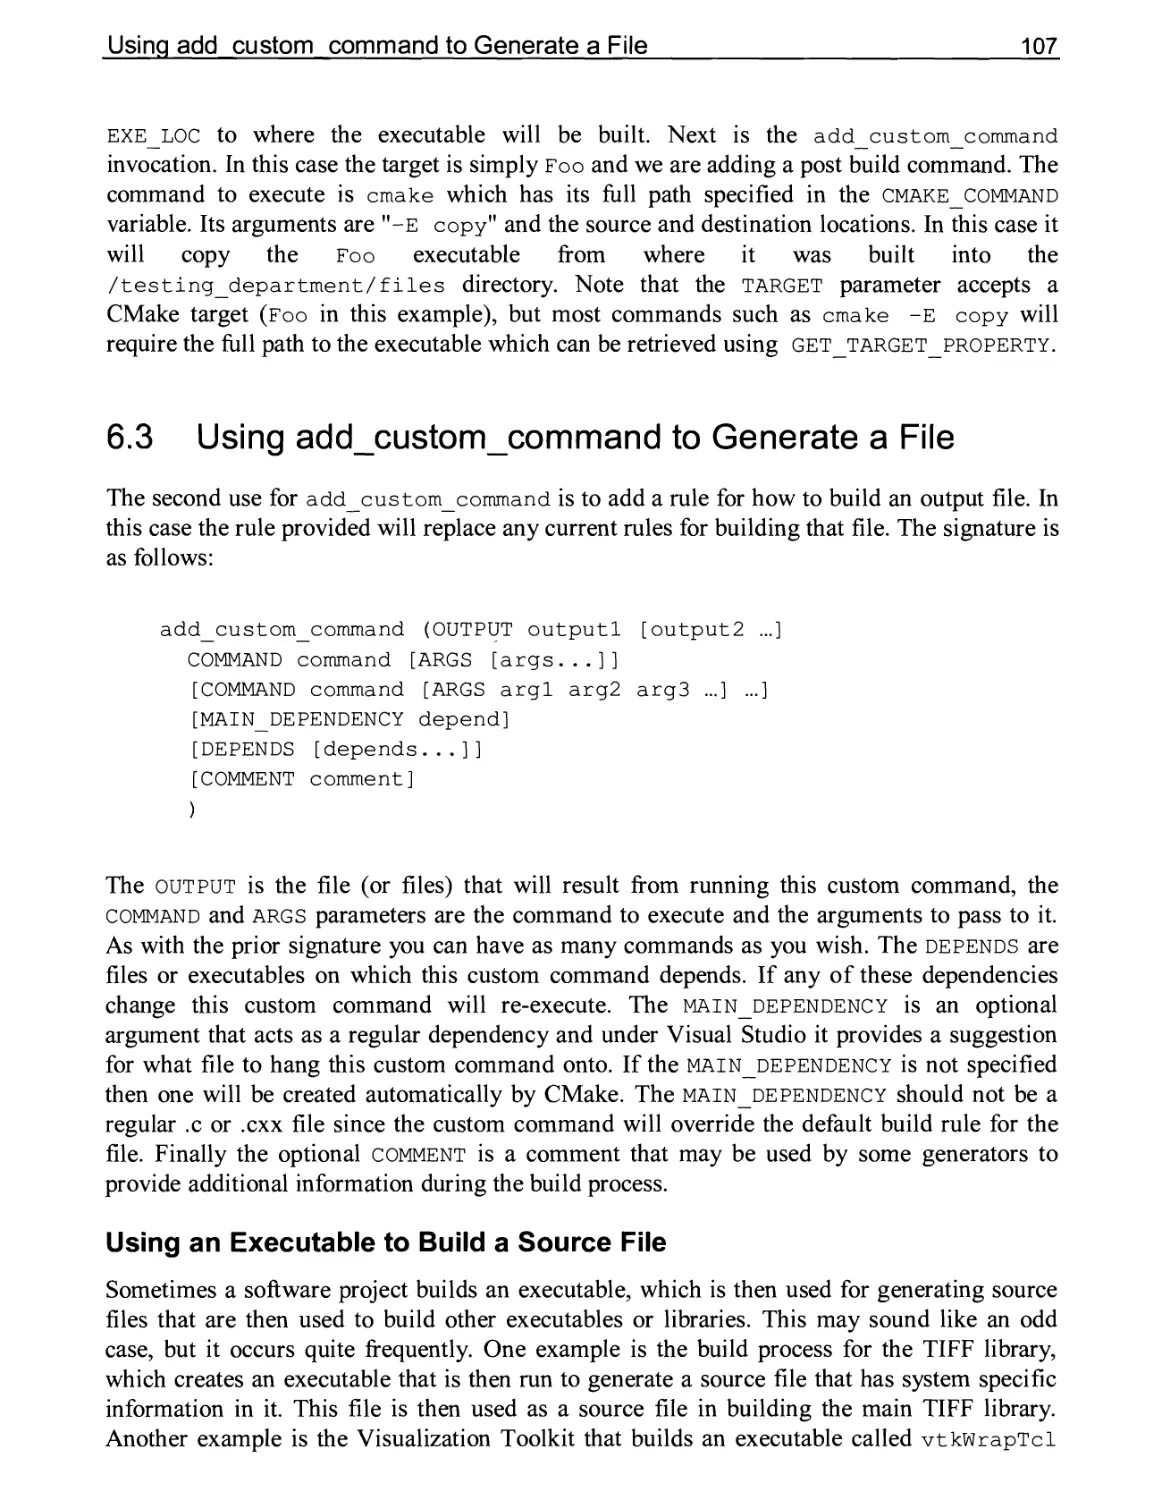
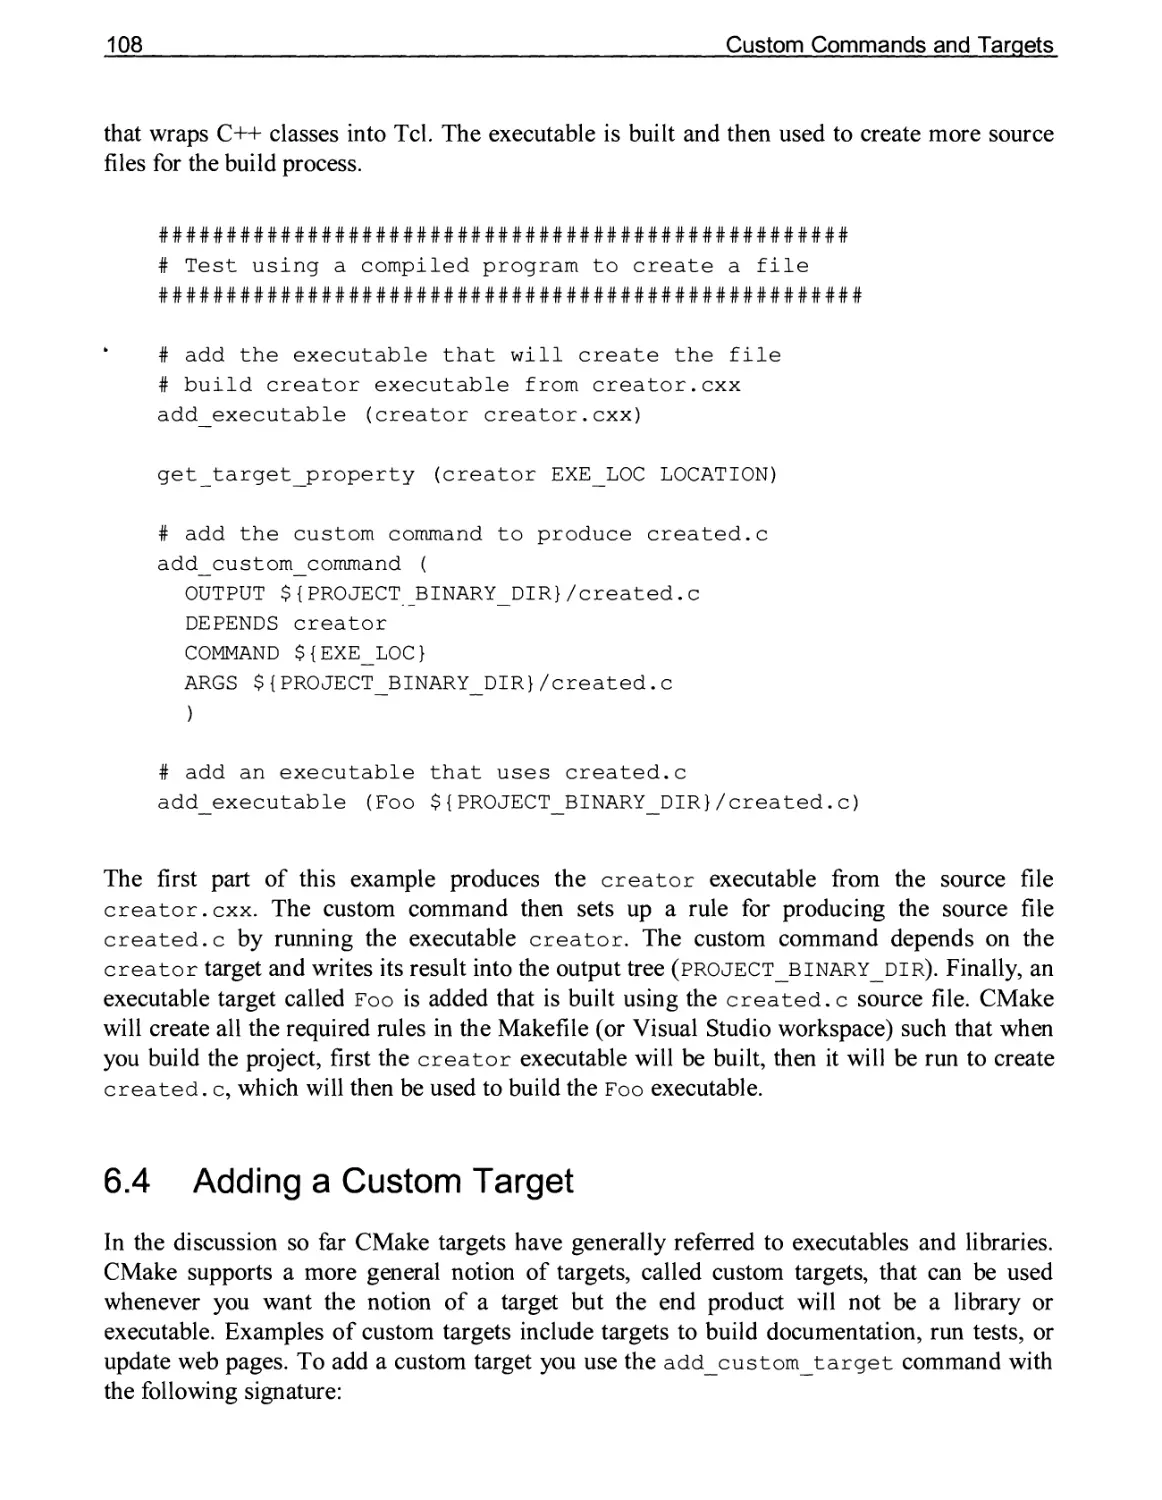
6.3 Using add_custom_command to Generate a File 107
Using an Executable to Build a Source File 107
6.4 Adding a Custom Target 108
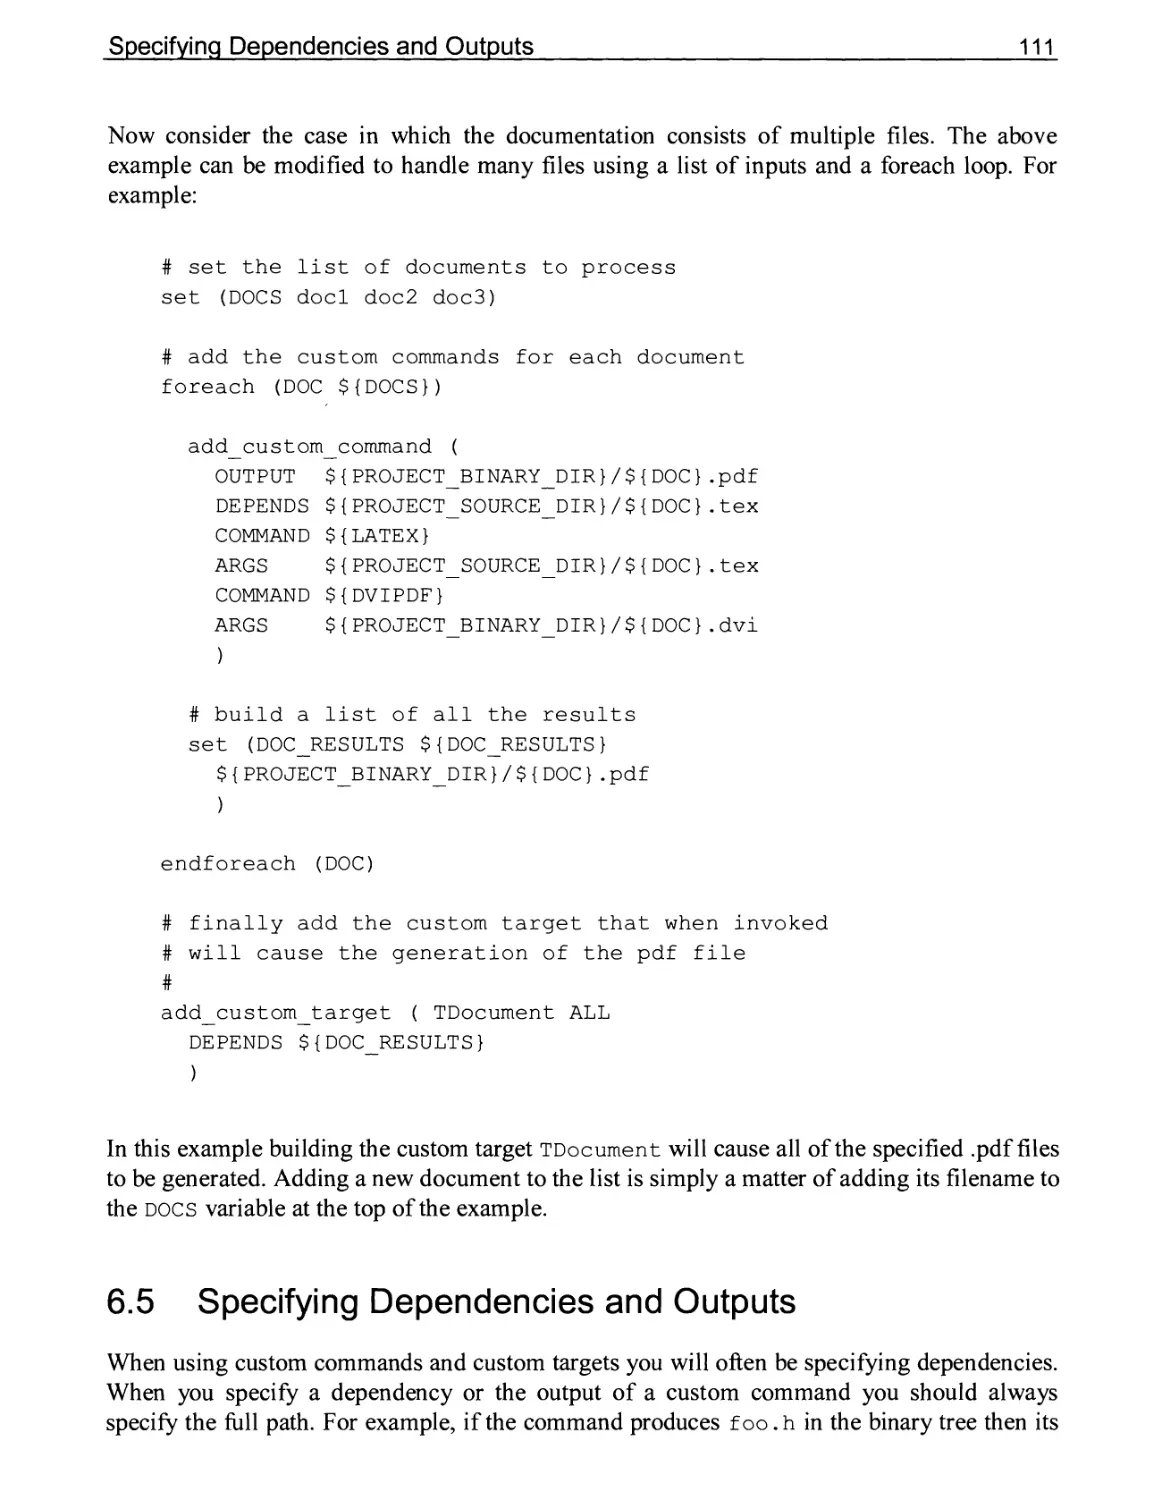
6.5 Specifying Dependencies and Outputs 111
6.6 When There Isn’t One Rule For One Output 112
A Single Command Producing Multiple Outputs 112
Having One Output That Can Be Generated By Different Commands 112
CHAPTER 7 CONVERTING EXISTING SYSTEMS TO CMAKE 115
7.1 Source Code Directory Structures 115
7.2 Build Directories 117
7.3 Useful CMake Commands When Converting Projects 119
7.4 Converting UNIX Makefiles 120
V
7.5 Converting Autoconf Based Projects 121
7.6 Converting Windows Based Workspaces 123
CHAPTER 8 CROSS COMPILING WITH CMAKE 125
8.1 Toolchain Files 126
Finding External Libraries, Programs and Other Files 128
8.2 System Inspection 130
Using Compile Checks 131
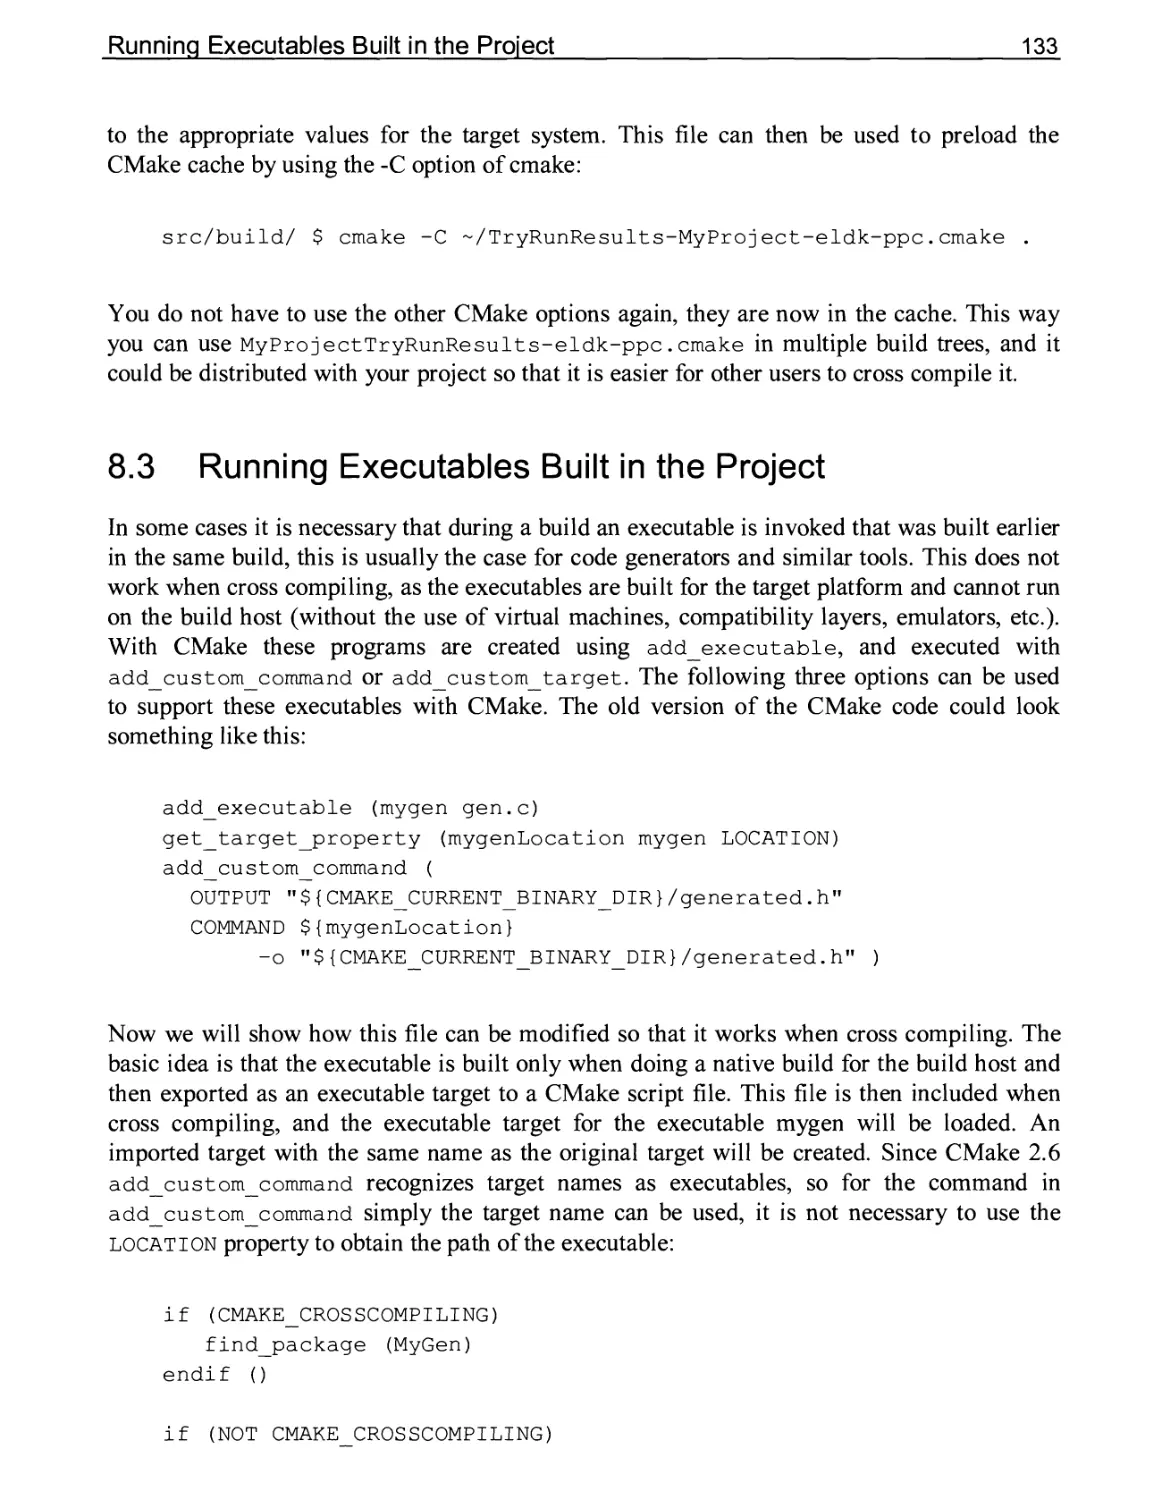
8.3 Running Executables Built in the Project 133
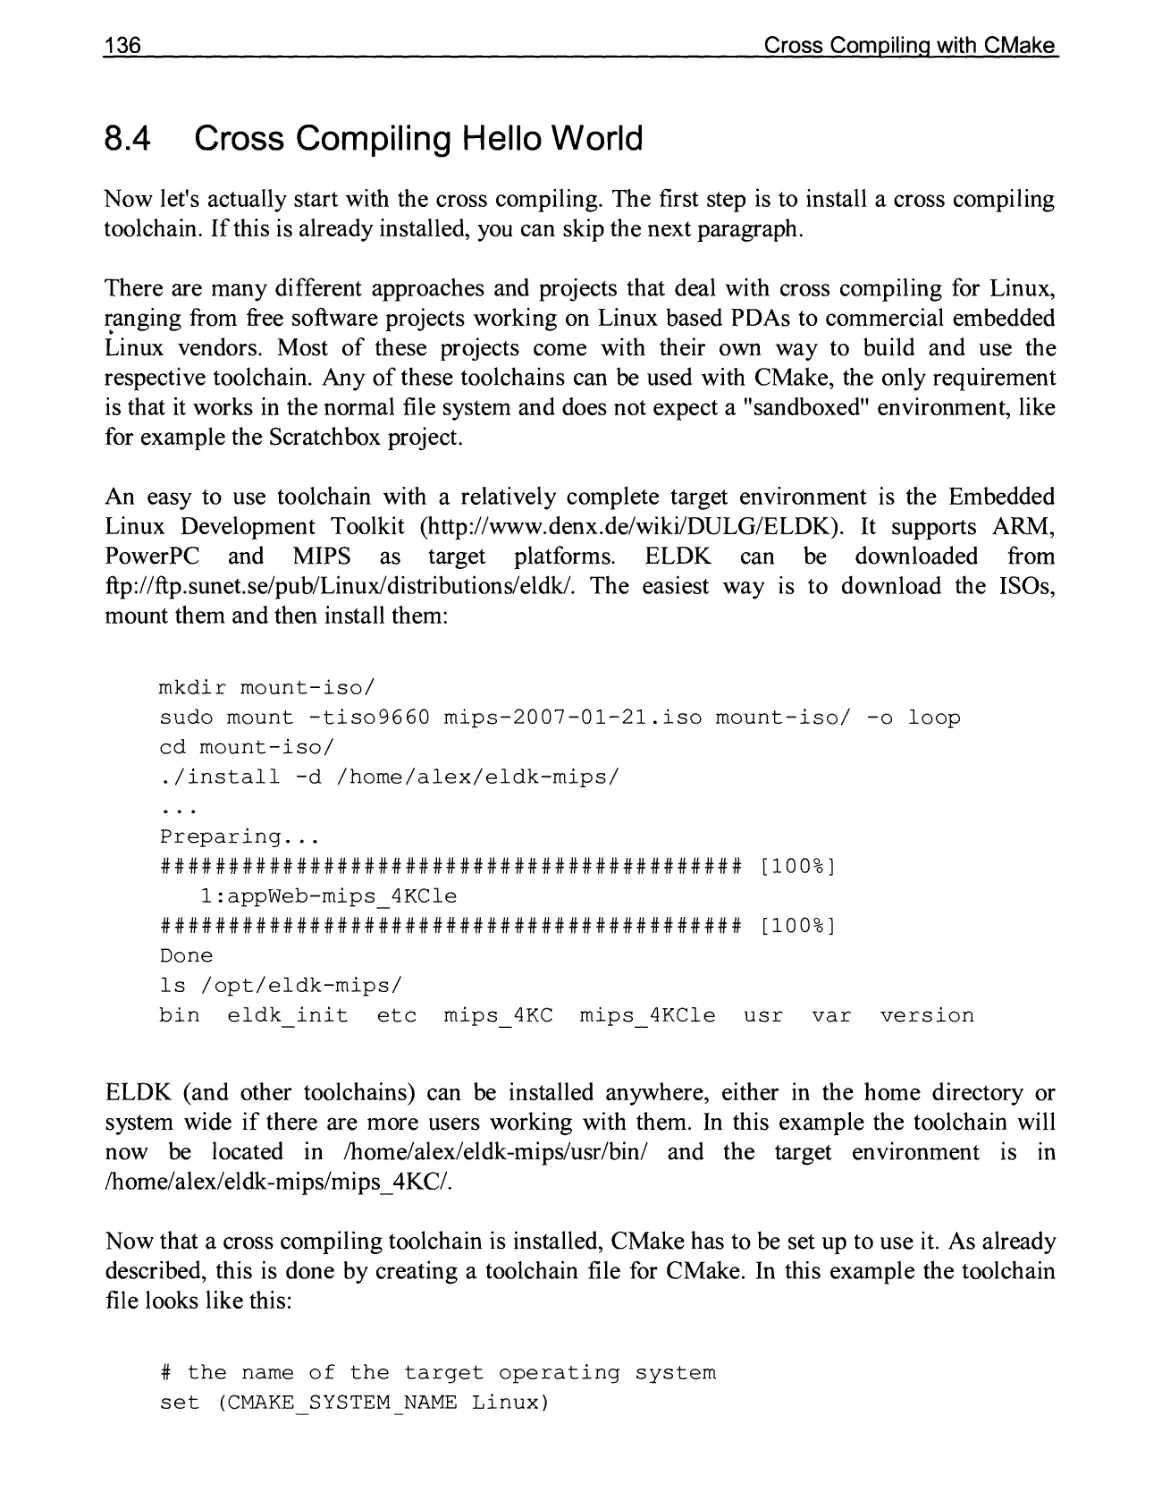
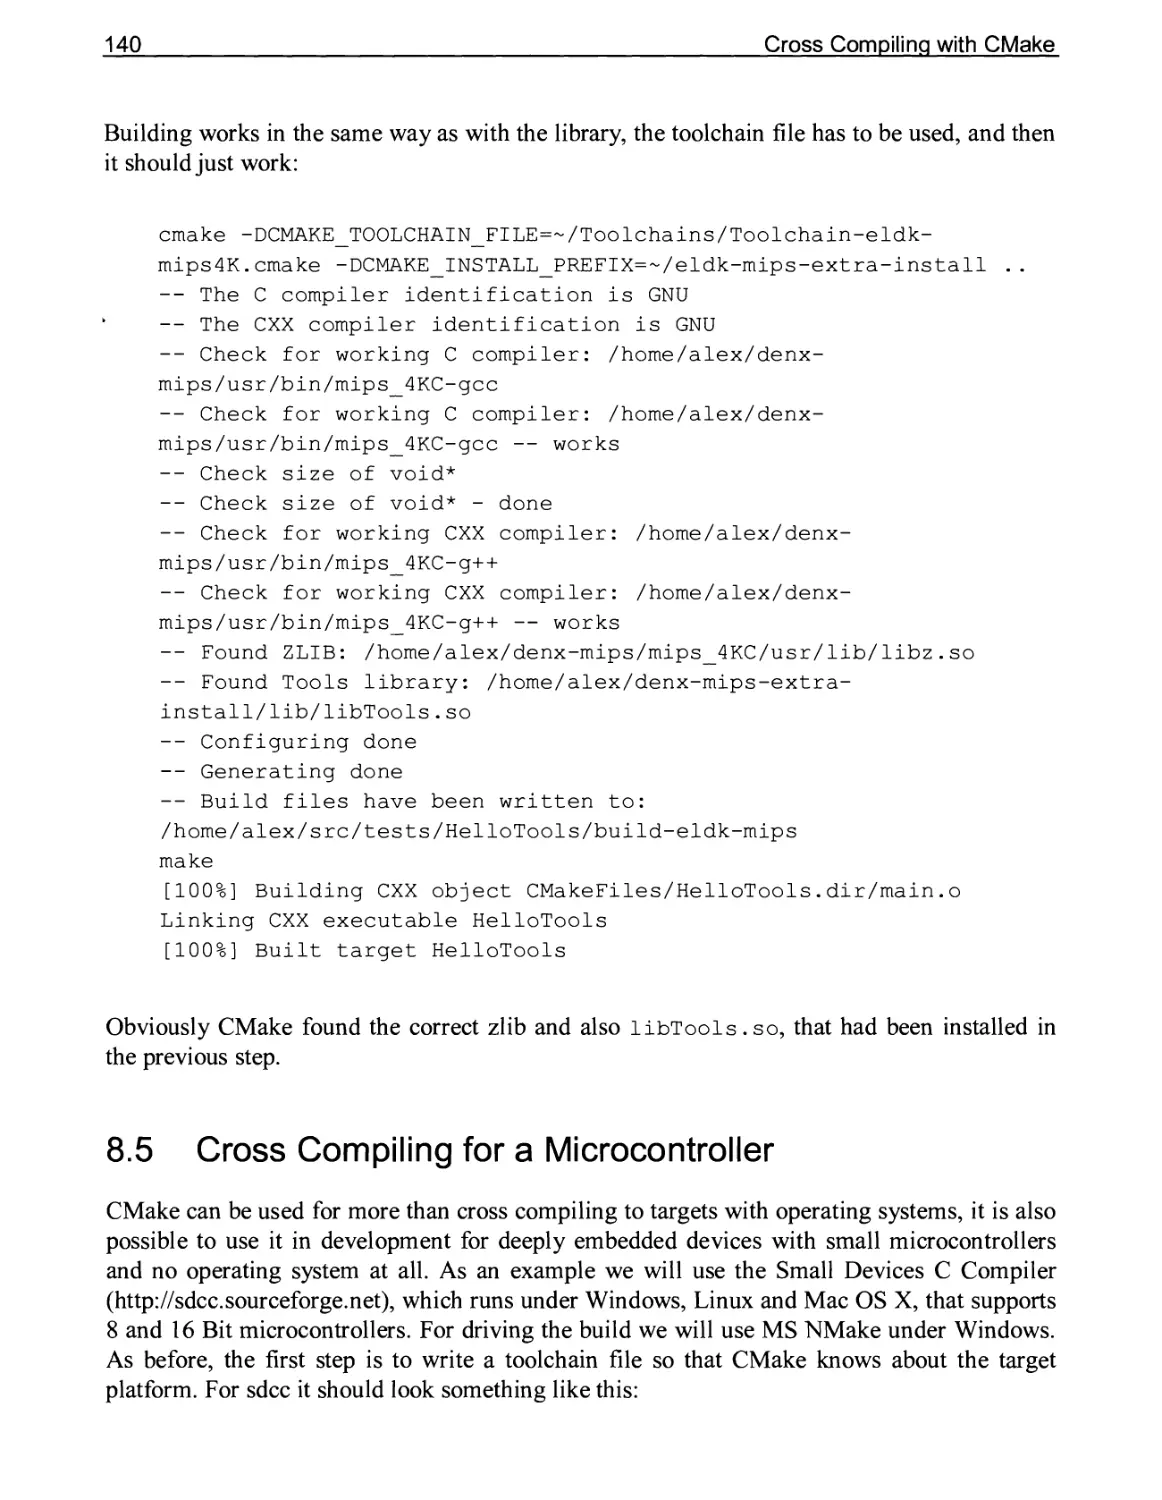
8.4 Cross Compiling Hello World 136
8.5 Cross Compiling for a Microcontroller 140
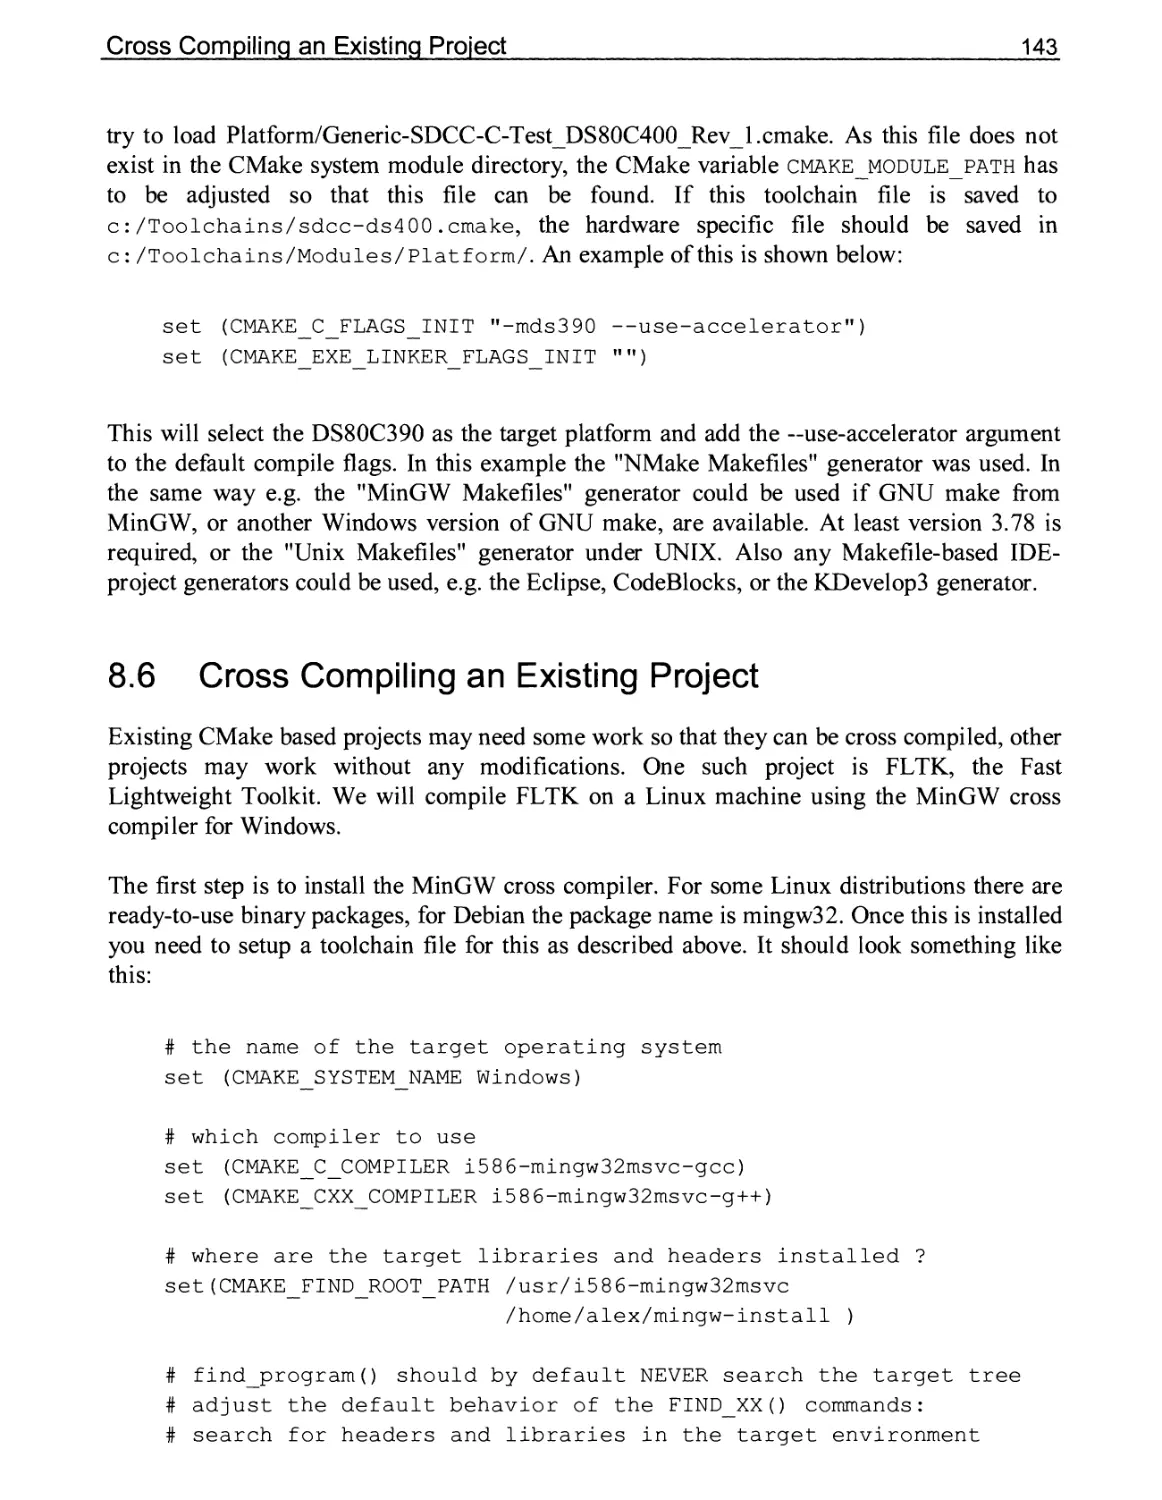
8.6 Cross Compiling an Existing Project 143
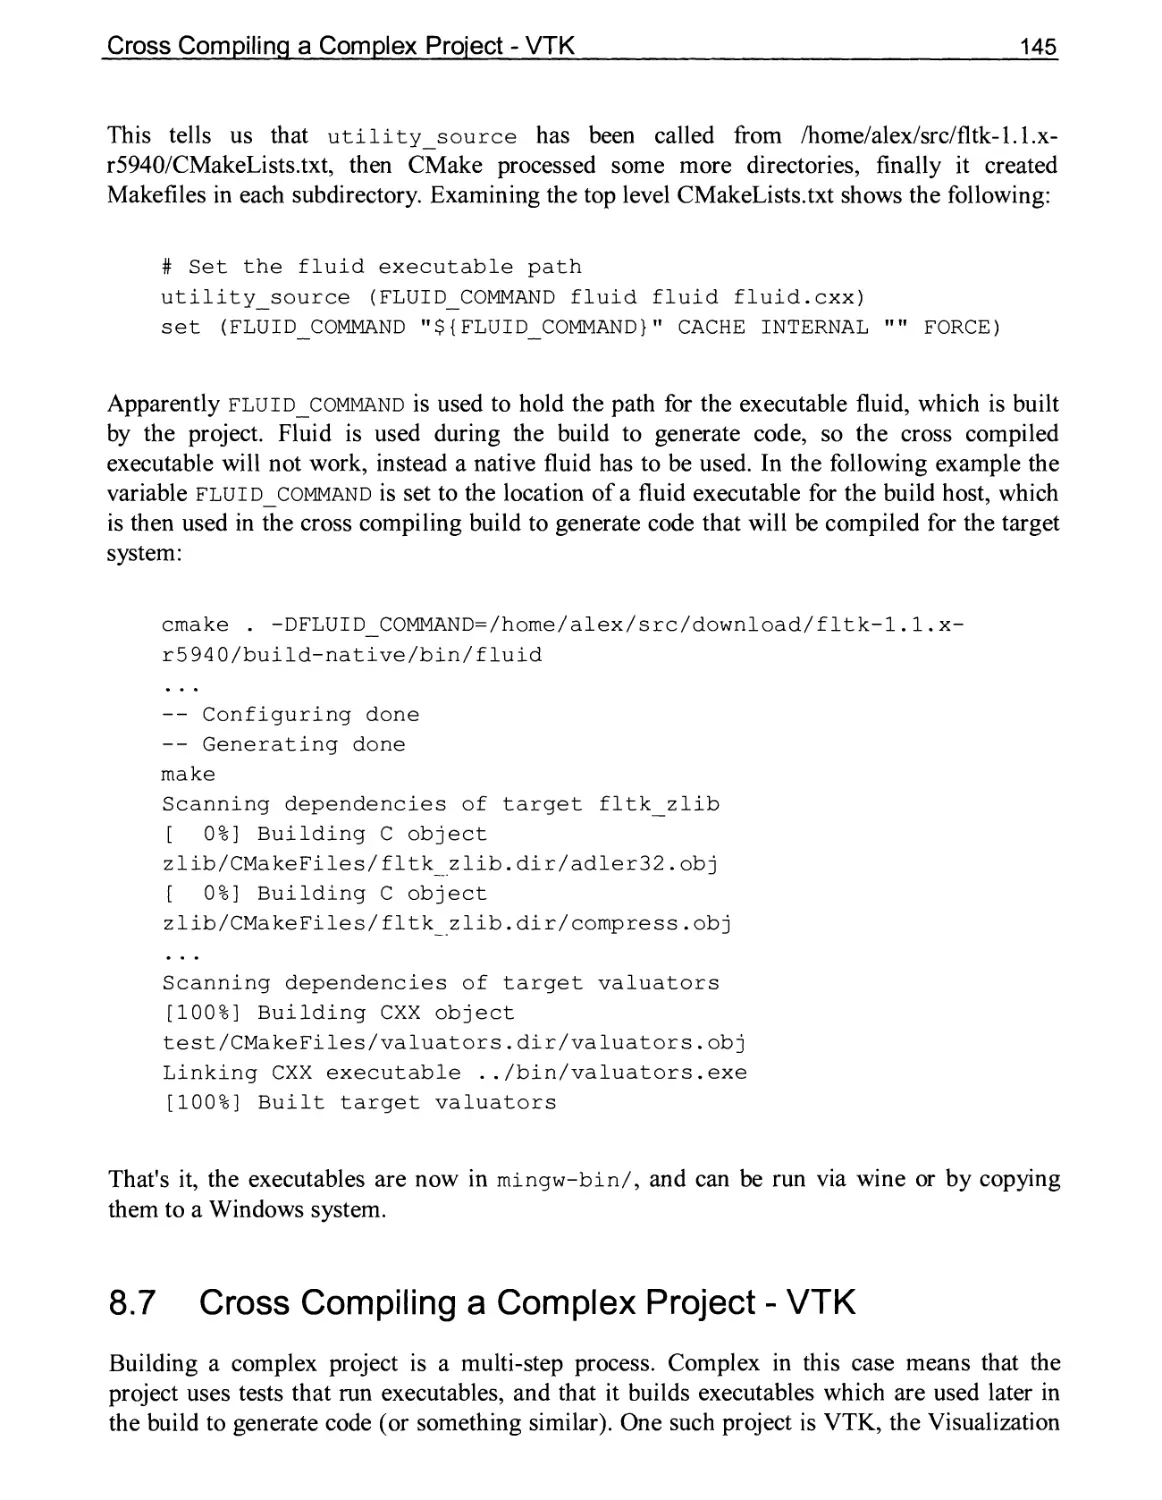
8.7 Cross Compiling a Complex Project - VTK 145
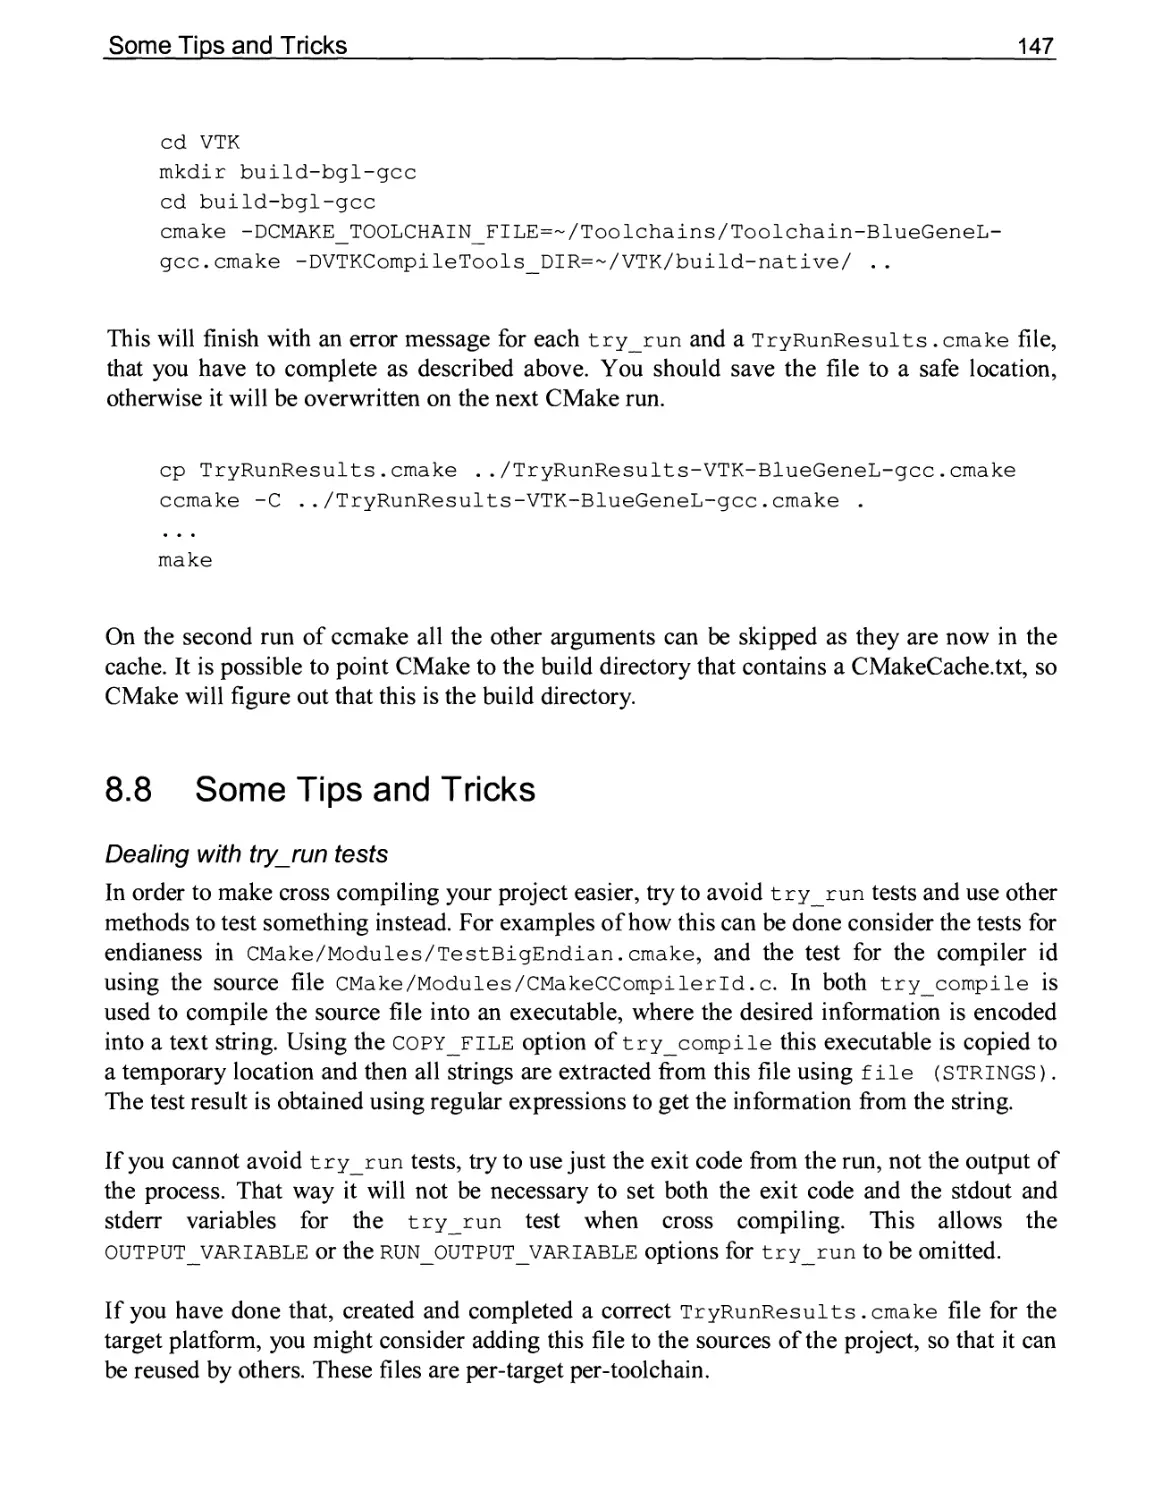
8.8 Some Tips and Tricks 147
CHAPTER 9 PACKAGING WITH CPACK 149
9.1 CPack Basics 149
Simple Example 150
What Happens When CPack.cmake Is Included? 151
Adding Custom CPack Options 152
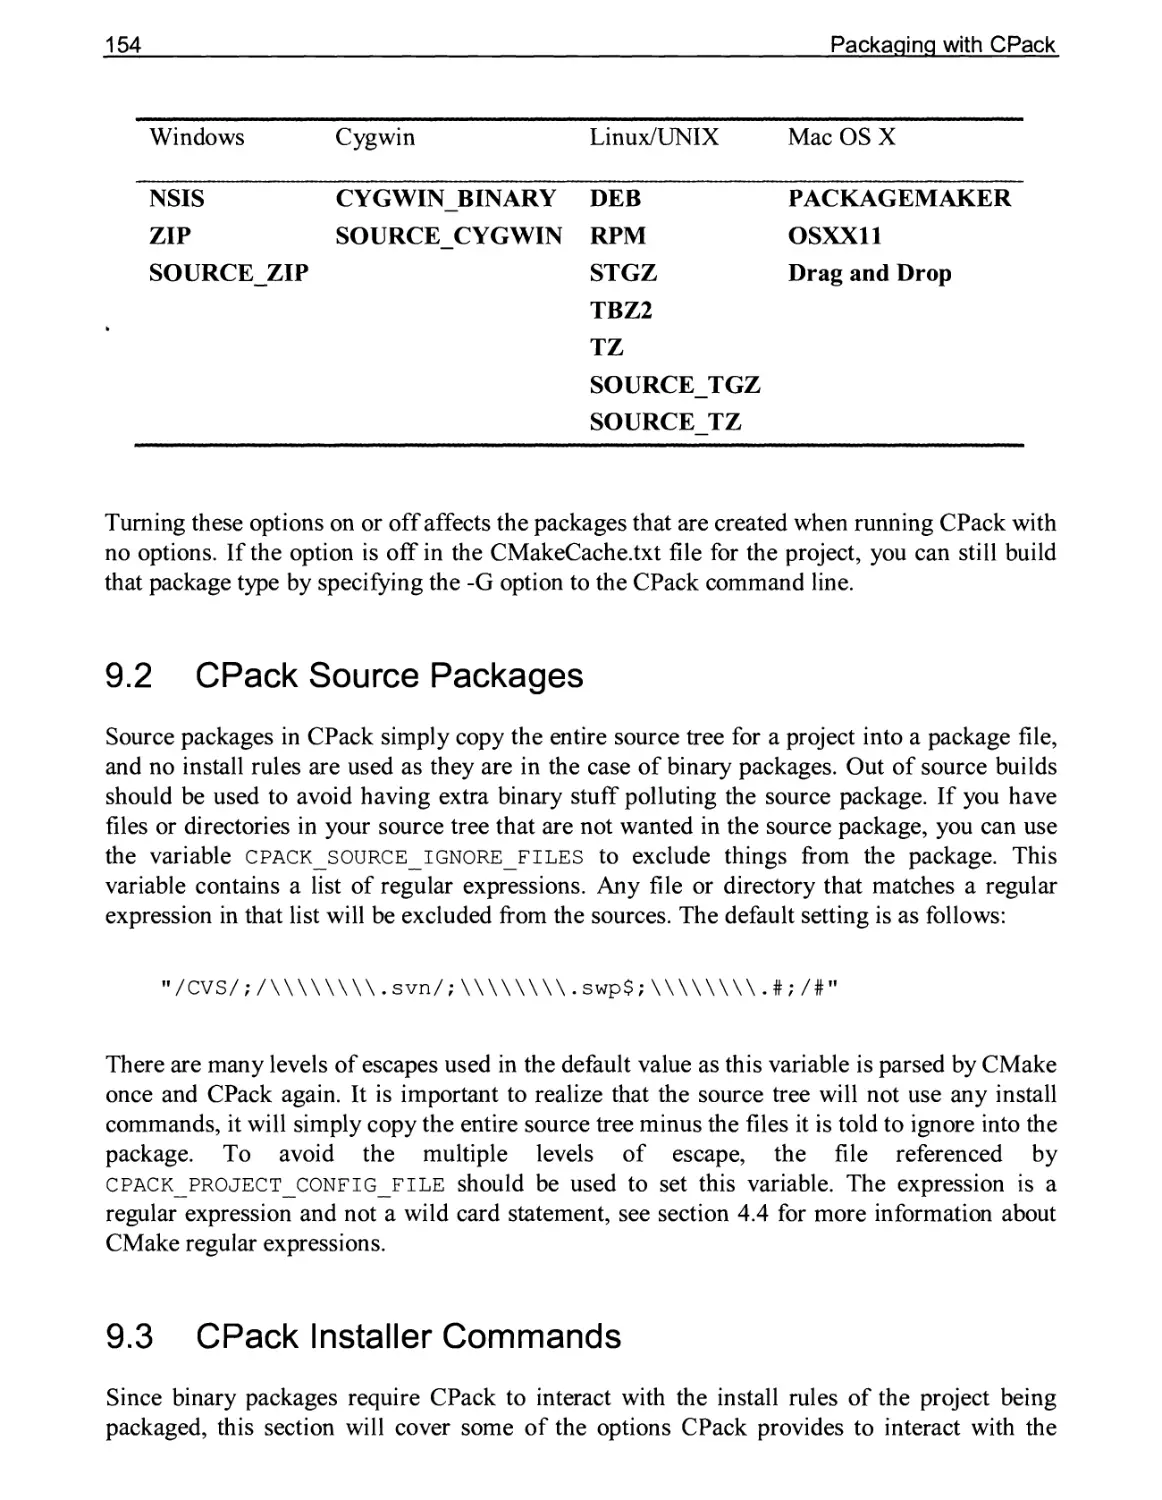
Options Added by CPack 153
9.2 CPack Source Packages 154
9.3 CPack Installer Commands 154
9.4 CPack for Windows Installer NSIS 156
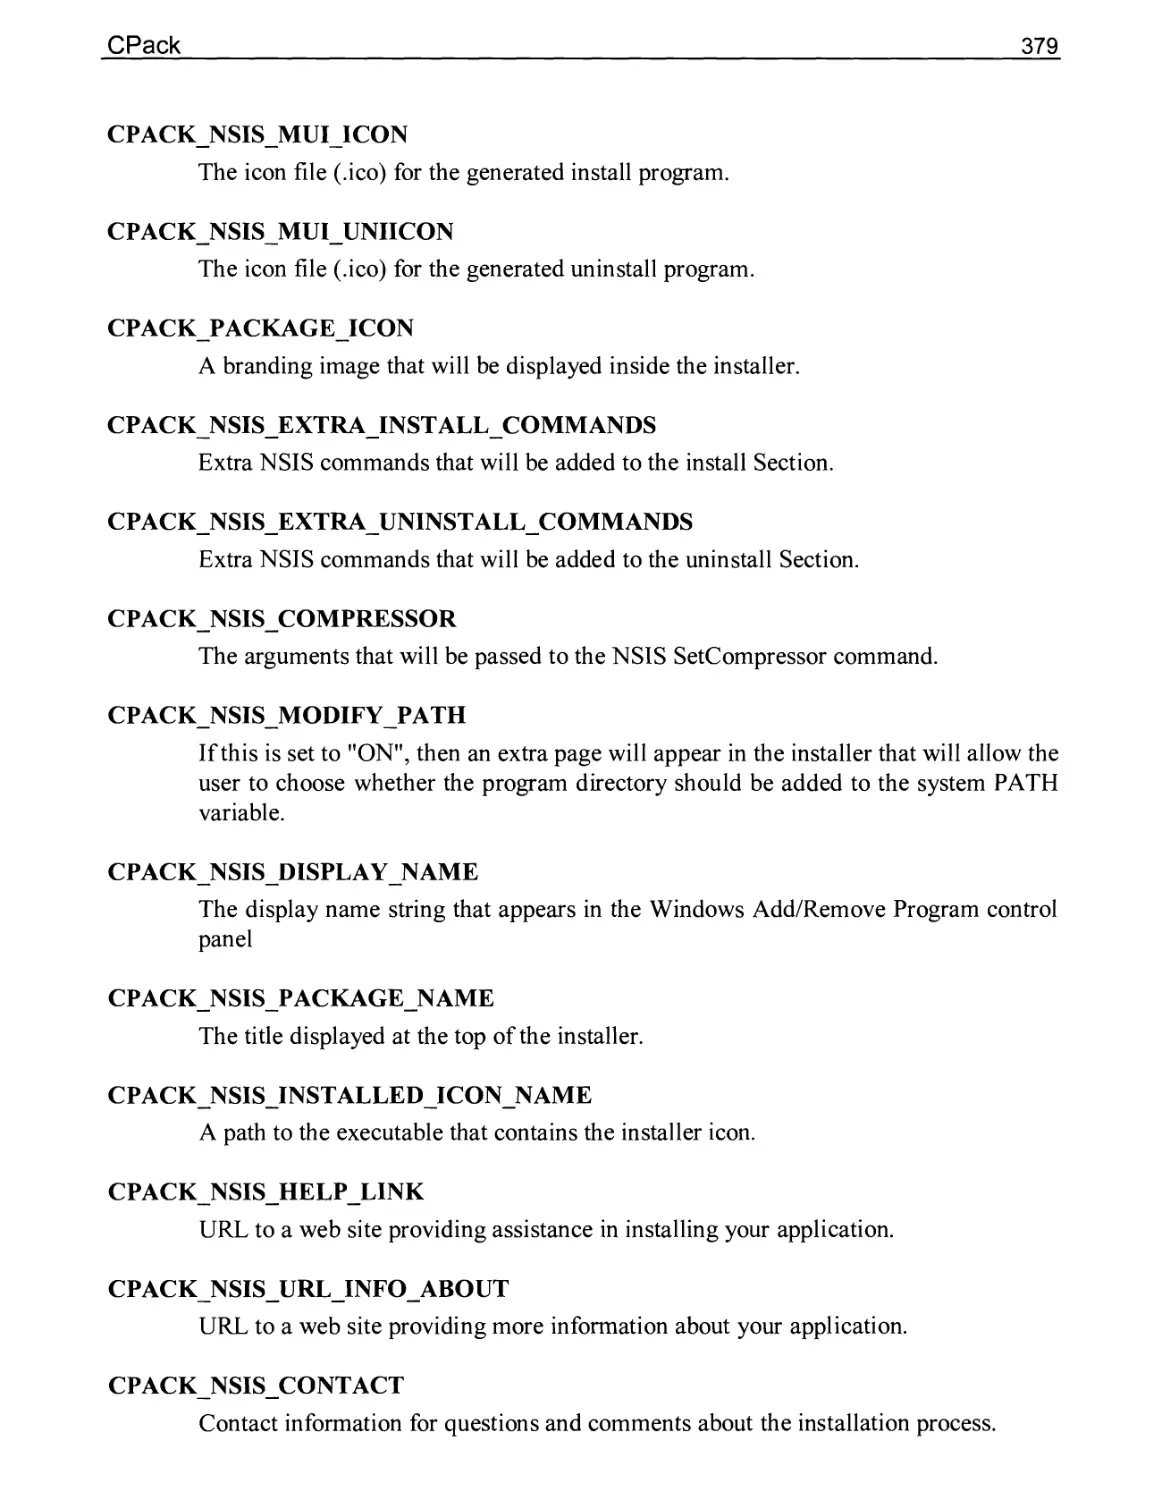
CPack Variables Used by CMake for NSIS 156
Creating Windows Short Cuts in the Start Menu 161
A dvanced NSIS CPack Options 161
Setting File Extension Associations With NSIS 162
Installing Microsoft Run Time Libraries 163
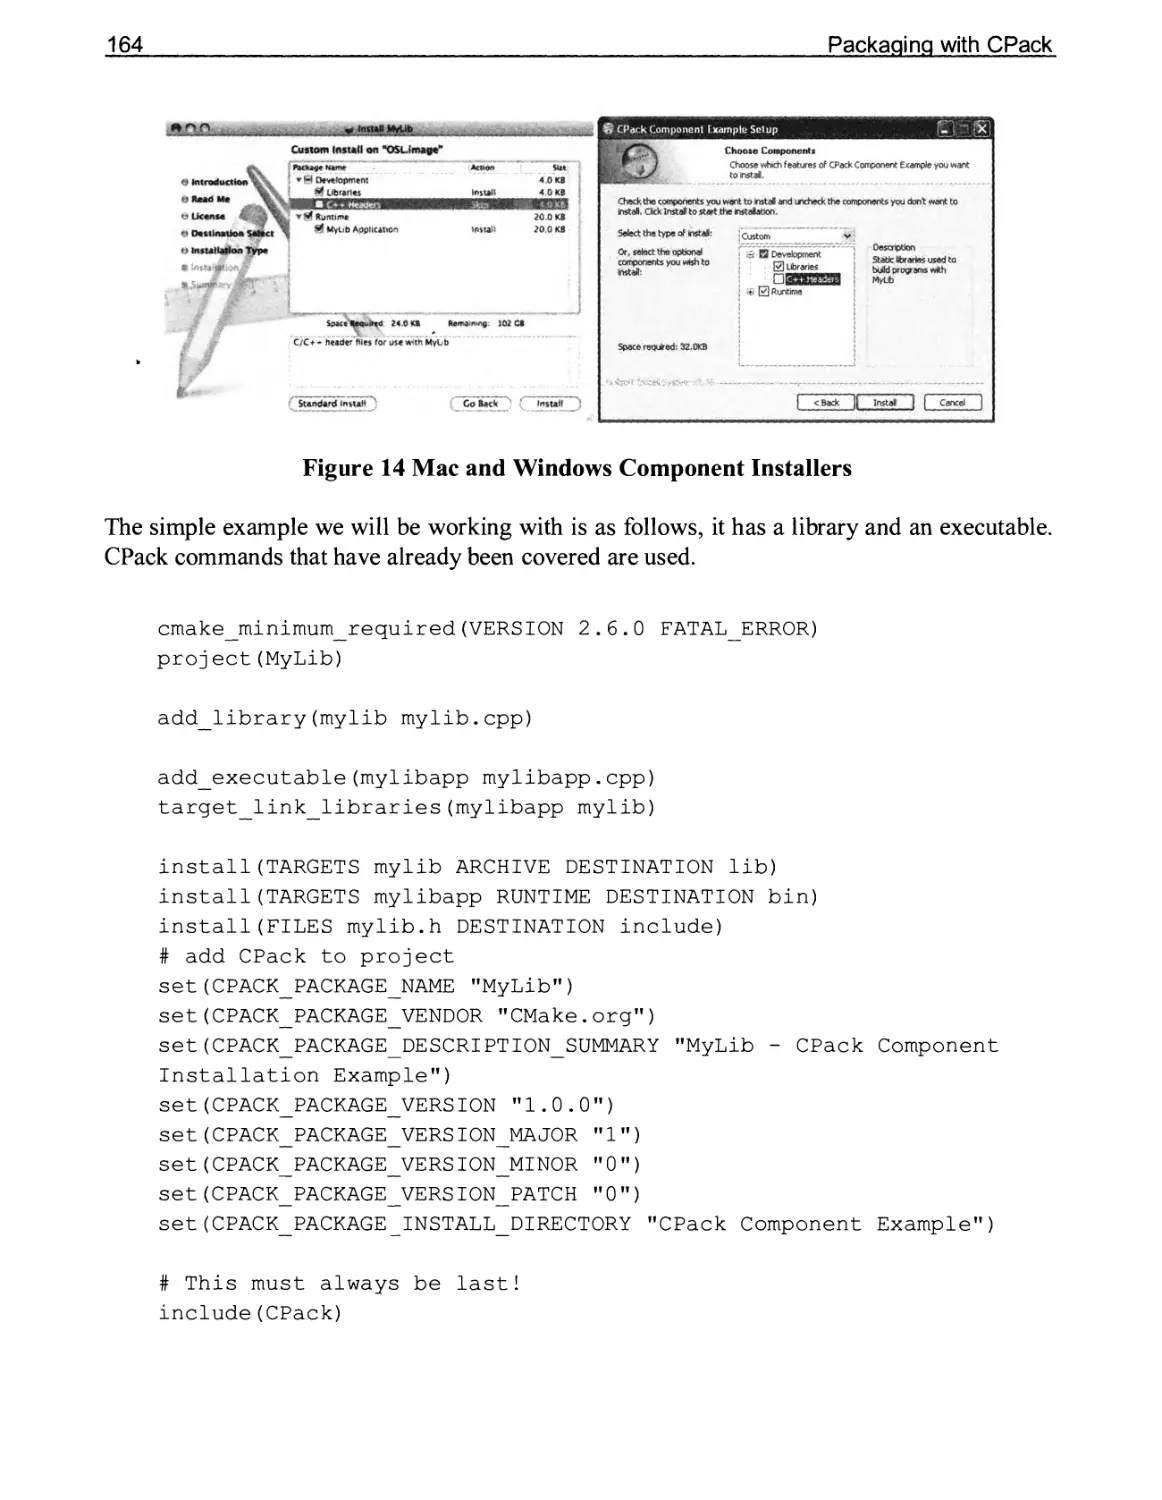
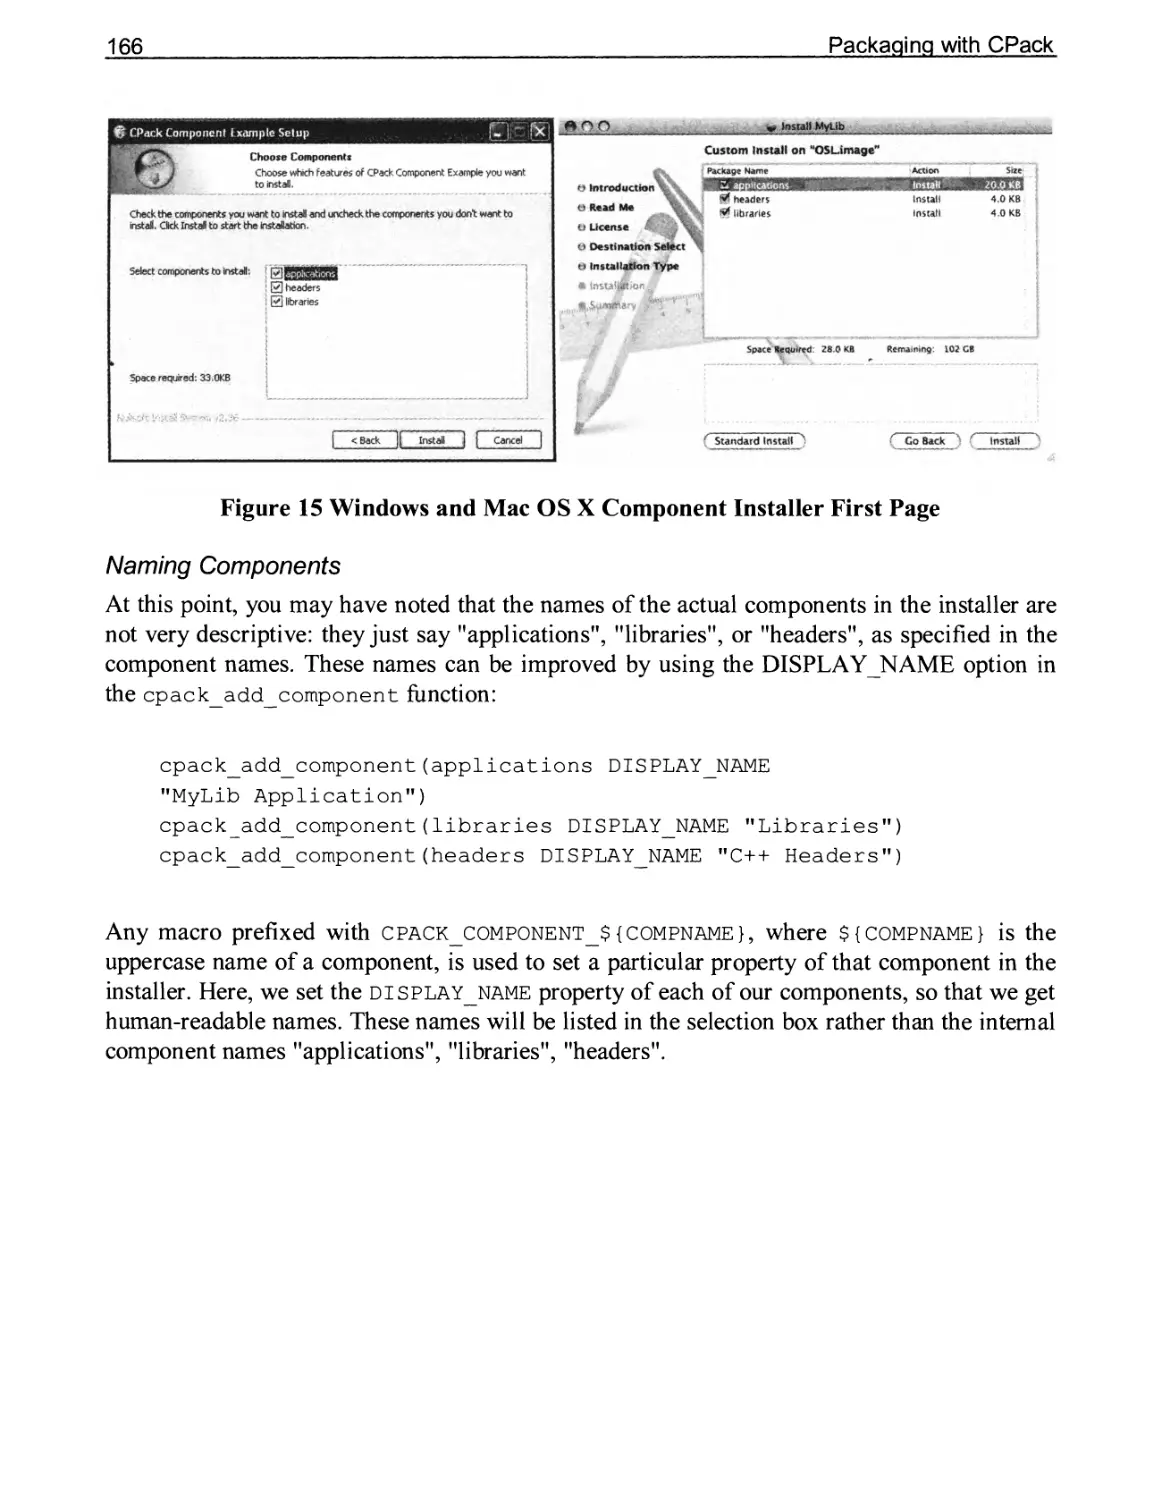
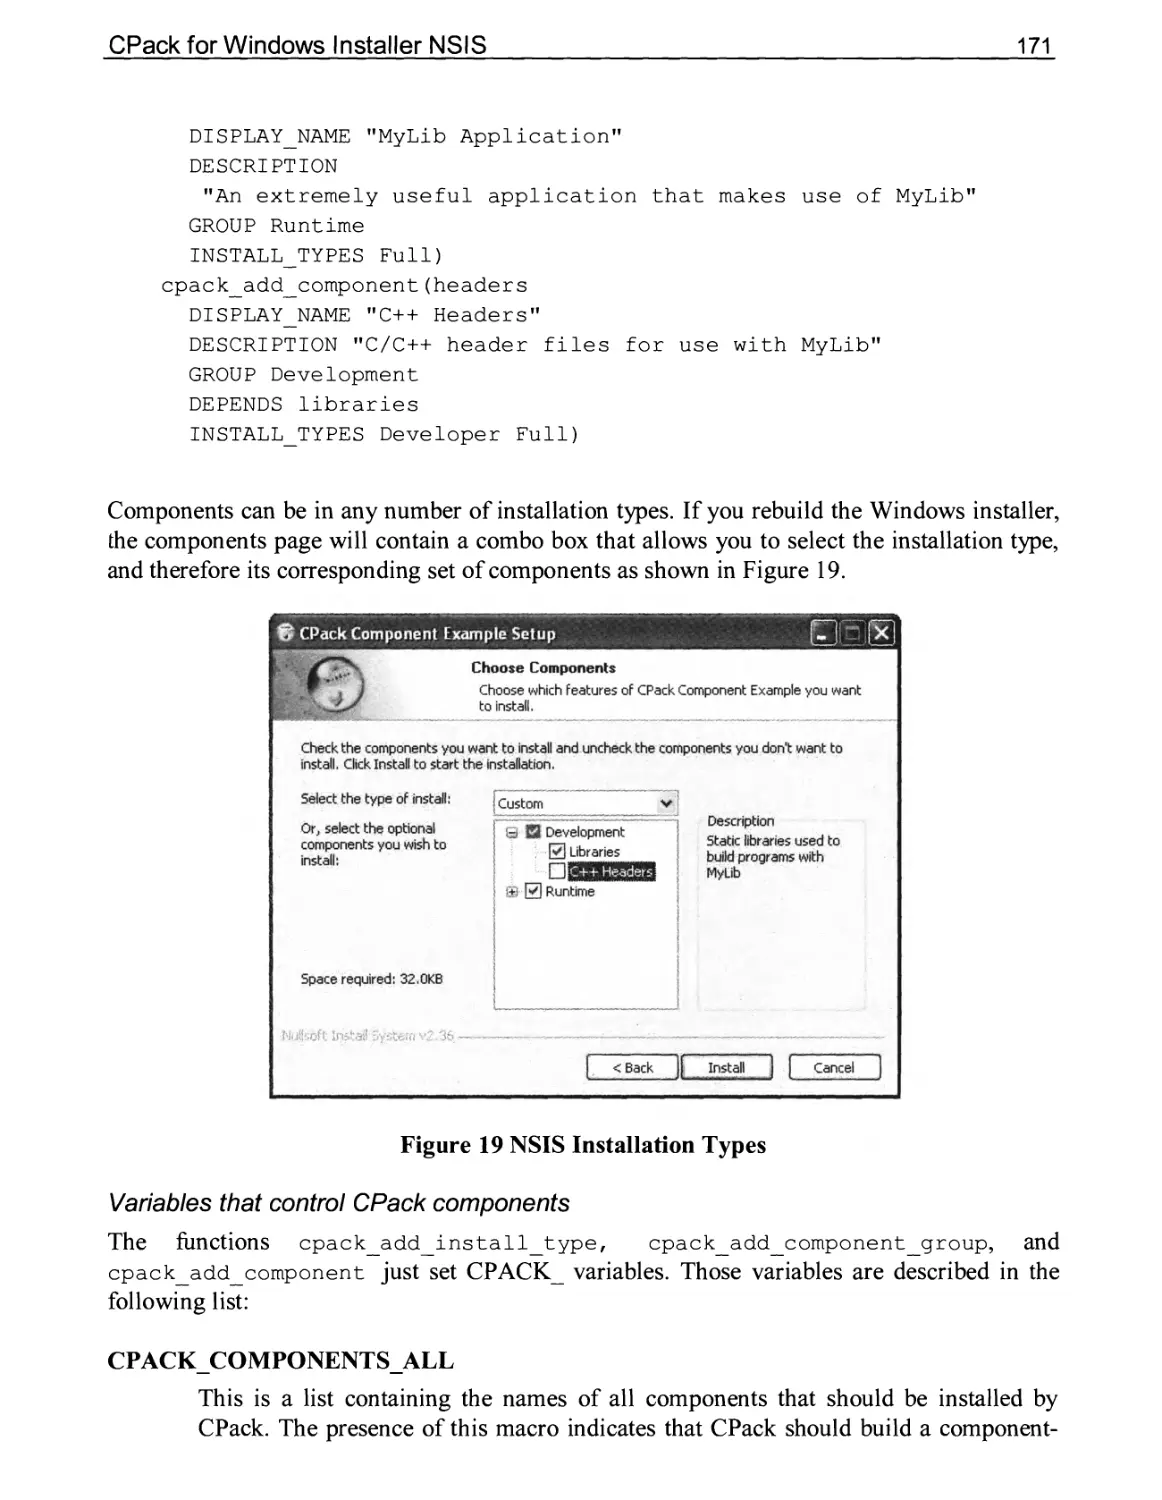
CPack Component Install Support 163
9.5 CPack for Cygwin Setup 173
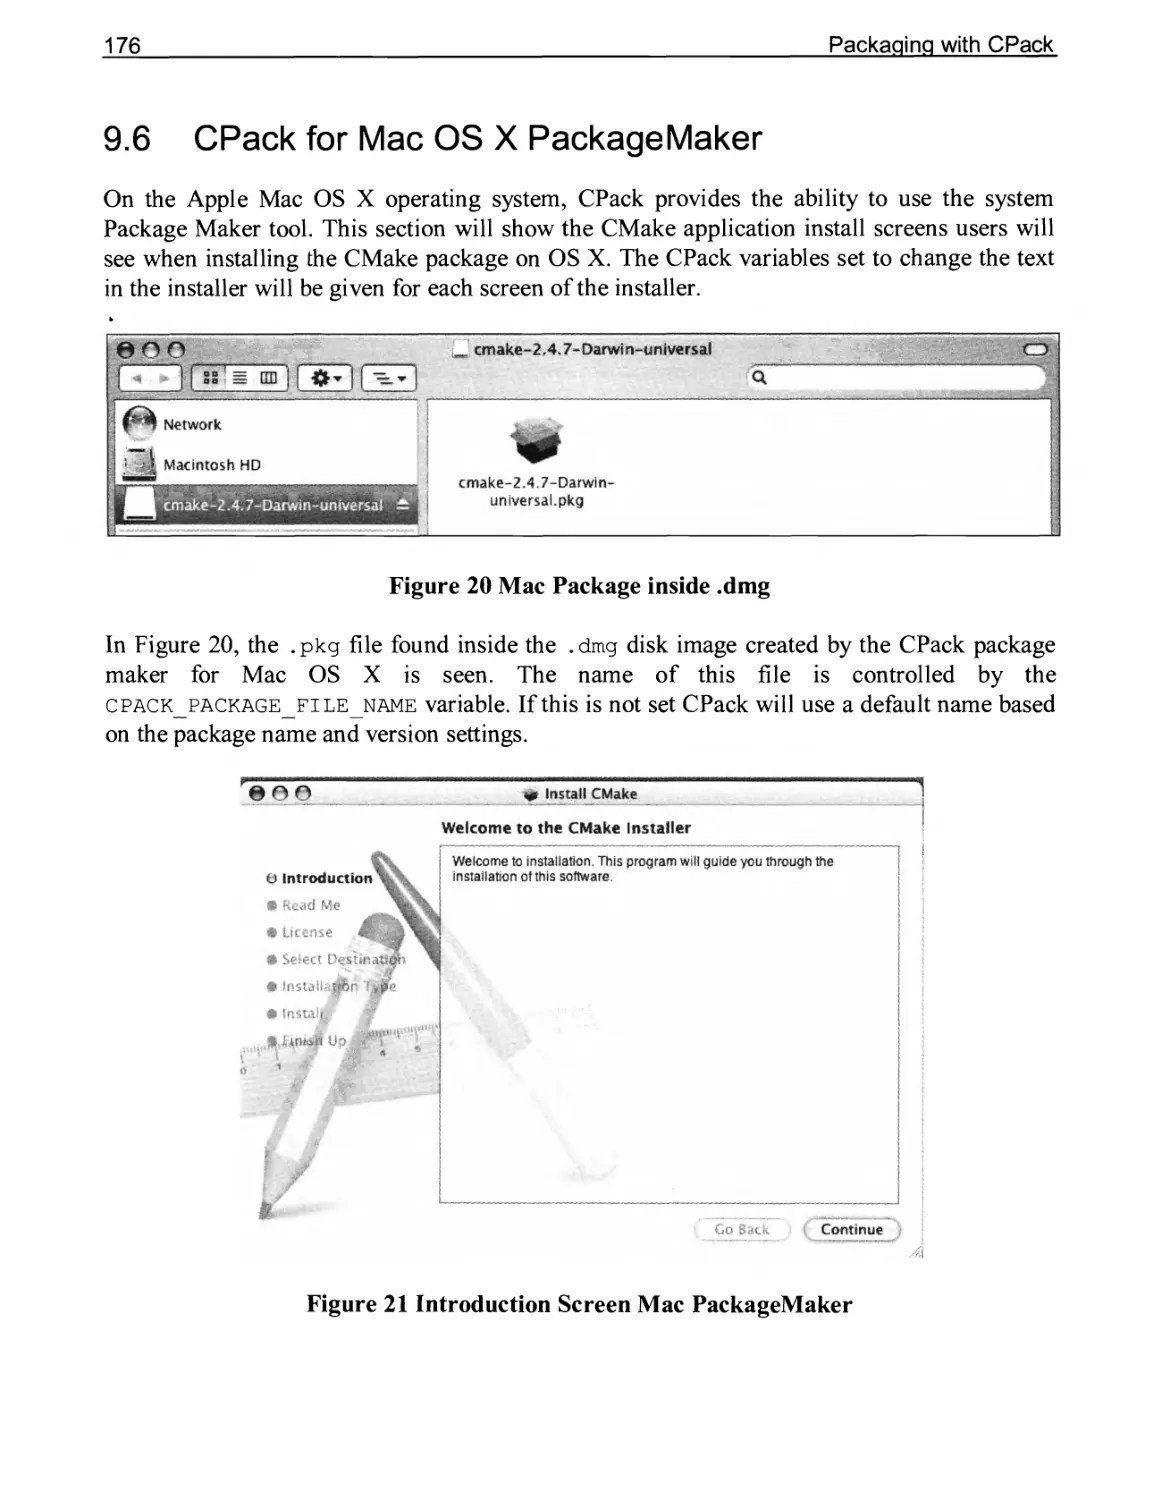
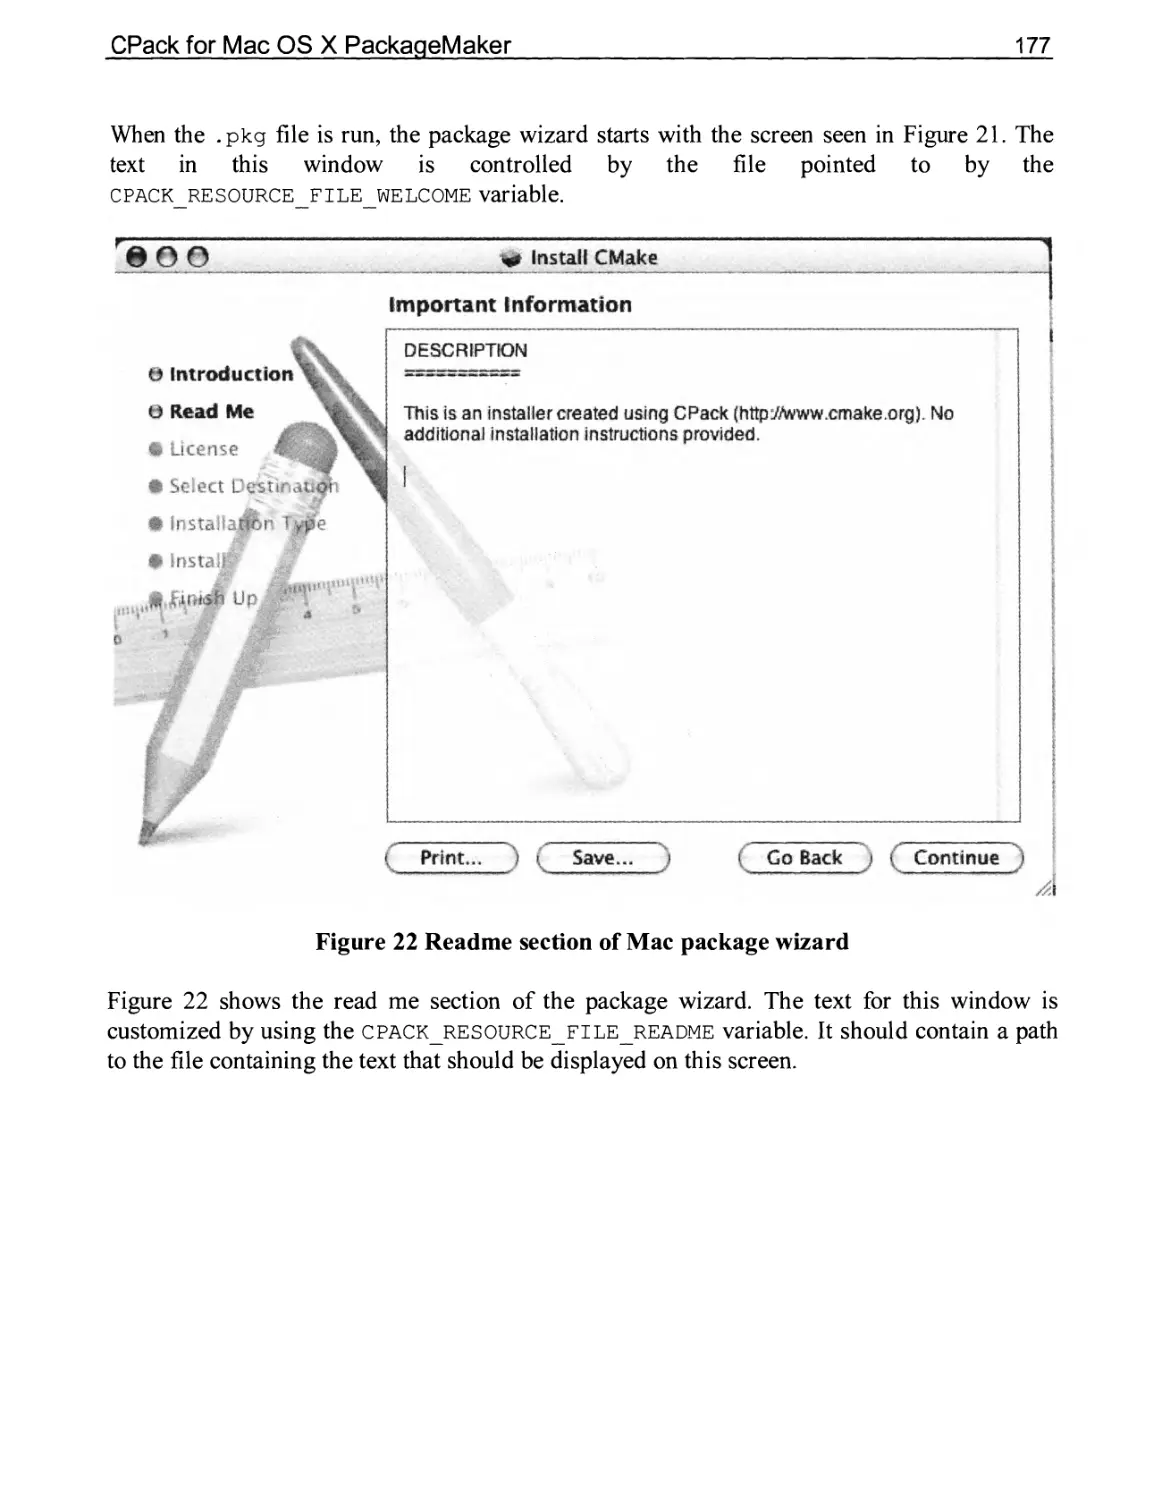
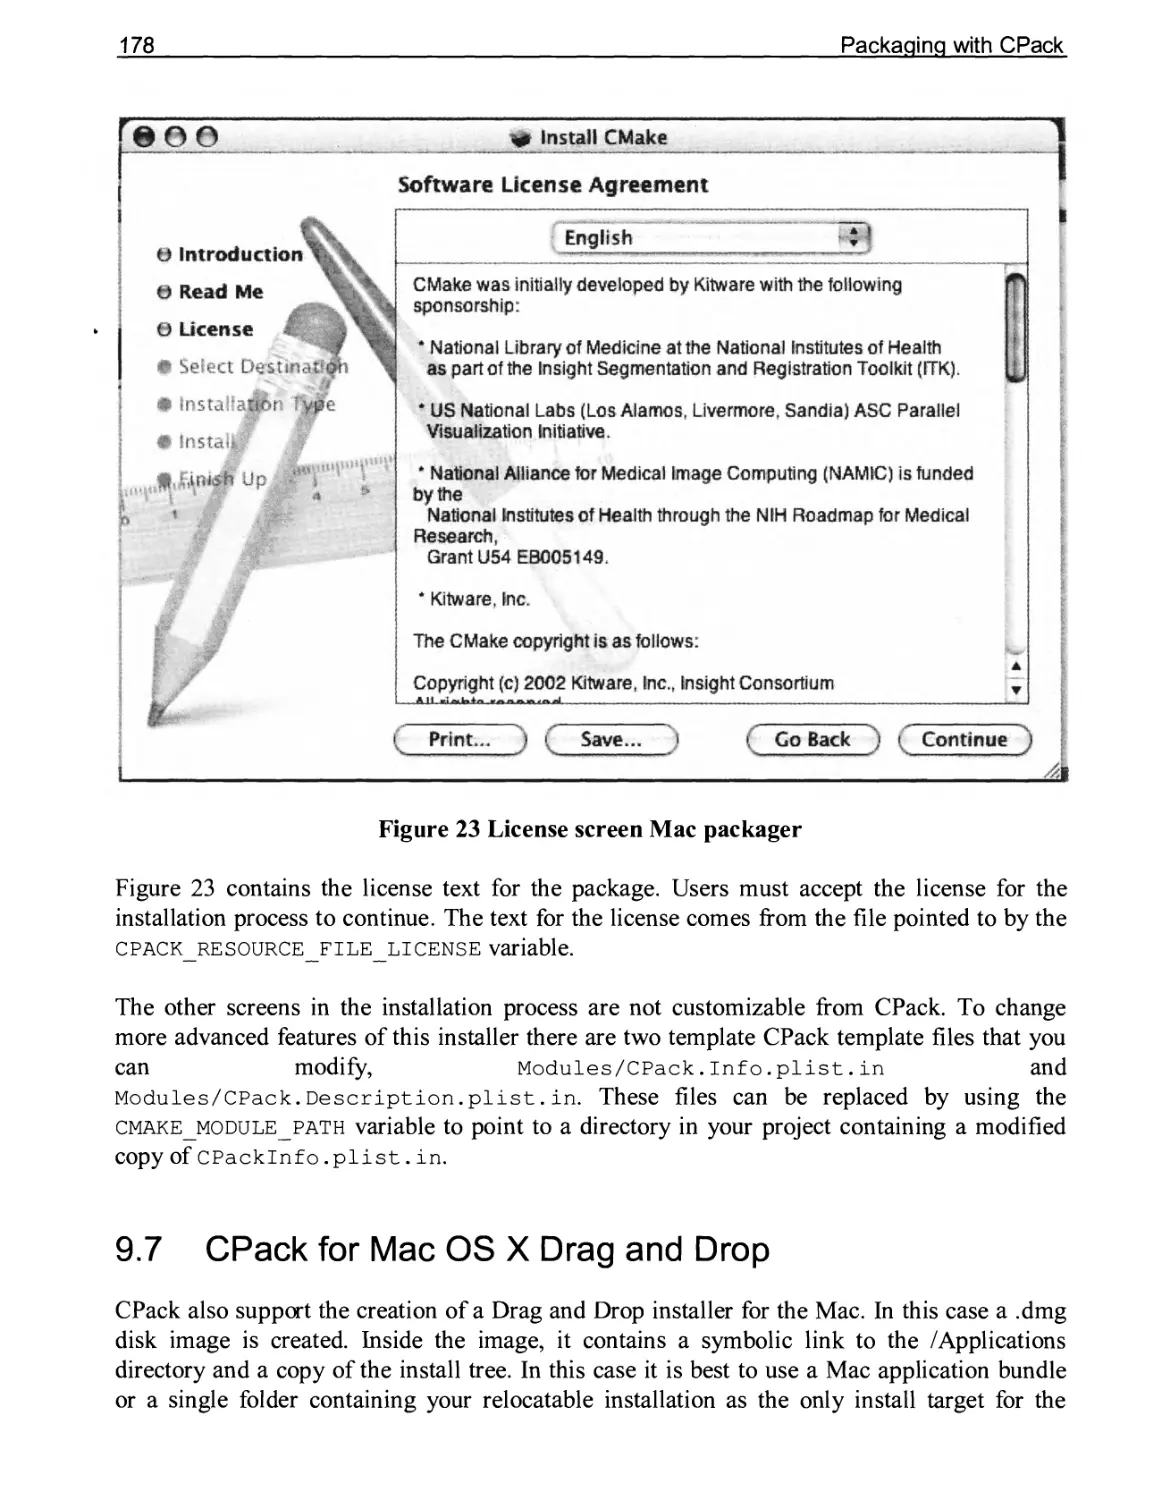
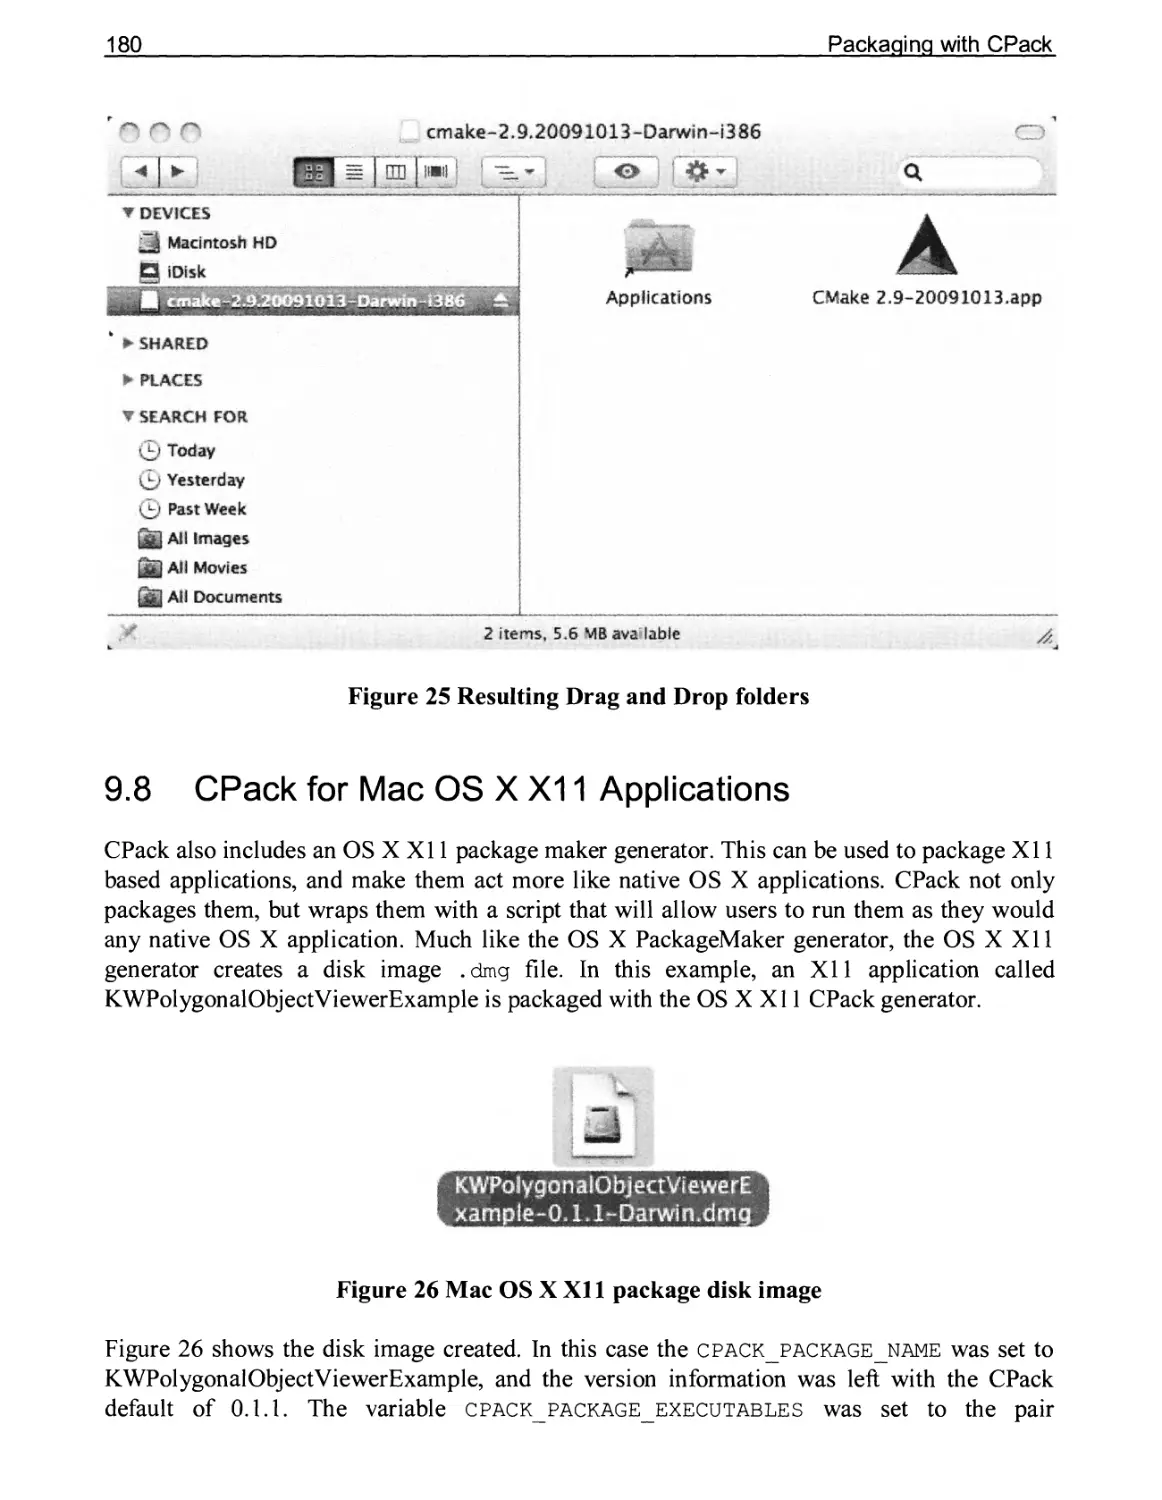
9.6 CPack for Mac OS X PackageMaker 176
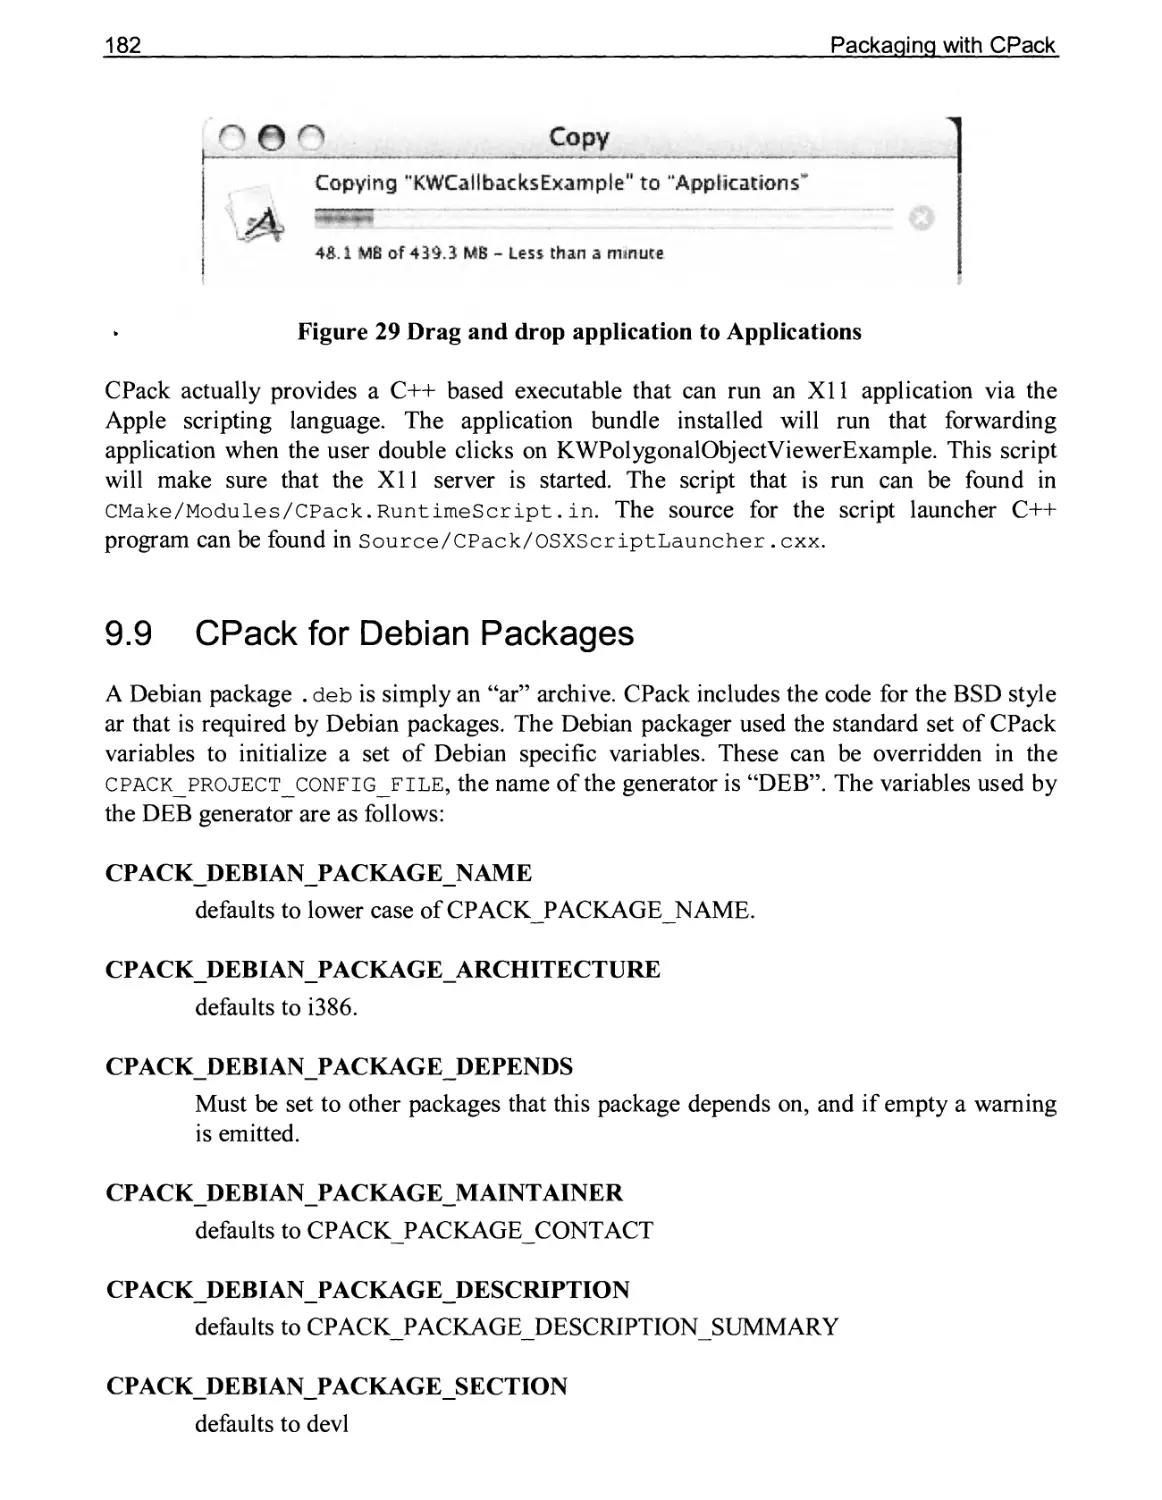
9.7 CPack for Mac OS X Drag and Drop 178
9.8 CPack for Mac OS X XI1 Applications 180
9.9 CPack for Debian Packages 182
9.10 CPack for RPM 183
9.11 CPack Files 183
CHAPTER 10 AUTOMATION & TESTING WITH CMAKE 185
10.1 Testing with CMake, CTest, and CDash 185
10.2 How Does CMake Facilitate Testing? 186
VI
10.3 Additional Test Properties 187
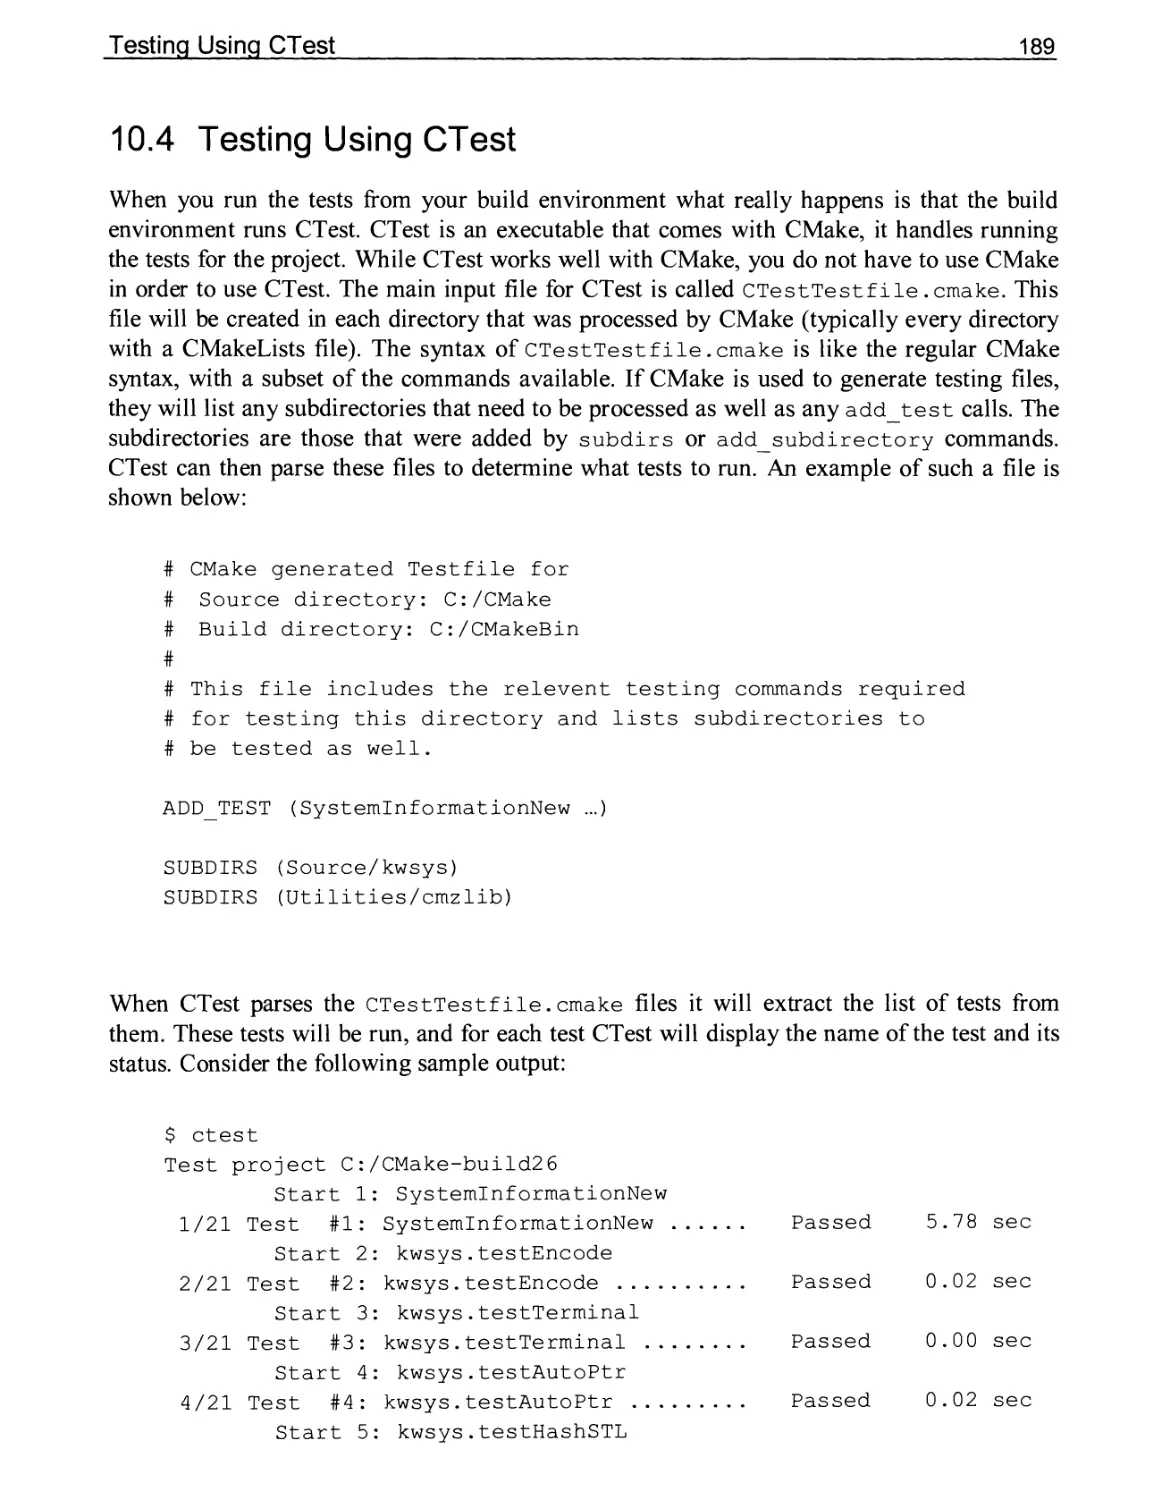
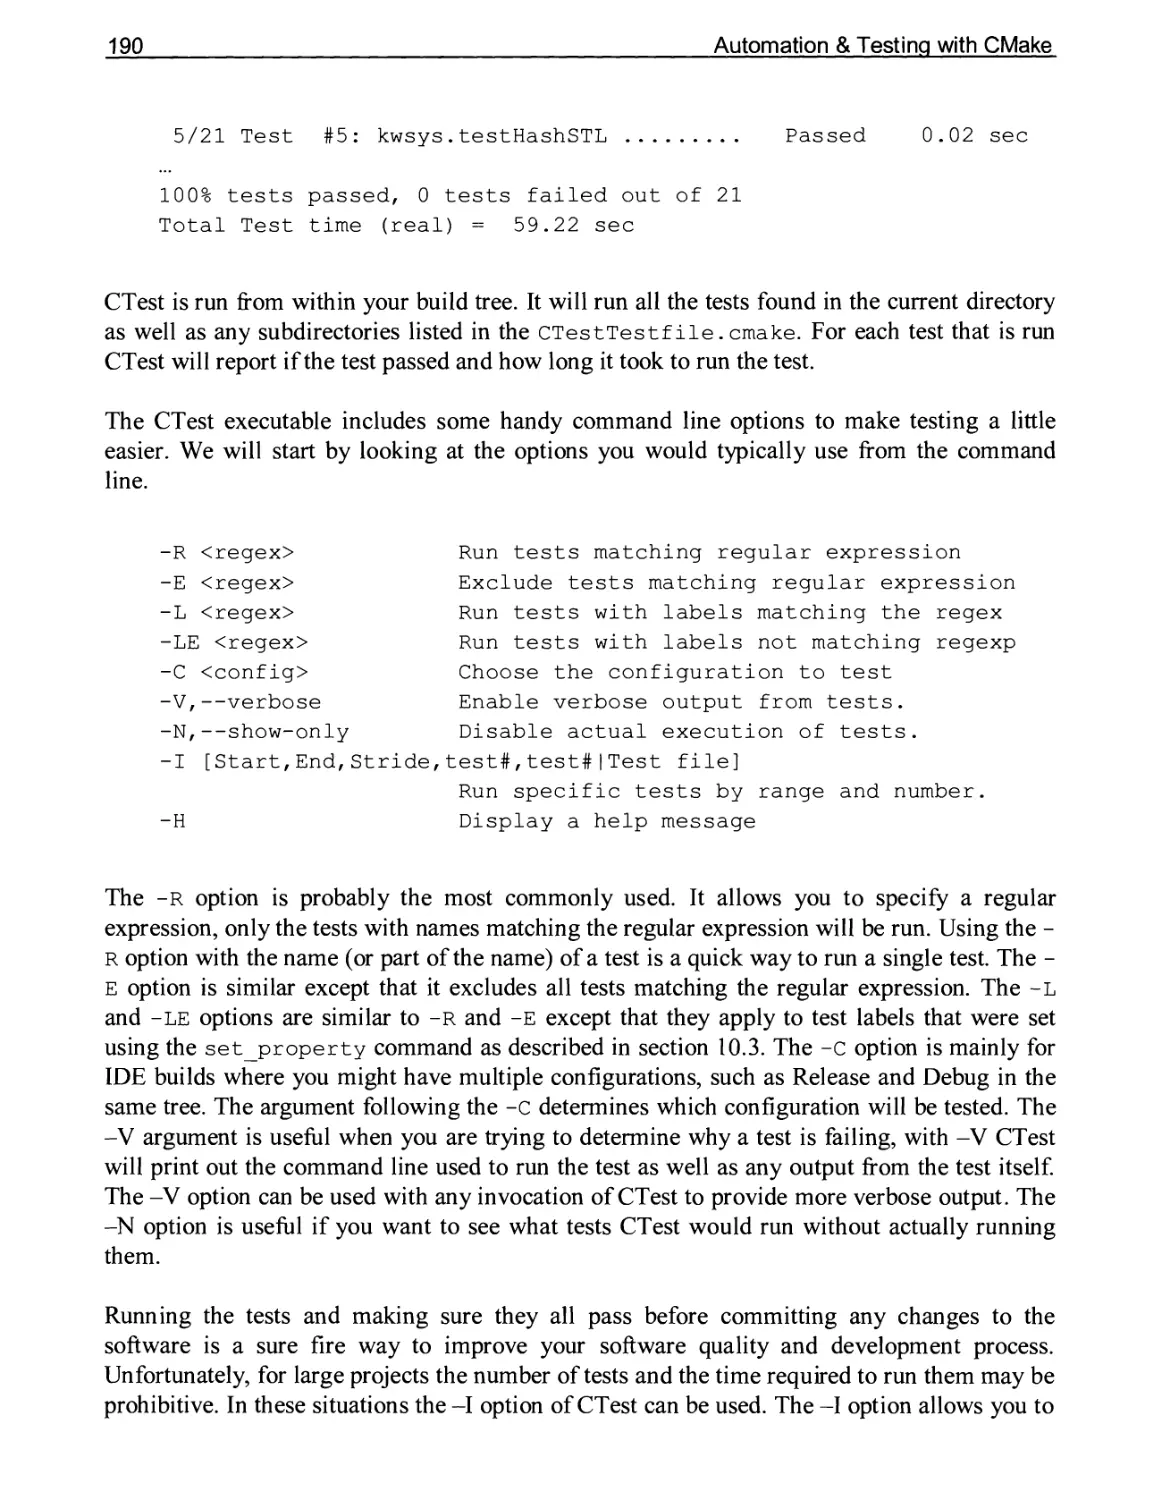
10.4 Testing Using CTest 189
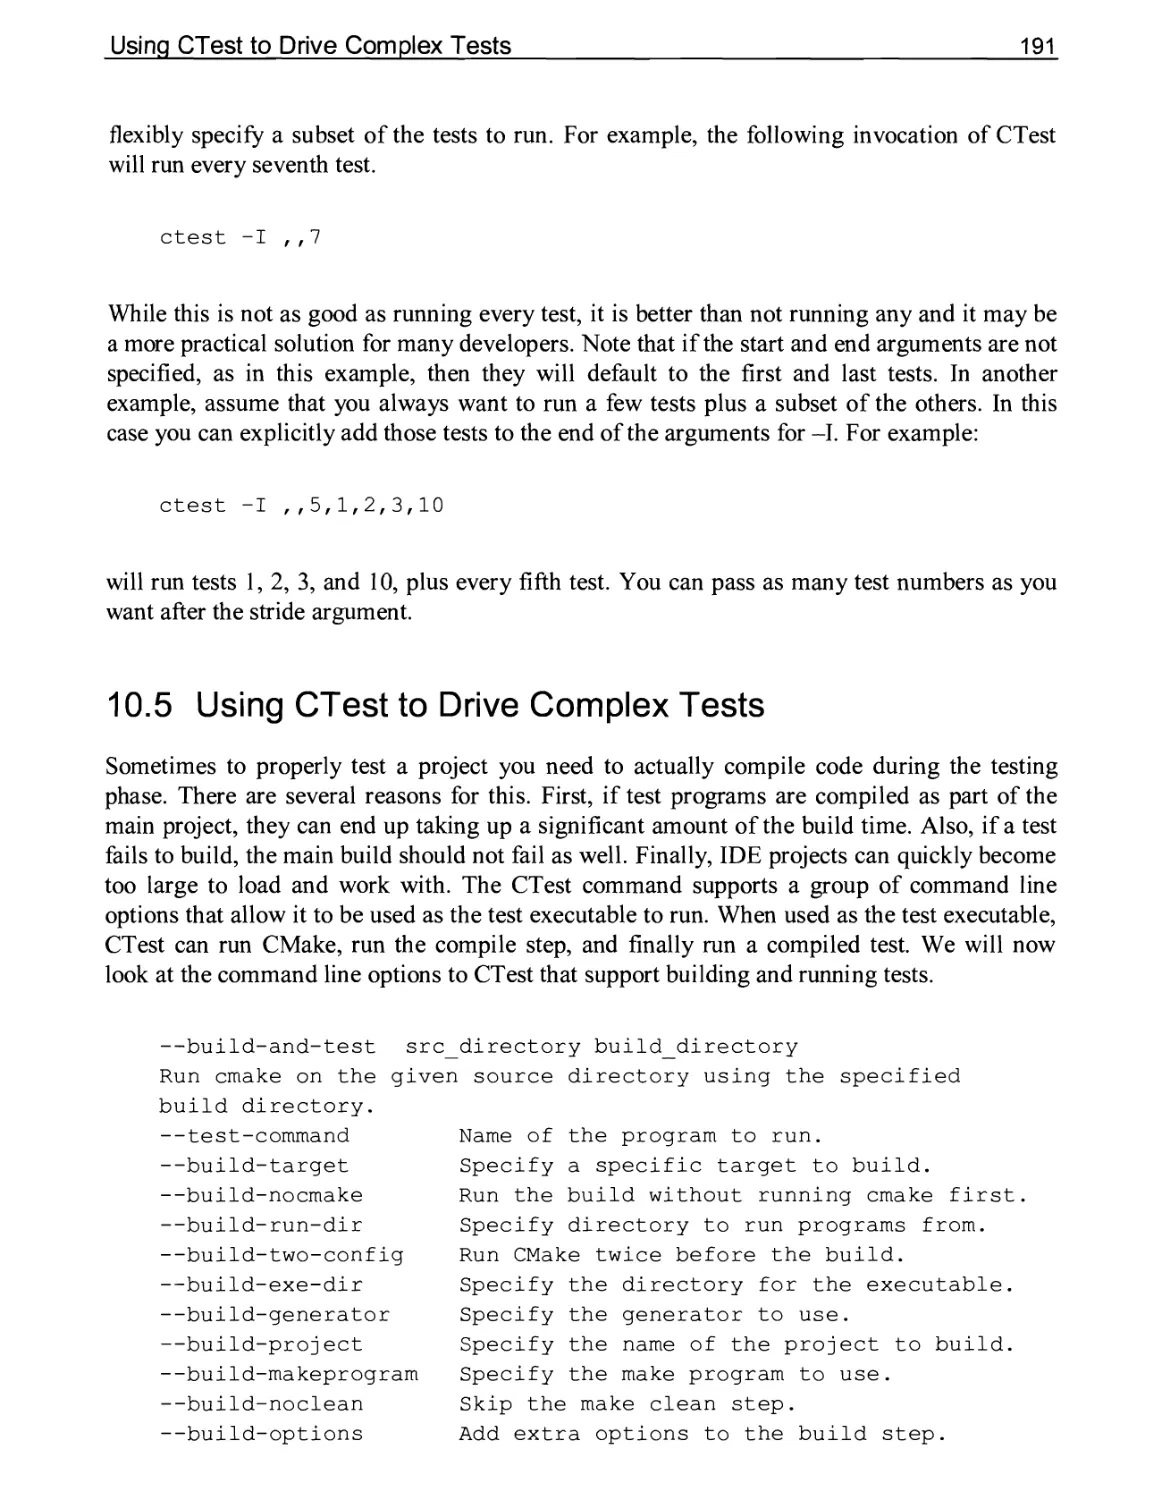
10.5 Using CTest to Drive Complex Tests 191
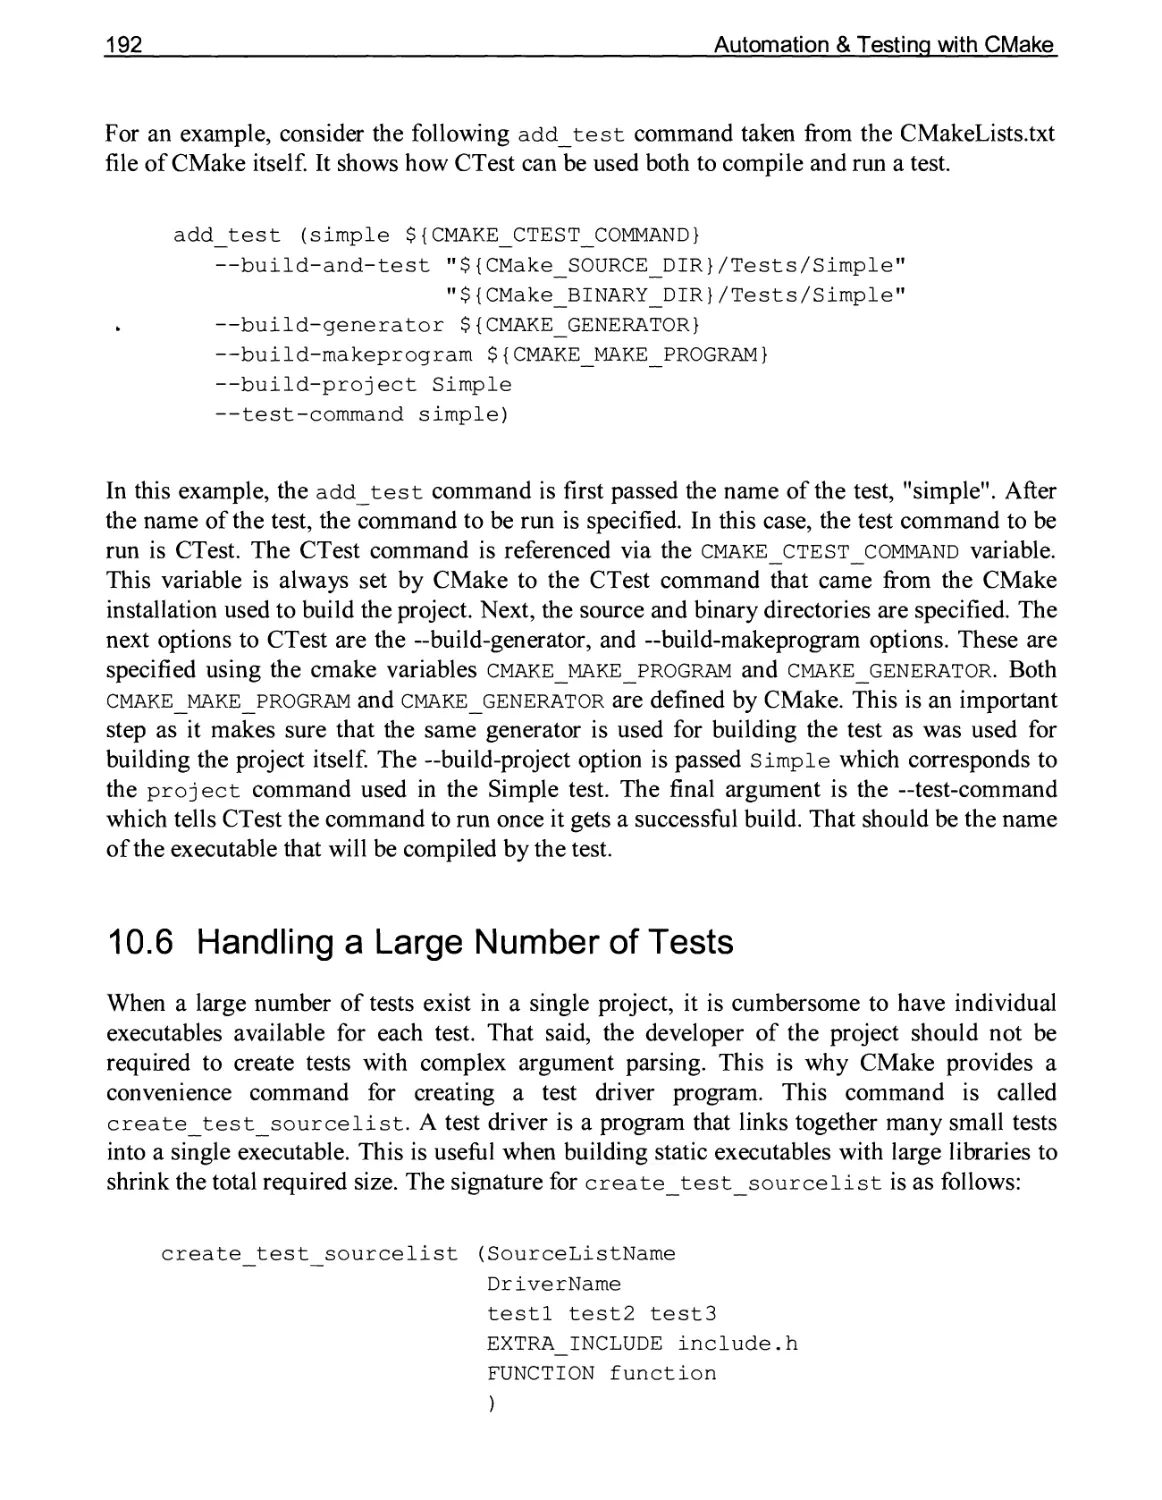
10.6 Handling a Large Number of Tests 192
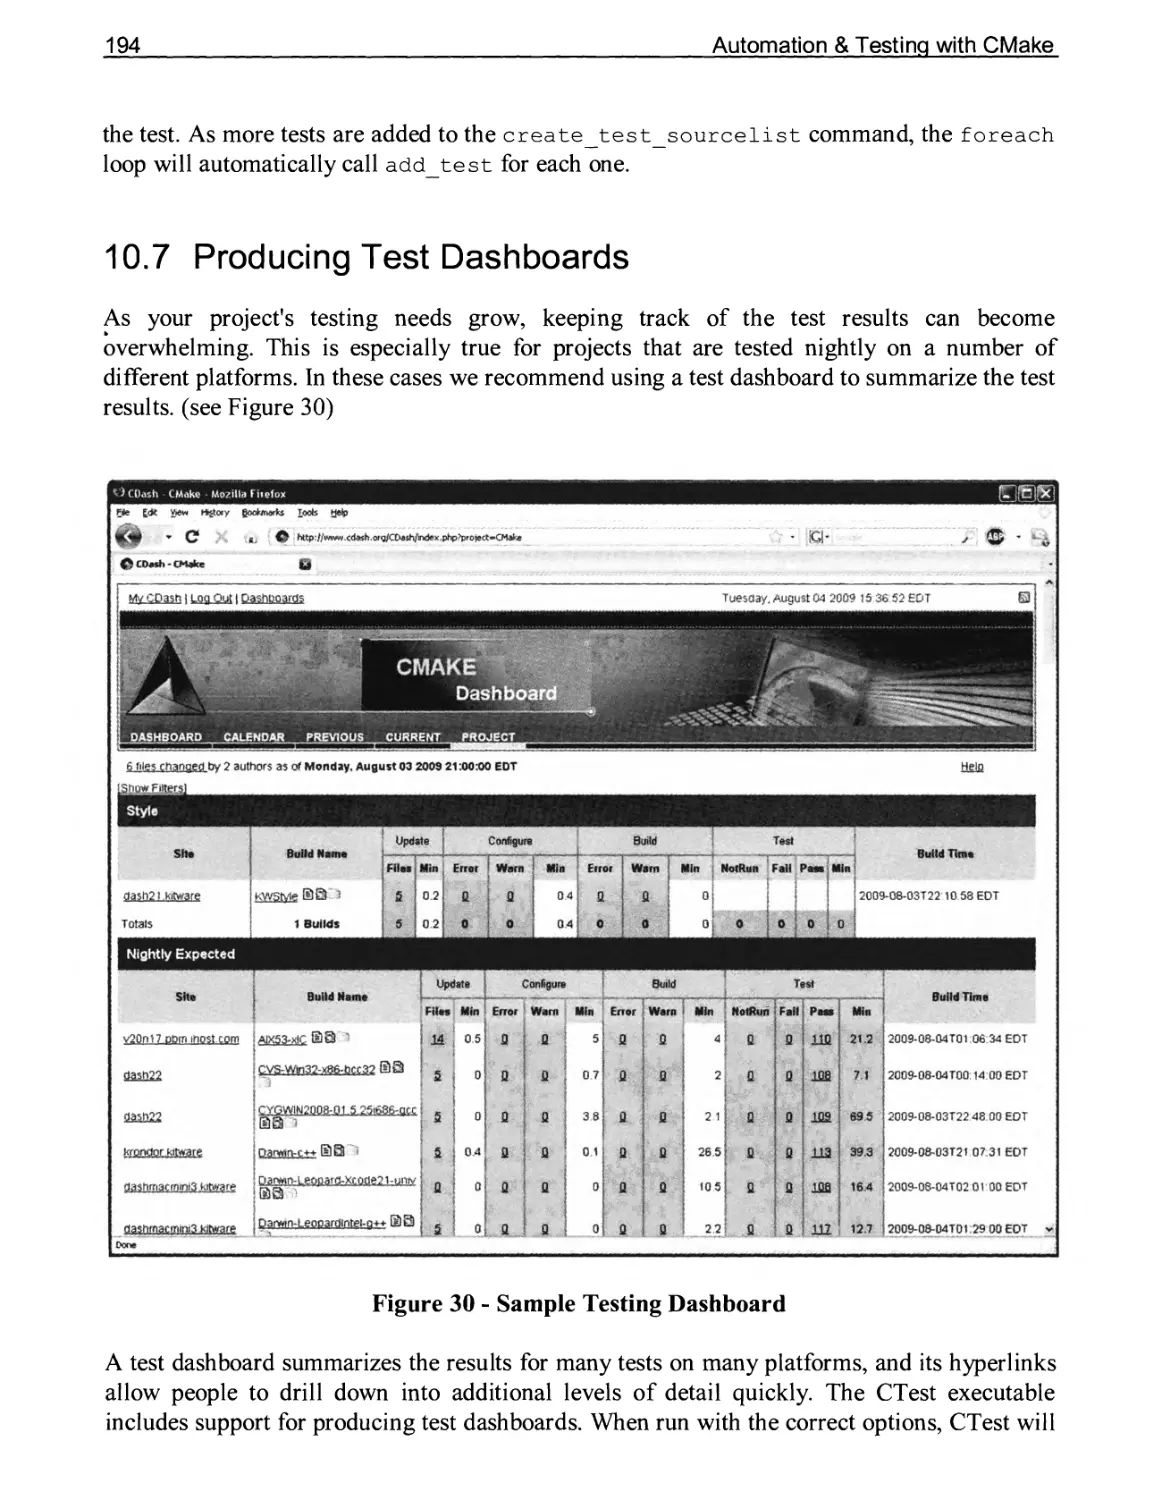
10.7 Producing Test Dashboards 194
Adding CDash Dashboard Support to a Project 196
- Client Setup 199
10.8 Customizing Dashboards for a Project 202
Dashboard Submissions Settings 202
Filtering Errors and Warnings 203
Adding Notes to a Dashboard 205
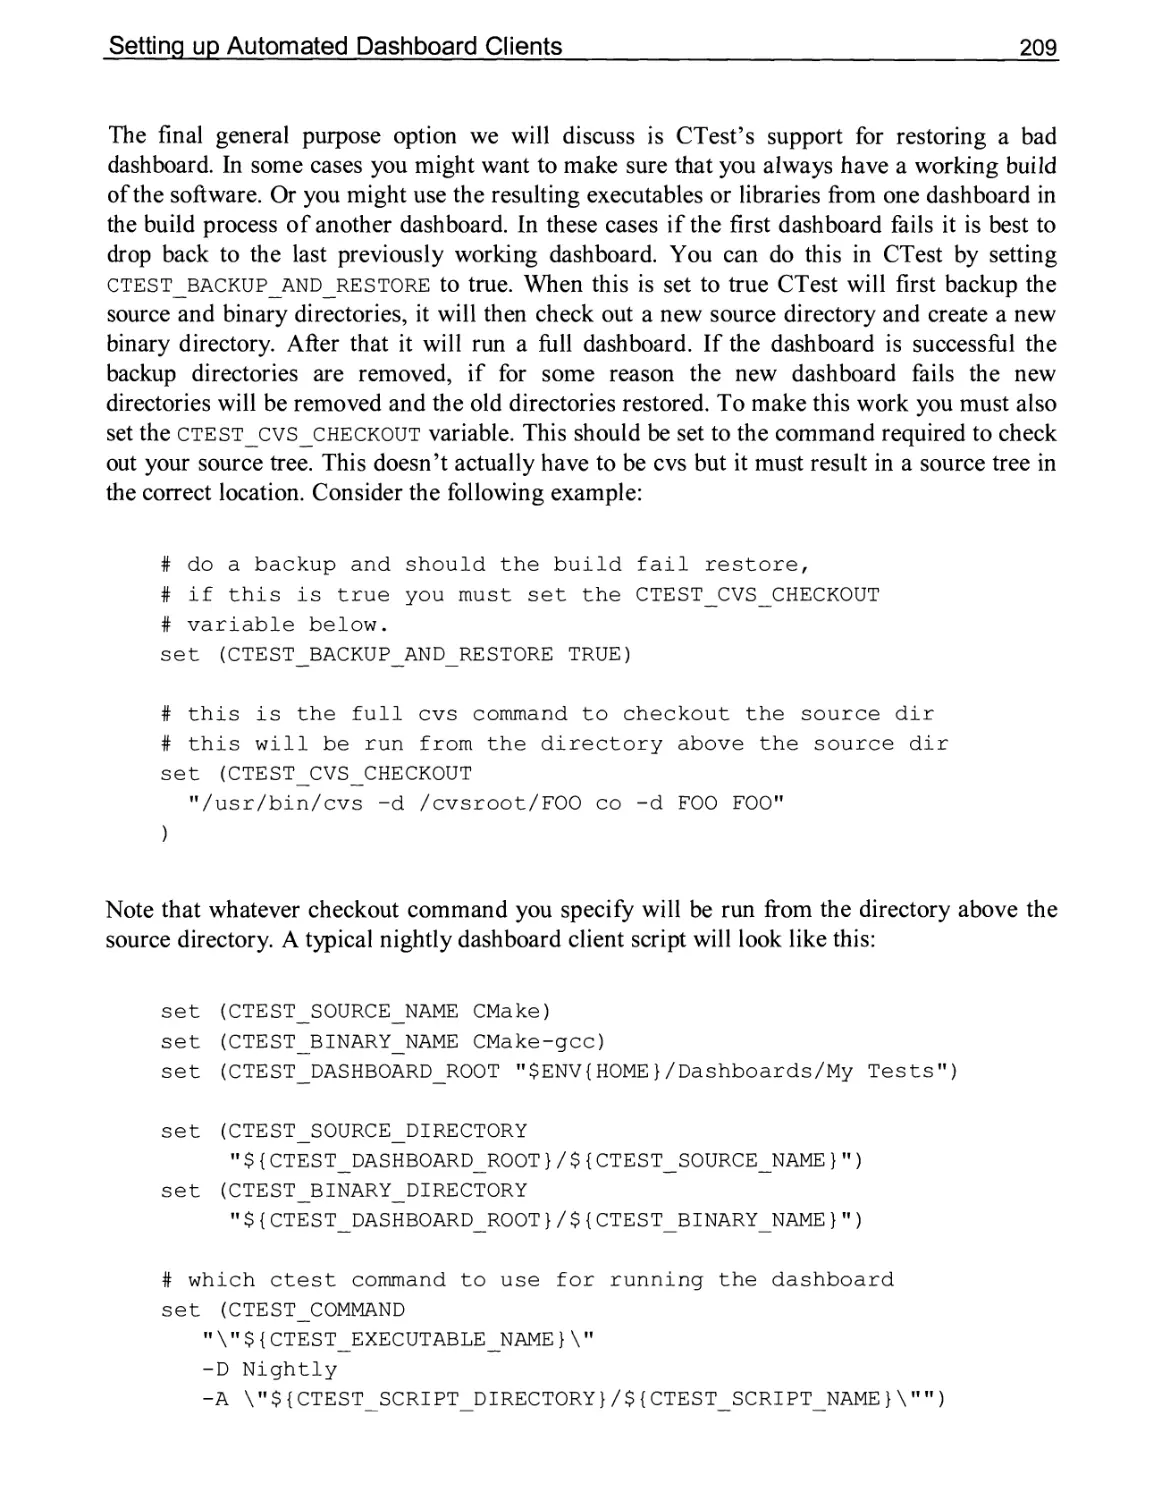
10.9 Setting up Automated Dashboard Clients 206
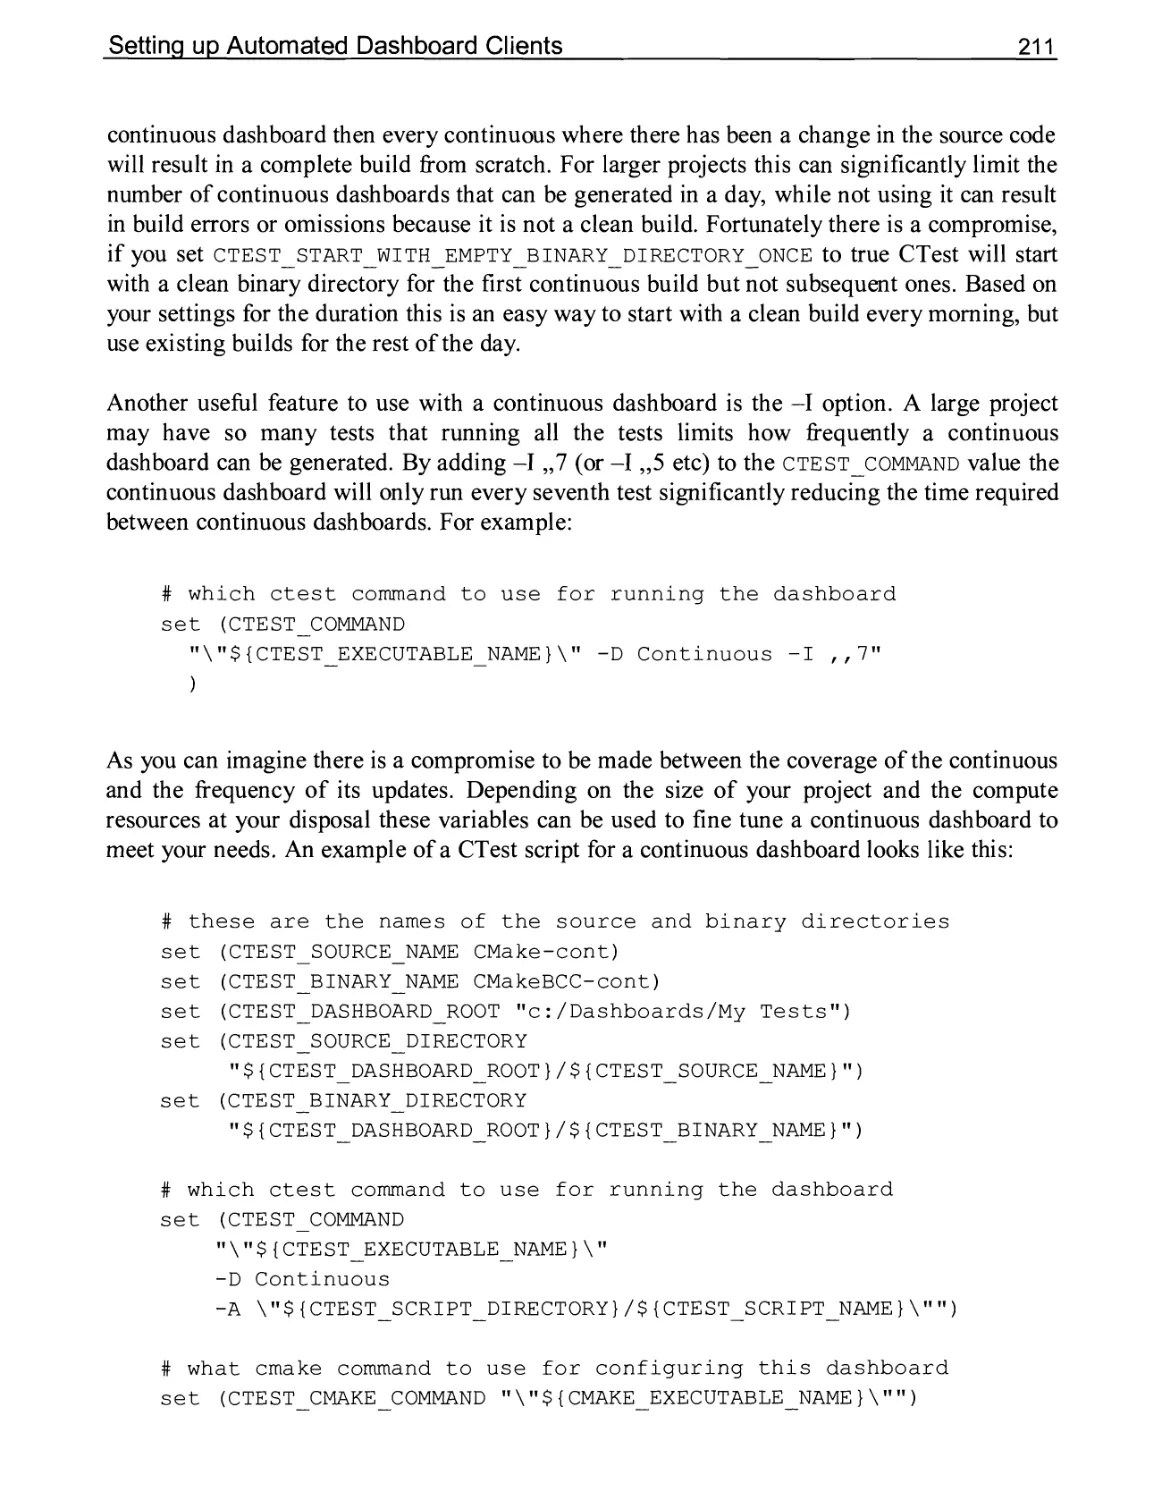
Settings for Continuous Dashboards 210
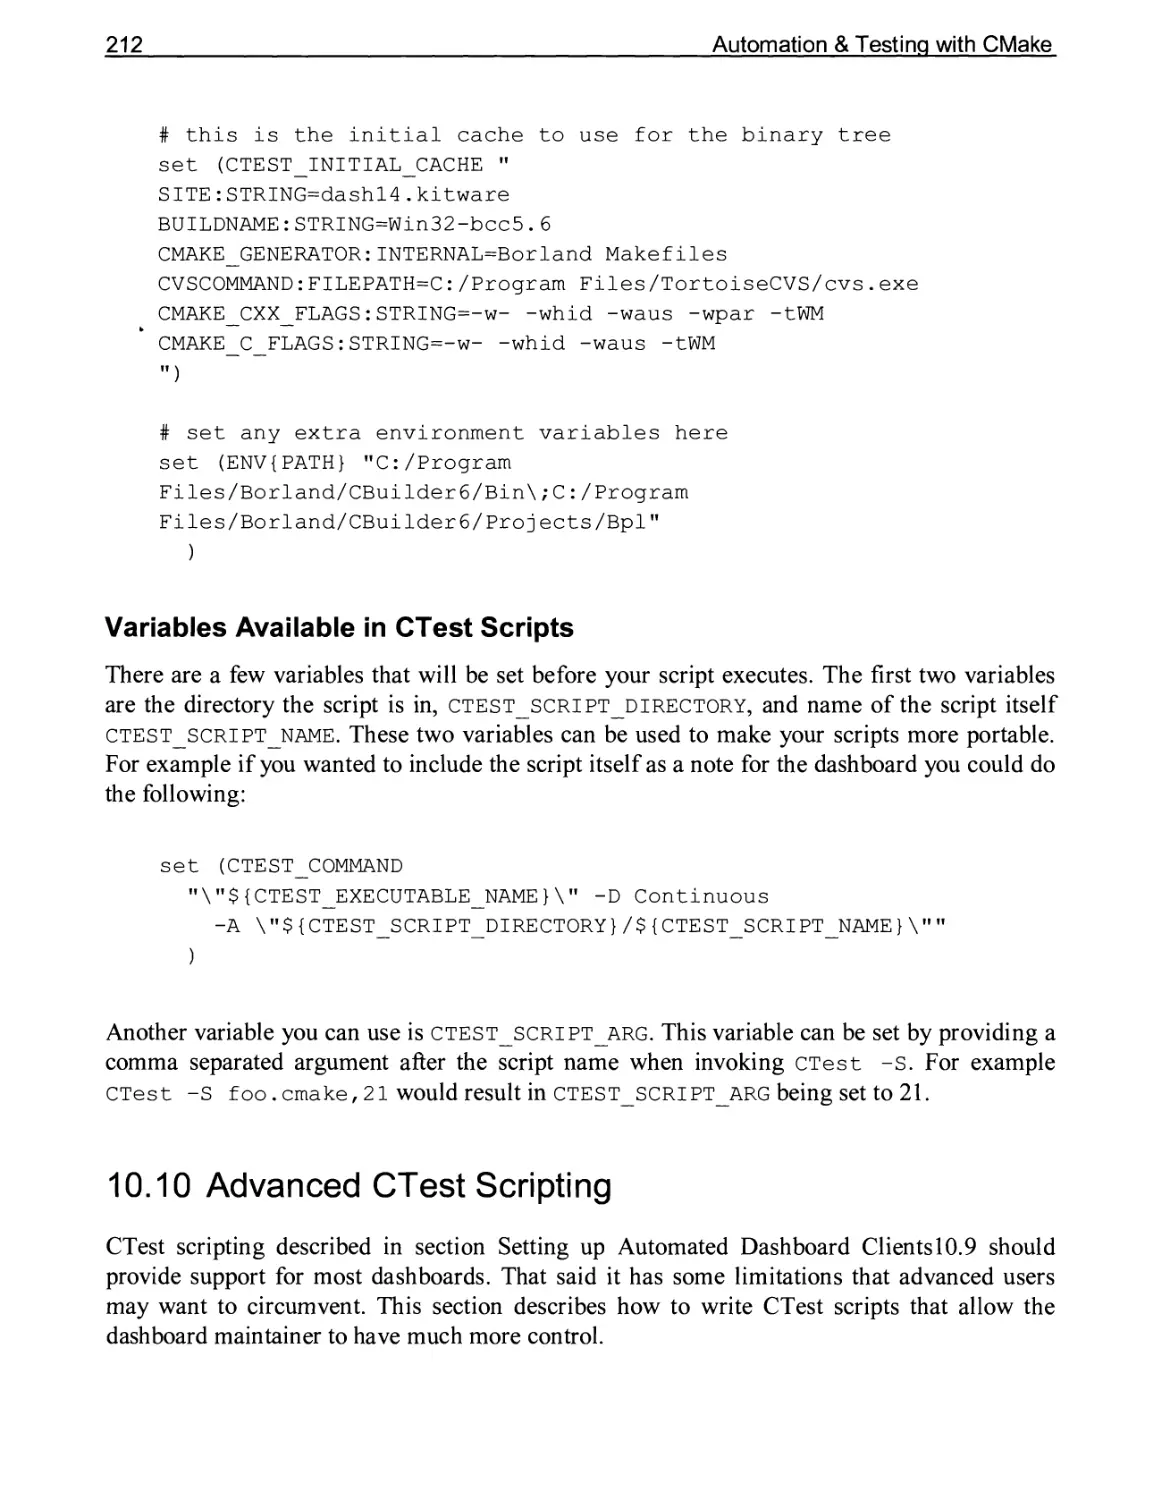
Variables Available in CTest Scripts 212
10.10 Advanced CTest Scripting 212
Limitations of Traditional CTest Scripting 213
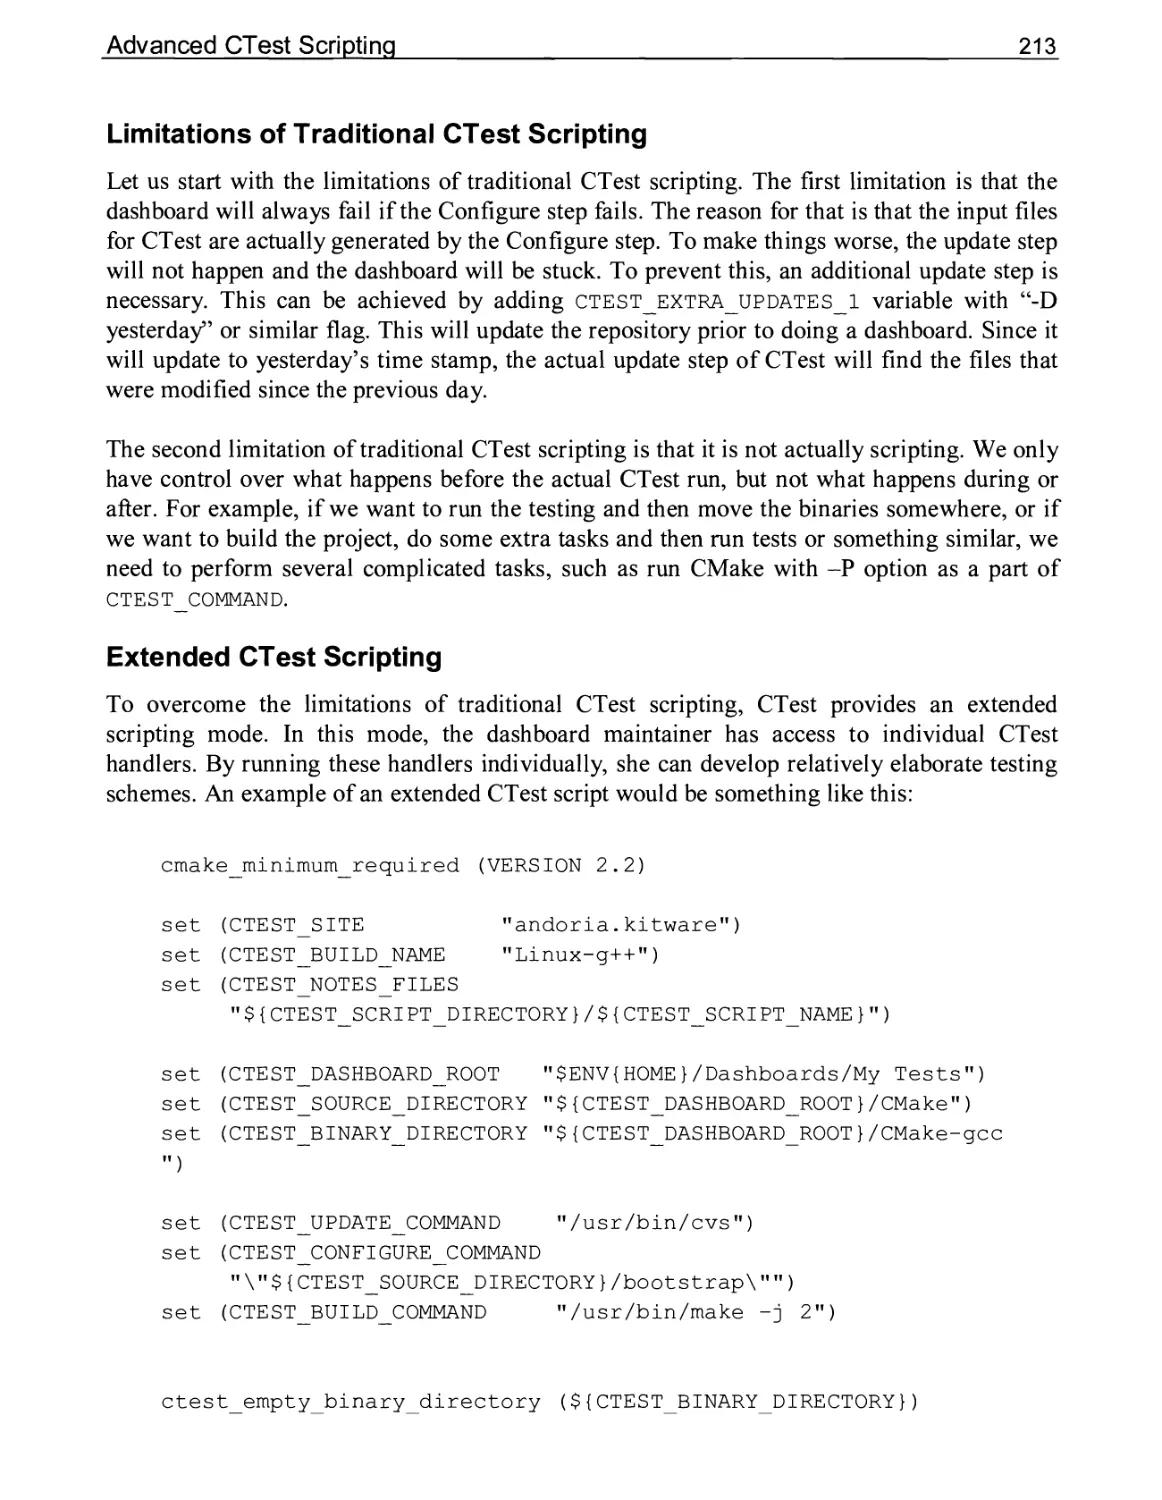
Extended CTest Scripting 213
10.11 Setting up a Dashboard Server 218
CDash Server 218
Advanced Server Management 220
Build Groups 223
Email 225
Sites 226
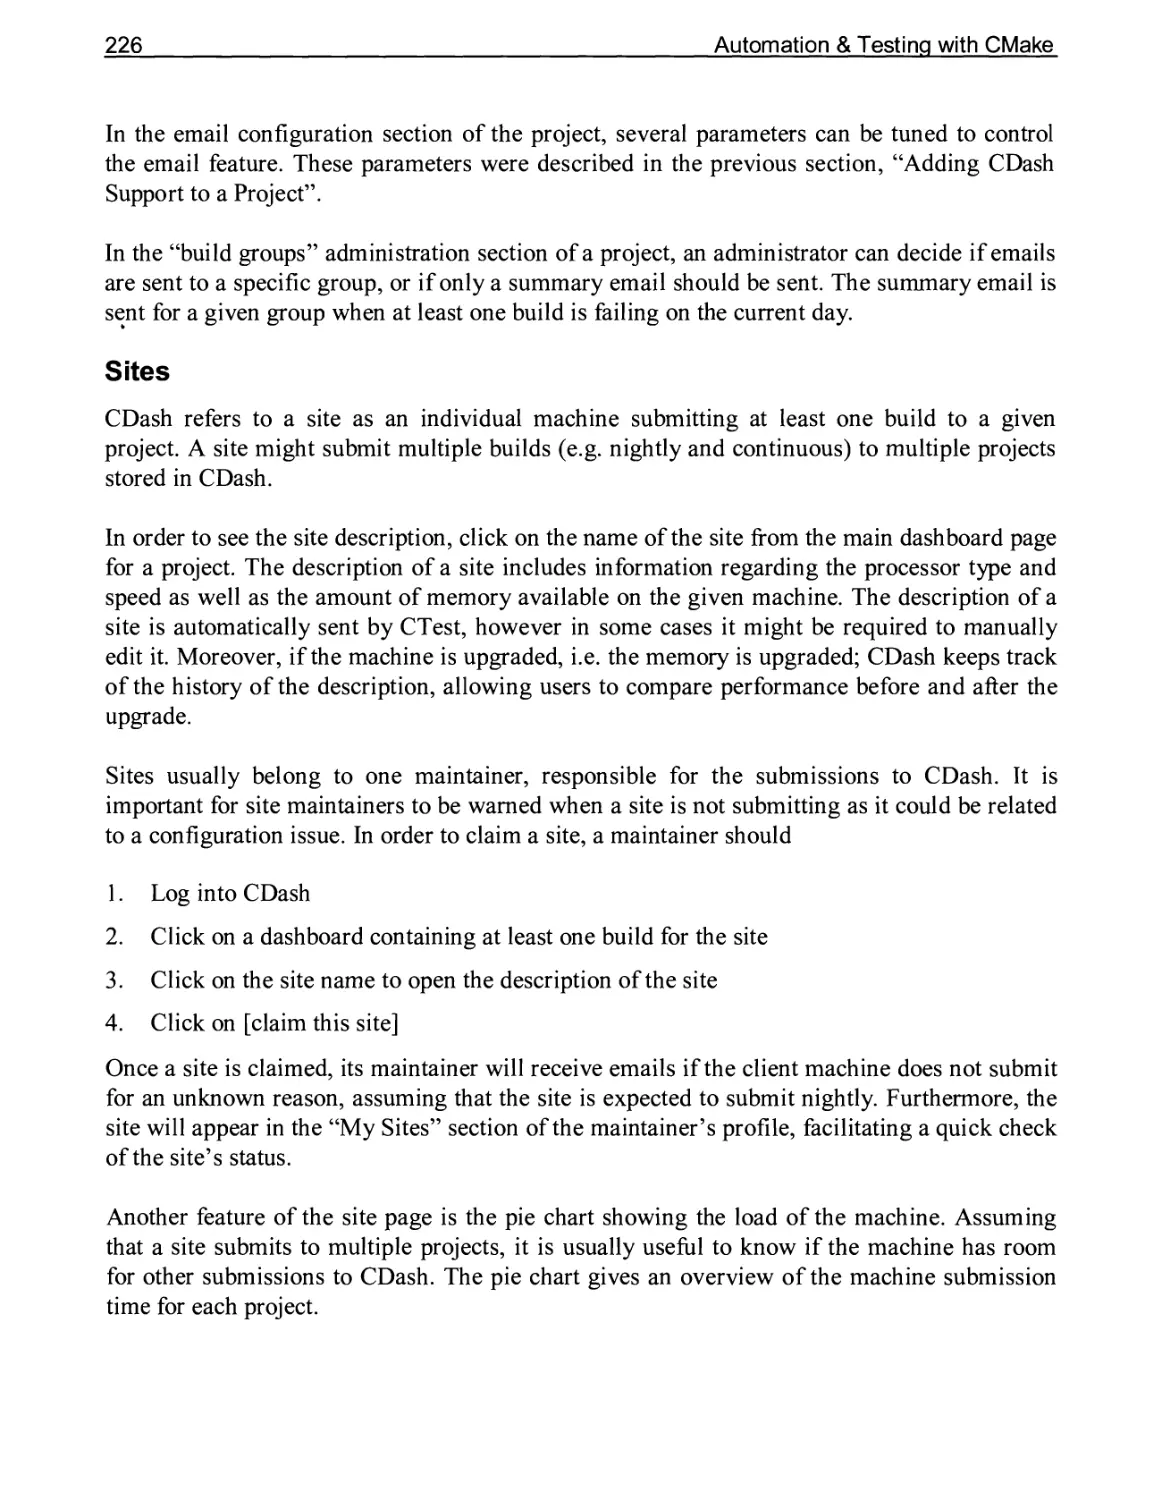
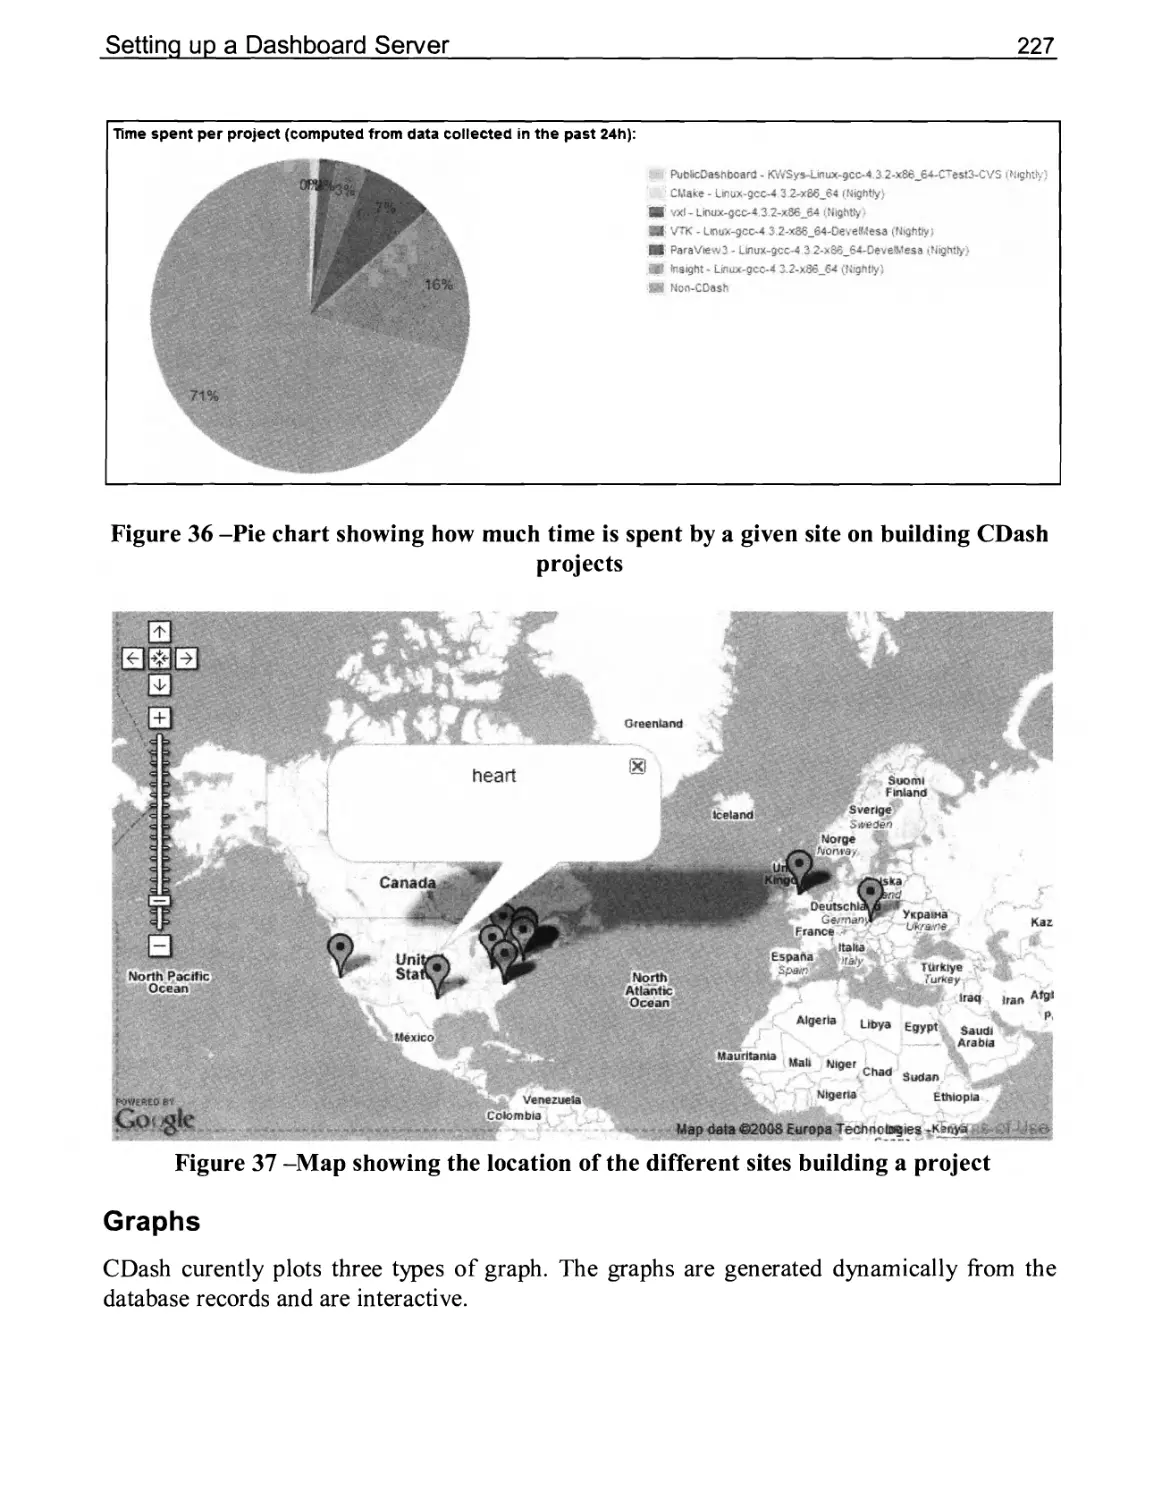
Graphs 227
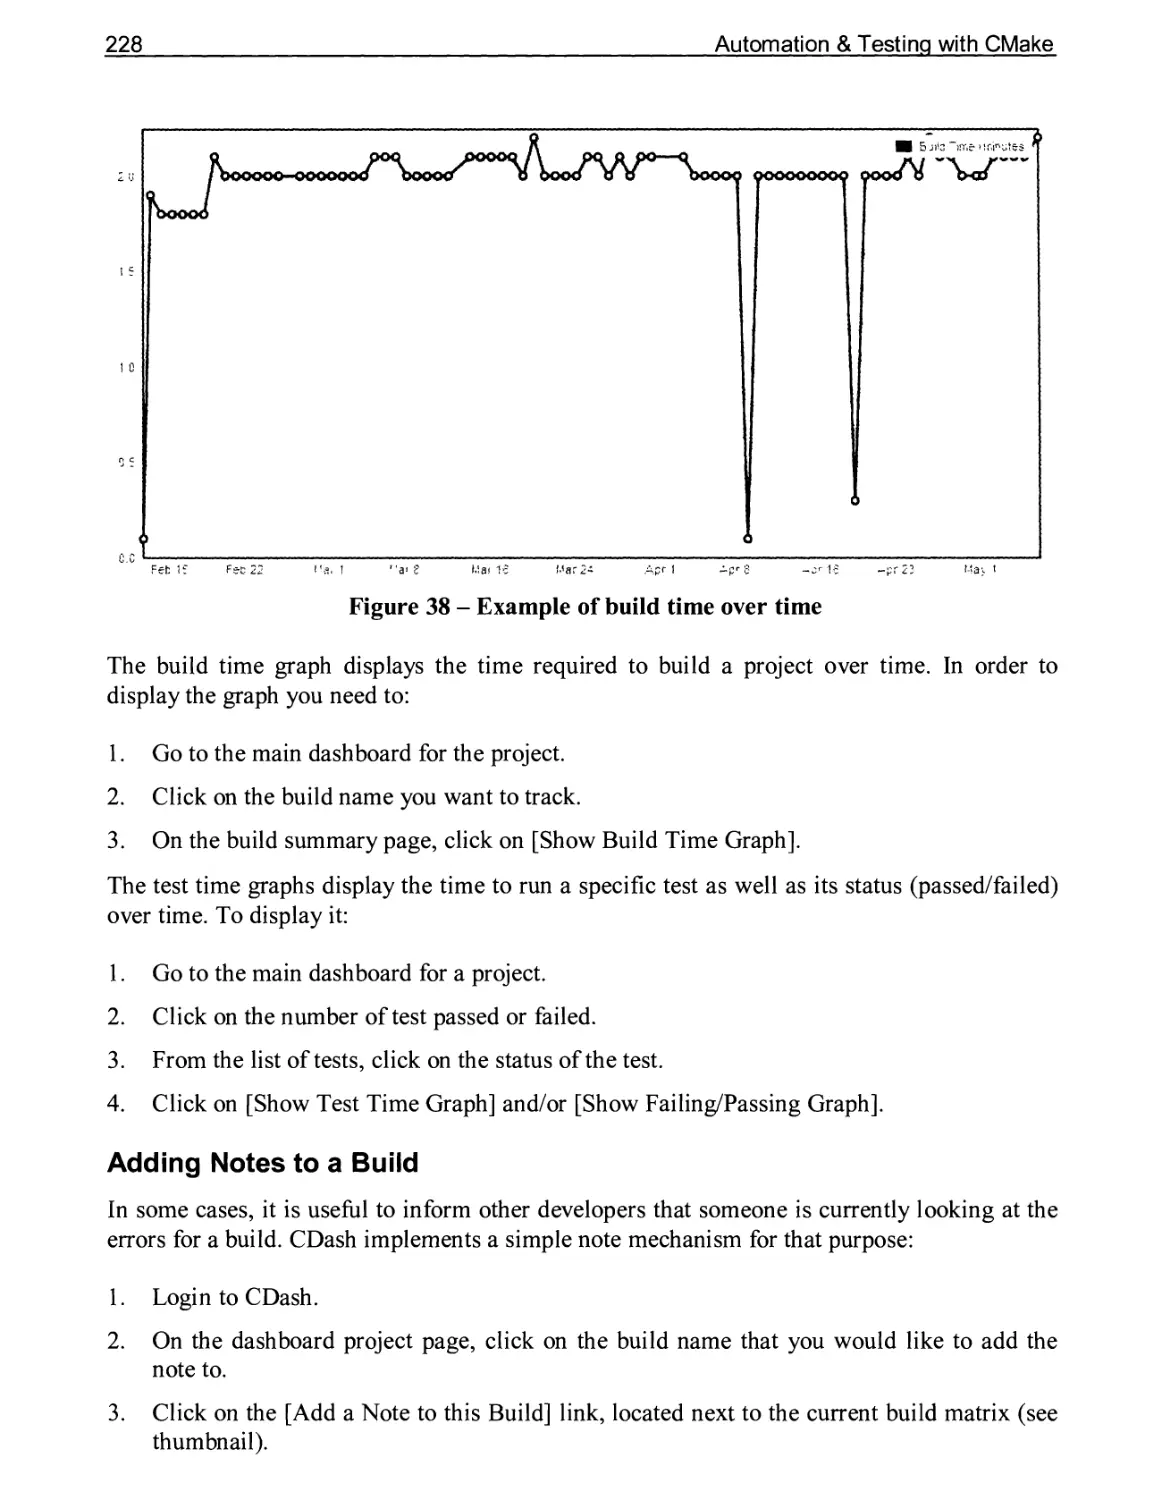
Adding Notes to a Build 228
Logging 229
Test Timing 229
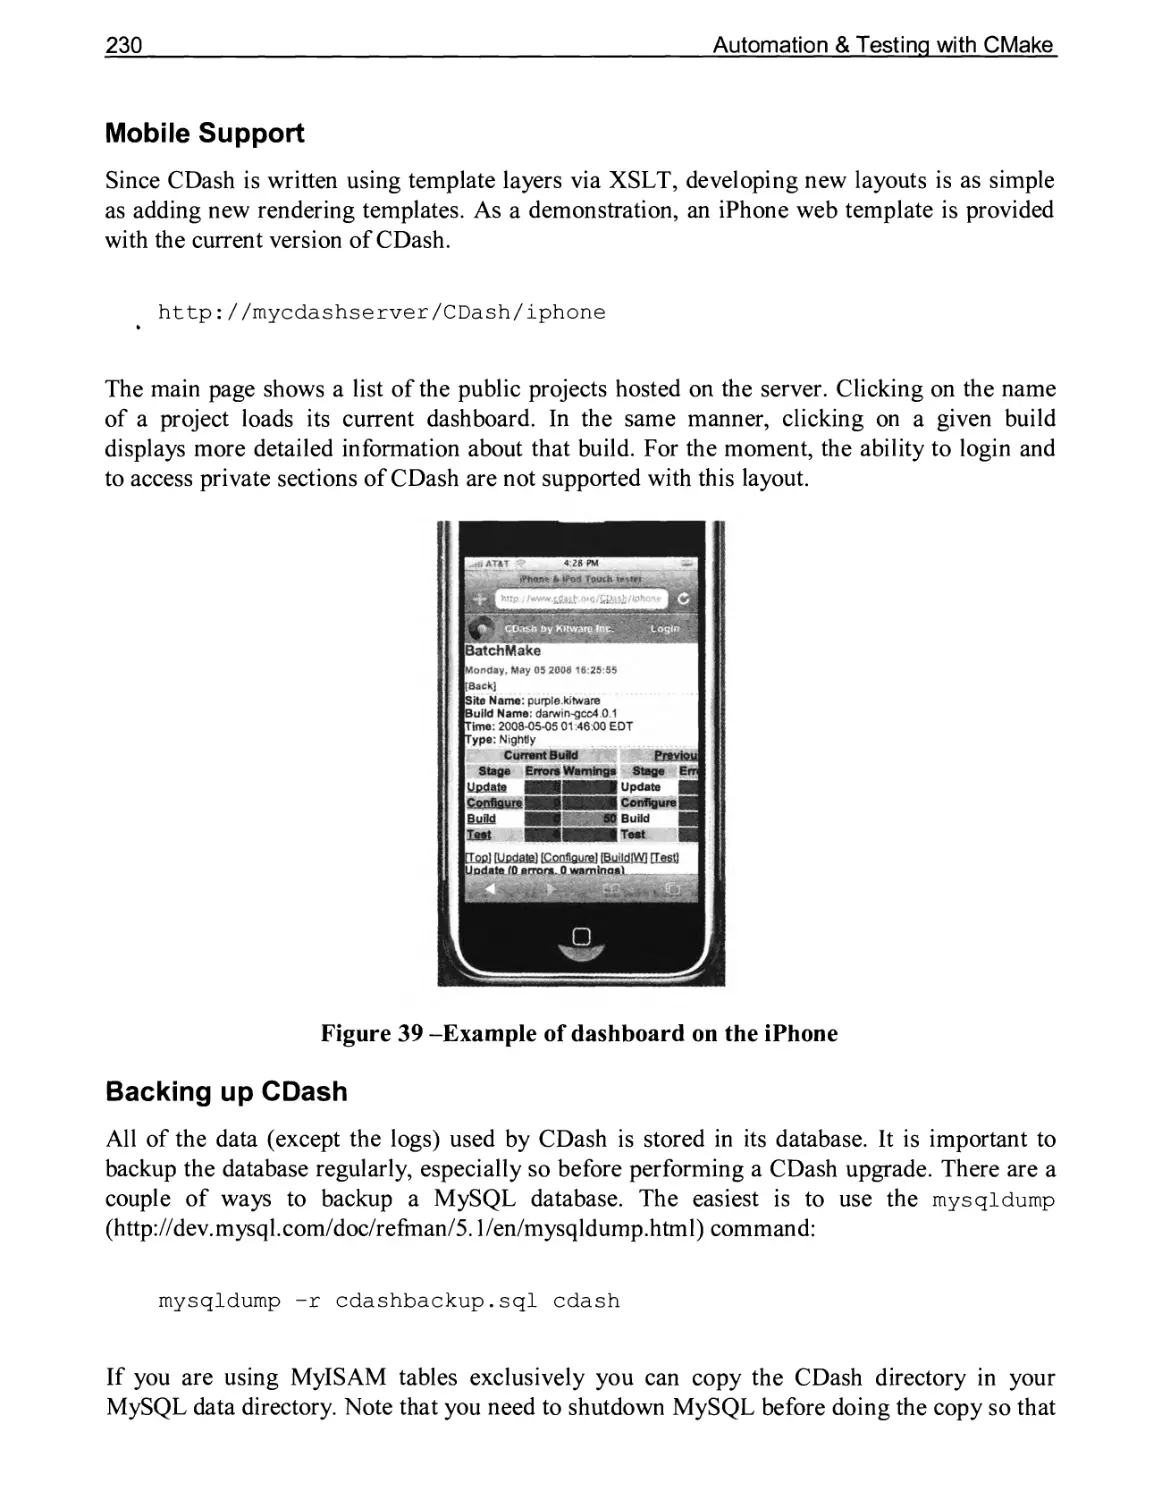
Mobile Support 230
Backing up CDash 230
Upgrading CDash 231
CDash Maintenance 232
10.12 Subprojects 233
Using ctestjsubmit with PARTS and FILES 236
Splitting Your Project into Multiple Subprojects 237
CHAPTER 11 PORTING CMAKE TO NEW PLATFORMS AND LANGUAGES241
11.1 The Determine System Process 241
11.2 The Enable Language Process 242
11.3 Porting to a New Platform 244
11.4 Adding a New Language 246
11.5 Rule Variable Listing 247
General Tag Variables 247
Language Specific Information 248
VII
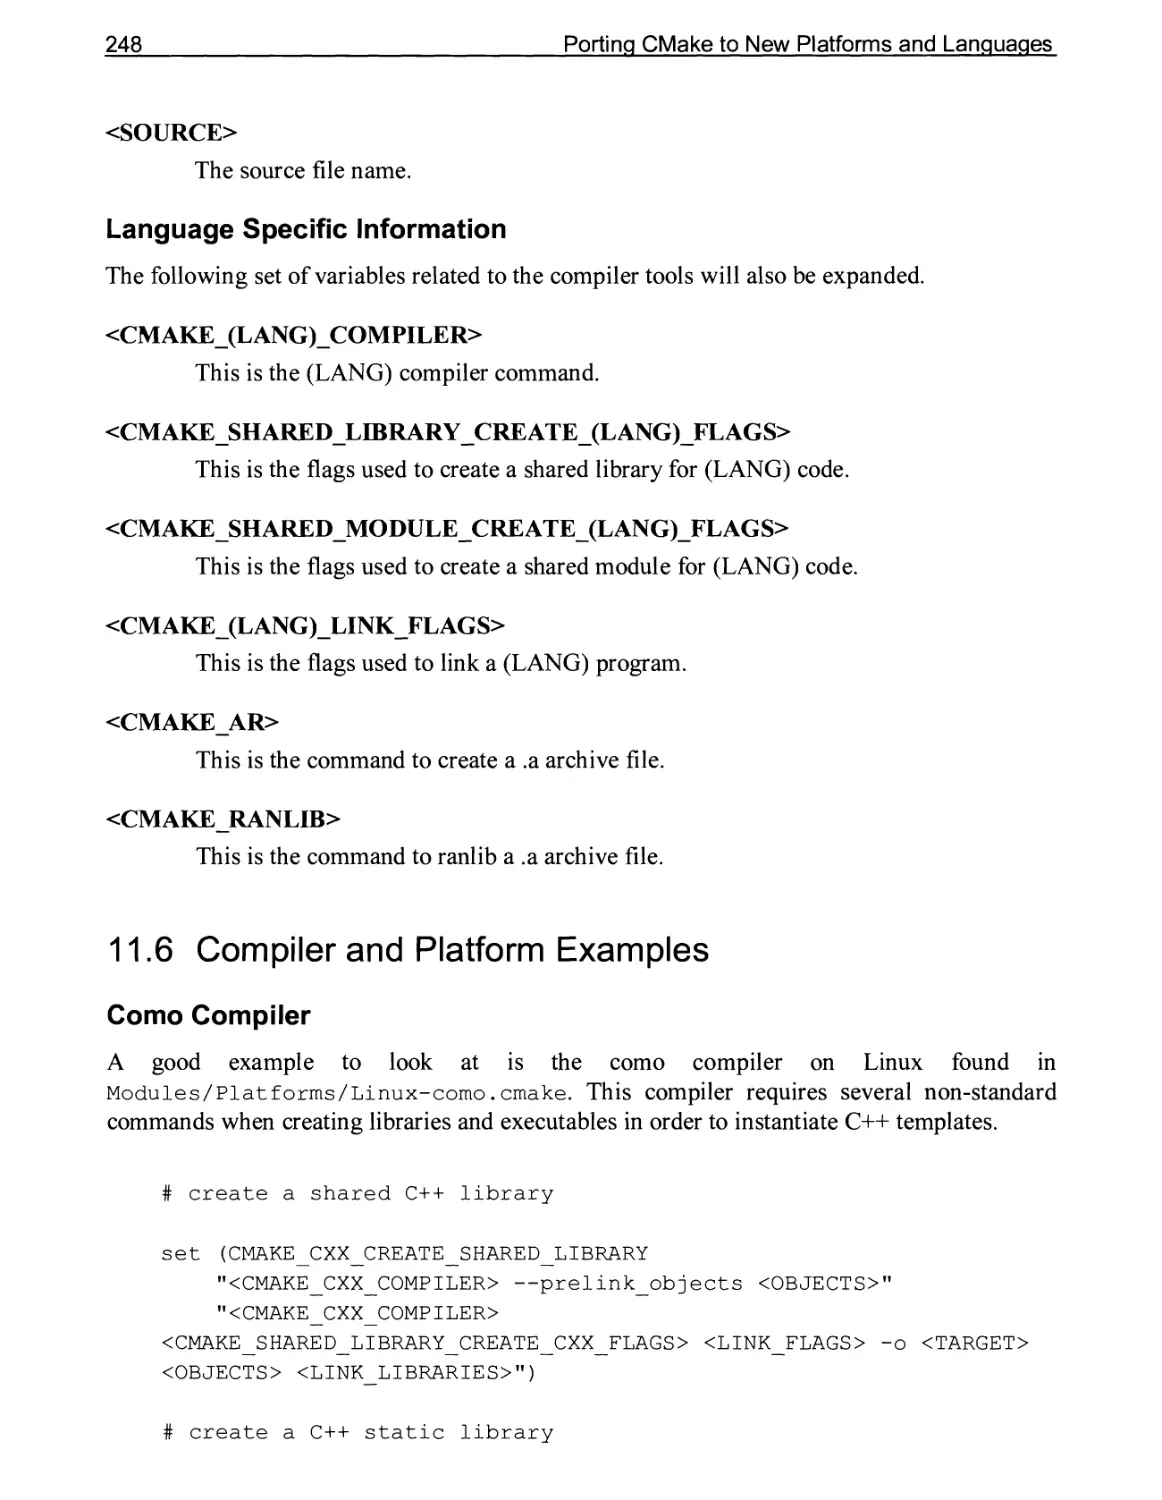
11.6 Compiler and Platform Examples 248
Como Compiler 248
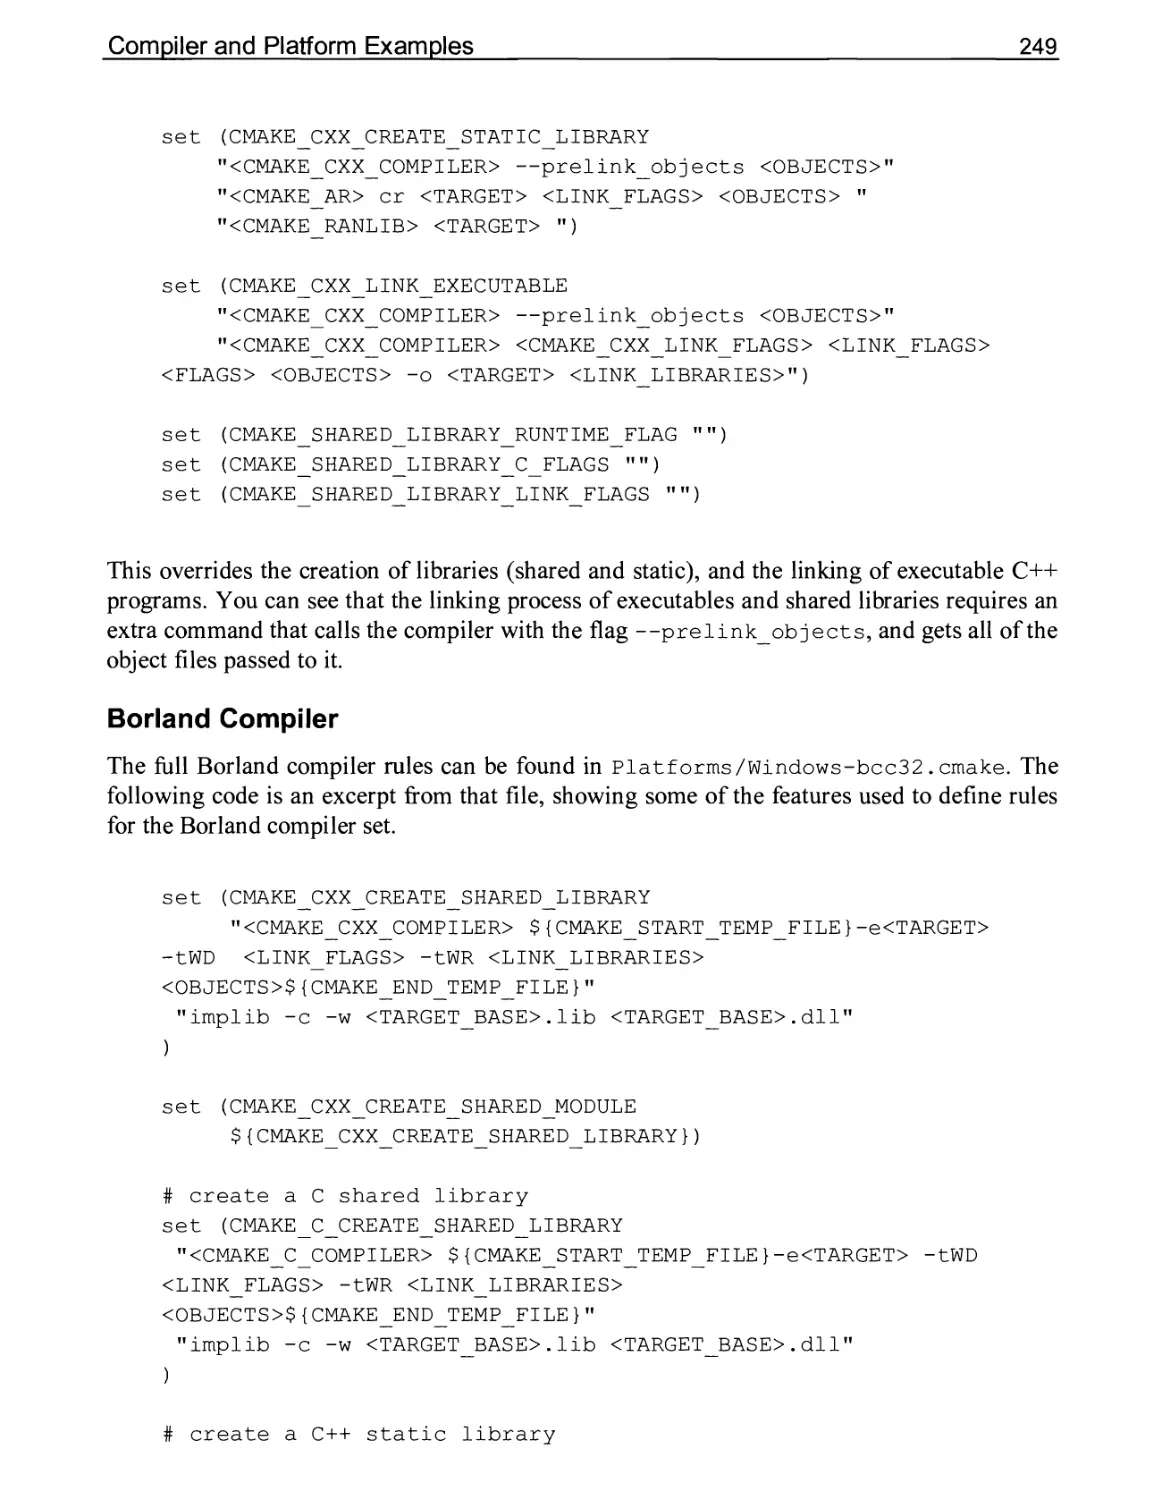
Borland Compiler 249
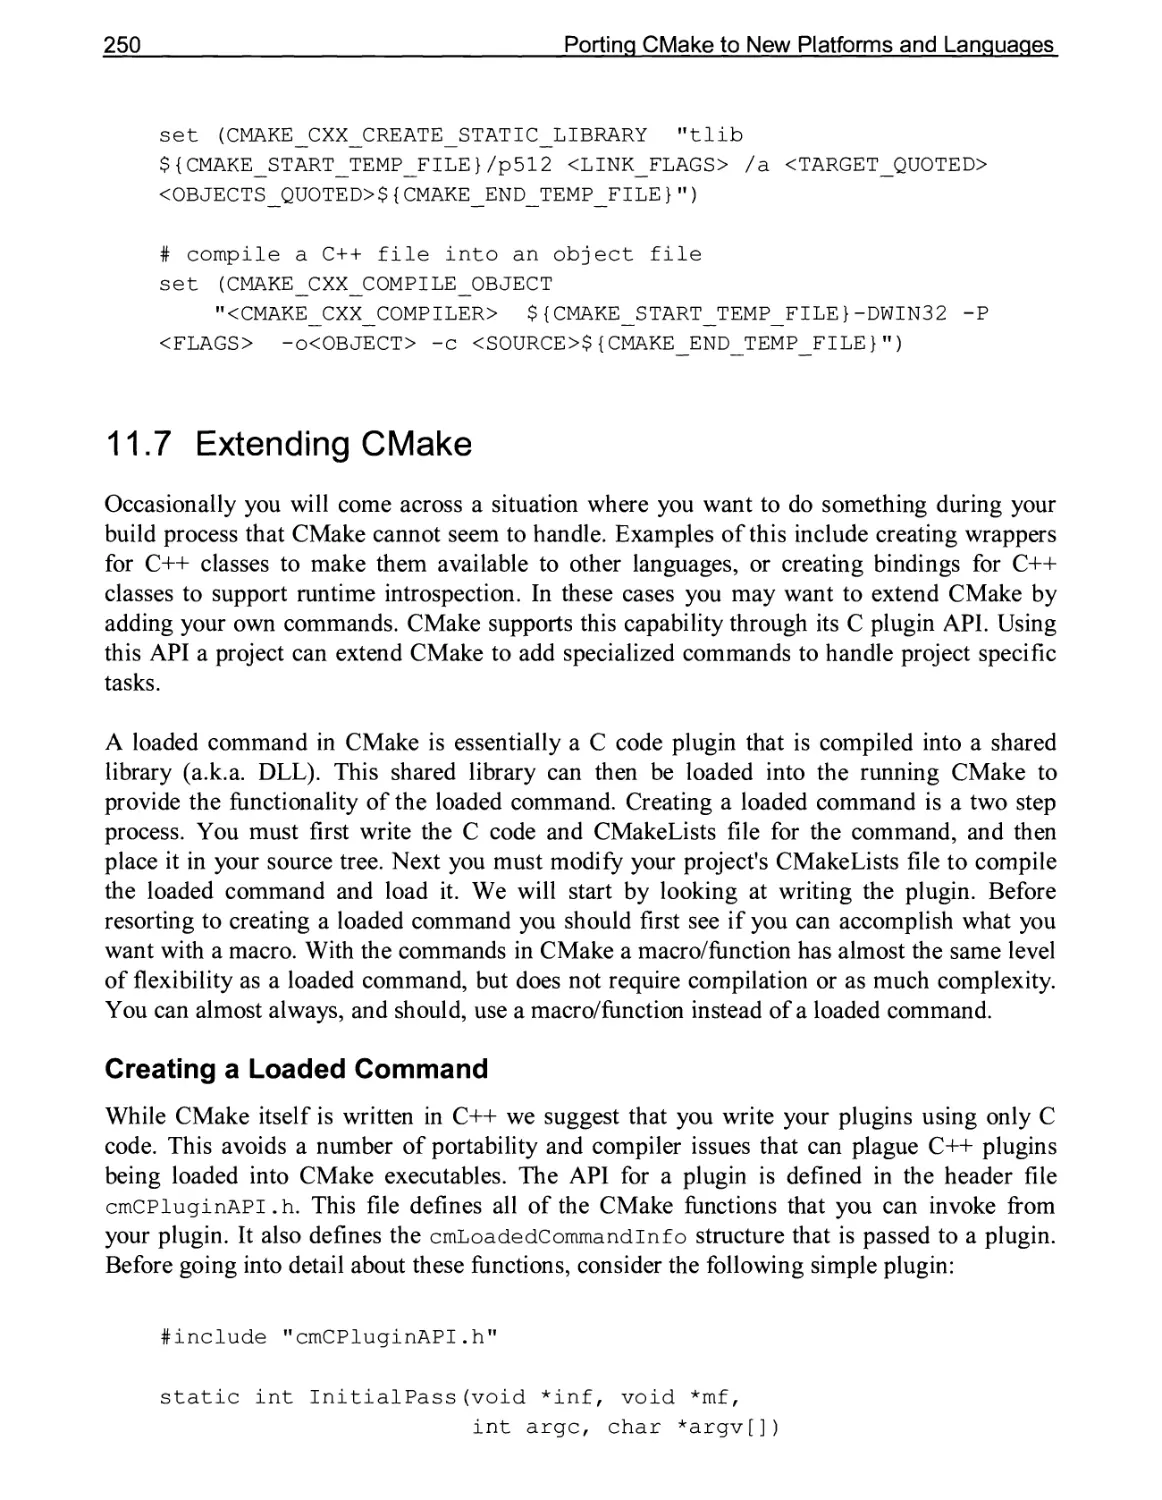
11.7 Extending CMake 250
Creating a Loaded Command 250
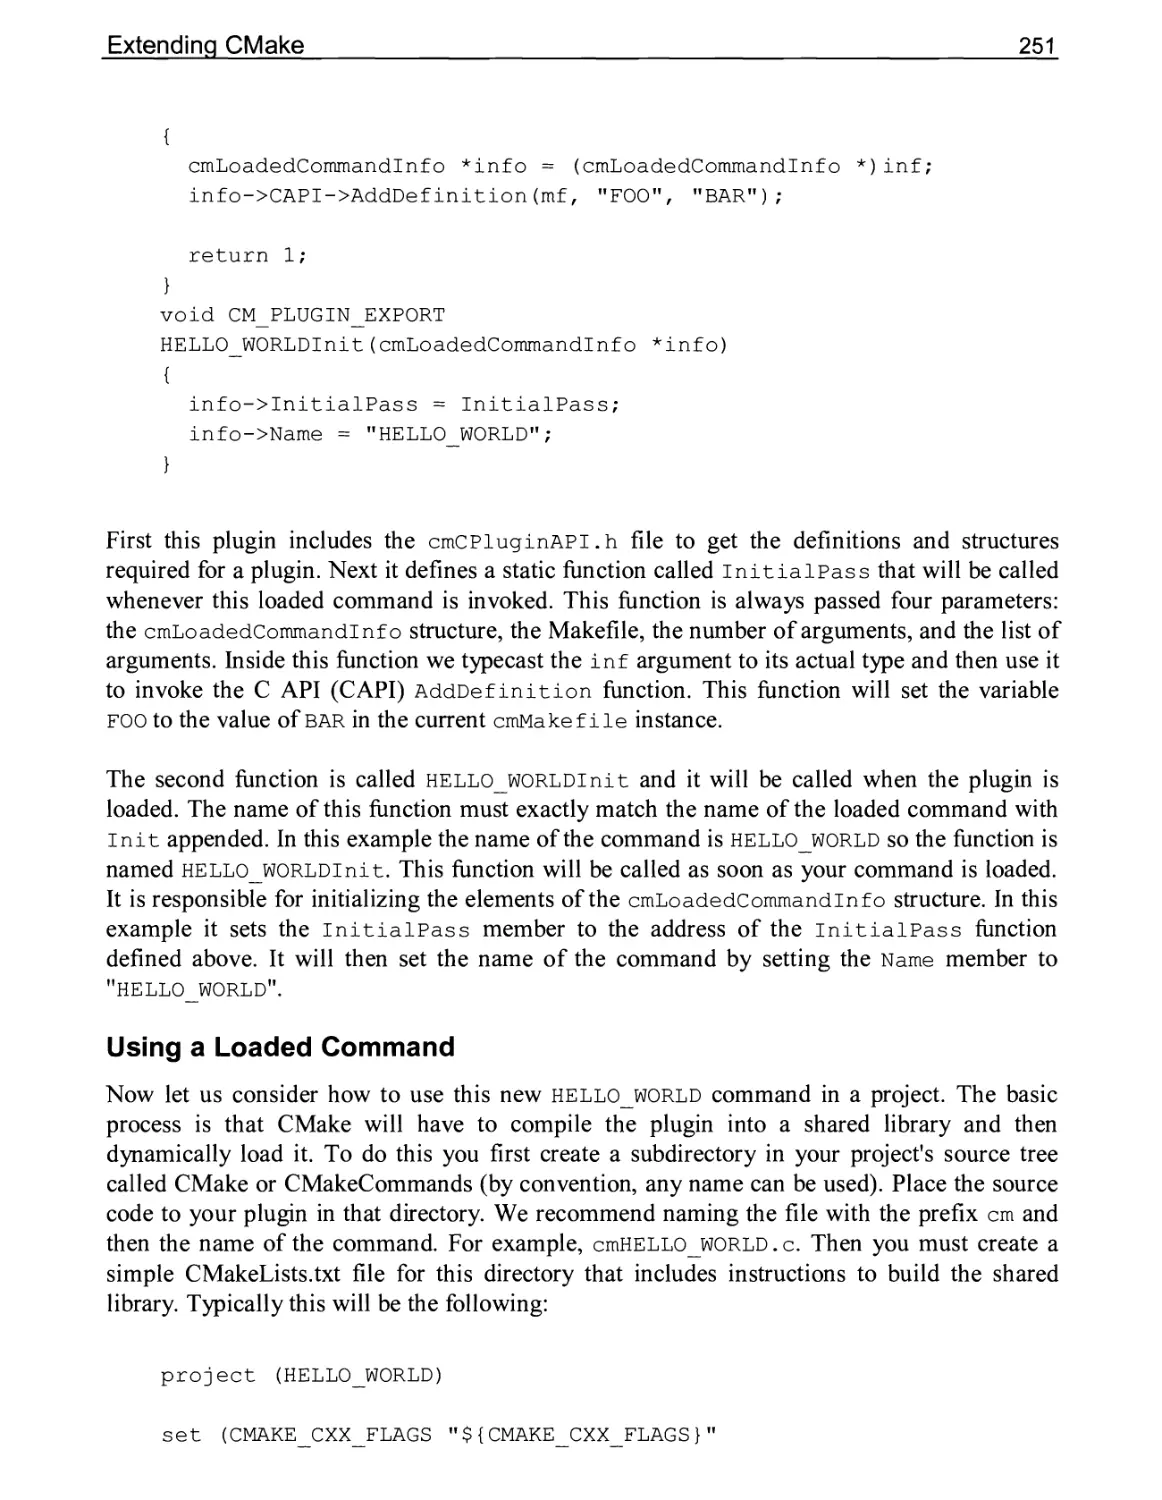
Using a Loaded Command 251
CHAPTER 12 TUTORIALS 255
12.1 A Basic Starting Point (Step 1) 255
Adding a Version Number and Configured Header File 256
12.2 Adding a Library (Step 2) 258
12.3 Installing and Testing (Step 3) 260
12.4 Adding System Introspection (Step 4) 262
12.5 Adding a Generated File and Generator (Step 5) 263
12.6 Building an Installer (Step 6) 267
12.7 Adding Support for a Dashboard (Step 7) 268
APPENDIX A - VARIABLES 269
Variables That Change Behavior 269
Variables That Describe the System 272
Variables for Languages 274
Variables That Control the Build 278
Variables That Provide Information 280
APPENDIX B - COMMAND LINE REFERENCE 287
CMake Command Line Options 287
CMake Generators 292
CTest Command Line Options 294
CPack Command Line Options 298
CPack Generators 299
APPENDIX C - LISTFILE COMMANDS 301
Current Commands 301
Compatibility Commands 366
APPENDIX D - SELECTED MODULES 373
CMake Modules
373
APPENDIX E - PROPERTIES 411
Properties of Global Scope 411
Properties on Directories 414
Properties on Targets 417
Properties on Tests 431
Properties on Source Files 431
Properties on Cache Entries 434
APPENDIX F - CMAKE POLICIES 437
INDEX 447
viii
Chapter 1
Why CMake?
If you have ever maintained the build and installation process for a software package, you will
be interested in CMake. CMake is an open source build manager for software projects that
allows developers to specify build parameters in a simple portable text file format. This file is
then used by CMake to generate project files for native build tools including Integrated
Development Environments such as Microsoft Visual Studio or Apple’s Xcode, as well as
UNIX, Linux, NMake, and Borland style Makefiles. CMake handles the difficult aspects of
building software such as cross platform builds, system introspection, and user customized
builds, in a simple manner that allows users to easily tailor builds for complex hardware and
software systems.
For any project, and especially cross platform projects, there is a need for a unified build
system. Many projects today ship with both a UNIX Makefile (or Makefile.in) and a
Microsoft Visual Studio workspace. This requires that developers constantly try to keep both
build systems up to date and consistent with each other. To target additional build systems
such as Borland or Xcode requires even more custom copies of these files, creating an even
bigger problem. This problem is compounded if you try to support optional components, such
as including JPEG support if libjpeg is available on the system. CMake solves this by
consolidating these different operations into one simple easy to understand file format.
If you have multiple developers working on a project, or multiple target platforms, then the
software will have to be built on more than one computer. Given the wide range of installed
software and custom options that are involved with setting up a modem computer, the chances
are that two computers running the same OS will be slightly different. CMake provides many
benefits for single platform multi-machine development environments including:
2
Why CMake?
• The ability to automatically search for programs, libraries, and header files that may be
required by the software being built. This includes the ability to consider environment
variables and Window’s registry settings when searching.
• The ability to build in a directory tree outside of the source tree. This is a useful feature
found on many UNIX platforms; CMake provides this feature on Windows as well. This
allows a developer to remove an entire build directory without fear of removing source
files.
• The ability to create complex custom commands for automatically generated files such
as Qt’s moc (qt.nokia.com), The Insight Toolkit’s CABLE wrappers
(public.kitware.com/Cable/HTML/Index.html) and SWIG (www.swig.org) wrapper
generators. These commands are used to generate new source files during the build
process that are in turn compiled into the software.
• The ability to select optional components at configuration time. For example, several of
VTK’s libraries are optional, and CMake provides an easy way for users to select which
libraries are built.
• The ability to automatically generate workspaces and projects from a simple text file.
This can be very handy for systems that have many programs or test cases, each of
which requires a separate project file, typically a tedious manual process to create using
an IDE.
• The ability to easily switch between static and shared builds. CMake knows how to
create shared libraries and modules on all platforms supported. Complicated platform-
specific linker flags are handled, and advanced features like built in run time search
paths for shared libraries are supported on many UNIX systems.
• Automatic generation of file dependencies and support for parallel builds on most
platforms.
When developing cross platform software, CMake provides a number of additional features:
• The ability to test for machine byte order and other hardware specific characteristics.
• A single set of build configuration files that work on all platforms. This avoids the
problem of developers having to maintain the same information in several different
formats inside a project.
• Support for building shared libraries on all platforms that support it.
• The ability to configure files with system dependent information such as the location of
data files and other information. CMake can create header files that contain information
such as paths to data files and other information in the form of #define macros. System
specific flags can also be placed in configured header files. This has advantages over
command line -D options to the compiler because it allows other build systems to use
the CMake built library without having to specify the exact same command line options
used during the build.
The History of CMake
3
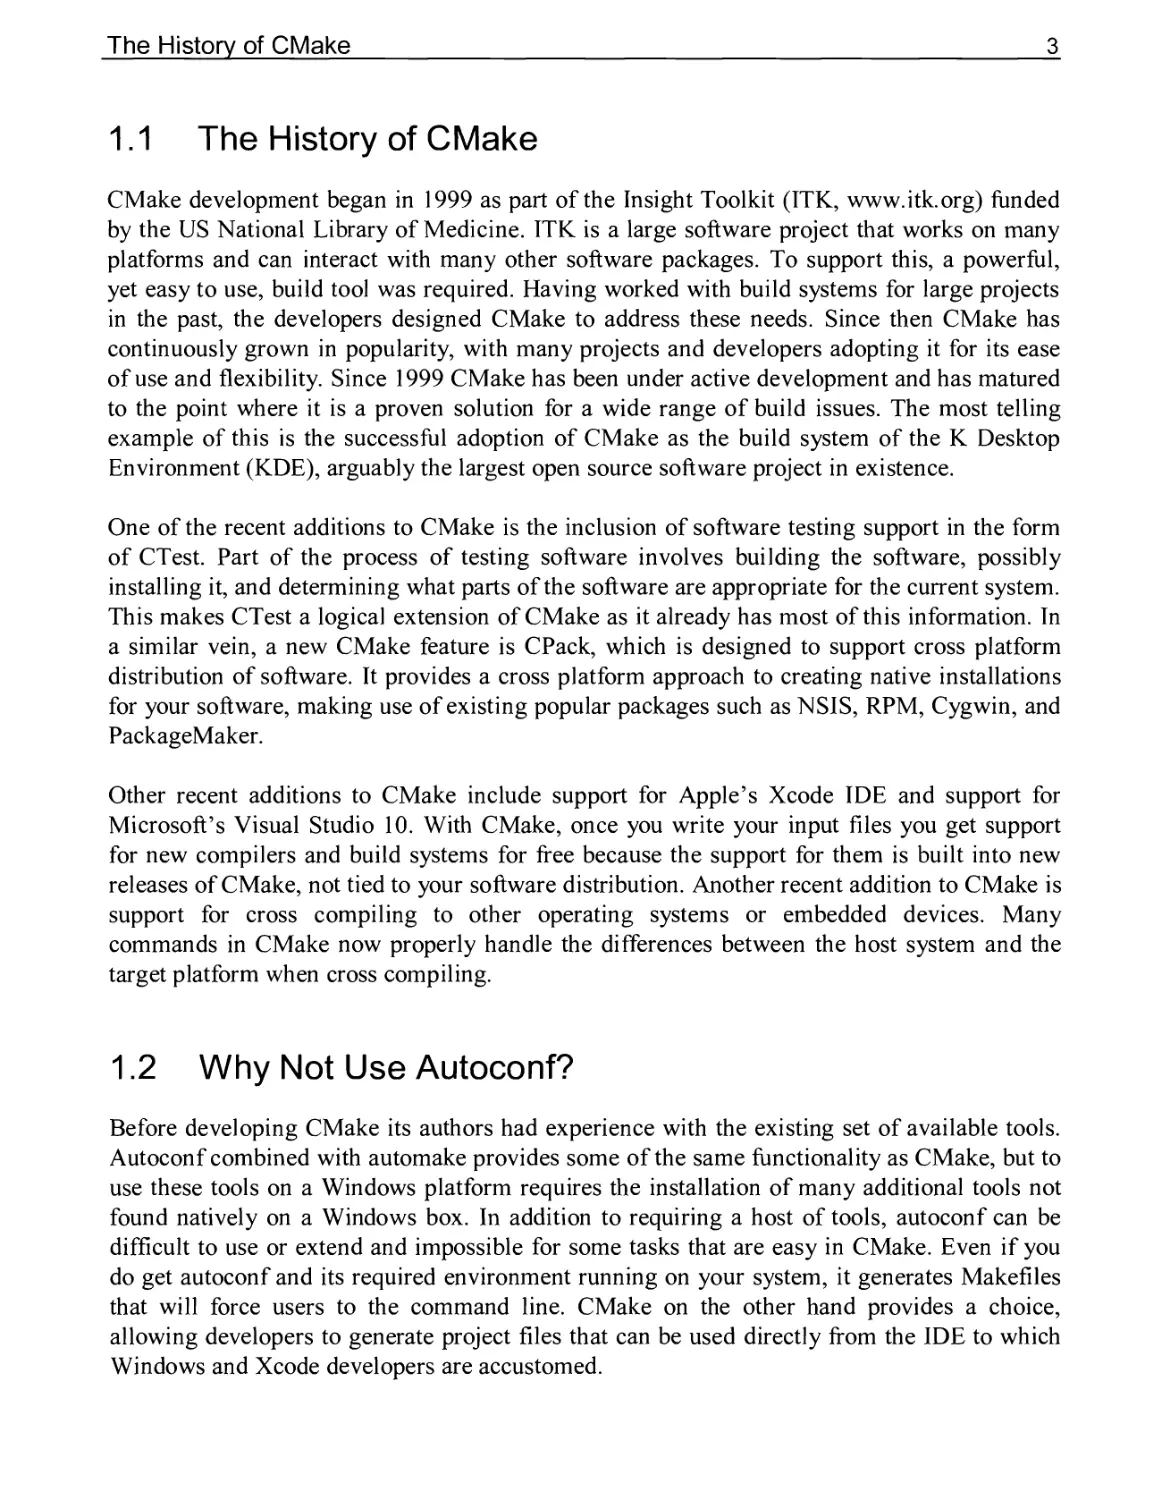
1.1 The History of CMake
CMake development began in 1999 as part of the Insight Toolkit (ITK, www.itk.org) funded
by the US National Library of Medicine. ITK is a large software project that works on many
platforms and can interact with many other software packages. To support this, a powerful,
yet easy to use, build tool was required. Having worked with build systems for large projects
in the past, the developers designed CMake to address these needs. Since then CMake has
continuously grown in popularity, with many projects and developers adopting it for its ease
of use and flexibility. Since 1999 CMake has been under active development and has matured
to the point where it is a proven solution for a wide range of build issues. The most telling
example of this is the successful adoption of CMake as the build system of the K Desktop
Environment (KDE), arguably the largest open source software project in existence.
One of the recent additions to CMake is the inclusion of software testing support in the form
of CTest. Part of the process of testing software involves building the software, possibly
installing it, and determining what parts of the software are appropriate for the current system.
This makes CTest a logical extension of CMake as it already has most of this information. In
a similar vein, a new CMake feature is CPack, which is designed to support cross platform
distribution of software. It provides a cross platform approach to creating native installations
for your software, making use of existing popular packages such as NSIS, RPM, Cygwin, and
PackageMaker.
Other recent additions to CMake include support for Apple’s Xcode IDE and support for
Microsoft’s Visual Studio 10. With CMake, once you write your input files you get support
for new compilers and build systems for free because the support for them is built into new
releases of CMake, not tied to your software distribution. Another recent addition to CMake is
support for cross compiling to other operating systems or embedded devices. Many
commands in CMake now properly handle the differences between the host system and the
target platform when cross compiling.
1.2 Why Not Use Autoconf?
Before developing CMake its authors had experience with the existing set of available tools.
Autoconf combined with automake provides some of the same functionality as CMake, but to
use these tools on a Windows platform requires the installation of many additional tools not
found natively on a Windows box. In addition to requiring a host of tools, autoconf can be
difficult to use or extend and impossible for some tasks that are easy in CMake. Even if you
do get autoconf and its required environment running on your system, it generates Makefiles
that will force users to the command line. CMake on the other hand provides a choice,
allowing developers to generate project files that can be used directly from the IDE to which
Windows and Xcode developers are accustomed.
4
Why CMake?
While autoconf supports user specified options, it does not support dependent options where
one option depends on some other property or selection. For example, in CMake you could
have a user option to enable multithreading be dependent on first determining if the user’s
system has multithreading support. CMake provides an interactive user interface, making it
easy for the user to see what options are available and how to set them.
For UNIX users, CMake also provides automated dependency generation that is not done
directly by autoconf. CMake’s simple input format is also easier to read and maintain than a
combination of Makefile.in and configure.in files. The ability of CMake to remember and
chain library dependency information has no equivalent in autoconfautomake.
1.3 Why Not Use JAM, qmake, SCons, or ANT?
Other tools such as ANT, qmake, SCons, and JAM have taken different approaches to solving
these problems and they have helped us to shape CMake. Of the four, qmake, is the most
similar to CMake although it lacks much of the system interrogation that CMake provides.
Qmake’s input format is more closely related to a traditional Makefile. ANT, JAM and SCons
are also cross-platform although they do not support generating native project files. They do
break away from the traditional Makefile oriented input with ANT using XML, JAM using its
own language, and SCons using Python. A number of these tools run the compiler directly, as
opposed to letting the system’s build process perform that task. Many of these tools require
other tools such as Python or Java to be installed before they will work.
1.4 Why Not Script It Yourself?
Some projects use existing scripting languages such as Perl or Python to configure build
processes. Although similar functionality can be achieved with systems like this, over-use of
tools can make the build process more of an Easter egg hunt than a simple-to-use build
system. When building your software package users are forced to find and install version
4.3.2 of this, and 3.2.4 of that, before they can even start the build process. To avoid that
problem, it was decided that CMake would require no more tools than the software it was
being used to build would require. At a minimum using CMake requires a C compiler, that
compiler’s native build tools, and a CMake executable. CMake was written in C++, requires
only a C++ compiler to build and precompiled binaries are available for most systems.
Scripting it yourself also typically means you will not be generating native Xcode or Visual
Studio workspaces, making Mac and Windows builds limited.
On What Platforms Does CMake Run?
5
1.5 On What Platforms Does CMake Run?
CMake runs on a wide variety of platforms including Microsoft Windows, Apple Mac OS X,
and most UNIX or UNIX-like platforms. At the time of the writing of this book CMake was
tested nightly on the following platforms: Windows 98/2000/XP/Vista/7, AIX, HPUX, IRIX,
Linux, Mac OS X, Solaris, OSF, QNX, CYGWIN, MinGW, and FreeBSD. You can check
www.cmake.org for a current list of tested platforms.
Likewise, CMake supports most common compilers. It supports the GNU compiler on all
CMake supported platforms. Other tested compilers include Visual Studio 6 through 10, Intel
C, SGI CC, Mips Pro, Borland, Sun CC and HP aCC. CMake should work for most UNIX-
style compilers out of the box. If the compiler takes arguments in a strange way, then see the
section Porting CMake to New Platform on page 241 for information on how to customize
CMake for a new compiler.
Chapter 2
Getting Started
2.1 Getting and Installing CMake on Your Computer
Before using CMake you will need to install or build the CMake binaries on your system. On
many systems you may find that CMake is already installed, or is available for install with the
standard package manager tool for the system. Cygwin, Debian, FreeBSD, Mac OS X Fink,
and many others all have CMake distributions. If your system does not have a CMake
package, you can find CMake precompiled for most common architectures at
www.cmake.org. If you do not find binaries for your system precompiled, then you can build
CMake from source. To build CMake you will need a modern C++ compiler.
UNIX and Mac Binary Installations
If your system provides CMake as one of its standard packages, follow your system’s package
installation instructions. If your system does not have CMake, or has an out of date version of
CMake, you can download precompiled binaries from www.cmake.org. The binaries from
www.cmake.org come in the form of a compressed tar file. The tar file contains a README
file and an enclosed tar file. The README file contains a manifest of the files contained in
the enclosed tar file, and some instructions. To install, simply extract the enclosed tar file into
a destination directory (typically /usr/local). However, it can be any directory, and does
not require root privileges for installation.
Windows Binary Installation
For Windows CMake has a NullSoft install file available for download from www.cmake.org.
To install this file, simply run the executable on the windows machine on which you want to
install CMake. You will be able to run CMake from the Start Menu after it is installed.
8
Getting Started
2.2 Building CMake Yourself
If binaries are not available for your system, or if binaries are not available for the version of
CMake you wish to use, you can build CMake from the source code. You can obtain the
CMake source code by following the instructions at www.cmake.org. Once you have the
source code it can be built in two different ways. If you have a version of CMake on your
system you can use it to build other versions of CMake. Generally the current development
version of CMake can always be built from the previous release of CMake. This is how new
versions of CMake are built on most Windows systems.
The second way to build CMake is by running its bootstrap build script. To do this you
change directory into your CMake source directory and type
./bootstrap
make
make install
The make install step is optional since CMake can run directly from the build directory if
desired. On UNIX, if you are not using the GNU C++ compiler, you need to tell the bootstrap
script which compiler you want to use. This is done by setting the environment variable cxx
before running bootstrap. If you need to use any special flags with your compiler, set the
cxxflags environment variable. For example, on the SGI with the 7.3X compiler, you would
build CMake like this:
cd CMake
(setenv CXX CC; setenv CXXFLAGS "-Bstatic-LANG:std"; ./bootstrap)
make
make install
2.3 Basic CMake Usage and Syntax
Using CMake is simple. The build process is controlled by creating one or more CMakeLists
files (actually CMakeLists.txt but this guide will leave off the extension in most cases) in each
of the directories that make up a project. The CMakeLists files should contain the project
description in CMake’s simple language. The language is expressed as a series of commands.
Each command is evaluated in the order that it appears in the CMakeLists file. The commands
have the form
command (args...)
Hello World for CMake
9
where command is the name of the command, and args is a white-space separated list of
arguments. (Arguments with embedded white-space should be double quoted.) CMake is case
insensitive to command names as of version 2.2. So where you see command you could use
COMMAND or Command instead. Older versions of CMake only accepted uppercase commands.
CMake supports simple variables that can be either strings or lists of strings. Variables are
referenced using a ${var} syntax. Multiple arguments can be grouped together into a list
using the set command. All other commands expand the lists as if they had been passed into
the command with white-space separation. For example, set (Foo a b c) will result in
setting the variable Foo to a b c, and if Foo is passed into another command
command (${ Foo}) it would be equivalent to command (a b c). If you want to pass a list of
arguments to a command as if it were a single argument simply double quote it. For example
command (" $ {Foo} " ) would be invoked passing only one argument equivalent to command (
"a be" ).
System environment variables and Windows registry values can be accessed directly in
CMake. To access system environment variables the syntax $env{var} is used. CMake can
also reference registry entries in many commands using a syntax of the form
[ HKEY_CURRENT_USER\\Sof tware\\path 1\ \path2; key ], where the paths are built
from the registry tree and key.
2.4 Hello World for CMake
For starters let us consider the simplest possible CMakeLists file. To compile an executable
from one source file the CMakeLists file would contain two lines:
project (Hello)
add executable (Hello Hello.c)
To build the Hello executable you follow the process described in Running CMake (See
section 2.5) to generate the Makefiles or Microsoft project files. The project command
indicates what the name of the resulting workspace should be and the add executable
command adds an executable target to the build process. That’s all there is to it for this simple
example. If your project requires a few files it is also quite easy, just modify the
add executable line as shown below.
add executable (Hello Hello.c File2.c File3.c File4.c)
add_executable is just one of many commands available in CMake. Consider the more
complicated example below.
10
Getting Started
cmake_minimum_required (2.6)
project (HELLO)
set (HELLO_SRCS Hello.c File2.c File3.c)
if (WIN32)
set(HELLO_SRCS ${HELLO_SRCS} WinSupport.c)
else ()
set (HELLO_SRCS ${HELLO_SRCS} UnixSupport.c)
endif ()
add executable (Hello ${HELLO_SRCS})
# look for the Tel library
findJLibrary (TC L_L IBRAR Y
NAMES tel tcl84 tcl83 tcl82 tcl80
PATHS /usr/lib /usr/local/lib
if (TCL_LIBRARY)
target link_library (Hello ${TCL LIBRARY})
endif ()
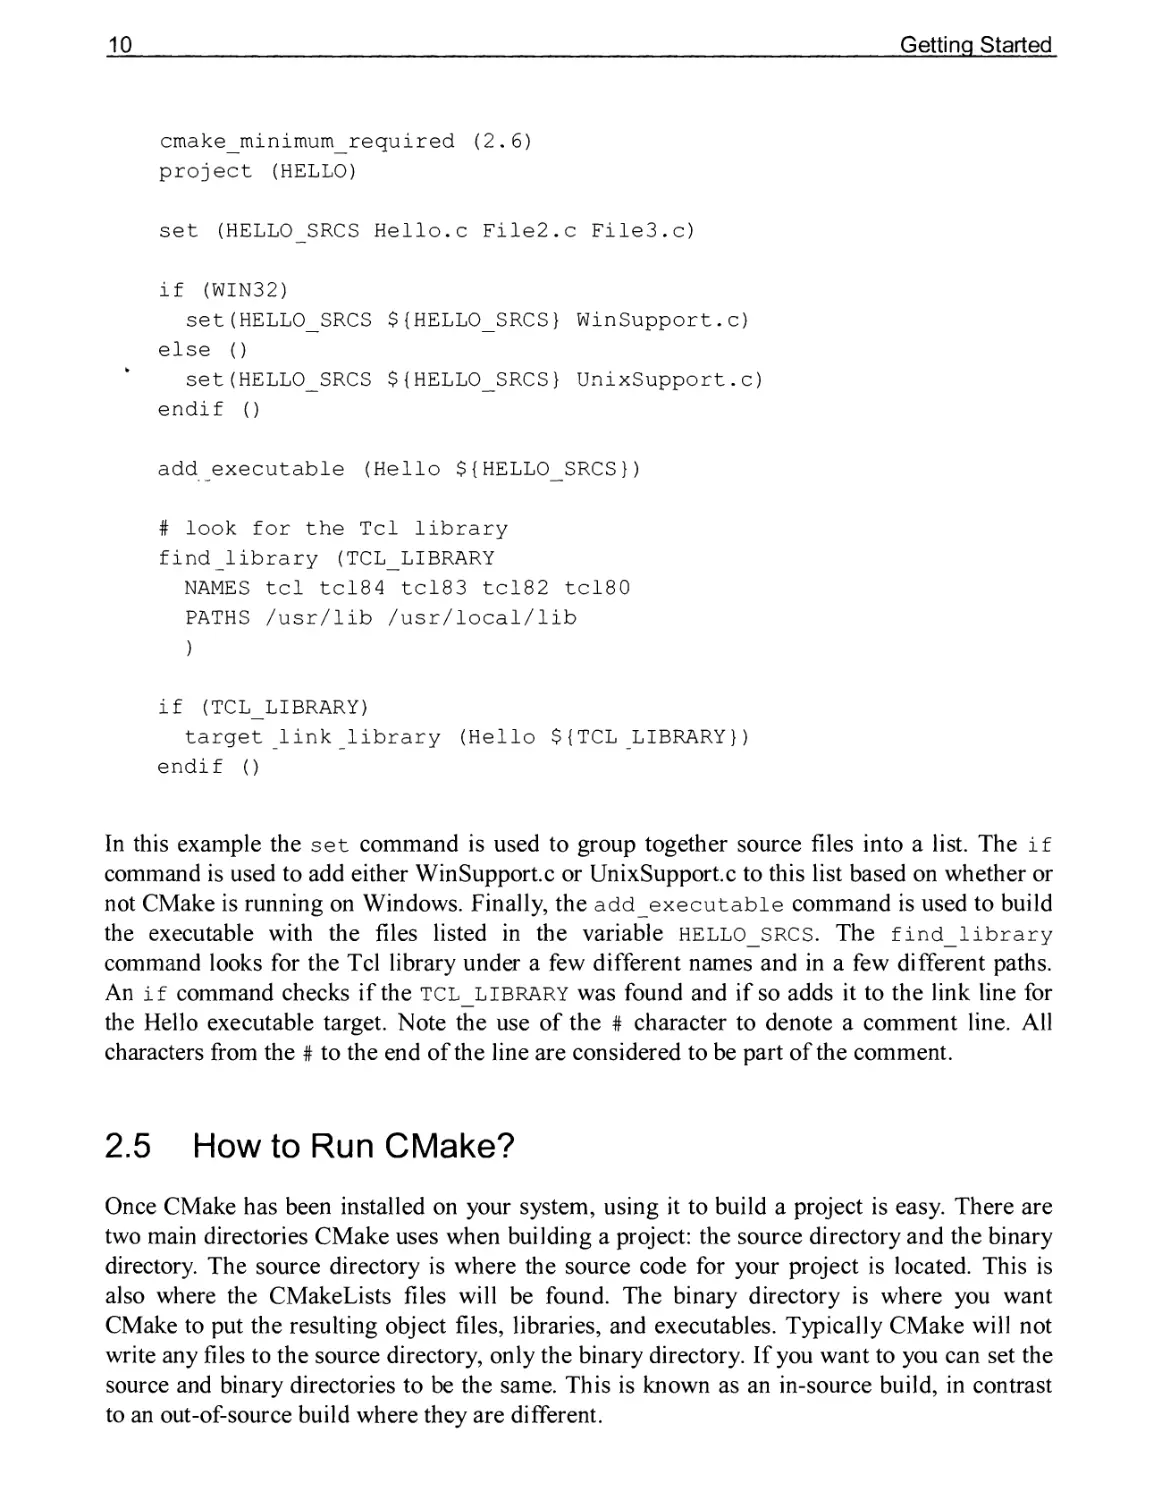
In this example the set command is used to group together source files into a list. The if
command is used to add either WinSupport.c or UnixSupport.c to this list based on whether or
not CMake is running on Windows. Finally, the add executable command is used to build
the executable with the files listed in the variable HELLO_SRCS. The find_library
command looks for the Tel library under a few different names and in a few different paths.
An if command checks if the tcllibrary was found and if so adds it to the link line for
the Hello executable target. Note the use of the # character to denote a comment line. All
characters from the # to the end of the line are considered to be part of the comment.
2.5 How to Run CMake?
Once CMake has been installed on your system, using it to build a project is easy. There are
two main directories CMake uses when building a project: the source directory and the binary
directory. The source directory is where the source code for your project is located. This is
also where the CMakeLists files will be found. The binary directory is where you want
CMake to put the resulting object files, libraries, and executables. Typically CMake will not
write any files to the source directory, only the binary directory. If you want to you can set the
source and binary directories to be the same. This is known as an in-source build, in contrast
to an out-of-source build where they are different.
How to Run CMake?
11
CMake supports both in-source and out-of-source builds on all operating systems. This means
that you can configure your build to be completely outside of the source code tree which
makes it very easy to remove all of the files generated by a build. Having the build tree differ
from the source tree also makes it easy to support having multiple builds of a single source
tree. This is useful when you want to have multiple builds with different options but just one
copy of the source code. Now let us consider the specifics of running CMake using its Qt
based GUI and command line interfaces.
Running CMake’s Qt Interface
CMake includes a Qt based user interface developed by Clinton Stimpson that can be used on
most platforms, including UNIX, Mac OS X, and Windows. This interface is included in the
CMake source code, but you will need an installation of Qt on your system in order to build it.
Figure 1 - Qt based CMake GUI
On Windows the executable is named cmake-gui.exe and should be in your Start menu
under Program Files. There may also be a shortcut on your desktop, or if you built CMake
from source, it will be in the build directory. For UNIX and Mac users the executable is
12
Getting Started
named cmake-gui and it can be found where you installed the CMake executables.A GUI will
appear similar to what is shown in Figure 1. The top two entries are the source code and
binary directories. They allow you to specify where the source code is for what you want to
compile and where the resulting binaries should be placed. You should set these two values
first. If the binary directory you specify does not exist, it will be created for you. If the binary
directory has been configured by CMake before then it will automatically set the source tree.
The middle area is where you can specify different options for the build process. More
obscure variables may be hidden, but can be seen if you select "Advanced View" from the
view pulldown. You can search for values in the middle area by typing all or part of the name
into the Search box. This can be handy for finding specific settings or options in a large
project. The bottom area of the window includes the Configure and Generate buttons as well
as a progress bar and scrollable output window.
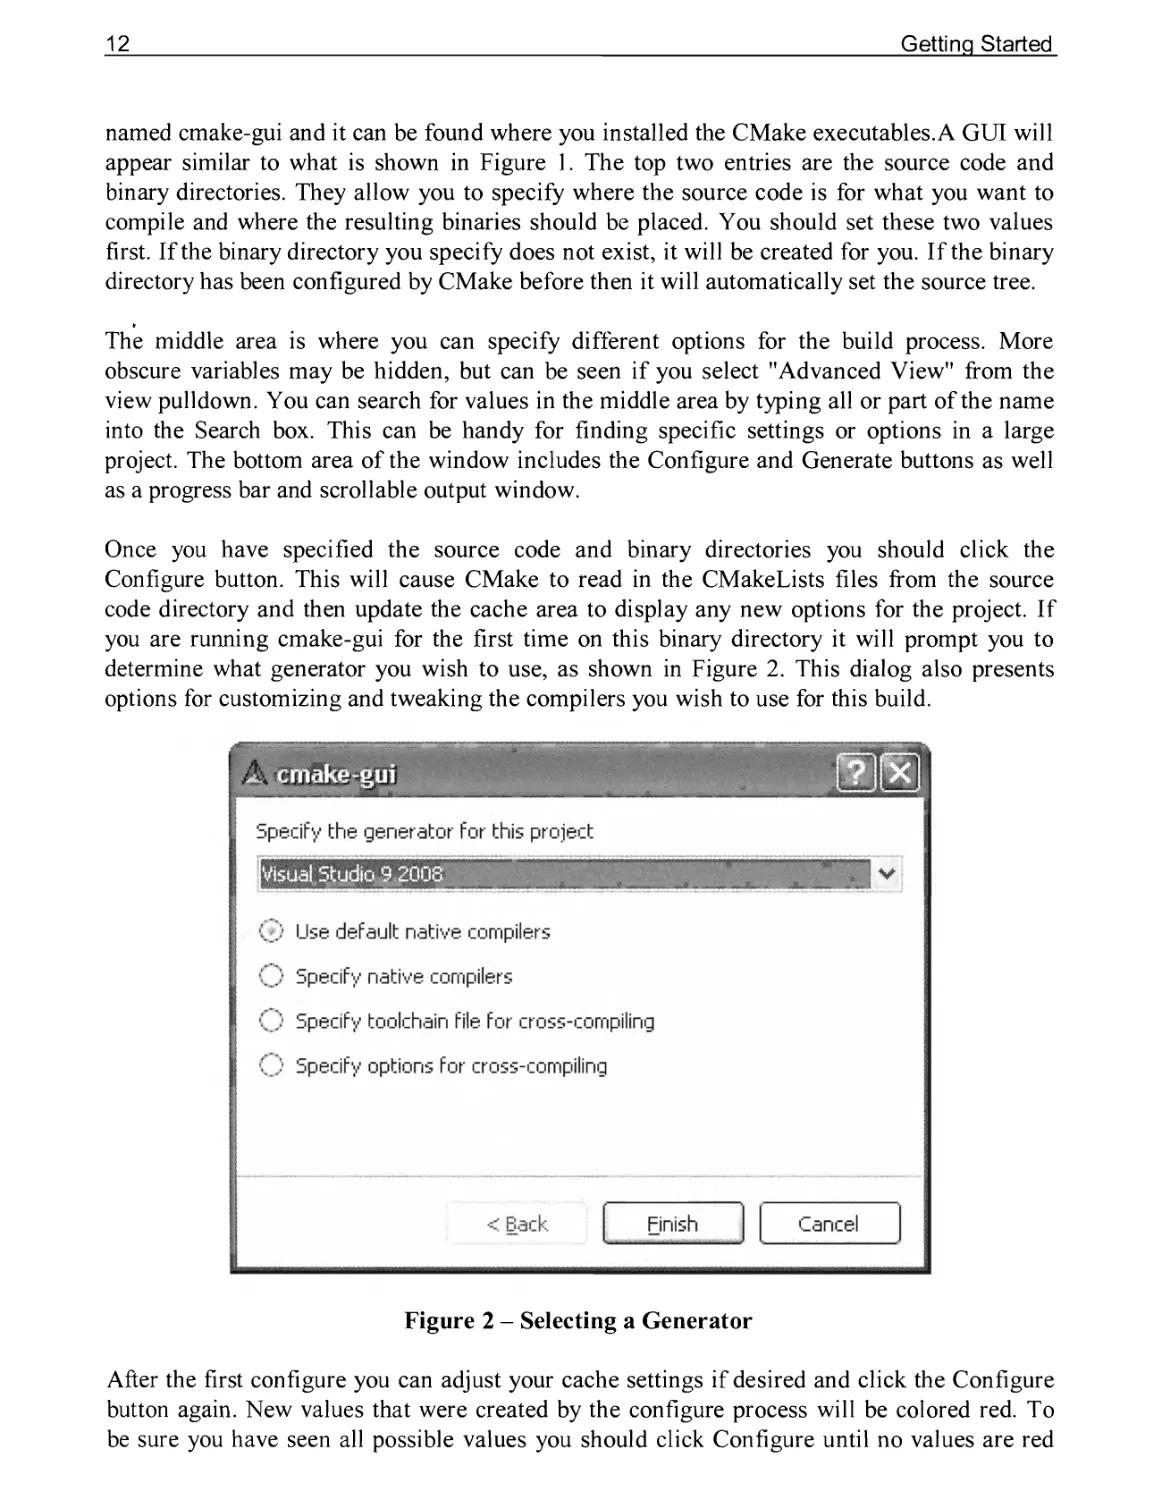
Once you have specified the source code and binary directories you should click the
Configure button. This will cause CMake to read in the CMakeLists files from the source
code directory and then update the cache area to display any new options for the project. If
you are running cmake-gui for the first time on this binary directory it will prompt you to
determine what generator you wish to use, as shown in Figure 2. This dialog also presents
options for customizing and tweaking the compilers you wish to use for this build.
Figure 2 - Selecting a Generator
After the first configure you can adjust your cache settings if desired and click the Configure
button again. New values that were created by the configure process will be colored red. To
be sure you have seen all possible values you should click Configure until no values are red
How to Run CMake?
13
and you are happy with all the settings. Once you are done configuring, click the Generate
button, this will produce the appropriate files.
It is important that you make sure that your environment is suitable for running cmake-gui. If
you are using an IDE such as Visual Studio then your environment will be setup correctly for
you. If you are using NMake or MinGW then you need to make sure that the compiler can run
from your environment. You can either directly set the required environment variables for
your compiler or use a shell in which they are already set. For example, Microsoft Visual
Studio has an option on the start menu for creating a Visual Studio Command Prompt. This
opens up a command prompt window that has its environment already setup for Visual
Studio. You should run cmake-gui from this command prompt if you want to use NMake
Makefiles. The same approach applies to MinGW, you should run cmake-gui from a MinGW
shell that has a working compiler in its path.
When cmake-gui finishes it will have generated the build files in the binary directory you
specified. If Visual Studio was selected as the generator, a MSVC workspace (or solution) file
is created. This file's name is based on the name of the project you specified in the project
command at the beginning of your CMakeLists file. For many other generator types,
Makefiles are generated. The next step in this process is to open the workspace with MSVC.
Once open, the project can be built in the normal manner of Microsoft Visual C++. The
all build target can be used to build all of the libraries and executables in the package. If
you are using a Makefile build type, then you would build by running make or nmake on the
resulting Makefiles.
Running the ccmake Curses Interface
On most UNIX platforms, if the curses library is supported, CMake provides an executable
called ccmake. This interface is a terminal-based text application that is very similar to the Qt
based GUI. To run ccmake, change directory (cd) to the directory where you want the binaries
to be placed. This can be the same directory as the source code for what we call in-source
builds or it can be a new directory you create. Then run ccmake with the path to the source
directory on the command line. For in-source builds use for the source directory. This will
start the text interface as shown in Figure 3 (in this case the cache variables are from VTK
and most are set automatically).
14
Getting Started
Figure 3 - ccmake running on UNIX
Brief instructions are displayed in the bottom of the window. If you hit the "c" key, it will
configure the project. You should always configure after changing values in the cache. To
change values, use the arrow keys to select cache entries, and then the enter key to edit them.
Boolean values will toggle with the enter key. Once you have set all the values as you like,
you can hit the "g" key to generate the Makefiles and exit. You can also hit "h" for help, Mq"
to quit, and "t" to toggle the viewing of advanced cache entries. Two examples of CMake
usage on the UNIX platform follow for a hello world project called Hello. In the first
example, an in-source build is performed.
cd Hello
ccmake .
make
In the second example, an out-of-source build is performed.
mkdir Helio-Linux
cd Helio-Linux
ccmake ../Hello
make
How to Run CMake?
15
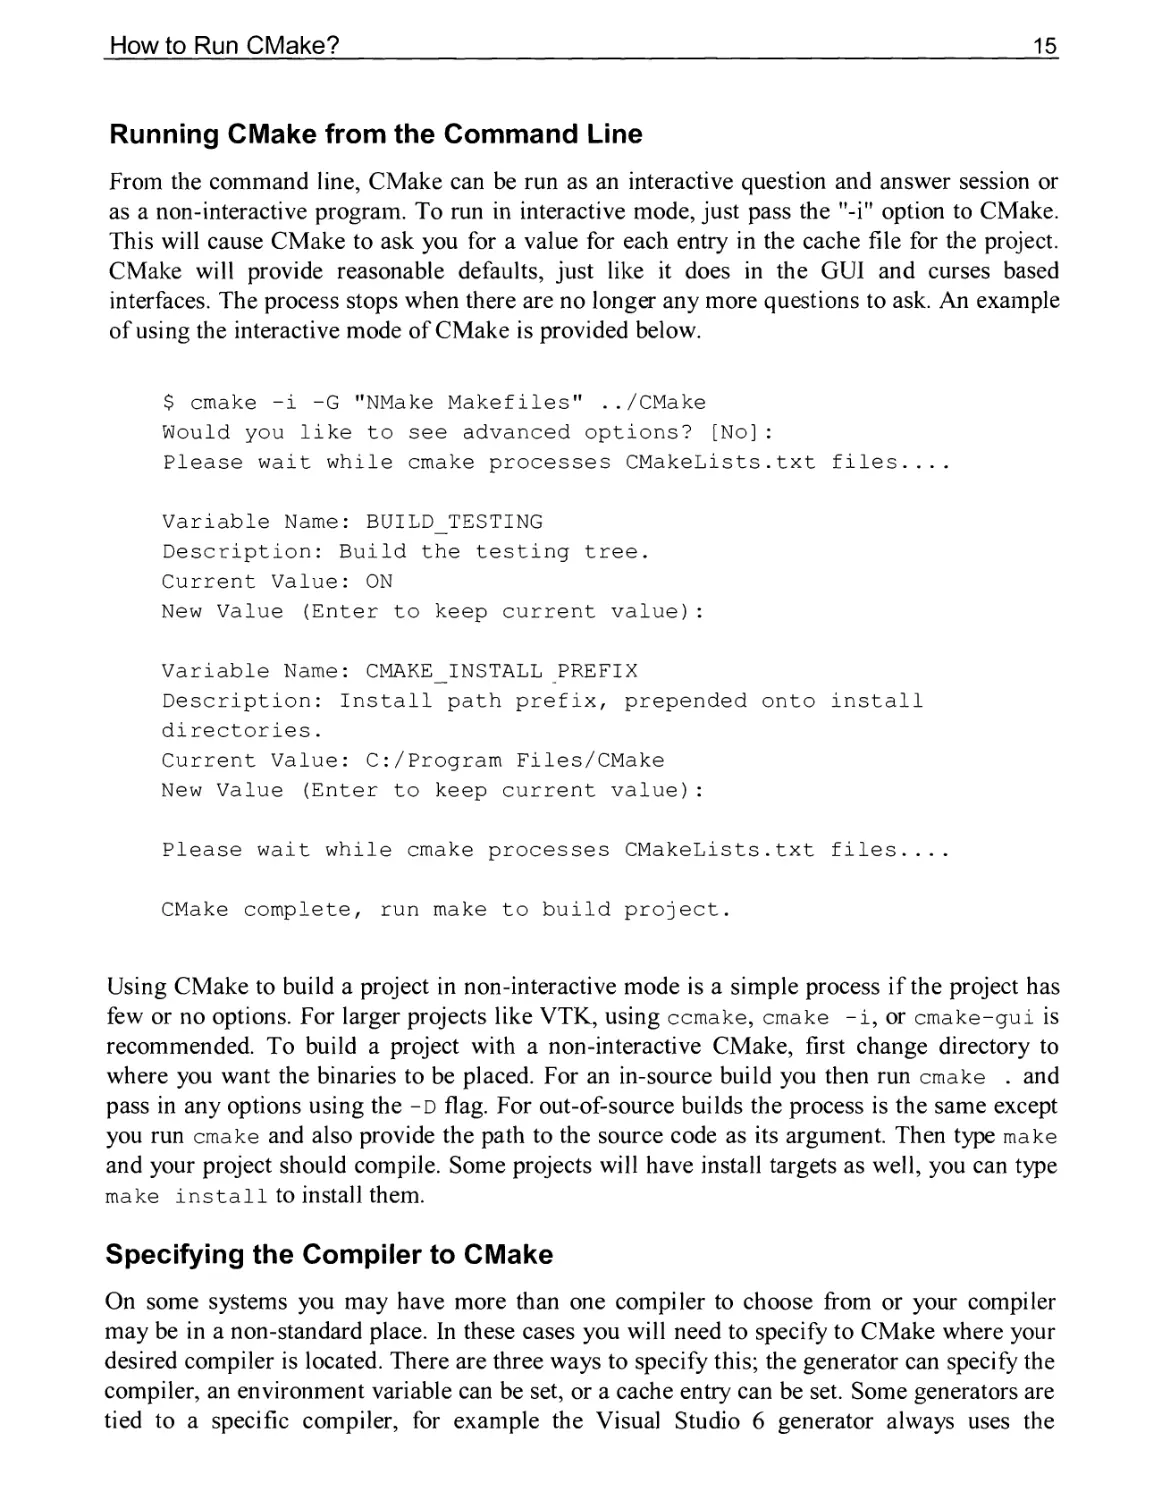
Running CMake from the Command Line
From the command line, CMake can be run as an interactive question and answer session or
as a non-interactive program. To run in interactive mode, just pass the ”-iM option to CMake.
This will cause CMake to ask you for a value for each entry in the cache file for the project.
CMake will provide reasonable defaults, just like it does in the GUI and curses based
interfaces. The process stops when there are no longer any more questions to ask. An example
of using the interactive mode of CMake is provided below.
$ cmake -i -G "NMake Makefiles" ../CMake
Would you like to see advanced options? [No]:
Please wait while cmake processes CMakeLists.txt files....
Variable Name: BUILD_TESTING
Description: Build the testing tree.
Current Value: ON
New Value (Enter to keep current value):
Variable Name: CMAKE_INSTALL PREFIX
Description: Install path prefix, prepended onto install
directories.
Current Value: C:/Program Files/CMake
New Value (Enter to keep current value):
Please wait while cmake processes CMakeLists.txt files....
CMake complete, run make to build project.
Using CMake to build a project in non-interactive mode is a simple process if the project has
few or no options. For larger projects like VTK, using ccmake, cmake -i, or cmake-gui is
recommended. To build a project with a non-interactive CMake, first change directory to
where you want the binaries to be placed. For an in-source build you then run cmake . and
pass in any options using the -D flag. For out-of-source builds the process is the same except
you run cmake and also provide the path to the source code as its argument. Then type make
and your project should compile. Some projects will have install targets as well, you can type
make install to install them.
Specifying the Compiler to CMake
On some systems you may have more than one compiler to choose from or your compiler
may be in a non-standard place. In these cases you will need to specify to CMake where your
desired compiler is located. There are three ways to specify this; the generator can specify the
compiler, an environment variable can be set, or a cache entry can be set. Some generators are
tied to a specific compiler, for example the Visual Studio 6 generator always uses the
16
Getting Started
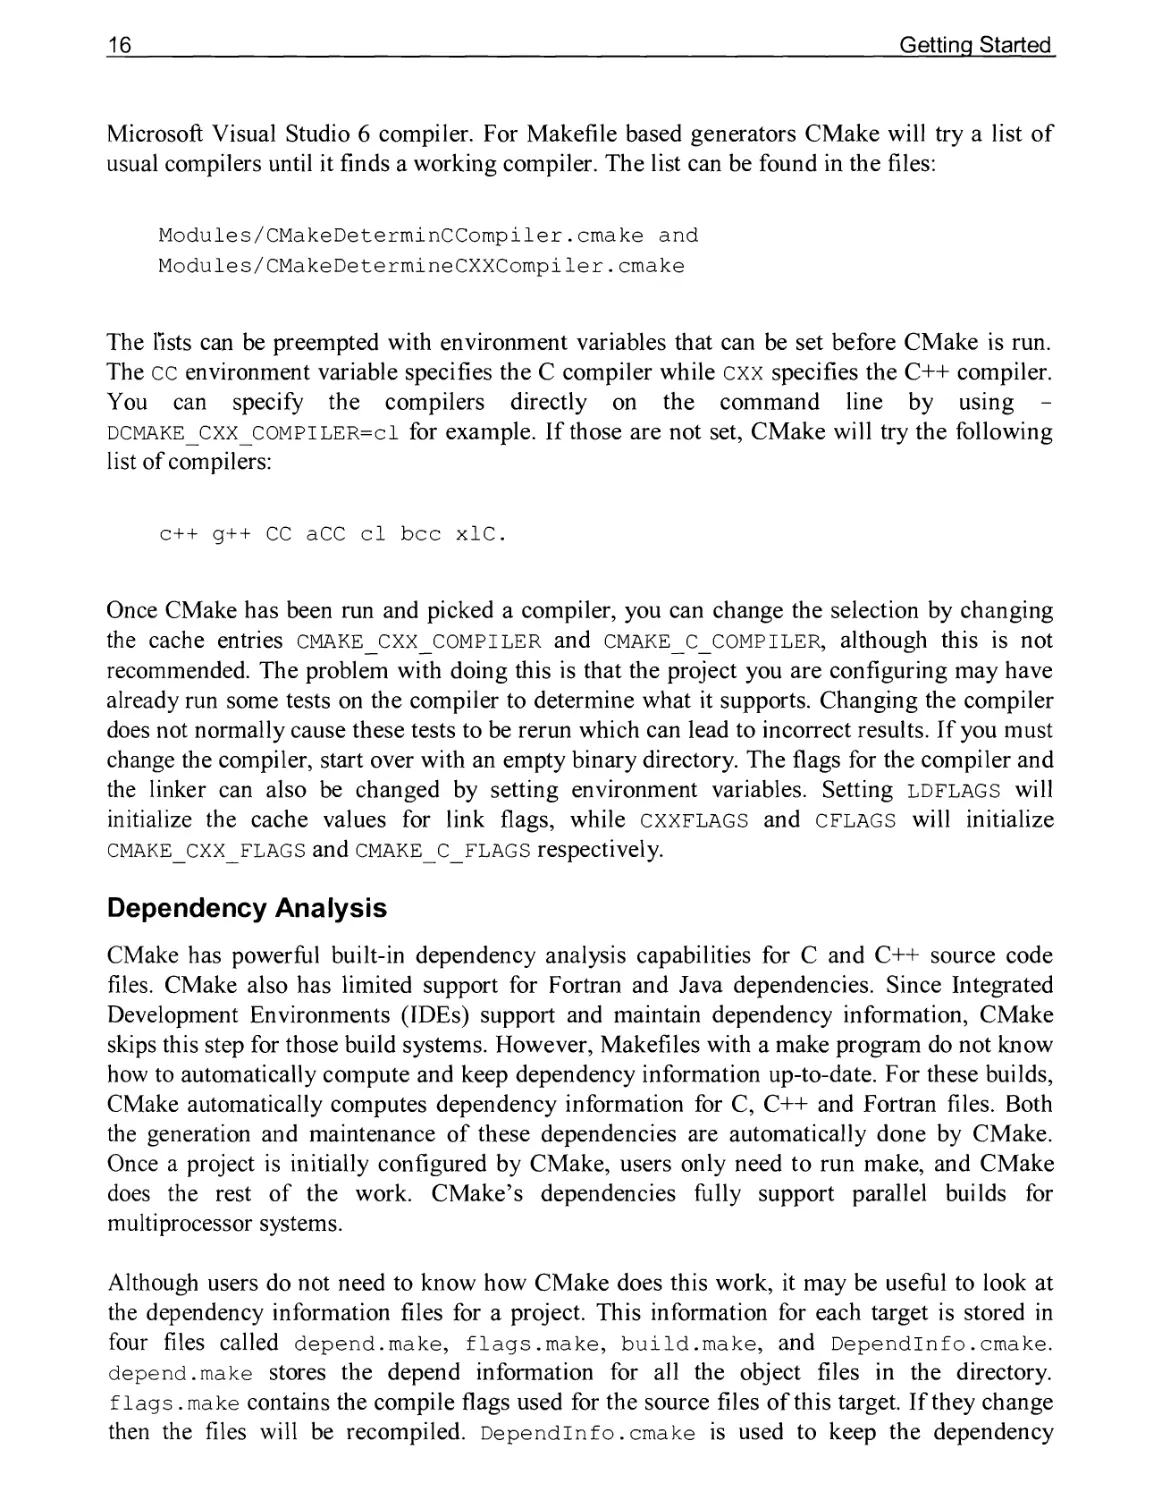
Microsoft Visual Studio 6 compiler. For Makefile based generators CMake will try a list of
usual compilers until it finds a working compiler. The list can be found in the files:
Modules/CMakeDeterminCCompiler.cmake and
Modules/CMakeDetermineCXXCompiler.cmake
The lists can be preempted with environment variables that can be set before CMake is run.
The CC environment variable specifies the C compiler while cxx specifies the C++ compiler.
You can specify the compilers directly on the command line by using -
dcmake_cxx compiler=c1 for example. If those are not set, CMake will try the following
list of compilers:
C++ g++ CC aCC cl bcc xlC.
Once CMake has been run and picked a compiler, you can change the selection by changing
the cache entries cmake_cxx_compiler and cmake_c_COMPILER, although this is not
recommended. The problem with doing this is that the project you are configuring may have
already run some tests on the compiler to determine what it supports. Changing the compiler
does not normally cause these tests to be rerun which can lead to incorrect results. If you must
change the compiler, start over with an empty binary directory. The flags for the compiler and
the linker can also be changed by setting environment variables. Setting ldflags will
initialize the cache values for link flags, while CXXFLAGS and cflags will initialize
cmake_cxx_flags and cmake_c_flags respectively.
Dependency Analysis
CMake has powerful built-in dependency analysis capabilities for C and C++ source code
files. CMake also has limited support for Fortran and Java dependencies. Since Integrated
Development Environments (IDEs) support and maintain dependency information, CMake
skips this step for those build systems. However, Makefiles with a make program do not know
how to automatically compute and keep dependency information up-to-date. For these builds,
CMake automatically computes dependency information for C, C++ and Fortran files. Both
the generation and maintenance of these dependencies are automatically done by CMake.
Once a project is initially configured by CMake, users only need to run make, and CMake
does the rest of the work. CMake’s dependencies fully support parallel builds for
multiprocessor systems.
Although users do not need to know how CMake does this work, it may be useful to look at
the dependency information files for a project. This information for each target is stored in
four files called depend.make, flags.make, build.make, and Dependlnfo . cmake.
depend.make stores the depend information for all the object files in the directory,
flags .make contains the compile flags used for the source files of this target. If they change
then the files will be recompiled. Dependlnfo. cmake is used to keep the dependency
Editing CMakeLists Files
17
information up-to-date and contains information about what files are part of the project and
what languages they are in. Finally, the rules for building the dependencies are stored in
build, make. If a dependency is out of date then all of the dependencies for that target will
be recomputed, keeping the dependency information current.
2.6 Editing CMakeLists Files
CMakeLists files can be edited in almost any text editor. Some editors, such as Notepad++,
come with CMake syntax highlighting and indentation support built in. For editors such as
Emacs or Vim CMake includes indentation and syntax highlighting modes. These can be
found in the Docs directory of the source distribution, or downloaded from the CMake web
site. The file cmake-mode. el is the Emacs mode, and cmake-indent. vim and cmake-
syntax. vim are used by Vim. Within Visual Studio the CMakeLists files are listed as part of
the project and you can edit them simply by double clicking on them. Within any of the
supported generators (Makefiles, Visual Studio, etc) if you edit a CMakeLists file and rebuild,
there are rules that will automatically invoke CMake to update the generated files (e.g.
Makefiles or project files) as required. This helps to assure that your generated files are
always in sync with your CMakeLists files.
Since CMake computes and maintains dependency information, the CMake executables must
always be available (though they don’t have to be in your PATH) when make or an IDE is
being run on CMake generated files. This means that if a CMake input file changes on disk,
your build system will automatically re-run CMake and produce up-to-date build files. For
this reason you generally should not generate Makefiles or projects with CMake and move
them to another machine that does not have CMake installed.
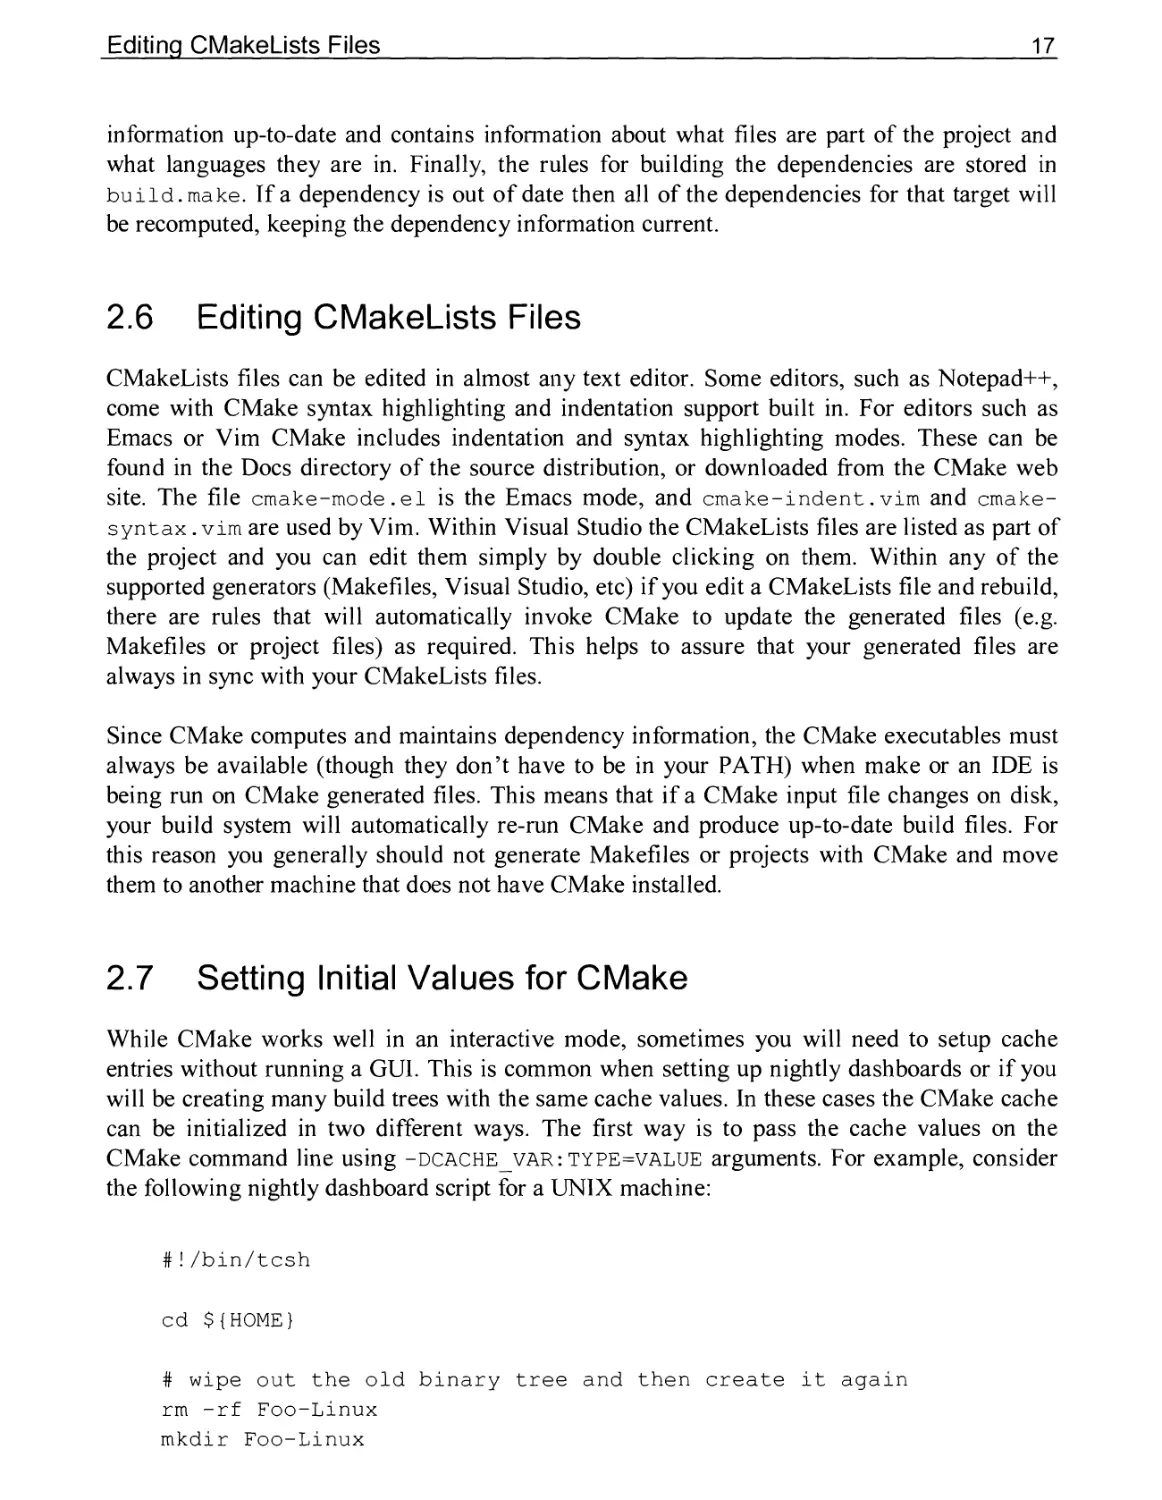
2.7 Setting Initial Values for CMake
While CMake works well in an interactive mode, sometimes you will need to setup cache
entries without running a GUI. This is common when setting up nightly dashboards or if you
will be creating many build trees with the same cache values. In these cases the CMake cache
can be initialized in two different ways. The first way is to pass the cache values on the
CMake command line using -dcache var: type=value arguments. For example, consider
the following nightly dashboard script for a UNIX machine:
#!/bin/tcsh
cd ${HOME}
# wipe out the old binary tree and then create it again
rm -rf Foo-Linux
mkdir Foo-Linux
18
Getting Started
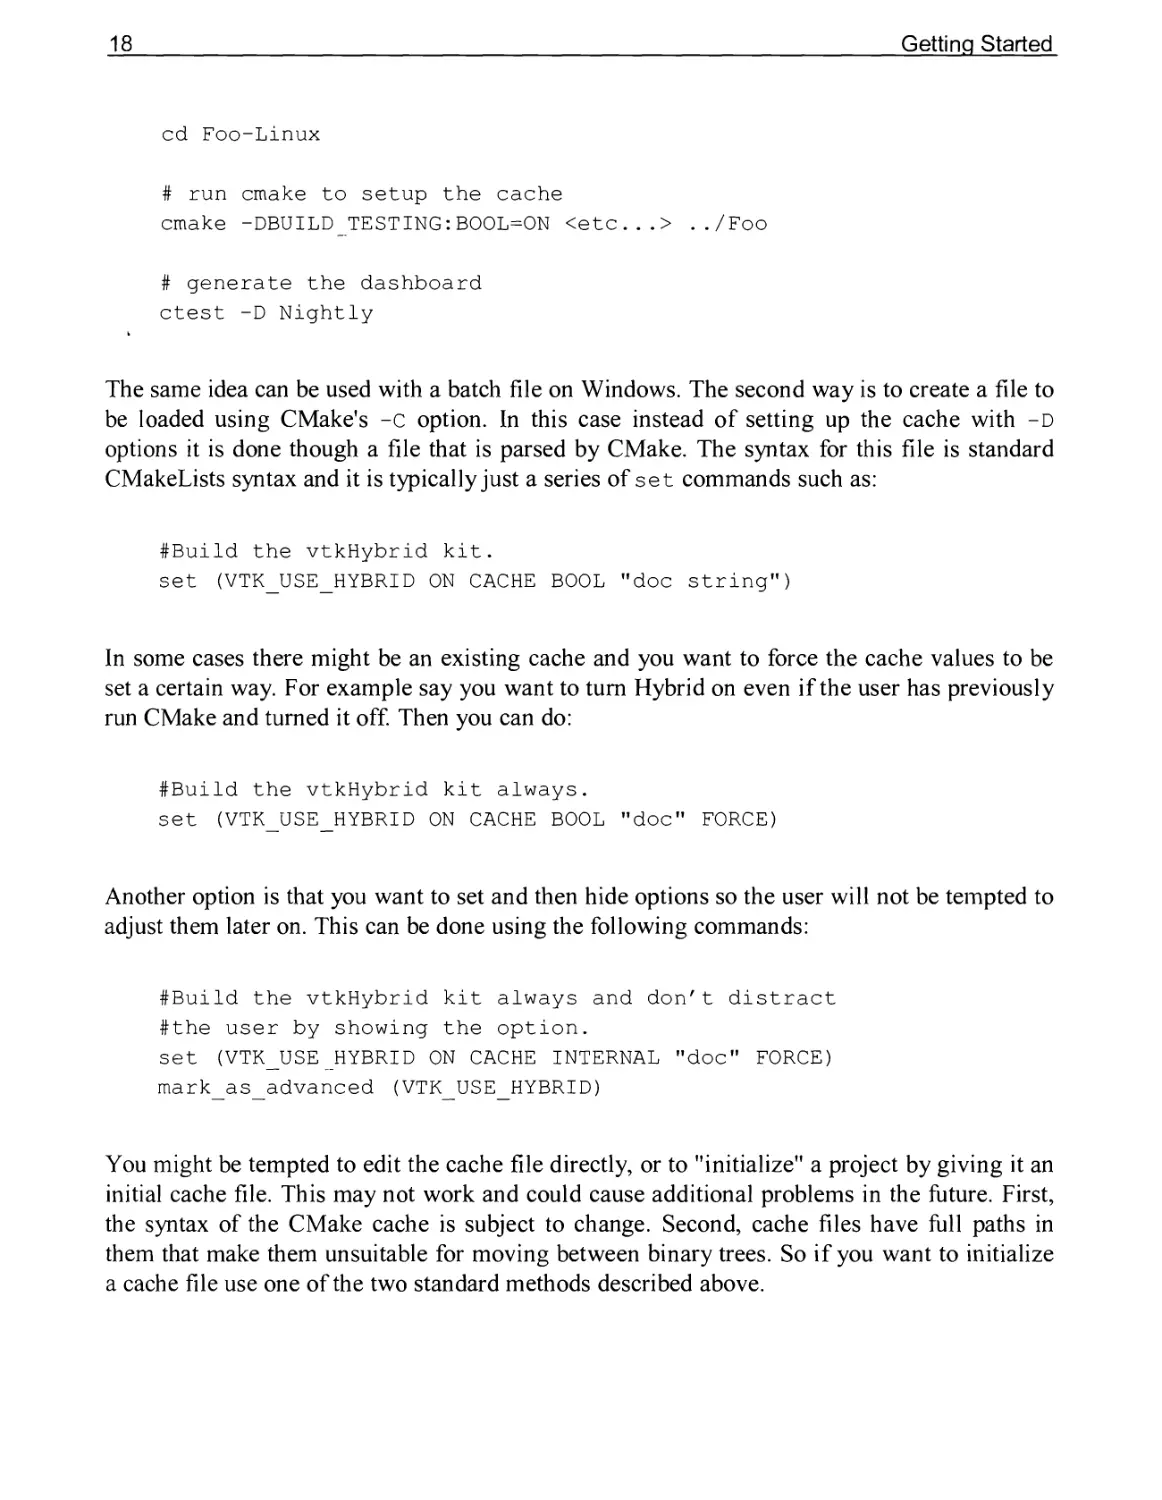
cd Foo-Linux
# run cmake to setup the cache
cmake -DBUILD_TESTING:BOOL-ON <etc...> ../Foo
# generate the dashboard
ctest -D Nightly
The same idea can be used with a batch file on Windows. The second way is to create a file to
be loaded using CMake's -C option. In this case instead of setting up the cache with -D
options it is done though a file that is parsed by CMake. The syntax for this file is standard
CMakeLists syntax and it is typically just a series of set commands such as:
#Build the vtkHybrid kit.
set (VTK_USE_HYBRID ON CACHE BOOL "doc string")
In some cases there might be an existing cache and you want to force the cache values to be
set a certain way. For example say you want to turn Hybrid on even if the user has previously
run CMake and turned it off. Then you can do:
#Build the vtkHybrid kit always.
set (VTK_USE_HYBRID ON CACHE BOOL "doc" FORCE)
Another option is that you want to set and then hide options so the user will not be tempted to
adjust them later on. This can be done using the following commands:
#Build the vtkHybrid kit always and don't distract
#the user by showing the option.
set (VTK_USE HYBRID ON CACHE INTERNAL "doc" FORCE)
mark_as_advanced (VTK_USE_HYBRID)
You might be tempted to edit the cache file directly, or to "initialize” a project by giving it an
initial cache file. This may not work and could cause additional problems in the future. First,
the syntax of the CMake cache is subject to change. Second, cache files have full paths in
them that make them unsuitable for moving between binary trees. So if you want to initialize
a cache file use one of the two standard methods described above.
Building Your Project
19
2.8 Building Your Project
After you have run CMake your project will be ready to be built. If your target generator is
based on Makefiles then you can build your project by changing directory to your binary tree
and typing make (or gmake or nmake as appropriate). If you generated files for an IDE such
as Visual Studio, you can start your IDE, load the project files into it, and build as you
normally would.
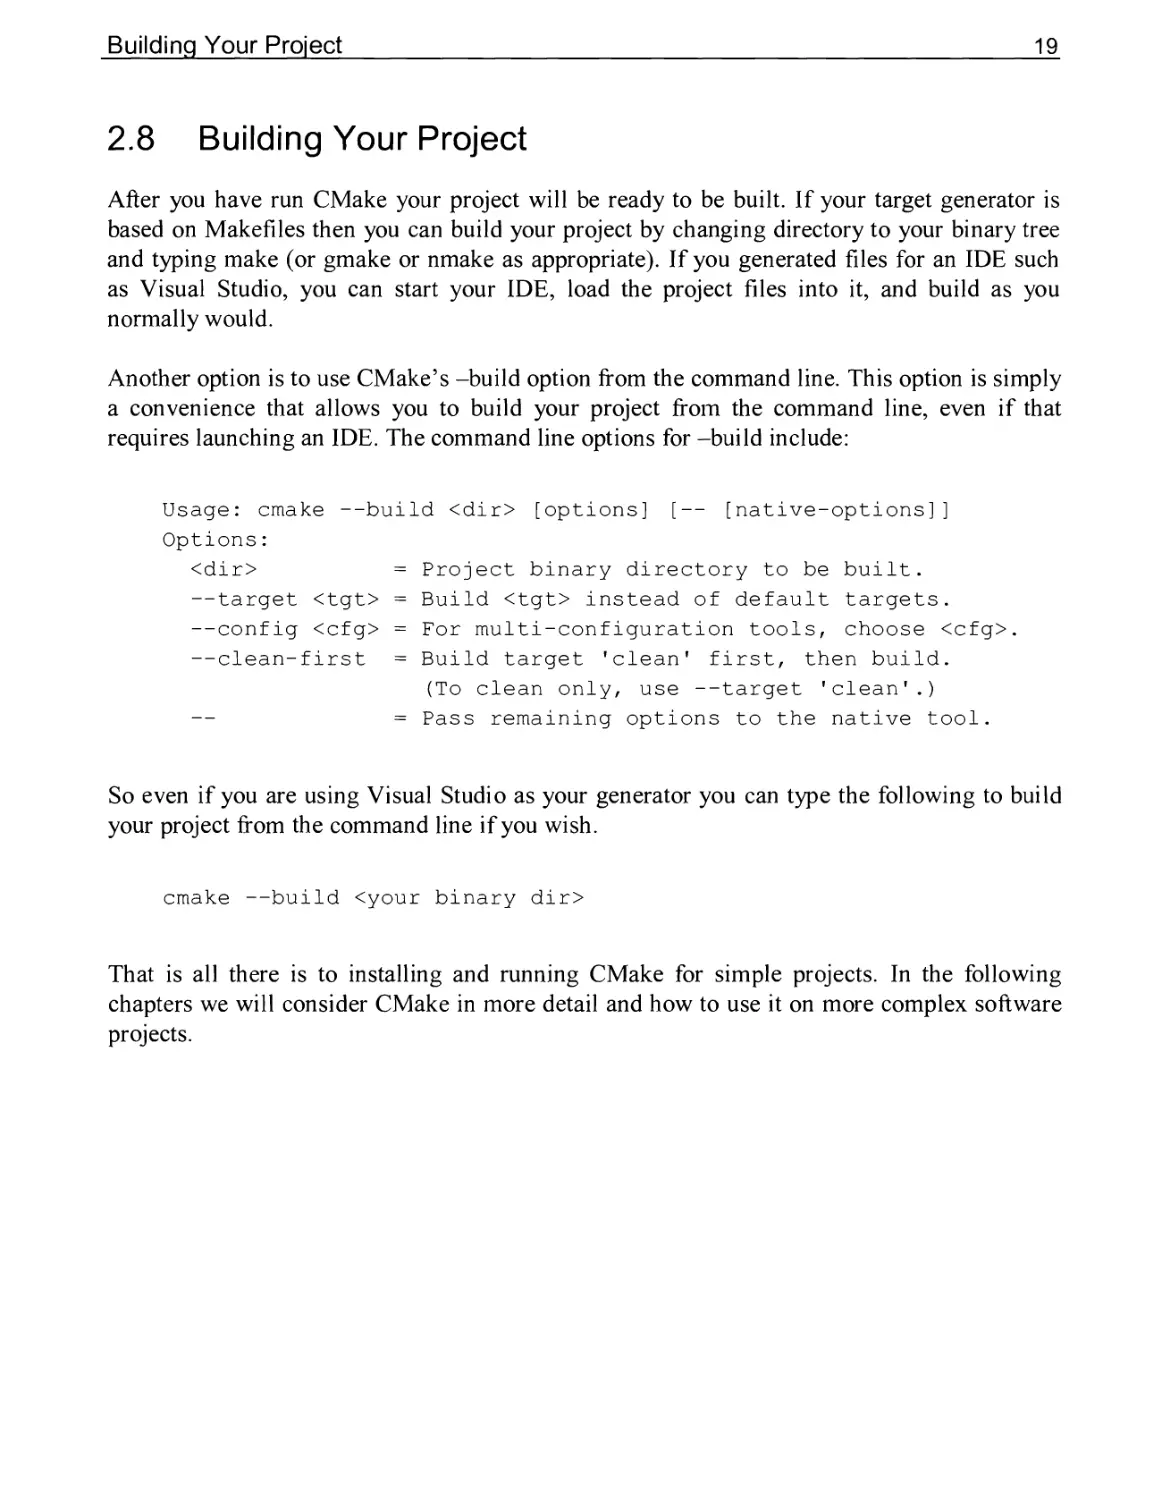
Another option is to use CMake’s -build option from the command line. This option is simply
a convenience that allows you to build your project from the command line, even if that
requires launching an IDE. The command line options for -build include:
Usage: cmake --build <dir> [options] [-- [native-options]]
Options:
<dir> = Project binary directory to be built.
--target <tgt> = Build <tgt> instead of default targets.
--config <cfg> = For multi-configuration tools, choose <cfg>.
—clean-first = Build target 'clean' first, then build.
(To clean only, use --target 'clean'.)
= Pass remaining options to the native tool.
So even if you are using Visual Studio as your generator you can type the following to build
your project from the command line if you wish.
cmake —build <your binary dir>
That is all there is to installing and running CMake for simple projects. In the following
chapters we will consider CMake in more detail and how to use it on more complex software
projects.
Chapter 3
Key Concepts
3.1 Main Structures
This chapter provides an introduction to CMake's key concepts. As you start working with
CMake you will run into a variety of concepts such as targets, generators, and commands. In
CMake these concepts are implemented as C++ classes and are referenced in many of
CMake’s commands. Understanding these concepts will provide you with the working
knowledge you need to create effective CMakeLists files.
Before going into detail about CMake’s classes it is worth understanding their basic
relationships. At the lowest level there are source files. These correspond to typical C or C++
source code files. Source files are combined into targets. A target is typically an executable or
library. A directory represents a directory in the source tree and typically has a CMakeLists
file and one or more targets associated with it. Every directory has a local generator that is
responsible for generating the Makefiles or project files for that directory. All of the local
generators share a common global generator that oversees the build process. Finally, the
global generator is created and driven by the cmake class itself.
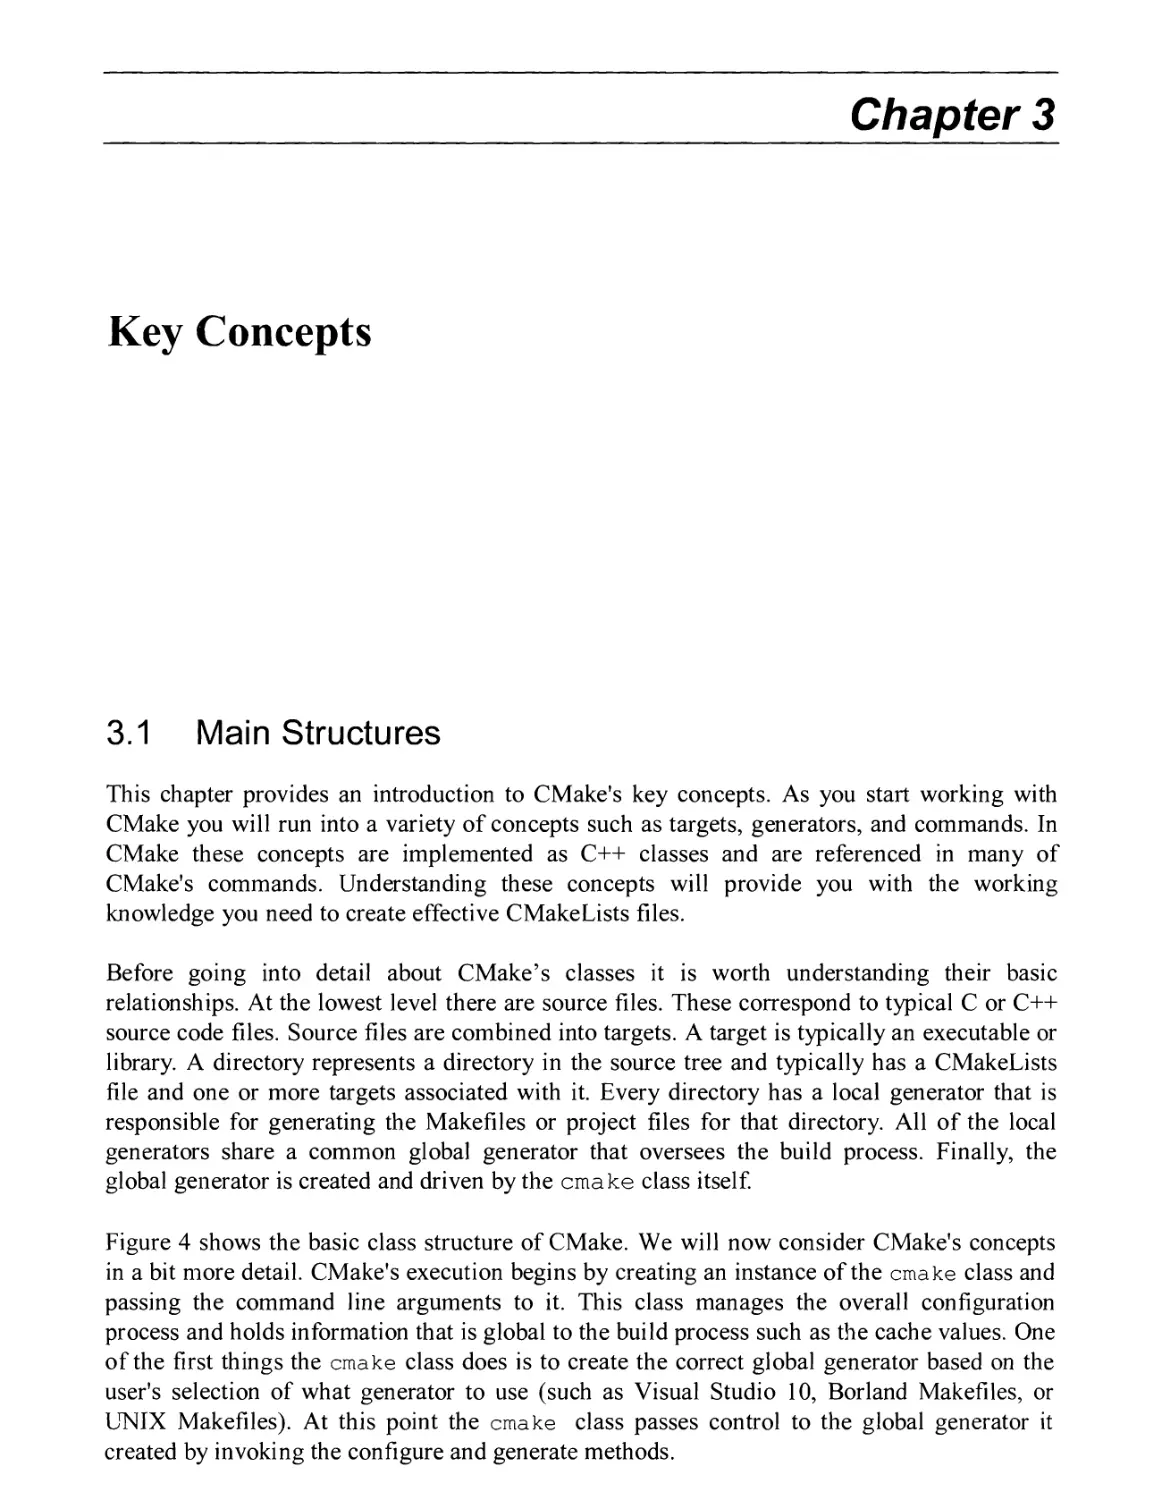
Figure 4 shows the basic class structure of CMake. We will now consider CMake's concepts
in a bit more detail. CMake's execution begins by creating an instance of the cmake class and
passing the command line arguments to it. This class manages the overall configuration
process and holds information that is global to the build process such as the cache values. One
of the first things the cmake class does is to create the correct global generator based on the
user's selection of what generator to use (such as Visual Studio 10, Borland Makefiles, or
UNIX Makefiles). At this point the cmake class passes control to the global generator it
created by invoking the configure and generate methods.
22
Key Concepts
Figure 4 - CMake Internals
controls the cmake process
can be created and used in
various GUIs
cmGlobalUnixMakefileGenerator
cmGlobalVisualStudio6Generator
cmGlobalVisualStudio7Generator
abstract base class
child classes responsible for
platform-specific build process
cmGlobalGenerator
Has one
Derive from
cmLocalUnixMakefileGenerator
cmLocalVisualStudio6Generator
cmLocalVisualStudio7Generator
Has many
cmLocalGenerator
abstract base class
child classes responsible for
platform-specific build file
generation
Derive from
abstract base class
child classes responsible for
implementing all commands in
CMake.
cmCommand
Has one
Stores all of the information parsed
from a CMakeLists.txt file.
List of targets and variables
Optional flags
List of libraries
List of include paths
Parses CMakeLists.txt files
cmMakefile
cmRemoveCommand
cmSetCommand
cm AddTestCommand
Derive from
cmake
Main Structures
23
The global generator is responsible for managing the configuration and generation of all of
the Makefiles (or project files) for a project. In practice most of the work is actually done by
local generators which are created by the global generator. One local generator is created for
each directory of the project that is processed. So while a project will have only one global
generator it may have many local generators. For example, under Visual Studio 7 the global
generator creates a solution file for the entire project while the local generators create a
project file for each target in their directory.
In the case of the "Unix Makefiles" generator, the local generators create most of the
Makefiles and the global generator simply orchestrates the process and creates the main top-
level Makefile. Implementation details vary widely among generators. The Visual Studio 6
generators make use of .dsp and .dsw file templates and perform variable replacements on
them. The generators for Visual Studio 7 and later directly generate the XML output without
using any file templates. The Makefile generators including UNIX, NMake, Borland, etc use a
set of rule templates and replacements to generate their Makefiles.
r
r*
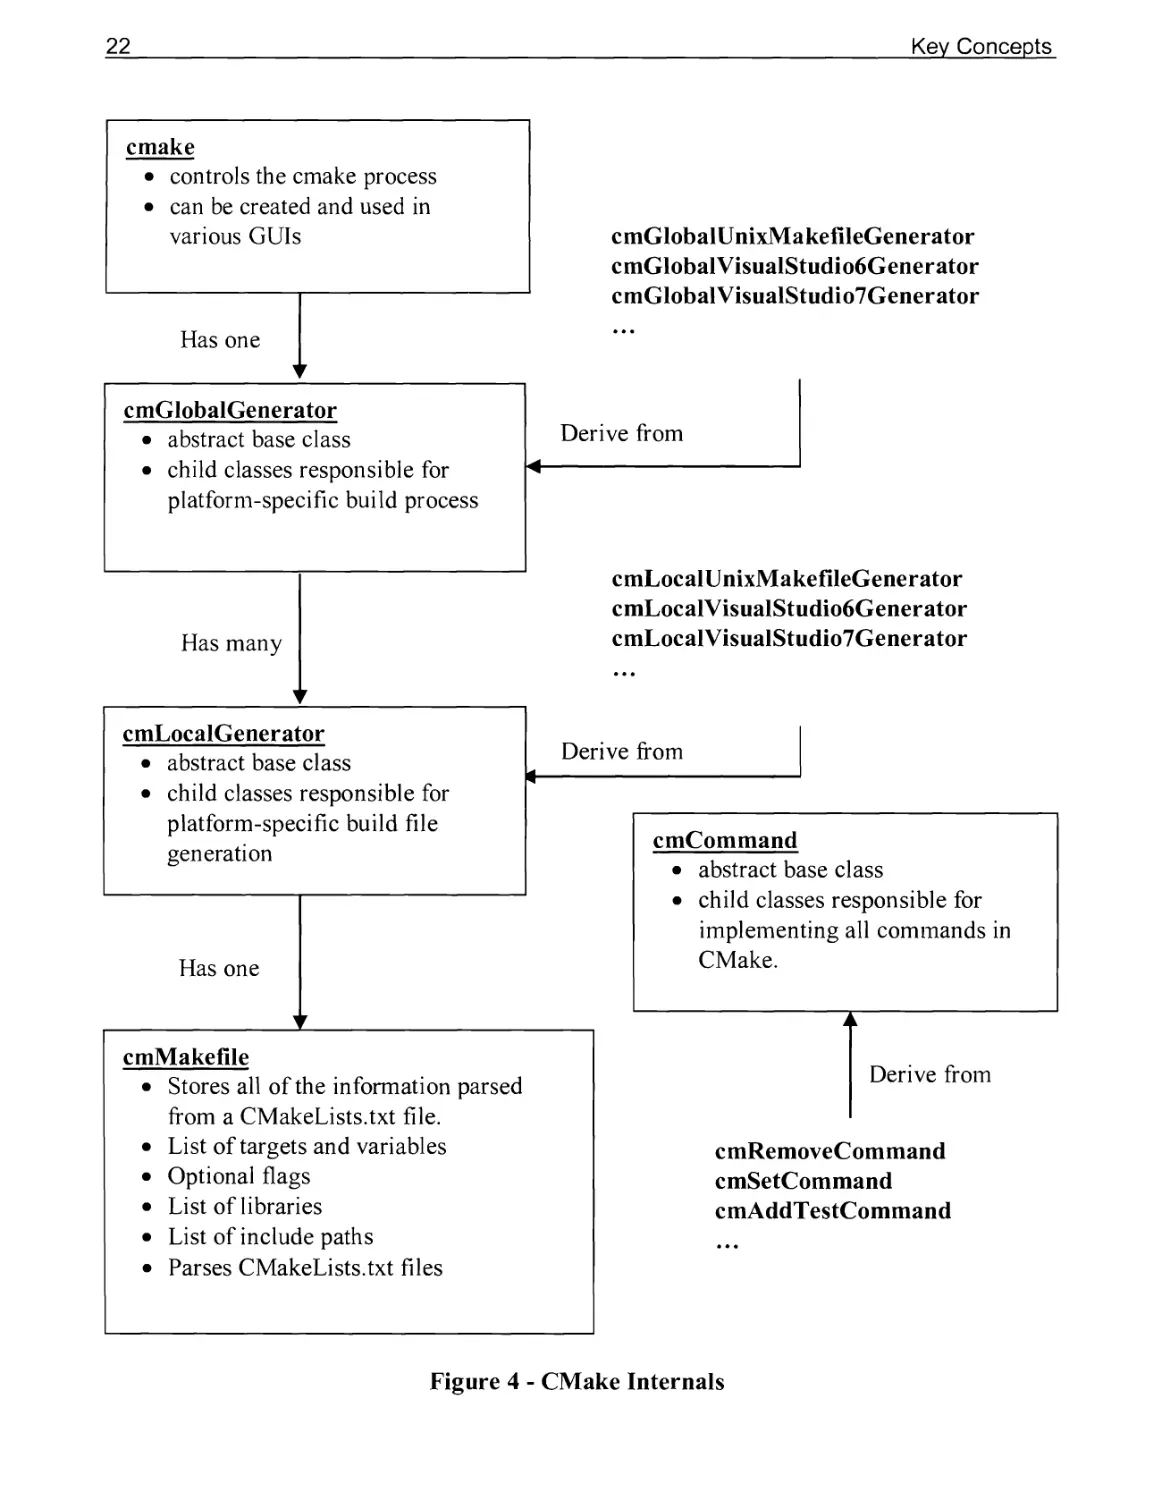
Figure 5 - Sample Directory Tree
Each local generator has an instance of the class cmMakefile, cmMakefile is where the results
of parsing the CMakeLists files are stored. Specifically, for each directory in a project there
will be a single cmMakefile instance which is why the cmMakefile class is often referred to as
the directory. This is clearer for build systems that do not use Makefiles. That instance will
hold all of the information from parsing that directory's CMakeLists file (see Figure 5). One
way to think of the cmMakefile class is as a structure that starts out initialized with a few
variables from its parent directory, and is then filled in as the CMakeLists file is processed.
Reading in the CMakeLists file is simply a matter of CMake executing the commands it finds
in the order it encounters them.
Each command in CMake is implemented as a separate C++ class, and has two main parts.
The first part of a command is the InitialPass method. The InitialPass method receives the
arguments and the cmMakefile instance for the directory currently being processed, and then
24
Key Concepts
performs its operations. In the case of the set command, it processes its arguments and if the
arguments are correct it calls a method on the cmMakef ile to set the variable. The results of
the command are always stored in the cmMakef ile instance. Information is never stored in a
command. The last part of a command is the FinalPass. The FinalPass of a command is
executed after all commands (for the entire CMake project) have had their InitialPass
invoked. Most commands do not have a FinalPass, but in some rare cases a command must do
something with global information that may not be available during the initial pass.
Once all of the CMakeLists files have been processed the generators use the information
collected into the cmMakef ile instances to produce the appropriate files for the target build
system (such as Makefiles).
3.2 Targets
Now that we have discussed the overall process of CMake, let us consider some of the key
items stored in the cmMakef ile instance. Probably the most important item is targets.
Targets represent executables, libraries, and utilities built by CMake. Every add library,
add_executable, and add_custom_target command creates a target. For example, the
following command will create a target named foo that is a static library, with fool. c and
f oo2 . c as source files.
add_library (foo STATIC fool.c foo2.c)
The name foo is now available for use as a library name everywhere else in the project, and
CMake will know how to expand the name into the library when needed. Libraries can be
declared to be of a particular type such as static, shared, module, or left undeclared.
static indicates that the library must be built as a static library. Likewise shared indicates
it must be built as a shared library, module indicates that the library must be created so that it
can be dynamically loaded into an executable. On many operating systems this is the same as
shared, but on other systems such as Mac OS X it is different. If none of these options are
specified this indicates that the library could be built as either shared or static. In that case
CMake uses the setting of the variable build shared libs to determine if the library
should be SHARED or static. If it is not set, then CMake defaults to building static libraries.
Likewise executables have some options. By default an executable will be a traditional
console application that has a main (int argc, const char*argv [ ] ) . If WIN32 is
specified after the executable name then the executable will be compiled as a MS Windows
executable and the operating system will call WinMain instead of main at startup. WIN32 has
no effect on non-Windows systems.
In addition to storing their type, targets also keep track of general properties. These properties
can be set and retrieved using the set_target_properties and get_target_property
Source Files
25
commands, or the more general set_property and get_property commands. The most
commonly used property is link_flags, which is used to specify link flags for a specific
target. Targets store a list of libraries that they link against which are set using the
target link libraries command. Names passed into this command can be libraries, full
paths to libraries, or the name of a library from an add library command. They also store
the link directories to use when linking, the install location for the target, and custom
commands to execute after linking.
For each library CMake creates, it keeps track of all the libraries on which that library
depends. Since static libraries do not link to the libraries on which they depend, it is important
for CMake to keep track of the libraries so they can be specified on the link line of the
executable being created. For example,
add_library (foo foo.cxx)
target_link_libraries (foo bar)
add_executable (foobar foobar.cxx)
target_link_libraries (foobar foo)
This will link the libraries foo and bar into the executable foobar even, although only foo was
explicitly linked into foobar. With shared or DLL builds this linking is not always needed, but
the extra linkage is harmless. For static builds this is required. Since the foo library uses
symbols from the bar library, foobar will most likely also need bar since it uses foo.
3.3 Source Files
The source file structure is in many ways similar to a target. It stores the filename, extension,
and a number of general properties related to a source file. Like targets you can set and get
properties using set_source_files_properties and get_source_file_property, or
the more generic versions. The most common properties include:
COMPILEFLAGS
Compile flags specific to this source file. These can include source specific -D and -
I flags.
GENERATED
The generated property indicates that the source file is generated as part of the
build process. In this case CMake will treat it differently for computation of
dependencies because the source file may not exist when CMake is first run.
26
Key Concepts
OBJECTDEPENDS
Adds additional files on which this source file should depend. CMake automatically
performs dependency analysis to determine the usual C, C++ and Fortran
dependencies. This parameter is used rarely in cases where there is an
unconventional dependency or the source files do not exist at dependency analysis
time.
ABSTRACT
WRAPEXCLUDE
CMake doesn't directly use these properties. Some loaded commands and extensions
to CMake look at these properties to determine how and when to wrap a C++ class
into languages such as Tel, Python, etc.
3.4 Directories, Generators, Tests, and Properties
In addition to targets and source files you may find yourself occasionally working with other
classes such as directories, generators, and tests. Normally such interactions take the shape of
setting or getting properties from these objects. All of these classes have properties associated
with them, as do source files and targets. A property is a key-value pair attached to a specific
object such as a target. The most generic way to access properties is through the
set property and get property commands. These commands allow you to set or get a
property from any class in CMake that has properties. Some of the properties for targets and
source files have already been covered. Some useful properties for a directory include:
ADDITIONAL J\1AKE_CLEAN_FILES
This property specifies a list of additional files that will be cleaned as a part of the
"make clean" stage. By default CMake will clean up any generated files that it knows
about, but your build process may use other tools that leave files behind. This
property can be set to a list of those files so that they also will be properly cleaned
up.
EXCLUDEFROMALL
This property indicates if all the targets in this directory and all sub directories
should be excluded from the default build target. If it is not, then with a Makefile for
example typing make will cause these targets to be built as well. The same concept
applies to the default build of other generators.
LISTFILESTACK
This property is mainly useful when trying to debug errors in your CMake scripts. It
returns a list of what list files are currently being processed, in order. So if one
CMakeLists file does an include command then that is effectively pushing the
included CMakeLists file onto the stack.
Variables and Cache Entries
27
A full list of properties supported in CMake can be obtained by running cmake with the -
help-property-list option. The generators and directories are automatically created for
you as CMake processes your source tree.
3.5 Variables and Cache Entries
CMakeLists files use variables much like any programming language. Variables are used to
store values for later use, and can be a single value such as "ON" or "OFF”, or they can
represent a list such as (/usr/include /home/foo/include /usr/local/include).
A number of useful variables are automatically defined by CMake and are discussed in
Appendix A - Variables.
Variables in CMake are referenced using a ${variable} notation, and they are defined in
the order of execution of the set commands. Consider the following example:
# FOO is undefined
set (FOO 1)
# FOO is now set to 1
set (FOO 0)
# FOO is now set to 0
This may seem straightforward, but consider the following example:
set (FOO 1)
if ( ${FOO} LESS 2)
set (FOO 2)
else (${FOO} LESS 2)
set (FOO 3)
endif (${FOO} LESS 2)
Clearly the if statement is true, which means that the body of the if statement will be
executed. That will set the variable FOO to 2, and so when the else statement is encountered
FOO will have a value of 2. Normally in CMake the new value of FOO would be used, but the
else statement is a rare exception to the rule and always refers back to the value of the
variable when the if statement was executed. So in this case the body of the else clause will
not be executed. To further understand the scope of variables consider this example:
28
Key Concepts
set (foo 1)
# process the dirl subdirectory
add_subdirectory (dirl)
# include and process the commands in filel.cmake
include (filel.cmake)
set (bar 2)
# process the dir2 subdirectory
add_subdirectory (dir2)
# include and process the commands in file2.cmake
include (file2.cmake)
In this example because the variable foo is defined at the beginning, it will be defined while
processing both dirl and dir2. In contrast bar will only be defined when processing dir2.
Likewise foo will be defined when processing both filel.cmake and file2.cmake, whereas
bar will only be defined while processing file2.cmake.
Variables in CMake have a scope that is a little different from most languages. When you set
a variable it is visible to the current CMakeLists file or function, as well as any subdirectory’s
CMakeLists files, any functions or macros that are invoked, and any files that are included
using the INCLUDE command. When a new subdirectory is processed (or a function called) a
new variable scope is created and initialized with the current value of all variables in the
calling scope. Any new variables created in the child scope, or changes made to existing
variables, will not impact the parent scope. Consider the following example:
function (foo)
message (${test}) # test is 1 here
set (test 2)
message (${test}) # test is 2 here, but only in this scope
endfunction()
set (test 1)
foo ()
message (${test}) # test will still be 1 here
In some cases you might want a function or subdirectory to set a variable in its parent’s scope.
This is one way for CMake to return a value from a function, and it can be done by using the
PARENT SCOPE option with the set command. We can modify the prior example so that the
function foo changes the value of test in its parent’s scope as follows:
Variables and Cache Entries
29
function (foo)
message (${test}) # test is 1 here
set (test 2 PARENT_SCOPE)
message (${test}) # test still 1 in this scope
endfunction()
set (test 1)
foo ()
message (${test}) # test will now be 2 here
Variables can also represent a list of values. In these cases when the variable is expanded it
will be expanded into multiple values. Consider the following example:
# set a list of items
set (items_to_buy apple orange pear beer)
# loop over the items
foreach (item ${items_to_buy})
message ( "Don't forget to buy one ${item}" )
endforeach ()
In some cases you might want to allow the user building your project to set a variable from
the CMake user interface. In that case the variable must be a cache entry. Whenever CMake is
run it produces a cache file in the directory where the binary files are to be written. The values
of this cache file are displayed by the CMake user interface. There are a few purposes of this
cache. The first is to store the user's selections and choices, so that if they should run CMake
again they will not need to reenter that information. For example, the option command
creates a Boolean variable and stores it in the cache.
option (USE_JPEG "Do you want to use the jpeg library")
The above line would create a variable called use jpeg and put it into the cache. That way
the user can set that variable from the user interface and its value will remain in case the user
should run CMake again in the future. To create a variable in the cache you can use
commands like option, find file, or you can use the standard set command with the
CACHE option.
set (USE_JPEG ON CACHE BOOL "include jpeg support?")
When you use the cache option you must also provide the type of the variable and a
documentation string. The type of the variable is used by the GUI to control how that variable
30
Key Concepts
is set and displayed. Variable types include bool, path, filepath, and string. The
documentation string is used by the GUI to provide online help.
The other purpose of the cache is to store key variables that are expensive to determine. These
variables may not be visible or adjustable by the user. Typically these values are system
dependent variables such as cmake_words_bigendian, which require CMake to compile
and run a program to determine their value. Once these values have been determined, they are
stored in the cache to avoid having to recompute them every time CMake is run. Generally
CMake tries to limit these variables to properties that should never change (such as the byte
order of the machine you are on). If you significantly change your computer, either by
changing the operating system, or switching to a different compiler, you will need to delete
the cache file (and probably all of your binary tree's object files, libraries, and executables).
Variables that are in the cache also have a property indicating if they are advanced or not. By
default when a CMake GUI is run (such as ccmake or cmake-gui) the advanced cache entries
are not displayed. This is so that the user can focus on the cache entries that they should
consider changing. The advanced cache entries are other options that the user can modify, but
typically will not. It is not unusual for a large software project to have fifty or more options,
and the advanced property lets a software project divide them into key options for most users
and advanced options for advanced users. Depending on the project there may not be any non-
advanced cache entries. To make a cache entry advanced the mark_as_advanced command
is used with the name of the variable (a.k.a. cache entry) to make advanced.
In some cases you might want to restrict a cache entry to a limited set of predefined options.
You can do this by setting the strings property on the cache entry. The following
CMakeLists code illustrates this by creating a property named CRYPTOBACKEND as usual, and
then setting the STRINGS property on it to a set of three options.
set (CRYPTOBACKEND "OpenSSL" CACHE STRING
"Select a cryptography backend")
set_property (CACHE CRYPTOBACKEND PROPERTY STRINGS
"OpenSSL" "LibTomCrypt" "LibDES")
When cmake-gui is run and the user selects the cryptobackend cache entry, they will be
presented with a pulldown to select which option they want, as shown in Figure 6.
Variables and Cache Entries
31
Figure 6 - Cache Value Options in cmake-gui
A few final points should be made concerning variables and their interaction with the cache.
If a variable is in the cache, it can still be overridden in a CMakeLists file using the set
command without the cache option. Cache values are checked only if the variable is not
found in the current cmMakefile instance before CMakeLists file processing begins. The
set command will set the variable for processing the current CMakeLists file (and
subdirectories as usual) without changing the value in the cache.
# assume that FOO is set to ON in the cache
set (FOO OFF)
# sets foo to OFF for processing this CMakeLists file
# and subdirectories; the value in the cache stays ON
Once a variable is in the cache, its "cache" value cannot normally be modified from a
CMakeLists file. The reasoning behind this is that once CMake has put the variable into the
cache with its initial value, the user may then modify that value from the GUI. If the next
invocation of CMake overwrote their change back to the set value, the user would never be
able to make a change that CMake wouldn’t overwrite. So a set (FOO ON cache bool
"doc") command will typically only do something when the cache doesn't have the variable
in it. Once the variable is in the cache, that command will have no effect.
32
Key Concepts
In the rare event that you really want to change a cached variable’s value you can use the
FORCE option in combination with the CACHE option to the set command. The FORCE option
will cause the set command to override and change the cache value of a variable.
3.6 Build Configurations
Build configurations allow a project to be built in different ways for debug, optimized, or any
other special set of flags. CMake supports, by default, Debug, Release, MinSizeRel, and
RelWithDeblnfo configurations. Debug has the basic debug flags turned on. Release has the
basic optimizations turned on. MinSizeRel has the flags that produce the smallest object code,
but not necessarily the fastest code. RelWithDeblnfo builds an optimized build with debug
information as well.
CMake handles the configurations in slightly different ways depending on what generator is
being used. The conventions of the native build system are followed when possible. This
means that configurations impact the build in different ways when using Makefiles versus
using Visual Studio project files.
The Visual Studio IDE supports the notion of Build Configurations. A default project in
Visual Studio usually has Debug and Release configurations. From the IDE you can select
build Debug, and the files will be built with Debug flags. The IDE puts all of the binary files
into directories with the name of the active configuration. This brings about an extra
complexity for projects that build programs that need to be run as part of the build process
from custom commands. See the cmake cfg intdir variable and the custom commands
section for more information about how to handle this issue. The variable
CMAKE CONFIGURATION TYPES is used to tell CMake which configurations to put in the
workspace.
With Makefile based generators, only one configuration can be active at the time CMake is
run, and it is specified by the cmake build type variable. If the variable is empty then no
flags are added to the build. If the variable is set to the name of a configuration, then the
appropriate variables and rules (such as CMAKE_CXX_FLAGS_<ConfigName>) are added to
the compile lines. Makefiles do not use special configuration subdirectories for object files.
To build both debug and release trees, the user is expected to create multiple build directories
using the out of source build feature of CMake, and to set the cmake_build_type to the
desired selection for each build. For example,
# With source code in the directory MyProject
# to build MyProject-debug create that directory, cd into it and
(ccmake ../MyProject -DCMAKE_BUILD_TYPE:STRING=Debug)
# the same idea is used for the release tree MyProject-release
(ccmake ../MyProject -DCMAKE_BUILD_TYPE:STRING=Release)
CMake Syntax
33
Writing CMakeLists Files
This chapter will cover the basics of writing effective CMakeLists files for your software. It
will cover all of the basic commands and issues you will need to handle most projects. It will
also discuss how to convert existing UNIX or Windows projects into CMakeLists files. While
CMake can handle extremely complex projects, for most projects you will find this chapter’s
contents will tell you all you need to know. CMake is driven by the CMakeLists.txt files
written for a software project. The CMakeLists files determine everything from what options
to put into the cache, to what source files to compile. In addition to discussing how to write a
CMakeLists file this chapter will also cover how to make them robust and maintainable. The
basic syntax of a CMakeLists.txt file and key concepts of CMake have already been discussed
in chapters 2 and 3. This chapter will expand on those concepts and introduce a few new ones.
4.1 CMake Syntax
CMakeLists files follow a simple syntax consisting of comments, commands, and white
space. A comment is indicated using the # character and runs from that character until the end
of the line. A command consists of the command name, opening parenthesis, white space
separated arguments and a closing parenthesis. All white space (spaces, line feeds, tabs) are
ignored except to separate arguments. Anything within a set of double quotes is treated as one
argument as is typical for most languages. The backslash can be used to escape characters
preventing the normal interpretation of them. The subsequent examples in this chapter will
help to clear up some of these syntactic issues. You might wonder why CMake decided to
have its own language instead of using an existing one such as Python, Java, or Tel. The main
reason is that we did not want to make CMake require an additional tool to run. By requiring
one of these other languages all users of CMake would be required to have that language
installed, and potentially a specific version of that language. This is on top of the language
34
Writing CMakeLists Files
extensions that would be required to do some of the CMake work, for both performance and
capability reasons.
4.2 Basic Commands
While the previous chapters have already introduced many of the basic commands for
CMakeLists files, this chapter will review and expand on them. The first command the top-
level CMakeLists file should have is the PROJECT command. This command both names the
project and optionally specifies what languages will be used by it. Its syntax is as follows:
project (projectname [CXX] [C] [Java] [NONE])
If no languages are specified then CMake defaults to supporting C and C++. If the none
language is passed then CMake includes no language specific support. Whenever C++
language support is specified then C language support will also be loaded.
For each project command that appears in a project, CMake will create a top level IDE project
file. The project will contain all targets that are in the CMakeLists.txt file, and any of its
subdirectories as specified by the addsubdirectory command. If the
EXCLUDE_FROM_ALL option is used in the add_subdirectory command, then the
generated project will not appear in the top level Makefile or IDE project file. This is useful
for generating sub projects that do not make sense as part of the main build process. Consider
that a project with a number of examples could use this feature to generate the build files for
each example with one run of CMake, but not have the examples built as part of the normal
build process.
The set command is probably one of the most used commands since it is used for defining
and modifying variables and lists. Complimenting the set command are the remove and
separate arguments commands. The remove command can be used to remove a value
from a variable list, while the separate arguments command can be used to take a single
variable value (as opposed to a list) and break it into a list based on spaces.
The add_executable and add library commands are the main commands for defining
what libraries and executables to build, and what source files comprise them. For Visual
Studio projects the source files will show up in the IDE as usual, but any header files the
project uses will not be there. To have the header files show up as well you simply add them
to the list of source files for the executable or library. This can be done for all generators. Any
generators that do not use the header files directly (such as Makefile based generators) will
simply ignore them.
Flow Control
35
4.3 Flow Control
In many ways writing a CMakeLists file is like a writing a program in a simple language.
Like most languages CMake provides flow control structures to help you along your way.
CMake provides three flow control structures;
• conditional statements (e.g. if)
• looping constructs (e.g. foreach and while)
• procedure definitions (e.g. macro and function)
First we will consider the if command. In many ways the if command in CMake is just like
the if command in any other language. It evaluates its expression and based on that either
executes the code in its body or optionally the code in the else clause. For example:
if (FOO)
# do something here
else (FOO)
# do something else
endif (FOO)
One difference you might notice is that the conditional of the if statement is repeated in the
else and endif clauses. This is optional and in this book you will see examples of both
styles. You could just as well choose to write:
if (FOO)
# do something here
else ()
# do something else
endif ()
When you include conditionals in the else and endif clause they are used to provide
additional error checking. As such they must exactly match the original conditional of the if
statement. The following code would not work:
set (FOO 1)
if (${FOO})
# do something
endif (1)
# ERROR, it doesn't match the original if conditional
36
Writing CMakeLists Files
Fortunately CMake provides verbose error messages in the case where an if statement is not
properly matched with an endif. This should help you to track down any problems with
matching conditionals. Providing the conditionals on the else and endif commands also has
the added benefit of helping to document your CMakeLists file. With a long if statement it
can be easy to lose track of what if statement the endif is closing, if statements can be
nested to any depth, and any command can be used inside of an if or else clause.
As with many other languages, CMake supports elseif so that you can sequentially test for
multiple conditions. For example:
if (MSVC80)
# do something here
elseif (MSVC90)
# do something else
elseif (APPLE)
# do something else
endif ()
The i f command has a limited set of operations that you can use. It does not support general
purpose C style expressions such as $ {FOO} & & $ {BAR} | | $ { FUBAR}, instead it supports
a limited subset of expressions that should work for most cases. Specifically if supports:
if (variable)
True if the variable's value is not empty, 0, FALSE, OFF, or NOTFOUND.
if (NOT variable)
True if the variable’s value is empty, 0, false, off, or NOTFOUND
if (variablel AND variable2)
True if both variables would be considered true individually.
if (variablel OR variable2)
True if either variable would be considered true individually.
if (COMMAND command-name)
True if the given name is a command that can be invoked.
if (DEFINED variable)
True if the given variable has been set, regardless of what value it was set to.
Flow Control
37
if (EXISTS file-name)
if (EXISTS directory-name)
True if the named file or directory exists.
if (IS DIRECTORY name)
if (IS ABSOLUTE name)
True if the given name is a directory, or absolute path respectively,
if (namel ISNEWERTHAN name2)
True if the file specified by namel has a more recent modification time than the file
specified by name2.
if (variable MATCHES regex)
if (string MATCHES regex)
True if the given string or variable’s value matches the given regular expression.
Options such as EQUAL, LESS, and GREATER are available for numeric comparisons.
STRLESS, strequal, and STRGREATER can be used for lexicographic comparisons.
VERS I0N_LESS, vers ion_equal, and VERS I ON_GREater can be used to compare versions
of the form major [ .minor [ .patch [ .tweak] ] ]. Similar to C and C++ these expressions
can be combined to create more powerful conditionals. For example consider the following
conditionals:
if ((1 LESS 2) AND (3 LESS 4))
message ("sequence of numbers")
endif ()
if (1 AND 3 AND 4)
message ("series of true values")
endif (1 AND 3 AND 4)
if (NOT 0 AND 3 AND 4)
message ("a false value")
endif (NOT 0 AND 3 AND 4)
if (0 OR 3 AND 4)
message ("or statements")
endif (0 OR 3 AND 4)
if (EXISTS ${PROJECT_SOURCE_DIR}/Help.txt AND COMMAND IF)
message ("Help exists")
endif (EXISTS ${PROJECT_SOURCE_DIR}/Help.txt AND COMMAND IF)
38
Writing CMakeLists Files
set (fooba 0)
if (NOT DEFINED foobar)
message ("foobar is not defined")
endif (NOT DEFINED foobar)
if (NOT DEFINED fooba)
message ("fooba not defined")
endif (NOT DEFINED fooba)
In compound if statements there is an order of precedence that specifies the order that the
operations will be evaluated. For example, in the statement below, the not will be evaluated
first then the AND, not the other way around. Thus the statement will be false and the message
never printed. Had the AND been evaluated first the statement would be true.
if (NOT 0 AND 0)
message ("This line is never executed")
endif (NOT 0 AND 0)
CMake defines the order of operations such that parenthetical groups are evaluated first, then
exists, command, defined and similar prefix operators are evaluated, then any equal,
LESS, GREATER, STREQUAL, STRLESS, STRGREATER, and MATCHES operators. The NOT
operators are evaluated next, and finally the and and OR expressions will be evaluated. With
operations that have the same level of precedence, such as AND and OR, they will be evaluated
from left to right. Once all of the expressions have been evaluated the final result will be
tested to see if it is true or false. CMake considers any of the following values to be true: on,
1, YES, true, Y. The following values are all considered to be false: off, 0, NO, false, n,
NOTFOUND, *-NOTFOUND, IGNORE. This test is case insensitive so true, True, and TRUE are
all treated the same.
Now let us consider the other flow control commands. The foreach, while, macro, and
function commands are the best way to reduce the size of your CMakeLists files and keep
them maintainable. The foreach command enables you to execute a group of CMake
commands repeatedly on the members of a list. Consider the following example adapted from
VTK:
foreach (tfile
TestAnisotropicDiffusion2D
TestButterworthLowPass
TestButterworthHighPass
TestCityBlockDistance
Flow Control
39
TestConvolve
)
add_test(${tfile}-image ${VTK_EXECUTABLE}
${VTK_SOURCE_DIR}/Tests/rtlmageTest.tel
${VTK_SOURCE_DIR}/Tests/${tfile}.tel
-D ${VTK_DATA_ROOT}
-V Baseline/Imaging/${tfile}.png
-A ${VTK_SOURCE_DIR}/Wrapping/Tcl
)
endforeach ( tfile )
The first argument of the foreach command is the name of the variable that will take on a
different value with each iteration of the loop. The remaining arguments are the list of values
over which to loop. In this example the body of the foreach loop is just one CMake
command, add_test. In the body of the foreach loop any time the loop variable (tfile in
this example) is referenced it will be replaced with the current value from the list. In the first
iteration, occurrences of ${ tfile} will be replaced with TestAnisotropicDiffusion2D.
In the next iteration, ${tfile} will be replaced with TestButterworthLowPass. The
foreach loop will continue to loop until all of the arguments have been processed.
It is worth mentioning that foreach loops can be nested and that the loop variable is replaced
prior to any other variable expansion. This means that in the body of a foreach loop you
can construct variable names using the loop variable. In the code below the loop variable
tfile is expanded, and then concatenated with _test_result. That new variable name is
then expanded and tested to see if it matches FAILED.
if (${${tfile}}_TEST_RESULT} MATCHES FAILED)
message ("Test ${tfile} failed.")
endif ()
The while command provides for looping based on a test condition. The format for the test
expression in the while command is the same as that for the if command described earlier.
Consider the following example, which is used by CTest. Note that CTest updates the value of
CTESTELAPSEDTIME internally.
#####################################################
# run paraview and ctest test dashboards for 6 hours
#
while (${CTEST_ELAPSED_TIME} LESS 36000)
set (START_TIME ${CTEST_ELAPSED_TIME})
ctest_run_script ( "dashl_ParaView_vs7lcontinuous.cmake" )
ctest_run_script ( "dashl_cmake_vs71continuous.cmake" )
40
Writing CMakeLists Files
endwhile ()
The for each and while commands allow you to handle repetitive tasks that occur in
sequence, whereas the macro and function commands support repetitive tasks that may be
scattered throughout your CMakeLists files. Once a macro or function is defined it can be
used by any CMakeLists files processed after its definition.
A function in CMake is very much like a function in C or C++. You can pass arguments into
it, and the arguments passed in become variables within the function. Likewise some standard
variables such as ARGC, ARGV, argn, and ARGVO, ARGVl, etc are defined. Within a function
you are in a new variable scope, much like when you drop into a subdirectory using the
add subdirectory command you are in a new variable scope. All the variables that were
defined when the function was called are still defined, but any changes to variables or new
variables only exist within the function. When the function returns those variables will go
away. Put more simply, when you invoke a function a new variable scope is pushed and when
it returns that variable scope is popped.
The first argument is the name of the function to define. All additional arguments are formal
parameters to the function.
function (DetermineTime _time)
# pass the result up to whatever invoked this
set (${_time} "1:23:45" PARENT_SCOPE)
endfunction()
# now use the function we just defined
DetermineTime( current_time )
if ( DEFINED current_time )
message(STATUS "The time is now: ${curret_time}”)
endif()
Note that in this example _time is used to pass the name of the return variable. The set
command is invoked with the value of _time, which in this example will be current time.
Finally the set command uses the parent scope option to set that variable in the parent’s
scope instead of the local scope.
Macros are defined and called in the same manner as functions. The main differences are that
a macro does not push and pop a new variable scope, and the arguments to a macro are not
treated as variables but are string replaced prior to execution. This is very much like the
differences between a macro and a function in C or C++. The first argument is the name of
the macro to create. All additional arguments are formal parameters to the macro[.
Flow Control
41
# define a simple macro
macro (assert TEST COMMENT)
if (NOT ${TEST})
message ("Assertion failed: ${COMMENT}")
endif (NOT ${TEST})
endmacro (assert)
# use the macro
find_library (FOO_LIB foo /usr/local/lib)
assert ( ${FOO_LIB} "Unable to find library foo" )
The simple example above creates a macro called assert. The macro is defined to take two
arguments. The first argument is a value to test and the second argument is a comment to print
out if the test fails. The body of the macro is a simple if command with a message
command inside of it. The macro body ends when the endmacro command is found. The
macro can be invoked simply by using its name as if it were a command. In the above
example if foo_lib was not found a message would be displayed indicating the error
condition.
The macro command also supports defining macros that take variable argument lists. This
can be useful if you want to define a macro that has optional arguments or multiple signatures.
Variable arguments can be referenced using ARGC and argvo, argvi, etc., instead of the
formal parameters, argvo represents the first argument to the macro, argvi represents the
next, and so forth. You can even use a mixture of formal arguments and variable arguments,
as shown in the example below.
# define a macro that takes at least two arguments
# (the formal arguments) plus an optional third argument
macro (assert TEST COMMENT)
if (NOT ${TEST})
message ("Assertion failed: ${COMMENT}")
# if called with three arguments then also write the
# message to a file specified as the third argument
if (${ARGC} MATCHES 3)
file (APPEND ${ARGV2} "Assertion failed: ${COMMENT}")
endif (${ARGC) MATCHES 3)
endif (NOT ${TEST})
endmacro (ASSERT)
42
Writing CMakeLists Files
# use the macro
find_library (FOO_LIB foo /usr/local/lib)
assert ( ${FOO_LIB} "Unable to find library foo" )
In this example the two required arguments are TEST and COMMENT. These required
arguments can be referenced by name, as they are in this example, or they can be referenced
using argvo and argvi. If you want to process the arguments as a list you can use the argv
and argn variables, argv (as opposed to argvo, argvi, etc) is a list of all the arguments to
the macro, while argn is a list of all the arguments after the formal arguments. Inside your
macro you can use the f oreach command to iterate over ARGV or argn as desired.
CMake has two commands for interrupting the processing flow. The break command will
break out of a foreach or while loop before it would normally end. The return command
will return from a function or listfile before the function or listfile has reached its end.
4.4 Regular Expressions
A few CMake commands, such as if and string, make use of regular expressions, or can
take a regular expression as an argument. In its simplest form, a regular-expression is a
sequence of characters used to search for exact character matches. However, many times the
exact sequence to be found is not known, or only a match at the beginning or end of a string is
desired. Since there are several different conventions for specifying regular expressions
CMake’s standard is described below. The description is based on the open source regular
expression class from Texas Instruments, which is used by CMake for parsing regular
expressions.
Regular expressions can be specified by using combinations of standard alphanumeric
characters and the following regular expression meta-characters:
A Matches at beginning of a line or string.
$ Matches at end of a line or string.
Matches any single character other than a newline.
[ ] Matches any character(s) inside the brackets.
[A ] Matches any character(s) not inside the brackets.
[-] Matches any character in range on either side of a dash.
* Matches preceding pattern zero or more times.
Regular Expressions
43
+ Matches preceding pattern one or more times.
? Matches preceding pattern zero or once only.
() Saves a matched expression and uses it in a later replacement.
(|) Matches either the left or right side of the bar.
Note that more than one of these meta-characters can be used in a single regular expression in
order to create complex search patterns. For example, the pattern [Aabl-9] indicates to match
any character sequence that does not begin with the characters Ma” or “b" or numbers in the
series one through nine. The following examples may help clarify regular expression usage:
• The regular expression "Ahello" matches a "hello” only at the beginning of a search
string. It would match "hello there", but not "hi,\nhello there".
• The regular expression "long$" matches a "long" only at the end of a search string. It
would match "so long", but not "long ago".
• The regular expression "t..t..g" will match anything that has a "t", then any two
characters, another "t", any two characters, and then a "g". It would match "testing" or
"test again", but would not match "toasting".
• The regular expression "[l-9ab]" matches any number one through nine, and the
characters "a" and "b". It would match "hello 1" or "begin", but would not match "no¬
match".
• The regular expression "[Al-9ab]" matches any character that is not a number one
through nine, or an "a" or "b". It would NOT match "lab2" or "b2345a", but would
match "no-match".
• The regular expression "br* " matches something that begins with a "b", is followed by
zero or more "r"s, and ends in a space. It would match "brrrrr " and "b ", but would not
match "brrh ".
• The regular expression "br+ " matches something that begins with a ”b", is followed by
one or more "r"s, and ends in a space. It would match "brrrrr ", and "br ", but would not
match "b " or "brrh ".
• The regular expression "br? " matches something that begins with a "b", is followed by
zero or one "r"s, and ends in a space. It would match "br ", and "b ", but would not
match "brrrr " or "brrh ".
• The regular expression "(..p)b" matches something ending with pb and beginning with
whatever the two characters before the first p encountered in the line were. It would find
"repb" in "rep drepaqrepb". The regular expression ”(..p)a" would find "repa qrepb" in
"rep drepa qrepb"
44
Writing CMakeLists Files
• The regular expression ”d(..p)" matches something ending with p, beginning with d, and
having two characters in between that are the same as the two characters before the first
p encountered in the line. It would match "drepa qrepb" in "rep drepa qrepb".
4.5 Checking Versions of CMake
CMake is an evolving program and as new versions are released, new features or commands
may be introduced. As a result, there may be instances where you might want to use a
command that is in a current version of CMake but not in previous versions. There are a
couple of ways to handle this. One option is to use the if command to check whether a new
command exists. For example:
# test if the command exists
if (COMMAND some_new_command)
# use the command
some_new_command ( ARGS...)
endif (COMMAND some new command)
The above approach should work in most cases, but if you need more information you can test
against the actual version of CMake that is being run by evaluating the cmake version
variables, as in the following example:
# look for newer versions of CMake
if (${CMAKE_VERSION} VERSION_GREATER 1.6.1)
# do something special here
endif ()
When writing your CMakeLists files you might decide that you do not want to support old
versions of CMake. To do this you can place the following command at the top of your
CMakeLists file:
cmake_minimum_required (VERSION 2.2)
This indicates that the person running CMake on your project must have at least CMake
version 2.2. If they are running an older version of CMake then an error message will be
displayed telling them that the project requires at least the specified version of CMake.
Using Modules
45
Finally, in some cases a new release of CMake might come out that no longer supports some
commands you were using (although we try to avoid this). In these cases you can use CMake
policies, as discussed in section 4.7.
4.6 Using Modules
Code reuse is a valuable technique in software development and CMake has been designed to
support it. Allowing CMakeLists files to make use of reusable modules enables the entire
CMake community to share reusable sections of code. For CMake these sections of code are
called modules and can be found in the Modules subdirectory of your CMake installation.
Modules are simply sections of CMake commands put into a file. They can then be included
into other CMakeLists files using the include command. For example, the following
commands will include the FindTCL module from CMake and then add the Tel library to the
target FOO.
include (FindTCL)
target_link_libraries (FOO ${TCL_LIBRARY})
A module’s location can be specified using the full path to the module file, or by letting
CMake find the module by itself. CMake will look for modules in the directories specified by
CMAKE_MODULE_PATH and if it cannot find it there, it will look in the Modules subdirectory
of CMake. This way projects can override modules that CMake provides, to customize them
for their needs. Modules can be broken into a few main categories:
Find Modules
These modules determine the location of software elements such as header files or
libraries.
System Introspection Modules
These modules test the system for properties such as the size of a float, support for
ANSI C++ streams, etc.
Utility Modules
These modules provide added functionality such as support for situations where one
CMake project depends on another and other convenience routines.
Now let us consider these three types of modules in more detail. CMake includes a large
number of Find modules. The purpose of a Find module is to locate software elements such as
header or library files. If they cannot be found then they provide a cache entry so that the user
can set the required properties. Consider the following module that finds the PNG library.
46
Writing CMakeLists Files
| # |
| # Find the native PNG includes and library j
i # i
i I
| # This module defines j
| # PNG_INCLUDE_DIR, where to find png.h, etc. j
- | # PNG_LIBRARIES, the libraries to link against to use PNG. j
! # PNGJDEFINITIONS - You should call j
| # add_definitions (${PNG_DEFINITIONS}) before compiling code j
j # that includes png library files,
j # PNG_FOUND, If false, do not try to use PNG.
; # also defined, but not for general use are
j # PNG_LIBRARY, where to find the PNG library.
! # None of the above will be defined unless zlib can be found.
i
I # PNG depends on Zlib
I include ( FindZLIB.cmake )
| if (ZLIB_FOUND)
j find_path (PNG_PNG_INCLUDE_DIR png.h
j /usr/local/include
j /usr/include
j )
j find_library (PNG_LIBRARY png
j /usr/lib
j /usr/local/lib
! )
j if (PNG_LIBRARY)
| if (PNG_PNG_INCLUDE_DIR)
j # png.h includes zlib.h. Sigh,
j set (PNG_INCLUDE_DIR
j ${PNG_PNG_INCLUDE_DIR} ${ZLIB_INCLUDE_DIR} ) j
| set (PNG_LIBRARIES ${PNG_LIBRARY} ${ZLIB_LIBRARY}) *
| set (PNG_FOUND "YES")
|
| if (CYGWIN)
| if (BUILD_SHARED_LIBS)
| # No need to define PNG_USE_DLL here, because
! # itfs default for Cygwin. j
j else (BUILD SHARED LIBS) j
Using Modules
47
set (PNG_DEFINITIONS -DPNG_STATIC)
endif (BUILD_SHARED_LIBS)
endif (CYGWIN)
endif ()
endif ()
endif ()
The top of the module clearly documents what the module will do and what variables it will
set. Next it includes another module, the FindZLIB module, that determines if the ZLib
library is installed. Next, if ZLib is found, the f ind path command is used to locate the
PNG include files. The first argument is the name of the variable to store the result in, the
second argument is the name of the header file to look for, the remaining arguments are paths
to search for the header file. If it is not found in the system path then the variable is set to
png_png_include_dir-notfound, allowing the user to set it.
Note that the paths to search for the PNG library can include hard coded directories, registry
entries, and directories made up of other CMake variables. The next command finds the actual
PNG library using the f ind library command. This command performs additional checks
to find a proper library name, such as adding "lib" in front of the name and ".so" at the end of
the name on Linux systems.
After the find calls, some CMake variables are set that developers using FindPNG can use in
their projects (such as the include paths, and library name). Finally png_found is set
correctly, which lets developers know that the PNG library was properly found.
This structure is fairly common to all Find modules in CMake. Usually they are fairly short,
but in some cases, such as FindOpenGL they can be a few pages long. They are normally
independent of other modules, but there is no restriction on the use of other modules.
System introspection modules provide information about the target platform or compiler.
Many of these modules have names prefixed with Test or Check, such as TestBigEndian
and CheckTypeSize. Many of the system introspection modules actually try to compile code
in order to determine the correct result. In these cases the source code is usually named the
same as the module, but with a .c or .cxx extension. System introspection modules are
covered in more detail in chapter 5.
CMake includes a few Utility modules to help make using CMake a little easier.
CMakeExportBuildSettings and CMakelmportBuildSettings provide tools to help
verify that two C++ projects are compiled with the same compiler and key flags. The
CMakePrintSystemln format ion module prints out a number of key CMake settings to aid
in debugging.
48
Writing CMakeLists Files
Using CMake with SWIG
One example of how modules can be used is to look at wrapping your C/C++ code in another
language using SWIG. SWIG (Simplified Wrapper and Interface Generator) www.swig.org is
a tool that reads annotated C/C++ header files, and creates wrapper code (glue code) in order
to make the corresponding C/C++ libraries available to other programming languages such as
Tel, Python, or Java. CMake supports SWIG with the find_package command. Although
SWIG can be used from CMake using custom commands, the SWIG package provides
several macros that make building SWIG projects with CMake simpler. To use the SWIG
macros, first you must call the find_package command with the name SWIG. Then you
need to include the file referenced by the variable swig_use_file. This will define several
macros and set up CMake to easily build SWIG based projects.
Two very useful macros are swig_add_module and swig_link_libraries.
SWIG_add_module works much like the add_library command in CMake. The command
is invoked like this:
SWIG_ADD_MODULE (module_name language sourcel source2 ... sourceN)
The first argument is the name of the module to create. The next argument is the target
language SWIG is producing a wrapper for. The rest of the arguments consist of a list of
source files used to create the shared module. The big difference is that SWIG . i interface
files can be used directly as sources. The macro will create the correct custom commands to
run SWIG, and generate the C or C++ wrapper code from the SWIG interface files. The
sources can also be regular C or C++ files that need to be compiled in with the wrappers.
The swig__link_libraries macro is used to link support libraries to the module. This
macro is used because depending on the language being wrapped by SWIG, the name of the
module may be different. The actual name of the module is stored in a variable called
SWIG_M0DULE_$ {name }_REAL_NAME where $ {name} is the name passed into the
SWIG_ADD_MODULE macro. For example, SWIG_ADD_MODULE (foo tel foo.i) would
create a variable called swiG_MODULE_f oo_real_name which would contain the name of
the actual module created.
Now consider the following example that uses the SWIG example found in SWIG under
Examples/python/class.
# Find SWIG and include the use swig file
find_package (SWIG REQUIRED)
include (${SWIG_USE_FILE})
# Find python library and add include path for python headers
find_package (PythonLibs)
include directories (${PYTHON INCLUDE PATH})
Using Modules
49
# set the global swig flags to empty
set (CMAKE_SWIG_FLAGS MM)
# let swig know that example.i is C++ and add the -includeall
# flag to swig
set_source_files_properties (example.i PROPERTIES CPLUSPLUS ON)
set_source_files_properties (example.i
PROPERTIES SWIG_FLAGS "-includeall")
# Create the swig module called example
# using the example.i source and example.cxx
# swig will be used to create wrap_example.cxx from example.i
SWIG_ADD_MODULE (example python example.i example.cxx)
SWIG_LINK_LIBRARIES (example ${PYTHON_LIBRARIES})
This example first uses find_package to locate SWIG. Next it includes the
SWIG_USE_file defining the SWIG CMake macros. Then it finds the Python libraries and
sets up CMake to build with the Python library. Notice that the SWIG input file example.i is
used like any other source file in CMake, and properties are set on the file telling SWIG that
the file is C++ and that the SWIG flag -includeall should be used when running SWIG on that
source file. The module is created by telling SWIG the name of the module, the target
language and the list of source files. Finally, the Python libraries are linked to the module.
Using CMake with Qt
Projects using the popular widget toolkit Qt from Nokia, qt.nokia.com, can be built with
CMake. CMake supports multiple versions of Qt, including versions 3 and 4. The first step is
to tell CMake what version(s) of Qt to look for. Many Qt applications are designed to work
with Qt3 or Qt4, but not both. If your application is designed for Qt4 then you can use the
FindQt4 module, for Qt3 you should use the FindQt3 module. If your project can work with
either version of Qt then you can use the generic FindQt module. All of the modules provide
helpful tools for building Qt projects. The following is a simple example of building a project
that uses Qt4.
find_package ( Qt4 )
if (QT4_F0UND)
include (${QT_USE_FILE})
# what are our ui files?
set (QTUI_SRCS qtwrapping.ui)
QT4_WRAP_UI (QTUI_H_SRCS ${QTUI_SRCS})
QT4 WRAP CPP (QT MOC SRCS TestMoc.h)
50
Writing CMakeLists Files
add_library (myqtlib ${QTUI_H_SRCS} ${QT_MOC_SRCS})
target_link_libraries (myqtlib ${QT_LIBRARIES} )
add_executable (qtwrapping qtwrappingmain.cxx)
target_link_libraries (qtwrapping myqtlib)
* endif (QT4_FOUND)
Using CMake with FLTK
CMake also supports the The Fast Light Toolkit (FLTK) with special FLTK CMake
commands. The fltk wrap ui command is used to run the fltk fluid program on a .fl file
and produce a C++ source file as part of the build. The following example shows how to use
FLTK with CMake.
find_package (FLTK)
if (FLTK_FOUND)
set (FLTK_SRCS
fltkl.fi
)
FLTK_WRAP_UI (wraplibFLTK ${FLTK_SRCS})
add_library (wraplibFLTK ${wraplibFLTK_UI_SRCS} )
endif (FLTK FOUND)
4.7 Policies
For various reasons, sometimes a new feature or change is made to CMake that is not fully
backwards compatible with older versions of CMake. This can create problems when
someone tries to use an old CMakeLists file with a new version of CMake. To help both end
users and developers through such issues, we have introduced policies. Policies are a
mechanism in CMake to help improve backwards compatibility and track compatibility issues
between different versions of CMake.
Design Goals
There were four main design goals for the CMake policy mechanism:
1. Existing projects should build with versions of CMake newer than that used by the
project authors. •• Users should not need to edit code to get the projects to build.
• Warnings may be issued but the projects should build.
Policies
51
2. Correctness of new interfaces or bugs fixes in old interfaces should not be inhibited by
compatibility requirements. Any reduction in correctness of the latest interface is not fair
on new projects.
3. Every change made to CMake that may require changes to a project’s CMakeLists files
should be documented.
• Each change should also have a unique identifier that can be referenced by warning
and error messages.
• The new behavior is enabled only when the project has somehow indicated it is
supported.
4. We must be able to eventually remove code that implements compatibility with ancient
CMake versions.
• Such removal is necessary to keep the code clean and to allow for internal
refactoring.
• After such removal, attempts to build projects written for ancient versions must fail
with an informative message.
All policies in CMake are assigned a name of the form cmpnnnn where nnnn is an integer
value. Policies typically support both an old behavior that preserves compatibility with earlier
versions of CMake, and a new behavior that is considered correct and preferred for use by
new projects. Every policy has documentation detailing the motivation for the change, and the
old and new behaviors
Setting Policies
Projects may configure the setting of each policy to request old or new behavior. When
CMake encounters user code that may be affected by a particular policy it checks to see
whether the project has set the policy. If the policy has been set (to OLD or NEW) then
CMake follows the behavior specified. If the policy has not been set then the old behavior is
used, but a warning is issued telling the project author to set the policy.
There are a couple ways to set the behavior of a policy. The quickest way is to set all policies
to a version corresponding to the release version of CMake for which the project was written.
Setting the policy version requests the new behavior for all policies introduced in the
corresponding version of CMake or earlier. Policies introduced in later versions are marked as
not set in order to produce proper warning messages. The policy version is set using the
cmake_policy command's version signature. For example, the code
cmake_policy (VERSION 2.6)
will request the new behavior for all policies introduced in CMake 2.6 or earlier. The
cmake minimum required command will also set the policy version, which is convenient
for use at the top of projects. A project should typically begin with the lines
52
Writing CMakeLists Files
cmake_minimum_required (VERSION 2.6)
project (MyProject)
# ...code using CMake 2.6 policies
Of course one should replace "2.6" with whatever version of CMake you are currently writing
to. You can also set each policy individually if you wish. This is sometimes helpful for project
authors who want to incrementally convert their projects to use the new behavior, or silence
warnings about dependence on old behavior. The cmake policy command's SET option
may be used to explicitly request old or new behavior for a particular policy.
For example, CMake 2.6 introduced policy CMP0002, which requires all logical target names
to be globally unique (duplicate target names previously worked in some cases by accident
but were not diagnosed). Projects using duplicate target names and working accidentally will
receive warnings referencing the policy. The warnings may be silenced by the code
cmake_policy (SET CMP0002 OLD)
which explicitly tells CMake to use the old behavior for the policy (silently accept duplicate
target names). Another option is to use the code
cmake_policy (SET CMP0002 NEW)
to explicitly tell CMake to use new behavior and produce an error when a duplicate target is
created. Once this is added to the project it will not build until the author removes any
duplicate target names.
When a new version of CMake is released that introduces new policies it will still build old
projects, because by default they do not request NEW behavior for any of the new policies.
When starting a new project one should always specify the most recent release of CMake to
be supported as the policy version level. This will make sure that the project is written to
work using policies from that version of CMake and not using any old behavior. If no policy
version is set CMake will warn and assume a policy version of 2.4. This allows existing
projects that do not specify cmake_minimum_required to build as they would have with
CMake 2.4.
The Policy Stack
Policy settings are scoped using a stack. A new level of the stack is pushed when entering a
new subdirectory of the project (with add_subdirectory) and popped when leaving it.
Therefore setting a policy in one directory of a project will not affect parent or sibling
directories, but will affect subdirectories.
Policies
53
This is useful when a project contains subprojects maintained separately but built inside the
tree. The top-level CMakeLists file in a project may write
cmake_policy (VERSION 2.6)
project (MyProject)
add_subdirectory (OtherProject)
# ... code requiring new behavior as of CMake 2.6 ...
while the OtherPro ject/CMakeLists . txt file contains
cmake_policy (VERSION 2.4)
project (OtherProject)
# ... code that builds with CMake 2.4 ...
This allows a project to be updated to CMake 2.6 while subprojects, modules, and included
files continue to build with CMake 2.4 until their maintainers update them.
User code may use the cmake_policy command to push and pop its own stack levels as long
as every push is paired with a pop. This is useful to temporarily request different behavior for
a small section of code. For example, policy CMP0 00 3 removes extra link directories that used
to be included when new behavior is used. While incrementally updating a project it may be
difficult to build a particular target with the new behavior but all other targets are okay. The
code
cmake_policy (PUSH)
cmake_policy (SET CMP0003 OLD) # use old-style link for now
add_executable (myexe ...)
cmake_policy (POP)
will silence the warning and use the old behavior for that target. You can get a list of policies
and help on specific policies by running cmake from the command line as follows
cmake --help-command cmake_policy
cmake —help-policies
cmake --help-policy CMP0003
Updating a Project For a New Version of CMake
When a CMake release introduces new policies it may generate warnings for some existing
projects. These warnings indicate that changes to the project may need to be made to deal
correctly with the new policies. While old releases of the project can continue to build with
54
Writing CMakeLists Files
the warnings the project development tree should be updated to take the new policies into
account. There are two approaches to updating a tree: one-shot and incremental. Which one is
easier depends on the size of the project and what new policies produce warnings.
The One-Shot Approach
The simplest approach to updating a project for a new version of CMake is simply to change
kthe policy version set at the top of the project, try building with the new CMake version, and
fix problems. For example, to update a project to build with CMake 2.8 one might write
cmake_minimum_required (VERSION 2.8)
at the beginning of the top-level CMakeLists file. This tells CMake to use the new behavior
for every policy introduced in CMake 2.8 and below. When building this project with CMake
2.8 no warnings will be produced about policies because it knows of no policies introduced in
later versions. However, if the project was depending on the old behavior of a policy it may
not build since CMake now uses the new behavior without warning. It is up to the project
author who added the policy version line to fix these issues.
The Incremental Approach
Another approach to updating a project for a new version of CMake is to deal with each
warning one-by-one. One advantage of this approach is that the project will continue to build
throughout the process, so the changes can be made incrementally.
When CMake encounters a situation where it needs to know whether to use the old or new
behavior for a policy, it checks whether the project has set the policy. If the policy is set
CMake silently uses the corresponding behavior. If the policy is not set, CMake uses the old
behavior but warns that the policy is not set.
In many cases the warning message will point at the exact line of code in the CMakeLists files
that caused the warning. In some cases the situation cannot be diagnosed until CMake is
generating the native build system rules for the project, so the warning will not include
explicit context information. In these cases CMake will try to provide some information about
where code may need to be changed. The documentation for these "generation-time" policies
should indicate the point in the project code at which the policy should be set to take effect.
In order to incrementally update a project one warning should be addressed at a time. Several
cases may occur as described below.
Silence a Warning When the Code is Correct
Many policy warnings may be produced simply because the project has not set the policy
even though the project may work correctly with the new behavior (there is no way for
CMake to know the difference). For a warning about some policy cmp<nnnn> one may check
whether this is the case by adding
Policies
55
cmake_policy (SET CMP<NNNN> NEW)
to the top of the project and trying to build it. If the project builds correctly with the new
behavior one may move on to the next policy warning. If the project does not build correctly
one of the other cases may apply.
Silence a Warning Without Updating the Code
One may suppress all instances of a warning cmp<nnnn> by adding
cmake_policy (SET CMP<NNNN> OLD)
at the top of a project. However, we encourage project authors to update their code to work
with the new behavior for all policies. This is especially important because versions of CMake
in the (distant) future may remove support for the old behavior and produce an error for
projects requesting it (which tells the user to get an older CMake to build the project).
Silence a Warning by Updating Code
When a project does not work correctly with the NEW behavior for a policy its code needs to
be updated. In order to deal with a warning for some policy cmp<nnnn> one may add
cmake_policy (SET CMP<NNNN> NEW)
at the top of the project and then fix the code to work with the NEW behavior.
If many instances of the warning occur fixing all of them simultaneously may be too difficult.
Instead a developer may fix one at a time. This may be done using the PUSH/POP signatures
of the cmake_policy command:
cmake_policy (PUSH)
cmake_policy (SET CMP<NNNN> NEW)
# ... code updated for new policy behavior ...
cmake_policy (POP)
This will request the new behavior for a small region of code that has been fixed. Other
instances of the policy warning may still appear and must be fixed separately.
Updating the Project Policy Version
After addressing all policy warnings and getting the project to build cleanly with the new
CMake version one step remains. The policy version set at the top of the project should now
be updated to match the new CMake version, just as in the one-shot approach above. For
56
Writing CMakeLists Files
example, after updating a project to build cleanly with CMake 2.8 one may update the top of
the project with the line
cmake_minimum_required(VERSION 2.8)
This will set all policies introduced in CMake 2.8 or below to use the new behavior. Then one
may sweep through the rest of the code and remove all the calls to the cmake_policy
command used to request the new behavior incrementally. The end result should look the
same as the one-shot approach above but could be attained step-by-step.
Supporting Multiple CMake Versions
Some projects might want to support a few releases of CMake simultaneously. The goal is to
build with an older version but also work with newer versions without warnings. In order to
support both CMake 2.4 and 2.6, one may write code like
cmake_minimum_required (VERSION 2.4)
if (COMMAND cmake_policy)
# policy settings ...
cmake_policy (SET CMP0003 NEW)
endif (COMMAND cmake_policy)
This will set the policies when building with CMake 2.6 and just ignore them for CMake 2.4.
In order to support both CMake 2.6 and some policies of CMake 2.8, one may write code like
cmake_minimum_required (VERSION 2.6)
if (POLICY CMP1234)
# policies not known to CMake 2.6 ...
cmake_policy (SET CMP1234 NEW)
endif (POLICY CMP1234)
This will set the policies when building with CMake 2.8 and just ignore them for CMake 2.6.
If it is known that the project builds with both CMake 2.6 and CMake 2.8's new policies one
may write
cmake_minimum_required (VERSION 2.6)
if (NOT ${CMAKE_VERSION} VERSION_LESS 2.8)
cmake_policy (VERSION 2.8)
endif ()
Linking Libraries
57
4.8 Linking Libraries
In CMake 2.6 and later a new approach to generating link lines for targets has been
implemented. Consider these libraries:
/path/to/libfoo.a
/path/to/libfoo.so
Previously if someone wrote
target_link_libraries (myexe /path/to/libfoo.a)
CMake would generate this code to link it:
... -L/path/to -Wl,-Bstatic -lfoo -Wl,-Bdynamic ...
This worked most of the time, but some platforms (such as Mac OS X) do not support the -
Bstatic or equivalent flag. This made it impossible to link to the static version of a library
without creating a symlink in another directory and using that one instead. Now CMake will
generate this code:
... /path/to/libfoo.a ...
This guarantees that the correct library is chosen. However there are some caveats to keep in
mind. In the past a project could write this (incorrect) code, and it would work by accident:
add_executable (myexe myexe.c)
target__link_libraries (myexe /path/to/libA. so B)
where "b" is meant to link "/path/to/libB. so". This code is incorrect because it asks
CMake to link to B but does not provide the proper linker search path for it. It used to work by
accident because the -L/path/to would get added as part of the implementation of linking
to A. The correct code would be either
link_directories (/path/to)
add_executable (myexe myexe.c)
target_link_libraries (myexe /path/to/libA.so B)
58
Writing CMakeLists Files
or even better
add_executable (myexe myexe.c)
target_link_libraries (myexe /path/to/libA.so /path/to/libB.so)
Linking to System Libraries
System libraries on UNIX-like systems are typically provided in /usr/lib or /lib. These
directories are considered implicit linker search paths because linkers automatically search
these locations, even without a flag like -L/usr/lib. Consider the code
find_library (M_LIB m)
target_link_libraries (myexe ${M_LIB})
Typically the find_library command would find the math library /usr/lib/libm. so,
but some platforms provide multiple versions of libraries corresponding to different
architectures. For example, on an IRIX machine one might find the libraries
/usr/lib/libm.so (ELF o32)
/usr/lib32/libm.so (ELF n32)
/usr/lib64/libm.so (ELF 64)
On a Solaris machine one might find
/usr/lib/libm.so (sparcv8 architecture)
/usr/lib/sparcv9/libm.so (sparcv9 architecture)
Unfortunately, find library may not know about all of the architecture-specific system
search paths used by the linker. In fact, when it finds /usr/lib/libm. so, it may be finding
a library with the incorrect architecture. If the link computation were to produce the line
... /usr/lib/libm.so ...
the linker might complain if /usr/lib/libm. so does not match the architecture it wants.
One solution to this problem is for the link computation to recognize that the library is in a
system directory and ask the linker to search for the library. It could produce the link line
. -lm ...
Shared Libraries and Loadable Modules
59
and the linker would search through its architecture-specific implicit link directories to find
the correct library. Unfortunately, this solution suffers from the original problem of
distinguishing between static and shared versions. In order to ask the linker to find a static
system library with the correct architecture it must produce the link line
... -Wl,-Bstatic -lm ... -Wl,-Bshared ...
Since not all platforms support such flags CMake compromises. Libraries that are not in
implicit system locations are linked by passing the full library path to the linker. Libraries that
are in implicit system locations (such as /usr/lib) are linked by passing the -1 option if a
flag like -Bstatic is available, and by passing the full library path to the linker otherwise.
Specifying Optimized or Debug Libraries with a Target
On Windows platforms it is often required to link debug libraries with debug libraries, and
optimized libraries with optimized libraries. CMake helps satisfy this requirement with the
target link libraries command, which accepts an optional flag that is debug or
optimized. So, if a library is preceded with either debug or optimized, then that library will
only be linked in with the like configuration type. For example:
add_executable (foo foo.c)
target_link_libraries (foo debug libdebug optimized libopt)
In this case foo will be linked against libdebug if a debug build was selected, or against libopt
if an optimized build was selected.
4.9 Shared Libraries and Loadable Modules
Shared libraries and loadable modules are very powerful tools for software developers. They
can be used to create extension modules or plugins for off-the-shelf software, and can be used
to decrease the compile/link/run cycles for C and C++ programs. However, despite years of
use, the cross platform creation of shared libraries and modules remains a black art
understood by only a few developers. CMake has the ability to aid developers in the creation
of shared libraries and modules. CMake knows the correct tools and flags to use in order to
produce the shared libraries for most modem operating systems that support them.
Unfortunately, CMake cannot do all the work, and developers must sometimes alter source
code and understand the basic concepts and common pitfalls associated with shared libraries
before they can be used effectively. This section will describe many of the issues required to
take advantage of shared libraries and loadable modules.
A shared library should be thought of more like an executable than a static library, and on
most systems actually requires executable permissions to be set on the shared library file. This
60
Writing CMakeLists Files
means that shared libraries can link to other shared libraries when they are created in the same
way as an executable. Unlike a static library where the atomic unit is the object file, for shared
libraries, the entire library is the atomic unit. This can cause some unexpected linker errors
when converting from static to shared libraries. If an object file is part of a static library, but
the executable linking to the library does not use any of the symbols in that object file, then
the file is simply excluded from the final linked executable. With shared libraries, all the
object files that make up the library and all of the dependencies that they require come as one
unit. For example, suppose you had a library with an object file defining the function
DisplayOnXWindow () which required the XI1 library. If you linked an executable to that
library, but did not call the DisplayOnXWindow () function, the static library version would
not require XI1, but the shared library version would require the XI1 library. This is because
a shared library has to be taken as one unit, and a static library is only an archive of object
files from which linkers can choose which objects are needed. This means that static linked
executables can be smaller, as they only contain the object code actually used.
Another difference between shared and static libraries is library order. With static libraries the
order on the link line can make a difference. This is because most linkers only use the
symbols that are needed in a single pass over all the given libraries. So, the library order
should go from the library that uses the most other libraries to the library that uses no other
libraries. CMake will preserve and remember the order of libraries and library dependencies
of a project. This means that each library in a project should use the
target_link_libraries command to specify all of the libraries that it directly depends
on. The libraries will be linked with each other for shared builds, but not static builds.
However, the link information is used in static builds when executables are linked. An
executable that only links library libA will get libA plus libB and libC as long as libA’s
dependency on libB and libC was properly specified using target_link_libraries
(libA libB libC).
At this point, one might wonder why shared libraries would be preferred over static libraries.
There are several reasons. First, shared libraries can decrease the compile/link/run cycle time.
This is because the linker does not have to do as much work when linking to shared libraries
because there are fewer decisions to be made about which object files to keep. Also, often
times, the executable does not even need to be re-linked after the shared library is rebuilt. So,
developers can work on a library compiling and linking only the small part of the program
that is currently being developed, and then re-run the executable after each build of the shared
library. Also, if a library is used by many different executables on a system, then there only
needs to be one copy of the library on disk, and often in memory too.
In addition to the concept of a software library, shared libraries can also be used on many
systems as run time loadable modules. This means that a program can at run time, load and
execute object code that was not part of the original software. This allows developers to create
software that is both open and closed. (For more information see Object Oriented Software
Construction by Bertrand Meyer.) Closed software is software that cannot be modified. It has
been through a testing cycle and can be certified to perform specific tasks with regression
Shared Libraries and Loadable Modules
61
tests. However, a seemingly opposite goal is sought after by developers of object oriented
software. This is the concept of Open software that can be extended by future developers.
This can be done via inheritance and polymorphism with object systems. Shared libraries that
can be loaded at run time, allow for these seemingly opposing goals to be achieved in the
same software package. Many common applications support the idea of plugins. The most
common of these applications is the web browser. Internet Explorer uses plugins to support
video over the web and 3D visualization. In addition to plugins, loadable factories can be used
to replace C++ objects at run time, as is done in VTK.
Once it is decided that shared libraries or loadable modules are the right choice for a
particular project, there are a few issues that developers need to be aware of. The first
question that must be answered is which symbols are exported by the shared library? This
may sound like a simple question, but the answer is different from platform to platform. On
many, but not all UNIX systems, the default behavior is to export all the symbols much like a
static library. However, on Windows systems, developers must explicitly tell the linker and
compiler which symbols are to be exported and imported from shared libraries. This is often a
big problem for UNIX developers moving to Windows. There are two ways to tell the
compiler/linker which symbols to export/import on Windows. The most common approach is
to decorate the code with a Microsoft™ C/C++ language extension. An alternative is to create
an extra file called a .def file. This file is a simple ASCII file containing the names of all the
symbols to be exported from a library.
The Microsoft™ extension uses the declspec directive. If a symbol has declspec (
dllexport ) in front of it, it will be exported, and if it has declspec ( dllimport ) it
will be imported. Since the same file may be shared during the creation and use of a library, it
must be both exported and imported in the same source file. This can only be done with the
preprocessor. The developer can create a macro called library_export that is defined to
dllexport when building the library and dllimport when using the library. CMake helps
this process by automatically defining $ {libname }_exports when building a DLL
(dynamic link library, a.k.a. a shared library) on Windows.
The following code snippet is from the VTK library vtkCommon, and is included by all files
in the vtkCommon library:
#if defined(WIN32)
#if defined(vtkCommon_EXPORTS)
#define VTK_COMMON_EXPORT declspec( dllexport )
#else
#define VTK_COMMON_EXPORT declspec( dllimport )
#endif
#else
#define VTK_COMMON_EXPORT
#endif
62
Writing CMakeLists Files
The example checks for Windows and checks the vtkCommon_EXPORTS macro provided by
CMake. So, on UNIX vtk_common_export is defined to nothing, and on Windows during
the building of vtkCommon.dll it is defined as declspec (dllexport), and when the file
is being used by another file, it is defined to declspec (dllimport).
The second approach requires a .def file to specify the symbols to be exported. This file could
be created by hand, but for a large and changing C++ library that could be time consuming
and error prone. CMake’s custom commands can be used to run a pre-link program that will
create a .def file from the compiled object files automatically. In the following example, a
Perl script called makedef.pl is used, the script runs the dumpbin program on the .obj files
and extracts all of the exportable symbols and writes a .def file with the correct exports for all
the symbols in the library mylib.
CMakeLists.txt
cmake_minimum_required (VERSION 2.6)
project (myexe)
set (SOURCES mylib.cxx mylib2.cxx)
# create a list of all the object files
string (REGEX REPLACE "W.cxx" M.obj" OBJECTS "${ SOURCES} ")
# create a shared library with the .def file
add_library (mylib SHARED ${SOURCES}
$ { CMAKE__CURRENT_BINARY_DIR} /mylib . def
)
# set the .def file as generated
set_source_files_properties (
${CMAKE_CURRENT_BINARY_DIR}/mylib.def
PROPERTIES GENERATED 1
# create an executable
add_executable (myexe myexe.cxx)
# link the executable to the dll
target_link_libraries(myexe mylib)
#convert to windows slashes
set (OUTDIR
${CMAKE_CURRENT_BINARY_DIR}/${CMAKE_CFG_INTDIR}
)
Shared Libraries and Loadable Modules
63
string (REGEX REPLACE "/" "WW" OUTDIR ${OUTDIR})
# create a custom pre link command that runs
# a perl script to create a .def file using dumpbin
add_custom_command (
TARGET mylib PRE_LINK
COMMAND perl
ARGS ${CMAKE_CURRENT_SOURCE_DIR}/makedef.pi
${CMAKE_CURRENT_BINARY_DIR}\\mylib.def mylib
${OUTDIR} ${OBJECTS}
COMMENT "Create .def file"
myexe.cxx
#include <iostream>
#include "mylib.h"
int main()
{
std: :cout « myTen() << "\n";
std: :cout « myEightO << "\n";
}
mylib. cxx—
int myTen()
{
return 10;
}
--mylib2.cxx
int myEightO
{
return 8;
}
64
Writing CMakeLists Files
There is a significant difference between Windows and most UNIX systems with respect to
the requirements of symbols. DLLs on Windows are required to be fully resolved, this means
that they must link every symbol at creation. UNIX systems allow shared libraries to get
symbols from the executable or other shared libraries at run time. On UNIX systems that
support this feature, CMake will compile with the flags that allow executable symbols to be
used by shared libraries. This small difference can cause large problems. A common, but hard
to track down bug with DLLs happens with C++ template classes and static members. Two
DLLs can end up with separate copies of what is supposed to be a single global static member
of a class. There are also problems with the approach taken on most UNIX systems. The start
up time for large applications with many symbols can be long since much of the linking is
deferred to run time.
Another common pitfall occurs with C++ global objects. These objects require that
constructors must be called before they can be used. The main that links or loads C++ shared
libraries MUST be linked with the C++ compiler, or globals like cout may not be initialized
before they are used, causing strange crashes at start up time.
Since executables that link to shared libraries must be able to find the libraries at run time,
special environment variables and linker flags must be used. There are tools that can be used
to show which libraries an executable is actually using. On many UNIX systems there is a
tool called ldd (otool -L on Mac OS X) that shows which libraries are used by an
executable. On Windows, a program called depends can be used to find the same type of
information. On many UNIX systems there are also environment variables like
ld_library_path that tell the program where to find the libraries at run time. Where
supported CMake will add run time library path information into the linked executables, so
that ld_library_path is not required. This feature can be turned off by setting the cache
entry cmake_skip_rpath to false. This may be desirable for installed software that should
not be looking in the build tree for shared libraries. On Windows there is only one path
environment variable that is used for both DLLs and finding executables.
4.10 Shared Library Versioning
When an executable is linked to a shared library, it is important that the copy of the shared
library loaded at runtime matches that expected by the executable. On some UNIX systems, a
shared library has an associated "soname" intended to solve this problem. When an executable
links against the library, its soname is copied into the executable. At runtime, the dynamic
linker uses this name from the executable to search for the library.
Consider a hypothetical shared library "foo" providing a few C functions that implement some
functionality. The interface to foo is called an Application Programming Interface (API). If
the implementation of these C functions changes in a new version of foo, but the API remains
the same, then executables linked against foo will still run correctly. When the API changes,
Shared Library Versioning
65
old executables will no longer run with a new copy of foo, so a new API version number must
be associated with foo.
This can be implemented by creating the original version of foo with a soname and file name
such as libfoo.so.l. A symbolic link such as libfoo.so -> libfoo.so. 1 will allow standard
linkers to work with the library and create executables. The new version of foo can be called
libfoo.so.2 and the symbolic link updated so that new executables use the new library. When
an old executable runs, the dynamic linker will look for libfoo.so.l, find the old copy of the
library, and run correctly. When a new executable runs, the dynamic linker will look for
libfoo.so.2 and correctly load the new version.
This scheme can be expanded to handle the case of changes to foo that do not modify the API.
We introduce a second set of version numbers that is totally independent of the first. This new
set corresponds to the software version providing foo. For example, some larger project may
have introduced the existence of library foo starting in version 3.4. In this case, the file name
for foo might be libfoo.so.3.4, but the soname would still be libfoo.so.l because the API for
foo is still on its first version. A symbolic link from libfoo.so.l -> libfoo.so.3.4 will allow
executables linked against the library to run. When a bug is fixed in the software without
changing the API to foo, then the new library file name might be libfoo.so.3.5, and the
symbolic link can be updated to allow existing executables to run.
CMake supports this soname-based version number encoding on platforms supporting soname
natively. A target property for the shared library named ’’VERSION" specifies the version
number used to create the file name for the library. This version should correspond to that of
the software package providing foo. On Windows the VERSION property is used to set the
binary image number, using major.minor format. Another target property named
"SOVERSION" specifies the version number used to create the soname for the library. This
version should correspond to the API version number for foo. These target properties are
ignored on platforms where CMake does not support this scheme.
The following CMake code configures the version numbers of the shared library foo:
set_target_properties (foo PROPERTIES VERSION 1.2 SOVERSION 4)
This results in the following library and symbolic links:
libfoo.so.1.2
libfoo.so.4 -> libfoo.so.1.2
libfoo.so -> libfoo.so.4
If only one of the two properties is specified, the other defaults to its value automatically. For
example, the code
66
Writing CMakeLists Files
set_target_properties (foo PROPERTIES VERSION 1.2)
results in the following shared library and symbolic link:
libfoo.so.1.2
libfoo.so -> libfoo.so.1.2
CMake makes no attempt to enforce sensible version numbers. It is up to the programmer to
utilize this feature in a productive manner.
4.11 Installing Files
Software is typically installed into a directory separate from the source and build trees. This
allows it to be distributed in a clean form and isolates users from the details of the build
process. CMake provides the install command to specify how a project is to be installed.
This command is invoked by a project in the CMakeLists file and tells CMake how to
generate installation scripts. The scripts are executed at install time to perform the actual
installation of files. For Makefile generators (UNIX, NMake, Borland, MinGW, etc.), the user
simply runs "make install" (or “nmake install”) and the make tool will invoke
CMake's installation module. With GUI based systems (Visual Studio, Xcode, etc.) the user
simply builds the target called install.
Each call to the install command defines some installation rules. Within one CMakeLists
file (source directory) these rules will be evaluated in the order in which the corresponding
commands are invoked. The order across multiple directories is not specified.
The install command has several signatures designed for common installation use cases. A
particular invocation of the command specifies the signature as the first argument. The
signatures are targets, files, programs, directory, script, and code.
install (TARGETS ...)
Install the binary files corresponding to targets built inside the project,
install (FILES ...)
General-purpose file installation. It is typically used for installation of header files,
documentation, and data files required by your software.
install (PROGRAMS ...)
Installs executable files not built by the project, such as shell scripts. It is identical to
install (FILES) except that the default permissions of the installed file include
the executable bit.
Installing Files
67
install (DIRECTORY ...)
Install an entire directory tree. This may be used for installing directories with
resources such as icons and images.
install (SCRIPT ...)
Specify a user-provided CMake script file to be executed during installation.
Typically this is used to define pre-install or post-install actions for other rules.
install (CODE ...)
Specify user-provided CMake code to be executed during the installation. This is
similar to install (script) but the code is provided inline in the call as a string.
The targets, files, programs, directory signatures are all meant to create install rules
for files. The targets, files, or directories to be installed are listed immediately after the
signature name argument. Additional details can be specified using keyword arguments
followed by corresponding values. Keyword arguments provided by most of the signatures are
as follows.
DESTINATION
Specifies the location in which the installation rule will place files. This argument
must be followed by a directory path indicating the location. If the directory is
specified as a full path it will be evaluated at install time as an absolute path. If the
directory is specified as a relative path it will be evaluated at install time relative to
the installation prefix. The prefix may be set by the user through the cache variable
CMAKE_install_prefix. A platform-specific default is provided by CMake:
“/usr/local” on UNIX and “<SystemDrive>/Program Files/<ProjectName>”
on Windows, where SystemDrive is something like “c: ” and ProjectName is the
name given to the top-most project command.
PERMISSIONS
Specifies file permissions to be set on the installed files. This option is needed only
to override the default permissions selected by a particular install command
signature. Valid permissions are owner_read, owner_write, owner_execute,
GROUP_READ, GROUP_WRITE, GROUP_EXECUTE, WORLD_READ, WORLD_WRITE,
world_execute, setuid, and setgid. Some platforms do not support all of these
permissions, on such platforms those permission names are ignored.
CONFIGURATIONS
Specifies a list of build configurations for which an installation rule applies (Debug,
Release, etc.). For Makefile generators the build configuration is specified by the
CMAKE_BUILD_TYPE cache variable. For Visual Studio and Xcode generators the
configuration is selected when the install target is built. An installation rule will
68
Writing CMakeLists Files
be evaluated only if the current install configuration matches an entry in the list
provided to this argument. Configuration name comparison is case-insensitive.
COMPONENT
Specifies the installation component for which the installation rule applies. Some
projects divide their installations into multiple components for separate packaging.
For example, a project may define a “Runtime” component that contains the files
needed to run a tool, a “Development” component containing the files needed to
build extensions to the tool, and a “Documentation” component containing the
manual pages and other help files. The project may then package each component
separately for distribution by installing only one component at a time. By default all
components are installed. Component-specific installation is an advanced feature
intended for use by package maintainers. It requires manual invocation of the
installation scripts with an argument defining the component variable to name the
desired component. Note that component names are not defined by CMake. Each
project may define its own set of components.
OPTIONAL
Specifies that it is not an error if the input file to be installed does not exist. If the
input file exists it will be installed as requested. If it does not exist it will be silently
not installed.
Projects typically install some of the library and executable files created during their build
process. The install command provides the targets signature for this purpose:
install (TARGETS targets...
[[ARCHIVE|LIBRARY|RUNTIME|FRAMEWORK|BUNDLE|
PRIVATE_HEADER|PUBLIC_HEADER|RESOURCE]
[DESTINATION <dir>]
[PERMISSIONS permissions...]
[CONFIGURATIONS [Debug|Release I .. .]]
[COMPONENT <component>]
[OPTIONAL]
[EXPORT <export name>]
[NAMELINK_ONLY|NAMELINK_SKIP]
] [-..])
The targets keyword is immediately followed by a list of the targets created using
add_executable or add_library to be installed. One or more files corresponding to each
target will be installed.
Files installed with this signature may be divided into three categories: archive, library,
and runtime. These categories are designed to group target files by typical installation
Installing Files
69
destination. The corresponding keyword arguments are optional, but if present specify that
other arguments following them apply only to target files of that type. Target files are
categorized as follows:
executables - runtime
Created by add_executable (.exe on Windows, no extension on UNIX)
loadable modules - library
Created by add_library with the MODULE option (.dll on Windows, .so on UNIX)
shared libraries - library
Created by add_library with the shared option on UNIX-like platforms (.so on
most UNIX, .dylib on Mac)
dynamic-link libraries - runtime
Created by add_library with the shared option on Windows platforms (.dll)
import libraries - archive
Linkable file created by a dynamic-link library that exports symbols (.lib on most
Windows, .dll.a on Cygwin and MinGW).
static libraries - archive
Created by add_library with the STATIC option (.lib on Windows, .a on UNIX,
Cygwin, and MinGW)
Consider a project that defines an executable myExecutable that links to a shared library
mySharedLib. It also provides a static library myStaticLib and a plugin module to the
executable called myPlugin that also links to the shared library. The executable, static
library, and plugin file may be installed individually using the commands
install (TARGETS myExecutable DESTINATION bin)
install (TARGETS myStaticLib DESTINATION lib/myproject)
install (TARGETS myPlugin DESTINATION lib)
The executable will not be able to run from the installed location until the shared library to
which it links is also installed. Installation of the library requires a bit more care in order to
support all platforms. It must be installed to a location searched by the dynamic linker on each
platform. On UNIX-like platforms the library is typically installed to lib,while on Windows
it should be placed next to the executable in bin. An additional challenge is that the import
library associated with the shared library on Windows should be treated like the static library
and installed to lib/myproject. In other words we have three different kinds of files
created with a single target name that must be installed to three different destinations!
70
Writing CMakeLists Files
Fortunately this problem can be solved using the category keyword arguments. The shared
library may be installed using the command
install (TARGETS mySharedLib
RUNTIME DESTINATION bin
LIBRARY DESTINATION lib
ARCHIVE DESTINATION lib/myproject)
This tells CMake that the runtime file (.dll) should be installed to bin, the library file
(.so) should be installed to lib, and the archive (.lib) file should be installed to
lib/mypro j ect. On UNIX the library file will be installed and on Windows the runtime
and archive files will be installed.
If the above sample project is to be packaged into separate runtime and development
components we must assign the appropriate component to each target file installed. The
executable, shared library, and plugin are required in order to run the application, so they
belong in a Runtime component. Meanwhile the import library (corresponding to the shared
library on Windows) and the static library are only required to develop extensions to the
application, and therefore belong in a Development component.
Component assignments may be specified by adding the component argument to each of the
commands above. We may also combine all of the installation rules into a single command
invocation. This single command is equivalent to all of the above commands with
components added. The files generated by each target are installed using the rule for their
category.
install (TARGETS myExecutable mySharedLib myStaticLib myPlugin
RUNTIME DESTINATION bin COMPONENT Runtime
LIBRARY DESTINATION lib COMPONENT Runtime
ARCHIVE DESTINATION lib/myproject COMPONENT Development)
Either nameLInk_onlY or nameLINK_skip may be specified as a library option. On some
platforms a versioned shared library has a symbolic link such as
lib<name>.so -> lib<name>.so.1
where lib<name>. so. 1 is the soname of the library and lib<name>.so is a Mnamelink”
that helps linkers to find the library when given -Knamex The namelink_only option
causes installation of only the namelink when a library target is installed. The
namelink skip option causes installation of library files other than the namelink when a
library target is installed. When neither option is given both portions are installed. On
Installing Files
71
platforms where versioned shared libraries do not have namelinks, or when a library is not
versioned, the namelink_skip option installs the library and the namelink_only option
installs nothing. See the version and soversion target properties for details on creating
versioned shared libraries.
Projects may install files other than those that are created with add_executable or
add_library, such as header files or documentation. General-purpose installation of files is
specified using the files signature:
install (FILES files... DESTINATION <dir>
[PERMISSIONS permissions...]
[CONFIGURATIONS [Debug|Release|...]]
[COMPONENT <component>]
[RENAME <name>] [OPTIONAL])
The FILES keyword is immediately followed by a list of files to be installed. Relative paths
are evaluated with respect to the current source directory. Files will be installed to the given
destination directory. For example, the command
install (FILES my-api.h ${CMAKE_CURRENT_BINARY_DIR}/my-config.h
DESTINATION include)
Installs the file my-api. h from the source tree and the file my-conf ig. h from the build tree
into the include directory under the installation prefix. By default installed files are given
permissions owner_write, owner_read, group_read, and world_read, but this may be
overridden by specifying the PERMISSIONS option. Consider the case in which we want to
install a global configuration file on a UNIX system that is readable only by its owner (such
as root). We may accomplish this with the command
install (FILES my-rc DESTINATION /etc
PERMISSIONS OWNER_WRITE OWNER_READ)
which installs the file my-rc with owner read/write permission into the absolute path /etc.
The rename argument specifies a name for an installed file that may be different from the
original file. Renaming is allowed only when a single file is installed by the command. For
example, the command
install(FILES version.h DESTINATION include RENAME my-version.h)
72
Writing CMakeLists Files
will install the file version .h from the source directory to include/my-version .h under
the installation prefix.
Projects may also install helper programs such as shell scripts or python scripts that are not
actually compiled as targets. These may be installed with the files signature using the
permissions option to add execute permission. However this case is common enough to
justify a simpler interface. CMake provides the programs signature for this purpose:
install (PROGRAMS files... DESTINATION <dir>
[PERMISSIONS permissions...]
[CONFIGURATIONS [Debug|Release I . ..]]
[COMPONENT <component>]
[RENAME <name>] [OPTIONAL])
The programs keyword is immediately followed by a list of scripts to be installed. This
command is identical to the files signature except that the default permissions additionally
include owner_execute, group_execute, and world_execute. For example, we may
install a python utility script with the command
install (PROGRAMS my-util.py DESTINATION bin)
which installs my-util.py to the bin directory under the installation prefix and gives it
owner, group, and world read and execute permission plus owner write.
Projects may also provide a whole directory full of resource files such as icons or html
documentation. An entire directory may be installed using the directory signature:
install (DIRECTORY dirs... DESTINATION <dir>
[FILE_PERMISSIONS permissions...]
[DIRECTORY_PERMISSIONS permissions...]
[USE_SOURCE_PERMISSIONS]
[CONFIGURATIONS [Debug|Release I . ..]]
[COMPONENT <component>]
[[PATTERN <pattern> | REGEX <regex>]
[EXCLUDE] [PERMISSIONS permissions...]] [...])
The directory keyword is immediately followed by a list of directories to be installed.
Relative paths are evaluated with respect to the current source directory. Each named
directory is installed to the destination directory. The last component of each input directory
Installing Files
73
name is appended to the destination directory as that directory is copied. For example, the
command
install (DIRECTORY data/icons DESTINATION share/myproject)
will install the data/icons directory from the source tree into share/myproject/icons
under the installation prefix. A trailing slash will leave the last component empty and install
the contents of the input directory to the destination. The command
install (DIRECTORY doc/html/ DESTINATION doc/myproject)
installs the contents of doc/html from the source directory into doc/mypro j ect under the
installation prefix. If no input directory names are given, as in
install (DIRECTORY DESTINATION share/myproject/user)
the destination directory will be created but nothing will be installed into it.
Files installed by the directory signature are given the same default permissions as the
files signature. Directories installed by the directory signature are given the same default
permissions as the programs signature. The file_permissions and
directory_permissions options may be used to override these defaults. Consider the case
in which a directory full of example shell scripts is to be installed into a directory that is both
owner and group writable. We may use the command
install (DIRECTORY data/scripts DESTINATION share/myproject
FILE_PERMISSIONS
OWNER_READ OWNER_EXECUTE OWNER_WRITE
GROUP_READ GROUP_EXECUTE
WORLD_READ WORLD_EXECUTE
DIRECTORY_PERMISSIONS
OWNER_READ OWNER_EXECUTE OWNER_WRITE
GROUP_READ GROUP_EXECUTE GROUP_WRITE
WORLD READ WORLD EXECUTE)
which installs the directory data/scripts into share/mypro j ect/scripts and sets the
desired permissions. In some cases a fully prepared input directory created by the project may
have the desired permissions already set. The use_source_permissions option tells
CMake to use the file and directory permissions from the input directory during installation. If
74
Writing CMakeLists Files
in the previous example the input directory were to have already been prepared with correct
permissions the following command may have been used instead.
install (DIRECTORY data/scripts DESTINATION share/myproject
USE_SOURCE_PERMISSIONS)
If the input directory to be installed is under source management, such as CVS, there may be
extra subdirectories in the input that we do not wish to install. There may also be specific files
which should not be installed, or be installed with different permissions, while most files get
the defaults. The pattern and regex options may be used for this purpose. A pattern
option is followed first by a globbing pattern and then by an exclude or permissions
option. A regex option is followed first by a regular expression and then by exclude or
permissions. The exclude option skips installation of those files or directories matching
the preceding pattern or expression, while the permissions option assigns specific
permissions to them.
Each input file and directory is tested against the pattern or regular expression as a full path
with forward slashes. A pattern will match only complete file or directory names occurring at
the end of the full path while a regular expression may match any portion. For example, the
pattern “foo*” will match “.../foo. txt” but not “.../myfoo. txt” or /foo/bar. txt”
but the regular expression “foo” will match all of them.
Returning to the above example of installing an icons directory, consider the case in which the
input directory is managed by CVS and also contains some extra text files that we do not want
to install. The command
install (DIRECTORY data/icons DESTINATION share/myproject
PATTERN "CVS" EXCLUDE
PATTERN "*.txt" EXCLUDE)
installs the icons directory while ignoring any CVS directory or text file contained. The
equivalent command using the regex option is
install (DIRECTORY data/icons DESTINATION share/myproject
REGEX "/CVS$" EXCLUDE
REGEX "/ [A/]*.txt$" EXCLUDE)
which uses V’ and ‘$’ to constrain the match in the same way as the patterns. Consider a
similar case in which the input directory contains shell scripts and text files that we wish to
install with different permissions than the other files. The command
Installing Files
75
install (DIRECTORY data/other/ DESTINATION share/myproject
PATTERN "CVS" EXCLUDE
PATTERN "*.txt"
PERMISSIONS OWNER_READ OWNER_WRITE
PATTERN "*.sh"
PERMISSIONS OWNER READ OWNER WRITE OWNER EXECUTE)
will install the contents of data/other from the source directory to share/mypro j ect
while ignoring CVS directories and giving specific permissions to . txt and . sh files.
Project installations may need to perform tasks other than just placing files in the installation
tree. Third-party packages may provide their own mechanisms to register new plugins which
must be invoked during project installation. The script signature is provided for this
purpose:
install (SCRIPT <file>)
The script keyword is immediately followed by the name of a CMake script. CMake will
execute the script during installation. If the file name given is a relative path it will be
evaluated with respect to the current source directory. A simple use case is printing a message
during installation. We first write a message. cmake file containing the code
message ("Installing My Project")
and then reference this script using the command
install (SCRIPT message.cmake)
Custom installation scripts are not executed during the main CMakeLists file processing.
They are executed during the installation process itself. Variables and macros defined in the
code containing the install (SCRIPT) call will not be accessible from the script. However
there are a few variables defined during the script execution which may be used to get
information about the installation. The variable cmake install prefix is set to the actual
installation prefix. This may be different from the corresponding cache variable value because
the installation scripts may be executed by a packaging tool that uses a different prefix. An
environment variable env{destdir} may be set by the user or packaging tool. Its value is
prepended to the installation prefix and to absolute installation paths to determine the location
to which files are installed. In order to reference an install location on disk the custom script
may use $env{destdir}${CMAKE_install_prefix} as the top portion of the path. The
variable cmake install config name is set to the name of the build configuration
76
Writing CMakeLists Files
currently being installed (Debug, Release, etc.). During component-specific installation the
variable cmake_install_component is set to the name of the current component.
Custom installation scripts, as simple as the message above, may be more easily created with
the script code placed inline in the call to the install command. The code signature is
provided for this purpose:
install (CODE "<code>")
The CODE keyword is immediately followed by a string containing the code to place in the
installation script. An install-time message may be created using the command
install (CODE "MESSAGE (V'Installing My ProjectV') ")
which has the same effect as the message. cmake script but contains the code inline.
Installing Prerequisite Shared Libraries
Executables are frequently built using shared libraries as building blocks. When you install
such an executable, you must also install its prerequisite shared libraries, called
“prerequisites” because the executable requires their presence in order to load and run
properly. The three main sources for shared libraries are the operating system itself, the build
products of your own project and third party libraries belonging to an external project. The
ones from the operating system may be relied upon to be present without installing anything:
they are on the base platform on which your executable runs. The build products in your own
project presumably have add_library build rules in the CMakeLists files, and so it should be
straightforward to create CMake install rules for them. It is the third party libraries that
frequently become a high maintenance item when there are more than a handful of them or
when the set of them fluctuates from version to version of the third party project. Libraries
may be added, code may be reorganized, and the third party shared libraries themselves may
actually have additional prerequisites that are not obvious at first glance.
CMake provides two modules to make it easier to deal with required shared libraries. The first
module, GetPrerequisites.cmake, provides the get_prerequisites function to analyze and
classify the prerequisite shared libraries upon which an executable depends. Given an
executable file as input, it will produce a list of the shared libraries required to run that
executable, including any prerequisites of the discovered shared libraries themselves. It uses
native tools on the various underlying platforms to perform this analysis: dumpbin
(Windows), otool (Mac) and ldd (Linux). The second module, BundleUtilities.cmake,
provides the fixup_bundle function to copy and fixup prerequisite shared libraries using
well-defined locations relative to the executable. For Mac bundle applications, it embeds the
libraries inside the bundle, fixing them up with install_name_tool to make a self-
Installing Files
77
contained unit. On Windows, it copies the libraries into the same directory with the
executable since executables will search in their own directories for their required DLLs.
The f ixup_bundle function helps you create relocatable install trees. Mac users appreciate
self-contained bundle applications: you can drag them anywhere, double click them and they
still work. They do not rely on anything being installed in a certain location other than the
operating system itself Similarly Windows users without administrative privileges appreciate
a relocatable install tree where an executable and all of its required DLLs are installed in the
same directory and it works no matter where you install it. You can even move things around
after installing them and is will still work.
To use f ixup_bundle, first install one of your executable targets. Then, configure a CMake
script that can be called at install time. Inside the configured CMake script, simply include
BundleUtilities and call the f ixup_bundle function with appropriate arguments.
In CMakeLists.txt:
install (TARGETS myExecutable DESTINATION bin)
# To install, for example, MSVC runtime libraries:
include (InstallRequiredSystemLibraries)
# To install other/non-system 3rd party required libraries:
configure_file (
${CMAKE_CURRENT_SOURCE_DIR}/FixBundle.cmake.in
${CMAKE_CURRENT_BINARY_DIR}/FixBundle.cmake
0ONLY
install (SCRIPT ${CMAKE_CURRENT_BINARY_DIR}/FixBundle.cmake)
In FixBundle.cmake.in:
include (BundleUtilities)
# Set bundle to the full path name of the executable already
# existing in the install tree:
set (bundle
"${CMAKE_INSTALL_PREFIX}/myExecutable0CMAKE_EXECUTABLE_SUFFIX0")
# Set other_libs to a list of full path names to additional
# libraries that cannot be reached by dependency analysis.
# (Dynamically loaded Plugins, for example.)
78
Writing CMakeLists Files
set (other_libs "")
# Set dirs to a list of directories where prerequisite libraries
# may be found:
set (dirs "@LIBRARY_OUTPUT_PATH@")
fixup_bundle ("${bundle}" "${other_libs}" "${dirs}")
You are responsible for verifying that you have permission to copy and distribute the
prerequisite shared libraries for your executable. Some libraries may have restrictive software
licenses that prohibit making copies a la fixup_bundle.
Exporting and Importing Targets
CMake 2.6 introduced support for exporting targets from one CMake-based project and
importing them into another. The main feature allowing this functionality is the notion of an
imported target. Here we present imported targets and then show how CMake files may be
generated by a project to export its targets for use by other projects.
Importing Targets
Imported targets are used to convert files outside of the project on disk into logical targets
inside a CMake project. They are created using the imported option to the
add_executable and add_library commands. No build files are generated for imported
targets. They are used simply for convenient, flexible reference to outside executables and
libraries. Consider the following example which creates and uses an imported executable
target:
add_executable (generator IMPORTED) # 1
set_property (TARGET generator PROPERTY
IMPORTED_LOCATION ”/path/to/some_generatorH) # .2
add_custom_command (OUTPUT generated.c
COMMAND generator generated.c) # 3
add_executable (myexe srcl.c src2.c generated.c)
Line #1 creates a new CMake target called generator. Line #2 tells CMake the location of
the target on disk to import. Line #3 references the target in a custom command. Once CMake
is run the generated build system will contain a command line such as
/path/to/some_generator /project/binary/dir/generated.c
Installing Files
79
in the rule to generate the source file. In a similar manner libraries from other projects may be
used through imported targets:
add_library (foo IMPORTED)
set_property (TARGET foo PROPERTY
IMPORTED_LOCATION M/path/to/libfoo.a")
add_executable (myexe srcl.c src2.c)
target_link_libraries (myexe foo)
On Windows a .dll and its .lib import library may be imported together:
add_library (bar IMPORTED)
set_property (TARGET bar PROPERTY
IMPORTED_LOCATION "c:/path/to/bar.dll")
set_property (TARGET bar PROPERTY
IMPORTED_IMPLIB Mc:/path/to/bar.lib")
add_executable (myexe srcl.c src2.c)
target_link_libraries (myexe bar)
A library with multiple configurations may be imported with a single target:
add_library (foo IMPORTED)
set_property (TARGET foo PROPERTY
IMPORTED_LOCATION_RELEASE Mc:/path/to/foo.lib")
set_property (TARGET foo PROPERTY
IMPORTED_LOCATION_DEBUG "c:/path/to/foo_d.lib")
add_executable (myexe srcl.c src2.c)
target_link_libraries (myexe foo)
The generated build system will link myexe to foo.lib when it is built in the release
configuration and foo_d. lib when built in the debug configuration.
Exporting Targets
Imported targets on their own are useful, but they still require the project that imports them to
know the locations of the target files on disk. The real power of imported targets is when the
project providing the target files also provides a file to help import them.
The install (TARGETS) and install (EXPORT) commands work together to install both a
target and a CMake file to help import it. For example, the code
add_executable (generator generator.c)
80
Writing CMakeLists Files
install (TARGETS generator DESTINATION lib/myproj/generators
EXPORT myproj-targets)
install (EXPORT myproj-targets DESTINATION lib/myproj)
will install the two files
<prefix>/lib/myproj/generators/generator
<prefix>/lib/myproj/myproj-targets.cmake
The first is the regular executable named generator. The second file, myproj-
targets. cmake, is a CMake file designed to make it easy to import generator. This file
contains code such as
get_filename_component (_self "${CMAKE_CURRENT_LIST_FILE}" PATH)
get_filename_component (PREFIX "${_self}/../.." ABSOLUTE)
add_executable (generator IMPORTED)
set_property (TARGET generator PROPERTY
IMPORTED_LOCATION "${PREFIX}/lib/myproj/generators/generator")
(note that $ {prefix} is computed relative to the file location). An outside project may now
use generator as follows:
include (${PREFIX}/lib/myproj/myproj-targets.cmake) # 1
add_custom_command (OUTPUT generated.c
COMMAND generator generated.c) # 2
add_executable (myexe srcl.c src2.c generated.c)
Line #1 loads the target import script (see section 5.7 to make this automatic). The script may
import any number of targets. Their locations are computed relative to the script location so
the install tree may be easily moved. Line #2 references the generator executable in a custom
command. The resulting build system will run the executable from its installed location.
Libraries may also be exported and imported:
add_library (foo STATIC fool.c)
install (TARGETS foo DESTINATION lib EXPORTS myproj-targets)
install (EXPORT myproj-targets DESTINATION lib/myproj)
This installs the library and an import file referencing it. Outside projects may simply write
Installing Files
81
include (${PREFIX}/lib/myproj/myproj-targets.cmake)
add_executable (myexe srcl.c)
target_link__libraries (myexe too)
and the executable will be linked to the library too exported and installed by the original
project.
Any number of target installations may be associated with the same export name. The export
names are considered global so any directory may contribute a target installation. Only one
call to the install (EXPORT) command is needed to install an import file that references all
targets. Both of the examples above may be combined into a single export file, even if they
are in different subdirectories of the project as shown in the code below.
# A/CMakeLists.txt
add_executable (generator generator.c)
install (TARGETS generator DESTINATION lib/myproj/generators
EXPORT myproj-targets)
# B/CMakeLists.txt
add_library (foo STATIC fool.c)
install (TARGETS foo DESTINATION lib EXPORTS myproj-targets)
# Top CMakeLists.txt
add_subdirectory (A)
add_subdirectory (B)
install (EXPORT myproj-targets DESTINATION lib/myproj)
Typically projects are built and installed before being used by an outside project. However in
some cases it is desirable to export targets directly from a build tree. The targets may then be
used by an outside project that references the build tree with no installation involved. The
export command is used to generate a file exporting targets from a project build tree. For
example, the code
add_executable (generator generator.c)
export (TARGETS generator FILE myproj-exports.cmake)
will create a file in the project build tree called myproj-exports. cmake that contains the
required code to import the target. This file may be loaded by an outside project that is aware
of the project build tree in order to use the executable to generate a source file. An example
application of this feature is for building a generator executable on a host platform when cross
compiling. The project containing the generator executable may be built on the host platform
and then the project that is being cross-compiled for another platform may load it.
82
Writing CMakeLists Files
4.12 Advanced Commands
There are a few commands that can be very useful but are not typically used in writing
CMakeLists files. This section will discuss a few of these commands and when they are
useful. First consider the add_dependencies command which creates a dependency
between two targets. CMake automatically creates dependencies between targets when it can
determine them. For example, CMake will automatically create a dependency for an
executable target that depends on a library target. The add_dependencies command is
typically used to specify inter target dependencies between targets where at least one of the
targets is a custom target (see section 6.4 for more information on custom targets).
The include_regular_expression command also relates to dependencies. This
command controls the regular expression that is used for tracing source code dependencies.
By default CMake will trace all the dependencies for a source file including system include
files such as stdio.h. If you specify a regular expression with the
include_regular_expression command that regular expression will be used to limit
what include files are processed. For example; if your software project’s include files all
started with the prefix foo (e.g. fooMain.c fooStruct.h etc) then you could specify a
regular expression of to limit the dependency checking to just the files of your
project.
Occasionally you might want to get a listing of all the source files that another source file
depends on. This is useful when you have a program that uses pieces of a large library but you
are not sure what pieces it is using. The output required files command will take a
source file and produce a list of all the other source files it depends on. You could then use
this list to produce a reduced version of the library that only contains the necessary files for
your program.
Some tools such as Rational Purify on the Sun platform are run by inserting an extra
command before the final link step. So, instead of
CC foo.o -o foo
The link step would be
purify CC foo.o -o foo
It is possible to do this with CMake. To run an extra program in front of the link line change
the rule variables cmake_cxx_link_executable, and cmake_c_link_executable. Rule
variables are described in chapter 11. The values for these variables are contained in the file
Modules/CMakeDef aultMakeRuleVariables . cmake, and they are sometimes redefined
Advanced Commands
83
in Modules/Platform/*. cmake. Make sure it is set after the PROJECT command in the
CMakeLists file. Here is a small example of using purify to link a program called foo:
project (foo)
set (CMAKE_CXX_LINK_EXECUTABLE
"purify ${CMAKE_CXX_LINK_EXECUTABLE}")
add executable (foo foo.cxx)
Of course, for a generic CMakeLists file you should have some if checks for the correct
platform. This will only work for the Makefile generators because the rule variables are not
used by the IDE generators. Another option would be to use $(PURIFY) instead of plain
purify. This would pass through CMake into the Makefile and be a make variable. The
variable could be defined on the command line like this: make PURIFY=purify. If not
specified then it would just use the regular rule for linking a C++ executable as PURIFY
would be expanded by make to nothing.
Chapter 5
System Inspection
This chapter will describe how you can use CMake to inspect the environment of the system
on which the software is being built. This is a critical factor in creating cross-platform
applications or libraries. It covers how to find and use system and user installed header files
and libraries. It also covers some of the more advanced features of CMake including the
try_compile and try_run commands. These commands are extremely powerful tools for
determining the capabilities of the system and compiler that is hosting your software. This
chapter also describes how to generate configured files and how to cross compile with
CMake. Finally, the steps required to enable a project for the find_package command are
covered, explaining how to create a <Package>Conf ig. cmake file and other required files.
5.1 Using Header Files and Libraries
Many C and C++ programs depend on external libraries. However, when it comes to the
practical aspects of compiling and linking a project, taking advantage of existing libraries can
be difficult for both developers and users. Problems usually show up as soon as the software
is built on a system other than that on which it was developed. Assumptions regarding where
libraries and header files are located become obvious when they are not installed in the same
place on the new computer and the build system is unable to find them. CMake has many
features to aid developers in the integration of external software libraries into a project.
The CMake commands that are most relevant to this type of integration are the find_file,
f ind_library, find_path, f ind_program, and find_package commands. For most C
and C++ libraries, a combination of find_library and find_path will be enough to
compile and link with an installed library. find_library can be used to locate, or allow a
86
System Inspection
user to locate a library, and find path can be used to find the path to a representative
include file from the project. For example, if you wanted to link to the tiff library, you could
use the following commands in your CMakeLists.txt file:
# find libtiff, looking in some standard places
find_library (TIFF_LIBRARY
„ NAMES tiff tiff2
PATHS /usr/local/lib /usr/lib
)
# find tiff.h looking in some standard places
find_path (TIFF_INCLUDES tiff.h
/usr/local/include
/usr/include
)
include_directories (${TIFF_INCLUDES})
add_executable (mytiff mytiff.c )
target_link_libraries (myprogram ${TIFF_LIBRARY})
The first command used is f ind library which in this case will look for a library with the
name tiff or tiff2. The find_library command only requires the library’s base name
without any platform specific prefixes or suffixes, such as lib and .dll. The appropriate
prefixes and suffixes for the system running CMake will be added to the library name
automatically when CMake attempts to find it. All the find * commands will look in the
path environment variable. In addition, the commands allow the specification of additional
search paths as arguments listed after the paths marker argument. As well as supporting
standard paths, windows registry entries and environment variables can be used to construct
search paths. The syntax for registry entries is the following:
[HKEY_CURRENT_USER\\Software\\Kitware\\Path;Buildl]
Because software can be installed in many different places, it is impossible for CMake to find
the library every time, but most standard installations should be covered. The find *
commands automatically create a cache variable so that users can override or specify the
location from the CMake GUI. This way if CMake is unable to locate the files it is looking for
users will still have an opportunity to specify them. If CMake does not find a file, the value is
set to var-notfound. This value tells CMake that it should continue looking each time
CMake’s configure step is run. Note that in if statements, values of var-notfound will
evaluate as false.
System Properties
87
The next command used is find path. This is a general purpose command that, in this
example, is used to locate a header file from the library. Header files and libraries are often
installed in different locations, and both locations are required to compile and link programs
that use them, find path is similar to f ind library, although it only supports one name.
It supports a list of search paths.
The next part of the CMakeLists file uses the variables created by the find* commands.
The variables can be used without checking for valid values as CMake will print an error
message notifying the user if any of the required variables have not been set. The user can
then set the cache values and reconfigure until the message goes away. Optionally, a
CMakeLists file could use the if command to use alternative libraries or options to build the
project without the library if it cannot be found.
From the above example you should be able to see how using the find* commands can help
your software to compile on a wide variety of systems. It is worth noting that the find *
commands search for a match starting with the first argument and first path. So when listing
paths and library names you should list your preferred paths and names first. If there are
multiple versions of a library, and you would prefer tiff over tifF2, make sure you list them in
that order.
5.2 System Properties
Although it is a common practice in C and C++ code to add platform-specific code inside
preprocessor ifdef directives, for maximum portability this should be avoided. Software
should not be tuned to specific platforms with ifdefs, but rather to a canonical system
consisting of a set of features. Coding to specific systems makes the software less portable,
because systems and the features they support change with time, and even from system to
system. A feature that may not have worked on a platform in the past may be a required
feature for the platform in the future. The following code fragments illustrate the difference
between coding to a canonical system and a specific system:
// coding to a feature
#ifdef HAS_FOOBAR_CALL
foobar ();
#else
myfoobar ();
#endif
// coding to specific platforms
#if defined(SUN) && defined(HPUX) && !defined(GNUC)
foobar();
#else
myfoobar ();
88
System Inspection
#endif
The problem with the second approach is that the code will have to be modified for each new
platform on which the software is compiled. For example, a future version of SUN may no
longer have the foobar call. Using the has_foobar_call approach, the software will work
as long as has_foobar_call is defined correctly, and this is where CMake can help. CMake
can be used to define has_foobar_call correctly and automatically by making use of the
try_compile and try_run commands. These commands can be used to compile and run
small test programs during the CMake configure step. The test programs will be sent to the
compiler that will be used to build the project, and if errors occur the feature can be disabled.
These commands require that you write a small C or C++ program to test the feature. For
example, to test if the foobar call is provided on the system, try compiling a simple program
that uses foobar. First write the simple test program (testNeedFoobar.c in this example) and
then add the CMake calls to the CMakeLists file to try compiling that code. If the compilation
works then has_foobar_call will be set to true.
testNeedFoobar.c
#include <foobar.h>
main ()
{
foobar();
}
testNeedFoobar.cmake
t ry_comp i1e (HAS_FOOBAR_CALL
${CMAKE_BINARY_DIR}
${PROJECT_SOURCE_DIR}/testNeedFoobar.c
Now that has_foobar_call is set correctly in CMake you can use it in your source code
through either the add_definitions command or by configuring a header file. We
recommend configuring a header file as that file can be used by other projects that depend on
your library. This is discussed further in section 5.6.
Sometimes, just compiling a test program is not enough. In some cases, you may actually
want to compile and run a program to get its output. A good example of this is testing the byte
order of a machine. The following example shows how you can write a small program that
CMake will compile and then run to determine the byte order of a machine.
System Properties
89
TestByteOrder.c
int main () {
/* Are we most significant byte first or last */
union
{
long 1;
char c[sizeof (long)];
} u;
u.l = 1;
exit (u.c[sizeof (long) - 1] == 1);
TestByteOrder.cmake
t r y_ru n (RUN_RES ULT_VAR
COMPILE_RE SULT_VAR
${CMAKE_BINARY_DIR}
${PROJECT_SOURCE_DIR}/Modules/TestByteOrder.c
OUTPUT VARIABLE OUTPUT
The return result of the run will go into run result var and the result of the compile will
go into compile result var, and any output from the run will go into output. You can
use these variables to report debug information to the users of your project.
For small test programs the file command with the write option can be used to create the
source file from the CMakeLists file. The following example tests the C compiler to verify
that it can be run.
file (WRITE
${CMAKE_BINARY_DIR}/CMakeTmp/testCCompiler.c
"int main(){return 0;}"
)
try_compile (CMAKE__C_COMPILER_WORKS
${CMAKE_BINARY_DIR}
${CMAKE_BINARY_DIR}/CMakeTmp/testCCompiler.c
OUTPUT VARIABLE OUTPUT
90
System Inspection
There are several predefined try-run and try-compile macros in the CMake/Modules
directory, some of which are listed below. These macros allow some common checks to be
performed without having to create a source file for each test. For detailed documentation or
to see how these macros work look at the implementation files for them in the
CMake/Modules directory of your CMake installation. Many of these macros will look at the
current value of the cmake_required_flags and cmake_required_libraries variables
to add additional compile flags or link libraries to the test.
CheckFunctionExists.cmake
Checks to see if a C function is on a system. This macro takes two arguments, the
first is the name of the function to check for. The second is the variable to store the
result into. This macro does use cmake_required_flags and
cmake_requ ired_l ibRARI es if they are set.
CheckIncludeFile.cmake:
Checks for an include file on a system. This macro takes two arguments. The first is
the include file to look for and the second is the variable to store the result into.
Additional CFlags can be passed in as a third argument or by setting
CMAKE_REQUIRED_FLAGS.
CheckIncludeFiIeCXX.cmake
Check for an include file in a C++ program. This macro takes two arguments. The
first is the include file to look for and the second is the variable to store the result
into. Additional CFlags can be passed in as a third argument.
CheckIncludeFiles.cmake
Check for a group of include files. This macro takes two arguments. The first is the
include files to look for and the second is the variable to store the result into. This
macro does use cmake required flags if it is set. This macro is useful when a
header file you are interested in checking for is dependent on including another
header file first.
CheckLibraryExists.cmake
Check to see if a library exists. This macro takes four arguments; the first is the name
of the library to check for. The second is the name of a function that should be in that
library. The third argument is the location of where the library should be found. The
fourth argument is a variable to store the result into. This macro uses
CMAKE_REQUIRED_FLAGS and CMAKE_REQUI RE D_L IBRARIE S if they are Set.
CheckSymbolExists.cmake
Check to see if a symbol is defined in a header file. This macro takes three
arguments. The first argument is the symbol to look for. The second argument is a
list of header files to try including. The third argument is where the result is stored.
System Properties
91
This macro uses cmake_required_flags and cmake_required_libraries if
they are set.
CheckTypeSize.cmake
Determines the size in bytes of a variable type. This macro takes two arguments. The
first argument is the type to evaluate. The second argument is where the result is
stored. Both cmake_required_flags and cmake_required_libraries are
used if they are set.
CheckVariableExists.cmake
Checks to see if a global variable exists. This macro takes two arguments. The first
argument is the variable to look for. The second argument is the variable to store the
result in. This macro will prototype the named variable and then try to use it. If the
test program compiles then the variable exists. This will only work for C variables.
This macro uses cmake_required_flags and cmake_required_libraries if
they are set.
Consider the following example that shows a variety of these modules being used to compute
properties of the platform. At the beginning of the example four modules are loaded from
CMake. The remainder of the example uses the macros defined in those modules to test for
header files, libraries, symbols, and type sizes respectively.
# Include all the necessary files for macros
include (ChecklncludeFiles)
include (CheckLibraryExists)
include (CheckSymbolExists)
include (CheckTypeSize)
# Check for header files
set (INCLUDES "")
CHECK_INCLUDE_FILES ("${INCLUDES};winsock.h" HAVE_WINSOCK_H)
i f (HAVE_WINSOCK_H)
set (INCLUDES ${INCLUDES} winsock.h)
endif (HAVE_WINSOCK_H)
CHECK_INCLUDE_FILES (M${INCLUDES};io.h" HAVE_IO_H)
if (HAVE_IO_H)
set (INCLUDES ${INCLUDES} io.h)
endif (HAVE_IO_H)
# Check for all needed libraries
set (LIBS "")
CHECK_LIBRARY_EXISTS ("dl;${LIBS}" diopen HAVE_LIBDL)
92
System Inspection
if (HAVE_LIBDL)
set (LIBS ${LIBS} dl)
endif (HAVE_LIBDL)
CHECK_LIBRARY_EXISTS ( "ucb;${LIBS}" gethostname " " HAVE_LIBUCB)
if (HAVE_LIBUCB)
set (LIBS ${LIBS} ucb)
endif (HAVE_LIBUCB)
# Add the libraries we found to the libraries to use when
# looking for symbols with the CHECK_SYMBOL_EXISTS macro
set (CMAKE_REQUIRED_LIBRARIES ${LIBS})
# Check for some functions that are used
CHECK_SYMBOL_EXISTS (socket "${INCLUDES}" HAVE_SOCKET)
CHECK_SYMBOL_EXISTS (poll "${INCLUDES}" HAVE_POLL)
# Various type sizes
CHECK_TYPE_SIZE (int SIZEOF_INT)
CHECK TYPE SIZE (size t SIZEOF SIZE T)
For more advanced try_compile and try_run operations, it may be desirable to pass flags
to the compiler, or to CMake. Both commands support the optional arguments cmake_flags
and compile_definitions. cmake_flags can be used to pass -dvar: type=value flags
to CMake. The value of compile_definitions is passed directly to the compiler command
line.
5.3 Finding Packages
Many software projects provide tools and libraries meant as building blocks for other projects
and applications. CMake projects that depend on outside packages locate their dependencies
using the f ind_package command. A typical invocation is of the form
find_package(<Package> [version])
where “<Package>” is the name of the package to be found, and “ [version] ” is an optional
version request (of the form major [ .minor. [patch] ]). See Appendix C - Listfile
Commands for the full command documentation. The command’s notion of a package is
distinct from that of CPack, which is meant for creating source and binary distributions and
installers.
Built-in Find Modules
93
The command operates in two modes: Module mode and Con fig mode. In Module mode the
command searches for a find-module: a file named "Find<Package>. cmake". It looks
first in the cmake_module_path and then in the CMake installation. If a find-module is
found, it is loaded to search for individual components of the package. Find-modules contain
package-specific knowledge of the libraries and other files they expect to find, and internally
use commands like f ind_library to locate them. CMake provides find-modules for many
common packages; see Appendix D - Selected Modules. Find-modules are tedious and
difficult to write and maintain because they need very specific knowledge of every version of
the package to be found.
The Config mode of find_package provides a powerful alternative through cooperation
with the package to be found. It enters this mode after failing to locate a find-module or when
explicitly requested by the caller. In Config mode the command searches for a package
configuration file: a file named “<Package>Config. cmake” or “<package>-
conf ig. cmake” that is provided by the package to be found. Given the name of a package,
the find_package command knows how to search deep inside installation prefixes for
locations like
<prefix>/lib/<package>/<package>-config.cmake
(see documentation of find_package in Appendix C - Listfile Commands for a complete
list of locations). CMake creates a cache entry called “< Package>_dir” to store the location
found or allow the user to set it. Since a package configuration file comes with an installation
of its package, it knows exactly where to find everything provided by the installation. Once
the f ind_package command locates the file it provides the locations of package components
without any additional searching.
The “ [version] ” option asks find_package to locate a particular version of the package.
In Module mode, the command passes the request on to the find-module. In Config mode the
command looks next to each candidate package configuration file for a package version
file: a file named “<Package>ConfigVersion. cmake” or “<package>-config-
<version>. cmake”. The version file is loaded to test whether the package version is an
acceptable match for the version requested (see documentation of find_package for the
version file API specification). If the version file claims compatibility the configuration file is
accepted, otherwise it is ignored. This approach allows each project to define its own rules for
version compatibility.
5.4 Built-in Find Modules
CMake has many predefined modules that can be found in the Modules subdirectory of
CMake. The modules can find many common software packages. See Appendix D - Selected
Modules for a detailed list.
94
System Inspection
Each Find<xx>. cmake module defines a set of variables that will allow a project to use the
software package once it is found. Those variables all start with the name of the software
being found <xx>. With CMake we have tried to establish a convention for naming these
variables, but you should read the comments at the top of the module for a more definitive
answer. The following variables are used by convention when needed:
<XX>_INCLUDE_DIRS
Where to find the package’s header files, typically <XX>.h, etc.
<XX>_LIBRARIES
The libraries to link against to use <XX>. These include full paths.
<XX>_DEFINITIONS
Preprocessor definitions to use when compiling code that uses <XX>.
<XX>_EXECUTABLE
Where to find the <XX> tool that is part of the package.
<XX>_<Y Y >_EXECUT ABLE
Where to find the <YY> tool that comes with <XX>.
<XX>_ROOT_DIR
Where to find the base directory of the installation of <XX>. This is useful for large
packages where you want to reference many files relative to a common base (or root)
directory.
<XX>_VERSION_<Y Y >
Version <YY> of the package was found if true. Authors of find modules should
make sure at most one of these is ever true. For example TCL VERSION 84
<XX>_<Y Y >_FOUND
If false, then the optional <YY> part of <XX> package is not available.
<XX>_FOUND
Set to false, or undefined, if we haven't found or don't want to use <XX>.
Not all of the variables are present in each of the Findxx.cmake files. However, the
<xx>_found should exist under most circumstances. If <xx> is a library, then
<xx>_libraries should also be defined, and <xx>_include_dir should usually be
defined.
How to Pass Parameters to a Compilation?
95
Modules can be included in a project either with the include command or the
find_package command.
find_package(OpenGL)
is equivalent to
include(${CMAKE_ROOT}/Modules/FindOpenGL.cmake)
and
include(FindOpenGL)
If the project converts over to CMake for its build system, then the find package will still
work if the package provides a <XX>Conf ig. cmake file. How to create a CMake package is
described in section 5.7.
5.5 How to Pass Parameters to a Compilation?
Once you have determined all features of the system in which you are interested, it is time to
configure the software based on what has been found. There are two common ways to pass
this information to the compiler: on the compile line, and using a preconfigured header. The
first way is to pass definitions on the compile line. A preprocessor definition can be passed to
the compiler from a CMakeLists file with the add_def initions command. For example, a
common practice in C code is to have the ability to selectively compile in/out debug
statements.
#ifdef DEBUG_BUILD
printf ("the value of v is %d", v);
#endif
A CMake variable could be used to turn on or off debug builds using the option command:
option (DEBUG_BUILD
"Build with extra debug print messages.")
if (DEBUG_BUILD)
add_definitions (-DDEBUG_BUILD)
endif (DEBUG BUILD)
96
System Inspection
Another example would be to tell the compiler the result of the previous has_foobar_call
test that was discussed earlier in this chapter. You could do this with the following:
i f (HAS_FOOBAR_CALL)
add_definitions (-DHAS_FOOBAR_CALL)
endif (HAS FOOBAR_CALL)
If you want to pass preprocessor definitions at a finer level of granularity, you can use the
COMPILE_definitions property that is defined for directories, targets, and source files. For
example, the code
add_library (mylib srcl.c src2.c)
add_executable (myexe mainl.c)
set_property (
DIRECTORY
PROPERTY COMPILE_DEFINITIONS A AV=1
)
set_property (
TARGET mylib
PROPERTY COMPILE_DEFINITIONS B BV=2
)
set_property (
SOURCE srcl.c
PROPERTY COMPILE DEFINITIONS C CV=3
will build the source files with these definitions:
srcl.c: -DA -DAV=1 -DB -DBV=2 -DC -DCV=3
src2.c: -DA -DAV=1 -DB -DBV=2
main2.c: -DA -DAV=1
When the add_definitions command is called with flags like "-DX" the definitions are
extracted and added to the current directory's COMPILE_definitions property. When a new
subdirectory is created with add_subdirectory the current state of the directory-level
property is used to initialize the same property in the subdirectory.
Note in the above example that the set_property command will actually set the property
and replace any existing value. The command provides the append option to add more
definitions without removing existing ones. For example, the code
How to Configure a Header File
97
set_property (
SOURCE srcl.c
APPEND PROPERTY COMPILE DEFINITIONS D DV=4
will add the definitions "-DD -ddv=4" when building srcl.c. Definitions may also be
added on a per-configuration basis using the compile_definitions_<config> property.
For example, the code
set_property (
TARGET mylib
PROPERTY COMPILE_DEFINITIONS_DEBUG MYLIB_DEBUG_MODE
)
will build sources in mylib with -dmylib_debug_mode only when compiling in a Debug
configuration.
The second approach for passing definitions to source code is to configure a header file. For
maximum portability of a toolkit, it is recommended that -D options are not required for the
compiler command line. Instead of command line options, CMake can be used to configure a
header file that applications can include. The header file will include all of the #define
macros needed to build the project. The problem with using compile line definitions can be
seen when building an application that in turn uses a library. If building the library correctly
relies on compile line definitions, then chances are that an application that uses the library
will also require the exact same set of compile line definitions. This puts a large burden on the
application writer to make sure they add the correct flags to match the library. If instead the
library’s build process configures a header file with all of the required definitions, then any
application that uses the library will automatically get the correct definitions when that header
file is included. A definition can often change the size of a structure or class, and if the
macros are not exactly the same during the build process of the library and the application
linking to the library, the application may reference the “wrong part” of a class or struct and
crash unexpectedly.
5.6 How to Configure a Header File
Hopefully we have convinced you that configured header files are the right choice for most
software projects. To configure a file with CMake the conf igure_f ile command is used.
This command requires an input file that is parsed by CMake which then produces an output
file with all variables expanded or replaced. There are three ways to specify a variable in an
input file for configure file.
98
System Inspection
#cmakedefine VARIABLE
If VARIABLE is true, then the result will be:
#define VARIABLE
If VARIABLE is false, then the result will be:
/* #undef VARIABLE */
${VARIABLE}
This is simply replaced by the value of VARIABLE.
@VARIABLE@
This is simply replaced by the value of VARIABLE.
Since the $ {} syntax is commonly used by other languages, there is a way to tell the
conf igure file command to only expand variables using the @var@ syntax. This is done
by passing the @only option to the command. This is useful if you are configuring a script
that may contain $ {var} strings that you want to preserve. This is important because CMake
will replace all occurrences of $ {var} with the empty string if var is not defined in CMake.
The following example configures a .h file for a project that contains preprocessor variables.
The first definition indicates if the foobar call exists in the library, and the next one contains
the path to the build tree.
CMakeLists.txt file
# Configure a file from the source tree
# called projectConfigure.h.in and put
# the resulting configured file in the build
# tree and call it projectConfigure.h
configure_file (
${PROJECT_SOURCE_DIR}/projectConfigure.h.in
${PROJEC T_BINARY_DIR}/projectConfigure.h)
Creating CMake Package Configuration Files
99
projectConfigure.h.in file
/* define a variable to tell the code if the */
/* foobar call is available on this system */
#cmakedefine HAS_FOOBAR_CALL
/* define a variable with the path to the */
/* build directory */
#define PROJECT_BINARY_DIR "${PROJECT_BINARY_DIR}"
It is important to configure files into the binary tree, not the source tree. A single source tree
may be shared by multiple build trees or platforms. By configuring files into the binary tree
the differences between builds or platforms will be kept isolated in the build tree, where it will
not corrupt other builds. This means that you will need to include the directory of the build
tree where you configured the header file into the project’s list of include directories using the
include directories command.
5.7 Creating CMake Package Configuration Files
Projects must provide package configuration files so that outside applications can find them.
Consider a simple project “Gromit” providing an executable to generate source code and a
library against which the generated code must link. The CMakeLists. txt file might start
with:
cmake_minimum_required (VERSION 2.6.3)
project (Gromit C)
set (version 1.0)
# Create library and executable.
add_library (gromit STATIC gromit.c gromit.h)
add_executable (gromit-gen gromit-gen.c)
In order to install Gromit and export its targets for use by outside projects, one adds the code
# Install and export the targets.
install (FILES gromit.h DESTINATION include/gromit-${version})
install (TARGETS gromit gromit-gen
DESTINATION lib/gromit-${version}
EXPORT gromit-targets)
install (EXPORT gromit-targets
DESTINATION lib/gromit-${version})
100
System Inspection
as described in Section 0. Finally, Gromit must provide a package configuration file in its
installation tree so that outside projects can locate it with f ind package:
# Create and install package configuration and version files,
configure_file (
${Gromit_SOURCE_DIR}/pkg/gromit-config.cmake.in
k ${Gromit_BINARY_DIR}/pkg/gromit-config.cmake 0ONLY)
configure_file (
${Gromit_SOURCE_DIR}/gromit-config-version.cmake.in
${Gromit_BINARY_DIR}/gromit-config-version.cmake 0ONLY)
install (FILES ${Gromit_BINARY_DIR}/pkg/gromit-config.cmake
${Gromit_BINARY_DIR}/gromit-config-version.cmake
DESTINATION lib/gromit-$(version})
This code configures and installs the package configuration file and a corresponding package
version file. The package configuration input file gromit-conf ig. cmake. in has the code,
# Compute installation prefix relative to this file.
get_filename_component (_dir "${CMAKE_CURRENT_LIST_FILE}" PATH)
get_filename_component (_prefix "$(_dir}/../.." ABSOLUTE)
# Import the targets.
include ("${_prefix}/1ib/gromit-@version@/gromit-targets.cmake")
# Report other information.
set (gromit_INCLUDE_DIRS "$(_prefix}/include/gromit-0version0")
After installation the configured package configuration file gromit-conf ig. cmake knows
the locations of other installed files relative to itself The corresponding package version file
is configured from its input file gromit-conf ig-version. cmake . in which contains code
such as,
set (PACKAGE_VERSION "0version0")
if (NOT "${PACKAGE_FIND_VERSION}" VERSION_GREATER "0version0")
set (PACKAGE_VERSION_COMPATIBLE 1) # compatible with older
if ("${PACKAGE_FIND_VERSION}" VERSION_EQUAL "0version0")
set (PACKAGE_VERSION_EXACT 1) # exact match for this version
endif ()
endif ()
Creating CMake Package Configuration Files
101
An application that uses the Gromit package might create a CMake file that looks like this:
cmake_minimum__required (VERSION 2.6.3)
project (MyProject C)
find_package (gromit 1.0 REQUIRED)
include_directories (${gromit_INCLUDE_DIRS})
# run imported executable
add__custom__command (OUTPUT generated.c
COMMAND gromit-gen generated.c)
add_executable (myexe generated.c)
target_link_libraries (myexe gromit) # link to imported library
The call to find_package locates an installation of Gromit or terminates with an error
message if none can be found (due to required). After the command succeeds, the Gromit
package configuration file gromit-conf ig. cmake has been loaded, so Gromit targets have
been imported and variables like gromit_iNCLUDE_DiRS have been defined.
The above example creates a package configuration file and places it in the install tree.
One may also create a package configuration file in the build tree to allow applications to
use the project without installation. In order to do this, one extends Gromit’s CMake file with
the code:
# Make project useable from build tree.
export (TARGETS gromit gromit-gen FILE gromit-targets.cmake)
configure_file (${Gromit_SOURCE_DIR}/gromit-config.cmake.in
${Gromit_BINARY_DIR}/gromit-config.cmake 0ONLY)
This conf igure_f ile call uses a different input file, gromit-conf ig. cmake. in,
containing
# Import the targets.
include(”0Gromit_BINARY_DIR0/gromit-targets.cmake")
# Report other information.
set(gromit_INCLUDE_DIRS "0Gromit_SOURCE_DIR0")
The package configuration file gromit-conf ig. cmake placed in the build tree provides the
same information to an outside project as that in the install tree, but refers to files in the
source and build trees. It shares an identical package version file gromit-config-
version. cmake with that placed in the install tree.
Chapter 6
Custom Commands and Targets
Frequently, the build process for a software project goes beyond simply compiling libraries
and executables. In many cases additional tasks may be required during or after the build
process. Common examples include: compiling documentation using a documentation
package, generating source files by running another executable, generating files using tools
for which CMake doesn’t have rules (such as lex, and yacc), moving the resulting
executables, post processing the executable, etc. CMake supports these additional tasks using
custom commands and custom targets. This chapter will describe how to use custom
commands and targets to perform complex tasks that CMake does not inherently support.
6.1 Portable Custom Commands
Before going into detail on how to use custom commands, we will discuss how to deal with
some of their portability issues. Custom commands typically involve running programs with
files as inputs or outputs. Even a simple command such as copying a file can be tricky to do in
a cross-platform way. For example, copying a file on UNIX is done with the cp command,
while on windows it is done with the copy command. To make matters worse, frequently the
names of the files will change on different platforms. Executables on Windows end with .exe
while on UNIX they do not. Even between UNIX implementations there are differences such
as what extensions are used for shared libraries; .so, .si, .dylib, etc.
CMake provides two main tools for handling these differences. The first is the -E option
(short for execute) to cmake. When the cmake executable is passed the -E option it acts as a
general purpose cross-platform utility command. The arguments following the -E option
indicate what cmake should do. Some of the options include:
104
Custom Commands and Targets
chdir dir command args
Changes the current directory to dir and then execute the command with the
provided arguments.
copy file destination
Copies a file from one directory or filename to another,
copy if different in-file out-file
copy_if_different first checks to see if the files are different before copying them,
copy if different is critical in many rules since the build process is based on file
modification times. If the copied file is used as the input to another build rule then
c°py_if_different can eliminate unnecessary recompilations.
copy directory source destination
This option copies the source directory including any subdirectories to the
destination directory.
remove filel file2 ...
Removes the listed files from the disk.
echo string
Echos a string to the console. This is useful for providing output during the build
process.
time command args
Runs the command and times its execution.
These options provide a platform independent way to perform a few common tasks. The
cmake executable can be referenced by using the cmake_command variable in your
CMakeLists files as later examples will show.
The second tool CMake provides to address portability issues is a number of variables
describing the characteristics of the platform. While most of these are covered in Appendix A
- Variables, some are particularly useful for custom commands.
EXEEXTENSION
This is the file extension for executables. Typically nothing on UNIX and .exe on
Windows
CMAKECFGINTDIR
Development environments such as Visual Studio and Xcode use subdirectories
based on the build type selected, such as Release or Debug. When performing a
Using add custom command on a Target
105
custom command on a library, executable or object file you will typically need the
full path to the file. cmake_cfg_intdir on UNIX will typically be ". / " while for
Visual Studio it will be set to M$ (intdir) /", which at build time will be replaced
by the selected configuration.
CMAKECURRENTBINARYDIR
This is the full path to the output directory associated with the current CMakeLists
file. This may be different from project_binary_dir which is the full path to the
top of the current project’s binary tree.
CMAKECURRENTSOURCEDIR
This is the full path to the source directory associated with the current CMakeLists
file. This may be different from project_SOURCE_dir which is the full path to the
top of the current project’s source tree.
EXECUTABLEOUTPUTPATH
Some projects specify a directory into which all the executables should be built. This
variable, if defined, holds the full path to that directory.
LIB RAR YO UT PUTP ATH
Some projects specify a directory into which all the libraries should be built. This
variable, if defined, holds the full path to that directory.
There are also a series of variables such as cmake_s hare d_module_pre fix and ...suffix
that describe the current platform’s prefix and suffix for that type of file. These variables are
defined for shared_module, shared_library, and library. Using these variables, you
can typically construct the full path to any CMake generated file that you need to. For
libraries and executable targets you can also use get_target_property with the
location argument to get the full path to the target.
CMake doesn’t limit you to using cmake -E in all your commands. You can use any
command that you like, although you should consider portability issues when doing it. A
common practice is to use f ind_program to find an executable (perl for example), and then
use that executable in your custom commands.
6.2 Using add_custom_command on a Target
Now we will consider the signature for add_custom_command. In Makefile terminology
add_custom_command adds a rule to a Makefile. For those more familiar with Visual
Studio, it adds a custom build step to a file. add_custom_command has two main signatures,
one for adding a custom command to a target and one for adding a custom command to build
a file. When adding a custom command to a target the signature is as follows:
106
Custom Commands and Targets
add_custom_command (
TARGET target
PRE_BUILD | PRE_LINK | POST_BUILD
COMMAND command [ARGS argl arg2 arg3 ...]
[COMMAND command [ARGS argl arg2 arg3 ...] ...]
[COMMENT comment]
The target is the name of a CMake target (executable, library, or custom) to which you want
to add the custom command. There is a choice of when the custom command should be
executed, pre build indicates that the command should be executed before any other
dependencies for the target are built, pre link indicates that the command should be
executed after the dependencies are all built, but before the actual link command.
post build indicates that the custom command should be executed after the target has been
built. The command argument is the command (executable) to run and ARGS provides an
optional list of arguments to the command. Finally the comment argument can be used to
provide a quoted string to be used as output when this custom command is run. This is useful
if you want to provide some feedback or documentation on what is happening during the
build. You can specify as many commands as you want for a custom command. They will be
executed in the order specified.
How to Copy an Executable Once it is Built?
Now let us consider a simple custom command for copying an executable once it has been
built.
# first define the executable target as usual
add_executable (Foo bar.c)
# get where the executable will be located
get_target_property (EXE_LOC Foo LOCATION)
# then add the custom command to copy it
add_custom_command (
TARGET Foo
POST_BUILD
COMMAND ${CMAKE_COMMAND}
ARGS -E copy ${EXE_LOC} /testing_department/files
The first command in this example is the standard command for creating an executable from a
list of source files. In this case an executable named Foo is created from the source file
bar.c. The next command is get_target_property which will set the variable called
Using add custom command to Generate a File
107
EXE_LOC to where the executable will be built. Next is the add_custom_command
invocation. In this case the target is simply Foo and we are adding a post build command. The
command to execute is cmake which has its full path specified in the cmake_command
variable. Its arguments are m-e copy" and the source and destination locations. In this case it
will copy the Foo executable from where it was built into the
/testing_department/ files directory. Note that the TARGET parameter accepts a
CMake target (Foo in this example), but most commands such as cmake -E copy will
require the full path to the executable which can be retrieved using get_target_property.
6.3 Using add_custom_command to Generate a File
The second use for add_custom_command is to add a rule for how to build an output file. In
this case the rule provided will replace any current rules for building that file. The signature is
as follows:
add_custom_command (OUTPUT outputl [output2 ...]
COMMAND command [ARGS [args...]]
[COMMAND command [ARGS argl arg2 arg3 ...] ...]
[MAIN_DEPENDENCY depend]
[DEPENDS [depends...]]
[COMMENT comment]
The output is the file (or files) that will result from running this custom command, the
command and args parameters are the command to execute and the arguments to pass to it.
As with the prior signature you can have as many commands as you wish. The depends are
files or executables on which this custom command depends. If any of these dependencies
change this custom command will re-execute. The main_dependency is an optional
argument that acts as a regular dependency and under Visual Studio it provides a suggestion
for what file to hang this custom command onto. If the main_dependency is not specified
then one will be created automatically by CMake. The main_dependency should not be a
regular .c or .cxx file since the custom command will override the default build rule for the
file. Finally the optional comment is a comment that may be used by some generators to
provide additional information during the build process.
Using an Executable to Build a Source File
Sometimes a software project builds an executable, which is then used for generating source
files that are then used to build other executables or libraries. This may sound like an odd
case, but it occurs quite frequently. One example is the build process for the TIFF library,
which creates an executable that is then run to generate a source file that has system specific
information in it. This file is then used as a source file in building the main TIFF library.
Another example is the Visualization Toolkit that builds an executable called vtkWrapTcl
108
Custom Commands and Targets
that wraps C++ classes into Tel. The executable is built and then used to create more source
files for the build process.
###################################################
# Test using a compiled program to create a file
####################################################
fc # add the executable that will create the file
# build creator executable from creator.cxx
add_executable (creator creator.cxx)
get_target_property (creator EXE_LOC LOCATION)
# add the custom command to produce created.c
add_custom_command (
OUTPUT ${PROJECT_BINARY_DIR}/created.c
DEPENDS creator
COMMAND ${EXE_LOC}
ARGS ${PROJECT_BINARY_DIR}/created.c
# add an executable that uses created.c
add_executable (Foo ${PROJECT_BINARY_DIR}/created.c)
The first part of this example produces the creator executable from the source file
creator.cxx. The custom command then sets up a rule for producing the source file
created.c by running the executable creator. The custom command depends on the
creator target and writes its result into the output tree (project_binary_dir). Finally, an
executable target called Foo is added that is built using the created, c source file. CMake
will create all the required rules in the Makefile (or Visual Studio workspace) such that when
you build the project, first the creator executable will be built, then it will be run to create
created, c, which will then be used to build the Foo executable.
6.4 Adding a Custom Target
In the discussion so far CMake targets have generally referred to executables and libraries.
CMake supports a more general notion of targets, called custom targets, that can be used
whenever you want the notion of a target but the end product will not be a library or
executable. Examples of custom targets include targets to build documentation, run tests, or
update web pages. To add a custom target you use the add_custom_target command with
the following signature:
Adding a Custom Target
109
add_custom_target ( name [ALL]
[command arg arg arg ... ]
[DEPENDS depend depend depend ... ]
)
The name specified will be the name given to the target. You can use that name to specifically
build that target with Makefiles (make name) or Visual Studio (right click on the target and
then select Build). If the optional all argument is specified then this target will be included
in the all_build target and will automatically be built whenever the Makefile or Project is
built. The command and arguments are optional, and if specified will be added to the target as
a post build command. For custom targets that will only execute a command this is all you
will need. More complex custom targets may depend on other files, in these cases the
depends arguments are used to list what files this target depends on. We will consider
examples of both cases. First let us look at a custom target that has no dependencies:
add_custom_target ( FooJAR ALL
${JAR} -cvf "\"$ {PROJECT_BINARY_DIR}/Foo.j ar\""
"\”${PROJECT_SOURCE_DIR}/Java\"M
)
With the above definition, whenever the FooJAR target is built it will run Java’s Archiver
(jar) to create the Foo. jar file from java classes in the $ {PROJECT_SOURCE_DlR} / Java
directory. In essence this type of custom target allows the developer to tie a command to a
target so that it can be conveniently invoked during the build process. Now let us consider a
more complex example that roughly models the generation of PDF files from LaTeX. In this
case the custom target depends on other generated files (mainly the end product .pdf files):
# Add the rule to build the .dvi file from the .tex
# file. This relies on LATEX being set correctly
#
add__custom_command (
OUTPUT ${PROJECT_BINARY_DIR}/docl.dvi
DEPENDS ${PROJECT_SOURCE_DIR}/docl.tex
COMMAND ${LATEX}
ARGS ${PROJECT_SOURCE_DIR}/docl.tex
)
# Add the rule to produce the .pdf file from the .dvi
# file. This relies on DVIPDF being set correctly
#
add_custom_command(
OUTPUT ${PROJEC T_BINARY_DIR}/docl.pdf
110
Custom Commands and Targets
DEPENDS ${PROJECT_BINARY_DIR}/docl.dvi
COMMAND ${DVIPDF}
ARGS ${PROJEC T_BINARY_DIR}/docl.dvi
# finally add the custom target that when invoked
# will cause the generation of the pdf file
#
add_custom_target ( TDocument ALL
DEPENDS ${PROJECT_BINARY_DIR}/docl.pdf
)
This example makes use of both add_custom_command and add_custom_target. The
two add_custom_command invocations are used to specify the rules for producing a .pdf file
from a .tex file. In this case there are two steps and two custom commands. First a .dvi file is
produced from the .tex file by running LaTeX, then the .dvi file is processed to produce the
desired .pdf file. Finally a custom target is added called TDocument. Its command simply
echoes out what it is doing, while the real work is done by the two custom commands. The
depends argument sets up a dependency between the custom target and the custom
commands. When TDocument is built it will first look to see if all of its dependencies are
built. If any are not built it will invoke the appropriate custom commands to build them. This
example can be shortened by combining the two custom commands into one custom
command, as shown in the following example:
# Add the rule to build the .pdf file from the .tex
# file. This relies on LATEX and DVIPDF being set correctly
#
add_custom_command(
OUTPUT ${PROJECT_BINARY_DIR}/docl.pdf
DEPENDS ${PROJECT_SOURCE_DIR}/docl.tex
COMMAND ${LATEX}
ARGS ${PROJECT_SOURCE_DIR}/docl.tex
COMMAND ${DVIPDF}
ARGS ${PROJEC T_BINARY_DIR}/docl.dvi
)
# finally add the custom target that when invoked
# will cause the generation of the pdf file
#
add_custom_target ( TDocument ALL
DEPENDS ${PROJECT_BINARY_DIR}/docl.pdf
)
Specifying Dependencies and Outputs
111
Now consider the case in which the documentation consists of multiple files. The above
example can be modified to handle many files using a list of inputs and a foreach loop. For
example:
# set the list of documents to process
set (DOCS docl doc2 doc3)
# add the custom commands for each document
foreach (DOC ${DOCS})
add_custom_command (
OUTPUT ${PROJECT_BINARY_DIR}/${DOC}.pdf
DEPENDS ${PROJECT_SOURCE_DIR}/${DOC}.tex
COMMAND ${LATEX}
ARGS ${PROJECT_SOURCE_DIR}/${DOC}.tex
COMMAND ${DVIPDF}
ARGS ${PROJEC T_BINARY_DIR}/${DOC}.dvi
)
# build a list of all the results
set (DOC_RESULTS ${DOC_RESULTS}
${PROJECT_BINARY_DIR}/${DOC}.pdf
)
endforeach (DOC)
# finally add the custom target that when invoked
# will cause the generation of the pdf file
#
add__custom_target ( TDocument ALL
DEPENDS ${DOC_RESULTS}
)
In this example building the custom target TDocument will cause all of the specified .pdf files
to be generated. Adding a new document to the list is simply a matter of adding its filename to
the DOCS variable at the top of the example.
6.5 Specifying Dependencies and Outputs
When using custom commands and custom targets you will often be specifying dependencies.
When you specify a dependency or the output of a custom command you should always
specify the full path. For example, if the command produces f oo. h in the binary tree then its
112
Custom Commands and Targets
output should be something like ${PROJECT_BiNARY_DiR}/foo.h. CMake will try to
determine the correct path for the file if it is not specified, complex projects frequently end up
using files in both the source and build trees, this can eventually lead to errors if the full paths
are not specified.
When specifying a target as a dependency you can leave off the full path and executable
extension, referencing it simply by its name. Consider the specification of the generator target
as an add_custom_command dependency in the example on page 108. CMake recognizes
creator as matching an existing target and properly handles the dependencies.
6.6 When There Isn’t One Rule For One Output
There are a couple of unusual cases that can arise when using custom commands that warrant
further explanation. The first is a case where one command (or executable) can create
multiple outputs, and the second is the case where multiple commands can be used to create a
single output.
A Single Command Producing Multiple Outputs
In CMake a custom command can produce multiple outputs simply by listing multiple outputs
after the OUTPUT keyword. CMake will create the correct rules for your build system so that
no matter which output is required for a target the right rules will be run. If the executable
happens to produce a few outputs, but the build process is only using one of them, then you
can simply ignore the other outputs when creating your custom command. Say that the
executable produces a source file that is used in the build process and also an execution log
that is not used. The custom command should specify the source file as the output and ignore
the fact that a log file is also generated.
Another case of having one command with multiple outputs is the case where the command is
the same but the arguments to it change. This is effectively the same as having a different
command and each case should have its own custom command. An example of this was the
documentation example on page 111, where a custom command was added for each .tex file.
The command is the same but the arguments passed to it change each time.
Having One Output That Can Be Generated By Different Commands
In rare cases you may find that you have more than one command that you can use to generate
an output. Most build systems such as make and Visual Studio do not support this and
likewise CMake does not. There are two common approaches that can be used to resolve this.
If you truly have two different commands that produce the same output, and no other
significant outputs, then you can simply pick one of them and create a custom command for
that one.
When There Isn’t One Rule For One Output
113
In the more complex case there are multiple commands with multiple outputs. For example:
Commandl produces foo.h and bar.h
Command2 produces widget.h and bar.h
There are a few approaches that can be used in this case. In some cases you might just
combine both commands and all three outputs into a single custom command, so that
whenever one output is required all three are built at the same time. You could also create
three custom commands, one for each unique output. The custom command for foo.h would
invoke Commandl while the one for widget .h would invoke Command2. When specifying
the custom command for bar. h you could choose either Commandl or Command2.
Chapter 7
Converting Existing Systems to CMake
For many people the first thing they will do with CMake is to convert an existing project from
using an older build system to use CMake. In many cases this can be a fairly easy process, but
there are a few issues to consider. This section will address those issues and provide some
suggestions for effectively converting a project over to CMake. The first issue to consider
when converting to CMake is the project's directory structure.
7.1 Source Code Directory Structures
Most small projects will have their source code in either the top level directory or in a
directory named src or source. Even if all of the source code is in a subdirectory we highly
recommend creating a CMakeLists file for the top level directory. There are two reasons for
this. First it can be confusing to some people that they must run CMake on the subdirectory of
the project instead of the main directory. Second, you may want to install documentation or
other support files from the other directories. By having a CMakeLists file at the top of the
project you can use the add_subdirectory command to step down into the documentation
directory where its CMakeLists file can install the documentation (you can have a
CMakeLists file for a documentation directory with no targets or source code).
For projects that have source code in multiple directories there are a few options. One option
that many Makefile based projects use is to have a single Makefile at the top level directory
that lists all the source files to compile in their subdirectories. For example:
116
Converting Existing Systems to CMake
SOURCES=\
subdirl/foo.cxx \
subdirl/foo2.cxx \
subdir2/gah.cxx \
subdir2/bar.cxx
This approach works just as well with CMake using a similar syntax:
set (SOURCES
subdirl/foo.cxx
subdir1/foo2.cxx
subdirl/gah.cxx
subdir2/bar.cxx
)
Another option is to have each subdirectory build a library or libraries that can then be linked
into the executables. In that case each subdirectory would define its own list of source files
and add the appropriate targets. A third option is a mixture of the first two. Each subdirectory
can have a CMakeLists file that lists its sources, but the top level CMakeLists file will not use
the add_subdirectory command to step into the subdirectories. Instead the top level
CMakeLists file will use the include command to include each of the subdirectory’s
CMakeLists files. For example, a top level CMakeLists file might include the following code:
# collect the files for subdirl
include (subdirl/CMakeLists.txt)
foreach (FILE ${FILES})
set (subdirlFiles ${subdirlFiles} subdirl/${FILE})
endforeach (FILE)
# collect the files for subdir2
include (subdir2/CMakeLists.txt)
foreach (FILE ${FILES})
set (subdir2Files ${subdir2Files} subdir2/${FILE})
endforeach (FILE)
# add the source files to the executable
add_executable (foo ${subdirlFiles} ${subdir2Files})
While the CMakeLists files in the subdirectories might look like the following:
Build Directories
117
# list the source files
set (FILES
fool.cxx
foo2.cxx
for this directory
The approach you use is entirely up to you. For large projects, having multiple shared libraries
can certainly improve build times when changes are made. For smaller projects the other two
approaches have their advantages. The main suggestion here is to choose a strategy and stick
with it.
7.2 Build Directories
The next issue to consider is where to put the resulting object files, libraries, and executables.
There are a few different approaches commonly used, and some work better with CMake than
others. Probably the most common approach is to produce the binary files in the same
directory as the source files. For some Windows generators such as Visual Studio they are
actually kept in a subdirectory matching the selected configuration, e.g. debug, release, etc.
CMake supports this approach by default. A closely related approach is to put the binary files
into a separate tree that has the same structure as the source tree. For example if the source
tree looked like the following:
f 00/
subdirl
subdir2
the binary tree might look like:
foobin/
subdirl
subdir2
CMake also supports this structure by default. Switching between in-source builds and out-of-
source builds is simply a matter of changing the binary directory in CMake (see How to Run
CMake? on page 10). Note that if you have already done an in-source build and want to
switch to an out of source build, you should start with a fresh copy of the source tree. If you
need to support multiple architectures from one source tree we highly recommend a directory
structure like the following:
118
Converting Existing Systems to CMake
proj ectf00/
foo/
subdirl
subdir2
foo-linux/
subdirl
subdir2
foo-solaris/
subdirl
subdir2
foo-hpux/
subdirl
subdir2
That way each architecture has its own build directory which will not interfere with any other
architecture. Remember that not only are the object files kept in the binary directories but also
any configured files are typically written to the binary tree. Another tree structure found
primarily on UNIX projects is one where the binary files for different architectures are kept in
subdirectories of the source tree, (see below) CMake does not work well with this structure,
so we recommend switching to the separate build tree structure shown above.
foo/
subdirl/
linux
Solaris
hpux
subdir2/
linux
Solaris
hpux
CMake provides two variables for controlling where binary targets are written. They are the
executable_output_path and library_output_path variables. These variables control
where the resulting libraries and executables will be written respectively. Setting these
enables a project to place all the libraries and executables into a single directory. For projects
with many subdirectories this can be a real time saver. A typical implementation is listed
below:
Useful CMake Commands When Converting Projects
119
# Setup output directories.
set (LIBRARY_OUTPUT_PATH
${PROJEC T_BINARY_DIR}/bin
CACHE PATH
"Single directory for all libraries."
)
set ( EXECUTABLE_OUTPUT_PATH
${PROJEC T_BINARY_DIR}/bin
CACHE PATH
"Single directory for all executables."
mark_as_advanced (
LIBRARY_OUTPUT_PATH
EXECUTABLE OUTPUT PATH
The two variables are set to the bin subdirectory of the project's binary tree (in this example
the bin subdirectory could just as easily be named "binaries"). These variables are cached so
that they will impact the entire project. Finally the variables are marked as advanced for two
reasons; first to reduce the number of choices the average user will see when running CMake,
and second to reduce the chances of someone changing them to another value. Setting these
variables is very useful for projects that make use of shared libraries (DLLs) since it collects
all of the shared libraries into one directory. If the executables are placed in the same
directory then they can find the required shared libraries more easily when run on Windows.
One final note on directory structures: with CMake it is perfectly acceptable to have a project
within a project. For example, within the Visualization Toolkit's source tree is a directory that
contains a complete copy of the zlib compression library. In writing the CMakeLists file for
that library we use the project command to create a project named VTKZLIB even though
it is within the VTK source tree and project. This has no real impact on VTK, but it does
allow us to build zlib independent of VTK without having to modify its CMakeLists file.
7.3 Useful CMake Commands When Converting Projects
There are a few CMake commands that can make the job of converting an existing project
easier and faster. The file command with the glob argument allows you to quickly set a
variable containing a list of all the files that match the glob expression. For example:
120
Converting Existing Systems to CMake
# collect up the source files
file (GLOB SRC_FILES *.cxx)
# create the executable
add_executable (foo ${SRC_FILES})
will set the src_files variable to a list of all the ". cxx" files in the current source directory.
Then it will create an executable using those source files. Windows developers should be
aware that glob matches are case sensitive.
Two other useful commands are make_directory and exec_program. By default CMake
will create all the output directories it needs for the object files, libraries, and executables.
With existing projects there may be some part of the build process that creates directories that
CMake would not normally create. In these cases the make_directory command can be
used. As soon as CMake executes that command it will create the directory specified if it does
not already exist. The exec_program command will execute a program when it is
encountered by CMake. This is useful if you want to quickly convert a UNIX autoconf
configured header file to CMake. Instead of doing the full conversion to CMake you could
run configure from an exec_program command to generate the configured header file (on
UNIX only of course).
7.4 Converting UNIX Makefiles
If your project is currently based on standard UNIX Makefiles (not autoconf and Makefile.in
or imake) then their conversion to CMake should be fairly straightforward. Essentially for
every directory in your project that has a Makefile you will create a matching CMakeLists
file. How you handle multiple Makefiles in a directory really depends on their function. If the
additional Makefiles (or Makefile type files) are simply included in the main Makefile then
you can create matching CMake syntax files and include them into your main CMakeLists file
in a similar manner. If the different Makefiles are meant to be invoked on the command line
for different situations then you should consider creating a main CMakeLists file that uses
some logic to choose which one to include based on a CMake option.
Converting the Makefile syntax to CMake is fairly easy. Frequently Makefiles have a list of
object files to compile. These can be converted to CMake variables as follows:
OBJS= \
fool.o \
foo2.o \
foo3 . o
Converting Autoconf Based Projects
121
becomes
set (SOURCES
fool.c
foo2.c
foo3.c
While the object files are typically listed in a Makefile, in CMake the focus is on the source
files. If you used conditional statements in your Makefiles they can be converted over to
CMake if commands. Since CMake handles generating dependencies, most dependencies or
rules to generate dependencies can be eliminated. Where you have rules to build libraries or
executables replace them with add_library or add_executable commands. Some UNIX
build systems (and source code) make heavy use of the system architecture to determine what
files to compile or what flags to use. Typically this information is stored in a Makefile
variable called arch or uname.
The first choice in these cases is to replace the architecture specific code with a more generic
test. For example, instead of switching your handling of byte order based on operating system,
make the decision based on the results of a byte order test such as CheckBigEndian. cmake.
With some software packages, there is too much architecture specific code for such a change
to be reasonable, or you may want to make decisions based on architecture for other reasons.
In those cases you can use the variables defined in the CMakeDetermineSystem module.
They provide fairly detailed information on the operating system and version of the host
computer.
7.5 Converting Autoconf Based Projects
Autoconf based projects primarily consist of three key pieces. The first is the configure.in file
that drives the process. The second is Makefile.in which will become the resulting Makefile
and the third piece is the remaining configured files that result from running configure. In
converting an autoconf based project to CMake you will start with the configure.in and
Makefile.in files.
The Makefile.in file can be converted to CMake syntax as explained in the preceding section
on converting UNIX Makefiles. Once this has been done you need to convert the configure.in
file into CMake syntax. Most functions (macros) in autoconf have corresponding commands
in CMake. A short table of some of the basic conversions is listed below:
AC ARG WITH
use the option command
122
Converting Existing Systems to CMake
ACCHECKHEADER
use the CHECK_INCLUDE_FILE macro from the CheckincludeFile module
ACMSGCHECKING
use the message command with the STATUS argument
ACSUBST
done automatically when using the conf igure_file command
ACCHECKLIB
use the CHECK_LIBRARY_EXISTS macro from the CheckLibraryExists module
ACCONFIGSUBDIRS
use the add_subdirectory command
ACOUTPUT
use the conf igure_file command
ACTRYCOMPILE
use the try compile command
If your configure script performs test compilations using AC TRY COMPILE you can use the
same code for CMake. You can either put it directly into your CMakeLists file if it is short, or
preferably put it into a source code file for your project. We typically put such files into a
CMake subdirectory for large projects that require such testing.
Where you are relying on autoconf to configure files you can use CMake’s conf igure_f ile
command. The basic approach is the same and we typically name input files to be configured
with a . in extension just as autoconf does. This command replaces any variables in the input
file referenced as ${VAR} or 0VAR@ with their values as determined by CMake. If a variable
is not defined, it will be replaced with nothing. Optionally, only variables of the form @var@
will be replaced and $ {var} will be ignored. This is useful for configuring files for languages
that use ${var} as a syntax for evaluating variables. You can also conditionally define
variables using the C pre processor by using #cmakedef ine VAR. If the variable is defined
then conf igure_f ile will convert the #cmakedefine into a # define, if it is not defined it
will become a commented out #undef. For example:
/* what byte order is this system */
#cmakedefine CMAKE_WORDS_BIGENDIAN
/* what size is an INT */
#cmakedefine SIZEOF INT 0SIZEOF INT@
Converting Windows Based Workspaces
123
7.6 Converting Windows Based Workspaces
To convert a Visual Studio workspace (or solution for Visual Studio .Net) to CMake involves
a few steps. First you will need to create a CMakeLists file at the top of your source code
directory. This file should start with a project command that defines the name of the
project. This will become the name of the resulting workspace (or solution for Visual Studio
.Net). Next you need to add all of your source files into CMake variables. For large projects
that have multiple directories you can create a CMakeLists file in each directory as described
previously in the section on source directory structures (page 115). You will then add your
libraries and executables using add_library and add_executable. By default
add_executable assumes that your executable is a console application. Adding the WIN32
argument to add_executable indicates that it is a Windows application (using WinMain
instead of main).
There are a few nice features that Visual Studio supports that CMake can take advantage of.
One is support for class browsing. Typically in CMake only source files are added to a target,
not header files. If you add header files to a target, they will show up in the workspace and
then you will be able to browse them as usual. Visual Studio also supports the notion of
groups of files. By default CMake creates groups for source files and header files. Using the
source group command you can create your own groups and assign files to them. If you
have any custom build steps in your workspace, these can be added to your CMakeLists files
using the add_custom_command command. Custom targets (Utility Targets) in Visual
Studio can be added with the add_custom_target command.
Chapter 8
Cross Compiling with CMake
Cross compiling a piece of software means that the software is built on one system but
intended to run on a different system. The system which is used to build the software will be
called the build host, the system for which the software is built will be called the target system
or target platform. The target system usually runs a different operating system (or none at all)
and/or runs on different hardware. A typical use case is software development for embedded
devices like network switches, mobile phones or engine control units. In these cases the target
platform doesn’t have or is not able to run the required software development environment.
Starting with CMake 2.6.0 cross compiling is fully supported by CMake, ranging from cross
compiling from Linux to Windows, cross compiling for supercomputers through to cross
compiling for small embedded devices without an operating system (OS).
Cross compiling has several consequences for CMake;
• CMake cannot automatically detect the target platform
• CMake cannot find libraries and headers in the default system directories
• executables built during cross compiling cannot be executed
Cross compiling support doesn't mean that all CMake-based projects can be magically cross
compiled out-of-the-box (some are), but that CMake separates between information about the
build platform and target platform and gives the user mechanisms to solve cross compiling
issues without additional requirements such as running virtual machines, etc.
126
Cross Compiling with CMake
To support cross compiling for a specific software project, CMake must to be told about the
target platform via a so called toolchain file. The CMakeLists.txt may have to be adjusted so
they are aware that the build platform may have different properties to the target platform, and
it has to deal with the cases where a compiled executable tries to execute on the build host.
8.1 Toolchain Files
In order to use CMake for cross compiling, a CMake file that describes the target platform has
to be created, called the "toolchain file". This file tells CMake everything it needs to know
about the target platform. Here is an example that uses the MinGW cross compiler for
Windows under Linux, the contents will be explained line by line afterwards:
# the name of the target operating system
set (CMAKE_SYSTEM_NAME Windows)
# which compilers to use for C and C++
set (CMAKE_C_COMPILER i586-mingw32msvc-gcc )
set (CMAKE_CXX_COMPILER i586-mingw32msvc-g++ )
# where is the target environment located
set (CMAKE_FIND_ROOT_PATH /usr/i586-mingw32msvc
/home/alex/mingw-install )
# adjust the default behavior of the FIND_XXX() commands:
# search programs in the host environment
set (CMAKE_FIND_ROOT_PATH_MODE_PROGRAM NEVER)
# search headers and libraries in the target environment
set (CMAKE_FIND_ROOT_PATH_MODE_LIBRARY ONLY)
set (CMAKE_FIND_ROOT_PATH_MODE_INCLUDE ONLY)
Assuming that this file is saved with the name TC-mingw.cmake in your home directory, you
instruct CMake to use this file by setting the cmake_toolchain_file variable:
~/src$ cd build
~/src/build$ cmake -DCMAKE_TOOLCHAIN_FILE=~/TC-mingw.cmake ..
cmake_toolchain_file has to be specified only on the initial CMake run, after that the
results are reused from the CMake cache. You don’t need to write a separate toolchain file for
every piece of software you want to build. The toolchain files are per target platform, i.e. if
Toolchain Files
127
you are building several software packages for the same target platform, you only have to
write one toolchain file that can be used for all packages. What do the settings in the toolchain
file mean? We will examine them one by one. Since CMake cannot guess the target operating
system or hardware, you have to set the following CMake variables:
CMAKESY STEMN AME
This variable is mandatory; it sets the name of the target system, i.e. to the same
value as cmake system name would have if CMake were run on the target system.
Typical examples are ’’Linux" and "Windows”. It is used for constructing the file
names of the platform files like Linux, cmake or Windows-gcc. cmake. If your
target is an embedded system without an OS then set cmake system name to
"Generic". Presetting cmake system name this way instead of being detected
automatically causes CMake to consider the build a cross compiling build and the
CMake variable cmake_crosscompiling will be set to true.
cmake_crosscompiling is the variable which should be tested in CMake files to
determine whether the current build is a cross compiled build or not.
CM AKE_S Y STEMVERSION
This variable is optional, it sets the version of your target system. CMake does not
currently use cmake_system_version.
CM AKESY STEMPROCESSOR
This variable is optional, it sets the processor or hardware name of the target system.
It is used in CMake for one purpose, load the
${CMAKE_SYSTEM_NAME}-COMPILER__ID-${CMAKE SYSTEM_PROCESSOR}.cmake
file. This file can be used to modify settings like compiler flags for the target. You
should only have to set this variable if you are using a cross compiler where each
target needs special build settings. The value can be chosen freely, so it could be e.g.
1386, or IntelPXA255, or MyControlBoardRev42.
In CMake code the cmake system xxx variables always describe the target platform. The
same is true for the short WIN32, UNIX, apple variables. These variables can be used to test
the properties of the target. If it is necessary to test the build host system, there is a
corresponding set of variables: cmake_host_system, cmake_host_system_name,
CMAKE_HOST_SYSTEM_VERSION, CMAKE_HOST_SYSTEM_PROCESSOR and also the short
forms CMAKE_HOST_WIN32, CMAKE_HOST__UNIX and CMAKE_HOST_APPLE.
Since CMake cannot guess the target system, it cannot guess which compiler it should use.
Setting the following variables defines what compilers to use for the target system.
128
Cross Compiling with CMake
CMAKE_C_COMPILER
This specifies the C compiler executable as either a full path or just the filename. If it
is specified with full path, then this path will be preferred when searching for the
C++ compiler and the other tools (binutils, linker, etc.). If the compiler is a GNU
cross compiler with a prefixed name (e.g. Marm-elf-gccM) CMake will detect this and
automatically find the corresponding C++ compiler (i.e. "arm-elf-c++"). The
compiler can also be set via the CC environment variable. Setting
CMAKE_C_C0MPIler directly in a toolchain file has the advantage that the
information about the target system is completely contained in this file, and it does
not depend on environment variables.
CMAKE_CXX_COMPILER
This specifies the C++ compiler executable as either a full path or just the filename.
It is handled the same way as cmake_c_COMPILER. If the toolchain is a GNU
toolchain, it should suffice to set only cmake_c_compiler, CMake should find the
corresponding C++ compiler automatically. As for cmake_c_COMPILER, also for
C++ the compiler can be set via the CXX environment variable.
Once the system and the compiler are determined by CMake, it will load the corresponding
files in the order described in section 11.2, The Enable Language Process.
Finding External Libraries, Programs and Other Files
Most non-trivial projects make use of external libraries or tools. CMake offers the
f ind_program, find_library, find_file, find_path, and find_package commands
for this purpose. They search the file system in common places for these files and return the
results, f ind_package is a bit different in that it does not actually search itself, but executes
Find<*>.cmake modules, which in turn usually call the find_program, find_library,
f ind_f ile and find_path commands.
When cross compiling these commands become more complicated. For example, when cross
compiling to Windows on a Linux system, getting /usr/lib/libjpeg.so as the result of the
command f ind_package (JPEG) would be useless, since this would be the JPEG library for
the host system and not the target system. In some cases you want to find files that are meant
for the target platform, in other cases you will want to find files for the build host. The
following variables are designed to give you the flexibility to change how the typical find
commands in CMake work, so that you can find both build host and target files as necessary.
The toolchain will come with its own set of libraries and headers for the target platform,
which are usually installed under a common prefix. It is also a good idea to set up a directory
where all the software that is built for the target platform will be installed, so that the software
packages don't get mixed up with the libraries that come with the toolchain.
Toolchain Files
129
The find_program command is usually used to find a program which will be executed
during the build, so this should still search in the host file system, not in the environment of
the target platform, f ind_library is normally used to find a library which is then used for
linking purposes, so this command should only search in the target environment. For
f ind_path and find_f ile it is not so obvious, in many cases they are used to search for
headers, so by default they should only search in the target environment. The following
CMake variables can be set to adjust the behavior of the find commands for cross compiling.
CMAKEFINDROOTPATH
This is a list of the directories that contain the target environment. Each of the
directories listed here will be prepended to each of the search directories of every
find command. Assuming your target environment is installed under
/opt/eldk/ppc_74xx and your installation for that target platform goes to -/install-
eldk-ppc74xx, set cmake_find_root_path to these two directories. Then
f ind_library (JPEG_LIB jpeg) will search in /opt/eldk/ppc_74xx/lib,
/opt/eldk/ppc_74xx/usr/lib, ~/install-eldk-ppc74xx/lib, ~/install-eldk-
ppc74xx/usr/lib, and should result in /opt/eldk/ppc_74xx/usr/lib/libjpeg.so.
By default cmake_find_root_path is empty. If set, first the directories prefixed
with the path given in cmake_find_root_path will be searched, and after that the
unprefixed versions of the same directories will be searched.
By setting this variable you are basically adding a new set of search prefixes to all of
the find commands in CMake, but for some find commands you may not want to
search the target or host directories. You can control how each find command
invocation works by passing in one of the three following options
NO_CMAKE_FIND_ROOT_PATH, ONLY_CMAKE_FIND_ROOT_PATH or
cmake_find_root_path_both when you call it. You can also control how the
find commands work using the following three variables.
CMAKEFINDROOTPATHMODEPROGRAM
This sets the default behavior for the find_program command. It can be set to
never, only or both. The default setting is both. When set to never,
CMAKE_FlND_ROOT_PATH will not be used for f ind_program calls except where it
is enabled explicitly. If set to only, only the search directories with the prefixes
coming from CMAKE_FlND_ROOT_PATH will be used by find_program. The
default is both, which means that first the prefixed directories, and then the
unprefixed directories, will be searched.
In most cases f ind_program is used to search for an executable which will then be
executed, e.g. using execute_process or add_custom_command. So in most
cases an executable from the build host is required, so setting
cmake_find_root_path_mode_program to never is normally preferred.
130
Cross Compiling with CMake
CMAKEFINDROOTPATHMODELIBRARY
This is the same as above, but for the f ind library command. In most cases this
is used to find a library which will then be used for linking, so a library for the target
is required. So in the common case it should be set to only.
CMAKEFINDROOTPATHMODEINCLUDE
This is the same as above and used for both find path and findfile. In most
cases this is used for finding include directories, so the target environment should be
searched. In the common case it should be set to only. If you also need to find files
in the file system of the build host, e.g. some data files that will be processed during
the build. You may need to adjust the behavior for those f ind path or find f ile
calls using the no_cmake_find_root_path, only_cmake_find_root_path and
CMAKE_FIND_ROOT_PATH_BOTH Options.
With a toolchain file set up as described, CMake now knows how to handle the target
platform and the cross compiler. We should now able to build software for the target platform.
For complex projects there are more issues that must to be taken care of.
8.2 System Inspection
Most portable software projects have a set of system inspection tests for determining the
properties of the (target) system. The simplest way to check for a system feature with CMake
is by testing variables. For this purpose CMake provides the variables UNIX, WIN32 and
apple. When cross compiling, these variables apply to the target platform, for testing the
build host platform there are corresponding variables cmake_host_unix,
CMAKE_HOST_WINDOWS and CMAKE_HOST_APPLE.
If this granularity is too coarse, the variables cmake_system_name, cmake_system,
cmake_system_version and cmake_system_processor can be tested, along with their
counterparts cmake_host_system_name, cmake_host_system,
cmake_host_system_version and cmake_host_system_processor, which contain the
same information, but for the build host and not for the target system.
if (CMAKE_SYSTEM MATCHES Windows)
message (STATUS "Target system is Windows")
endif ()
if (CMAKE_HOST_SYSTEM MATCHES Linux)
message (STATUS "Build host runs Linux")
endif ()
System Inspection
131
Using Compile Checks
In CMake there are macros such as check_include_files and check_c_source_runs
that are used to test the properties of the platform. Most of these macros internally use either
the try compile or the try run commands. The try compile command works as
expected when cross compiling, it tries to compile the piece of code with the cross compiling
toolchain, which will give the expected result.
All tests using try run will not work since the created executables cannot normally run on
the build host. In some cases this might be possible, e.g. using virtual machines, emulation
layers like Wine or interfaces to the actual target, CMake does not depend on such
mechanisms. Depending on emulators during the build process would introduce a new set of
potential problems, they may have a different view on the file system, use other line endings,
require special hardware or software, etc.
If try run is invoked when cross compiling, it will first try to compile the software, which
will work the same way as when not cross compiling. If this succeeds, it will check the
variable cmake crosscompiling to determine whether the resulting executable can be
executed or not. If it cannot, it will create two cache variables, which then have to be set by
the user or via the CMake cache. Assume the command looks like this:
t r y__r u n (S HARE D_L IBRAR Y_PATH_T YPE
S HARE D_ LIBRAR Y_PATH_I NFO__COMP ILE D
${PROJECT_BINARY_DIR}/CMakeTmp
${PROJECT_SOURCE_DIR}/CMake/SharedLibraryPathlnfo.cxx
OUTPUT_VARIABLE OUTPUT
ARGS "LDPATH"
In this example the source file SharedLibraryPathlnfo.cxx will be compiled and if that
succeeds, the resulting executable should be executed. The variable
ShareD_LIbrary_pATH_INfo_COMpiled will be set to the result of the build, i.e. TRUE or
false. CMake will create a cache variable shared_library_path_type and preset it to
please_fill_out-failed_to_run. This variable must be set to what the exit code of the
executable would have been if it had been executed on the target. Additionally, CMake will
create a cache variable shared_library_path_type tryrun_output and preset it to
please fill out-notfound. This variable should be set to the output that the executable
prints to stdout and stderr if it were executed on the target. This variable is only created if the
try_run command was used with the run_output_variable or the output_variable
argument. You have to fill in the appropriate values for these variables. To help you with this
CMake tries its best to give you useful information. To accomplish this CMake creates a file
$ {CMAKE_BINARY_DIR} /TryRunRe suits. cmake,that you can see an example of here:
132
Cross Compiling with CMake
# SHARED_LIBRARY_PATH_TYPE
# indicates whether the executable would have been able to run
# on its target platform. If so, set SHARED_LIBRARY_PATH_TYPE
# to the exit code (in many cases 0 for success), otherwise
# enter MFAILED_TO_RUNn.
# SHARED_LIBRARY_PATH_TYPE TRYRUN_OUTPUT
k # contains the text the executable would have printed on
# stdout and stderr. If the executable would not have been
# able to run, set SHARED_LIBRARY_PATH_TYPE TRYRUN_OUTPUT
# empty. Otherwise check if the output is evaluated by the
# calling CMake code. If so, check what the source file would
# have printed when called with the given arguments.
# The SHARED_LIBRARY_PATH_INFO_COMPILED variable holds the build
# result for this TRY_RUN().
#
# Source file: ~/src/SharedLibraryPathInfo.cxx
# Executable : ~/build/cmTryCompileExec-SHARED_LIBRARY_PATH_TYPE
# Run arguments: LDPATH
# Called from: [1] ~/src/CMakeLists.cmake
set (S HARE D_LIBRARY_PATH_T YPE
"0"
CACHE STRING "Result from TRY_RUN" FORCE)
set (S HARE D_LIBRARY_PATH_T YPE TRYRUN_OUT PUT
i? ii
CACHE STRING "Output from TRY_RUN" FORCE)
You can find all of the variables that CMake could not determine, from which CMake file
they were called, the source file, the arguments for the executable and the path to the
executable. CMake will also copy the executables to the build directory, they have the names
cmTryCompileExec-<name of the variable>, e.g. in this case cmTryCompileExec-
SHARED LIBRARY PATH TYPE. You can then try to run this executable manually on the
actual target platform and check the results.
Once you have these results, they have to be put into the CMake cache. This can be done by
using ccmake/cmake-gui/Mmake editcache" and editing the variables directly in the cache. It
is not possible to reuse these changes in another build directory or if CMakeCache.txt is
removed.
The recommended approach is to use the TryRunResults. cmake file created by CMake.
You should copy it to a safe location (i.e. where it will not be removed if the build directory is
deleted), and give it a useful name, e.g. TryRunResults-MyPro ject-eldk-ppc. cmake.
The contents of this file have to be edited so that the set commands set the required variables
Running Executables Built in the Project
133
to the appropriate values for the target system. This file can then be used to preload the
CMake cache by using the -C option of cmake:
src/build/ $ cmake -C ~/TryRunResults-MyProject-eldk-ppc.cmake .
You do not have to use the other CMake options again, they are now in the cache. This way
you can use MyProjectTryRunResults-eldk-ppc. cmake in multiple build trees, and it
could be distributed with your project so that it is easier for other users to cross compile it.
8.3 Running Executables Built in the Project
In some cases it is necessary that during a build an executable is invoked that was built earlier
in the same build, this is usually the case for code generators and similar tools. This does not
work when cross compiling, as the executables are built for the target platform and cannot run
on the build host (without the use of virtual machines, compatibility layers, emulators, etc.).
With CMake these programs are created using add_executable, and executed with
add_custom_command or add_custom_target. The following three options can be used
to support these executables with CMake. The old version of the CMake code could look
something like this:
add_executable (mygen gen.c)
get_target_property (mygenLocation mygen LOCATION)
add_custom_command (
OUTPUT "${CMAKE_CURRENT_BINARY_DIR}/generated.h"
COMMAND ${mygenLocation}
-o n${CMAKE_CURRENT_BINARY_DIR}/generated.h" )
Now we will show how this file can be modified so that it works when cross compiling. The
basic idea is that the executable is built only when doing a native build for the build host and
then exported as an executable target to a CMake script file. This file is then included when
cross compiling, and the executable target for the executable mygen will be loaded. An
imported target with the same name as the original target will be created. Since CMake 2.6
add_custom_command recognizes target names as executables, so for the command in
add_custom_command simply the target name can be used, it is not necessary to use the
location property to obtain the path of the executable:
if (CMAKE_CROSSCOMPILING)
find_package (MyGen)
endif ()
if (NOT CMAKE_CROSSCOMPILING)
134
Cross Compiling with CMake
add_executable (mygen gen.c)
export (TARGETS mygen FILE
”${CMAKE_BINARY_DIR}/MyGenConfig.cmake")
endif ()
add_custom_command (
OUTPUT M${CMAKE_CURRENT_BINARY_DIR}/generated.h"
k COMMAND mygen -o "${CMAKE_CURRENT_BINARY_DIR}/generated. h" )
With the CMakeLists.txt modified like this the project can be cross compiled. First, a native
build has to be done in order to create the necessary mygen executable. After that the cross
compiling build can begin. The build directory of the native build has to be given to the cross
compiling build as the location of the MyGen package, so that find_package (MyGen) can
find it:
mkdir build-native; cd build-native
cmake ..
make
cd . .
mkdir build-cross; cd build-cross
cmake -DCMAKE_TOOLCHAIN_FILE=MyToolchain.cmake \
-DMyGen_DIR=~/src/build-native/ ..
make
This code works, but CMake versions prior to 2.6 will not be able to process it, as they do not
know the export command and they do not recognize the target name mygen in
add_custom_command. A compatible version that works with CMake 2.4 looks like this:
if (CMAKE_CROS SCOMPILING)
find_package (MyGen)
endif (CMAKE_CROSSCOMPILING)
if (NOT CMAKE_CROSSCOMPILING)
add_executable (mygen gen.c)
if (COMMAND EXPORT)
export (TARGETS mygen FILE
”${CMAKE_BINARY_DIR}/MyGenConfig.cmake")
endif (COMMAND EXPORT)
endif (NOT CMAKE_CROSSCOMPILING)
get_target_property (mygenLocation mygen LOCATION)
Running Executables Built in the Project
135
add_custom_command (
OUTPUT "${CMAKE_CURRENT_BINARY_DIR}/generated.h"
COMMAND ${mygenLocation}
-o ”${CMAKE_CURRENT_BINARY_DIR}/generated.h" )
In this case the target is only exported if the export command exists and the location of the
executable is retrieved using the location target property.
mkdir build-native; cd build-native
cmake ..
make
cd . .
mkdir build-cross; cd build-cross
cmake -DCMAKE_TOOLCHAIN_FILE=MyToolchain.cmake \
-DMyGen_DIR=~/src/build-native/ ..
make
The “old” CMake code could also be using the utility source command:
subdirs (mygen)
utility_source (MYGEN_LOCATION mygen mygen gen.c)
add_custom_command (
OUTPUT "${CMAKE_CURRENT_BINARY_DIR}/generated.h"
COMMAND ${MYGEN_LOCATION}
-o ”${CMAKE_CURRENT_BINARY_DIR}/generated.hM )
In this case the CMake script doesn't have to be changed, but the invocation of CMake is
more complicated, since each executable location has to be specified manually:
mkdir build-native; cd build-native
cmake ..
make
cd . .
mkdir build-cross; cd build-cross
cmake -DCMAKE_TOOLCHAIN_FILE=MyToolchain.cmake
-DMYGEN_LOCATION=~/src/build-native/bin/mygen ..
make
136
Cross Compiling with CMake
8.4 Cross Compiling Hello World
Now let's actually start with the cross compiling. The first step is to install a cross compiling
toolchain. If this is already installed, you can skip the next paragraph.
There are many different approaches and projects that deal with cross compiling for Linux,
ranging from free software projects working on Linux based PDAs to commercial embedded
Linux vendors. Most of these projects come with their own way to build and use the
respective toolchain. Any of these toolchains can be used with CMake, the only requirement
is that it works in the normal file system and does not expect a "sandboxed" environment, like
for example the Scratchbox project.
An easy to use toolchain with a relatively complete target environment is the Embedded
Linux Development Toolkit (http://www.denx.de/wikiyDULG/ELDK). It supports ARM,
PowerPC and MIPS as target platforms. ELDK can be downloaded from
ftp://ftp.sunet.se/pub/Linux/distributions/eldk/. The easiest way is to download the ISOs,
mount them and then install them:
mkdir mount-iso/
sudo mount -tiso9660 mips-2007-01-21.iso mount-iso/ -o loop
cd mount-iso/
./install -d /home/alex/eldk-mips/
Preparing...
########################################### [100%]
1:appWeb-mips_4KCle
########################################### [100%]
Done
Is /opt/eldk-mips/
bin eldk_init etc mips_4KC mips_4KCle usr var version
ELDK (and other toolchains) can be installed anywhere, either in the home directory or
system wide if there are more users working with them. In this example the toolchain will
now be located in /home/alex/eldk-mips/usr/bin/ and the target environment is in
/home/alex/eldk-mips/mips_4KC/.
Now that a cross compiling toolchain is installed, CMake has to be set up to use it. As already
described, this is done by creating a toolchain file for CMake. In this example the toolchain
file looks like this:
# the name of the target operating system
set (CMAKE SYSTEM NAME Linux)
Cross Compiling Hello World
137
# which C and C++ compiler to use
set (CMAKE_C_COMPILER /home/alex/eldk-mips/usr/bin/mips_4KC-gcc)
set (CMAKE_CXX_COMPILE R
/home/alex/eldk-mips/usr/bin/mips_4KC-g++)
# location of the target environment
set (CMAKE_FIND_ROOT_PATH /home/alex/eldk-mips/mips_4KC
/home/alex/eldk-mips-extra-install )
# adjust the default behavior of the FIND_XXX() commands:
# search for headers and libraries in the target environment,
# search for programs in the host environment
set (CMAKE_FIND_ROOT_PATH_MODE_PROGRAM NEVER)
set (CMAKE_FIND_ROOT_PATH_MODE_LIBRARY ONLY)
set (CMAKE_FIND_ROOT_PATH_MODE_INCLUDE ONLY)
The toolchain files can be located anywhere, but it is a good idea to put them in a central
place so that they can be reused in multiple projects. We will save this file as
~/Toolchains/Toolchain-eldk-mips4K.cmake. The variables mentioned above are set
here: cmake_system_name, the C/C++ compilers, cmake_find_root_path to specify
where libraries and headers for the target environment are located. The find modes are also set
up so that libraries and headers are searched for in the target environment only, whereas
programs are searched for in the host environment only. Now we will cross compile the hello
world project from Chapter 2:
project (Hello)
add executable (Hello Hello.c)
Run CMake, this time telling it to use the toolchain file from above:
mkdir Hello-eldk-mips
cd Hello-eldk-mips
cmake -DCMAKE_TOOLCHAIN_FILE=~/Toolchains/Toolchain-eldk-
mips4K.cmake ..
make VERBOSE=l
This should give you an executable that can run on the target platform. Thanks to the
verbose=1 option you should see that the cross compiler is used. Now we will make the
example a bit more sophisticated by adding system inspection and install rules. We will build
and install a shared library named Tools, and then build the Hello application which links to
the Tools library.
138
Cross Compiling with CMake
include (ChecklncludeFiles)
check_include_files (stdio.h HAVE_STDIO_H)
set (VERSION_MAJOR 2)
set (VERSION_MINOR 6)
set (VERSION_PATCH 0)
configure_file (config.h.in ${CMAKE_BINARY_DIR}/config.h)
add_library (Tools SHARED tools.cxx)
set_target_properties (Tools PROPERTIES
VERSION ${VERSION_MAJOR}.${VERSION_MINOR}.${VERSION_PATCH}
SOVERSION ${VERSION_MAJOR})
install (FILES tools.h DESTINATION include)
install (TARGETS Tools DESTINATION lib)
There is no difference to a normal CMakeLists.txt, no special prerequisites are required for
cross compiling. The CMakeLists.txt checks that the header stdio. h is available and sets the
version number for the Tools library. These are configured into config.h, which is then
used in tools . cxx. The version number is also used to set the version number of the Tools
library. The library and headers are installed to ${CMAKE_install_prefix}/lib and
$ { cmake_install_prefix } / include respectively. Running CMake gives this result:
mkdir build-eldk-mips
cd build-eldk-mips
cmake -DCMAKE_TOOLCHAIN_FILE=~/Toolchains/Toolchain-eldk-
mips4K.cmake -DCMAKE_INSTALL_PREFIX=~/eldk-mips-extra-install ..
— The C compiler identification is GNU
-- The CXX compiler identification is GNU
-- Check for working C compiler: /home/alex/eldk-
mips/usr/bin/mips_4KC-gcc
-- Check for working C compiler: /home/alex/eldk-
mips/usr/bin/mips_4KC-gcc — works
-- Check size of void*
-- Check size of void* - done
-- Check for working CXX compiler: /home/alex/eldk-
mips/usr/bin/mips_4KC-g++
-- Check for working CXX compiler: /home/alex/eldk-
mips/usr/bin/mips_4KC-g++ — works
-- Looking for include files HAVE_STDIO_H
-- Looking for include files HAVE_STDIO_H - found
-- Configuring done
Cross Compiling Hello World
139
-- Generating done
-- Build files have been written to:
/home/alex/src/tests/Tools/build-mips
make install
Scanning dependencies of target Tools
[100%] Building CXX object CMakeFiles/Tools.dir/tools.o
Linking CXX shared library libTools.so
[100%] Built target Tools
Install the project...
-- Install configuration:
-- Installing /home/alex/eldk-mips-extra-install/include/tools.h
-- Installing /home/alex/eldk-mips-extra-install/lib/libTools.so
As can be seen in the output above, CMake detected the correct compiler, found the stdio. h
header for the target platform and successfully generated the Makefiles. The make command
was invoked, which then successfully built and installed the library in the specified
installation directory. Now we can build an executable that uses the Tools library and does
some system inspection:
project (HelloTools)
find_package (ZLIB REQUIRED)
find__library (TOOLS_LIBRARY Tools)
find_path (TOOLS_INCLUDE_DIR tools.h)
if (NOT TOOLS_LIBRARY OR NOT TOOLS_INCLUDE_DIR)
message (FATAL_ERROR "Tools library not found")
endif (NOT TOOLS_LIBRARY OR NOT TOOLS_INCLUDE_DIR)
set (CMAKE_INCLUDE_CURRENT_DIR TRUE)
set (CMAKE_INCLUDE_DIRECTORIES_PROJECT_BEFORE TRUE)
include_directories ("${TOOLS_INCLUDE_DIR}"
" $ { ZLIB__INCLUDE_DIR} " )
add_executable (HelloTools main.cpp)
target_link_libraries (HelloTools $ {TOOL S__L I BRARY}
${ZLIB_LIBRARIES})
set_target_properties (HelloTools PROPERTIES
INSTALL_RPATH_USE_LINK_PATH TRUE)
install (TARGETS HelloTools DESTINATION bin)
140
Cross Compiling with CMake
Building works in the same way as with the library, the toolchain file has to be used, and then
it should just work:
cmake -DCMAKE_TOOLCHAIN_FILE=~/Toolchains/Toolchain-eldk-
mips4K.cmake -DCMAKE_INSTALL_PREFIX=~/eldk-mips-extra-install ..
-- The C compiler identification is GNU
k -- The CXX compiler identification is GNU
-- Check for working C compiler: /home/alex/denx-
mips/usr/bin/mips_4KC-gcc
-- Check for working C compiler: /home/alex/denx-
mips/usr/bin/mips_4KC-gcc — works
-- Check size of void*
-- Check size of void* - done
-- Check for working CXX compiler: /home/alex/denx-
mips/usr/bin/mips_4KC-g++
-- Check for working CXX compiler: /home/alex/denx-
mips/usr/bin/mips_4KC-g++ — works
-- Found ZLIB: /home/alex/denx-mips/mips_4KC/usr/lib/libz.so
-- Found Tools library: /home/alex/denx-mips-extra-
install/lib/libTools.so
-- Configuring done
-- Generating done
-- Build files have been written to:
/home/alex/src/tests/HelloTools/build-eldk-mips
make
[100%] Building CXX object CMakeFiles/HelloTools.dir/main.o
Linking CXX executable HelloTools
[100%] Built target HelloTools
Obviously CMake found the correct zlib and also libTools.so, that had been installed in
the previous step.
8.5 Cross Compiling for a Microcontroller
CMake can be used for more than cross compiling to targets with operating systems, it is also
possible to use it in development for deeply embedded devices with small microcontrollers
and no operating system at all. As an example we will use the Small Devices C Compiler
(http://sdcc.sourceforge.net), which runs under Windows, Linux and Mac OS X, that supports
8 and 16 Bit microcontrollers. For driving the build we will use MS NMake under Windows.
As before, the first step is to write a toolchain file so that CMake knows about the target
platform. For sdcc it should look something like this:
Cross Compiling for a Microcontroller
141
set (CMAKE_SYSTEM_NAME Generic)
set (CMAKE_C_COMPILER Mc:/Program Files/SDCC/bin/sdcc.exe")
The system name for targets that do not have an operating system, "Generic", should be used
as the cmake system name. The CMake platform file for "Generic" doesn't set up any
specific features. All that it assumes is that the target platform does not support shared
libraries, and so all properties will depend on the compiler and cmake system processor.
The toolchain file above does not set the FIND-related variables. As long as none of the find
commands is used in the CMake commands, this is fine. In many projects for small
microcontrollers this will be the case. The CMakeLists.txt should look like the following:
project (Blink C)
add_library (blink blink.c)
add_executable (hello main.c)
target_link_libraries (hello blink)
There are no major differences to other CMakeLists.txt files. One important point is that the
language "C" is enabled explicitly using the project command. If this is not done, CMake
will also try to enable support for C++, which will fail as sdcc only has support for C.
Running CMake and building the project should work as usual:
cmake -G"NMake Makefiles"
-DCMAKE TOOLCHAIN FILE=c:/Toolchains/Toolchain-sdcc.cmake .
-- The C compiler identification
-- Check for working C compiler:
files/sdcc/bin/sdcc.exe
-- Check for working C compiler:
files/sdcc/bin/sdcc.exe — works
-- Check size of void*
-- Check size of void* - done
-- Configuring done
-- Generating done
-- Build files have been written
is SDCC
c:/program
c:/program
to: C:/src/tests/blink/build
nmake
Microsoft (R) Program Maintenance Utility Version 7.10.3077
Copyright (C) Microsoft Corporation. All rights reserved.
Scanning dependencies of target blink
[ 50%] Building C object CMakeFiles/blink.dir/blink.rel
142
Cross Compiling with CMake
Linking C static library blink.lib
[ 50%] Built target blink
Scanning dependencies of target hello
[100%] Building C object CMakeFiles/hello.dir/main.rel
Linking C executable hello.ihx
[100%] Built target hello
This was a simple example using NMake with sdcc with the default settings of sdcc. Of
course more sophisticated project layouts are possible. For this kind of project it is also a good
idea to setup an install directory where reusable libraries can be installed, so it is easier to use
them in multiple projects. It is normally necessary to choose the correct target platform for
sdcc, not everybody uses i8051, which is the default for sdcc. The recommended way to do
this is via setting cmake_system_processor.
This will cause CMake to search for and load the platform file Platform/Generic-SDCC-
C-$ {CMAKE_SYSTEM_PROCESSOR}. cmake. As this happens right before loading
Platform/Generic-SDCC-C. cmake, it can be used to setup the compiler and linker flags
for the specific target hardware and project. Therefore, a slightly more complex toolchain file
is required:
get_filename_component (_ownDir
” $ {CMAKE_CURRENT__LIST_FILE } M PATH)
set (CMAKE_MODULE_PATH "${_ownDir}/Modules"
${CMAKE_MODULE_PAT H})
set (CMAKE_SYSTEM_NAME Generic)
set (CMAKE_C_COMPILER "c:/Program Files/SDCC/bin/sdcc.exe")
set (CMAKE_SYSTEM_PROCESSOR MTest_DS80C400_Rev_l")
# here is the target environment located
set (CMAKE_FIND_ROOT_PATH Mc:/Program Files/SDCC"
"c:/ds80c400-install" )
# adjust the default behavior of the FIND_XXX() commands:
# search for headers and libraries in the target environment
# search for programs in the host environment
set (CMAKE_FIND_ROOT_PATH_MODE_PROGRAM NEVER)
set (CMAKE_FIND_ROOT_PATH_MODE_LIBRARY ONLY)
set (CMAKE_FIND_ROOT_PATH_MODE_INCLUDE ONLY)
This toolchain file contains a few new settings, it is also about the most complicated toolchain
file you should ever need, cmake system processor is set to Test_DS80C400_Rev_l,
which is just an identifier for the specific target hardware. This has the effect that CMake will
Cross Compiling an Existing Project
143
try to load Platform/Generic-SDCC-C-Test_DS80C400_Rev_l.cmake. As this file does not
exist in the CMake system module directory, the CMake variable cmake_module_path has
to be adjusted so that this file can be found. If this toolchain file is saved to
c: /Toolchains/sdcc-ds4 00. cmake, the hardware specific file should be saved in
c : /Toolchains/Modules/Plat form/. An example of this is shown below:
set (CMAKE_C_FLAGS_INIT n-mds390 --use-accelerator")
set (CMAKE_EXE_LINKER_FLAGS_INIT "")
This will select the DS80C390 as the target platform and add the -use-accelerator argument
to the default compile flags. In this example the MNMake Makefiles” generator was used. In
the same way e.g. the ”MinGW Makefiles” generator could be used if GNU make from
MinGW, or another Windows version of GNU make, are available. At least version 3.78 is
required, or the "Unix Makefiles” generator under UNIX. Also any Makefile-based IDE-
project generators could be used, e.g. the Eclipse, CodeBlocks, or the KDevelop3 generator.
8.6 Cross Compiling an Existing Project
Existing CMake based projects may need some work so that they can be cross compiled, other
projects may work without any modifications. One such project is FLTK, the Fast
Lightweight Toolkit. We will compile FLTK on a Linux machine using the MinGW cross
compiler for Windows.
The first step is to install the MinGW cross compiler. For some Linux distributions there are
ready-to-use binary packages, for Debian the package name is mingw32. Once this is installed
you need to setup a toolchain file for this as described above. It should look something like
this:
# the name of the target operating system
set (CMAKE_SYSTEM_NAME Windows)
# which compiler to use
set (CMAKE_C_COMPILER i586-mingw32msvc-gcc)
set (CMAKE_CXX_COMPILER i586-mingw32msvc-g++)
# where are the target libraries and headers installed ?
set(CMAKE_FIND_ROOT_PATH /usr/i586-mingw32msvc
/home/alex/mingw-install )
# find_program() should by default NEVER search the target tree
# adjust the default behavior of the FIND_XX() commands:
# search for headers and libraries in the target environment
144
Cross Compiling with CMake
# search for programs in the host environment
set (CMAKE_FIND_ROOT_MODE_PROGRAM NEVER)
set (CMAKE_FIND_ROOT_MODE_LIBRARY ONLY)
set (CMAKE_FIND_ROOT_MODE_INCLUDE ONLY)
Once this is working, run CMake with the appropriate options on FLTK:
mkdir build-mingw
cd build-mingw
cmake -DCMAKE_TOOLCHAIN_FILE=~/Toolchains/Toolchain-
mingw32.cmake -DCMAKE_INSTALL_PREFIX=~/mingw-install ..
-- The C compiler identification is GNU
-- The CXX compiler identification is GNU
-- Check for working C compiler: /usr/bin/i586-mingw32msvc-gcc
-- Check for working C compiler: /usr/bin/i586-mingw32msvc-gcc -
- works
In FLTK the utility source command is used to build the executable fluid, whose
location is put into the CMake variable fluid command. If you intend to run this executable,
you need to preload the cache with the full path to a version of that program that can be run
on the build host.
-- Configuring done
-- Generating done
— Build files have been written to: /home/alex/src/fltk-1.1.x-
r594 0/build-mingw
Below you can see a warning from CMake about the use of the utilitysource command.
To find out more CMake offers the —debug-output argument:
rm -rf *
cmake -DCMAKE_TOOLCHAIN_FILE=~/Toolchains/Toolchain-
mingw32.cmake -DCMAKE_INSTALL_PREFIX=~/mingw-install .. --debug-
output
UTILITY_SOURCE is used in cross compiling mode for
FLUID_COMMAND. If your intention is to run this executable, you
need to preload the cache with the full path to a version of
that program, which runs on this build machine.
Called from: [1] /home/alex/src/fltk-1.1.x-r594O/CMakeLists.txt
Cross Compiling a Complex Project - VTK
145
This tells us that utility_source has been called from /home/alex/src/fltk-1.1.x-
r5940/CMakeLists.txt, then CMake processed some more directories, finally it created
Makefiles in each subdirectory. Examining the top level CMakeLists.txt shows the following:
# Set the fluid executable path
utility_source (FLUID_COMMAND fluid fluid fluid.cxx)
set (FLU I D_COMMAND " $ { FLUI D_COMMAND} " CACHE INTERNAL ,,lf FORCE)
Apparently fluidjCOMMAND is used to hold the path for the executable fluid, which is built
by the project. Fluid is used during the build to generate code, so the cross compiled
executable will not work, instead a native fluid has to be used. In the following example the
variable fluid command is set to the location of a fluid executable for the build host, which
is then used in the cross compiling build to generate code that will be compiled for the target
system:
cmake . -DFLUID__COMMAND=/home/alex/src/download/fltk-1.1.x-
r5940/build-native/bin/fluid
-- Configuring done
-- Generating done
make
Scanning dependencies of target fltk_zlib
[ 0%] Building C object
zlib/CMakeFiles/fltk_ zlib.dir/adler32.obj
[ 0%] Building C object
zlib/CMakeFiles/fltk_zlib.dir/compress.obj
Scanning dependencies of target valuators
[100%] Building CXX object
test/CMakeFiles/valuators.dir/valuators.obj
Linking CXX executable ../bin/valuators.exe
[100%] Built target valuators
That's it, the executables are now in mingw-bin/, and can be run via wine or by copying
them to a Windows system.
8.7 Cross Compiling a Complex Project - VTK
Building a complex project is a multi-step process. Complex in this case means that the
project uses tests that run executables, and that it builds executables which are used later in
the build to generate code (or something similar). One such project is VTK, the Visualization
146
Cross Compiling with CMake
Toolkit. It uses several try run tests and creates several code generators. When running
CMake on the project, every try run command will produce an error message and at the end
there will be a TryRunResults . cmake file in the build directory. You need to go through all
of the entries of this file and fill in the appropriate values. If you are uncertain about the
correct result, you can also try to execute the test binaries on the real target platform, they are
saved in the binary directory.
k VTK contains several code generators, one of which is ProcessShader. These code generators
are added using add_executable and get_target_property (LOCATION) is used to get
the locations of the resulting binaries, which are then used in add_custom_command or
add_custom_target commands. Since the cross compiled executables cannot be executed
during the build, the add_executable calls are surrounded by if (NOT
CMAKE CROSSCOMPILING) commands and the executable targets are imported into the
project using the add_executable command with the IMPORTED option. These import
statements are in the file VTKCompileToolsConfig. cmake, which does not have to be
created manually, but it is created by a native build of VTK.
So in order to cross compile VTK you need
• install a toolchain and create a toolchain file for CMake
• build VTK natively for the build host
• run CMake for the target platform
• complete TryRunResults . cmake
• use the VTKCompileToolsConf ig. cmake file from the native build
• finally build
So first, build a native VTK for the build host using the standard procedure.
cvs -d :pserver:anonymous@public.kitware.com:/cvsroot/VTK co VTK
cd VTK
mkdir build-native; cd build-native
ccmake ..
make
Ensure that all required options are enabled using ccmake, e.g. if you need Python wrapping
for the target platform you must enable Python wrapping in build-native/. Once this build
has finished, there will be a VTKCompileToolsConf ig. cmake file in build-native/. If
this succeeded, we can continue to cross compiling the project, in this example for an IBM
BlueGene supercomputer.
Some Tips and Tricks
147
cd VTK
mkdir build-bgl-gcc
cd build-bgl-gcc
cmake -DCMAKE_TOOLCHAIN_FILE=~/Toolchains/Toolchain-BlueGeneL-
gcc.cmake -DVTKCompileTools_DIR=~/VTK/build-native/ ..
This will finish with an error message for each try_run and a TryRunResults . cmake file,
that you have to complete as described above. You should save the file to a safe location,
otherwise it will be overwritten on the next CMake run.
cp TryRunResults.cmake ../TryRunResults-VTK-BlueGeneL-gcc.cmake
ccmake -C ../TryRunResults-VTK-BlueGeneL-gcc.cmake .
make
On the second run of ccmake all the other arguments can be skipped as they are now in the
cache. It is possible to point CMake to the build directory that contains a CMakeCache.txt, so
CMake will figure out that this is the build directory.
8.8 Some Tips and Tricks
Dealing with try_run tests
In order to make cross compiling your project easier, try to avoid try run tests and use other
methods to test something instead. For examples of how this can be done consider the tests for
endianess in CMake/Modules/TestBigEndian. cmake, and the test for the compiler id
using the source file CMake/Modules/CMakeCCompilerld.c. In both try_compile is
used to compile the source file into an executable, where the desired information is encoded
into a text string. Using the copy_file option of try_compile this executable is copied to
a temporary location and then all strings are extracted from this file using file (strings) .
The test result is obtained using regular expressions to get the information from the string.
If you cannot avoid tryrun tests, try to use just the exit code from the run, not the output of
the process. That way it will not be necessary to set both the exit code and the stdout and
stderr variables for the tryrun test when cross compiling. This allows the
output_variable or the run_output_variable options for try__run to be omitted.
If you have done that, created and completed a correct TryRunResults. cmake file for the
target platform, you might consider adding this file to the sources of the project, so that it can
be reused by others. These files are per-target per-toolchain.
148
Cross Compiling with CMake
Target platform and toolchain issues
If your toolchain is not able to build a simple program without special arguments, like e.g. a
linker script file or a memory layout file, the tests CMake does initially will fail. To make it
work anyway, there is a CMake module, CMakeForceCompiler, that offers the following
macros:
CMAKE_FORCE_SYSTEM (name version processor),
CMAKE_FORCE_C_COMPILER (compiler compiler_id sizeof_void_p)
CMAKE_FORCE_CXX_COMPILER (compiler compiler_id).
These macros can be used in a toolchain file so that the required variables will be preset and
the CMake tests avoided.
RPATH handling under UNIX
For native builds CMake builds executables and libraries by default with RPATH. In the build
tree the RPATH is set so that the executables can be run from the build tree, i.e. the RPATH
points into the build tree. When installing the project, CMake links the executables again, this
time with the RPATH for the install tree, which is empty by default.
When cross compiling you probably want to set up RPATH handling differently, as the
executable cannot run on the build host it makes more sense to build it with the install
RPATH right from the start. There are several CMake variables and target properties for
adjusting RPATH handling.
set (CMAKE_BUILD_WITH_INSTALL_RPATH TRUE)
set (CMAKE_INSTALL_RPATH "<whatever you need>")
With these two settings the targets will be built with the install RPATH instead of the build
RPATH, this avoids the need to link them again when installing. If you don’t need RPATH
support in your project, you don't need to set cmake_install_rpath, it is empty by default.
Setting cmake_install_rpath_use_link_path to true is useful for native builds, since
it automatically collects the RPATH from all libraries against which a targets links. For cross
compiling it should be left at the default setting, which is false, because on the target the
automatically generated RPATH will be wrong in most cases, it will probably have a different
file system layout to the build host.
Chapter 9
Packaging with CPack
CPack is a powerful, easy to use, cross-platform software packaging tool distributed with
CMake since version 2.4.2. It uses the generators concept from CMake to abstract package
generation on specific platforms. It can be used with or without CMake, but it may depend on
some software being installed on the system. Using a simple configuration file, or using a
CMake module, the author of a project can package a complex project into a simple installer.
This chapter will describe how to apply CPack to a CMake project.
9.1 CPack Basics
Users of your software may not always want to, or be able to, build the software in order to
install it. The software maybe closed source, or it may take a long time to compile, or in the
case of an end user application the users may have no interest in building the application. For
these cases, what is needed is a way to build the software on one machine, and then move the
install tree to a different machine. The most basic way to do this is to use the DESTDIR
environment variable to install the software into a temporary location, then to tar or zip up
that directory and move it to the another machine. Another more powerful approach is to use
the CPack tool included in CMake.
CPack is a tool included with CMake, it can be used to create installers and packages for
projects. CPack can create two basic types of packages, source and binary. CPack works in
much the same way as CMake does for building software. It does not aim to replace native
packaging tools, rather it provides a single interface to a variety of tools. Currently CPack
supports the creation of Windows installers using NullSoft installer NSIS, Mac OS X Package
Maker tool, OS X Drag and Drop, OS X XI1 Drag and Drop, Cygwin Setup packages,
150
Packaging with CPack
Debian packages, RPMs, .tar.gz, .sh (self extracting .tar.gz files), .zip compressed files. The
implementation of CPack works in a similar way to CMake. For each type of packaging tool
supported, there is a CPack generator written in C++ that is used to run the native tool and
create the package. For simple tar based packages, CPack includes a library version of tar and
does not require tar to be installed on the system. For many of the other installers, native tools
must be present for CPack to function.
With source packages, CPack makes a copy of the source tree and creates a zip or tar file. For
binary packages, the use of CPack is tied to the install commands working correctly for a
project. When setting up install commands, the first step is to make sure the files go into the
correct directory structure with the correct permissions. The next step is to make sure the
software is relocatable and can run in an installed tree. This may require changing the
software itself, and there are many techniques to do that for different environments that go
beyond the scope of this book. Basically, executables should be able to find data or other files
using relative paths to the location of where it is installed. CPack installs the software into a
temporary directory, and copies the install tree into the format of the native packaging tool.
Once the install commands have been added to a project, enabling CPack in the simplest case
is done by including the CPack.cmake file into the project.
Simple Example
The most basic CPack project would look like this:
project(CoolStuff)
add_executable(coolstuff coolstuff.cxx)
install(TARGETS coolstuff RUNTIME DESTINATION bin)
include(CPack)
In the CoolStuff project, an executable is created and installed into the directory bin. Then the
CPack file is included by the project. At this point project CoolStuff will have CPack enabled.
To run CPack for a CoolStuff, you would first build the project as you would any other
CMake project. CPack adds several targets to the generated project. These targets in
Makefiles are package and package source, and PACKAGE in Visual Studio and Xcode. For
example, to build a source and binary package for CoolStuff using a Makefile generator you
would run the following commands:
mkdir build
cd build
cmake ../Coolstuff
make
make package
make package_source
CPack Basics
151
This would create a source zip file called Cooistuf f-0.1.1-Source . zip, a NSIS installer
called CoolStuf f-0.1. l-win32 . exe, and a binary zip file CoolStuff-0.1.1-
win32. zip. The same thing could be done using the CPack command line.
cd build
cpack -C CPackConfig.cmake
cpack -C CPackSourceConfig.cmake
What Happens When CPack.cmake Is Included?
When the include (CPack) command is executed, the CPack.cmake file is included into
the project. By default this will use the configure_file command to create
CPackConf ig. cmake and CPackSourceConf ig. cmake in the binary tree of the project.
These files contain a series of set commands that set variables for use when CPack is run
during the packaging step. The names of the files that are configured by the CPack.cmake
file can be customized with these two variables; cpack_output_config_file which
defaults to CPackConf ig. cmake and CPACK_SOURCE_OUTPUT_CONFIG_FILE which
defaults to CPackSourceConf ig. cmake.
The source for these files can be found in the Templates/CPackConf ig. cmake . in. This
file contains some comments, and a single variable that is set by CPack.cmake. The file
contains this line of CMake code:
@_CPACK_OTHER_VARIABLES_@
If the project contains the file CPackConf ig. cmake. in in the top level of the source tree,
that file will be used instead of the file in the Templates directory. If the project contains the
file CPackSourceConfig. cmake. in, then that file will be used for the creation of
CPackSourceConfig.cmake.
The configuration files created by CPack.cmake will contain all variables that begin with
“CPACK ” in the current project. This is done using the command:
get_cmake_property(res VARIABLES)
The above command gets all variables defined for the current CMake project. Some CMake
code then looks for all variables starting with “CPACK ”, and each variable found is
configured into the two configuration files as CMake code. For example, if you had a variable
set like this in your CMake project:
set(CPACK PACKAGE NAME "CoolStuff")
152
Packaging with CPack
CPackConfig.cmake and CPackSourceConf ig. cmake would have the same thing in
them:
set(CPACK PACKAGE NAME "CoolStuff")
It is important to keep in mind that CPack is run after CMake on the project. CPack uses the
same parser as CMake, but will not have the same variable values as the CMake project. It
will only have the variables that start with CPACK_, and these variables will be configured
into a configuration file by CMake. This can cause some errors and confusion if the values of
the variables use escape characters. Since they are getting parsed twice by the CMake
language, they will need double the level of escaping. For example, if you had the following
in your CMake project:
set(CPACK PACKAGE NAME "Cool V'StuffV'")
The resulting CPack files would have this:
set(CPACK_FOOBAR "Cool "Stuff"")
That would not be exactly what you would want or might expect. To get around this problem,
there are two solutions. The first is to add an additional level of escapes to the original set
command like this:
(CPACK PACKAGE NAME "Cool \\V'Stuff\\\"")
This would result in the correct set command which would look like this:
set(CPACK FOOBAR "Cool \"Stuff!"")
The second solution to the escaping problem is explained in the next section.
Adding Custom CPack Options
To avoid the escaping problem a project specific CPack configure file can be specified. This
file will be loaded by CPack after CPackConf ig. cmake or CPackSourceConf ig. cmake is
loaded, and cpack generator will be set to the CPack generator being run. Variables set in
this file only require one level of CMake escapes. This file can be configured or not, and
contains regular CMake code. In the example above, you could move cpack_foobar into a
file MyCPackOptions . cmake. in and configure that file into the build tree of the project.
Then set the project configuration file path like this:
CPack Basics
153
configure_file ("${PROJECT_SOURCE_DIR}/MyCPackOptions.cmake.in"
"${PROJECT_BINARY_DIR}/MyCPackOptions.cmake"
0ONLY)
set (CPACK_PROJECT_CONFIG_FILE
"${PROJECT_BINARY_DIR}/CMakeCPackOptions.cmake")
Where MyCPackOptions . cmake . in contained:
(CPACK FOOBAR "Cool \"Stuff\"")
The cpack_project_config_file variable should contain the full path to the CPack
config file for the project, as seen in the above example. This has the added advantage that the
CMake code can contain if statements based on the cpack_generator value, so that
packager specific values can be set for a project. For example, the CMake project sets the icon
for the installer in this file:
set (CPACK_NSIS_MUI_ICON
"0CMake_SOURCE_DIR0/Utilities/ReleaseWCMakeLogo.ico")
Note that the path has forward slashes except for the last part which has an escaped \ as the
path separator. As of the writing of this book, NSIS needed the last part of the path to have a
Windows style slash. If you do not do this, you may get the following error:
File: ".../Release/CMakeLogo. ico" -> no files found.
Usage: File [/nonfatal] [/a] ([/r] [/x filespec [...]]
filespec [...] I /oname=outfile one_file__only)
Options Added by CPack
In addition to creating the two configuration files, CPack.cmake will add some advanced
options to your project. The options added depend on the environment and OS that CMake is
running on, and control the default packages that are created by CPack. These options are of
the form CPACK_<CPack Generator Name>, where generator names available on each
platform can be found in the following table:
154
Packaging with CPack
Windows
Cygwin
Linux/UNIX
Mac OS X
NSIS
CY GWINBINARY
DEB
PACKAGEMAKER
ZIP
SOU RCEC Y G WIN
RPM
OSXX11
SOURCEZIP
STGZ
TBZ2
TZ
SOURCETGZ
SOURCETZ
Drag and Drop
Turning these options on or off affects the packages that are created when running CPack with
no options. If the option is off in the CMakeCache.txt file for the project, you can still build
that package type by specifying the -G option to the CPack command line.
9.2 CPack Source Packages
Source packages in CPack simply copy the entire source tree for a project into a package file,
and no install rules are used as they are in the case of binary packages. Out of source builds
should be used to avoid having extra binary stuff polluting the source package. If you have
files or directories in your source tree that are not wanted in the source package, you can use
the variable cpack_source_ignore_files to exclude things from the package. This
variable contains a list of regular expressions. Any file or directory that matches a regular
expression in that list will be excluded from the sources. The default setting is as follows:
"/CVS/;/\\\\\\\\.svn/;\\\\\\\\.swp$;\\\\\\\\.#;/#n
There are many levels of escapes used in the default value as this variable is parsed by CMake
once and CPack again. It is important to realize that the source tree will not use any install
commands, it will simply copy the entire source tree minus the files it is told to ignore into the
package. To avoid the multiple levels of escape, the file referenced by
CPACK_project_config_file should be used to set this variable. The expression is a
regular expression and not a wild card statement, see section 4.4 for more information about
CMake regular expressions.
9.3 CPack Installer Commands
Since binary packages require CPack to interact with the install rules of the project being
packaged, this section will cover some of the options CPack provides to interact with the
CPack Installer Commands
155
install rules of a project. CPack can work with CMake’s install scripts or with external install
commands.
CPack and CMake install commands
In most CMake projects, using the cmake install rules will be sufficient to create the desired
package. By default CPack will run the install rule for the current project. However, if you
have a more complicated project, you can specify sub-projects and install directories with the
variable cpack_install_cmake_projects. This variable should hold quadruplets of
install directory, install project name, install component, and install subdirectory. For
example, if you had a project with a sub project called MySub that was compiled into a
directory called SubProject, and you wanted to install all of its components, you would have
this:
SET(CPACK_INSTALL_CMAKE_PROJECTS "SubProject;MySub;ALL; / ")
CPack and DESTDIR
By default CPack does not use the destdir option during the installation phase. Instead it
sets the cmake_install_prefix to the full path of the temporary directory being used by
CPack to stage the install package. This can be changed by setting cpack_set_destdir to
on. If the destdir option is on, CPack will use the project’s cache value for
cpack_install_prefix, and set destdir to the temporary staging area. This allows
absolute paths to be installed under the temporary directory. Relative paths are installed into
DESTDIR/ $ {pro j ect' s CMAKE_INSTALL_PREFIX} where DESTDIR is Set to the
temporary staging area.
When doing a non-DESTDiR install for packaging, which is the default, any absolute paths are
installed into absolute directories, and not into the package. Therefore, projects that do not use
the destdir option, must not use any absolute paths in install rules. Conversely, projects that
use absolute paths, must use the desdir option.
One other variable can be used to control the root path into which projects are installed into,
the cpack_packaging_install_prefix. By default many of the generators install into the
directory /usr. That variable can be used to change that to any directory, including just /.
CPack and other installed directories
It is possible to run other install rules if the project is not CMake based. This can be done by
using the variables cpack_install_commands, and cpack_installed_directories.
cpack_install_commands are commands that will be run during the installation phase of
the packaging. cpack__installed_directories should contain pairs of directory and
subdirectory. The subdirectory can be 7 to be installed in the top-level directory of the
installation. The files in each directory will be copied to the corresponding subdirectory of the
CPack staging directory and packaged with the rest of the files.
156
Packaging with CPack
9.4 CPack for Windows Installer NSIS
To create Windows style wizard based self extracting executables, CPack uses NSIS
(NullSoft Scriptable Install System). More information about NSIS can be found at the NSIS
home page: http://nsis.sourceforge.net/ NSIS is a powerful tool with a scripting language used
to create professional Windows installers. To create Windows installers with CPack, you will
.need NSIS installed on your machine.
CPack uses configured template files to control NSIS. There are two files configured by
CPack during the creation of a NSIS installer. Both files are found in the CMake Modules
directory. Modules/NSlS. template. in is the template for the NSIS script, and
Modules/NSlS . InstallOptions . ini . in is the template for the modem user interface or
MUI used by NSIS. The install options file contains the information about the pages used in
the install wizard. This section will describe how to configure CPack to create an NSIS install
wizard.
CPack Variables Used by CMake for NSIS
This section contains screen captures from the CMake NSIS install wizard. For each part of
the installer that can be changed or controlled from CPack, the variables and values used are
given.
The first thing that a user will see of the installer in Windows is the icon for the installer
executable itself. By default the installer will have the Null Soft Installer icon, as seen in
Figure 7 for the 20071023 cmake installer. This icon can be changed by setting the variable
cpack_nsis_mui_icon. The installer for 20071025 in the same figure shows the CMake
icon being used for the installer.
(7; cmake-2.5.2Q071023-win32-x86.exe 6r290 KB Application
A cmake-2.5.2Q071G25-win32-x36.exe 6,324 KB Application
Figure 7 Icon for installer in Windows Explorer
The last thing a users will see of the installer in Windows is the icon for the uninstall
executable, as seen in Figure 8. This option can be set with the cpack_nsis_mui_uniicon
variable. Both the install and uninstall icons must be the same size and format, a valid
windows .ico file usable by Windows Explorer. The icons are set like this:
# set the install/uninstall icon used for the installer itself
set (C PACK_N SIS_MUI_ICON
"${CMake_SOURCE_DIR}/Utilities/Release\\CMakeLogo.ico")
set (C PACK_NSIS_MUI_UN11CON
" $ { CMake_SOURCE_DIR} /Utilities/ReleaseWCMakeLogo. ico" )
CPack for Windows Installer NSIS
157
Figure 8 Uninstall Icon for NSIS installer
On Windows, programs can also be removed using the Add or Remove Programs tool from
the control panel as seen in Figure 9. The icon for this should be embedded in one of the
installed executables. This can be set like this:
# set the add/remove programs icon using an installed executable
SET(CPACK_NSIS_INSTALLED_ICON_NAME Mbin\\cmake-gui.exe”)
I A CMake 2.4 a cross-platform, open-source build system
Size 10.02MB
Figure 9 Add or Remove Programs Entry
Figure 10 First Screen of Install Wizard
When running the installer, the first screen of the wizard will look like Figure 10. In this
screen you can control the name of the project that shows up in two places on the screen. The
name used for the project is controlled by the variable
158
Packaging with CPack
CPACK_PACKAGE_INSTALL_DIRECTORY or CPACK_NSIS_PACKAGE_NAME. In this example,
it was set to “CMake 2.5” like this:
set (CPACK_PACKAGE_INSTALL_DIRECTORY "CMake
${CMake_VERSION_MAJOR}.${CMake_VERSION_MINOR}")
*■ # or this
set(CPACK_NSIS_PACKAGE_NAME "CMake
${CMake_VERSION_MAJOR}.${CMake_VERSION_MINOR}")
Figure II Second Screen of Install Wizard
The second page of the install wizard can be seen in Figure 11. This screen contains the
license agreement and there are several things that can be configured on this page. The banner
bitmap to the left of the “License Agreement” label is controlled by the variable
cpack_package_icon like this:
set (C PACK_PACKAGE_ICON
" $ {CMake_SOURCE_DIR} / Util i ties/Re leas eWCMakel ns tall .bmp")
CPack for Windows Installer NSIS
159
CPACK_package_install_directory is used again on this page everywhere you see the
text “CMake 2.5”. The text of the license agreement is set to the contents of the file specified
in the cpack_resource_file_license variable. CMake does the following:
set (C PACK_RES OURCE_FILE_LICEN SE
"${CMAKE_CURRENT_SOURCE_DIR}/Copyright.txt")
Figure 12 Third page of installer wizard
The third page of the installer can be seen in Figure 12. This page will only show up if
cpack_nsis_modify_path is set to on. If you check the Create “name” Desktop Icon
button, and you put executable names in the variable cpack_create_desktop_links, then
a desktop icon for those executables will be created. For example, to create a desktop icon for
the cmake-gui program of CMake, the following is done:
set (CPACK_CREATE_DESKTOP_LINKS cmake-gui)
Multiple desktop links can be created if your application contains more than one executable.
The link will be created to the Start Menu entry, so CPACKPACKAGEEXECUTABLES,
which is described later in this section, must also contain the application in order for a desktop
link to be created.
160
Packaging with CPack
Figure 13 Fourth page of installer wizard
The fourth page of the installer seen in Figure 13 uses the variable
cpack_package_install_directory to specify the default destination folder in Program
Files. The following cmake code was used to set that default:
set (CPACK_PACKAGE_INSTALL_DIRECTORY "CMake
${CMake_VERSION_MAJOR}.${CMake_VERSION_MINOR}")
The remaining pages of the installer wizard do not use any additional CPack variables, and
are not included in this section. Another important option that can be set by the NSIS CPack
generator is the registry key used. There are several CPack variables that control the default
key used. The key is defined in the NSIS.template.in file as follows:
Software\@CPACK PACKAGE VENDOR®\0CPACK PACKAGE INSTALL REGISTRY KEY®
Where cpack_package_vendor defaults to Humanity, and
cpack_package_install_registry_key defaults to M${CPACK_PACKAGE_NAME}
$ {CPACKPACKAGEVERSION}M
So for CMake 2.5.20071025 the registry key would look like this:
CPack for Windows Installer NSIS
161
HKEY_LOCAL_MACHINE\SOFTWARE\Ki tware\CMake 2.5.20071025
Creating Windows Short Cuts in the Start Menu
There are two variables that control the short cuts that are created in the Windows Start menu
by NSIS. The variables contain lists of pairs, and must have an even number of elements to
work correctly. The first is cpack_package_executables, it should contain the name of
the executable followed by the name of the short cut. For example in the case of CMake, the
executable is called cmake-gui, but the shortcut is named “CMake”. CMake does the
following to create that short cut:
set (CPACK_PACKAGE_EXECUTABLES "cmake-gui" "CMake" )
The second is cpack_nsis_menu_links. This variable contains arbitrary links into the
install tree, or to external web pages. The first of the pair is always the existing source file or
location, and the second is the name that will show up in the Start menu. To add a link to the
help file for cmake-gui and a link to the CMake web page the following add the following:
set (C PACK_NSIS_MENU_LINKS
"doc/cmake-${VERSION_MAJOR}.${VERSION_MINOR}/cmake-gui.html"
"cmake-gui Help" "http://www.cmake.org" "CMake Web Site")
Advanced NSIS CPack Options
In addition to the variables already discussed, CPack provides a few variables that are directly
configured into the NSIS script file. These can be used to add NSIS script fragments to the
final NSIS script used to create the installer. They are as follows:
CPACKNSISEXTRAINSTALLCOMMANDS
Extra commands used during install.
CPACKNSISEXTRAUNINSTALLCOMMANDS
Extra commands used during uninstall.
CPACKNSISCREATEICONSEXTRA
Extra NSIS commands in the icon section of the script.
CPACK_NSIS_DELETE_ICONS_EXTRA
Extra NSIS commands in the delete icons section of the script.
162
Packaging with CPack
When using these variables the NSIS documentation should be referenced, and the author
should look at the NS IS. template . in file for the exact placement of the variables.
Setting File Extension Associations With NSIS
One example of a useful thing to do with the extra install commands is to create associations
from file extensions to the installed application. For example, if you had an application
CoolStuff that could open files with the extension .cool, you would set the following extra
install and uninstall commands:
set (CPACK_NSIS_EXTRA_INSTALL_COMMANDS "
WriteRegStr HKCR '.cool' '' 'CoolFile'
WriteRegStr HKCR 'CoolFile' '' 'Cool Stuff File'
WriteRegStr HKCR 'CoolFileXXshell' '' 'open'
WriteRegStr HKCR 'CoolFileX\DefaultIcon' \\
’' ’$INSTDIR\\bin\\coolstuff.exe, 0'
WriteRegStr HKCR 'CoolFile\\shell\\open\\command' XX
’’ '$INSTDIR\\bin\\coolstuff.exe \"%1\"'
WriteRegStr HKCR \"CoolFile\\shell\\edit' \\
'' 'Edit Cool File'
WriteRegStr HKCR 'CoolFile\\shell\\edit\\command' \\
'' '$INSTDIR\\bin\\coolstuff.exe \"%1\'"
System::Call XX
'Shell32::SHChangeNotify(i 0x8000000, i 0, i 0, i 0)'
")
set (C PACK_N SIS_EXTRA_UNIN S TALL_COMMANDS "
DeleteRegKey HKCR '.cool'
DeleteRegKey HKCR 'CoolFile'
This creates a Windows file association to all files ending in .cool, so that when a user
double clicks on a .cool file coolstuff.exe is run with the full path to the file as an
argument. This also sets up an association for editing the file from the windows right click
menu to the same coo Is tuff. exe program. The Windows explorer icon for the file is set to
the icon found in the coolstuff.exe executable. When it is uninstalled, the registry keys
are removed. Since the double quotes and Windows path separators must be escaped, it is best
put this code into the cpack_project_config_file for the project.
configure_file(
${CoolStuff_SOURCE_DIR}/CoolStuffCPackOptions.cmake.in
${CoolStuff_BINARY_DIR}/CoolStuffCPackOptions.cmake 0ONLY)
CPack for Windows Installer NSIS
163
set (CPACK_PROJECT_CONFIG_FILE
${CoolStuff_BINARY_DIR}/CoolStuffCPackOptions.cmake)
include (CPack)
Installing Microsoft Run Time Libraries
Although not strictly an NSIS CPack command, if you are creating applications on Windows
with the Microsoft compiler, you will most likely want to distribute the run time libraries
from Microsoft alongside your project. In CMake, all you need to do is the following:
include (InstallRequiredSystemLibraries)
This will add the compiler run time libraries as install files that will go into the bin directory
of your application. If you do not want the libraries to go into the bin directory, you would do
this:
set CMAKE_INSTALL_SYSTEM_RUNTIME_LIBS_SKIP TRUE)
include InstallRequiredSystemLibraries)
install PROGRAMS ${CMAKE_INSTALL_SYSTEM_RUNTIME_LIBS}
DESTINATION mydir)
It is important to note that the run time libraries must be right next to the executables of your
package in order for Windows to find them. As of Visual Studio 2005, side by side manifest
files are also required to be installed with your application when distributing the run time
libraries. If you want to package a debug version of your software you will need to set
CMAKE_INsTall_deBUG_LIbrarIE s to ON prior to the include.
CPack Component Install Support
By default, CPack's installers consider all of the files installed by a project as a single,
monolithic unit: either the whole set of files is installed, or none of the files are installed.
However, with many projects it makes sense for the installation to be subdivided into distinct,
user-selectable components: some users may want to install only the comand-line tools for a
project, while other users might want the GUI or the header files.
This section describes how to configure CPack to generate component-based installers that
allow users to select the set of project components that they wish to install. As an example a
simple installer will be created for a library that has three components: a library binary, a
sample application, and a C++ header file. When finished the resulting installers for Windows
and Mac OS X look like the ones in Figure 14.
164
Packaging with CPack
Figure 14 Mac and Windows Component Installers
The simple example we will be working with is as follows, it has a library and an executable.
CPack commands that have already been covered are used.
cmake_minimum_required(VERSION 2.6.0 FATAL_ERROR)
proj ect(MyLib)
add_library(mylib mylib.cpp)
add_executable(mylibapp mylibapp.cpp)
target_link_libraries(mylibapp mylib)
install(TARGETS mylib ARCHIVE DESTINATION lib)
install(TARGETS mylibapp RUNTIME DESTINATION bin)
install(FILES mylib.h DESTINATION include)
# add CPack to project
set(CPACK_PACKAGE_NAME "MyLib")
set (CPACK_PACKAGE_VENDOR ,fCMake . org" )
set (CPACK_PACKAGE_DESCRIPTION_SUMMARY "MyLib - CPack Component
Installation Example")
set(CPACK_PACKAGE_VERSION "1.0.0")
set(CPACK_PACKAGE_VERSION_MAJOR "1")
set(CPACK_PACKAGE_VERSION_MINOR "0")
set(CPACK_PACKAGE_VERSION_PATCH "0")
set(CPACK_PACKAGE_INSTALL_DIRECTORY "CPack Component Example")
# This must always be last!
include(CPack)
CPack for Windows Installer NSIS
165
Specifiing Components
The first step in building a component-based installation is to identify the set of installable
components. In this example, three components will be created: the library binary, the
application, and the header file. This decision is arbitrary and project-specific, but be sure to
identify the components that correspond to units of functionality important to your user, rather
than basing the components on the internal structure of your program.
For each of these components, we need to identify which component each of the installed files
belong in. For each install command in CMakeLists.txt, add an appropriate component
argument stating which component the installed files will be associated with:
install(TARGETS mylib
ARCHIVE
DESTINATION lib
COMPONENT libraries)
install(TARGETS mylibapp
RUNTIME
DESTINATION bin
COMPONENT applications)
install(FILES mylib.h
DESTINATION include
COMPONENT headers)
Note that the component argument to the install command is not new; it has been a part of
CMake's install command to allow installation of only part of a project. If you are using
any of the older installation commands (install_targets, install_files , etc.), you
will need to convert them to install commands in order to use components.
The next step is to notify CPack of the names of all of the components in your project by
calling the cpack_add_component function for each component of the package:
cpack_add_component(applications)
cpack_add_component(libraries)
cpack_add_component(headers)
At this point, you can build a component-based installer with CPack that will allow one to
independently install the applications, libraries, and headers of MyLib. The Windows and
Mac OS X installers will look like the ones shown in Figure 15.
166
Packaging with CPack
Figure 15 Windows and Mac OS X Component Installer First Page
Naming Components
At this point, you may have noted that the names of the actual components in the installer are
not very descriptive: they just say "applications'’, "libraries", or "headers", as specified in the
component names. These names can be improved by using the DISPLAYNAME option in
the cpack_add_component function:
cpack_add_component(applications DISPLAY_NAME
"MyLib Application")
cpack_add_component(libraries DISPLAY_NAME "Libraries")
cpack_add_component(headers DISPLAY_NAME "C++ Headers")
Any macro prefixed with cpack_component_$ {compname }, where ${COMPNAME} is the
uppercase name of a component, is used to set a particular property of that component in the
installer. Here, we set the display name property of each of our components, so that we get
human-readable names. These names will be listed in the selection box rather than the internal
component names "applications", "libraries", "headers".
CPack for Windows Installer NSIS
167
Figure 16 Windows and Mac OS X Installers with named components
Adding Component Descriptions
There are several other properties associated with components, including the ability to make a
component hidden, required, or disabled by default, to provide additional descriptive
information. Of particular note is the description property, which provides some
descriptive text for the component. This descriptive text will show up in a separate
"description" box in the installer, and will be updated either when the user's mouse hovers
over the name of the corresponding component (Windows) or when the user clicks on a
component (Mac OS X). We will add a description for each of our components below:
cpack_add_component(applications DISPLAY_NAME "MyLib
Application"
DESCRIPTION
"An extremely useful application that makes use of MyLib"
)
cpack_add_component(libraries DISPLAY_NAME "Libraries"
DESCRIPTION
"Static libraries used to build programs with MyLib"
)
cpack_add_component(headers DISPLAY_NAME "C++ Headers"
DESCRIPTION "C/C++ header files for use with MyLib"
Generally, descriptions should provide enough information for the user to make a decision on
whether to install the component, but should not themselves be more than a few lines long
(the "Description" box in the installers tends to be small). Figure 17 shows the description
display for both the Windows and Mac OS X installers.
168
Packaging with CPack
Figure 17 Component Installers with descriptions
Component Interdependecies
With most projects, the various components are not completely independent. For example, an
application component may depend on the shared libraries in another component to execute
properly, such that installing the application component without the corresponding shared
libraries would result in an unusable installation. CPack allows you to express the
dependencies between components, so that a component will only be installed if all of the
other components it depends on are also installed.
To illustrate component dependencies, we will place a simple restriction on our component-
based installer. Since we do not provide source code in our installer, the C++ header files we
distribute can only actually be used if the user also installs the library binary to link their
program against. Thus, the "headers" component depends on the availability of the "libraries"
component. We can express this notion by setting the depends property for the headers
component as such:
cpack_add_component(headers DISPLAY_NAME "C++ Headers"
DESCRIPTION
"C/C++ header files for use with MyLib"
DEPENDS libraries
The depends property for a component is actually a list, as such a component can depend on
several other components. By expressing all of the component dependencies in this manner,
you can ensure that users will not be able to select an incomplete set of components at
installation time.
Grouping Components
When the number of components in your project grows large, you may need to provide
additional organization for the list of components. To help with this organization, CPack
CPack for Windows Installer NSIS
169
includes the notion of component groups. A component group is, simply, a way to provide a
name for a group of related components. Within the user interface, a component group has its
own name, and underneath that group are the names of all of the components in that group.
Users will have the option to (de-)select the installation of all components in the group with a
single click, or expand the group to select individual components.
We will expand our example by categorizing its three components, ’’applications”, "libraries",
and ’’headers", into "Runtime" and "Development" groups. We can place a component into a
group by using the GROUP option to the cpack_add_component function as follows:
cpack_add_component(applications
DISPLAY_NAME "MyLib Application"
DESCRIPTION
"An extremely useful application that makes use of MyLib"
GROUP Runtime)
cpack_add_component(libraries
DISPLAY_NAME "Libraries"
DESCRIPTION
"Static libraries used to build programs with MyLib"
GROUP Development)
cpack_add_component(headers
DISPLAY_NAME "C++ Headers"
DESCRIPTION "C/C++ header files for use with MyLib"
GROUP Development
DEPENDS libraries
)
Like components, component groups have various properties that can be customized,
including the display_name and description. For example, the following code adds an
expanded description to the "Development" group:
cpack_add_component_group(Development
EXPANDED
DESCRIPTION
"All of the tools you’ll ever need to develop software")
Once you have customized the component groups to your liking, rebuild the binary installer to
see the new organization: the MyLib application will show up under the new "Runtime"
group, while the MyLib library and C++ header will show up under the new "Development"
group. One can easily turn on/off all of the components within a group using the installer’s
GUI. This can be seen in Figure 18.
170
Packaging with CPack
Figure 18 Component Grouping
Installation Types (NSIS Only)
When a project contains a large number of components, it is common for a Windows installer
to provide pre-selected sets of components based on specific user needs. For example, a user
wanting to develop software against a library will want one set of components, while an end
user might use an entirely different set. CPack supports this notion of pre-selected component
sets via installation types. An installation type is, simply, a set of components. When the user
selects an installation type, exactly that set of components is selected—then the user is
permitted to further customize their installation as desired. Currently this is only supported by
the Windows NSIS generator.
For our simple example, we will create two installation types: a "Full" installation type that
contains all of the components, and a "Developer" installation type that includes only the
libraries and headers. To do this, we use the function cpack_add_install_type to add the
types.
cpack_add_install_type(Full DISPLAY_NAME "Everything")
cpack_add_install_type(Developer)
Next, we set the install_types property of each component to state which installation
types will include that component. This is done with the INSTALL TYPES option to the
cpack_add_component function.
cpack_add_component(libraries DISPLAY_NAME "Libraries"
DESCRIPTION
"Static libraries used to build programs with MyLib"
GROUP Development
INSTALL_TYPES Developer Full)
cpack_add_component(applications
CPack for Windows Installer NSIS
171
DISPLAY_NAME "MyLib Application"
DESCRIPTION
"An extremely useful application that makes use of MyLib"
GROUP Runtime
INSTALL_TYPES Full)
cpack_add_component(headers
DISPLAYJNTAME "C++ Headers"
DESCRIPTION "C/C++ header files for use with MyLib"
GROUP Development
DEPENDS libraries
INSTALL_TYPES Developer Full)
Components can be in any number of installation types. If you rebuild the Windows installer,
the components page will contain a combo box that allows you to select the installation type,
and therefore its corresponding set of components as shown in Figure 19.
Figure 19 NSIS Installation Types
Variables that control CPack components
The functions cpack_add__install_type, cpack_add__component_group, and
cpack_add_component just set CPACK_ variables. Those variables are described in the
following list:
CPACKCOMPONENTSALL
This is a list containing the names of all components that should be installed by
CPack. The presence of this macro indicates that CPack should build a component-
172
Packaging with CPack
based installer. Files associated with any components not listed here or any
installation commands not associated with any component will not be installed.
CPACK_COMPONENT_${COMPNAME}_DISPLAY_NAME
The displayed name of the component ${COMPNAME}, used in graphical installers
to display the component name. This value can be any string.
CPACK_COMPONENT_${COMPNAME}_DESCRIPTION
An extended description of the component ${COMPNAME}, used in graphical
installers to give the user additional information about the component. Descriptions
can span multiple lines using "\n" as the line separator.
CPACK_COMPONENT_${COMPNAME}_HIDDEN
Flag that indicates that this component will be hidden in the graphical installer, and
therefore cannot be selected or installed. Only available with NSIS.
CPACK_COMPONENT_${COMPNAME}_REQUIRED
Flag that indicates that this component is required, and therefore will always be
installed. It will be visible in the graphical installer, but it cannot be unselected.
CPACK_COMPONENT_${COMPNAME} DISABLED
Flag that indicates that this component should be disabled (unselected) by default.
The user is free to select this component for installation.
CPACK_COMPONENT_${COMPNAME}_DEPENDS
Lists the components on which this component depends. If this component is
selected, then each of the components listed must also be selected.
CPACK_COMPONENT_${COMPNAME}_GROUP
Names the component group of which this component is a part. If not provided, the
component will be a standalone component, not part of any component group.
CPACK_COMPONENT_${COMPNAME}_INSTALL_TYPES
Lists the installation types of which this component is a part. When one of these
installations types is selected, this component will automatically be selected. Only
available with NSIS.
CPACK_COMPONENT_GROUP_${GROUPNAME}_DISPLAY_NAME
The displayed name of the component group ${GROUPNAME}, used in graphical
installers to display the component group name. This value can be any string.
CPack for Cygwin Setup
173
CPACK_COMPONENT_GROUP_${GROUPNAME}_DESCRIPTION
An extended description of the component group ${GROUPNAME}, used in
graphical installers to give the user additional information about the components
contained within this group. Descriptions can span multiple lines using "\n" as the
line separator.
CPACK_COMPONENT_GROUP_${GROUPNAME}_BOLD_TITLE
Flag indicating whether the group title should be in bold. Only available with NSIS.
CPACK_COMPONENT_GROUP_${GROUPNAME}_EXPANDED
Flag indicating whether the group should start out "expanded", showing its
components. Otherwise only the group name itself will be shown until the user clicks
on the group. Only available with NSIS.
CPACK_INSTALL_TYPE_${INSTNAME}_DISPLAY_NAME
The displayed name of the installation type. This value can be any string.
9.5 CPack for Cygwin Setup
Cygwin (http://www.cygwin.com/) is a Linux-like environment for Windows that consists of
a run time DLL and a collection of tools. To add tools to the official cygwin the cygwin setup
program is used. The setup tool has very specific layouts for the source and binary trees that
are to be included. CPack can create the source and binary tar files correctly bzip’ed that can
be uploaded to the cygwin mirror sites. You must of course have your package accepted by
the cygwin community before that is done. Since the layout of the package is more restrictive
than other packaging tools, you may have to change some of the install options for your
project.
The cygwin setup program requires that all files be installed into /usr/bin,
/usr/share/project-version, /usr/share/man and /usr/share/doc/package-
version. The cygwin CPack generator will automatically add the /usr to the install
directory for the project. The project must install things into /share and /bin, and CPack
will add the /usr prefix automatically.
Cygwin also requires that you provide a shell script that can be used to create the package
from the sources. Any cygwin specific patches that are required for the package must also be
provided in a diff file. CMake’s configure_file command can be used to create both of these
files for a project. Since CMake is a cygwin package, the CMake code used to configure
CMake for the cygwin CPack generators is as follows:
174
Packaging with CPack
set (CPACK_PACKAGE_NAME cmake)
# setup the name of the package for cygwin cmake-2.4.3
set (C PACK_PACKAGE_FILE_NAME
"${CPACK_PACKAGE_NAME}-2.2.${CPACK_PACKAGE_VERSION_PATCH}")
#k the source has the same name as the binary
set (CPACK_SOURCE_PACKAGE_FILE_NAME ${CPACK_PACKAGE_FILE_NAME})
# Create a cygwin version number in case there are changes
# for cygwin that are not reflected upstream in CMake
set (CPACK_CYGWIN_PATCH_NUMBER 1)
# if we are on cygwin and have cpack, then force the
# doc, data and man dirs to conform to cygwin style directories
set (CMAKE_DOC_DIR "/share/doc/${CPACK_PACKAGE_FILE_NAME}")
set (CMAKE_DATA_DIR "/share/${CPACK_PACKAGE_FILE_NAME}")
set (CMAKE_MAN_DIR M/share/man")
# These files are required by the cmCPackCygwinSourceGenerator and
# the files put into the release tar files,
set (CPACK_CYGWIN_BUILD_SCRIPT
"${CMake_BINARY_DIR}/@ CPACK_PACKAGE_FILE_NAME @-
0CPACK_CYGWIN_PATCH_NUMBER0.sh")
set (CPACK_CYGWIN_PATCH_FILE
"${CMa ke_BINARY_DIR}/0 C PACK_PACKAGE_FILE_NAME @-
0CPACK_CYGWIN_PATCH_NUMBER0.patch")
# include the sub directory for cygwin releases
include (Utilities/Release/Cygwin/CMakeLists.txt)
# when packaging source make sure to exclude the .build directory
set (C PACK_SOURCE_IGNORE_FILE S
"/CVS/" ”/\\\\. build/" "/WW.svn/" "\\\\. swp$" M\\\\.#n "/#"
Utilities/Release/Cygwin/CMakeLists.txt:
# create the setup.hint file for cygwin
configure_file (
"${CMake_SOURCE_DIR}/Utilities/Release/Cygwin/cygwin-setup.hint.in"
"${CMa ke_BINARY_DIR}/setup.hint")
configure_file (
CPack for Cygwin Setup
175
"${CMake_SOURCE_DIR}/Utilities/Release/Cygwin/README.cygwin.in"
"${CMake_BINARY_DIR}/Docs/@ CPACK_PACKAGE_FILE_NAME @-
0CPACK_CYGWIN_PATCH_NUMBER0.README")
install_files (/share/doc/Cygwin FILES
${CMake_BINARY_DIR}/Docs/0C PACK_PACKAGE_FILE_NAME 0-
0CPACK_CYGWIN_PATCH_NUMBER0.README)
# create the shell script that can build the project
configure_file (
"${CMake_SOURCE_DIR}/Utilities/Release/Cygwin/cygwin-package.sh.in"
${CPACK_CYGWIN_BUILD_SCRIPT})
# Create the patch required for cygwin for the project
configure_file (
"${CMake_SOURCE_DIR}/Utilities/Release/Cygwin/cygwin-patch.diff.in"
${CPACK_CYGWIN_PATCH_FILE})
The file Utilities/Release/Cygwin/cygwin-package. sh. in, can be found in the
CMake source tree. It is a shell script that can be used to re-create the cygwin package from
source. For other projects, there is a template install script that can be found in
Templates/cygwin-package . sh. in. This script should be able to configure and package
any cygwin based CPack project, and it is required for all official cygwin packages.
Another important file for cygwin binaries is share/doc/Cygwin/project-
version.readme. This file should contain the information required by cygwin about the
project. In the case of CMake, the file is configured so that it can contain the correct version
information. For example part of that file for CMake looks like this:
Build instructions:
unpack cmake-2.5.20071029-l-src.tar.bz2
if you use setup to install this src package, it will be
unpacked under /usr/src automatically
cd /usr/src
./cmake-2.5.20071029-1.sh all
This will create:
/usr/src/cmake-2.5.20071029.tar.bz2
/usr/src/cmake-2.5.20071029-l-src.tar.bz2
176
Packaging with CPack
9.6 CPack for Mac OS X PackageMaker
On the Apple Mac OS X operating system, CPack provides the ability to use the system
Package Maker tool. This section will show the CMake application install screens users will
see when installing the CMake package on OS X. The CPack variables set to change the text
in the installer will be given for each screen of the installer.
Figure 20 Mac Package inside .ding
In Figure 20, the .pkg file found inside the .dmg disk image created by the CPack package
maker for Mac OS X is seen. The name of this file is controlled by the
CPACK_package_file_name variable. If this is not set CPack will use a default name based
on the package name and version settings.
Figure 21 Introduction Screen Mac PackageMaker
CPack for Mac OS X PackageMaker
177
When the .pkg file is run, the package wizard starts with the screen seen in Figure 21. The
text in this window is controlled by the file pointed to by the
cpack resource file welcome variable.
Figure 22 Readme section of Mac package wizard
Figure 22 shows the read me section of the package wizard. The text for this window is
customized by using the cpack_resource_file_readme variable. It should contain a path
to the file containing the text that should be displayed on this screen.
178
Packaging with CPack
Figure 23 License screen Mac packager
Figure 23 contains the license text for the package. Users must accept the license for the
installation process to continue. The text for the license comes from the file pointed to by the
cpack_resource_file_license variable.
The other screens in the installation process are not customizable from CPack. To change
more advanced features of this installer there are two template CPack template files that you
can modify, Modules/CPack.lnfo.plist. in and
Modules/CPack. Description.plist. in. These files can be replaced by using the
cmake_module_path variable to point to a directory in your project containing a modified
copy of CPackinfo.plist.in.
9.7 CPack for Mac OS X Drag and Drop
CPack also support the creation of a Drag and Drop installer for the Mac. In this case a .dmg
disk image is created. Inside the image, it contains a symbolic link to the /Applications
directory and a copy of the install tree. In this case it is best to use a Mac application bundle
or a single folder containing your relocatable installation as the only install target for the
CPack for Mac OS X Drag and Drop
179
project. The variable cpack_package_executables is used to point to the application
bundle for the project.
Figure 24 Drag and Drop License dialog
180
Packaging with CPack
Figure 25 Resulting Drag and Drop folders
9.8 CPack for Mac OS X X11 Applications
CPack also includes an OS X XI1 package maker generator. This can be used to package XI1
based applications, and make them act more like native OS X applications. CPack not only
packages them, but wraps them with a script that will allow users to run them as they would
any native OS X application. Much like the OS X PackageMaker generator, the OS X XI1
generator creates a disk image .dmg file. In this example, an XI1 application called
KWPolygonalObjectViewerExample is packaged with the OS X XI1 CPack generator.
Figure 26 Mac OS X XI1 package disk image
Figure 26 shows the disk image created. In this case the cpack_package_name was set to
KWPolygonalObjectViewerExample, and the version information was left with the CPack
default of 0.1.1. The variable cpack_package_executables was set to the pair
CPack for Mac OS X X11 Applications
181
KWPolygonalObjectViewerExample and KWPolygonalObjectViewerExample, the installed
XI1 application is called KWPolygonalObjectViewerExample.
Figure 27 Opening OS X XI1 disk image
Figure 27 shows what a user would see after clicking on the . dmg file created by CPack. Mac
OS X is mounting this disk image as a disk
Figure 28 Mounted .dmg disk image
Figure 28 shows the mounted disk image. It will contain a symbolic link to the /Applications
directory for the system, and it will contain an application bundle for each executable found in
cpack_package_executables. The users can then drag and drop the applications into the
Applications folder as seen in Figure 29.
182
Packaging with CPack
- Figure 29 Drag and drop application to Applications
CPack actually provides a C++ based executable that can run an XI1 application via the
Apple scripting language. The application bundle installed will run that forwarding
application when the user double clicks on KWPolygonalObjectViewerExample. This script
will make sure that the XI1 server is started. The script that is run can be found in
CMake/Modules/CPack. RuntimeScript. in. The source for the script launcher C++
program can be found in Source/CPack/OSXScriptLauncher . cxx.
9.9 CPack for Debian Packages
A Debian package . deb is simply an “ar” archive. CPack includes the code for the BSD style
ar that is required by Debian packages. The Debian packager used the standard set of CPack
variables to initialize a set of Debian specific variables. These can be overridden in the
cpack_project_config_file, the name of the generator is UDEB”. The variables used by
the DEB generator are as follows:
CPACKJDEBIAN_PACKAGE_NAME
defaults to lower case of CPACK PACKAGE NAME.
CPACKDEBIANPACKAGEARCHITECTURE
defaults to i386.
CPACKDEBIANPACKAGEDEPENDS
Must be set to other packages that this package depends on, and if empty a warning
is emitted.
CPACKDEBIANPACKAGEMAINTAINER
defaults to CPACK PACKAGE CONTACT
CPACKDEBIANPACKAGEDESCRIPTION
defaults to CPACK PACKAGE DESCRIPTION SUMMARY
CPACKDEBIANPACKAGESECTION
defaults to devl
CPack for RPM
183
CPACKDEBIANPACKAGEPRIORITY
defaults to optional
9.10 CPack for RPM
CPack has support for creating Linux RPM files. The name of the generator as set in
CPACK_GENERATOR is “RPM”. The RPM package capability requires that rpmbuild is
installed on the machine and is in PATH. The RPM packager uses the standard set of CPack
variables to initialize RPM specific variables. The RPM specific variables are as follows:
CPACK_RPM_PACKAGE_SUMMARY
defaults to ${CPACK_PACKAGE_DESCRIPTION_SUMMARY}
CPACKRPMPACKAGENAME
defaults to lower case of $ {CPACK PACKAGE NAME}
CPACK_RPM_PACKAGE_VERSION
defaults to ${CPACK_PACKAGE_VERSION}.
CPACKRPMPACKAGEARCHITECTURE
defaults to i386
CPACKRPMPACKAGERELEASE
defaults to 1. This is the version of the RPM file, and not the version of the software
being packaged.
CPACK_RPM_PACKAGE_GROUP
defaults to none.
CPACKRPMPACKAGEVENDOR
defaults to ${CPACK_PACKAGE_VENDOR}
9.11 CPack Files
There are a number of files that are used by CPack that can be useful for learning more about
how CPack works and what options you can set. These files can also be used as the starting
point for other generators for CPack. These files can mostly be found in the Modules and
Templates directories of CMake and typically start with the prefix CPack.
Chapter 10
Automation & Testing with CMake
10.1 Testing with CMake, CTest, and CDash
Testing is a key tool for producing and maintaining robust, valid software. This chapter will
examine the tools that are part of CMake to support software testing. We will begin with a
brief discussion of testing approaches and then discuss how to add tests to your software
project using CMake. Finally we will look at additional tools that support creating centralized
software status dashboards.
The tests for a software package may take a number of forms. At the most basic level there
are smoke tests, such as one that simply verifies that the software compiles. While this may
seem like a simple test, with the wide variety of platforms and configurations available,
smoke tests catch more problems than any other type of test. Another form of smoke test is to
verify that a test runs without crashing. This can be handy for situations where the developer
does not want to spend the time creating more complex tests, but is willing to run some
simple tests. Most of the time these simple tests can be small example programs. Running
them verifies not only that the build was successful, but that any required shared libraries can
be loaded (for projects that use them) and that at least some of the code can be executed
without crashing.
Moving beyond basic smoke tests leads to more specific tests such as regression, black, and
white box testing. Each of these has its strengths. Regression testing verifies that the results of
a test do not change over time, or platform. This is very useful when performed frequently, as
it provides a quick check that the behavior and results of the software have not changed.
When a regression test fails a quick look at recent code changes can usually identify the
culprit. Unfortunately, regression tests typically require more effort to create than other tests.
186
Automation & Testing with CMake
White and black box testing refer to tests written to exercise units of code (at various levels of
integration) with and without knowledge of how those units are implemented respectively.
White box testing is designed to stress potential failure points in the code knowing how that
code was written, and hence its weaknesses. As with regression testing this can take a
substantial amount of effort to create good tests. Black box testing typically knows little or
nothing about the implementation of the software other than its public API. Black box testing
can provide a lot of code coverage without too much effort in developing the tests. This is
especially true for libraries of object oriented software where the APIs are well defined. A
black box test can be written to go through and invoke a number of typical methods on all the
classes in the software.
The final type of testing we will discuss is software standard compliance testing. While the
other test types we have discussed are focused on determining if the code works properly,
compliance testing tries to determine if the code adheres to the coding standards of the
software project. This could be a check to verify that all classes have implemented some key
method, or that all functions have a common prefix. The options for this type of test are
limitless and there are a number of ways to perform such testing. There are software analysis
tools that can be used, or specialized test programs (maybe python scripts etc) could be
written. The key point to realize is that the tests do not necessarily have to involve running
some part of the software. The tests might run some other tool on the source code itself.
There are a number of reasons why it helps to have testing support integrated into the build
process. First, complex software projects may have a number of configuration or platform-
dependent options. The build system knows what options can be enabled and can then enable
the appropriate tests for those options. For example, the Visualization Toolkit (VTK) includes
support for a parallel processing library called MPI. If VTK is built with MPI support then
additional tests are enabled that make use of MPI and verify that the MPI-specific code in
VTK works as expected. Secondly, the build system knows where the executables will be
placed and it has tools for finding other required executables (such as perl, python etc). The
third reason is that with UNIX Makefiles it is common to have a test target in the Makefile so
that developers can type make test and have the test(s) run. In order for this to work, the build
system must have some knowledge of the testing process.
10.2 How Does CMake Facilitate Testing?
CMake facilitates testing your software through special testing commands and the CTest
executable. First we will discuss the key testing commands in CMake. To add testing to a
CMake-based project is fairly simple using the add_test command. The add_test
command has a simple syntax as follows:
add_test (TestName ExecutableToRun argl arg2 arg3 ...)
Additional Test Properties
187
The first argument is simply a string name for the test. This is the name that will be displayed
by testing programs. The second argument is the executable to run. The executable can be
built as part of the project or it can be a standalone executable such as python, perl, etc. The
remaining arguments will be passed to the running executable. A typical example of testing
using the add_test command would look like this:
add_executable (Testlnstantiator Testlnstantiator.cxx)
target__link_libraries (Testlnstantiator vtkCommon)
add_test (Testlnstantiator
${EXECUTABLE_OUTPUT_PATH}/Testlnstantiator)
The add_test command is typically placed in the CMakeLists file for the directory that has
the test in it. For large projects there may be multiple CMakeLists files with add_test
commands in them. Once the add_test commands are present in the project, the user can
run the tests by invoking the “test” target of Makefile, or the run_tests target of Visual
Studio or Xcode. An example of running tests on the CMake tests using the Makefile
generator on Linux would be:
$ make test
Running tests.
Test project
Start 2:
kwsys.testEncode
1/20 Test #2
: kwsys.testEncode
Passed
0.02
sec
Start 3:
kwsys.testTerminal
2/20 Test #3
: kwsys.testTerminal
Passed
0.02
sec
Start 4:
kwsys.testAutoPtr
3/20 Test #4
: kwsys.testAutoPtr
Passed
0.02
sec
10.3 Additional Test Properties
By default a test passes if all of the following conditions are true:
• The test executable was found
• The test ran without exception
• The test exited with return code 0
That said, these behaviors can be modified using the set_property command:
set_property (TEST test_name
PROPERTY propl valuel value2 ...)
188
Automation & Testing with CMake
This command will set additional properties for the specified tests. Example properties are:
ENVIRONMENT
Specify environment variables that should be defined for running a test. If set to a list
of environment variables and values of the form MYVAR=va 1 ue those environment
variables will be defined while the test is running. The environment is restored to its
previous state after the test is done.
LABELS
Specify a list of text labels associated with a test. These labels can be used to group
tests together based on what they test. For example you could add a label of MPI to
all tests that exercise MPI code.
WILLFAIL
If this option is set to true, then the test will pass if the return code is not 0 and fail if
it is. This reverses the third condition of the pass requirements.
PASSREGULAREXPRESSION
If this option is specified, then the output of the test is checked against the regular
expression provided (a list of regular expressions may be passed in as well). If none
of the regular expressions match, then the test will fail. If at least one of them
matches, then the test will pass.
FAILREGULAREXPRESSION
If this option is specified, then the output of the test is checked against the regular
expression provided (a list of regular expressions may be passed in as well). If none
of the regular expressions match, then the test will pass. If at least one of them
matches, then the test will fail.
If both PAS S_REGUlar_expreSSI ON and fail_regular_exPRESS ION are specified, then
the FAi l_reGUlar_expres SI ON takes precedence. The following example illustrates using
the PASS_REGULAR_EXPRESS ION and FAIL_REGULAR_EXPRESS ION:
add_test (outputTest ${EXECUTABLE_OUTPUT_PATH}/outputTest)
set (passRegex ,,ATest passed" ,,AA11 ok")
set (failRegex "Error" "Fail")
set_property (TEST outputTest
PROPERTY PAS S_RE GU LAR_EX PRE SSION "${passRegex}")
set_property (TEST outputTest
PROPERTY FAIL_RE GULAR_EX PRE SSION "${failRegex}")
Testing Using CTest
189
10.4 Testing Using CTest
When you run the tests from your build environment what really happens is that the build
environment runs CTest. CTest is an executable that comes with CMake, it handles running
the tests for the project. While CTest works well with CMake, you do not have to use CMake
in order to use CTest. The main input file for CTest is called CTestTestfile. cmake. This
file will be created in each directory that was processed by CMake (typically every directory
with a CMakeLists file). The syntax of CTestTestfile. cmake is like the regular CMake
syntax, with a subset of the commands available. If CMake is used to generate testing files,
they will list any subdirectories that need to be processed as well as any add_test calls. The
subdirectories are those that were added by subdirs or add_subdirectory commands.
CTest can then parse these files to determine what tests to run. An example of such a file is
shown below:
# CMake generated Testfile for
# Source directory: C:/CMake
# Build directory: C:/CMakeBin
#
# This file includes the relevent testing commands required
# for testing this directory and lists subdirectories to
# be tested as well.
ADD_TEST (SystemlnformationNew ...)
SUBDIRS (Source/kwsys)
SUBDIRS (Utilities/cmzlib)
When CTest parses the CTestTestfile. cmake files it will extract the list of tests from
them. These tests will be run, and for each test CTest will display the name of the test and its
status. Consider the following sample output:
$ ctest
Test project C:/CMake-build26
Start 1: SystemlnformationNew
1/21 Test #1: SystemlnformationNew Passed 5.78 sec
Start 2: kwsys.testEncode
2/21 Test #2: kwsys. testEncode Passed 0.02 sec
Start 3: kwsys.testTerminal
3/21 Test #3: kwsys. testTerminal Passed 0.00 sec
Start 4: kwsys.testAutoPtr
4/21 Test #4: kwsys. testAutoPtr Passed 0.02 sec
Start 5: kwsys.testHashSTL
190
Automation & Testing with CMake
5/21 Test #5: kwsys. testHashSTL Passed 0.02 sec
100% tests passed, 0 tests failed out of 21
Total Test time (real) = 59.22 sec
CTest is run from within your build tree. It will run all the tests found in the current directory
as well as any subdirectories listed in the CTestTestf ile. cmake. For each test that is run
CTest will report if the test passed and how long it took to run the test.
The CTest executable includes some handy command line options to make testing a little
easier. We will start by looking at the options you would typically use from the command
line.
-R <regex> Run tests matching regular expression
-E <regex> Exclude tests matching regular expression
-L <regex> Run tests with labels matching the regex
-LE <regex> Run tests with labels not matching regexp
-C <config> Choose the configuration to test
-V,--verbose Enable verbose output from tests.
-N,--show-only Disable actual execution of tests.
-I [Start,End,Stride,test#,test#|Test file]
Run specific tests by range and number.
-H Display a help message
The -R option is probably the most commonly used. It allows you to specify a regular
expression, only the tests with names matching the regular expression will be run. Using the -
R option with the name (or part of the name) of a test is a quick way to run a single test. The -
E option is similar except that it excludes all tests matching the regular expression. The -L
and -LE options are similar to -R and -E except that they apply to test labels that were set
using the set property command as described in section 10.3. The -c option is mainly for
IDE builds where you might have multiple configurations, such as Release and Debug in the
same tree. The argument following the -c determines which configuration will be tested. The
-V argument is useful when you are trying to determine why a test is failing, with -V CTest
will print out the command line used to run the test as well as any output from the test itself.
The -V option can be used with any invocation of CTest to provide more verbose output. The
-N option is useful if you want to see what tests CTest would run without actually running
them.
Running the tests and making sure they all pass before committing any changes to the
software is a sure fire way to improve your software quality and development process.
Unfortunately, for large projects the number of tests and the time required to run them may be
prohibitive. In these situations the -I option of CTest can be used. The -I option allows you to
Using CTest to Drive Complex Tests
191
flexibly specify a subset of the tests to run. For example, the following invocation of CTest
will run every seventh test.
ctest -I , , 7
While this is not as good as running every test, it is better than not running any and it may be
a more practical solution for many developers. Note that if the start and end arguments are not
specified, as in this example, then they will default to the first and last tests. In another
example, assume that you always want to run a few tests plus a subset of the others. In this
case you can explicitly add those tests to the end of the arguments for -I. For example:
ctest -I ,,5,1,2,3,10
will run tests 1, 2, 3, and 10, plus every fifth test. You can pass as many test numbers as you
want after the stride argument.
10.5 Using CTest to Drive Complex Tests
Sometimes to properly test a project you need to actually compile code during the testing
phase. There are several reasons for this. First, if test programs are compiled as part of the
main project, they can end up taking up a significant amount of the build time. Also, if a test
fails to build, the main build should not fail as well. Finally, IDE projects can quickly become
too large to load and work with. The CTest command supports a group of command line
options that allow it to be used as the test executable to run. When used as the test executable,
CTest can run CMake, run the compile step, and finally run a compiled test. We will now
look at the command line options to CTest that support building and running tests.
--build-and-test src_directory build_directory
Run cmake on the given source directory using the specified
build directory.
-test-command
-build-target
-build-nocmake
-build-run-dir
-build-two-config
-build-exe-dir
-build-generator
-build-proj ect
-build-makeprogram
-build-noclean
-build-options
Name of the program to run.
Specify a specific target to build.
Run the build without running cmake first.
Specify directory to run programs from.
Run CMake twice before the build.
Specify the directory for the executable.
Specify the generator to use.
Specify the name of the project to build.
Specify the make program to use.
Skip the make clean step.
Add extra options to the build step.
192
Automation & Testing with CMake
For an example, consider the following add_test command taken from the CMakeLists.txt
file of CMake itself It shows how CTest can be used both to compile and run a test.
add__test (simple $ {CMAKE_CTEST_COMMAND}
—build-and-test "${CMake_SOURCE_DIR}/Tests/Simple"
"${CMa ke_BINARY_DIR}/Tests/Simplen
k --build-generator ${CMAKE_GENERATOR}
--build-makeprogram ${CMAKE_MAKE_PROGRAM}
—build-project Simple
—test-command simple)
In this example, the add_test command is first passed the name of the test, "simple”. After
the name of the test, the command to be run is specified. In this case, the test command to be
run is CTest. The CTest command is referenced via the cmake_ctest_command variable.
This variable is always set by CMake to the CTest command that came from the CMake
installation used to build the project. Next, the source and binary directories are specified. The
next options to CTest are the -build-generator, and -build-makeprogram options. These are
specified using the cmake variables cmake_make_program and cmake_generator. Both
cmake_make_program and cmake_generator are defined by CMake. This is an important
step as it makes sure that the same generator is used for building the test as was used for
building the project itself. The -build-project option is passed Simple which corresponds to
the project command used in the Simple test. The final argument is the -test-command
which tells CTest the command to run once it gets a successful build. That should be the name
of the executable that will be compiled by the test.
10.6 Handling a Large Number of Tests
When a large number of tests exist in a single project, it is cumbersome to have individual
executables available for each test. That said, the developer of the project should not be
required to create tests with complex argument parsing. This is why CMake provides a
convenience command for creating a test driver program. This command is called
create_test_sourcelist. A test driver is a program that links together many small tests
into a single executable. This is useful when building static executables with large libraries to
shrink the total required size. The signature for create_test_sourcelist is as follows:
create_test_sourcelist (SourceListName
DriverName
testl test2 test3
EXTRA_INCLUDE include.h
FUNCTION function
)
Handling a Large Number of Tests
193
The first argument is the variable which will contain the list of source files that must be
compiled to make the test executable. The DriverName is the name of the test driver program
(e.g. the name of the resulting executable). The rest of the arguments consist of a list of test
source files. Each test source file should have a function in it that has the same name as the
file with no extension (foo.cxx should have int foo(argc, argv) ;) The resulting
executable will be able to invoke each of the tests by name on the command line. The
extra_include and function arguments support additional customization of the test
driver program. Consider the following CMakeLists file fragment to see how this command
can be used:
# create the testing file and list of tests
create_test_sourcelist(Tests
CommonCxxTests.cxx
ObjectFactory.cxx
otherArrays.cxx
otherEmptyCell.cxx
TestSmartPointer.cxx
Systemlnformation.cxx
)
# add the executable
add_executable(CommonCxxTests ${Tests})
# remove the test driver source file
set (TestsToRun ${Tests})
remove (TestsToRun CommonCxxTests.cxx)
# Add all the ADD_TEST for each test
foreach (test ${TestsToRun})
get_filename_component(TName ${test} NAME_WE)
add_test (${TName} CommonCxxTests ${TName})
endforeach ()
The create_test_sourcelist command is invoked to create a test driver. In this case it
creates and writes CommonCxxTests . cxx into the binary tree of the project using the rest of
the arguments to determine its contents. Next the add_executable command is used to add
that executable to the build. Then a new variable called TestsToRun is created with an initial
value of the sources required for the test driver. The remove command is used to remove the
driver program itself from the list. Then a foreach command is used to loop over the
remaining sources. For each source its name without a file extension is extracted and put in
the variable TName, then a new test is added for TName. The end result is that for each source
file in the create test sourcelist an add test command is called with the name of
194
Automation & Testing with CMake
the test. As more tests are added to the create_test_sourcelist command, the f oreach
loop will automatically call add_test for each one.
10.7 Producing Test Dashboards
As your project's testing needs grow, keeping track of the test results can become
overwhelming. This is especially true for projects that are tested nightly on a number of
different platforms. In these cases we recommend using a test dashboard to summarize the test
results, (see Figure 30)
Figure 30 - Sample Testing Dashboard
A test dashboard summarizes the results for many tests on many platforms, and its hyperlinks
allow people to drill down into additional levels of detail quickly. The CTest executable
includes support for producing test dashboards. When run with the correct options, CTest will
Producing Test Dashboards
195
produce XML-based output recording the build and test results and post them to a dashboard
server. The dashboard server runs an open source software package called CDash. CDash
collects the XML results and produces HTML web pages from them.
Figure 31 - Experimental, Coverage, and Dynamic Analysis Results
Before discussing how to use CTest to produce a dashboard let us consider the main parts of a
testing dashboard. Each night at a specified time the dashboard server will open up a new
dashboard, so each day there is a new web page showing the results of tests for that twenty-
four hour period. There are links on the main page that allow you to quickly navigate through
different days. Looking at the main page for a project (such as CMake’s dashboard off of
www.cmake.org) you will see that it is divided into a few main components. Near the top you
will find a set of links that allow you to step to previous dashboards as well as links to project
pages such as the bug tracker, documentation etc.
Below that you will find groups of results. Typically groups that you will find include
Nightly, Experimental, Continuous, Coverage, and Dynamic Analysis (see Figure 31). The
category into which a dashboard entry will be placed depends on how it was generated. The
simplest are Experimental entries which represent dashboard results for someone’s current
196
Automation & Testing with CMake
copy of the project's source code. With an experimental dashboard the source code is not
guaranteed to be up to date. In contrast a Nightly dashboard entry is one where CTest tries to
update the source code to a specific date and time. The expected result is that all nightly
dashboard entries for a given day should be based on the same source code.
A continuous dashboard entry is one that is designed to run every time new files are checked
in. Depending on how frequently new files are checked in a single day's dashboard could have
many continuous entries. Continuous dashboards are particularly helpful for cross platform
projects where a problem may only show up on some platforms. In those cases a developer
can commit a change that works for them on their platform and then another platform running
a continuous build could catch the error, allowing the developer to correct the problem
promptly.
Dynamic Analysis and Coverage dashboards are designed to test the memory safety and code
coverage of a project. A Dynamic Analysis dashboard entry is one where all the tests are run
with a memory access/leak checking program enabled. Any resulting errors or warnings are
parsed, summarized and displayed. This is important to verify that your software is not
leaking memory, reading from un-initialized memory, etc. Coverage dashboard entries are
similar in that all the tests are run, but as the tests are run the lines of code executed are
tracked. When all the tests have been run, a listing of how many times each line of code was
executed is produced and displayed on the dashboard.
Adding CDash Dashboard Support to a Project
In this section we show how to submit results to the CDash dashboard. You can either use the
Kitware CDash servers at my.cdash.org or you can setup your own CDash server as described
in section 10.11. If you are using my.cdash.org you can click on the “Start My Project” button
which will ask you to create an account (or login if you already have one), and then bring you
to a page to start creating your project. If you have installed your own CDash server then you
should login to your CDash server as administrator and select “Create New Project” from the
administration panel. Regardless of which approach you use the next few steps will be to fill
in information about your project as shown in Figure 32. Many of the items below are
optional, so do not be concerned if you do not have a value for them.
Producing Test Dashboards
197
Figure 32 - Creating a new project in CDash
Name: what you want to call the project.
Description: description of the project to be shown on the first page.
Home URL: home URL of the project to appear in the main menu of the dashboard.
Bug Tracker URL: URL to the bug tracker. Currently CDash supports Mantis
(http://www.mantisbt.org/), and if a bug is entered in the repository with the message “BUG:
132456”, CDash will automatically link to the appropriate bug.
Documentation URL: URL to where the project’s documentation is kept. This will appear in
the main menu of the dashboard.
Public Dashboard: if checked, the dashboard is public and anybody can see the results of the
dashboard. If unchecked, only users assigned to this project can access the dashboard.
Logo: logo of the project to be displayed on the main dashboard. Optimal size for a logo is
100x100 pixels. Transparent GIFs work best as they can blend in with the CDash background.
198
Automation & Testing with CMake
Repository Viewer URL: URL of the web repository browser. CDash currently supports:
ViewCVS, Trac, Fisheye, ViewVC, WebSVN and Loggerhead. For instance a URL for
ViewVC is http://public.kitware.com/cgi-bin/viewcvs.cgi/?cvsroot=CMake, or for WebSVN:
https://www.kitware.com/websvn/listing.php?repname=MyRepository
Repositories: in order to display the daily updates CDash gets a diflf version of the modified
files. Current CDash supports only anonymous repository access. A typical URL is
:pserver:anoncvs@myproj ect.org:/cvsroot/MyProject.
Nightly Start Time: CDash displays the current dashboard using a 24 hour window. The
nightly start time defines the beginning of this window. Note that the start time is expressed in
the form HH:MM:SS TZ, e.g. 21:00:00 EDT.
Coverage Threshold: CDash marks that coverage has passed (green) if the global coverage
for a build or specific files is above this threshold. It is recommended to set the coverage
threshold to a high value and decrease it as you focus on improving your coverage.
Enable Test Timing: enable/Disable test timing for this project See “Test timing” in the next
section for more information.
Test Time Standard Deviation: set a multiplier for the standard deviation of a test time. If
the time for a test is higher than the mean + multiplier*standard deviation, the test time status
is marked as failed. The default value is 4 if not specified. Note that changing this value does
not affect previous builds, only builds submitted after the modification.
Test Time Standard Deviation Threshold: set a minimum standard deviation for a test time.
If the current standard deviation for a test is lower than this threshold then the threshold is
used instead. This is particularly important for tests that have a very low standard deviation
but still some variability. The default threshold is set to 2 if not specified. Note that changing
this value does not affect previous builds, only builds submitted after the modification.
Test Time # Max Failures Before Flag: some tests might take longer from one day to
another depending on the client machine load. This variable defines the number of times a test
should fail because of timing issues before being flagged.
Email Submission Failures: enable/disable sending email when a build fails (configure,
error, warnings, update, test failings) for this project. This is a general feature.
Email Redundant Failure: by default CDash does not send email for the same failures. For
instance if a build continues to fail over time, only one email would be sent. If the email
redundant failures is checked then CDash will send an email every time a build has a failure,
(not all versions of CDash have this option).
Producing Test Dashboards
199
Email Administrator: enable/disable sending email when submission to CDash is invalid.
This can help tracking down misconfigured clients. This is particularly useful when CTest is
not used to submit to CDash..
Email Build Missing: enable/disable sending email when a build has not submitted.
Email Low Coverage: enable/disable sending email when the coverage for files is lower than
the default threshold value specified above.
Email Test Timing Changed: enable/disable sending email when a test’s timing has
changed.
Maximum Number of Items in Email: how many failures should be sent in an email.
Maximum Number of Characters in Email: how many characters from the log should be
sent in the email.
Google Analytics Tracker: CDash supports visitor tracking through Google analytics. See
“Adding Google Analytics” for more information.
Show Site IP Addresses: Enable/disable the display of IP addresses of the sites submitting to
this project.
Display Labels: as of CDash 1.4, and recent versions of CTest, labels can be attached to build
files, these can displayed and retrieved on CDash.
AutoRemove Timeframe: set the number of days to keep for this project. If the timeframe is
less than 2 days, CDash will not remove any builds (not all versions of CDash have this
option).
AutoRemove Max Builds: set the maximum number of builds to remove when performing
the auto removal of builds (not all versions of CDash have this option).
After providing this information you can click on “Create Project” to create the project in
CDash. At this point the server is ready to accept dashboard submissions. The next step is to
provide the dashboard server information to your software project. This information is kept in
a file named CTestConfig. cmake at the top level of your source tree. You can download
this file by clicking on the “Edit Project” button for your dashboard (it looks like a pie chart
with a wrench underneath it), then click on the miscellaneous tab and select “Download
CTestConfig” and save the CTestConfig. cmake in your source tree. In the next section we
review this file in more detail.
Client Setup
To support dashboards in your project you need to include the CTest module as follows.
200
Automation & Testing with CMake
# Include CDash dashboard testing module
include (CTest)
The CTest module will then read settings from the CTestConfig.cmake file you
downloaded from CDash. If you have added add test command calls to your project
creating a dashboard entry is as simple as running:
ctest -D Experimental
The -D option tells CTest to create a dashboard entry. The next argument indicates what type
of dashboard entry to create. Creating a dashboard entry involves quite a few steps that can be
run independently or as one command. In this example the Experimental argument will cause
CTest to perform a number of different steps as one command. The different steps of creating
a dashboard entry are summarized below.
Start
Prepare a new dashboard entry. This creates a Testing subdirectory in the build
directory. The testing subdirectory will contain a subdirectory for the dashboard
results with a name that corresponds to the dashboard time. The testing subdirectory
will also contain a subdirectory for the temporary testing results called Temporary.
Update
Perform a source control update of the source code (typically used for nightly or
continuous runs). Currently CTest supports Concurrent Versions System (CVS),
Subversion, Git, Mercurial and Bazaar.
Configure
Run CMake on the project to make sure the Makefiles or project files are up to date.
Build
Build the software using the specified generator.
Test
Run all the tests and record results.
MemoryCheck
Perform memory checks using Purify or valgrind.
Coverage
Collect source code coverage information.
Producing Test Dashboards
201
Submit
Submit the testing results as a dashboard entry to the server.
Each of these steps can be run independently for a Nightly or Experimental entry using the
following syntax:
ctest -D NightlyStart
ctest -D NightlyBuild
ctest -D NightlyCoverage -D NightlySubmit
or
ctest -D ExperimentalStart
ctest -D ExperimentalConfigure
ctest -D ExperimentalCoverage -D ExperimentalSubmit
etc. Alternatively you can use shortcuts that perform the most common combinations all at
once. The shortcuts that CTest has defined include:
ctest -D Experimental
performs a start, configure, build, test, coverage, submit
ctest -D Nightly
performs a start, update, configure, build, test, coverage, submit
ctest -D Continuous
performs a start, update, configure, build, test, coverage, submit
ctest -D MemoryCheck
performs a start, configure, build, memory check, coverage, submit
When first setting up a dashboard it is often useful to combine the -D option with the -V
option. This will allow you to see the output of all the different stages of the dashboard
process. Likewise, CTest maintains log files in the Testing/Temporary directory it creates
in your binary tree. There you will find log files for the most recent build, update, test, etc.
The actual dashboard results are stored in the Testing directory too.
202
Automation & Testing with CMake
10.8 Customizing Dashboards for a Project
CTest has a few options that can be used to control how it processes a project. If, when CTest
runs a dashboard, it finds CTestCustom. ctest files in the binary tree, it will load these files
and use the settings from them to control its behavior. The syntax of a CTestCustom file is the
same as regular CMake syntax. That said, only set commands are normally used in this file.
These commands specify properties that CTest will consider when performing the testing.
Dashboard Submissions Settings
A number of the basic dashboard settings are provided in the file that you download from
CDash. You can edit these initial values and provide additional values if you wish. The first
value that is set is the nightly start time. This is the time that dashboards all around the world
will use for checking out their copy of the nightly source code. This time also controls how
dashboard submissions will be grouped together. All submissions from the nightly start time
until the next nightly start time will be included on the same "day”.
# Dashboard is opened for submissions for a 24 hour period
# starting at the specified NIGHLY_START_TIME. Time is
# specified in 24 hour format.
set (CTEST_NIGHTLY_START_TIME "21:00:00 EDT")
The next group of settings control where to submit the testing results. This is the location of
the CDash server.
# CDash server to submit results (used by client)
set (CTEST_DROP_METHOD http)
set (CTEST_DROP_SITE "my.cdash.org")
set (CTEST_DROP_LOCATION "/submit.php?project=KensTest")
set (CTEST_DROP_SITE_CDASH TRUE)
The ctest_drop_site specifies the location of the CDash server. Build and test results
generated by CDash clients are sent to this location. The ctest_drop_location is the
directory or the HTTP URL on the server where CDash clients leave their build and test
reports. The ctest_drop_site_cdash specifies that the current server is CDash which
prevents CTest from trying to trigger the submission (backwards compatibility with Dart and
Dart 2).
Currently CDash supports only the HTTP drop submission method; however CTest supports
other submission types. The ctest_drop_method specifies the method used to submit
testing results. The most common setting for this will be HTTP which uses the Hyper Text
Transfer Protocol (HTTP) to transfer the test data to the server. Other drop methods are
supported for special cases such as FTP and SCP. In the example below, clients that are
Customizing Dashboards for a Project
203
submitting their results using the HTTP protocol use a web address as their drop site. If the
submission is via FTP, this location is relative to where the ctest_drop_SITE_user will
log in by default. The ctest_drop_site_user specifies the FTP username the client will
use on the server. For FTP submissions this user will typically be '’anonymous". However,
any username that can communicate with the server can be used. For FTP servers that require
a password this can be stored in the ctest_drop_site_password variable. The
CTEST_drop_SITE_mode (not used in this example) is an optional variable that you can use
to specify the FTP mode. Most FTP servers will handle the default passive mode but you can
set the mode explicitly to active if your server does not.
CTest can also be run from behind a firewall. If the firewall allows FTP or HTTP traffic, then
no additional settings are required. If the firewall requires an FTP/HTTP proxy or uses a
SOCKS4 or SOCKS5 type proxy, some environment variables need to be set. HTTP PROXY
and FTPJPROXY specify the servers that service HTTP and FTP proxy requests.
HTTP PROXY PORT and FTP_PROXY_PORT specify the port on which the HTTP and
FTP proxies reside. HTTP PROXY TYPE specifies the type of the HTTP proxy used. The
three different types of proxies supported are the default, which is a generic HTTP/FTP
proxy, "SOCKS4", and "SOCKS5", which specify SOCKS4 and SOCKS5 compatible
proxies.
Filtering Errors and Warnings
By default CTest has a list of regular expressions that it matches for finding the errors and
warnings from the output of the build process. You can override these settings in your
CTestCustom. ctest files using several variables as shown below.
set (CTE ST_CUS TOM_WARNING_MATCH
${CTEST_CUSTOM_WARNING_MATCH}
"{standard input}: [0-9][0-9]*: Warning: "
set (CTEST_CUSTOM_WARNING_EXCEPTION
${CTEST_CUSTOM_WARNING_EXCEPTION}
" t k8.4.5 /[A/]+/[A/] + .c[:\"]"
"xtree.[0-9]+. : warning C4702: unreachable code"
"warning LNK4221"
"variable .var_args[2]*. is used before its value is set"
"jobserver unavailable"
)
Another useful feature of the CTestCustom files is that you can use it to limit the tests that are
run for memory checking dashboards. Memory checking using purify or valgrind is a CPU
intensive process that can take twenty hours for a dashboard that normally takes one hour. To
204
Automation & Testing with CMake
help alleviate this problem CTest allows you to exclude some of the tests from the memory
checking process as follows:
set (CTEST_CUSTOM_MEMCHECK_IGNORE
${CTEST_CUSTOM_MEMCHECK_IGNORE}
TestSetGet
„ otherPrint-ParaView
Example-vtkLocal
Example-vtkMy
)
The format for excluding tests is simply a list of test names as specified when the tests were
added in your CMakeLists file with add test.
In addition to the demonstrated settings, such as ctest_custom_warning_match,
CTEST_CUSTOM_WARNING_EXCEPTION, and CTEST_CUSTOM_MEMCHECK_IGNORE, CTest
also checks several other variables.
CTESTCUSTOMERRORMATCH
Additional regular expressions to consider a build line as an error line
CTESTCUSTOMERROREXCEPTION
Additional regular expressions to consider a build line not as an error line
CTESTCUSTOMWARNINGMATCH
Additional regular expressions to consider a build line as a warning line
CTESTCUSTOMWARNINGEXCEPTION
Additional regular expressions to consider a build line not as a warning line
CTEST_CUSTOM_MAXIMUM_NUMBER_OF_ERRORS
Maximum number of errors before CTest stops reporting errors (default 50)
CTEST_CUSTOM_MAXIMUM_NUMBER_OF_WARNINGS
Maximum number of warnings before CTest stops reporting warnings (default 50)
CTESTCUSTOMCOVERAGEEXCLUDE
Regular expressions for files to be excluded from the coverage analysis
Customizing Dashboards for a Project
205
CTESTCUSTOMPREMEMCHECK
CTESTCUSTOMPOSTMEMCHECK
List of commands to execute before/after performing memory checking
CTESTCUSTOMMEMCHECKIGNORE
List of tests to exclude from the memory checking step
CTESTCUSTOMPRETEST
CTESTCUSTOMPOSTTEST
List of commands to execute before/after performing testing
CTESTCUSTOMTESTSIGNORE
List of tests to exclude from the testing step
CTEST_CUSTOM_MAXIMUM_PASSED_TEST_OUTPUT_SIZE
Maximum size of test output for the passed test (default lk)
CTEST_CUSTOM_MAXIMUM_FAILED_TEST_OUTPUT_SIZE
Maximum size of test output for the failed test (default 300k)
Commands specified in ctest_custom_pre_test and ctest_custom_post_test, as
well as the equivalent memory checking ones, are executed once per CTest run. These
commands can be used for example if all tests require some initial setup and cleanup to be
performed.
Adding Notes to a Dashboard
CTest and CDash support adding notes to a dashboard submission. These notes will appear on
the dashboard as a graphical icon that when clicked expands to the text of the notes. Using
CTest you can use the -A option followed by a semicolon separated list of filenames. The
contents of these files will be submitted as notes for the dashboard. For example:
ctest -D Continuous -A C:/MyNotes.txt;C:/OtherNotes.txt
Another way to submit notes with a dashboard is to copy or write the notes as files into a
Notes directory under the Testing directory of your binary tree. Any files found there when
CTest submits a dashboard will also be uploaded as notes.
206
Automation & Testing with CMake
10.9 Setting up Automated Dashboard Clients
CTest has a built-in scripting mode to help make the process of setting up dashboard clients
even easier. CTest scripts will handle most of the common tasks and options that CTest -D
Nightly does not. The dashboard script is written using CMake syntax and mainly involves
setting up different variables or options, or creating an elaborate procedure, depending on the
complexity of testing. Once you have written the script you can run the nightly dashboard on
Windows, Mac OS X or UNIX systems as follows:
ctest -S myScript.cmake
First we will consider the most basic script you can use, and then we will cover the different
options you can make use of. There are four variables that you must always set in your scripts.
The first two variables are the names of the source and binary directories on disk,
ctest_source_directory and ctest_binary_directory. These should be fully
specified paths. The next variable, ctest_COMMAND, specifies which CTest command to use
for running the dashboard. This may seem a bit confusing at first. The -S option of CTest is
provided to do all the setup and customization for a dashboard, but the actual running of the
dashboard is done with another invocation of CTest -D. Basically once the CTest script has
done what it needs to do to setup the dashboard, it invokes CTest -D to actually generate the
results. You can adjust the value of ctest_command to control what type of dashboard to
generate (Nightly, Experimental, Continuous) as well as to pass other options to the internal
CTest process such as -I „7 to run every 7th test. To refer to the CTest that is running the
script, use the variable: ctest_executable_name. The last required variable is
CTEST_CMAKE_COMMAND which specifies the full path to the cmake executable that will be
used to configure the dashboard. To refer to the CMake command that corresponds to the
CTest command running the script, use the variable: cmake executable name . The CTest
script does an initial configuration with CMake in order to generate the
CTestConfig. cmake file that CTest will use for the dashboard. The following example
demonstrates the use of these four variables and is an example of the simplest script you can
have.
# these are the source and binary directories on disk
set (CTEST_SOURCE_DIRECTORY C:/martink/test/CMake)
set (CTEST_BINARY_DIRECTORY C:/martink/test/CMakeBin)
# which CTest command to use for running the dashboard
set (CTEST_COMMAND
" \ " $ {CTEST_EXECUTABLE_NAME}\" -D Nightly"
)
# what cmake command to use for configuring this dashboard
set (CTEST CMAKE COMMAND
Setting up Automated Dashboard Clients
207
"\"${CMAKE_EXECUTABLE_NAME}\""
)
The script above is not that different to running CTest -D from the command line yourself.
All it adds is that it verifies that the binary directory exists and creates it if it does not. Where
CTest scripting really shines is in the optional features it supports. We will consider these
options one by one, starting with one of the most commonly used options
CTEST_start_with_empty_binary_directory. When this variable is set to true it will
delete the binary directory and then recreate it as an empty directory prior to running the
dashboard. This guarantees that you are testing a clean build every time the dashboard is run.
To use this option you simply set it in your script. In the example above we would simply add
the following lines:
# should CTest wipe the binary tree before running
set (CTEST START WITH EMPTY BINARY DIRECTORY TRUE)
Another commonly used option is the ctest_initial_cache variable. Whatever values
you set this to will be written into the CMakeCache file prior to running the dashboard. This
is an effective and simple way to initialize a cache with some preset values. The syntax is the
same as what is in the cache with the exception that you must escape any quotes. Consider the
following example:
# this is the initial cache to use for the binary tree, be
# careful to escape any quotes inside of this string
set (CTEST_INITIAL_CACHE "
//Command used to build entire project from the command line.
MAKECOMMAND:STRING=\MC:/PROGRA-1/MICROS-l.NET/Common7/IDE/devenv
.com\" CMake.sln /build Debug /project ALL_BUILD
//make program
CMAKE_MAKE_PROGRAM:FILEPATH=C:/PROGRA-l/MICROS-1.NET/Common7/IDE
/devenv.com
//Name of generator.
CMAKE_GENERATOR:INTERNAL=Visual Studio 7 .NET 2003
//Path to a program.
CVSCOMMAND:FILEPATH=C:/cygwin/bin/cvs.exe
//Name of the build
BUILDNAME:STRING=Win32-vs71
208
Automation & Testing with CMake
//Name of the computer/site where compile is being run
SITE:STRING=DASH1.kitware
Note that the above code is basically just one set command setting the value of
ctest_initial_cache to a multiline string value. For Windows builds these are the most
common cache entries that need to be set prior to running the dashboard. The first three values
control what compiler will be used to build this dashboard (Visual Studio 7.1 in this example).
CVSCOMMAND might be found automatically, but if not it can be set here. The last two cache
entries are the names that will be used to identify this dashboard submission on the dashboard.
The next two variables work together to support additional directories and projects. For
example, imagine that you had a separate data directory that you needed to keep up to date
with your source directory. Setting the variables ctest_cvs_command and
ctest_extra_updates_1 tells CTest to perform a cvs update on the specified directory,
with the specified arguments prior to running the dashboard. For example:
# what cvs command to use for configuring this dashboard
set (CTEST_CVS_COMMAND "C:/cygwin/bin/cvs.exe")
# set any extra directories to do an update on
set (CTEST_EXTRA_UPDATES_1
nC:/Dashboards/My Tests/VTKData" "-dAP")
If you have more than one directory that needs to be updated you can use
ctest_extra_updates_2 through ctest_extra_updates_9 in the same manner. The
next variable you can set is called ctest_environment. This variable consolidates several
set commands into a single command. Setting this variable allows you to set environment
variables that will be used by the process running the dashboards. You can set as many
environment variables as you want using the syntax shown below.
# set any extra environment variables here
set (C TE S T_ENVIRONMENT
"DISPLAY=:0"
"USE_GCC_MALLOC=1"
)
# is the same as
set (ENV{DISPLAY} ":0")
set (ENV{USE GCC MALLOC} "1")
Setting up Automated Dashboard Clients
209
The final general purpose option we will discuss is CTest’s support for restoring a bad
dashboard. In some cases you might want to make sure that you always have a working build
of the software. Or you might use the resulting executables or libraries from one dashboard in
the build process of another dashboard. In these cases if the first dashboard fails it is best to
drop back to the last previously working dashboard. You can do this in CTest by setting
ctest_backup_and_restore to true. When this is set to true CTest will first backup the
source and binary directories, it will then check out a new source directory and create a new
binary directory. After that it will run a full dashboard. If the dashboard is successful the
backup directories are removed, if for some reason the new dashboard fails the new
directories will be removed and the old directories restored. To make this work you must also
set the ctest_cvs_checkout variable. This should be set to the command required to check
out your source tree. This doesn’t actually have to be cvs but it must result in a source tree in
the correct location. Consider the following example:
# do a backup and should the build fail restore,
# if this is true you must set the CTEST_CVS_CHECKOUT
# variable below.
set (CTE ST_BACKUP_AND_RESTORE TRUE)
# this is the full cvs command to checkout the source dir
# this will be run from the directory above the source dir
set (CTEST_CVS_CHECKOUT
"/usr/bin/cvs -d /cvsroot/FOO co -d FOO FOO"
)
Note that whatever checkout command you specify will be run from the directory above the
source directory. A typical nightly dashboard client script will look like this:
set (CTEST_SOURCE_NAME CMake)
set (CTEST_BINARY_NAME CMake-gcc)
set (CTEST_DASHBOARD_ROOT M$ENV{HOME}/Dashboards/My Tests")
set (CTE ST_S OURCE_DIRECTORY
"${CTEST_DASHBOARD_ROOT}/${CTEST_SOURCE_NAME}")
set (CTEST_BINARY_DIRECTORY
"${CTEST_DASHBOARD_ROOT}/${CTE S T_BINARY_NAME}")
# which ctest command to use for running the dashboard
set (C TE S T_COMMAND
"\"${CTEST_EXECUTABLE_NAME}\"
-D Nightly
-A \"${CTEST SCRIPT DIRECTORY}/${CTEST SCRIPT NAME}\"")
210
Automation & Testing with CMake
# what cmake command to use for configuring this dashboard
set (CTEST J2MAKE JO OMMAND "\"${CMAKE_EXECUTABLE_NAME}\"")
# should ctest wipe the binary tree before running
set (CTEST_START_WITH_EMPTY_BINARY_DIRECTORY TRUE)
# this is the initial cache to use for the binary tree
set (CTEST_INITIAL_CACHE "
SITE:STRING=midworld.kitware
BUILDNAME:STRING=DarwinG5-g++
MAKECOMMAND:STRING=make -i -j2
# set any extra environment variables here
set (CTE ST_ENVIRONMENT
"CC=gccM
"CXX=g++ "
Settings for Continuous Dashboards
The next three variables are used for setting up continuous dashboards. As mentioned earlier a
continuous dashboard is designed to run continuously throughout the day providing quick
feedback on the state of the software. If you are doing a continuous dashboard you can use
CTEST_CONTINUOUS_DURATION and CTEST_CONTINUOUS_MINIMUM_INTERVAL to run the
continuous repeatedly. The duration controls how long the script should run continuous
dashboards, and the minimum interval specifies the shortest allowed time between continuous
dashboards. For example, say that you want to run a continuous dashboard from 9AM until
7PM and that you want no more than one dashboard every twenty minutes. To do this you
would set the duration to 600 minutes (ten hours) and the minimum interval to 20 minutes. If
you run the test script at 9AM it will start a continuous dashboard. When that dashboard
finishes it will check to see how much time has elapsed. If less than 20 minutes has elapsed
CTest will sleep until the 20 minutes are up. If 20 or more minutes have elapsed then it will
immediately start another continuous dashboard. Do not be concerned that you will end up
with 300 dashboards a day (10 hours * three times an hour). If there have been no changes to
the source code, CTest will not build and submit a dashboard. It will instead start waiting until
the next interval is up and then check again. Using this feature just involves setting the
following variables to the values you desire.
set (CTEST_CONTINUOUS_DURATION 600)
set (CTEST_CONTINUOUS_MINIMUM_INTERVAL 20)
Earlier we introduced the ctest_start_with_empty_binary_directory variable that
can be set to start the dashboards with an empty binary directory. If this is set to true for a
Setting up Automated Dashboard Clients
211
continuous dashboard then every continuous where there has been a change in the source code
will result in a complete build from scratch. For larger projects this can significantly limit the
number of continuous dashboards that can be generated in a day, while not using it can result
in build errors or omissions because it is not a clean build. Fortunately there is a compromise,
if you set ctest_start_with_empty_binary_directory_once to true CTest will start
with a clean binary directory for the first continuous build but not subsequent ones. Based on
your settings for the duration this is an easy way to start with a clean build every morning, but
use existing builds for the rest of the day.
Another useful feature to use with a continuous dashboard is the -I option. A large project
may have so many tests that running all the tests limits how frequently a continuous
dashboard can be generated. By adding -I „7 (or -I „5 etc) to the ctest_command value the
continuous dashboard will only run every seventh test significantly reducing the time required
between continuous dashboards. For example:
# which ctest command to use for running the dashboard
set (CTEST_COMMAND
" \ " $ {CTEST_EXECUTABLE_NAME}\M -D Continuous -I , ,7"
As you can imagine there is a compromise to be made between the coverage of the continuous
and the frequency of its updates. Depending on the size of your project and the compute
resources at your disposal these variables can be used to fine tune a continuous dashboard to
meet your needs. An example of a CTest script for a continuous dashboard looks like this:
# these are the names of the source and binary directories
set (CTEST_SOURCE_NAME CMake-cont)
set (CTEST_BINARY_NAME CMakeBCC-cont)
set (CTEST_DASHBOARD_ROOT nc:/Dashboards/My Tests")
set (CTEST_SOURCE_DIRECTORY
"${CTEST_DASHBOARD_ROOT}/${CTEST_SOURCE_NAME}")
set (CTEST_BINARY_DIRECTORY
"${CTEST_DASHBOARD_ROOT}/${CTE S T_BINARY_NAME}")
# which ctest command to use for running the dashboard
set (CTEST_COMMAND
"\"${CTE ST_EXECUTABLE_NAME}\"
-D Continuous
-A \"${CTEST_SCRIPT_DIRECTORY}/${CTEST_SCRIPT_NAME}\"")
# what cmake command to use for configuring this dashboard
set (CTEST CMAKE COMMAND "\"${CMAKE EXECUTABLE NAME}\"")
212
Automation & Testing with CMake
# this is the initial cache to use for the binary tree
set (CTEST_INITIAL_CACHE "
SITE:STRING=dashl4.kitware
BUILDNAME:STRING=Win32-bcc5.6
CMAKE_GENERATOR:INTERNAL=Borland Makefiles
CVSCOMMAND:FILEPATH=C:/Program Files/TortoiseCVS/cvs.exe
. CMAKE_CXX_FLAGS:STRING=-w- -whid -waus -wpar -tWM
CMAKE_C_FLAGS:STRING=-w- -whid -waus -tWM
")
# set any extra environment variables here
set (ENV{PATH} "C:/Program
Files/Borland/CBuilder6/Bin\;C:/Program
Files/Borland/CBuilder6/Proj ects/Bpl"
Variables Available in CTest Scripts
There are a few variables that will be set before your script executes. The first two variables
are the directory the script is in, ctest_script_directory, and name of the script itself
CTEST_SCRIpt_name. These two variables can be used to make your scripts more portable.
For example if you wanted to include the script itself as a note for the dashboard you could do
the following:
set (CTEST_COMMAND
"\"${CTEST_EXECUTABLE_NAME}\M -D Continuous
-A \"${CTEST_SCRIPT_DIRECTORY}/${CTEST_SCRIPT_NAME}\""
Another variable you can use is CTEST_SCRIPT_ARG. This variable can be set by providing a
comma separated argument after the script name when invoking CTest -s. For example
CTest -S foo. cmake, 21 would result in CTEST_SCRIPT_ARG being set to 21.
10.10 Advanced CTest Scripting
CTest scripting described in section Setting up Automated Dashboard Clientsl0.9 should
provide support for most dashboards. That said it has some limitations that advanced users
may want to circumvent. This section describes how to write CTest scripts that allow the
dashboard maintainer to have much more control.
Advanced CTest Scripting
213
Limitations of Traditional CTest Scripting
Let us start with the limitations of traditional CTest scripting. The first limitation is that the
dashboard will always fail if the Configure step fails. The reason for that is that the input files
for CTest are actually generated by the Configure step. To make things worse, the update step
will not happen and the dashboard will be stuck. To prevent this, an additional update step is
necessary. This can be achieved by adding ctest_extra_updates_1 variable with “-D
yesterday” or similar flag. This will update the repository prior to doing a dashboard. Since it
will update to yesterday’s time stamp, the actual update step of CTest will find the files that
were modified since the previous day.
The second limitation of traditional CTest scripting is that it is not actually scripting. We only
have control over what happens before the actual CTest run, but not what happens during or
after. For example, if we want to run the testing and then move the binaries somewhere, or if
we want to build the project, do some extra tasks and then run tests or something similar, we
need to perform several complicated tasks, such as run CMake with -P option as a part of
CTEST_COMMAND.
Extended CTest Scripting
To overcome the limitations of traditional CTest scripting, CTest provides an extended
scripting mode. In this mode, the dashboard maintainer has access to individual CTest
handlers. By running these handlers individually, she can develop relatively elaborate testing
schemes. An example of an extended CTest script would be something like this:
cmake_minimum_required (VERSION 2.2)
set (CTEST_SITE "andoria.kitware")
set (CTEST_BUILD_NAME "Linux-g++")
set (CTEST_NOTES_FILES
"${CTEST_SCRIPT_DIRECTORY}/${CTEST_SCRIPT_NAME}")
set (CTEST_DASHBOARD_ROOT "$ENV{HOME}/Dashboards/My Tests")
set (CTEST_SOURCE_DIRECTORY "${CTEST_DASHBOARD_ROOT}/CMake")
set (CTEST_BINARY_DIRECTORY "${CTEST_DASHBOARD_ROOT}/CMake-gcc
")
set (CTEST_UPDATE_COMMAND "/usr/bin/cvs")
set (CTEST_CONFIGURE_COMMAND
"\"${CTEST_SOURCE_DIRECTORY)/bootstrap\"")
set (CTEST_BUILD_COMMAND "/usr/bin/make -j 2")
ctest_empty_binary_directory (${CTEST_BINARY_DIRECTORY})
214
Automation & Testing with CMake
ctest_start (Nightly)
ctest_update (SOURCE "${CTEST_SOURCE_DIRECTORY}M)
ctest_configure (BUILD M${CTEST_BINARY_DIRECTORY}”)
ctest_build (BUILD ”${CTEST_BINARY_DIRECTORY}”)
ctest_test (BUILD ,f $ { CTEST_BINARY_DIRECTORY} M )
ctest submit ()
The first line is there to make sure an appropriate version of CTest is used, the advanced
scripting was introduced in CTest 2.2. The CMake parser is used, and so all scriptable
commands from CMake are available. This includes the cmake_minimum_required
command:
cmake_minimum_required (VERSION 2.2)
Overall the layout of the rest of this script is similar to the traditional one. There are several
settings that CTest will use to perform its tasks. Then, unlike with traditional CTest, there are
the actual tasks that CTest will perform. Instead of providing information in the project’s
CMake cache, in this scripting mode, all the information is provided to CTest. For
compatibility reasons we may choose to write the information to the cache, but that is up to
the dashboard maintainer. The first block contains the variables about the submission.
set (CTEST_SITE "andoria.kitware")
set (CTEST_BUILD_NAME "Linux-g++")
set (CTEST_NOTES_FILES
"${CTEST_SCRIPT_DIRECTORY}/${CTEST_SCRIPT_NAME}")
These variables serve the same role as the site and build_name cache variables. They are
used to identify the system once it submits the results to the dashboard.
ctest_notes_files is a list of files that should be submitted as the notes of the dashboard
submission. This variable corresponds to the -A flag of CTest.
The second block describes the information that CTest handlers will use to perform the tasks:
set (CTESTJDASHBOARD_ROOT "$ENV{HOME}/Dashboards/My Tests")
set (CTEST_SOURCE_DIRECTORY "${CTEST_DASHBOARD_ROOT}/CMake")
set (CTEST_BINARY_DIRECTORY "${CTEST_DASHBOARD_ROOT}/CMake-gcc
")
set (CTEST_UPDATE_COMMAND "/usr/bin/cvs")
set (CTE ST_CONFIGURE_COMMAND
"\"${CTEST_SOURCE_DIRECTORY}/bootstrap\"")
set (CTEST_BUILD_COMMAND "/usr/bin/make -j 2")
Advanced CTest Scripting
215
The ctest_source_directory and ctest_binary_directory serve the same purpose
as in the traditional CTest script. The only difference is that we will be able to overwrite these
variables later on when calling the CTest handlers. The ctest_update_COMMAND is the path
to the command used to update the source directory from the repository. Currently CTest
supports Concurrent Versions System (CVS), Subversion, Git, Mercurial and Bazaar.
Both the configure and build handlers support two modes. One mode is to provide the full
command that will be invoked during that stage, this is designed to support projects that do
not use CMake as their configuration or build tool. In this case you specify the full command
lines to configure and build your project by setting the CTEST_CONFiGURE_COMMAND and
CTEST_build__command variables respectively. This is similar to specifying
CTEs t_cmake_commanD in the traditional CTest scripting.
For projects that use CMake for their configuration and build steps you do not need to specify
the command lines for configuring and building your project. Instead you will specify the
CMake generator to use by setting the ctest_cmake_generator variable. This way CMake
will be run with the appropriate generator. One example of this is:
set (CTEST_CMAKE_GENERATOR "Visual Studio 8 2005")
For the build step you should also set the variables ctest_project_name and
ctest_build_configuration to specify how to build the project. In this case
ctest_project_name will match the top level CMakeLists file’s project command. The
CTEST_build_CONFIGURATION should be one of Release, Debug, MinSizeRel, or
RelWithDeblnfo. Additionally ctest_build_flags can be provided as a hint to the build
command. An example of testing for a CMake based project would be:
set (CTEST_CMAKE_GENERATOR "Visual Studio 8 2005")
set (CTEST_PROJECT_NAME "Grommit")
set (CTEST_BUILD_CONFIGURATION "Debug")
The final block performs the actual testing and submission:
ctest_empty_binary_directory (${CTEST_BINARY_DIRECTORY})
ctest_start (Nightly)
ctest_update (SOURCE
"${CTEST_SOURCE_DIRECTORY}" RETURN_VALUE res)
ctest_configure (BUILD
"${CTEST_BINARY_DIRECTORY}" RETURN_VALUE res)
ctest build (BUILD "${CTEST BINARY DIRECTORY}" RETURN VALUE res)
216
Automation & Testing with CMake
ctest_test (BUILD "${CTEST_BINARY_DIRECTORY}" RETURN_VALUE res)
ctest submit (RETURN VALUE res)
The ctest_empty_binary_di rectory command empties the directory and all
subdirectories. Please note that this command has a safety measure built in, which is that it
will only remove the directory if there is a CMakeCache.txt file in the top level directory.
This is to prevent CMake from mistakenly removing a directory.
The rest of the block contains the calls to the actual CTest handlers. Each of them corresponds
to a CTest -D option. For example, instead of:
ctest -D ExperimentalBuild
The script would contain:
ctest_start (Experimental)
ctest_build (BUILD "${CTEST_BINARY_DIRECTORY}" RETURN_VALUE res)
Each step can return a return value, which can then be used to determine if the step was
successful. For example the return value of the Update stage can be used in a continuous
dashboard to determine if the rest of the dashboard should be run.
To demonstrate some advantages of using extended CTest scripting, let us examine a more
advanced CTest script. This script drives testing of an application called Sheer. Sheer uses
CMake internally, but it drives the build process through a series of Tel scripts. One of the
problems of this approach is that it does not support out-of-source builds. Also, on Windows,
certain modules come pre-built, so they have to be copied to the build directory. To test a
project like that, we would use a script like this:
cmake_minimum_required (VERSION 2.2)
# set the dashboard specific variables -- name and notes
set (CTEST_SITE "dashll.kitware")
set (CTEST_BUILD_NAME "Win32-VS71M)
set (CTEST_NOTES_FILES
"${CTEST_SCRIPT_DIRECTORY}/${CTEST_SCRIPT_NAME}")
# do not let the test run for more than 1500 seconds
set (CTEST TIMEOUT "1500")
# set the source and binary directories
Advanced CTest Scripting
217
set (CTEST_SOURCE_DIRECTORY "C:/Dashboards/MyTests/slicer2")
set (CTEST_BINARY_DIRECTORY M ${CTEST_SOURCE_DIRECTORY}-build)
set (SLICER_SUPPORT
"//Dash11/Shared/Support/SIicerSupport/Lib”)
set (TCLSH "${SLICER_SUPPORT}/win32/bin/tclsh84.exe")
# set the complete update, configure and build commands
set (C TE ST_U PDATE_COMMAND
"C:/Program Files/TortoiseCVS/cvs.exe”)
set (CTEST_CONFIGURE_COMMAND
"\"${TCLSH}\"
\"${CTEST_BINARY_DIRECTORY}/Scripts/genlib.tcl\”")
set (CTEST_BUILD_COMMAND
"\”${TCLSH}\"
\"${CTEST_BINARY_DIRECTORY}/Scripts/cmaker.tcl\"")
# clear out the binary tree
file (WRITE "${CTEST_BINARY_DIRECTORY}/CMakeCache.txt”
"// Dummy cache just so that ctest will wipe binary dir")
ctest_empty_binary_directory (${CTEST_BINARY_DIRECTORY})
# special variables for the Slicer build process
set (ENV{MSVC6} "0")
set (ENV{GENERATOR} "Visual Studio 7 .NET 2003")
set (ENV{MAKE} "devenv.exe ")
set (ENV{COMPILER_PATH}
"C:/Program Files/Microsoft Visual Studio .NET
2003/Common7/Vc7/bin")
set (ENV{CVS} "${CTEST_UPDATE_COMMAND}")
# start and update the dashboard
ctest_start (Nightly)
ctest_update (SOURCE "${CTEST_SOURCE_DIRECTORY}")
# define a macro to copy a directory
macro (COPY_DIR srcdir destdir)
exec_program ("${CMAKE_EXECUTABLE_NAME}" ARGS
"-E copy_directory \"${srcdir}\" \"${destdir}\"")
endmacro ()
# Slicer does not support out of source builds so we
# first copy the source directory to the binary directory
# and then build it
copy_dir ("${CTEST_SOURCE_DIRECTORY}"
"${CTEST BINARY DIRECTORY}")
218
Automation & Testing with CMake
# copy support libraries that slicer needs into the binary tree
copy_dir ("${SLICER_SUPPORT}"
"${CTEST_BINARY_DIRECTORY}/Lib M)
# finally do the configure, build, test and submit steps
ctest_configure (BUILD "${CTEST_BINARY_DIRECTORY}")
ctest_build (BUILD "${CTEST_BINARY_DIRECTORY}")
ctest_test (BUILD "${CTEST_BINARY_DIRECTORY}")
ctest submit ()
With extended CTest scripting we have full control over the flow, so we can perform arbitrary
commands at any point. For example, after performing an update of the project, the script
copies the source tree into the build directory. This allows it to do an “out-of-source” build.
10.11 Setting up a Dashboard Server
For many people making use of Kitware’s my.cdash.org dashboard hosting will be sufficient,
if that is the case for you then you can skip this section. If you wish to setup your own server,
then this section will walk you through the process. There are a few options for what to run on
the server to process the dashboard results. The preferred option is to use CDash, a new
dashboard server based on PHP, MySQL, CSS, and XSLT. Predecessors to CDash such as
DART 1 and DART 2 can also be used, information on them can be found at
http://www.itk.org/Dart/HTML/Index.shtml.
CDash Server
CDash is a new dashboard server developed by Kitware that is based on the common LAMP
platform. It makes use of PHP, CSS, XSL, MySQL/PostgreSQL and of course your web
server, normally Apache. CDash takes the dashboard submissions as XML and stores them in
an SQL database (currently MySQL and PostgreSQL are supported). When the web server
receives requests for pages the PHP scripts extract the relevant data from the database and
produce XML that is sent to XSL templates, that in turn convert it into HTML. CSS is used to
provide the overall look and feel for the pages. CDash can handle large projects ,and has been
hosting up to 20 projects on a typical server (dual-core PC running Ubuntu), with about 300M
records stored in the database.
Server requirements
• MySQL (5.x and higher) or PostgreSQL (8.3 and higher)
• PHP (5.0 recommended)
• XSL module for PHP (apt-get install php5-xsl)
Setting up a Dashboard Server
219
• cURL module for PHP
• GD module for PHP
Gettting CDash
You can get CDash from the www.cdash.org website, or you can get the latest code from
SVN using the following command:
svn co https://www.kitware.com:8443/svn/CDash/trunk CDash
Quick installation
1. Unzip or checkout CDash in your webroot directory on the server. Make sure the web
server has read permission to the files
2. Create a cdash/config. local .php and add the following lines, adapted for your
server configuration
// Hostname of the database server
$CDASH_DB_HOST = 'localhost';
// Login for database access
$CDASH_DB_LOGIN = 'root';
// Password for database access
$CDASH_DB_PASS = ' ' ;
// Name of the database
$ C DAS H_DB_NAME = 'cdash';
// Database type
$CDASH_DB_TYPE = 'mysql';
3. Point your web browser to the install.php script
http://mywebsite.com/CDash/install.php
4. Follow the installation instructions
5. When the installation is done, add the following line in the config. local .php to
ensure the installation script is no longer accessible
$CDASH PRODUCTION MODE = true;
220
Automation & Testing with CMake
Testing the installation
In order to test the installation of the CDash server, you can download a small test project and
test the submission to CDash, by following these steps:
1. Download the test project at
k http://www.cdash.org/download/CDashTest.zip
2. Create a CDash project named “test” on your CDash server (see 10.7 Producing Test
Dashboards)
3. Download the CTestConf ig. cmake file from the CDash server
4. Run CMake on CDashTest to configure the project
5. Run
make experimental
6. Go to the dashboard page for the “test” project, you should see the submission in the
experimental section.
Advanced Server Management
Project Roles: CDash supports three role levels for users:
• Normal users are regular users with read and/or write access to the project’s code
repository.
• Site maintainers are responsible for periodic submissions to CDash.
• Project administrators have reserved privileges to administer the project in CDash.
The first two levels can be defined by the users themselves. Project administrators access
must be granted by another administrator of the project, or a CDash administrator.
In order to change the current role for a user:
1. Select [Manage project roles] in the administration section
2. If you have more than one project, select the appropriate project
3. In the “current users” section change the role for a user
4. Click “update” to update the current role
5. In order to completely remove a user from a project, click “remove”
Setting up a Dashboard Server
221
6. If the CVS login is not correct it can be changed from this page. Note that users can also
change their CVS login manually from their profile
In order to add a current role for a user:
1. Select [Manage project roles] in the administration section
2. Then, if you have more than one project, select the appropriate project
3. In the “Add new user” section type the first letters of the first name, last name or email
address of the user you want to add. Or type ‘%’ in order to show all the users registered
in CDash
4. Select the appropriate user’s role
5. Optionally enter the user’s CVS login
6. Click on “add user”
Figure 33 - Project Role management page in CDash
Importing users: to batch import a list of current users for a given project
1. Click on [manage project role] in the administration section
2. Select the appropriate project
3. Click “Browse” to select a CVS users file.
4. The current file should be formatted as follows:
cvsuser:email:first name last name
222
Automation & Testing with CMake
5. Click “import”
6. Make sure the reported names and email addresses are correct, deselect any that should
not be imported
7. Click on “Register and send email”. This will automatically register the users, set a
random password and send a registration request to the appropriate email addresses
Ooogle Analytics
Usage statistics of the CDash server can be assessed using Google Analytics. In order to setup
google analytics:
1. Go to http://www.google.com/analytics/index.html
2. Setup an account if necessary
3. Add a website project
4. Login into CDash as the administrator of a project
5. Click on “Edit Project”
6. Add the code from Google into the Google Analytics Tracker (i.e. UA-43XXXX-X) for
your project
Submission backup
CDash backups all the incoming XML submissions and places them in the backup directory
by default. The default timeframe is 48 hours. The timeframe can be changed in the
conf ig. local .php as follows:
$ C DA S H_BAC KU P_TIME FRAME=72;
If projects are private it is recommended to set the backup directory outside of the apache root
directory to make sure that nobody can access the XML files, or to add the following lines to
the .htaccess in the backup directory:
<Files *>
order allow,deny
deny from all
</files>
Note that the backup directory is emptied only when a new submission arrives. If necessary,
CDash can also import builds from the backup directory:
1. Log into CDash as administrator
2. Click on [Import from backups] in the administration section
Setting up a Dashboard Server
223
3. Click on “Import backups”
Build Groups
Builds can be organized by groups. In CDash, three groups are defined automatically and
cannot be removed: Nightly, Continuous and Experimental. These groups are the same
as the ones imposed by CTest. Each group has an associated description that is displayed
when clicking on the name of the group on the main dashboard.
To add a new group:
1. Click on [manage project groups] in the administration section
2. Select the appropriate project
3. Under the “create new group” section enter the name of the new group
4. Click on “create group”. The newly created group appears at the bottom of the current
dashboard
To order groups:
1. Click on [manage project groups] in the administration section
2. Select the appropriate project
3. Under the “Current Groups” section, click on the [up] or [down] links. The order
displayed in this page is exactly the same as the order on the dashboard
To update group description:
1. Click on [manage project groups] in the administration section
2. Select the appropriate project
3. Under the “Current Groups” section, update or add a description in the field next to the
[up] [down] links
4. Click “Update Description” in order to commit your changes
By default a build belongs to the group associated with the build type defined by CTest, i.e. a
nightly build will go in the nightly section. CDash matches a build by its name, site, and build
type. For instance a nightly build named “Linux-gcc-4.3” from the site “midworld.kitware
will be moved to the nightly section unless a rule on “Linux-gcc-4.3”-“midworld.kitware”-
“Nightly” is defined. There are two ways to move a build into a given group by defining a
rule: Global Move and Single Move.
Global move allows moving builds in batch.
1. Click on [manage project groups] in the administration section .
2. Select the appropriate project (if more than one).
224
Automation & Testing with CMake
3. Under “Global Move” you will see a list of the builds submitted in the past 7 days,
(without duplicates). Note that expected builds are also shown, even if they have not been
submitting in the past 7 days.
4. You can narrow your search by selecting a specific group (default is All).
5. Select the builds to move. Hold “shift” in order to select multiple builds.
6. k Select the target group. This is mandatory.
7. Optionally check the “expected” box if you expect the builds to be submitted on a daily
basis. For more information on expected builds see the “Expected builds” section below.
8. Click “Selected Builds to Group” to move the groups.
Single move allows modifying only a particular build. From the main dashboard page,
if logged in as an administrator of the project, a small folder icon is displayed next to
each build. Clicking on the icon shows some options for each build. In particular,
project administrators can mark a build as expected, move a build to a specific group,
or delete a bogus build.
Expected builds: Project administrators can mark certain builds as expected. That
means builds are expected to submit daily. This allows you to quickly check if a build
has not been submitting on today’s dashboard, or to quickly assess how long the
build has been missing by clicking on the info icon on the main dashboard.
midworld.kitware
j DarwinG5-g++ \±t:3
This build has not been submitting since 2008-04-23 15:56:00 (9 days)
Figure 34 -Information regarding a build from the main dashboard page
If an expected build was not submited the previous day and the option “Email Build Missing”
is checked for the project, an email will be sent to the site maintainer and project
administrator to alert them (see the Sites section for more information).
Setting up a Dashboard Server
225
Figure 35 -Build Group Configuration Page
Email
CDash sends email to developers and project administrators when a failure occurs for a given
build. The configuration of the email feature is located in three places: the
conf ig. local .php file, the project administration section and the project’s groups section.
In the conf ig. local .php, two variables are defined to specify the email address from
which email is sent and the reply address. Note that the SMTP server cannot be defined in the
current version of CDash, it is assumed that a local email server is running on the machine.
$CDASH_EMAIL_FROM = 'admin0mywebsite.com’ ;
$CDASH_EMAIL_REPLY = 'noreply@mywebsite.com';
226
Automation & Testing with CMake
In the email configuration section of the project, several parameters can be tuned to control
the email feature. These parameters were described in the previous section, “Adding CDash
Support to a Project”.
In the “build groups” administration section of a project, an administrator can decide if emails
are sent to a specific group, or if only a summary email should be sent. The summary email is
sent for a given group when at least one build is failing on the current day.
Sites
CDash refers to a site as an individual machine submitting at least one build to a given
project. A site might submit multiple builds (e.g. nightly and continuous) to multiple projects
stored in CDash.
In order to see the site description, click on the name of the site from the main dashboard page
for a project. The description of a site includes information regarding the processor type and
speed as well as the amount of memory available on the given machine. The description of a
site is automatically sent by CTest, however in some cases it might be required to manually
edit it. Moreover, if the machine is upgraded, i.e. the memory is upgraded; CDash keeps track
of the history of the description, allowing users to compare performance before and after the
upgrade.
Sites usually belong to one maintainer, responsible for the submissions to CDash. It is
important for site maintainers to be warned when a site is not submitting as it could be related
to a configuration issue. In order to claim a site, a maintainer should
1. Log into CDash
2. Click on a dashboard containing at least one build for the site
3. Click on the site name to open the description of the site
4. Click on [claim this site]
Once a site is claimed, its maintainer will receive emails if the client machine does not submit
for an unknown reason, assuming that the site is expected to submit nightly. Furthermore, the
site will appear in the “My Sites” section of the maintainer’s profile, facilitating a quick check
of the site’s status.
Another feature of the site page is the pie chart showing the load of the machine. Assuming
that a site submits to multiple projects, it is usually useful to know if the machine has room
for other submissions to CDash. The pie chart gives an overview of the machine submission
time for each project.
Setting up a Dashboard Server
227
Time spent per project (computed from data collected in the past 24h):
Figure 36 -Pie chart showing how much time is spent by a given site on building CDash
projects
Figure 37 -Map showing the location of the different sites building a project
Graphs
CDash curently plots three types of graph. The graphs are generated dynamically from the
database records and are interactive.
228
Automation & Testing with CMake
Figure 38 - Example of build time over time
The build time graph displays the time required to build a project over time. In order to
display the graph you need to:
1. Go to the main dashboard for the project.
2. Click on the build name you want to track.
3. On the build summary page, click on [Show Build Time Graph].
The test time graphs display the time to run a specific test as well as its status (passed/failed)
over time. To display it:
1. Go to the main dashboard for a project.
2. Click on the number of test passed or failed.
3. From the list of tests, click on the status of the test.
4. Click on [Show Test Time Graph] and/or [Show Failing/Passing Graph].
Adding Notes to a Build
In some cases, it is useful to inform other developers that someone is currently looking at the
errors for a build. CDash implements a simple note mechanism for that purpose:
1. Login to CDash.
2. On the dashboard project page, click on the build name that you would like to add the
note to.
3. Click on the [Add a Note to this Build] link, located next to the current build matrix (see
thumbnail).
Setting up a Dashboard Server
229
4. Enter a short message that will be added as a note.
5. Select the status of the note: Simple note, Fix in progress, Fixed.
6. Click on "Add Note".
Logging
CDash supports internal logging mechanism using the error_log() function from PHP. Most
of the critical SQL queries are logged. By default the CDash log file is located in the backup
directory under the name cdash.log. The location of the log file can be modified by
changing the variable in the conf ig. local .php configuration file.
$CDASH_BACKUP_DIRECTORY='/var/temp/cdashbackup/log';
The log file can be accessed directly from CDash if the log file is in the standard location:
1. Log into CDash as administrator.
2. Click on [CDash logs] in the administration section.
3. Click on cdash.log to see the log file.
Note that CDash does not perform any log rotation.
Test Timing
CDash supports checks on the duration of tests. CDash keeps the current weighted average of
the mean and standard deviation for the time each test takes to run in the database. In order to
keep the computation as efficient as possible, the following formula is used, which only
involves the previous build.
newMean = (1-alpha)*oldMean + alpha*currentTime
newSD = sqrt((1-alpha)*SD*SD + alpha*(currentTime-newMean)*
(currentTime-newMean)
A test is defined as failing based on the following logic:
if previousSD < thresholdSD then previousSD = thresholdSD
if currentTime > previousMean+multiplier*previousSD then fail
It should be noted that alpha defines the current “window” for the computation. By default
alpha is set to 0.3.
230
Automation & Testing with CMake
Mobile Support
Since CDash is written using template layers via XSLT, developing new layouts is as simple
as adding new rendering templates. As a demonstration, an iPhone web template is provided
with the current version of CDash.
http://mycdashserver/CDash/iphone
The main page shows a list of the public projects hosted on the server. Clicking on the name
of a project loads its current dashboard. In the same manner, clicking on a given build
displays more detailed information about that build. For the moment, the ability to login and
to access private sections of CDash are not supported with this layout.
Figure 39 -Example of dashboard on the iPhone
Backing up CDash
All of the data (except the logs) used by CDash is stored in its database. It is important to
backup the database regularly, especially so before performing a CDash upgrade. There are a
couple of ways to backup a MySQL database. The easiest is to use the mysqldump
(http://dev.mysql.eom/doc/refman/5.l/en/mysqldump.html) command:
mysqldump -r cdashbackup.sql edash
If you are using MylSAM tables exclusively you can copy the CDash directory in your
MySQL data directory. Note that you need to shutdown MySQL before doing the copy so that
Setting up a Dashboard Server
231
no file could be changed during the copy. Similarly to MySQL, PostGreSQL has a pg_dump
utility:
pg_dump -U posgreSQL_user cdash > cdashbackup.sql
Upgrading CDash
When a new version of CDash is released or if you decide to update from the SVN repository,
CDash will warn you on the front page if the current database needs to be upgraded. When
upgrading to a new release version the following steps should be taken:
1. Backup your SQL database (see previous section).
2. Backup your conf ig. local .php (or config.php) configuration files.
3. Replace your current cdash directory with the latest version and copy the
conf ig. local .php in the cdash directory.
4. Navigate your browser to your CDash page. (e.g.http://localhost/CDash).
5. Note the version number on the main page, it should match the version that you are
upgrading to.
6. The following message may appear: 'The current database shema doesn't match the
version of CDash you are running, upgrade your database structure in the Administration
panel of CDash." This is a helpful reminder to perform the following steps.
7. Login to CDash as administrator.
8. In the ‘Administration’ section, click on ‘[CDash Maintenance]’.
9. Click on ‘Upgrade CDash’: this process might take some time depending on the size of
your database (do not close your browser).
• Progress messages may appear while CDash performs the upgrade.
• If the upgrade process takes too long you can check in the backup/cdash. log file
to see where the process is taking a long time and/or failing.
• It has been reported that on some systems the spinning icon never turns into a check
mark. Please check the cdash. log for the "Upgrade done." string if you feel that the
upgrade is taking too long.
• On a 50GB database the upgrade might take up to 2 hours.
10. Some web browsers might have issues when upgrading (with some javascript variables
not being passed correctly), in that case you can perform individual updates. For
example, upgrading from CDash 1-2 to 1-4:
http://mywebsite.com/CDash/backwardCompatibilityTools.php?upgrad
e-l-4=l
232
Automation & Testing with CMake
CDash Maintenance
Database maintenance: we recommend that you perform database optimization (reindexing,
purging, etc.) regularly to maintain a stable database. MySQL has a utility called
mysqlcheck, and PostgreSQL has several utilities such as vacuumdb.
Deleting builds with incorrect dates: some builds might be submitted to CDash with the
Wrong date, either because the date in the XML file is incorrect or the timezone was not
recognized by CDash (mainly by PHP). These builds will not show up in any dashboard
because the start time is bogus. In order to remove these builds:
1. Login to CDash as administrator.
2. Click on [CDash maintenance] in the administration section.
3. Click on ‘Delete builds with wrong start date’.
Recompute test timing: if you just upgraded CDash you might notice that the current
submissions are showing a high number of failing test due to time defects. This is because
CDash does not have enough sample points to compute the mean and standard deviation for
each test, in particular the standard deviation might be very small (probably zero for the first
few samples). You should turn the “enable test timing” off for about a week, or until you get
enough build submissions and CDash has calculated an approximate mean and standard
deviation for each test time.
The other option is to force CDash to compute the mean and standard deviation for each test
for the past few days. Be warned that this process may take a long time, depending on the
number of test and projects involved. In order to recompute the test timing:
1. Login to CDash as administrator.
2. Click on [CDash maintenance] in the administration section.
3. Specify the number of days (default is 4) to recompute the test timings for.
4. Click on “Compute test timing”. When the process is done the new mean, standard
deviation and status should be updated for the tests submitted during this period.
Automatic build removal
In order to keep the database at a reasonable size, CDash can automatically purge old builds.
There are currently two ways to setup automatic removal of builds: without a cronjob edit the
conf ig. local. php and add/edit the following line
$ C DASH_AUTOREMOVE_BUIL DS ='1' ;
CDash will automatically remove builds on the first submission of the day. Note that
removing builds might add an extra load on the database, or slow down the current
Subprojects
233
submission process if your database is large and the number of submissions is high. If you can
use a cronjob the PHP command line tool can be used to trigger build removals at a
convenient time. For example, removing the builds for all the projects at 6am every Sunday:
06**0 php5 /var/www/CDash/autoRemoveBuilds.php all
Note that the ‘all’ parameter can be changed to a specific project name in order to purge
builds from a single project.
CDash XML Schema
The XML parsers in CDash can be easily extended to support new features. The current XML
schemas generated by CTest, and their features as described in the book, are located at:
http://public.kitware.com/Wiki/CDash:XML
10.12 Subprojects
CDash (versions 1.4 and later) supports splitting projects into subprojects. Some of the
subprojects may in turn depend on other subprojects. A typical real life project consists of
libraries, executables, test suites, documentation, web pages and installers. Organizing your
project into well-defined subprojects and presenting the results of nightly builds on a CDash
dashboard can help identify where the problems are at different levels of granularity.
A project with subprojects has a different view for its top level CDash page than a project
without any. It contains a summary row for the project as a whole, and then one summary row
for each subproject.
234
Automation & Testing with CMake
Organizing and defining subprojects
To add subproject organization to your project, you must: (1) define the subprojects for
CDash, so that it knows how to display them properly and (2) use build scripts with CTest to
submit subproject builds of your project. Some (re-)organization of your project’s
CMakeLists.txt files may also be necessary to allow building of your project by subprojects.
There are two ways to define subprojects and their dependencies: interactively in the CDash
GUI when logged in as a project administrator, or by submitting a Project.xml file
describing the subprojects and dependencies.
Adding Subprojects Interactively
As a project administrator, a “Manage subprojects” button will appear for each of your
projects on the My CDash page. Clicking the Manage Subprojects button opens the manage
subproject page where you may add new subprojects, or establish dependencies between
existing subprojects for any project that you are an administrator of. There are two tabs on this
page, one for viewing the current subprojects along with their dependencies, and one for
creating new subprojects.
To add subprojects, for instance two subprojects called Exes and Libs, and to make Exes
depend on Libs, the following steps are necessary:
Subprojects
235
• Click the “Add a subproject” tab.
• Type “Exes” in the “Add a subproject” edit field.
• Click the “Add subproject” button.
• Click the “Add a subproject” tab.
• Type “Libs” in the “Add a subproject” edit field.
• Click the “Add Subproject” button.
• In the “Exes” row of the “Current Subprojects” tab, choose “Libs” from the “Add
dependency” drop down list and click the “Add dependency” button.
To remove a dependency or a subproject, click on the “X” next to the item you wish to delete.
Adding Subprojects Automatically
Another way to define CDash subprojects and their dependencies is to submit a “Project.xml”
file along with the usual submission files that CTest sends when it submits a build to CDash.
To define the same two subprojects as in the interactive example above (Exes and Libs) with
the same dependency (Exes depend on Libs) the Project.xml file would look like the
following example:
<Project name="Tutorial">
<SubProject name="Libs"x/SubProject>
<SubProject name="Exes">
<Dependency name="Libs>
</SubProject>
</Proj ect>
Once the Project.xml file is written or generated, it can be submitted to CDash from a ctest
-S script using the new files argument to the ctest_submit command, or directly from
the ctest command line in a build tree configured for dashboard submission.
From inside a ctest -S script:
ctest_submit(FILES "${CTEST_BINARY_DIRECTORY}/Project.xml")
From the command line:
cd ../Project-build
ctest --extra-submit Project.xml
236
Automation & Testing with CMake
CDash will automatically add subprojects and dependencies according to the Project.xml
file. CDash will also remove any subprojects or dependencies not defined in the
Pro j ect. xml file. Additionally, if the Pro j ect. xml is submitted multiple times, the second
and subsequent submissions will have no observable effect: the first submission adds/modifies
the data, the second and later submissions send the same data, so no changes are necessary.
CDash tracks changes to the subproject definitions over time to allow for projects to evolve. If
you view dashboards from a past date, CDash will present the project/subproject views
according to the subproject definitions in effect on that date.
Using ctest_submit with PARTS and FILES
In ctest version 2.8 and later, the ctest_submit command supports new parts and files
arguments. With parts, you can send any subset of the xml files with each ctest_submit call.
Previously, all parts would be sent with any call to ctest_submit. Typically, the script
would wait until all dashboard stages were complete and then call ctest_submit once to
send the results of all stages at the end of the run. Now, a script may call ctest_submit with
parts to do partial submissions of subsets of the results. For example, you can submit
configure results after ctest_configure, build results after ctest_build and test results
after ctest_test. This allows for information to be posted as the builds progress.
With files, you can send arbitrary XML files to CDash. In addition to the standard build
result XML files that CTest sends, CDash also handles the new Project.xml file that
describes subprojects and dependencies, as described previously. Prior to the addition of the
ctest_submit parts handling, a typical dashboard script would contain a single
ctest_submit () call on its last line:
ctest_start (Experimental)
ctest_update (SOURCE "${CTEST_SOURCE_DIRECTORY}")
ctest_configure (BUILD "${CTEST_BINARY_DIRECTORY}")
ctest_build (BUILD "${CTEST_BINARY_DIRECTORY}")
ctest_test (BUILD "${CTEST_BINARY_DIRECTORY}")
ctest submit ()
Now, submissions can occur incrementally, with each part of the submission sent piecemeal
as it becomes available:
ctest_start (Experimental)
ctest_update (SOURCE "${CTEST_SOURCE_DIRECTORY}")
ctest_configure (BUILD "${CTEST_BINARY_DIRECTORY}")
ctest_submit (PARTS Update Configure Notes)
ctest_build (BUILD "${CTEST_BINARY_DIRECTORY}" APPEND)
ctest_submit (PARTS Build)
Subprojects
237
ctest_test (BUILD "${CTEST_BINARY_DIRECTORY}" APPEND)
ctest_submit (PARTS Test)
Submitting incrementally by parts means that you can inspect the results of the configure
stage live on the CDash dashboard while the build is still in progress. Likewise, you can
inspect the results of the build stage live while the tests are still running.
Splitting Your Project into Multiple Subprojects
One ctest_build invocation that builds everything followed by one ctest_test
invocation that tests everything is sufficient for a project that has no subprojects. But if you
want to submit results on a per-subproject basis to CDash, you will have to make some
changes to your project and test scripts. For your project you need to identify what targets are
part of what sub-projects. If you organize your CMakeLists files such that you have a target to
build for each subproject, and you can derive (or look up) the name of that target based on the
subproject name, then revising your script to separate it into multiple smaller
configure/build/test chunks should be relatively painless. To do this you can modify your
CMakeLists files in various ways depending on your needs. The most common changes are
listed below.
CMakeLists.txt modifications
• Name targets the same as subprojects, or base target names on subproject names, or
provide a look up mechanism to map from subproject name to target name.
• Possibly add custom targets to aggregate existing targets into subprojects, using
add_dependencies to say which existing targets the custom target depends on.
• Add the LABELS target property to targets with a value of the subproject name.
• Add the LABELS test property to tests with a value of the subproject name.
Next you need to modify your CTest scripts that run your dashboards. To split your one large
monolithic build into smaller subproject builds you can use a foreach loop in your CTest
driver script. To help you iterate over your subprojects, CDash provides a variable named
CTEST_PROJECT_SUBPROJECTS in CTestConfig. cmake. Given the above example,
CDash produces a variable like this:
set (CTEST_PROJECT_SUBPROJECTS Libs Exes)
CDash orders the elements in this list such that the independent subprojects (that do not
depend on any other subprojects) are first, followed by subprojects that depend only on the
independent subprojects. After that subprojects that depend on those. The same logic
continues until all subprojects are listed exactly once in this list in an order that makes sense
for building them sequentially, one after the other.
238
Automation & Testing with CMake
To facilitate building just the targets associated with a subproject, use the variable named
CTEST_BUILD_TARGET to tell ctest_build what to build. To facilitate running just the
tests associated with a subproject, assign the labels test property to your tests and use the
new include_label argument to ctest_test.
ctest driver script modifications
• k Iterate over the subprojects in dependency order (from independent to most
dependent...).
• Set the SubProject and Label global properties - CTest uses these properties to submit
the results to the correct subproject on the CDash server.
• Build the target(s) for this subproject: compute the name of the target to build from the
subproject name, set CTESTBUILDTARGET, call ctest build.
• Run the tests for this subproject using the INCLUDE or INCLUDE LABEL arguments
to ctest_ctest.
• Use ctest submit with the PARTS argument to submit partial results as they complete.
To illustrate this, the following example shows the changes required to split a build into
smaller pieces. Assume that the subproject name is the same as the target name required to
build the subproject’s components. For example, here is a snippet from CMakeLists.txt, in the
hypothetical Tutorial project. The only additions necessary (since the target names are the
same as the subproject names) are the calls to set_property for each target and each test.
# "Libs" is the library name (therefore a target name) and
# the subproject name
add_library (Libs ...)
set_property (TARGET Libs PROPERTY LABELS Libs)
add_test (LibsTestl ...)
add_test (LibsTest2 ...)
set_property (TEST LibsTestl LibsTest2 PROPERTY LABELS Libs)
# "Exes" is the executable name (therefore a target name)
# and the subproject name
add_executable (Exes ...)
target_link_libraries (Exes Libs)
set_property (TARGET Exes PROPERTY LABELS Exes)
add_test (ExesTestl ...)
add_test (ExesTest2 ...)
set_property (TEST ExesTestl ExesTest2 PROPERTY LABELS Exes)
Here is an example of what the CTest driver script might look like before and after organizing
this project into subprojects. Before the changes:
Subprojects
239
ctest_start (Experimental)
ctest_update (SOURCE "${CTEST_SOURCE_DIRECTORY}")
ctest_configure (BUILD "${CTEST_BINARY_DIRECTORY}")
# builds *all* targets: Libs and Exes
ctest_build (BUILD "${CTEST_BINARY_DIRECTORY}")
# runs *all* tests
ctest_test (BUILD "${CTEST_BINARY_DIRECTORY}")
# submits everything all at once at the end
ctest submit ()
After the changes (new lines emphasized):
ctest_start (Experimental)
ctest_update (SOURCE "${CTEST_SOURCE_DIRECTORY}")
ctest_submit (PARTS Update Notes)
# to get CTEST_PROJECT_SUBPROJECTS definition:
include ("${CTEST_SOURCE_DIRECTORY}/CTestConfig.cmake")
foreach (subproj ect ${CTEST_PROJECT_SUBPROJECTS})
set_property (GLOBAL PROPERTY SubProject ${subproject})
set_property (GLOBAL PROPERTY Label ${subproject})
ctest_configure (BUILD "${CTEST_BINARY_DIRECTORY}")
ctest_submit (PARTS Configure)
set (CTEST_BUILD_TARGET ??$ { subpro j ect} ")
ctest_build (BUILD "${CTEST_BINARY_DIRECTORY}")
# builds target ${CTEST_BUILD_TARGET}
ctest_submit (PARTS Build)
ctest_test (BUILD ,f$ {CTEST_BINARY_DIRECTORY) "
INCLUDE_LABEL "${subproject}"
)
# runs only tests that have a LABELS property matching
# "${subproject}"
ctest_submit (PARTS Test)
endforeach ()
In some projects, more than one ctest build step may be required to build all the pieces of the
subproject. For example, in Trilinos, each subproject builds the $ {subpro j ect} libs target
and then builds the all target to build all the configured executables in the test suite. They also
240
Automation & Testing with CMake
configure dependencies such that only the executables that need to be built for the currently
configured packages build when the all target is built.
Normally, if you submit multiple Build, xml files to CDash with the same exact build stamp,
it will delete the existing entry and add the new entry in its place. In the case where multiple
ctest_build steps are required, each with their own ctest_submit (PARTS Build) call,
usekthe append keyword argument in all of the ctest_build calls that belong together. The
append flag tells CDash to accumulate the results from multiple submissions and display the
aggregation of all of them in one row on the dashboard. From CDash’s perspective, multiple
ctest_build calls (with the same build stamp and subproject and append turned on) result
in a single CDash build.
Adopt some of these tips and techniques in your favorite CMake-based project:
• labels is a new CMake/CTest property that applies to source files, targets and tests.
Labels are sent to CDash inside the resulting xml files.
• Use ctest_submit (PARTS ...) to do incremental submissions. Results are available
for viewing on the dashboards sooner.
• Use include_label with ctest_test to run only the tests with labels that match the
regular expression. •• Use ctest_build_target to build your subprojects one at a time, submitting
subproject dashboards along the way.
Chapter 11
Porting CMake to New Platforms and
Languages
In order to generate build files for a particular system, CMake needs to determine what
system it is running on, and what compiler tools to use for enabled languages. To do this
CMake loads a series of files containing CMake code from the Modules directory. This all has
to happen before the first try-compile or try-run is executed. To avoid having to re-compute
all of this information for each try-compile and for subsequent runs of CMake, the discovered
values are stored in several configured files that are read each time CMake is run. These files
are also copied into the try-compile and try-run directories. This chapter will describe how
this process of system and tool discovery works. An understanding of the process is necessary
to extend CMake to run on new platforms, and to add support for new languages.
11.1 The Determine System Process
The first thing CMake needs to do is to determine what platform it is running on and what the
target platform is. Except for when you are cross compiling the host platform and the target
platform are identical. The host platform is determined by loading the
CMakeDetermineSystem. cmake file. On POSIX systems, "uname" is used to get the name
of the system. cmake_host_system_name is set to the result of uname -s, and
CMAKE_HO S T_s Ys tem_ve RSI ON is set to the result of uname -r. On Windows systems,
cmake_host_system_name is set to Windows and cmake_host_system_version is set
to the value returned by the system function GetVersionEx. The variable
cmake_host_s ys tem is set to a combination of cmake_host_system_name and
CMAKE HOST SYSTEM VERSION as follows:
242
Porting CMake to New Platforms and Languages
${CMAKE_HOST_SYSTEM_NAME}-${CMAKE_HOST_SYSTEM_VERSION}
Additionally CMake tries to figure out the processor of the host, on POSIX systems it uses
uname -m or uname -p to retrieve this information, on Windows it uses the environment
variable processor_architecture. cmake_host_system_processor holds the value
of the result
Now that CMake has the information about the host that it is running on, it needs to find this
information for the target platform. The results will be stored in the cmake_system_name,
CMAKE_SYSTEM_VERSION, CMAKE_SYSTEM and CMAKE_S YSTEM_PROCESSOR variables,
corresponding to the cmake_host_system_* variables described above. See the "Cross
compiling with CMake" chapter on how this is done when cross compiling. In all other cases
the cmake_system_* variables will be set to the value of their corresponding
cmake_host_system_* variable.
Once the CMAKE_SYSTEM information has been determined, CMakeSystem. cmake. in is
configured into $ {CMAKE_BINARY_DIR} /CMakeFiles/CMakeSystem. cmake. CMake
versions prior to 2.6.0 did not support cross compiling, and so only the cmake_system_* set
of variables was available.
11.2 The Enable Language Process
After the platform has been determined, the next step is to enable all languages specified in
the project command. For each language specified CMake loads
CMakeDetermine (LANG) Compiler. cmake where LANG is the name of the language
specified in the project command. For example with project (f Fortran) the file is
called CMakeDetermineFortranCompiler. cmake. This file discovers the compiler and
tools that will be used to compile files for the particular language. Starting with version 2.6.0
CMake tries to identify the compiler for C, C++ and Fortran not only by its filename, but by
compiling some source code, which is named CMake (LANG) Compilerld. (LANG_SUFFIX).
If this succeeds, it will return a unique id for every compiler supported by CMake. Once the
compiler has been determined for a language, CMake configures the file
CMake(LANG)Compiler.cmake.in into CMake(LANG)Compiler.cmake.
After the platform and compiler tools have been determined, CMake loads
CMakeSystemSpecif iclnf ormation. cmake which in turn will load
$ { cmake_system_name } .cmake from the platform subdirectory of modules if it exists for
the platform. An example would be SunOS. cmake. This file contains OS specific information
about compiler flags, creation of executables, libraries, and object files.
Next, CMake loads CMake (LANG) Information, cmake for each LANG that was enabled.
This file in turn loads two files; ${cmake system name}-${compiler id}-lang-
The Enable Language Process
243
$ {CMAKE_SYSTEM_PROCESSOR}. cmake if it exists, and after that
$ { CMAKE_SYSTEM_NAME} - $ {COMPILER_ID} - LANG . cmake. In these file names
compiler id references the compiler identification determined as described above. The
CMake (LANG) Information.cmake file contains default rules for creating executables,
libraries, and object files on most UNIX systems. The defaults can be overridden by setting
values in either $ {cmake_system_name }. cmake or ${cmake_system_name}-
${COMPILER_ID}-LANG.cmake.
${CMAKE_SYSTEM_NAME}-${COMPILER_ID}-LANG-
$ {CMAKE_SYSTEM_PROCESSOR}. cmake is intended to be used only for cross compiling, it is
loaded before ${cmake_system_name}-${compiler_id}-lang.cmake, so variables can
be set up which can then be used in the rule variables.
In addition to the files with the compiler_id in their name, CMake also supports these files
using the compiler_base_name. compiler_base_name is the name of the compiler with
no path information. For example cl would be the compiler base name for the Microsoft
Windows compiler, and Windows-cl .cmake would be loaded. If a COMPILERID exists, it
will be preferred over the compiler base name, since on one side the same compiler can
have different names, but there can be also different compilers all with the same name. This
means, if
${CMAKE_SYSTEM_NAME}-${COMPILER_ID}-LANG-
${CMAKE_SYSTEM_PROCESSOR}.cmake
was not found, CMake tries
${CMAKE_SYSTEM_NAME}-${COMPILER_BASE_NAME}.cmake
and if
$ { CMAKE_SYSTEM_NAME} -$ {COMPILER__ID} -LANG . cmake
was not found, CMake tries
$ { CMAKE_SYSTEM_NAME} -$ {COMPILER_BASE_NAME} . cmake .
CMake (LANG) Information. cmake and associated Platform files define special CMake
variables, called rule variables. A rule variable consists of a list of commands separated by
spaces. The commands are enclosed by quotes. In addition to the normal variable expansion
performed by CMake, some special tag variables are expanded by the Makefile generator. Tag
244
Porting CMake to New Platforms and Languages
variables have the syntax of <name> where name is the name of the variable. An example
rule variable is cmake_cxx_create_shared_library, and the default setting is
set (CMAKE_CXX_CREATE_S HARE D_LIBRARY
"<CMAKE_CXX_COMPILER> <CMAKE_SHARED_LIBRARY_CXX_FLAGS >
<LINK_FLAGS> <CMAKE_SHARED_LIBRARY_CREATE_CXX_FLAGS>
<CMAKE_SHARED_LIBRARY_SONAME_CXX_FLAGXTARGET_SONAME> -o
<TARGET> <0BJECTS> <LINK LIBRARIES>")
At this point, CMake has determined the system it is running on, the tools it will be using to
compile the enabled languages, and the rules to use the tools. This means there is enough
information for CMake to perform a try-compile. CMake will now test the detected compilers
for each enabled language by loading CMakeTest (LANG)Compiler.cmake. This file will
usually run a try-compile on a simple source file for the given language to make sure the
chosen compiler actually works.
Once the platform has been determined, and the compilers have been tested, CMake loads a
few more files that can be used to change some of the computed values. The first file that is
loaded is CMake (PROJECTNAME) Compatibility. cmake where PROJECTNAME is the name
given to the top level project command in the project. The project compatibility file is used
to add backwards compatibility fixes into CMake. For example, if a new version of CMake
fails to build a project that the previous version of CMake could build, then fixes can be
added on a per project basis to CMake. The last file that is loaded is
$ { cmake_user_make_rules__override }. This file is an optionally user supplied variable,
that can allow a project to make very specific platform based changes to the build rules.
11.3 Porting to a New Platform
Many common platforms are already supported by CMake. However, you may come across a
compiler or platform that has not yet been used. If the compiler uses an Integrated
Development Environment (IDE), then you will have to extend CMake from the C++ level.
However, if the compiler supports a standard make program, then you can specify in CMake
the rules to use to compile object code and build libraries by creating CMake configuration
files. These files are written using the CMake language with a few special tags that are
expanded when the Makefiles are created by CMake. If you run CMake on your system and
get a message like the following, you will want to read how to create platform specific
settings.
System is unknown to cmake, create:
Modules/Platform/MySystem.cmake
to use this system, please send your config file to
cmake0www.cmake.org so it can be added to cmake
Porting to a New Platform
245
At a minimum you will need to create the Platform/$ {CMAKE_SYSTEM_NAME} .cmake file
for the new platform. Depending on the tools for the platform, you may also want to create
Platform/$ {CMAKE_SYSTEM_NAME } - $ { COMPILER_BASE_NAME} .cmake. On most
systems, there is a vendor compiler and the GNU compiler. The rules for both of these
compilers can be put in Platform/${CMAKE_SYSTEM_NAME}.cmake instead of creating
separate files for each of the compilers. For most new systems or compilers, if they follow the
basic UNIX compiler flags, you will only need to specify the system specific flags for shared
library and module creation.
The following example is from Platform/IRIX. cmake. This file specifies several flags, and
also one CMake rule variable. The rule variable tells CMake how to use the IRIX CC
compiler to create a static library, which is required for template instantiation to work with
IRIX CC.
# there is no -ldl required on this system
set (CMAKE_DL_LIBS "")
# Specify the flag to create a shared c library
set (CMAKE_S HARE D_LIBRARY_CREATE_C_FLAGS
"-shared -rdata_shared")
# Specify the flag to create a shared C++ library
set (CMAKE_S HARE D_LIBRARY_CREATE_CXX_FLAGS
"-shared -rdata_shared")
# specify the flag to specify run time paths for shared
# libraries -rpath
set (CMAKE_SHARED__LIBRARY_RUNTIME_C_FLAG "-W1,-rpath, ")
# specify a separator for paths on the -rpath, if empty
# then -rpath will be repeated.
set (CMAKE_SHARED_LIBRARY_RUNTIME_C_FLAG_SEP "")
# if the compiler is not GNU, then specify the initial flags
if (NOT CMAKE_COMPILER_IS_GNUCXX)
# use the CC compiler to create static library
set (CMAKE__CXX_CREATE_STAT I C_L IBRARY
"<CMAKE__CXX_COMPILER> -ar -o <TARGET> <OBJECTS>")
# initializes flags for the native compiler
set (CMAKE_CXX_FLAGS_INIT "")
set (CMAKE_CXX_FLAGS_DEBUG_INIT "-g")
set (CMAKE_CXX_FLAGS_MINSIZEREL_INIT "-03 -DNDEBUG")
set (CMAKE CXX FLAGS RELEASE INIT "-02 -DNDEBUG")
246
Porting CMake to New Platforms and Languages
set (CMAKE_CXX_FLAGS_RELWITHDEBINFO_INIT "-02")
endif (NOT CMAKE_COMPILER_IS_GNUCXX)
11.4 Adding a New Language
In addition to porting CMake to new platforms a user may want to add a new language. This
can be done either through the use of custom commands, or by defining a new language for
CMake. Once a new language is defined, the standard add library and addexecutable
commands can be used to create libraries and executables for the new language. To add a new
language, you need to create four files. The name lang has to match in exact case the name
used in the project command to enable the language. For example Fortran has the file
CMakeDeterminFortranCompiler. cmake, and it is enabled with a call like this project
(f Fortran). The four files are as follows:
CMakeDetermine(LANG)Compiler.cmake
This file will find the path to the compiler for LANG and then configure
CMake(LANG)Compiler.cmake.in.
CMake(LANG)Compiler.cmake.in
This file should be used as input to a configure file call in the
CMakeDetermine(LANG)Compiler.cmake file. It is used to store compiler
information and is copied down into try-compile directories so that try compiles do
not need to re-determine and test the LANG.
CMakeTest(LANG)Compiler.cmake
This should use a try compile command to make sure the compiler and tools are
working. If the tools are working, the following variable should be set in this way:
set (CMAKE_(LANG)_COMPILER_WORKS 1 CACHE INTERNAL "")
CMake(LANG)Information.cmake
Set values for the following rule variables for lang:
CMAKE_ (LANG) _CREATE_SHARED_LIBRARY
CMAKE_(LANG)_CREATE_SHARED_MODULE
CMAKE_(LANG)_CREATE_STATIC_LIBRARY
CMAKE_(LANG)_COMPILE_OBJECT
CMAKE (LANG) LINK EXECUTABLE
Rule Variable Listing
247
11.5 Rule Variable Listing
For each language that CMake supports, the following rule variables are expanded into build
Makefiles at generation time, lang is the name used in the project (name lang)
command. CMake currently supports CXX, C, Fortran, and Java as values for lang.
General Tag Variables
The following set of variables will be expanded by CMake.
<TARGET>
The name of the target being built (this may be a full path).
<TARGET_QUOTED>
The name of the target being built (this may be a full path) double quoted.
<T ARGETB ASE>
This is replaced by the name of the target without a suffix.
<TARGET_SONAME>
This is replaced by
CMAKE_SHARED_LIBRARY_SONAME_(LANG)_FLAG
<OBJECTS>
This is the list of object files to be linked into the target.
<OB JECTSQ UOTED>
This is the list of object files to be linked into the target double quoted.
<OBJECT>
This is the name of the object file to be built.
<LINK_LIBRARIES>
This is the list of libraries that are linked into an executable or shared object.
<FLAGS>
This is the command line flags for the linker or compiler.
<LINK_FLAGS>
This is the flags used at link time.
248
Porting CMake to New Platforms and Languages
<SOURCE>
The source file name.
Language Specific Information
The following set of variables related to the compiler tools will also be expanded.
<CMAKE_(LANG)_COMPILER>
This is the (LANG) compiler command.
<CMAKE_SHARED_LLBRARY_CREATE_(LANG)_FLAGS>
This is the flags used to create a shared library for (LANG) code.
<CMAKE_SHARED_MODULE_CREATE_(LANG)_FLAGS>
This is the flags used to create a shared module for (LANG) code.
<CMAKE_(LANG)_LINK_FLAGS>
This is the flags used to link a (LANG) program.
<CMAKE_AR>
This is the command to create a .a archive file.
<CMAKE_RANLIB>
This is the command to ranlib a .a archive file.
11.6 Compiler and Platform Examples
Como Compiler
A good example to look at is the como compiler on Linux found in
Modules/Platforms/Linux-como.cmake. This compiler requires several non-standard
commands when creating libraries and executables in order to instantiate C++ templates.
# create a shared C++ library
set (CMAKE_CXX_CREATE_SHARED_LIBRARY
"<CMAKE__CXX_COMPILER> —prelink_objects <OBJECTS>"
"< CMAKE_CXX_COMPILER>
<CMAKE_SHARED_LIBRARY_CREATE_CXX_FLAGS> <LINK_FLAGS> -o <TARGET>
<OBJECTS> <LINK LIBRARIES>")
# create a C++ static library
Compiler and Platform Examples
249
set (CMAKE_CXX_CREATE_STATIC_LIBRARY
"<CMAKE_CXX_COMPILER> —prelink_objects <OBJECTS>"
"<CMAKE_AR> cr <TARGET> <LINK_FLAGS> <OBJECTS> "
"<CMAKE_RANLIB> <TARGET> ")
set (CMAKE_CXX_LINK_EXECUTABLE
M<CMAKE_CXX_COMPILER> --prelink_objects <OBJECTS>"
"<CMAKE_CXX_COMPILER> <CMAKE_CXX_LINK_FLAGS> <LINK_FLAGS>
<FLAGS> <0BJECTS> -o <TARGET> <LINK_LIBRARIES>")
set (CMAKE_SHARED_LIBRARY_RUNTIME_FLAG "M)
set (CMAKE_SHARED_LIBRARY_C_FLAGS "")
set (CMAKE SHARED_LIBRARY LINK FLAGS "")
This overrides the creation of libraries (shared and static), and the linking of executable C++
programs. You can see that the linking process of executables and shared libraries requires an
extra command that calls the compiler with the flag —prelinkob jects, and gets all of the
object files passed to it.
Borland Compiler
The full Borland compiler rules can be found in Platforms/windows-bcc32. cmake. The
following code is an excerpt from that file, showing some of the features used to define rules
for the Borland compiler set.
set (CMAKE_CXX_CREATE_SHARED_LIBRARY
"<CMAKE_CXX_COMPILER> ${CMAKE_START_TEMP_FILE}-e<TARGET>
-tWD <LINK_FLAGS> -tWR <LINK_LIBRARIES>
<OB JECTS>$ {CMAKE_END__TEMP_FILE } "
"implib -c -w <TARGET_BASE>.lib <TARGET_BASE>.dll"
set (CMAKE_CXX_CREATE_SHARED_MODULE
${CMAKE_CXX_CREATE_SHARED_LIBRARY})
# create a C shared library
set (CMAKE_C_CREATE_SHARED_LIBRARY
"<CMAKE_C_COMPILER> ${CMAKE_START_TEMP_FILE}-e<TARGET> -tWD
<LINK_FLAGS> -tWR <LINK_LIBRARIES>
<OBJECTS>${CMAKE_END_TEMP_FILE}"
"implib -c -w <TARGET_BASE>.lib <TARGET_BASE>.dll"
)
# create a C++ static library
250
Porting CMake to New Platforms and Languages
set (CMAKE_CXX_CREATE_STATIC_LIBRARY "tlib
${CMAKE_START_TEMP_FILE}/p512 <LINK_FLAGS> /a <TARGET_QUOTED>
<0BJECTS_QU0TED>${CMAKE_END_TEMP_FILE}")
# compile a C++ file into an object file
set (CMAKE_CXX_COMPILE_OBJECT
"<CMAKE_CXX_COMPILER> ${CMAKE_START_TEMP_FILE}-DWIN32 -P
<FLAGS> -o<0BJECT> -c <SOURCE>${CMAKE_END_TEMP_FILE}")
11.7 Extending CMake
Occasionally you will come across a situation where you want to do something during your
build process that CMake cannot seem to handle. Examples of this include creating wrappers
for C++ classes to make them available to other languages, or creating bindings for C++
classes to support runtime introspection. In these cases you may want to extend CMake by
adding your own commands. CMake supports this capability through its C plugin API. Using
this API a project can extend CMake to add specialized commands to handle project specific
tasks.
A loaded command in CMake is essentially a C code plugin that is compiled into a shared
library (a.k.a. DLL). This shared library can then be loaded into the running CMake to
provide the functionality of the loaded command. Creating a loaded command is a two step
process. You must first write the C code and CMakeLists file for the command, and then
place it in your source tree. Next you must modify your project's CMakeLists file to compile
the loaded command and load it. We will start by looking at writing the plugin. Before
resorting to creating a loaded command you should first see if you can accomplish what you
want with a macro. With the commands in CMake a macro/function has almost the same level
of flexibility as a loaded command, but does not require compilation or as much complexity.
You can almost always, and should, use a macro/function instead of a loaded command.
Creating a Loaded Command
While CMake itself is written in C++ we suggest that you write your plugins using only C
code. This avoids a number of portability and compiler issues that can plague C++ plugins
being loaded into CMake executables. The API for a plugin is defined in the header file
cmCPluginAPi. h. This file defines all of the CMake functions that you can invoke from
your plugin. It also defines the cmLoadedCommandlnfo structure that is passed to a plugin.
Before going into detail about these functions, consider the following simple plugin:
#include "cmCPluginAPi.h"
static int InitialPass(void *inf, void *mf,
int argc, char *argv[])
Extending CMake
251
{
cmLoadedCommandlnfo *info = (cmLoadedCommandlnfo *)inf;
info->CAPI->AddDefinition(mf, "FOO", "BAR");
return 1;
}
void CM_PLUGIN_EXPORT
HELLO_WORLDInit(cmLoadedCommandlnfo *info)
{
info->InitialPass = InitialPass;
info->Name = "HELLOJtfORLD";
}
First this plugin includes the cmCPluginAPi. h file to get the definitions and structures
required for a plugin. Next it defines a static function called InitialPass that will be called
whenever this loaded command is invoked. This function is always passed four parameters:
the cmLoadedCommandlnf o structure, the Makefile, the number of arguments, and the list of
arguments. Inside this function we typecast the inf argument to its actual type and then use it
to invoke the C API (CAPI) AddDefinition function. This function will set the variable
FOO to the value of BAR in the current cmMakef ile instance.
The second function is called HELL0_W0RLDinit and it will be called when the plugin is
loaded. The name of this function must exactly match the name of the loaded command with
init appended. In this example the name of the command is hello_world so the function is
named HELL0_W0RLDinit. This function will be called as soon as your command is loaded.
It is responsible for initializing the elements of the cmLoadedCommandlnfo structure. In this
example it sets the InitialPass member to the address of the InitialPass function
defined above. It will then set the name of the command by setting the Name member to
"HELLO_WORLD".
Using a Loaded Command
Now let us consider how to use this new hello_world command in a project. The basic
process is that CMake will have to compile the plugin into a shared library and then
dynamically load it. To do this you first create a subdirectory in your project's source tree
called CMake or CMakeCommands (by convention, any name can be used). Place the source
code to your plugin in that directory. We recommend naming the file with the prefix cm and
then the name of the command. For example, cmHELLO WORLD. c. Then you must create a
simple CMakeLists.txt file for this directory that includes instructions to build the shared
library. Typically this will be the following:
proj ect (HELLO_WORLD)
set (CMAKE CXX FLAGS "${CMAKE CXX FLAGS}
252
Porting CMake to New Platforms and Languages
"${CMAKE_ANSI_CXXFLAGS}"
set (CMAKE_C_FLAGS "${CMAKE_C_FLAGS}”
"${CMAKE_ANSI_CFLAGS}"
)
include_directories (${CMAKE_ROOT}/include
${CMAKE_ROOT}/Source
)
add_library (cmHELLO_WORLD MODULE cmHELLO_WORLD.c)
It is critical that you name the library cm followed by the name of the command as shown in
the add library call in the above example (e.g. cmHELLO WORLD). When CMake loads a
command it assumes that the command is in a library named using that pattern. The next step
is to modify your project’s main CMakeLists file to compile and load the plugin. This can be
accomplished with the following code:
# if the command has not been loaded, compile and load it
if (NOT COMMAND HELLO_WORLD)
# try compiling it first
try_compile (COMPILE_OK
${PROJEC T_BINARY_DIR}/CMake
${PROJECT_SOURCE_DIR}/CMake
HELLO WORLD
# if it compiled OK then load it
if (COMPILE_OK)
load_command (HELLO_WORLD
${PROJECT_BINARY_DIR}/CMake
${PROJECT_BINARY_DIR}/CMake/Debug
)
# if it did not compile OK, then display an error
else (COMPILE_OK)
message ("error compiling HELLO_WORLD extension")
endif (COMPILE_OK)
endif (NOT COMMAND HELLO_WORLD)
Extending CMake
253
In the above example you would simply replace hello_world with the name of your
command and replace $ {project_source_dir}/CMake with the actual name of the
subdirectory where you placed your loaded command. Now let us look at creating loaded
commands in more detail. We will start by looking at the cmLoadedCommandinf o structure.
typedef const char* (*CM_DOC_FUNCTION)();
typedef int (*CM_INITIAL_PASS_FUNCTION)(
void *info, void *mf, int argc, char *[]);
typedef void (*CM_FINAL_PASS_FUNCTION)(
void *info, void *mf);
typedef void (*CM_DESTRUCTOR_FUNCTION)(void *info);
typedef struct {
unsigned long reservedl;
unsigned long reserved2;
cmCAPI *CAPI;
int m_Inherited;
CM_INITIAL_PASS_FUNCTION InitialPass;
CM_FINAL_PASS_FUNCTION FinalPass;
CM_DESTRUCTOR_FUNCTION Destructor;
CM_DOC_FUNCTION GetTerseDocumentation;
CM_DOC_FUNCTION GetFullDocumentation;
const char *Name;
char *Error;
void *ClientData;
} cmLoadedCommandinfo;
The first two entries of the structure are reserved for future use. The next entry, CAPI, is a
pointer to a structure containing pointers to all the CMake functions you can invoke from a
plugin. The m_inherited member only applies to CMake versions 2.0 and earlier. It can be
set to indicate if this command should be inherited by subdirectories or not. If you are creating
a command that will work with versions of CMake prior to 2.2 then you probably want to set
this to zero. The next five members are pointers to functions that your plugin may provide.
The InitialPass function must be provided and it is invoked whenever your loaded
command is invoked from a CMakeLists file. The FinalPass function is optional and is
invoked after configuration but before generation of the output. The Destructor function is
optional and will be invoked when your command is destroyed by CMake (typically on exit).
It can be used to clean up any memory that you have allocated in the InitialPass or
FinalPass. The next two functions are optional and are used to provide documentation for
your command. The Name member is used to store the name of your command. This is what
will be compared against when parsing a CMakeLists file, it should be in all caps in keeping
254
Porting CMake to New Platforms and Languages
with CMake’s naming conventions. The Error and ClientData members are used
internally by CMake, you should not directly access them. Instead you can use the CAPI
functions to manipulate them.
Now let us consider some of the common CAPI functions you will use from within a loaded
command. First we will consider some utility functions that are provided specifically for
loaded commands. Since loaded commands use a C interface they will receive arguments as
(int argc, char *argv[] ), for convenience you can call
GetTotalArgumentSize (argc, argv) which will return the total length of all the
arguments. Likewise some CAPI methods will return an (argc, argv) pair that you will be
responsible for freeing. The FreeArguments (argc, argv) function can be used to free
such return values. If your loaded command has a Final Pass () then you might want to pass
data from the initial Pa ss() to the Final Pass () invocation. This can be accomplished
using the SetClientData (void *info, void *data) and void
*GetClientData (void *info) functions. Since the client data is passed as a void *
argument, any client data larger than a pointer must be allocated and then finally freed in your
Destructor () function. Be aware that CMake will create multiple instances of your loaded
command so using global variables or static variables is not recommended. If you should
encounter an error in executing your loaded command, you can call SetError (void
*info, const char *errorString) to pass an error message on to the user.
Another group of CAPI functions worth noting are the cmSourceFile functions.
cmSourceFile is a C++ object that represents information about a single file including its
full path, file extension, special compiler flags, etc. Some loaded commands will need to
either create or access cmSourceFile instances. This can be done using the void
*CreateSourceFile() and void * GetSource (void *mf, const char
*sourceName) functions. Both of these functions return a pointer to a cmSourceFile as a
void * return value. This pointer can then be passed into other functions that manipulate
cmSourceFiles such as SourceFileGetProperty() or SourceFileSetProperty().
Chapter 12
Tutorials
This chapter provides a step by step tutorial that covers common build system issues that
CMake helps address. Many of these topics have been introduced in prior chapters as separate
issues but seeing how they all work together in an example project can be very helpful. This
tutorial can be found in the Tests/Tutorial directory of the CMake source code tree. Each step
has its own subdirectory containing a complete copy of the tutorial for that step.
12.1 A Basic Starting Point (Step 1)
The most basic project is an executable built from source code files. For simple projects a two
line CMakeLists file is all that is required. This will be the starting point for our tutorial. The
CMakeLists file looks like:
cmake_minimum_required (2.6)
project (Tutorial)
add executable (Tutorial tutorial.cxx)
Note that this example uses lower case commands in the CMakeLists file. Upper, lower, and
mixed case commands are supported by CMake. The source code for tutorial.cxx will
compute the square root of a number and the first version of it is very simple, as follows:
256
Tutorials
// A simple program that computes the square root of a number
#include <stdio.h>
#include <math.h>
int main (int argc, char *argv[])
{
if (argc < 2)
> {
fprintf(stdout, "Usage: %s numberin'', argv [0 ]) ;
return 1;
}
double inputValue = atof(argv[1]);
double outputValue = sqrt(inputValue);
fprintf(stdout,"The square root of %g is %g\n",
inputValue, outputValue);
return 0;
}
Adding a Version Number and Configured Header File
The first feature we will add is to provide our executable and project with a version number.
While you can do this exclusively in the source code, doing it in the CMakeLists file provides
more flexibility. To add a version number we modify the CMakeLists file as follows:
cmake_minimum_required (2.6)
project (Tutorial)
# The version number.
set (Tutorial_VERSION_MAJOR 1)
set (Tutorial_VERSION_MINOR 0)
# configure a header file to pass some of the CMake settings
# to the source code
configure_file (
"${PROJECT_SOURCE_DIR}/TutorialConfig.h.in"
"${PROJECT_BINARY_DIR}/TutorialConfig.h"
)
# add the binary tree to the search path for include files
# so that we will find TutorialConfig.h
include_directories("${PROJECT_BINARY_DIR}")
# add the executable
add_executable(Tutorial tutorial.cxx)
A Basic Starting Point (Step 1)
257
Since the configured file will be written into the binary tree we must add that directory to the
list of paths to search for include files. We then create a TutorialConf ig. h. in file in the
source tree with the following contents:
// the configured options and settings for Tutorial
#define Tutorial_VERSION_MAJOR @Tutorial_VERSION_MAJOR@
#define Tutorial_VERSION_MINOR @Tutorial_VERSION_MINOR@
When CMake configures this header file the values for @Tutorial_VERSiON_MAJOR@ and
@Tutorial_VERSiON_MiNOR@ will be replaced by the values from the CMakeLists file.
Next we modify tutorial. cxx to include the configured header file and to make use of the
version numbers. The resulting source code is listed below.
//A simple program that computes the square root of a number
#include <stdio.h>
#include <math.h>
#include "TutorialConfig.h"
int main (int argc, char *argv[])
{
if (argc < 2)
{
fprintf(stdout,"%s Version %d.%d\n",
argv[0],
Tu to r i a1_VERSION_MAJOR,
Tutorial_VERSION_MINOR);
fprintf (stdout, "Usage: %s numberin'', argv [0]) ;
return 1;
}
double inputValue = atof(argv[1]);
double outputValue = sqrt(inputValue);
fprintf(stdout,"The square root of %g is %g\n",
inputValue, outputValue);
return 0;
}
The main changes are the inclusion of the TutorialConf ig. h header file and printing out a
version number as part of the usage message.
258
Tutorials
12.2 Adding a Library (Step 2)
Now we will add a library to our project. This library will contain our own implementation for
computing the square root of a number. The executable can then use this library instead of the
standard square root function provided by the compiler. For this tutorial we will put the
library into a subdirectory called MathFunctions. It will have the following one line
CMakeLists file:
add_library(MathFunctions mysqrt.cxx)
The source file mysqrt. cxx has one function called mysqrt that provides similar
functionality to the compiler’s sqrt function. To make use of the new library we add an
add_subdirectory call in the top level CMakeLists file so that the library will get built.
We also add another include directory so that the MathFunctions/mysqrt .h header file
can be found for the function prototype. The last change is to add the new library to the
executable. The last few lines of the top level CMakeLists file now look like:
include_directories ("${PROJECT_SOURCE_DIR}/MathFunctions")
add_subdirectory (MathFunctions)
# add the executable
add_executable (Tutorial tutorial.cxx)
target_link_libraries (Tutorial MathFunctions)
Now let us consider making the MathFunctions library optional. In this tutorial there really
isn’t any reason to do so, but with larger libraries or libraries that rely on third party code you
might want to. The first step is to add an option to the top level CMakeLists file.
# should we use our own math functions?
option (USE_MYMATH
"Use tutorial provided math implementation" ON)
This will show up in the CMake GUI with a default value of ON that the user can change as
desired. This setting will be stored in the cache so that the user does not need to keep setting it
each time they run CMake on this project. The next change is to make the build and linking of
the MathFunctions library conditional. To do this we change the end of the top level
CMakeLists file to look like the following:
Adding a Library (Step 2)
259
# add the MathFunctions library?
#
if (USE_MYMATH)
include_directories ("${PROJECT_SOURCE_DIR}/MathFunctions")
add_subdirectory (MathFunctions)
set (EXTRA_LIBS ${EXTRA_LIBS} MathFunctions)
endif (USE_MYMATH)
# add the executable
add_executable (Tutorial tutorial.cxx)
target_link_libraries (Tutorial ${EXTRA_LIBS})
This uses the setting of use mymath to determine if the MathFunctions should be compiled
and used. Note the use of a variable (extra_libs in this case) to collect up any optional
libraries to later be linked into the executable. This is a common approach used to keep larger
projects with many optional components clean. The corresponding changes to the source code
are fairly straight forward and leave us with:
// A simple program that computes the square root of a number
#include <stdio.h>
#include <math.h>
#include "TutorialConfig.h"
#ifdef USE_MYMATH
#include "MathFunctions.h"
#endif
int main (int argc, char *argv[])
{
if (argc < 2)
{
fprintf(stdout,"%s Version %d.%d\n", argv[0],
Tutorial_VERSION_MAJOR,
Tutorial_VERSION_MINOR);
fprintf (stdout, "Usage: %s numberin'1, argv [0] ) ;
return 1;
}
double inputValue = atof (argv[1]);
#ifdef USE_MYMATH
double outputValue = mysqrt(inputValue);
#else
260
Tutorials
double outputValue = sqrt(inputValue);
#endif
fprintf(stdout,"The square root of %g is %g\n",
inputValue, outputValue);
return 0;
}
In the source code we make use of use_mymath as well. This is provided from CMake to the
source code through the TutorialConf ig.h. in configured file by adding the following
line to it:
#cmakedefine USE MYMATH
12.3 Installing and Testing (Step 3)
For the next step we will add install rules and testing support to our project. The install rules
are fairly straight forward. For the MathFunctions library we setup the library and the header
file to be installed by adding the following two lines to MathFunctions’ CMakeLists file:
install (TARGETS MathFunctions DESTINATION bin)
install (FILES MathFunctions.h DESTINATION include)
For the application the following lines are added to the top level CMakeLists file to install the
executable and the configured header file:
# add the install targets
install (TARGETS Tutorial DESTINATION bin)
install (FILES "${PROJECT_BINARY_DIR}/TutorialConfig.h"
DESTINATION include)
That is all there is to it. At this point you should be able to build the tutorial, then type make
install (or build the install target from an IDE) and it will install the appropriate header
files, libraries, and executables. The CMake variable cmake_install_prefix is used to
determine the root of where the files will be installed. Adding testing is also a fairly straight
forward process. At the end of the top level CMakeLists file we can add a number of basic
tests to verify that the application is working correctly.
Installing and Testing (Step 3)
261
# does the application run
add_test (TutorialRuns Tutorial 25)
# does it sqrt of 25
add_test (TutorialComp25 Tutorial 25)
set_tests_properties (TutorialComp25
PROPERTIES PASS_REGULAR_EXPRESSION "25 is 5")
# does it handle negative numbers
add_test (TutorialNegative Tutorial -25)
set_tests_properties (TutorialNegative
PROPERTIES PAS S_RE GU LAR_EX PRE SSION ”-25 is 0”)
# does it handle small numbers
add_test (TutorialSmall Tutorial 0.0001)
set_tests_properties (TutorialSmall
PROPERTIES PAS S_RE GULAR_EX PRE SSION "0.0001 is 0.01")
# does the usage message work?
add_test (TutorialUsage Tutorial)
set_tests_properties (TutorialUsage
PROPERTIES
PASS_REGULAR_EXPRESSION "Usage:.^number")
The first test simply verifies that the application runs, does not segfault or otherwise crash,
and has a zero return value. This is the basic form of a CTest test. The next few tests all make
use of the pass regular expression test property to verify that the output of the test
contains certain strings. In this case verifying that the computed square root is what it should
be and that the usage message is printed when an incorrect number of arguments are provided.
If you wanted to add a lot of tests to test different input values you might consider creating a
macro like the following:
#define a macro to simplify adding tests, then use it
macro (do_test arg result)
add_test (TutorialComp${arg} Tutorial ${arg})
set_tests_properties (TutorialComp${arg}
PROPERTIES PAS S_RE GU LAR_EX PRE SSION ${result})
endmacro (do_test)
# do a bunch of result based tests
do_test (25 "25 is 5")
do test (-25 "-25 is 0")
262
Tutorials
For each invocation of do test, another test is added to the project with a name, input, and
results based on the passed arguments.
12.4 Adding System Introspection (Step 4)
Next let us consider adding some code to our project that depends on features the target
platform may not have. For this example we will add some code that depends on whether or
not the target platform has the log and exp functions. Of course almost every platform has
these functions but for this tutorial assume that they are less common. If the platform has log
then we will use that to compute the square root in the mysqrt function. We first test for the
availability of these functions using the CheckFunctionExists. cmake macro in the top
level CMakeLists file as follows:
# does this system provide the log and exp functions?
include (CheckFunctionExists.cmake)
check_function_exists (log HAVE_LOG)
check_function_exists (exp HAVE_EXP)
Next we modify the TutorialConf ig. h. in to define those values if CMake found them on
the platform as follows:
// does the platform provide exp and log functions?
#cmakedefine HAVE_LOG
#cmakedefine HAVE EXP
It is important that the tests for log and exp are done before the configure_file command
for TutorialConf ig. h. The conf iguref ile command immediately configures the file
using the current settings in CMake. Finally in the mysqrt function we can provide an
alternate implementation based on log and exp if they are available on the system using the
following code:
// if we have both log and exp then use them
#if defined (HAVE_LOG) && defined (HAVE_EXP)
result = exp (log(x)*0.5);
#else // otherwise use an iterative approach
Adding a Generated File and Generator (Step 5)
263
12.5 Adding a Generated File and Generator (Step 5)
In this section we will show how you can add a generated source file into the build process of
an application. For this example we will create a table of precomputed square roots as part of
the build process, and then compile that table into our application. To accomplish this we first
need a program that will generate the table. In the MathFunctions subdirectory a new source
file named MakeTable. cxx will do just that.
//A simple program that builds a sqrt table
#include <stdio.h>
#include <math.h>
int main (int argc, char *argv[])
{
int i;
double result;
// make sure we have enough arguments
if (argc < 2)
{
return 1;
}
// open the output file
FILE *fout = fopen(argv[1],"w");
if (!fout)
{
return 1;
}
// create a source file with a table of square roots
fprintf(fout,"double sqrtTable[] = {\n");
for (i =0; i < 10; ++i)
{
result = sqrt(static_cast<double>(i) ) ;
fprintf(fout,"%g,\n",result) ;
}
// close the table with a zero
fprintf(fout,"0};\n") ;
fclose(fout);
return 0;
}
264
Tutorials
Note that the table is produced as valid C++ code and that the name of the file to write the
output to is passed in as an argument. The next step is to add the appropriate commands to
MathFunctions’ CMakeLists file to build the MakeTable executable, and then run it as part of
the build process. A few commands are needed to accomplish this, as shown below.
# first we add the executable that generates the table
add_executable(MakeTable MakeTable.cxx)
# add the command to generate the source code'
add_custom_command (
OUTPUT ${CMAKE_CURRENT_BINARY_DIR}/Table.h
COMMAND MakeTable ${CMAKE_CURRENT_BINARY_DIR}/Table.h
DEPENDS MakeTable
)
# add the binary tree directory to the search path for
# include files
include_directories( ${CMAKE_CURRENT_BINARY_DIR} )
# add the main library
add_library(MathFunctions mysqrt.cxx
${CMAKE_CURRENT_BINARY_DIR}/Table.h )
First the executable for MakeTable is added as any other executable would be added. Then
we add a custom command that specifies how to produce Table.h by running MakeTable.
Next we have to let CMake know that mysqrt.cxx depends on the generated file Table.h.
This is done by adding the generated Table.h to the list of sources for the library
MathFunctions. We also have to add the current binary directory to the list of include
directories so that Table . h can be found and included by mysqrt. cxx.
When this project is built it will first build the MakeTable executable. It will then run
MakeTable to produce Table.h. Finally, it will compile mysqrt.cxx which includes
Table. h to produce the MathFunctions library.
At this point the top level CMakeLists file with all the features we have added looks like the
following:
cmake_minimum_required (2.6)
project (Tutorial)
# The version number.
set (Tutorial_VERSION_MAJOR 1)
set (Tutorial VERSION MINOR 0)
Adding a Generated File and Generator (Step 5)
265
# does this system provide the log and exp functions?
include (${CMAKE_ROOT}/Modules/CheckFunctionExists.cmake)
check_function_exists (log HAVE_LOG)
check_function_exists (exp HAVE_EXP)
# should we use our own math functions
option(USE_MYMATH
"Use tutorial provided math implementation" ON)
# configure a header file to pass some of the CMake settings
# to the source code
configure_file (
"${PROJECT_SOURCE_DIR}/TutorialConfig.h.in"
"${PROJECT_BINARY_DIR}/TutorialConfig.h"
)
# add the binary tree to the search path for include files
# so that we will find TutorialConfig.h
include_directories ("${PROJECT_BINARY_DIR}")
# add the MathFunctions library?
if (USE_MYMATH)
include_directories ("${PROJECT_SOURCE_DIR}/MathFunctions")
add_subdirectory (MathFunctions)
set (EXTRA_LIBS ${EXTRA_LIBS} MathFunctions)
endif (USE_MYMATH)
# add the executable
add_executable (Tutorial tutorial.cxx)
target_link_libraries (Tutorial ${EXTRA_LIBS})
# add the install targets
install (TARGETS Tutorial DESTINATION bin)
install (FILES "${PROJECT_BINARY_DIR}/TutorialConfig.h"
DESTINATION include)
# does the application run
add_test (TutorialRuns Tutorial 25)
# does the usage message work?
add_test (TutorialUsage Tutorial)
set_tests_properties (TutorialUsage
PROPERTIES
266
Tutorials
PASS_REGULAR_EXPRESSION "Usage:.*number"
#define a macro to simplify adding tests
macro (do_test arg result)
add_test (TutorialComp${arg} Tutorial ${arg})
set_tests_properties (TutorialComp${arg}
PROPERTIES PASS_REGULAR_EXPRESSION ${result}
)
endmacro (do_test)
# do a bunch of result based tests
do
test
(4
"4
is
2")
do
test
(9
"9
is
3")
do
test
(5
"5
is
2.236")
do
test
(7
"7
is
2.645")
do
test
(25
ii
25
is 5")
do
test
(-25
"-25 is 0")
do
test
(0.
0001
"0.0001
TutorialConf ig. h looks like:
// the configured options and settings for Tutorial
#define Tutorial_VERSION_MAJOR @Tutorial_VERSION_MAJOR@
#define Tutorial_VERSION_MINOR @Tutorial_VERSION_MINOR@
#cmakedefine USE_MYMATH
// does the platform provide exp and log functions?
#cmakedefine HAVE_LOG
#cmakedefine HAVE EXP
Building an Installer (Step 6)
267
And the CMakeLists file for MathFunctions looks like:
# first we add the executable that generates the table
add_executable(MakeTable MakeTable.cxx)
# add the command to generate the source code
add_custom__command (
OUTPUT ${CMAKE_CURRENT_BINARY_DIR}/Table.h
DEPENDS MakeTable
COMMAND MakeTable ${CMAKE_CURRENT_BINARY_DIR}/Table.h
)
# add the binary tree directory to the search path
# for include files
include_directories( ${CMAKE_CURRENT_BINARY_DIR} )
# add the main library
add_library(MathFunctions mysqrt.cxx
${CMAKE_CURRENT_BINARY_DIR}/Table.h)
install (TARGETS MathFunctions DESTINATION bin)
install (FILES MathFunctions.h DESTINATION include)
12.6 Building an Installer (Step 6)
Next suppose that we want to distribute our project to other people so that they can use it. We
want to provide both binary and source distributions on a variety of platforms. This is a little
different from the instal we did previously in section 12.3, where we were installing the
binaries that we had built from the source code. In this example we will be building
installation packages that support binary installations and package management features as
found in cygwin, debian, RPMs etc. To accomplish this we will use CPack to create platform
specific installers as described in Chapter 9. Specifically we need to add a few lines to the
bottom of our toplevel CMakeLists.txt file.
# build a CPack driven installer package
include (InstalIRequiredSystemLibraries)
set (C PACK_RESOURCE_FILE_LICENSE
"${CMAKE_CURRENT_SOURCE_DIR}/License.txtM)
set (CPACK_PACKAGE_VERSION_MAJOR "${Tutorial_VERSION_MAJOR}")
set (CPACK_PACKAGE_VERSION_MINOR "${Tutorial_VERSION_MINOR}")
include (CPack)
That is all there is to it. We start by including InstallRequiredSystemLibraries. This module
will include any runtime libraries that are needed by the project for the current platform. Next
268
Tutorials
we set some CPack variables to where we have stored the license and version information for
this project. The version information makes use of the variables we set earlier in this tutorial.
Finally we include the CPack module which will use these variables and some other
properties of the system you are on to setup an installer.
The next step is to build the project in the usual manner and then run CPack on it. To build a
binary distribution you would run:
cpack -C CPackConfig.cmake
To create a source distribution you would type
cpack -C CPackSourceConfig.cmake
12.7 Adding Support for a Dashboard (Step 7)
Adding support for submitting our test results to a dashboard is very easy. We already defined
a number of tests for our project in the earlier steps of this tutorial. We just have to run those
tests and submit them to a dashboard. To include support for dashboards we include the CTest
module in our toplevel CMakeLists file.
# enable dashboard scripting
include (CTest)
We also create a CTestConf ig. cmake file where we can specify the name of this project for
the dashboard.
set (CTEST PROJECT_NAME "Tutorial")
CTest will read in this file when it runs. To create a simple dashboard you can run CMake on
your project, change directory to the binary tree, and then run ctest -D Experimental. The
results of your dashboard will be uploaded to Kitware's public dashboard at:
http://www.cdash.org/CDash/index.php?project=PublicDashboard
Appendix A
Appendix A - Variables
Variables That Change Behavior
BUILD_SHARED_LIBS: Global flag to cause add library to create shared libraries if on.
If present and true, this will cause all libraries to be built shared unless the library was
explicitly added as a static library. This variable is often added to projects as an OPTION so
that each user of a project can decide if they want to build the project using shared or static
libraries.
CMAKE__BACKWARDs_COMPATibilITY: Version of cmake required to build project
From the point of view of backwards compatibility, this specifies what version of CMake
should be supported. By default this value is the version number of CMake that you are
running. You can set this to an older version of CMake to support deprecated commands of
CMake in projects that were written to use older versions of CMake. This can be set by the
user or set at the beginning of a CMakeLists file.
CMAKE_build_type: Specifies the build type for make based generators.
This specifies what build type will be built in this tree. Possible values are empty, Debug,
Release, RelWithDeblnfo and MinSizeRel. This variable is only supported for make based
generators. If this variable is supported, then CMake will also provide initial values for the
variables with the name CMAKE_C_FLAGS_[Debug|Release|RelWithDebInfo|MinSizeRel].
For example, if CMAKEBUILDTYPE is Debug, then CMAKE C FLAGS DEBUG will
be added to the CMAKE C FLAGS.
CMAKE_COLOR_MAKEFiLE: Enables color output when using the Makefile generator.
270
Appendix A
When enabled, the generated Makefiles will produce colored output. Default is ON.
CMAKE_C0NFIGURATI0N_TYPES: Specifies the available build types.
This specifies what build types will be available such as Debug, Release, RelWithDeblnfo
etc. This has reasonable defaults on most platforms. But can be extended to provide other
build types. See also CMAKEBUILDTYPE.
CMAKE_find_library_preFIXES: Prefixes to prepend when looking for libraries.
This specifies what prefixes to add to library names when the find library command looks for
libraries. On UNIX systems this is typically lib, meaning that when trying to find the foo
library it will look for libfoo.
CMAKE_FIND_LIBRARY_SUFFIXES: Suffixes to append when looking for libraries.
This specifies what suffixes to add to library names when the find_library command looks for
libraries. On Windows systems this is typically .lib and .dll, meaning that when trying to find
the foo library it will look for foo.dll etc.
CMAKE_INCLUDE_PATH: Path used for searching by FIND_FILE() and FIND_PATH().
Specifies a path which will be used both by FIND_FILE() and FIND_PATH(). Both
commands will check each of the contained directories for the existence of the file which is
currently searched. By default it is empty, it is intended to be set by the project. See also
CMAKE SYSTEM INCLUDE PATH, CMAKE PREF1X PATH.
CMAKE_INSTALL_PREFIX: Install directory used by install.
If’’make install” is invoked or INSTALL is built, this directory is pre-pended onto all install
directories. This variable defaults to /usr/local on UNIX and c:/Program Files on Windows.
CMAKE_library_path: Path used for searching by FIND LIBRARY().
Specifies a path which will be used by FIND_LIBRARY(). FIND LIBRARY() will check
each of the contained directories for the existence of the library which is currently searched.
By default it is empty, it is intended to be set by the project. See also
CMAKE SYSTEM LIBRARY PATH, CMAKE PREFIX PATH.
CMAKE_MFC_FLAG: Tell CMake to use MFC for an executable or dll.
This can be set in a CMakeLists.txt file and will enable MFC in the application. It should be
set to 1 for static the static MFC library, and 2 for the shared MFC library. This is used in
visual studio 6 and 7 project files. The CMakeSetup dialog used MFC and the CMakeLists.txt
looks like this:
Variables That Change Behavior
271
add_definitions(-D_AFXDLL)
set(CMAKE_MFC_FLAG 2)
add_executable(CMakeSetup WIN32 ${SRCS})
CMAKE_MODULE_PATH: Path to look for cmake modules to load.
Specifies a path to override the default search path for CMake modules. For example include
commands will look in this path first for modules to include.
CMAKE_N0T_USING_C0NFIG_FLAGS: Skip BUILDTYPE flags if true.
This is an internal flag used by the generators in CMake to tell CMake to skip the
BUILD TYPE flags.
CMAKE_prefix_path: Path used for searching by FIND_XXX(), with appropriate suffixes
added.
Specifies a path which will be used by the FIND_XXX() commands. It contains the "base"
directories, the FIND_XXX() commands append appropriate subdirectories to the base
directories. So FIND_PROGRAM() adds /bin to each of the directories in the path,
FIND_LIBRARY() appends /lib to each of the directories, and FIND_PATH() and
FIND_FILE() append /include . By default it is empty, it is intended to be set by the project.
See also CMAKES Y STEMPREFIXPATH, CMAKE1NCLUDEPATH,
CMAKE LIBRARY_PATH, CMAKE PROGRAM PATH.
CMAKE_PROGRAM_PATH: Path used for searching by FIND_PROGRAM().
Specifies a path which will be used by FINDPROGRAMQ. FIND_PROGRAM() will check
each of the contained directories for the existence of the program which is currently searched.
By default it is empty, it is intended to be set by the project. See also
CMAKE SYSTEM PROGRAM PATH, CMAKE PREFIX PATH.
CMAKE_SKiP_INStall_all_dePENDENCY: Don't make the install target depend on the all
target.
By default, the "install" target depends on the "all" target. This has the effect, that when
"make install" is invoked or INSTALL is built, first the "all" target is built, then the
installation starts. If CMAKE SKIP INSTALL ALL DEPENDENCY is set to TRUE, this
dependency is not created, so the installation process will start immediately, independent from
whether the project has been completely built or not.
CMAKE_system_include_path: Path used for searching by FIND_FILE() and
FIND_PATH().
Specifies a path which will be used both by FIND_FILE() and FIND_PATH(). Both
commands will check each of the contained directories for the existence of the file which is
currently searched. By default it contains the standard directories for the current system. It is
272
Appendix A
NOT intended to be modified by the project, use CMAKEINCLUDEPATH for this. See
also CM AKES YSTEM_PREFIX_P ATH.
CMAKE_system_library_path: Path used for searching by FIND_LIBRARY().
Specifies a path which will be used by FIND_LIBRARY(). FIND_LIBRARY() will check
each of the contained directories for the existence of the library which is currently searched.
By default it contains the standard directories for the current system. It is NOT intended to be
modified by the project, use CMAKESYSTEMLIBRARYPATH for this. See also
CMAKES Y STEMPREFIXPATH.
CMAKE_SYSTEM_PREFIX_PATH: Path used for searching by FIND_XXX(), with appropriate
suffixes added.
Specifies a path which will be used by the FIND_XXX() commands. It contains the "base"
directories, the FIND_XXX() commands append appropriate subdirectories to the base
directories. So FIND_PROGRAM() adds /bin to each of the directories in the path,
FIND_LIBRARY() appends /lib to each of the directories, and FIND_PATH() and
FIND_FILE() append /include . By default this contains the standard directories for the
current system. It is NOT intended to be modified by the project, use
CMAKEPREFIXPATH for this. See also CMAKES Y STEMINCLUDEP ATH,
CMAKESYSTEMLIBRARYPATH, CM AKES Y STEMPROGRAMP ATH.
CMAKE_SYSTEM_PROGRAM_PATH: Path used for searching by FIND_PROGRAM().
Specifies a path which will be used by FIND_PROGRAM(). FIND_PROGRAM() will check
each of the contained directories for the existence of the program which is currently searched.
By default it contains the standard directories for the current system. It is NOT intended to be
modified by the project, use CMAKE_PROGRAM_PATH for this. See also
CMAKESYSTEMPREFIXPATH.
CMAKE_USER_MAKE_RULES_OVERRlDE: Specify a file that can change the build rule
variables.
If this variable is set, it should to point to a CMakeLists.txt file that will be read in by CMake
after all the system settings have been set, but before they have been used. This would allow
you to override any variables that need to be changed for some special project.
Variables That Describe the System
APPLE: True if running on Mac OS X.
BORLAND: True if the Borland compiler is being used.
CMAKE_CL_64: Using the 64 bit compiler from Microsoft
Set to true when using the 64 bit cl compiler from Microsoft.
Variables That Describe the System
273
CMAKE_COMPILER_2005: Using the Visual Studio 2005 compiler from Microsoft
Set to true when using the Visual Studio 2005 compiler from Microsoft.
CMAKE_HOST_APPLE: True for Apple OS Xoperating systems.
CMAKE_HOST_SYSTEM: Name of system CMake is being run on.
The same as CMAKE_SYSTEM but for the host system instead of the target system when
cross compiling.
CMAKE_HOST_SYSTEM_NAME: Name of the OS CMake is running on.
The same as CMAKE_SYSTEM_NAME but for the host system instead of the target system
when cross compiling.
CMAKE_HOST_SYSTEM_PROCESSOR: The name of the CPU CMake is running on.
The same as CMAKE SYSTEM PROCESSOR but for the host system instead of the target
system when cross compiling.
CMAKE_HOST_SYSTEM__VERSION: OS version CMake is running on.
The same as CMAKE_SYSTEM_VERSION but for the host system instead of the target
system when cross compiling.
CMAKE_HOST_unix: True for UNIX and UNIX like operating systems.
Set to true when the host system is UNIX or UNIX like (i.e. APPLE and CYGWIN).
CMAKE_H0ST_WIN32: True on windows systems, including win64.
Set to true when the host system is Windows and on cygwin.
CMAKE_OBJECT_PATH_MAX: Maximum object file full-path length allowed by native build
tools.
CMake computes for every source file an object file name that is unique to the source file and
deterministic with respect to the full path to the source file. This allows multiple source files
in a target to share the same name if they lie in different directories without rebuilding when
one is added or removed. However, it can produce long full paths in a few cases, so CMake
shortens the path using a hashing scheme when the full path to an object file exceeds a limit.
CMake has a built-in limit for each platform that is sufficient for common tools, but some
native tools may have a lower limit. This variable may be set to specify the limit explicitly.
The value must be an integer no less than 128.
CMAKE_SYSTEM: Name of system CMake is compiling for.
This variable is the composite of CMAKE_SYSTEM_NAME and
CMAKE SYSTEM VERSION, like this $ (CMAKE S YSTEM N AME} -
274
Appendix A
$ {CM AKES YSTEMVERSION}. If CMAKESYSTEMVERSION is not set, then
CM AKES YSTEM is the same as CMAKESYSTEMNAME.
CMAKE_system__name: Name of the OS CMake is building for.
This is the name of the operating system on which CMake is targeting. On systems that have
the uname command, this variable is set to the output of uname -s. Linux, Windows, and
Darwin for Mac OS X are the values found on the big three operating systems.
CMAKE_SYSTEM_PROCESSOR: The name of the CPU CMake is building for.
On systems that support uname, this variable is set to the output of uname -p, on Windows it
is set to the value of the environment variable PROCESSORARCHITECTURE
CMAKE_SYSTEM_VERSlON: OS version CMake is building for.
A numeric version string for the system, on systems that support uname, this variable is set to
the output of uname -r. On other systems this is set to major-minor version numbers.
CYGWIN: True for cygwin.
MSVC: True when using Microsoft Visual C
MSVC80: True when using Microsoft Visual C 8.0
MSVC_IDE: True when using the Microsoft Visual C IDE
Set to true when the target platform is the Microsoft Visual C IDE, as opposed to the
command line compiler.
MS VC__VERS I ON: The version of Microsoft Visual C/C++ being used if any.
The version of Microsoft Visual C/C++ being used if any. For example 1300 is MSVC 6.0.
UNIX: True for UNIX and UNIX like operating systems.
Set to true when the target system is UNIX or UNIX like (i.e. APPLE and CYGWIN).
WIN32: True on windows systems, including win64.
Set to true when the target system is Windows and on cygwin.
XC0DE_VERSION: Version of Xcode (Xcode generator only).
Under the Xcode generator, this is the version of Xcode as specified in
"Xcode.app/Contents/version.plist" (such as ”3.1.2”).
Variables for Languages
CMAKE_<LANG>__ARCHIVE_APPEND: Rule variable to append to a static archive.
Variables for Languages
275
This is a rule variable that tells CMake how to append to a static archive. It is used in place of
CMAKE_<LANG>_CREATE_STATIC_LIBRARY on some platforms in order to support
large object counts. See also CMAKE_<LANG>_ARCHIVE_CREATE and
CMAKE_<LANG>_ARCHIVE_FINISH.
CMAKE_<LANG>_ARCHIVE__CREATE: Rule variable to create a new static archive.
This is a rule variable that tells CMake how to create a static archive. It is used in place of
CMAKE_<LANG>_CREATE_STATIC_LIBRARY on some platforms in order to support
large object counts. See also CMAKE_<LANG>_ARCHIVE_APPEND and
CMAKE_<LANG>_ARCHIVE_FINISH.
CMAKE__<LANG>__ARCHIVE__FINISH: Rule variable to finish an existing static archive.
This is a rule variable that tells CMake how to finish a static archive. It is used in place of
CMAKE_<LANG>_CREATE_STATIC_LIBRARY on some platforms in order to support
large object counts. See also CMAKE_<LANG>_ARCHIVE_CREATE and
CMAKE_<LANG>_ARCHIVE_APPEND.
CMAKE__<LANG>__COMPlLER: The full path to the compiler for LANG.
This is the command that will be used as the <LANG> compiler. Once set, you cannot change
this variable.
CMAKE__<LANG>_C0MPILER_ABI: An internal variable subject to change.
This is used in determining the compiler ABI and is subject to change.
CMAKE_<LANG>_COMPlLER_lD: An internal variable subject to change.
This is used in determining the compiler and is subject to change.
CMAKE_<LANG>__COMPlLER__LOADED: Defined to true if the language is enabled.
When language <LANG> is enabled by project() or enable_language() this variable is defined
to 1.
CMAKE_<LANG>__COMPlLE_OBJECT: Rule variable to compile a single object file.
This is a rule variable that tells CMake how to compile a single object file for for the language
<LANG>.
CMAKE__<LANG>_CREATE_SHARED_LIBRARY: Rule variable to create a shared library.
This is a rule variable that tells CMake how to create a shared library for the language
<LANG>.
CMAKE <LANG> CREATE SHARED MODULE: Rule variable to create a shared module.
276
Appendix A
This is a rule variable that tells CMake how to create a shared library for the language
<LANG>
cmake_<lang>_CREATE_static_library: Rule variable to create a static library.
This is a rule variable that tells CMake how to create a static library for the language
<LANG>
CMAKE_<LANG>_FLAGS_DEBUG: Flags for Debug build type or configuration.
<LANG> flags used when CMAKEBUILDTYPE is Debug.
CMAKE_<LANG>_FLAGS_MINSIzerel: Flags for MinSizeRel build type or configuration.
<LANG> flags used when CMAKE BUILD TYPE is MinSizeRel.Short for minimum size
release.
CMAKE__<LANG>_FLAGS_RELEASE: Flags for Release build type or configuration.
<LANG> flags used when CMAKE BUILD TYPE is Release
CMAKE_<LANG>_FIAGS_RELWITHDEBINF0: Flags for RelWithDeblnfo type or
configuration.
<LANG> flags used when CMAKE BUILD TYPE is RelWithDeblnfo. Short for Release
With Debug Information.
CMAKE__<LANG>_lGNORE_EXTENSIONS: File extensions that should be ignored by the build.
This is a list of file extensions that may be part of a project for a given language but are not
compiled.
CMAKE__<LANG>_IMPLICIT_INCLUDE_DIRECT0RIES: Directories implicitly searched by the
compiler for header files.
CMake does not explicitly specify these directories on compiler command lines for language
<LANG>. This prevents system include directories from being treated as user include
directories on some compilers.
CMAKE_<LANG>_IMPLICIT_LINK_DIRECT0RIES: Implicit linker search path detected for
language <LANG>.
Compilers typically pass directories containing language runtime libraries and default library
search paths when they invoke a linker. These paths are implicit linker search directories for
the compiler's language. CMake automatically detects these directories for each language and
reports the results in this variable.
CMAKE_<LANG>_IMPLICIT_LINK_LIBRARIES: Implicit link libraries and flags detected for
language <LANG>.
Variables for Languages
277
Compilers typically pass language runtime library names and other flags when they invoke a
linker. These flags are implicit link options for the compiler's language. CMake automatically
detects these libraries and flags for each language and reports the results in this variable.
CMAKE_<LANG>_LINKER_PREFERENCE: Preference value for linker language selection.
The "linker language" for executable, shared library, and module targets is the language
whose compiler will invoke the linker. The LINKERLANGUAGE target property sets the
language explicitly. Otherwise, the linker language is that whose linker preference value is
highest among languages compiled and linked into the target. See also the
CMAKE_<LANG>_LINKER_PREFERENCE_PROPAGATES variable.
CMAKE_<LANG>_LINKER_PREFERENCE_PROPAGATES: True if
CMAKE_<LANG>_LINKER_PREFERENCE propagates across targets.
This is used when CMake selects a linker language for a target. Languages compiled directly
into the target are always considered. A language compiled into static libraries linked by the
target is considered if this variable is true.
CMAKE_<LANG>_LINK_EXECUTABLE : Rule variable to link and executable.
Rule variable to link and executable for the given language.
CMAKE_<LANG>_OUTput_extensION: Extension for the output of a compile for a single file.
This is the extension for an object file for the given <LANG>. For example .obj for C on
Windows.
CMAKE_<lang>_platform_id: An internal variable subject to change.
This is used in determining the platform and is subject to change.
CMAKE_<lang>_SIZEOF_data_ptr: Size of pointer-to-data types for language <LANG>.
This holds the size (in bytes) of pointer-to-data types in the target platform ABI. It is defined
for languages C and CXX (C++).
CMAKE_<lang>_SOURCE_fi le_extens I ON S: Extensions of source files for the given
language.
This is the list of extensions for a given languages source files.
CMAKE_C0MPILER_IS_GNU<LANG>: True if the compiler is GNU.
If the selected <LANG> compiler is the GNU compiler then this is TRUE, if not it is FALSE.
CMAKE_lNTERNAL_PLATFORM_ABi: An internal variable subject to change.
This is used in determining the compiler ABI and is subject to change.
278
Appendix A
CMAKE__USER_MAKE__RULES__0VERRIDE_<LANG>: Specify a file that can change the build
rule variables.
If this variable is set, it should to point to a CMakeLists.txt file that will be read in by CMake
after all the system settings have been set, but before they have been used. This would allow
you to override any variables that need to be changed for some language.
Variables That Control the Build
CMAKE__<CONFiG>_POSTFix: Default filename postfix for libraries under configuration
<CONFIG>.
When a non-executable target is created its <CONFIG>_POSTFIX target property is
initialized with the value of this variable if it is set.
CMAKE__archive_OUTPUT_dIRECTORY: Where to put all the ARCHIVE targets when built.
This variable is used to initialize the ARCHIVEOUTPUTDIRECTORY property on all the
targets. See that target property for additional information.
CMAKE_BUILD_WITH_INSTALL_RPATH: Use the install path for the RPATH
Normally CMake uses the build tree for the RPATH when building executables etc on
systems that use RPATH. When the software is installed the executables etc are relinked by
CMake to have the install RPATH. If this variable is set to true then the software is always
built with the install path for the RPATH and does not need to be relinked when installed.
CMAKE_DEBUG_POSTFix: See variable CMAKE_<CONFIG>_POSTFIX.
This variable is a special case of the more-general CMAKE_<CONFIG>_POSTFIX variable
for the DEBUG configuration.
CMAKE_EXE_LINKER_FLAGS: Linker flags used to create executables.
Flags used by the linker when creating an executable.
CMAKE_EXE_LINKER_FLAGS_[CMAKE_BUILD_TYPE]: Flag used when linking an
executable.
Same as CMAKECFLAGS* but used by the linker when creating executables.
CMAKE_Fortran_MODULE_DIRECTORY: Fortran module output directory.
This variable is used to initialize the Fortran MODULE DIRECTORY property on all the
targets. See that target property for additional information.
CMAKE_INCLUDE_CURRENT_DIR: Automatically add the current source- and build directories
to the include path.
Variables That Control the Build
279
If this variable is enabled, CMake automatically adds in each directory
$ {CMAKECURRENTSOURCEDIR} and $ {CMAKE CURRENT BINARY DIR} to
the include path for this directory. These additional include directories do not propagate down
to subdirectories. This is useful mainly for out-of-source builds, where files generated into the
build tree are included by files located in the source tree.
By default CMAKEINCLUDECURRENTDIR is OFF.
CMAKE__INSTALL_NAME_DIR: Mac OS X directory name for installed targets.
CMAKE INSTALL NAME DIR is used to initialize the INSTALL NAME DIR property
on all targets. See that target property for more information.
CMAKE_install_rpath: The rpath to use for installed targets.
A semicolon-separated list specifying the rpath to use in installed targets (for platforms that
support it). This is used to initialize the target property INSTALL_RPATH for all targets.
CMAKE_install_rpath_use_link__path: Add paths to linker search and installed rpath.
CMAKE INSTALL RPATH USE LINK PATH is a boolean that if set to true will append
directories in the linker search path and outside the project to the INSTALL RPATH. This is
used to initialize the target property INSTALL RPATH USE LINK PATH for all targets.
CMAKE__library_OUTPUT_dIRECTORY: Where to put all the LIBRARY targets when built.
This variable is used to initialize the LIBRARY OUTPUT DIRECTORY property on all the
targets. See that target property for additional information.
CMAKE_LIBRARY_PATH_FLAG: The flag used to add a library search path to a compiler.
The flag used to specify a library directory to the compiler. On most compilers this is "-L".
CMAKE_link_def_file_flag : Linker flag used to specify a .def file for dll creation.
The flag used to add a .def file when creating a dll on Windows, this is only defined on
Windows.
CMAKE_LINK_LIBRARY_FILE_FLAG: Flag used to link a library specified by a path to its file.
The flag used before a library file path is given to the linker. This is needed only on very few
platforms.
CMAKE_link_library_FLAG: Flag used to link a library into an executable.
The flag used to specify a library to link to an executable. On most compilers this is M-l".
CMAKE_N0_BUILTIN_CHRPATH: Do not use the builtin ELF editor to fix RPATHs on
installation.
280
Appendix A
When an ELF binary needs to have a different RPATH after installation than it does in the
build tree, CMake uses a builtin editor to change the RPATH in the installed copy. If this
variable is set to true then CMake will relink the binary before installation instead of using its
builtin editor.
CMAKE__runtime__output_directory: Where to put all the RUNTIME targets when built.
This variable is used to initialize the RUNTIMEOUTPUTDIRECTORY property on all the
targets. See that target property for additional information.
CMAKE_skip__build_rpath: Do not include RPATHs in the build tree.
Normally CMake uses the build tree for the RPATH when building executables etc on
systems that use RPATH. When the software is installed the executables etc are relinked by
CMake to have the install RPATH. If this variable is set to true then the software is always
built with no RPATH.
CMAKE_USE_RELATIVE_PATHS: Use relative paths (May not work!).
If this is set to TRUE, then the CMake will use relative paths between the source and binary
tree. This option does not work for more complicated projects, and relative paths are used
when possible. In general, it is not possible to move CMake generated Makefiles to a different
location regardless of the value of this variable.
EXECUTable__OUTPUT_PATH: Old executable location variable.
The target property RUNTIME OUTPUT DIRECTORY supercedes this variable for a target
if it is set. Executable targets are otherwise placed in this directory.
LlBRARY_OUTPUT_PATH: Old library location variable.
The target properties ARCHIVEOUTPUTDIRECTORY,
LIBRARY OUTPUT DIRECTORY, and RUNTIME OUTPUT DIRECTORY supercede
this variable for a target if they are set. Library targets are otherwise placed in this directory.
Variables That Provide Information
variables defined by CMake, that give information about the project, and CMake
CMAKE_AR: Name of archiving tool for static libraries.
This specifies name of the program that creates archive or static libraries.
CMAKE_binary_dir: The path to the top level of the build tree.
This is the full path to the top level of the current CMake build tree. For an in-source build,
this would be the same as CMAKE SOURCE DIR.
Variables That Provide Information
281
CMAKE_BUlLD_TOOL: Tool used for the actual build process.
This variable is set to the program that will be needed to build the output of CMake. If the
generator selected was Visual Studio 6, the CMAKE MAKE PROGRAM will be set to
msdev, for Unix Makefiles it will be set to make or gmake, and for Visual Studio 7 it set to
devenv. For NMake Makefiles the value is nmake. This can be useful for adding special flags
and commands based on the final build environment.
CMAKE_CACHEFILE_DIR: The directory with the CMakeCache.txt file.
This is the full path to the directory that has the CMakeCache.txt file in it. This is the same as
CMAKEBINARYDIR.
CMAKE__CACHE__MAJOR__VERS I ON: Major version of CMake used to create the
CMakeCache.txt file
This is stores the major version of CMake used to write a CMake cache file. It is only
different when a different version of CMake is run on a previously created cache file.
CMAKE__CACHE_MIN0R_VERSI0N: Minor version of CMake used to create the
CMakeCache.txt file
This is stores the minor version of CMake used to write a CMake cache file. It is only
different when a different version of CMake is run on a previously created cache file.
CMAKE__CACHE__PATCH__VERSION: Patch version of CMake used to create the
CMakeCache.txt file
This is stores the patch version of CMake used to write a CMake cache file. It is only different
when a different version of CMake is run on a previously created cache file.
CMAKE_CFG__INTDIR: Build-time reference to per-configuration output subdirectory.
For native build systems supporting multiple configurations in the build tree (such as Visual
Studio and Xcode), the value is a reference to a build-time variable specifying the name of the
per-configuration output subdirectory. On Makefile generators this evaluates to because
there is only one configuration in a build tree. Example values:
$(intDir)
= Visual Studio 6
$(OutDir)
= Visual Studio 7, 8, 9
$(Configuration)
= Visual Studio 10
$(CONFIGURATION)
= Xcode
= Make-based tools
Since these values are evaluated by the native build system, this variable is suitable only for
use in command lines that will be evaluated at build time. Example of intended usage:
282
Appendix A
add_executable(mytool mytool.c)
add_custom_command(
OUTPUT out.txt
COMMAND
${CMAKE_CURRENT_BINARY_DIR}/${CMAKE_C FG_INT DIR}/mytool
${CMAKE_CURRENT_SOURCE_DIR}/in.txt out.txt
DEPENDS mytool in.txt
)
add_custom_target(drive ALL DEPENDS out.txt)
Note that CMAKECFGINTDIR is no longer necessary for this purpose but has been left for
compatibility with existing projects. Instead add_custom_command() recognizes executable
target names in its COMMAND option, so
M$ {CMAKE_CURRENT_BINARY_DIR}/$ {CM AKECFGJNTDIR} /mytool" can be
replaced by just "mytool".
This variable is read-only. Setting it is undefined behavior. In multi-configuration build
systems the value of this variable is passed as the value of preprocessor symbol
"CMAKEINTDIR" to the compilation of all source files.
CMAKE_COMMAND: The full path to the cmake executable.
This is the full path to the CMake executable cmake which is useful from custom commands
that want to use the cmake -E option for portable system commands, e.g. /usr/local/bin/cmake
CMAKE_CROS SCOMPI LING: Is CMake currently cross compiling.
This variable will be set to true by CMake if CMake is cross compiling. Specifically if the
build platform is different from the target platform.
CMAKE_CTEST_COMMAND: Full path to ctest command installed with cmake.
This is the full path to the CTest executable ctest which is useful from custom commands that
want to use the cmake -E option for portable system commands.
CMAKE_CURRENT_BINARY_DIR: The path to the binary directory currently being processed.
This the full path to the build directory that is currently being processed by cmake. Each
directory added by add_subdirectory will create a binary directory in the build tree, and as it is
being processed this variable will be set. For in-source builds this is the current source
directory being processed.
CMAKE_CURRENT_LIST_FILE: Full path to the listfile currently being processed.
As CMake processes the listfiles in your project this variable will always be set to the one
currently being processed. See also CMAKE PARENT LIST FILE.
Variables That Provide Information
283
CMAKE_CURRENT_LIST_LINE: The line number of the current file being processed.
This is the line number of the file currently being processed by cmake.
CMAKE_CURRENT_SOURCE_DlR: The path to the source directory currently being processed.
This the full path to the source directory that is currently being processed by cmake.
CMAKE_dl_lIBS: Name of library containing dlopen and dlcose.
The name of the library that has dlopen and diclose in it, usually -ldl on most UNIX
machines.
CMAKE_EDiT_COMMAND: Full path to cmake-gui or ccmake.
This is the full path to the CMake executable that can graphically edit the cache. For example,
cmake-gui, ccmake, or cmake -i.
CMAKE_EXECUTABLE_SUFFIX: The suffix for executables on this platform.
The suffix to use for the end of an executable if any, .exe on Windows.
CMAKE_EXECUTABLE_SUFFIX_<LANG> overrides this for language <LANG>.
CMAKE_EXTRA_SHARED_LIBRARY_SUFFIXES: Additional suffixes for shared libraries.
Extensions for shared libraries other than that specified by
CMAKESHAREDLIBRARYSUFFIX, if any. CMake uses this to recognize external
shared library files during analysis of libraries linked by a target.
CMAKE_GENERATOR: The generator used to build the project.
The name of the generator that is being used to generate the build files, (e.g. "Unix
Makefiles", "Visual Studio 6", etc.)
cmake_home_directory: Path to top of source tree.
This is the path to the top level of the source tree.
CMAKE_IMP0RT_Library__preFIX: The prefix for import libraries that you link to.
The prefix to use for the name of an import library if used on this platform.
CMAKE_IMPORT_LIBRARY_PREFIX_<LANG> overrides this for language <LANG>.
CMAKE_import_libraryjsuffix: The suffix for import libraries that you link to.
The suffix to use for the end of an import library if used on this platform.
CMAKE_IMPORT_LIBRARY_SUFFIX_<LANG> overrides this for language <LANG>.
284
Appendix A
CMAKE_LINK_LIBRARY_SUFFIX: The suffix for libraries that you link to.
The suffix to use for the end of a library, .lib on Windows.
CMAKE_MAJOR_VERSlON: The Major version of cmake (i.e. the 2 in 2.X.X)
This specifies the major version of the CMake executable being run.
CMAKE_MAKE_PROGRAM: See CMAKEBUILDTOOL.
This variable is around for backwards compatibility, see CMAKE BUILD TOOL.
CMAKE_MIN0R_VERSI0N: The Minor version of cmake (i.e. the 4 in X.4.X).
This specifies the minor version of the CMake executable being run.
CMAKE__PARENT_LIST__FILE: Full path to the parent listfile of the one currently being
processed.
As CMake processes the listfiles in your project this variable will always be set to the listfile
that included or somehow invoked the one currently being processed. See also
CMAKECURRENTLISTFILE.
CMAKE_PATCH_VERSION: The patch version of cmake (i.e. the 3 in X.X.3).
This specifies the patch version of the CMake executable being run.
CMAKE__PROJECT_NAME: The name of the current project.
This specifies name of the current project from the closest inherited PROJECT command.
CMAKE_RANLIB: Name of randomizing tool for static libraries.
This specifies name of the program that randomizes libraries on UNIX, not used on Windows,
but may be present.
CMAKE_ROOT: Install directory for running cmake.
This is the install root for the running CMake and the Modules directory can be found here.
This is commonly used in this format: ${CMAKE ROOT}/Modules
CMAKE_SHARED_LIBRARY_PREFIX: The prefix for shared libraries that you link to.
The prefix to use for the name of a shared library, lib on UNIX.
CMAKE_SHARED_LIBRARY_PREFIX_<LANG> overrides this for language <LANG>.
CMAKE_SHARED_LIBRARY_SUFFIX: The suffix for shared libraries that you link to.
The suffix to use for the end of a shared library, .dll on Windows.
Variables That Provide Information
285
CMAKE_SHARED_LIBRARY_SUFFIX_<LANG> overrides this for language <LANG>
CMAKE_SHARED_MODULE_PREFlX: The prefix for loadable modules that you link to.
The prefix to use for the name of a loadable module on this platform.
CMAKE_SHARED_MODULE_PREFIX_<LANG> overrides this for language <LANG>.
CMAKE_SHARED_MODULE_SUFFiX: The suffix for shared libraries that you link to.
The suffix to use for the end of a loadable module on this platform
CMAKE_SHARED_MODULE_SUFFIX_<LANG> overrides this for language <LANG>.
CMAKE_sizeof_void_p: Size of a void pointer.
This is set to the size of a pointer on the machine, and is determined by a try compile. If a 64
bit size is found, then the library search path is modified to look for 64 bit libraries first.
CMAKE_SKIP_RPATH: If true, do not add run time path information.
If this is set to TRUE, then the rpath information is not added to compiled executables. The
default is to add rpath information if the platform supports it.This allows for easy running
from the build tree.
CMAKE_SOURCE_DlR: The path to the top level of the source tree.
This is the full path to the top level of the current CMake source tree. For an in-source build,
this would be the same as CMAKE BINARY DIR.
CMAKE_STANDARD_LIBRARIES: Libraries linked into every executable and shared library.
This is the list of libraries that are linked into all executables and libraries.
CMAKE_STATIC_LIBRARY_PREFIX: The prefix for static libraries that you link to.
The prefix to use for the name of a static library, lib on UNIX.
CMAKE_STATIC_LIBRARY_PREFIX_<LANG> overrides this for language <LANG>.
CMAKE_STATIC_LIBRARY_SUFFIX: The suffix for static libraries that you link to.
The suffix to use for the end of a static library, .lib on Windows.
CMAKE_STATIC_LIBRARY_SUFFIX_<LANG> overrides this for language <LANG>.
CMAKE_USING__VC_FREE_T00LS: True if free visual studio tools being used.
This is set to true if the compiler is Visual Studio free tools.
286
Appendix A
CMAKE_VERB0SE_MAKEFILE: Create verbose Makefiles if on.
This variable defaults to false. You can set this variable to true to make CMake produce
verbose Makefiles that show each command line as it is used.
CMAKE_VERSION: The full version of cmake in major.minor.patch format.
This specifies the full version of the CMake executable being run. This variable is defined by
versions 2.6.3 and higher. See variables CMAKEMAJORVERSION,
CMAKEMINORVERSION, and CMAKE PATCH VERSION for individual version
components.
PROJECT_BINARY__DIR: Full path to build directory for project.
This is the binary directory of the most recent PROJECT command.
projectjname: Name of the project given to the project command.
This is the name given to the most recent PROJECT command.
PROJECT_SOURCE_DlR: Top level source directory for the current project.
This is the source directory of the most recent PROJECT command.
[Project name]_BINARY_DIR: Top level binary directory for the named project.
A variable is created with the name used in the PROJECT command, and is the binary
directory for the project. This can be useful when SUBDIR is used to connect several projects.
[Project name]_SOURCE_DlR: Top level source directory for the named project.
A variable is created with the name used in the PROJECT command, and is the source
directory for the project. This can be useful when add subdirectory is used to connect several
projects.
Appendix B
Appendix B - Command Line Reference
CMake Command Line Options
cmake [options] <path-to-source>
cmake [options] <path-to-existing-build>
The "cmake" executable is the CMake command-line interface. It may be used to configure
projects in scripts. Project configuration settings may be specified on the command line with
the -D option. The -i option will cause cmake to interactively prompt for such settings.
-C <initial-cache>: Pre-load a script to populate the cache.
When cmake is first run in an empty build tree, it creates a CMakeCache.txt file and populates
it with customizable settings for the project. This option may be used to specify a file from
which to load cache entries before the first pass through the project's cmake listfiles. The
loaded entries take priority over the project's default values. The given file should be a CMake
script containing SET commands that use the CACHE option, not a cache-format file.
-D <var>:<type>=<value>: Create a cmake cache entry.
When cmake is first run in an empty build tree, it creates a CMakeCache.txt file and populates
it with customizable settings for the project. This option may be used to specify a setting that
takes priority over the project's default value. The option may be repeated for as many cache
entries as desired.
-U <globbing_expr>: Remove matching entries from CMake cache.
288
Appendix B
This option may be used to remove one or more variables from the CMakeCache.txt file,
globbing expressions using * and ? are supported. The option may be repeated for as many
cache entries as desired.
Use with care, you can make your CMakeCache.txt non-working.
-G <generator-name>: Specify a Makefile generator.
CMake may support multiple native build systems on certain platforms. A Makefile generator
is responsible for generating a particular build system. Possible generator names are specified
in the Generators section.
-Wno-dev: Suppress developer warnings.
Suppress warnings that are meant for the author of the CMakeLists.txt files.
-Wdev: Enable developer warnings.
Enable warnings that are meant for the author of the CMakeLists.txt files.
-E: CMake command mode.
For true platform independence, CMake provides a list of commands that can be used on all
systems. Run with -E help for the usage information. Commands available are: chdir, copy,
copyifdifferent copydi rectory, comparefiles, echo, echoappend, environment,
makedirectory, md5sum, removedi rectory, remove, tar, time, touch, touch nocreate,
write_regv, delete_regv, comspec, create_symlink.
-i: Run in wizard mode.
Wizard mode runs cmake interactively without a GUI. The user is prompted to answer
questions about the project configuration. The answers are used to set cmake cache values.
-L [A] [H]: List non-advanced cached variables.
List cache variables will run CMake and list all the variables from the CMake cache that are
not marked as INTERNAL or ADVANCED. This will effectively display current CMake
settings, which can be then changed with -D option. Changing some of the variable may result
in more variables being created. If A is specified, then it will display also advanced variables.
If H is specified, it will also display help for each variable.
CMake Command Line Options
289
--build <dir>: Build a CMake-generated project binary tree.
This abstracts a native build tool's command-line interface with the following options:
<dir>
—target <tgt>
—config <cfg>
--clean-first
Project binary directory to be built.
Build <tgt> instead of default targets.
For multi-configuration tools, choose <cfg>.
Build target 'clean' first, then build.
(To. clean only, use --target 'clean'.)
Pass remaining options to the native tool.
Run cmake —build with no options for quick help.
-N: View mode only.
Only load the cache. Do not actually run configure and generate steps.
-P <file>: Process script mode.
Process the given cmake file as a script written in the CMake language. No configure or
generate step is performed and the cache is not modified. If variables are defined using -D,
this must be done before the -P argument.
—graphviz=[file]: Generate graphviz of dependencies.
Generate a graphviz input file that will contain all the library and executable dependencies in
the project.
— system-information [file]: Dump information about this system.
Dump a wide range of information about the current system. If run from the top of a binary
tree for a CMake project it will dump additional information such as the cache, log files etc.
--debug-trycompile: Do not delete the try compile directories..
Do not delete the files and directories created for try_compile calls. This is useful in
debugging failed try_compiles. It may however change the results of the try-compiles as old
junk from a previous try-compile may cause a different test to either pass or fail incorrectly.
This option is best used for one try-compile at a time, and only when debugging.
—debug-output: Put cmake in a debug mode.
Print extra stuff during the cmake run like stack traces with message(send_error) calls,
--trace: Put cmake in trace mode.
Print a trace of all calls made and from where with message(send_error ) calls.
290
Appendix B
—help-command cmd [file]: Print help for a single command and exit.
Full documentation specific to the given command is displayed. If a file is specified, the
documentation is written into and the output format is determined depending on the filename
suffix. Supported are man page, HTML, DocBook and plain text.
—help-command-list [file]: List available listfile commands and exit.
The list contains all commands for which help may be obtained by using the -help-command
argument followed by a command name. If a file is specified, the documentation is written
into and the output format is determined depending on the filename suffix. Supported are man
page, HTML, DocBook and plain text.
—help-commands [file]: Print help for all commands and exit.
Full documentation specific for all current command is displayed.If a file is specified, the
documentation is written into and the output format is determined depending on the filename
suffix. Supported are man page, HTML, DocBook and plain text.
--help-compatcommands [file]: Print help for compatibility commands.
Full documentation specific for all compatibility commands is displayed.If a file is specified,
the documentation is written into and the output format is determined depending on the
filename suffix. Supported are man page, HTML, DocBook and plain text.
—help-module module [file]: Print help for a single module and exit.
Full documentation specific to the given module is displayed.If a file is specified, the
documentation is written into and the output format is determined depending on the filename
suffix. Supported are man page, HTML, DocBook and plain text.
—help-module-list [file]: List available modules and exit.
The list contains all modules for which help may be obtained by using the -help-module
argument followed by a module name. If a file is specified, the documentation is written into
and the output format is determined depending on the filename suffix. Supported are man
page, HTML, DocBook and plain text.
—help-modules [file]: Print help for all modules and exit.
Full documentation for all modules is displayed. If a file is specified, the documentation is
written into and the output format is determined depending on the filename suffix. Supported
are man page, HTML, DocBook and plain text.
—help-custom-modules [file]: Print help for all custom modules and exit.
Full documentation for all custom modules is displayed. If a file is specified, the
documentation is written into and the output format is determined depending on the filename
suffix. Supported are man page, HTML, DocBook and plain text.
CMake Command Line Options
291
—help-policy cmp [file]: Print help for a single policy and exit.
Full documentation specific to the given policy is displayed.If a file is specified, the
documentation is written into and the output format is determined depending on the filename
suffix. Supported are man page, HTML, DocBook and plain text.
—help-policies [file]: Print help for all policies and exit.
Full documentation for all policies is displayed.If a file is specified, the documentation is
written into and the output format is determined depending on the filename suffix. Supported
are man page, HTML, DocBook and plain text.
—help-property prop [file]: Print help for a single property and exit.
Full documentation specific to the given property is displayed.If a file is specified, the
documentation is written into and the output format is determined depending on the filename
suffix. Supported are man page, HTML, DocBook and plain text.
--help-property-list [file]: List available properties and exit.
The list contains all properties for which help may be obtained by using the -help-property
argument followed by a property name. If a file is specified, the help is written into it.If a file
is specified, the documentation is written into and the output format is determined depending
on the filename suffix. Supported are man page, HTML, DocBook and plain text.
—help-properties [file]: Print help for all properties and exit.
Full documentation for all properties is displayed.If a file is specified, the documentation is
written into and the output format is determined depending on the filename suffix. Supported
are man page, HTML, DocBook and plain text.
—help-variable var [file]: Print help for a single variable and exit.
Full documentation specific to the given variable is displayed.If a file is specified, the
documentation is written into and the output format is determined depending on the filename
suffix. Supported are man page, HTML, DocBook and plain text.
--help-variable-list [file]: List documented variables and exit.
The list contains all variables for which help may be obtained by using the -help-variable
argument followed by a variable name. If a file is specified, the help is written into it.If a file
is specified, the documentation is written into and the output format is determined depending
on the filename suffix. Supported are man page, HTML, DocBook and plain text.
--help-variables [file]: Print help for all variables and exit.
Full documentation for all variables is displayed.If a file is specified, the documentation is
written into and the output format is determined depending on the filename suffix. Supported
are man page, HTML, DocBook and plain text.
—copyright [file]: Print the CMake copyright and exit.
If a file is specified, the copyright is written into it.
—help: Print usage information and exit.
Usage describes the basic command line interface and its options.
--help-full [file]: Print full help and exit.
Full help displays most of the documentation provided by the UNIX man page. It is provided
for use on non-UNIX platforms, but is also convenient if the man page is not installed. If a
file is specified, the help is written into it.
--help-html [file]: Print full help in HTML format.
This option is used by CMake authors to help produce web pages. If a file is specified, the
help is written into it.
—help-man [file]: Print full help as a UNIX man page and exit.
This option is used by the cmake build to generate the UNIX man page. If a file is specified,
the help is written into it.
—version [file]: Show program name/version banner and exit.
If a file is specified, the version is written into it.
CMake Generators
The following generators are available within CMake:
Borland Makefiles: Generates Borland Makefiles.
MSYS Makefiles: Generates MSYS Makefiles.
The Makefiles use /bin/sh as the shell. They require msys to be installed on the machine.
MinGW Makefiles: Generates a Makefile for use with mingw32-make.
The Makefiles generated use cmd.exe as the shell. They do not require msys or a UNIX shell.
NMake Makefiles: Generates NMake Makefiles.
Unix Makefiles: Generates standard UNIX Makefiles.
A hierarchy of UNIX Makefiles is generated into the build tree. Any standard UNIX-style
make program can build the project through the default make target. A "make install" target is
also provided.
CMake Generators
293
Visual Studio 10: Generates Visual Studio 10 project files.
Visual Studio 6: Generates Visual Studio 6 project files.
Visual Studio 7: Generates Visual Studio .NET 2002 project files.
Visual Studio 7 .NET 2003: Generates Visual Studio .NET 2003 project files.
Visual Studio 8 2005: Generates Visual Studio .NET 2005 project files.
Visual Studio 8 2005 Win64: Generates Visual Studio .NET 2005 Win64 project files.
Visual Studio 9 2008: Generates Visual Studio 9 2008 project files.
Visual Studio 9 2008 Win64: Generates Visual Studio 9 2008 Win64 project files.
Watcom WMake: Generates Watcom WMake Makefiles.
CodeBlocks - MinGW Makefiles: Generates CodeBlocks project files.
Project files for CodeBlocks will be created in the top directory and in every subdirectory
which features a CMakeLists.txt file containing a PROJECT() call. Additionally a hierarchy
of Makefiles is generated into the build tree. The appropriate make program can build the
project through the default make target. A "make install” target is also provided.
CodeBlocks - NMake Makefiles: Generates CodeBlocks project files.
Project files for CodeBlocks will be created in the top directory and in every subdirectory
which features a CMakeLists.txt file containing a PROJECT() call. Additionally a hierarchy
of Makefiles is generated into the build tree. The appropriate make program can build the
project through the default make target. A "make install” target is also provided.
CodeBlocks - Unix Makefiles: Generates CodeBlocks project files.
Project files for CodeBlocks will be created in the top directory and in every subdirectory
which features a CMakeLists.txt file containing a PROJECT() call. Additionally a hierarchy
of Makefiles is generated into the build tree. The appropriate make program can build the
project through the default make target. A "make install” target is also provided.
Eclipse CDT4 - MinGW Makefiles: Generates Eclipse CDT 4.0 project files.
Project files for Eclipse will be created in the top directory and will have a linked resource to
every subdirectory which features a CMakeLists.txt file containing a PROJECT()
call.Additionally a hierarchy of Makefiles is generated into the build tree. The appropriate
make program can build the project through the default make target. A "make install" target is
also provided.
Eclipse CDT4 - NMake Makefiles: Generates Eclipse CDT 4.0 project files.
Project files for Eclipse will be created in the top directory and will have a linked resource to
every subdirectory which features a CMakeLists.txt file containing a PROJECT()
call. Additionally a hierarchy of Makefiles is generated into the build tree. The appropriate
294
Appendix B
make program can build the project through the default make target. A ’’make install" target is
also provided.
Eclipse CDT4 - Unix Makefiles: Generates Eclipse CDT 4.0 project files.
Project files for Eclipse will be created in the top directory and will have a linked resource to
every subdirectory which features a CMakeLists.txt file containing a PROJECT()
cail.Additionally a hierarchy of Makefiles is generated into the build tree. The appropriate
make program can build the project through the default make target. A "make install" target is
also provided.
CTest Command Line Options
ctest [options]
The "ctest" executable is the CMake test driver program. CMake-generated build trees created
for projects that use the ENABLE TESTING and ADD TEST commands have testing
support. This program will run the tests and report results.
-C <cfg>, —build-config <cfg>: Choose configuration to test.
Some CMake-generated build trees can have multiple build configurations in the same tree.
This option can be used to specify which one should be tested. Example configurations are
"Debug" and "Release".
-V,--verbose: Enable verbose output from tests.
Test output is normally suppressed and only summary information is displayed. This option
will show all test output.
-W, —extra-verbose: Enable more verbose output from tests.
Test output is normally suppressed and only summary information is displayed. This option
will show even more test output.
—debug: Displaying more verbose internals of CTest.
This feature will result in large number of output that is mostly useful for debugging
dashboard problems.
--output-on-failure: Output anything outputted by the test program if the test should
fail. This option can also be enabled by setting the environment variable
CTEST OUTPUT ON FAILURE
CTest Command Line Options
295
-F: Enable failover.
This option allows ctest to resume a test set execution that was previously interrupted. If no
interruption occurred, the -F option will have no effect.
-Q, —quiet: Make ctest quiet.
This option will suppress all the output. The output log file will
output-log is specified. Options such as —verbose, -extra-verbose,
—quiet is specified.
-O <file>, —output-log <file>: Output to log file
This option tells ctest to write all its output to a log file.
-N, - -show-only: Disable actual execution of tests.
This option tells ctest to list the tests that would be run but not actually run them. Useful in
conjunction with the -R and -E options.
-L <regex>, —label-regex <regex>: Run tests with labels matching regular
expression.
This option tells ctest to run only the tests whose labels match the given regular expression.
-R <regex>, —tests-regex <regex>: Run tests matching regular expression.
This option tells ctest to run only the tests whose names match the given regular expression.
-E <regex>, —exclude-regex <regex>: Exclude tests matching regular expression.
This option tells ctest to NOT run the tests whose names match the given regular expression.
-LE <regex>, --label-exclude <regex>: Exclude tests with labels matching regular
expression.
This option tells ctest to NOT run the tests whose labels match the given regular expression.
-D <dashboard>, —dashboard <dashboard>: Execute dashboard test
This option tells ctest to perform act as a Dart client and perform a dashboard test. All tests
are <Mode><Test>, where Mode can be Experimental, Nightly, and Continuous, and Test can
be Start, Update, Configure, Build, Test, Coverage, and Submit.
-M <model>, —test-model <model>: Sets the model for a dashboard
This option tells ctest to act as a Dart client where the TestModel can be Experimental,
Nightly, and Continuous. Combining -M and -T is similar to -D
still be generated if the —
and —debug are ignored if
296
Appendix B
-T <action>, --test-action <action>: Sets the dashboard action to perform
This option tells ctest to act as a Dart client and perform some action such as start, build, test
etc. Combining -M and -T is similar to -D
—track <track>: Specify the track to submit dashboard to
Submit dashboard to specified track instead of default one. By default, the dashboard is
submitted to Nightly, Experimental, or Continuous track, but by specifying this option, the
track can be arbitrary.
-S <script>, --script <script>: Execute a dashboard for a configuration
This option tells ctest to load in a configuration script which sets a number of parameters such
as the binary and source directories. Then ctest will do what is required to create and run a
dashboard. This option basically sets up a dashboard and then runs ctest -D with the
appropriate options.
-SP <script>, —script-new-process <script>: Execute a dashboard for a
configuration
This option does the same operations as -S but it will do them in a seperate process. This is
primarily useful in cases where the script may modify the environment and you do not want
the modified enviroment to impact other -S scripts.
-A <file>, —add-notes <file>: Add a notes file with submission
This option tells ctest to include a notes file when submitting dashboard.
-I [Start,End,Stride,test#,test#|Test file], --tests-information: Run a
specific number of tests by number.
This option causes ctest to run tests starting at number Start, ending at number End, and
incrementing by Stride. Any additional numbers after Stride are considered individual test
numbers. Start, End,or stride can be empty. Optionally a file can be given that contains the
same syntax as the command line.
-U, —union: Take the Union of -I and -R
When both -R and -I are specified by default the intersection of tests are run. By specifying -
U the union of tests is run instead.
—max-width <width>: Set the max width for a test name to output
Set the maximum width for each test name to show in the output. This allows the user to
widen the output to avoid cliping the test name which can be very annoying.
CTest Command Line Options
297
--interactive-debug-mode [0 11]: Set the interactive mode to 0 or 1.
This option causes ctest to run tests in either an interactive mode or a non-interactive mode.
On Windows this means that in non-interactive mode, all system debug pop up windows are
blocked. In dashboard mode (Experimental, Nightly, Continuous), the default is non-
interactive. When just running tests not for a dashboard the default is to allow popups and
interactive debugging.
—no-label-summary: Disable timing summary information for labels.
This option tells ctest to not print summary information for each label associated with the tests
run. If there are no labels on the tests, nothing extra is printed.
--build-and-test: Configure, build and run a test.
This option tells ctest to configure (i.e. run cmake on), build, and or execute a test. The
configure and test steps are optional. The arguments to this command line are the source and
binary directories. By default this will run CMake on the Source/Bin directories specified
unless — build-nocmake is specified. Both — build-makeprogram and -build-generator MUST
be provided to use —built-and-test. If -test-command is specified then that will be run after
the build is complete. Other options that affect this mode are -build-target —build-nocmake, -
-build-run-dir, — build-two-config, — build-exe-dir, -build-project,—build-noclean, -build-
options
--build-target: Specify a specific target to build.
This option goes with the — build-and-test option, if left out the all target is built.
--build-nocmake: Run the build without running cmake first.
Skip the cmake step.
—build-run-dir: Specify directory to run programs from.
Directory where programs will be after it has been compiled.
--build-two-config: Run CMake twice
--build-exe-dir: Specify the directory for the executable.
--build-generator: Specify the generator to use.
--build-project: Specify the name of the project to build.
--build-makeprogram: Specify the make program to use.
--build-noclean: Skip the make clean step.
—build-config-sample: A sample executable to use to determine the configuraiton
A sample executable to use to determine the configuraiton that should be used. e.g.
Debug/Release/etc
298
Appendix B
—build-options: Add extra options to the build step.
This option must be the last option with the exception of -test-command
—test-command: The test to run with the —build-and-test option.
--test-timeout: The time limit in seconds, internal use only.
—.tomorrow-tag: Nightly or experimental starts with next day tag.
This is useful if the build will not finish in one day.
—ctest-config: The configuration file used to initialize CTest state when submitting
dashboards.
This option tells CTest to use different initialization file instead of CTestConfiguration.tcl.
This way multiple initialization files can be used for example to submit to multiple
dashboards.
--overwrite: Overwrite CTest configuration option.
By default ctest uses configuration options from configuration file. This option will overwrite
the configuration option.
—extra-submit <file>[ ;<file>]: Submit extra files to the dashboard.
This option will submit extra files to the dashboard.
--force-new-ctest-process: Run child CTest instances as new processes
By default CTest will run child CTest instances within the same process. If this behavior is
not desired, this argument will enforce new processes for child CTest processes.
—submit-index: Submit individual dashboard tests with specific index
This option allows performing the same CTest action (such as test) multiple times and submit
all stages to the same dashboard (Dart2 required). Each execution requires different index.
CPack Command Line Options
cpack -G <generator> [options]
The ’’cpack" executable is the CMake packaging program. CMake-generated build trees
created for projects that use the INSTALL_* commands have packaging support. This
program will generate the package.
CPack Generators
299
-G <generator>: Use the specified generator to generate package.
CPack may support multiple native packaging systems on certain platforms. A generator is
responsible for generating input files for particular system and invoking that systems. Possible
generator names are specified in the Generators section.
-C <Conf iguration>: Specify the project configuration
This option specifies the configuration that the project was build with, for example 'Debug’,
'Release'.
-D <var>=<value>: Set a CPack variable.
Set a variable that can be used by the generator.
—conf ig <conf ig f ile>: Specify the config file.
Specify the config file to use to create the package. By default CPackConfig.cmake in the
current directory will be used.
CPack Generators
NSIS: Null Soft Installer
STGZ: Self extracting Tar GZip compression
TBZ2: Tar BZip2 compression
TGZ: Tar GZip compression
TZ: Tar Compress compression
ZIP: ZIP file format
Appendix C
Appendix C - Listfile Commands
Current Commands
The following is an alphabetical listing of the commands that are currently used by CMake.
Later in the appendix there is a section on commands that are deprecated but may still be
handled by CMake for backwards compatibility.
add_custom_command: Add a custom build rule to the generated build system.
There are two main signatures for addcustomcommand The first signature is for adding a
custom command to produce an output.
add_custom_command(OUTPUT outputl [output2 ...]
COMMAND commandl [ARGS] [argsl...]
[COMMAND command2 [ARGS] [args2...] ...]
[MAIN_DEPENDENCY depend]
[DEPENDS [depends...]]
[IMPLICIT_DEPENDS <langl> dependl ...]
[WORKING_DIRECTORY dir]
[COMMENT comment] [VERBATIM] [APPEND])
This defines a command to generate specified OUTPUT file(s). A target created in the same
directory (CMakeLists.txt file) that specifies any output of the custom command as a source
file is given a rule to generate the file using the command at build time. If an output name is a
relative path it will be interpreted relative to the build tree directory corresponding to the
302
Appendix C
current source directory. Note that MAIN_DEPENDENCY is completely optional and is used
as a suggestion to Visual Studio about where to hang the custom command. In Makefile terms
this creates a new target of the following form:
OUTPUT: MAIN_DEPENDENCY DEPENDS
COMMAND
If more than one command is specified they will be executed in order. The optional ARGS
argument is for backward compatibility and will be ignored.
The second signature adds a custom command to a target such as a library or executable. This
is useful for performing an operation before or after building the target. The command
becomes part of the target and will only execute when the target itself is built. If the target is
already built, the command will not execute.
add_custom_command(TARGET target
PRE_BUILD | PRE_LINK | POST_BUILD
COMMAND commandl [ARGS] [argsl...]
[COMMAND cominand2 [ARGS] [args2...] ...]
[WORKING_DIRECTORY dir]
[COMMENT comment] [VERBATIM])
This defines a new command that will be associated with building the specified target. When
the command will happen is determined by which of the following is specified:
PRE_BUILD - run before all other dependencies
PRE_LINK - run after other dependencies
POST_BUILD - run after the target has been built
Note that the PRE BUILD option is only supported on Visual Studio 7 or later. For all other
generators PRE BUILD will be treated as PRE LINK.
If WORKINGDIRECTORY is specified the command will be executed in the directory
given. If COMMENT is set, the value will be displayed as a message before the commands
are executed at build time. If APPEND is specified the COMMAND and DEPENDS option
values are appended to the custom command for the first output specified. There must have
already been a previous call to this command with the same output. The COMMENT,
WORKING DIRECTORY, and MAIN DEPENDENCY options are currently ignored when
APPEND is given, but may be used in the future.
If VERBATIM is given then all arguments to the commands will be escaped properly for the
build tool so that the invoked command receives each argument unchanged. Note that one
add custom target
303
level of escapes is still used by the CMake language processor before add_custom_command
even sees the arguments. Use of VERBATIM is recommended as it enables correct behavior.
When VERBATIM is not given the behavior is platform specific because there is no
protection of tool-specific special characters.
If the output of the custom command is not actually created as a file on disk it should be
marked as SYMBOLIC with SET_SOURCE_FILES_PROPERTIES.
The IMPLICITDEPENDS option requests scanning of implicit dependencies of an input file.
The language given specifies the programming language whose corresponding dependency
scanner should be used. Currently only C, C++ and Fortran language scanners are supported.
Dependencies discovered from the scanning are added to those of the custom command at
build time. Note that the IMPLICIT DEPENDS option is currently supported only for
Makefile generators and will be ignored by other generators.
If COMMAND specifies an executable target (created by ADD EXECUTABLE) it will
automatically be replaced by the location of the executable created at build time. Additionally
a target-level dependency will be added so that the executable target will be built before any
target using this custom command. However this does NOT add a file-level dependency that
would cause the custom command to re-run whenever the executable is recompiled.
The DEPENDS option specifies files on which the command depends. If any dependency is
an OUTPUT of another custom command in the same directory (CMakeLists.txt file) CMake
automatically brings the other custom command into the target in which this command is
built. If DEPENDS specifies any target (created by an ADD* command) a target-level
dependency is created to make sure the target is built before any target using this custom
command. Additionally, if the target is an executable or library a file-level dependency is
created to cause the custom command to re-run whenever the target is recompiled.
add_custom_target: Add a target with no output so it will always be built.
add_custom_target(Name [ALL] [commandl [argsl...]]
[COMMAND command2 [args2...] . ..]
[DEPENDS depend depend depend ... ]
[WORKING_DIRECTORY dir]
[COMMENT comment] [VERBATIM]
[SOURCES srcl [src2...]])
Adds a target with the given name that executes the given commands. The target has no
output file and is ALWAYS CONSIDERED OUT OF DATE even if the commands try to
create a file with the name of the target. Use ADD CUSTOM COMMAND to generate a file
with dependencies. By default nothing depends on the custom target. Use
ADD DEPENDENCIES to add dependencies to or from other targets. If the ALL option is
304
Appendix C
specified it indicates that this target should be added to the default build target so that it will
be run every time (the command cannot be called ALL). The command and arguments are
optional and if not specified an empty target will be created. If WORKING DIRECTORY is
set, then the command will be run in that directory. If COMMENT is set, the value will be
displayed as a message before the commands are executed at build time. Dependencies listed
with the DEPENDS argument may reference files and outputs of custom commands created
witji add_custom_command() in the same directory (CMakeLists.txt file).
If VERBATIM is given then all arguments to the commands will b^ escaped properly for the
build tool so that the invoked command receives each argument unchanged. Note that one
level of escapes is still used by the CMake language processor before add_custom_target even
sees the arguments. Use of VERBATIM is recommended as it enables correct behavior. When
VERBATIM is not given the behavior is platform specific because there is no protection of
tool-specific special characters.
The SOURCES option specifies additional source files to be included in the custom target.
Specified source files will be added to IDE project files for convenience in editing even if
they have not build rules.
add_definitions: Adds -D define flags to the compilation of source files.
add_definitions(-DFOO -DBAR ...)
Adds flags to the compiler command line for sources in the current directory and below. This
command can be used to add any flags, but it was originally intended to add preprocessor
definitions. Flags beginning in -D or /D that look like preprocessor definitions are
automatically added to the COMPILEDEFINITIONS property for the current directory.
Definitions with non-trival values may be left in the set of flags instead of being converted for
reasons of backwards compatibility. See documentation of the directory, target, and source
file COMPILE DEFINITIONS properties for details on adding preprocessor definitions to
specific scopes and configurations.
add_dependencies: Add a dependency between top-level targets.
add_dependencies(target-name depend-target1
depend-target2 ...)
Make a top-level target depend on other top-level targets. A top-level target is one created by
ADDEXECUTABLE, ADDLIBRARY, or ADDCUSTOMT ARGET. Adding
dependencies with this command can be used to make sure one target is built before another
target. See the DEPENDS option of ADDCUSTOMT ARGET and
ADD_CUSTOM_COMMAND for adding file-level dependencies in custom rules. See the
add executable
305
OBJECTDEPENDS option in SETSOURCEFILESPROPERTIES to add file-level
dependencies to object files.
add_executable: Add an executable to the project using the specified source files.
add_executable(<name> [WIN32] [MACOSX_BUNDLE]
[EXCLUDE_FROM_ALL]
sourcel source2 ... sourceN)
Adds an executable target called <name> to be built from the source files listed in the
command invocation. The <name> corresponds to the logical target name and must be
globally unique within a project. The actual file name of the executable built is constructed
based on conventions of the native platform (such as <name>.exe or just <name>).
By default the executable file will be created in the build tree directory corresponding to the
source tree directory in which the command was invoked. See documentation of the
RUNTIMEOUTPUTDIRECTORY target property to change this location. See
documentation of the OUTPUT_NAME target property to change the <name> part of the
final file name.
If WIN32 is given the property WIN32_EXECUTABLE will be set on the target created. See
documentation of that target property for details.
If MACOSX BUNDLE is given the corresponding property will be set on the created target.
See documentation of the MACOSX_BUNDLE target property for details.
If EXCLUDE_FROM_ALL is given the corresponding property will be set on the created
target. See documentation of the EXCLUDE_FROM_ALL target property for details.
The add_executable command can also create IMPORTED executable targets using this
signature:
add_executable(<name> IMPORTED)
An IMPORTED executable target references an executable file located outside the project. No
rules are generated to build it. The target name has scope in the directory in which it is created
and below. It may be referenced like any target built within the project. IMPORTED
executables are useful for convenient reference from commands like add_custom_command.
Details about the imported executable are specified by setting properties whose names begin
in "IMPORTED ". The most important such property is IMPORTED LOCATION (and its
per-configuration version IMPORTED_LOCATION_<CONFIG>) which specifies the
306
Appendix C
location of the main executable file on disk. See documentation of the IMPORTED*
properties for more information.
add__library: Add a library to the project using the specified source files.
add_library(<name> [STATIC | SHARED | MODULE]
. [E XC LUDE_FROM_ALL]
sourcel source2 ... sourceN)
Adds a library target called <name> to be built from the source files listed in the command
invocation. The <name> corresponds to the logical target name and must be globally unique
within a project. The actual file name of the library built is constructed based on conventions
of the native platform (such as lib<name>.a or <name>.lib).
STATIC, SHARED, or MODULE may be given to specify the type of library to be created.
STATIC libraries are archives of object files for use when linking other targets. SHARED
libraries are linked dynamically and loaded at runtime. MODULE libraries are plugins that
are not linked into other targets but may be loaded dynamically at runtime using dlopen-like
functionality. If no type is given explicitly the type is STATIC or SHARED based on whether
the current value of the variable BUILD SHARED LIBS is true.
By default the library file will be created in the build tree directory corresponding to the
source tree directory in which the command was invoked. See documentation of the
ARCHIVEOUTPUTDIRECTORY, LIBRARYOUTPUTDIRECTORY, and
RUNTIME OUTPUT DIRECTORY target properties to change this location. See
documentation of the OUTPUT_NAME target property to change the <name> part of the
final file name.
If EXCLUDE_FROM_ALL is given the corresponding property will be set on the created
target. See documentation of the EXCLUDEFROMALL target property for details.
The add_library command can also create IMPORTED library targets using this signature:
add_library(<name> <SHARED|STATIC|MODULE|UNKNOWN> IMPORTED)
An IMPORTED library target references a library file located outside the project. No rules are
generated to build it. The target name has scope in the directory in which it is created and
below. It may be referenced like any target built within the project. IMPORTED libraries are
useful for convenient reference from commands like target_link_libraries. Details about the
imported library are specified by setting properties whose names begin in MIMPORTED_M.
The most important such property is IMPORTEDJLOCATION (and its per-configuration
add subdirectory
307
version IMPORTED_LOCATION_<CONFIG>) which specifies the location of the main
library file on disk. See documentation of the IMPORTED * properties for more information.
add_subdirectory: Add a subdirectory to the build.
add_subdirectory(source_dir [binary_dir]
[EXCLUDE_FROM_ALL])
Add a subdirectory to the build. The source_dir specifies the directory in which the source
CmakeLists.txt and code files are located. If it is a relative path it will be evaluated with
respect to the current directory (the typical usage), but it may also be an absolute path. The
binary_dir specifies the directory in which to place the output files. If it is a relative path it
will be evaluated with respect to the current output directory, but it may also be an absolute
path. If binary dir is not specified, the value of source_dir, before expanding any relative
path, will be used (the typical usage). The CMakeLists.txt file in the specified source
directory will be processed immediately by CMake before processing in the current input file
continues beyond this command.
If the EXCLUDE_FROM_ALL argument is provided then targets in the subdirectory will not
be included in the ALL target of the parent directory by default, and will be excluded from
IDE project files. Users must explicitly build targets in the subdirectory. This is meant for use
when the subdirectory contains a separate part of the project that is useful but not necessary,
such as a set of examples. Typically the subdirectory should contain its own project()
command invocation so that a full build system will be generated in the subdirectory (such as
a VS IDE solution file). Note that inter-target dependencies supercede this exclusion. If a
target built by the parent project depends on a target in the subdirectory, the dependee target
will be included in the parent project build system to satisfy the dependency.
add_test: Add a test to the project with the specified arguments.
add_test(testname Exename argl arg2 ...)
If the ENABLE_TESTING command has been run, this command adds a test target to the
current directory. If ENABLE TESTING has4iot been run, this command does nothing. The
tests are run by the testing subsystem by executing Exename with the specified arguments.
Exename can be either an executable built by this project or an arbitrary executable on the
system (like tclsh). The test will be run with the current working directory set to the
CMakeList.txt files correspondingdfirectory in the binary tree.
-^^add::>test (NAME^eframe> [CONFIGURATIONS [ Debug | Release I . . . ] ]
COMMAND <command> [argl [arg2 ...]])
308
Appendix C
If COMMAND specifies an executable target (created by add_executable) it will
automatically be replaced by the location of the executable created at build time. If a
CONFIGURATIONS option is given then the test will be executed only when testing under
one of the named configurations.
Arguments after COMMAND may use ’’generator expressions" with the syntax
These expressions are evaluted during build system generation and produce information
specific to each generated build configuration. Valid expressions are:
$<CONFIGURATION> = configuration name
$<TARGET_FILE:tgt> = main file (.exe, .so.1.2, .a)
$<TARGET_LINKER_FILE:tgt> = file used to link (.a, .lib, .so)
$<TARGET_SONAME_FILE:tgt> = file with soname (.so.3)
where "tgt" is the name of a target. Target file expressions produce a full path, but DIR and
_NAME versions can produce the directory and file name components:
$<TARGET_FILE_DIR: tgt>/$<TARGET_FILE_NAME: tgt>
$<TARGET_LINKER_FILE_DIR:tgt>/$<TARGET_LINKER_FILE_NAME:tgt>
$ < TARGE T_S ONAME_FILE_DIR:tgt>/$<TARGET_SONAME_FILE_NAME:tgt>
Example usage:
add_test(NAME mytest
COMMAND testDriver —config $<CONFIGURATION>
—exe $<TARGET_FILE:myexe>)
This creates a test "mytest" whose command runs a testDriver tool passing the configuration
name and the full path to the executable file produced by target "myexe".
aux_source_directory: Find all source files in a directory.
aux_source_directory(<dir> <variable>)
Collects the names of all the source files in the specified directory and stores the list in the
<variable> provided. This command is intended to be used by projects that use explicit
template instantiation. Template instantiation files can be stored in a "Templates"
subdirectory and collected automatically using this command to avoid manually listing all
instantiations.
break
309
It is tempting to use this command to avoid writing the list of source files for a library or
executable target. While this seems to work, there is no way for CMake to generate a build
system that knows when a new source file has been added. Normally the generated build
system knows when it needs to rerun CMake because the CMakeLists.txt file is modified to
add a new source. When the source is just added to the directory without modifying this file,
one would have to manually rerun CMake to generate a build system incorporating the new
file.
break: Break from an enclosing foreach or while loop.
break()
Breaks from an enclosing foreach loop or while loop
build_command: Get the command line that will build this project.
build_command(<variable> <makecommand>)
Sets the given <variable> to a string containing the command that will build this project from
the root of the build tree using the build tool given by <makecommand>. <makecommand>
should be msdev, nmake, make or one of the end user build tools. This is useful for
configuring testing systems.
cmake_minimum_required: Set the minimum required version of cmake for a project.
cmake_minimum_required(VERSION major[.minor[.patch]]
[FATAL_ERROR])
If the current version of CMake is lower than that required it will stop processing the project
and report an error. When a version higher than 2.4 is specified the command implicitly
invokes
cmake_policy(VERSION major[.minor[.patch]])
which sets the cmake policy version level to the version specified. When version 2.4 or lower
is given the command implicitly invokes
cmake_policy(VERSION 2.4)
310
Appendix C
which enables compatibility features for CMake 2.4 and lower. The FATALERROR option
is accepted but ignored by CMake 2.6 and higher. It should be specified so CMake versions
2.4 and lower fail with an error instead of just a warning.
cmake_policy: Manage CMake Policy settings.
As CMake evolves it is sometimes necessary to change existing behavior in order to fix bugs
or improve implementations of existing features. The CMake Policy mechanism is designed
to help keep existing projects building as new versions of CMake introduce changes in
behavior. Each new policy (behavioral change) is given an identifier of the form
"CMP<NNNN>" where "<NNNN>" is an integer index. Documentation associated with each
policy describes the OLD and NEW behavior and the reason the policy was introduced.
Projects may set each policy to select the desired behavior. When CMake needs to know
which behavior to use it checks for a setting specified by the project. If no setting is available
the OLD behavior is assumed and a warning is produced requesting that the policy be set.
The cmake_policy command is used to set policies to OLD or NEW behavior. While setting
policies individually is supported, we encourage projects to set policies based on CMake
versions.
cmake_policy(VERSION major.minor[.patch])
Specify that the current CMake list file is written for the given version of CMake. All policies
introduced in the specified version or earlier will be set to use NEW behavior. All policies
introduced after the specified version will be unset. This effectively requests behavior
preferred as of a given CMake version and tells newer CMake versions to warn about their
new policies. The policy version specified must be at least 2.4 or the command will report an
error. In order to get compatibility features supporting versions earlier than 2.4 see
documentation of policy CMP0001.
cmake_policy(SET CMP<NNNN> NEW)
cmake_policy(SET CMP<NNNN> OLD)
Tell CMake to use the OLD or NEW behavior for a given policy. Projects depending on the
old behavior of a given policy may silence a policy warning by setting the policy state to
OLD. Alternatively one may fix the project to work with the new behavior and set the policy
state to NEW.
cmake_policy(GET CMP<NNNN> <variable>)
Check whether a given policy is set to OLD or NEW behavior. The output variable value will
be "OLD" or "NEW" if the policy is set, and empty otherwise.
configure file
311
CMake keeps policy settings on a stack, so changes made by the cmake_policy command
affect only the top of the stack. A new entry on the policy stack is managed automatically for
each subdirectory to protect its parents and siblings. CMake also manages a new entry for
scripts loaded by include() and find_package() commands except when invoked with the
NOPOLICYSCOPE option (see also policy CMP0011). The cmake_policy command
provides an interface to manage custom entries on the policy stack:
cmake_policy(PUSH)
cmake_policy(POP)
Each PUSH must have a matching POP to erase any changes. This is useful to make
temporary changes to policy settings.
Functions and macros record policy settings when they are created and use the pre-record
policies when they are invoked. If the function or macro implementation sets policies, the
changes automatically propagate up through callers until they reach the closest nested policy
stack entry.
conf igure_f ile: Copy a file to another location and modify its contents.
configure_file(<input> <output>
[COPYONLY] [ESCAPE_QUOTES] [0ONLY])
Copies a file <input> to file <output> and substitutes variable values referenced in the file
content. If <input> is a relative path it is evaluated with respect to the current source
directory. The <input> must be a file, not a directory. If <output> is a relative path it is
evaluated with respect to the current binary directory. If <output> names an existing directory
the input file is placed in that directory with its original name.
This command replaces any variables in the input file referenced as ${VAR} or @VAR@
with their values as determined by CMake. If a variable is not defined, it will be replaced with
nothing. If COPYONLY is specified, then no variable expansion will take place. If
ESCAPE_QUOTES is specified then any substituted quotes will be C-style escaped. The file
will be configured with the current values of CMake variables. If @ONLY is specified, only
variables of the form @VAR@ will be replaces and ${VAR} will be ignored. This is useful
for configuring scripts that use ${VAR}. Any occurrences of #cmakedefme VAR will be
replaced with either #define VAR or /* #undef VAR */ depending on the setting of VAR in
CMake. Any occurrences of #cmakedefine01 VAR will be replaced with either #define VAR
1 or #define VAR 0 depending on whether VAR evaluates to TRUE or FALSE in CMake
create_test_sourcellst: Create a test driver and source list for building test programs.
312
Appendix C
create_test_sourcelist(sourceListName driverName
testl test2 test3
EXTRA_INCLUDE include.h
FUNCTION function)
A test driver is a program that links together many small tests into a single executable. This is
useful when building static executables with large libraries to shrink the total required size.
The list of source files needed to build the test driver will be in sourceListName. DriverName
is the name of the test driver program. The rest of the arguments consist of a list of test source
files, can be semicolon separated. Each test source file should have a function in it that is the
same name as the file with no extension (foo.cxx should have int foo(int, char*[]);)
DriverName will be able to call each of the tests by name on the command line. If
EXTRAINCLUDE is specified, then the next argument is included into the generated file. If
FUNCTION is specified, then the next argument is taken as a function name that is passed a
pointer to ac and av. This can be used to add extra command line processing to each test. The
cmake variable CMAKE TESTDRIVER BEFORE TESTMAIN can be set to have code that
will be placed directly before calling the test main function.
CMAKE TESTDRIVER AFTER TESTMAIN can be set to have code that will be placed
directly after the call to the test main function.
def ine_property: Define and document custom properties.
define_property(<GLOBAL | DIRECTORY | TARGET | SOURCE |
TEST | VARIABLE | CACHED_VARIABLE>
PROPERTY <name> [INHERITED]
BRIEF_DOCS <brief-doc> [docs...]
FULL_DOCS <full-doc> [docs...])
Define one property in a scope for use with the set_property and get_property commands.
This is primarily useful to associate documentation with property names that may be retrieved
with the get_property command. The first argument determines the kind of scope in which the
property should be used. It must be one of the following:
GLOBAL = associated with the global namespace
DIRECTORY = associated with one directory
TARGET = associated with one target
SOURCE = associated with one source file
TEST = associated with a test named with add_test
VARIABLE = documents a CMake language variable
CACHED VARIABLE = documents a CMake cache variable
else
313
Note that unlike set_property and get_property no actual scope needs to be given; only the
kind of scope is important. The required PROPERTY option is immediately followed by the
name of the property being defined.
If the INHERITED option then the get_property command will chain up to the next higher
scope when the requested property is not set in the scope given to the command.
DIRECTORY scope chains to GLOBAL. TARGET, SOURCE, and TEST chain to
DIRECTORY.
The BRIEF DOCS and FULL DOCS options are followed by strings to be associated with
the property as its brief and full documentation. Corresponding options to the get_property
command will retrieve the documentation.
else: Starts the else portion of an if block. See the if command,
elseif: Starts the elseif portion of an if block. See the if command.
enable_language: Enable a language (CXX/C/Fortran/etc)
enable_language(languageName [OPTIONAL] )
This command enables support for the named language in CMake. This is the same as the
project command but does not create any of the extra variables that are created by the project
command. Example languages are CXX, C, Fortran. If OPTIONAL is used, use the
CMAKE_<languageName>_COMPILER_WORKS variable to check whether the language
has been enabled successfully.
enable_testing: Enable testing for current directory and below.
enable_testing()
Enables testing for this directory and below. See also the add_test command. Note that ctest
expects to find a test file in the build directory root. Therefore, this command should be in the
source directory root.
endf oreach: Ends a list of commands in a foreach block. See the foreach command,
endfunction: Ends a list of commands in a function block. See the function command,
endif: Ends a list of commands in an if block. See the if command,
endmacro: Ends a list of commands in a macro block. See the macro command,
endwhile: Ends a list of commands in a while block. See the while command.
execute_process: Execute one or more child processes.
314
Appendix C
execute_process(COMMAND <cmdl> [argsl...]]
[COMMAND <cmd2> [args2...] [...]]
[WORKING_DIRECTORY <directory>]
[TIMEOUT <seconds>]
[RE SULT_VARIABLE <variable>]
[OUTPUT_VARIABLE <variable>]
[ERROR_VARIABLE <variable>]
[INPUT_FILE <file>]
[OUTPUT_FILE <file>]
[ERROR_FILE <file>]
[OUTPUT_QUIET]
[ERROR_QUIET]
[OUTPUT_STRIP_TRAILING_WHITESPACE]
[ERROR_STRIP_TRAILING_WHITESPACE])
Runs the given sequence of one or more commands with the standard output of each process
piped to the standard input of the next. A single standard error pipe is used for all processes. If
WORKINGDIRECTORY is given the named directory will be set as the current working
directory of the child processes. If TIMEOUT is given the child processes will be terminated
if they do not finish in the specified number of seconds (fractions are allowed). If
RESULTVARIABLE is given the variable will be set to contain the result of running the
processes. This will be an integer return code from the last child or a string describing an error
condition. If OUTPUT VARIABLE or ERROR VARIABLE are given the variable named
will be set with the contents of the standard output and standard error pipes respectively. If the
same variable is named for both pipes their output will be merged in the order produced. If
INPUTFILE, OUTPUTFILE, or ERROR FILE is given the file named will be attached to
the standard input of the first process, standard output of the last process, or standard error of
all processes respectively. If OUTPUT QUIET or ERROR QUIET is given then the standard
output or standard error results will be quietly ignored. If more than one OUTPUT * or
ERROR * option is given for the same pipe the precedence is not specified. If no
OUTPUT * or ERROR * options are given the output will be shared with the corresponding
pipes of the CMake process itself.
The execute_process command is a newer more powerful version of exec_program, but the
old command has been kept for compatibility.
export: Export targets from the build tree for use by outside projects.
export(TARGETS [targetl [target2 [...]]] [NAMESPACE <namespace>]
[APPEND] FILE <filename>)
Create a file <filename> that may be included by outside projects to import targets from the
current project's build tree. This is useful during cross-compiling to build utility executables
file
315
that can run on the host platform in one project and then import them into another project
being compiled for the target platform. If the NAMESPACE option is given the <namespace>
string will be prepended to all target names written to the file. If the APPEND option is given
the generated code will be appended to the file instead of overwriting it. If a library target is
included in the export but a target to which it links is not included the behavior is unspecified.
The file created by this command is specific to the build tree and should never be installed.
See the install(EXPORT) command to export targets from an installation tree.
export(PACKAGE <name>)
Store the current build directory in the CMake user package registry for package <name>.
The find_package command may consider the directory while searching for package <name>.
This helps dependent projects find and use a package from the current project's build tree
without help from the user. Note that the entry in the package registry that this command
creates works only in conjunction with a package configuration file (<name>Config.cmake)
that works with the build tree.
file: File manipulation command.
file(WRITE filename "message to write"... )
file(APPEND filename "message to write"... )
file(READ filename variable [LIMIT numBytes]
[OFFSET offset]
[HEX])
file(STRINGS filename variable [LIMIT_COUNT num]
[LIMIT_INPUT numBytes] [LIMIT_OUTPUT numBytes]
[LENGTH_MINIMUM numBytes] [LENGTH_MAXIMUM numBytes]
[NEWLINE_CONSUME] [REGEX regex]
[NO_HEX_CONVERSION])
file (GLOB variable [RELATIVE path] [globbing expressions]...)
file(GLOB_RECURSE variable [RELATIVE path]
[FOLLOW_SYMLINKS] [globbing expressions]...)
file(RENAME <oldname> <newname>)
file(REMOVE [filel ...])
file(REMOVE_RECURSE [filel ...])
file(MAKE_DIRECTORY [directoryl directory2 ...])
file(RELATIVE_PATH variable directory file)
file(TO_CMAKE_PATH path result)
file(TO_NATIVE_PATH path result)
file(DOWNLOAD url file [TIMEOUT timeout]
[STATUS status] [LOG log])
316
Appendix C
WRITE will write a message into a file called 'filename’. It overwrites the file if it already
exists, and creates the file if it does not exist.
APPEND will write a message into a file same as WRITE, except it will append it to the end
of the file
READ will read the content of a file and store it into the variable. It will start at the given
offset and read up to numBytes. If the argument HEX is given, the binary data will be
converted to hexadecimal representation and this will be stored in the variable.
STRINGS will parse a list of ASCII strings from a file and store it in a variable. Binary data
in the file are ignored. Carriage return (CR) characters are ignored. It works also for Intel Hex
and Motorola S-record files, which are automatically converted to binary format when reading
them. Disable this using NO_HEX_CONVERSION.
LIMIT COUNT sets the maximum number of strings to return. LIMIT INPUT sets the
maximum number of bytes to read from the input file. LIMIT OUTPUT sets the maximum
number of bytes to store in the output variable. LENGTH MINIMUM sets the minimum
length of a string to return. Shorter strings are ignored. LENGTH MAXIMUM sets the
maximum length of a string to return. Longer strings are split into strings no longer than the
maximum length. NEWLINE CONSUME allows newlines to be included in strings instead
of terminating them.
REGEX specifies a regular expression that a string must match to be returned. Typical usage
file(STRINGS myfile.txt myfile)
stores a list in the variable "myfile" in which each item is a line from the input file.
GLOB will generate a list of all files that match the globbing expressions and store it into the
variable. Globbing expressions are similar to regular expressions, but much simpler. If
RELATIVE flag is specified for an expression, the results will be returned as a relative path to
the given path. Examples of globbing expressions include:
*.cxx - match all files with extension cxx
*.vt? - match all files with extension vta,...,vtz
f [3-5J.txt - match files f3.txt, f4.txt, f5.txt
GLOB RECURSE will generate a list similar to the regular GLOB, except it will traverse all
the subdirectories of the matched directory and match the files. Subdirectories that are
symlinks are only traversed if FOLLOW SYMLINKS is given or cmake policy CMP0009 is
not set to NEW. See cmake -help-policy CMP0009 for more information. Examples of
recursive globbing include:
317
/dir/*.py - match all python files in /dir and subdirectories
MAKEDIRECTORY will create the given directories, also if their parent directories don't
exist yet
RENAME moves a file or directory within a filesystem, replacing the destination atomically.
REMOVE will remove the given files, also in subdirectories
REMOVE_RECURSE will remove the given files and directories, also non-empty directories
RELATIVE PATH will determine relative path from directory to the given file.
TOCMAKEPATH will convert path into a CMake style path with UNIX /. The input can
be a single path or a system path like "$ENV{PATH}". Note the double quotes around the
ENV call TO CMAKE PATH only takes one argument.
TO NATIVE PATH works just like TO CMAKE PATH, but will convert from a cmake
style path into the native path style \ for windows and / for UNIX.
DOWNLOAD will download the given URL to the given file. If LOG var is specified a log of
the download will be put in var. If STATUS var is specified the status of the operation will be
put in var. The status is returned in a list of length 2. The first element is the numeric return
value for the operation, and the second element is a string value for the error. A 0 numeric
error means no error in the operation. If TIMEOUT time is specified, the operation will
timeout after time seconds, time can be specified as a float.
The file() command also provides COPY and INSTALL signatures:
file (<COPY|INSTALL> files... DESTINATION <dir>
[FILE_PERMISSIONS permissions...]
[DIRECTORY_PERMISSIONS permissions...]
[NO_SOURCE_PERMIS SIONS] [USE_SOURCE_PERMIS SIONS]
[FILES_MATCHING]
[[PATTERN <pattern> | REGEX <regex>]
[EXCLUDE] [PERMISSIONS permissions...]] [...])
The COPY signature copies files, directories, and symlinks to a destination folder. Relative
input paths are evaluated with respect to the current source directory, and a relative
destination is evaluated with respect to the current build directory. Copying preserves input
file timestamps, and optimizes out a file if it exists at the destination with the same timestamp.
Copying preserves input permissions unless explicit permissions or
NO SOURCE PERMISSIONS are given (default is USE_SOURCE_PERMISSIONS). See
318
Appendix C
the install(DIRECTORY) command for documentation of permissions, PATTERN, REGEX,
and EXCLUDE options.
The INSTALL signature differs slightly from COPY: it prints status messages, and
NO SOURCE PERMISSIONS is default. Installation scripts generated by the install()
command use this signature (with some undocumented options for internal use).
f ind_f ile: Find the full path to a file.
find_file(<VAR> namel [pathl path2 ...])
This is the short-hand signature for the command that is sufficient in many cases. It is the
same as find_file(<VAR> namel [PATHS pathl path2 ...])
find_file(
<VAR>
name | NAMES namel [name2 ...]
[HINTS pathl [path2 ... ENV var]]
[PATHS pathl [path2 ... ENV var]
[PATH_SUFFIXES suffixl [suffix2 ...]]
[DOC "cache documentation string"]
[NO_DE FAULT_PATH]
[NO_CMAKE_ENVIRONMENT_PATH]
[NO_CMAKE_PATH]
[NO_S Y S TEM_ENVIRONMENT_PAT H]
[NO_CMAKE_SYSTEM_PATH]
[CMAKE_FIND_ROOT_PATH_BOTH |
ONLY_CMAKE_FIND_ROOT_PATH |
NO_CMAKE_FIND_ROOT_PATH]
This command is used to find a full path to named file. A cache entry named by <VAR> is
created to store the result of this command. If the full path to a file is found the result is stored
in the variable and the search will not be repeated unless the variable is cleared. If nothing is
found, the result will be <VAR>-NOTFOUND, and the search will be attempted again the
next time find file is invoked with the same variable. The name of the full path to a file that is
searched for is specified by the names listed after the NAMES argument. Additional search
locations can be specified after the PATHS argument. If ENV var is found in the FUNTS or
PATHS section the environment variable var will be read and converted from a system
environment variable to a cmake style list of paths. For example ENV PATH would be a way
to list the system path variable. The argument after DOC will be used for the documentation
319
string in the cache. PATHSUFFIXES specifies additional subdirectories to check below each
search path.
If NODEFAULTPATH is specified, then no additional paths are added to the search. If
NODEFAULTPATH is not specified, the search process is as follows:
1. Search paths specified in cmake-specific cache variables. These are intended to be used on
the command line with a -DVAR=value. This can be skipped if NO_CMAKE_PATH is
passed.
<prefix>/include for each <prefix> in CMAKE_PREFIX_PATH,
CMAKE_INCLUDE_PATH and CMAKE_FRAMEWORK_PATH
2. Search paths specified in cmake-specific environment variables. These are intended to be
set in the user's shell configuration. This can be skipped if
NO CMAKE ENVIRONMENT PATH is passed.
<prefix>/include for each <prefix> in CMAKE_PREFIX_PATH,
CMAKE INCLUDE PATH and CMAKE FRAMEWORK PATH
3. Search the paths specified by the HINTS option. These should be paths computed by
system introspection, such as a hint provided by the location of another item already found.
Hard-coded guesses should be specified with the PATHS option.
4. Search the standard system environment variables. This can be skipped if
NOSYSTEMENVIRONMENTPATH is an argument. Sepcifically PATH and
INCLUDE
5. Search cmake variables defined in the Platform files for the current system. This can be
skipped ifNO CMAKE SYSTEM PATH is passed.
<prefix>/include for each <prefix> in CMAKE_SYSTEM_PREFIX_PATH,
CMAKE_SYSTEM_INCLUDE_PATH and CMAKE_SYSTEM_FRAMEWORK_PATH
6. Search the paths specified by the PATHS option or in the short-hand version of the
command. These are typically hard-coded guesses.
On Darwin or systems supporting OS X Frameworks, the cmake variable
CMAKE FIND FRAMEWORK can be set to empty or one of the following:
320
Appendix C
"FIRST" - Try to find frameworks before standard
libraries or headers. This is the default on Darwin.
"LAST" - Try to find frameworks after standard
libraries or headers.
"ONLY" - Only try to find frameworks.
"NEVER" - Never try to find frameworks.
On Darwin or systems supporting OS X Application Bundles, the cmake variable
CMAKEFINDAPPBUNDLE can be set to empty or one of the following:
"FIRST" - Try to find application bundles before standard
programs. This is the default on Darwin.
"LAST" - Try to find application bundles after standard
programs.
"ONLY" - Only try to find application bundles.
"NEVER" - Never try to find application bundles.
The CMake variable CMAKEFINDROOTPATH specifies one or more directories to be
prepended to all other search directories. This effectively Mre-rootsM the entire search under
given locations. By default it is empty. It is especially useful when cross-compiling to point to
the root directory of the target environment and CMake will search there too. By default at
first the directories listed in CMAKE FIND ROOT PATH and then the non-rooted
directories will be searched. The default behavior can be adjusted by setting
CMAKEFINDROOTPATHMODEINCLUDE. This behavior can be manually
overridden on a per-call basis. By using CMAKE FIND ROOT PATH BOTH the search
order will be as described above. If NOCMAKEFINDROOTPATH is used then
CMAKE FIND ROOT PATH will not be used. If ONLY CMAKE FIND ROOT PATH is
used then only the re-rooted directories will be searched.
The default search order is designed to be most-specific to least-specific for common use
cases. Projects may override the order by simply calling the command multiple times and
using the NO * options:
find_file(<VAR> NAMES name PATHS paths... NO_DEFAULT_PATH)
find_file(<VAR> NAMES name)
Once one of the calls succeeds the result variable will be set and stored in the cache so that no
call will search again.
f ind_library: Find a library.
321
find_library(<VAR> namel [pathl path2 ...])
This is the short-hand signature for the command that is sufficient in many cases. It is the
same as fmd_library(<VAR> namel [PATHS pathl path2 ...])
find_library(
<VAR>
name | NAMES namel [name2 ...]
[HINTS pathl [path2 ... ENV var]]
[PATHS pathl [path2 ... ENV var]]
[PATH_SUFFIXES suffixl [suffix2 . ..]]
[DOC "cache documentation string"]
[NO_DEFAULT_PATH]
[NO_CMAKE_ENVIRONMENT_PATH]
[NO_CMAKE_PATH]
[NO_S YS TEM_ENVIRONMENT_PATH]
[NO_CMAKE_SYSTEM_PATH]
[CMAKE_FIND_ROOT_PATH_BOTH |
ONLY_CMAKE_FIND_ROOT_PATH |
NO_CMAKE_FIND_ROOT_PATH]
This command is used to find a library. A cache entry named by <VAR> is created to store
the result of this command. If the library is found the result is stored in the variable and the
search will not be repeated unless the variable is cleared. If nothing is found, the result will be
<VAR>-NOTFOUND, and the search will be attempted again the next time find library is
invoked with the same variable. The name of the library that is searched for is specified by the
names listed after the NAMES argument. Additional search locations can be specified after
the PATHS argument. If ENV var is found in the HINTS or PATHS section the environment
variable var will be read and converted from a system environment variable to a cmake style
list of paths. For example ENV PATH would be a way to list the system path variable. The
argument after DOC will be used for the documentation string in the cache.
PATH SUFFIXES specifies additional subdirectories to check below each search path.
If NO DEFAULT PATH is specified, then no additional paths are added to the search. If
NODEFAULTPATH is not specified, the search process is as follows:
1. Search paths specified in cmake-specific cache variables. These are intended to be used on
the command line with a -DVAR=value. This can be skipped if NO_CMAKE_PATH is
passed.
322
Appendix C
<prefix>/lib for each <prefix> in CMAKE_PREFIX_PATH
CMAKE LIBRARY PATH and CMAKE FRAMEWORK PATH
2. Search paths specified in cmake-specific environment variables. These are intended to be
set in the user's shell configuration. This can be skipped if
NOCMAKEENVIRONMENTPATH is passed.
<prefix>/lib for each <prefix> in CMAKE_PREFIX_PATH
CMAKE LIBRARY PATH and CMAKE FRAMEWORK PATH
3. Search the paths specified by the HINTS option. These should be paths computed by
system introspection, such as a hint provided by the location of another item already found.
Hard-coded guesses should be specified with the PATHS option.
4. Search the standard system environment variables. This can be skipped if
NOS Y STEMENVIRONMENTP ATH is an argument. Sepcifically PATH and
LIB.
5. Search cmake variables defined in the Platform files for the current system. This can be
skipped if NO CMAKE SYSTEMP ATH is passed.
<prefix>/lib for each <prefix> in CMAKE_SYSTEM_PREFIX_PATH
CMAKE_SYSTEM_LIBRARY_PATH and CMAKE_SYSTEM_FRAMEWORK_PATH
6. Search the paths specified by the PATHS option or in the short-hand version of the
command. These are typically hard-coded guesses.
On Darwin or systems supporting OS X Frameworks, the cmake variable
CMAKEFINDFRAMEWORK can be set to empty or one of the following:
"FIRST" - Try to find frameworks before standard
libraries or headers. This is the default on Darwin.
"LAST" - Try to find frameworks after standard
libraries or headers.
"ONLY" - Only try to find frameworks.
"NEVER" - Never try to find frameworks.
On Darwin or systems supporting OS X Application Bundles, the cmake variable
CMAKE FIND APPBUNDLE can be set to empty or one of the following:
find package
323
"FIRST" - Try to find application bundles before standard
programs. This is the default on Darwin.
"LAST" - Try to find application bundles after standard
programs.
"ONLY" - Only try to find application bundles.
"NEVER" - Never try to find application bundles.
The CMake variable CMAKEFINDROOTPATH specifies one or more directories to be
prepended to all other search directories. This effectively "re-roots" the entire search under
given locations. By default it is empty. It is especially useful when cross-compiling to point to
the root directory of the target environment and CMake will search there too. By default at
first the directories listed in CMAKE FIND ROOT PATH and then the non-rooted
directories will be searched. The default behavior can be adjusted by setting
CMAKEFINDROOTPATHMODELIBRARY. This behavior can be manually
overridden on a per-call basis. By using CMAKEFINDROOTPATHBOTH the search
order will be as described above. If NO CMAKE FIND ROOT PATH is used then
CMAKE FIND ROOT PATH will not be used. If ONLY CMAKE FIND ROOT PATH is
used then only the re-rooted directories will be searched.
The default search order is designed to be most-specific to least-specific for common use
cases. Projects may override the order by simply calling the command multiple times and
using the NO * options:
find_library(<VAR> NAMES name PATHS paths... NO_DEFAULT_PATH)
find_library(<VAR> NAMES name)
Once one of the calls succeeds the result variable will be set and stored in the cache so that no
call will search again.
If the library found is a framework, then VAR will be set to the full path to the framework
<flillPath>/A.framework. When a full path to a framework is used as a library, CMake will
use a -framework A, and a -F<fullPath> to link the framework to the target.
f ind_package: Load settings for an external project.
find_package(<package> [version] [EXACT] [QUIET]
[[REQUIRED|COMPONENTS] [components...]]
[NO_POLICY_SCOPE])
Finds and loads settings from an external project. <package>_FOUND will be set to indicate
whether the package was found. When the package is found package-specific information is
provided through variables documented by the package itself. The QUIET option disables
324
Appendix C
messages if the package cannot be found. The REQUIRED option stops processing with an
error message if the package cannot be found. A package-specific list of components may be
listed after the REQUIRED option or after the COMPONENTS option if no REQUIRED
option is given. The [version] argument requests a version with which the package found
should be compatible (format is major[.minor[.patch[.tweak]]]). The EXACT option requests
that the version be matched exactly. If no [version] is given to a recursive invocation inside a
find-module, the [version] and EXACT arguments are forwarded automatically from the outer
call. Version support is currently provided only on a package-by-package basis (details
below).
User code should generally look for packages using the above simple signature. The
remainder of this command documentation specifies the frill command signature and details
of the search process. Project maintainers wishing to provide a package to be found by this
command are encouraged to read on.
The command has two modes by which it searches for packages: ’’Module” mode and
"Config” mode. Module mode is available when the command is invoked with the above
reduced signature. CMake searches for a file called "Find<package>.cmake" in the
CMAKE MODULE PATH followed by the CMake installation. If the file is found, it is read
and processed by CMake. It is responsible for finding the package, checking the version, and
producing any needed messages. Many find-modules provide limited or no support for
versioning; check the module documentation. If no module is found the command proceeds to
Config mode.
The complete Config mode command signature is:
find_package(<package> [version] [EXACT] [QUIET]
[[REQUIRED|COMPONENTS] [components...]] [NO_MODULE]
[NO_POLICY_SCOPE]
[NAMES namel [name2 ...]]
[CONFIGS configl [config2 ...]]
[HINTS pathl [path2 ... ]]
[PATHS pathl [path2 ... ]]
[PATH_SUFFIXES suffixl [suffix2 ...]]
[NO_DEFAULT_PATH]
[NO_CMAKE_ENVIRONMENT_PATH]
[NO_CMAKE_PATH]
[NO_S YS TEM_ENVIRONMENT_PATH]
[NO_CMAKE_PACKAGE_REGISTRY]
[NO_CMAKE_BUILDS_PATH]
[NO_CMAKE_S YS TEM_PATH]
[CMAKE_FIND_ROOT_PATH_BOTH |
ONLY_CMAKE_FIND_ROOT_PATH |
NO CMAKE FIND ROOT PATH])
325
The NO MODULE option may be used to skip Module mode explicitly. It is also implied by
use of options not specified in the reduced signature.
Config mode attempts to locate a configuration file provided by the package to be found. A
cache entry called <package>_DIR is created to hold the directory containing the file. By
default the command searches for a package with the name <package>. If the NAMES option
is given the names following it are used instead of <package>. The command searches for a
file called "<name>Config.cmake" or "<lower-case-name>-config. cmake" for each name
specified. A replacement set of possible configuration file names may be given using the
CONFIGS option. The search procedure is specified below. Once found, the configuration file
is read and processed by CMake. Since the file is provided by the package it already knows
the location of package contents. The full path to the configuration file is stored in the cmake
variable <package>_CONFIG.
If the package configuration file cannot be found CMake will generate an error describing the
problem unless the QUIET argument is specified. If REQUIRED is specified and the package
is not found a fatal error is generated and the configure step stops executing. If
<package>_DIR has been set to a directory not containing a configuration file CMake will
ignore it and search from scratch.
When the [version] argument is given Config mode will only find a version of the package
that claims compatibility with the requested version (format is major[.minor[.patch[.tweak]]]).
If the EXACT option is given only a version of the package claiming an exact match of the
requested version may be found. CMake does not establish any convention for the meaning of
version numbers. Package version numbers are checked by "version" files provided by the
packages themselves. For a candidate package configuration file "<config-file>.cmake" the
corresponding version file is located next to it and named either "<config-file>-
version.cmake" or "<config-file>Version.cmake". If no such version file is available then the
configuration file is assumed to not be compatible with any requested version. When a version
file is found it is loaded to check the requested version number. The version file is loaded in a
nested scope in which the following variables have been defined:
PACKAGE_FIND_NAME = the <package> name
PACKAGE_FIND_VERSION = full requested version string
PACKAGE_FIND_VERSION_MAJOR = major version if requested, else 0
PACKAGE_FIND_VERSION_MINOR = minor version if requested, else 0
PACKAGE_FIND_VERSION_PATCH = patch version if requested, else 0
PACKAGE_FIND_VERSION_TWEAK = tweak version if requested, else 0
PACKAGE FIND VERSION COUNT = number of version components 0 to 4
326
Appendix C
The version file checks whether it satisfies the requested version and sets these variables:
PACKAGE_VERSION = full provided version string
PACKAGE_VERSION_EXACT = true if version is exact match
PACKAGE_VERSION_COMPATIBLE = true if version is compatible
PACKAGE_VERSION_UNSUITABLE = true if unsuitable as any version
These variables are checked by the find_package command to determine whether the
configuration file provides an acceptable version. They are not available after the
find_package call returns. If the version is acceptable the following variables are set:
<package>_VERSION = full provided version string
<package>_VERSION_MAJOR = major version if provided, else 0
<package>_VERSION_MINOR = minor version if provided, else 0
<package>_VERSION_PATCH = patch version if provided, else 0
<package>_VERSION_TWEAK = tweak version if provided, else 0
<package>_VERSION_COUNT = number of version components, 0 to 4
and the corresponding package configuration file is loaded. When multiple package
configuration files are available whose version files claim compatibility with the version
requested it is unspecified which one is chosen. No attempt is made to choose a highest or
closest version number.
Config mode provides an elaborate interface and search procedure. Much of the interface is
provided for completeness and for use internally by find-modules loaded by Module mode.
Most user code should simply call
find_package(<package> [major[.minor]] [EXACT] [REQUIRED|QUIET])
in order to find a package. Package maintainers providing CMake package configuration files
are encouraged to name and install them such that the procedure outlined below will find
them without requiring use of additional options.
CMake constructs a set of possible installation prefixes for the package. Under each prefix
several directories are searched for a configuration file. The tables below show the directories
searched. Each entry is meant for installation trees following Windows (W), UNIX (U), or
Apple (A) conventions.
327
<prefix>/ (W)
<prefix>/(cmake|CMake) / (W)
<prefix>/<name>*/ (W)
<prefix>/<name>*/(cmake|CMake)/ (W)
<prefix>/(share|lib)/cmake/<name>*/ (U)
<prefix>/(share|lib)/<name>*/ (U)
<prefix>/(share|lib)/<name>*/(cmake|CMake)/ (U)
On systems supporting OS X Frameworks and Application Bundles the following directories
are searched for frameworks or bundles containing a configuration file:
<prefix>/<name>.framework/Resources/ (A)
<prefix>/<name>.framework/Resources/CMake/ (A)
<prefix>/<name>.framework/Versions/*/Resources/ (A)
<prefix>/<name>.framework/Versions/*/Resources/CMake/ (A)
<prefix>/<name>.app/Contents/Resources/ (A)
<prefix>/<name>.app/Contents/Resources/CMake/ (A)
In all cases the <name> is treated as case-insensitive and corresponds to any of the names
specified (<package> or names given by NAMES). If PATH SUFFIXES is specified the
suffixes are appended to each (W) or (U) directory entry one-by-one.
This set of directories is intended to work in cooperation with projects that provide
configuration files in their installation trees. Directories above marked with (W) are intended
for installations on Windows where the prefix may point at the top of an application's
installation directory. Those marked with (U) are intended for installations on UNIX
platforms where the prefix is shared by multiple packages. This is merely a convention, so all
(W) and (U) directories are still searched on all platforms. Directories marked with (A) are
intended for installations on Apple platforms. The cmake variables
CMAKE FIND FRAMEWORK and CMAKE FIND APPBUNDLE determine the order of
preference as specified below.
The set of installation prefixes is constructed using the following steps. If
NO_DEFAULT_PATH is specified all NO_* options are enabled.
1. Search paths specified in cmake-specific cache variables. These are intended to be used on
the command line with a -DVAR=value. This can be skipped if NO CMAKE PATH is
passed. Specifically CMAKEPREFIXPATH CMAKEFRAMEWORKPATH and
CMAKEAPPBUNDLEPATH.
2. Search paths specified in cmake-specific environment variables. These are intended to be
set in the user's shell configuration. This can be skipped if
328
Appendix C
NOCMAKEENVIRONMENTPATH is passed. Specifically CMAKE PREFIX PATH
CMAKE FRAMEWORK PATH and CMAKEAPPBUNDLEPATH.
3. Search paths specified by the HINTS option. These should be paths computed by system
introspection, such as a hint provided by the location of another item already found. Hard¬
coded guesses should be specified with the PATHS option.
4. Search the standard system environment variables. This can be skipped if
NO SYSTEMEN VIRONMENTP ATH is passed. Path entries ending in "/bin" or 7sbinM
are automatically converted to their parent directories. Specifically: PATH.
5. Search project build trees recently configured in a CMake GUI. This can be skipped if
NO CMAKE BUILDS PATH is passed. It is intended for the case when a user is building
multiple dependent projects one after another.
6. Search paths stored in the CMake user package registry. This can be skipped if
NO CMAKE PACKAGE REGISTRY is passed. Paths are stored in the registry when
CMake configures a project that invokes export(PACKAGE <name>). See the
export(PACKAGE) command documentation for more details.
7. Search cmake variables defined in the Platform files for the current system. This can be
skipped if NOCMAKESYSTEMPATH is passed. Specifically:
CM AKES Y STEMPREFIXP ATH CMAKESYSTEMFRAMEWORKPATH and
CM AKES Y STEMAPPBUNDLEP ATH
8. Search paths specified by the PATHS option. These are typically hard-coded guesses.
On Darwin or systems supporting OS X Frameworks, the cmake variable
CMAKE FIND FRAMEWORK can be set to empty or one of the following:
"FIRST" - Try to find frameworks before standard
libraries or headers. This is the default on
Darwin.
"LAST" - Try to find frameworks after standard
libraries or headers.
"ONLY" - Only try to find frameworks.
"NEVER" - Never try to find frameworks.
On Darwin or systems supporting OS X Application Bundles, the cmake variable
CMAKE FIND APPBUNDLE can be set to empty or one of the following:
find path
329
"FIRST" - Try to find application bundles before standard
programs. This is the default on Darwin.
"LAST" - Try to find application bundles after standard
programs.
"ONLY" - Only try to find application bundles.
"NEVER" - Never try to find application bundles.
The CMake variable CMAKEFINDROOTPATH specifies one or more directories to be
prepended to all other search directories. This effectively Mre-rootsM the entire search under
given locations. By default it is empty. It is especially useful when cross-compiling to point to
the root directory of the target environment and CMake will search there too. By default at
first the directories listed in CMAKE FIND ROOT PATH and then the non-rooted
directories will be searched. The default behavior can be adjusted by setting
CMAKEFINDROOTPATHMODEPACKAGE. This behavior can be manually
overridden on a per-call basis. By using CMAKE FIND ROOT PATH BOTH the search
order will be as described above. If NOCMAKEFINDROOTPATH is used then
CMAKE FIND ROOT PATH will not be used. If ONLY CMAKE FIND ROOT PATH is
used then only the re-rooted directories will be searched.
The default search order is designed to be most-specific to least-specific for common use
cases. Projects may override the order by simply calling the command multiple times and
using the NO* options:
find_package(<package> PATHS paths... NO_DEFAULT_PATH)
find_package(<package>)
Once one of the calls succeeds the result variable will be set and stored in the cache so that no
call will search again. See the cmakejpolicy() command documentation for discussion of the
NO POLICY SCOPE option.
findjpath: Find the directory containing a file.
find_path(<VAR> namel [pathl path2 ...])
This is the short-hand signature for the command that is sufficient in many cases. It is the
same as find_path(<VAR> namel [PATHS pathl path2 ...])
330
Appendix C
find_path(
<VAR>
name | NAMES namel [name2 ...]
[HINTS pathl [path2 ... ENV var]]
[PATHS pathl [path2 ... ENV var]]
[PATH_SUFFIXES suffixl [suffix2 ...]]
[DOC "cache documentation string"]
[NO_DEFAULT_PATH]
[N0_CMAKE_ENVIRONMENT_PATH]
[NO_CMAKE_PATH]
[NO_SYSTEM_ENVIRONMENT_PAT H]
[NO_CMAKE_SYSTEM_PATH]
[CMAKE_FIND_ROOT_PATH_BOTH |
ONLY_CMAKE_FIND_ROOT_PATH |
NO_CMAKE_FIND_ROOT_PATH]
This command is used to find a directory containing the named file. A cache entry named by
<VAR> is created to store the result of this command. If the file in a directory is found the
result is stored in the variable and the search will not be repeated unless the variable is
cleared. If nothing is found, the result will be <VAR>-NOTFOUND, and the search will be
attempted again the next time find_path is invoked with the same variable. The name of the
file in a directory that is searched for is specified by the names listed after the NAMES
argument. Additional search locations can be specified after the PATHS argument. If ENV
var is found in the HINTS or PATHS section the environment variable var will be read and
converted from a system environment variable to a cmake style list of paths. For example
ENV PATH would be a way to list the system path variable. The argument after DOC will be
used for the documentation string in the cache. PATH SUFFIXES specifies additional
subdirectories to check below each search path.
If NODEFAULTPATH is specified, then no additional paths are added to the search. If
NODEFAULTPATH is not specified, the search process is as follows:
1. Search paths specified in cmake-specific cache variables. These are intended to be used on
the command line with a -DVAR=value. This can be skipped if NO CMAKE PATH is
passed.
<prefix>/include for each <prefix> in CMAKE_PREFIX_PATH
CMAKE INCLUDE PATH and CMAKE FRAMEWORK PATH
2. Search paths specified in cmake-specific environment variables. These are intended to be
set in the user's shell configuration. This can be skipped if
NO CMAKE ENVIRONMENT PATH is passed.
331
<prefix>/include for each <prefix> in CMAKE_PREFIX_PATH
CMAKE_INCLUDE_PATH and CMAKE_FRAMEWORK_PATH
3. Search the paths specified by the HINTS option. These should be paths computed by
system introspection, such as a hint provided by the location of another item already found.
Hard-coded guesses should be specified with the PATHS option.
4. Search the standard system environment variables. This can be skipped if
NO SYSTEM ENVIRONMENT PATH is an argument. Specifically: PATHand INCLUDE
5. Search cmake variables defined in the Platform files for the current system. This can be
skipped ifNOCMAKESYSTEMPATH is passed.
<prefix>/include for each <prefix> in CMAKE_SYSTEM_PREFIX_PATH
CMAKE_SYSTEM_INCLUDE_PATH and CMAKE_SYSTEM_FRAMEWORK_PATH
6. Search the paths specified by the PATHS option or in the short-hand version of the
command. These are typically hard-coded guesses.
On Darwin or systems supporting OS X Frameworks, the cmake variable
CMAKE FIND FRAMEWORK can be set to empty or one of the following:
"FIRST" - Try to find frameworks before standard
libraries or headers. This is the default on Darwin.
"LAST" - Try to find frameworks after standard
libraries or headers.
"ONLY" - Only try to find frameworks.
"NEVER" - Never try to find frameworks.
On Darwin or systems supporting OS X Application Bundles, the cmake variable
CMAKE FIND APPBUNDLE can be set to empty or one of the following:
"FIRST" - Try to find application bundles before standard
programs. This is the default on Darwin.
"LAST" - Try to find application bundles after standard
programs.
"ONLY" - Only try to find application bundles.
"NEVER" - Never try to find application bundles.
The CMake variable CMAKE FIND ROOT PATH specifies one or more directories to be
prepended to all other search directories. This effectively ”re-rootsM the entire search under
332
Appendix C
given locations. By default it is empty. It is especially useful when cross-compiling to point to
the root directory of the target environment and CMake will search there too. By default at
first the directories listed in CMAKEFINDROOTPATH and then the non-rooted
directories will be searched. The default behavior can be adjusted by setting
CMAKEFINDROOTPATHMODEINCLUDE. This behavior can be manually
overridden on a per-call basis. By using CMAKE FIND ROOT PATH BOTH the search
order will be as described above. If NO CMAKE FIND ROOT PATH is used then
CMAKE FIND ROOT PATH will not be used. If ONLY CMAKE FIND ROOT PATH is
used then only the re-rooted directories will be searched.
The default search order is designed to be most-specific to least-specific for common use
cases. Projects may override the order by simply calling the command multiple times and
using the NO * options:
find_path(<VAR> NAMES name PATHS paths... NO_DEFAULT_PATH)
find_path(<VAR> NAMES name)
Once one of the calls succeeds the result variable will be set and stored in the cache so that no
call will search again.
When searching for frameworks, if the file is specified as A/b.h, then the framework search
will look for A.framework/Headers/b.h. If that is found the path will be set to the path to the
framework. CMake will convert this to the correct -F option to include the file.
f ind__program: Find an executable program.
find_program(<VAR> namel [pathl path2 ...])
This is the short-hand signature for the command that is sufficient in many cases. It is the
same as find_program(<VAR> namel [PATHS pathl path2 ...])
find_program(
<VAR>
name | NAMES namel [name2 ...]
[HINTS pathl [path2 ... ENV var]]
[PATHS pathl [path2 ... ENV var]]
[PATH_SUFFIXES suffixl [suffix2 ...]]
[DOC "cache documentation string"]
[NO_DEFAULT_PATH]
[NO_CMAKE_ENVIRONMENT_PATH]
[NO_CMAKE_PATH]
[NO SYSTEM ENVIRONMENT PATH]
find program
333
[ NO_CMAKE_S YSTEM_PATH ]
[CMAKE_FIND_ROOT_PATH_BOT H |
ON LY_CMAKE_FIN D_ROOT_PAT H |
NO_CMAKE_FIND_ROOT_PATH]
This command is used to find a program. A cache entry named by <VAR> is created to store
the result of this command. If the program is found the result is stored in the variable and the
search will not be repeated unless the variable is cleared. If nothing is found, the result will be
<VAR>-NOTFOUND, and the search will be attempted again the next time find_program is
invoked with the same variable. The name of the program that is searched for is specified by
the names listed after the NAMES argument. Additional search locations can be specified
after the PATHS argument. If ENV var is found in the HINTS or PATHS section the
environment variable var will be read and converted from a system environment variable to a
cmake style list of paths. For example ENV PATH would be a way to list the system path
variable. The argument after DOC will be used for the documentation string in the cache.
PATH SUFFIXES specifies additional subdirectories to check below each search path.
If NODEFAULTPATH is specified, then no additional paths are added to the search. If
NODEFAULTPATH is not specified, the search process is as follows:
1. Search paths specified in cmake-specific cache variables. These are intended to be used on
the command line with a -DVAR=value. This can be skipped if NO_CMAKE_PATH is
passed.
<prefix>/[s]bin for each <prefix> in CMAKE_PREFIX_PATH
CMAKE_PROGRAM_PATH and CMAKE_APPBUNDLE_PATH
2. Search paths specified in cmake-specific environment variables. These are intended to be
set in the user's shell configuration. This can be skipped if
NO CMAKE ENVIRONMENT PATH is passed.
<prefix>/[s]bin for each <prefix> in CMAKE_PREFIX_PATH
CMAKE PROGRAM PATH and CMAKE APPBUNDLE PATH
3. Search the paths specified by the HINTS option. These should be paths computed by
system introspection, such as a hint provided by the location of another item already found.
Hard-coded guesses should be specified with the PATHS option.
4. Search the standard system environment variables. This can be skipped if
NOS Y STEMENVIRONMENTP ATH is an argument. Specifically: PATH.
334
Appendix C
5. Search cmake variables defined in the Platform files for the current system. This can be
skipped if NOCM AKES YSTEMP ATH is passed.
<prefix>/[s]bin for each <prefix> in CMAKE_SYSTEM_PREFIX_PATH
CMAKE_SYSTEM_PROGRAM_PATH and CMAKE_SYSTEM_APPBUNDLE_PATH
6. Search the paths specified by the PATHS option or in the short-hand version of the
command. These are typically hard-coded guesses.
On Darwin or systems supporting OS X Frameworks, the cmake variable
CMAKE FIND FRAMEWORK can be set to empty or one of the following:
"FIRST" - Try to find frameworks before standard
libraries or headers. This is the default on Darwin.
"LAST" - Try to find frameworks after standard
libraries or headers.
"ONLY" - Only try to find frameworks.
"NEVER" - Never try to find frameworks.
On Darwin or systems supporting OS X Application Bundles, the cmake variable
CMAKEFINDAPPBUNDLE can be set to empty or one of the following:
"FIRST" - Try to find application bundles before standard
programs. This is the default on Darwin.
"LAST" - Try to find application bundles after standard
programs.
"ONLY" - Only try to find application bundles.
"NEVER" - Never try to find application bundles.
The CMake variable CMAKEFINDROOTPATH specifies one or more directories to be
prepended to all other search directories. This effectively "re-roots" the entire search under
given locations. By default it is empty. It is especially useful when cross-compiling to point to
the root directory of the target environment and CMake will search there too. By default at
first the directories listed in CMAKE FIND ROOT PATH and then the non-rooted
directories will be searched. The default behavior can be adjusted by setting
CMAKEFINDROOTPATHMODEPROGRAM. This behavior can be manually
overridden on a per-call basis. By using CMAKEFINDROOTPATHBOTH the search
order will be as described above. If NO CMAKE FIND ROOT PATH is used then
CMAKE FIND ROOT PATH will not be used. If ONLY CMAKE FIND ROOT PATH is
used then only the re-rooted directories will be searched.
fltk wrap ui
335
The default search order is designed to be most-specific to least-specific for common use
cases. Projects may override the order by simply calling the command multiple times and
using the NO_* options:
find_program(<VAR> NAMES name PATHS paths... N0_DEFAULT_PATH)
find_program(<VAR> NAMES name)
Once one of the calls succeeds the result variable will be set and stored in the cache so that no
call will search again.
f ltk_wrap_ui: Create FLTK user interfaces Wrappers.
fltk_wrap_ui(resultingLibraryName sourcel
source2 ... sourceN )
Produce .h and .cxx files for all the .fl and .fid files listed. The resulting .h and .cxx files will
be added to a variable named resultingLibraryNameFLTKUISRCS which should be added
to your library.
f oreach: Evaluate a group of commands for each value in a list.
foreach(loop_var argl arg2 ...)
COMMAND1(ARGS . . . )
COMMAND2(ARGS . . . )
endforeach([loop_var])
All commands between foreach and the matching endforeach are recorded without being
invoked. Once the endforeach is evaluated, the recorded list of commands is invoked once for
each argument listed in the original foreach command. Before each iteration of the loop
M${l°0P_var}M will be set as a variable with the current value in the list.
foreach(loop_var RANGE total)
foreach(loop_var RANGE start stop [step])
Foreach can also iterate over a generated range of numbers. There are three types of this
iteration:
* When specifying single number, the range will have elements 0 to "total".
336
Appendix C
* When specifying two numbers, the range will have elements from the first number to the
second number.
* The third optional number is the increment used to iterate from the first number to the
second number.
„ foreach(loop_var IN [LISTS [listl [...]]]
[ITEMS [iteml [...]]])
Iterates over a precise list of items. The LISTS option names list-valued variables to be
traversed, including empty elements (an empty string is a zero-length list). The ITEMS option
ends argument parsing and includes all arguments following it in the iteration.
function: Start recording a function for later invocation as a command.
function(<name> [argl [arg2 [arg3 ...]]])
COMMAND1(ARGS ...)
COMMAND2(ARGS ...)
endfunction([<name>])
Define a function named <name> that takes arguments named argl arg2 arg3 (...). Commands
listed after function, but before the matching endfunction, are not invoked until the function is
invoked. When it is invoked, the commands recorded in the function are first modified by
replacing formal parameters (${argl}) with the arguments passed, and then invoked as
normal commands. In addition to referencing the formal parameters you can reference the
variable ARGC which will be set to the number of arguments passed into the function as well
as ARGVO ARGV1 ARGV2 ... which will have the actual values of the arguments passed in.
This facilitates creating functions with optional arguments. Additionally ARGV holds the list
of all arguments given to the function and ARGN holds the list of argument past the last
expected argument.
See the cmake_policy() command documentation for the behavior of policies inside functions,
ge t_cmake_j?roper ty: Get a property of the CMake instance.
get_cmake_property(VAR property)
Get a property from the CMake instance. The value of the property is stored in the variable
VAR. If the property is not found, CMake will report an error. Some supported properties
get directory property
337
include: VARIABLES, CACHEVARIABLES, COMMANDS, MACROS, and
COMPONENTS.
get_directory_property: Get a property of DIRECTORY scope.
get_directory_property(<variable> [DIRECTORY <dir>] <prop-name>)
Store a property of directory scope in the named variable. If the property is not defined the
empty-string is returned. The DIRECTORY argument specifies another directory from which
to retrieve the property value. The specified directory must have already been traversed by
CMake.
get_directory_property(<variable> [DIRECTORY <dir>]
DEFINITION <var-name>)
Get a variable definition from a directory. This form is useful to get a variable definition from
another directory.
get_filename_component: Get a specific component of a full filename.
get_filename_component(VarName FileName
PATH|ABSOLUTE|NAME|EXT|NAME_WE|REALPATH
[CACHE])
Set VarName to be the path (PATH), file name (NAME), file extension (EXT), file name
without extension (NAME_WE) of FileName, the full path (ABSOLUTE), or the full path
with all symlinks resolved (REALPATH). Note that the path is converted to UNIX slashes
format and has no trailing slashes. The longest file extension is always considered. If the
optional CACHE argument is specified, the result variable is added to the cache.
get_filename_component(VarName FileName
PROGRAM [PROGRAM_ARGS ArgVar]
[CACHE])
The program in FileName will be found in the system search path or left as a full path. If
PROGRAM_ARGS is present with PROGRAM, then any command-line arguments present
in the FileName string are split from the program name and stored in ArgVar. This is used to
separate a program name from its arguments in a command line string.
get_j>roperty: Get a property.
338
Appendix C
get_property(<variable>
<GLOBAL |
DIRECTORY [dir] |
TARGET <target> |
SOURCE <source> |
TEST <test> |
„ CACHE <entry> |
VARIABLE>
PROPERTY <name>
[SET | DEFINED | BRIEF_DOCS | FULL_DOCS])
Get one property from one object in a scope. The first argument specifies the variable in
which to store the result. The second argument determines the scope from which to get the
property. It must be one of the following:
GLOBAL scope is unique and does not accept a name.
DIRECTORY scope defaults to the current directory but another directory (already processed
by CMake) may be named by full or relative path.
TARGET scope must name one existing target.
SOURCE scope must name one source file.
TEST scope must name one existing test.
CACHE scope must name one cache entry.
VARIABLE scope is unique and does not accept a name.
The required PROPERTY option is immediately followed by the name of the property to get.
If the property is not set an empty value is returned. If the SET option is given the variable is
set to a boolean value indicating whether the property has been set. If the DEFINED option is
given the variable is set to a boolean value indicating whether the property has been defined
such as with define_property. If BRIEF DOCS or FULL DOCS is given then the variable is
set to a string containing documentation for the requested property. If documentation is
requested for a property that has not been defined NOTFOUND is returned.
get_source_f ile_property: Get a property for a source file.
get_source_file_property(VAR file property)
get target property
339
Get a property from a source file. The value of the property is stored in the variable VAR. If
the property is not found, VAR will be set to "NOTFOUND". Use set_source_files_properties
to set property values. Source file properties usually control how the file is built. One property
that is always there is LOCATION
get_target_j?roperty: Get a property from a target.
get_target__property (VAR target property)
Get a property from a target. The value of the property is stored in the variable VAR. If the
property is not found, VAR will be set to "NOTFOUND". Use set_target_properties to set
property values. Properties are usually used to control how a target is built, but some query
the target instead. This command can get properties for any target so far created. The targets
do not need to be in the current CMakeLists.txt file.
get_test_j>roperty: Get a property of the test.
get_test_property(test VAR property)
Get a property from the Test. The value of the property is stored in the variable VAR. If the
property is not found, CMake will report an error. For a list of standard properties you can
type cmake -help-property-list
if: Conditionally execute a group of commands.
if (expression)
# then section.
COMMAND1(ARGS ...)
COMMAND2(ARGS ...)
elseif (expression2)
# elseif section.
COMMAND1 (ARGS . . . )
COMMAND2 (ARGS . . . )
else ( [expression2])
# else section.
COMMAND1 (ARGS . . . )
COMMAND2 (ARGS . . . )
endif([expressions] )
340
Appendix C
Evaluates the given expression. If the result is true, the commands in the THEN section are
invoked. Otherwise, the commands in the else section are invoked. The elseif and else
sections are optional. You may have multiple elseif clauses. Note that the expression in the
else and endif clause is optional. Long expressions can be used and there is a traditional order
of precedence. Parenthetical expressions are evaluated first followed by unary operators such
as EXISTS, COMMAND, and DEFINED. Then any EQUAL, LESS, GREATER, STRLESS,
STRGREATER, STREQUAL, MATCHES will be evaluated. Then NOT operators and
finally AND, OR operators will be evaluated. Possible expressions are:
if (variable)
True if the variable's value is not empty, 0, N, NO, OFF, FALSE, NOTFOUND, or
<variable>-NOTFOUND.
if (NOT variable)
True if the variable's value is empty, 0, N, NO, OFF, FALSE, NOTFOUND, or <variable>-
NOTFOUND.
if (variablel AND variable2)
True if both variables would be considered true individually.
if (variablel OR variable2)
True if either variable would be considered true individually.
if(COMMAND command-name)
True if the given name is a command, macro or function that can be invoked.
if (POLICY policy-id)
True if the given name is an existing policy (of the form CMP<NNNN>).
if(TARGET target-name)
True if the given name is an existing target, built or imported.
if
341
if(EXISTS file-name)
if(EXISTS directory-name)
True if the named file or directory exists. Behavior is well-defined only for full paths.
if (filel IS_NEWER__THAN file2)
True if filel is newer than file2 or if one of the two files doesn't exist. Behavior is well-
defined only for full paths.
if(IS_DIRECTORY directory-name)
True if the given name is a directory. Behavior is well-defined only for full paths.
if(IS_ABSOLUTE path)
True if the given path is an absolute path.
if(variable MATCHES regex)
if(string MATCHES regex)
True if the given string or variable's value matches the given regular expression.
if(variable LESS number)
if(string LESS number)
if(variable GREATER number)
if(string GREATER number)
if(variable EQUAL number)
if(string EQUAL number)
True if the given string or variable's value is a valid number and the inequality or equality is
true.
if(variable STRLESS string)
if(string STRLESS string)
if(variable STRGREATER string)
if(string STRGREATER string)
342
Appendix C
if (variable STREQUAL string)
if (string STREQUAL string)
True if the given string or variable's value is lexicographically less (or greater, or equal) than
the string or variable on the right.
if (versionl VERSION_LESS version2)
if(versionl VERSION_EQUAL version2)
if(versionl VERSION_GREATER version2)
Component-wise integer version number comparison (version format is
major[.minor[.patch[.tweak]]]).
if(DEFINED variable)
True if the given variable is defined. It does not matter if the variable is true or false just if it
has been set.
if ( (expression) AND (expression OR (expression)))
The expressions inside the parenthesis are evaluated first and then the remaining expression is
evaluated as in the previous examples. Where there are nested parenthesis the innermost are
evaluated as part of evaluating the expression that contains them.
The if statement was written fairly early in CMake's history and it has some convenience
features that are worth covering. The if statement reduces operations until there is a single
remaining value, at that point if the case insensitive value is: ON, 1, YES, TRUE, Y it returns
true, if it is OFF, 0, NO, FALSE, N, NOTFOUND, *-NOTFOUND, IGNORE it will return
false.
This is fairly reasonable. The convenience feature that sometimes throws new authors is how
CMake handles values that do not match the true or false list. Those values are treated as
variables and are dereferenced even though they do not have the required ${} syntax. This
means that if you write
if (boobah)
CMake will treat it as if you wrote
include
343
if (${boobah})
likewise if you write
if (fubar AND sol)
CMake will conveniently treat it as
if ("${fubar}" AND "${sol}")
The later is really the correct way to write it, but the former will work as well. Only some
operations in the if statement have this special handling of arguments. The specific details
follow:
1) The left hand argument to MATCHES is first checked to see if it is a defined variable, if so
the variable's value is used, otherwise the original value is used.
2) If the left hand argument to MATCHES is missing it returns false without error
3) Both left and right hand arguments to LESS GREATER EQUAL are independently tested
to see if they are defined variables, if so their defined values are used otherwise the original
value is used.
4) Both left and right hand arguments to STRLESS STREQUAL STRGREATER are
independently tested to see if they are defined variables, if so their defined values are used
otherwise the original value is used.
5) Both left and right hand argumemnts to VERSION LESS VERSION EQUAL
VERSIONGREATER are independently tested to see if they are defined variables, if so their
defined values are used otherwise the original value is used.
6) The right hand argument to NOT is tested to see if it is a boolean constant, if so the value is
used, otherwise it is assumed to be a variable and it is dereferenced.
7) The left and right hand arguments to AND OR are independently tested to see if they are
boolean constants, if so they are used as such, otherwise they are assumed to be variables and
are dereferenced.
include: Read CMake listfile code from the given file.
344
Appendix C
include(<file|module> [OPTIONAL] [RESULT_VARIABLE <VAR>]
[NO_POLICY_SCOPE])
Reads CMake listfile code from the given file. Commands in the file are processed
immediately as if they were written in place of the include command. If OPTIONAL is
present, then no error is raised if the file does not exist. If RESULTVARIABLE is given the
variable will be set to the full filename which has been included or NOTFOUND if it failed.
If a module is specified instead of a file, the file with name <modulename>.cmake is searched
in the CMAKE MODULE PATH.
See the cmake_policy() command documentation for discussion of the NOPOLICYSCOPE
option.
include_directories: Add include directories to the build.
include_directories([AFTER|BEFORE] [^YSTEM] dirl dir2 ...)
Add the given directories to those searched by the compiler for include files. By default the
directories are appended onto the current list of directories. This default behavior can be
changed by setting CMAKE include directories BEFORE to ON. By using BEFORE or
AFTER you can select between appending and prepending, independent from the default. If
the SYSTEM option is given the compiler will be told that the directories are meant as system
include directories on some platforms.
include_external_mspro ject: Include an external Microsoft project file in a workspace.
include_external_msproject(projectname location
depl dep2 ...)
Includes an external Microsoft project in the generated workspace file. Currently does nothing
on UNIX. This will create a target named
INCLUDE_EXTERNAL_MSPROJECT_[projectname]. This can be used in the
add dependencies command to make things depend on the external project.
include_regular_expression: Set the regular expression used for dependency checking.
include regular expression (regex match [regex complain])
install
345
Set the regular expressions used in dependency checking. Only files matching regexmatch
will be traced as dependencies. Only files matching regex_complain will generate warnings if
they cannot be found (standard header paths are not searched). The defaults are:
regex_match = (match everything)
regex_complain = "A$" (match empty string only)
install: Specify rules to run at install time.
This command generates installation rules for a project. Rules specified by calls to this
command within a source directory are executed in order during installation. The order across
directories is not defined.
There are multiple signatures for this command. Some of them define installation properties
for files and targets. Properties common to multiple signatures are covered here but they are
valid only for signatures that specify them.
DESTINATION arguments specify the directory on disk to which a file will be installed. If a
full path (with a leading slash or drive letter) is given it is used directly. If a relative path is
given it is interpreted relative to the value of CMAKEINSTALLPREFIX.
PERMISSIONS arguments specify permissions for installed files. Valid permissions are
OWNERREAD, OWNERWRITE, OWNEREXECUTE, GROUPREAD,
GROUPWRITE, GROUPEXECUTE, WORLDREAD, WORLDWRITE,
WORLDEXECUTE, SETUID, and SETGID. Permissions that do not make sense on certain
platforms are ignored on those platforms.
The CONFIGURATIONS argument specifies a list of build configurations for which the
install rule applies (Debug, Release, etc.).
The COMPONENT argument specifies an installation component name with which the install
rule is associated, such as "runtime" or "development". During component-specific
installation only install rules associated with the given component name will be executed.
During a full installation all components are installed.
The RENAME argument specifies a name for an installed file that may be different from the
original file. Renaming is allowed only when a single file is installed by the command.
The OPTIONAL argument specifies that it is not an error if the file to be installed does not
exist.
The TARGETS signature:
346
Appendix C
install(TARGETS targets... [EXPORT <export-name>]
[[ARCHIVE|LIBRARY|RUNTIME|FRAMEWORK|BUNDLE|
PRIVATE_HEADER | PUBLIC__HEADER | RESOURCE]
[DESTINATION <dir>]
[PERMISSIONS permissions...]
[CONFIGURATIONS [Debug|Release|...]]
> [COMPONENT <component>]
[OPTIONAL] [NAMELINK_ONLY|NAMELINK_SKIP]
] [-..])
The TARGETS form specifies rules for installing targets from a project. There are five kinds
of target files that may be installed: ARCHIVE, LIBRARY, RUNTIME, FRAMEWORK, and
BUNDLE. Executables are treated as RUNTIME targets, except that those marked with the
MACOSX BUNDLE property are treated as BUNDLE targets on OS X. Static libraries are
always treated as ARCHIVE targets. Module libraries are always treated as LIBRARY
targets. For non-DLL platforms shared libraries are treated as LIBRARY targets, except that
those marked with the FRAMEWORK property are treated as FRAMEWORK targets on OS
X. For DLL platforms the DLL part of a shared library is treated as a RUNTIME target and
the corresponding import library is treated as an ARCHIVE target. All Windows-based
systems including Cygwin are DLL platforms. The ARCHIVE, LIBRARY, RUNTIME, and
FRAMEWORK arguments change the type of target to which the subsequent properties
apply. If none is given the installation properties apply to all target types. If only one is given
then only targets of that type will be installed (which can be used to install just a DLL or just
an import library).
The PRIVATEHEADER, PUBLICHEADER, and RESOURCE arguments cause
subsequent properties to be applied to installing a FRAMEWORK shared library target's
associated files on non-Apple platforms. Rules defined by these arguments are ignored on
Apple platforms because the associated files are installed into the appropriate locations inside
the framework folder. See documentation of the PRIVATE_HEADER, PUBLIC FLEADER,
and RESOURCE target properties for details.
Either NAMELINK ONLY or NAMELINK SKIP may be specified as a LIBRARY option.
On some platforms a versioned shared library has a symbolic link such as
lib<name>.so -> lib<name>.so.1
where "lib<name>.so.l" is the soname of the library and "lib<name>.so" is a "namelink"
allowing linkers to find the library when given "-l<name>". The NAMELINKONLY option
causes installation of only the namelink when a library target is installed. The
NAMELINK_SKIP option causes installation of library files other than the namelink when a
library target is installed. When neither option is given both portions are installed. On
platforms where versioned shared libraries do not have namelinks or when a library is not
install
347
versioned the NAMELINKSKIP option installs the library and the NAMELINK ONLY
option installs nothing. See the VERSION and SOVERSION target properties for details on
creating versioned shared libraries.
One or more groups of properties may be specified in a single call to the TARGETS form of
this command. A target may be installed more than once to different locations. Consider
hypothetical targets "myExe", "mySharedLib", and "myStaticLib". The code
install(TARGETS myExe mySharedLib myStaticLib
RUNTIME DESTINATION bin
LIBRARY DESTINATION lib
ARCHIVE DESTINATION lib/static)
install(TARGETS mySharedLib DESTINATION /some/full/path)
will install myExe to <prefix>/bin and myStaticLib to <prefix>/lib/static. On non-DLL
platforms mySharedLib will be installed to <prefix>/lib and /some/full/path. On DLL
platforms the mySharedLib DLL will be installed to <prefix>/bin and /some/full/path and its
import library will be installed to <prefix>/lib/static and /some/full/path. On non-DLL
platforms mySharedLib will be installed to <prefix>/lib and /some/full/path.
The EXPORT option associates the installed target files with an export called <export-name>.
It must appear before any RUNTIME, LIBRARY, or ARCHIVE options. See documentation
of the install(EXPORT ...) signature below for details.
Installing a target with EXCLUDE_FROM_ALL set to true has undefined behavior.
The FILES signature:
install(FILES files... DESTINATION <dir>
[PERMISSIONS permissions...]
[CONFIGURATIONS [Debug|Release|...]]
[COMPONENT <component>]
[RENAME <name>] [OPTIONAL])
The FILES form specifies rules for installing files for a project. File names given as relative
paths are interpreted with respect to the current source directory. Files installed by this form
are by default given permissions OWNER WRITE, OWNER READ, GROUP READ, and
WORLD READ if no PERMISSIONS argument is given.
The PROGRAMS signature:
348
Appendix C
install(PROGRAMS files... DESTINATION <dir>
[PERMISSIONS permissions...]
[CONFIGURATIONS [Debug|Release I ...]]
[COMPONENT <component>]
[RENAME <name>] [OPTIONAL])
The PROGRAMS form is identical to the FILES form except that the default permissions for
the installed file also include OWNEREXECUTE, GROUP_EXECUTE, and
WORLDEXECUTE. This form is intended to install programs that are not targets, such as
shell scripts. Use the TARGETS form to install targets built within the project.
The DIRECTORY signature:
install(DIRECTORY dirs... DESTINATION <dir>
[FILE_PERMISSIONS permissions...]
[DIRECTORY_PERMISSIONS permissions...]
[USE_S OURCE_PERMISSIONS] [OPTIONAL]
[CONFIGURATIONS [Debug|Release I . ..]]
[COMPONENT <component>]
[FILES_MATCHING
[[PATTERN <pattern> | REGEX <regex>]
[EXCLUDE] [PERMISSIONS permissions...]] [...])
The DIRECTORY form installs contents of one or more directories to a given destination.
The directory structure is copied verbatim to the destination. The last component of each
directory name is appended to the destination directory but a trailing slash may be used to
avoid this because it leaves the last component empty. Directory names given as relative paths
are interpreted with respect to the current source directory. If no input directory names are
given the destination directory will be created but nothing will be installed into it. The
FILEPERMISSIONS and DIRECTORY PERMISSIONS options specify permissions given
to files and directories in the destination. If USE SOURCE PERMISSIONS is specified and
FILE PERMISSIONS is not, file permissions will be copied from the source directory
structure. If no permissions are specified files will be given the default permissions specified
in the FILES form of the command, and the directories will be given the default permissions
specified in the PROGRAMS form of the command.
Installation of directories may be controlled with fine granularity using the PATTERN or
REGEX options. These "match” options specify a globbing pattern or regular expression to
match directories or files encountered within input directories. They may be used to apply
certain options (see below) to a subset of the files and directories encountered. The frill path to
each input file or directory (with forward slashes) is matched against the expression. A
PATTERN will match only complete file names: the portion of the full path matching the
pattern must occur at the end of the file name and be preceded by a slash. A REGEX will
install
349
match any portion of the full path but it may use V and ’$’ to simulate the PATTERN
behavior. By default all files and directories are installed whether or not they are matched.
The FILES MATCHING option may be given before the first match option to disable
installation of files (but not directories) not matched by any expression. For example, the code
install(DIRECTORY src/ DESTINATION include/myproj
FILES_MATCHING PATTERN M*.hM)
will extract and install header files from a source tree.
Some options may follow a PATTERN or REGEX expression and are applied only to files or
directories matching them. The EXCLUDE option will skip the matched file or directory. The
PERMISSIONS option overrides the permissions setting for the matched file or directory. For
example the code
install(DIRECTORY icons scripts/ DESTINATION share/myproj
PATTERN "CVS" EXCLUDE
PATTERN "scripts/*"
PERMISSIONS OWNER_EXECUTE OWNER_WRITE OWNER_READ
GROUP EXECUTE GROUP READ)
will install the icons directory to share/myproj/icons and the scripts directory to share/myproj.
The icons will get default file permissions, the scripts will be given specific permissions, and
any CVS directories will be excluded.
The SCRIPT and CODE signatures:
install([[SCRIPT <file>] [CODE <code>]] [...])
The SCRIPT form will invoke the given CMake script files during installation. If the script
file name is a relative path it will be interpreted with respect to the current source directory.
The CODE form will invoke the given CMake code during installation. Code is specified as a
single argument inside a double-quoted string. For example, the code
install(CODE "MESSAGE(\"Sample install message.\")")
will print a message during installation.
The EXPORT signature:
350
Appendix C
install(EXPORT <export-name> DESTINATION <dir>
[NAMESPACE <namespace>] [FILE <name>.cmake]
[PERMISSIONS permissions...]
[CONFIGURATIONS [Debug|Release I ...]]
[COMPONENT <component>])
The EXPORT form generates and installs a CMake file containing code to import targets
from the installation tree into another project. Target installations are associated with the
export <export-name> using the EXPORT option of the install(TARGETS ...) signature
documented above. The NAMESPACE option will prepend <namespace> to the target names
as they are written to the import file. By default the generated file will be called <export-
name>.cmake but the FILE option may be used to specify a different name. The value given
to the FILE option must be a file name with the ".cmake” extension. If a
CONFIGURATIONS option is given then the file will only be installed when one of the
named configurations is installed. Additionally, the generated import file will reference only
the matching target configurations. If a COMPONENT option is specified that does not match
that given to the targets associated with <export-name> the behavior is undefined. If a library
target is included in the export but a target to which it links is not included the behavior is
unspecified.
The EXPORT form is useful to help outside projects use targets built and installed by the
current project. For example, the code
install(TARGETS myexe EXPORT myproj DESTINATION bin)
install(EXPORT myproj NAMESPACE mp_ DESTINATION lib/myproj)
will install the executable myexe to <prefix>/bin and code to import it in the file
"<prefix>/lib/myproj/myproj.cmake". An outside project may load this file with the include
command and reference the myexe executable from the installation tree using the imported
target name mp_myexe as if the target were built in its own tree.
NOTE: This command supercedes the INSTALL TARGETS command and the target
properties PRE INSTALL SCRIPT and POST INSTALL SCRIPT. It also replaces the
FILES forms of the INSTALLFILES and INSTALLPROGRAMS commands. The
processing order of these install rules relative to those generated by INSTALL_TARGETS,
INSTALL FILES, and INSTALL PROGRAMS commands is not defined.
link_directories: Specify directories in which the linker will look for libraries.
link_directories(directoryl directory2 ... )
list
351
Specify the paths in which the linker should search for libraries. The command will apply
only to targets created after it is called. For historical reasons, relative paths given to this
command are passed to the linker unchanged (unlike many CMake commands which interpret
them relative to the current source directory).
list: List operations.
list(LENGTH <list> Coutput variable>)
list(GET <list> <element index> [<element index> ...]
Coutput variable>)
list(APPEND <list> <element> [<element> ...])
list(FIND <list> <value> coutput variable>)
list(INSERT clist> Celement_index> Celement> [celement> ...])
list(REMOVE_ITEM clist> Cvalue> [Cvalue> ...])
list(REMOVE_AT clist> cindex> [cindex> ...])
list (REMOVE_DUPLICATES Clist>)
list(REVERSE Clist>)
list (SORT Clist>)
LENGTH will return a given list's length.
GET will return list of elements specified by indices from the list.
APPEND will append elements to the list.
FIND will return the index of the element specified in the list or -1 if it wasn't found.
INSERT will insert elements to the list to the specified location.
REMOVE_AT and REMOVE_ITEM will remove items from the list. The difference is that
REMOVE ITEM will remove the given items, while REMOVE AT will remove the items at
the given indices.
REMOVE_DUPLICATES will remove duplicated items in the list.
REVERSE reverses the contents of the list in-place.
SORT sorts the list in-place alphabetically.
NOTES: A list in cmake is a ; separated group of strings. To create a list the set command can
be used. For example, set(var a b c d e) creates a list with a;b;c;d;e, and set(var "abed e")
creates a string or a list with one item in it.
352
Appendix C
When specifying index values, if <element index> is 0 or greater, it is indexed from the
beginning of the list, with 0 representing the first list element. If <element index> is -1 or
lesser, it is indexed from the end of the list, with -1 representing the last list element. Be
careful when counting with negative indices: they do not start from 0. -0 is equivalent to 0, the
first list element.
loakd_cache: Load in the values from another project's CMake cache.
load_cache(pathToCacheFile READ_WITH_PREFIX
prefix entryl...)
Read the cache and store the requested entries in variables with their name prefixed with the
given prefix. This only reads the values, and does not create entries in the local project's
cache.
load_cache(pathToCacheFile [EXCLUDE entryl...]
[INCLUDE_INTERNALS entryl...])
Load in the values from another cache and store them in the local project's cache as internal
entries. This is useful for a project that depends on another project built in a different tree.
EXCLUDE option can be used to provide a list of entries to be excluded.
INCLUDE INTERNALS can be used to provide a list of internal entries to be included.
Normally, no internal entries are brought in. Use of this form of the command is strongly
discouraged, but it is provided for backward compatibility.
load_command: Load a command into a running CMake.
load_command(COMMAND_NAME <locl> [loc2 ...])
The given locations are searched for a library whose name is cmCOMMAND_NAME. If
found, it is loaded as a module and the command is added to the set of available CMake
commands. Usually, TRY_COMPILE is used before this command to compile the module. If
the command is successfully loaded a variable named
CMAKE_LOADE D_C OMMAND_< COMMAN D_NAME >
will be set to the full path of the module that was loaded. Otherwise the variable will not be
set.
macro: Start recording a macro for later invocation as a command.
mark as advanced
353
macro(<name> [argl [arg2 [arg3 ...]]])
COMMAND1 (ARGS . . . )
COMMAND2(ARGS . . . )
endmacro([<name>])
Define a macro named <name> that takes arguments named argl arg2 arg3 (...). Commands
listed after macro, but before the matching endmacro, are not invoked until the macro is
invoked. When it is invoked, the commands recorded in the macro are first modified by
replacing formal parameters (${argl}) with the arguments passed, and then invoked as
normal commands. In addition to referencing the formal parameters you can reference the
values ${ARGC} which will be set to the number of arguments passed into the function as
well as ${ARGV0} ${ARGV1} ${ARGV2} ... which will have the actual values of the
arguments passed in. This facilitates creating macros with optional arguments. Additionally
${ARGV} holds the list of all arguments given to the macro and ${ARGN} holds the list of
argument past the last expected argument. Note that the parameters to a macro and values
such as ARGN are not variables in the usual CMake sense. They are string replacements
much like the c preprocessor would do with a macro. If you want true CMake variables you
should look at the function command.
See the cmake_policy() command documentation for the behavior of policies inside macros.
mark_as_advanced: Mark cmake cached variables as advanced.
mark_as_advanced([CLEAR|FORCE] VAR VAR2 VAR...)
Mark the named cached variables as advanced. An advanced variable will not be displayed in
any of the cmake GUIs unless the show advanced option is on. If CLEAR is the first
argument advanced variables are changed back to unadvanced. If FORCE is the first
argument, then the variable is made advanced. If neither FORCE nor CLEAR is specified,
new values will be marked as advanced, but if the variable already has an advanced/non-
advanced state, it will not be changed. This command does nothing in script mode.
math: Mathematical expressions.
math(EXPR <output variable> <math expression^
EXPR evaluates mathematical expression and return result in the output variable. Example
mathematical expression is '5 * ( 10 + 13 )'. Supported operators are + - * / % | & A ~ « » *
/ %. They have the same meaning as they do in c code.
message: Display a message to the user.
354
Appendix C
message([STATUS|WARNING|AUTHOR_WARNING|FATAL_ERROR|SEND_ERROR]
"message to display" . . . )
The optional keyword determines the type of message:
k; (none)
Important information
Incidental information
CMake Warning, continue processing
CMake Warning (dev), continue processing
CMake Error, continue but skip generation
CMake Error, stop all processing
STATUS
WARNING
AU T H OR_WARNING
SEND_ERROR
FATAL ERROR
The CMake command-line tool displays STATUS messages on stdout and all other message
types on stderr. The CMake GUI displays all messages in its log area. The interactive dialogs
(ccmake and CMakeSetup) show STATUS messages one at a time on a status line and other
messages in interactive pop-up boxes.
CMake Warning and Error message text displays using a simple markup language. Non-
indented text is formatted in line-wrapped paragraphs delimited by newlines. Indented text is
considered pre-formatted.
option: Provides an option that the user can optionally select.
option(<option_variable> "help string describing option"
Provide an option for the user to select as ON or OFF. If no initial value is provided, OFF is
used.
output_required_files: Output a list of required source files for a specified source file.
output_required_files(srcfile outputfile)
Outputs a list of all the source files that are required by the specified srcfile. This list is
written into outputfile. This is similar to writing out the dependencies for srcfile except that it
jumps from .h files into .cxx, .c and .cpp files if possible.
project: Set a name for the entire project.
[initial value])
project(<projectname> [languageNamel languageName2 ... ] )
qt wrap cpp
355
Sets the name of the project. Additionally this sets the variables
<projectName>_BINARY_DIR and <projectName>_SOURCE_DIR to the respective values.
Optionally you can specify which languages your project supports. Example languages are
CXX (i.e. C++), C, Fortran, etc. By default C and CXX are enabled. E.g. if you do not have a
C++ compiler, you can disable the check for it by explicitely listing the languages you want to
support, e.g. C. By using the special language "NONE" all checks for any language can be
disabled.
qt_wrap__cpp: Create Qt Wrappers.
qt_wrap__cpp (resultingLibraryName DestName
SourceLists ...)
Produce moc files for all the .h files listed in the SourceLists. The moc files will be added to
the library using the DestName source list.
qt_wrap__ui: Create Qt user interfaces Wrappers.
qt_wrap__ui(resultingLibraryName HeadersDestName
SourcesDestName SourceLists .. .)
Produce .h and .cxx files for all the .ui files listed in the SourceLists. The .h files will be
added to the library using the HeadersDestNamesource list. The .cxx files will be added to the
library using the SourcesDestNamesource list.
remove_def initions: Removes -D define flags added by add defmitions.
remove definitions(-DFOO -DBAR ...)
Removes flags (added by add_definitions) from the compiler command line for sources in the
current directory and below.
return: Return from a file, directory or function.
return()
Returns from a file, directory or function. When this command is encountered in an included
file (via include() or find_package()), it causes processing of the current file to stop and
control is returned to the including file. If it is encountered in a file which is not included by
356
Appendix C
another file, e.g. a CMakeLists.txt, control is returned to the parent directory if there is one. If
return is called in a function, control is returned to the caller of the function. Note that a
macro is not a function and does not handle return like a function does.
separate_arguments: Parse space-separated arguments into a semicolon-separated list.
; separate_arguments(<var> <UNIX|WINDOWS>_COMMAND ”<args>M)
Parses a UNIX- or Windows-style command-line string "<args>" and stores a semicolon-
separated list of the arguments in <var>. The entire command line must be given in one
"<args>" argument.
The UNIX COMMAND mode separates arguments by unquoted whitespace. It recognizes
both single-quote and double-quote pairs. A backslash escapes the next literal character (\" is
"); there are no special escapes (\n is just n).
The WINDOWS COMMAND mode parses a windows command-line using the same syntax
the runtime library uses to construct argv at startup. It separates arguments by whitespace that
is not double-quoted. Backslashes are literal unless they precede double-quotes. See the
MSDN article "Parsing C Command-Line Arguments" for details.
separate_arguments(VARIABLE)
Convert the value of VARIABLE to a semi-colon separated list. All spaces are replaced with
This helps with generating command lines.
set: Set a CMAKE variable to a given value.
set (<variable> <value>
[[CACHE <type> <docstring> [FORCE]] | PARENT_SCOPE])
Within CMake sets <variable> to the value <value>. <value> is expanded before <variable>
is set to it. If CACHE is present and <variable> is not yet in the cache, then <variable> is put
in the cache. If it is already in the cache, <variable> is assigned the value stored in the cache.
If CACHE is present, also <type> and <docstring> are required. <type> is used by the CMake
GUI to choose a widget with which the user sets a value. The value for <type> may be one of
FILEPATH = File chooser dialog.
PATH = Directory chooser dialog.
STRING = Arbitrary string.
set directory properties
357
BOOL = Boolean ON/OFF checkbox.
INTERNAL = No GUI entry (used for persistent variables).
If <type> is INTERNAL, then the <value> is always written into the cache, replacing any
values existing in the cache. If it is not a cache variable, then this always writes into the
current Makefile. The FORCE option will overwrite the cache value removing any changes
by the user.
If PARENT SCOPE is present, the variable will be set in the scope above the current scope.
Each new directory or function creates a new scope. This command will set the value of a
variable into the parent directory or calling function (whichever is applicable to the case at
hand).
If <value> is not specified then the variable is removed instead of set. See also: the unset()
command.
set(<variable> <valuel> ... <valueN>)
In this case <variable> is set to a semicolon separated list of values. <variable> can be an
environment variable such as:
I set( ENV{PATH} /home/martink )
in which case the environment variable will be set.
set_directory_j>roperties: Set a property of the directory.
; set_directory_properties(PROPERTIES propl valuel prop2 value2)
Set a property for the current directory and subdirectories. If the property is not found, CMake
will report an error. The properties include: INCLUDEDIRECTORIES,
LINKDIRECTORIES, INCLUDEREGULAREXPRESSION, and
ADDITIONALMAKECLEANFILES. ADDITIONALMAKECLEANFILES is a list
of files that will be cleaned as a part of "make clean" stage.
setjproperty: Set a named property in a given scope.
; set_property(<GLOBAL I
DIRECTORY [dir] I
TARGET [targetl [target2 ...]] I
358
Appendix C
SOURCE
TEST
CACHE
[APPEND]
PROPERTY
[srcl [src2 ...]] I
[testl [test2 . . . ] ] I
[entryl [entry2 ...]]>
<name> [valuel [value2 ...]])
Set one property on zero or more objects of a scope. The first argument determines the scope
in which the property is set. It must be one of the following:
GLOBAL scope is unique and does not accept a name.
DIRECTORY scope defaults to the current directory but another directory (already processed
by CMake) may be named by full or relative path.
TARGET scope may name zero or more existing targets.
SOURCE scope may name zero or more source files.
TEST scope may name zero or more existing tests.
CACHE scope must name zero or more cache existing entries.
The required PROPERTY option is immediately followed by the name of the property to set.
Remaining arguments are used to compose the property value in the form of a semicolon-
separated list. If the APPEND option is given the list is appended to any existing property
value.
set_source_f iles_properties: Source files can have properties that affect how they are
built.
set_source_files_properties(filel file2 ...
PROPERTIES propl valuel
prop2 value2 ...)
Set properties on a file. The syntax for the command is to list all the files you want to change,
and then provide the values you want to set next. You can make up your own properties as
well. The following are used by CMake. The ABSTRACT flag (boolean) is used by some
class wrapping commands. If WRAP_EXCLUDE (boolean) is true then many wrapping
commands will ignore this file. If GENERATED (boolean) is true then it is not an error if this
source file does not exist when it is added to a target. Obviously, it must be created
(presumably by a custom command) before the target is built. If the HEADER_FILE_ONLY
(boolean) property is true then the file is not compiled. This is useful if you want to add extra
non build files to an IDE. OBJECT DEPENDS (string) adds dependencies to the object file.
set target properties
359
COMPILE_FLAGS (string) is passed to the compiler as additional command line arguments
when the source file is compiled. LANGUAGE (string) CXX|C will change the default
compiler used to compile the source file. The languages used need to be enabled in the
PROJECT command. If SYMBOLIC (boolean) is set to true the build system will be
informed that the source file is not actually created on disk but instead used as a symbolic
name for a build rule.
set_target_j?roperties: Targets can have properties that affect how they are built.
set_target_properties(target1 target2 ...
PROPERTIES propl valuel
prop2 value2 ...)
Set properties on a target. The syntax for the command is to list all the files you want to
change, and then provide the values you want to set next. You can use any prop value pair
you want and extract it later with the GET TARGET PROPERTY command. See Appendix
E - Properties for a full list of target properties.
set_testsjproperties: Set a property of the tests.
set_tests_properties(testl [test2...]
PROPERTIES propl valuel prop2 value2)
Set a property for the tests. If the property is not found, CMake will report an error. See
Appendix E - Properties for a list of test properties.
site_name: Set the given variable to the name of the computer.
site name(variable)
source__group: Define a grouping for sources in the Makefile.
source_group(name [REGULAR_EXPRESSION regex]
[FILES srcl src2 ...])
Defines a group into which sources will be placed in project files. This is mainly used to setup
file tabs in Visual Studio. Any file whose name is listed or matches the regular expression will
be placed in this group. If a file matches multiple groups, the LAST group that explicitly lists
the file will be favored, if any. If no group explicitly lists the file, the LAST group whose
regular expression matches the file will be favored.
360
Appendix C
The name of the group may contain backslashes to specify subgroups:
source_group (outer Winner ...)
For backwards compatibility, this command is also supports the format:
source_group(name regex)
string: String operations.
string(REGEX MATCH <regular_expression>
<output variable> <input> [<input>...])
string(REGEX MATCHALL <regular_expression>
Coutput variable> <input> [<input>...])
string(REGEX REPLACE <regular_expression>
<replace_expression> <output variable>
<input> [<input>...])
string(REPLACE <match_string>
<replace_string> Coutput variable>
<input> [<input>...])
string(COMPARE EQUAL <stringl> <string2> Coutput variable>)
string(COMPARE NOTEQUAL Cstringl> Cstring2> Coutput variable>)
string(COMPARE LESS Cstringl> Cstring2> Coutput variable>)
string(COMPARE GREATER Cstringl> Cstring2> Coutput variable>)
string(ASCII Cnumber> [Cnumber> ...] Coutput variable>)
string(CONFIGURE Cstringl> Coutput variable>
[0ONLY] [ESCAPE_QUOTES])
string(TOUPPER Cstringl> Coutput variable>)
string(TOLOWER Cstringl> Coutput variable>)
string(LENGTH Cstring> Coutput variable>)
string(SUBSTRING Cstring> cbegin> clength> Coutput variable>)
string(STRIP Cstring> Coutput variable>)
string(RANDOM [LENGTH Clength>] [ALPHABET Calphabet>]
Coutput variable>)
REGEX MATCH will match the regular expression once and store the match in the output
variable.
REGEX MATCHALL will match the regular expression as many times as possible and store
the matches in the output variable as a list.
string
361
REGEX REPLACE will match the regular expression as many times as possible and
substitute the replacement expression for the match in the output. The replace expression may
refer to paren-delimited subexpressions of the match using \1, \2, \9. Note that two
backslashes (\\1) are required in CMake code to get a backslash through argument parsing.
REPLACE will replace all occurrences of match string in the input with replace string and
store the result in the output.
COMPARE EQUAL/NOTEQUAL/LESS/GREATER will compare the strings and store true
or false in the output variable.
ASCII will convert all numbers into corresponding ASCII characters.
CONFIGURE will transform a string like CONFIGURE FILE transforms a file.
TOUPPER/TOLOWER will convert string to upper/lower characters.
LENGTH will return a given string's length.
SUBSTRING will return a substring of a given string.
STRIP will return a substring of a given string with leading and trailing spaces removed.
RANDOM will return a random string of given length consisting of characters from the given
alphabet. Default length is 5 characters and default alphabet is all numbers and upper and
lower case letters.
The following characters have special meaning in regular expressions:
A Matches at beginning of a line
$ Matches at end of a line
Matches any single character
[ ] Matches any character (s) inside the brackets
[A ] Matches any character(s) not inside the brackets
Matches characters in range on either side of a dash
* Matches preceding pattern zero or more times
+ Matches preceding pattern one or more times
? Matches preceding pattern zero or once only
| Matches a pattern on either side of the |
() Saves a matched subexpression, which can be referenced
in the REGEX REPLACE operation. Additionally it is
Saved by all regular expression-related commands,
including e.g. if( MATCHES ), in the variables
CMAKE MATCH (0. .9) .
362
Appendix C
target_link_libraries: Link a target to given libraries.
target_link_libraries(<target> [iteml [item2 [...]]]
[[debug|optimized|general] <item>] ...)
Specify libraries or flags to use when linking a given target. If a library name matches that of
another target in the project a dependency will automatically be added in the build system to
make sure the library being linked is up-to-date before the target links. Item names starting
with but not '-1' or ’-framework', are treated as linker flags.
A "debug”, "optimized", or "general" keyword indicates that the library immediately
following it is to be used only for the corresponding build configuration. The "debug"
keyword corresponds to the Debug configuration (or to configurations named in the
DEBUGCONFIGURATIONS global property if it is set). The "optimized" keyword
corresponds to all other configurations. The "general" keyword corresponds to all
configurations, and is purely optional (assumed if omitted). Higher granularity may be
achieved for per-configuration rules by creating and linking to IMPORTED library targets.
See the IMPORTED mode of the add library command for more information.
Library dependencies are transitive by default. When this target is linked into another target
then the libraries linked to this target will appear on the link line for the other target too. See
the LINKINTERFACELIBRARIES target property to override the set of transitive link
dependencies for a target.
target_link_libraries(<target> LINK_INTERFACE_LIBRARIES
[[debug|optimized|general] <lib>] ...)
The LINKINTERFACELIBRARIES mode appends the libraries to the
LINKINTERFACELIBRARIES and its per-configuration equivalent target properties
instead of using them for linking. Libraries specified as "debug" are appended to the the
LINKINTERFACELIBRARIESDEBUG property (or to the properties corresponding to
configurations listed in the DEBUG CONFIGURATIONS global property if it is set).
Libraries specified as "optimized" are appended to the the LINK INTERFACE LIBRARIES
property. Libraries specified as "general" (or without any keyword) are treated as if specified
for both "debug" and "optimized".
The library dependency graph is normally acyclic (a DAG), but in the case of mutually-
dependent STATIC libraries CMake allows the graph to contain cycles (strongly connected
components). When another target links to one of the libraries CMake repeats the entire
connected component. For example, the code
try compile
363
add_library(A STATIC a.c)
add_library(B STATIC b.c)
target_link_libraries(A B)
target_link_libraries(B A)
add_executable(main main.c)
target_link_libraries(main A)
links 'main' to 'A B A B'. (While one repetition is usually sufficient, pathological object file
and symbol arrangements can require more. One may handle such cases by manually
repeating the component in the last target_link_libraries call. However, if two archives are
really so interdependent they should probably be combined into a single archive.)
try_compile: Try compiling some code.
try_compile(RESULT_VAR bindir srcdir
projectName <targetname> [CMAKE_FLAGS <Flags>]
[OUTPUT_VARIABLE var])
Try compiling a program. In this form, srcdir should contain a complete CMake project with a
CMakeLists.txt file and all sources. The bindir and srcdir will not be deleted after this
command is run. If <target name> is specified then build just that target otherwise the all or
ALL BUILD target is built.
try_compile(RESULT_VAR bindir srcfile
[CMAKE_FLAGS <Flags>]
[COMPILE_DEFINITIONS <flags> ...]
[OUTPUT_VARIABLE var]
[COPY FILE <filename> )
Try compiling a srcfile. In this case, the user need only supply a source file. CMake will
create the appropriate CMakeLists.txt file to build the source. If COPY_FILE is used, the
compiled file will be copied to the given file.
In this version all files in bindir/CMakeFiles/CMakeTmp, will be cleaned automatically, for
debugging a —debug-trycompile can be passed to cmake to avoid the clean. Some extra flags
that can be included are, INCLUDEDIRECTORIES, LINKDIRECTORIES, and
LINK LIBRARIES. COMPILEDEFINITIONS are -Ddefinition that will be passed to the
compile line. try_compile creates a CMakeList.txt file on the fly that looks like this:
add_definitions(<expanded COMPILE_DEFINITIONS from cmake>)
include directories(${INCLUDE DIRECTORIES})
364
Appendix C
link_directories(${LINK_DIRECTORIES})
add_executable(cmTryCompileExec sources)
target_link_libraries(cmTryCompileExec ${LINK_LIBRARIES})
In both versions of the command, if OUTPUTVARIABLE is specified, then the output from
the build process is stored in the given variable. Return the success or failure in
RkSULT_VAR. CMAKE FLAGS can be used to pass -DVAR:TYPE=VALUE flags to the
cmake that is run during the build.
try_run: Try compiling and then running some code.
try_run(RUN_RESULT_VAR COMPILE_RESULT_VAR
bindir srcfile [CMAKE_FLAGS <Flags>]
[COMPILE_DEFINITIONS <flags>]
[COMPILE_OUTPUT_VARIABLE comp]
[RUN_OUTPUT_VARIABLE run]
[OUTPUT_VARIABLE var]
[ARGS <argl> <arg2>...])
Try compiling a srcfile. Return TRUE or FALSE for success or failure in
COMPILERESULTVAR. Then if the compile succeeded, run the executable and return its
exit code in RUNRESULTVAR. If the executable was built, but failed to run, then
RUN RESULT VAR will be set to FAILED TO RUN. COMPILE_OUTPUT_VARIABLE
specifies the variable where the output from the compile step goes.
RUNOUTPUTVARIABLE specifies the variable where the output from the running
executable goes.
For compatibility reasons OUTPUT VARIABLE is still supported, which gives you the
output from the compile and run step combined.
Cross compiling issues
When cross compiling, the executable compiled in the first step usually cannot be run on the
build host. try_run() checks the CMAKE CROSSCOMPILING variable to detect whether
CMake is in crosscompiling mode. If that's the case, it will still try to compile the executable,
but it will not try to run the executable. Instead it will create cache variables which must be
filled by the user or by presetting them in some CMake script file to the values the executable
would have produced if it would have been run on its actual target platform. These variables
are RUN RESULT VAR (explanation see above) and if RUN OUTPUT VARIABLE (or
OUTPUTVARIABLE) was used, an additional cache variable
RUN RESULT VAR COMPILE RESULT VAR TRYRUN OUTPUT.This is intended
to hold stdout and stderr from the executable.
unset
365
In order to make cross compiling your project easier, use tryrun only if really required. If
you use try run, use RUN OUTPUT VARIABLE (or OUTPUTVARIABLE) only if really
required. Using them will require that when crosscompiling, the cache variables will have to
be set manually to the output of the executable. You can also ’’guard” the calls to try run with
if(CMAKE_CROSSCOMPILING) and provide an easy-to-preset alternative for this case.
unset: Unset a variable, cache variable, or environment variable.
unset(<variable> [CACHE])
Removes the specified variable causing it to become undefined. If CACHE is present then the
variable is removed from the cache instead of the current scope. <variable> can be an
environment variable such as:
unset(ENV{LD_LIBRARY_PATH})
in which case the variable will be removed from the current environment.
variable_watch: Watch the CMake variable for change.
variable watch(Cvariable name> [<command to execute>])
If the specified variable changes, the message will be printed about the variable being
changed. If the command is specified, the command will be executed. The command will
receive the following arguments: COMMAND(<variable> <access> <value> <current list
file> <stack>)
while: Evaluate a group of commands while a condition is true.
while(condition)
COMMAND1(ARGS ...)
COMMAND2(ARGS .. .)
endwhile([condition])
All commands between while and the matching endwhile are recorded without being invoked.
Once the endwhile is evaluated, the recorded list of commands is invoked as long as the
condition is true. The condition is evaluated using the same logic as the if command.
366
Appendix C
Compatibility Commands
This is the documentation for now obsolete listfile commands from previous CMake versions,
which are still supported for compatibility reasons. You should instead use the newer,
preferred commands.
build^name: Deprecated. Use ${CM AKES YSTEM} and ${CMAKE_CXX_COMPILER}
instead.
build_name(variable)
Sets the specified variable to a string representing the platform and compiler settings. These
values are now available through the CMAKESYSTEM and CMAKE CXX COMPILER
variables.
exec_program: Deprecated. Use the execute_process() command instead.
Run an executable program during the processing of the CMakeList.txt file.
exec_program(Executable [directory in which to run]
[ARGS <arguments to executable>]
[OUTPUT_VARIABLE <var>]
[RETURN_VALUE <var>])
The executable is run in the optionally specified directory. The executable can include
arguments if it is double quoted, but it is better to use the optional ARGS argument to specify
arguments to the program. This is because cmake will then be able to escape spaces in the
executable path. An optional argument OUTPUT_VARIABLE specifies a variable in which
to store the output. To capture the return value of the execution, provide a
RETURN VALUE. If OUTPUT VARIABLE is specified, then no output will go to the
stdout/stderr of the console running cmake.
export_library_dependencies: Deprecated. Use INSTALL(EXPORT) or EXPORT
command.
This command generates an old-style library dependencies file. Projects requiring CMake 2.6
or later should not use the command. Use instead the install(EXPORT) command to help
export targets from an installation tree and the export() command to export targets from a
build tree.
The old-style library dependencies file does not take into account per-configuration names of
libraries or the LINK INTERFACE LIBRARIES target property.
install files
367
export_library_dependencies(<file> [APPEND])
Create a file named <file> that can be included into a CMake listfile with the INCLUDE
command. The file will contain a number of SET commands that will set all the variables
needed for library dependency information. This should be the last command in the top level
CMakeLists.txt file of the project. If the APPEND option is specified, the SET commands
will be appended to the given file instead of replacing it.
install_files: Deprecated. Use the install(FILES ) command instead.
This command has been superceded by the install command. It is provided for compatibility
with older CMake code. The FILES form is directly replaced by the FILES form of the install
command. The regexp form can be expressed more clearly using the GLOB form of the file
command.
install files(<dir> extension file file ...)
Create rules to install the listed files with the given extension into the given directory. Only
files existing in the current source tree or its corresponding location in the binary tree may be
listed. If a file specified already has an extension, that extension will be removed first. This is
useful for providing lists of source files such as foo.cxx when you want the corresponding
foo.h to be installed. A typical extension is \h\
install_files(<dir> regexp)
Any files in the current source directory that match the regular expression will be installed.
install files(<dir> FILES file file ...)
Any files listed after the FILES keyword will be installed explicitly from the names given.
Full paths are allowed in this form. The directory <dir> is relative to the installation prefix,
which is stored in the variable CMAKE INSTALL PREFIX.
install^programs: Deprecated. Use the in stall (PROGRAMS ) command instead.
This command has been superceded by the install command. It is provided for compatibility
with older CMake code. The FILES form is directly replaced by the PROGRAMS form of the
INSTALL command. The regexp form can be expressed more clearly using the GLOB form
of the FILE command.
368
Appendix C
install_programs(<dir> filel file2 [file3 ...])
install_programs(<dir> FILES filel [file2 ...])
Create rules to install the listed programs into the given directory. Use the FILES argument to
guarantee that the file list version of the command will be used even when there is only one
argument.
install_programs(<dir> regexp)
In the second form any program in the current source directory that matches the regular
expression will be installed. This command is intended to install programs that are not built
by cmake, such as shell scripts. See the TARGETS form of the INSTALL command to create
installation rules for targets built by cmake. The directory <dir> is relative to the installation
prefix, which is stored in the variable CMAKEINSTALLPREFIX.
install_targets: Deprecated. Use the install(TARGETS ) command instead.
This command has been superceded by the install command. It is provided for compatibility
with older CMake code.
install_targets(<dir> [RUNTIME_DIRECTORY dir] target target)
Create rules to install the listed targets into the given directory. The directory <dir> is relative
to the installation prefix, which is stored in the variable CMAKE INSTALL PREFIX. If
RUNTIME DIRECTORY is specified, then on systems with special runtime files (Windows
DLL), the files will be copied to that directory.
link_libraries: Deprecated. Use the target_link_libraries() command instead.
Link libraries to all targets added later.
link_libraries(library1 <debug | optimized> library2 ...)
Specify a list of libraries to be linked into any following targets (typically added with the
add executable or add library calls). This command is passed down to all subdirectories. The
debug and optimized strings may be used to indicate that the next library listed is to be used
only for that specific type of build.
make_directory: Deprecated. Use the file(MAKE_DIRECTORY ) command instead.
make_directory(directory)
remove
369
Creates the specified directory. Full paths should be given. Any parent directories that do not
exist will also be created. Use with care.
remove: Deprecated. Use the list(REMOVE_ITEM ) command instead.
| remove(VAR VALUE VALUE ...)
Removes VALUE from the variable VAR. This is typically used to remove entries from a
vector (e.g. semicolon separated list). VALUE is expanded.
subdir_depends: Deprecated. Does nothing.
subdir_depends(subdir depl dep2 ...)
Does not do anything. This command used to help projects order parallel builds correctly.
This functionality is now automatic.
subdirs: Deprecated. Use the add_subdirectory() command instead.
Add a list of subdirectories to the build.
subdirs(dirl dir2 ...[EXCLUDE_FROM_ALL exclude_dirl ...]
j [PREORDER] )
Add a list of subdirectories to the build. The add subdirectory command should be used
instead of subdirs although subdirs will still work. This will cause any CMakeLists.txt files in
the sub directories to be processed by CMake. Any directories after the PREORDER flag are
traversed first by Makefile builds, the PREORDER flag has no effect on IDE projects. Any
directories after the EXCLUDE FROM ALL marker will not be included in the top level
Makefile or project file. This is useful for having CMake create Makefiles or projects for a set
of examples in a project. You would want CMake to generate Makefiles or project files for all
the examples at the same time, but you would not want them to show up in the top level
project or be built each time make is run from the top.
use_mangled__mesa: Copy mesa headers for use in combination with system GL.
use_mangled_mesa(PATH_TO_MESA OUTPUT_DIRECTORY)
The path to mesa includes, should contain gl mangle.h. The mesa headers are copied to the
specified output directory. This allows mangled mesa headers to override other GL headers by
being added to the include directory path earlier.
370
Appendix C
utility_source: Specify the source tree of a third-party utility.
utility_source(cache_entry executable_name
path_to_source [filel file2 ...])
Wl\en a third-party utility’s source is included in the distribution, this command specifies its
location and name. The cache entry will not be set unless the path_to_source and all listed
files exist. It is assumed that the source tree of the utility will have been built before it is
needed.
When cross compiling CMake will print a warning if a utility_source() command is executed,
because in many cases it is used to build an executable which is executed later on. This
doesn't work when cross compiling, since the executable can run only on their target platform.
So in this case the cache entry has to be adjusted manually so it points to an executable which
is runnable on the build host.
variable__requires: Deprecated. Use the if() command instead.
Assert satisfaction of an option's required variables.
variable_requires(TEST_VARIABLE RESULT_VARIABLE
RE QUIRE D_VARIABLE1
REQUIRED_VARIABLE2 ...)
The first argument (TEST_VARIABLE) is the name of the variable to be tested, if that
variable is false nothing else is done. If TEST_VARIABLE is true, then the next argument
(RESULT_VARIABLE) is a variable that is set to true if all the required variables are set.
The rest of the arguments are variables that must be true or not set to NOTFOUND to avoid
an error. If any are not true, an error is reported.
write_file: Deprecated. Use the file(WRITE ) command instead.
write_file(filename "message to write"... [APPEND])
The first argument is the file name, the rest of the arguments are messages to write. If the
argument APPEND is specified, then the message will be appended.
NOTE 1: file(WRITE ... and file(APPEND ... do exactly the same as this one but add some
more functionality.
write file
371
NOTE 2: When using write_file the produced file cannot be used as an input to CMake
(CONFIGUREFILE, source file ...) because it will lead to an infinite loop. Use
configure_file if you want to generate input files to CMake.
Appendix D
Appendix D - Selected Modules
CMake Modules
This is the documentation for the modules and scripts that come with CMake. Using these
modules you can check the computer system for installed software packages, features of the
compiler and the existance of headers to name just a few.
AddFileDependencies: ADD_FILE_DEPENDENCIES(sour cefl 1 e depend_fi 1 es...)
Adds the given files as dependencies to source_file
BundleUtilities:
A collection of CMake utility functions useful for dealing with .app bundles on the Mac and
bundle-like directories on any OS. The following functions are provided by this module:
get_bundle_main_executable
get_dotapp_dir
get_bundle_and_executable
get_bundle_all_executables
get_item_key
clear_bundle_keys
set_bundle_key_values
get_bundle_keys
374
Appendix D
c°py__resolved_item_into_bundle
f ixup_bundle__item
fixup_bundle
copy_and_fixup_bundle
verify_bundle_prerequisites
verify_bundle_symlinks
verify_app
Requires CMake 2.6 or greater because it uses function, break and PARENTSCOPE. Also
depends on GetPrerequisites.cmake.
CMakeBackwardCompatibilityCXX: define a bunch of backwards compatibility variables
CMAKE_ANSI_CXXFLAGS - flag for ansi C++
CMAKE_HAS_ANSI_STRING_STREAM - has <strstream>
INCLUDE(TestForANSIStreamHeaders)
INCLUDE(ChecklncludeFileCXX)
INCLUDE(TestForSTDNamespace)
INCLUDE(TestForANSIForScope)
CMakeDependentQption: Macro to provide an option dependent on other options.
This macro presents an option to the user only if a set of other conditions are true. When the
option is not presented a default value is used, but any value set by the user is preserved for
when the option is presented again. Example invocation:
CMAKE_DEPENDENT_OPTION(USE_FOO "Use Foo" ON
"USE_BAR;NOT USE_ZOT" OFF)
If USEBAR is true and USEZOT is false, this provides an option called USEFOO that
defaults to ON. Otherwise, it sets USE FOO to OFF. If the status of USE BAR or USE ZOT
ever changes, any value for the USE_FOO option is saved so that when the option is re¬
enabled it retains its old value.
CMakeDetermineVSServicePack: Includes a public function for assisting users in trying to
determine the
Visual Studio service pack in use. Sets the passed in variable to one of the following values or
an empty string if unknown.
vc80
vc80spl
CMa keFindFrameworks
375
vc90
vc90spl
Usage:
if (MSVC)
include(CMakeDetermineVSServicePack)
DetermineVSServicePack( my_service_pack )
if( my_service_pack )
message(STATUS "Detected: ${my_service_pack}")
endif()
endif()
CMakeFindFrameworks: helper module to find OSX frameworks
CMakeForceCompiler:
This module defines macros intended for use by cross-compiling toolchain files when CMake
is not able to automatically detect the compiler identification. The macro
CMAKEFORCECCOMPILER has the following signature:
CMAKE_FORCE_C_COMPILER(<compiler> <compiler-id>)
It sets CMAKE_C_COMPILER to the given compiler and the cmake internal variable
CMAKE_C_COMPILER_ID to the given compiler-id. It also bypasses the check for working
compiler and basic compiler information tests.
The macro CMAKE FORCE CXX COMPILER has the following signature:
CMAKE_FORCE_CXX_COMPILER(<compiler> <compiler-id>)
It sets CMAKE_CXX_COMPILER to the given compiler and the cmake internal variable
CMAKE_CXX_COMPILER_ID to the given compiler-id. It also bypasses the check for
working compiler and basic compiler information tests.
376
Appendix D
So a simple toolchain file could look like this:
INCLUDE (CMakeForceCompiler)
SET(CMAKE_SYSTEM_NAME Generic) j
CMAKE_FORCE__C_COMPILER (chcl2 MetrowerksHicross)
; CMAKE_FORCE_CXX_COMPILER (chcl2 MetrowerksHicross) j
CMakePrintSystemlnformation: print system information
This file can be used for diagnostic purposes just include it in a project to see various internal
CMake variables.
CPack: Build binary and source package installers
The CPack module generates binary and source installers in a variety of formats using the
cpack program. Inclusion of the CPack module adds two new targets to the resulting
Makefiles, package and packagesource, which build the binary and source installers,
respectively. The generated binary installers contain everything installed via CMake's
INSTALL command (and the deprecated INSTALL FILES, INSTALLPROGRAMS, and
INSTALLTARGETS commands).
For certain kinds of binary installers (including the graphical installers on Mac OS X and
Windows), CPack generates installers that allow users to select individual application
components to install. The contents of each of the components are identified by the
COMPONENT argument of CMake's INSTALL command. These components can be
annotated with user-friendly names and descriptions, inter-component dependencies, etc., and
grouped in various ways to customize the resulting installer. See the cpackadd* commands,
described below, for more information about component-specific installations.
Before including the CPack module, there are a variety of variables that can be set to
customize the resulting installers. The most commonly-used variables are:
CPACKPACKAGENAME
The name of the package (or application). If not specified, defaults to the project
name.
CPACKPACKAGEVENDOR
The name of the package vendor (e.g. "Kitware").
CPACKPACKAGEVERSIONMAJOR
Package major Version
CPACKPACKAGEVERSIONMINOR
Package minor Version
CPack
377
CPACKPACKAGEVERSIONPATCH
Package patch Version
CPACKPACKAGEDESCRIPTIONFILE
A text file used to describe the project. Used, for example, the introduction screen of
a CPack-generated Windows installer to describe the project.
CPACKPACKAGEDESCRIPTIONSUMMARY
Short description of the project (only a few words).
CPACK_PACKAGE_FILE_NAME
The name of the package file to generate, not including the extension. For example,
cmake-2.6. l-Linux-i686.
CPACKPACKAGEINSTALLDIRECTORY
Installation directory on the target system, e.g., MCMake 2.5”.
CPACKRESOURCEFILELICENSE
License file for the project, which will typically be displayed to the user (often with
an explicit "Accept” button, for graphical installers) prior to installation.
CPACKRESOURCEFILEREADME
ReadMe file for the project, which typically describes in some detail
CPACKRESOURCEFILEWELCOME
Welcome file for the project, which welcomes users to this installer. Typically used
in the graphical installers on Windows and Mac OS X.
CPACKMONOLITHICINSTALL
Disables the component-based installation mechanism, so that all components are
always installed.
CPACKGENERATOR
List of CPack generators to use. If not specified, CPack will create a set of options
(e.g., CPACK BINARY NSIS) allowing the user to enable/disable individual
generators.
CPACKOUTPUTCONFIGFILE
The name of the CPack configuration file for binary installers that will be generated
by the CPack module. Defaults to CPackConfig.cmake.
378
Appendix D
CPACKPACKAGEEXECUTABLES
Lists each of the executables along with a text label, to be used to create Start Menu
shortcuts on Windows. For example, setting this to the list ccmake;CMake will
create a shortcut named "CMake" that will execute the installed executable ccmake.
CPACKSTRIPFILES
List of files to be stripped. Starting with CMake 2.6.0 CPACK_STRIP_FILES will
be a boolean variable which enables stripping of all files (a list of files evaluates to
TRUE in CMake, so this change is compatible).
The following CPack variables are specific to source packages, and will not affect binary
packages:
CPACKSOURCEPACKAGEFILENAME
The name of the source package,
e.g., cmake-2.6.1
CPACKSOURCESTRIPFILES
List of files in the source tree that will be stripped. Starting with CMake 2.6.0
CPACK SOURCE STRIP FILES will be a boolean variable which enables
stripping of all files (a list of files evaluates to TRUE in CMake, so this change is
compatible).
CPACKSOURCEGENERATOR
List of generators used for the source packages. As with CPACK GENERATOR, if
this is not specified then CPack will create a set of options (e.g.,
CPACK_SOURCE_ZIP) allowing users to select which packages will be generated.
CPACKSOURCEOUTPUTCONFIGFILE
The name of the CPack configuration file for source installers that will be generated
by the CPack module. Defaults to CPackSourceConfig.cmake.
CPACK_SOURCE_IGNORE_FILES
Pattern of files in the source tree that won't be packaged when building a source
package. This is a list of patterns, e.g., /CVS/;A\.svn/;\\.swp$;\\.#;/#;.*~;cscope.*
The following variables are specific to the graphical installers built on Windows using the
Nullsoft Installation System.
CPACKPACKAGEINSTALLREGISTRYKEY
Registry key used when installing this project.
CPack
379
CPACKNSISMUIICON
The icon file (.ico) for the generated install program.
CPACKNSISMUIUNIICON
The icon file (.ico) for the generated uninstall program.
CPACKPACKAGEICON
A branding image that will be displayed inside the installer.
CPACKNSISEXTRAINSTALLCOMMANDS
Extra NSIS commands that will be added to the install Section.
CPACKNSISEXTRAUNINSTALLCOMMANDS
Extra NSIS commands that will be added to the uninstall Section.
CPACKNSISCOMPRESSOR
The arguments that will be passed to the NSIS SetCompressor command.
CPACK_NSIS_MODIFY_PATH
If this is set to "ON”, then an extra page will appear in the installer that will allow the
user to choose whether the program directory should be added to the system PATH
variable.
CPACKNSISDISPLAYNAME
The display name string that appears in the Windows Add/Remove Program control
panel
CPACKNSISPACKAGENAME
The title displayed at the top of the installer.
CPACKNSISINSTALLEDICONNAME
A path to the executable that contains the installer icon.
CPACKNSISHELPLINK
URL to a web site providing assistance in installing your application.
CPACKNSISURLINFOABOUT
URL to a web site providing more information about your application.
CPACKNSISCONTACT
Contact information for questions and comments about the installation process.
380
Appendix D
CPACKNSISCREATEICONSEXTRA
Additional NSIS commands for creating start menu shortcuts.
CPACKNSISDELETEICONSEXTRA
Additional NSIS commands to uninstall start menu shortcuts.
The following variable is specific to installers build on Mac OS X using PackageMaker:
CPACKOSXPACKAGEVERSION
The version of Mac OS X that the resulting PackageMaker archive should be
compatible with. Different versions of Mac OS X support different features. For
example, CPack can only build component-based installers for Mac OS X 10.4 or
newer, and can only build installers that download component son-the-fly for Mac
OS X 10.5 or newer. If left blank, this value will be set to the minimum version of
Mac OS X that supports the requested features. Set this variable to some value (e.g.,
10.4) only if you want to guarantee that your installer will work on that version of
Mac OS X, and don’t mind missing extra features available in the installer shipping
with later versions of Mac OS X.
The following variables are for advanced uses of CPack:
CPACKCMAKEGENERATOR
What CMake generator should be used if the project is CMake project. Defaults to
the value of CMAKEGENERATOR; few users will want to change this setting.
CPACKINSTALLCMAKEPROJECTS
List of four values that specify what project to install. The four values are: Build
directory, Project Name, Project Component, Directory. If omitted, CPack will build
an installer that installers everything.
CPACKS Y STEMN AME
System name, defaults to the value of ${CMAKE_SYSTEM_NAME}.
CPACKPACKAGEVERSION
Package full version, used internally. By default, this is built from
CPACKPACKAGEVERSIONMAJOR,
CPACKPACKAGEVERSIONMINOR, and
CPACKPACKAGEVERSIONPATCH.
CPACKTOPLEVELTAG
Directory for the installed files.
CPack
381
CP ACKIN ST ALLCOMM ANDS
Extra commands to install components.
CPACK_INSTALL_DIRECTORIES
Extra directories to install.
Component-specific installation allows users to select specific sets of components to install
during the install process. Installation components are identified by the COMPONENT
argument of CMake's INSTALL commands, and should be further described by the following
CPack commands:
| cpack_add_component - Describes a CPack installation component
l named by the COMPONENT argument to a CMake INSTALL command.
; cpack_add_component(compname
j [DISPLAY_NAME name]
[DESCRIPTION description]
[HIDDEN | REQUIRED | DISABLED ]
I [GROUP group]
j [DEPENDS compl comp2 ... ] j
[INSTALL_TYPES typel type2 ... ]
[DOWNLOADED] j
[ARCHIVE_FILE filename])
The cmakeaddcomponent command describes an installation component, which the user
can opt to install or remove as part of the graphical installation process, compname is the
name of the component, as provided to the COMPONENT argument of one or more CMake
INSTALL commands.
DISPLAY NAME is the displayed name of the component, used in graphical installers to
display the component name. This value can be any string.
DESCRIPTION is an extended description of the component, used in graphical installers to
give the user additional information about the component. Descriptions can span multiple
lines using "\nM as the line separator. Typically, these descriptions should be no more than a
few lines long.
HIDDEN indicates that this component will be hidden in the graphical installer, so that the
user cannot directly change whether it is installed or not.
REQUIRED indicates that this component is required, and therefore will always be installed.
It will be visible in the graphical installer, but it cannot be unselected. (Typically, required
components are shown greyed out).
382
Appendix D
DISABLED indicates that this component should be disabled (unselected) by default. The
user is free to select this component for installation, unless it is also HIDDEN.
DEPENDS lists the components on which this component depends. If this component is
selected, then each of the components listed must also be selected. The dependency
information is encoded within the installer itself, so that users cannot install inconsitent sets of
components.
GROUP names the component group of which this component is a part. If not provided, the
component will be a standalone component, not part of any component group. Component
groups are described with the cpack_add_component_group command, detailed below.
INSTALL_TYPES lists the installation types of which this component is a part. When one of
these installations types is selected, this component will automatically be selected. Installation
types are described with the cpack_add_install_type command, detailed below.
DOWNLOADED indicates that this component should be downloaded on-the-fly by the
installer, rather than packaged in with the installer itself. For more information, see the
cpack_configure_downloads command.
ARCHIVE_FILE provides a name for the archive file created by CPack to be used for
downloaded components. If not supplied, CPack will create a file with some name based on
CPACKPACKAGEFILENAME and the name of the component. See
cpack configure downloads for more information.
cpack_add_component_group - Describes a group of related CPack
installation components.
cpack_add_component_group(groupname
[DISPLAY_NAME name]
[DESCRIPTION description]
[PARENT_GROUP parent]
[EXPANDED]
[BOLD_TITLE])
The cpack_add_component_group describes a group of installation components, which will
be placed together within the listing of options. Typically, component groups allow the user to
select/deselect all of the components within a single group via a single group-level option.
Use component groups to reduce the complexity of installers with many options, groupname
is an arbitrary name used to identify the group in the GROUP argument of the
cpackaddcomponent command, which is used to place a component in a group. The name
of the group must not conflict with the name of any component.
CPack
383
DISPLAY_NAME is the displayed name of the component group, used in graphical installers
to display the component group name. This value can be any string.
DESCRIPTION is an extended description of the component group, used in graphical
installers to give the user additional information about the components within that group.
Descriptions can span multiple lines using "\n" as the line separator. Typically, these
descriptions should be no more than a few lines long.
PARENT_GROUP, if supplied, names the parent group of this group. Parent groups are used
to establish a hierarchy of groups, providing an arbitrary hierarchy of groups.
EXPANDED indicates that, by default, the group should show up as "expanded", so that the
user immediately sees all of the components within the group. Otherwise, the group will
initially show up as a single entry.
BOLD_TITLE indicates that the group title should appear in bold, to call the user's attention
to the group.
cpack_add_install_type - Add a new installation type containing
a set of predefined component selections to the graphical
installer.
cpack_add_install_type(typename [DISPLAY_NAME name])
The cpack_add_install_type command identifies a set of preselected components that
represents a common use case for an application. For example, a "Developer" install type
might include an application along with its header and library files, while an "End user"
install type might just include the application's executable. Each component identifies itself
with one or more install types via the INSTALL_TYPES argument to cpack_add_component.
DISPLAY_NAME is the displayed name of the install type, which will typically show up in a
drop-down box within a graphical installer. This value can be any string.
cpack_configure_downloads - ^Configure CPack to download selected
components on-the-fly as part of the installation process.
cpack_configure_downloads(site
[UPLOAD_DIRECTORY dirname]
[ALL]
[ADD REMOVE|NO_ADD_REMOVE])
The cpack_configure_downloads command configures installation-time downloads of
selected components. For each downloadable component, CPack will create an archive
384
Appendix D
containing the contents of that component, which should be uploaded to the given site. When
the user selects that component for installation, the installer will download and extract the
component in place. This feature is useful for creating small installers that only download the
requested components, saving bandwidth. Additionally, the installers are small enough that
they will be installed as part of the normal installation process, and the "Change" button in
Windows Add/Remove Programs control panel will allow one to add or remove parts of the
application after the original installation. On Windows, the downloaded-components
functionality requires the ZipDLL plug-in for NSIS, available at:
http://nsis.sourceforge.net/ZipDLLjplug-in
On Mac OS X, installers that download components on-the-fly can only be built and installed
on system using Mac OS X 10.5 or later.
The site argument is a URL where the archives for downloadable components will reside,
e.g., http://www.cmake.Org/files/2.6.l/installer/ All of the archives produced by CPack should
be uploaded to that location.
UPLOAD DIRECTORY is the local directory where CPack will create the various archives
for each of the components. The contents of this directory should be uploaded to a location
accessible by the URL given in the site argument. If omitted, CPack will use the directory
CPackUploads inside the CMake binary directory to store the generated archives.
The ALL flag indicates that all components be downloaded. Otherwise, only those
components explicitly marked as DOWNLOADED or that have a specified ARCHIVE FILE
will be downloaded. Additionally, the ALL option implies ADDREMOVE (unless
NOADDREMOVE is specified).
ADD REMOVE indicates that CPack should install a copy of the installer that can be called
from Windows' Add/Remove Programs dialog (via the "Modify" button) to change the set of
installed components. NO ADD REMOVE turns off this behavior. This option is ignored on
Mac OS X.
CPackRPM: The builtin (binary) CPack RPM generator (UNIX only)
CPackRPM may be used to create RPM package using CPack. CPackRPM is a CPack
generator thus it uses the CPACK * variables used by CPack. However CPackRPM has
specific features which are controlled by the specifics CPACK RPM * variables. You'll find a
detailed usage on the wiki:
http://www.cmake.org/Wiki/CMake:CPackPackageGenerators
CheckCCompilerFlag
385
CheckCCompilerFlag: Check whether the C compiler supports a given flag.
CHECK_C_COMPILER_FLAG(<flag> <var>)
<flag> - the compiler flag
<var> - variable to store the result
This internally calls the checkcsourcecompiies macro. See help for
CheckCSourceCompiles for a listing of variables that can modify the build.
CheckCSourceCompiles: Check if the given C source code compiles.
CHECK_C_SOURCE_COMPILES(<code> <var> [FAIL_REGEX <fail-regex>])
<code> - source code to try to compile
<var> - variable to store whether the source code compiled
<fail-regex> - fail if test output matches this regex
The following variables may be set before calling this macro to modify the way the check is
run:
CMAKE_REQUIRED_FLAGS = string of compile command line flags
CMAKE_REQUIRED_DEFINITIONS = list of macros to define
e.g. (-DFOO=bar)
CMAKE_REQUIRED_INCLUDES = list of include directories
CMAKE_REQUIRED_LIBRARIES = list of libraries to link
CheckCSourceRuns: Check if the given C source code compiles and runs.
CHECK_C_SOURCE_RUNS(<code> <var>)
<code> - source code to try to compile
<var> - variable to store the result
(1 for success, empty for failure)
The following variables may be set before calling this macro to modify the way the check is
run:
CMAKE_REQUIRED_FLAGS = string of compile command line flags
CMAKE_REQUIRED_DEFINITIONS = list of macros to define
e.g. (-DFOO=bar)
CMAKE_RE QUIRE D_INC LU DE S = list of include directories
CMAKE REQUIRED LIBRARIES = list of libraries to link
386
Appendix D
CheckCXXCompilerFlag: Check whether the CXX compiler supports a given flag.
CHECK_CXX_COMPILER_FLAG(<flag> <var>)
<flag> - the compiler flag
<var> - variable to store the result
This internally calls the checkcxxsourcecompiles macro. See help for
CheckCXXSourceCompiles for a listing of variables that can modify the build.
CheckCXXSourceCompiles: Check if the given C++ source code compiles.
CHECK_CXX_SOURCE_COMPILES(<code> <var>
[FAIL_REGEX <fail-regex>])
<code> - source code to try to compile
<var> - variable to store whether the source code compiled
<fail-regex> - fail if test output matches this regex
The following variables may be set before calling this macro to modify the way the check is
run:
CMAKE_REQUIRED_FLAGS = string of compile command line flags
CMAKE_REQUIRED_DEFINITIONS = list of macros to define
e.g. (-DFOO=bar)
CMAKE_REQUIRED_INCLUDES = list of include directories
CMAKE_REQUIRED_LIBRARIES = list of libraries to link
CheckCXXSourceRuns: Check if the given C++ source code compiles and runs.
CHECK_CXX_SOURCE_RUNS(<code> <var>)
<code> - source code to try to compile
<var> - variable to store the result
(1 for success, empty for failure)
387
The following variables may be set before calling this macro to modify the way the check is
run:
CMAKE_REQUIRED_FLAGS = string of compile command line flags
CMAKE_REQUIRED_DEFINITIONS = list of macros to define
e.g. (-DFOO=bar)
CMAKE_REQUIRED__INCLUDES = list of include directories
CMAKE_REQUIRED_LIBRARIES = list of libraries to link
CheckFortranFunctionExists: macro which checks if the Fortran function exists
CHECK_FORTRAN_FUNCTION_EXISTS(FUNCTION VARIABLE)
FUNCTION - the name of the Fortran function
VARIABLE - variable to store the result
The following variables may be set before calling this macro to modify the way the check is
run:
CMAKE_REQUIRED_LIBRARIES = list of libraries to link
ChecklncludeFile: macro which checks the include file exists.
CHECK__INCLUDE_FILE (INCLUDE VARIABLE)
INCLUDE - name of include file
VARIABLE - variable to return result
an optional third argument is the CFlags to add to the compile line or you can use
CMAKEREQUIREDFLAGS
The following variables may be set before calling this macro to modify the way the check is
run:
CMAKE_REQUIRED_FLAGS = string of compile command line flags
CMAKE_REQUIRED_DEFINITIONS = list of macros to define
e.g. (-DFOO=bar)
CMAKE REQUIRED INCLUDES = list of include directories
388
Appendix D
ChecklncludeFileCXX: Check if the include file exists.
CHECK_INCLUDE_FILE_CXX(INCLUDE VARIABLE)
INCLUDE - name of include file
VARIABLE - variable to return result
An optional third argument is the CFlags to add to the compile line or you can use
CMAKE REQUIRED FLAGS. The following variables may be set before calling this macro
to modify the way the check is run:
CMAKE_REQUIRED_FLAGS = string of compile command line flags
CMAKE_REQUIRED_DEFINITIONS = list of macros to define
e.g. (-DFOO=bar)
CMAKE_REQUIRED INCLUDES = list of include directories
ChecklncludeFiles: Check if the files can be included
CHECK_INCLUDE_FILES(INCLUDE VARIABLE)
INCLUDE - list of files to include
VARIABLE - variable to return result
The following variables may be set before calling this macro to modify the way the check is
run:
CMAKE_REQUIRED_FLAGS = string of compile command line flags
CMAKE_REQUIRED_DEFINITIONS = list of macros to define
e.g. (-DFOO=bar)
CMAKE_REQUIRED_INCLUDES = list of include directories
CheckLibraryExists: Check if the library exists with the specified function.
CHECK_LIBRARY_EXISTS (LIBRARY FUNCTION LOCATION VARIABLE)
LIBRARY - the name of the library you are looking for
FUNCTION - the name of the function
LOCATION - location where the library should be found
VARIABLE - variable to store the result
389
The following variables may be set before calling this macro to modify the way the check is
run:
I CMAKE_REQUIRED_FLAGS = string of compile command line flags
| CMAKE_REQUIRED_DEFINITIONS = list of macros to define
j e.g. (-DFOO=bar)
j CMAKE_REQUIRED_LIBRARIES = list of libraries to link
Checks true tHasMember: Check if the given struct or class has the specified member
variable
CHECK_STRUCT_HAS_MEMBER (STRUCT MEMBER HEADER VARIABLE)
STRUCT - the name of the struct or class you are interested in
MEMBER - the member which existence you want to check
HEADER - the header(s) where the prototype should be declared
VARIABLE - variable to store the result
The following variables may be set before calling this macro to modify the way the check is
run:
CMAKE_REQUIRED_FLAGS = string of compile command line flags
CMAKE_REQUIRED_DEFINITIONS = list of macros to define
e.g. (-DFOO=bar)
CMAKE_REQUIRED_LIBRARIES = list of libraries to link
Example:
i CHECK_STRUCT_HAS_MEMBER("struct timeval" tv_sec sys/select.h
HAVE_TIMEVAL_TV_S EC)
CheckSymbolExists: Check if the symbol exists in include files
j CHECK_SYMBOL_EXISTS(SYMBOL FILES VARIABLE)
i SYMBOL - symbol
; FILES - include files to check
VARIABLE - variable to return result
390
Appendix D
The following variables may be set before calling this macro to modify the way the check is
run:
CMAKE_REQUIRED_FLAGS = string of compile command line flags
CMAKE_REQUIRED_DEFINITIONS = list of macros to define
e.g. (-DFOO=bar)
CMAKE_REQUIRED_INCLUDES = list of include directories
CMAKE REQUIRED LIBRARIES = list of libraries to link
CheckTypeSize: Check sizeof a type
CHECK_TYPE_SIZE(TYPE VARIABLE [BUILTIN_TYPES_ONLY])
Check if the type exists and determine size of type, if the type exists, the size will be stored to
the variable. This also calls check include file for sys/types.h stdint.h and stddef.h, setting
HAVE_SYST YPESH, HAVE STDINT H, and HAVE STDDEF H. This is because
many types are stored in these include files.
VARIABLE - variable to store size if the type exists.
HAVE_${VARIABLE} - does the variable exists or not
BUILTIN_TYPES_ONLY - The third argument is optional and if
it is set to the string BUILTIN_TYPES_ONLY
this macro will not check for any header
files.
The following variables may be set before calling this macro to modify the way the check is
run:
CMAKE_REQUIRED_FLAGS = string of compile command line flags
CMAKE_REQUIRED_DEFINITIONS = list of macros to define
e.g. (-DFOO=bar)
CMAKE_REQUIRED_INCLUDES = list of include directories
CMAKE REQUIRED LIBRARIES = list of libraries to link
CheckVariableExists
391
CheckVariableExists: Check if the variable exists.
CHECK_VARIABLE_EXISTS(VAR VARIABLE)
VAR - the name of the variable
VARIABLE - variable to store the result
This macro is only for C variables. The following variables may be set before calling this
macro to modify the way the check is run:
CMAKE_REQUIRED_FLAGS = string of compile command line flags
CMAKE_REQUIRED_DEFINITIONS = list of macros to define
e.g. (-DFOO=bar)
CMAKE_REQUIRED LIBRARIES = list of libraries to link
ExternalPro ject: Create custom targets to build projects in external trees
The 'ExtemalProject Add' function creates a custom target to drive download, update/patch,
configure, build, install and test steps of an external project:
ExternalProj ect_Add(<name>
[DEPENDS projects...] #
[PREFIX dir] #
[LIST_SEPARATOR sep] #
[TMP_DIR dir] #
[STAMP_DIR dir] #
# Name for custom target
Targets on which the project depends
Root dir for entire project
Sep to be replaced by ; in cmd lines
Directory to store temporary files
Directory to store step timestamps
#--Download step
[DOWNLOAD_DIR dir] #
[DOWNLOAD_COMMAND cmd...]
[CVS_REPOSITORY cvsroot]
[CVS_MODULE mod]
[CVS_TAG tag]
[SVN_REPOSITORY url]
[SVN_REVISION rev]
[URL /.../src.tgz]
Directory to store downloaded files
# Command to download source tree
# CVSROOT of CVS repository
# Module to checkout from CVS repo
# Tag to checkout from CVS repo
# URL of Subversion repo
# Revision to checkout from SVN repo
# Full path or URL of source
#--Update/Patch step
[UPDATE_COMMAND cmd...] # Source work-tree update command
[PATCH_COMMAND cmd...] # Command to patch downloaded source
#--Configure step-
[SOURCE DIR dir]
# Source dir to be used for build
392
Appendix D
[CONFIGURE_COMMAND cmd...] # Build tree configuration command
[CMAKE_COMMAND /.../cmake] # Specify alternative cmake exec
[CMAKE_GENERATOR gen] # Specify generator for native build
[CMAKE_ARGS args...] # Arguments to CMake command line
#--Build step
[BINARY_DIR dir]
[BUILD_COMMAND cmd...]
[BUILD_IN_SOURCE 1]
#--Install step
[INSTALL_DIR dir] # Installation prefix
[INSTALL_COMMAND cmd...] # Command to drive install after
build
# Specify build dir location
# Command to drive the native build
# Use source dir for build dir
#--Test step
[TEST_BEFORE_INSTALL 1] #
[TEST_AFTER_INSTALL 1] #
[TEST_COMMAND cmd...] #
)
Add test step before install step
Add test step after install step
Command to drive test
The *_DIR options specify directories for the project, with default directories computed as
follows. If the PREFIX option is given to ExtemalProject_Add() or the EP PREFIX directory
property is set, then an external project is built and installed under the specified prefix:
TMP_DIR = <prefix>/tmp
STAMP_DIR = <prefix>/src/<name>-stamp
DOWNLOAD_DIR = <prefix>/src
SOURCE_DIR = <prefix>/src/<name>
BINARY_DIR = <prefix>/src/<name>-build
INSTALL_DIR = <prefix>
Otherwise, if the EP BASE directory property is set then components of an external project
are stored under the specified base:
TMP_DIR = <base>/tmp/<name>
STAMP_DIR = <base>/Stamp/<name>
DOWNLOAD_DIR = <base>/Download/<name>
SOURCE_DIR = <base>/Source/<name>
BINARY_DIR = <base>/Build/<name>
INSTALL DIR = <base>/Install/<name>
FeatureSummary
393
If no PREFIX, EPPREFIX, or EP BASE is specified then the default is to set PREFIX to
M<name>-prefixM. Relative paths are interpreted with respect to the build directory
corresponding to the source directory in which ExtemalProject Add is invoked.
If SOURCE DIR is explicitly set to an existing directory the project will be built from it.
Otherwise a download step must be specified using one of the DOWNLOADCOMMAND,
CVS *, SVN_*, or URL options. The URL option may refer locally to a directory or source
tarball, or refer to a remote tarball (e.g. http://.../src.tgz).
The 'ExternalProj ectAddStep' function adds a custom step to an external project:
ExternalProject_Add_Step(
<name> <step> #
[COMMAND cmd...] #
[COMMENT "text..."] #
[DEPENDEES steps...] #
[DEPENDERS steps...] #
[DEPENDS files...] #
[ALWAYS 1] #
[WORKING_DIRECTORY dir] #
)
Names of project and custom step
Command line invoked by this step
Text printed when step executes
Steps on which this step depends
Steps that depend on this step
Files on which this step depends
No stamp file, step always runs
Working directory for command
The command line, comment, and working directory of every standard and custom step is
processed to replace tokens <SOURCE_DIR>, <BINARY_DIR>, <INSTALL_DIR>, and
<TMP_DIR> with corresponding property values.
The 'ExternalProj ect_Get_Property' function retrieves external project target properties:
ExternalProject_Get_Property(<name> [propl [prop2 [...]]])
It stores property values in variables of the same name. Property names correspond to the
keyword argument names of 'ExternalProject Add'.
FeatureSummary: Macros for generating a summary of enabled/disabled features
PRINT_ENABLED_FEATURES() - Print a summary of all enabled features. By default all
successful! FIND_PACKAGE() calls will appear here, except the ones which used the QUIET
keyword. Additional features can be added by appending an entry to the global
ENABLED FEATURES property. If SET_FEATURE_INFO() is used for that feature, the
output will be much more informative.
394
Appendix D
PRINTJDISABLED_FEATURES() - Same as PRINT_ENABLED_FEATURES(), but for
disabled features. It can be extended the same way by adding to the global property
DISABLEDFEATURES.
SET_FEATURE_INFO(NAME DESCRIPTION [URL [COMMENT] ] ) - Use this macro to
set up information about the named feature, which will then be displayed by
PRINT_ENABLED/DISABLED_FEATURES(). For Example:
SET_FEATURE_INFO(LibXml2 "XML processing library."
"http://xmlsoft.org/")
FindALSA: Find alsa
FindASPELL: Try to find ASPELL
FindAVlFile: Locate AVIFILE library and include paths
FindBlSON: Find bison executable and provides macros to generate custom build rules
FindBLAS: Find BLAS library
FindBZip2: Try to find BZip2
FindBoost: Try to find Boost include dirs and libraries
Usage of this module is as follows. Using Header-Only libraries from within Boost:
find_package( Boost 1.36.0 )
if(Boost_FOUND)
include_directories ($ {Boost__INCLUDE_DIRS })
add_executable(foo foo.cc)
endif ()
Using actual libraries from within Boost:
set(Boost_USE_STATIC_LIBS ON)
set(Boost_USE_MULTITHREADED ON)
find_package( Boost 1.36.0 COMPONENTS date_time filesystem
system ... )
FindBoost
395
if (Boost_FOUND)
include_directories(${Boost_INCLUDE_DIRS})
add_executable(foo foo.cc)
target_link_libraries(foo ${Boost_LIBRARIES})
endif()
The components list needs to contain actual names of boost libraries only, such as "datetime"
for "libboostdatetime". If you're using parts of Boost that contain header files only (e.g.
foreach) you do not need to specify COMPONENTS.
You should provide a minimum version number that should be used. If you provide this
version number and specify the REQUIRED attribute, this module will fail if it can't find the
specified or a later version. If you specify a version number this is automatically put into the
considered list of version numbers and thus doesn't need to be specified in the
BoostADDITIONALVERSIONS variable (see below).
NOTE for Visual Studio Users: Automatic linking is used on MSVC & Borland compilers by
default when including things in Boost. It's important to note that setting
BoostUSESTATICLIBS to OFF is NOT enough to get you dynamic linking, should you
need this feature. Automatic linking typically uses static libraries with a few exceptions
(Boost.Python is one).
Please see the section below near Boost LIB DIAGNOSTIC DEFINITIONS for more
details. Adding a TARGET_LINK_LIBRARIES() as shown in the example above appears to
cause VS to link dynamically if Boost USE STATIC LIBS gets set to OFF. It is suggested
you avoid automatic linking since it will make your application less portable.
BoostADDITIONALVERSIONS
OK, so the Boost ADDITIONAL VERSIONS variable can be used to specify a list of boost
version numbers that should be taken into account when searching for Boost. Unfortunately
boost puts the version number into the actual filename for the libraries, so this variable will
certainly be needed in the future when new Boost versions are released.
Currently this module searches for the following version numbers: 1.33, 1.33.0, 1.33.1, 1.34,
1.34.0, 1.34.1, 1.35, 1.35.0, 1.35.1, 1.36, 1.36.0, 1.36.1, 1.37, 1.37.0, 1.38, 1.38.0, 1.39,
1.39.0, 1.40, 1.40.0
NOTE: If you add a new major 1.x version in Boost ADDITIONAL VERSIONS you should
add both 1.x and l.x.O as shown above. Official Boost include directories omit the 3rd version
number from include paths if it is 0 although not all binary Boost releases do so.
set(Boost ADDITIONAL VERSIONS "0.99" "0.99.0" "1.78" "1.78.0")
396
Appendix D
Variables used by this module, they can change the default behaviour and need to be set
before calling find_package:
BoostUSEMULTITHREADED
Can be set to OFF to use the non-multithreaded boost libraries. If not specified,
defaults to ON.
B oostU SEST ATICLIB S
Can be set to ON to force the use of the static boost libraries. Defaults to OFF.
Further documentation on other variables used by this module which you may want to set can
be found in the module itself.
FindBullet: Try to find the Bullet physics engine
This module defines the following variables
BULLET_FOUND - Was bullet found
BULLET_INCLUDE_DIRS - the Bullet include directories
BULLET_LIBRARIES - Link to this, by default it includes
all bullet components (Dynamics,
Collision, LinearMath, & SoftBody)
This module accepts the following variables:
BULLET_ROOT - Can be set to bullet install path or Windows build
path
FindCABLE: Find CABLE
FindCUDA: Tools for building CUDA C files: libraries and build dependencies.
This script locates the NVIDIA CUDA C tools. It should work on linux, windows, and mac
and should be reasonably up to date with CUDA C releases. This script makes use of the
standard find_package arguments of <VERSION>, REQUIRED and QUIET.
CUDA FOUND will report if an acceptable version of CUDA was found.
FindCURL: Find curl
FindCVS:
FindCoin3D: Find Coin3D (Open Inventor)
FindCups: Try to find the Cups printing system
FindCurses: Find the curses include file and library
FindCxxTest
397
FindCxxTest: Find CxxTest
Find the CxxTest suite and declare a helper macro for creating unit tests and integrating them
with CTest. For more details on CxxTest see http://cxxtest.tigris.org
INPUT Variables
CXXTEST_USE_PYTHON
If true, the CXXTEST_ADD_TEST macro will use
the Python test generator instead of Perl.
OUTPUT Variables
CXXTEST_FOUND
True if the CxxTest framework was found
CXXTEST_INCLUDE_DIR
Where to find the CxxTest include directory
CXXTEST_PERL_TESTGEN_EXECUTABLE
The perl-based test generator.
CXXTEST_PYTHON_TESTGEN_EXECUTABLE
The python-based test generator.
MACROS for optional use by CMake users:
CXXTEST_ADD_TEST(<test_name> <gen_source_file>
<input_files_to_testgen...>)
Creates a CxxTest runner and adds it to the CTest testing suite
Parameters:
test_name The name of the test
gen_source_file The generated source filename to be
generated by CxxTest
input_files_to_testgen The list of header files containing
the CxxTest::TestSuite’s to be
included in this runner
398
Appendix D
Sample usage:
find_package(CxxTest)
if (CXXTEST_FOUND)
include_directories(${CXXTEST_INCLUDE_DIR})
enable_testing()
CXXTEST_ADD_TEST (unittest_foo foo_test.cc ■
${CMAKE_CURRENT_SOURCE_DIR}/foo_test.h)
target_link_libraries(unittest_foo foo) # as needed
endif()
This will (if CxxTest is found):
1. Invoke the testgen executable to autogenerate foo_test.cc in the binary tree from
"foo test.h" in the current source directory.
2. Create an executable and test called unittest foo.
FindCygwin: this module looks for Cygwin
FindDCMTK: find DCMTK libraries
FindDart: Find DART
FindDeviL: This module locates the developer’s image library.
FindDoxygen: This module looks for Doxygen and the path to Graphviz’s dot
FindEXPAT: Find the native EXPAT headers and libraries.
FindFLEX: Find flex executable and provides a macro to generate custom build rules
FindFLTK: Find the native FLTK includes and library
FindFLTK2: Find the native FLTK2 includes and library
FindFreetype: Locate FreeType library
FindGCCXML: Find the GCC-XML front-end executable.
FindGDAL: Locate gdal
FindGIF:
FindGLUT: try to find glut library and include files
FindGTK: try to find GTK (and glib) and GTKGLArea
FindGTK2: FindGTK2.cmake
FindGTest: Locate the Google C++ Testing Framework.
FindGettext: Find GNU gettext tools
FindGnuTLS: Try to find the GNU Transport Layer Security library (gnutls)
FindGnuplot
399
FindGnuplot: this module looks for gnuplot
FindHDF5: Find HDF5, a library for reading and writing self describing array data.
This module invokes the HDF5 wrapper compiler that should be installed alongside HDF5.
Depending upon the HDF5 Configuration, the wrapper compiler is called either h5cc or
h5pcc. If this succeeds, the module will then call the compiler with the -show argument to see
what flags are used when compiling an HDF5 client application.
FindHSPELL: Try to find HSPELL
FindHTMLHelp: This module looks for Microsoft HTML Help Compiler
FindlTK: Find an ITK installation or build tree.
FindlmageMagick: Find the ImageMagick binary suite.
FindJNl: Find JNI java libraries.
FindJPEG: Find the native JPEG includes and library.
FindJasper: Try to find the Jasper JPEG2000 library
Find Java: This module finds if Java is installed and determines where the include files and
libraries are.
FindKDE3: Find the KDE3 include and library dirs, KDE preprocessors and define some
macros.
FindKDE4: Find KDE4 and provide all necessary variables and macros to compile software
for it.
FindLAPACK: Find the LAPACK library
FindLATEX: This module finds if Latex is installed and determines where the executables are.
FindLibXml2: Try to find LibXml2
FindLibXslt: Try to find LibXslt
FindLua50: Find Lua version 5.0
FindLua51: Find Lua version 5.1
FindMFC: Find MFC on Windows
FindMPEG: Find the native MPEG includes and library
FindMPEG2: Find the native MPEG2 includes and library
FindMPl: Message Passing Interface (MPI) module.
FindMatlab: this module looks for Matlab
FindMotif: Try to find Motif (or lesstif)
FindOpenAL:
FindOpenGL: Try to find OpenGL
400
Appendix D
FindOpenMP: Finds OpenMP support
FindOpenSSL: Try to find the OpenSSL encryption library
FindOpenSceneGraph: Comprehensive module to find Open Seen eGraph and all of its
various parts.
FindOpenThreads: Find the OpenThreads, C++ based threading library.
FindPHP4: Find PHP4
FindPNG: Find the native PNG includes and library
FindPackageHandleStandardArgs:
FIND_PACKAGE_HANDLE_S TANDARD_ARG S(NAME
(DEFAULT_MSG|"Custom failure message") VAR1 ... )
This macro is intended to be used in FindXXX.cmake modules files. It handles the
REQUIRED and QUIET argument to FIND_PACKAGE() and it also sets the
<UPPERCASED_NAME>_FOUND variable. The package is found if all variables listed are
TRUE. For example:
FIND_PACKAGE_HANDLE_STANDARD_ARGS (LibXml2 DEFAULT_MSG
LIBXML 2_LIBRARIE S
LIBXML2 INCLUDE DIR)
LibXml2 is considered to be found, if both LIBXML2LIBRARIES and
LIBXML2 INCLUDE DIR are valid. Then also LIBXML2_FOUND is set to TRUE. If it is
not found and REQUIRED was used, it fails with FATAL ERROR, independent whether
QUIET was used or not. If it is found, the location is reported using the VAR1 argument, so
here a message "Found LibXml2: /usr/lib/libxml2.so" will be printed out. If the second
argument is DEFAULT MSG, the message in the failure case will be "Could NOT find
LibXml2", if you don't like this message you can specify your own custom failure message
there.
FindPackageMes sage:
FIND_PACKAGE_MESSAGE(<name> "message for user"
"find result details")
This macro is intended to be used in FindYYY.cmake modules files. It will print a message
once for each unique find result. This is useful for telling the user where a package was found.
The first argument specifies the name (YYY) of the package. The second argument specifies
the message to display. The third argument lists details about the find result so that if they
FindPerl
401
change the message will be displayed again. The macro also obeys the QUIET argument to
the fmd_package command. For example:
if(Xll_FOUND)
FIND_PACKAGE_MESSAGE(XI1 "Found Xll: ${X11_X11_LIB}"
"[${XI1_X11_LIB} ][${XI1_INCLUDE_DIR}]")
else ()
endif ()
FindPerl: Find perl
FindPerlLibs: Find Perl libraries
FindPhysFS: Locate the PhysFS library
FindPike: This module finds PIKE and determines where the include files and libraries are.
FindPkgConfig: a pkg-config module for CMake
Usage:
pkg_check_modules(<PREFIX> [REQUIRED] <MODULE> [<MODULE>]*)
checks for all the given modules
pkg_search_module(<PREFIX> [REQUIRED] <MODULE> [<MODULE>]*)
checks for given modules and uses the first working one
When the 'REQUIRED' argument was set, macros will fail with an error when module(s)
could not be found
It sets the following variables:
PKG_CONFIG_FOUND ... true if pkg-config works on the system
PKG_CONFIG_EXECUTABLE ... pathname of the pkg-config program
<PREFIX>_FOUND ... set to 1 if module (s) exist
For the following variables two sets of values exist; first one is the common one and has the
given PREFIX. The second set contains flags which are given out when pkgconfig was called
with the '—static' option.
402
Appendix D
<XPREFIX>_LIBRARIES
<XPREFIX>_LIBRARY_DIRS
<XPREFIX>_LDFLAGS
<XPREFIX>_LDFLAGS_OTHER
<XPREFIX>_INCLUDE_DIRS
<XPREFIX>_CFLAGS
<XPREFIX> CFLAGS OTHER
only the libraries (w/o the '-1')
the paths of the libraries
(w/o the '-L')
all required linker flags
all other linker flags
the '-I' preprocessor flags
(w/o the ' -I')
all required cflags
the other compiler flags
<XPREFIX> = <PREFIX> for the common case
<XPREFIX> = <PREFIX>_STATIC for static linking
There are some special variables whose prefix depends on the count of given modules. When
there is only one module, <PREFIX> stays unchanged. When there are multiple modules, the
prefix will be changed to <PREFIX>_<MODNAME>:
<XPREFIX>_VERSION . .. version of the module
<XPREFIX>_PREFIX ... prefix-directory of the module
<XPREFIX>_INCLUDEDIR ... include-dir of the module
<XPREFIX>_LIBDIR ... lib-dir of the module
<XPREFIX> = <PREFIX> when |MODULES| == 1, else
<XPREFIX> = <PREFIX> <MODNAME>
A <MODULE> parameter can have the following formats:
{MODNAME} ... matches any version
{MODNAME}>={VERSION} ... at least version <VERSION> is required
{MODNAME}={VERSION} ... exactly version <VERSION> is required
{MODNAME}<={VERSION} ... modules must not be newer than
<VERSION>
FindProducer
403
Examples
pkg_check_modules (GLIB2 glib-2.0)
pkg_check_modules (GLIB2 glib-2.0>=2.10)
requires at least version 2.10 of glib2 and defines e.g.
GLIB2_VERSION=2.10.3
pkg_check_modules (FOO glib-2.0>=2.10 gtk+-2.0)
requires both glib2 and gtk2, and defines e.g.
FOO_glib-2.0_VERSION=2.10.3
FOO_gtk+-2.0_VERSION=2.8.20
pkg_check_modules (XRENDER REQUIRED xrender)
defines e.g.:
XRENDER_LIBRARIES=Xrender;XI1
XRENDER_STATIC_LIBRARIES=Xrender;XI1;pthread;Xau;Xdmcp
pkg_search_module (BAR libxml-2.0 libxml2 libxml>=2)
FindProducer: Find the producer library
FindProtobuf: Locate and configure the Google Protocol Buffers library.
FindPythonlnterp: Find python interpreter
FindPythonLibs: Find python libraries
FindQt: Searches for all installed versions of QT.
FindQt3: Locate Qt 3 include paths and libraries
FindQt4: This module can be used to find Qt4.
FindQuickTime: Locate QuickTime library and includes.
FindRTl: Try to find M&S HLA RTI libraries and includes.
FindRuby: This module finds Ruby and determines where the include files and libraries are.
FindSDL: Locate the SDL Library and includes.
FindSDL__image: Locate SDLimage library.
FindSDL_mixer: Locate SDLmixer library.
FindSDL_net: Locate SDL net library.
FindSDL_sound: Locates the SDL sound library
FindSDL_ttf: Locate SDL ttf library.
FindSWiG: Find the SWIG wrapper generator.
404
Appendix D
FindSelfPackers:Find upx
FindSquish: This module can be used to find Squish.
FindSubversion: Extract information from a subversion client
The module defines the following variables:
Subversion_SVN_EXECUTABLE - path to svn command line client
Subversion_VERSION_SVN - version of svn command line client
Subversion FOUND - true if the command line client was found
If the command line client executable is found the macro
Subversion_WC__INFO (<dir> <var-prefix>)
is defined to extract information of a subversion working copy at a given location. The macro
defines the following variables:
<var-prefix>_WC_URL - url of the repository (at <dir>)
<var-prefix>_WC_ROOT - root url of the repository
<var-prefix>_WC_REVISION - current revision
<var-prefix>_WC_LAST__CHANGED_AUTHOR - author of last commit
<var-prefix>_WC_LAST__CHANGED_DATE - date of last commit
<var-prefix>_WC_LAST__CHANGED_REV - revision of last commit
<var-prefix>_WC_LAST__CHANGED_LOG - last log of base revision
<var-prefix>_WC__INFO - output of command 'svn info <dir>’
Example usage:
find_package(Subversion)
if (Subversion_FOUND)
Subversion_WC_INFO(${PROJECT_SOURCE_DIR} Project)
message ("Current revision is ${Project_WC_REVISION}")
Subver s i on_WC_LOG ($ { PRO JECT__SOURCE_DIR} Pro j ect)
message ("Last changed log is ${Project_LAST_CHANGED_LOG}")
endif()
FindTCL: This module finds if Tel is installed and locates the include files and libraries.
FindTlFF: Find the native TIFF includes and library.
FindTclStub: This module finds Tel stub libraries.
FindTcIsh
405
FindTcIsh: Find tclsh
FindThreads: This module determines the thread library of the system.
The following variables are set
CMAKE_THREAD_LIBS_INIT - the thread library
CMAKE_USE_SPROC_INIT - are we using sproc?
CMAKE_USE_WIN32_THREADS_INIT - using WIN32 threads?
CMAKE_USE_PTHREADS_INIT - are we using pthreads
CMAKE_HP_PTHREADS_INIT - are we using hp pthreads
FindUnixCommands: Find UNIX commands from cygwin
FindVTK: Find a VTK installation or build tree.
FindWget: Find wget
FindWish: Find wish installation
FindXll: Find XI1 installation
FindXMLRPC: Find the native XMLRPC headers and libraries.
FindZLlB: Find the native ZLIB includes and library
Findosg*: Find a specific part of open scene graph. See the FindOpenSceneGraph module as
well.
FindwxWidgets: Find a wxWidgets (a.k.a., wxWindows) installation.
FortranClnterf ace: Fortran/C Interface Detection
This module automatically detects the API by which C and Fortran languages interact.
Variables indicate if the mangling is found:
FortranClnterface_GLOBAL_FOUND
= Global subroutines and functions
FortranClnterface_MODULE_FOUND
= Module subroutines and functions
(declared by "MODULE PROCEDURE")
A function is provided to generate a C header file containing macros to mangle symbol
names:
FortranClnterface_HEADER(<file>
[MACRO_NAMESPACE <macro-ns>]
[SYMBOL_NAMESPACE <ns>]
[SYMBOLS [<module>:]<function> ...])
406
Appendix D
It generates in <file> definitions of the following macros:
#define FortranCInterface_GLOBAL (name,NAME) ...
#define FortranCInterface_GLOBAL_(name,NAME) ...
#define FortranCInterface_MODULE (mod,name, MOD,NAME) ...
#define FortranCInterface_MODULE_(mod,name, MOD,NAME) ...
These macros mangle four categories of Fortran symbols, respectively:
- Global symbols without : call mysub()
- Global symbols with : call my_sub()
- Module symbols without : use mymod; call mysub()
- Module symbols with : use mymod; call my_sub()
If mangling for a category is not known, its macro is left undefined. All macros require raw
names in both lower case and upper case. The MACRO_NAMESPACE option replaces the
default "FortranCInterface" prefix with a given namespace "<macro-ns>". The SYMBOLS
option lists symbols to mangle automatically with C preprocessor definitions:
<function> ==> #define <ns><function> ...
<module>:<function> ==> #define <ns><module> <function> ...
If the mangling for some symbol is not known then no preprocessor definition is created, and
a warning is displayed. The SYMBOL NAMESPACE option prefixes all preprocessor
definitions generated by the SYMBOLS option with a given namespace "<ns>". Example
usage:
include(FortranCInterface)
FortranCInterface_HEADER(FC.h MACRO_NAMESPACE "FC_")
This creates a MFC.hM header that defines mangling macros FC_GLOBAL(),
FC_GLOBAL_(), FCMODULEQ, and FC_MODULE_(). Another example:
include(FortranCInterface)
FortranCInterface_HEADER(FCMangle.h
MACRO_NAMESPACE "FC_M
SYMBOL_NAMESPACE MFC_M
SYMBOLS mysub mymod:my_sub)
GetPrerequisites
407
This creates a "FC.h" header that defines the same FC_*() mangling macros as the previous
example plus preprocessor symbols FC mysub and FCmymodmysub. Another function is
provided to verify that the Fortran and C/C++ compilers work together:
FortranCInterface_VERIFY([CXX] [QUIET])
It tests whether a simple test executable using Fortran and C (and C++ when the CXX option
is given) compiles and links successfully. The result is stored in the cache entry
FortranCInterfaceVERIFIEDC (or FortranCInterface VERIFIED CXX if CXX is given)
as a boolean. If the check fails and QUIET is not given the function terminates with a
FATAL ERROR message describing the problem. The purpose of this check is to stop a
build early for incompatible compiler combinations.
FortranCIn ter face is aware of possible GLOBAL and MODULE manglings for many Fortran
compilers, but it also provides an interface to specify new possible manglings. Set the
variables
FortranCInterface_GLOBAL_SYMBOLS
FortranCInterface MODULE SYMBOLS
before including FortranCInterface to specify manglings of the symbols "MySub", "My_Sub",
MMyModule:MySubM, and "My_Module:My_Sub". For example, the code:
set(FortranCInterface_GLOBAL_SYMBOLS mysub_ my_sub MYSUB_)
set(FortranCInterface_MODULE_SYMBOLS
mymodule_MOD_mysub my_module_MOD_my_sub)
include(FortranCInterface)
tells FortranCInterface to try given GLOBAL and MODULE manglings. (The carets point at
raw symbol names for clarity in this example but are not needed.)
GetPrerequisites: See section 4.11
InstallRequiredSystemLibraries: See section 4.11
By including this file, all files in the CMAKEINSTALLDEBUGLIBRARIES, will be
installed with INSTALL_PROGRAMS into /bin for WIN32 and /lib for non-win32. If
CMAKE SKIP INSTALL RULES is set to TRUE before including this file, then the
INSTALL command is not called. The use can use the variable
CMAKEINSTALLSYSTEMRUNTIMELIBS to use a custom install command and
install them into any directory they want. If it is the MS VC compiler, then the microsoft run
time libraries will be found add automatically added to the
CMAKEINSTALLDEBUGLIBRARIES, and installed. If
408
Appendix D
CMAKE INSTALL DEBUG LIBRARIES is set and it is the MSVC compiler, then the
debug libraries are installed when available. If CMAKE INSTALL MFC LIBRARIES is set
then the MFC run time libraries are installed as well as the CRT run time libraries.
SelectLibraryConfigurations:
select_library_configurations ( basename )
This macro takes a library base name as an argument, and will choose good values for
basenameLIBRARY, basenameLIBRARIES, basenameLIBRARYDEBUG, and
basenameLIBRARYRELEASE depending on what has been found and set. If only
basenameLIBRARYRELEASE is defined, basenameLIBRARY,
basename LIBRARY DEBUG, and basename LIBRARY RELEASE will be set to the
release value. If only basename LIBRARY DEBUG is defined, then basename LIBRARY,
basename LIBRARY DEBUG and basename LIBRARY RELEASE will take the debug
value.
If the generator supports configuration types, then basenameLIBRARY and
basename LIBRARIES will be set with debug and optimized flags specifying the library to
be used for the given configuration. If no build type has been set or the generator in use does
not support configuration types, then basename LIBRARY and basename LIBRARIES will
take only the release values.
TestBigEndian: Define macro to determine endian type
TEST_BIG_ENDIAN(VARIABLE)
VARIABLE - variable to store the result to
TestCXXAcceptsFIag: Test CXX compiler for a flag
Check if the CXX compiler accepts a flag
Macro CHECK_CXX_ACCEPTS_FLAG(FLAGS VARIABLE) -
checks if the flag is accepted
FLAGS - the flags to try
VARIABLE - variable to store the result
TestForANSlForScope: Check for ANSI for scope support
CMAKE NO ANSI FOR SCOPE - holds result
TestForANSIStreamHeaders
409
TestForANSIStreamHeaders: Test for compiler support of ANSI stream headers
Check if we they have the standard ansi stream files (without the .h)
CMAKE_NO_ANSI_STREAM_HEADERS - defined by the results
TestForSSTREAM:
CMAKE_NO_ANSI_STRING_STREAM - defined by the results
TestForSTDNamespace: Test for std:: namespace support
check if the compiler supports std:: on stl classes
CMAKE_NO_STD_NAMESPACE - defined by the results
UseEcos: This module defines variables and macros required to build eCos applications.
UseQt4: Use Module for QT4
Sets up C and C++ to use Qt 4. It is assumed that FindQt.cmake has already been loaded. See
FindQt.cmake for information on how to load Qt 4 into your CMake project.
UseSWiG: SWIG module for CMake
Use_wxWindows:
UsewxWidgets: Convenience include for using wxWidgets library
Appendix E
Appendix E - Properties
This is the documentation for the properties supported by CMake. Properties can have
different scopes. They can be assigned to a source file, a directory, a target, test, etc. By
modifying the values of properties the behaviour of the build system can be customized.
Properties of Global Scope
ALLOW_DUPLlCATE_CUSTOM_TARGETS: Allow duplicate custom targets to be created.
Normally CMake requires that all targets built in a project have globally unique logical names
(see policy CMP0002). This is necessary to generate meaningful project file names in Xcode
and VS IDE generators. It also allows the target names to be referenced unambiguously.
Makefile generators are capable of supporting duplicate custom target names. For projects
that care only about Makefile generators and do not wish to support Xcode or VS IDE
generators, one may set this property to true to allow duplicate custom targets. The property
allows multiple add custom target command calls in different directories to specify the same
target name. However, setting this property will cause non-Makefile generators to produce an
error and refuse to generate the project.
DEBUG_CONFlGURATIONS: Specify which configurations are for debugging.
412
Appendix E
The value must be a semi-colon separated list of configuration names. Currently this property
is used only by the target_link_libraries command (see its documentation for details).
Additional uses may be defined in the future.
This property must be set at the top level of the project and before the first
target link libraries command invocation. If any entry in the list does not match a valid
configuration for the project the behavior is undefined.
DISABLED_FEATURES: List of features which are disabled during the CMake run.
List of features which are disabled during the CMake run. Be default it contains the names of
all packages which were not found. This is determined using the <NAME>_FOUND
variables. Packages which are searched QUIET are not listed. A project can add its own
features to this list.This property is used by the macros in FeatureSummary.cmake.
enabled_features : List of features which are enabled during the CMake run.
List of features which are enabled during the CMake run. Be default it contains the names of
all packages which were found. This is determined using the <NAME>_FOUND variables.
Packages which are searched QUIET are not listed. A project can add its own features to this
list.This property is used by the macros in FeatureSummary.cmake.
ENABLED_LANGUAGES: Read-only property that contains the list of currently enabled
languages
Set to list of currently enabled languages.
FIND__LIBRARY__USE_LIB64_PATHS: Whether FINDLIBRARY should automatically
search lib64 directories.
FIND_LIBRARY_USE_LIB64_PATHS is a boolean specifying whether the
FIND LIBRARY command should automatically search the lib64 variant of directories
called lib in the search path when building 64-bit binaries.
FIND_LIBRARY_USE_0PENBSD_VERSI0NING: Whether FIND LIBRARY should find
OpenBSD-style shared libraries.
This property is a boolean specifying whether the FIND LIBRARY command should find
shared libraries with OpenBSD-style versioned extension: ".so.<major>.<minor>". The
property is set to true on OpenBSD and false on other platforms.
GLOBAL_DEPENDS_DEBUG_MODE: Enable global target dependency graph debug mode.
CMake automatically analyzes the global inter-target dependency graph at the beginning of
native build system generation. This property causes it to display details of its analysis to
stderr.
GLOBAL_DEPENDS_NO_CYCLES: Disallow global target dependency graph cycles.
Properties of Global Scope
413
CMake automatically analyzes the global inter-target dependency graph at the beginning of
native build system generation. It reports an error if the dependency graph contains a cycle
that does not consist of all STATIC library targets. This property tells CMake to disallow all
cycles completely, even among static libraries.
in_try_COMPILE: Read-only property that is true during a try-compile configuration.
True when building a project inside a TRYCOMPILE or TRY RUN command.
PACKAGES_FOUND: List of packages which were found during the CMake run.
List of packages which were found during the CMake run. Whether a package has been found
is determined using the <NAME>_FOUND variables.
PACKAGEs_NOT_FOUND: List of packages which were not found during the CMake run.
List of packages which were not found during the CMake run. Whether a package has been
found is determined using the <NAME>_FOUND variables.
REPORT_UNDEFiNED_PROPERTlES: If set, report any undefined properties to this file.
If this property is set to a filename then when CMake runs it will report any properties or
variables that were accessed but not defined into the filename specified in this property.
RULE_LAUNCH_COMPiLE: Specify a launcher for compile rules.
Makefile generators prefix compiler commands with the given launcher command line. This
is intended to allow launchers to intercept build problems with high granularity. Non-
Makefile generators currently ignore this property.
RULE_LAUNCH_CUSTOM: Specify a launcher for custom rules.
Makefile generators prefix custom commands with the given launcher command line. This is
intended to allow launchers to intercept build problems with high granularity. Non-Makefile
generators currently ignore this property.
rule_launch__link: Specify a launcher for link rules.
Makefile generators prefix link and archive commands with the given launcher command line.
This is intended to allow launchers to intercept build problems with high granularity. Non-
Makefile generators currently ignore this property.
RULEJMESSAGES: Specify whether to report a message for each make rule.
This property specifies whether Makefile generators should add a progress message
describing what each build rule does. If the property is not set the default is ON. Set the
property to OFF to disable granular messages and report only as each target completes. This is
intended to allow scripted builds to avoid the build time cost of detailed reports. If a
414
Appendix E
CMAKE RULE MESSAGES cache entry exists its value initializes the value of this
property. Non-Makefile generators currently ignore this property.
TARGET_ARCHIVES_MAY_BE_SHARED__LIBS: Set if shared libraries may be named like
archives.
On AIX shared libraries may be named "lib<name>.a". This property is set to true on such
platforms.
TARGET_SUPPORTS_SHARED_LiBS: Does the target platform support shared libraries.
TARGET SUPPORTS SHARED LIBS is a boolean specifying whether the target platform
supports shared libraries. Basically all current general general purpose OS do so, the
exception are usually embedded systems with no or special OSs.
CMAKE_DELETE_CACHE_CHANGE_VARS_: Internal property
Used to detect compiler changes, Do not set.
Properties on Directories
ADDITI0NAL_MAKE_CLEAN_FILES: Additional files to clean during the make clean stage.
A list of files that will be cleaned as a part of the "make clean" stage.
CACHE_VARIableS: List of cache variables available in the current directory.
This read-only property specifies the list of CMake cache variables currently defined. It is
intended for debugging purposes.
CLEAN_NO__CUSTOM: Should the output of custom commands be left.
If this is true then the outputs of custom commands for this directory will not be removed
during the "make clean" stage.
COMPILE_DEFINITIONS: Preprocessor definitions for compiling a directory's sources.
The COMPILE DEFINITIONS property may be set to a semicolon-separated list of
preprocessor definitions using the syntax VAR or VAR=value. Function-style definitions are
not supported. CMake will automatically escape the value correctly for the native build
system (note that CMake language syntax may require escapes to specify some values). This
property may be set on a per-configuration basis using the name
COMPILE_DEFINITIONS_<CONFIG> where <CONFIG> is an upper-case name (ex.
"COMPILE DEFINITIONS DEBUG"). This property will be initialized in each directory by
its value in the directory's parent.
Properties on Directories
415
CMake will automatically drop some definitions that are not supported by the native build
tool. The VS6 IDE does not support definition values with spaces (but NMake does).
Dislaimer: Most native build tools have poor support for escaping certain values. CMake has
work-arounds for many cases but some values may just not be possible to pass correctly. If a
value does not seem to be escaped correctly, do not attempt to work-around the problem by
adding escape sequences to the value. Your work-around may break in a future version of
CMake that has improved escape support. Instead consider defining the macro in a
(configured) header file. Then report the limitation.
COMPile_definiTIONs_<CONFlG>: Per-configuration preprocessor definitions in a
directory.
This is the configuration-specific version of COMPILEDEFINITIONS. This property will be
initialized in each directory by its value in the directory's parent.
definitions: For CMake 2.4 compatibility only. Use COMPILE DEFINITIONS instead.
This read-only property specifies the list of flags given so far to the add_definitions
command. It is intended for debugging purposes. Use the COMPILE DEFINITIONS instead.
exclude_from_all: Exclude the directory from the all target of its parent.
A property on a directory that indicates if its targets are excluded from the default build target.
If it is not, then with a Makefile for example typing make will cause the targets to be built.
The same concept applies to the default build of other generators.
implicit_depends_include_transform: Specify #include line transforms for
dependencies in a directory.
This property specifies rules to transform macro-like #include lines during implicit
dependency scanning of C and C++ source files. The list of rules must be semicolon-
separated with each entry of the form "A_MACRO(%)=value-with-%" (the % must be
literal). During dependency scanning occurrences of A_MACRO(...) on #include lines will be
replaced by the value given with the macro argument substituted for '%'. For example, the
entry
MYDIR(%)=<mydir/%>
will convert lines of the form
#include MYDIR(myheader.h)
to
416
Appendix E
#include <mydir/myheader.h>
allowing the dependency to be followed. This property applies to sources in all targets within
a directory. The property value is initialized in each directory by its value in the directory's
parent.
INCLUDE_DIRECT0RIES: List of preprocessor include file search directories.
This read-only property specifies the list of directories given so far to the include directories
command. It is intended for debugging purposes.
lNCLUDE_REGULAR_EXPRESSlON: Include file scanning regular expression.
This read-only property specifies the regular expression used during dependency scanning to
match include files that should be followed. See the include regular expression command.
link_directories: List of linker search directories.
This read-only property specifies the list of directories given so far to the link directories
command. It is intended for debugging purposes.
LISTFILE_STACK: The current stack of listfiles being processed.
This property is mainly useful when trying to debug errors in your CMake scripts. It returns a
list of what list files are currently being processed, in order. So if one listfile does an
INCLUDE command then that is effectively pushing the included listfile onto the stack.
MACROS: List of macro commands available in the current directory.
This read-only property specifies the list of CMake macros currently defined. It is intended
for debugging purposes. See the macro command.
parent_dIRECTORY: Source directory that added current subdirectory.
This read-only property specifies the source directory that added the current source directory
as a subdirectory of the build. In the top-level directory the value is the empty-string.
RULE_LAUNCH__COMPILE: Specify a launcher for compile rules.
See the global property of the same name for details. This overrides the global property for a
directory.
RULE_LAUNCH_CUSTOM: Specify a launcher for custom rules.
See the global property of the same name for details. This overrides the global property for a
directory.
RULE_LAUNCH__LINK: Specify a launcher for link rules.
Properties on Targets
417
See the global property of the same name for details. This overrides the global property for a
directory.
TEST_INCLUDE_FILE: A cmake file that will be included when ctest is run.
If you specify TESTINCLUDEFILE, that file will be included and processed when ctest is
run on the directory.
VARIABLES: List of variables defined in the current directory.
This read-only property specifies the list of CMake variables currently defined. It is intended
for debugging purposes.
Properties on Targets
<CONFlG>__OUTPUT_NAME: Old per-configuration target file base name.
This is a configuration-specific version of OUTPUTNAME. Use
OUTPUT_NAME_<CONFIG> instead.
<C0NFIG>_P0STFIX: Postfix to append to the target file name for configuration <CONFIG>.
When building with configuration <CONFIG> the value of this property is appended to the
target file name built on disk. For non-executable targets, this property is initialized by the
value of the variable CMAKE_<CONFIG>_POSTFIX if it is set when a target is created.
This property is ignored on the Mac for Frameworks and App Bundles.
archive_OUTPUT_dIRECTORY: Output directory in which to build ARCHIVE target files.
This property specifies the directory into which archive target files should be built. There are
three kinds of target files that may be built: archive, library, and runtime. Executables are
always treated as runtime targets. Static libraries are always treated as archive targets. Module
libraries are always treated as library targets. For non-DLL platforms shared libraries are
treated as library targets. For DLL platforms the DLL part of a shared library is treated as a
runtime target and the corresponding import library is treated as an archive target. All
Windows-based systems including Cygwin are DLL platforms. This property is initialized by
the value of the variable CMAKJEARCHIVEOUTPUTDIRECTORY if it is set when a
target is created.
ARCH I ve_OUTPUT_name : Output name for ARCHIVE target files.
This property specifies the base name for archive target files. It overrides OUTPUT_NAME
and OUTPUT_NAME_<CONFIG> properties. There are three kinds of target files that may
be built: archive, library, and runtime. Executables are always treated as runtime targets.
Static libraries are always treated as archive targets. Module libraries are always treated as
library targets. For non-DLL platforms shared libraries are treated as library targets. For DLL
platforms the DLL part of a shared library is treated as a runtime target and the corresponding
418
Appendix E
import library is treated as an archive target. All Windows-based systems including Cygwin
are DLL platforms.
ARCHIVE_0UTPUT_NAME_<C0NFIG>: Per-configuration output name for ARCHIVE target
files.
This is the configuration-specific version of ARCHIVEOUTPUTNAME.
build_with_install_rpath: Should build tree targets have install tree rpaths.
BUILD WITH INSTALL RPATH is a boolean specifying whether to link the target in the
build tree with the INSTALL_RPATH. This takes precedence over SKIP BUILD RPATH
and avoids the need for relinking before installation. This property is initialized by the value
of the variable CMAKE BUILD WITH INSTALL RPATH if it is set when a target is
created.
C0MPILE_DEFINITI0NS: Preprocessor definitions for compiling a target’s sources.
The COMPILEDEFINITIONS property may be set to a semicolon-separated list of
preprocessor definitions using the syntax VAR or VAR=value. Function-style definitions are
not supported. CMake will automatically escape the value correctly for the native build
system (note that CMake language syntax may require escapes to specify some values). This
property may be set on a per-configuration basis using the name
COMPILE_DEFINITIONS_<CONFIG> where <CONFIG> is an upper-case name (ex.
”COMPILE_DEFINITIONS_DEBUG”).
CMake will automatically drop some definitions that are not supported by the native build
tool. The VS6 IDE does not support definition values with spaces (but NMake does).
Dislaimer: Most native build tools have poor support for escaping certain values. CMake has
work-arounds for many cases but some values may just not be possible to pass correctly. If a
value does not seem to be escaped correctly, do not attempt to work-around the problem by
adding escape sequences to the value. Your work-around may break in a future version of
CMake that has improved escape support. Instead consider defining the macro in a
(configured) header file. Then report the limitation.
COMP ile__de fini TI ON S_<CONFi G>: Per-configuration preprocessor definitions on a target.
This is the configuration-specific version of COMPILE DEFINITIONS.
COMPILE__FLAGS: Additional flags to use when compiling this target's sources.
The COMPILE FLAGS property sets additional compiler flags used to build sources within
the target. Use COMPILE DEFINITIONS to pass additional preprocessor definitions.
DEBUG_P0STFIX: See target property <CONFIG>_POSTFIX.
Properties on Targets
419
This property is a special case of the more-general <CONFIG>_POSTFIX property for the
DEBUG configuration.
DEFlNE_SYMBOL: Define a symbol when compiling this target's sources.
DEFINE_SYMBOL sets the name of the preprocessor symbol defined when compiling
sources in a shared library. If not set here then it is set to target_EXPORTS by default (with
some substitutions if the target is not a valid C identifier). This is useful for headers to know
whether they are being included from inside their library our outside to properly setup
dllexport/dllimport decorations.
ENABLE_EXPORTS: Specify whether an executable exports symbols for loadable modules.
Normally an executable does not export any symbols because it is the final program. It is
possible for an executable to export symbols to be used by loadable modules. When this
property is set to true CMake will allow other targets to "link" to the executable with the
TARGET LINK LIBRARIES command. On all platforms a target-level dependency on the
executable is created for targets that link to it. For non-DLL platforms the link rule is simply
ignored since the dynamic loader will automatically bind symbols when the module is loaded.
For DLL platforms an import library will be created for the exported symbols and then used
for linking. All Windows-based systems including Cygwin are DLL platforms.
exclude_from_all: Exclude the target from the all target.
A property on a target that indicates if the target is excluded from the default build target. If it
is not, then with a Makefile for example typing make will cause this target to be built. The
same concept applies to the default build of other generators. Installing a target with
EXCLUDE FROM ALL set to true has undefined behavior.
Echostring: A message to be displayed when the target is built.
A message to display on some generators (such as Makefiles) when the target is built.
framework: This target is a framework on the Mac.
If a shared library target has this property set to true it will be built as a framework when built
on the mac. It will have the directory structure required for a framework and will be suitable
to be used with the -framework option
Fortran_MODULE_DIRECTORY: Specify output directory for Fortran modules provided by
the target.
If the target contains Fortran source files that provide modules and the compiler supports a
module output directory this specifies the directory in which the modules will be placed.
When this property is not set the modules will be placed in the build directory corresponding
to the target's source directory. If the variable CMAKE Fortran MODULE DIRECTORY is
set when a target is created its value is used to initialize this property.
420
Appendix E
GENERATOR_FlLE_NAME: Generator's file for this target.
An internal property used by some generators to record the name of project or dsp file
associated with this target.
HAS_CXX: Link the target using the C++ linker tool (obselete).
TJiis is equivalent to setting the LINKER LANGUAGE property to CXX. See that property's
documentation for details.
implicit_depends_include_transform: Specify #include line transforms for
dependencies in a target.
This property specifies rules to transform macro-like #include lines during implicit
dependency scanning of C and C++ source files. The list of rules must be semicolon-
separated with each entry of the form "A_MACRO(%)=value-with-%" (the % must be
literal). During dependency scanning occurrences of A_MACRO(...) on #include lines will be
replaced by the value given with the macro argument substituted for '%'. For example, the
entry
MYDIR(%)=<mydir/%>
will convert lines of the form
#include MYDIR(myheader.h)
to
#include <mydir/myheader.h>
allowing the dependency to be followed. This property applies to sources in the target on
which it is set.
IMPORTED: Read-only indication of whether a target is IMPORTED.
The boolean value of this property is true for targets created with the IMPORTED option to
add_executable or addlibrary. It is false for targets built within the project.
imported_CONFI GURATI ON S: Configurations provided for an IMPORTED target.
Lists configuration names available for an IMPORTED target. The names correspond to
configurations defined in the project from which the target is imported. If the importing
project uses a different set of configurations the names may be mapped using the
MAP_IMPORTED_CONFIG_<CONFIG> property. Ignored for non-imported targets.
Properties on Targets
421
imported_implib: Full path to the import library for an IMPORTED target.
Specifies the location of the ".lib" part of a windows DLL. Ignored for non-imported targets.
IMP0RTED_IMPLIB__<C0NFIG>: Per-configuration version of IMPORTED IMPLIB
property.
This property is used when loading settings for the <CONFIG> configuration of an imported
target. Configuration names correspond to those provided by the project from which the target
is imported.
imported__link_dependent__lIBRARIES: Dependent shared libraries of an imported
shared library.
Shared libraries may be linked to other shared libraries as part of their implementation. On
some platforms the linker searches for the dependent libraries of shared libraries they are
including in the link. This property lists the dependent shared libraries of an imported library.
The list should be disjoint from the list of interface libraries in the
IMPORTED LINK INTERFACE LIBRARIES property. On platforms requiring dependent
shared libraries to be found at link time CMake uses this list to add appropriate files or paths
to the link command line. Ignored for non-imported targets.
IMP0RTED_L ink_de pendent_l I BRARIE S_<CONFl G>: Per-con figuration version of
IMPORTEDLINKDEPENDENTLIBRARIES.
This property is used when loading settings for the <CONFIG> configuration of an imported
target. Configuration names correspond to those provided by the project from which the target
is imported. If set, this property completely overrides the generic property for the named
configuration.
IMP0RTED_LINK_INTERFACE_LANGUAGES: Languages compiled into an IMPORTED static
library.
Lists languages of soure files compiled to produce a STATIC IMPORTED library (such as
"C" or "CXX"). CMake accounts for these languages when computing how to link a target to
the imported library. For example, when a C executable links to an imported C++ static
library CMake chooses the C++ linker to satisfy language runtime dependencies of the static
library.
This property is ignored for targets that are not STATIC libraries. This property is ignored for
non-imported targets.
IMP0RTED_LINK_INTERFACE__LANGUAGES_<C0NFIG>: Per-configuration version of
IMPORTEDLINKINTERFACELANGUAGES.
This property is used when loading settings for the <CONFIG> configuration of an imported
target. Configuration names correspond to those provided by the project from which the target
422
Appendix E
is imported. If set, this property completely overrides the generic property for the named
configuration.
imported_link_interface_librarieS: Transitive link interface of an IMPORTED
target.
Lists libraries whose interface is included when an IMPORTED library target is linked to
another target. The libraries will be included on the link line for the target. Unlike the
LINK_INTERFACE_LIBRARIES property, this property applies to all imported target types,
including STATIC libraries. This property is ignored for non-imported targets.
IMP0RTED_Link__interface_libraries__<CONFlG>: Per-configuration version of
IMPORTEDLINKINTERFACELIBRARIES.
This property is used when loading settings for the <CONFIG> configuration of an imported
target. Configuration names correspond to those provided by the project from which the target
is imported. If set, this property completely overrides the generic property for the named
configuration.
imported_link_interface_multiplicity: Repetition count for cycles of IMPORTED
static libraries.
This is LINKINTERFACEMULTIPLICITY for IMPORTED targets.
IMP0RTED_LINK_INTERFACE_MULTIPLICITY_<C0NFIG>; Per-configuration repetition
count for cycles of IMPORTED archives.
This is the configuration-specific version of
IMPORTED LINK INTERFACE MULTIPLICITY. If set, this property completely
overrides the generic property for the named configuration.
lMPORTED_LOCATION: Full path to the main file on disk for an IMPORTED target.
Specifies the location of an IMPORTED target file on disk. For executables this is the
location of the executable file. For bundles on OS X this is the location of the executable file
inside Contents/MacOS under the application bundle folder. For static libraries and modules
this is the location of the library or module. For shared libraries on non-DLL platforms this is
the location of the shared library. For frameworks on OS X this is the location of the library
file symlink just inside the framework folder. For DLLs this is the location of the ’'.dll" part of
the library. For UNKNOWN libraries this is the location of the file to be linked. Ignored for
non-imported targets.
IMP0RTED_L0CATI0N_<C0NFIG>: Per-configuration version of IMPORTED LOCATION
property.
This property is used when loading settings for the <CONFIG> configuration of an imported
target. Configuration names correspond to those provided by the project from which the target
is imported.
Properties on Targets
423
lMPORTED_SONAME: The "soname" of an IMPORTED target of shared library type.
Specifies the "soname" embedded in an imported shared library. This is meaningful only on
platforms supporting the feature. Ignored for non-imported targets.
IMP0RTED__S0NAME__<C0NFIG>: Per-configuration version of IMPORTED SONAME
property.
This property is used when loading settings for the <CONFIG> configuration of an imported
target. Configuration names correspond to those provided by the project from which the target
is imported.
IMP0RT_PREFIX: What comes before the import library name.
Similar to the target property PREFIX, but used for import libraries (typically corresponding
to a DLL) instead of regular libraries. A target property that can be set to override the prefix
(such as "lib") on an import library name.
IMP0RT__SUFFIX: What comes after the import library name.
Similar to the target property SUFFIX, but used for import libraries (typically corresponding
to a DLL) instead of regular libraries. A target property that can be set to override the suffix
(such as ".lib") on an import library name.
INSTALL_NAME_DIR: Mac OSX directory name for installed targets.
INSTALLNAMEDIR is a string specifying the directory portion of the "install_name" field
of shared libraries on Mac OSX to use in the installed targets.
INSTALL_RPATH: The rpath to use for installed targets.
A semicolon-separated list specifying the rpath to use in installed targets (for platforms that
support it). This property is initialized by the value of the variable
CMAKE_INSTALL_RPATH if it is set when a target is created.
INSTALL__RPATH_USE__LINK_PATH: Add paths to linker search and installed rpath.
INSTALLRPATHUSELINKPATH is a boolean that if set to true will append directories
in the linker search path and outside the project to the INSTALL_RPATH. This property is
initialized by the value of the variable CMAKE_INSTALL_RPATH_USE_LINK_PATH if it
is set when a target is created.
LABELS: Specify a list of text labels associated with a target.
Target label semantics are currently unspecified.
LIBRARY_OUTPUT_DIRECTORY: Output directory in which to build LIBRARY target files.
This property specifies the directory into which library target files should be built. There are
three kinds of target files that may be built: archive, library, and runtime. Executables are
424
Appendix E
always treated as runtime targets. Static libraries are always treated as archive targets. Module
libraries are always treated as library targets. For non-DLL platforms shared libraries are
treated as library targets. For DLL platforms the DLL part of a shared library is treated as a
runtime target and the corresponding import library is treated as an archive target. All
Windows-based systems including Cygwin are DLL platforms. This property is initialized by
the value of the variable CMAKELIBRARYOUTPUTDIRECTORY if it is set when a
target is created.
library_output_name: Output name for LIBRARY target files.
This property specifies the base name for library target files. It overrides OUTPUT JNAME
and OUTPUT_NAME_<CONFIG> properties. There are three kinds of target files that may
be built: archive, library, and runtime. Executables are always treated as runtime targets.
Static libraries are always treated as archive targets. Module libraries are always treated as
library targets. For non-DLL platforms shared libraries are treated as library targets. For DLL
platforms the DLL part of a shared library is treated as a runtime target and the corresponding
import library is treated as an archive target. All Windows-based systems including Cygwin
are DLL platforms.
library_OUTPUT_name_<CONFIG>: Per-configuration output name for LIBRARY target
files.
This is the configuration-specific version of LIBRARY OUTPUT NAME.
linker_language: Specifies language whose compiler will invoke the linker.
For executables, shared libraries, and modules, this sets the language whose compiler is used
to link the target (such as "C" or "CXX"). A typical value for an executable is the language of
the source file providing the program entry point (main). If not set, the language with the
highest linker preference value is the default. See documentation of
CMAKE_<LANG>JLINKER_PREFERENCE variables.
LINK_FLAGS: Additional flags to use when linking this target.
The LINK_FLAGS property can be used to add extra flags to the link step of a target.
LINK_FLAGS_<CONFIG> will add to the configuration <CONFIG>, for example, DEBUG,
RELEASE, MINSIZEREL, RELWITHDEBINFO.
LINK_FLAGS_<C0NFIG>: Per-con figuration linker flags for a target.
This is the configuration-specific version of LINK FLAGS.
LINK_INTERFACE_LIBRARIES: List public interface libraries for a shared library or
executable.
By default linking to a shared library target transitively links to targets with which the library
itself was linked. For an executable with exports (see the ENABLE_EXPORTS property) no
default transitive link dependencies are used. This property replaces the default transitive link
Properties on Targets
425
dependencies with an explict list. When the target is linked into another target the libraries
listed (and recursively their link interface libraries) will be provided to the other target also. If
the list is empty then no transitive link dependencies will be incorporated when this target is
linked into another target even if the default set is non-empty. This property is ignored for
STATIC libraries.
LInk_interface_librarieS_<CONFIG>: Per-configuration list of public interface
libraries for a target.
This is the configuration-specific version of LINKINTERFACELIBRAR1ES. If set, this
property completely overrides the generic property for the named configuration.
LINK_INTERFACE_MULTIPLICITY: Repetition count for STATIC libraries with cyclic
dependencies.
When linking to a STATIC library target with cyclic dependencies the linker may need to
scan more than once through the archives in the strongly connected component of the
dependency graph. CMake by default constructs the link line so that the linker will scan
through the component at least twice. This property specifies the minimum number of scans if
it is larger than the default. CMake uses the largest value specified by any target in a
component.
link_interface_multiplicity_<CONFIG>: Per-configuration repetition count for cycles
of STATIC libraries.
This is the configuration-specific version of LINKINTERFACEMULTIPLICITY. If set,
this property completely overrides the generic property for the named configuration.
link_SEARCH_end_STATIC: End a link line such that static system libraries are used.
Some linkers support switches such as -Bstatic and -Bdynamic to determine whether to use
static or shared libraries for -1XXX options. CMake uses these options to set the link type for
libraries whose full paths are not known or (in some cases) are in implicit link directories for
the platform. By default the linker search type is left at -Bdynamic by the end of the library
list. This property switches the final linker search type to -Bstatic.
LOCATION: Read-only location of a target on disk.
For an imported target, this read-only property returns the value of the
LOCATION_<CONFIG> property for an unspecified configuration <CONFIG> provided by
the target.
For a non-imported target, this property is provided for compatibility with CMake 2.4 and
below. It was meant to get the location of an executable target's output file for use in
add_custom_command. The path may contain a build-system-specific portion that is replaced
at build time with the configuration getting built (such as ”$(ConfigurationName)" in VS). In
CMake 2.6 and above addcustomcommand automatically recognizes a target name in its
426
Appendix E
COMMAND and DEPENDS options and computes the target location. Therefore this
property is not needed for creating custom commands.
LOCATION_<CONFlG>: Read-only property providing a target location on disk.
A read-only property that indicates where a target's main file is located on disk for the
configuration <CONFIG>. The property is defined only for library and executable targets. An
imported target may provide a set of configurations different from that of the importing
project. By default CMake looks for an exact-match but otherwise uses an arbitrary available
configuration. Use the MAP_IMPORTED_CONFIG_<CONFIG> property to map imported
configurations explicitly.
MACOSX_BUNDLE: Build an executable as an application bundle on Mac OS X.
When this property is set to true the executable when built on Mac OS X will be created as an
application bundle. This makes it a GUI executable that can be launched from the Finder. See
the MACOSX BUNDLE INFO PLIST target property for information about creation of the
Info.plist file for the application bundle.
macosx_bundle_info_plist: Specify a custom Info.plist template for a Mac OS X App
Bundle.
An executable target with MACOSX_BUNDLE enabled will be built as an application bundle
on Mac OS X. By default its Info.plist file is created by configuring a template called
MacOSXBundlelnfo.plist.in located in the CMAKE MODULE PATH. This property
specifies an alternative template file name which may be a full path.
The following target properties may be set to specify content to be configured into the file:
MACOSX_BUNDLE_INFO_STRING
MACOSX_BUNDLE_ICON_ FILE
MACOSX_BUNDLE_GUI_IDENTIFIER
MACOSX_BUNDLE_LONG__ VERSION_STRING
MACOSX_BUNDLE_BUNDLE_NAME
MACOSX_BUNDLE_SHORT_VERSION_STRING
MACOSX_BUNDLE_BUNDLE_VERSION
MACOSX_BUNDLE_COPYRIGHT
CMake variables of the same name may be set to affect all targets in a directory that do not
have each specific property set. If a custom Info.plist is specified by this property it may of
course hard-code all the settings instead of using the target properties.
macosx_framework_info_plist: Specify a custom Info.plist template for a Mac OS X
Framework.
Properties on Targets
427
An library target with FRAMEWORK enabled will be built as a framework on Mac OS X. By
default its Info.plist file is created by configuring a template called
MacOSXFrameworklnfo.plist.in located in the CMAKEMODULEPATH. This property
specifies an alternative template file name which may be a full path.
The following target properties may be set to specify content to be configured into the file:
MACOSX_FRAMEWORK_ICON_FILE
MACOSX_FRAMEWORK_IDENTIFIER
MACOSX_FRAMEWORK_SHORT_VERSION_STRING
MACOSX FRAMEWORK BUNDLE VERSION
CMake variables of the same name may be set to affect all targets in a directory that do not
have each specific property set. If a custom Info.plist is specified by this property it may of
course hard-code all the settings instead of using the target properties.
map_imported__CONFIG_<CONFIG>: Map from project configuration to IMPORTED
target’s configuration.
List configurations of an imported target that may be used for the current project’s
<CONFIG> configuration. Targets imported from another project may not provide the same
set of configuration names available in the current project. Setting this property tells CMake
what imported configurations are suitable for use when building the <CONFIG>
configuration. The first configuration in the list found to be provided by the imported target is
selected. If no matching configurations are available the imported target is considered to be
not found. This property is ignored for non-imported targets.
OUTPUT_name: Output name for target files.
This sets the base name for output files created for an executable or library target. If not set,
the logical target name is used by default.
OUTPUT_NAME_<CONFlG>: Per-configuration target file base name.
This is the configuration-specific version of OUTPUT_NAME.
POST_lNSTALL_SCRlPT: Deprecated install support.
The PRE INSTALL SCRIPT and POST INSTALL SCRIPT properties are the old way to
specify CMake scripts to run before and after installing a target. They are used only when the
old INSTALL_TARGETS command is used to install the target. Use the INSTALL command
instead.
prefix: What comes before the library name.
A target property that can be set to override the prefix (such as "lib”) on a library name.
428
Appendix E
pre_install_script: Deprecated install support.
The PREIN ST ALLSCRIPT and POSTINSTALLSCRIPT properties are the old way to
specify CMake scripts to run before and after installing a target. They are used only when the
old INSTALL TARGETS command is used to install the target. Use the INSTALL command
instead.
PRIVATE_HEADER: Specify private header files in a FRAMEWORK shared library target.
Shared library targets marked with the FRAMEWORK property generate frameworks on OS
X and normal shared libraries on other platforms. This property may be set to a list of header
files to be placed in the PrivateHeaders directory inside the framework folder. On non-Apple
platforms these headers may be installed using the PRIVATE HEADER option to the
install(TARGETS) command.
PROJECT_LABEL: Change the name of a target in an IDE.
Can be used to change the name of the target in an IDE like visual stuido.
public_header: Specify public header files in a FRAMEWORK shared library target.
Shared library targets marked with the FRAMEWORK property generate frameworks on OS
X and normal shared libraries on other platforms. This property may be set to a list of header
files to be placed in the Headers directory inside the framework folder. On non-Apple
platforms these headers may be installed using the PUBL1CHEADER option to the
install(TARGETS) command.
RESOURCE: Specify resource files in a FRAMEWORK shared library target.
Shared library targets marked with the FRAMEWORK property generate frameworks on OS
X and normal shared libraries on other platforms. This property may be set to a list of files to
be placed in the Resources directory inside the framework folder. On non-Apple platforms
these files may be installed using the RESOURCE option to the install(TARGETS)
command.
RULE_LAUNCH_COMPiLE: Specify a launcher for compile rules.
See the global property of the same name for details. This overrides the global and directory
property for a target.
rule_launch_custom: Specify a launcher for custom rules.
See the global property of the same name for details. This overrides the global and directory
property for a target.
RULE_LAUNCH_LINK: Specify a launcher for link rules.
See the global property of the same name for details. This overrides the global and directory
property for a target.
Properties on Targets
429
runtime_OUTPUT_dIRECTORY: Output directory in which to build RUNTIME target files.
This property specifies the directory into which runtime target files should be built. There are
three kinds of target files that may be built: archive, library, and runtime. Executables are
always treated as runtime targets. Static libraries are always treated as archive targets. Module
libraries are always treated as library targets. For non-DLL platforms shared libraries are
treated as library targets. For DLL platforms the DLL part of a shared library is treated as a
runtime target and the corresponding import library is treated as an archive target. All
Windows-based systems including Cygwin are DLL platforms. This property is initialized by
the value of the variable CMAKE RUNTIME OUTPUT DIRECTORY if it is set when a
target is created.
runtime_output_name: Output name for RUNTIME target files.
This property specifies the base name for runtime target files. It overrides OUTPUT NAME
and OUTPUT_NAME_<CONFIG> properties. There are three kinds of target files that may
be built: archive, library, and runtime. Executables are always treated as runtime targets.
Static libraries are always treated as archive targets. Module libraries are always treated as
library targets. For non-DLL platforms shared libraries are treated as library targets. For DLL
platforms the DLL part of a shared library is treated as a runtime target and the corresponding
import library is treated as an archive target. All Windows-based systems including Cygwin
are DLL platforms.
runtime_output_name_<config>: Per-configuration output name for RUNTIME target
files.
This is the configuration-specific version of RUNTIME OUTPUT NAME.
SKIp_build__rpath: Should rpaths be used for the build tree.
SKIP BUILD RPATH is a boolean specifying whether to skip automatic generation of an
rpath allowing the target to run from the build tree. This property is initialized by the value of
the variable CMAJKJE SK1P BUILD RPATH if it is set when a target is created.
SOURCES: Source names specified for a target.
Read-only list of sources specified for a target. The names returned are suitable for passing to
the set_source_files_properties command.
SOVERSION: What version number is this target.
For shared libraries VERSION and SOVERSION can be used to specify the build version and
api version respectively. When building or installing appropriate symlinks are created if the
platform supports symlinks and the linker supports so-names. If only one of both is specified
the missing is assumed to have the same version number. For shared libraries and executables
on Windows the VERSION attribute is parsed to extract a "major.minor" version number.
These numbers are used as the image version of the binary.
430
Appendix E
STATIC_LIBRARY_FLAGS: Extra flags to use when linking static libraries.
Extra flags to use when linking a static library.
SUFFIX: What comes after the library name.
A target property that can be set to override the suffix (such as ".so”) on a library name.
TYPE: The type of the target.
This read-only property can be used to test the type of the given target. It will be one of
STATICLIBRARY, MODULELIBRARY, SHARED JLIBRARY, EXECUTABLE or one
of the internal target types.
VERSION: What version number is this target.
For shared libraries VERSION and SOVERSION can be used to specify the build version and
api version respectively. When building or installing appropriate symlinks are created if the
platform supports symlinks and the linker supports so-names. If only one of both is specified
the missing is assumed to have the same version number. For executables VERSION can be
used to specify the build version. When building or installing appropriate symlinks are created
if the platform supports symlinks. For shared libraries and executables on Windows the
VERSION attribute is parsed to extract a "major.minor'' version number. These numbers are
used as the image version of the binary.
VS_KEYWORD: Visual Studio project keyword.
Can be set to change the visual studio keyword, for example QT integration works better if
this is set to Qt4VSvl .0.
vS_SCC_LOCALpath: Visual Studio Source Code Control Provider.
Can be set to change the visual studio source code control local path property.
vS_SCC_PROjectname: Visual Studio Source Code Control Project.
Can be set to change the visual studio source code control project name property.
vS_SCC_PROVIDER: Visual Studio Source Code Control Provider.
Can be set to change the visual studio source code control provider property.
WIN32__EXECUTABLE: Build an executable with a WinMain entry point on windows.
When this property is set to true the executable when linked on Windows will be created with
a WinMainQ entry point instead of of just main().This makes it a GUI executable instead of a
console application. See the CMAKE_MFC_FLAG variable documentation to configure use
of MFC for WinMain executables.
XCODE_ATTRlBUTE_<an-attributed Set Xcode target attributes directly.
Properties on Tests
431
Tell the Xcode generator to set ’<an-attribute>’ to a given value in the generated Xcode
project. Ignored on other generators.
Properties on Tests
ENVIRONMENT: Specify environment variables that should be defined for running a test.
If set to a list of environment variables and values of the form MYVAR=value those
environment variables will be defined while running the test. The environment is restored to
its previous state after the test is done.
fai l_regular_expre SSI ON: If the output matches this regular expression the test will fail.
If set, if the output matches one of specified regular expressions, the test will fail.For
example: PASSREGULARJEXPRESSION M[Aa-z]Error;ERROR;FailedM
LABELS: Specify a list of text labels associated with a test.
The list is reported in dashboard submissions.
measurement: Specify a CD ASH measurement and value to be reported for a test.
If set to a name then that name will be reported to CDASH as a named measurement with a
value of 1. You may also specify a value by setting MEASUREMENT to
" m eas ur em ent=val ue ".
PAS S_RE gular_expre SSI ON: The output must match this regular expression for the test to
pass.
If set, the test output will be checked against the specified regular expressions and at least one
of the regular expressions has to match, otherwise the test will fail.
timeout: How many seconds to allow for this test.
This property if set will limit a test to not take more than the specified number of seconds to
run. If it exceeds that the test process will be killed and ctest will move to the next test. This
setting takes precedence over CTEST TESTING TIMEOUT.
will_fail: If set to true, this will invert the pass/fail flag of the test.
This property can be used for tests that are expected to fail and return a non zero return code.
Properties on Source Files
ABSTRACT: Is this source file an abstract class.
432
Appendix E
A property on a source file that indicates if the source file represents a class that is abstract.
This only makes sense for languages that have a notion of an abstract class and it is only used
by some tools that wrap classes into other languages.
COMPILE_definitions: Preprocessor definitions for compiling a source file.
The COMPILEDEFINITIONS property may be set to a semicolon-separated list of
preprocessor definitions using the syntax VAR or VAR=value. Function-style definitions are
not supported. CMake will automatically escape the value correctly for the native build
system (note that CMake language syntax may require escapes to specify some values). This
property may be set on a per-con figuration basis using the name
COMPILE_DEFINITIONS_<CONFIG> where <CONFIG> is an upper-case name (ex.
"COMPILEDEFINITIONSDEBUG").
CMake will automatically drop some definitions that are not supported by the native build
tool. The VS6 IDE does not support definition values with spaces (but NMake does). Xcode
does not support per-configuration definitions on source files.
Dislaimer: Most native build tools have poor support for escaping certain values. CMake has
work-arounds for many cases but some values may just not be possible to pass correctly. If a
value does not seem to be escaped correctly, do not attempt to work-around the problem by
adding escape sequences to the value. Your work-around may break in a future version of
CMake that has improved escape support. Instead consider defining the macro in a
(configured) header file. Then report the limitation.
COMP I le_de fini TI ON s__<CONFi G>: Per-configuration preprocessor definitions on a source
file.
This is the configuration-specific version of COMPILE DEFINITIONS. Note that Xcode
does not support per-configuration source file flags so this property will be ignored by the
Xcode generator.
COMPILE_FLAGS: Additional flags to be added when compiling this source file.
These flags will be added to the list of compile flags when this source file builds. Use
COMPILE DEFINITIONS to pass additional preprocessor definitions.
EXTERNAL_OBJECT: If set to true then this is an object file.
If this property is set to true then the source file is really an object file and should not be
compiled. It will still be linked into the target though.
GENERATED: Is this source file generated as part of the build process.
If a source file is generated by the build process CMake will handle it differently in temrs of
dependency checking etc. Otherwise having a non-existent source file could create problems.
Properties on Source Files
433
header_file_only: Is this source file only a header file.
A property on a source file that indicates if the source file is a header file with no associated
implementation. This is set automatically based on the file extension and is used by CMake to
determine is certain dependency information should be computed.
KEEP_EXTENSlON: Make the output file have the same extension as the source file.
If this property is set then the file extension of the output file will be the same as that of the
source file. Normally the output file extension is computed based on the language of the
source file, for example .cxx will go to a .o extension.
LABELS: Specify a list of text labels associated with a source file.
This property has meaning only when the source file is listed in a target whose LABELS
property is also set. No other semantics are currently specified.
language: What programming language is the file.
A property that can be set to indicate what programming language the source file is. If it is not
set the language is determined based on the file extension. Typical values are CXX C etc.
LOCATION: The full path to a source file.
A read only property on a SOURCE FILE that contains the full path to the source file.
MACOSX__PACKAGE_LOCATION: Place a source file inside a Mac OS X bundle or framework.
Executable targets with the MACOSX BUNDLE property set are built as Mac OS X
application bundles on Apple platforms. Shared library targets with the FRAMEWORK
property set are built as Mac OS X frameworks on Apple platforms. Source files listed in the
target with this property set will be copied to a directory inside the bundle or framework
content folder specified by the property value. For bundles the content folder is
"<name>.app/Contents". For frameworks the content folder is
M<name>.framework/Versions/<version>M. See the PUBLICHEADER,
PRIVATEHEADER, and RESOURCE target properties for specifying files meant for
Headers, PrivateHeadres, or Resources directories.
OBJECT_DEPENDS: Additional files on which a compiled object file depends.
Specifies a semicolon-separated list of full-paths to files on which any object files compiled
from this source file depend. An object file will be recompiled if any of the named files is
newer than it.
This property need not be used to specify the dependency of a source file on a generated
header file that it includes. Although the property was originally introduced for this purpose,
it is no longer necessary. If the generated header file is created by a custom command in the
same target as the source file, the automatic dependency scanning process will recognize the
dependency. If the generated header file is created by another target, an inter-target
434
Appendix E
dependency should be created with the add_dependencies command (if one does not already
exist due to linking relationships).
OBJECT_OUTPUTS: Additional outputs for a Makefile rule.
Additional outputs created by compilation of this source file. If any of these outputs is
missing the object will be recompiled. This is supported only on Makefile generators and will
be ignored on other generators.
symbolic: Is this just a name for a rule.
If SYMBOLIC (boolean) is set to true the build system will be informed that the source file is
not actually created on disk but instead used as a symbolic name for a build rule.
wrap_exclude: Exclude this source file from any code wrapping techniques.
Some packages can wrap source files into alternate languages to provide additional
functionality. For example, C++ code can be wrapped into Java or Python etc using SWIG
etc. If WRAPEXCLUDE is set to true (1 etc) that indicates then this source file should not
be wrapped.
Properties on Cache Entries
advanced: True if entry should be hidden by default in GUIs.
This is a boolean value indicating whether the entry is considered interesting only for
advanced configuration. The mark_as_advanced() command modifies this property.
helpstring: Help associated with entry in GUIs.
This string summarizes the purpose of an entry to help users set it through a CMake GUI.
modified: Internal management property. Do not set or get.
This is an internal cache entry property managed by CMake to track interactive user
modification of entries. Ignore it.
STRINGS: Enumerate possible STRING entry values for GUI selection.
For cache entries with type STRING, this enumerates a set of values. CMake GUIs may use
this to provide a selection widget instead of a generic string entry field. This is for
convenience only. CMake does not enforce that the value matches one of those listed.
type: Widget type for entry in GUIs.
Cache entry values are always strings, but CMake GUIs present widgets to help users set
values. The GUIs use this property as a hint to determine the widget type. Valid TYPE values
are:
Properties on Cache Entries
435
BOOL
PATH
FILEPATH
STRING
INTERNAL
STATIC
UNINITIALIZED
= Boolean ON/OFF value.
= Path to a directory.
= Path to a file.
= Generic string value.
= Do not present in GUI at all.
= Value managed by CMake, do not change.
= Type not yet specified.
Generally the TYPE of a cache entry should be set by the command which creates it (set,
option, find_library, etc.).
value: Value of a cache entry.
This property maps to the actual value of a cache entry. Setting this property always sets the
value without checking, so use with care.
Appendix F
Appendix F - CMake Policies
CMP0000: A minimum required CMake version must be specified.
CMake requires that projects specify the version of CMake to which they have been written.
This policy has been put in place so users trying to build the project may be told when they
need to update their CMake. Specifying a version also helps the project build with CMake
versions newer than that specified. Use the cmake_minimum_required command at the top of
your main CMakeLists.txt file:
cmake_minimum_required(VERSION <major>.<minor>)
where M<major>.<minor>" is the version of CMake you want to support (such as "2.6”). The
command will ensure that at least the given version of CMake is running and help newer
versions be compatible with the project. See documentation of cmake_minimum_required for
details.
Note that the command invocation must appear in the CMakeLists.txt file itself; a call in an
included file is not sufficient. However, the cmakejpolicy command may be called to set
policy CMP0000 to OLD or NEW behavior explicitly. The OLD behavior is to silently ignore
the missing invocation. The NEW behavior is to issue an error instead of a warning. An
included file may set CMP0000 explicitly to affect how this policy is enforced for the main
CMakeLists.txt file.
This policy was introduced in CMake version 2.6.0.
CMP0001: CMAKE BACKWARDS COMPATIBILITY should no longer be used.
438
Appendix F
The OLD behavior is to check CMAKEBACKWARDSCOMPATIBILITY and present it
to the user. The NEW behavior is to ignore CMAKEBACKWARDSCOMPATIBILITY
completely.
In CMake 2.4 and below the variable CMAKE BACKWARDS COMPATIBILITY was used
to request compatibility with earlier versions of CMake. In CMake 2.6 and above all
compatibility issues are handled by policies and the cmake_policy command. However,
CMake must still check CMAKE BACKWARDS COMPATIBILITY for projects written
for CMake 2.4 and below.
This policy was introduced in CMake version 2.6.0. CMake version 2.8.0-rc2 warns when the
policy is not set and uses OLD behavior. Use the cmake_policy command to set it to OLD or
NEW explicitly.
CMP0002: Logical target names must be globally unique.
Targets names created with add_executable, add_library, or add_custom_target are logical
build target names. Logical target names must be globally unique because:
- Unique names may be referenced unambiguously both in CMake
code and on make tool command lines.
- Logical names are used by Xcode and VS IDE generators
to produce meaningful project names for the targets.
The logical name of executable and library targets does not have to correspond to the physical
file names built. Consider using the OUTPUT_NAME target property to create two targets
with the same physical name while keeping logical names distinct. Custom targets must
simply have globally unique names (unless one uses the global property
ALLOW DUPLICATE CUSTOM TARGETS with a Makefiles generator).
This policy was introduced in CMake version 2.6.0. CMake version 2.8.0-rc2 warns when the
policy is not set and uses OLD behavior. Use the cmakejpolicy command to set it to OLD or
NEW explicitly.
CMP0003: Libraries linked via full path no longer produce linker search paths.
This policy affects how libraries whose full paths are NOT known are found at link time, but
was created due to a change in how CMake deals with libraries whose full paths are known.
Consider the code
target_link_libraries(myexe /path/to/libA.so)
CMP0003
439
CMake 2.4 and below implemented linking to libraries whose full paths are known by
splitting them on the link line into separate components consisting of the linker search path
and the library name. The example code might have produced something like
... -L/path/to -1A ...
in order to link to library A. An analysis was performed to order multiple link directories such
that the linker would find library A in the desired location, but there are cases in which this
does not work. CMake versions 2.6 and above use the more reliable approach of passing the
full path to libraries directly to the linker in most cases. The example code now produces
something like
. .. /path/to/libA.so ....
Unfortunately this change can break code like
target_link_libraries(myexe /path/to/libA.so B)
where "BM is meant to find 7path/to/libB.soM. This code is wrong because the user is asking
the linker to find library B but has not provided a linker search path (which may be added
with the link directories command). However, with the old linking implementation the code
would work accidentally because the linker search path added for library A allowed library B
to be found.
In order to support projects depending on linker search paths added by linking to libraries
with known full paths, the OLD behavior for this policy will add the linker search paths even
though they are not needed for their own libraries. When this policy is set to OLD, CMake
will produce a link line such as
... -L/path/to /path/to/libA.so -IB ...
which will allow library B to be found as it was previously. When this policy is set to NEW,
CMake will produce a link line such as
. .. /path/to/libA.so -IB ...
which more accurately matches what the project specified.
440
Appendix F
The setting for this policy used when generating the link line is that in effect when the target
is created by an add_executable or add_library command. For the example described above,
the code
cmake_policy(SET CMP0003 OLD) # or cmake_policy(VERSION 2.4)
add executable(myexe myexe.c)
target_link_libraries(myexe /path/to/libA.so B)
will work and suppress the warning for this policy. It may also be updated to work with the
corrected linking approach:
cmake_policy(SET CMP0003 NEW) # or cmake_policy(VERSION 2.6)
link_directories(/path/to) # needed to find library B
add_executable(myexe myexe.c)
target_link_libraries(myexe /path/to/libA.so B)
Even better, library B may be specified with a full path:
add_executable(myexe myexe.c)
target_link_libraries(myexe /path/to/libA.so /path/to/libB.so)
When all items on the link line have known paths CMake does not check this policy so it has
no effect.
Note that the warning for this policy will be issued for at most one target. This avoids
flooding users with messages for every target when setting the policy once will probably fix
all targets.
This policy was introduced in CMake version 2.6.0. CMake version 2.8.0-rc2 warns when the
policy is not set and uses OLD behavior. Use the cmake_policy command to set it to OLD or
NEW explicitly.
CMP0004: Libraries linked may not have leading or trailing whitespace.
CMake versions 2.4 and below silently removed leading and trailing whitespace from libraries
linked with code like
target_link_libraries(myexe " A ")
This could lead to subtle errors in user projects.
CMP0QQ5
441
The OLD behavior for this policy is to silently remove leading and trailing whitespace. The
NEW behavior for this policy is to diagnose the existence of such whitespace as an error. The
setting for this policy used when checking the library names is that in effect when the target is
created by an add_executable or add_library command.
This policy was introduced in CMake version 2.6.0. CMake version 2.8.0-rc2 warns when the
policy is not set and uses OLD behavior. Use the cmake_policy command to set it to OLD or
NEW explicitly.
CMP0005: Preprocessor definition values are now escaped automatically.
This policy determines whether or not CMake should generate escaped preprocessor
definition values added via add_defmitions. CMake versions 2.4 and below assumed that only
trivial values would be given for macros in add_definitions calls. It did not attempt to escape
non-trivial values such as string literals in generated build rules. CMake versions 2.6 and
above support escaping of most values, but cannot assume the user has not added escapes
already in an attempt to work around limitations in earlier versions.
The OLD behavior for this policy is to place definition values given to add_defmitions
directly in the generated build rules without attempting to escape anything. The NEW
behavior for this policy is to generate correct escapes for all native build tools automatically.
See documentation of the COMPILE DEFINITIONS target property for limitations of the
escaping implementation.
This policy was introduced in CMake version 2.6.0. CMake version 2.8.0-rc2 warns when the
policy is not set and uses OLD behavior. Use the cmake_policy command to set it to OLD or
NEW explicitly.
CMP0006: Installing MACOSXBUNDLE targets requires a BUNDLE DESTINATION.
This policy determines whether the install(TARGETS) command must be given a BUNDLE
DESTINATION when asked to install a target with the MACOSX BUNDLE property set.
CMake 2.4 and below did not distinguish application bundles from normal executables when
installing targets. CMake 2.6 provides a BUNDLE option to the install(TARGETS) command
that specifies rules specific to application bundles on the Mac. Projects should use this option
when installing a target with the MACOSX BUNDLE property set.
The OLD behavior for this policy is to fall back to the RUNTIME DESTINATION if a
BUNDLE DESTINATION is not given. The NEW behavior for this policy is to produce an
error if a bundle target is installed without a BUNDLE DESTINATION.
This policy was introduced in CMake version 2.6.0. CMake version 2.8.0-rc2 warns when the
policy is not set and uses OLD behavior. Use the cmake_policy command to set it to OLD or
NEW explicitly.
CMP0007: list command no longer ignores empty elements.
442
Appendix F
This policy determines whether the list command will ignore empty elements in the list.
CMake 2.4 and below list commands ignored all empty elements in the list. For example,
a;b;;c would have length 3 and not 4. The OLD behavior for this policy is to ignore empty list
elements. The NEW behavior for this policy is to correctly count empty elements in a list.
This policy was introduced in CMake version 2.6.0. CMake version 2.8.0-rc2 warns when the
policy is not set and uses OLD behavior. Use the cmake_policy command to set it to OLD or
NEW explicitly.
CMP0008: Libraries linked by full-path must have a valid library file name.
In CMake 2.4 and below it is possible to write code like
target_link_libraries(myexe /full/path/to/somelib)
where "somelib" is supposed to be a valid library file name such as "libsomelib.a" or
"somelib.lib". For Makefile generators this produces an error at build time because the
dependency on the full path cannot be found. For VS IDE and Xcode generators this used to
work by accident because CMake would always split off the library directory and ask the
linker to search for the library by name (-lsomelib or somelib.lib). Despite the failure with
Makefiles, some projects have code like this and build only with VS and/or Xcode. This
version of CMake prefers to pass the full path directly to the native build tool, which will fail
in this case because it does not name a valid library file.
This policy determines what to do with full paths that do not appear to name a valid library
file. The OLD behavior for this policy is to split the library name from the path and ask the
linker to search for it. The NEW behavior for this policy is to trust the given path and pass it
directly to the native build tool unchanged.
This policy was introduced in CMake version 2.6.1. CMake version 2.8.0-rc2 warns when the
policy is not set and uses OLD behavior. Use the cmake_policy command to set it to OLD or
NEW explicitly.
CMP0009: FILE GLOB_RECURSE calls should not follow symlinks by default.
In CMake 2.6.1 and below, FILE GLOB_RECURSE calls would follow through symlinks,
sometimes coming up with unexpectedly large result sets because of symlinks to top level
directories that contain hundreds of thousands of files.
This policy determines whether or not to follow symlinks encountered during a FILE
GLOB_RECURSE call. The OLD behavior for this policy is to follow the symlinks. The
NEW behavior for this policy is not to follow the symlinks by default, but only if
FOLLOW SYMLINKS is given as an additional argument to the FILE command.
CMP0010
443
This policy was introduced in CMake version 2.6.2. CMake version 2.8.0-rc2 warns when the
policy is not set and uses OLD behavior. Use the cmakejpolicy command to set it to OLD or
NEW explicitly.
CMP0010: Bad variable reference syntax is an error.
In CMake 2.6.2 and below, incorrect variable reference syntax such as a missing close-brace
("${FOO") was reported but did not stop processing of CMake code. This policy determines
whether a bad variable reference is an error. The OLD behavior for this policy is to warn
about the error, leave the string untouched, and continue. The NEW behavior for this policy is
to report an error.
This policy was introduced in CMake version 2.6.3. CMake version 2.8.0-rc2 warns when the
policy is not set and uses OLD behavior. Use the cmake_policy command to set it to OLD or
NEW explicitly.
CMP0011: Included scripts do automatic cmake_policy PUSH and POP.
In CMake 2.6.2 and below, CMake Policy settings in scripts loaded by the include() and
findjpackage() commands would affect the includer. Explicit invocations of
cmake_policy(PUSH) and cmake_policy(POP) were required to isolate policy changes and
protect the includer. While some scripts intend to affect the policies of their includer, most do
not. In CMake 2.6.3 and above, include() and find_package() by default PUSH and POP an
entry on the policy stack around an included script, but provide a NO POLICY SCOPE
option to disable it. This policy determines whether or not to imply NOPOLICYSCOPE for
compatibility. The OLD behavior for this policy is to imply NO_POLICY_SCOPE for
include() and find_package() commands. The NEW behavior for this policy is to allow the
commands to do their default cmakejpolicy PUSH and POP.
This policy was introduced in CMake version 2.6.3. CMake version 2.8.0-rc2 warns when the
policy is not set and uses OLD behavior. Use the cmake_policy command to set it to OLD or
NEW explicitly.
CMP0012: The if() command can recognize named boolean constants.
In CMake versions prior to 2.6.5 the only boolean constants were 0 and 1. Other boolean
constants such as true, false, yes, no, on, off, y, n, notfound, ignore (all case insensitive) were
recognized in some cases but not all. In later versions of cmake these values are treated as
boolean constants more consistently and should not be used as variable names. The OLD
behavior for this policy is to allow variables to have names such as true and to dereference
them. The NEW behavior for this policy is to treat strings like true as a boolean constant.
This policy was introduced in CMake version 2.6.5. CMake version 2.8.0-rc2 warns when the
policy is not set and uses OLD behavior. Use the cmake_policy command to set it to OLD or
NEW explicitly.
444
Appendix F
CMP0013: Duplicate binary directories are not allowed.
CMake 2.6.3 and below silently permitted add_subdirectory() calls to create the same binary
directory multiple times. During build system generation files would be written and then
overwritten in the build tree and could lead to strange behavior. CMake 2.6.4 and above
explicitly detect duplicate binary directories. CMake 2.6.4 always considers this case an error.
In CMake 2.6.5 and above this policy determines whether or not the case is an error. The
OLD behavior for this policy is to allow duplicate binary directories. The NEW behavior for
this policy is to disallow duplicate binary directories with an error.
This policy was introduced in CMake version 2.6.5. CMake version 2.8.0-rc2 warns when the
policy is not set and uses OLD behavior. Use the cmake_policy command to set it to OLD or
NEW explicitly.
CMP0014: Input directories must have CMakeLists.txt.
CMake versions before 2.8 silently ignored missing CMakeLists.txt files in directories
referenced by add_subdirectory() or subdirs(), treating them as if present but empty. In
CMake 2.8.0 and above this policy determines whether or not the case is an error. The OLD
behavior for this policy is to silently ignore the problem. The NEW behavior for this policy is
to report an error.
This policy was introduced in CMake version 2.8.0. CMake version 2.8.0-rc2 warns when the
policy is not set and uses OLD behavior. Use the cmake_policy command to set it to OLD or
NEW explicitly.
CMP0015: The set() CACHE mode and optionQ command make the cache value visible.
In CMake 2.6 and below the CACHE mode of the set() command and the option() command
did not expose the value from the named cache entry if it was already set both in the cache
and as a local variable. This led to subtle differences between first and later configurations
because a conflicting local variable would be overridden only when the cache value was first
created. For example, the code
set(x 1)
set (before ${x})
set (x 2 CACHE STRING "X")
set (after ${x})
message(STATUS M${before},${after}")
would print "1,2" on the first run and "1,1" on future runs.
CMake 2.8.0 and above prefer to expose the cache value in all cases by removing the local
variable definition, but this changes behavior in subtle cases when the local variable has a
different value than that exposed from the cache. The example above will always print "1,2".
CMP0015
445
This policy determines whether the commands should always expose the cache value. The
OLD behavior for this policy is to leave conflicting local variable values untouched and hide
the true cache value. The NEW behavior for this policy is to always expose the cache value.
This policy was introduced in CMake version 2.8.0. CMake version 2.8.0-rc2 warns when the
policy is not set and uses OLD behavior. Use the cmake_policy command to set it to OLD or
NEW explicitly.
Index
Index
A
ALL BUILD target, 13, 109
ANT, 4
assert, 41
autoconf, 3
converting to CMake, 121
B
batch commands, 103
binary packages, 150
Borland compiler, 5, 21,23, 249
build
configurations, 32, 67
in-source. See in-source build
out-of-source. See out-of-source build
build platform, 125
building your project, 19
C
cache
advanced entries, 18, 30
documentation, 30
entries, 27, 29, 434
find_* commands, 86
FORCE option, 18, 32
intializing, 17
predefined options, 30
purpose, 30
set command, 29
variable behavior, 31
case sensitivity, 9, 38
ccmake. See running CMake
CDash, 195
adding notes, 205
automatic submissions, 206
backup,230
client setup, 199
creating a new project, 196
email, 225
448
Index
expected builds, 224
filtering errors/wamings, 203
logging, 229
mobile support, 230
server setup, 218
sites, 226
" specifying the server, 202
submitting results, 196
subprojects, 233
timing, 229
tutorial, 268
upgrading, 231
CMake
benefits, 1
command line, 287
compiler selection, 15
extending, 250
history, 3
plugin, 250
porting, 241
Structure, 21
syntax, 8, 33
tutorial, 255
versions, 43
CMake Commands, 8, 9, 34, 301
add_custom_command, 62, 105-8, 109, 110,
111, 112, 123,301
add_custom_target, 24, 108, 109, 110, 111, 123,
303
add_definitions, 88, 95, 96, 304
add_dependencies, 81,304
add_executable, 9, 10, 24, 25, 34, 121, 193, 305
addjibrary, 24, 25, 34, 121,306
add_subdirectory, 28, 34, 115, 116, 122, 307
add_test, 38,39, 186, 187, 188, 192, 193,307
aux_source_directory, 308
break, 42, 309
build_command, 309
cmake_minimum_required, 44, 51,214, 309
cmake_policy, 51,310
configure_file, 97, 98, 122, 311
create_test_sourcelist, 192, 193, 311
define_property, 312
else, 10,35
el seif, 36
enable_language, 313
enable_testing, 313
endif, 10, 35
exec_program, 120, 217
execute_process, 313
export, 81,314
file, 89, 116, 119, 120,315
find_file, 29, 85,318
findjibrary, 10, 41,46, 47, 85, 86, 320
find_package, 48, 85, 92, 95, 323
find_path, 46, 47, 85, 86, 329
find_program, 85, 105, 332
fltk_wrap_ui, 50, 335
foreach, 29,35,38,39,335
function, 38, 39, 336
get_cmake_property, 336
gct_directory_property, 337
get_filename_component, 193,337
get_property, 25, 26, 337
get_source_file_property, 25, 338
get_target_property, 24, 105, 106, 108, 339
get_test_property, 339
if, 10, 27, 35, 36, 37, 38, 40, 42, 339
include, 28,45,46, 95,343
include_directories, 86, 99, 252, 344
include_external_msproject, 344
include_regular_expression, 82, 344
install, 66, 68, 345
link_directories, 350
link_libraries, 25, 62
list, 351
load_cache, 352
load_command, 252, 352
macro, 35, 38, 39, 40, 41,217, 352
make_directory, 120
mark_as_advanced, 18, 30, 119, 353
math, 353
message, 29, 122, 353
obsolete/deprecated, 366
option, 29, 95, 121,354
output_required_files, 82, 354
project, 9, 10,34, 82, 105, 119, 123,242,354
qt_wrap_cpp, 355
qt_wrap_ui, 355
remove, 34, 193
449
Index
remove_definitions, 355
return, 42, 355
separate_arguments, 34, 356
set, 9, 10, 18, 24, 27, 28, 29, 31,32, 34, 35, 46,
356
set_directory_properties, 357
set_property, 25, 26, 357
set_source_file_properties, 358
set_source_files_properties, 25, 48, 62
set_target_properties, 24, 65, 359
set_tests_properties, 187, 188,359
site_name, 359
source_group, 123, 359
string, 42, 62, 360
subdirs, 189
target_link_libraries, 25, 59, 60, 362
try_compile, 85, 88, 89, 92, 122, 131,363
try_run, 85, 88, 89, 92, 364
unset, 365
variable_watch, 365
while, 35,38,39,365
CMake Modules. See modules
CMake Policies. See policies
CMake Properties, 26, 411
ABSTRACT, 26
ADDITION ALMAKECLEANFILES, 26
COMPILE DEFINITIONS, 96
COMPILE_DEFINITIONS_<CONFIG>, 97
COMPILE FLAGS, 25
EXCLUDEFROMALL, 26
GENERATED, 25
LABELS, 240
LINK_FLAGS, 25
list of, 27
LISTFILE STACK, 26
OBJECT DEPENDS, 26
WRAP EXCLUDE, 26
CMake Variables
BUILD SHARED LIBS, 24
CMAKEBUILDTYPE, 32
CMAKEBUILDTYPE, 67
CMAKECCOMPILER, 16, 249
CMAKECCOMPILERWORKS, 89
CMAKECCREATESHAREDLIBRARY,
249
CMAKECFLAGS, 16,252
CM AKECLINKEXECUTABLE, 82
CMAKECFG1NTDIR, 32, 62, 104
CMAKECOMMAND, 104, 106, 107,206
CMAKE CONFIGURATION TYPES, 32
CMAKECROSSCOMPILING, 127
CMAKECTESTCOMMAND, 192
CMAKECURRENTBINARYDIR, 105,
267
CMAKECURRENTSOURCEDIR, 105
CMAKE CXX COMPILE OBJECT, 250
CMAKE CXX COMPILER, 16, 244, 245, 248,
249, 250
CMAKECXXCREATESHAREDLIBRAR
Y,244,248, 249
CMAKECXXCREATESHAREDMODL'L
E, 249
CMAKE_CXX_CREATE_STATIC_LIBRARY,
245,249, 250
CMAKE CXX FLAGS, 16, 32, 251
CMAKE CXX FLAGS DEBUG, 245
CMAKE CXX FLAGS DEBUG INIT, 245
CMAKE_CXX_FLAGS_INIT, 245
CMAKE CXX FLAGS MINSIZEREL, 245
CMAKE_CXX_FLAGS_MINSIZEREL_INIT,
245
CMAKE_CXX_FLAGS_RELEASE, 245
CMAKE CXX FLAGS RELEASE INIT, 245
CMAKE_CXX_FLAGS_RELWITHDEBINFO,
246
CMAKE_CXX_FLAGS_RELWITHDEBINFO_
INIT, 246
CMAKE CXX LINK EXECUTABLE, 82, 249
CMAKE DL LIBS, 245
CMAKE_END_TEMP_FILE, 249, 250
CMAKEFINDROOTPATH, 129
CMAKEGENERATOR, 192,207
CMAKE_HOST_*, 130
CMAKEIN ST ALLCOMPONENT, 75
CMAKE INSTALL PREFIX, 15, 67, 75
CMAKEINSTALLRPATH, 148
CMAKELIBRARYPREFIX, 105
450
Index
CM AKE_MAJOR_ VERSION, 44
CMAKEMAKEPROGRAM, 192
CMAKJEMODULEPATH, 45
CMAKERANLIB, 248, 249
CMAKE_ROOT, 95, 252, 265
CMAKE_SHARED_LIBRARY_C_FLAGS, 249
,CMAKE_SHARED_LIBRARY_CREATE_C_F
LAGS, 245
CMAKE_SHARED_LIBRARY_CREATE_CX
X_FLAGS, 244, 245, 248
CMAKE_SHARED_LIBRARY_RUNTIME_C_
FLAG, 245
CMAKE_SHARED_LIBRARY_RUNTIME_C_
FLAG_SEP, 245
CMAKE_SHARED_MODULE_PREFIX, 105
CMAKE_SKIP_RPATH, 64
CMAKE_START_TEMP_F1LE, 249, 250
CMAKESYSTEMNAME, 127,241,242,
245
CM AKESY STEMPROCESSOR, 127, 142
CMAKE_SYSTEM_VERSION, 127, 241
CMAKE_TOOLCHAIN_FILE, 126
CMAKE_VERSION, 44
EXECUTABLEOUTPUTPATH, 105, 118,
119
LIBRARY_EXPORT, 61
LIBRARYOUTPUTPATH, 105, 118, 119
PROJECT BINARY D1R, 105, 119, 252
PROJECT SOURCE DIR, 37, 105, 109, 252,
253,258
WIN32, 10,24,61, 123
cmake-gui, 11, 13, 15, 30
pulldown option, 30
CMakeSetup. See cmake-gui
cmMakefile, 23,24,31
code coverage, 196, 200
comments, 10, 33
comparison, 37
compile flags, 25
compiler specification, 15
compilers, 5, 243
compiling CMake, 8
conditional statements, 35
configured header, 256, 260
converting autoconf projects to CMake, 121
converting Makefiles to CMake, 120
converting Visual Studio projects, 123
copying files. See file
CPack, 149
command line, 298
components, 163
DESTDIR, 155
escape characters, 152
generators, 153
tutorial, 267
variables, 151
cross compiling, 125
hello world, 136
system introspection, 130
CTest, 189
advanced, 212
building tests, 191
command line, 294
options, 190
properties, 187
regular expressions, 188
running the tests, 189
tutorial, 260
variables, 212
CTest Commands
ctest_build, 214
ctest_build_command, 213
ctest_configure, 214
ctest_empty_binary_directory, 213
ctest_start, 214
ctest_submit, 214
ctest__test, 214
ctest_update, 214
custom commands, 103, 105
custom targets, 108
CVS, 209
cygwin, 149, 173
D
DART. See CDash
dashboards, 17, 185, 194, 195
Debian, 150, 182
451
Index
declspec, 61
dependencies, 82
dependency analysis, 16, 26
DESTDIR, 75, 149, 155
directory installation, 72
directory structures, 10, 115
creating, 120
properties, 26
functions, 39
G
generator, 15, 21,23, 32, 207, 263
graphviz, 289
E
editing CMakeLists files, 17
Emacs modes, 17
embedded devices, 125
environment variables, 2, 9, 16, 64, 217
escape character, 33
executing programs, 120
F
false, 38
file
COMPONENT, 67
copying, 104
exclude, 74
existance, 36
globbing, 119
installing, 66
OPTIONAL, 68
permissions, 67
properties, 25
regular expressions, 74
remove, 104
rename, 71
filtering errors and warnings, 203
final pass, 24
find modules. See modules
Hags, 16,25,64
fow control, 34
FLTK, 50, 143
fortran, 242, 278
function, 35
H
header files, configured, 97
hello world, 9, 136
history of CMake, 3
I
initial pass, 23
in-source build, 10, 117
installation scripts, 75
installer, 267
installing CMake
Mac OS X, 7
UNIX, 7
Windows, 7
installing files. See files
J
JAM, 4
K
KDE, 3
L
languages, 34, 242, 247
LaTeX custom target, 109
452
Index
libraries, 59
API changes, 64
exporting, 80
importing, 78
installing prerequisites, 76
modules, 24
pitfalls, 63
rpath, 64
shared, 24
shared vs static, 59
soname, 64
static, 24, 25
versions, 64
library configurations, 59
linking
libraries, 56
system libraries, 57
Windows, 59
list. See variables
loaded commands, 26, 250, 254
looping constructs, 35
M
Mac OS X
drag and drop installer, 178
frameworks, 319, 322, 327
Package Maker, 149, 176
relocatable applications, 76
Xcode. See Xcode
macros, 39, 40
Makefiles, 21, 23, 32
build configurations, 32
microcontroller, 140
MinGW, 13, 143
modules, 44, 373
documentation, 47
find, 45,93
find <Package>Config.cmake, 93
find conventions, 93
path, 45
system introspection, 47, 87
utility, 47
modules, loadable. See libraries
N
NMake, 23
not found, 86
NSIS, 149, 153, 156
Nullsoft Installer, 149
numeric comparison, 37
O
operator precedence, 38
operators, 36
out-of-source build, 10, 117
P
package configuration file, 99
platforms, 4, 242
PLEASEFILLOUT, 131
plugins, 59,250,251
policies, 50, 437
scope, 52
setting, 51
support multiple versions, 56
portability issues, 103
portability of code, 87
porting CMake, 241
POSIX systems, 241
project
languages, 34
name, 34
properties. See CMake Properties
proxies, 203
purify, 82, 200, 203
Q
qmake, 4
453
Index
Qt, 2, 49
Qt CMake user interface. See cmake-gui
quoting, 9
R
regression testing, 185
regular expressions, 37, 42-43, 82, 190
relocatable packages, 76, 150
removing files. See file
required package, 101
RPATH, 64, 148
RPM, 150, 183
rule variables, 247
running CMake, 10
ccmake, 13
cmake-gui, 11
command line, 15
S
SCons, 4
shared library. See libraries
shell commands, 103
source files, 25, 431
generated, 107
source packages, 150, 154
subprojects, 237
SWIG, 2, 47-49
syntax of CMake, 8, 33
system introspection, 262, See modules
T
target platform, 126
targets, 24
custom, 108
custom commands, 105
exporting, 79
importing, 78
properties, 25, 417
testing, 185
toolchain file, 126
true, 38
tutorial, 255
U
unit testing, 186
UNIX
libraries, 63
Makefiles. See Makefiles
symbols, 61
utility modules. See modules
V
valgrind, 200, 203
variable argument lists, 41
variable scope, 28
variables, 9, 27, 269
cache, 29
interaction with cache, 31
list, 9, 29, 34
PARENTSCOPE, 28
quoting, 9
remove from list, 34
rule, 247
scope, 40
types, 30
versions, 43
Vim mode, 17
Visual Studio, 3, 5, 13, 15, 17,21,23,32,34, 66,
104, 105, 107, 109, 112, 117
converting to CMake, 123
file groups, 123
header files, 123
W
white space, 33
Windows
454
Index
build directory, 1 19
CDash, 208
dllexport, 61
executable, 24
executables, 123
installers. See NSIS
run time libraries, 163
symbols, 61
WinMain, 24, 123
wrapping C/C++. See SWIG
linking, 59
manifest flies, 163
X
registry entries, 2, 86
registry values, 9
relocatable applications, 76
Xcode, 3,66,274