/


Текст
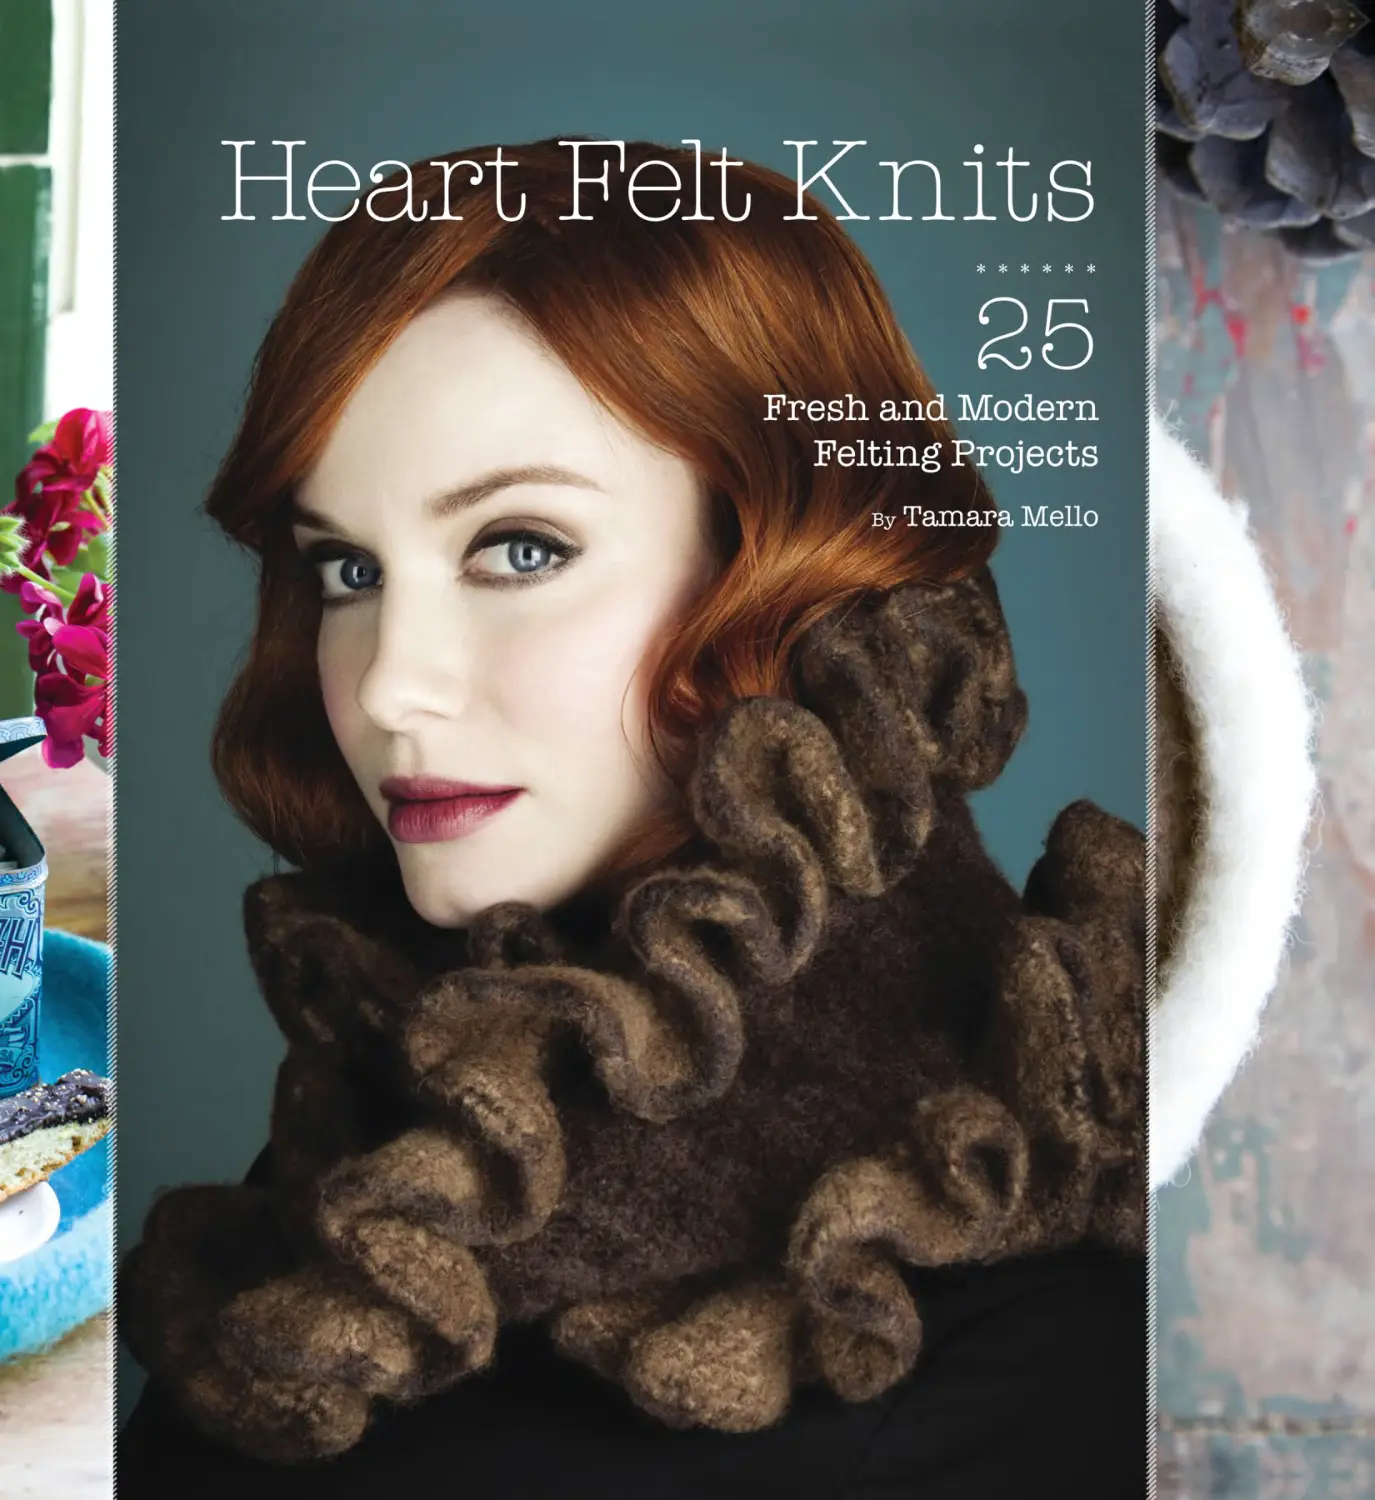
                    Heart Felt Knits
25

Fresh and Modern
Felting Projects
******

By

Tamara Mello

Copyright © 2012 by Tamara Mello.
All rights reserved. No part of this book may be reproduced in any form
without written permission from the publisher.
Library of Congress Cataloging-in-Publication Data available
eISBN: 978-1-4521-1306-7
Designed by Ayako Akazawa
Sample Knitting and Pattern Testing by Samantha Fisher
Photo Editing by Jennifer Laski
Photographs by Jessica Sample
Prop styling by Kathryn Kendall
Modeling by Maxime Laski, Gemma Cascardo, Olivia Cascardo, Kathryn Kendall, and Lara Everly
Front cover, Ruffle Scarf, and Cloche Hat photos:
Photographs by Frank W. Ockenfels 3
Hair by John Ruggiero
Makeup by Vanessa Scali
Modeling by Christina Hendricks
Blue Sky Alpacas is a registered trademark of Blue Sky Alpacas, Inc.
Cascade Yarns is a registered trademark of Cascade Yarns, Inc.
Dr. Bronner's Magic Soap is a registered trademark of All-One-God-Faith Inc. Corp.
Lion Brand Yarns and LB Collection are registered trademarks of
Orchard Yarn & Thread Company, Inc.
Naturally Yarn is a registered trademark of Wentworth Distributors NZ Ltd.
Patons is a registered trademark of Patons and Baldwins Limited Co.
Trendsetter Yarn is a registered trademark of Trendsetter Yarns Intl.
Velcro is a registered trademark of Velcro Industries B.V. Corp.
Chronicle Books LLC
680 Second Street
San Francisco, California 94107
www.chroniclebooks.com

For Olivia and Paolo, my two great loves

Contents
Foreword by Christina Hendricks 6
Introduction 8 * Techniques 10 * Abbreviations 19
Tips, Tools, and Troubleshooting 20
HOME
01 Nesting Bowls 27 * 02 Two-Tone Tray 35 * 03 Round Platter 39
04 Oversize Pencil Holder 43 * 05 Knitting Needle Carrier 47
06 Set of Four Coasters 51 * 07 Upcycled Ornaments 55
08 Soft Felted Spheres 59 * 09 Stuffed Robot 63 * 10 Little Acorns 71
11 Baby Elf Booties 75 * 12 Men’s Clog Slippers 81
STYLE
13 Chain Necklace 91 * 14 Farmers’ Market Tote 95
15 Ruffle Scarf 101 * 16 Laptop Messenger Bag 105
17 Mini Cashmere Clutch 111 * 18 Concentric Circles Barrette 117
19 Bangles 121 * 20 Cat Ears Hat 125 * 21 Chic Hand Warmers 133
22 Cashmere Cuff 137 * 23 Rose Brooch or Barrette 141
24 Cloche Hat 145 * 25 Baby Acorn Hat 149
Resources 154 * Index 155 * Acknowledgments 156
*****

Foreword
I met Tamara eight years ago at a party I was hosting. She was the tiny little
bird in the corner sipping champagne (although she hardly looked old enough),
laughing, smiling, and just being charming. We had a brief conversation, and I
floated off to serve more cocktails and refill the cracker plate. To be quite honest,
I assumed she was the young date of a friend, and that I would probably never
see her again.
But I did see her again, several months later—this time for a mini road trip we
were taking to go see a mutual friend perform in a play. We hopped in the car, put
on our seat belts, and . . . both pulled out our knitting at the same time! I pulled
out one of those shape-changing scarves you make when you first start to knit
(due to unintentionally dropping and adding stitches every other row), and she
pulled out the most stunning cardigan with a shawl collar. I could tell she was a
pro, so I took advantage, and during the next few hours, she helped me fix all the
mistakes I had made on my sad little scarf. She also revealed herself to be one of
the smartest, wittiest, and warmest people I had ever met.
At one point Tamara asked, “Do you want to start a knitting club with me?” and I
was immediately on board. We called some friends that we knew were beginning
knitters, and it was on! We named ourselves the “Knitwits.” We quickly found out
that our name wasn’t all that original and that other groups in town had cooler
names than us (the “Shizknits,” for example), but we didn’t care; we were excited
and felt that we were creating something special regardless of the name.
Over the next few years, Tamara and I patiently and proudly taught new members
to knit and purl, cable, and yarn over. We inspired each other and learned and
improved together, but above all—something I hadn’t expected going in—we
created a new family, because we weren’t just knitting together. We were sharing
our lives: our accomplishments, our relationships, our family feuds, and our
hopes and dreams.

Would I have had a home to stay in when I was unemployed with nowhere to
go? Would I have spent summers in Tamara’s backyard picking fresh plums,
painting my toenails, and sipping white wine? Would I have been in the delivery
room for the birth of Tamara and Paolo’s beautiful daughter, Olivia? Would I have
done any of these things if it weren’t for knitting?
I’ll never know. But what I do know is that what seemed like a hobby turned out to
be much, much more. Knitting is a lifestyle. A community. A group of people who
take pride and comfort in creating one little stitch and turning it into something
beautiful. Knitting taught me that taking the time to nurture something and
make it your own, and ask for help from friends along the way, is what life is all
about. And for that, I have Tamara Mello to thank.
Christina Hendricks
*****

7 / Foreword

Introduction
I grew up in a home where we made stuff. Rainy days meant homemade play
dough we could mold, bake in the oven, and paint. My mom was always whipping
up elaborately themed birthday parties and gorgeous Halloween costumes
fashioned from tulle and tinfoil. My father could build anything. He once made
me the world’s greatest dollhouse and decorated each room with different
wallpaper and carpet. I learned recently that one of my great-grandmothers
and her sisters were wool weavers. I suppose my penchant for creating is in
the blood.
Working as an actor, as I have for over a decade, one of the first things you learn
is that there is a lot of downtime. A lot. As it turned out, the endless hours between
takes and before auditions ultimately led me to crafting. While I was working
on the show Popular, my amazing costume designer, Lou Eyrich, taught me
the basics of knitting. Once I learned how to knit, I became obsessed, knitting
in my trailer, on set, in line at the grocery store, in my car at red lights (not
recommended)—anytime I had an extra moment. Knitting was a satisfying way
to fill the downtime, and I began to shift more and more focus onto what I was
creating with my hands between the duties of my day job.
I quickly learned or taught myself most of the techniques involved in knitting. I
admit that felting came a bit later. For a while, my only association with felting
was fuzzy, misshapen handbags that did not appeal to me. Then one day, I
accidentally washed a little wool hat that I had knit for my daughter, and out of
the dryer popped the cutest little felted wool bowl I’d ever seen. And that’s all it
took. I went into a frenzy, knitting various giant things and then felting them
to see what they would become. Many of these early experiments were horrible
disasters. But a select few came out well and became the foundation for Blackbird
Design House, my online shop.
There are different types of felting techniques. For this book, I focus on the
technique of traditional wet felting, which involves knitting with wool yarn to
create different shapes and textures and then turning the knitted wool into a
felted fabric. Wet felting is an ancient textile process that involves transforming

knitted wool into a dense cloth by bonding and shrinking the fibers together
using hot water and agitation. Wet felting is by no means an exact science
and a lot of experimentation went into developing the patterns for this book.
But unpredictability is part of the fun of felting. I also love the idea of using a
centuries-old technique to create something that is both modern and timeless.
Felted wool is very dense and water resistant. It is also, amazingly, fire retardant
and if protected from moths, virtually indestructible. This makes it the perfect
material from which to create something that can be passed down from
generation to generation. And because wool is a perfectly renewable, sustainable
resource, the practice of knitting and felting is also incredibly eco-friendly.
Felting by hand uses very little water and zero electricity yet creates something
that can last a lifetime or more. Although felting by machine uses electricity and
a bit more water, it results in a lasting and sustainable heirloom. I explain both
hand felting and machine felting in the “Felting 101” section; use the technique
that works best for you.
The patterns in this book are fairly simple and are written for people with a
working knowledge of knitting techniques and terminology. Many of my
patterns begin with a simple circle base that is bound off to create a structure
for the sides of the piece. I’ve found that this leads to cleaner lines and an overall
sturdier design. I’ve included at the front of the book a handy Abbreviations
guide to help you with the various abbreviations found within each pattern.
I’ve also included a section on Techniques with how-to photos and a helpful
Tips, Tools, and Troubleshooting guide just in case you get stuck.
In the following pages, you will find projects that are both practical and whimsical.
I hope you find inspiration here and use this book as a jumping-off point to create
your own unique pieces. Many of my designs started off as mistakes, which
turned into ideas, which turned into something not even remotely resembling
what I’d originally intended. That’s what I love most about the felting process: It
is all about transformation. And really, isn’t everything?

9 / Introduction

Techniques

Felting 101
How to Felt
There are a couple of different ways to achieve a felted look. I prefer the hand
felting method. Felting by hand is more work than machine felting, but you
ultimately have much more control over how your final product looks. The added
bonus is that it is eco-friendly. On the other hand, machine felting is much faster
and easier. Try both, and decide which works best for you. One caveat: Machine
felting works best in top-loading washers. The front-loading washers don’t use
as much water or agitation, and you can’t stop them in the middle of the cycle to
check your progress.
*****

Hand Felting
YOU WILL NEED
Hot water
Ice water
Rubber dishwashing gloves
2 buckets or bowls large enough for the object you’re felting
Dr. Bronner’s Lavender Liquid Soap (You can really use any
liquid soap, but I love this brand because it is all natural
and the lavender is a natural moth repellent.)
Small washboard or other textured surface
Stamina

INSTRUCTIONS
Step 1 Place the item to be felted into your container of very hot water. (I usually boil

the water on the stove, then add a bit of cold water so I don’t scald myself.) Wear gloves
and be careful!

Step 2 Add a couple of drops of soap and start agitating, using a spoon, plunger, or

other household item, depending on the size of your piece. You can just sort of spin
things around so your piece gets thoroughly wet and the wool fibers begin to open
up a bit. (You won’t see this, but it’s happening!) Do this for 5 or 10 minutes to get the
felting process started.

Step 3 Remove from hot water, wring out, and plunge into cold water. This process
shocks the wool fibers and gets them to open up and start fusing together.

Step 4 Wring out your item gently but thoroughly, and place back in hot water. Begin
to scrub your piece against your washboard using the soap as lubrication. Don’t use
too much soap—just a drop or two—or you won’t get the necessary friction. You can
scrub your piece alternately against the washboard, against itself, and between your
hands. Progress will seem slow at first, but don’t give up. You will begin to notice that
your wool is looking fuzzy and the stitches less distinct. This is a great sign and means
your wool is starting to felt.

Step 5 After a few more minutes, plunge your piece back into the ice water. This will
shock the fibers again and cause them to open even more.

Step 6 Gently squeeze out excess water.
Repeat steps 1–6 until the desired amount of felting has occurred. This generally

means when you can no longer see the stitches and your knitting looks like a piece
of wool fabric. Experiment to find the look that works for you. Some of the patterns in
this book are felted less than others, so that you can still see the stitchwork. It really
is a matter of personal preference.

Step 7 Rinse.
Step 8 Roll the piece up in a towel to squeeze out excess water.
NOTE:
A salad spinner is another great way to remove excess water from smaller
projects. It’s like a kinder, gentler spin cycle and really speeds up the drying
time. However, I would recommend reserving a salad spinner for this
purpose only, or you may end up with some fuzz on your microgreens.

11 / Techniques

Step 9 Place on mold if required or lay flat to air dry.
NOTE:
Please don’t ignore your rubber gloves. Wear them! Most gloves have a textured
surface on the palms that’s great for felting your fabric, and they really and
truly protect your hands from drying out. Take it from me. I ignored my own
advice and now have the hands of a one-hundred-year-old washerwoman.
*****

Machine Felting
NOTE:
Again, machine felting should really only be done in a top-loading washing
machine, so you can open the door to check on your work. However, if all
you have is a front loader and you really don’t want to felt by hand, there’s a
tiny window of time between the wash and rinse cycles when you can open
the door. You basically just have to stand there and watch your washer, or
you’ll miss the window. I still don’t advise this method, but it is possible.
Step 1 Place each item to be felted into its own lingerie bag or zippered pillowcase.
This is important when felting pieces of different colors to prevent fibers from one
color from felting into another. The lingerie bags will also protect your washer pump
from getting clogged with fuzz, which can be annoying and expensive!

Step 2 Add a few drops of soap and set the water temperature on the washing machine

to hot with a cold rinse. If your model has multiple speeds, set the wash cycle for the
longest time with maximum agitation. Add a pair of old jeans or a few tennis balls to
the machine to add friction.

Step 3 Check the felting process after five or ten minutes. You can put your item back
in to continue felting and start the wash cycle over for more time. Just don’t let your
machine get to the spin cycle. The spin cycle can cause creases where you don’t want
them, and they can’t be removed. The spin cycle is your enemy. Most top-loading
machines won’t spin or drain when the lid is lifted, which is a helpful feature if you
need to step away—you know your knits will be safe. Add a kettle of boiling water if it
needs another cycle to keep the water nice and hot. Continue until your item reaches
the desired degree of felting. Some people like to be able to still see their stitches while
others prefer a more solid fabric. It’s really up to you or what your pattern calls for.

Step 4 Once your item is felted to perfection, remove it from the wash. No spin cycle!

Many a felted lovely has been beaten beyond recognition in the spin cycle. This is
another reason I don’t recommend felting in a front loader. They spin to wash rather
than agitate.

12 / Heart Felt Knits

Step 5 Rinse with cold water and roll up tightly in a towel to squeeze out the excess water.
Step 6 Place on mold if required or lay flat and allow to air dry.
*****

Caring for your felted knits
I recommend spot cleaning with mild soap and cold water when necessary.
Should a piece need an all-over cleaning, hand wash it in cold water, reshape,
and air dry.
*****

Knitting in the Round
On a Circular Needle
A circular needle is used for creating a tube of knitting. The right side is always
facing out, so when you knit every row you are in fact creating stockinette stitch
rather than garter stitch. Cast on the desired number of stitches and place a
marker after the last stitch (Figure 1). Holding the needle with the first cast‑on
stitch in your left hand and the needle with the last stitch in your right, use
the right-hand needle to knit into the first cast-on stitch (Figure 2), moving
the new stitch off the left and onto the right-hand needle (Figure 3). Continue
in this manner until you reach your marker. This completes your first round.
Continue for desired number of rounds or inches (or centimeters, for those more
comfortable with the metric system).
*****

* fig 1 *

* fig 2 *
13 / Techniques

* fig 3 *

On Double-Pointed Needles (DPNs)
DPNs are used to create knitted tubes of a smaller circumference than
circular needles, and in this book I use them to create the circular base for
many of my patterns. You will frequently switch from circulars to DPNs while
decreasing, when you have too few stitches to continue knitting comfortably on
circular needles.
Using four needles, the stitches are arranged in a circle on three of the needles,
with the fourth needle used as the working needle. The working needle and
the first needle of the round will be worked just as knitting would be done on
two needles, with the stitches moving from the left needle onto the working
needle. The other two needles just hold the other stitches until they are ready
to be worked. Once the first needle’s stitches are knitted, the working needle
becomes the first needle in the round, and the newly emptied needle becomes
the working needle.
To work on double-pointed needles, cast the desired number of stitches onto one
of your needles (Figure 1). Divide the stitches evenly among three needles and
set a place marker between the last two stitches (Figure 2).
Use the fourth double-pointed needle to join and begin knitting in the round
(Figure 3).
*****

* fig 1 *

* fig 2 *

14 / Heart Felt Knits

* fig 3 *

Bind-Off Methods
Standard Bind-Off
This is the most common and frequently used bind-off method. Knit the first
stitch on your needle, then knit the second stitch. * You now have two stitches
on your right-hand needle. Insert the left needle tip into the outside stitch on
your right needle (Figure 1), then lift this stitch up and over the second stitch
(Figure 2) and off your needle. Knit the next stitch, then repeat from * to the
end of the row or for the number of stitches required by the pattern. When you
have just one stitch remaining on your right needle, break the yarn and pull it
through the remaining stitch.
*****

* fig 2 *

* fig 1 *

Three-Needle Bind-Off
Place the stitches to be joined onto two separate needles, and hold them with the
right sides of knitting together. Insert a third needle of similar size into the first
stitch on each needle and knit them together as one stitch. * Knit the next stitch
on the two needles together the same way, then pass the first stitch over the
second stitch on the right-hand needle as you do for a standard bind-off. Repeat
from * to end of row until you have just one stitch remaining on your right-hand
needle. Break yarn and pull tail through the last stitch.
*****

15 / Techniques

I-Cord
Using two double-pointed needles, cast on the required number of stitches
(between 3 and 7). * Without turning the needle, slide stitches to the other side
of your needle, pull yarn across the back of your stitches and knit the stitches
again. Repeat from * to desired length (Figure 1).

Pick Up and Knit
With the right side facing you, work from right to left. Insert tip of needle into
center of stitch below the edge (Figure 2), wrap yarn around needle, and pull it
through to make a stitch along the horizontal edge (Figure 3). Pick up one stitch
for every stitch in a bound-off or cast-on edge.

NOTE:
For patterns that simply call for you to pick up stitches without knitting
them, proceed as follows: With a spare needle and working from left to
right, lift up one leg of each stitch along the edge and place them on the
needle without knitting them. Then continue with the directions given.

pick up and knit

* fig 1 *

* fig 2 *

16 / Heart Felt Knits

* fig 3 *

Flat Seam
This is used when you do not want any bulk on the inside of your knitting. You
weave in and out of both sides on the very edge of the knitting (Figure 1).

Decreases
Ssk Decrease
This is a left-slanting decrease. Slip two stitches knitwise one at a time onto your
right needle (Figure 2). Insert the tip of your left needle from left to right into
the front of these two stitches, and knit them together (Figure 3).
*****

* fig 1 *

* fig 2 *

17 / Techniques

* fig 3 *

K2tog Decrease
This is a right-slanting decrease. Insert the needle into two stitches knitwise,
and knit them together as though they were a single stitch (Figure 1).
*****

Increases
Kfb Increase
Knit into the front of a stitch but leave it on your left-hand needle (Figure 2), knit
through the back of the same stitch (Figure 3), then slip the original stitch off
your needle. You have created two stitches from one.
*****

Yarn Over
Bring the yarn to the front into the purl position, then knit the next stitch. This
creates an eyelet and an extra stitch. When you get to the yarn over on the next
row, treat it as a regular stitch.
*****

* fig 1 *

* fig 2 *

18 / Heart Felt Knits

* fig 3 *

Abbreviations
Italicized terms are described in more detail in the Techniques section.

BO

bind off

C1

color 1

C2

color 2

CC

contrast color

cm

centimeter(s)

CO

cast on

dec

decrease(s)

DPN

double-pointed needle(s)

g

gram(s)

in

inch(es)

inc

increase(s)

k

knit

k2tog

knit 2 stitches together

kfb

knit into the front and
back of the same stitch

knitwise

as if to knit

M1

make one

MC

main color

mm

millimeter(s)

p

purl

p2tog

purl 2 stitches together

pfb	purl into front and
back of same stitch
pm

place marker

psso

pass slip stitch over

purlwise

as if to purl

rnd(s)

round(s)

RS

right side

sl

slip

ssk

slip, slip, knit

st(s)

stitch(es)

tbl

through back loop

WS

wrong side

yd

yard(s)

yo

yarn over

*

repeat starting point

*_*	repeat all instructions
between asterisks
( )	alternate measurements
or instructions
[ ]	instructions that are to
be worked as a group a
specified number of times

Tips, Tools, and Troubleshooting
Shrinkage
Felting is by no means an exact science. A general rule of thumb is that most
wool will shrink by about 15 percent in width and 25 percent in length. This,
however, is a huge generalization. Different types of wool and different blends of
wool felt at different rates. Some of the yarns used in this book will shrink up to
50 percent of the original width.
Each of the patterns in this book was written specifically for the yarns called for
in each one, but this certainly doesn’t mean you can’t use different yarn if you
want to! Try to use the same weight as the stated yarn so you will get a similar
look and feel. Also be sure to do a test swatch to see how the wool felts before
using it. I generally knit a 4-by-4-in/10-by-10-cm swatch in stockinette stitch.
Check the initial gauge (number of stitches and number of rows over a 2-in/5‑cm
square) against the gauge given in the pattern instructions. If you have fewer
stitches per inch, try using a smaller needle; if you have more stitches per inch,
try using a bigger needle. Felt the test swatch and measure the difference in
height and width. This will tell you how much the wool shrinks when felted, and
you can adjust the pattern accordingly.

Overfelting
You left the work it took you two weeks to knit up in the washing machine too
long. The men’s size 12 (UK size 11) slipper you intended looks like it might fit
an eight-year‑old girl. Don’t panic! All is not necessarily lost. Felted wool while
still wet has amazing stretching capabilities. Pull and stretch that slipper as if
your very life depended on it. Use brute force if necessary; I promise it won’t rip.
Stretch the item over a mold of the appropriate shape and allow to dry. The mold
itself doesn’t matter as long as it will hold its shape. You can use a bowl, a shoe, a
vase, whatever. I’ve been known to use my own head to stretch out an overfelted
hat. Be creative! The felted wool will dry around the mold and retain the new
shape.

Mastering Double-Pointed Needles (DPNs)
If you’re new to the double-pointed needle and are having trouble, do not despair.
There’s a definite learning curve with these guys. Review the Techniques
section and keep practicing. One of the most obvious problems with DPNs is that
the stitches have a tendency to slide off the needles. I use bamboo DPNs almost
exclusively. This doesn’t eradicate the problem entirely, but it really helps, as
they are much less slippery than metal or plastic needles.
Most of the patterns in this book will require you to switch from DPNs to circular
needles or vice versa. If it is not specified in the pattern (or even if it is!), switch
needles when it is most comfortable for you, for example when you have too few
stitches on your circulars or too many on your DPNs to knit comfortably.
There are a couple of other methods for knitting in the round as well. One uses
two sets of circular needles rather than DPNs. The other is called the “magic loop”
method and uses just one set of circulars. There are loads of tutorials for both of
these techniques on the Internet if you are not keen on the idea of using DPNs.

Gauge
In knitting, especially if you’re knitting a garment, gauge is incredibly helpful.
In felting, however, the rules get a bit skewed. As I’ve said, it’s always a little
difficult to know how particular wool is going to felt. I give the gauge of a project
when I think it’s necessary. If a pattern doesn’t have a gauge, don’t worry about
it; it just isn’t all that important.

21 / Tips, Tools, and Troubleshooting

Mistakes
There are no real mistakes in felting, just future projects waiting to be born. I
came up with the idea for the upcycled ornaments because I had a basket full
of projects that were either felted too much or just didn’t turn out quite right. I
wish you a felting career filled only with successful projects. However, if one or
two should go awry, save them! Ditto for shrunken or moth-eaten wool sweaters.
Turn them into embellishments for hats or patches for jeans, or cut out squares
and sew them into a funky patchwork scarf.

Tools and Supplies
These tools are not entirely necessary for the projects in the book, but I find them
incredibly helpful.
Row Counter These come in various forms. Some are handheld with a little
button on top that you push after each row. Others fit on the end of one of your
needles, and you turn a dial after each row. Of course you can just make hash
marks on a piece of scrap paper, but I find these to be super helpful.
Stitch Markers These are just little circular pieces of plastic or metal that slide
on and off your needles to help you keep track of the stitches in a pattern. They
are used frequently when knitting in the round so you know where your round
begins and ends. You can also just tie some contrasting scrap yarn in a knot,
leaving an opening wide enough for your needle to slide through.

22 / Heart Felt Knits

Row Markers These are similar to stitch markers, but have an opening in them
so you can attach them directly to a stitch. They don’t travel with your needles
but stay in one place to mark a certain row you may need to reference later in the
pattern. You can use safety pins for the same purpose.
Stitch Holders Stitch holders resemble extra large safety pins and are used for
setting aside stitches to be worked later in a pattern. If you just need to mark a
few stitches, you can use a safety pin or piece of scrap yarn.
Knit Check This handy little device not only provides a system for checking the
size of your needles but also has an inch and centimeter ruler and a row- and
stitch-to-the-inch gauge.
Lavender This is a wonderful moth repellent. I felt everything using all-natural
lavender soap. I also keep a spray bottle with lavender water in it and occasionally
spray it on my felted items to protect them. Plus it smells amazing!
Plastic Bags As hard as I try to use my own shopping bags and not bring home
plastic ones, they still manage to sneak into the house. Before recycling them, I
use them in my felting. You can cut off the handles to thread through eyelets so
they don’t become felted shut. You can stuff them inside a bag, slipper, or bangle
when machine felting to keep the sides from fusing together. And the same bags
can be used over and over again.

23 / Tips, Tools, and Troubleshooting

Home

01

Nesting Bowls
I love nesting bowls. There’s a lovely simplicity to them,
the way they fit together, the way they belong to each other.
Perhaps they remind me of my husband, my daughter, and
myself. I’ve been collecting vintage English ironstone for
years and for this project, I decided to try to replicate a set
of ironstone nesting bowls in felt. These felted bowls come
in handy for holding paper clips, staples, rubber bands, or
jewelry and other odds and ends. I keep some on a table
in the entryway for keys and meter change. But honestly,
I think they’re just pretty sitting all on their own.

*****

27 / Home: Nesting Bowls

Nesting Bowls
GAUGE
6 stitches = 2 in/5 cm, with yarn held double, before felting. Don’t
go crazy trying to obtain the exact gauge, though; it does not have
to be precise. This rule may also be applied to life in general.
YOU WILL NEED
Patons Classic Wool Yarn (100% wool, 223 yd/205 m per 100 g):
1 skein in Winter White (MC) and 1 skein in Natural (CC)
or substitute any worsted weight (#4) 100% wool
1 set US size 9/5.5 mm DPNs
US size 9/5.5 mm circular needle 16 in/40 cm long,
or size to obtain gauge
Stitch marker
Yarn needle
BEFORE YOU BEGIN
Divide each skein of yarn into 2 separate balls
so that you can double your yarn.
*****

28 / Heart Felt Knits

Small Bowl
With yarn held double and leaving a tail approximately 10 in/25 cm long, cast
on 16 stitches with MC to one of your DPNs. Divide the stitches evenly onto
3 needles (5, 5, 6).

FOR THE BOTTOM OF THE BOWL
Place a marker between last 2 stitches. Join to knit in the round, being careful not
to twist your stitches.

Round 1 *Kfb, k1, repeat from * to end of round. 24 stitches.
Round 2 (and all even rounds): Knit.
Round 3 *Kfb, k2, repeat from * to end of round. 32 stitches.
Round 5 *Kfb, k3, repeat from * to end of round. 40 stitches.
Round 6 Knit.
Bind off loosely.

FOR THE SIDES OF THE BOWL
Using your circular needle, pick up and knit 40 stitches around the bound-off edge;
pm after the last stitch.
Join and knit in the round until the side of your bowl measures 3 in/7.5 cm.
Bind off loosely.
Using your yarn needle, weave in ends. Use the tail from your original cast-on to
sew over and close the hole in the bottom of the bowl.

29 / Home: Nesting Bowls

Medium Bowl
FOR THE BOTTOM OF THE BOWL
Rounds 1–6 With CC, follow instructions for small bowl.
Round 7 *Kfb, k4, repeat from * to end of round. 48 stitches.
Round 8 Knit.
Bind off loosely.

FOR THE SIDES OF THE BOWL
Using your circular needle, pick up and knit 48 stitches around the bound-off edge;
pm after the last stitch.
Join and knit in the round until the sides of your bowl measure 4 in/10 cm.
Bind off loosely.
Using your yarn needle, weave in ends. Use the tail from your original cast-on to
sew over and close the hole in the bottom of the bowl.

30 / Heart Felt Knits

Large Bowl
FOR THE BOTTOM OF THE BOWL
Rounds 1–8 With MC, follow instructions for Medium Bowl.
Round 9 *Kfb, k5 repeat from * to end of round. 56 stitches.
Round 10 Knit.
Bind off loosely.

FOR THE SIDES OF THE BOWL
Using your circular needle, pick up and knit 56 stitches around the bound-off edge;
pm after the last stitch.
Join and knit in the round until the sides of your bowl measure 5 in/12.5 cm.
Bind off loosely.
Using your yarn needle, weave in ends. Use the tail from your original cast-on to
sew over and close the hole in the bottom of the bowl.

31 / Home: Nesting Bowls

Felting
Felt your bowls according to the instructions in the Techniques section. If felting
by machine, place each bowl into a separate lingerie bag. Check frequently to avoid
any curling around the edges.

Shaping
Once your bowls are felted, it’s time to place them on molds. Now don’t go all
bananas trying to find the perfect mold. I promise you have stuff around the
house you can use. I use vintage mason jars in 3 different sizes, but you can
use any type of jar, can, vase, and so on. You just need 3 molds in similar shapes
and graduated sizes to stretch your bowls over until they dry. Bowls should
fit snugly against whatever molds you choose, so that the sides and bottom
dry straight.
Allow bowls to air dry, remove from molds, and voilà! Your nesting bowls are
complete.

32 / Heart Felt Knits

How to shape bowls on molds.

33 / Home: Nesting Bowls

02

Two-Tone Tray
When my daughter, Olivia, was six months old, she began
getting into everything. And tragically, it became necessary
to baby-proof our home. I am a person who values aesthetics
and craves beautiful surroundings, and this was a fate I was
dreading. My beloved ironstone nesting bowls, beautiful
pinecone collection, and precious silver tray from Argentina
had all become hazards overnight. So I decided to start
making things that were both pleasing to the eye and
safe for tiny, curious hands. This tray was one of my first
experiments in making a container from knitted, felted wool.
It’s wonderful for holding remotes or as a stand-alone piece.
Try knitting two in different sizes and nesting them together.

*****

35 / Home: Two-Tone Tray

Two-Tone Tray
GAUGE
5½ stitches and 9½ rows = 2 in/5 cm
Does not have to be exact, but close
YOU WILL NEED
Patons Classic Wool Yarn (100% wool; 223 yd/205 m per 100 g):
1 skein each in Lemon Grass (MC) and Dark Gray Mix (CC)
or substitute any worsted weight (#4) 100% wool
US size 10/6 mm circular needle 24 in/60 cm long,
or size to obtain gauge
US size 10/6 mm straight needles (optional)
Stitch marker
Yarn needle
Ribbon or leather cord
Grommet maker and grommets (optional)
BEFORE YOU BEGIN
Divide each skein of your yarn into 2 balls so you
can double your yarn as you knit.
*****

36 / Heart Felt Knits

Base of Tray
The base of the tray can be knit on straight needles or back and forth on a circular
needle.
Using MC and holding yarn double, CO 21 stitches.
Knit in stockinette stitch for 11 in/28 cm.
Bind off loosely.

Sides of Tray
Using a circular needle and holding CC yarn double, pick up and knit 120 stitches
around the rectangle you have just knit: 20 stitches on each short side and
40 stitches on each long side. Don’t lose your mind over this little detail. An
extra stitch or two on any given side won’t kill anyone.
Join and knit in the round for 3 in/7.5 cm.
Bind off.
Weave in ends.

Felting
Felt according to the instructions in the Techniques section.

Shaping
Once your tray is felted, you need something to prop the edges up while it dries. I
stick mine in a Pyrex baking dish.
Once it’s dry, to keep the edges from drooping you can poke holes in either side of
each top corner and thread through some leather or pretty ribbon. You can even
use grommets instead of just holes for a more finished look.

37 / Home: Two-Tone Tray

03

Round Platter
I originally made this piece to put under a vase as a way
to protect my table from moisture. But one day when my
mouse pad had gone missing, I grabbed it and it did the
trick! It turns out that the little edge around the platter is
a perfect place to rest your wrist. You can even roll it up
a bit if you want a little more support. This still makes a
beautiful platter for small objects or centerpieces; mine just
happened to find a permanent home next to my computer.

*****

39 / Home: Round Platter

Round Platter
DIMENSIONS
About 12 in/30.5 cm in diameter with a 2-in/5-cm rim
GAUGE
With yarn held double, 6 stitches = 2 in/5 cm
YOU WILL NEED
Patons Classic Wool Yarn (100% wool; 223 yd/205 m per 100 g): 1 skein in
Aquarium or substitute 100 yd/90 m of any worsted weight (#4) 100% wool
1 set US size 9/5.5 mm DPNs, or size to obtain approximate gauge
US size 9/5.5 mm circular needle 16 in/40 cm long
Stitch marker
Yarn needle
BEFORE YOU BEGIN
Divide yarn into 2 balls so you can double your yarn while knitting.
*****

Base of Platter
You will start knitting on DPNs; switch to a circular needle when it is comfortable
to do so.
Holding yarn double, cast on 10 stitches to one of your DPNs, leaving a 10-in/25-cm
tail. Divide the stitches over 3 needles (3, 3, 4); pm before your last stitch and join to
knit in the round.

Round 1 *Kfb, repeat from * around. 20 stitches.

40 / Heart Felt Knits

Round 2 and all even rounds Knit.
Round 3 *Kfb, k1, repeat from * to end. 30 stitches.
Round 5 *Kfb, k2, repeat from * to end. 40 stitches.
Round 7 *Kfb, k3, repeat from * to end. 50 stitches.
Round 9 *Kfb, k4, repeat from * to end. 60 stitches.
Round 11 *Kfb, k5, repeat from * to end. 70 stitches.
Round 13 *Kfb, k6, repeat from * to end. 80 stitches.
Round 15 *Kfb, k7, repeat from * to end. 90 stitches.
Round 17 *Kfb, k8, repeat from * to end. 100 stitches.
Round 19 *Kfb, k9, repeat from * to end. 110 stitches.
Round 21 Bind off loosely.

Sides of Platter
Pick up and knit 110 stitches around the bound-off edge. Place marker and join to
knit in the round. Knit 9 rows. Bind off loosely. Using a yarn needle, sew up the hole
in the middle using the cast-on tail. Weave in ends.

Felting
Felt according to the instructions in the Techniques section. Rinse in cold water
and roll tightly in towel to wring out excess water.

Shaping
I use a large enameled cast-iron pot as the mold for these platters. The weight of the
cast iron does a great job flattening the felt to create a smooth surface. You can
also use a large flowerpot or just smooth with your hands and straighten the edges.
Allow to air dry.

41 / Home: Round Platter

04

Oversize Pencil Holder
This is a bit larger than your average pencil holder. I admit I’m a
little OCD about office supplies—I like having tons of sharpened
pencils, ballpoint pens, markers, and a few pairs of scissors
within arm’s reach at all times. This is the perfect pencil holder
for creative types who might easily misplace a pencil or two.
(As the child of a highly creative mother, I couldn’t find a pen or
pair of scissors in our house to save my life!) Make this holder
to keep on your desk or to give to a creative friend. If you keep
it stocked, you may never go hunting for your scissors again.

*****

43 / Home: Oversize Pencil Holder

Oversize Pencil Holder
GAUGE
8 stitches and 10 rows = 2 in/5 cm
YOU WILL NEED
1 empty 16-ounce/1-pint coffee can
Cascade 220 Yarn (100% wool; 220 yd/200 m): 1 skein in color
8401 Gray (MC) and 1 skein in color 9404 Cranberry (CC) or substitute
100 yd/90 m each in two colors of any worsted weight (#4) 100% wool
1 set US size 8/5 mm DPNs, or size to obtain gauge
US size 8/5 mm circular needle 16 in/40 cm long
Stitch marker
Yarn needle
*****

Bottom of Holder
Leaving a 10-in/25-cm tail, CO 8 stitches in CC to one of your DPNs.
Divide the stitches evenly among 3 needles (3, 3, 2), pm, and join to knit in the
round.

Round 1 *Kfb, repeat from * to end of round. 16 stitches.
Round 2		 Knit.
Round 3 *Kfb, k1, repeat from * to end of round. 24 stitches.
Round 4		 Knit.

44 / Heart Felt Knits

Round 5		 Switch to MC and *kfb, k2, repeat from * to end of round. 32 stitches.
Round 6		 Knit.
Round 7 *Kfb, k3, repeat from * to end of round. 40 stitches.
Round 8		 Knit.
Round 9 *Kfb, k4, repeat from * to end of round. 48 stitches.
Round 10		 Knit.
Round 11 *Kfb, k5, repeat from * to end of round. 56 stitches.
Round 12		 Knit.
Bind off.

Sides of Holder
With MC and circular needle, pick up and knit 56 stitches around bound-off edge.
Knit in stockinette stitch for 3 in/7.5 cm.
Switch to CC and work even for 4 in/10 cm more.
Switch back to MC and work even for 3 in/7.5 cm more. The sides now measure
10 in/25 cm from the picked-up stitches.
Bind off.

Felting
Felt according to instructions in the Techniques section. Check frequently to be
sure the sides of holder don’t felt together. Once it is felted, stretch holder over coffee
can and air dry. Leave the can in place to provide the structure for your holder and
to protect it from sharp points and ink.

45 / Home: Oversize Pencil Holder

05

Knitting Needle Carrier
Knitters tend to accumulate quite a few knitting needles.
Non-knitters are always shocked to see just how many
needles I have in my stash. What they don’t realize is that
you often need different sizes and types of needles for a
single pattern. The problem is keeping these needles stored,
organized, and ready to take on the go. After all, you never
know when you’ll be stuck in an extra‑long line at the bank
or post office and have time to dash off a few rows of your
latest project. I love this carrier because it stores various sizes
of needles and is easy to roll up and stash in your knitting
bag before you walk out the door. This makes a great gift
for any knitter, but don’t forget to make one for yourself!

*****

47 / Home: Knitting Needle Carrier

Knitting Needle Carrier
DIMENSIONS
The final dimensions of the carrier shown are
7 in/18 cm wide by 14 in/36 cm high. Yours may differ
a bit depending on felting time and method.
GAUGE
7 stitches = 2 in/5 cm
YOU WILL NEED
Naturally Yarn Vero (100% wool; 87 yd/80 m per 50 g):
2 skeins in color 77 Moss and Rose or substitute
any worsted weight (#4) 100% wool
Commercial felt, about 12 in/30 cm square (I prefer wool
felt to synthetic craft felt. Available in fabric stores.)
US size 9/4.5 mm needles, or size to obtain gauge
10-in/25-cm piece of leather for tie (You can find
leather cord in most craft stores. I used a piece of
suede I upcycled from a thrift store jacket.)
Tailor’s chalk or fabric marker
Yarn needle
Sewing machine or sewing needle and coordinating
or contrasting thread
Ruler
*****

48 / Heart Felt Knits

For Body of Roll-Up Carrier
CO 63 stitches.
Work even in stockinette stitch until piece measures 13 in/38 cm from cast-on
edge, ending with a WS (purl) row.
Bind off.

NOTE:
These are the dimensions for a travel-size carrier. If you would like a wider
carrier that holds more needles, just knit more rows before you begin the
bind-off. Adjust the length of the tie so it is the same as your new width.

Felting
Felt according to the instructions. This yarn felts up quite quickly, so this carrier
is a great project for hand felting.

49 / Home: Knitting Needle Carrier

Lining and Needle Holder
Step 1 Cut a piece of your commercial felt 5 in/13 cm high and ½ in/1.5 cm

narrower than your carrier. Mine was 6.5 in/17 cm wide to fit my 7-in-/18-cm-wide
carrier. Your width may differ depending on the final dimensions of your carrier.

Step 2 Lay the needle carrier flat with RS down and the tie to one side. Center the
piece of commercial felt on the bottom edge of the carrier (the side closest to you)
and pin in place along the bottom and sides.

NOTE:
You can choose to have the knit side or the purl side of the carrier be
the outside!
Step 3 Using a sewing machine or needle and thread, sew along your pinned
edges, leaving a ¼-in/6-mm seam allowance.

Step 4 Using your tailor’s chalk or fabric marker and a ruler, draw equidistant

vertical lines onto your commercial felt (parallel to the short sides of the carrier).
These will be the guidelines for sewing your needle pocket dividers.

NOTE:
See what measurements works best for your fabric width and needles.
Mine came out as 1-in/2.5-cm sections. Yours can be anywhere from
¾ in/2 cm to 1.5 in/4 cm each. You can also vary the widths of your
sections if you want to accommodate different needle sizes.
Step 5 Using sewing machine or needle and thread, sew straight along guidelines,
being sure to backstitch at the pocket openings.

Step 6 Sew leather tie to the center left side of your carrier.
And you’re all done. Now just pack up your needles and go!

50 / Heart Felt Knits

06

Set of Four Coasters
It always surprises me when someone places a frosty
glass, dripping with condensation, on my antique
rosewood dining table without a coaster. Heathens!
I’ve spent hours rubbing mayonnaise (it works!) into
water rings. And it’s for these visitors in particular
that I like to keep a stack of felted coasters handy.
They are useful and cute, knit up quickly, and absorb
lots of moisture. And your guests will be so impressed
that your coasters are handmade, they won’t even feel
awkward when you slide one under their drink.

*****

51 / Home: Set of Four Coasters

Set of Four Coasters
GAUGE
7 stitches = 2 in/5 cm
YOU WILL NEED
Classic Elite Montera Yarn (50% llama, 50% wool;
127 yd/117 m per 100 g): 1 skein each of Aqua Ice, Majolica Blue,
and Pear or substitute any worsted weight (#4) 100% wool
1 set US size 8/5 mm DPNs, or size to obtain gauge
Stitch marker
NOTE:
The pattern is written for C1 as the center color and C2 as the outer
color. Combine your colors to make as many coasters as you wish.
*****

Coaster
CO 8 stitches with C1 to one DPN.
Divide stitches evenly among 3 needles (3, 3, 2).
Pm and join to knit in the round.

53 / Home: Set of Four Coasters

Round 1 *Kfb, repeat from * around. 16 stitches.
Round 2 and all even rounds Knit.
Round 3 *Kfb, k1, repeat from * to end of round. 24 stitches.
Round 5 *Kfb, k2, repeat from * to end of round. 32 stitches.
Round 7 *Kfb, k3, repeat from * to end of round. 40 stitches.
Round 9 Switch to C2. *Kfb, k4, repeat from * to end of round. 48 stitches.
Round 11 *Kfb, k5, repeat from * to end of round. 56 stitches.
Round 13 *Kfb, k6, repeat from * to end of round. 64 stitches.
Round 15 *Kfb, k7, repeat from * to end of round. 72 stitches.
Round 16 Knit.
Bind off loosely.
Repeat the above instructions for each color combination.

Felting
Felt according to instructions in the Techniques section. This yarn felts quickly
and very thickly.

Finishing
Place each coaster under a weight to flatten it. You can use a book, a pot, or
anything else with some weight to it. Allow to dry, then use sharp scissors to
trim any fuzziness from coasters.

54 / Heart Felt Knits

07

Upcycled Ornaments
As you make your way through the wonderful world of felting,
you will undoubtedly stumble a time or two. Things will
felt too much, or felt unevenly, or just turn out a bit wonky.
Whatever happened, don’t throw away these odds and ends.
One person’s trash is another’s Christmas tree ornament!
These ornaments are simple to make and look festive
all year round. If you’re itching to try this project before
you’ve accumulated enough scrap pieces of felt, you
can always knit some up. Just knit a good-size square
and felt it before you start. Or you can find inexpensive
sweaters—alpaca, angora, wool, mohair, and cashmere all
felt beautifully—at a secondhand store. Throw them in the
washing machine on hot, and they will felt right up.
*****

55 / Home: Upcycled Ornaments

Upcycled Ornaments
YOU WILL NEED
Fairly large sections, at least 8 by 8 in/20 by 20 cm, of felted wool
Fabric marker
Cookie cutters or other templates in the shape of your choice
Sharp scissors
Ribbon
Needle and thread
Fiberfill
*****

Making Up
Step 1 Using your fabric marker and one of your cookie cutters/templates, trace
the image twice onto the felt.

Step 2 Cut out each piece.
Step 3 Cut a 5-in/13-cm length of ribbon.
Step 4 Lay your pieces one on top of the other so that the edges match up.
Step 5 Using a needle and thread, with a loose overcast or blanket stitch, sew your
pieces together around the edge, leaving a small opening at the top. The opening
should be about twice the width of your ribbon.

Step 6 Stuff your ornament lightly with fiberfill through the opening.
Step 7 Double your ribbon and place the two ends through the opening at the top of
the ornament; sew closed.

57 / Home: Upcycled Ornaments

08

Soft Felted Spheres
Toys today do everything. They light up and play music,
they talk, they walk, they fly, they shape-shift. But left to
their own devices, children can amuse themselves with a
wooden spoon and a piece of string. I wanted to get back
to basics with this project. And nothing is more basic than
a simple ball. Yet as uncomplicated as it is, its uses are
infinite. You can roll it, throw it, and hide it. You can cuddle
it, bounce it, and juggle it. You can even introduce it to
another ball and make them talk to each other. Plus, these
soft spheres look great stacked in a decorative bowl or box.

*****

59 / Home: Soft Felted Spheres

Soft Felted Spheres
GAUGE
4 stitches = 2 in/5 cm
YOU WILL NEED (FOR THE BALLS AS SHOWN)
Blue Sky Alpacas Bulky Yarn (50% alpaca, 50% wool; 45 yd/41 m per
100 g): 1 skein each of two colors. Grasshopper, Jasmine, Azalea, and
Boysenberry are shown. Or substitute any bulky weight (#6) 100% wool.
US size 15/10 mm needles, or size to obtain approximate gauge
Yarn needle
Cotton or bamboo fiberfill
NOTE:
You can combine your colors as you please. Just plug your
color choices into the pattern as either MC or CC.
*****

60 / Heart Felt Knits

For Spheres
Cast on 24 stitches in MC.

Row 1 Knit.
Row 2 Purl.
Rows 3–7 Work even in stockinette stitch.
Row 8 Switch to CC and purl.
Row 9 (K2tog) 12 times. 12 stitches.
Row 10 (P2tog) 6 times. 6 stitches.
Row 11 (K2tog) 3 times. 3 stitches.
Row 12 P3tog.
Break yarn leaving a 10-in/25-cm tail. Thread tail through a yarn needle and pull
it through the remaining stitch on your needle. Fold knitting in half and sew up
sides to your cast-on row.

NOTE:
You can switch to the MC yarn when appropriate so your seam colors match.
Using your yarn needle, draw yarn through the 24 stitches from your cast-on row.
Use the cotton or bamboo stuffing to stuff ball. Pull yarn on needle tightly to gather
up stitches. Sew the hole closed and weave in all ends.

Felting
Felt either by hand or machine according to instructions in the Techniques section.
When felting is complete, wring out excess water and roll between palms to shape.
Air dry.

61 / Home: Soft Felted Spheres

09

Stuffed Robot
I’ve always dreamed of having a little girl and sharing with
her my doll collection from childhood. When I was four, my
grandmother gave me one of my mom’s old dolls. She was
like an artifact from an ancient time or another world, and
I played with her for hours on end. When Olivia was three
and a half, I decided it was time to pass my dolls on to her.
Giddy with excitement, I dug around the attic until I found
the dusty old box containing the holy grail of my girlhood.
I presented it to her with a flourish, carefully opening the box
to reveal each sacred relic inside and . . . nothing. She had
no interest in the dolls I had lovingly saved for her. So I
made this felted robot for her instead. Luckily, she loves this
guy—his bright colors and cuddly size make him the perfect
playmate and an eye-catching piece for any kid’s room.

*****

63 / Home: Stuffed Robot

Stuffed Robot
GAUGE
8 stitches = 2 in/5 cm
YOU WILL NEED
Cascade 220 Yarn (100% wool, 220 yd/200 m per 100 g): 2 skeins
in Aqua (MC), 1 skein in Purple (CC1), 1 skein in Orange (CC2)
or substitute any worsted weight (#4) 100% wool yarn
US size 9/5.5 mm straight needles, or size to obtain gauge
1 set US size 9/5.5 mm DPNs
Yarn needle
Bamboo or polyester fiberfill
*****

64 / Heart Felt Knits

For Body of Robot
TOP
Using MC and straight needles, cast on 25 stitches.
Work even in stockinette stitch for 24 rows.
Bind off loosely.

SIDE 1
Pick up and knit 25 stitches along bound-off edge of top.
Work in stockinette stitch for 49 rows.
Bind off loosely.

BOTTOM
Pick up and knit 25 stitches along bound-off edge of side 1.
Work in stockinette stitch for 24 rows.
Bind off loosely.

SIDE 2
Pick up and knit 25 stitches along bound-off edge of bottom.
Work in stockinette stitch for 49 rows.
Leave stitches on needle.

65 / Home: Stuffed Robot

Using second needle, pick up 25 stitches along your original cast-on edge.
Connect the 25 picked-up stitches from the cast-on edge and the 25 stitches from
side 2 using the three-needle bind-off method. (See Techniques section.)

Front of Robot
Pick up and knit 25 stitches along one edge of the top. (The top and bottom are the
same, so either will do.)
Work in stockinette stitch for 49 rows.
Leave stitches on needle.
Using second needle, pick up 25 stitches along the edge of the bottom that’s
facing you.
Connect the 25 picked-up stitches and the 25 stitches from the front using the
three-needle bind-off method. (See Techniques section.)
Using the yarn needle and a loose overcast stitch, sew up sides of robot.

Back of Robot
Work the same as for the front, leaving a 2-in/5-cm opening along one side seam.
You will use this opening after felting to add stuffing to your robot.

66 / Heart Felt Knits

Arms (make 2)
Using CC1, cast on 20 stitches.
Knit 10 rows in garter stitch.
Switch to MC and continue in garter stitch for 6 rows.
Switch to CC2 and continue in garter stitch for 12 rows.
Bind off.
Fold in half lengthwise, then fold in half again.
The extra bulk in the arms will give them some stability so they stick out from the
robot’s body.
Using yarn needle, sew the two short ends and the open side closed, changing yarn
color to match as you go.
Sew one end of each arm to center sides of robot body.

Legs (make 2)
Using CC1, cast on 20 stitches.
Knit 12 rows in garter stitch.
Switch to MC and continue in garter stitch for 8 rows.
Switch to CC2 and continue in garter stitch for 14 rows.
Bind off.
Fold in half lengthwise, then in half again.
Using yarn needle, sew the two short ends and the open side closed, changing yarn
color to match as you go.
Sew ends of legs onto center bottom of robot body.

67 / Home: Stuffed Robot

Antenna
Using CC2, cast on 4 stitches to DPN.
Work I-cord for 4 in/10 cm. (See Techniques section.)
Bind off.
Sew to top of robot.

Mouth
Using straight needles and CC1, cast on 15 stitches.
Knit 8 rows in garter stitch.
Bind off.
Weave in ends.

Eyes (make 2)
Using DPNs and CC2, cast on 4 stitches.
Divide among 3 needles (1, 1, 2).
Kfb in each stitch. 8 stitches.
Pm and join to knit in the round.

Round 1 Knit.
Round 2 Switch to CC1 and *kfb, k1, repeat from * to end of round. 12 stitches.

68 / Heart Felt Knits

Round 3 Knit.
Round 4 *kfb, k2, repeat from * to end of round. 16 stitches.
Round 5 Knit.
Bind off and weave in ends.

Felting
If felting your robot in the washing machine, stuff him loosely with plastic bags.
(It’s a great way to reuse grocery bags, and they will last for several projects.) This
will keep the sides from felting together.
Felt eyes and mouth by placing them in their own lingerie bag or pillowcase. They
will be sewn to your robot after felting.
Felt until you’ve achieved the shape you want. If you want a more rectangular
shape, then felt your robot less. A longer felting time will result in rounder, less
defined edges, giving your robot more of a ball shape.

Finishing
Using a loose overcast stitch in matching colors, sew eyes and mouth to the front of
your robot.
Stuff robot and sew up seam opening with a sharp yarn needle.

69 / Home: Stuffed Robot

10

Little Acorns
My daughter and I love collecting acorns at her grandparents’
house in Florida. We’ve spent hours crawling around together
beneath the trees as we gather up our treasures, and we’ve
decided that fairies must surely use the acorn caps for hats.
We keep these felt acorns nestled in a felted bowl next
to our fireplace. They’re lovely to look at and to hold and
make a perfect seasonal decoration for autumn.

*****

71 / Home: Little Acorns

Little Acorns
GAUGE
Approximately 10 stitches = 2 in/5 cm
While the gauge is not critical for this project, be sure
to use a needle size appropriate for your yarn.
YOU WILL NEED
Worsted weight wool scrap yarn
US size 7/4.5 mm needles
Yarn needle
Glue gun or craft glue
Clean acorn caps (If you can’t find your own, they’re
readily available for purchase online.)
*****

72 / Heart Felt Knits

Knitting
Cast on 8 stitches. Leave a 20-in/50-cm tail.

Rows 1–3 Work in stockinette stitch.
Row 4 (P2tog) 4 times. 4 stitches.
Row 5 (K2tog) twice. 2 stitches.
Row 6 P2tog. 1 stitch.
Break yarn leaving a 12-in/30-cm tail. Thread tail through a yarn needle
and pull it through the remaining stitch on your needle. Fold knitting in
half and sew up sides, working up to your cast-on row. Using your yarn needle,
pick up the 8 stitches you cast on. Stuff original tail into the center of ball and
pull yarn on needle tightly to gather up stitches. Sew the hole closed and weave
in the end.

Felting
These felt quickly and easily by hand but can certainly be done in the machine
as well. The key is to roll the ball between your palms while still wet in order to
make it as round as possible. Allow to dry.

Finishing
Use a glue gun to glue the felted balls into the acorn caps. If you like, you can
drill a tiny hole through the top of the cap first and thread a piece of ribbon or
embroidery floss through so the acorn can be hung.

73 / Home: Little Acorns

11

Baby Elf Booties
It is my belief that while babies are tiny and unable to
voice their opinions, they should wear the absolutely most
adorable, whimsical clothing possible. I loved dressing my
daughter, Olivia, when she was a baby. Now she insists on
dressing herself, so I encourage you to take advantage of
the baby window while you have it! The Baby Elf Booties
are soft, cozy, and irresistible slippers for your little one.
Or knit up a pair as a memorable baby shower gift.

*****

75 / Home: Baby Elf Booties

Baby Elf Booties
SIZING
3–6 months (6–12 months)
Instructions for 2 sizes are given here. Much of the sizing can also
be determined by how little or how much you felt the booties.
GAUGE
8 stitches and 10 rows = 2 in/5 cm
YOU WILL NEED
Patons Classic Wool Yarn (100% wool; 210 yd/194 m per 100 g):
1 skein in Currant (MC) and 1 skein in Wisteria (CC) or substitute
120 yd/110 m of other worsted weight (#4) 100% wool
US size 8/5 mm straight needles, or size to obtain gauge
1 set US size 8/5 mm DPNs
Yarn needle
*****

76 / Heart Felt Knits

Heel
Using straight needles, cast on 3 (5) stitches in MC.

Row 1 Knit.
Row 2 Kfb, k to last stitch, kfb.
Row 3 Purl.
Row 4 Kfb, k to last stitch, kfb.
Row 5 Purl.
Row 6 Kfb, k to last stitch, kfb.
Row 7 Purl.
Row 8 Kfb, k to last stitch, kfb. 11 (13) stitches.
Row 9 Purl.
The following extra rows are for the 6–12 month size only.

Extra Row 1 Kfb, k to last stitch, kfb.
Extra Row 2 Purl. 15 stitches.
Row 10 (all sizes) Knit.
Row 11 Purl.
Break yarn and leave stitches on needle.

77 / Home: Baby Elf Booties

Foot
With right side facing and MC, starting at the point of the heel triangle, use first
DPN to pick up and knit 9 (10) stitches along the right side; with second DPN, knit
the 11 (15) stitches held on the needle; with third DPN, pick up and knit 9 (10)
stitches down the left side of the heel. 29 (35) stitches.
Turn work; do not join to knit in the round. You will be working back and forth
across the three needles as follows:

Row 1 (WS) Purl. Turn.
Row 2 K9 (10), slip1, k9 (13), slip1, k to end of row. Turn.
Repeat the last 2 rows until bootie measures 4 in/10 cm from the pick-up row.
Place detachable markers on the first and last stitch of your last row.
Repeat Rows 1 and 2 above for another 1 in/2.5 cm (1.5 in/4 cm), ending with
a purl row.

Shaping Toe
NOTE:
At this point you may find it easier to switch back to straight needles.
Row 1 K5 (7), slip1, k1, psso, k2tog, k11 (13), slip1, k1, psso, k2tog, k5 (7).
25 (31) stitches.

Row 2 and all even rows Purl.
Row 3 K4 (6), slip1, K1, psso, k2tog, k9 (11), slip1, k1, psso, k2tog, k4 (6).
21 (27) stitches.

Row 5 K3 (5), slip1, k1, psso, k2tog, k7 (9), slip1, k1, psso, k2tog, k3 (5).
17 (23) stitches.

Row 7 K2 (4), slip1, k1, psso, k2tog, k5 (7), slip1, k1, psso, k2tog, k2 (4).
13 (19) stitches.

78 / Heart Felt Knits

Row 9 K1 (3), slip1, k1, psso, k2tog, k3 (5), slip1, k1, psso, k2tog, k1 (3).
9 (15) stitches.

Row 11 K1 (2), slip1, k1, psso, k2tog, k0 (3) slip1, k1 psso, k2tog, k0 (2).
5 (11) stitches.

The following extra 2 rows are for the 6–12 month size only.

Extra Row 1 Purl.
Extra Row 2 (Slip1, k1, psso) 2 times, k2tog, k1, (k2tog) 2 times. 6 stitches.
Row 12 (all sizes) Purl.
Bind off.
Cut yarn leaving a 16-in/40-cm tail, pull through remaining stitch on needle, and
secure. Sew instep from point of toe to markers using a flat seam. Remove markers.

Cuff
With the right side facing, beginning at front seam, use CC and DPNs to pick up and
knit 36 stitches around the opening of bootie. Divide stitches onto three needles.
Do not join to knit in the round. Turn work and knit back and forth across needles
as follows:

Row 1 K36, turn.
The next 2 rows will create the eyelets for your laces.

Row 2 K2tog, yo, k2tog, k to last 4 stitches, k2tog, yo, k2tog. 32 stitches.
Row 3 K1, (k1, p1) in the yo, k to last 2 stitches, (k1, p1) in the yo, k1. 36 stitches.
Row 4 Knit.
Continue even in garter stitch (knit every row) until cuff measures 2 in/5 cm.

79 / Home: Baby Elf Booties

I-Cord Laces (make 2)
With CC, cast on 2 stitches to DPN. Follow the I-cord instructions in the Techniques
section and make a 10-in/25-cm I-cord.

Finishing
Weave in all ends neatly. Cut the handles from a plastic grocery bag or use a piece
of cotton waste yarn to thread through the eyelets on either side of your cuff. Tie
in a knot. These will keep your eyelets open during felting and can be cut off once
felting is complete.

Felting
Felt according to the instructions in the Techniques section. I recommend
felting your I-cords by hand. They felt up quickly and have a tendency to tangle
in the washing machine. Whether felting by machine or by hand, turn the
booties inside out and back a few times to insure even felting. Once they are
felted, thread the I-cords through your eyelets and stuff the booties with plastic
bags to shape and dry.

NOTE:
If you’re making these for a child that is already walking, be sure to attach
a non-slip material (like the kind sold in fabric stores for pajama feet) to the
soles. Another solution is to use a hot glue gun and just make some squiggly
lines across the bottom of the sole, then allow to dry. This provides great
traction and is super easy.

80 / Heart Felt Knits

12

Men’s Clog Slippers
My wonderful husband, Paolo, loves slippers. He had a pair
of store-bought clog slippers that he completely wore out, so
I decided to try to copy them. After all, he puts up with a lot
from me—yarn everywhere, my head always in a knitting
project. It was time to make the man a pair of slippers.
I wanted something that could be knit up on one set of
circular needles because I travel a lot with my knitting, and
knitting on double-pointed needles, as you normally would
for slippers or socks, can be difficult when you want to just
pick up and go. After many failed attempts, I came up with
this design (for which you only need the double-pointed
needles on the last few rows). The wonderful husband may
still be saddled with me, but at least his feet are warm!

*****

81 / Home: Men’s Clog Slippers

Men’s Clog Slippers
SIZING
Men’s shoe size 8–10 (or 11–13) / 7–9 (or 10–12)
Much of the sizing can be determined in the felting process.
GAUGE
6 stitches = 2 in/5 cm with yarn held double
YOU WILL NEED
Lion Brand Fishermen’s Wool Yarn (100% wool; 465 yd/425 m per
8 oz): 1 skein in Oatmeal (MC) and 1 skein in Natural (CC)
US size 13/9 mm circular needle 16 in/40 cm long,
or size to obtain gauge
Stitch markers
1 set US size 13/9 mm DPNs
Yarn needle

*****

83 / Home: Men’s Clog Slippers

Heel
Divide each yarn skein into 2 separate balls so you can double your yarn while
knitting. Make both slippers the same.
Using CC held double and circular needle, cast on 40 stitches. Place marker and join
to knit in the round.

Round 1 Knit.
Round 2 K11, place marker, k18, place marker, and turn work.
NOTE:
You will knit back and forth across these 18 stitches for
several rows to create the heel of your clog.

Heel Flap
With wrong side facing, switch to MC.

Row 1 Slip1, purl to marker, turn.
Row 2 Slip1, k to marker, turn.
Repeat these 2 rows 5 (6) times, then repeat Row 1 once more.

Shaping Heel
Row 1 Slip1, k9, ssk, k1, turn, leaving 5 stitches unworked.
Row 2 Slip1, p3, p2tog, p1, turn, leaving 5 stitches unworked.
Row 3 Slip1, k4, ssk, k1, turn, leaving 3 stitches unworked.
Row 4 Slip1, p5, p2tog, p1, turn, leaving 3 stitches unworked.

84 / Heart Felt Knits

Round 11 K11, k2tog, k22, ssk, k11.
Round 13 K10, k2tog, k22, ssk, k10.
Round 15 K9, k2tog, k22, ssk, k9.
Round 17 K8, k2tog, k22, ssk, k8. 40 stitches.

Foot
Work even in rounds until clog measures 12 (14) in/30 (40) cm from back of heel.

DECREASE FOR TOE
Round 1 *K6, k2tog, repeat from * to end of round. 35 stitches.
Round 2 and all even rows Knit.
Round 3 *K5, k2tog, repeat from * to end of round. 30 stitches.
Switch to DPNs and divide stitches evenly on 3 needles (10 stitches per needle).
Place marker and continue knitting in the round.

Round 5 *K4, k2tog, repeat from * to end of round. 25 stitches.
Round 7 *K3, k2tog, repeat from * to end of round. 20 stitches.
Round 9 *K2, k2tog, repeat from * to end of round. 15 stitches.
Round 11 *K1, k2tog, repeat from * to end of round. 10 stitches.
Round 13 *K2tog, repeat from * to end of round. 5 stitches.

86 / Heart Felt Knits

Finishing
Cut yarn leaving a 12-in/30-cm tail. Using a yarn needle, draw the tail through the
remaining 5 stitches. Fasten off and weave in all ends on wrong side of clog.

Felting
As with most of your larger pieces, it’s much easier and faster to felt these in the
washing machine. The sizing can be largely be controlled by how much you felt
your slipper.

Shaping
The easiest way to dry and mold your clogs will be to stretch them over a shoe in
the desired size. When I made these for my husband I used one of his Converse™
tennis shoes as the mold, and they worked great.

NOTE:
Clogs can be worn as is or you can add a sole to them. You can find ready-made
soles in most craft stores or you can make your own. I’ve used suede or leather
jackets bought cheaply at secondhand stores. Just trace the shape of your clog
onto the leather, cut out, and sew to the bottom of clog using a sewing needle
and thread and a blanket stitch.

87 / Home: Men’s Clog Slippers

Style

13

Chain Necklace
I love using felt to create something unexpected, and
because I’m also a jewelry designer, a necklace seemed
like a great choice. I was drawn to the idea of replicating
the links of a chain for this project—I liked the thought
of taking something that would ordinarily be made of
cold, hard metal and making it from something soft and
warm. This sort of contrast really inspires my work.
This piece makes a bold statement paired with a little
black dress. But, more often than not I throw it on with
jeans and a T-shirt for a look that’s casual yet pulled
together. It works well as a statement necklace or ultracozy warm scarf. Warning: People tend to ask about it,
so don’t wear it if you aren’t in the mood to chat!

*****

91 / Style: Chain Necklace

Chain Necklace
YOU WILL NEED
Patons Classic Wool Yarn (100% wool; 223 yd/205 m per 100 g):
1 skein each in Dark Gray (MC), Black (CC1), and Red (CC2)
or substitute any worsted weight (#4) 100% wool
US size 9/5.5 mm circular needle 9 in/23 cm long
Stitch marker
Yarn needle
NOTE:
If you don’t have a 9-in/23-cm circular needle, use DPNs.
*****

First Link
Divide each skein of yarn in half so you have 2 balls of each color and can double
your yarn.
With MC and holding yarn double, CO 55 stitches, pm, and join to knit in the round.
Knit even for 10 rows.
Bind off.
You now have a circle. Set it aside.

92 / Heart Felt Knits

Small Link
CO 30 stitches with CC1 held double.
Before you start to knit, take your first link and put it onto your circular needle
(see Figure 1), pm, and join to knit in the round.
Knit 10 rows.
Bind off.
You now have the first two links of your chain.

* fig 1 *

Large Link
CO 55 stitches with MC held double.

Place the link you just finished onto your needle as before, pm, and join to knit in
the round.
Knit 10 rows.
Bind off.

93 / Style: Chain Necklace

NOTE:
Do not, I repeat, do not forget to loop the last finished link through the new one
before you join your stitches. I’ve done this more times than I care to remember,
and it infuriates me every time. You just end up with a lonely, unjoined circle.
Continue in this manner, alternating colors and sizes, until you have 9 links.

Joining the Ends
CO 30 stitches with CC2 held double for your final link.
Take the first and last links of your chain and put them onto your needles, pm, and
join to knit in the round.
Knit 10 rows.
Bind off.
Weave in all ends with yarn needle.

NOTE:
The sides of each link will curl in. Let them. They will felt together and
create a seam.

Felting
Felt according to instructions in the Techniques section. Lay on a flat surface to
dry. Amaze your friends.

94 / Heart Felt Knits

14

Farmers’ Market Tote
This bag makes me happy. It holds everything! I use it
for groceries, gym clothes, library books, anything. It’s
utilitarian and pretty. Best of all, it isn’t plastic, so it won’t
end up damaging the environment by sitting in a landfill.
It is durable and will last for years. This bag is one of
my personal favorites and goes with me everywhere.
Make one for yourself and all your friends!

*****

95 / Style: Farmers’ Market Tote

Farmers’ Market Tote
DIMENSIONS
Before felting: 22 in/56 cm wide and 28 in/71 cm tall
After felting: approximately 10.5 in/45.8 cm wide and 14 in/35.6 cm tall
GAUGE
7 stitches and 10 rows = 2 in/5 cm
YOU WILL NEED
Lion Brand LB Collection Organic Wool Yarn (100% wool;
185 yd/170 m per 100 g): 2 skeins in Eggplant (MC) and 2 skeins in
Avocado (CC) or substitute any worsted weight (#4) 100% wool
NOTE:
This particular yarn shrinks a great deal in length when
felted. If using a different yarn, be sure to do a swatch
test to determine the correct measurements.
1 set of leather purse handles
1 set US size 9/5.5 mm DPNs, or size to obtain gauge
US size 9/5.5 mm circular needle 24 in/60 cm long
Yarn needle
*****

97 / Style: Farmers’ Market Tote

Bottom of Bag
CO 10 stitches with MC to one DPN, leaving a 10-in/25-cm tail. Divide the stitches
over three needles (3, 3, 4); pm before your last stitch, and join to knit in the round.
Switch to a circular needle when it’s no longer comfortable to knit on DPNs.

Round 1 *Kfb, repeat from * around. 20 stitches.
Round 2 and all even rows Knit.
Round 3 *Kfb, k1, repeat from * to end. 30 stitches.
Round 5 *Kfb, k2, repeat from * to end. 40 stitches.
Round 7 *Kfb, k3, repeat from * to end. 50 stitches.
Round 9 *Kfb, k4, repeat from * to end. 60 stitches.
Round 11 *Kfb, k5, repeat from * to end. 70 stitches.
Round 13 *Kfb k6, repeat from * to end. 80 stitches.
Round 15 *Kfb, k7, repeat from * to end. 90 stitches.
Round 17 *Kfb, k8, repeat from * to end. 100 stitches.
Round 19 *Kfb, k9, repeat from * to end. 110 stitches.
Round 21 *Kfb, k10, repeat from * to end. 120 stitches.
Round 23 *Kfb, k11, repeat from * to end. 130 stitches.
Round 25 *Kfb, k12, repeat from * to end. 140 stitches.
Round 27 *Kfb, k13, repeat from * to end. 150 stitches.
Round 29 *Kfb, k14, repeat from * to end. 160 stitches.
Round 30 Knit.
Bind off loosely.
This is the round bottom of your bucket-shaped bag. Using a yarn needle, sew up
the hole in the middle using the cast-on tail. Weave in ends.

98 / Heart Felt Knits

Body of Bag
Using a circular needle and MC, pick up and knit 160 stitches around the bound-off
edge. Pm and join to knit in the round.
Work even in stockinette stitch for 20 rounds.
Switch to CC and knit 20 rounds.
Repeat the last 40 rounds 2 times more. The bag measures approximately
28 in/65 cm.
Bind off loosely.
You have a gigantic bag, but don’t worry; it will felt down to a beautiful, sturdy tote.
Weave in ends.

Felting
Felt according to instructions in the Techniques section. For a piece this size,
it is definitely easier to felt by machine, but keep close watch so the top edge
doesn’t curl.

Shaping
Stuff your bag with a large towel so that the sides are straight and the bag can sit
up on its own. Allow to air dry.

Finishing
Using a yarn needle and matching yarn, sew the handles to the top of your bag.

99 / Style: Farmers’ Market Tote

15

Ruffle Scarf
I love this piece for its sheer drama; people can’t help
but take a second look at it. The ruffles remind me of an
Elizabethan collar. I think it’s important for functional
garments to still make you feel beautiful while you wear
them. This piece is pretty and also incredibly warm
and water resistant. You can wrap this scarf once or
several times, and it frames the face beautifully.

*****

101 / Style: Ruffle Scarf

Ruffle Scarf
GAUGE
6 stitches and 6½ rows = 2 in/5 cm
YOU WILL NEED
Cascade Jewel Hand Dyed Yarn (100% wool; 142 yd/131 m per 100 g):
2 skeins in Color 9992 (MC) and 3 skeins in Color 8422 (CC)
or substitute any chunky weight (#5) 100% wool
US size 10/6 mm straight needles, or size to obtain approximate gauge
US size 10/6 mm circular needle 60 in/150 cm long
NOTE:
If you can’t find a 60-in/150-cm circular needle, you
can also use 2 sets of 32-in/80-cm needles.
Stitch marker
Yarn needle
*****

102 / Heart Felt Knits

Body of Scarf
Using straight needles, CO 24 stitches with MC.
Work even in stockinette stitch for 79 in/178 cm.
Bind off loosely.

Ruffle
Round 1 with CC Pick up and knit 518 stitches around perimeter of scarf:
22 stitches on each short end and 237 stitches on each long side. Place a
marker and join to knit in the round.

Round 2 and all even rounds Knit.
Round 3 *K1, kfb repeat from * to end. 777 stitches.
Round 5 *K1, kfb repeat from * to end. 1,166 stitches.
Round 7 *K1, kfb repeat from * to last stitch, k1. 1,749 stitches.
Round 8 Knit.
Round 9 Bind off loosely.

Felting
In order to keep some pliability and movement in your wrap, you need to felt it
only very lightly. Felt until the spaces between your stitches begin to disappear
but not so much that the fabric becomes stiff. Lay flat to dry.

103 / Style: Ruffle Scarf

16

Laptop Messenger Bag
I needed a bag that could hold my laptop when I traveled. It
was important to me to have something that was padded
enough to protect my computer but that still looked fashionable.
Everything I saw in stores just looked like a computer bag—
boring and too similar to everyone else’s. So I decided to make
my own. This bag is roomy enough to hold your computer,
cell phone, and other essentials but doesn’t feel bulky or
cumbersome. It opens easily, so taking your computer in and
out at airports is a cinch, but the magnetic closure keeps
it shut when you need it to. Felted wool is naturally water
repellent, so it will keep your laptop cozy and dry. I think
the look is handsome enough for a man to carry, too.

*****

105 / Style: Laptop Messenger Bag

Laptop Messenger Bag
NOTE:
I have not had any problems with the magnetic closure and
my laptop, but use at your own risk. If you opt out of the
magnet, try a nice button or Velcro strip instead.

GAUGE
6 stitches and 8 rows = 2 in/5 cm with yarn held double
YOU WILL NEED
Lion Brand Fishermen’s Wool Yarn (100% wool; 465 yd/425 m
per 8 oz): 1 skein in Nature’s Brown (MC) and 1 skein in Brown
Heather (CC) or substitute any worsted weight (#4) 100% wool
US size 10/6 mm needles, or size to obtain gauge
Yarn needle
Two 1½-in/38-mm metal rings
One ¾-in/18-mm magnetic snap
Decorative button
BEFORE YOU BEGIN
Divide each skein of yarn into 2 balls so you can double your yarn.
*****

106 / Heart Felt Knits

Bottom of Bag
With MC held double, CO 47 stitches.
Work in stockinette stitch for 4 in/10 cm.
Bind off.

Front of Bag
With CC held double and RS facing, pick up and knit 47 stitches along the edge
you just bound off.
Work even in stockinette stitch until piece measures 13 in/33 cm from the
picked‑up stitches.
Bind off.

Back of Bag
With CC held double and RS facing, pick up and knit 47 stitches along the original
cast-on edge. (This is the long edge opposite the piece you just finished.)
Work even in stockinette stitch until piece measures 13 in/33 cm from the
picked‑up stitches.
Bind off.

Sides
With MC held double and RS facing, pick up and knit 12 stitches along one of the
short sides of the bottom rectangle.
Work even until piece measures 13 in/33 cm from the picked-up stitches.
Bind off.

107 / Style: Laptop Messenger Bag

Work the second side the same way.
The bottom and the four sides of the bag are now complete. Sew the edges of each
side to the front and back panels along the 13-in/33-cm sides.

Top Flap
With MC held double and RS facing, pick up and knit 47 stitches along the top edge
of the back panel.
Work even in stockinette stitch for 13 in/33 cm.
Bind off.

Bases for Strap
With MC held double and RS facing, pick up and knit 10 stitches, centered, from the
top of one side panel.
Work even in stockinette stitch for 6 in/15 cm.
Bind off, leaving a 10-in/25-cm tail.
Insert this piece through one of your metal rings and double it over with wrong
sides together.
Thread tail onto the yarn needle and sew the bound-off edge to the inside of edge of
side panel.
Repeat on the opposite side to attach the second ring.

Strap
With MC held double, CO 10 stitches.
Work even in stockinette stitch for 42 in/107 cm.
Bind off, leaving a 10-in/25-cm tail.

108 / Heart Felt Knits

Thread the bound-off end of the strap approximately 2 in/5 cm through one metal
ring and fold it over with wrong sides together. Remember, the right side of the
strap should face out. Use the tail to sew the bound-off end to the wrong side of the
strap about 2 in/5 cm above the ring.
Being sure not to twist the strap, repeat with the cast-on end and the opposite
metal ring.

Cell Phone Pocket
With MC held double, CO 24 stitches.
Work even in stockinette stitch until piece measures 7 in/18 cm.
Bind off.
Center the pocket on the inside of the back panel. Using the yarn needle, sew the
sides and bottom of your pocket to the back panel. Place a piece of plastic bag in
the cell phone pocket prior to felting to keep it from attaching to the back panel.
Just be sure not to overstretch the pocket or your bag won’t felt properly. I learned
this the hard way and my first bag had a big, unfelted lump in the back. Not pretty.

Felting
Felt according to instructions in the Techniques section. If felting by machine
check frequently to ensure the top edge doesn’t curl, the strap remains straight,
and the pocket doesn’t become felted to the back panel.
Lay flat to dry, allowing strap to hang off side of table so it dries straight.

Finishing
Attach metal snap pieces to the outside of the front panel and the inside of the flap.
Sew button on outside flap over the snap.

109 / Style: Laptop Messenger Bag

17

Mini Cashmere Clutch
I adore a giant, oversize handbag. On any given day I’m
carrying around knitting projects, spare clothes for Olivia,
snacks, my laptop, and maybe a small dog. With all this
happening in one purse, it’s very important to have smaller
compartments to store things and stay (somewhat) organized.
This little bag is great for stashing lipstick, credit cards, ID,
and a cell phone. You can even use it as a sunglasses case.
Throw it in a larger bag or carry it on its own for a night on the
town. I knit this up in cashmere for an extra touch of luxury,
but feel free to experiment with other fibers and textures.

*****

111 / Style: Mini Cashmere Clutch

Mini Cashmere Clutch
GAUGE
8 stitches and 9 rows = 2 in/5 cm
YOU WILL NEED
Trendsetter Kashmir Yarn (65% cashmere, 35% silk; 110 yd/100 m = 50 g):
1 skein in Gray or substitute similar worsted weight (#4)
cashmere blend yarn
US size 7/4.5 mm needles, or size to obtain gauge
Stitch holder
1 set US size 7/4.5 mm DPNs
Yarn needle
One ½-in/1.3-cm button
*****

112 / Heart Felt Knits

Front
Cast on 40 stitches.

Row 1 Knit.
Row 2 Purl.
Rows 3–18 Work even in stockinette stitch.
Row 19 K19, slip next 2 stitches to stitch holder, k19.
NOTE:
Just leave the stitches on the holder at the front of your
work. You will use them later to make the I-cord tie.
Row 20 P19, M1 purlwise, M1 purlwise, p19. 40 stitches.
Rows 21–27 Work 7 more rows in stockinette stitch, ending with a knit row.
Bind off, keeping last stitch on needle. Do not break yarn.
Turn the work, keeping the remaining stitch on the right-hand needle.

Bottom
With the last stitch of the front on your needle, pick up and knit 39 stitches along
the bound-off edge. 40 stitches.

Row 1 Purl.
Row 2 Knit.
Row 3 Purl.
Row 4 Knit.

113 / Style: Mini Cashmere Clutch

Bind off, keeping last stitch on needle. Do not break yarn.
Turn the work, keeping the remaining stitch on the right-hand needle.

Back
With the last stitch on the bottom on your needle, pick up and knit 39 stitches along
the bound-off edge. 40 stitches.

Row 1 Purl.
Row 2 Knit.
Rows 3–28 Work 25 more rows in stockinette stitch, ending with a knit row.
Bind off, keeping last stitch on needle. Do not break yarn.
Turn the work, keeping the remaining stitch on the right-hand needle.

Top Flap
With the last stitch of the back on your needle, pick up and knit 39 stitches along
the bound-off edge. 40 stitches.

Row 1 Purl.
Row 2 Knit.
Row 3 Purl.
Row 4 Knit.
Row 5 Purl.

114 / Heart Felt Knits

Row 6 (Slip1, k1, psso) 2 times, k32, (k2tog) 2 times. 36 stitches.
Row 7 Purl.
Row 8 (Slip1, k1, psso) 2 times, k28, (k2tog) 2 times. 32 stitches.
Row 9 Purl.
Row 10 (Slip1, k1, psso) 2 times, k24, (k2tog) 2 times. 28 stitches.
Row 11 Purl.
Row 12 (Slip1, k1, psso) 2 times, k20, (k2tog) 2 times. 24 stitches.
Row 13 Purl.
Row 14 (Slip1, k1, psso) 2 times, k16, (k2tog) 2 times. 20 stitches.
Row 15 Purl.
Row 16 (Slip1, k1, psso) 2 times, k12, (k2tog) 2 times. 16 stitches.
Row 17 Purl.
Bind off.

Tie
Transfer the stitches from your stitch holder to one of your DPNs. Reattach yarn
and work I-cord (see Techniques section) for 5 in/13 cm. Bind off.
Double the I-cord over to form a loop and sew the end securely to the front panel
right next to where your I-cord begins.

115 / Style: Mini Cashmere Clutch

Assembling
Weave in ends.
Fold bag so that the top of the front and the top of the back are aligned. Use yarn
needle and yarn to sew sides of bag using a flat seam. (See Techniques section.)
When you get to the bottom, take care to square up the bottom corners with the
edge of your side seam.

Felting
Felt according to instructions in the Techniques section. Since this piece
is smaller, it’s a great item to felt by hand. If felting by machine, check on it
frequently to make sure the front and back of your bag don’t felt together
and that the I-cord loop remains open.
Pull into shape and lay flat to dry.

Finishing
Once the piece is dry, attach the button to the center of your top flap. You can use
either yarn or thread depending upon the fixture of your button.

116 / Heart Felt Knits

18

Concentric Circles Barrette
Embellished barrettes are great to have in your beauty
arsenal. As someone who juggles a household, family, and
career, I am not ashamed to tell you that I rarely, if left
to my own devices, spend more than twenty seconds on
my hair. On a good day, it gets washed and thrown into a
ponytail. Therefore it’s important to me to have an array
of hats and hair doodads on hand to create the illusion
that I’ve actually paid attention to my own grooming.
I adore the simplicity and perfection of a circle. It is
an ancient symbol that manages to remain modern
and chic. Many of my designs begin with this simple
shape as a base, and here I pay homage to my muse, the
circle. Hopefully, when worn, it will distract the casual
observer from noticing I’m still wearing slippers.

*****

117 / Style: Concentric Circles Barrette

Concentric Circles Barrette
YOU WILL NEED
Scraps of felted wool in various colors

See Upcycled Ornament pattern for suggestions.
Circle templates in 3 sizes

I used a shot glass, a quarter, and a penny.
Fabric marker
Sharp scissors
Needle and thread
Glue gun
4-in/10-cm barrette backing
*****

To Make Up
Step 1 Using your templates, trace circles onto your felt, making 3 of each size.
Step 2 Cut out circles.
Step 3 Make 3 separate stacks out of your circles with the largest circles on the
bottom and the smallest on top.

Step 4 Using needle and thread, sew each set of circles together using tiny stitches
through the center.

Step 5 Use a hot glue gun to attach circles to barrette so that they slightly overlap.

119 / Style: Concentric Circles Barrette

19

Bangles
When my husband and I were approaching our first
wedding anniversary, I decided that I’d like gold bangles
to commemorate the important occasions in our lives.
My thinking was that someday I would be a wrinkled old
lady with an armful of glamorous bangles to represent
my favorite memories. So far I have four. In the meantime,
I thought it would be fun to knit and felt a few extra
bangles. These are perfect for winter—they are warm
and really brighten up a gray, dreary day. I love wearing
them with all black to add a striking splash of color.
Stack them together or wear them one at a time. These
knit up quickly and make a stylish, unique gift.

*****

121 / Style: Bangles

Bangles
SIZING
The pattern as written is for an average-size woman’s wrist. It can
be easily adapted for larger or smaller wrists by simply adding
or subtracting a few stitches from the number you cast on.
GAUGE
10 stitches = 2 in/5 cm
YOU WILL NEED
Blue Sky Alpacas Sport Weight Yarn (100% baby alpaca;
110 yd/100 m per 50 g): 1 skein each in the following colors:
Buttercup, Tangerine, Navy Blue, and Eggplant

You can substitute another luxury sport weight (#3) feltable
yarn. You will need approx. 50 yd/45 m per bangle.
1 set US size 5/3.75 mm DPNs, or size to obtain gauge
Stitch marker
Yarn needle
Plastic grocery bag or other scrap plastic
Safety pin
Bamboo fiberfill or polyfill

I prefer the bamboo for sustainability and softness.
*****

122 / Heart Felt Knits

Knitting
Using DPNs and your first color, cast on 44 stitches.
Divide stitches evenly over 3 needles (15, 15, 14).
Pm after last stitch and join to knit in the round. (See Techniques section.)
Knit even for 24 rows.
Bind off.
Break yarn leaving an 18-in/45-cm tail.

Finishing
Fold the tube in half with cast-on and bound-off edges together and the right side
facing out.
Thread tail through your yarn needle and sew sides together using a flat seam,
leaving a 2-in/5-cm opening.
Cut a piece of your plastic bag to a size that can be pulled through your bangle. A
4-by-12-in/10-by-30-cm piece should do the trick.
Attach a safety pin to the plastic and pull it through the opening in your bangle; tie
the ends together. This will keep the inside of your bracelet open during felting so it
can be stuffed later.
Repeat these steps for each color of bracelet you make.

123 / Style: Bangles

Felting
Felt according to the instructions in the Techniques section. It’s best to felt
each bangle individually by hand or in separate bags by machine so the colors
don’t blend.
Wring out excess water.
Remove plastic bags.
Stretch bangles over a soup can (or something of comparable size) to shape
until dry.

Stuffing
Stuff each bangle with fiberfill and sew closed with sharp yarn needle and
matching yarn.

124 / Heart Felt Knits

20

Cat Ears Hat
What is there really to say about a cat hat? Do you have one?
Probably not. Do you need one? Yes, yes, I think you do. I first
made a miniature version of this hat for my daughter when
she was a baby. Everyone thought she looked adorable in it.
Strangers just couldn’t get enough of an infant in a cat hat.
Not to be outdone by my own child, I immediately set about
making one for myself. You should have a cat hat in your
wardrobe, too. It will add some whimsy to your days and also
keep your ears toasty warm. Not to mention its usefulness in
scaring off any marauding mice that might cross your path.

*****

125 / Style: Cat Ears Hat

Cat Ears Hat
SIZING
This hat is knit to fit an average-size woman’s head. It can be
felted less for a larger size or more for a smaller size.
GAUGE
5½ stitches and 9½ rows = 2 in/5 cm
YOU WILL NEED
Patons Classic Wool Roving (100% wool; 120 yd/109 m per 100 g):
2 skeins in Orchid or substitute 200 yd/190 m of
any chunky weight (#5) 100% wool
1 pair size 10.5/6.5 mm needles, or size to obtain gauge
Yarn needle
Stitch holder
*****

127 / Style: Cat Ears Hat

Body of Hat
You will begin knitting from the top, or the “ears,” of the hat. The hat is knit flat and
seamed at the end.
Cast on 64 stitches.

Rows 1–6 Work even in stockinette stitch, beginning with a knit row.
Row 7 (K13, k2tog, k2, k2tog tbl, k13) 2 times. 60 stitches.
Row 8 Purl.
Row 9 Knit.
Row 10 Purl.
Row 11 (K12, k2tog, k2, k2tog tbl, k12) 2 times. 56 stitches.
Rows 12–16 Work even in stockinette stitch.
Row 17 (K12, kfb, k2, kfb, k12) 2 times. 60 stitches.
Row 18 Purl.
Row 19 (K5, kfb, k3, kfb, k5) 4 times. 68 stitches.
Row 20 Purl.
Row 21 (K5, kfb, k5, kfb, k5) 4 times. 76 stitches.
Row 22 Purl.
Row 23 (K6, kfb, K5, kfb, k6) 4 times. 84 stitches.
Row 24 Purl.
Rows 25–30 Work even in stockinette stitch.
Row 31 K2tog, knit to last 2 stitches, k2tog tbl. 82 stitches.

128 / Heart Felt Knits

Rows 32–36 Work even in stockinette stitch.
Row 37 K2tog, knit to last 2 stitches, k2tog tbl. 80 stitches.
Rows 38–42 Work even in stockinette stitch.
Row 43 K2tog, knit to last 2 stitches, k2tog tbl. 78 stitches.
Rows 44–46 Work even in stockinette stitch.

First Earflap
Row 47 Break off yarn and place the first 28 stitches onto stitch holder. With right

side facing, rejoin yarn to the remaining stitches, bind off 22 stitches, knit to end of
row. 28 stitches.

Row 48 Purl.
Row 49 Knit to last 3 stitches, k2tog tbl, k1. 27 stitches.
Row 50 Purl.
Row 51 Knit to last 3 stitches, k2tog tbl, k1. 26 stitches.
Row 52 Bind off 6 stitches purlwise, purl to end of row. 20 stitches.
Row 53 Knit.
Row 54 and following even rows Purl.
Row 55 Knit.
Row 57 K8, k2tog tbl, k2tog, k8. 18 stitches.
Row 59 Knit.
Row 61 K7, k2tog tbl, k2tog, k7. 16 stitches.
Row 63 K6, k2tog tbl, k2tog, k6. 14 stitches.

129 / Style: Cat Ears Hat

Row 65 K5, k2tog tbl, k2tog, k5. 12 stitches.
Row 67 K4, k2tog tbl, k2tog, K4. 10 stitches.
Row 69 K3, k2tog tbl, k2tog, K3. 8 stitches.
Row 71 (K2tog tbl) 2 times, (k2tog) 2 times. 4 stitches.
Row 72 Bind off purlwise.

Second Earflap
Slip the 28 stitches from your stitch holder back onto needle. With right side facing,
rejoin yarn.

Row 1 Knit.
Row 2 Purl.
Row 3 K1, k2tog tbl, k to end. 27 stitches.
Row 4 Purl.
Row 5 K1, k2tog tbl, k to end. 26 stitches.
Row 6 and following even rows Purl.
Row 7 Bind off 6 stitches, k to end. 20 stitches.
Row 9 Knit.
Row 11 K8, k2tog tbl, k2tog, k8. 18 stitches.
Row 13 Knit.
Row 15 K7, k2tog tbl, k2tog, k7. 16 stitches.

130 / Heart Felt Knits

Row 17 K6, k2tog tbl, k2tog, k6. 14 stitches.
Row 19 K5, k2tog tbl, k2tog, k5. 12 stitches.
Row 21 K4, k2tog tbl, k2tog, k4. 10 stitches.
Row 23 K3, k2tog tbl, k2tog, k3. 8 stitches.
Row 25 (K2tog tbl) 2 times, (k2tog) 2 times. 4 stitches.
Row 26 Bind off purlwise.

Finishing
Weave in ends with yarn needle. Fold work in half. Using a flat-seam technique (see
Techniques section), sew up the side of your hat. Turn hat right side out and fold so
that seam is at center back. Use an overcast stitch to sew the top edges together.

Felting
Pay special attention to your hat while it’s felting, as this type of yarn felts rather
quickly. If felting by machine, check often during the wash cycle so as not to
overshrink. I like this hat with a bit of pliability and think it’s best if only lightly
felted with stitches still visible.

Shaping
Hat can be laid flat to dry and will conform to the shape of the wearer’s head.

131 / Style: Cat Ears Hat

21

Chic Hand Warmers
My hands are almost always cold, as I seem to come from a
long line of “cold hands, warm heart” types. As an avid knitter,
I can’t wear gloves, because I need to be able to feel the fibers
I’m working with and manipulate the yarn. Luckily these
wrist warmers will keep your hands cozy while freeing up
your fingers to get stuff done. And they look pretty cute, too.

*****

133 / Style: Chic Hand Warmers

Chic Hand Warmers
SIZING
Women’s XS/S (women’s M/L)
GAUGE
7.5 stitches and 9 rows = 2 in/5 cm
YOU WILL NEED
Cascade Yarn Lana d’Oro Paints (50% alpaca, 50% wool;
219 yd/200 m per 100 g): 1 skein in color 9923 (or 110 yd/100 m
of other worsted weight wool/alpaca blend) or substitute
110 yd/100 m any worsted weight (#4) 100% wool
US size 8/5 mm needles, or size to obtain gauge
Yarn needle
NOTE:
You will make your wrist warmers in 4 separate pieces,
2 tops and 2 bottoms.
*****

134 / Heart Felt Knits

Top (make 2)
Cast on 64 (80) stitches.

Row 1 *K2tog, repeat from * to end of row. 32 (40) stitches.
Row 2 *P2tog, repeat from * to end of row. 16 (20) stitches.
Work in stockinette stitch, starting with a knit row, for 11 in/28 cm more.

Bottom (make 2)
Cast on 16 (20) stitches.
Work in stockinette stitch, starting with a knit row, for 11 in/28 cm.

Finishing
Take one top and one bottom for each warmer, placing wrong sides together. Pin
the bottom to the top just below the ruffle. Using yarn needle and a flat seam, sew
edges of left side together on first warmer and edges of right side together on the
second warmer.
On remaining open edges measure 3.5 in/9 cm from the top edge of the bottom
piece (the piece without the ruffle), and place a straight pin here for a marker.
Using a flat seam, sew from the bottom of warmer up to this marker, leaving
2.5 in/6.5 cm open for thumb, and then sew remainder of seam.

Felting
Felt your wrist warmers according to instructions in the Techniques section. This
yarn felts pretty quickly and is a great project to felt by hand.
Lay flat to dry.

135 / Style: Chic Hand Warmers

22

Cashmere Cuff
Nothing says luxury to me like cashmere. The feel of
it against bare skin is at once lavish and comforting. I
remember the first cashmere sweater I owned—it was an
olive green V-neck and at the time the most extravagant
item I’d ever purchased for myself. I loved that sweater!
This wrist cuff is a little piece of luxury you can wear
every day. Cashmere felts absolutely beautifully and lasts
a long time—just keep it away from pesky moths.

*****

137 / Style: Cashmere Cuff

Cashmere Cuff
GAUGE
8 stitches and 9 rows = 2 in/5 cm
YOU WILL NEED
Trendsetter Kashmir Yarn (65% cashmere, 35% silk;
110 yd/100 m per 50 g): 1 skein in Plum (C1) and 1 skein in Gray (C2)
or substitute similar worsted weight (#4) cashmere blend yarn
US size 7/4.5 mm needles, or size to obtain gauge
Cotton string or yarn
Leather cord or ribbon
*****

138 / Heart Felt Knits

Knitting
Cast on 27 stitches in C1.

Row 1 Knit.
Row 2 Purl.
Rows 3–14 Work even in stockinette stitch.
The next 2 rows will create the eyelets you will use to thread your cord or ribbon
through.

Row 15 K2tog, yo, k2tog, k19, k2tog, yo, k2tog.
Row 16 P1, (p1, k1) in yo, p21, (p1, k1) in yo, p1.
Row 17 Switch to C2 and knit.
Row 18 Purl.
Rows 19–32 Work even in stockinette stitch.
Bind off.

Felting
Thread cotton string or yarn through eyelets and tie in a knot. This will keep your
eyelets from felting closed. Felt according to instructions in the Techniques section.
Lay flat to dry.

Finishing
Cut cotton string from eyelet holes and thread the holes through with ribbon or
leather cording. Tie to secure.

139 / Style: Cashmere Cuff

23

Rose Brooch or Barrette
This pretty little rose instantly adds interest and color to a
drab lapel or hat. When worn as a barrette, it can turn an
everyday ponytail into a work of art. Combine the flower with
the cloche hat on page 145 and you’ve got a real showstopper.
The rose knits up quickly, but that doesn’t mean that
it won’t impress. These make a fabulous gift that
will have people saying, “I can’t believe you made
that!” It will be our little secret how simple it is.

*****

141 / Style: Rose Brooch or Barrette

Rose Brooch or Barrette
YOU WILL NEED
Patons Classic Wool Roving (100% wool; 120 yd/109 m per 100 g): 1 skein in
Orchid and 1 skein in Leaf or substitute any chunky weight (#5) 100% wool
US size 11/8 mm needles
Yarn needle
Flat-back pin bar or barrette backing
Glue gun
*****

Rose
Cast on 12 stitches.

Row 1 Knit.
Row 2 and all even rows Purl.
Row 3 Kfb across. 24 stitches.
Row 5 Kfb across. 48 stitches.
Row 7 Kfb across. 96 stitches.
Row 9 Kfb across. 192 stitches.
Bind off.
Break yarn, leaving a 12-in/30-cm tail.

Leaves (make 2)
Cast on 3 stitches.

Row 1 Knit.

142 / Heart Felt Knits

Row 2 and all even rows Purl.
Row 3 Kfb, k1, kfb. 5 stitches.
Row 5 Kfb, k3, kfb. 7 stitches.
Row 7 Kfb, k5, kfb. 9 stitches.
Row 9 Knit.
Row 11 Ssk, k5, k2tog. 7 stitches.
Row 13 Ssk, k3, k2tog. 5 stitches.
Row 15 Ssk, k1, k2tog. 3 stitches.
Bind off.

Finishing
Starting at one end of rose piece, begin to wind the piece around itself to create the
rose shape. Thread tail through a yarn needle and sew into the rose to secure its
shape. Weave in ends.

Felting
Felt leaves and rose separately. Once you’ve achieved the desired amount of felting,
pull your pieces into shape and lay them flat to dry. Once dry, use a sharp yarn
needle to sew leaves into place.

Making Up
Using a glue gun, attach your rose onto the pin bar or barrette backing.

143 / Style: Rose Brooch or Barrette

24

Cloche Hat
I’ve always loved the fashion of the 1920s—the Charleston,
cigarette holders, bobbed hair, red lipstick, and kohl-rimmed
eyes all appeal to my inner flapper—to me they are the pinnacle
of feminine glamour. But my all‑time favorite look from this
era is the iconic cloche hat. I love everything about a cloche.
I adore the way it couches the wearer in mystery, keeping
the eyes in shadow and showing off pouty lips. I also
love the fact that the domed top adds a bit of height to my
5-foot-2-inch frame. In my opinion, a cloche can make
anyone look and feel just a bit more elegant than usual.

*****

145 / Style: Cloche Hat

Cloche Hat
SIZING
This hat is designed to fit an average-size woman’s head. A custom
fit can be achieved during felting and subsequent shaping.
DIMENSIONS
Circumference at widest point: 35 in/89 cm before
felting; 27 in/68.5 cm after felting
Height: 13.5 in/34 cm before felting; 9 in/23 cm after felting
GAUGE
4 stitches and 5½ rows = 2 in/5 cm with yarns held together
YOU WILL NEED
Cascade Jewel Hand Dyed Yarn (100% wool;
142 yd/131m per 100 g): 1 skein in color 9284
Patons Classic Wool Roving (100% wool; 120 yd/109 m per 100 g):
1 skein in Gold or substitute two chunky weight (#5) yarns
US size 15/10 mm circular needle 24 in/60 cm long,
or size to obtain gauge
1 set US size 15/10 mm DPNs
Yarn needle
Stitch marker
NOTE:
You will start knitting on a circular needle; switch to DPNs when
you have too few stitches to continue on a circular needle.
*****

146 / Heart Felt Knits

Brim
With both yarns held together, CO 70 stitches to a circular needle. Pm and join to
knit in the round. Work even in stockinette stitch until piece measures 3.5 in/9 cm.

Next row: (K2tog, k15) 3 times, k2 tog, k17. 66 stitches.
Bind off.

Crown
Pick up and knit 66 stitches from the inside (WS) of bound-off edge. This will create
the welt detail around the brim.

Rounds 1–6 Knit.
Round 7 *K2tog, k9, repeat from * to end of round. 60 stitches.
Round 8 and all even rows Knit.
Round 9 *K2tog, k8, repeat from * to end of round. 54 stitches.
Round 11 *K2tog, k7, repeat from * to end of round. 48 stitches.
Round 13 *K2tog, k6, repeat from * to end of round. 42 stitches.
Round 15 *K2tog, k5, repeat from * to end of round. 36 stitches.
Round 17 *K2tog, k4, repeat from * to end of round. 30 stitches.
Round 19 *K2tog, k3, repeat from * to end of round. 24 stitches.
Round 21 *K2tog, k2, repeat from * to end of round. 18 stitches.
Round 23 *K2tog, k1, repeat from * to end of round. 12 stitches.
Round 25 *K2tog, repeat from * to end of round. 6 stitches.

147 / Style: Cloche Hat

Finishing
Cut yarn leaving a 10-in/25-cm tail. Using a yarn needle draw the tail through the
remaining 8 stitches. Pull tightly and secure. Weave in all ends on wrong side of
cloche.

Felting
Felt according to instructions in the Techniques section. If felting by machine, keep
close watch on your cloche so that the brim doesn’t curl up. This hat looks and feels
best if you can still see some stitch definition. This yarn combination felts quickly,
and overfelting will result in a super dense, too-small hat, so check frequently.

Shaping
To achieve the domed shape of the cloche, dry over a bowl in the appropriate size.

148 / Heart Felt Knits

25

Baby Acorn Hat
If you have ever said to yourself, “How could my baby
possibly be any cuter than she already is?” try this—
make her an acorn hat! This little cap is simply
irresistible on a baby. Best of all, the project knits up
quickly and easily and makes a darling baby gift.

*****

149 / Style: Baby Acorn Hat

Baby Acorn Hat
SIZING
The size given will fit 0–6 months. Much of the sizing can be
determined in the felting. If hat is too big, just felt it a little more.
GAUGE
7 stitches = 2 in/5 cm
YOU WILL NEED
US size 10/6 mm circular needle 16 in/40 cm long,
or size to obtain gauge
Cascade Eco+ Yarn (100% wool; 478 yd/441 m per 250 g):
1 skein in color 2452 (MC) and 1 skein in color 9459 (CC) or
substitute 100 yd/90 m in chunky weight (#5) green wool (MC)
and 50 yd/46 m in chunky weight (#5) brown wool (CC)
1 set US size 10/6 mm DPNs
Stitch marker
Yarn needle
*****

151 / Style: Baby Acorn Hat

I-Cord
Using CC and DPNs, cast on 3 stitches. Make an I-cord 3 in/7.5 cm long. (See
Techniques section.) Break yarn, leaving a 12-in/30-cm tail. You will use the
tail to sew your “stem” to the top of your hat. Set aside.

Body of Hat
Using MC and circular needle, cast on 64 stitches. Pm and join to knit in the round.

Rounds 1–28 Knit.

Crown
Round 29 Switch to CC. *K1, p1, repeat from * to end of round.
Round 30 *P1, k1, repeat from * to end of round.
Rounds 31–32 Repeat rounds 29 and 30.
The next row will begin your decrease rows. Switch to DPNs when it becomes
difficult to continue knitting on a circular needle.

Round 33 *K2tog, k6, repeat from * to end of round. 56 stitches.
Round 34 and all subsequent even rows Knit.
Round 35 *K2tog, k5, repeat from * to end of round. 48 stitches.
Round 37 *K2tog, k4, repeat from * to end of round. 40 stitches.
Round 39 K2tog, k3, repeat from * to end of round. 32 stitches.
Round 41 K2tog, k2, repeat from * to end of round. 24 stitches.

152 / Heart Felt Knits

Round 43 K2tog, k1, repeat from * to end of round. 16 stitches.
Round 45 (K2tog) 8 times. 8 stitches.

Finishing
Break yarn leaving a 12-in/30-cm tail. Using yarn needle, thread tail through
remaining stitches. Pull tightly and secure. Sew back and forth neatly across hole
to cover, and weave in ends on wrong side of hat. Attach I-cord to center top of hat
using yarn needle.

Felting
Felt according to instructions in the Techniques section and allow hat to dry on a
bowl to create shape.

153 / Style: Baby Acorn Hat

Resources

Thanks so much to all of the amazing companies that generously contributed yarn for
the projects in this book. You can find them all at your local yarn stores or online.

Blue Sky Alpacas
www.blueskyalpacas.com
(888) 460-8862 Canada/
North America
763-753-5815 International

Lion Brand Yarn Company
www.lionbrand.com
135 Kero Road
Carlstadt, NJ 07072
(800) 258-YARN (9276)

Cascade Yarns
www.cascadeyarns.com
1224 Andover Park E.
Tukwila, WA 98188
(800) 548-1048

Patons
www.patonsyarn.com
320 Livingstone Ave. S.
Listowel, Ontario, Canada N4W 3H3

Classic Elite Yarns
www.classiceliteyarns.com
122 Western Avenue
Lowell, MA 01851
(978) 453-2837
Dr. Bronner’s Magic Soaps
www.drbronner.com
P.O. Box 28
Escondido, CA 92033
(877) 786-3649

Trendsetter and Naturally Yarns
www.trendsetteryarns.com
info@trendsetteryarns.com
(818) 780-5497

Index
A

Abbreviations and symbols, 19
Accessories. See Fashion
accessories; Home decor
Acorn Hat, Baby, 149–53
Acorns, Little, 70–73

B

Baby Acorn Hat, 149–53
Baby Elf Booties, 74–80
Bags
Farmers’ Market Tote, 95–99
Laptop Messenger Bag, 104–9
Mini Cashmere Clutch, 110–16
Bangles, 120–24
Barrettes
Concentric Circles Barrette,
117–19
Rose Brooch or Barrette, 140–43
Booties, Baby Elf, 74–80
Bowls, Nesting, 26–33
Brooch or Barrette, Rose, 140–43

C

Cashmere Cuff, 136–39
Chain Necklace, 90–94
Chic Hand Warmers, 132–35
Children, projects for
Baby Acorn Hat, 149–53
Baby Elf Booties, 74–80
Soft Felted Spheres, 58–61
Stuffed Robot, 62–69
Cloche Hat, 144–48
Clog Slippers, Men’s, 81–87
Clutch, Mini Cashmere, 110–16
Coasters, Set of Four, 51–54
Concentric Circles Barrette, 117–19
Cuff, Cashmere, 136–39

F

Farmers’ Market Tote, 95–99
Fashion accessories
Baby Acorn Hat, 149–53
Baby Elf Booties, 74–80
Bangles, 120–24
Cashmere Cuff, 136–39
Cat Ears Hat, 125–31
Chain Necklace, 90–94
Chic Hand Warmers, 132–35
Cloche Hat, 144–48
Concentric Circles
Barrette, 117–19
Farmers’ Market Tote, 95–99
Laptop Messenger Bag, 104–9
Men’s Clog Slippers, 81–87
Mini Cashmere Clutch, 110–16
Rose Brooch or Barrette, 140–43
Ruffle Scarf, 100–103
Felted knits. See also Knitting
care of, 13
felting techniques, 10–13
mistakes, 22
overfelting, 20
shrinkage, 20

H

Hand Warmers, Chic, 132–35
Hats
Baby Acorn Hat, 149–53
Cat Ears Hat, 125–31
Cloche Hat, 144–48
Home decor
Little Acorns, 70–73
mouse pad (round platter), 39
Nesting Bowls, 26–33
Oversize Pencil Holder, 42–46
Round Platter, 38–41

Set of Four Coasters, 51–54
Soft Felted Spheres, 58–61
Stuffed Robot, 62–69
Two-Tone Tray, 34–37
Upcycled Ornaments, 55–57

I

I-cord, 16

K

Knitting
abbreviations and symbols, 19
bind-off methods, 15
decreases, 17–18
flat seams, 17
gauge, 21
I-cord, 16
increases, 18
knitting in the round, 13–14, 21
pick up and knit, 16
resources, 154
tools and supplies, 22–23
Knitting Needle Carrier, 46–50

L

Laptop Messenger Bag, 104–9
Little Acorns, 70–73

O

Ornaments, Upcycled, 55–57
Oversize Pencil Holder, 42–45

P

Pencil Holder, Oversize, 42–45
Platter, Round, 38–41

R

Robot, Stuffed, 62–69
Rose Brooch or Barrette, 140–43
Round Platter, 38–41
Ruffle Scarf, 100–103

S

Scarves
Chain Necklace, 90–94
Ruffle Scarf, 100–103
Seams, flat, 17
Set of Four Coasters, 51–54
Slippers
Baby Elf Booties, 74–80
Men’s Clog Slippers, 81–87
Soft Felted Spheres, 58–61
Stuffed Robot, 62–69

T

Men’s Clog Slippers, 81–87
Mini Cashmere Clutch, 110–16
Mouse pad (round platter), 39

Tote, Farmers’ Market, 95–99
Toys
Soft Felted Spheres, 58–61
Stuffed Robot, 62–69
Two-Tone Tray, 34–37

N

U

M

Necklace, Chain, 90–94
Needle Carrier, 46–50
Nesting Bowls, 26–33

Upcycled Ornaments, 55–57

Acknowledgments
When approached to write this book, I responded the way I do to most everything
in my life: I said yes before considering the fact that I didn’t really know how.
So many people contributed to make the idea of Heart Felt Knits a reality. First
and foremost is my editor, Laura Lee Mattingly, who brought me the idea in the
first place. Her vision and gentle guidance turned this daunting undertaking
into one of my proudest achievements. Chronicle Books took a chance on a
first-time writer and provided me with the most amazing team. I owe a huge
debt of gratitude to everyone at Chronicle, but especially to my art director,
Ayako Akazawa, and to my technical editor, Kristi Porter.
I was so privileged to work with the most incredible photographers on this project,
and I am indebted to Frank Ockenfels and Jessica Sample. They managed to see
the vision I had in my head and turn it into a beautiful reality. I’m also lucky
enough to have the two best friends in the world, and I couldn’t have done this
without either of them: Jennifer Laski, who found me incredible photographers,
produced the photo shoots, and has always been my biggest cheerleader, and
Christina Hendricks, my muse, trusted critic, and the most beautiful cover girl
ever, inside and out. Thank you, my ladies.
Thanks also to Pearl Hanan for essentially managing my life and my career.
And to my family, who has been extraordinarily patient with me during the
writing of this book, I am forever in your debt. These people have dealt with a
houseful of yarn, projects everywhere, my complete preoccupation with finding
the perfect algebraic equation for every pattern, and my utter inability to commit
to any plan: Diane Affourtit; Charlotte and Sergio Cascardo; Danielle Carr;
John and Rosalina Mello; Lucas and Lisa Cascardo; and most importantly, my
husband, Paolo Cascardo, and our daughter, Olivia. I love and adore you all, and
I am eternally grateful that you continue to put up with me.