/


Текст
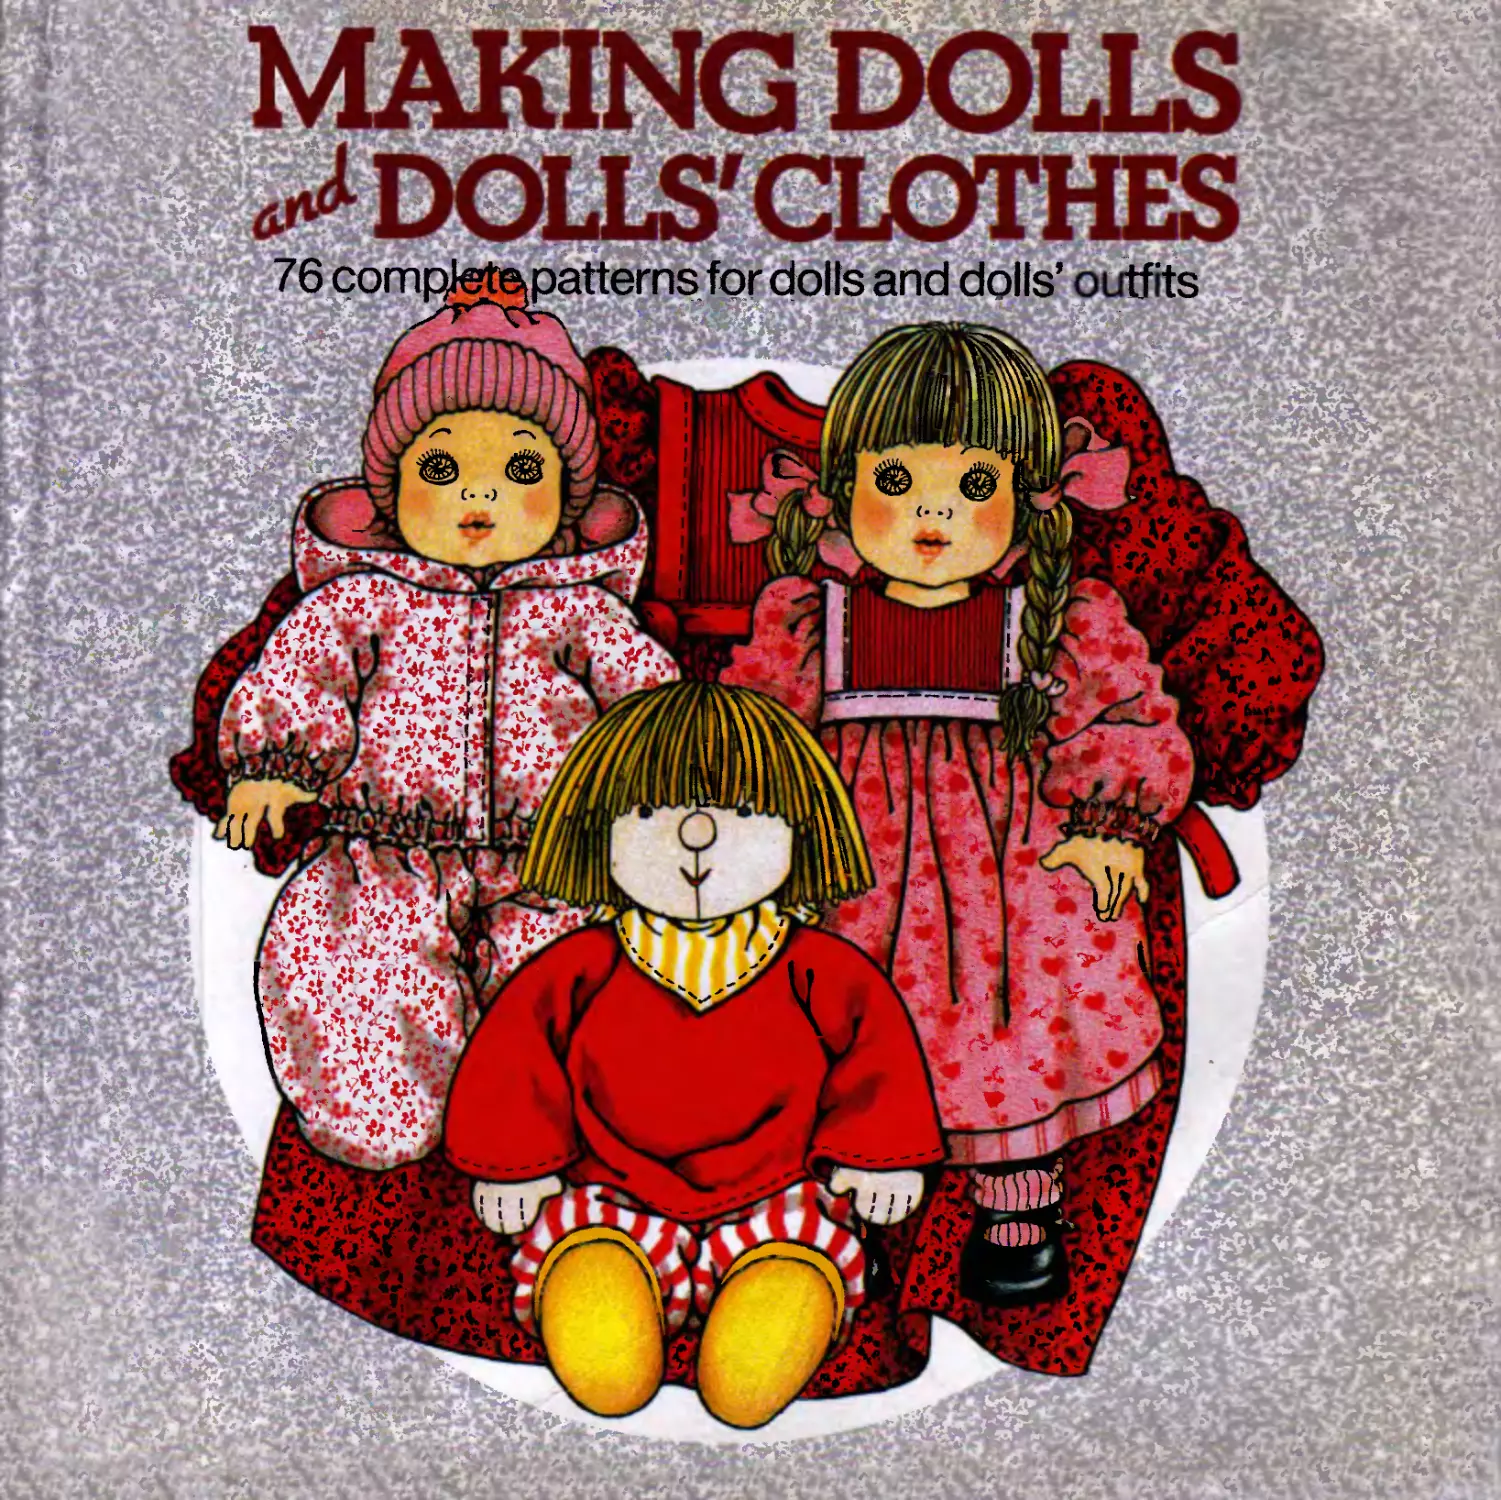
MAKING DOLLS
^DOLLS'CLOTHES
76 complete patterns for dolls and dolls’ outfits
Lia van Steenderen
BEXLEY
Contents
Foreword	7
Introduction	8
Rag dolls	15
Cuddly doll, cloth doll and miniature doll	18
Cuddly doll with floppy arms and legs	24
4" (10cm) doll	28
Rag doll	32
Stick doll or hand puppet	46
Baby dolls	51
Night clothes	54
Pinafore, pants, blouse and pullover	64
Stretch suit, pants jacket, bolero-type jacket	74
Dresses and pinafores	82
Outdoor suit, pants, seeveless jacket and	90
sweater
Playsuit, knitted jackets, sweater and pants	100
Bootees, shoes, mittens and hats	108
Backpack and baby carrier	112
Portable crib, hotwater bottle cover,
toilet-bag, patchwork quilt	118
Doll’s crib, table and chair	122
Stand-up dolls	127
Clothes for a stand-up doll	130
Jacket, sleeveless jacket, pants, skirt and	142
pullover
Overalls, skirt with bib top, all-in-one suit, 152
skirt, bolero-type jacket
Blouse, skirt, pants and sleeveless pullover 160
Jacket, skirt, dress, sleeveless jacket and 166
bag
Dresses, top, pinafore	174
Backpack, footwear, pantyhose, scarf and 182
hat
Foreword
A book full of home-made dolls’ clothes and clothes for
children up to the age of seven.
The smallest doll is a cuddly little thing measuring 4"
(10cm): it can easily be fitted into a coat pocket and taken
to nursery school. It consists simply of a head and a body.
The larger rag dolls have arms and legs and they are
equipped with clothes which can be put on and taken off.
Then there is a set of clothes for baby dolls 11’/г" (29cm),
14" (36cm) and 17" (43cm) long, which you can buy. You
will find everything that the baby doll needs, from sleeping
sack to underwear, pants and jackets. From tiny mittens,
scarf and hat for chilly days to airy clothes for boiling hot
weather The portable crib is very handy to take out;
naturally the doll will then be wearing her special outdoor
clothes'
Dolls who are past the baby stage, standing-up dolls, are,
of course, more demanding as far as clothes are
concerned. They won’t wear just anything any more, they
like to follow fashion. That is why in addition to the
practical things that you just have to have, like jackets,
dresses, pants and night clothes, they also have a jogging
suit, a bodywarmer and legwarmers and there is a real
Japanese kimono. Lots of clothes, like overalls, can be
worn by boy and girl dolls.
The fathers and mothers of the dolls are also taken into
account. If they are not older than seven, they can wear
the same clothes as the dolls. The patterns for their clothes
are in the book, together with the patterns for the dolls’
clothes and the rag dolls The sewing instructions are set
out clearly next to the patterns.
Introduction
jacquard:	Figured woven material made of cot-
ton, linen or half-linen. Damask pat-
terns stand out from the ground fabric
with a contrasting sheen.
ticking:	Tough linen or cotton material, usually
striped.
terrycloth:	Soft, absorbent cotton fabric consist-
ing of many tiny loops.
stretch terrycloth: The same but of a finer consistency
and stretchable.
viyella:	Fine, soft quality half-woollen flannel.
3 Materials
The children’s clothes and dolls’ clothes in this book can
be made out of almost any material. It is best to choose
easily washable fabrics that don’t run. If you don’t like the
shade of a piece of cloth, you can dye it first. Textile dyes
can be bought at supermarkets and department stores.
Cotton can easily be washed at quite high temperatures.
This is very handy for children’s or dolls’ clothes, which
can become very soiled. Cotton material may shrink the
first time it is washed. It is therefore advisable to wash
new cotton mater jal before cutting it out to fit the pattern.
Wool needs very careful washing. Wash only by hand and
never in too hot or too cold water. If very frequently
washed, wool may become matted or felted.
Some types of materials
BATISTE:	Fine light cotton or linen fabric like cambric.
BOUCLE:	Material knitted or woven from spec- ially looped yarn which gives a curly look.
CORDUROY	Coarse or fine ribbed cotton velvet.
CREPE:	The yarn is exceedingly twisted dur- ing weaving. It is crease-resistant.
DENIM:	Strong cotton material.
FLANNEL	Soft woollen fabric of open texture with a light nap.
FLANNELETTE:	Brushed cotton fabric.
GABARDINE:	Smooth durable twill woven cloth.
GLAZED COTTON:	A cotton fabric covered with a layer of lacquer.
honeycomb/thermal Fabric woven with a pattern of raised
hexagons or squares.
Different materials can make very good combinations.
Some examples are:
Glazed cotton lined with brushed flannel or corduroy.
Corduroy combined with shiny cotton (pockets, casing
etc.)
Shiny cotton combined with terrycloth.
Honeycomb/thermal combined with flannelette.
Quilted material
It is quite easy to make your own quilted material. The
outer layer and the inner layer can be made of cotton,
the filling can be polyester wadding or lightweight interlin-
ing.
You can stitch straight or diagonal lines for your quilting
design. You can also follow the lines of a fabric motif or
applique. For transferring an applique design to fabric see
the heading: applique. First baste the three pieces of cloth
together and then quilt them.
You can quilt the three layers of fabric as one whole length
of material first and then put the pattern on to the material
and cut according to the instructions. Or, you can cut out
the pattern separately from the three fabrics and quilt
each pattern piece. In tnis case, add a very generous
seam allowance of 2" (5cm) because the material will be
drawn together when it is quilted.
Amount of material
The amount of material has been generously calculated
for the largest size. For a smaller size you can usually
count on a lesser quantity, it depends on the style. For
pants you can use quite a lot less material for a smaller
size.
The amount of material needed for dolls’ clothes has not
been stated, because usually you can make a great deal
out of a very small piece of material.
Taking measurements
Sizes for babies and small children
Measure over underwear. The pattern should always be
slightly bigger than the measured sizes.
1.	Chest width measured over the fullest part of the
chest.
2.	Waist width measured around the waist.
3.	Hip width measured across the fullest part of the but-
tocks.
4.	Back length, from the base of the neck to the waist.
5.	Sleeve length, from the shoulder to the wrist.
6.	Skirt length, from the waist to any desired length.
7.	Length of pants, from the waist to any desired length,
(see diagram)
If in doubt, always follow the size measurement rather
than the age of your child. Size is by height of the child.
size 24" (62cm) is for about 0-3 months
size 27" (68cm) is for about 3-6 months
size 29" (74cm) is for about 6-9 months
size 31" (80cm) is for about 9 months to 1
size 34" (86cm) is for about 11Л years
size 36" (92cm) is for about 2 years
size 38" (98cm) is for about 3 years
size 40" (104cm) is for about 4 years
size 43" (110cm) is for about 5 years
size 45" (116cm) is for about 6 years
size 47" (122cm) is for about 7 years
year
9
1. Chest width
2. Waist width
3. Hip width
4. Back length
5. Sleeve length
6. Skirt length
7. Length of
pants
Sizes for baby doll:
Length of the doll: 17"(43ст)	14"(36cm)	111Л”(29ст)
Chest width:	11 "(28cm)	9 (23cm)	7"(18cm)
Waist width:	nw'(29cm)	9%"(25cm)	8УГ(21ст)
Hip width:	131Л (34cm)	11У?"(29.5ст) 91Zi"(24cm)
Sleeve length: 5"(13ст)	4"(10cm)	23/4"(7cm)
Upper arm width: 5"(13ст)	41/4"(11cm)	3W'(9cm)
Hand width:	41/4"(11ст)	33/4"(9.5cm)	3"(8cm)
Outside leg length: 8W'(22cm)	63/4"(17cm)	4У>"(12ст)
Inside leg length: 4W'(i2cm)	31/4"(8.5cm)	2"(5cm)
Thigh width:	7У/'(19ст)	61/4"(16cm)	5"(13cm)
Knee width:	6W'(i7cm)	5W'(14cm)	41/4"(11cm)
Foot width:	73/4"(20cm)	61Л"(16.5ст)	43/4"(12cm)
Neck width:	7"(17.5ст)	6"(15cm)	4%"(12ст)
Sizes for standing-up doll:
Length Of the doll: 19W'(50cm) 15%"(40cm) 113/4"(30cm)
Chest width:	11 "(28cm)	9V4"(24cm)	8"(20cm)
Waist width:	93/4"(25cm)	81/4"(21cm)	6W'(17cm)
Hip width:	131Z>"(34cm)	11 "(28cm)	8W'(22cm)
Sleeve length:	5У>"(14ст)	4У4"(11ст)	3"(8cm)
Upper arm width:	4W'(l2cm)	4"(10cm)	3"(8cm)
Hand width:	4У>"(12ст)	4"(10cm)	3 (8cm)
Outside leg length: 91/4"(24cm)		7У>"(19ст)	5W(14cm)
Inside leg length:	63/4"(17cm)	5"(13cm)	3V&"(9cm)
Thigh width:	7"(18cm)	6"(15cm)	4W(12cm)
Knee width:	6V4"(16cm)	5"(13cm)	4"(10cm)
Foot width:	6%"(17cm)	5W'(14cm)	4У»"(11ст)
Neck width:	6%"(17cm)	6"(15cm)	4W(12cm)
Instructions:
The patterns are drawn to scale. If they are drawn on
squares, the patterns can be reproduced on squared
dressmaker’s pattern paper 2 x 2" (5 x 5cm) squares.
You can buy this paper where you buy your fabric or
you can draw 2 x 2" (5 x 5cm) squares on a large sheet
of paper.
The small squares vary in size throughout the book.
Whatever the size, each one represents 2 x 2" (5 x 5cm).
Mark the pattern at the points where items such as
pockets, casings, loops and buttons need to be sewn
on.
Reproduce the front and the back section. The section
with the low neckline is always the front.
On the pattern pages, the different sizes are indicated
by different lines, e.g. dotted line, solid line.
Reproducing a pattern on squared paper
Reproducing a pattern on 2 x 2" (5 x 5cm) dressmaker’s
pattern paper may seem difficult to those of you who have
never done it before. However, once you get started you
will see that it is quite easy.
This is what to do.
Draw the longest straight line from the pattern diagram
in the book on to your 2 x 2" (5 x 5cm) squared paper
This will give you an idea of the relative proportions. From
here on, mark a dot on each square of your dressmakers
pattern paper at the point where it is crossed by a line
on the pattern diagram.
Having done this, you join up the dots. Watch the diagra
carefully to see if the lines are straight, diagonal or curved
Don’t be afraid of slight variations, it doesn’t have to be
absolutely accurate, (see diagram)
Sewing instructions
Always read the sewing instructions through to the end
before you pin the pattern to the material and cut it out.
After that, follow the instructions step by step. Read each
step thoroughly before you continue sewing.
Sleeves
Sleeves that are cut out in one piece with the mam garment
can also be cut out and sewn on separately Just cut the
sleeves off the pattern, remembering to add a seam allow-
ance to both pieces. For example, it is fun to make sleeves
out of a different fabric. The joining seam can be disguised
with a contrasting band. A row of different bands looks
very cheerful (see illustration).
The upper side of the sleeve now adjoins the fabric fold.
Ruched lingerie elastic
When using ruched lingerie elastic in a waistline, take a
length of elastic that is 2" (5cm) less than the waist width.
Stretch the elastic as you stitch the fabric, thereby giving
the ruched effect
For dolls, the waist, the leg or the wrist are measured with
slightly stretched elastic Take care that both legs, the foot
or the hand can still fit through the opening. Take approx.
%" -%" (1 -2cm) extra because the elastic is to be stitched
in with the side seams. For the waistline, the elastic is
often cut into two pieces. One piece is sewn into the front
panel and the second piece is sewn into the back panel.
Then the side seams are stitched together
Pinning and basting
Pin or baste a garment together first if there is any doubt
about the fit. Follow the sewing instructions except that
where stitching is indicated, you pin or baste.
Stretch fabrics
Stretch fabrics should always be sewn with a synthetic
thread using a gentle zig-zag stitch so that the seams
can stretch with the rest of the material
Curved seams
Clip the seam allowance of an inner curved seam Cut
V-shaped notches in the seam allowance of an outer
curved seam (see diagram).
11
Finishing and flattening a seam
Lay the material flat and stitch Уд" (0 5cm) away from the
seam (see illustration).

Cuffs
Knitted cuffs to add to the bottom of sleeves or the lower
edge of a jacket can be bought ready-made, but you can
also knit them yourself.
The cuffs should be slightly stretched while being stitched
on, in order to give a puffed effect to the garment.
Bias binding
You can buy bias binding, but you can also cut the binding
out of the same material as your garment or else use
contrasting material. Cut the strip from the fabric on the
bias - diagonally to the threads. You will often need to
join several strips. Do this having the right sides together
and the edges at right angles to each other. If you use
the same material, you will need to buy more than indi-
cated in the sewing instructions. Fabric that is very in-
clined to fray is not suitable for bias binding.
When a seam is on an inner curve, the bias binding is
12
stitched on more tightly. On an outer curve the bias binding
is stitched on somewhat more generously. This is to pre-
vent pulling (see diagrams 1 -7).
Applique
Reproduce the design on 2 x 2" (5 x 5cm) dressmaker’s
pattern paper. Now take the material on to which the
design is to be transferred Place a sheet of dressmaker’s
tracing paper (tracing carbon) over the position where the
design is to be. Place the carbon side facing the material.
Place your applique drawing on top of this.
Now trace the lines of the design with a pencil. The
applique design is now transferred to the material. Now
repeat the procedure to obtain different parts of the design
on different pieces of material. Cut them out and iron very
thin fusible webbing on to the backs (you can also use
textile glue to attach appliques to garments).
Pin and baste the appliques in exactly the right positions
on the design. Now attach them to the material using a
zigzag stitch. Use closely-spaced, fairly large zigzag
stitches. It is preferable not to use too thin or too thick
fabrics for appliques Also avoid stretch fabrics or velvet
- these are difficult to work with. You could try first making
an applique on a trial piece of fabric.
Pompom
Pompoms
You will need: two round cardboard discs of equal size
with a hole in the middle Remnants of wool or cotton yarn.
With three or four strands at a time, wind the threads
around the hole in the middle of the discs until it is com-
pletely filled in. (see diagram) Then cut the yarn between
the two discs around the outer edge Wind a double thread
between the two discs around the cut yarn and tie it in a
tight knot. Then remove the cardboard discs. Trim the
pompom to make an even ball and hold it briefly over
steam to make it extra fluffy.
Bias binding is first stitched on to the wrong side of the materia
Diagram 2
Then fold the binding over the material and stitch it on the right side
of the material
Diagram 3
In this diagram a loop is stitched on with the binding. The loop is
on top of the material.
4
Diagram 4
The loop is turned to the outside and when the bias binding is folded
over and stitched on the right side of the material, the loop is sewn
on with it.
Diagram 5
When finishing off a collar or neckline, the end of the bias binding
is first turned in. For the rest see diagrams 1 and 2
Diagram 6
The double-stitched binding hangs out like a tie ribbon. When the
binding is stitched on to the right side of the material, the length
that hangs out must also be stitched twice
The double stitched loose end of the binding is now folded back to
form a loop, the end of which is stitched on to the back of the opening.
to insert a zipper
opening for the zipper together along the seam
ire and press the edges flat. On the wrong side of the
•5x2  c pm the zipper in position face down, with the teeth
- the middle of the basted seam and the zipper tab
n) from the top edge. Baste through all thick-
- - 3 and remove pins. On the right side, stitch the
. pper m place using a zipper foot. Start at the top and
sstcn Уд' (0 5cm) from the teeth, pivoting the fabric at the
corners. On an open-ended separating zipper,
down each side separately. Remove the basting
Tread.
и з: к and eye fastening band
~h«s is attached in two sections. One section is sewn on
of the fabric and the other underneath the fabric
If hook and eye fastener is to be used as a middle front
or middle back fastening, you should leave a section stick-
mg out on one side (see diagram).
13

Diagram 1
Turn in the seam allowance on one side Sew on the hook and eye
fastener band. Leave a section sticking out.
Turn in the seam allowance on the other side The hook and eye
fastener band is completely sewn down on the .aside
Diagram 3
The closed jacket or blouse.

Knitting
Materials
required:	Remnants of wool yarn, knitting needles
size 9 (3.75mm).
Sampler:	11 stitches and 16 rows in tricot stitch
add up to a square measuring 21/д" x 2У4"
(6 x 6cm).
12 stitches and 14 rows in plain stitch
make a square measuring 21/д" x 21/д" (6
x 6cm)
Stitches used rib stitch: 1 plain, 1 purl
plain stitch: knit all the stitches plain
tricot stitch: 1 row plain, 1 row purl
jacquard stitch: 1 row plain, 1 row purl,
knitted in different shades in different
designs (see diagram)
O&ccs
2

3
I
Cuddly doll,
cloth doll and
miniature doll
18
Materials:	white unspun sheep’s wool,
white, pink or beige knitted fabric,
wool or cotton knitting yarn for the hair,
soft textured cotton, cotton with a nap
or a piece of an old pullover.
Sewing instructions head and body
Head:
Take a white, beige or pink square of fabric measuring
roughly 9" (23cm). For example, a piece of an old T-shirt.
Place some unspun wool or other filling in the middle of
the square of fabric.
Fold in the corners to make a round ball. Add more filling
until it is a tight ball measuring about 2%'' (7cm) from top
to bottom. Tie it together around the base with strong
thread or cord. Cut off the loose ends of thread (diagram
1).
Sew on a strong thread at ear level. Wind the thread around
the ball several times. Pull the thread tight and sew it
down in the position of the second ear (diagram 2).
Now bring a thread over the top of the head, through the
neck. Do not pull the thread too tight Sew the thread
down on both sides at the ear position (diagram 3).
By pulling the thread down on one side, the back of the
head is formed (diagram 4).
РкгтеЫ
Qot-шег
V (угсЛ
Cut out a piece of pink or beige knitted fabric to cover
the head (diagram 5).

19
Place the piece of fabric over the head and see that it fits
smoothly over the eyes Sew the edges together at the
back and sew down the flap on top of the head Tie the
fabric tightly around the neck (diagram 6).
Hair for doll model 1
Mark the position of the eyes and embroider these on,
working the needle back and forth from the ear position
or the neck position. Embroider on the hair working from
the middle of the head to the forehead (diagram 7)
ш>
Bonnet
Reproduce the pattern piece Place the middle back
against the fabric fold. Cut out with an extra 3/e" (1cm) for
seam allowance. Stitch the back seams. Turn in and stitch
the seam allowance at the front. Pull the bonnet over the
head and sew it down with a few stitches. Tie it tightly to
the head at the neckline.
Hair for doll model 2
Cut strands of wool yarn measuring 572" (14cm) Fold
them in half and sew them on two strands at a time along
the top of the head from ear to ear. If preferred draw a
line first. Trim the strands to hang just above the eyes
(diagram 8).
Draw a line from the front along the middle of the back
of the head Cut strands of wool yarn 11%" (30cm) long.
Sew them on two strands at a time along the middle of
the back of the head (diagram 9).
Sew the bunches against the sides of the head. Tie ribbons
around the bunches and trim them into shape (diagram
10).
Body
Place the pattern piece on folded fabric (knitted fabric,
soft cotton or an old pullover.
Cut it out with an extra 3/e" (1cm) for seam allowance.
Stitch the body together, leaving the neck open. Clip the
seam allowance all the way around and turn it right side
out-
Stuff the body with filling (unspun wool, wadding, nylon
scraps).
Insert the protruding flap of fabric from the neck (and the
bonnet) into the neck opening. Fold in the seam allowance
of the neck opening and sew this firmly to the threads
encircling the neck.
10
Playsuit
Pattern pieces: pants front panel and pants back panel
Notions:	bias binding
Sewing instructions:
1	Reproduce the pattern piece. Cut it out twice in double
fabric with an extra 3/e" (1cm) for seam allowance.
2	Zigzag around the edges of the pieces.
3	Stitch the inside leg seams. Clip the curve in the seam
allowance.
4	Stitch the crotch seam together all the way around.
Clip the curve in the seam allowance.
5	Gather the front and the back. Finish the upper edge
at the front and the back with bias binding.
6	Stitch bias binding around the armholes, leaving a
length loose at the top to make a tie ribbon.
7	Stitch the side seams together.
Jacket
Pattern pieces: front panel, back panel
Notions:	bias binding
- л тд instructions:
1	“eproduce the pattern pieces. Fold the fabric in half
and pm the pieces to it, having the middle back against
the fabric fold.
2	Cut out the neckline, the front panel and the bottom
edge of the sleeves without a seam allowance. The
remaining edges with an extra %" (1 cm) for seam allo-
wance.
3	Zigzag around the edges of all the pieces.
4	Stitch the upper arm seams.
5	Stitch bias binding along the edges of the front panels.
6	Stitch bias binding around the bottom edges of the
sleeves.
7	Stitch bias binding around the neckline. Leave enough
binding loose on both sides to tie in a bow.
8	Stitch the underarm side seams. Clip the curve in the
more filling in between your fingers until the head is a taut
ball about 21Zr (6cm) high. Make sure that the head stays
in the middle of your piece of fabric.
Secure the head tightly with a cord or ribbon.
Knot two corners to make hands.
Reproduce the pattern for the head scarf.
.......
DOLL 2.	;
21
seam allowance.
9 Turn in and stitch the hemline.
10 Make 2 pompoms and sew them on to the ends of
the tie ribbons (see introduction).
Cloth doll
Take a piece of soft fabric, e.g. viyella or knitted fabric,
and cut out an 18" (45cm) square.
Stitch or embroider the edges together.
Place some unspun wool in the middle of the square and
make a ball by pulling the fabric tightly around it. Push in
PfrtJTS Doll. I
feooN Oou_S
Turn in and stitch the edges and tie the scarf on to the
head.
The scarf is knotted at the back of the doll’s neck.
Sew the knot together and sew the scarf on to the doll’s
head so that the baby can’t pull it off.
Miniature doll
Reproduce the pattern. Place it on folded fabric, with the
middle against the fabric fold. Cut it out twice.
Stitch the pieces together all the way around but leave
an opening of about 2" (5cm) on the top. Turn the bag
right side out and stuff it with filling; unspun wool, wadding
or nylon scraps. Do not stuff it too tightly, it should feel
22 nice and soft.
Make the head and the bonnet (see model 1).
Put the head into the neck opening and sew it on firmly,
at the same time sewing up the whole opening.
Crochet a cord and make 2 pompoms. (See introduction.)
Sew these to the ends of the cord and tie around the
neck of the doll.
FABRIC Fold- Hippie 6АСЖ
'/a. H£AOSga*F
FA£>&g fql!>
H6ftl>SaA£F DOL-l-3
PATTbSiJ DOUU 4
Fold
23
Cuddly doll with
floppy arms
and legs
24
Body model 1
Fold the fabric in half and pin the pattern piece to it against
the fold (use knitted fabric, soft cotton or an old pullover).
Cut it out twice with an extra %" (1 cm) for seam allowance.
Stitch the body together. Leave the neck open. Clip the
seam allowance all the way around and turn the right side
out. Stuff the body with filling (unspun wool, wadding,
nylon scraps).
Arms and body model 2
Fold the fabric in half and place the pattern against the
fabric fold (use terrycloth, cotton flannel, an old pullover).
Cut it out twice.
Mark the point up to which the underarm seam is to be
stitched. Stitch the upper arm seam. Stitch the underarm
seams together as far as the mark.
Leave the neck open.
Pull body 2 over body 1.
Head
See the sewing instructions and diagrams on page 18
(cuddly doll). In this case, the head is about 3" (8cm) high.
Finishing the head and neck
Insert the loose edges of the head (and the bonnet) into
both neck openings. Turn in the seam allowance of both
neck openings and sew them firmly to the threads at the
base of the head.
Hands
Cut these out four times in the same material as the head.
Stitch two pieces together for each hand leaving the base
of the hand open. Fill up the hands and sew them together.
Feet
Cut these out in fabric four times. Stitch two pieces to-
gether for each foot, leaving the top edge open. Clip the
seam allowance of the feet. Fill them up and sew them
together.
Pants
With nght sides together, fold the fabric in half and pm
the pattern piece to it, having the side seam against the
fabric fold. Cut out the pattern piece twice.
Stitch the inside leg seams. Stitch the crotch seam to-
gether all the way around. Clip the seam allowance.
Turn in and baste the seam allowances on the ends of
the legs.
Now insert the feet into the ends of the legs. Pull the
basting thread tight and sew the feet on firmly.
Put some filling into the legs, not too much because the
legs must remain soft.
Baste the top edge of the pants. Do not turn the seam
allowance in while doing so. Place the base of body 1
into the pants and pull the basting thread tight. Sew the
pants firmly to the body.
Finishing body 2
Turn in the seam allowance at the base of the arms and
baste.
Now insert the hands into the arms. Pull the basting thread
tight and sew the hands on firmly.
Put some filling into the arms, not too much because the
arms must stay floppy.
Turn in the seam allowance at the base of the body. Pull
the lower end of the body down over the sewn-down top
of the pants and sew it on firmly.
Alternatively, sew on some tape to cover the join.
Hair
Draw a line around the head. Start from the ear position,
then along the top of the forehead, along the neck and
back to the ear.
Cut strands of wool yarn 16" (40cm) long. Sew them two


Jacket
Pattern pieces: front panel, back panel
Notions bias binding
Sewing instructions:
1	Reproduce the pattern pieces. With right sides to-
gether, fold the fabric in half and pin the pieces to it,
having the middle of the back against the fabric fold
2	Cut out the middle of the front and the neckline without
a seam allowance, the remaining edges with an extra
%" (1cm) for seam allowance.
3	Zigzag around the edges of the pieces.
4	Stitch the upper arm seams.
5	Turn in and stitch the seam allowance at the bottom
of the sleeves.
6	Stitch the underarm side seams.
7	Stitch bias binding around the front panel.
8	Stitch bias binding around the neckline. Leave a loose
end on both sides to make a tie fastening.
9	Turn in and stitch the bottom edge.
Jacket
f^Ob/T PA/JEL
BACK PArJGl-


4" (10cm) Doll
Bl 6
28 Head
For the head follow the instructions on page 18.
For this doll the head will be about 11/д" (3cm) high. The
piece of cloth need not be bigger than a 4" (10cm) square.
Hair: see how to make hair for the previous dolls.
Body
Use stretch fabric for the body.
With right sides together fold the fabric in half and pin
the pattern piece to it with the middle of the front and the
middle of the back against the fabric fold. Cut the piece
out twice. Stitch the body together all the way around,
leaving the neck open.
Stuff the body with filling. You could also use grains of
rice as filling.
Turn in the seam allowance of the neck. Insert the loose
edges of the head into the neck opening and sew the
body firmly to the head.
Bib
Cut out the bib in single fabric with no seam allowance
Zigzag and then blanket stitch around the edge. Crochet
cords and sew these on to the top.
Pinafore, blouse and sleeveless jacket
With right sides together, fold the fabric in half and pm
the pattern pieces to it, having the top edge against the
fabric fold. Turn in and stitch the seam allowances of the
neckline, the sides and the lower edge. There is no seam
allowance for the sleeveless jacket - the edges are blanket
stitched and the lower part of the side seams is sewn
together.

PWAFoKC,
BLouse,
JACKET
S* 1
right sides together, fold the fabric in half and pin
pattern piece to it, with one side against the fabric
d Turn in and stitch the seam allowance on the top
-2 ;e and the bottom edge. Stitch or baste elastic around
те waistline and stitch the side seam.
seckerchief or head scarf
" nght sides together, fold the fabric in half and pin
Tie pattern to it, having the middle of the back against
fabric fold. Zigzag around the edges of the headscarf
and clip the corners. Turn in and stitch the sides. Sew the
*ie scarf on to the head with a few stitches.
HAL£ HEADSCARF


Pol£>
(30 r4 N £ *T
q
u.
FA&Aic fOLQ MiOOie BACK

3
Rag Doll
Stuff the head and body firmly and sew up the underneath
of the body. Gather the edge of the nose with small basting
stitches. Fill the nose and pull in the gathering thread.
Sew on the nose with the gathered side next to the face.
By cutting out a larger or smaller circle you can make a
larger or smaller nose.
The Hair
32
Height:
Material:
18" (45cm) approx
36" (90cm) wide: 24 (60cm) thick knitted
fabric, beige or pink.
54" (140cm) wide: 14" (35cm) thick knit-
ted fabnc, beige or pink.
2oz (50g) approx, yellow, brown or beige
wool yam for the hair.
Blue embroidery yarn for the eyes.
Optional: red embroidery yarn for the
mouth.
Hair riobon for doll 2.
The fringe (bangs) is the same for all the dolls. Cut strands
of wool yam 8* (20cm) long, fold them in half and sew
them on, using three strands at a time, along the middle
seam on top of the head. Sew in place %" (2cm) away
from the middle of the head and trim evenly just above
the eyes (see diagram 1).
Sewing instructions:
Reproduce the pattern pieces for the doll.
With right sides together, fold the fabric in half and pin
the pieces to it. The arms and legs are cut out twice. The
nose is cut out on a single layer of fabric. Cut out the
pieces with an extra %*' (1cm) for seam allowance
Place the arm and leg pieces on top of each other (arm
by arm and leg by leg) and stitch them together. Leave
the attachment line open. Turn the pieces right side out
and stuff them with filling.
Do not completely fill the very tops of the arms and legs,
so that the limbs remain flexible.
Stitch the fingers where indicated.
Stitch together the middle seam on the front and the back
of the head.
Stitch the front of the body to the front of the head. Stitch
the back of the body to the back of the head- With the
right sides together and the arms inserted where indi-
cated, stitch these two pieces together. Leave the under-
neath open. Turn right side out.
Stitch the legs on to the front of the body, but leave the
seam open.
Doll 1
Cut strands of wool yarn approx 20" (50cm) long. Sew
them on along the middle of the back of the head. Draw
a line from the middle back hair at the neck up to the
front. Fold strands of yarn in half and sew them on along
this line. Do this using 2 or 3 strands at a time, at the
back and side of the head. Make two bunches of hair,
sew them down and plait or braid them. Tie a nobon on
at both ends and trim them into shape (see diagrams 2,
3 and 4).
Doll 2
Follow instructions for doll 1, but start sewing on the
strands 11Л* (4cm) from the middle seam on the head.
Leave 4 loose strands hanging down on the forehead and
trim. Sew down the bunches of hair and tie ribbons around
the ends. Trim into shape (see diagrams 2, 3 and 4).
Doll 3
Using two or three strands at a time sew the wool yam
in 3 horizontal layers around the back of the head. Trim
into shape around the ends (see diagram 5).


34


К/05&
aio
35
Top	model 1
Pattern pieces: front panel, back panel, front neckline
facing, back neckline facing.
Notions:	hook and eye fastening band
Sewing instructions:
1	Reproduce the pattern pieces. With right sides to-
gether, fold the fabnc in half and pm the pieces to it,
having the middle of the front and the middle front
facing against the fabric fold.
2	Cut out with an extra W (1cm) for seam allowance.
3	Zigzag around the edges of all the pieces.
4	Stitch the front neckline facing to the neckline. Clip
the seam allowance.
5	Stitch the back neckline facing to the back neckline.
Clip the seam allowance.
6	Stitch the upper arm seams. At the same time stitch
the sides of the facings. Turn in the facing and top-
stitch around the neckline.
7	Turn in and stitch the bottom edges of the sleeves.
8	Stitch the underarm side seams. Clip the curves in
the seam allowance.
9	Turn in and stitch the seam allowance on the hemline.
10	Turn in the seam allowance at the back and stitch
pieces of hook and eye fastening band on to the back
(see introduction).
Neckerchief
model 1
Sewing instructions:
1	Reproduce the pattern piece.
2	With right sides together, fold the fabric in half and
pin the piece to it, having the middle against the fabnc
fold.
3	Zigzag around the edges of the neckerchief.
4	Cut off the corners of the seam allowance and turn in
and stitch the seam allowance.
Socks
model 1
Follow the instructions for the largest size baby socks.
Knit the cuffs of the socks a little longer, if preferred.
г


Pants	model 1
Pattern pieces: pants front panel
pants back panel
Notions:	ruched lingerie elastic %' (1cm) wide
Sewing instructions:
1	Reproduce the pattern pieces. With right sides to-
gether, fold the fabric in half and pm the pieces to it.
2	Cut out with an extra %" (1 cm) for seam allowance.
3	Zigzag around the edges of the pieces.
4	Stitch the inside leg seams of the front and back panels
together.
38
к нет/ тмсщ
loiw тнеТь/о
5 ЕСТI OfJS
I


5 Stitch the crotch seams together. Clip the curve in the
seam allowance.
5 Turn in the seam allowances at the top of the pants
front and the pants back. Stitch stretched ruched
lingerie elastic on to the inside, so that the top of the
pants are finished at the same time.
7 Turn in the seam allowance at the ends of the legs
and stitch stretched ruched lingerie elastic to the in-
side of the ends of the legs.
8 Stitch the side seams together.
SCAK
РЛг/TS feftCC PMGL
sibe seah
39
РйоНТ PftMGL
nXAClcs/q
Join тле two
S£CTioi>Z5

f
Nightgown
model 2
40
Pattern pieces: front panel, back panel
Notions:	bias binding
Sewing instructions:
1	Reproduce the pattern pieces on 2 x 2" (5 x 5cm)
dressmaker’s pattern paper. Fold the fabric in half and
pin the pieces to it, having the middle of the front and
the middle front facing against the fabric fold.
2	Cut out the neckline and the lower ends of the sleeves
without a seam allowance, the rest with an extra %"
(1cm) for seam allowance.
3	Zigzag around the edges of all the pieces.
4	Stitch the upper arm seams.
5	Turn in and stitch the middle back seam allowances.
6	Gather the neckline and the lower ends of the sleeves
until they are the same width as the doll’s hand Stitch
bias binding around the neckline and the lower ends
of the sleeves. Leave a loose end on both sides of the
	GACh £	is
	у Q <2
	'•fl
			1
	r
	/ST PAf >
	Hi DO pqAn POU	—
			1
neck opening to make a tie fastening.
7	Stitch the underarm side seams and clip the seam
allowance.
8	Turn in and stitch the hemline
f
/
Hi DOLE. -
Oess	model 3
Pattern pieces: front panel, back panel, sleeve, front
yoke, back yoke, front facing, back fac-
ing.
Notions:	hook and eye fastening band, or buttons
and loops, elastic.
jGlrJ “TH to TWO
SoCT i OrJ 3
Sewing instructions:
1	Reproduce the pattern pieces. With right sides to-
gether, fold the fabric in half and pm the pieces to it,
having the front yoke, the facing of the front yoke, the
sleeve and the front panel against the fabric fold
2	Cut out the pieces with an extra %" (1cm) for seam
allowance. Cut out the sleeve twice.
3	Zigzag around the edges of all the pieces.
4	Gather the upper edge of the sleeves. Gather the upper
edge of the front panel and both back panels.
41

______________CjiiPOLb f
42
5	Stitch the front panel to the front yoke.
6	Stitch the back panels to the back vokes
7	Stitch the shoulder seams together.
8	Stitch the shoulder seams of the facings together.
9	Stitch the neckline of the front and back yoke and the
neckline of the front and back facing together. Clip
the seam allowance.
10	Turn in the middle of the back and stitch along the
edges.
11	Turn in the facing and topstitch around the neckline.
12	Stitch pieces of hook and eye fastening band to the
top of the back opening or attach buttons and loops
to the back opening.
13	Stitch around the ends of the sleeves. Stitch ruched
lingerie elastic 3/4" (2cm) from the ends of the sleeves.
14	Stitch the sleeves into the armholes. Clip the seam
allowance.
15	Stitch the underarm side seams. Clip the curve in the
seam allowance.
16	Turn in and stitch the hemline at the desired length.
Pinafore	Model 3
Pattern pieces: front panel, back panel, front yoke, back
yoke, shoulder strap, pocket, armhole
facings.
Notions:	buttons and loops
Sewing instructions:
1	Reproduce the pattern pieces. With right sides to-
gether, fold the fabric in half and pin the pieces to it,
having the middle of the front panel and the front yoke
against the fabric fold.
2	Cut out the pieces with an extra %" (1cm) for seam
allowance.
3	Zigzag around the edges of all the pieces.
4	Stitch the armhole facings to the front and the back
panel. Clip the seam allowance.
5	Gather the upper edge of the front and back panel
and stitch these to the front yoke and back yoke.
6	Stitch the pockets on where indicated.
7	Turn in and stitch the seam allowance on the neckline
side of the shoulder straps.
8	Turn in and stitch the top edges of the front and the
back yoke.
9	Stitch the shoulder straps to the front and the back
yoke.
10	Turn in the seam allowance of the armhole (shoulder
strap, yokes) and facing all together and then top-
stitch all the way around the armhole.
11	Turn in and stitch the seam allowance at the back.
Attach buttons and loops at the top of the opening.
12	Turn in and stitch the hemline.
Pants
Model 3
Pattern pieces: pants front, pants back
Notions:	ruched lingerie elastic % ' (1cm) wide.
Sewing instructions:
Follow the instructions for model 1, the only variation is
in step 7.
7 Turn in and stitch the seam allowance at the end of
the pants legs. Stitch ruched lingerie elastic 3/4" (2cm)
from the ends of the legs.
Socks
Pattern piece sock
Model 1
Sewing instructions:
1	Reproduce the pattern piece. Fold the fabric in half
and pin the piece to it, having the middle of the back
against the fabric fold. For the fabric you can use an
old knitted pullover.
2	Turn in and stitch the top edges.
3	Stitch the front and underneath sides.
Shoes
Pattern pieces: shoe, sole
Notions:	bias binding
Model 2, 3
Sewing instructions:
1	Reproduce the pattern pieces. Lay out the pieces on
a double layer of fabric (felt, plastic or fabric reinforced
with fabric webbing).
2	Cut out the entire upper surface of the shoe without
a seam allowance.
3	Zigzag around the edges of the pieces.
4	Stitch the back and the front part of the shoe.
5	Stitch the sole to the upper part of the shoe.
6	Stitch bias binding around all the upper edges. Leave
a length hanging out on both sides of the shoe to
make a tie fastening.
SHoUL06^ST<Af


Stick doll
or hand puppet
Head
To make the head follow the instructions on page 18 The
height of the head should be approx 21/г" (6cm).
To make the stick doll, form the head around the stick.
Then secure the head to the stick by winding thread or
cord very tightly around the stick. The stick should be
about 14" (35cm) long and about %" (1cm) in diameter.
For a hand puppet, make the base of the head about 21/г"
(6cm) long. Sew the inner fabric against the outer fabric
Baste three rows of elastic all the way around both fabrics,
so that a cylindrical hollow is formed. A finger can be
fitted into this hollow to move the head.
Hair
Follow the instructions for the other dolls’ hair You can
also make a fringe (bangs) and two plaits (see diagram).
Sew these on to the sides of the head. Then tie the scarf
around the head and secure it to the head with a few
stitches.
All headgear should be sewn down in this way.
Body
Pattern pieces: front, back, hand
Sewing instructions:
1	Reproduce the pattern pieces. With right sides to-
gether, fold the fabric in half and pm the pieces to it,
having the front and the back against the fabric fold
The hand is not placed against the fold and is cut out
twice.
2	Cut out the pieces with an extra 3/s" (1cm) for seam
allowance.
3	Zigzag around the edges of the pieces.
4	Stitch the hands on to the ends of the sleeves.
5	Stitch the upper arm seams, the hands and the side
seams together. Clip the curves in the seam allowance.
6	Turn in and stitch the hemline.
7	Insert the loose fabric at the base of the neck into the
neck opening. Turn in the seam allowance of the neck
opening and sew this firmly to the neck threads on
the head
Cook’s smock
Pattern pieces: front panel, back panel
Follow the instructions for the body, omitting the hands.
Turn in and stitch the ends of the sleeves and then stitch
the side seams.
Cook’s hat
Pattern pieces: top section of hat, bottom section of hat
Sewing instructions:
1	Reproduce the pattern pieces With right sides to-
gether, fold the fabric m half and pin the pieces to it,
having the top section of the hat against the fabric fold.
2	Cut out the pieces with an extra %" (1cm) for seam
allowance.
3	Zigzag around the edges of the pieces.
4	Gather the lower edges of the top of the hat.
5	Stitch these to the upper edges of the bottom of the
hat.
6	Turn m the lower edges of the hat and stitch the side
seams together.
Tunic for the cook and the gnome
Pattern pieces: front panel and back panel cut in one
piece
Sewing instructions:
1	Reproduce the pattern. With right sides together, fold
the fabric in half and pin the piece to it, having the
upper edges against the fabric fold
2	Cut out the side and the lower edge with an extra %"
(1cm) for seam allowance and the remaining edges
without a seam allowance Zigzag around the edges.
3	Turn in and stitch the hemlines and the sides.
4	Blanket stitch around the neckline and the front edges.

Pinafore for witch (or girl)
Gnome’s cap
48
Pattern pieces: front panel, back panel cut in one piece.
Sewing instructions
1	Reproduce the pattern. With the right sides together,
fold the fabric in half and pin the pattern to it, having
the top edge against the fabric fold.
2	Cut out with an extra %" (1 cm) for seam allowance.
3	Zigzag around the edges.
4	Clip the corners of the neckline and then turn in and
stitch the seam allowance.
5	Turn in and stitch the sides and the hemline.
Headscarf
Sewing instructions:
1	Reproduce the pattern. With the right sides together,
fold the fabric in half and pin the pattern to it with the
shortest side against the fabric fold.
2	Cut out with an extra %" (1cm) for seam allowance.
3	Zigzag around the edges of the scarf.
4	Cut off the corners of the seam allowance diagonally
and turn in and stitch the seam allowance all the way
around.
Sewing instructions:
1	Reproduce the pattern piece and pin it to single thick-
ness fabric.
2	Cut out with an extra %" (1cm) for seam allowance.
3	Zigzag around the edges.
4	Turn in and stitch the bottom edge and with right sides
together stitch the seam.
5	Make a pompom (see introduction) and sew this to
the tip of the cap.


gs for elf or angel
sanctions:
1	Use some flexible wire that won’t rust - it shouldn’t
be too thin. Bend the wire to make two wings.
2	Cover the wings with very thin white nylon. Do this by
stretching the nylon over the wings and gathering in
and stitching down the fabric at the beginning of each
wing.
3	Sew the wings to the back of the puppet.
49
D&ccs


Clothes for
baby dolls
Night clothes
54 Jacket
modei 1
Pattern pieces: front panel, back panel
Notions:	hook and eye fastening band, home-
knitted or shop-bought knitted cuffs,
bias binding.
Sewing instructions:
1	Reproduce the pattern pieces. With right sides to-
gether, fold the fabric in haif and pm the pieces to it,
having the middle of the back against the fabric fold.
Mark the points where the pieces of hook and eye
fastening band are to be attached.
2	Cut out the upper arm seam, the underarm side seam
and the bottom edge of the sleeve with an extra 3/s"
(1 cm) for seam allowance Cut out the remaining edges
without a seam allowance.
3	Zigzag around the eges of the pieces.
4	Stitch the upper arm seams. Press them open
5	Stitch the cuffs to the ends of the sleeves.
6	Stitch the underarm side seams together. Clip the
curve in the seam allowance.
7	Stitch bias binding around the edges of the jacket.
8	Stitch pieces of hook and eye fastening band where
indicated.
Pants
Pattern pieces: pants front, pants back
Notions ruched lingere elastic %" (1cm) wide
Sewing instructions:
1	Reproduce the pattern pieces. With right sides to-
gether, fold the fabric in half and pin the pieces to it.
2	Cut out the upper edge with an extra 5/e''(1 5cm) and

4- 6ЯСК
55

56
remaining edges with an extra %"(1cm) for seam
allowance.
3	Zigzag around the edges of the pieces.
4	Stitch the inside leg seams of the pants front and the
pants back together. Press the seams open.
5	Stitch the crotch seam of the front panels together.
Repeat with the back panels. Clip the curve of the
seam allowance. Press the seams open.
6	Turn in the seam allowance of the waist at the front
and the back. Stitch stretched ruched lingerie elastic
to the inside of the waist, thereby finishing the inside
of the waist at the same time, lb find out how much
elastic is needed, measure the doll’s waist with elastic.
Note that you only need a piece of elastic measunng
half the width of the doll’s waist for the front of the
pants and the same again for the back.
7	Stitch cuffs on to the ends of the legs.
8	Stitch the side seams together.
Nappy/Diaper (knitted/T-shirt fabric) model 2
Notions:	Pieces of hook and eye fastening band
Sewing instructions:
1	Reproduce the pattern piece. With right sides together
fold the fabric in half and pin the piece to it. Mark the
position of the hook and eye fastening band.
2	Cut out the side edge with an extra %" (1.5cm) for
seam allowance. The remaining edges with an extra
%" (1cm) for seam allowance.
3	Zigzag around the edges.
4	Turn in the seam allowance and sew it down with a
zigzag stitch.
5	Stitch pieces of hook and eye fastening band where
indicated.


58
Bathrobe with hood	model 3
Pattern pieces: bathrobe, hood
Notions:	bias binding
Sewing instructions:
1	Reproduce the pieces on 2 x 2" (5 x 5cm) dressmaker’s
pattern paper.
2	With right sides together, fold the fabric in half and
pin the bathrobe to it, having the middle against the
fabric fold. The hood is pinned to single thickness
fabric.
3	Cut out the pieces without a seam allowance.
4	Finish the front of the hood with bias binding.
5	Place the hood on a corner of the bathrobe.
6	Stitch bias binding all the way around the edge of the
shawl. Stitch on the hood at the same time.
Bib with applique	model 4
Notions:	bias binding, scraps of fabric for the
applique.
Sewing instructions:
1	Reproduce the pattern.
2	With right sides together, fold the fabric in half and
pin on the pattern with the middle of the front against
the fabric fold.
3	Cut out the bib without a seam allowance.
4	Zigzag around the edges of the bib.
5	Reproduce the applique drawing. Cut out the pieces
without a seam allowance from the scraps of material.
Iron very thin fusible webbing to the backs of the
pieces. First, zigzag the striped fabric to the bib. Then
the mouse. Draw the tail on the bib and then zigzag
stitch or embroider along the line of the tail.
6	Stitch bias binding around the edge of the bib. Begin
and end at the middle of the back.
7	Finish the neckline with bias binding. Use a longer
piece of bias binding than you need and leave a loose
end on both sides to make a tie fastening.
Vest and panties	model 5
Vest:	knitted/stretch fabric
Pattern pieces: front panel, back panel
Notions:	bias binding
Sewing instructions:
1	Reproduce the pattern pieces. Wtih right sides to-
gether, fold the fabric in half and pin the pieces to it,
having the middle of the back against the fabric fold.
Mark the positions for the tapes.
2	Cut out with an extra 3/s" (1cm) for seam allowance.
3	Zigzag around the edges of the pieces.
4	Using a zigzag stitch, stitch the shoulder seams and
the side seams, stitching on the tapes at the same
time.
5	Turn in and stitch the seam allowance all the way
around the edge. Stitch tapes where indicated.
Panties:	knitted/stretch fabric
Notions:	elastic
Sewing instructions:
1	Reproduce the pattern. With right sides together, fold
the fabric in half and pin the piece to it against the
fabric fold.
2	. Cut out the upper edge with an extra %" (2cm) for
seam allowance. The remaining edges with an extra
%" (1 cm) for seam allowance.
3	Zigzag all the way around the edges.
гШс Foun-__________[ЦЧС£.
FKorJ-Г
59
4	Turn in and stitch the seam allowance of the leg open-
ings, using a zigzag stitch.
5	Stitch the side seams.
6	Turn in and stitch the seam allowance along the top
edge. Leave a small opening for the elastic. Thread
the elastic through the casing, stitch the two ends
together and then stitch up the opening.
Wrapover sleeping sack	model 6
Pattern pieces: front panel, back panel
Notions:	bias binding
Sewing instructions:
1	Reproduce the pattern on 2 x 2" (5 x 5cm) dressmaker’s
pattern paper. With right sides together, fold the fabric
in half and pin the pattern to it, having the middle of
the back against the fabric fold.
Follow the instructions for child’s sleeping sack below.
Child’s wrapover sleeping sack
Pattern pieces: front panel, back panel
Fabnc needed: 36" (90cm) wide; 2%yd (2.4m)
54" (140cm) wide: 1%yd (1.6m)
Notions:	21/syd (2.3m) bias binding, piece of hook
and eye fastening band.


					r L		1 ..J			- -’T 	1
							—r
							о L £		z' S
				I &		(>	TV*"		I
				S		b к
						V z.	.T
							£		Г Pf
							r г		<T<
							r V		“T“


nhen i^c»vq
JOlrU THE Two
scct »orJS
61
S?  >ng instructions:
' Reproduce the pattern pieces on 2 x 2" (5 x 5cm)
dressmaker’s pattern paper.
2	With right sides together, fold the fabric in half and
pm the pieces to it, having the middle of the back
against the fabric fold
3	Cut out the neckline, the upper edge and side edge
of the wrapover and the bottom edge of the sleeves
without a seam allowance. Cut out the other edqes
’yearn iterance.
-	Zigzag around the edges of all the pieces.
~ Stitch the upper arm seams together and press them
open.
Stitch bias binding around the neckline and wrapover
and the bottom edge of the sleeves.
~ Decide which side should wrap over on top. Stxtch
fie underarm side seams together all the way around
and stitch the bottom of the wrapover at the same
e. Clip the curve in the seam allowance and press
me seams open.
-	btrtch pieces of hook and eye fastening band where
ndicated.

3
Sleeveless top,
pants, overalls,
blouse and
knitted sweater
64
Sleeveless top and pants	mode/1
Top
кол! рале/, back рале/
Notions:	bias binding and hook and eye fastening
band
Sewing instructions:
1	Reproduce the pattern pieces. With right sides to-
gether, fold the fabric in half and pin the pieces to it,
having the front panel against the fabric fold. Mark
the points where tapes are to be sewn on.
2	Cut out the middle of the back and the shoulder seams
with an extra %" (1 cm) for seam allowance. The remain-
ing edges without a seam allowance.
3	Zigzag the edges of the shoulder seams.
4	Stitch the shoulder seams.
5	Stitch bias binding around the neckline.
6	Fold in the seam allowance along the middle of the
back and stitch it down. Stitch on pieces of hook and
eye fastening band lengthwise to make the fastening.
7	Stitch bias binding around the edge of the garment.
Fold pieces of bias binding in half and stitch around
the edges to make tapes. Sew the tapes where indi-
cated on the sides.
Pants
Pattern pieces: pants front, pants back - see pp 55-57.
Notions:	ruched lingerie elastic 3/e" (1cm) wide
Sewing instructions:
1	Reproduce the pattern pieces. With right sides to-
gether, fold the fabric in half and pin the pieces to it.
2	Cut out the top and bottom edge with an extra 5Л"
(1.5cm) for seam allowance. The remaining edges with
an extra %" (1cm) for seam allowance.
3	Z gzag around the edges of the pieces.
4	Stitch the inside leg seams of the pants front and the
pants back together. Press the seams open.
5	Stitch the crotch seams of the front panels together.
Repeat with back panels. Clip the curve in the seam
allowance. Press the seams open.
6	Turn in the seam allowance for the waist at the front
and at the back. Stitch stretched ruched lingerie elastic
to the inside of the waist, thereby finishing the inside
of the waist at the same time. To find out how much
elastic is needed, measure the doll’s waist with elastic.
Use a piece of elastic measuring half the width of the
doll’s waist for the front of the pants and the same
again for the back.
7	Turn in the seam allowances at the ends of the legs.
Measure the circumference of the doll’s legs and stitch
stretched ruched elastic to the inside.
- Stitch the side seams together.
Overalls	model 2, 3
em pieces: pants front, pants back, bib front, bib
б12£:14-*’СЗЬсм)
Notions:
back, shoulder strap, front bib facing,
back bib facing.
hook and eye fastening band or snap
fasteners.
Sewing instructions:
1	Reproduce the pattern pieces. With right sides to-
gether, fold the fabric in half and pin the pieces to it,
having the middle front and middle back of the bib
against the fabric fold. Cut out the bibs twice. Cut out
the shoulder strap twice.
2	Cut out the pieces with an extra %" (1cm) for seam
allowance.
3	Zigzag around the edges of the pieces.
4	Stitch the inside leg seams of the pants front and
pants back together and press the seams open.
5	Stitch the crotch seams together, clip the curve in the
seam allowance and press the seam open.
6	Turn in the seam allowances at the ends of the legs.
Measure the circumference of the doll’s legs and stitch
stretched ruched lingerie elastic to the inside.
7	Stitch the side seams together. Leave a small opening
at the top.
8	Gather the top edge of the pants until both the front
and back panels are the same width as the bib.
9	With right sides together, stitch the front bib to the
pants front.
10	With right sides together, stitch the back bib to the
pants back.
11	Fold the shoulder straps in half lengthwise and stitch
along the edge. Turn them right side out and pin them
with the diagonal side against the back panel.
12	With right sides together, stitch the front facing along
the top edge, armholes and side of the bib. Clip the
curve and the corners of the seam allowance.
13	With right sides together, stitch the back facing along
the top edge, armholes and side of the back bib. At
the same time, stitch in the shoulder straps being sure
that these are sticking out on the right side of the
fabric. Clip the curve and the corners of the seam
allowance.
14	Turn the pants right side out, with the facing on the
inside. Top-stitch all the way around, along the upper
edge and the waistline.
15	Attach snap fasteners or stitch hook and eye fastening
band where indicated.
65
HiQOlE + &ACK ftu&c foLO
Outdoor overalls	model 3
Dattern pieces: pants front, pants back, front bib, back
bib, shoulder strap, front bib facing,
back bib facing.
Notions:	hook and eye fastening band or snap
fasteners.
Sewing instructions:
-allow instructions for model 2
awever, in this case stitch the inside leg seams and the
de seams together in one go. With right sides together
ht the legs into one another and stitch the crotch seams.
Blouse	mode! 1, 2
pattern pieces: front panel, back panel, front neckline
facing, back neckline facing.
Notions:	hook and -eye fastening band, ruched
lingerie elastic %" (1cm) wide
Sewing instructions:
1	Reproduce the pattern pieces. With right sides to-
gether, fold the fabric in half and pin the pieces to it,
having the middle of the front and the middle of the
front facing agamst the fabric fold.
2	Cut out with an extra %" (1 cm) for seam allowance.
3	Zigzag around the edges of all the pieces.
4	Stitch the front neckline facing to the neckline. Clip
the seam allowance.
5	Stitch the back facings to the back neckline. Clip the
seam allowance.
о Stitch the upper arm seams. At the same time stitch
the sides of the facings. Turn in the facing and stitch
around the neckline.
' Turn in and stitch the bottom edges of the sleeves or
turn in the seam allowance at the end of the sleeves
and stitch on stretched ruched lingerie elastic.
В Stitch the underarm side seams. Clip the curve in the
seam allowance.
? Turn in and stitch the seam allowance along the bottom
edge.
Turn in the seam allowance along the middle of the
back and stitch pieces of hook and eye fastening band
on to the back (see introduction).
the neckline and the ends of the sleeves are to be
shed in blanket stitch, then there is no need to cut
~ese out with a seam allowance.
Knitted sweater: Follow instructions for model 3 page 75.
Sleeveless top with pants for your child
Size by age:	6-9 months, 18months, 2years
He-ght of child: 29" (74cm) 34"(86cm),38 (98cm)
Sleeveless top
Pattern pieces: front panel, back panel.
Fabric needed: 36" (90cm) wide: 1/2yd (0.45m)
54" (140cm) wide: 1/2yd (0.45m)
Notions:	button,
31Ayd (30m) bias binding.
Sewing instructions:
1	Reproduce the pattern pieces on 2 x 2" (5 x 5cm)
dressmaker’s pattern paper. Mark the pattern where
tapes .are to be attached.
2	With right sides together, fold the fabric in half and
pin the pieces to it, having the middle of the front
against the fabric fold.
3	Cut out the middle of the back and the shoulder seams
with an extra %-3/4" (1-2cm) for seam allowance. The
remaining edges without a seam allowance.
4	Zigzag around all the pieces.
5	Stitch the shoulder seams.
6	Stitch the middle back seam. Leave an opening
measuring 4-6" (10-15cm) at the top.
7	Stitch bias binding around the neckline. Leave 21/г"
(6cm) hanging out on one side to make a loop.
8	Stitch bias binding around the edge of the garment.
To make tapes, fold pieces of bias binding in half and
stitch around the edges. Stitch on tapes where indi-
cated.
9	Sew on the button opposite the loop.
67
Pants
Pattern pieces: pants front, pants back
Fabric needed: 36" (90cm) wide. 13/4yd (1 60m)
54" (140cm) wide- %yd (0.80m)
Notions:	%yd (60cm) elastic %" (1 cm) wide
11Ayd (1.10m) elastic for baggy pants
68
Sewing instructions:
1	Reproduce the pattern pieces on 2 x 2" (5 x 5cm)
dressmaker’s pattern paper.
2	With right sides together, fold the fabric in half and
pm the pieces to it.
3	Cut out the top edge and the bottom edge with an
extra 1" (2.5cm) for seam allowance. If making baggy
pants, cut out the bottom edge with an extra 3" (7cm)
for seam allowance. The remaining edges with a seam
allowance of %-3/4" (1 -2cm).
4	Zigzag around the edges of the pieces.
5	Stitch the inside leg seams of the pants front and the
pants back together. Press the seams open.
6	Stitch the front panel crotch seams together. Repeat
with the back panels. Clip the curve in the seam allow-
ance. Press the seam open
7	Stitch the side seams together. Press the seams open.
8	Turn in 1" (2.5cm) along the bottom edge of the pants
legs and stitch %" (1.5cm) from the bottom edge. For
the baggy pants leave a small opening and insert the
elastic through this opening. Stitch the two ends of
the elastic together and stitch up the opening.
9	Turn in Г (2.5cm) along the top edge of the pants.
Stitch along %" (15cm) from the edge. Leave a small
opening. Insert the elastic into the opening. Stitch the
two ends of the elastic together and stitch up the
opening.

		ye Lil _		Lt
		Ht I • 11.		6 j a
		7ТГ '/* Su	E&V&l	J <s
	1	/-	ft H	s J.»	Л	OUT 4- ^CK.	U. +
	1 1	I • • 9 • •	П Wt- L—	о Q
	h II 1 1	• • • • •		X
	T l		1 • • • •	1	• • • •			j

	1 ’	-	— —	1 	J

69

3oirJ THC
wo


Stretch suit,
pants, jacket and
bolero-type jacket
Jacket
model 2
Pattern pieces: front panel, back panel
Notions:	bias binding
Sewing instructions:
1	Reproduce the pattern.
2	With right sides together, fold the fabric in half and
pin the pieces to it, having the middle of the back
against the fabric fold.
74
Long-sleeved stretch suit	model 1
Pattern pieces: front panel, back panel, upper side of
foot.
Notions:	cuffs, hook and eye fastening band or
zipper.
Sewing instructions:
1	Reproduce the pattern pieces With right sides to-
gether, fold the fabric in half and pin the pieces to it.
2	Cut out the middle of the back with an extra 5/e" (1 5cm)
for seam allowance. The remaining edges with an extra
%" (1cm) for seam allowance.
3	Zigzag around the edges of all the pieces.
4	Stitch the front foot pieces on to the front leg pieces.
Clip the seam allowance and press the seams open.
5	Stitch part of the middle back seam, leaving an open-
ing at top. Press the seam open and stitch a piece of
hook and eye fastening band or a zipper into the open-
ing. (See introduction for how to insert zipper)
6	Stitch the inside leg seams as far as the front foot
pieces. Press the seams open.
7	Stitch the middle front seam and the crotch seam until
it reaches the middle back seam which has already
been stitched together.
8	Stitch the upper arm seams.
9	Knit or buy cuffs for the neckline and the ends of the
sleeves and stitch these on with a zigzag stitch Clip
the seam allowance of the neckline.
10	Trace the drawing of the mouse and zigzag stitch it
on to the front panel (see Introduction: Applique).
11	Stitch the underarm side seams and the leg seams
together all the way around. Clip the curve in the seam
allowance.
out the upper arm seam and the underarm side
earn with an extra %" (1cm) for seam allowance. The
: 'ing edges without a seam allowance.
-Zu g around the edges of all the pieces
5 St* bias binding along the edge of the front opening
-------bias binding around the neckline. Leave a piece
з ng out on each side to make a tie fastening.
’ Sather the ends of the sleeves until they are the same
as the doll’s hands Finish the ends of the sleeves
bias binding.
: xh the underarm side seams. Clip the curve in the
seam allowance. Press the seams open.
- 'jn in and stitch the bottom edge.

model 2
pattern and sewing instructions for nightclothes -
page 54. The only variation is in step 7.
Sather the ends of the legs until they are the same
 dth as the doll’s feet and finish them with bias bind-
r*g
« *red top
model 3
* read the section on knitting in the introduction for
- pitches used and the size of knitting needles.
last on 24, 32, 38 stitches, according to size of doll.
* * m plain stitch until your knitting measures %" (1.5cm),
" 2.5cm), 1%" (3.5cm).
ise on both sides 8,12,16 stitches. Keep on knitting
rt measures 2%" (7cm), 31/д" (8.5cm), 4” (10cm).
Zast off the middle 6, 10 or 12 stitches. On one side pick
he shoulder stitches on a reserve strand of yarn.
’ Sontinue knitting on one side to a length of ЗУ2" (9cm),
- ’’ (10 5cm), 5" (12.5cm). Now increase 4, 5, 6 stitches
the neckline side. Continue knitting to a length of 51/4"
-3 5cm), 6" (15.5cm), 6%" (17.5cm). Cast off 8, 12 or 16
ches on the sleeve side. Continue knitting until you
*ave a total length of 6" (15cm), 7" (18cm), 8УГ (21cm).
Last off.
_ s»ng the stitches from the reserve strand, repeat from *
г 'everse.
“rochet or buy a length of cord and attach pompoms to
~e ends (see introduction).
Stretch pants	model 3
Pattern pieces: pants front, pants back, upper side of
foot
Notions:	elastic
Sewing instructions:
1	Reproduce the pattern pieces. With right sides to-
gether fold the fabric in half and pin the pieces to it.
2	Cut out with an extra %" (2cm) for seam allowance
along the upper edge. The remaining edges with an
extra %" (1cm) for seam allowance.
3	Zigzag around the edges of the pieces.
4	Stitch the front foot pieces on to the front legs. Clip
the seam allowance and press the seams open.
5	Stitch the inside leg seams, the feet and the outside
leg seams together all the way around. Clip the curve
in the seam allowance.
6	Turn in and stitch the seam allowance on the waistline.
Leave a small opening for the elastic.
7	Thread the elastic through the opening, stitch the ends
of the elastic together and stitch up the opening.
Bolero-type jacket and pants	model 4
Bolero-type Jacket
Pattern pieces front panel, back panel
Notions:	bias binding
Sewing instructions: Follow instructions for child’s bolero-
type jacket below.
75
Pants
Pattern pieces: pants front, pants back
Notions:	ruched lingerie elastic %" (1cm) wide
Pattern and sewing instructions: Follow instructions for
pants on page 64. See pages 70/71 for pattern.
Blouse
model 4
See pages 66 & 67 for pattern and sewing instructions
Bolero-type jacket for a child
Size by age;	9-12 months, 2years,	4 years,
Height of child: 31 "(80cm), 36"(92cm), 40"(104cm)
Pattern pieces: front panel, back panel
Fabric needed: 36" (90cm) wide: 3/4yd (0.70m)
Notions:	270yd (1.9m) bias binding
76
Sewing instructions:
1	Reproduce the pattern pieces on to 2 x 2" (5 x 5cm)
dressmaker’s pattern paper.
2	With right sides together, fold the fabric in half and
pin the pieces to it. The middle back is placed against
the fabric fold.
3	Cut out the middle of the front, the shoulder seams
and the side seams with an extra %-3/4" (1-2cm) for
seam allowance. The bottom edge with an extra 3ZT
(2cm) for seam allowance. The remaining edges with-
out a seam allowance.
4	Zigzag around the edges of the pieces.
5	Stitch the shoulder seams. Press the seams open.
6	Stitch the side seams together. Press the seams open.
7	Turn in the bottom edge and stitch it down.
8	Turn in the front edges and stitch them down.
9	Stitch bias binding around the armholes.
10	Stitch bias binding around the neckline. Use 24
(60cm) more bias binding than you need for the
neckline and leave 12" (30cm) hanging out on both
sides to make a tie fastening.
											to - X
									Sixes	: 3l"(&C		(,41c		46" (u
		r							Г
			T		V ’ • ” 1	1 *	• \ % x	%*			i	•		*	7/ 1
				A*, и* / •					!	г > >		• 4 « • •	I \
		1 I		/ • z • f=f	6|JT MGL-	I iD				' & pp		• • « •		1;			I 1
		1 1 1	1 Г1 1			Q Q			।	* a к		 • • •		1 i
		7 L	n  »						r	г"		• •		J


:


Dresses and
pinafores
g2 Dress
model 1, 2
Pattern pieces: front panel, back panel, sleeve, front
yoke, back yoke, front facing, back
facing.
Notions:	hook and eye fastening band, elastic.
Sewing instructions:
1	Reproduce the pattern pieces. With right sides to-
gether, fold the fat me in half and pin the pieces to it.
Place the front yoke, the front yoke facing, the sleeve
and the front panel against the fabric fold. Cut out the
sleeve twice.
2	Cut out with an extra %" (1cm) for seam allowance.
3	Zigzag around the edges of all the pieces.
4	Gather the sleeves along the upper edge. Gather the
front panel and the two back panels along the top
edge until they measure the same width as the front
and the back yoke.
5	Stitch the front panel to the front yoke.
6	Stitch the back panels to the back yokes.
7	Stitch the shoulder seams together.
8	Stitch the shoulder seams of the facings together.
9	Stitch the neckline of the front and back yoke and the
neckline of the front and back facing together. Clip
the seam allowance.
10	Turn in the middle of the back and stitch the edges.
11	Turn in the facing and top-stitch around the neckline.
12	Stitch pieces of hook and eye fastening band to the
top of the back opening or attach buttons and loops.
13	For Model 2, turn in and stitch the bottom edge of the
sleeves. For Model 1, do a second row of stitching to
make a casing. Leave a small opening. Insert elastic
through the opening and stitch the two ends together.
Stitch up the opening.
14	Stitch the sleeves into the armholes. Clip the seam
allowance.
15	Stitch the underarm side seams. Clip the curve in the
seam allowance.
16	Stitch the hemline at the desired length.
Pinafore	model 1, 3, 4 and 5
Pattern p'eces: front panel, back panel, front yoke, back
yoke, front facing, back facing, frill,
armhole facing.
Notions:	hook and eye fastening band or buttons
and loops, lace (optional)
Sewing instructions:
1	Reproduce the pattern pieces. With right sides to-
gether, fold the fabric in half and pin the pieces to it.
The front panel, front yoke frill and armhole facing are
placed against the fabric fold. Cut out the frill and
armhole facing twice.
2	Cut out the pieces with an extra %" (1cm) for seam
allowance.
3	Zigzag around the edges of all the pieces.
4	Gather the frills between the points indicated on the
pattern.
5	Stitch the side seams.
6	Stitch the armhole facings to the armholes. Clip the
seam allowance. Turn the facing to the inside of the
dress and press.
7	Gather the top edges of the front panel and the two
back panels until they are the same width as the front
and the back yoke.
8	Stitch the front panel to the front yoke.
9	Stitch the back panels to the back yokes.
10	Stitch the shoulder seams together.
11	Stitch the shoulder seams of the facings together.
12	Stitch the neckline of the front and back yoke and the
neckline of the front and back facing together. Clip
the seam allowance.
13	Turn in the middle back seams and stitch along the
edges.
14	Turn the facing to the inside and top-stitch around the
neckline.
15	Turn in and stitch the outer edge of the frills.
16	Stitch the frills to the armholes on the front panel anc
the back panel.
17	Turn in the seam allowance on the frill. Turn in tr*
seam allowance on the side edges of the front у -
facing and the back yoke facing. Stitch around the
i bole. In doing so, stitch the lower edge of the frills
on to the front and back panel.
= Чип in and stitch the bottom edge.
? Stitch hook and eye fastening band or buttons and
oops to the opening in the middle of the back yoke.
’Odel 5. the frill is omitted.
del 1. decorative braid or lace is stitched to the outer
. e of the frill and the hemline of the pinafore.
>.- dress
model 6
~ ^em pieces, front panel, back panel
4oP0ns:	ruched lingerie elastic 3/e" (1cm) wide,
bias binding
4	Stitch the side seams.
5	Turn in and stitch the bottom edge
6	Turn in and stitch the seam allowance along the top
edge. Leave a small opening for the elastic.
7	Insert the elastic into the casing. Stitch the ends of
elastic together and stitch up the opening
Matching pantaloons, pantaloons with lace edging
model 1, 4 and 6
Use pattern for pants on pages 55 and 57 and follow
sewing instructions for pants on page 64.
For the lace-edged pantaloons cut the legs shorter and
instead of elastic, stitch lace to the bottom edge of the
legs.
83
Sewing instructions:
1	Reproduce the pattern pieces With right sides to-
gether, fold the fabric in half and pin the pieces to it,
having the middle of the front and the middle of the
back against the fabric fold.
2	Cut out the armholes without a seam allowance. The
remaining edges with an extra %" (1cm) for seam
allowance.
3	Zigzag around the edges of all the pieces.
4	Stitch the side seams
5	Turn in and stitch the bottom edge.
6	Fold in the top edge of the front panel and stitch
stretched ruched lingerie elastic to the inside.
7	Fold in the top edge of the back panel and stitch
stretched ruched lingerie elastic to the inside.
8	Stitch bias binding around the armholes. Leave a long
piece of tape hanging out on both sides to make a tie
fastening on the shoulders.
-FAfcfUC FbcO
Рйомт	back FAcir/q
Skirt or Petticoat	model 2
Pattern pieces: front panel, back panel
Notions:	elastic
Sewing instructions:
1	Reproduce the pattern pieces. With right sides to-
gether, fold the fabric in half and pin the pieces to it,
having the middle of the front and the middle of the
back against the fabric fold.
2	Cut out the top edge with an extra 3/4" (2cm) for seam
allowance, the remaining edges with an extra %" (1 cm)
for seam allowance.
3	Zigzag around the edges of all the pieces.
84
PwAf=o££S
о
cesses
^aci^Q Mo0£u 4-
iP^ftTH Of	1 *3
f$6 OftCSS 2
।	Tolu
Dress for your child
model 2
Size by age: 2 years, 4 years, 6 years
Height of child 38" (92cm), 40" (104cm), 45" (116cm)
Pattern pieces: front panel, back panel, front yoke, back
yoke, front facing, back facing, sleeve.
Fabric needed: 36" (90cm) wide. 2%yd (2.5m)
54" (140cm) wide: 13Ayd (1 6m)
Notions:	12" (30cm) zipper
86
Sewing instructions:
1	Reproduce the pattern pieces on 2 x 2" (5 x 5cm)
dressmaker’s pattern paper.
2	With right sides together, fold the fabric in half and
pin the pieces to it, having the middle front of the front
yoke, the middle front of the front panel and the sleeve
against the fabric fold.
3	Cut out the pieces with an extra 3/e-3/4" (1-2cm) for
seam allowance. The bottom edge with an extra 11/e"
(3cm) for seam allowance
4	Zigzag around the edges of all the pieces.
5	Gather the sleeves along the top edge. Gather the
front panel and the back panels along the top edge.
6	Stitch the back panels to the back yokes.
7	Stitch the front panel to the front yoke.
8	Stitch the middle back seam as far as the mark indi-
cated on the pattern.
9	Stitch the shoulder seams together.
10	Stitch the sleeves into the armholes. Clip the curve in
the seam allowance.
11	Stitch the underarm side seams. Clip the curve in the
seam allowance.
12	Stitch the zipper into the opening in the back seam.
(See introduction for how to insert zipper)
13	Stitch the shoulder seams of the front and the back
facing.
14	With right sides together stitch the neckline of the
front and back yoke and the neckline of the front and
back facing together. Clip the seam allowance. Turn
in the facing and top-stitch around the edge of the
neckline. On the inside, sew the facing to the shoulder
seams and to the edge of the zipper.
15	Turn in and stitch the bottom edge of the sleeves.
16	Turn in and st'tch the bottom edge of the dress.
87

3
4
Outdoor suits, pants,
sleeveless jacket or
bodywarmer and
sweater
allowance of the hood neckline and the seam allowance
of the garment neckline up. Stitch the neckline of the
hood lining to the neckline of the garment.
15 Thread a cord through the casing and attach pom-
poms (see introduction) to the ends of the cord.
90 Outdoor all-in-one suit with hood	model 1
Pattern pieces: front panel, back panel, hood, casing
Notions:	zipper, cord, cuffs
Sewing instructions:
1	Reproduce the pattern pieces. With nght sides to-
gether, fold the fabric in half and pin the pieces to it hav-
ing the casing against the fabric fold. Mark the position
of the zipper on the middle of the front. Mark the posi-
tion of the casing.
2	Cut out the middle of the front with an extra 5/e" (1.5cm)
for seam allowance. The remaining edges with an extra
%" (1cm) for seam allowance Cut out the hood once
again in lining fabric.
3	Zigzag around the edges of all the pieces.
4	Stitch the inside leg seams.
5	Stitch the crotch seam as far as the mark in the middle
of the front. Clip the curve in the seam allowance.
6	Stitch the upper arm seams.
7	Knit or buy cuffs and stitch these to the ends of the
sleeves and legs
8	Stitch the underarm side seams. Clip the curve in the
seam allowance.
9	Turn in and press the seam allowance of the casing and
stitch this on where indicated.
10	Stitch the zipper into the middle of the front seam.
(See introduction for how to insert zipper)
11	Stitch the hood sections together. Stitch the hood to
the neckline.
12	Stitch the lining sections of the hood together.
13	With right sides together, stitch the front edges of the
hoods together and turn the lining to the inside.
14	Clip the seam allowance of the neckline. Presstheseam
Hooded jacket	model 2
Pattern pieces: front panel, back panel, hood
Notions:	hook and eye fastening band, ruched
lingerie elastic %" (1cm) wide
Sewing instructions:
1	Reproduce the pattern pieces. With right sides to-
gether, fold the fabric in half and pin the pieces to it
having the middle of the back against the fabric fold
Mark the position of the hook and eye fastening band
2	Cut out the middle of the front with an extra %" (1.5cm)
for seam allowance. The remaining edges with a seam
allowance of 3Л" (1 cm). Cut out the hood again in lining
fabric.
3	Zigzag around the edges of all the pieces.
4	Stitch the upper arm seams.
5	Turn in the seam allowance at the bottom edge of the
sleeves and stitch stretched ruched lingerie elastic to
the inside.
6	Stitch the underarm side seams and clip the curve in
the seam allowance.
7	Turn in the bottom edge of the jacket and stitch
stretched ruched lingerie elastic to the inside. First
measure the hip width of the doll.
8	Stitch the hood sections together. Clip the seam
allowance.
9	Stitch the hood lining sections together. Clip the seam
allowance.
10	With right sides together stitch the front edges of the
hoods together. Turn the lining to the inside.
11	Stitch the neckline of both hoods to the neckline of the
jacket. Stitch as far as the middle of the front
12	Trim the seam allowance on the neckline as narrow as
possible and, starting %" (1cm) from the middle of the
front, zigzag or blanket stitch it down.
13	Turn in the seam allowances on the edges of the front
opening. Stitch hook and eye fastening band where in-
dicated.
Outdoor pants
Pattern pieces: pants front, pants back
Notions:	elastic
model 2
Pattern and sewing instructions: use pattern and follow in-
structions for outdoor overalls, omitting bib front, on page
67.
Sleeveless jacket or bodywarmer	model 3
°attern pieces: front panel, back panel
Notions:	ruched lingerie elastic %" (1 cm) wide
Sewing instructions:
1	Reproduce the pattern pieces. With right sides to-
gether, fold the fabric in half and pin the pieces to it,
having the middle of the back against the fabric fold.
2	Cut out the pieces with an extra %" (1 cm) for seam allo-
wance.
3	Zigzag around the edges of all the pieces.
4	Stitch the shoulder seams.
5	Clip the armhole seam allowance and turn in and
stitch.
6	Stitch the side seams.
7	Turn in the seam allowance along the bottom edge and
stitch stretched ruched lingerie elastic to the inside of
the jacket.
8	Clip the neckline seam allowance and turn in and
stitch.
9	Turn in the seam allowances along the middle of the
front and stitch them down.
Pants
model 3
Pattern pieces: pants front, pants back
Notions:	ruched lingerie elastic %" (1 cm) wide
Pattern and sewing instructions, use pattern and follow in-
structions for pants (model 1) page 64.
Sewing instructions:
1	Reproduce the pattern pieces. With right sides to-
gether, fold the fabric in half and pin the pieces to it,
having the collar and the collar facing against the fabric
fold. Mark the position of the zipper on the middle of
the front. Mark the position of the ruched lingerie
elastic at the waist.
2	Cut out the middle of the front with an extra %" (1.5cm)
for seam allowance. The remaining edges with an extra
3/e" (1 cm) for seam allowance
3	Zigzag around the edges of all the pieces.
4	Stitch the inside leg seams
5	Stitch the crotch seam as far as the mark for the zipper
in the middle of the front. Clip the curve in the seam
allowance.
6	Stitch the upper arm seams.
7	Turn in the bottom edge of the Sleeves and stitch
stretched ruched lingerie elastic to the inside.
8	Turn in the bottom edge of the legs and stitch stretched
ruched lingerie elastic to the inside.
9	Stitch the underarm side seams and clip the curve in
the seam allowance.
10	Stitch ruched lingerie elastic where indicated around
the waistline.
11	Stitch the zipper into the middle of the front seam. (See
introduction for how to insert zipper.)
12	With right sides together pm the collar to the neckline
of the garment and stitch all the way around.
13	With right sides together pin the collar facing to the
right side of the collar and stitch all the way around the
top edge. Clip the curve in the seam allowance. Turn
right side out.
14	Clip the seam allowance of the neckline. Fold the seam
allowances of the neckline and the collar facing into the
inside of the collar and stitch the facing to the neckline.
15	Top-stitch along the top of the collar as far as the stitch-
ing on the zipper.
All-in-one suit with stand-up collar	model 4
Pattern pieces: front panel, back panel, collar, collar
facing •
Notions:	zipper, ruched lingerie elastic %" (1cm)
wide.
.0

Нооккмиече
ДООН
ici^- эко* |"*гм/
Turtle-neck sweater
First see introduction for information about stitches used
and size of needles.
Front panel
Cast on: 28, 34 or 40 stitches, according to s.ze of doll.
Knit 4, 5, 5 rows in rib stitch.
Qarry on in stocking stitch (1 row plain, 1 row purl). During
the first row increase 4,4 or 6 stitches.
Optional: knit the following rows in jacquard pattern (see
introduction).
Knit to 4" (10cm), 43/4" (12cm) or 51/e" (13cm)
Pick up the middle 8,12 or 14 stitches on a reserve strand.
Continue knitting on both sides, and every other row pick
up 1 stitch on the reserve strand. 1,2 or 2 stitches respect-
ively.
Continue knitting until your work measures 4W (11.5cm),
5!£" (14cm), 6V4" (16cm). Cast off the shoulder stitches or
put them on a reserve strand.
Left back panel
Cast on: 16, 2; or 22 stitches, according to size of doll.
Knit 4, 5, 5 rows in rib stitch.
Continue in stocking stitch. During the first row increase 1,
2 or 3 stitches. But continue to knit the first 4 stitches on
the right-hand side in rib stitch.
Optional: knit the following rows in jacquard pattern. If you
decide to do so, continue to knit the first 4 stitches on the
right-hand side in the mam shade.
Continue to knit until your work measures 41/e" (10.5cm), 5"
(12.5cm), 5УГ (13.5cm).
Pick up 7, 8, 9 stitches from the right-hand side on a re-
serve strand of yarn.
Every second row pick up another 1, 2, 2 stitches on a re-
serve strand.
When your work measures 41/г" (11.5cm), 5W' (14cm), 6У4"
(16cm) pick up the shoulder stitches on a reserve strand or
cast off the stitches.
Right back panel
As left back panel but in reverse.
Sleeve
Cast on: 20, 22 or 24 stitches.
Knit 3, 4,4 rows in rib stitch.
Continue in stocking stitch.
During the first row increase 2,4 4 stitches.
Optional: knit the following rows in jacquard pattern.
Knit until your work measures 2" (5cm), 2W (6cm), 23A"
(7cm).
Cast off.
Construction
Baste or sew the shoulder seams together.
On the neckline pick up 36, 46, 54 stitches including the
stitches from the reserve strand.
Knit in rib stitch for VA" (3cm), 13/4" (4.5cm), 2'A" (6cm).
Cast off.
Sew on the sleeves, having the middle of the top edge op-
posite the shoulder seam.
Sew the underarm side seams together.
Sew snap fasteners or hook and eye fastening band to the
back.
Hooded jacket for your child	model 2
Size by age: 6-9months, 18mths, 3years
Height of child: 29"(74cm), 34"(86cm), 38"(98cm)
Pattern pieces: front panel, back panel, hood, pocket.
Fabric needed: 54" (140cm) wide: iy>yd (1.10m)
Lining fabric: 54" (140cm) wide: 3/eyd (0.35m)
Notions:	open-ended separating zipper, 1 yd (1 m)
ruched lingerie elastic 3/4" (2cm) wide
Sewing instructions:
1	Reproduce the pattern pieces on 2 x 2" (5 x 5cm)
dressmaker’s pattern paper. Mark the position of the
. pocket on the front panel.
2	With right sides together, fold the fabric in half and pin
the pieces to it, having the middle of the back against
the fabric fold.
3	Cut out the middle of the front with an extra %" (2cm)
for seam allowance. The remaining edges with an extra
%-%" (1 -2cm) for seam allowance.
4	Cut out the hood pieces again in lining fabric.
5	Zigzag around the edges of the pieces.
6	Stitch the underarm side seams together. Clip the
curve in the seam allowance and press the seams
open.
7	Stitch the upper arm seams together. Press the seams
open.
8	Stitch the hood sections together. Clip the curve in the
seam allowance and press the seams open. Stitch the
hood to the neckline.
9	Stitch the lining sections of the hood together.
 ih right sides together stitch the front edges of the
ds together. Turn the lining to the inside.
Z ip the seam allowance of the neckline. Press the
=eam allowance of the hood neckline and the seam al-
owance of the jacket neckline up and stitch the
— ne of the lining to the jacket neckline.
in and press the seam allowance all the way
.  d the edges of the pockets. Turn in and stitch the
i з1 side at the top of the pocket and stitch the
• o on to the jacket where indicated.
C n the bottom edge of the sleeves and stitch
"ed ruched lingerie elastic to the insides. (The
• - - 'the sleeve is stitched at the same time.)
14 Turn in the bottom edge of the jacket and stitch
stretched ruched lingerie elastic to the inside.
15 Stitch the zipper into the middle of the front. (See intro-
duction for how to insert zipper.)
97


Playsuit,
knitted jackets,
sweater and pants
Iqq Playsuit with yoke
model 1
Pattern pieces: front yoke, back yoke, front yoke facing,
back yoke facing, front panel, back
panel, sleeve.
Notions:	hook and eye fastening band or loops
and buttons.
Sewing instructions:
1	Reproduce the pattern pieces. With right sides to-
gether, fold the fabric in half and pin the pieces to it,
having the front yoke, the front yoke facing and the
sleeve against the fabric fold.
2	Cut out the sleeve twice. Cut out all the pieces with an
extra %" (1 cm) for seam allowance.
3	Zigzag around the edges of all the pieces.
4	Gather the sleeves at the upper edge.
5	Stitch the inside leg seams.
6	Stitch the crotch seam, leaving a long opening at the
back.
7	Gather the front panel and the two back panels along
the upper edge, until they are the same width as the
front and back yoke.
8	Stitch the front panel to the front yoke.
9	Stitch the back panels to the back yokes.
10	Stitch the shoulder seams together.
11	Stitch the shoulder seams of the facings together.
12	Stitch the neckline of the front and back yoke and the
neckline of the front and back facing together. Clip the
seam allowance.
13	Turn in the seam allowance of the back opening and
the facing and stitch along the edges.
14	Turn in the facing and top-stitch around the neckline.
15	Stitch pieces of hook and eye fastening band at the top
of the opening or else attach buttons and loops.
16	Turn in the bottom edge of the sleeves and stitct
stretched ruched lingerie elastic to the inside.
17	Turn in the bottom edge of the legs and stitch stretchec
ruched lingerie elastic to the inside.
18	Stitch the sleeves into the armholes. Clip the seam allo-
wance.
19	Stitch the underarm side seams. Clip the curve in th-
seam allowance.
Pullover
First see introduction for instructions about stitches usee
and size of knitting needles.
Cast on: 24,32 or 38 stitches, according to size of doll.
Knit in plain stitch for I3/»" (4.5cm), 2W (6.5cm), 31/*'
(8.5cm).
Cast off the middle 8,10,12 stitches. Pick up the shoulde'
stitches on one side on a reserve strand of yarn.
* Carry on knitting on the other side to a length of 21л’
(6.5cm), 3W' (9cm), 4%" (11 cm).
Increase 4,5,6 stitches on the neckline side.
Carry on knitting to a total length of 4" (10cm), 51Л" (14cmj.
7" (18cm).
Cast off.
Starting with the stitches from the reserve strand, repeat
from * reversing instructions.
Construction
Sew a small section of the side seams together.
Knitted stretch pants	model 3, 4
First see introduction for instructions about stitches used
and size of knitting needles.
Cast on 22,26 or 30 stitches, according to size of doll.
Knit in rib stitch: 4,6, 8 rows.
Continue in stocking stitch. In the next row increase 16,20.
24 stitches.
Knit to a length of 1%" (3.5cm), 2W (6.5cm), 4W (11.5cm).
Increase 1 stitch at each end of the row. This applies to all
sizes.
Then, for sizes 11W' (29cm) and 14" (36cm), after 4 rows
increase one stitch on each side.
For size 17" (43cm) increase 4 stitches and after 4th row
increase one stitch on both sides.
Knit to 21/>" (6cm), 3W' (9cm), 5W' (13cm).
Once you have reached this length, decrease at both ends
2 and 1, 3 and 2, 4 and 2 stitches respectively.
After 2 rows once again decrease 1 stitch at both ends.
*nrt to 4%" (12cm), 61/д" (16cm), 8" (20cm).
Sow decrease 8, 10, 12 stitches by knitting 2 stitches
’ ogether at different places in the row 8, 10 or 12 times
respectively.
Sow knit 3, 4, 6 rows in rib stitch.
Cast off.
Knit the other side, reversing the instructions.
Construction
Sew the pieces together.
On the inside, baste thin elastic to the top and bottom
edges of the waistband. Make sure that the elastic cannot
эе seen on the outside.
Jacket with fabric pocket	model 2
Z rst see introduction for instructions about stitches used
-nd size of knitting needles.
~ast on:
24, 32, 38 stitches, according to size of doll. Knit in plain
stitch.
Knit for %" (1.5cm), 1" (2.5cm), 13/д" (3.5cm). Increase 8,
12,16 stitches on both sides.
Knit to 2%" (7cm), 31/4" (8.5cm), 4" (10cm).
Cast off the middle 8,10,12 stitches. Pick up the shoulder
stitches on one side on a reserve strand.
Continue knitting on the other side to a length of 3l£"
Эст), 41/8" (10.5cm), 5" (12.5cm).
^crease 8, 10,12 stitches on the neckline side.
Continue knitting to a length of 51/д" (13.5cm), 61Л"
15.5cm), 6%" (17.5cm).
Cast off 8,12,16 stitches on the sleeve side.
Continue knitting to a total length of 57/e" (15cm), 7" (18cm),
Г (21 cm).
4ow pick up the stitches from the reserve strand. Knit to
a ength of 31Z?" (9cm), 4W' (10.5cm), 5” (12.5cm). Increase
- 4, 4 stitches on the neckline side.
Continue knitting to a length of б’Л" (13.5cm), 6" (15.5cm),
5'V (17.5cm). Cast off 8,12,16 stitches on the sleeve side,
“ontinue knitting to a total length of 57/s" (15cm), 7" (18cm),
= 4* (21cm).
Construction
► rst decide which side is to wrap over on top.
Sew the underarm side seams together. Turn in and stitch
аюпд the edges of the pocket and sew this on to the
jacket. Crochet loops for the buttons and sew the buttons
on to the jacket.
Jacket with hood	model 3
First see introduction for instructions about stitches used
and size of knitting needles.
Cast on: 28, 34, 40 stitches, according to size of doll.
Knit 4, 5, 5 rows in plain stitch.
Continue in stocking stitch to 11Л" (4cm), 2Va" (5.5cm),
2W (6.5cm).
Increase 8,12,16 stitches on both sides for the sleeves.
Then knit 4, 4, 5 stitches in plain stitch at both ends and
knit the stitches in between in stocking stitch.
Knit to 3W' (9cm), 4W' (11.5cm), 51/4" (13.5cm).
Then, starting on one side, put 26, 36, 44 stitches on a
reserve strand.
* Continue knitting with the remaining stitches. On the
lower edge of the sleeve continue knitting 4, 4, 5 plain
stitches and the rest in stocking stitch.
Knit 6, 8, 10 rows. After that increase 4, 7, 8 stitches on
the neckline side. Now knit 4, 4, 5 plain stitches at both
ends of the row and the stitches in between in stocking
stitch.
Knit to a length of 6" (15.5cm), 75/e" (19.5cm), 81/4" (21.5cm).
Decrease 8,12,16 stitches on the sleeve side.
Carry on knitting to 71/4" (18.5cm), 91/4" (23.5cm), 10W'
(26.5cm).
Knit 4, 5, 5 rows in plain stitch.
Cast off.
Pick up 18,22,28 stitches from the side. Leave the remain-
ing 8, 14, 16 stitches on the reserve strand.
Repeat from * but reverse the instructions.
Hood
Pick up 26, 34, 46 stitches at the neckline (including the
stitches on the reserve strand).
Knit two rows, knitting the first and the last 4,4,5 stitches
in plain stitch. Knit the remaining stitches in stocking
stitch.
During the 3rd row increase 12, 14, 16 stitches. Do this
in the stocking stitch.
Continue knitting to a length of 43/4" (12cm), 6" (15.5cm),
7W' (19cm).
Cast off.
Instead of the hood you can knit a collar (see below).
101
Construction
Sew the seam along the top of the hood and sew the
underarm side seam.
Make a pompom (see introduction) and sew this to the
top of the hood.
Crochet loops and sew buttons to the jacket.
Collar
Pick up 26, 36, 46 stitches at the neckline (including the
stitches on the reserve strand).
Knit 4, 5, 5 rows in plain stich.
Cast off.
102 Jacket with hood and rounded corners
Pattern pieces: front panel, back panel, hood.
Use pattern on pages 94 and 95.
Notions:	remnants of wool or cotton yarn.
Sewing instructions:
1	Reproduce the pattern pieces. With right sides to-
gether. fold the fabric in half and pin the pieces to it,
having the middle of the back against the fabric fold.
2	Cut out the bottom edge of the sleeve, the front of
the jacket and the front of the hood without a seam
allowance. The remaining edges with an extra 3/e" (1 cm)
for seam allowance.
3	Zigzag around the edges of all the pieces
4	Stitch the upper arm seams.
5	Stitch the hood sections together. Clip the seam
allowance.
6	Stitch the hood to the neckline. Trim the seam allow-
ance to 1/д" (0.5cm). Blanket stitch or zigzag stitch
around the neckline.
7	Stitch the underarm side seams. Clip the curve in the
seam allowance.
8	Blanket stitch the bottom edge of the sleeves.
9	Blanket stitch around the entire front edge of the
jacket.
10	Crochet loops and attach buttons to the front opening.
Instead of blanket stitching you can crochet around the
edges of the jacket, if you are using a knitted fabric.
Square-necked sweater	model 4
First see introduction for instructions about stitches used
and size of knitting needles.
Front panel
Cast on: 28, 34, 40 stitches, according to size of doll.
Knit 4, 5, 5 rows in rib stitch.
Continue in stocking stitch and in the first row increase
4, 4, 5 stitches.
Optional: knit the next rows in jacquard pattern
Knit to 4" (10cm), 43/4" (12cm), 5" (13cm).
Cast off the middle 8, 12, 14 stitches.
Carry on knitting on both sides to a length of 4Уг" (11.5cm
51/2" (14cm), 6" (15.5cm)
Cast off the shoulder stitches or pick them up on a reserve
strand.
Left back panel
Cast on 16, 20, 22 stitches.
Knit 4, 5, 5 rows in rib stitch.
Carry on in stocking stitch but knit the first 4 stitches on
the right-hand side in rib stitch. In the first row, increase
1, 2, 3 stitches.
Optional knit the following rows in jacquard pattern If
you choose to do this, carry on knitting the first 4 stitches
on the right-hand side in the mam shade.
Knit to a length of 41/4" (11cm), 5" (13cm), 53/4" (14.5cm)
Cast off 7, 8, 9 stitches from the right-hand side.
Knit on from the remaining stitches until your work
measures AY?" (11.5cm), 51/г" (14cm), 6*' (15.5cm).
Pick up the shoulder stitches on a reserve strand or cast
them off
Knit the right back panel, reversing the instructions
Sleeve
Cast on: 20. 22,24 stitches.
Knit 3, 4,4 rows in rib stitch.
Carry on in stocking stitch.
In the first row increase 2, 4, 4 stitches.
Optional: knit the next rows in jacquard pattern.
Knit to a length of 2" (5cm). 21/4" (6cm), 2%" (7cm)
Cast off.
Construction
Baste or sew the shoulder seams together. Crochet
around the edge of the neckline.
Sew on the sleeves, with the middle of the upper edge
against the shoulder seam.
Sew the underarm side seams together.
Sew snap fasteners or hook and eye fastening band to
the back
ACortT + Back 40KG
'&*ггч-вАСКЧоКЕ- РАО*Ц
fAfiAiC Fout>


:*aysuit with yoke for your child	model 1
3»2e by age:	0-3mths, 3-6mths, 9mths-1 year
-ght of child: 24" (62cm), 27"(68cm), 29"(74cm)
•ern pieces: front panel, back panel, front уоке, back
yoke, front yoke facing, back yoke
facing, sleeve.
Fabric needed: 36" (90cm) wide: 1V£yd (1.35m)
54" (140cm) wide: 3/4yd (0.70m)
Notions:	zipper, elastic
Sewing instructions
1	Reproduce the pattern pieces on 2 x 2" (5 x 5cm)
dressmaker’s pattern paper.
2	With right sides together, fold the fabric in half and
pin the pieces to it, having the front panel, front yoke,
front yoke facing and the sleeve against the fold Cut
out the sleeve twice. Mark the middle of the sleeve
3
Cut out the bottom edge of the legs and the sleeves
with an extra 1" (2.5cm) for seam allowance, the middle
of the back with an extra 3/4" (2cm) for seam allowance.
The remaining edges with an extra 3/e-3/4" (1-2cm) for
seam allowance.
105
Ooujs Ричлин
/
/
X
О/
I
Pi

.. S о r/s
/
/
/
i

106
4	Zigzag around the edges of all the pieces
5	Stitch the middle back seam together, stopping 11,?
(3.5cm) from the top.
6	Gather the front panel and stitch the front panel and
front yoke together.
7	Gather the back panels and stitch these to the back
yokes.
8	Stitch the zipper into the back panel. (See introduction
for how to insert zipper.)
9	Stitch the crotch seam. Clip the curve in the seam
allowance and press the seam open
10	Stitch the side seams and press them open.
11	Turn in the bottom edge of the legs and stitch around
them 5/b" (1.5cm) from the edge. Leave a small opening.
12	Stitch the shoulder seams. Stitch the sleeve seams.
Press them open.
13	Mark the middle of the sleeve. Place the r ght side of
the sleeve against the right side of the armholes of
the front and back panel. The shoulder seams of the
front and back panel should be placed against the
mark for the middle of the sleeve. Stitch together and
press the seams flat.
14	Turn in 1" (2.5cm) along the bottom edge of the sleeves
and stitch %" (1.5cm) from the edge. Leave a smal1
opening.
15	Stitch the shoulder seams of the facing together. Press
the seams open.
16	With right sides together stitch the neckline of the
facing and the yokes together. Clip the seam allowance
and turn right side out.
17	Turn in the seam allowance on the middle back facing
Top-stitch all the way around the neckline.
18	Thread elastic through the casings, stitch the ends of
elastic together and then stitch up the opening.

Bootees, shoes,
mittens and hats
plastic or fabric reinforced with fabric webbing.
2	Cut along the top edge without a seam allowanc
The remaining edges with an extra Уд" (0.5cm) for sea
allowance.
3	Zigzag around the edges of the pieces, if necessar
4	Stitch the front of the bootee. The cord or tape (if usir
tape, fold it in half first) is stitched on at the same tii
with the folded side of the tape on the right side.
5	Stitch the sole onto the bootee.
Ю8 Pantyhose
Pattern pieces: front panel, back panel
Notions:	elastic
Sewing instructions:
1	Reproduce the pattern, draw the highest and the low-
est side of the tights. Fold the fabric in half and pin
the pieces to it against the fabric fold. (You can use
an old pair of tights or a th n pullover for the fabric.)
2	The front of the tights is cut low and the back is cut
high. Cut out the top edge with an extra 3/д" (2cm) for
seam allowance. The remaining edges with an extra
Уд" (0.5cm) for seam allowance.
3	Sew the inside leg seams by hand or with a zigzag
stitch as far as the mark. Zigzag both edges of the
seam allowance together.
4	Stitch the crotch seam by hand or using a zigzag stitch.
5	Zigzag both edges of the seam allowance together.
6	Turn in the seam allowance along the top edge and
zigzag or hem it down. Leave a small opening in the
middle of the back to insert the elastic.
7	Thread elastic through the casing, stitch the ends
together and stitch up the opening.
Bootees
Pattern pieces: bootee, sole
Notions:	cord or tape
Sewing instructions:
1 Reproduce the pattern pieces. With right sides to-
gether, fold the fabric in half and pin the pieces to it,
having the back of the bootee against the fabric fold.
For the fabric use imitation leather, soft leather, felt,
Shoes
Pattern pieces: shoe, sole
Notions:	hook and eye fastening band or s
fasteners
Sewing instructions:
1	Reproduce the pattern pieces and pin them t<
double layer of imitation leather, soft leather, f
plastic or fabric reinforced with fabric webbing.
2	Cut out the upper edge of the shoe and the anl
strap without a seam allowance. The remaining ed
with an extra Уд" (0.5cm) for seam allowance.
3	Zigzag around the edges of all the pieces.
4	Stitch the back and the front seam of the foot.
5	Stitch the sole onto the foot.
6	Stitch pieces of hook and eye fastening band to t
ankle strap or else sew on snap fasteners. If us
leather you can cut out a buttonhole and sew c
small button.
Knitting: First see introduction for information a
stitches used and size of knitting needles.
Mittens
Cast on 12, 14 or 16 stitches, according to size of de
Knit %" (1cm), W' (1.25cm), %" (1.5cm) in rib stitch
Continue in stocking stitch.
Increase 2, 4, 6 stitches on the first row.
Knit to V/2" (4cm), 2" (5cm), 21/д" (6cm).
For the next 2 rows keep knitting 2 stitches togetb
Cast off.
Sew up the seams.
Crochet or buy a cord to join the mittens. Sew the mrr
to the cord.
On the next 6,7,9 rows, decrease 1 stitch on each side.
After that knit 2 stitches together throughout the next row.
Cast off. Sew up the seam.
бле>ч oo l<_
gooтеe
Socks
':	doll
Shoe
Z ast on: 20, 24 or 26 stitches, according to size of doll.
Knit in plain stitch or rib stitch to VA" (4cm), 1%" (4.75cm),
2A" (5.5cm).
Continue in stocking stitch.
.Vhen you have knitted 2" (5cm), 2'A" (5.75cm), 21Z>"
6.5cm), increase 1 stitch on each side of every row for
rhe next 2, 3, 4 rows.
Continue knitting to a length of 21/e" (5.5cm), 3" (7.5cm),
ЗА" (9cm).
Scarf
Cast on: 4, 6 or 8 stitches, according to size of doll.
Knit in rib stitch or in plain stitch to a length of 11" (28cm),
14" (36cm), 171/4" (44cm). Cast off.
If you wish, make pompoms (see introduction) and sew
these to the ends of the scarf.
109

Hat with pompom
Cast on: 40, 50 or 60 stitches, according to size of doll.
Knit in rib stitch to a length of 2" (5cm), 21/4" (6cm), 23/4"
(7cm)
Continue in stocking stitch to a length of 4" (10cm), 43/4"
(12cm), 51/2" (14cm).
Throughout the next two rows knit 2 stitches together.
Cast off the remaining stitches.
Sew up the seam and then thread a strand of yarn through
the stitches at the top of the hat. Pull this tight and sew
it down.
Make a pompom (see introduction) and sew this to the top.
Bonnet with knitted panel
Pattern pieces: ear piece
Notions:	bias binding (if a cord is crocheted the
bias binding can be omitted)
Sewing instructions:
1	Knit in plain stitch a panel measuring 2% x 53/4" (6 x
14 5cm). 3 x 7" (7.5 x 17.5cm) or 3 x 8" (9 x 20.5cm).
2	Reproduce the pattern.
3	With right sides together, fold the fabric in half and
pin the pattern to it. Cut out with an extra 3/a" (1 cm)
for seam allowance all the way around.
4	Turn in and stitch the seam allowance on the front
edge.
5	Using a zigzag stitch, stitch the knitted panel to the
upper edge of the ear pieces. Clip the seam allowance
and turn the bonnet right side out.
6	Crochet a border around the edge of the bonnet
Crochet cords to make a tie fastening or sew bias
binding around the bottom edge and then around the
front edge. Leave enough tape hanging out on bot
sides to tie in a bow.
Hooded scarf
Cast on 4, 4 or 6 stitches and knit for 51/г" (14cm), 6s*'
(17cm). 8" (20cm).
Repeat on another pair of needles for the second sea"
On the second scarf, using the same knitting need
cast on an additional 26 stitches.
Now pick up the stitches from the first scarf and join tr-
two scarves by knitting 4, 4, 6 rows in rib stitch. T*>e
scarves are now at opposite ends of the knitting.
Continue knitting the first and last 4, 4, 6 stitches in -
stitch. Knit the stitches in between in stocking stitch.
Increase 8, 10, 12 stitches in the stocking stitches.
Knit to a length of 43/4" (12cm), 5%" (14.5cm), 6%" (17crr
Cast off
With the right sides together, match up the front ec
and sew up the seam on top of the hood.
Make a pompom (see introduction) and sew this to the •

Backpack and
baby carrier
112
Baby carrier
Pattern pieces' middle section, side band, top strap,
bottom strap.
Notions:	31Z>yd (3m) twill band 11/г" (4cm) wide,
elastic, 2 D-rings VA" (3cm) long.
Sewing instructions:
1	Reproduce the pattern pieces. With right sides to-
gether, fold the fabric in half and pin the pieces to it,
having the middle section and the side section against
the fabric fold.
2	Cut out both pieces twice with an extra %" (1cm) for
seam allowance. Cut out two straps in twill band. Cut
one band 133/4" (35cm) long and one band 2%yds
(2.50m) long.
3	Zigzag around the edges of the pieces.
4	Stitch the middle section and the middle section facing
to the leg hole facings. Clip the seam allowance and
turn the right side out. Top-stitch around the leg holes.
5	Iron in the seam allowances on both side sections and
press the side bands in half lengthwise. Stitch them
to the sides of the middle section. Thread pieces of
elastic measuring ЗУд" (8cm), 41/д" (11cm), 6Уд" (16cm)
respectively through both side sections. Sew down
the elastic at the top and bottom.
6	Fold the 133/д" (35cm) twill band lengthwise and stitch
it along the bottom edge of the baby carrier. Place the
middle of the band on the middle of the middle section.
7	Fold the 23Z»yds (2.50m) twill band lengthwise and
stitch it around the top edge of the baby carrier. Place
the middle of the band on the middle of the middle
section.
8	Stitch the D-rings to the ends of the lower strap.

113

d^y<^ XNiOd
I rl=*V>IH->W L)W
OX. Г*ЭИХ1ЭлгП -->


ffcg>£AC Fql-p
fcfcCVAcK. PKONT+ 6A(X fWet-

Portable crib, hot-
water bottle cover,
toilet-bag,
patchwork quilt
118
Portable crib
Pattern pieces:
Notions:
crib, handle
piece of strong cardboard measuring
9 x 17" (23.5 x 43.5cm)
optional: foam rubber %" (1 cm) thick for
the sides, 2 pieces measuring 6 x 10"
(15 x 25cm) and 2 pieces measuring 6 x
18" (15 x 45cm).
Sewing instructions.
1	Reproduce the pattern pieces on 2 x 2" (5 x 5cm)
dressmaker’s pattern paper.
2	Fold the fabric in half and pin the pattern pieces to it.
Cut out with an extra 5/e" (1.5cm) for seam allowance.
Mark the positions of the stitching lines.
3	Zigzag around the edges of the pieces
4	With the right sides on the outside, place the crib
pieces on top of each other. To hold in the cardboard
stitch the seam lines together on the two longest sides
and one of the short sides. Insert the cardboard Then
stitch the last seam together.
5	Stitch the handles together Sew them where indicated
on the right side of the fabric, having the closed edge
on top.
6	Clip the corners as far as the cardboard seam lines.
Now stitch together the seams to form the corners.
Hand stitch the two flaps on the corner seams together
stopping Уд" (2cm) from the top edge.
7	Now turn the right side out. Optional: insert foam rub-
ber into the side panels, turn in the seam allowance
along the top edge and stitch all the way around.
Hot-water bottle cover
Pattern pieces: side, base
Notions:	bias binding
Sewing instructions:
1	Reproduce the pattern pieces. With right sides to-
gether, fold the fabric in half and pin the side piece tc
it against the fabric fold. Cut out the base on sing e
fabric.
2	Cut out with an extra %" (1cm) for seam allowance
3	Zigzag around the edges of all the pieces.
4	Turn in and stitch the seam allowance along the top
edge. Stitch the side seam. Fold a length of bias bino-
mg in half lengthwise and stitch along it or else use a
length of cord and stitch it on to the upper edge where
indicated. Be sure that the ends are hanging out or
the right side.
5	Stitch on the bottom section. Clip the seam allowance
and turn the right side out.
Toilet-bag
Notions:	4" (10cm) zipper
Sewing instructions.
1	Reproduce the square. Cut it out in fabric twelve times
with an extra %" (1cm) for seam allowance. Zigzag
around the edges of all the pieces.
2	Stitch 6 squares together - three squares on top and
three underneath. Do this twice.
3	Now you have two pieces of fabric. Stitch the zipper
(see introduction) in between these two pieces of fab-
ric on the long side Leave the tab hanging out. Th.s
will hang free inside the bag.
4	Stitch all the way around the bag. Clip the corners cf
the seam allowance. Turn the bag right side out.
Patchwork quilt
Make this by cutting out 45 squares measuring 2 x 2" (5
x 5cm) twice; allow %" (1cm) for seam allowance. Zigzag
around the edges of the squares and stitch them together
to form two pieces of fabric 10 x 18" (25 x 45cm).
With right sides together stitch these two pieces of fabric
together on three sides. Clip the corners and turn the
right side out. Fill the quilt with lining material and sew
up the open side Distribute the filling evenly and stitch
along the seamlines of the patchwork squares
						— • —	• —— • -	— • •	—• • —	• —
																	1
	t			rJ
?c		СГАЫ	E оси	।

1							Г1ТСН II	jq nr	'e						1 •
															f • 1
i			—— • —	. —						ЛЛ 1	- • -	— к — .	-”1		1 • 1		i
« 1		1. _	~ • — - -		sP					I г	*—	.  • »			• 1 «		i
4 • * 1 1 1					Ы. vll Z j					z fD					a 1		3l
		Г” •	— » 		- —	Z X					Л	— •	 — • —	—1		i 1		c ~s
1		i _	• —	 <	-——	V £					1		—• • 					i		1 i		i •
															i a J		1
						г			is						a 1 a 	L_		i _i
< * X tay	я	&Ufe6€	IF USin/ £-?ccn	A													. 1
'	1		!LMJ ьш															1 a

						— . —				' —
Mattress: make a cover for a piece of foam rubber measur-
ing 91Л x 17%" (24 x 44cm) and %" (2cm) thick.
Sheet: stitch a piece of fabric measuring 13% x 211Л"
(35 x 55cm).
Rubber sheet: cut a piece of polythene 8x12" (20 x 30cm).
Flannelette undersheet: cut a piece of flannelette measur-
ing 17% x 10" (45 x 25cm). Blanket stitch around the edges.
Pillow: use a piece of fabric measuring 7 x 4" (18 x 10cm)
and stitch the seams together on three sides. Turn right
side out. Stuff with filling, turn in the seam allowances on
the open side and stitch together.
Pillowcase: use a piece of fabric 18 x 4%" (46 x 11cm).
Cut out with an extra %" (1.5cm) for seam allowance
Zigzag around the edges. Turn in and stitch the seam
allowances on the short ends. Turn in 3" (8cm) on one
side and 7W (19cm) on the other side. With right sides
together stitch the two long edges together. Turn the piНол
case right side out.
120
square
fbL
TbiuET 6ЛЦ
Сит \ъ-
РАвДс Fb4>
о
HcnV/fKTEX. CoTTL^
г О
1-1


Doll’s crib, table
and chair
122
Bed furnishings
Mattress
Make a cover for a piece of foam rubber V/г" (4cm) thick.
The foam rubber should be the same size as the sheet
of cardboard, but if you prefer you can have the foam
rubber slightly smaller. Cut off the corners.
Rubber sheet: piece of polythene 11% x 153/д" (30 x 40cm).
Flannelette undersheet: piece of flannelette 173/д x 231Л"
(45 x 60cm). Blanket stitch around the edges.
Pillow: use a length of fabric measuring 11% x 8" (30 x
20cm) and stitch the seams together on three sides. Stuff
with filling. Turn in the seam allowance on the open side
and stitch the seam together.
Pillowcase: a length of fabric 281/д x 8" (72 x 20cm).
Cut out with an extra %" (1.5cm) for seam allowance.
Zigzag around the edges. Turn in and stitch the seam
allowances at both ends. On one side turn in 4%" (12cm)
and on the other side turn in 113/д" (30cm). Stitch the two
side seams together. Turn the pillowcase right side out.
Patchwork quilt
Cut out 48 squares each measuring 4 x 4" (10 x 10cm);
allow an extra %" (1cm) for seam allowance. Zigzag
around the edges of the squares and then sew them to-
gether to make two pieces measuring 15% x 2ЗУ2" (40 x
60cm). With right sides together stitch the two pieces
together on three sides. Clip the corners and turn the
right side out. Stuff the quilt with filling and stitch the open
side together. Distribute the filling evenly and then stitch
along the seamlines of the squares.
Canopy
Use a piece of fabric measuring 15/syds x 36" (1.5m x
90cm) and a rod. Turn in and stitch the edges of the fabric
on three sides. Leave the bottom edge measuring 15/eyds
(1.5m). Gather the stitched long edge until it measures
twice the length of the upper edge of the rod.
Gather the fabric again 1V&" (4cm) underneath so that it
measures twice the length of the upper edge of the rod.
With the right sides on the outside, fold the gatherec
piece of fabric in half.
Stitch the top edge together and then stitch once ада г
1V&" (4cm) below this.
Sew the front edge together between the gathered sec
tions.
Push the canopy over the rod.
Measure the length you want the canopy and then turn
in the bottom edge and stitch it.
Before buying wood, look around to see if you can fine
wood remnants. These are often obtainable from a car
penter. In this way you can make an attractive bed си
chair for very little money.
Crib
Material:
4 bars	1% x 1V&" (4 x 4cm),	18" (46cm) long
4 bars	1x1" (2.5 x 2.5cm),	14" (60cm) long
4 bars	1x1" (2.5 x 2.5cm),	13%" (35cm) long
Ask a carpenter to make a groove lengthwise in the bars
The groove should be the same width as the thicknes
of the plywood.
10 round bdrs W (14mm) diameter, 15%" (40cm) lone
[flat drill bit W (14mm)J
For the head and foot ends:
2 sheets of plywood ±3/e" (1cm) thick, 12Уд x 133/д" (3’ »
35cm)
plywood
For the base:
2 plywood bars % x %" (1x1 cm), 24" (60cm) long
2 plywood slats % x %" (1 x 1cm), 13%" (35cm) long
1 sheet plywood 141Л x 24Уг" (37 x 62cm)
12 wood plugs 13/д" (44mm) diameter
8 screws 21/д" (6cm) long
small screws about 5/e" (1.5cm) long
-netal rod for the canopy ± 43Уд" (1.10m)
e clamps for the rod
* jod glue
Carpentry instructions:
° ace the four 24" (60cm) 1x1" (2.5 x 2.5cm) bars side
oy side. Using a set square, draw a line to mark every 4"
*0cm). Mark the middle of each line. Do this on all four
oars.
'ow drill holes %" (1.5cm) deep. Use a drill stand or sup-
: >t while doing this.
'*ow try the round bars into the holes. If the bars are a
rtfe too thick, you can sandpaper around the ends of
“gm. Sandpaper or plane the corners of the rectangular
oars to smooth them off.
Sow take a rectangular bar with,the holes on top. Spread
= l-ttle glue in each hole and fit the round bars into the
“des. Spread some glue into the holes in another oar
and put this on top of the round bars. Push the bars into
holes. Wipe off the excess glue immediately.
N ?w measure the round bars to make sure that they are
12" (30cm) long. If necessary, use a wooden hammer
:э knock the bars further into the holes. Protect the wood
*hile doing this so that it is not damaged.
--^oeat this with the other two rectangular bars and the
~jnd bars.
- ace the four 18" (46cm) 1У2 x 1У2" (4 x 4cm) bars side
зу side. Measure 2" (5cm) from the ends and make a
““ark. Starting at the 2" (5cm) marks measure a further 1"
5 5cm) at each end. Mark the middie of thabars by draw-
- g a cross (see diagram 1).
□w a line lengthwise along the middle of the bars. On
~ s line mark the middle of the width of the bars.
'te>w using а Уд" (4mm) drill, make holes at the three marks.
‘ e holes should be half the length of the wood plugs.
Do this on all four of the bars.
5 -ndpaper the bars.
w take the four bars with the groove. Put some glue
о the grooves. Don’t use too much glue. Glue the bars
2 the top and the bottom end of the plywood (if necessary
ammer a small nail in at the ends). Remove excess glue
~4nediately.
Secide on the positions in which the wood plugs are to
P5 attached (see diagram 2).
’«w using а Уд" (4mm) drill make holes in the three indi-
cated positions; the holes should be half the length of the
wood plugs. Do this on all four sides.
Put some glue into the holes in the head end and the foot
end and put the plugs into the holes.
Put some glue on to the flat parts on the side of the
plywood sheets and press the sides against the V/2 x V/2"
(4 x 4cm) rectangular bars. The wood plugs are thus
pushed into the drilled holes.
Now drill a hole in the V/2 x V/2" (4 x 4cm) bed posts, on
the side facing the sides of the bed. The hole should be
drilled right through the middle of the post, 2Уг" (6.25cm)
from the end of the post at both ends. First check the
diameter of the wood screws (see diagram 3). Screw the
sides to the head end and the foot end.
Now choose which side you want to have as the bottom
of the bed. Screw and glue on the plywood slats at the
same level as the base of the 1x1" (2.5 x 2.5cm) bars.
(Pre-drill the slats). Check the measurements of the base
of the bed. Cut the corners off the sheet of plywood.
Place this in the bed and, if you wish, screw down.
Finishing:
Sandpaper the whole bed, lacquer, sandpaper again and
lacquer once or twice more. You can also paint or varnish
it.
If you wish you can buy protective caps for the screws.
To support the canopy: bend over the top end of the metal
rod. Fix the rod to the head end with clamps.
123
Doll’s table
Material:
4 wooden bars
6 wooden bars
Plywood
Wood plugs
3/4 x %" (2 x 2cm), 16" (40cm) long
% x З/4" (2 x 2cm), 12" (30cm) long
12 x 12 x %" (30 x 30 x 1.5cm) with plastic
surface if preferred
131/2 x 12 x y8" (34 x 30 x 1.5cm) with
plastic surface if preferred
12 measuring W' (4mm)
Screws measuring 13/e" (3.5cm) long
Carpentry instructions:
* Place the four long bars side by side. Starting at eac
end measure %" (2cm) in. Draw lines on the bars a"
mark the middle of the measured ends (see diagram z
Measure 63/4" (17cm) from the ends of the bars and the
3/4" (2cm) (the thickness of the wood).
Draw crosses to find the middle (see diagram 4).
Drill holes W' (4mm) in diameter, about 3/8" (1cm) deec
lake the remaining 6 bars. At the top of each bar draw
cross to mark the middle Drill the depth of the wood p
- 3/8" (1cm).
Put some glue into the holes and insert the wood plugs
Put some glue into the drilled holes on the long bars a*
attach three short bars to two long bars. Repeat this stes
Now you have the sides of the table.
Sandpaper the sides and, if necessary, round off *
corners.*
Now attach the 131/2 x 12" (34 x 30cm) plywood shee
the two long bars.
Use the screws to do this.
Now attach the 12 x 12" (30 x 30cm) plywood to the rr
bars. The side should touch the previous shee
plywood.
Use the screws to attach the plywood. The chair
on this side of the table.
Finishing: lacquer the table, sandpaper and lacque^
more.
Cd\b F^JC> CHT4t£
(binqReMS 1-4.)
Chair
Material:	10 wooden bars % x %" (2 x 2cm)
10" (25cm) long
Plywood:	10 x 10 x %" (25 x 25 x 1.5cm)
10V4 x 10 x %" (26 x 25 x 1.5cm)
4% x 11У2 x %" (12 x 29 x 1.5cm)
All above with plastic surface if preferred
12 wood plugs measuring Уд" (4mm)
8 screws measuring V/2" (3.5cm)
optional: 2 flat-headed bolts (±11/2"
(4cm) with protective cap.
Carpentry instructions:
For the underneath of the chair follow the instructions for
the table from * to *.
The in-between bar is now placed exactly in the middle.
Now attach the 10 x 10" (25 x 25cm) plywood sheet
between the middle bars.
Use the screws to do this. This is the seat.
Now attach the ЮУд x 10" (26 x 25cm) plywood between
the armrests. See that the underneath of the plywood is
on the same level as the underneath of the seat. If you
wish round off the corners on the upper edge.
Attach the 4% x ИУ2" (12 x 29cm) plywood on to the front
of the armrests, so it sticks out 5/e" (1.5cm) at the front.
125
||||||ИПППТБППП>