/
Автор: Tischler P.
Теги: construction furniture

Текст
Making Dining Tables
That Work
BY PETER TISCHLER
66 AKE FURNITURE THAT
:; \ people can be comfortable
living with,” said Sam
Maloof, the noted chairmaker. This same
guiding principle is at the heart of the fur-
niture [ build. Optimum comfort certainly
applies to chairs, and the same holds true for
dining tables. When building a dining table,
I start by finding out how the owner likes
to dine and where the table is going. I use
this information to come up with rough
sketches and scale models, which convey
material and proportions better than draw-
ings. Then I measure everything—people,
dining room, rugs, existing furniture, and
china—so I can translate dimensions to
drawings and occasional mock-ups.
Design Is Always
a Compromise
How a dining table relates to its users is just
as important as how it relates to its sur-
roundings.The best tables are the ones that
make tiny compromises. For example, when
building a table for a family with children,
the durability of the finish on the tabletop
outweighs the need of the finish to be au-
thentic to the table s style period. Fortu-
nately, there are some simple guidelines that
will help with design decisions.
Seating The first step is to determine the
number of people to be seated, so you can
figure the table size that will fit them com-
fortably. If the owner entertains regularly,
you’ll want to make a table with an ex-
panding top that doesn’t require a compli-
cated leaf system or a forest of legs. General
rules (for example, the commonly given
24 in. of elbow room per person) may have
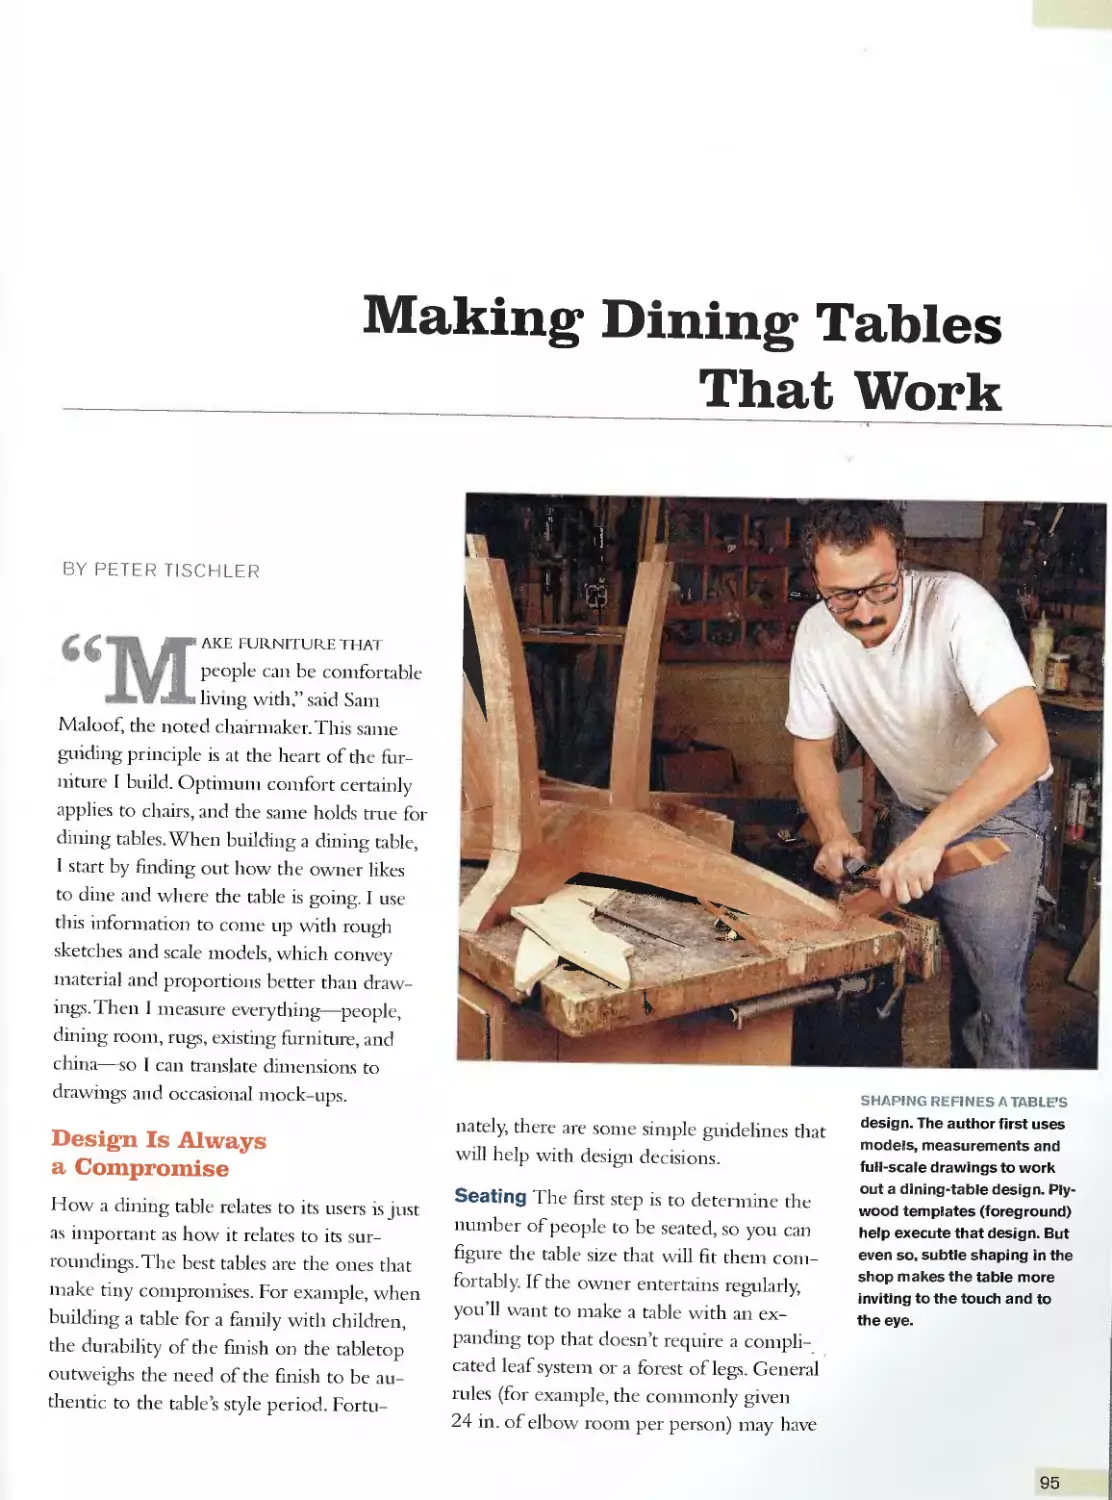
SHAPING REFINES A TABLE’S
design. The author first uses
models, measurements and
full-scale drawings to work
out a dining-table design. Ply-
wood templates (foreground)
help execute that design. But
even so, subtle shaping in the
shop makes the table more
inviting to the touch and to
the eye.
95
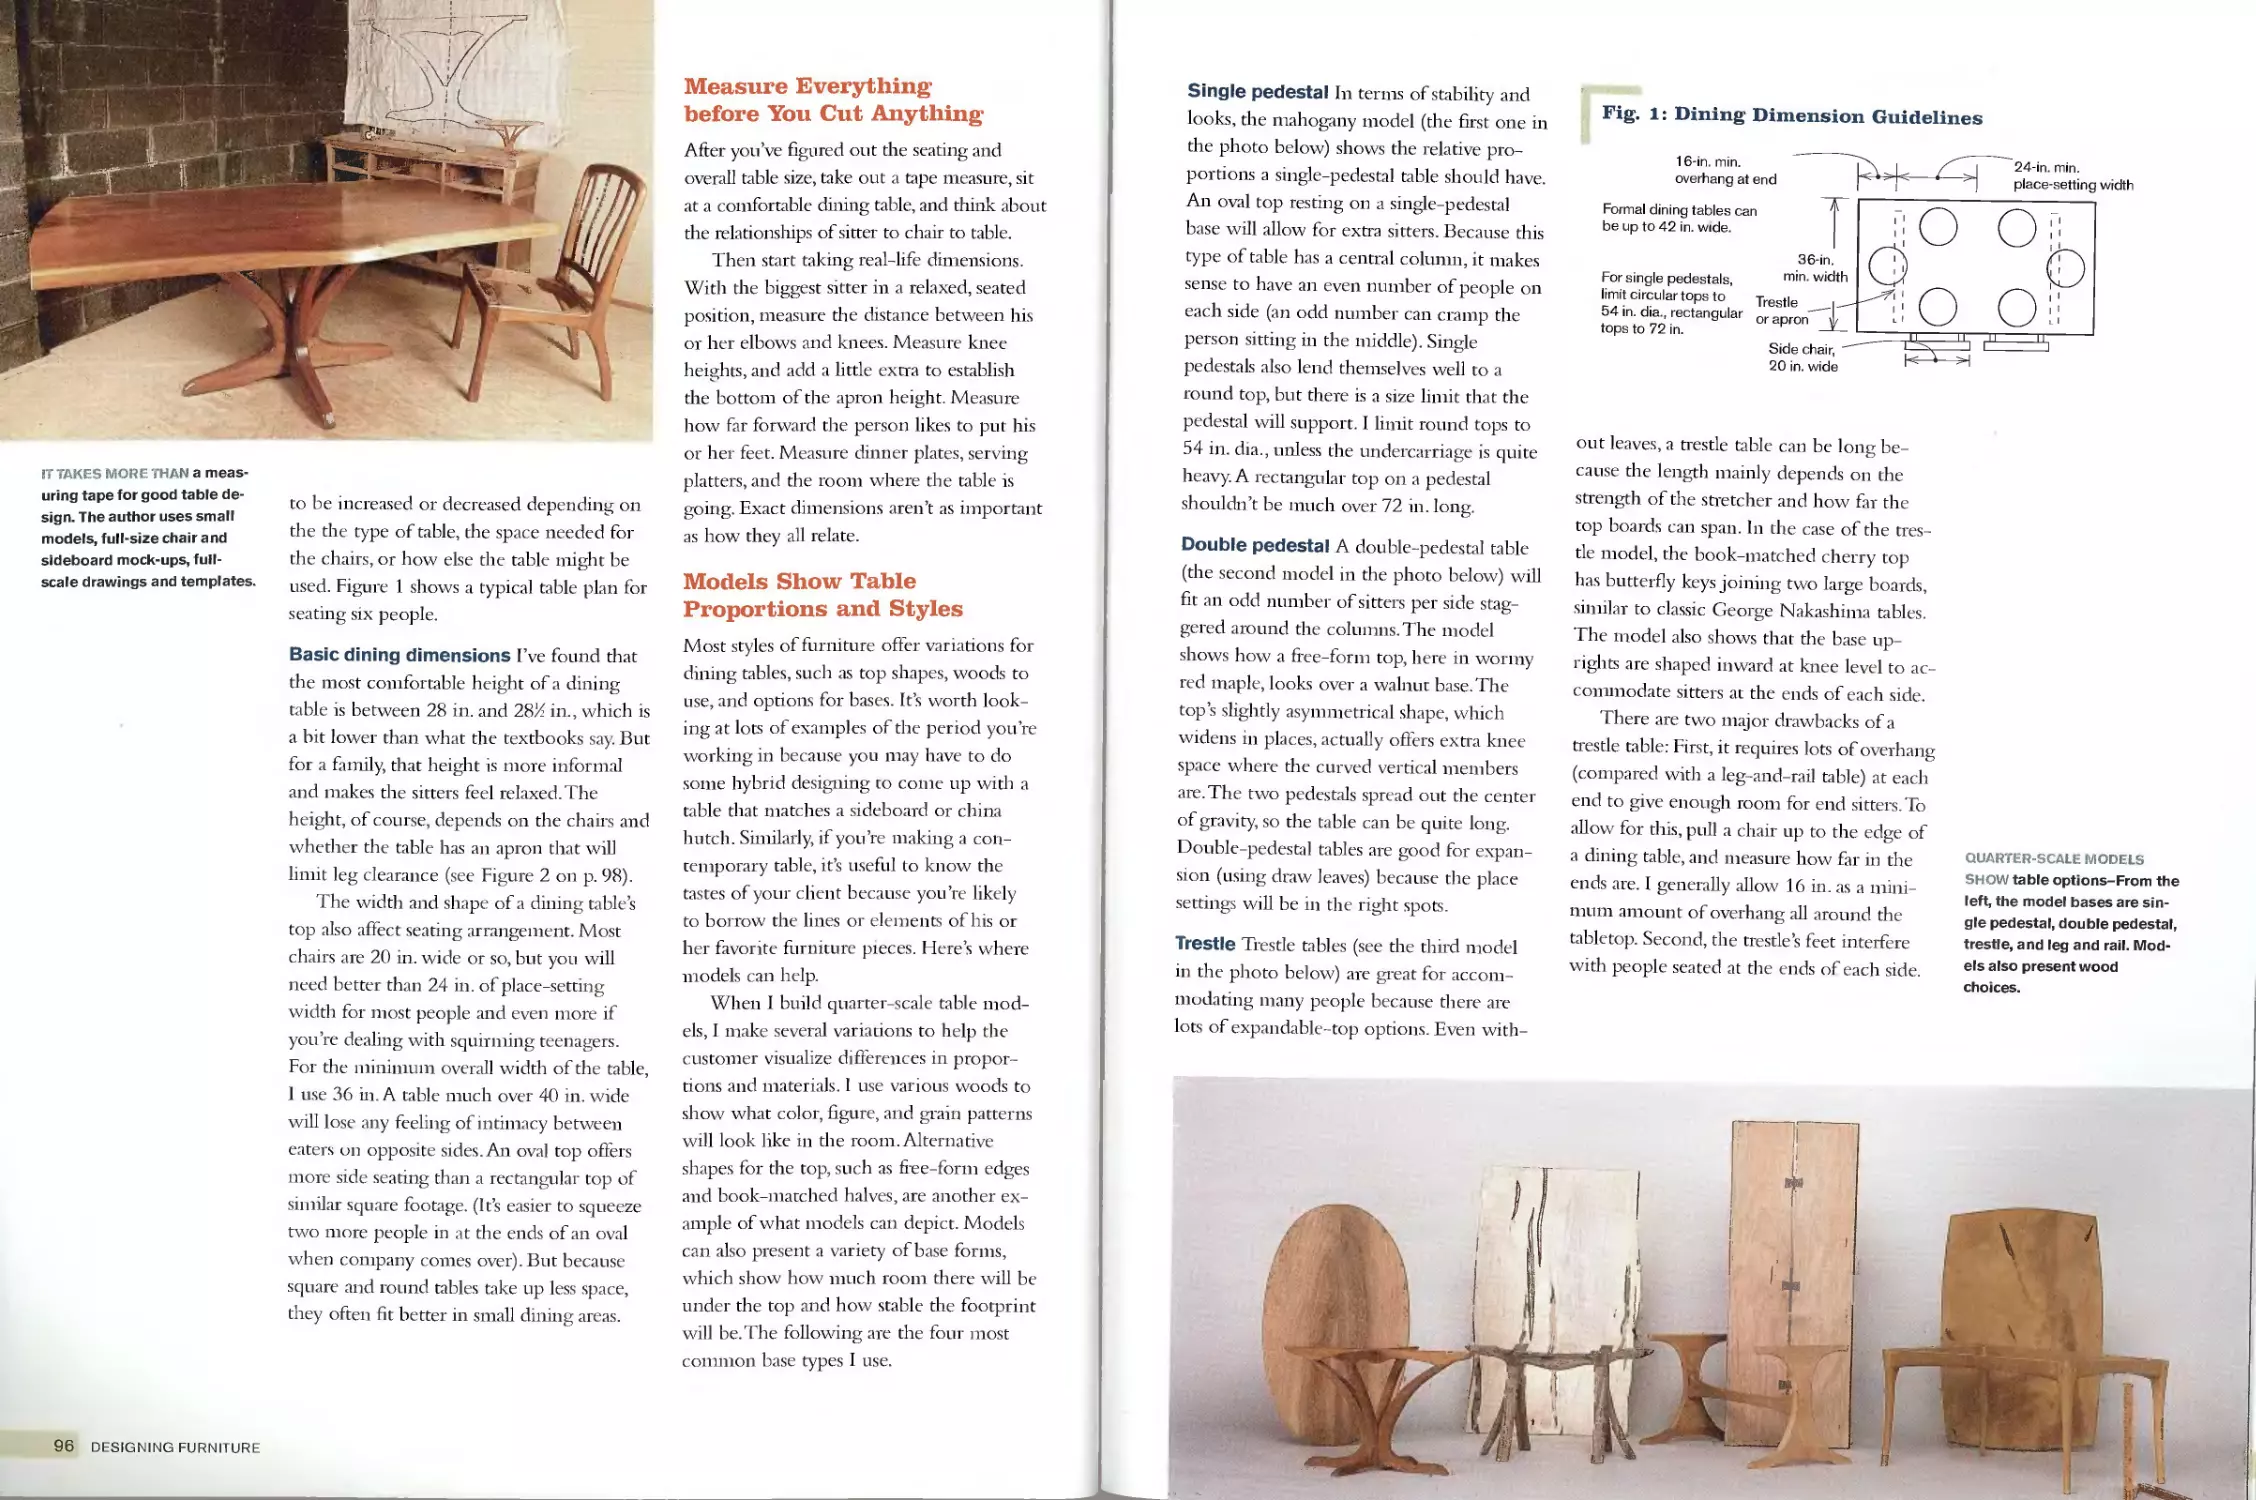
IT TAKES MORE THAN a meas-
uring tape for good table de-
sign. The author uses small
models, full-size chair and
sideboard mock-ups, full-
scale drawings and templates.
to be increased or decreased depending On
the the type of table, the space needed for
the chairs, or how else the table might be
used. Figure 1 shows a typical table plan for
seating six people.
Basic dining dimensions I’ve found that
the most comfortable height of a dining
table is between 28 in. and 28/ in., which is
a bit lower than what the textbooks say. But
for a family, that height is more informal
and makes the sitters feel relaxed. The
height, of course, depends on the chairs and
whether the table has an apron that will
limit leg clearance (see Figure 2 on p. 98).
The width and shape of a dining table’s
top also affect seating arrangement. Most
chairs are 20 in. wide or so, but you will
need better than 24 in. of place-setting
width for most people and even more if
you’re dealing with squirming teenagers.
For the minimum overall width of the table,
1 use 36 in. A table much over 40 in. wide
will lose any feeling of intimacy between
eaters on opposite sides. An oval top offers
more side seating than a rectangular top of
similar square footage. (It’s easier to squeeze
two more people in at the ends of an oval
when company comes over). But because
square and round tables take up less space,
they often fit better in small dining areas.
Measure Everything
before You Cut Anything
After you’ve figured out the seating and
overall table size, take out a tape measure, sit
at a comfortable dining table, and think about
the relationships of sitter to chair to table.
Then start taking real-life dimensions.
With the biggest sitter in a relaxed, seated
position, measure the distance between his
or her elbows and knees. Measure knee
heights, and add a little extra to establish
the bottom of the apron height. Measure
how far forward the person likes to put his
or her feet. Measure dinner plates, serving
platters, and the room where the table is
going. Exact dimensions aren’t as important
as how they all relate.
Models Show Table
Proportions and Styles
Most styles of furniture offer variations for
dining tables, such as top shapes, woods to
use, and options for bases. It’s worth look-
ing at lots of examples of the period you’re
working in because you may have to do
some hybrid designing to come up with a
table that matches a sideboard or china
hutch. Similarly, if you’re making a con-
temporary table, it’s useful to know the
tastes of your client because you’re likely
to borrow the lines or elements of his or
her favorite furniture pieces. Here’s where
models can help.
When I build quarter-scale table mod-
els, I make several variations to help the
customer visualize differences in propor-
tions and materials. I use various woods to
show what color, figure, and grain patterns
will look like in the room. Alternative
shapes for the top, such as free-form edges
and book-matched halves, are another ex-
ample of what models can depict. Models
can also present a variety of base forms,
which show how much room there will be
under the top and how stable the footprint
will be. The following are the four most
common base types I use.
96 DESIGNING FURNITURE
Single pedestal In terms of stability and
looks, the mahogany model (the first one in
the photo below) shows the relative pro-
portions a single-pedestal table should have.
An oval top resting on a single-pedestal
base will allow for extra sitters. Because this
type of table has a central column, it makes
sense to have an even number of people on
each side (an odd number can cramp the
person sitting in the middle). Single
pedestals also lend themselves well to a
round top, but there is a size limit that the
pedestal will support. I limit round tops to
54 in. dia., unless the undercarriage is quite
heavy. A rectangular top on a pedestal
shouldn’t be much over 72 in. long.
Double pedestal A double-pedestal table
(the second model in the photo below) will
fit an odd number of sitters per side stag-
gered around the columns. The model
shows how a free-form top, here in wormy
red maple, looks over a walnut base.The
top’s slightly asymmetrical shape, which
widens in places, actually offers extra knee
space where the curved vertical members
are. The two pedestals spread out the center
of gravity, so the table can be quite long.
Double-pedestal tables are good for expan-
sion (using draw leaves) because the place
settings will be in the right spots.
Trestle Trestle tables (see the third model
in the photo below) are great for accom-
modating many people because there are
lots of expandable-top options. Even with-
Fig. 1: Dining Dimension Guidelines
16-in. min.
overhang at end
out leaves, a trestle table can be long be-
cause the length mainly depends on the
strength of the stretcher and how far the
top boards can span. In the case of the tres-
tle model, the book-matched cherry top
has butterfly keys joining two large boards,
similar to classic George Nakashima tables.
The model also shows that the base up-
rights are shaped inward at knee level to ac-
commodate sitters at the ends of each side.
There are two major drawbacks of a
trestle table: First, it requires lots of overhang
(compared with a leg-and-rail table) at each
end to give enough room for end sitters. To
allow for this, pull a chair up to the edge of
a dining table, and measure how far in the
ends are. I generally allow 16 in. as a mini-
mum amount of overhang all around the
tabletop. Second, the trestle’s feet interfere
with people seated at the ends of each side.
QUARTER-SCALE MODELS
SHOW table options-From the
left, the model bases are sin-
gle pedestal, double pedestal,
trestle, and leg and rail. Mod-
els also present wood
choices.
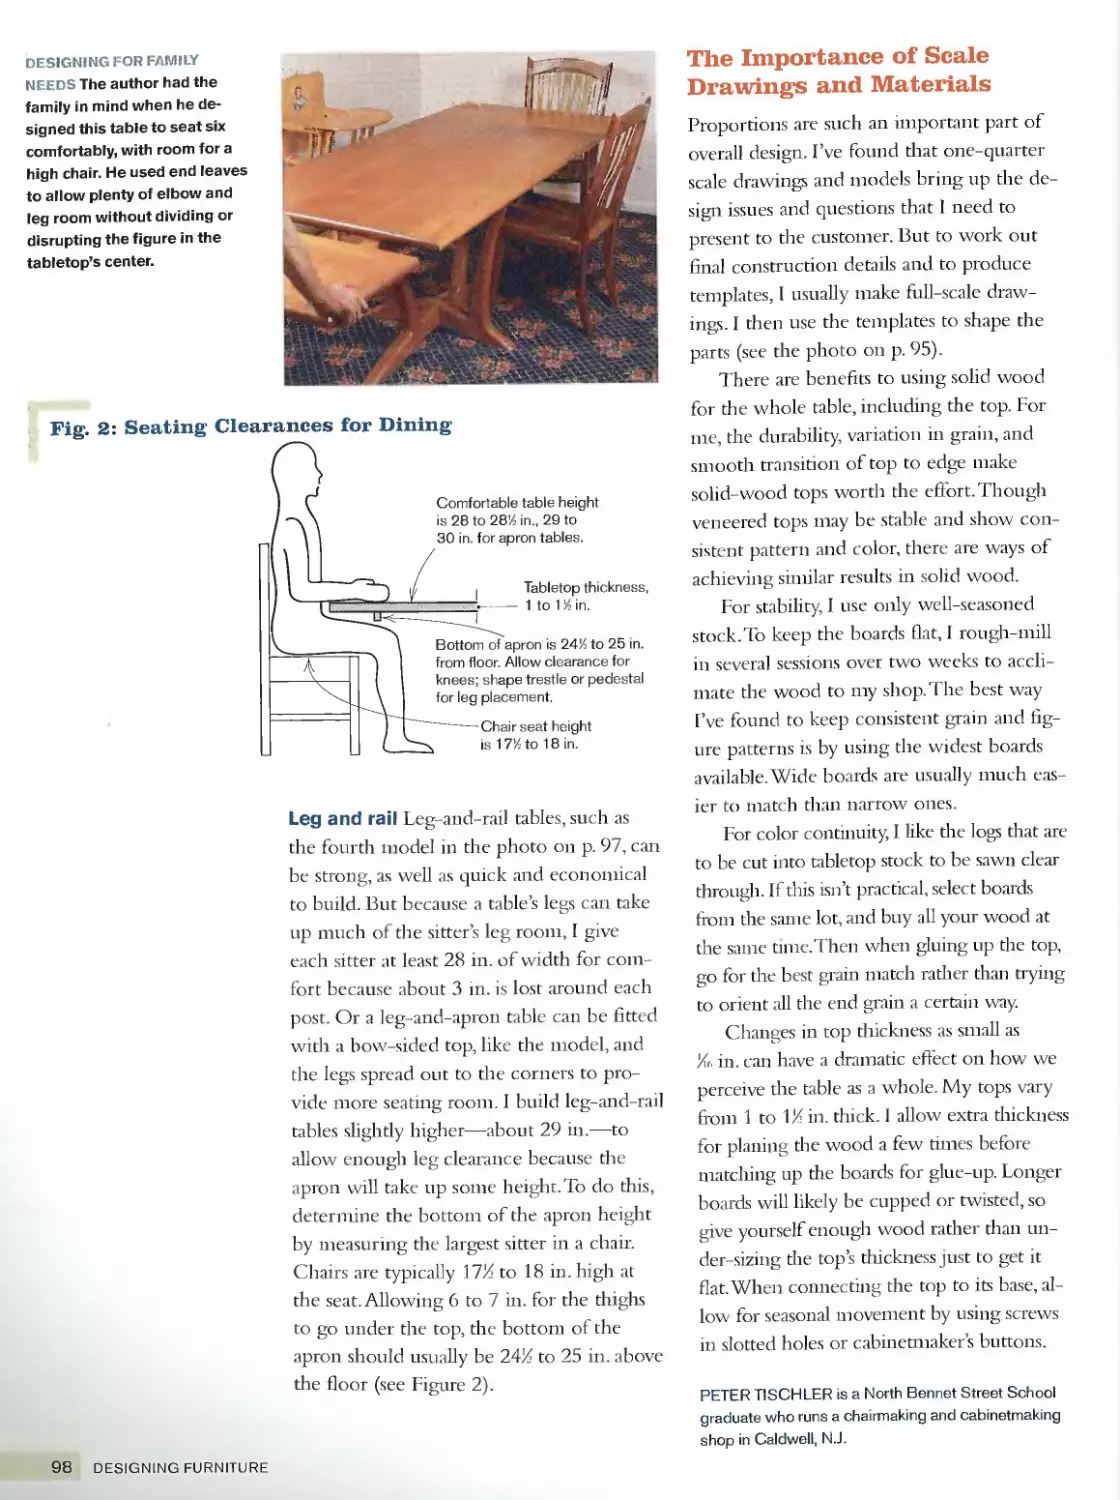
DESIGNING FOR FAMILY
NEEDS The author had the
family in mind when he de-
signed this table to seat six
comfortably, with room for a
high chair. He used end leaves
to allow plenty of elbow and
leg room without dividing or
disrupting the figure in the
tabletop’s center.
Fig. 2: Seating Clearances for Dining
Chair seat height
is 17% to 18 in.
Comfortable table height
is 28 to 28% in., 29 to
30 in for apron tables.
Bottom of apron is 24% to 25 in.
from floor. Allow clearance for
knees; shape trestle or pedestal
for leg placement.
Tabletop thickness,
— 1 to 1 % in.
Leg and rail Leg-and-rail tables, such as
the fourth model in the photo on p. 97, can
be strong, as well as quick and economical
to build. But because a table’s legs can take
up much of the sitter’s leg room, I give
each sitter at least 28 in. of width for com-
fort because about 3 in. is lost around each
post. Or a leg-and-apron table c an be fitted
with a bow-sided top, like the model, and
the legs spread out to the corners to pro-
vide more seating room. I build leg-and-rail
tables slightly higher—about 29 in.—to
allow enough leg clearance because the
apron will take up some height. To do this,
determine the bottom of the apron height
by measuring the largest sitter in a chair.
Chairs are typically 17/ to 18 in. high at
the seat. Allowing 6 to 7 in. for the thighs
to go under the top, the bottom of the
apron should usually be 24/ to 25 in. above
the floor (see Figure 2).
The Importance of Scale
Drawings and Materials
Proportions are such an important part of
overall design. I’ve found that one-quarter
scale drawings and models bring up the de-
sign issues and questions that 1 need to
present to the customer. But to work out
final construction details and to produce
templates, 1 usually make full-scale draw-
ings. I then use the templates to shape the
parts (see the photo on p. 95)
There are benefits to using solid wood
for the whole table, including the top. For
me, the durability, variation in grain, and
smooth transition of top to edge make
solid-wood tops worth the effort. Though
veneered tops may be stable and show con-
sistent pattern and color, there are ways of
achieving similar results in solid wood.
For stability, I use only well-seasoned
stock. To keep the boards flat, I rough-mill
in several sessions over two weeks to accli-
mate the wood to my shop. The best way
I’ve found to keep consistent grain and fig-
ure patterns is by using the widest boards
available. Wide boards are usually much eas-
ier to match than narrow ones.
For color continuity, I like the logs that are
to be cut into tabletop stock to be sawn clear
through. If this isn’t practical, select boards
from the same lot, and buy all your wood at
the same time. Then when gluing up the top,
go for the best grain match rather than trying
to orient all the end grain a certain way.
Changes in top thickness as small as
%. in. can have a dramatic effect on how we
perceive the table as a whole. My tops vary
from 1 to 1X in. thick. 1 allow extra thickness
for planing the wood a few times before
matching up the boards for glue-up. Longer
boards will likely be cupped or twisted, so
give yourself enough wood rather than un-
der-sizing die top’s thickness just to get it
flat.When connecting the top to its base, al-
low for seasonal movement by using screws
in slotted holes or cabinetmaker’s buttons.
PETER TISCHLER is a North Bennet Street School
graduate who runs a chairmaking and cabinetmaking
shop in Caldwell, N.J.
98 DESIGNING FURNITURE