/


Теги: weapons military affairs
Год: 1942

Текст
NOT TO BE PUBLISHED
The information given in this document
is not to be communicated, either directly
or indirectly, to the Press or to any person
not holding an official position in His
Majesty's Service.
Small Arms Training
Volume I, Pamphlet No. 3
Rifle
1942
This pamphlet supersedes the 1937 edition ; Supple-
ment No. 1, 1941, and the edition reprinted with
(No. 1) 1940.
---------
Amendments
Crown Copyright Reserved
The War Office,
17M June, 1942.
By Command of the Army Council,
ii
DISTRIBUTION
Scale
Ail Arms ...................................... D
OCT Us........................................ IV
О R.T Us....................................... D
S.A.S. Hythe Wing ........................... 140
S.A.S. Netheravon Wing JOO
CONTI NTS
Page
General notes for instructors ... ....... 1
CHAPTER I. MMNII
Lesson 1.—Cleaning ..... I
Lesson 2.—Examination of tlie rittv
CHAPTER II. —AIMING INSTRUCTION
Lesson 3.—The correct aim ....
Lesson 4.—Aiming off the target .. 11
CHAPTER III. —FIRING INSTRUCTION
Lesson 5.—Loading and unloading ............... 14
Lesson 6.—Holding and trigger pressing ........ 16
Lesson 7.—Firing from low cover ............... 19
Lesson 8. -Other positiorb ............... ... 21
Lesson 9.—Firing at moving targets ............ 24
CHAPTER IV. —QUICKENING AND STRENGTHENING
EXERCISES
CHAPTER V. —TESTS\ OF ELEMENTARS TRAINING
Appendix I.—Care of No. 2 -22-inch rille ......... /8
Appendix П.—Variations in teaching thi No 3 till* ... • »
Appendix III. —Variations in teaching the N<> 4 rille .. 30
Appendix IV. —Sniper rifle and zeroing 18 and Aldi»
telescope ... ... 32
Appendix V. —The No. 4 Sniper rifle 37
Appendix VI. —The Sniper sling . .39
1
GENERAL NOTES FOR INSTRUCTORS
The object of weapon training
1. The sole object of weapon training is to teach all ranks
the inost efficient way of handling their weapons in order to
kill the enemy. Instructors will always bear this fact in
mind, and will continually impress it upon those whom they
instruct.
Genoral points of safely
2. Before commencing any lesson in this pamphlet,
instructors will invariably inspect rifles, drill cartridges and
pouch equipment. They will also show their own to the
squad. It is only by the strictest adherence to this principle
that accidents with live S.A.A. will be avoided.
3. When using the aiming disc, or firing at another man’s
eye, drill cartridges will NEVER be used.
Recruit instruction
4. Instructors must appreciate that, while the lessens arc
designed to be taught in one period, more time will be necessary
for practice and revision to obtain proficiency.
Trained soldier instruction
5. Once men have been trained in the elementary handling
of the rifle, all future instruction must then be progressive
as it is useless to exercise trained men as if they were recruits.
The following are ways in which further useful instruction
can be given :—
i. T.E.T. to ensure that men have not lost their skill.
Interest can be .developed if the men themselves
are required to point out faults.
ii. Lessons 7, 8, and 9, together with the quickening
exercises.
iii. Carrying out these lessons on different types of ground,
involving as many different types of firing positions
and cover as possible.
iv. Paying, the fullest attention to tactical considerations
and the importance of concealment frofe the enefny,
including camouflage measures, so * as to permit
seeing without being seen.
v. Explaining the limitations of rifle fire, and teaching,
by demonstration Xvithin the squad or otherwise,
2
what are easy and what are difficult targets for men
armed with rifles.
Improvisation
6. Instructors must make every effort to improvise any
training stores that may be needed.
Provided that weapons and cleaning stores are issued, then
all essential lessons can bo taught by improvising where And
when necessary. For details Ш heading " Stores Improvise*
tion " under the different lesAuns,
Drill cartridges
7. Where these do not exist, the whole training can fat?
carried out without them, but every effort shtnild be ffiftdn
to obtain them for use.
CHAPTER I.—MAINTENANCE
(LESSONS 1 AND 2)
Object.—To teach the soldier from the beginning of
his service that he must take proper carq of his weapons Au
that they are always at the maximum efficiency for killing
the enemy.
But ЗНэд
4
LESSON 1.—CLEANING
Instructor's Notes
Stores.—
All cleaning materials.
Safety precautions (see General Notes for InstructM\t
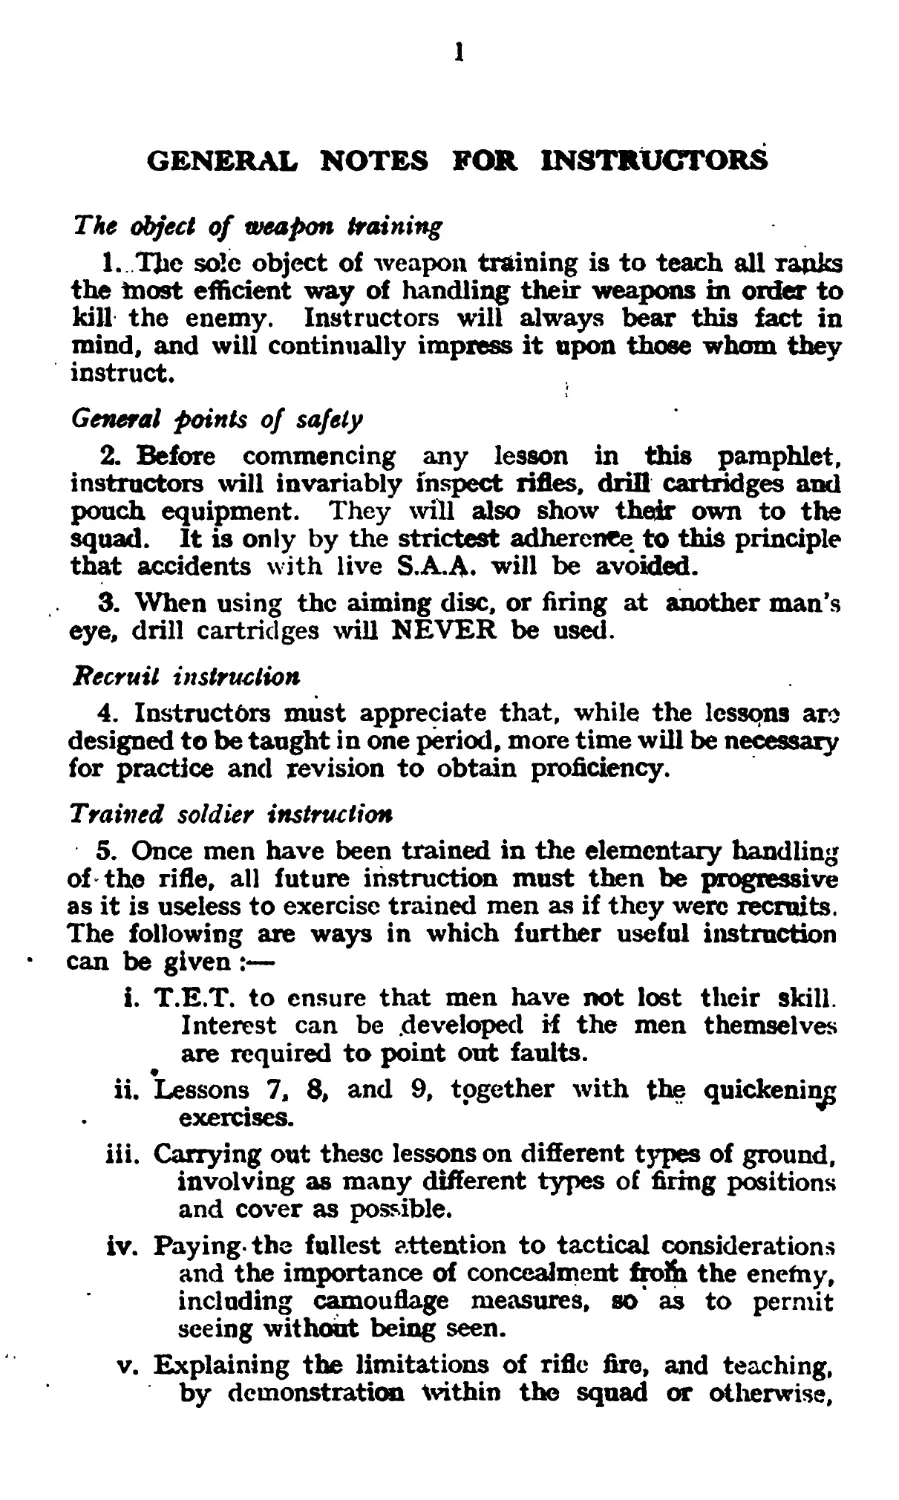
Name all parts of the rifle as dealt with. This '
to all rifle instruction (see Fig. 1). , >
1. Explain that if the rifle is cleaned and handled'ТОЦЙЫу
it is capable of a high and accurate rate of fire. । ,
If, as will normally be the case, the men of the 3quod hfcv n
previously witnessed a demonstration ti> show “1
rifle fire, reference will be made to it. Otherwise, thfc Squad
will be told the grand effect of the fire delivered by ЭДшЬЬ
men whote weapons are in the best possible COndltlctfL
Explain an<l demonstrate with squad imitating 1=-
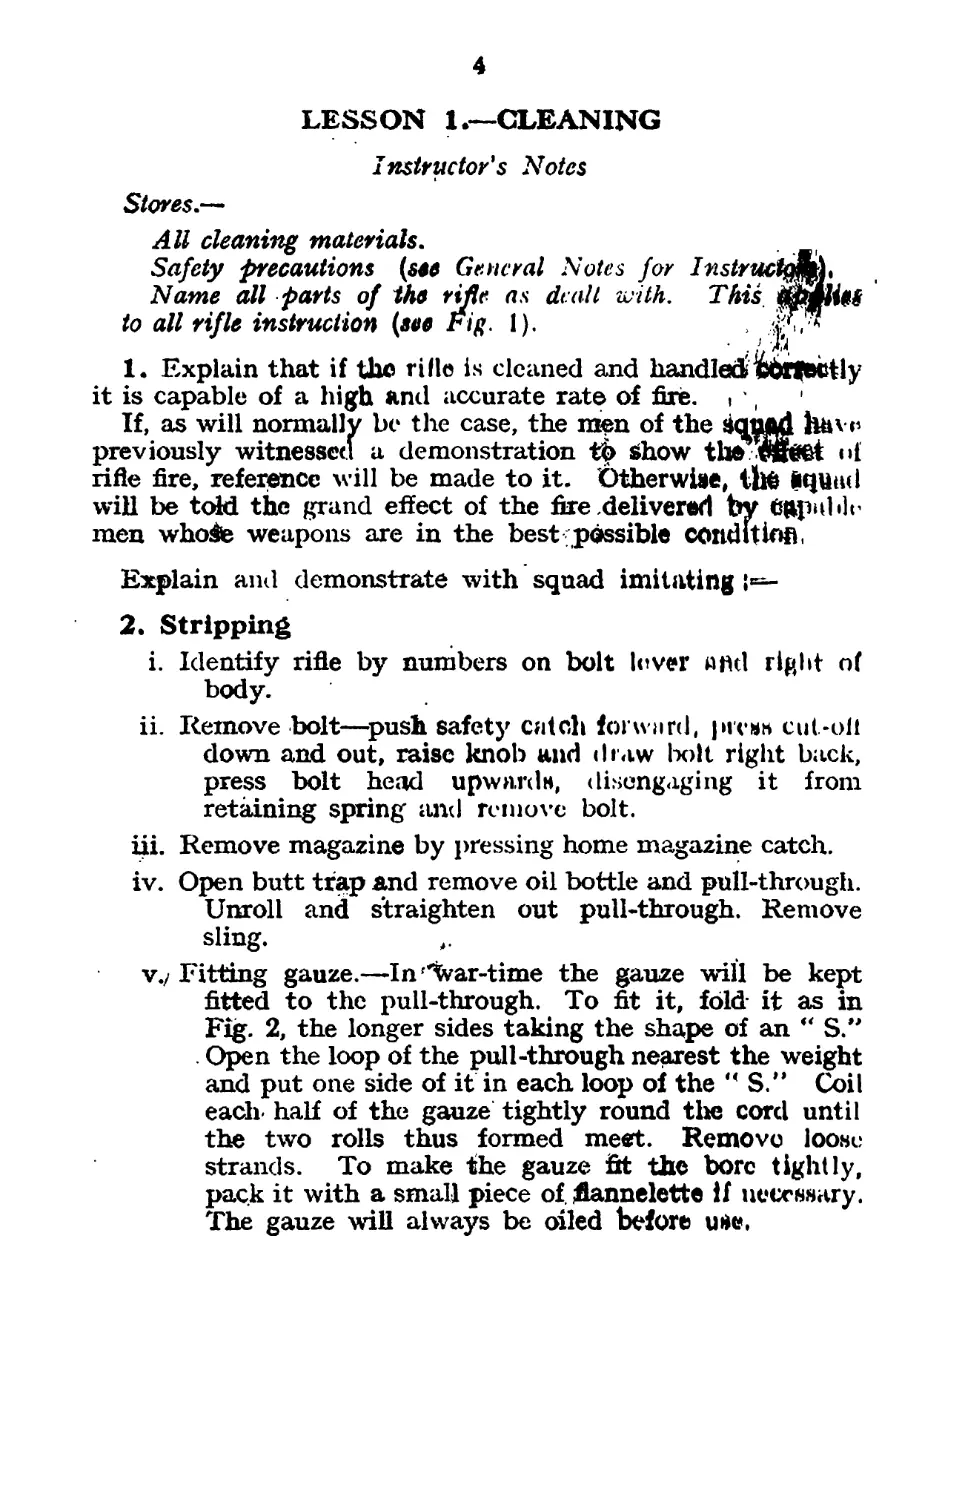
2. Stripping
i. Identify rifle by numbers on bolt lover «nd right of
body.
ii. Remove bolt—push safety catch forward, press cut-oil
down and out, raise knob and draw bolt right back,
press bolt head upwards, disengaging it from
retaining spring and remove bolt.
iii. Remove magazine by pressing home magazine catch.
iv. Open butt trap and remove oil bottle and pull-through.
Unroll and straighten out pull-through. Remove
sling.
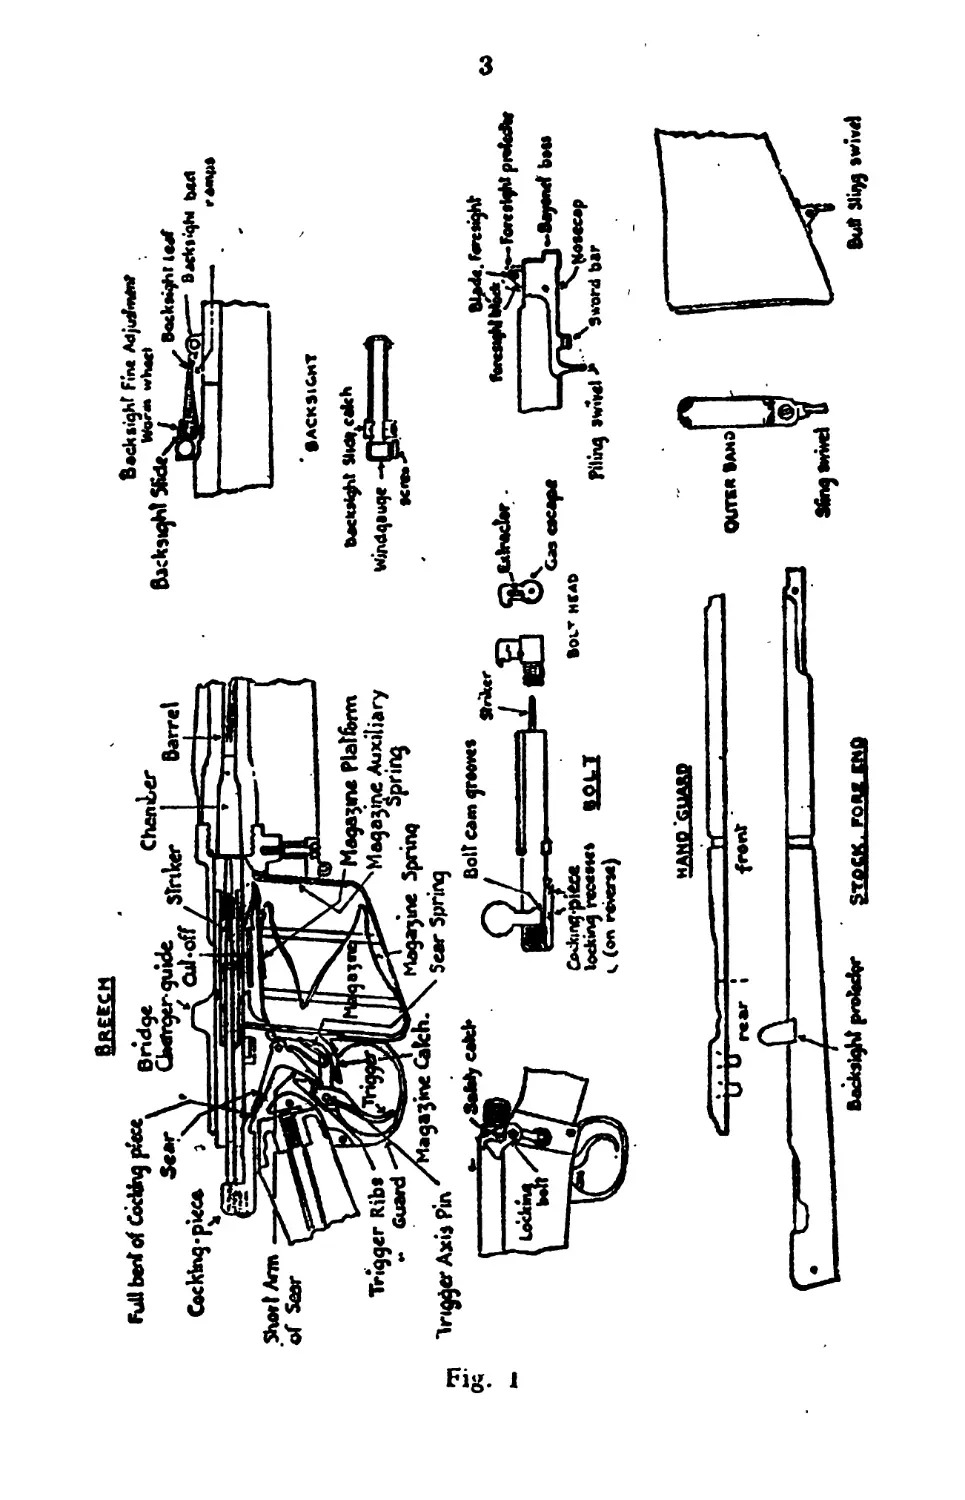
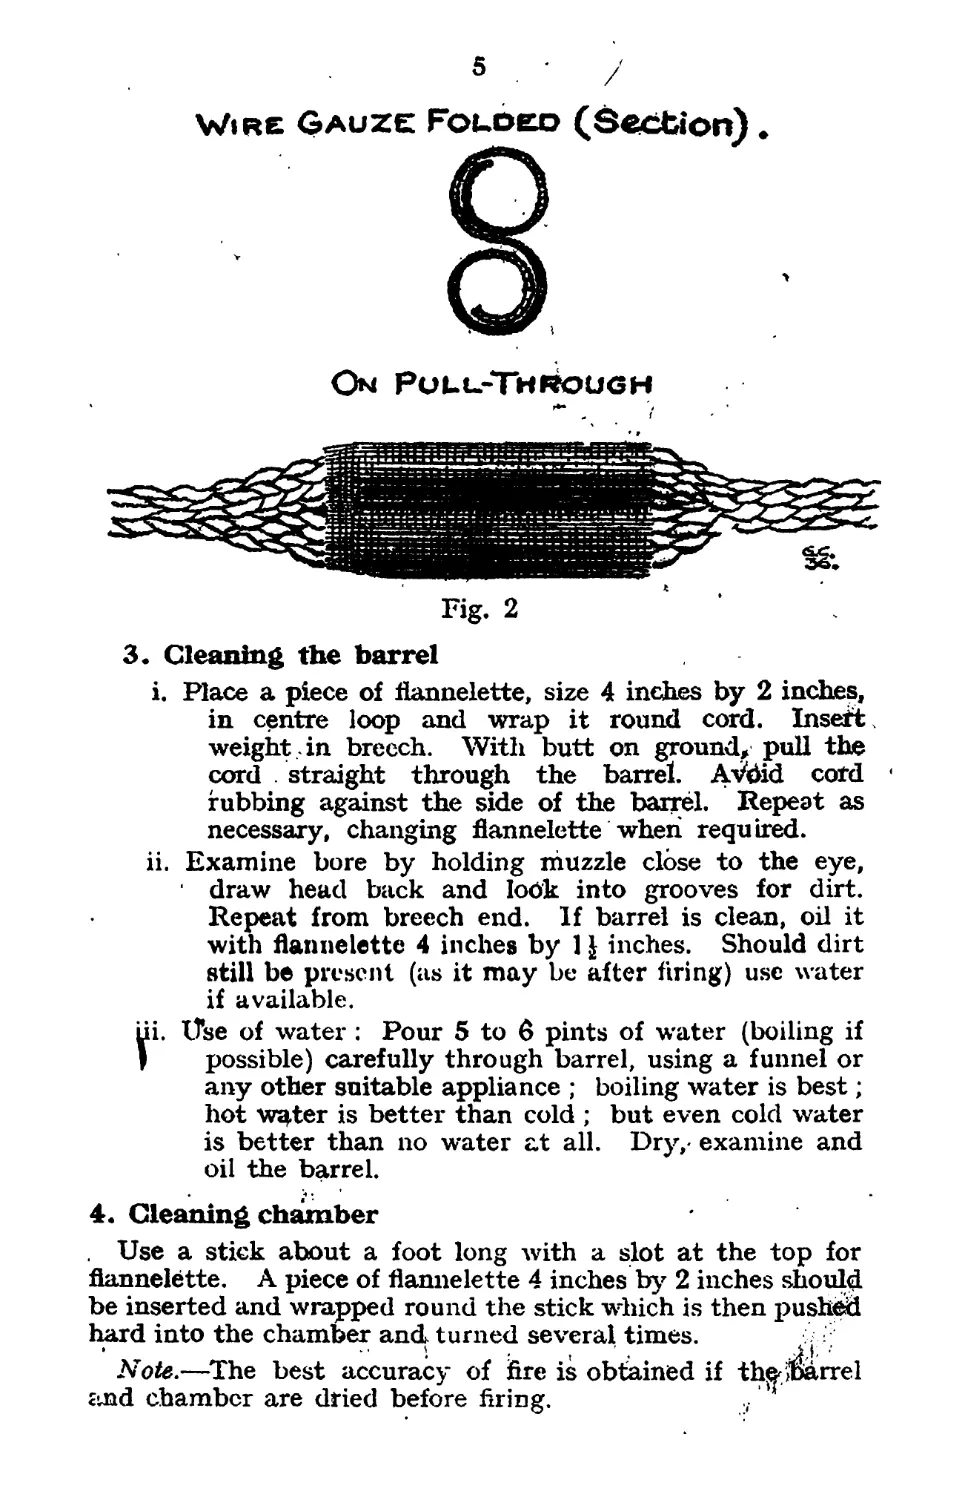
v./ Fitting gauze.—In f<War-time the gauze will be kept
fitted to the pull-through. To fit it, fold it as in
Fig. 2, the longer sides taking the shape of an ° S.”
. Open the loop of the pull-through nearest the weight
and put one side of it in each loop of the и S.” Coil
each< half of the gauze tightly round the cord until
the two rolls thus formed meet. Remove loose
strands. To make the gauze fit the bore tightly,
pack it with a small piece of. flannelette if necessary.
The gauze will always be oiled before use,
5
Wire Gauze Foudeo (Section).
3. Cleaning the barrel
i. Place a piece of flannelette, size 4 inches by 2 inches,
in centre loop and wrap it round cord. Insert
weight in breech. With butt on ground, pull the
cord straight through the barrel. AVbid cord
rubbing against the side of the barrel. Repeat as
necessary, changing flannelette when required.
ii. Examine bore by holding muzzle close to the eye,
draw head back and look into grooves for dirt.
Repeat from breech end. If barrel is clean, oil it
with flannelette 4 inches by 1J inches. Should dirt
still be present (as it may be after firing) use water
if available.
ni. Use of water : Pour 5 to 6 pints of water (boiling if
) possible) carefully through barrel, using a funnel or
any other suitable appliance ; boiling water is best;
hot water is better than cold ; but even cold water
is better than no water at all. Dry,- examine and
oil the barrel.
4. Gleaning chamber
. Use a stick about a foot long with a slot at the top for
flannelette. A piece of flannelette 4 inches by 2 inches should
be inserted and wrapped round the stick which is then pushed
hard into the chamber and turned several times.
Note.—The best accuracy of fire is obtained if the'Marrel
Sind chamber are dried before firing.
G
5. Cleaning outside of rifle
After cleaning barrel and chuinber, wino the (Hit from
all metal portions, using an oily rug. Mnkr cvrtuin all
crevices and gas escapes are clcnn,
6. Cleaning and replacing of bolt and magasino, etc.
i. Bolt.—Dirt and grit must Im removed Inmi all parts.
Oil it, except in dusty < li mutes.
ii. Magazine.- Remove dirt finui inside and outwidc,
if necessary remove plalfonn and spring by pressing
down wide end. Narrow end is then disengaged
from front lips. Remove platform and spring
carefulfy. Replace in reverse order. It should
only be removed when necessary.
iii. Replace bolt.—See that number corresponds with
body number. Head should be screwed fully home.
See that cocking piece is in line with steel lug and
safety catch forward. Push bolt into the body
till it meets the charger guide, turn down the bolt
head, draw it back to resisting shoulder, press it
right down. Close cut-off. Push bolt forward and
down. Press trigger and put safety catch back.
iv. Replace magazine.—Front end first into magazine
opening. Press fully home and test it to ensure
it is engaged.
v. Replace oil-bottle head first, then roll up pull-through
by holding end of cord in the hand with about
1 inch below the bottom of the hand. Roll loosely
once round the hand. Slip coil off and twist
remainder of cord tightly round it, leaving enough
to allow the weight to drop easily into the recess in
butt trap. Push cord into the trap, leaving loop
end uppermost and close the trap. Replace sling.
7. Explain the rifle must be examined and cleaned at
frequent and regular intervals, particularly after recent
firing. /
8. Action during and after gas attack
During :—
To keep weapon in working order all parts should be well
oiled.
After :— ' .
If splashed with blister gas, weabonmust be decontaminated
as follows :—
i. Rub anti-gas ointment into the hands; leave a
visible film of ointment on the hands.
ii. Unless the sling is heavily contaminated it should
remain on the rifle, all free liquid being removed
with a swab, and ointment applied to the contamina-
tion on both sides of the sling.
iii. Remove all free liquid from the rifle with any available
swab (grass, etc.). The personal issue of cotton
waste should not be used.
iv. Rub the contaminated portions of the rifle with oint-
ment vigorously. The ointment should be rubbed
well into the woodwork.
v. Remove ointment from the metal parts of the rifle
with a swab and re-oil. Do not remove ointment
from the woodwork.
vi. Wipe off surplus ointment from the hands with cotton
waste, then rub more ointment int6 the hands for
half a minute.
9. Ammunition
All free liquid should be swabbed off and the ammunition
used as early as possible.
10. Practise and question squad.
LESSON 2.-EXAMINATION OF THE RIFLE
(For officers and N.C.Os, only)
All officers and N.C.Os. must possess a thorough knowledge
of the inspection and rare of rifles. Young officers will be
instructed by the armourer 'and N.C.Os. by a qualified
instructor in the various components of the rifle as below :—
ч i. With the barrel dry, examine it for rust, cuts, bulges
' and. fouling.
ii. Foresight; that blade is not deformed and that nose
cap is not loo-н .
iii. Backsight, for firmness ; that it is not bent; that
slide moves smoothly ; that thumb-piece and fine
adjustment worm work freely and engage in i a< к on
side of leaf; and that “ U *’ is not deformed.
iv. Magazine ; that platform works freely ; also magazine
catch ; auxiliary spring present.
v. Bolt; that at beaiis same number as body ; and that
bolt works smoothly.
8
vi. Sear ; that it holds cocking-piece back securely when
bolt is driven forward sharply to closed position.
vii. Cocking-piece ; for firmness on striker.
viii. Cocking-piece and striker; that they fly forward
freely on pressing the trigger. Test both the
pressures of the latter.
ix. Striker point; that it is correct shape and projects
sufficiently through face of bolt-head ; also extractor
and spring.
x. Safety-catch and locking bolt; that safety-catch
engages in camway of bolt and locks it; that it
does not move too easily; and that cocking-piece
is withdrawn slightly to rear when locking bolt
is applied, whether it is at " full cock ” or " fired ”
position.
xi. Stock, fore-end and butt; general condition and butt
not loose.
CHAPTER II,—AIMING INSTRUCTION
(LESSONS 3 AND 4)
1. Object.—To teach the soldier to aim correctly in order
to kill the enemy.
2. Aids.—Instructors should draw or use diagrams to
illustrate rules.
3. Standard of accuracy.—Accuracy must always be
insisted upon. Targets should be made more difficult as
progress is made. The necessity for aiming off the target
for wind, etc., should be constantly kept before the man's
mind after the early lessons have been completed. Sights
should be frequently inspected to see that they have been
adjusted as ordered.
4. Aim corrector.—When used, the aim corrector will be
placed on the rifle behind the backsight with the reflector
glass to the left, sights being raised to about 400 yards to
give a clear view.
5« Stores improvisation
Aiming Rests and Tripods.
If not available, use a 6-foot table with a filled sandbag on
the forward and rear edges. The man under instruction sits
on a form or chair. If sandbags are not available, use folded
greatcoats, blankets or waterproof} sheets. Grooves cut in
old boxes is another method which may be used.
9
Targets.
Targets representing enemy can be painted on the sides of
walls and buildings, or the regulation paper may be used and
pinned on.
Nates—1. The above applies to all lessons of aiming.
2. Should the correct full distances not be obtainable,
then the size of the targets must be reduced
proportionately.
Я. Auxiliary targets and figures for Lesson 4 can be
made from sheet metal, wood or cardboard.
LESSON 3_______THE CORRECT AIM
Instructor’s Notes
Stores.—
Figs. 5, 4a, ,3 at 100, 200, 300 yards respectively, and
Figs. 2 at 400 and 500 yards. Aiming rests and tripods.
Safety precautions (see General Notes for Instructors).
Method of checking aims.—
If a man has not aimed correctly, tell him to look again.
Should he not see his mistake convince him by placing a piece
of paper in front of the muzzle.^ Tell the man to get his eye
over the heel of the butt. He should then move his head until
the top of the foresight is in the middle of the " U 99 and in line
with the shoulders. Then remove the paper quickly-^after
a slight pause replace it and point out where the shot would
have gone. If an aim is approximate to the centre of the
target, consider it as correct.
I. Sightsetting
i. Explain and demonstrate, with squad imitating:—
J Before aiming, the backsight must be set to the
range required. Draw back the rifle so that the
sights can be clearly seen. With the left thumb
press the stud on the left of the slide and move the
slide until the line in centre is even with the mark
on the leaf for range ordered. Ensure that it is
firmly fixed. If slide, adjusted to a range, does not
exactly agree with the line on the leaf, adjust it by
pressing in stud on slide with left thumb, at the
same time turn worm wheel. Do not press the stud
too far home or the slide will not move. Ensure
that the above is carried out with the minimum of
movement.
10
ii. Practise squad.
2. Aiming
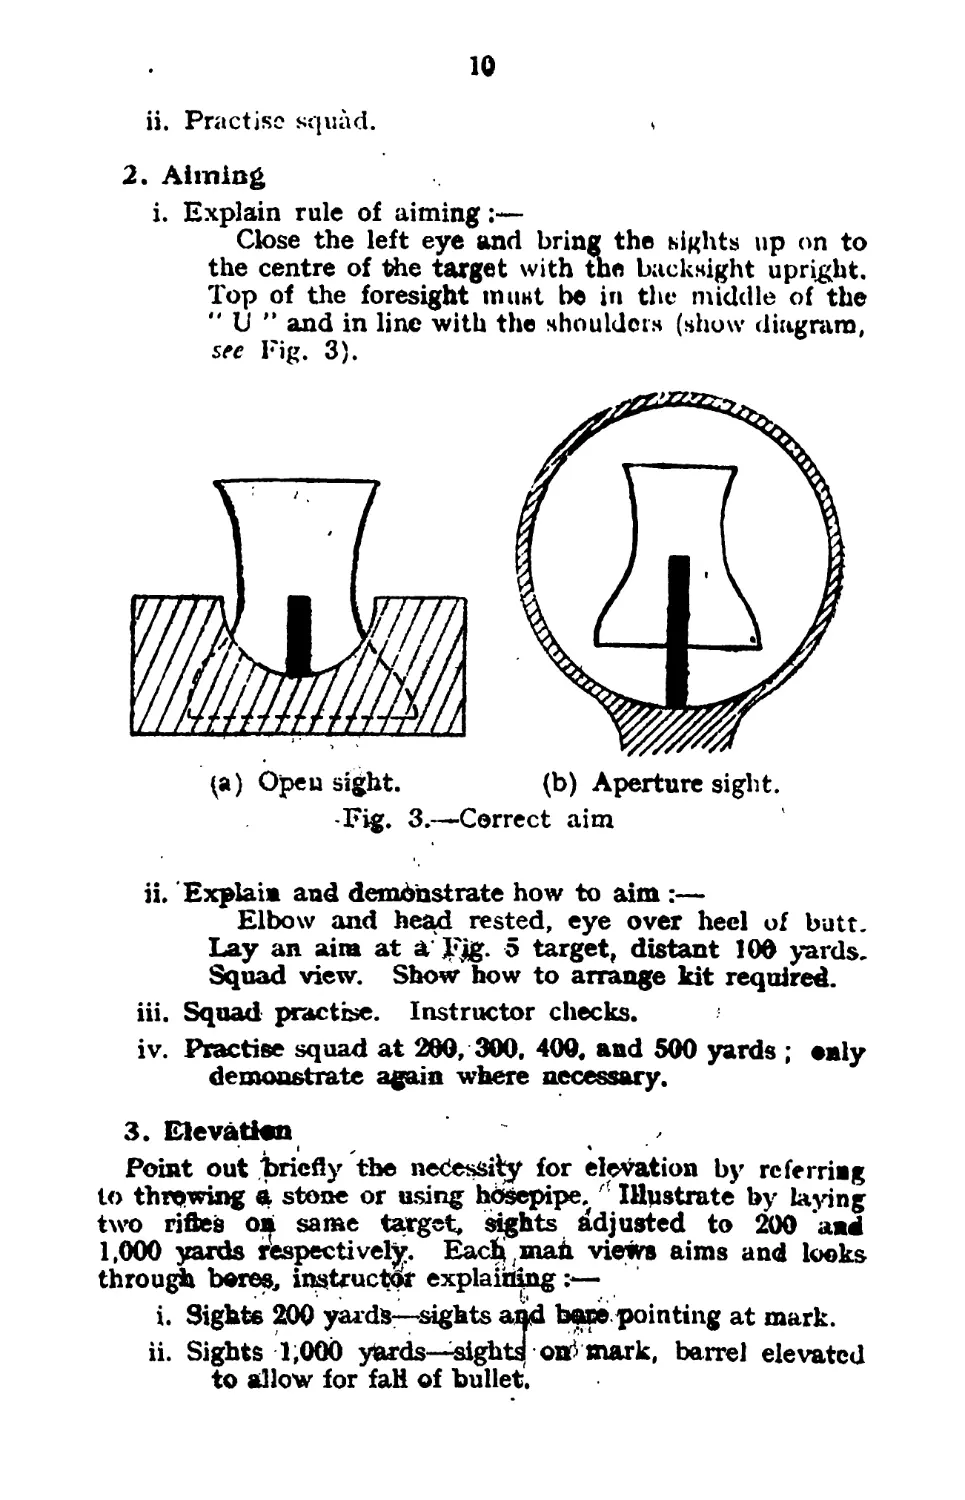
i. Explain rule of aiming;—
Close the left eye and bring the sights up on to
the centre of the target with the backsight upright.
Top of the foresight must be in the middle of the
“ Li ° and in line with the shoulders (show diagram,
sec Fig. 3).
Fig. 3.—Correct aim
ii. Explain and demonstrate how to aim :—
Elbow and head rested, eye over heel of butt-
Lay an aim at a JFjg. 5 target, distant 100 yards.
Squad view. Show how to arrange kit required.
iii. Squad practise. Instructor checks.
iv. Practise squad at 260, 300, 400. and 500 yards ; enly
demonstrate again where necessary.
3. Elevation
Point out briefly the necessity for elevation by referring
to throwing 9, stone or using hosepipe.,4 Illustrate by laying
two rifles on same target, sights adjusted to 200 and
1,000 yards respectively. ЕасЬутап views aims and looks
through boros, instructor explaining ?—
i. Sights 200 yards—sights and base pointing at mark.
ii. Sights 1,000 yhrds—sights) oni mark, barrel elevated
to allow for faH of bullet.
11
4. Altering sights " '
Point out that extra or less elevation is, therefore, obtained
by altering sights and this should be done wheri rifle is shooting
high or low. A correct aim is itill taken.
i. If rifle shodts low, raise sights 100 yards and Are again.
Repeat until target is hit.
1 ii. Reverse procedure if rifle shoots high.
iii. Give problems and practise squad, insisting on correct
aim being maintained. As progress is made, altera-
tion of sights and fresh aims should Ьё carried out
quickly.
LESSON 4.—AIMING OFF
Instructor's Notes
Stores.—As for Lesson 3./^
Safety precautions (sec General Notes for Instructors).
If possible, before lesson commences, arrange for correct
/ position of auxiliary in para. 5 of the lesson—aiming downr
This can be done by aiming down 1 figure's heighten# placing
auxiliary or some other object there. Then mark the spot.
1. Aiming off for wind
i. Explain:—
Wind has the same effect en a bulifet й it has on
a football, only to a much lesser degree, The
bullet, therefore, is carried off its course to the
target by the wind. To counteract this the firer
must aim off into the wind.
ii. Each individual is responsible at al times for making
the necessary allowance for wind when engaging
the enemy.
iii. The following rules are a guide for service conditions.
. They must Ъё applied with common sense according
I to the strength and direction of the wind. They
apply to direct or oblique cross winds, no allowance
being necessary for head or rear winds. The firer
can tell the direction of wind by its effect on his face
or on grass, smoke from weapons, etc.
(a) Und^ 200 yatfds—no aim off Ц required.
(b) From 200-460 yards inclusive—aim off 1 man's
width from the centre.
(c) Over 400 yards—aim off 2 men's widths frdm the
centre.
12
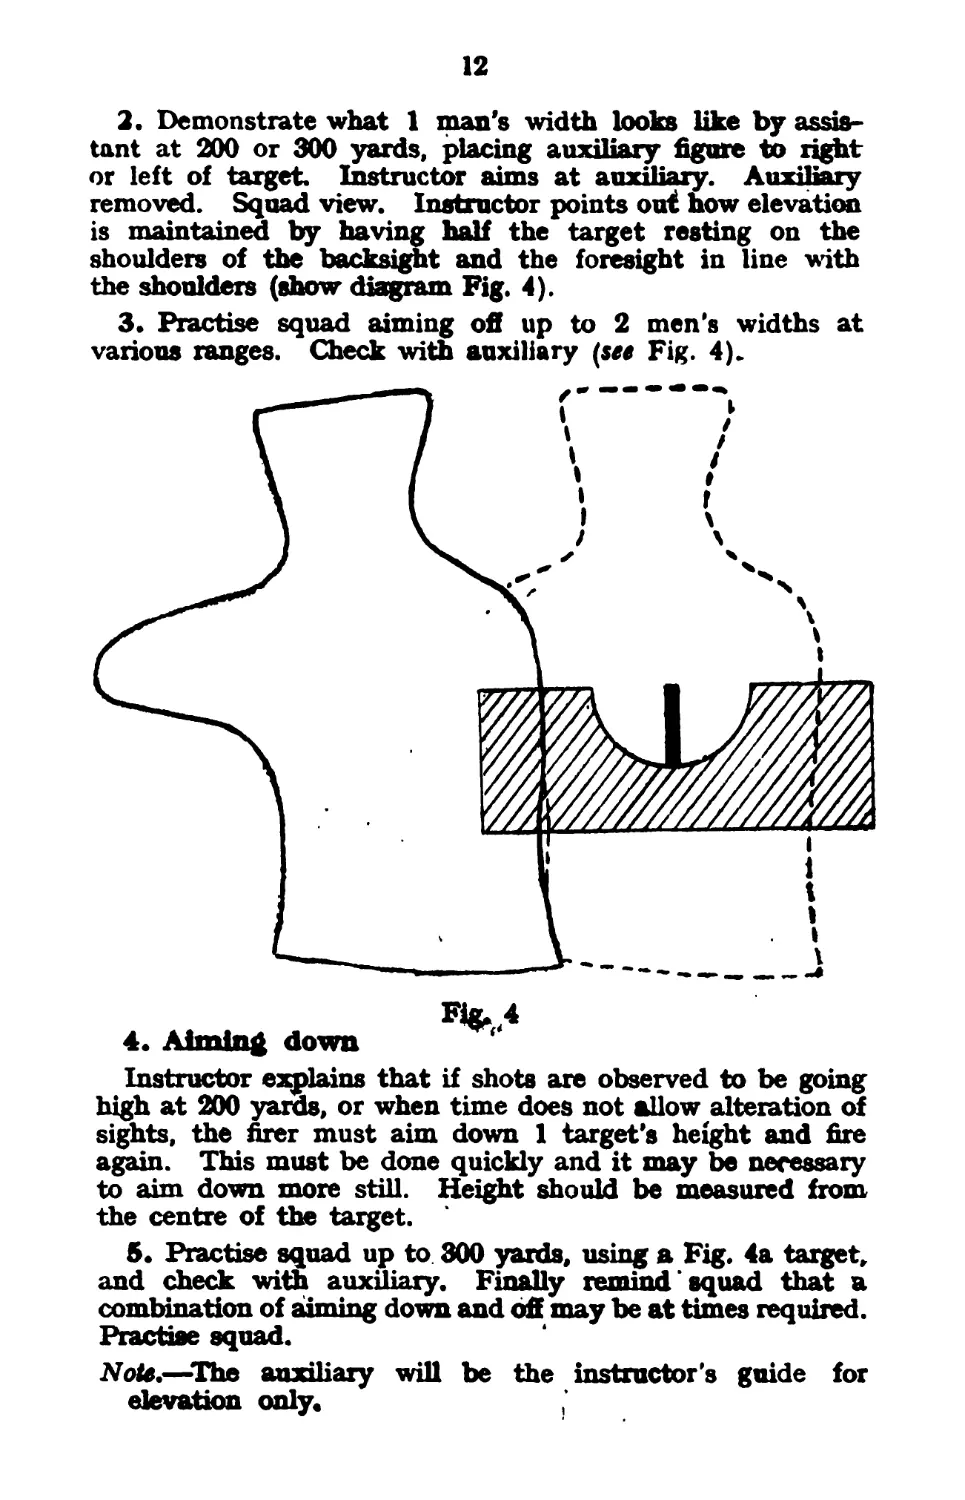
2. Demonstrate what 1 man's width looks like by assis-
tant at 200 or 300 yards, placing auxiliary figure to right
or left of target. Instructor aims at auxiliary. Auxiliary
removed. Squad view. Instructor points out: how elevation
is maintained by having half the target resting on the
shoulders of the backsight and the foresight in line with
the shoulders (show diagram Fig. 4).
3. Practise squad aiming ofi up to 2 men's widths at
various ranges. Check with auxiliary (see Fig. 4).
Instructor explains that if shots are observed to be going
high at 200 yards, or when time does not allow alteration of
sights, the firer must aim down 1 target's height and fire
again. This must be done quickly and it may be necessary
to aim down more still. Height should be measured from
the centre of the target.
5. Practise squad up to 300 yards, using a Fig. 4a target,
and check with auxiliary. Finally remind squad that a
combination of aiming down and off may be at times required.
Practise squad.
Note.—The auxiliary will be the instructor’s guide for
elevation only.
13
CHAPTER III.—FIRING INSTRUCTION
LESSONS 5 TO 9
1. Object
To teach the soldier to fire effectively from any type of
cover and to ensure by practice that his actions in battle will
be instinctive, so that all his thoughts can be concentrated
on how best to kill the enemy.
2. Use of left shoulder
A man with normal vision learning to use the rifle can be
taught to fire from the right shoulder, for which the rifle is
constructed, as easily as from the left. Any inclination to
use the left shoulder will, therefore, be discouraged.
3. Fitting rifles
Rifles have long, normal and short butts, and will be issued
to men according to their build. The readiness with which
the firer can bring his rifle into the aim without having his
nose and mouth too close to the thumb and fingers of his
trigger hand, will indicate the suitability of the size of his
rifle. This test will be made under the supervision of ah
officer as soon as the recruit has .been taught how to fire in
the lying position^ or whenever a new rifle is issued to him.
4. Declaration of aim
As soon as the man has been taught how to press his trigger
he will be informed that, in all firing instruction* he will have
to declare his exact aim at the moment the second pressure
has been takeh, except in rapid fife. The importance of a
truthful declaration must be emphasized. Instructors must
set a good example, taking care not to acquire a habit of
automatically declaring their own shots correct when demon*
strating to young soldiers. This applies to individual but
not colld|ptive training
5. Quickening exercises
The instructor will impress on his men the necessity for
speed at the first available opportunity. This will only come
with constant practice. Therefore the last few minutes of
each lesson should be devoted to quickening up in all move-
ments, particularly in getting down and up again, loading,
etc. These exercises should occasionally be carried out
wearing respirators.' Examples of such exercises, which are
left to the discretion of instructors, are given in Chapter V.
14
6. During all firing instruction the soldier will be dressed in
battle order.
7. During Bring the instructor will continually check
aiming and trigger release by means of an aiming disc. Drill
cartridges will NOT be usal when aims an» living checked
with an aiming disc.
8. After the initial lessonftin loading, the rille can be loaded
in any convenient position, such as standing, providing safety
is considered, i.e. muzzle pointed upwards.
LESSON 5.—LOADING AND UNLOADING
Instructor's Notes
Stores.—
Suitable targets for eack man and instructor.
Safely precautions (see General Notes for Instructors}.
Explain how to fill chargers (see Fig. 5).
Extend squad to two paces ; allot targets.
Suitable targets for instructor and each man
15
This lesson can be taught on any rough grbund. Speed is
essential in getting down, loading, etc.
1. Explain and demonstrate, with squad imitating.
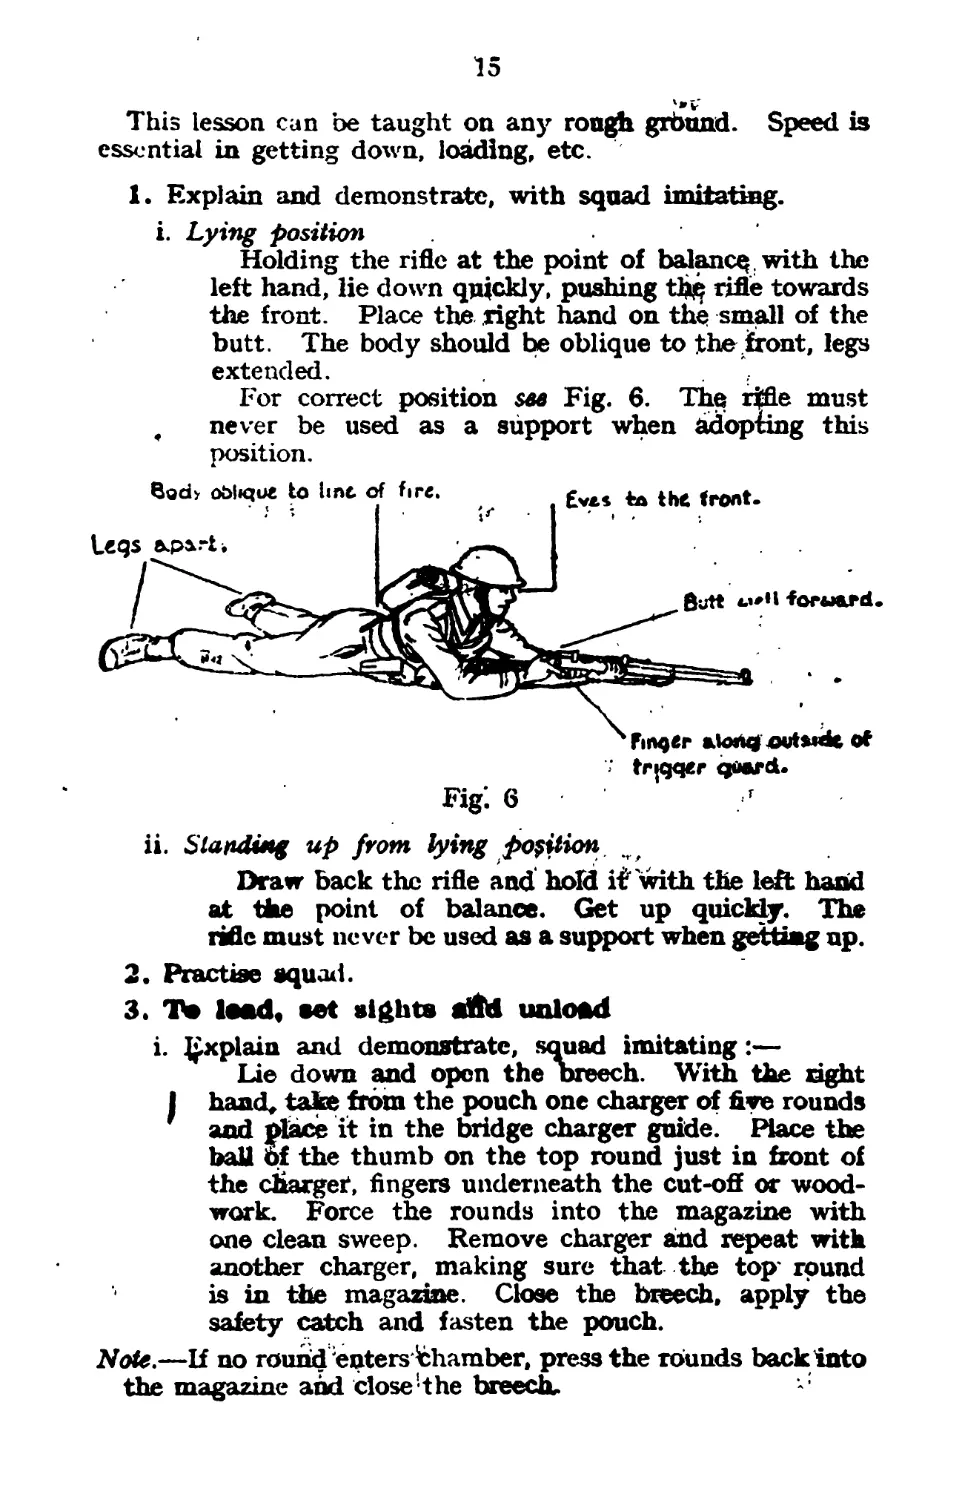
i. Lying position
Holding the rifle at the point of balance, with the
left hand, lie down quickly, pushing tlj^ rifle towards
the front. Place the right hand on the small of the
butt. The body should be oblique to the front, legs
extended.
For correct position sm Fig. 6. The rifle must
, never be used as a support when adopting this
position.
ii. Standing up from lying position
Draw back the rifle and hold if with the left hand
at the point of balance. Get up quickly. The
rifle must never be used as a support when getting up.
2. Practise squad.
3. Ta lead, set sights ritd unload
i. Explain and demonstrate, squad imitating:—
Lie down and open the breech. With the right
I hand* take from the pouch one charger of five rounds
' and place it in the bridge charger guide. Place the
ball bf the thumb on the top round just in front of
the charger, fingers underneath the cut-off or wood-
work. Force the rounds into the magazine with
one clean sweep. Remove charger arid repeat with
another charger, making sure that the top round
is in the magazine. Close the breech, apply the
safety catch and fasten the pouch.
Note.—If no round enters Chamber, press the rounds back into
the magazine and close'the breechu
16
ii. To set the sights
When the range is ordered, draw back the rifle
until the sights can be clearly seen and set the sights
with, the minimum movement, and resume the
correct position.
iii. To unload
Pull the bolt backwards and forwards quickly
without lowering the lever until all rounds are clear
of the magazine and chamber, close cut-off, breech,
press trigger and apply safety . catch. Lower the
sights and stand up.
4. Practise squad.
5. Alternative methods of loading and unloading
Explain and demonstrate, with squad imitating:—
i. Loading and unloading in the standing position. As
in the lying position, but with the rifle kept pointing
upwards.
ii. If unloading in a muddy trench or in the dark, etc.,
remove the magazine, open breech slowly and remove
round from chamber. Close cut-off and breech,
press trigget and apply safety catch. Empty the
magazine and replace it in the rifle.
LESSON 6.—HOLDING AND TRIGGER PRESSING
Instructor's Notes
Stores.—
Suitable targets for each man and instructor. Aiming
disc. Safety precautions (see General Notes for Instructors).
Extend squad to two paces, allot targets.
To get the eye back from the cocking piece :—
i. Raise the head and draw it back,
ii. Raise the butt higher in the shoulder,
iii. Turn the body less obliquely to the target,
iv. If these methods fail try to get a longer butt.
Stores Improvisation
Aiming disc.—
Any short strip of tin or cardboard, about an inch wide
and a few inches long.
Paint one side grey with a brown figure 5 on it.
Make a small hole in the centre^ of the figure 5.
17
1. Holding and trigger pressing
i. Explain:—
Correct trigger pressing is essential for accurate
shooting. The rifle must be kept still during the
pressing of the trigger. This can only be done
by having a firm grip with both hands, particularly
the right hand. The trigger has two pressures which
are termed the first and second pressures.
Give order ° Without drill cartridges—load—
200.”
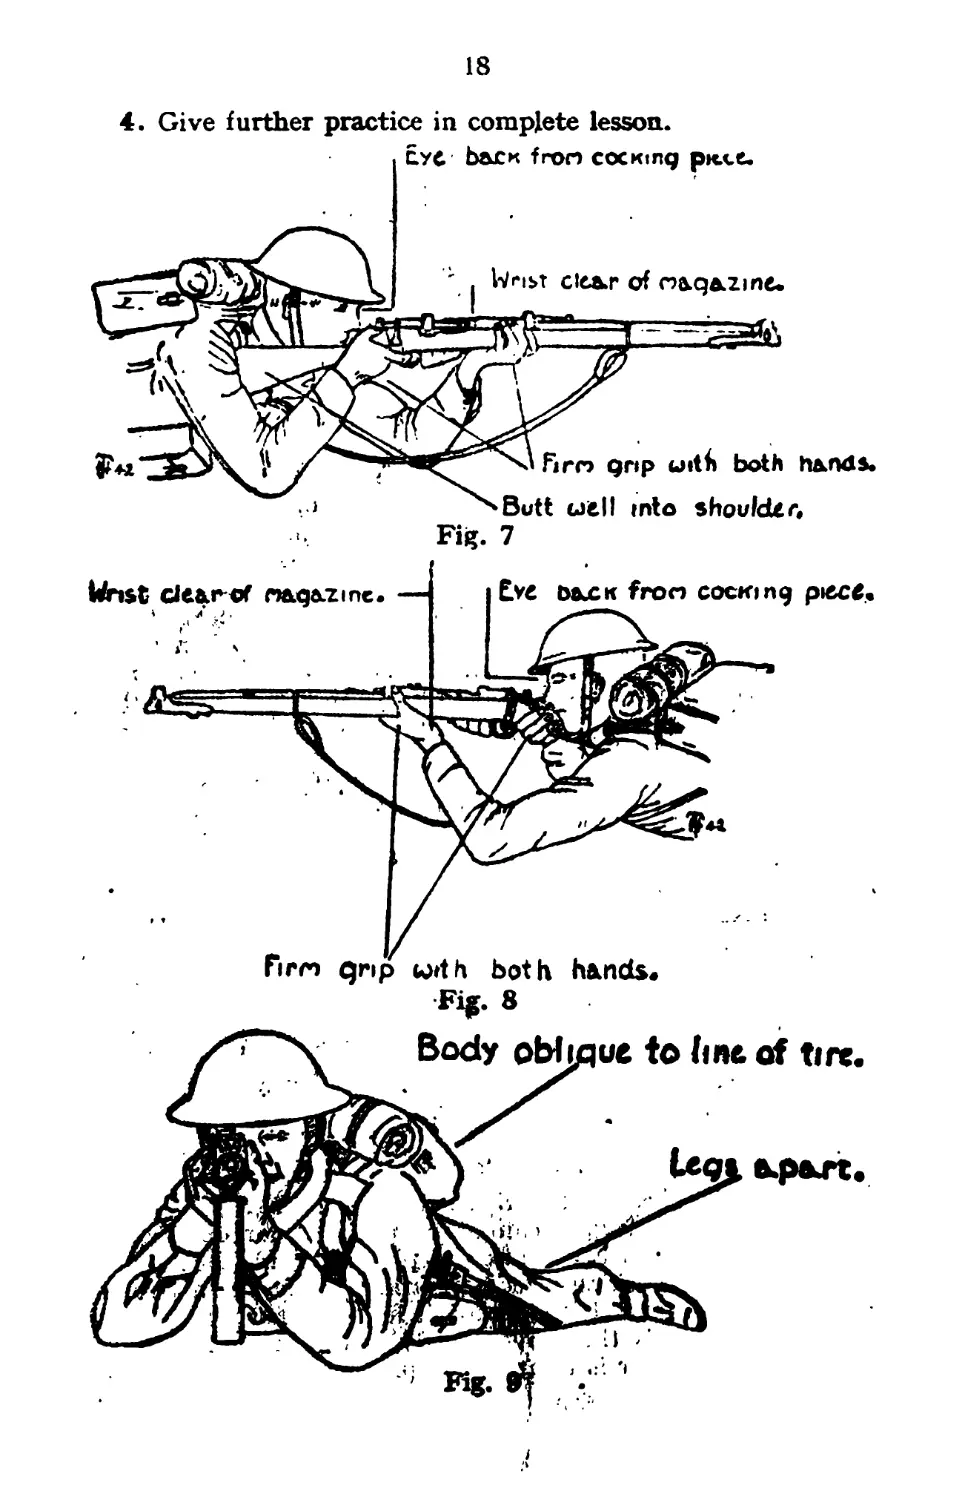
ii. Explain and demonstrate, squad imitating:— .
. Look to the front and push forward the safety
catch. Lift the rifle so that the butt comes quickly
into the shoulder. Pull well in with both hands,
the wrist of the left hand being clear of the magazine.
Without releasing the grip of the right hand, place
the first joint of the forefinger round the lower part
of the trigger and squeeze with the whole hand until
there is a distinct check to the trigger. This is the
first pressure, and will always be taken when the
butt is in contact with the shoulder. Lower the
cheek to the butt, keeping the eye well back from the
cocking-piece. Close the left eye and aim. [See
Figs. 7, 8, 9.] When the aim is correct, restrain
the breathing and continue the steady squeeze with
the right hand until the cocking-piece goes forward.
Notice where the sights are pointing at this moment
and declare truthfully high, low, etc. (This only
applies to slow firing.) Hold the rifle firmly in the '
shoulder with left hand and, keeping the head still,
open and close the breech quickly, avoiding un-
necessary movement. Tilting the rifle slightly to
the right will assist in reloading. Lower the rifle
to the ground.
2. Practise squad. Instructor checks each man with aiming
disc. Drift cartridges will NOT be used,
3. Half cock and how to remedy
Explain and demonstrate, with squad imitating.
At half cock the trigger cannot be pressed, nor can the
breech be opened, until the action is placed at full cock by
drawing back the cocking-piece. If firing, apply the above
remedy and continued If the Station is found at half cock on
other occasions, apply the above remedy, but open the breech
to ensure the chamber is clear before pressing the trigger.
18
4. Give further practice in complete lesson.
Eye bauCK fron cocKinq pic.ce.
Fig. 7
Fig. 8
19
LESSON 7.—FIRING FROM LOW COVER
Instructor's Notes
Stores,— '
Suitable targets for each Utah and instructor.
Safety precautions {see GeneraljNotes for Instructors}.
This lesson should be carriedout using low covtir,such as
banks, folds in the ground, etc. Do not insist ondtUi move-
ments. Criticism and corrections will be madeby questioning
men, thus making them use their ovbn intelligence. Bayonets
will be fixed gs progress is made. Give order “ load ” {see
Chap. 3, Sec, ^.'^paad on right side of cover.
1. Explain:—
The object of firing from cover is to kill7the enemy while
presenting the smallest possible target to his view or fire.
Soldiers must be trained to fire from natural cover^suqji as
banks and ditches or from artificial cover such as trenches,
shell holes, buildings, etc. A good fire position should
Permitfree use of the weapon. ‘
Have a good field of fire. ? #
Be inconspicuous.
Be bullet proof
Be easy to move from.
There are two main points for the soldier to remember when
using cover.
i. Correct resting of the rile.
ii. No undue movement'dr exposure. This necessitates
modification of the firer’s position to suit the cover.
This ifceon deals with all types ot low cover.
. I
2. Explain abd demonstrate :—
Position Of observattan,^4Jsod when the firor(s) is watch-
у ing his front. On the commend “ Down ”, lie down
as quickly as possible behind the dover and crawl
forward so that the front can be seen without undue
movement or ехреецге. The ride is below cover with
the safety batch applied.
Position behind covejL—Used when the Sec. Comd. does
not want the whme of the section observing. On the
order " В&Ш cover " the whole oftho body and the
weapon ntast be completely concealed behind the
20
cover. If the order " Watch the front " is given get
back into the ° Position of observation ” again.
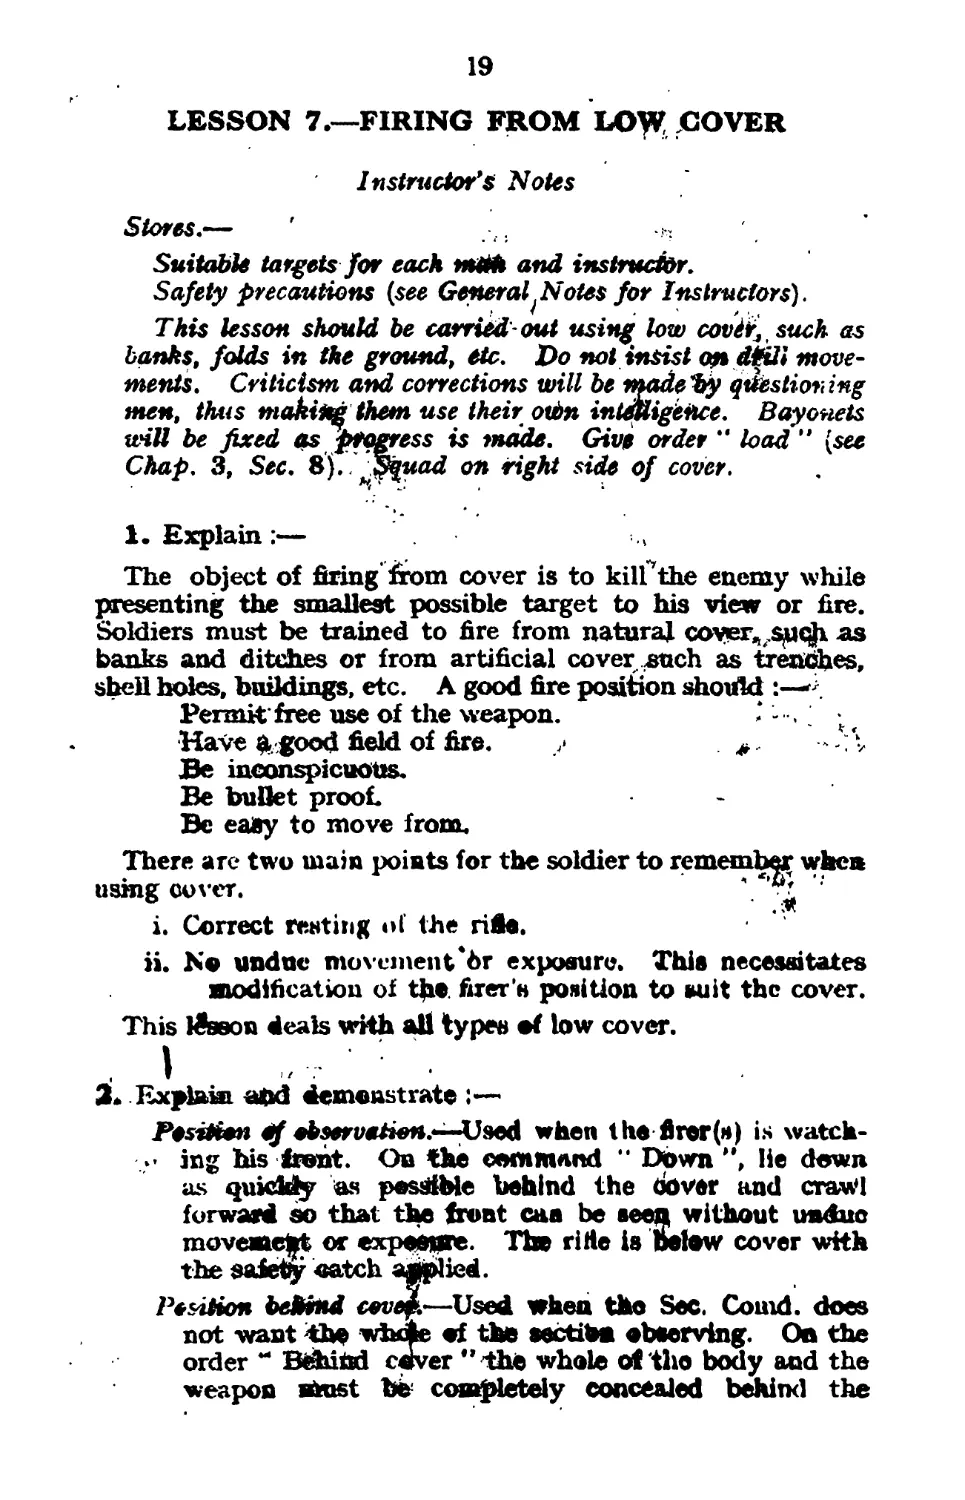
Position of readiness.—On the " Range ” being ordered,
or, if acting individually, set the sights to the estimated
range and slide the rifle cautiously forward over the
cover and adopt a position as near to the “ Loading
position " as possible, safety catch forward. On the
target being indicated, aim. The left wrist and hand
should be rested on the cover if possible. If the cover
is hard, then the , rifle is rested as near the point of
balance as possible, fore end cleat of cover. The left
hand should be clear of the magazine and hard against
the cover, both elbows being rested if possible. When
firing from a fold in the ground the body and rifle
should be back behind the crest, with the muzzle just
above the crest of the cover (see Fig. 10).
Huzzie of nfle todctr ceutn
Fig. 10
On the order to fire, carry on as taught in Lesson в. If
Eble, keep the rifle in the shoulder all the time during
j, as this will restrict movement and not draw the enemy's
attention. Slow fire is only five rounds per minute. On we
order ° Stop ” being given, load with a further five rounds,
if there are only five rounds or less in the magazine. This
will be done with the rifle on the cover, avoiding unneces-
sary exposure, the safety catch being left forward. The soldier
must count the number of rounds fired so that he will know
when to load with a further five rounds. The order to
** Advance ”, ° Watch the front ” or “ Take cover ” may now
be given, when the safety catch will be applied.
3. Practise squad.
4. i. Explain
In action, the enemy may only expose themselves
for a very short space of tilhe. It follows that the
soldier must be trained to [fire quickly as well as
accurately. This type of firing is exactly the same
as slow in principle, but the time for aiming must be
21
reduced to a minimum, and the general handling of
the rifle speeded up.
ii. Explain and demonstrate (in firing position, with
squad on right side) :—
On the order “ Rapid fire ”, fire as quickly as
possible, consistent with accuracy. Quick reloading
is essential. Continue firing until the enemy dis-
appears or the order “ Stop ” is given.
5. Practise squad.
LESSON 8.—OTHER POSITlbNS
Instructor’s Notos
Stores.—
Suitable targets for each man and instructor.
Safety precautions (see General Notes for Instructors).
Give order “ load ” (see Chapter 3, Sec. 8). Squad on right
side of cover.
This lesson should be taught behind varying types of cover,
such as walls, trenches, windows, etc. The order of teaching
is immaterial, i.e. standing may be taught first.
1. Revise Lesson 7, para. 1.
’ 2. Explain and demonstrate :—
i. When high cover is met with, the firer will have to
alter his position to suit it, so that he can fire
accurately at the enemy. The methods of handling
and firing the rifle are exactly the same as taught in
Lesson 7. The positions which can be adopted will
be shown in this lesson.
ii. Kneeling and sitting.—” Positions of observation ”
“ Behind cover ” and ” Watch the front ” will be
carried out in exactly the вше way as in Lesson 7,
। except the positions must be modified to suit the
I cover. The main point is to avoid over exposure.
On Ий ° Range ” being ordered, or, if acting indivi-
dually, set the sights to the estimated range and
adopt the “ Positiofi of readiness ". Kneel on the
rightknee, keepingit rout to the right, and with the
bodj^dpported on the right heel, the lofi elbow
resungbn the left Wgh« if possible. It m.« v t »<* more
comfortable to kny on both knees or even .«iopt a
sitting position, rapending on the nature of the
cover (see Fig. 11K
iii. Firing.—The resting of thei rifle, firing, loading, etc.,
is exactly the same as already taught.
22
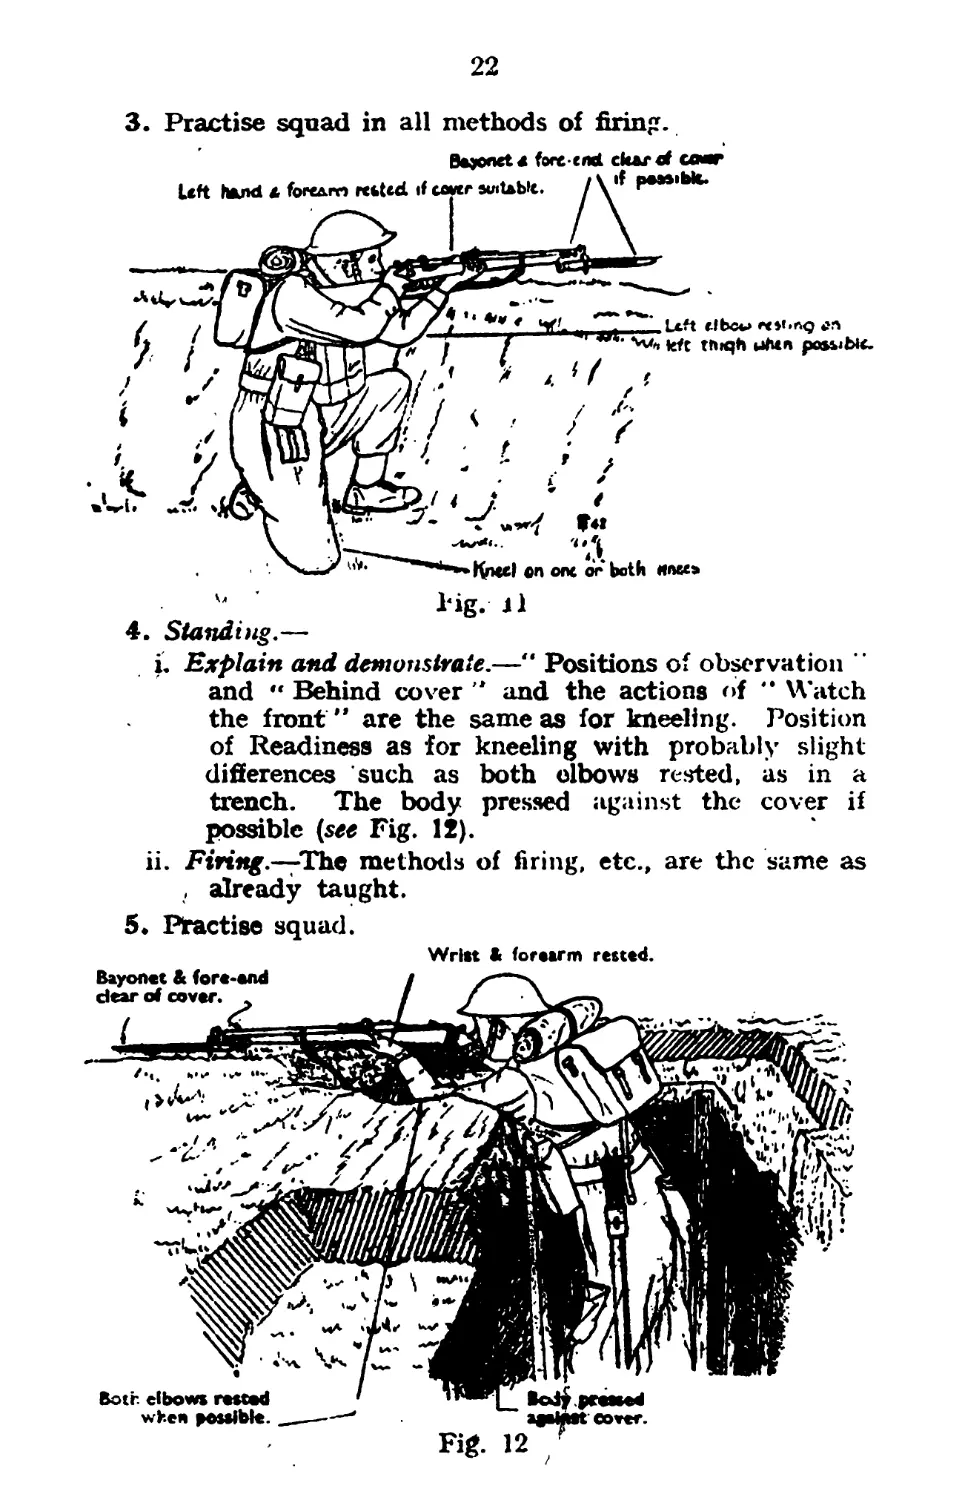
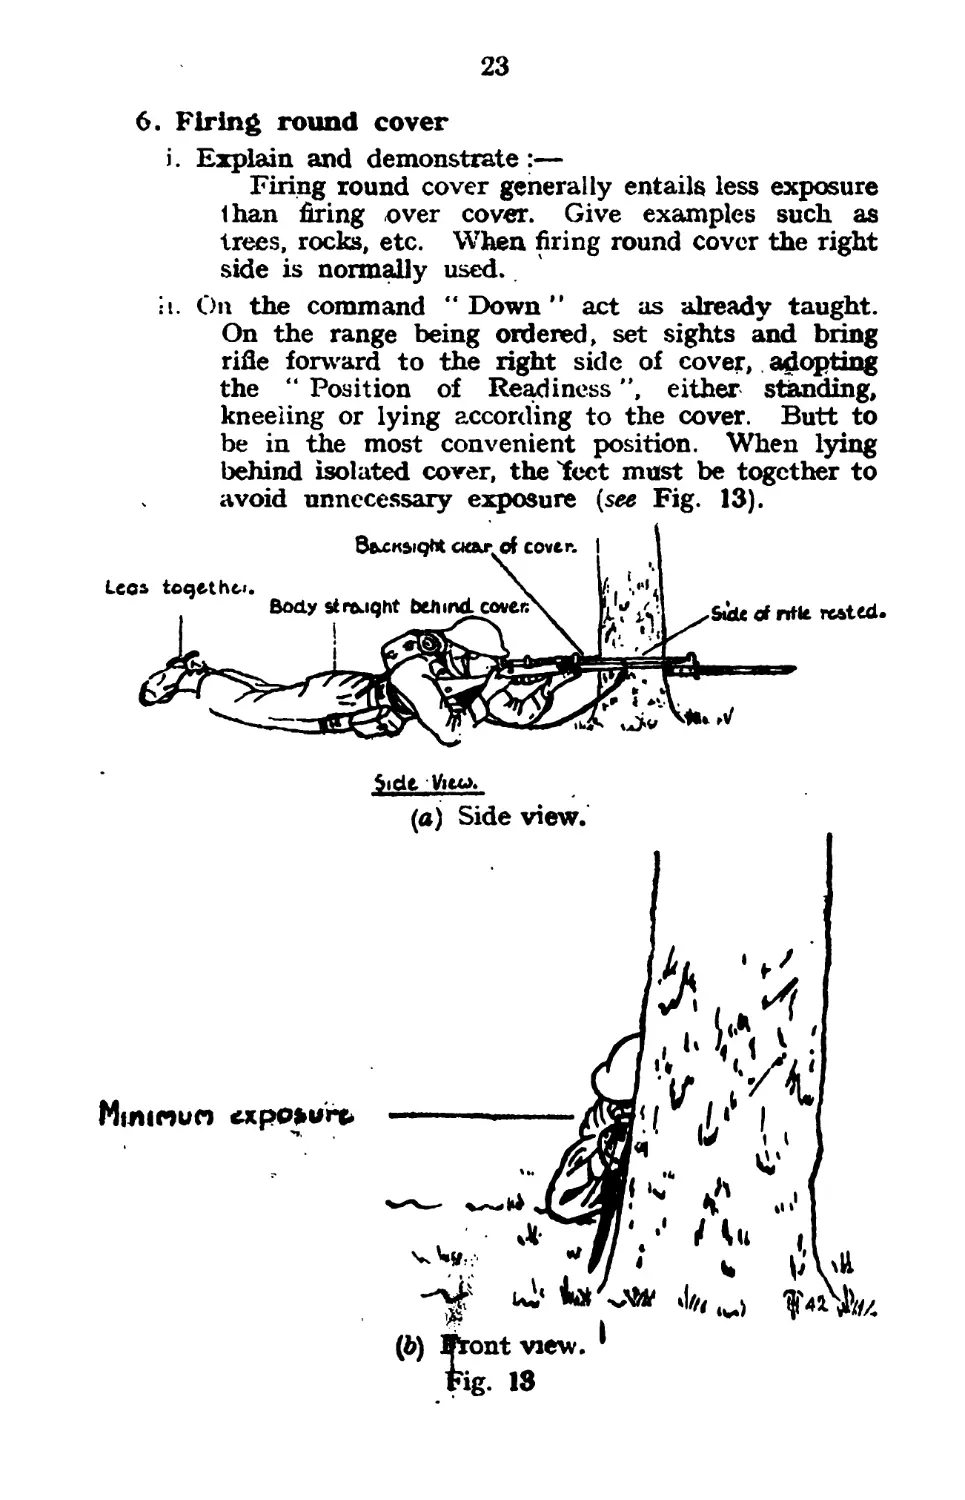
3. Practise squad in all methods of firing.
i. Explain and demonstrate.—“ Positions of observation ”
and " Behind cover " and the actions of “ Watch
the front ° are the same as for kneeling. Position
of Readiness as for kneeling with probably slight
differences such as both elbows rested, as in a
trench. The body pressed against the cover if
possible (see Fig. 12).
ii. Firing—-The methods of firing, etc., are the same as
, already taught.
5* Practise squad.
Writs & forearm rested.
23
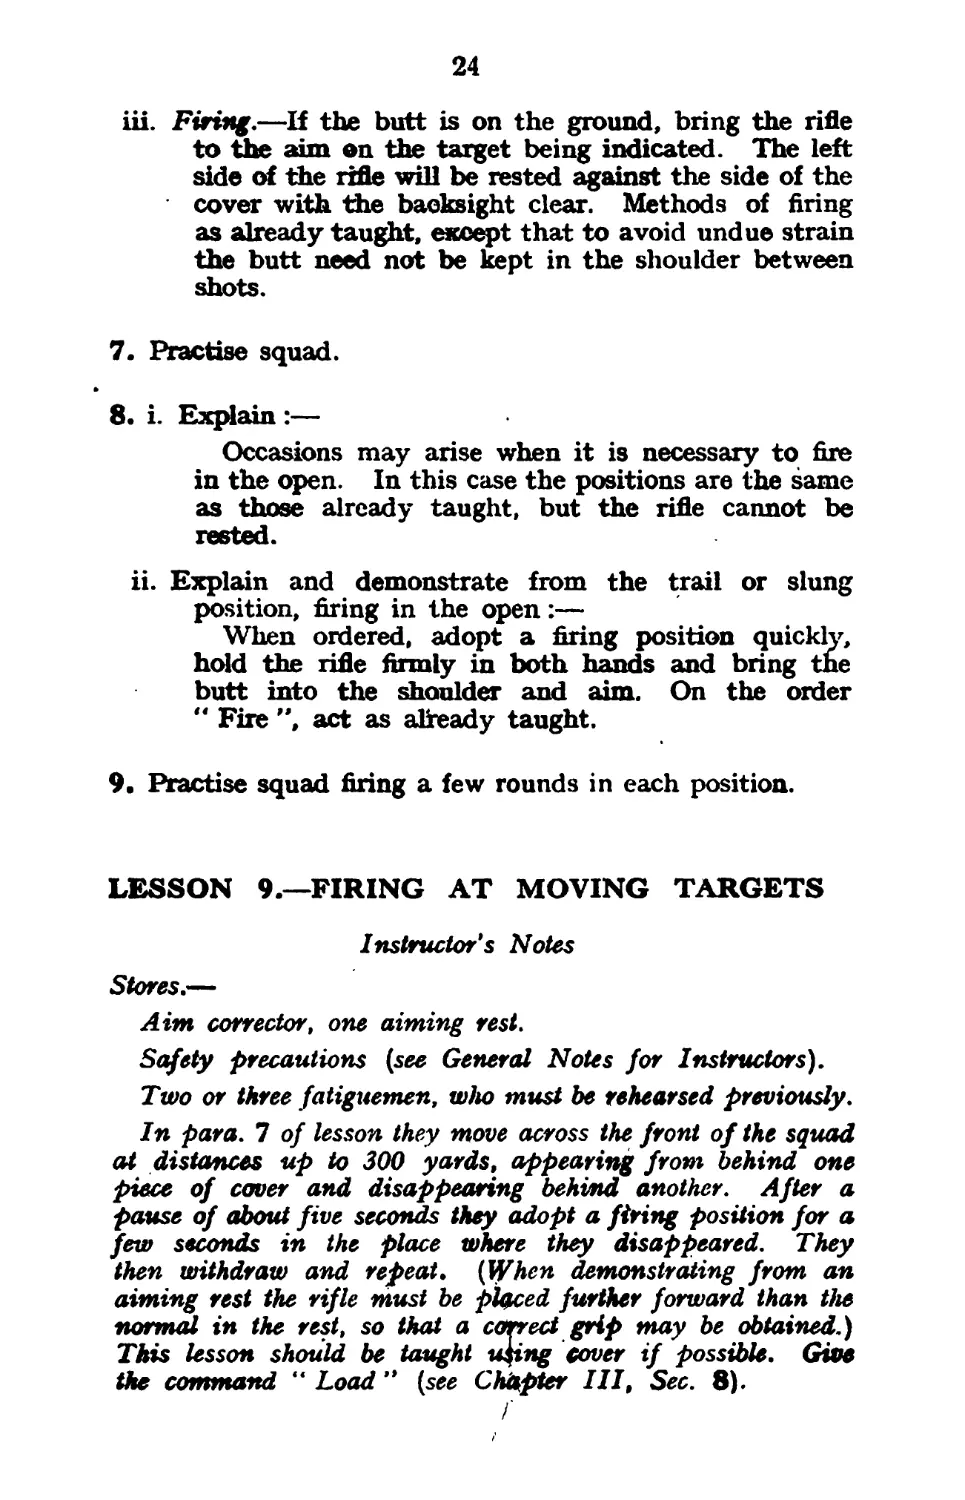
6. Firing round cover
i. Explain and demonstrate :—
Firing round cover generally entails less exposure
than firing over cover. Give examples such as
trees, rocks, etc. When firing round cover the right
side is normally used.
h. On the command “Down” act as already taught.
On the range being ordered, set sights and bring
rifle forward to the right side of cover, adopting
the “ Position of Readiness ”, either standing,
kneeling or lying according to the cover. Butt to
be in the most convenient position. When lying
behind isolated cover, the lect must be together to
avoid unnecessary exposure (see Fig. 13).
Side.
(aj Side view.
24
iii. Firing.—If the butt is on the ground, bring the rifle
to the aim on the target being indicated. The left
side of the rifle will be rested against the side of the
cover with the backsight clear. Methods of firing
as already taught, except that to avoid undue strain
the butt need not be kept in the shoulder between
shots.
7. Practise squad.
8. i. Explain :—
Occasions may arise when it is necessary to fire
in the open. In this case the positions are the same
as those already taught, but the rifle cannot be
rested.
ii. Explain and demonstrate from the trail or slung
position, firing in the open:—
When ordered, adopt a firing position quickly,
hold the rifle firmly in both hands and bring the
butt into the shoulder and aim. On the order
" Fire ", act as already taught.
9. Practise squad firing a few rounds in each position.
LESSON 9.—FIRING AT MOVING TARGETS
Instructor's Notes
Stores.—
Aim corrector, one aiming rest.
Safety precautions (see General Notes for Instructors).
Two or three fatiguemen, who must be rehearsed previously.
In para. 7 of lesson they move across the front of the squad
at distances up to 300 yards, appearing from behind one
piece of cover and disappearing behind another. After a
pause of about five seconds they adopt a firing position for a
few seconds in the place where they disappeared. They
then withdraw and repeat. (When demonstrating from an
aiming rest the rifle must be placed further forward than the
normal in the rest, so that a correct grip may be obtained.)
This lesson should be taught ubing cover if possible. Give
the command “ Load " (see Chapter III, Sec. 8).
25
1. Explain :—
As a general rule rifle fire will seldom be effective against
individual men beyond 300 yards or against single vehicles
'beyond 500 yards.
A.F.Vs. must be engaged with small arms fire because it
causes the visors to be closed and thereby hinders the crew.
Further, while visors are still open a chance bullet, or small
molten fragments from bullets hitting the armour near by,
may enter.
2. Riflemen must endeavour to shoot their enemy before
they can get to cover. If this is not possible, the spot where
they take cover must be marked so that they can be engaged
quickly with accuracy on reappearing.
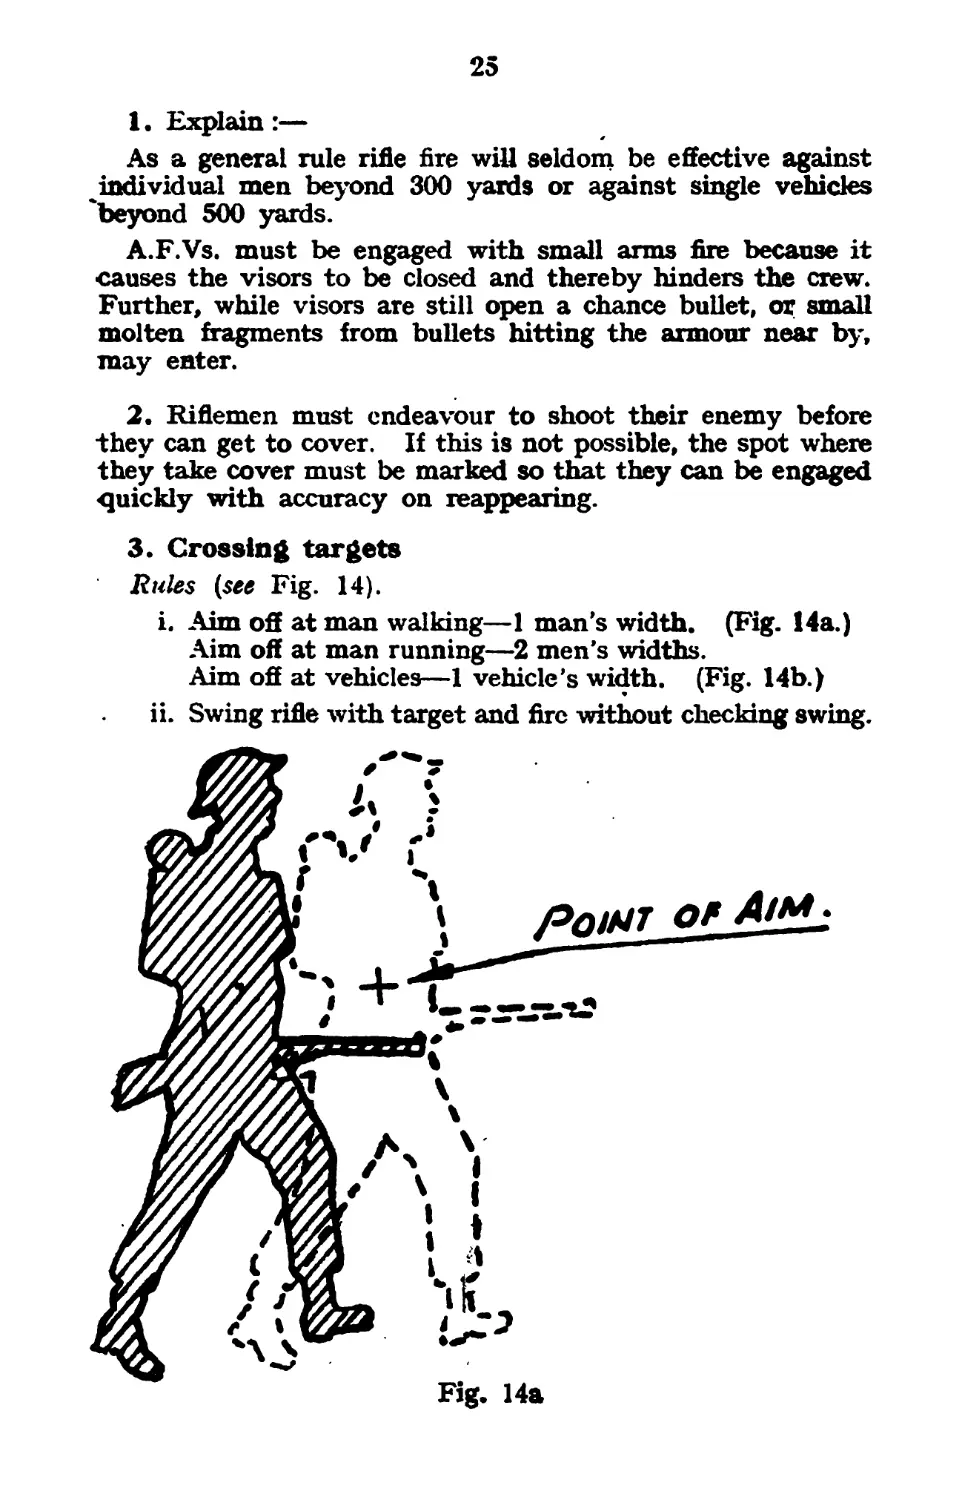
3. Crossing targets
Rules (see Fig. 14).
i. Aim off at man walking—1 man’s width. (Fig. 14a.)
Aim off at man running—2 men’s widths.
Aim off at vehicles—1 vehicle’s width. (Fig. 14b.)
ii. Swing rifle with target and fire without checking swing.
Fig. 14a
26
/Ар/а/г of Д/л*.
О/л£етюм or Movement.
Fig. 14b
4. Demonstrate to each, man through aim corrector, using
aiming rest (if available), emphasizing continuous swing
which must not be checked as trigger is pressed.
5. Practise squad at 100 yards and 200 yards. Check with
aim corrector..
6. Aiming at ground
Ride,—Note the spot where enemy has disappeared and
aim just below; on reapjiearance of target aim and fire.
7. Practise squad firing at men walking to cover at
200 yards. Squad should fire at least one shot at fatigue-
man in movement, and one when he reappears. Instructor
checks with aim corrector. Repeat as time permits with
fatigueman moving at the double up to 300 yards. Aiming
off at vehicles should be practised, using any available traffic.
CHAPTER IV*—QUICKENING AN®
STRENGTHENING EXERCISES
1. These provide a means quickening men in haadhng
the rifle, and also of strengthening those muscles used in
holding and firing it. 3 4
2. They should be carried out for the last few minutes
of firing lessons whenever possible. They are also suitable
for the daily weapon training pyiod with trained soldiers.
3. The instructor should use his own discretion in framing
these exercises ; some suitable opes are given as a guide.
4. The men should be told the object of quickening
and strengthening exercises (as in para. 1) and a spirit of
competition introduced. Except for recruits, bayonets will
normally be fixed.
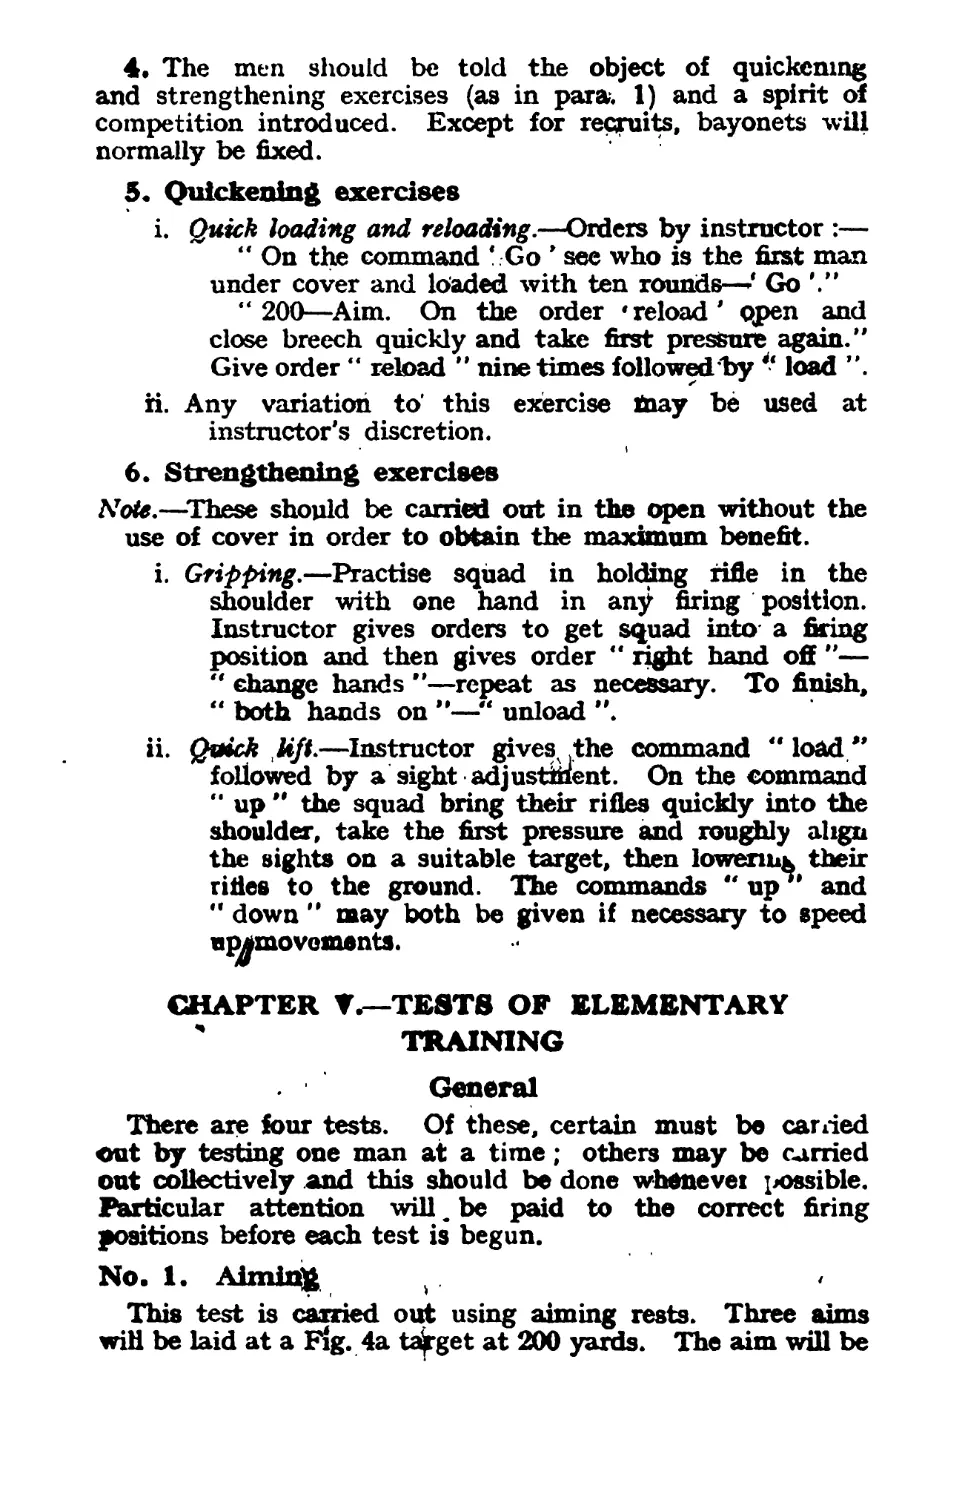
5. Quickening exercises
i. Quick loading and reloading.—Orders by instructor :—
“ On the command * Go * see who is the first man
under cover and loaded with ten rounds—* Go
“ 200—Aim. On the order 'reload' open and
close breech quickly and take first pressure again."
Give order “ reload " nine times followed by * load ".
ri. Any variation to’ this exercise tnay be used at
instructor's discretion.
6. Strengthening exercises
Note.—These should be carried out in the open without the
use of cover in order to obtain the maximum benefit.
i. Gripping.—Practise squad in holding rifle in the
shoulder with one hand in any firing position.
Instructor gives orders to get squad into a firing
position and then gives order “ right hand off "—
“ change hands "—repeat as necessary. To finish,
“ both hands on "—“ unload ".
ii. Quick lift.—Instructor gives the command “load"
followed by a sight adjustment. On the command
“ up " the squad bring their rifles quickly into the
shoulder, take the first pressure and roughly align
the sights on a suitable target, then lowenug their
rifles to the ground. The commands “ up*' and
“ down " may both be given if necessary to speed
u^movoments.
CHAPTER TESTS OF ELEMENTARY
4 TRAINING
General
There are four tests. Of these, certain must bo carried
out by testing one man at a time; others may be carried
out collectively and this should be done whenever possible.
Particular attention will_ be paid to the correct firing
positions before each test is begun.
No. 1. Aiming
This test is carried out using aiming rests. Three aims
win be laid at a Fig. 4a target at 200 yards. The aim will be
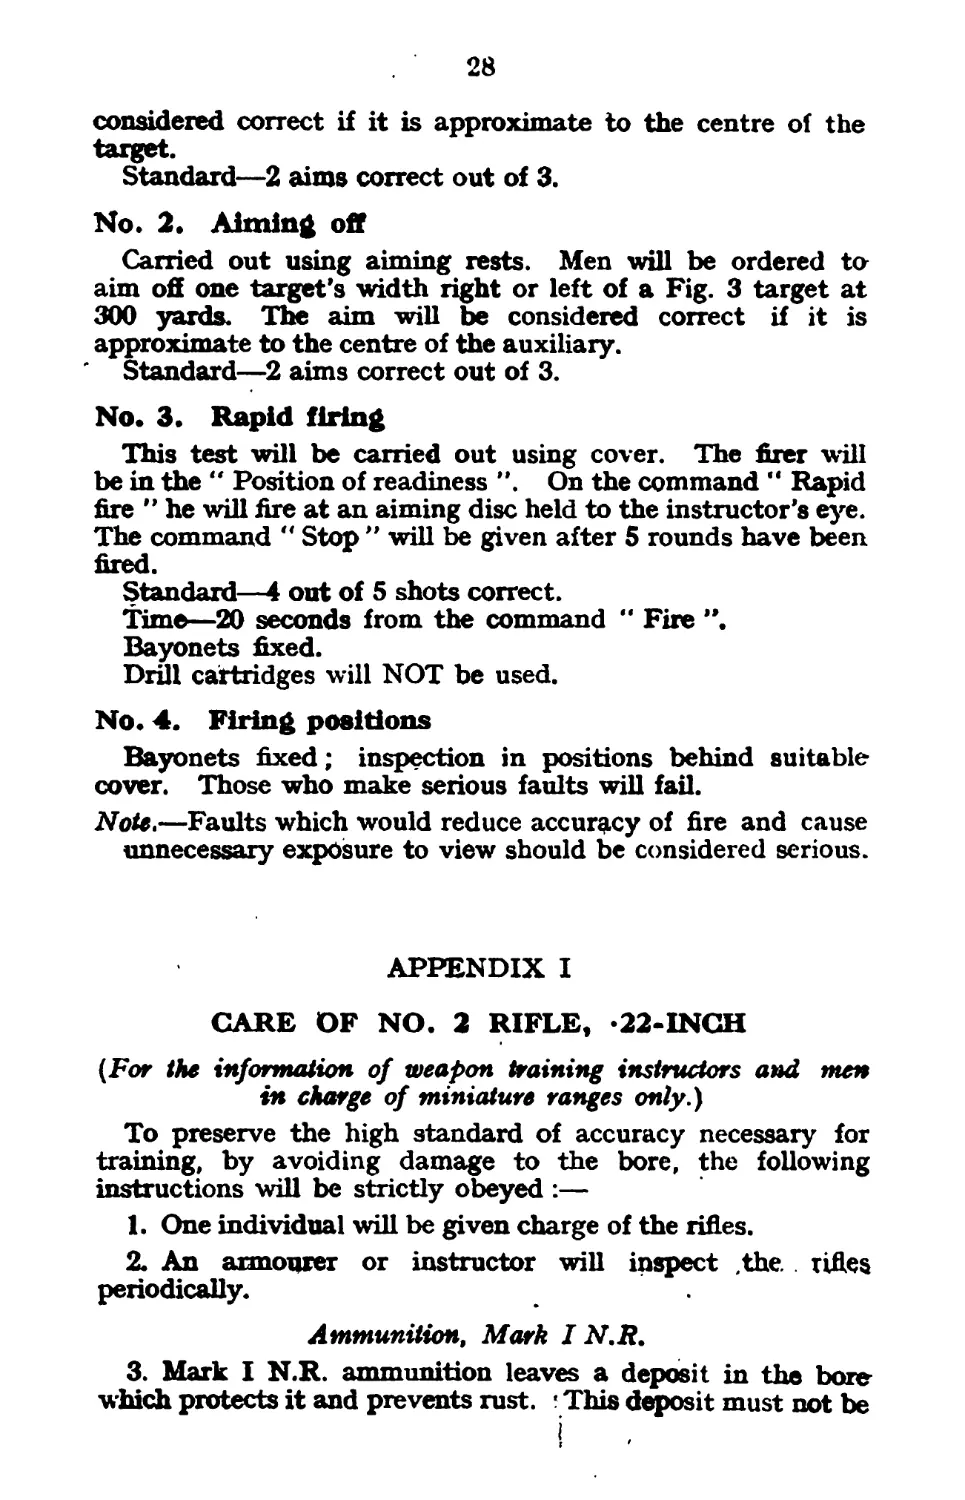
28
considered correct if it is approximate to the centre of the
target.
Standard—2 aims correct out of 3.
No. 2. Aiming off
Carried out using aiming rests. Men will be ordered to
aim off one target's width right or left of a Fig. 3 target at
300 yards. The aim will be considered correct if it is
approximate to the centre of the auxiliary.
Standard—2 aims correct out of 3.
No. 3. Rapid firing
This test will be carried out using cover. The firer will
be in the " Position of readiness ”. On the command " Rapid
fire ” he will fire at an aiming disc held to the instructor's eye.
The command ° Stop " will be given after 5 rounds have been
fired.
Standard—4 out of 5 shots correct.
Time—20 seconds from the command “ Fire ".
Bayonets fixed.
Drill cartridges will NOT be used.
No. 4. Firing positions
Bayonets fixed; inspection in positions behind suitable
cover. Those who make serious faults will fail.
Note»—Faults which would reduce accuracy of fire and cause
unnecessary exposure to view should be considered serious.
APPENDIX I
CARE OF NO. 2 RIFLE, -22-INCH
(For the information of weapon training instructors and men
in charge of miniature ranges only.)
To preserve the high standard of accuracy necessary for
training, by avoiding damage to the bore, the following
instructions will be strictly obeyed :—
1. One individual will be given charge of the rifles.
2. An armourer or instructor will inspect .the rifles
periodically.
Ammunition, Mark I N.R.
3. Mark I N.R. ammunition leaves a deposit in the bore
which protects it and prevents rust. * This deposit must not be
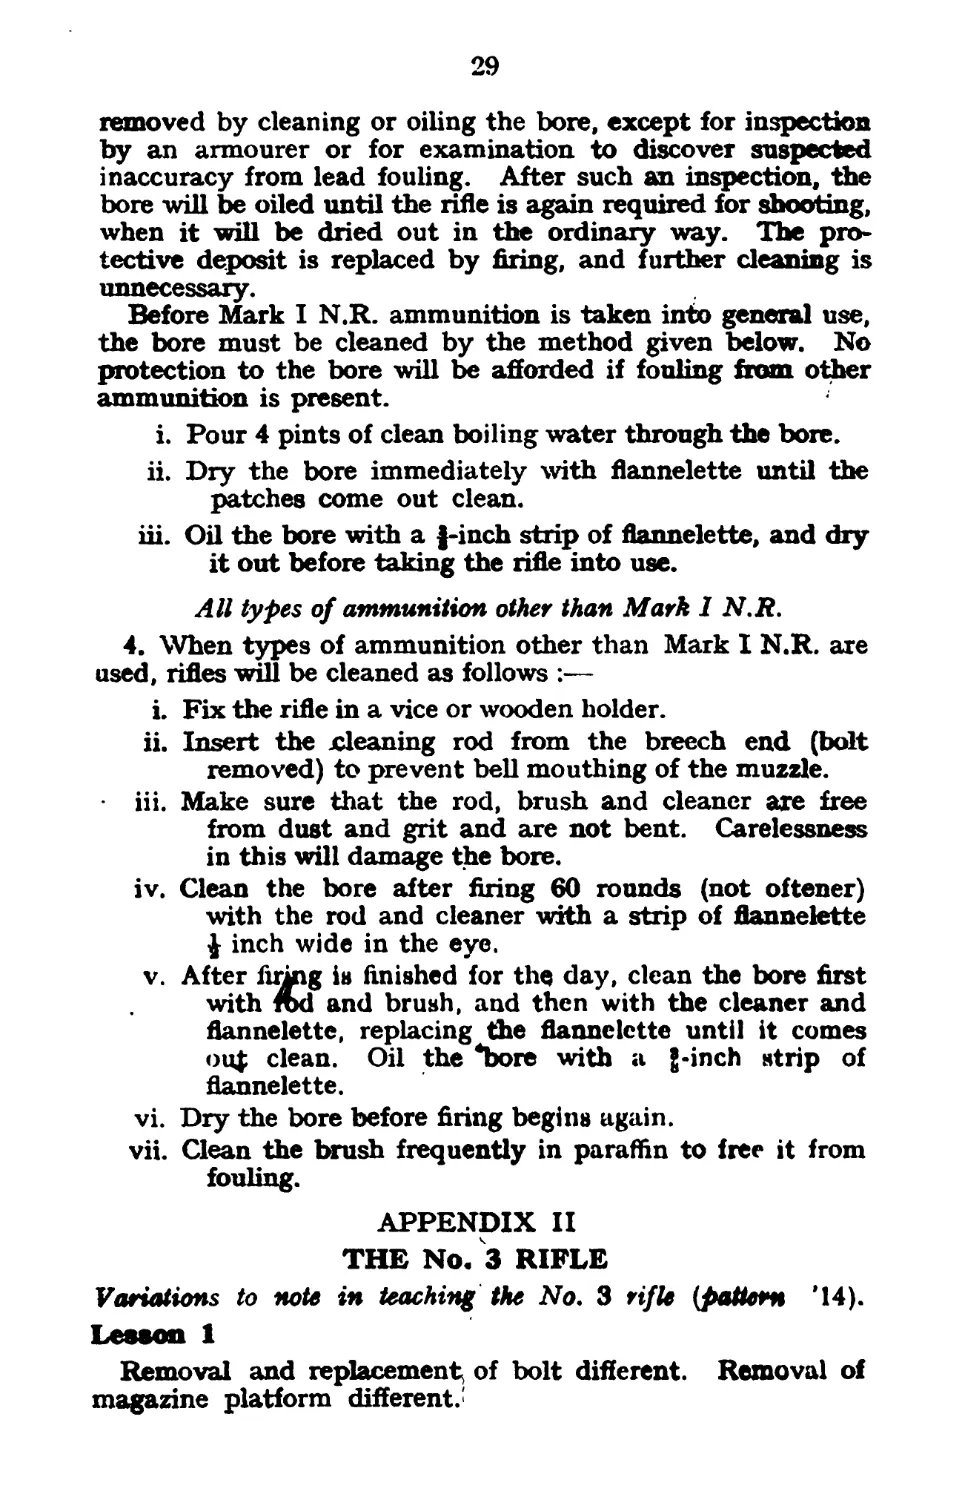
29
removed by cleaning or oiling the bore, except for inspection
by an armourer or for examination to discover suspected
inaccuracy from lead fouling. After such an inspection, the
bore will be oiled until the rifle is again required for shooting,
when it will be dried out in the ordinary way. The pro-
tective deposit is replaced by firing, and further cleaning is
unnecessary.
Before Mark I N.R. ammunition is taken into general use,
the bore must be cleaned by the method given below. No
protection to the bore will be afforded if fouling from other
ammunition is present.
i. Pour 4 pints of clean boiling water through the bore.
ii. Dry the bore immediately with flannelette until the
patches come out clean.
iii. Oil the bore with a j-inch strip of flannelette, and dry
it out before taking the rifle into use.
All types of ammunition other than Mark I N.R.
4. When types of ammunition other than Mark I N.R. are
used, rifles will be cleaned as follows :—
i. Fix the rifle in a vice or wooden holder.
ii. Insert the cleaning rod from the breech end (bolt
removed) to prevent bell mouthing of the muzzle.
iii. Make sure that the rod, brush and cleaner are free
from dust and grit and are not bent. Carelessness
in this will damage the bore.
iv. Clean the bore after firing 60 rounds (not oftener)
with the rod and cleaner with a strip of flannelette
| inch wide in the eye.
v. After firing is finished for the day, clean the bore first
with fbd and brush, and then with the cleaner and
flannelette, replacing the flannelette until it comes
ou{ clean. Oil the Sore with a {-inch strip of
flannelette.
vi. Dry the bore before firing begins again.
vii. Clean the Inrush frequently in paraffin to free it from
fouling.
APPENDIX II
THE No. 3 RIFLE
Variations to note in teaching the No. 3 rifle {pattern 44).
Lesson 1
Removal and replacement of bolt different. Removal of
magazine platform different.'
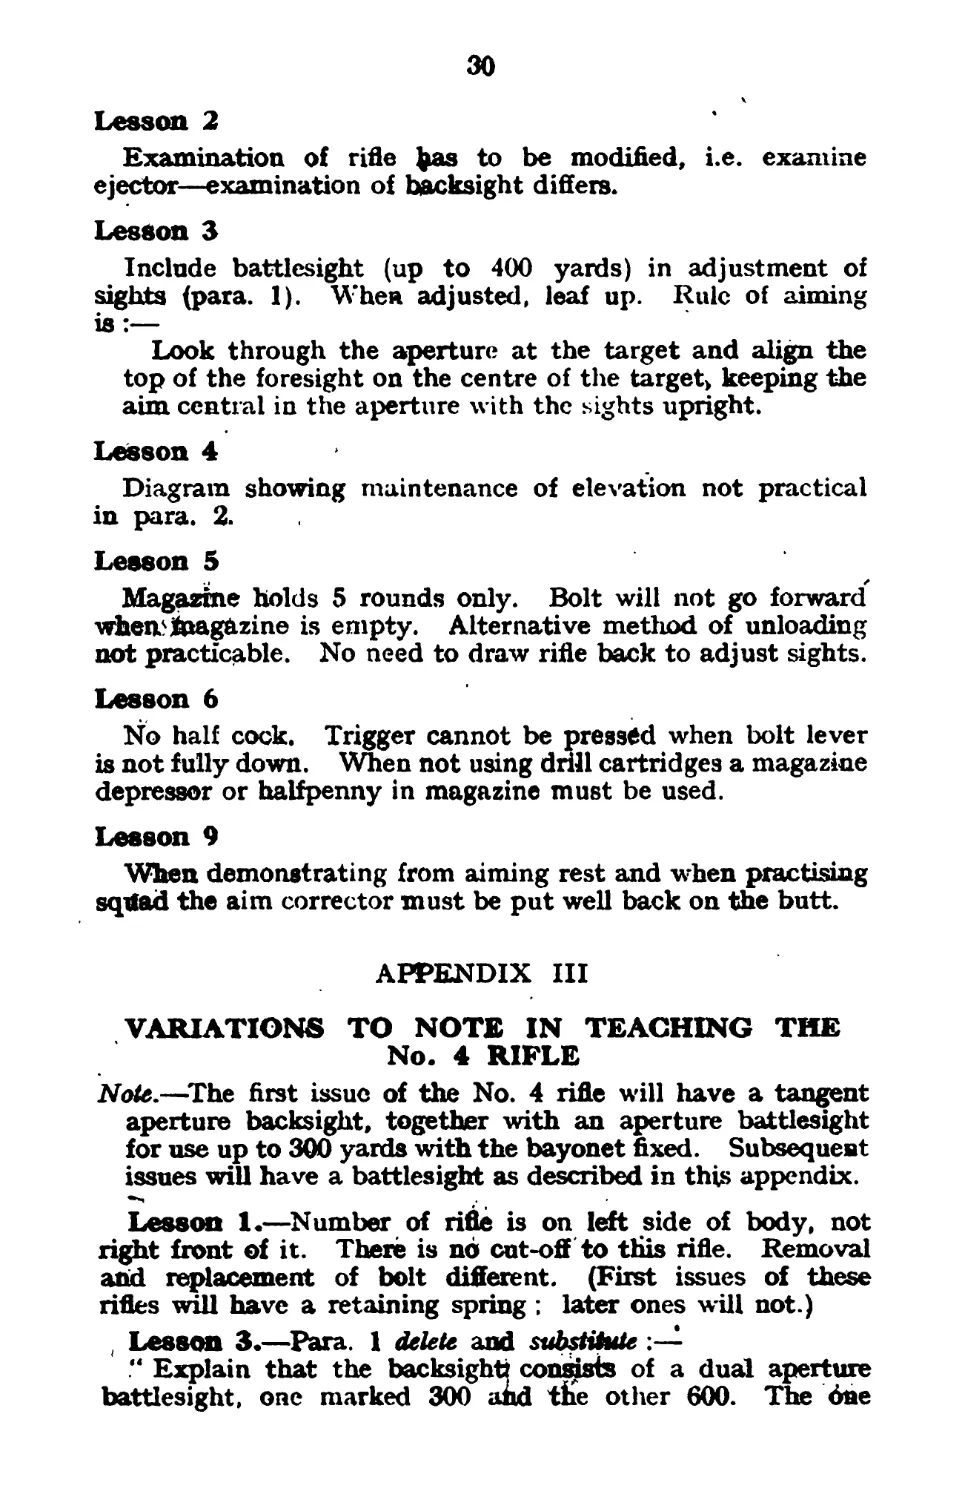
30
Lesson 2
Examination of rifle J^as to be modified, i.e. examine
ejector—examination of backsight differs.
Lesson 3
Include battlesight (up to 400 yards) in adjustment of
sights (para. 1). When adjusted, leaf up. Rule of aiming
is:—
Look through the aperture at the target and align the
top of the foresight on the centre of the target» keeping the
aim central in the aperture with the sights upright.
Lesson 4
Diagram showing maintenance of elevation not practical
in para. 2.
Lesson 5
Magazine holds 5 rounds only. Bolt will not go forward
whemhaagazine is empty. Alternative method of unloading
not practicable. No need to draw rifle back to adjust sights.
Lesson 6
No half cock. Trigger cannot be pressed when bolt lever
is not fully down. When not using drill cartridges a magazine
depressor or halfpenny in magazine must be used.
Lesson 9
When demonstrating from aiming rest and when practising
sqtfad the aim corrector must be put well back on the butt.
APPENDIX III
VARIATIONS TO NOTE IN TEACHING THE
No. 4 RIFLE
Note.—The first issue of the No. 4 rifle will have a tangent
aperture backsight, together with an aperture battlesight
for use up to 300 yards with the bayonet fixed. Subsequent
issues will have a battlesight as described in this appendix.
Lesson 1.—Number of rifle is on left side of body, not
right front of it. There is nd cut-off to this rifle. Removal
and replacement of bolt different. (First issues of these
rifles will have a retaining spring; later ones will not.)
, Lesson 3.—Para. 1 delete and substitute -
“ Explain that the backsight! consists of a dual aperture
battlesight, one marked 300 and tiie other 600. The dne
31
marked 300 is accurate at 300 yards with the bayonet fixed,
and at 400 yards without the bayonet. The one marked 600
is accurate at 600 yards without the bayonet. Adjust the
sight in any convenient manner. '
Para. 2. Rules of aiming.—See Appendix II as for No. 3
rifle.
Para. 3. Elevation—Rifles*-one 300 sight^—one 600 sight.
Para. 4. Not applicable.
Lesson 4—Aiming off the target
i. Add to Instructor’s Notes:—
(It must be clearly explained fo men that the
effect of removing the bayonet is to throw the shots
higher.* This is the opposite effect to the No. 1
rifle. This will be approximately 1 foot at 200 and
300 yards.)
ii. Para. 2 of Lesson (maintaining elevation)—No
diagram practical.
iii. After teaching Lesson 4, paras. 1, 2, 3, substitute the
following for paras. 4 and 5 of Lesson :—
4. Explain:—
It is only possible to make two alterations in sight adjust-
ment—300 or 600 yards. The rifle is, t lie ref orc, accurately
sighted as follows :—
i. Using the 300 sight-^at 300 yards when the bayonet
is fixed. ....
ii. Using the 300 sight—at 400 yards without the bayonet,
iii. Using the 600 sight—at 600,yards without the.baypnet.
5. The general 4ule is, therefore, as follows:—
i. At ranges up to 300 yards
The bayonet wilh.be fixed, and the trajectory of
thfe bullet is sufficiently flat for accurate shooting
at service targets. The regulation aim will be used
with the 300 sight.
ii. At ranges of approximately 400 yaads 1.
The bayonet will not be fixed, and the regulation
aim wili jbe used with the 300 sight.,
iii. A t ranges beyond 400. and up to 600 yaf^
The 600 sight will be used, and it will be necessary
to aim down about 2| feet at $00 yards.
Point out that it may be necessary to aim down to the
amount of 1 figure's height on any type of target and at
all ranges up to SOO yards. This is to counter errors in
32
elevation. One figure’s height is a qhick guide and will
have to be used with commonsense.
Set simple problems to ensure the correct use of sights
and to include aiming down. Check as in Lesson 4, No. 1
rifle.
Lesson 5.—need to draw rifle back to adjust sights.
APPENDIX IV
THE No. 3 SNIPER RIFLE
The No. 3 rifle can be adapted to take either a pattern
'18 or Aldis telescope and used as a sniper's rifle as follows :—
P.'18 telescope (differences in Aldis are shown in parentheses).
1. Method of focusing
i. Loosen clamping screw.
ii. Hold telescope steady—look through as in using
ordinary telescope—with eye about 2 or 3 inches
away—should have a full field of view.
iii. Move focusing slide backward or forward until a clear
view is obtained (Aldis—slide moves in diagonal
slot).
iv. Tighten clamping screw.
v. Take care to keep slide in the same position when
tightening up clamping screw.
2. How to attach telescope to rifle (Aldis telescope is
permanently attached)
i. See that fixing lever on left of rifle body is to the rear.
ii. Place the two hooks under trunnions.
iii. Drop rear end into rectangular slot on left of body.
iv. Turn lever over to front to engage.
3. Method of lolling with telescope attached
i. Chargers cannot be used unless telescope is removed.
ii. Load with 5 rounds singly. (Aldis—’scope is off-set—
charger loading can be used.)
4. Adjustment of sight
i. Explain markings and figures on range scale.
ii. Loosen range drum damping screw.
33
iii. Turn range drum with thumb and forefinger until
line required on range scale is opposite reference
mark on saddle.
iv. Tighten clamping screw.
5. Method of aiming
i. Use aiming and head rests.
ii. Illustrate with large diagram.
iii. Sights upright. Cross wire a good guide when actually
aiming.
iv. Close disengaged eye.
v. Eye about 2 to 3 inches away. A full field of view
must be»obtained. If floating aperture is visible,
the eye is either too near or tod far away from
telescope.
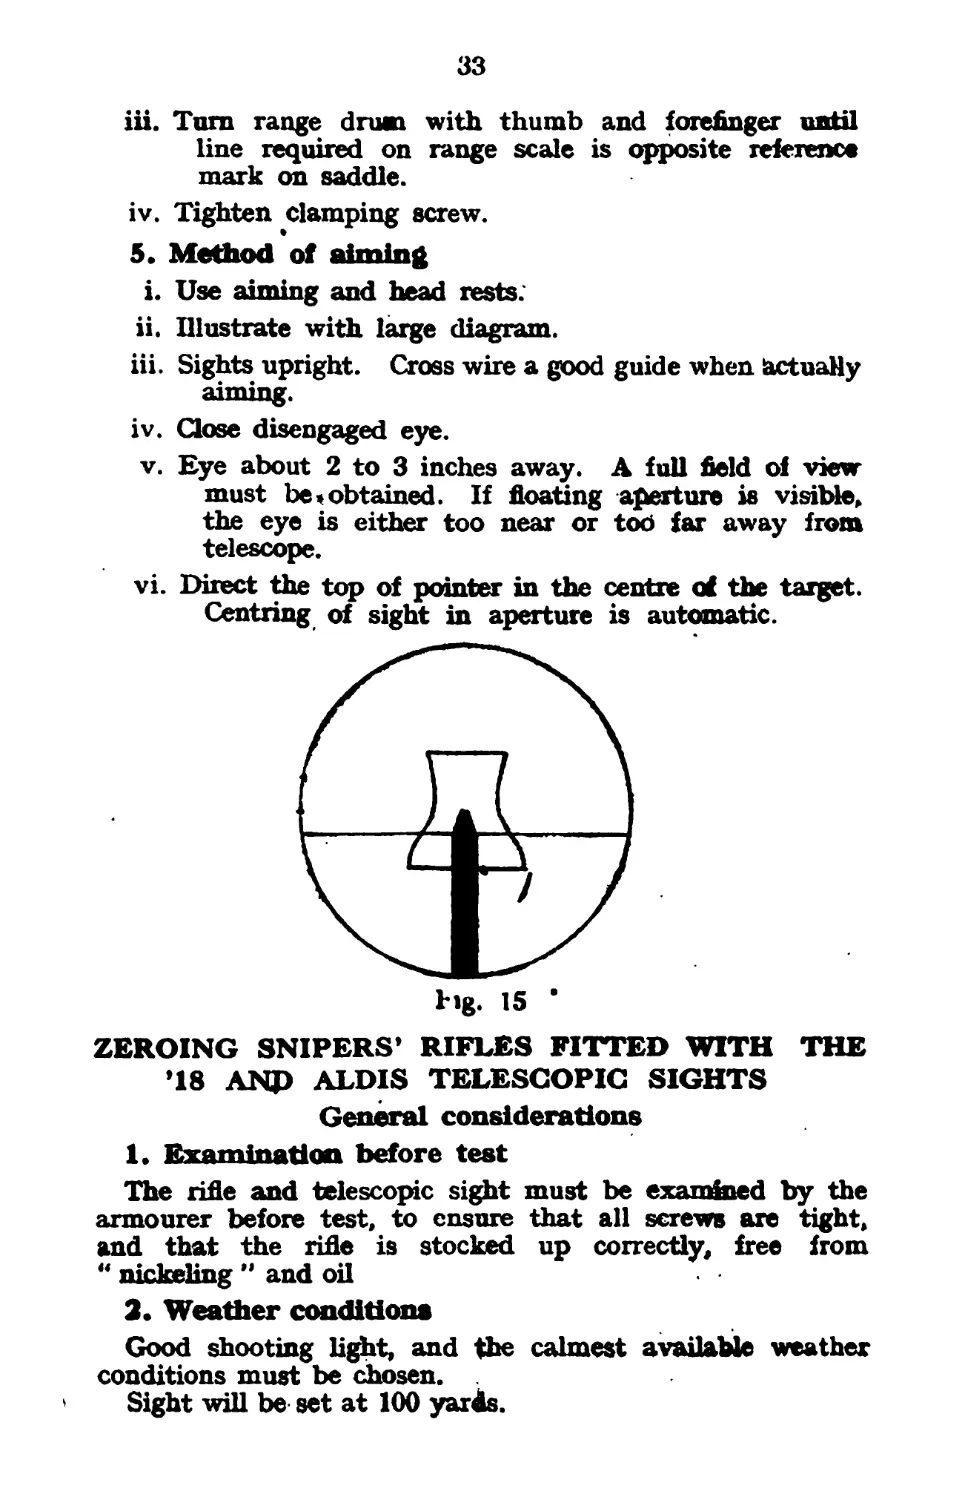
vi. Direct the top of pointer in the centre of the target.
Centring of sight in aperture is automatic.
ZEROING SNIPERS’ RIFLES FITTED WITH THE
’18 ANP ALDIS TELESCOPIC SIGHTS
General considerations
1. Examination before test
The rifle and telescopic sight must be examined by the
armourer before test, to ensure that all screws are tight,
and that the rifle is stocked up correctly, free from
“ nickeling ” and oil
2. Weather conditions
Good shooting light, and the calmest available weather
conditions must be chosen.
Sight will be set at 100 yards.
34
3. Range
100 yards from foresight to target.
4. Position
Lying. Forearm and wrist rested (not the rifle).
5. Targets
Any suitable target with a 2-inch black aiming mark. A
vertical line to be drawn through the centre of the mark,
and another line J inch to the right of centre. (This line is
for the Aldis.)
6. Point ofaipa
Lowest central point of the aiming maft.
7. Method
. Two shots will be fired into the bank to warm the barrel.
A group of five rounds will be fired. The necessary standard
of grouping is 3 inches at 100 yards.
8. After any adjustment has been made, the rifle should
be re-tested and corrected as necessary, as the figures given
are approximations, but if used as a guide will save time and
ammunition.
Note,—ETo vertical or lateral error should ever be left on a
sniper’s rifle.
THE *18 TELESCOPIC SIGHT
1. The M.P.I. using the T8 telescopic sight should be as
follows :—
At 100 yards, the point of aim.
2. To adjust errors
i. For deflection
Remove telescope from rifle.
Remove ray shade.
Slacken the three screws fixing the prism cell.
With adjusting key turn cell containing prism as
required, viz:— . *
If the group has/formed on the right ef the centre
line, turn the cell clockwise, if to the left, anti-
clockwise. By turning the cqll the prism is also
turned, which, being wedge shaped, bends the ray
of light. The sight itself is moved.
One division in the adapter gives approximate^
5 inches for each KXHyaixfe.
35
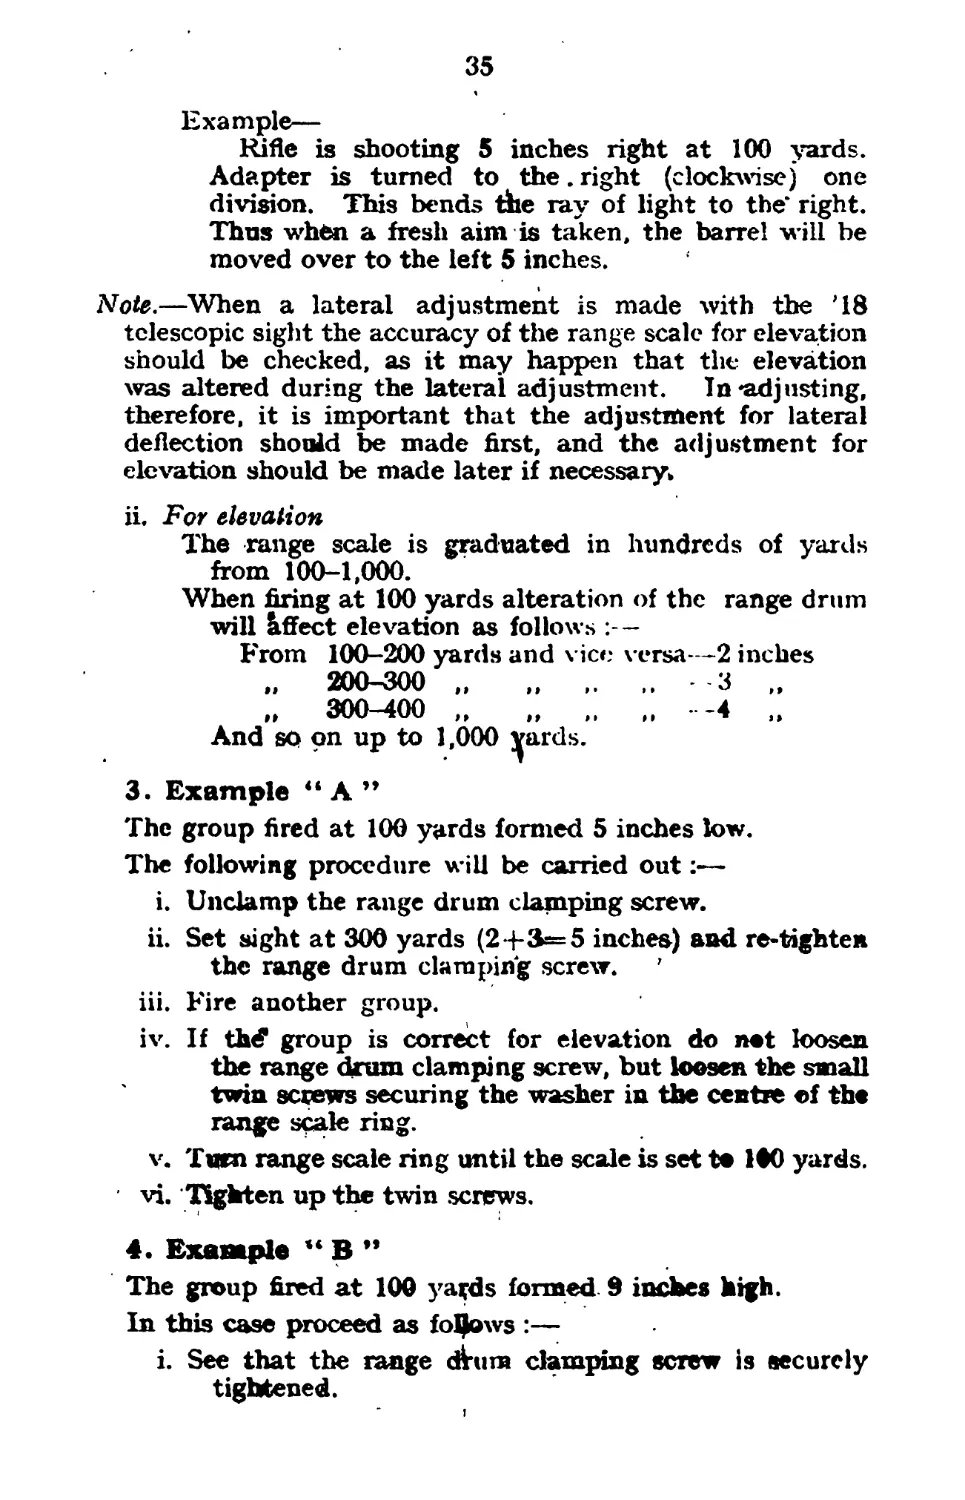
Example—
Rifle is shooting 5 inches right at 100 yards.
Adapter is turned to the. right (clockwise j one
division. This bends the ray of light to the* right.
Thus when a fresh aim is taken, the barrel will be
moved over to the left 5 inches.
Note.—When a lateral adjustment is made with the ’18
telescopic sight the accuracy of the range scale for elevation
should be checked, as it may happen that the elevation
was altered during the lateral adjustment. In *adjlisting,
therefore, it is important that the adjustment for lateral
deflection should be made first, and the adjustment for
elevation should be made later if necessary*
ii. For elevation
The range scale is graduated in hundreds of yards
from 100-1,000.
When firing at 100 yards alteration of the range drum
will Effect elevation as follows —
From 100-200 yards and vice versa—2 inches
,, 200-300 ................. - 3 „
„ 300-400 „ ......... -4 ,,
And so on up to 1,000 ^ards.
3. Example “ A ”
The group fired at 100 yards formed 5 inches low.
The following procedure will be carried out:—
i. Unclamp the range drum clamping screw.
ii. Set sight at 300 yards (24-3=5 inches) and re-tighten
the range drum clamping screw. ’
iii. Fire another group.
iv. If thd* group is correct for elevation do not loosen
the range dram clamping screw, but loosen the small
twin screws securing the washer in the centre of the
range scale ring.
v. Turn range scale ring until the scale is set to 100 yards,
vi. Tighten up the twin screws.
4. Example “ В ”
The group fired at 100 yards formed 9 inches high.
In this case proceed as follows :—
i. See that the range dirum clamping screw is securely
tightened.
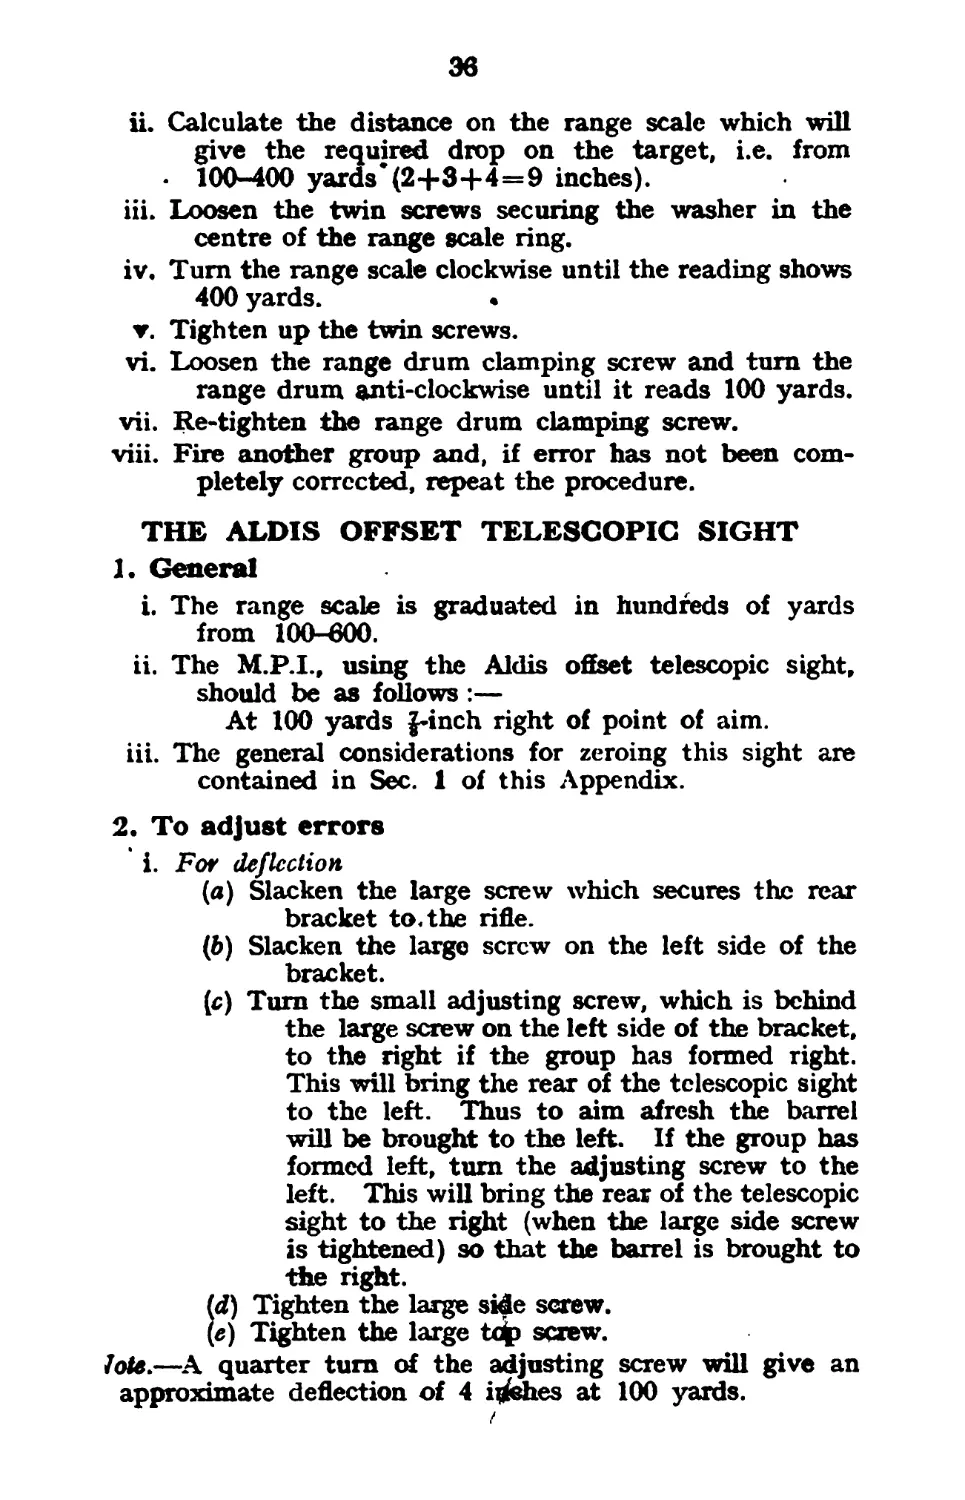
эв
ii. Calculate the distance on the range scale which will
give the required drop on the target, i.e. from
• 100-400 yards*(2+3+4=9 inches).
iii. Loosen the twin screws securing the washer in the
centre of the range scale ring.
iv. Turn the range scale clockwise until the reading shows
400 yards. •
▼. Tighten up the twin screws.
vi. Loosen the range drum clamping screw and turn the
range drum anti-clockwise until it reads 100 yards.
vii. Re-tighten the range drum clamping screw.
viii. Fire another group and, if error has not been com-
pletely corrected, repeat the procedure.
THE ALDIS OFFSET TELESCOPIC SIGHT
1. General
i. The range scale is graduated in hundreds of yards
from 100-600.
ii. The M.P.I., using the Aldis offset telescopic sight,
should be as follows :—
At 100 yards J-inch right of point of aim.
iii. The general considerations for zeroing this sight are
contained in Sec. 1 of this Appendix.
2. To adjust errors
i. For deflection
(a) Slacken the large screw which secures the rear
bracket to. the rifle.
(b) Slacken the largo screw on the left side of the
bracket.
(c) Turn the small adjusting screw, which is behind
the large screw on the left side of the bracket,
to the right if the group has formed right.
This will bring the rear of the telescopic sight
to the left. Thus to aim afresh the barrel
will be brought to the left. If the group has
formed left, turn the adjusting screw to the
left. This will bring the rear of the telescopic
sight to the right (when the large side screw
is tightened) so that the barrel is brought to
the right.
(d) Tighten the large side screw.
(e) Tighten the large tc|) screw.
Zofc.—A quarter turn of the adjusting screw will give an
approximate deflection of 4 iflfehes at 100 yards.
37
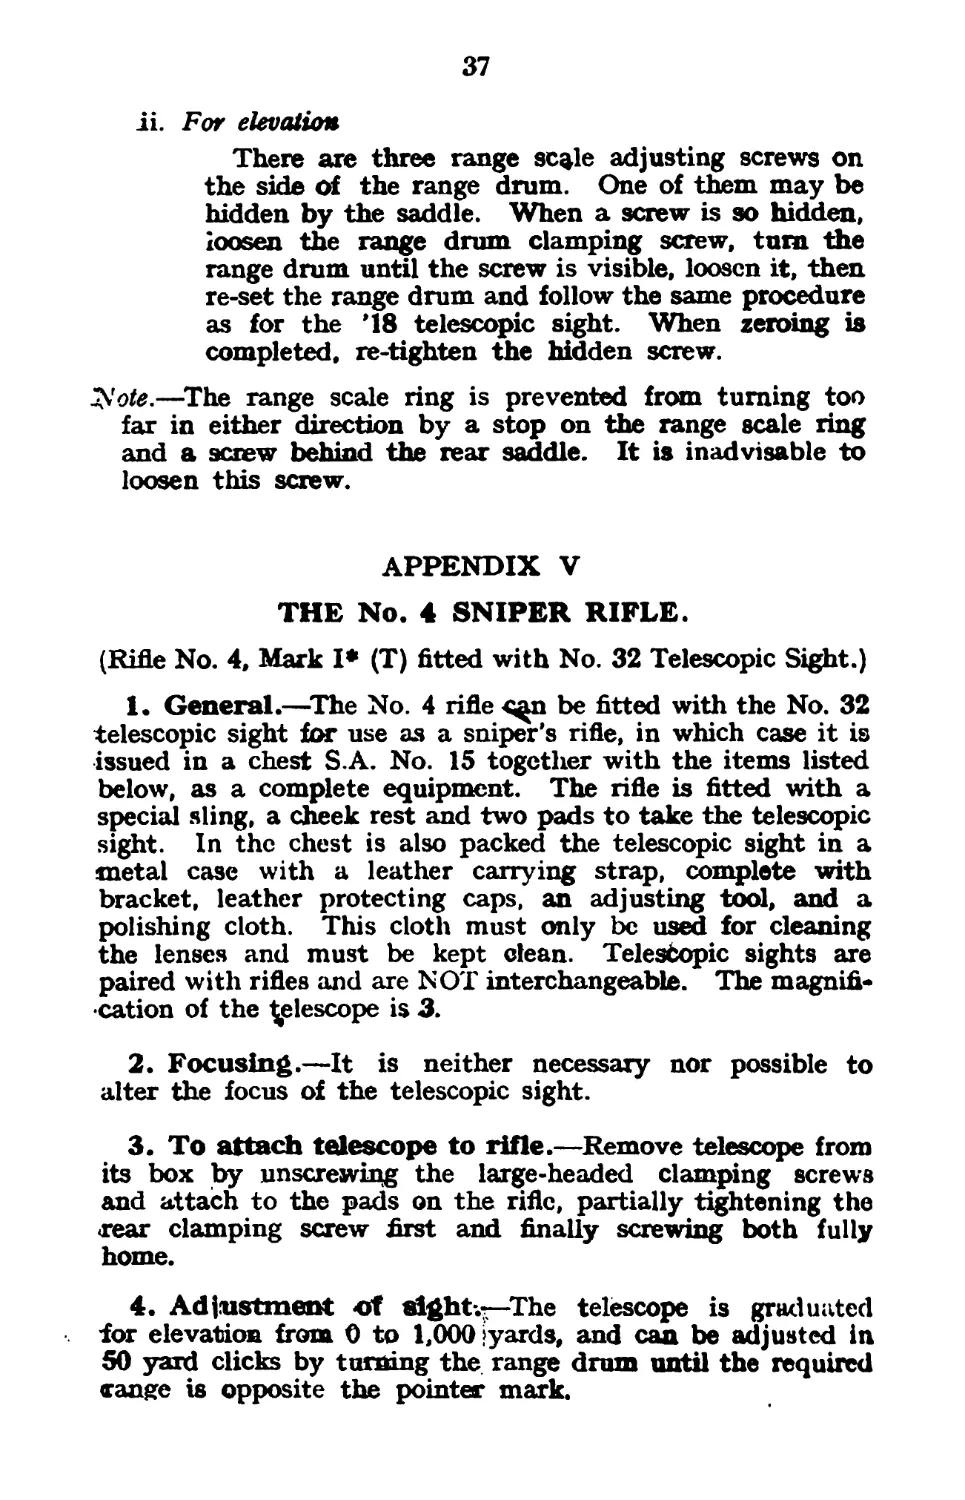
ii. For elevation
There are three range scale adjusting screws on
the side oi the range drum. One of them may be
hidden by the saddle. When a screw is so hidden,
loosen the range drum clamping screw, turn the
range drum until the screw is visible, loosen it, then
re-set the range drum and follow the same procedure
as for the ’18 telescopic sight. When zeroing is
completed, re-tighten the hidden screw.
—The range scale ring is prevented from turning too
far in either direction by a stop on the range scale ring
and a screw behind the rear saddle. It is inadvisable to
loosen this screw.
APPENDIX V
THE No. 4 SNIPER RIFLE.
(Rifle No. 4, Mark !♦ (T) fitted with No. 32 Telescopic Sight.)
1. General.—The No. 4 rifle be fitted with the No. 32
telescopic sight for use as a sniper’s rifle, in which case it is
issued in a chest S.A. No. 15 together with the items listed
below, as a complete equipment. The rifle is fitted with a
special sling, a cheek rest and two pads to take the telescopic
sight. In the chest is also packed the telescopic sight in a
metal case with a leather carrying strap, complete with
bracket, leather protecting caps, an adjusting tool, and a
polishing cloth. This cloth must only be used for cleaning
the lenses and must be kept clean. Telescopic sights are
paired with rifles and are NOT interchangeable. The magnifi-
cation of the ^elescope is 3.
2. Focusing.—It is neither necessary nor possible to
alter the focus of the telescopic sight.
3. To attach telescope to rifle.—Remove telescope from
its box by unscrewing the large-headed clamping screws
and attach to the pads on the rifle, partially tightening the
rear clamping screw first and finally screwing both fully
home.
4. Adjustment -of sight-.—-The telescope is graduated
for elevation from 0 to 1,000 'yards, and can be adjusted in
50 yard clicks by turning the range drum until the required
range is opposite the pointer mark.
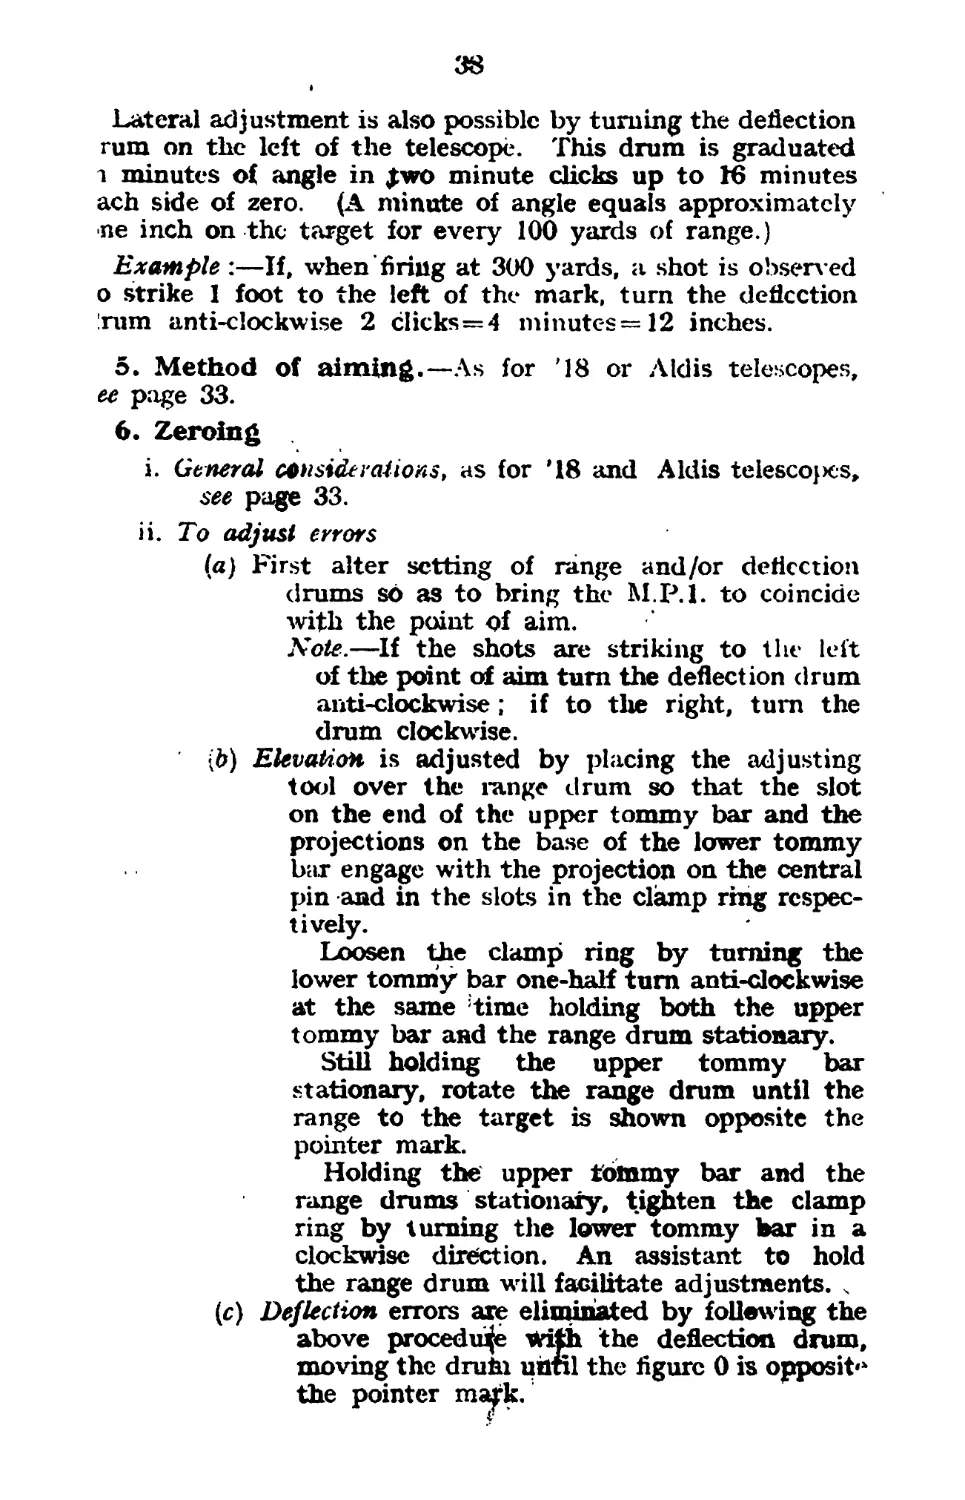
38
Lateral adjustment is also possible by turning the deflection
rum on the left of the telescope. This drum is graduated
i minutes of angle in £wo minute clicks up to 16 minutes
ach side of zero. (A minute of angle equals approximately
•ne inch on the target for every 100 yards of range.)
Example :—If, when firing at 300 yards, a shot is observed
о strike 1 foot to the left of the mark, turn the deflection
!rum anti-clockwise 2 clicks=4 minutes =12 inches.
5. Method of aiming.—As for '18 or Aldis telescopes,
ее page 33.
6. Zeroing
i. General considerations, as for ’18 and Aldis telesco}>es,
see page 33.
ii. To adjust errors
(a) First alter setting of range and/or deflection
drums so as to bring the M.P.l. to coincide
with the point of aim.
Note.—If the shots are striking to the left
of the point of aim turn the deflection drum
anti-clockwise; if to the right, turn the
drum clockwise.
\b) Elevation is adjusted by placing the adjusting
tool over the range drum so that the slot
on the end of the upper tommy bar and the
projections on the base of the lower tommy
bar engage with the projection on the central
pin and in the slots in the clamp ring respec-
tively.
Loosen the clamp ring by turning the
lower tommy bar one-half turn anti-clockwise
at the same time holding both the upper
tommy bar and the range drum stationary.
Still holding the upper tommy bar
stationary, rotate the range drum until the
range to the target is shown opposite the
pointer mark.
Holding the upper tommy bar and the
range drums stationary, tighten the clamp
ring by turning the lower tommy bar in a
clockwise direction. An assistant to hold
the range drum will facilitate adjustments. .
(c) Deflection errors axe eliminated by following the
above procedure With the deflection drum,
moving the druhi until the figure 0 is opposite
the pointer majrk.
39
APPENDIX VI
THE SNIPER SLING
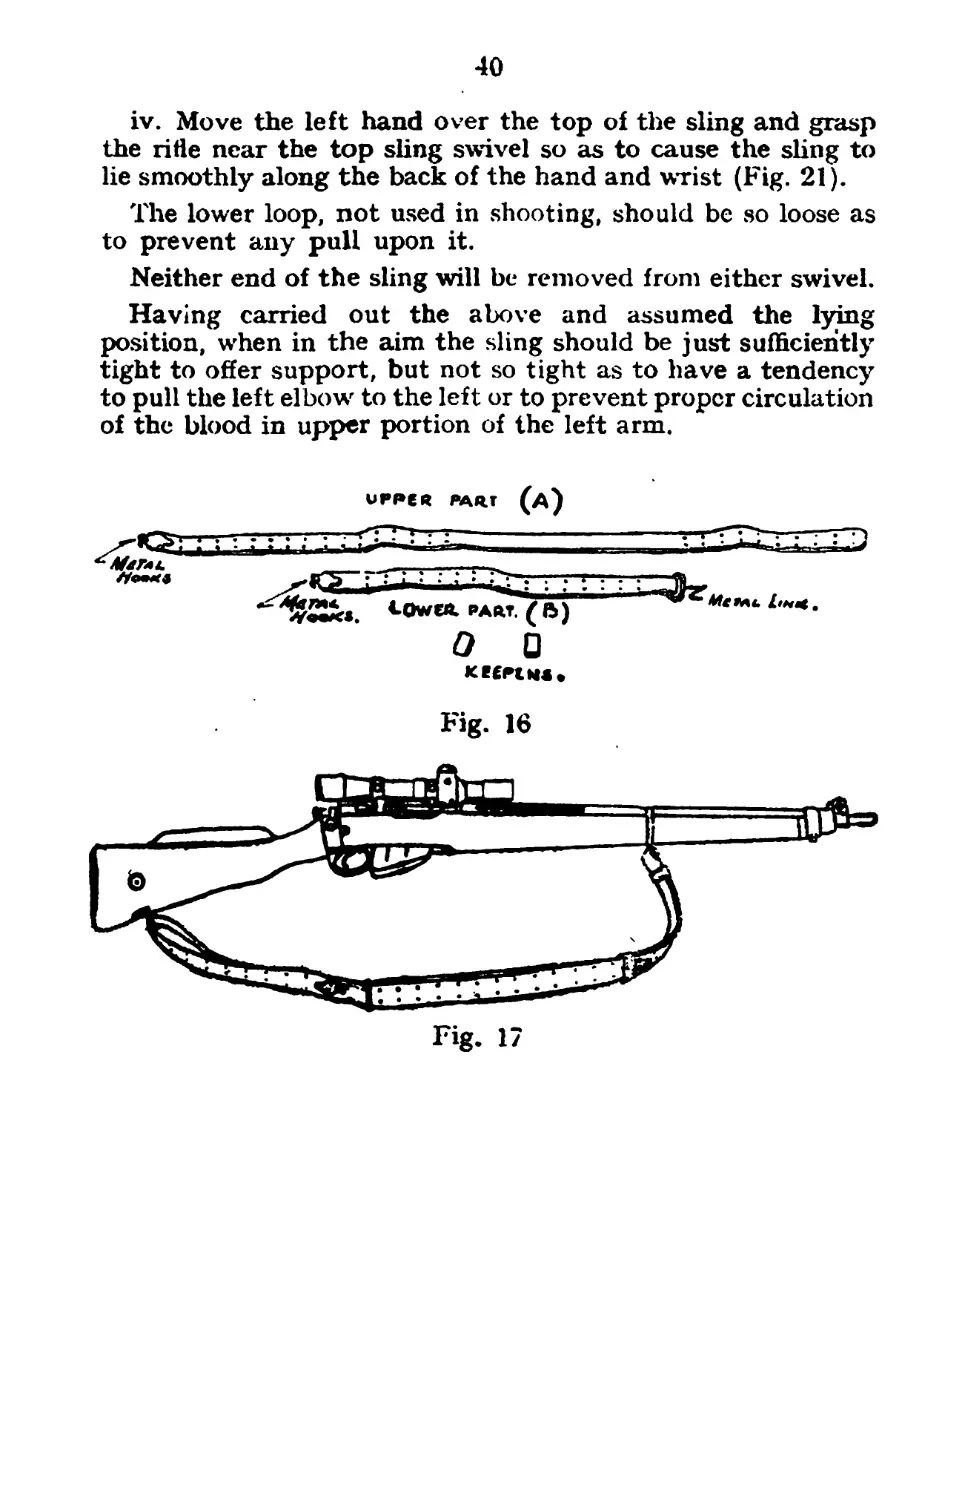
General description
The sling consists briefly of two parts. (A and В as shown
in Fig. 16.) Part A is longer than Part В and is attached
to the upper sling swivel and forms the principal part. Part В
is much shorter, is fixed to the lower sling swivel and is con-
nected with A by a metal link, so enabling the rifle to be slung.
The object of the sling
i. To assist shooting by keeping the rifle steady, when
cover is not available.
ii. To enable the rifle to be carried on the shoulder in the
normal manner.
How to fit to rifle
Take the larger Part A, which forms the upper part and
do as follows :—
i. Slide the sling keeper (leather band) down to within
about 9 inches from the sling hooks, place the plain
end through the link^ttached to Part В till it touches
the keeper, bend the sling round and slide it once
more back through the keeper, thus forming a leather
loop for the metal link attached to B.
ii. Slip the second keeper over the plain end of the sling
and place this end through the upper sling swivel,
double over and bring back through the second keeper
and engage first pair of Holes with the hooks. '
iii. Place Part В through the lower sling swivel, and engage .
hooks with holes so that sling hangs sufficiently
loose to enable rifle to be carried slung on the
shoulder.
How to use the sling
i. Loosen the lower loop of the sling so that it hangs free
as shown in Fig. 18.
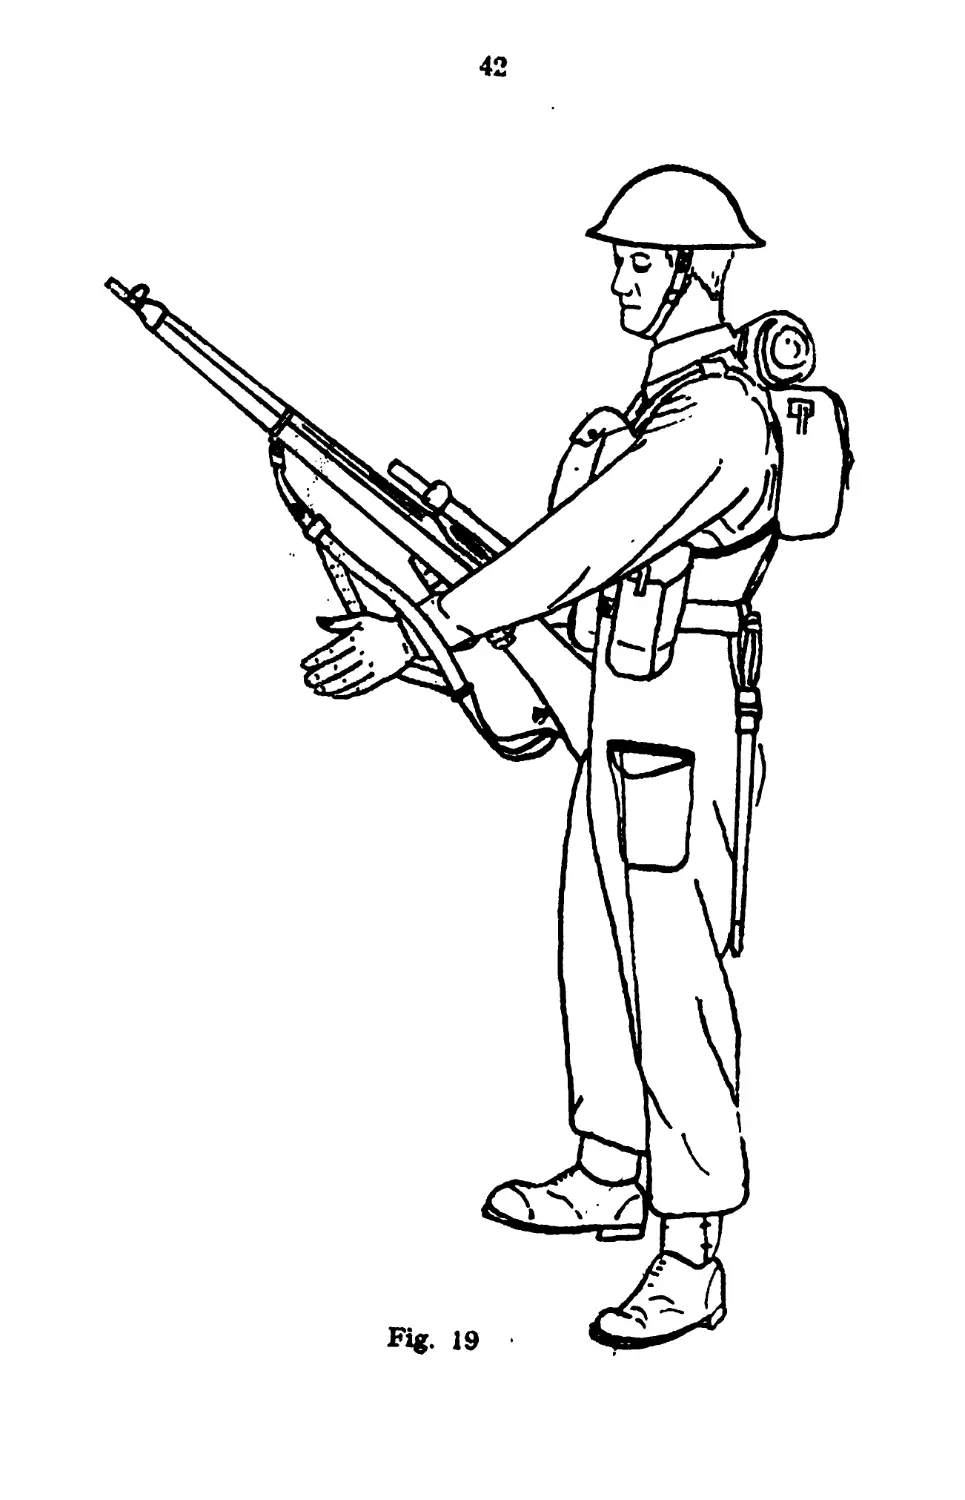
ii. Insert the left arm through the upper loop from right
to left. (To facilitate doing this, the sling should be given a
half turn in an anti-clockwise direction.) Hoist the upper
loop well up the arm so that it is near the shoulder and well
above the biceps muscle (Fig. 19).
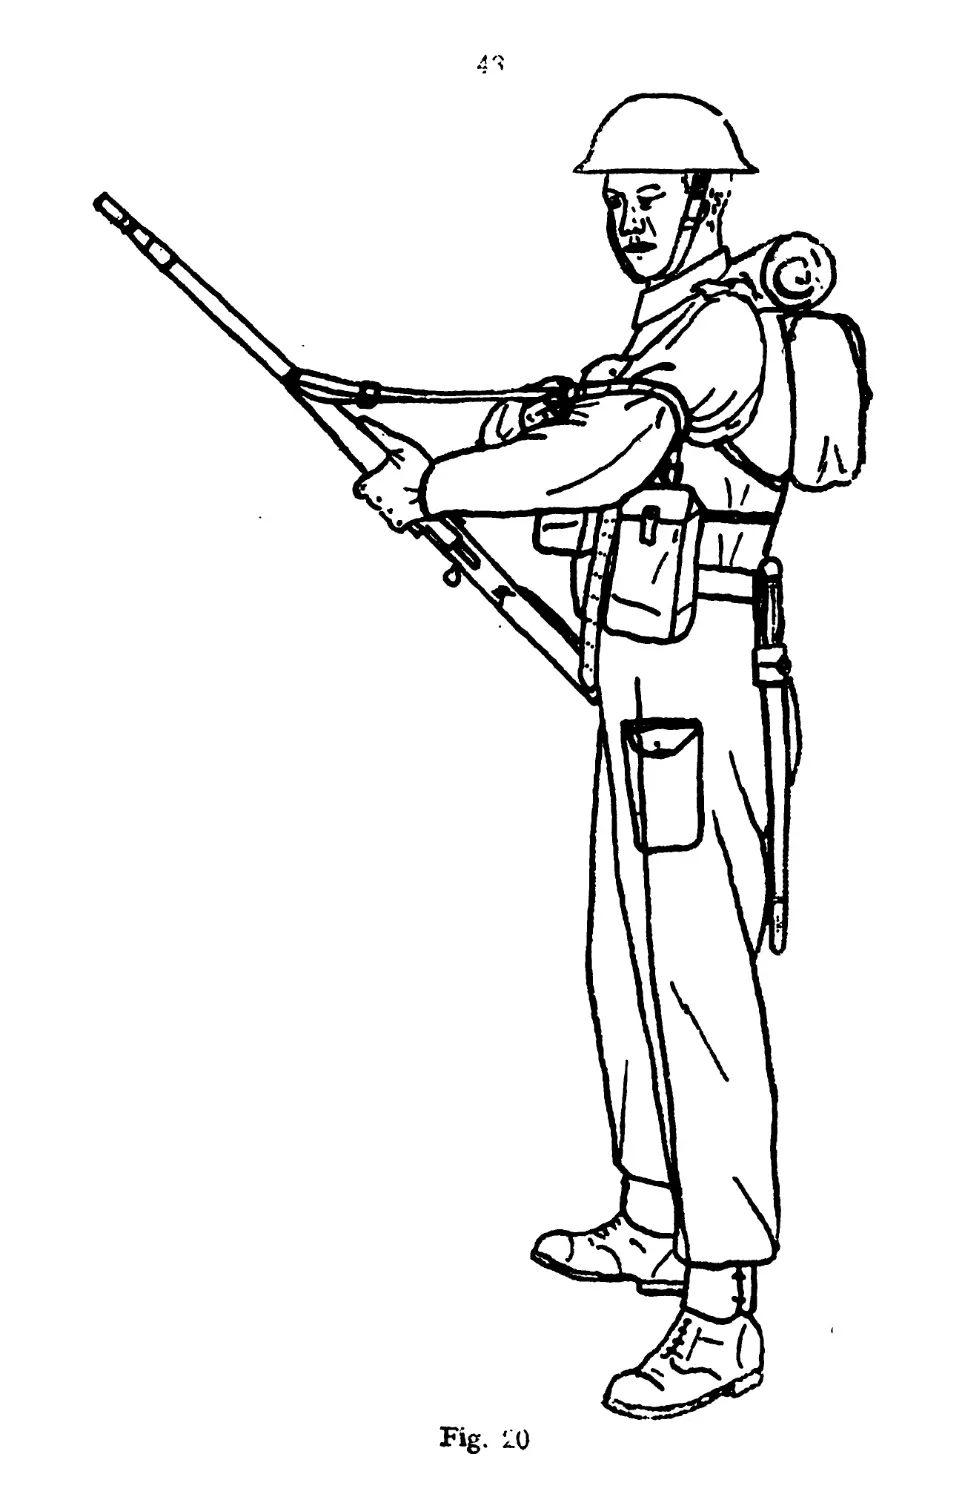
iii. Pull the keeper (Fig. 20) close against the arm to keep
the upper loop in place.
40
iv. Move the left hand over the top of the sling and grasp
the rifle near the top sling swivel so as to cause the sling to
lie smoothly along the back of the hand and wrist (Fig. 21).
The lower loop, not used in shooting, should be so loose as
to prevent any pull upon it.
Neither end of the sling will be removed from either swivel.
Having carried out the above and assumed the lying
position, when in the aim the sling should be just sufficiently
tight to offer support, but not so tight as to have a tendency
to pull the left elbow to the left or to prevent proper circulation
of the blood in upper portion of the left arm.
UPPCR PART (A)
0 0
41
Fig. 1?
42
Fig. 19
Fig. i.0
44
Fig. 21
380,000 6/42 (17288) G2032 120,000 8/^2 K.H.K. Gp.8/9