/



Текст
'
t^l'^r
'••
'./*
*
'%
3M
^'^/^B
^;/
^^
y/A
?^?S?^3l^g^^^^
k''
fi
¥
"^
10^
0'.
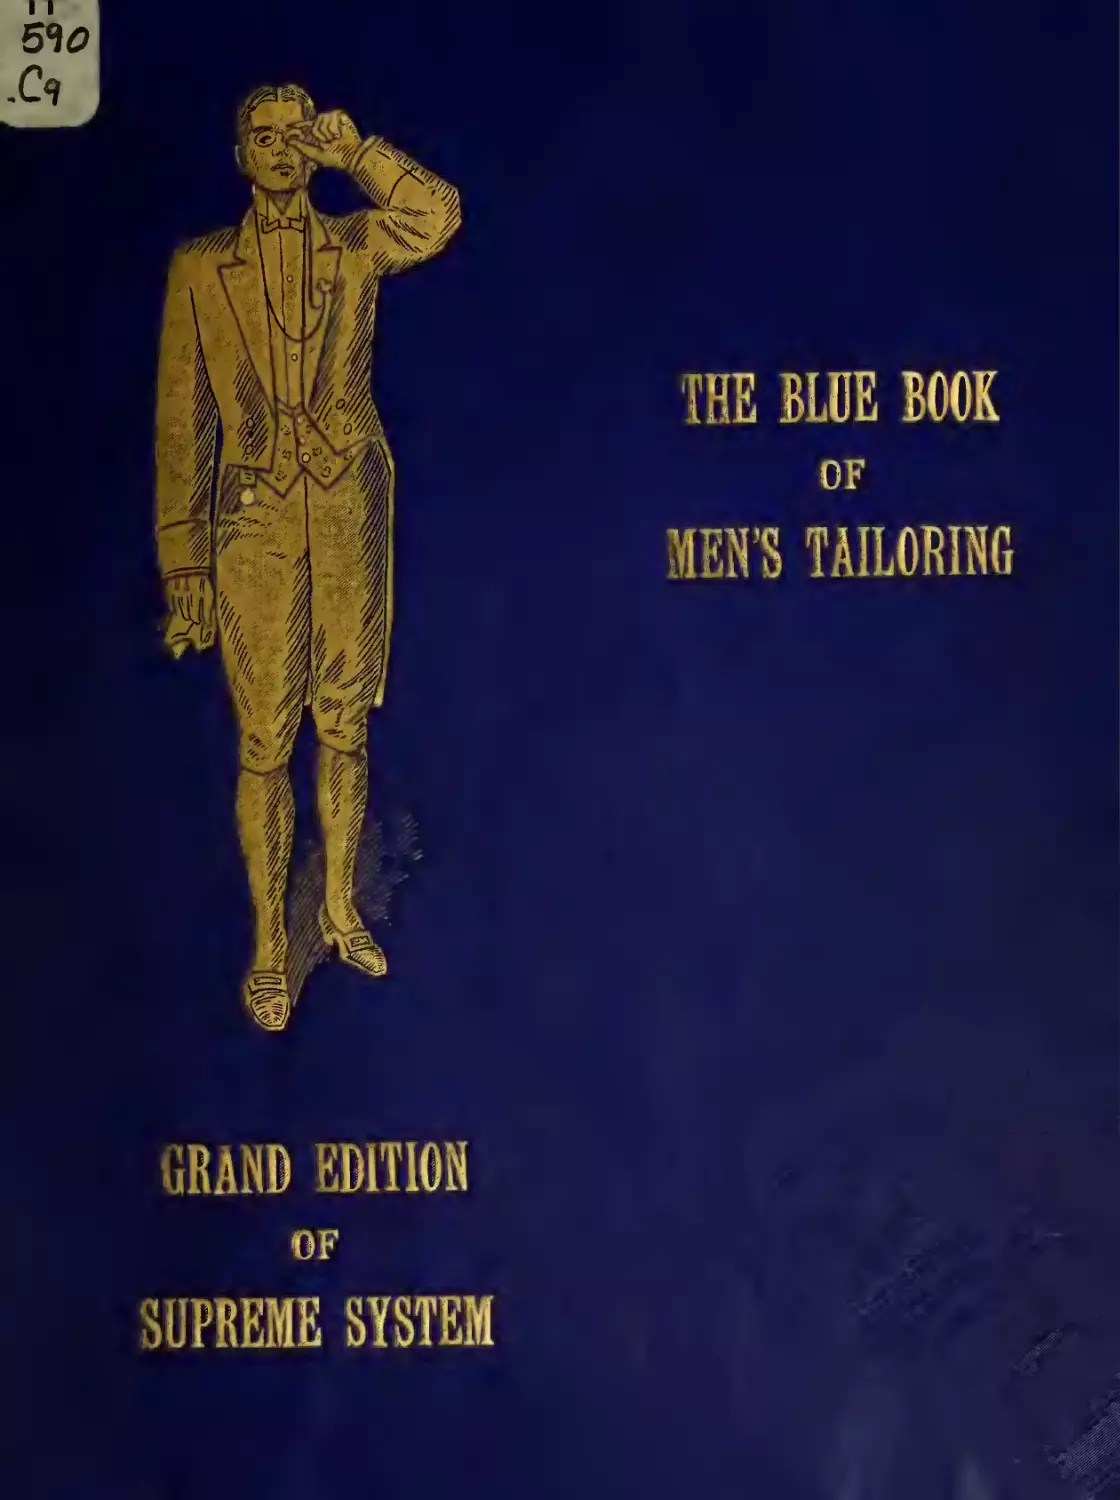
THE BLUE BOOK
>^:
A
%,.
m
y/3
I
I
^fi,f"'
'""
.4:^/./"'/;/^
a<%^a8-%»;a:
-.
«-::
.
^-^;;a^i»,^^^,.
:A'^H*fei;
^
:"?
7^
a
It
[-
'¥
1.
...^
Class
M
_:iJ_tL 31
Book _.__CLij
GopightN°_
COPYRIGHT DEPOSIT.
_
;,«^^ V^i^^B'St'S^ISf^"^*^-
r
The Blue Book of
Men's Tailoring
Copyright
CROONBORG SARTORIAL
New York-Chicago
1907
II
CO.
IV
GR^Miy EBITIOH
°/
SUPREME SYSTEM
FOR. PR.ODUCING
MEN'S GARMENTS
SCIENCE
By
Frederick T. Croonborg
Published by the
CROONBORG S^RTORIJiL
1181-83
Broadway
NEW YORK
CO,
183-189 Dearborn St.
CHICAGO
LIBRARY of CONGRESS
Two Cooles Received
JUL
9 190?
yj OooyiirM Entry
ytCL^f 6'./ 907
^LASS 'a. XXC, NO.
COPY
B.
-^
1
*
(
Introduction
When
there
no doubt that
is
the best
way
followed
it.
to
human
race,
in
weaving the leaves together she used some method which was
to her
mind
first
garment worn by one
produce the apron which was the progenitor of the multitude of garments which have
Ever since the
earliest times there
most earnest students
rules
of the
Eve, in the Garden of Eden, fashioned the
of the centuries
which would produce,
for the
have been "systems"
in cutting,
and the brightest minds, the
have devoted their energies to finding a
making
garments and the
of
fitting of the
set of
human
mathematical
form, an
infalli-
ble method.
For the foundation
human body
of the science of
follows approximately the
garment cutting some
same
which
will serve as a
is
necessary.
The
even when the variations of stature and curva-
lines,
ture are extreme, and the average proportions of the different
tables
system
sort of a
members may be reduced
to a set of
ground work on which to erect the superstructure which produces the
perfect garment.
many
In so
same.
Most
many
years of study there have been evolved
cutters are firmly
wedded
they aim to achieve, and would in
to the
many
different
arrangement which has secured for them the
cases destroy any other.
supports him over the stream although there
methods whose goal was the
may
be
many weak
result
Every one praises the bridge that
points in
it
which would not bear
the weight of others.
The
originator of a system of garment cutting, through the very study to prepare himself and
the observation and trial to which he
must subject
strong and weak points of any method, and
work could be
eliminated,
his system,
is
eminently qualified to judge of the
the personal element and the just pride in his
if
would usually be an impartial
critic.
But
this is too
much
to expect
own
from
a mortal.
Every system has
The
its
strong points, each
earnest pioneers in the science,
succeeding generations, are worthy of
easier
way
The
to
all
its
weak
who gave
ones.
their best
thought and work for the benefit of
honor, and to each student
who has
discovered a
new and
do a hard thing due credit should be given.
object of this
work
is,
condemn previous
therefore, not to
their value as pioneers, enabling others to take
efforts,
but rather to acknowledge
up the science where they
left off,
and thus, building
block by block, the edifice will in the end be a beautiful and worthy one.
If all
men were
cast in one mold, or
if all
were clothed with the same material,
easy to produce an ideal system, by which a cutter could with his square and tape
it
line,
would be
following
exact mathematical rules, construct garments which would be absolutely satisfactory to his customer.
But as men are
of different minds, of
varying proportions,
and choose
to
clothe
themselves in a
diversity of materials, the author
ment
normal male
for the
figure,
laid the foundation
by a simple system has
then shows
how
his pattern
may
which produces a gar-
be changed to meet the requirements
of taller or shorter, larger or smaller than the average, or to cover defects of figure.
Theory Justified
We
We
We
We
have heard
of
good as well as bad
have seen two persons working
cutters.
at the
have seen proportions used with good
same cutting board with
effect
where
have seen cutters using long measures who were
direct
entirely
measures have
fairly successful,
when
different
failed,
results.
and vice versa.
others were absolute
failures.
Yet
in
response to
inquiries as to the reason for these varying observations the
all
be sure to obtain proper balance in the garment.
Balance
and the diversity and confusion
is
This will rectify the greater portion of the errors.
garments seems to be the great center
in
answer
arguments and theories
for
of ideas in this respect is astonishing.
Therefore,
in this profession
it is
a positive fact,
as well as a necessity, that a cutter should thoroughly understand the scientific part of garment
cutting as well as the artistic.
Science
In going
is
down
simply doing.
Science shows us
to the root of these
work
two words, we
Art
is
how
things should be done and
the
and
cause and effect (variations), and Science
is,
is
that
Consequently, Art
of Science.
we know how
to
do them.
is
which guides and regulates the work.
they should be done.
therefore, the
doing; Science
is
Science illustrates to us
fundamental part of garment cutting. Art
can only reach excellence as a product of Science, and there
cise
means knowing, while Art
find that Science
or task, while Science
why
Jirt
is
no true Art without the proper exer-
We
knowing how.
Therefore, the secret of high achievements
to
is
cannot do things unless
be found
in
Science or
system.
The Supreme System
The Supreme System
is
based on the above stated principles, and
and Variations (Science) coupled with a methodical way
of taking
is
composed
and applying
of Proportions
direct measures.
Short or direct measures belong to the artistic part of our work for the reason that measures are
more or
less subject to
judgment and anything that
is
a matter of judgment should be classed with
the artistic part.
Proportions
Artists
product.
and painters always require a model from which
This
an Apollo,
is
also true in Sartorial Art,
5 feet 8 inches in height,
measure 36 inches around breast.
including shoulder, circumference,
draw the fundamental part
and the ideal model for Supreme proportions
is
of their
that of
weighing 135 pounds, which practice has demonstrated
Furthermore, this subject
etc.
to
is
will
absolutely normal in every respect,
Therefore, in selecting a model for practice
we choose
the
Contents.
Page.
Page.
INTRODUCTION
Theory
1
2
2
2
2
Justified
Science and Art
Supreme System
Proportions
Height
Circumference
Exaggerations
3
3
3
Variations
Direct Measurements
Block Patterns
Individuality
4
4
6
Fashions
6
THE SQUARE
7
Diagram of the Square
The Tester
9
6
8
THE SYSTEM.
How
Sack
Sack
Sack
Sack
to
Measure, 12
;
Diagrams
Hunchback, 60
RELATIVE
Breast Measures by Weight and Height, Proportionate Table
Waist Lengths for Coats and Full Length
Coats, Proportionate Table
22
Diagram
61
62
Overcoat, Fashion, Description
63
Overcoat, Fashion, Illustration
Box Overcoat, E.xaggerated, Single and Double
65
Breasted, 64 Diagram
66
Overcoat, Single Breasted, Newmarket
67
Overcoat, Double Breasted Surtout
69
Overcoat, Inverness, 68 Diagram
70
Full Dress, Fashion, Description
71
Full Dress Fashions, illustration
72
Full Dress Coat
Full Dress Coat without strap and lapel seam,
73
72 Diagram
Tuxedo, or Dinner Coat, Fashion, 74; Diagram. 75
77
Cassock, 76 Diagram
Direct Measures from Heights and Circumfer78
ence, Proportionate Table
79
Theories and Practice
;
;
;
.
;
13
14
Coats, Description
15
Coat, Fashion Plate
Coat, Systematical Outline, 16; Diagram.. 17
19
Coat, Proportionate, 18; Diagram
21
HEIGHTS, 20; Diagram
;
VEST SECTION— 81-91.
Front lengths for Vests, Proportionate Table..
of Vests, Proportionate Table. ...
Vests, Fashion, Description
Vests, How to Measure, 84 Diagram
82
82
83
85
Vests, Proportionate, Single and Double Breasted, 86 Diagram
\^ests for Stout Figure, 88 Diagram
\''ests. Double Breasted, with Lapel Front
Vests, Full Dress, with small waisted effect. ...
Vests, Double. Breasted, with separate lapel, 90;
87
89
90
90
Waist length
;
;
of
;
22
23
Sack Coat for Corpulent Figure, 24; Diagram. 25
EXAGGERATION, Sack Coat, 26; Diagram.. 27
Sack Overcoat, Single and Double Breasted, 28
29
Diagram
Frock Coats, Single and Double Breasted, Fash-
CIRCUMFERENCE
.
Diagram
gram
3ri
Frock Coat, Double Breasted, 36; Diagram
Frock Coat, Corpulent, 38; Diagram
Frock Coat for Stout, 40 Diagram
;
i7
39
40
98
VEST VARIATIONS.
31
ions
Frock Coat, Outline for Body, 32; Diagram. ... 33
Frock Coat, 3-Button, Single Breasted, 34; Dia-
91
Vests, Clerical
Stooping and Erect
Large and Small Blades
Sloping and Square Shoulders
Long and Short Neck
Vests, Notched Collar for Corpulent Figure, 96;
Diagram
92
93
94
95
97
VARIATIONS.
Definition of Types, Illustrated
Incline
41
Head, Forward and Back
Stooping and Erect
Large and Small Blades
Sloping and Square Shoulders
Long and Short Neck
45
44
46
47
48
49
50
Sleeves, Proportionate
Sleeves, Stooping and Erect
Sleeves, High and Low Top
51
bl
DIRECT MEASURES.
TROUSERS SECTION—99-124.
of Trousers, Proportionate Table
Rise in Trousers, Proportionate Table
Trousers, Fashion Illustrations
Trousers, How to Measure, 102; Diagram
Trousers, Proportionate, 104; Diagram
Trousers, Peg Top
Trousers, Dress
Trousers, Corpulent, 108; Diagram
Long and Short Front
Open and Closed
Large and Flat Seat
Inseam
Bow Leg
Direct Measures, Diagram
Application of measurement
55, 56, 57, 58,
53
59
and Knock Knee
Combinations of Variations. 112 Diagram
Combinations of Variations, 114; Diagram
;
100
100
101
103
105
106
107
109
110
110
Ill
Ill
113
115
Contents
—
INDIVIDUALITY SECTION— 169,
Page.
116; DiaKnickerbockers, with
117
gram
Riding Breeches, 118 and 120; Diagram 119 and 121
122
Spring Bottom Trousers
123
Broad Falls
123
SpHt Falls
124
Overgaiters
124
Leggings
Cuff attached,
U.
S.
ARMY.
gram
Novelty Sack Coat, 1-Button, 174; Diagram.
Novelty Sack Coat, 3-Button, 176; Diagram.
Novelty Sack Coat, 3-Button
.126
Chaplain, Illustration
gram
Flaring of Skirt, Frock Coat
Vest, Novelty Dress
Vest, Double Breasted
Vest, Single Breasted, Novelty
Vest, Notched Collar
Vest, Full Dress
Dress Ethics
CLOTH CUTTING— 213,
;
143
General Officers' Dress Uniform, 144; Dia145
gram
Circular and Military Capes, 146; Diagram. 147
149
Regular Capes, 148 Diagram
150
Clencal Coat
151
Knight Templar Coat, 150; Diagram
Coachman's Coat, Single and Double Breasted.
153
.\
152 Diagram
155
Footman's Coat, 154 Diagram
157
Automobile Ulster, 156; Diagram
158
Chauffeur Sack Coat
159
Policeman's Blouse
161
Policeman's Frock Coat, 160; Diagram
163
Norfolk Jacket, 162 Diagram
165
Golf Coat, 164 Diagram
166
Riding Coat
167
Hunting Sack
;
.
;
211
220.
214
-I3
for 3-Button Frock Suit
for Overcoat
Lay for Sack Suit
Lay for Stout Men's Sack Suit
Lay for Trousers
Lay for Stout Men's Trousers
Lav for Double Breasted Vest
Lay for Notched Collar Vest
Fittings for Sack Coat
Fittings for Overcoat
Fittings for Vest
Fittings for Frock Coat
Fittings for Trousers
Dia-
gram
202 and 203
202 and 203
204
206
207
208
209
210
Lay
Lay
141
;
201
Collars and Lapels
Sleeve Cuffs, Fancy
Knight Templar, Illustration
Frock Uniform for Army Officers, Mounted
139
and Unmounted, 138; Diagram
Military Blouse, 140 Diagram
Military Overcoat, U. S. Army, 142
.
.
133
133
135
135
Dress Uniform, Illustration
Summer Uniform, Illustration
.
173
.175
.177
178
;
131
131
Military Cape, Illustration
.
;
.
MiHtary Overcoat, Illustration
.
Manipulation of front for corpulent or stout fig179
ure
180
Manipulation of Sack Coat Pattern
181
Flaring of Overcoat
183
Top Coat, Novelty, 182 Diagram
Box Overcoat, Single Breasted, 184; Diagram.. 185
187
Fur Coat, 186 Diagram
Manipulation of Overcoat Pattern, 188; Dia189
gram
Frock Coat, 2-Button Novelty, 190; Diagram. .191
Frock Coat, 1-Button Novelty, 192; Diagram. .. 193
Frock Coat, 3-Button Novelty, 194; Diagram. .. 195
Frock Coat, Double Breasted Novelty, 196; Diagram
197
Full Dress Coat, Novelty, 198; Diagram
199
Newmarket, Double Breasted Novelty, 200; Dia-
126
Full Dress Coat, Description
128
Description
Coat,
Dress
128
Service Coat, Description
130
Description
White Coat,
130
Overcoat, Description
132
Description
Capes,
132
Full Dress Trousers, Description
132
Dress Trousers, Description
132
White Trousers, Description
132
Service Trousers, Description
132
Dress Breeches, Description
132
Service Breeches, Description
134
Evening Uniform, Description
134
Aless Jackets, Description
134
LTniforms for Enlisted Men, Description
Line Officer Full Dress, Dismounted, Illustra127
tion
127
Social Dress Uniform, Illustration
129
Field Officer, Mounted, Illustration
129
General Officer, Illustration
.
209.
Page.
170
Sack Coat Novelty
Outing Sack Coat, Double Breasted, 172; Dia-
MILITARY, LIVERY, SPORTING AND OUTING GARMENT SECTION— 125, 167.
UNIFORMS FOR OFFICERS
continued.
21
215
216
216
217
217
218
218
219
219
219
PRACTICAL TAILORING— 221.
.
;
How
to
Canvas
How
How
How
;
Make
for
a
to Make a Pocket
to Try On
to Instruct the Maker
Coat Making
Vest Making
Trouser Making
;
\iii
Try-On
Coat
224
225 and 226
227
229
231
233
237
238
Preface
The demand from
latest
developments
and work, both
the progressive
in sartorial science
of the author,
and
members
and
of the
art,
of the profession
and the necessity
desire to keep abreast of the
for a permcinent record of the
thought
thousands of earnest students, who, by the use of the Supreme
System have attained success and have created many
and grand edition
third, enlarged, simplified
who
original ideas, has led to the publication of this
Supreme System
of the
of
Garment Cutting.
In presenting this volume to the public, the author believes that the following features of his work
adapt
1.
it
to the purposes for
It
contains no
which
it
was designed.
more than can be mastered by the average
intellect in the
time usually given to
the study and acquirement of the Art of Cutting.
2.
It is
thoroughly systematized.
The order and development
of subjects
of topics especially adapted to the best
3.
It is
human
thought to be logical and practical, and the arrangement
methods of
Artistic Drafting.
written and illustrated in accordance with modern theories and practice, and no pains or
expense have been spared
as
is
in the
attempt to make
it
fully represent the present
needs of the Art, so far
ingenuity and deep study can obtain.
In addition to his efforts to make these features prominent, the author has not forgotten that a
student will succeed best
when
required to learn one thing at a time.
practical, presented each subject separately
leading to a height from which the student
of
Garment Cutting, and
SUPREME SYSTEM
at the
makes
same
and in natural order,
may have
a clear
who
has, therefore, as far as
like the successive steps of a ladder,
and comprehensive view of the Science
time, let us hope, reach that
easily accessible to those
He
Acme
of Artistic Skill,
which
desire to give serious thought
THE
and honest
application to these pages.
THE AUTHOR.
i.\
Inspiration—
''All
Things Come To
Him Who Hustles While He
Waits
Advice To The Student.
The system
volume and
set forth in this
its
results are based
practical application, previous to its publication, in high-class
author but by hundreds of his successful students as well.
of practice has revealed
aimed
many improvements, and
volume
Personally
that hesitation
is
man and have
a detriment to one's
ning the study of this volume
with the
own
is
to
interests
thorough qualification
in
fullest confidence that the best results
proper application that
its
do just as he
Therefore, the best advice
have faith
volume
The
your work.
yet simplified subject.
in the
wills.
I
in
system you are about to
may
lies in
learn.
is
is
it
it
for the student to
branch
off into
over and over again until
its
secured the principal points,
it
principles have been
make
Be
perfectly hon-
is
become.
first
confi-
not an easy task to learn to
part of the
to study
With
qualifications.
work has been drawn up
more than one thing
at a time.
It
disproportions or direct measurements before the
Therefore, the proportionate draft should be gone
thoroughly acquired, and
in
this
way, having
will be a surprise to the student to recognize in the following drafts
same principles incorporated, while the subject
tions, as well as direct
it
will
advanced attainments and
would be a great mistake
elementary portion had been completely mastered.
the
not
very necessary to success in this masterly
must be admitted that
a gradual process from elementary to
scientific simplicity, for
would be unwise
is
your application of the system, and, while the details are numerous,
In order to encourage perseverance in the student, the
with
Confidence
the fact that a realization of sartorial truths will
right mental attitude
dence incorporate perseverance, and, while
it
further believe
maintain steady progress toward
you proceed the more interesting the subject
will find that the farther
be a cutter,
I
Further, in addition to confidence in the system, you must have confidence in
with yourself and honest
you
I
can give the student begin-
yourself so that you will be able to thoroughly absorb the details herein set forth.
est
these years
men's garment cutting.
practical value of this
in
by the
and the creator of unnecessary thoughts which
only valuable, but an absolute necessity in order that a student
you stronger
tailoring, not alone
The experience gained during
faith in his capacity to
sap one's energies and waste one's brains.
The
of eighteen years'
to its readers.
believe in
I
is
merchant
be obtained from this system upon
at in high-class tailoring can
offer this
it
on the experience
measurements, will each
of the different heights, attitudes
in the
and dispropor-
proper order be thoroughly mastered.
FREDERICK
T.
CROONBORG.
A
original 36-inch normal.
the breast, and
for the
more over the
inch
1
Supreme System
Height,
proportionate subject measures 4 inches less at the waist than around
The measures
seat than over the breast.
model
for the ideal
are, therefore, as follows
5 feet 8 inches.
Weight, 135 pounds.
Circumference of breast, 36 inches.
Circumference of waist, 32 inches.
Circumference of
In drafting
we
inches.
seat, 37
use the regular tailoring square
(illustrated
on page
square shows the gradations and fractions of inches and the other side the
we
these divisions on the square
we
first
is
Supreme System,
this
of
By means
of
and by the same method
The beginner should
garment with promptness and exactness.
Inasmuch as the various divisions on the square are
of all familiarize himself with the square.
applied in the
side
full inches.
find the proportions for our ideal model,
are able to produce any kind of
One
9.)
should be thoroughly studied. Further, the application of divisions
it
so regulated that each pattern will have uniformity, and formulate
in the different sizes, therefore necessitating that these divisions
ing to instructions, or else the grade will be
gradations of patterns
the
must be absolutely applied accord-
lost.
Height
While
inches in height
5 feet 8
or short man.
is
This, however, in no
the ideal model,
way changes
we
constantly
come
in contact
tall
the application of the divisions, but necessitates
additions and deductions to depth of scye, waist length, length to seat, and in
the length of the garment.
with the
(As per instructions and
illustrations
probability also to
all
on pages 20 and
21.)
Circumferen ce
While
4 inches
is
the normal difference between breast and waist,
increase and decrease of waist
For corpulent on pages
For stout on page
must be treated
24, 25, 38
illustrations
manner
illustrated
must be understood that
and instructed on page
23.
39.
40.
For slim on pages 18 and
These
and
in the
it
19.
and instructions should be given attentive consideration, as
stout there are varying points relative to both circumference
and depth
of scye
;
in
corpulent and
also, for the
reason
that they give the student a thorough understanding of the definition of slim, normal, corpulent
and
stout.
Exaggerations
Exaggeration
is
is
the scientific resource for enlargement of patterns.
incorporated in order to obtain the different effects the style demands.
how and when
to exaggerate they
would have
less trouble,
More
or less exaggeration
If half
the cutters
knew
and thousands of dollars would be saved
By
in the busheling department.
in
the use of exaggeration the cutter
circumference as he desires, while the garment
tionately around the
body
and, the armhole
;
is
able to produce a coat as large
is
clings to the neck, the goods drape propor-
still
placed in the right position and at the proper height.
(See pages 26 and 27.)
Variations
Under
this
head we come
in contact
with
many
subjects that at
seem
first
to be
most complicated,
but upon application to the direction and instruction from numerous illustrations on this subject,
study of cause and effect from the original draft,
after
well as scientific,
therefore,
way
it
will
of variations for the different attitudes
by giving attention and proper study
pages 41-43), and fixing
in one's
become
forms (as shown
of the types,
and
in that
mathematical drawing of variations of coats illustrated on pages 45-49,
applying the divisions in the usual
form
of type,
whether
it
way
it
makes
it
possible to produce a
it
most simple, reasonable, as
and subjects a cutter
to the types of
mind the regular code
a
called
on
to
fit,
in illustrations
on
is
connection studying the
soon be plain that by
will
good pattern
for
any
size or
be slim, stout, or corpulent, stooping or erect, head forward or backward,
sloping or square shoulders, long or short neck, etc.
However, careful study
have been stipulated
of attitudes is very essential so as to be sure that in actual practice
in the right direction.
the various directions stipulated
it
It
to be noticed that
is
will develop striking
similarity
by working the
in
patterns,
all
ideal
they
model
indicating
in
that,
while the pattern has been swayed in various ways for the different types of forms, increases or decreases of circumference, and different heights,
it
retains the
most men
of
may have
the
same
size.
it
will
The
be surprising to see
alteration
in
how
the original, insuring a
stipulated the third degree of deformation of a certain type.
is
by
the
well a proportionate coat will
most cases would be
with the form of the subject, and unless there
fault
of
Therefore, caution should be exercised
well balanced garment for any form or type of man.
cutter in stipulating the type, as
symmetry
slight,
fit
even where the cutter
It is
not advisable to find
a positive inclination of a certain type, cut
a proportionate pattern subject to height and circumference.
'Direct
I
am
Measurements
a firm believer in fundamental principles,
Weight, Circumference and Variations
symmetry and
direct
tion with illustrations
tem proper, inasmuch
way
for the different types of
of
men
Supreme
proportions.
Height,
as a regulation for obtaining
correct balance in men's garments.
In discussing
methodical
consisting
measures,
what has been stated heretofore
in this introduction in
connec-
and instructions pertaining to fundamentals, contains the principles of the Sysas
it
of applying
comprises the
scientific
part of garment cutting.
measures over said proportions, variations, heights,
Direct measures
circumferences,
is
a
etc.
In connection with these proportions, direct measures are of value, but direct measures cannot
be relied upon, as a foundation in themselves, inasmuch as in applying measures to any part of the
body judgment must be exercised
to the utmost.
There
no doubt, experts who have by long experience accustomed themselves
are,
to particular
methods, enabling them to take measures with great exactness, but that proves only their
The
own
skill.
remains that the great majority of cutters cannot handle the customer with the manner of
fact
an expert nor secure measures that are even approximately correct.
No
view
material progress in measuring has been
my
of
made during
personal study on this subject for years,
I
the past twenty-five years and
in
have come to the conclusion that the object
the cutter should have in view in cutting a garment should be to cut
it
so
it
will
fit
and clothe the
customer gracefully.
am
I
aware
perfectly
of the fact that
it is
an utter impossibility to be successful with direct meas-
ures unless combined with the fundamentals, proportions and variations.
The
seconds
;
principal reason for this
same
that the form will not measure the
is
for five consecutive
a deep breath, a shifting of the weight from one foot to the other, or any other slight move-
ment on the part
of the
customer not only changes
his size, but so varies the relations of the points
measurements are unattainable.
to each other that absolute
This, together with the difference of undergarments, renders accuracy out of the question.
Any
slight
who
cutter
who
has ever placed a square under the arm of a customer knows very well that a
make
pressure will easily
a difference of one-fourth to one-half inch, and
the cutter
is
can measure the depth of scye, blade and strap twice alike with a tape and square where pro-
portions are not stipulated to guide him.
which require many
of
who
anatomy
superficial
to enable
them
to the sixteenth of an inch,
But
Young
cutters are especially inclined to adopt
methods
measurements, and are prone to believe they should have a knowledge
to succeed.
They
strain their eyes in an endeavor
and are happy so long as the measures are
in spite of all these uncertainties in
to take
measures
fractional.
measurements, direct measures are of great value
in
connection with proportions and variations, but they must be taken and applied in the manner described in the various diagrams on
how
will then be readily seen that direct
goes to show that there
the
Supreme System
Heights,
of
no true
will be
Circumferences,
EDITION
is
to take
them and
WHEN
and
WHERE
to apply them.
It
measures should not be used without fundamentals, which only
art
without the proper exercise of science.
found a complete combination
Exaggerations and
Direct
of
Supreme
Measures,
hence
For these reasons,
proportions,
the
name
the
in
Variations,
GRAND
SUPREME SYSTEM.
Block Patterns
Any man who
thoroughly understands the system of drafting, measurements and applications,
as well as exaggerations,
much
and has the principles
success as by drafting.
This
is
of variations,
etc.,
can use block patterns with as
especially true in regard to sacks
that block patterns are safer to use than uncertain drafted patterns.
and overcoats.
The
be used as a model, subject to variations and measurements, and the fact
is
It is also true
block, of course,
would
that a good block in the
hands of a proficient cutter
that
will give the
same
results as drafting.
no man who does not thoroughly understand System and
It
its
must, however, be understood
resources can intelligently use
block patterns.
Individuality
By
cutter
Individuality,
is
scientific
I
mean
the quality of being distinct or personal, and the extent to which a
individual in his productions depends entirely on his artistic ability in connection with his
and practical knowledge of
his special
tailoring, as in the
and independent personality.
Toward
this
individuality of
his
productions he displays
end the exaggerations and manipulations of
These
patterns and a thorough knowlege of practical try-ons and draping act as his resources.
re-
sources, in connection with the development of the latest styles, such as correct shoulders, placing
of vents, the different positions of pockets, as well as
collars
and
lapels,
on
cuffs
sleeves,
various
lengths and the general effect of the prevailing styles enable a cutter to produce not only stylish
garments but
to
display his
own
individuality as well.
Another thing which should be given thorough consideration
making
of the
in
this respect is the cutting
and
canvas of the coat, as the canvas should be changed as often as the style demands and
for the different individual effects
and shapes of
fronts.
For
this reason the
portant factor in the production of individual and stylish garments.
Tailoring; also, study the lecture on
the cultured public which
is
"How
to
to be gratified,
Make
a Try-on and
and Individuality
is
canvas
is
a
most im-
(See the Treatise on Practical
How
the
to
Try
on.")
interpretation
Remember
of
Sartorial
it is
Art
which embraces more than mere system.
Fashions
The
style of yesterday,
would be impossible
which may never return, would be
to foretell.
For
this reason
and the
is
based on the
and the fashion cuts adorning the pages
They
scientific
of this
of the standard type of the time of its publication to serve as a foundation for
style in the future.
style of
tomorrow
no account has been taken of the fashion of the
future in this volume, but every style, past, present, and future,
principles set forth in this work,
useless,
work
and
artistic
are, therefore,
whatever
may
be the
are also valuable as an illustration of the finished product of the various
diagrams and instructions, and, further, with the view of illustrating the regulations of dress for
ferent occasions, thereby serving as Dress Ethics.
dif-
The Square
Besides the yardstick, tape and chalk, the only device used in drafting patterns for garments
the square, and the square
on
illustrated
it,
we
the most essential device, for the reason that
is
find fractions of inches,
which when put
in practice,
is
upon the various divisions
enable us to find the various
proportions of the different parts of patterns, as well as enabling us to produce any size desired.
Therefore, the square must be studied thoroughly by
of drafting, as without a
A
in drafting.
to
remember
full
knowledge
knowledge
all
persons whose ambition
must be acquired
of this square
used for both
is
in drafting patterns.
divisions
which
of the square
Now,
let
is
used, or
which
if
For example
arm
;
Be
a person measures 36 breast, 18
always
Be
sure you
fix in
mind
just
double in
laid
front and back part are pro-
is
is
the figure on the
the figures on the various divisions
You
Notice the divisions on the
will first find the twenty-fourths
all
;
next, the
on the long
arm
of the square starting
where these
and
with the right angle.
finally the half inches
on the short
divisions are located on the short
arm
j^a>**
Next, take the regular square and study
it
together with the illustration.
understand and know where to find the various divisions of inches.
Remember,
well
your mind just where these divisions are located.
a thorough examination of the short
sure you have fixed in your
regular
it is
used, and so on.
is
of the square.
and
is
then the sixths, and again the thirds, and finally the two-thirds of inches,
make
study
Therefore, use only half of the breast or waist
First are the sixteenths, then the eighths, then the fourths,
arm.
The
us take a general examination of the square illustrated.
of this square.
Next,
In this connection
person measures 40 breast, 20
If a
:
long arm of the square, starting from the right angle.
twelfths
first of all.
For example:
sides.
duced, laid on double cloth and so cut out for both sides.
measure
to begin the
of this square and its various divisions, nothing can be accomplished
that in producing patterns for garments of any kind the cloth
cutting, while one pattern
it is
square
until
in drafting
draft only one pattern
you
are
satisfied
that
you are using only one-half
and the pattern
is
laid
you
Be sure you thoroughly
Therefore, study both illustration
have absorbed and know
of the regular
it
thoroughly.
measure for the reason that you
on double cloth for cutting.
The Tester
To Draft
Draw
The
to
is
1
A-1, and
lines
A-L
difference between the figures
from
A
down
in.
J/2
Proceed to square out the
A
from
tration
A
at right angle.
A
From
down
to
L
lines as
as indicated
%
is
from
shown
-iS
1
E
to
to 5
is
1/6 on divisions of 48
a line
A
D
from
E
to
9
is
%
to 24.
to
is 3/^
on the divisions of 48; 24 on
to
4
5.
on divisions of 48; 24 on the square.
34 on divisions of 24; 12 on the square.
is
Rule a
on divisions of 24
to
in illus-
1
1
24 on the square.
1/6 on divisions of 24; 12 on the square.
is
Rule
the square.
From
;
line
D
from
to 4.
12 on the
;
square.
Rule a
line
from
L
A
to 9.
C
to
is
1/12 on divisions of 48; 24 on the
square.
A
From
to
H
^
is
1
on divisions of 48
;
to 3
1/12 on divisions of 24; 12 on the square.
is
24 on the
Rule a
line
A
is
from C
to 3.
square.
From
to 8
1
3^ on divisions of 24; 12 on the
is
square.
Rule a
line
from
H
to 8.
1
to
B
to 2
is
Rule a
From
A
to
G
is
%
on divisions of 48
;
iV
iV
line
on divisions of 48 24 on the square.
;
on divisions of 24; 12 on the square.
B
from
to 2.
24 on the
square.
From
to 7
1
is
I3 on divisions of 24; 12 on the
square.
Rule a
line
from
G
Now
proceed to
test the
trated on the square
from 48
you have
to 7.
all
large
to
F
is
'4
on divisions of 48
;
24 on the
square.
to
all
man measuring 48
6
is
kinds of garments, from the
to the little
boy measuring
only 24 around the breast, waist, or seat.
ample, try size 40-36,
J4 on divisions of 24; 12 on the square.
Rule a line from F to 6.
1
illus-
the divisions applied in the production of
the various sizes for
From A
various divisions
to 24, as in this tester
etc.,
for the various divisions,
in fact, try all sizes for a better
different divisions.
For ex-
understanding of the
H
W
1-3
>
t-H
o
en
O
C
>
>
2i
O
H
w
M
W
The Ideal Model for
Supreme System
Hoiv
Those whose ambition
forms of men; and
last,
to
is
it
They should
of measuring.
are,
and circumference
and
We
Measures.
become successful
but not
cutters should give thorough study to the art
by observing the
is
The second
that of Short,
The
and as many measures as are necessary
in order to
sometimes
Measures,
in the
volume by now taking the
in this
consists of length
first
consists of the definition of types, forms
Direct
or
proceed to give Measurements
will, therefore,
and instructions are arranged
and
hard to obtain.
therefore, divided into three different sections.
third section
different types, shapes
taking short, or direct measures, exercise the utmost care,
least, in
is
connection with heights.
in
The
attitudes.
Measure
further train their faculties
as exactness of these measures
Measurements
to
manner
in
Cross
called
which the
illustrations
Section under consideration,
Fiist
produce a propoitionate coat, subject to height
i
and circumference.
Practice has demonstrated that taking the length of the coat and width cf back before a cus-
tomer removes the garment
will give the best satisfaction, for the reason that the old coat acts as a
foundation for these measurements, and the cutter by taking these measurements over same can
better distinguish whether the old coat
more
correct length for the
the same manner.
new
how
For the same reason the width
coat.
(See Plate No.
too long, or too short, and
is
Next, after the coat
1.)
is
rr
uch, thereby obtaining
of the
back
also taken in
is
removed place the regular
tailoring
square at the top of shoulder and have the short arm of square rest en the end of the right shoulder
the long
arm
of square across the
and with a piece
back;
of chalk in your right
hold same even with
hand mark
off
shoulder end witl: your
left
point Z, as illustialed in Plate
point of the neck by laying on the tape to the back of the neck, allowing both ends of
to the front.
Turn
with the
hand, and with a piece of chalk in the right hand
left
tration in Plate
2.
the tape under the
arms and across back, holding both ends
register the figure of circumference of breast.
hand mark
A
Next,
fix
the waist line
off the
waist
line,
or point C, Plate
2,
left
hand
Fix the
same
to run
of the tape together
and
B
as
shown
in illus-
breast,
and
by placing the tape around
hand, and with the piece of chalk
at the
same time
register the circum-
Next, place the tape around the most prominent part of the seat, hold the
ference of the waist.
tape together with the
measure.
points
2.
Next remove the tape from the back of the neck and place tape around
the hollow of the waist, holding the tape together with the
in the right
mark
left
left
hand, marking with the right hand point D, Plate
2,
and register seat
Plate No. 3 illustrates the front view of Plate No. 2 with a square properly placed under
arm and tape attached for the measuring of sleeve length from H to G as shown, as well as
manner in which the tape line should be placed when breast, waist and seat measure
taken. Next, if possible, ascertain the correct height and weight of the customer. While the length
the
illustrating the
is
of coat
and width
of
back will in proportions be given
measures were registered
measures so
far taken
Length
Width
of back
first
with view of applying
from
in
29 inches
Seat
14 inches
Sleeve length
Breast
36 inches
Height
32 inches
Weight
is
and
circumference, these two
with
said
proportions.
The
should be entered in the measuring books as follows:
Waist
This
height
connection
the First Section of Measurements.
for the Third Section see Direct Measures.
37 inches
1854 inches
5 feet
8 inches
135 pounds
For the Second Section see Definition of Types, and
How
to
Measure
MMl(i/i
P/a/€ Z.
Flc^tcL
PLddc 3.
The Sack Coat
Every man
as laborer,
in
America, multi-niiilionaire as well
wears a sack
can business coat, and
coat.
in
It is
the great
other countries
is
Ameri-
it
is
to allow free
movement, and because
its
ets,
vogue.
Then
which make
it
it
it
loose
enough
has no
is
extremely convenient to the busi-
ness man.
year slight changes are
observable in the fashion of sack coats, the general
design has remained unchanged for
grows
shorter, then
longer, then
many
years.
short again.
straight front has
vogue for about the same time.
logically
distinguishing
In
to
It
It
is
])n)(
narrow shoulders
mark
in
it
would
will be the
next
favor.
hieing a sack coat there are three points
be reiuembered, for upon these depend
larity.
the
to
The
tails
plentifully supplied with pock-
Although from year
popular.
less
In the change from the wide shoulder,
perhaps the reason for part of
is
in
seem that
roomy and comfortable,
to get in the way.
been
recog-
nized as the badge of the American.
That
been more or
It
will
popu-
must be roomy and comfortable, yet
same time
which
its
at
witiiout
any trimming or finishing
nl>struct free
movement, and have plentv
of pockets.
The
different
models of sack coats are
all
built
on the same general design, the double and single
loose
and boxy, then body-litting and has many varia-
breast, the placing of the pockets, buttons, cuff's, etc.,
tions
between these extremes.
the cutting of fronts, collars and lapels, express only
For ten years past the sack coat has been half
fitting,
and for six years the padded shoulders have
the individuality of the tailor, the personal
the customer, or the exactions of fashion.
taste
of
Sack Coats
REGULAR MODELS OF SACK
OR BUSINESS COATS
Systematical Outline for Sack Coat
Measures:
Breast
36
in.
Seat
Waist
32
in.
Heig-ht
To
A
Vis
%
to
B
is
3
to
C
is
^
of total height plus >2
to
D
is
i/H
of height plus
to
E
is
3'2
By
A to B
A
A
A
9
height minus
to
C
is-
\7y2
to
D
is
2Zy2
in.
E
it
5
in.
in.
is
29
W
in.
8
in.
1-6 breast measitre.
is
will be
N
B
to
N
to I
breast measure.
is
is
W.
2J4
in.
Square down from
in.
X
found that from
in.
in.
to
to
Square up from
in.
applying measure
is
G
measure.
1
ft.
Square up and down from G.
to
'jreast
,5
in.
Draft
Square out and down from A.
A
V
A
A
... .0/
for this particular
height and
to
O
I.
1-6 breast measure.
is
from
Q
Rule
a line
A
to
T
is
1-6 breast measure.
T
to
R
is
34 in.
Rule a
line
from
to
W
I.
to R.
circumference.
Square out B, C,
D
Square back from point K, finding point
Rule a
B
to
F
is
1/3
F
to
H
is
\y,
Z.
and E.
from
line
breast measure.
Q
in.
to
P
is
X
to Z.
1-6 breast measure.
from
Square up and down from H.
Rule a
B
These are the principal points for normal, and
to
S
is
3/ breast measure.
S to
G
is
33/2
line
should be studied
in.
16
first
J to P.
of
all.
Systematical Outline for Sack Coat
I
N
W
C
S
H
F
C
D
U
DIAGRAM NO.
1.
Sack Coat
liegulatlon
—
continued
Measures:
Breast
36
in.
Seat
Waist
32
in.
Heis:ht
5
37
in.
8
in.
ft.
To Draft
First
up
la_v
from
continue as follows
C
to
M
:
H
line
to 15
Rule a
3 to 4
K
is
in.
Yf,
and
to 15
out.
in.
L
2 to
to
4,
is
J4 in.
back
to top of
A
at
A
X
V&
to
25
is
to
26
is
Notch
at
16 to 20
top
R
to 11,
to 3
ZY^
is
Y
is
is
2
3^
in.
33^
in.
is
3K-
3
in.
is
as
sack.
in.
shown by dash
For small-waisted sack
Take out of center seam
to
M
man
every inch the
and
to 8.
V
Shape from
10 to 12
lines.
less
is
down
at
P and you have
shown by dotted
Apply waist measure from 4
from
of the divisions
7 to 9
same distance
as
from
R
to 11
minus
amount
the
is
taken out in an underarm
from armhole
for
in.
to
M
lines.
and
to 7.
in.
is 2>Y2
9 to 3
in.
^^
than normal.
as
J"-
%
M
point
V
to
as
be reduced, which
shown by dotted
is
lines
to pocket.
in.
Reduce
2 to
side of front part Y^
Shape as shown in solid
3, 3 to 12 and down.
Sweep back from
'"•
point
'^^
2.
lines of illustration
from
Extend width of forepart
shown by dotted lines, which
seams used for underarm \'.
point 2 Y^
at
is
iii->
as
allowance for two
This finishes draft for small waist.
5 to 6, using point 2 as a pivot.
Sweep forward from
X
to R,
a
J4 waist measure.
Apply seat measure on
10 to 14 and U to 10.
From
I to
Take out a V of ^ in. at point
normal double-breasted sack.
and shape back as
4 to 10 and down.
Applv waist measure from 4
From 8
From
From
From
Shape front
per solid lines in illustration, from
11 to 2,
body of a single-breasted normal
the
front.
M.
J4 in.
is
to 11
Add
from B
^
is
to
1-12 breast measure.
is
line
15 to 2
\
from
is
'"•
For double-breasted sack note the dash lines at
Square down from M.
Rule a
;
This
in.
Yo
is
The pockets are found % of the sleeve length,
G down pockets for this size of coat are 6V2
points as described in outline, then
all
point 6 to 16, using point
Collar
as a pivot.
Shape armhole from
Y
Make width
I
to 13
is
to 19
Extend
Now
is
1
of lapel 3
\Ya
Shape
diagram from
Y
to
to P.
from 18
to 17.
and
is
22
is
to
2i
X
is
line
1>4
23 to 24
is
2
27 to 21
is
1J4
from 6
to 16.
as
in.
as
from
A
to
R
shown.
to 27.
in.
Shape from 22
in illustration
to 23.
to 27.
P
shown
1
same distance
the
of length at point 16.
to 17, 17 to 13, 13 to 19
from 13 up
in.
the stand of
Shape from 22
to 16.
as
17 to 27
27 to 22
in.
shape from point
and down
in.
in
in.
\Y2
in.
Extend crease
to 2 as illustrated.
Shape shoulder as shown
and
shape neck hole from X
X,
ill-
to 2Z, 23 to 24,
24 to 21, 21 to 27,
—
Regulation Sack Coat
DIAGRAM NO.
19
2.
continued
Heights
men
In variation of heights
are
divided into three classes, viz.
normal and
tall,
(See
short.
illus-
Heights.)
Relative
tration
:
In each of these classes
we may
have several degrees of the same
As
type.
in
we
a rule
find difficulty
impressing the student with an
understanding of the necessity of
height as a positive guide to regu-
and shape the garment to the
A knowledge of the height
of the customer is of great praclate
figure.
value to a cutter, not only as
tical
a guide to regulate the length of
the garment, but also to obtain the
proportionate
station
relative
to
heights, such as slope of shoulder,
depth of scye, waist length, length
to
as well
seat,
length
of
average
the
as
garment, so as to
the
avoid the possibility of cutting a
long coat for a short figure or a
short coat for a
man.
tall
(See
A
lustration Relative Heights.)
Z
the neck point,
is
slope of shoul-
is
der,
B
depth of scye,
and
D
length to seat.
C
Suppose the height
in.
il-
waist length
to be 5
ft.
8
as the middle figure of Relative
Heights
in. is
normal
in.,
height of
eighth of 68
is
8>4
ft. and 8
which is the
man. One-
Five
illustrate.
a total of 68
a
in.
Add
to this
and we have 9 in., which is
Yz
the total amount of depth of scye
in.
for a subject 5
and 36
ft.
8
in height
in.
Then again divide
amount of the depth of
breast.
the total
the scye into three equal parts, and
1-3 of this
amount
is
the propor-
tionate slope of shoulder.
(See
il-
lustration Relative Heights.)
The circumference
of breast reg-
ulates the depth of scye because the
arms and muscles graue
m
circum-
ference in proportion with the cir-
cumference of the body, and the
normal depth of scye is, therefore,
found by taking 1-3 of the breast
measure plus 3 inches for the normal height of 5 ft. 8 in. (See Dia-
gram
3,
5'
4"
56"
AB.)
2()
512'
Heights
The
of scye
tire
fact
is
remains that the depth
approximately
]/&
of en-
height of figure, and in vary-
ing from the normal height 34 of
an inch is added to the depth for
every inch the subject
5
ft.
8
in.,
and
in.
]4,
from depth of scye
the subject
in.
is
is taller
is
deducted
for every inch
shorter than 5
(See Diagram
than
3,
ft.
8
Point A, nor-
mal, and variations for 5
ft.
4
in.
and 5 ft. 12 in., as shown by dash
and dotted lines.) Illustrating that
for 6 ft. there is 3^ in. addition to
the depth of scye and for 5 ft. 4 in.
there is lA deduction from the normal representing 14, of an inch for
each inch he
is
taller
or
shorter
than the normal.
The
natural
waist
coat
is
of the entire height. For
]^,
fashionable waist add IJ^
Waist length for sack coat
of the entire
height
(See Diagram
3,
a
frock
is
J4
plus Yz
in.
Point C, for nor-
mal, dotted line for 5
4
ft.
and
in.,
The
dash line for 5
ft.
length to seat
1-3 of the entire
height plus
for
in.
(See Diagram
4
ft.
and dash
in.,
line for 5
12 in.)
ft.
The average
of
y2
is
length of sack coat
minus
height
the
(See Diagram
3,
dash
line for 5
4
ft.
and
in.,
of a S. B.
half the height plus 2 in.
is
The average length
frock
in.
12 in.)
ft.
The average length
frock
5
Point E, for nor-
mal, dotted line for 5
of
D.
a
B.
3^ of the height plus 6
is
Average length
is
3,
D, for normal, dotted line
Point
for 5
is
in.
1
12 in.)
in.
for a full dress coat
Yi of the height plus 5
and
in.,
the average length for an overcoat
is
half of the height plus 8
While
governs the length
style
of the garment,
heights
regulate
a guide
as
length
the
which
ment,
of
division
this
serve
will
in.
of
should
the
be
to
gar-
graded
IS'*
t5"
according
the
to
customer.
height
of
the
Relative
Illustration
Heights shows the position and
which
cline
neck point,
is
D
A
D
length to seat.
is
By
C
Z
is
B depth
of
to
waist length and
A
to
illus-
Relative Heights, and the
Diagram No.
the
to
in-
the
as
a careful study of the
tration
.a'*"
A
scye,
to
A
therefore
shoulder slope,
5-ir
calculated
3,
instructions
and thereby
and following out
herein
illustrated,
stipulated
will
make
the student conversant with relative
E
L
DIAGRAM NO.
heights as well as the necessity of
incorporating the same in producJi'^"
tion of patterns.
3.
Proportionate Table of Breast Measures by Weight and Height
Circumference
In variations of circumference customers are divided into four types
(See
Stout.
illustrations.)
36 breast and 30 waist,
the
Normal
coat
still
retaining
waist measure
4.
The
stout
is
athletic
(See Fig.
the
man
same
is
By
as over breast.
its
he
type,
:
less
Slim, Normal, Corpulent and
than normal around waist, as
manner stipulated and insttucted in diagram 2;
same diagram. The Corpulent differs from the Stout
is
the Corpulent figure
termed Corpulent
:
mean
grown heavy
around the waist
for
40 and 39 waist with the 42 breast measure would
but measuring more
I
than
a figure which has
proportionate
;
Any man whose
waist measures more than Normal, or any man whose
termed Corpulent, and should be treated as shown in diagram
measures more around the waist tiian around the breast. .Study Fig. 9 for
8.)
as over breast,
who
who measure
should be treated in the
example, 42 breast and 42 waist
also be corpulent.
refer to persons
I
that of the solid lines in the
is
around waist as well
while
who
By Slim
Stout form, and treat same as shown
is
in diagram 11.
In classifying Circumference, the Slim measures
around waist than Normal, the Corpulent measures more around waist than regulation or Normal
waist measure, and the Stout measures more around waist than around breast.
In application of the
divisions for depth of scye, the increase and decrease for depth of scye over 42 will be only 1-12 inch.
( See diagram 4.
less
Sack Coat for Corpulent Figure
Note difference of increase on depth of
than normal, but
A
scye.
corpulent figure
is
one whose waist measure
is
more
does not exceed breast measure.
still
Measures Used
Breast
-18
in.
Seat
Waist
48
in.
Height
To
Square out and down from A.
A
42
to 48
inasmuch as
point for regular grade, size 42
taken into consideration.
Therefore,
.\
to
42
is
48
in.
8
in.
ft.
DraLft
diagram from
and down.
in
1-3 breast measure, but
is
stipulated
is
5
P
to
is
1-3
X
R
to 11, 11 to 2, 2 to 3, 17
from J to P.
same distance
line
Y
to
to R,
1-6 breast measure.
is
Rule a
A
is
as
R
from
to
1 1
minus
of size 42.
y^
V is half way between 48 and 42.
V to B is 3 in.
A to C is >4 height plus {2 in.
in.
height plus
A to D is
minus
3 in.
height
is
to
E
A
>4
Square out B, C, D and E.
%
B
F
B
to
F
to
H
to
S
is
S
to
G
is
G
to
W
B
to
N
is
Zyi
in.
in.
M
to
T
to
R
is
is
1
Shape
1
X, using point
to
G
as a pivot.
1
to
X
is
y2
in.
from VV to R.
Square back frpm K, finding point
Rule a line from X to Z.
Square out from X by balance line.
Rule a
X
to
L
to
Shape
and down.
H
line
O
O
1/6 breast measure.
is
3^ waist measure.
Rule a
19 to 2
shown
is
line
is
14, in-
%
point 5 to 6, using point 2 as
in
B
Make
using point
X
as
from
and
out.
A
and
at
iy2 in.
ly. in.
lapel
and
\y2
is
front.
in.
plait
from front of pocket dpwn
O
to
1,
O
is
4
is
yi
ing
is
in.
to
front
lines, in size so that
distance from 20 to 21 will be y%
in.
over normal waist.
for each inch
In this case the
over normal and total from 20 to 21
in.
in
line
on side of front part
center of armhole and
down
illustrates
open-
to side of front
part.
For
back
is
the garment
in.
to top of
16,
corner of coat as shown by shaded
coat
illustration
to 19
to
in illustration.
Z.
1/12 breast measure.
from
in.
as shown in illustration
from
2 to 4, 12 and down,
also shape side of front part
and shape bottom of coat from 6 to 18.
For double-breasted coat note dash line in this
illustration, and add same amount to front as for
double-breasted coat illustrated in diagram 2.
Place pocket as shown in diagram.
Cut a slash in pattern from center of armhole to
point 21 and from 21 to front end of pocket, as shown
Dash
to 19
Add
is
as
of division from 17 to
Shape cutaway of front
in.
point
is
16 to 18
1/6 breast measure.
Sweep back from
to 13
to 15
>4 in.
%
%
a pivot.
Square down from M.
Rule a line from V to M.
A
T
2
is
Sweep forward from 6
breast measure.
is
in.
a pivot.
to I is 2J4 in.
Square down from I.
Square up from W.
Square up and down from G.
Square up and down from H.
to
3K'
10 to 12
N
C
is
Sweep back from
1-6 breast measure.
is
'4
Apply seat measure on
14 and U to 10.
breast.
J/2
is
M
8 to
breast measure.
\y2
is
Shape armholc as shown in diagram from Y to 2,
Shape shoulder from Y to X and shape neck
hole from X to P and out.
to 8.
and
Apply waist measure from 3 to
1
i/ii
in.
sliape as
shown
further
information
manipulation for stout.
on
this
subject
see
Sack Coat for Corpulent Figure
DIAGRAM NO.
4.
Exaggeration
In these days
fashion
We
viduality in clothes.
is
hablc
change ahnost over night, and the general demand
to
when
are past the time
clothes are valued simply as a
fit
;
is
for
indi-
but fitness in clothes
expressed by style and individual effect produced for particular customers. E.xaggeration, then, becomes
a most valuable resource, because by the application of exaggerations to the patterns a cutter is able
to produce a garment that not only holds the fitting points, but can be made as many sizes larger than
is
man
circumference of the
actual
the
as
while
necessary,
is
proportionately
material
distributing the
For the tall and thin figure exaggeration is of incalculable value, for if a garment
was cut according to measurements alone it would by no means represent the advanced style of toExaggeration is therefore a scientific resource subject to the personality of the type of customer
day.
as well as to style, and can be relied on for exactness in enlargement of circumference in garments
Measurements taken of a customer remain the same as for a fitting garment,
to the fullest extent.
and the amount of excess is stipulated according to the type of the customer as well as the prevailing
The amount of excess also varies in different classes of trade.
style, by so many inches in excess.
requiring exaggeration it would be well to include one size of
figures
for
different
providing
In
in.
and
36 breast, and an average of 3-2 in. more excess for each inch
5
ft.
8
excess in the normal, or
around the body.
the customer
is
taller
This
his height.
is
For overcoats
than
5
8
ft.
in.,
provided he does not increase
circumference
in
proportion to
in
for sack coats.
it
has been found practical to give 2 inches of excess to the figure of normal height
more
'and circumference, and an average of yS inch
man
for each inch a
taller
is
than normal.
In frock
advisable not to include any excess for normal height and circumference, but to add J2 inch
This is for the tall and slim types.
for each inch the subject is taller than normal.
coats
is
it
For Short and Corpulent and Short and Stout
in excess, and frock coat J^
overcoat two sizes
demonstrated
that
this
conservative advice
it
is
size
should
be
advisable to cut a sack according to regular measure
than regular measure.
less
by students
followed
Personal practice has
also,
;
measurements
that
should be taken according to instructions, and the excess stipulated at the time measurements are taken.
In the Second Section or Definition of Types, Ex. 1, 2 and 3, thereby meaning excess 1. 2 or 3 inches.
The diagram on
<
opposite page illustrates exaggeration of 36 to 40.
Measurements are as Follows:
in.
Waist
32
in.
in.
Seat
2>7
in.
Waist length
Length to seat
17j^
Full length
29
in.
Breast
36
in.
23^
four
E.xaggerated
in.
sizes.
For proportionate 36
breast subject.
To Draft
The dotted
2)7 in.
lines
and
S
to
G
is
height, accord-
G
to
9
is
indicate the regular 36, 32
circumference, and 5
ft.
8
in. in
ing to the regular instructions of sack coat.
The
36 and 41
It
solid lines
show an exaggerated
respectively, also 5
in.,
will be noticed that the
ft.
8
is
9 to
W
height.
depth of scye, waist
jg
r>
B
^
to
IS
%
T-
F
-t
is
,
breast measure.
•
is
^^ jg
j^
^^ ^^
j^
H
to
S
is
is
the regular
1^
e^it^'i
and
9.
size the coat
^^^ ^^^^j^^ ^^^^^^ measure.
^,^^
,
,
exaggerated breast measure.
,
.
,0
18
.
'
N.
to 1
is
^t
and N
,,,,.,,.
bv dashes
that the increase between
to
,
is
,^
V2
in the distance
e.xJSI
1
Add
to
t'"'"
for each size, as indicated
F.
F
B
Vi i"-
9
from 18
aggerated, as indicated by dashes between points
and
ui.
1-
4.
''»
^
.
ijubreast measure, making
exaggerated
r
3/ i"-
^^^^^^
Note
,r
c
t.
j-u
each
size the coat
an increase of \1/6
m. for
G
1/6 of regular breast measure.
is
^^^^^^
.„,
^
L.
for each size the coat
g^^^^^ ^^ ^^^ ^^^^
g
^
fore, placed as follows:
1
in.
^,p ^^^^ ^^^^.^^
g^^,^^^
a coat exaggerated four sizes, the increases are, there,
or ^4
See dashes between
Square up from 8
mains the same as the original, while the increases
are m the circumference, which places the goods of an
exaggerated coat in the proper position. This being
,
is
8
(
exao-gerated.
length, length to seat, as well as length of coat re-
„,,.,,,
B to
% of regular
W
to
in.
in.,
1
exaggerated.
coat to 40,
in. in
iyi
4 inches to the regular waist measure for
e.xaggerated
in.
J^ regular breast measure.
plus
26
3^
z/4 m.
in.
waist,
and apply
in
the
usual
manner
Diagram
for Exaggerated
DIAGRAM NO.
Also add four sizes to the seat measure and
apply in the regular manner, plus 2
These are
all
the points
moved
in.
b}'
exaggeration
or obtained by exaggerated measures.
All other points relative to shoulders, top of back,
etc..
the button stand, as in a regular coat, and
shape as shown by solid lines and
finish,
5.
aggerated coat
is
completed.
Should less exaggeration be desired over waist
and seat, add less to your measure, and operate on
front part by taking out a V in the same manner as
illustrated in the regular sack coat for small waist.
Height, variations,
remain according to regulations.
Add
Sack Coat
and the ex-
incorporated
direct
measures,
etc.,
according to instructions and
tions in this volume.
to
be
illustra-
and Double Breasted Sack Overcoat
Single
Mea.sures Used
Breast
40
in.
Seat
Waist
36
in.
Lenffth, etc., based
To
to
V
%
is
breast measure.
to
B
C
.A
to
D
is
%
A
to
E
is
J^ height plus 8
to
is
3 in.
is
34 height plus
seat measure on
D
10 to 12
is
234
in.
Reduce front part 3^
1
Shape
or length of coat
in.,
to
F
to
H
is
V/i
to
S
is
J4 breast measure.
S
to
G
is 2>Y2
G
to
W
B
to
N
N
to I
is
of the division from
point
in illustration
point
X
From
minus
^
Y
to
is
shown
Shape armhole
breast measure.
Shape shoulder from
to
in.
P
as
in
Y
to
M
X
W.
Rule a
.\ to
T
to
from
line
T
R
Rule a
V
to
is
1/6 breast.
is
%
line
Rule a
line
to 17
Rule a
X
to
K
is
from
W
is
3,
X.
from B
and
is
34
as
to
is
From
and down.
I,
in illustration
A, from
down
to
A
to
R,
in.
lapel desired.
as
shown
%
pockets
of
I
R
by starting
Peak
]/%
20
to
is
4
from 13
to 15
and
in
diagram.
sleeve
length
down from
is
4
in.
4
in.
lapel according to taste.
Make width
to 11, 11 to 2,
is
M
and
of lapel
double-breasted coat
to 8.
28
lines.
in.
Shape as shown by
3 to
from
to length of front at point 18.
in.
to 19
5.
Apply waist measure from
illustration
in.
2
is
front as per illustration
18 to 21
shown
in
For double breasted see d^sh
out.
in.
line at point
3 to 10 and
O
from
1
Place
to 17
to P.
armhole, and draw up collar in regulation way.
1/6 breast measure.
Shape back
above
to
to 2.
in.
Shape bottom
Z.
Y
X.
to 16.
Add
to R.
12 breast measure.
as indicated
to 11
2
down
from Z
1
line
Q
Shape
to LS
Shape
Square back from K, finding point
n
2
Extend width of
in.
to 11
out.
16 to 18
M.
from J
a line
1 to 13 is
>^ in.
is
Square down from M.
R
from
1/6 breast measure.
is
P and
to
as
as a pivot.
diagram from
to
Shape neck hole as shown
34 waist measure.
X
in.
Square up and down from G.
is
to 4, 4 to 12
to 6, using point
5
same distance
Draw
to
from 2
using point
6,
Square up and down from H.
L
C
2.
to 6.
Sweep forward from
in.
Square up from
in.
2 as a pivot.
in.
2%
is
shown
as
%
in. at
1/6 breast measure.
is
8
ft.
in.
Sweep backward from
and E.
B
F
B
5
in..
in.
i^ breast measure.
is
43^
to 10.
and down
Square out B, C,
2 to
is
U
desired.
in.
8 to 4
Apply
10 to 14 and
1
height plus
heisrht of
in.
DrcLft
Square out and down from A.
A
V
A
on
41
is
33-^
in.
dash
complete.
lines
and
regular
Single
and Double Breasted Sack Overcoat
DIAGRAM NO.
6.
The Frock Coat
The frock
is
coat, as
worn
down
a heritage handed
in the
to
us by our ancestors.
a modification of the coat which has been
It is
by gentlemen
hundreds of years, and
for
much worn by
all classes,
The
twentieth century,
is
worn
today as
strict
regulation as to
what
is
proper
in the
and material of the double-breasted frock, ex-
cut
tends also to the accessories of the costume which
worn with
are
it.
which have always affected
A
standing, or poke collar, a white shirt, an As-
as ever.
it,
cot or puff tie of
Today
the frock coat
is
cream or gray,
silk hat,
patent leather
worn usually by profesor varnished shoes, and white or gray gloves are re-
men, the better
sional
class of business
men, and for
garded by well dressed men as correct, and the fashformal day dress.
ion
The double-breasted
is
ularized by the late Prince Consort of England, has
grown
into the correct
For day
it
the
is
for formal
As
only correct garment.
from season
mark
garment
is
little
variation
in
to season, the changes
in
other dress
general design
in
model which
of buttons,
With
facing, the
is
frock in
single-breasted
its
various models
very generally worn by professional and business
men
as a business coat.
tion
grows
fessional
The tendency
in that direc-
steadily stronger every year, as
men want
to
wear something
most pro-
different
in
design from the ordinary sack coat.
a business coat
in the accessories
much more
worn with
latitude
is
allowed
the single-breasted frock,
etc.
is
usually
black or Oxford gray materials, trousers
of gray striped worsted are worn, although
is
As
nmnber and placing
the double-breasted frock, which
made from
the
The
the necessary differences in fashion being mainly
in the collars, lapels,
vest
day dress.
receptions, weddings, church wear, etc.,
garments, there
not likely to change for several years.
frock, or Prince Albert, pop-
if
a fancy
part of the costume, the trousers should be of
same material
as the coat.
than with the double-breasted.
collars,
a four-in-hand
tie,
may
be worn, although
if
and
other
as
accessories
breasted frock
mav
Any
and a
the coat
worn
of the business
soft or
is
derby hat
black, a silk hat
with
the
be worn for semi-dress.
double
Frock Coats
t^S
SINGLE BREASTED, OR MORNING FROCK.
DOUBLE BREASTED, OR PRINCE ALBERT
Outline for
Body of Frock Coat
Measures Used
37
Breast
36
in.
Seat
Waist
32
in.
Height
To
A
is
Yi breast measure.
Square back from K, finding point Z.
is
3
Rule a
C
D
is
in.
to
F
to
H
%
is
L
C
of height.
3-4
V/o
is
in.
C and
M
to
U
B
to
S
is
Shape
S
to
G
is
G
to
W
in.
breast measure.
B
to
N
N
to I
is
M
>4
to 4
U
point
1,
using
G
Square up and down from
as a pivot.
line
T
to
1/6 breast measure.
line
is
is
from
Q
to
from 2
O
I.
to
P
1/6 breast measure.
Rule a
^
Rule a
in.
32
7.
J4 waist measure.
22 to 9
T
R
as
waist suppression.
I.
Rule a
to
from 23
to
8 and
from S
to 6.
is
1/6 breast measure.
is
1/6 breast measure.
line
line
from J
from G
is
divided into
2 and 3 indicate.
4,
same distance
is
X
A
iUustration
waist suppression, which
Square out from X.
Rule a
U.
to
J^ waist measure.
is
is
is
is
V
shown by
7 to 6
O
from
Yz breast measure.
is
as
in.
to
to Z.
3^ of breast measure.
is
to 23
8 to 7
Sweep backward from
is
3/
X
three equal parts, as Figs.
in.
Square down from
X
in.
in.
line
to 8
4 to
breast measure.
234
is
in.
down.
in.
1/6 breast measure.
is
2
is
is
Rule a
Square up from H.
33/2
from
line
to
U
K
J<2
in.
Square down from U.
D.
breast measure.
1><
is
8
to R.
B
Square up and down from G.
to
W
V
Square out B,
1
from
line
to
to
B
F
Rule a
to
to
C
ft.
DraLft
Square out and down from A.
A
V
5
to P.
to 23.
to
U, or
%
of
Outline for Body of Frock Coat
33
Three Button Frock— continued
A
E
to
5^ height plus 2
is
24 to 10
is
J4 in.
23 to 13
is
^
in.
Shape back of
from 13
K
to 11
body
side
24 and
to 7,
R
R.
to
%
to
ilhistration
and
6 to 5
is
from
illustration
%
in.
down
and S
to 20,
to 5
Shape bottom of
as
from 4
X
Y
ilhistration
and down
from S
to
is
minus
to 20,
J4
is
same distance
as
from
R
to 11
lines
minus
to 18, 18
in.
seat measure.
-j
from 10
line
10 to 17
is
12 to 27
is
to 15
and down.
same distance
as
from
D
to
E
in.
1
in.,
from 25
illustration
1/12 seat measure.
from 10
to 17
in illustration
from
same distance
as
in.
Shape top
and
in.
of skirt as
shown
above point 10 to point
Shape front and back of
from 10 to
17,
12.
skirt as
extending
J-j
in.
shown by
solid
opposite point
15.
Shape armhole
as
shown by
illustration
from
Shape bottom of
Y
from 17
to 13.
Shape shoulder from
X
to
From
P and
I
to 18
Y
to
Draw
a line
o
to ^4 in. in front of point
1 1
Shape
From
From X
to 29
29 to 30
is
29 to 31
is
is
illustration
\'
in
shown
in
diagram.
front of neckhole and finish as
a. r
'as
and from 29
and up.
shown by
represented.
is 1 3/2 in.
from 18
as
a \^ in front part as
Take out
out.
skirt
to 27.
Take out
X, and shape neckhole
C
X
14 to 15
1
3
is
in.
to 9.
>'2
is
From
6 and
to 21.
body from 10
side
is
10 to 14
plus 14
Vs in.
from
down
From
to 9.
to
19 and
to 2, or
shape bottom of front part as shown by illustration
from 21
shown by
as
Rule a
same distance
shown by
as
Shape
above
11 to 23.
I'j
is
to 25
9 to 12
of waist suppression.
Shape
to 19
From 26
yi in.
is
to 11
From
shown by
as
10.
Shape as shown by
A
From
in.
from outune
shown
in
illustration
from 30
to 29
from 30
to 32,
to 31.
25 to 32
is
I'j inches.
1/6 breast measure.
32 to 33
1%. inches.
2 inches.
is
1-34
inches.
Shape as shown
31 to 33
and 33 to
32.
in
illustration
Three Button Frock
Double Breasted Frock Coat
Me8LS\ires bls Follo^vs
Natural waist
.
.
.
.
.
in.
Seat
17
37
in.
Fashionable waist
.18>4
in.
Height
Full length
.40
in.
Weight
135 lbs.
Breast
.36
in.
Attitude
Normal
Waist
.32
in.
To
A
to
Y
to
V
4 to
.\ to
is
natural waist length.
A
D
is
fashionable waist length.
A
to
E
to
3
in.
full
is
to
F
F
B
to
H
to
S
is
^
S
to
G
is
V/2
G
to
W
B
to
N
N
to
B
I
\y2
'
and E.
in.
Shape
24 to
in.
A
to
to
T
R
in.
is
1/6 breast.
is
^
Q
1,
using point
G
as
a
pivot.
1
to
X
Square back from point K, finding point
Rule a line from X to Z.
L
to
Q
to
is
is
to
U
y,
.Square
down from U.
line
to
8
to
23
is
to 11
is
is
from
J/g
V
shown by
yi
to
to
to
in.
AI to 4
is
is
2
line
Y
is
9 to 12
is
to
2V2
3K
28 to 27
in.
m.
lapel according to style.
Rule a
and
Add
3
is
in.
to 25,
from 25
and down
to 27
to
8.
from
A
to R,
in.
J4 waist measure.
.A,
R
and shape as
to 11. 11 to 23,
24 and down.
shown by
illustration
10 to 14
is
%
14 to 15
is
1/12 seat measure.
to 15
same distance
is
and shape
from 10
to 12.
seat measure.
from 10
line
and down.
as
from
D
to E, plus
in.
12 to 19
top of back at
to
to top of skirt at point 10
in.
10 to 17
y2
from 12
line
%
Rule a
line.
%
top of skirt as
in.
illustration
M
I,
U.
23 to 8 and down.
L
to
Yi breast measure.
Square down from
Add
and
to 9.
Square down from 12 by fashionable waist
in.
is 9 in.
23 to 24 is
breast measure.
y2
in.
3/^
13 to 7
1-6 breast measure, plus J^ in.
is
12 to 23
in.
Rule a
U
K
K
P
Shape from 26
1/6 breast measure.
J4 waist measure.
is
from
illustration
in.
is
12.
Shape as shown by illustration from
down.
22 to 9 is 1/6 breast measure.
C
to
26 to 25
Z.
Square out from X.
X
%
is
23 to 13
10.
Peak
>4 in.
is
24 to 10
23.
from yi in. forward of J to P.
same distance as R to 11, minus fg in.
Shape armhole from Y to 13.
Shape shoulder from Y to X.
Shape neckhole from X to P.
Lay your square level from 9 to 22 and draw a
straight line up to 26.
X
W
line
waist suppression, or same distance
shown by
as
Rule a
in.
from
to R.
Sweep back from point
Rule a
%
Shape from S to 6 and 20.
Shape from S to 5 and 21.
Shape from 10 to 20 and from 21
Square down from I.
Square up from \\'.
Square up and down from G.
Square up from H.
T
J4 waist measure.
is
Square down from 7.
Draw a line from G to
breast measure.
2^4
U.
as 4 to 2.
breast measure.
is
divided into
is
73 waist suppression, or same distance
is
to
5 to 6 is
1-6 breast measure.
is
is
D
from 2
7 to 6
breast measure.
is 1/3
is
as
length of coat.
Square out B, C,
waist suppression, which
is
8 to 7
B
C
is
U
three equal parts, as Figs. 4, 2 and 3 indicate.
breast measure.
is 1.3
8
in.
Dra^ft
down from A.
.Square out and
5
ft.
is
same distance
as 10 to 17
minus
1
in.
Shape back of skirt from 10 to 17 extending
and bottom of skirt from 17 to 19 as
y2 in. at 15,
shown in illustration.
Take out a V in
Add
as shown.
I3-J
in.
front part as shown.
to back
from
D
and down and
finish
Double Breasted Frock Coat
37
Frock Coat for Corpulent Figure
Measures as Follows:
17
Natural waist
in.
Breast
42
ni.
42
in.
Fashionable waist
IS^/j
in.
Waist
Full
2,7
in.
Seat
lensrth
43
in.
To Draft
Square out and down from A.
to V is 1/3 breast measure.
A
V
A
A
A
to
B
C
to
D
to
E
to
3
is
natural waist length.
in.
to
F
to
H
to
S
S
to
G
is full
ly.
is
D
to
W
to
N
N
to I
214
is
R
^
is
in.
to
U
to 23
is
K
to 11
is
to 8
Add
shown
is
W
Z.
in.
y^
from
to
X
first
is
inch waist measure
the waist
total
4
is
A
to R.
R
to 11, 11 to 23,
in.
1
X
to
to
O
is
is
y2
is
X, using point
G
as a pivot.
then add y% in. for each
over proportion. In this case
in,
;
over normal
;
for that reason the
is
1
in.
Take out
y^ in.
same distance
as
from 10
to 17.
minus
Y
is
to
P
is
same distance as R to 11, minus y^ in.
1/6 lireast measure.
Shape armhole from Y to 13; shoulder from
to X, and neckhole from X to P.
1
to 18
is
l;/'
ill-
is
1'4
in.
laix'l
desired,
and shape same,
shape as shown by illustration from 10 to 17 on back
9.
between 25 and 27 of
Y
is
of skirt, and a three-button frock
34 waist measure.
Y
amount
as well as front, front of skirt, bottom of skirt, and
1/6 breast measure.
measure.
a
is
Extend width of
1/ waist
Square back from
is
waist suppression, or same
to
to 19
Rule a line from O to I,
and down.
22 to 9 is 1/6 breast measure.
9 to 25
i/i'i
in.
X
to
amount from 1 to X in this instance
Rule a line from 1 to Z.
Square out from X.
L
waist measure.
as per illustration
12 to 26
1
to 16.
Sweep back from
1
U.
,'4
K' in.
of back at A, and shajjc as
to top
down
23 to 8 and
5 is
to
"':')
J^ in.
in illustration
divided into
from 13 to 7 and down.
from S to 6 and down.
from S to 5 and down.
from 10 to 20, 21 to 27, and shape top of
skirt as shown in illustration from 10 to 12.
10 to 14 is
seat measure.
14 to 15 is 1 '12 seat measure.
Rule a line from 10 to 15 and down.
10 to 17 is same distance as from D to E plus
J^ breast measure.
y% breast measure.
in.
is
23 to 13
Square down from U.
Rule a line from V to U.
U
K
is
73 of waist suppression, or same
is
from 2
Shape
Shape
Shape
Shape
in.
5^
is
waist measure.
waist suppression, which
is
.
to R.
Rule a line from
Square back from K, finding point
C
in.
8 to 7
as
6 to
Square up and down from G.
Square up from H.
A to T is 1/6 breast measure.
to
j.4
from 2 to 4.
Square down from 7.
Point 10 is •)4 ill. below fashionable waist line.
From 9 to 12 is, first V2 in., same as in normal,
plus the amount which is taken out between 25 and
27
In this instance from 9 to 12 would be 1 in.
Square down from I.
Square up from W.
T
is
U
at waist.
would be taken out
as
breast measure.
is
4
7 to 6
1/6 breast measure.
is
2
From
amount
in.
in.
is 3^/2
to
J4 in.
three equal parts as Figs. 4, 2 and 3 indicate.
y, breast measure.
is
G
4
length of coat.
is
to
in.,
27.
M
to
M
and E.
breast measure.
%
is
B
L
fashionable waist length.
Square out B, C,
B
F
B
In this instance, being 4
between 25 and
is
is
man measures over normal
every inch the
J/^
in.
for
is
finished.
For double breasted effect shown by dash lines,
see normal draft of double breasted frock, as the
shape of front and skirt is identical with it.
The technical part for V in front and more
crooked shoulder are the same as for this diagram.
Frock Coat for Corpulent Figure
DIAGRAM
39
No.
10
for Stout Figure
Biagram
DIAGRAM
No.
11
Mea-sures:
46
Breast
All regular points are obtained in the
Then apply waist measure on
same man-
ner as for corpulent coat with the following additions
33
is
E
is
to
4 to
^
in.
for every inch the subject
5
measures more over waist than breast.
Shape from O through 33 to E and square down
M
is
obtained
in
the
same manner
to
30
is
is
waist suppression and
is
divided in the
same distance
as
32
is
is
same distance
same distance
as
I
to 33.
as I to 33.
Take out the difiference between S and 31, as per
diagram, also shape armhole, and if for sack coat,
perform the same operation and take out the excess
as in
regular draft.
M
C
to 31
G to
from E.
Point
J^s from 30
the
usual manner.
in.
extra y%
in.
to 4.
and deductions
I to
?0
Waist
in.
at side
to E.
iO
seam, as shown by dash
lines.
Definitions of Types
Second Section
Having completed the study
patterns from
of Section
Measurements
(Measurements), as
1
well
as
drawing proportionate
Height and Circumference, and the section on Exaggerations, we now arrive
definition of types.
at the
In actual practice the Definition of Types comes immediately after the First
we have
Section of Measurements, and for this reason
plain the subject in a comprehensive
manner
a
with the idea that the student
may
ular code of types of variations
from the normal
A
of
so arranged the illustrations.
number
In order to ex-
of types in figures, illustrated, are introduced,
study the types and forms of men, and
fix in his
mind the
reg-
figure.
subject can be either:
Sloping or Square Shouldered.
Large or small blades.
Stooping or Erect.
Head forward
Long
or backward.
or short neck.
The degrees
of these variations
1.
Slight inclination.
2.
Medium
3.
Extreme
These degrees
fore, after
from the normal are three
in
number and
are termed:
inclination.
inclination.
of deformation hold
good
in
any
of the
having taken the measurements stipulated
weight, and ascertaining the style
of
garment
above stated types from the normal. There-
in Section
desired,
make
1,
as well as registering height
and
a thorough examination of the custom-
er's figure
and
Find the inclination at back of neck by placing the yard stick
attitude.
shown
of the straight line
in illustration of
in position
Relative Heights, and with the regular tailoring square
pressed against the neck point, ascertain the distance from the neck-point to the yard stick.
normal inclination
2^
is
inches.
or holds his head forward.
If
If
the distance
distance
is
less
it
is
greater
it
indicates that the customer
indicates that he
erect or holds his
is
is
The
stooping
head backward.
a student with an active mind a mere glance will suffice to give character to the form and classify
To
By
the type.
first
viewing the customer from the front a cutter
able to ascertain whether he
is
is
sloping or square shouldered, and in what degree, also, to notice the development of the muscles
and whether he
and
broad or narrow chested.
Next
is
well to view the customer from the side or
is
stooping, or
using the inclination as a guide, or whether he holds only his head forward or backward,
in
what degree.
and stipulate
in
Next, observing the customer from the back will enable a cutter to notice
what degree the customer has large or small blades or long or short neck.
to give the final idea of the extent of the degree of
of
it
This will enable the cutter to notice and stipulate in what degree the customer
profile.
erect,
is
which
all,
deformation
In order
five different illustrations are
shown,
with the exception of the Normal, show the Second degree of variation from the Normal.
^S^;:
Fig.
1.
Fig.
2.
Normal.
Square Shoulders.
Fig.
3.
Sloping shoulders.
Fig.
4.
Erect.
Fig.
5.
Stooping.
In providing for the requirements of the different forms
two or more types
in
one subject.
we
constantly
come
in
contact with
For example, a man can be both Sloping and Stooping, or he can
be Sloping, Stooping and have large blades, and also have a long or short neck in that connection; or
he can be Square, small blades and erect,
ing,
and Figure
7
etc., etc.
for Square, small blades
(See Figure 5 for Sloping, large blades and Stoop-
and Erect.)
In studying the various types for the different subjects be sure that the illustrations pertaining
to
them
are thoroughly understood.
Then
yourself the three
picture to
yourself before a mirror and arrange yourself
first in
Normal
the
different
Place
degrees.
position, then in the
first,
next in
the second, and finally in the third degree of Square.
Next arrange yourself as nearly as possible
study your
own form
in the three
degrees of Sloping.
large or small blades. Stooping or Erect,
for
places notice the different types and forms of men.
tions
will
from
it
and
fix
it
will be for you.
the degree.
It will
Always carry
in
this is
and whenever
Ascertain whether this or that
short neck, or any other deformation, and in what degree.
this study the better
etc.,
When
man
done
in public
has a long or
The sooner you accustom
yourself to
your mind the Normal and notice the varia-
surprise ycu to find that in a comparatively short time
be able to classify the different types and stipulate the degree
of variation
you
with promptness and
exactness so that you can apply them in actual practice.
The Second
Section of Measurement consists of defining
all
the types and degrees of variation, and
should, therefore, be entered on your order book just after the First Section of
Measurements and
before taking direct measures, so as to be sure that the variations have been thoroughly stipulated, as
variations in drafting belong to the scientific part.
These deformations
of types
or applying direct measures.
tomer
is
of variation
in the first,
sloping in the
first,
must be thoroughly defined before taking
Therefore, stipulate in your order book as Section 2 whether the cus-
Normal
Or square
Or
and degrees
second or third degree.
second or third degree.
4.1
Or
large blades in the
Or small
blades in the
Or
stooping in the
Or
erect in the
Or long neck
Or
first,
second or third degree.
in the first,
short neck in the
Or head forward
second or third degree.
first,
in the
Or head backward
second or third degree,
second or third degree.
first,
first,
second or third degree,
first,
second or third degree,
second or third degree.
first,
second or third degree.
in the first,
Then, again, caution should be exercised
ing, the application of
them
have prompt
will
with the form of the customer
if
degree of the above types, as
in stipulating the
effect
on the pattern.
in draft-
Therefore, do not try to find fault
on careful examination no noticeable inclination
any
to
of the
above
stated types can be found, as practice has demonstrated that a garment produced from a good proportionate pattern will
if
fit
men
at least one-half of the
the inclination to a certain type
is
so slight that
of the
it is
same height and circumference.
hard to distinguish,
would advise
I
Therefore,
to cut a pro-
portionate shoulder in the pattern.
Incline
How
tions.
to obtain the
The
incline
incline
illustrated
is
measurement
is
in
Relative
For application
Heights.
taken with the view of ascertaining whether the customer
or erect, head forward or backward, or whether he has large or
blades,
flat
conjunction with definition of types and in stipulating degrees of same.
either
more or
tomer
is
tional Yz
less
less
than normal means one degree.
For example
of incline the customer
2^4
If the
is
normal
distance
If the
is
The
incline
is
is
instructions see
stooping
in.
the cus-
and for each addicustomer measures
in either first,
than normal.
obtained by placing the yardstick perpendicularly against customer's back, and with
regular drafting square press against neck point.
neck point
is
Varia-
incline, 3^ in.
2^
than normal the incline indicates whether erect, head backward, or has small blades,
less
see
a valuable resource in
in. is
would be stipulated an additional degree.
second nr third degree, according to the amount he measures
to
:
and
either stooping, or has head forward, or has large blades in the first degree,
in.
draft
to
the incline.
For positions of
The
distance on the measuring square from yardstick
incline see illustration Relative to Heights.
Second Section of Measurements
in connection
cation to drafting see \^ariations.
44
For further
with Definition of Types, and for appli-
Variations
Diagram
or backward
A
in
illustrates variation of
head forward
Point
C
is
half
way between
A
and B.
Square
out from C.
second degree.
is half way between C and D.
Sweep up and down from A, using point
pivot, and sweep up and down from X, using
Point 12
Solid lines
illustrate
show normal shoulder
variation of head
lustrate variation of
backward
;
;
dotted lines
dash
lines
il-
head forward.
a
12 as
point
12 as a pivot.
Head Forward
Stipulate degree of variation for head forward by
either J4
in--
Rule a
Y^ in. or
line
^
from 2
from A to 2 and X to 8.
Z and square out by same
in.
to
line
from point 2
as indicated
by dash
lines,
thereby
finding point 8 on front shoulder.
Head Backward
in.,
line,
For head backward stipulate degree by either 34
in. from A to 3 and X to 7.
2 in. or
Rule a line from 3 to Z and square out by same
as illustrated by dotted lines from point 3, finding
point 7 on front shoulder,
%
The
other lines e.xplain themselves.
inclination
thi s
and
fliaarram.
Always study
definition of types in connection with
Variations
^h^^'m^^
^V^<>1
Stooping
Diagram B
Draw
stooping and
illustrates variation for
dash
erect.
Solid
illustrate
lines
normal, dash
stooping, and dotted lines illustrate erect.
Point
H
half
is
way between
W and B.
Stipulate variation by 34 '"> 3^
B
in.
or y^
from
in.
to 12.
from 12
to
H
and out
as
shown by
Square up from same line from W, G, H and 12.
12 to 2 is y^ breast measure, plus 3 in.
Square out from 2 by dash line, finding point 8.
show
lines
a line
line.
Shape back, armhole, shoulders and neckhole
shown by dash line for stooping.
as
Erect
For
in.
or
%
erect, stipulate
in.
Draw
from B
a line
dotted breast
Square
degree of variation 34
i")
from 13
to
H
and out as shown by
from dotted
line
from
W,
G,
H
and
point 13.
13 to 3
1
3
find point 7
and thoroughly
breast measure, plus 3
in.
b)'
dotted line
as
inclination in
stipulate
degree
of
variation.
Width of
Q
is
Square out from point 3 as shown
and
shown by dotted line for erect.
Always study definition of type and
this connection,
line.
tip
Shape back, armhole, shoulders and neckhole
V^
to 13.
from
and 9 to 14, are each 1-6 breast, the
normal coat. All points below breast line
back, the depth of neckhole as
to P, 10 to 15
same
as in
are found in the regular
and manipulations for
manner
sizes.
subject to variations
Variations
Diagram C
illustrates
large
Solid lines
show normal, dash
and dotted
lines
show small
and
lines
small
show
blade.
large blade
or
G
%
in.,
to 7
is
anil
blade.
from
FI to
6
is
FI to 5 is
"''v
/^
by
dash
lines
for
varying from G.
for large blade
and
G
as from
same distance
same distance
as from
G
G
to 8,
to
7.
Shape back, armhole and shoulders as shown
Stipulate degree of variation by either 34
in.
ample, from
shoulder, and back as
to 8
is
large
blade
;
sharp
shown by dotted
armhole,
line for small
for small
blade.
blade.
It will
moves
in
Always study
be clearly seen that the' width, of back
same direction
as front of scve.
For ex-
in
definition of types
connection with this diagram.
and inclination
Variations
Diagram
ders.
D
show normal, dash
and dotted
sloping,
and square shoul-
illustrates sloping
Solid lines
lines
illustrate
lines illustrate square.
>2
in.
or 34
in.
from
from point B by
B
Square out from point 2; from
distance as from
from B
B
to 2
and
Y
to
9
is
to 2.
K
to 5
as
is
same
same distance
to 2.
Shape
or ^4
^n.
from point
K
to 4
distance as
is
B
to
front shoulder as
3.
line for square.
^
in.,
yi
to point 3.
same distance
as
B
line.
to 3
;
Y
to 7 is
same
Shape shoulder, armhole and
shown by dash
line for sloping.
as
Always study
shown by dotted
B
Square out as shown by dash
Stipulate degree of variation
i"-,
Stipulate degree of variation by either
in.
For SquaLre
either 14
For Sloping
with this diagram.
definition
of types
in
connection
Variations,
Diagram E
illustrates
The arrow shows
tween B and
Shape top of back and front shoulder
long and short neck.
point
and
1
half
is
way
by dotted
be-
Yz
in.,
Short Neck
Stipulate degree of variation by Y^
line
shown
long neck.
line for
W.
Long Neck
Rule a
as
from
1
to
X
and
%
in.
from
A
to 3
and from
X
Square out from point 7 by balance
out.
in.,
or
to 7.
line.
Shape top of back, front shoulder and neckhole
Stipulate degree of variation by ]\
in..
>'<
in.,
or
as
^4 in. for long
neck from
Square out from
A
to 2
and
X
to 6.
shown by dash
line for short neck.
Always study definition of type, in connection
with this diagram.
6.
49
Sleeves
All sleeves must be produced
from the
size
of
Therefore, always measure your armhole
armhole.
and whatever the armhole
is
circumference use
in
that for 3-our size of sleeve.
For example,
in
if
your armhole or scye
is
18
in.
circumference use 18 as a drafting size for your
sleeve.
produced from an 18 in. armhole
length from the armpit to the hand.
This sleeve
and
is
18
in. in
is
To
Dracft
Square out and down from
A
to
A
B
is
1/12 arm-scye.
to
C
B
is
% arm-scye.
to
E
is
1/6 arm-scye.
B
to
D
is
1
B
P
to
P
to
R
is
half
K
is
is
in.
full
V.A
length of sleeve.
in.
way between B and
Square out C, B,
A
A
to
F
is
to
G
is
.\.
K
P.
and R.
54 arm-scye.
3^ arm-scye.
Square down from G.
H
C
P
to J
is
3^ arm-scye.
L is 3^ arm-scye.
to N is 63/2 in., making
to
a finished cuff ol
12
inches.
Shape as shown in illustration from D to L, F
and H.
Rule a line from E to J and shape as shown in
illustration from D to J.
Shape from H to N.
Shape from P to N.
Shape from J to O and N.
K
to 5
is
^
in.
Shape as shown in illustration from D to 5 and P.
If seam is desired under the arm add }^ in.
from B to 1 and P to 3.
Shape as shown by dasji line from D to 1, and
1
P
to 3.
to
Reduce the under-sleeve 'V^
4 and shape from 2 to 4.
in.
from
B
to 2
and
Sleeve for Stooping
Broad Shoulder
and Erect
In sleeves
for
stooping and erect balance line
must be changed
dash lines on diagram.
at
front
as
shown by dotted and
If shoulders are
For Stooping
Dotted
lines
on
indicate stooping.
by 3/2 in., 1 in. or
\y2 in. from P to 2. Shape top and under sleeve as
shown by dotted line from H to 2 and J to 2 and
from D to 2.
Stipulate degree of variation
—
lines indicate erect.
Stipvjlate
degree of variation by J4
the sleeve,
and
if
sleeve should be less.
narrow a high top
is
necessary
shoulders are wide the top of
Therefore, in the diagram per-
taining to high and low tops on sleeves, the dotted
lines
low
illustrate
the high top and the dash lines the
The
construction lines are the same as in
top.
the normal sleeve, which has been explained, but
For Erect
Dash
Narrow and
Sleeve for
in.,
1
in.
or
from P to 1. Shape top and under sleeve as
1^
shown by dash lines from H to 1 and T to 1 and
from D to 1.
in.
—
it
must be understood that the amount you reduce the
width of shoulder must be added to the sleeve and
the amount you widen the shoulder of coat must be
taken from the sleeve.
Earnest attention should be
oiven to this in drafting.
Direct Measures
Third Section
Having
and order
in the First
in
and Second Sections
of
Measurements
Measurements
of
which measurements should be taken, as well as the Definition
Deformation and application to draft of these variations,
all
illustrated
I
would
like to
measurements, as well as the Definition of Types, are a matter
and instructed the manner
and the Degrees
of types
have
it
understood that, while
judgment, that in application to
of
the draft, the proportions, heights and circumference, as well as variation of attitudes,
the same principle,
and
are, therefore, the
fundamental and
scientific
heretofore taken in connection with the fundamental principles
we
any part
and
scientific point of
of the
to
and from any part
in itself
aggravating,
is
on these supplementary measures for symmetry and grace, but
to rely
the past been considered, and in
as an independent
term proportionate
Short, or direct measures are
The name
of the draft.
nection with fundamentals they act as a guide to attitudes.
known
Measures
view supplementary measures, as these measures can be taken from and to
body and applied
would be unwise
it
spring from
all
part of this work.
shall, therefore,
measures, as they have reference only to lengths and circumference.
from the
of
fact,
method
in con-
While proportions and variations have
in
are a system in themselves, direct measures have also been
for the production of clothes.
Modern developments and
practical
application of both principles and theories are not only beneficial and practical, but a necessity, hence,
this
combination of the two principles: a methodical
tion with fundamental
and
scientific
way
of
measurement, and application in connec-
proportions and variations.
The term measuring means the
application of the measuring tape to and from different parts of the body, thereby ascertaining that
one part of the body
is
so
many
inches from another.
If
the space on which the measuring tape
applied differs from one side or the other, the different quantities of surface on which
are either smaller or larger than normal.
stood.
The most
essential direct, or
This
is
the theory of
supplementary measures are as follows
Blade measure.
Depth
of Scye.
Front measure.
Waist
length.
Strap measure.
Over shoulder measure.
to seat.
The chalk marks made on
the customer's back
to indicate the different stations for
would cause
all
when
proportionate measures were taken are meant
supplementary measures.
measures the utmost care should be exercised
as mismeasuring
was applied
it
measurements and should be so under-
Slope of shoulder.
Length
is
in
In taking these direct or supplementary
order to have them as nearly correct as possible,
kinds of trouble in patterns and try-on.
Toward
this
end
it is
hereby
suggested to the student that he procure for himself a measuring square on which the various proportions of these
will
now,
in a
measurements are
stipulated,
and with the tape attached
methodical way, proceed to take these supplementary measures.
behind the customer and place the end of the tape at point A, Plate
right
hand
to the angle of this square
to point Z, Plate
4,
4.
4,
tape pass through the right hand to point
C and
and register the measure for depth
register waist length
from
stand
Pass the tape through your
and register the measure for slope of shoulder.
through the right hand to point B, Plate
In measuring,
we
A
Next, pass the tape
of scye.
to C, Plate
Next,
4.
let
the
Next, pass
Measures
'Direct
FU\e ±
rii^^t 5.
r.3
the tape through the right hand to point D, and register length to seat, from
place the measuring square under the
but not so high that
it
would
ascertain that the square
Section of Measurements.
plementary measures
Now,
placed exactly level.
is
and while
in this connection,
illustration of front view, Plate
of front view, Plate
5,
it
will
it
is
of neck,
H
to D, Plate
placed well under the arm,
Particular care should be taken to
measure taken
ideal
5,
materially assist
in
obtaining better measure-
Having the square properly
placed,
5,
under arm to
model
for
in
B on back
in
view, Plate
same
4,
register blade measure.
position,
and register front meas-
Next, turn tape around and up on shoulder and to back
5.
H
and register strap measure from
B
shown
as
etc.,
proceed to take measures as follows:
to X, as per front view, Plate
to point
in the First
Also, proportion figures for the sup-
on front view, Plate
to
5,
A
on back view, Plate
turn the tape over shoulder to point B, and register over shoulder measure from point
Plate
Now,
4.
not certain that the measures taken will
Next, turn tape around and over breast, and hold square
ure from
is
recall the breast
Find the same figure on the square.
ments than without these tables of proportions.
H
said square
raise the shoulder of the customer.
correspond with these proportionate measures,
From
Be sure
arm.
left
A
of back view, Plate
The complete measurements
4.
Supreme System you have entered
Length
in
H
Next,
4.
front view,
for a coat of the style of the
your measuring book stand as follows
Seat
37 inches
14
"
Sleeve
18^
Breast
36
"
Height
5 feet
Waist
32
"
Weight
135
Width
29 inches
of
back
Shoulder slope
3 inches
Depth of scye
Waist length
Length to seat
9
1?!^
23^
all
8
pounds
ly^ inches
Incline
While these are
"
"
"
"
Blade
Front
11 inches
7
"
Strap
12
"
Over shoulder
17
"
the measures necessary, additional measures can be taken to and from any
point of the body and incorporated with other supplementary measures and applied in the
same man-
ner over draft, but practical cutters do not take more measures than necessary, for the reason that
would be confusing, and
my
advice to beginners
because supplementary measures are
difficult to
fit
differ
more value
your own
fundamental principles as possible,
By
using proportions and variations
satisfaction,
and where
from the fundamental, give proportions and variations
by cutting difference between the two points
ures are of
to stay as near
obtain correctly.
as heretofore stipulated, apply these measures for
mentary measures
is
in
direct, or supple-
at least half the bene-
two, placing the point in the middle.
to the experienced cutter or
it
Direct meas-
advanced student, as by experience they have
learned to take measurements with more exactness, so in application they are more experienced, consequently, they
more thoroughly understand the value
of these measures.
The
truth,
however,
is
a good, experienced cutter always lays up his proportions subject to height and circumference.
that
He
applies his variations to the draft according to the definition of attitude so as to place the different
points in position for measurements and finally applies direct measurements as he finds practical and
divides the difference between the fundamental and direct measures, as
my
advice to beginners shows.
Application of Measurements
Mea-sures
Ots Follow^s
9
in.
Blade
H
i"-
Strap
12
in.
Breast
36
in.
Depth of scye
Waist
32
in.
8
in.
Height
5
Normal
Attitude
Obtain
ft.
all scientific
points by regulations for cir-
line
From G
to
from
AA
distance as from
A
X
is
to
G
G
is
blade measure.
is
1>4
in.
(addition necessary to blade
measure for make up).
and down.
1/6 breast measure (or same
Apply strap measure plus
and the three most
to T).
Apply measure for depth of scye from
(no addition).
to 8
8 to
cumference and height.
Rule a
B
A
to
B
essential
J4 in.
from
plied to draft with the proper additions.
section of measurements.
AA
to
X,
measures have been ap-
Read
third
Application of Measurements
Mea.sures
in.
^8
Breast
a.s FolIoNvs:
-56 in.
Waist
5 ft. 10 in.
Height
(For large blade second degree, long neck second degree.)
To
First lay
up normal draft subject
to height
in.
Blade
12
in.
Strap
1-^34 in.
of back
in.
Apply blade measure plus V/z in. from B to D.
(Note that point G is normal.)
Apply strap measure, plus yi in., from AA to X.
Apply measure for width of back, plus ^ in.,
as shown in illustration.
Apply waist measure in regular manner from 12
to 13 and 9 to 5.
Add 3>^ in. for shape up on side of front part
and
at waist.
3.
B
7^
Dratft
Promptly note variations and degree of same and
apply them to draft as shown in illustration of variation (see Diagram C and E on Variations), thereby
placing your draft in position for measurements.
Draw a line from X to D and down.
D to AA is 1/6 breast measure, or same dis-
Apply measure for depth of scye from
10/4
Width
circumference.
tance from 6 to
Depth of scye
Read
to 6.
56
third section of measurements.
application of Measurements
Me&sures
40
40
Breast
Waist
Height, 5
ft.
8
in.,
a.s
Follows
:
in.
Blade
12
in.
in.
Strap
1354
in.
Over-shoulder
18^
stooping in second degree and
Front
sloping in second degree.
iyk
Incline
Depth of scye
11
Width
in.
of back
in.
8
in.
8
in.
in.
To Draft
Apply depth of scye from 7
First lay out your normal draft subject to height
and circumference.
Apply blade measure plus
Stipulate stooping in second degree as per Definition of
Types and
incline.
(See Diagram
B
Apply strap measure,
—Vari-
ations.)
Next
slope
same
in
second degree.
to
(See Diagram
D — Variations.)
is
Draw
a line from
D
as
now
Draft
to
AA
is
in position for
X to D
to 4.
1^/2 in.
plus '<
in.,
Apply over shoulder measure,
14 and D to J.
from 7
from
plus
1
to D.
AA
in.,
to
X.
from 7
Apply measure for width of back, plus J^- in., as
shown in illustration, and apply front measure, plus
% in., from D to E.
measurements.
and down.
Apply waist measure
1/6 breast measure, or same distance
Read
from 4 to T.
57
in regular
manner.
third section of measurements.
Application of Measurements
DIAG. N.
_5T
lOl
Li
cn|
asl
^1
-$1
iai
d
^1
SI
^g
MeaLSures
36
Breast
Waist
Height
30
5
ft.
4
bls
Blade
10^
in.
in.
Strap
11J4
in.
Over-shoulder
15^
in.
6i^
in.
TYi.
in.
erect in second degree, small
in.,
blade in second degree, square in second degree.
Incline
M
in-
Width
7%
in.
Front
1
Depth of scye
To
First lay
;
also as
back
Having
now
variations.
is
finished these preliminaries, the draft
in position for
Apply
shown from G to D on this diashown by illustrations Diagram C
Small blade
of
Dracft
up regulation draft subject to height
and circumference.
Promptly note
gram
Follows
in.
all
is
measurement.
measurements and allow same addi-
tions as previously illustrated
and explained
Applications of Measurements
;
measurements
waist,
in these
these
also note that
Variations.
Next
erect
draft
as
of types as stipulated in
Next square same
trated in Diagram D
—
per incline and definition
out a
Diagram B- -Variations.
shown by regulation illus-
V
in side
front part as
as
Variations.
inof
58
call
for
small
therefore,
and add 2 seams, or }4
shown by
small waist.
in.,
take
to side of
direction in diagram 2
show-
application of Measurements
This diagram
is
produced for the purpose of
how measurements
lustrating
tion with exaggerations,
by
illustration
plied in
and
will be
that depth of scye
same manner
as usual,
blade, with 1>4 in. addition,
from B
are appHed in connecit
which
ured in with the measurements, and these are the
il-
only three short measures to be applied in connec-
-
tion with proportions
clearly seen
and variations for an exagger-
ated coat.
and strap are apas
well as that of
In connection with the study and practice of these
is
the total distance
diagrams, thoroughly study the different types, height,
circumference and exaggerations; also, the three
to G.
ferent sections of measurements.
See Diagram Page 27 on Exaggerations.
G
and
to
this
D
is
the
amount
is
amount
the coat
is
introductory articles, as well as that
is.
Practice,
exaggerated,
allowed for draping necessary
an exaggerated garment, and
therefore,
not
Be sure
explanations.
fig-
59
to read the
on Theory and
and try to commit same to memory, as
of these have direct
in
dif-
all
bearing on these drawings and
Hunchback
This diagram
coat
is
illustrates the
manner
drafted for regular hunchback.
Squared
Waist
in.
in.
1/4
Head forward
from proportions and variations,
actual measures are of more value for a subject of this
kind than for any other.
Measures used as follows:
in.
15
Waist length
in.
21
Length to seat
in.
26
Full length
in.
36
Breast
can be produced
i2
36
Seat
which a
While same
in
in third degree.
Direct measures applied:
Upper width
Lower width
of back
of back
14
in.
15
in.
7^
Depth of scye
Blade
Front measure
in.
in.
in.
1
7
in.
Strap
10
in.
Over-shoulder
16^4
in.
To Draft
from 13
Square out and down from A.
A to 18 is breast measure.
Rule a
H
to 22
is
%
in.
18 to 20
B
to 19
is
34
in.
%
in.
to
B is 1^ in. for square.
C is waist length.
to
D
20 to
A
A
A
3
is
E
to
is full
to
S
is
J^ breast measure.
S
to
G
is
G
to
W
3j4
B
to
N
to I
Z
back
Square up from H.
is
half the distance between
1
to
to
A
13.
V
to
T
to
line
from
7.
L
to
M
is
to
G
and down.
5^ waist measure.
is
is
14 and
334
seat
U
10 to 12
to
M
and
to 8.
in.
measure on
%
of divisions
from 10
to 10.
is
l}i
in.
Reduce front part 34 in. at point 2.
Shape as shown by illustration from 2 to 3, 12
and down.
Sweep backward from point 5. using point 2 as
measure.
W
to
across
1/6 breast measure, or same distance
8 to 3
to X.
T is 1/6 breast
R is % in.
is
as a pivot.
Rule a line from
to R.
Square back from K, finding point Z.
Rule a line from X to Z.
K to 11 is same distance as B to 20, or lyi in.
X to 21 is same distance as R to 11 minus 34
21 to Y is same distance as B to 20, or I54 in.
Rule a line from X to Y.
C
line
in.
in illustration.
Apply waist measure from 4
Apply
V
shown
from X to
pivot.
V is % in.
X is ^ in.
Rule a
from
%
to B.
half the distance between 13 to
Sweep up from A, using point 9 as a
Sweep forward from 1, using point 9
A
to G.
in.
from V to T.
Apply strap measure plus 34 in. from AA to X.
Apply over-shoulder measure plus 1 in. from B
to 25 and G to 26.
in. from G to L
Apply front measure plus
Shape as shown in illustration from V to 13, V to
R, R to 11, 11 to 2, 2 to 4 and down.
W.
Square out from
to V.
as
I.
Square up and down from G.
Point 9
in.
half lower width of back plus 34
Rule a
in.
Square up from
is
J4
at point 17, as
G to AA
Square down from
Point 13
1/12 breast measure.
half upper width of back plus ^4
Apply
in.
1/6 breast measure.
254
is
is
is
and square down from 22.
to K.
breast measure.
is
to 15
15 to 2
19,
in.
H
is
on point
Apply
to
\y2
rest
H
and E.
F
B
is
and down.
breast measure.
D
F
is ip.
M
Apply measure for depth of scye from B
Apply blade measure plus 1J4 in. from B
to
N
same
length of coat.
Square out B, C,
B
to
Place corner of square at 22, letting short arm of
length to seat.
is
line
a pivot.
Sweep forward from 6
to 16, using point
X
as a
pivot.
in-
Shape armhole as shown
in
to 2.
Shape shoulder from
14 in.
60
Y
to X.
illustration
from
Y
Diagram
X
to
Q
Shape
is
as
for
Hunchback
1
1-6 breast measure.
shown
in ilkistration
from
Q
to
I,
to
P
is
24
is
to
and
iy2
in.
1J4
in-
Take out a
down.
Q
to 23
is
Shape
1-6 breast measure.
V
finish as
61
gorge as shown
shown.
in illustration.
and bottom.
and pockets in regular manner and
lapel, front
Place collar
Rule a line from J to P.
Shape neckhole from X to P.
in
Overcoats
The
shifting
and uncertain
characterizes most of
may
be put on or
to suit the differences in climate.
By common
garment.
of
consent
overcoat has been adopted
this
wliich
northern hemisphere makes
tlie
necessary an overgarment which
removed
temperature
Fashion
in
in
men
well-dressed
America
model for
as the
overcoats
the
decrees
yet in late years the
fashionable models have been
or
Chesterfield
body
less
is
wear and
called a covert coat,
is
with which
box
it
overcoat,
The
fitting.
box overcoat
short
designed for riding, driving or country
from the material
The
usually built.
is
ulster
a long
is
coat.
There
from
is little
change of design
in
garments made
heavy materials, for wear
in cool
or extremely cold weather, the material only
makes
either light or
between the spring and
divided into the loose coats without a waist seam,
the
and the frock overcoats, on the order of the New-
winter overcoats.
difiference
In
market.
sack
the
which may be more or
many
changes, sometimes rapid, other times slowly growing,
and
shoulders,
strictly
dress
overcoats,
the
fall
and tRe
Inverness
with
a cape, for evening wear, has been the favored garFirst one style and then the other has the vogue,
ment
number
for a
of years, and while recently
it
has
but seldom do the two general designs become popsuffered
ular at the
same
there
When
the frock overcoats are in favor the straight
backed variety
The
is
usually not largely worn.
single-breasted frock overcoat
Newmarket, the double-breasted
eclipse
is
favor.
is
in
reason to believe
Certainly no
ment could be worn
called the
the Surtout.
In the straight falling style there are two
els,
an
favor of the
sack overcoat,
time.
the straight, box back overcoat, falling from the
its
slowly coming back into
more graceful and becoming garfor formal dress.
Sometimes a novel idea
the surface, but
mod-
it is
reign
is
in
overcoats comes to
usually short lived.
was the Raglan, which was
so popular a
Such
few years
Overcoats
FRONT AND BACK VIEWS OF
SINGLE BREASTED BOX OVERCOAT
Exaggerated Single and Double Breasted Box Coat
Mea-surements Used
Waist length
Length to seat
Follows
a.re a.s
17i4 in
Excess, four
sizes.
24
Height, 5
8
in.
ft.
in.
Attitude, normal.
Full length of coat
45
in.
Breast
40
in.
Direct measures
Depth of scye
Waist
36
in.
Blade
12
in.
Seat
41
in.
Strap
13
in.
To
C
V
From
A
A
A
B
3 in.
is
to
C
to
D
is
to
E
is
is
A
length to seat.
Rule a
K
length of coat.
to
H
is
\y2
to
S
is
54 regular breast measure.
in.
S to 5 is 3^/2 in.
Apply blade measure plus lj4
5 to
is
G
in.
in.
3 to
is
W
is
B
from
to
10 to 12
5.
1/6 regular breast measure.
J^ in. for each size the coat
N
to I
is
is
is
W
is
A
to
to
%
to
to
breast measure.
I
Q is 1/6 breast measure.
O is half of regular waist
inch for every inch the coat
this case
1
Shape
down
as
shown
in illustration
is
31/
to
P
is
in.
as
X
as
from
Y
to 18, using point
1/6 regular breast measure.
in
ilUistration
is
exaggerated.
from
Add
1
in.
to front length at point 18.
Shape front for single-breasted coat
In
Q
to
I,
and
as
shown by
solid lines.
For double breasted, dash
lines illustrate the front
part.
Extend 4 in. on front from points I,
Peak lapel as shown in illustration.
Make width
measure plus
in.
to 18.
top of back at point A.
Shape shoulder from Y to X.
Shape neck hole from X to P and out.
Extend a button-stand to front of 2 inches from
to 15 and 18 to 16 for single-breasted coat.
to 13,
W
X
in.
3-4
to 2.
Rule a line from
to R.
Square back from K, finding point Z.
Rule a line from X to G and down.
G to AA is 1/6 breast measure, or same distance
as from A to T.
Apply strap measure plus J^ in. from AA to X.
Rule a line from Z to X.
L
out.
the pivot.
in.
T is 1/6 regular
R is % in.
and
to 17
Rule a line from J to P.
Shape armhole as shown
Square up from W.
Square up and down from G.
Square up from H.
T
in.
Sweep forward from 6
exag-
exaggerated breast measure.
2J4
1
B
the pivot.
Q
N
to
is
from
Reduce front part J4 in. at point 2.
Rule a line from 2 to 12 and down.
Sweep backward from 5 to 6, using point 2
for each size the
in.
B
and down.
would be 45 on the two-thirds of the divisions
from 18 to 14 and U to 10.
In this case the distance from 3 to
gerated.
M
case
to 44.
to 3
is
to
J^ exaggerated breast measure.
from S to 18 and down.
in. at
Ys,
V
is
Shape as shown in illustration from A to R, R to
and 11 to 2.
Apply exaggerated seat measure, which in this
garment
garment being exaggerated from
or ^4
1 in.,
exaggerated, this
B
y2
is
11
in.
from
to 17
line
to 11
Add
>^
line
H
waist length.
full
is
line
14 to 18
From
%
%
F
B
to
Rule a
to B.
Square out B, C, D and E.
regular breast measure.
B to 4 is
exaggerated breast measure.
B to F is
40
M
Rule a
to
in.
Draft
Square out and down from A.
A to V is Vg, breast measure.
Apply measure for depth of scye from
9^
V
in the
of lapel at top
gorge, as
shown
Place the pockets
3^
in.
and
18.
and take out
in illustration.
down
% of the sleeve
length.
For top coat as shown by dot and dash lines produce same coat as heretofore described with the exception of the length, which may be 34 to 36 in.
Exaggerated Single and Double Breasted Box Overcoat
65
Single Breasted
Solid lines indicate front of
way
indicate the
lines
This diagram
the
Hewmarket and Double Breasted Surtout
Newmarket and dash
front
cut for surtout.
is
produced from the following meas-
is
Waist
36
Seat
41
Height
5
in.
in.
8
in.
9^
in.
ft.
Attitude, normal.
ures:
Natural waist
17
Fashionable waist
18 J4 in.
Direct measures
Depth of scye
Full length of coat
48
in.
Blade
12
in.
Breast
40
in.
Strap
13
in.
in.
To Draft
Square out and down from A.
A to V is y^ breast measure.
A
A
A
V
to
C
is
to
D
is
fashionable waist length.
to
E
is
full
B
to
is
3
natural waist length.
F
to
H
to
is
length of coat.
N
to
to I
to G.
to
to
U
Rule a
U to
8
Square
Square
K
23
to
Add
shown
breast measure.
to top of
in illustration
back
from
A
K
R
to R,
down to 16 as shown by
Sweep back from point 1, using
to
X
Rule
to
G
Y&
A
is
from
a line
X
to Z,
and
A
to
AA
1
X
to
to
O
is
is
AA
X
from
to
X.
3^ waist measure.
O
to
I.
line
is
to 18 is
to G.
is
^
in.
in illustra-
out.
from J to P and out.
same distance as from
R
to
minus
11
illustration
in
Y
X
and down.
2
to
from
Y
to 19
in.
X.
to P.
is
2
in.
width of lapel from 28 to 27,
12 to 33
1/6 breast measure.
Shape from
from 23
24 to 10
1/6 breast measure.
is
Y
Rule a
as a pivot.
to T.
L
P
is
line
9
in.
from 12
ii to 34
to
3>-^ in.
is
Y&
is
%
14 to 15
is
1/12 seat measure.
line.
in.
34 and down.
10 to 14
.
seat measure.
from 10 to 15 and down.
same distance as D to E plus J/2 in.
12 to 25 is same distance as 10 to 17 minus 1 in.
Add 34 in. to top of skirt at point 10 and shape
top of skirt as shown by illustration from 10 to 12.
Add y, in. at point 15 to back of skirt, and shape
as shown by solid lines from 10 to 17, and shape from
Take out a \' in front part as shown.
17 to 25.
Rule a
Apply strap measure plus ^-j in- from
Square out from X by balance line.
line
Shape from 27 to 18, 19 and down to 12.
Square down from 12 by fashionable waist
solid lines.
rule a line
to
Make
'"•
X'
1/6 breast measure, or same distance
is
Rule a
Yi in.
is
Shape shoulder from
Shape neckhole from
to 11, 11 to 23,
G
waist measure.
V^
Shape armhole as shown
and shape as
point
is
in.
;^ in.
is
divided into
is
to 13.
and down.
G
as
to 11
at point
23 to 8 and
1
W
in.
%
is
in-
Ys
>4 waist measure.
is
waist suppression, or same distance
from 21 to 9 and
X
from
to R.
Square down from U.
line from V to U.
is J^ breast measure.
down from 8.
back from point K, finding point Z.
3^
is
%
is
Rule a
C
4
waist suppression, or same distance
7 to 6
2.
to
T
to
Shape bottom of front part as shown
I.
tion
T is 1/6 breast measure.
R is ^ in.
Draw a line
to
M
in.
Shape as shown in illustration from 13 to 7 and
down to 10 and from S to 6 and 20; also from S to 5
and 21.
Shape bottom of sidebody from 10 to 20.
Square up from W.
Square up and down from G.
Square up from H.
A
2
waist suppression, which
%
is
13 to 23
,
Square down from
in.
4 to
as
breast measure.
is
is 2]/^
1/6 breast measure.
is
U.
6 to 5
W
N
U
8 to 7
as 2 to
S to G is 3y2 in.
Apply blade measure plus !]/> in. from B
is 1/6 breast measure.
G to
B
is
three equal parts, as Figures 4, 2 and 3 indicate.
Vs breast measure.
\y2 in. B to S is J/4 breast measure.
is
is
M
to
4 to
Square out from B, C, D and E.
Apply depth of scye from A to B.
B
F
22 to 9
L
in.
'1-
line
10 to 17
is
For Surtout
Note dash
frock, with the exception that width of lapel averages
lines at front of coat.
Level your square from 9 to 22 and rule up same
Lapels and front for surtout are produced
same manner
as
in.
wider.
The front of skirt is
manner as double-breasted
as in double-breasted frock.
actly the
Y2
in
ex-
those of double-breasted
also
produced
in the
same
frock.
Therefore, see diagram of same on another page
of this volume.
Single Breasted
Newmarket and Double Breasted Surtout
67
Inverness
MeeLSuremervts Used Are As Follows:
Waist length
18
in.
Waist
36
in.
To
24
in.
Seat
41
in.
34
in.
seat
Length
48
in.
Length of cape
Breast
40
in.
Breast, waist and seat exaggerated 4 sizes each.
To
Dracft
Square back from K, finding point Z.
Rule a line from X to Z.
X to Q is 1/6 breast measure.
L to is J 2 waist measure plus J4 in. for each
size the coat is exaggerated.
and
Shape as shown in illustration from Q to I,
Square out and down from A.
A to V If', breast measure.
A
V to B is
A to D
3 in.
is
length to seat.
A
is
length of coat.
E
to
C
to
waist length.
is
M
is >4
C to
Square out B, C, D and E.
and down.
Rule a line from V to
exaggerated breast measure.
B to F is
in.
M
down to bottom of coat.
Apply seat measure on
%
H
F
B
to
S
S
to
22
to
to 14
in.
J4 regular breast measure.
is
Zy2
is
G
22 to
V/i
is
is
in.
garment
for each size the
G
O
is
garment is exaggerated
4 sizes, consequently the distance from 22 to G is 1 in.
G to 21 is 1/6 regular breast measure.
exaggerated; in
W
21 to
garment
being Y^
exaggerated.
is
N
B
to
N
to I
this case the
is
in.,
J4
in.
Rule a
Add
from 6
K
to
line
from J
35.
to P.
shown
as
to 15
1
6,
5,
using point 2 as a pivot, and
using point
coat
is
as a pivot.
to front length at point 16
in.
2
in.
for button stand
and 16 to
and shape
from P
to 29,
I
to 13,
19.
Shape front as shown
20 and down.
X
to 19.
Add
W
from
line
is
to 12
in.
13/2
sweep forward from
in.
J4 breast measure.
is
and down.
Square back from
1/6 breast measure.
is
Sweep back from
%
14 to 20
in.
from 2
in illustration.
Square up from W.
Square up and down from G.
Square up from H.
A to T is 1/6 breast measure.
in.
to R.
Rule a line from
T to R is
2^
is
from 20
of divisions
Shape armhole, shoulder and neckhole
for each size the
exaggerated breast measure.
is
P
Rule a
3>4
is
line
to 35
to
%
to 10.
10 to 12
Rule a
in.
J4
U
and
and body of
in illustration
finished.
Cape
This cape
drafted over coat and
is
from draft on another paper.
is
traced off
To
X to Y is
Y to 17 is
same distance
1
as
point are in
Front and shoulder
R
of cape
same
place as those of coat.
Shoulder
shape of regular coat.
DraLft
Shape as shown
to K.
in illustration
Y
from
and
to 18
17 to 18.
in.
from 36 to V and out.
Apply measure for length of cape as taken over
shoulder from X to Y and 17 to 24.
Sweep forward from 24, using point X as a pivot.
Rule a
is
line
Add 1 in. to length of
From Y to 18 is 4 in.
Shape from 36
to 17.
From
is
^
plus
17 to 27
24 to 28
From
cape at 23.
27 to
from
K
to 2,
same distance
as
from
same distance
as
in.
is
7
in.
for vent in side.
2 to 25 and 2 to 26
is
28.
Collar
To
From.
X
P
to 33
is
same distance
as
from
A
to
R
Dra.ft
and
Shape from ZZ
to P.
33 to 32
33 to 34
is
Shape
shown
as
1^4
3 in.
to P.
P
to 31
is
3
in.
Shape as shown in illustration from 34
Shape from 32 to 31 and P to 31.
and 52.
in.
in illustration frf>m
is
34 to P.
68
to
Zi
Inverness
Full Evening Dress
Custom decrees
is
that
when formal evening
The garments should be
dress
required, the long-tailed coat which has earned the
name
though a
of evening coat should be worn.
It is
formal dress and for
The
allowable.
necessary that there should be uniformity in
this
slight tendency
reason well-dressed
seam.
men
The
of black
toward gray
material,
al-
sometimes
is
trousers are braided on the outside
waistcoat
white, of duck or
is
silk,
single
or double breasted, either plain or corded.
are a unit in deciding the use and the usage for eve-
With
the full dress coat a plain white shirt, with
ning dress.
two or three pearl
To
in
formal dress
is
and no gentleman
to
straight front or poke
make one unduly conspicuous,
likes to
broad ends
render himself an object of
The formal evening
coat
is
worn
after 6 o'clock
kid,
afternoon at any formal occasion, such as wed-
dings, receptions, balls, the opera and theater,
ever ladies are present.
by any excuse
;
is
worn.
The
collar
is
either
No
and
pumps
the
tie
a white lawn
for dancing
hat, silk or opera.
to slight variations
when-
;
bow
;
the gloves white
This fashion
from season
is
subject
to season, but in
general effect will doubtless be unchanged for
other costume can be held
years.
to be correct.
70
with
the shoes patent leather with button tops.
or patent leather
remark.
in the
studs,
deviate even slightly from established custom
its
many
Full Dress
VIEWS OF FULL EVENING DRESS AND EVENING
COAT WITHOUT STRAP AND LAPEL SEAMS
Full Dress Coat
Solid lines at front indicate regular dress coat.
Dash
coat
lines illustrate the
is
manner
which the dress
in
Waist
32
in.
Seat
37
in.
Height, 5
cut without strap or lapel seam, the following
Natural waist
17
in.
Fashionable
18^
in.
40
in.
waist
Full length of coat
Breast
36
in.
To
.
and 3
for
in.
12
U
Distance from 4 to
in.
9
11 in.
.\
.
in.
DraLft
3
is
.
Strap
V
divided
depth of
is
waist suppression, which
equal parts,
three
into
as
Figures
4,
2
indicate.
8 to 7
%
is
of waist suppression, or same dis-
tance as 2 to U.
A
A
A
to
C
to
D
to
E
natural waist length.
is
C
full
is
U
to
D
%
to
F
is
to
H
is
1%
to
S
is
^
and E.
U and
rule a line
from
N
to I
U to V.
to
in.
X
breast measure.
to G.
to
to
T is 1/6 breast
R is M in.
down
X
is
>4
X
A
to
AA is
to
Z and
is
K
From
to 11
Add
shown
14,
><
rule a line
from
in-
is
in.
from
AA
to
X.
line
is
is
1^
3/2
^
in.,
23 to 13
shown by
is
Y^
illustration
in.
from 13
and
to 7
to 10.
to
6 and 20, and shape from S to 5
21.
back at point
from
A
to R,
R
A
Rule a
line
9 to 23
is
from
iy2
to
to P.
level
P
X.
from 9
to
22 and draw a
by having square
level
with
G
to 27
and
out.
in.
and shape
23 to 18
is
2
to 11, 11 to
27 to 28
is
234
in.
in.
Shape outside of lapel from 28 to 18.
Take out a V in front part as shown
in.
waist measure.
Lay your square
up to 27.
Square out from
Y
X
balance line finding point 27.
8.
and down.
to M
M to 4
is
Shape shoulder from
Shape neckhole from
yi breast measure.
to top of
25,
to 13.
in.
in illustration
23, 23 to 8
L
to 23
is
I,
^
pivot.
J^ breast measure.
Square up and down from
K
to
%
to T.
to 8
Q
%
1/6 breast measure, or same distance
Apply strap measure, plus J4
U
from
1/6 breast measure.
is
as
illustration
Shape sidebody from 10 to 20, and shape bottom
from 21 to 9.
O to P is 1/6 breast measure plus
in.
Rule a line from
in. forward of J to P.
X to Y is same distance as R to 11, minus
in.
Shape armhole as shown in illustration from Y
to
G
1/6 breast measure.
of front part
in.
Rule a line from
G and down.
is
Shape from S
and
W
to
7.
waist measure.
34 in.
is
Q
Shape
measure.
Rule a line from
to R.
Square back from K, finding point Z.
Sweep back from point 1, using point G as a
1
to
22 to 9
;
T
25
24 to 10
2>4
Square down from I square up from W.
Square up and down from G and square up
from H.
A
^
is
Shape as shown by
22 and down.
in.
is
to
Square out from X.
breast measure.
is
distance
2.
L
breast measure.
W
N
to
% waist suppression, or same
is
Square down from
S to G is 33^2 in.
Apply blade measure plus I3/2 in. from B
is 1/6 breast measure.
G to
B
4 to
in.
5^
is
as
J4 waist measure.
is
6 to 5
length of coat.
Square down from
B
F
B
7 to 6
fashionable waist length.
is
Square out B, C,
as
Blade
is
Check same distance by measure
as
Direct measures applied
Depth of scye
%
scye.
X
Attitude, normal.
Square out and down from A.
A to V is breast measure.
B
in.
Weight, 135 pounds.
measures being used
to
8
ft.
tion.
in illustra-
Full Dress Coat
Front Without
Strap and Lapel
For
Seam
Note dash
on front part
line
coming down
reduce front at point
18, '4 in.,
This
same as two seams.
or
lower
the
leave
will
and
to point 23,
of
part
front in one piece.
Skirt
10 to 14
is
seat measure.
1/3
Square back from
14 to 15
Rule a
14.
1/12 seat measure.
is
from 10
line
to 15
and
down.
.
9 to 12
is i<
in.
2
in.
12 to 19
is
19 to 29
is
1/3
of the distance
of 9 to 24.
Add
J4 in. to top of skirt at
point 10, and shape top of skirt
shown by
as
from
illustration
:o to 12.
From
10 to 17
tance as
Add
D
to E, plus
in.
3/4
same
is
1/2
disin.
15 and
to point
shape back of skirt as shown
by
illustration.
17 to 26
Rule a
is
line
same distance
from 29
Shape front of
bottom as shown by
Shape top of
strap and lapel
out
to 26.
from 29
illustration
skirt
seam
as
for
and
\y2
in.
finish as
to
from 17
full
shown.
dress
end of
back from
and shape
to 26,
to 26.
coat
shown by dash
\' in front part at front
Add
tack,
skirt
as 19 to 29.
D
line.
without
Take
skirt.
to
E. for back
The Tuxedo or Dinner Coat
WITH SHAWL ROLL AND NOTCH COLLAR
The dinner
coat,
or Tuxedo, as
America, was designed
evening wear to be put on
dress coat
was taken
after dinner the
men
smoking or
the
retired.
rule,
in the
coat
in
for
evening when the
and
full
dress
universal,
is
of the party frequently resort to
room when the ladies have
was then donned, with the
billiard
The dinner
called
is
In England, where large
off.
house parties are the
it
a lounge
for
first
coat
trousers and waistcoat of the dress
clothes.
From
beginning the dinner coat grew to the dignity
this
of a distinct costume, to be
men
are present.
At
clubs,
worn
as dress
when only
men's dinners,
etc.,
it
is
correct.
be
at
Many men imagine that the Tuxedo costume may
worn interchangeably with the dress coat, and
the theater, formal dinners, balls,
dies are present
it is
frequently seen.
etc.,
where
la-
Nothing could be in worse taste, and nothing
shows more clearly how little a man knows about
correct dressing than such wear of a Tu.xedo.
In its proper place, among men, it is a sightly,
easy garment, which is very well liked by men who
like to be comfortable and at the same time well
dressed.
It
may
as the coat,
be
worn with
which
is
same material
Oxford gray,
a vest of the
usually black or
or with a fancy vest of steel gray.
The
shirt
is
white
and pleated, the collar a turn over or wing, and the
tie a black bow, or of a color to match the vest.
The coat may have either a shawl or notch collar, either being in good taste.
The Tu.xedo being a sack
worn with it a soft or derby
opera
hat.
coat,
hat,
requires to be
never a
silk
or
The Tuxedo or Dinner Coat
To
Draw up your
from
the roll or
Take out a
Point 3
is
Run same
This
is
crease lines from the bottom of
of
1J4
V
1^
in.
1
in.
below breast
done whether there
to 4
is
from 2
3 inches.
shawl collar
to
If
1.
line.
from 4 to
peak lapel
is
shown
in illustration.
a shawl collar or a peak
is
desired, shape as
shown
in illus-
5.
is
desired,
peak lapel according
to
style.
4 to 6
to point 3, as
lapel dinner jacket.
If
tration,
5 to 2.
V
Dracft
4 to
is
2y2
in.
Shape as shown by dash
6 and 6 to 5.
All
lines in illustration
other points are the same as
sack coat.
in
from
a regular
Cassock
Mea.sures as Follo\vs:
Natural waist
„,.,,.
17
in.
. r,
.
ly
i-ashionable waist
Breast
36
in.
Waist
32
in.
in.
-u ^o u ^^
j
with
32 buttons and
^
t-u
r
^
r *i
1 he front of this coat closes
•
i
Full length
58
'
button holes.
in.
To Draft
Square out and down from A.
i-g
A
A
to
D
is
to
E
is full
Rule a
23 to 13
S
1>4
S
is
J4 breast measure.
5
to
G
is
G
to
W
B
to
N
N
to I
3j^
and
O
.
breast measure.
is
2^4
in.
'
Square down from
^
W.
Square up from
T
to
5
T is 1/6 breast
R is 34 in.
Rule a
line
Sweep back from
hole
point
1,
using point
G
pivot.
is
J^
X
to
L
to
O
I/2
is
by balance
L
M
M
to
to
4 to
C
2
is
4
in illustration
from
O
to
I,
and
waist suppression, which
is
is
divided into
three equal parts, as Figures 4, 3 and 2 indicate.
C
is
7 to 6
6 to
as 4 to
K
K
M
is
is
%
34 waist measure.
is ifi
Y
waist suppression, or same distance
2.
to
to 23
is
1/6 breast measure.
to 11
is
14 in.
to
20 and
9.
from
J to P.
X
to Z.
same distance
is
X
from
as
R
to 11
in illustration
minus
from
Y
Y
X
to
and shape neck-
Rule a
line
from
A
to
28 and down.
line
from 35
to
D
and down.
line
D
to 17
is
E
as a pivot.
same distance
same distance
is
skirt as
as 28 to 16.
as 28 to 16
shown
minus
in illustration
1
in.
from
9.
to
I to
25
is
to
24
9 to 12
26
is
lj4
in.
is
l]^
in.
is
1>^
in.
Ij^
as
shown
in illustration
as per illustration
as
shown
from
in illustration
in.
Shape as shown in illustration from 26 to 25, 24
12 and down to bottom.
Put on standing collar of l.)4 in. width, as shown
in illustration.
76
to
to P.
Rule a
From P
1/6 breast measure.
waist suppression, the same distance as from 2 to C.
to 8
8 to 7
body from 27
Extend a plait of 2 in.
from D to 33 and 18 to 34.
Extend a plait of 2 in.
30 to 32 and 17 to 31.
Extend a plait of 2 in.
from 28 to 30 and 16 to 29.
in.
27.
5 to
to 5.
from
30 to
5^ waist measure.
is
line
to
from
Shape top of
1/6 breast measure.
is
Rule a
12 to 19
down.
22 to 9
line
From 30
line.
waist measure.
Shape as shown
and
1/6 breast measure.
is
to 18, using point
X
1/6 breast measure.
is
P
Rule a
in.
Square out from
to 7
from J to 30 and down,
Sweep forward from E to 16 and back from
as a
_
X
to
side
Shape shoulder from
W to R.
from
to
and 13
measure.
Square back from K, finding point Z.
1
from 13
6 and 20 and shape from
Shape armhole as shown
Square up from H.
to
in illustration
5 to
in.
Square up and down from G.
A
in.
21.
Rule a
X
I.
to
to 23.
shape bottom of front part from 21 to
in.
R
in.
Shape bottom of
'
1/6 bi-east measure.
is
is
in.
G
to R,
to 28.
in.
%
is
Shape from
M
His
1^/2
Shape as shown
%
to
^
is
is
30 to 27
length of coat.
Square out from B, C, D and E.
B to F is
breast measure.
to
to 5
from
line
down
A
from
in illustration
23 to 8 and
11, 11 to 23,
fashionable waist length.
F
B
shown
Sliape as
A to V is breast measure.
V to B is 3 in.
A to C is natural waist length.
The Cassock
Theories
The
practical cutter
recognize in this work
and the advanced student who have studied cutting as a science
many
of the ideas they
many new
time they will observe
and Practice
have proved
to be of
ideas introduced and expressed, which
ideas
it is
not
my
intention to criticise
have expressed
I
anybody
or his work, there
else,
At the same
practical value.
may
no doubt
be in direct opposition to
system makers and instructors of cutting.
their views, as well as in opposition to the opinions of other
While
good
will
will to a considerable extent revolutionize
some
been in use heretofore and have been accepted as correct, but which are
many
no doubt that
is
of the practices
in fact
of the
which have
nothing but fallacious
theories.
For instance,
it
has been a
common
practice to lay
up the normal points
of a coat
cutter
in this
tions,
the depth of scye
is
54 of an inch longer than normal, measures are applied direct without the
knowing the reason why the depth
is
The Second Section
greater.
volume, has been either ignored or else the cutter does not
and the consequence
is
more
of the following types
essential that this be thoroughly understood.
The same
applies to the strap measure, or
parison with the normal.
and
this reason can be
Measurements, as described
know anything about
scientific varia-
The reasons
found promptly
may
if it is
for the excess length could
Height, stooping, sloping, or long neck.
:
If it is not, see
this increase or decrease in length
stipulated
be remedied in a
when measurements
scientific
It
is
diagrams and instructions.
any other measure which may be long or short
There must be a reason for
Section of Measurement, and
of
that this measure has been applied before regulating the draft for the
type or form which causes this measure to be 3^ inch longer.
be traced to one or
to
For example:
apply direct measures without having arranged the points in position for measurement.
Where
and then
in
com-
from normal,
are taken, in the Second
way by adhering
to the illustrations
and
instructions of variations. First laying out the proportionate points, applying height and circumference,
and
next, variations, according to definition of types. It will be readily seen that the points
positions,
and by
and the draft
is
this operation the different points are placed in graphic
then in position for measurement that
is less
conflicting.
have changed
harmony with each
In fact,
if
other,
the types have
been correctly stipulated and measurements accurately taken, there should be no difference between
the measurements and variations.
retain the
symmetry and grace
to scientific variations
At the same time the garment
of the ideal model.
While
it
will
fitting points
and
has been for various reasons subjected
and methodical measurements, yet balance and
79
have the proper
fitting points
have been retained.
The shoulder
point has been a subject of
much
of
view the shoulder point has only a fixed relation
to
any
It
circle.
attempt to
fix
has nothing to do with what
is
discussion in the trade, but from a scientific point
to the
neck that a point
commonly
is
For instance, a stooping figure
wrong.
theories are put in practice.
there
is
to be a straight or crooked shoulder.
is
to
and
to
as a rule also round-backed,
The length
of the
is
fallacious, yet,
the back
is
straight
shoulders
out of the question.
The
influence.
only
are
location
of
An
(See diagram for stooping and erect).
To produce
of a
B demands
The
so-called
word "term"
shoulder point
is
is
something that has no independent
entirely
dependent on the increase
a well-balanced garment necessitates
all
fit,
or character of the
parts of the coat being in strict har-
each other, and this important feature can not possibly be secured by any process of meas-
mony with
uring that
to
Therefore, to alter the shoulder point without reference to
or decrease given to the length of the back to produce the intended effect,
garment.
A
independent shoulder point has no existence, and crooked and
terms.
the
even in
back determines whether
Raising or lowering of the back and increase or decrease of the distance from
raising or lowering of the shoulder point.
To
means without reference
reduce the length of front shoulder of a coat without reference to the back
some modern methods, such
circumference has
called straight or crooked shoulders.
the shoulder point by direct measurement, or by any other
the top of the back
in the
is
practicable for students to use, without the aid of proportions and variations.
garment depends entirely on the
to the type
and
figure,
and
in
making
taste
it
and individual
skill of
The
the cutter in adapting the garment
the proper size so as to dress the customer correctly.
80
style
VEST SECTION
The Supreme Vest System
with Instructions How to
Measure and Apply Measurements
Vests;
to
Proportion Tables*
81
also
Proportiona.te Front Length for Vests
Breast.
32
33
34
35
36
37
38
39
40
5-4
5-5
5-6
5-7
5-8
5-9
5-10
5-11
6
23
231
23*
23i
23*
23f
24
26f
27
23i
24
24i
24*
24f
25
25i
25*
25f
26
26i
26*
26f
27
27i
234
23f
24
24i
24^
24}
25
25i
25*
25f
26
26i
26*
26f
27
27i
274
24i
24*
24}
25
251
25*
25}
26
26}
26*
26}
27
27}
27*
27}
24
24}
24*
24}
25
25}
254
25}
26
26}
26*
26}
27
27}
27*
27}
28
24}
24*
24}
25
25}
25*
25}
26
26}
26i
26}
27
27}
27*
27}
28
28}
244
24}
25
25}
25*
25}
26
26}
26*
26}
27
27}
27*
27}
28
28}
284
24}
25
25}
25*
25}
26
26}
26*
26}
27
27}
27*
27}
28
28}
28*
28}
25
25}
25*
25}
26
26}
26*
26}
27
27
27*
27}
28
28}
284
28}
29
16
16}
16*
16}
17
'i
17*
17}
18
23f
24
24i
24A
24J
25
41
25i
25i
25|
26
261
264
42
43
44
45
46
47
48
Proportionate
of Vests
from Height and Circumference
Waist Length
82
ft.
Vests
"^'^
>»(•.
^
1
MODELS OF THE DIFFERENT FANCY AND REGULAR VESTS COMMONLY WORN
83
How
to
Measure
Vests
After having ascertained the style desired and arranged the vest so that
it
is
smooth front and
back, proceed to take measurements over vest as follows:
1.
Measure as shown
in
illustration for actual
opening desired from
A
on back view to
E
on
back view to
F
on
front view.
2.
Measure as shown
in illustration
for full length
vest
of
from
A
on
front view.
3.
Measure as shown
4.
Measure
in illustration to side
from
all
around breast as shown
in front
all
around waist as shown
in front
A
view
on back view to
G
on front view.
Measurements taken should
illustration.
be medium snug.
5.
be
Measure
medium
illustration.
Measurements taken should
snug.
Height and weight of customer are essential
of breast
view of
in order to
prove up breast measure with the table
measures compounded from heights and weights, and also so as
to designate the proportionate
length of depth of scye and waist.
Measurements
for vest
when
entered in order book should stand as follows:
Opening
Breast
Full length
Waist
Length
to side
For the
urements.
different attitudes
and deformations, see Definition
For short or direct measures, such as depth
and front measure, see Third Section
of
Types or Second Section
of
Meas-
of scye, waist length, blade, strap, over shoulder
Measurements.
84
of
How
to
Measure
Vests
fprn'/y
W^^'-
85
Proportionate Vest
Mea.sures
1"
in.
Opening
1 1
in.
Front length
25
in.
Waist length
To
a-s
Follows:
Length
22
in.
Breast
36
in.
Waist
32
in.
Draft
Square out and down from A.
A
V
A
to
V
is
I3 breast measure.
to
B
is
3
to
C
is
waist length.
Apply measure for opening plus
T
to
F
is 1/3
to
H
is
to
S
is
S
to
G
is
G
to
W
B
to
N
N
to I
B and
A
T
to
and
X
to 6.
L
to 3
J4 breast measure.
G
to
3 in.
M to 5
lyi
2
Square down from
to
Rule a
from
line
W
to
M
is
1
from
to 7
in illustration
from Z
to
M
X
and
Sweep back from
point
2,
using point
G
to 13
as
and
8 to
as a
from P
to 3
and
6.
to J.
A
to
R
and
line
R
as
to E.
R
shown
as
and Yi
in.
in
E
to
minus J4
illustration
in
>"•
^
is
%
Y
to
X.
in.
shown by
solid lines
from 13
to 8,
from
to J.
Place vest pockets as shown, lower pocket 4
2 to
X
is
Rule a
2 to
O
to
J4
line
is
is
from bottom, and make lower pocket
in.
from
X
Make
to Z.
1/6 breast measure.
Q
to
I,
breast pocket 4
Extend button-stand
5^ waist measure.
Shape from
in.
front of balance line
to E.
Shape
pivot.
T
7.
and shape from 6
Shape shoulder from
down.
L
Y
4 and
same distance
is
below breast
to
34 in.
is
Y
A
from
in.
Shape armhole
to R.
in.
Shape as shown
to
in illustration
to
V/i
is
Shape from
X
Square back from K, finding point Z.
C
E
in.
1
in.
Shape from 10
Square up from H.
T
to 10
to
from
in.
J4 waist measure.
is
shown
K
to
1/12 breast measure.
as
J\I
A
in.
1
is
Shape
I.
measure.
to side plus
1
W.
T is 1/6 breast
R is % in.
for full length plus 1^4
is
Square up and down from G.
to
is
P
Shape from P
in.
from
in.
to J.
4
5 to
breast measure.
is
is
in.
1/6 breast measure.
is
X
and
Apply measure
C.
breast measure.
1
to 8.
Apply measure
Square up from
A
X
and
in.
Square out from
B
F
B
to side
in. in
as
in.
4j/2 in. in length.
length.
shown by dotted
line, to
be used only on right side of vest, and single-breasted
and down.
vest
is
completed.
Double Breasted
For double-breasted vest see dash
Make
Make
line
on
distance from solid line to point
distance from J to 12, 2}i
Shape as shown
front.
11,
4
to 12
in.
in.
86
and J
to 12,
in illustration
from 8
and double-breasted vest
to 11, 11
is
finished.
Proportionate Single
and
87
Trouble Breasted Vest
Vest for Stout Figure
Mea-sures
Waist length
Opening
.
i/
... 17
inin.
Length
23^
in.
12
in.
Breast
48
in.
29^
in.
Waist
50
in.
Full length
To
B and
Square out
F
to
H
to
S
S
to
G
G
to
W
is
B
to
N
is
N
to
I is
is
iy2
is
^
is
and 48.
T
to
R
breast measure.
to 17
K
to
E
in.
11 to 10 in
G
as
a
is J/2
from
line
is
12
is
X
is
^ waist measure.
^ for each inch
in.
Shape from 10
A
to
R
and
I to
waist meas-
from
to 12
is
%
lines
from
Shape armhole
much
11
is J/^ in.
Q
to
I
and down
shown by
and shape
as
to J.
illustration
from
E
Shape from 18
as
is
point
necessary to get
J/^
in.
for each
10
9,
J/g
in.,
Add
in.
much
as
to
make opening between
for each inch waist measure
is
^2
3
over nor-
instance waist measure exceeds normal
therefore the distance from 3 to 9
in.
is
%
in.
for seams at 6.
Shape from 6
to J.
Extend button stand of
is
M
as
in this
;
by 6
for every inch waist meas-
In this case waist measure
to J.
Place pocket and cut same open and lay a plait at
and
over normal, consequently the distance from
in.
to 12
X
Shape front of armhole as shown by solid lines
Y to 16 and taking out as much
more in armhole as distance from P to 16.
inch waist measure exceeds breast.
M to
as
at point
of illustration from
and
mal
a good shaped front, or an average of
ure exceeds normal.
to 7.
Shape front from 8
in-
12.
15 as
7.
Extend
in. to front
shown by illustration.
1/6 breast measure.
Square down from
J4
from
to P.
to Z.
Shape as shown by dotted
Add from
P to 4 and
1% in.
^
in.
12.
is
illustration
to 18.
Shape from
ure exceeds breast measure, in this case being 48
to 11
in.
down
I.
breast and 50 waist, the distance
in.
%
^
From L to
From to
6
is
is
in.
^
From
is 1 in.
1/6 breast measure.
2
2 to 13
Q
12.
T
13 to X is J^ in. for each inch waist measure exceeds breast measure, in this case being 48
in.
breast and 50 waist, the distance from 13 to X is
2 to
and
to E.
pivot.
Rule a
to 11
is
in.
1/6 breast measure.
breast measure.
Rule a line from R to W.
Square back from K, finding point Z.
Sweep back from point 2, using point
From
From
V
from
Apply measure for opening plus 1 in. from A to
and X to 8.
Apply measure for full length plus 1J4 in. from
A to T and X to J.
Apply measure for side length plus 1 in. from A
to T and X to 18.
X to Y is same distance as R to E minus 54 inP to 16 is same distance as 1 to 15.
Shape as shown by illustration from 16 to 17 and
3
is
T
R
L
Shape as shown by
in.
Square up from W.
Square up and down from G.
Square up from H.
to
illustration
From 11 to 5 is J^ waist measure.
From 5 to 14 is 1 in.
From 14 to 4 is same distance as to
G to P is 1/12 breast measure.
C.
Square down from
A
Dracft
% breast measure.
to
B
F
B
to side
Shape as shown by
down.
Square out and down from A.
A to 42 is Ys of 42 on divisions.
A to 48 is 1/3 of breast measure.
V is half way between 42
V to B is 3 in.
A to C is waist length.
bls Follou's:
}i in. as
shown by dotted
line
of front according to illustration to right side
and
finish as represented.
Vest for Stout Figure
S9
Breasted Vest With Separate Lapel. Also Full
Bress Vest With Small Waisted Effect
Trouble
Measures
a^s ^ollo^vs:
Waist leneth
17
in.
Length
Opening
10>4
in.
Full length.
All systematical points are oJDtained in
regular draft, hut
ner as in
measures
call
making
36,
for 30 waist,
waist
the
will
it
l>e
22
in.
Breast
36
in.
Waist
30
in.
To
Draft
same man-
row
noticed
while the hreast
the
to side
at
the waist and
M
h""rom
measure 2
smaller
in.
width over the
chest.
still
is
retaining the
than
to 15
is
J/^
for each inch the waist
in.
is
smaller than normal.
normal.
In applying waist measure from
L we
A V
taken out
is
in the
back so as to reduce the
find point
width
at waist,
having the same
efiiect
as that of the
but the front must have the normal shape as point
9,
indicates,
in
and
a
V
front part, which,
front part.
is
taken out
in the side, as
when seamed
the distance from 9 to 0,
making
shown
In other details the opening remains the same as
up, will eliminate
in resrulation draft.
the front part nar-
Double Breasted Vest With Separate Lapel
Lay square
level
from point
Make width
and square up,
J to
From
finding point 15.
Square forward and back from 15 through
15 to 14
is
same distance
as
from 8
Shape
8.
to 15.
0,
of lapel 4
J to 12
as
is
shown
2
in. at
point 11.
in.
in illustration
14 to 11, 11 to 12 and
J
from 8
to 0, 14 to
to 12.
Full Dress Vest
For
full
Be sure
dress vest use dash lines in front part of
Measure
full
the points are thoroughly understood,
as while system remains the
vest.
in.
all
for whatever opening
is
desired plus
from 2 down and shape as shown by dash
dress vest
is
line
to
1
same
for
all vests,
subject
variations which will be given hereafter, various
fronts are only additions and deductions according to
and
the |iurposc for which the vest
completed.
90
may
be designed.
Double Breasted Vest With Separate Lapel.
Vest With Small Waisted Effect
Full Dress
Variations
7^>>
^foy^tnp'
Diagram
F.
Illustrates variations for
illustrate stooping,
and dotted
stoopingand
H
Qi-ecl
show normal.
way between
and B.
Solid lines
erect.
Point
lines illustrate erect.
/
is
half
W
Dash
lines
Stooping
Stipulate variations of }i
B
in.,
>4 in or
%
in.
from
Square out from 10 by dash
line finding point P.
to 8.
Draw
by dash
a line from 8 through
H
and out
as
18
shown
is
found by sweeping back from
P
as in regu-
lar draft.
line.
Square up by same
8 to 10
is 1/3
line
from H,
G
and
breast measure, plus 3
W and
Shape back, armhole, shoulder and opening as
line and stooping is finished.
8.
shown by dash
in.
Erect
Stipulate degrees of variation of
or
%
from B to 9.
Draw a line from 9 through
in.,
1,4
Square out from point
yi in.
in.
by dotted
point
H
and out
as
shown
9 to 11
is i/j
line
from
\V, G,
H
and
breast measure, plus 3
by dotted
line,
finding
19 is found in regular manner by sweeping back
from M.
Shape back, armhole, shoulders and opening as
shown by dotted line, and erect is finished.
line.
Square up by dotted
11
M.
9.
in.
92
Variations
DIACC.
Diagram
G.
Illustrates large
Solid lines illustrate normal
;
and small blades.
dash lines
show
large
Stipulate degree of variation of J4
in.,
G
in.,
/^ in.
or
is
for large blade
and
G
to 8
is
for small
scye
is
moved.
H
by dash
H
to 5
to 6
is
is
same distance
same distance
arnihole,
as
G
as
to
G
to
8,
and
7.
shoulder and opening as shown
line for large blade.
Shape armhole, shoulder and opening as shown
blade.
It will
from
Shape
varying from point G.
to 7
in either direction as the front of
For example
From
blade, and dotted lines illustrate small blade.
^
moves
be clearly seen that the width of the back
bv dotted
line for small blade.
Variations
Diagram H.
Illustrates
Solid lines illustrate normal
ing,
and dotted
;
and square.
sloping
dash
lines
show
slop-
lines illustrate square.
For Squatre Shoulder
Stipulate variation from point
or
%
from B to 8.
Square out from 8.
From E to D is same distance
B
of J4
as
B
iri-,
J^
Y to 11 is same distance as E to D.
Shape as shown by dotted line for square shoul-
in-
in.
der.
to 8.
For Sloping
Stipulate degree of variation by
%
^
in,,
from point B to 9.
Square out from 9 as shown by dash
E to L is same distance as B to 9.
lA in. or
same distance as E to L.
and X remain same as normal vest.
Shape shoulder and armhole as shown by dash
Y
to 10
Points
in.
line.
is
R
line for sloping shoulder.
Variations
j^ng /
Diagram
long and short neck.
Illustrates
J.
Dash
Solid lines illustrate normal.
neck, dotted lines
Rule a
line
show long
from
H
to
X
Bit Of/ i^fifl
lines
show
short
neck.
and
out.
For Short Neck
For Long Neck
Stipulate degree of variation of J4
Stipulate degree of variation of '4
}i
in.
for long neck
Square out from
and shoulder
as
from
5,
A
to 5,
and
in.,
X
J/^
m. or
lines for
/^
i'l-
or
from A to 6 and X to L.
Square out from 6 and shape top of back, front
and shoulder as shown by dash line for short neck.
Be sure to study incline and definition of types
in connection with these diagrams of variations.
34 in.
to D.
and shape top of back, front
shown by dotted
i"-,
long neck.
93
J^otch Collar Vest for Corpulent Figure
Meatsures
a.s
Follows
Waist length
Opening
13
in.
Direct measures applied
Depth of scye
lOYs
in.
Full length
28
in.
Strap
13J/2
in.
To
23
in.
Blade
12>^
in.
Breast
42
in.
Over shoulder
19
in.
Waist
42
in.
17 in.
side
To
Attitude, normal.
Dra.ft
M
Square out and down from A.
to V is y^ breast measure.
A
V
A
B
C
to
to
3
is
in.
5 to
L
G
Square out B and C.
is
%
is
\y2
B
F
to
F
to
H
B
to
S
is
S
to
G
is
G
to
W
B
to
N
N
to I
in.
2
to
R
in.
^
is
W
Rule a
line
G to AA
as
A
X
2 to
is
from
3^
X
K to E
X to Y
Shape
G
Apply strap measure plus
X
^
in.
from
2 to
O
L
C
M
to
from B
is
is
is
AA
to
and
G
1
in.
as
1
A
to
is
as
1
in.
IJ/2
in.
from
A
from
to
T
X and shape opening
and shape front from 8 to
lJ-2
V
^
12.
7.
to 11
and 10
to 12.
in.
same distance as R to E minus 34 in.
shown in illustration from A to R and
R
P and Y
in
to P.
illustration
from
Y
X.
make
plait in front of pattern
and make opening between 3
and 9 oi ]4, iu- for each size vest is larger over waist
than normal in this case it would be 3/2 in., and add
1/2 in. for seams at 6.
Shape from 6 to J.
Extend button stand of 9-4 inch to right side and
shown
;
to 14.
1/6 breast measure.
J/2
from
in.
Place pocket and
X.
to Z.
to 13
in.
to front at point
is
is
length plus
side plus
solid lines,
as illustrated in draft
over-shoulder measure plus
in illustration
to
from
line
in.
full
Shape armhole from E to
Shape shoulder as shown
and down.
to
Rule a
1
to E.
to T.
Appl}!-
%
shown by
Shape from
in.
to
in.
1
is
11 to 10
1/6 breast measure, or same distance
is
for each size waist
waist measure.
and down.
Shape from P to J and
Shape from P to 4 and
line from
to R.
Square back from K, finding point Z.
Apply depth of scye from B to A.
Apply blade measure plus 1 in. from B to G.
Sweep back from 2, using point G as a pivot.
From
in.
]4,
in.
1
is
P
to
Add
as
inch.
Rule a
to J
^
is
is
and X to 8.
Apply measure for
A to T and X to J.
Apply measure to
and X to 12.
Square up from W.
Square up and down from G.
Square up from H.
A to T is 1/6 breast measure.
T
or
in.,
T
1/6 breast measure.
breast measure.
is
is
J/2
1/12 breast measure.
Apply measure ftjr opening plus
breast measure.
J^ breast measure.
3 in.
is
4
is
over proportion.
is
11 to 5
,
waist length.
is
to 11
measure
waist measure.
in.
finish.
96
N.otch Collar Vest for Corpulent Figure
Clerical Vest
MeaLSures
a.s
Follows:
Waist length
17
in.
Breast
38
in.
Full length.
25i^
in.
Waist
34
in.
Side length
22
in.
To
All systematical points are obtained in the
manner
same
which
O
to 8
is
1/6 breast measure.
Shape as indicated from
Rule a
line
from where
at side as indicated
will serve as
button stand.
Shape another part as indicated by dash
as for regular draft.
From
bottom
Dra.ft
X
side
is
by dotted
to be put in.
Place one button hole at point
to 8.
collar
where button holes are
attached
down
posite
to
Y
and put six button holes
Draw up
line.
This will give you a separate part for right side
as
98
shown.
line for
X
and one op-
at side.
collar as indicated in
diagram and
finish
TROUSERS SECTION
The Supreme System
for
Trousers with Instructions
How
to Measure,
How
to
Apply Measurements and
Proportion Tables.
LOFa
ProportioncLte InseaLin of Trousers
To be Used
Breast
in Connection
with the Table of Sizes for Coats.
101
How
Measure
to
Trousers
At the
start,
request the customer to adjust his trousers so that they will
fit
up
in the crotch to
Next, have him stand erect so that the body rests well on the legs with the feet
the extent desired.
about 8 inches apart, so as to give free play for measurements.
1.
Measure outside seam from point
2.
Measure
for inside
A
at the waist to point
seam from point C close up
B
at the
in crotch to point
See illustration.
bottom.
F
to the heel of the shoe.
See illustration.
3.
Measure waist
4.
Measure seat
all
all
around the body over the waist band, drawing tape moderately
around the body
Request the customer
to stand
5.
Measure
6.
Measure
Measures
all
all
easy.
way between
For corpulent or stout
figures,
the
is
for trousers
when
This
measurements may be
in a great
measure.
entered in the order book should stand as follows:
Seat
Knee
seam
Bottom
Having completed measurements, take a
place his heels together.
two
careful examination of the customer,
Place your hand between his legs at knee.
fingers' breadth,
he
is
slightly bow-leg.
If
there
is
and request him
a distance
to
between
Breadth of three fingers would indicate that
he was bow-leg in medium degree, and the breadth of the hand would indicate bow-leg
in the
extreme
Notice whether he bends over or whether he requires a long front to trousers, or whether he
has a large or
or keeps
taken.
of trousers at point F.
Waist
degree.
seat.
in illustration.
Outside seam
the legs of
measurement
knee and bottom are subject to style and individual taste
for
The regular measures
Inside
this
of
waist and seat.
around knee, as shown
around bottom
D, the most prominent part
with his heels together while
measurement should be taken moderately
taken over the abdomen half
at point
tight.
them
book so that
flat
seat
;
notice whether he has large or small hip, and whether he spreads his feet out
close together
when
in drafting a pattern
measurements are concerned,
it is
Note
in a natural position.
you can use variations
possible to take
them
to
all
these deformations in the measuring
overcome these
difficulties.
As
far
as
correctly relative to length and circumference,
but unless the various attitudes and deformations have been stipulated at the time measurements were
taken, thus enabling you to use variations in drafting, the result will be unsatisfactory.
How
to
Measure Trousers
103
Proportionate Trousers
Follows:
Mea.surements
a-s
41>4
in.
Seat
Inside length
32
in.
Knee
Waist
32
in.
Bottom
length
Outside
.
.-.
.
.
.
.
2)7
in.
18
in.
16
in.
To Draft— Front Part
^ waist measure.
M to O ^ knee measure.
M to V ^ knee measure.
to R
^ bottom measure.
Square out and down from A.
A
to
B
B
to
C
is
J4
to
E
D
D
way between B and
2
is
and B.
to
F
is
J4 seat measure.
F
to
6
is
3^
G
to
H
to
%
I is
Rule a
G
and C.
K
J to
from
H
to
from
Rule a
line
from
to
T
K
O
to
F and from
to
R
and from
K to 6.
V to P.
L
from
in illustration
to C,
V
1/6 seat measure.
K
Shape from
T
to
G
and from
Shape from
G
to
O
and from S
shape as shown
I.
J4 waist measure.
is
line
Reduce length of front
seat measure.
line
bottom measure.
J4
Rule a
F
Square up from H.
B
is
and down.
in.
way between
54
is
34
is
P
Shape as shown
in.
j^ seat measure.
is
is
I to
C
S
I
C.
in.
E
is
is
inside length.
is
L
is
outside length.
is
Square out C,
6 to S
J to
to S.
to
O.
inch at point
1
from P
in illustration
to
R.
I
and
Front
part finished.
Bacck PaLrt
Cut out front
part.
C
Place on another paper and
draft back part as follows
Rule a
line across
from
V
to
U
and from
P
to
N.
Sweep forward from
S, using point
O
as a pivot.
Sweep forward from
L, using point
F
as a pivot.
Sweep backward from
L, using point
V
C.
using point
V
as
a
is
to 5
to 3
to
1
S to
O
to
R
to
W
U
N
1/ seat
is
Vy
is
a
1/12 seat measure.
is
1
in.
is
1
in.
down
to VV,
same
rest
Finished.
X.
104
measure plus
1
from
Shape from
and 9
to 4.
1
1
in.
for seams.
in.
in.
Y
Y
and 2
of the difiference
seams.
in illustration
from
X
to
W
to
U
and down
to
5,
Z,
V, and down to P.
in
illustration
Shape as shown
on point C, and square up from
T
measure plus
V between
Y minus two
Shape from
to
in.
Shape as shown
is
Place corner of square at point T, letting long
of
measure from 8
34 waist
is
Y
in.
1^
between 3 and
pivot.
to
4
Take out
Sweep backward from
T
\y2
is
seat
3 to
pivot.
arm
Z
Apply
X
X
as a
to
to
1
and 2
to
X.
to
T
and
N.
from P
to
N.
Proportionate Trousers
105
Peg Top Trousers
Mea-sures Used
a.s
Follows:
seam
Outside
41 J/^
in.
32
in.
Waist
i^
in.
Seat
38
in.
Bottom
16
in.
4
in.
tiie
same
seam
Inside
Excess of
size
over hip
To Draft
All systematical points are obtained in
manner
proportionate trousers with the excep-
as in
tion that the knee
is
measure
is
ignored.
J4 ii- for each inch of exaggeration
in this case
Shape
down
tration
as
shown
is
IJ^
bj'
solid line
Z
from
L
to 5
and
in.
from
Y
to
Z and down
shown by
solid line
from S
Straighten line at point
shown by
solid lines
solid line in illus-
to P.
on front part and shape
Straighten lines at point
to R.
U
from
on back part and shape
W
All other points remain the
draft and can be subjected to
to
N.
same
as for regular
same variations
trated and stipulated elsewhere.
106
to 5
in.
1
Shape back part as shown by
as
from C
size
to P.
5 to
as
Excess of
as illus-
Dress Trousers
Produced from the following measures:
.40
in.
Seat
36
in.
Inside
seam ....31
in.
18
in.
Waist
31
in.
Knee
Bottom
Outside scam
.
.
15>4 in
To Draft— Front Part
Square out and down from A.
A
to
B
to
B
C
is
5^
D
D
outside length.
inside length.
way between B and
E
to
is
is
2
is
Square out C,
C
to
F
to 6
F
6 to S
S
is
is
G
to
H
is
is
E
and B.
J/2
seat measure.
3^
in.
^ seat
^
measure.
in.
way between G and
y2
is
C.
in.
C.
Square up from H.
B to I is l^ seat measure.
Rule a line from H to I and square up from H.
J to
M
to
R
to
I
K and J to L are each % waist measure.
O and M to V are each % knee measure.
and
P
to
I
Shape as
and down to P.
Shape as shown
down
b_y
dash
bottom measure.
L
from
line
from S
line
to C,
to
V
O
and
G
and
R.
to
Rule a
F
%
are each
shown by dash
to
K
from
line
T
to
F and from
K
to 6.
1/6 seat measure.
is
Shape as shown
from G to O and K
T
from
in illustration
to
to S.
BaLck PaLrt
Cut out front part, place same on another paper
and draft back part as follows
Line across from
P
to
Sweep forward from
N
and
V
to
U.
point S, using point
O
as
point L, using point
F
as
a pivot.
Sweep forward from
a pivot.
Sweep back from L, using
Sweep back from C, using
S to
W
is
O
U
is
to
R
to
N
C
to
Z
point
point
of
is
1
in.
1
in.
lYz
is
same
as a pivot.
T
and
as a pivot.
1/12 seat measure.
in.
Place corner of square at point
arm
V
V
rest
let
long
on point C, and square up, finding
point X.
X
to 3
3 to
Y
Shape
W
to U and N.
and P, from Y to X, from X to T and W, and from
shown.
finish
as
Shape bottom as shown in illustration and
is
is
as
J^ waist measure.
1
in.
shown
in illustration
from
Y
to Z,
V
Trousers for Corpulent Figure
Measurements as Follows:
Outside seam
43
in.
31
in.
Seat
44
in.
Waist
45
in.
seam
Inside
To
Abdomen
47
in.
Knee
21
in.
Bottom
17
in.
Draft
H
from
Square out and down from A.
Rule a
A
outside length.
Square up from F, finding point
inside length.
J to
B
to
B
C
is
^
to
E
to
D
D
is
is
way between B and
2
is
to
F
to 6
is
S
to
H
G
E
F
and B.
in.
is
^
to
I
%
is
K
to
F
K
and
from
as
K.
11 to
to 6.
shown
from
in illustration
O
to
S and
and G.
O and M to V are each y^ knee measure.
to R and I to P are each J4 bottom measure.
Shape from L to C, V and down to P.
Shape from S to O and down to R.
in.
C.
Square up from H.
B
11.
are each ^4 waist measure.
to
I
way between G and
is 3/2
Q
M
I.
1/6 seat measure.
is
as
to
same distance
is
from
line
T
to
L
to
Q
to
T
to
Shape
from
J^ seat measure.
is
and J
Rule a
J4 seat measure.
is 5/2
6 to S
K
From K
C.
in.
Square out C,
C
F
line
G
Shape from
seat measure.
O.
to
Back Part
Cut out front part and lay on another paper and
10 to 5
P
to
N
and
V
to
S, using point
Sweep forward from
L, using point
Sweep back from L, using point
V
From
U.
Sweep forward from
Sweep back from
O
as a pivot.
F
as a pivot.
O
R
as a pivot.
point C, using point
V
Y
W
C
Z
to
of
U
to
N
5, 7,
is
is
as
Z,
1/12 seat measure.
is
is
same
rest
on C, and square up from T, finding
1
O
and
X
in.
shown by
solid line in illustration
and down
X
and from
X
to 2,
Shape from
W
to
U
and down
to
N.
Shape from
P
to
N.
If
from
to P.
to
to
to 3.
in.
1
V
to
Y
down
lj4 in.
is
L
in.
1
Shape from
Place corner of square at point T, letting long
arm
to
Y
3 to
to
Shape
as a
pivot.
S to
in.
1
Apply waist measure from
draft back part as follows
Line across from
is
1,
T
and
W.
an easier pair of trousers be desired, sweep
point X.
Apply
seat
4 to 7
is
measure from 15
1^
to
T and
1
back part backward as shown by dash
to 4.
%
in.
Apply measure
for
abdomen from 9
to
8
in.
at
X, adding same amount
same amount
and
lines,
2 to 10.
108
and
at point 12,
finish.
at
lines,
14,
also
take off
adding
and shape as shown by dash
Trousers for Corpulent Figure
Variations
The upper part of this diagram ilhistrates the
manner of handhng regular drafted pattern for long
and short
Solid lines illustrate normal, dash and
front.
dot lines illustrate long front, and dotted lines illustrate
short front.
Long Front
Square back from point T, obtaining normal line.
Stipulate degree of variation by ^4 '". Vz in- or
%
from T to 9.
Rule a line from 9 to 25.
Square up from 22, finding point 5.
Square back and forth from 5 through L.
From 5 to 2 and 5 to 4 are each >4 waist measure.
Rule a line from 2 to 9.
Shape as shown in illustration from 2 to 9 and
in.
down.
Shape from 4 to 25.
Shape from 4 to 2.
Short Front
Stipulate degree of variation by J4
%
in.
from
Rule a
T
i"-,
V^ in. or
to 8.
from 8
line
to 25.
Square up from 24, finding point 7.
Square back and forth from 7 through L.
Apply yi waist measure from 7 to 1 and 7
to 3
each.
25,
Rule a line from 1 to 8.
Shape as shown by dotted
and 3 to 1.
lines
from
1
to 8, 3 to
Open and Closed Trousers
Lower
part of this diagram illustrates
trousers for open and closed
how
to vary
also called large
;
and
small hip.
Line drawn from
line illustrates closed
H
normal dotted
to I represents
;
and dash and dot
line illustrates
open trousers.
Closed Trousers
For closed trousers
by Yi in., 1
Rule a
From
in.
or 1>4
from H
to 11 and
line
N
in.
stipulate degree of variation
from
I
to
N.
to
N.
N
to 12 are
each ]i bottom
measure.
20 to 15 and 20 to 19 are each V4 knee measure.
Shape as shown b\' dotted lines of illustration
from S to 15 and 11.
Shape from C to 19 and 12.
Open
Stipulate degree of variation
lJ/2 in.
from
I to
O
to 13
and
In-
O.
Rule as shown by dash and dot
O
]A
1
in.
or
H-Q.
line
to 14 are each y^ of
in..
bottom meas-
ure.
21 to 16 and 21 to 18 are each
J/4
knee measure.
Shape as shown by dash and dot
18 and 14.
Shape from S to 16 and 13.
line
from C
to
Variations
Upper part
which
of this
diagram
illustrates
manner
Solid lines
and large seat is obtained.
normal; dash and dot
flat
back part
illustrate
trate large,
and dotted
in
on
lines illus-
lines illustrate flat seat.
Large Seat
Stipulate degree of variation by >4
^
T
from
in.
in.,
in.
]/>
or
to 18.
Place corner of square at 18, letting long arm of
same rest on C, and square up as shown Ijy dash and
dot
line.
4 is same distance as T to 18.
Measure up trousers in regular way, thereby
X
to
ing point
W
find-
7.
from T to 18.
Shape as shown in illustration from 7 to 4, 4 to
18, and 18 to 8.
Shape from 8 to U.
Shape as shown by dash and dot line from 7
down.
to 8 is half the distance
Flat Seat
Stipulate degree of variation by
i/^
in.
from
T
>-4
in.,
^
in.
or
to 19.
Place corner of square at 19, letting long arm of
same rest on C.
Square up from 19.
X to 3 is same distance
W
to
9
is
T
as
half the distance
to 19.
from
T
to 19.
Measure for waist in regular way and shape
shown by dotted line in illustration from 10 to 3, 3
19 and 19 to 9.
Shape from 9 to U and Y down.
Bow Leg
as
to
Knock Knee
a-nd
part of this diagram illustrates the manner of varying for bow leg and knock knee.
Line H-I illustrates normal dotted line illustrates
Lower
;
bow
leg,
and dash and dot
line
knock knee.
Bow Leg
Stipulate degree of variation by >4
1>4
in.
1
m. or
from I to N for bow leg.
to N.
Rule as shown by dotted line from
N to 11 and N to 12 are each Y^ bottom measure.
to 11.
Rule as shown by dotted line from
in.
Rule from
M
V to 12 for bow leg.
Knock Knee
Stipulate degree of variation by >2
in.
1
m. or
from I to O.
to Q.
Rule as shown by dash and dot line from
Q to 13 and O to 14 are each Y^ bottom measure.
to
Rule as shown by dash and dot line from
13 and V to 14 for knock knee.
1>4
in,
M
Combinations of Variations
Mea.sures Used:
Outside seam
seam
Inside
42
in.
Knee
32^4
in.
Bottom
Waist
33
in.
gg^,.
39
in,
—
Definition of Typt-s
19
in.
16
m.
Small hip, knock knee, short
front and large seat.
To Draft
Square out and down from A.
Square back from T, finding
A
to
T
B
to
D
D
B
C
outside length.
is
way between C and
half
is
E
to
2
is
F
to
to 6
E
6 to S
H
%
is
B
to
in.
%
I is
to 16
G
and C.
Rule a
16 to 18
Rule a
is
1
H
for
in.
M
from
line
F
T
^
lines
Sweep back from
12,
using point
Sweep back from
C, using point
using point
X
same distance
is
5 to 22
22 to
W
C
Z
is
is
is
and
are each
knee measure.
%
of bottom meas-
to R.
V
to P.
line
from 12
8 and G.
5 to
5 to
S.
Shape from S
to 0.
G
to 0.
as
from 12
P
T
half the distance
R
shown by dotted
as
measure plus l}i
seat
shown
to
R
long arm of
to
U
N
is
is
as shown,
112
to
15
from
Y
in
manner with
regular
and take out a
V
in
back
in.
1
in.
1
to
1,
Shape from
W
Shape from
Y
Shape from P
in.
from 8
in.
in illustration.
Shape back part
9.
to 9.
and
line,
to Z.
part, as
tration
T
to
V.
finished.
to 9.
from
C and
to
PeiLrt
as a pivot.
9, letting
is
same additions
1/12 seat measure.
llA
P
Apply waist measure
as a pivot.
as a pivot.
on point C, and square up from
4 to
to
V
V
as a pivot.
F
variation for large seat.
Place corner of square at
rest
from
and 9
12,
same
from
line
Apply
P-N and V-U.
S, using point
in.
line
Shape from
Sweep forward from
J^
5 to 8.
to
Rule a
front part
Sweep forward from
is
and 18
Rule a
Shaf>e
waist measure.
Cut out front part and lay same on another paper.
T to 9
R
Shape from
Bsvck
Square out
M to V are each ^
to 18.
1/6 seat measure.
is
from
and
knock knee.
Q
to
line
M to
Shape from
to 16.
and J to K are each
Rule a line from F to K.
J to
to 5
for small hip.
from
line
13, finding point 10.
Shape front part as shown by dash
seat measure.
is 1 in.
to 15.
ure.
Square up from H.
I
for short front.
in.
from 8
line
Rule a
18 to
way between
half
is
seat measure.
5^ seat measure.
is
G
S to
and B.
in.
)^
is
^
is
Square up from
B.
in.
is J/2
8
10 to 5 and 10 to 12 are each }i waist measure.
Square out C,
C
F
to
Rule a
inside length.
is
15.
as
shown by
2 to X, and
to
U
to Z,
to
N
and
V
U
X
to
and P.
and
solid line of illus-
finish.
to
9 and
N.
W.
Small Hip, Kjiock Kjie^t Short Front, Large Seat
Combinations of Variations
Measures Used
seam
Outside
Inside
seam
Waist
40^4
in-
Knee
18
in.
31
in.
Bottom
15j^
in.
29
in.
37
Seat
leg,
long
Square up from 13 as shown by dash
line,
find-
front, flat
in.
— Large
bow
Types
of
Definition
hip,
seat, small waist.
To Draft
Square out and down from A.
C
A
to
B
to
B
C
is
half
to
E
D
D
to 15
is
outside length.
Rule a
is
inside length.
T
way between B and
2
is
E
and B.
T
from
line
from
line
15 to 9.
ing point 10.
L
to
F
J^ seat measure.
10 to 5 and 10 to
to
6
is
3^
Rule a
line
from 9
6 to S
is
3^ seat measure.
M
and
M
%
18 to
C
F
S
H
is
G
to
is
in.
in.
way between C and
is h.alf
G.
I
to 16
to
is
1
%
I is
Rule a
is
line
1
5 to
seat measure.
H
for
in.
bow
M
from
to
T
are each ^4 knee measure.
P
%
are each
bottom measure.
shown by dotted
as
line
from
9 and G.
5 to
Shape from
L
Rule a
line
from
Rule a
line
from
to C.
to R.
V
to P.
Shape as shown by dash
to 18.
G
Shape from
J4 waist measure.
Shape from C
1/6 seat measure.
is
to
5.
leg.
and J to Q are each
Rule a line from F to K.
F
S and
are each 54 waist measure.
to
V
to
and 18
to 16.
K
J to
R
for large hip.
in.
Rule a Hue from
16 to 18
to
Shape front part
Square up from H.
From B
to 15.
for long front.
is J/2 in.
Rule a
C.
in.
Square out C,
to 9
1/6 seat measure.
is
stipulated
is
from S
line
to 0.
to 0.
to
V, and front part with variations
complete.
Back Part
Cut out front part and
Rule across from
V
to
lay
P
U, and
S, using point
Sweep forward from
L, using point
L, using point
Sweep back from
C,
is
5^
as a pivot.
C
as a pivot.
Apply
F
V as a pivot.
using point V as a pivot.
Sweep back from
to 8
to
to N.
Sweep forward from
From T
U
R to N
on another paper.
in.,
amount
T
to
Z
is
is
is
in.
1
in.
1
1^
seat
in.
measure plus
\j/\
in.
from 9
to 15
toZ.
Apply waist measure
of change for small
in
regular manner.
V
in
back part, as shown
Shape from
Y
to
1,
Shape from
W to U and N.
Shape from
Y
Take out
a
in illustra-
seat.
tion.
Lay corner of square
of
same
rest
From 4
S to 7
From
at point 8, letting
long arm
on point C, and square up from
to
is
7 to
X
is
same distance
as
from
T
8.
to 8.
1/12 seat measure.
W
is
half the distance
from
T
Shape from P
to 8.
114
and
to Z,
to
N
2 to X,
V
X
to
S and W.
and P.
and
finish as
shown.
Large Hip, Bowleg, Long Front, Flat Seat, Small
Waist
J^nickers with Cuffs Jittached
These knickers are drafted best from the regular
measure
of
with
trousers,
a
snug measure
taken
around the knee.
The Following
are the Meas\irements Used:
Outside
41 J4
i"-
Seat
17
in.
Inside
32
in.
Knee
13
in.
Waist
32
in.
Bottom of
cuff
13 1/^ in
To Draft
R
Square out and down from A.
I
A to C
Square down from R.
934 inches, being the distance between
is
lengths.
M
the actual length of the leg.
C
seam
the outside and inside
C
D
E
to
to
D
is
J/2
to
E
is
2y2
in.
to
B
is
3^
in.
for cuffs.
E
Square out from C, D,
N
to
9
to
1%
is
in.
^
is
of the knee measure.
>4
in.
Shape from
L
is
9 and
to
R
O
to
F
is
^
S
is
J^ of the seat measure.
Square down from Q.
S to
G
is
1/24 of the seat measure.
N
to
O
H
half
F
to
T
of the seat measure plus J2
way between
G
K
J to
K
and C.
Rule a
L
J to
of the waist measure.
from F
line
P
to
^
is
y.
is
to K.
P
to J
and out to L.
i;'j
of the knee measure.
1/6 of the seat measure.
is
to
T
T
and G, reducing 54
to
O
and
Shape from P
to
Shape from P
Shape from S
G
and
S, allowing J4 in- at T.
Q
down
i"-
at T.
to the bottom.
to O.
Place your front part on another paper and com-
mence
J4 of the waist measure.
is
is
Shape from
in.
from
line
the
the thirds.
in.
Square up and down from H.
Rule a
to
one-third of the knee measure, 13 on
is
to
is
and down
bottom.
and B.
to
C
F
R
drafting.
Back Part
Square up from
L, using point
Square out from
S.
J to
X
Rule a
9 to Z
I
to
is
N
as the pivot.
from
XYz
4 and
I
T
to
U
and
to
X.
S
in.
to
Y
V
are each
the waist measure plus
1
in.
the seat measure plus
1
in.
is
V
a
as indicated by
between 2 and
Shape back part from
to 5 are each ^X in.
M
to
is
to the distance
more than one-
third of the knee measure.
M
to 2
Take out
1/6 of the seat measure.
line
is
X
X
J.
Sweep back from
%
in.
to
W
is
Shape from
Y
Shape from
W
The
one-third of the knee measure.
A
Apply bottom measure of cuff across the front part
and from 7 to 8 on back part and add to same 1 in.
Y
to 6,
to
1
to
X,
U, 4 and
amounting
minus two seams.
to Z,
V,
X
5
and
to
T
8.
in.
and
T
to
W.
7.
to 7.
cuff closes with 4 buttons
button stand
is
and
holes.
allowed on the back part as
indicated bv dotted line from 5 to 8.
116
6,
1/12 seat measure plus Yz
Shape from 8
more than
Y
and
1
Knickers with Cuffs Attached
in
li^lding
Breeches
Mea.sures as Follows:
Rise
10
in.
Full length
26
in.
Waist
33
in.
Width
of knee
U%
in.
Seat
39
in.
Width
of small knee
IZyz
in.
14^^
in.
Width
of calf
Uy2
in.
l"^^
in.
Width
of bottom
10
in.
2U
m.
Length
to
Length
to small
Length
to calf
knee
knee
'2
To Draft
Square out and down from A.
I
A
J to
B
to
the rise, or 10
is
in.
to
C
is
to
D
is
D
to
E
F
C
is
half
to
N
1/12 of seat measure.
L
to
M
Rule a
B.
in.
>4
N
on
rest
to
Drop
Place corner of square
same
K
K
1/12 of seat measure.
way between D and
is
knee measure.
measure and
G
Y
to
34 of
is
Square up from F.
3^ of seat measure.
is
R is 34 small
T is 34 calf
ankle measure.
Square out from B.
B
C
to
F, letting short
at
and square down
arm
of
is
line
34 waist measure.
D
from
the front }^
to L.
in.
L
at
E
to
Q,
Q
to R,
Take out a
V
of 34
in. at
from
shown by dash
as
34 waist measure.
is
L
to E,
and shape as indicated
R to T and T to Y.
Q as shown in this illus-
tration.
lines in center of trousers.
F
F
F
F
to
H
to
I
in.,
the length to calf or 21 J4
is
G
length to knee or 14>>4
plus 3^
the length to small knee or 17^/2
is
to J
to
is
is
full
length or 26
H
H
in.
to
P
to
O
I34
is
is
334
and
in-
G
V
to
is 1 in.
in.
in.
Square back from O.
in.
B
Z
to
is
134
in.
in.
Shape
Square both ways from H.
to
M
from
to Z,
Z
to
P and P
V.
Square both ways from L
Square both ways from J and G.
H to O is J4 knee measure.
as indicated
the
Extend the waistband and place the split fall in
manner illustrated in the diagram and cut out the
front part.
BeiLck Pevrt
Place the front part on another paper.
Extend
From
Rule
E
K
X
to
to 2
is
is
from
a line
ly
1/6 seat measure, plus
D
to
to
Z
to 4.
T
to 7.
Apply
line
X
to 2.
G
and
from M,
1
in.
from
L
to
M
V
5 to
is
2
in.
calf
measure plus
a ^^ of
1
1
in.
34 in. in the
in.
from
in.
from
P
to
Q
anil
as indicated
7 and 7 to
center
U
T
to
V
to
and
G
back at point
from
off the
from
W
and
Y
to
4 to
5,
Y,
to 10, 10 to 4,
8.
back part from 4 to
R
in the
indicated in this diagram and take out
1
from S to
in.
to 8.
Shape
and
1
5.
apply ankle measure plus 134
Cut
10
to
Take out
Apply knee measure plus
O
and
in.
W.
to
R
R
in.
Apply waist measure plus
X
J-4
X.
Shape as indicated from
Extend the
Apply small knee measure plus
K.
line at
1
in.
manner
at
the
line.
Extend the waistband and
finish as represented.
Riding Breeches
119
liiding Breeches
The
draft
produced from the following nieas-
is
tirements
Rise
9>4
Inseam
Waist
in.
Seat
H
Knee
17
in.
Small knee
13>^
in.
m.
Z2
in.
Calf
14
in.
32
in.
Ankle
10
in.
To Draft
Square out and down from A.
A
C
or 14
C
to
E
to
the
is
2
is
or 9y2
rise,
in. less
28 to 11 and 28 to 14 are each 34 of the calf
measure.
in.
than ^4 of the inseam measure,
I
to 5
M
to
and
to 6 are each 34 of the ankle meas-
I
in.
ure.
C
to
B
E
to
D
is
half
2y2
is
3
is
than the inseam measure.
in. less
way between B and D.
O
Square out C, E, D,
F
C
F
to S
S
to
to
and B.
G
is half way between
Square up from H.
K is %
K to Q is
J to
L
Rule a
F
T
to
M
is
Q
from F
to J
to
in.
in.
3/1
1/6 of the knee measure.
is
and
L
to C, extending 34
C, 20,
at
in.
9.
front part
is
is
thus reduced, and while the
amount
given, the exact
cut off
from the fore part would vary a little, according to
whatever is taken off the front part must be
;
and
added
to the
back part.
out.
Shape from
Shape from
K.
Q
Shape from S
to
T
and
to
T
and G, reducing
S,
extending
and
to 18, 12, 11
G
Shape from
knee measure.
34 of the
and
to 12
is
average amount
1/6 of the seat measure.
is
9
in.
from
line
17 to 22
H.
to
34 of the waist measure.
is
in.
In order to have the outside run well toward the
style
J<^
line
1
24, 10
of the waist measure.
J to
Rule a
is
to
front, the
is
Rule a
28 to 10
Shape from
and C.
same distance as C
line from H to I.
to I
134
17 to 20
in.
1/24 of the seat measure.
H
B
3-2
of the seat measure.
is 3/^
is
is
I
of the seat measure, plus
is 1/
G
24
in.
knee measure.
part
is
34
a-t
T.
at T.
in.
5.
to 18.
L
Extend the waistband from
Al to 13 are each 34 of the small
14 i"-
K
to
and the front
completed.
Back Part
Cut out the front part and place same on another
12 to 2i
paper.
5 to
Square across
at knee, small knee, calf
Square up from
X
is
W
S to
Rule a
line
J.
Apply waist measure plus 1 in. from X to 2.
Apply seat measure plus 1 in. from X to Y.
Take out a V at 1 and 4 amounting to the
tance between 2 and Y minus two seams.
M
17 to
P
is
2
M
V
is
J^ of an inch.
to
1 to
7 and
I
to
U
is
in.
Shape
dis-
in.
1
from 18
in.
to 20,
17,
U
Shape from
Y
Shape from
W to
Shape from
N
to 4,
to
Extend waistband
I.
to
28 and
Y
from
side of back part
to
Z, 27, 25,
16 and N.
of an inch.
above point
Shape as indicated from P to
Shape from P to V, 28 and 8.
is
%
in.
to 8 are each 34 in.
Points 7 and 8 are 34
18 to 21
each
11 to 15 are
in.
Apply small knee measure plus I34 in. from 12
to 24, 23 to U and V to 25.
Apply the calf measure plus 134 in. from 11 to
10, IS and 16.
Apply ankle measure plus 13/ in. from 5 to 6,
R to 7 and 8 to N.
as the pivot.
as the pivot.
1/12 of the seat measure, plus 3^
from T to X.
in.
134
Apply knee measure plus I34
and ankle.
1/6 of the seat measure.
is
and
is
21 and 27.
Sweep from S to W, using point 18
Sweep from L to Y, using point 20
J to
R
The
down to
7.
forcement
34 in.
120
in a
to
X,
21, 23, 15
X
to
T
and
T
to
and R.
to the top of breeches.
from crotch
extends
shown in the diagram shape
like manner and finish as shown.
as
W.
8 and 7 to R.
reinforcement
inside
calf,
1
;
rein-
Hiding Breeches
121
Spring Bottom Trousers
Suppose measures
All systematical points for this kind of trousers
are obtained in the regular
manner with
the exception
of the bottom.
to be:
Knee
17 m.
Bottom
20
in.
To Draft
From
I
to 6
is
4^^
in.
Square back and forth from
Extend
y^
in.
extra
6.
length
to
front
part
N
P
to
R
to 9, 2 to 3
y2 bottom measure plus
O
and
to
U
are each
1
1
at
Shape
point
is
as
shown
in illustration
in.
in.
V
to 5
and B.
finish as
repre-
from
I.
Make no
Shape from
other changes to front part from regu-
Shape from B
lation.
R
U to
to
B
is
J/2
bottom measure.
sented.
122
3 and N.
to
I
and
N
and
Broad
and
Falls
Split Falls
Broad Falls
Broad
trousers are cut the same
fall
any other
as
with the ex-
trousers,
ception that the fall-bearer
is
an ad-
dition.
The
fall
first
diagram shows the broad
showing the
pants, the solid line
fall-bearer.
Six
fall
buttonholes
are
usual
and as many buttons
the
in
in the
fall-
bearer.
The bearer
make up
The opening
thirds
enough
cut high
is
to
for the waistband.
of
the
the
in
rise
side
two-
is
of
the
waist,
in
the
bearer as
or
I
about 7 or 8 inches.
Pockets are put
indicated.
On
line
the back part which the dotted
indicates,
waistband must be
a
added.
Split Falls
The lower diagram shows
style or
split
The width
the older
fall.
of the
fall
one-sixth
is
of the waist measure, and the open-
ing
is
wide,
make
gram.
finished
the
it
end
with a strap
turned
point as
In
other
in
shown
in
respects
mafle like the broad
falls.
^
so
inch
as
to
the dia-
they
are
Over Gaiters and Leggings
A
C
^
P
I
Over-gaiters are sometimes cut as liigh as to the
knee, but on an average 9 inches in height.
We
therefore give a diagram of the average, and
by using the same method for the long gaiter
can
it
so be produced
Mea.surements Used:
9
Length
Leg
12><
Calf
13
in.
Ankle
11
in.
in.
Instep
16
in.
23^
Bottom
in.
Mea.su rements Used
in.
To Draft
Draw
a straight line from
A
to
U.
Follows:
a-s
Length
15
in.
Knee
13
in.
Calf
13K'
i"-
Ankle
11
in.
Square across from A.
A
U
C
U
to
To
the length of the gaiter.
is
to
C
is
4
in.
to
B
is
4
in.
R
is
half
way between
Square across
at B,
U
and C.
Rule a
C and U.
A
A
Square back from R.
C
E
to
one-fourth of the ankle measure.
is
Square up
G
P
to
plus y>
F
plus J^
N
E
to
F and
G.
one-half the measure around the leg
B
C
one-half the measure around the calf
is
K
plus 3^
is
one-half of the instep measure plus
S
is
one-half of the bottom measure
Buttons should be placed
front
Ti.
to
C
is
1%
in.
N is one-half the calf measure plus ^
K is one-half the ankle measure plus
J^j
in.
in.
in.
order to obtain
in.
from
line
Put on heel straps
A
in the
this,
add
middle of the
to
G
and
R
to
S are each
2^
in.
line
bottom, extending one inch at S.
Shape the button stand as indicated by extending
line,
both hack and
one inch at U.
U.
at L'
to
from G to S.
L to U is 1 '4 in.
Square up from U and make this the button stand.
Shape as indicated from G to F and down to the
Shape as shown in the diagram from G, F, E
and S, S to U, and M, and from P to N. K and M.
in
to
to
Rule a
plu.s
yi in.
and
R
the buttons.
A
to
is 3,'/. in.
;
M
y2 m.
M
B
R.
to
Shape as indicated from P to X and K.
to O and R to L are each 2"^ in.
Rule a line from L to O this is where you place
in.
to
to
A
the length of the legging.
A
one-half the measure around the ankle
is
is
Square down from K.
in.
to
E
from
from
R
Square back and forth from A, B, C and R.
A to P is one-half the knee measure plus Yi
in.
to
E
line
is
line
to
Dracft
Place buttons on the side as shown
and
finish as
shown.
and
124
finish as
shown.
in this
diagram
MILITARY,
LIVERY and
SPORTING
GARMENTS
125
Army
Description of Garments for Officers of the
Dress Coat
Fvill
For
collar
all
the
;
except Chaplains.
officers,
skirt
the l)end of the knee
For general
;
made
officers the collar will be
For other
all
to
;
the sleeve will have a cuff of blue
made
of the same material as the coat,
made detachable
prescribe
for
officers,
and extending
all
epaulets.
officers.
all
ornamentation of the collar for the General
may
for the Lieutenant General, such as he
;
For other general
For
general
other officers, shoulder knots of gold wire cord, to be securely fastened to the coat, and to
COLLAR ORNAMENT. — The
officers
all
way
the
all
around the
may
be such as he
prescribe after consultation with the General.
in
around.
will
and
collar
two bands of
consist of
parallel with
its
J/2
inch gold wire lace, two vel-
edge, the upper edge of the upper band being
lower edge of the lower band resting on
inch from the edge of the collar, the
The upper band
will
ornamented with a band of oak leaves embroidered
the collar will be
other officers the ornament
lums, passing
y^
from the point of the hip
cufTs will simply be a continuation of the material of the sleeves.
For
gold,
of blue black velvet
the collar will be
officers
SHOULDER ORNAMENTS.— For
be
three-quarters the distance
to
the lining to be black, with pockets on the inside of the skirt.
black velvet 4 inches wide.
and the
double-breasted frock coat of dark blue cloth, with standing
from one-half
extend
to
—A
the
seam.
collar
brought down parallel to the front edge of the collar and distant 34 inch there-
to be
The two bands
from, and to be joined to the lower band.
ground of
of gold wire lace to be on a
or cloth of the color of the facings of the corps, department or
arm
silk
of the service, with an interval of
not less than J4 inch nor more than V^ inch between the bands.
SLEEVE ORNAMENT. —The
may
prescribe
for the
;
For other general
embroidered
leaves
ornamentation of the sleeve for the Generals
officers
velvet
the
cuff
of the
gold passing around the cuff
in
may
Lieutenant General, such as he
below the upper edge of the velvet cuff;
star for a brigadier general,
embroidered
to
sleeve
will
ornamented with
be
he
band of oak
a
band of oak leaves
the top of the
;
such as
be
will
prescribe after consultation with the General.
be
to
1
inch
be surmounted by two stars for a major general and one
each star to have one point up and placed above the
in silver,
velvet cuff.
For general
will be
placed
For
all
1
officers of the staff
inch
above the velvet
indicated by
rank,
arm
and the
General
Staff'
stars, as before,
Corps,
flat
2^-2
gold wire lace
inch
Y^
in
width.
The
proper
insignia
inch above the insignia.
1
inches from the end of the sleeve
the
;
to be
inch gold
wire
surmounted by the insignia
insignia of the corps, department or
space
lace insignia.
BUTTONS. —Two
regulation gilt buttons will be placed at the back of the waist, and one regulation
button near the end of each
Three small regulation
For
two
lace,
of service, in gold or silver metal or embroidery will be placed in the center of the open
under the
gilt
cuff,
the
other officers the sleeve will be ornamented with a band of Yi
vellums, passing around the cuff
of
departments, except
gilt
officers of the various
skirt,
making four buttons on
buttons
be
will
grades regulation
the back of the coat, for
all
officers.
placed on the cuff at sleeve for general officers only.
gilt
buttons will be placed on the breast of the coat as
follows
GENERAL. — Two
8 to
10
inches
at
the
rows, twelve in each row, placed bv fours, the distance between rows being from
top
and from 4
to
5
inches at the bottom
rically disposed.
121)
;
rows and groups
to
be
symmet-
U.
S.
Army
Uniforms
i
SOCIAL DRESS UNIFORM
LINE OFFICER'S FULL DRESS
DISMOUNTED
127
U.
Jirmy Uniforms
S.
LIEUTENANT GENERAL. — The
in
same as for the General, except that there will be ten buttons
each row, the upper and lower groups by three and the middle groups by fours.
MAJOR GENERAL. The same as for the General, except that there will be nine buttons in each
—
row, placed by threes.
BRIGADIER GENERAL.— The
each row, placed
same
as for the General, except that there will be eight buttons in
in pairs.
COLONEL, LIEUTENANT COLONEL AND MAJOR.— The
that
there
same
as
for the
General, except
be nine buttons in each row, buttons at equal intervals.
will
CAPTAIN, FIRST LIEUTENANT, SECOND LIEUTENANT
LIEUTENANT. —The same as
FOR THE CHIEF OF ENGINEERS.— The
for a
Colonel,
AND ADDITIONAL SECOND
except that there will be seven buttons in each row.
same
as that of general
ofificers,
with the following
exceptions
A
piping of scarlet velvet >^ inch wide, to be placed along the upper and outer edges of
the lapels, continuing down the edges of the skirt to the bottom, and from top of back flaps in middle
Piping:
of back to bottom of skirt.
To be of scarlet velvet with one row of Yz inch gold two-line vellum thread lace
showing 3-32 inch of braid on each side, }4 inch from the outer edge of the
white
braid,
placed upon
scarlet velvet, following the vertical and horizontal lines, with a regulation gilt button placed in the lower
Skirt Facings:
corner of the scarlet velvet just inside the gold lace.
For all other officers of the Corps of Engineers.
—The
as for other officers, with the following
same
exceptions
A
Piping:
of collar lace
back
flap
piping of scarlet cloth yi inch wide, to be placed around the base of neck, the edge
down the front edge of lapel, stopping at the bottom, and from top of
along top, and
the middle of the back to the bottom of skirt.
in
To
Skirt Facings:
be of scarlet cloth with one row of
J/'
upon white braid, showing 3-32 inch of braid on each side, ^4
inch gold wire two-vellum lace placed
inch
from
the outer edge of the scarlet
cloth, following the vertical and horizontal lines, with a regulation gilt button placed in the lower corner
of the scarlet cloth just inside the gold lace.
—
For Chaplains. A black frock coat, without ornamentation, with standing
black silk buttons on the breast. Of same length as for other officers.
collar,
one row of nine
Dress Coat
—
For general officers. A sack coat of dark blue cloth or serge; three small regulation gilt buttons
on the cufT at sleeve high rolling collar double breasted, with two rows of regulation gilt
buttons grouped according to rank, as on the full dress coat the skirt to extend one-third the distance
from the point of the hip to the bend of the knee. A slit extending from 2 inches above to 2 inches
below the hip, so as to permit of hooking up of saber. A shoulder strap will be placed on each shoulInside pockets.
der, adjacent to the seam, and collar ornaments on the collar.
cloth or serge, with standing collar
blue
For all other officers. A single-breasted sack coat of dark
slit
fastened with two hooks and eyes coat to close with flap containing suitable concealed fastenings
distance
not exceeding 3 inches for hooking up saber the skirt to extend from one-third to two-thirds the
from the point of the hip to the bend of the knee, according to the height of the wearer cut to fit the
The coat to be trimmed
figure easily; a vertical opening at each side of the hip, according to pattern.
will be placed
;
;
;
—
;
;
;
:
with lustrous
flat
Edged all around the bottom, the
upward from the bottom along both side openings of the skirt.
ornaments will be worn with this garment.
black mohair braid 1^4 inches wide, as follows:
front edges, the collar, and for 6 inches
Shoulder straps and collar
Service Coat
For
material,
all
officers.
—A
single-breasted sack coat of olive drab woollen material or khaki-colored cotton
made with two
tern below the waist
;
outside
breast
choked-bellows pockets and two outside pockets of same pat-
pockets to be without plaits and covered by
128
flaps,
rounded
at
edges, buttoned by
U.
S.
Army
FIELD OFFICER— MOUNTED
Uniforms
GENERAL OFFICER'S UNIFORM
129
a
small
regulation
on the wearer.
The
button.
On
coat
have
to
from
falling collar,
to
1
inches in width, depending
1;54
each shoulder a loop of the same material as the coat
in
let
at
shoulder seam and
reaching from the sleeve seam to the edge of the collar, and buttoning at the upper end with a small
regulation button; loops to be 2 inches wide at the shoulder end and
coat to
ment
fit
buttoned
;
and loosely
closely at the waist
down
the
with
front
this coat to
The
regulation buttons.
five
tance from the point of the hip to the bend of the knee.
The
inch wide at the collar end.
1
at the chest, at least 5 inches in excess of the chest
measure-
extend one-third the
skirt to
Sleeves to be without cufTs.
dis-
buttons for
All
be of dull finish bronze metal.
Collar ornaments
will
be
worn with
The
garment.
this
insignia
rank
of
be
will
on the
placed
Chaplains will wear a plain Latin cross of dull finish bronze metal
shoulder loop, near the sleeve seam.
in lieu of the insignia of rank.
Officers of the General Staff Corps, except the Chief of Staff,
will
wear
band of black braid
a
i/S
inch wide on the sleeve of the service coat, the lower edge of the braid 3 inches from the end of the
sleeve.
White Coa.t
—
For all officers. A single-breasted sack coat of white material, with standing collar fastened with
two hooks and eyes, white metal coat to close with a flap containing suitable concealed fastenings. The
skirt to extend from one-third to two-thirds the distance from the point of the hip to the bend of the
;
according to the height of the wearer
knee,
The
side of the hip, according to pattern.
cut
;
to
fit
the figure easily
;
opening
a vertical
each
at
trimmed with white flat braid 1J4 inches wide, as
follows
Edged all around the bottom, the front edges, the collar, and for 6 inches upward from the
bottom along both side openings of the skirt. White shoulder loops of the same material as the coat,
let in at shoulder seams, and of the pattern prescribed for the service coat.
coat to be
:
Insignia on the collar to be the
same
as prescribed for the dress coat
insignia of rank to be placed
;
on the shoulder loop, as prescribed for the service coat.
OvercoBLt
For
—A
double-breasted ulster of olive drab woolen material, suitably lined, and closing
by means of five large buttons 45 lines diameter; a standing rolling collar, the "stand" to be not less
all
officers.
than }i nor more than lj4 inches, and the turn
inches in width.
coat,
down
Collar in front to be closed by two
inches in length and 2 inches in width, provided
5
tachable,
so as to close the
falling
part of the
part not less than 4 nor
(falling)
hooks and eyes; a
collar
with
of same
flap
one buttonhole
when worn
at
more than
material
each
end,
5
as
the
made
de-
closed.
A
pocket on each side, placed vertically, lower end of pocket 2 inches below the hip bone, extending
to 10 inches upward.
Over the pockets a flap of same length, rounded at edges and closed by
a small button at middle of flaps.
Slits of pockets to be cut through linings, thus permitting the slings
from 8
come through left pocket hole for hooking up of saber.
20 to 25 inches and closed by small buttons under concealed
to
Coats to extend down the legs from 8
wearer.
Sleeves
loose,
without cuffs
or
to
slit.
The back
flap,
to be
slit
up from the bottom
from right to left.
the latter buttoning
10 inches below the knee, according to the height of the
Back straps placed
at
waist
line, let in at the side
seams,
and to button together by two large buttons.
A
hood of same material as
coat, lined with suitable material of
the neck under the collar by
and cap.
When
in
means of
garrison the hood
Under arms, only when prescribed by
All buttons to be of horn,
The
five
small buttons.
will
ordinarily be
the
conforming
commanding
in
it
is
Insignia on Sleeve.
same
color;
to be large
worn only
at
made
enough
night or
in
to button
around
to cover the
head
inclement weather.
officer.
color to the material of the coat.
front corners of the skirt to be provided with
turned back when
Hood
buttons or hooks, so that said corners
may
be
necessary to facilitate marching.
— Sleeve
insignia of rank as prescribed
:
in
addition thereto the insignia of corps.
U.
S.
Army
MILITARY OVERCOAT
Uniforms
MILITARY CAPE
131
department,
arm
or
of
of
service,
bronze metal, will be placed
finish
diill
in
the middle of the lower
loop 13^ inches above the end of the sleeve.
For general
band of lustrous black mohair braid, 1,'4 inches wide,
surmounted by the proper number of stars, 1
inch in diameter, of dull finish bronze metal, placed % inch above the braid the stars to be surmounted
by a band of lustrous black mohair braid 3^ inch wide, 34 inch above the stars.
placed with
its
officers the insignia will consist of a
lower edge
2^
inches above end of sleeve
;
;
Overcoats for chaplains to be without insignia of rank.
Officers of the General Stafif Corps, except general officers, will
%
wear a band of black mohair braid
inches wide on the sleeve, the lower edge of braid to be l^A inches above the end of the sleeve, the
lower ends of the prescribed insignia of rank to rest upon the upper edge of
this
band.
Cacpes
For
—To
officers.
all
fingers with the
be of dark blue cloth without braid binding, reaching at least to the tips of the
arm dropped
and not below the knee
at the side,
3 inches broad, and closing at the throat with a long loop.
on duty with troops under arms.
To
It
;
with a rolling collar of black velvet
may
be worn by
all
officers
when not
be lined as follows
—
For general officers and officers of the Staff Corps and departments. Dark
For officers of infantry. Light blue.
For officers of artillery.
For officers of cavalry. Yellow.
—
—
blue.
— Scarlet.
Full Dress Trousers
For general
— Of
dark blue cloth, with two stripes of gold wire lace 3^ inch wide with 34
mounted upon light weight velvet of color of cuffs and collar of coat and
placed along the outside seam of the trousers. In the case of the Chief of Engineers the interval between
the two stripes shall be scarlet velvet.
For officers holding permanent appointments in the Staff Corps and departments, except Engineers.
officers.
inch interval between them,
Of dark
For
at the
blue cloth, with one stripe of gold wire lace Y^ inch wide along each outside seam.
and infantry. C)f sky blue cloth with stripes 13^ inches wide, welted
—
officers of cavalry, artillery
edges
the color of the stripes to be that of the facings of the respective corps or arms, except that
;
for officers of infantry the stripes shall be white.
For
in
of the Corps of Engineers.
all officers
— Of dark
blue cloth, with stripes of scarlet cloth
13/$
inches
width, with a piping of white cloth 34 inch in width.
For chaplains.
— Of
plain black or blue black cloth, without stripe, welt or cord.
Dress Trousers
For general
officers, officers
—Of dark blue
be of
blue
other
—The
cept Engineers.
trousers shall
For
all
holding permanent appointments in the Staff Corps and departments, ex-
cloth without stripe, welt or cord, except that for the Chief of Artillery the
light
officers.
cloth
same
with the addition of a stripe of scarlet cloth I3X inches wide.
as for full dress.
White Trovisers
For
all
officers.
— Of
plain white material to
match
the white coat, without stripe, welt or cord.
Service Trousers
For
all
— Of
officers.
olive drab,
woolen, or khaki-colored cotton material, to match the coat, without
stripe, welt or cord.
Dress Breeches
For
—Of
same material and with same stripes as dress trousers, cut in the prescribed
pattern and fastened from the knee down with dark bone buttons of appropriate size or with laces.
all
officers.
Service Breeches
For
all
officers.
— Of olive
drab woolen or khaki-colored cotton material, to
132
match the service
coat,
U.
S.
Army
Uniforms
\:
SUMMER UNIFORM
DRESS UNIFORM
133
and above the knees to fit closely below
with tapes or laces or buttons.
To
and
to
be
fastened
the knee, extending to the tops of the shoes,
for
officers
required
to
be
have a re-enforced or saddle piece of the same material on the seat and legs
To
without stripe, welt or cord.
be
made
loose about the seat
;
.
mounted.
Uniform
The commanding
or
designate the uniform for evening wear on
will
officer
Evening Wear
for
all
occasions of a general
official
character occurring within the limits of his command.
For occasions of special formality, the uniform for evening functions shall be the prescribed full
dress dismounted uniform.
For other occasions of ceremony to which officers are invited in their official capacity, such as balls,
official dinners, official receptions, etc., and formal mess dinners, the following special full dress uniform
is authorized, and officers are at liberty to wear it or the full dress dismounted uniform
An evening dress coat of dark blue cloth cut on the lines of the civilian dress coat, with the gilt buttons of the same number and place as regulation requires the sleeves of this coat to be ornamented for
;
all
officers
A
same manner
in the
as the sleeves of their full dress
should be worn with this coat; also
tons,
uniform
coats.
waistcoat of dark blue or white, cut low with full open bosom, three small gilt
dress trousers by
full
all
officers
regulation but-
except those of engineers,
and infantry, who will wear dark blue trousers without stripes, patent leather shoes and
for other
Shoulder ornaments for general officers will be epaulets or shoulder knots
full dress cap.
On proper occasions which are not official in character, officers
officers, except chaplains, shoulder knots.
are authorized to wear civilian evening dress.
cavalry, artillery
;
Mess Jacket
Officers
the
of
staff
departments, the corps of artillery and the regiments of cavalry and
corps and
infantry are authorized to adopt a "mess jacket" distinctive of their corps, department or regiment.
To
be
made
of dark blue cloth.
Body
of jacket to be cut like evening dress coat, to descend to point
curved to a peak behind and
of hips, slightly
on each
lation coat size
placed
side,
IJ^
front; five buttonholes on lapels, three buttons of regu-
in
inches from bottom, and spaced 2 to 3j^ inches apart.
Sleeves
ornamented same as full dress coat. Such further distinctive ornamentation of this jacket as may
be desired by the organizations named is authorized, but when once adopted the "mess jacket" for any
particular organization shall not be changed without authority of the Secretary of War on the recom-
to be
mendation of a majority of the
With
this jacket will be
officers interested.
worn
the detachable shoulder knot provided for full dress coat; also vests
of the color of the coat or white.
Commanding
worn with
officers
may
in
the tropics or in the
warm
season authorize the white trousers to be
this jacket.
Black shoes
will
always be worn with
this jacket.
Professors and associate professors of the United States Military
pointments as such, will wear the
Department, omitting the
full
dress and dress
uniforms of
Academy holding permanent
officers
of
the
Military
ap-
Secretary's
aiguillettes.
DESCRIPTION OF GARMENTS AND OTHER ARTICLES OF
UNIFORM FOR ENLISTED MEN OF THE ARMY
Dress Coat
A
single-breasted sack coat of dark blue cloth, fastened with six regulation buttons
standing collar
;
shoulder loops, of the same material and color,
ton to the collar with a small regulation button
regulation buttons.
The
of corps, department or
and Signal Corps
to be
collar,
arm
mixed
;
shoulder loops and
of service.
The
let in
the sleeves to have a cuiT,
cufifs to
down
the front
seam and to butornamented with three small
at the shoulder
be piped with "cord edge braid" of the color
color of the braid for Engineers, Ordnance, Hospital Corps
in alternate stripes.
U.
S.
Army
CHAPLAIN
Uniforms
KNIGHT TEMPLAR UNIFORM
J
35
Collar ornaments for enlisted men, of _vellow material similar to those for officers, will be placed on
this coat in
same manner
on the dress coat of the officers.
wear the insignia of regiment or corps on
same as worn on cap.
the
as
Musicians and trumpeters
musicians a
lyre,
will
their coat collars.
Band
Breast Cord
Cords and
tassels
of mohair of the color of the corps, department or
tached to the dress coat, beginning at the button of the
neck and the other
front,
in
under the
first
left
arm
of the service, to be at-
shoulder loop, one cord passing
in rear of
the
button of the coat, crossing under the right shoulder loop
and brought together under the right arm with a slide, then passing across the breast between the third
and fourth buttons and attached to the left shoulder button.
Service Coat
A
sack coat of olive drab woolen material or khaki-colored cotton material conforming in design and
cut to the service coat for officers.
dress coat, except that
all
The same
collar
ornaments
will
be placed on this coat as on the
buttons and metal ornaments will be of dull finish bronze metal.
White Coat
A
Collar ornaments to be the same as prescribed for the dress
sack coat of bleached cotton duck.
coat.
Fatigue Coat
For
ail
enlisted
men.
— Of
brown cotton duck.
Overcoats
For
all
enlisted
men.
—Of
olive drab
woolen material, general design and cut
to be that of the officers'
overcoat, the buttons to be of dull finish bronze metal.
Dress Trousers
For
all
enlisted
men.
—
(_)f
sky blue kersey.
Stripes for Trousers
Stripes to be of cloth of the following colors
— Yellow.
—
Infantry. — White.
Engineers. — Scarlet,
Cavalry.
Artillery.
Army
(
)rdnance.
piped with scarlet.
Post Commissary Sergeants.
piped with white.
Hospital Corps.
service detachment of the United States Military
All noncommissioned officers above the rank of corporal
cluding pipings.
— Black,
—Buff.
— Cadet gray.
Post Quartermaster Sergeants.
Scarlet.
—Orange,
piped with white.
—
Academy, West Point, N. Y.
will wear stripes 1>4 inches
Buft'.
in
width,
in-
All corporals will wear stripes ^^ inch wide, including pipings.
Musicians and trumpeters will wear two
stripes,
each ;/ inch wide.
White Trousers
Of
bleached ciittun duck, without stripes.
Canvas Fatigue Trousers
Of brown
cotton duck, without stripes.
Service Breeches
of
drab woolen or khaki-colored cotton material, to match the service coat. To be worn withmade loose above the knee, fitting closely below the knee, extending to the tops of
the shoes, and fastened with tapes or laces to be worn with shoes and leggings.
olive
out stripes; to be
;
For mounted
use, to
have a reinforced or saddle piece of the same material on seat and
general design of the breeches will conform to the pattern prescribed for
officers.
legs.
The
DIAGRAMS
for
UNIFORMS.
LIVERY and
SPORTING
COSTUMES
137
Frock Uniform for U.
Army
S,
Mounted and
Officers,
Unmounted
Measurements as Follows:
Proportionate draft subject to height, variations
Note that
and supplementary measurements.
in
Natural waist
mih-
Fashionable waist
„
tary garments proportion is ciianged so as to make
^ ^
^
blade K' 'i- smaller, and waist measure is 1 in. less
X
,
,
I
which would be preferable
proportion,
than
in
I8J/2
in.
in.
Breast
36
in.
Waist
31
in.
Seat
57
in.
,,
,
1
Full length
"
all
military garments.
ni.
ii
ii
-r-
_
1/
To Draft
Shape
Square out and down from A.
A
V
A
A
A
to
V
to
to
B
C
to
D
is
to
E
is full
1/3 breast measure.
is
is
3
is
natural waist length.
L
.
4 to
B
F
B
to
F
to
H
to
S
is
^
S
to
G
is
3
G
to
W
is
l/'6
B
to
N
is
breast measure.
N
to
I is
as 2 to
1/3 breast measure.
is
6 to
breast measure.
X is
T is
yi
to
T
to
R
^
to
_
to
L
to
Q
23 to 13
G
down
as
in.
in.
W
Shape as shown
down
in illustration
9 to 27
is
27 to 35
C
to
U
334
is
from
O
to
I,
and
U
to 8
is
9 to
34.
U
and
rule a line
from
\' to
to 23
is
K
to 11
is J/2 in.
in.
illustration
from 13
to 7
and
is
Y
to 22
to 9.
Take out
V
stipulated between 27
From 33
to
30
is
30 to 28
is
4
26 to 25
is
3}i
same distance
in illustration
and
35.
as 33 to P.
from 30
to 31.
in.
in.
Rule a line from 28 to 25.
Shape bottom of lapel as shown in illustration, and
place buttons and l)uttonholes as shown.
U.
1/6 breast measure.
K
}i
as
in
as
Shape as shown
in.
Square down from
Add
in.
y2 in.
is
in.
3/s
Shape shoulder from Y to X.
Shape neckhole from X to P.
Shape front as shown in illustration from P
9.
Square down from
is
1/6 breast measure.
Shape armhole as shown in illustration from
and down
same distance
line.
to 13.
1/6 breast measure plus jA
is
Square back from
line.
below fashionable waist
in.
to 10.
X to
Q to P
])oint Z.
as dotted lines.
22 to 9
below fashionable waist
in.
3/2
shown in illustration from S to 6 and 20.
from S to 5 and 21.
bottom of side body from 24 to 20.
bottom of front part from 21 to 35.
Y is same distance as R to 11 minus 3/s in.
J4 waist measure.
is
is
Shape as shown
1/6 breast measure.
is
in.
Square down from 24.
R"le a line from G to 23.
Shape
Shape
Shape
Shape
Rule a line from
to R.
Square back from point K. finding
Rule a line from X to Z.
Square out from X by balance line.
X
•
1/3 waist suppression, or same distance
5 is
Point 21
in.
1/6 breast measure.
is
indicate.
>4 waist measure.
^
a pivot.
1
is
24 to 10 is )4
Point 20 is
breast measure.
Square up and down from I.
Square up from W.
Square up and down from G.
Square up from H.
Sweep back from point 1 to X, using point
A
and 3
2/3 waist suppression, or same distance
is
as 4 to 2.
in.
2j4
to
U.
7 to 6
is 1 in.
R
to R,
waist suppression, divided in three eqiml
is
8 to 7
and E.
A
in.
parts, as Figures 4, 2
length of coat.
from
>^ waist measure.
is
U
2
is
M to 4
fashionable waist length.
D
M
to
in illustration
8 and down.
23 to
11, 11 to 23,
in.
Square out B, C,
shown
as
8.
1/6 breast measure.
Lav up
a standing collar in connection with this
diagram as per illustration, and be sure it is in length
the same distance as from A to R and X to P.
to top of back at point A.
138
Frock Uniform for U,
S.
Jlrmy
Officers^
Mounted and
Unmounted
Skirt
10 to 14
is
14 to 15
is
1/3 seat measure.
From
1/12 seat measure.
12 to 29
10 to 12 is same distance as 24 to 20, 21 to 35,
and 27 to 25.
Square down from 12 bv fashionable waist line.
1
is same distance as from D to E.
same distance as from 10 to 17 minus
10 to 17
is
in.
Shape top of
back of same, and
139
skirt,
front
finish as
and bottom,
shown.
as well as
Military Blouse
Measures as Follows:
Waist length
17
in.
Breast
36
in.
To
23)^
29
in.
Waist
31
in.
in.
Seat
2)7
in.
To
Draft
seat
Full length
Square out and down from A.
Rule a
A
V
A
A
C
A
to \'
to
B
C
to
to
to
1/3 breast measure.
is
3
is
natural waist length.
Rule a
D
is
length to seat.
21 to 4
E
is full
in.
F
to
H
to
S
is 3^2
is
is
S
to
G
to
W
B
to
N
N
to
I is
and E.
1/3 breast measure,
is
G
D
to
3 in.
1/6 breast measure.
is
breast measure.
is
2^4
in.
to
T
to
T
R
to
X
is
1/6 breast measure.
is
J4 in-
Rule a line from J to P.
Shape as shown in illustration from X to P.
Shape shoulder from Y to X.
Shape armhole as shown in illustration from
Y
to
L
to
O
is
K
to
is
X
is
^
%
in.
in.
to 7
is
yi waist measure.
7 to 21
is
waist suppression, which
parts, as Figures 7
From
From
pivot.
4 to 3
is
and 2
is
divided into
indicate.
3^ waist suppression, or
same
dis-
M to 8
is J/j
waist suppression, or same dis-
7.
Apply seat measure on 2/3 of divisions plus IjX
from 10 to 14 and U to 12.
Shape as shown in illustration from 23 to 3 and 12,
from 19 to
and 17, and from 19, 8 to 18.
Sweep back from point 5, using 23 as a pivot.
Sweep forward from 6, using point X as a pivot.
Shape as shown in illustration from 6 to 17 and 18
line.
in.
M
0.
illustration
from
O
to I
from
A
to R,
and
0.
to Z.
i"-
Shape as shown
24 and out.
24 to 11
by balance
X
from
K'
2
tance as 2 to 21.
54 waist measure.
line
24
is
tance as from 2 to
Square down from
Shape as shown in
Rule a
1/6 breast measure.
is
to
two equal
1/6 breast measure.
is
is
M
M
W
Square out from
X
P
to
S to 19
L
i^ in.
is
seat measure.
]/4
to 23.
Rule a line from
to R.
Square back from K, finding point Z.
Sweep back from point 1, using point G as a
1
is
23
Square up from W.
Square up and down from G.
Square up from H.
A
to 21.
34 waist measure.
is
11 to 23,
O
breast measure.
21.
from Z
Shape as shown in illustration from
4 and 10 and down to 5.
in.
1
to 23.
in.
1
line
14 to 10
length of coat.
Square out from B, C,
to
is
Square down from
is
B
F
B
from B
line
to 21
in illustration
R
to
to 16.
Lay up standing
collar l}^ in. wide, as
shown
in
illustration.
in.
X to 20 is same distance as R to
20 to Y is same distance as K to
Rule a line from X to Y.
K to 23 is 1/6 breast measure.
Dotted
11.
line
in
front of blouse
ndicates button
stand.
24.
Dot and dash line illustrating peak
front shows front of mess jacket.
lapel
and
cut-
away
Mess Jacket
Take out
From
From
Crease
V
of
Ij/^ in.
15 to 13
to 21
line is
is
is
ZjA
3^4
from
P
Shape lapel and front from 15 to 13, and 13 to 21.
Cut away as shown by dash line, and mess jacket
to 15.
in.
in.
shown bv dot and dash
is
line.
140
finished.
Military Blouse
Mess Jacket
Military Overcoat
— U.
Army
J.
Measures as Follows
Waist length
18
in.
Waist
36
To
seat
25
in.
Seat
41
Full length
47
in.
Breast
40
in.
To
All systematical points are obtained in
Excess of 4
V
and
taken out
Square up and down from
30 to 20
same distance
is
same man-
16 to 19
20 to 21
is
4
4
in.
is
3^
Shape front
as
30.
in.
shown
in
illustration
from 21
to
to 30.
13,
to 15
is
Square out from
in front.
from P
circumference allowed for
DraLft
I.
as
in.
exaggeration.
ner as in double-breasted box overcoat, with the exception of collar
sizes of
in.
15 and 19.
in.
CoUacr
28 to 27
Shape
as
From P
X
is
1
shown
to
Make width
in.
26
in illustration
is
from 27
same distance
as
A
to P.
to
R
same width
and
Shape
to P.
Width of
collar stand
from
P
13^
in.,
and
in back.
collar
all
around as per
Place pockets as shown
to
in
illustration.
this illustration,
with
22 and 26 to 25
flaps
is
of collar from 2i to 24 4
and buttons.
in.
Shape
allow J4
as
in.
shown
for
in illustration
from 27
seam on upper part of
have seam come on
to 23,
Place belt on back with two buttons and finish
and
as
collar so as to
inside.
142
shown.
— U.
Military Overcoat
J.
Army
General Officer's Dress Uniform
Measures Used as Follows:
Waist length
Length
to
seat
17^
in.
Breast
38
in.
23^
in
Waist
33
in.
in.
Seat
39
in.
.29
Full length
To Draft
All systematical points are obtained in the
manner as for regular military blouse.
The difference between this garment and
military blouse
front
that this
is
the
double breasted, and
obtained in the following manner
is
O
is
Square across from
same
point
by
21 to 15
is
same distance
15 to 13
is
4
in.
25 to 26
is
3
in.
Square down from waist
1/6 breast measure.
Place corner of square at 25, level same with
to 25
P
is
W-1.
line
P
as
line
to 21.
through 26 and rule
a line from 13 to 26.
and square up.
Collar
From P
X
to 27
is
same distance
as
A
to
R
and
27 to 29
P
to P.
Shape
as
27 to 28
shown
is
154
Shape from 28
in illustration
from 27
to
30
Shape
to P.
to 29,
in.
to P.
Ui
is
is
as
3 in.
3
in.
shown
in illustration
29 to 30 and 30 to P, and
from 28
finish as
to 27,
shown.
27
General Officer's Dress Uniform
and Military Capes
Circular
view of the
111
the cape
it is
fact that
to side, as well as
down.
was Produced from the Following Measures
Draft
Breast
36
in.
From neck over
Back length
26
in.
Front length
To
shoulder and
H
Square up from A.
C
to
B
A
to
Square out from C and B.
B
F
to
C
F
1/6 breast measure.
is
y2 breast measure.
M
to
N
to
G
is
3^
N
to
P
G
to
W
line
is
to
T
in.
1/6 breast measure.
Rule a
from
H
to
Rule a
W and down.
to
R
is
^
Square out
H
M
to
Rule a
by
line
line
1/3 breast measure.
1/3 breast measure.
is
is
1^4
line
in.
H
from
to P.
side length
from
A
R
shown by
from
E
to
X
Shape from
M.
A
Shape neckhole from
solid line
to R.
R
to
M
and
from
D
to D.
to J.
M
Apply front length from
H-W.
1/6 breast measure.
is
is
Apply back length from
Apply
H-O
in.
in.
1/6 breast measure.
is
in.
line
.ZSyi
Square down from P.
1/6 breast measure.
Square up from T.
T
.
Dratft
to
A
at side.
26
A
is
i
down
Square out and down from A.
is
back length
from back of neck down, and front length from throat
advisable to take measurements from the neck over
The
and down
the shoulder
tiiat
on the hand or arm,
a certain position
fall to
often required
is
it
to J
to
O
and
P and S and
to
and shape as
S.
circular cape
is
completed.
out.
Milita.ry Ca.pe
Is
from
to J
from
produced from same pattern by cutting
R
to
E
and
plait as
shown by
and U, leaving opening
R
to
K, reducing width
Dot and dash
at
bottom and
U
fall in
is
cape
is
is
Capes lend themselves
collar.
and lengths, the accompanying drafts
forming the groundwork.
front.
These are intended for
of opening through or facing with
shown
turn
a very
Some
down and
illustration
to
in
sired can be
All of these
collar
ready for the
to various styles
ton stand.
graceful folds.
garments are to be made before the
Neck being on
the cape
lines
They must be properly balanced
allow the fulness to
E
and D.
will be noticed that cutting a
simple matter.
tape shall be basted on the neck to remain there until
open
from
shown by dotted
lines illustrate military cape, as
by points A, R, E, K, L, V,
It
as
illustration
it
are
made with
regular coat.
the bias of the cloth necessitates that a
146
or without but-
lapels
and
others in military style as
regular cape.
Any
collars to
shown
style of collar
in
de-
attached to these capes for the reason
that the neckhole of the cape
put on.
fly
style
is
the
same shape
as
Circular
and Military Capes
147
Capes
Regular Cape
Cape
cut with
is
measures used for
seams over the sliuulders and
illustration are as follows
Back length
32
in.
Breast measure
36
in.
To Draft
Back Part
Square out and down from A.
Square out from H.
A to C is 1/6 breast measure.
A to E is full length of cape.
A to T is 1/6 breast measiu'e.
T to R is }i in.
H
to
F
F
to
G
is
J<2
2
is
to
H
Rule a
line
from
R
to G.
Rule a
line
from
G
to I
K
breast measure.
J to
Shape as shown
R
F.
is
3
to
Z
B
to
D
to
is
Rule a
%
is
is
S
G
to
to
I)
to
M
is
3
D.
L
to
N
is
iy2
R
to S,
From 3
From S
as
shown by dash
S
.A.
to
R
and
and
I
K
and shape from
E
to K.
IS
\}{[
A
to
R
and
R
to S.
in.
in illustration
from S
to 3
and S
4. 5 to 4,
line.
4
is
4
in.
to 5
is
4
in.
to
to
Shape
in.
Shape button stand
from
to
in.
Shape as shown in illustration from
and down to L and from L to K.
S to
is 1'^ in.
in illustration
same distance as
is
i to 2
Shape as shown
A
Square down from D.
E
to 3
From
in.
from
as a
Collar
in.
1%
R
to G.
Shape from
1/3 breast measure.
line
point E, using point
in.
Front Part
C
C
B
and down.
pivot, finding" point J.
% breast measure.
is
;^ breast measure.
in.
Square down from
F
I is
Sweep forward from
Square out from C.
C
to
as
shown
and S
to 5
in illustration
and
finish.
from 2
to 3, 3 to
and
Clerical Chaplain^
Templar Coat
I^night
In the production of the Clerical, Chaplain and
are exactly the same, while they differ in front as re-
Knight Templar coats the same diagrams are used,
Sfards buttons.
for the reason that in the production of patterns they
Measurements as Follows:
17
in.
ner as for regular frock coat.
Fashionable waist
18>1
in.
that' these
Full length
40
m.
Waist
22
in.
Seat
3/
Natural
waist
^^
^^^^
lar.
T_
All systematical points are obtained in
other
.
HI.
same.
same man-
l.iO
The only
difference
is
garments have straight front and button up
throat in military style, and have standing col-
There
is
details
no other difference
see
fashion
in drafting,
illustrations
but for
pertaining to
^
'^
Regular Capes
Clerical
and
I^night
Templar Coat
CLERICAL AND KNIGHT TEMPLAR.
and Double Breasted Coachman's Coat
Single
MeaLSuremervts
a.s
Follows.
Natural waist
17
in.
Breast
38
in.
Fashionable waist
19
in.
Waist
.34
in.
Full length for under coat
7)7
in.
Seat
.39
in.
Full length of overcoat
44
in.
To
Dracft
From 9
All systematical points are obtained in the same
manner
in
Shape
as for regular frock coat, subject to height,
measurements according
variations and
P
diagrams illustrating same.
28
to
29
is
4
27
is
is
as
33 to 22
P
collar,
1'4
shown by
solid lines.
efifect,
in.
shown
P and
illustration
from 22
to
in illustration
from 34
to 33
in
to 31
is 3J/'
is
3>4
in.
in.
Shape as shown
22 and from 32 to 31, and
for
In
3
skirt as
down
34 to P.
double-breasted frock.
to
3 in.
is
and
produced as follows
same distance as A to R and X to P.
is
2)2)
Shape
as will be seen by illustration.
From 26
to
33 to 34
For single-breasted coat note dash lines in front.
Extend a button stand from I .out to dash line of
1J4 in-, and same amount from 22 ^to dash line.
Shape as shown by dash line
For double-breasted coat follow instructions
to 12
lapel
Collar has turn
to stipulations
This single-breasted coat has a regular coat
.
all
frock coats.
in.
152
and
to 31.
other details patterns for these garments
are produced
in.
P
in
the
same manner
as
for regulation
Single
and Double Breasted Coachman' s Coat
153
Footman
Coat
s
I
/
Mea-surements as Follows;
Natural waist
17
in.
Breast
36
ni.
Fashionable waist
18^
in.
Waist
32
in.
Length
i7
in-
Seat
2)7
in.
To
All systematical points are obtained in the
manner
Dra.ft
same
Place broad flaps at side extending
variations and measurements as
shown
These
ni illustrations
extended to front, and
this
is
garment
front, as
closely on the
In
military style.
It
side
has a side edge at
edge should
lie
-/;;
the
back
fold,
and
at
in this
each corner.
There should be six buttons on each side of the
no button stand
is
shaped as indicated
flaps should be
diagram, with a button
regulating same.
While the edges meet there
down from
the front of skirt.
as for regular frock coat, subject to height,
shown
all
diagram.
other details this coat
same manner
this
in
tematical reeulations for
of the leni^th of the skirt.
154
is
as regular frock coat,
fit,
etc.
produced
in
the
subject to sys-
Footman' s Coat
lo5
Automobile Coat
To
Measures as Follows:
Waist length
To
seat
Length
18
All systematical points are obtained in the same
in.
manner
and double-breasted box overcoat,
as in single
243/2
in.
49
in.
with the exception of a
collar,
which
40
in.
Waist
36
in.
Square up from
in.
22 to 21
41
to 15
4 sizes of excess to breast, waist and seat.
4
is
and the
P
to 22.
in.
3^
is
as
in.
4
is
21.
in.
Shape as shown
and
at front,
I.
Square out from
21 to 20
taken out
same distance
is
16 to 18
V
in military effect.
is
Breast
Scat
Dra.ft
20 to
in iUustration fioni
15
13,
18.
Cut front part of pattern apart from 27 to 25 and
spread same 8
from 27
as shown,
in.,
F and
to
25 to
26.
Insert in jiattern a piece of paper 8
23 to 24 and 25 to 26 for inverted
in.
plait to
wide from
extend from
pocket down.
Above pocket add one seam
to each side only.
Coll&.r
29
to
28
is
1
in.
Shape as shown by
From P
X
to 35
is
illustration
from 28
same distance
as
A
to P.
R
to
and
to P.
Width of stand
and 35
of collar
from 33
so as to
to 31
collar as
in.
from P
to
30
shown by
illustra-
and allow one seam im upper part
make seam come on
Width of
width
1>4
to 34.
Shape upper part of
tion
is
collar
inside.
from 31
to Zl
is
4
in.,
and same
in back.
Place belt straps on back of coat and
finish.
Jiutomohile Coat
Sack Coat
Chauffeur's
Produced on the style of the Norfolk, but with
down collar and military closing at throat. In
drafting a coat of this kind, always add two sizes to
regular measures.
For example: If circumference
tration.
turn
is
38,
breast 36, waist 32, seat
2>7.
pattern
on over pattern.
In producing the collar, the distance from P to
20 is same as from A to R and X to P.
20 to 21 is 114 in.
Shape as shown in illustration from 21 to P.
Shape from 20 to P.
20 to 19 is 3 in.
P to 18 is 3 in. Shape from 21 to 20 and 19.
Shape from 19 to 18.
Shape from 18 to P.
the draft should be
34 and 39, so as to make the garment
easier.
All systematical points are obtained in the same
manner
as
in
regular
measurements are
in Variations
sack
coat.
is
For yoke and
Variations
and
allowed as shown in directions
The
and Measurements.
sides the excess,
C.
to be
that nothing
is
These straps are sewed on the goods. The
cut regular and these trimmings are laid
is
difference, be-
taken out at point
Place at side patch pockets 8
straps, as well as belt, follow illus-
flap
158
and button,
as
shown
in.
in length,
in illustration.
with
Policemen's
Blouse
16-
Mea-surements Used
Follows
a.re Ols
has a straight front and buttons to the throat
17'/
in.
23%
in.
29
in.
Breast
36
in.
in
Waist
32
in.
understood that drafting
in.
portions, but to height, variations
\\'aist
To
lengtli
seat
Length
i7
Seat
All systematical
the
same manner
waisted effect
is
points
are obtained
as for regular sack coat.
in
It
in
exactly
The
as
shown
V
is
159
subject not only to pro-
and measurements,
diagram illustrating same,
produced merely
changes from regular,
taken out in side.
is
in stipulations in
This diagram
small-
incorporated, as will be seen by
style, and has a turn down collar.
This coat should be close fitting, and no excess
It is
size is necessary in the production of same.
miHtary
to
show
the small
Policemen
Coat
s
Measures as Follows:
Natural waist
17
in.
19
Fashionable waist
in.
Fnll length
46
in.
Breast
40
in.
Waist
38
in.
41
in.
Seat
To Draft
All systematical points are obtained in the
manner
of the front, which
L
same
as for regnlar frock coat, with the exception
to
12 to 9
produced
Yi waist plus
is
29 to 12
is
is
3 in.
VY
is
in.
shown by
a \' as
Take out
^
in military style.
in.
illustration
from 12
to 9.
Square out from P.
P
to
to
26
2>4
is
in.
Shape as shown by
'
illustration
from P
illustration
from 25
I
and 26
I.
26 to 25
is
iy^
in.
29 to 27
is
314
in.
Shape as shown by
Place side edge of back as
shown
Policemen's coats are usually
collar, as
shown
If turned
POLICEMEN'S
to
to 27.
in illustration.
made with standing
in illustration.
down
nulitarv overcoat.
collar
is
desired see illustration of
Policemen's Coat
161
N o rfo
Mea-sures
a.s
I
Follows:
Waist length
17^
in.
Breast
To
23%
in.
Waist
seat
To
All systematical points are obtained in same
is
From
man-
is
4
from 9
being 2
in illustration
from 4
to 7
to
24
dotted
is
17
is
half
21
is
half
From 24
22
is
same distance
Cut patterns apart as follows
From
4 to
in.
from 18
to 19
in.
and 17
to 20,
on each side
plait; the other inch
is
then assume position shown by
will
as
is
in.
Point 23
is
I
Point 19
to 21.
is
Seams
7.
of %.
22 to 24.
plait of
2
in.
brought back to 18 and 20 to
in.
plait
on back from 18 to
must be added
7 to 4, 20 to 25, 25 to 24
From 9 to 14.
From 20 to 25.
From 25 to 24.
From 21 to 22.
to 23,
assume the position as
brought back to 21 and 24 to 22,
which creates a box
:
from 21
part, spreading
lines.
which creates a box
from
done with fore
fore part will then
shown by dotted
7.
way between 20 and 25.
way between 9 and L
to
^7
lines.
The
way between 4 and
half
box
the pattern as cut 4
Line up from 25 to 24.
18
for
The same thing
to 25.
1/6 breast measure.
is
in.
The back
and
to 14.
Line up from 20
in.
for turn under.
in.
Line up as shown
in.
32
18 to 17.
Spread pattern 4
nothing taken out at point C, and the
addition to waist
36
Dracft
ner as in regular draft for sack coat, with the exception that there
.'
Seat
.29
Full length.
k
and 9
to all parts
17,
17.
from
to 14.
Place the pockets as shown, and also
belt,
cover-
ing seam below waist, which completes illustration as
shown.
162
Norfolk Jacket
\
163
Golf Coat
L
to
O
J/ waist measure.
is
Q
Shape from
Q
P
to
O
I,
and down.
1/6 breast measure.
Rule a line from J through P.
to
is
A
Shape from
X
H
to
Y
is
to
F
is
^
1%
Rule a
line
F
is
to 2
R
to
3^
K.
to
to F, as
K
to 2
to K.
shown by dotted
Y
and shape from
X
H
Square down from
linr.
to 2.
to P.
and shape from 2
to 3,
M
to 5.
C
V
to
is
]/
Shape from
in.
A
V
to
and square down from V.
Ap])ly waist measure plus ilA
6
R
in.
Shape neckhole from
down
R
than from
in.
from B
Shape from
and
in. less
in.
from
and
3 to \^
to 4.
ions
Apply seat measure plus 2 in. on the
from J\I to D and \V to N.
Sweep back from
ing point
5,
of divis-
using point 2 as a pivot, find-
6.
Sweep forward from
ing point
%
6,
using
X
as a pivot, find-
7.
Extend a button stand, 1^4
in- at I,
in. at
1
O, and
shape front and bottom as shown, lengthening
1
in.
at point 7.
This finishes the regular draft of sack coat.
To produce
the golf or stroke coat do as follows
Place the breast pocket and the lower pocket and cut
out pattern as shown by heavy
To
of thirteen plaits of
DraLft
Square out and down from A.
to B is
breast measure plus 3
A
A
A
A
%
tern as shown.
D
is
seat length.
forepart.
to
E
is
full length.
shrunk
to
T
R
is
is
waist length.
X
to
O
is
this
will be
Also place the
back as shown.
Give a
little
box
also a
in.
dash
The back
cut without a seam and is
shown on drawing. There is
in back below belt the same width as
and is shown by the fine solid and
is
in at center as
back above
plait
belt
line.
The breast pocket has a flap to go in and
The lower pocket is a patch pocket, as shown.
in.
In
out.
laying the pattern together deduct the two
seams running down from point 2 that you would
lose on the original pattern and add seams in all
places that are lost in putting in these plaits, that you
1/6 breast measure.
The
would otherwise not lose in a regular coat.
small
plaits turn and run each way as shown by the
crosses.
They are stitched on the edge close, but not
stitched down flat, as they are intended to open out
J4 in-
Rule a line from R to S.
Square back from K finding point
Rule a line from Z to X.
at
piece
spring at bottom to correspond with spring lost in
to
to
Mark around same and
same width
C
Square out from B, C, D and E.
B to G is 3-2 breast measure plus 3
B to I is breast measure plus 2 in.
B to H is 1-. breast measure plus lYz
Square up from H.
Square up and down from G.
(j to S is 1/6 breast measure.
Square up from S.
A
T
Plait a
lines.
each and place under pat-
the piece to insert for the plaiting.
belt the
in.
to
is
in.
1
Z.
when
1/6 breast measure.
164
the stroke
is
taken.
Golf Coat
16.-)
llidlng Coat
Mea-svirements
Follows:
a.s
K
Natural waist
17
in.
From
Fashionable waist
19
in.
In producing skirt the distance
Full length
33
in.
Breast
36
in.
Waist
32
in.
Seat
37
in.
to 15
24 to
to 8
is
may
be
to 27,
in
illustration
from
24 to 17 and 17 to 27.
placed
pockets on the front part, as
to riding coat
in.
-^4
shown
from point 14
12.
Flaps
on
the
shown
sides
and patch
in illustration.
All other details in the production of this draft
areas follows:
C
skirt as
Shape from 12
in regular
1/6 breast measure.
is
1/12 seat measure plus
Shape top of
All systematical points for shoulders are obtained
manner.
Exceptions from regular frock coat
is
to 23
are
1/6 breast measure, making back wider.
identical
with regular frock, subject to height.
variations and measurements.
169
Hunting Sack
Measurements as
Waist length
17j-j
Length
23^4 ™29
in.
36
in.
in.
32
37
in.
to seat
Full length
Breast
Waist
Seat
Follo^vs;
space for ammunition and other things to
be carried in the pockets. It is cut on the principles
of the straight front sack, and has a turn down collar
and buttons to the throat in military style.
This coat is cut with a straight back and shaped
only a little at the sides. As indicated by dotted lines,
a protector is put on the shoulder so as to give more
service in wear.
The pockets are generally patch,
and finished with flaps as indicated in draft, and are
unusually large. The breast pocket is about 63^ in.
wide and about 8 in. deep the side pockets are 10 in.
wide and as deep as the length of the coat will allow.
sufficient
in.
All systematical points are obtained in the same
as for regular sack coat, subject to height,
variations and measurements, as shown in directions in
diagrams illustrating same, but in producing a coat of
this kind it is advisable to cut it 2 or 3 sizes larger
than called for by the measurements, so as to allow
manner
;
167
INDIVIDUALITY SECTION
Showing
Coats
Construction
and
and Collars
Vests^
different
the ordinary and
of
Lapels
from
which give
Personality to the Wearer,
160
IndiuLduality
Individuality to the tailor
means the process
which emphasize and bring out
No two men
from his
different
This
It
is
is
The
down
is
to
Each one has some small
same mold.
distinction
which makes him
fellow.
personality which
tailor
who
This
is
A man who
liked or disliked, a success or a failure.
has
influence for good or otherwise.
makes
artistic tailor
it
emphasize
his business to
this personality as
much
the difference between custom-made and ready-made clothing.
common
to the
makes a man
little
an
is
garment which
To
garments the different touches
personality.
as possible.
A
his
his customer's personality.
are cast in the
personality has but
little
of putting into
is
cut and
level,
made
so as to suit one
man
and takes away that attraction which
increase a man's personality
make him
to
is
as another tends to bring a
as well
man
the birthright of every man.
is
noticed and increase his chances of success.
a cutter's duty to study each customer's build, attitude, character,
and even his business,
It
to be able
produce clothes which shall harmonize with and express his personality.
Progressive cutters should cultivate individuality as well as style in the garments,
man
average
can learn system without trouble, the true Sartorial Artist
scientific part alone.
He who
can,
by the use
of graceful
lines
is
not
for,
satisfied
while any
with the
and curves, incorporate individuality
with system, and produce garments which heighten the customer's personality and are becoming to
the individual, has solved the problem, and
Individuality
may
is
in fact, as well as
is
name, an
the strongest point today for the custom tailor.
obtain the best patterns in the world and
The ready-made manufacturer
work out the most complete system
but for him to produce personal clothes for the individual customer
is
must
fit
hundreds or thousands
of
men
of
height and size to distinguish one from another.
make
all
men
While
I
for his
an impossibility.
has been graded, hundreds, and perhaps thousands of garments must be
clothes
artistic tailor.
made from
workmen,
When
it,
a model
and these
varying personality, with only the difference in the
The
result
is
that the ready-made manufacturers
look alike.
admit that
it is
possible for
them
to
sometimes produce
fitting,
and even exaggerated, gar-
ments, they can not produce individuality to the extent that their garments will express the personality of
each and every individual wearer.
The more study
result of his work.
the cutter gives to the producing of individuality and style, the better will be the
The merchant
tailoring cutter has an opportunity to display his resources because
he knows his customer's
peculiarities,
tomer, and because the cloth
For the purpose
produce
it,
made
cut and
in this section a
from these patterns.
specially
of illustrating to the student
have inserted
I
is
because he prepares a special pattern for each individual cus-
what
number
meant by
is
INDIVIDUALITY
pertaining to individual garments, as
of drafts
stated in the introduction.
INDIVIDUALITY
and how to
»
can best be expressed by variations
the style of a garment, as, an individual
in
lapel or a certain shoulder, or a particular shape of collar, or the line or curves or the corners, etc.
In the diagrams illustrating
INDIVIDUALITY,
will be well to
it
curves, also the different positions of seams, dashes, vents, etc.
INDIVIDUALITY,
pockets,
etc., all
as
is
the manipulations of patterns.
c6me within
the scope of
The
study the various lines and
Exaggeration
a valuable aid to
is
lengths of coats, placing of
different
INDIVIDUALITY.
In connection with the problem of the making of individual garments,
special study should be given the different patterns of
each customer will receive such cloth as suits his
woolens which
own
personality.
suit
it
is
very essential that
each type of man, so that
should be becoming to his
It
complexion, and the style and weave should be appropriate to his build, height, weight, age and occupation, so as to prevent, for instance, the possibility of
only
making
inches in height and weighs 225 pounds, or of
5 feet 4
a suit of Scotch plaid for a
making
man who
is
a small stripe or a fine silky mix-
ture for a six-footer weigliing 125 pounds.
While
true that the customer usually selects his
is
it
him whether
own
cloth,
it
is
the duty of the merchant
tailor
and cutter
him.
Personal experience has demonstrated that a customer will often fancy a piece of cloth which
to advise
would be utterly unsuitable
finished, see his mistake,
to familiarize yourself
Unless he
for him.
and blame the
with what
is
his selection
tailor for
is
is
right or wrong,
and whether
advised differently, he
an unbecoming garment.
is
it
the garment
will, after
Therefore,
men
appropriate and becoming to various types of
becoming to
it
is
is
advisable
in materials, as
well as in shapes and styles of garments.
In connection with the diagrams illustrating
vases,
how
to
make
a try-on,
how
to try on,
good a pattern you produce nor how much
INDIVIDUALITY,
study also the making of can-
and the tailoring part thoroughly, as
style
it
matters not
how
and individuality you incorporate in your patterns,
unless in addition to the fundamentals, proportions, variations,
height,
circumference, exaggerations,
manipulations of patterns, and lines and curves for individuality, you have enough knowledge of practical tailoring to direct
be unsatisfactory.
reasons
why
it
is
your workmen so that you can obtain what you desire.
See the article on
essential to
"How
make such
to Instruct the
If not,
Maker," and study
to
the result will
understand the
clothes as not only please the customer, but are also a credit
to yourself.
171
Double Breasted Outing Sack Coat
Measures as Follows
:
Waist length
Length to seat
l/VS
in.
23;J4 in.
30
Full length
in.
38
Breast
in.
Waist
34
in
Seat
39
in.
To
Dracft
All systematical points obtained in regular
subject
ner,
height,
to
circumference,
man-
variations,
measurements and exaggeration.
The
special
taken out
1
in
to point 9,
feature
the crease
jf
line
this
of
garment
1J4
'n.
is
the
V
from point
giving an oval shape to the crease of
apel.
Also attention
is
called to the shape of the patch
same and shape of lapel.
Extension of button stand from front line is 4
in. all the way down.
This diagram was produced from a pattern drawn
for an actual garment, material of which was white
flannel.
It was exhibited at various conventions and
pronounced a most beautiful garment.
pockets, position of
Special study should be given to the lines and
curves and
all
details of this
garment.
Coat
Double Breasted Outing Sack
173
One Button Novelty Sack Coat
^5
Measures as Follows.
Waist length
17>^
in.
Breast
36
in.
Length
23>^
in.
Waist
32
in.
29>4
in.
Seat
37
in.
to seat
Full length
To Draft
crease line and are scooped out on the outside edge.
All systematical points are obtained in the regular
manner, subject to height, circumference, variations,
Take out a
measurements and exaggerations.
Shape
The
ment
is
difference from the regulation in this gar-
H
From 4
to
Shape
S
to
as
Take out
S
is
Y^
in.
Y
is
%
in.
shown
in
illustration
illustration
from
R
to
in
S and
a
in. at
point P.
and front as shown
V
in this
in illustration.
diagram are
in side of front part, as
welt.
shown
in
and stretch lower part of same and hold
the goods at upper part of V, thereby forcing a
chesty effect into front.
to 2.
Shape
The
of 1^4
The pockets shown
as follows
From
lapel
V
as
shown
in illustration
lapels are long
from
Y
to
and have the oval
In
X.
effect
same
on
174
all
other details the garment
as regulation.
is
exactly the
One Button
J^ovelty
175
Sack Coat
Three Button Novelty Sack Coat
Mea.s\ires a-s Follows:
Waist length
l/j^
in.
Waist
a
in.
Length
2^y4
in.
Seat
i7
ill.
Full length
29
in.
E.xcess over breast
Breast
36
in.
seat
to
To
systematical points
All
are
obtained in
DraLft
Take out a
regular
circumference, variation and measurcnT°nts.
The
special feature of this
is
H
to S.
Shape shoulder of back part
as
shown
From
tion
garment
from
from
4 to
R
Y
is
;)4
in.
from
that shoul-
to
in.,
thereby obtani-
Notch of
lapel
Take out
a
is
2
is
in.
12
in.
long.
and notch of
in illustra-
V
as
V
in side
is
1>4
shown by dashes
in
and stretch lower part of
illustration,
and shrink
upper part of V, thereby producing chest
as
collar
in.
to S.
Y
gorge of Ij^
Outside edge of lapel
Yx in.
Shape shoulder of front part
tration
\^ in
ing oval effect of lapel.
manner, including exaggeration, and subject to height,
der seams are raised
2 sizes
shown
in
illus-
Shape
lapel, front
and bottom,
as
shown
in illus-
X.
tration.
From L
to
is
J/2
waist measure.
Apply regular waist measure
3 to
V
and
Re sure
plus 3j^
in.
from
to 9.
176
to study lines
and curves of
in
in the coat.
this
garment.
Three Button Movelty Sack Coat
177
Three Button Hovelty Sack Coat
Measures as Follows:
Waist length
17>2
in.
Breast
To
seat
23^
in.
Waist
Full length
29>^
in.
Seat
38
34
...2,9
in.
{„'
m.
To Draft
V
All systematical points are obtained in the regular
manner, subject
tions,
to
height,
circumference, varia-
is
(]^,(-e
stretched and upper part
is
held in so as to pro-
^^e chesty effect.
measurements and exaggeration.
The
of the lapel,
monize with the hollowed out
A V
Special attention should be given to the shapes
garment are the shape
and welt pockets (which are made to har-
special features of this
is
taken out
lapel)
in the side,
;
and curves of
lapels, front
Also note that a
front and bottom.
and lower part of
V
is
and bottom.
taken out
produces the oval effect to the crease
178
in
gorge, which
line of lapel.
Manipulation of Front for Corpulent or Stout Figure
In sack or overcoat for corpulent or stout figures
there
is
abdomen.
tion
always a surplus length of edge below the
This can be remedied as shown in
by making a cut from center of armhole down
pocket from
to
illustra-
A.
1
to 2,
and another cut
in
to
pocket from 3
Fold surplus over according to illustration at
4,
making
the opening between 2 and 3
inch subject measures
]4,
more than normal
in.
for every
at waist.
The
dotted lines at side and bottom illustrate the shape of
side
and bottom after
this
operation
is
performed.
In
cutting cloth cut as per dotted lines at side and bottom
and take out goods
in
V
from
1
to 2
and 3
to 2.
Manipulation of Sack Coat Pattern
This illustration shows
effect in shoulders
;
also
how
from a regular pattern.
how
how
to
obtain a square
fit,
and one
at
much
also
back end of pocket.
full
and meas-
little
to the
full to
slightly.
regularly
drafted
In making, stretch the shoulder a trifle
V
as
is
taken out
in
In making, hold the back a
front part at side.
Draw
in
trifle
the back a
shoulder.
This
Also, hold in the front of armhole
will
give a smooth
fitting
back and
lines
and have
chesty effect.
For double breasted note dash
pattern.
where shaded.
buttons lj4
This will produce the square effect of shoulders.
effect take out a
in illustration.
before you sew in the sleeve and hold the back
Raise shoulder seam of back 34 i"Forward
front shoulder ]/?, in. and shape as per solid line, as
For chesty
V
spring of front part as
it
urements, proceed as follows for square shoulders
the
to
shows
Besides these
After having drafted pattern according to pro-
indicate
at
Add
shown
portions, height, circumference, variations
lines
back end of pocket and another
front end of pocket, as
to obtain a double breasted front.
(lotted
at the
to obtain a chesty effect
This
ISO
farther apart at chest than at waist.
will further increase the chesty
garment.
in side for closer
in.
appearance of the
Flaring of Overcoat
This
diagram explains itself, therefore
planation would hardly be necessary.
Make a slash from the bottom 'of the
an
ex-
Spread the back
back up to
about V/> inches above the
breast line and to armhole.
1
Vz
a slash in the front part,
mches above the breast
line
and
bottom about V/, inches and
Place this pattern upon
another paper and mark
and you will have an overcoat
that spreads
off.
Make
at
the front about 2 inches.
well
extending about
at
to the armhole.
coat.
181
the
bottom without changing the
balance of the
Novelty Top Coat
Mea.sures as Follows:
Waist length
18
in.
Waist
36
in.
Full length
34
in.
Seat
41
in.
Breast
40
in.
Excess circumference
To
All
systematical
points
are obtained
in
4
sizes
Dra^ft
part and the side seam of the back part together and
regular
manner, subject to height, circumference, variations,
reduce same two seams.
measurements and eyaggeration.
The
The armhole,
special feature of this
garment
is
that
it
tom
produced without side seams.
After having drafted pattern in regular
having cut
it
out,
vv^ay
shoulder, neckhole, front and bot-
is
will present the
appearance of the dotted
Cut the front and back part
and
paste the side seam of the front
result will be a top coat
182
in
lines.
one piece and the
without side seams.
Top Coat
J\louelty
183
Single Breasted
Box Overcoat
Measures as Follows:
Waist length
18
in.
Length
24
in.
Full length
45
in.
Breast
40
in.
Waist
36
in.
41
in.
to seat
Seat
Excess
in
circumference
4
sizes
To Draft
All systematical points are obtained in the regular
manner, subject
tions,
to
height, circumference, varia-
special feature of this
efTect of lapel
garment
is
the oval
and hollowed out outside edge of same.
The dotted
lines
illustrate
the
is
attached to armhole, and
manner
in
which
its
relation to the
armhole.
The pockets
measurements and exaggeration.
The
sleeve
The
are vertical.
sides are slightly shaped.
placed in this volume especially for
This diagram
its
outlines.
Therefore, study the lines and shape of same.
is
Single Breasted
185
Box Qvercoat
Shell for
Fur Coat
Measures as Follows:
Waist length
18
24
Seat length
in.
Waist
38
in.
in.
Seat
43
in.
Full length
48
in.
Breast
42
in.
To
AH
manner
IDroLft
Add
systematical points are obtained in the regular
for
exaggerated
height, circumference
The
Six sizes of exaggeration for circumference.
difference
Make
is
box
overcoat,
subject
and measurements.
Shape
as follows:
depth of scye J4
in.
a button stand of 5 in. all the
way down
the
front.
to
collar
and
lapel
as
shown
in
illustration,
and with these few changes, including depth of scye
lower than proportions
and exaggerations, you
or measures call for.
fur coat.
186
will
have a good
shell for a
Shell for
Fur Coat
Manipulation of Overcoat Pattern
This illustration shows manner of obtaining a
flar-
ing effect at the bottom of overcoat as well as a chesty
Having produced
effect of same.
ular
proportions,
height,
a pattern
circumference,
measurements and exaggerations,
from reg-
reshape side as shown by solid
in
opening from armhole down
will give the flare at the
is
For chesty
manner, as the square
placed represents the cloth.
in
which the
make
down
pocket.
down
flare.
to
the
to the
effect to the
\'
front end of pocket as
shown
in
illustration
at side
wide enough to make up
V
taken out
in front
end of pattern.
a cut in the cloth from armhole
Plait
goods from the pocket
This will leave an opening from armhole
Lay
garment, take out a
Shape around
bottom to the extent you wish the coat
to the pocket.
bottom.
il-
for the
pattern, then
This
lay patterns on the
and make a wedge
lustration
to the pocket.
wedge
variations,
at the
cloth in regular
Insert a
line.
to
down
the regular pattern on again and
For double breasted space buttons IjX
over chest than at waist.
Remember,
in.
)'0u use
wider
an ordi-
nary pattern and these manipulations are made on the
cloth.
Manipulation of Overcoat Pattern
Two
Button Novelty Frock Coat
r
Measures as
^
Follou's:
Natural waist
17
in.
Breast
38
in.
Fashionable waist
18J^
in.
Waist
34
in.
Length
37>4
in.
Seat
39
in.
To Draft
All systematical points are obtained in the regular
manner, subject
to
height, circumference,
one being
ing
skirt,
special feature of this
same 2
garment
is
in.
length of lapel and narrow side body at the
minus
i/i
Note
front closes with 2 buttons and button holes.
diagram.
190
slashes in the skirt
in.
above.
and spreading
each slash, a flaring effect will be given.
Width of
the flar-
waist.
The
waist seam and the other 5
By making two
variations
and measurements.
The
in the
side
body
at waist is J4
waist measure
in.
lines
and curves of the different parts of
Two
Button Novelty Frock Coat
191
Novelty
One Button Frock Coat
Measures as Follows:
Natural waist
1
Fashionable waist
Full length
in.
Breast
36
in.
183^
in.
Waist
32
in.
38
in.
Seat
37
in.
7
To Draft
All systematical points are obtained in the regular
manner, subject
to
height,
Width
circumference, variations
minus
A V
and measurements.
The
special features of this
garment are the low
opening and long oval lapel with scooped out
outside edge of
^
same and pockets
at side
effect
of side body at waist
is
34 waist
measure
in.
is
taken out in front
part
to
produce a
chesty effect.
The run
on
which are
when
finished with a welt.
of the front will allow vest to be
finished.
In other details the diagram explains
X92
shown
itself.
Novelty
One Button Frock Coat
193
Three Button Alooelty Frock Coat
Measures as Follows:
Natural waist
1/
in.
Breast
38
Fashionable waist
18>4
in.
Waist
34
in
Full length
39
in.
Seat
40
in
To
Draft
.
All systematical
manner, subject
points
to height,
regular
The
circumference, variations,
!>ieasure
are obtained
measurements and exaggeration.
of this garment
is
The
in
minus
from
out as
seam
hollowed out
shown
The long
V
of 1J4
illustration.
oval lapel
in. in
is
obtained by taking out a
on
gorge.
shown
slant, also
form with
a
V
at front
in.
V
on side of front part running up
Take out
take out Yz
in
end of
flaj)
of
^j,
in.
y^
is
narrow, obtained by
Special
in.
bottom, also shape of
two Vs being taken out the front part from waist
up, as
body
attention
%
waist
should be
given to the run of the front, as well as that of the
special feature
the chesty effect produced
side
in.
flaps.
See they are hollowed
in illustration so as to
lapel.
The
conform with the
breast pocket,
placed
has the same oval shape so as to con-
lapel.
Too much study cannot be given
and
vi'hile
to
the
lines,
shapes and curves of the various parts of a garment
from waist seam.
of this kind.
191
Three Button Movelty Frock Coat
195
Double Breasted Novelty Frock Coat
Measures as Follows:
Natural waist
17
in.
Breast
38
in.
Fashionable waist
18>^
in.
Waist
34
in.
Full length
43
in.
Seat
39
in.
To Draft
All systematical points
manner, subject
to
and measurements,
The
^
The
14,
seat
obtained
in
as
shown
in system.
garment
special feature of this
which
is
^
is
the
narrow
of waist measure
illustration
U
to 17
is
obtained by using
and hollowing top of
shows
flat
braided edges and lap-
are silk faced to notch.
front closes with 2 buttons and there are
two
button holes on lapel.
Width
of lapel at bottom
top button hole
special width of skirt
skirt seam.
els
The
in.
measure from
The
regular
height, circumference, variations,
side body, the width of
minus
are
is
placed
it
is
is 2j/2
3^-2
in.
in.
and where the
wide.
Special attention should be paid to the lines and
curves of this draft.
Double Breasted Novelty Frock Coat
197
Novelty Full Dress Coat
Measures as Follows:
Natural waist
17
in.
Breast
36
in.
Fashionable waist
18 1^
in.
Waist
32
in.
Full length
41
in.
Seat
37
in.
To Draft
All systematical ])oints are obtained in the
manner
same
so as to obtain slickness in side and length in front
part, for
as for regular full dress coat, subject to height,
Side body
circumference, variations and measurements.
The
and
special feature of this
garment
is
measure minus
that front
one piece, consequently there
skirt are cut in
seam necessary
Shape
is
to join front part
and
skirt.
is
narrow, and obtained by 34 waist
-y^
in.
lapel, front
no
and front of
skirt as
shown
in
illustration.
strap or lapel seam.
In the reproduction of this kind of coat
A V
of 3
and another
V
in. is
is
also one in skirt.
Stretch
V
taken out in crease line of lapel
taken out
(
in front part at point
where shaded
would
be well to have the collar and lapels faced to the edge
10
with
See point 10).
in front part
it
silk.
Special study should be given to the lines and
at point 10
curves of this diagram.
198
J\lovelty
Full Dress Coat
199
Novelty Double Breasted }iewmarket Coat
Measures as Follows:
Natural waist
17
in.
Breast
40
in.
Fashionable waist
19
in.
Waist
36
in.
Full length
49
in.
Seat
41
in.
Excess 3 sizes over chest.
To Draft
AH
manner.
line
This draft
may
urements according
The
market
be subjected to height and meas-
and
regfular
in
O.
and front
shown by
New-
The
as follows
No seam
to
of back from
Width
of side body
lapel
V
is
to 8 is
Y\
j5/^
The
amount
line
V
is
Shape
waist measure minus
1/6 breast measure plus
li/.
front.
in.
is
M/i
26
to
slashes in
as the difference between the squared
down
slash 2
in.
obtained by applying waist measure
In
all
is
200
lapel
After
same
taken out at button stand
line
in side of front part, as
in.
wide
at chest
and
2j/2 in. at
is
2^
in.
and front
as
shown by
illustration.
front part and skirt are cut in one piece at
the
and the
V
breast measure.
The
W
W.j
waist.
inch.
to
line at
middle of back.
Width
N
See distance between squared down
illustration.
From P
%
(
Also, take out another
to system.
difference between this coat
is
L
from
systematical points are obtained in the usual
same
laying
up
regular
as per dotted lines
skirt
make four
and spread each
other details the diagram explains
itself.
Movelty Double Breasted Newmarket Coat
J
-L.
s_
201
Collars
and Lapels
Different Styles of
Makeup
of Sleeves
Collars
and
Lapels
Different Styles
of
Makeup
of Sleeves
K
203
Flaring of Skirt
The
obtain a
dotted line indicates a normal skirt front.
full flare at
balance of the
ate skirt
skirt,
(Two
good
full skirt.)
mark
oflf
to all
when
the bottom without changing the
make four
slashes in a proportion-
and spread the same as much as you wish
the bottom.
and you
To
at
inches in each slash will give a
Place this upon another paper and
will obtain the desired result.
frock coats should be treated in this
a proportionate skirt
is
204
not desired.
Skirts
manner
Vests
SHOWING NOVEL DESIGNS IN REGULAR
AND FANCY VESTS
205
Novelty Vest
The above
draft illustrates a single breasted three-button novelty vest.
Measures as Follows:
Waist length
17
in.
Opening
16
in.
Breast
36
in.
Full length
26>4
in.
Waist
i2
in.
Length
22
in.
to side
To Draft
AH
systematical points are
obtained in
Special attention should be given to placing the
regular
pockets as shown in illustration.
manner, subject to height, circumference, variations
This diagram has been specially inserted with the
and measurements.
view of showing a pattern of vest front suitable for
The
special feature of this vest
is
the shaping of
fancy material, such as brocaded velvet or novelties,
the opening, front
and bottom.
and while the edges
There
is
pockets have
only one pocket at each side and these
not
flaps.
terial
206
necessary
to
in this instance are braided,
have them
so,
provided the
it
is
ma-
would make up a good edge without braiding.
Double Breasted Vest
Measures as Follows:
Waist length
17
in.
Opening
15
in.
Breast
36
in.
Full length
26
in.
Waist
32
in.
Length
22
in.
To
Dra.ft
The buttons
All systematical points are obtained in the regular
manner, subject
to side
to height, circumference, variations
in.
apart at top and i]^
In connection with this diagram
and measurements.
illustration
The
are 7
special feature of this vest
is
It
is
is
well to note
V
close to button stand
and width of button stand.
will be
and reducing length
noted that the crease line of opening
produced with oval
lapel
it is
of manipulation of front part of double
the shaping of
breasted vest, as by cutting a
the lapels
in.
apart at bottom.
effect
tion,
and the outside edge ot
it is
at opening, as
shown
possible to obtain not only a chestv
also a closer opening without the aid of too
absolutely straight.
ing in with the stay tape.
207
in illustraefifect,
much
but
hold.
•
Single Breasted Novelty Vest
Measures as
Follo\vs:
Waist length
17
in.
Opening
g j.g^g^
36
in.
yy^jjgj.
32
in.
To
14
in.
Full length
26
in.
Length
22
in.
The
tom up
is
special feature of this vest
produced with
lar.
a turn
down
lapel
is
By
that the opening
and standing
col-
front has one pocket on each side with flaps.
A V
manner, subject to height, circumference, variations
The
to side
DraLft
All systematical points are obtained in the regular
and measurements.
".
way
to
is
taken out
in the front
part from the bot-
so as to produce a chesty effect.
careful study of this diagram and noting the
the
opening
produce
is
made
this novelty vest.
the
student will be able
Motch Collar Novelty Vest
I
t
Measures as Follows:
Waist length
17
in.
Opening
16
in.
Breast
36
in.
Full length
26>4
in.
Waist
32
in.
Length
22
in.
to side
To Draft
Flaps shaped as shown in illustration.
All systematical points are obtained in the regular
manner, subject to height,
circumference,
A V
variation
and measurement.
The
shape of
special
is
taken out
in
front part so as to give
smoothness to the waist and a chesty
feature of this
collar, front
vest
is
and bottom of front
the
effect.
artistic
Special attention should be given to the oval efpart.
fect of
opening, shape of collar, front and bottom, as
ton holes, and has one pocket on each side of front
effects
and
part.
all
This vest front closes with four buttons and but-
2oy
lines of this character
good and
artistic tailors.
should be used by
Full Dress Vest
Measures as Follows:
Waist length
17
in.
Opening
Breast
36
in.
I'\ill
Waist
32
in.
Length
All
systematical
manner, subject
to
points are
height,
obtained in
To
Dra^ft
regular
vest,
length
to side
and the
V
in front part taken out
smoothness to the waist and the chesty
circumference, variations
21
in.
26y2
in.
22
in.
which gives
effect.
Particularly note shape of opening, collar, cor-
and measurements.
ners and bottom of front part, as graceful lines of
The
trates a
special
feature of this vest
is
that
V-shaped opening, the long points
it
illus-
this
kind
may
noveltv vests.
at front of
210
be incorporated in the production of
CO
o o
<u
.1/
CO
'.Q
t o "
-a
c
3
3
pa
O
z
M
3
<
B
C^
&
O
—
"o -B
s
o
u
o
W2
£
O^ a
2
^
—
Ui
I
o
-C
h
S
^
B
o c
o ^
1c
I
<
O
U
I
a o
O
Q
.-
O Z
3
H O c
(D
be
n
Ui
in
<u
I
s'
3
-
,-
T3 '3
<
O
u
r;
o
tj
^^
Cloth Cutting
While the systems published are numerous, the authors seem
of patterns there
is
another important part of tailoring,
and material has been wasted
in gaining this
viz.
:
Lay-outs and cloth cutting.
knowledge, and realizing this
volume therefore places before the student a few layouts so as
to give
ting, as well as in the placing of outlets, pockets, buttons, etc., as
this connection
collars, etc.
we have
to forget that besides the production
fact,
him a good
shown
Much
time
the author of this
start in cloth cut-
in illustrations of layouts.
In
also illustrated the necessary fittings, such as facings, flaps, facings for pockets,
Careful study of the illustrations and trials from regular patterns on cloth will be found
not only a great saving of labor, but of great practical value to the student.
213
215
Lays for Trousers
l.PiY
FOR TROUSERS
Seat, 40 in.; 32 in. inseam.
114 yards, 55
in.
Amount
wide.
of material required,
Fold, out.
LAY FOR STOUT MEN'S TROUSERS
(Back Part Reversed.)
Seat, 45 in; 32 in. inseam.
Xy^ yards, 55
in.
Amount
wide.
of material required,
Fold, out.
Lays for Vests
o
LAY FOR DOUBLE BREASTED VEST
Breast, 38
in.
Amount
of material required, Vi yard, single
width, doubled over.
Fold,
in.
LAY FOR NOTCH COLLAR VEST
Breast, 38
in.
% yard, single
Amount of material required,
width, doubled over. Fold, in.
Fittings
For Coats,
The diagrams
Vests, Trousers
necessary for Coats, Vests and Trousers, such as front
in this section illustrate the fittings
facing, pocket facing, welts, flaps,
and necessary
and Overcoats
outlets.
FITTINGS FOR OVERCOAT
FITTINGS FOR SACK COAT.
While the undercollar
details the
is
illustrated,
it
is
customary to cut
diagrams explain themselves.
218
it
from special undercollar
cloth.
In
all
other
Fittings for
Frock Coat, Vests and Trousers
BACK PART OF VEST
FRONT PART OF VEST
FRONT PART OF FROCK COAT
TROUSERS
219
PRACTICAL TAILORING SECTION
INCLUDING
How
How
How
How
to
Make
to
Try-on
a Try-on
to Instruct the
to
Make
Coats^ Vests
and Trousers
221
Maker
Practical Tailoring
There
it
is
only one kind of tailoring which can be recognized, and that
pleasant in an establishment
good
clothes
the kind that
in
money and
material, style, symmetry,
To my
fit
idea a good tailor
am aware
much an
as
is
of the fact that there
ommend. Undoubtedly you have heard
his
back when the garment
This class of tailoring
five to
money
the
the best of everything that
much
brought
it.
to
desired
is
It is
is
him
;
makes the
the kind that
is
it
the kind that creates
detrimental to the trade and
satisfied
is
garment,
ideal
not his sewing alone that pro-
I
could not possibly rec-
down
cutter feel the chills creep
argument between the customer
one hundred per cent
man who
profit to a
merchant who deals
the
The bargain-hunting customer
sharks.
comparisons he
in
may
it
sale.
ranked
be
soon find that he has paid from seventy-
will
does transient tailoring business, while the high-priced
by paying more for a
that
see
clearly
will
to
his artistic skill.
is
it
;
It
another kind of tailoring, but that
is
of
the cutter.
artist as
dealer charges only from thirty-three and one-third to forty per cent profit.
these
makes up an
he
In establishments that handle this grade of work there are always misfits for
and the producer.
among
is
asked, because
price
mind not
his
and the best possible make.
duces the smoothness, beauty and effect so
I
make up
puts on his suit to
the future for his clothes, and to willingly pay the
that he has received full value for his
makes
the kind which
by persons of good taste and wearers of
appreciated
is
new customer when he
the kind that causes a
;
go elsewhere
;
is
he
suit,
is
By showing your customer
a gainer both in a financial
and practical way.
These e.xplanations
illustrate
time
I
and explain the manner
how
am
I
First,
in
may
find necessary in order that I
in
which
I
used to
make
be clearly understood in
coats,
vests
my
and trousers, and
attempt to
at
having them made now.
cutting the patterns they should be carefull}'
be those of proportions, variations and direct measures,
tern should be incorporated
when
necessary.
The height
The
prepared.
of the subject should be given consideration so
and proportionate length,
words, the cutter should not only apply his technical knowledge and
ability,
Before laying the pattern on the
all
but also analyze his measures,
cloth, be sure that
the
cloth
isfactory from an economical as well as practical point of view.
well sharpened, so that in chalking around
is
Carefully
mark your
the proper
ticket
pockets, placing of buttons, etc.
manner and wrapped
and the cutter
is
it
up
in
fact,
in
;
circumstances.
has been properly
that the lay of the pattern conforms with the run of the grain of the cloth.
the chalk
In other
etc.
inasmuch as some of them are useless and others may have been taken incorrectly or carelessly
must be carefully prepared under
should
applied
principles
and exaggerations and manipulations of pat-
as to stipulate the exaggeration and to obtain the proper depth
patterns
same
the
223
it
Allow the regulation
pattern
Then chop
the canvas, tie
then ready for the next.
the
Be sure
out.
Notice
shrunk.
that the lay
outlets.
is
sat-
See that
you obtain good and clean
lines.
After having trimmed the suit in
up with a stay tape and attach the maker's
Hotv
Having
Make
to
stands, etc., proceed
pockets, button
Having
diagram
cut
Take out
1.
down
der point
D
point
V
Next prepare
make
of the
C
mind
Cover the edges
should
be
Measure down seven inches
Sew up
diagram
Have
2.
V
the
a cut at point E,
making
V
of
placing a
on diagram
2.
the horsehair run straight across the
and placing another piece
point, thereby
B by
illustration
in
join the
to
Insert a
taken out at point
shown
A, bear-
at point
you are readv
over edge to edge.
stitch
to edge, as
same amount
Now
with the front.
from edge
the foundation of
Place the straight edge from the shoul-
B.
one inch below the scye depth.
in illustration.
stitch
is
it.
on under side and cross
and cross
same
canvas
a cut in shoulder as illustrated by point D,
of an inch opening at angle and the
the hair cloth as indicated in
at
such as outlets,
coat,
that the canvas
slashes in the haircloth where indicated in the illustration, and
running up and down,
tion.
make
illustration at point
strip of stay linen
by making
the shoulder,
%
preparing
in
regulation,
Place point
and sew up same as shown
piece of linen on the under side
shoulder:
same
as in
and take out
opening by placing a
3-4 in. at
cannot be too careful
the straight line should always run
that
niiiiil
the
])arts
understood that the
is
well to bear in
It is
canvas according to
to center of chest.
for the average size
ing in
tailor
the
different
It
should be cut so that the threads will run straight with the front,
it
to give steadiness to the front of the coat.
garment and the
the
in
cut the canvas.
to
thoroughly shrunk before cutting and
the
marks
finished putting in the thread
On
a Try
fit
it
on the canvas
in
of haircloth, with the horsehair
shown
a spring to the shoulder, as
in
illustra-
or some thin material, and be sure that the hair-
of the haircloth with silesia,
cloth and canvas harmonize in the shoulders.
Ne.xt
in
examine diagram
order
covered with one sheet of wadding
Padding
flannel.
Do
.3.
3,
which shows the canvas
work
too thick and does not
is
not pad too close, nor take too long stitches, as one
too close
it
would make the canvas and breast too
chest,
Then pad
so well.
and
this
covered
then
with
the canvas as indicated in diagram
way would
be as bad as the other.
and would not produce fhe smooth
stiff,
having been
the haircloth
com]:)leted,
and over the
the shoulder
in
If i>adde<l
effect desired.
Therefore, do not pad too close nor pull the stitches too hard.
Next, press the canvas thoroughly into shape
the shoulder a
trifle
at the place
where the
V
;
is
stretch to the neckhole near the shoulder point.
also press the fore part of the coat into shape.
Press in the breast of the coat and press the coat over
thoroughly, and be sure the edges are inclined to be short
armhole slightly
front of scye.
at
conform with each
many
that
is
I
not
is
am
is
I
some
given no time to put
would misplace them.
in the habit
is
it
regular
more
tailors
pressing as to
is
generally torn
pockets
for
fear
to think
is
to
produce
try-on
that in
that with a cutter
who knows how
On
away from
the other hand,
the front
is
basted under for the second time, the
do not seem
a sack coat
in
or overcoat
who
difificulties
in
are
rea-
they would have
takes careless measures
of this kind would arise,
jiatterns properly, including the
way
successful by having his pockets in for try-on, because the canvas
from the canvas and nine times out of ten the cloth
is
in the
many tailoring establishments there
not make the try-on.
Still another
In
coaimaker does
While admitting
then basted under the front for good.
the canvas
in
Press
not practiced to a great extent for the reason that
of paying attention to details of the customer,
of the opinion that a careful cutter
try-on, the canvas
have the pockets put
in the pockets.
cutters are afraid of misplacing the
of placing the pockets, will be far
is
and front part are so shaped
the canvas
will say that I prefer to
of the fact that
men, consequently the
try-on
alterations that
and
am aware
cases the tailor
special
son
I
around the front and the bottom.
all
other.
Before going further
before try-on.
Be sure
Stretch
inserted in the canvas, or point D, and give a slight
part
if
are not put in before the
and the front part pressed over separate
stretched
front
the pockets
more or
part
less in different directions.
and canvas do not harmonize.
necessary that the cloth and canvas should harmonize and that
224
it
When
Many
must be
Canvas for Coat
DIAGRAM
225
1.
DIAGRAM
exactly as
to
it
was when
DIAGRAM
2.
tried on, in order to procure
be sure that the front part
canvas
patterns a cutter produces or
Therefore, for the above reasons
good before
the
garment
In starting to
carefully
it
is
Extraordinary care should be taken
a well-known fact that the canvas leads
in absolute
harmony, for
would dislocate the shoulder and throw the coat out of balance.
it
how good
for
results.
harmonize, as
Therefore, the front part and canvas must be
the cloth.
monize
and
good
mark
make
the same.
is
I
how
3.
It
if
they did not har-
would make no difference
carefully the coat has been tried on.
favor having the pockets put in and the canvas basted under
tried on.
pockets, see that they are put in the right place and of the proper size, and
Next proceed
to
mark
out the flaps to correspond with the length and width of
Cut cmt the
the pocket.
goods toward the lining and
the corners.
in
stitched, stitch the
Next baste
/7/aj».
rather snug, especially in
is
the flaps.
row before pressing
first
Having completed and pressed
wrong
Turn them
and
double
if
mark from
the flaps,
the
where the
side of the front part
Baste a strip of goods, well-stayed, to the right side of the lower part of the
Then sew through
Next examine diagram B. which shows
diagram A.
it
turn the right side of the
Next sew around
a strip of stay on the
pocket and baste the flap to the upper part.
in
around the
Stitch
their edges.
side the width desired.
Now
around.
basting the lining under the flaps see that
second row after pressing.
pockets are to be placed.
shown
all
Particular care should be exercised in this respect.
and carefully baste around
wrong
allowing sufficient for seams
flaps,
the flap as well as the
stayed strip, as
the staying of the pocket
from the wrong
a.
Di^o-D.
^
side,
where the pocket has been cut open between the two rows of
also
each side and illustrates the manner
a turn for the finish.
Then turn
Next press out
the stayed strip of
the edges of the coat.
in
stitching,
which the ends of the pockets should be cut
the
seam
of the lower part of the pocket
stitch
same
as
shown
in
in
as
you intend
upper part.
flap.
Make
to the
the pocket the desired depth.
first
diagram C.
to the
upper part,
less
the flap.
See diagram D, pocket completed.
make your
front part and press out the seam.
foregoing explanation,
to stitch
Baste a stay from the back end of the pocket up to the armhole. Stitch through the
For regulation welt pocket,
it
flap.
Face the under side of the pocket
which now appears on the lower part on diagram C, with a piece of lining and baste same
covering up the
order to obtain
and press down the
goods over and mark the semi-welt the same width
Turn and
leaving a seam on
welt properly.
In details this pocket
Mark
is
off the
width of same.
made very much
Press the pockets thoroughly and
see
that
you
like the
have
one
Sew
in the
everything
Lay
and the canvas harmonize in every detail. Then
See that your
start to baste, as indicated in diagram E, from 1 to 2, 1 to 3, 3 to 4, 4 to 2, 6 to 7 and 7 to 2.
front part is good and smooth over the canvas in the shoulder, having the canvas rather full under the front
part between 1 and 2, 1 and 3, 3 and 4, 4 and 2 and 6 and 7, and push the goods back a little from the
edge from 7 to 2, so as to give the front edge a tendency to turn in. Next turn the ends of your pocket
and tack same, and in tacking your pocket, do so with accuracy and be sure to have the same good and
The canvas is then basted under and the pocket
clean, as well as firm, so that it can withstand the strain.
Diagram F illustrates the canvas from the wrong side after it is
presents a complete appearance.
basted under the front part, as well as the pocket completed, and the stay from the pocket to the armThe diagram explains itself.
hole and front end of pocket tacked to the canvas.
Next baste your side seams together. Hold your back a trifle full to the front part just below the
armhole.
Baste together the back seam even all the way down. Turn all seams and rebaste them. Press
smooth and get ready
to baste the canvas under.
the front part over the same.
Be sure
Place the canvas right before you on the bench.
that the front part
the seams, also the front parts and turn in the edges
give the back about
^
in.
all
around.
Baste your shoulder seams together and
fullness.
Use special under collar cloth for the collar. The canvas for the collar should be cut so that it
runs with the thread in the front of collar and on the bias in the back. The collar should not be stretched
much; hardly anything on the outside, but stretch it some on the inside, so as to conform with the stand.
Then
crease it over. In basting on the collar, see that you hold it good and full near the shoulder seam
on the front part, and rather short in the gorge and even in the back.
Baste up your sleeves. Se sure that they do not twist in any way and in basting them into the armhole, see that they are properly placed and have the proper amount of fullness.
Give the whole coat a good smoothing over with the press iron. Trim off uneven outlets, canvas or
anything that does not look clean and your coat is ready for try-on.
Remember that unless the try-on
has been properly prepared, it is practically of no value, as the defects of the garment can only be traced
in a
coat that
is
properly basted.
228
Hotv
Before going into the details of
how
Try On
to
to try on,
is
advisable that in trying on a garment you do
it
many cooks
spoil the broth,"
it
is
it
handle
to
without the assistance of anybody
Most
else.
Apart from the truism
certainly acts as a detriment to the cutter in obtaining the cus-
tomer's confidence in his ability as a cutter and
completed and sent home,
how
most important and very trying ordeal.
a
is
customers have a decided objection to more than one person trying on a garment.
"that too
to the fact that be-
very essential to understand
is
it
the customer at the time of the try-on, inasmuch as the try-on
It
your attention
will first direct
I
good try-on man and draper of garments,
side being a
The
fitter.
result
that often after a
is
returned to the firm with the words, "the garment
is
garment has been
not altogether what
I
You wonder why it is sent back. You look the garment over carefully and you cannot detect
any material defects. You send word to the customer, asking him to call, so that you may slip on the
garment. The customer calls. You inspect the garment and find it to be good. In fact, as good a garexpected."
ment
as
you anticipated when you
He
questions about this or that.
say that the garment
it
to
and
fit
style
when
am
tried on,
There was someone
to direct
you
in
He
so.
asks
it
order to produce the proper
these difficulties orig-
suggestions to you as to the
style, etc.
pressing the customer with their broad experiences in the trade
But these impressions generally prove a
is
connected with the estab-
for granted that you were incapable and
personally acquainted with merchant tailors, managers and salesmen
style.
fact
else
who no doubt made some
of the garment, and the customer simply took
must have some one
I
garment was
the
The
doubt your judgment.
inated because you did not try on the garment alone.
lishment present
customer does not seem to think
on, but the
and he seems
right
all
is
tried
seems to hesitate as to whether you are telling him the truth when you
well
as
who
as
and
financial loss to the firm
I
mention
this
as
are very desirous of imas creators of
their ability
in
inasmuch
many
instances these in-
truders display rather their want of knowledge, practical experience and fitness as creators.
When
trying on a garment the cutter should under
demeanor, and by
all
means
listen to the
ligent inquiries that his sole
aim
is
to please.
customer notice that you are nervous, he
circumstances maintain a calm and collected
all
customer's requirements in a respectful manner, showing by
Overcome any semblance
will lose faith in
you
of
nervousness,
for
For
reason
a
this
if
I
would advise you
will attract his attention, a pretty picture
you are making your inspection.
here?"
picture
all
and
to select a certain place
etc.
where you can
I
By drawing
will call his attention
and
it
will
on the garment and give
the
or anything that will occupy his
to
saying,
this,
it
"How
do you
mind while
this
like
prettv
customer's attention to this attraction he will momentarily forget
He
about the try-on and his interests will be centered elsewhere.
attitude,
slip
front of the
his usual one.
This place should be so arranged that the customer will be confronted with
preliminary examination.
something which
in
customer sees himself he generally assumes an attitude different from
the
should the
for
at once.
Before slipping the basted garment on the customer contrive that he does not stand
mirror,
intel-
then be possible for you to give
the
w'ill
assume
his
regular position
garment a thorough inspection
as
well
as
draping.
garment
First, be sure the
difficulties
being
may
be traced.
Turn
is
placed in proper position, as
to the front, pin
it
together and
from want of
be sure
to
notice
this
that
one-half of the
both
sides
are
fitted alike.
Notice the length and width and hang of the sleeve.
and
is
it
rip out
your
Make
necessary markings
for
alterations
sleeve.
Place your hands under the arms of the customer, thereby ascertaining whether the armhole
deep or too shallow, or
eral defects of the
is
in a
is
too
methodical manner to inspect the gen-
garment.
Smooth your hand
bottom of scye
has the proper depth, and proceed
if it
correct.
across the shoulder and see
Then pass on
to the front
229
if
your back balance from the back of neck to the
and observe the
fit
from the shoulder.
Does the
garment balance correctly?
If
not,
unrip the collar, turn to the back, arrange a perfect balance, and
place a pin at the back of neck.
Next open
Turn
back.
tice
what
the right shoulder and pin
to the left shoulder
effect this
together so that you obtain the proper balance front and
Observe the
Next pass again
and perform the same operation.
changing of shoulder had on the waist and
tit
of the back of armhple and see that
it
is
in
hole, also
mark
mark
the same.
Next mark
the shoulder
See that any change you
is
in
such a
in
seams and neck
may make
is
properly
harmony with
Notice the position of neck point and pin the collar on to the garment
proper height, length and run.
to the
back and no-
See that you have made proper
seat.
Notice the run of the side seams and that the garment
provision for the hips.
blades.
it
hole.
fitted
over the
the curve of the back.
way
that you obtain the
Carefully inspect the arm-
harmony with
all
other points.
Then
the front of the garment.
At
inquire
if
this point
I
would
he wishes to
politely request the
make any
customer to step before the mirror and when there would
suggestions, regarding either style or
the customer, be sure that he does not lead
you on
to
make
fit.
In deciding such matters with
alterations such as
would change the balance
or spoil the garment, but at the same time defer to his opinion.
Ne.xt unpin and take off the garment.
Show
the customer courtesy by helping
him
to redress
and
in
parting bid him a friendly "good-day."
As soon
Too much
as you can find time after the customer has
care cannot be exercised in this respect.
It is
gone be sure to re-mark the different
well to
slow aspires by just degrees to reach perfection's height." and
fitting as well as stylish
garment.
230
it
remember
is
that
"Nature
in
alterations.
her productions
the smaller details that count in a well
Hoiv
Having under
the head of
"Making
"How
of Try-On," and also
to
handling the customer so that you beget confidence and respect
sity of
tempt to explain how
mind
Maker
Instruct the
to
maker of
instruct the
I
good
of the student that to obtain
between the cutter and the journeyman
deficient in
that he select such jours, to
ings, for the reason that
is
and probably also
style
do
it
his
work
his
to order chiefly
of sartorialism.
Further, the cutter should by
his help as well,
by good,
is
it
upon him the
be accepted.
On
manner, but
in a
in
the
all
tailor
and the
ideas and teachings.
may
would
is
be
say teach-
I
get
Rememthe
small
for his par-
necessarv that the cutter and tailor should
other
mechanical
for the
them
means endeavor
branches
in their respective
good
to create a
Tn giving the tailor his work,
instructed and that this
qualifications
is
feeling
among
him
luider-
let
a matter of business,
fact that unless these details are carried out to the letter the
work
will
and
not
the other hand, these instructions and rules should not be given in a hastv or impatient
way
calculated to give the proper impression and have the desired efTect.
and pinned up the shoulders, omitted
simply giving the tailor the coat, telling him to
Now,
possible
manner he had
cutters who, after they had tried on the coat
right.
Unless there
combination
reason that he
positions occupied by
for
sensible, practicable instructions.
must be executed
further impress
exist.
to obtain clothes that are suitable
In view of these facts,
style.
possessed by them as individuals, as well as
it
own
the
for
not only be friends, but should also recognize and respect each
stand that
individual garment, as well as
Let me, therefore, suggest to the cutter
in quality.
most careful manner, as well as
and up-to-date
build
ticular
a
made
at-
understanding
perfect
a
productions of this
harmony with
are are in
now make an
necessary to instruct the tailor as to particulars of each garment.
ber that your customer has his clothes
details attended to in
making of each
tailor the
will
I
the neces-
take this opportunity to impress upon the
I
end there must exist
to the
as
tailor,
journeyman
the cutter and the
unharmonious and
results in the
him,
in
good feeling between these two individuals should
to the absolute necessity that
harmony between
garment and
the
Try On," dwelt upon
this is not the
tailor
way
may do
to obtain
good
make
up
it
as
The
results.
the best he can, but the fact
is
was pinned and
it
cutter then places
out the pins,
to take
that
all
have seen
I
it
would be
all
responsibility on the
he has no conception as to the customer's
requirements for this particular garment.
I
have noted the results from such deficient handling of garments which have by no means been
satisfactory either as to
or as to style, and have seen that these lame instructions to the tailor act
fit
as a creator of
arguments between the cutter and the
alterations that
had the
tailor
made
it
the other hand, the tailor will say that he
making.
He
will
as
tailor.
was pinned,
it
made
it
as
it
cutter did not say anything further about this or that,
I
have seen some very good
argument and because the
the tailor to
cutter will say after he has had to
certainly
would have been
was pinned, but had no
add that he has done the best he could
had learned years ago.
it
The
in
he
marking
made
it
it
off,
in detail unless
right
;
definite instructions as to the
but
tailors quit their positions
in
view of the fact that the
on account of
It is
this
kind of
unreasonable to expect
he has been instructed for each particular garment.
231
while, on
according to the regulation that he
cutter has not been careful in his instructions.
know everything
all
make
shoiiW unpin
will say right here that the cutter
I
attends to these details, the tailor
fact, unless the cutter
displayed by him, and the truth
is
tions such as shoulders, armholes,
carefully,
etc.,
the
carefully
alterations
in
;
impressed with the lack of knowledge
he
will
and capable cutter always marks
that the careful, practical
fronts,
mark
i^arment,
the
altera-
his
where changes may be needed, and makes notes
of details as well.
Then, again,
throw
the
to
intd his
it
garment
I
have seen the cutter
who
usual corner and probably
hands the bundle
out, he simply
made
has
let
etc.. tie
up the garment
When
week or two.
there for a
lie
it
markings,
his
he
in a bundle,
ready to give
is
any further instructions than to
to the tailor without
him
tell
have the garment completed by a certain time.
This
is
also
wrong
him make the garment,
I
showing him
alteration,
my
in
In place of simply giving the tailor the bundle and telling
estimation.
would untie the bundle and with the
why
an intelligent manner the reasons
in
tailor
I
would go over every
I
had made these
of
detail
alterations.
I
would
inform him of the customer's disproportions and attitude and give him comprehensive instructions as to
the style of the particular garment.
would give the
The
and the
collar
lapels
tailor a special pattern to follow in this
the collar required,
how
hang
to
the sleeves.
ward or backward and give reasons
would
I
therefor.
should
respect.
"Move
to
it
that the collar
the back
is
him whether they should hang normal,
instruct
give reasons therefor.
or
why you do
down
this is
state reason for
do
I
"Mr
move
the back
Jones stoops quite a
down
bit
so or so much," and
much and add
so and so
much
to
"See about and crook the shoulder so or so much," and
this or that for creating this or that effect.
same, so and so
for-
brought forward so and so much."
are
"Further, take out the front of armhole so and so
Further,
so.
sleeves
as to avoid this or that, or
the width of back," and give reasons therefor.
state
I
For example, "This customer stands erect and requires a
not too long and that the
up so and so much
delineated.
would inform him about the length of
I
longer collar, and have the sleeve hang backward to this or that extent," or
and see
thoroughly
be
also
much
fullness
is
moving your
In
up
collar
necessary there or there, and give reasons
why
done, or do this or that so as to create a square shoulder effect, or do this or that so as to obtain
the oval lapel.
Further follow
this
here
line
familiarize your tailors with
(indicating)
stipulated.
Then
Tell
state
him
having told him of
geniality
all
that the
every
it
to
detail.
If
you think the
your measure
ticket
garment must be well made,
it
tailor is forgetful write
and impress upon
finished,
your time when the garment must be completed and
necessary that he shall have
at the
in
the directions on an extra slip of paper, pin
to forget anything.
In fact,
the details necessary in order to obtain a well balanced, fitting and stylish
all
garment, and be sure that they understand you
down
for your front, place your buttons so or so.
let
his
mind not
and have the
style
him understand
that
completed and brought to you for an examination by that time.
these details give
him
a
few cheerful words, something that
and sympathy, and bid him good-bye.
same time you must handle them
Remember
that
you must be friendly
so that they will respect you.
232
will display
to
your
you
it
is
After
your contailors
and
Coat Making
tions
Upon getting the coat back from try-on the tailor should thoroughly examine the details of instrucreceived from the cutter, smooth out the various parts of the garment and proceed to put in new
threadmarks where alterations have been marked.
In sewing up the seams, instructions as to fullness,
etc.,
Having sewed up the side seams and padded your lapels, press the front
into shape and re-mark the front as previously marked by the cutter. Lay on the lapel pattern given you
by the cutter and mark around it carefully, then cut away all unnecessary material.
Trim away your
canvas 34 in- from the edges. Next fit out your facing and lining. Sew on the lining to the facing and
put in your inside breast pocket.
Having completed the linings, baste on stay tape around the front.
Be sure that you hold it sufficiently short, but not too much, as one way is as bad as the other. After
should be followed to the
letter.
down
the stay tape on both sides, press over the fronts thoroughly. Also press the facing,
and lining and have the facing and lining so arranged that it harmonizes with the
front part.
Next lay the lining on the bench wrong side down. Lay the front part above same with
the right side to the lining and baste as indicated in diagram G. See that you have the facing sufficiently
having
felled
inside breast pocket
Baste so that the lower corner will turn inward, and in basting around the lapel
sufficient fullness on the facing side.
Then press from facing side, so that it will be
long, but not too long.
be sure that there
smooth.
Mark
is
with the chalk the front edge where you are to sew.
Next sew around the edge where
marked.
seam of edge thoroughly; trim seam down to yi in. on each side. Then turn
down. In basting down be sure to hold the seam even in the middle of the edge,
so that in stitching you are sure to catch both sides.
See edge as illustrated in diagram H.
Next,
provide for sufficient fullness of lapel.
Attach your inside breast pocket to canvas.
Baste from the
wrong side of the lining where the lining is sewed to the facing, and attach this seam to the canvas.
Next baste the lining under in such a way that it will have sufficient length and width. Sew the seam in
the middle of the back and press seam out. Turn up the bottom and stitch the first row of stitching
around the edge then press edge thoroughly before stitching the second row. Having finished stitching the
edges, take out the basting around them and press the edge thoroughly. Baste in the back lining and be
sure it is long enough, but not too long, and allow a pleat in center seam. Should the lining be shorter or
even in length with the goods, you will find there will be wrinkles on the outside therefore, the lining
should average Y^ inch in excess of the outside goods. Having completed the basting under of the lining
and turning in at the side seams, turn up the bottom of the lining in such a way that you can fell it Yz in.
beneath the turn. Diagram I illustrates the way a garment should look after the lining has been basted
Next
press out the
the edge and baste
it
;
;
under and the extra length required
are of the proper length, as a small button hole looks bad, and besides
more
quickly.
They should not be too
much
Now make
comparison with the outside goods.
in
the bottonholes by noting that they are in the proper place, and in cutting
large, but they should be
it
is
preparation
for
them be particular that they
hard to button and wears out
sufficiently
large to
permit
being
of
and wrinkles around them when
buttoned.
In making buttonholes the tailor should exercise a great deal of care so as to make them
soft and even.
There are many good tailors who are not able to make good buttonholes. I have seen
beautifully made garments spoiled by poor buttonholes, and I must say that good buttonhole makers are
rare.
The general fault in buttonholes seems to be that the makers put in too many stitches. It seems as
if they were anxious to show the amount of work they had done on them.
The fact is that when the
stitches are too close it makes the buttonhole hard, and in consequence it wears out much sooner.
If it
in
with
the
right
kind
had been worked with a moderate number of stitches
the proper direction and
of
silk, an even looking buttonhole would have been produced and the softness given so essential for wear.
The secret of a good buttonhole cannot be explained in writing or by illustration it must be explained
and demonstrated in actual practice.
buttoned without too
effort,
and
this will also eliminate the fullness
;
Having completed
together.
This
is
the buttonholes in the best possible manner, re-mark the shoulders and baste
a very particular part of the
work because
it
must be done exactly according
directions given by the cutter so as to correspond with the alterations
of the making
it
may
made
be well to take into consideration a second try-on.
in the try-on.
While
I
At
them
to the
this stage
personally seldom have
you have any doubt as to the fitting
would advise a second try-on to avoid busheling. Therefore, after having
basted the shoulders together and basted the seams over, arrange the canvas, lining, etc., so they are
smooth and even in the shoulder re-mark the line where it should be basted to the collar press collar
into shape and baste it on.
If I intended to have a second try-on I would baste in the sleeve as a reassurance that I had the right length and width in every particular. In preparing for a second try-on, I would
a second try-on,
I
will say to the students of Practical Tailoring, if
points and balance of a garment,
I
;
pull out as
many
press the edges
;
basting threads as are not absolutely necessary to hold the garment together.
all
around, smooth the lining and trim out any excess there might be
in
I
would
armholes,
etc.,
and show up the garment in the best possible shape. See diagram J.
In trying on the garment the second time I would carefully inspect every detail in the same manner
as in the first try-on, and if necessary I would redrape the shoulders.
While a second try-on would
would show that he was careful, and
a garment has been tried on twice at
the proper times, and properly handled, there should seldom be any occasion for busheling after completion.
After receiving the garment back from the second try-on and having received proper instructions from the cutter, 'promptly note alterations, if any.
Then again baste the shoulder together with
the same care so that you have the fullness in the proper place according to the cutter's directions, and
sew the shoulder seam by hand a machine-sewed shoulder is never so satisfactory as a hand-sewed one,
for the reason that the machine will stretch some and displace the fullness of the back.
A hand-sewed
shoulder will hold the seam short, as well as enable you to have the fullness properly placed. All good
tailors sew the shoulder seam by haiiil.
Next, press the seams out, and prepare to rearrange the canvas
indicate inexperience on the part of the cutter, at the
same time
often a second try-on saves a great deal of busheling.
—
2.34
In fact,
it
if
In doing this be sure the canvas
in the shoulder.
is
sufficiently
long and wide and that
it
will
harmonize
same manner. Be sure to notice that
with the cloth in every respect. Next
in
way.
Baste around the neckhole close to
any
neither canvas nor lining interferes with the outside goods
neckhole
a thorough pressing; also
Give the shoulder and
the line where the collar is to be attached.
then
re-mark line to which
neckhole;
re-press crease line of under collar into shape; test shape of same to
arrange the lining
collar
is
in
the
to be basted.
In basting on collar
I
would
start at the back, basting
toward the front of the
left side
of the coat,
giving Ss inch fulness to the collar on the front part from the shoulder seam to the crease line, and hold
If the left side is satisfactory,
the collar slightly short to the lapel from the crease line to the gorge.
back of the neck and baste the collar to the right side, leaving the same amount of fulness, etc.,
Next, fell the collar down neatly also fell the inside edge to the collar take out the
bastings and arrange collar and lapel on the pressing block in a way to give them a thorough shaping
and pressing with the iron. Next mark off the width, etc., of the collar according to the pattern furnished
start at the
as on the left side.
;
;
by the cutter or the prevailing style. See diagram J.
In putting on the top. collar be sure that it has been shaped so as to conform with the under
basting
on notice that
it
it
fits
the crease,
and
that there
DIAG.
front end.
under
Be
positive that
you have a turn of
is
a certain
amount of
In
collar.
fulness, especially at the
I.
Y\ inch.
collar to that of the turn of the top collar, stitch
After
the
having
first
felled
the
outside
row before pressing.
edge of the
Also press the
crease of the collar and then stitch the second row.
In
average
making
conform with the armhole an
armhole measures 18 inches,
comparison with the arm scye. In
the sleeves, see that they are of the proper width so as to
fulness
of
2^4
inches
should
be
allowed.
For example:
;
If the
inches, and be larger or smaller in
marking them off be sure they are of the proper width at the bottom, as well as over the elbow. Prepare and produce the cuff desired, and in seaming up the sleeve be sure it does not twist in any way. Also
Having finished them acbe sure that the sleeve lining conforms with the sleeve before seaming up.
cording to regulations and instructions from the cutter, give the sleeves a thorough pressing oflf. Next
carefully inspect the top of the sleeve, trim off any unevenness, if any, and give the sleeve lining ^
excess at the top as allowance for turn, which turn should also be basted down before fitting the sleeve
Having properly finished the sleeve, re-mark the armhole and draw in the back of
to the armhole.
with
linen thread; also draw in the front of scye a little with linen thread before basting
the armhole
the sleeve should measure 20-;4
in the sleeve.
235
See
In basting the sleeve to the armhole, start with the right sleeve at the front of the armhole.
sleeve
the
inch
fulness
to
the
under
at
giving
about
back,
that the notches meet and baste toward the
}i
armhole.
Hold
it
around
tight
the
easy
be
held
to
At no place should the sleeve
back of the armhole.
and give about lyi inch fulness from about 2^ inches to the front of the shoulder
seams and down the front of scye. Now, if the right sleeve hangs properly, baste in the left sleeve
Press out the seam and place a little wadding in the
in the same manner, and seam them in by hand.
the shoulder seams
shoulder and
the shoulder.
let
it
run
That
is
down
It
also well to leave the
is
seam loose
at the top of
canvas from the shoulder seam to about 3 inches
Finish armhole by felling the sleeve lining in carefully, and the coat is then
above the front of scye.
ready to press
a bit in the sleeve.
to say, do not fasten
it
to the
off.
In pressing off
I
have found
it
a
good way
to start
then the edges and linings, leaving the collar and lapels
DIAG.
with the shoulders, next the body of the coat,
Be sure the coat is thoroughly
to the last.
J.
%
and sponged, and in sewing on the buttons have them sewed on so they have a neck of
Before bringing the garment in for the cutter's examination, give it a good preliminary ininch.
spection.
First:
See that the sleeves balance and have the proper fulness, and that the collar and
lapels have the proper shape according to the style.
Second: -View the sleeves from the back and
see that they fall gracefully, and also notice the general appearance of the back.
Third: View the
shape of the collar by holding the coat up by the shoulders with both hands. Fourth
Inspect the lining.
See that it is of sufficient length and width also see that the felling and sewing have been properly
pressed
—
—
:
—
—
;
Fifth
executed.
:
—Take
the coat by the back of the collar with the left
of the lapel with the right
inspect the pockets
garment
is
hand and be sure the
and other
details.
collar
is
Ascertain whether everything
finished.
236
hand and hold the lower end
of the right length and proper shape.
is
in
proper order, and
if
Also
so the
Making
Vest
After having marked
points where the pockets
all
proceed to cut inter-lining for vest.
Also insert a
in the interlining.
V
Take out
^
are to be placed,
well
as
Next proceed
of 3^ inch in shoulder of same.
Next give the front parts a thorough press
interlining.
pressing in the edges
put on properly by holding
down and
baste
a
down
pressed
edge.
it
Tack
it
is
hole, see that
Pull out
first
is
all
Stitch
first
row of edge before pressing, then
done
in a
Next
erly basted them,
sew
in
also
felled
is
same
felling
it
down
stitch
Turn
second row.
in as
inside breast pocket, baste
to the
much
under
as
lining.
facings of front as well as in arm-
Finish up back by
if
them
straps are used place
in
proper position.
inside
Join
and outside
place both front parts between the inside and outside back, and after having propside
Fell
the most careful manner,
ofif
trifle,
neat manner.
seam back of armhole and shoulder.
parts through the only opening, the neckhole.
Mark
Having
unnecessary bastings and give front part a thorough press over.
back at bottom.
lining.
and
after having finished buttonholes
sewing middle seam, and
to strap at collar.
Stretch the shoulders a
thoroughly, seam on facing, press out the seams and trim them and turn over and
long and wide enough, and
it
and
the pockets through
moderately short around opening, front and bottom.
it
seam around armhole and
Be sure
over.
to put in pockets
In putting on stay tape, be sure same
around opening, front and bottom.
all
stand,
inch in armhole, and also 3^ inch at bottom of front
press the front parts thoroughly into shape and baste under the interlining.
the
button
the
as
vest by pulling out both front
After having turned vest and smoothed
back down neatly and
first
Next turn
it
is
ready for press
ofif.
The
press
by pressing over the front parts, then sponging, and
the places of buttons,
vest a thorough examination and be sure
sew them
it
on, and,
if
out,
fit
the back
should be done
finally
in
smoothing the
buckle straps, sew on buckle.
has been properly completed.
237
ofif
it
Then give
T r o use r Making
A
good hanging pair of trousers can be procured only from
thoroughly the shaping of a pair of trousers.
so experienced a tailor as coat making,
sitate
A
curve of front.
Put pockets
Stretch the
stitched.
band
twist
well
as
as
in
any way.
in
button
placed,
give the waistband and
bottom
and place them
and
flys
that
so
Next
tom.
the
fly
ment, and
in
the turnup
down
do
ofif
flys,
a
all
around.
thorough
it
over
that
all
is
in
the
all
short
shrink
the
way down and
in
cloth protector
the proper places
properly placed and smooth
;
also
when
take
felled
4
in.
at
shrink in
In joining the
all
crease
front
at
seam
to
is
at
be
at the
crotch.
from knee up.
instep
two parts together
near bot-
sec that they
circumstances be sewed by hand.
Be sure they are up
make
it
to
measure-
firmer at the bottom.
Fell
long to the bottom of the back part.
on waistband and
down.
fly
seams so they meet
the
back part
well to soap the crease so as to
a
In joining the
where buttonhole
the back of outside
to
from the crotch down.
of trousers
and sew on buttons
is
trifle
Stretch the back part at knee
Next arrange
2 inches
to
side
The back seam should under
manner and sew
In pressing
out creases before turning.
Next be sure
fly.
ofif
the
the trousers be sure
Press the bottom thor-
After having turned them, give the top of the trousers, including the pockets and
press
off.
Next
bottom, and see that inside seam
and both legs
Be sure
is
properly placed.
is
shaping from the wrong side
all
oughly
a neat
in
lining at top part
to
inside length
turning the bottom
mark
Carefully
the
ofT
seam
inside
measure correctly around the waist.
Next measure
to handle the
the seams and finished placing the canvas in waist
a thorough press over.
Crease front
buttonhole
that
see
a jewel
and that the trousers balance properly
and turned over the
lined
Press the trouser legs into proper shape.
Press calf into proper shape.
is
as follows
Stretch inside edge from knee up.
Having pressed out
fiy,
good trouser maker
below. Hold the front part a
in.
front part to the back part be sure the notches meet at the knee
and do not
making does not neces-
making are
points in trouser
side near the bottom.
on outside edge.
calf
in
that a
careful and understands
both front and back parts, and be sure they are properly placed and
in
front part slightly on each
on outside edge and press
be true that trouser
held in 34 inch from crotch to 5
is
is
good trouser maker must know how
The most important
press iron and produce proper shape.
See that the front part
may
it
must be understood
it
merchant tailoring house, as they are scarce.
to a
in
While
who
a tailor
the
is
lay
2
in.
the
trousers so that the inside and outside seams meet at the
toward the back of outside seam
same manner and take out crease
around bottom.
at crotch.
Press both sides
Having thoroughly pressed
parts of the trousers, re-measure the length of inside seam, as well as waist, so as to be satisfied
you have the correct measures, and
finish.
zae
19Cy
i