/


Автор: Kiisel K.
Теги: clothing clothing manufacturing clothing designing
ISBN: 978-1-78067-093-5
Год: 2013


Текст
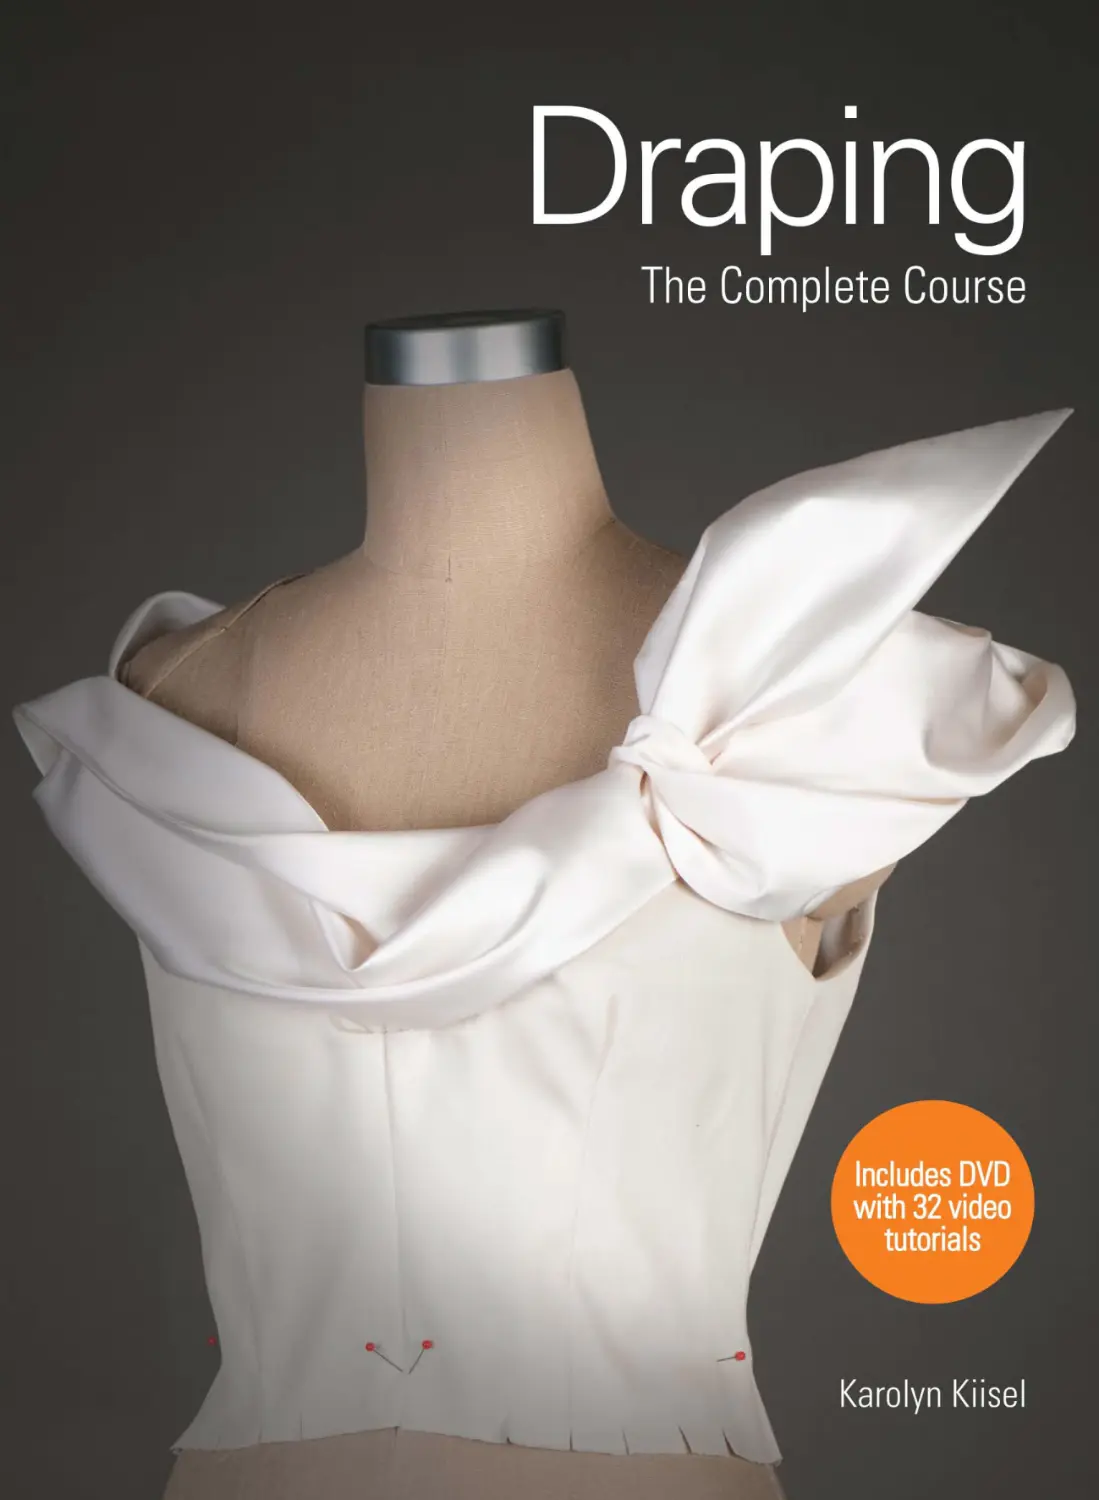
                    Draping

Published in 2013
by Laurence King Publishing Ltd
361–373 City Road
London EC1V 1LR
United Kingdom
Tel. +44 20 7841 6900
Fax +44 20 7841 6910
E-mail enquiries@laurenceking.com
www.laurenceking.com
Text © 2013 Karolyn Kiisel
Karolyn Kiisel has asserted her right under the
Copyright, Designs, and Patents Act 1988 to be
identified as the Author of this work.
All rights reserved. No part of this publication may
be reproduced or transmitted in any form or by any
means, electronic or mechanical, including photocopy,
recording, or any information storage and retrieval
system, without prior permission in writing from
the publisher.
A catalog record for this book is available from
the British Library
ISBN 978 1 78067 093 5
Design by The Urban Ant Ltd
Picture research by Heather Vickers
Photography by Sia Aryai Photography, www.siaaryai.com
Line art by Briana Boyko
Technical diagrams and Photoshop enhancement
by Mikiela Salgado
Printed in China

Draping
The Complete Course

Karolyn Kiisel

Laurence King Publishing

Contents

INTRODUCTION
> Draping is an art
> Tools and preparation
> Terminology

PART 1: Beginning Draping
006
009
013

1.1 Draping the Woven Panel

016

1.2 Dresses

038

History

018

History

040

Exercises
> Preparing the muslin
> Draping the three grains
> Visualizing muslin vs. fabrics
> Dance tunic

020
020
023
024
026

Exercises
> Dart variations
> Classic bodice with bust dart
> Bodice with French dart
> Swing dress with no darts

042
042
044
046
048

Draping project
Diana of Versailles’s garment

030

Draping project
Audrey Hepburn’s dress in
Breakfast at Tiffany’s

050

Variations
> Setting the princess line into a yoke
> Joining two darts to create
the princess line
> Bodice with an armhole princess line

058
058
060
064

PART 3: Advanced Draping
2.3 Pants

156

2.4 Knits

184

3.1 Coats and Jackets

204

History

158

History

186

History

206

Exercises
> Draping and fitting pants
> Harem pant
> Hakama
> Wide-leg trouser with front tucks
> Easy pant draft

160
160
162
166
170
171

Exercises
188
> Cotton knit top with ribbed neckline 188
> Strapless knit top
190

Exercises
> Understanding shoulders
> Chanel-style jacket
> The two-piece sleeve
> Easy two-piece sleeve draft

208
208
210
215
216

176

Draping project
Dolce & Gabbana tuxedo jacket

222

Draping project
Nanette Lepore cropped pant

Variations
> Raglan jacket
> Trench coat
> Swing coat with shawl collar
> Coat with egg-shaped silhouette

234
234
240
246
252

Draping project
Nanette Lepore halter-neck knit top

192

Variations
> Top with kimono sleeves

198
198

PART 2: Intermediate Draping
1.3 Bustiers

066

2.1 Skirts

088

2.2 Blouses

112

History

068

History

090

History

114

Exercises
> Preparing the form for draping
the bustier
> Preparing the fabric and materials
for the bustier
> Princess-line bustier
> Bustier with Georgian shape

070

Exercises
> Kilt
> Skirt silhouettes
> Straight skirt
> A-line skirt
> Bias circle skirt

092
092
094
096
098
100

Exercises
> Draping the blouse
> Peasant blouse
> Gibson Girl blouse
> Easy sleeve draft

116
116
118
122
124

102

Draping project
Bill Blass organza ribbon blouse

130

Draping project
Bill Blass pegged skirt
Variations
> Yoked skirt with gathers and flare

110
110

Variations
> Tunic with bell sleeve
> Mandarin collar
> Peter Pan collar
> Blouse with peplum and
classic bishop sleeve

142
142
146
148

Draping project
Christian Lacroix bustier

070
071
072
074
078

150

3.2 The Grand Gown

258

3.3 Draping on the Bias

282

3.4 Improvisational Draping

300

History

260

History

284

History

302

Exercises
> Supporting the skirt
> Corsets
> Gown with ruffled petticoat

262
262
264
266

Exercises
> Bias-draped camisole
> Bias chemise with princess line

286
286
290

Exercises
> Asymmetrical draped neckline

304
304

292

Draping project
Vivienne Westwood dress

306

Draping project
Oscar de la Renta gown

270

Draping project
Jean Harlow’s dress in
Dinner at Eight

Variations
> Royal wedding gown

280
280

Glossary 314 | Resources 315 | Index 316 | Credits 319 | About the DVD 320
Related study material is available from the Laurence King website at www.laurenceking.com

Introduction
Draping is an art
“Draping” is the term for using fabric to create a design
directly on a mannequin or dress form. It is an essential
skill for a fashion designer.

The French word for draping is moulage, meaning “to
mold or sculpt.” Fashion designers are artists, giving
physical expression to concepts as they work with
form, space, and energy flow. Impact and emotion
enter with the use of color and surface detail, but first
a silhouette must be sculpted.
Learning to drape involves training the eye to recognize
balance, symmetry, and a graceful line, and training the
hand to dexterity in cutting, pinning, and joining
complex curves.
Ultimately, success for designers and artists lies in
finding their own unique style of expression. Draping is
a skill that helps the individuality of the designer’s
creative vision to emerge.
In this book, you will be draping ancient forms of
clothing, historical garments from art works, costumes
from movies, contemporary designer pieces, and styles
from past decades.
At the beginning of each chapter are examples of early
forms of clothing, often simple woven panels of cloth
wrapped, tied, or draped over the body. Understanding
how a modern blouse or jacket evolved from these
basic shapes makes it easier to conceptualize how to
drape one. It is less intimidating when you understand
that, for thousands of years, people have created
beautiful, practical, transformational shapes from a
simple length of woven cloth.

006

Many of the designs in the book are taken from the
“Golden Age of Draping.” From the late 1930s through
the 1960s, Hollywood costume designers had unlimited
resources from the studios to clothe their stars. After

World War II, in Europe and New York, the couture
ateliers were blossoming. Balenciaga, Dior, Givenchy,
and, later, Yves Saint Laurent were only a few of the
many designers using new fabrics and techniques to
produce beautifully draped and impeccably tailored
couture clothing. Learning to drape these iconic styles
teaches important basic techniques and hones
observational skills.
Studying modern and contemporary clothing helps to
focus on the subtleties of shape and form. To create a
silhouette that is truly new, one must know what has
come before.
The value of learning to drape
When draping, the muslin, or “toile,” is a work in
progress, continuing to evolve until it is taken off the
form and turned into a pattern for a garment.
Draping a new design, rather than drafting a flat
pattern for it, is, for many, an easier way to develop the
important skill of visualizing how a two-dimensional
sketch moves into a three-dimensional form. As the
contours of the garment can be seen taking shape
during the draping process, it eliminates some of the
guesswork involved with pattern drafting.
When drafting, it is not until the pattern is finished
and the garment is cut and sewn that one can see
the three-dimensional result. Becoming proficient
at pattern drafting takes a lot of experience. With
a few basic skills, draping can be done by anyone,
even as our ancestors did with their simple tunics
and robes.

Creating a signature look
The ultimate goal of training in the skills of draping
is to strengthen original expression while creating
new silhouettes.
Clothes are marketed today less by their fit and finesse
than by a “designer’s statement.” In fashion, it is
crucial for a designer to develop their own style.
Having this “signature look” sets a designer apart.
Further, it helps the women who wear it define their
own personal styles.

The first step in creating a signature look is to anchor
a creative vision before beginning to drape. The
inspiration can come from a sunset, a painting, a
photograph of another design, or simply a feeling or
attitude that you want to express.

Top: Creating beautifully
draped clothing requires
developing an eye for
perfect composition. In Sir
Lawrence Alma-Tadema’s
The Frigidarium (1890),

details are adjusted to
bring the proportions into
balance.

Above: Yves Saint Laurent,
a master of draping skills,
created a new and unique
fashion sense for women.
His signature look is still
sought after today.

Introduction
Draping is an art | Tools and preparation | Terminology

Today’s woman wants clothes that not only fit
comfortably but that help her express her attitudes and
sensibilities. She wants her clothing to say something
to the world about who she is. Like the actress who
can’t get into character without her costume, a woman
needs her clothes to help her excel in the corporate
world, relax into a yoga posture, or feel glamorous for
a special event.

007

If you have the skills to execute your creative vision,
your personal flair becomes apparent, driven by your
decisions on proportion and line, scale and volume,
subtleties of shape, and placement of details.
Refining the drape and adjusting the final proportion
becomes very personal; you work on it until you arrive
at a balance that you like. When it pleases your eye, it
is done. When you continue to pursue and express the
looks you connect with and that attract you, your own
style inevitably emerges.
Form follows function
“Form follows function” is basic design theory. If the
designer is clear on the function or purpose of their
design, the many choices to be made during the
draping process will flow more naturally.
Clothing has many functions, from basic warmth and
protection to attraction and seduction. It is important
to understand the garment’s physical as well as
non-physical purpose. How a garment makes a woman
feel is as important as how it will make her look.
A crucial draping skill is understanding grainline
placement. A simple tunic cut on the bias will have a
totally different feel to one cut with lengthgrains
placed vertically. The designer must be able to control
the deeper energetic flow of the form they are creating
and how it will affect the wearer. In this book, you will
practice discerning the emotional tenor of a design and
explore ways of making sure that mood or tone is
present in the finished garment.

In the clothing created
by the Inuit, the design
purpose is clear: to keep
out the cold.

008

Draping today
Basic draping techniques have remained constant
since the development of the padded dress form and
its continued popularization by the Wolf Form Company
in the early 1900s.
However, in design studios around the world,
technology is embraced to save time and money.
Design firms have master pattern “blocks” that reflect
their specific fit and sizing. These are used to produce
new collections in which the width of a pant or the
scale of a jacket is changed by simply manipulating
these blocks. Digital patternmaking allows companies
to churn out dozens of variations in short order.
So what, then, is the enduring value of draping by hand
in this brave new world of digital fashion?
The challenge is for designers to go beyond the rote
process of developing a pattern that fits well and to
use the basic concepts of darting and seaming as a
springboard for creating new and unique forms.
Much of contemporary design is not about the perfection
of the classic couture of the 1960s. It’s about twisting,
wrapping, tucking, and cutting asymmetrically, reminding
us sometimes of early forms of clothing.
When a designer is aspiring toward an innovative
silhouette, they need to experiment with focal points
to create emphasis and attitude, and work with
proportions and scale to sculpt a shape that evokes
a specific emotion.
To create something truly fresh and new, the intimate,
hands-on relationship between designer, muslin, and
dress form is invaluable in facilitating the expression of
the designer’s personal vision.
It is now possible to have the best of both worlds: the
inspiration that comes from the purity of the simple
draped panels together with the classic draping skills
that were perfected in the Parisian ateliers. Both serve
to turn the art of sculptural draping into something
magical and new.

When you see this icon, refer to
the DVD that accompanies the
book for video demonstrations
of draping techniques.

Tools and
preparation
Draping, as with any artisans’ skill, has its tools of the
trade. It is a worthwhile investment to find tools that
are of good quality and that fit your physical size.
Having the right tools increases efficiency and will help
the skills to become second nature so you can focus on
the creative rather than the technical.

The dress form

Preparatory skills

The primary piece of equipment needed to begin draping is the dress
form. Many variations are available. Choosing the right one will
depend on your circumstances and needs. The best of these covered
forms are solidly mounted on heavy metal stands. Be careful of forms
that are covered in fabric that is too tightly woven, as pins will not
easily penetrate.

To make full use of the information in this book, it is recommended
that you have mastered some basic sewing skills (see “Terminology”),
and have some experience with pattern drafting, which is used in the
“Marking and Truing” sections of each chapter to create the pattern
for the garments draped.

Standard dress forms usually follow the measurement specifications
of commercial sizing. In a professional design studio, a small to
medium size is often used. When the clothing is finished, it can
easily be graded up or down for larger or smaller sizes.
The Wolf Form Company forms pictured in this book are high-quality
linen-covered “cocktail dress” forms, which have more bust and hip
definition than standard dress forms. They are adjustable, meaning
they are easy to move up and down, and the shoulders collapse
inward to allow garments to be put on over the top. They roll and
turn easily.
Before using the form, you will need to define the bust, waist,
and hips. The best way is to use a cotton twill tape, ¼–½"
(0.5–1.5 cm) wide, and pin it around the form as follows:

Waist tape The waistline will usually have a seam in the fabric,
making it easy to identify; but if not, simply find the smallest part
and wrap the tape tightly around the waistline, pinning as you go.
Hip tape Hip measurements are usually taken 7" (18 cm) below the
waist. Starting at a side seam, pin the tape horizontally keeping it
parallel to the floor, at 7" (18 cm) below the waist.

Introduction
Draping is an art | Tools and preparation | Terminology

Bust tape Start at a side seam and wrap the tape around the
fullest part of the bust (the “bust point”), pinning every few inches
(7.5–10 cm) all the way into the form. Allow the tape to follow the
form at the center front. Keep the tape high in the back, parallel to
the floor.

009

Understanding your form’s measurements
Measure your form and keep the measurements at hand. That way,
if you are working on a garment for a specific size, or customizing it
for an individual, you can determine how you may need to adjust your
form. If you are draping something for a larger size than your form, it
is possible to pad the form to reach the desired measurements. The
best way to do this is to simply cut strips of cotton felt approximately
5" (12.5 cm) wide and wrap and shape the form until it reaches the
measurements you need.
If the size you need is smaller than your form, you must allow for that
by draping the form more tightly or make the adjustments later in the
truing stage.

The bifurcated neck-to-ankle form
The bifurcated neck-to-ankle form is necessary for draping pants.
Some forms are available with only one leg, which makes it a little
easier to drape the crotch area, but harder ultimately to see the
full drape.
This style of form is also useful for full-length designs where the
shape of the leg needs to be considered.

Draping in front of a mirror
It is very useful to drape in front of a mirror. As you learn how to
study your silhouette and shape, it becomes important to see it from
a distance. With a mirror, it is easy to glance up and observe your
drape from 4–5' (about 1.5 m) away. It is a good perspective check,
allowing you to view your drape with fresh eyes and again compare
it to the sketch or photograph you are working from.

Muslins
Muslin is the traditional garment industry standard used for “toiles,”
or fitting prototypes. It drapes differently from the final fabrics of most
of the garments being made in this book, but it has other very positive
qualities.
First and foremost, it has a stable grainline that can be easily seen.
Where more loosely woven fabrics will stretch and pull out of shape
when draping, the muslin’s grainlines will remain perpendicular. It is
light and supple, easy for cutting and folding and creasing with your
hands. The crispness makes it clear to see how the pieces are fitting
together and when they are balanced.
Fairly inexpensive, it is your artists’ medium; it is good to think of it
as paper. It is not too precious—don’t get too attached to it, or worry
about ruining it. You can tear it and mark it and experiment with it.
Have enough on hand so that if something is just not working, you can
discard it and start over.

010

An important skill for a designer to master is the ability to visualize.
This means being able to see what a sketch will look like as a finished

garment, and what a muslin drape will look like in the final fabric.
Silk charmeuse has a lovely, soft hand, for example, yet is difficult to
handle in draping. If the design is first draped in muslin, the balance
can be achieved more easily. With some practice, you will learn
to visualize how the garment will look in the charmeuse after it is
draped in muslin.
There are four different types of muslin used throughout this book.
While it is not necessary to work with such a variety, it is helpful to
understand their different qualities. Where possible, use a muslin
type that will drape as closely as possible to the way your final
garment fabric will drape.

Cotton twill This softer but weightier twill reacts quite differently
from a standard muslin. Observe how the folded edges are rolling
more smoothly and the entire piece looks more substantial. It does
not have the crispness that the standard muslin has, but because it
is heavier, it will hold a larger silhouette. This is a perfect muslin for
garments such as coats and jackets.

Cotton voile The lightest of the muslins used in the book, this voile
is loosely woven, semi-transparent, and has a very crisp hand. Used
in Chapter 2.2: Blouses, it is the perfect weight for the large puffed
sleeve. Thin and light, it has enough body to hold shape and works
well where multiple layers of fabric are being used.

Silk/hemp muslin This muslin, while slightly heavier than the
cotton twill, has a softer, smoother drape, which is evident in the
way the folds do not “break” at all. It is loosely woven and perfect for
garments where the grainline needs to be visible, such as the bustiers
in Chapter 1.3. In Chapter 3.3: Draping on the Bias, it smoothes and
shapes over the curves of the form very easily because it has such a
heavy drape.

Introduction
Draping is an art | Tools and preparation | Terminology

Standard muslin This medium-weight and fairly crisp muslin works
well for most garments. It is light enough to manipulate easily and
holds shape as you work with bodices, skirt shapes, and sleeves.
Observe how in the center of the folds there are little “breaks” in the
fold where it makes a sharp turn rather than a smooth roll. A softer
muslin might not do that, but then it will not allow you to achieve as
defined a silhouette as this crisper muslin.

011

General supplies

Draping supplies

Tape measure Helpful to use in visualizing volume for muslin pieces and
also to check measurements of the muslin while draping.

Pins and wrist cushion A generous supply of pins will increase
efficiency, and a wrist cushion is helpful in keeping the pins at hand
rather than reaching for them while you are holding on to the muslin.

Scissors Your most important tool. Choose carefully: you want a scissor
that is light enough to be comfortable, yet heavy enough to deftly cut
through the muslin as you drape.
Yardstick Important for finding and marking the grainlines.
Right-angled ruler Necessary for checking that the length- and
crossgrains are at right angles.
Clear graph ruler The transparency and grids of this ruler are helpful
when marking grainlines and seam allowances on the muslin.
Soft lead pencil Test the pencil on the muslin you are using and choose
one that is soft enough to make a clear, visible grainline, yet not so soft
that it smudges the fabric.

Sticky tape—black and red Used as above, but with a more
temporary use. Red is used for correction lines.
Elastic Having elastic on hand in a few different widths—¼, ½,
and 1" (0.5, 1.5, and 2.5 cm)—will help when gathering sections
of muslin.
Hem gauge For measuring hems in relation to the cage of the dress
form, and for checking sections of a garment that call for uniform size.

Marking and truing supplies

Additional rulers

Chalk—two colors Used for marking seams when turning fronts
over backs, hems, etc. Having two colors will help you to color-code if
you adjust fit and re-mark a seam.

Small graph rulers Useful for marking seam allowances. Their
transparency makes it easy to see the sew lines as you mark the
cut lines.

Pencils—regular, red, and blue Used for drawing on the muslin
after it is taken apart. The first line drawn is with regular pencil. A
correction line will be in red, and a further correction will be in blue.

Clear French curve Because this curve goes from convex to
concave, it is essential for areas, such as the waistline, that follow
that trajectory. This curve is also useful for truing up armholes and
small curves.

Carbon paper Used in truing up when lines need to be traced
through to a second piece of muslin or onto the reverse side of
the muslin.

Hip curve Traditionally used to follow the curve from the waist along
the hipline, its universal shape is useful in many other areas.

Tracing wheel For use with carbon paper to trace lines onto a
second piece of muslin or onto the reverse side of the muslin.

Hem curve This curve is the general shape of a skirt hem as it travels
from the center front in a soft curve up toward the side seam.

Needle and thread When marking a muslin, sometimes a pencil is
not enough and a basted line needs to be made using a needle and
thread to allow for a more precise marking.

012

Twill tape—black and white Used for marking necklines,
armholes, stylelines, etc.

Terminology
The following are terms used throughout the book.
Brief definitions are given here, and many will be
explained further elsewhere in the book.
Stitching

Abbreviations
CF = center front
CB = center back

Diagrams
Flat sketches The two-dimensional line
drawings that are made from photographs
as a blueprint for construction and grainline
configuration.

Muslin-preparation diagrams The
charts at the beginning of each project
with the measurements of the pieces of
muslin to be cut. If the measurements of the
form you are using are different from the
standard form used here, simply adjust the
dimensions of the muslin pieces up or down.
The measurements of the pieces have an
allowance of several extra inches, so unless
your form is 3" (7.5 cm) different, the pieces
will work.

Princess line The vertical line that
divides the torso in half from center front
to side seam. Usually it begins at the center
of the shoulder, but it can also curve out
from the armhole.

Muslin
Grainlines These refer to the direction
of the threads. Woven fabrics consist of
two threads interlaced at right angles.
The vertical or “warp” threads run parallel
to the selvage. The horizontal or “weft”
thread runs crosswise.

Lengthgrain The warp thread direction,
sometimes called the straight grain.

Crossgrain The weft thread direction.

Fit and figure
Ease The extra fabric allowed in the fit of
a garment. For example, if the waistline
measurement is 26" (66 cm) and the skirt
waistband measurement is 27" (68.5 cm),
then there is 1" (2.5 cm) ease in the skirt/
waist fit.

High hipline This measurement is taken
about 2–3" (5–7.5 cm) down from the waist
at the hipbone where casual pants, such as
jeans, often sit.

Thread trace A hand-sewn straight stitch
line used to mark seams or edges during
draping or the marking and truing-up process.

Catch stitch A useful stitch for holding
together two pieces of muslin during draping
in areas that may have some pressure
pulling on them.

Tailor tack A stitch used to mark a single
point on the fabric during draping and the
marking and truing-up process.

Selvage edge The bound edges on either
side of the fabric. Most fabrics are woven at
45–60" (115–150 cm) wide.

Blocking the muslin To stretch, pull, and
press the muslin until the warp/vertical and
weft/horizontal threads of the weave are
perpendicular and the edges are straight.

Step 1

Step 2

Introduction
Draping is an art | Tools and preparation | Terminology

Hipline The fullest part of the hip, usually
considered to be 7" (18 cm) down from
the waist.

Baste To hand-sew a stitch line to hold a
seam together temporarily.

Bias line This runs at 45° to the lengthgrain
and is the part of the fabric that has the
most give.

Bust point The fullest part of the bust.

Waistline The narrowest part of the waist
area on the form.

Sew line This is referred to in draping and
in truing up, and is simply the stitching line
that will be used to join the seams.

013

1

Beginning
Draping
1.1 Draping the Woven Panel
1.2 Dresses
1.3 Bustiers
Section 1 works to develop your skills of observation as each fashion
design is studied in terms of its composition—the specific balance of
silhouette and proportion.
Photographs of the draping projects will be analyzed in terms of grainline
placement and construction, then translated into working “blueprints”—
flat sketches from which to drape.
Basic draping skills are introduced, such as preparing the form and muslin,
pinning, trimming, clipping, marking and truing, and presenting a finished
toile or muslin.
You will learn to identify a designer’s intended mood and tone and further
define the attitude of a garment by using a muse to place the design in a
social context.

.
1
1

Draping the
Woven Panel

History
The earliest clothing was probably made from leaves,
grasses, and bark or, in colder climates, animal skins
and furs.

The development of weaving must have heralded a
giant leap in the sophistication of a civilization. As the
techniques developed, woven panels were wrapped,
draped, and tied over the body. Simply creating the
fabrics would have required so much time and effort
that cutting the cloth was unrealistic.
Since few ancient fabrics have survived to the present
day, only the artistic renderings of garments on pottery
fragments and murals suggest what early clothing
might actually have looked like. Some of the oldest
garments that we can see and study are those depicted
on ancient Greek and Roman sculptures and vases.

018

These early garment forms—the chiton
and peplos of the Greeks, and the toga
worn in Rome—were simple basic
shapes; many were woven panels of
varying sizes. However, the draping
was sometimes elaborate. It is
thought that a nobleman in full
dress would have been
accompanied by a servant to
help keep the drapes properly
adjusted. In all their variety,
these garments appear to
be very comfortable, their
relaxed, elegant style echoing
the Greek ideal of freedom. The
fabrics of flax (linen) and wool
must have been very fine to drape
with the beautiful folds seen in
sculptures and paintings.
Garments became increasingly
complicated as craftsmanship and

Left: Preserving the
integrity of the square-cut
woven panel gives the
most natural form to a
drape. There is a majestic
quality in its simplicity.

In the modern era, garments made from draped
square-cut panels appear in the artwork of
Alphonse Mucha and Maxfield Parrish. Isadora
Duncan, the founder of modern dance, was
famous for wearing her version of a tunic. In
the first half of the twentieth century, the great
Italian textile and clothing designer Mariano
Fortuny made exquisite, timeless garments from
two rectangles of pleated silk.
The draping projects in this chapter are variations
of these classic tunic forms and, because of their
simplicity, are excellent exercises for developing
an eye for proportion and balance. Finding the
symmetry and adjusting the gathers of these
pieces teaches sensitivity to handling fabric,
a skill that takes practice.

A contemporary design
using the simplicity of
two rectangles by Karolyn
Kiisel for Tara West Spawear, made of hemp/silk.

Chapter 1.1
Draping the Woven Panel
History | Exercises | Draping project

Far left: This huipil from
the Triki, a mountaindwelling tribe in Oaxaca,
Mexico, is a square-cut
garment that exhibits
a traditional weaving
style over two centuries
old. It consists of three
rectangles, finished and
ornamented with colored
ribbon. The drape is
symmetrical and graceful.

technology developed and new fabrics became
available. Yet from time to time there has been a
return to simplicity, a refreshing revival of this more
natural style.

019

Exercises
Preparing the
muslin
All woven fabrics consist of two threads interlaced at
right angles. The vertical (warp) threads run parallel to
the selvage edge and are called the “lengthgrain,” or
sometimes the “straight grain.” The horizontal (weft)
thread runs crosswise on the fabric and is called the
“crossgrain.”
In the weaving process, the warp threads are usually
set up tightly on the loom first and then the weft
threads criss-cross back and forth, filling in the fabric.
The warp threads, therefore, are usually stronger, and
the fabric has the strongest drape when hung vertically.

Tearing the muslin
To prepare the muslin for draping, the pieces are torn to
predetermined measurements. Tearing the muslin is more accurate
than measuring and cutting with a scissor because the original
perpendicular grid of the warp and weft threads of the muslin often
becomes distorted during shipping. Even when measuring from the
selvage edges, it is not possible to be certain that the threads are
running parallel to the edges of the fabric.

Understanding grainlines
It is important to understand how the set of the grainlines can affect
the look of a garment. Their direction determines the energy flow. The
reason square-cut garments like tunics look so elegant and regal is
because the grainlines are perfectly balanced.

Muslin preparation
24"

24"

1"

12"
cu

t

cu

t

12"

36"

24"

24"

36"

Crossgrain
cu

t

Lengthgrain

t
cu

Bias

020

Step 1

Step 2

First the selvage edge must be removed.
When the fabric is finished on the loom, the
tighter weave of the edges, while serving
to keep it from unraveling, will sometimes
restrict the drape of the fabric. If the fabric
is steamed and/or pressed, the edges pull in
and cause the fabric to pucker.

After the fabric is torn to specific
measurements, it must be “blocked.”
Blocking the fabric is the means by which
the warp and weft threads are pulled
back into their original shape, exactly
perpendicular to each other.

Tear selvage edge off by clipping in about
½" (1.5 cm), grasping edge firmly and
pulling it sharply down length of fabric.
Now mark desired measurements of
the muslin, clip edge, and tear both the
lengthgrain and crossgrain directions.
It is helpful to first draw a small
lengthgrain for reference so that you do
not lose track of the direction.

Where the muslin does not form a 90°
angle, grasp it firmly with both hands, and
pull and stretch it until it returns to its
original shape.

Press on lengthgrain or crossgrain

lengthgrain

Step 3
Now the muslin must be pressed. When
pressing muslin, it is important to handle it
gently so that it remains smooth and even.
A bit of steam is fine; the muslin may also
need to be steamed later during the truingup process and it is preferable to let it shrink
before you start draping. If you use too much
steam, however, the muslin will pucker and
become unusable.

Create a grid by drawing vertical and
horizontal lines on graph paper. You do not
need to draw the exact size of the piece;
a right angle will suffice to align the fabric
and check that it is square.

Sponge any deep wrinkles in the muslin with
a damp cloth, rubbing out the creases.
When pressing, move the iron in vertical
and horizontal directions only. If the muslin
is pressed on the diagonal, or bias, grain,
you will pull the threads out of alignment
and cause the fabric to stretch.

DO NOT press on the bias

Chapter 1.1
Draping the Woven Panel
History | Exercises | Draping project

After pressing, check the muslin again on
the grid paper to see if it has torqued; if
so, pull and stretch it again until it goes
back into right angles at the corners.

crossgrain

021

Marking grainlines
There are two methods used in this book
to mark grainlines:
Mark using a medium soft pencil or
tailor’s chalk and a yardstick and graph
ruler to draw the lines on the muslin.
When this method is recommended,
you will see a pencil symbol.

Mark with a “thread trace.” If you want
to reuse the muslin pieces, are working
with a fabric that will later be sewn
into a garment, or prefer working with
needle and thread, this method can
be used.
When this method is recommended,
you will see the needle-and-thread
symbol.

Step 4

Step 5

Now you are ready to mark the grainlines
on the muslin. On the first piece, use
a soft pencil or tailor’s chalk to mark
the lengthgrain, which is parallel to
the selvages. On the second, mark the
crossgrain, which runs across the width
of fabric.

On the third piece of muslin, draw the bias
line. The “true bias” of the fabric is the 45°
angle to the length- and crossgrains. The
bias line is traditionally marked with double
parallel lines.

Make two or three small marks on the
muslin using the given dimensions,
measuring in from the left-hand edge.
Line up the graph ruler or yardstick with
the marks, and draw the line needed.
Use this method for the first two pieces.

Mark only the lines on the fabric—no
measurements or other notes are
necessary. Be accurate and precise. After
draping, your pattern will be made with
these muslin pieces.

Find the true bias using a right-angled
ruler and a graph ruler. Position the rightangled ruler against one of the edges of
the fabric and mark equal distances from
the angle point. For example, mark 8"
(20 cm) from the point, going along the
crossgrain and along the lengthgrain.
Line the graph ruler up with the two points
and draw in the bias line, a 45° angle.
For bias lines, two parallel lines are used,
⁄ " (0.5 cm) apart.

18

Neatness is important: when draping, it
is essential to be able to concentrate on
the shapes you are creating. Superfluous
lines and marks will be distracting.

Thread tracing
First locate the grainline. Measure in from the sides of the muslin piece and mark it with a
pin line or tailor tacks. Place the pins perpendicular to the sew line, and use the entry point
of the pin as your line demarcation.
Lay the graph ruler or yardstick an even ½–1" (1.5–2.5 cm) from the pin or tailor-tack line.
Leaving the muslin on the table, pull the needle and thread through the fabric, using very
large stitches.
It can help to place weights on the ruler or yardstick to keep the fabric from moving while
you stitch it.

The muslin-preparation diagrams on the
following pages all contain measurements
that will help you position the muslin on
the form. The pieces are all oriented with
the lengthgrain going up and down, and the
crossgrain going from side to side.

Marking grainlines with pen

022

1

2

3

4

5

2

1

0

1

2

1

2

3

4

5

Another method is to mark the line with
a “disappearing ink” fabric pen. Test to
make sure it works as it should, and also
that it lasts long enough for you to finish
the drape and transfer it to paper.

Draping the
three grains

Pinning
Make sure you have a good supply of pins
nearby or on a wrist cushion.

This exercise will train your eye to see the difference in
the three grainlines. Use the three pieces of muslin
that you prepared for pages 20–22. As you work, try to
feel the difference in how the muslin drapes, even as
you first pin the pieces to the form. If you do not have
three forms, pin the three prepared pieces of muslin to
anything you have available so you can study all of
them at the same time.

Lengthgrain
Holding lengthgrain piece of muslin in
two places at the top, center grainline by
aligning it with center front line of form.
Pin muslin evenly at two areas above
the bustline and smooth out drape with
your hands, studying how fabric is falling
across form.

Crossgrain
Grasp edge of crossgrain piece of muslin
with the 1" (2.5 cm) lengthgrain running
horizontally and the crossgrain line falling
vertically, and align crossgrain line with
center front of form.

The pins are not placed at a 90° angle to
the form, but at an angle tilting upward.
This holds the fabric securely in place.
If you are supporting a heavier weight
of fabric, sometimes instructions are
given to “anchor-pin,” or place two pins
in a “V” position, which holds the fabric
more securely.

Bias grain
Drape the bias piece of muslin on the
form, with the double bias line lined up
along the center front of the form and
hanging vertically.

Pin areas above bust and observe how
fabric is draping.

The lengthgrain piece forms two strong drapes
as it flares out from the bust to the hip, the
natural drape of a balanced square. The sides
drape with a straight, vertical flow.
The crossgrain piece appears slightly wider at
the hip and doesn’t seem to fall quite as easily.
The side areas seem to stand out more. This

is because the stronger lengthgrain is running
horizontally and wants to push the fabric out.
The muslin cut on the bias grain has the most
give and so forms drapes that are softer and
less defined than those on the lengthgrain or
crossgrain. The fabric gently flares out at the
sides, creating a cascade effect.

From the strength of the lengthgrain to the soft
drape of the bias, these different qualities will
translate into garments as you drape. Learning
to use these grainlines to your advantage will
help you to achieve specific looks.

Chapter 1.1
Draping the Woven Panel
History | Exercises | Draping project

Analysis

023

Visualizing muslin
vs. fabrics
A fashion designer’s skill of visualization comes from
familiarity with all types of fabrics and how they drape.
When selecting fabrics, a designer will pull, stretch,
and smooth the fabric; pin it onto a form to see how it
falls; and hold a length to the body in the mirror to see
how it moves.
Train your eye to see how different fabrics drape, and
how they drape differently from muslin, with this
exercise. Drape several types of fabric onto a form
using as inspiration this contemporary dress by
Michael Kors. First, drape each fabric over your hand,
taking a moment to study its qualities.
Align CF line of muslin with CF of form. Pin at shoulders about
midway between neckline and outer shoulder point. Find the spot
where, in the photograph, the snakeskin leather piece sits at the
shoulder line.
Now try pinning fabric 1–2" (2.5–5 cm) further toward side of
muslin piece but at the same point of the shoulder, allowing fabric
to drape in CF.
Continue moving fabric toward center; watch how drape forms as
you pin further and further toward sides of fabric.
Look for the optimum spot where CF neckline drape is low, as in
the photograph, but you still have enough fabric left on the sides to
create the pretty drape that hangs at the armholes. Pin or tie a twill
tape at the hips, if it helps you to find the right drape.

Muslin preparation
40"

20"

30"

024

Draping in different fabrics
Using the muslin-preparation diagram,
prepare these additional fabrics: linen, silk
crepe de chine, chiffon, and a knit. If you do
not have these easily at hand, use whatever
you have—even a silk scarf will do! Do not
worry about making the drape look exactly
like the garment in the photograph. This
is an exercise in observing how different
fabrics drape.

Linen

Crepe de chine

The linen drapes most similarly to the
muslin. It has a loosely woven grain and so
a softer drape than the muslin, but still has
a lot of body. Both muslin and linen tend to
“break” at the center front, making a sharp
bend or crease instead of flowing evenly
around the curve of the drape.

The crepe de chine falls very differently. The
center front drape has a softer look and falls
into more folds than the linen or muslin.
The drapes at the side armhole area tend to
flutter rather than just sit.

Chiffon

Knit

The chiffon is even softer than the crepe
de chine, but it has a bouncy quality.
Although it hangs beautifully, it is more
difficult to handle.

The knit drapes the closest in look to the
Michael Kors dress. Knits tend to hang in a
heavier way. The sense of gravity pulling the
fabric down creates the sensual look that
Kors seems to have intended.

Why drape with muslin?
If muslin is stiffer and drapes quite
differently from other fabrics, why use it
for draping? The answer is that muslin
has a stable grainline and is easy to
work with. Also, its absence of color
creates a neutrality that helps you see
the silhouette you are sculpting, providing
a blank canvas upon which to create a
design. As you experience the qualities
of different fabrics, you will begin to
instinctively sense how a fabric will
behave in comparison to the muslin.

Chapter 1.1
Draping the Woven Panel
History | Exercises | Draping project

025

Dance tunic
This tunic—a dance costume for an opera—
is based on a Greek chiton. It is made from two
rectangles, held together at the shoulders by metal
brooches. Traditionally, the tunic would have a belt,
but because this is a modern dance costume, the
waistline can be drawn in with elastic. The lines are
angular and vertical, so both pieces will be cut on the
lengthgrain. The flat sketch indicates the waistline
construction, shoulder closures, and the proportion
of the ornamentation at the neckline.

Visualizing the volume
After the flat sketch is done, the next step is
to map out the muslin-preparation diagram,
deciding the approximate size of each of
the pieces.
Try using a muse for this process. Visualize
Isadora Duncan dancing in this tunic. Imagine
the volume of fabric she needs to give her
full freedom of movement, but note that too
many gathers at the waist will tend to widen
the silhouette and weight her down visually.
Familiarize yourself with the final fabric by
draping some of it on the form as shown.
The Lycra chiffon used here is light and airy,
yet the small percentage of Lycra (a heavy
fiber), gives it some weight and definition.

026

Pin the fabric to the form at the shoulders
and let it drape to the floor.
Tie a piece of twill tape or elastic around
the waist to imitate the construction.
Study the proportions of the sketch and
note down some target length and width
measurements for the tunic.

Muslin preparation
24"
10"

17"
7"

1"

9"

17"

Step 1

40"

40"

Front

Back

Step 2
Pin back piece to back of form, lining up
CB pencil line with CB seam of form, and
aligning crossgrains with bust and waist
tapes of form. Pin to just above waist (not
shown). Anchor-pin at top CB.

Pin across shoulder areas about 3" (7.5 cm)
below neckline.

Pin across shoulder a few inches (about
7–10 cm) below neckline, keeping
crossgrain lines horizontal.

Tie a narrow length of elastic or twill tape
around the waist. The penciled waist
crossgrain should be right under elastic.

Chapter 1.1
Draping the Woven Panel
History | Exercises | Draping project

Pin muslin to CF of form, lining up CF
pencil line with CF of form, and aligning
upper crossgrain with bust tape and lower
crossgrain with waist tape. Pin to just
above waist. Anchor-pin at top CF.

Step 3

027

Step 4
Keeping penciled crossgrain parallel to
waist, adjust gathers of muslin by grasping
fabric above and below elastic and pulling.
Repeat for back.

Step 5
Add blouson effect by pulling up top front
and back waist crossgrain to a few inches
(about 7–10 cm) above waist elastic and
letting excess fabric fall over waist elastic.

Step 6
Pin side seams together. Side seam
allowances are 1" (2.5 cm), so first gently
crease 1" (2.5 cm) under on front section
and lay it on top of back section, about
1" (2.5 cm) in.
If you need to, lightly chalk the 1" (2.5 cm)
line to make it easier.
Start at matching waistline crossgrains,
turning front over back, working down
toward hem.

028

Pinning two pieces of
muslin together
When pinning two pieces of muslin
together, try to create the smoothest
look possible, by placing the pins
perpendicular to the seamline.
When studying the shape of the
whole garment, you do not want to
be distracted by clumsy pinning and
wrinkled seams.

Step 7
Turn up hem of tunic by leveling it against
one of the bars on the cage of the form.
Place pins perpendicular to edge of hem.
Check drape against sketch for proportion.

Step 8
Release CF pins and experiment with
how the CF drapes by moving shoulder
area toward neck and then toward
shoulder. Observe the difference in the
way the CF drapes.
Now compare your muslin with the
photograph. The muslin, of course, is
draping much more stiffly, but you should
be able to see clearly from the muslin
whether or not the balance and proportion
are correct.
Finalize the position of the shoulder
placement and pin.

Use a mirror to check the drape
At this point, give yourself a “perspective
check.” Look at your drape in the mirror or
from a distance, study the silhouette, and
adjust it until you feel it is correct.

Chapter 1.1
Draping the Woven Panel
History | Exercises | Draping project

029

Draping project
This statue is known as Diana of Versailles, a Roman
copy of a Greek statue of Artemis, goddess of the
hunt. She is an archer, running through the woods with
wild animals. Her garment has a comfortable, relaxed,
utilitarian feel, its short length giving her freedom of
movement for her hunt.

In the photograph, Diana appears to be wearing either
a single garment folded up or a top and skirt. Based on
research of garments from this era, it would be an
ankle-length garment, pulled up to knee length.
The waist has an odd double wrap in the front, which
indicates the waist and shoulder sash may have been
one piece. However, you can simplify your drape into
three basic pieces: tunic, waist wrap, and shoulder
sash. The hypothetical purpose of the garment is a
costume, not an authentic reproduction.

Waistband

Halfway

First, draw a sketch of the finished look of the garment
to get the proportions right. Then make another set of
sketches determining the number of elements: front,
back, waist wrap, and shoulder sash.

Shoulder sash

Tunic with
fold over
Waist wrap

030

Visualizing the volume

Muslin preparation A

The actual fabric depicted in the sculpture is
either lightweight linen or wool. It has a lot
of lines and folds, which means a substantial
amount of width in the rectangles. Estimate
the maximum amount of fabric you think you
will need.

16"

12"

16"
5"

5"

9"

10"
6"

10"
16"

17"

45"

60"

60"

60"

Blocking the muslin

Waist wrap

Prepare the muslin, and don’t forget to
block and press it as on page 21.
Front

Back

Step 1

Step 2

Pin muslin to CF of the form, lining up CF
pencil line with CF of form, and aligning
upper crossgrain with bust tape and lower
crossgrain with waist tape. Pin to just
above waist (not shown). Anchor-pin at
top CF.

Pin the back piece to the back of the
form, lining up the CB pencil line with the
CB seam of the form, and aligning the
crossgrains with the bust and waist tapes
of the form. Pin to just above the waist.
Anchor-pin at top CB.

Pin across bust area and to side seam
below armplate.

Pin across shoulder a few inches (about
7–10 cm) below neckline, keeping
crossgrain lines horizontal and wrapping
muslin over shoulder.

Note that length grainlines have a strong
vertical look. Notice in the photo how the
vertical lines of the fabric folds support
this strong grainline.

032

Shoulder sash

Pinning smoothly
Take the time to pin accurately and
smoothly, pins perpendicular to the
seams (left) rather than parallel (right).
You want your tools to recede so
that you can focus on the shape you
are creating.

Step 3

Step 4

Pin side seams together wrong sides out
from waist crossgrain to hem.

Lightly chalk pin line on both back and
front pieces with a broken line.

To pin front seam allowance over back at
the side seam, first pin smoothly (with pins
vertical) from waist to hem.

Crossmark every 10" (25 cm) or so. The
crossmark is a horizontal line that is drawn
on both front and back pieces to help
when realigning two sections after they
are separated.

Step 5
Remove pins a few at a time, turning front
over the back at side seam and repinning
with pins placed horizontally.

Chapter 1.1
Draping the Woven Panel
History | Exercises | Draping project

033

Step 6
Tie a narrow length of elastic or twill
tape around the waist. Penciled waist
crossgrain should be right under elastic.

Step 7
Anchor-pin below bust and at side seams
to hold firmly in place and remove pins
from below waist.
Pull up to create a blouson effect until
desired proportion is reached and hem
of garment is parallel to bars on the
cage of the form.

Step 8
Drape waist wrap at waistline, scrunching
in folds as in the photograph and wrapping
one of the ends over into the waist.
Drape bodice by unpinning front and
bringing side area toward CF. Adjust
front and shoulder drape and pin flat
to shoulder.

034

Step 9

Step 10

Drape shoulder sash by slipping long
rectangle under front and back waist wrap
and folding into pleats.

The drape proportions look the same,
except perhaps in the width. It is not as
full as in the photograph.

Now check against the flat sketch on p. 30.
Holding the flat, step back to a distance
where the lines of the flat match the lines
of the drape and check your proportions.

Since there is extra fabric at CF, try
shifting this toward the side and note the
difference it makes in the front drape and
the volume below the waist.

Marking and truing

Step 1
Pencil or chalk-mark pinned areas:
shoulders and side seams.
Crossmark once or twice at shoulder and
every 4–5" (10–12.5 cm) at side seam.

Step 2
Pencil or chalk-mark lines made by elastic
at the waist.

Chapter 1.1
Draping the Woven Panel
History | Exercises | Draping project

There are various ways to mark your muslin
before taking it apart and making the
pattern. One is to simply mark with a pencil
or chalk all the seams and intersections;
another is to “thread-trace” a line. To
thread-trace means to stitch a long running
baste along a fabric area to indicate a line
on the muslin. The thread trace is done on
both sides of a seamline so that when the
muslin is taken apart, the line is evident on
each piece.

035

Step 3

Analysis

Thread-trace the sash where it hits the
waist front and back.

Comparing the photograph on page 31 with
the drape reveals a fairly accurate match.
The proportions are very similar, the lines of
the diagonal drapes above the waist have
the same angles, and the general volume
of fabric is about the same, although it is a
little hard to tell from the sculpture because
of the movement of the skirt and shoulder
sash. It is also difficult to know how much
the artist idealized the drape of the fabric;
it must have been an extremely thin, finequality fabric to drape with such flow.

Thread-trace the new CF and new CB
(not shown).
Thread-trace the waist wrap along the
edge where it folds to the inside.
Remove the shoulder sash and waist
wrap, lift the folded piece, and mark
the new waistline where it is hitting
the elastic.
Carefully remove the pieces from the form
and press gently to flatten out.

The waist sash of the drape is not as wide
as the statue’s, perhaps succumbing to that
modern fashion imperative, the desire for
a narrow waist. The center front neck area
on the drape is larger than the drape in the
statue, and the right bodice of the statue is
pulled more tightly. It may be that Diana’s
quiver strap is pulling the garment toward
the back.

Since this finished piece is the pattern, the
only lines that need to be marked are the
side seams and the new waistline.
Side seams will be totally straight with 1"
(2.5 cm) seam allowance.
The new waistline will be 22" (55 cm) up
from the hemline.

The sense of freedom and ease and the look
of a utilitarian hunting garment have been
achieved. It would be interesting to construct
the garment with a very fine silk mesh, to
see if that looked closer to the fine folds in
the marble statue.

Cut the new muslin as indicated in Muslin
Preparation B.
Sew side seams from the upper waistline
(before the blouson) and the shoulder
seams, then redrape on form, following
Steps 1 through 10.

Choosing a fabric to check the pattern
When checking a new, full muslin, often a fabric is chosen that is
closer than muslin to the drape of the intended final fabric. In this
case, the “voile” muslin will be used; it has been washed to imitate
more closely the look of the garment in the photograph.

Muslin preparation B
30"

12"

30"

15"

6"

15"

22"

10"

22"
45"

60"

60"

60"

Waist wrap

036

Front

Back

Shoulder sash

.2
1
Dresses

History
The majestic draped panels worn in ancient cultures
evolved into more fitted garments for various practical
reasons. Clothing that was more fitted offered expanded
mobility for activities such as riding horses, getting in
and out of carriages, and dancing.
In colder climates, people needed to wrap themselves
more tightly for warmth, and also to allow for layering
of additional pieces. Northern cultures crafted sleeves
and pants by wrapping and tying fabrics to keep out
the cold.
Eventually, woven panels were cut to fit over the head,
and one was gathered onto another for fullness. By the
Left: Khandro Tseyang’s
design of a modern
traditional Tibetan chuba.
Right: The chuba is
constructed from two
skirt rectangles and a
fitted bodice.
Opposite page:
Left: In this detail from
Ghirlandaio’s Birth of the
Virgin Mary, the tight
sleeve is opened for a
better fit.
Right: Similar in shape
to an ancient tunic form,
this flapper dress from
the 1920s is made of two
rectangles with little in the
way of fit seams or darting.

040

time of the Italian Renaissance, the cutting and
shaping of fabric was in full swing, as seen in the
elaborate, colorful, and close-fitting clothing of that
era. The shapes of many of our modern garments
evolved through developments in tailoring from the
fourteenth century onward.
For hundreds of years, dresses worn by women in
Western cultures consisted of bodices (often tight-fitting
for support), full skirts, and sleeves either attached or
belonging to a separate garment worn under the bodice.
This basic dress structure also existed in Eastern
cultures, in garments such as the chuba, which
originated in the cold Himalayan mountains of Tibet.
In the modern version of the traditional cut shown
here, the structure consists of two rectangles for the
skirt and two panels lightly shaped into a fitted bodice.
As with many historical dresses, the sleeves are
part of the undergarment.

The creating of volume and shape with techniques such
as darting, seaming, and gathering continued to evolve
in both men’s and women’s clothing.
For centuries, women’s dresses were constructed around
the corset and petticoat. That fashion paradigm finally
began to shift in the late nineteenth century, as dress
reform movements emerged. The Rational Dress Society,
founded in 1881, objected to the tightly laced corset for
health reasons and championed looser-fitting clothing.

In modern fashion, we have found a balance: existing
alongside voluminous shapes, darting and seaming
are used to create subtlety in contour and fit. By
studying the dress bodices in this chapter, we will
see how various types of darts and seams create
specific silhouettes.

Chapter 1.2
Dresses
History | Exercises | Draping project | Variations

In the early 1900s, the famous couturier Paul Poiret
continued this trend by designing clothing that was
roomy and comfortable, with no corsets. His designs
were so radically different that seeing women wearing
his creations was said to have caused people to faint.

041

Exercises
Dart variations
Observe what happens when a perfect square of
muslin is draped over the female form. The obvious
challenge is to work with the curve of the bust
and waist. Various types of darts can be used to
different effect to fit the bodice. Three are shown
here. As you work, train the eye to see subtle
differences in silhouette; look closely at how the
muslin falls and what happens to the grainlines.

Muslin preparation
12"
1"

11"

18"

042

Shoulder dart

Side bust dart

Waist dart

Pin muslin down CF and at neckline.

Pin muslin down CF and at neckline.

Pin muslin down CF and at neckline.

Keeping crossgrain horizontal, fold in a
dart with excess formed at shoulder area.

Now smooth muslin over the shoulder,
letting it fall downwards, and pin side dart
by folding excess muslin up at side seam.

Now smooth muslin over the shoulder,
armhole, and side seam, allowing excess
muslin to fall toward front.

Pin dart, ending it just before bust point,
and study the silhouette.

Pin a dart at the princess line, about
halfway between side seam and CF.

Pin dart and study the silhouette created.

The deeper the dart, the more
exaggerated the point at the end of it
will be. Unless this is a style or design
decision, darts need to be subtle and as
invisible as possible.
Try redraping all the above darts
lessening the intake and observe
the difference.

Chapter 1.2
Dresses
History | Exercises | Draping project | Variations

Creating subtle darts

043

Classic bodice
with bust dart
This sleeveless bodice with a side bust dart illustrates
the very straight drape this dart creates. Note how the
lines of the plaid remain vertical and horizontal with
the help of that dart. The sides drop vertically, with
only slight shaping out at the bust and in at the waist.
This classic, utilitarian darting is used for blouses and
dresses where taking the flare out of the front part of
the garment is needed, without fit at the waist.
Notice how the fairly high tie-front neckline and classic
armhole shape support the quietly conservative nature
of this bodice.

Disappearing darts
Darts are used to create shape, and are not normally featured
as stylelines. Therefore, the idea is to make them as invisible as
possible. When choosing which dart to use for bust shaping, consider
not only the silhouette you want to create, but also how that dart will
look in the final fabric. Remeber to back the dart off the bust point
and keep it as shallow as your style will allow.

Muslin preparation
13"

12"
1"

1"

11"

11"

Front

22"

22"

044

Back

Step 1
Pin down CF, aligning crossgrain line with
bustline tape. Leave the ½" (1.5 cm) or
so of ease that is created between bust
points and let muslin fall free at curve
of waistline.
Pin at bust.
Trim and clip neckline area and shoulder
excess until muslin lies smoothly.

Step 2
Form side bust dart by folding lower fabric
up. Check the silhouette in the photograph:
side seam should be falling quite straight.
The dart ends about ½" (1.5 cm) before
bust point and will be about ¾" (2 cm)
wide on the double. If the dart is too deep
or carries too far toward the center front,
it will create a very pointed look; your goal
in this is to let it disappear and create a
rounded look without a pucker.
Pin at side seam to hold in place and check
the silhouette again. The crossgrain should
be parallel to the floor, and the look from
the front should be smooth and boxy. Note
the silhouette in the photograph.
Trim away armhole excess, leaving
approximately 1" (2.5 cm) seam allowance.

Step 3
Pin down CB, leaving space at waistline to
hang freely, aligning crossgrain line with
bust tape.
Create back neckline dart by holding
fabric gently at shoulder-blade area and
folding excess fabric toward CB. The dart
intake should be about ¼" (0.5 cm) wide
on the double.
Trim and clip back neckline and shoulder
until fabric lies smoothly. Trim armhole
area to about 1" (2.5 cm) seam allowance.
Pin wrong sides together at side seam
along side seam of dress form. Trim seam
allowance down to about 1" (2.5 cm) and
clip a few times at waist, which will allow
seam allowances to turn more smoothly.
Turn front over back at side seams and
shoulder areas. At the shoulder, pin firmly
at either side of seam so fabric does not
move, then fold front over back. At side
seams, because you are draping away
from the form, chalk a pin line lightly, with
a crossmark or two along the seam, then
fold front over back.

Check the silhouette in the photograph and
adjust if necessary by pinning more tightly
or loosely until you achieve the look.
Mark neckline and armhole with twill tape.
Note that the neckline you are marking is
without the bias collar piece.

Clipping
Clipping takes practice. The idea is to clip
enough for the muslin to lie smoothly.
Where the fabric is restricted, trim and
clip, letting the fabric fall where it wants
to go.

Chapter 1.2
Dresses
History | Exercises | Draping project | Variations

Step 4

045

Bodice with
French dart
The French dart is a side bust dart similar to that
shown on pages 42–43, but it is angled quite severely
from the side waist to the bust. This type of dart,
widely used in the 1950s, removes fullness from the
front part of the bodice and provides a closer fit to the
underbust area. It allows the waist to be pulled in to
match the fitted skirt. The neckline is not extremely low
or tight. The bodice is form-fitting and feminine, and
retains a sense of youthful innocence, personified here
by Reese Witherspoon.
Notice how the dart is slightly curved as it moves
toward the bust point. The lengthgrain runs straight
down the center front and center back. The back
bodice does not need a dart as the top edge is below
the shoulder blade, the area that normally would
need shaping.

Muslin preparation
12"

10"

1"

1"

2"

4"

Front

11"

13"

046

Back

Step 1

Step 2

Pin down CF, aligning crossgrain line with
bustline tape. Leave the ½" (1.5 cm) or
so of ease that is created between bust
points and pin at bust and waist.

Form French dart by folding fabric from
center upward toward side seam. The dart
should begin at the bust point and end
about 1" (2.5 cm) above the waist.

Smooth muslin over top of bust to side
seam, allowing ease to fall toward front.

Lightly chalk the lines of the dart.

Now reopen dart and, following chalk
lines, trim away excess fabric inside
dart intake. Leave about ¾" (2 cm) seam
allowance for the dart. Cutting out the
dart will allow you to curve it, thereby
achieving a closer fit.
Folding lower edge over upper, fold in
French dart, pulling in as much as possible
from underbust area to get a close fit.

Pin down side seam about 2" (5 cm).
Smooth and pin waistline from CF
toward princess line, trimming and
clipping as needed.

Step 3

Side bust area

Pin down side seam.

The upper edge of the side bust is usually
kept quite high as it offers more support
for that area. The back upper edge should
lie along the bra line.

Step 4
Pin CB lines, aligning crossgrain with
bust tape.
Smooth muslin over back bust area,
allowing crossgrain to float up naturally.

Step 5
Check photo and create neckline with
twill or sticky tape.

Chapter 1.2
Dresses
History | Exercises | Draping project | Variations

Pin along waistline from CB toward side
seam, trimming and clipping excess as
necessary to allow fabric to fall smoothly.

047

Swing dress
with no darts
The draping of the “swing” (or tent/trapeze) dress will
illustrate what happens when no darts are formed. All
of the ease simply falls to the front over the bust and
creates flare in the front.
The mood of the dress is playful and flirty—it can be
full and short. It is a day dress so the armholes will be
cut in at the back shoulder for a sporty, racerback style.

Muslin preparation
22"

22"
1"
11"

11"

25"

25"

Front

40"

40"

048

Here, the width of the pieces can be
larger or smaller depending on how
full you want your dress to be.

1"

Back

Step 1
Pin down CF, aligning crossgrain line with
bustline tape and lower crossgrain line
generally at hipline.
Trim and clip neckline as you smooth ease
over shoulder area. Note how the angle of
the shoulder seam will control how much
front flare is created.

Step 2
Pin shoulder and upper half of armhole and
trim excess to about 1" (2.5 cm), carving
out armhole area all the way to bust/
crossgrain line.
Repeat from Step 1 for the back.

Step 3
Pin front over back at shoulder.
Pin side seam at underarm.
Hold side seams together and check flare
(using a mirror if possible).
Pin side seams lightly together.
Trim side seams to about 1" (2.5 cm).

Step 4
Matching grainlines

Turn front side seam over back (lightly
chalk at the pins if necessary).

It is not critical to match the grainlines you have drawn on the muslin; they are guidelines to help
see if the grainlines are balanced. It is acceptable for the front and back to shift slightly up or
down when they are pinned.

Using one of the dress form’s cage bars as
a guide, level the hem.
Twill-tape neckline and armhole shape.
The armhole has a slightly cut-in angle in
the front and a racerback feel in the back,
but will still maintain the classic armhole
egg shape, with the narrowest part being
1" (2.5 cm) toward the front of the side
seam. The armhole will be about ¾" (2 cm)
below the plate.

Leave neckline high until marked
for stability.
Check hem, armhole, and neckline shape
for attitude. This dress is young and
playful. Look at the balance of the shapes
and see if it has the same lighthearted, fun
look as in the photograph.
Try letting down the hem and raising the
neckline tape to see how this changes the
look of the dress.

Chapter 1.2
Dresses
History | Exercises | Draping project | Variations

Step 5

049

Draping project
The famous bateau-neck sheath dress that
Audrey Hepburn wore in Breakfast at Tiffany’s
defined an iconic look of the 1950s. Coco Chanel
had already popularized the little black dress.
Here, Hepburn epitomizes its modernity and
elegant glamour.
This dress will be draped in two pieces, front and back,
creating the close fit with side bust darts and princessline vertical darts. The side seams will taper slightly,
following the look of the dress in the photograph.
Before beginning the drape, look at the photograph
again. Study the silhouette with its sleek lines. It
appears to be quite tight-fitting, so drape it with some
ease in the fit. The actual dress worn by Hepburn in
the film had a waist seam that would have allowed
a slightly tighter fit at the waist. The design has been
modified here so you can practice the long, vertical
darts. The object is to capture the narrow, willowy
look of the dress.

Muslin preparation
13"

12"
1"

1"

11"

11"

17"

17"

Front

55"

55"

050

Back

Step 2
Observe the fullness at the front and how
it naturally wants to be folded in.

Pin back section down CB and anchor-pin
at neckline and hipline.

Form front vertical dart. Start at waistline,
folding fabric toward side (dart will be
pressed toward center), then taper toward
bust, ending dart about ½" (1.5 cm) before
bust point. Taper to hip area, ending dart
about 4–5" (10–12.5 cm) below waist.

Form back neck dart by holding muslin
at shoulder-blade area (at princess line,
about 7" [18 cm] below CB neck point).
Then fold muslin toward CB with
¾" (2 cm) dart intake. Pin dart.

Pin muslin to side seam of form, leaving
ease. The dress will be body skimming,
not skin tight. The typical amount of ease
is about ½" (1.5 cm) at bust, lying away
from the form about ½" (1.5 cm) at waist
and about ¾" (2 cm) at hip.

Step 1
Align CF lines and crossgrain line with
bustline. Pin down CF to high hipline
leaving the ease between bust point and
at waist. Anchor-pin at CF neckline. Pin at
bust point.
Smooth muslin over shoulder area,
trimming and clipping neckline.
Form side dart by folding fabric up so
waist crossgrain remains horizontal. This
dart is not as severely angled as a French
dart, but angled down more than the side
dart on pp. 44–45. This allows the muslin
to fall in at the side.

052

Pin side seam from underarm to high
hipline and trim away excess at shoulder,
armhole, and side seam above waist,
leaving about 1" (2.5 cm) seam allowance.

Step 3

Trim and clip back neckline and
shoulder area.
Pin front shoulder over back.
Start back vertical dart by folding in at
waist about ½" (2 cm) on the double.
The single back dart will have to be very
deep to allow the ease you want in the
hip. To shape back more gracefully, split
darts and form two instead of one.

Step 4

Step 5

Top end of darts will stop before shoulderblade area, about 6–7" (15–18 cm) above
waist. Lower end of darts can go almost to
hipline; darts may be longer in back than
in front. The dart closest to CB should be
a little longer than the one toward the
side seam.

Prepare to turn front over back at side
seams. Take care not to disturb the drape
you have created. Lightly mark every
3–4" (7.5–10 cm) with chalk on both front
and back of the dress. Chalk in a few
crossmarks for reference so the pieces do
not shift when you unpin them.

Now pin at sides, wrong sides together,
leaving ease the same as the front, and
trim away side seam excess, leaving about
1" (2.5 cm) seam allowance. Check the
sketch to make sure you have the taper
toward the hemline.

Clip a few times at the waist to make it
easier to fold in.

Step 6
Unpin side seams, placing pins a few
inches from the seam to hold the muslin
in place.
Starting at waist, turn under front muslin
to match back muslin at side seam of
dress form. Work up toward bust, then
down from waist to hem.

Trim seam allowances to about 1" (2.5 cm).

Step 7
After pinning side seam, check that
the seam is lying smoothly. Here at
the waistline, one of the pins is pulling
the fabric too tightly. Observe the two
wrinkles pulling diagonally from the pin.

The solution to this problem is to remove
the pin and drape in a little more fabric
in that area. Clip more at the curves if it
is still pulling.

Chapter 1.2
Dresses
History | Exercises | Draping project | Variations

Step 8

053

Step 9
Notice how here the seam has been
smoothed out.

Step 10
Use a metal right-angled ruler and chalk to
mark hemline before turning it up.

Step 11
Set armhole and neckline stylelines using
twill or sticky tape. Check the sketch to
see where to place the tape.

Marking and truing
This is a part of the process that is painstaking
at first but will become easier as you learn
more about how classic pattern shapes look. It
is sometimes difficult to tell whether a mark on
the muslin is a subtlety of shaping in the drape,
or whether it is simply a stray mark. If a great
discrepancy appears, you can always repin and
check that section on the form again.

Muslin preparation
26"

12"

13"

1"

17"

17"

55"

55"

Cutting the muslin
To economize on muslin, you can cut
another half front and simply seam
the two fronts together, with the
understanding that the final garment
will be cut in one piece.

054

Left: Front
Right: Back

Step 1
Using a pencil, mark around neckline and
armhole on outside edge of twill tape.
Mark both edges of the darts, mark upper
and lower end points, and crossmark
every 3–4" (7.5–10 cm).
Mark side seams on both front and back
sections; use crossmarks about every
10" (25 cm), making sure to use one at
the waistline for easy reference when
truing curves.

Step 2
Unpin the muslin and gently press with
very little steam so that it does not shrink
or twist.
For this dress, check the full muslin. You
will, therefore, need to cut a new muslin
section for the full front and one additional
back section for the left back.
Block new front muslin, and draw lengthand crossgrains as shown in the muslinpreparation diagram on p. 54.

Step 3
With a clear graph ruler, mark the lines that
will be perfectly straight: CF neckline will
square exactly with CF line for at least the
first 1" (2.5 cm); shoulder seams will be
straight; side bust dart legs and hemlines
will all be straight.
Fold in side bust dart to its original draped
position and draw a straight line from the
waist to the underarm.

Fold new muslin in half on CF, pinning at
crossgrain to ensure it is exactly aligned.
Now align draped piece onto the folded
muslin, aligning length- and crossgrains,
and pin into place.

Step 4

Step 5
Using a long metal hip curve, draw side
seam from high hip to hem.

Now draw in waist-to-hip curve as it
changes from a concave to a convex curve.
This tool is especially useful for this area.

Use a long metal ruler to finish side
seam, which should be very straight
from hip to hem.

Marking the muslin
When marking the muslin on the form, use a dotted line made with a pencil or chalk. After you
have unpinned and are smoothing the curves with the rulers, use a continuous line. That way it
will be easier to keep track of which lines you have trued.

Sometimes when truing lines there are
markings that do not seem to be compatible
with others. It is important in these cases
to use pattern-drafting training to discern
whether the markings are purposeful and
adding subtlety to a line, or whether they
are stray marks that need to be smoothed
out. In this case, the marks are curving
in below the hipline, but you know that
you want your side seam to fall straight
with a little bit of narrowing at the hem.
Therefore, ignore those few markings that
have strayed beyond that straight lines, and
simply draw in a smooth curved line.

Chapter 1.2
Dresses
History | Exercises | Draping project | Variations

Using a clear hip curve, draw in bateau
neckline and armhole.

Step 6

055

Analysis
Compare your drape with the photograph.
First, look at the overall impression. Is
the general shape the same? Have you
captured the essence
of the design?

Step 7
Using a clear graph ruler, add seam
allowances to edges as follows:
• Neckline and armholes: ½" (1.5 cm)
• Shoulders and side seams: ¾" (2 cm)
• Hem: 2" (5 cm)
Then cut through all layers on the
new lines.
Clip in at crossmarks no more
than ¼" (0.5 cm).

Begin at the top and work down: does the
bateau neckline have the right height and
curve? Do the armholes have the same
cut-in angle?

Step 8
To mark darts or any interior lines, tracing
paper and the tracing wheel are used.
Slip tracing paper underneath draped
muslin and draw dart lines with tracing
wheel. Since you are working with a
double piece, you must also mark the
other side by placing tracing paper
underneath the folded piece and tracing
the line a second time.

Do the side seams taper to the same
degree? In the photograph, Hepburn has
one leg in front of the other, and the fabric
of the dress may have been pulled back.
The actual dress cannot be too slim or
movement will be restricted.
Try visualizing the dress in a beautiful
black silk crepe. Does it evoke the modern,
glamorous look that Audrey Hepburn
personifies?

Transferring the muslin to a paper pattern
Once the muslin is marked and trued, you may want to create
a paper pattern.
1. Draw length- and crossgrains on dotted graph paper to correspond
to the grainlines on your muslin pieces.
2. Align muslin piece on the paper, matching the grainlines. If the
grainlines have twisted or angled, gently reblock the muslin so
it aligns with the paper grainlines.
3. Use a tracing wheel to transfer all markings on the muslin to
the paper. Using carbon paper makes the lines easier to see.
For specific points such as the tailor-tacked darts, use an awl
to punch through the muslin onto the paper.
4. Remove the muslin and draw in lines smoothly using the proper
rulers for each type of straight or curved line. If this step is done
before you repin or baste the muslin and do a fitting, make sure
you accurately transfer any corrections onto the paper pattern.

056
Front

Back

Variations
Setting the
princess line
into a yoke
In this contemporary design, the fit of the bodice is in
the yoke seam above the bust and in the princess line
running vertically from that yoke. The basic shape is
similar to the Audrey Hepburn dress, but looser. It is a
strong, confident, almost aggressive look.

Muslin preparation
10"

10"
1"

4"

1"

Far left: Front yoke piece
Left: Back yoke piece

4"
10"

9"

8"

7"

8"

1"

7"
1"

4"

4"

4"

4"

3½"

Side front

Center back

15"

16"

Center front

15"

16"

058

3½"

Side back

Step 1
Align CF lines and pin crossgrain at bust.
Center side front section between
side seam and princess line, allowing
lengthgrain to fall straight.
Pin wrong sides together, forming the
princess line.
Check the photo. This is a loose-fitting
dress and the princess line is quite wide,
at least 1" (2.5 cm) wider than the line
on the form. The CF shape is fairly boxy.

Step 2
Pin CF section over side front section.
Slice out seam allowance of armhole
leaving about 1" (2.5 cm) seam allowance.

Step 3
Set yoke piece by aligning CF lines and
pinning crossgrain, taking care to keep the
grain parallel to the floor.
Trim and clip neckline until it lies smoothly.

The yoke is used here in a similar way to
how a dart is used. The joining of the two
pieces is straight until the last 3" (7.5 cm)
or so before the armhole. At that point,
each piece is cut in slightly, creating
a dart-like shape that takes up excess
fabric and allows a closer fit to the body.

The yoke line is straight to princess seam
and then gently folds up about ½" (1.5 cm)
more at armhole to take up ease and keep
line visually straight.

Step 4
Repeat from Step 1 for back section. Make
back yoke about same width as front.
Turn front side seam over back side seam.
Turn front shoulder seam over back
shoulder seam.
Twill tape armhole and neckline. Note that
the armhole in this dress is slightly more
contemporary than the classic bodice on
p. 44. It is cut a little bit lower—a good 1"
(2.5 cm) below the armplate.

Chapter 1.2
Dresses
History | Exercises | Draping project | Variations

Using the yoke line as a dart

Turn under yoke line, following stylelines
of the photograph.

Any shaping you give to the bodice at this
point, therefore, should come from the
side front section. The CF princess line
should remain almost straight, and the
side front section will curve out at the bust
and slightly in at the waist. It is difficult
to tell from the photo how much shaping
has been created at the waist. It will be
possible, however, to keep the shape boxy
and still have a little shaping at the waist,
which will make it more flattering.

059

Joining two
darts to create
the princess line
Princess Alexandra of Denmark popularized the
combining of skirt and bodice into one garment, using
a long, vertical seam running from the mid-shoulder
point over the bust point, down past the hip, centered
between the side seam and the center front. The seam
was named after her—the princess line.
The fit is comparable to that you would get from using
a shoulder dart (see p. 43) and a long dart as in the
Audrey Hepburn dress. If the two darts are joined,
you can see how the two pieces will look.

Muslin preparation
7"

9"

8"

1"

8"

1"
4½"

11"

10"

20"

Side front

21"

Center back

25"

Center front

11"

26"

060

11"

25"

25"

21"

4"

21"

Side back

Step 1
Align CF lines and crossgrain line with bustline. Pin down CF to
high hipline, leaving the ease that forms between bust point and at
waist. Anchor-pin at CF neckline to hold firmly. Pin at bust to hold
crossgrain in place.
Smooth muslin over shoulder area, trimming and clipping neckline
as needed.
Following princess line of dress form, trim away excess muslin,
leaving about 1" (2.5 cm) seam allowance.

Step 2
Set side front section by centering lengthgrain line at approximate
center of side bust area, and align crossgrain line with bust tape.
The lengthgrain line should remain perpendicular to the floor.
Pin down lengthgrain line and across crossgrain line.
Leave ¼" (0.5 cm) or more ease on armhole area as you drape
section across shoulder.
With wrong sides together, pin side front section to CF section
along princess line, starting at bust and pinning up, then pinning
down to high hipline.

When to shape the neckline

Matching crossgrain lines
It is not crucial for crossgrains to match up; they are there only for
guidelines on setting the pieces. It is more important, for example,
that the side front lengthgrain is perpendicular to the floor than that
the crossgrains match.

Clipping or trimming seam allowances
Whenever you are directed to clip or trim a seam allowance to
an approximate amount, do not stop and measure, just trim away
enough that you can continue draping without obstruction and the
fabric lies smoothly. While draping, a general rule of thumb for seam
allowances is:
Necklines: ½" (1.5 cm)
Armholes and side and shoulder seams: ¾" (2 cm)
Hems: 1" (2.5 cm) minimum.

Chapter 1.2
Dresses
History | Exercises | Draping project | Variations

When draping bodices, it is important to leave the muslin intact all
the way to the neckline so that it does not shift or twist. Once the
muslin is marked, with twill or sticky tape, you can trim away the
excess fabric.

061

Step 3
Trim side front seam allowance and clip to
pins from underbust to waist.
Trim seam allowance of armhole and
shoulder to about 1" (2.5 cm).
Turn front section over side front section
and pin (you can either lightly chalk a few
places, or place pins to the side of the
seam as you turn).
Trim side seam to about 1" (2.5 cm),
following side seam of dress form.
Repeat for back. Align CB lines and
crossgrain line with bustline. Pin down
CB to high hipline, allowing fabric to
fall in lightly at waist. Anchor-pin at CB
neckline to hold firmly. Pin at bust to hold
crossgrain in place.
Smooth muslin over neck and shoulder
area, trimming and clipping neckline
as needed.
Following back princess line of dress form,
trim away excess muslin, leaving about 1"
(2.5 cm) seam allowance.

Step 4
Set side back section by centering
lengthgrain line at approximate center of
side bust area, and align crossgrain line
with bust tape. Lengthgrain line should
remain perpendicular to floor.
Pin down lengthgrain line and across
crossgrain line.
Leave ¼" (0.5 cm) or more ease on
armhole area as you drape the section
across the shoulder.

062

Avoiding bias at the shoulder
Angle the lengthgrain toward the outer
edge of the shoulder, which will give the
ease needed at the armhole and keep
the grain from moving toward the bias
at the back armhole. It will also keep the
grain from shifting to the bias, which will
weaken the shoulder line—the area that
will support the weight of the garment.

Step 5
With wrong sides together, pin side back
section to CB section along princess line,
starting at bust and pinning up, then
pinning down to high hipline.
Pin side seams together, trim seam
allowances, and clip curves.
Turn center section over side section.

Step 6
Turn front shoulder over back, adjusting
princess-line seams to match at shoulder.

Step 7
Tape armhole and neckline.

Chapter 1.2
Dresses
History | Exercises | Draping project | Variations

063

Bodice with
an armhole
princess line
Jacqueline Kennedy Onassis, widow of U.S. President
John F. Kennedy, was a style icon in her own right.
As one of the youngest (and most beautiful) of the
American First Ladies, she set the standard for stylish,
fashion-forward dress. She chose as her primary
designer Oleg Cassini, but she also wore Dior,
Givenchy, and Chanel.

Muslin preparation
9"

8"

9"

8"

5"

6"

1"

1"

12"

20"

20"

Side front

064

Center front

4"

Side back

Center back

14"

4"

14"

11"

Step 1
Align CF lines and crossgrain line with
bustline. Pin down CF to waist leaving the
ease that forms between bust point and
at waist.
Anchor-pin at CF neckline to hold firmly.
Pin at bust to hold crossgrain in place.
Smooth muslin over shoulder area,
trimming and clipping neckline
as needed.
Pin a length of twill tape along armhole
princess line, beginning where you feel
it will start and ending at waistline. In the
photograph, it appears to begin about twothirds down from shoulder line and end
a little toward center of the princess line.

Step 2
Set side front section by centering the
lengthgrain line at approximate center of
side bust area, and align crossgrain line
with bust tape. Lengthgrain line should
remain perpendicular to floor.

Step 3
Repeat from Step 1 for back sections.
Pin front shoulder over back and front
side seam over back side seam.

Pin down lengthgrain line and across
crossgrain line.
Using the twill tape as a guide, pin the
two sections, wrong sides together,
beginning at bust point and working up
toward armhole, and then down to waist.
Trim and clip armhole excess, princess-line
excess, and at waist to allow muslin to lie
smoothly over form.

Trim away the muslin, leaving at least 1"
(2.5 cm) seam allowance.
Checking ease
Remember that this is a dress with some
ease and should not be tight against the
form. Some armhole ease—½" (1.5 cm)
or so—and some ease in the underbust
area is necessary to allow the fabric to
fall smoothly.

Study the photograph and set the armhole
and neckline tapes to catch the attitude
of the dress. It is from the early 1960s:
armholes were cut very high and small; the
neckline is a modest V with a gentle curve,
concave from shoulder to CF, lending grace
to the style.

Chapter 1.2
Dresses
History | Exercises | Draping project | Variations

Step 4

065

.3
1
Bustiers

History
The plethora of resources for corsets and bustiers today
attest to the enduring appeal of this seemingly restrictive
but surprisingly comfortable, timeless garment.

068

The corset was developed originally to protect, support,
and shape the female bust. While the basic structure
has remained fairly constant, silhouettes changed to
accommodate current fashion.

Victorian corset had a voluptuous, Rubensian look,
the seaming and boning sculpting the body into an
hourglass shape. In the twentieth century, a popular
look of the 1950s was the conical effect of the bust.

In the Georgian era, corsets had a flattening effect,
pushing the upper torso into a tubular form, while the

Chapter 1.2: Dresses explored how different
silhouettes can be shaped through the use of darting

Georgian

Victorian

and seaming. Corsets and bustiers are draped closer
to the form, but the same construction principles are
applied to achieve specific fits and subtle sculpting
of the female figure.
Understanding and using grainlines correctly is vital
to creating a corset that performs well. The grainlines
need to work together with the boning to create
support and shape. It is crucial for the lengthgrain and
crossgrain to balance, otherwise the ring of tension
around the body will be broken, the corset will twist,
and support will be lost. It is useful to think of the
grainlines as an architectural blueprint. As the steel
structure of an architectural form creates the stable
foundation of the building, the strength of the
grainlines and positioning of the boning enable
the corset to give support and shape.

Above left: Corsets have
been shaped to create
different silhouettes
throughout history to
match the aesthetic of
the time. Here the flatter
Georgian silhouette
is contrasted with the
rounder shape of the
Victorian era.
Above right: This Issey
Miyake sculpture shows
the complex curves of the
female figure.

be sexually provocative,
it offered a throwback to
the bras of the 1950s and
explored the concept of
underwear as outerwear.

Chapter 1.3
Bustiers
History | Exercises | Draping project

Opposite page: In this still
from Gone with the Wind,
Scarlett O’Hara (played
by Vivien Leigh) is being
laced into her corset by
her maid, in an attempt to
achieve the highly prized
tiny waist in vogue at the
time. This corset probably
consisted of more than a
dozen lengths of boning
placed vertically along the
lengthgrain of the fabric,
and was laced in the back
to allow for tight fit.

Jean Paul Gaultier created
this cone-shaped bustier
for Madonna’s 1990 Blond
Ambition tour. While the
costume was designed to

069

Exercises
Preparing the
form for draping
the bustier
Study the measurements of your form. If you are draping
the bustier or corset to fit a specific person, compare the
two sets of measurements. Many forms do not have
much bust definition. Usually the upper bust
measurement—a few inches (about 7–10 cm) above
the bust point—of an average female will be smaller
than the form’s. The measurement of the underbust, a
few inches below the bust point, where the lower bra
line would fall, is also quite a bit smaller on a real
person than on a form.
Determine what shape and size of bustier you are
going to create. If desired, you can add a bra or bust
pad to the form to give more definition.
Step 1
Depending on the volume needed, cut one
to three layers per side of felt or fiberfil,
following the pattern.
Stitch them together along the top edge
and pull the thread slightly to ease it in
until it forms a curve.
Steam over a ham until desired shape
is reached.

Step 2
Set the pad slightly under the bust and to
the side, and pin it into place. The human
bustline will be fuller than the form’s
under the bust point.
Check the silhouette that you intend to
create and determine the best way to
achieve it with the seaming. Remember
that the closer your seams are to the bust
point, the smoother your fabric will lie.

Preparing the form
Draping bustiers and corsets is best done with the shoulders of the form pushed into the
armplates, creating a smaller, softer shape that more closely resembles a woman’s body from
the underarm to bust point.

070

Preparing the
fabric and materials
for the bustier
Pulling a thread

For garments where grainline accuracy is particularly critical, like the
bustier and corset, a thread is pulled to mark the line where the fabric
can be cut instead of torn, or to locate the line where the grainline of
the piece can be marked with pencil.
Mark the dimensions of the piece, clip in ½" (1.5 cm), find a thread,
and pull gently until you see it moving through the fabric.
If the thread comes all the way out, you will have a clear path on
which to cut the fabric. If not, cut along the pulled line. If the thread
breaks before you are at the end of the piece, you can simply take a
pin, pick out another thread, and keep going.
To mark the grainline with pencil, simply draw along the “run” in the
fabric where the thread is missing.

Fabrics Contemporary bustiers and corsets
are made with a variety of fabrics, even
knits or stretch panels containing Lycra.
Fortunately for the modern woman, this
allows some flexibility in fit and breathing
room even when tightly fitted. However, for
full control and support, and a more precise
fit, using strictly woven fabrics, is preferable.
Corsets are commonly used as foundations
for gowns. They are ideally made of a flatweave fabric in which the length- and
crossgrains have equal strength, such as
a damask or fine cotton. Chiffon, light voile,
and even silk tulle can also be used. They
are delicate and beautiful, but will only work
if the grainlines are balanced and sufficient
boning is used to keep the fabric taut.

Closures Bustiers can be fastened in a
variety of ways: zippers, buttons, hooks and
eyes, or a busk. Buttons will gap unless the
bustier is not too tight or it has an underlayer
with a more secure fastening. Zippers are
efficient, but be careful in a fashion show or
costuming situation because they sometimes
break at a critical moment. Hook-and-eye
tape or a busk is a common solution.

Boning comes in various forms; sometimes it
can be stitched directly onto the lining, or it
may come in a casing which can be stitched
on before the boning is reinserted. Metal
spiral boning will need a bias casing made
for it or a tunnel constructed between layers
of fabric.

Muslin Hemp/silk muslin is used here for
the bustiers because it is so easy to see
the grainlines. The bustiers are draped very
tightly to the form, and if you are able to see
the grainlines clearly, you can tell right away
when the pieces are twisting or pulling.

Petersham ribbon It is useful to construct
the bustier with a length of ribbon stitched
at the waistline. Petersham ribbon is strong,
yet can be steamed into a curve. This element
serves a dual purpose. First, anchoring the
bustier firmly at the waist with the ribbon
makes it easier to know exactly the distance
from bust point to waist, which is helpful
when fitting the more difficult bust area.
Second, when putting on a bustier, if the
waist ribbon is done first, it is then easier
to fasten the other closures, which can
sometimes be awkward to do without help.

Chapter 1.3
Bustiers
History | Exercises | Draping project

Interlining The muslin or finished fabric
will often be fused or backed to create a
firm panel.

Boning A careful decision is needed as to
where the boning will go. It will play a large
part in determining the silhouette and look
of the bustier. It is usually placed in areas
where most support is needed, like the side
front. This will hold the bust toward the
center front. Traditionally, it is also placed
in the center front and the side back. Boning
placed in the sides is often uncomfortable.

071

Princess-line
bustier
The lace-front princess-line bustier shown here is
a soft, lingerie garment as opposed to a heavily
structured corset. The princess line gives the shaping
over the bust. In this case, the lace overlay makes it
easy to see the styleline. The bustier does not have
a very tight fit, so the buttons on the front closure do
not pull. As with the dress on pages 64–65, this is an
armhole princess-line seam. The fitting seam begins
at the armscye area, then extends over the bust point
and down toward the waist.

Muslin preparation
10"

9"

6"

8"
1"

1½"

3"
1"
5"
4"

13"

16"

11"

Center back
Side front

072

Center front

Side back

11"

1"

11"

4½"

Step 1
Align crossgrain with bust line and pin CF
lengthgrain along CF of form, clipping at
bustline to allow fabric to lie smoothly.
Following the styleline you have created
for the princess line, trim away excess
muslin leaving about 1" (2.5 cm) seam
allowance.
Clip at underbust and waistline to styleline
to allow fabric to fit snugly against the
shape of the form.

Step 2
Set side front section by aligning crossgrain
with bust tape and centering lengthgrain
between princess line and side seam,
keeping grainline perpendicular to floor.

Step 3
Turn front over side front section and pin,
removing pins a few inches at a time and
placing them to the side of the seam to
keep them from moving.

Pin along grainlines and side seams.
With wrong sides together, pin side front
at the princess line to CF section.
Trim seam allowance to about ¾" (2 cm)
and clip every 1" (2.5 cm) or so to pin line.
The muslin should be now fitting quite
snugly and grainlines should be stable and
holding their vertical and horizontal lines.
Check pencil lines carefully: if any are
wavy, twisting, or pulling, carefully remove
pins one at a time to determine how to
correct them.

Pinning
When draping a very fitted garment,
remember that you will need to place the
pins more closely as you drape more tightly.

Step 4
Set CB section, aligning lengthgrain with
CB and crossgrain with bust tape.
Pin down back princess line, angling
slightly in toward the waist.
Trim seams to about 1" (2.5 cm) and clip
waist area.

Step 5
Pin front over back at sides and
CB over side back.
Tape hemline and neckline.

Chapter 1.3
Bustiers
History | Exercises | Draping project

Set side back section as side front,
keeping grainline vertical.

073

Bustier with
Georgian shape
Contrast the mood of this bustier with the one on page
72. This Versace bustier has a tougher, edgier quality.
The metal zipper and heavy topstitching add to the
armorlike quality.
The grainline placement creates a Georgian silhouette.
The center front lines are vertical, and the side panel
grainlines slant toward the center front, causing the
energy to focus toward the waistline with the bustline receding.
The multiseam front divides the fit of the bust into
three panels instead of the two used in the princessline bustier. The bust shape will be softer and flatter
than the more defined silhouette achieved with the
single seam.

Muslin preparation
6"

8"

5"

7"

5"

3"

1"

2½"

9"

Center back
Mid-back
Side back

Side front

Center front

074

Mid-front

14"

8"

18"

10"
20"

18"

10½"

3½"

13"

4"

12"

7"
1"

3"

2"

4"

4½"

10"

6"

1"

Step 1

Step 2

Step 3

Create two stylelines on form with black
twill tape in front and to side of princess
line from armhole to waist.

Set mid-front section by aligning
crossgrain with bust tape and waist
crossgrain with waist tape on the form.

Pin mid-front and CF sections together,
wrong sides out. They should fit the form
quite tightly.

Align crossgrain with bustline and pin CF
lengthgrain along CF of form, clipping at
bustline to allow fabric to lie smoothly.

The lengthgrain here is angling toward
CF, allowing the strength of the grain to
run alongside the bust. This gives support
where it is needed on the side bust.

Trim seam allowances to about ¾" (2 cm).

Following the styleline you have created,
trim away excess muslin leaving about 1"
(2.5 cm) seam allowance.

Clip at waist and underbust. Trim away
seam allowance on the edge toward the
side to about ¾" (2 cm).

Pin down lengthgrain and across bust and
waistlines.

Clip at underbust and waistline to styleline
to allow fabric to fit snugly against shape
of form.
Pin across bustline, underbust, and waist.

Aligning crossgrains

Note how the grainline becomes bias
below the waist, allowing some give
where it is needed for the shape of
the high hip.

Chapter 1.3
Bustiers
History | Exercises | Draping project

Using bias for stretch

Remember that the crossgrains do not
have to match exactly when you join two
pieces of muslin. They are guides for the
proper placement of individual sections.
The crossgrains in the bustier should
generally be along the same meridians,
but it is not a goal to have them match at
the seams. Often they will not.

075

Step 4

Step 5

Step 6

Set side front section by aligning bust
crossgrains with bust tape and waist
crossgrains with waist tape.

Pin side front section to mid-front section
and trim away seam allowances to about
¾" (2 cm).

Cut a small piece that will allow draping to
continue. Align grainlines and cross-stitch
it in place.

Lengthgrain will angle forward and run
parallel to grainline of mid-front section.

Clip where needed.

Continue to drape side panel by pinning
down side seam of form and trimming
away excess seam allowances.

Pin down grainlines.

Observe how, at the side seam, the fabric
has run short. A small piece must be added.

Adding sections of fabric
When draping, you can simply add on a
piece of fabric if the initial muslin has
run short. It is, however, critical that the
piece added is of the same grainline as
the main piece.

Turning the seams of a
fitted garment
The best method for this tight-fitting
garment is to make a line of pins on
either side of the seam that is being
turned. Then, a few at a time, unpin and
repin, folding front over back, allowing
the pins on the sides to hold the fabric
firmly in place.

Step 7

076

Turn seams front over back.

Step 8
Stand back, hold up your flat sketch, and
check the stylelines. You can shift them at
this point if necessary.
Check for twisting and pulling by studying
the grainlines. They should be running
smoothly in straight lines down the pieces.
Note how, on the mid-front section, the
pencil line is curved in below the waist.
That means it is “off grain” and needs to
be corrected.
Release any pulls in the grainlines and
repin to straighten lines.
Repeat from Step 1 for back.

Step 9
Mark top and lower edges with twill or
sticky tape.
Keep the top edge high at the front
underarm area to give additional support
to the bust.

Chapter 1.3
Bustiers
History | Exercises | Draping project

077

Draping project
This bustier from Christian Lacroix’s Fall/Winter 1997
collection is a play of contrasts: the soft and sensual
flowers and S-curve seaming with the hard structure and
tight fit. The forward motion of the overflowing flowers is
held back by the vertical lines that restrain and hold the
body erect.
The low and sexy top edge is covered by ornamentation.
The accompanying skirt supports this theme, with soft
folds spilling out from beneath a hard leather belt,
which cuts across the front of the skirt, holding it in.
The tension of these two aspects creates energy—
a perfect balance of the magnetic and dynamic.
This is a Victorian silhouette, evident in the bust
definition and small waist. The upright quality of the
bustier—the sense that it holds the wearer erect—
indicates that the grainlines should be vertical,
although the seaming is curved.
The princess-line seam will give the bust definition.
The two seams of the mid-section, as in the Georgianstyle bustier on pages 74–77, give additional fit to
the bust and waist.
The two boned seams curving forward help to hold the
waistline in. The side-piece grainline becomes bias as
it extends toward the front, giving stretch and,
therefore, more shape to the front high hip area.

078

Visualizing the volume
Before preparing the muslin, visualize the
volume: the pieces angle toward the front,
so they will need enough width to keep the
grainlines vertical from top edge to hem.

upright. The restraint is not negative; she
feels supported and dignified.

proportioned, so note that your stylelines
will look slightly foreshortened.

The photograph shows the proportions of a
model’s body. The dress form is realistically

As you drape, try to strike that balance
between soft sensuality and a “held-in"
quality. Imagine how the woman in this
bustier feels: the boning is holding her

Muslin preparation
7"

8"

3"

4"

8"
2"

2½"

2"

1"

3"

2"

2"
14"

5"

2"

13"

4"

6"
2"

13"

1"

6"

16"

16"

17"

Back

Mid-back
Side back

Mid-front

Side front

Center front

Step 1

080

Step 2

Following the flat sketch on p. 78, set two
pieces of twill tape on the form.

Set CF section by aligning length- and
crossgrain with CF and bust tape; pin.

Set bust pad in place at underbust area,
or put a bra on the form.

Clip at CF bust to allow fabric to lie
smoothly.

Using twill tape, create the two front
seamlines. Do not relate to curved vertical
line next to CF line yet. That line is simply
an overlay and not a construction seam.

Trim excess along twill tape line, leaving
about 1" (2.5 cm) seam allowance.

Step 3
To set mid-front piece, align crossgrain
with bust tape and center lengthgrain
between the pre-determined stylelines.

Step 4

Step 5

Pin along next twill tape styleline. Trim
seam allowances to about 1" (2.5 cm).

Now check stylelines of three front
sections and compare with the sketch.

Pin the mid-front and CF sections wrong
sides together, placing pins quite close
together to get a snug fit. Do not forget to
accentuate the underbust area.

Set side front section by aligning
crossgrain with bust tape and letting
lengthgrain fall vertically. If it becomes
confusing to find the right line, hang a
plumb-line weight to correct your line.

It may help to lay some twill tapes on the
pinned seams and see if they have the
same beautiful flow that the Lacroix does.

Trim together to ¾" (2 cm); clip waist and
underbust curves.

Pin mid-front piece to side piece, wrong
sides together.
Trim side seam allowance to about 1"
(2.5 cm), following side seam of form.

Step 6
Set CB section by aligning lengthgrain
with CB and crossgrain with bust tape.
Set mid-back section by aligning
lengthgrain with back princess line
and crossgrain with bust tape.

Pin back section to mid-back, wrong
sides together.
Set side back section as for mid-back,
forming a dart at waist.

Because the bustier is very fitted, an
exaggerated back curve will help keep the
bustier in place.

Chapter 1.3
Bustiers
History | Exercises | Draping project

Form a dart in center of mid-back
section to fit back waist very tightly.

Fitting

081

Step 8
Tape CF overlay piece, which will be an
important part of the look.
Tape top edge and hemline.
Check stylelines of the photograph again
for accuracy. It may help to highlight
seamlines with black tape, so that when
you step back and analyze the drape you
can see if the look is achieved.
Correct your lines accordingly.

Step 7
Pin all seams to inside, folding seam
allowances toward CF and CB.

Step 9
The side front line will be moved slightly
toward the front to achieve a more
dramatic hip emphasis.
Check line again from a distance and repin
seam accordingly.
Mark all seams with crossmarks, which
will help you re-match the pieces after you
take them apart. Use your patternmaking
skills to double-notch or crossmark back
pieces and notch or crossmark front pieces
at different levels. Mark waistline on all
pieces for an easy reference point.

082

Marking and truing
Muslin presentation
Be clear on the purpose of your muslin
presentation. Is it for yourself, to see
the finished effect of your seaming
and grainline placement, or are you
showing it to an employer or potential
client? The more finished construction
details you include in the final muslin,
the easier it will be to make decisions
about proportions like stitching details
and trims.

Step 1
True up CF piece. Use a clear French curve
to smooth the lines that move from convex
to concave curves from bust and waist to
high hip areas.

Step 2
True the lines on mid-front section using
the long metal hip curve to draw in longer,
straighter areas.

First, block the new muslin pieces, and
draw length- and crossgrains as shown in
the muslin-preparation diagram on p. 78.
Now align draped piece onto folded
muslin, align length- and crossgrains,
and pin into place.
Cut the two pieces together along the
lines you have trued.

Step 3
Use a small graph ruler to true the straight
lines and to add seam allowances. Use a
½" (1.5 cm) seam allowance to join body
pieces, and 1½" (4 cm) at CF and CB.

Now coordinate all the details of the
piece. The quilted sections will have to
be prepared before the garment is sewn.
Using a pencil, determine the proportion
you feel is right and draw the lines using a
graph ruler.

True mid-front to side front at crossmarks.
For this bustier, sew the full muslin. You
will, therefore, need to cut the mirrorimage second sections for all pieces.

Step 6
For the closure, use a “busk”: two metal
strips containing a knob and loop piece.
You could also use hook-and-eye tape.
For the boning, use metal spiral boning,
which, unlike its plastic counterpart, curves
with the seaming. This is important, as the
two main front seams follow S-curves.

Step 7
Sew seams and then sew an additional
line close to raw edges of the seam
allowance, forming a casing into which
boning can be inserted.
In the photograph, it appears that the
boning and seaming may be topstitched
differently, but this will suffice.

Chapter 1.3
Bustiers
History | Exercises | Draping project

Step 5

Step 4

083

Step 8
Cut and twist some muslin roughly to
give an idea of the form and shape of the
flowers you want for the ornamentation.
A design assistant can use these mock-ups
as a guide when choosing silk flowers for
your final piece.
Attach flower pieces by tacking them onto
the top edge or tucking them inside.

Step 9
The CB will be constructed with a lace-up
treatment. This will allow the wearer to
adjust the bustier and help it further settle
into the subtleties of the fit.
Two boning pieces are placed at the
tunnel created by the CB fold. Grommets
are attached just to the inside of those
tunnels, which helps CB stay straight.

Analysis
Look carefully at the original Lacroix
photograph and your drape. On your
muslin, the Victorian silhouette has been
achieved with the use of two front seams.
But the Lacroix has slightly more of an
S-curve as it travels from the top edge to
the waist. Also, there seems to be less
distance in the Lacroix from the top edge
to the waist. It appears to be cut slightly
lower than the muslin, which would
account for that.

084

Side front

The model’s waist may be smaller than
the form’s, but in any case, the waist of
the Lacroix looks a little narrower. Notice
how the first front seam of the muslin
is slightly wider at the waist. If the two
seams had been brought in a little closer
there, this may have given the illusion of
a smaller waist.

Mid-front

Center front

Center back

Using the designer’s skill of visualization,
imagine how this would look in the final
fabric with the delicate silk flowers. That
balance of the push/pull or magnetic/
dynamic energy feels present.

Mid-back

Side back

2

Intermediate
Draping
2.1 Skirts
2.2 Blouses
2.3 Pants
2.4 Knits
In this section, your aim is to find the balance of an individual garment or
ensemble. The multiple elements in garments such as blouses or jackets
are more complex to coordinate than the simpler shapes explored in Part 1.
The trained eye begins to recognize a well-proportioned fit, a balanced line,
an interesting focal point, or a new silhouette.
Now that you have some experience with draping, practice will help you
gain precision and dexterity, and basic skills will become second nature.
Knowing how to create volume with tucks, pleats, and gathers and being
able to handle complex curves that work together will allow you to more
easily control the silhouette you are creating.
As you gain confidence you will develop a “good eye.” By maintaining a
vision of the finished creation, you will learn to recognize it as the muslin
takes shape, and your individual style will begin to emerge.

.1
2
Skirts

History
In 2004, Prada opened an exhibition called “Waist
Down,” featuring skirt designs from 1988 to the present.
The variety of shapes was seemingly endless. Pleated,
darted, tucked, gored, gathered, and ingeniously
seamed, each silhouette was unique.
One of the features of the exhibition was an array of
spinning skirts suspended by wires from the ceiling. The
different shapes they created underscored an important
quality of the skirt: the beauty of fabric in motion.
The fitted bodices featured in Chapter 1.2 were created
through different methods of darting and seaming. These
same techniques, and those listed above, are used to

Left: Visible in the sarongs
worn by these two women
are the long straight lines
that form typically from a
simple rectangle tied at
the waist. In the garment
on the right, the draping
effect is created by
wrapping and tying at
the top edge.

Above: The flat sketch
of this Burmese sarong
clearly shows the simple
shape of the fabric.

engineer movement and flow in skirts. The various
effects of these methods result in the myriad of skirt
styles worn throughout history.
The earliest skirts were made from simple woven panels
worn by both men and women. From culture to culture,
differences lay only in the way the panels were wrapped
or tied. The Africans of Tanzania had the kanga, preIslamic tribes of the Arabian peninsula had the izaar. The
sarong, a Malay garment also worn widely in Southeast
Asia and the Pacific Islands, continues to appear in
modern fashion as a swimsuit wrap or resort skirt.
The way that the fabric panels were fastened to the body
defined the silhouette. In Western Europe, peasants used
a simple ropelike belt drawn through a folded edge at
the top of the skirt to gather in the fullness. Traditional
Indian skirts, or ghagras, were made from a very thin
silk, with the fabric simply folded repeatedly until it fit
the waistline.
Over time, as womens’ bodices became more fitted
and shaped, skirt panels began also to be cut and more
specifically fit. While skirts generally remained long,
modestly covering the ankle—at least for nonworking
women—they fluctuated in width and silhouette,

ranging from the rectangular shape, supported by
panniers, of the 1750s, through the narrow silhouette
of the Empire line of the 1800s, to the rounder silhouette
of the 1850s, formed over the crinoline that required many
yards of fabric. Skirts then began to be pulled back by
bustles; they continued to shorten until, by 1915,
hemlines were finally above the floor.
Skirts held out by petticoats were not really seen again
in daywear until Christian Dior’s “New Look” was
revealed in 1947. As a reaction to the constraints of the
war years, Dior introduced extravagant full skirts with
small waists that became the silhouette of the following
decade and re-established Paris as a fashion capital.
Hemlines continue to go up and down, bubble skirts go in
and out. A fashionable modern skirt today often uses these
same timeless techniques of darting, tucking, and gathering
to sculpt skirt silhouettes that seem fresh yet familiar.

Multiple pleated folds
falling open from the waist
create the fullness of
the traditional Rajasthan
ghagra skirt.

Chapter 2.1
Skirts
History | Exercises | Draping project | Variations

091

Exercises
Kilt
The kilt, a traditional Scottish garment worn by men
and women, is a rectangular length of woolen tartan,
constructed to lie flat in the front and then pleat
symmetrically around the body. The pleats are stitched
vertically in place and released at the high hipline,
creating the freedom of movement. Compare the
silhouette of the Rajasthan ghagra on page 91, also
constructed of multiple vertical pleats, with the kilt.

Muslin preparation
45"

1"

8"
18"

092

Step 1
Pin CF line, aligning crossgrain with
hip tape.
Form a small dart at the princess line
to help fit the waist and to keep the
crossgrain horizontal as it travels around
the curve of the hip.

Step 2
Pleat in about 4" (10 cm) on each of the
pleats until the end of the fabric.

Step 3
Observe the silhouette created by the
pleating. Traditionally, all pleats were
sewn down several inches (about 10 cm)
and then released. This treatment creates
a silhouette that follows the line of the hip
and then flares outward in an angular way.

Chapter 2.1
Skirts
History | Exercises | Draping project | Variations

093

Skirt silhouettes
Dirndls and ballet skirts, as with the kilt, are
constructed of basic rectangular panels of fabric
held in at the waist, as worn for centuries in many
cultures. Pleating provides the fullness for the kilt;
in dirndl and ballet skirts, the volume is created by
simply gathering the fabric at the waist.
In this exercise, you can see how, even when
both skirts are made of muslin, the lengths of the
skirts and the amount of gathers result in very
different silhouettes.

Dirndls and ballet skirts
Dirndl: A dirndl is a European folkloric-style skirt worn by peasants for
hundreds of years in various cultures. It is made from simple woven
panels held at the waist by a band or drawstring.
Ballet skirt: A ballet skirt, obviously inspired by the dance, is generally
understood to be any skirt constructed of large volumes of fabric of
any length, usually very lightweight, gathered in at the waist.

Muslin preparation
45"

1"
8"

25"

094

Dirndl

Ballet skirt

Prepare for the drape by tying a length of
elastic around waist of form.

Measure down 18" (45.5 cm) from top
edge of dirndl skirt. Tear bottom part of
skirt off.

Pin muslin at CF. Slip top edge under elastic.

Adjust gathers toward the front so that
what was the center back line is now even
with the side seam.

Now adjust the muslin, gathering it evenly
toward the back, keeping crossgrain
horizontal at hipline.

Observe the silhouette created by the
shorter length and additional fabric. The
volume of the gathered fabric pushes the
hemline out.

Observe the silhouette created: the
gathering at the waist causes the fabric
to puff out slightly before falling in a
straight line.

Three simple skirts
Study the three silhouettes carefully so
that you begin to train your eye to see the
subtle but distinct differences created by
the construction techniques.
Chapter 2.1
Skirts
History | Exercises | Draping project | Variations

Note that these pleating, tucking, and
gathering techniques will create the same
types of looks when translated into a
sleeve or neckline.

Kilt

Dirndl

Ballet skirt

095

Straight skirt
The straight skirt can be seen as a modern version of the
dirndl as it also is constructed of simple woven rectangles
wrapped around the body. However, where the dirndl is
gathered at the waist, the straight skirt uses darts to
eliminate the fullness, thus creating a smoother line.
Often this type of skirt will have a pleat or slit opening
from the hem in the center back for ease of movement.
Sometimes called a “pencil” skirt, this slim-fitting garment
was popularized during World War II when a struggling
economy dictated cutting down on fabric usage. What
began as a working woman’s practical, basic skirt has
evolved into a timeless fashion staple.

Muslin preparation
13"

13"

1"

1"

9"

9"

24"

24"

096

Front

Back

Step 1

Step 2

Align CF grainline with CF of form and pin
down about 6" (15 cm).

Fold in princess-line dart with an intake of
about 1" (2.5 cm) in total.

Allowing about 1" (2.5 cm) ease, pin at
hipline, keeping crossgrain horizontal.

Pin from waist to about 4" (10 cm) down.
Dart should angle slightly out toward the
side to shape fullness of front hip area.

Smooth muslin from hipline up to waist.
Observe excess formed at front.

Trim and clip at waistline until muslin
lies smoothly.

Step 3
For the back, repeat Step 1.
As you pin up the side seam, observe that
there is even more excess fabric here than
in the front due to the rounder shape of
the back hip area.
Experiment with folding darts. A single
dart creates a prominent end point and
will need to be quite long.
Try separating ease into two darts. Now
darts can be shorter and, because they
are not as deep, create a much smoother
back area.

Matching crossgrains
It is not important that the crossgrains meet. They are there as a guide to keep the grains of the
individual pieces of muslin balanced. It is not a goal to make them match.

Step 4
Pin side seams wrong sides together; trim
to about 1" (2.5 cm).
Turn front side seam over back side seam,
making sure ease is equal in front and back.

Place a tape around the waist to make it
easier to mark.
Turn hem up, leveling it against one of the
bars on the cage of the form.

Chapter 2.1
Skirts
History | Exercises | Draping project | Variations

Step 5

097

A-line skirt
The flared or “A-line” skirt generally refers to a style
that is closely fitted at the waist or hip and becomes
fuller at the hem. The silhouette of this drape will
depend on the final fabric being used. A thin silk in
a longer length would create a softer, more flowing
look at the hemline.
As the skirt is draped over the high hip, the extra fabric
will fall toward the front, allowing for a much smaller
dart than in the straight skirt.
Do not forget the closure; determine whether you want
a side or back zipper.

Muslin preparation
20"

20"

1"

1"

9½"

9½"

098

22"

22"

Front

Back

Step 1

Step 2

Step 3

Align CF grainline with CF of form and pin
down about 6" (15 cm).

Smooth muslin over waist and high
hipline, continuing to clip at waistline.

Trim away side seam allowance to about
1" (2.5 cm), following side seam of form.

Pin high hipline about 3" (7.5 cm) across
from CF.

Form a small dart at princess line to keep
flare from becoming too exaggerated.

For the back, repeat from Step 1.

Start pinning across waistline, trimming
and clipping as you go, allowing fabric to
fall forward, starting the flare.

Check the photograph. The skirt is fairly
flat in the front and the small dart will
allow the flare to be controlled toward the
side, giving a more balanced look.

Pin side seams wrong sides together. Pin
line will follow form for about the first 4"
(10 cm) and then become a straight line,
angling out toward hem to create flare.
Check flare from the side. For this skirt,
the flare should be of equal fullness. Note
that, classically, skirts are flared slightly
more in the back than front for a more
graceful flow when in movement.

Step 4
Turn front side seam over back. First,
lightly chalk hipline on both sides and
draw a crossmark so pieces can be
realigned when repinning. Remove pins
and fold front over back.

Twill-tape waist to hold firmly.
Using a long ruler or right-angled metal
ruler, mark hem and turn up.

Side seam
Note that as the front or back waistline
shifts up or down, the side seam angle
will change as well. The side seam should
follow the side seam of the form.

Chapter 2.1
Skirts
History | Exercises | Draping project | Variations

Be accurate with the balance. If the front
side seam shifts up in relation to the back,
or vice versa, it will change the way the
flare drapes. Be careful not to lose the
style of drape you have created.

099

Bias circle skirt
In the bias circle skirt, no darting or seaming is used
and the fabric is simply smoothed over the waist and
high hipline and allowed to fall freely into flares at the
hemline. The lengthgrains fall at the center front and
back, the crossgrains at the side seams, and the true
bias at the princess lines. The generous amount of
fabric at the hemline and the use of the bias areas
create a wonderful, swirling flow when in motion.
With its upbeat attitude, this skirt became a signature
look of the optimistic 1950s. It is seen here on Audrey
Hepburn in Roman Holiday.

Bias lines
Bias lines are marked as a double line 1/ 8" (0.5 cm) apart.

Muslin preparation
33"

11"

33"

1"

1"

100

35"

35"

Front

11"

Back

Step 1
Align CF grainline with CF of form and
crossgrain with hipline. The top edge
of the fabric will reach almost to the
bustline.
Pin down the CF about 5" (12.5 cm) and
across 1" (2.5 cm) (latter not shown).
Slash horizontally about 1" (2.5 cm) above
the waist and clip to the waist about 1"
(2.5 cm) toward side seam.

Step 2
Since you are using entire quartercircle for half the front, drape top edge
downward so that crossgrain is now
running parallel to side seam of form and
bias line is vertical. Bias lines should be
at about the princess seam.

Step 3
Begin trimming and clipping at
waist, every ½" (1.5 cm), keeping
flare falling evenly.
Repeat from Step 1 for back.
Pin front over back at sides.

Lightly mark waist with chalk for reference.

Clipping and pinning
Remember to be as precise as possible
when clipping and pinning. Even a ¼"
(0.5 cm) difference in the placement of your
pin will change the way the flares drape.

Step 4
Level hem using a right-angled ruler or one
of the bars of the form cage. Start at side
seam where skirt will be shortest.

Finalize waist pins and tie twill tape
around waist for an easy waistline marker.

Chapter 2.1
Skirts
History | Exercises | Draping project | Variations

Note how flare can be adjusted by further
clipping at waist.

101

Draping project
This Bill Blass skirt has a basic cut similar to that of the
straight skirt on page 96. However, subtle differences in
the shape give it a more dynamic attitude. The side seam
follows the contours of the body and the hemline “pegs
in,” or narrows at the knee. The high waist and close fit
accentuate the classic, curvy feminine hourglass shape.
Runway models are typically very tall. When planning
your muslin pieces for the drape, consider any
difference in proportion between what you see in the
photograph and the eventual size you are working
toward. Before starting the drape, decide on the length
of your skirt. This will make it easier to establish the
rest of the proportions. You also will need to decide
how much “ease,” or extra fabric, will be built into the
fit of the skirt. It appears to be very fitted on the model,
but practically speaking, it needs to have at least 1–2"
(2.5–5 cm) ease at the hip.
As you begin the drape, visualize the wearer, the shape
of the skirt, and the strong, sexy look.

Muslin preparation A
14"

14"

18"

1"
11"

11"

102

26"

26"

Front

Belt

1"

Back

3½"

1"

Step 1
Align CF grainline with CF of form and
crossgrain with hipline. Pin down about
6" (15 cm).
Calculate how much ease you will have
at the hip/side seam area and pin from
hipline to waist.
To place the dart, study the photograph
and note that the high hip area has
a broad feeling to it. This is partially
because of the horizontal stripes, but
also because the dart is toward the side
of the princess line and angles slightly
outward. Pin the dart from the waist to
the lower end.
Because the dart is angled toward the
side at the lower end, as it runs up past
the waist it naturally continues that angle,
which becomes unflattering. You will need
to clip the dart to angle it toward the side
above the waist.

Step 2
Unpin CF and clip dart in center
near waistline.

Step 3
Pin dart again, with its top end angling
toward side seam. This will accentuate
the waist-conscious look.

Precision pinning
The more accurate your drape, the easier
it will be to transfer it to a paper pattern.
Practice pinning very carefully, placing
pins horizontal to the seams as shown.
Crease the folds of the fabric as evenly as
possible. If you are experiencing puckers,
try repinning one pin at a time to figure
out where the problem lies.

104

Step 4
Determine side seam by looking at the
photograph and determining angle of peg.
Keep crossgrain horizontal.
Check seam in the mirror and against
the sketch.
Pin side seam to form, leaving some ease.
Trim seam allowance to about 1" (2.5 cm).
Clip at waistline.

Step 5
Align CB lengthgrain with CB of form,
aligning hip crossgrain with hip tape.
Fold in double darts at back waist, clipping
as with front.

Step 6
Pin side seam to front from hipline down.
Check peg in the mirror and against
the sketch.

Chapter 2.1
Skirts
History | Draping | Draping project | Variations

Pin side seam to form, from hipline up.
Trim to 1" (2.5 cm).

105

Step 7

Step 8

Pin front over back at side seams. Start at
hipline and pin up.

To drape the belt, first check the sketch.
The belt is as much as 2" (5 cm) wide.

Now hold at hem and fold the two pieces
in, holding muslin taut so that it falls into
place smoothly.

Chalk-mark the lines and press under both
raw edges to create a 2" (5 cm) piece.

Check the silhouette from 360°. Is there
the right angle of the pegged side seam
from waist to knee? Does it have the
hourglass curve?

Drape around waist, about two-thirds
above the waist and one-third below.
Turn under top edge of skirt and the hem.

Step 9
If the belt seems too wide, try a smaller
proportion. On these narrow pieces, even
¼" (0.5 cm) makes a big difference.
Mark all seams and darts.

106

Checking proportions
Details such as the belt width are very
important to setting the proportions.
Study how the two different widths
change the look of the skirt from slightly
clunky and awkward with the wider belt
to more refined with the narrower belt.

Marking and truing
It is not always the case that the front and
back curves will match; some specific styles
will call for a differently shaped seam. In
this case, however, the front and back have
similar shapes. You will even them out to be
assured of a smooth side seam.
When the hem is a concave curve such
as this one, either the hem must be small
enough to be able to turn back comfortably,
perhaps 1–1½" (2.5–4 cm), or it must be
finished with a facing.

Step 1
Draw dart lines and cut seam allowance to
½" (1.5 cm).

Step 2
Draw side seam line of front and back.
Pin front and back together, matching
waistlines and at hem.

Compare the two side seam lines—they
should balance. If one is much larger than
the other, take the measurement. Add a
little to the smaller one and subtract from
the larger to balance them out.

Step 4
Use a hem curve to draw the hemline; it
will be slightly concave because of the
peg of the skirt. From your patternmaking
knowledge, you know that side seams
will have to be drawn at a right angle to
the hemline. Therefore, the hemline will
naturally slant up toward the skirt. After
drawing in the right angles, the line will
straighten out in the centers of the front
and back hemlines.
Using a clear graph ruler, add seam
allowances to edges as follows:
• Side seams: ¾" (2 cm)
• Top edge: ½" (1.5 cm)
• Hem: 1" (2.5 cm).

Chapter 2.1
Skirts
History | Draping | Draping project | Variations

Slide a piece of carbon paper underneath
the back; using a tracing wheel, mark the
curve of the front side seam onto the back
side seam.

Step 3

107

Muslin preparation B
28"

Cut one more set of muslin pieces as in
Muslin Preparation A (p. 102) to use for
the back.
11"

14"

Same belt piece can be used.

26"

Front

For this skirt, sew the full muslin. You will,
therefore, need to cut the mirror-image front
and back sections.

Cut the two pieces together along the
lines you have trued and to which you
have added seam allowance.

First, block the new muslin pieces, and
draw length- and crossgrains as shown in
muslin-preparation diagram.

For the back pieces, align length- and
crossgrains, pin into place, and again
cut along trued lines to which you have
added seam allowance.

For the front, use center lengthgrain as a
foldline and align CF line of draped piece
onto fold of new muslin. Align crossgrains
and pin into place.

Use tracing paper and a tracing wheel
to mark darts or any interior lines. Slip
tracing paper underneath the muslin and
draw the dart lines with the tracing wheel.
Since you are working with a double
piece, you must also mark the other side
by placing tracing paper underneath the
folded piece and drawing the line a
second time.

Clip in at crossmarks, no more than
¼" (0.5 cm).

Analysis
To analyze your skirt drape, have the
photograph on hand and get a little
distance from the form. How well has
the shape worked? Does it have the right
amount of fit to be comfortable yet have
the body-conscious attitude of the photo?
Study the side seam. Looking at the
negative space, try to see if your drape
has the same angle from the waist to
hem as the photograph.
The belt is an accessory, but here it
plays an important part in assessing the
proportions. After adjusting it during
draping, it seems to be the right look.

108

It can be challenging to visualize the
muslin drape in the black stripe fabric,
but it is a good exercise to try to see it.
Front

Back

Belt

Variations
Yoked skirt with
gathers and flare
The fitted panel, or yoke, of this skirt provides a base
that supports the gathered and flared lower section.
Because the yoke ends at the high hipline, no darts
are necessary. The top edge will curve, creating the
fit. Note how the hem falls in rolling flares, similar to
the bias circle skirt. Because the skirt section is not
rectangular but curved, the side areas begin to
incorporate some bias grain, which gives the skirt
a lovely swing as it moves.

Muslin preparation
30"

30"
12"
2"

1"
6"

10"

10"

Front yoke
24"

24"

12"
2"

1"
6"

Front

110

Back

Back yoke

Step 1
To set front yoke piece, align CF grainline
with CF of form and crossgrain with
waist tape.
Pin downward and flat across waistline for
the first 1" (2.5 cm).

Step 2

Step 3

Pin yoke wrong sides together at side
seam. Since weight of the skirt will hang
from the yoke, it can be draped quite close
to the form with no ease.

To drape the skirt front, you will create
flare and gathers. As in the dance tunic
exercise on pp. 26–29, set a piece of
elastic to help you adjust fabric evenly.

Turn front over back and pin.

Lift yoke pieces up gently and pin a piece
of elastic about 1" (2.5 cm) above yoke
line, keeping elastic horizontal to floor.

Then trim and clip, smoothing yoke toward
side seam.

Twill-tape waist and anchor-pin firmly at
CF and CB.

Repeat for back yoke.

Determine necessary width of yoke to
create desired proportion; measure and
lightly chalk the line.
Turn up yoke edge along marked line.

Slip skirt front under elastic, aligning
CF grainlines. Pull it up evenly to 4–6"
(10–15 cm) above elastic.
Note the silhouette is now the same as
that of the dirndl on pp. 94–95. Since you
want some flare in the skirt, the rectangle
will need to become a curved piece.

Step 5
Pin side seams together.
Trim top edge just above elastic piece.
Finalize gathering. Note how, in the
photograph, sides are fairly flat to give a
more flattering silhouette and gathering is
concentrated toward CF and CB.
Fold yoke back down and pin to skirt along
folded edge.
Turn up hem using bar of form cage
to level.

Reference the drape of the bias circle skirt
on pp. 100–101 and note how the fabric
drops to the side as you clip and create
the curve. Starting at the side seam, grasp
the fabric at the hem and pull downward,
adjusting the gathers as you go, and note
how the flare is being created. Continue
until the desired flare is reached.

Note that the crossgrain is no longer
horizontal, but drops down toward side
seam. The side seam will now be angled
and large triangle at top edge can be
cut away.

Chapter 2.1
Skirts
History | Exercises | Draping project | Variations

Step 4

Repeat from Step 3 for back section.

111

.2
2
Blouses

History
Early clothing often consisted of variations and layers of
tunics—woven panels wrapped and tied in ways particular
to a certain region or tribe. In Western culture, these simple
shapes evolved into the “peasant” smock, which made use
of gathers and combinations of square-cut panels.
By the late fourteenth century, panels were
being cut and shaped into more elaborate forms
for men’s “shirts.”
For women, however, the “blouse” didn’t make
an appearance in the fashionable wardrobe until
the 1860s, when Empress Eugénie of France
popularized the red Garibaldi shirt, named for the
Italian revolutionary. The garment echoed a man’s
shirt and was cut from a series of squares and
rectangles fashioned from a single piece of cloth
with no wastage.

114

When the concept of the yoke was introduced,
along with shaped armholes and sleeve heads, this
shaped shirt offered a much more comfortable fit and
became the precursor to the woman’s blouse. By the
1890s, the “shirtwaist” was developed in response
to the needs of a rising number of women entering
employment who required a new, practical look.
In modern fashion, women’s blouses are among
the most complex cuts of garments and are often
beautifully detailed and embellished, as were
the peasant smocks of centuries past.

This detail from a 1494
painting by Carpaccio
shows men wearing very
fitted, complex garments,
made from cut and shaped
woven panels.

This shirt of a Tartar
woman from Nucha
illustrates the simplicity
with which the early
“blouse” was traditionally
constructed. The ribbon
trim, gold plaques,
and coins at the hem
exemplify the elaborate
ornamentation used in
many cultures.

This cotton shirt from
about 1866–90 shows a
similar construction to the
peasant blouse: front and
back rectangular panels
with an underarm gusset.

This modern version of
a peasant blouse is the
same cut as the historical
one in the illustration
of the Tartar woman’s
shirt (above). Note how
the triangular piece at
the underarm is a folded
square, creating a gusset
that allows for more
movement of the arms.

Chapter 2.2
Blouses
History | Exercises | Draping project | Variations

Fold

115

Exercises
Draping the blouse
Techniques such as pleating, tucking, and gathering
that bring volume and movement to skirts are similarly
used in blouses to create the shapes needed to fit the
curves of a woman’s shoulders, bust, and waistline.
Proportion is of utmost importance in blouses, as
there are multiple elements to coordinate. The height
of the neckline, shape of the sleeve, and cut of the side
seams must flow together. The sizing of collars, cuffs,
and buttons must be coordinated to keep the whole
in balance.
Blouses are usually lightly fitted for comfort. Draping
construction elements such as gathering or tucking
must be done with practical sensitivity to the shapes
they are accommodating. Areas that need ease, such
as the bust, top of the arm, and shoulder blades,
require working away from the form as opposed to
fitting to it. This takes practice and skill.

Sleeves and armholes: An infinite variety of curves
The armhole and sleeve fit together in a complex
combination of curves. Slight differences in these curves
result in a drastically different look and fit to a sleeve.

116

The fitted sleeve and curved armhole of the modern
blouse were a later development in clothing. Compared
to the elegant, elemental forms created by square/
rectangular woven panels, modern sleeves and armholes
are far trickier to engineer. The combination of curves
that comprise a graceful and well-fitting sleeve is
complex but very important to master. A sleeve often
tends to be a focal point, and frames the upper torso.
If an armhole is awkward, the untrained eye may not
know why the garment does not look right but will be
instinctively aware that something is askew.

Since sleeves are relatively difficult to drape, it will
help to understand some basics of how sleeve patterns
work before beginning the draping exercises. Shown
here are three sleeves and armholes that create very

different effects. Study the differences in the curves of
the sleeve patterns and the resulting underarm fit to
understand how carving out more in the lower curve
functions like a dart to remove fullness from that area.

Traditional African daishiki
The sleeves and body of this traditional tunic
are cut geometrically as squares/rectangles.
The fit is full and graceful. Note the many
folds of fabric that result as the sleeve falls
to the side, but also that full freedom of
movement is possible.

Classic shirt
On this classic shirt, the yoke absorbs some
of the bust and armhole ease. There are no
darts; it is loose fitting. Note how the curve
at the sleeve cap has allowed a wedge of
fabric to be cut away. There are still folds
and fullness at the underarm area, though
not as much as with the daishiki. The arm
can still be lifted fairly high.

This slim-fitting women’s tuxedo shirt has a
front panel at the princess line that absorbs
bust ease, taking the place of a dart. The cap
of this sleeve is quite high, which allows the
underarm area to be closely fitted. Note the
additional fabric that has been removed from
the sleeve pattern lower curve, and with
that, the folds at the underarm. However,
here the lift of the arm is more limited.

Chapter 2.2
Blouses
History | Exercises | Draping project | Variations

Women’s tuxedo shirt

117

Peasant blouse
In this peasant blouse, based on a jumpsuit from the
Moschino Spring/Summer 2008 collection, the front,
back, and sleeves are cut from rectangles that are
gathered around the neckline. The uniqueness of this
garment is in the play of its proportions. The elongated
front and back is accented by the wide epaulets, cuffs,
and placket.

Adapting existing styles
Quite often in fashion, designers will adapt existing styles or classic
cuts to suit their own purposes. Here, a one-piece garment has been
cut off just below the high hipline and made into a blouse.

Muslin preparation
16"

16"

22"
14"

1"

11"

1"

4"

10"

11"

15"

9"

Cuff

22"

22"

15½"

16½"

Sleeve

8"
3"

Epaulet
Front

118

Back

Step 1
Attach stuffed arm to dress form by
pinning triangular piece onto shoulder area
from the point and at the two edges. The
arm seam should line up with the edge of
the form’s shoulder. Do not let it hang over
the edge; pin it firmly.
Note that the arm should angle slightly
toward the front with a similar hang to the
natural position of the arm.

Step 2
Pin CF lengthgrain down CF of form,
aligning first crossgrain with bust tape and
second with waistline.
Check photo and determine amount of
fullness to the front of the blouse, then pin
at side seam area (not shown), keeping
bust crossgrain horizontal.

Step 3
Pin a piece of twill tape over gathers to
help keep them evenly distributed.
Repeat from Step 1 for back section.
Coordinate the gathers with the front,
creating an equal amount at the back.
Pin front and back side seams together
wrong sides out, flaring slightly at hem.

Hold in top area of muslin to check amount
of gathers, then pin in place.

Step 4
Place sleeve piece on stuffed arm, aligning
lengthgrain with center line on arm.

What you have now are two squares
similar to those in the blouse illustrations
on p. 115. The basic construction of the
blouse is similar. Seeing this will help
you to visualize how the sleeves may be
attached to the body pieces.

Chapter 2.2
Blouses
History | Exercises | Draping project | Variations

Clip to seam allowance at underarm to
allow you to turn front over back and pin
down side seam (not shown).

Basic construction of the blouse

119

Step 5
Drape sleeve by aligning lengthgrain of
muslin with shoulder line and outside line
of stuffed arm, and crossgrain of musin
with bicep line of stuffed arm.
Hold in fullness at shoulder area and pin
in place.
Lift arm and check photograph to
determine volume of sleeve.
Pin underarm seam wrong sides together,
matching crossgrains.
Clip to seam allowance a few inches
(about 7.5 cm) above bicep line, to allow
you to turn and pin underarm area front
over back.

Pinning the underarm area
The underarm area is difficult to pin. It
takes practice, but it is an important part
of the silhouette you are creating. Try
twisting the arm a bit toward the back
and using the stuffed arm to press against
while you pin. The last few inches (about
7.5 cm) of the underarm seam and of the
side seam can also be left unpinned and
then finished up on the table after you
remove the drape from the form.

120

Step 6

Step 7

Trim away excess triangles of fabric
formed at the front and back of the top of
the sleeve.

Tie a length of twill tape or elastic around
cuff area to start getting an idea of the
volume of the sleeve.

Now trim away the similar triangles
formed at the front and back of the
blouse sections.

Pin sleeve section over front and back
sections, starting in the middle and
then working upward to neckline and
downward toward underarm.
Study carefully how look of sleeve
changes as you shift sleeve seam back
and forth, taking more or less fabric into
armhole. Now shift sleeve seam up and
down and observe again the change in
shape. Check the photograph and try to
place sleeve seam at the same angle.

Step 8
When working with the final proportions,
it helps to have the photograph right next
to the drape so you can continually check
on the details you are draping.
Drape sleeve band around sleeve hem
and adjust gathers to determine length
and volume.
Twill-tape neckline and hemline following
stylelines in the photograph. To visualize
the look, it may help to cut the excess from
hem and neckline.

Step 9
Use finishing details such as the epaulet,
buttons, and placket to help you achieve
the right proportions.

The success of your blouse drape will depend on the way the proportions of the details are
balanced. The size of the cuffs and epaulets, for example, must relate to each other and
complement the volume of the blouse—not too large and not too small.

Chapter 2.2
Blouses
History | Exercises | Draping project | Variations

Balancing the proportions of the details

Experiment with your widths and observe how minor changes shift the look.

121

Gibson Girl blouse
The “ideal” American woman of the 1900s was created
by artist Charles Dana Gibson. The Gibson Girl had an
upright posture, luxurious hair, and a tiny waist. The
classic version of her blouse was a yoke style, with
buttons down the back, puff sleeves, and a stand collar.
It was sold in more than a hundred variations at the
height of its popularity.

Muslin preparation
15"
5"

15"
1"

1"

18"

10"

5"

1"
11"

15"

15"

9"
22"

12"

Front yoke
Front

10"

Back
1"
11"

12"
1"

Sleeve
5"

Collar

122

Back yoke

Step 1
Tape position of yoke line on form.
Pin front yoke section to form, aligning CF
grainline with CF of form, trimming and
clipping neckline until it lies smoothly.
Trim yoke line following twill tape, leaving
at least 1" (2.5 cm) seam allowance.
Pin back yoke section to form, aligning CB
grainline with CB of form, trimming and
clipping neckline as front (not shown).
Trim shoulder excess and pin front
over back.

Step 2
Flip up yoke to get it out of the way, then
set front section by aligning CF with CF of
form and crossgrain with bust tape.
Study the photograph and try to determine
volume of the front piece. Set a pin at the
side seam.
Place twill tape across yoke line and pull
the fabric underneath it. This will help you
adjust the gathers. Arrange more fullness
over the bust where it is needed and less
gathering toward the side, where it will
create unwanted volume.

Step 3
Fold in a few tucks under bust at waistline
to help control shape of bodice.
Check the photograph and make sure you
have the rounded look at the bust.
Repeat from Step 2 for back section.
Pin side seams together and turn front
over back. (Pin wrong sides together first if
you need to, then mark, unpin, and turn.)
Turn yokes back down. Shape curve and
pin to the bodice front, continuing to
adjust gathers evenly.

Cut away the armhole section to allow
side seam to lie smoothly up into
underarm area.

Step 4
If gathers do not look even, you can use a
running baste along the seam line.

Mark neckline with tape. At CF, it should
be about ½" (1.5 cm) below form neckline,
and at neckline seam of form at CB.
Check your taped lines against the
photograph and mark them lightly with
chalk. Remove tape before beginning
sleeve drape.

Chapter 2.2
Blouses
History | Exercises | Draping project | Variations

Mark armhole with tape or twill. The
armhole will be the classic shape: the
front lower curve carved out slightly more
than the straighter curve of the back.
Because a sleeve is being attached, the
armhole will be slightly lower than on a
sleeveless bodice.

123

Easy sleeve draft
The next step is to drape the sleeve. You can either
drape it from scratch (see p. 126, Step 5), or you can
use the easy sleeve draft method shown here as a
starting point.
There are many methods to draft sleeves using precise
measurements rather than draping. With draping,
however, you have the advantage of being able to see
the shape you are creating as it develops, and the
flexibility to further refine its subtleties.

A

This particular method is intended to help you drape
the sleeve. Having some measurements and a basic
shape to follow is useful when starting the drape. It is
not, however, intended to be a final pattern, but rather
a time-saving device to set the general parameters of
the sleeve’s volume.
This draft can be done on paper and then transferred
to a muslin piece, or it can be drawn directly onto
the muslin.

A

B
B

Step 1
Determine length of sleeve, A, by
measuring from edge of armhole at the
shoulder to wrist or to the place on the
arm where sleeve will finish.
Draw a vertical line and label it “A.” This
also signifies lengthgrain of fabric.
Gibson Girl blouse: A = 20" (51 cm);
three-quarter-length sleeve

124

Step 2
Next determine cap height, B. This is the
length from sleeve cap to underarm line.
There are three ways to arrive at this
measurement:
1. Divide armhole measurement by three
(cap height is one-third of armhole
measurement).
2. Measure drop of underarm from edge
of shoulder to where armhole ends
below underarm.
3. Estimate underarm length. Decide on
optimum lift of arm and measure from
the wrist to bottom of armhole. In this
way, you arrive at the horizontal line
on the pattern by measuring from
the wrist up rather than from the
top edge down.

Using one or more of these methods, or
perhaps an average of the three, measure
down from top of vertical line and draw
a horizontal line centered on the vertical
line, labeling it “B.” This is the underarm
line and also signifies the crossgrain.
Gibson Girl blouse: B = 9" (23 cm)

A

A

A

¾"

½"

D

D

B

B

B

Back

C

C

Step 4

Step 3
Estimate hem circumference, C.
Approximate amount of fullness at hem
edge and draw a horizontal line centered
at the bottom of the vertical lengthgrain
line A. Label this horizontal line “C.”
Gibson Girl blouse: C = 14" (35.5 cm)

Determine underarm circumference, D.
To do this, set points on line B to create
angle of cap height to underarm line. The
traditional method is to calculate half of
the armhole measurement and draw the
diagonal line of that length between the
top of line A to the point where it meets
line B to the left and right. Label these
new points “D.”
An alternative method is to simply
approximate the volume of the sleeve
you want at the height of the underarm
line, which is the bicep line for a higher
armhole, or 1" (2.5 cm) or so below that for
a lower armhole. Center this measurement
on line A and mark points to the left and
right on line B. Draw diagonal lines to
the left and right from the top of line A to
meet the points on line B.

Front

C

Step 5
Now create S-curve of sleeve cap.
Mark front and back of sleeve. Front is
usually on right and back on left.
Divide the lines from A to D into thirds.
On the front, mark a point ¾" (2 cm) out
from the mark signifying the top third.
On the back, mark a point ½" (1.5 cm) out
from the mark signifying the top third.
Draw a line from the above points through
the lower third point. This intersection at
the lower third point is called the “pivot
point.” It is the place where the sleeve
goes from following the top of the armhole
with a convex curve to falling toward the
lower armhole in a concave curve.

Draw lines from both points D to each end
of line C.
Gibson Girl blouse: D = 11" (28 cm)

A

Step 6

D
B

Back

Front

C

Study the shape of the sleeve. It helps
to be able to visualize the eventual shape
of your pattern piece when you are
draping, even if it is only a starting
point for the sleeve.

The upper third of the front part of the
sleeve is larger than the back of the
sleeve to accommodate the bony part
of the shoulder about an inch or two
(2.5–5 cm) below the top of the shoulder.
The slope at the back of the sleeve is
softer and wider to create extra room
for the arm to move forward.

Chapter 2.2
Blouses
History | Exercises | Draping Project | Variations

Draw S-curve from top of line A through
pivot point to underarm line B.

The shape of the sleeve cap

125

Measuring the cap height
Observe what happens when a simple
square shape is used to wrap the arm. When
matched at the underarm side seam, the
obvious missing shape is the triangle needed
to fill in the space up to the shoulder. This is
called the cap of the sleeve.
Measure the distance from the edge of the
shoulder seam to the top edge of the fabric
as it matches up with the lower edge of the
armhole. This will be your “cap height.”
Sleeves are easier to drape if you begin with
some target measurements such as this one.

Step 5
If you have used the Easy Sleeve Draft,
lightly mark the lines on the muslin to
use as reference. If you have draped from
scratch, take cap height measurement
(see box above) and mark it on the muslin
for reference.
Align lengthgrain with outer line of stuffed
arm. Pin at bicep line and again toward
wrist area.
Allow sleeve to angle slightly forward
following natural hang of arm, indicated
by the blue line on the stuffed arm.
As the triangle of excess fabric folds
back, you can see the shape of the sleeve
starting to emerge.

126

Step 6
Set cap volume by pinning in gathers until
the look of the photograph is achieved.

Step 7
Starting at the wrist, determine volume of
lower edge. It looks in the photograph as if
it may be slightly flared.
Pin wrong sides together about halfway up
to elbow area.

Step 8
Set the notch points. Start by looking at
the sleeve from the side and determine
the volume around the arm at about the
bicep level. Check sleeve through 360°
and adjust volume until you feel it has
the look of the photo. The notch point,
or “pivot point,” is the point where the
sleeve head begins to fall to the underside
of the arm. Experiment with moving notch
point of sleeve piece up and down the

armhole 1" (2.5 cm) or so, and notice how
this changes the balance of the sleeve
drape. Find the position that feels the most
balanced and graceful.
Pin firmly at front and back to about
halfway down depth of armhole.
Clip to the pin, and trim off excess triangle
above it (not shown).

Chapter 2.2
Blouses
History | Exercises | Draping project | Variations

127

Pinning the underarm
Pinning the underarm is an awkward
process that takes some practice. Try
using the stuffed arm to support the
seam as you pin.

Step 9
Turn underarm seam of sleeve front over
back from wrist to elbow, checking that
crossgrains are matching up.
Once it is turned, tie a piece of twill tape
or elastic at lower edge and begin to
adjust gathers.
Check drape from the side and make back
slightly longer than front to allow room for
elbow. Trim the excess, leaving about ½"
(1.5 cm) seam allowance (not shown).

Step 10
Finish cap adjustment by checking the
balance again and turning it under along
armhole line.
Turn triangles of excess fabric below notch
to the inside and allow them to fall along
armhole line.
Pin along lower curve, raising and
lowering stuffed arm and studying the way
the sleeve “breaks.” Ideally, armhole seam
should be covered by drape of sleeve.

128

Alternately, pin down underarm seam on
sleeve and up underarm seam to armhole.

The last few inches (about 7.5 cm) will be
difficult to finesse; after you have finished
the collar drape, it is acceptable to remove
the blouse from the form and finish pinning
this area last (see Step 13).

Collars
Collars can be draped from front to
back or from back to front. This simple
band collar will start from the front.
The closure will be at the back.

Step 11
Start collar at CF by aligning lengthgrains.
Pin firmly and begin clipping to neckline as
you wrap band collar around to back.

Step 12
Turn upper edge over to desired width.
Turn lower edge under and pin to neckline.

Step 13
Mark sleeve and remove muslin from form.
You can continue pinning the underarm
seam on the table (see Step 10).
Study shape of sleeve and height of
your cap. The underarm point of front
and back should be on the same
crossgrain, and the shape should
look similar to the flat sketch below.

Chapter 2.2
Blouses
History | Exercises | Draping project | Variations

129

Draping project
A modern version of the Gibson Girl blouse
can be seen in this design from Bill Blass.
Both blouses strike a balance between the masculine
and the feminine. The tailored elements, the collar and
cuffs, reference the feel of a strong, independent,
working woman’s blouse, while the shapes have a soft
femininity. The convertible collar frames the face and
the sleeves frame the torso; achieving the right
proportions of these is key.
In making construction decisions for the bust fit, the
ribbon trim will work well to hide a princess-line seam.

Visualizing the volume
The focal point of the blouse is the exaggerated sleeve. Because the
fabric is a sheer organza, the sleeve can be large without seeming
too overwhelming. Visualize the wearer and try to set a proportion
for the sleeve. Use a tape measure to determine an approximate
circumference.
As you begin to drape the blouse, try to feel what it would be like to
wear it. How much ease is there in the torso? How much puff does
the sleeve need to be a focal point without being out of proportion?

Muslin preparation
8"

8"

8"

8"

24"
10"

10½"

10"

4"

1"

4"

11"

12"

11"
12"

22"

22"

22"

22"

22"

15"

6"

8"

1"

1"

Collar

13"
3"

Center front

130

Side front

Center back

Side back

Sleeve

Cuff

Draping the bodice
Step 1
Twill-tape styleline of the pink ribbon.
Set CF section by aligning CFs, trimming
and clipping neckline and smoothing
muslin over shoulder area. Trim shoulder
angle, leaving 1" (2.5 cm) seam allowance.
Trim CF section along twill-tape line,
leaving about 1" (2.5 cm) seam allowance.

Step 2
Set side front section by aligning
crossgrain with bust tape, keeping
lengthgrain vertical.
Slice out armhole area to allow arm to
hang freely, but leave as much seam
allowance as possible. Clip at notch
points, allowing muslin for underarm area
to fall toward side seam.
Pin at side seam, trying to approximate the
volume of the blouse.
Pin along princess line. The line on this
design is actually farther to the side seam
than the actual princess line; here you
need to keep the CF section as straight
as possible. The fabric required to fit the
shape of the bust will be added to the side
front piece.

Step 3
Pin front over back at shoulders, matching
princess lines.
Pin sides, first wrong sides together, then
trim and clip and turn front over back.
Pin at hem, as if blouse were tucked into
a skirt, and check the silhouette. It should
have about the same amount of fullness at
the lower edge (not shown).
Tape armhole as a classic shape. It should
be about ¾" (2 cm) below armhole plate to
accommodate the full sleeve (not shown).
When you feel you have the right curves,
lightly pencil in the line and remove tape.
Trim seam allowance to about ¾" (2 cm).

Pin shoulder area.
This is not a fitted bodice like that on
pp. 60–63; it is a looser-fitting blouse, so
keep grainline as vertical as possible and
leave about 1" (2.5 cm) ease in armhole.
Repeat from Step 1 for back.

Embellishing the princess line
Classic princess lines are curved; however, as you are going to embellish the princess lines here
with ribbon, they need to be straight so the ribbon will fall vertically. Ribbon will not sew well on
a curve.
When draping the front princess-line seam, keep the CF section as straight as possible so the
ribbon trim will fall vertically, as in the photograph. To create the bust fit, the fabric will be
shaped, or curved out, in the side front section.

132

Marking and truing the bodice
Before beginning the sleeve, true up the
bodice shape to ensure the armhole is
smoothly drawn.

Step 1
Unpin all pieces and gently press
them flat.
Look at CF piece and side front section:
note how the CF is almost a straight line
and the shape of the side front section is
quite curved. The same happens with the
CB and side back sections.
Smooth out curves and check crossmarks.

Step 2
Reassemble muslin by pinning front to side
front and back to side back, turning under
the excess or seam allowance on the line
drawn. Pin first the princess seams and
then the sides and shoulder seams.

Step 3
Mark armhole with tape.
Pin waist as if blouse were tucked in to
check silhouette and volume.

Draping the sleeve
Review the Sleeve Draping Order before
beginning to drape the sleeve.

Sleeve draping order
This draping order works on many different styles of sleeve. Work alternately from the cap area
to the wrist and back, working down the armhole and up the underarm seam, ending at the
underarm point.

2. Pin cap at shoulder.
3. Set wrist and pin circumference. Match crossgrains.
4. Set pivot/notch points.
5. Work underarm seam from wrist to elbow.
6. Trim excess and refine upper half of sleeve cap.
7. Move up the underarm seam, turning excess to the inside and finalizing sleeve width in
bicep area.
8. Work lower sleeve curves from pivot points to underarm point.

Chapter 2.2
Blouses
History | Exercises | Draping project | Variations

1. Set correct angle of sleeve, with lengthgrain slightly toward front.

9. Finish underarm seam, joining it with underarm point of sleeve.

133

Step 4

The natural hang of the arm

Review the Sleeve Draping Order (p. 133).
Begin the sleeve drape by aligning
lengthgrain of sleeve section with outer
line of stuffed arm.
Allow sleeve piece to angle slightly
forward, following the blue line on the
stuffed arm.
Lift lengthgrain up toward the elbow and
pin again, starting to visualize the fullness
of the sleeve taking shape.

Step 5
Set cap volume by gathering in the upper
edge at shoulder area.
Observe proportion of neck to shoulder
seam. Set your sleeve with the same
proportion.

Step 6
Starting at the wrist, determine volume of
lower sleeve edge. It looks like it may be
slightly narrower at the elbow than at the
top, so bring in the seam at a slight angle.
Remember that crossgrains must match up
at underarm. As you pin this area, match
up the lower crossgrains.
Pin wrong sides together from wrist up to
elbow area.

134

When beginning a sleeve drape, first
make sure your stuffed arm is pinned
securely to the shoulder with the arm
seam just meeting the edge of the form.
It is crucial that it angles slightly forward,
like the natural hang of the arm. This
means that the red “lengthgrain” of the
stuffed arm will be aligning with the side
seam of the form.

Step 7
Pin gathers at cap with the distribution
that you see in the photo.
Check height of fabric above shoulder line:
is it as high as you would like it to be?

Step 8
Set notch points. Looking at sleeve from
the side, determine volume around the
arm. This step is made easier by the
sheerness of the fabric in the blouse.
You can see that the sleeve width is
about double the width of the arm.
Check the sleeve through 360° and adjust
until you are sure it is balanced and has
the look of the photo.
Pin firmly to about halfway down depth
of armhole.
Clip to the pin, and trim off excess triangle
of fabric above it.

Fabric vs. muslin

Step 9
Clip to your pins on the underarm seam.

When setting a sleeve, it is important
to consider the fabric. A skilled designer
knows how the actual blouse fabric
will react differently from the muslin. In
this case, when the blouse is sewn in
organza, it will have slightly more height
than the muslin, as organza is a lighter
and crisper fabric.
Practice visualizing this by gathering a
length of organza as for a sleeve cap and
pin or hold it next to your muslin sleeve to
study the different silhouettes.

Turn underarm seam front over back from
wrist to elbow, checking that crossgrains
are matching up.
Once seam is turned, tie a piece of twill
tape or elastic at lower edge and begin to
adjust gathers.
Check the photograph: raise the arm of
your drape to the same height and see if
the volume looks the same.

Repeat for back.
Chapter 2.2
Blouses
History | Exercises | Draping project | Variations

135

Step 10

Step 11

Check drape from the side; make back
slightly longer than front to allow room for
the elbow.

Finish cap adjustment by checking the
balance of the line again and turning it
under along armhole line.

Pin down the underarm seam on sleeve,
alternately pinning up the underarm seam
to armhole.

Trim the excess, leaving about ½" (1.5 cm)
seam allowance.

Continue pinning front over back up
underarm seam, finalizing width of
bicep area.

The last few inches (about 7.5 cm) will be
difficult to finesse; after you have finished
the drape, it is acceptable to remove
blouse from form and finish pinning this
area last.

When you feel you have achieved the look,
drape a rectangular sleeve band piece.

Turn triangles below notch to the inside
and allow them to fall along armhole line.
Pin along lower curve, raising and lowering
the stuffed arm and studying the way the
sleeve “breaks.” Ideally, armhole seam
should be covered by drape of sleeve.

Finessing the sleeve drape
In Step 12, note how the back of the sleeve is caving in along the armhole. This
means that more needs to be taken from the curve of the sleeve. See the dotted
line in this diagram for amount to remove.

136

Step 12

Draping the convertible collar
Step 13
Lightly chalk neckline so that you have a
guide for your collar drape.
Begin collar drape by placing muslin piece
at CB neckline and pinning perpendicular
to the CB for the first inch (2.5 cm) or so.

Step 14
Continue clipping as needed and pinning
to the neckline as you pull collar section
around to about 1” (2.5 cm) in front of
shoulder line.
Now determine the stand of the collar.
Keep CB of collar aligned to CB of form
all the way up collar piece. At a point
1” (2.5 cm) in front of the shoulder line,
keep collar muslin about a finger’s width
from neck of form and experiment with
moving lower edge of collar up and down
on neckline. Note that if the lower edge
is almost a straight line, as in a band or
mandarin collar, the stand is very high at
the back.
You will have to flip hem of collar up to
allow it to lie smoothly.

Step 15
Turn collar down and check that there is
space between neck of form and collar
for ease.
Turn under outer edge, following styleline
in the photograph.

Chapter 2.2
Blouses
History | Exercises | Draping project | Variations

137

Step 16
Turn collar back up and make sure it is
lying smoothly all the way around.

Step 17
Clip collar edge a little bit at a time until it
is standing smoothly from CB to CF.

Step 18
The collar should now be lying smoothly
all the way around.

Look at the photograph and note area
by shoulder where fabric is caving in.
This indicates that it needs to be clipped
in further.

Step 19
Finish the blouse by determining the
“break point” where the first button will
hold the fold of the blouse between front
and collar.

138

Marking and truing
the sleeve and collar
Step 1
Mark all seams with pencil or chalk and
crossmark where needed.
With a convertible collar, it will help
to have the collar line and the neckline
marked on both sides. Using carbon
paper and a tracing wheel, mark along
the neckline so that the line is recorded
accurately on the underside as well.

Step 2
True up collar, first using a clear graph
ruler to make sure that CB lengthgrain is
square with CB neckline for the first 1"
(2.5 cm) or so.
Then use a French curve to draw the
neckline curve as it goes up slightly
toward front area.

Step 3
Smooth out lines on sleeve. The back
sleeve curve should be flatter and broader;
the front will be deeper. Compare the
curve to the classic sleeve shape.

On the lower sleeve edge, the back will be
longer and the front shorter, as the back
sleeve needs more length as it travels over
the elbow.
Using a clear graph ruler, add seam
allowances to the edges. The following
are suggested seam allowances. If you are
going to be fitting the blouse on someone
larger, it is fine to add more; just keep
track of what you are adding by notching
the measurement at the pattern edge.

Step 4
Because of the gathering of the sleeves,
it will be difficult to analyze your final
result by pinning or hand basting, so make
up a full muslin of the blouse. You will
therefore need to cut the mirror image
of all the pieces. Refer to the muslinpreparation diagram on p. 130.
Block the new muslin pieces. Draw lengthand crossgrains as shown on the diagram.

Align length- and crossgrains of draped
piece onto the lines of the new muslin
pieces and pin or secure with weights.
Cut the two pieces together along the
lines you have trued and to which you
have added seam allowances.
Clip in at crossmarks, no more than
¼" (0.5 cm).
For the presentation, the ribbon seen in
the photograph will be basted onto the
seams in the same places and buttons
will be attached.

Chapter 2.2
Blouses
History | Exercises | Draping project | Variations

Make sure underarm points of each side
are on the same crossgrain.

• Side seams and shoulder seams:
¾" (2 cm)
• Front and back princess seams:
½" (1.5 cm)
• Neckline and collar: ½" (1.5 cm)
• Hem: 1" (2.5 cm)

139

Analysis of the ensemble

Analysis
First, look at the overall feeling of the
blouse. The muslin, of course, looks
heavier, but use your designer’s eye to
visualize how the shape would look in
crisp, sheer organza.
Begin at the top of the piece and compare
the elements. The collar and lapel are
slightly wider on the drape and the
shoulders slightly narrower. The princessline ribbons are closer together on the
drape than on the Bill Blass blouse.
If the blouse were styled on a model as on
p. 131, with the collar up, buttons opened
further down, and sleeves pushed up a
bit higher, that attitude of feminine chic
would be more apparent.

This blouse is paired with the Bill Blass
skirt you draped in Chapter 2.1: Skirts
(see p. 102).
The model in the photograph is probably
almost 6 feet (183 cm) tall, so your first
impression when comparing the total look
will be that your muslin looks wider. This
illustrates another visualization challenge
a designer faces: garments almost always
look better on runway models due to their
elongated shapes, narrow waists, and
broad shoulders. As a designer, you must
train your eye to visualize how the work
will look on an average woman.

Study the proportions of the blouse and
skirt together: they are synchronized.
The wide belt seems to balance out the
width of the collar and cuffs. The soft,
full, rounded sleeves and the sharp, curvy
silhouette of the skirt create the balanced
contrast of femininity and strength.

Collar

Side front

Front

Back

Sleeve

140

Cuff

Side back

Variations
Tunic with
bell sleeve
This contemporary design is reminiscent of the
elemental tunic, combined here with a bell sleeve.
While ancient tunics were often loose fitting, this
modern version is fitted in the torso with darts.
The bell sleeve is slim fitting from shoulder to elbow
and then gently flares to the wrist in a bell shape.

Using negative space to refine shape
When draping, train your eye to see the negative space around the
shape instead of focusing only on the muslin. For example, with this
bell sleeve, you can easily see the space between the sleeve and the
side of the blouse. Referring to this will help you achieve the right
curve in the side seam and refine the subtle shape of the sleeve:
narrow at the bicep and widening toward the wrist.

Muslin preparation
15"

14"

1"

20"

10"

1"

10½"

11"

11"

31"

31"

Sleeve
Front

142

Back

28"

16"

Step 1
This sleeve will be draped on a tunic with
a classic armhole. First create a bodice
with a side bust dart in the front and a
single vertical dart in the back.
Tape, then mark, a classic egg-shaped
armhole with a drop of about 1" (2.5 cm)
below the armplate (not shown).

Step 2
Align lengthgrain with outer line of stuffed
arm and pin at bicep line (not shown).
Allow sleeve to angle slightly forward,
following the blue line on the stuffed arm.
Set cap volume by holding upper edge in
slightly at shoulder area. There will not
be any gathering, but there will be slight
easing in of the muslin. If it helps you, pin
out ½" (1.5 cm) on front and back cap.

Step 3
Starting at the wrist, determine volume
of lower edge. It is narrower at the elbow
than at the wrist, so bring in the seam at
an angle.
As you pin, remember that the crossgrains
must match up at underarm.
Pin wrong sides together from wrist to
elbow area; clip to your pins.

Sleeve-cap notches
Classic sleeve patterns are marked with a single notch where the sleeve matches the shoulder
seam. A double notch indicates the back of the sleeve, a single notch indicates the front.
Accustom yourself to this widely used system.

Step 4
Set notch points. Looking at sleeve from
the side, determine volume around arm.

Check the sleeve through 360° and adjust
until you are sure it is balanced and has
the look of the photo.
Pin firmly to about halfway down depth
of armhole.
Clip to the pin, and trim off triangle of
excess fabric above it.
Repeat for back.

Chapter 2.2
Blouses
History | Exercises | Draping project | Variations

If you have not already done so in Step 2,
pin out ½" (1.5 cm) or so ease on outside
of arm. Even though the sleeve has a very
slim fit, it will still need some ease.

143

Step 5
Turn underarm seam front over back
from wrist to elbow, checking to see that
crossgrains are matching up.
Turn up hem.
Finish cap area by adjusting the ease and
then turning it under along armhole line.

Step 6
Trim away excess on lower sleeve in a
curve that approximates the curve of the
lower armhole.

Step 7
Allow lower sleeve to turn to the inside.
Note where it falls against armhole line.
Pin the front lower curve.

144

Step 8
Observe how fabric is draping at the
underarm. It has too many folds, which
means more fabric needs to be taken out
of the sleeve at the underarm curve.

Lowered cap

Higher cap

Pin along lower curve, raising and lowering
the stuffed arm and studying the way the
sleeve breaks.
Find the balance between being able to lift
the arm freely, yet resulting in lots of folds
at the underarm, and having a smooth fit
with no lift.

Step 9
Pin down the underarm seam on sleeve,
alternately pinning up the underarm seam
to armhole.

Tape neckline.

Note that the neckline is kept high and
not cut away. Unless it is crucial to
observing the silhouette, leave this area
in place to help maintain the stability of
your drape. A cut-out neckline is usually
bias, which is prone to stretching. This
is especially important with a lower
neckline such as this one.

Chapter 2.2
Blouses
History | Exercises | Draping project | Variations

The last few inches (about 7.5 cm) will be
difficult to finesse; after you have finished
the drape, it is acceptable to remove
blouse from form and finish pinning this
area last.

Maintaining a stable neckline

145

Mandarin collar
The mandarin collar in Western clothing probably
dates from the 1930s, when there was a vogue for the
Chinese cheongsam, a one-piece form-fitting dress that
is still prominent in Asian fashion. The style originated
with the mandarins (civil servants) of Imperial China.
The collar, usually ½–2 inches (1.5–5 cm) in height,
frames the face as it follows the neckline around to
the center front.

Calculating ease for blouses
Blouses are looser fitting than bustiers and often looser even than the
dress bodices in Chapter 1.2. The amount of ease on blouses varies,
but the minimum average ease around the bust for a comfortable fit is
about 3" (7.5 cm) total.

Muslin preparation
14"

13"

11"
1"
4"

1"

1"

10½"

22"

21"

11"

Front

146

Collar

Back

Step 1
Set front section by aligning CFs, pinning
across bustline and shoulder. Clip and trim
neckline until it lies smoothly against form.
Smooth excess ease toward waist and
pin dart near princess line with about 1"
(2.5 cm) dart intake. As dart continues
below waist, it should become smaller to
accommodate high hip area. Note how the
muslin shapes in at the waist and back out
again over the high hip.

Step 2
Set back section by aligning CBs, pinning
across bustline and shoulder.
Pin dart as for front section in Step 1.
Pin shoulder seams front over back and
allow them to extend over the stuffed arm
to create the cap sleeve.
Pin side seams together, wrong sides
together first, then turn front over back,
shaping in slightly at waist (not shown).

Step 3
Check side view of cap sleeve area.
The “break” (where the muslin is folding)
should be larger and lower in the back
and higher and smaller in the front.
Tape armhole. On a cap sleeve, the front
area is carved out to allow the arm to
move freely. The back armhole will be
fuller, to cover the underarm area.

Trim shoulder excess to approximate cap
sleeve line.
Trim side seam excess allowing for the
shaping of the waist curve.

Step 4
Begin collar drape by placing muslin piece
at CB neckline and pinning perpendicular
to the CB for the first inch (2.5 cm) or so.

Continue clipping as needed and pinning
to the neckline as you pull collar section
around to CF. At shoulder point, collar
piece should be about a finger’s width
from neck of form to allow for ease.

Step 6
Turn under neckline edge of collar, then
top edge of collar.
Turn under hem of sleeve.

Chapter 2.2
Blouses
History | Exercises | Draping project | Variations

Step 5

147

Peter Pan collar
The Peter Pan collar made its appearance under that
name in the mid-1900s, named after the costume worn
by Maude Adams in the production of Peter Pan.
Similar collars were named for Little Lord Fauntleroy
and Buster Brown. The flat, round-cornered collar has
remained popular primarily in children’s clothing, but
periodically in contemporary fashion as well.
In this blouse from Louis Vuitton’s Fall/Winter 2012
collection, a classic Peter Pan collar contrasts with a
tight and tough leather bodice.

Muslin preparation
9"

12"

12"

1"
1"

1"

4"

Slash

6"
12"
10"

Collar

Bodice front
Bodice back

148

16"

15"

9"

Step 1
Prepare a classic bust dart bodice (see
p. 44), but smooth bust ease into a dart at
underbust area. Keep neckline high and
neatly clipped and trimmed. Mark it lightly
½" (1.5 cm) down from CB seam on form,
½" (1.5 cm) out from seam at shoulder
point, and ¾" (2 cm) down at CF.
Align CB of collar muslin piece with CB of
bodice neckline, allowing slashed area to
lie at shoulder line.
Trim and clip neckline to match neckline
of bodice.

Step 2
Continue clipping and trimming as you
bring fabric around to front. Allow it to
lie smoothly on bodice front.

Step 3
Tape the shape of the collar.

Line and proportion corrections
Pay close attention to the front collar curve in the photograph. To find the correct shape, it can
be helpful to check the negative space. Here, for example, the negative space between the two
collar curves at the center front forms an inverted V. Duplicate the look by focusing on that shape
rather than the shape of the muslin collar.
It can also help to connect reference points. Here, draw an imaginary line from the front
collar curve to the bust point. Do the same for the photograph and compare the angles of
those two lines.

Step 4
Turn under outer edge of collar and neck
edge, matching neck edge of bodice.

Chapter 2.2
Blouses
History | Exercises | Draping project | Variations

To help you check proportions, add
finishing details such as the buttons
and armhole line.

149

Blouse with
peplum and classic
bishop sleeve
The elegant and sensual look of this wrap-front blouse is
created by the full volume of the sleeve, the softly flared
peplum, and the focal point, a bias-cut silk georgette
neckline that finishes in a bow closure at the waist. The
blouse is made of silk crepe georgette, a lightweight,
semi-sheer fabric that has a beautiful, swingy, fluid drape.
The fit is achieved by released tucks at the waistline
and side seams that angle in at the waist. A light
shoulder pad supports the weight of the full “bishop”
sleeve. The peplum skirt section is the same basic cut
as the bias circle skirt on pages 100–101.

A trained eye comes with practice
The fluid drape of the silk georgette that makes the blouse so pretty also
makes it difficult to drape with. Draping it in muslin makes it easier to
achieve a balanced pattern. Before you begin the drape, take time to study
the “hand” of the georgette (the way it moves and falls) so you can visualize
it while you work and take into consideration how it differs from the muslin.

Muslin preparation
16"

1"

28"

30"

5"

11"

5"
12"
25"

28"

32"

17"

31"

18"

5"

28"

20"

12"

14"

22"

Back
Peplum
Collar
Front

150

Sleeve

Step 1
Prepare form by setting a small shoulder
pad to give the square shape to the
shoulder edge.
Pin front section to form, aligning CF
lengthgrain with CF of form.
Pin across bust and trim and clip until
neckline lies smoothly.
Allow excess bust ease to drape to the
waistline and pin a tuck at about the
princess line. Keep it angled toward the
bust, where the extra fullness is needed.

Angled tucks
The angles of the front and back
tucks are important in determining
the fit and the look of the silhouette.
If they are angled too far to the side,
they will add width to the body and
make the wearer look bigger. They
need to angle toward the areas that
need more space: the bust in front
and the shoulder blade in back.

Step 2
Repeat for back bodice, allowing ease to
fall to the waist; slightly angle tuck toward
shoulder blade.

Pin shoulder and side seams front
over back.
Tape armhole as the classic shape, about
1" (2.5 cm) below the armplate.

Chapter 2.2
Blouses
History | Exercises | Draping project | Variations

Step 3

151

Step 4
Begin drape of bias peplum piece by
aligning lengthgrain with lengthgrain of
front section at the princess line. Start
3–4" (7.5–10 cm) up to allow room for the
clipping and dropping of the bias piece
(see bias circle skirt, pp. 100–101).
Step 5
Clip and trim, allowing fabric to fall in
folds at the hem, bringing fabric around
the side and ending at CB. The true bias
pencil line should be straight up and down
at about the side seam.

Step 6
Cut hem excess to even it out, but do not
finalize until rest of blouse is ready.
Tape neckline and armhole.

152

Sleeve draping order
As you begin the sleeve drape, remember
to follow the basic draping order set out
on p. 133:
1. Set proper angle
2. Pin cap
3. Set wrist
4. Set notch points
5. Work line from underarm to elbow
6. Trim excess and work lower sleeve
curves
7. Finish underarm seam where it meets
the armhole point.

Step 7
Align lengthgrain of sleeve piece with
outer line of stuffed arm and pin at bicep
line (not shown).
Allow sleeve to angle slightly forward as
the natural hang of the arm, following the
blue line on the stuffed arm.

Step 8
Set cap volume by pinning in ease on
upper edge at shoulder area. There will be
about ½" (1.5 cm) ease on both the front
and the back.

Step 10
Set notch points. Looking at sleeve from
the side, determine volume around arm.
Pin at notch points. Note that there is
quite a bit more fullness in the bicep area
than there was with the bell sleeve (see
pp. 142–45). The actual cap ease will still
be ½" (1.5 cm) at both front and back,
but there will be more as it travels down
toward notch area.
Step 9
Starting at wrist, determine volume of
lower edge. It is narrower at the elbow
than at the wrist, so bring in seam at an
angle, keeping wrist area as full as possible.

Pin wrong sides together from wrist to
elbow area. Clip to your pins.

Clip to the pin, and trim off excess triangle
of muslin above it.
Repeat for back.
Chapter 2.2
Blouses
History | Exercises | Draping project | Variations

Remember to match crossgrains at
underarm as you pin this area.

Pin firmly to about halfway down depth
of armhole.

153

Step 11
Turn underarm seam front over back
from wrist to elbow, checking to see that
crossgrains are matching up. This is an
awkward procedure. To make it easier,
lean the fabric against the stuffed arm and
smooth it out as you pin.
Tie a twill tape or elastic around the wrist
and adjust gathers.
Check the photo for amount of blouson.
As you adjust the gathers, note that in
the photograph the back of the sleeve is
longer than the front. This creates more
ease for the movement of the elbow;
also, a sleeve that is shorter in the front
and longer in the back gives a more
graceful, classic look.

Step 12
Finish cap area by adjusting ease and
turning it under along armhole line.
Trim away excess below notches at front
and back, and turn to the inside.

154

Step 13
Pin underarm seam up to armhole as you
alternately pin the lower sleeve area down
the armhole.

Step 14
Pin lower front and back curves, raising
and lowering the stuffed arm and studying
the way the sleeve “breaks.” Ideally,
armhole seam should be covered by drape
of sleeve, as seen here.

Step 15
Drape collar by first folding bias section
in half.
Starting at CB neckline, pin to the halfway
point. Pin straight for the first 1" (2.5 cm),
clip, then continue clipping as collar rolls
around shoulder area.
Bring it down along the taped styleline of
the neckline.
When you see the volume you want, pin it
to the neckline, folding excess under.

Draping bias fabrics

Use a smaller scrap of bias to create a tie
piece that will begin at the left side seam;
create a bow with the piece that ends at
the right waistline.
This is your focal point, so look carefully
at the proportion you are creating and
coordinate with the rest of the blouse.
Turn up the hem.
Check your drape from a distance to see if
the fullness of the sleeve flows well with
the amount of flare in the peplum. The size
of the bow should complement the volume
of the other elements.

Chapter 2.2
Blouses
History | Exercises | Draping project | Variations

Because the fabric is on the bias grain,
it will stretch. Allow it to fall naturally
without trying to stretch it. Notice how
the bias grain lets the fabric follow
the neckline curve without breaking
or wrinkling.

Step 16

155

.3
2
Pants

History
Modern ethnic pants echo the traditional forms pictured
here. The woven panels are cleverly engineered to allow
for maximum movement and economic utilization of the
fabric. These elemental designs have endured because
of their purity of form, simplicity, and functionality.
Early pants evolved over centuries and through many
practical changes before arriving at what we consider
today a well-fitting trouser. The contrast between the
basic cuts of these pants and the detail and finesse
that go, for example, into the pattern for a modern
designer jean is extreme.

Top: Wide cloth trousers
from Syria and Kurdistan.
Note the geometric cuts of
this traditional pant.

158

Above: Traditional
women’s trousers and
riding pant from Turkestan.
Note the geometric cut.
The center front gussets
allow for freedom of
movement.

With the advent of a
shaped crotch curve, the
generously cut style of
the ethnic pant gradually
evolved to the gentleman’s

fitted trouser, as depicted
in this nineteenth-century
portrait by FrançoisÉdouard Picot.

Today, pants are an indispensable part of a woman’s
wardrobe. However, in historical context, they are
relatively new. The modern pant as we know it did not
come to widespread use until the early nineteenth
century. Before that time, in Western culture, welldressed men wore knee breeches with long stockings
to cover the rest of their legs.
Knee breeches first gave way to pantaloons around
1792. These were made from a light-colored cloth or
cotton, covered the entire length of the leg, and were
cut on the bias to achieve a close fit. The pant or
trouser, which evolved from a functional garment worn
by sailors and was first adopted as seaside wear,
gradually replaced pantaloons for daywear by the
mid-1820s. In the United States, it was not until around
1810 that long pants came into fashion. By 1850 Levi

Different pant types

Hot pants

Shorts

Bermuda shorts

Capris

Toreador pants

For women, wearing pants took much longer to become
acceptable, due to social and cultural mores. One of the
first innovators in women’s pants was the rebellious
American Amelia Jenks Bloomer, a suffragette and
champion of women’s rights. In the 1850s she designed
a loose-fitting pant, the “bloomer,” to be worn under a
knee-length skirt. She and her followers were subjected
to so much ridicule and harassment that it became
apparent the world was not ready for women in pants.
However, pants were beginning to be worn regularly in
work situations. Women working in British coal mines
were reported wearing trousers in the 1840s, and
women working the ranches of the American West
needed the practicality of pants more than they needed
or cared to look stylish.
Marlene Dietrich was escorted off the streets of
Munich for wearing pants in 1932, and when Katharine
Hepburn insisted on wearing pants on her movie sets,
there was no going back. In the 1940s, while men went
off to fight in World War II, women began to take their
jobs in factories and on assembly lines—wearing
pants. Money and materials were in short supply, so
wives began to dress in their husbands’ clothes to save
wear and tear on their own.
By the 1950s, pants were acceptable for gardening and
beachwear. By the 1960s, they were fully accepted in
society for any occasion.
The 1980s designer-jean trend brought pant fit to an
exact science, with the smallest incremental changes
in the curves of the pattern causing sales to rise and
fall as shoppers sought out the latest style and fit.

Clam diggers
Highwaters

Trousers

Today there are a myriad of
pant styles for women.

Chapter 2.3
Pants
History | Exercises | Draping project

Pedal pushers

Strauss was producing the first denim, a sturdy cotton
with a blue warp thread and a white weft, the origin of
what now is almost an international “uniform.”

159

Exercises
Draping and
fitting pants
The modern pant is traditionally draped with the
lengthgrain running vertically down the leg to achieve
maximum strength and a long, slimming line. The way the
crotch area is cut away determines the fit of the pant. The
goal is to create a well-balanced combination of curves at
the hip, crotch, and inseams so that no matter how wide
or narrow the pant, it fits well and falls smoothly.

160

Beginning a pant

Joining the inseams

Observe the shape that is created when a
simple rectangle of fabric is wrapped around
the lower torso and leg.

Note how the fabric wrinkles at the crotch
when the inseams are joined. Historically,
this issue is addressed by adding more
panels, as in the ethnic pants on p. 158.

Beginning the front crotch curve

Beginning the back crotch curve

To release the tension and wrinkling at the
inseam/crotch area, slash in horizontally
about 4–5" (10–12.5 cm), allowing the fabric
to lie smoothly as it wraps around the leg.

For the back, a greater allowance is needed
for the fullness of the back hip area.
Note in the photograph the difference
between the front and back; there is a
greater distance to travel at the back of the
crotch than at the front.

Combination of curves
As with the join of the sleeve and armhole in Chapter 2.2, here again
is a complex combination of curves, this time required to fit two pant
legs together.
There is an infinite variety of combinations that create the fit of a
pant. The way these curves are engineered affects the fit at the hip,
crotch, and inseam areas.
Chapter 2.3
Pants
History | Exercises | Draping project

Generally, the wider and fuller the pant, the longer the “hook” or
curve of the crotch seam extends. For a narrow, close-fitting pant, the
back hook, usually much longer than the front, meets toward the front
of the classic inseam point.

161

Harem pant
In 1910 the Russian painter and theatrical designer Leon
Bakst created these harem pants, worn by Nijinsky in the
Ballets Russes production of Scheherazade. This simply
cut traditional pant is seen in many ancient cultures.
It was revived by Yves Saint Laurent in the 1980s and
continues to surface in designer collections periodically.
It is also a staple of the modern belly-dancing costume.
In preparing the flat sketch, try to capture the fullness
and also the straight look of the leg. It is gathered at
the top edge.
There is no side seam, so, opened up, the pattern was
probably cut from a simple rectangle of cloth with
shaping for the crotch. The lengthgrain would be straight
down the side seam and the crossgrain perpendicular.

The fabric determines the volume
The final look and silhouette of this pant will vary according to
the fabric used. If cut in chiffon, the thin, fluid quality of that fabric
would drape very straight down the side of the leg. If a heavier silk
or cotton is used, the volume of the pant will be fuller.

162

Visualizing the volume

Crotch depth

When preparing your muslin, the amount of
fabric needed will have to be estimated.

To estimate where to draw the crossgrain, which will be at about the
crotch depth, or “rise,” have the wearer sit in a chair and measure
from the waist to the bottom of the chair.

Hold a tape measure around the hip area and
try to estimate how full you want the pant
to be. Stand at a distance before a mirror to
make it easier to see how the proportions of
the length and width are working. Visualize
Nijinsky or your favorite dancer on stage and
try to work out how much fabric they would
like to have around their body as they extend
their legs to leap and dance.

Waist

Muslin preparation
45"
5"

8"

14"

6"

48"

Chapter 2.3
Pants
History | Exercises | Draping project

22½"

163

Step 1
Because you are using the full width of the
fabric, pin the inseam together first.
On the table, fold in ½" (1.5 cm) or so
seam allowance on the front and pin over
back to about halfway up the leg. It helps
to place a graph ruler under the seam to
press against (not shown).

Step 2
Align lengthgrain with side seam of
form, then CF line with CF of form and CB
lengthgrain with CB of form.
Tie a length of elastic or twill tape around
the waist and adjust top edge so high hip
crossgrain is level with ground (not shown).

Muslin vs. fabric
Use your skills of visualization here. The
muslin will react differently from a soft
silk or jersey, for example. Try to imagine
how the volume of your drape would
change when made up in a thinner fabric
with a softer hand.

Step 3
As gathers are adjusted at the waist,
under the elastic, the lengthgrain of
CF and CB should fall quite straight,
perpendicular to the ground.

164

Step 4
Clip straight to CF at high hipline, then
tape front crotchline, following the curve
of the form.
Trim away excess fabric; clip as the seam
falls in toward the inseam (not shown).
Cut away curve for the front crotch seam
(not shown).

Step 5
Repeat Step 4 for back, but note that the
back hip area requires a deeper curve to
be cut away than at the front.
Trim crotch curve a little at a time until it
smoothly follows the seam of the form.
Pin the inseam above the knee.

Step 6
Tie elastic or twill tape around ankle
and adjust gathers until the look of the
photograph is achieved.

Step 7
Observe finished pant drape and compare
it to the photograph. Notice how the
muslin falls; it will be easy to see if you
are off balance by looking closely at the
grainlines. Practice your visualization skills
by imagining what the pant would look
like in a soft silk, like a chiffon or a crepe
de chine.

Chapter 2.3
Pants
History | Exercises | Draping project

165

Hakama
The hakama is the traditional pant of the Japanese
samurai. Originally, it was a heavy outer garment worn
to protect the legs while riding through brush, similar
to the chaps worn by Western cowboys. Now it is worn
by men and women for the practice of kyudo and other
martial arts.
Made basically of four squares—two fronts and two
backs—the hakama has deep pleats that attach to a
wrap waistband and side openings that are very low.

Muslin preparation
34"

28"

5"

5"

6"

8"

16"

16"

40"

40"

166

Front

Back

Step 1
Align CF line with CF of form, keeping
crossgrain horizontal to floor.
Tie a length of elastic or twill tape around
the waistline to hold in the area that will
be pleated.

Step 2
Trim excess at front crotch along twill tape
and turn into the inseam, clipping where
necessary to allow fabric to lie smoothly.

Step 3
Align CB line with CB of form, keeping
crossgrain horizontal to floor.
Tie a length of elastic or twill tape around
the waistline to hold in the area that will
be pleated.

Pin at side seam to support pant.

Pin at side seam to support pant.

Tape crotch line. In the photograph it is
quite low, probably 6–8" (15–20.5 cm)
from the actual crotch line.

Tape the crotch line, ending at the same
depth as the front.

Step 4
Trim excess from back crotch along
twill tape and turn into the inseam,
clipping where necessary to allow
fabric to lie smoothly.
Pin pant inseam, keeping seam straight
and grainlines horizontal.
Chapter 2.3
Pants
History | Exercises | Draping project

167

Step 5
Study the photograph and form the pleats
to achieve the linear and geometric look
of the pant.
In the front, the pleats fall vertically and
are not angled at all; therefore, the top
edge should be very straight.

Step 6
The back pleat angles strongly toward
CB. Note how back waist pleat must end
above waistline to achieve the look.
As you form this pleat and set the
waistline, check the inseam. It should be
hanging straight down center of inside
leg. If it is angling toward the back,
back waist is being pulled too high; if it
is falling toward the front, back waist is
too low. Experiment with what happens
to the inseam as you move the back up
and down.

Balance of the inseam
The balance of the inseam is critical in
pants. If a pant is torqued either to the
front or back, the fit will not be right. It
is important to develop your eye to see
when this balance is achieved. Study
pants carefully and observe how moving
the inseam toward the front or back
affects the hang of the pant.

168

Step 7
Pin sides so that seam hangs straight
along side seam of form. As in traditional
forms of this pant, side seams will be
perfectly straight on the grain.
Note the interesting silhouette created
on the side by the angled back pleat and
the straight front pleats. The angle of the
pleats forces the fabric out in the back.

Step 8
Turn front over back at side seam and pin.
Tape side openings.
The sides of traditional hakama are open
to mid-thigh. In a modern version, this
would be a great place to set in a deep
side pocket.

Because the pant is voluminous and the
angled tucks are important to the way the
it hangs, this is a good time to view your
drape from a distance in front of a mirror.
Experiment with the balance of the pant
by pulling up first the front waist, then
the back. See what happens when one is
dropped and the other pulled up.

Chapter 2.3
Pants
History | Exercises | Draping project

Pin a tape or ribbon around the waist to
help mark exact waistline.

169

Wide-leg trouser
with front tucks
After Marlene Dietrich surprised the fashion world by
wearing pants, called slacks, in her early movies, the
style was embraced by Hollywood stars—most notably
by Katharine Hepburn, who was seldom seen in a dress
outside of the movies.
Draw the pant, noticing how the proportion of details
affects the look. The classic trouser will have some
sort of pockets, a zipper, and often cuffed hems.

Muslin preparation A: Draping from scratch
18"

18"

4½"
11"

4½"

4"

6"

To drape the pant from scratch, use Muslin
Preparation A and follow the steps on
pp. 174–75.

11"

42"

42"

The Easy Pant Draft is a similar way of
working. You can calculate the kind of fit
and ease you want by anticipating the
measurements listed on p. 171 and marking
them lightly on the muslin before you begin.
That way, as the draping process goes
forward, reference points are marked on the
muslin to help keep the pant fit correct.
If you want to try using the draft, use Muslin
Preparation B (p. 172), and follow the steps for
the Easy Pant Draft first to create the draft on
the pant muslin.

170

Front

Back

Easy pant draft
There are many methods available to draft pants by
precise measurement rather than by draping. With
draping, however, you have the advantage of being
able to see the silhouette as it is created and the
flexibility to refine the subtleties of its shape.
This particular method is intended to help you drape
the pant. Having some measurements and a basic
shape to follow is useful when starting the drape. It is
not intended to be a final pattern, but rather a timesaving device to set the general parameters of the
pant’s volume.

C F

Amount of ease

This draft can be done on paper and then transferred to
a muslin piece, or it can be drawn directly onto muslin.

Measurements
Waist or high hip

26" (66 cm)

This is where you want the pant top edge to be.

Hip

40" (101.5 cm)

This is probably the widest area of the pant pattern.
Determine the ease. For a tight-fitting pant, work with the exact hip measurement of the
form. For a standard, more loosely fitted modern pant, estimate 4" (10 cm) around the hip.
Although that sounds like a lot more than the 36" (91.5 cm) hip measurement of the form, it
is only 2" (5 cm) for each side, and only 1" (2.5 cm) per front and back, which will be about
right for a nonstretch fabric (see diagram above).

Crotch depth

9" (23 cm)

Determine crotch depth using the method on p. 162, or measure down from the waist of the
bifurcated form to the crotch.

Length

38" (96.5 cm)

Determine an approximate length by estimating an outseam measurement. This is the
measurement on the side seam of the bifurcated form from the waist tape to the end of
the leg.

Drafting the pant hem measurement

These two curves are critical to the fit of the pant and have an infinite
variety of settings. You will have to further determine this curve by
working with the pant on the dress form.

When adding to or decreasing the pant hem measurement, a good
rule is to do it equally from both the inseam and the outseam.

It is a good exercise to study the crotch curves of different types
of pants. Notice how the shapes of these curves affect the fit of
the pants.

Chapter 2.3
Pants
History | Exercises | Draping project

Front and back crotch curves

171

Muslin preparation B: Easy pant draft
18"

18"

1"

1"

12"

2¾"

12"

2¼"
2¾"

42"

42"

8"

8"

1"

5"

5"

10"

10"

38"

Front

B

2½"

Measure depth of crotch down the vertical.
Draw a horizontal line and label it “B.”
This will become your crossgrain line.
Repeat for back.

172

2½"

2½"

B
2½"

2½"

2½"

2½"

38"

Back

Front

Back

Step 2

Step 1
Draw a vertical line the length of your
target pant length and label it “A.” This
will become your lengthgrain line. Draw a
line at 90° to the top of this line to mark
the waist/high hipline. Repeat for back.

2½"

B
Outseam edge

5"

A

Outseam edge

B

9"

Inseam edge

9"
5"

A

Center back

A
Center front

A

Inseam edge

1"

Divide your hip measurement in half: 20"
(52 cm) for the half pant you will draft.
Now divide that in half for the front and
back sections: 10" (26 cm) each. Now
divide that measurement equally either
side of the lengthgrain, and from line A
measure out 5" (13 cm) along line B to
each side and mark two points.

Now divide the measurement between the
two points into four, creating 2½" (6.5 cm)
segments, and mark the points along the
crossgrain line B.
Draw two vertical lines up from the two
outside points to the waist/high hipline.
These two lines will become the center
front and back, respectively.
Label inseam and outseams.

2½"

C
4½"

B
Inseam edge

C

Outseam edge

Inseam edge

B

A

Outseam edge

A

D
Front

D

D

D

Back

Step 4

Step 3
To create front crotch curve, add one
increment—in this case, 2½" (6.5 cm)—to
the front inseam edge, and mark it point “C.”
To create back crotch curve, add two
increments less ½" (1.5 cm)—in this case,
4½" (11.5 cm)—to the back inseam edge
and also mark it point “C.”
Keeping lower curve quite straight for the
first inch (2.5 cm) or so in the front and 2"
(5 cm) in the back, blend line upward.

Determine hem measurement. It is better
to take a larger measurement than you
actually anticipate and then finalize it
during the draping process. For now, draw
the lines tapering in only 1" (2.5 cm) on
each side and adjust it further on the form.
Measure hem out equally either side of
lengthgrain at the bottom of line A and
mark two points, labeling them “D.” From
points D, draw lines up to the points C
on the inseam and to the bottom of the

vertical lines you drew in Step 2 to create
the outseams.
After filling in the outseam and
inseam lines, the waistline is yet to be
determined. This will largely depend on
how you are treating the fit at waist and
hip. You will need some sort of darting or
tucking to create the fit at the waist; for
now, just leave the waist and drape it on
the form.

Measurements for the wide-leg trouser with front tucks
Lengthgrain
line A

42"
(108 cm)

This is a looser-fitting trouser with pleats in the front, so allow that much ease.

Crotch depth
for position of
crossgrain line B

11"
(28 cm)

It has a high waist and a waistband, typical of the 1940s vintage look. This measurement is,
therefore, taken from crotch to waist plus about 1" (2.5 cm).

Points C

When determining these points, allocate 22" (56 cm) for the front pant, because of the fullness
of the front pleats, and 20" (52 cm) for the back pant.
Points C, therefore, will be:
Front: 11" (28 cm) crossgrain line, centered and divided into fourths = 2¾" (7 cm) per increment
= 2¾" (7 cm) extra for front crotch curve.
Back: 10" (26 cm) crossgrain line, centered and divided into fourths = 2½" (6.5 cm) per increment.
Add two increments, less ½" (1.5 cm) = 4½" (11.5 cm) extra for back crotch curve.

Often in the garment industry, basic slopers, or blocks, are used to create new patterns. A pant
firm, for example, would have various slopers representing their different types of fit. When
a new style is being created, one of the slopers would be used as a reference. That way, the
designers know that the pant hip, inseam, and crotch curves have been tested and can use
that information to save time when developing the new style.

Chapter 2.3
Pants
History | Exercises | Draping project

Creating new styles from established patterns

173

Step 1

Step 2

Align CF line with CF of form, keeping
crossgrains horizontal to floor.

Repeat Step 1 for back, making sure
crossgrains are on same horizontal level.

Approximate pleat point and pin pleat.

Note how much more fabric is needed in
the back than the front to create the back
crotch curve.

Pin at side seam to support pant.

Step 3
Using the Easy Pant Draft to help find
the right crotch depth, estimate hip
measurement of pant. In this case, the
front pant will be slightly larger than the
back because of the pleat.
Tape front crotch line and clip to CF
grainline about 4" (10 cm) down from
waist. Continue clipping and trimming
away excess, following curve of form all
the way to inseam.
Remove tape.
Repeat Step 3 for back of pant, as shown.
The crotch depth should end at the same
place as the front (crossgrains should
match at the inseam).
If you feel more comfortable draping the
pant without the draft method, drape curve
by trimming and clipping until crotch line
lies smoothly along crotch line of form.
For a classic cut, remember that the back
curve will be a little less than twice the
depth of the front.

Step 4
Pin inseam front over back. If you have a
two-legged form it can be difficult to fold
under and pin, so just pin the front over
the back, laying the two pieces flat on a
table. If you have a one-legged form, pin
front over back on the form.

174

Step 5
Pin side seams wrong sides together and
check the silhouette of the photograph.
Check that side seam is falling straight
down side seam of form.
Check fullness of pant. This trouser is cut
with a very straight, angular look, and the
cuff ends at the top of the shoe.

To help determine a target measurement
for the cuff, study some of your own pants
and familiarize yourself with what a 24"
(61 cm) pant hem looks like compared with
an 18" (45.5 cm) hem. This one looks to be
about 20–24" (50–60 cm) wide.
Pin down side seams and adjust inseam
until balanced.

Step 6
Once you feel you have achieved the look,
pin front over back at side seam.

Step 7
Once you have corrected the width of
the pant, find the center of the front leg
and check how your front tuck is angled.
Correct it if you need to; it should angle
slightly outward to coordinate with the
crease at CF of pant.
The tuck is stitched down 3–4" (7.5–10 cm),
so pin down to where tuck stitch will finish.

Step 8
Determine width of waistband and wrap it
snugly around the waist to make marking
the waist easier. This is a 1940s-era pant,
so the waist will be high.
Turn up the cuff.

Chapter 2.3
Pants
History | Exercises | Draping project

175

Draping project
This contemporary design from Nanette
Lepore’s Spring/Summer 2011 collection is a
cropped pant with some flare at the hem.
The fabric in the photograph appears to be a Tencel,
silk, or soft cotton twill, as it has a gentle flow. The
ease at the waist is taken in by small darts hidden at
the flap-pocket line. Very little fit is needed in the
waistband, as it sits at the high hipline a few inches
(about 7.5 cm) below the waist.
The attitude is of relaxed resortwear—casual, fun,
and chic. The pant should have a modern fitted hip
and fairly slim upper leg that flares just a bit at
the hem.
For this style, use hemp/silk muslin. It has a softer
drape than the standard muslin and more closely
resembles the look of the pant in the photo. Also,
because it has a looser weave, it is easier to see
the grainlines, which is helpful in draping a pant.
If you use the Easy Pant Draft (pp. 171–73), the
approximate crotch depth will be 1–2" (2.5–5 cm)
shorter in the front than the back, similar to a jean
cut. Calculate the hip measurement very close to
the form. For this project, the ease at the waist will
be taken in by just one dart.

Slim-fitting styles
Often in a jean style or slim-fitting pant, the back crotch is extended
and the front shortened for a closer fit in the back high area.

Muslin preparation
20"
4"

22"
5"

7"

9"

18"
4"

4"
7"

8"

Waistband

176

40"

40"

Front

Back

Pocket

Step 1
Set front snugly around hip, keeping
lengthgrain vertical.
Fold in the front dart, keeping it as small
as possible, just enough to take a little
excess off the waist.
Tape front crotch line.

Step 2
Set back section, keeping grainline vertical
below hip. Then, allow CB grainline to fall
to the left of the CB of form, smoothing
muslin to fit over back high hip. Angling
this CB grainline will allow for a more
fitted back hip area. Also, because the CB
is thrown onto a slight bias grain, this will
give some stretch, allowing the piece to
form fit over the body.
Form a small dart to fit the top edge.
Hold fabric in at thigh area.
Form back dart.

Step 3
Cut crotch-depth line in front and back;
note that, as you follow the crotch line,
you will be clipping beyond your taped
line. As the pant is quite fitted in that area
and needs to be draped close to the form,
it is acceptable to do this. Keep back thigh
slim as you pull fabric around to inseam.
Pin inseam area to form. Again, because
this is a fitted pant, the inseam often goes
toward the front. In this case, drape it
about 1" (2.5 cm) toward the front, which
should allow you to keep the fit close to
the thigh in the back.
Make sure that your knee-line crossgrains
are matched at the inseam. If you have a
one-legged form, this will be easy to do.
If you have the two-leg form, it is more
difficult, so just pin the muslin to the
inside leg of the form as smoothly
as possible.

Fitting the back thigh
You can shape the upper thigh by pulling
more or less muslin into the inseam.

178

Step 4
Check the photograph and start pinning
side seams wrong sides out. When you get
to the knee area, begin to flare out the leg.

Step 5
Trim excess at hip area and continue
pinning to the hem.
Pin the inseam at the same time,
balancing the two flares and keeping
grainline straight down the center of the
pant front and back.

Step 6
Turn side seam front over back and
check silhouette.
If you have a single-leg form, you can pin
the inseam front over back as well. If you
have a two-leg form, pin by laying the
front on top of the back.

When working with pant flare, the
amount on the inseam and outseam
should be fairly equal.

Chapter 2.3
Pants
History | Exercises | Draping project

Pant flare

179

Step 7
Determine set of waistband by first taping
the position of the top and bottom edge.
Drape pocket flap by creating a rectangle
from muslin with the edges turned under.
Tape the fly stitching or J-stitch.
Check the proportions of all three details.

Step 10
Trim excess from both sides of waistband
and turn edges under along the taped
lines. You can remove the tape so that it is
easier to see the actual line.
With small scraps of muslin, determine
proportion and placement of belt loops.
When positioning these details, note that
even ¼" (0.5 cm) larger or smaller makes
a big difference in the look of the pant. A
1½" (4 cm) waistband has a completely
different look to a 1¼" (3 cm) waistband.

Step 11
Turn up the hem.

180

Step 8
Start draping waistband at CF with
crossgrain centered on taped area and
lengthgrain vertical to CF.

Step 9
Pulling fairly tightly, wrap waistband
around to CB, allowing grainline to drop as
CB of waistband becomes bias. This will
allow band to fit snugly around high hip.

Marking and truing
Correcting lines
Use a red pencil for corrected lines, and blue if there are
further corrections. That way, it is easy to remember that your
pencil line is the original marking, and the two colors are the
subsequent corrections.

Step 1
In truing up a pant, it is very important
that the long seamlines of the outseam
and inseam are smooth. The long metal
hip curve is perfect for the job. Here it is
combined with the metal ruler to create
the line from hip to hem.
Observe the two side-seam curves. The
front section appears quite a bit wider
than the back. It is possible for the back to
be slightly smaller than the front pant, but
in this case it may have draped slightly off
balance. It would, therefore, be sensible to
even out the flares by taking a little bit off
the front and adding it to the back.

Step 2
At the point where the crotch seam flattens
out, the inseam will usually begin with a
concave curve angling toward the knee.
Here you can see the pencil lines are quite
erratic. Draw a red line to start the correct
angle, but then soften it with the further
correction in blue.
True up the waistline of the pant from the
bottom edge of the back waistband tape
and align the small front darts with the
position of the pocket flap.

Chapter 2.3
Pants
History | Exercises | Draping project

181

Analysis
Does your pant accomplish the look of the
photograph? What kind of attitude does
is evoke overall? Does the upper part look
fitted and flattering? Are the legs flared
enough to look playful yet chic?

If the upper pant seems to be sagging in
the front or back, try pulling up first at
the front waistband, then the back, and
observe how it changes the tilt and look of
the pant.

Look carefully at the hip area. The inseam
is pulling in the front or back crotch and
creating a “smile” effect. This will occur if
your front or back crotch seam, or “rise,”
is too short. Add to the crotch line where
it flattens out, which means you will also
have to widen your pant slightly at the
top of the inseam. Just blend the line as it
travels down toward the knee.

It is questionable whether there is enough
fullness in the pant leg. The fabric in the
photographed design has a lighter drape
than our hemp/silk muslin. But some of the
fullness here is in the back, unseen, while
the photograph has some movement in it.

If the back crotch is cutting in too much,
your back curve is probably not concave
enough. Carve out a little more, starting
about 4" (10 cm) down from the top edge,
and observe the difference. Just ¼" (0.5 cm)
more out of that curve will change the fit.

If you want to add to or subtract from
the width of the legs, remember to do
it equally on the inseam and outseam,
unless there is a balance issue.

Waistband

Flap pocket piece

182

Front

Back

Fly extension

Fly facing

.4
2
Knits

History
The beauty of knit is in its ability to stretch. Interlaced
yarns comprise an entirely different structure than that
of a woven fabric. The inherent give in the knit can
create either a smooth, close fit or, when falling freely,
a uniquely fluid drape.
The earliest knitted fabric is attributed to the Egyptians.
Their style of knitting however, was closer to the way
fishnets are made than to what we know as knitting
today. Beaded dresses of this fishnet construction,
when worn over a sheathlike garment made from linen,
would create a figure-hugging silhouette.
Knitting with two needles probably emerged as a
technique for making fabric around 1000 AD. Before
that, textiles of similar structure were made using one

needle. Evidence of knitting can be found in medieval
paintings and in surviving garments—including
jackets, caps, and gloves—from the sixteenth and
seventeenth centuries.
The mechanization of knitting began in 1589 with the
stocking frame by the Reverend William Lee. Successive
generations built on the machine’s foundations, through
to the Industrial Revolution in the mid-nineteenth
century, when the industry gained in stature.

Opposite page:
Left: Coco Chanel is
seen here getting into
her car, the model of the
emancipated, mobile,
modern woman in her
knit ensemble. The knit
skirt allows a freedom of
movement that symbolizes
women’s forward progress.

186

Knitted fabric is created by
interlocked loops formed
from a single piece of
yarn, its structure giving it
stretch in all directions.

Right: Like a second skin,
painted and ornamented
knit garments, such as
this unitard, afford the
acrobats and aerialists
of Cirque du Soleil full
freedom of movement.

The first designer to truly popularize the wearing of knits
by women for daywear was the revolutionary fashion icon
Coco Chanel. Early in her career, Chanel often borrowed
garments from the men in her life with which to work. One
of the first garments she experimented with was said to
be a polo shirt cast off by a stable boy, which she cut up
and tailored to fit herself.
After World War I, when textiles were in short supply,
Chanel’s ingenuity served her well. She fashioned knits

that were more commonly used for undergarments
into modern and comfortable tops, skirts, and jackets,
often with bright stripes and patterns.
Technological advances in yarns and knitting in the
last half century have brought us from those old polo
shirts to the state-of-the-art fabrics used for legwear
and hosiery, swimming, and shaping and slimming,
with such amazing qualities as moisture wicking and
thermoregulation.

Chapter 2.4
Knits
History | Exercises | Draping project | Variations

187

Exercises
Cotton knit top with
ribbed neckline
Creating fitted garments from knit fabric is more
commonly done by pattern drafting than draping,
because it is difficult to pin the fabric to the form while
stretching it. If the garment is tight, and the stretch of
the knit is being utilized, such as in swimwear, it is
better to draft the pattern. If the knit fabric is intended
to softly lie over the body, or to be draped in folds, then
it works well to drape it.

Knit fabric preparation
20"

20"

25"

25"

A problem that sometimes arises when
draping with knits is that the knit may
stretch out of shape during the process.
When truing up, it becomes difficult to tell
what the original measurements were.
For that reason, it is helpful to draw a grid
on the fabric before draping with it. This
entails drawing additional grainlines on the
fabric so that it can be reblocked back into
its original measurement after draping.
In the following exercise, you will draw
a grid on the knit so that it can easily be
reblocked. This will make it easier to see
where you are utilizing the stretch as the
grid moves out of alignment.

188

Front

Back

Step 1
Align CF of knit piece to CF of form; pin
down CF and at shoulders. Keep the
gridlines as close to vertical and horizontal
balance as possible.

Step 2
Cut away CF at neckline to allow fabric to
lie smoothly.
Pull equally on both sides at bust to
determine how much of the stretch will
be utilized. The goal is to pull it tightly
enough so that the dart usually used for
the bust ease will not be needed.
Pin at bust and down sides until the
front has the look you want. It should lie
smoothly with very little wrinkling.

Step 3
Repeat from Step 1 for back.

Starting at CF, pull rib piece around
neckline toward the back, stretching
slightly as you go. Observe how, at
the shoulder, the cut edge needs to be
stretched more until the folded edge
lies flat.

Draping a knitted garment
With knits, it is best to drape a full front and back instead of only half
the garment. This will help keep the knit stable as you are working
with it.

Drape rib piece around armhole, as you did
with the neckline.
Tape the hem length.
Chapter 2.4
Knits
History | Exercises | Draping project | Variations

To drape the rib neckline piece, first
determine a width and fold a piece of rib
fabric in half against the rib. If you don’t
have rib, a small piece of your crossgrain
knit will work as well.

Step 4

189

Strapless
knit top
This classic strapless style can be done in any fabric,
but works particularly well in knits. The fabric is
stretched over the bodice, resulting in beautiful gathers
that conform to the shape of the body and are then
tacked lightly to the lining to keep them in place.

Utilizing the stretch of knit fabric
This is a style that utilizes the full stretch of the knit fabric. When you
pull the knit firmly over the form, observe how the gathers seem to
fall naturally into place.

Muslin preparation
15"

7" (bust)

Knit fabric preparation
13"

1"

1"

22"

20"

6"
15"
22"

20"

18"

Back
Front
Back
Front

190

Step 1
Set a woven bodice on the form to use
as a base for the gathers. Try using the
bodice draped on pp. 46–47.

Step 2
Pin CF to CF of form, and left side of the
knit to side seam of form.
Start gathering up the sides, pulling fabric
evenly over bust.

Step 3
Tape top edge and hem.
Pin to hold gathers in place.

Chapter 2.4
Knits
History | Exercises | Draping project | Variations

191

Draping project
This halter-neck knit top from Nanette Lepore’s
Spring/Summer 2011 collection exhibits a
sporty chic and whimsical attitude.
The multiple neck straps are not necessary to hold up
the top, but they serve well to keep the top edge even
since there is no understructure to support the light
knit. A halter-style neckline is created by the ring of
knit that holds the straps.

Knit fabric preparation
18"

16"

18"

5"

11"

12"

Neckband
16"
4"

Front
4" grid

Back
Center strap
7"
4"

192

Side straps (cut two pieces)

Step 1
Set front by pinning CF to CF of form.

Turn front over back and pin side seams.

Smooth fabric equally toward both sides.

Tape neckline. Take care to keep side bust
area high before sloping down at the back.
Top edge of back should cover bra line.
Check photograph to determine top edge
of front. It is a little bit lower in the center.

Pull slightly over the bust to determine
how much of the stretch you need to
utilize to eliminate the need for any
darting or seaming.
Repeat for the back.

Step 4
Set side straps.
Readjust neckline drape so it looks like the
photograph—not too tight, not too loose.

194

Step 2

Step 3
Set neckline halter drape and CF straps.

Marking and truing
Step 1
Mark knit top with pencil or chalk before
removing it from the form (not shown).
Sometimes with knits, the pencil or chalk
does not give enough definition. If so, try a
felt-tip or gel pen, taking care it does not
bleed through to the form.
Crossmark more frequently with knits than
with woven fabrics (not shown).
Remove the tape (not shown).
Reblock onto paper grid to the original
measurement.

Step 2
True curves as marked, and correct against
the photograph.
Mark seam allowances, which on knits are
often 3⁄8" (1 cm) to allow for overlocking.
Use V-notches, rather than cutting in on
knit fabrics.

Chapter 2.4
Knits
History | Exercises | Draping project | Variations

195

Analysis
Compare the fit of your knit top with that
in the photograph. Does it lie smoothly
over the front torso? If it is too tight, it will
wrinkle at the underbust or waist. If it is
too loose, it will sag slightly.
The right degree of utilization of stretch
takes some experience. Study this by
making the top both slightly smaller and
larger, and observe the differences in
the fit.
Visualize the top on a muse. Is it low
enough in the neckline to be fun and
flirtatious? Are the straps spaced in an
interesting way?
When looking at the straps, pay attention
to the negative spaces. Rather than
looking at the straps themselves, focus
on the spaces between them, and then
compare those shapes to those on the
photograph. This may help you determine
whether you have spaced them correctly.

Analysis of the ensemble
This top is paired with the pants you draped
in Chapter 2.3: Pants (see p. 176).
When working with ensembles, the
challenge is to coordinate the overall
look and sizing of the pieces. If the top is
too fitted and petite, or the trousers too
oversize, the proportion will look askew.
When draping two pieces to be worn
together, it is important to view them
on the form at the same time, to make
sure they look as if they belong together.
Here, the sizing is similar to that in the
photograph.
The details are important. The size of the
neck and shoulder straps must relate to
pant details such as the belt and pocket
flap. They do not need to be the same
size, but if they are of the same level of
volume, they will flow together. Be aware
of details that stand out too much; this
may signal that they are out of proportion
within the ensemble.

Neckband

Center strap

Front
Back

196

Detailing such as topstitching is important
here, too. Remember that the delicacy or
boldness of the stitching needs to match
the tone of the garments.
Wide belt loops create a broken-line effect
that is echoed in the neckline straps. The
gaps are not the same size, but they tie
the two pieces together, drawing the eye
smoothly over the ensemble.
It is a little hard to tell from the photo
exactly where the crotch depth ends, and
the legs on the pants seem a bit longer.
It could be that the model’s very tall
proportions are giving a more elongated
look to the leg. Also, the movement in
the pant is bringing the flare forward,
whereas the leg here is static and the
flare is partly in the back where you do not
see it. Visualize the pant in movement to
determine whether you have achieved the
right amount of flare.

Side strap

Side strap

Variations
Top with kimono
sleeves
The knit used in this blouse utilizes stretch only in the
sleeve lift. The fabric is a rayon that has a heavy drape,
which works well with the volume in the peplum.
The “kimono sleeve” is named for an ancient form of
Japanese garment, but the term is used today for a
sleeve that is cut in one piece with the bodice.
For this drape you do not need grids on the peplum
pieces, as you are not utilizing the stretch in those areas.

The character of draped knits
This style shows off the beauty of draped knit fabric, which tends
to fall and flow heavily and evenly. It is a good exercise to study
the many different weights and fibers of knit fabric and familiarize
yourself with the different looks they create.

Knit fabric preparation

Muslin preparation

34"

34"
1"

18"

15"

4"

1"

12"

20"

20"

1"

7½"

Lower front
Back

44"

Front

18"

5" grid

4"
14"

1"

Lower back
Drop piece

198

Step 1
Set front section by pinning down CF,
trimming and clipping neckline as needed.
Pin across shoulder area and at bustline.

Step 2
Determine depth of kimono sleeve. Test
the lift by draping high and then dropping
the arm to check amount of fabric at
underarm. Pin side and underarm seams.

Step 3
The sleeve set at this lift results in quite a
bit of fabric under the arm.

Tie a length of twill tape around the wrist
(not shown). Set the stuffed arm at a
height you would consider optimal lift.

Try testing the lift at a lower angle.
Set this low, the sleeve has no lift and will
not be comfortable.

Step 5
Try to arrive at a height that seems like a
comfortable compromise.

Chapter 2.4
Knits
History | Exercises | Draping project | Variations

Step 4

199

Step 6
Set the stuffed arm at desired height and
pin shoulder area wrong sides together.
Trim excess fabric, leaving about 1"
(2.5 cm) seam allowance.
Pin underarm curve wrong sides together.
Trim excess fabric, leaving about 1" (2.5 cm)
seam allowance.
Tie a length of wide elastic around
waistline and check balance.

Setting the sleeve angle
The angle of the kimono sleeve determines
how the underarm drape of the blouse will
look. There is an infinite array of shapes to
choose from, and there is no right or wrong
way here. It depends on the look you want and
the degree of lift you need.

200

Step 7
Set wide elastic at the waist.
Set lower front drape. Start in CF with top
edge of fabric a few inches (about 7.5 cm)
above the waist. Trim and clip as you did
with the bias skirt to create the flare. Here
you will also gather in the fabric as you go
to create more fullness.
Set lower back drape in the same way.
Join side seams of peplum drape
(not shown).

Step 8
Trim hem of peplum, following the line
of the photograph as it slants down from
front to back.
Turn waist edge under top edge and set
wide elastic onto the outside.

Step 9
Drape shoulder piece by tucking it into the
elastic and looking at the shape it creates
at the waist. It should gently fall over the
elastic, but not too much.

Remember that the mirror is your secret
weapon! Designers tend to look at their
work at very close range, but clothes
are not usually seen that way—others
see us at a further distance. Even
when conversing with friends, we are
often 5–6' (1.5–2 m) away. This is the
perspective you need to consider when
you make the final adjustments to your
drapes. Position yourself with a mirror so
that you can continually look up and get
that helpful perspective.

Chapter 2.4
Knits
History | Exercises | Draping project | Variations

Practice draping this piece while looking in
the mirror from a distance until you arrive
at a look with which you are satisfied.

Working with a mirror

201

3

Advanced
Draping
3.1 Coats and Jackets
3.2 The Grand Gown
3.3 Draping on the Bias
3.4 Improvisational Draping
With these advanced draping exercises, your eye will become more highly
trained in recognizing subtleties in shape and form. Attention is given to
360° awareness of the drape, crucial to recognizing when a silhouette
becomes new.
You will learn to map out the energetic flow of a garment, using grainline
placement to support emotional content.
You will practice the designer’s skill of visualization, critical in maintaining
the essence of inspiration while draping larger shapes, such as a gown, or
while working with support elements such as shoulder pads, foundations,
and petticoats.
You will continue to train your hand in the skills of sculpting through use of
more complex seaming and shaping, learning to understand the power of
emphasis and focal point and how slight differences can shift the
atmosphere and mood of a garment.
Once you are able to focus more on the abstract, the ultimate goal of
creating a signature look begins to be emerge, communicating not just a
garment, but a consciousness.

.1
3

Coats and Jackets

History
The inherently balanced drape of a simple square-cut
panel of woven fabric can be easily seen in outerwear
pieces such as cloaks, capes, and mantles.

A classic example of the elegance of this elemental
form can be seen in the royal robe. Throughout history,
kings and queens were pictured with majestic lengths
of fabric trailing behind them. The wealthier the family,
the more fabric could be afforded, along with more
elaborate embellishments.

Because they needed to be large enough to cover
other garments, these panels of heavier fabrics—
woolens, linens, and, later, heavy velvets—often
worked best when simply shaped, draped over or
seamed at the shoulders.

Left: Queen Victoria
wears a long cape of
golden cloth in this
nineteenth-century
portrait by Charles
Robert Leslie.

206

Above: A wool aba, chiefly
worn by the Bedouins
of Syria, is a simple
outerwear garment made
of woven panels pieced
together at the shoulders.

Garments recognizable as the ancestors of the
coat and jacket began to evolve well before the
Renaissance. The ancient Persians are credited with
developing the first seamed coat with sleeves. For
women, it was not until the mid-nineteenth century
that coats and jackets were worn as fashionable
daywear, as capes and mantles remained more
practical for covering the voluminous garments worn
for so many centuries.

When creating a coat that has older origins, be aware
of references that may arise. For example, a woman’s
jacket with a fitted bodice and gathering in the cap of a
fitted sleeve might remind one of the Victorian era,
imparting to the garment the flavor of the posture,
attitude, or sentiment of that time.

Collars and shoulders tend to be focal points for
jackets and coats. The collar frames the face—
from demure lace to fur collars to the huge ruffs of
the seventeenth century. Since the working man’s
frock coat was adopted into fashionable attire in the
1730s, the notched collar and lapel have become a
timeless template, even as proportions constantly
change with fashion trends.

Above left: This shepherd’s
cloak of Finnish/Asiatic
origin is made of a series
of square-cut woven
panels and can be seen
as an early example of a
modern coat.

Above right: This cloak by
Paul Poiret from the 1920s
is a modern example of
the timeless elegance of a
simple drape.

Chapter 3.1
Coats and Jackets
History | Exercises | Draping project | Variations

Many of the coats and jackets worn today are modern
adaptations of cuts whose construction template has
endured and evolved over long periods of time. The
original trench coat, peacoat, Spencer jacket, and
tailcoat are some examples of these classic coat styles.

Another example is that timeless classic, the trench
coat. Countless versions have been designed, yet they
always have a certain cachet. The collar with the high
stand gives protection from rain, but also imparts a
mysterious chic. The storm flap, deep pockets, and
shoulder epaulets remind one of Humphrey Bogart
and his unflappable cool.

207

Exercises
Understanding
shoulders
The shoulder as focal point dates back to the ancient
Greeks, whose peploses and chitons were fastened at
the shoulders. Historically, in the military, the shoulder
held the rank—it is where epaulets are worn and
where sashes and awards are hung. Coats and capes
often have embellishments at the shoulders.
Various types of padding have been used over time to
give the shoulder area more strength and volume, as a
strong shoulder tends to give one more stature, dignity,
and even a sense of power. In the 1980s, the American
television series Dynasty popularized women’s suits
with huge shoulder pads, dubbed “power suits.”

balance. If the shoulder line is off-balance, the front
and back of the dress or jacket will kick out in the front
or back, pushing the drape of the fabric toward the
center front or back.
Since many garments are supported by the shoulders,
it is important to understand their structure. The outer
shoulder is round, dips down in the center, and curves
up at the neck. In simple clothing construction, this
seam is often drawn as a straight line.
Study the shape and silhouette of clothing with
different shoulder treatments, noticing the effect of a
well-fitting shoulder.

However, the curve of the shoulder line is important to
consider, as this is where the front and back fabric

The curved shoulder shape holds the balance
and must support the weight in many types
of garments.

The decorated shoulder imparts a sense
of dignity.

208

Kimono sleeve
The classic Japanese kimono is an
example of a completely unstructured
shoulder. The construction is completely
geometric, the woven panels maintaining
their balanced purity.
With this kimono sleeve construction,
the fabric falls over the natural shoulder
line unsupported, creating many folds and
drapes at the underarm area. Because of
the perfect balance of the front and back,
the look is graceful and relaxed.

Shoulder pads
As a counterpoint to the kimono, the
shoulder here is at its most constructed.
With the help of a fitted shoulder pad, the
fabric is shaped and molded closely over
the shoulder, eliminating all excess from the
underarm area. There are no soft folds here,
the line is trim and crisp. The front of the
garment fits smoothly over the figure.
The large shoulder pad here, typical of the
1940s, makes it an obvious focal point. The
height and angular shoulder line create a
strong and sexy look for Lauren Bacall, the
ultimate modern woman of her time, both
beautiful and powerful.
Chapter 3.1
Coats and Jackets
History | Exercises | Draping project | Variations

209

Chanel-style jacket
The famous fashion innovator Coco Chanel
popularized the fitted tailored jacket for women.
She distilled the modern jacket of her day into a
timeless classic that became her signature look.
The original Chanel jacket was short, with no collar,
and typically boxy in shape. One of the key features of
the tailored jacket is the three-panel construction.

Muslin preparation
12"

10"

12"

13"

9"

4"

4½"
1"

2"

5"
10"
11"

12"

17"

24"

25"

26"

17"

16"

Side
Undersleeve
Top sleeve
Front

210

Back

20"

11"

18"

10"

6"

6½"

Today, Karl Lagerfeld designs for the House of Chanel.
Many of his jackets still reflect the classic Chanel
look—the boxy shape and short length with the
three-panel construction. Other elements that reflect
the look are the flap pockets, the bound edges, and
the finishing touch, the signature strand of pearls.
As jackets are intended to be layered over other
garments, they need to have a comfortable amount
of ease, which requires draping away from the dress
form. The sculpting of the shape and sensitivity to the
contour of the lines becomes more challenging and
ever more important.

Balancing the three panels requires 360°
awareness of the shape, so that it looks
flattering from every angle.

Chapter 3.1
Coats and Jackets
History | Exercises | Draping project | Variations

The classic three-panel jacket has a side
section that eliminates the side seam and
sits between the princess lines in the front
and back. The two-piece sleeve angles
slightly forward for the natural hang of the
arm, and has a closer fit at the inside of the
arm and more room at the elbow.

211

Shoulder pads

Draping away from the form

To prepare the form for the drape, first
determine the type of shoulder pads to
be used. They are not necessarily needed
for height, but to help support the shape.
Woolens used for fine jackets are often
loosely woven; because so much of the
weight of the jacket will be falling from
the shoulders, a pad helps to support the
fabric and keep it from stretching while
maintaining the specific shape you are
trying to drape.

Take care not to drape too tightly. You
are draping away from the form to
make a jacket that is not very fitted. The
temptation for the beginning student is
to follow the shape of the form, but now
is the time to break that habit. Try to
accustom yourself to pinning and shaping
the muslin without the support of the
form, but just in space.

Step 1

Step 2

Begin by draping without the stuffed arm;
it is much easier to see the balance of the
three panels without the arm in the way.

Set front panel by aligning CF of muslin
with CF of form. Trim and clip neckline
until it fits smoothly.

Pin shoulder pad firmly in place at the two
lower corners and center of the shoulder
area. Make sure the pins are stuck all the
way into the form so they do not interfere
with the drape of the muslin.

Pin across bust and into shoulder area
lightly, leaving a little ease in the armhole
and taking care not to pin too tightly.
Pin at side to prepare for the volume you
want. Because this first panel extends
further toward the side than a princess
line, you will need a dart to pull in the
waist shape.
Fold in a vertical dart with a fairly small
intake; ½" (1.5 cm) at the waist is about
standard.

212

Step 3
Set back panel by aligning CB of muslin
with CB of form.
Pin across back shoulder, keeping
crossgrain horizontal by giving some ease
at the armhole and shoulder area.
Drape a very small dart into shoulder-seam
area, and also pull in a little extra ease
along that seam. It makes a better fall
in the back at the hem if the shoulder is
properly draped with the crossgrain close
to horizontal and some ease on that seam.
This ease and shoulder dart may be
eliminated later depending on how the
fabric reacts to shaping. Many weights of
wool can be steamed and shaped to create
room over the shoulder blade.

Armhole ease
Note that as you drape the ease in
the body pieces that you need, it will
naturally result in some armhole ease.
Don’t pin the tops of the side panel too
closely; allow about 1" (2.5 cm) extra in
the front and back.

Step 4
Set side panel piece by centering the piece
in the side seam.

Pin down as you experiment with the
amount of ease.

Keeping crossgrain horizontal, pin wrong
sides out along back and front, joining
the seams.
Trim away excess leaving about 1" (2.5 cm)
seam allowance.

Chapter 3.1
Coats and Jackets
History | Exercises | Draping project | Variations

First lay this panel on top of the front and
back sections and try to get a feel for how
much volume you would like to have.

Step 5

213

Step 6
Turn seams to the inside, front over side
and back over side panel.
Tape armhole and neckline.
Position pocket to help you set
the proportions.
Study the balance of the three sections.
Do all three pieces have an even look?
What does the contour of the jacket look
like? Is it similar to the photograph? Does
it look good from every angle?

Studying through 360°
Look at the jacket through 360°, as you would if it were being worn
by a person. The jacket needs to be well shaped from every angle,
not just from the front and back.

214

Step 7
Look closely at the back side seam. It is
forming a straighter line than the front
seam, which has more of the contour of
the body.
Try unpinning the back waist area,
then clip more at the waist and repin
a little tighter.
Note how this correction changes the
look of the jacket. The back panel seam
now subtly shapes out at the shoulder
blade where more room is needed and
gently shapes in at the waist.

The two-piece
sleeve
Another basic construction element of the classic
tailored jacket is the two-piece sleeve. Imagine that
you have a basic blouse sleeve on the form and you
want it to be shaped more ergonomically to the arm.
One way to do that is to pin a dart from the front
underarm area to the wrist, pinning out more at the
elbow where the arm curves in. Then pin the back
sleeve area in above the elbow, letting out at the
elbow where you need the room and pinning in again
toward the wrist. Essentially, these darts made into
seams are what form the two-piece sleeve.
The construction of two seams is a practical way to
create a more comfortable shape to the sleeve by
following the natural hang of the arm. Ideally, the
seams should be minimally visible, falling to the inside
of the arm and hidden in the folds of the fabric.
The seams traditionally do not match at the armhole.
It is tempting to draw them that way when designing,
because it makes sense for seams to match. However,
in reality, four seams meeting at one point of the
armhole would create too much bulk.

Front

Note the position of the connection
of the two-piece-sleeve seams at the
armhole. They should NOT match the
side-panel seams.

Chapter 3.1
Coats and Jackets
History | Exercises | Draping project | Variations

Back

215

Easy two-piece
sleeve draft
rather a time-saving device to set the general
parameters of the sleeve’s volume.

There are many methods for drafting sleeves using
precise measurement rather than draping. With
draping, however, you have the advantage of being
able to see the shape you are creating as it develops
and the flexibility to further refine its subtleties.

This draft can be done on paper and then transferred to
a muslin piece, or it can be drawn directly on muslin.

This particular method is intended to help you drape
the sleeve. Having some measurements and a basic
shape to follow is useful when starting the drape. It is
not, however, intended to be a final pattern, but is

A

A

A

¾"

D

D

A
B

B

D

B
Back

C

UL

Front

C

Step 1
Begin with Step 5 from the Easy Sleeve
Draft (see pp. 124–25).

B

F

Step 2
Divide hem into quarters, and mark new
point at the front “F” and new point
at the back “B.”
Draw dotted lines from the lower marks
on the back and from armhole down to the
new points B and F on the hem.
Notch the dotted lines to keep the fronts
and backs from getting mixed up, with two
notches on the back and one on the front.
Label the underarm lines “UL.”

216

UL

Front

UL

Back

UL

½"

Back

Front

Step 3
Cut the sleeve pattern apart on dotted
lines from F and B.
Notch the cut lines on the smaller pieces
to match with the larger piece.

A

UL

UL

B

Step 4
Tape the two smaller pattern pieces
together along the UL lines.
Now you have the two basic pattern
pieces for the two-piece sleeve: the
smaller one is commonly called the
“undersleeve”; the larger one is the
“top sleeve.”

Step 5
Mark the taped UL line as the lengthgrain
of that piece and the center line of the top
sleeve as the lengthgrain.

Step 6
Now add some shape to the elbow area to
follow the natural hang of the arm.
Draw an elbow line about 7" (17.5 cm)
below the underarm line on both pieces.
Slash and spread the elbow line of both
pieces open about ½" (1.5 cm).

Mark the remaining marks on the back
armhole curve with a double notch and on
the front with a single notch.

Step 7
Then add shape to the bicep area.
Add a further ½–¾" (1.5–2 cm) to the
bicep area of the top sleeve and a little
less to the undersleeve.

It is preferable that the front seam of
the two-piece sleeve is not too visible
from the front. Adjust pattern slightly by
adding an inch or so (2.5–4 cm) to lower
front edge of top sleeve; remove the
corresponding amount from undersleeve.

Chapter 3.1
Coats and Jackets
History | Exercises | Draping project | Variations

Blend lines into a curve, smoothing out the
elbow line.

217

Four sleeve types and their pattern pieces
Note how the two-piece sleeve pattern can be
adjusted to create various sleeve shapes.

A: Classic two-piece sleeve

B: Angled two-piece sleeve

C: Riding jacket sleeve

D: Oversized two-piece sleeve

218

Step 8
Using the shape from the two-piece sleeve
draft, trace top sleeve paper pattern lightly
with chalk onto prepared muslin piece.

Step 9
Repeat Step 8 for undersleeve
pattern piece.

Cut around the line leaving about 1"
(2.5 cm) seam allowance.

Step 10

Use a clear graph ruler to help you pin
the second seam, as shown.

Chapter 3.1
Coats and Jackets
History | Exercises | Draping project | Variations

Pin top sleeve over undersleeve on
seam lines.

Step 11

219

Step 8
If not already attached, pin the shoulder
pad to the muslin. Gently remove the
jacket drape with the pad from the form.
Attach the stuffed arm.
Replace the drape and pad in the same
position, pinning again down CF and CB.
Chalk armhole and remove tape so it is
easier to pin on the muslin sleeve.
Set the two-piece sleeve onto the
shoulder, starting at the cap and angling
it slightly toward the front, following the
natural hang of the arm.

Step 9
Note how the sleeve puffs out slightly at
the cap area. This indicates that there is
significant ease at the cap area. It should
be no more than about ¾" (2 cm) per front
and back. Because the final jacket fabric
will be wool, this amount of ease can be
steamed and shaped to fit the armhole.
Now check the position of the two sleeve
seams. They should be slightly hidden by
the drape of the sleeve.
Here it looks as if the front undersleeve
is angling too far to the front; use tape if
necessary to re-mark the new lines.
Readjust angle of sleeve drape and/or
height of notch points so seams are either
hidden or hanging in an unobtrusive way.
Repin if necessary.

Step 10
Adjust and distribute ease of sleeve cap.
Finalize position of notch points.

220

Step 11
Allow excess at lower armhole of sleeve
to fall toward inside of armhole.
Pin it into a smooth curve, raising
and lowering armhole as you go to
find the right balance aesthetically
and for movement.

Step 12
Repeat from Step 9 for back, remembering
that sleeve should be hanging slightly
toward the front, following the natural fall
of the arm; therefore, there will be slightly
more ease in the back of the sleeve and a
little less fabric in the front, especially at
the lower parts of the curves.

Step 13
Complete the drape by adding the finishing
details, taping the pocket flaps, buttons,
and sleeve vent.

There is a happy medium to be found in
the sleeve lift. If the lift is very high, there
is freedom of movement, although more
fabric under the arm. If the lift is low, and
all the ease has been draped out, raising
the arm will cause the entire jacket to
ride up.

Chapter 3.1
Coats and Jackets
History | Exercises | Draping project | Variations

Aesthetics vs. movement

221

Draping project
This Dolce & Gabbana tuxedo jacket, worn by Rihanna,
is a perfect balance of masculine and feminine. The
body of the jacket is the epitome of classic menswear
tailoring with its fitted shape, welt pockets, and peaked
lapels, while the rounded, Victorian-style leg-o’-mutton
sleeves are soft, light, and feminine.

When preparing your flat sketch, try to capture the
angular look of the body and the contrasting soft
curves of the sleeves. To help you visualize the
volume, find a sleeve as close as possible to this
one. Studying this reference will help you decide
how much larger or smaller your actual sleeve needs
to be. Calculate measurements for the largest sleeve
you think you may want, so that you do not run short
on your muslin pieces while draping.
For this drape, use a heavier muslin, such as a cotton
twill, or simply fuse your regular muslin. The weight
will help the definition of the body shape and sleeves.

Muslin preparation
16"

13"

3"

11"

12"

9"

4"

25"

12½"
11"

Collar A
30"

17"

30"

17"

18"
36"
12"

Front

222

9"

27"

Collar B

Back
Sleeve

Step 1
Study the silhouette of the jacket and
determine which shoulder pad to use.
Set shoulder pad onto shoulder, extending
it about ¾" (2 cm) beyond armplate.
Compare it to the Chanel-style jacket on
pp. 212–13; note that its look is more
square than the softer Chanel.

Step 2
Pin CF. Trim and clip neck, but only exactly
where it hits the form’s neck. Leave CF
high for the peaked lapel.
Form a neckline dart that starts about
1" (2.5 cm) from the shoulder line and
parallels what will be the roll line. This
will help keep crossgrain horizontal, and
will transfer some of the neck ease to
bust area. It will also help the lapel to
curve a bit and roll more smoothly.
Trim shoulder and armhole area.
Form front vertical dart. Check silhouette:
if it seems that the dart needs to be very
deep to create the fitted waist, form two
darts instead. The second dart should be
midway between first dart and side seam,
and shorter than main dart.

Step 3
For the back, align crossgrain across
shoulder blades and pin.
Note the long angular look necessary to
keep the jacket long and slim.
Pin a vertical dart.
Shape CB seam in at waist and out at
shoulder blades.
Wrap shoulder seam toward front,
trimming and clipping neckline, and pin.
There should be ease in the back shoulder
area. (This will be shaped in during
sewing.) Allow about ¼" (0.5 cm) for a
satin and up to 5/8" (1.5 cm) for a loosely
woven wool.
If necessary, fold in a small shoulder or
back neckline dart to hold the ease.

Pin at the side.

Step 4
Clip curve of side seam all the way to sew
line at the waist and turn front over back.
Check the shape: the contour of the side
seam is very important in achieving the
look. It is long and slim, gently curving in
so that it is not too exaggerated or sharply
hourglass in shape.

224

Remember to check your drape in the
mirror from a distance. Look at the side
seam in the photograph; it has a very sleek
look. Observe any difference between

your seam and that of the jacket in the
photograph and adjust it if you need to.
Add another dart at the waist if it brings
you closer to the look of the photograph.
Remember to look at the jacket through
360° degrees and even out the fit between
all the darts and the side seam.

Step 5
Determine roll line and break point of
lapel and collar, which is the exact point
where the front of the jacket turns over to
become the lapel. Check the photograph.
Anchor-pin the point at which the closure
will sit at the waistline. It is important to
finalize this break point now; moving it
later will affect the collar drape.
Tape lower hemline to help determine
proportions.
Clip to waist and turn back lapel area.

Step 6
Tape the armhole.
Tape the neckline. Start from CB and bring
tape around to front in a fairly straight
line, then angle up for the peak of the
collar and lapel.

Step 7
Turn lapel over at break point and tape
styleline.
You will need to see the neckline from
both sides of the muslin, so retape from
the underside as well, making a smooth
connection with the lapel and creating
the angle you want.
If you need to adjust the tape on the other
side of the muslin to match it, do so now.
Trim excess muslin and tape the welt
pocket line. This detail will help you see
whether you have achieved the right
proportion.
Study the silhouette. Compare it to the
photograph, and check it in a mirror.

Chapter 3.1
Coats and Jackets
History | Exercises | Draping project | Variations

225

Draping the notched collar
The notched collar is draped from the
opposite direction to the collars draped
previously in the book. Instead of starting at
the center back, start at the front and roll the
muslin piece toward the back. It is crucial
that the collar flows with the roll line of the
lapel as it travels around the neck toward
the back. First connect the two pieces and
then work with the height of the stand and
the width of the collar.
The grainline of notched collars is at the
discretion of the designer. It is most
commonly placed with the lengthgrain
matching the grain of the center back.

Step 9
Now wrap collar piece around the neck
toward the back.
Observe the nature of the fold: it appears
crisp and has quite a high stand.

226

If there is a pattern to the fabric, it is important
that it match there. The lengthgrain placed
vertically at the center back also gives the
strongest line to the collar and a crisper roll
around the neckline. For a softer look, the
collar may be draped on the bias.

Step 8
Start the collar drape at the front by
folding muslin piece with the lengthgrain
and laying it under the lapel. Keeping the
folded edge on an exact line with the roll
line, pin it to the top part of the lapel.

Step 10
Test the bias grain to see if it works better:
fold the muslin with bias grain running
parallel to foldline and place that piece
against the lapel edge. Drape it around the
shoulder toward the back.
See the subtle difference between this
fold and that created with the lengthgrain
piece in Steps 8 and 9. The bias rolls

around the neckline very smoothly while
the lengthgrain piece breaks as it travels
around the neckline, making a harder fold,
like a crease in the fabric.
The bias grain always tends to look softer.
In this case, the stronger look of the
lengthgrain in Step 9 is more suited to the
masculine, angular jacket.

Step 11
Once you are happy with the look and
proportion of the collar, carefully turn
it up and begin pinning it to the back
neckline, clipping as you move toward
the shoulder.

Step 12
Continue pinning collar to neckline all
the way to the front edge, checking the
styleline you taped beneath the lapel.

Step 13
Fold collar down and check that it is
smooth, with no breaks around neckline.

Chapter 3.1
Coats and Jackets
History | Exercises | Draping project | Variations

Tape the styleline along the outer edge,
comparing it to the photograph and finding
a good balance to the peaked lapel.

227

A

Draping the sleeve
For this sleeve, use the Easy Sleeve Draft
(pp. 124–25). The sleeve here is so large and
cumbersome to drape that it will be easier
to do it in one piece and form the two seams
as darts.

18"

Alternatively, you can follow the instructions for
the Easy Two-piece Sleeve Draft (pp. 216–19)
and proceed, creating the two seams now.

22"

B

You can also drape it from scratch—it is
awkward, but not hard.

35"
C = 10"

Step 14
Chalk armhole and remove tape so it is
easier to pin the sleeve (not shown).
Attach the stuffed arm if you have not
already done so (not shown).
On the table, pin underarm of sleeve up to
elbow area, front over back. Use a clear
graph ruler inserted inside the sleeve to
help you avoid inadvertently pinning to the
other side of the sleeve.

228

Step 15
You will need some support for the muslin
at the cap area. Pin a ruffle of crinoline or
extra muslin onto the top of the arm or the
seam allowance of the armhole.
Whether or not you need to incorporate
this ruffle in the final garment will depend
on the main type of fabric being used and
how much body it has. It is likely, however,
that some type of support will be needed.

Step 16
Start by setting sleeve piece at cap area,
angling the grainline slightly toward the
front. Pin to armhole a few inches to the
front and back of the shoulder point.

Step 17
Set notch points at back and front armhole
by checking height of cap and checking
circumference of that area against the
photograph. Pin firmly in place.
The notch points will help you determine
the amount of lift. Test lift by moving the
stuffed arm up and down until you get a
look you like.
Finalize cap height and pin edge of sleeve
to armhole. The fullness of the sleeve will
be accommodated by gathers on the top
edge. You will need to pin every ½" (1.5 cm)
or so to keep the heavily gathered muslin
in place.

Step 18
Create a dart in the front of the sleeve
in the position of the front seam for the
two-piece sleeve. Take fabric out from the
wrist to the elbow to shape the sleeve,
creating a forward bend and a more
slimming and flattering look for the front
of the arm.
Remember that with a two-piece piece
sleeve, you want the seam to fall toward
the inside of the sleeve so that it will not
be seen from the front.
Cut or clip the dart if necessary.

Step 19
As with the front, create a dart in the
position of the back seam for the twopiece sleeve, this time creating a line that
will fall to the inside back of the sleeve.
You will need a vent at the back of the
wrist; determine its length and mark it.
Here the dart has been taped to check the
position of the seam from a distance.

Chapter 3.1
Coats and Jackets
History | Exercises | Draping project | Variations

229

Shaped darts
Subtly shaping the darts to fit the figure
more precisely would improve the look
of this jacket. Work the darts carefully,
pulling in just a bit more fabric at the
underbust area and letting out some at
the high hip. This shaping will also help
the end points of the darts to smooth into
the jacket without puckering.

Step 20
Check drape from all angles, and how it
works through 360°.
Check all darts and refine their shapes.
They can be molded in at the underbust
area and slightly shaped out below the
waist at the high hip.
Check position of the two-piece sleeve
seams, making sure they flow with the
sleeve and fall toward the underarm area.

230

Step 21
Determine the finishing touches: what will
the front closure be? It could be a large
hook and eye, or perhaps two buttons
linked by a cord.
Decide whether you want to include the
chest welt pocket and side pockets of
the classic tuxedo style. The jacket in the
photograph appears to have a binding
trim on the outside edge of the lapel;
this would be a good time to check the
proportion and determine its width.

Marking and truing
Step 1
Mark the muslin along all sew lines, taking
extra care to crossmark frequently on
sleeve cap area (not shown).
Clearly mark break point at the waist; its
position is very important in keeping drape
of collar intact (not shown).
Mark roll line on collar and lapel with
needle and thread for precision.

Step 2
Remove drape from form and mark the
lines of the collar and lapel on both sides
of the muslin using carbon paper.

True up sleeve cap shape using round end
of hem curve.
Keep in mind the classic shape of a
sleeve: the back curve is wider but softer;
the front curve is wider at the top for the
bone just below the shoulder line, but
then curves down more sharply to remove
excess fabric from front of sleeve.

Mark the neckline with pencil.
Use lots of crossmarks on the darts where
you have shaped them (not shown).

Step 6
Smooth the lines of the two-piece
sleeve seams.

Step 4
Mark the CB seam line; note that it is not
a straight line.
Draw in the shape of the vent.

Step 7
Crossmark the two-piece sleeve seams
before cutting seams to create the two
pieces of the sleeve.

Chapter 3.1
Coats and Jackets
History | Exercises | Draping project | Variations

Step 5

Step 3

231

Analysis
Compare the look of your drape with
that of Rihanna’s jacket in the photograph.
Imagine your jacket in a different fabric,
a silk satin perhaps, and imagine Rihanna
wearing it. Does it convey the right
attitude? Do the contours of the lines
have that crispness and slim angular look?
Is your waistline too hourglass shaped?
Is the sleeve soft and elegant?
It is helpful when analyzing your work
to start systematically at the top and
work your way down. After assessing the
overall look, carefully study the lines of
the collar, then the lapel. Then move to the
sleeves and their seams. Check the fit of
the waist and hip and then the length of
the jacket to see if it is all in balance.
Remember that proportions are very
important. If you do not like the look of
your jacket but cannot quite work out why,
try working with the sizing of the pockets,
or the width of the lapel until everything
feels more harmonious.

Front

Back

Collar

232

Top sleeve

Undersleeve

Variations
Raglan jacket
The raglan sleeve was created by a tailor who fashioned
the looser-fitting armhole for the 1st Baron Raglan, who
had suffered an arm injury at the Battle of Waterloo. This
sleeve extends at a diagonal from the underarm to the
collarbone, often with a dart at the shoulder line.
The jacket draped here is modeled after one from the
1940s, an era when the raglan’s soft shoulder line gained
popularity in womenswear.

Muslin preparation
13"

12"

2"

14"

1"

6"

5"

20"

10"

11"
24"

13"

14"

18"

19"

28"

28"

28"

16"

20"

Side front
Front

Cuff

3"

4"

234

Back

13"
6½"

Sleeve

Step 1
Prepare form by setting a shoulder pad.
The classic raglan pad extends over the
shoulder with a soft curve. If you do not
have a raglan pad, tack some cotton
batting or felt over a classic pad.

Step 2
Set front by aligning CF grainlines with CF
of form and keeping crossgrain horizontal.
Smooth shoulder area and neckline,
clipping and trimming only enough to
allow shoulder to lie smoothly.
Do not cut top part of CF muslin; it will be
needed for the collar.
Form a dart along the neckline where the
fabric seems to fold in on itself. This is the
beginning of your undercollar shape.

Step 3
Set side front piece and form a side
bust dart.
Keep side bust dart small: you want to
distribute the ease and fit over the whole
front, not fit the bust area too specifically.
Remember you are draping a jacket that
needs to have ease. Try pinning with fewer
pins and let the fabric fall away from the
form as you work the shape.
The only part that needs to be firmly
pinned is the area of the shoulder where
it meets the rise of the neck, about 1"
(2.5 cm) out from the neck seam of the
form. This is the crucial point from which
coats and jackets balance, so do not let it
get loose and undefined. Be clear about
where that point is and pin it decisively.

Step 4
Set back piece by aligning CB grainline
with CB of form.
Set width by pinning lightly at the side
seam area.

Form the vertical dart in the center of the
back panel.
Pin back side seam to front side seam,
wrong sides together. Check the amount
of ease. The fit is shaped to the figure, but
not tightly.

Chapter 3.1
Coats and Jackets
History | Exercises | Draping project | Variations

Trim and clip neckline and shoulder to fall
smoothly, but not too tightly over the form.

235

Step 5
Turn front over side front at the princess
line. Turn front over back at the side seams
and at the shoulder.
Although the raglan sleeves will drape
over the shoulder area, leave the shoulder
seam in place for now to maintain stability
in the drape.
Check the silhouette. Compare it to the
photograph: does it have the same fit? Do
the lines have the same soft contour?

Step 6
It appears that the waistline in the
photograph is more shaped in than the
muslin. Try pinning a dart in the side front
panel between the side seam and the
princess seam. This will help fit the waist
a little more closely. Do not make it too
tight; remember that this jacket needs
some ease.
Observe the subtle difference in bust
shape and waistline with the addition of
the dart.

Step 7
Tape the roll line. It will angle toward the
break point where the first button will go.
Tape it firmly. This part is on the bias and
will stretch easily. Often in tailoring, this
tape will pull in a little bit of ease so that
the front of the jacket gently cups over the
bust area.
Tape the hemline.
Prepare for the raglan sleeve by taping
the armhole. You will not have to adhere
to this as your final line, but it will help by
giving you a target line for which to aim.

236

Step 8
Start by setting the sleeve at cap and
shoulder area.
Form the dart with the excess fabric
created by the shoulder curve.

Step 9
Review the Sleeve Draping Order (see
p. 133). Next determine circumference
of wrist. Pin wrong sides together a few
inches (about 7.5 cm) up.
Trim the excess from wrist to elbow area,
leaving about 1" (2.5 cm) seam allowance.

Step 10
Set the notch points by determining
volume of sleeve around bicep area.
Pin firmly.
Working with the stuffed arm, raise and
lower sleeve until you have found optimum
lift point.
Trim the excess triangles below the raglan
seam tapes (not shown).

Continue pinning raglan seams.
Trim the dart.
Finish shaping sleeve by pinning underarm
seam to armhole, wrong sides together.

Chapter 3.1
Coats and Jackets
History | Exercises | Draping project | Variations

Step 11

237

Step 12
Turn raglan seam allowances over the
armhole line.
Finish underarm seam by turning seams to
the inside and pinning as far as you can up
the underarm.
Notice the shape of the sleeve in the
photograph: it is angled forward at the
elbow. Pinning one or two darts at the
elbow will give that curve to the sleeve.

Fitting a jacket

Step 13
Check the side view to make sure the
sleeve is hanging toward the front and the
back is draping slightly larger and lower
than the front.
Here the front does not seem to have
a good drape; it is sagging at the front
raglan line and must be corrected.

Step 14
To work out how to correct that sagging,
try pinning various darts in different
directions to determine where to correct
it. Observe how the sleeve changes as
you take in or adjust the angle at various
different points.
A horizontal dart on the raglan seam lifts
the sleeve toward the front, allowing it to
fall without wrinkling and sagging, so that
is where to make the correction.

Step 15
Study the corrected angle of the sleeve.

Fitting a jacket is a complex skill and
takes experimentation. If something does
not look quite right, trust your eye. Go
back to the photograph and follow the
contours, trying to see where it differs
from your drape. Having the patience to
repin and adjust the drape is critical to
the learning process.

238

Step 16
Start collar by pinning at CB, clipping
at neckline and bringing it around the
shoulder, controlling the stand with the
angle of the collar piece.
Bring collar to front, aligning roll line of
collar with roll line on jacket front.

Step 18

Step 17
Turn lapel section over draped collar piece.
Trim excess of neckline section so it lies
smooth OVER the collar.

Create styleline by taping outer edge of
the lapel and continue that line as it falls
to the inside and becomes the neckline.

Roll line of collar should blend with roll
line of lapel. When it is lying smoothly, pin
the two pieces together.

Create styleline of collar from CB to where
it connects to the lapel.

Step 19
Create the cuff by draping the muslin piece
around hem of sleeve, letting it angle out
slightly in the back. Trim lower edge even
with the hem, clipping if necessary, and
turn it under. Tape or fold under top edge.
Finish the details, taking extra care to
balance the proportions: tape front pocket;
set button placement; and trim hem,
turning it under to check the shape.

Step 20

The muslin doesn’t quite have the sensual
quality of the photo. The break point is
too high, which is making the jacket seem
too conservative. Remember that you are
communicating an attitude.
To lower the break point, you will need to
change the collar drape and pull in some
excess fabric where the collar joins the
top of the lapel.

Chapter 3.1
Coats and Jackets
History | Exercises | Draping project | Variations

Check the final drape against the
photograph. Scan contours and check
proportions. Do the lines of the notched
collar and lapel complement the soft
roundness of the raglan shape?

239

Trench coat
This is a classic trench coat as defined by the elements
historically associated with that style. It is belted,
roomy, and knee length, with a storm flap at the front
and back, a high stand and collar, pockets, and
epaulets. The coat has a no-nonsense, utilitarian feel,
yet its directness and clarity of purpose impart a
modern, chic, and stylish look.

Muslin preparation
10"

15"

10"

19"

5"

8"
11"

10½"
14"

5"
19"

18"

12"

38"

25"

42"

42"

38"

8"

30"

19"

Front yoke

26"

5"

6"
12"

11"

10"

14"
1"

5"

3"

25"

12"

5"

5"

1"

7"
14"

9"

Undersleeve
Top sleeve
Back yoke
Side front

240

Back

1"

Collar

7"

Front

12"

Side back

Save scrap pieces for belt,
belt loops, and welt pocket

Step 1
Set the shoulder pad.

Step 2
Set the center front section by aligning
CF grainline with CF of form. Note that
the grainline placement here leaves
excess at the left side of the form for
the large placket.
Pin a vertical shoulder dart to
accommodate the bust and keep the
coat from flaring out in the front.

Step 3
Set the side front panel by centering the
grainline between the princess line and
the side seam. Keep the grainline vertical.
Trim the excess above the waist, and
make sure to leave plenty of room for the
fullness below the waist toward the hem.
Note that in the photograph there is a
gentle A-line swing to the lower coat, yet
it is not full at the waist. This tells you
there are princess seams that are shaped
in at the waist and flare out toward the
hem. This has been done to keep the extra
folds of the fabric away from the waist,
where they would add extra bulk.

Step 4
Set CB panel by aligning CB grainline
with CB of form. As with the front panel,
the grainline is drawn inside the panel
to allow extra muslin in back that will
accommodate the deep CB pleat.

Step 5
Set the back at waist, checking volume.
Form the shoulder dart, easing in a little
bit of the volume.
Trim and clip neckline and smooth
shoulder under front shoulder piece,
pinning front over back.

Chapter 3.1
Coats and Jackets
History | Exercises | Draping project | Variations

Form CB pleat by folding excess fabric
toward CB, keeping the foldline vertical.
This is called an “inverted pleat.”

241

Step 6
Set side back by centering grainline of
piece between back princess line and
side seam.
Pin to the side and back pieces.

Step 8

Step 7
Turn side seams to inside, front over back.
Tie belt around waist to check volume.
If hem flare is not wide enough, adjust
pinning of the two princess-line seams.

Check the balance of all four pieces; they
should be shaped in at waist and flared
at hem.
Turn front and back over side front and
back pieces.

Step 9
Now that the body is set, start filling in
some of the details that will help you
confirm whether your silhouette is correct.
Tape the placket line to prepare for the
front yoke piece.
Place pocket line below the waist.
Turn front placket to the inside to
determine its width.

242

Step 10
Set front yoke by pinning along shoulder
line and armhole. The shape is flat; it will
lie smoothly over the bust.
Set back yoke the same way.
Join the two yokes at the side seam,
noting amount of ease over body sections.
It should stand away, as in the photograph.
Tape hems of yokes and mark armhole.
Add belt again to check the silhouette.

Step 11
Drape the collar starting at the CB.
Pull the piece around to the front and
check the height of the collar and the
distance from the neck.

Step 12
Finish collar by trimming excess and
turning under the outer edge.
Flip collar up again; make sure it is trimmed
and clipped smoothly and pinned to the
neck edge without any concave areas.
If any areas are caving in, clip a little
more and pull collar piece out slightly.
Very small amounts here make a big
difference.
You may want to trim or turn under
the yoke hems to help you visualize
the proportions.

Chapter 3.1
Coats and Jackets
History | Exercises | Draping project | Variations

243

Draping the sleeve
Step 13
Before beginning the sleeve drape,
review the Sleeve Draping Order (p. 133).
If you feel it will be easier, use the Easy
Two-piece Sleeve Draft (pp. 216–19) to
set your parameters.
Starting the sleeve drape with the muslin
placed at the proper angle is crucial.
Set the cap. On this coat, there is no
gathering to help you fit the shape into the
armhole, which always makes it a little
more difficult. There is probably about ¾"
(2 cm) of ease in the front and back curves.

Step 14
Setting the notch points is also key. This
will determine how much ease is left to
work into the upper cap area and how the
sleeve falls below those points.
Also analyze the lift. Decide how much
fabric to leave in the underarm area and
the degree of lift you want.

Step 15
Work the lower curves of the front and
back sleeve. Keep them pulled up and the
line crisp and clean.
Review the classic shape of the sleeve as
you refine these lines. You will be pulling
more out of the front than the back.
Raise and lower the stuffed arm
continually, studying the way the
fabric falls as you adjust this important
combination of curves.

244

Step 16
Turn up the hem and belt the coat.
Place the epaulets and sleeve band.
Place the buttons.
Now analyze the proportions and details.
Here it appears from a distance that the
belt is too prominent. Notice how it is
making the whole coat appear chunky
and wide in the middle.

Step 17
Place a narrower belt with a smaller
buckle on the coat. The proportions are
now correct.
Notice how such a small adjustment
suddenly brings the proportions of the
piece into balance.

Chapter 3.1
Coats and Jackets
History | Exercises | Draping project | Variations

245

Swing coat with
shawl collar
The swing coat came into vogue in the late 1940s, its
full volume a reaction to the austerity of the war years.
As Dior’s New Look gained popularity, wider coats that
flared away from the hips and legs were needed to
cover the full skirts. Here, the full sweep of the hem
adds a flirty, stylish attitude.

Muslin preparation
24"

24"

13"

18"

6"
6"
6"

11"

11"
26"

30"

18"

Elbow
6½"

46"

25"

9"

52"

31"

14"

Underarm

17"

Undersleeve
Top sleeve

Back
Front

246

Step 1
Prepare form by setting a shoulder pad.
You can use a rounded pad similar to the
raglan pad, but it needs to be a little more
substantial to hold the weight of the wool
from which the finished coat will be made.
Begin coat by setting front section onto
form, aligning CF grainlines and pinning at
bustline and shoulder.
Now drape the flare. Notice how you can
control the direction and volume of the
flare by the way you hold the shoulder line.
Find the point that secures the flare that
you want. Keep in mind that the weight
of the coat will be supported from that
shoulder area, so pin firmly.

Step 2
The awkward part of a shawl collar
is determining where to slash at the
shoulder. Find the point at which neckline
needs to be clipped to allow the collar
fabric to lie smoothly over the shoulder,
with the excess fabric toward the front
and rolling toward the back to create
the shawl collar.

Step 3
Prepare to drape the front by cutting away
excess fabric from the shoulder line to the
high hipline.

Slash fabric into the shoulder line.

Keeping the crossgrain horizontal, fold in
a shoulder dart to accomodate the ease
from the bust.
Step 4
Drape back piece by manipulating the
shoulder area in the same way that you
did the front until you achieve the right
amount and direction of flare.
Chapter 3.1
Coats and Jackets
History | Exercises | Draping project | Variations

Cut away excess from the shoulder to the
high hipline.

247

Step 5
After cutting away the excess, note how
the fabric now falls naturally at the side
seams. It should fall unobstructed from
the shoulder area. If the stuffed arm is
restricting it, cut away more until it is
falling freely.
Pin front over back at the shoulder.
Cut hem to approximate length, leveling it
against the bars of the form cage.

Step 6
Pin side seams together. Use the method
of simply folding back seam allowance on
the front section and letting it fall over the
back section until it balances. Then pin
front over back.

Step 7
Lift shawl collar and pivot it at the clipped
point. Continue to clip as you pull it around
to CB, pinning as you go. Check it a few
times to make sure you have a finger’s
distance between coat and neck of form.
Adjust outer edge/hem of collar and set it
firmly at CB.

248

Step 8
Form the dart that runs from armhole
to top of pocket area. This will pull in
a little extra fabric at the armhole area,
but take care not to reduce the amount
of fabric needed to accommodate the
bust comfortably.
Tape the armhole.
Tape the pocket line.

Step 9
Start sleeve by preparing the muslin,
following the Easy Two-piece Sleeve Draft
on pp. 216–19.
Trace around the pieces leaving about
1½" (4 cm) seam allowance.
Pin sleeve seams together as on p. 219.
Chalk armhole line and remove tape to
make sleeve piece easier to pin on.
Align sleeve section from the cap, angling
forward slightly.
Pin at the cap area, accommodating about
1" (2.5 cm) of ease.

Step 10
Pin out cap ease, distributing it evenly.
Set the notch points, checking
circumference around top area of sleeve.
Trim excess triangles at top of sleeve.
Check sleeve angle again to see where
the two-piece sleeve seams are hitting.
If they intersect with the front armhole
seam, shift it up or down a bit to avoid
too much bulk.
Check the volume of the sleeves and
adjust if necessary.
Turn sleeve seams to inside and pin.

Draping the sleeve from scratch
If you prefer not to use the
sleeve draft, drape the sleeve
from scratch following the basic
Sleeve Draping Order (p. 133).

Pin cap and angle it toward
the front. Then determine
where the seams will go;
they should fall toward
the inside and be as hidden
as possible.
Now determine total
measurement of hem at
the wrist. Also determine
measurement of
undersleeve.

Set the notch points as in
Step 10.
Pin top and undersleeves
wrong sides out. Shape the
sleeve, working from the
wrist up.
Trim excess triangle sections
at top of sleeve.
Step 3
Turn seams to inside
and pin.
Continue with Step 11,
p. 250.

Chapter 3.1
Coats and Jackets
History | Exercises | Draping project | Variations

Step 1

Step 2

249

Step 11
It will help at this point to use a tape to
hold up the arm as you check the notch
points to achieve the optimum lift point.
Work with the ease created when the arm
is dropped. Here it seems as if there is too
much; pull in more fabric at notch points
until you feel you have a good balance.

Step 12
Finish the lower curves at front and back
and check the lift.

Step 13
Check sleeve proportion with coat volume.
Pin up the hem.

250

Step 14
Check the coat through 360°. The break of
the sleeve should be lower in back than in
front and should angle forward. Here the
sleeve silhouette has a break just below
bust-point level at the back of the arm.
Turn up hem at the sleeve cuff.

Arriving at your signature look
Study your drape next to the photograph. Look at it in the mirror from
a distance and visualize it being worn by someone strolling down a
busy boulevard. Think about what you could do to bring it closer to
your “signature look.”
For example, the length could move up or down, the fullness in or out.
The look would change if the collar became much wider or narrower.
Would the addition of pockets change the focal point?
Arriving at your signature look is allowing yourself to express what
YOU like, the proportions that please YOUR eye. Go for it!

Chapter 3.1
Coats and Jackets
History | Exercises | Draping project | Variations

251

Coat with eggshaped silhouette
This coat from the DKNY Spring/Summer 2011 collection
envelops the model with its high funnel collar, tapered
sleeves, and pegged-in hem. The shoulder is a rounded/
kimono style, which supports the look of the egg-shaped
silhouette. The diagonal seam from the neckline to
pocket allows shaping in the front and fit for the bust.
The silhouette, along with the soft, thick wool, adds to
the sense of warmth and protection of this garment.
Anchor this feeling and the visualization of the shape
before you begin draping.

Muslin preparation
18"

30"

32"

12"

5"
11"

7"

11"

1"

11"

12"

6"

25"
24"
47"

25"

40"

40"

25"

Front sleeve section
36"
14"

14"
7"

7"
8"

8"

Center front
2"

252

Collar front

Back

2"

Collar back

Underarm/side panel

Step 1
Set a raglan, or dropped shoulder, pad.
This one is soft but has some lift, as it will
drop a little with the weight of the wool.

Step 2

Step 3

Set front by pinning down CF and across
shoulder and bust.

Pin at CB, across shoulder and shoulderblade area.

Trim and clip neckline to fit smoothly.

Form a small dart at neckline to keep grain
horizontal; if collar is set low enough, or
the coat is made from a wool that can
be molded and eased, the dart can be
eliminated later.

This is a coat, so remember to keep the
drape light and roomy.

Balancing from the shoulders
When setting the shoulder seams, pay close attention. Properly set, the ease or dart in the back
shoulder seam will allow the crossgrain to remain horizontal, keeping the coat from kicking out
in the back.
The angle of the front shoulder seam will control the hang of the front of the coat. The point
about 1" (2.5 cm) from the neck of the form will hold most of the weight of the coat. Make sure
it is pinned firmly and decisively. Then check that the front and back of the coat are balanced.

Step 4
Pin the shoulders.
Check the drape from all angles.
Clip about halfway along shoulder and turn
front over back.

Recall the visualization of the volume and
shape of the coat. It will help you when
draping such a large piece away from the
support of the form.

Chapter 3.1
Coats and Jackets
History | Exercises | Draping project | Variations

Remember that coats hang from the
shoulders. It is important at this point
to stop and check the balance. The
crossgrains should be fairly horizontal.

253

Step 5
To determine the placement of the front
seam, it can help to set some of the
other details in place so you can start
coordinating the proportions.
First, tape the neckline, setting it low to
allow for the funnel collar and also making
it a little wide to allow for other garments
to be worn beneath.

Step 6
Set front sleeve piece by aligning
crossgrains.
Pin across shoulder and down the twilltape line.
Trim away the excess (not shown).

Set the buttons, two below the collar line
and two just above waist.
Tape the pockets at the high hipline.
Now tape the front seam.
Trim away excess above the seamline,
leaving fullness at hem below pocket line.

Step 7
Now set sleeve height by setting the
stuffed arm at about a 45° angle and
pinning across the shoulder area, keeping
grains horizontal and balance between
front and back.
Take time to consider the amount of ease
you want under the arm: the higher the
lift, the more fabric you will need under
the arm; the lower the lift, the less you
will need.
Pin back to front at top of the sleeve.
Trim away triangles of excess fabric at the
top edge.

254

Step 8
Set the underarm height and clip all the
way to underarm area.
Set the hip width and trim the excess.
Tape seamline in front and back as
preparation for side panel.

Step 9
Turn the front sleeve piece seam over the
coat front.
Turn the shoulder and top sleeve seam
front over back.
Now check the silhouette: note that the
coat shapes in very slightly at the waist.
Pull a little fullness out from the diagonal
sleeve seam to help make that shape
(not shown).

Step 10
Set the side panel. Start by pinning
the approximate center of the panel
to underarm areas.
Make sure crossgrains on side panel
section remain horizontal to the floor.
Pin wrong sides together, working back
and forth, from underarm toward wrist
and from underarm toward hem.

Chapter 3.1
Coats and Jackets
History | Exercises | Draping project | Variations

255

Step 11
Turn front and back over side panel.
This is a difficult and awkward operation,
so be prepared to spend some time with
this. Set the arm at about 45°; as you
pin, continue checking side panel from
underneath to make sure it is smooth and
balanced. Do not worry about keeping
the lengthgrain centered. As you will be
draping with the arm angled toward the
front, the grainline may shift as it moves
toward the wrist.
Check the proportions against the sketch.
It will help to finalize the shape by doing
some of the finishing work: attach pocket
flap; turn up hem of sleeves and lower
edge of coat (not shown); remove twill
tape and turn under edge of front facing.

Step 12
Look at the coat in the mirror and check
though 360°, with the arm up and down.
Once you are satisfied with the drape,
remove twill tape and mark neckline
with chalk to prepare for the collar drape
(not shown).

256

Draping the standing collar
To determine the collar’s construction,
first consider its grainline. The standing
collar’s strong vertical shape tells you that
the stronger lengthgrain must be at the
center front and center back.
It will need side seams. If the center back
is on the lengthgrain, as it needs to be, then,
as the piece wraps toward the front, the
center front will end up bias, which would
soften the grain too much to keep the strong
standing shape. Also, adding a side seam will
give you more freedom in determining the
angle of the collar as it travels upward from
the shoulder.
Because of the large size of the collar,
it will be helpful to drape the full piece
rather than half the front and back. That
way, as you drape, the collar piece will
help support itself. If your muslin is soft,
stiffening it with a fusible interfacing will
help it hold the shape.

Step 13
Start the back collar by pinning center line
and crossgrain line to CB of coat.
Clip and trim as you bring the piece around
to the shoulders, working both sides.
Follow the neckline you have chalked, but
if you feel it is not giving you the look you
want, move the collar away from the line.
The collar should stand away from the
back neck.

Step 14
Begin draping the front collar by pinning
intersection of length- and crossgrain lines
at front of chalked neckline.
Trim and clip the back as you pull collar
piece around toward the shoulder.
The front collar will also stand away from the
neck, even more so than at the back. Check
the photograph: note how the model’s chin
just meets the edge of the collar.
Also note that the collar is not really
round, but is broad at the front and then
angles strongly toward the shoulder.
Pin side edges and trim the excess.

Step 15
From the side, the front collar should angle
significantly more forward than the back.
When you feel you have it right, turn front
collar over back collar at sides and pin.
When refining the shape of the collar,
you only have to perfect one side. Make
sure you keep the CF and CB lengthgrains
vertical. The side that has been perfected
can be transferred to the other side of the
pattern afterward.

Step 16
Turn under neckline of collar and pin to
neckline of coat.

Remember to take care when marking the
collar. The line may have shifted while
you were focusing more on achieving the
shape of the collar than sticking with the
original neckline.
Turn down top edge of collar to determine
its width.

Chapter 3.1
Coats and Jackets
History | Exercises | Draping project | Variations

If the collar is collapsing in areas, rework
the clipping; clip little by little, pulling out
collar seam until it lies smoothly.

257

.2
3

The Grand Gown

History
The “grand gown” is not so much a fashion term as a
statement. It describes a dress that is a grand gesture:
the wedding gown, ball gown, and evening gown. These
clothes are about presence, about making an impact.

The grand gown is worn by a woman when she
is at her most highly ornamented. It employs the
highest quality fabrics, most advanced draping and
couture sewing techniques, and the most precision
of fit. This genre of clothing represents the very best
artisanship that a culture is able to produce. Fashion
history is full of stories of scores of seamstresses

working night and day on elaborate gowns for
their wealthy clients.
Intriguing in their display, enchanting by their
sheer beauty, these dresses are beguiling to men
and women alike. There are the legendary gowns:
Empress Elisabeth’s famous wedding dress; Marie
Antoinette’s outrageously ostentatious court dresses;
Scarlett O’Hara’s romantic and seductive antebellum
ball gowns. Glinda the Good Witch of the North from
The Wizard of Oz was magical because her dress was.
In many cultures and eras, the volume of the gown
was a display of wealth. Multiple yards of silk in a
skirt were an indication of a comfortable position in
life. In the medieval and Renaissance periods clothes
were worn in layers, each of which was cut to reveal
the richness of the fabrics beneath. Slashing was used
from around 1480 to 1650 to add decorative pattern
and also to reveal colored linings.
The origins, or elemental structures, of these dresses hark
back to simple shapes—the multiple panels of a large
skirt, and bodices and sleeves that were darted and fitted.
The basic construction of women’s clothing remained
unchanged for many centuries. The large skirt and

260

The artistry of Charles
Frederick Worth: silk
satin, trimmed with pearl
embroidery and lace,
lined with silk, the bodice
supported with whalebone
struts, machine and hand
sewn, c. 1881.

embellished bodice was the uniform of Western
culture. Styles and silhouettes often changed
in reaction to social, economic, and cultural
developments, although the antecedents of these
new styles were often already in existence. One
example is the extreme opulence of the dress of
Marie Antoinette and the women of the court of
Louis XVI that gave way to a slimmer silhouette after
the French Revolution. That silhouette, ironically,
was borrowed from the chemise dress popularized
by Marie Antoinette herself in the 1780s.
The voluminous ball gowns of the 1950s became
dated as soon as Marilyn Monroe appeared in
Gentlemen Prefer Blondes wearing a narrow sheath
dress. Jacqueline Kennedy’s inaugural gowns as First
Lady of the United States in 1961 were slim and fitted,
paving the way for a new trend in silhouette.

Top: Elizabeth Taylor’s
Renaissance-style costume
for The Taming of the Shrew
has been slashed to reveal
multiple layers and colors
of fabric in an ingenious
display of wealth.

Above: Evening dress in the
early nineteenth century
reflected the simplicity of
the fashionable shapes
of that period, but still
employed elaborate fabrics
and trimmings.

Chapter 3.2
The Grand Gown
History | Exercises | Draping project | Variations

In draping, the larger the panels of fabric involved,
the easier it is to get lost in the details and lose sight
of the overall form. The study of the grand gown is
important in learning how to hold a vision of the final
outcome and then express it—to materialize the grand
gesture. It is essential to have clarity of intent and the
skills to realize it.

261

Exercises
Supporting
the skirt
Creating a gown with large volume of fabric is never a
simple endeavor. It takes skill to engineer the support
and then sculpt the shape that lays over it. The
silhouette of a full skirt is dictated by the type of fabric
used, but also by the understructure. Throughout history,
as styles changed, so did the understructures that
created them. Mechanical miracles were accomplished
with bustles and crinolines, hoop skirts and panniers,
whalebones, wire, and even wooden pulleys.

Crinolines
“Crinoline” was originally a term for a stiff linen fabric with horsehair
weft, starched and ruffled, which was used for petticoats. As skirt
volumes increased, more support was needed, and by the 1830s
whalebone or cane was used to help hold the skirts up and out. The
famous dome-shaped “hoop” skirt undergarment was patented in
1846. It allowed women to wear fewer petticoats and lightened their
skirts considerably.
The crinoline was not an entirely new concept. The “farthingale,”
worn in the fifteenth and sixteenth centuries, had also been stiffened
with subtropical cane and, later, whalebone.
The term “crinoline” is now understood to be simply a structure that
supports a large skirt.

262

The softer petticoats that were worn over them (and
sometimes under them) were made of ruffles of fabric
layered onto an underskirt base, until the desired
silhouette was achieved. The type of fabric used for
the ruffles helped determine the shape of the petticoat
and ultimately, the final outcome of the skirt.

A fashion icon of her time,
Austrian Empress Elisabeth
is pictured here in 1867 in
one of her grand gowns.

Panniers
The “pannier” is an undergarment similar in construction to the
crinoline. Also made of whalebone and linen fabric, it held the fabric
of the skirt out on the sides, while remaining relatively flat in the front
and the back. Popularized in the Spanish courts of the seventeenth
century, they reached their most extreme during the reign of Marie
Antoinette in the French court of 1774 to 1792.

Kirsten Dunst, in a
costume from the film
Marie Antoinette, wears
panniers under her skirt to
create the volume typical
of the eighteenth century.

Sometimes as wide as several feet (1 meter) on each side, the width
of the skirt provided a surface for the rich embroideries and elaborate
embellishments the wealthy classes favored.

Chapter 3.2
The Grand Gown
History | Exercises | Draping project | Variations

263

Corsets
The support of the skirt is only half the story. The
other element is the foundation piece—a corset,
bustier, or bodice.
Unlike coats and jackets, where the weight of the
garment hangs from the shoulders, many modern-day
gowns are supported at the waist by this foundation
garment. The weight of the skirt and any lower
understructure is held by the tightly fitted waist,
while the foundation also supports the bodice from
the waist up. The foundation needs to have either
a very fitted and shaped waist or a ribbon or tape
sewn at the waistline to keep it in place.
The bustiers in Chapter 1.3 are constructed with boning
and a fairly substantial outer fabric, fused to give body

and strength. A lighter-weight lining fabric would
be used to simply finish the inside of the piece.
With a foundation piece for a gown, the concept is
the opposite. The underlayer has the stronger, heavier,
usually boned construction, and the outer layer (the actual
bodice fabric of the dress) lays gently over its support piece,
relieving any stress on the lighter outer fabric. Because
fine-quality silks or brocades can be delicate and easily
bruised, the undergarment will do the support work
and protect the more expensive fabric from damage.
This top layer of fabric sets the tone for the dress.
Heavy, luxurious velvet will create an entirely different
effect, even on the same understructure, as a light and
crisp organza.

Fabric as inspiration
Effects of different fabrics
Often the inspiration for a dress comes from the fabric. Many designers
begin by pinning the fabric to the form and observing how it drapes.

264

This silk gazar wedding dress stands out on its own with the help of
only a light net petticoat (left). Note the different effect of four-ply silk
crepe as it falls heavily in deep folds from a supporting bodice.

Study the two fabrics on the previous page. Practice visualizing
what they would look like draped over Lady Gaga’s foundation/
crinoline structure (left). The line drawings below show the different
silhouettes and moods the two fabrics would create.
The drawing on the left shows what shape the dress might be if
constructed of silk gazar: it is crisp and light and the energy of the
dress is perky, light, and uplifting.
The drawing on the right shows what would happen if the dress was
made of the four-ply silk crepe: the heavy fabric falls with gravity and
the energy pulls downward, creating a grounded, sensual mood.

Lady Gaga at the 2010
Grammy Awards, wearing
a dress reminiscent of a
boned bodice with wire
crinoline understructure.

Down energy

Up energy

Chapter 3.2
The Grand Gown
History | Exercises | Draping project | Variations

265

Gown with ruffled
petticoat
Glinda the Good Witch in The Wizard of Oz wears a
huge tulle and organza skirt with a fitted bodice. The
skirt will be built of layers of ruffles engineered to
create the silhouette of the photograph and to create
a natural flow when in motion.
Hoop-skirt forms are available for use in making this
skirt, but they often look stilted or forced. Various
weights of muslin can be used to drape this dress.
Experiment to discover the effects ruffles of different
weights create.

Muslin preparation
42"

45"

7"

7"

14"
1"

4½"

9"

1"

1"

Front yoke
50"

48"

12"
1"

4½"
9"

Back yoke

Front

266

Back

Step 1
Set front yoke by aligning CF of muslin
with CF of form. With the yoked skirt in
Chapter 2.1 (see pp. 110–11), the waistline
was simply clipped and the fabric allowed
to wrap around the high hip area. For this
piece, drape a dart into the waistline to
keep the crossgrain horizontal and give it
the strength to hold the heavy skirt it will
be supporting.
If the crossgrain remains horizontal, then
the side seams will stay on the strong
lengthgrain, again offering more support.
If the fabric is wrapped toward the side
without a dart, the side area would then
be on the bias, giving too much stretch to
the support piece.

Step 2
Set the front skirt piece by aligning CF
lines and then gathering in the muslin
at the top edge to form the gathers.
Pin along the yoke, allowing lower edge
to flare out.
Trim the triangle formed between hem
and high hipline.
Repeat from Step 1 for the back.
Turn side seams to the inside.
Level the hem.
Mark the yoke line and true up
(not shown).
Sew yoke darts and side seams.
Sew side seams of petticoat skirt.
Sew petticoat skirt onto yoke.

Step 3
Topstitch a length of grosgrain or
Petersham ribbon to the waistline to give
it some strength.
Sew a width of horsehair braid into the
hem to help it stand out.
Chapter 3.2
The Grand Gown
History | Exercises | Draping project | Variations

267

Step 4
In the same way you draped the first
petticoat skirt section; drape a new panel
onto the high hipline to create a base for
the next set of ruffles.

Step 6

Step 5
Cut a width of crinoline and gather it up
fairly tightly.

Create two overlapping layers of crinoline
at hip.

Working from CF to CB, pin the crinoline
ruffle onto the outer layer, leveling it from
the hem.

Step 7
Drape an organza layer over the two top
crinolines and attach by hand-sewing onto
the yoke seam.
Note how the silhouette continues to
evolve as you add the layers, slowly
building out the volume and trying to
achieve the effect of Glinda’s silhouette.

268

Step 8
Study the photograph and try and work out
how to achieve the exact silhouette of the
skirt. It appears here that the petticoat still
needs to be built out a little more at the
hipline.
Working with the fine tulle, create another
layer and tack it onto the organza at the
level where you need the extra width.
Lastly, add more fine tulle ruffles about 12"
(30 cm) above the hem to make the lower
edge kick out a little more.

Step 9

Join the panels, gather up the top edge,
and hand-tack to the yoke.
Trim the hem even with the floor.

Chapter 3.2
The Grand Gown
History | Exercises | Draping project | Variations

Drape the overlayer of sparkle organza
onto the petticoat in as many panels as
you need to create the fullness. It will be
shaped down for the front yoke, so do not
forget to gather it in and mark the angle of
the yoke onto the gathered piece.

269

Draping project
This gown was designed by Oscar de la Renta and
worn by Gwyneth Paltrow at the 1999 Oscars. Its
beauty is classic: the simple lines are flattering,
the full skirt is showy and luxurious but not overly
opulent. There is a feel of cool elegance and restraint.
The light, crisp, silk taffeta brings out the young,
princesslike quality of the dress.
One of the challenges of working with large skirts is
determining the seaming. First you must consider the
width of the fabric being used, and then calculate how
many widths of the fabric will be needed to go around
the finished hemline.
A large skirt such as Empress Elisabeth’s (p. 262)
must have had eight or more widths on each side.
When seaming them, the rectangles of fabric would
require far too much gathering at the waist, so the
panels were probably cut in wedge-shaped pieces,
with a small amount of gathering at the waist to
create the small waist with fullness at the hem.

270

In this dress, the deep tucks that are released at
the waist create the fullness of the skirt. The hem
circumference is large, but probably not more than
four panels per side.
The fitted bodice has delicate lines; the straps are
quite thin and set wide apart. The dress must have
a foundation for the thin silk taffeta that lies on top.
The foundation will not only support the bust and
shape the torso, but will provide a base for the
petticoat to be sewn onto, which gives the full
skirt its shape.

Muslin preparation: Foundation
7"

9"

7"

9"

2"
3"
5"

5"

9"
17"

12"

1"

20"

20"

12"

15"

9"

1"

Center back
Side back
Center front

Side front

Draping the foundation
Review Chapter 1.3: Bustiers to prepare for
this drape.

Step 1
Set CF piece of bodice by aligning CF
grainlines. Form a horizontal dart at the
bustline. This serves to fit CF of bustier
against figure between the bust points.

Step 2
Set side front piece as for the princess-line
bustier in Chapter 1.3 (see pp. 72–73).

Step 3
Set CB and side back as for the princessline bustier in Chapter 1.3 (see p. 73)
(not shown).
Pin an additional dart on side front panel
to pull waist in further.
Finish foundation
True up by cutting both sides and sewing
foundation pieces together.
Mark lines for boning.
Mark top edge.
Mark hem.

Step 4
Sew the full foundation together.

272

Turn under a top edge on what will be the
preliminary top edge of the dress.

Step 5
Stitch a length of grosgrain or Petersham
ribbon onto waistline inside foundation.
When fitting on your model, this will
be fastened first to hold up the weight
of the dress. A hook-and-eye closure is
recommended.

Muslin preparation: Petticoat
45"

45"

12"

1"

1"

12"
25"

46"

44"

Lower ruffle

Length to be
determined during
actual drape

Front
Back

Draping the petticoat
Step 6
Drape the petticoat following the method
on pp. 267–68.

Attach a tulle ruffle to give the lower skirt
some lift.
Chapter 3.2
The Grand Gown
History | Exercises | Draping project | Variations

Finish the petticoat base and sew
horsehair braid to inside of hem to help
hold it out.

Step 7

273

Draping the gown
Step 8

274

To begin the gown drape, first experiment
with draping some of the silk taffeta that
will be used for the dress. This will help
you visualize the volume and decide how
wide the sweep of the hem should be and
how deep the tucks.

Step 10

Step 9

Remove the taffeta from the form.

The front bodice will have a deep tuck at
the waist. Study the effects of the tucking
in the taffeta fabric to determine how
deep the tuck will be.

Placing the thread-traced area of the
taffeta over the muslin section, trace the
line with carbon paper and a tracing wheel
onto the muslin to help set the CF drape.

Thread-trace the bodice as you have
draped it, the tuck, and the top edge.

Now use the information you have gleaned
from the actual fabric drape to help set the
measurements and proportions of the muslin
pieces for that drape. The measurements
taken from the above exercise will determine
the size of muslins to prepare.

Muslin preparation: Gown
27"

45"

5"
12"

45"
3"
11"

12"

11"

22½"

Back

60"

60"

60"

60"

Side front

Side back

Chapter 3.2
The Grand Gown
History | Exercises | Draping project | Variations

24"

1"

Front

45"
3"

4"

275

Step 11

Step 12

Set CF section by aligning CF grainline
with CF of form, following the lines
created by the tracing of the fabric drape.

Set side front piece by centering grainline
between the princess line and side seam
of the form.

Set the top edge along top edge of
foundation.

Pin to the front section as for the princessline bustier in Chapter 1.3 (see p. 73).

Fold the muslin at the tuck point.

Trim excess triangle of muslin above waist.

Step 13
As you set the princess line, check the
photograph and note that the straps are
set very wide, at what should be the
widest point of the foundation.

Allow muslin to drape over petticoat with
as much fullness as you can.

Step 14
Set back section by aligning CB with CB
of form and allowing full width of muslin
piece to spread out over petticoat.

276

Step 15
Set side back section by centering
grainline between the back princess line
and side seam of the form.

Step 16
Beginning with the side seam, turn seams
to the inside, giving as much fullness as
the fabric width will allow to the skirt.

Step 17

Marking and truing

Pin CF front section over side front.

Mark the muslin with pencil or chalk.

Pin side back over back.

If you were draping in taffeta, thread-trace
and tailor-tack your sew lines.

Cut two of each of the sections and repin
or sew to test the pattern.

Chapter 3.2
The Grand Gown
History | Exercises | Draping project | Variations

Unpin and gently press out the pieces and
true the lines.

277

Analysis
First analyze the overall effect of your
drape. Does it have the light, young, and
pretty feel of the photograph? If not, try
to work out why. It may be a proportion
issue. Perhaps the straps are too narrow
on the chest, or the tucks too close to
the center of the bodice.
Now check all the lines and balance
of the drape. Starting from the top of
the shoulder, carefully compare the
contours of your drape with those of
the photograph. Train your eye to see
subtle differences, and how they
affect the overall look.
Note that the angle of the “V” neckline
is shallower in the drape. It is making
the bodice look heavier and slightly
more elongated. It will need correction.

Side front

Front

Back

Side back

What is successful about your drape?
Does it accomplish the intent of the
sketch or photo? How would you
characterize the attitude it conveys?

Side front

278

Front

Side back

Back

Variations
Royal wedding
gown
The exquisite gown Catherine Middleton wore at her
wedding to Prince William, Duke of Cambridge, in April
2011 showed off the very best of British craftsmanship.
Designed by Sarah Burton and made by the House of
Alexander McQueen, the dress was made of ivory
silk satin gazar with a bodice appliquéd in an Irish
Carrickmacross pattern with English Cluny and
French Chantilly lace. The 9-foot (2.7-meter) train
was accented with a subtle ruffle treatment at the
back waist that you will drape here.

Muslin preparation
36"

30"

40"
5"

15"
1"

30"

18"

50"

60"

Back flounce piece

Side back
Center back

280

Step 1
First, create the dress back to use as a
base for the ruffle drape. The actual train
was 9 feet (2.7 m) long, but here you just
need some length and width to get a
sense of proportion.

Step 2
Set back drape piece high to give plenty of
extra muslin for the flare in the back. Pin
at the waist about 12" (30 cm) down from
the top edge of the muslin section.

Step 3
Cut down vertically to the waist and let
back fall to hem of draped piece. You will
see that this creates a cascade drape.
Pin a deep pleat that folds toward the
side, as in the photograph.

Start by draping CB piece at the waistline,
letting it stretch out past the floor.
Drape a side back panel and pin the two
together to support the overdrape.
Pin firmly along back waistline.
If it helps, place some weights on the hem
area to help keep the train fanned out.

Step 4
Note that hem of draped piece is now
falling quite straight across back of train.
Cut hem of draped piece so it angles up
in the center of the pleated area, leaving
longer areas in CB and side back.
Check the photograph for proportion.

Step 5
Check the angle of the tucks. Look at the
photograph and note their direction.
Repin and adjust the angle until you
achieve the look that you feel is right.

Chapter 3.2
The Grand Gown
History | Exercises | Draping project | Variations

Note that the shape of the back ruffle
drape is controlled by how much flare is
worked into the actual piece and also by
the length of the ruffle piece. If you want
more flare, which will result in more folds,
study the cut that you made in Step 3.
Practice visualizing how the drape would
change if the cut was made with more
fabric falling into the drape.

281

.3
3

Draping on the Bias

History
A bias-cut garment is cut with the warp and weft
threads at a 45˚ angle. This allows the weave to
open and spread, giving the fabric the soft drape that
characterizes the bias cut. At the same time, the stretch
enables the fabric to mold to the curves of the body.

284

Above: In this classic
Vionnet design, c. 1926,
the bias cut allows the
bodice and green side
panel to conform to the
figure. The light, airy skirt
is made from overlapping

square-cut panels, set at
a 45˚ angle so that the
bias grain hangs vertically,
creating a cascade effect.
The lengthgrain (indicated
in the inset by arrows)
gives strength to the

shoulder area, which
supports the weight
of the dress. The skirt
panels are cut on the
bias (indicated by a
double line).

Above: Claudette Colbert
in It Happened One Night
wears a bias-cut wedding
gown of silk crepe. This
is a heavier fabric than
that used in the dress by
Madeleine Vionnet (left).

Its weight falls in wide,
sumptuous folds, following
the contour of the hip,
and then flows out at
the hemline with a lush,
fluid finish.

The name of designer Madeleine Vionnet (1876–1975)
has become synonymous with the bias cut. The first
designer to widely utilize this cut, Vionnet took
advantage of the flexibility and fluidity of the bias grain
to contour dress shapes in a new way, highlighting the
natural curves of the feminine form. She created a
collection of groundbreaking work in the 1920s, when
corsetless dressing finally became established.
Vionnet often used the purity of the simple, draped
square in her work, sometimes referencing the ancient
Greek peplos, a square of fabric held at the shoulders
and belted at the waist. The miniature mannequin was
an indispensible tool for Vionnet’s technique. There are
many photos of the designer sitting with her doll-sized
wooden form on a spinning piano stool as she worked
Here, a length of silk
crepe, similar to that of
Claudette Colbert’s gown,
is draped with the true
bias aligned with the
center front of the form.
Study the way the fabric
falls as it stretches over
the form.

out just how the bias fabric pieces would fit together.
She would then make diagrams to precut the fabric into
the shapes she needed before draping them onto the
full-size form, or onto one of her many private clients.
The bias cut naturally requires larger pieces of fabric to
accommodate the tilted pattern pieces. But if they are
cleverly seamed, the pieces will wrap the body in a
spiral, and the pattern will fit with just as much
economy of cut as a straight-grain garment.
Traditionally, softer fabrics are used for bias cuts—
georgettes, crepes, and chiffons. Used often in lingerie
for its ability to conform to the figure, silk charmeuse is
a contemporary fabric favorite. Of course, any fabric
can be cut on the bias. Even heavy woolen garments
incorporate the use of bias to help a collar roll better or
to give some stretch to a specific area.
The bias cut has remained popular throughout the
twentieth and into the twenty-first century, the 1930s
in particular. In the costume-design studios of
Hollywood’s Golden Age, extravagance was the rule.
Designers employed an army of experts to create some
of the extraordinary clothing cut on the bias seen in the
films from the 1930s through the 1950s.
Chapter 3.3
Draping on the Bias
History | Exercises | Draping project

285

Exercises
Bias-draped
camisole
This camisole takes advantage of the bias cut with
both the easy drape of the silk mesh overpiece and the
cut of the pattern pieces. The front and back are
basically squares tilted on the diagonal, the bias grain
falling straight down the center front and back. The
bias silk charmeuse fits by allowing the fabric to
stretch gently over the bust and shape to the figure
over the waist and high hip.

Muslin preparation
28"

27"

16"
8"
6"

Front inset piece
27"

28"

14"

13½"

11"

11"

Front

286

Back

Draped piece

Step 1
Pin CF bias line to CF of form.
Smooth muslin to the sides of form and
pin as closely as you can without allowing
it to pull or twist.

Step 2
Clip at armscye where necessary. Note
that when fabric is pulled tightly, ease
forms above and below bust point, but
the shape of the form is still visible, as
the bias grain tends to mold itself over
the form.
Chapter 3.3
Draping on the Bias
History | Exercises | Draping project

287

Step 3
Form a side bust dart to pull fabric even
closer to the form.
Repeat from Step 1 for the back.
Pin the sides together right sides out and
trim excess fabric.
Twill-tape the hem.
Twill- or sticky-tape the bustline where
lace will meet bodice fabric. This will be
the point at which the bust ease can no
longer be shaped to the body.

Step 4
Center bias line of lace inset piece to CF.
Trim excess where lace will meet top edge
of the front piece.
Tape the upper edge. Trim excess above
the tape.

Step 5
Think of the lace inset as a sort of yoke.
As it meets the top of the front edge, it
absorbs that extra ease there, and allows
a smooth fit from CF to mid-underarm area.
Turn under lower edge of lace piece along
this line.
Turn down upper edge of lace piece.
Turn side seams front over back.

288

Step 7
Trim side edges of draped piece and set
the straps.
Remember that the side bust underarm
area needs to remain high at the armhole
to cover the side of the bustline.

Step 6
Align bias line of bodice overpiece to CF
and determine amount of drape or “cowl.”

Pin at the sides and again check the depth
of the CF drape. Because the lace is sheer,
you need to cover the bustline, but you
also want the lace still to show.

With the bias, if you want a particular
area to be more tightly fitted, it is not
always that area that needs to be taken
in. Try following the lengthgrain up to the
edge of the piece and pulling in there.

Chapter 3.3
Draping on the Bias
History | Exercises | Draping project

Here, a silk mesh is used to indicate a
softer fabric. It would be good practice to
try draping with a piece of softer fabric
such as chiffon or georgette here, but if it
is not available, the same muslin as the
body drape will still work.

Fitting on the bias

289

Bias chemise with
princess line
The bias cut is perfect for lingerie, softly molding to the
shape of the body. As with the bias-draped camisole,
the heavier hemp/silk muslin will be used. With the
bias, the weight of this fabric will give and stretch in a
way that is more similar to the silk that will be used for
the final garment. Also, it is easier to see the actual
grainlines with this more loosely woven muslin.

Draping in full for the bias
For this chemise the front and back sections will be draped not just
from the CF to the princess-line seams, but with a full front. It is
necessary when working with the bias to have the support of the
larger piece. If it is cut on the bias line, it will stretch too much.

Muslin preparation
32"

32"

27"

4"

30"

32"

32"

13"

13"

15"

Side
Front

290

Back

Step 1

Step 2

Step 3

Set front section by first aligning bias line
with CF of form.

Set side panel piece by centering bias
grainline on side seam of form.

Pin the three pieces together, wrong
sides out.

Trim along the styleline, which is about at
the princess line.

Anchor it around the armscye and then
allow it to fall freely.

Trim away the excess, leaving at least a
1" (2.5 cm) seam allowance.

At this point the bias will begin to stretch.
Let it fall naturally; when it seems to have
stopped stretching, pin it lightly along the
side seam to keep the grainline vertical.

Find the balance, experimenting with
pulling and fitting as closely as you can.
Try pulling from different areas of the
same section and see what happens.

Repeat for the back.
Join the shoulders and pin wrong sides
together.

Step 4
Turn front and back over side panel,
trimming and clipping where necessary.
Turn front over back at shoulder.
Stand back to check the silhouette: it
should skim the body, not have a tight fit.

Step 5
Place godets by opening up front and
back princess seams and inserting godet
sections behind the other sections, pulling
godets out until you get the flare you want.

Chapter 3.3
Draping on the Bias
History | Exercises | Draping project

Pin up the hem. Check the waist again;
pull in as close as possible with the fabric
still falling smoothly (not shown).

Turn seams to the inside.
Tape the neck and armhole.

291

Draping project
Gilbert Adrian designed this bias-cut satin slip dress
for “blonde bombshell” Jean Harlow to wear in the
1933 film Dinner at Eight.
The dress became Harlow’s signature look and helped
to cement her enormous popularity. The spiral dynamic
of the bias is perfect for the attitude of this dress;
Harlow is bursting with energy, held in only by the
close fit of the thin silk.
To arrive at a preparation diagram for a garment
that uses this type of spiral design, first drape the
dress roughly on the mini-mannequin to determine
where the fabric will be cut. Then take the drape apart
and see how the pieces might fit together on the fabric
most economically. The measurements of the minimannequin are half the size of the full dress form, so
you just need to double the specifications to work out
the size of the pieces.
This bias dress will be very close fitting. Different types
of fabrics will all stretch in varying degrees on the bias,
so it will be best to drape in the final fabric.

Using a mini-mannequin
The amount of fabric in the dress is about
3.5 yards (3.2 m). The fabric being used is
54" (137 cm) wide.

Pin around hip level, which is the tightest
part, keeping the bias running straight up
and down the whole way around the form.

Prepare a piece of fabric, or muslin, half
the size of this estimate—1.5 yards
(1.4 m) long and 27" (68.5 cm) wide.

Cut away triangles in the front.

You can see in the photograph that the
dress has a CF seam, so start with the bias
line going straight down the CB.
Wrap the fabric to CF to see if there is
enough width to make the dress with no
side seams.

292

It appears that the fabric will be just wide
enough, although it might be short in the
front. Bias dresses often use godets to fill
in missing corners; with that knowledge
you can proceed.

Cut below bust and to the back on grain.
It will be difficult to get a close fit at the
back high hip area, so put an inset in the
lower CB area.
Use a strip of bias for the wrap-style
neckband.

Fabric preparation
3 yards

11
"

Halter
Bodices

10"
26"

43
"

Front gown

57
"

10"
77
"
19
"

27
"

Step 1
Align one of the bias lines with CF of form
and wrap it toward the back. CF needs to
be high enough to reach bustline at CF.
In order to keep bias line straight, angle fabric
up toward shoulder. Pin at right shoulder.
Set the piece at the CB and CF.

294

26"
60"

Godet

Since you are draping with
the final fabric, you must
thread-trace the grainlines.
Place a weighted yardstick
along the bias grain and
stitch the fabric on the table,
being careful not to let it
move. Stitch a series of lines
parallel to that bias grain,
about 12" (30 cm) apart.

Step 2
Wrap the fabric around to the back,
keeping bias grainlines vertical.
Pin along the hipline to CB.
Release the pins on the right shoulder.
Pin excess fabric at left shoulder.

Step 3
Continue to drape fabric all the way
around to CF and pin a vertical seam from
underbust to hem.
Cut away excess at CFs—basically, the
two large triangles.
You have now established the main body
of the dress. Continue to cut away excess
from the hem and back lines.

Step 4
Pin CF seam to inside, continuing to refine
the fit of the dress. The tightest part will
be at the hip. Pull in as much as you can
at the waist.
Note that the look of the dress is pulled
up at the CF; the more you pull up at that
point, the more fitted the waist becomes.
Tape the hipline where it stops being able
to fit the form and where you see excess is
being created. This is where you will need
to seam in an inset piece at the back.
Continue taping up to CF bust point.
Trim away excess fabric.

Step 5
Set bodice and back piece. To do this,
take a section of fabric that has been cut
away and place lengthgrain along side of
bust. Using the strong lengthgrain here
will create less give and keep the area
from stretching out. It is always good to
support the bust from the side, pushing it
toward CF.
Create two tucks at the top of the
neckline area, as in the photograph, to
accommodate the bust ease.

Chapter 3.3
Draping on the Bias
History | Exercises | Draping project

295

Step 6
Continue draping front bodice piece
by wrapping it around to the back and
attaching it to high hipline of skirt piece.
Pin under the seam allowance where it
attaches to the main dress piece, taking in
the ease created at that seam.
Drape the godet at the hem by placing
a large triangular piece over the lower
CF seam where it is missing fabric. Pin it
evenly to the two front sections, allowing
it to drape out in the center, which will
give a little more walking room.

Step 7
Drape the bias halter strap by starting
at the CB waist and wrapping it around
the front, as in the photograph.
The strap will have a closure at the
CB neckline.

Step 8
Adjust the strap over the bust area,
as in the photograph.
Turn up the hem.

296

Marking and truing
Mark the muslin by using a contrasting
thread to outline each piece.
First, thread-trace along all the sew lines.
On the join between bodice and skirt
section, sew a thread-traced line on both
sides of the seam so the line will be
marked on each piece when the garment
is taken apart.
Crossmark at least once on each piece so
it will be easier to join the seams when
you true the lines.
Tailor-tack the tucks (not shown).
On the bias halter strap, mark where it hits
the CB and the side seams, and where it
crosses over itself in the CF.
After thread-tracing, unpin, clip the tailor
tacks, and press out very gently.
Study the shape of your pieces and note
any lines that look wobbly or unbalanced.
At this point it is important to discern
whether a wavy line is the subtlety of your
drape, or whether it is an error. Do not
smooth out a line until you are sure which
it is. If you are not sure, repin the muslin
and put it back on the form to check it.
If you want to save your pattern, use
a tracing wheel to copy it onto a piece
of drafting paper. If not, since you have
draped the dress in the actual fabric,
simply trim and sew the dress back
together along the sew lines that you
have marked.
You can do this by either:
1. cutting the seam allowance to equal
widths so that you can line up your pieces
edge to edge and sew them together; or
2. lining up the two thread-traced lines and
carefully hand-basting the two pieces
together first, before machine sewing.
The second method is more accurate, the
first is faster.

Chapter 3.3
Draping on the Bias
History | Exercises | Draping project

297

Analysis
Compare your drape with the dress in the
photograph. Before analyzing the details,
assess the general feeling of it. Try to
identify the spiral energy of the bias. It
should look like the fabric is wrapping
tightly around the body (the lengthgrains).
Held up by the halter strap, the bias grains
should be molding to the curves of the
bust, waist, and hips.

Now, starting at the top of the dress,
follow the contours of the dress. Start
with the negative space at the neckline
and shoulder. Does the shape of the areas
of bare skin seem to be the same as in
your drape? Does the width of the strap
look like the right proportion? Check the
direction of the tucks. Do they aim toward
the bust point correctly?

Jean Harlow's dress caused a sensation
in its time. More than just communicating
an attitude, it made a larger statement,
creating a new consciousness that women
were confidently in control of their sexuality.
Does your drape communicate that? Is
it extreme enough? Can it be tighter, the
proportions more exaggerated?

The side silhouette is important. In the
photograph, the dress has a definite
S-curve as it travels out at the hip and in
at the knee.
If necessary, adjust your drape and then
thread-trace the corrections in a different
colored thread.

Halter

Front godet
Bodice
Front gown

298

.4
3

Improvisational
Draping

History
Improvisation is the act of creating in the moment.
In draping, this means working directly on the dress
form on a new design without having a sketch or
blueprint to follow.

In this final chapter of the book, having covered the
complex techniques of darting, seaming, and sculpting
shapes, you are back to draping on forms with simple
panels of woven cloth. Since you are not working
from a flat sketch or visualizing a final outcome, you
need some reason, motivation, or inspiration as a
starting point.

Eskimos’ furs serve a practical need for warmth and
protection. In fashion, inspiration often comes from a
beautiful fabric that instills a desire to see it sewn.
Experimenting with its drape and flow generates ideas
about how to best highlight its particular qualities.
Invention can be triggered by connecting with a muse.
Visualize a specific person. How would you like her to
look? What unique qualities does she exhibit? How
much space does she take up when she enters a room?
What kind of impact would you like her to have on
those around her? Will she stand out as a star
attraction? You help define the reality.
Sometimes, writing notes in a journal about what you
want to express helps to ignite the creative process.
Inspiration can come from other artists’ work or the
attitudes and styles of a particular historical era.
Designers often say that a collection was inspired by
the colors and tone of a particular painting, or the
silhouettes of a specific era.
“Classic” fashion design refers to styles of clothing
that have stood the test of time. Chanel’s tailored suit
jacket still works today; the classic two-front-pleat
trouser continues to reassert itself. In this chapter you

302

Chögyam Trungpa’s
Abstract Elegance
represents balance and
beauty in asymmetry.
The same configuration
of energy, space, and
form can be translated
into a three-dimensional
sculpture, such as a
draped fashion design.

will diverge from these classic forms to appreciate the
beauty and balance in asymmetry and the unexpected.
In costume design, the personality of the character
dictates the emotion that the clothing needs to
communicate. In making the costume for the Exiled
Goddess (right), the first step was to gather the
collection of colors and textures to be used. The base
of the costume is a hemp/silk loose-fitting tunic top.
First, the large blue section was draped from the
shoulder, then the contrast raw-silk neckline was
draped. The look needed to be ragged, as the character
has been exiled for twenty years, so the neckline drape
is asymmetrical and twisted. An artist herself, the
character has ornamented this part with shells and
fringe. Despite her poverty, she has a sense of dignity.
Her long shoulder drape is bold and elegant.
Being spontaneous, intuitive, and willing to experiment
are key to improvisational practice. It is more important
than ever to have mastery of your draping techniques.
When the designer can rely on these core skills, the
intuitive mind can emerge and creativity is free to bring
the form to fruition.
Chapter 3.4
Improvisational Draping
History | Exercises | Draping project

“The Exiled Goddess,”
a costume design by
Karolyn Kiisel for a stage
production of Thyestes’
Feast, made of weathered
linen and silk, hemp, and
mussel shells.

303

Exercises
Asymmetrical
draped neckline
This dress, with its simple fitted bodice and full skirt,
needs an interesting neckline. Use the intense flourish
and long, smooth, tapering brushstroke of Chögyam
Trungpa’s Abstract Elegance (see p. 302) as inspiration.
Approximating the required width, prepare a bias panel,
as that will flow the most smoothly of all the grainline
choices. This improvisational drape will not be planned
out, but the flat sketches below will help you translate
the energy flow of the calligraphy into a neckline.
In the drape, the flourish will be created at the back
left shoulder. The change in direction at the top of the
calligraphy will correspond to the center front. The
uninterrupted drape across the back represents the
long brushstroke on the right, and the finish point will
be at the left shoulder in the front.

Muslin preparation
60"

15

"

50

"

45"

"
15
70

"

"
30

60"

15

"

45"

304

Step 1
First, create the bodice to use as a base
for the new neckline.

Form CF neckline and right shoulder area,
keeping the neck open and low.

The calligraphy in the inspirational image
has a flourish at the beginning so, starting
at the back, build volume with the bias
panel by working in some layered tucks,
securing them with pins as you go.

Step 5
The back will have a long, smooth area of
visual relief, taking inspiration from the
long, rounded part of the calligraphy.

Step 3
Creating a twist, bring the bias panel
around to the front.

Step 6
Finish with the pointed end of your piece
by echoing the line of calligraphy that
tapers off into space.

Chapter 3.4
Improvisational Draping
History | Exercises | Draping project

Step 4

Step 2

305

Draping project
Vivienne Westwood is the grande dame of
improvisational draping. Throughout her career,
she has taken current trends one step further
by doing the unexpected. Her wildly creative
silhouettes have challenged our conventional
view of beauty for decades.
In doing an improvisational drape of this Vivienne
Westwood dress, the goal is to capture the essence of
the look without being too literal about the construction.
If you are doing a truly improvisational drape, you are
starting with only your own idea or concept. Creative
inspiration can come from anywhere.
In either case, begin by mapping out the energetic flow
of the piece through the grainline configuration. If you
are clear on the mood and tone you want to express,
this can be something very simple (see the neckline
schematic on p. 304).
Without thinking about specific seaming, decide on
some parameters for the scale of your garment. This
will help you to determine the size of the muslin pieces
to prepare. Mark the lengthgrains on each piece. Mark
bias grains as well if you think that some areas of your
piece will utilize the specific benefits of the bias, such
as a cowl or draped section.
If you are draping in muslin, consider the final fabric
you will be using. Familiarize yourself with the hand of
it so that you can use your skills of visualization to
understand how the outcome will differ from that of
the muslin.
When you are ready to begin, relax into your
environment and feel the confidence that your skills
have become second nature. By anchoring your vision
or inspiration foremost in your mind, your own unique
style of expression will surely emerge in your work.

306

Step 1
Drape and sew a foundation garment
similar to the Georgian bustier in Chapter
1.3 (see pp. 74–77).
Keep upper edge wide across mid-front to
accommodate the wide set of the straps.

Step 2
Drape the front underskirt by aligning a
lengthgrain with the side front of the form.
First hold in the amount of fullness and
flare to create the look that you want
in the skirt, then refine the volume into
tucks to keep the waistline flat. Keep skirt
section flatter in front with more flare to
the sides.
Cut from the side piece the excess created
by the flare—basically, the large triangle
that is smallest at hem and largest at waist.
Cut hem a few inches (about 7 cm) off the
ground from CF to side seam.

Step 3
Calculate the length of the skirt and turn
up the hem.
The hem must be very deep as it will show
when the folds and drapes are pulled up.
Pick up the front corner and experiment
with placement, watching how the folds
change with different positions.

308

Step 4
Drape the back by forming tucks in the
same way that you did for the front,
folding up a deep hem.

Step 5
Turn up the front hem of the skirt to create
the asymmetrical drape.

Step 6
Attach a long rectangular piece of muslin
to left side of form, leaving a little more in
the back than in the front.
Hold the center of the piece and pin it at
the waist.

Step 7
Fold the piece in half lengthwise, bringing
the outside edge underneath, and pin it to
the foundation at the waist.
Create some volume at the waist by
holding in gathers at the waist to create
fullness at the hip in the front and back.
Keep the side seam fairly flat.
Pin the two long edges of the inside piece
together.
Pin up a hem, at least 3" (7.5 cm) deep.

Pin a butterfly-shaped fold by reaching
in and picking up some of the pinned side
seam and connecting the two pieces,
as shown.

Chapter 3.4
Improvisational Draping
History | Exercises | Draping project

Step 8

309

Step 9
Refine gathers at waist until they are flat
and the drape falls in a balanced way.
This is a good time for a perspective
check. Look in the mirror from a distance
and observe the silhouette closely. The
pieces should flow with each other at the
hems. Make sure you like what you have;
after you add the top sections, it will
become harder to make alterations.

Step 10
Start front upper section by aligning one
of the bias grainlines with CF of form.
The lengthgrain will follow the torn
lower edge.

Step 11
Fasten the muslin corner at the right
shoulder of the form.
Notice the broadness across the front
chest and keep the shoulder wide.
Trim off the top edge.
Make a tuck at right shoulder, folding it
down and aiming ease toward bust.

Step 12
Wrap lower edge of front piece around to
the back, draping some deep folds into the
back, emanating from left back of waistline.
Drape a back bodice section centering the
bias line on CB of form.

310

Step 13
Trim the excess at the left shoulder.
Wrap fabric around the side to create
side seams.
Clip to the waist at both side seams and
pin them front over back.

Step 14
Create sleeves by wrapping rectangular
pieces around the arm and fitting them
up into the lower armhole. This is an offshoulder sleeve without a real cap, so a
rectangle shape will work.

Step 15
Pin the back sleeve into the “armhole,”
which is actually the side-seam area.

Fold over the top edge.
Cut away excess at the right shoulder,
leaving a tail for shoulder wrap.
Drape left side of bodice by slipping the
muslin underneath the top edge and
creating a strap similar to the right side.

Step 16
Using an extra piece of bias muslin,
create a twist effect on the top of the
sleeve, as in the photograph. The bodice
will be pinned to the foundation, and the
off-shoulder treatment should serve to
keep the sleeve up.
Chapter 3.4
Improvisational Draping
History | Exercises | Draping project

311

Marking and truing
Step 1
Tailor-tack all connection points.

Step 2
Thread-trace and tailor-tack all sew lines
and tucks.

Step 3
If you want to make a paper pattern,
disassemble the dress and press it gently.
True the lines with your rulers and check
the seams against each other.
Align the grainlines of the muslin with
the grainlines of the pattern paper.
Use a tracing wheel to transfer all
sew lines and crossmarks to the paper.
Add seam allowances.
If you don’t need a paper pattern, check
the drape by truing the lines and repinning,
or simply lay the trued muslin pieces onto
the final fabric, add seam allowances, cut,
and sew.

Analysis
Stand at a distance from the drape and try
to discern if it is expressing the emotional
tone, attitude, or consciousness you were
aiming for.
If it is not quite right, try to assess which
elements of the design are not supporting
the concept.

A trained eye comes with practice
For designers in all disciplines, excellence is often referred to as “having a good eye.” This means
that one can see and execute interesting composition, balance, and proportion. It means being
able to recognize when the energetic currents are working together, when design work moves
from static to dynamic.
A trained eye comes with practice. Continuing to study the skills learned in this book will steadily
increase your ability to see not just with the eyes of a student, but with those of an accomplished
designer who is able to express their own, unique, creative vision.

312

When comparing this muslin drape to the
Vivienne Westwood photograph, a few
areas do not seem to be flowing together
well. On the form’s left side at the hem,
the asymmetrical folds look awkward.
Even though it will look lighter and more
like the photograph in the final fabric, the
drape needs to be adjusted. Sometimes
during this process, you will see that
suddenly the part you are working on
seems to have more life and falls into
balance with the whole.
Part of finding your own unique look is
following what proportions you like, what
dynamics interest you. When it satisfies
your aesthetic, it is done.

Glossary
Anchor pin Pin or pins specifically used to
firmly secure a muslin piece when draping.

Gathers Folds or puckers of extra
predetermined fabric that create fullness.

Silhouette An outline of a specific shape
or form.

Armscye Fabric edge of an armhole to which
a sleeve is sewn.

Grommet A short, circular, metal tube applied
to a garment for a lace-up opening designed
to give a flat, rimmed finish.

Sponge To moisten muslin creases with
a damp cloth before pressing.

Bateau neckline A high, wide neckline that
runs the length of the collarbone and ends at
the shoulder. Also known as “boat neckline.”
Bishop sleeve A long sleeve, fuller at the
bottom than the top, and gathered into a cuff.

Intake Amount of fabric taken in when sewing
a dart.

Blouson A woman’s long blouse with closely
tied waistband, or a style of garment that has
extra fabric draping over a waistband or elastic.

Interlining Fabric placed between main outer
fabric and lining used to give specific degree
of weight or stiffness to the fabric.

Bodice Upper, main, front, and back pattern
piece(s) of a garment.

Jewel neckline Circular neckline that sits
at base of throat.

Boning A flexible yet firm strip of metal or
plastic used to support and maintain shape.

Knit Fabric constructed by means of
interlocking loops between weft and
warp yarns.

Break point The beginning of the roll line,
usually at the first button.
Busk A corset or bustier closure consisting of
a piece of slotted stays of steel, bone, or wood.
Bustier A woman’s tight-fitting, strapless top,
usually using boning.
Bust point The highest and fullest point of
the bust.
Cap The top third of a sleeve, from the
underarm line to the shoulder area.
Contour line A line that represents the outer
edge of a form.

Thread trace Temporary, hand-sewn stitches
indicating seams, darts, grainlines, and other
construction lines.
Truing The process of correcting and
equalizing any discrepancies in sew lines
created during draping.

Negative space The areas around or outside
the positive shape of a garment that share
edges with the form.

Underbust Area under bust curve along the
upper rib cage.

Peg, pegged Pants and skirts whose side
seams narrow towards the hem.
Petersham ribbon Ribbed ribbon used in
hats, corsets, and waistbands designed for
reinforcement. It can be steamed into curves
to fit the shapes of the garments.

Corset A woman’s close-fitting undergarment,
usually using boning and lacing, designed to
support and shape the upper body.

Prototype A sample garment using actual
fabrics designed to test a design for fit and
proportion.

Crinoline A stiff, coarse fabric used to give
body and stiffness to a garment.

Racer-back armhole An extended and
exaggerated back armhole cut-out.

Crossmarks Lines designating the
intersections of fit seams, stylelines, or darts.

Rib knit Fabric constructed with knit and
purl wales (diagonal lines) running crosswise,
resulting in an unbalanced plain weave with
noticeable ribs on the surface of the fabric.

French dart Dart with diagonal intersecting
lines that taper at the apex.

Tailor’s tacks Loose and temporary doublethread stitches with unknotted ends indicating
construction details.

Tunic Loose or close-fitting garment that
extends over the hips, historically made of
two rectangles of cloth.

Pivot point In a sleeve, the exact point of
intersection on the armhole where the seam
of the sleeve falls toward the underarm.

Fit seam A seam that is used specifically to
help create the fit of a garment.

Styleline A seamline that runs from one
point of a garment to another, used specifically
for style rather than to help with the fit of
a garment.

Loom Machine that weaves fabric by
interlacing horizontal and vertical yarns.

Convertible collar Rolled collar that forms
small lapels when worn open.

Ease The extra fabric allowed in the fit of a
garment. Also the process of sewing a length
of fabric into a smaller one without resulting
in gathers or puckers, usually in fitting the cap
of a sleeve into an armhole or the back of a
garment into the shoulder seam.

314

Gusset An extra section of fabric set into
seams to give fullness.

Roll line The line on a coat or jacket indicating
the fold of the lapel from the roll and stand of
a collar to the first button.
Selvages The long finished edges of a bolt
of fabric.
Side bust dart A dart that extends towards
the bust, originating at the side seam.

Weft Continuous yarns that run crosswise in
woven fabric. Also known as “filling yarns.”
Warp A series of yarns that run lengthwise
and parallel to the selvage in woven fabric.
Also known as “ends.”
Yoke An upper, fitted piece of a skirt, a blouse
or shirt, or pants that supports another, usually
fuller section of fabric.

Resources
Books

Supplies

Websites

Helen Joseph Armstrong, Draping for Apparel
Design (3rd edition). New York: Fairchild Books,
2013.

Corsetry (fabric, boning, ribbon, etc.)

La Couturière Parisienne
www.marquise.de
Period costume, from the Middle Ages to
the early 20th century, with patterns

Helen Joseph Armstrong, Patternmaking for
Fashion Design (5th edition). Upper Saddle
River, New Jersey: Pearson Prentice Hall, 2009.
Michele Wesen Bryant, Fashion Drawing:
Illustration Techniques for Fashion Designers.
London: Laurence King Publishing/Upper
Saddle River, New Jersey: Pearson Prentice
Hall, 2011.
Michele Wesen Bryant and Diane DeMers,
The Specs Manual (2nd edition). New York:
Fairchild Books, 2004.
Kathryn Hagen, Fashion Illustration for
Designers (2nd edition). Upper Saddle River,
New Jersey: Prentice Hall, 2010.
Kathryn Hagen and Parme Giuntini (eds), Garb:
A Fashion and Culture Reader. Upper Saddle
River, New Jersey: Pearson Prentice Hall, 2007.

Farthingales Corset Making Supplies
(worldwide)
farthingalescorsetmakingsupplies.com
Richard the Thread (worldwide)
www.richardthethread.com
Dress forms
Kennett & Lindsell Ltd (UK)
www.kennettlindsell.com

The Museum at FIT (Fashion Institute of
Technology), New York
www.fitnyc.edu/museum

Morplan (UK)
www.morplan.com

Fashion Museum, Bath, UK
www.museumofcostume.co.uk

Siegel & Stockman (Paris)
www.siegel-stockman.com

Center for Pattern Design
www.centerforpatterndesign.com
Free resources related to patternmaking
and design

Superior Model Form Co. (US)
www.superiormodel.com
Wolf Dress Forms (US)
www.wolfform.com
General

Kathryn Hagen and Julie Hollinger, Portfolio for
Fashion Designers. Boston: Pearson, 2013.

Ace Sewing Machine Co. (US)
www.acesewing.com

Sue Jenkyn Jones, Fashion Design (3rd edition).
London: Laurence King Publishing, 2011.

B. Black & Sons (US)
www.bblackandsons.com

Gareth Kershaw, Patternmaking for Menswear.
London: Laurence King Publishing, 2013.

Borovick Fabrics Ltd (UK)
www.borovickfabridsltd.co.uk

Abby Lillethun and Linda Welters, The Fashion
Reader (2nd edition). London: Berg Publishers,
2011.

Britex Fabrics (US)
www.britexfabrics.com

Dennic Chunman Lo, Patternmaking. London:
Laurence King Publishing, 2011.
Hisako Sato, Drape Drape. London: Laurence
King Publishing, 2012.
Hisako Sato, Drape Drape 2. London: Laurence
King Publishing, 2012.
Hisako Sato, Drape Drape 3. London: Laurence
King Publishing, 2013.
Martin M. Shoben and Janet P. Ward, Pattern
Cutting and Making Up—The Professional
Approach. Burlington: Elsevier, 1991.
Basia Skutnicka, Technical Drawing for Fashion.
London: Laurence King Publishing, 2010.

Nora Waugh, The Cut of Women’s Clothes.
London: Faber and Faber, 1994.

The Cutting Class
www.thecuttingclass.com
Online analysis of key haute couture and
ready-to-wear collections
Fashion Net
www.fashion.net
Global fashion portal

MacCulloch & Wallis Ltd. (UK)
www.macculloch-wallis.co.uk
Manhattan Fabrics (US)
www.manhattanfabrics.com
PGM-PRO Inc. (worldwide)
www.pgmdressform.com
Patternmaking
Sew Essential Ltd. (worldwide)
www.sewessential.co.uk
Whaleys (Bradford) Ltd. (UK)
www.whaleys-bradford.ltd.uk
Eastman Staples Ltd. (UK)
www.eastman.co.uk
Patterns
Karolyn Kiisel
www.karolynkiisel.com
Patterns for all garments draped in the book are
available to purchase; specific sizes on request.
Order by page number and title of garment.

Resources

Phyllis G. Tortora and Keith Eubank, Survey
of Historic Costume (5th edition). New York:
Fairchild Books, 2010.

Fashion-Era
www.fashion-era.com
Fashion, costume, and social history

315

Index
aba 206
Adrian, Gilbert 292
Africa, clothing of 91, 117
Alexandra, Princess of Denmark 60
A-line skirt 98–99
Alma-Tadema, Lawrence,
Frigidarium, The (detail) 7
anchor-pinning 23, 34
Antoinette, Marie 260, 261, 263
Arabia, clothing of 91
arm, natural hang of 134, 215
armholes: blouses/shirts 115, 116,
117, 136; ease in 213; princess
line 65
asymmetry 8, 302, 303; and
necklines 304–5

316

Bacall, Lauren 209
back hook (pants) 161
back rise (pants) see crotch curves
Bakst, Leon 162
Balenciaga 6
ball gowns 260, 261 see also grand
gowns
ballet skirts 94, 95
baste 13
bateau neckline 50, 56
bell sleeve 142–5
belts 91, 106, 108, 140
Bermuda shorts 159
bias circle skirt 100–1
bias grain 23, 62, 75, 78, 110, 257,
285
bias line 8, 11, 13, 22, 23, 100, 110,
155, 226, 289, 290–1, 306
bias-cut garments 8, 284–5;
blouses 150–5; dresses 284–5,
292–8; lingerie 286–9, 290–1;
skirts 100–1, 110–11; pants 159
Blass, Bill: organza ribbon blouse
(draping project) 130–41; pegged
skirt (draping project) 102–9
blocking: knits 188–9; muslin 13,
21, 32
blocks see slopers
Bloomer, Amelia Jenks 159
bloomers 159
blouses 44, 114–16, 146; armhole
design 115, 116; Gibson Girl
122–9; kimono sleeve 198–201;
peasant 114, 115, 118–21;
wrap-front 150–5 see also shirts
bodices 40, 41, 132–3, 148, 304;
use of darts in 41, 42–7, 58–65,
90, 149; in grand gowns 260–1,
266, 270; and princess line
58–61, 64 see also corsets
Bogart, Humphrey 207

boning (corsetry) 69, 71, 78, 83, 264
Breakfast at Tiffany’s: Hepburn’s
dress in (draping project) 50–7
breeches see knee breeches
bubble skirts 91
Burton, Sarah 280
bust point 9, 13
bust tape 9
bustiers 68–9; fabric and materials
for 71; preparing the form for
draping 70–71; princess-line
72–3, 272; with Georgian shape
74–77; Christian Lacroix (draping
project) 78–85; Victorian shape
69, 78
bustles 91, 262
buttons 71, 122, 138; sizing 116
camisole 286–9
cap sleeves 147
capes 206–7, 208
Capri pants 159
carbon paper 12
Cassini, Oleg 64
catch stitch 13
chalk 12
Chanel, Coco 50, 64, 186, 187, 211;
classic jacket design 210–14,
220–1, 302
charmeuse see silk charmeuse
chemise 290–1
cheongsam 146
chiffon 25, 26, 71, 162, 165, 285
China, clothing of 146
chiton 19, 26, 208
chuba 40
Cirque du Soleil 186
clam diggers 159
clipping 45, 61, 101
cloaks 206–7
closures see fasteners
clothing, history of 6, 7: ancient
Egyptian 186; Georgian/Regency
68, 69, 74–7, 91, 159, 207, 261;
ancient Greek/Roman 18–19,
30, 208, 285; medieval 260;
Renaissance 40, 260; Victorian
68, 69, 78–85, 91, 159, 207,
222, 260
coats/jackets: Chanel classic
design 210–14, 220–1, 302;
collars on 207; fitting 238;
history of 6, 206–7; raglan
234–9; tailored 210–14; threepanel 210–14; tuxedo 222
Colbert, Claudette 284
collar curves 149

collars 116, 122, 129, 137–9,
146–9, 155, 207; convertible
130, 137–9; funnel 252;
mandarin 146–7; notched 207,
226–7; Peter Pan 148–9; shawl
246, 248; standing 257
collar stands 122, 207, 240
composition 7, 312 see also
proportion, sense of; symmetry
convertible collar 130, 137–9
corsets 41, 68–9, 264, 272; and
fabric selection 71 see also
boning (corsetry)
costume design 261: Exiled
Goddess 303; in Hollywood 6,
100, 261, 285, 292 see also
under individual names
cotton 71, 115, 159, 188
cotton knit 188
cotton twill 11, 176, 222
couture 6–7, 8, 260 see also under
individual names
creative process/vision 6, 7–8, 302,
303, 306
crepe de chine 25, 165
crinolines 262, 265
crossgrains 20, 23, 61, 69; aligning
75, 97
crotch curves 176; back 161, 171,
173, 176, 182; front 158, 161,
171, 173, 176, 182
crotch depth 163, 171
curves (rulers) 12
daishiki 117
damask 71
dance tunic 26–9
darting 8, 41, 42–7, 50–65, 59,
90–1, 176; in bodices 41, 42–7,
58–65, 90, 149; French 46–7; in
grand gowns 260; shaped 230;
at shoulders 43, 60; at side bust
42–3, 44, 46–7, 50; in sleeves
215, 229–30; in skirts 96–9,
102–9; at waist 43 see also
silhouettes
denim 159
diagrams 13, 22, 285, 292
Diana of Versailles (statue) 31;
garment (draping project) 30–7
Dietrich, Marlene 159, 170
digital pattern cutting 8
Dinner at Eight: Jean Harlow’s
dress in (draping project) 292–9
Dior, Christian 6, 64; “New Look”
91, 246
dirndl 94, 95
DKNY 252

Dolce & Gabbana 222; tuxedo
jacket (draping project) 222–33
drafts: easy pant 171–3; easy
sleeve 14–5; easy two-piece
sleeve 216–19
drawings see diagrams, flat
sketches
dresses 40, 58–9; bias, cut on the
292–9; and costume design
(film) 50–7, 100, 260, 261,
266–9; flapper 40; little black
50; sheath 50–7; swing 48–9;
see also grand gowns; wedding
gowns
dress forms 8; bifurcated neckto-ankle 10; and measurement
taking 9–10, 13; sizing 9–10
Duncan, Isadora 19, 26
Dunst, Kirsten 263
ease 13, 65, 116, 117, 146, 176,
211; at armholes 213
Egypt, ancient (clothing of) 186
elastic 12; used at cuffs 120; used
at waistline 26–8, 34, 111, 164,
200–1
Elisabeth, Empress of Austria 260,
262
embellishments 114, 132, 206, 208,
260–1, 263
epaulets 207, 208, 240
equipment see tools and
equipment
ethnic pants 158
Eugènie, Empress of France 114
evening gowns 260, 261 see also
grand gowns
Exiled Goddess (costume design)
303
fabrics: history of 18, 19; choosing
10–11, 24–5, 36, 71, 135, 162,
164, 264–5, 274 see also under
individual entries
farthingale 262
fashion designers 6, 8 see also
under individual names
fashion industry 7, 41: history of 6,
41, 91 see also under individual
names
fasteners: for blouses 122, 138; for
corsets 71, 74, 83; for skirts 98
flap pockets 211, 221
flapper dress (1920s) 40
flare: creating 48, 100, 101, 110,
176, 179, 247, 281; removing
44, 241 see also bias; pleats/
pleating

flat sketches 10, 13, 15, 26, 30,
162, 302, 304
flax 19
“form follows function” 8
Fortuny, Mariano 19
foundation pieces see bodices;
boning (corsetry); corsets
French curve 12
French dart 46–7
frock coat 207
front hook (pants) 161
front rises (pants) see crotch curves
full sleeves 150, 153–5, 249–51
functions (of garments) 8
funnel collar 252
Gaga, Lady 265
Garibaldi shirt 114
gathering 41, 116; at neckline 118,
120; at waistline 91, 94–5, 310
Gaultier, Jean Paul 69
Georgian/Regency clothing: coats/
jackets 207; corsets 68, 69,
74–7; grand gowns 261; pants
159
ghagras 91
Ghirlandaio, Birth of the Virgin
Mary (detail) 40
Gibson Girl blouse 122–9
Givenchy 6, 64
Glinda the Good Witch of the North
(Wizard of Oz, The) 260, 266–9
“Golden Age of Draping” 6
Gone with the Wind (film) 69
“good eye” 150, 312 see also
proportion, sense of
grainlines 8, 13, 20, 23, 25, 69, 284;
horizontal 20, 23, 61, 69, 75, 97;
marking 12, 22, 306; matching
49, 75, 96; stable 10; straight 8,
13, 20, 23, 62, 69; visible 11, 71,
176 see also bias grain
grand gowns 270–9; foundations of
264–5, 270, 272; history of 260–
1, 262; and ruffled petticoats
266–9, 273; skirts of 260,
262–3, 269, 270; undergarments
supporting 262–3, 264, 266
Greece, ancient (clothing of) 18–19,
26, 30, 185
grids, use of in knits 188–9
gussets: armhole 115; pant 158

improvisation 302–3; dresses
306– 13; necklines 304–5
India, clothing of 91
inseam 160, 161, 168, 171, 173,
178, 181 see also crotch curves
inspiration 302, 303, 306 see
also creative process/vision;
visualizing
interlining 71
Inuit clothing 8
invention 302
ironing see pressing
izaar 91
jackets see coats/jackets
Japan, clothing of 166, 209
jeans 159
kanga 91
Kennedy, Jacqueline see Onassis,
Jacqueline Kennedy
Kiisel, Karolyn 303
kilt 92–3, 95
kimono sleeve 198–200
kimono styles 209, 252
knee breeches 159
knit garments 25, 186; cut on the
bias 285; coats 252; use of grids
188–9; jackets 212; stretch in
190, 196; tops 188–201 see also
wool
knitting 186 see also wool
knitting machines 186
Kors, Michael 24
Lacroix, Christian 78; corset
(draping project) 78–85
Lagerfeld, Karl 211
lapels 207; peaked 222, 225, 227
layering 40
leather 24, 78, 148
Lee, Reverend William 186
leg-o’-mutton sleeves 222, 228–30

Leigh, Vivien 69
lengthgrains 8, 13, 20, 23, 62, 69
Lepore, Nanette: cropped pants
(draping project) 176–82, halterneck top (draping project) 192–7
Leslie, Charles Robert 206
linen 19, 25, 32, 186, 206, 262,
263, 303
lingerie 286–91
“little black dress” 50
Lycra 26, 71
McQueen, House of Alexander 280
Madonna 69
mandarin collar 146–7
mantles 206–7
Marie Antoinette (film) 263
marking 54–5, 107, 133, 139, 181,
231, 297, 312
measurement taking 13: and dress
forms 9–10, 13; tools for 12
medieval period (clothing) 260
Mexico, tribal clothing of 19
military dress 208
mirrors 10, 29, 201, 310
Miyake, Issey 69
mobility see movement
Monroe, Marilyn 261
Moschino 118
movement: for arms 115, 125;
allowed by a garment 24, 26, 30,
36, 40, 158, 168; in jackets 221,
244 see also ease; swing
Mucha, Alphonse 19
muslin (fabric) 10–11, 13, 25, 135;
grainlines of 10, 25; pinning 28,
33; preparing 13, 20–2, 26
muslin-preparation diagrams 13, 26
muslins (toiles) 6, 10, 56;
presentation 83, 139 see also
muslin (fabric); fabrics
necklines 145; asymmetrical 302–
3; bateau 50, 56; determining
height of 116; improvisational
304–5; ornamentation at 26, 78,
303; shaped/shaping 46, 49, 61,
121 see also collars; halter-neck
styles
negative spaces 142, 196
“New Look” (Dior) 91, 246
notch points (sleeve cap) 143, 229,
244
notched collar 207, 226–7
O’Hara, Scarlett 260
Onassis, Jacqueline Kennedy 64,
261
organza 130, 135, 264, 266, 268,
269
ornamentation 84, 132, 186, 260;
at hem 115; at neckline 26, 78,
303; at seams 19
outseam 171, 179

padding see shoulder pads
Paltrow, Gwyneth 270; Oscar de
la Renta gown (draping project)
270–9
panels 8, 40: cut on the bias 284,
304, 305; and corsetry 40; used
for skirts 91 see also woven
panels
panniers 262, 263
pantaloons 159
pant drafts 170, 171–3, 176
pants: cropped 176–83; ethnic 158;
fitted 158; flared 176, 179, 196;
history of 158–9; pleating in
168; slim–fitting 176; traditional
styles of 158; wide-leg trouser
170–5, 176–83; as womenswear
159 see also pant drafts
Parrish, Maxfield 19
pattern slopers (blocks) 8, 173
patternmaking 8
pattern drafting 6, 9, 55, 56, 188;
pants 170, 171–3, 176; sleeves
216–19, 228
peacoat 207
peaked lapels 222, 225, 227
peasant blouse 114, 115, 118–21
pedal pushers 159
pencil skirt see straight skirt
pencils 12, 181
peplos 19, 208, 285
peplum 150, 152, 198, 201
Persians, ancient 207
Peter Pan collar 148–9
Petersham ribbon 71
petticoats 41, 91, 262, 270, 273;
ruffled 266–9, 273
pinning 12, 23; fitted garments 73;
muslin 28, 33; precision in 101,
104; underarm area 120, 128
pins 12
pleats/pleating 92, 93, 95, 116;
pants 168
pockets 207, 230, 251; flap 211,
221; side 230; welt 222, 230
Poiret, Paul 41, 207
polo shirts 187
“power suits” 208
Prada: “Waist Down” (exhibition)
90
pressing 21
princess line 13, 64–5, 78, 117;
corset 72–3; and darting 50,
60–3; embellishing 132; in
lingerie 290–1; setting into a
yoke 58–9
proportion, sense of 8, 19, 251, 312
see also “good eye”
proportions: of dress forms 80; of
an ensemble 140, 170, 196; of
garment elements 7, 8, 26, 29,
102, 106, 116, 121, 130, 149,
245, 298

Index

hakama, the 166–9
halter-neck styles 192–7, 292–6
harem pants 162–5
Harlow, Jean 292; dress in Dinner
at Eight (draping project) 292–7
hem curve 12
hem gauge 12
hem measurements: pants 171,
173
hemlines: skirts 91; pants 171, 173
hemp/silk blend 11, 19, 71, 176,
182, 290, 303

Hepburn, Audrey 50–7, 100; dress
in Breakfast at Tiffany’s (draping
project) 50–7
Hepburn, Katharine 159, 170;
wide-leg trouser with front tuck
170–75
highwaters 159
hip curve 12
hipline 12, 13
hip measurements 9, 12, 171
hip tape 9
history see clothing, history of;
fabrics
Hollywood (costume design) 6,
285, 292
hoop skirts (undergarments) 262,
266
horizontal grains see crossgrains
horizontal threads see weft
hot pants 159
huipil 19

317

raglan jacket 234–9
raglan sleeves 234–9
Rational Dress Society, The 41
rayon 198
Renta, Oscar de la: gown (draping
project) 270–9
ribbons 71, 132
riding jacket sleeves 218
Rihanna 222; Dolce & Gabbana
tuxedo jacket (draping project)
222–33
Roman Holiday (Hepburn’s skirt
in) 100
Rome, ancient (clothing of) 18–19,
30
royal robes 206
ruffles 262, 266, 268–9
rulers 12

318

sarongs 90, 91
scissors 12
S-curve seaming 78
seam allowances 61
seaming 8, 41, 90–1, 215, 270;
S-curve 78
selvage edge 13, 21
sew line 13
sewing see stitching
shawl collar 246, 248, 251
sheath dress 50–7
shepherd’s cloak (Finnish/Asiatic)
207
shirts 114, 115, 117 see also
blouses
shorts 159
shoulder closures 26, 285
shoulder dart 43, 60
shoulder line (of garment) 62, 208,
253
shoulder pads 150, 208, 209, 212
shoulder sashes/drapes 30, 35, 303
shoulder seams, balancing 253
shoulders 208: avoiding bias at
62; of coats 207, 252, 253;
unstructured 209
side bust dart 42–3, 44, 46–7, 50
side pockets 230
“signature look”, developing a 7,
231, 251
silhouettes: and corsetry 68–9, 74,
78; coat/jacket 252; creating/
developing 6, 7, 8, 10, 26, 41;
and darting 41, 42–3, 50; eggshaped 252–7; determined by
fabric behavior/choice 98, 203,
264–5, 274; gowns 261, 306;
and knit 186; pants 162, 171;
and ruffles 262, 266, 268–9; skirt
91, 95, 98, 262, 270
silk 19, 25, 36, 91, 162, 164, 260,
264, 303
silk charmeuse 10, 285, 286
silk crepe 264, 265, 285
silk crepe georgette 150

silk gazar 264, 265
silk satin gazar 280
silk taffeta 270, 275, 277
silk tulle 71
sizing: altering 8, 10; and use of
dress forms 9–10, 12; using
slopers (blocks) 8
sketches see flat sketches
skirts 90–1; ballet 94, 95; bias
circle 100–1; using darts 96–9,
102–9; of grand gowns 260,
262–3, 266–9, 270; knitted 186;
pleated 92–3; straight 96–7,
102–9; gathered waists on
94–5, 310; yoked 110–11
slashing 260, 261
sleeve cap 125, 126, 135, 136, 143
sleeve drafts 124–6, 228; twopiece 216–17, 228
sleeve draping order 133–4, 136,
153, 244
sleeve patterns 117, 143
sleeve-cap notches 143, 229, 244
sleeveless styles 40, 44–5
sleeves 40; bell 142–5; blouses
115, 116–17, 124–6, 147; cap
147; cap height 124, 126, 128;
coat/draping 244; draping from
scratch 249; exaggerated 130,
134–6, 222, 228–30; flared 126,
142; full 150, 153–5, 249–51;
kimono 198–201, 209; raglan
234–9; sleeve cap 117, 125, 134,
220; tapered 252; two-piece
215–21, 228 see also armholes;
arm, natural hang of
slopers 8, 173
smocks 114
snakeskin leather 24
Spencer jacket 207
spiral design 285, 292, 298
standing collar 257
steam pressing see pressing
stitching 13
stocking frame 186
storm flaps 207, 240
straight grains see lengthgrains
straight skirt 96–7, 102–9
strapless styles 190–1
Strauss, Levi 159
stretch 190, 196
stylelines 12, 44, 72, 80
swing (movement of fabric) 48–9,
110; in dresses 48; of fabric 150;
in skirts 110; in coats 241, 246
swing coat 246–51
swing dress 48–9
symmetry 6, 19 see also
asymmetry
Syria, clothing of 206
tack 13
taffeta see silk taffeta
tailcoat 207

tailor tack 13
tailoring, developments in 40
Taming of the Shrew, The (Taylor’s
costume) 261
tape measure 12
Tara West Spawear 19
tartan 92
Tartar shirt 115
Taylor, Elizabeth 261
technology: and fabric development
19, 187; and knitting 186, 187;
and patternmaking 8
tent dress see swing dress
thread, pulling a 71
thread-tracing 13, 22, 35–6, 294,
297
three-panel construction (tailored
jacket) 210–14
Tibet, clothing of 40
toga 19
tools and equipment 9–12
topstitching 74, 196
toreador pants 159
tracing wheel 12
train (on wedding dress) 280–1
trapeze dress see swing dress
trench coat 207, 240–5
Triki tribe, Oaxaca, Mexico 19
truing 54–5, 107, 133, 139, 181,
231, 297, 312
Trungpa, Chögyam: Abstract
Elegance 302, 303
tucking 91, 95, 116, 150, 151, 173,
175; and grand gowns 270, 275
tulle 71, 266, 269
tunics 19, 26–9, 30, 32, 114, 117,
142–5, 303
tuxedo jacket 222; Dolce &
Gabbana (draping project)
222–33
tuxedo shirt (for women) 117
twill tape 12
two-piece sleeves 215–21; angled
218; drafting 216–17, 218, 228;
oversized 218
underarm area: pinning 120, 128
see also armholes
undergarments 40, 187, 262–3,
264, 266
underwear 69 see also lingerie;
petticoats; undergarments
unitard 186
Versace 74
vertical threads see warp
Victoria, Queen 206
Victorian clothing: coats/jackets
207, 222; corsets 68, 69, 78–85;
grand gowns 260; pants 159
Vionnet, Madeleine 284, 285
visualization 10, 24, 140, 150, 163,
203, 302, 306; and volume 6,
12, 26, 80, 130, 164 see also
creative process/vision

voile 11, 36, 71
volume: creating 41, 87, 91, 94–5,
127, 162, 262, 263; visualizing
6, 12, 26, 80, 130, 164 see also
darting
Vuitton, Louis 148
waist dart 43
“Waist Down” (Prada exhibition) 90
waist tape 9
waist wrap 30
waistlines 9, 13; gathering at 91,
94–5, 310; high 102–9, 173;
pants 173
warp 13, 20, 284
weaving 20: development of 18;
traditional styles of 13, 19, 20
see also woven panels
wedding gowns 260, 264;
Claudette Colbert 284; Catherine
Middleton’s 280; trains on 280–1
see also grand gowns
weft 13, 20, 284
welt pockets 222, 230
Westwood, Vivienne 306–7; dress
(draping project) 306–13
whalebone 262, 263
Wizard of Oz, The: Glinda the Good
Witch of the North’s dress 260,
266–9
Wolf Form Company 8, 9
wool 19, 92, 206, 212, 252, 285 see
also knit garments
Worth, Charles Frederick 260
woven panels 6, 18–19, 20, 40, 91,
209; square-cut 114, 206, 207
see also tunics
wrap-front blouse 150–5
wrist cushion 12, 23
yokes 58–9, 110, 114, 122–3
Yves Saint Laurent 6, 7, 162
zippers 71, 74, 98, 170 see also
fasteners

Credits
All dress forms used in the book are by Wolf Forms Company, Inc.
http://www.wolfform.com/

Author’s acknowledgments
Thank you to:
Greg Lubkin for helping me with the original proposal and giving me
the confidence to do it.
Peter Wing Healey for the initial inspiration that, as a Los Angeles–
based costume designer, I should use costumes from films for draping
lessons.
Victoria Allen and Russell Ellison for tireless work in researching images
and information about costumes and vintage and historical clothing.
Marty Axelrod for his generous help in text critiquing and editing.
Sia Aryai, my amazingly talented photographer, for all his patience while
I prepared the draping steps.
Designer P’lar Millar for being my “beginning draping test-trial student.”
Eddie Bledsoe for costume history research and information.
Aiko Beall, my teacher and mentor for over 30 years.
Helen Rochester, Anne Townley, and Jodi Simpson, my email friends
at Laurence King, for guiding a first-time author through the strange
labyrinth of completing a finished book.
My two daughters, Claire and Ellie Fraser, for their help with computer
issues and for their time in trying on clothes constantly and modeling for
the book.

Credits

7 (top) Lawrence Alma-Tadema (1836–1912), The Frigidarium, 1890,
oil on panel. Private Collection/The Bridgeman Art Library; 7 (bottom)
© Eric Ryan/Getty Images; 8 © B&C Alexander/Arcticphoto; 18 Huipil
from the Triki, a mountain-dwelling tribe from outside Oaxaca, Mexico.
Model: Elaine Wong; 19 Spa-wear tunic by Karolyn Kiisel for Tara
West. Model: Chelsea Miller; 24 © Anthea Simms; 26 Gold-stenciled
tunic by Karolyn Kiisel, costume for Mesopotamian Opera’s Thyestes’
Feast. Model: Vidala Aronsky; 31 The Bridgeman Art Library/Getty
Images; 40 Modern traditional Tibetan chuba, worn by the Sakyong
Wangmo, Khandro Tseyang, Queen of Shambhala; 41 (top) Domenico
Ghirlandaio, Birth of the Virgin Mary (detail), 1485–90, fresco. Cappella
Maggiore, Santa Maria Novella, Florence. © Quattrone, Florence; 41
(bottom) At the Dance, fashion plate from Art, Gout, Beaute (Paris,
1920s). Private Collection/The Bridgeman Art Library; 44 Side dart
plaid blouse designed by Karolyn Kiisel. Model: Ellie Fraser; 46 Photo
by Frazer Harrison/Getty Images; 48 Swing dress designed by Karolyn
Kiisel. Model: Ellie Fraser; 51 © Sunset Boulevard/Corbis; 58 ©
Anthea Simms; 60 Courtesy Los Angeles County Museum of Art: www.
lacma.org; 64 Photo by Art Rickerby/Time Life Pictures/Getty Images;
68 Photo by Fotos International/Hulton Archive/Getty Images; 69 (top)
© Philadelphia Museum of Art/CORBIS; 69 (bottom) Photo by Time
Life. Pictures/DMI/Time Life Pictures/Getty Images; 74 © Anthea
Simms; 79 © Thierry Orban/Sygma/Corbis; 72 Princess-line bustier
designed by Karolyn Kiisel. Model: Julia La Cour; 90 © Michael
Freeman/Alamy; 91 © Prasanta Biswas/ZUMA Press/Corbis; 92
Modern traditional kilt in the Fraser Hunting Tartan plaid. Model: Ellie
Fraser; 94 © SuperStock/Alamy; 96 Skirt designed by Karolyn Kiisel.
Model: Michelle Mousel; 98 Skirt designed by Karolyn Kiisel. Model:
Claire Marie Fraser; 100 Photo by SNAP/Rex Features; 103 Photo by
Mark Mainz/Getty Images for IMG; 110 Skirt designed by Karolyn
Kiisel. Model: Julia La Cour; 114 Carpaccio, Healing of the Possessed
Man (detail), 1494. Accademia, Florence. © CAMERAPHOTO Arte,
Venice; 115 (top) Max Tilke, Oriental Costumes: Their Designs and
Colors, trans. L. Hamilton (London: Kegan Paul Trench, Trubner and
Co., 1923); 115 (center) © Victoria and Albert Museum, London; 115
(bottom) Vintage peasant blouse. Model: Ellie Fraser; 118 Catwalking.
com; 122 Author’s own collection; 131 Photo by Mark Mainz/Getty
Images for IMG; 142 Bell-sleeve tunic top designed by Karolyn Kiisel
for Tara West. Model: Michelle Mousel; 146 Vintage mandarin collar
blouse. Model: Vidala Aronsky; 148 Photo by Joseph Kerlakian/Rex
Features; 150 Peplum blouse with bishop sleeve designed by Karolyn
Kiisel. Model: Michelle Mousel; 158 (left, top and bottom) Max Tilke,
Oriental Costumes: Their Designs and Colors, trans. L. Hamilton
(London: Kegan Paul Trench, Trubner and Co., 1923); 158 (right)
Fitzwilliam Museum, University of Cambridge, UK/The Bridgeman Art
Library; 162 Photo by Apic/Getty Images; 166 Traditional Japanese
hakama, worn in kyudo practice by Alan Chang; 170 © Bettmann/
CORBIS; 177 © Corbis. All Rights Reserved; 187 UPPA/Photoshot All
Rights Reserved; 193 © Corbis. All Rights Reserved; 198 Knit top with
kimono sleeves designed by Angela Chung. Model: Michelle Mousel;
206 (left) Charles Robert Leslie (1794–1859), Queen Victoria in Her
Coronation Robe, 1838, oil on canvas. Victoria & Albert Museum,
London, UK/The Stapleton Collection/The Bridgeman Art Library;
206 (right) Max Tilke, Oriental Costumes: Their Designs and Colors,
trans. L. Hamilton (London: Kegan Paul Trench, Trubner and Co., 1923);

207 (left) Max Tilke, Oriental Costumes: Their Designs and Colors,
trans. L. Hamilton (London: Kegan Paul Trench, Trubner and Co., 1923);
207 (right) © Mary Evans Picture Library/Alamy; 209 (top) Vintage
Japanese kimono owned by Shibata Sensei, Imperial bowmaker to the
Emporer Emperor of Japan. Model: Elaine Wong; 209 (bottom): Getty
Images; 210 © 2003 Topham Picturepoint/Photoshot; 211 Chanel-style
jacket designed by Karolyn Kiisel. Model: Ellie Fraser; 223 Photo by
Kevin Mazur/WireImage; 234 Vintage-inspired brocade jacket designed
by Karolyn Kiisel. Model: Julia La Cour; 240 © Anthea Simms; 246
Swing coat with shawl collar designed by Karolyn Kiisel. Model:
Claire Marie Fraser; 252 Catwalking.com; 260 © Victoria and Albert
Museum, London; 261 (top) THE KOBAL COLLECTION/COLUMBIA; 261
(bottom) © Victoria and Albert Museum, London; 262 akg-images/
MPortfolio/Electa; 263 © Sony Pictures/Everett/Rex Features; 264
Wedding dress designed by Karolyn Kiisel. Model: Claire Marie Fraser;
265 Photo by Steve Granitz/WireImage; 266 (top) Everett Collection/
Rex Features; 266 (bottom) Photo by MGM Studios/Courtesy of Getty
Images; 271 Photo by Ke.Mazur/Wireimage/Getty Images; 280 ODD
ANDERSEN/AFP/Getty Images; 284 (left) © THE BRIDGEMAN ART
LIBRARY; 284 (right): THE KOBAL COLLECTION/COLUMBIA; 286 Bias
camisole designed by Karolyn Kiisel for Jacaranda. Model: Chelsea
Miller; 290 Bias lace-trimmed chemise designed by Karolyn Kiisel for
Jacaranda. Model: Michelle Mousel; 293 Photo by George Hurrell/
John Kobal Foundation/Getty Images; 302 Chögyam Trungpa, Abstract
Elegance. Calligraphy by Chögyam Trungpa copyright Diana J. Mukpo.
Used by permission; 304 Gray silk dress with asymmetrical neckline
designed by Karolyn Kiisel for Jacaranda. Model: Julia La Cour;
306 Catwalking.com.

My mother for being a great listener and support throughout the process.

319

About the DVD
The enclosed DVD contains 32 video tutorials in
which Karolyn Kiisel demonstrates different draping
techniques and skills.
DVD contents

DVD credits

Part 1: Beginning Draping

Featuring
Karolyn Kiisel

1. Tearing the Muslin (Calico) (see p. 20)
2. Blocking the Muslin (Calico) (see p. 21)
3. Pressing the Muslin (Calico) (see p. 21)
4. Marking the Grainlines – Pencil (see p. 22)
5. Marking the Grainlines – Thread Tracing (see p.22)
6. Draping the Three Grains (see p. 23)
7. Aligning the Grainlines (see p. 27)
8. Pinning Two Pieces of Muslin (Calico) Together (see p. 28)
9. Turning Up and Pinning the Hem (see p. 29)
10. Pinning, Marking, and Turning Seams (see p. 33)
11. Trimming and Clipping (see p. 45)
12. Side Bust Dart (see p. 45)
13. Turning Front Over Back (see p. 45)
14. French Dart (see p. 47)
15. Long Vertical Darts, Front and Back (see p. 52)
16. Taping the Stylelines (see p. 54)
17. Marking (see p. 55)
18. Truing (see p. 55)
19. Fitting the Dress (see p. 56)
20. Transferring the Muslin (Toile) to a Pattern Paper (see p. 56)
21. Marking the Grainlines – Pulling a Thread (see p. 71)
22. Adding Sections of Fabric (see p. 76)
23. Turning the Seams of a Fitted Garment (see p. 76)
Part 2: Intermediate Draping
24. Draping the Bias Circle Skirt (see p. 101)
25. Draping the Sleeve (see p.133)
26. Draping the Convertible Collar (see p. 137)
27. Draping the Crotch (see p. 164)
28. Fitting the Pant (Trousers) (see p. 182)
Part 3: Advanced Draping
29. The Two-piece Sleeve (see p. 215)
30. Draping the Gown (see p. 274)
31. Fitting on the Bias (see p. 289)
32. Improvisational Draping (see p. 303)

320

Director
Kyle Titterton
Producer
Kyle Titterton
Editor
Kyle Titterton
Boom Mike Operator
Fernanda Starling
Lighting
Sia Aryai
Draping Model
Claire Fraser
Make-Up for Draping Model
Naomi Camille
Make-Up for Karolyn Kiisel
Yoko Kagaya, Chinatsu Watanabe, Haruyo Sawada
Key Grip
Alexander Dumitru
Set Designer
Mallory Michelle
Production Assistants
Saori Mitome, Cory Miller, Russel Ellison