/


Теги: weapons machine gun


Текст
FULL AUTO
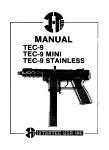
KG-99, KG-99 MINI
TEC-9, TEC-9 MINI
FULL AUTO
CONVERSION MANUAL
RILL AUTO
KG-99» KG-99 MINI, TEC-9, TEC-9 MINI
RILL AUTO CONVERSION MANUAL
2
WARNING !
The legal construction and possession of
a fully automatic weapon is controlled by the
Bureau of Alcohol, Tobacco, and Firearms division
of the U.S. Treasury Department.
Proper application to the B.A.T.F., authori-
zation, and permission must be secured before
constructing this or any other similar device.
Local and state laws vary and may restrict owner-
ship of this or similar type weapons.
Severe penalties are authorized for violators
of these laws. Minuteman Publications offers
this information for academic study of firearms
design and disclaims any responsibility or liabil-
ity for the improper or illegal use of this
or other similar devices.
3
Table Of Contents
CONTENTS PAGE
Introduction ...................... 5
Chapter 1
Background Information ......... 7
Chapter 2
Operation & Disassembly.........17
Chapter 3
Conversion Procedure ...........31
Chapter 4
Assembly A Testing .............41
4
Introduction
The purpose of this manual is to present
the necessary engineering data, manufacturing
procedures, and machinist drawings which are
used for conversion of the MKG-99" family of
semi-automatic pistols into ultra-compact, fully
automatic submachineguns which fire from an
open bolt.
The information provided in this manual
applies to conversion of the INTERDYNAMIC KG-99,
KG-99 MINI, INTRATEC TEC-9, and TEC-9 MINI.
The forerunner of this series of weapons is
the KG-9, a semi-automatic pistol which fires
from the open bolt. Because of the limited
number of KG-9’s produced, full auto conversion
of these will not be addressed in this manual.
Under provisions of the GUN CONTROL ACT
of 1966, individuals owning semi-automatic weapons
may apply to the BUREAU OF ALCOHOL, TOBACCO,
AND FIREARMS division of the U.S. Treasury Depart-
ment on ATF FORM 1 for authority to convert
their weapon to fire fully automatic. Those
persons not able to do the actual conversion
may choose to purchase a converted weapon from
a Class II firearms mfg. or Class III "machinegun"
dealer. These would be handled on ATF Form
4. The transfer tax required for ownership
of a machinegun 1s $200.00 per weapon registered.
5
This is a one time fee paid to the Treasury
Department allowing individual ownership. How-
ever, state and or local laws restrict private
ownership of machineguns in various parts of
the country, requiring investigation by prospec-
tive owners prior to acquiring or converting
a gun to fire fully automatic.
The full auto conversion procedure in this
manual has been fully tested with excellent
results. The process requires the skills of
an experienced machinist, a requirement often
criticized by persons who simply want to be
able to "grind this part or that sear engagement"
to have a "machinegun*. The key factor in this
design is reliability, a principal consideration
for those persons whose lives may depend on
the function of their weapons. Much engineering
effort went into the initial design of the
semi-automatic series of weapons, and similarly
extensive engineering was required in producing
a practical and functional full auto design
based on the semi-auto weapons.
The end result of these design efforts
is a family of highly functional, rugged, and
reliable submachineguns of moderate cost. The
weapons featured in this manual are lightweight,
compact, simple in design and maintenance, inex-
pensive, and high in performance. They represent
many years of submachinegun design in which
effective and battle proven concepts have been
combined using modern manufacturing techniques.
6
Background Information
Before getting Into the specific details
of the weapons involved, it is of interest to
note the development of this family of weapons.
The Swedish firm Interdynamic AB is the parent
company who designed the KG-9 pistol, which
was subsequently manufactured by INTERDYNAMICS,
INC. of Miami, Florida, and distributed by F.I.E.
(Federal Import and Export Co.)
The KG-9 and the other versions to follow
it are all futuristic looking, featuring computer
assisted designs utilizing the latest manufactur-
ing technology. The basic mechanisms of the
weapons produced are not really anything new
or revolutionary. One must realized that most
new firearms produced use several individual
component designs decades old. Tine, as well
as extended periods of field use in conflicts
around the world, have proven several basic
mechanical designs which are then ‘'borrowed”
and Incorporated in later "newly designed” weap-
ons.
It is not suprising that the Swedes originat-
ed the KG-9, owing to the fact that they have
been quite successful in firearms design and
manufacture through modern history. The famous
Karl Gustaf "K" SHG greatly influenced the design
of the KG-9. By comparing the model "K" to
7
the KG-9, it 1$ easy to see various elements
of the "K" that were scaled down, streamlined,
and made simpler to manufacture. The entire
KG/ТЕС series as well as the model "K" are consid-
ered second generation weapons. It is interesting
to see development in this area in light of
the success of third generation weapons such
as the MAC and UZI weapon families. Third genera-
tion basically indicates wrap-around bolts and
magazine housings contained in the grip assembly
providing "hand meets hand" loading.
The "KG" used in designating the INTERDYNAMIC
model reportedly is taken from "Karl Gustaf",
the "9" perhaps designating the caliber. Other
influential weaponry used in designing the KG-9
were the German MP-38/40, Walther MPK, and the
US M3/M3-A1 SMG's. The original Swedish produced
versions of the KG-9 were reported to have been
"machine-pistols", designed for special purposes
requiring maximum firepower in a small package.
The construction of the KG/ТЕС family incor-
porates the use of a synthetic plastic material
which comprises the lower receiver. This part
is an integral unit which houses the entire
trigger/sear mechanism as well as the magazine
latch mechanism. The lower receiver is very
lightweight, yet strong due to the use of Dupont
"high impact" phenolic resins. The unit is
very nicely injection molded, being reinforced
at stress points. The use of high impact plastics
in firearms production is becoming more common-
place each year. Using materials of this type
is often snubbed by "purists", but allows the
expedient productions of parts which would be
difficult and expensive to machine in a conven-
tional manner. The bottom line here is that
8
the overall cost per unit is greatly reduced,
a definite plus in this age of expensive weaponry,
(UZI, HK-94, STERLING).
The tubular upper receiver features ventila-
tion holes in the barrel jacket to disperse
heat build up, and houses the barrel and bolt
assembly. This unit attaches to the lower receiv-
er by keying the upper receiver onto a rear
mounted disc attached to the lower receiver,
and by aligning and assembling the upper to
lower receivers at the front of the plastic
housing using a single assembly pin.
The KG-9 uses an open bolt mechanism incorpo-
rating the use of a fixed firing pin. This
design was in production as a "semi-auto" pistol,
but after producing only approximately 2500
of these units, production was forced to cease
due to a re-classification of the KG-9 as a
“machinegun" due to the ease and frequency that
these models were being illegally modified to
fire fully automatic. The serial numbers of
the KG-9‘s were merely stamped into the plastic
lower receiver, which could be easily altered
and removed. Current production models use
a steel serial number plate molded into the
receiver.
After the KG-9 was declared a "machinegun”
by a BATF ruling, all KG-9‘s produced before
January 19, 1982 had to be registered as Title
2 firearms, the same as any submachinegun although
they were semi-auto. This led to the design
and introduction of the KG-99, basically the
same as the KG-9, except that the weapon fires
from a closed bolt. The bolt incorporates a
floating firing pin which is carried by the
9
INTBRDYNAMIC
KQ-99
900 121 Barrel Assembly catch 152 958 Rear cover Buffer
123* Snap ball 959 Buffer plate
124* Snap spring 156* Screw
954 Rear sight 151* Assembly pin
135* Sling catches 160 Trigger
920* Receiver tube 161 Trigger axis
929 Upper receiver sub-assembly 162* Trigger spring
930 Bolt 170* Disconnector
131 Extractor 171 Disconnector axis
132* Extractor screw 172* Disconnector spring
933* Operating handle 980 Sear
934* Operating handle spring 181 Sear axis
935 Firing pin 185* E-Ring
936 Striker 183* Sear retainer
937 Striker spring 982 Sear spring
938 Striker spring guide rod 190 Magazine catch
940 Recoil spring 191 Magazine catch axis
941 Recoil spring guide rod 192 Magazine catch spring
144* E-Ring 200* Ejector
950 Frame (lower receiver) 210 Magazine assembly
928* Bolt assembly - complete 250 Assault grip
Parts list and cross section of the KG-99 semi-auto pistol.
( NOTE - The * designates parts either not identified by number
or not shown in this view.)
striker assembly. The striker is spring loaded
by tension exerted from the striker spring.
Each pull of the trigger allows the striker
assembly to slam forward, the trigger movement
having forced the disconnector downward, a machin-
ed notch of the same engaging and pulling the
sear down simultaneously which disengages the
striker, providing force to be transmitted to
the cartridge primer through the firing pin.
The detailed description of this sequence in
both the semi-auto and converted full auto weapon
will follow in a later chapter.
The KG-99 was introduced as a moderately
priced weapon, the current retail price running
around $250.00. This low price combined with
the good availability has made it a very popular
item with shooters ranging from pl inkers, sur-
vivalists, and home owners as a high volume
self defense firearm. The relatively small
size of the gun made it handy for executive
protection, being small enough to carry in a
breifcase without the weight factor common to
the НАС-10. The only thing it lacked was a
full auto capability which Interdynamics, Inc.
(USA) later addressed in a version known as
the MP-9. At this writing the fate of the MP-9
is unknown. It was eagerly anticipated but
early models were plagued with quality problems
in the bolt area, specifically the heat treatment
of the sear engagement area of the bolt.
This area was identified and presumably
corrected, but the promotion of the MP-9 SMG
has been low key. The HP-9 was produced as
a selective fire SMG, the selector located on
the right side forward of the trigger. The
12
Interdynamic
MP9 9 mm
Cross-sectional diagram of the commercial
INTERDYNAMIC MP-9 9mm SMC.
13
selector did not provide a "safe" position,
this being accomplished by rotating the bolt
handle upward into a locking notch in the receiver
reminiscent of the STEN MKII, MP-38/40, or Karl
Gustaf "K". The MP-9 also incorporated the
addition of a simple wire form retractable stock
similar to the US M3/M3A1. This would have
been a worthy addition to the KG-99 pistol but
unfortunately would have violated BATF regulations
regarding shoulder stocks attached to hand guns.
Probably the most noteworthy complaint
against the production model KG-99*s has been
the long, rough trigger pull, as well as the
inability of shooters to comfortably hold the
weapon with one or two hands. The weapon, fully
loaded, weighs 67 ounces making it front-heavy
when firing one handed. When shooting two handed,
there is really no proper (conventional) way
to place the left hand. An optional foregrip
is made that attaches to the bottom of the venti-
lated barrel jacket, as seen in the photos in
this manual. This solves the problem of holding
the weapon, becoming very important after conver-
sion to fully automatic. The grip is positive
and controllability as well as user confidence
are improved greatly.
Due in part to the success of the KG-99
and the complaints regarding handling difficul-
ties, a third version evolved, known as the
KG-99 MINI. The MINI shares the same lower
receiver as the KG-99, the only difference being
that the barrel and upper receiver are shortened.
The barrel of the MINI is 3.0" long as opposed
to the 5.0м barrel of the KG-99. The ventilated
barrel jacket is eliminated on the MINI, the
upper receiver ending just forward of the barrel
14
INTERDYNAMIC KG-99 semi-auto pistol with 36 round
magazine and optional front grip.
INTRATEC TEC-9 .MINI semi-auto pistol with 20 round
magazine.
15
bushing. This compact version comes with a
20 round magazine as opposed to the standard
36 round magazine of the KG-99. A different
recoil spring is used in the MINI due to the
lower pressure generated in the 3.0“ barrel.
Both the KG-99 and KG-99 MINI come standard
with threaded barrels for attachment of recoil
compensators, flash suppressors, or sound
suppressors (silencers). The MINI is the pre-
ferred choice for silencing because of its lower
projectile velocity. The 5.0" barrel produces
a projectile velocity of 1200-1400 fps, exceeding
the speed of sound and causing a "crack" as
the bullet breaks the sound barrier. The retail
price of the MINI runs about $40.00 less than
the KG-99.
Later, both of these models were further
popularized by the introduction of stainless
steel construction, and important development
in firearms construction and use, especially
marine use in a salt water environment.
At some time during 1985 or perhaps late
1984, the name of the company "Interdynamics,
Inc." was changed to "INTRATEC". The reason
is immaterial as no changes were noted in the
construction of their guns. The model designa-
tions did change, the KG-99 becoming the "TEC-9",
and the KG-99 MINI becoming the "TEC-9 MINI".
These are the current production models, the
stainless versions also being available.
16
2
Operation & Disassembly
The KG-99, KG-99 MINI, TEC-9, and TEC-9
MINI are all semi-automatic pistols which operate
by elementary blowback, firing from the closed
bolt. The full auto conversion of these weapons
will change the mode of operation to open bolt
functioning, providing full automatic functioning
with operator control of the length of burst.
This full auto conversion is not selective,
however, excellent results can be achieved with
minimal training. This type mechanism (being
non-selective) duplicates functioning of many
submachineguns in production and use worldwide.
OPERATION - SEMI AUTO PISTOL
A loaded magazine is inserted with the
bolt in the forward (closed) position. The
firer pulls the operating handle fully rearward,
then sharply releases it, allowing it to move
forward under the pressure exerted by the recoil
spring. This allows the bolt to strip and chamber
the top cartridge from the magazine into the
barrel chamber. The act of retracting the operat-
ing (bolt) handle previously described causes
the striker to engage the sear, the firing pin
being held in a "cocked** position.
With the bolt forward the firer may place
the weapon on "safe" by pushing the bolt handle
17
1 2 3
View of KG-99 lower receiver detailing:
1. Ejector
2. Disconnector
3. Sear
Top view of lower receiver showing same components
as Identified in preceeding photo.
18
in towards the receiver. This blocks the firing
pin from moving forward. To fire the weapon
the bolt handle must be pulled out to the "fire"
position. At this time the trigger is pressed,
the movement of which forces the disconnector
downward pulling the sear down simultaneously.
As the sear disengages the base of the striker,
the spring tension exerted by the striker spring
forces the striker and firing pin forward, ident-
ing the primer and detonating the cartridge.
The forward movement of the striker also pivots
the disconnector forward out of engagement with
the sear.
The rapidly expanding gases generated in
the cartridge case propel the projectile into
the rifled lands of the barrel. The gases push
rearward against the now empty case and bolt,
the heavy mass opening only 1/16" at the time
the bullet leaves the barrel. The bolt continues
back, extracting and ejecting the empty case.
The striker assembly moves rearward with the
bolt, passing over the sear nose. The recoil
spring is supported by a guide rod, and the
tension exerted overcomes the mass of the bolt,
causing it to stop and reciprocate forward,
stripping and chambering another live cartridge.
The trigger must be released so that the notch
in the rear of the disconnector may rise and
engage the sear. By pressing the trigger again,
the firing sequence will then by repeated. At
any time the weapon may be put on "safe" by
pushing the bolt handle "in" after the bolt
is in the "closed" position.
19
OPERATION - FULL AUTO SMG
The weapon is loaded in the same manner
as the semi-auto versions. To ready the weapon
for firing, retract the bolt handle fully rear-
ward. The bolt features a fixed firing pin
and a sear engagement step. By releasing the
bolt, the recoil spring will cause the bolt
to move forward slightly, its movement stopped
as the sear intercepts the bolt (step on bottom
of bolt). The firer then presses the trigger,
the disconnector pulling the sear nose down
out of engagement with the bolt, allowing the
bolt to move forward sharply, the raised feed
lip of the bolt face catching the base of the
top cartridge in the magazine.
The inertia of the bolt movement strips
the round out of the magazine and guides it
up the feed ramp and into the chamber. As the
bolt nears its maximum forward travel, the car-
tridge case will locate securely in the chamber,
the extractor claw will spring over the rim
of the case and the firing pin machined into
the bolt face will indent and ignite the primer.
The resultant ignition propels the bullet through
the barrel, with the bolt mass remaining closed
until the bullet nears the muzzle. The inertia
of the gases generated will force the bolt
rearward, and as the bolt nears maximum rearward
travel, the recoil spring arrests bolt movement
and forces it forward again. At this point the
firer may continue to hold the trigger down,
the disconnector being engaged with the sear
which cannot rise to intercept the bolt until
the trigger is released. The firing sequence
will repeat as long as the trigger is depressed,
or until all cartridges are fired.
20
KG-99 open bolt SMG being readied to fire. Step one
is to push bolt handle into the safe position.
Insert a loaded magazine upward into magazine housing.
Push firmly until the magazine latch engages locking
block on magazine.
21
When ready to fire the weapon, pull the bolt handle
out of the "safe" position. Then retract the handle
and bolt assembly until it engages the sear.
Close up view of the ejection port showing the bolt
in the "cocked" position with a loaded magazine in
place. Note top cartridge in magazine.
22
To unload the SMG, the bolt will be in the "cocked"
position and the firer simply presses the magazine
latch towards the magazine and pulls downward on
magazine.
Comparitive view of the 20 round magazine (left),
and 36 round magazine (right).
23
As with the semi-auto versions, the bolt
handle may be pressed in to lock the bolt in
the “closed” position. It is recommended that
the weapon be carried with the bolt "closed"
on an empty chamber, with the safety (bolt handle)
"on". In the full automatic version the safety
mechanism is the large diameter step on the
bolt handle which, when the handle is depressed
fits into an enlarged area of the bolt handle
slot which is wider than the rest of the slot.
The bolt cannot reciprocate rearward because
the slot is narrower than the handle shank except
for the front portion. This also applies to
the serai-auto safety, a two part safety which
blocks the firing pin as well as blocking rearward
bolt movement.
When ready to fire, pull the handle out
then retract the bolt to the open (cocked) posi-
tion. It Is common for open bolt SMG's to be
carried "closed and locked" in this manner,
a safety consideration in the event the weapon
is dropped or Jarred severely. If that were
to happen, the locked bolt handle will prevent
the bolt from slamming rearward possibly chamber-
ing and detonating a live round by accident.
DISASSEMBLY SEMI-AUTO PISTOL
The semi-auto versions must be first unloaded
before field stripping. Always assume the weapon
is loaded and push the bolt handle into the
"safe" position. Remove the magazine by pressing
the latch beneath the magazine well toward the
magazine, then removing the magazine downward.
Keep fingers away from the trigger, aim the
muzzle in a safe direction, pull out on the
24
•»J1
909 barrel
9S4 Hear itgTl
929 Upper receiver iub~amtnt>ty
93* Bolt
IJI Extractor
132 Extractor acnev
933 Operating handle
M< OperalIno handle tpri*Q
MS > irP^ pin
9Jd Strpoer
937 Slrboer iprtng
938 Striker spring g'^dr rod
MO Recall eprtng
940 Recoil wong - Mint
941 Recoil tprwqj guide
144 E-Rif\g
930 rrome Rower receiver)
162 Rear cover
9M Buffer
959 Buffer pleic
139 Scr*%-
/5) Aiatmbtypin
169 Trtp^tr
I5i Trtpper axis
162 ГгГро*г зргщр
170 Divconnector
17) Disconnector nrx
172 Dlocorinccior sprtog
Dhi) .Seor
!3i Seoraxu
MS E-Rino
133 Sear retainer toot shown)
962 Seor лрллд
190 Мррахаъе coicb
191 Maoa:tne catch axis
102 Moportn* catch spring
200 £ fee tor
2)0 MpgaxtM assembly (compute)
Exploded view of the KG-99 semi-automatic pistoL
bolt handle, retract the bolt handle to the
rear, extracting and ejecting a live cartridge
if one was chambered. Work the handle back
and forth then visually check the chamber and
bolt face for a live round. This practice should
be employed on all automatic weapons. Remember
"Murphy’s Law" and that Murphy was an optomist!
Too often he only allows you one mistake. Depress
the trigger allowing the striker to fall.
Press out the assembly pin with a mallet
and punch. Pull the upper receiver up and for-
ward, out of assembly with the lower receiver.
Retract the bolt handle pulling the handle out
of the bolt when aligned with the hole at the
end of the slot. The bolt assembly will now
slide out the rear of the upper receiver. The
bolt assembly is stripped by removing the E-ring
on the end of the recoil spring guide rod. The
bolt will slide off leaving the striker, firing
pin, recoil spring, recoil spring guide rod,
striker spring guide rod, striker spring, buffer
assembly, and two more E-rings at the buffer
end of the respective guide rods. Assemble
by reversing this procedure. No disassembly
to the lower receiver is needed or recommended.
DISASSEMBLY FULL AUTO SMB
Unload the weapon by removing the magazine
as described in the above section. Pull the
bolt handle fully rearward until the bolt engages
the sear. Visually inspect the chamber and
bolt face for a live round. (The purpose of
checking the bolt face is to see if a cartridge
has been positioned in the recessed bolt face
and being held in place by the extractor).
26
After assuring an unloaded condition, allow
the bolt to close on an empty chamber by aiming
in a safe direction and pressing the trigger.
Press out the assembly pin securing the two
receiver components, lift the upper receiver
and pull it forward off of the disc at the rear
of the lower receiver. At this time pull the
bolt handle fully rearward to the enlarged hole
in the receiver slot and retract the bolt handle
out of the bolt. The bolt assembly will slide
out the rear of the receiver at this time. Only
the recoil spring, recoil spring guide rod,
and recoil buffer assembly will be attached
to the bolt. Removal of the front E-ring from
the recoil spring guide rod will allow removal
of the bolt body. Reverse the procedure to reas-
semble.
Before disassembly, unload the weapon and place the
bolt in the closed position.
27
Use a suitable punch and press the assembly pin out
of the lower receiver.
The upper receiver may now be tilted upward at front,
and pulled forward out of the lower receiver.
28
Slide the bolt assembly rearward until the bolt handle
can be pulled out of the bolt and through the enlarged
hole in the receiver slot.
Slide the bolt assembly rearward out of the upper
receiver body.
29
The KG-99 SMG field-stripped into its major
components.
1. Upper receiver assembly with optional vertical foregrip.
2. Lower receiver assembly 4. Bolt handle
3. Full-auto bolt assembly 5. Assembly pin
1. Bolt
2. Striker Spring Guide
3. E-Ring
4. Striker Spring
5. Firing Pin
6. Striker
30
3
Conversion Procedure
The conversion procedure outlined in this
chapter falls under federal regulations regarding
machineguns, and the completed bolt necessary
to facilitate full auto functioning in any of
the weapons previously mentioned is considered
a machinegun itself by definition, irregardless
of the prescence of a firearm. The conversion
described here requires the manufacture and
installation of a new bolt. This bolt is the
only component required to produce full auto
fire, henceforth the bolt becomes the registered
element comprising a ''machinegun**. DO NOT BEGIN
CONSTRUCTION OF THE BOLT UNTIL ATF APPROVAL
IS RECEIVED. FAILURE TO DO $0 MAY SUBJECT THE
BUILDER TO A FINE OF UP TO $10,000.00 AND/OR
INCARCERATION OF UP TO TEN YEARS.
As described in the previous chapter, the
fully automatic KG-99, KG-99 MINI, TEC-9, and
TEC-9 MINI all operate from the open bolt. The
original semi-auto bolt, striker, striker spring,
striker spring guide, E-ring, and firing pin
are not used and may be saved for spare components
if the weappon were to be later converted to
semi-auto, (an example being to move to another
state in which machineguns are not permitted).
The extractor and extractor screw are removed
and used with the new bolt. It is advisable
to simply order a replacement extractor and
31
screw in the event the original ever becomes
damaged.
The SMG open bolt is detailed in the accom-
panying drawings and photos. The bolt retains
most of the same profiles and dimensions of
the original semi-auto bolt. All dimensions
are provided to fabricate a new bolt from the
respective drawings, but it will be helpful
to the machinist to compare the old bolt noting
the similarities to the drawings for reference
during construction. The areas of difference
between the two are described as follows:
1. Elimination of the complex rear cavity housing
the striker assembly and firing pin. The
open bolt does away with all of these compo-
nents, allowing the rear bottom section
of the bolt to remain “solid". Also, the
firing pin hole through the center of the
bolt is deleted. Additionally, the striker
sping guide rod hole through the bolt is
deleted. The photos clearly show bottom
views of both semi and full auto bolts.
2. Utilization of a fixed firing pin. As noted
in fl above, the floating firing pin has
been deleted. A fixed firing pin is machined
Into the bolt face to the prescribed dimen-
sions. Also of critical importance in assur-
ing proper feed in open bolt SMG's is the
raised '’feed lip" on the bolt face. This
is a ridge the same height as the major
bolt face, and is the part of the bolt which
contacts the base of the cartridges as they
are stripped from the magazine. The impor-
tance of this "ridge" is that it keeps the
base of the cartridge away from the protruding
32
Comparitive view of the bottom of the semi-auto
pistol bolt (top), and SMG open bolt (lower). Note
absence of cavity in rear of SMC bolt. Also note sear
engagement "step" on SMG bolt.
Front views of semi-auto bolt (left), and SMG bolt
(right). Note fixed firing pin and raised feed lip on
SMG bolt.
33
firing pin located in the bolt face recess.
As the cartirdge is fed up the barrel ramp
and into the chamber, the base of the shell
slides smoothly over the feed lip until
the round is properly positioned in the
chamber, at which time the extractor springs
over the shell rim and the firing pin deto-
nates the primer. The semi-auto bolts will
have had a relief cut milled into the bolt
face to the depth of the recess. This is
a common practice for all weapon manufactur-
ers. If, for instance, a bolt with a fixed
firing pin but without a raised feed lip
if used, the cartridge base will slide up
the recessed bolt face during chambering
until the rim of the case contacts and Jams
against the protruding firing pin.
3. Establishment of a "sear engagement step"
on the base of the full auto bolt. As
described previously open bolt weapons are
“cocked" by retracting the bolt assembly
until it is locked in place by engaging
the sear nose. To enable the sear to inter-
cept the full auto bolt, It is necessary
to incorporate a 90° shoulder on the base
of the bolt. This shoulder is machined
to the prescribed dimensions and is to remain
“sharp". No burrs may remain, likewise
the shoulder should not be chamfered or
radiused. The heat treatment procedure
will provide proper wear resistance to prevent
damage at this point. It is this area in
which Interdynamics USA had problems with
earlier MP-9 SMG bolts being “soft" and
wearing excessively.
4. OPTIONAL MODIFICATION - A slot exists in
the base of both the semi and SMG bolts,
34
Close up view of front of SMG bolt. Note extractor,
fixed firing pin, raised feed lip, recoil spring guide
rod hole, and clearance notches for magazine feed
lips and ejector.
Detail of sear engagement step on bottom of SMG
bolt.
35
1.325 0.0.
EXTRACTOR SLOT .093
(.125 optional)
-----210 from Q
A .430 to recoil spring guide hole centerline
from bolt £ .
В .207 to extractor hole centerline from bolt
FULL-AUTO BOLT
36
C Drill (size #3) through intersecting Extractor
hole. Thread 1/4" X 28 NF.
D Drill letter "Q" (.332) X .715 deep.
E Groove diameter .385 X .080 wide - 2 places.
Dimensions given to groove centerline.
37
identical in depth. The purpose of the
slot is to provide clearance between the
bolt which reciprocates over the ejector
extending above the trigger and sear mecha-
nisms. In alignment with the ejector is
the disconnector. If the disconnector is
bent or off center in its alignment with
the ejector, the sides of the slot in the
full auto bolt may cause friction and tripping
the disconnector out of engagement with
the sear resulting in an un-anticipated
stoppage. As a precautionary measure, machine
the width of the slot to .125" rather than
the standard .093“. Use the same centerline
dimension of the slot for reference. Extra
side clearance is then achieved without
affecting cartridge stripping or positioning
in the bolt face. Also check the sides
of the disconnector for any burrs which
may interfere in the slot area of the bolt.
This completes description of the full auto
bolt differences.
HEAT TREATMENT OF THE BOLT
The bolt must be manufactured of a suitable
heat-treatable steel, and then heat treated
after all machining is completed. The particular
steel used in fabricating the bolt in this manual
was 1-3/8" diameter drill rod, which is an oil
hardening variety known as 0-1.
Below are some of the more common heat
treatable steels which may be encountered for
use in fabricating the bolt, as well as heat
treatment data. The first three listings are
38
The extractor is held in place by a socket head set
screw through the side of the bolt, intersecting the
extractor hole.
The bolt handle hole is drilled into the bolt body and
grooved internally in two places to retain the bolt
handle in "fire" and "safe" positions.
39
for common aircraft alloys, while the last three
are for typical tool steel alloys.
ТУРЕ HARDENING TEJVERATURE QUENCH TDFERINC TEJVERATURE ROCKWELL HARDNESS
SAE 4130 1600-1650°F OIL 700-1250° F 35
SAE 4140 1550-1600°F OIL 700-1300°F 50
SAE 4340 1475-1525°F OIL 400- SOO°F 50
A1SI A2 1700-1800’F AIR 350-1000°F 57-62
A1$I 02 1800-1875®F AIR 400- 100°F 54-61
A1SI 01 1450-1500°F OIL 350- 500°F 57-62
If proper heat treating facilities are
not available, it is advisable to have it commer-
cially processed, preferably in a vacuum oven,
or inert gas injection oven to prevent scaling.
Check with local machine shops or the yellow
pages for references.
40
4
Assembly & Testing
The various parts to be deleted have been
listed in previous chapters. These part are
removed as follows:
1. The recoil spring guide is removed from
the original bolt by supporting the buffer
against a secure object and with one hand
push the bolt downward toward the buffer
slightly so that the E-ring can be reached
near the end of the guide rod. Using a
pair of small pliers, grip the middle edge
of the E-ring and pull it out of the machined
groove in the guide rod. The bolt may now
be carefully removed from the guide rod.
Be careful since the recoil spring is exerting
tension against the bolt.
2. The striker spring guide will still be posi-
tioned 1n the buffer plate as the original
bolt is removed from the recoil spring guide.
After the bolt is removed, the firing pin,
striker, and striker spring will be free.
Take these off of the striker spring guide
and set them aside. The striker spring
guide can now be pressed rearward out of
the buffer plate. The rear E-ring on the
guide does not have to be removed. Place
the striker spring guide along with the
other removed parts.
41
Complete semi-auto bolt assembly in inverted position.
Note the striker engagements, one which engages
the sear and one that trips the disconnector.
To strip the bolt assembly, push the bolt down on the
guide rods and remove the "E-Ring" on the end of
the recoil spring guide nod.
42
Semi-auto bolt assembly fully stripped:
L Bolt
2. Buffer and Buffer Plate
3. Firing Pin
4. Striker
5. Extractor
6. Extractor Screw
7. Recoil Spring Guide Rod w/E-Ring (rear)
8. Recoil Spring
9. Striker Spring Guide w/E-Ring (rear)
10. Striker Spring
IL E-Ring
43
900 Barrel
934 Rear tight
929 Upper rec* her jubxuwmMy
9J0 SMG open-bolt
131 Extractor
132 Extractor wr**
933 Operating handle
934 Operating handle spring
140 Recoil spring
940 Recoil -jprtnp - MW
941 Recoil spring gutde rod
144 E-R(ng
930 Erome (hover received
132 Rear covtr
938 Buffer
939 Buffer plot*
136 Sc rev
131 Ante mMy pin
160 Trigger
161 Trigger oxi»
162 Trigger spring
HO DiMxxinector
Hl Oincrmncctor axis
112 OiAconneclor spring
000 Stflr
161 Sear axis
163 К Ring
183 Seor retainer ptot «hownl
992 Seor 5pr(no
190 Magazine calc*
191 UpgaiPse ootc/i axU
192 kogaxme catch spring
200 Ejector
210 MapoiHe asKmNy (comptele)
Exploded view of the KG-99 open-bolt SMG.
3. Using a 1/8" alien wrench, remove the socket
head set screw retaining the extractor from
the old bolt. Note the position of the
extractor "claw" in relationship to the
recessed bolt face before removal. The
extractor will slide out of the front of
the bolt at this time. This bolt may now
be placed with the other deleted components.
4. Place the extractor into the corresponding
hole in the face of the new bolt. Screw
the socket head extractor screw into the
threaded hole in the side of the new bolt.
Check position of the extractor and tighten
the retaining screw. Check the "claw" for
proper depth.
5. The new bolt may now be assembled to the
recoil spring guide/buffer assembly. The
recoil spring guide should still be assembled
to the buffer plate and buffer. A single
E-ring will be in position in a machined
groove near the rear end of the guide rod.
This ring will be on the rear side of the
buffer plate. The recoil spring should
be positioned over the rod, and in a free
condition extend past the end of the rod.
about 2-3/16".
6. Place the new bolt over the end of the recoil
spring, aligning the spring in the appropriate
hole which passes through the bolt. Make
sure the buffer plate is against a secure
object and gripping the bolt with one hand,
push the bolt down against the recoil spring
until the end of the recoil spring guide
rod extends past the bolt face. The machined
groove for the front E-ring will be seen.
Snap the E-ring in the groove and over the
45
SMG Bolt Assembly field stripped: NOTE Items 8
& 9 are now deleted and not necessary for the SMG
conversion.
1. Open Bolt
2, Buffer and Buffer Plate
3. Extractor
4. Extractor Screw
5. Recoil Spring guide
rod with rear E-Ring
6. Recoil Spring
7. E-Ring
SMG Open-Bolt assembly ready for final assembly
in upper receiver.
46
guide rod. The bolt assembly will now be
fully assembled and ready for installation
Into the receiver.
7. Place the bolt assembly into the rear of
the upper receiver» positioning it so that
the bolt handle hole in the bolt corresponds
with the large hole at the rear of the bolt
handle slot in the upper receiver. Insert
the bolt handle until the spring-loaded
ball in the handle shank engages the first
Internal groove. Slide the handle and bolt
assembly all the way forward.
8. The upper receiver is now ready to assemble
to the lower receiver. The rear of the
upper receiver is positioned onto the station-
ary rear cover disc at the rear of the lower
receiver. The front of the upper receiver
is elevated slightly at this time. When
the two are in position» push the upper
receiver down onto the lower receiver, align-
ing the assembly pin hole and pressing the
assembly pin through both receivers until
flush.
9. Pull the bolt handle back, checking for
drag or friction. The sear should rise
and intercept the bolt after passing the
engagement step on the bottom of the bolt.
Maintain rear pressure on the bolt handle
and press the trigger. The sear should
release and the bolt then can be eased for-
ward. Maintain pressure on the trigger
and cycle the bolt back and forth fully
several times to check for excess friction.
If this checks out all right, place a dunvny
round into the magazine, load the magazine
47
into the weapon securely» cock the weapon,
and dry fire. The bolt should slam forward,
sucessfully stripping and chambering the
round without jamming. If this can be com-
pleted several times without feeding jams,
the weapon can be tested with live ammunition.
This is to be done using one round in the
magazine at a time at first. If no problems
result, work up in capacity one round at
a time until satisfied that the sear will
intercept the bolt when attempting burst
firing. Once the function of the weapon
is proven, full magazines may be tested
to see if the pressure of 36 rounds in the
magazine causes any problems with partial
cartridge stripping and feeding jams when
firing.
If more than one magazine is to be used,
check all for proper functioning. If magazines
are dropped, check the lips for deformation
which would cause misfeeds. Once all of the
tests are completed, the user can practice,
working on firing short bursts of 3-5 rounds.
That is the most practical method of using any
SMG since the hit probability increases when
short bursts are fired rather than “hosing**
a target. The firing rate will be approximately
800-900 rounds per minute.
Weapons in this configuration are ideal
for a variety of situations, such as self-defense
weaponry for military aircrewmen, vehicular
crews and drivers, medical corpsmen, radio opera-
tors, officers, military and civilian law enforce-
ment officers (especially when working undercover
requiring maximum concealment), SWAT teams,
border guards, drug enforcement officers, and
executive protection details.
48