/


Текст
CONTENTS IN DETAIL
TITLE PAGE
COPYRIGHT
ABOUT THE AUTHOR
INTRODUCTION
PART I: EMBEDDED PROGRAMMING
CHAPTER 1: HELLO WORLD
Installing GCC
Downloading System Workbench for STM32
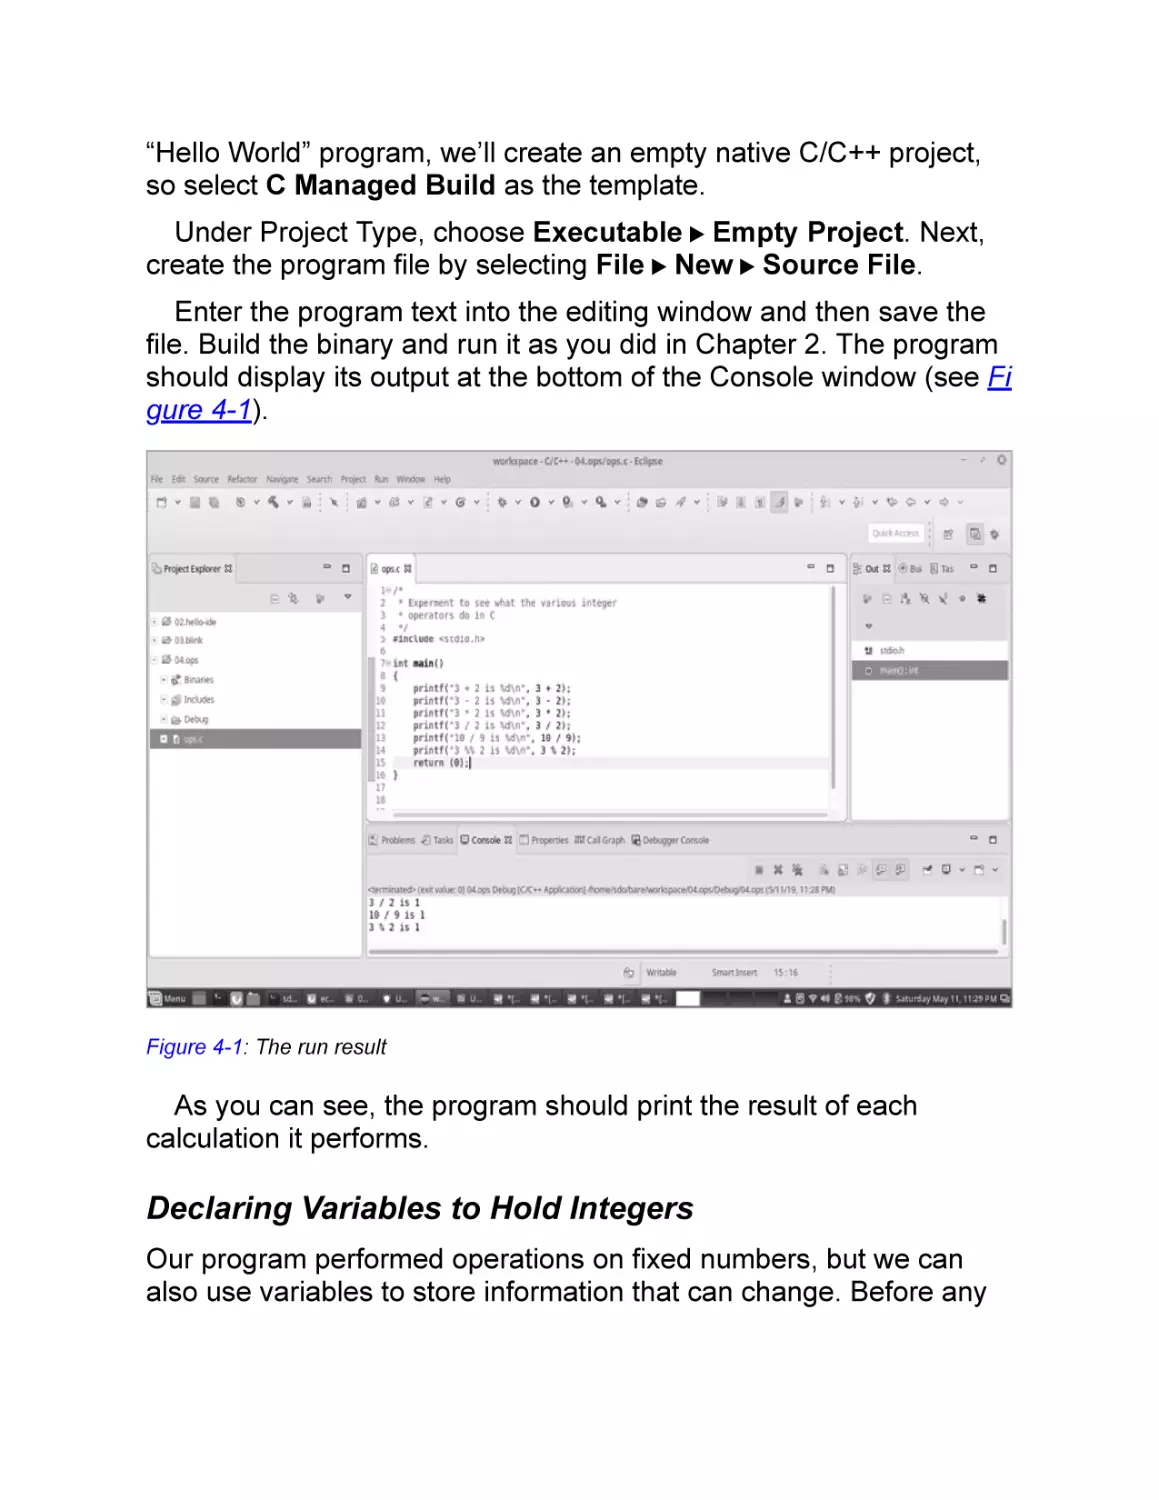
Our First Program
Compiling the Program
Making Mistakes
Understanding the Program
Adding Comments
Improving the Program and Build Process
The make Program
Compiler Flags
How the Compiler Works Behind the Scenes
The Preprocessor
The Compiler
The Assembler
The Linker
Adding to Your Makefile
Summary
Questions
CHAPTER 2: INTRODUCTION TO THE INTEGRATED
DEVELOPMENT ENVIRONMENT
Using System Workbench for STM32
Starting the IDE
Creating Hello World
Debugging the Program
What the IDE Did for Us
Importing the Book’s Programming Examples
Summary
Programming Problems
Questions
CHAPTER 3: PROGRAMMING THE MICROCONTROLLER
The NUCLEO-F030R8 Development Board
Programming and Debugging the Board
Setting Up the Board
Setting Up an Embedded Project
Your First Embedded Program
Initializing the Hardware
Programming a GPIO Pin
Toggling the LED
Building the Completed Program
Exploring the Build Process
Exploring the Project Files
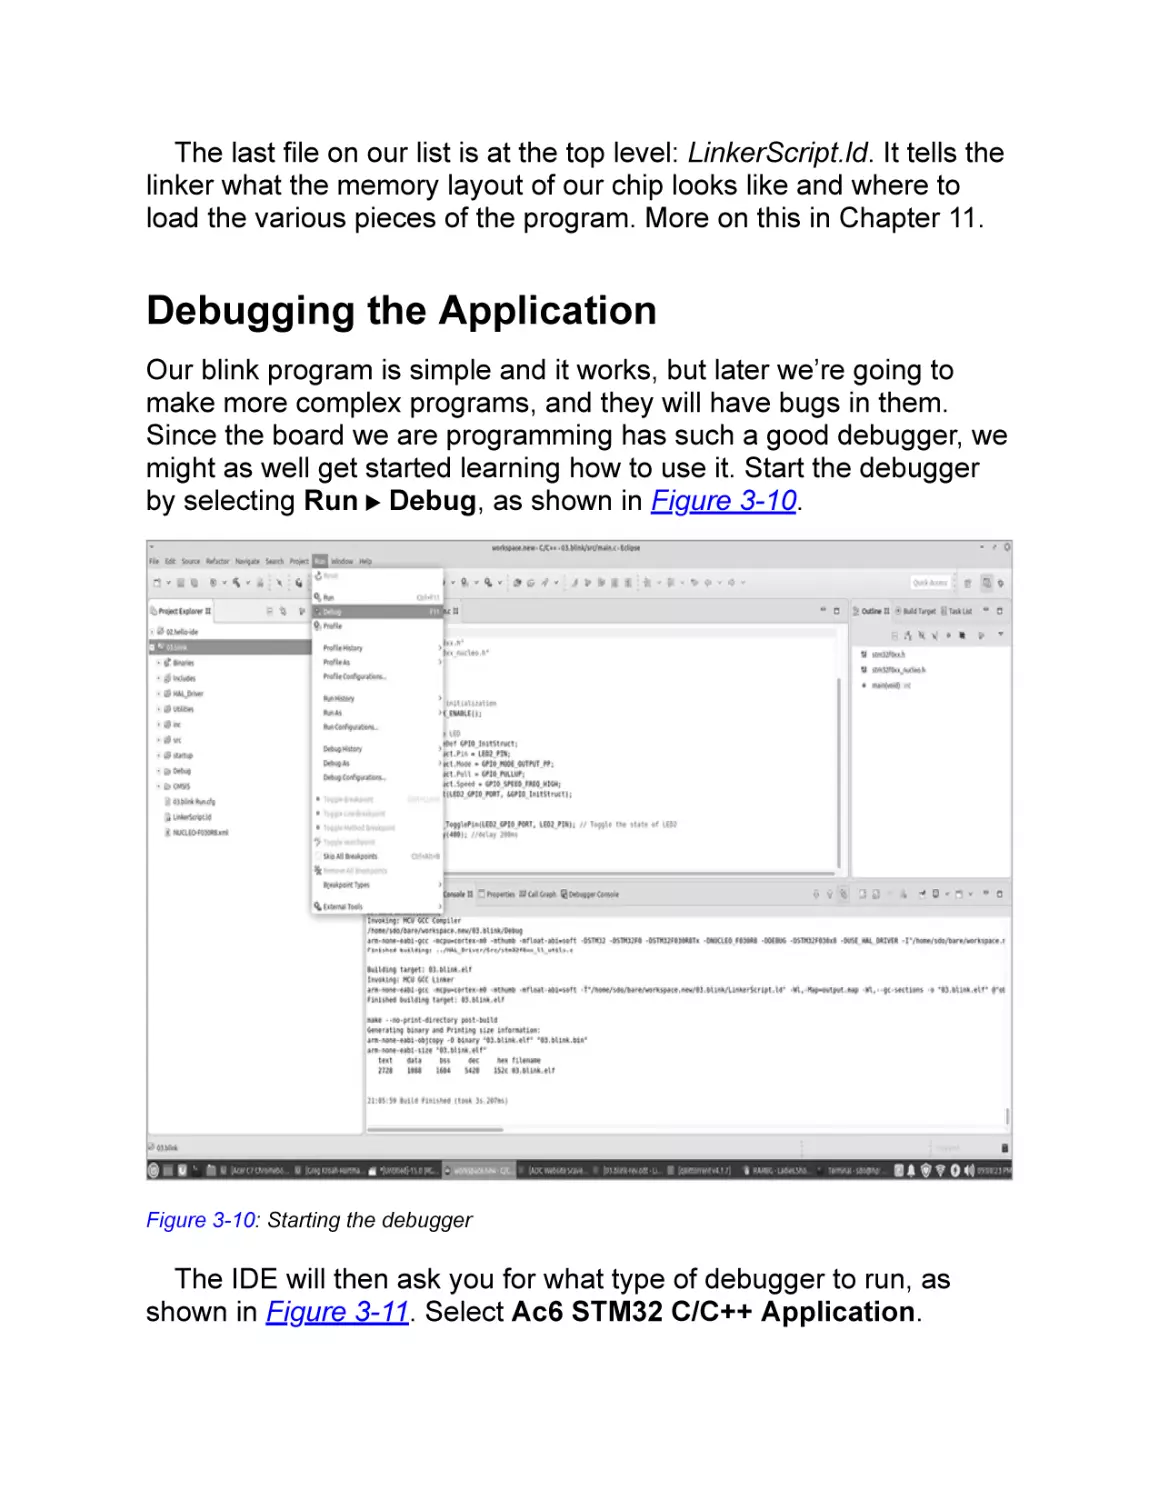
Debugging the Application
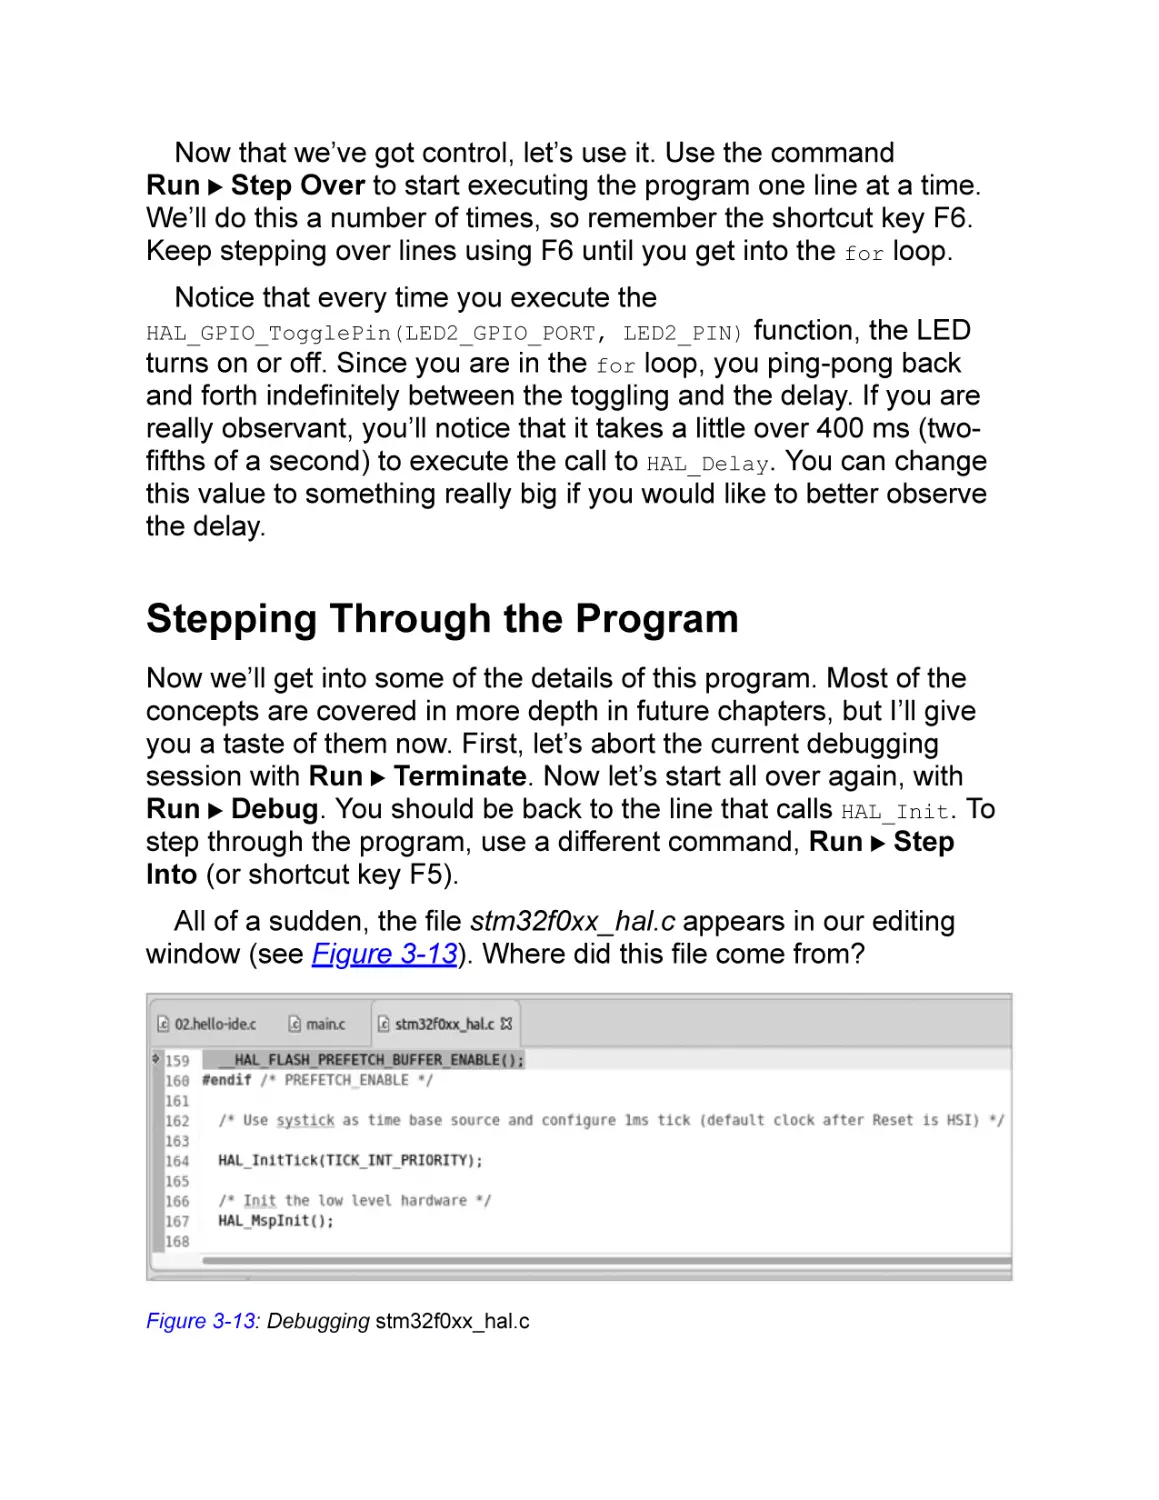
Stepping Through the Program
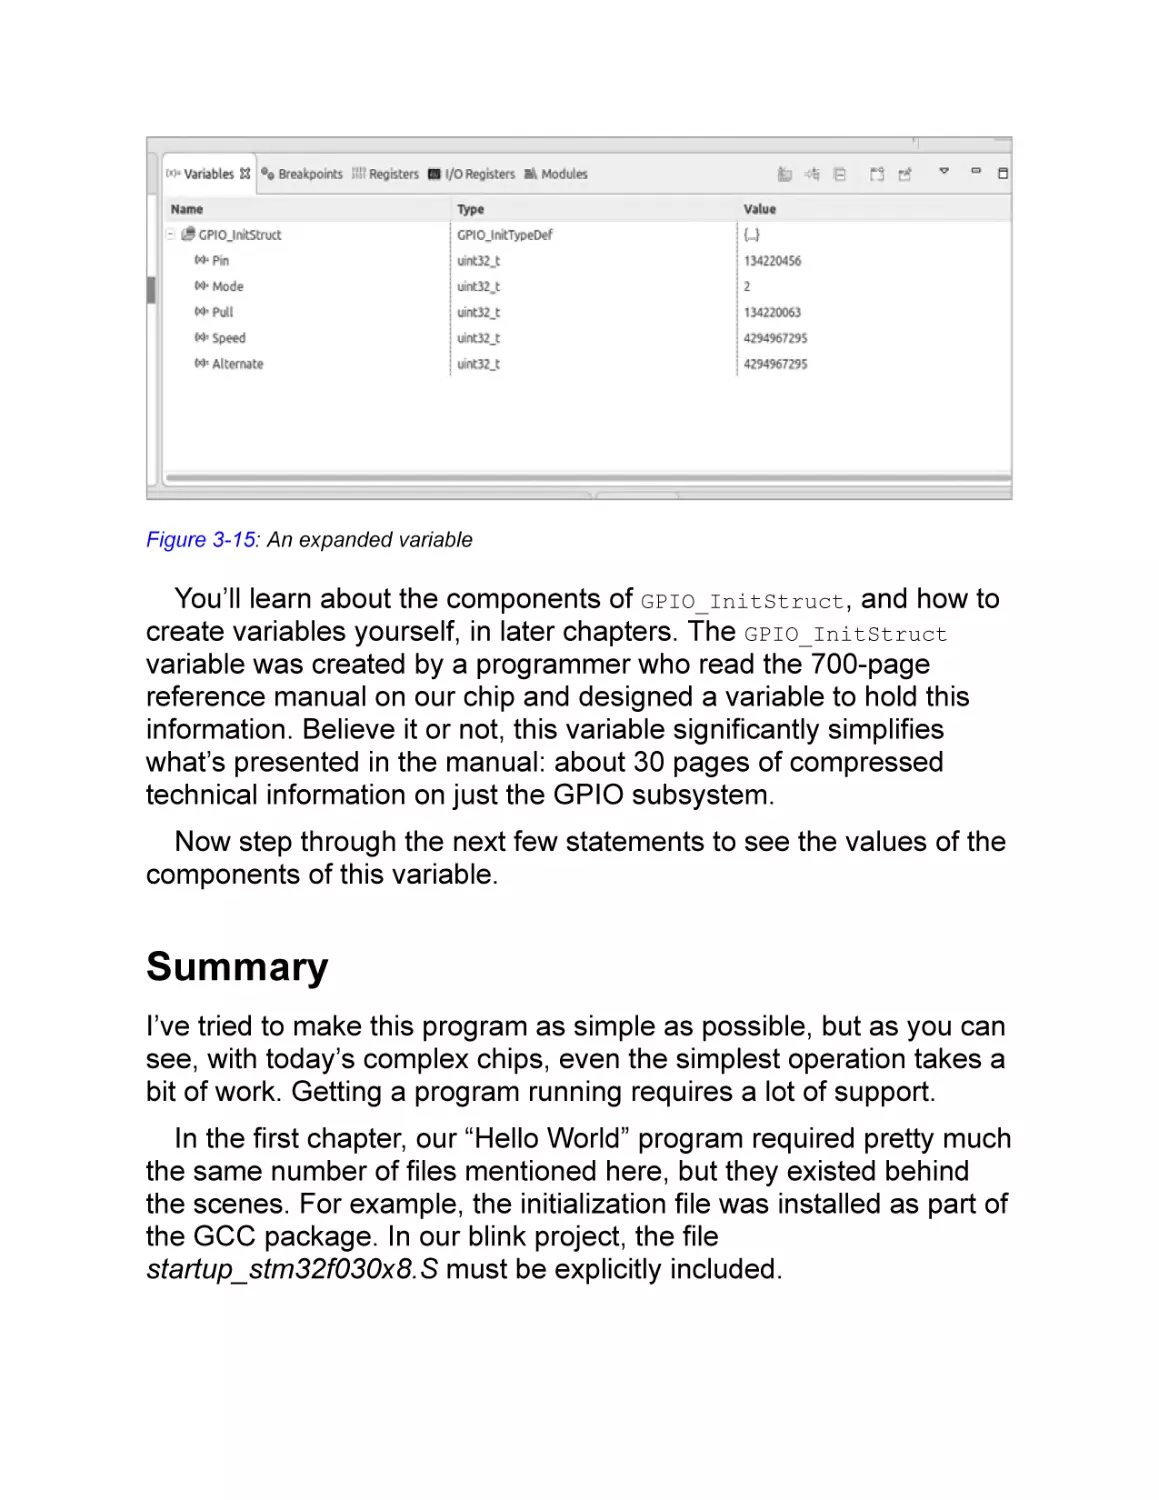
Summary
Programming Problems
Questions
CHAPTER 4: NUMBERS AND VARIABLES
Working with Integers
Declaring Variables to Hold Integers
Assigning Values to Variables
Initializing Variables
Integer Sizes and Representations
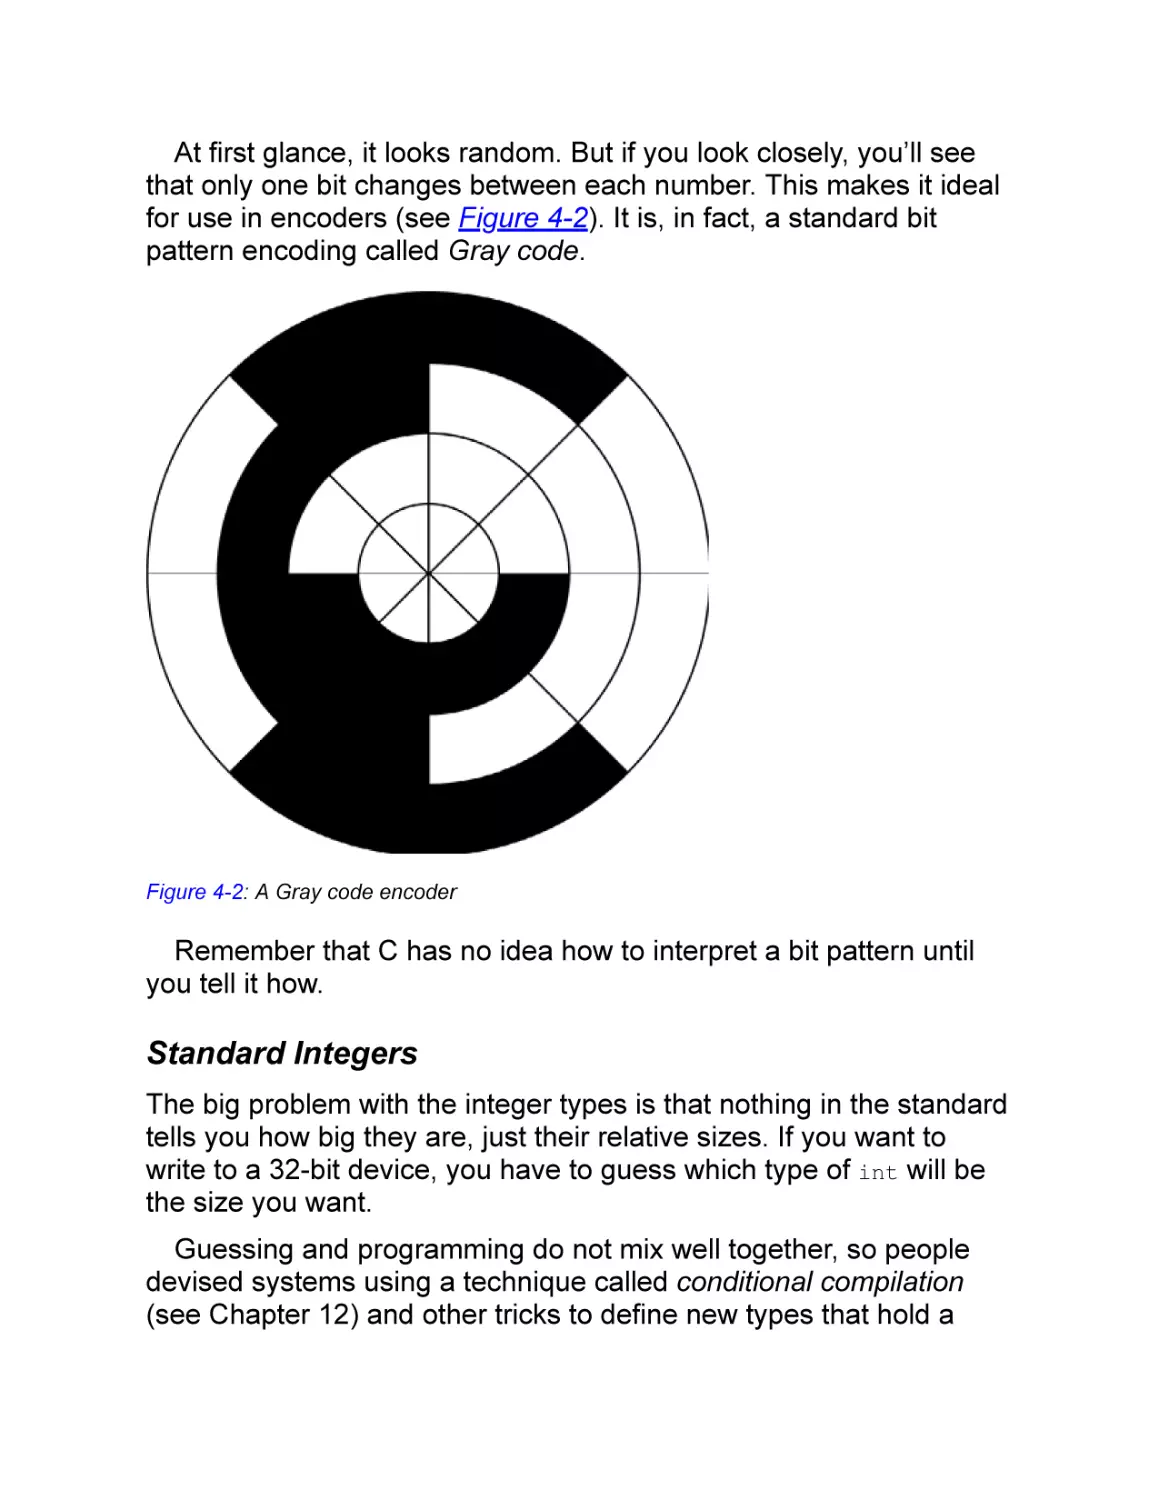
Number Representations
Standard Integers
Unsigned Integer Types
Overflow
Two’s Complement Representation in Signed Integer Types
Shorthand Operators
Controlling Memory-Mapped I/O Registers Using Bit Operations
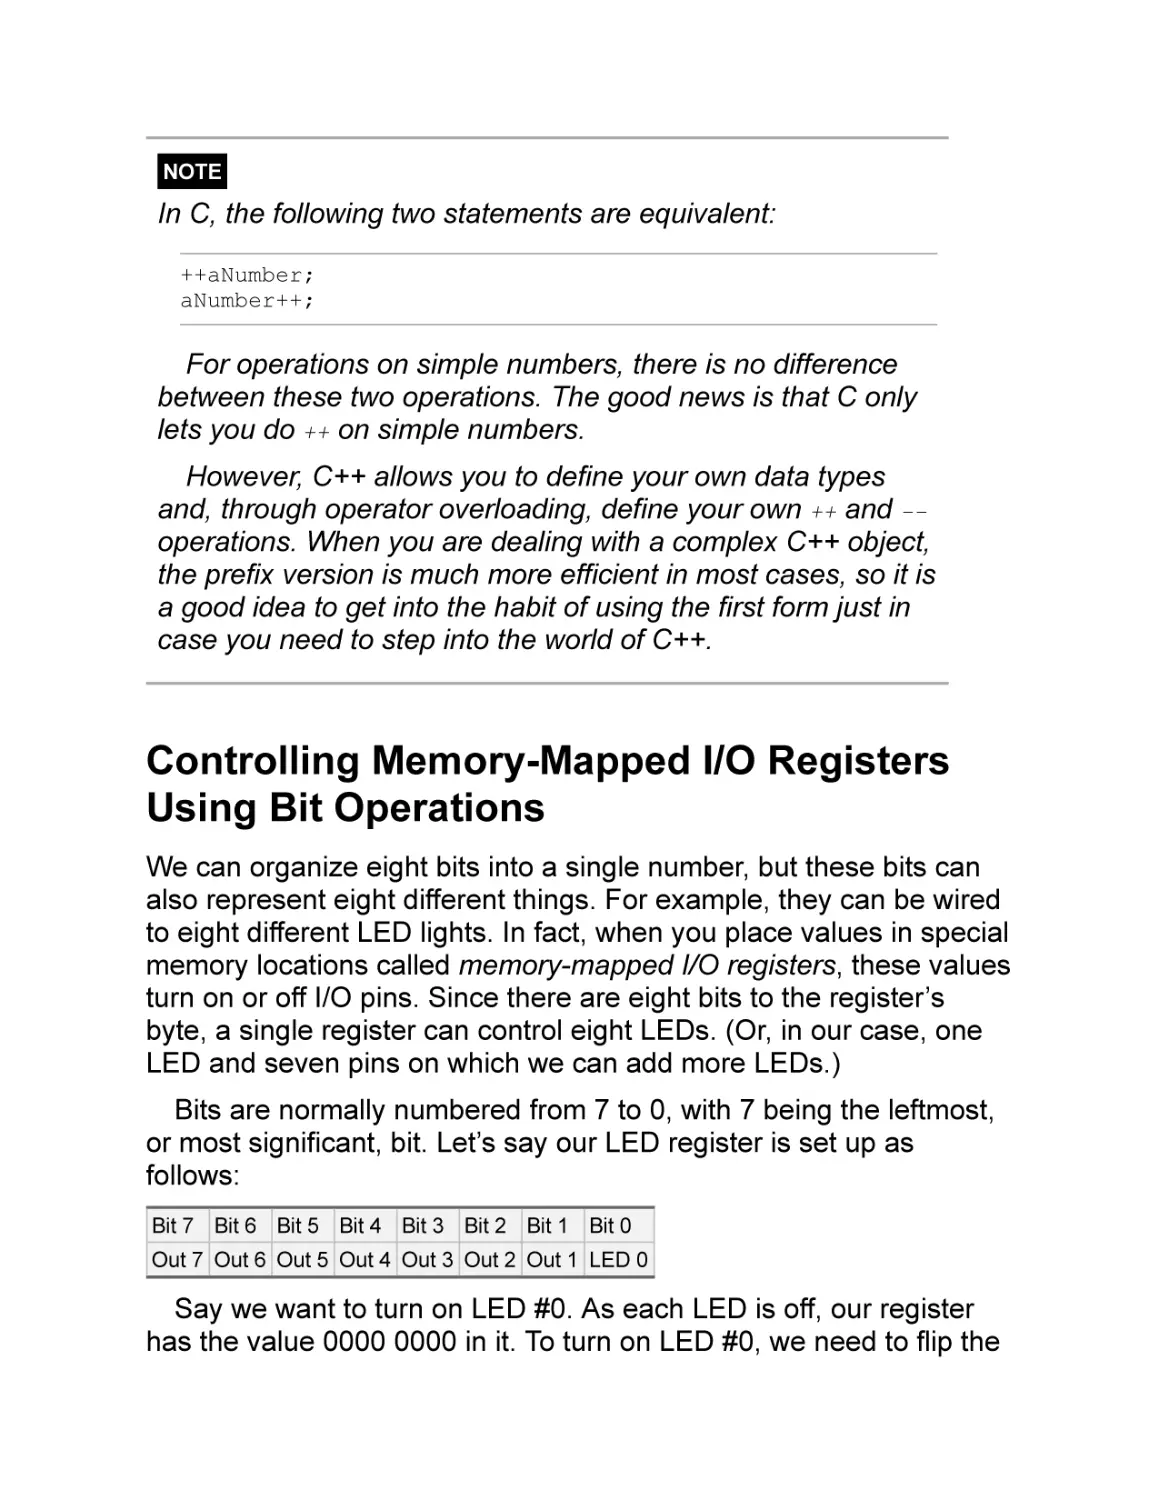
OR
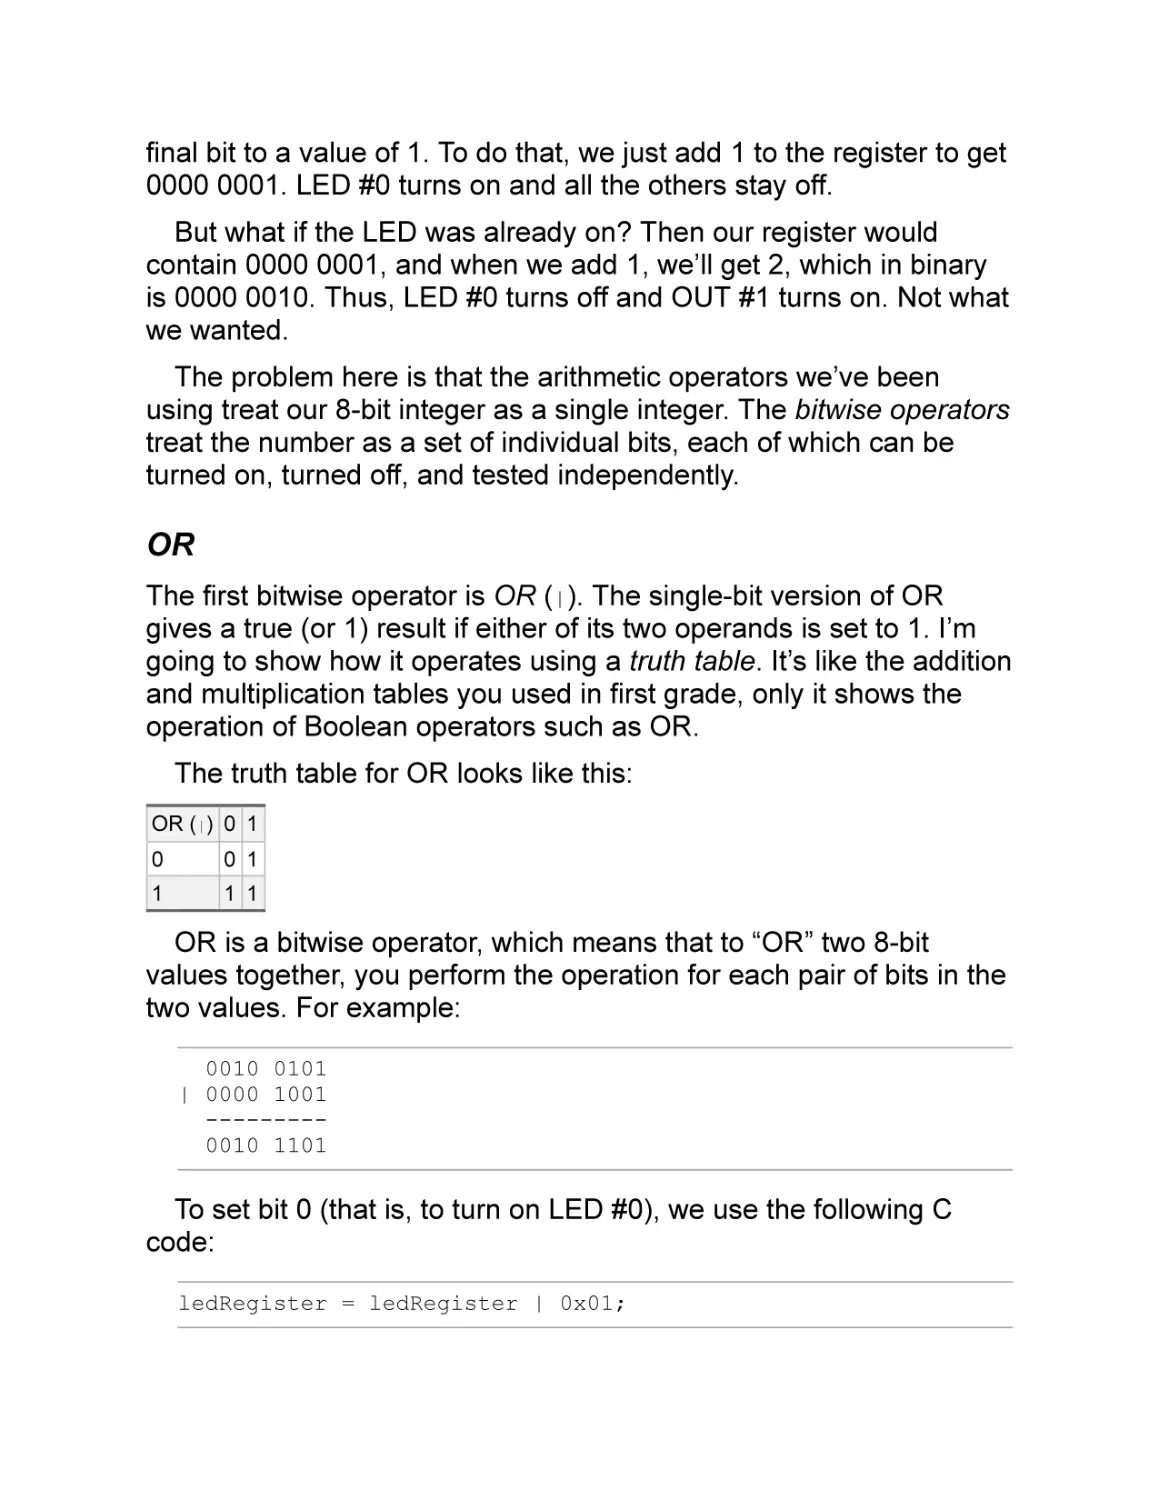
AND
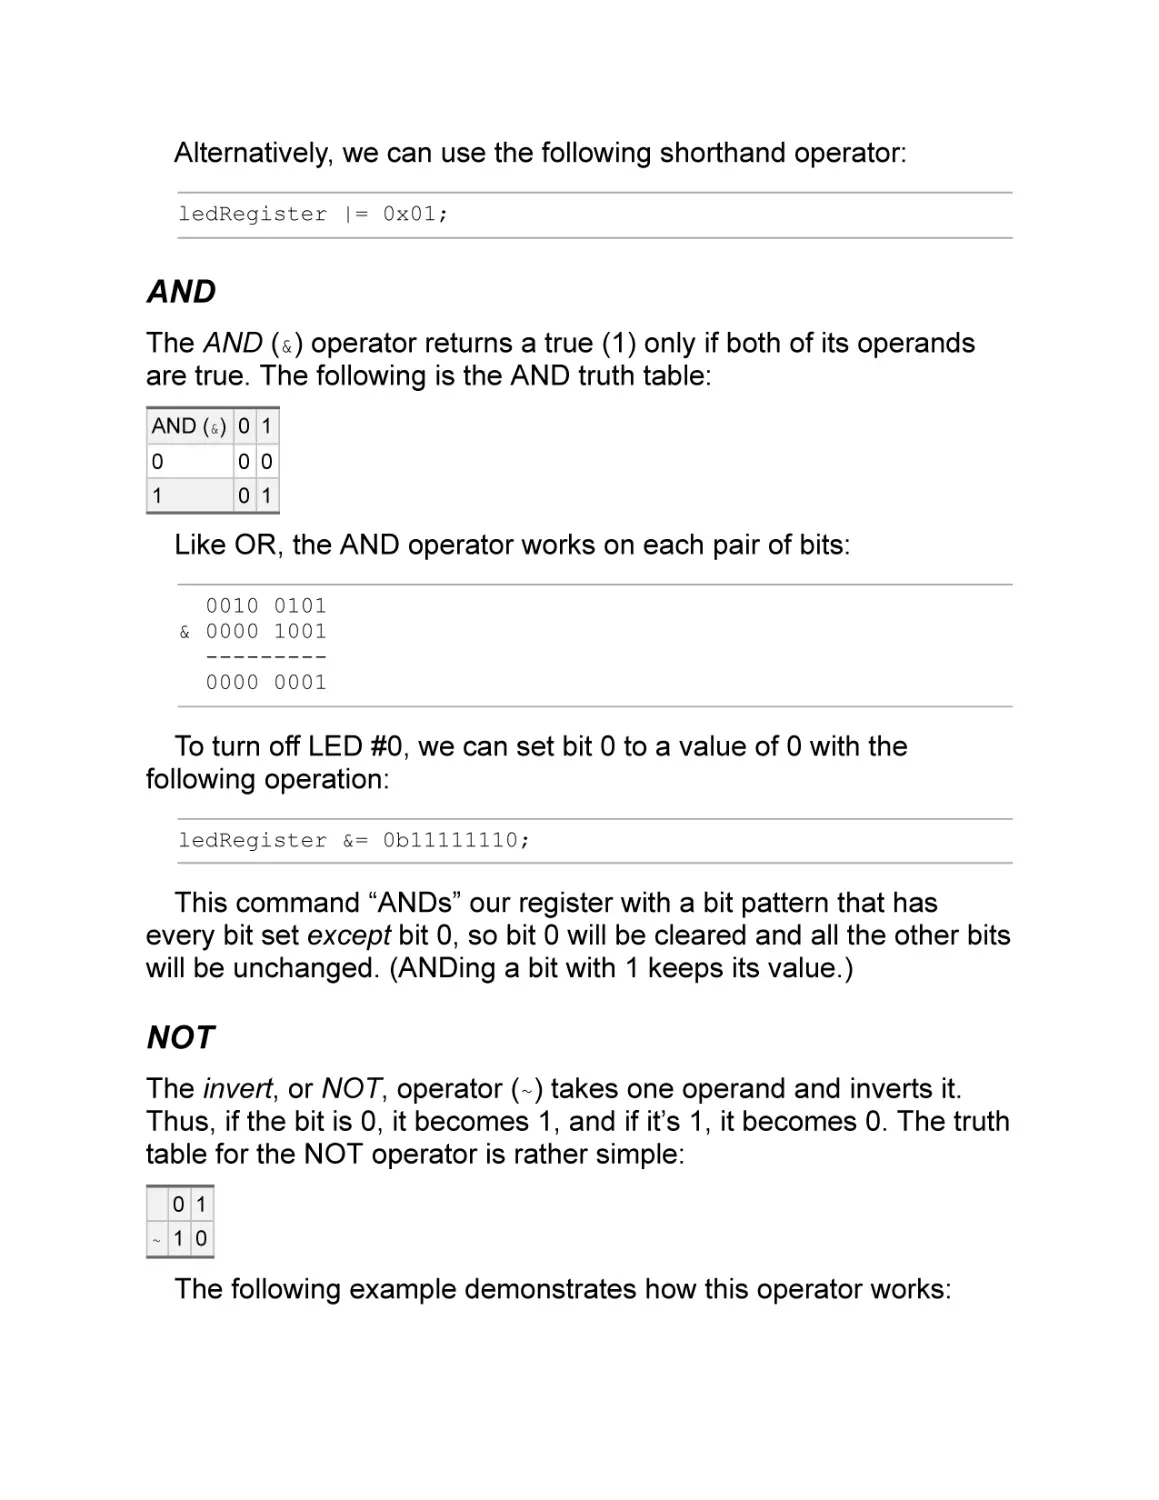
NOT
Exclusive OR
Shifting
Defining the Meaning of Bits
Setting the Values of Two Bits at Once
Turning Off a Bit
Checking the Values of Bits
Summary
Programming Problems
CHAPTER 5: DECISION AND CONTROL STATEMENTS
The if Statement
The if/else Statement
Looping Statements
The while Loop
The for Loop
Using the Button
Initialization
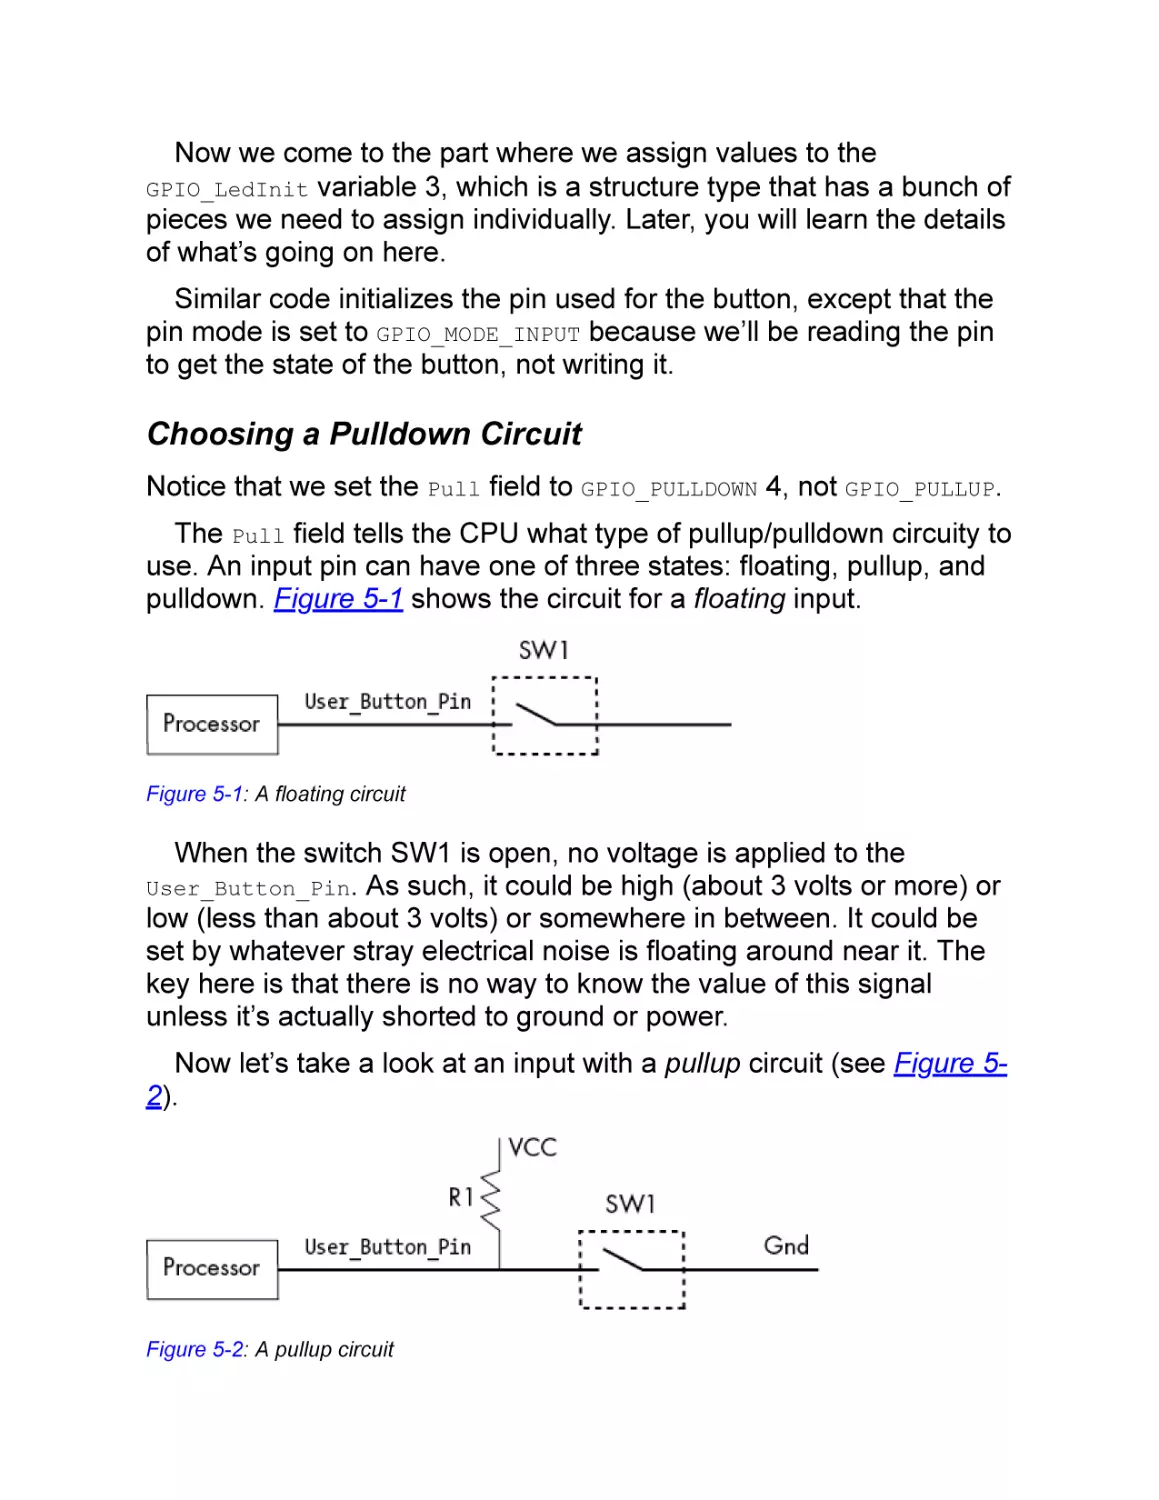
Choosing a Pulldown Circuit
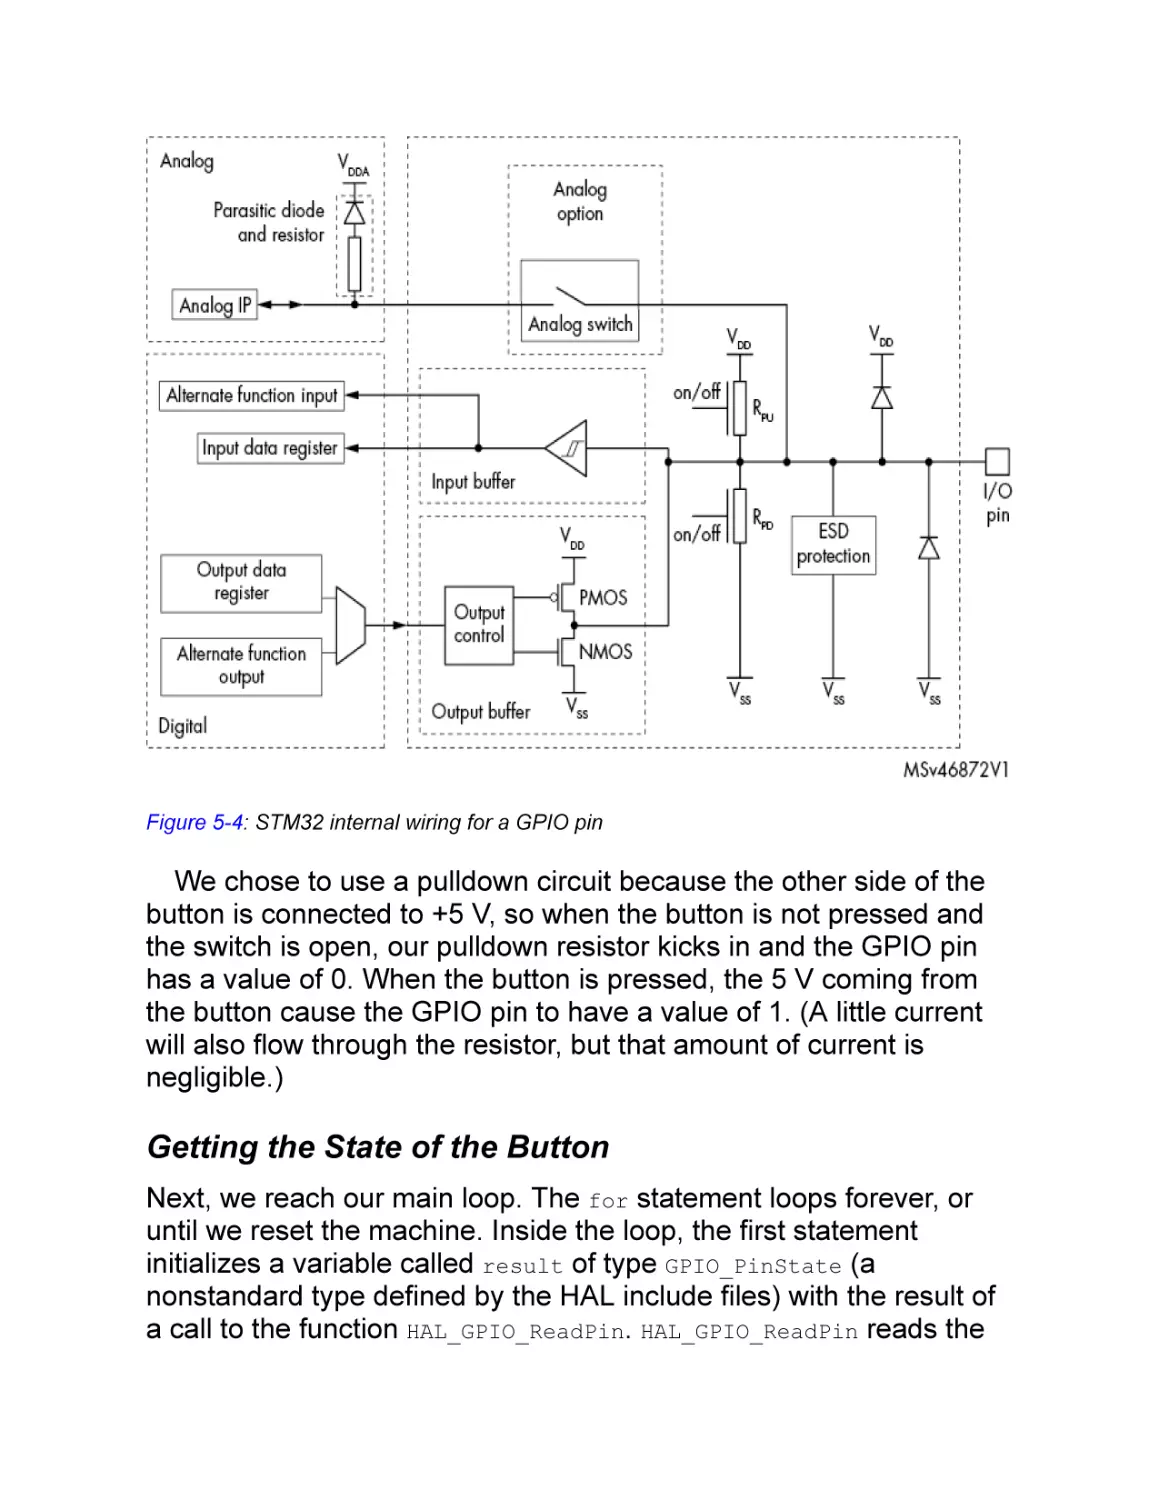
Getting the State of the Button
Running the Program
Loop Control
The break Statement
The continue Statement
Anti-patterns
The Empty while Loop
Assignment in while
Summary
Programming Problems
CHAPTER 6: ARRAYS, POINTERS, AND STRINGS
Arrays
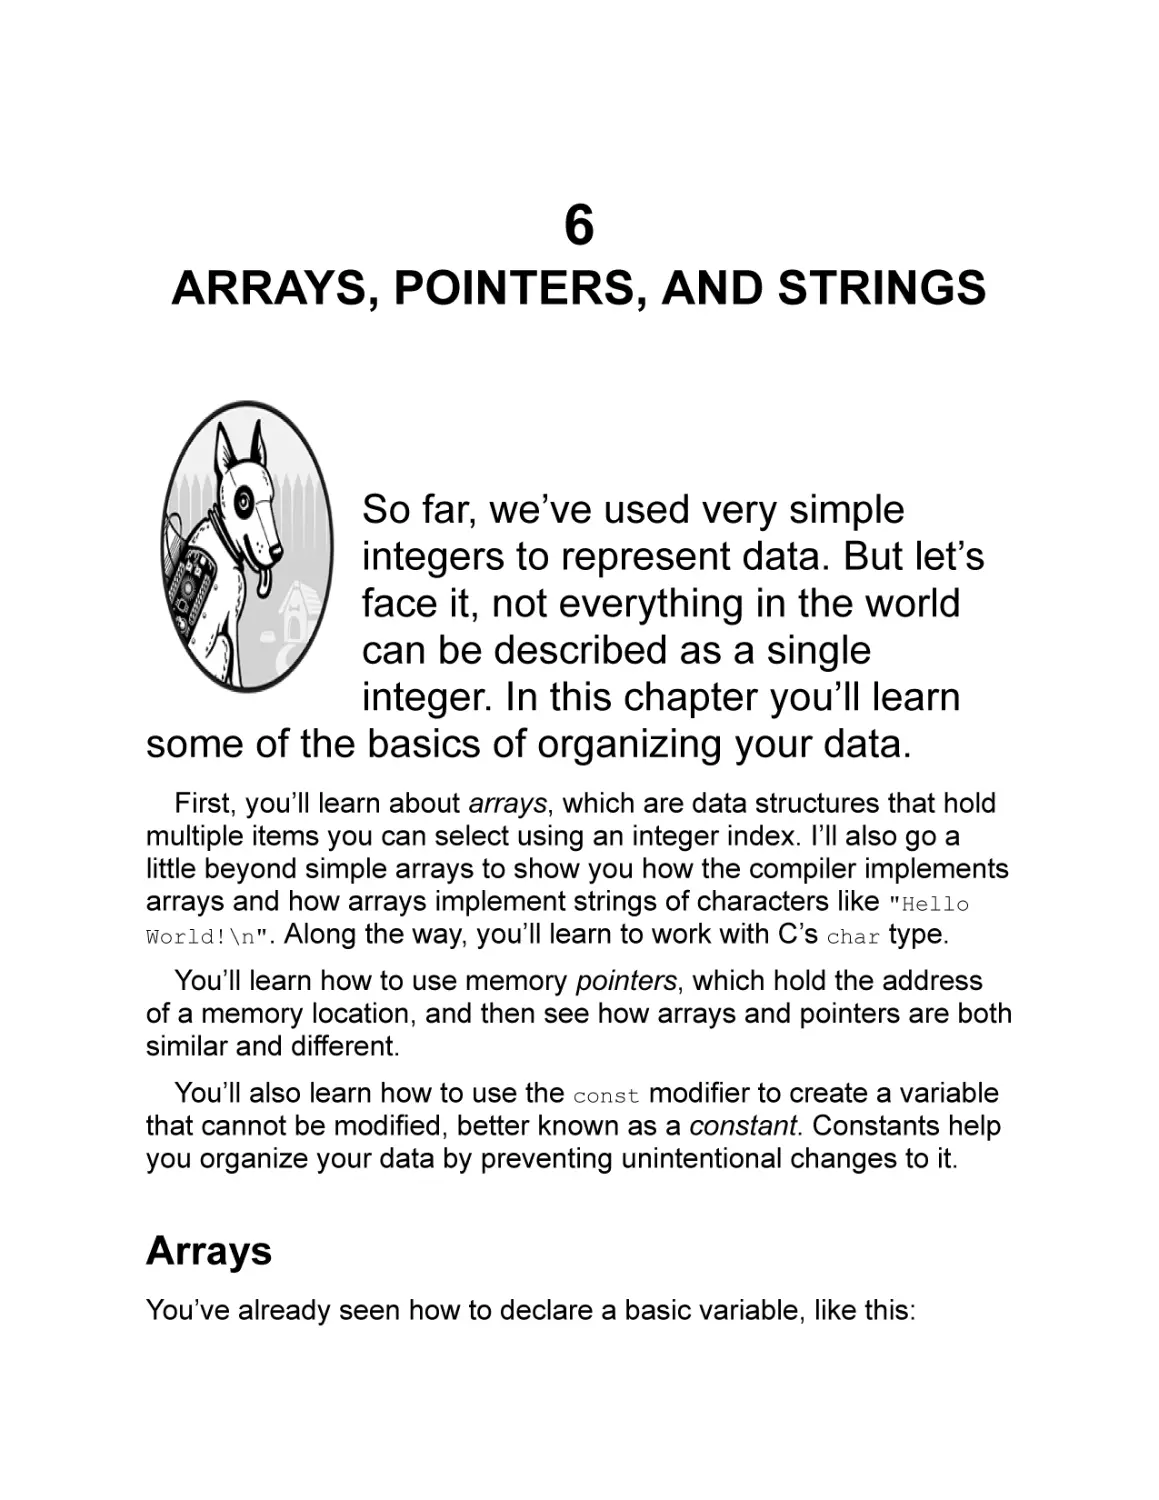
Under the Hood: Pointers
Array and Pointer Arithmetic
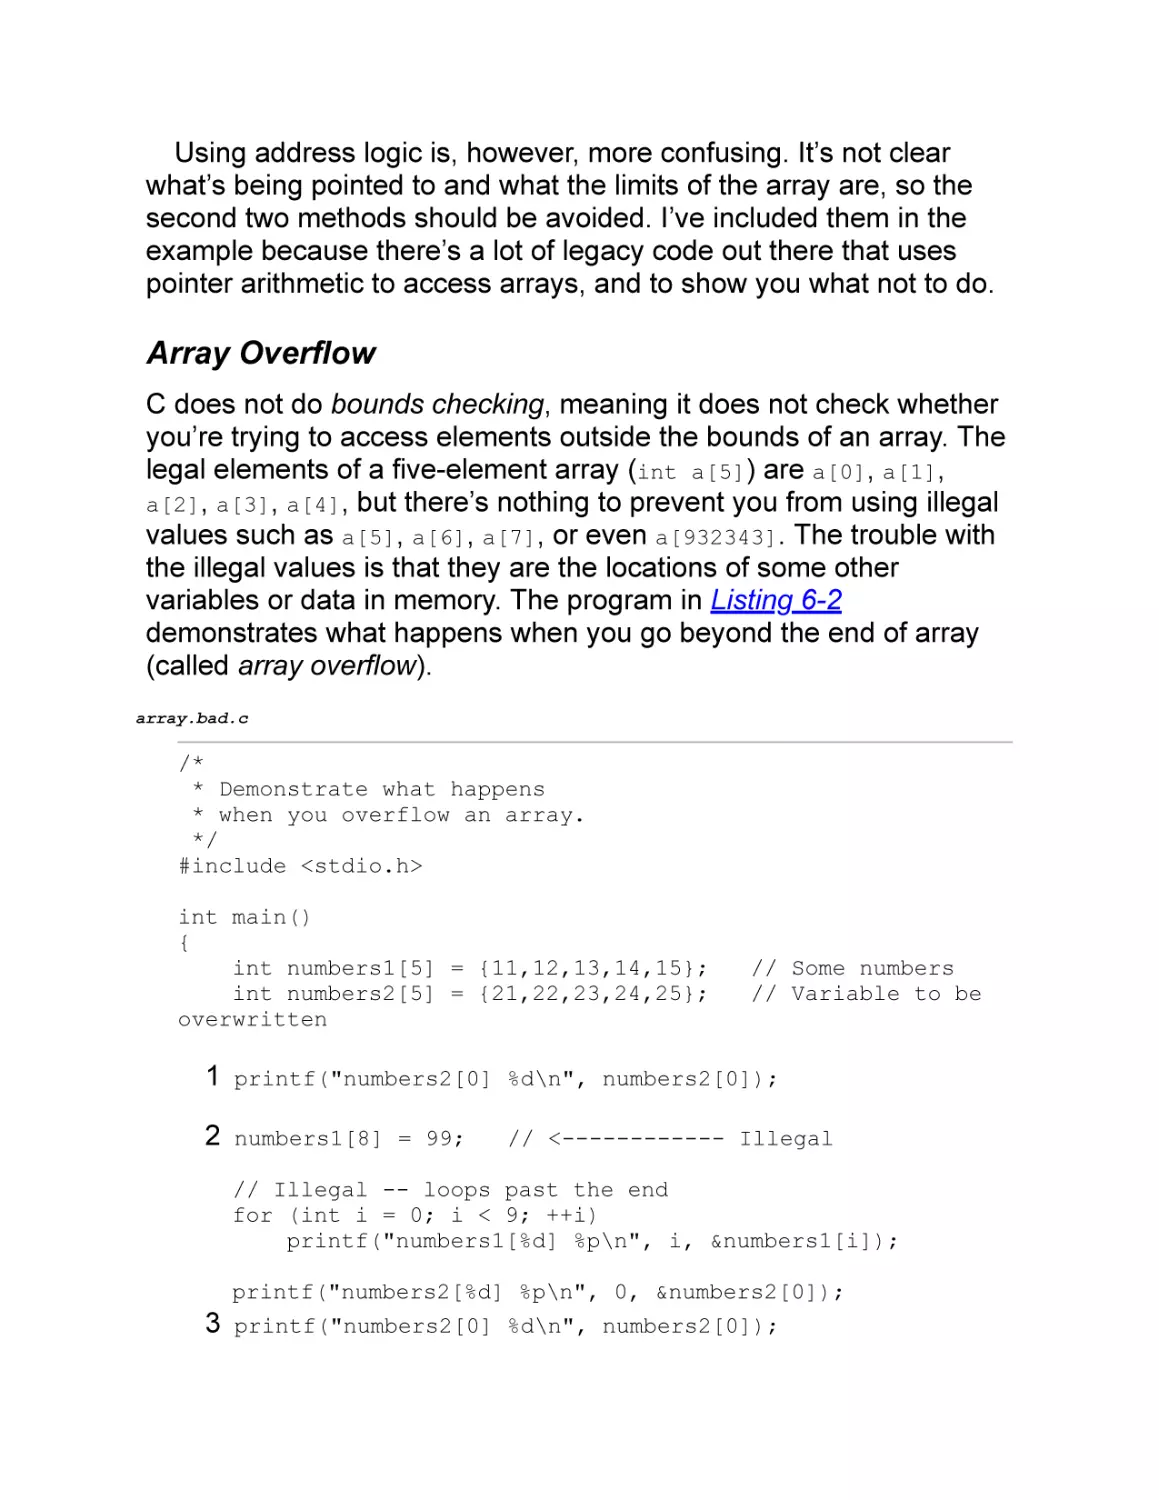
Array Overflow
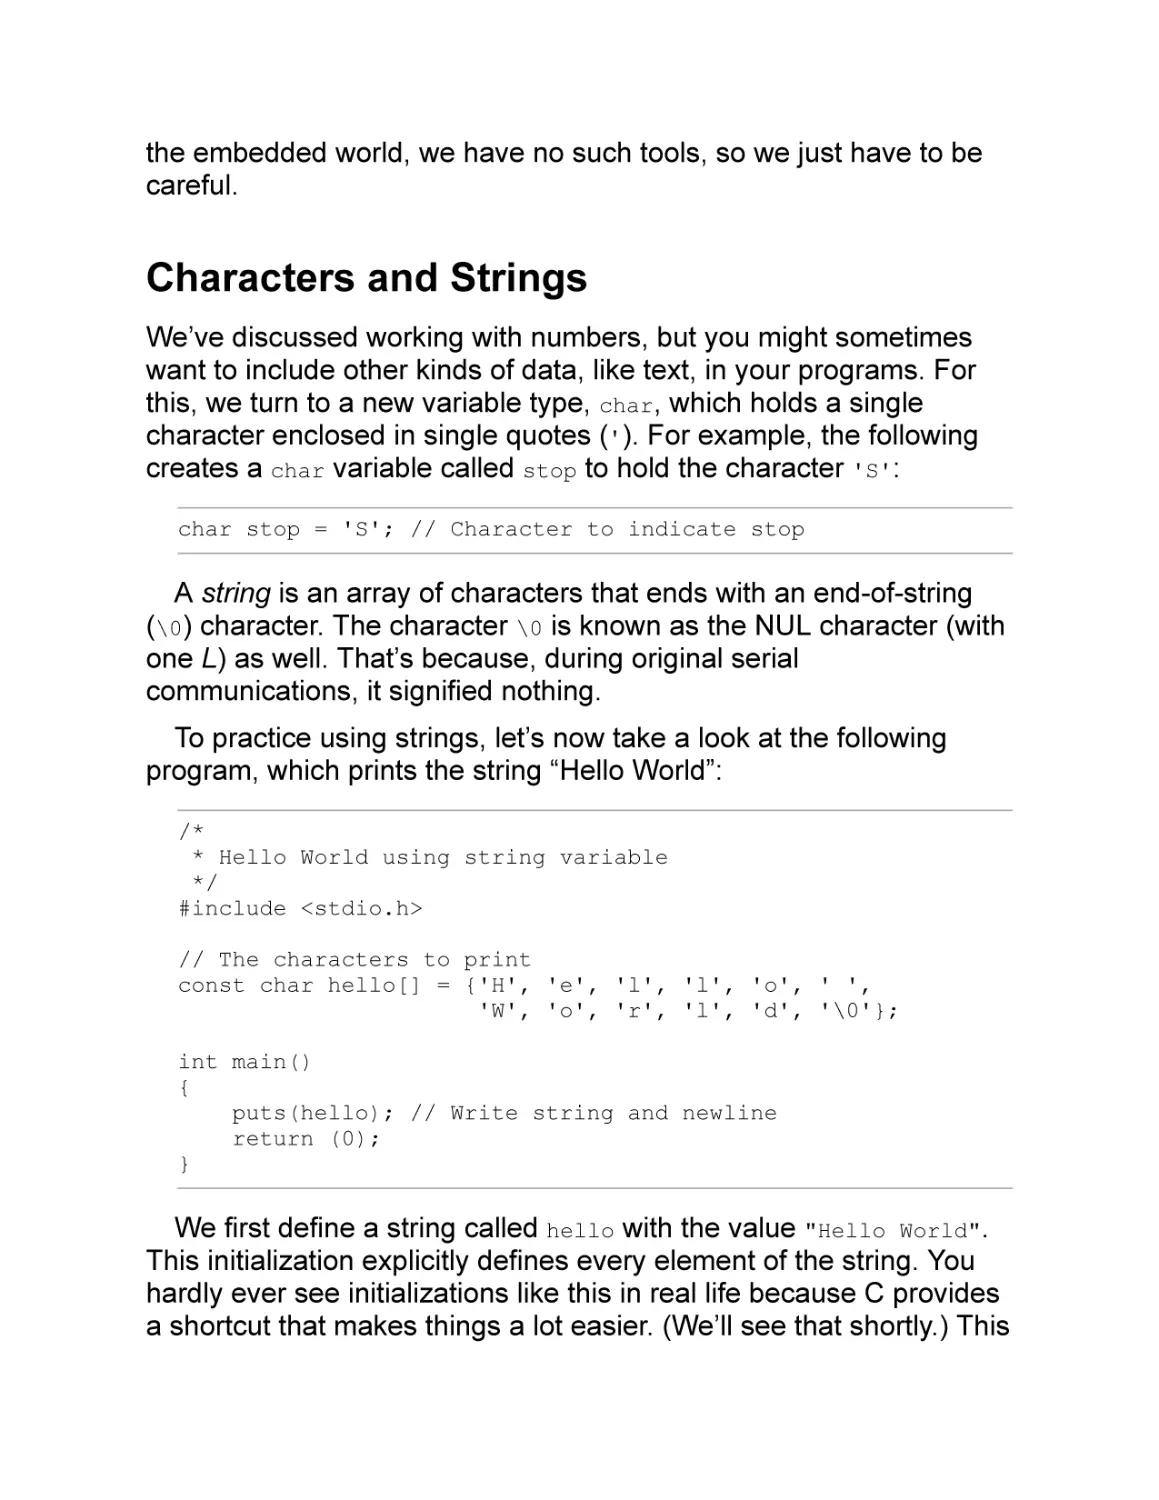
Characters and Strings
Summary
Programming Problems
CHAPTER 7: LOCAL VARIABLES AND PROCEDURES
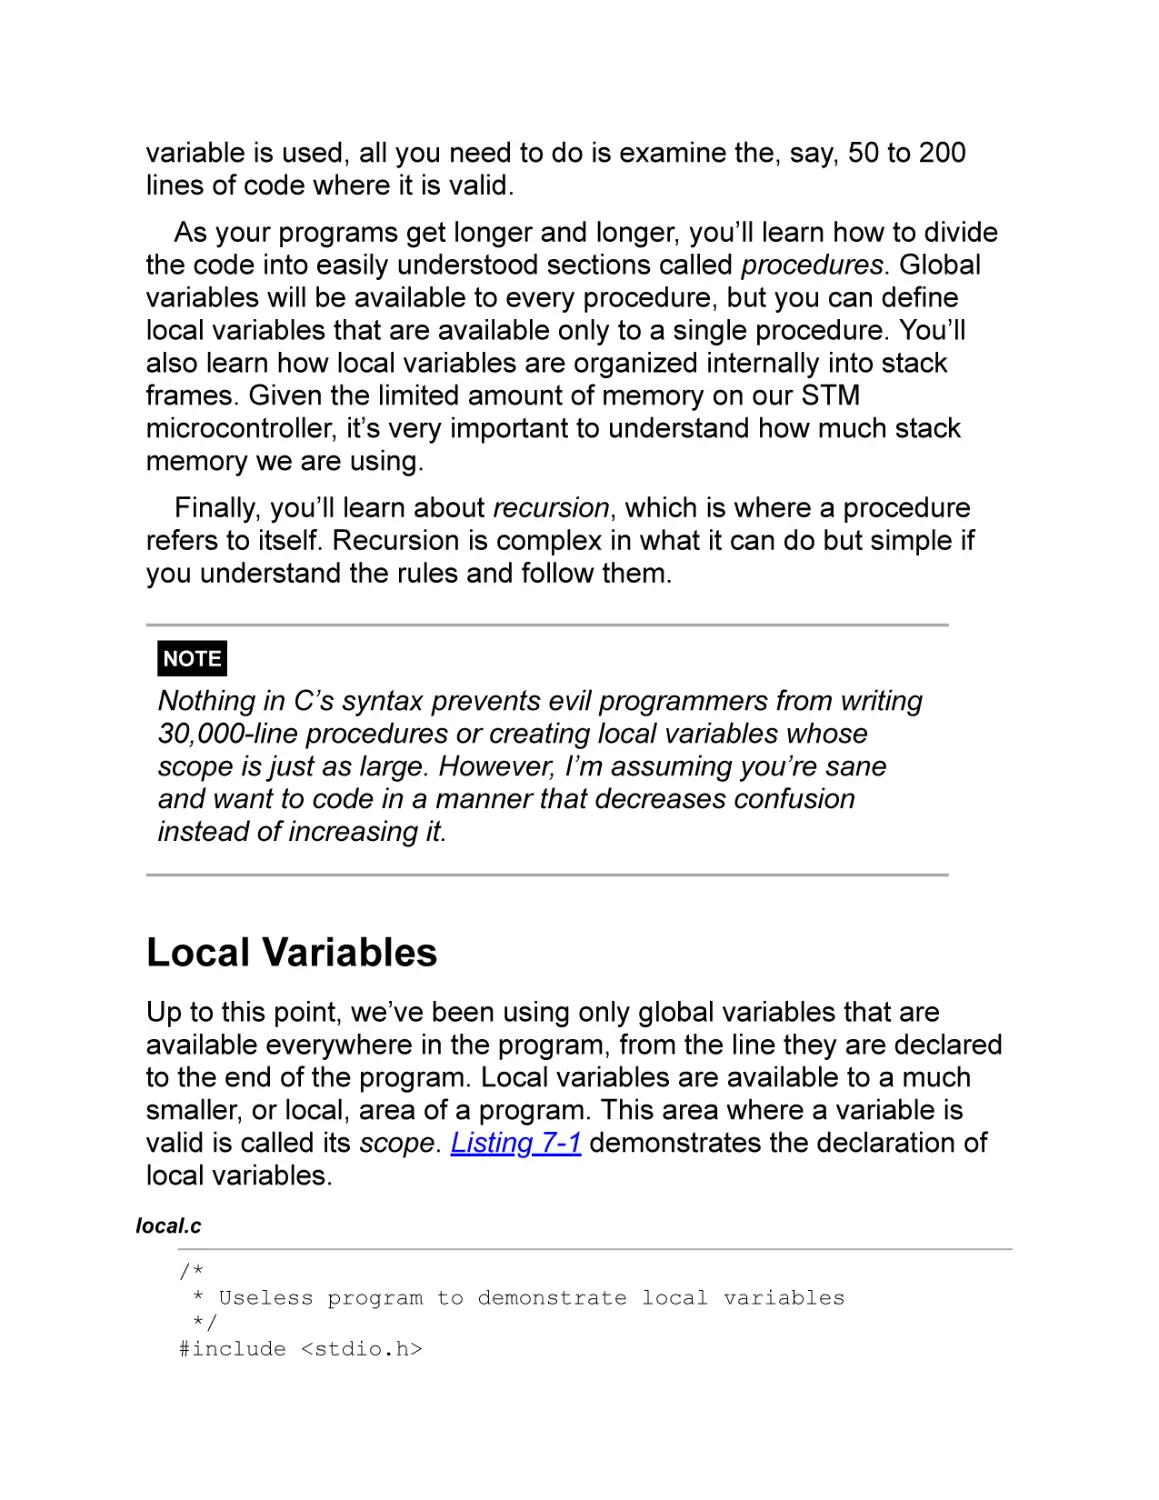
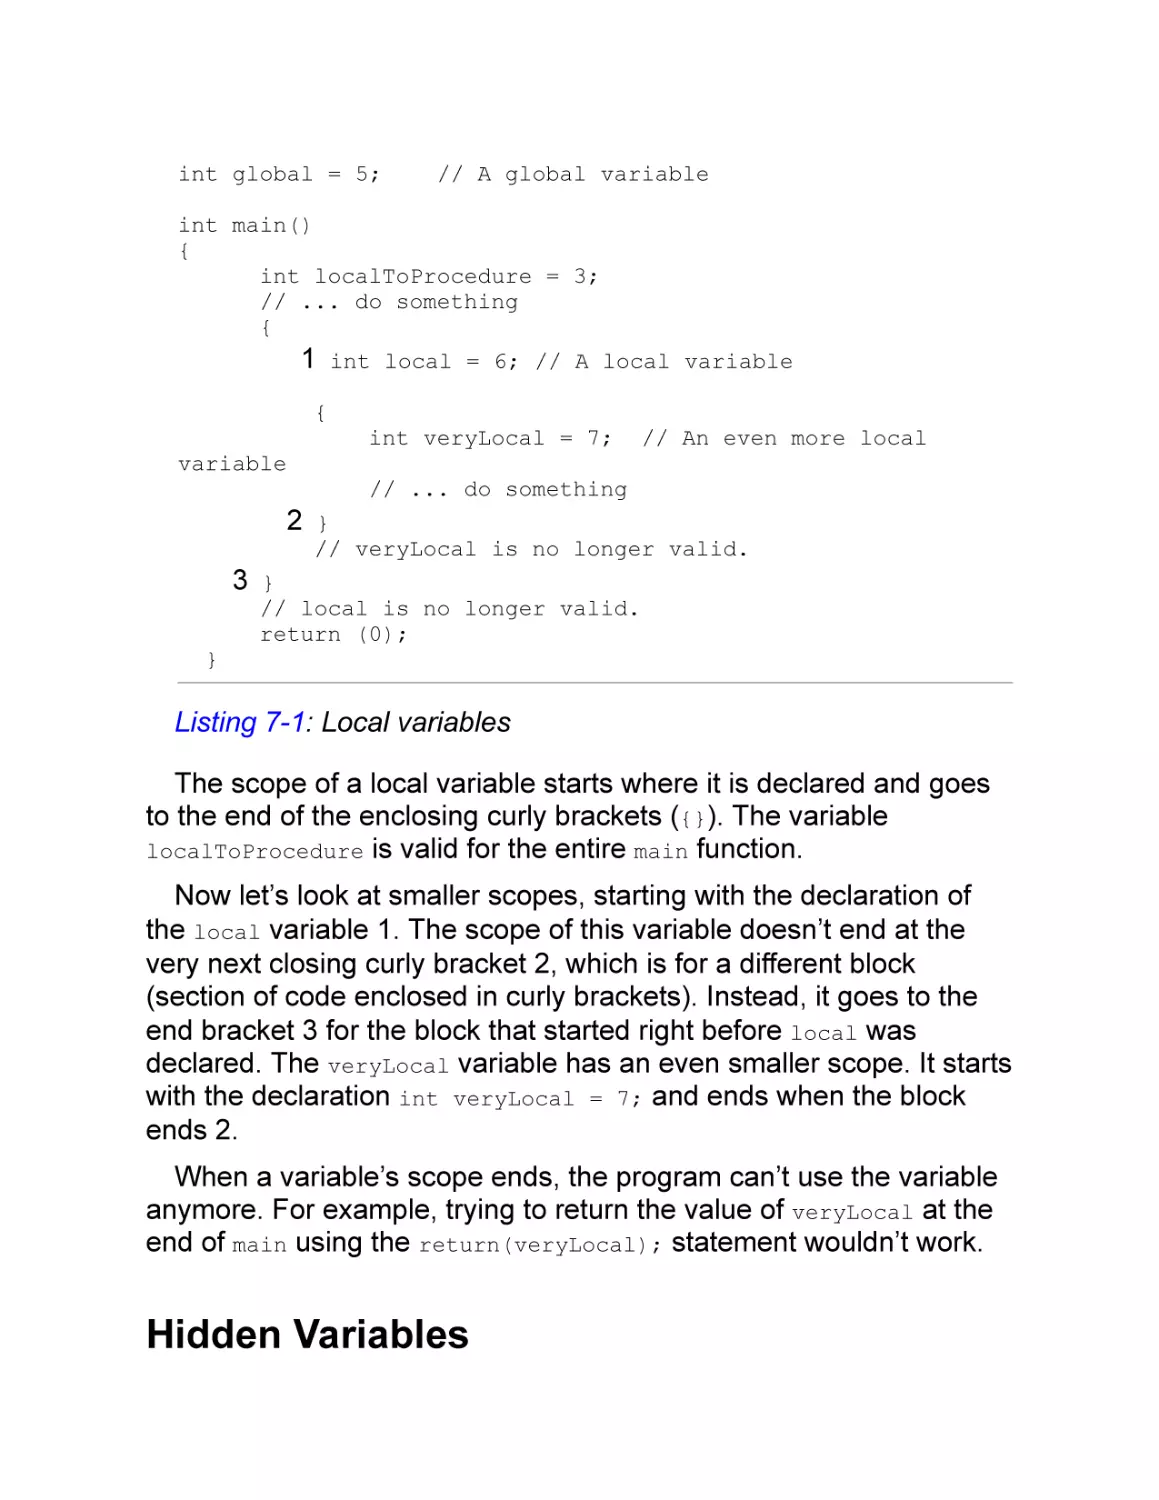
Local Variables
Hidden Variables
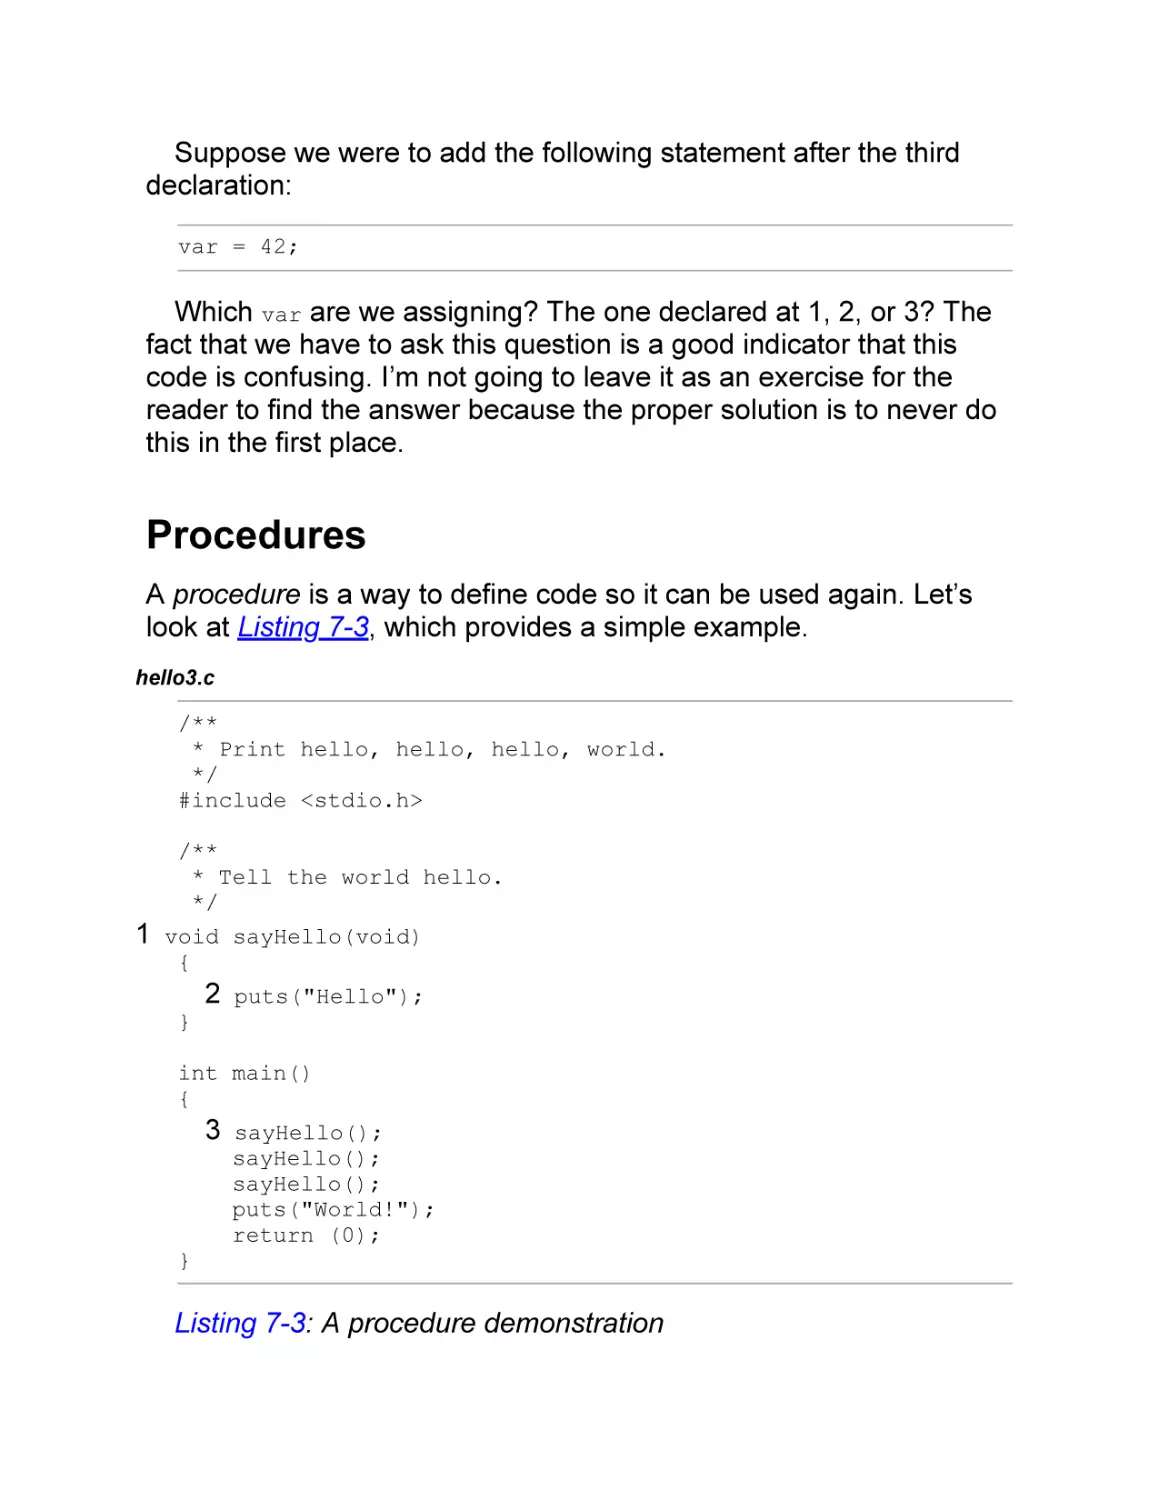
Procedures
Stack Frames
Recursion
Programming Style
Summary
Programming Problems
CHAPTER 8: COMPLEX DATA TYPES
Enums
Preprocessor Tricks and Enums
Structures
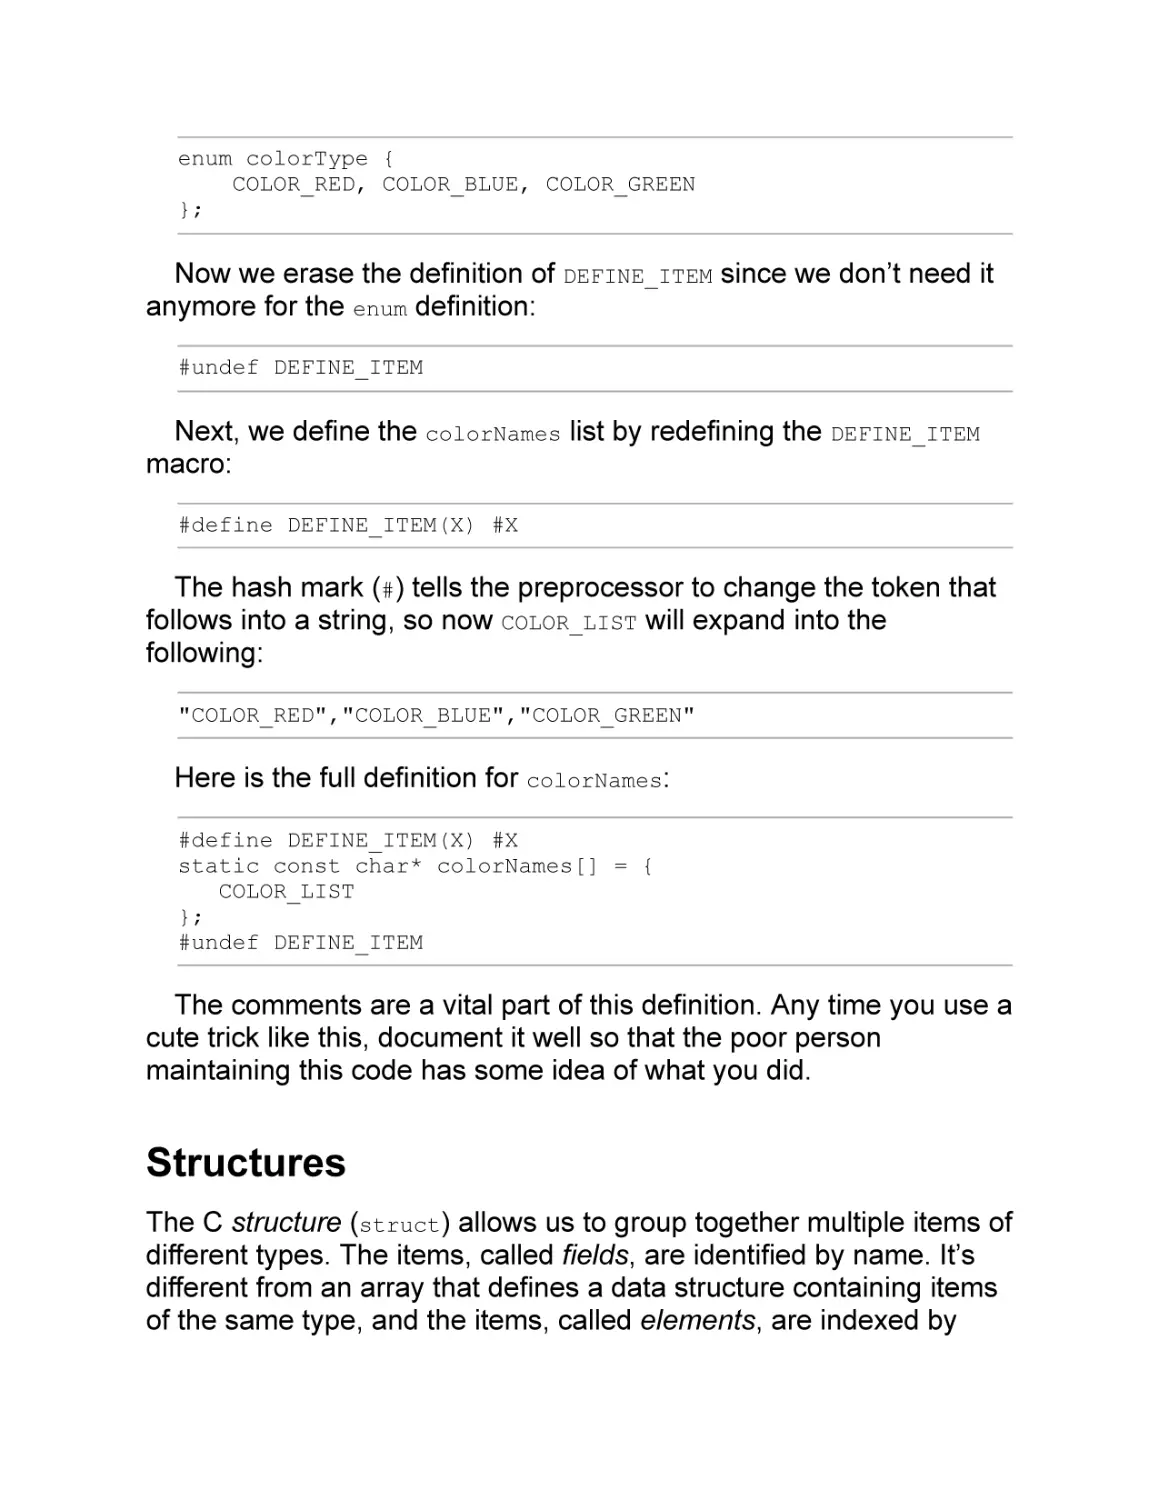
Structures in Memory
Accessing Unaligned Data
Structure Initialization
Structure Assignment
Structure Pointers
Structure Naming
Unions
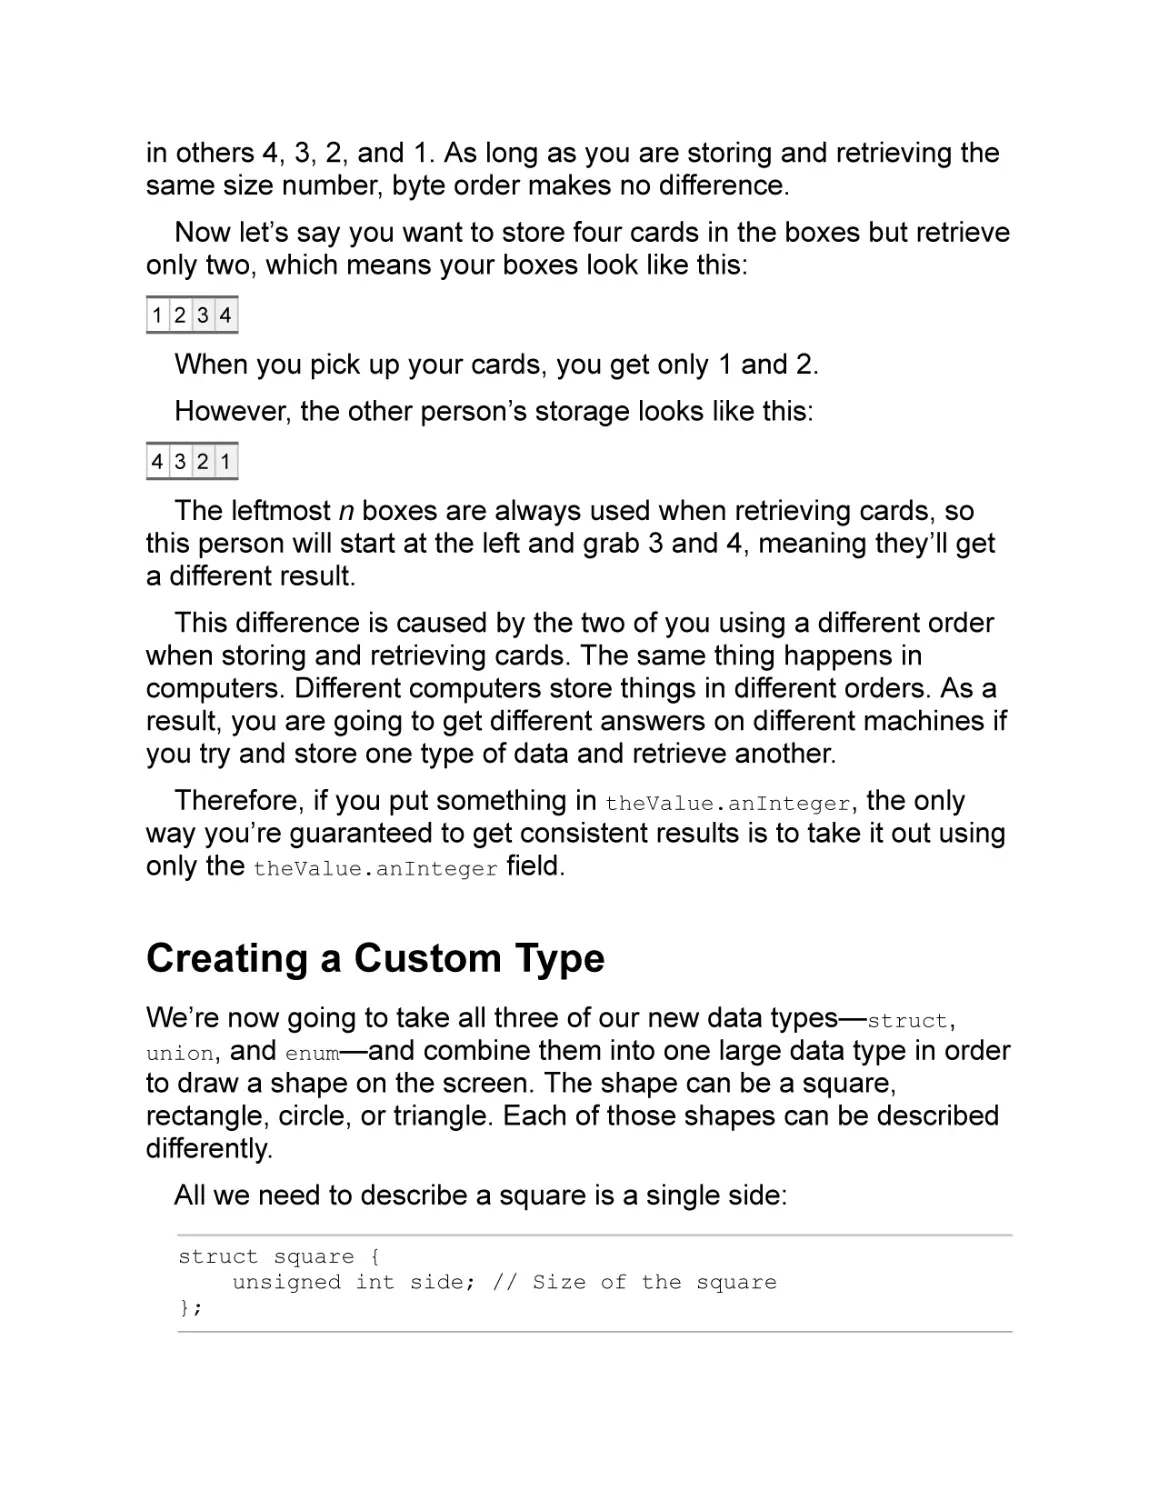
Creating a Custom Type
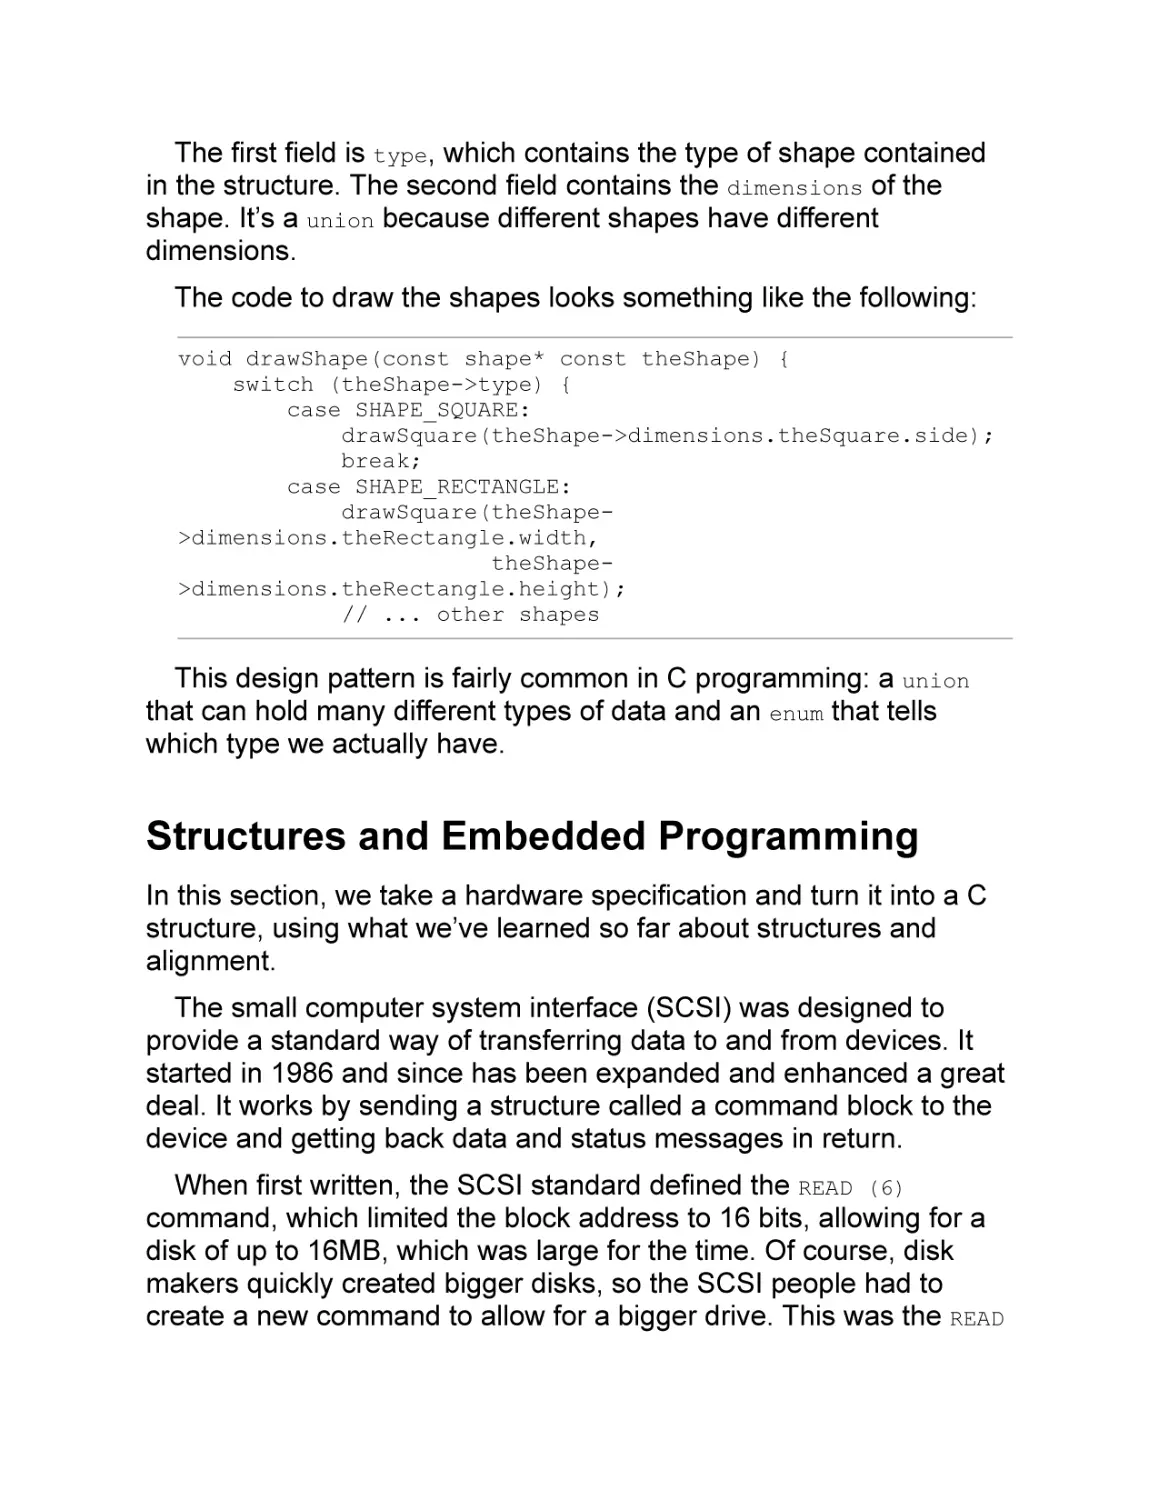
Structures and Embedded Programming
typedef
Function Pointers and typedef
typedef and struct
Summary
Programming Problems
CHAPTER 9: SERIAL OUTPUT ON THE STM
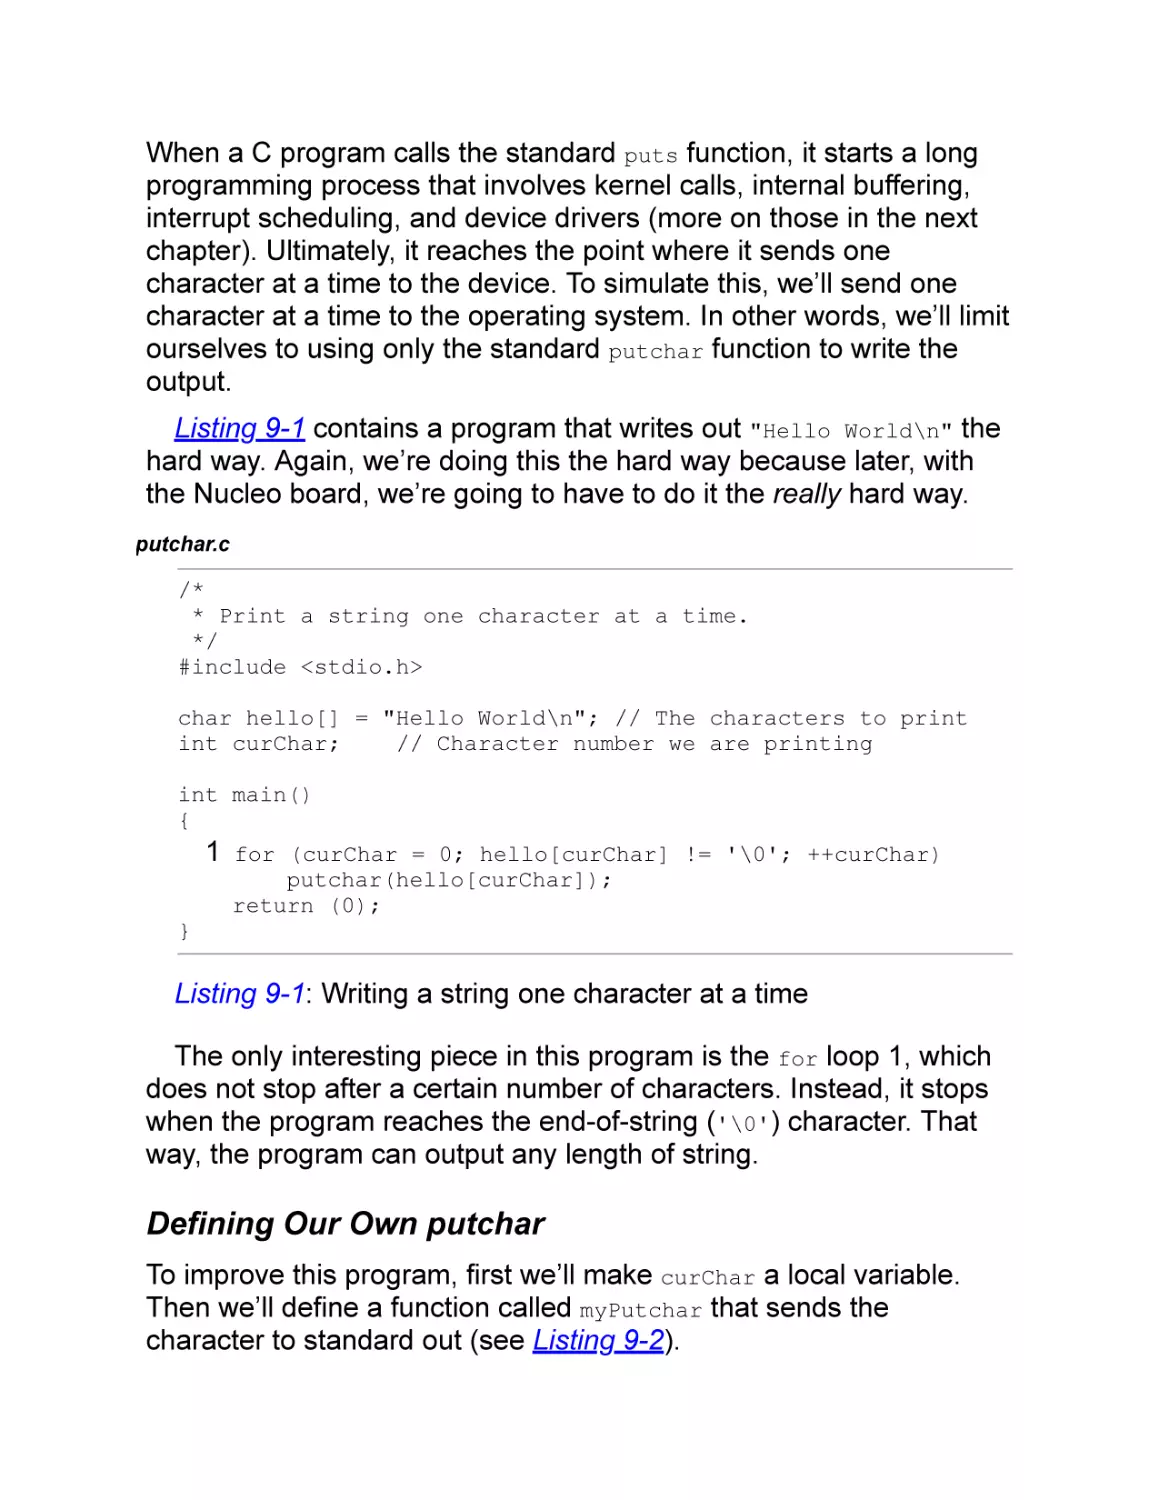
Writing a String One Character at a Time
Defining Our Own putchar
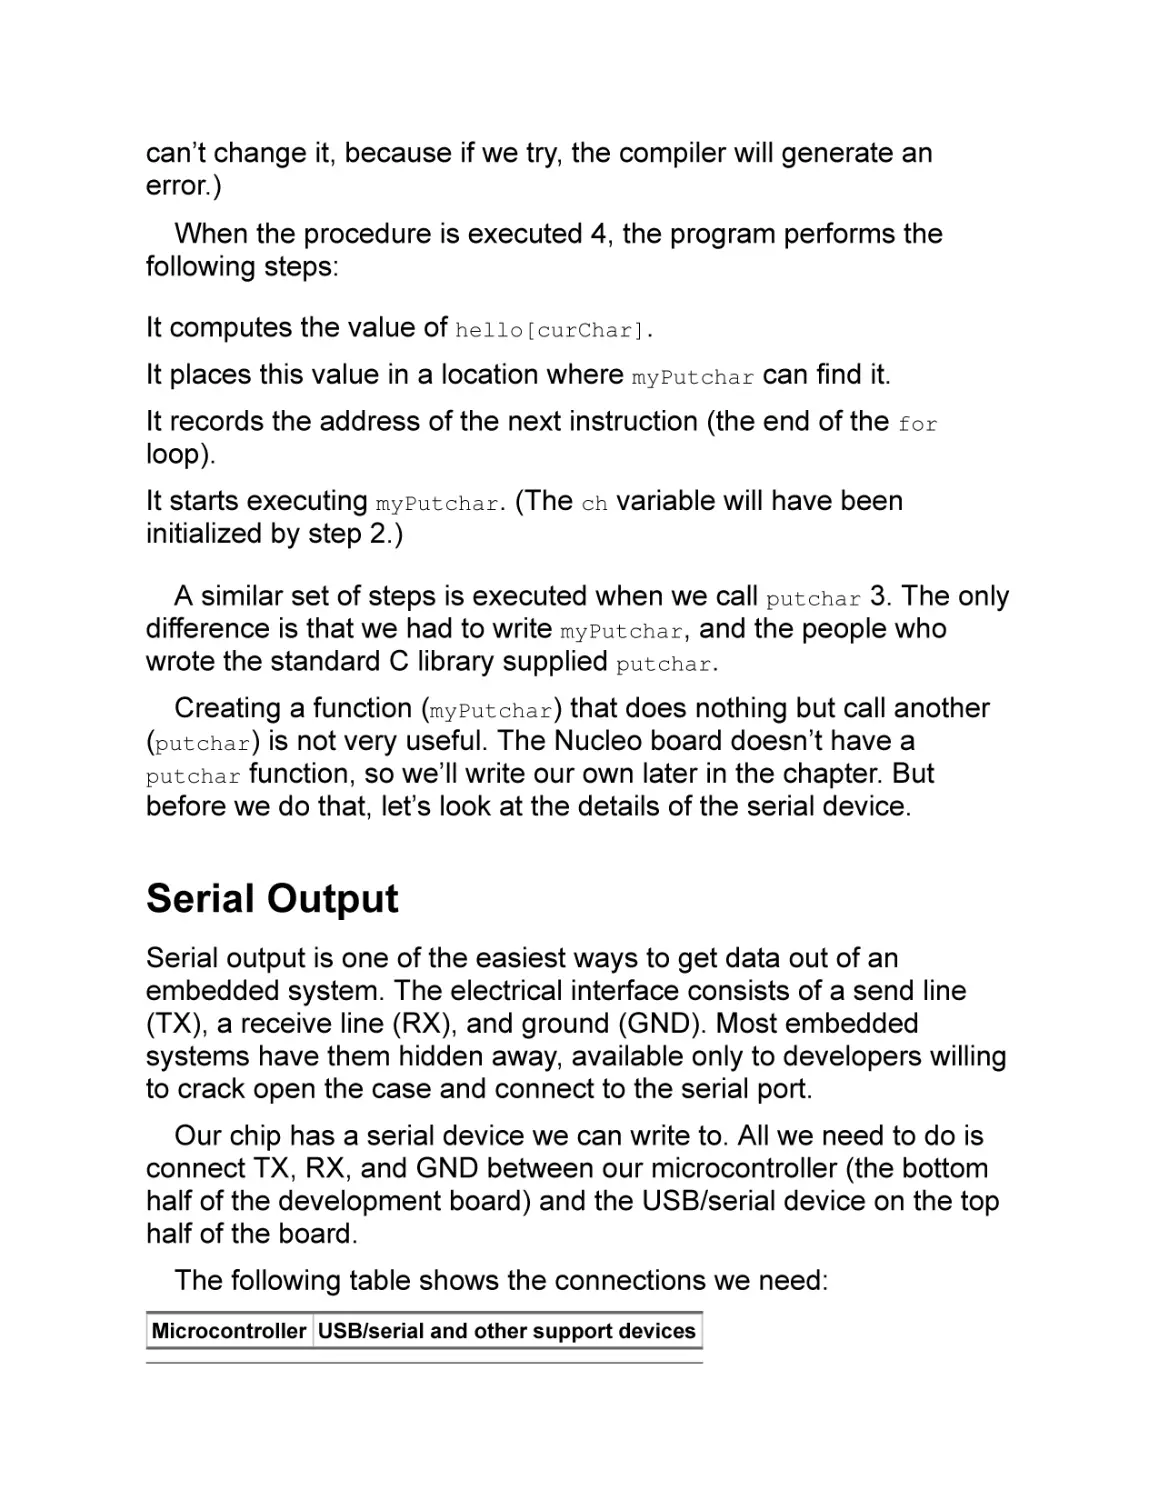
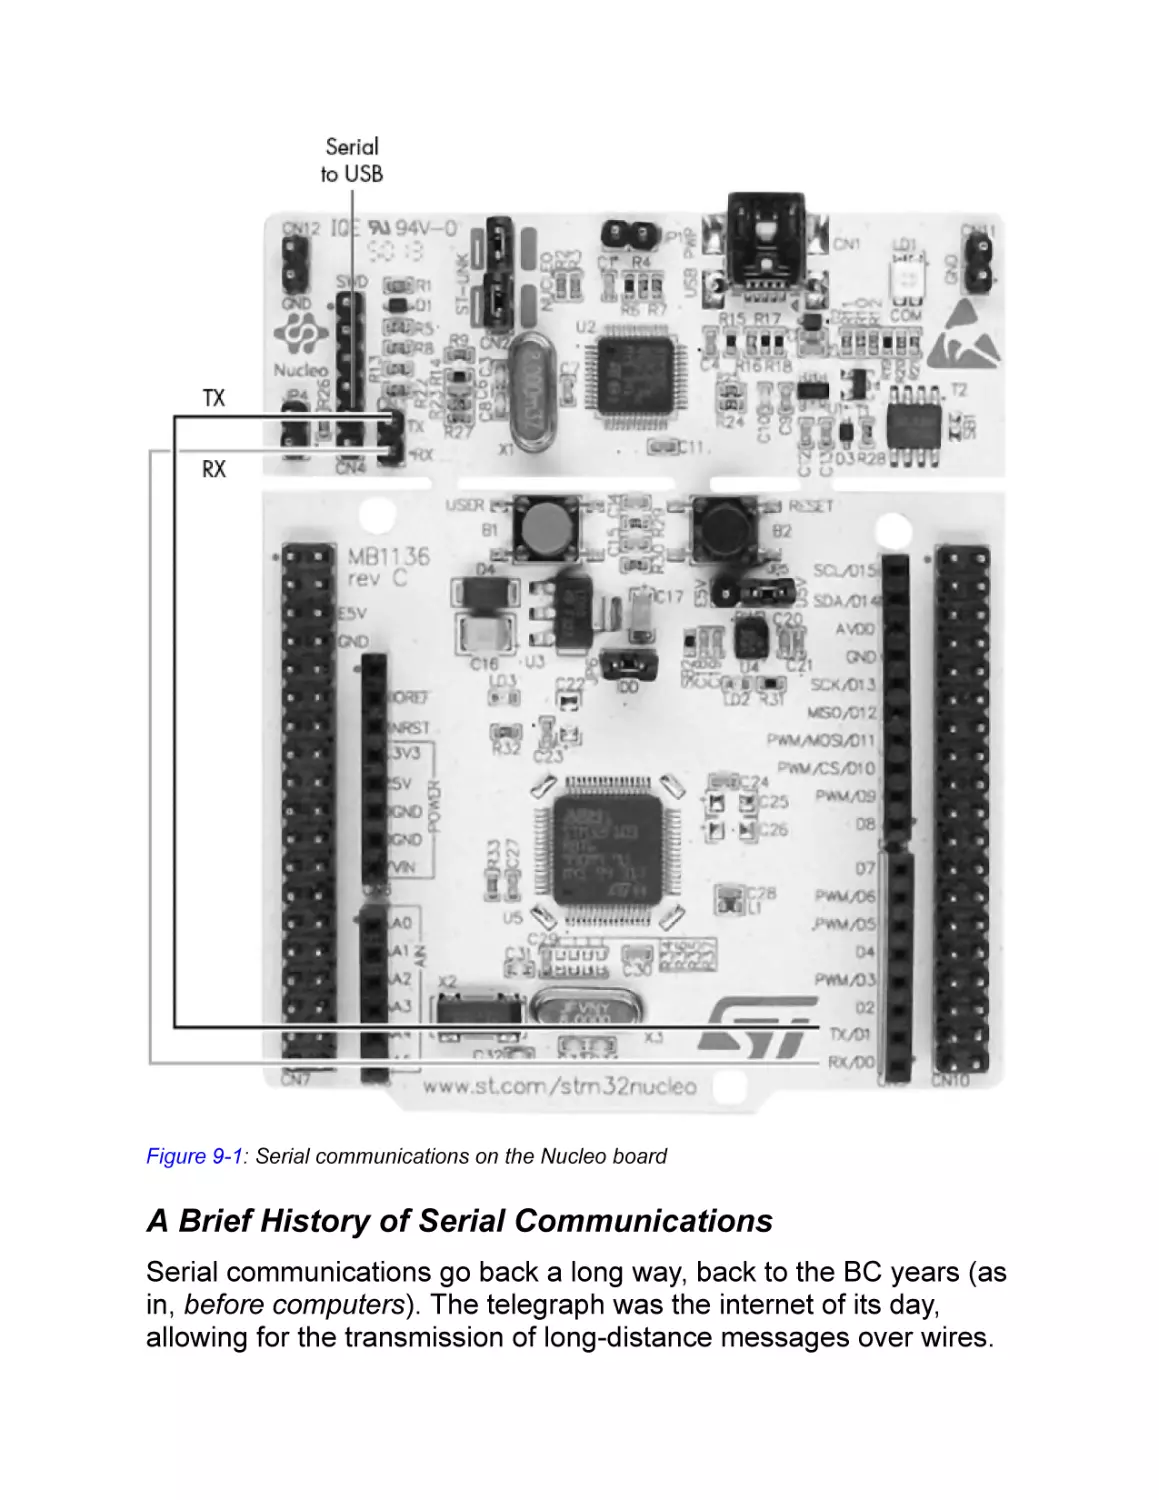
Serial Output
A Brief History of Serial Communications
Serial Hello World!
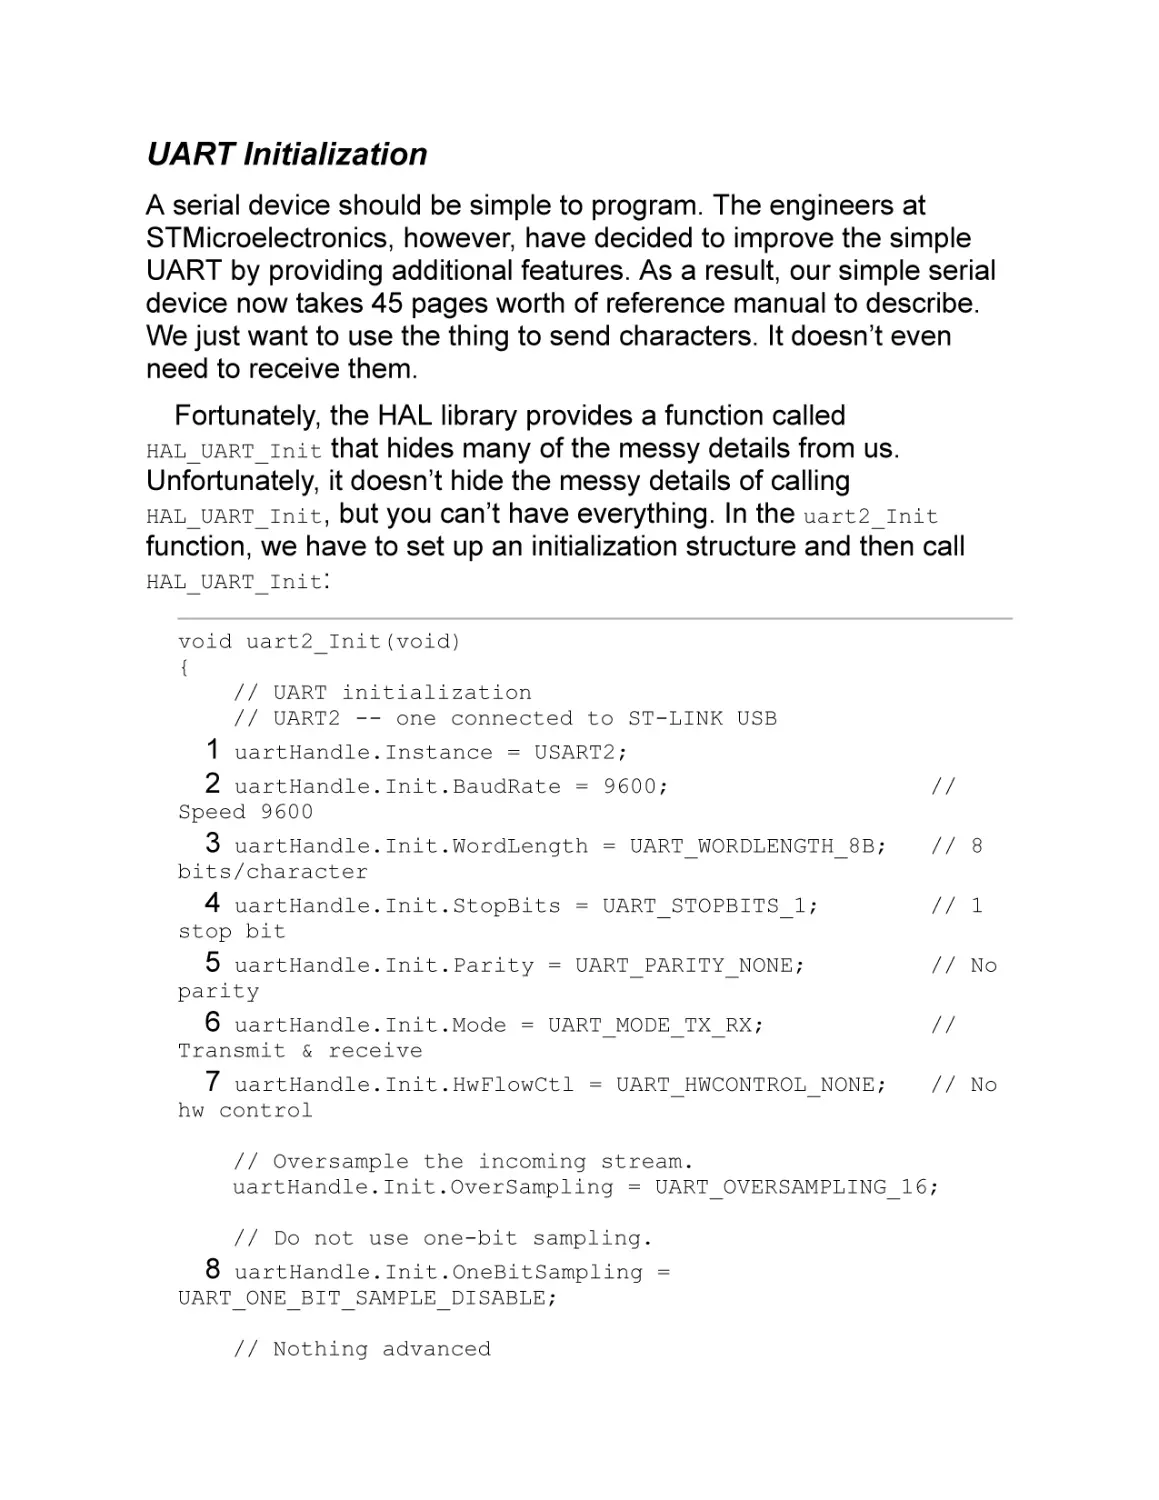
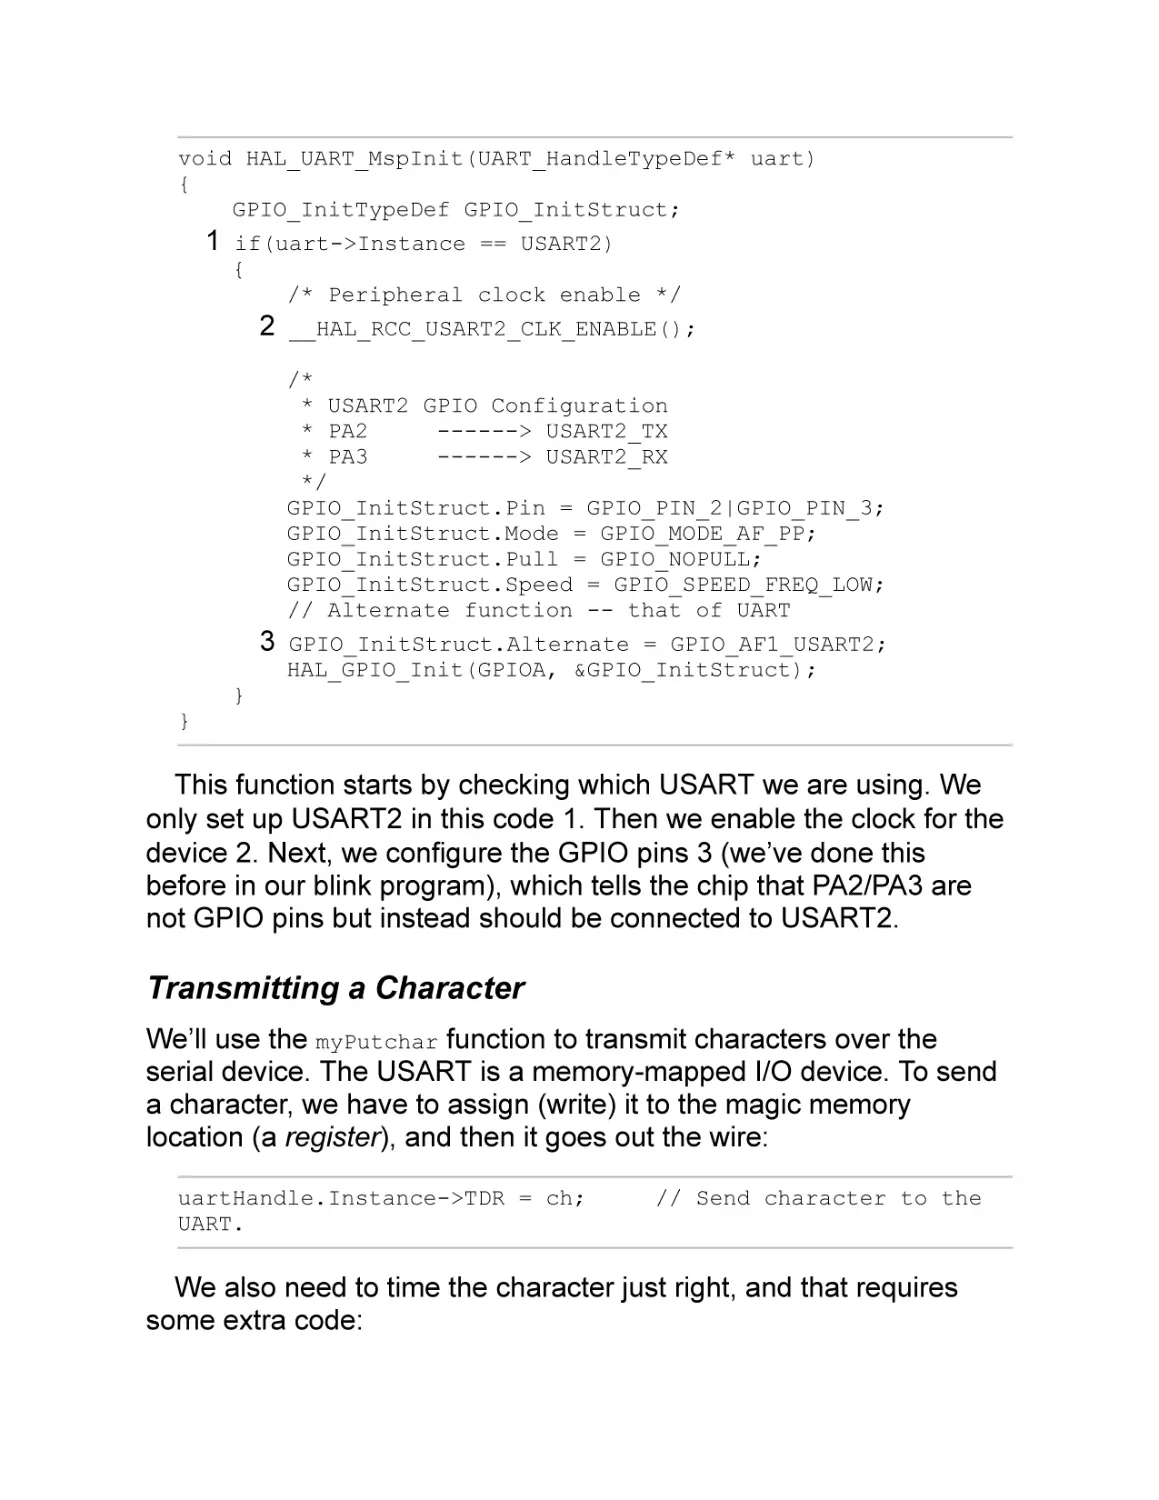
UART Initialization
Transmitting a Character
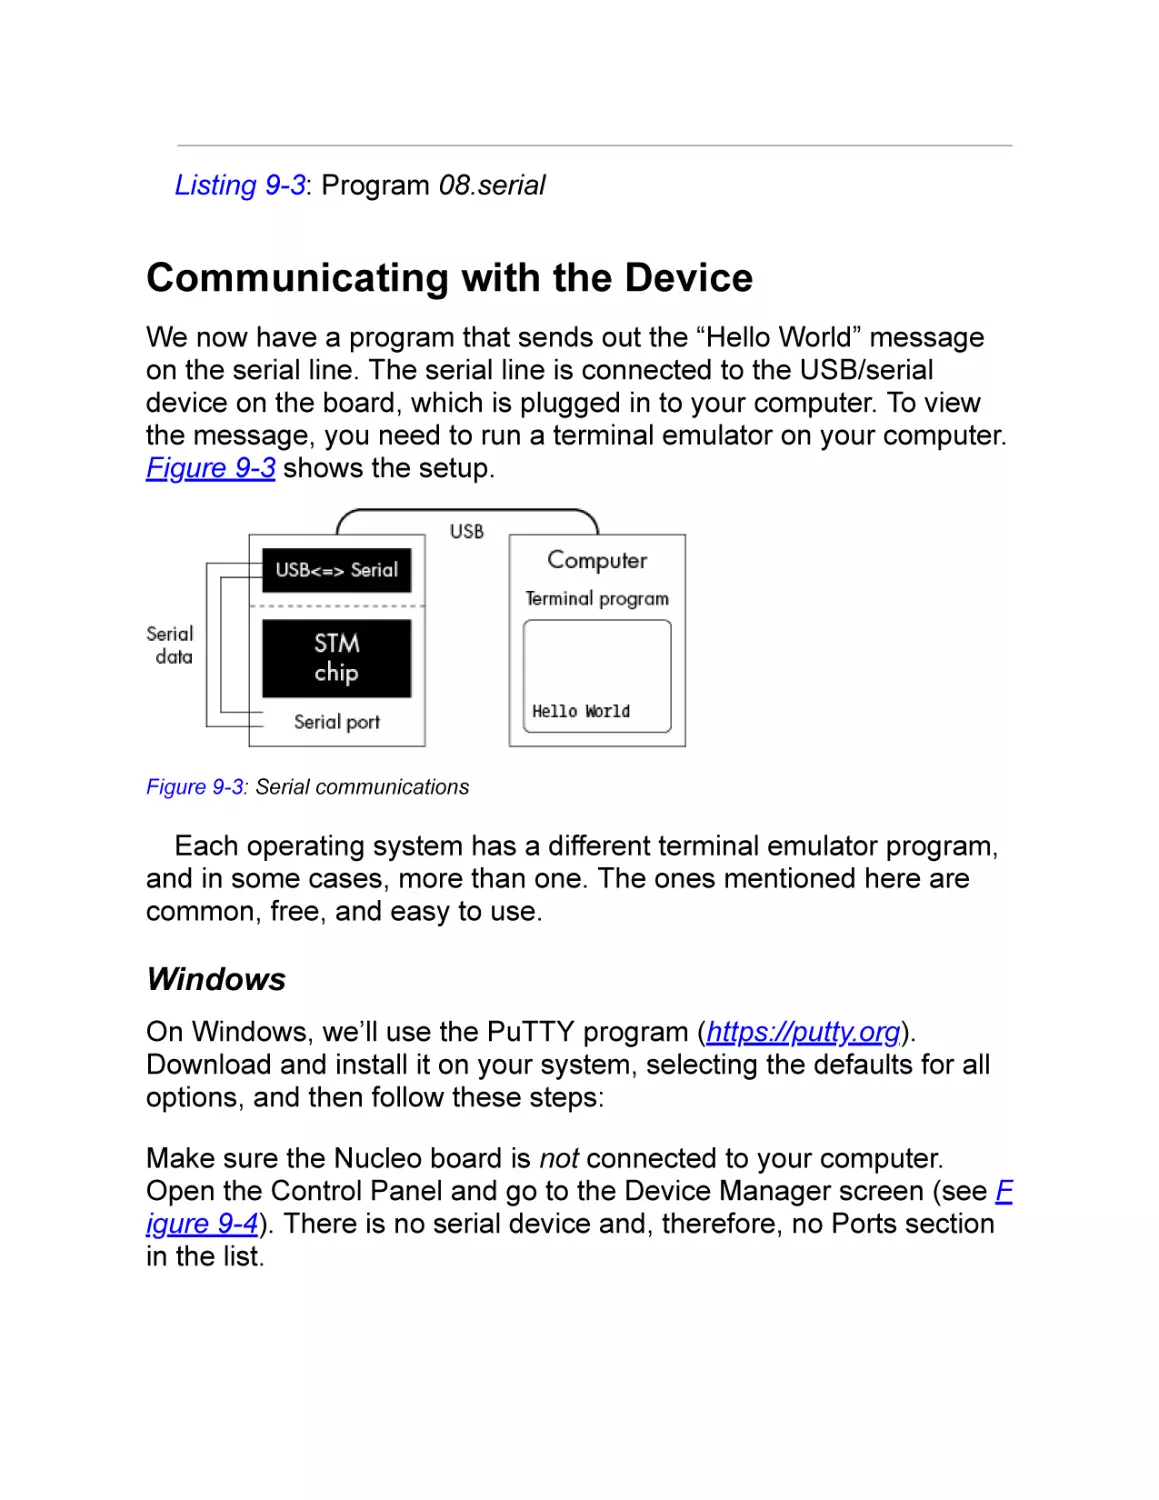
Communicating with the Device
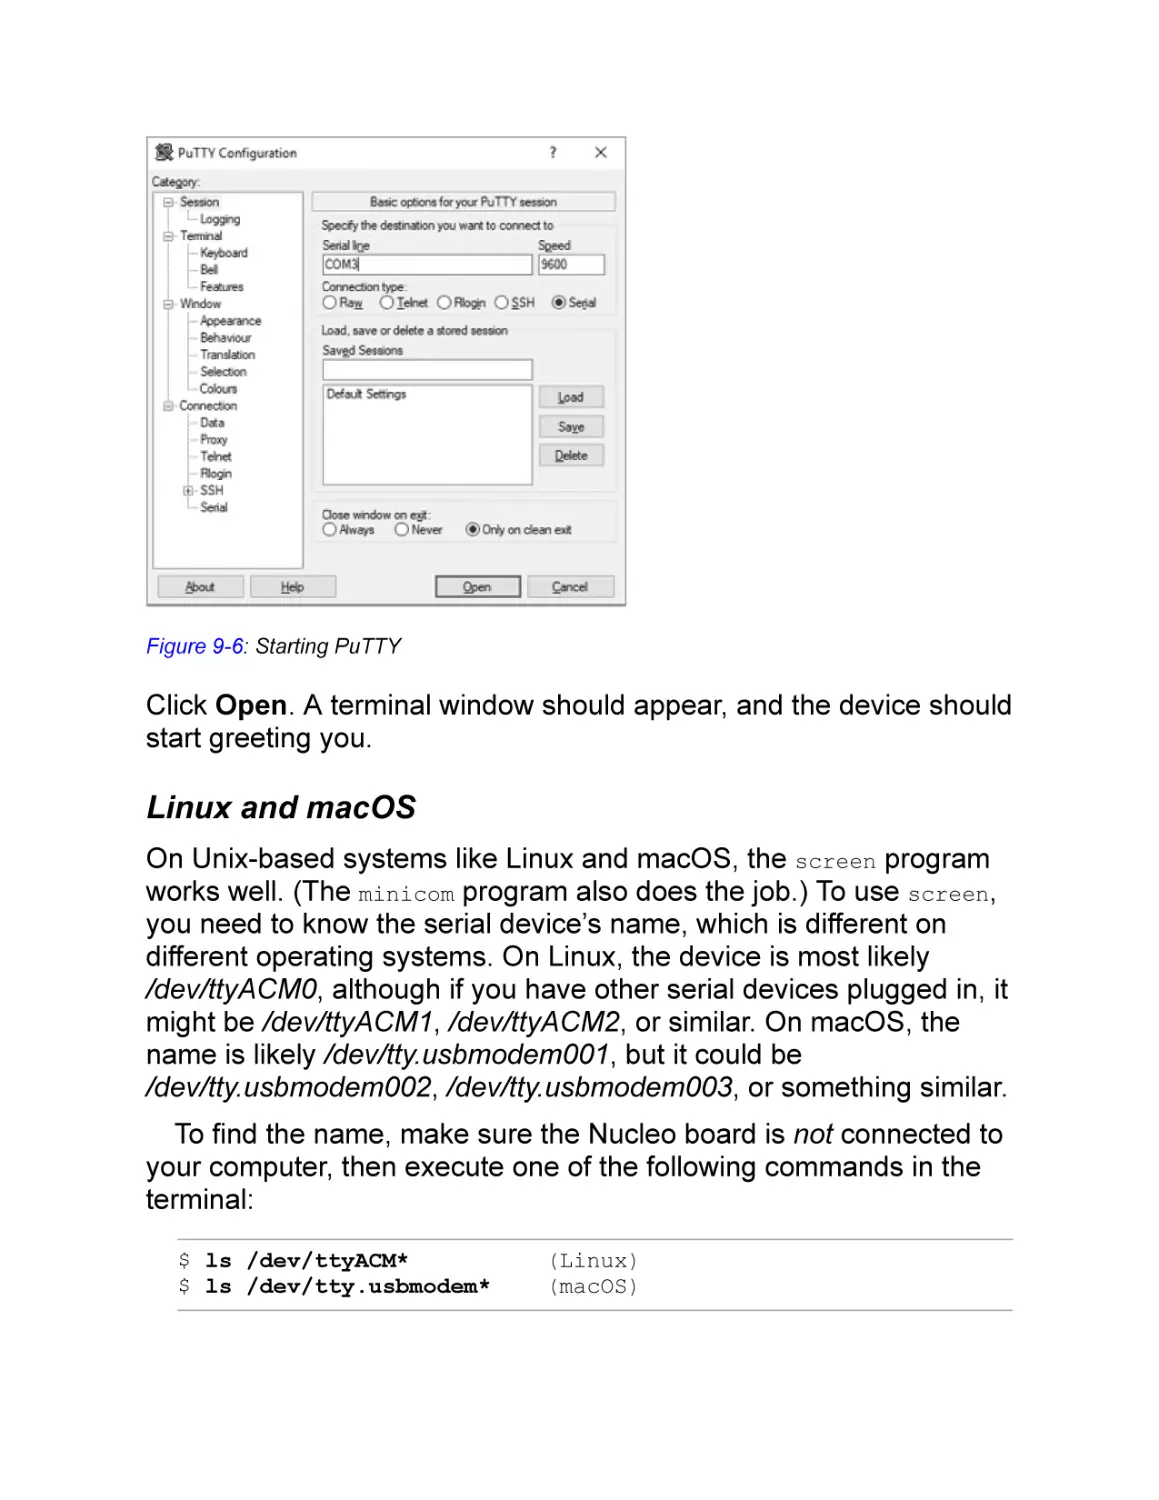
Windows
Linux and macOS
Summary
Programming Problems
CHAPTER 10: INTERRUPTS
Polling vs. Interrupts
Interrupts for Serial I/O
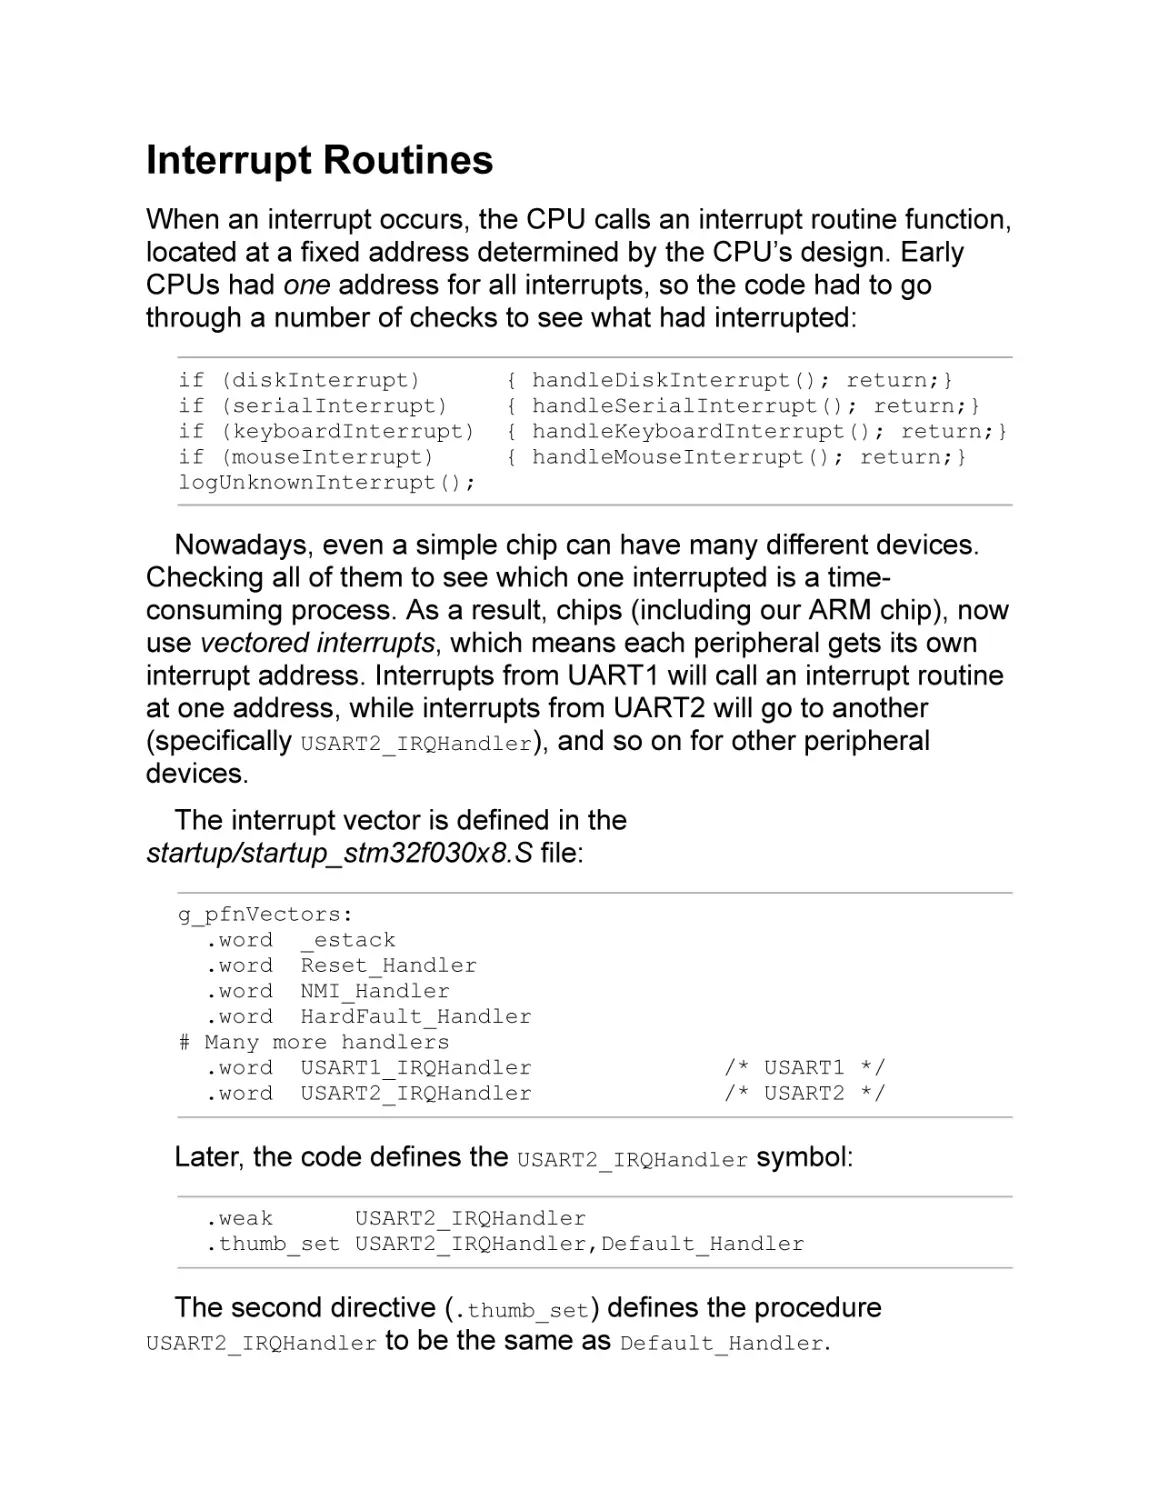
Interrupt Routines
Writing a String with Interrupts
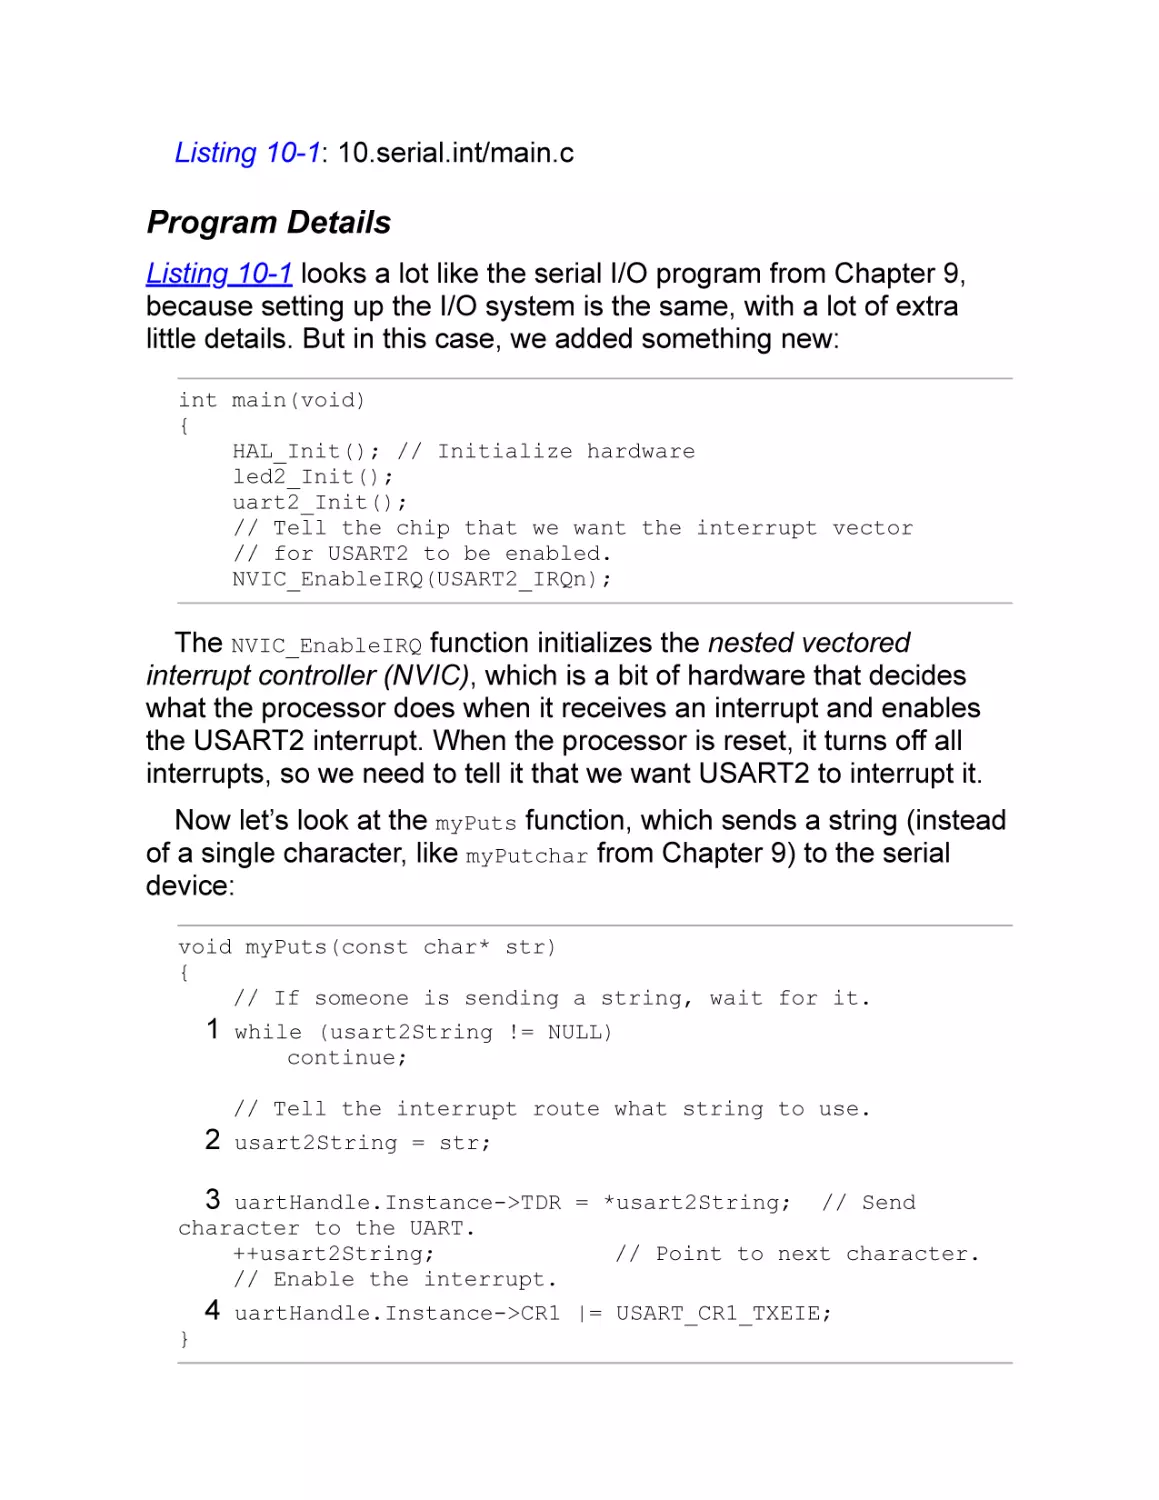
Program Details
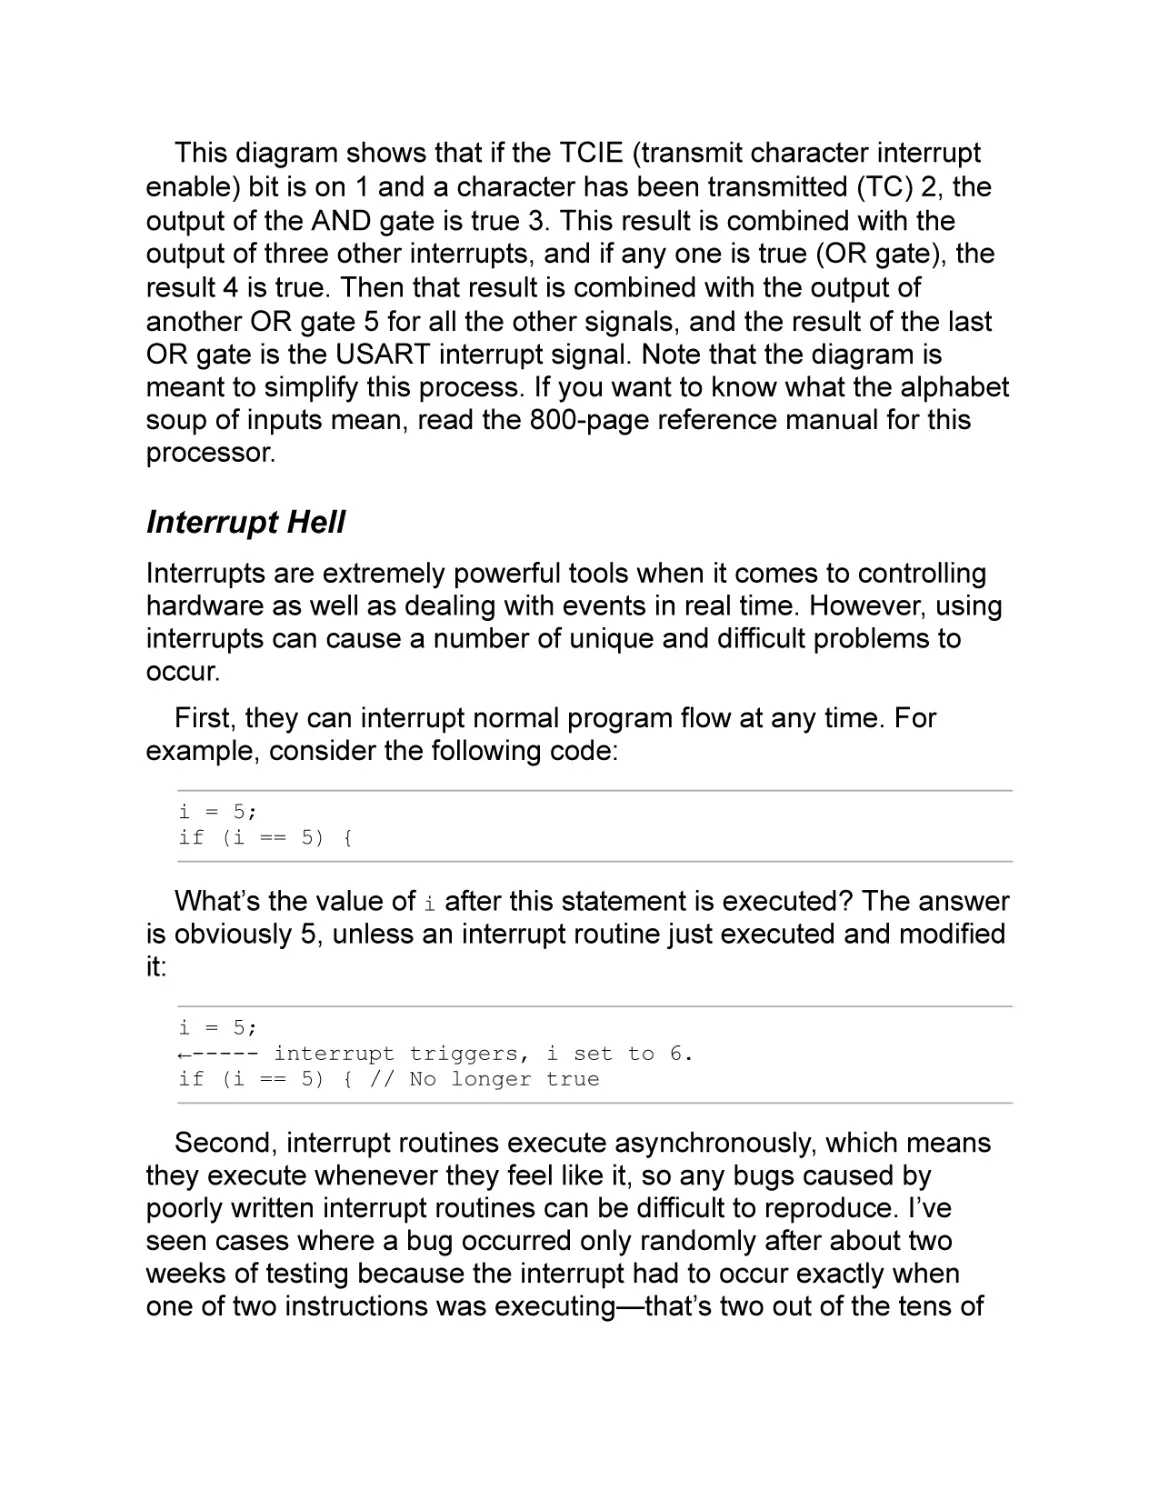
Interrupt Hell
Using a Buffer to Increase Speed
Sending Function
Interrupt Routine
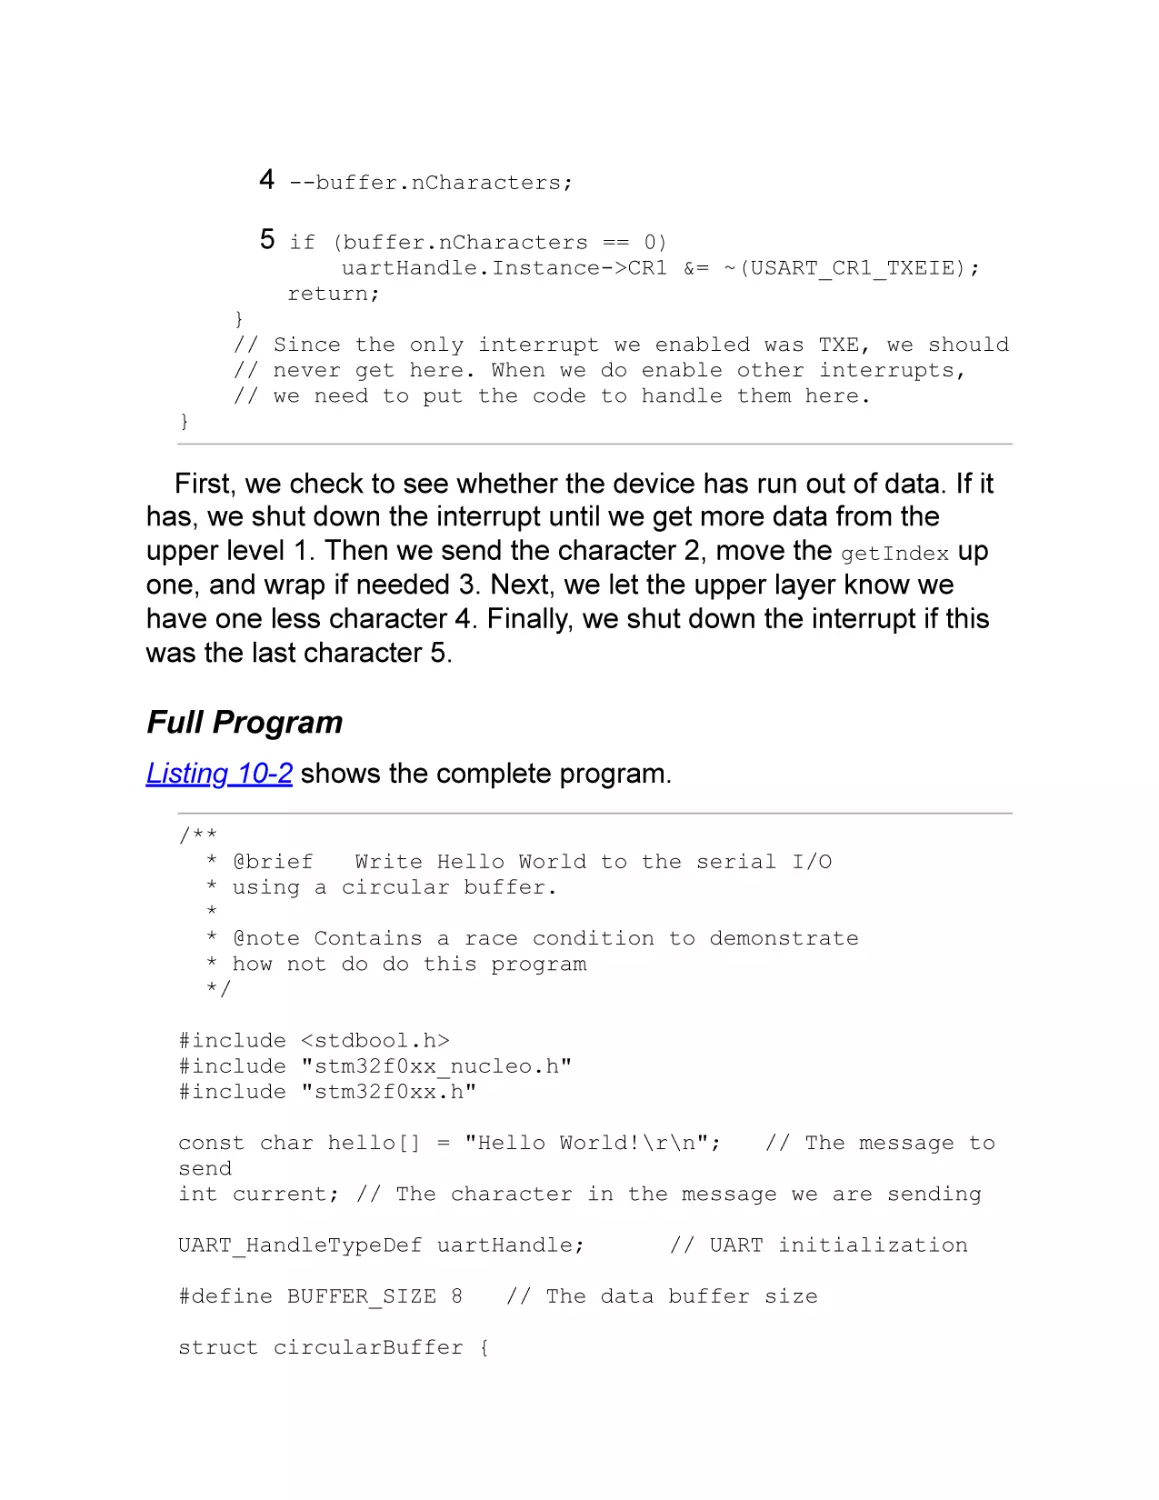
Full Program
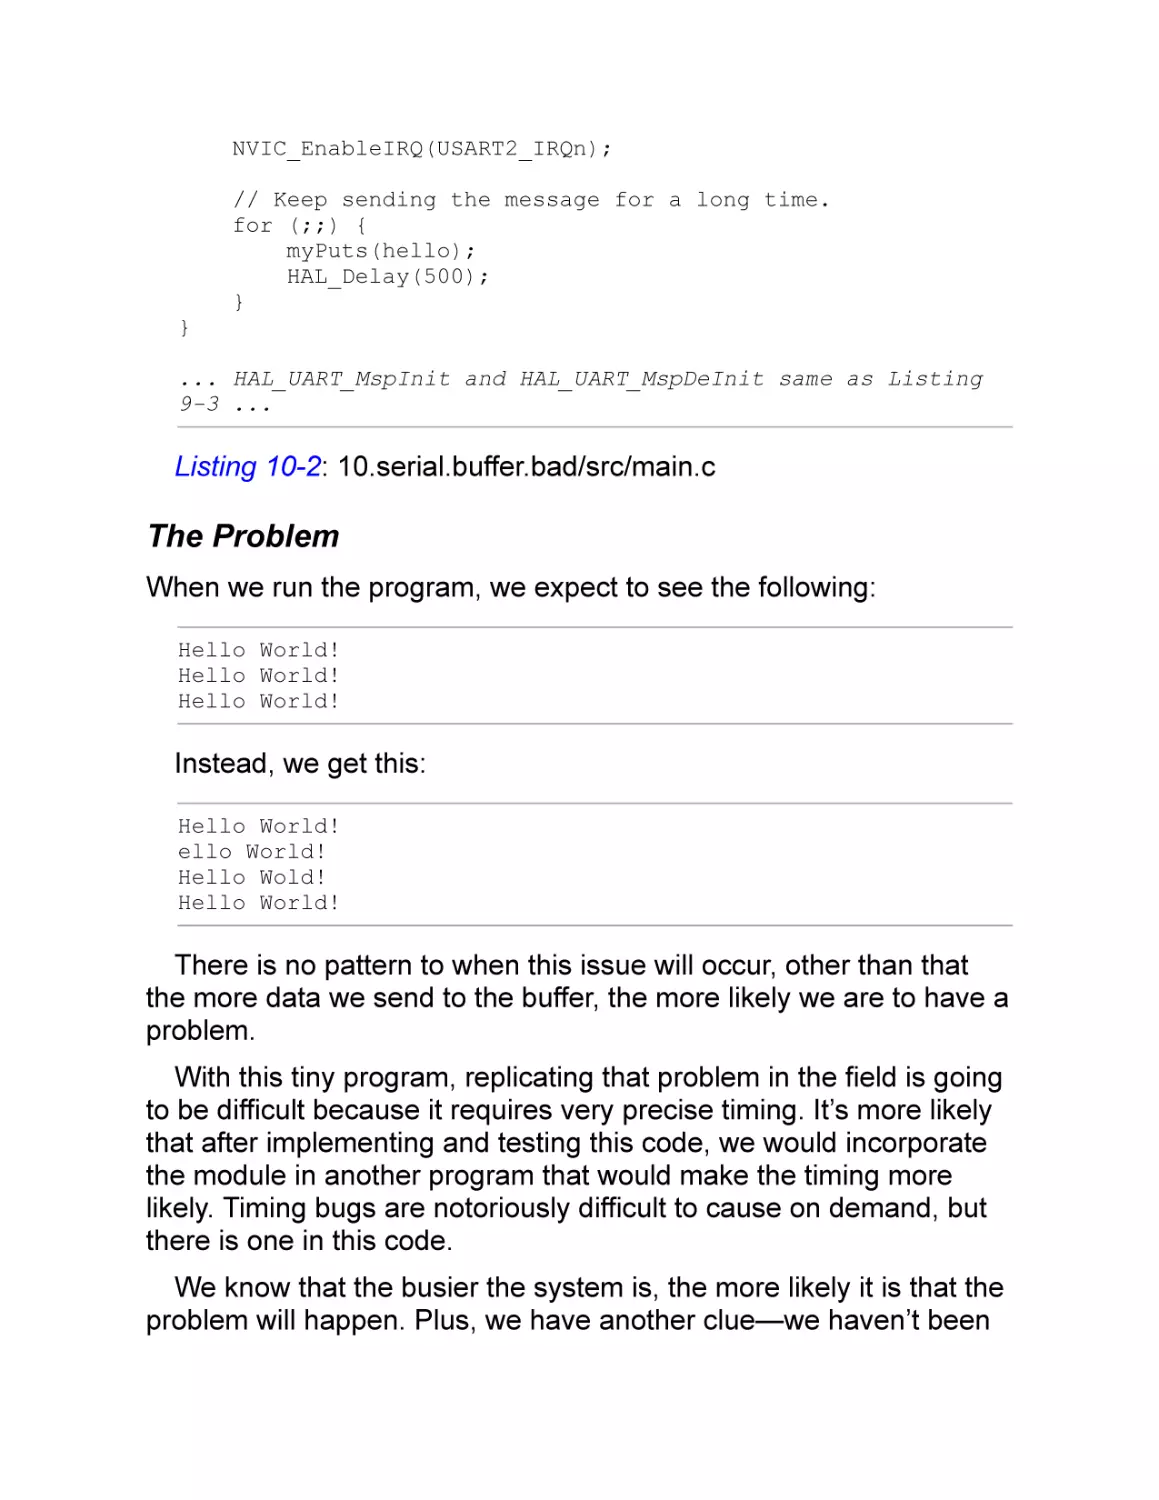
The Problem
Summary
Programming Problems
CHAPTER 11: THE LINKER
The Linker’s Job
Compilation and Linking Memory Models
The Ideal C Model
Nonstandard Sections
The Linking Process
Symbols Defined by the Linker
Relocation and Linking Object Files
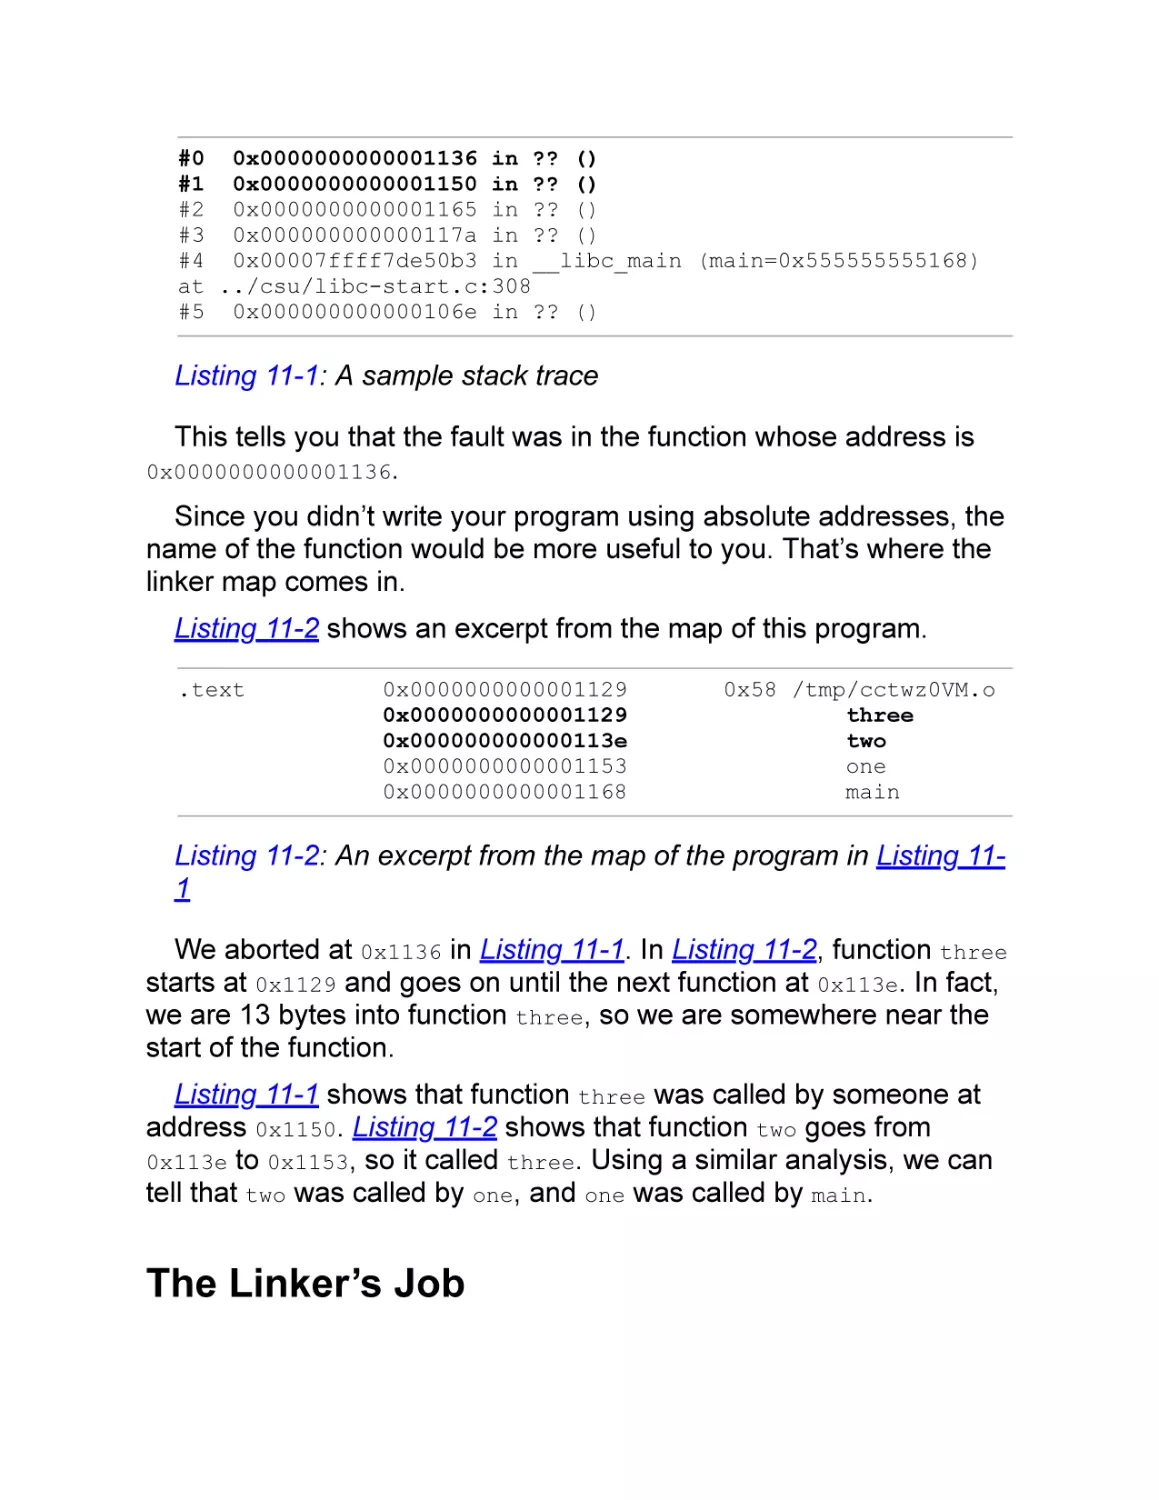
The Linker Map
Advanced Linker Usage
Flash Memory for “Permanent” Storage
Multiple Configuration Items
Field Customization Example
Firmware Upgrade
Summary
Programming Problems
CHAPTER 12: THE PREPROCESSOR
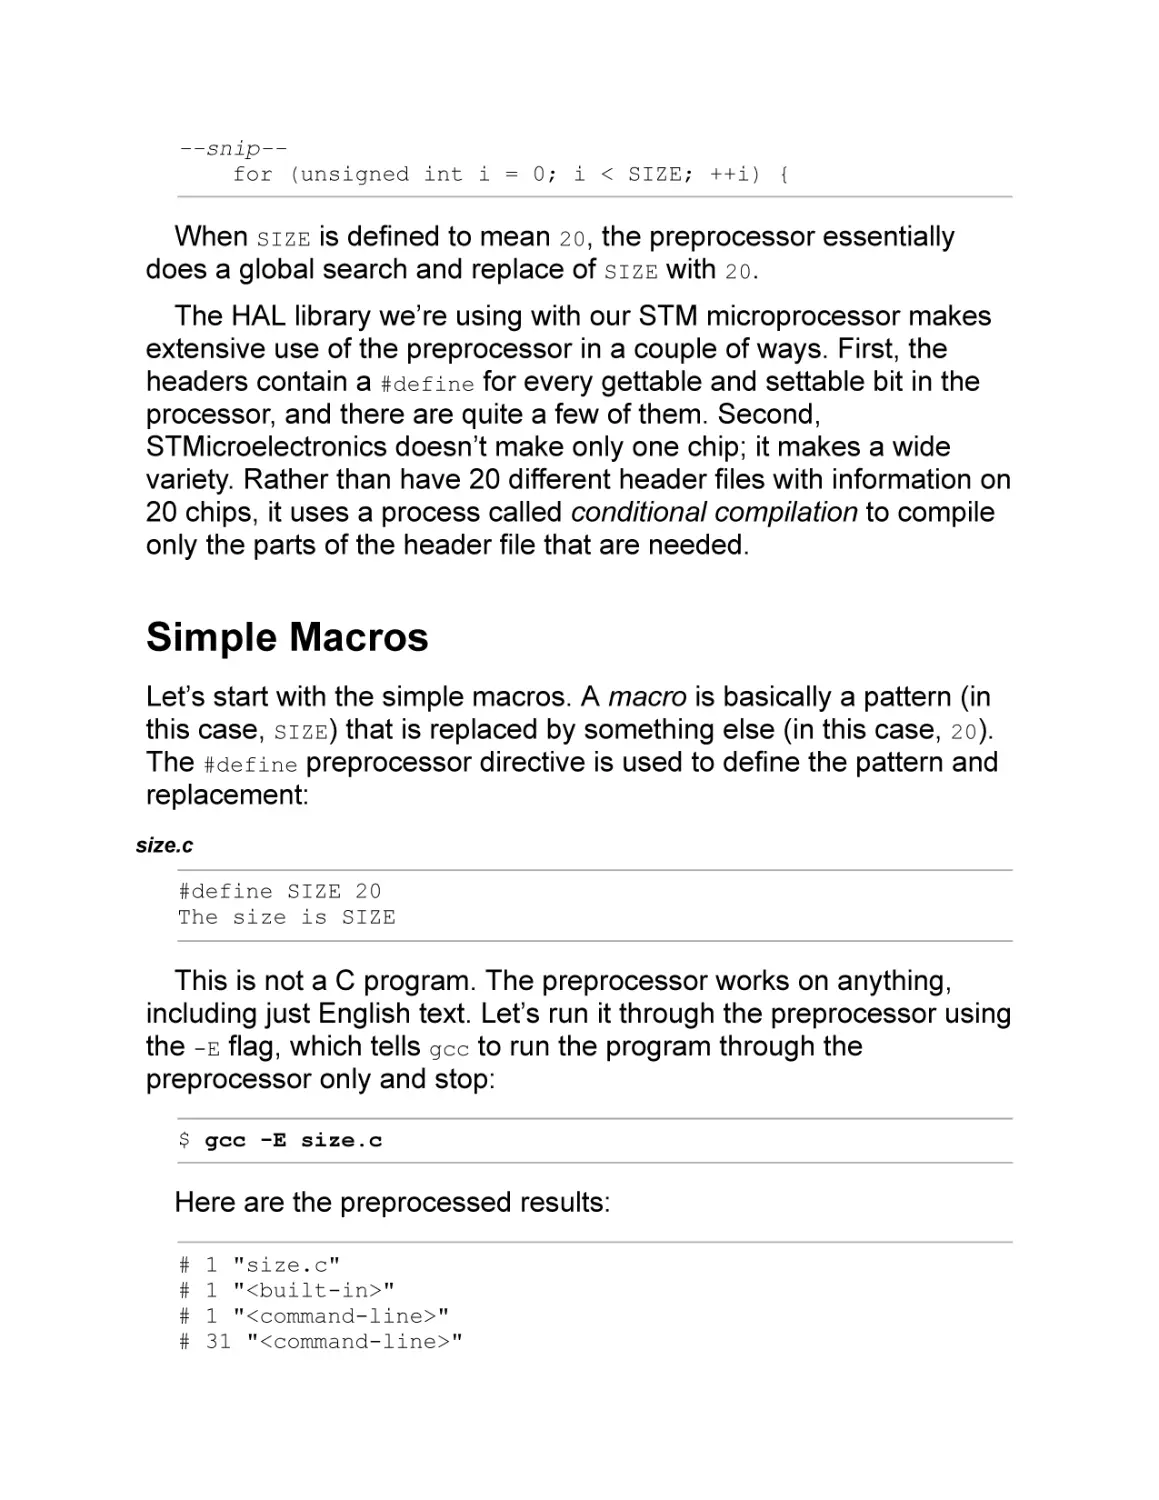
Simple Macros
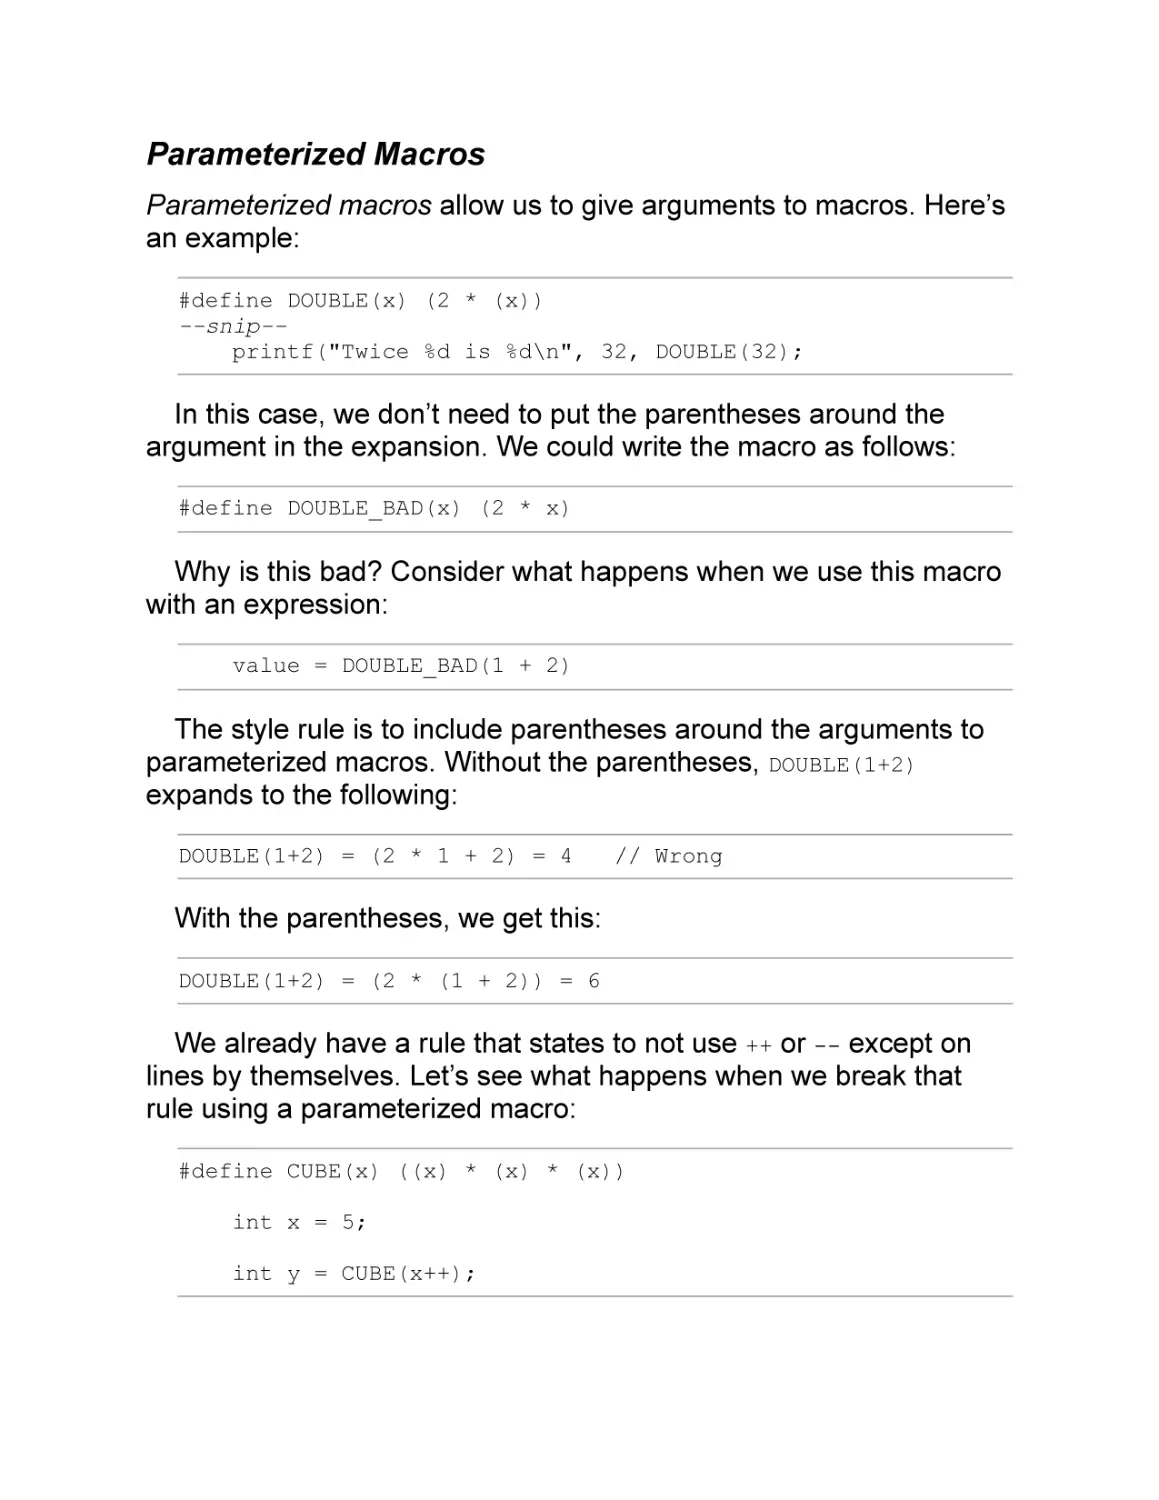
Parameterized Macros
Code Macros
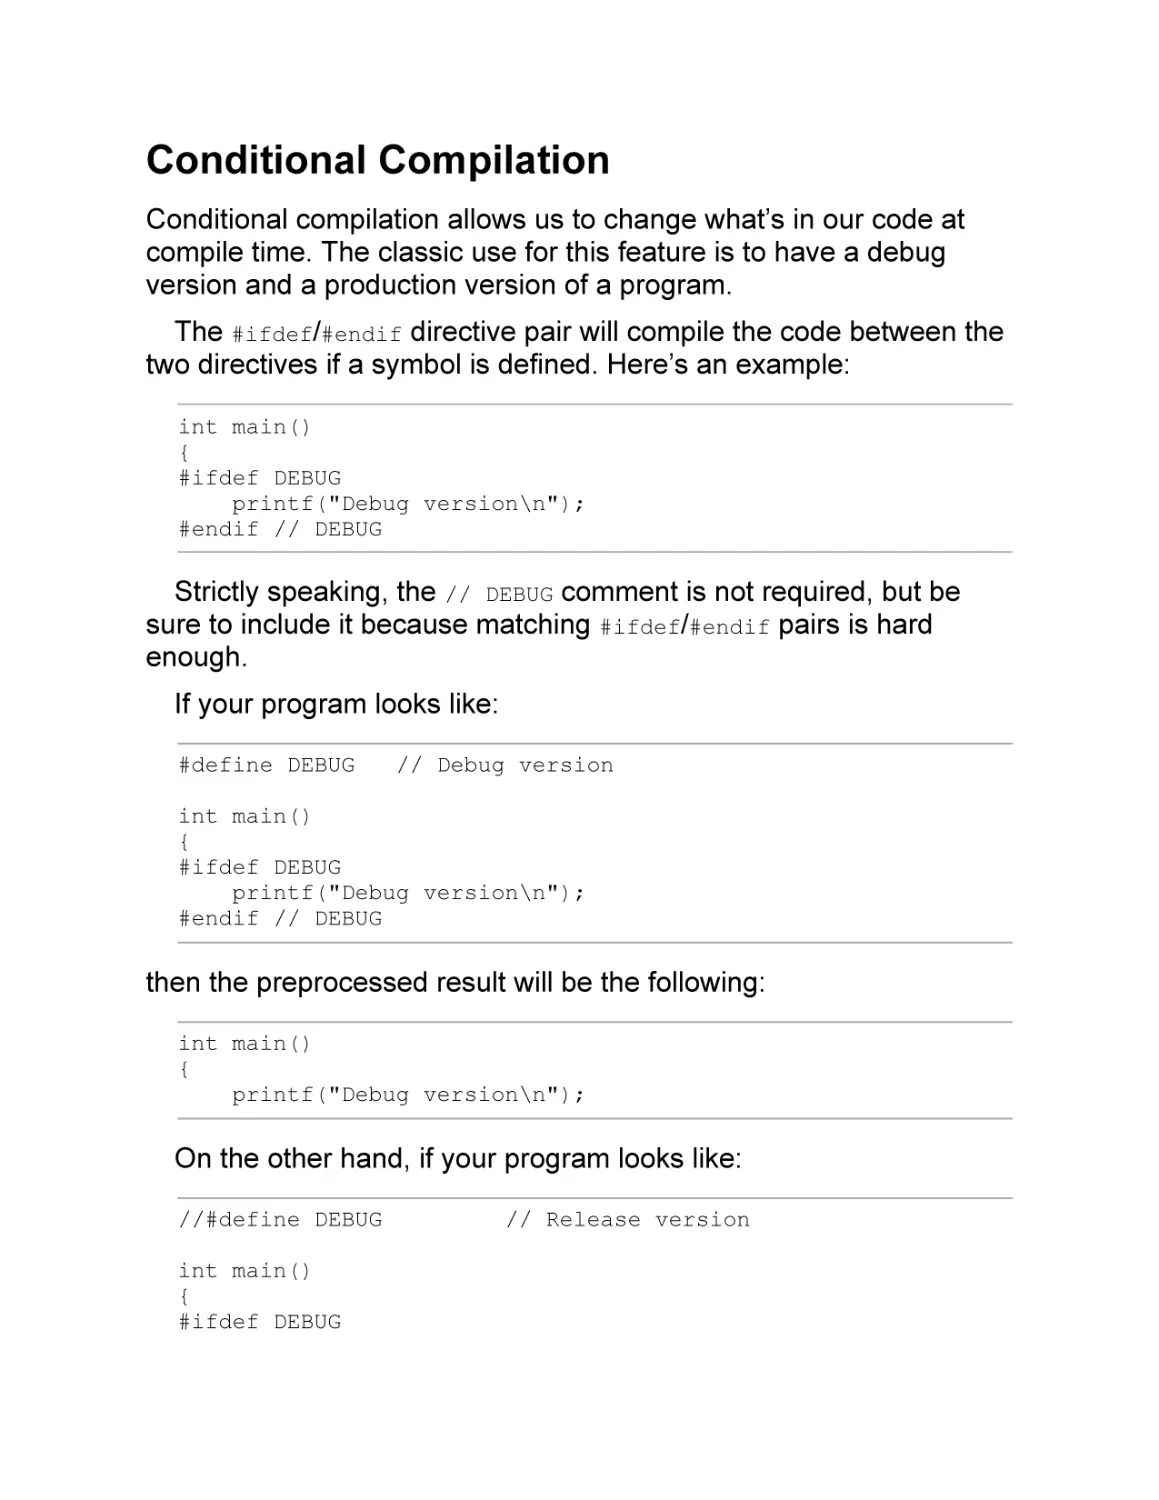
Conditional Compilation
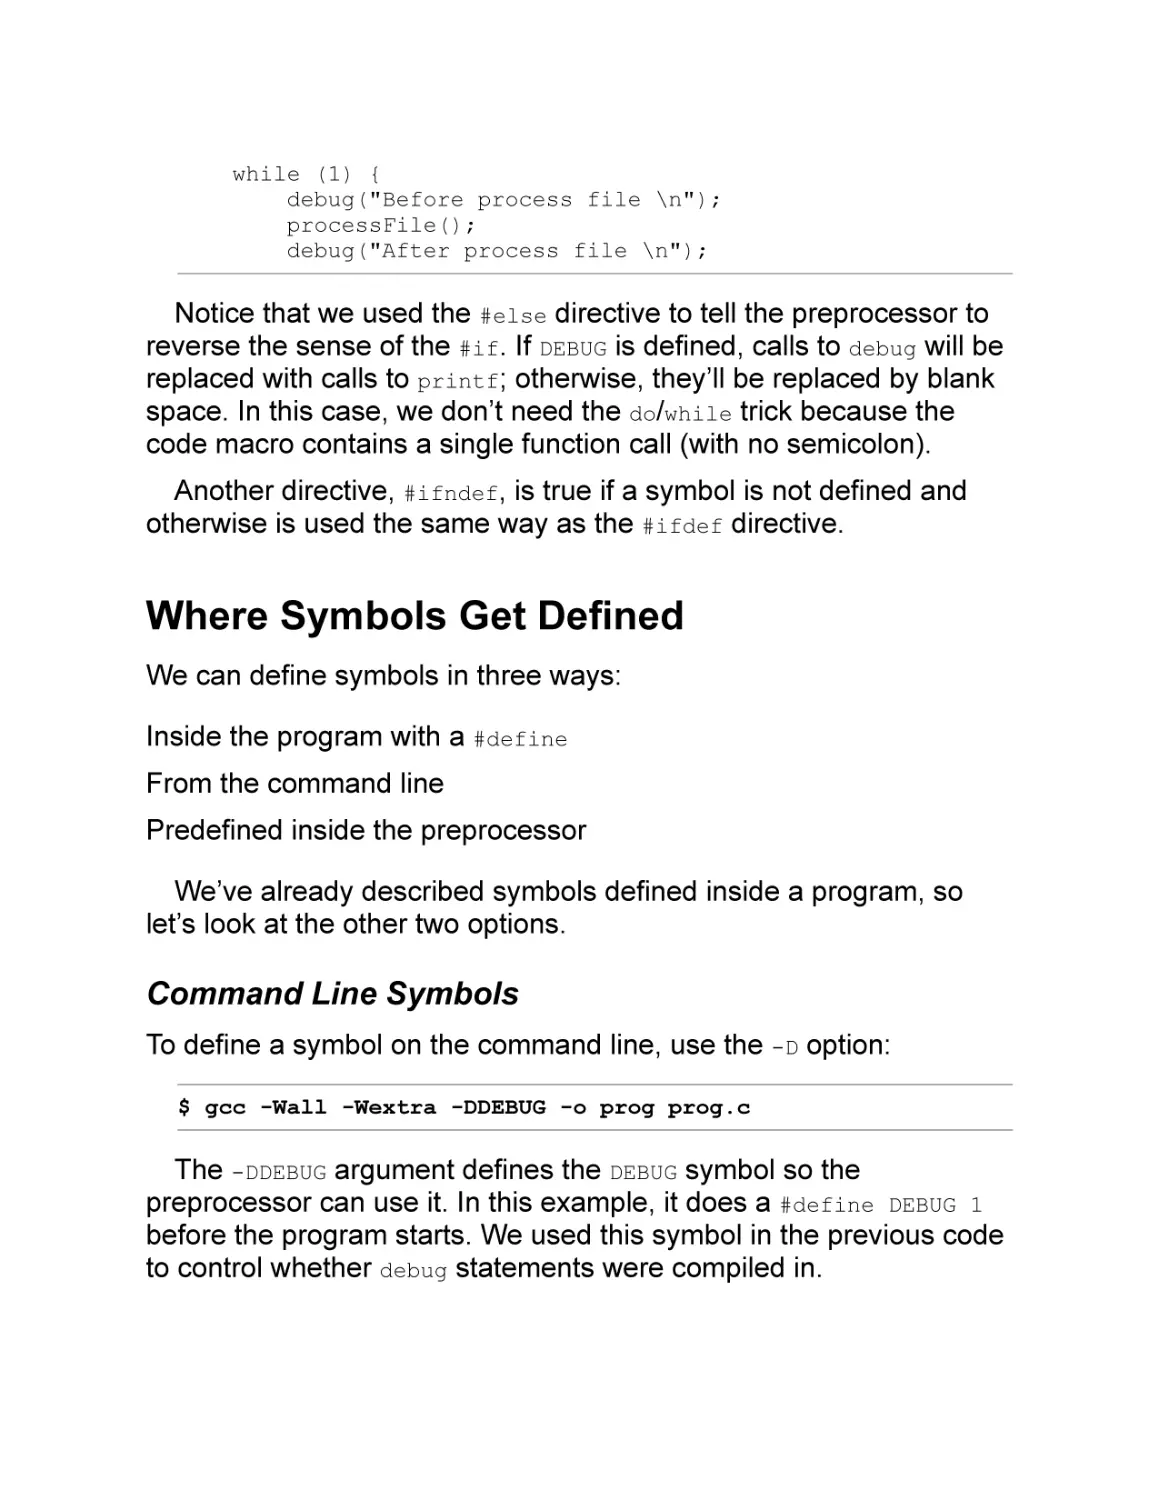
Where Symbols Get Defined
Command Line Symbols
Predefined Symbols
Include Files
Other Preprocessor Directives
Preprocessor Tricks
Summary
Programming Problems
PART II: C FOR BIG MACHINES
CHAPTER 13: DYNAMIC MEMORY
Basic Heap Allocation and Deallocation
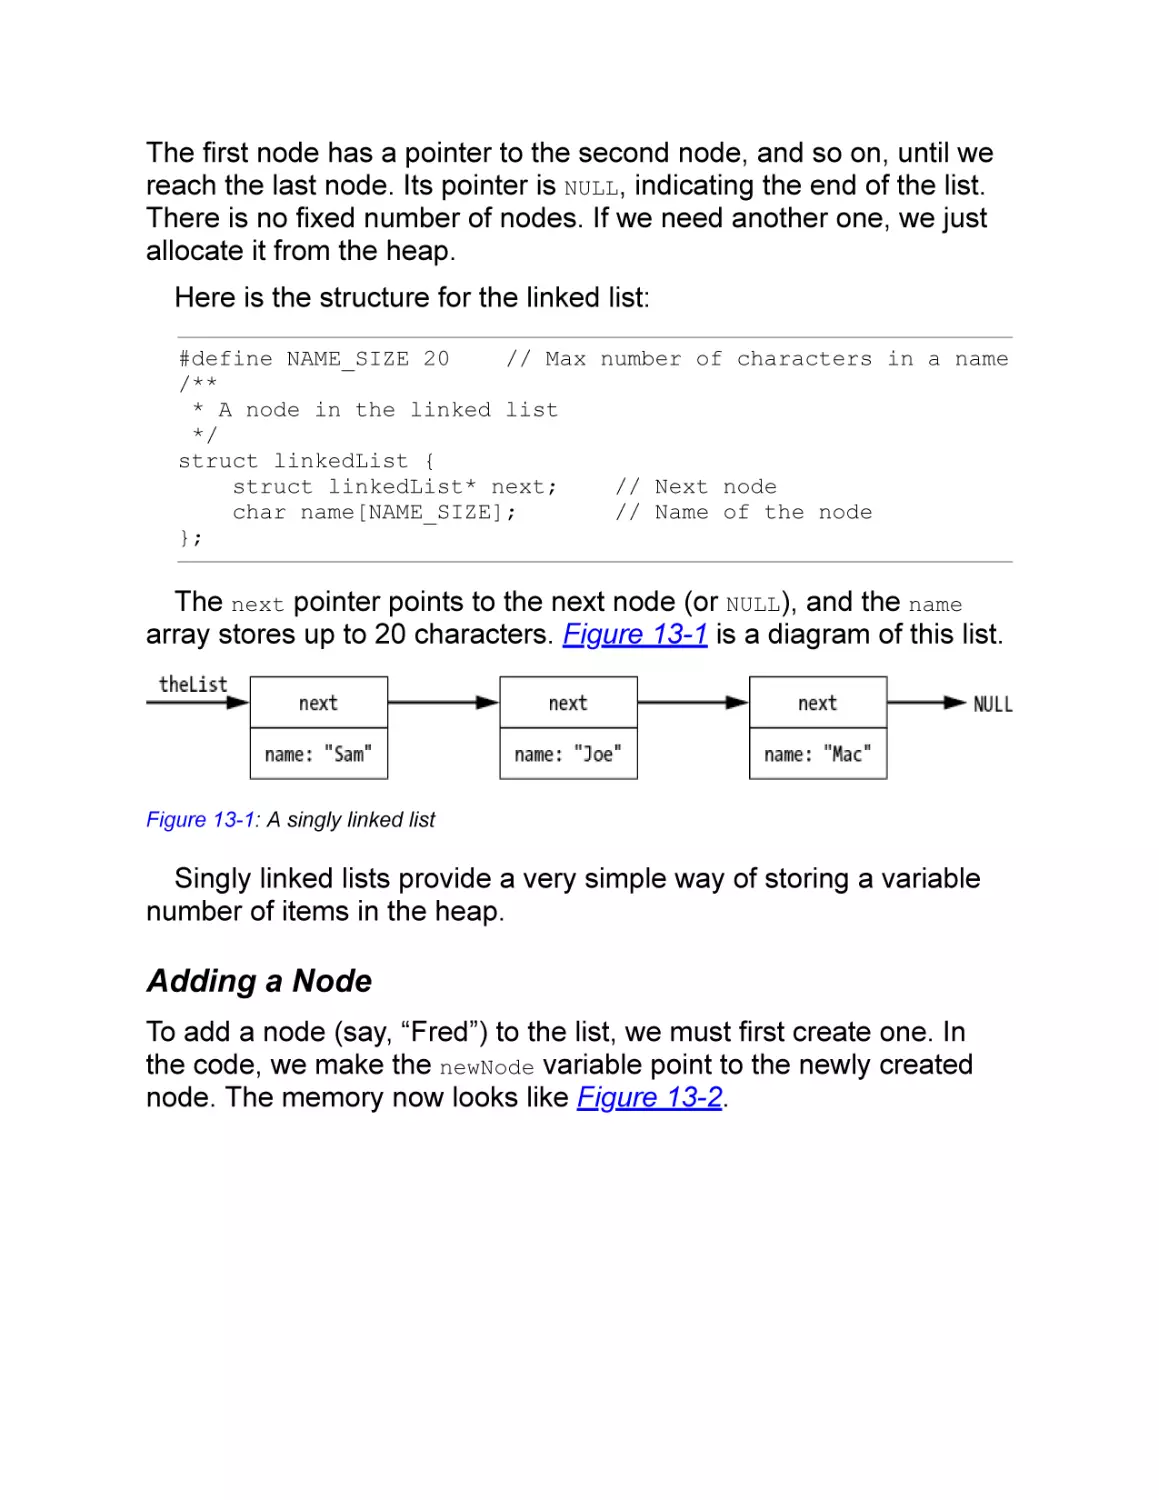
Linked Lists
Adding a Node
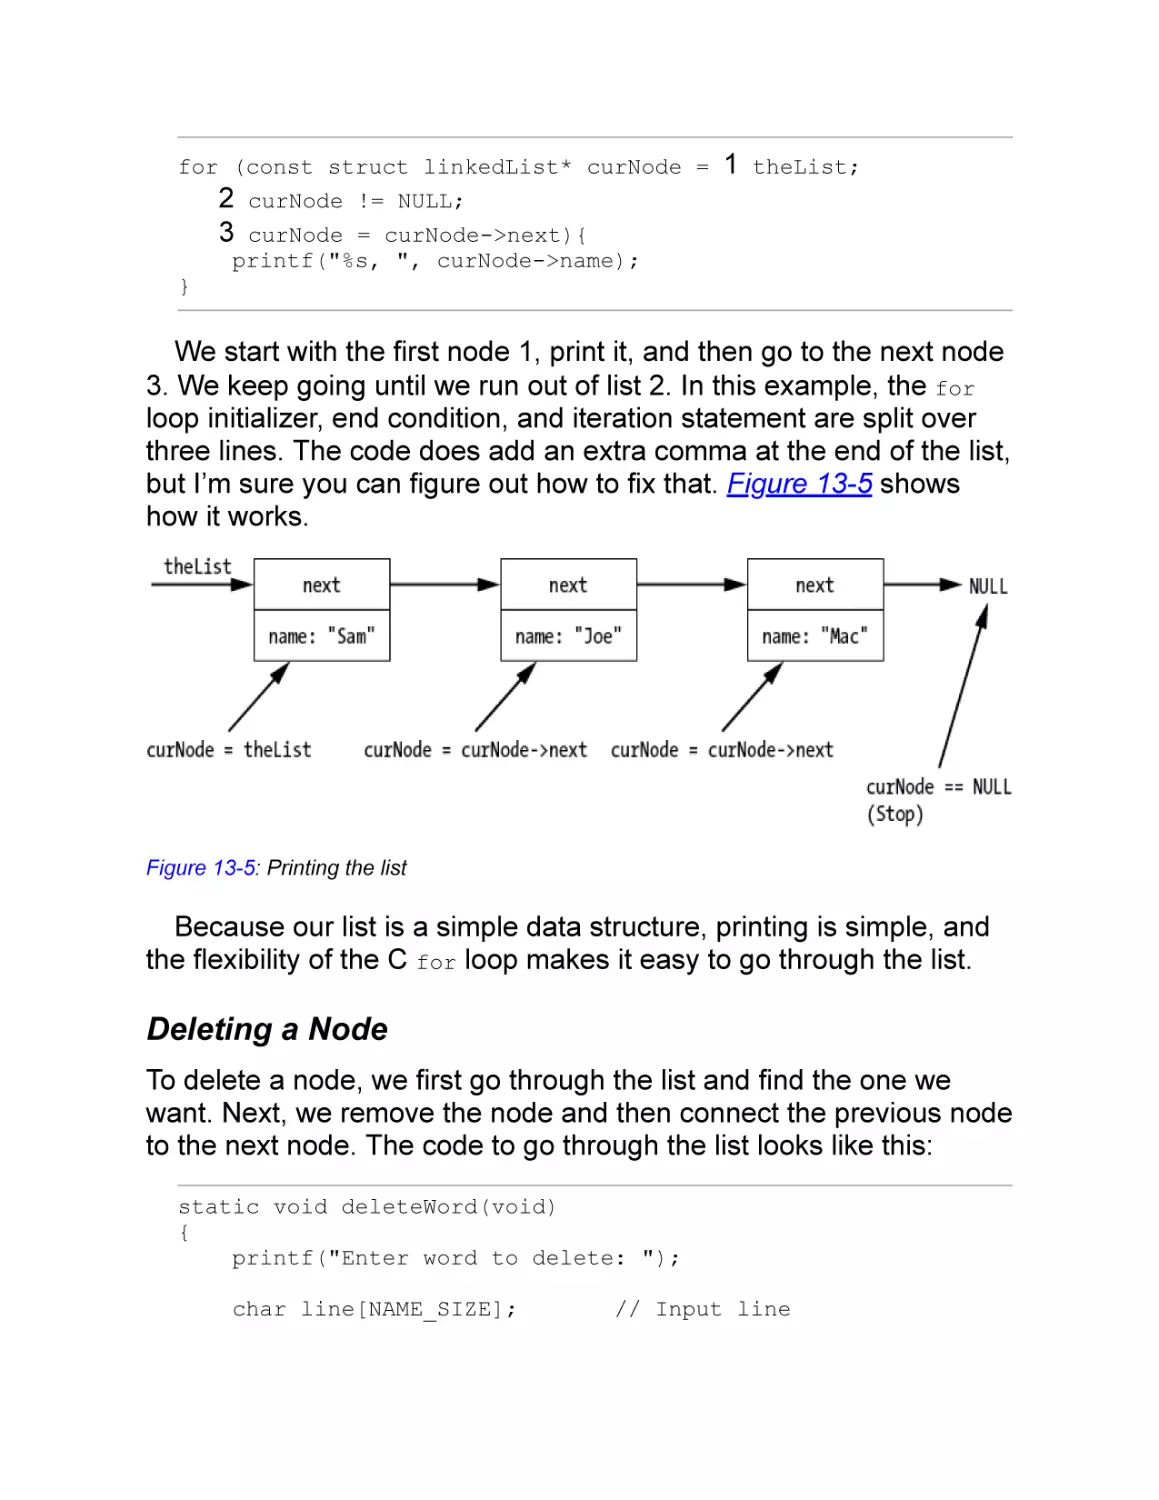
Printing the Linked List
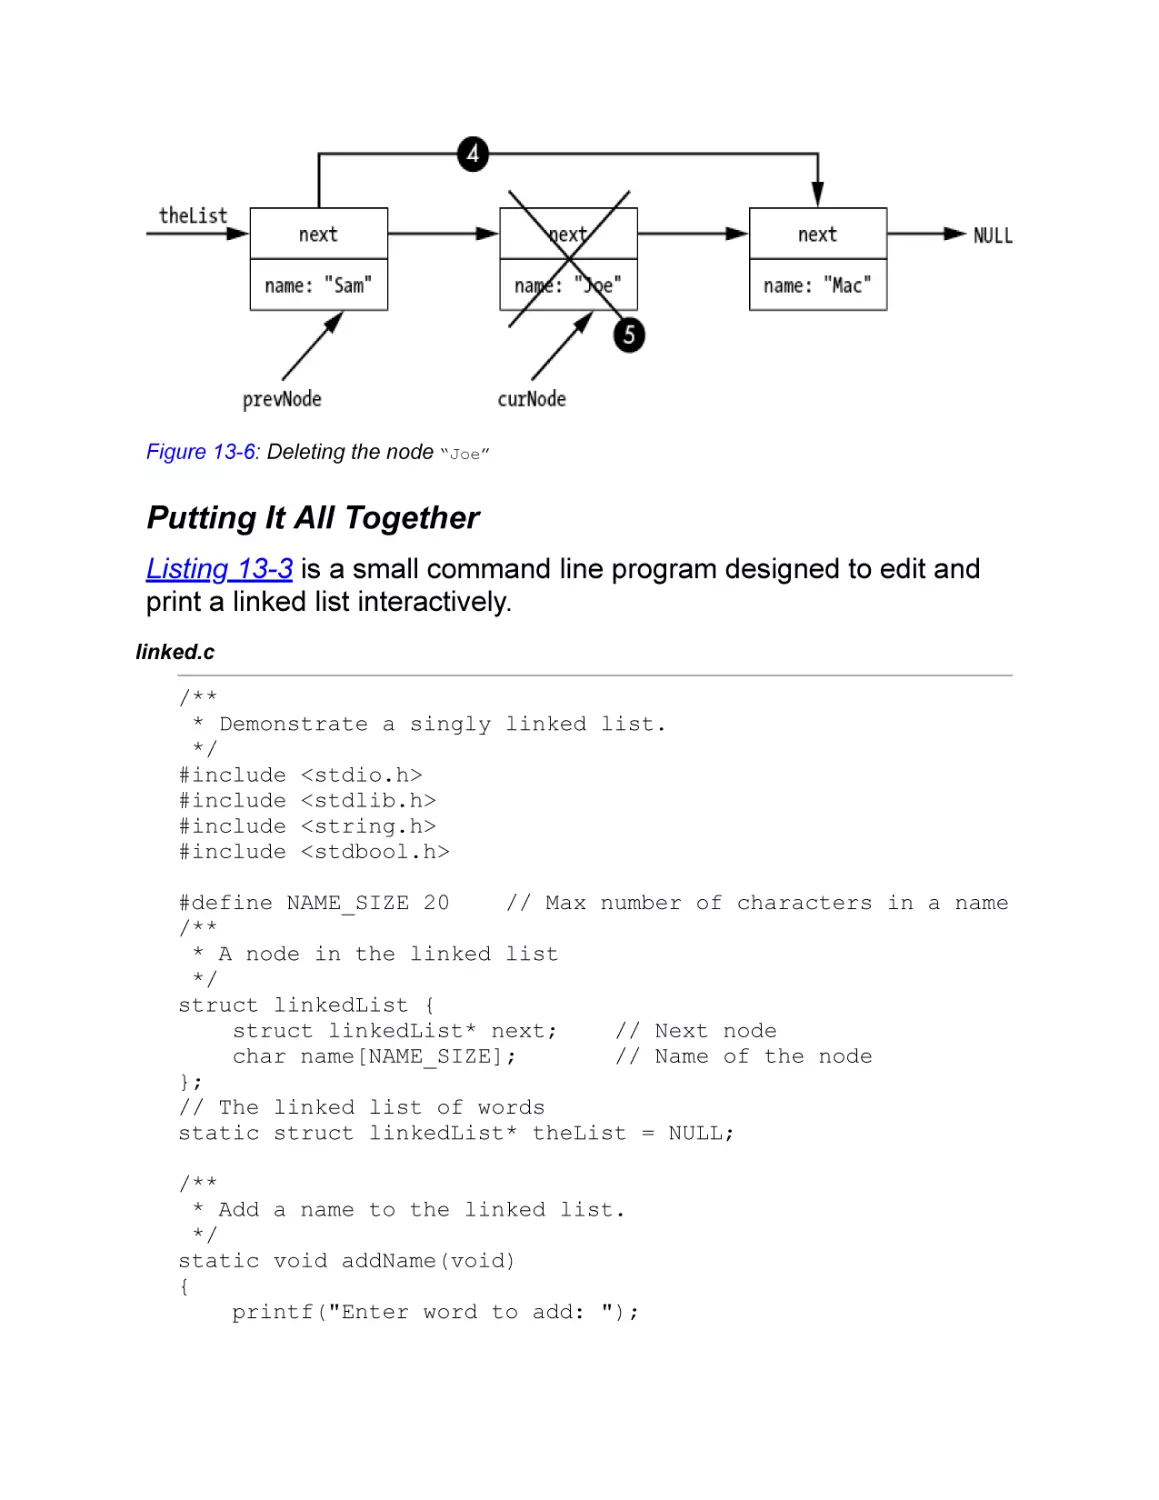
Deleting a Node
Putting It All Together
Dynamic Memory Problems
Valgrind and the GCC Address Sanitizer
Summary
Programming Problems
CHAPTER 14: BUFFERED FILE I/O
The printf Function
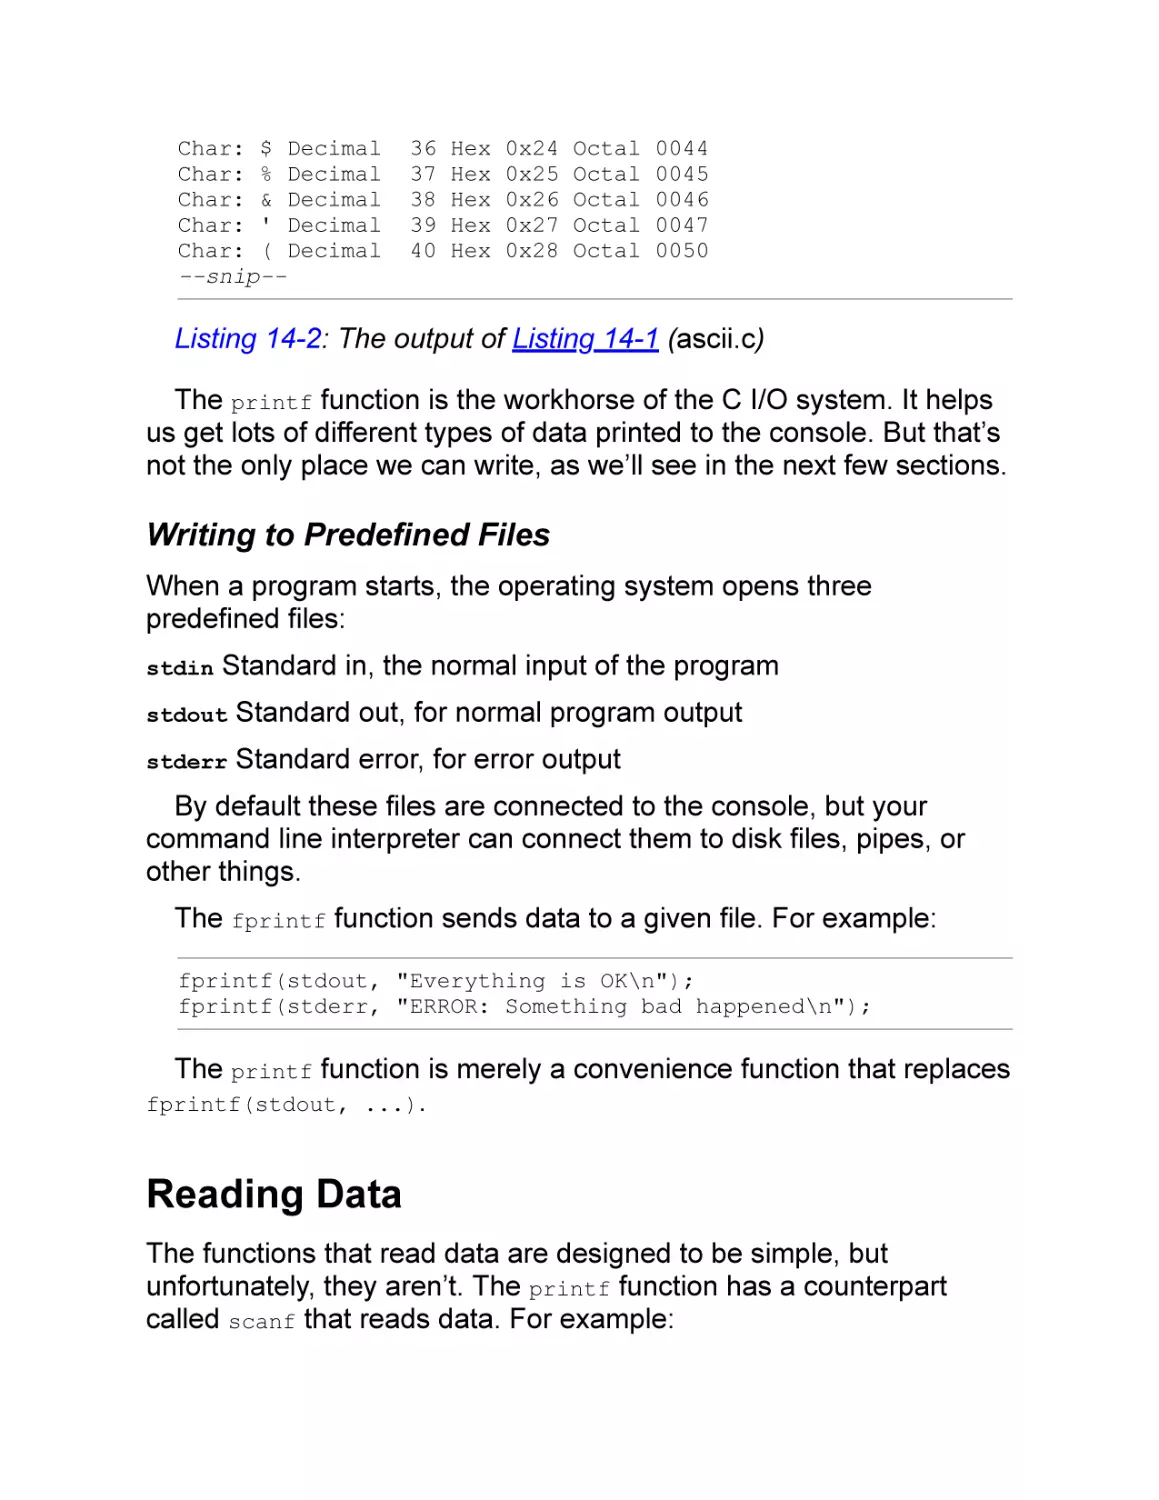
Writing the ASCII Table
Writing to Predefined Files
Reading Data
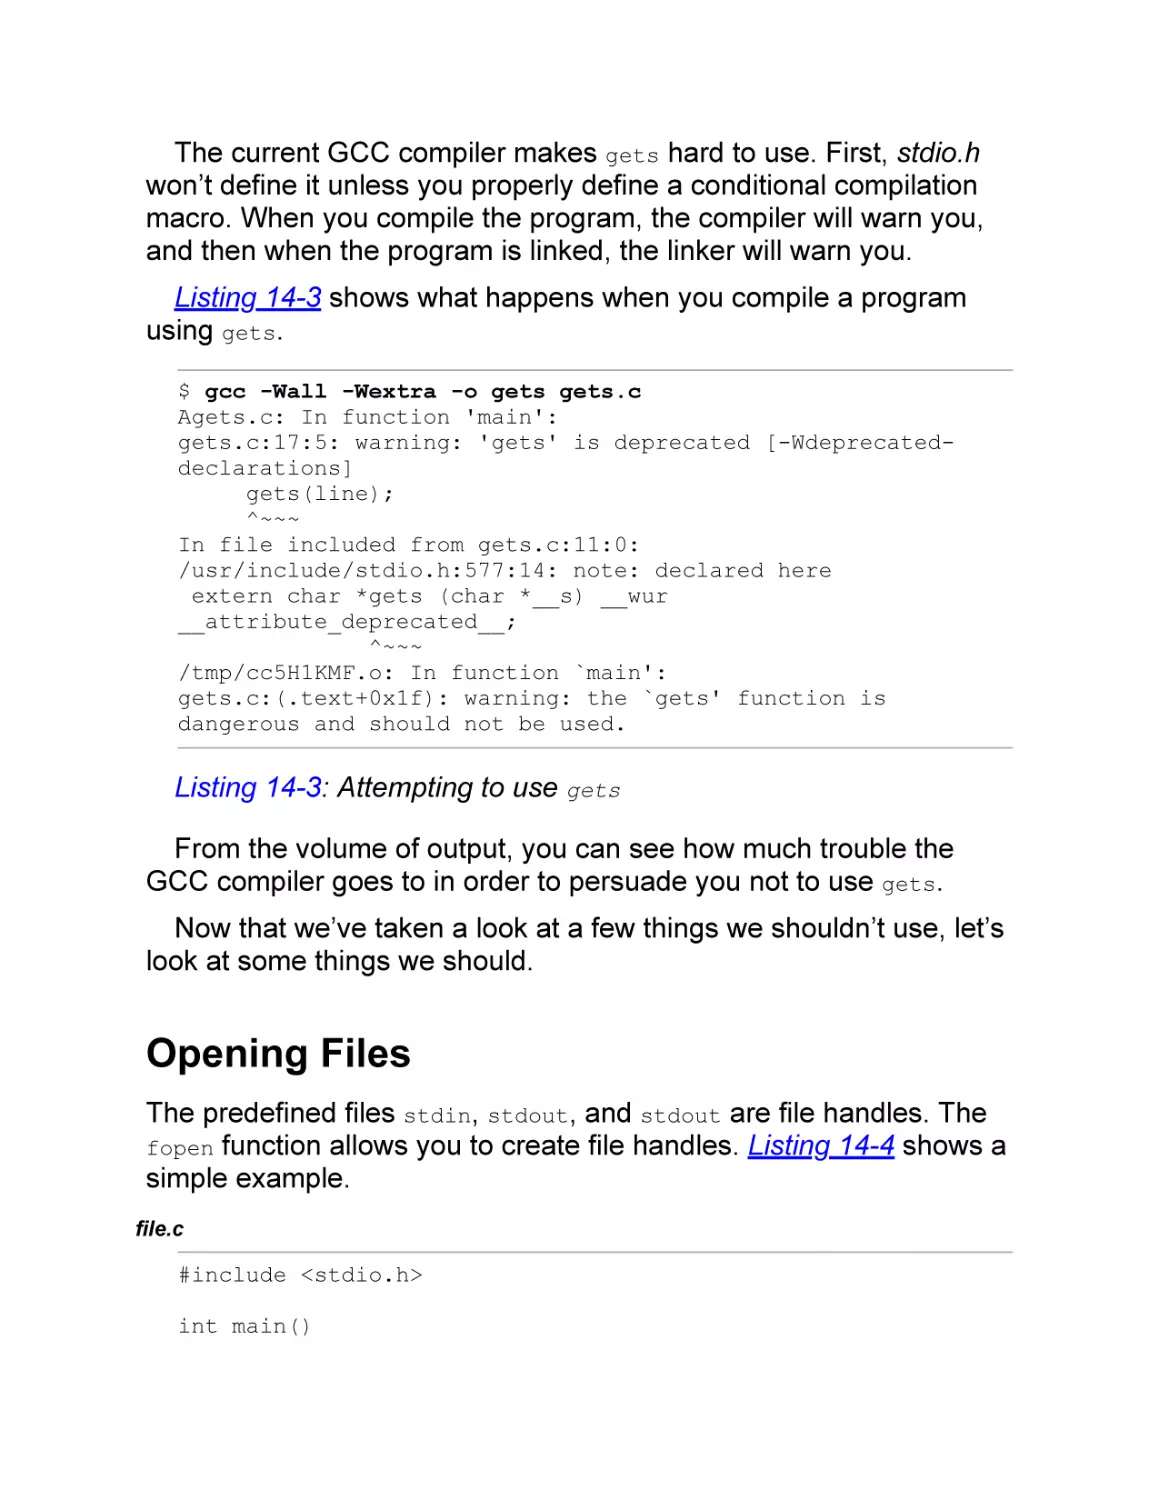
The Evil gets Function
Opening Files
Binary I/O
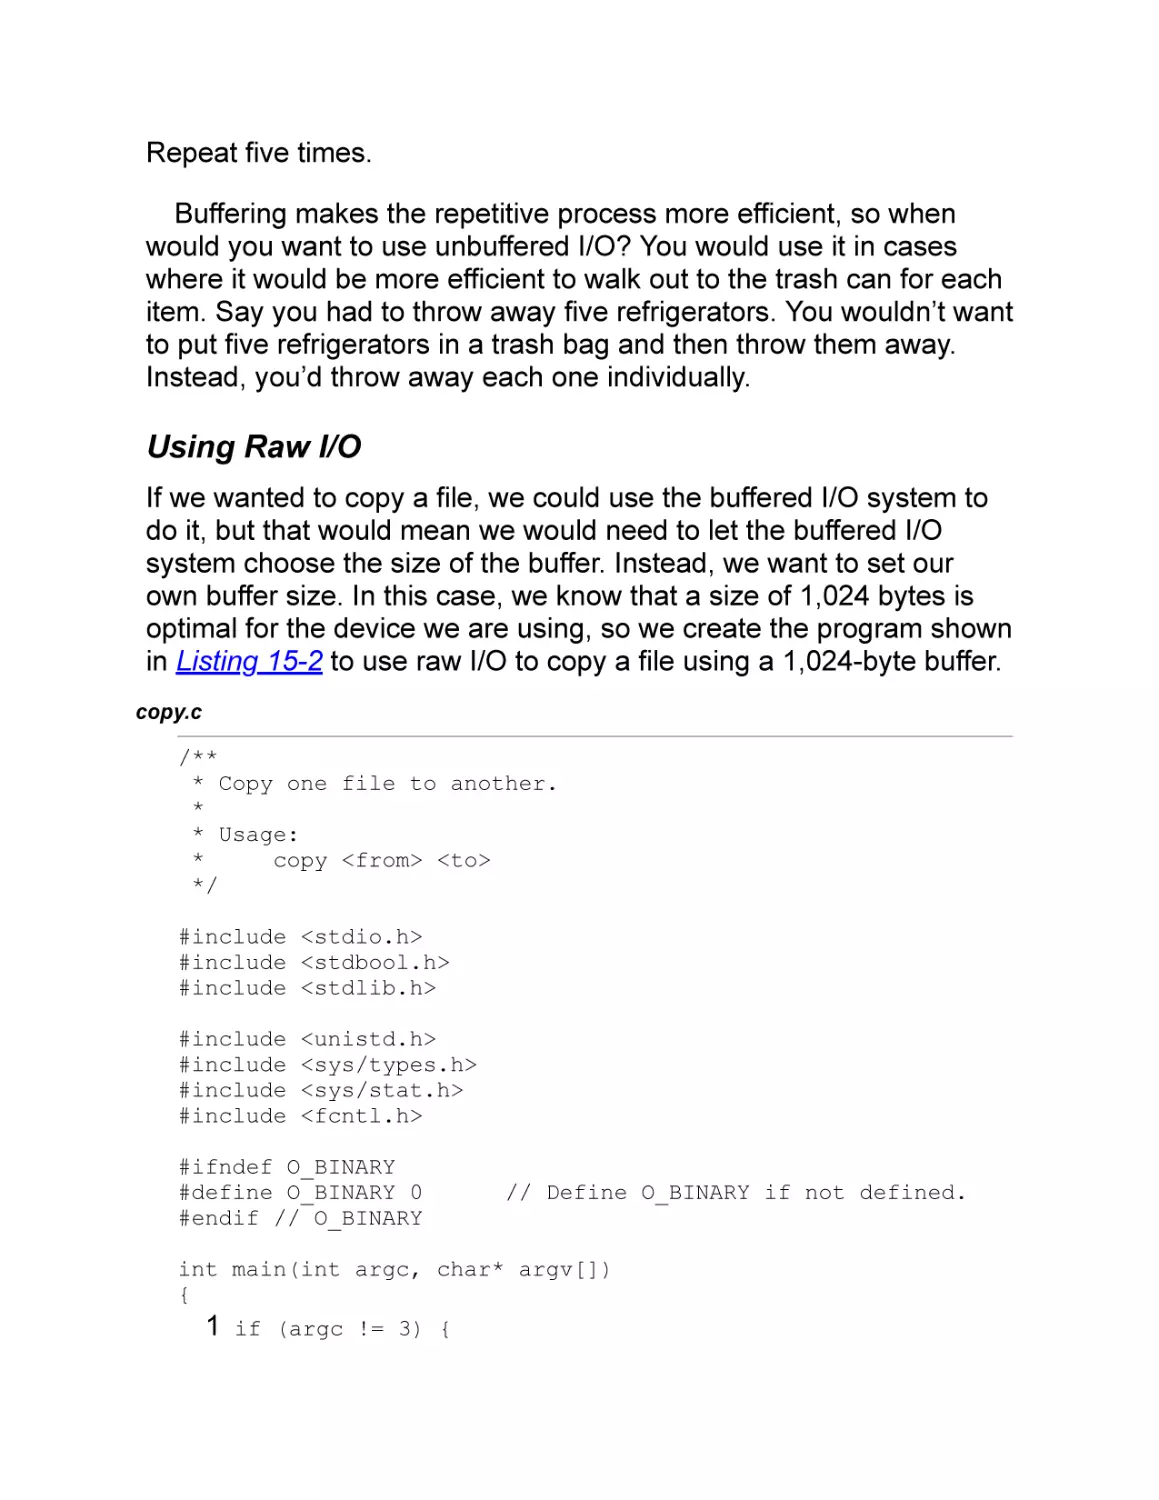
Copying a File
Buffering and Flushing
Closing Files
Summary
Programming Problems
CHAPTER 15: COMMAND LINE ARGUMENTS AND RAW I/O
Command Line Arguments
Raw I/O
Using Raw I/O
Using Binary Mode
ioctl
Summary
Programming Problems
CHAPTER 16: FLOATING-POINT NUMBERS
What Is a Floating-Point Number?
Floating-Point Types
Automatic Conversions
Problems with Floating-Point Numbers
Rounding Errors
Digits of Precision
Infinity, NaN, and Subnormal Numbers
Implementation
Alternatives
Summary
Programming Problems
CHAPTER 17: MODULAR PROGRAMMING
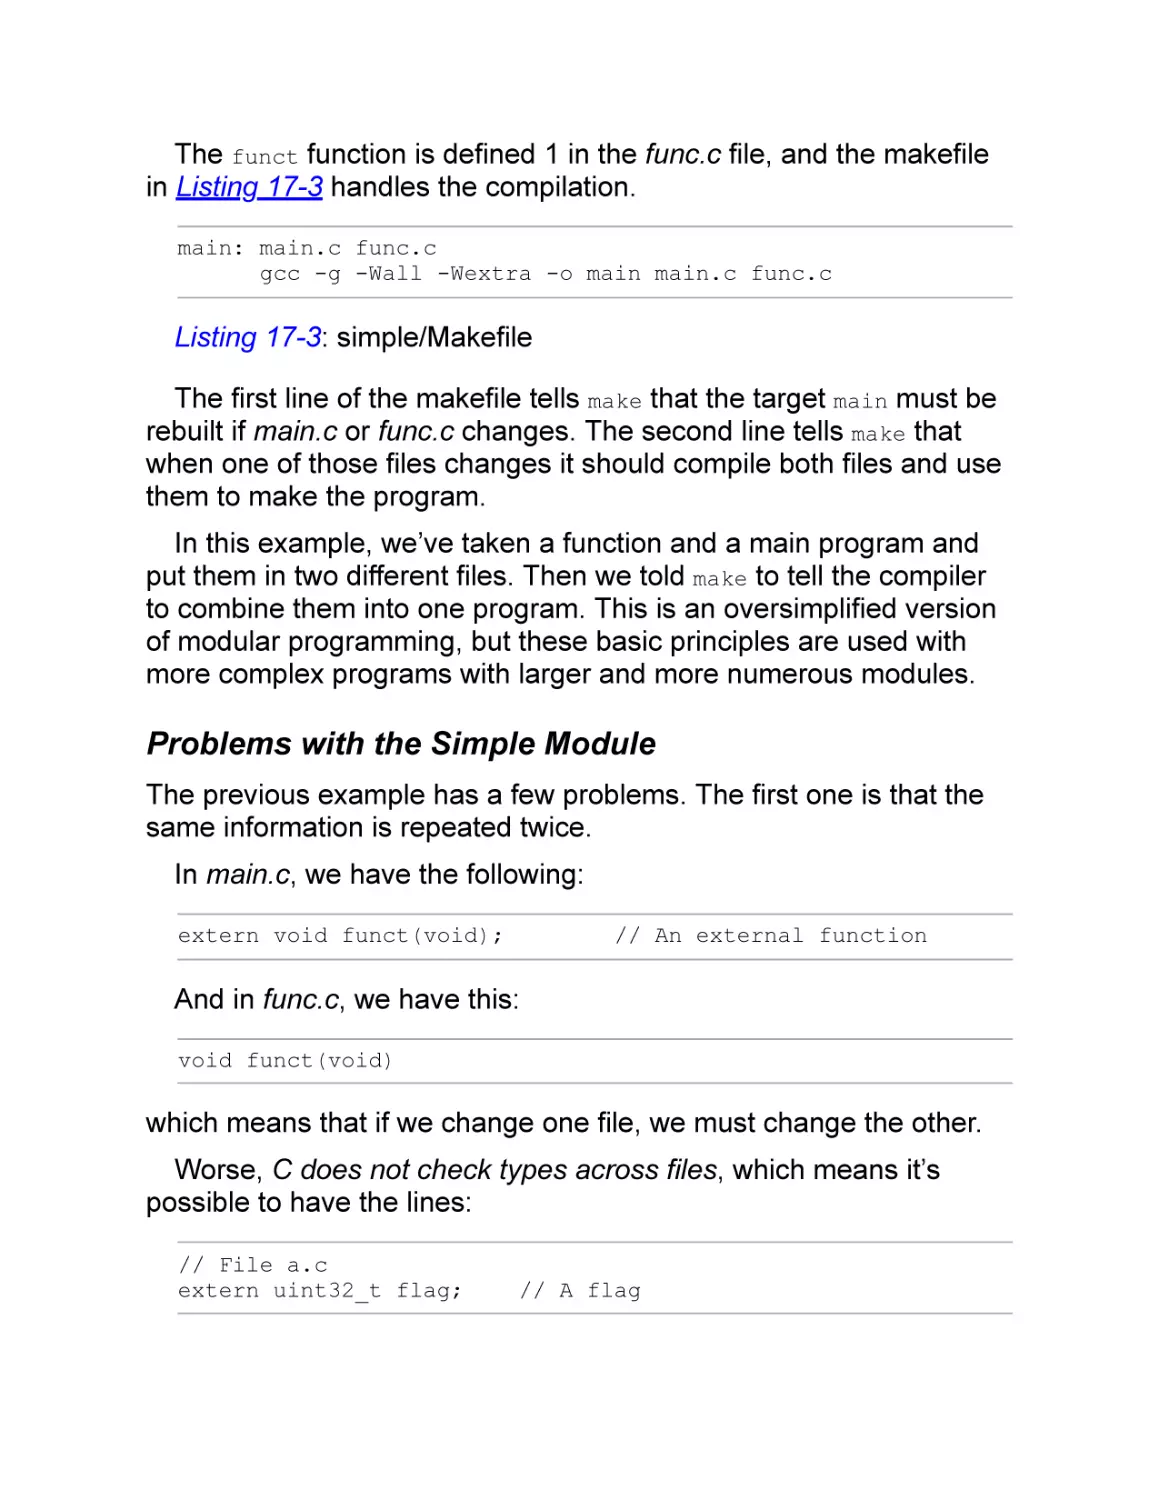
Simple Modules
Problems with the Simple Module
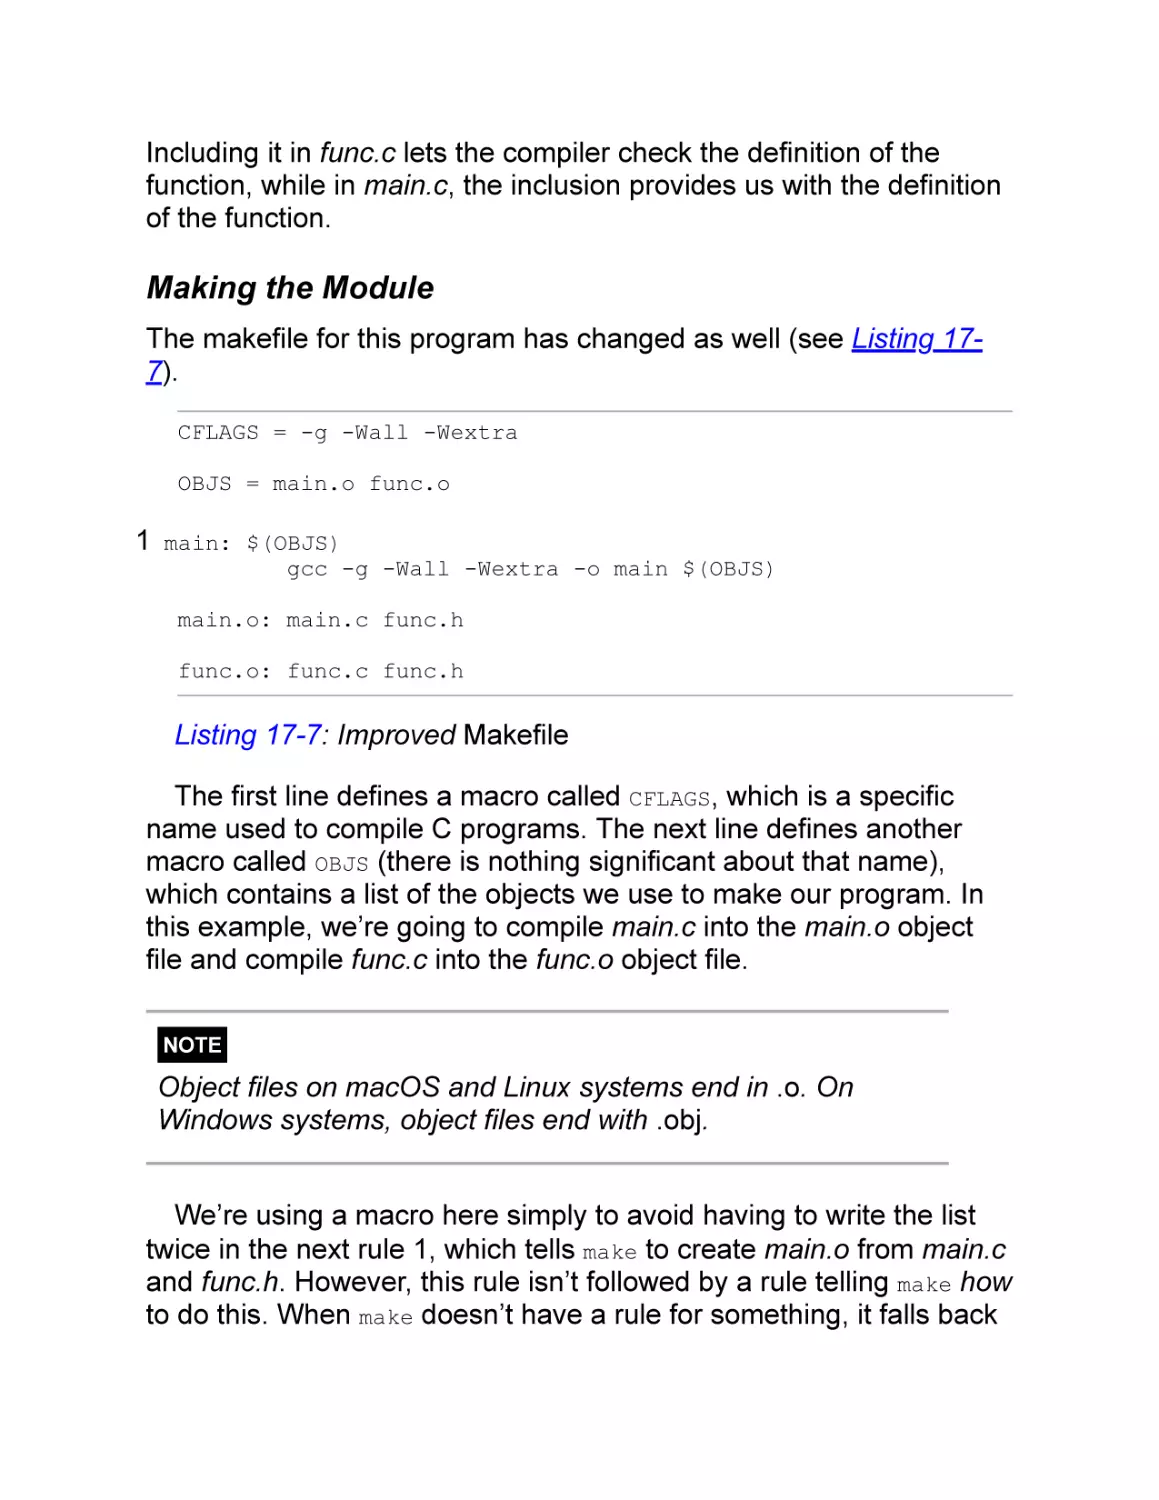
Making the Module
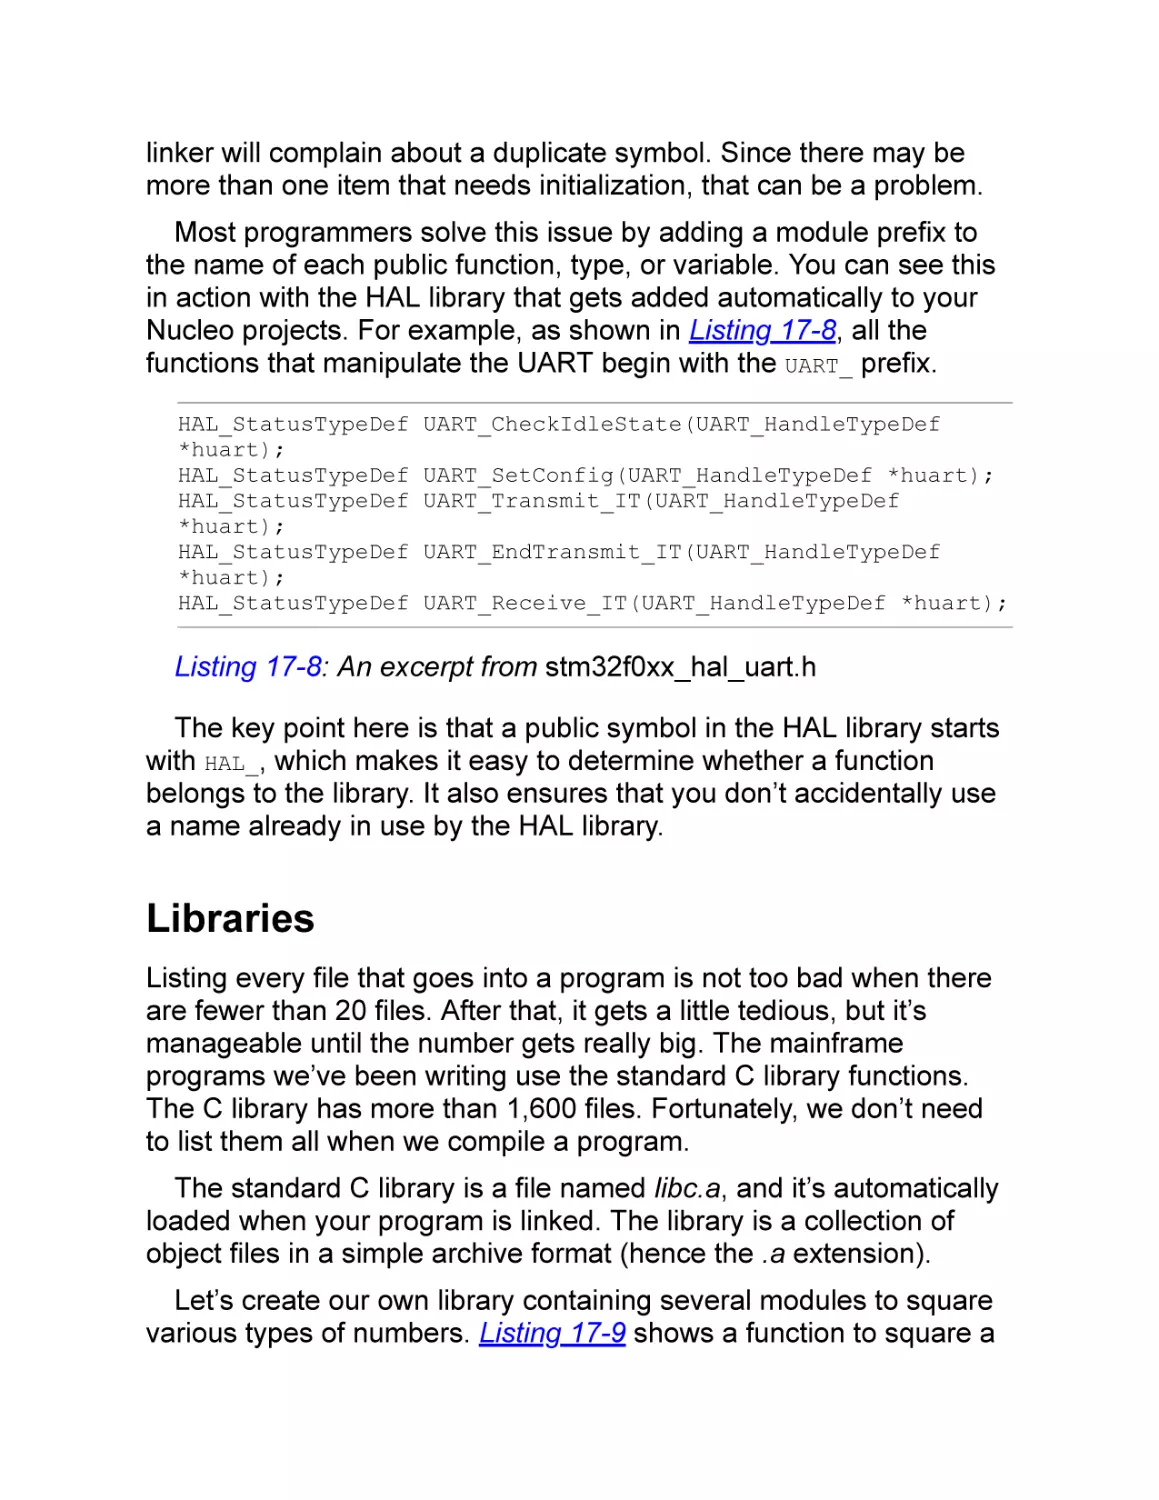
What Makes Good Modules
Namespaces
Libraries
ranlib and Library Linking
Deterministic vs. Nondeterministic Libraries
Weak Symbols
Summary
Programming Problems
AFTERWORD
Learn How to Write
Learn How to Read
Collaboration and Creative Theft
Useful Open Source Tools
Cppcheck
Doxygen
Valgrind
SQLite
Never Stop Learning
APPENDIX: PROJECT CREATION CHECKLIST
Native C Project
STM32 Workbench Embedded Project
INDEX
BARE METAL C
Embedded Programming for the Real
World
by Steve Oualline
BARE METAL C. Copyright © 2022 by Stephen Oualline.
All rights reserved. No part of this work may be reproduced or transmitted in any form or by
any means, electronic or mechanical, including photocopying, recording, or by any
information storage or retrieval system, without the prior written permission of the copyright
owner and the publisher.
First printing
26 25 24 23 22 1 2 3 4 5
ISBN-13: 978-1-7185-0162-1 (print)
ISBN-13: 978-1-7185-0163-8 (ebook)
Publisher: William Pollock
Managing Editor: Jill Franklin
Production Manager: Rachel Monaghan
Production Editor: Jennifer Kepler
Developmental Editors: Jill Franklin and Frances Saux
Cover Illustrator: Gina Redman
Interior Design: Octopod Studios
Technical Reviewer: Frank Duignan
Copyeditor: Bart Reed
Compositor: Ashley McKevitt, Happenstance Type-O-Rama
Proofreader: Rachel Head
For information on distribution, bulk sales, corporate sales, or translations, please contact
No Starch Press, Inc. directly at info@nostarch.com or:
No Starch Press, Inc.
245 8th Street, San Francisco, CA 94103
phone: 1.415.863.9900
www.nostarch.com
Library of Congress Cataloging-in-Publication Data
Names: Oualline, Steve, author.
Title: Bare metal C : embedded programming for the real world / Stephen Oualline.
Description: San Francisco : No Starch Press, [2022] | Includes index.
Identifiers: LCCN 2021049830 (print) | LCCN 2021049831 (ebook) | ISBN 9781718501621
(paperback) |
ISBN 9781718501638 (ebook)
Subjects: LCSH: C (Computer program language) | Embedded computer systems-Programming.
Classification: LCC QA76.73.C15 O835 2022 (print) | LCC QA76.73.C15 (ebook) | DDC
005.13/3--dc23/
eng/20211105
LC record available at https://lccn.loc.gov/2021049830
LC ebook record available at https://lccn.loc.gov/2021049831
No Starch Press and the No Starch Press logo are registered trademarks of No Starch
Press, Inc. Other product and company names mentioned herein may be the trademarks of
their respective owners. Rather than use a trademark symbol with every occurrence of a
trademarked name, we are using the names only in an editorial fashion and to the benefit of
the trademark owner, with no intention of infringement of the trademark.
The information in this book is distributed on an “As Is” basis, without warranty. While every
precaution has been taken in the preparation of this work, neither the author nor No Starch
Press, Inc. shall have any liability to any person or entity with respect to any loss or damage
caused or alleged to be caused directly or indirectly by the information contained in it.
About the Author
Steve Oualline has been writing reliable, low-bug programs for
embedded systems for over 50 years. He has a master of science
from the University of Southern California and has written many
books for both No Starch Press and O’Reilly. He is currently a
volunteer at the Southern California Railroad Museum, where his
most recent project was debugging the computer controller for their
Acme Traffic signal. (Ants built a nest inside it and had to be
removed.) His website can be found at http://oualline.com.
About the Technical Reviewer
Frank Duignan graduated as an electrical engineer in 1988. Since
then he has worked mostly at the interface between hardware and
software. He is currently lecturing in electrical/electronic engineering
at Technological University Dublin. Frank’s blog can be found at http
s://ioprog.com.
INTRODUCTION
This book is called Bare Metal C
because it’s for people who get
close to the hardware. It’s not for
people who buy their computer in a
box and never see the inside. The
computer used in this book doesn’t even have a
box. If you want to use it, you’re going to have to
connect something to the “bare metal” of the
board.
This book teaches embedded programming. An embedded
computer is one that sits inside the machine and you never know it’s
there. It’s the device that runs your garage door opener, your
microwave, your car, or even your greeting card. But before it can do
any of those things, it needs to be programmed. And that is what this
book teaches you: how to program an embedded system.
Why C? C gives you precise control over what your program is
doing, whereas other languages, such as C++, can do a great deal
of things behind your back. Consider the following statement:
a = b;
In C++, this could call a class’s assignment operator function,
which might result in heap memory being allocated and freed as well
as an exception being thrown. What all that means is unimportant
right now; the point is that you don’t know exactly what’s going to
happen.
In C, this statement assigns the value b to the variable a with no
side effects; it’s just an assignment, nothing more. This example is
simple, but you’ll see other ways that C does exactly what you tell it
throughout the book.
Precise control is important because we are using C to program a
low-end system on a chip (SOC) system based on the
STM32F030x4 processor (a cheap ARM Cortex-M0-based system)
that has 8KB of RAM. Memory management is very important with
limited RAM, so we can’t afford to have a high-level language like
C++ play with memory behind our backs. Precise control is also
important because an embedded system doesn’t have an operating
system and you need to tell the hardware what to do directly. Highlevel languages don’t always let you talk to the hardware, but C
does.
The book is designed for people who have a basic knowledge of
computers and hardware, but have a limited knowledge of
programming. It is for the hardware designer who wants to connect a
new piece of hardware to a microcontroller and use it for the first
time. It is for the programmer who is interested in low-level
programming and wants to get the most out of a 38¢ chip.
NOTE
The ARM Cortex-M0 is very popular with low-end products
because it costs 38¢ in quantities of 10,000 at the time of
writing. Given that we hope to sell millions of whatever
embedded system we are making, the difference between a
38¢ chip and a 56¢ chip is significant.
To get the most out of your programs, you’ll need to know what
goes on under the hood. The book shows you not only how to write a
program, but also how your program is translated into machine code
that’s used by the ARM chip. That’s important for maximum
efficiency. For example, you’ll learn how much of a performance hit
you’ll get if you change your program from using 16-bit integers to
using 32-bit integers. The answer, surprisingly, is that 32-bit integers
are more efficient and faster (32 bits is the natural number size for
the ARM, and if it’s forced to do 16-bit arithmetic, it does 32-bit
calculations and then throws away 16 bits).
To program and debug an ARM chip, you’ll need some extra tools:
a flash memory programmer (to get your code into the machine), a
USB-to-serial converter (because we use the serial line for
debugging), and a JTAG debugger. Since almost all developers need
this combination of tools, STMicroelectronics makes a board that
provides all the hardware you’ll need, called the NUCLEO-F030R8.
As of this writing, a chip shortage has made some boards hard to
find. See https://nostarch.com/bare-metal-c for alternate boards.
You’ll also need a mini USB cable (the one that doesn’t fit your
phone) so you can plug the board into your computer.
Your first task is to order a NUCLEO-F030R8. Then start reading
Chapter 1. By the time the board arrives, you will be ready for it.
PART I
EMBEDDED PROGRAMMING
Let me describe a “simple” embedded system. It
is a battery-powered processor housed in a
pendant worn around someone’s neck. When
the end user has an emergency, they press the
button and the computer sends a radio signal to
a receiver that makes an emergency call.
Sounds simple . . . except you have to send a precise set of
pulses to the radio so it will generate the proper signal. The system
must periodically check the battery and send battery information to
the base station as well, which serves two purposes. First, when the
battery starts to get a little low, the alarm company is notified and
sends the end user a new pendant. Second, if the base station
doesn’t receive a periodic signal, the alarm company knows that
something is wrong with the pendant.
This type of program is typical in the embedded world. It’s small,
must be precise, and doesn’t use a lot of outside resources.
In this section of the book, you’ll learn about basic C syntax and
programming. We also go through in detail what the C compiler does
so you can precisely control what your program does. To have this
precise control, you need to know what the compiler is doing behind
your back.
Embedded programming presents its own unique debugging
challenges. Fortunately, tools like the JTAG debugging interface
make things easier, but still, debugging an embedded system can be
quite difficult.
One of the most basic and common debugging methods is to put
printf statements in your code. This is somewhat difficult when
doing embedded programming, as there’s no place to send printed
output. We’ll cover how to use serial I/O to get printed data out of the
embedded system for debugging and logging.
And finally, in this part of the book, you’ll learn about interrupt
programming. Interrupts allow you to perform I/O efficiently, but they
also allow you to create race conditions and other random bugs if not
done right. Design is extremely important here because interrupt
problems can be quite debug-resistant.
Welcome to the world of embedded programming. Have fun.
1
HELLO WORLD
In this chapter, you’ll create and
execute your first program, “Hello
World.” This is about the simplest
program you can make and the first
program in almost all C books. But
you’ll go beyond just creating it: you’ll learn
what’s actually going on behind the scenes
during its creation.
The tools you’ll use are designed to make things quick and easy,
which is good for regular programming but can be bad for embedded
programming. The compiler, GCC, is actually a wrapper that runs a
whole bunch of other tools. We’ll look at what each tool does to get
your program from code to execution. In the process, you’ll discover
that the GCC optimizer has a surprise for us. Although our program
is very simple, the optimizer will decide to rewrite part of it to make it
more efficient—and it won’t tell us about the rewrite! In fact, we
would never know about it if we didn’t look under the hood to see
what’s going on. (I won’t tell you what it will do to us; you’ll have to
read the rest of the chapter to find that out.)
Installing GCC
In order to run the program in this chapter, you’ll need to download
and install the GNU C compiler (GCC) on your system, along with
related tools. The instructions for doing so vary based on your
operating system.
On Windows, install Minimalist GNU for Windows (MinGW), which
can be found at http://www.mingw.org. See https://nostarch.com/bare
-metal-c for detailed instructions.
On macOS, the GCC compiler is part of the developer packages
that can be accessed with the following command:
$ xcode-select --install
Select the Command Line Tools option for installation.
Linux installation instructions depend on which distribution you are
using. For Debian systems such as Ubuntu and Linux Mint, use the
following commands:
$ sudo apt-get install build-essential
$ sudo apt-get install manpages-dev
For Red Hat–based systems (such as Fedora or CentOS), use the
following command:
$ dnf groupinstall "Development Tools"
For any other Linux-based system, use the package manager that
came with the system or search online to find the command needed
for installation.
After installing the software, open a terminal window and issue the
command gcc. If you get a “no input files” error, you’ve installed
successfully.
$ gcc
gcc: fatal error: no input files
compilation terminated.
Downloading System Workbench for STM32
System Workbench for STM32 is an IDE we’ll use to write C
programs for our embedded devices. We won’t use it until Chapter 2,
but the download will take some time, so I recommend you start it
now. By the time you finish reading this chapter, the download
should be complete.
Go to http://openstm32.org/HomePage, locate the link for System
Workbench for STM32, and click it. Register (it’s free), or log in if you
have an account, and then follow the links to the installation
instructions. Install the IDE from the installer and not from Eclipse.
When the download starts, return here and continue reading.
Tools and installation procedures may change over time. If you
encounter any issues, visit https://nostarch.com/bare-metal-c to
check for updated instructions.
Our First Program
Our first program is called hello.c. Begin by creating a directory to
hold this program and jump into it. Navigate to the root directory of
your workspace, open a command line window, and enter these
commands:
$ mkdir hello
$ cd hello
Using a text editor such as Notepad, Vim, or Gedit, create a file
called hello.c and enter the following code:
#include <stdio.h>
int main()
{
printf("Hello World!\n");
return (0);
}
We’ll walk through this program in detail in the following sections.
First, though, we have to run it.
Compiling the Program
The file you just created is known as a source file, and it contains
code in human-readable format. (Yes, really; this is supposed to be
human readable.) It’s the source of all the other files we are going to
produce. The content of the file is called source code. The computer
does not understand source code; it only understands machine
code, a set of instructions in a numeric format. So, we need to
transform our source code into machine code, a process called
compiling.
To do this, we execute the following compiler command on macOS
or Linux:
$ gcc -o hello hello.c
On Windows, we execute the following command:
$ gcc -o hello.exe hello.c
If you get no output, just a command prompt, the command was
successful. Otherwise, you’ll get error messages.
This command tells the program GCC to compile and link the
program, putting the output in a file called hello on macOS and Linux
or hello.exe on Windows. We can now run our program using the
following command on macOS or Linux:
$ ./hello
Hello World!
On Windows, run the following:
$ hello
Hello World!
Making Mistakes
Let’s introduce a mistake and see what happens. Change the
second line so that it looks like this:
intxxx main()
Now let’s try to compile the program:
$ gcc -o hello hello.c
hello.c:2:1: error: unknown type name 'intxxx'
intxxx main()
^
The output tells us that there is a problem in line 2 of the program
and that the error was discovered at character position 1. In this
case, where the compiler was expecting a type, it got something
different—namely, the garbage we deliberately put in. Fix the
program by changing the line back.
Next let’s take something out—specifically, the semicolon on the
fourth line:
printf("Hello World!\n")
This gives us a different error message:
$ gcc -o hello hello.c
hello.c: In function 'main':
hello.c:5:5: error: expected ';' before 'return'
return (0);
^
You’ll notice that the compiler pointed to line 5 when issuing the
error message. That’s because although we made a mistake on line
4, the compiler didn’t detect it until it looked at line 5.
Sometimes errors on a previous line will not be detected for one or
more lines, so don’t look just at the line specified by the error; look
above it as well.
Understanding the Program
Now let’s go through our program line by line to see what it is doing.
Take a look at the first line:
#include <stdio.h>
In order to build our program, we are using components that come
with the compiler—namely, the standard input/output (I/O) package.
The functions in this package are defined in the /usr/include/stdio.h
file. (Windows may use a slightly different directory.) Specifically, we
use the standard I/O function printf later in the program.
Next, we define the starting point for our program:
int main()
The name main is special and indicates the main body of the
program. All programs start at main. This is followed by a set of
statements enclosed in curly brackets:
{
...
}
The curly brackets denote the body of main. In other words, they’re
used to group the statements that follow. We indent the statements
inside the curly brackets by four spaces for readability, but you are
free to use other indentation sizes. In fact, the C compiler doesn’t
care how much whitespace we use. We could have used no
indentation at all, but no indentation makes the program hard to
read, so most C programmers indent their code.
Inside the curly brackets is our first executable statement:
printf("Hello World!\n");
This tells the program to use the standard I/O function printf to
output a string to the standard output location (our terminal). The \n
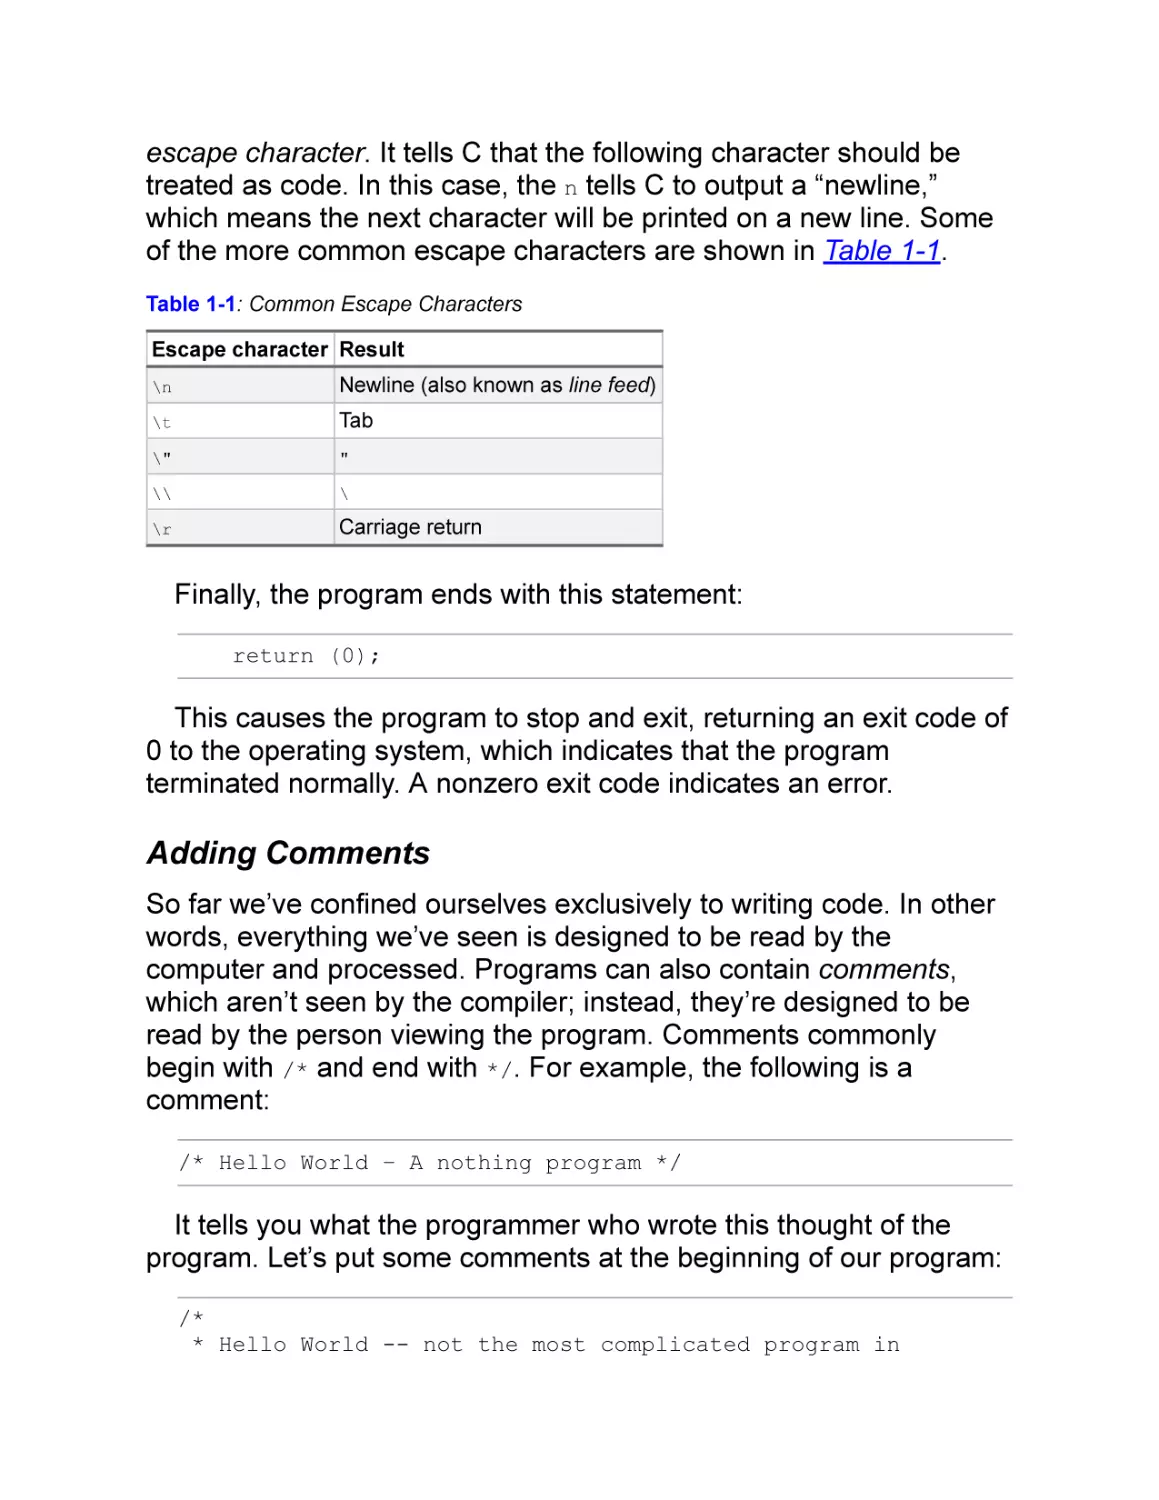
is a special character in this string. The backslash (\) is called the
escape character. It tells C that the following character should be
treated as code. In this case, the n tells C to output a “newline,”
which means the next character will be printed on a new line. Some
of the more common escape characters are shown in Table 1-1.
Table 1-1: Common Escape Characters
Escape character Result
\n
Newline (also known as line feed)
\t
Tab
\"
"
\\
\
\r
Carriage return
Finally, the program ends with this statement:
return (0);
This causes the program to stop and exit, returning an exit code of
0 to the operating system, which indicates that the program
terminated normally. A nonzero exit code indicates an error.
Adding Comments
So far we’ve confined ourselves exclusively to writing code. In other
words, everything we’ve seen is designed to be read by the
computer and processed. Programs can also contain comments,
which aren’t seen by the compiler; instead, they’re designed to be
read by the person viewing the program. Comments commonly
begin with /* and end with */. For example, the following is a
comment:
/* Hello World – A nothing program */
It tells you what the programmer who wrote this thought of the
program. Let’s put some comments at the beginning of our program:
/*
* Hello World -- not the most complicated program in
*
the universe but useful as a starting point.
*
* Usage:
*
1. Run the program.
*
2. See the world.
*/
Another style of comment starts with // and goes to the end of the
line. As you see more programs, you’ll be able to determine for
yourself which is better to use.
Always add comments to your code when you write a program,
because that’s when you know what you are doing. Five minutes
later, you might forget. Five days later, you will forget. For example, I
once had to do a complex bitmap transformation in order to translate
a raster image into a firing command for an inkjet nozzle. The
transformation involved taking a horizontal raster image, turning the
row data into column data for the nozzles, and then, since the
nozzles were offset, shifting the data left to match the nozzle
location. I wrote out a page of comments describing every factor that
affected the firing order. Then I added half a page of ASCII art
diagramming what I had just described. Only after doing this and
making sure I understood the problem did I write the code. And
because I had to organize my thoughts in order to document them,
the program worked on the first try.
When creating the answers to the programming problems
presented in this book, get in the habit of writing comments. The
really good programmers are fanatical comment writers.
Improving the Program and Build Process
When it comes to our little “Hello World” program, manually
compiling it isn’t a problem. But for a program with thousands of
modules in it, keeping track of what needs to be compiled and what
doesn’t can be quite difficult. We need to automate the process to be
efficient and avoid human error.
In this section, we’ll tweak our program to improve it and automate
the build process. Ideally, you should be able to build a program
using a single command and no parameters, which would indicate
you have a consistent and precise build process.
The make Program
One problem with our build process is that we have to enter the
compilation command each time we build the program. This would
be tedious for a program with several thousand files in it, each of
which would need to be compiled. To automate the build process,
we’ll use the make program. It takes as its input a file called a
makefile, which tells make how to build a program.
Create a file called Makefile containing the following on macOS or
Linux:
CFLAGS=-ggdb -Wall -Wextra
all: hello
hello: hello.c
gcc $(CFLAGS) -o hello hello.c
On Windows, the makefile should contain the following:
CFLAGS=-ggdb -Wall -Wextra
all: hello.exe
hello.exe: hello.c
gcc $(CFLAGS) -o hello.exe hello.c
It’s important that the indented lines begin with a tab character.
Eight spaces won’t work. (Horrible file design, but we’re stuck with
it.) The first line defines a macro. As a result of this definition,
whenever we specify $(CFLAGS) in the makefile, the make program will
replace this with -ggdb -Wall -Wextra. Next, we define the target all,
which is the default target by convention. When make is run with no
parameters, it tries to build the first one it sees. The definition of this
target, all: hello, tells the make program, “When you try to build all,
you need to build hello.” The final two lines of the makefile are the
specification for hello (or hello.exe on Windows). These tell make
that hello is made from hello.c by executing the command gcc
$(CFLAGS) -o hello hello.c. This command contains the macro we
defined, $(CFLAGS), which expands to -ggdb -Wall -Wextra. You’ll
notice that we added a couple of extra flags to our compilation. We’ll
discuss those in the next section.
Now let’s make the program using the make command:
$ make
gcc -ggdb -Wall -Wextra -o hello hello.c
As you can see, the program ran the commands to build the
executable. The make program is smart. It knows that hello is made
from hello.c, so it will check the modification dates of these two files.
If hello is newer, then it does not need to be recompiled, so if you
attempt to build the program twice, you’ll get the following message:
make: Nothing to be done for 'all'.
This is not always the correct behavior. If we change the flags in
our makefile, we’ve changed the compilation process and should
rebuild our program. However, make doesn’t know about this change
and won’t rebuild the program unless we edit hello.c and save the
file or delete the output file.
Compiler Flags
The GCC compiler takes a number of options. In fact, the list of
options for this compiler exceeds eight pages. Fortunately, we don’t
have to worry about them all. Let’s take a look at the ones we used
for our program:
Compiles the program so we can debug it. Mostly, this adds
debugging information to the output file that allows the debugger to
understand what is going on.
-ggdb
Turns on a set of warnings that will flag correct but
questionable code. (This book will teach you not to write
questionable code.)
-Wall
-Wextra
Turns on extra warnings in an effort to make our code more
precise.
-o hello Puts the output of our program
is -o hello.exe for Windows users.)
in the file hello. (This option
How the Compiler Works Behind the Scenes
In order to best make use of the compiler, you need to understand
what goes on behind the scenes when you run it. That’s because
when you’re writing software for embedded devices, you’ll often
need to circumvent some of the operations the compiler performs
automatically, which consist of a number of steps:
The source code is run through a preprocessor, which handles all
the lines that begin with #, called directives. In our original source
file, this is the #include statement. Later, you will learn about
additional directives.
The compiler proper takes the preprocessed source code and turns
it into assembly language code. C code is supposedly machineindependent and can be compiled and run on multiple platforms.
Assembly language is machine-dependent and can be run on only
one type of platform. (Of course, it is still possible to write C code
that will work on only one machine. C tries to hide the underlying
machine from you, but it does not prevent you from directly
accessing it.)
The assembly language file is passed through an assembler, which
turns it into an object file. The object file contains just our code.
However, the program needs additional code to work. In our case,
the object file for hello.c needs a copy of the printf function.
The linker takes the object code in the object file and combines
(links) it with useful code already present on your computer. In this
case, it’s printf and all the code needed to support it.
Figure 1-1 illustrates the process. All these steps are hidden from
you by the gcc command.
Figure 1-1: The steps needed to produce a program
You’ll notice that the gcc command is acting as both compiler and
linker. In fact, gcc is designed as a sort of executive program. It looks
at the arguments and decides which other programs it needs to run
in order to do its job. This might include the preprocessor (cpp), the C
compiler (cc1), the assembler (as), the linker (ld), or other programs
as needed. Let’s walk through these components in more detail.
The Preprocessor
The first program run is the preprocessor, which is a macro
processor (a type of automatic text editor) that handles all the lines
that begin with #. In our program, it processes the #include line. We
can get the output of the preprocessor with this command:
$ gcc -E hello.c >hello.i
The output of this command is stored in the hello.i file. If we look at
this file, we see that it’s more than 850 lines long. That’s because the
#include <stdio.h> line causes the entire stdio.h file to be copied
into our program, and because the stdio.h file has its own #include
directives, the files included by stdio.h get copied in as well.
We needed stdio.h for the printf function, and if we look through
hello.i, we find the definition of this function, which is now included in
our program:
extern int printf (const char *__restrict __format, ...);
extern int sprintf (char *__restrict __s,
const char *__restrict __format, ...) __attribute__
((__nothrow__));
The preprocessor also removes all the comments and annotates
the text with information indicating what file is being processed.
The Compiler
Next, the compiler turns the C language code into assembly
language. We can see what’s generated with this command:
$ gcc -S hello.c
This should produce a file that starts with the following lines:
.LC0:
.file
"hello.c"
.section
.rodata
.string "Hello World!"
Notice that the compiler translated the C string "Hello World!\n"
to the assembly language .string command. If you have sharp
eyes, you’ll also notice that the \n is missing. We’ll discover why a
little later.
The Assembler
The assembly language file goes into the assembler, where it is
translated into machine code. The gcc command has an option (-Wa)
that lets us pass flags to the assembler. Since it’s impossible to
understand the machine code unless you’re a machine, we will use
the following command to ask for an assembly language listing that
prints the machine code in human-readable format, with the
corresponding assembly language statements that generated that
code:
$ gcc -Wall -Wextra -g -Wextra -Wa,-a=hello.lst -c hello.c
The -Wa option tells GCC that what follows is to be passed to the
assembler. The -a=hello.lst option tells the assembler to produce a
listing called hello.lst. Let’s take a look at that file. It begins as
follows:
4
5
6 0000 48656C6C
6
6F20776F
6
726C6421
6
00
.LC0:
.section
.rodata
.string "Hello World!"
Assembly language differs on each machine. In this file, you’re
looking at x86 assembly language. It might seem like a confused
mess, even in comparison to other assembly languages. You
probably won’t understand it completely, and that’s okay; this chapter
should only give you a sense of what assembly language looks like.
In later chapters, when we get to the ARM processor, you’ll see a
much saner and easier-to-understand assembly.
The first column is a line number from the assembly language file.
The second column, if present, indicates the address of the data
being stored. All computer memory slots have a numerical address.
In this case, the string "Hello World!" is being stored at address
0000 relative to the section that is currently being used (in this case,
a section titled .rodata). When we discuss the linker in the next
section, we’ll see how this relative address is translated into an
absolute one.
The next column contains the numerical values to be stored in
memory in hexadecimal format. Then comes the text of the
assembly language code itself. In the file, we can see that the
.string directive tells the assembler to generate the codes for a text
string.
Later in the file, we find the code for main:
15 0000 55
16
17
18 0001 4889E5
19
12:hello.c
****
20
21 0004 BF000000
21
00
22 0009 E8000000
22
00
pushq
%rbp
.cfi_def_cfa_offset 16
.cfi_offset 6, -16
movq
%rsp, %rbp
.cfi_def_cfa_register 6
printf("Hello World!\n");
.loc 1 12 0
movl
$.LC0, %edi
call
puts
On line 15, we can see the assembly language instruction 55,
which will be stored at location 0 in this section. This instruction
corresponds to pushq %rbp, which does some bookkeeping at the
start of the procedure. Also notice that some machine instructions
are 1 byte long and others as long as 5 bytes. The instruction at line
21 is an example of a 5-byte instruction. You can see that this
instruction is doing something with .LC0. If we look at the top of our
listing, we see that .LC0 is our string.
As a C programmer, you’re not expected to fully understand what
the assembly language does. Complete understanding would require
absorbing several thousand pages of reference material. But we can,
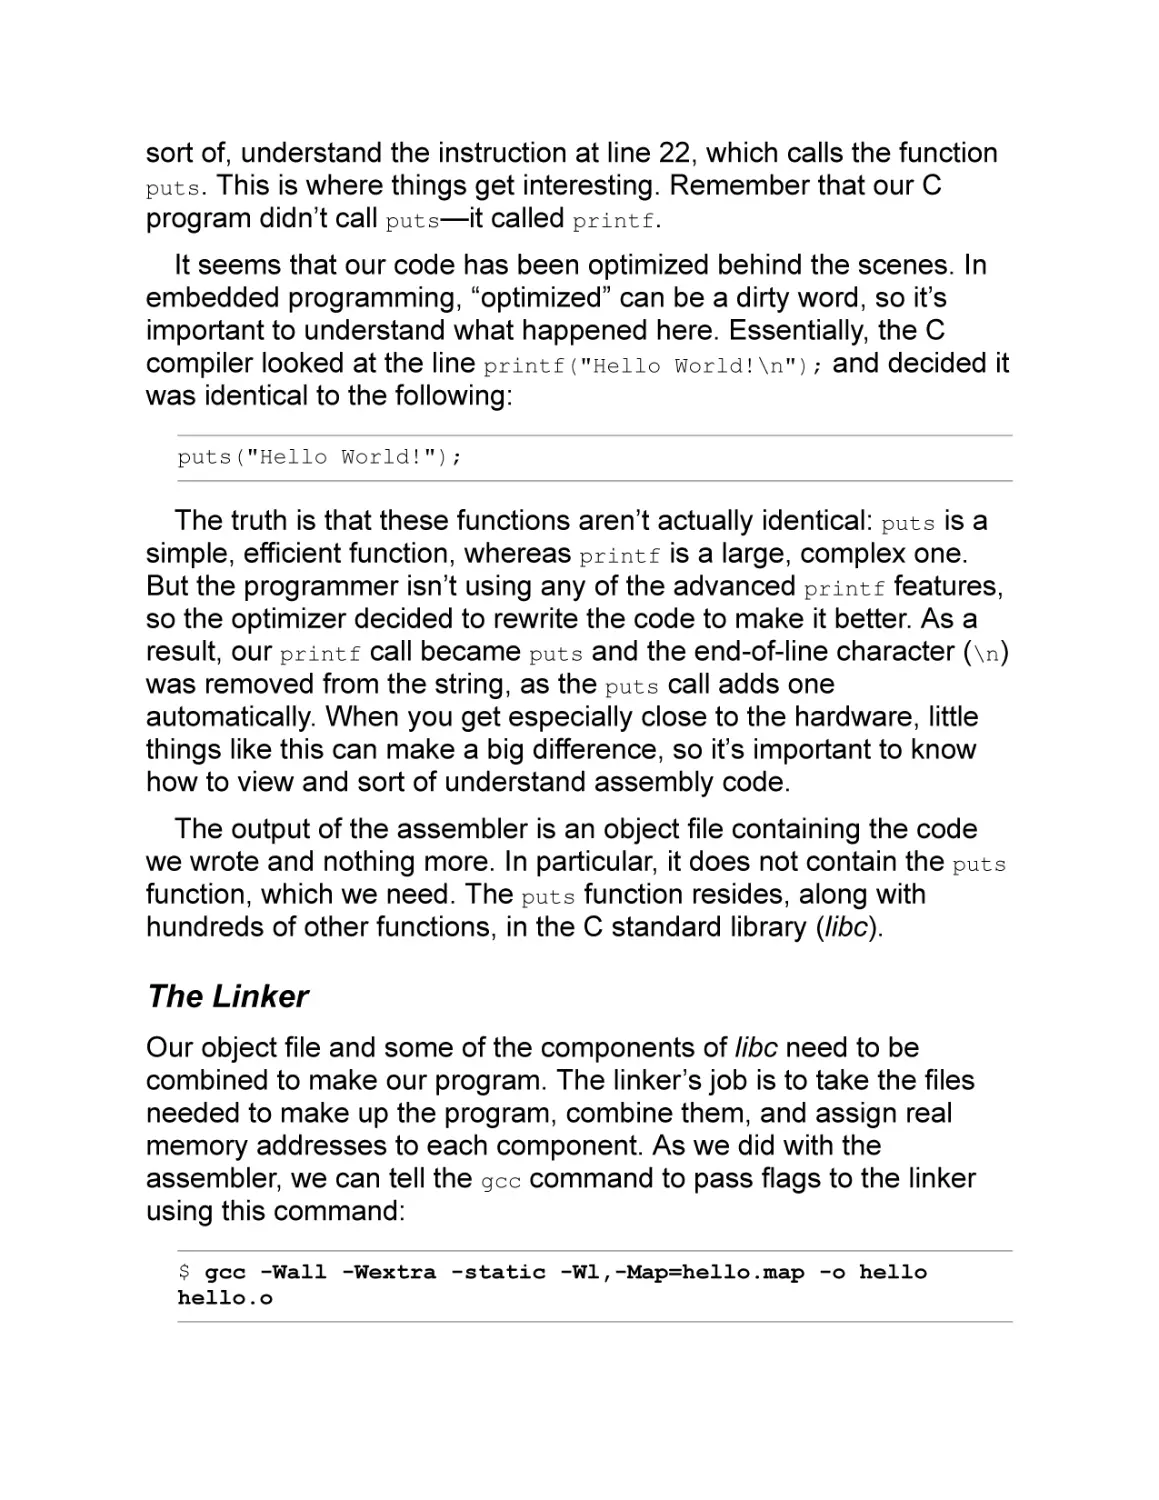
sort of, understand the instruction at line 22, which calls the function
puts. This is where things get interesting. Remember that our C
program didn’t call puts—it called printf.
It seems that our code has been optimized behind the scenes. In
embedded programming, “optimized” can be a dirty word, so it’s
important to understand what happened here. Essentially, the C
compiler looked at the line printf("Hello World!\n"); and decided it
was identical to the following:
puts("Hello World!");
The truth is that these functions aren’t actually identical: puts is a
simple, efficient function, whereas printf is a large, complex one.
But the programmer isn’t using any of the advanced printf features,
so the optimizer decided to rewrite the code to make it better. As a
result, our printf call became puts and the end-of-line character (\n)
was removed from the string, as the puts call adds one
automatically. When you get especially close to the hardware, little
things like this can make a big difference, so it’s important to know
how to view and sort of understand assembly code.
The output of the assembler is an object file containing the code
we wrote and nothing more. In particular, it does not contain the puts
function, which we need. The puts function resides, along with
hundreds of other functions, in the C standard library (libc).
The Linker
Our object file and some of the components of libc need to be
combined to make our program. The linker’s job is to take the files
needed to make up the program, combine them, and assign real
memory addresses to each component. As we did with the
assembler, we can tell the gcc command to pass flags to the linker
using this command:
$ gcc -Wall -Wextra -static -Wl,-Map=hello.map -o hello
hello.o
The -Wl tells GCC to pass the option that follows (-Map=hello.map)
to the linker. The map tells us where the linker put things in memory.
(More on this later.) We’ve also added the directive -static, which
changes the executable from dynamic to statically linked so that the
memory map will look more like what we will see with our embedded
systems. That way, we can avoid having to discuss the complexities
of dynamic linking.
Object files such as hello.o are relocatable. That is, they can go
anywhere in memory. It is the job of the linker to decide exactly
where in memory they go. It is also the linker’s job to go through the
libraries used by the program, extract any needed object files, and
include them in the final program. The linker map tells us where
things went and what library components were included in our
program. For example, a typical linker entry might look like this:
.text
0x000000000040fa90
0x1c8
/usr/lib/gcc/x86_64-linux-gnu/5/../../../
x86_64-linux-gnu/libc.a(ioputs.o)
0x000000000040fa90
0x000000000040fa90
*fill*
0x000000000040fc58
0x8
puts
_IO_puts
Remember that we didn’t write puts, even though it appears in this
linker entry. As mentioned, it came from the standard C library file
(libc.a). We can see here that the code for this function is located at
0x000000000040fa90. This information could be useful if, say, our
program crashed somewhere between 0x40fa90 and 0x40fc58. In
that case, we would know that puts caused the crash.
We also know that puts takes up 0x1c8 bytes (40fc58–40fa90). This
is 456 decimal bytes, or a little under .5K. The amount of memory
will concern us when we start programming our microprocessor,
which has limited memory.
You should now have a good idea of every element of a C
program and what these various pieces do. Most of the time, you
can let the compiler take care of these details without worrying about
what’s going on under the hood. But when you’re programming small
chips with limited resources, you do need to worry about what’s
going on inside.
Adding to Your Makefile
Explore the various aspects of the GCC compiler, assembler, and
linker on your own by amending your makefile to generate all the
files described in the previous section:
CFLAGS=-Wall -Wextra -ggdb
all: hello hello.i hello.s
hello.o: hello.c
gcc $(CFLAGS) -Wa,-a=hello.lst -c hello.c
hello: hello.o
gcc $(CFLAGS) -static -Wl,-Map=hello.map -o hello
hello.o
hello.i: hello.c
gcc -E hello.c >hello.i
hello.s: hello.c
gcc -S hello.c
# Type "make verbose" to see the whole command line
verbose:
gcc -v $(CFLAGS) -Wextra -c hello.c
clean:
rm -f hello hello.i hello.s hello.o
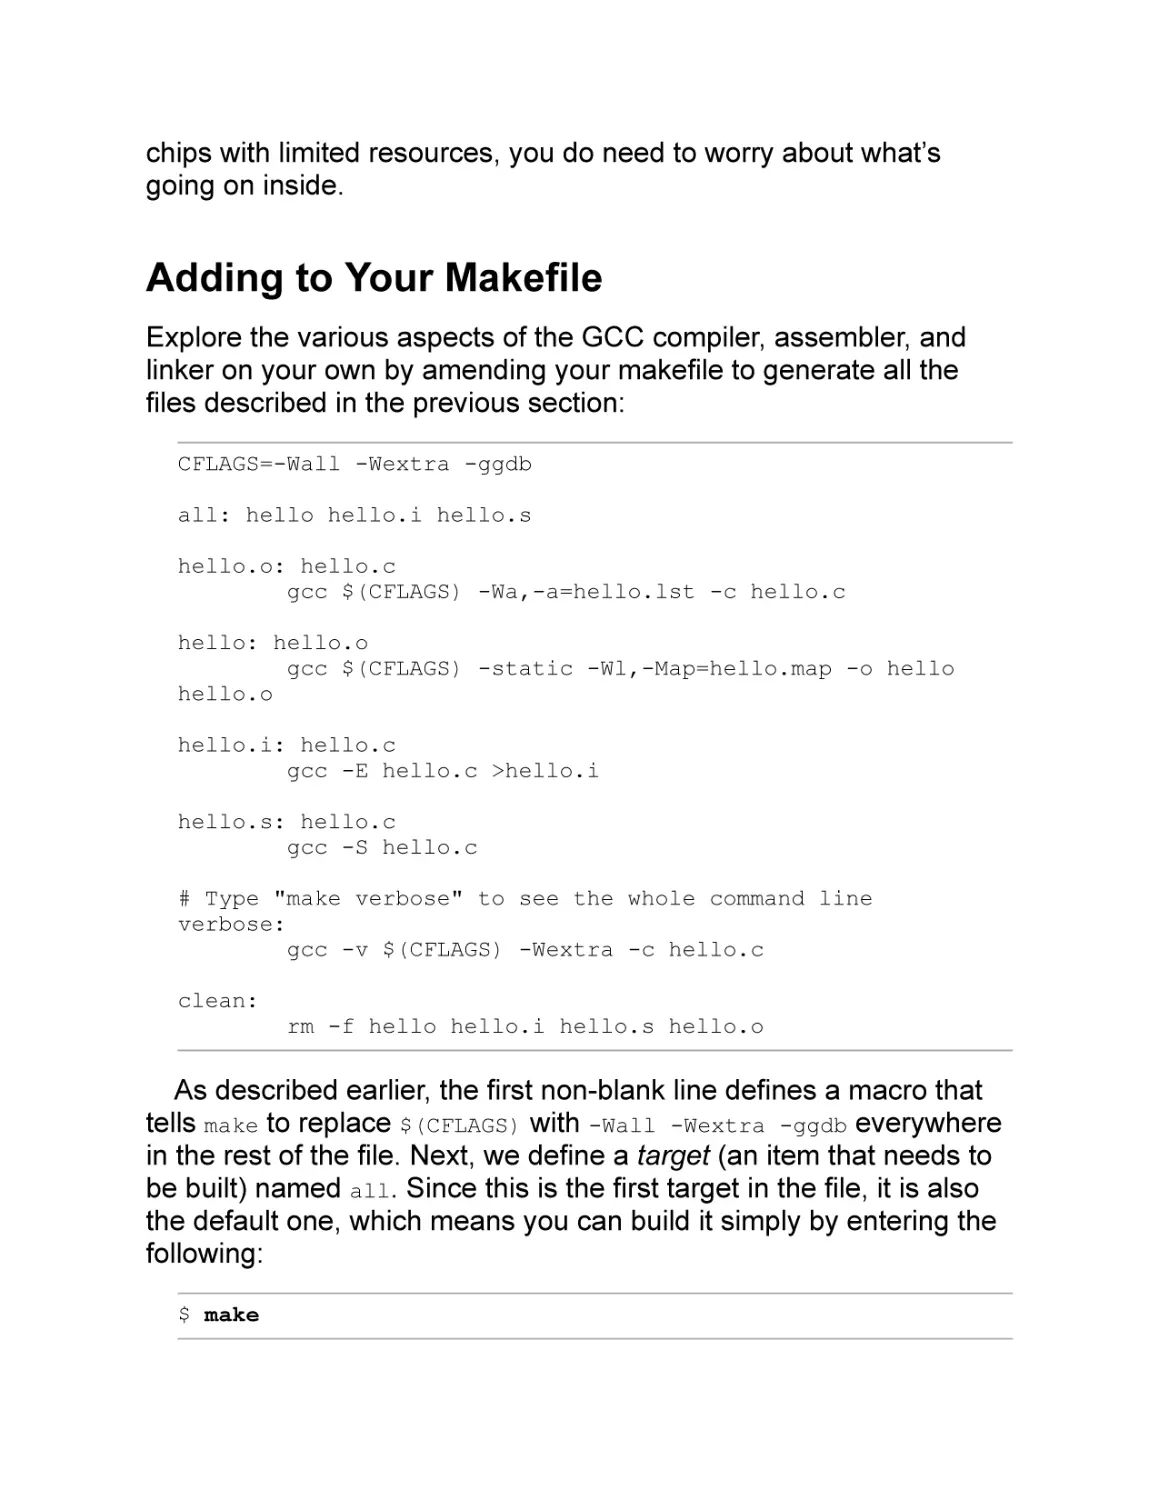
As described earlier, the first non-blank line defines a macro that
tells make to replace $(CFLAGS) with -Wall -Wextra -ggdb everywhere
in the rest of the file. Next, we define a target (an item that needs to
be built) named all. Since this is the first target in the file, it is also
the default one, which means you can build it simply by entering the
following:
$ make
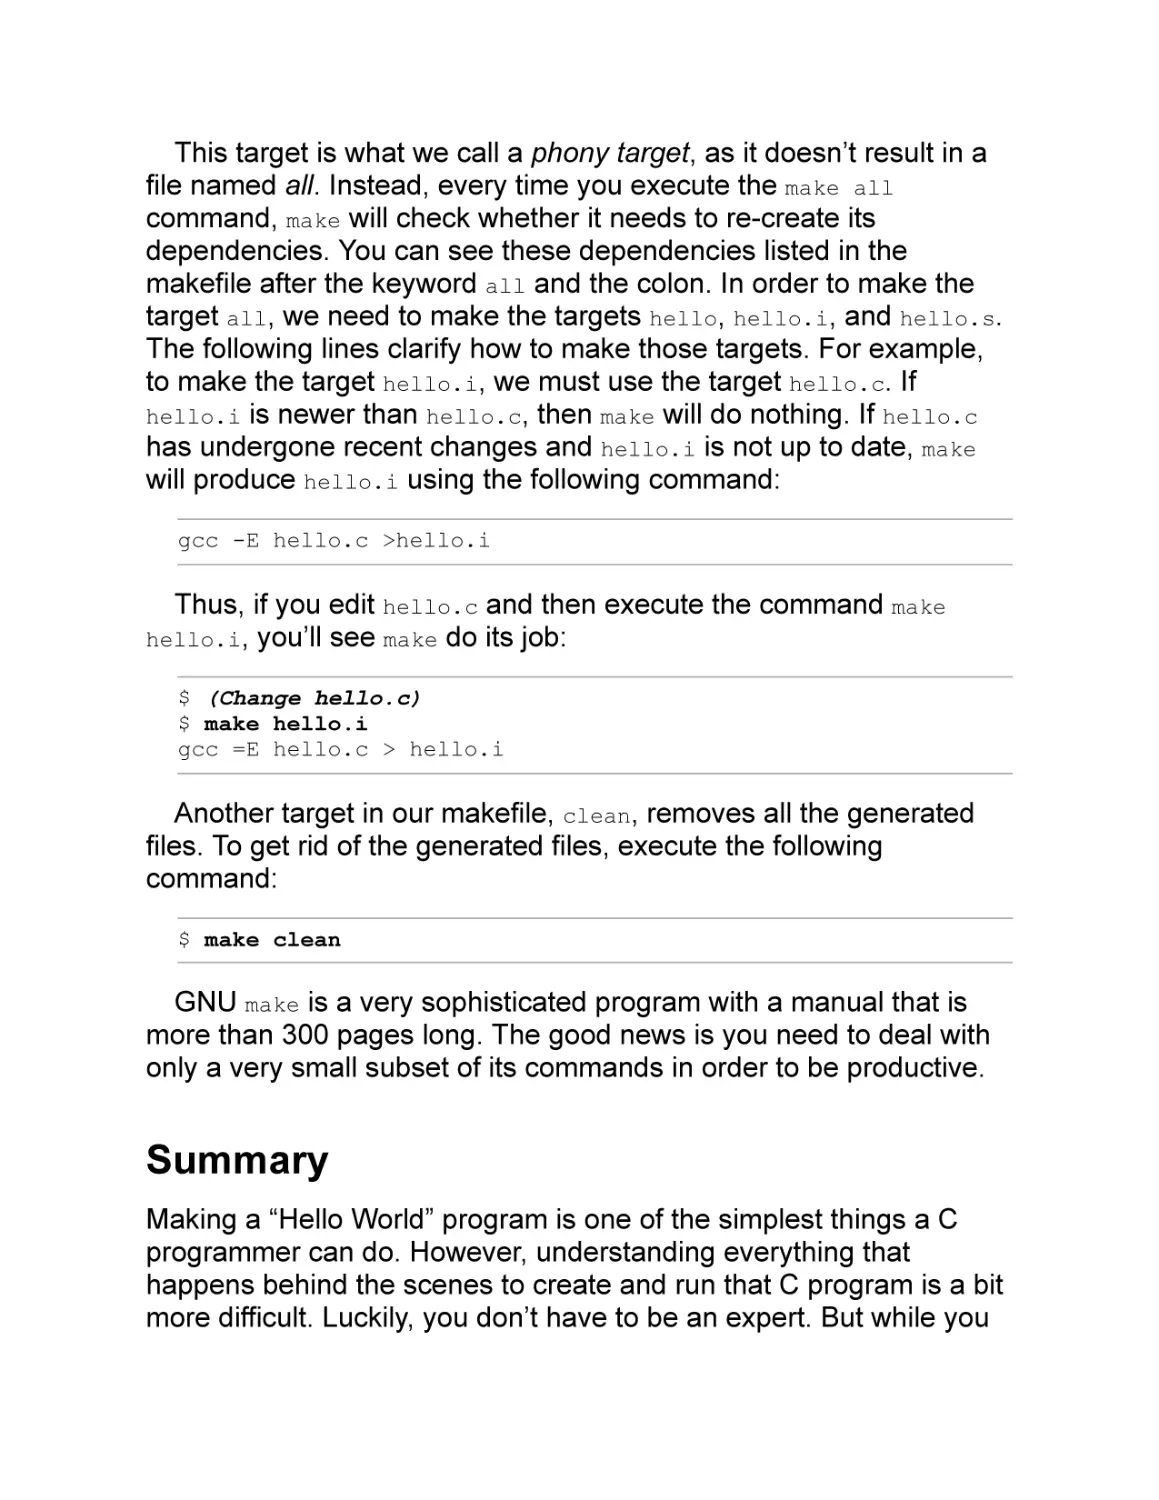
This target is what we call a phony target, as it doesn’t result in a
file named all. Instead, every time you execute the make all
command, make will check whether it needs to re-create its
dependencies. You can see these dependencies listed in the
makefile after the keyword all and the colon. In order to make the
target all, we need to make the targets hello, hello.i, and hello.s.
The following lines clarify how to make those targets. For example,
to make the target hello.i, we must use the target hello.c. If
hello.i is newer than hello.c, then make will do nothing. If hello.c
has undergone recent changes and hello.i is not up to date, make
will produce hello.i using the following command:
gcc -E hello.c >hello.i
Thus, if you edit hello.c and then execute the command make
hello.i, you’ll see make do its job:
$ (Change hello.c)
$ make hello.i
gcc =E hello.c > hello.i
Another target in our makefile, clean, removes all the generated
files. To get rid of the generated files, execute the following
command:
$ make clean
GNU make is a very sophisticated program with a manual that is
more than 300 pages long. The good news is you need to deal with
only a very small subset of its commands in order to be productive.
Summary
Making a “Hello World” program is one of the simplest things a C
programmer can do. However, understanding everything that
happens behind the scenes to create and run that C program is a bit
more difficult. Luckily, you don’t have to be an expert. But while you
don’t need to master every bit of the assembly language generated
by the program, any embedded programmer should understand
enough to be able to spot potential problems or unusual behavior,
such as puts showing up in a program that calls printf. Paying
attention to these details will allow us to get the most out of our small
machines.
Questions
Where does the documentation for GNU make reside?
Is C code portable between different types of machines?
Is assembly language code portable between different types of
machines?
Why does a single statement in assembly language code generate
just one machine instruction when one statement in C can generate
many?
2
INTRODUCTION TO THE INTEGRATED
DEVELOPMENT ENVIRONMENT
So far, we’ve used individual tools
such as GCC, make, and a text editor
to build our program. This has
allowed you to see what each tool
does and learn about the details of
software development. Now you’ll learn about
using an integrated development environment
(IDE). The IDE is a program designed to take all
those tools (and some others) and hide them
behind one integrated interface.
The main advantage of this approach is that you can use one GUIbased tool to do everything. The major disadvantage is that it works
well only if you behave the way the IDE expects you to behave. Also,
it hides a great deal from you. For example, to get a linker map, you
have to go through several layers of GUI and enter the map option in
an obscure customization box.
The IDE we’ll use in this book is the System Workbench for
STM32 IDE. From its name, you can tell it was created for the
STM32 microprocessors. An enhancement to a very popular IDE
called Eclipse, it includes an editor, debugger, and compiler. It is
especially powerful when it comes to debugging, because remotely
debugging on a microcontroller involves a lot of tools, and the IDE
makes them work together seamlessly.
To practice using the IDE, you’ll write the same “Hello World”
program you wrote in Chapter 1, only this time you will wrap every
step of the process in a unified GUI. In one respect, the IDE makes
things simpler by hiding the compiler and other tools from you. In
other ways, it makes things more complex, because accessing those
tools to tune them is more difficult. For example, if I want to add the
flag -Wextra to the compiler command line without an IDE, all I do is
edit the makefile. When using an IDE, I have to find the magic box in
which I can enter this value (spoiler: it’s Project ▶ Properties and
then C/C++ Build ▶ Settings ▶ Tool Settings ▶ GCC Compiler ▶ All
Options).
Using System Workbench for STM32
So far, we’ve used a text editor, a compiler called GCC, and a
program called make to run the compiler. As we get into more
complex programs, we’ll need a debugger as well.
The STM32 Workbench bundles all these tools into one integrated
development environment that is built on the Eclipse IDE. In fact, it is
Eclipse, with lots of special STM32 stuff added, and I’ll refer to it as
such in the following discussion. We’ll get deeper into the STM32
side of things in Chapter 3. For now, let’s explore the IDE by writing
a “Hello World” program.
Starting the IDE
If you followed the advice at the beginning of Chapter 1, you’ve
already downloaded System Workbench for STM32. Install it using
the instructions from the website. The standard installation creates a
desktop icon and a startup menu item, so you should be able to start
the IDE in the same way as any other program.
When first started, Eclipse asks for the location of your workspace.
Enter the directory that will contain all the projects for this book.
Next, Eclipse should display the Welcome screen. Dismiss the
screen by clicking the close icon (the little X next to the tab).
A window should pop up indicating that the system is downloading
additional tools for the ARM processor. When the system finishes,
you should get a C/C++ view of an empty project, as shown Figure 2
-1.
Figure 2-1: An empty project screen
Eclipse is the frontend for a lot of tools. Displaying them in an
organized manner is quite a challenge. To cope with this, Eclipse
uses the concept of views. A view is a window layout that is
designed for a particular task. For example, a Java programmer
might have a different view than that of a C programmer. Likewise,
debugging requires a different view than coding.
The default view in this version of Eclipse is that of a C/C++
project. (You can change the view at any time by using the
Window ▶ View menu.) On the left of the view is the Project Explorer
(currently empty), which allows you to view your projects and their
details. In the upper middle, you have a text editor. On the right is a
window with three tabs: Outline, Build Targets, and Task List. We’ll
go into them when we get to more complex projects.
At the bottom is a small, wide window with the tabs Problems,
Tasks, Console, Properties, and Call Graph. The Problems window
contains a list of the errors and warnings generated by the code in
your current project. The Console window contains the output of the
build process. The other tabs we’ll worry about when we start
generating more complex programs.
Creating Hello World
We will now create another “Hello World” project. You must take
certain steps whenever you create a native C project (native means
the program runs on the machine on which it was compiled; if you
compile it on one machine and run it on another, that’s called crosscompilation), and this chapter goes through them in detail. You will
be going through these steps a lot; so that you don’t have to
remember them all, refer to the checklist in the appendix.
Start a new project by selecting File ▶ New ▶ C Project from the
menu bar. This brings up the C Project dialog.
I’ve chosen the name 02.hello-ide for our project, as it’s unique
and descriptive. Project names can contain any character except
spaces and special characters such as a forward slash (/), backslash
(\), colon (:), and other characters that have special meaning for your
filesystem. Letters, digits, dashes, dots, and underscores are okay.
WARNING
Eclipse will let you create a project with a space in the name
and then fail to properly build it, so don’t use spaces.
For the project type, select Hello World ANSI C Project. For
toolchains, select the toolchain for your operating system, as shown
in Figure 2-2. Click Next.
Figure 2-2: The project creation dialog
We now see the Basic Settings dialog. Leave these settings alone
and click Next.
The next dialog is Select Configurations (see Figure 2-3).
Figure 2-3: The Select Configurations dialog
You have a lot of different options for building your project. Eclipse
groups these into project configurations. The two defined by default
are Release and Debug. Release produces highly optimized code
that is difficult if not impossible to debug. Debug produces
unoptimized, easy-to-debug code and generates debug symbols.
Since you are learning, we’ll stick with the Debug configuration.
Deselect the Release configuration, leaving only Debug selected,
and click Finish.
The IDE creates our project and generates a number of files. One
of these is our source code, already filled in with its version of a
“Hello World” program (see Figure 2-4).
Figure 2-4: The result of creating our “Hello World” project
If you enter any code yourself, note that the Eclipse editor uses a
tab size of 4 by default, which means that when you use a tab to
indent a line in source code, the tab will have a width of four spaces.
Practically every other editor and tool uses eight spaces. You can fix
this with one of the configuration items in Window ▶ Preferences.
(Telling you how to further customize Eclipse would take a whole
book, and this is not that book.)
At this point we would be done—if we were writing in Java. Eclipse
was designed for Java. C is an add-on that almost completely works.
We have to do one more fix-up.
First, compile the project by choosing Project ▶ Build Project.
Then select Run ▶ Run Configurations, which should bring up the
Run Configurations dialog. Next, click C/C++ Application on the left
side, and then click the small icon on the left of the icon row to create
a new configuration. Finally, under C/C++ Application, click Browse,
as shown in Figure 2-5.
Use the file browser to find your executable in the Debug directory.
The IDE has created a project directory for you in your workspace
(the location of which is system-dependent) that has the same name
as your project. All the files for your project are in this directory.
Within the project directory, a Debug directory contains all the files
built as part of the Debug build (the only type of build we are doing).
Within that directory, you’ll find 02.hello-ide on macOS and Linux or
02.hello-ide.exe on Windows. Select this file, as shown Figure 2-6,
and then click OK.
Figure 2-5: The Run Configurations dialog
Figure 2-6: The Application Selection dialog
Next, click Apply and Close to finish the run configuration. This
setup tells the IDE where your program is actually located. (Since it
decided where to put it, you’d think it would know where it went, but
for some reason it doesn’t.)
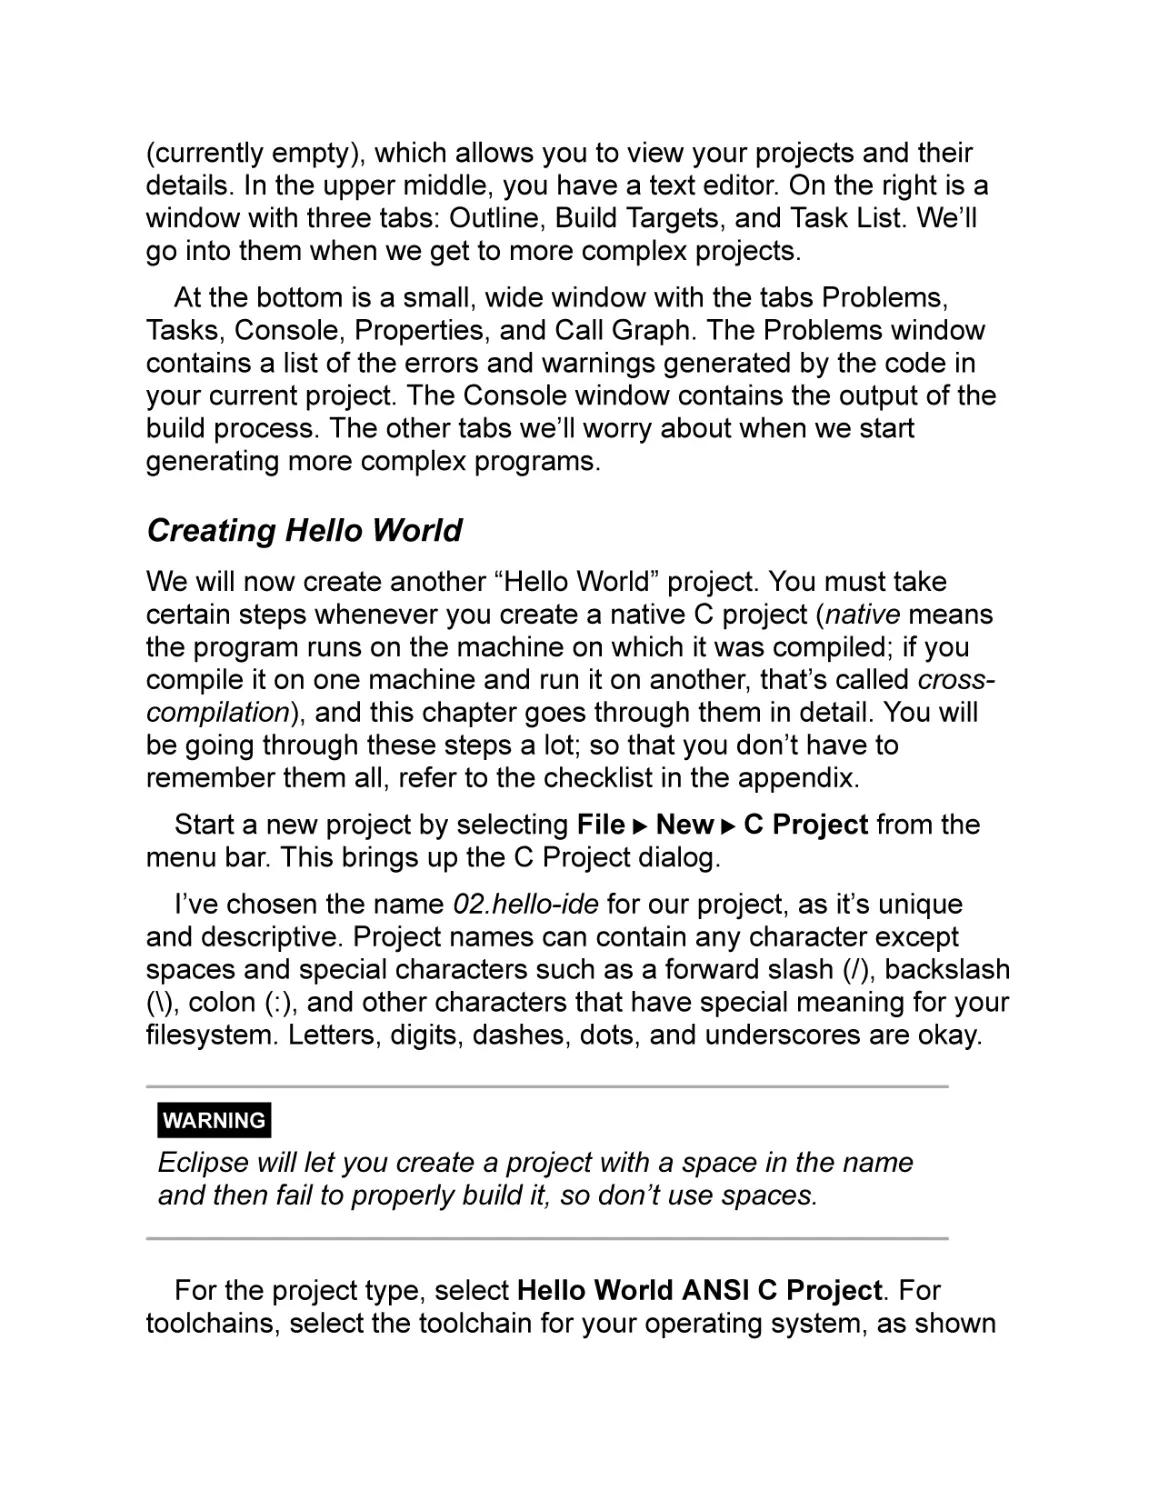
Now let’s actually run the program. Select Run ▶ Run. The results
should appear in the Console window, as shown in Figure 2-7.
Figure 2-7: The results of our program
Debugging the Program
Now for a quick introduction to the debugger, which watches our
program execute and lets us see what’s going on inside it. First, let’s
generate a little more code to debug by duplicating line 15
(puts("!!!Hello World!!!");) and then save the project by choosing
File ▶ Save All.
It is important to choose File ▶ Save All after each edit. If you were
to run the program now, before saving all files, the compiler would
see the old, unsaved file on disk and compile it. The resulting
program would print !!!Hello World!!! only once instead of twice,
which could get very confusing. The code we have in front of us is
correct; the code we are running is not. Until you choose File ▶ Save
All, the files are not the same. (End of soapbox mode.)
Now let’s start the debugger with Run ▶ Debug (see Figure 2-8).
Figure 2-8: Starting the debugger
The IDE is about to switch into debugging mode, which changes
the perspective from development to debugging. This means a
whole new window arrangement. The system warns you that this is
about to happen, as shown in Figure 2-9. (Remember that you can
always switch perspectives with the command
Window ▶ Perspective ▶ C/C++ or Window ▶ Perspective ▶ Debug.)
Figure 2-9: The debug perspective warning
Click Yes in the warning. The debug perspective should open, as
shown in Figure 2-10.
Figure 2-10: The debug perspective
In the upper left is the Stack Trace window, which shows the
program being executed and how far into it you are. This information
will become more useful when we discuss stack usage in Chapter 7.
Next to that is the Variables/Breakpoints/Registers/I/O
Registers/Modules window, which contains the following:
Variables Information about the program’s variables. (More on this
starting with Chapter 4.)
Breakpoints A breakpoint is a location in your program at which
the program stops and lets the debugger examine it. You can set a
breakpoint by double-clicking the line number of an executable line
in your program. We’ll start using them in Chapter 3.
Registers Information about the current state of the processor’s
registers. (Discussed in Chapter 10.)
Modules The dynamically linked modules. Since this feature is not
available to embedded programmers, we won’t be discussing it.
In the middle of the screen, the Source window displays our
program. The highlighted line of code indicates that the debugger
has run the program up to this line and stopped.
Next to the Source window is the Outline panel. This is like a table
of contents indicating which files go into our program. I’ve included
the files stdio.h and stdlib.h so that they show up here.
Across the bottom is the
Console/Tasks/Problems/Executables/Memory window. The Console
window displays the output from the program. All the other tabs
contain information we’re not interested in.
Now we’ll step through the program, meaning we will execute one
statement at a time using the debugger. Click the Step Over icon at
the top of the screen (see Figure 2-11) or press F6 to step over the
current line.
Figure 2-11: Step Over (F6)
The highlighted line in the Source window advances one line, and
!!!Hello World!!! appears in the Console window (see Figure 2-
12).
Figure 2-12: Single-step results
If you keep stepping, you’ll see the second puts executed,
followed by the return statement. After that, the program goes into
the system library to do cleanup work. Since we don’t have the
source code for this library, the debugger can display no information
about it.
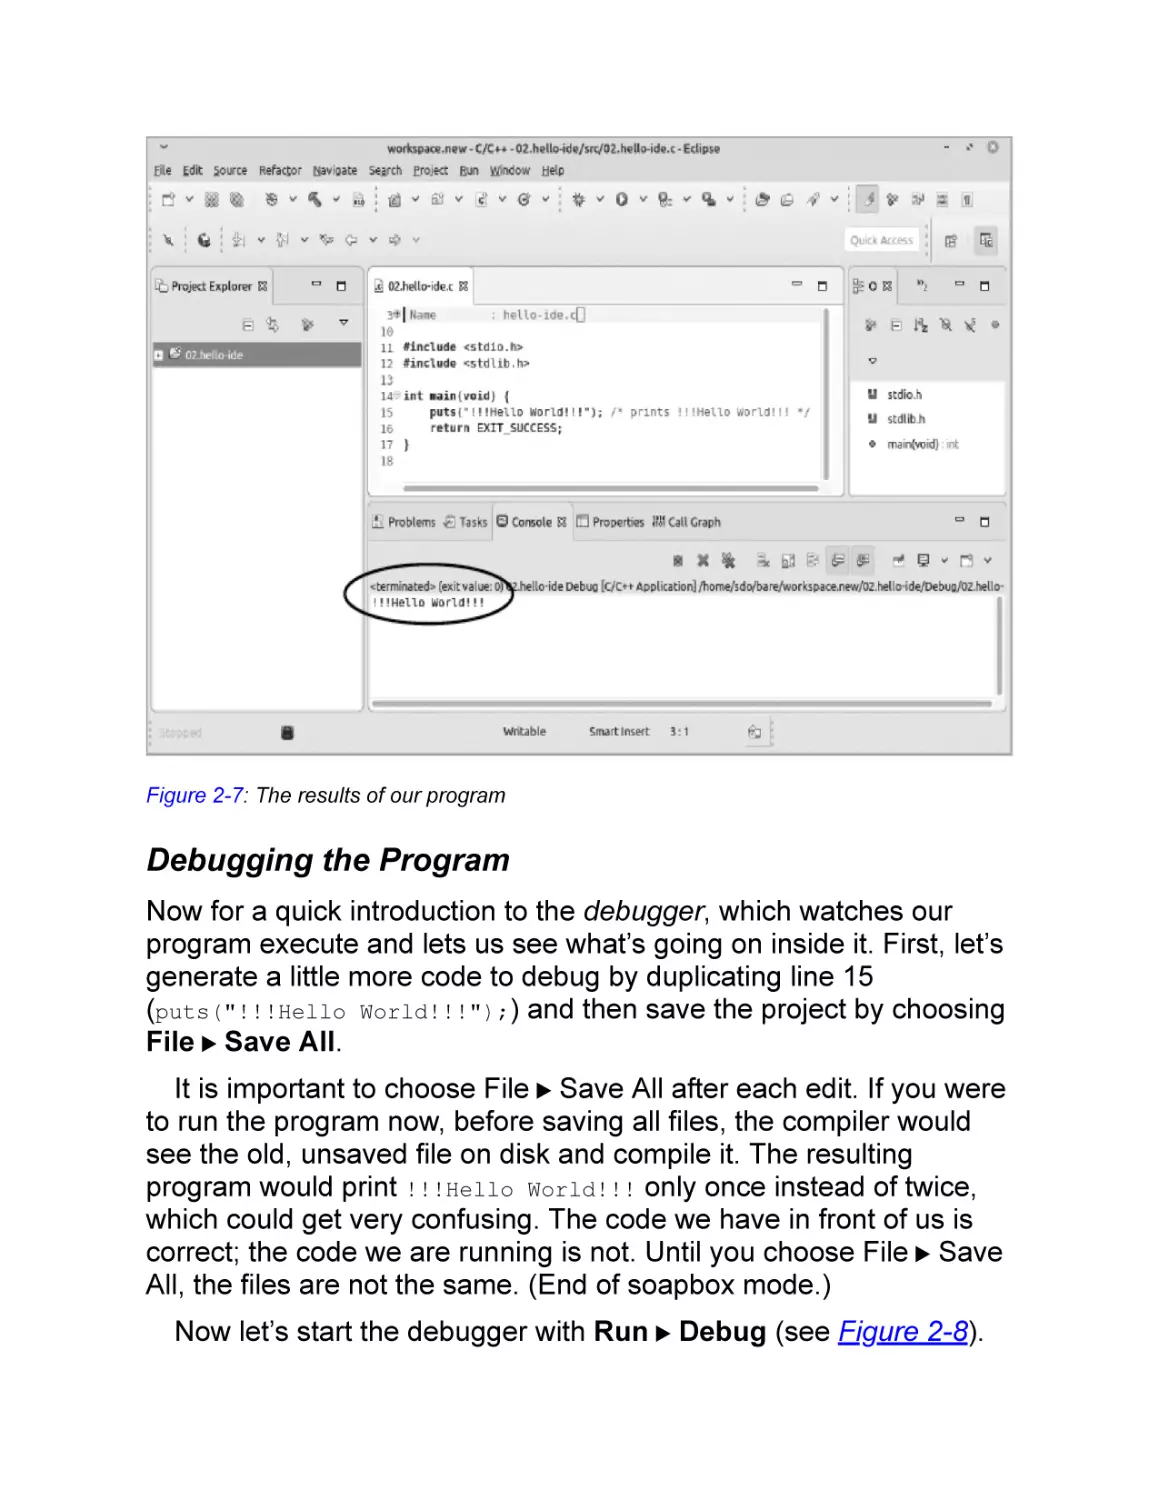
There are two other significant icons on the toolbar (see Figure 2-1
3). The Resume icon (or F8 key) runs the program until it finishes or
hits a breakpoint. The Debug icon restarts debugging.
Figure 2-13: Debugging commands
We’ll make use of the debugger a lot in coming chapters. It will
provide a very useful way of getting information out of our running
program and seeing what’s going on. To return to the original C/C++
perspective, select Window ▶ Perspective ▶ Open
Perspective ▶ C++.
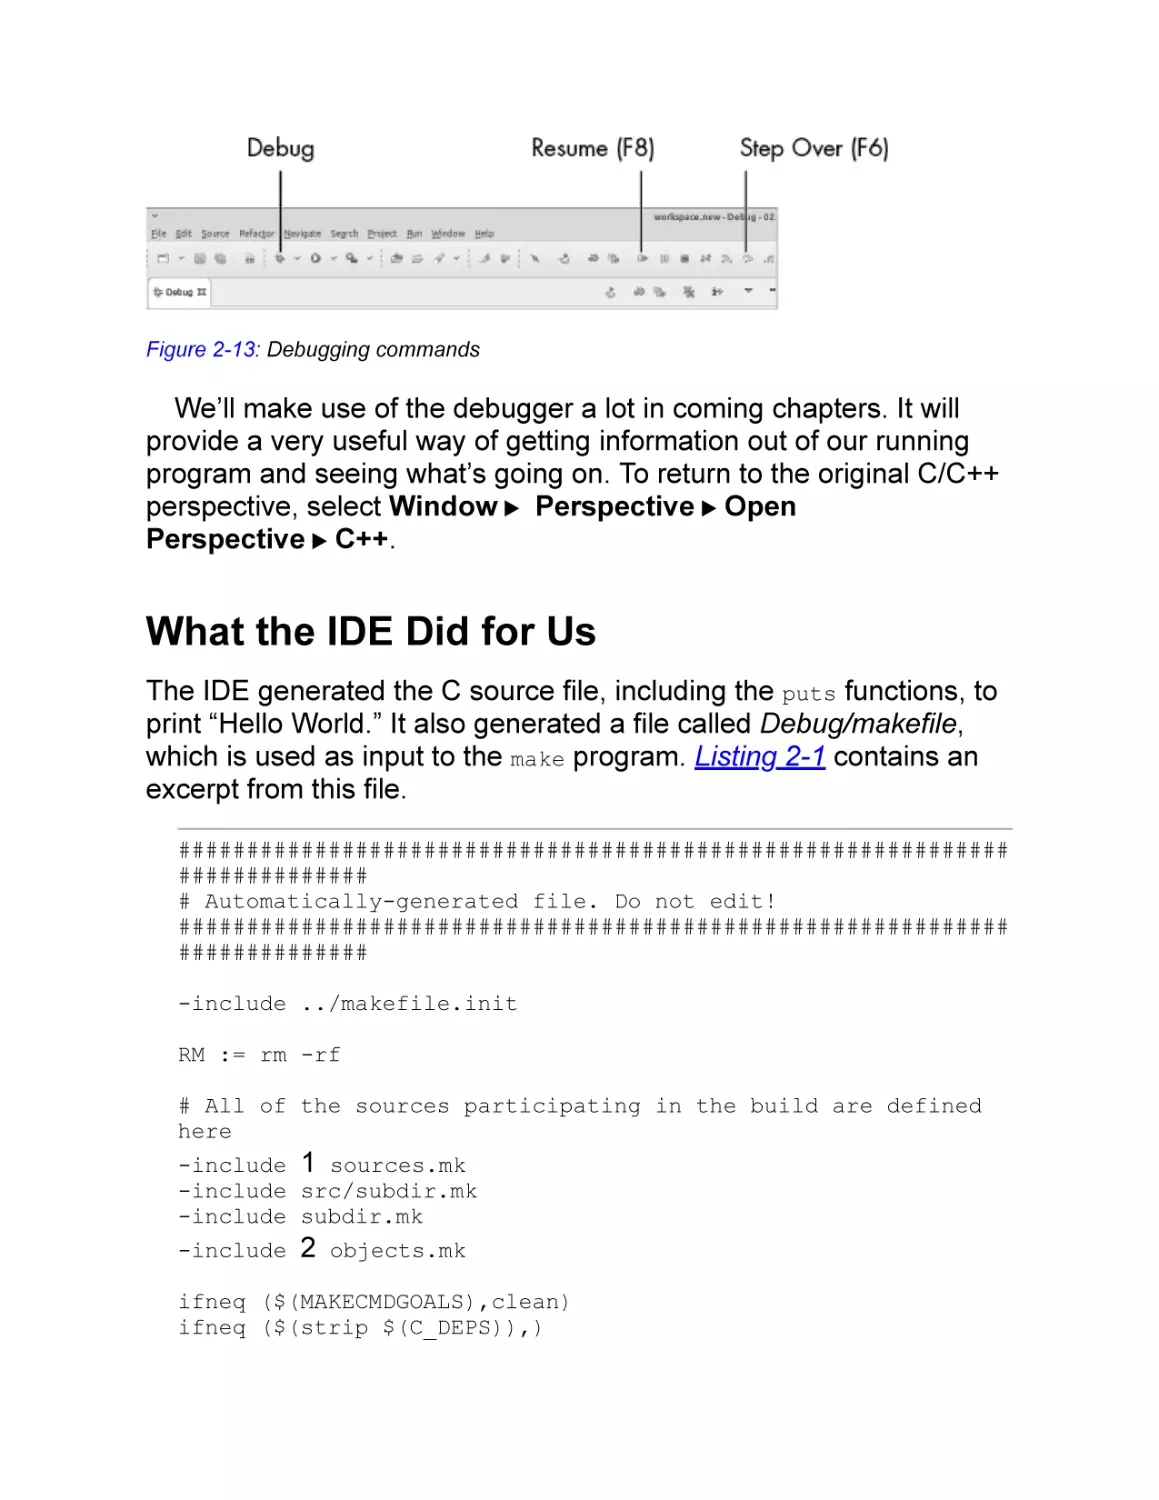
What the IDE Did for Us
The IDE generated the C source file, including the puts functions, to
print “Hello World.” It also generated a file called Debug/makefile,
which is used as input to the make program. Listing 2-1 contains an
excerpt from this file.
#############################################################
##############
# Automatically-generated file. Do not edit!
#############################################################
##############
-include ../makefile.init
RM := rm -rf
# All of the sources participating in the build are defined
here
-include 1 sources.mk
-include src/subdir.mk
-include subdir.mk
-include
2
objects.mk
ifneq ($(MAKECMDGOALS),clean)
ifneq ($(strip $(C_DEPS)),)
-include $(C_DEPS)
endif
endif
-include ../makefile.defs
# Add inputs and outputs from these tool invocations to the
build variables
# All Target
all: 02.hello-ide
Listing 2-1: An excerpt from Debug/makefile
This makefile is located in the Debug directory. The IDE supports
multiple build configurations and generates a makefile in a different
directory for each of them. (For this project, we created only a Debug
configuration. Other projects may also use a Release configuration.)
The makefile is more complex than the one we generated
ourselves in Chapter 1 because the IDE uses lots and lots of
advanced make syntax. The IDE also generated the files sources.mk
1 and objects.mk 2, which are included in the makefile. What we can
see from these files is that computer-generated stuff is designed to
be very flexible at the cost of making the thing nearly impossible to
read.
As it stands now, the IDE does not generate or download a lot of
data. But when we start to do embedded programming, this will
change dramatically.
Importing the Book’s Programming
Examples
The programming examples used in this book can be downloaded at
https://nostarch.com/bare-metal-c. To use the downloaded
programming examples, you’ll need to import them. (You can’t just
stick the files in your workspace; that would be too easy.) To perform
an import, use the following steps:
Select File ▶ Import.
In the Import dialog, select General ▶ Existing Projects into
Workspace.
Click Next.
Select the radio button Select Archive File and then click Browse
after the blank space to select the file containing the project (the one
you downloaded from the website).
Click Finish.
Summary
The IDE is a mixed blessing. On the one hand, you don’t have to
worry about all the tools that it takes to create a program. You didn’t
have to create the makefile, manually perform the build, or run the
debugger.
But this hands-off approach comes with a price. To add a compiletime flag to your program from Chapter 1, you just add the flag to the
makefile. With the IDE, you can’t do this, because the IDE generates
the makefile on its own. You have to find the right configuration item
to do it in the IDE, and, as we will discover, the IDE has a lot of
options.
In this book I try to keep things as simple as possible through the
use of checklists (like the one in the appendix) and standard
procedures. Eclipse tries to take care of everything, but you will
occasionally need to tweak things under the hood.
Programming Problems
Find out what happens when you put \t in a string to be printed.
In Chapter 1, we used printf to print the message. In this chapter,
Eclipse uses puts. Look up the documentation of these functions to
see how they are different.
Questions
What is an IDE?
What are the files generated by our IDE, and what do they contain?
Where can you get help with using C and Eclipse?
3
PROGRAMMING THE
MICROCONTROLLER
Now that we’ve written and run a
“Hello World” program in the IDE,
we’ll do the same on the STM32
NUCLEO-F030R8 development
board, which contains the
STM32F030R8 processor and several other
components needed to use the processor. On
an embedded system, the equivalent of “Hello
World” is a program that makes an LED blink.
By making an LED blink, you’ll learn the steps
needed to make a complex program at a smaller
scale.
In the process, you’ll learn how to use the System Workbench for
STM32, which we explored in the last chapter, to create an
embedded program. To assist us, we’ll use STMicroelectronics
software called the hardware abstraction layer (HAL), which hides
some of the more annoying details of the hardware from you.
(However, the details aren’t hidden very deep, and you can examine
the source code to see what was done.) We’ll also get into what the
IDE is doing behind the scenes with a detailed explanation of the
options it’s using to compile the code.
Finally, like we did in Chapter 2, we’ll run the debugger to see our
program execute one statement at a time, which will prove extremely
useful when we start to make larger and larger programs.
The NUCLEO-F030R8 Development Board
Development boards are circuit boards that contain a processor chip
and various other components required to develop applications for
that processor, including a lot of useful items for developing
programs and circuits that use the chip. In addition to programming
and debugging support, the development board includes numerous
connectors, which allow you to hook up your prototype hardware. It
also includes a few peripherals such as a serial port, a push button
switch, and an LED, although some of the fancier boards will have
additional peripherals.
Thus, the development board provides you with an instant
prototype for developing the initial software with breadboarded
hardware. Microprocessor manufacturers generally sell development
boards with all that stuff included to get people to use their chips.
The STM32 NUCLEO-F030R8 board bundles the STM32F030R8
chip with a clock circuit, a power supply, and some devices to talk to,
including an LED, a button, and a serial I/O device. Figure 3-1 shows
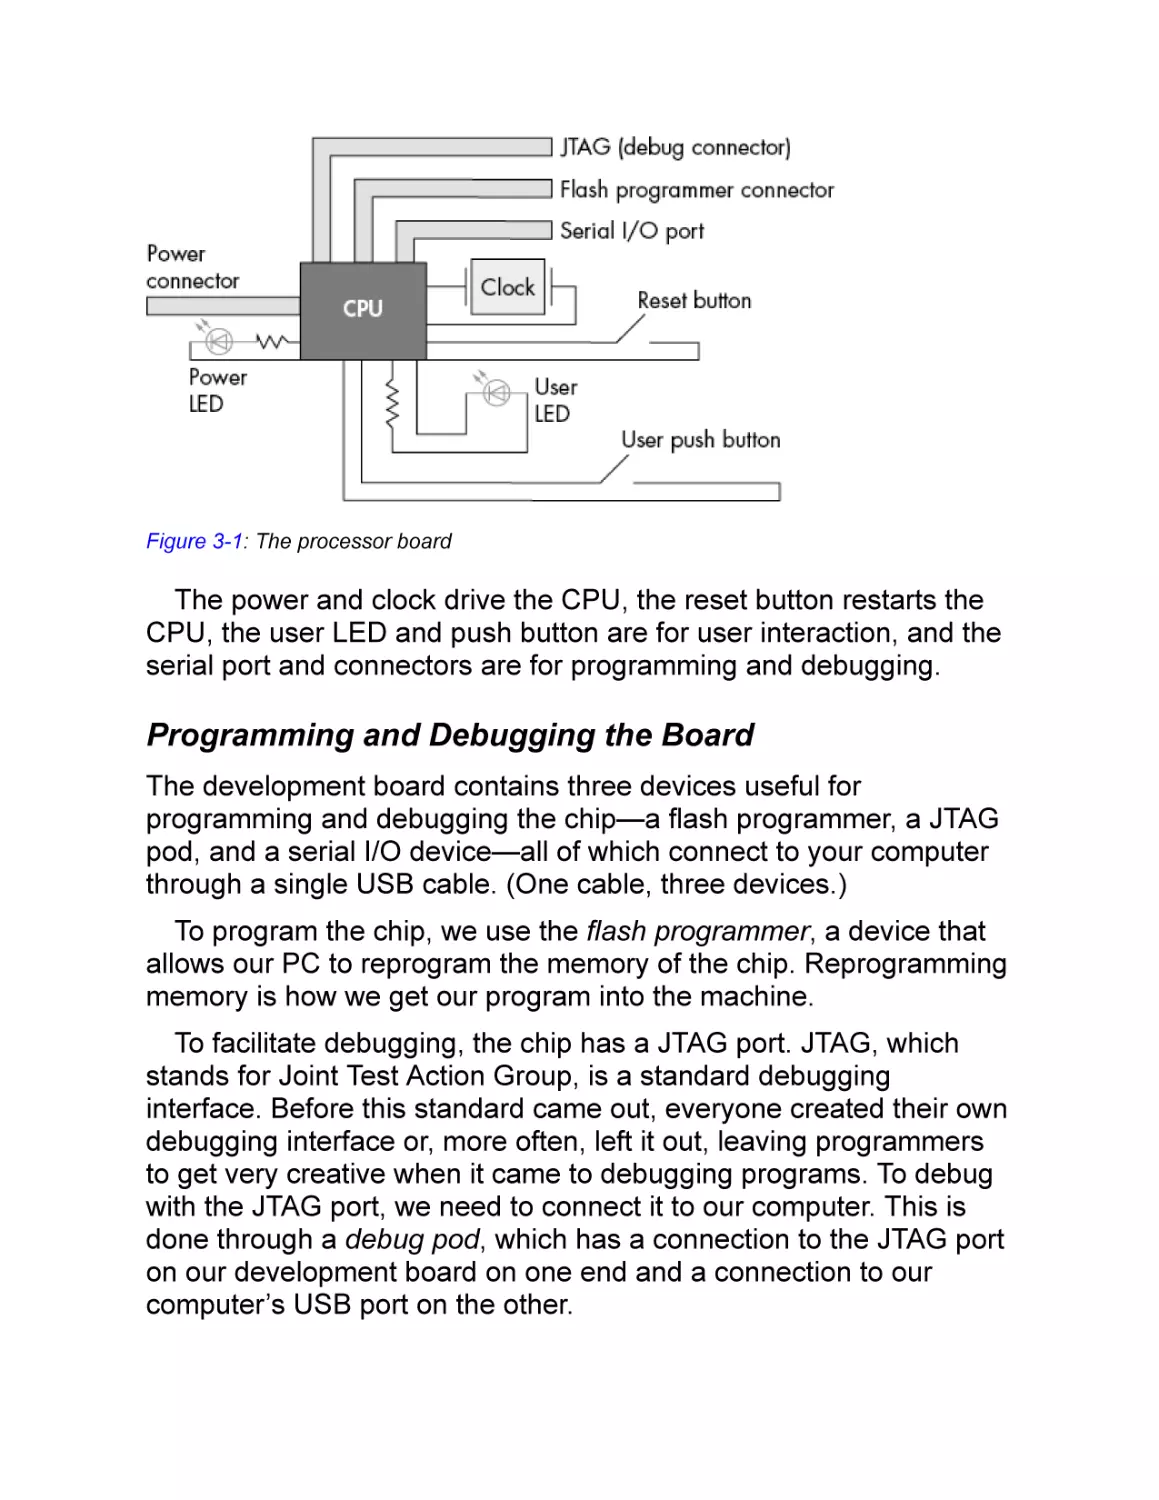
the basic building blocks of our processor board.
Figure 3-1: The processor board
The power and clock drive the CPU, the reset button restarts the
CPU, the user LED and push button are for user interaction, and the
serial port and connectors are for programming and debugging.
Programming and Debugging the Board
The development board contains three devices useful for
programming and debugging the chip—a flash programmer, a JTAG
pod, and a serial I/O device—all of which connect to your computer
through a single USB cable. (One cable, three devices.)
To program the chip, we use the flash programmer, a device that
allows our PC to reprogram the memory of the chip. Reprogramming
memory is how we get our program into the machine.
To facilitate debugging, the chip has a JTAG port. JTAG, which
stands for Joint Test Action Group, is a standard debugging
interface. Before this standard came out, everyone created their own
debugging interface or, more often, left it out, leaving programmers
to get very creative when it came to debugging programs. To debug
with the JTAG port, we need to connect it to our computer. This is
done through a debug pod, which has a connection to the JTAG port
on our development board on one end and a connection to our
computer’s USB port on the other.
Another very useful debugging and maintenance tool is the
printing of diagnostic messages. The problem when it comes to
embedded programs is where to print them. You don’t have a
screen, so printing to the screen is out. Printing the messages in a
logfile is difficult because you don’t have a filesystem. What most
device designers do is put a serial port, a simple three-wire
communication interface, on the board. Chapter 9 goes into the
details of this device.
Setting Up the Board
The bottom half of the Nucleo board contains the chip and support
circuitry, with lots and lots of pins broken out to connectors on the
sides of the board (for connecting peripherals). Above that is the
support board containing a programmer, a debugger, a serial-to-USB
device, and a USB storage device.
Figure 3-2 shows how the board is put together.
Figure 3-2: The NUCLEO-F030R8 board
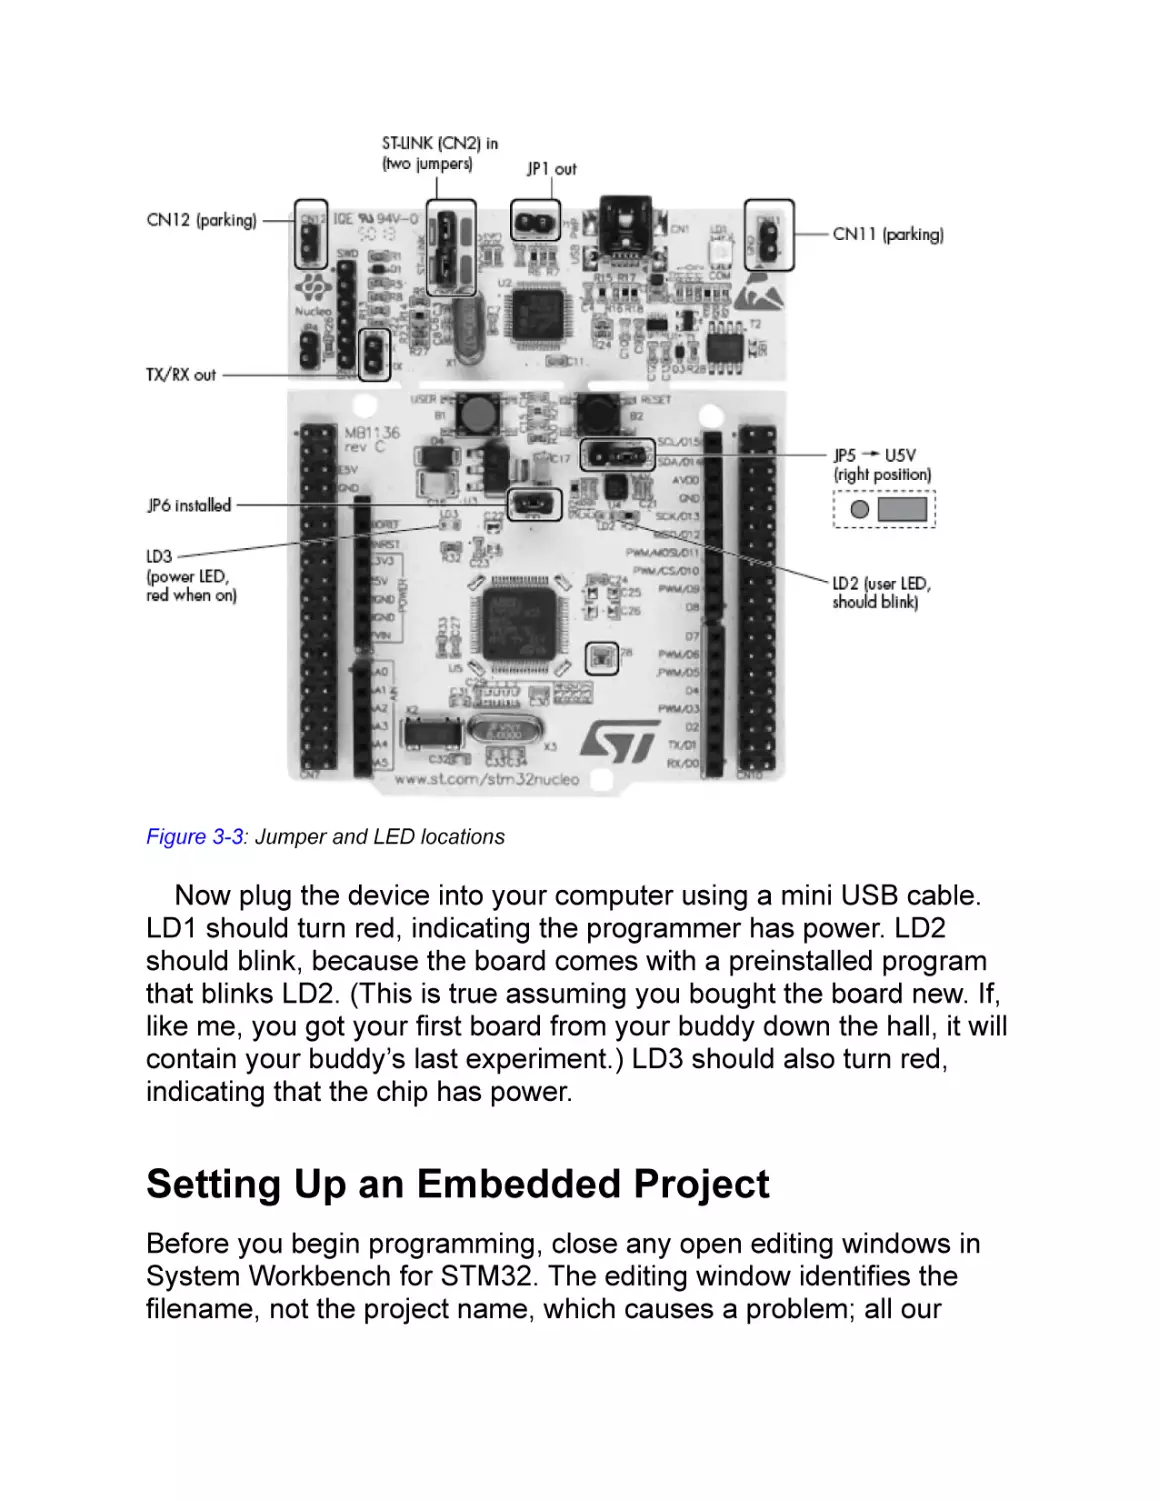
The board also contains several jumpers and LEDs. Jumpers are
small plastic devices that short two pins together. They are used to
select hardware options, such as enabling the onboard debugger
(ST-LINK), and should be installed as shown in Figure 3-3. Follow
these steps to do so:
Install the ST-LINK with two jumpers (CN2). Doing so configures the
onboard debugging pod (ST-LINK) to debug the onboard
microcontroller. If you remove these two jumpers, you can use the
ST-LINK pod to debug other boards instead.
Do not install the power supply jumper (JP1). This configuration
allows the Nucleo board to draw up to 300mA of power through the
USB port, letting you power the device using the USB port. If you
connected lots of power-hungry peripherals to the board, you could
use JP1 to enable an external power supply. This book doesn’t use
any external hardware, so leave JP1 out.
Do not install RX-TX, a debug option that shorts the input and output
of the serial port together. We’ll use the serial port as an actual serial
port later, so leave this jumper off.
Install the JP5 jumper to the right position (U5V). Doing so ensures
the board will be powered through the USB port instead of through
an external power source.
Power the measurement jump (JP6). This is a lower-power device.
The two pins shorted by JP6 supply power to the chip. Remove the
jumper and connect an amp meter to measure power consumption.
CN11 and CN12 are places to store jumpers when not in use.
Installing jumpers there won’t affect the circuitry.
Figure 3-3: Jumper and LED locations
Now plug the device into your computer using a mini USB cable.
LD1 should turn red, indicating the programmer has power. LD2
should blink, because the board comes with a preinstalled program
that blinks LD2. (This is true assuming you bought the board new. If,
like me, you got your first board from your buddy down the hall, it will
contain your buddy’s last experiment.) LD3 should also turn red,
indicating that the chip has power.
Setting Up an Embedded Project
Before you begin programming, close any open editing windows in
System Workbench for STM32. The editing window identifies the
filename, not the project name, which causes a problem; all our
projects will have a main.c file, and things would get pretty confusing
with half a dozen main.c editing windows open.
Next, create an embedded project by selecting File ▶ New ▶ C
Project. (A checklist detailing these steps can be found in the
appendix.) The C Project dialog should appear (see Figure 3-4).
Figure 3-4: The C Project dialog
For the project name, enter 03.blink. For the project type, select
Ac6 STM32 MCU Project. On first startup, the IDE downloads the
GCC ARM toolchain to the directory where you installed the IDE, as
well as the entire STM32 firmware library, a portion of which will get
copied to your project. If you’d like to explore this library’s code and
examples further, the cache directory it uses is ~/.ac6 on Linux and
macOS and C:\Users\<username>\AppData\Roaming\Ac6 on
Windows. Be warned, however, that these examples are designed to
show off the STM chips and aren’t easily understood by novice
programmers.
Click Next. The Select Configurations dialog, shown in Figure 3-5,
should appear.
Figure 3-5: The Select Configurations dialog
Leave Debug selected and deselect Release. To keep things
simple, we’ll perform only one type of build. Click Next.
Next is the Target Configuration dialog (see Figure 3-6).
Figure 3-6: The Target Configuration dialog
For the series, select STM32F0, and for the board, select
NUCLEO-F030R8. Click Next.
This brings us to the Project Firmware Configuration dialog (see Fi
gure 3-7).
Figure 3-7: The Project Firmware Configuration dialog
The project firmware configuration options let us use free standard
code available from STMicroelectronics and other suppliers. Since
someone else has written most of the hard stuff, let’s use their work.
Select Hardware Abstraction Layer (Cube HAL) and then click the
button labeled Download Target Firmware when it appears. Accept
the license agreement, and the IDE will download the firmware
library.
After the long download completes, the system displays additional
options. Leave them to the default values and click Finish.
Back in the C/C++ Project view, you should see an entry in the
project list for blink. Click the triangle next to blink to see a list of
directories that make up the project, and click the triangle next to src
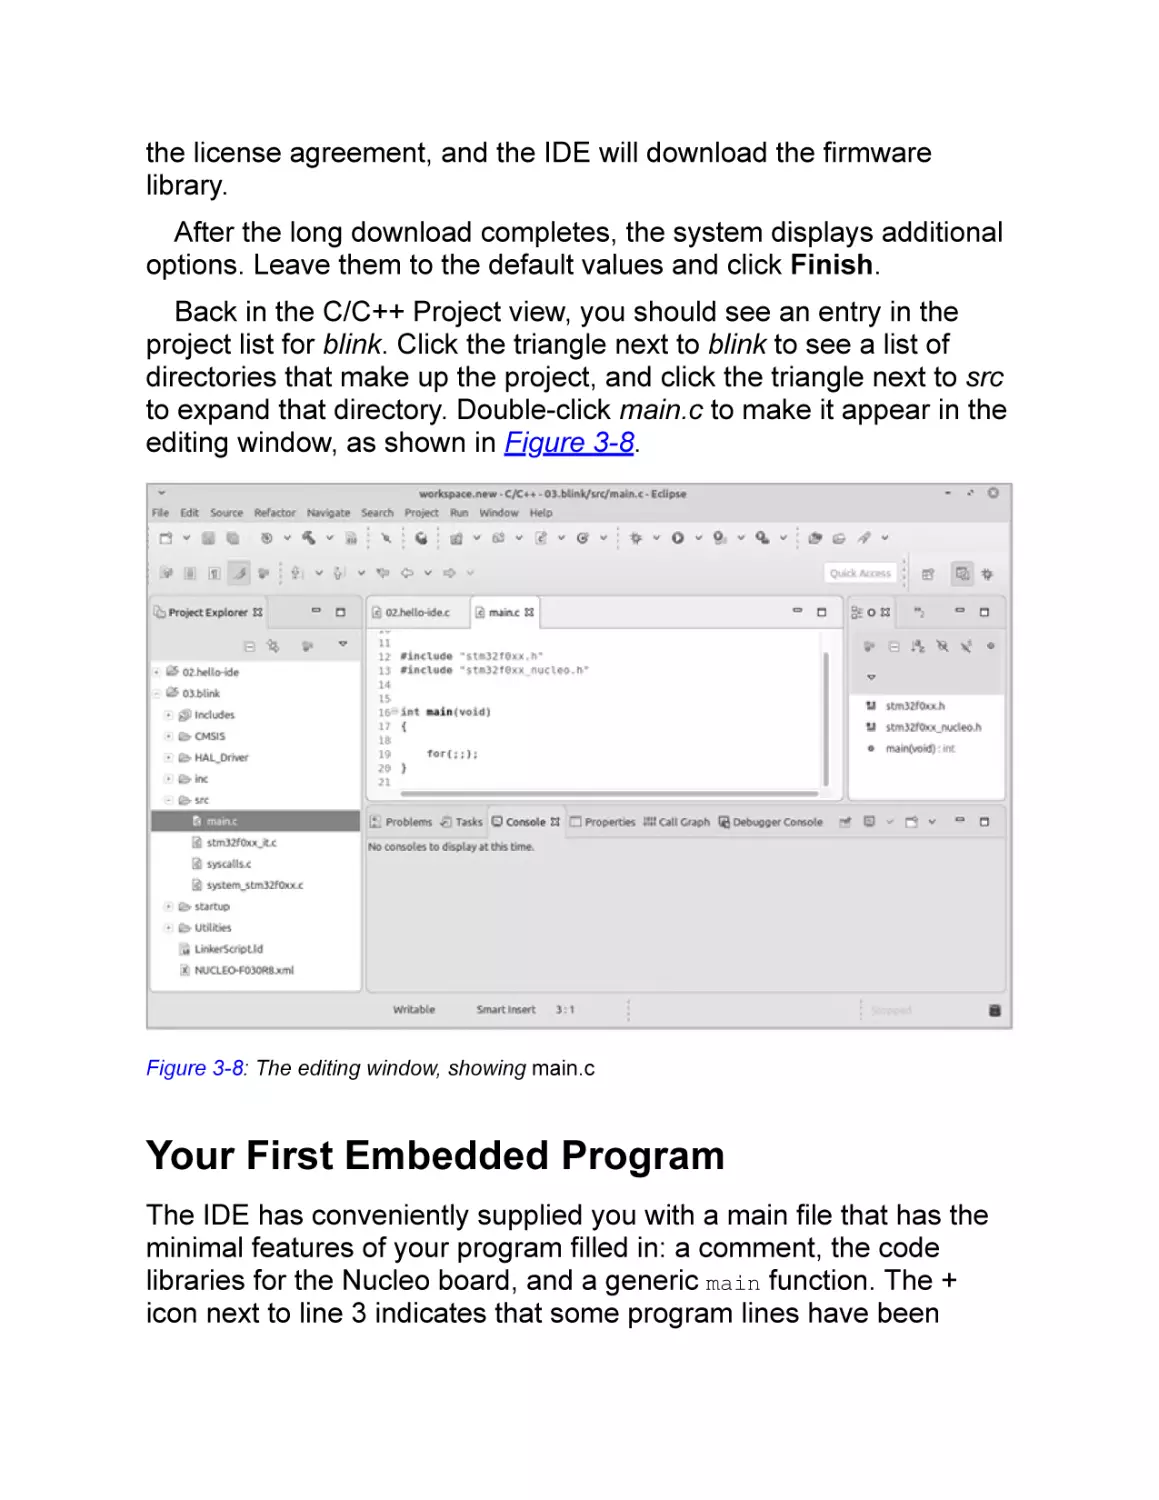
to expand that directory. Double-click main.c to make it appear in the
editing window, as shown in Figure 3-8.
Figure 3-8: The editing window, showing main.c
Your First Embedded Program
The IDE has conveniently supplied you with a main file that has the
minimal features of your program filled in: a comment, the code
libraries for the Nucleo board, and a generic main function. The +
icon next to line 3 indicates that some program lines have been
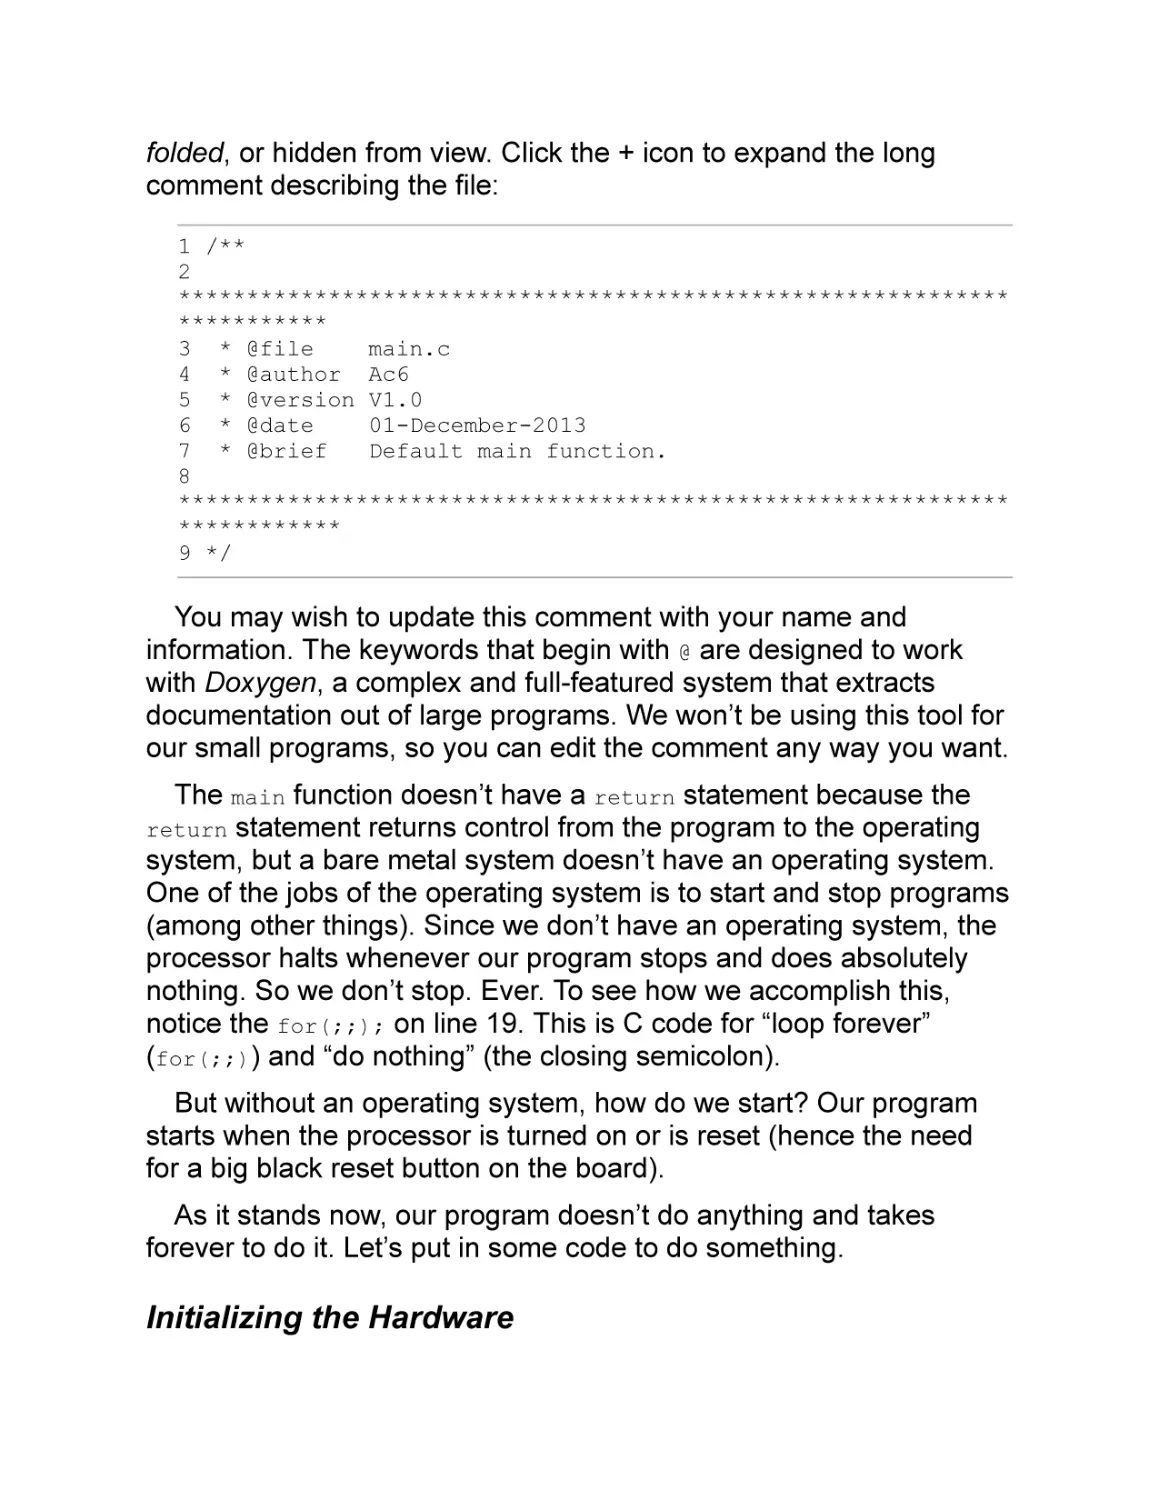
folded, or hidden from view. Click the + icon to expand the long
comment describing the file:
1 /**
2
*************************************************************
***********
3 * @file
main.c
4 * @author Ac6
5 * @version V1.0
6 * @date
01-December-2013
7 * @brief
Default main function.
8
*************************************************************
************
9 */
You may wish to update this comment with your name and
information. The keywords that begin with @ are designed to work
with Doxygen, a complex and full-featured system that extracts
documentation out of large programs. We won’t be using this tool for
our small programs, so you can edit the comment any way you want.
The main function doesn’t have a return statement because the
return statement returns control from the program to the operating
system, but a bare metal system doesn’t have an operating system.
One of the jobs of the operating system is to start and stop programs
(among other things). Since we don’t have an operating system, the
processor halts whenever our program stops and does absolutely
nothing. So we don’t stop. Ever. To see how we accomplish this,
notice the for(;;); on line 19. This is C code for “loop forever”
(for(;;)) and “do nothing” (the closing semicolon).
But without an operating system, how do we start? Our program
starts when the processor is turned on or is reset (hence the need
for a big black reset button on the board).
As it stands now, our program doesn’t do anything and takes
forever to do it. Let’s put in some code to do something.
Initializing the Hardware
First, we need to initialize the hardware. To do so, we’ll make our first
use of the HAL library. The HAL software layer is designed to hide all
the ugly details involved with getting the chip to work. For example,
we have to initialize the on-chip clock before we can use it to time
the blinks of an LED. Doing this ourselves would require
programming specific I/O registers that directly control how an I/O
device acts. They are part of the hardware.
Although we could go through the chip’s 700-page reference
manual to determine what registers to program, and then do all the
calculations to figure out what values to program them with, this
would take a lot of work.
Instead, we can use the HAL software, and specifically the
HAL_Init function, to do all that work for us. The HAL_Init function
programs the system clock so we can use it later to time our LED.
Insert a call to HAL_Init just after the first curly bracket in the main
function, as follows:
int main(void)
{
HAL_Init();
In general, it’s best practice to indent by four spaces for every set
of curly brackets you use. The C language does not require this, but
it makes understanding the program easier. (There’s nothing magical
about four spaces. Some programs use two, some eight, and a few
strange people use three.)
That takes care of the basic hardware.
Programming a GPIO Pin
The chip has a number of general-purpose input/output pins,
referred to as GPIO pins, which we can program to either receive
input or send output for a variety of things. For example, we can
program a pin for output and connect it to an LED (which is exactly
what we’ll do in this program). Alternatively, we can program a pin for
input and connect it to a switch (which we’ll do in the next chapter).
Some of the microcontroller’s pins can be used as analog input or
output. Most GPIO pins can be either on or off. Analog pins can
handle voltages between on and off, such as 32765/65536 on.
Others can be connected to a USART (serial I/O controller) or an I2C
bus (simple I/O bus) to communicate with I2C peripheral chips. The
good news is that these pins can do a lot of things. The bad news is
that we have to program our chip to tell it, “Don’t do all that fancy
stuff. Just turn on when I want you to turn on and turn off when I
want you to turn off.”
We will program the GPIO pin that is connected to the user LED
(LED2). We need to tell the chip that we are using this pin for output;
then we must tell it a lot about how we are going to use it. This
includes setting up a GPIO clock, which controls how fast it reacts.
The HAL firmware can do most of this work, but we have to tell the
HAL what to do by passing a structure of configuration information to
the HAL_GPIO_Init function (C’s structure concept is covered in more
detail in Chapter 7):
// LED clock initialization
LED2_GPIO_CLK_ENABLE();
// Initialize LED
GPIO_InitTypeDef GPIO_InitStruct;
GPIO_InitStruct.Pin = LED2_PIN;
GPIO_InitStruct.Mode = GPIO_MODE_OUTPUT_PP;
GPIO_InitStruct.Pull = GPIO_PULLUP;
GPIO_InitStruct.Speed = GPIO_SPEED_FREQ_HIGH;
HAL_GPIO_Init(LED2_GPIO_PORT, &GPIO_InitStruct);
NOTE
The STM hardware guys labeled this LED “LD2” on the board,
but the software guys call it “LED2.” Therefore, if you set the
control bit LED2_PIN, LD2 lights up. Consistency is wonderful.
We set the pin on in order to transmit data to LED2_PIN, which is
the one connected to the user LED. Next, we specify that the pin will
be used for output because we’re sending data to the LED rather
than retrieving data, and we set the mode to push/pull. This mode is
determined by what you connect to the output pin. In this case, our
circuit needs push/pull. This option controls the internal hardware
used to drive the GPIO pin. The STM chip reference shows you how
this circuit is organized (or, better put, it shows your hardware person
how the chip is organized, and they can tell you which mode to use).
The pullup flags configure the GPIO pin so that, in input mode, a
pullup resister is part of the circuit. This is irrelevant for output pins,
but it still needs to be set. We set it to GPIO_PULLUP, which means
absolutely nothing. Finally, we set the speed to high with
GPIO_SPEED_FREQ_HIGH.
Toggling the LED
Now remove the final ; after the for(;;) statement. Remember that
this semicolon essentially means “do nothing.” To introduce code
that the for loop should execute, add these new lines:
for(;;) {
// Toggle LED2
HAL_GPIO_TogglePin(LED2_GPIO_PORT, LED2_PIN);
HAL_Delay(400); // Delay 400 ms
}
The function HAL_GPIO_TogglePin toggles the LED2 GPIO pin. On
our chip, GPIO pins are organized into groups of 32 bits, collectively
called a GPIO register. Our pin is in register LED2_GPIO_PORT. To tell
the function which of the 32 GPIO pins to toggle, we specify
LED2_PIN.
After we toggle the pin, we need to do nothing for a while;
otherwise, the LED will blink so fast we can’t see it. We use the
HAL_Delay function to delay for 400 milliseconds (ms).
Building the Completed Program
Our full program looks like this:
/*
* Blink the user LED on the board.
*
* A simple program to write, but getting it
* working is going to require learning a
* lot of new tools.
*/
#include "stm32f0xx.h"
#include "stm32f0xx_nucleo.h"
int main(void)
{
HAL_Init();
// LED clock initialization
LED2_GPIO_CLK_ENABLE();
// Initialize LED
GPIO_InitTypeDef GPIO_InitStruct;
GPIO_InitStruct.Pin = LED2_PIN;
GPIO_InitStruct.Mode = GPIO_MODE_OUTPUT_PP;
GPIO_InitStruct.Pull = GPIO_NOPULL;
GPIO_InitStruct.Speed = GPIO_SPEED_FREQ_HIGH;
HAL_GPIO_Init(LED2_GPIO_PORT, &GPIO_InitStruct);
}
for(;;) {
// Toggle LED2
HAL_GPIO_TogglePin(LED2_GPIO_PORT, LED2_PIN);
HAL_Delay(400); // Delay 400 ms
}
Now build the project by selecting Project ▶ Build Project. If
everything went okay, you should see no problems in the Problems
window. If there are problems, fix them and try again.
In the Console window, you’ll see that the IDE invoked make, which
then invoked the GCC compiler named arm-none-eabi-gcc. This is
the compiler for our embedded chip.
Start the program by selecting Run ▶ Run. (Be sure to click Run
on the main menu. You can also right-click the project, but that runs
a slightly different command.) The Run command hides a lot of work.
First, the IDE checks whether the project needs to be built. Then it
runs a program that takes the program file and communicates with
the flash programmer on our development board to flash the
program in memory. Finally, the programmer tells the chip to reset
and start our program.
As a result, you should see the green LED blink slowly.
Exploring the Build Process
The Console window shown in Figure 3-9 contains the output of the
build process. (If this window is empty, you can re-create the
contents with Project ▶ Clean followed by Project ▶ Build Project.)
NOTE
If the menu item Build Project is not enabled, select the toplevel project directory in the Project Explorer and try again.
Figure 3-9: The Console window
Let’s scroll up and look at one line in the build process, a typical
invocation of the GCC compiler:
arm-none-eabi-gcc -mcpu=cortex-m0 -mthumb -mfloat-abi=soft \
-DSTM32 -DSTM32F0 -DSTM32F030R8Tx -DNUCLEOF030R8 -DDEBUG
-DSTM32F030x8 \
-DUSEHALDRIVER \
-I"/home/sdo/bare/workspace/blink/HALDriver/Inc/Legacy" \
-I"/home/sdo/bare/workspace/blink/Utilities/STM32F0xx-Nucleo"
\
-I"/home/sdo/bare/workspace/blink/inc" \
-I"/home/sdo/bare/workspace/blink/CMSIS/device" \
-I"/home/sdo/bare/workspace/blink/CMSIS/core" \
-I"/home/sdo/bare/workspace/blink/HALDriver/Inc" \
-O0 -g3 -Wall -fmessage-length=0 -ffunction-sections \
-c -MMD -MP -MF"HALDriver/Src/stm32f0xxlltim.d" \
-MT"HALDriver/Src/stm32f0xxlltim.o" \
-o "HALDriver/Src/stm32f0xxlltim.o"
"../HALDriver/Src/stm32f0xxll_tim.c"
This is a single line in the Console window, broken apart for
formatting. As you can see, the compiler is being given a lot of
additional options. The following are the key items on this command
line:
This is a GCC compiler, but unlike the native
GCC, which compiles for your computer, it is a cross-compiler
producing code for the ARM processor. There is no underlying
operating system (hence the none option), and the system is
designed for an embedded application binary interface (eabi), which
defines how pieces of the program communicate with one another
and with the outside world.
arm-none-eabi-gcc
This produces code for the cortex-m0 version of the
CPU. ARM has multiple processor variations, and this flag tells GCC
which version to use.
-mcpu=cortex-m0
Some ARM processors can execute two different instruction
sets. There is the full 32-bit RISC instruction set, which executes
very quickly but uses lots and lots of memory, and there is the thumb
set, which is slower but far more compact. This directive tells GCC
that we want thumb code (a good idea if you are using a cheap chip
with limited memory, which we are).
-mthumb
Our processor does not have floating-point
hardware, so this flag tells GCC to fake it with software. (More on
floating point can be found in Chapter 16.)
-mfloat-abi=soft
Specifies level 0 (that is, no) optimization. This turns off a
compiler feature where the compiler analyzes your code and
performs all sorts of tricks to make it go faster. These tricks make the
underlying code harder to understand and debug.
-O0
-g3
Turns on debugging.
Turns on the set of warnings named all, which contains
almost all of the useful warnings.
-Wall
-c
Compiles a single source file into a single object file.
-o"HALDriver/Src/stm32f0xxll_tim.o"
given file.
Stores the object file in the
"../HALDriver/Src/stm32f0xxll_tim.c"
Specifies name of the source
file.
The other options tell the compiler where the included files are for
the library and how these files should be configured. (We discuss the
-D directive in Chapter 12.) The -I directive tells the compiler to
search for include files in the specified directory in addition to the
standard include file directories.
In addition to the compilation commands, we can see the linker
command:
arm-none-eabi-gcc -mcpu=cortex-m0 -mthumb -mfloat-abi=soft \
-T"/home/sdo/bare/workspace/blink/LinkerScript.ld" \
-Wl,-Map=output.map -Wl,--gc-sections \
-o "blink.elf" @"objects.list" -lm '''
The key directive, T"/home/sdo/bare/workspace/blink/LinkerScript.ld",
tells the linker
to use LinkerScript.ld to tell it where to put the various pieces of the
program. (This is discussed in detail in Chapter 11.)
The build process ends with the following two commands:
arm-none-eabi-objcopy -O binary "blink.elf" "blink.bin"
arm-none-eabi-size "blink.elf"
text
data
bss
dec
hex filename
2620
1088
1604
5312
14c0 blink.elf
The arm-none-eabi-objcopy command takes the .elf file and turns it
into a raw binary image. ELF is a complex file format that tells the
loader where to place various things. The raw binary image is
exactly what’s going into your flash memory.
Finally, arm-none-eabi-size prints out the size of the resulting
program (Table 3-1).
Table 3-1: Program Memory Section Sizes
Segment Description
text
Size of read-only data (goes into flash)
data
Size of read/write data that requires initialization (goes into RAM)
bss
Size of read/write data that is initialized to zero (goes into RAM)
dec
Total size in decimal
hex
Total size in hexadecimal
We will explore the different types of memory, like flash and RAM,
in later chapters. For now, understand that this step is done to
answer the question, “If I keep programming, when will I run out of
memory?”
Exploring the Project Files
System Workbench for STM32 has created and downloaded a lot of
files for our project. Let’s go through the key files.
We can view our src directory by clicking the triangle next to the
directory name. It contains the files listed in Table 3-2.
Table 3-2: The src Directory Files
File
Description
main. The main program, where all our code goes.
c
stm32 The interrupt service routines. You will learn about interrupts in Chapter 10. For this
f0xxit. simple program, the only interrupt we care about is the system clock, and even
c
then, we don’t see the details of it directly. It’s used by HAL_Delay.
syscal Dummy functions that are not used.
ls.c
Syste Code that supports the system clock (explained in later chapters).
mstm
32f0x
x.c
The startup directory contains one file: startup_stm32f030x8.S.
This is an assembly language file that performs just enough
initialization that the processor can run C code; it then jumps to the C
startup code. This program contains the first instruction executed
when you press the reset button.
The inc directory contains one file, stm32f0xx_it.h, which is used
to tell other programs about the interrupt handlers in stm32f0xx_it.c.
It’s a very small and boring file.
Now we come to the HAL_Driver directory. This directory contains
approximately 130 files that provide a HAL library for use in the
program. The HAL hides (abstracts) the fact that different ARM
CPUs have different capabilities. For example, the function HAL_Init
will initialize all the hardware. If you have a Cortex-M0 processor, the
Cortex-M0 version will initialize all the Cortex-M0 hardware. If you
have a Cortex-M4 processor, all the Cortex-M4 hardware will be set
up. There are so many files in this directory because the board we
are using has lots of hardware. (And this is the simple version of the
system.)
The CMSIS directory contains low-level code designed to support
the HAL layer.
Finally, the Debug directory contains all the files related to our
Debug build. In particular, it contains a make input file called Makefile
and some generated files (see Table 3-3).
Table 3-3: Generated Files in the Debug Directory
File
Description
blink.elf
Our program in ELF format (a file format for executables)
blink.bin
Our program as a memory image (raw code)
output.map The memory map for the program
NOTE
Unlike the makefile we wrote in Chapter 1, this makefile is
machine-generated and uses tons of very advanced make
features. If you really want to understand everything that goes
on in this file, search online for “GNU Make Manual” and
spend a few hours with it.
The last file on our list is at the top level: LinkerScript.ld. It tells the
linker what the memory layout of our chip looks like and where to
load the various pieces of the program. More on this in Chapter 11.
Debugging the Application
Our blink program is simple and it works, but later we’re going to
make more complex programs, and they will have bugs in them.
Since the board we are programming has such a good debugger, we
might as well get started learning how to use it. Start the debugger
by selecting Run ▶ Debug, as shown in Figure 3-10.
Figure 3-10: Starting the debugger
The IDE will then ask you for what type of debugger to run, as
shown in Figure 3-11. Select Ac6 STM32 C/C++ Application.
Figure 3-11: Debugger selection
The system will ask if you want to “Switch to the Debug
Perspective.” Answer Yes. The system then goes through a number
of steps automatically:
It builds the software.
The IDE downloads the program to the chip using the flash
programmer.
A debugger is attached to the device through the JTAG interface.
The debugger sets a breakpoint at the first line of main.
The breakpoint tells the chip to stop just before the first line of main is
executed.
The microprocessor resets, and the program runs up to main.
The debugger regains control when the program reaches the
breakpoint at main.
Once the debugger reaches the breakpoint, you are ready to
debug the program, as seen in Figure 3-12. At this point, the
program has executed until the first statement of the main function
and is paused before the call to HAL_Init.
Figure 3-12: Debugging the program
NOTE
The light in the corner of the Nucleo board flashing red and
green indicates that the board is under the control of the
external debugger.
Now that we’ve got control, let’s use it. Use the command
Run ▶ Step Over to start executing the program one line at a time.
We’ll do this a number of times, so remember the shortcut key F6.
Keep stepping over lines using F6 until you get into the for loop.
Notice that every time you execute the
HAL_GPIO_TogglePin(LED2_GPIO_PORT, LED2_PIN) function, the LED
turns on or off. Since you are in the for loop, you ping-pong back
and forth indefinitely between the toggling and the delay. If you are
really observant, you’ll notice that it takes a little over 400 ms (twofifths of a second) to execute the call to HAL_Delay. You can change
this value to something really big if you would like to better observe
the delay.
Stepping Through the Program
Now we’ll get into some of the details of this program. Most of the
concepts are covered in more depth in future chapters, but I’ll give
you a taste of them now. First, let’s abort the current debugging
session with Run ▶ Terminate. Now let’s start all over again, with
Run ▶ Debug. You should be back to the line that calls HAL_Init. To
step through the program, use a different command, Run ▶ Step
Into (or shortcut key F5).
All of a sudden, the file stm32f0xx_hal.c appears in our editing
window (see Figure 3-13). Where did this file come from?
Figure 3-13: Debugging stm32f0xx_hal.c
Well, we called the procedure HAL_Init. That procedure is defined
in stm32f0xx_hal.c, so the debugger automatically opened that file
when we stepped into the call to HAL_Init. Alternatively, the Step
Over command would treat the statement (in this case, HAL_INIT();)
as a single unit and step over the function, hiding all the details.
The Step Into command knows we are calling a function and steps
into its code. As you can see, it takes a lot of extra code to support
our little program. When you program on a PC, the code is hidden
from you, and it’s very difficult to get its source. The STM32
Workbench supplies all that code for you in the HAL_Driver/Src
directory.
In addition to showing the code inside functions, the debugger can
show us the status of all program variables. To see this in action,
select Run ▶ Step Over (or press F6) about half a dozen times until
you wind up back in main.c at the line that selects the pin to use. In
the upper-right corner of the screen, you’ll see a panel titled
Variables (see Figure 3-14).
Figure 3-14: The Variables panel
In our program, we’ve defined a variable called GPIO_InitStruct.
In the Variables panel, the + before the name indicates that
GPIO_InitStruct is a complex variable, which means that it contains
more than a simple integer, Boolean, or other single value. To see
the all the components inside, expand it by clicking the + icon (see Fi
gure 3-15).
Figure 3-15: An expanded variable
You’ll learn about the components of GPIO_InitStruct, and how to
create variables yourself, in later chapters. The GPIO_InitStruct
variable was created by a programmer who read the 700-page
reference manual on our chip and designed a variable to hold this
information. Believe it or not, this variable significantly simplifies
what’s presented in the manual: about 30 pages of compressed
technical information on just the GPIO subsystem.
Now step through the next few statements to see the values of the
components of this variable.
Summary
I’ve tried to make this program as simple as possible, but as you can
see, with today’s complex chips, even the simplest operation takes a
bit of work. Getting a program running requires a lot of support.
In the first chapter, our “Hello World” program required pretty much
the same number of files mentioned here, but they existed behind
the scenes. For example, the initialization file was installed as part of
the GCC package. In our blink project, the file
startup_stm32f030x8.S must be explicitly included.
This chapter threw a ton of new concepts at you. Don’t worry if you
don’t understand them all yet. We’ll dive deeper into them in future
chapters.
Programming Problems
Experiment with changing the delay in the Hal_Delay(); statement to
make the blink frequency longer and shorter.
Examine LinkerScript.ld to find the answers to the following
questions:
How much flash (read-only) memory do you have?
How much RAM (read/write memory) do you have?
Examine the file output.map and determine the actual address of
Reset_Handler.
For intermediate readers: Change the program so it turns the LED
on for a short time, then off for a longer time.
Questions
What files are generated by the IDE, and what do they contain?
Where on your system did the IDE stash the compiler?
What does a commercial JTAG debugger look like? How much does
it cost? What does it take to hook it up to a typical development
board? (And be glad you got an integrated system!)
4
NUMBERS AND VARIABLES
Now that we have written a trivial
program or two, it’s time to get the
machine to do some real work. In
this chapter you will learn how to
manipulate numbers.
As embedded programmers, we are concerned with exactly what
the numbers are doing. For example, the number 32 could represent
the number of sheep in a barnyard, or it could energize GPIO pin #4,
which turns on the big red warning light. What’s worse, our STM32
groups up to 32 different GPIOs into a single number, so while 32
might tell the device to “turn on the big red light,” 34 could tell it to
“turn on the big red light and sound the klaxon.” To control our
devices, we need to know precisely what these numbers are doing.
Thus, we will take a deep dive into the numbers as seen by the
computer.
Once you know what a number is, you will learn how to work with
it by using variables to store the information in our program. Next,
you’ll practice manipulating the bits in the hardware’s I/O registers to
turn various functions on or off. In the process, you’ll see how the
program in Chapter 3 worked behind the scenes.
Working with Integers
We’ll start with integers, or whole numbers. These are numbers
without a decimal point, such as 37, 45, –8, and 256.
Table 4-1 lists the operations you can do with numbers in C.
Table 4-1: Number Operators in C
Operator Description
+
Add
-
Subtract
*
Multiply
/
Divide (truncates to a whole number)
%
Modulus (returns the remainder after division)
The following listing illustrates how these operators work:
#include <stdio.h>
int main()
{
printf("3 + 2 is %d\n", 3 + 2);
printf("3 - 2 is %d\n", 3 - 2);
printf("3 * 2 is %d\n", 3 * 2);
printf("3 / 2 is %d\n", 3 / 2);
printf("10 / 9 is %d\n", 10 / 9);
printf("3 %% 2 is %d\n", 3 % 2);
return (0);
}
We demonstrate each operation inside a printf statement that
prints the result. To print the result of a calculation using printf, put
a %d in the string where you want a number to appear and then list
the calculation as a second argument to printf. Notice that if you
want to print a % to represent the modulus operation, you need to
specify it twice.
To view this program’s output, let’s get it into our IDE. Start System
Workbench for STM32 and then go through the list of steps in
Chapter 2 to create a program. (A checklist in the appendix
summarizes these steps.) This time, however, instead of creating a
“Hello World” program, we’ll create an empty native C/C++ project,
so select C Managed Build as the template.
Under Project Type, choose Executable ▶ Empty Project. Next,
create the program file by selecting File ▶ New ▶ Source File.
Enter the program text into the editing window and then save the
file. Build the binary and run it as you did in Chapter 2. The program
should display its output at the bottom of the Console window (see Fi
gure 4-1).
Figure 4-1: The run result
As you can see, the program should print the result of each
calculation it performs.
Declaring Variables to Hold Integers
Our program performed operations on fixed numbers, but we can
also use variables to store information that can change. Before any
variable can be used, it has to be declared. The format of a variable
declaration is as follows:
type variable_name; // Comment explaining what this variable
does
For example, using int as the type would indicate that the variable
is an integer. To be precise, it is the type of integer that the computer
can most easily handle. We will get into other types of integers later
in this chapter.
Variable names begin with a letter and must contain only letters,
digits, and the underscore. The STM32 firmware library uses the
camel case variable naming style, where words within the name are
capitalized, so to be compatible, we use camel case throughout this
book:
startTime
currentStation
area
While names can begin with an underscore, such names are
considered reserved for system functions and should not be used in
ordinary programming. Also, never use l (lowercase L) or O
(uppercase O) as a variable name. In case the reasons aren’t
obvious, consider the following code:
O = l + 1 + O * 0;
shot.
// This sort of programming will get you
Technically, you can omit the comment from your variable
declaration. However, including a comment gives the people who
work with the code after you an idea of why you declared the
variable and what it does. In other words, it helps you create a minidictionary or glossary.
Assigning Values to Variables
Once we’ve declared a variable, we can assign it a value with an
assignment statement. The general form of an assignment statement
is as follows:
variable = expression;
This tells the computer to compute the value of the expression and
store it in the variable. Variables can then be used anyplace we put
an integer, such as a printf statement. The following program
demonstrates variable declaration, assignment, and use:
var.c
/*
* A program to sum two variables
*/
#include <stdio.h>
int main()
{
int aNumber;
int otherNumber;
// Some number
// Some other number
aNumber = 5;
otherNumber = 7;
}
printf("Sum is %d\n", aNumber + otherNumber);
return (0);
This program creates two variables, aNumber and otherNumber, and
then assigns them each a value and prints the sum. Enter this
program into System Workbench for STM32 now.
Initializing Variables
When you declare a variable in your program, you tell the C compiler
to allocate memory space for an integer (int). But before you specify
a value for it, this variable is considered uninitialized; it may contain
any random garbage value left over from the last time the memory
was used.
To see this at work in the program we just wrote, open the
debugger and take a look at the Variables panel as you step through
the program. Before you assign them values, our two variables,
aNumber and otherNumber, have values of zero. But uninitialized
variables could have any value; the fact that they’re zero here is pure
luck.
We can initialize a variable at declaration time by adding an
assignment to it:
int aNumber = 5;
// Some number
This is a good idea in most cases, as it makes sure our program is
working with an expected value. Let’s rewrite our program to add
these initializers:
/*
* A program to see if we can sum two variables
*/
#include <stdio.h>
int main()
{
int aNumber = 5;
int otherNumber = 7;
}
// Some number
// Some other number
printf("Sum is %d\n", aNumber + otherNumber);
return (0);
Once we’ve made that change, we can delete the lines that
initialize the variables later in the program.
Integer Sizes and Representations
C has integer types other than int that it uses to represent numbers
of different sizes.
As computers evolved, people discovered that the most efficient
way to organize memory is in 8-bit groups called bytes. The
computer lets you combine multiple bytes into 2-byte, 4-byte, and 8byte values, and the int type tells C to define an integer using the
most efficient number of bytes for the computer you are using. This
may be a 16-bit (2-byte) integer or a 32-bit (4-byte) integer,
depending on the system. The compiler for our chip, the ARM
Cortex-M0 CPU, uses a 32-bit integer.
To make programs even more efficient, C lets you select the type
of integer you want. For example, you may wish to store numbers in
the range of 0 to 100. You don’t need a full-size integer for that, so
you can use a short int, which is like an integer but takes up less
space. (Technically, the C standard only states that a short int is no
larger than a regular int, but in most implementations it is smaller.)
The following declares a short
short int shortNumber;
int:
// A shorter-than-normal integer
A longer-than-normal integer can be declared with the modifier
long:
long int longNumber;
// A longer-than-normal integer
When computers gained the ability to efficiently process even
longer numbers, people needed an integer type that could contain
even more bits than a long does. The result was the (somewhat silly)
long long integer:
long long int veryLongNumber;
// An even longer integer
The C standard does not define the size of each type of integer.
They could all be the same size, and you’d still have a standard
compiler. However, it does guarantee the following:
sizeof(short int) <= sizeof(int) <= sizeof(long int) <=
sizeof(long long int)
The sizeof operator returns the number of bytes it takes to store a
variable or type.
Let’s see how much space each type of integer takes for the
compiler on our system using a short program to print the sizes of
the various flavors of integer:
size.c
/*
* Show different number types.
*/
#include <stdio.h>
int main()
{
short int aShortInt;
int aInteger;
long int aLongInt;
long long int aLongLongInt;
//
//
//
//
Short integer
Default integer
Long integer
Long long integer
printf("Size of (short int) = %ld (bytes) %ld bits\n",
sizeof(aShortInt), sizeof(aShortInt)*8);
printf("Size of (int) = %ld (bytes) %ld bits\n",
sizeof(aInteger), sizeof(aInteger)*8);
printf("Size of (long int) = %ld (bytes) %ld bits\n",
sizeof(aLongInt), sizeof(aLongInt)*8);
printf("Size of (long long int) = %ld (bytes) %ld
bits\n",
sizeof(aLongLongInt), sizeof(aLongLongInt)*8);
}
return (0);
Earlier, we used %d to print a number. In this program, we use %ld,
because sizeof returns a long int and %ld is used to print long int
numbers.
The program produces the following output on my system:
Size
Size
Size
Size
of
of
of
of
(short int) = 2 (bytes) 16 bits
(int) = 4 (bytes) 32 bits
(long int) = 8 (bytes) 64 bits
(long long int) = 8 (bytes) 64 bits
From this, we can see that the size of a long int is the same as a
long long int. However, that is true only for this compiler on this
system (GNU GCC on an x86_64 processor). Different compilers
might implement things differently.
Number Representations
Let’s say we have five cows. In English, we could represent that
number as “five,” “5,” or “V.” Likewise, in C, you can use four number
representations: decimal, binary, octal, and hexadecimal.
People typically use decimal (base 10), but computers store
numbers in binary (base 2) because it’s cheap and easy to make
binary circuits. For example, we might write the following assignment
statement using decimal:
aNumber = 5;
This same statement could be written in binary like this:
aNumber = 0b101;
// 5 in binary
The prefix 0b indicates a binary number follows. (We could use 0B
too, but it’s harder to read.)
Or, we could use octal (base 8):
aNumber = 05;
// 5 in octal
Finally, we can use hexadecimal (base 16):
aNumber = 0x5;
// 5 in hexadecimal
Binary numbers take up a lot of room to write, so to make things
more compact, we often use hexadecimal notation in programming
to represent exact binary values. Each single hex digit translates into
four binary bits, as shown in Table 4-2.
Table 4-2: Converting Between Binary and Hex
Binary Hex Binary Hex
0000
0
1000
8
0001
1
1001
9
0010
2
1010
A
0011
3
1011
B
0100
4
1100
C
0101
5
1101
D
0110
6
1110
E
0111
7
1111
F
As you can see, 1111 1100b is the equivalent of the hex value
0xFC. Similarly, 0xA5 is 1010 0101b. Using this table, you can
quickly and easily translate between binary and hexadecimal.
While the computer stores a number as a set of bits, the meaning
of those bits is entirely up to us. For example, the bit pattern 0000
0101 could mean 5 if we interpret it as a binary number. But 0000
0101 could also mean 10,005. How did I get that number? I made it
up. In this case, I arbitrarily picked a strange value. Other arbitrary
meanings could include “May,” the letter “E,” and “LED0+LED2.”
One less common but still useful bit pattern mapping is shown in T
able 4-3.
Table 4-3: A Bit Pattern to Number Mapping
Bit pattern Meaning
000
0
001
1
011
2
010
3
110
4
111
5
101
6
100
7
At first glance, it looks random. But if you look closely, you’ll see
that only one bit changes between each number. This makes it ideal
for use in encoders (see Figure 4-2). It is, in fact, a standard bit
pattern encoding called Gray code.
Figure 4-2: A Gray code encoder
Remember that C has no idea how to interpret a bit pattern until
you tell it how.
Standard Integers
The big problem with the integer types is that nothing in the standard
tells you how big they are, just their relative sizes. If you want to
write to a 32-bit device, you have to guess which type of int will be
the size you want.
Guessing and programming do not mix well together, so people
devised systems using a technique called conditional compilation
(see Chapter 12) and other tricks to define new types that hold a
precise number of bits: int8_t, int16_t, int32_t, and int64_t. The
name of the type specifies the size of the integer. For example, the
type int32_t has 32 bits in it no matter what size the int is. Like
most good ideas, these new types became widely used—so widely
used that the C standards committee decided to add them to the
language with the stdint library. They are not part of the built-in C
types, so you have to include them by using the following statement:
#include <stdint.h>
Listing 4-1 shows our new integer types in action.
/*
* Demonstrate different sizes of integers.
*/
#include <stdio.h>
#include <stdint.h>
int main()
{
int8_t
has8bits = 0x12;
int16_t has16bits = 0x1234;
int32_t has32bits = 0x12345678;
int64_t has64bits = 0x123456789abcdef0;
}
printf(" 8 bits
printf("16 bits
printf("32 bits
printf("64 bits
return (0);
//
//
//
//
8-bit integer
16-bit integer
32-bit integer
64-bit integer
%x\n", has8bits);
%x\n", has16bits);
%x\n", has32bits);
%lx\n", has64bits);
Listing 4-1: Integer demonstration
In this program, we use the formatting character %x to print the
numbers in hexadecimal. Specifically, the %x format character prints
an int in hexadecimal, but we can also use it for int8_t, int16_t,
and int32_t because of some behind-the-scenes stuff called
argument promotion.
C is a somewhat lazy language. Because it’s hard to pass a 16-bit
integer to printf when your processor has 32-bit registers, C takes
the int16_t and converts, or promotes, it to an int32_t for this one
operation, which lets us get away with using %x for an int16_t.
Similarly, we can use %x for an int8_t because it will get promoted to
an int32_t as well. (Strictly speaking, the C standard states that
promotion may occur. It does not require it. This code works on our
x86_64 machine with this compiler, but it is not portable to other
systems.)
Now we come to int64_t. If C were to change this into an int
(int32_t), we’d lose half our number. C can’t do anything to it, so it
passes an int64_t argument as an int64_t argument. The format
had to change from %x (int) to %lx (int64_t) to print the longer value.
Investigation for the reader: try changing %lx to %x in the example
and see what you get.
Unsigned Integer Types
In the last section, we used signed integer types, which can be either
positive or negative. Unsigned integer types hold only positive values
and are simpler than their signed counterparts. The standard
unsigned types are uint8_t, uint16_t, uint32_t, and uint64_t. The
type uint8_t is an unsigned 8-bit integer that can hold numbers from
0 (0000 0000b) to 255 (1111 1111b). The ranges of the unsigned
integer types are shown in Table 4-4.
Table 4-4: Unsigned Integer Type Ranges
Ty Low
pe
ui
High
0000 0000 (0)
1111 1111 (255)
0000 0000 0000 0000 (0)
1111 1111 1111 1111 (65,535)
0000 0000 0000 0000 0000 0000
0000 0000 (0)
1111 1111 1111 1111 1111 1111 1111 1111
(4,294,967,295)
0000 0000 0000 0000 0000 0000
0000 0000 0000 0000 0000 0000
0000 0000 0000 0000 (0)
1111 1111 1111 1111 1111 1111 1111 1111 1111
1111 1111 1111 1111 1111 1111 1111
(18,446,744,073,709,551,615)
nt
8_
t
ui
nt
16
_t
ui
nt
32
_t
ui
nt
64
_t
Here’s a simple example of using a uint8_t variable. This program
prints three different representations for smallNumber without
changing its value:
/*
* Simple use of uint8_t
*/
#include <stdio.h>
#include <stdint.h>
int main()
{
uint8_t smallNumber = 0x12; // A small number
}
printf("0x12 is %u decimal\n", smallNumber);
printf("0x12 is %o octal\n", smallNumber);
printf("0x12 is %x hex\n", smallNumber);
return(0);
The %u printf specification tells C we want to print an unsigned
int (the default unsigned integer type). We use the format
specification %o to print in octal and %x to print in hexadecimal.
The output of this program looks like this:
0x12 is 18 decimal
0x12 is 22 octal
0x12 is 12 hex
Overflow
Now we will explore the limits of our machine. Actually, we will
exceed them. The biggest uint8_t number is 255 (0b1111 1111).
What happens when we go beyond that and try to print 255 + 1?
Let’s try it:
/*
* See what happens when we exceed the maximum number.
* (Contains a mistake)
*/
#include <stdio.h>
#include <stdint.h>
int main()
{
// Very small integer, set to the maximum
uint8_t smallNumber = 255;
1
}
printf("255+1 is %u\n", smallNumber + 1);
return (0);
According to this program, the result of adding 1 to the 8-bit
unsigned integer 255 is 256, but the number 256 in binary is 0b1
0000 0000, or 0x100, which can’t fit in 8 bits. Either we’ve warped
the laws of the universe or something went wrong with our program.
To understand what’s going on, let’s take a look at the print
statement 1. The type of smallNumber is uint8_t; however, on most
32-bit computers, it’s hard, if not impossible, to add two 8-bit
integers. Because of the way the computer is constructed, you have
to add two 32-bit numbers. So, to compute an expression, the C
compiler does the following:
Converts shortNumber to a unit32_t value
Adds 1 to the result (of type uint32_t)
Prints the result (256) as a uint32_t
The result is a uint32_t that can hold the value 256, and that’s
what’s printed. So, we did not cause an 8-bit overflow (which we
wanted to demonstrate). Instead, we demonstrated automatic
promotion, which we discussed earlier in this chapter.
To get the result we want, we need to make a slight adjustment to
the program to store the result in a uint8_t value (I’ve highlighted
the changes to our program in bold):
/*
* See what happens when we exceed the maximum number.
*/
#include <stdio.h>
#include <stdint.h>
int main()
{
uint8_t smallNumber;
uint8_t result;
}
smallNumber = 255;
result = smallNumber + 1;
printf("255+1 is %d\n", result);
return (0);
Now the result is 0. Why? Because our calculation returned
0b1111 1111 + 0b000 0001 = 0b1 0000 0000. Only the bold portion
was stored due to the limited space in which to store the variable.
Overflow occurs when the result is too big for the machine to
handle. In this case, the 9-bit result won’t fit in an 8-bit value. Think
of a car’s odometer. It can display mileage to 999,999. What
happens if someone drives a million miles?
Understanding how the compiler is manipulating the numbers is
key to making good embedded programs. For example, I once had a
GPS that kept altitude as an unsigned number. (It was not designed
to work on submarines.) I took it on a trip to Death Valley, and it died.
That’s because when I reached Badwater Basin, elevation –282 feet,
it couldn’t handle the negative altitude. The GPS’s designers had
assumed that all altitudes would be greater than zero. After all, the
GPS was not designed to work underwater. Therefore, using an
unsigned integer for altitude was not an unreasonable decision—
except for users in locations like Badwater Basin, where the altitude
is negative, causing the GPS to die. This mistake shows why it’s
important to know the limitations of your numbering system.
Two’s Complement Representation in Signed Integer
Types
Signed numbers are represented by using one bit (the leftmost) as a
sign bit: if the bit is 1, the number is negative. Thus, 8-bit signed
integers (int8_t) can represent numbers from 127 to –128.
Almost all computers today use two’s complement numbers to
represent negative values. Two’s complement representation stores
a number as that number pre-subtracted from 0.
For example, –1 can be determined by the following calculation:
0000 0000
-0000 0001
--------1111 1111
This works because the computer adds a magic “borrow” bit to the
left of the number, making the arithmetic look like this:
1 0000 0000
0000 0001
--------1111 1111
-
Two’s complement is similar to a mechanical car odometer. Let’s
say you buy a brand-new car and its odometer reads 000,000. If you
drove backward, your odometer would read 999,999, which is the
ten’s complement of –1.
You may have noticed that the biggest number a uint8_t can hold
is 255, whereas an int8_t can store only values up to 127 (half that).
That’s because one bit is used as the sign bit, leaving only seven
bits to store the number part.
What happens when we exceed the boundaries with 8-bit signed
numbers? I’m going to let you investigate that yourself. See what
happens with the operations 127 + 1 and –128 – 1. Also see what
happens with –(–128), the negation of –128.
Shorthand Operators
You’ve learned about integers and the simple operations that can be
done on them, but to let you do arithmetic faster, C provides a
number of shorthand operators.
For example, consider adding a value to a number, like this:
aNumber = aNumber + 5;
You can shorten this operation to the following:
aNumber += 5;
You can perform similar shortcuts for all the other arithmetic
operators.
Additionally, you can condense the operation of adding 1 to a
number:
aNumber += 1;
It can be shortened to this:
++aNumber;
To decrement numbers by 1, use the -- (minus minus) operator.
There is a caveat. C lets you combine the increment (++) and
decrement (--) operations with other statements:
result = ++aNumber;
// Don't do this.
Please don’t do this, as it can cause the program to have
undefined behavior. For example, consider the following statements:
aNumber = 2;
result = ++aNumber * ++aNumber + ++aNumber;
The second statement tells C to increment aNumber, then
increment aNumber again. It then multiplies aNumber with itself and
increments aNumber a third time. Finally, it adds this to the result.
Unfortunately, nothing tells C that these operations have to occur
in the order I’ve listed here. For example, all the increments could
come at the beginning, making the result (5 × 5 + 5) = 30. Or they
could come one at a time, and we would have (3 × 4 + 5) = 17. For
those reasons, be sure to put ++ and -- on lines by themselves.
One more thing: there are two forms of increment and decrement
operations. You can place the operator either before or after the
variable you would like to increment:
aNumber = 5;
result = ++aNumber;
aNumber = 5;
result = aNumber++;
These do slightly different things. I leave it to the reader to write a
small program to print the results of the preceding code and figure
out what they do—and then please never again use ++ combined
with another statement.
NOTE
In C, the following two statements are equivalent:
++aNumber;
aNumber++;
For operations on simple numbers, there is no difference
between these two operations. The good news is that C only
lets you do ++ on simple numbers.
However, C++ allows you to define your own data types
and, through operator overloading, define your own ++ and -operations. When you are dealing with a complex C++ object,
the prefix version is much more efficient in most cases, so it is
a good idea to get into the habit of using the first form just in
case you need to step into the world of C++.
Controlling Memory-Mapped I/O Registers
Using Bit Operations
We can organize eight bits into a single number, but these bits can
also represent eight different things. For example, they can be wired
to eight different LED lights. In fact, when you place values in special
memory locations called memory-mapped I/O registers, these values
turn on or off I/O pins. Since there are eight bits to the register’s
byte, a single register can control eight LEDs. (Or, in our case, one
LED and seven pins on which we can add more LEDs.)
Bits are normally numbered from 7 to 0, with 7 being the leftmost,
or most significant, bit. Let’s say our LED register is set up as
follows:
Bit 7 Bit 6 Bit 5 Bit 4 Bit 3 Bit 2 Bit 1 Bit 0
Out 7 Out 6 Out 5 Out 4 Out 3 Out 2 Out 1 LED 0
Say we want to turn on LED #0. As each LED is off, our register
has the value 0000 0000 in it. To turn on LED #0, we need to flip the
final bit to a value of 1. To do that, we just add 1 to the register to get
0000 0001. LED #0 turns on and all the others stay off.
But what if the LED was already on? Then our register would
contain 0000 0001, and when we add 1, we’ll get 2, which in binary
is 0000 0010. Thus, LED #0 turns off and OUT #1 turns on. Not what
we wanted.
The problem here is that the arithmetic operators we’ve been
using treat our 8-bit integer as a single integer. The bitwise operators
treat the number as a set of individual bits, each of which can be
turned on, turned off, and tested independently.
OR
The first bitwise operator is OR (|). The single-bit version of OR
gives a true (or 1) result if either of its two operands is set to 1. I’m
going to show how it operates using a truth table. It’s like the addition
and multiplication tables you used in first grade, only it shows the
operation of Boolean operators such as OR.
The truth table for OR looks like this:
OR (|) 0 1
0
0 1
1
1 1
OR is a bitwise operator, which means that to “OR” two 8-bit
values together, you perform the operation for each pair of bits in the
two values. For example:
0010 0101
| 0000 1001
--------0010 1101
To set bit 0 (that is, to turn on LED #0), we use the following C
code:
ledRegister = ledRegister | 0x01;
Alternatively, we can use the following shorthand operator:
ledRegister |= 0x01;
AND
The AND (&) operator returns a true (1) only if both of its operands
are true. The following is the AND truth table:
AND (&) 0 1
0
0 0
1
0 1
Like OR, the AND operator works on each pair of bits:
0010 0101
& 0000 1001
--------0000 0001
To turn off LED #0, we can set bit 0 to a value of 0 with the
following operation:
ledRegister &= 0b11111110;
This command “ANDs” our register with a bit pattern that has
every bit set except bit 0, so bit 0 will be cleared and all the other bits
will be unchanged. (ANDing a bit with 1 keeps its value.)
NOT
The invert, or NOT, operator (~) takes one operand and inverts it.
Thus, if the bit is 0, it becomes 1, and if it’s 1, it becomes 0. The truth
table for the NOT operator is rather simple:
0 1
~
1 0
The following example demonstrates how this operator works:
~ 0000 0001
--------1111 1110
Using the bitwise operators we’ve covered so far, we can already
write some code to turn off all registers and then turn on and off the
LED:
const uint8_t LED_BIT = 0b0000001;
// Turn off everything.
ledRegister = 0;
// Turn on the LED.
ledRegister |= LED_BIT;
// Wait a while.
sleep(5);
// Turn off the LED.
ledRegister &= ~LED_BIT;
This is exactly what the blink program from Chapter 3 was doing,
except that the STM library hid these details from us.
Exclusive OR
The result of the bitwise operator exclusive OR (^) is true if one or
the other bit is set, but not both. Here is its truth table:
Exclusive OR (^) 0 1
0
0 1
1
1 0
To see how it works, consider the following example:
0010 0101
^ 0000 1001
--------0010 1100
Exclusive OR is useful if we want to invert the value of the LED in
our ledRegister, like this:
ledRegister ^= LED_BIT; // Toggle the LED bit.
Inverting an LED makes it blink slowly.
Shifting
The left shift operator (<<) shifts the contents of a variable to the
left by a given number of bits, filling in zeros for the missing bits. For
example, consider the following operation:
uint8_t result = 0xA5 << 2
This causes the computer to move the bits two places to the left so
that the following:
1010 0101
becomes this:
1001 0100
The right shift operator (>>) is a little more tricky. For unsigned
numbers, it works just like the left shift, except it shifts the bits in the
rightward direction. Again, the computer fills in zeros for the missing
bits. Thus, uint8_t result = 0xA5 >> 2; would be computed so that
the following:
1010 0101
becomes this:
0010 1001
But when the number is signed, the computer uses the sign bit to
supply the missing bits. For example, consider the following
operation:
int8_t result = 0xA5 >> 2;
// Note the lack of "u"
This would be computed such that the following:
1010 0101
becomes this:
1110 1001
Because it’s a signed number shifting right, the missing bits on the
right side are filled in with copies of the sign bit, so the result is 0xE9,
which is –23.
Defining the Meaning of Bits
Hardware people love defining things in terms of bits. That’s
because when the signals come out of the chip, they leave from
single pins on the hardware that have names like GPIO A-3 (which
means GPIO register A, bit 3). As the signal on a single pin is either
high (1) or low (0), you can represent it with a single bit.
But by the time the programmer sees the signal, it has been
bundled with a bunch of others into an 8-bit, 16-bit, or 32-bit register.
Therefore, we need a way of easily translating hardware speak (like
“bit 3”) into software speak (such as “0x04”). The shift operators,
properly used, can be a big help with this translation.
For example, let’s say we have a light board whose hardware
specification is the following:
+----+----+----+----++----+----+----+----+
| 7 | 6 | 5 | 4 || 3 | 2 | 1 | 0 |
| MF | DF | OL | OP || PW | PF | AP | CF |
+----+----+----+----++----+----+----+----+
MF (bit 7) Master fail: Lights when any other failure light gets lit.
DF (bit 6) Data fail: Incoming data is inconsistent or corrupt.
OL (bit 5) Oil low: The oil level in the accumulator is low.
OP (bit 4) Oil pressure: The accumulator oil pressure is low.
PW (bit 3) Power failure: The main power supply has failed.
PF (bit 2) Position fault: The position frame has hit a limit switch and
is not where it is supposed to be.
AP (bit 1) Air pressure: The air compressor has failed.
CF (bit 0) Clean filter: The filter to the air compressor needs
cleaning.
Each of these bits is connected to a light. The light circuit is wired
to the GPIO pins of our controller. For example, if we set bit 0 of the
GPIO device, the “Clean Filter” light will come on:
ledRegister = 1;
// Turn on clean filter.
// (Turn all others off.)
Even so, it’s still not easy to remember which number goes with
which bit. Bit 0 is the first value, bit 1 is the second value, and so on.
Quick: Which bit is represented by the 6th value? There is a nice
way of making this easier. Bit 0 holds value 1, which is equivalent to
the expression (1 << 0). Bit 1 is value 2, which is (1 << 2), and bit 3
is (1 << 3), and so on. From this, it’s easy to see that bit 5 is (1 <<
5). Using this system, we can define constants to represent each bit:
const
const
const
const
const
const
const
const
uint8_t
uint8_t
uint8_t
uint8_t
uint8_t
uint8_t
uint8_t
uint8_t
MASTER_FAIL
DATA_FAIL
OIL_LOW
OIL_PRESSURE
POWER_FAILURE
POSITION_FAULT
AIR_PRESSURE
CLEAN_FILTER
=
=
=
=
=
=
=
=
(1
(1
(1
(1
(1
(1
(1
(1
<<
<<
<<
<<
<<
<<
<<
<<
7);
6);
5);
4);
3);
2);
1);
0);
Let’s once again turn on the CLEAN_FILTER LED and leave all the
others alone, this time using our new constant to reference the
relevant bit:
ledRegister |= CLEAN_FILTER; // Turn on clean filter.
Notice here that we also used the |= shorthand operator
introduced earlier in this chapter.
Setting the Values of Two Bits at Once
Now let’s say we want to set the values of both POWER_FAILURE and
MASTER_FAIL. We can accomplish that with the following statement:
ledRegister |= MASTER_FAIL | POWER_FAILURE;
Since MASTER_FAIL has a value of 1 in bit 7, and any nonzero value
results in a value of 1, the MASTER_FAIL bit will be set in the panel.
Turning Off a Bit
We use the following pattern to turn off a bit:
bitSet &= ~bitToTurnOff;
To understand how this operation works, let’s go through it in detail
using the following statement:
ledRegister &= ~(MASTER_FAIL | POWER_FAILURE);
Let’s start with the result of (MASTER_FAIL
| POWER_FAIL):
1000 1000 (MASTER_FAIL | POWER_FAIL)
Now we apply the invert or NOT (~) operator:
0111 0111 ~(MASTER_FAIL|POWER_FAIL)
Next, we take a look at the existing value of ledRegister. For this
example, it has MASTER_FAIL and CLEAN_FILTER set.
1000 0001 (ledRegister: MASTER_FAIL, CLEAN_FILTER)
Now we “AND” the results together:
0111 0111 ~(MASTER_FAIL|POWER_FAIL)
1000 0001 (ledRegister: MASTER_FAIL, CLEAN_FILTER)
Result: 0000 0001 (CLEAN_FILTER)
Checking the Values of Bits
The following program shows a typical use of bit-banging, the art of
turning on and off individual bits. It also contains logic to check the
values of the different bits:
/*
* Program to demonstrate the use of bit operations
*/
#include <stdio.h>
#include <stdint.h>
//< Master fail -- shows if any other error is present.
const uint8_t MASTER_FAIL
= (1 << 7);
//< Indicates that inconsistent data was received.
const uint8_t DATA_FAIL
= (1 << 6);
//< Oil container is low.
const uint8_t OIL_LOW
= (1 << 5);
//< Oil pressure is low.
const uint8_t OIL_PRESSURE
= (1 << 4);
//< Main power supply failed.
const uint8_t POWER_FAILURE
= (1 << 3);
//< We told the position to go to x and it didn't.
const uint8_t POSITION_FAULT
= (1 << 2);
//< Air compressor stopped.
const uint8_t AIR_PRESSURE
= (1 << 1);
//< Air filter has reached end of life.
const uint8_t CLEAN_FILTER
= (1 << 0);
/*!
* Prints the state of the bits
* (Substitutes for a real LCD panel)
*
* \param ledRegister Register containing the LED bits
*/
static void printLED(const uint8_t ledRegister)
{
printf("Leds: ");
if ((MASTER_FAIL & ledRegister) != 0)
printf("MASTER_FAIL ");
}
if ((DATA_FAIL & ledRegister) != 0)
printf("DATA_FAIL ");
if ((OIL_LOW & ledRegister) != 0)
printf("OIL_LOW ");
if ((OIL_PRESSURE & ledRegister) != 0)
printf("OIL_PRESSURE ");
if ((POWER_FAILURE & ledRegister) != 0)
printf("POWER_FAILURE ");
if ((POSITION_FAULT & ledRegister) != 0)
printf("POSITION_FAULT ");
if ((AIR_PRESSURE & ledRegister) != 0)
printf("AIR_PRESSURE ");
if ((CLEAN_FILTER & ledRegister) != 0)
printf("CLEAN_FILTER ");
printf("\n");
int main()
{
uint8_t ledRegister = 0x00;
off.
// Start with all
printLED(ledRegister);
// Power went out.
ledRegister |= POWER_FAILURE | MASTER_FAIL;
printLED(ledRegister);
// Now the air went out.
ledRegister |= AIR_PRESSURE;
printLED(ledRegister);
}
// Power back, air out, so master is on.
ledRegister &= ~POWER_FAILURE;
printLED(ledRegister);
return (0);
Let’s start by looking at the printLED function, which contains a
bunch of lines that test each individual bit and print a message if it is
set. (You’ll learn about the if statements used to do this in Chapter
5.) To understand the logic of the test, take a look at the following
statement:
if ((MASTER_FAIL & ledRegister) != 0)
printf("MASTER_FAIL ");
The message will print if the expression on the first line is not
equal to 0. Because the expression uses the AND operator, each bit
in ledRegister must match the corresponding bit in MASTER_FAIL for
that bit to have a value of 1. If at least one set of bits both have a
value of 1, the printf is executed. In other words, behind the
scenes, the operation looks something like this:
1000 0000 (MASTER_FAIL)
& 1000 0001 (ledRegister with MASTER_FAIL and CLEAN_FILTER
set)
--------= 1000 0000 (Since this is not zero, print "MASTER FAIL")
The entire function will perform a similar test and print every bit
that’s set in the register. This function is used here because we don’t
have a hardware light panel and we want to see what’s happening.
Later in the program, we play with the bits. For example, we
simulate a power failure by turning on the POWER_FAILURE and
_MASTER_FAIL bits. Thus, when we print the LEDs now, we get the
following message:
Leds: MASTER_FAIL POWER_FAILURE
The rest of the program sets and clears the various bits to produce
the following messages:
Leds:
Leds: MASTER_FAIL POWER_FAILURE
Leds: MASTER_FAIL POWER_FAILURE AIR_PRESSURE
Leds: MASTER_FAIL AIR_PRESSURE
Summary
This chapter covered what you can do with simple integers. There’s
the usual add, subtract, multiply, and divide, but you also saw how a
computer stores the data and, most importantly, what happens when
you run into problems like overflow.
You also learned about bit manipulation, where you treat an
integer as a group of 8, 16, or 32 bits. This is very important because
embedded programmers frequently deal with bitmapped registers.
For example, the GPIO register we used to turn on and off our LED
contains bits for 31 other GPIOs. The other 31 pins are entirely
unrelated to our LED and have other functions (or they would have if
we wired them to anything).
In the next chapter, you’ll learn how to make decisions based on
those computations.
Programming Problems
The largest int16_t value is 32,767. Write a program to find out what
the int16_t value of 32,767 + 1 is.
There is a serial I/O register that contains a 2-bit value for the parity,
as specified here:
+----+----+----+----++----+----+----+----+
| 7 | 6 | 5 | 4 || 3 . 2 | 1 . 0 |
| IE | TE | RD | BR || Parity | X Bits |
+----+----+----+----++----+----+----+----+
Write an expression to extract the parity-checking number (in the
range 0 to 3) from the register. The parity is stored in bits 2 and 3 as
a 2-bit unsigned binary number.
Write code to set the value to 2 (binary 0x10).
5
DECISION AND CONTROL
STATEMENTS
A computer is a powerful instrument
because it can make decisions
based on the data it receives. For
example, a computer can turn on an
LED if a button is being pressed and
turn off the LED if it isn’t. In this chapter we will
see how C’s various decision and control
statements operate. Then we’ll apply them to
embedded programming by making our device
respond to button presses.
The if Statement
We use the if statement to execute some code only if some
condition is true. Here is the general form of this statement:
if (condition)
statement;
To conditionally execute more than one statement, enclose the set
of statements affected by the condition inside curly brackets ({}), as
shown next. C will treat the set of statements as a single block:
if (condition)
statement;
statement;
statement;
// ...
}
{
C considers anything nonzero as true and zero as false.
Therefore, if the condition is nonzero, the statements will execute. If
the condition is zero, they will not.
Table 5-1 lists the other comparison operators.
Table 5-1: The Comparison Operators
Operator Description
==
Equals
<
Less than
<=
Less than or equal
!=
Not equals
>
Greater than
>=
Greater than or equal
For example, if you wanted some code to execute only if a
variable had a value of 5, you could use the equals (==) operator, as
follows:
if (aNumber == 5) {
printf("The number is 5\n");
}
A word of warning: C allows assignment inside conditionals. For
example, the following code, which assigns a variable a value of 7
within the if statement, is legal:
if (aNumber = 7) {
printf("Something happened\n");
}
This is the equivalent of the following code, which tests whether
the variable is equal to zero after the assignment:
aNumber = 7;
// Assignment
if (aNumber != 0) { // Test against zero
printf("Something happened\n");
}
It is not the same as the following condition, which tests whether a
variable is equal to 7:
if (aNumber == 7)
This problem was a nasty one in the early days of C when
compiler technology was not what it is today. You’d make a mistake
by accidentally writing something like the following code, only much
more complicated:
aNumber = 5;
if (aNumber = 7) { // Notice the missing '=' character.
printf("Something happened\n");
}
The code within the if statement would be executed, as the
variable would be reassigned a value of 7, which as a nonzero value
would immediately make the condition true, even though you
intended aNumber to be 5, not 7. With the modern GCC compiler,
assignment in a condition generates a warning:
equal.c:14:5: warning: suggest parentheses around assignment
used as truth value [-Wparentheses]
if (aNumber = 7) {
Here, GCC is telling you that if you want to suppress the warning
because you really want to combine an assignment statement and
an if statement, you should write the code as follows:
if ((aNumber = 7)) {
// Very very lousy programming
I’ve added the comment because I consider it poor programming
practice to combine statements. Make one statement do one thing.
For example, when you need to do an assignment and a test, do the
assignment and then do the test.
The if/else Statement
We use the if/else statement when we want to make some
statements execute if the condition is true and other statements
execute when it is false. For example, consider the following:
if ((number % 2) == 0) {
printf("Number is even\n);
} else {
printf("Number is odd\n);
}
If the value of the number variable has a remainder of 0 when
divided by 2, this code will print a message noting that the number is
even; otherwise, it will print a message noting that the number is
odd.
Now we come to another of C’s darker little corners: you don’t
have to put curly brackets ({}) around a single statement after an if
or an else. Consider the following code, deliberately indented
incorrectly:
if (a == 1)
if (b == 2)
printf("Condition orange\n");
else
printf("Condition pink\n");
Which if does the else go with, the first if or the second if?
a. The first if: if
(a == 1)
b. The second if: if
(b == 2)
c. If you don’t write code like this, you don’t have to worry about
such silly questions.
Let’s use answer C and rewrite the code. Which if does the else
go with in the following code?
if (a == 1) {
if (b == 2) {
printf("Condition orange\n");
} else {
printf("Condition pink\n");
}
}
Here, you can tell it goes with the second if. That’s the “official”
answer to the previous question too, but by writing your code clearly,
you can come up with the answer without having to go through the C
language standard with a fine-tooth comb.
It should be noted that some style guides require that you always
put the body of the if inside curly brackets; however, this is a
decision best left up to the programmer.
Looping Statements
A loop is a programming feature that repeats some code as long as
a condition is met. C has three looping statements: while, for, and
do/while. We’ll start with while, since it’s the simplest, followed by
for. We won’t get into do/while because it’s rarely used.
The while Loop
The general form of the while statement is as follows:
while (condition)
statement;
Remember that statement can be a single C statement or a series
of statements enclosed in {}. To see how a while loop can be useful,
let’s write a program that tests the numbers from 1 to 10 to see
which ones are even and which ones are odd, as shown in Listing 51.
odd.c
/*
* Test to see if the numbers 1 through 10 are even
* or odd.
*
#include <stdio.h>
int main()
{
int aNumber; // Number to test for oddness
aNumber = 1;
while (aNumber <= 10) {
if ((aNumber % 2) == 1) {
printf("%d is odd\n", aNumber);
} else {
printf("%d is even\n", aNumber);
}
++aNumber;
}
return (0);
}
Listing 5-1: Testing for oddness
In the main function, we declare a variable, aNumber, to hold the
value we’ll test in our while loop. Then we set that variable to 1.
Next, we set the while loop to run as long as aNumber is less than
or equal to 10. Inside the loop (that is, inside the brackets) we use
the if/else statement introduced in the previous section of this
chapter to check the remainder of dividing aNumber by 2. This lets us
know whether it’s even or odd.
Before we finish the loop, we add 1 to aNumber with ++aNumber;.
Thus, the next time the loop runs, aNumber will have a value of 2, and
so on. Eventually, when aNumber’s value reaches 11, the loop ends
and the program exits with the return value 0.
When this program runs, the output looks like this:
1 is odd
2 is even
3 is odd
4 is even
5 is odd
6 is even
7 is odd
8 is even
9 is odd
10 is even
The for Loop
Our while loop had three main components: an initialization
statement (aNumber = 1), a test statement (checking whether aNumber
is greater or equal to 10), and a statement to increment the variable
after the loop was executed (++aNumber).
This design pattern (initialization, condition, and increment) is so
common it has its own statement: the for statement. We write this
statement as follows:
for (initialization; condition; increment)
To see how it works, let’s convert our while loop into a for loop.
The following code shows the same odd-or-even program using a
for statement:
/*
* Test to see if the numbers 1 through 10 are even
* or odd.
*/
#include <stdio.h>
int main()
{
int aNumber; // Number to test for oddness
for (aNumber = 1; aNumber <= 10; ++aNumber) {
if ((aNumber % 2) == 1) {
printf("%d is odd\n", aNumber);
} else {
printf("%d is even\n", aNumber);
}
}
}
return (0);
Notice that the for clause includes our three statements,
separated by semicolons.
Any one of the statements may be left out of the for loop. For
example, we could have written our program by initializing aNumber
before entering the loop:
aNumber = 1;
for (; aNumber <= 10; ++aNumber) {
Alternatively, we could increment the variable’s value within the
loop’s body, rather than in the for clause:
for (aNumber = 1; aNumber <= 10;) {
// Oddness test
++aNumber;
If the condition is left out, however, the loop will never terminate.
This is why the following statement loops forever:
for (;;)
We use this “for-ever” loop in our embedded programs, because
the programs should never exit.
Using the Button
Now that we know how to make decisions, we’ll write a program that
makes a decision based on the one input source our development
board has by default: a blue button. Our program will make use of
the one output we know how to control: the LED. Let’s turn our
development board into a tiny computerized lamp.
Start System Workbench for STM32 and begin a new embedded
project. The main.c file should look like this:
/**
*************************************************************
*
* @file
main.c
* @author Steve Oualline
* @version V1.0
* @date
11-April-2018
* @brief
Push the button -- flash the LED
*************************************************************
*
*/
#include "stm32f0xx.h"
#include "stm32f0xx_nucleo.h"
int main(void)
{
1 GPIO_InitTypeDef GPIO_LedInit; // Init. for the LED
GPIO_InitTypeDef GPIO_ButtonInit; // Init. for push
button
GPIO_PinState result; // The result of reading the pin
HAL_Init();
// LED clock initialization
2
LED2_GPIO_CLK_ENABLE();
// Initialize LED.
3
GPIO_LedInit.Pin = LED2_PIN;
GPIO_LedInit.Mode = GPIO_MODE_OUTPUT_PP;
GPIO_LedInit.Pull = GPIO_PULLUP;
GPIO_LedInit.Speed = GPIO_SPEED_FREQ_HIGH;
HAL_GPIO_Init(LED2_GPIO_PORT, &GPIO_LedInit);
// Push button clock initialization
USER_BUTTON_GPIO_CLK_ENABLE();
4
/* Configure GPIO pin : For button */
GPIO_ButtonInit.Pin = USER_BUTTON_PIN;
GPIO_ButtonInit.Mode = GPIO_MODE_INPUT;
GPIO_ButtonInit.Pull = GPIO_PULLDOWN;
GPIO_ButtonInit.Speed = GPIO_SPEED_FREQ_HIGH;
HAL_GPIO_Init(USER_BUTTON_GPIO_PORT, &GPIO_ButtonInit);
}
for(;;) {
// Get the current state of the push button
result = HAL_GPIO_ReadPin(USER_BUTTON_GPIO_PORT,
USER_BUTTON_PIN);
if (result == GPIO_PIN_SET)
HAL_GPIO_WritePin(LED2_GPIO_PORT,
LED2_PIN, GPIO_PIN_SET);
else
HAL_GPIO_WritePin(LED2_GPIO_PORT,
LED2_PIN,GPIO_PIN_RESET);
}
Let’s go over this code in detail.
Initialization
To begin our program, we’ll make use of a lot of code that is defined
by the hardware abstraction layer (HAL). In the next few chapters,
you’ll learn about every one of these pieces.
First, we define a new variable named GPIO_LedInit of type
GPIO_InitTypeDef 1. The GPIO_InitTypeDef type is not a standard C
type: it’s defined by the HAL include files brought in at the top of the
program. At this point, the details of this type don’t matter. We need
the variable to define how the LED pin is going to be configured.
(You’ll learn about defining variable types in later chapters.)
Similarly, we define another variable, GPIO_ButtonInit, to define
how the button GPIO pin is going to be configured, and a variable to
hold the state of the button pin (GPIO_PinState).
Inside the main procedure, the first thing we do is call HAL_Init to
set up the hardware, as we did in the blink program from Chapter 3.
You need to call HAL_Init at the top of every STM32 program.
Next, we turn on the clock for LED2 (the user LED) 2. The clock
controls how the data we write to the GPIO pin gets to the actual pin.
Without this line, writing to the LED doesn’t work. Although it looks
like a procedure call to a function named LED2_GPIO_CLK_ENABLE, it’s
actually a preprocessor macro, which we will study later.
Now we come to the part where we assign values to the
GPIO_LedInit variable 3, which is a structure type that has a bunch of
pieces we need to assign individually. Later, you will learn the details
of what’s going on here.
Similar code initializes the pin used for the button, except that the
pin mode is set to GPIO_MODE_INPUT because we’ll be reading the pin
to get the state of the button, not writing it.
Choosing a Pulldown Circuit
Notice that we set the Pull field to GPIO_PULLDOWN 4, not GPIO_PULLUP.
The Pull field tells the CPU what type of pullup/pulldown circuity to
use. An input pin can have one of three states: floating, pullup, and
pulldown. Figure 5-1 shows the circuit for a floating input.
Figure 5-1: A floating circuit
When the switch SW1 is open, no voltage is applied to the
User_Button_Pin. As such, it could be high (about 3 volts or more) or
low (less than about 3 volts) or somewhere in between. It could be
set by whatever stray electrical noise is floating around near it. The
key here is that there is no way to know the value of this signal
unless it’s actually shorted to ground or power.
Now let’s take a look at an input with a pullup circuit (see Figure 52).
Figure 5-2: A pullup circuit
When SW1 is open, voltage flows though the resistor R1, raising
(or pulling up) the User_Button_Pin to VCC, or a positive level. When
SW1 is closed, the pin is shorted to ground (Gnd). R1 is a very big
resistor, so the current flowing through it is negligible and the voltage
on the pin goes to zero.
A pulldown circuit is similar, except R1 is connected to ground,
and SW1 to VCC, so the User_Button_Pin goes to ground (that is, it’s
pulled down to zero) if SW1 is open (see Figure 5-3).
Figure 5-3: A pulldown circuit
On the STM32 chip, circuits are cheap and pins are expensive.
Therefore, the chip’s creators wanted to get as much out of each pin
as possible. For every GPIO pin, there is a pullup resistor, a
pulldown resistor, and the transistors to connect these resistors,
depending on how the pin may be configured. This makes things
easy, as we don’t have to put these resistors on the board ourselves.
It also makes things difficult, however, because we have to program
them. Figure 5-4 shows the internal wiring of a single GPIO pin on
the STM32. (Even this is a simplified version.) The key thing to note
is that there are pullup (RPU) and pulldown (RPD) internal resistors
that can be turned on and off.
Figure 5-4: STM32 internal wiring for a GPIO pin
We chose to use a pulldown circuit because the other side of the
button is connected to +5 V, so when the button is not pressed and
the switch is open, our pulldown resistor kicks in and the GPIO pin
has a value of 0. When the button is pressed, the 5 V coming from
the button cause the GPIO pin to have a value of 1. (A little current
will also flow through the resistor, but that amount of current is
negligible.)
Getting the State of the Button
Next, we reach our main loop. The for statement loops forever, or
until we reset the machine. Inside the loop, the first statement
initializes a variable called result of type GPIO_PinState (a
nonstandard type defined by the HAL include files) with the result of
a call to the function HAL_GPIO_ReadPin. HAL_GPIO_ReadPin reads the
GPIO pin connected to the button. More specifically, it reads the 32bit GPIO port USER_BUTTON_GPIO_PORT and then tests the value of the
USER_BUTTON_PIN. (A lot of the bit manipulation we covered in the
previous chapter goes on inside the HAL_GPIO_ReadPin function.)
Now we test to see if the pin is set by comparing result to the
symbol GPIO_PIN_SET (a constant defined by the HAL code), and then
we turn on the LED pin if the button pin is set. Otherwise, we turn off
the LED pin. (The code to do this was covered in Chapter 3.)
Running the Program
When we run the program, the LED turns on. Press the user button
and the LED turns off. Release the button and the LED will come
back on, and so on. Although a simple operation, it took a lot of
learning to get us here.
Unfortunately, we’ve made a very complex flashlight with a button
that turns the light off instead of on. The good news is that it’s
computer-controlled, so we can fix it in software. I’m going to leave
that for you to figure out.
Loop Control
Our programming example made basic use of looping statements,
but C gives you several ways of adding extra control to your loops.
The two major statements that modify the loop control are break and
continue.
The break Statement
The break statement allows you to exit a loop early (that is, break out
of the loop). For example, consider the following short program,
which looks through an array for a key number. If the number is
there, the program prints it:
/*
* Find the key number in an array.
*/
#include <stdio.h>
#include <stdbool.h>
#define ARRAY_SIZE
7
// Size of the array to search
int main()
{
// Array to search
int array[ARRAY_SIZE] = {4, 5, 23, 56, 79, 0, -5};
static const int KEY = 56; // Key to search for
{
for (unsigned int index = 0; index < ARRAY_SIZE; ++index)
if (array[index] == KEY) {
printf("Key (%d) found at index %d\n",
KEY, index);
1
}
}
break;
}
return (0);
This program searches an array for a key value. Once we find the
key value, we’re done. We don’t want to go through the entire rest of
the loop, so to exit, we use the break statement 1.
The continue Statement
The other loop control statement, continue, starts execution at the
top of the loop. The following program prints a list of commands,
skipping those that start with a dot. When we encounter one of
these, we jump to the top of the loop with the continue command:
/*
* Find the key number in an array.
*/
#include <stdio.h>
#define COMMAND_COUNT 5 // Number of commands
// Commands, ones beginning with . are secret
static const char commands[COMMAND_COUNT][4] = {
"help",
"exec",
".adm",
"quit"
};
int main()
{
// Print the help text
for (unsigned int index = 0;
index < COMMAND_COUNT;
++index) {
1
if (commands[index][0] == '.') {
// Hidden command
2
continue;
}
printf("%s\n", commands[index]);
}
}
return (0);
The key to this program is the test to see if we have a dot
command 1 and then continue 2 to start over (thus skipping the rest
of the loop and the printf).
Anti-patterns
While you’re learning how to use loops, you should also learn how
not to use loops. Several programming patterns have crept into the
programming industry that do more to confuse things than promote
good programming, which is why they’re called anti-patterns. I’m
going to warn you about two.
The Empty while Loop
The first anti-pattern is the empty while loop. Consider the following
code:
while (GPIO_PIN_SET ==
HAL_GPIO_ReadPin(USER_BUTTON_GPIO_PORT, USER_BUTTON_PIN));
{
// ... do something
}
You probably gather that this code repeats some action as long as
the user button is pressed. But it doesn’t. The reason it doesn’t is
that the while loop affects a single statement only. You might
assume that the statement within the while loop is the one enclosed
in curly brackets, but there is a statement before the brackets too.
It’s a very short statement and very easy to miss, because it’s an
empty statement. We can tell it’s there because there is a semicolon
after the statement:
while (GPIO_PIN_SET ==
HAL_GPIO_ReadPin(USER_BUTTON_GPIO_PORT, USER_BUTTON_PIN));
{
// ... do something
}
The semicolon is easy to overlook. That’s why I had to set it in
boldface. It’s also why this type of coding is considered bad. Very
bad.
The continue statement comes to our rescue. We can rewrite this
while loop as follows:
while (GPIO_PIN_SET == HAL_GPIO_ReadPin(BTN_PORT, BTN_PIN))
continue;
{
// ... do something
}
Now we can see that the while loop controls the continue
statement and nothing else. The indentation and the big obvious
statement tell us that.
Assignment in while
The second anti-pattern is assignment in the while loop:
while ((result = ReadPin(BTN_PORT, BTN_PIN)) == GPIO_PIN_SET)
{
// ... statements
}
This statement does two things at once. First, it calls ReadPin and
assigns the result to result. Second, it tests result to see if it is set.
Programs are much easier to understand and maintain if they do
small, simple things one at a time. This shortcut saves typing a
couple of newlines at the cost of program clarity. It could just as
easily have been written like this:
while (1) {
result = ReadPin(BTN_PORT, BUTTON_PIN);
if (result != GPIO_PIN_SET)
break;
// ... statements
}
Our goal should be to make our programs as simple and easy to
read as possible, not as compact and clever as possible.
Summary
We now have two key aspects of computing under our belt: numbers
and how to make decisions based on those numbers. Single
decisions can be made with the if statement, while the while and
for statements let us make repeating decisions. The break and
continue keywords give us more control over those decisions.
Decision statements gave us the ability to write a small program
that flashes the LED at the touch of a button. Although the program
is simple, we took input, processed it, and produced output, which is
the basis for a huge number of embedded programs. In the next few
chapters, you’ll learn how to deal with more complex data and more
complex ways of processing it, all of which builds on the basics you
learned here.
Programming Problems
Write a program to produce a multiplication table for the numbers
from 0 × 0 to 9 × 9.
Write a program to count the number of bits that are set in a
uint32_t integer. For example, the number 0x0000A0 has two bits
set in it.
Write a program that flashes a pattern on the LED. Use one array of
integers to control the delay for LED on and LED off. Repeat the
pattern.
Write a program that blinks the letter “H” in Morse code using the
LED. When the button is pressed, it blinks “E.” If you keep pressing
the button, you’ll get all of “HELLO WORLD” in Morse code.
Write a program to compute the first 10 primes.
Write a program to find the largest and smallest elements in a set.
Create a program that goes through a string and prints only the
vowels.
6
ARRAYS, POINTERS, AND STRINGS
So far, we’ve used very simple
integers to represent data. But let’s
face it, not everything in the world
can be described as a single
integer. In this chapter you’ll learn
some of the basics of organizing your data.
First, you’ll learn about arrays, which are data structures that hold
multiple items you can select using an integer index. I’ll also go a
little beyond simple arrays to show you how the compiler implements
arrays and how arrays implement strings of characters like "Hello
World!\n". Along the way, you’ll learn to work with C’s char type.
You’ll learn how to use memory pointers, which hold the address
of a memory location, and then see how arrays and pointers are both
similar and different.
You’ll also learn how to use the const modifier to create a variable
that cannot be modified, better known as a constant. Constants help
you organize your data by preventing unintentional changes to it.
Arrays
You’ve already seen how to declare a basic variable, like this:
int aNumber;
// A number
This variable can hold only one value at a time. Yet we can also
declare a variable that holds a set of values using an array
declaration, which places the number of items to include in the array
in brackets:
int anArray[5];
// An array of numbers
This code declares an array of five integers numbered 0, 1, 2, 3,
and 4. The element numbers are called indices, and the first index is
0, not 1. To access individual elements of the array, we use square
brackets containing an index. For example, the following line assigns
a value of 99 to the fourth item in the array (the one at index 3):
anArray[3] = 99;
// Store an element in the array.
if (anArray[3] == 98) {
There is nothing in the C language that prevents you from indexing
a nonexistent array element, but although it is possible to use an
illegal index, the results are not defined (meaning something bad will
probably happen). For example, the last element of anArray is 4, so
the following declaration is legal:
anArray[4] = 0;
// Legal
However, this one isn’t:
anArray[5] = 9;
// Illegal, 5 is too big
This statement tries to access an element that isn’t in the array.
Let’s see how arrays work in action. Take a look at Listing 6-1,
which is a program that sums the elements of an array and outputs
the total.
/*
* Sum up a series of numbers.
*/
#include <stdio.h>
int main()
{
const int NUMBER_ELEMENTS = 5;
int numbers[NUMBER_ELEMENTS];
int sum;
int current;
we are adding
numbers[0]
numbers[1]
numbers[2]
numbers[3]
numbers[4]
}
=
=
=
=
=
//
//
//
//
Number of elements
The numbers
The sum so far
The current number
5;
8;
9;
-5;
22;
sum = 0;
// Loop over each element and add them up.
for (current = 0; current < NUMBER_ELEMENTS; ++current)
{
sum += numbers[current];
}
printf("Total is %d\n", sum);
return (0);
Listing 6-1: Basic array usage
We start by defining a variable, NUMBER_ELEMENTS, to hold the
number of elements we have in the array. The keyword const tells C
that this variable is not to be changed (more on this later).
We use this constant two places. The first declares the array. The
second loops through each element of the array. While we could
have instead used the value 5 in both of these places, doing so
would have introduced a magic number into our code. A magic
number is a number that appears in the program in multiple places
but whose connection to the code is unclear. Using a magic number
is risky; in this case, if we changed the 5 in the array declaration, we
would have to remember to also change the 5 in the loop. By using
the constant declaration, we define the size of the array in only one
place. If we change the constant to 14, we take care of every place it
is used automatically.
Back to the code. We need to put some numbers in our array, so
we do so by assigning a value to each of its indices. Next, we use a
for loop to access each element of the array. The for loop statement
illustrates a common C programming phrase for looping through an
array. The loop starts at zero and continues as long as the index is
less than (<) the size of the array. The index must be less than 5,
because number[5] is a nonexistent element.
Arrays can be initialized at the time of declaration, just like simple
variables, by listing all of the elements inside curly brackets:
// Define some numbers to sum.
int numbers[5] = {5 8, 9, -5, 22};
In this case, the number of elements must match the size of the
array or you’ll get a warning message.
C is a smart language. It can deduce the size of the array from the
number of elements, so this declaration also works:
// Define some numbers to sum.
int numbers[] = {5 8, 9, -5, 22};
Under the Hood: Pointers
My father, C. M. Oualline, famously taught me, “There are things and
there are pointers to things.” See Figure 6-1 for a detailed diagram of
what this means. Although it looks simple, understanding this
diagram is extremely important.
Figure 6-1: Things and pointers to things
An integer is a thing. In fact, it is a thing that has an integer in it. A
pointer is an address of a thing.
Things come in different sizes. A uint64_t integer is a relatively
big thing, while a uint8_t is a small thing. The key here is that things
come in different sizes. A pointer is a fixed size. The thing it points to
can be big or small, but the pointer is always the same size.
Pointers are useful for quickly accessing data structures and
linking data structures together. In embedded programming, pointers
are used to point to memory-mapped I/O devices, which gives the
program control of the devices.
The big advantage of pointers is that they can point to anything.
The biggest disadvantage is that they can point to things they
shouldn’t. When that happens, programs start to do strange and
unexpected things, so use pointers very carefully.
To declare a pointer, use an asterisk (*) in the declaration to
indicate that the variable is a pointer and not a thing:
uint8_t* thingPtr;
// A pointer to an integer
The address of (&) operator changes a thing into a pointer to a
thing:
uint8_t thing = 5;
thingPtr = &thing;
// A thing
// thingPtr points to 5.
Now thingPtr points to thing. The dereference (*) operator turns a
pointer back into a thing:
otherThing = *thingPtr; // Get what's pointed to by thingPtr.
This assigns otherThing to the value pointed to by thingPtr.
The following program shows how these operations work. In this
program, we introduce a new printf conversion, %p, which prints
pointers:
/*
* Demonstrate pointers.
*/
#include <stdio.h>
#include <stdint.h>
int main()
{
uint8_t smallThing = 5;
// Something small
uint8_t smallThing2 = 6;
// Something else small
uint64_t largeThing = 987654321; // Something large
1
uint8_t* smallPtr;
// Pointer to small thing
uint64_t* largePtr;
// Pointer to large thing
printf("smallThing %d\n", smallThing);
printf("sizeof(smallThing) %lu\n", sizeof(smallThing));
printf("largeThing %ld\n", largeThing);
printf("sizeof(largeThing) %lu\n", sizeof(largeThing));
// smallPtr points to smallThing.
smallPtr = &smallThing;
2
printf("smallPtr %p\n", smallPtr);
printf("sizeof(smallPtr) %lu\n", sizeof(smallPtr));
printf("*smallPtr %d\n", *smallPtr);
// smallPtr points to smallThing2.
smallPtr = &smallThing2;
printf("*smallPtr %d\n", *smallPtr);
largePtr = &largeThing;
printf("largePtr %p\n", largePtr);
printf("sizeof(largePtr) %lu\n", sizeof(largePtr));
printf("*largePtr %ld\n", *largePtr);
}
return (0);
Let’s go through this in detail. We start by declaring three things
and two pointers. We use the suffix Ptr when naming all pointers to
make them very obvious. At this point, smallPtr does not point to
any particular thing.
Before we use the pointer, let’s use our smallThing. Using two
calls to printf, we print the value and the size of smallThing 1. This
will output the following:
smallThing 5
sizeof(smallThing) 1
Now let’s take a look at the pointer 2. First, we print the value of
the pointer, which is a memory address. We are on an x86-type
machine with 64-bit pointers, so the value of the pointer is a 64-bit
number. The actual number value comes from the way that memory
is laid out, which we will discuss in detail in Chapter 11. When we
print sizeof(smallPtr), we see that it is indeed 8 bytes or 64 bits
long, and the value pointed to by smallPtr is 5. All in all, these three
calls to printf will print the following:
smallPtr 0x7fffc3935dee
sizeof(smallPtr) 8
*smallPtr 5
We do something similar with largePtr. Notice that while the size
of the thing being pointed to is different, the size of the pointer
remains the same. The size of the pointer depends on the processor
type, not the type of data being pointed to. On our STM32 processor,
we have 32-bit addresses, so the pointer will be a 32-bit value. On
an x64 machine with 64-bit addresses, the size of a pointer is 4
bytes:
largeThing 987654321
sizeof(largeThing) 8
largePtr 0x7fffc3935df0
sizeof(largePtr) 8
*largePtr 987654321
To see what the pointers are actually pointing to, enter this
program into the STM32 Workbench and run it using the debugger.
Put a breakpoint just after everything has been assigned and run the
program up to the breakpoint.
Opening the Variables panel shows us all the variables and their
values (see Figure 6-2).
Figure 6-2: The Variables panel with pointers
Usually, the value of the pointer is not that interesting. What’s
more interesting is what it points to. Clicking the + icon expands the
smallPtr entry, and we can see that smallPtr points to 6 (also known
as the character '\006'). Similarly, we can see that largePtr points
to 987654321.
Array and Pointer Arithmetic
C treats array variables and pointers very much alike. Consider the
following code:
int array[5] = {1,2,3,4,5};
int* arrayPtr = array;
We’ve assigned arrayPtr the value of array, not &array, because
C will automatically turn an array into a pointer when it’s used like a
pointer. In fact, arrays and pointers are almost interchangeable,
except that they are declared differently.
Now let’s access an element of the array:
int i = array[1];
This syntax is the same as the following, which says to take the
value of arrayPtr, add 1 to it (scaled by the size of the data being
pointed to), and return the data pointed to by the result of this
expression:
int i = *(arrayPtr+1);
The following program demonstrates the relationship between
arrays and pointers in more detail:
/*
* Demonstrate the relationship between arrays and pointers.
*/
#include <stdio.h>
int main()
{
int array[] = {1,2,3,4,-1}; // Array
int* arrayPtr = array;
// Pointer to array
// Print array using array.
for (int index = 0; array[index] >= 0; ++index) {
printf("Address %p Value %d\n",
&array[index], array[index]);
}
printf("--------------\n");
// Same thing with a pointer
for (int index = 0; *(arrayPtr +index) >= 0; ++index) {
printf("Address %p Value %d\n",
arrayPtr + index, *(arrayPtr + index));
}
printf("--------------\n");
// Same thing using an incrementing pointer
for (int* current = array; *current >= 0; ++current) {
printf("Address %p Value %d\n", current, *current);
}
}
The first thing this program does is print the address and contents
of each array element in the conventional manner: by using a for
loop to access each index in turn.
In the next loop, we print using pointer arithmetic. Now, we need to
understand exactly what we are dealing with. The variable array is
an array. The expression array[index] is an integer, and the &
(address of) operator changes an integer into a pointer, so
&array[index] is a pointer. As a result, this code prints the following
memory addresses for each element in the array:
Address
Address
Address
Address
0x7fffa22e0610
0x7fffa22e0614
0x7fffa22e0618
0x7fffa22e061c
Value
Value
Value
Value
1
2
3
4
The pointer value increases by 4, the size of an integer, each time,
so array[0] is at address 0x7fffa22e0610, and array[1] is at a
memory location 4 bytes larger, at 0x7fffa22e0614.
This method uses pointer arithmetic. (We actually used pointer
arithmetic in the first method too, but C hid it all behind our back.)
With this loop, you can see that arrayPtr + 1 is 0x7fffa22e0614,
which is exactly the same as &array[1]. Again, notice that with
pointer arithmetic, things are automatically scaled by the size of the
item being pointed to. In this case, the type of the data being pointed
to is int, so the expression arrayPtr + 1 is actually arrayPtr + 1 *
sizeof(int), and thus 0x7fffa22e0610 + 1 is really 0x7fffa22e0610 +
1 * sizeof(int), which is 0x7fffa22e0614.
Finally, we do the same thing a third way using an incrementing
pointer.
Using pointers to access arrays is common, because many people
think doing so is more efficient than using an array index. After all,
computing array[index] involves an address calculation, but
compiler technology has improved over the years. Today’s compilers
are very good at generating more efficient code, so using pointers for
array indexing is not actually more efficient.
Using address logic is, however, more confusing. It’s not clear
what’s being pointed to and what the limits of the array are, so the
second two methods should be avoided. I’ve included them in the
example because there’s a lot of legacy code out there that uses
pointer arithmetic to access arrays, and to show you what not to do.
Array Overflow
C does not do bounds checking, meaning it does not check whether
you’re trying to access elements outside the bounds of an array. The
legal elements of a five-element array (int a[5]) are a[0], a[1],
a[2], a[3], a[4], but there’s nothing to prevent you from using illegal
values such as a[5], a[6], a[7], or even a[932343]. The trouble with
the illegal values is that they are the locations of some other
variables or data in memory. The program in Listing 6-2
demonstrates what happens when you go beyond the end of array
(called array overflow).
array.bad.c
/*
* Demonstrate what happens
* when you overflow an array.
*/
#include <stdio.h>
int main()
{
int numbers1[5] = {11,12,13,14,15};
int numbers2[5] = {21,22,23,24,25};
overwritten
// Some numbers
// Variable to be
1
printf("numbers2[0] %d\n", numbers2[0]);
2
numbers1[8] = 99;
// <------------ Illegal
// Illegal -- loops past the end
for (int i = 0; i < 9; ++i)
printf("numbers1[%d] %p\n", i, &numbers1[i]);
printf("numbers2[%d] %p\n", 0, &numbers2[0]);
3
printf("numbers2[0] %d\n", numbers2[0]);
}
return (0);
Listing 6-2: Array overflow
The key item to watch is numbers2[0], which we set to 21 when we
initialize it. When we print it the first time, at 1, its value is, in fact, 21.
However, when we print it later, at 3, it is 99. What happened?
Let’s look at the output of this program:
numbers2[0]
numbers1[0]
numbers1[1]
numbers1[2]
numbers1[3]
numbers1[4]
numbers1[5]
numbers1[6]
numbers1[7]
numbers1[8]
numbers2[0]
numbers2[0]
21
0x7ffc5e94ff00
0x7ffc5e94ff04
0x7ffc5e94ff08
0x7ffc5e94ff0c
0x7ffc5e94ff10
0x7ffc5e94ff14
0x7ffc5e94ff18
0x7ffc5e94ff1c
0x7ffc5e94ff20
0x7ffc5e94ff20
99
From this, we see that numbers1 is allocated the memory from
0x7ffc5e94ff00 to 0x7ffc5e94ff13. The variable numbers2 is allocated
0x7ffc5e94ff20 to 0x7ffc5e94ff33. This memory layout is visually
expressed in Table 6-1.
Table 6-1: Memory Layout
Variable Address
Contents
numbers1 0x7ffc5e94ff00 11
0x7ffc5e94ff04 12
0x7ffc5e94ff08 13
0x7ffc5e94ff0c 14
0x7ffc5e94ff10 15
numbers2 0x7ffc5e94ff20 21
0x7ffc5e94ff24 22
0x7ffc5e94ff28 23
0x7ffc5e94ff2c 24
0x7ffc5e94ff30 25
The statement at 2 in Listing 6-2 uses an illegal index, since
numbers1 has only five elements. So, what memory does this
overwrite? From the output of our program, we see that the address
of this value is 0x7ffc5e94ff20. By a strange coincidence, this is also
the address of numbers2[0]. Our sample program makes the memory
corruption immediately apparent when it prints the content of
numbers2[0] the second time.
This program is a simple illustration of what can go wrong when an
array overflows. In real life, identifying such problems is much
harder. Usually, these errors show up as weird program behavior
that occurs long after the index error, so debugging them is
complicated. Avoid making this type of mistake.
The most common error novice C programmers make is to forget
that C arrays start at 0 and go to size-1. For example, you might
write the following:
int array[5];
// Wrong
for (int i = 1; i <= 5; ++i)
array[i] = 0;
If you program on Linux machines, tools such as Valgrind and the
GCC address sanitizer will do a runtime check for array overflows. In
the embedded world, we have no such tools, so we just have to be
careful.
Characters and Strings
We’ve discussed working with numbers, but you might sometimes
want to include other kinds of data, like text, in your programs. For
this, we turn to a new variable type, char, which holds a single
character enclosed in single quotes ('). For example, the following
creates a char variable called stop to hold the character 'S':
char stop = 'S'; // Character to indicate stop
A string is an array of characters that ends with an end-of-string
(\0) character. The character \0 is known as the NUL character (with
one L) as well. That’s because, during original serial
communications, it signified nothing.
To practice using strings, let’s now take a look at the following
program, which prints the string “Hello World”:
/*
* Hello World using string variable
*/
#include <stdio.h>
// The characters to print
const char hello[] = {'H', 'e', 'l', 'l', 'o', ' ',
'W', 'o', 'r', 'l', 'd', '\0'};
int main()
{
puts(hello); // Write string and newline
return (0);
}
We first define a string called hello with the value "Hello World".
This initialization explicitly defines every element of the string. You
hardly ever see initializations like this in real life because C provides
a shortcut that makes things a lot easier. (We’ll see that shortly.) This
version makes everything obvious, which is good for learning but not
for brevity.
Later, we print the string using the standard C function puts. The
puts function prints a single string and is simple, whereas printf can
do formatting and is a large, complex function. The puts function
also adds a newline, so we didn’t put one in our original string.
C has a shorthand for initializing strings, allowing us to write the
same declaration like this:
const char hello[] = "Hello World";
print
// The characters to
Both statements create an array of 12 characters and initialize it.
("Hello World" contains 11 characters, and the 12th is the end-ofstring character '\0', which is automatically supplied when you use
the shorthand.)
Because arrays and pointers are very similar, you can also declare
the string as a pointer:
const char* const hello = "Hello World";
to print
// The characters
You’ll notice that we now have two const keywords. Things are
getting a little tricky here. The first const affects the pointer; the
second affects the data being pointed to. The following program
illustrates how these work:
/**
* @brief Program to demonstrate the use of const
* with pointers
*/
char theData[5] = "1234";
with
// Some data to play
char*
can change
const char*
not
allChange;
// Pointer and value
dataConst = "abc"
// Char const, pointer
char* const ptrConst = theData; // Char var, ptr not
const char* const allConst = "abc";
// Nobody change
nothing
int main()
{
char otherData[5] = "abcd";
// Some other data
allChange = otherData;
*allChange = 'x';
// Change pointer
// Change data
dataConst = otherData;
// *dataConst = 'x';
// Change pointer
// Illegal to change data
// ptrConst = otherData;
pointer
*ptrConst = 'x';
// Illegal to change
// allConst = otherData;
pointer
// *allConst = 'x';
return (0);
}
// Illegal to change
// Change data
// Illegal to change data
This program shows every possible way const can be used to
define a character pointer. We then try to modify the pointer and the
data being pointed to. Depending on where we put const modifiers,
some of these statements will fail and some will work.
Summary
We started this book by dealing with variables that could hold single
values. Arrays let us deal with a set of data. This gives us much
more power when it comes to organization.
Strings are a special type of array. They hold characters and have
an end-of-string marker to signal their end.
Pointers and arrays are similar in that both can be used to access
a section of memory. Arrays are restricted by their size (although
they can overflow), while pointers are not. C does not restrict the use
of pointers, and that gives the language a lot of power. This power
can be used for good, such as when dealing with memory-mapped
I/O, or bad, such as when accidentally destroying random memory.
As we are seeing, C gives programmers the power to fully use
their machines. But this power comes at a cost. C does not prevent
you from doing something stupid. C gives you tools like arrays and
pointers to organize your data. It’s up to you to do it wisely.
Programming Problems
Write a program to find the lowest and highest numbered elements
in an array of integers.
Write a program to scan an array for duplicate numbers. The
duplicated numbers will be in consecutive elements.
Write a program to scan an array for duplicate numbers that may
occur anywhere in the array.
Create a program that prints only the odd numbers of an array.
Write a program that goes through a string and makes the first letter
of each word uppercase. You’ll need to look up the standard C
functions isalpha and toupper.
7
LOCAL VARIABLES AND
PROCEDURES
So far, we’ve been using a design
pattern called “one big mess.” All
code is dumped into main, and all
variables are defined at the
beginning of the program. This
method works fine when your program is 100 or
fewer lines long, but when you’re dealing with a
500,000-line program, you’re going to need
some organization. This chapter discusses ways
of limiting the scope of variables and instructions
so you can make long, unmanageable blocks of
code easier to understand, manage, and
maintain.
For example, you can use a global variable anywhere in a
program. To know where and how it’s used in a 500,000-line
program, however, you have to scan all 500,000 lines. A local
variable has limited scope. To understand where and how a local
variable is used, all you need to do is examine the, say, 50 to 200
lines of code where it is valid.
As your programs get longer and longer, you’ll learn how to divide
the code into easily understood sections called procedures. Global
variables will be available to every procedure, but you can define
local variables that are available only to a single procedure. You’ll
also learn how local variables are organized internally into stack
frames. Given the limited amount of memory on our STM
microcontroller, it’s very important to understand how much stack
memory we are using.
Finally, you’ll learn about recursion, which is where a procedure
refers to itself. Recursion is complex in what it can do but simple if
you understand the rules and follow them.
NOTE
Nothing in C’s syntax prevents evil programmers from writing
30,000-line procedures or creating local variables whose
scope is just as large. However, I’m assuming you’re sane
and want to code in a manner that decreases confusion
instead of increasing it.
Local Variables
Up to this point, we’ve been using only global variables that are
available everywhere in the program, from the line they are declared
to the end of the program. Local variables are available to a much
smaller, or local, area of a program. This area where a variable is
valid is called its scope. Listing 7-1 demonstrates the declaration of
local variables.
local.c
/*
* Useless program to demonstrate local variables
*/
#include <stdio.h>
int global = 5;
// A global variable
int main()
{
int localToProcedure = 3;
// ... do something
{
1 int local = 6; // A local variable
{
variable
2
3
}
int veryLocal = 7;
// An even more local
// ... do something
}
// veryLocal is no longer valid.
}
// local is no longer valid.
return (0);
Listing 7-1: Local variables
The scope of a local variable starts where it is declared and goes
to the end of the enclosing curly brackets ({}). The variable
localToProcedure is valid for the entire main function.
Now let’s look at smaller scopes, starting with the declaration of
the local variable 1. The scope of this variable doesn’t end at the
very next closing curly bracket 2, which is for a different block
(section of code enclosed in curly brackets). Instead, it goes to the
end bracket 3 for the block that started right before local was
declared. The veryLocal variable has an even smaller scope. It starts
with the declaration int veryLocal = 7; and ends when the block
ends 2.
When a variable’s scope ends, the program can’t use the variable
anymore. For example, trying to return the value of veryLocal at the
end of main using the return(veryLocal); statement wouldn’t work.
Hidden Variables
In the previous example, all the local variables had different names
in addition to having different scope. However, variables can also
have the same name in different scopes. If multiple variables have
the same name, C will use the value of the one in the current scope
and hide the others. (Please don’t do this because it makes code
confusing. It’s mentioned here so you know what to avoid.)
Let’s take a look at Listing 7-2, which demonstrates a very badly
written program.
hidden.c
/*
* Useless program to demonstrate hidden variables
*/
#include <stdio.h>
1
int var = 7;
// A variable
int main()
{
// ... do something
{
2
int var = 13;
// Hides var = 7
{
3
int var = 16;
// Hides var = 7, var = 13
// ... do something
}
// ... do something
}
}
// ... do something
return (0);
Listing 7-2: Hidden variables
In this program, we define three variables, all named var. When
the second one is defined 2, it hides the first one 1. Similarly, the int
var = 16; declaration hides the second variable var 2, which hides
the first one 1.
Suppose we were to add the following statement after the third
declaration:
var = 42;
Which var are we assigning? The one declared at 1, 2, or 3? The
fact that we have to ask this question is a good indicator that this
code is confusing. I’m not going to leave it as an exercise for the
reader to find the answer because the proper solution is to never do
this in the first place.
Procedures
A procedure is a way to define code so it can be used again. Let’s
look at Listing 7-3, which provides a simple example.
hello3.c
/**
* Print hello, hello, hello, world.
*/
#include <stdio.h>
1
/**
* Tell the world hello.
*/
void sayHello(void)
{
2 puts("Hello");
}
int main()
{
3 sayHello();
sayHello();
sayHello();
puts("World!");
return (0);
}
Listing 7-3: A procedure demonstration
This program prints Hello three times, then World!. The procedure
starts with a comment block, which isn’t strictly necessary, but if
you’re going to write quality code, you should put one in before each
procedure. The beginning (/**) of the comment block indicates that
the Doxygen documentation tool should process it. To be compatible
with the format of the STM libraries, we are using the same
commenting convention.
The statement void sayHello(void) 1 tells C that our procedure’s
name is sayHello. It returns nothing (first void) and takes no
parameters (second void). The {} block that follows this statement
defines the body of the procedure and contains all the instructions
executed by the procedure 2. The three sayHello(); lines 3 are calls
to the sayHello procedure. They tell the processor to save the
location of the next statement (either another call to sayHello or the
call to puts) and then start execution with the first line of sayHello.
When the procedure finishes (or hits a return statement), execution
continues at the point saved during the call.
Stack Frames
Procedures have their own local variables. The compiler’s job is to
organize memory so it can hold those variables. For global variables
(not in a procedure), the compiler says something like, “I need 4
bytes to hold the integer named Total.” The linker then sees that and
assigns the variable a physical location in memory (for example,
0xffffec04). Global variables are allocated statically at compile time,
meaning the compiler allocates space for the variables and that’s it.
The variables are never destroyed, and their memory is not
reallocated.
Variables that are local to a procedure are more complex. They
have to be allocated dynamically at runtime. When a procedure
starts, all the local variables for that procedure are allocated. (Note:
there is a static local variable that’s allocated at compile time, but
we haven’t covered that yet.) When the procedure ends, they are
deallocated. The compiler accomplishes this by creating a stack
frame when the procedure starts and destroying it when the
procedure ends. The stack frame holds all the temporary information
the procedure needs.
Let’s look at Listing 7-4, which shows a sample program.
proc.c
/**
* @brief Program to demonstrate procedures and local
variables
*/
/**
* Function that is called from another function
*/
void inner(void) {
int i = 5;
// A variable
int k = 3;
// Another variable
1 i = i + k;
// Do something with variables
}
/**
* Outer-level function
*/
void outer(void) {
int i = 6;
// A variable
int j = 2;
// Another variable
i = j + i;
// Use variables
inner();
}
int main()
{
outer();
return(0);
}
Listing 7-4: A stack frame demonstration
Let’s create a project for this program and start debugging it. Run
the program in the debugger, then step through it using the
command Run ▶ Step Into (F5) until you reach 1. Your screen
should look like Figure 7-1.
Figure 7-1: Debugging proc.c
When a program is loaded, all the statically allocated variables get
their own memory locations. In the STM32 chip, they are assigned to
the lower portion of the random access memory (RAM). The leftover
memory is reserved for dynamic allocation. Specifically, two memory
areas are used dynamically: the stack, which holds local variables,
and the heap. We won’t worry about the heap for now; our
microprocessor doesn’t have enough memory to use it. (We’ll
discuss the heap in Chapter 13, when we talk about programming for
larger systems.)
The name stack comes from the fact that data is stacked on top of
each other in memory. When your program starts, the main function
allocates a stack frame for its local variables and temporary values.
When outer is called, it allocates another stack frame on top of the
one for main. The call to inner adds a third stack frame to the stack.
To see where the stack is in each procedure, click the Registers
tab in the upper-right panel and scroll down until you see the rsp
register. Figure 7-2 shows that it contains 0x7fffffffd0e0.
Figure 7-2: Displaying the registers
Depending on the machine, the stack may either start at a low
memory address and grow up or at a high memory address and
grow down. On this machine (the x86), it starts high and goes down.
The stack from the outer frame is at 0x7fffffffd0f0. Because our
stack grows down, this number is lower than the stack frame for
main. The inner frame is at 0x7fffffffd110 (see Table 7-1).
Table 7-1: Stack Usage
Address
Procedure Contents
Comments
0x7fffffffd110 main
<overhead> Bottom of stack
0x7fffffffd0f0 outer
<overhead>
i
j
0x7fffffffd0e0 inner
<overhead> Top of stack
i
k
One key concept to understand is that stack frames are allocated
in last in, first out (LIFO) order. When we are done with inner, its
stack frame will be destroyed and then the outer frame will be
destroyed.
The Variables panel (shown in Figure 7-1, upper right) displays the
i and k variables. The debugger is displaying the variables in the
stack frame for inner, indicated by the fact that the stack frame for
inner is highlighted in the Debug panel (upper left). Click the outer
stack frame in the Debug panel, and you’ll see the Variables panel
change and show the variables for outer, as in Figure 7-3.
Figure 7-3: The outer stack frame
Let’s continue debugging the program by stepping past the last
instruction of inner. When we exit inner, the stack frame for that
function disappears, because we are no longer executing inner and
have no need for a place to store its variables.
Figure 7-4 shows the stack after we exit the inner stack frame.
Figure 7-4: The stack after exiting the inner stack frame
Notice there are now only two stack frames on the stack.
Recursion
So far, we’ve been dealing with basic procedure calls; each
procedure was given a different name, and the calling process was
simple. Now we’re going to focus on recursion, which is when a
function calls itself. Recursion can be a powerful tool, but it’s tricky to
use if you don’t understand the rules.
The classic recursive problem is computing a factorial. The
factorial function is defined as follows:
f(n) = 1, when n is 1
otherwise, f(n) = n × f(n – 1)
Turning this into code gives us Listing 7-5.
factor.c
/**
* Compute factorial recursively
* (the basic recursive example)
*/
#include <stdio.h>
/**
* Compute factorial
*
* @param x The number to compute the factorial of
* @returns the factorial
*/
int factor(const int x) {
if (x == 1)
return (1);
return (x * factor(x-1));
}
int main()
{
int result = factor(5);
printf("5! is %d\n", result);
return (0);
}
Listing 7-5: A program to compute factorials
First, we call factor(5) to get the factorial of 5. For that, we need
factor(4), so we suspend factor(5) while we call factor(4). But
factor(4) needs factor(3), so we suspend work and call factor(3).
Now factor(3) needs factor(2), and, again, factor(2) needs
factor(1). Finally, factor(1) doesn’t need anything, so it returns 1 to
its caller, factor(2). The function factor(2) is running, so it
computes 2 × 1 and returns 2 to its caller, factor(3). Next, factor(3)
takes the return value (2), computes 2 × 3, and returns 6 to its caller,
factor(4). Nearing the end, factor(4) computes 6 × 4 and returns
24. Finally, factor(5) computes 24 × 5 and returns 120.
When you execute this program in the debugger, you should see
the stack grow and shrink as the program computes the factorial.
You also should see a stack with five stack frames allocated for the
factor procedure, one for each instance: factor(1), factor(2),
factor(3), factor(4), and factor(5).
Two rules determine when you can use recursion:
Each call to the procedure must make the problem simpler.
There must be an end point.
Let’s see how those rules work with our factorial program. In order
to compute factor(5), we need to compute factor(4). The first rule
is satisfied because factor(4) is simpler than factor(5). Sooner or
later, we reach factor(1), and that’s the end point, which satisfies
the second rule.
Let’s violate the rules to see what happens; we’ll modify the
program and try to compute factor(-1).
Does this satisfy the two rules? Well, factor(-1) needs
factor(-2), which needs factor(-3), and so on, until we reach 1.
But there is no way to go from –1 to 1 by subtraction, so we have no
way of ending the program.
When I run this program on my little Linux box, I see the following:
$ ./06.factor-m1
Segmentation fault (core dumped)
The system ran out of stack memory, and the program aborted
because it violated the constraints of the memory protection of the
x86 processor. On other systems, the results may be different. For
example, on ARM processors, the stack can run into the heap and
trash it (more on the heap in Chapter 13), or something else can get
clobbered. In any case, running out of stack is not a good thing to
do.
Incidentally, the program got all the way to x=-262007 before it
aborted.
Programming Style
In this book, we try to use good programming style whenever we
can. For example, we’ve made sure to include a comment block at
the top of every procedure, and we always include a comment after
each variable declaration. Good programming style is designed the
way it is for two reasons: to give the programmer who comes after
you a clear idea of what you did and to make it difficult to make
errors.
We violated one of those rules in the factorial example. This is the
offending line:
int factor(const int x) {
What’s wrong with it? The int type is signed, but you can compute
the factorial only on positive numbers. We could have written our
function as the following:
unsigned int factor(const unsigned int x) {
Writing it that way would make it impossible to pass in a negative
number. Note that the compiler will helpfully change –1 to an
unsigned number (4294967295) without warning, unless you include
the compiler switch -Wconversion. GCC has hundreds of options, and
finding out which to use is its own art form. The first version of that
line did have two advantages, however; it’s a good example of bad
style, and it allowed us to demonstrate stack overflow with
factor(-1).
Summary
You may have noticed something about this book. It’s divided into
chapters. Why? To make it easier to read, of course. A chapter
provides the reader with an understandable unit of information that
can be absorbed in one sitting.
Computer programs need to be divided into bite-size chunks as
well. It’s impossible to keep track of a 750,000-line program. It is
possible to understand everything about a 300-line procedure. Local
variables also help in this organization. If you have a variable that’s
local to a 300-line procedure, you know it will be used only in those
300 lines. On the other hand, a global variable can be used
anywhere in a 750,000-line program.
The key to writing good code is to make it understandable and
simple. Procedures help you divide your program into simple,
understandable units, which helps you write code that’s more reliable
and easier to maintain.
Programming Problems
Write a function to compute the area of a triangle and a small main
program to test it with three different sets of values.
Write a procedure called max that returns the maximum of two
numbers.
Write a program that computes the fifth Fibonacci number. Bonus
points for doing it recursively.
Create a function that adds up the digits in a number. For example,
123 results in 6 (in other words, 1 + 2 + 3). If the result is 10 or
greater, the process should repeat until the result is a single digit.
For example, 987 is 9 + 8 + 7 = 24. That’s bigger than 10, so 24 is 2
+ 4, which yields 6.
8
COMPLEX DATA TYPES
In this chapter, we’ll move beyond
arrays and simple types to create
more complex data types. We’ll start
with a simple enum that defines a
named list of items. Then we’ll look
at structures and unions, which hold values of
different types, accessed by name (unlike
arrays, which contain values of a single type
accessed by number or index). To make a
custom data type, we’ll combine enums,
structures, and unions. In addition, we’ll explore
how structures are used in embedded
programming. Finally, we’ll take a look at
typedef, which allows us to define our own data
type from existing types.
Enums
An enumerated type, or enum, is a data type that allows us to define a
named list of items. For example, if we want to store a limited set of
colors in a variable, we could enter the following:
const uint8_t COLOR_RED = 0;
const uint8_t COLOR_BLUE = 1;
const uint8_t COLOR_GREEN = 2;
#define colorType uint8_t;
colorType colorIWant = COLOR_RED
Although this will work, we would still need to keep track of the
various colors. Fortunately, C will do that for us if we use an enum:
enum colorType {
COLOR_RED,
COLOR_BLUE,
COLOR_GREEN
};
enum colorType colorIWant = COLOR_RED;
With enum, C does the bookkeeping for us. If we have only three
colors, that’s not much of a problem. However, the X Window
System has more than 750 named colors. Keeping track of all those
numbers is a nontrivial process.
C tends to be a bit loose when it comes to types. Internally, C
assigns COLOR_RED, COLOR_BLUE, and COLOR_GREEN the integer values of
0, 1, and 2, respectively. We normally don’t care about that, but
sometimes this assignment surfaces. For example, this:
enum colorType fgColor = COLOR_GREEN;
printf("The foreground color is %d\n", fgColor);
will print the following:
The foreground color is 2
Also, C does not type-check enum assignments. For example, the
following statement will not generate an error or warning:
colorIWant = 33;
Our enum defines three colors, so the legal numbers for colors are
0, 1, and 2—not 33. This can be a problem.
Suppose we write a function to print the color stored in colorIWant.
What will users think when they see the following output?
Your box color is 33.
Printing an incorrect answer like this gives the user a good
indication that your program is broken. You can give a better one if
you use the enum value to index an array. Here’s an example:
static const char* const colorNames = {"Red", "Blue",
"Green"};
--snip-printf("Your box color is %s\n", colorNames[colorIWant]);
Now if colorIWant is 33, the program will print:
Your box color is @ @@@�HH
XXXDDS�td888 P�td
pp�-�=�=�px�-�=�=�888
Your results may vary, depending on what data there is in element
33 of a three-element array.
Preprocessor Tricks and Enums
In this section, you’ll learn how to use some advanced preprocessor
directives to make dealing with enums a little easier. First, I want to
say that 999 times out of 1,000, using a clever trick will cause more
trouble than it’s worth. Simple and clear is almost always better than
complex and clever. This situation is one of the few exceptions.
Let’s take a look at some code that defines colors and the names
of colors.
// WARNING: Do not change this without changing colorNames.
enum colorType {
COLOR_RED,
COLOR_BLUE,
COLOR_GREEN
};
// WARNING: Do not change this without changing colorType.
static const char* const colorNames = {
"COLOR_RED", "COLOR_BLUE", "COLOR_GREEN"};
This example has two items that depend on each other: colorType
and colorNames. The programmer who wrote it was nice enough to
put in a comment indicating that those two items are linked, and the
two items are actually defined next to each other. (Sometimes two
items that depend on each other can be in different files without
comments indicating the linkage.)
As programmers, we want our code to be as simple as possible.
Having two different items that must be updated simultaneously is
not ideal. We can solve this problem through the clever use of the
preprocessor:
// This is the beginning of a clever trick to define both the
values and
// the names for the enum colorType. The list below will be
used twice,
// once to generate the value and once to generate the names.
#define COLOR_LIST
DEFINE_ITEM(COLOR_RED),
DEFINE_ITEM(COLOR_BLUE),
DEFINE_ITEM(COLOR_GREEN)
\
\
\
// Define DEFINE_ITEM so it generates the actual values for
the enum.
#define DEFINE_ITEM(X) X
enum colorType {
COLOR_LIST
};
#undef DEFINE_ITEM
// Define DEFINE_ITEM so it generates the names for the enum.
#define DEFINE_ITEM(X) #X
static const char* colorNames[] = {
COLOR_LIST
};
#undef DEFINE_ITEM
Let’s start with the first definition:
#define COLOR_LIST
DEFINE_ITEM(COLOR_RED),
DEFINE_ITEM(COLOR_BLUE),
DEFINE_ITEM(COLOR_GREEN)
\
\
\
The backslash (\) tells the C preprocessor that the line is
continued. We’ve put them all in the same column, so it’s obvious if
we accidentally omit one.
Now everywhere we use COLOR_LIST, the C preprocessor will turn it
into the following:
DEFINE_ITEM(COLOR_RED), DEFINE_ITEM(COLOR_BLUE),
DEFINE_ITEM(COLOR_GREEN)
When we define the enum, we need our list to be the following:
COLOR_RED, COLOR_BLUE, COLOR_GREEN
We get this by defining DEFINE_ITEM to output only the item name:
#define DEFINE_ITEM(X) X
This means that the following code:
enum colorType {
COLOR_LIST
};
gets turned into this:
enum colorType {
COLOR_RED, COLOR_BLUE, COLOR_GREEN
};
Now we erase the definition of DEFINE_ITEM since we don’t need it
anymore for the enum definition:
#undef DEFINE_ITEM
Next, we define the colorNames list by redefining the DEFINE_ITEM
macro:
#define DEFINE_ITEM(X) #X
The hash mark (#) tells the preprocessor to change the token that
follows into a string, so now COLOR_LIST will expand into the
following:
"COLOR_RED","COLOR_BLUE","COLOR_GREEN"
Here is the full definition for colorNames:
#define DEFINE_ITEM(X) #X
static const char* colorNames[] = {
COLOR_LIST
};
#undef DEFINE_ITEM
The comments are a vital part of this definition. Any time you use a
cute trick like this, document it well so that the poor person
maintaining this code has some idea of what you did.
Structures
The C structure (struct) allows us to group together multiple items of
different types. The items, called fields, are identified by name. It’s
different from an array that defines a data structure containing items
of the same type, and the items, called elements, are indexed by
number. For example, consider this structure that groups together
information describing a house:
struct house {
uint8_t stories;
uint8_t bedrooms;
uint32_t squareFeet;
};
// Number of stories in the house
// Number of bedrooms
// Size of the house
To access an element of a structure, use the format
variable.field, with a dot in the middle. For example:
struct house myHouse;
--snip-myHouse.stories = 2;
myHouse.bedrooms = 4;
myHouse.squareFeet = 5000;
The following program shows how to put this all together:
struct.c
/**
* Demonstrate the use of a structure.
*/
#include <stdio.h>
#include <stdint.h>
struct house {
uint8_t stories;
uint8_t bedrooms;
uint32_t squareFeet;
};
int main() {
struct house myHouse;
// Number of stories in the house
// Number of bedrooms
// Size of the house
// The house for this demo
myHouse.stories = 2;
myHouse.bedrooms = 4;
myHouse.squareFeet = 5000;
printf("House -- Stories: %d Bedrooms %d Square Feet
%d\n",
myHouse.stories, myHouse.bedrooms,
myHouse.squareFeet);
}
printf("Size of the structure %ld\n", sizeof(myHouse));
return (0);
Let’s debug this program in the STM32 Workbench (see Figure 81).
Figure 8-1: The struct variable display
Stopping on line 20, we can now see the structure in the variable
list. Clicking the + icon expands the structure to show what’s in it.
Structures in Memory
Let’s take a look at how the C compiler will lay out this structure in
memory. The compiler needs to allocate 1 byte for stories (uint8_t),
1 byte for bedrooms (uint8_t), and 4 bytes for squareFeet (uint32_t).
Logically, the layout should look like Table 8-1.
Table 8-1: Structure Layout
Offset Type
Field
0
uint8_t
stories
1
uint8_t
bedrooms
2
uint32_t
3
squareFeet
4
5
From Table 8-1, we see that the structure takes up 6 bytes.
However, when we run the program, we see the following output:
Size of the structure 8
Where did the other 2 bytes come from?
The problem is memory design. On the ARM chip (and many
others), memory is organized as a series of 32-bit integers aligned
on a 4-byte boundary, like so:
0x10000
32 bits
0x10004
32 bits
0x10008
32 bits
. . .
Let’s say we want an 8-bit byte at 0x10001. The machine fetches
32 bits from 0x10000 and then throws away 24 bits, which is wasteful
because extra data is fetched, although there is no performance hit.
Now let’s say we need a 32-bit integer starting at 0x10002.
Attempting to fetch this data directly results in an alignment
exception that will abort our program. The computer has to do the
following:
Fetch 16 bits from 0x10000.
Fetch 16 bits from 0x10004.
Combine them.
The internal ARM circuitry does not complete these steps. Instead,
the compiler must generate multiple instructions to do the work,
which isn’t good for performance. (We go into this in more detail later
in the chapter.)
It would be much nicer if squareFeet aligned on a 4-byte boundary
instead of a 2-byte boundary, so the compiler optimizes the layout of
the structure by adding 2 bytes of padding. This makes the structure
larger but much easier to deal with. Table 8-2 shows the structure’s
actual adjusted layout.
Table 8-2: Padded Structure Layout
Offset Type
Field
0
uint8_t
stories
1
uint8_t
bedrooms
2
uint8_t
(padding)
3
uint8_t
(padding)
4
uint32_t
5
6
squareFeet
7
This extra padding is sometimes a problem. For example, if you
have a lot of houses and very limited memory, the padding in each
house structure adds up to a lot of wasted space.
Another example is in embedded programming. I had an old, preiPod music device called the Rio that didn’t come with Linux tools to
load the music onto the device, so I wrote some tools myself. Every
data block had a header that looked something like this:
struct dataBlockHeader {
uint32_t nextBlock;
this song
uint16_t timeStamp;
section of the song
uint32_t previousBlock;
in the song
};
// Number of the next block in
// Time in seconds of this
// Number of the previous block
When I first loaded songs on my Rio, they would play fine. But
when I pressed Rewind to back up a few seconds, the device would
go crazy and start the song all over again. The problem was that
GCC was adding padding to the structure:
struct dataBlockHeader {
uint32_t nextBlock;
this song
uint16_t timeStamp;
section of the song
uint16_t padding;
uint32_t previousBlock;
in the song
};
// Number of the next block in
// Time in seconds of this
// Automatically added
// Number of the previous block
As a result, what the Rio thought was the previous block was
instead some padding and half the value of the previous block. No
wonder the device became confused.
The solution was to tell the compiler not to add padding with the
packed attribute:
struct dataBlockHeader {
uint32_t nextBlock;
this song
uint16_t timeStamp;
section of the song
uint32_t previousBlock;
in the song
} __attribute__((packed));
// Number of the next block in
// Time in seconds of this
// Number of the previous block
In this example, __attribute__((packed)) is a GNU extension to
the C language, and it may not work on other compilers.
Accessing Unaligned Data
By default, the compiler will “adjust” the alignment of elements of a
structure for efficient memory access. As we’ve seen, hardware
designers sometimes have different ideas, and in order to get the
structure to match the hardware, we have to include the
__attribute__((packed)) directive.
To see why the compiler makes such adjustments, let’s write a
program that does both aligned and unaligned 32-bit accesses. The
packed structure is more compact, but it requires more code to
access the 32-bit value. The unpacked structure is efficient to
access, but it takes up more memory.
NOTE
Every time I’ve had to use the __attribute__((packed))
directive, it was to make a structure compatible with the
hardware I was given—hardware designed by other
engineers who didn’t know about the alignment issues they
were causing.
The following program shows how both the packed and unpacked
structures are accessed:
/*
* A demonstration of packed and unpacked.
* This program does nothing useful except
* generate an assembly listing showing
* how hard it is to access squareFeet
* in a packed structure.
*
* To run -- don't. Compile and look at the
* assembly listing instead.
*/
#include "stm32f0xx.h"
#include "stm32f0xx_nucleo.h"
// An example of an unpacked structure
struct unpackedHouse {
uint8_t stories;
// Number of stories in the house
uint8_t bedrooms;
// Number of bedrooms
uint32_t squareFeet; // Size of the house
uint8_t doors;
// Number of doors
uint8_t windows;
// Number of windows
};
// An example of a packed structure
struct packedHouse {
uint8_t stories;
//
uint8_t bedrooms;
//
uint32_t squareFeet; //
uint8_t doors;
//
uint8_t windows;
//
} __attribute__((packed));
Number of stories in the house
Number of bedrooms
Size of the house
Number of doors
Number of windows
// A place to dump squareFeet for unpackedHouse
volatile uint32_t unpackedFeet;
volatile uint32_t packedFeet;
// A place to dump squareFeet
for packedHouse
// An example unpackedHouse -- values chosen to make
demonstration easier
struct unpackedHouse theUnpackedHouse = {0x01, 0x02,
0x11223344, 0x03, 0x04};
// An example packedHouse -- values chosen to make
demonstration easier
struct
packedHouse thePackedHouse = {0x01, 0x02,
0x11223344, 0x03, 0x04};
int main(void)
{
1 unpackedFeet = theUnpackedHouse.squareFeet;
2
}
packedFeet = thePackedHouse.squareFeet;
for(;;);
First, let’s look at the code generated to fetch an aligned uint32_t
1 (comments added):
;unpackedFeet = theUnpackedHouse.squareFeet;
ldr
r3, .L3
; Get address of theUnpackedHouse.
ldr
r2, [r3, #4] ; Get data at offset 4
; (theUnpackedHouse.squareFeet).
--snip-L3: theUnpackedHouse
It uses one instruction to get the address of the structure and one
to get the value.
Now let’s look at the unaligned fetch 2:
;
packedFeet = thePackedHouse.squareFeet;
ldr
r3, .L3+8
; Get address of thePackedHouse.
ldrh
r2, [r3, #2] ; Get uint16_t at offset 2
(0x3344).
; (Byte order puts the low-order
bytes first.)
ldrh
(0x1122).
r3, [r3, #4]
lsls
squareFeet
r3, r3, #16
orrs
; Get uint16_t at offset 4
; (High bytes come after low.)
; r3 contains the top 1/2 of
; in the bottom 16 bits of r3.
; Shift it left into the top half.
r3, r2
; Combine the two halves.
.L3: theUnpackedHouse
thePackedHouse
The unaligned fetch requires four instructions instead of the one
required by an aligned fetch. The program must use two load
instructions to get the two halves of the number: one shift to get the
top half to the top of the register, and a logical OR to combine the
two numbers.
Code like this must be used every time an unaligned uint32_t is
loaded or stored. You can see why the compiler might want to avoid
doing that and adds padding.
Structure Initialization
We can initialize structures by putting the initializer list inside curly
brackets ({}). For example, the following statement declares and
initializes myHouse with one statement:
struct house {
uint8_t stories;
uint8_t bedrooms;
uint32_t squareFeet;
};
// Number of stories in the house
// Number of bedrooms
// Size of the house
// 2 stories
// 5 bedrooms
// 2500 square feet
struct house myHouse = {2, 5, 2500};
In early versions of the language, that was the only way to initialize
structures. Later, when C99 (the C specification finalized in 1999)
came along, a new feature called designated initializers was added
to let you initialize fields by name. Here’s an example:
struct house myHouse = {
stories: 2,
bedrooms: 5,
squareFeet: 2500
};
The fields must be in the same order as they are declared in the
structure. The GCC compiler has an extension that lets you use
designated initializers using a different method:
struct house myHouse = {
.stories: 2,
.squareFeet: 2500,
.bedrooms: 5
};
In this case, the order does not have to match the order in which
the fields were declared.
Structure Assignment
C does not allow you to assign one array to another, but it does allow
you to assign one structure to another. Here’s an example:
int array1[5];
int array2[5];
// An array
// Another array
array1 = array2;
// Illegal
struct example {
int array[5];
};
// Array inside a structure
struct example struct1;
struct example struct2;
// A structure
// Another structure
// Initialize structure 2
struct1 = struct2;
// Structure assignment allowed
If these were arrays, assignment would be illegal, but since they
are structures, it works.
Structure Pointers
C’s parameter-passing mechanism uses call by value, meaning that
if we pass a parameter to a procedure, it copies the value of the
parameter onto the stack. This practice is not a problem when we
have something small like a 2-byte integer, but most structures are
not very small and actually can be quite large. When a structure is
passed as a parameter, the entire structure is copied onto the stack,
making it an expensive operation. Here’s an example:
// A rectangle
struct rectangle {
unsigned int width; // Width of the rectangle
unsigned int height; // Height of a rectangle
};
// Inefficient parameter passing
unsigned int area(const struct rectangle aRectangle)
{
return (aRectangle.width * aRectangle.height);
}
What’s going on here is that in order to perform the “call by value”
parameter passing, the compiler must generate code to copy
aRectangle in its entirety onto the stack. For larger structures, that
can use a lot of stack space and take up a lot of time copying the
data.
It’s more efficient to pass a structure as a pointer:
// Efficient parameter passing
unsigned int area(const struct rectangle* const aRectangle)
{
}
return ((*aRectangle).rectangle * (*aRectangle).height);
In this case, only the pointer (a small item) is passed as a
parameter. In the case of the ARM compiler, this is done by putting it
in a register: quick, easy, and no stack space used.
One of the advantages of call by value is any changes to the
parameter are not passed back to the caller. But we didn’t make any
changes, so that’s not an issue.
When we passed parameters as pointers, we used const to
indicate that no changes to the parameters were allowed.
It’s a little awkward to access a member of a structure pointer
using the (*rectangle).height syntax. Because of this, C has added
some syntactic sugar that allows us to use a shortcut—the ->
operator:
// Efficient parameter passing
unsigned int area(const struct rectangle* const aRectangle)
{
return (aRectangle->rectangle * aRectangle->height);
}
C feels free to treat an array as a pointer and a pointer as an
array. When an array is passed in as a parameter, the array is
automatically turned into a pointer. When an array is specified as a
procedure parameter, it is automatically turned into a pointer behind
your back.
Saying C is “call by value” is not strictly true. It’s more precise to
say, “C is called by value, except for arrays, which are called by
pointer value.”
Structure Naming
Like many things in C, the naming of structures is not all that simple.
That’s because in a single C structure declaration, we can define a
structure name (or not) and a variable (or not). Here’s the general
syntax for a structure definition:
struct [struct-name] {
field1;
field2;
--snip-} [var-name(s)];
Let’s consider the example when we don’t have a structure name:
// A box to put our stuff into
struct {
uint32_t width;
// Width of the box
uint32_t height;
// Height of the box
} aBox;
This defines the aBox variable, but what type is aBox? It is a
structure with no name, or an anonymous structure. Anonymous
structures can be used to define a variable only when the structure is
defined. They do not specify a structure name that can be used in
later declarations.
Now let’s consider the case where we leave off the variable name:
struct box {
uint32_t width;
uint32_t height;
};
// Width of the box
// Height of the box
This defines a structure type but no variables. It can be used later
to define a variable:
struct box aBox; // Box to put stuff into
We can put in both a structure name and a variable name in the
same declaration:
struct box {
uint32_t width;
uint32_t height;
} aBox;
// Width of the box
// Height of the box
This defines both a box structure and a variable aBox.
C has one more trick up its sleeve—we can have a structure
definition with no structure name and no variable name:
// Silly definition
struct {
uint32_t width;
uint32_t height;
};
// Width of the box
// Height of the box
Because there is no structure name, we can use this only to
access the variable defined here. But no variable is defined here, so
we can’t access anything, which means that although it’s perfectly
legal, it’s also perfectly useless.
Unions
A union is like a struct except that instead of each field being
assigned a different location, all the fields are stored in the same
location. Here’s an example:
union value {
uint32_t anInteger;
float aFloat;
};
The compiler allocates 4 bytes for the uint32_t and the same 4
bytes for the float. Let’s take a look at this in action:
union value theValue;
// Define the value.
theValue.anInteger = 5; // anInteger is 5.
theValue.aFloat = 1.0; // Assign the field aFloat/wipe out
anInteger.
The second assignment actually changes anInteger to
1065353216 (0x3f800000). It’s a very strange integer, but as a
floating point, it’s 1.0.
Good programming practice is to use the same field name for
storing and retrieving a value from an union. For example:
1.2
theValue.aFloat = 1.2;
float someFloat = theValue.aFloat;
// Assigns someFloat
When you use different fields, the results will be different on
different machines.
theValue.aFloat = 1.2;
int someInt = theValue.anInteger;
dependent
// Results machine-
In this case the value of someInt will depend on the size of an
integer, the size of a float, the floating-point format, and the byte
order, all of which are processor-dependent.
Now let’s talk about the byte order problem. Let’s say you have
four cards in your hand, numbered 1, 2, 3, and 4. You want to put
them into a row of four boxes in front of you. So, you take the top
card and put it in the leftmost box, you put the next card in the box to
the right of that, and so on. Your boxes now contain the following:
1 2 3 4
When you pick up the cards, you start at the right and put each
card on top of the pile. The result is that you get 1, 2, 3, and 4 in
order back in your hand.
Now another person comes along and puts the cards in the boxes
starting on the right side and going left. Their boxes look like this:
4 3 2 1
They pick up the cards starting at the left and work right. Again,
this person will wind up with 1, 2, 3, and 4 in their hand, in exactly
that order.
What I’ve just described is how two different CPU architectures will
store numbers in memory. In some cases it will be 1, 2, 3, and 4 and
in others 4, 3, 2, and 1. As long as you are storing and retrieving the
same size number, byte order makes no difference.
Now let’s say you want to store four cards in the boxes but retrieve
only two, which means your boxes look like this:
1 2 3 4
When you pick up your cards, you get only 1 and 2.
However, the other person’s storage looks like this:
4 3 2 1
The leftmost n boxes are always used when retrieving cards, so
this person will start at the left and grab 3 and 4, meaning they’ll get
a different result.
This difference is caused by the two of you using a different order
when storing and retrieving cards. The same thing happens in
computers. Different computers store things in different orders. As a
result, you are going to get different answers on different machines if
you try and store one type of data and retrieve another.
Therefore, if you put something in theValue.anInteger, the only
way you’re guaranteed to get consistent results is to take it out using
only the theValue.anInteger field.
Creating a Custom Type
We’re now going to take all three of our new data types—struct,
union, and enum—and combine them into one large data type in order
to draw a shape on the screen. The shape can be a square,
rectangle, circle, or triangle. Each of those shapes can be described
differently.
All we need to describe a square is a single side:
struct square {
unsigned int side; // Size of the square
};
To describe a rectangle, we need a width and height:
struct rectangle {
unsigned int width;
unsigned int height;
};
// Width of the rectangle
// Height of the rectangle
We can draw a circle with only its radius:
struct circle {
unsigned int radius;
};
// Radius of the circle
Finally, to draw a triangle, we describe the base and height:
struct triangle {
unsigned int base;
unsigned int height;
};
// Base of the triangle
// How high is it?
A generic shape type should hold any one of these, which
indicates that we need a union. But in order to draw a shape, we
need to know not only its description but also what type of shape it
is. The enum data type was designed for a limited list of simple
values:
enum shapeType {
SHAPE_SQUARE, SHAPE_RECTANGLE, SHAPE_CIRCLE,
SHAPE_TRIANGLE
};
Now we get to define our data structure:
struct shape {
enum shapeType type;
// The type of the shape
union {
struct square theSquare;
struct rectangle theRectangle;
struct circle theCircle;
struct triangle theTriangle;
} dimensions;
};
The first field is type, which contains the type of shape contained
in the structure. The second field contains the dimensions of the
shape. It’s a union because different shapes have different
dimensions.
The code to draw the shapes looks something like the following:
void drawShape(const shape* const theShape) {
switch (theShape->type) {
case SHAPE_SQUARE:
drawSquare(theShape->dimensions.theSquare.side);
break;
case SHAPE_RECTANGLE:
drawSquare(theShape>dimensions.theRectangle.width,
theShape>dimensions.theRectangle.height);
// ... other shapes
This design pattern is fairly common in C programming: a union
that can hold many different types of data and an enum that tells
which type we actually have.
Structures and Embedded Programming
In this section, we take a hardware specification and turn it into a C
structure, using what we’ve learned so far about structures and
alignment.
The small computer system interface (SCSI) was designed to
provide a standard way of transferring data to and from devices. It
started in 1986 and since has been expanded and enhanced a great
deal. It works by sending a structure called a command block to the
device and getting back data and status messages in return.
When first written, the SCSI standard defined the READ (6)
command, which limited the block address to 16 bits, allowing for a
disk of up to 16MB, which was large for the time. Of course, disk
makers quickly created bigger disks, so the SCSI people had to
create a new command to allow for a bigger drive. This was the READ
(10) command, which was followed by the READ (12), READ (16), and
READ (32) commands. The READ (32) command uses a 64-bit block
address. Hopefully, it will take the disk manufacturers a little time to
catch up and create an 8-zebibyte disk.
Figure 8-2 shows the command block for the READ (10) command.
If we want to read data from the disk, we’ll need a C structure to
contain this information and send it to the device.
Figure 8-2: The READ
(10)
command block
At first, it seems like a simple translation:
struct read10 {
uint8_t opCode;
// Op code for read
uint8_t flags;
// Flag bits
uint32_t lba;
// Logical block address
uint8_t group;
// Command group
uint16_t transferLength; // Length of the data to read
uint8_t control;
// Control bits, the NACA being the
only one defined
};
#include <assert.h>
int main() {
assert(sizeof(struct read10) == 10);
Now, because we’re paranoid and careful, the first thing we did in
the program was to put in an assert statement to make sure our
definition matches the hardware. An assert statement aborts the
program if the condition is not true. If we expect the read10 control
block to contain 10 bytes and it doesn’t, our program has a big
problem. And we do too, because the assert fails.
So what happened? Inspecting the structure, we see that the lba
field (a uint32) is aligned on a 2-byte boundary. The compiler wants
to put it on a 4-byte boundary, so it added 2 bytes of padding. We
need to pack the structure:
struct read10 {
uint8_t opCode;
// Op code for read
uint8_t flags;
// Flag bits
uint32_t lba;
// Logical block address
uint8_t group;
// Command group
uint16_t transferLength; // Length of the data to read
uint8_t control;
// Control bits, the NACA being the
only one defined
} __attribute__((packed));
The packed attribute tells GCC to not add any padding. As a result,
our structure is inefficient, but it matches the hardware. Also, our
assert doesn’t fail, so we’ve done it right.
typedef
We can define our own types using the typedef statement. For
example, the following statement defines a new dimension type:
typedef unsigned int dimension;
plans
// Dimension for use in the
This type is equivalent to an unsigned
any other type:
int
and can be used like
dimension width;
// Width of the thing in furlongs
The syntax of a typedef is similar to that of a variable declaration.
It contains the typedef keyword and the name of the initial type, as
well as the name of the defined type:
typedef initialtype newtypename;
// A type definition
One example of typedef can be found in the stdint.h file, which is
included in many of our programs:
// These typedefs are system-dependent.
typedef signed char
int8_t;
typedef unsigned char
uint8_t;
typedef signed short int
int16_t;
typedef unsigned short int uint16_t;
typedef signed int
int32_t;
typedef unsigned int
uint32_t;
In the early days of C, an int could be 16 or 32 bits, depending on
the processor. In the early days of programming, if users wanted to
use a 16-bit integer (which the old C standard didn’t support), they
had to put something like this in their code:
#ifdef ON_16_BIT_CPU
typedef signed int
int16_t;
#else // ON_32_BIT_CPU
typedef signed short int
int16_t;
#endif
After years of having to define our own precise data types, the C
standards committee created the stdint.h header file and made it a
part of the language.
Function Pointers and typedef
C allows pointers to functions, which are useful when doing
callbacks. For example, we might tell a graphics system to call a
given function when a button is pressed. The code for that might look
like the following:
registerButtonPressHandler(functionToHandleButtonPress);
The functionToHandleButtonPress parameter is a pointer to a
function that returns an integer and takes a constant event pointer as
its single argument. That sentence is a mess, and it doesn’t get any
easier when we translate it to C:
int (*ButtonCallback)(const struct event* const theEvent);
The first set of parentheses is required because without it we
define a function that returns an integer pointer:
// Define function that returns int*
int* getPointer(...)
Rather than remember these convoluted syntax rules, let’s simplify
the syntax using typedef:
// Function type for callback function
typedef int ButtonCallbackType(const struct event* const
theEvent);
// Pointer to callback function
typedef ButtonCallbackType* ButtonCallbackPointer;
This changes the definition of registerButtonPressHandler from:
void registerButtonPressHandler(int (*callbackPointer)
(const struct event* const theEvent));
to this:
void registerButtonPressHandler(ButtonCallbackPointer
callbackPointer);
The typedef provides a way of organizing types to simplify our
code, as well as make things clearer.
typedef and struct
We’ve already seen how we can use struct to define a structured
data type.
struct rectangle {
uint32_t width; // Width of the rectangle
uint32_t height; // Height of the rectangle
};
To use this structure, we must use the struct keyword:
struct rectangle bigRectangle;
// A big rectangle
The typedef statement allows us to avoid using the struct
keyword:
typedef struct{
uint32_t width;
uint32_t height;
} rectangle;
// Width of the rectangle
// Height of the rectangle
rectangle bigRectangle;
// A big rectangle
The typedef in this case tells C that we want to define a new
rectangle type.
Some people believe that using typedef to define a new structure
type makes the code simpler and cleaner. Others prefer to use
struct because it makes it obvious that a variable is a struct. The
syntax is optional, so use whatever works best for you.
Summary
This chapter is all about organizing data. The enum type allows you to
organize simple name lists without having to worry about which field
gets what value. Structures provide a powerful tool for organizing
data of different types. For embedded programmers, they are also
useful for communicating with actual hardware devices. However,
keep in mind that a hardware designer’s idea of how a structure is
laid out can be different from what C thinks it should be.
While structures can hold only a fixed set of data, unions can hold
multiple sets (just not at the same time). Between the two of them,
we have a great deal of control over how we store data.
Another tool for organizing data is the typedef directive, which
allows us to define our own types. It lets us represent data using
familiar types instead of being forced to use the basic C types.
Many complex data types exist, and C provides a good set of tools
for managing them.
Programming Problems
Create a structure to hold a fraction. Then create procedures that
add, subtract, multiply, and divide fractions. The fractions should be
stored in normalized form. In other words, 2/4 should be stored as
1/2.
Create a structure called car that holds attributes common to both
electric and gas-powered cars. Add to it a union with two fields,
electric and gas, that are structures that hold attributes specific to
that type of car. For example, numberOfPassengers is common to all
cars. The field chargingTime would be electric-only.
Write a structure to describe a student (single class). The data
should contain not only the student’s name and ID number but also
an array containing the student’s grades.
Write a structure to handle the data shown in Figure 8-3.
Figure 8-3: IPv4 header format
NOTE
The IP structure uses network byte order, or big-endian
format.
The Southern California Railroad has the only Acme Traffic Signal
(the one with arms and lights) actually at an intersection. To change
the signal from STOP to GO, the controller must do the following:
Turn off the STOP light.
Turn on the GO light.
Turn on the DIRECTION relay.
Energize the ARM relay.
Wait 3 seconds.
Turn off the ARM relay.
Turn off the DIRECTION relay.
We have the following commands available: (1) change state of light
x to y, where x is STOP or GO, and y is ON or OFF; (2) set
DIRECTION relay power to x, where x is ON or OFF; and (3) sleep
for n seconds. Write a structure for each command. Then write a
union that holds an enum to identify the command and the structure
for the given command.
9
SERIAL OUTPUT ON THE STM
We’re now back to “Hello World,”
only this time we’ll use our Nucleo
board, which presents several
challenges. The first is where to
write the message. There is no
display. Fortunately, the chip has a serial port
that’s nicely connected to a USB/serial port on
the top half of the board.
The next challenge is the writing itself. We need to initialize the
device and create a procedure to actually write a character. The
device is designed to accept one character at a time, and we must
keep that limitation in mind when writing our program.
We’ll simulate the process before working with the device. C has a
great deal of standard functions, such as puts, that make outputting
data easy. The Nucleo board doesn’t have such nice features, so we
must write our own output functions. In order to transition into the
low-level coding we need for the Nucleo, we’ll write out “Hello World”
one character at a time.
Writing a String One Character at a Time
When a C program calls the standard puts function, it starts a long
programming process that involves kernel calls, internal buffering,
interrupt scheduling, and device drivers (more on those in the next
chapter). Ultimately, it reaches the point where it sends one
character at a time to the device. To simulate this, we’ll send one
character at a time to the operating system. In other words, we’ll limit
ourselves to using only the standard putchar function to write the
output.
Listing 9-1 contains a program that writes out "Hello World\n" the
hard way. Again, we’re doing this the hard way because later, with
the Nucleo board, we’re going to have to do it the really hard way.
putchar.c
/*
* Print a string one character at a time.
*/
#include <stdio.h>
char hello[] = "Hello World\n"; // The characters to print
int curChar;
// Character number we are printing
int main()
{
1 for (curChar = 0; hello[curChar] != '\0'; ++curChar)
putchar(hello[curChar]);
return (0);
}
Listing 9-1: Writing a string one character at a time
The only interesting piece in this program is the for loop 1, which
does not stop after a certain number of characters. Instead, it stops
when the program reaches the end-of-string ('\0') character. That
way, the program can output any length of string.
Defining Our Own putchar
To improve this program, first we’ll make curChar a local variable.
Then we’ll define a function called myPutchar that sends the
character to standard out (see Listing 9-2).
my_putchar.c
/**
* Print a string one character at a time
* using our own function.
*/
#include <stdio.h>
char hello[] = "Hello World\n"; // The characters to print
1
2
/**
* Reimplementation of putchar
*
* @param ch The character to send
*
* @note Not as apparently useless as it seems
*/
void myPutchar(const char ch)
{
3
}
putchar(ch);
int main()
{
int curChar;
}
// Index of the current character we
// are printing
for (curChar = 0; hello[curChar] != '\0'; ++curChar)
4 myPutchar(hello[curChar]);
return (0);
Listing 9-2: One character at a time using our own output function
At the beginning of myPutchar, we’ve added some additional
elements 1 to the comment block. The keyword @param indicates a
parameter, and the @note keyword defines a note. You can use lots
of other keywords in Doxygen-style comments, but for now we’ll use
the basics to be compatible with the existing STM code.
The actual function starts with the void myPutchar(const char ch)
declaration 2, which indicates that the myPutchar procedure returns
nothing and takes one parameter of type char. The const modifier
indicates that we don’t change it inside the procedure. (In fact, we
can’t change it, because if we try, the compiler will generate an
error.)
When the procedure is executed 4, the program performs the
following steps:
It computes the value of hello[curChar].
It places this value in a location where myPutchar can find it.
It records the address of the next instruction (the end of the for
loop).
It starts executing myPutchar. (The ch variable will have been
initialized by step 2.)
A similar set of steps is executed when we call putchar 3. The only
difference is that we had to write myPutchar, and the people who
wrote the standard C library supplied putchar.
Creating a function (myPutchar) that does nothing but call another
(putchar) is not very useful. The Nucleo board doesn’t have a
putchar function, so we’ll write our own later in the chapter. But
before we do that, let’s look at the details of the serial device.
Serial Output
Serial output is one of the easiest ways to get data out of an
embedded system. The electrical interface consists of a send line
(TX), a receive line (RX), and ground (GND). Most embedded
systems have them hidden away, available only to developers willing
to crack open the case and connect to the serial port.
Our chip has a serial device we can write to. All we need to do is
connect TX, RX, and GND between our microcontroller (the bottom
half of the development board) and the USB/serial device on the top
half of the board.
The following table shows the connections we need:
Microcontroller USB/serial and other support devices
Microcontroller USB/serial and other support devices
RX
CN9-1
TX
CN3-1
TX
CN9-2
RX
CN3-2
GND
CN6-5
GND
CN4-3
We would have to make these connections if we had a Raspberry
Pi or other embedded system without a built-in serial controller. Figur
e 9-1 shows the layout of these components and the internal wiring
supplied by STM.
STM has already made the connections for us. No jumpers
needed.
Figure 9-1: Serial communications on the Nucleo board
A Brief History of Serial Communications
Serial communications go back a long way, back to the BC years (as
in, before computers). The telegraph was the internet of its day,
allowing for the transmission of long-distance messages over wires.
The sender consisted of a telegraph key that, when pressed, would
cause the receiver to “click.” The clicks were encoded using a
system called Morse code (still in use today). This invention
revolutionized communications. You could send a message to the
next city and get a response the same day. Take that, Pony Express.
There was just one problem, however; you needed skilled
operators at both ends of the telegraph who knew Morse code.
Unskilled people could not send or receive messages, and training
operators was expensive. One solution was to use two clocks: one
for the transmitter and one for the receiver. On the clock dial were
the letters, from A to Z. To send an S, for example, the sender would
wait until the single hand on the clock pointed to the S and press the
telegraph key. The receiver would see that the hand pointed to S and
record the letter.
Keeping the clocks in sync was next to impossible, though, so a
very smart inventor decided that each clock would stop its hands at
the top position. When the sender wanted to send a letter, they
would press the telegraph key as a start signal. The clocks would
keep good enough time to make it around the dial once correctly.
The sender would then press the letter signal. When the hand
reached the top, a short pause called the stop time would give the
slower clock a chance to catch up. The sequence of events went like
this: start signal, letter signal, stop time.
Now let’s fast-forward to the invention of the teletype machine,
which could send text over the equivalent of telegraph lines. Instead
of a single letter pulse, the teletype encoded the characters into a
series of eight pulses (seven for data and one for primitive error
checking). It used a keyboard encoder built out of levers to turn a
key press into an 8-bit code that was fed to a mechanical shift
register that looked like a distributor cap. This device sent the pulses
down the wire, where another teletype would turn them into a single
printed letter.
The teletype sequence went like this: The sender would press a
key, and the mechanical sender would send out a 10-bit signal (1
start bit, 8 data bits, and 1 stop bit). When the receiver got the start
bit, it turned on its shift register (another motor with a distributor cap)
and used the incoming pulses to turn a print head so the right letter
printed. After the 8 data bits were sent, both machines paused at
least 1 bit time (the stop bit) to remain synchronized.
Most teletypes could transmit characters at 110 baud
(bits/second), or 10 characters a second. That doesn’t sound like
much in the day of megabit internet connections, but it was a
revolutionary improvement in communications.
Computers today still use the serial communication that the
teletype used. The speeds have improved, but the basic protocol
remains the same.
Line Endings
In fact, we’re still dealing with one other teletype legacy: line
endings. After typing 80 characters, you could send the machine a
character called a carriage return to make it return to position 1. The
problem was that it took two-tenths of a second to move the
printhead. If you sent a character immediately after the carriage
return, you’d get a blurred blob printed in the middle of the line as the
printhead tried to print while moving.
The teletype people solved this issue by making the end of a line
two characters. The first, the carriage return, moved the print head to
position 1. The second, the line feed, moved the paper up one line.
Since the line feed didn’t print anything on the paper, the fact that it
was done while the printhead was flying to the left didn’t matter.
However, when computers came out, storage cost a lot of money
(hundreds of dollars per byte), so storing two characters for an end
of line was costly. The people who created Unix, the inspiration for
Linux, decided to use the line feed (\n) character only. Apple decided
to use the carriage return (\r) only, and Microsoft decided to use
both the carriage return and the line feed (\r\n) for its line ending.
C automatically handles the different types of newlines in the
system library, but only when you use the system library. If you are
doing it yourself, like we are about to do, you must write out the full
end-of-line sequence (\r\n).
Serial Communications Today
Today, almost every embedded processor has a serial interface on it.
Serial devices are simple and cheap to make. The only difference
between the interface of today and that of the 1800s is that speed
has gone up (from 110 bits/second up to 115,200 bits/second), and
the voltages have changed. In the 1800s they used –15 to –3 as a
zero bit and +3 to +15 as a one bit. That’s still the “standard,” but
most computers use voltages of 0 (for zero) and 3 (for one).
The device that handles the serial I/O is called a universal
asynchronous receiver-transmitter (UART). There are two major
types of serial communication: asynchronous and synchronous. With
synchronous communications, the sender’s and receiver’s clocks
must be synchronized by having the sender continually send out
characters. The receiver then looks at the incoming characters and
deduces the clock timing from them. The sender must always send
characters, even if it’s just an “idle” character (indicating no data).
With asynchronous communications, there is no shared clock. The
start bit triggers the receiver to start its clock and look for a
character. Asynchronous communications assume that the sender
and receiver can keep their clocks close enough together for one
character time. Because there is no need for continuous
transmissions to keep the clocks synchronized, there is no idle
character. When idle, the transmitter just doesn’t send anything.
The STM chip has one port that allows for both synchronous and
asynchronous communications, so in the STM documentation, you’ll
see it referred to as a universal synchronous/asynchronous receivertransmitter (USART). This program uses the term UART to be
compatible with the STM HAL library.
Serial Hello World!
Let’s create a new project for main.c, which is a somewhat long
“Hello World,” but it has to do all the things that the operating system
hides from us. First, we include the header files that define the
information about the UART (and lots of other devices as well):
#include "stm32f0xx.h"
#include "stm32f0xx_nucleo.h"
For the code, we’ll start with the main function:
int main(void)
{
1
2
HAL_Init(); // Initialize hardware.
led2_Init();
uart2_Init();
// Keep sending the message for a long time.
for (;;) {
// Send character by character.
for(current = 0; hello[current] != '\0'; ++current) {
3 myPutchar(hello[current]);
}
4
}
}
HAL_Delay(500);
The main function looks pretty much like the one in Listings 9-1
and 9-2. One addition is that it must initialize all the devices we’re
going to use 1, including the hardware library (HAL_Init), the red
LED (led2_Init), and the UART (uart2_Init). Our embedded
program can’t stop, so we have an infinite loop 2 that sends out the
string 3 and then sleeps for half a second 4.
One of the first things to do next is create an ErrorHandler
function, which the HAL library calls if something goes wrong. We
can’t print an error message, because our printing code just went
south, so we resort to blinking the red light. True, it’s a very limited
error indication, but so is the check engine light in your car. In both
cases, the designers are doing the best they can. We won’t go
through the Error_Handler function here; it’s “blink” from Chapter 3
with a new name.
UART Initialization
A serial device should be simple to program. The engineers at
STMicroelectronics, however, have decided to improve the simple
UART by providing additional features. As a result, our simple serial
device now takes 45 pages worth of reference manual to describe.
We just want to use the thing to send characters. It doesn’t even
need to receive them.
Fortunately, the HAL library provides a function called
HAL_UART_Init that hides many of the messy details from us.
Unfortunately, it doesn’t hide the messy details of calling
HAL_UART_Init, but you can’t have everything. In the uart2_Init
function, we have to set up an initialization structure and then call
HAL_UART_Init:
void uart2_Init(void)
{
// UART initialization
// UART2 -- one connected to ST-LINK USB
1
2
uartHandle.Instance = USART2;
uartHandle.Init.BaudRate = 9600;
Speed 9600
3 uartHandle.Init.WordLength = UART_WORDLENGTH_8B;
bits/character
//
// 8
4 uartHandle.Init.StopBits = UART_STOPBITS_1;
stop bit
5 uartHandle.Init.Parity = UART_PARITY_NONE;
parity
// 1
6 uartHandle.Init.Mode = UART_MODE_TX_RX;
Transmit & receive
//
7
uartHandle.Init.HwFlowCtl = UART_HWCONTROL_NONE;
hw control
// No
// No
// Oversample the incoming stream.
uartHandle.Init.OverSampling = UART_OVERSAMPLING_16;
// Do not use one-bit sampling.
8
uartHandle.Init.OneBitSampling =
UART_ONE_BIT_SAMPLE_DISABLE;
// Nothing advanced
9 uartHandle.AdvancedInit.AdvFeatureInit =
UART_ADVFEATURE_NO_INIT;
/*
* For those of you connecting a terminal emulator, the
above parameters
* translate to 9600,8,N,1.
*/
}
if (HAL_UART_Init(&uartHandle) != HAL_OK)
{
Error_Handler();
}
We first tell the system which UART to use 1. Our chip has more
than one, and the second one is connected to the USB serial
interface. Next, we set the speed to 9,600 baud (bits/second) 2, or
960 characters a second. Why the 10 to 1 ratio? We have 1 bit for
the start bit, 8 data bits, and 1 stop bit. The number of bits per
character is 8, because C stores characters in 8-bit units. It is
possible to have systems with 5, 6, 7, or 9 bits per character, but
almost everyone uses 8, except for a TDD deaf communication
device, which uses 5. We need to tell the system that we’re using 8
bits 3.
The next line configures the number of stop bits 4, which is the
amount of time (in bits) that occurs between characters. Most people
use 1 stop bit. (If the sender uses 2 and the receiver uses 1, it still
works. The extra bit will be interpreted as between-character idle
time.)
Early serial devices used a 7-bit character and 1 parity bit. The
parity bit provided a simple, primitive method of error checking. We
do not use this feature, so we turn parity off 5. We then enable the
transmitter and receiver 6.
The original serial interface (RS-232 standard) has a number of
hardware flow control lines. On our board, they are not wired up, and
we don’t use them 7.
One of this UART’s advanced features is oversampling, which
allows the receiver to check the state of an incoming bit multiple
times before deciding whether it is a one or a zero. This feature is
sometimes useful when you have a noisy electrical environment and
are running serial cables over long distances. Our serial “cable”
consists of two traces that run from the bottom of the board to the
top, a distance of about 3 inches. We don’t need oversampling, but
we do have to turn it off 8. Finally, we are not using any advanced
features.
Next, we call HAL_UART_Init to initialize the UART 9, which needs
help to do its job. The general-purpose input/output (GPIO) pins on
our processor can do a lot of different things, including act as GPIO
pins. Most of them have “alternate functions,” meaning that you can
program them to act as different devices (GPIO pin, USART device,
SPI bus, I2C bus, PWM pin, and so on). Note that not all pins
support all devices. Finally, HAL_UART_Init calls HAL_UART_MspInit,
which sets up pins for the UART:
HAL_StatusTypeDef HAL_UART_Init(UART_HandleTypeDef *huart)
{
/* Check the UART handle allocation. */
if(huart == NULL)
{
return HAL_ERROR;
}
// ...
if(huart->gState == HAL_UART_STATE_RESET)
{
/* Allocate lock resource and initialize it. */
huart->Lock = HAL_UNLOCKED;
}
/* Initialize the low-level hardware: GPIO, CLOCK. */
HAL_UART_MspInit(huart);
We need to supply HAL_UART_MspInit. Keep in mind that pins are
expensive and transistors to drive them are cheap. By default, the
two pins that drive our serial device, named PA2 and PA3, are GPIO
pins. We need to tell the system to use the pins’ alternate function
and turn them into serial device pins.
Our HAL_UART_MspInit function looks a lot like the initialization code
for the GPIO pin we used for “blink,” but with some slight differences:
void HAL_UART_MspInit(UART_HandleTypeDef* uart)
{
GPIO_InitTypeDef GPIO_InitStruct;
1
if(uart->Instance == USART2)
{
/* Peripheral clock enable */
2
3
}
}
__HAL_RCC_USART2_CLK_ENABLE();
/*
* USART2 GPIO Configuration
* PA2
------> USART2_TX
* PA3
------> USART2_RX
*/
GPIO_InitStruct.Pin = GPIO_PIN_2|GPIO_PIN_3;
GPIO_InitStruct.Mode = GPIO_MODE_AF_PP;
GPIO_InitStruct.Pull = GPIO_NOPULL;
GPIO_InitStruct.Speed = GPIO_SPEED_FREQ_LOW;
// Alternate function -- that of UART
GPIO_InitStruct.Alternate = GPIO_AF1_USART2;
HAL_GPIO_Init(GPIOA, &GPIO_InitStruct);
This function starts by checking which USART we are using. We
only set up USART2 in this code 1. Then we enable the clock for the
device 2. Next, we configure the GPIO pins 3 (we’ve done this
before in our blink program), which tells the chip that PA2/PA3 are
not GPIO pins but instead should be connected to USART2.
Transmitting a Character
We’ll use the myPutchar function to transmit characters over the
serial device. The USART is a memory-mapped I/O device. To send
a character, we have to assign (write) it to the magic memory
location (a register), and then it goes out the wire:
uartHandle.Instance->TDR = ch;
UART.
// Send character to the
We also need to time the character just right, and that requires
some extra code:
void myPutchar(const char ch)
{
// This line gets and saves the value of UART_FLAG_TXE at
call
// time. This value changes so if you stop the program on
the "if"
// line below, the value will be set to zero because it
goes away
// faster than you can look at it.
int result __attribute__((unused)) =
(uartHandle.Instance->ISR & UART_FLAG_TXE);
// Block until the transmit empty (TXE) flag is set.
while ((uartHandle.Instance->ISR & UART_FLAG_TXE) == 0)
continue;
uartHandle.Instance->TDR = ch;
the UART.
}
// Send character to
The register we are writing is called the transmit data register
(TDR). If we write this register while a character is being transmitted,
the new character overwrites the old one, causing errors and
confusion. To send a, b, c, we’d write code like this:
uartHandle.Instance->TDR = 'a';
sleep_1_960_second();
uartHandle.Instance->TDR = 'b';
sleep_1_960_second();
uartHandle.Instance->TDR = 'c';
sleep_1_960_second();
This sort of timing is tricky, especially if we want to execute code
between characters. The STM32 chip has a bit for everything,
including “TDR empty, you can write another character now.”
This bit is in a register called the interrupt and status register (ISR)
that has a number of bits in it indicating the status of the device. Figu
re 9-2 shows a diagram of this register from the STM32F030R8
reference manual (“RM0360 Reference
manual/STM32F030x4/x6/x8/xC and STM32F070x6/xB”).
Figure 9-2: Interrupt and status register contents
We are interested in the bit named TXE (bit 0 in the diagram). The
HAL defines the TXE bit using the name UART_FLAG_TXE. We must
wait for the TXE bit to clear (become zero) before we can send data
to the TDR without clobbering a character being transmitted. Nothing
in the code changes uartHandle.Instance->ISR.
However, uartHandle.Instance->ISR is a magic memory location
electrically connected to the device. The state of the device changes
when something like a character transmission completes, and when
that happens, the contents of uartHandle.Instance->ISR change as
well.
NOTE
The ISR field is declared volatile to tell C that it can change
magically at any time in ways that are not under the control of
the compiler.
Now if you try to examine uartHandle.Instance->ISR using the
debugger, the UART_FLAG_TXE flag will appear always to be set. That’s
because it’s cleared when a character is transmitted (in 1/960th of a
second), which is a long time in terms of computers, but a very short
time in terms of humans typing commands.
To help show what’s going on, we’ve added a useless statement:
int result __attribute__((unused)) =
(uartHandle.Instance->ISR & UART_FLAG_TXE);
This statement tests the value of UART_FLAG_TXE and stores it in
result. Now the value of (uartHandle.Instance->ISR &
UART_FLAG_TXE) might magically change, but the value result will
remain the same for the lifetime of the procedure.
You can look at result in the debugger and see what the value of
the bit was at the beginning of the loop. You’ll notice a strange
phrase in the code:
__attribute__((unused))
This is a GCC extension to the C language. It tells the compiler
that we know this variable is not used, so it doesn’t generate a
warning. (In fact, it’s not used by the program, but it may be used by
the debugger. The compiler doesn’t see anything outside the
program itself.)
The string we send for “Hello World” ends with \r\n (carriage
return, line feed). In our original “Hello World” program from Chapter
1, the operating system edited the output stream and changed \n
into \r\n for us. We have no operating system, so we must do it all
ourselves.
Listing 9-3 contains the full serial version of our “Hello World”
program.
/**
* @brief Write hello world on the serial port.
*/
#include <stdbool.h>
#include "stm32f0xx_nucleo.h"
#include "stm32f0xx.h"
const char hello[] = "Hello World!\r\n";
// The message to
send
int current; // The character in the message we are sending
UART_HandleTypeDef uartHandle;
// UART initialization
/**
* @brief This function is executed in case of error
occurrence.
*
* All it does is blink the LED.
*/
void Error_Handler(void)
{
/* Turn LED2 on. */
HAL_GPIO_WritePin(LED2_GPIO_PORT, LED2_PIN,
GPIO_PIN_SET);
while (true)
{
// Toggle the state of LED2.
HAL_GPIO_TogglePin(LED2_GPIO_PORT, LED2_PIN);
HAL_Delay(1000);
// Wait one second.
}
}
/**
* Send character to the UART.
*
* @param ch The character to send
*/
void myPutchar(const char ch)
{
// This line gets and saves the value of UART_FLAG_TXE at
call
// time. This value changes so if you stop the program on
the "if"
// line below, the value will be set to zero because it
goes away
// faster than you can look at it.
int result __attribute__((unused)) =
(uartHandle.Instance->ISR & UART_FLAG_TXE);
// Block until the transmit empty (TXE) flag is set.
while ((uartHandle.Instance->ISR & UART_FLAG_TXE) == 0)
continue;
uartHandle.Instance->TDR = ch;
the UART.
}
// Send character to
/**
* Initialize LED2 (so we can blink red for error).
*/
void led2_Init(void)
{
// LED clock initialization
LED2_GPIO_CLK_ENABLE();
GPIO_InitTypeDef GPIO_LedInit;
// Initialization for
the LED
// Initialize LED.
GPIO_LedInit.Pin = LED2_PIN;
GPIO_LedInit.Mode = GPIO_MODE_OUTPUT_PP;
GPIO_LedInit.Pull = GPIO_PULLUP;
GPIO_LedInit.Speed = GPIO_SPEED_FREQ_HIGH;
HAL_GPIO_Init(LED2_GPIO_PORT, &GPIO_LedInit);
}
/**
* Initialize UART2 for output.
*/
void uart2_Init(void)
{
// UART initialization
// UART2 -- one connected to ST-LINK USB
uartHandle.Instance = USART2;
uartHandle.Init.BaudRate = 9600;
Speed 9600
uartHandle.Init.WordLength = UART_WORDLENGTH_8B;
bits/character
uartHandle.Init.StopBits = UART_STOPBITS_1;
stop bit
uartHandle.Init.Parity = UART_PARITY_NONE;
parity
uartHandle.Init.Mode = UART_MODE_TX_RX;
Transmit & receive
uartHandle.Init.HwFlowCtl = UART_HWCONTROL_NONE;
hw control
// Oversample the incoming stream.
uartHandle.Init.OverSampling = UART_OVERSAMPLING_16;
// Do not use one-bit sampling.
//
// 8
// 1
// No
//
// No
uartHandle.Init.OneBitSampling =
UART_ONE_BIT_SAMPLE_DISABLE;
// Nothing advanced
uartHandle.AdvancedInit.AdvFeatureInit =
UART_ADVFEATURE_NO_INIT;
/*
* For those of you connecting a terminal emulator, the
above parameters
* translate to 9600,8,N,1.
*/
}
if (HAL_UART_Init(&uartHandle) != HAL_OK)
{
Error_Handler();
}
int main(void)
{
HAL_Init(); // Initialize hardware.
led2_Init();
uart2_Init();
}
// Keep sending the message for a long time.
for (;;) {
// Send character by character.
for(current = 0; hello[current] != '\0'; ++current) {
myPutchar(hello[current]);
}
HAL_Delay(500);
}
/**
* Magic function that's called by the HAL layer to actually
* initialize the UART. In this case we need to
* put the UART pins in alternate mode so they act as
* UART pins and not like GPIO pins.
*
* @note: Only works for UART2, the one connected to the USB
serial
* converter
*
* @param uart The UART information
*/
void HAL_UART_MspInit(UART_HandleTypeDef* uart)
{
GPIO_InitTypeDef GPIO_InitStruct;
if(uart->Instance == USART2)
{
/* Peripheral clock enable */
__HAL_RCC_USART2_CLK_ENABLE();
}
/*
* USART2 GPIO Configuration
* PA2
------> USART2_TX
* PA3
------> USART2_RX
*/
GPIO_InitStruct.Pin = GPIO_PIN_2|GPIO_PIN_3;
GPIO_InitStruct.Mode = GPIO_MODE_AF_PP;
GPIO_InitStruct.Pull = GPIO_NOPULL;
GPIO_InitStruct.Speed = GPIO_SPEED_FREQ_LOW;
// Alternate function -- that of UART
GPIO_InitStruct.Alternate = GPIO_AF1_USART2;
HAL_GPIO_Init(GPIOA, &GPIO_InitStruct);
}
/**
* Magic function called by HAL layer to de-initialize the
* UART hardware. It's something we never do, but we put it
* in here for the sake of completeness.
*
* @note: Only works for UART2, the one connected to the USB
serial
* converter
*
* @param uart The UART information
*/
void HAL_UART_MspDeInit(UART_HandleTypeDef* uart)
{
if(uart->Instance == USART2)
{
/* Peripheral clock disable */
__HAL_RCC_USART2_CLK_DISABLE();
}
}
/*
* USART2 GPIO Configuration
* PA2
------> USART2_TX
* PA3
------> USART2_RX
*/
HAL_GPIO_DeInit(GPIOA, GPIO_PIN_2|GPIO_PIN_3);
Listing 9-3: Program 08.serial
Communicating with the Device
We now have a program that sends out the “Hello World” message
on the serial line. The serial line is connected to the USB/serial
device on the board, which is plugged in to your computer. To view
the message, you need to run a terminal emulator on your computer.
Figure 9-3 shows the setup.
Figure 9-3: Serial communications
Each operating system has a different terminal emulator program,
and in some cases, more than one. The ones mentioned here are
common, free, and easy to use.
Windows
On Windows, we’ll use the PuTTY program (https://putty.org).
Download and install it on your system, selecting the defaults for all
options, and then follow these steps:
Make sure the Nucleo board is not connected to your computer.
Open the Control Panel and go to the Device Manager screen (see F
igure 9-4). There is no serial device and, therefore, no Ports section
in the list.
Figure 9-4: Serial device not installed
Plug in the Nucleo board. The device list will change as shown in Fig
ure 9-5.
Figure 9-5: New USB serial device
You should see a new USB serial device named COM3. (Windows
has a system for assigning COM parts to serial devices, but no one
knows what that is. You may see a different COM port on your
machine.)
Start PuTTY. In the main window, shown in Figure 9-6, select the
Serial radio button. Under Serial Line, select the new COM port you
just found in the Device Manager. The speed should default to 9600.
Figure 9-6: Starting PuTTY
Click Open. A terminal window should appear, and the device should
start greeting you.
Linux and macOS
On Unix-based systems like Linux and macOS, the screen program
works well. (The minicom program also does the job.) To use screen,
you need to know the serial device’s name, which is different on
different operating systems. On Linux, the device is most likely
/dev/ttyACM0, although if you have other serial devices plugged in, it
might be /dev/ttyACM1, /dev/ttyACM2, or similar. On macOS, the
name is likely /dev/tty.usbmodem001, but it could be
/dev/tty.usbmodem002, /dev/tty.usbmodem003, or something similar.
To find the name, make sure the Nucleo board is not connected to
your computer, then execute one of the following commands in the
terminal:
$ ls /dev/ttyACM*
$ ls /dev/tty.usbmodem*
(Linux)
(macOS)
Plug in the device and execute the same command again. You
should see one more device in the list. Use that one. Now execute
the following command:
$ screen /dev/ttyACM0 9600
You should see “Hello World” appear. To exit the program, press
CTRL-A-\.
Summary
This programming book covers “Hello World” in Chapter 9. Why?
Because we had to do everything ourselves. Writing a simple
program to send out our message, character by character, involved
initializing the UART (a nontrivial process), telling the GPIO pin that it
was now a serial pin, and using a hardware register (those
mysterious memory locations that magically change depending on
the state of the device) to see when the UART was ready to transmit
a character.
We’ve made a tremendous leap forward. First, we’ve programmed
a moderately complex device and in the process learned a lot about
direct low-level I/O. Second, the serial port is the main diagnostic
and maintenance device hidden in many embedded devices. Despite
all the advances in computer technology in the last 60 years, the
most commonly used debugging technique is still printf to the serial
port. The serial port is a very simple robust device that’s cheap to
make and easy to connect to, and now we know how to use it to
debug our embedded systems.
Programming Problems
For the student: After you get the program working, see what
happens if you remove the \r. Then try it with the \r back in, but the
\n removed.
Moderately difficult mystery: Try changing the configuration so that
you send 7 data bits and even parity (instead of 8 data bits, no
parity). Do not change your terminal emulator’s configuration. Some
of the characters will be changed. Examine the bit pattern of the
characters and figure out which ones changed and why.
Advanced: As written, our program has no flow control. You’re going
to get a “Hello World” whether you like it or not. Change the
initialization code to use soft flow control. This means when you type
the XOFF character (CTRL-S), the output should stop. When you
type XON (CTRL-Q), it should resume.
Advanced: Write a function for the Nucleo board that reads a
character. It will look much like the myPutchar function, only it will
check a different bit and read the I/O port instead of writing to it.
You’ll need to read the microcontroller’s documentation to see what
the RDR bit does.
10
INTERRUPTS
The two main methods for handling
I/O are polling, which repeatedly
asks the device whether it has any
data ready, and interrupts, which are
when the device interrupts normal
workflow to tell you it’s ready. This chapter
describes the difference between polling and
interrupts as well as explains how interrupts
work so you can use them to write a string to the
serial port more efficiently (yes, “Hello World”
again).
Polling vs. Interrupts
Let’s consider how polling and interrupts would work in the case of
the telephone. With polling, the ringer is turned off, and you must
check the phone every 10 seconds to see whether a call is coming
in. You must sit by the phone and not get bored easily. This method
is what we used in our previous serial program in Chapter 9, which
basically went like the following dialogue:
“Are you busy?” “Yes.”
“Are you busy?” “Yes.”
“Are you busy?” “Yes.”
“Are you busy?” “No.” “Here’s the next character.”
The computer is stuck in a polling loop, waiting for the UART
status register to indicate that the UART is ready for the next
character. At this point, the computer has nothing else to do and
doesn’t get bored. The main advantages of polling are that it’s easy
to understand and implement.
Let’s go back to the telephone again, but this time we’ll use the
interrupt method. You don’t sit by the phone continually checking
whether a call is coming in. Instead, you go about your normal
business until the phone rings (an interrupt occurs). Then you drop
everything, race to the phone, and pick up it—only to discover that
it’s another telemarketing call for something you wouldn’t buy in a
million years.
The key sequence of events in the interrupt scenario is as follows:
We go about our normal work.
We get an interrupt (the phone rings).
We pick up the phone (service the interrupt), shout “No, I don’t want
to buy a combination shaving brush and fountain pen,” and hang up.
We resume our normal work where we left off.
Interrupts for Serial I/O
We can send characters to the UART only when the transmit data
register (TDR) is empty. Figure 10-1 shows a block diagram of a
portion of the UART to illustrate how the TDR works.
Figure 10-1: UART transmission hardware
When we want to send a character, we dump it in the TDR, which
holds 8 bits. The character is then dumped into the transmit shift
register (TSR), which holds 10 bits. The 2 extra bits are the start bit
at the beginning of the character and the stop bit at the end of the
character. The TSR then sends the data out the transmit serial line
(TX) one bit at a time.
When the data is moved from the TDR to the TSR, the TDR
becomes empty and is ready to receive another character.
The polling loop we’ve been using looks like the following:
// Block until the transmit empty (TXE) flag is set.
while ((uartHandle.Instance->ISR & UART_FLAG_TXE) == 0)
continue;
In English, this says, “Are you empty yet? Are you empty yet? Are
you empty yet?” And it’s just as annoying in C code as it is in
English. Again, polling’s main advantage is its simplicity.
The other way to transmit characters is to tell the system we want
an interrupt when the UART is ready to receive another character.
An interrupt function is called automatically when something occurs.
In our case, we want an interrupt when the TDR is empty.
With interrupts, we tell the processor, “I’m going to go off and do
useful work. When the TDR is empty, I want you to interrupt the
normal flow and call an interrupt routine function, so I can give you
the next character.”
Interrupt Routines
When an interrupt occurs, the CPU calls an interrupt routine function,
located at a fixed address determined by the CPU’s design. Early
CPUs had one address for all interrupts, so the code had to go
through a number of checks to see what had interrupted:
if (diskInterrupt)
if (serialInterrupt)
if (keyboardInterrupt)
if (mouseInterrupt)
logUnknownInterrupt();
{
{
{
{
handleDiskInterrupt(); return;}
handleSerialInterrupt(); return;}
handleKeyboardInterrupt(); return;}
handleMouseInterrupt(); return;}
Nowadays, even a simple chip can have many different devices.
Checking all of them to see which one interrupted is a timeconsuming process. As a result, chips (including our ARM chip), now
use vectored interrupts, which means each peripheral gets its own
interrupt address. Interrupts from UART1 will call an interrupt routine
at one address, while interrupts from UART2 will go to another
(specifically USART2_IRQHandler), and so on for other peripheral
devices.
The interrupt vector is defined in the
startup/startup_stm32f030x8.S file:
g_pfnVectors:
.word _estack
.word Reset_Handler
.word NMI_Handler
.word HardFault_Handler
# Many more handlers
.word USART1_IRQHandler
.word USART2_IRQHandler
/* USART1 */
/* USART2 */
Later, the code defines the USART2_IRQHandler symbol:
.weak
USART2_IRQHandler
.thumb_set USART2_IRQHandler,Default_Handler
The second directive (.thumb_set) defines the procedure
USART2_IRQHandler to be the same as Default_Handler.
The first .weak directive defines it as a weak symbol. If it were a
regular symbol and we tried to define our own USART2_IRQHandler,
the linker would abort with a Duplicate symbol error message.
However, because the symbol is weak, the linker will throw away the
weak definition and use the one that we provide.
NOTE
The STM documentation sometimes labels our serial I/O port
as both a UART (asynchronous I/O) and a USART
(synchronous I/O) port. The port can do either one depending
on configuration. Thus, we have one serial I/O port that has
two names: USART and UART. It’d just be too easy if they
picked one name and stuck to it.
The startup/startup_stm32f030x8.S file defines Default_Handler
later:
.section .text.Default_Handler,"ax",%progbits
Default_Handler:
Infinite_Loop:
b Infinite_Loop
The default response to an interrupt is to loop forever, making the
machine almost totally useless (I say “almost totally useless”
because the machine will still respond to the debugger and a reset).
We’ll write our own USART2_IRQHandler to respond when the TDR is
empty and thereby replace the default handler with something more
useful.
Writing a String with Interrupts
Now let’s change our serial I/O program from Chapter 9 so that it
uses interrupts instead of polling to write a string. All that’s
communicated between the upper layer (the main program) and the
lower layer (interrupt routine) is a single global variable:
const char* volatile usart2String = NULL;
we are sending
// The string
The const qualifier tells C that the character data is constant and
we’ll never attempt to change it. The volatile qualifier tells C that
this variable may be changed at any time by something outside the
flow of a normal C program, such as an interrupt function.
To clarify, because C’s syntax is a little complex at this point, the
const appears before the char declaration and means that the
character data is constant. It does not appear after the pointer
operator (*), so the pointer is not constant. The volatile modifier
appears after the pointer operator, indicating the pointer may be
changed. The lack of the const modifier after the pointer operator
means that the program can change this value.
NOTE
It is possible to have a const volatile variable, which would
tell C that the program cannot change the value of the
variable, but something outside the scope of the program can.
For example, the UART receive register can be const
volatile. We can’t change it, but every time a character
comes in, it changes.
We need to be careful with any variables used by both layers.
Fortunately, for this example, that’s just one variable, usart2String.
The following lists show the workflow for that variable:
Upper Layer (Main Program)
Wait for usart2String to become NULL.
Point it to the string we want to send to the output.
Send the first character.
Increment the pointer.
Enable the UART interrupt.
Lower Layer (Interrupt)
If we’ve reached the end of the string, set usart2String to NULL.
Acknowledge that the UART received the interrupt.
Send the character pointed to by the string.
Increment the pointer.
Both the upper and lower layers increment the pointer. We need to
be very careful when it comes to enabling the interrupt to make sure
both layers don’t try to use the pointer at the same time. The upper
layer won’t do anything until usart2String == NULL, and the lower
layer sets usart2String to NULL only when it has run out of data and
disables the UART2 interrupt. The upper layer protects itself by not
enabling interrupts until after it performs the increment. Thus, the
interrupt routine cannot monkey with the code.
This analysis is extremely important. When it’s not done or not
done properly, the program will fail, and the failures will occur at
random times with random results. These results pose an extremely
difficult, debug-resistant problem.
I actually spent about three years finding one of these bugs. The
problem occurred only for one customer and only about once every
two months. We were completely unable to reproduce it in the lab.
Fortunately, the customer was very mellow and willing to work with
us on the solution. Later in this chapter, we’ll explore what happens
when this analysis is not done and consider some techniques for
diagnosing interrupt-related bugs.
Listing 10-1 contains the interrupt-driven serial I/O program.
/**
* @brief
Write Hello World to the serial I/O.
* Use interrupts instead of polling.
*/
#include <stdbool.h>
#include "stm32f0xx_nucleo.h"
#include "stm32f0xx.h"
const char hello[] = "Hello World!\r\n";
// The message to
send
int current; // The character in the message we are sending
UART_HandleTypeDef uartHandle;
// UART initialization
... Error_Handler same as Listing 9-3 ...
const char* volatile usart2String = NULL;
// The string
we are sending
/**
* Handle the USART2 interrupt.
*
* Magically called by the chip's interrupt system.
* Name is fixed because of the startup code that
* populates the interrupt vector.
*/
void USART2_IRQHandler(void)
{
if ((uartHandle.Instance->ISR & USART_ISR_TXE) != 0) {
// This should never happen, but we don't want to
crash if it does.
if (usart2String == NULL) {
// Turn off interrupt.
uartHandle.Instance->CR1 &= ~(USART_CR1_TXEIE);
return;
}
if (*usart2String == '\0') {
usart2String = NULL;
// We're done with
the string.
// Turn off interrupt.
uartHandle.Instance->CR1 &= ~(USART_CR1_TXEIE);
return;
}
uartHandle.Instance->TDR = *usart2String; // Send
character to the UART.
++usart2String;
// Point to next
character.
return;
}
// Since the only interrupt we enabled was TXE, we should
never
// get here. When we do enable other interrupts, we need
to put
// code to handle them here.
}
/**
* Our version of puts
*
* Outputs the exact string given to the output
*
* @param str String to send
*
* @note Assumes that str is not null and not
* pointing to the empty string
*/
void myPuts(const char* str)
{
// If someone is sending a string, wait for it.
while (usart2String != NULL)
continue;
// Tell the interrupt route what string to use.
usart2String = str;
uartHandle.Instance->TDR = *usart2String; // Send
character to the UART.
++usart2String;
// Point to next character.
// Enable the interrupt.
uartHandle.Instance->CR1 |= USART_CR1_TXEIE;
}
... led2_Init and uart2_Init, same as Listing 9-3 ...
int main(void)
{
HAL_Init(); // Initialize hardware.
led2_Init();
uart2_Init();
// Tell the chip that we want the interrupt vector
// for USART2 to be enabled.
NVIC_EnableIRQ(USART2_IRQn);
}
// Keep sending the message for a long time.
for (;;) {
myPuts(hello);
HAL_Delay(500);
}
... HAL_UART_MspInit and HAL_UART_MspDeInit, same as Listing
9-3 ...
Listing 10-1: 10.serial.int/main.c
Program Details
Listing 10-1 looks a lot like the serial I/O program from Chapter 9,
because setting up the I/O system is the same, with a lot of extra
little details. But in this case, we added something new:
int main(void)
{
HAL_Init(); // Initialize hardware
led2_Init();
uart2_Init();
// Tell the chip that we want the interrupt vector
// for USART2 to be enabled.
NVIC_EnableIRQ(USART2_IRQn);
The NVIC_EnableIRQ function initializes the nested vectored
interrupt controller (NVIC), which is a bit of hardware that decides
what the processor does when it receives an interrupt and enables
the USART2 interrupt. When the processor is reset, it turns off all
interrupts, so we need to tell it that we want USART2 to interrupt it.
Now let’s look at the myPuts function, which sends a string (instead
of a single character, like myPutchar from Chapter 9) to the serial
device:
void myPuts(const char* str)
{
// If someone is sending a string, wait for it.
1
while (usart2String != NULL)
continue;
// Tell the interrupt route what string to use.
2
usart2String = str;
3 uartHandle.Instance->TDR = *usart2String; // Send
character to the UART.
++usart2String;
// Point to next character.
// Enable the interrupt.
4
}
uartHandle.Instance->CR1 |= USART_CR1_TXEIE;
The first thing we do is wait for the previous string to finish 1. We
know that if usart2String is not NULL, the interrupt routine is active
and we should wait until the previous string is transmitted. When it
becomes NULL, the interrupt routine is inactive and we can start our
transmission.
When we do get our turn, we tell the interrupt function what string
we are transmitting 2, and then we transmit the first character 3. As a
final step, we enable the transmit data buffer empty interrupt 4.
Several symbols control what interrupts are enabled. The
USART_CR1_TXNEIE bit tells the UART to interrupt when the transmit
data buffer is empty. Here are some other symbols to note:
USART_CR1_IDLEIE
IDLE interrupt enable
USART_CR1_RXNEIE
Receive interrupt enable
Transmission complete interrupt enable (interrupt
when the character has gone out, not when we first load a character
into the transmission register)
USART_CR1_TCIE
USART_CR1_PEIE
Parity error interrupt enable
Once we send the first character, the TDR is filled. When it is
transferred to the TSR, the TDR will be empty and we’ll get an
interrupt. From here on, the interrupt routine does the work.
The actual interrupt routine is as follows:
1
void USART2_IRQHandler(void)
{
2
if ((uartHandle.Instance->ISR & USART_ISR_TXE) != 0) {
// This should never happen, but we don't want to
crash if it does.
3
if (usart2String == NULL) {
// Turn off interrupt.
uartHandle.Instance->CR1 &= ~(USART_CR1_TXEIE);
return;
}
4 if (*usart2String == '\0') {
usart2String = NULL;
// We're done with
the string.
// Turn off interrupt.
uartHandle.Instance->CR1 &= ~(USART_CR1_TXEIE);
return;
}
5 uartHandle.Instance->TDR = *usart2String; // Send
character to the UART.
6
++usart2String;
return;
// Point to next character.
}
// Since the only interrupt we enabled was TXE, we should
never
// get here. When we do enable other interrupts, we need
to put
// code to handle them here.
}
The function declaration uses a magic name that identifies it as
the interrupt routine 1.
If the function gets called, we know we have an interrupt from
USART2, but we don’t know what type of interrupt it is because the
USART has multiple types of interrupts:
USART_ISR_TXE
TDR empty
USART_ISR_CTSIF
USART_ISR_TC
CTS interrupt
Transmission complete
USART_ISR_RXNE
Receive data register not empty (data ready to be
read)
USART_ISR_ORE
Overrun error detected
USART_ISR_IDLE
Idle line detected
USART_ISR_FE
Framing error
USART_ISR_PE
Parity error
USART_ISR_NE
Noise flag
USART_ISR_CMF
Character match
USART_ISR_TXE
Receiver timeout
All of these interrupts will result in a call to USART2_IRQHandler.
First, we need to check whether we have a transmit buffer empty
interrupt 2. Our interrupt function should never be called with
usart2String set to NULL, but “should” and “reality” are vastly
different, so we put in a little bit of paranoia to make sure we don’t
crash if something goes wrong 3. The variable usart2String should
never be NULL at this point, but if it is, we don’t want to cause trouble.
Without that check, we might try to deference a NULL pointer 4.
Dereferencing a NULL pointer is illegal, and the STM32 is nice
enough to have hardware to check for this condition. When it occurs,
the STM32 generates a memory fault interrupt. In other words, the
interrupt handler is being interrupted, and control transfers to the
memory fault interrupt handler. However, we haven’t written one, so
the default handler is executed. As mentioned previously, the default
handler locks up the system until you reset it. To protect ourselves
against an improper usart2String, when we see it, we do the safest
thing, which is to turn off the interrupt and do nothing else 3.
Next, we check to see whether we’ve run out of string. If we have,
we NULL out the string to signal to the top level that we’re done and to
turn off interrupts. Otherwise, we know we have data for the UART
and that the TDR is empty, so we dump a character into it 5. Once
we’ve sent the character, we need to point to the next one for the
next time we get interrupted, and then return to the main program 6.
At this point, the TDR is full, and the UART is sending characters.
The interrupt route has nothing more to do, so it will return and
normal execution will resume. When the character is sent and the
TDR is empty, we’ll get another interrupt, which will continue until we
run out of string and turn off the interrupt.
NOTE
The ARM chip is nice in that an ordinary procedure can serve
as an interrupt routine. The chip does the saving and
restoring of all the state needed to execute the routine safely.
Other chips are not so nice. For example, the PIC family of
processors requires the use of a keyword interrupt (a PIC
extension) before each interrupt routine: interrupt
PIC_GPIO_Interrupt(void).
The hardware engineers at STMicroelectronics have helpfully
explained this process with a diagram (see Figure 10-2).
Figure 10-2: USART interrupt mapping
This diagram shows that if the TCIE (transmit character interrupt
enable) bit is on 1 and a character has been transmitted (TC) 2, the
output of the AND gate is true 3. This result is combined with the
output of three other interrupts, and if any one is true (OR gate), the
result 4 is true. Then that result is combined with the output of
another OR gate 5 for all the other signals, and the result of the last
OR gate is the USART interrupt signal. Note that the diagram is
meant to simplify this process. If you want to know what the alphabet
soup of inputs mean, read the 800-page reference manual for this
processor.
Interrupt Hell
Interrupts are extremely powerful tools when it comes to controlling
hardware as well as dealing with events in real time. However, using
interrupts can cause a number of unique and difficult problems to
occur.
First, they can interrupt normal program flow at any time. For
example, consider the following code:
i = 5;
if (i == 5) {
What’s the value of i after this statement is executed? The answer
is obviously 5, unless an interrupt routine just executed and modified
it:
i = 5;
←----- interrupt triggers, i set to 6.
if (i == 5) { // No longer true
Second, interrupt routines execute asynchronously, which means
they execute whenever they feel like it, so any bugs caused by
poorly written interrupt routines can be difficult to reproduce. I’ve
seen cases where a bug occurred only randomly after about two
weeks of testing because the interrupt had to occur exactly when
one of two instructions was executing—that’s two out of the tens of
thousands in the code. It took a lot of testing to stumble upon this
problem.
Because of the inherent difficulties with interrupt routines, it pays
to give them a lot of respect. The most important design rule when
dealing with interrupt routines is to keep them small and simple,
because the less the routine does, the less there is that can go
wrong. It’s better to leave the “thinking” to the higher-level code
where debuggers work nicely and where reproducibility is not a
problem.
Interrupt routines also need to execute quickly, because while an
interrupt routine is executing, other interrupts are held off until the
routine is finished. If you take a long time in an interrupt routine that’s
reading a character from UART1, another device, such as UART2,
might lose data because its interrupt couldn’t get serviced in time.
Using a Buffer to Increase Speed
The system we just used has some limits. It can transmit only one
message at a time. Suppose we wanted to output multiple short
messages. Each one would have to wait until the previous one
finished. Here’s an example:
myPuts("There are ");
if (messageCount == 0)
myPuts(" no ");
// Blocks waiting on previous
message
else
myPuts(" some ");
// Blocks waiting on previous
message
myPuts("messages waiting\r\n"); // Blocks waiting on previous
message
One solution to this problem is to create a buffer to hold the
character data until the interrupt routine can service it. Doing that
adds complexity to the application, but it increases the speed at
which your top-level program can send data.
Using serial I/O means considering the general trend of speed
versus simplicity. The polling version was very simple and slow. The
single string interrupt version was faster but more complex. The
buffer system we are using now is much faster and much more
complex. This trend is true for most programs.
For this problem, let’s go back to the buffer. We’ll use a circular
buffer that has the following basic structure:
struct circularBuffer {
uint32_t putIndex;
character
uint32_t getIndex;
character
uint32_t nCharacters;
buffer
char data[BUFFER_SIZE];
}
// Where we will put the next
// Where to get the next
// Number of characters in the
// The data in the buffer
It’s called a circular buffer because the indices wrap. In other
words, after a character is put in the last element of data, the
putIndex will wrap from 7 (BUFFER_SIZE-1) to 0.
Graphically, this looks like Figure 10-3.
Figure 10-3: A circular buffer in action
Our implementation is going to contain a deliberate nasty mistake,
so we can look at techniques and procedures for finding such
mistakes in a small, controlled program. I’ll show the symptoms of
the bug, the diagnostic techniques used to locate it, and the fix as we
go through the program.
The first time I encountered a problem like this was about 30 years
ago. It wasn’t in a 200-line demonstration program; it was in the BSD
Unix kernel in a serial module with tens of thousands of lines. It
occurred about once every three to seven days randomly and took
three engineers two months to find it. To make matters worse, it was
processor-dependent and didn’t occur on the VAX processor that ran
the original BSD.
The top-level program (the sender) puts data in the buffer. The
lower-level interrupt routine (the receiver) removes data from the
buffer.
In pseudocode, the sender’s job is as follows:
If the buffer is full, wait.
Put a character in the buffer at putIndex.
Move putIndex up one, wrapping if needed.
Increment the number of characters in the buffer.
And the receiver’s job is as follows:
Get a character from the buffer at getIndex.
Increment getIndex, wrapping as needed.
Decrement the number of characters in the buffer.
Sending Function
To use a circular buffer, we have to go back to sending one character
at a time with another version of myPutchar. Let’s look at the code
doing the sending:
void myPutchar(const char ch)
{
// Wait until there is room.
1
while (buffer.nCharacters == BUFFER_SIZE)
continue;
2
3
buffer.data[buffer.putIndex] = ch;
++buffer.putIndex;
if (buffer.putIndex == BUFFER_SIZE)
buffer.putIndex = 0;
// We've added another character.
4
++buffer.nCharacters;
// Now we're done.
// Enable the interrupt (or reenable it).
5
}
uartHandle.Instance->CR1 |= USART_CR1_TXEIE;
In the beginning, we wait until there is room for at least one
character in the buffer 1. Then we dump the character in the buffer 2.
The putIndex advances by one and wraps back to 0 if necessary
3.The number of characters in the buffer has increased, so we
increment the nCharacters count in the buffer structure 4. Finally, we
enable the interrupt 5. If we are transmitting, the interrupt may
already be enabled. Enabling it again won’t cause problems.
Interrupt Routine
The interrupt routine reads the data from the buffer and transmits it
to the UART. If a character is in the buffer, the routine removes it and
sends it to the UART. If nothing is in the buffer, the routine turns off
the interrupt.
Here’s the code for this procedure:
void USART2_IRQHandler(void)
{
1
if ((uartHandle.Instance->ISR & USART_ISR_TXE) != 0) {
if (buffer.nCharacters == 0) {
// Turn off interrupt.
uartHandle.Instance->CR1 &= ~(USART_CR1_TXEIE);
return;
}
2
// Send to UART.
uartHandle.Instance->TDR =
buffer.data[buffer.getIndex];
3
++buffer.getIndex;
if (buffer.getIndex == BUFFER_SIZE)
buffer.getIndex = 0;
}
4
--buffer.nCharacters;
5
if (buffer.nCharacters == 0)
uartHandle.Instance->CR1 &= ~(USART_CR1_TXEIE);
return;
}
// Since the only interrupt we enabled was TXE, we should
// never get here. When we do enable other interrupts,
// we need to put the code to handle them here.
First, we check to see whether the device has run out of data. If it
has, we shut down the interrupt until we get more data from the
upper level 1. Then we send the character 2, move the getIndex up
one, and wrap if needed 3. Next, we let the upper layer know we
have one less character 4. Finally, we shut down the interrupt if this
was the last character 5.
Full Program
Listing 10-2 shows the complete program.
/**
* @brief
Write Hello World to the serial I/O
* using a circular buffer.
*
* @note Contains a race condition to demonstrate
* how not do do this program
*/
#include <stdbool.h>
#include "stm32f0xx_nucleo.h"
#include "stm32f0xx.h"
const char hello[] = "Hello World!\r\n";
// The message to
send
int current; // The character in the message we are sending
UART_HandleTypeDef uartHandle;
#define BUFFER_SIZE 8
struct circularBuffer {
// UART initialization
// The data buffer size
uint32_t putIndex;
character
uint32_t getIndex;
character
uint32_t nCharacters;
buffer
char data[BUFFER_SIZE];
};
// Where we will put the next
// Where to get the next
// Number of characters in the
// The data in the buffer
// A simple, classic circular buffer for USART2
volatile struct circularBuffer buffer = {0,0,0, {'\0'}};
... Error_Handler from Listing 9-3 ...
/**
* Handle the USART2 interrupt.
*
* Magically called by the chip's interrupt system.
* Name is fixed because of the startup code that
* populates the interrupt vector.
*/
void USART2_IRQHandler(void)
{
if ((uartHandle.Instance->ISR & USART_ISR_TXE) != 0) {
if (buffer.nCharacters == 0) {
// Turn off interrupt.
uartHandle.Instance->CR1 &= ~(USART_CR1_TXEIE);
return;
}
// Send to UART.
uartHandle.Instance->TDR =
buffer.data[buffer.getIndex];
++buffer.getIndex;
if (buffer.getIndex == BUFFER_SIZE)
buffer.getIndex = 0;
--buffer.nCharacters;
if (buffer.nCharacters == 0)
uartHandle.Instance->CR1 &= ~(USART_CR1_TXEIE);
return;
}
// Since the only interrupt we enabled was TXE, we should
never
// get here. When we do enable other interrupts, we need
to put
// code to handle them here.
}
/**
* Put a character in the serial buffer.
*
* @param ch The character to send
*/
void myPutchar(const char ch)
{
// Wait until there is room.
while (buffer.nCharacters == BUFFER_SIZE)
continue;
buffer.data[buffer.putIndex] = ch;
++buffer.putIndex;
if (buffer.putIndex == BUFFER_SIZE)
buffer.putIndex = 0;
// We've added another character.
++buffer.nCharacters;
// Now we're done.
}
// Enable the interrupt (or reenable it).
uartHandle.Instance->CR1 |= USART_CR1_TXEIE;
/**
* Our version of puts
*
* Outputs the exact string given to the output
*
* @param str String to send
*
* @note Assumes that str is not null
*/
void myPuts(const char* str)
{
for (/* str set */; *str != '\0'; ++str)
myPutchar(*str);
}
... led2_init and uart2_init same as Listing 9-3 ...
int main(void)
{
HAL_Init(); // Initialize hardware.
led2_Init();
uart2_Init();
// Tell the chip that we want the interrupt vector
// for USART2 to be enabled.
NVIC_EnableIRQ(USART2_IRQn);
}
// Keep sending the message for a long time.
for (;;) {
myPuts(hello);
HAL_Delay(500);
}
... HAL_UART_MspInit and HAL_UART_MspDeInit same as Listing
9-3 ...
Listing 10-2: 10.serial.buffer.bad/src/main.c
The Problem
When we run the program, we expect to see the following:
Hello World!
Hello World!
Hello World!
Instead, we get this:
Hello World!
ello World!
Hello Wold!
Hello World!
There is no pattern to when this issue will occur, other than that
the more data we send to the buffer, the more likely we are to have a
problem.
With this tiny program, replicating that problem in the field is going
to be difficult because it requires very precise timing. It’s more likely
that after implementing and testing this code, we would incorporate
the module in another program that would make the timing more
likely. Timing bugs are notoriously difficult to cause on demand, but
there is one in this code.
We know that the busier the system is, the more likely it is that the
problem will happen. Plus, we have another clue—we haven’t been
able to catch it in the act, but afterward we looked at the debugger
and discovered the following:
nCharacters == 0
getIndex != putIndex
In a correctly working program, both of these conditions can never
be true. There are two ways of attacking this problem. The first is to
instrument the code and try to find out what is going on. The second
is to perform very detailed analysis of any data shared between the
upper and lower layers and the code that manipulates this data. Let’s
do both.
Instrumenting the Code
Instrumenting the code means putting in temporary debugging
statements that will help find a problem. With most code, this means
writing printf statements to output intermediate data that we can
check as the program progresses. Sometimes data is printed to a
logfile that can be analyzed after the problem occurs. Neither of
these options is viable for our embedded program. We can’t use
printf because the output would go to the serial console, and that’s
the code with the bug. We can’t write a logfile because we don’t
have a filesystem to write logging information to.
We need to use a log buffer that will store the last 100 events.
When we encounter a problem, we can go back and look at the
events to see what led up to the problem. The log records the
relevant data (getIndex, putIndex, nCharacters) and the line number
of the call to the event-logging code.
When the problem occurs and we get a chance to stop the
program in the debugger, we can look through the log. If we are
lucky, we should be able to find a few log entries where at line X the
buffer information was consistent and at line Y it was screwed up,
which reveals that the problem occurred between lines X and Y.
Listing 10-3 shows the code to record an event. Add this code
after the other definitions and variable declarations.
#define N_EVENTS 100
// Store 100 events.
uint32_t nextEvent = 0;
// Where to put the
next event
struct logEvent debugEvents[N_EVENTS]; // The log data
void debugEvent(const uint32_t line)
{
debugEvents[nextEvent].line = line;
debugEvents[nextEvent].putIndex = buffer.putIndex;
debugEvents[nextEvent].getIndex = buffer.getIndex;
debugEvents[nextEvent].nCharacters = buffer.nCharacters;
++nextEvent;
if (nextEvent == N_NEVETS)
nextEvent = 0;
}
Listing 10-3: The event recorder
This event recorder contains the same type of bug we’re trying to
find, but for now, we’ll assume that it works well enough for us to
locate the problem.
Now we need to put in a few calls to the debugEvent function to see
whether we can spot the error. Since nCharacters is driving us nuts,
we put a call to debugEvent before and after each operation we
perform on nCharacters:
void USART2_IRQHandler(void)
--snip-debugEvent(__LINE__);
--buffer.nCharacters;
debugEvent(__LINE__);
void myPutchar(const char ch)
--snip-debugEvent(__LINE__);
++buffer.nCharacters;
debugEvent(__LINE__);
We also put a consistency check at the beginning of myPutchar to
make sure the buffer is sane. Specifically, if we see the condition
where the buffer is inconsistent (nCharacters == 0 and getIndex !=
putIndex), we invoke the Error_Handler function to stop the program:
void myPutchar(const char ch)
{
if ((buffer.nCharacters == 0) && (buffer.getIndex !=
buffer.putIndex))
Error_Handler();
Let’s start the program under the debugger with a breakpoint at
Error_Handler and see if we can catch the error. Eventually, we hit
the breakpoint and, using the debugger, examine the debugEvents.
Looking back through the traces using the debugger, we find the
following:
Line 119: nCharacters
== 3
Line 89: nCharacters
== 3
Line 91: nCharacters
== 2
Line 121: nCharacters
== 4
Why did nCharacters jump by 2 between the last two events?
Here are the relevant lines:
77 void USART2_IRQHandler(void)
--snip-89
debugEvent(__LINE__);
90
--buffer.nCharacters;
91
debugEvent(__LINE__);
and:
106 void myPutchar(const char ch)
--snip-119
debugEvent(__LINE__);
120
++buffer.nCharacters;
121
debugEvent(__LINE__);
Something is wrong with line 90 or 120, which also tells us
something important. After line 119 and before line 121, an interrupt
occurred. We’ve now pinpointed the error to a couple lines of code
and an interrupt. Let’s shift gears and use code analysis to reach the
same conclusion. We’re exploring both methods because sometimes
one method works and the other doesn’t.
Analyzing the Code
The other way to figure out the problem is to analyze what is going
on and try to identify potential problem spots. The analysis starts by
identifying the shared data between the upper and lower layers—in
other words, the buffer:
struct circularBuffer {
uint32_t putIndex;
character
uint32_t getIndex;
character
uint32_t nCharacters;
buffer
char data[BUFFER_SIZE];
};
// Where we will put the next
// Where to get the next
// Number of characters in the
// The data in the buffer
Neither putIndex nor getIndex should cause a problem, since
they’re used by only one layer each (the upper and lower layer,
respectively). The data array is shared by both layers, but it’s written
by the upper layer and read by the lower level, so each layer has a
distinct job when it comes to that array. In addition, putIndex controls
the portion of the array the upper layer uses, and getIndex controls
the portion the lower layer uses. They point to different elements of
the array, and nothing going into or out of data could affect the
indices or character counter. The data array is not the problem.
All that’s left is nCharacters, which the upper layer increments and
the lower level decrements, so there are two potential problem lines.
One is in the interrupt routine:
--buffer.nCharacters;
And the other is in myPutchar:
++buffer.nCharacters;
These are the same two lines our instrumented code indicated
might be a problem.
Closely Examining the Code
Let’s see exactly what happens when the following line is executed:
++buffer.nCharacters;
Here is the assembly code (comments added) for this line:
120:../src/main.c *** ++buffer.nCharacters;
404
loc 2 118 0
405 005c 094B
ldr r3, .L22
; Load r3 with the
address in .L22,
; which happens to be
"buffer".
406 005e 9B68
ldr r3, [r3, #8] ; Get the value of
; buffer.nCharacters.
407 0060 5A1C
1 adds r2, r3, #1 ; Add 1 to r3 and store
the result in r2.
408 0062 084B
ldr r3, .L22
; Get the address again.
409 0064 9A60
str r2, [r3, #8] ; Store
buffer.nCharacters.
This code loads the value of nCharacters into register r3,
increments it, and sticks it back in nCharacters. Interrupts can
happen at any time, like right after the value is loaded into r3 1,
which causes the following to happen (assuming nCharacters is 3):
At line 406, register r3 gets the value of nCharacters (r3
== 3).
Just before the instruction at line 407, an interrupt occurs.
The interrupt routine reads nCharacters (it’s 3).
It decrements it, so the value of nCharacters is now 2.
The interrupt routine completes and returns control to line 407.
The instruction at line 407 adds 1 to register r3 and sticks the result
in r2 (r3 contains 3, r2 contains 4).
Line 409 stores the value of r2 into nCharacters, which should be 3,
but it’s now 4.
At line 407, the program assumes that r3 has the correct value of
nCharacters, but it doesn’t.
The register r3 doesn’t have the correct value of nCharacters
because an interrupt occurred at just the right time and the variable
was modified. We failed to protect the consistency of shared data.
The upper layer was modifying nCharacters while the lower layer
was modifying it at the same time.
If the interrupt occurs between some other instructions, the
problem does not occur. This problem is random and happens
infrequently, making it one of the more difficult problems to solve.
Fixing the Problem
The solution is to prevent the interrupt routine from modifying
nCharacters while we are modifying it. To do that, we turn off
interrupts before the increment and turn them on afterward:
119
120
121
__disable_irq();
++buffer.nCharacters;
__enable_irq();
Keep the amount of time interrupts are turned off short. If
interrupts are turned off for a long period of time, you might miss an
interrupt and drop data.
In the interrupt routine, we decrement nCharacters, so don’t we
need to protect that with a __disable_irq and an __enable_irq? We
don’t, because when an interrupt occurs, the system automatically
performs the following steps:
It disables interrupts for this level interrupt and lower. Higher-level
interrupts can interrupt our interrupt routine, but lower ones cannot.
It saves the state of the machine, including all general-purpose
registers and status registers.
It calls the interrupt function.
When the interrupt routine returns, the system then performs these
steps:
It restores the state of the machine.
It turns the interrupts back on.
It returns control to the upper-level code.
A lot of bookkeeping needs to be done at the start and end of an
interrupt routine. Fortunately, the designers of the ARM processor
family decided to do it all in hardware. Other processors may not be
so nice.
Summary
Interrupts allow you to respond to input and output requests in real
time. They also allow you to screw up your program in strange and
random ways. Be sure to keep interrupt routines and code that
accesses shared data as simple and clear as possible. Spending
extra time making sure that interrupt-related code is written properly
will save you a tremendous amount of debugging time later.
Programming Problems
Create an interrupt routine that reads characters from the serial port.
Add an interrupt routine to service a button push and change the
message when it occurs.
Browse the HAL library and find out how __disable_irq is
implemented.
11
THE LINKER
This chapter explores in extreme
detail how the linking process
works. The linker’s job is to take all
the object files that make up a
program and put them together. The
linker must know exactly what the memory
layout of your device is so it can fit the program
into memory. It’s also responsible for connecting
external symbols in one file with their actual
definitions in another. This process is called
linking symbols.
It is the linker that knows exactly where things are. On big systems
where we have gigabytes of memory, this doesn’t matter that much,
but on a microcontroller with 16KB of RAM, knowing what every byte
is used for is important.
Let’s take a look at a typical problem that shows how better
understanding the linker can be helpful. Say you have a system in
the field that’s crashing. When it crashes, it prints a stack trace
showing the call stack that details the faults leading up to the
problem (see Listing 11-1).
#0 0x0000000000001136 in ?? ()
#1 0x0000000000001150 in ?? ()
#2 0x0000000000001165 in ?? ()
#3 0x000000000000117a in ?? ()
#4 0x00007ffff7de50b3 in __libc_main (main=0x555555555168)
at ../csu/libc-start.c:308
#5 0x000000000000106e in ?? ()
Listing 11-1: A sample stack trace
This tells you that the fault was in the function whose address is
0x0000000000001136.
Since you didn’t write your program using absolute addresses, the
name of the function would be more useful to you. That’s where the
linker map comes in.
Listing 11-2 shows an excerpt from the map of this program.
.text
0x0000000000001129
0x0000000000001129
0x000000000000113e
0x0000000000001153
0x0000000000001168
0x58 /tmp/cctwz0VM.o
three
two
one
main
Listing 11-2: An excerpt from the map of the program in Listing 111
We aborted at 0x1136 in Listing 11-1. In Listing 11-2, function three
starts at 0x1129 and goes on until the next function at 0x113e. In fact,
we are 13 bytes into function three, so we are somewhere near the
start of the function.
Listing 11-1 shows that function three was called by someone at
address 0x1150. Listing 11-2 shows that function two goes from
0x113e to 0x1153, so it called three. Using a similar analysis, we can
tell that two was called by one, and one was called by main.
The Linker’s Job
The linker’s job is to take the object files that make up the program
and put them together to form a single program file. An object file
contains code and data organized into named sections. (The actual
names of the sections are compiler-dependent. Advanced
programmers can even make up their own names.)
The sections in the object file have no fixed address. They are
said to be relocatable, which means they can be put almost
anywhere, but the linker puts them in a specific place in memory.
The ARM chip contains two types of memory: random access
memory (RAM) and flash. RAM is where the variables go. One
problem with this type of memory is that all the data is lost when the
power goes off. Flash memory, for all practical purposes, is a type of
read-only memory. (You can write to it if you’re very clever with the
I/O system.) The data in flash memory is not erased when the
system loses power.
The linker takes the data from all the object files and packs it into
the RAM. It then splits up the remaining RAM into the stack and the
heap. The code and read-only data get put in the flash memory. This
description is somewhat oversimplified, but we’ll leave the details for
later in this chapter.
The final thing the linker does is write out a map file telling you
where it put everything. Why do we care where the linker puts
things? After all, the principal thing is that the program gets put in the
memory. When it comes to debugging in the field, however, we need
to know where things are. Also, there are times when we may want
to define specialized memory sections or attach additional memory
chips to our system.
And then there’s the big reason: the firmware upgrade. It has been
said that the hardware people have to get the hardware right the first
time. The only thing the software people have to get right is the
firmware upgrade. But how do you use the running software to
replace the running software? And more importantly, how do you do
it without bricking your system? (Bricking refers to a failed upgrade
process that turns your system into something about as useful as a
brick.) That involves some tricky programming, which I’ll explain near
the end of this chapter.
Compilation and Linking Memory Models
A memory model describes how memory is specified in a system.
Basically, memory is divided into named sections. The C standard,
the object files, and the ARM chip all use different names to describe
their memory. Worse, it is possible to define custom names through
C language extensions. The linker must then be told what to do with
those custom sections.
The Ideal C Model
Everything in a C program ideally will go into one of the standard
sections: text, data, or bss.
Read-only instructions and read-only data go in the text section.
Here, both the code for main and the text string (read-only) go in the
text section:
int main() {
doIt("this goes in text too");
return();
}
Initialized data (initialized global variables) goes in the data
section:
int anExample = 5;
Uninitialized data (uninitialized global variables) goes in the bss
section:
int uninitialized;
Technically, bss is uninitialized according to the standard.
However, in every implementation I’ve seen of a C programming
system, the bss section is initialized to zero.
The data for these sections is allocated at compile time. The C
compiler will spit out an object file that says, “I need this much text,
and here are the contents. I need this much data, and here are the
contents. I need this much bss, with no contents specified.”
The size command shows how much space your program is using
in each section.
$ size example.o
text
data
481
4
bss
4
dec
489
hex
1e9
filename
example.o
The object file uses 481 bytes of text, 4 bytes of data, and another
4 bytes of bss. The total number of bytes for all three is 489, or 1e9
in hexadecimal.
The ideal C model has two other memory sections. However, they
are not allocated by the compiler; they are allocated by the linker.
These are the stack and the heap. The stack is used for local
variables and is dynamically allocated as procedures are called. The
heap is a pool of memory that can be dynamically allocated and
freed (more on the heap in Chapter 13).
The compiler takes our variable definitions and assigns them to
memory sections. Those sections use a different namespace from
the ideal C memory section names. In some cases the names are
similar, and in some cases they are completely different. Different
compilers and even different versions of the same compiler might
use different names for the sections.
Listing 11-3 shows a program that contains every type of data
we’ve discussed.
/**
* A program to demonstrate various types of variable
* storage, so we can see what the linker does with them
*/
int uninitializedGlobal;
// An uninitialized global
(section bss)
int initializedGlobal = 1; // An initialized global (section
data)
int initializedToZero = 0; // An initialized global (section
bss)
// aString -- initialized variable (section bss)
// "A string." -- constant (section text)
const char* aString = "A string."; // String (pointing to
ready-only data)
static int uninitializedModule;
// An uninitialized
module-only symbol
// (section bss)
static int initializedModule = 2; // An initialized moduleonly symbol
// (section data)
int main()
{
int uninitializedLocal;
// A local variable (section
stack)
int initializedLocal = 1234; // An initialized local
(section stack)
static int uninitializedStatic;
// "Uninitialized"
static (section bss)
static int initializedStatic = 5678; // Initialized
static (section data)
}
while (1)
continue; // Not much logic here
Listing 11-3: Examples of data types
Let’s see what our GNU GCC compiler does with our sample
program from Listing 11-3—specifically, how it really allocates
memory for the various types of variables and data.
First, here’s initializedGlobal from Listing 11-3:
int initializedGlobal = 1; // An initialized global (section
data)
16
17
18
.global initializedGlobal
.data
.align 2
21
22 0000 01000000
initializedGlobal:
.word
1
The .global directive tells the assembler that this is a global
symbol and can be referred to by other object files. The .data
directive tells the assembler that what follows goes in the .data
section. So far, we’re following the ideal C memory model naming
convention.
The .align directive tells the assembler that the following data
should be aligned on a 4-byte boundary. (The last 2 bits of the
address must be zero, thus the .align 2.) Finally, there is the
initializedGlobal label and the .word 1 data.
When a variable is initialized to zero (initializedToZero in Listing
11-3), we see slightly different code:
int initializedToZero = 0; // An initialized global (section
bss)
23
24
25
28
29 0000 00000000
.global initializedToZero
.bss
.align 2
initializedToZero:
.space 4
Here, the compiler uses the .bss directive to put the variable in the
bss section. It also uses the .space directive instead of .word, which
tells the assembler that this variable takes up 4 bytes of space and
to initialize those bytes to zero.
Now let’s deal with an uninitialized global variable
(uninitializedGlobal from Listing 11-3):
int uninitializedGlobal; // An uninitialized global (section
bss)
15
uninitializedGlobal,4,4
.comm
The .comm section tells the assembler to define a symbol that is 4
bytes long and aligned on a 4-byte boundary. The symbol goes into
a memory section called COMMON. In this case, the section name does
not follow the ideal C memory model naming convention.
The statement that defines aString in Listing 11-3 also defines a
string constant ("A string."). The string constant is read-only, while
the pointer (aString) is read/write. Here’s the generated code:
const char* aString = "A string."; // String (pointing to
read-only data)
30
31
32
33
34 0000 41207374
34
72696E67
34
2E00
35
36
39
40 0004 00000000
.LC0:
.global aString
.section
.rodata
.align 2
.ascii
"A string.\000"
.data
.align
2
.word
.LC0
aString:
First, the compiler must generate the constant for "A string.". It
generates an internal name (.LC0) for this constant, and the contents
of this constant are generated with the .ascii assembler directive.
The .section .rodata directive puts the constant in a linker section
called .rodata. (The ideal C memory model calls this text.)
Now we come to the definition of the variable itself, aString. The
.data directive puts it in the data section. Since it’s a pointer, it is
initialized with the address of the string (namely, .LC0).
The last major section is the one that contains the code. The ideal
C memory model calls this text. Here’s the assembly listing for the
start of main:
int main()
52
.text.main,"ax",%progbits
53
54
.section
.align 1
.global main
60
67 0000 80B5
main:
push
{r7, lr}
The name for this section is text.main. In this case, the compiler
decided to take the text prefix and add on the name of the module
(main) to form the section name.
We’ve covered the major memory sections that the compiler
knows about, so next let’s look at the code generated by some other
types of declarations. The static keyword used outside any
procedure indicates a variable that can be used only within the
current module.
Here’s the code that creates the initializedModule variable from L
isting 11-3:
static int initializedModule = 2; // An initialized moduleonly symbol
// (section data)
46
47
50
51 0008 02000000
.data
.align 2
initializedModule:
.word 2
It looks pretty much the same as initializedGlobal, only the
.global directive is missing.
Similarly, the uninitializedModule variable from Listing 11-3 looks
much like uninitializedGlobal, only again, we are missing the
.global directive:
static int uninitializedModule; // An uninitialized moduleonly symbol
// (section bss)
41
42
43
44 0004 00000000
.bss
.align 2
uninitializedModule:
.space 4
Now we come to the variables declared static inside a procedure.
These variables are allocated at compile time in main memory, but
their scope is local to the procedure where they are defined.
Let’s start with the uninitializedStatic variable from Listing 11-3:
static int uninitializedStatic; // "Uninitialized" static
(section bss)
94
95
96
97 0008 00000000
.bss
.align 2
uninitializedStatic.4108:
.space 4
It looks like any uninitialized local, except the compiler changed
the name of the variable from uninitializedStatic to
uninitializedStatic.4108. Why? Each block, or section of code
enclosed in curly brackets ({}), can have its own
uninitializedStatic variable. The scope of the C variable name is
local to the block in which it is defined. The scope of the assembly
language is the entire file, so the compiler makes the name unique
by appending a unique random number to the end of the variable
declaration.
Similarly, the initializedStatic variable looks pretty much like its
global brother:
static int initializedStatic = 5678; // Initialized static
(section data)
88
89
92
93 000c 2E160000
.data
.align 2
initializedStatic.4109:
.word 5678
In this case, the .global is missing and the name has been
transformed by the addition of a suffix.
Nonstandard Sections
We’ve discussed the standard memory sections that the GNU
toolchain generates. The STM32 chips use a custom section named
.isr_vector, and it must be the first data programmed into the flash
memory because the ARM hardware uses this section of memory to
service interrupts and other hardware-related functions. Table 11-1,
adapted from the STM32F030x4 manual, describes the interrupt
vector.
Table 11-1: Interrupt Vector Documentation (Truncated)
Posi Pri Type of
tion orit priority
y
Acro Description
nym
Addre
ss
—
—
0x0000
—
—
Reserved
0000
—
–3
Fixed
Rese Reset
t
0x0000
0004
—
–2
Fixed
NMI
0x0000
0008
—
–1
Fixed
Hard All class of fault
Fault
—
—
—
0
3
5
6
7
1
2
Non-maskable interrupt. The RCC Clock Security
System (CSS) is linked to the NMI vector.
000C
Settable SVC System service call via SWI instruction
all
0x0000
Settable Pend Pendable request for system service
SV
0x0000
Settable SysT System tick timer
ick
0x0000
Settable WW Window watchdog interrupt
DG
0x0000
Rese
rved
9
0x0000
002C
0038
003C
0040
0x0000
0044
Settable RTC RTC interrupts (combined EXTI lines 17, 19, and 20)
0x0000
0048
The STM firmware file startup_stm32f030x8.s (an assembly
language file) contains the code that defines this table. Here’s an
excerpt:
131
134
135
136
137 0000 00000000
138 0004 00000000
.section .isr_vector,"a",%progbits
g_pfnVectors:
.word _estack
.word Reset_Handler
139 0008 00000000
140 000c 00000000
.word
.word
NMI_Handler
HardFault_Handler
The first line tells the linker that the table goes in a section called
.isr_vector. This section is highly hardware-specific, precisely
defined, and must go in exactly the right place. Otherwise, nothing
will work.
The code defines an array called g_pfnVectors that contains the
following:
The address of the initial stack
The address reset handler
The address of the non-maskable interrupt (NMI) handler
Other interrupt vectors, as described in Table 11-1
We’ll see how the linker handles this code in the next section.
The Linking Process
The compiler and assembler produced a set of object files that divide
up the code and data into the following sections:
text.<name>
rodata
data
Read-only data and code
Read-only data
Initialized data
Data initialized to zero (slightly different definition from the one
the ideal C memory model uses)
bss
COMMON
Uninitialized data
.isr_vector
Interrupt and reset handlers that must go in a specific
place
The linker is controlled by a script named LinkerScript.ld, which is
part of each STM32 Workbench project. The script tells the linker
that the system’s memory consists of two sections:
Flash, starting at 0x8000000, 64KB long
RAM, starting at 0x20000000, 8KB long
The linker’s job is to take the data from the object files and pack it
into memory via the following steps:
Put the .isr_vector section at the beginning of flash.
Put all the data from the .text.* sections into flash.
Put the .rodata section into flash.
Put the .data section into RAM, however the initializers for the .data
section go into flash (we’ll discuss this more later).
Put the .bss section into RAM.
Finally, load the COMMON section into RAM.
NOTE
There are some other steps in the linker script that are used
when switching between thumb and ARM mode programming
and for handling C++ constructors and destructors. We don’t
use these features here.
The .data section is the tricky one. Consider the declaration:
int initializedGlobal = 1234;
The linker allocates space in RAM for initializedGlobal. The
initializer (1234) goes into flash. At startup, the initializers are copied
as a block into RAM to initialize the .data section.
Symbols Defined by the Linker
During the linking process, the linker defines some important
symbols, including the following:
_sidata
Start of the initializers for the .data section in flash
_sdata
Start of the .data section in RAM
_edata
End of the .data section in RAM
_sbss
Start of the .bss and COMMON sections in RAM
_ebss
End of the .bss and COMMON sections in RAM
_estack
Last address of RAM
Upon reset, the code in startup_stm32f030x8.S executes and
performs the following steps:
Load the stack register with _estack. The stack will grow down.
Fill the section of memory from _sdata to _edata with the initialization
values stored starting at _sidata.
Zero the memory between _sbss and _ebss.
Call the function SystemInit to initialize the STM32 chip.
Call the function __libc_init_array to initialize the C library.
Call main.
Loop forever.
Relocation and Linking Object Files
There are two types of object files: absolute and relocatable. An
absolute file defines everything in terms of a fixed (absolute)
address. In other words, the symbol main is at 0x7B0, and it cannot be
set to another address by the linker or any other tool.
A relocatable object file is designed to have the location of its data
move around (relocate). For example, the main.c source file
produces the main.o object file. If we look at the assembly listing, we
see the symbol main is defined at 0000:
52
--snip-60
.section
main:
.text.main,"ax",%progbits
61
--snip-67 0000 80B5
.LFB0:
push
{r7, lr}
This symbol is relative to the section where it resides (namely,
text.main). Because the object file is relocatable, text.main can be
located anywhere in memory. In this case, the linker decided to put it
in flash memory at 0x00000000080007b0. (We found this value using
the linker map, which is discussed in the next section.) Because main
is at the beginning of this segment, it gets the value
0x00000000080007b0.
As part of the linker process, the linker takes the relocatable object
files and assigns them a location in the memory. The result is a
program file with absolute addresses for each object file.
The linker also links the object files together. For example, the
startup_stm32f030x8.S file calls main. The problem is that this code
doesn’t know where main is. It’s defined in another module (main.o),
so at link time, the linker will see that startup_stm32f030x8.S needs
to know where the main symbol is defined and will perform a link
operation between the startup_stm32f030x8.S call to main and the
absolute address of main (0x7B0).
A library is a collection of object (.o) files in an archive format
(similar to .zip, but not as sophisticated). The linker script tells the
linker to include the libraries libc.a, libm.a, and libgcc.a. For example,
the libm.a library contains the following:
s_sin.o
s_tan.o
s_tanh.o
s_fpclassify.o
s_trunc.o
s_remquo.o
--snip--
When processing a library, the linker will load an object file only if it
defines a symbol that your program needs. For example, if your
program uses the sin function, it will link in the object s_sin.o file that
defines this function. If you don’t use the sin function, then the linker
knows you don’t need the code in s_sin.o and therefore will not link
in the file.
The Linker Map
As the linker loads data into the program, it produces a map file
(Debug/output.map) that contains information about where our code
and data are. This map file is very complete and contains a lot of
useful information as well as a lot of stuff we don’t care about. For
example, it tells us what our memory configuration looks like, which
shows the various types of memory and their locations for our
processor:
Memory Configuration
Name
Attributes
FLASH
RAM
*default*
Origin
Length
0x0000000008000000 0x0000000000010000 xr
0x0000000020000000 0x0000000000002000 xrw
0x0000000000000000 0xffffffffffffffff
In this case, our chip has FLASH memory, which has the read (r)
and execute (x) attributes set. It starts at 0x8000000 and goes on for
0x10000 bytes. The RAM section starts at 0x20000000 and goes on for
only 0x2000 bytes. It is readable (r), writable (w), and executable (x).
As mentioned previously, the .isr_vector section is loaded first.
The linker map tells us where this is located:
.isr_vector
0x0000000008000000
0xc0
The address 0x8000000 is the start of flash. The hardware expects
the interrupt vector to be at this address, so that is a good thing. The
other bit of information is that this section is 0xc0 bytes long.
The main symbol is defined in src/main.o. It is part of the
.text.main segment and is located at 0x0000000008000138:
.text.main
0x0000000008000138
0x0000000008000138
0x60 src/main.o
main
It also contains a bit of code (0x60 bytes, which is large
considering Listing 11-3 is a nothing program).
We can also see where our global variables are located. For
example, here’s the location for uninitializedGlobal:
COMMON
0x0000000020000464
0x0000000020000464
0x4 src/main.o
uninitializedGlobal
The linker map provides the absolute address of every variable
and function in this program. Why is that useful? When we are
debugging in the field (no JTAG debugger), frequently we have only
absolute addresses, so if your program suffers a fatal error and you
see:
FATAL ERROR: Address
0x0000000008000158
on the debug console, you’ll know the error occurred 0x20 bytes into
main.
We’ve been using an external debugger with our STM board. This
system consists of a host computer running the debugger, a JTAG
debugging pod, and a target machine. The debugger on the host
computer has access to the source code and the symbol table (from
the linker). When it detects an error at 0x8000158, it can look into the
symbol table, see that the error occurred 0x20 bytes into the
program, figure out on which line the error occurred, and display in
the source file a big red arrow pointing to where the error occurred.
Some systems have an internal debugger, where the debugger
and all the files it needs are on the target system. Some internal
debuggers provide the ability to dump memory based on absolute
addresses. Such debuggers are small and dumb, yet they can be
surprisingly useful when it comes to debugging in the field.
Suppose you have such a debugger and need to know the value
of uninitializedGlobal. A dumb debugger doesn’t know anything
about symbol names. It dumps memory based on address, and
that’s it.
On the other hand, you do know about symbol names. You’ve got
the linker map, so you can tell the debugger to display a 4-byte value
at location 0x20000464:
D> x/4 20000464
0x20000464:
1234
0x4D2
This sort of debugging is primitive and difficult, but sometimes with
embedded systems, it’s the only way to perform debugging.
Maybe you’re wondering why we don’t tell the debugger where
uninitializedGlobal is, which would make things much easier. The
problem is that a symbol table takes up a lot of space, and we are
space-limited. Also, having the symbol table on the system itself is a
security risk. (A hacker would just love to know the address of
passwordCheckingFunction!)
Advanced Linker Usage
So far, we’ve used the linker only with the default settings. However,
there will be times when you’ll want to perform more advanced
functions than what you get with the defaults.
Flash Memory for “Permanent” Storage
One of the problems with the default C memory model is that all your
data is reset when the program starts. On the STM32, this means
resetting the device causes it to lose all data. Suppose you want to
keep some configuration data around between boots. The default
setup won’t let that happen. How do we do it?
Let’s start with the serial “Hello World” program from Chapter 9.
We’re going to add a counter that tells how many times the system
has booted and then write a message with the reset count to the
serial device.
Our design is simple. We’re going to take the top 4KB of flash and
use it for configuration data. We’ll give it the imaginative name of
CONFIG,
and we’ll define a new memory section called .config in
which we’ll put our reset variable.
Here’s the C code to do that:
static uint32_t resetCount __attribute__((section(.config)) =
0;
Now we need to modify the linker script to handle our new section.
We start by dividing up the flash memory into two sections. The first
will be the traditional flash memory we discussed earlier. The
second, CONFIG, will hold our configuration data, which means we
need to edit LinkerScript.ld and replace this:
MEMORY
{
FLASH (rx)
RAM (xrw)
}
: ORIGIN = 0x8000000, LENGTH = 64K
: ORIGIN = 0x20000000, LENGTH = 8K
with this:
MEMORY
{
FLASH (rx)
CONFIG (rw)
RAM (xrw)
}
: ORIGIN = 0x8000000,
LENGTH = 60K
: ORIGIN = 0x8000000 + 60K, LENGTH = 4K
: ORIGIN = 0x20000000,
LENGTH = 8K
This reduces the size of FLASH by 4KB and then uses that 4KB for
the memory section called CONFIG.
Flash is different from normal memory in that you can write it only
once before you must erase it. Erasing must be done a page at a
time. In the STM32’s case, that means our CONFIG section must be at
least 1KB long and must be a multiple of 1KB in size. We’ve chosen
4KB because we will probably want to store a lot more configuration
data later on.
Now we need to tell the linker to put the .config section into the
memory block called CONFIG. This is done by adding the following to
the SECTIONS portion of the LinkerScript.ld file:
{
. = ALIGN(4);
*(.config*)
} >CONFIG
Changing this variable is not as simple as just writing the following:
++resetCount;
A whole sequence of steps is needed to program the chip. We’ve
put all the steps in a function called updateCounter, shown in Listing 1
1-4.
/**
* Update the resetCounter.
*
* In C this would be ++resetCount. Because we are dealing
* with flash, this is a much more difficult operation.
*/
static HAL_StatusTypeDef updateCounter(void) {
1
2
HAL_FLASH_Unlock(); // Allow flash to be modified.
uint32_t newResetCount = resetCount + 1;
for reset count
uint32_t pageError = 0;
erase operation
// Next value
// Error indication from the
// Tell the flash system to erase resetCounter (and the
rest of the page).
3
FLASH_EraseInitTypeDef eraseInfo = {
.TypeErase = FLASH_TYPEERASE_PAGES,
erase one page
.PageAddress = (uint32_t)&resetCount,
of the page
.NbPages = 1
to erase
};
// Going to
// The start
// One page
// Erase the page and get the result.
4 HAL_StatusTypeDef result = HAL_FLASHEx_Erase(&eraseInfo,
&pageError);
if (result != HAL_OK) {
HAL_FLASH_Lock();
return (result);
}
// Program the new reset counter into flash.
result =
5
HAL_FLASH_Program(FLASH_TYPEPROGRAM_WORD,
(uint32_t)&resetCount, newResetCount);
}
HAL_FLASH_Lock();
return (result);
Listing 11-4: The updateCounter procedure
The flash memory on the STM32 chip is protected, so we need to
unprotect it by calling HAL_FLASH_Unlock 1. This function writes two
password values to the flash protection system that enable the
writing of flash. However, we still can’t write resetCount directly to
flash, so instead we assign resetCount (a flash value) to
newResetCount (a regular variable) 2, which we can increment.
Before we can write to flash, we must erase it, and the smallest
unit we can erase is a page. We first need to initialize a structure 3 to
specify how many pages to erase at what address, and then pass
this as a parameter to HAL_FLASHEx_Erase to erase the memory 4.
Now that the memory holding resetCount has been erased, we
can write it. Unfortunately, we have a 32-bit value, and the flash
memory writes only 16 bits at a time, so we use another HAL
function, HAL_FLASH_Program 5, to do the job.
Listing 11-5 shows the whole program.
/**
* @brief Write the number of times the system reset to the
serial device.
*/
#include <stdbool.h>
#include "stm32f0xx_nucleo.h"
#include "stm32f0xx.h"
const char message1[] = "This system has been reset ";
//
Part 1 of message
const char message2[] = " times\r\n";
//
Part 2 of message
const char many[] = "many";
// The word many
// Number of times reset has been performed
uint32_t resetCount __attribute__((section(".config.keep")))
= 0;
int current; // The character in the message we are sending
UART_HandleTypeDef uartHandle;
// UART initialization
/**
* @brief This function is executed in case of error
occurrence.
*
* All it does is blink the LED.
*/
void Error_Handler(void)
{
/* Turn ED3 on. */
HAL_GPIO_WritePin(LED2_GPIO_PORT, LED2_PIN,
GPIO_PIN_SET);
while (true)
{
// Toggle the state of LED2.
HAL_GPIO_TogglePin(LED2_GPIO_PORT, LED2_PIN);
HAL_Delay(1000);
// Wait one second.
}
}
/**
* Send character to the UART.
*
* @param ch The character to send
*/
void myPutchar(const char ch)
{
// This line gets and saves the value of UART_FLAG_TXE at
call
// time. This value changes, so if you stop the program
on the "if"
// line below, the value will be set to zero because it
goes away
// faster than you can look at it.
int result __attribute__((unused)) =
(uartHandle.Instance->ISR & UART_FLAG_TXE);
// Block until the transmit empty (TXE) flag is set.
while ((uartHandle.Instance->ISR & UART_FLAG_TXE) == 0)
continue;
uartHandle.Instance->TDR = ch;
the UART.
}
// Send character to
/**
* Send string to the UART.
*
* @param msg Message to send
*/
static void myPuts(const char* const msg)
{
for (unsigned int i = 0; msg[i] != '\0'; ++i) {
myPutchar(msg[i]);
}
}
/**
* Initialize LED2 (so we can blink red for error).
*/
void led2_Init(void)
{
// LED clock initialization
LED2_GPIO_CLK_ENABLE();
GPIO_InitTypeDef GPIO_LedInit;
// Initialization for
the LED
// Initialize LED.
GPIO_LedInit.Pin = LED2_PIN;
GPIO_LedInit.Mode = GPIO_MODE_OUTPUT_PP;
GPIO_LedInit.Pull = GPIO_PULLUP;
GPIO_LedInit.Speed = GPIO_SPEED_FREQ_HIGH;
HAL_GPIO_Init(LED2_GPIO_PORT, &GPIO_LedInit);
}
/**
* Initialize UART2 for output.
*/
void uart2_Init(void)
{
// UART initialization
// UART2 -- one connected to ST-LINK USB
uartHandle.Instance = USART2;
uartHandle.Init.BaudRate = 9600;
Speed 9600
uartHandle.Init.WordLength = UART_WORDLENGTH_8B;
//
// 8
bits/character
uartHandle.Init.StopBits = UART_STOPBITS_1;
One stop bit
uartHandle.Init.Parity = UART_PARITY_NONE;
parity
uartHandle.Init.Mode = UART_MODE_TX_RX;
Transmit & receive
uartHandle.Init.HwFlowCtl = UART_HWCONTROL_NONE;
hw control
//
// No
//
// No
// Oversample the incoming stream.
uartHandle.Init.OverSampling = UART_OVERSAMPLING_16;
// Do not use one-bit sampling.
uartHandle.Init.OneBitSampling =
UART_ONE_BIT_SAMPLE_DISABLE;
// Nothing advanced
uartHandle.AdvancedInit.AdvFeatureInit =
UART_ADVFEATURE_NO_INIT;
/*
* For those of you connecting a terminal emulator, the
above parameters
* translate to 9600,8,N,1.
*/
if (HAL_UART_Init(&uartHandle) != HAL_OK)
{
Error_Handler();
}
}
/**
* Update the resetCounter.
*
* In C, this would be ++resetCounter. Because we are dealing
* with flash, this is a much more difficult operation.
*/
static HAL_StatusTypeDef updateCounter(void) {
HAL_FLASH_Unlock(); // Allow flash to be modified.
uint32_t newResetCount = resetCount + 1;
// Next value
for reset count
uint32_t pageError = 0;
// Error indication from the
erase operation
// Tell the flash system to erase resetCounter (and the
rest of the page).
FLASH_EraseInitTypeDef eraseInfo = {
.TypeErase = FLASH_TYPEERASE_PAGES,
// Going to
erase 1 page
.PageAddress = (uint32_t)&resetCount,
of the page
.NbPages = 1
to erase
};
// The start
// One page
// Erase the page and get the result.
HAL_StatusTypeDef result = HAL_FLASHEx_Erase(&eraseInfo,
&pageError);
if (result != HAL_OK) {
HAL_FLASH_Lock();
return (result);
}
// Program the new reset counter into flash.
result = HAL_FLASH_Program(FLASH_TYPEPROGRAM_WORD,
(uint32_t)&resetCount, newResetCount);
}
HAL_FLASH_Lock();
return (result);
int main(void)
{
HAL_Init(); // Initialize hardware.
led2_Init();
uart2_Init();
myPuts(message1);
HAL_StatusTypeDef status = updateCounter();
switch (status) {
case HAL_FLASH_ERROR_NONE:
// Nothing, this is correct.
break;
case HAL_FLASH_ERROR_PROG:
myPuts("HAL_FLASH_ERROR_PROG");
break;
case HAL_FLASH_ERROR_WRP:
myPuts("HAL_FLASH_ERROR_WRP");
break;
default:
myPuts("**unknown error code**");
break;
}
// A copout to avoid writing an integer to an ASCII
function
if (resetCount < 10)
myPutchar('0'+ resetCount);
else
myPuts("many");
myPuts(message2);
}
for (;;) {
continue;
}
// Do nothing.
/**
* Magic function that's called by the HAL layer to actually
* initialize the UART. In this case, we need to put the UART
pins in
* alternate mode so they act as UART pins and not like GPIO
pins.
*
* @note: Only works for UART2, the one connected to the USB
serial
* converter
*
* @param uart The UART information
*/
void HAL_UART_MspInit(UART_HandleTypeDef* uart)
{
GPIO_InitTypeDef GPIO_InitStruct;
if(uart->Instance == USART2)
{
/* Peripheral clock enable */
__HAL_RCC_USART2_CLK_ENABLE();
}
/*
* USART2 GPIO Configuration
* PA2
------> USART2_TX
* PA3
------> USART2_RX
*/
GPIO_InitStruct.Pin = GPIO_PIN_2|GPIO_PIN_3;
GPIO_InitStruct.Mode = GPIO_MODE_AF_PP;
GPIO_InitStruct.Pull = GPIO_NOPULL;
GPIO_InitStruct.Speed = GPIO_SPEED_FREQ_LOW;
// Alternate function -- that of UART
GPIO_InitStruct.Alternate = GPIO_AF1_USART2;
HAL_GPIO_Init(GPIOA, &GPIO_InitStruct);
}
/**
* Magic function called by HAL layer to de-initialize the
* UART hardware. Something we never do, but we put this
* in here for the sake of completeness.
*
* @note: Only works for UART2, the one connected to the USB
serial
* converter
*
* @param uart The UART information
*/
void HAL_UART_MspDeInit(UART_HandleTypeDef* uart)
{
if(uart->Instance == USART2)
{
/* Peripheral clock disable */
__HAL_RCC_USART2_CLK_DISABLE();
}
}
/*
* USART2 GPIO Configuration
* PA2
------> USART2_TX
* PA3
------> USART2_RX
*/
HAL_GPIO_DeInit(GPIOA, GPIO_PIN_2|GPIO_PIN_3);
Listing 11-5: The reset counting program
Multiple Configuration Items
Suppose we want to keep more than one configuration variable in
flash memory. The problem is that flash memory is not ordinary
memory. After you store a value in a flash memory variable, you
cannot change it until you erase the entire memory page containing
the variable.
That works fine when you store one variable per page (a very
wasteful way of doing things), but how do you store multiple
configuration variables in memory and update one? It requires a little
work. Here is the process:
Save all the configuration variables in RAM.
Update the value you need to change in RAM.
Erase all the configuration variables in flash. (Erase the flash page.)
Copy the RAM version back into flash.
Listing 11-6 shows an outline of the code to declare a
configuration structure in the .config section and update a value in
the struct.
struct config {
char name[16];
// Name of the unit
uint16_t sensors[10]; // The type of sensor connected to
each input
uint32_t reportTime; // Seconds between reports
// ... Lots of other stuff
};
struct config theConfig __attribute__((section ".config"));
// The configuration
static void updateReportTime(const uint32_t newReportTime) {
// <Prepare flash>
struct config currentConfig = config;
currentConfig.reportTime = newReportTime;
// <Erase flash>
writeFlash(&config, ¤tConfig,
sizeof(currentConfig));
}
// <Lock flash>
Listing 11-6: Updating the configuration in flash
A number of problems are associated with flash memory. As
mentioned previously, the first problem is that an entire page must
be erased in order to write a single word. It takes time to write a
page into flash, and it’s possible for the system to be powered off or
reset while you are writing. If that happens, the write will be
incomplete and your configuration data will be corrupted.
A solution to this is to have two configuration sections, a primary
and a backup, that each contain a checksum. The program first tries
to read the primary configuration. If the checksum is bad, it reads the
second. Because only one configuration is written at a time, you can
be pretty sure that either the primary or the secondary is going to be
correct.
Another problem with flash is that it suffers from memory wear.
You can go through only so many program/erase cycles before the
memory becomes corrupted. Depending on the type of flash being
used, this can be between 100,000 and 1,000,000 cycles. So, using
the flash memory to store a configuration that is expected to change
at the rate of once per month will work. Using it for something that
will change several times a second will quickly wear out the memory.
There are ways of programming around the limits of flash memory.
You also can add external memory chips to your system that don’t
have the design limitations of flash.
Field Customization Example
Let’s say we work for a company that makes alarms. These alarms
go out to alarm service companies who install them at end-user
sites. Now, Joe’s Alarm Company and Bait Shop is not going to be
happy if the alarm panel it installs shows an Acme Alarm Maker logo
when it boots. Joe is into branding and wants his own logo to appear,
which means we need to give customers a way of customizing the
logos inside their boxes. We can reserve a section of memory for the
logo:
MEMORY
{
FLASH (rx)
LOGO (r)
CONFIG (rw)
RAM (xrw)
}
:
:
:
:
ORIGIN
ORIGIN
ORIGIN
ORIGIN
=
=
=
=
0x8000000,
LENGTH =
0x8000000 + 52K, LENGTH =
0x8000000 + 60K, LENGTH =
0x20000000,
LENGTH =
52K
8K
4K
8K
Now the question is, how do we get the logo into the system? We
could program it at the factory, but that would mean every time we
shipped a unit, someone would have to open the box, plug in the
device, program the logo, and put it back in the box, which is an
expensive operation.
Instead, we could let the customers do it themselves. We’d give
them a cable and some software and let them program the logo. We
can sell that ability as a feature that allows customers to update units
with a new logo if needed.
The programming can be accomplished using the same hardware
and software we use to load our code into flash, or we can write an
onboard program that takes data off the serial line and programs it
into the LOGO memory.
Replacing a logo is a simple customization to perform. Also, if the
replacement is botched, a bad logo won’t stop the system. However,
replacing the firmware is another matter.
Firmware Upgrade
Upgrading software while you are running that software is a bit tricky,
but there are several ways to do it. One of the simplest is to divide
up the flash memory into three sections:
The bootloader
Program section 1
Program section 2
The bootloader is a very small program that will never be
upgraded. It has a rather simple job to do, so hopefully we’ll get it
right the first time. The program sections contain a complete version
of the program. They also contain a program version number and a
checksum.
The bootloader’s job is to decide which program section should be
used. It verifies the checksum for the two sections and then decides
which one to use based on the following calculation:
if ((bad checksum1) and (good checksum2)) use section2
if ((good checksum1) and (bad checksum2)) use section1
if (both good) use the section with the highest version
number
if (both bad) blink the emergency light; we're bricked
This is the general idea, but we’ve skipped some bookkeeping
steps. For example, the interrupt table in the .isr_vector section
needs to be changed so that all interrupts go to the proper place.
Summary
Memory is a limited resource, especially when you’re doing
embedded programming. You need to know exactly where your
memory is located and how to get the most out of it.
The linker’s job is to take the pieces of your program, link them
together, and produce a program that you can load into memory. For
simple programs, the default configuration works well. However, as
you get into more advanced systems, you’ll need to control more
precisely exactly what’s being done with your limited memory
resources, so understanding the linker is vital to being an effective
embedded programmer.
Programming Problems
Modify the config program (Listing 11-6) so that the CONFIG segment
does not start on a page boundary. What happens?
Change the config program so that instead of printing a single-digit
reset number, the program prints a complete number.
The linker script defines a number of symbols to indicate the start
and end of a memory area. Examine the linker script or linker map to
find the symbols that define the start and end of the text area. Using
these symbols, print the size of the text area. Use the arm-noneeabi-size command to verify your result.
Use the same techniques to print the amount of stack space
allocated.
Advanced: Print the stack space left. This will require reading the
current value of the stack register into a variable using the asm
keyword.
Figuring out what’s in a binary file can be very useful, and the GNU
toolchain has a number of programs to do so. Examine the
documentation for the following commands:
objdump,
which dumps object file information
nm,
which lists the symbols in a file
ar,
which creates libraries or extracts information and files from them
readelf,
which displays information on elf (program) files
12
THE PREPROCESSOR
The basic C compiler has a number
of powerful features, but there are
some things it just can’t do. To get
around its limitations, a
preprocessor was added to the
language. The preprocessor is primarily a macro
processor, a program that replaces text with
other text, but it can also include and exclude
text and perform other actions based on certain
conditions. The idea is to have one program (the
preprocessor) do a small, simple text editing job
and then feed that into the compiler proper.
Since those two steps (and a few others) are
hidden behind the gcc command, you hardly
think about them, but they are there.
For example, let’s look at the following code:
#define SIZE 20
int array[SIZE];
// Size of the array
// The array
--snip-for (unsigned int i = 0; i < SIZE; ++i) {
When SIZE is defined to mean 20, the preprocessor essentially
does a global search and replace of SIZE with 20.
The HAL library we’re using with our STM microprocessor makes
extensive use of the preprocessor in a couple of ways. First, the
headers contain a #define for every gettable and settable bit in the
processor, and there are quite a few of them. Second,
STMicroelectronics doesn’t make only one chip; it makes a wide
variety. Rather than have 20 different header files with information on
20 chips, it uses a process called conditional compilation to compile
only the parts of the header file that are needed.
Simple Macros
Let’s start with the simple macros. A macro is basically a pattern (in
this case, SIZE) that is replaced by something else (in this case, 20).
The #define preprocessor directive is used to define the pattern and
replacement:
size.c
#define SIZE 20
The size is SIZE
This is not a C program. The preprocessor works on anything,
including just English text. Let’s run it through the preprocessor using
the -E flag, which tells gcc to run the program through the
preprocessor only and stop:
$ gcc -E size.c
Here are the preprocessed results:
#
#
#
#
1 "size.c"
1 "<built-in>"
1 "<command-line>"
31 "<command-line>"
1
# 1 "/usr/include/stdc-predef.h" 1 3 4
# 32 "<command-line>" 2
# 1 "size.c"
2
The size is 20
The lines beginning with a hash mark (#) are called line markers.
They consist of a hash mark, a line number, and the name of the file
(and some other junk). Since the preprocessor may add or remove
lines, it would be impossible for the compiler to know where it was in
the original input file without them.
A lot happens before the first line is processed, but finally we get
to the second occurrence of it 1, and the output 2 shows that SIZE
has been replaced with the defined value.
The preprocessor takes things literally, which can get you into
trouble, as shown here:
square.c
#include <stdio.h>
1
#define SIDE 10 + 2
// Size + margin
int main()
{
2 printf("Area %d\n", SIDE * SIDE);
return (0);
}
This example finds the area of a square. It includes a little margin
so the side of the square is defined 1. To get the area, we multiply
the sides together and print the result 2. However, this program
contains a bug: SIZE is not 12; it is 10 + 2. The preprocessor is a
dumb text editor. It does not understand C syntax or arithmetic.
After passing the program through the preprocessor, we can see
where we made our mistake:
square.i
# 5 "square.c"
int main()
{
printf("Area %d\n", 10 + 2 * 10 + 2);
return (0);
}
As mentioned previously, the preprocessor doesn’t understand C.
When we use the following statement, it defines SIZE as literally 10 +
2 rather than 12:
#define SIDE 10 + 2
And as you can see, 12
10 + 2.
// Size + margin
* 12
is a different number from 10
+ 2 *
When using #define to define constants more complex than a
simple number, we put parentheses around the entire expression, as
shown here:
#define SIDE (10 + 2)
// Size + margin
Following this style rule prevents incorrect results from an
unexpected order of operations after substitution.
To avoid the issue of incorrect macro evaluation entirely when the
purpose of a #define is to set or calculate a value in one place and
then use it throughout the program, use const, which is preferred
over #define wherever possible. Here’s an example:
const unsigned int SIDE = 10 + 2;
// This works.
The main reason for this rule is that the const modifier is part of
the C language, and the compiler will evaluate the expression
assigned to a const variable, so SIDE is actually 12.
When C was first designed, it had no const modifier, so everyone
had to use the #define statement, which is why #define is so widely
used, even though the more modern const has been available for
some time.
Parameterized Macros
Parameterized macros allow us to give arguments to macros. Here’s
an example:
#define DOUBLE(x) (2 * (x))
--snip-printf("Twice %d is %d\n", 32, DOUBLE(32);
In this case, we don’t need to put the parentheses around the
argument in the expansion. We could write the macro as follows:
#define DOUBLE_BAD(x) (2 * x)
Why is this bad? Consider what happens when we use this macro
with an expression:
value = DOUBLE_BAD(1 + 2)
The style rule is to include parentheses around the arguments to
parameterized macros. Without the parentheses, DOUBLE(1+2)
expands to the following:
DOUBLE(1+2) = (2 * 1 + 2) = 4
// Wrong
With the parentheses, we get this:
DOUBLE(1+2) = (2 * (1 + 2)) = 6
We already have a rule that states to not use ++ or -- except on
lines by themselves. Let’s see what happens when we break that
rule using a parameterized macro:
#define CUBE(x) ((x) * (x) * (x))
int x = 5;
int y = CUBE(x++);
What’s the value of x after this is executed? It’s 8 instead of 6, as
expected. Worse, the value of y can be anything, because C’s order
of execution rules are ambiguous when it comes to mixing multiply
(*) and increment (++) operations.
If you’re going to write code like this, consider inline functions,
which replace the function call with the body of the function:
static inline int CUBE_INLINE(const int x) {
return (x * x * x);
}
It works even if you use the following statement:
y = CUBE_INLINE(x++);
But again, you shouldn’t write code like this. Instead, write code
like this:
x++;
y = CUBE_INLINE(x);
Use inline functions instead of parameterized macros whenever
possible. Because inline functions are part of the C language, the
compiler can make sure they’re being used correctly (unlike the
preprocessor, which just replaces text blindly).
Code Macros
So far, we’ve been writing macros to define constants and simple
expressions. We can use #define to define code. Here’s an example:
#define FOR_EACH_VALUE for (unsigned int i = 0; i <
VALUE_SIZE; ++i)
--snip-int sum = 0;
FOR_EACH_VALUE
sum += value[i]
However, this code has some problems. First, it’s not obvious
where the variable i comes from. We’ve also obscured what’s
incrementing it, which is why this sort of macro is rarely seen.
A more common macro is one that emulates a short function. Let’s
define a macro called DIE that writes out a message and then kills
the program:
// Defined badly
#define DIE(why)
\
printf("Die: %s\n", why); \
exit(99);
We use the backslash (\) to extend the macro over multiple lines.
We can use this macro as follows:
void functionYetToBeImplemented(void) {
DIE("Function has not been written yet");
}
In this case, it works, which is due more to luck than design. The
problem is that DIE looks like a function, so we can treat it as a
function. Let’s put it inside an if statement:
// Problem code
if (index < 0)
DIE("Illegal index");
To understand why this is a problem, let’s look at the expansion of
this code:
if (index < 0)
printf("Die %s\n", "Illegal index");
exit(99);
Here it is properly indented:
if (index < 0)
printf("Die %s\n", "Illegal index");
exit(99);
In other words, it will always exit, even if the index is good.
Let’s see if we can fix this issue by putting curly brackets ({})
around our statements:
// Defined not as badly
#define DIE(why) {
\
printf("Die: %s\n", why); \
exit(99);
\
}
This now works in the following case:
// Problem code
if (index < 0)
DIE("Illegal index");
However, it does not work in this case:
if (index < 0)
DIE("Illegal index");
else
printf("Did not die\n");
This code generates an error message: else without previous
However, we have an if right there. Let’s look at the expansion:
if.
if (index < 0)
{
printf("Die: %s\n", why); \
exit(99);
\
};
// <=== Notice two characters here.
else
print("Did not die\n");
The problem here is that before the else, C wants a statement
ending with a semicolon (;) or a set of statements enclosed in curly
brackets ({}). It doesn’t know what to do with a set of statements
enclosed in curly brackets that ends in a semicolon.
The solution to this problem is to use an obscure C statement
called the do/while. It looks like this:
do {
// Statements
}
while (condition);
The statements in the block after do always execute once, and
then again as long the condition is true. Although it is part of the C
language standard, I’ve seen it used only twice in the wild, and one
of those times was as a punch line to a joke.
However, it is used for code macros:
#define DIE(why)
do {
\
printf("Die: %s\n", why); \
exit(99);
\
} while (0)
It works because we can put a semicolon after it:
if (index < 0)
DIE("Illegal index");
// Note semicolon at the end of
the statement.
else
printf("Did not die\n");
This code expands to the following:
if (index < 0)
do {
printf("Die: %s\n", "Illegal index");
exit(99);
} while (0);
else
printf("Did not die\n");
Syntactically, do/while is a single statement, and we can include a
semicolon after it without trouble. The code within the curly brackets
(printf and exit) is safely encapsulated inside the do/while. The
code outside the curly brackets is one statement, and that’s what we
want. Now the compiler will accept the code macro.
Conditional Compilation
Conditional compilation allows us to change what’s in our code at
compile time. The classic use for this feature is to have a debug
version and a production version of a program.
The #ifdef/#endif directive pair will compile the code between the
two directives if a symbol is defined. Here’s an example:
int main()
{
#ifdef DEBUG
printf("Debug version\n");
#endif // DEBUG
Strictly speaking, the // DEBUG comment is not required, but be
sure to include it because matching #ifdef/#endif pairs is hard
enough.
If your program looks like:
#define DEBUG
// Debug version
int main()
{
#ifdef DEBUG
printf("Debug version\n");
#endif // DEBUG
then the preprocessed result will be the following:
int main()
{
printf("Debug version\n");
On the other hand, if your program looks like:
//#define DEBUG
int main()
{
#ifdef DEBUG
// Release version
printf("Debug version\n");
#endif // DEBUG
then the preprocessed result will be the following:
int main()
{
// Nothing
Because DEBUG is not defined, no code is generated.
One problem is that all the #ifdef statements tend to make the
program look ugly. Consider the following:
int main()
{
#ifdef DEBUG
printf("Debug version\n");
#endif // DEBUG
#ifdef DEBUG
printf("Starting main loop\n");
#endif // DEBUG
while (1) {
#ifdef DEBUG
printf("Before process file \n");
#endif // DEBUG
processFile();
#ifdef DEBUG
printf("After process file \n");
#endif // DEBUG
We can do the same thing with a lot less code:
#ifdef DEBUG
#define debug(msg) printf(msg)
#else // DEBUG
#define debug(msg) /* nothing */
#endif // DEBUG
int main()
{
debug("Debug version\n");
debug("Starting main loop\n");
while (1) {
debug("Before process file \n");
processFile();
debug("After process file \n");
Notice that we used the #else directive to tell the preprocessor to
reverse the sense of the #if. If DEBUG is defined, calls to debug will be
replaced with calls to printf; otherwise, they’ll be replaced by blank
space. In this case, we don’t need the do/while trick because the
code macro contains a single function call (with no semicolon).
Another directive, #ifndef, is true if a symbol is not defined and
otherwise is used the same way as the #ifdef directive.
Where Symbols Get Defined
We can define symbols in three ways:
Inside the program with a #define
From the command line
Predefined inside the preprocessor
We’ve already described symbols defined inside a program, so
let’s look at the other two options.
Command Line Symbols
To define a symbol on the command line, use the -D option:
$ gcc -Wall -Wextra -DDEBUG -o prog prog.c
The -DDEBUG argument defines the DEBUG symbol so the
preprocessor can use it. In this example, it does a #define DEBUG 1
before the program starts. We used this symbol in the previous code
to control whether debug statements were compiled in.
In addition to symbols, we add to the compilation command
manually, and the STM32 Workbench generates a makefile to
compile a program that defines a number of symbols on the
command line. The most significant is defined by the -DSTM32F030x8
option. The CMSIS/device/stm32f0xx.h file uses the STM32F030x8
symbol to include board-specific files:
#if defined(STM32F030x6)
#include "stm32f030x6.h"
#elif defined(STM32F030x8)
#include "stm32f030x8.h"
#elif defined(STM32F031x6)
#include "stm32f031x6.h"
#elif defined(STM32F038xx)
The STM firmware supports a number of boards, only one of
which is the NUCLEO-F030R8. Each chip has a different set of I/O
devices located at different places. You don’t need to worry about
where they are, as the firmware will find the right place using the
preceding code. This file says, “If I’m an STM32F030x6, include the
header file for that board; if I’m an STM32F030x8, include the
header file for that board,” and so on.
The directives used are #if and #elif. The #if tests to see
whether the expression that follows is true (in this case, whether
STM32F030x6 is defined). If it is, the code following it will be compiled.
The #elif is a combination of #else and #if, which says if the
expression is not true, then test another expression. The other
directive, defined, is true if the symbol is defined.
Predefined Symbols
Finally, the preprocessor itself defines a number of symbols, such
as __VERSION__ (to specify the compiler version) and __linux (on
Linux systems). To see what’s predefined on your system, use the
following command:
$ gcc -dM -E - < /dev/null
The __cplusplus symbol is defined only if you are compiling a C++
program. Frequently, you’ll see something like this in files:
#ifdef
__cplusplus
extern "C"
{
#endif
It’s part of a song and dance needed by C++ so it can use C
programs. You can just ignore it for now.
Include Files
The #include directive tells the preprocessor to bring in an entire file
as if it were part of the original file. There are two forms of this
directive:
#include <file.h>
#include "file.h"
The first form brings in system header files (files that come with
the compiler or system libraries you are using). The second brings in
files you create.
One problem with header files is that they can be included twice. If
that happens, you get a lot of duplicate defined symbols and other
problems. The solution to this problem is to add a sentinel by using
the following design pattern:
#ifndef __FILE_NAME_H__
#define __FILE_NAME_H__
// Body of the file
#endif __FILE_NAME_H__
The first time through, the __FILE_NAME_H__ symbol (the sentinel) is
not defined, so the entire header file is included. This is good,
because we wanted it included—once. The next time through,
__FILE_NAME_H__ is defined, and the #ifndef prevents the code below
it from being included until the #endif is reached at the end of the
file. Thus, although the header file is included twice, the contents of
the file appear only once.
Other Preprocessor Directives
A few minor preprocessor directives are also useful, such as
#warning, #error, and #pragma.
The #warning directive displays a compiler warning if seen:
#ifndef PROCESSOR
#define PROCESSOR DEFAULT_PROCESSOR
#warning "No processor -- taking default"
#endif // PROCESSOR
The related #error directive issues an error and stops your
program from compiling:
#ifndef RELEASE_VERSION
#error "No release version defined. It must be defined."
#endif // RELEASE_VERSION
The #pragma directive defines compiler-dependent controls. Here’s
an example:
// I wish they would fix this include file.
#pragma GCC diagnostic ignored "-Wmissing-prototypes"
#include "buggy.h"
#pragma GCC diagnostic warning "-Wmissing-prototypes"
This GCC-specific #pragma turns off warnings about missing
prototypes, includes a buggy include file, and turns warnings back
on.
Preprocessor Tricks
The preprocessor is a dumb macro processor, and as a result, we’ve
had to adopt a number of style rules, described previously, to keep
us out of trouble. The power of the preprocessor also allows us to
perform some interesting tricks to make our lives easier. One of them
is the enum trick, which we discussed in Chapter 8. In this section,
we’ll look at commenting out code.
Sometimes, we need to disable some code for testing. One way to
do that is to comment out the code. For example, suppose the
auditing process is buggy; we can disable it until the audit group gets
its act together.
Here’s the original code:
int processFile(void) {
readFile();
connectToAuditServer();
if (!audit()) {
printf("ERROR: Audit failed\n");
return;
}
crunchData();
writeReport();
}
And here’s the code with the audit removed:
int processFile(void) {
readFile();
//
connectToAuditServer();
//
if (!audit()) {
//
printf("ERROR: Audit failed\n");
//
return;
//
}
crunchData();
writeReport();
}
Every line that we wanted removed now begins with the comment
(//) marker.
Commenting out every line is labor-intensive, however. Instead,
we can use conditional compilation to remove the code. All we need
to do is surround it with #ifdef UNDEF and #endif // UNDEF
statements, like this:
int processFile(void) {
readFile();
#ifdef UNDEF
connectToAuditServer();
if (!audit()) {
printf("ERROR: Audit failed\n");
return;
}
#endif // UNDEF
crunchData();
writeReport();
}
The code inside the #ifdef/#endif block will be compiled only if
UNDEF is defined, and no sane programmer would do that. Using #if
0 / #endif does the same thing without depending on the sanity of
other programmers.
Summary
The C preprocessor is a simple yet powerful automatic text editor.
Used properly, it can make programming tremendously easier. It
allows you to define simple numeric macros as well as small code
macros. (Actually, you can define large code macros, but you really
don’t want to do that.)
One of its biggest features is the #include directive, which
facilitates the sharing of interfaces between modules. Also, the
#ifdef capabilities allow you to write one program that has multiple
personalities through the use of conditional compilation.
However, you must remember that the preprocessor does not
understand C syntax. As a result, you must remember several style
rules and programming patterns to use the system effectively.
For all of its limitations and quirks, the preprocessor can be a
powerful tool when it comes to creating C programs.
Programming Problems
Write a macro to swap two integers.
Advanced: Write a macro to swap two integers of any type. (Read
the documentation for GCC’s typeof keyword before doing this.)
Create a macro called islower(x) that returns true if x is a lowercase
letter.
Crazy advanced: Figure out how the program zsmall.c works (https://
www.cise.ufl.edu/~manuel/obfuscate/zsmall.hint). This program is a
winner of the obfuscated C contest (it won an award for “Best Abuse
of the Preprocessor”). All it does is print a list of primes, but all the
calculations and loops are done using the preprocessor.
PART II
C FOR BIG MACHINES
So far we’ve concentrated on embedded
programming. With embedded systems, you
have limited memory and limited resources.
However, C is designed to work on larger
machines with operating systems (that we don’t
have to program ourselves), and it has many
features that are useful on these larger
machines.
For example, there is a memory region called the heap that allows
you to allocate and free memory, as needed, to store complex
objects. Things like web browsers and XML parsers make extensive
use of the heap.
We haven’t covered this before because we barely had enough
memory for the stack—and dividing memory into a stack and heap
would like dividing a drop of water between two glasses. It’s
possible, but very tricky and not very useful.
We also haven’t covered the C I/O system. We’ve had to do the
I/O ourselves, going directly to the hardware. On big machines with
an operating system, the C I/O system and the operating system
hide all those details from you.
Let’s take a look at the differences between embedded and nonembedded programming.
In embedded programming, when you write to a device, you write
directly to the device. This means that you must know the details of
the device you are using. For non-embedded programming, when
you call write to write to a device, you tell the operating system to do
the work, including buffering to make the I/O more efficient and
dealing with the actual device.
In embedded programming, you have limited memory. You need to
know where every byte is and how its being used. With nonembedded programming, you have an operating system and
memory mapping system, which gives you access to a lot of
memory. Most programs can afford to waste memory, and a lot of
programs do.
An embedded program is loaded into flash memory by an external
loader. In our case, it’s called ST-LINK and is hidden inside the IDE,
but it’s there. The program stays in flash forever and is never
unloaded or replaced during the normal operation of the system.
Non-embedded systems, on the other hand, have an operating
system that loads and unloads programs as needed.
An embedded system runs one program. You barely have enough
memory for that. However non-embedded systems can and do run
more than one program at a time. The system I’m writing this on is
currently running 341 programs, and it’s a small system.
Embedded programs never stop, whereas non-embedded ones
can exit and return control to the operating system.
Embedded systems store all their data in memory. Non-embedded
systems have a filesystem and can read and write file data as well
as screens, networks, and other peripherals.
Finally, errors in embedded systems must be handled by your
program. For non-embedded systems, you have an operating
system that will catch errors not handled by the program and print a
warning or stop the program. The operating system keeps a bad
program from damaging other resources on the system. In contrast,
if an embedded program goes south, you can easily brick the
system.
C++ works well on larger systems because, in most cases, the
overhead does not significantly affect things. For example, let’s
suppose you want to write a program to read a bunch of data from a
database and write a report. For a report that runs once a day, who
cares if the program uses 0.5 seconds of CPU time versus 0.2
seconds?
However, if you are doing high-performance computing, such as
gaming, animation, or video editing, you need the performance and
precision of C. Even though it’s an older language, C still has its
place on mainframes.
In this section, you’ll learn how to use the heap, which is dynamic
memory that can be allocated or freed at will. You will also learn how
to deal with the operating system’s I/O system—actually, two I/O
systems: the buffered I/O system and the raw I/O system.
Finally, you will discover how to use floating-point numbers. Most
cheap embedded processors don’t have a floating-point unit, so we
can’t use floating-point numbers in embedded programs. Also,
although mainframes have dedicated floating-point hardware, you
must use this feature carefully; otherwise, you may get unexpected
results.
13
DYNAMIC MEMORY
Embedded systems have very
limited random access memory
(RAM). So far, we’ve divided the
free memory into a small stack with
no space left for anything else.
When dealing with bigger systems, we have
gigabytes of memory, making it easier to divide
the memory into two sections: the stack and the
heap.
We talked about the stack in Chapter 7. It’s where the program
allocates local variables and temporary values for each procedure as
it’s needed. The heap is a little different. You decide when memory is
allocated from the heap as well as when it is returned to the heap.
Using the heap, you can create very complex and large data
structures. For example, web browsers use the heap to store the
structural elements that make up a web page.
This chapter describes how to allocate and deallocate memory. In
addition, we’ll explore how to implement a linked-list data structure to
demonstrate common dynamic memory operations and how to
debug common memory problems.
Basic Heap Allocation and Deallocation
We use the malloc function to get memory from the heap. Here is the
general form of this function:
pointer = malloc(number-of-bytes);
This function gets number-of-bytes from the heap and returns a
pointer to them. The memory is uninitialized, so it contains random
values. If the program is out of heap, the function returns the NULL
pointer.
The program in Listing 13-1 allocates memory for a structure on
the heap and then does absolutely nothing with it.
simple.c
#include <stdlib.h>
#include <stdio.h>
// Singly linked list with name as payload
struct aList {
struct aList* next; // Next node on the list
char name[50];
// Name for this node
};
int main() {
struct aList* listPtr = malloc(sizeof(*listPtr));
if (listPtr == NULL) {
printf("ERROR: Ran out of memory\n");
exit(8);
}
return (0);
}
Listing 13-1: A simple pointer allocation
To make the program more reliable, we use sizeof(*listPtr) to
determine how many bytes to allocate, which is a common design
pattern:
pointer = malloc(sizeof(*pointer));
A common design mistake is to omit the asterisk, like this:
struct aList* listPtr = malloc(sizeof(listPtr));
There are things and pointers to things. The listPtr variable is a
pointer, and the *listPtr expression is a thing. A pointer is small: 8
bytes on a 64-bit system. The size of a thing, in this case, is 56
bytes. The design pattern ensures that you allocate the right number
of bytes for the variable, since the variable is repeated in the
argument to malloc.
Oftentimes you’ll see the structure itself, instead of a pointer to the
structure, used in sizeof:
struct aList* listPtr = malloc(sizeof(struct aList));
That works, but it’s slightly dangerous. Suppose someone
changes the type of listPtr. For example, the following is incorrect:
struct aListImproved* listPtr = malloc(sizeof(struct aList));
So what happened? In the beginning we had the following correct
but dangerous declaration:
struct aList* listPtr = malloc(sizeof(struct aList));
Everything worked, because listPtr was a pointer to struct
aList. As long as the types matched, everything was okay. Now let’s
say someone decided to alter the code and made listPtr point to
the new and improved version of the aList called aListImproved, but
they didn’t change the type in the malloc function. What’s worse,
imagine if the code wasn’t the simple, obvious one-liner from earlier
and instead looked like this:
struct aListImproved* listPtr;
// 3,000 lines of dense code
// WRONG
listPtr = malloc(sizeof(struct aList));
This code doesn’t allocate enough space for the new fields, so
every time someone uses the new fields, random memory is
overwritten.
A good practice to see if you ran out of memory is to check
whether malloc returned a NULL pointer:
if (listPtr == NULL) {
printf("ERROR: Ran out of memory\n");
exit(8);
}
This is vital even if you think malloc will never fail.
NOTE
As a general design rule, I check for error returns on almost
every function call that can return an error. The only place I
don’t check for errors is when I’m writing out the error
message, because I haven’t figured out where to write the
error message telling the user that I can’t write error
messages.
Our program has a memory leak, meaning that it does not
deallocate the memory it uses. When a program deallocates
memory, it’s returned to the heap for reuse by a later malloc. To do
that, we use the free function:
free(listPtr);
listPtr = NULL;
Setting the listPtr to NULL is a design pattern that makes sure you
don’t try to use the memory after it’s freed. It’s not required by the C
language.
If we try to use the freed listPtr without setting it to NULL first, we’ll
write into memory that shouldn’t have been written to. Here’s an
example:
free(listPtr);
listPtr->name[0] = '\0'; // Wrong, but will execute and
// possibly create a strange error
// much later in the program
When we write to freed memory, something bad may happen later
in the program that will be difficult to debug because the relationship
between the bug and the preceding mistake will not be obvious.
It’s nice if we make our mistakes in an obvious manner, like so:
free(listPtr);
listPtr = NULL;
listPtr->name[0] = '\0';
// Program crashes with a good
// indication of where and why
This is a form of paranoid programming. The idea is to turn a
subtle, hard-to-find screwup into one that crashes the entire program
and is thus much easier to find.
Linked Lists
Now that we have a heap and can store data in it, we’re going to use
a primitive data structure called a singly linked list, which has several
advantages over an array. It does not have a fixed size, and insert
and delete operations are much quicker using it than using an array.
(Arrays have the advantage of being faster to search.)
Imagine we need to store a number of names for a phone book.
The problem is that we don’t know how many names. Also, names
may be added or removed at any time. For embedded systems, this
problem is simple. We create an array in which to store the names. If
we run out of room in the array, we tell the users they can’t store any
more names. A linked list would be better, if we had the memory and
if we had a heap. On an extremely limited embedded system, we
have neither.
Each element of our list, called a node, is allocated from the heap.
To keep track of these elements, we have a pointer to the first node.
The first node has a pointer to the second node, and so on, until we
reach the last node. Its pointer is NULL, indicating the end of the list.
There is no fixed number of nodes. If we need another one, we just
allocate it from the heap.
Here is the structure for the linked list:
#define NAME_SIZE 20
// Max number of characters in a name
/**
* A node in the linked list
*/
struct linkedList {
struct linkedList* next;
// Next node
char name[NAME_SIZE];
// Name of the node
};
The next pointer points to the next node (or NULL), and the name
array stores up to 20 characters. Figure 13-1 is a diagram of this list.
Figure 13-1: A singly linked list
Singly linked lists provide a very simple way of storing a variable
number of items in the heap.
Adding a Node
To add a node (say, “Fred”) to the list, we must first create one. In
the code, we make the newNode variable point to the newly created
node. The memory now looks like Figure 13-2.
Figure 13-2: New node created
Figure 13-2 shows our linked list (without “Fred”) and the new
node we’ve allocated for “Fred.” Next, we make the next link of our
new node point to the start of the list (see Figure 13-3).
Figure 13-3: The next pointer of the new node points to the start of the list.
The last step is to assign theList = newNode, moving the pointer to
the head of our list to our new first node (see Figure 13-4).
Figure 13-4: Moving the new node to the head of the list
Listing 13-2 shows the code for adding the new node to the start of
the list.
static void addName(void)
{
printf("Enter word to add: ");
char line[NAME_SIZE];
// Input line
if (fgets(line, sizeof(line), stdin) == NULL)
return;
if (line[strlen(line)-1] == '\n')
line[strlen(line)-1] = '\0';
// Get a new node.
struct linkedList* newNode = malloc(sizeof(*newNode));
}
strncpy(newNode->name, line, sizeof(newNode->name)-1);
newNode->name[sizeof(newNode->name)-1] = '\0';
newNode->next = theList;
theList = newNode;
Listing 13-2: Adding a word to the linked list
We start with a function declaration, and the static keyword
indicates that the function is visible only to the code in this file. We
first ask for the word to add and get it using the fgets function, which
has the following general form:
fgets(array, size, file)
This function reads a line from the file and puts it in the array.
The size is the number of bytes to stick in the array, including an
end-of-string (\0) character. In this case, the array is line (the input
line), and the file is stdin (standard in, or in other words, the
terminal). If fgets returns NULL, we couldn’t read stdin because of an
error or running out of data. At that point, we give up and return
because we didn’t get a word.
The fgets function reads at most size-1 characters, because it
always puts an end-of-string character (\0) in the array. If the line
that’s entered is shorter than size, the entire line is put in the buffer,
including the newline. If it’s longer, the input is truncated.
We can’t count on a newline being in the buffer, nor do we want
one. If the last character in the string (found using the strlen
function, which returns the number of characters in the string) is a
newline, we delete it by changing it to a null ('\0'). Then we allocate
memory for the new node and populate it by copying line into the
node’s name.
The strncpy function copies the second argument (line) into the
first (newNode->name) but copies only the number of characters
specified by the third argument. If the data to be copied (line) has
more characters than the size parameter, it limits the number of
characters copied and doesn’t insert an end-of-string character (\0)
at the end, so just to be safe, we manually add an end-of-string
character at the end of the name array.
We make newNode point to the first node, and then we take theList
and make it point to the new node, as shown in Figures 13-3 and 134.
Printing the Linked List
The rules for printing a linked list are simple. Here’s an example:
for (const struct linkedList* curNode =
1
theList;
2
3
}
curNode != NULL;
curNode = curNode->next){
printf("%s, ", curNode->name);
We start with the first node 1, print it, and then go to the next node
3. We keep going until we run out of list 2. In this example, the for
loop initializer, end condition, and iteration statement are split over
three lines. The code does add an extra comma at the end of the list,
but I’m sure you can figure out how to fix that. Figure 13-5 shows
how it works.
Figure 13-5: Printing the list
Because our list is a simple data structure, printing is simple, and
the flexibility of the C for loop makes it easy to go through the list.
Deleting a Node
To delete a node, we first go through the list and find the one we
want. Next, we remove the node and then connect the previous node
to the next node. The code to go through the list looks like this:
static void deleteWord(void)
{
printf("Enter word to delete: ");
char line[NAME_SIZE];
// Input line
if (fgets(line, sizeof(line), stdin) == NULL)
return;
if (line[strlen(line)-1] == '\n')
line[strlen(line)-1] = '\0';
struct linkedList* prevNode = NULL; // Pointer to
previous node
1
for (struct linkedList* curNode = theList;
curNode != NULL;
curNode = curNode->next) {
2
if (strcmp(curNode->name, line) == 0) {
if (prevNode == NULL) {
3
theList = curNode->next;
} else {
4 prevNode->next = curNode->next;
}
5
}
}
free(curNode);
curNode = NULL;
return;
6 prevNode = curNode;
}
printf("WARNING: Node not found %s\n", line);
We use a for loop, much like we did for printing 1, but instead of
printing the node, we check to see whether it’s the one we want with
the strcmp function 2, which returns 0 if the strings are the same. If
it’s not the one we want, we update the pointer to the previous node
6 (which we’ll need for deleting) and go to the next node using the
for loop.
If we do find the node (say, “Joe”), prevNode will point to “Sam” and
curNode will point to “Joe,” as shown in Figure 13-6.
We next make the link from “Sam” point to “Mac,” bypassing the
“Joe” node 4. Then we delete the node by freeing it and setting the
pointer to NULL 5, which works as long as prevNode is set. If we want
to delete the first node, “Sam,” we need to change the pointer to the
list to bypass the deleted node 3.
Figure 13-6: Deleting the node “Joe”
Putting It All Together
Listing 13-3 is a small command line program designed to edit and
print a linked list interactively.
linked.c
/**
* Demonstrate a singly linked list.
*/
#include <stdio.h>
#include <stdlib.h>
#include <string.h>
#include <stdbool.h>
#define NAME_SIZE 20
// Max number of characters in a name
/**
* A node in the linked list
*/
struct linkedList {
struct linkedList* next;
// Next node
char name[NAME_SIZE];
// Name of the node
};
// The linked list of words
static struct linkedList* theList = NULL;
/**
* Add a name to the linked list.
*/
static void addName(void)
{
printf("Enter word to add: ");
char line[NAME_SIZE];
// Input line
if (fgets(line, sizeof(line), stdin) == NULL)
return;
if (line[strlen(line)-1] == '\n')
line[strlen(line)-1] = '\0';
// Get a new node.
struct linkedList* newNode = malloc(sizeof(*newNode));
}
strncpy(newNode->name, line, sizeof(newNode->name)-1);
newNode->name[sizeof(newNode->name)-1] = '\0';
newNode->next = theList;
theList = newNode;
/**
* Delete a word from the list.
*/
static void deleteWord(void)
{
printf("Enter word to delete: ");
char line[NAME_SIZE];
// Input line
if (fgets(line, sizeof(line), stdin) == NULL)
return;
if (line[strlen(line)-1] == '\n')
line[strlen(line)-1] = '\0';
struct linkedList* prevNode = NULL; // Pointer to the
previous node
for (struct linkedList* curNode = theList;
curNode != NULL;
curNode = curNode->next) {
if (strcmp(curNode->name, line) == 0) {
if (prevNode == NULL) {
theList = curNode->next;
} else {
prevNode->next = curNode->next;
}
free(curNode);
curNode = NULL;
return;
}
prevNode = curNode;
}
}
printf("WARNING: Node not found %s\n", line);
/**
* Print the linked list.
*/
static void printList(void)
{
// Loop over each node in the list.
for (const struct linkedList* curNode = theList;
curNode != NULL;
curNode = curNode->next) {
printf("%s, ", curNode->name);
}
printf("\n");
}
int main()
{
while (true) {
printf("a-add, d-delete, p-print, q-quit: ");
char line[100]; // An input line
if (fgets(line, sizeof(line), stdin) == NULL)
break;
}
}
switch (line[0]) {
case 'a':
addName();
break;
case 'd':
deleteWord();
break;
case 'p':
printList();
break;
case 'q':
exit(8);
default:
printf(
"ERROR: Unknown command %c\n", line[0]);
break;
}
Listing 13-3: A program that implements a linked list
The user inputs commands to add or remove nodes by name, print
the list, or quit the program. When the user adds or removes a node,
the program dynamically allocates or deallocates memory.
Dynamic Memory Problems
Several common errors can occur when we’re using dynamic
memory, such as memory leaks, using a pointer after it’s freed, and
writing data beyond the end of a structure and trashing random
memory. Let’s look at each error and how to prevent it.
A memory leak happens when memory is allocated and never
freed. Here’s an example:
{
}
int* dynamicArray;
// A dynamic array
// Allocate 100 elements.
dynamicArray = malloc(sizeof(int) * 100);
Every time the program executes this code, it allocates another
400 bytes of memory. If the program runs long enough, it will
consume all available memory and die. (Actually, it will consume
enough memory resources to make all the other programs very slow,
before using so much memory that the computer is completely
useless, runs for a while longer, and finally runs out of memory.)
Using a pointer after it’s freed (often referred to as use after free)
may result in random results or overwriting random memory. Let’s
look at an example:
free(nodePtr);
nextPtr = nodePtr->Next;
// Illegal
In this case, the free function may write bookkeeping or other data
into the node, and as a result nextPtr is undefined.
As mentioned earlier in this chapter, a simple design pattern will
limit the damage this type of code can do. We always set the pointer
to NULL after freeing it:
free(nodePtr);
nodePtr = NULL;
nextPtr = nodePtr->Next;
// Crashes the program
We’ve exchanged an undefined, random behavior for a
reproducible, predictable one. The cause of the crash is easy to find.
The last dynamic memory problem we’ll consider is writing data
beyond the end of a structure. As you saw earlier, nothing prevents
you from writing past the end of an array. You can do the same thing
with allocated memory:
int* theData;
// An array of data
*theData = malloc(sizeof(*theData)*10);
theData[0] = 0;
theData[10] = 10; // Error
There is no good way of preventing or detecting these types of
errors using the C language. An external tool or augmented
compilation is required.
Valgrind and the GCC Address Sanitizer
Memory errors have become such a problem that many tools have
been created to try to detect them, including Valgrind and the GCC
address sanitizer.
Valgrind is open source and freely available for Linux and macOS
at http://valgrind.org. It’s designed to find the following: memory
leaks, writing past the end of an array or allocated memory block,
using a pointer after it’s freed, and making a decision based on the
value of uninitialized memory.
Valgrind is a runtime tool. You don’t need to recompile your code
to use it; instead, you compile your program normally and then run
Valgrind with the program as an argument.
Listing 13-4 shows a program that leaks memory.
/**
* Leaks memory and uses it badly.
* Generates warnings when compiled.
* Generates errors when run.
*
* Please don't program like this.
*/
#include <stdlib.h>
static void leak(void)
{
char* data = malloc(100);
}
int main()
{
leak();
return (0);
}
Listing 13-4: A leaky program
Listing 13-5 shows the result of running this program under
Valgrind with leak checking set to the maximum.
$ valgrind --leak-check=full ./leaker
--snip-==14500== 100 bytes in 1 blocks are definitely lost in loss
record 1 of 1
==14500==
at 0x4C2FB0F: malloc (in
/usr/lib/valgrind/vgpreload_memcheck-amd64-linux.so)
==14500==
by 0x10865B: leak (leaker.c:12) 1
==14500==
by 0x10866B: main (leaker.c:17)
==14500==
==14500== LEAK SUMMARY:
==14500==
definitely lost: 100 bytes in 1 blocks
--snip--
Listing 13-5: Valgrind results
From this output, we can see that line 12 is leaking 1.
The GCC address sanitizer is designed to detect only memory
leaks and writing past the end of an array or allocated memory block.
Unlike Valgrind, it’s a compile-time tool, so you need to compile your
code with the –fsanitize=address flag to use it. After that, when you
run the program, it automatically generates its report, as shown in Li
sting 13-6.
$ /leaker
=============================================================
====
==14427==ERROR: LeakSanitizer: detected memory leaks
Direct leak of 100 byte(s) in 1 object(s) allocated from:
#0 0x7f07c712cb50 in __interceptor_malloc
(/usr/lib/x86_64-linux-gnu/libasan.so.4+0xdeb50)
#1 0x5607aef0b7fb in leak
/home/sdo/bare/xx.leaker/leaker.c:15
#2 0x5607aef0b80b in main
/home/sdo/bare/xx.leaker/leaker.c:17
#3 0x7f07c6c7eb96 in __libc_start_main (/lib/x86_64linux-gnu/libc.so.6+0x21b96)
SUMMARY: AddressSanitizer: 100 byte(s) leaked in 1
allocation(s).
Listing 13-6: Address sanitizer results
Memory problems have plagued programs since the time of the
first computer, and they are nasty to try to find. The address sanitizer
is one tool that gives us extra help in finding them.
Summary
The heap allows you to add and remove extra memory for your
program, as needed. It gives you the ability to create large, complex,
and wonderful data structures. A description of the various sorts of
data structures and data structure designs could fill an entire book.
This chapter describes the single linked list, which is the “Hello
World” of data structures. As you progress, you can learn how to use
the heap to store more complex data. For now, you’ve learned the
basics, so where you take it from here is up to you.
Programming Problems
Change the program in Listing 13-3, which implements a linked list,
so that it always keeps the nodes in order.
Given two ordered linked lists, create a function that returns a list of
the common nodes. You can do this as a new list or create a list
where the body is just a pointer to one of the nodes in the other lists.
Change the program in Listing 13-3 to use a doubly linked list. Each
node will have a next pointer that points to the next node and a
previous pointer that points to the previous node.
Write a function to reverse the order of a singly linked list.
Write a function that will remove duplicates from a linked list.
14
BUFFERED FILE I/O
In the first part of this book, we
struggled to get even the simplest
output to the console. But for this
part of the book, we have an
operating system, and that makes
dealing with output and input a lot easier. That’s
because the operating system hides a great
deal of the complexity from you: you just write
"Hello World\n", and the operating system
sends the data to the appropriate place.
In this chapter you’ll learn about C’s I/O system, which includes
not only the printf function but also functions to read and write disk
files in a manner that is both efficient and very flexible.
The printf Function
We’ve already used the printf function a couple of times for simple
output. The basic format of the function is:
printf(format-string, argument, ...)
The format string tells printf what to print. Any character other
than percent (%) is printed. The % character starts a field specification,
which tells printf to go to the argument list and print the next
argument according to the field specification that follows. For
example:
printf("Number: ->%d<-\n", 1234);
// Prints
->1234<-
The %d field specification can be modified with a number:
printf("Number: ->%3d<-\n", 12);
. for space)
printf("Number: ->%-3d<-\n", 12);
. for space)
printf("Number: ->%3d<-\n", 1234);
least 3 characters)
// Prints
->.12<- (using
// Prints
->12.<- (using
// Prints
->1234<-(at
In these examples, %3d tells printf to use at least three characters
to print the number. The %-3d field tells printf to print the number
with at least three characters and to left-justify it.
So far we’ve discussed only the d conversion character, which is
used to covert an integer argument to text for printing. Table 14-1
lists the major conversion characters.
Table 14-1: Major C Conversion Characters
Conversio Argum Notes
n
ent
character type
%d
Integer The char and short int types are promoted to int when passed as
parameters, so this format also works for those three types.
%c
Charact Because of promotion, this conversion character actually takes an
er
integer argument and prints it as a character.
%o
Integer Prints in octal.
%x
Integer Prints in hexadecimal.
%f
Double Works for both float and double types because all float
parameters are promoted to double when passed as an argument.
%l
Long
integer
The long int type requires its own conversion because the int type
is not automatically promoted to long int.
Writing the ASCII Table
Let’s write a short program to create a table containing the printable
characters with their hex and octal values, which will provide a
practical demonstration of the formatting strings. This program (Listin
g 14-1) gives us a chance to express the same data four different
ways and to try out different formats inside a printf statement.
ascii.c
/**
* Print ASCII character table (only printable characters).
*/
#include <stdio.h>
int main()
{
for (char curChar = ' '; curChar <= '~'; ++curChar) {
printf("Char: %c Decimal %3d Hex 0x%02x Octal
0%03o\n",
curChar, curChar, curChar, curChar);
}
return (0);
}
Listing 14-1: A program to create an ASCII table
First, the %c format string prints out the character as a character.
Next, we print out the character as a three-digit decimal number
(%3d). To be precise, the type of the argument is a character, and it’s
promoted to an integer. The number will be three characters long
because of the 3 in the argument specification. After that, we print in
hexadecimal using the %02x format. The zero (0) tells printf to pad
the result with zeros if needed to match the desired width (the width
is, of course, 2). Finally, we print in octal with the %03o string.
Listing 14-2 shows the output of this program.
Char:
Decimal
Char: ! Decimal
Char: " Decimal
Char: # Decimal
32
33
34
35
Hex
Hex
Hex
Hex
0x20
0x21
0x22
0x23
Octal
Octal
Octal
Octal
0040
0041
0042
0043
Char: $ Decimal
Char: % Decimal
Char: & Decimal
Char: ' Decimal
Char: ( Decimal
--snip--
36
37
38
39
40
Hex
Hex
Hex
Hex
Hex
0x24
0x25
0x26
0x27
0x28
Octal
Octal
Octal
Octal
Octal
0044
0045
0046
0047
0050
Listing 14-2: The output of Listing 14-1 (ascii.c)
The printf function is the workhorse of the C I/O system. It helps
us get lots of different types of data printed to the console. But that’s
not the only place we can write, as we’ll see in the next few sections.
Writing to Predefined Files
When a program starts, the operating system opens three
predefined files:
stdin
Standard in, the normal input of the program
stdout
Standard out, for normal program output
stderr
Standard error, for error output
By default these files are connected to the console, but your
command line interpreter can connect them to disk files, pipes, or
other things.
The fprintf function sends data to a given file. For example:
fprintf(stdout, "Everything is OK\n");
fprintf(stderr, "ERROR: Something bad happened\n");
The printf function is merely a convenience function that replaces
fprintf(stdout, ...).
Reading Data
The functions that read data are designed to be simple, but
unfortunately, they aren’t. The printf function has a counterpart
called scanf that reads data. For example:
// Reads two numbers (do not use this code)
scanf("%d %d", &aInteger, &anotherInteger);
First, note the ampersands (&) in front of the arguments, which are
used because scanf needs to modify the arguments; therefore, the
arguments must be passed by address.
The format string passed to scanf looks a lot like the one for
printf, but there is one big problem with scanf: unless you are an
extreme expert, you never know how it’s going to deal with
whitespace. So, we don’t use it.
Instead, we use the fgets function to get a single line from the
input, and then we use sscanf to parse the resulting string:
fgets(line, sizeof(line), stdin);
// Read a line
sscanf(line, "%d %d", &aInteger, &anotherInteger);
The general form of fgets is:
char* result = fgets(buffer, size, file);
where result is a pointer to the string that was just read (buffer), or
NULL if we’ve reached the end of the file (EOF). The buffer is a
character array where the line is to be placed, and file is a file
handle indicating which file to read (stdin is the only file we know
about at this point).
The buffer will always be null-terminated (\0), so at most size-1
characters will be put in buffer. (An entire line will be read, even if
buffer is not large enough to contain it.)
The sscanf function is much like the scanf function, only the first
argument is now a string. The rest of the arguments are the same.
The sscanf function returns the number of items it converted.
The preceding code assumes that everything works. Let’s rewrite
it, and this time check for errors:
if (fgets(line, sizeof(line), stdin) == NULL) {
fprintf(stderr, "ERROR: Expected two integers, got EOF\
n");
return (ERROR);
}
if (sscanf(line, "%d %d", &aInteger, &anotherInteger) != 2) {
fprintf(stderr, "ERROR: Expected two integers.\n");
return (ERROR)
}
If the first call to fgets returns NULL, something went wrong. We
then print an error message to the predefined file for errors (stderr)
and return an error code to the caller. Next, we perform an sscanf,
which should find two integers. If it doesn’t, we again print an error
message and return an error code.
The Evil gets Function
The fgets function has a corresponding shorthand function to read
data from stdin. It’s called gets and has this general form:
result = gets(buffer);
The gets function reads in a line of data and puts it in the buffer,
whether or not the buffer can hold it.
WARNING
The gets function is dangerous to use. Do not use it. It was
created in the very early days of computing when computers
were rare, and you assumed anyone who used one was
smart and honest. Things have changed since then, and
people are a lot less honest. Hackers quickly discovered how
to send programs that used gets more data than the buffer
could handle, in what was called a stack smashing attack. For
a time, gets was the most widely available security hole
around.
The current GCC compiler makes gets hard to use. First, stdio.h
won’t define it unless you properly define a conditional compilation
macro. When you compile the program, the compiler will warn you,
and then when the program is linked, the linker will warn you.
Listing 14-3 shows what happens when you compile a program
using gets.
$ gcc -Wall -Wextra -o gets gets.c
Agets.c: In function 'main':
gets.c:17:5: warning: 'gets' is deprecated [-Wdeprecateddeclarations]
gets(line);
^~~~
In file included from gets.c:11:0:
/usr/include/stdio.h:577:14: note: declared here
extern char *gets (char *__s) __wur
__attribute_deprecated__;
^~~~
/tmp/cc5H1KMF.o: In function `main':
gets.c:(.text+0x1f): warning: the `gets' function is
dangerous and should not be used.
Listing 14-3: Attempting to use gets
From the volume of output, you can see how much trouble the
GCC compiler goes to in order to persuade you not to use gets.
Now that we’ve taken a look at a few things we shouldn’t use, let’s
look at some things we should.
Opening Files
The predefined files stdin, stdout, and stdout are file handles. The
fopen function allows you to create file handles. Listing 14-4 shows a
simple example.
file.c
#include <stdio.h>
int main()
{
1
FILE* outFile = 2 fopen("hello.txt", "w");
if (outFile == NULL) {
fprintf(stderr, "ERROR: Unable to open
'hello.txt'\n");
exit(8);
}
if (fprintf(outFile, "Hello World!\n") <= 0) {
fprintf(stderr, "ERROR: Unable to write to
'hello.txt'\n");
exit(8);
}
if (fclose(outFile) != 0) {
fprintf(outfile, “ERROR: Unable to close
'hello.txt'\n");
exit(8);
}
return (0);
}
Listing 14-4: A file version of “Hello World”
First, the FILE* declaration 1 declares a new file handle. All file
operations require a file handle. Next we have the fopen call 2, which
has this general form:
result = fopen(filename, mode);
The mode can be one of the following:
r
Read only
w
Write only
r+
a
Read and write
Append (write but start at the end of file)
Used in combination with the other modes for binary files
(discussed in the next section)
b
BEWARE MICROSOFT FILENAMES
Be careful of the Microsoft naming convention that uses the backslash (\) as a
separator. If you want to write a file in the top-level directory named root with a filename
of file.txt on Linux or macOS, you would use the statement:
FILE* fopen("/root/file.txt", "w);
On Microsoft systems, the following does not work:
// Wrong
FILE* fopen("\root\file.txt", "w);
That’s because the backslash (\) is the escape character, and since \r is the
<return> character and \f is the <form-feed> character, you’re trying to write the file:
<return>oot<form-feed>ile.txt
What you want is:
// Right
FILE* fopen("\\root\\file.txt", "w);
By escaping the escape character, you get a literal backslash in the path.
Now that we have the files open, we can read and write to them.
Text can be written by fprintf and read by fgets. Next, let’s take a
look at the other type of file: binary files.
Binary I/O
So far we’ve limited ourselves to text files, but the C I/O system can
handle binary files through the use of the fread and fwrite functions.
The general form of the fread function is:
result = fread(buffer, elementSize, size, inFile);
Here, buffer is a pointer to the data buffer in which the data will be
placed. The elementSize is always 1 (see the following box for an
explanation). The size is the size of the buffer, which is usually
sizeof(buffer), and inFile is the file to read.
The function returns the number of items read, which because
elementSize is 1 is the number of bytes read. It returns 0 for the end
of file and a negative number if there is an I/O error.
ELEMENTSIZE
The original intention was that elementSize would be the size of an element in the
buffer array, and size would be the number of elements to read. The result would be
the number of elements read. However, as things evolved, almost all programs wanted
to read a given number of bytes, not a given number of elements. So, in the real world,
elementSize is 1, and size is the number of bytes to read.
I have seen code where elementSize was not 1. Twice. In 40 years of programming. It
is extremely rare for this to occur.
The fwrite function has a similar structure:
result = fwrite(buffer, elementSize, size, inFile);
Everything is the same, except the data is written instead of read.
Copying a File
We’ll use fread and fwrite calls to copy a file. Since we don’t know
how to pass arguments on the command line yet (see Chapter 15),
the filenames are hardcoded to infile.bin and outfile.bin. Listing 14-5
contains the code.
copy.c
/**
* Copy infile.bin to outfile.bin.
*/
#include <stdio.h>
#include <stdlib.h>
#include <stdbool.h>
int main()
{
// The input file
1
FILE* inFile = fopen("infile.bin", "rb");
if (inFile == NULL) {
fprintf(stderr, "ERROR: Could not open
infile.bin\n");
exit(8);
}
// The output file
FILE* outFile = fopen("outfile.bin", "wb");
if (outFile == NULL) {
fprintf(stderr, "ERROR: Could not create
outfile.bin\n");
exit(8);
}
char buffer[512];
// A data buffer
while (true) {
// Read data, collect size
2
inFile);
ssize_t readSize = fread(buffer, 1, sizeof(buffer),
if (readSize < 0) {
fprintf(stderr, "ERROR: Read error seen\n");
exit(8);
}
3 if (readSize == 0) {
break;
}
4 if (fwrite(buffer, 1, readSize, outFile) !=
(size_t)readSize) {
fprintf(stderr, "ERROR: Write error seen\n");
exit(8);
}
}
fclose(inFile);
fclose(outFile);
return (0);
}
Listing 14-5: Copying a file
First, note the fopen call 1. We open the file using the rb mode,
which tells the system we’re going to read the file (r) and that the file
is binary (b).
Next, let’s take a look at the fread call 2. The return value for this
function is ssize_t, which is a standard type that’s big enough to
hold the size of the largest object (structure, array, union) that can
possibly exist. It also can hold –1 to indicate an error condition.
If we’ve read all the data from the file, fread returns 0. When that
happens, we’re done, so we exit the main loop 3.
Now we come to the fwrite call 4, which returns a size_t value.
This is an unsigned type that holds the size of the largest object you
can put in a program, but because it’s unsigned, it cannot hold an
error value. What happens when fwrite gets an error when writing
something? It writes as much as it can and returns the number of
bytes written, so it will never return an error code, just a short write.
Note that fread returns an ssize_t result and fwrite returns a
size_t result. There are good reasons for this, but it means that if we
check to see whether the number of bytes we tried to write is the
same as the number we actually asked fwrite to write, we get a
compiler warning:
35
if (fwrite(buffer, 1, readSize, outFile) !=
readSize) {
Warning: signed vs.
unsigned compare
To get rid of the warning, we need to insert a cast, thus telling C,
“Yes, I know we are mixing signed and unsigned types, but we have
to do it because of the stupid way fread and fwrite are defined”:
if (fwrite(buffer, 1, readSize, outFile) != (size_t)readSize)
{
Also note that on the last read we probably won’t get a full 512
bytes. That’s why we are using readSize in the fwrite statement
instead of sizeof(buffer).
Buffering and Flushing
The C I/O system uses buffered I/O, which means that when you do
a printf or fwrite, the data may not be sent to the output device
immediately. Instead, it will be stored in memory until the system has
enough data to make things efficient.
Data going to the console is line buffered, which means that if you
print part of a line, it might not go out until the rest of the line is sent.
Let’s see how this can get us into trouble with the program in Listing
14-6.
/**
* Demonstrate how buffering can fool
* us with a divide-by-zero bug.
*/
#include <stdio.h>
int main()
{
int zero = 0;
int result;
}
// The constant zero, to trick the
// compiler into letting us divide by 0
// Something to put a result in
printf("Before divide ");
result = 5 / zero;
printf("Divide done\n");
printf("Result is %d\n", result);
return (0);
Listing 14-6: Dividing by zero
When running this program, you would expect to see the following
output:
Before divide Floating point exception (core dumped)
But what you actually see is this:
Floating point exception (core dumped)
Your first thought might be that printf did not execute, but it did.
The data went into a buffer and was sitting in the buffer when the
program aborted, giving a false indication that printf did not work.
NOTE
Integer divide by zero results in a floating-point exception
(core dumped) and aborts the program. Floating point divide
by zero causes a NaN value to be assigned to the result, and
the program will not abort. There’s a lot of history around this
behavior. The term core dumped is a holdover from when
computer memory actually consisted of ferrite cores. As to the
floating-point exception for integer divides, it was an old
oddity when I started programming, and I still don’t know why
things were done this way.
To fix this problem, we need to tell the I/O system “write the
buffered data out now,” which is done with the fflush function:
printf("Before divide ");
fflush(stdout);
Flushing out the data ensures that we can see it. On the other
hand, we don’t want to flush after every write, as that would defeat
the purpose of buffering, which is to make I/O more efficient.
Closing Files
Finally, after we’re done with a file, we need to tell C that we’re
finished with it. We do this using the fclose function:
int result = fclose(file);
where file is the FILE* to close and result is 0 if it worked or
nonzero if it didn’t.
Summary
In the embedded world, I/O is difficult because you have to write
code to deal directly with the device, and you need to write different
code for every different type of device.
The C I/O system is designed to hide all those details from you. It
also provides a lot of nice features, such as formatting, buffering,
and device independence. The buffered I/O system works well for
most general applications.
Programming Problems
See what happens when you put too many or too few parameters in
a printf statement. What happens when you put the wrong type (for
example, double instead of int)?
Write a program that asks the user for a temperature in Centigrade
and converts it to Fahrenheit.
Write a program that counts the number of words in a file. Be sure
you document the definition of “word,” as some people’s idea of a
word may be different from yours.
Write a program that compares two files line by line and writes out
the lines that differ.
15
COMMAND LINE ARGUMENTS AND
RAW I/O
In this chapter, we explore how
command line arguments allow the
operating system to pass
information to a program when the
program is invoked. We also take a
look at another feature that’s close to the
operating system: the raw input/output (I/O)
system. This system lets us precisely control
how a program performs I/O. Done right, it can
be a tremendous asset to a program.
We’ll use the raw I/O system to perform a high-speed file copy.
This program will also use command line arguments to specify the
source and destination files, so we don’t need to hardcode them into
the program.
Command Line Arguments
Operating systems give the user the ability to provide a program with
a number of command line options when the program is run:
$ ./prog argument1 argument2 argument3
C passes in these arguments through two parameters, argc and
argv, to main:
int main(const int argc, const char* const argv[])
The first parameter, argc, contains the number of arguments. For
historical reasons, it is an integer and not an unsigned integer. The
second parameter, argv, is an array of strings representing the actual
arguments.
If you run a program with an invocation like this:
./prog first second third
the argv and argc parameters will contain the following:
argc
4
argv[0]
argv[1]
argv[2]
argv[3]
./prog
first
second
third
The first argument is the name of the program. The next argument
is the first parameter on the command line, and so on.
Listing 15-1 contains a short program designed to print the
command line arguments.
echo.c
/**
* Echo the command line arguments.
*/
#include <stdio.h>
int main(const int argc, const char* argv[])
{
for (int i = 0; i < argc; ++i) {
printf("argv[%d] = %s\n", i, argv[i]);
}
}
return (0);
Listing 15-1: Printing command line arguments
You don’t have to name the argument count argc and the
argument vector argv, nor do you have to declare argv and argc
const, but it’s conventional to do so.
Raw I/O
The two major file I/O systems available to C programmers are
buffered I/O and unbuffered I/O. The standard I/O system (printf),
which we discussed in Chapter 14, uses buffers. In this chapter, we’ll
work with unbuffered I/O. To show the differences between the two,
let’s consider an example. Say you want to clean out your closet,
and you have 500 old power cords to throw away. You could do the
following:
Pick up a power cord.
Walk outside to the trash can.
Throw it away.
Repeat 500 times.
This method would be like using unbuffered I/O to get rid of the
power cords. The throughput (speed at which you are doing the
work) is terrible.
Let’s add a buffer—in this case, a garbage bag. The procedure
now looks like this:
Put a power cord in bag.
Keep putting cords in the bag until it is full. (It holds 100 cords.)
Walk outside to the trash can.
Throw the bag away.
Repeat five times.
Buffering makes the repetitive process more efficient, so when
would you want to use unbuffered I/O? You would use it in cases
where it would be more efficient to walk out to the trash can for each
item. Say you had to throw away five refrigerators. You wouldn’t want
to put five refrigerators in a trash bag and then throw them away.
Instead, you’d throw away each one individually.
Using Raw I/O
If we wanted to copy a file, we could use the buffered I/O system to
do it, but that would mean we would need to let the buffered I/O
system choose the size of the buffer. Instead, we want to set our
own buffer size. In this case, we know that a size of 1,024 bytes is
optimal for the device we are using, so we create the program shown
in Listing 15-2 to use raw I/O to copy a file using a 1,024-byte buffer.
copy.c
/**
* Copy one file to another.
*
* Usage:
*
copy <from> <to>
*/
#include <stdio.h>
#include <stdbool.h>
#include <stdlib.h>
#include
#include
#include
#include
<unistd.h>
<sys/types.h>
<sys/stat.h>
<fcntl.h>
#ifndef O_BINARY
#define O_BINARY 0
#endif // O_BINARY
// Define O_BINARY if not defined.
int main(int argc, char* argv[])
{
1
if (argc != 3) {
fprintf(stderr, "Usage is %s <infile> <outfile>\n",
argv[0]);
exit(8);
}
2
// The fd of the input file
int inFd = open(argv[1], O_RDONLY|O_BINARY);
3
if (inFd < 0) {
fprintf(stderr, "ERROR: Could not open %s for
input\n", argv[1]);
exit(8);
}
// The fd of the output file
4 int outFd = open(argv[2], O_WRONLY|O_CREAT|O_BINARY,
0666);
if (outFd < 0) {
fprintf(stderr, "ERROR: Could not open %s for
writing\n", argv[2]);
exit(8);
}
while (true)
{
char buffer[1024];
size_t readSize;
// Buffer to read and write
// Size of the last read
5
6
readSize = read(inFd, buffer, sizeof(buffer));
if (readSize < 0) {
fprintf(stderr, "ERROR: Read error for file
%s\n", argv[1]);
exit(8);
}
7 if (readSize == 0)
break;
8
if (write(outFd, buffer, readSize) != readSize) {
fprintf(stderr, "ERROR: Write error for %s\n",
argv[2]);
exit(8);
}
}
9 close(inFd);
close(outFd);
}
return (0);
Listing 15-2: A program to copy one file to another using raw I/O
To use the program in Listing 15-2, we must specify an input file
and an output file:
$ ./copy input-file output-file
The program first checks to see that the proper number of
arguments is supplied 1. Next, it opens the input file 2. The general
form of the open function is file-descriptor = open(filename,
flags). The flags indicate how the file is to be opened. The O_RDONLY
flag opens the file read-only, and the O_BINARY flag indicates that the
file is binary. The O_BINARY flag is a funny one (I’ll explain it in the
next section).
The open command returns a number called a file descriptor. If
there is an error, it returns a negative number, which means the next
step in the program is to check for errors 3.
Then we open the output file using the O_WRONLY (write only) and
O_CREAT (create the file if needed) flags 4.
The additional 0666 parameter means that if the file is created, it’s
in protection mode. It’s an octal number, with each digit representing
a protection user set and each bit representing a protection type:
4 Read
2 Write
1 Execute
The digits are in the following order: <user>, <group>, <other>.
The 0666 parameter tells the system to create the file so that the user
can read and write it (6), so that accounts in the same group as the
user get read/write access (6), and so that anyone else gets the
same read/write permission (6).
NOTE
If we had used 0640, the user would have read/write access
(6), the group would have only read access (4), and everyone
else would have no access (0).
Once the files are open, we do the copy 5. The read function has
the general form:
bytes_read = read(fd, buffer, size);
where fd is the file descriptor, buffer is the buffer that receives the
data, and size is the maximum number of characters read. The
function returns the number of bytes read (bytes read), 0 to indicate
the end of the file (EOF), or a negative number indicating an error.
After reading, we check for an error 6. Then we check to see
whether we have reached the end of the file 7. If so, we’re done
transferring data.
At this point we’re sure to have some data, so we write it 8. The
write function has the general form:
bytes_written = write(fd, buffer, size);
where fd is the file descriptor, buffer is the buffer that has the data,
and size is the number of characters to write. This function returns
the number of bytes written or a negative number to indicate an
error. Once the write is completed, we close the file descriptors 9.
Using Binary Mode
Unfortunately, text files are not portable across operating systems
because different operating systems use different characters to
indicate the end of a line. C was originally written for Unix, which
inspired Linux. Both operating systems use line feed (character
number 0x0a) as the line ending.
Say you open a text file with no O_BINARY flag and want to write to
it. If you write out a string to a file using:
// Bad style; 3 should be a named constant.
write(fd, "Hi\n", 3);
on Linux, you’ll get a file with three characters in it:
48
H
69
i
0a
\n
Other operating systems have to translate the end-of-line
sequence into their native line ending. Table 14-1 lists the various
line endings.
Table 15-1: File Line Endings
OS
Line ending
Characters Translation
Linux
Line feed
\n
None
macOS
Carriage return
\r
Replace \n with \r on output
\r\n
Insert \r before each \n
Windows Carriage return, line feed
If you are running a C program on Windows and execute this:
// Bad style; 3 should be a named constant.
write(fd, "Hi\n", 3);
which is the same code as before, four characters are written:
48
H
69
i
0d
\r
0a
\n
There will be times, however, when you’re writing a binary file and
want byte 0a to be written as 0a without translation. On Linux, that’s
easy, because Linux never does translation. However, other
operating systems do, so they added a new O_BINARY flag to tell the
library that a binary file is being used and to skip the file translation.
Linux does not have the O_BINARY flag since it makes no distinction
between binary and text files. In fact, you can have a half-binary/half-
text file. (I don’t know why you’d want to do that, but Linux will let
you.)
I included the O_BINARY flag in Listing 15-2 because I wanted the
copy program to be portable. We need to supply an O_BINARY mode
when using Apple and Microsoft systems, but if we compile the
program on a Linux system, O_BINARY is undefined.
Thus, the hack is to define it if it is not already defined by the
operating system in the header files:
#ifndef O_BINARY
#define O_BINARY 0
#endif // O_BINARY
// Define O_BINARY if not defined.
If the operating system has an O_BINARY defined, the #define will
not be compiled. If we are using a Linux-like operating system with
no O_BINARY, #define O_BINARY 0 will be compiled, and O_BINARY will
be assigned the value of 0, which does nothing—and doing nothing
is exactly what we need on Linux.
ioctl
In addition to reading and writing, the raw I/O system provides a
function called ioctl that performs I/O control. Its general form is:
result = ioctl(fd, request, parameter);
where fd is the file descriptor, request is the device-specific control
request, and parameter is the parameter to the request. For most
requests, the function returns 0 if the request worked and a nonzero
value otherwise (some ioctl calls return something different).
You can use ioctl to eject removable media, rewind or fastforward tape drives, set the speed and other parameters of a serial
device, and set the address information for a network device.
Because the ioctl specification is open-ended, a lot of functionality
has been crammed into this interface.
Summary
The raw I/O system provides the best control over what your I/O
operations actually do. There is minimal editing or interference from
the operating system, but this control comes with a price. The
buffered I/O system helps limit your mistakes, whereas the raw I/O
system does not. Still, if you know what you’re doing, it can be a
tremendous asset.
Programming Problems
Write a program that takes one argument: the name of the person
running the program. It then says Hello <name>. Here’s an example:
./hello Fred
Hello Fred
./hello
Hello stranger
Write a program that scans the argument list and, if -d is an
argument, prints Debug mode. If the -d is missing, it prints Release
mode. Add other options as well.
Time how long it takes the copy program in Listing 15-2 to copy a
large file. Now change the buffer size to 1. See how fast the program
is. Change the buffer size to 16384. See how fast it runs. Try 17000.
Note: almost every disk reads and writes in 512-byte blocks. How
does this fact explain the timings you are seeing?
Research the getopt function and use it to parse the command line
arguments you invented for problem 1.
16
FLOATING-POINT NUMBERS
In this part of the book, we work
through some C features that aren’t
typically useful in embedded
programming but that you may
encounter in mainframe
programming. Floating-point numbers aren’t
common in embedded programming because a
lot of low-end processor chips can’t handle
them. Even when you have a CPU that does
work with them, floating-point arithmetic is slow,
inexact, and tricky to use.
However, because you will occasionally encounter these numbers
in scientific or 3D graphic programs, you should be prepared. This
chapter covers the basics of floating point, why floating-point
operations are so expensive to compute, and some of the errors that
can occur while using them.
What Is a Floating-Point Number?
A floating-point number is one in which the decimal point floats. It
can occur in different places in the number, such as 1.0, 0.1, 0.0001,
or 1000.0. Strictly speaking, having a digit after the decimal point isn’t
required. For example, 1.0 and 1. are the same number. However,
floating-point numbers are easier to read and more obvious if they
have digits on both sides of the decimal point.
We can also write floating-point numbers using exponent notation,
such as 1.0e33, which represents the number 1.0 × 1033. (You can
use an uppercase E or lowercase e, but the lowercase version is
more readable.)
Floating-Point Types
In C, the floating-point types are float, double, and long double. The
double type is supposed to have twice the precision and range of the
float (single-precision) type. The long double has a greater
precision and range than the other two types.
All floating-point constants are of the double type unless you tell C
differently. Adding an F suffix to the end of a number makes it a
single-precision float, and adding an L at the end makes it a long
double.
The decimal point is required for floating-point numbers. Consider
the following code:
float f1 = 1/3;
float f2 = 1.0 / 3.0;
The first assignment does not assign f1 the value 0.3333. Instead,
it assigns it the value 0.0, because 1 and 3 are integers. C performs
an integer divide (which results in integer 0), promotes it to floating
point, and makes the assignment. The second line does what we
want and assigns the value 0.3333.
Automatic Conversions
C does some automatic conversions behind your back. If one
operand of an expression is a floating-point number, C automatically
converts the other to a float. Here’s an example:
f = 1.0 / 3;
// Bad form
In this case, the 3 will be turned into 3.0 before the division
operation. This example is considered bad form because you don’t
want to mix integers and floating-point constants if you can help it.
Also, if you assign a floating-point number to an integer, it is
converted to an integer.
Problems with Floating-Point Numbers
One of the problems with floating-point numbers is that they’re not
exact. For example, 1/3 in decimal floating point is 0.333333. No
matter how many digits you use, it still is not exact. Rather than
show what happens with binary floating point (used by a computer),
we’re going to use a decimal floating point (familiar to humans).
Everything that can go wrong with our decimal floating point can go
wrong with the binary version. The only difference is that with
decimal floating point, the examples are easier to understand.
Decimal floating point is a limited version of scientific notation.
Here’s an example:
+1.234e+56
This number has a sign (+), a fraction (four digits), and an
exponent. This is not a problem for humans, but representing
numbers like this in a computer is tricky.
Computers use a similar format, except the exponent and fraction
are in binary. Also, they mix up the order and store the components
in the order sign, exponent, and then fraction. For more details, see
the IEEE-754 floating-point specification, which is used by almost all
computers currently.
Rounding Errors
You know that 1 + 1 is 2, but 1/3 + 1/3 is not 2/3. Let’s take look at
how this works. First, let’s add the numbers:
+3.333e-01
+3.333e-01
+6.666e-01
// 1/3 in our notation
// 1/3 in our notation
However, 2/3 is the following:
+6.667e-01
This is an example of a rounding error. There is a small error
between +3.333e-01 and 1/3. Because of the standard rounding rules
we are using, we round down. When we compute 2/3, we get 6.67e1. In this case, the rounding rules cause us to round up, so although
1 + 1 = 2 (integer), 1/3 + 1/3 != 2/3 (floating point).
We can use some tricks to minimize rounding errors here. One
trick most computers use is to add guard digits during calculations. A
guard digit is an extra digit added to the number while the
calculations are being done. When the result is computed, the guard
digit is dropped.
WARNING
One of the early programs I wrote was an accounting
program. In spite of the fact that I should have known better, I
used floating point for money. It worked well for about three
months of transactions, but then my balance disagreed with
the bank’s by one penny ($0.01). The cause was a floatingpoint roundoff error. Never use floating point for money. Use
integer cents instead.
Digits of Precision
Single-precision floating point (float) should give you about 6.5
digits of precision, but that’s not always true. How many digits can
you trust? In the previous example, we might be tempted to say that
the first three digits of our decimal floating point are accurate, but we
can’t rely on that.
Let’s compute 2/3 – 1/3 – 1/3:
+6.667e-01
-3.333e-01
-3.333e-01
+0.001e-01
+1.000e-04
//
//
//
//
//
2/3
1/3
1/3
Result unnormalized
Result normalized
How many digits are correct? The first digit of our result is 1.
(Normalization means that we change the number so that there is a
digit in the first location. All floating-point numbers are stored
normalized, except for a few edge cases that we’ll cover later.) The
correct first digit should be 0.
A number of problems are inherent in the design of floating-point
arithmetic. Mainly they boil down to the fact that most numbers are
inexact, which can result in computational errors and problems with
exact comparisons.
If you are doing a limited amount of floating-point operations, they
probably won’t bite you, but you should be aware of them. If you are
doing a lot of floating-point operations, you should check out the
branch of computer science called numerical analysis that’s devoted
to dealing with floating-point issues and how to get stable results out
of them, but that’s beyond the scope of this book.
Infinity, NaN, and Subnormal Numbers
The IEEE floating-point format has a few bit patterns that make no
sense as numbers. For example, consider the number 0*105. Since
0 times anything is 0, we can use the exponent in this case to
indicate a special value. In this section, we’ll look at a few of these,
as well as the edge cases of the floating-point format.
Let’s consider the following expression:
float f = 1.0 / 0.0;
If this were an integer, dividing it by zero would abort your
program. However, because it’s floating point, the result is that f is
assigned the value INFINITY (this constant is defined in the #include
<math.h> header file).
Similarly, the statement:
float f = -1.0 / 0.0;
assigns f the value -INFINITY.
The numbers INFINITY and -INFINITY are not floating-point
numbers (they have no digits and no decimal point), but the IEEE
floating-point specification has defined several of these special
numbers. Since you are likely to encounter these types of numbers
(especially if your program contains bugs), it’s important to know
what they are.
You also may encounter a NaN (for Not a Number), which is
generated when an operation cannot produce a result. Here’s an
example:
#include <math.h>
float f = sqrt(-1.0);
Newer versions of the C standard include complex numbers, but
the sqrt function always returns a double, so sqrt(-1.0) always
returns NaN.
HISTORICAL NOTE
The statement:
float f = 1.0 / 0.0;
results in the program assigning f the value INFINITY, and the operation continues
normally.
On Linux, the statement:
int i = 1 / 0;
results in the program being aborted with the following error:
Floating point exception (core dumped)
This message is wrong for a number of reasons. First, it’s an integer exception that
causes the problem, not a floating-point exception. Second, core memory went away
about 40 years ago. Third, memory dumps are disabled by default on almost all current
Linux distributions.
Now, what’s the tiniest number we can represent in our floatingpoint scheme? You might be tempted to say it’s the following:
+1.0000e-99
The fraction 1.0000 is the smallest fraction we can create. (If we
used 0.5000, it would get normalized to 5.0000.) And –99 is the
smallest exponent we can get with two digits.
However, we can get smaller:
+0.1000e-99
// -99 is the limit on the exponent.
And smaller still:
+0.0001e-99
Up to this point, the numbers we’ve been discussing have been
normalized, which means a digit is always in the first position. Those
numbers are considered to be subnormal. We’ve also lost some
significant digits. We have five significant digits with the number
+1.2345e-99, but only one for +0.0001e-99.
In C, the isnormal macro returns true if a number is normalized,
and the issubnormal macro returns true if the number is
subnormalized.
If you encounter subnormalized numbers, you’ve reached into the
darkest corners of the C floating point. So far, I’ve not seen any real
program that’s made use of them, but they exist and you should be
aware of them.
Implementation
Floating points can be implemented in a variety of ways. Let’s start
with the STM chip we’ve been using. Implementation is simple: you
can’t have floating point. The hardware doesn’t do it, and the
machine doesn’t have enough power to do it in software.
Lower-end chips generally have no floating-point unit. As a result,
floating-point operations are done through the use of a software
library, which comes with a cost. Floating-point operations in general
take about 1,000 times longer than their integer counterparts.
Once you get into the better chips, you’ll find native floating-point
support. The operations are still expensive; a floating-point operation
will take roughly 10 times longer than an integer operation.
Alternatives
One of the best ways to deal with floating point is to not use it. As
mentioned previously, one example is when working with money. If
you store money as a float, rounding errors will eventually cause you
to generate incorrect totals. If instead you store money as an integer
number of cents, you’ll avoid floating point and all its ills.
Let’s define a simple fixed-point number with the number of digits
after the decimal fixed at 2. Here are some examples and an integer
implementation:
Fixed point
12.34
00.01
12.00
Implementation
1234
1
1200
To add or subtract fixed point, just add or subtract the underlying
implementation:
12.34
+22.22
-----34.56
1234
+2222
----2346
98.76
-11.11
-----87.65
9876
-1111
-----8765
To multiply fixed-point numbers, multiply the two numbers and
divide by 100 to correct for the placement of the decimal point:
12.00
x 00.50
-----x 06.00
1200
x 0050
60000 (Uncorrected)
-----0600 (After 100 correction)
To divide, you do the opposite: divide the underlying numbers and
multiply by a correction.
Listing 15-1 contains a program demonstrating the use of fixedpoint numbers.
fixed.c
/**
* Demonstrate fixed-point numbers.
*/
#include <stdio.h>
/**
* Our fixed-point numbers have the form
* of xxxxx.xx with two digits to the right
* of the decimal place.
*/
typedef long int fixedPoint;
// Fixed-point data
type
static const int FIXED_FACTOR = 100;
// Adjustment factor
for fixed point
/**
* Add two fixed-point numbers.
*
* @param f1 First number to add
* @param f2 Second number to add
* @returns f1+f2
*/
static inline fixedPoint fixedAdd(const fixedPoint f1, const
fixedPoint f2)
{
return (f1+f2);
}
/**
* Subtract two fixed-point numbers.
*
* @param f1 First number to subtract
* @param f2 Second number to subtract
* @returns f1-f2
*/
static inline fixedPoint fixedSubtract(
const fixedPoint f1,
const fixedPoint f2)
{
return (f1-f2);
}
/**
* Multiply two fixed-point numbers.
*
* @param f1 First number to multiply
* @param f2 Second number to multiply
* @returns f1*f2
*/
static inline fixedPoint fixedMultiply(
const fixedPoint f1,
const fixedPoint f2)
{
return ((f1*f2)/FIXED_FACTOR);
}
/**
* Divide two fixed-point numbers.
*
* @param f1 First number to divide
* @param f2 Second number to divide
* @returns f1/f2
*/
static inline fixedPoint fixedDivide(
const fixedPoint f1,
const fixedPoint f2)
{
return ((f1*FIXED_FACTOR) / f2);
}
/**
* Turn a fixed-point number into a floating one (for
printing).
*
* @param f1 Fixed-point number
* @returns Floating-point number
*/
static inline double fixedToFloat(const fixedPoint f1)
{
return (((double)f1) / ((double)FIXED_FACTOR));
}
/**
* Turn a floating-point number into a fixed one.
*
* @param f1 Floating-point number
* @returns Fixed-point number
*/
static inline fixedPoint floatToFixed(const double f1)
{
return (f1 * ((double)FIXED_FACTOR));
}
int main()
{
fixedPoint f1 = floatToFixed(1.2);
number
fixedPoint f2 = floatToFixed(3.4);
point number
// A fixed-point
// Another fixed-
printf("f1 = %.2f\n", fixedToFloat(f1));
printf("f2 = %.2f\n", fixedToFloat(f2));
printf("f1+f2 = %.2f\n", fixedToFloat(fixedAdd(f1, f2)));
printf("f2-f1 = %.2f\n", fixedToFloat(fixedSubtract(f2,
f1)));
printf("f1*f2 = %.2f\n", fixedToFloat(fixedMultiply(f1,
f2)));
printf("f2/f1 = %.2f\n", fixedToFloat(fixedDivide(f1,
f2)));
return (0);
}
Listing 16-1: Using fixed-point numbers
This is not a perfect implementation. Rounding errors occur in
some places, such as the multiply and divide operations, but if you’re
really into fixed point, you should be able to spot them easily.
Summary
Understanding the underlying implementation and the limitations of
floating-point numbers is important. As mentioned previously, you
should never use floating point for money. Accountants like exact
numbers, and rounding errors can result in incorrect answers. The
numerical analysis branch of computer science deals with analyzing
how computations are made and figuring out how to minimize errors.
This chapter shows you the basics. If you’re going to use floatingpoint numbers extensively, you should have a working knowledge of
numerical analysis. However, the best way of using floating point is
to avoid it altogether, so make sure you understand that alternatives
to floating point, such as fixed point, exist.
Wikipedia has a good article on the IEEE floating-point standard
with links to lots of online reference material: https://en.wikipedia.org/
wiki/IEEE_754.
Programming Problems
Write a function that computes the sin of an angle. How many
factors do you need to compute to get an accurate answer?
Using a float, compute pi to as many digits as possible. How many
digits more will you get if you change the data type to double? How
many for long double?
Say you want to find the number of bits in the fraction part of a
floating-point number. Write a program that starts with x = 1 and
keeps dividing x by 2 until (1.0 + x = 1.0). The number of times you
divided by 2 is the number of bits in your floating-point calculations.
17
MODULAR PROGRAMMING
So far we’ve been working with
small, simple one-file programs,
which is fine if all you’re going to do
is write sample programs for a book.
In the real world, however, you’re
probably going to encounter programs with more
than 50 lines in them.
The Linux kernel has 33,000 files and 28 million lines of code (and
those numbers are increasing as you are reading this). You can’t
deal with that amount of information without organizing it by dividing
up the code into modules.
A module ideally is a single file containing a collection of data and
functions that does one thing well with minimum interaction with
other modules. We’ve already used the STM HAL collection of
modules earlier in this book, including the module containing the
HAL_Init function. It does a lot of work internally, but we never see it.
We see only a simple module that does one thing well: it initializes all
the stuff needed to get the hardware to work.
Simple Modules
Let’s create a program that uses two files. The main program will be
called main.c (see Listing 17-1) and will call a function in the func.c
file (see Listing 17-2). We’ll use a makefile (see Listing 17-3) to
compile the two files into one program.
main.c
/**
* Demonstrate the use of extern.
* @note: Oversimplifies things.
*/
#include <stdio.h>
1
extern void funct(void);
// An external function
int main()
{
printf("In main()\n");
funct();
return (0);
}
Listing 17-1: The main program
The first thing to notice is the declaration of funct 1 in main.c. The
extern keyword tells C that the function is defined in another file,
named func.c. Listing 17-2 contains that file.
func.c
1
/**
* Demonstration of a function module
*/
#include <stdio.h>
/**
* Demonstration function
*/
void funct(void)
{
printf("In funct()\n");
}
Listing 17-2: The file that defines the function
The funct function is defined 1 in the func.c file, and the makefile
in Listing 17-3 handles the compilation.
main: main.c func.c
gcc -g -Wall -Wextra -o main main.c func.c
Listing 17-3: simple/Makefile
The first line of the makefile tells make that the target main must be
rebuilt if main.c or func.c changes. The second line tells make that
when one of those files changes it should compile both files and use
them to make the program.
In this example, we’ve taken a function and a main program and
put them in two different files. Then we told make to tell the compiler
to combine them into one program. This is an oversimplified version
of modular programming, but these basic principles are used with
more complex programs with larger and more numerous modules.
Problems with the Simple Module
The previous example has a few problems. The first one is that the
same information is repeated twice.
In main.c, we have the following:
extern void funct(void);
// An external function
And in func.c, we have this:
void funct(void)
which means that if we change one file, we must change the other.
Worse, C does not check types across files, which means it’s
possible to have the lines:
// File a.c
extern uint32_t flag;
// A flag
and:
// File b.c
int16_t flag;
// A flag
in two different files. Suppose file a.c decides to set flag to zero. The
program is going to deposit 32 bits worth of zero into flag, which is
defined in file b.c as being only 16 bits long. What will actually
happen is that 16 bits will go into flag, and 16 bits will go into
something else. The result is that unexpected, surprising, and
difficult-to-debug things will happen to your program.
It is possible to declare a variable extern in a file and later declare
it without the extern. C will check to make sure that the type in the
extern definition matches the type in the actual declaration:
#include <stdint.h>
extern uint32_t flag;
int16_t flag;
// A flag
// A flag
Compiling this will result in an error:
16.bad.c:3:9: error: conflicting types for 'flag'
int16_t flag; // A flag
16.bad.c:2:17: note: previous declaration of 'flag' was here
extern uint32_t flag; // A flag
Concerning the second problem, suppose we want to use our
external function funct in several different files. Do we want to add
an extern statement to each of them? That would mean the
definition of funct would be duplicated in many different places (and
not checked by the compiler).
The solution is to create a header file to hold the extern definition.
Listing 17-4 contains this file.
func.h
#ifndef __FUNC_H__
#define __FUNC_H__
1
extern void funct(void);
#endif // __FUNC_H__
Listing 17-4: The file that defines the function
Along with the function definition 1, this file also contains double
inclusion protection. The #findef/#endif pair prevents problems that
might occur if your program does something like this:
#include "func.h"
#include "func.h"
This will cause the definitions in func.h to be defined twice, which
is not a problem for extern declarations, but it will upset the compiler
if multiple instances of #define are involved.
This example looks a bit silly, because in real programs, the
problem is not so obvious. You may have a case where the code
looks like:
#include "database.h"
#include "service.h"
but the database.h file includes the direct_io.h file, which includes
func.h, and the service.h file includes the network.h file, which
includes func.h. You then get func.h included twice, even though you
took the long way to do it.
The format of the #include statement has changed slightly in these
examples as well. Instead of:
#include <file.h>
it’s this:
#include "file.h"
The quotation marks indicate that the file to be included is a usergenerated file. The compiler will search for it in the current directory
instead of searching through the system files.
Listing 17-5 contains an improved main.c that uses the include file
to bring in the extern declarations.
good/main.c
/**
* Demonstrate the use of extern.
*/
#include <stdio.h>
#include "func.h"
int main()
{
printf("In main()\n");
funct();
return (0);
}
Listing 17-5: Improved main.c
Listing 17-6 contains the improved func.c that includes func.h. The
extern functions defined in func.h are not really needed to compile
func.c, but by bringing them in, we make sure that the extern
matches the actual function declaration.
good/func.c
/**
* Demonstration of a function module
*/
#include <stdio.h>
#include "func.h"
/**
* Demonstration function
*/
void funct(void)
{
printf("In funct()\n");
}
Listing 17-6: Improved func.c
By including the func.h file twice, we’ve solved the problem that
can occur when the extern does not match the actual declaration.
Including it in func.c lets the compiler check the definition of the
function, while in main.c, the inclusion provides us with the definition
of the function.
Making the Module
The makefile for this program has changed as well (see Listing 177).
CFLAGS = -g -Wall -Wextra
OBJS = main.o func.o
1
main: $(OBJS)
gcc -g -Wall -Wextra -o main $(OBJS)
main.o: main.c func.h
func.o: func.c func.h
Listing 17-7: Improved Makefile
The first line defines a macro called CFLAGS, which is a specific
name used to compile C programs. The next line defines another
macro called OBJS (there is nothing significant about that name),
which contains a list of the objects we use to make our program. In
this example, we’re going to compile main.c into the main.o object
file and compile func.c into the func.o object file.
NOTE
Object files on macOS and Linux systems end in .o. On
Windows systems, object files end with .obj.
We’re using a macro here simply to avoid having to write the list
twice in the next rule 1, which tells make to create main.o from main.c
and func.h. However, this rule isn’t followed by a rule telling make how
to do this. When make doesn’t have a rule for something, it falls back
to its list of built-in rules. When we create a .o (or .obj) file from a .c
file, that built-in rule is:
$(CC) $(CFLAGS) -c file.c
where CC is the macro containing the name of the C compiler (in this
case, cc, which is an alias for gcc).
This example demonstrates a simple modular program, but the
design pattern works when programs have additional modules.
What Makes Good Modules
The following list outlines some rules for making good modules:
Each module should have a header file with the same name as the
module. That file should contain the definitions of the public types,
variables, and functions in that module (and nothing else).
Every module should include its own header file so that C can check
to make sure the header file and the implementation match.
Modules should contain code used for a common purpose, and they
should expose the minimum amount of information to the outside
world. The information they do expose through extern declarations is
global (seen by the entire program), and as described in the next
section, sometimes that can be a problem.
Namespaces
One problem with C is that it does not have namespaces. In C++, for
example, you can tell the compiler that all the symbols in a given
module belong to the db namespace, so you can create a module
with entries like insert, delete, and query that are visible to other
people as db::insert, db::delete, and db::query, respectively.
In C, if you define a public function called Init, no one else can
define a function called Init in any module. If this does happen, the
linker will complain about a duplicate symbol. Since there may be
more than one item that needs initialization, that can be a problem.
Most programmers solve this issue by adding a module prefix to
the name of each public function, type, or variable. You can see this
in action with the HAL library that gets added automatically to your
Nucleo projects. For example, as shown in Listing 17-8, all the
functions that manipulate the UART begin with the UART_ prefix.
HAL_StatusTypeDef
*huart);
HAL_StatusTypeDef
HAL_StatusTypeDef
*huart);
HAL_StatusTypeDef
*huart);
HAL_StatusTypeDef
UART_CheckIdleState(UART_HandleTypeDef
UART_SetConfig(UART_HandleTypeDef *huart);
UART_Transmit_IT(UART_HandleTypeDef
UART_EndTransmit_IT(UART_HandleTypeDef
UART_Receive_IT(UART_HandleTypeDef *huart);
Listing 17-8: An excerpt from stm32f0xx_hal_uart.h
The key point here is that a public symbol in the HAL library starts
with HAL_, which makes it easy to determine whether a function
belongs to the library. It also ensures that you don’t accidentally use
a name already in use by the HAL library.
Libraries
Listing every file that goes into a program is not too bad when there
are fewer than 20 files. After that, it gets a little tedious, but it’s
manageable until the number gets really big. The mainframe
programs we’ve been writing use the standard C library functions.
The C library has more than 1,600 files. Fortunately, we don’t need
to list them all when we compile a program.
The standard C library is a file named libc.a, and it’s automatically
loaded when your program is linked. The library is a collection of
object files in a simple archive format (hence the .a extension).
Let’s create our own library containing several modules to square
various types of numbers. Listing 17-9 shows a function to square a
floating-point number.
square_float.c
#include "square_float.h"
/**
* Square a floating-point number.
*
* @param number Number to square
* @returns The square of the number
*/
float square_float(const float number) {
return (number * number);
}
Listing 17-9: A function to square a floating-point number
Listing 17-10 is the header for that module.
square_float.h
#ifndef __SQUARE_FLOAT_H__
#define __SQUARE_FLOAT_H__
extern float square_float(const float number);
#endif // __SQUARE_FLOAT_H__
Listing 17-10: The header file for the square_float.c module
Listing 17-11 defines a function to square an integer.
square_int.c
#include "square_int.h"
/**
* Square an integer.
*
* @param number Number to square
* @returns The square of the number
*/
int square_int(const int number) {
return (number * number);
}
Listing 17-11: A function to square an integer
Listing 17-12 defines its header file.
square_int.h
#ifndef __SQUARE_INT_H__
#define __SQUARE_INT_H__
extern int square_int(const int number);
#endif // __SQUARE_INT_H__
Listing 17-12: The header file for square_int.c
Next, Listing 17-13 is a similar function to square an unsigned
integer.
square_unsigned.c
#include "square_unsigned.h"
/**
* Square an unsigned integer.
*
* @param number Number to square
* @returns The square of the number
*/
unsigned int square_unsigned(const unsigned int number) {
return (number * number);
}
Listing 17-13: A function to square an unsigned integer
Listing 17-14 defines the header file.
square_unsigned.h
#ifndef __SQUARE_UNSIGNED_H__
#define __SQUARE_UNSIGNED_H__
extern unsigned int square_unsigned(const unsigned int
number);
#endif // __SQUARE_UNSIGNED_H__
Listing 17-14: The header file for square_unsigned.c
We are going to put our three functions in a library. If users want to
use this library, they will have to include all those header files. That’s
a lot of work.
To make things easier, we’ll create a header file called square.h for
the library. This file consolidates the individual headers for each of
the preceding library components (modules). As a result, people who
use this library just need to include square.h (see Listing 17-15)
instead of a bunch of individual headers.
square.h
#ifndef __SQUARE_H__
#define __SQUARE_H__
#include "square_float.h"
#include "square_int.h"
#include "square_unsigned.h"
#endif // __SQUARE_H__
Listing 17-15: The header file for the library
We’ve now followed our style rule of one header per program file,
as well as the style rule that says the interface to a library should be
as simple as possible.
Next, let’s create a small test program for our library (see Listing 1
7-16).
square.c
/**
* Test the square library.
*/
#include <stdio.h>
#include "square.h"
int main()
{
printf("5 squared is %d\n", square_int(5));
printf("5.3 squared is %f\n", square_float(5.3));
return (0);
}
Listing 17-16: A test program for the library
Notice that we don’t test all the members of the library (this will
matter later).
Now that we have the source files for our library, we need to turn
them into an actual library. As mentioned previously, a library is a set
of object files in an archive format, sort of like a .zip file, only without
the compression.
In this case, we’ll create the libsquare.a file (the library itself) from
the square_float.o, square_int.o, and square_unsigned.o files.
The make program is quite intelligent and has the ability to update
an archive’s components. For example, one of the components of
libsquare.a is square_int.o. The following rule makes this a
component of the library:
libsquare.a(square_int.o): square_int.o
ar crU libsquare.a square_int.o
The first line tells make that we are creating or updating the
square_int.o component in the libsquare.a library. This component
depends on the square_int.o object file.
The second line is the actual command to add the library. The c
option tells ar to create the archive if it does not exist. The r causes
ar to create or replace the square_int.o component in the archive.
The U flag tells ar to run in nondeterministic mode, which stores the
creation time of the file in the archive (we’ll discuss deterministic
versus nondeterministic mode later in this chapter). Following that
command is the name of the library (libsquare.a) and the name of
the component to add or replace (square_int.o). The linker sets the
naming convention. It must begin with lib and end with .a (more on
this naming convention later).
Next, with the following directives, we tell make what components
should make up the libsquare.a library:
libsquare.a: libsquare.a(square_int.o) \
libsquare.a(square_float.o)
libsquare.a(square_unsigned.o)
ranlib libsquare.a
The first two lines tell make what components to make libsquare.a
out of. The third line, ranlib libsquare.a, tells make to run a program
called ranlib on the archive after installing all the components to
create a table of contents for the archive.
ranlib and Library Linking
The reason we use ranlib is due to some of the early linkers.
Suppose that we had an archive with the components a.o (defines
a_funct), b.o (defines b_funct), and c.o (defines c_funct) and that
the program needed a function in b.o. The linker would open the
archive and go through it serially, looking at each member to see
whether it was needed. The decision process goes like this:
Look at the list of undefined symbols (the program uses b_funct, so
it’s undefined).
Open the archive.
Look at a.o. Does it define a needed symbol? No. Do not load it.
Look at b.o. Does it define a needed symbol? Yes. Load it.
Look at c.o. Does it define a needed symbol? No. Do not load it.
Now suppose that b.o needed the a_funct function. The linker
would not go back and reexamine the archive. It would continue on
and look only at c.o. Since c.o does not define the symbol, it would
not be loaded. The linker would reach the end of the archive and
abort because it did not find an object file to satisfy the need for
a_funct.
Because of the way the linker worked, sometimes you needed to
specify the same library two or three times. To solve that problem, a
table of contents was added to the archive so the components could
be loaded in random order (thus the name ranlib).
Now the algorithm to load components is as follows:
Look at the list of undefined symbols (the program uses b_funct, so
it’s undefined).
Open the archive.
Do we have an undefined symbol that’s in the table of contents?
If so, load it.
Repeat until we have no more symbols that can be satisfied by this
library.
This process solves the ordering problem because the table of
contents makes everything accessible.
The following command actually links the library with our program:
square: square.o libsquare.a
$(CC) $(CFLAGS) -o square square.o -L. -lsquare
The -L. flag tells the linker to search the current directory (.) for
library files. Otherwise, only the system library directories are
searched. The library itself is specified with the -lsquare directive.
The linker looks for a library called libsquare.a, first in the current
directory (because of the -L.) and then in the system directories.
Listing 17-17 shows the full makefile for this project.
CFLAGS=-g -Wall -Wextra
all: square
square: square.o libsquare.a
$(CC) $(CFLAGS) -o square square.o -L. -lsquare
libsquare.a: libsquare.a(square_int.o) \
libsquare.a(square_float.o)
libsquare.a(square_unsigned.o)
ranlib libsquare.a
libsquare.a(square_int.o): square_int.o
ar crU libsquare.a square_int.o
libsquare.a(square_float.o): square_float.o
ar crU libsquare.a square_float.o
libsquare.a(square_unsigned.o): square_unsigned.o
ar crU libsquare.a square_unsigned.o
square_int.o: square_int.h square_int.c
square_float.o: square_float.h square_float.c
square_unsigned.o: square_unsigned.h square_unsigned.c
square.o: square_float.h square.h square_int.h
square_unsigned.h square.c
Listing 17-17: The full makefile
Because our test program does not call square_unsigned, the
square_unsigned.o module will not be linked into our program. (The
test for square_unsigned was omitted to demonstrate how the linker
will not link in unneeded object files.)
Deterministic vs. Nondeterministic Libraries
Ideally, if you run a make command, the resulting binary should be the
same, no matter when the command was executed. For this reason,
originally the library files did not store information on who created the
components or when they were created.
However, that causes some difficulties for the make program. How
can it determine whether the version of square_int.o in the archive is
newer or older than the version you just compiled if the archive
doesn’t store the modification date?
The ar command was modified to store this information. Because
this feature broke legacy functionality, the ar maintainers decided to
make storing this information optional. If you specify the D option, the
modification times are not stored and you get a deterministic archive
(the same binary every time). If you specify U for nondeterministic,
you get a different binary each time, but one that the make program
likes better. The default is D, the legacy format.
Weak Symbols
So far, we’ve defined modules with functions and variables that are
always loaded. In other words, if a module defines a doIt function,
that’s the only definition of the function that’s loaded. An extension to
the C language provided by GCC and most other compilers allows
for weak symbols. A weak symbol tells the linker, “If no one else
defines this symbol, use me.”
One example of where weak symbols are used is in the STM
interrupt table. You must define functions to be called for every
possible interrupt; the hardware requires it. So you have to write an
interrupt route for interrupts that never occur. Since the function is
never going to be called, that should make things simple.
However, the STM firmware is designed around the idea that
although interrupt routes for disabled interrupts should never be
called, that doesn’t mean that they will never be called. The STM
firmware defines interrupt handlers for all interrupts that brick the
system. If they ever do get called, your system stops and you get a
chance to go in with the debugger and try and figure out why.
The only way a default interrupt handler will be called is if you turn
on interrupts and don’t provide your own interrupt handler. In that
case the default interrupt knows something went wrong and just sits
there waiting for you to figure out what.
The STM interrupt handler from the USART2 interrupts is the
function USART2_IRQHandler, which is defined as follows:
void USART2_IRQHandler(void) {
while(true)
continue;
}
However, if we define our own, the one in the firmware library
disappears, in spite of the fact that the other 40 or so interrupt
functions in the same module will be loaded.
Let’s see this in action with our own code. In Listings 17-18 and
17-19 we have sub1 and sub2, and sub2 is defined twice (once in
main.c and once in sub.c). When the linker looks at those two files, it
says, “There are two sub2 functions here. Should I raise an error?
No. One of them is weak, and I can throw it away.” The sub2 in
main.c will get linked in and the one in sub.c will not.
Let’s first define a main program whose job is to call our two
subroutines (see Listing 17-18).
main.c
#include "sub.h"
int main()
{
sub1();
sub2();
return (0);
}
Listing 17-18: The main program to call the two subroutines
In Listing 17-19, we tell the compiler that sub2 in sub.c is weak
through the GCC extension.
sub.c
#include "sub.h"
void sub2(void) __attribute__((weak));
void sub1(void) {}
void sub2(void) {}
Listing 17-19: Tells the compiler sub2 is weak
Next, we need a header file, so let’s produce one (see Listing 17-2
0).
sub.h
#ifndef __SUB_H__
#define __SUB_H__
extern void sub1(void);
extern void sub2(void);
#endif // __SUB_H__
Listing 17-20: The header file
Finally, we define our own sub2 function in Listing 17-21.
sub2.c
#include <stdio.h>
#include "sub.h"
void sub2(void) {
printf("The non-weak sub2\n");
}
Listing 17-21: Defining the sub2 function
If we link main.c and sub.c, the weak sub2 will be linked in. If we
link main.c, sub.c, and sub2.c, the non-weak version defined in
sub2.c will be used.
This is useful for cases like interrupt routines where you have to
define one whether you use it or not. It allows you to supply a
fallback or default version.
Summary
Modules enable you to split up large programs into manageable
units. Good design means a large program does not need to have
large parts. Multiple modules can be organized into a library. The
advantage of a library is that it can include a large number of
specialized modules, and the linker will only link in the needed ones.
Good programming is all about organizing information, and
modules and libraries let you organize a huge programming mess
into manageable-sized units.
Programming Problems
Write a library to compute the area of geometric shapes
(rectangle_area, triangle_area, and so on). Each function should be
in its own object file, and all the area functions should be combined
into a single library. Write a main program to perform a unit test on
the functions.
Rewrite one of the serial output programs created in previous
chapters so that all of the UART-related code is in a module of its
own.
Test to see what happens when:
You define two weak symbols and one strong one.
You define two weak symbols and no strong one.
You define two strong symbols.
Afterword
This book should give you a good
start with embedded C
programming, but there’s a whole
world outside Bare Metal C waiting
for you to explore it. In closing, here
are some helpful tips for starting down the road
to professional programming.
Learn How to Write
By far, the most important skill a professional programmer can have
is being able to write well, as the programming process includes
writing several types of documents, such as proposals,
requirements, design documents, user documentation, and sales
literature.
Take a creative writing course where your work is reviewed by
others in your class. The feedback I got from the San Diego Writing
Workshop was some of the most valuable training I’ve received in
my life.
Here’s a pro tip: if you’re writing the design or requirements for a
project, you have great power in steering the direction of the project.
Learn How to Read
You can learn a lot by “reading” technical documentation. I’ve put
“reading” in quotation marks because you don’t read most technical
documents in their entirety. You scan them to find the information
you need at the time.
Here’s a list of the documents I’ve used in preparation for this
book:
ISO/IEC9899:2017, “Programing Languages: C” (500 pages)
RM0360 reference manual, “STM32F030x4/x6/x8/xC and
STM32F070x6/xB Advanced ARM®-based 32-bit MCUs” (800
pages)
ARM® Developer Suite Assembler Guide Version 1.2, https://develo
per.arm.com/documentation/dui0068/b (400 pages)
“Using the GNU Compiler Collection” (GCC documentation, 1,000
pages)
GNU Make Manual, https://www.gnu.org/software/make/manual (225
pages)
I did not read all these documents cover to cover. I probably used
about 0.5 to 15 percent of them. I’ve become proficient at using the
find command to locate the portion of the documentation I’m
interested in.
Collaboration and Creative Theft
No matter how experienced you are, you are only one person. By
getting together with other people and reviewing each other’s work,
you can expand your own knowledge and the knowledge of others. A
good example of where this has worked well is the Linux kernel.
Thousands of people have shared their code, received feedback,
improved their code, and then collected it into the most powerful
operating system in the world.
Looking through publicly available code to see how other
programmers do things is also helpful. One example is the HAL
firmware that comes with the STM32 Workbench. It is professional
code that provides great internal documentation. (See the upcoming
“Doxygen” section.) The bad news is that it’s designed to be used on
a whole set of different chips, so you have to deal with the land of
200 #ifdefs. Lots of good source is available. Browse through some
and see what you pick up.
Useful Open Source Tools
The open source community has a long history of developing quality
tools to aid in program creation and editing. These free tools are
created by the people who want to use them, as opposed to
commercial programs that add features that help sell the programs
but might not be useful. This section describes a few helpful open
source tools.
Cppcheck
The Cppcheck program is a static program checker. In other words,
it looks for problems in your program that the compiler didn’t find,
which is getting tough these days as the compilers have become
quite sophisticated.
This program was responsible for finding my favorite bit of C code.
This was the error message:
Detect matching 'if' and 'else if' conditions
In other words, the body of the if and the body of the else
contained the same code. There’s no need for the condition if the
computer does the same thing when the condition is true or false.
Here’s the code in question:
if (flag) {
//(removed) processMessage()
} else {
//(removed) processMessage()
}
That’s right, the body of the if was one commented-out procedure
call, and the body of the else was the same commented-out
procedure call!
I prefer Cppcheck over most commercial static program analyzers
because it generates a minimum number of false positives. If
Cppcheck flags a line in your code, it’s a good idea to look at that
code.
Doxygen
Ever since the first program grew to be longer than 50 lines, people
have tried to make programming languages that are selfdocumenting. So far, they’ve failed. The people behind Doxygen
created a system where through structured comments in your
program, you can create documentation for it (at least in theory).
The first difficulty is that you have to put the comments in the
code, and many engineers fail to comment their code at all. Another
issue is that the documentation looks like it was automatically
generated. Although it’s actually very good for automatically
generated documentation, it’s still automatically generated
documentation.
The Cppcheck program mentioned in the previous section uses
Doxygen for its internal documentation.
Valgrind
The Valgrind project is a suite of tools designed to look at your
program to check for errors dynamically. One of the most popular
tools in the suite is memcheck, which looks for memory errors such
as array overflows, pointers being used after they are freed, and so
on. It’s very effective at detecting most simple runtime errors.
SQLite
SQLite is an embedded database library that’s good for small
databases (up to 100,000 records). It’s not the fastest database in
the world, but for small embedded systems where you don’t want the
overhead of a major database, it works well. You’ll need to learn
SQL to use it, but it’s a valuable skill to learn.
Never Stop Learning
Computer technology is changing at an amazing rate. That one little
38¢ STM microchip we use in this book has more power than all the
computers in the world had in 1950. The technology will never stop
changing, so you should never stop learning. You never know what
new discovery you’ll find around the corner.
APPENDIX
PROJECT CREATION CHECKLIST
Native C Project
For programs that run on the PC, start the STM32 Workbench,
select a workspace if needed, and then complete the following steps:
In the main window, select File ▶ New ▶ C/C++ Project.
In the C/C++ Project window, select C Managed Build and click
Next.
In the C Project window:
Fill in the name (no spaces or funny characters).
In the Project Type column, select Executable ▶ Empty Project.
In the Toolchains column, select the one for your native system. For
example, if you are on Windows with Visual C++, you would choose
Visual C++. If you’re on Linux, you would select the Linux C
compiler, GNU gcc.
Click Next.
In the Configurations window:
Uncheck Release.
Debug should remain checked.
Click Finish.
In the main window:
In the Project Explorer (left column), select the project.
Select File ▶ New ▶ Source File.
In the Source File window:
In the Source File field, enter the name of your program file (ends
with .c).
Click Finish.
Back in the main window (with the file shown in the editing pane):
Enter the program.
Select File ▶ Save All.
Select Project ▶ Build Project.
Select Run ▶ Run Configuration.
In the Create, Manage, and Run Configurations window:
In the left column, select C/C++ Application.
Click New.
Under C/C++ Application, click Browse.
In the File dialog:
Go to your workspace and open the project folder.
In the project folder, open the Debug directory.
Select the executable for your program.
Click OK.
Back in the Create, Manage, and Run Configurations window:
Click Apply.
Click Close.
You can now run and debug your program.
STM32 Workbench Embedded Project
For programs that run on the Nucleo board, start the STM32
Workbench, select the workspace if needed, and then complete the
following steps:
In the main window, select File ▶ New ▶ C Project.
In the C Project window:
Fill in the name (no spaces or funny characters).
In the Project Type column, select Executable ▶ Empty Project.
In the Toolchains column, select Ac6 STM32 MCU GCC.
Click Next.
In the Configurations window:
Uncheck Release.
Debug should remain checked.
Click Finish.
In the Target Configuration window:
For the series, select STM32F0.
For the board, select NUCLEO-F030R8.
Click Next.
In the Project Firmware Configuration window:
Click Hardware Abstraction Layer (Cube HAL).
Download the target firmware (needed only once).
Click Finish.
Back in the main window:
In the Project Explorer (left column), select the project.
Select Project ▶ Properties.
In the Properties window:
Expand C++ Build.
Go to Settings.
Go to the Tool Settings tab.
Select MCU GCC Compiler ▶ Debugging.
Debug level: Maximum (-g3).
Select MCU GCC Compiler ▶ Miscellaneous.
Other flags: -fmessage-length=0
0Wa,adhls=$(@:%.o=%.lst).
Turn on Listings.
Click Apply.
Click OK.
In the main window:
In the Project Explorer (left column), select the project.
Expand the project.
Expand the src directory.
Click main.c to edit it.
Enter the program.
Select File ▶ Save All.
Select Project ▶ Build Project.
Select Project ▶ Run or Project ▶ Debug.
Index
Please note that index links to approximate location of each term.
Symbols
#define
code, 211–213
conditional code, 214
parameterized, 210
preprocessor, 119, 120, 121, 208
#elif
(preprocessor), 216
#endif
(preprocessor), 214, 215
#error
(preprocessor), 218
#ifdef
(preprocessor), 214, 215
#ifdef UNDEF
#ifndef
(preprocessor), 215
#include
#pragma
(remove code), 219
(preprocessor), 7, 12, 209, 217, 270
(preprocessor), 217, 218
#pragma diagnostic
#warning
%
(GCC), 218
(preprocessor), 218
(modulus), 54
%c (printf
format), 238, 239
%d (printf
format), 54, 238, 239
%f (printf
format), 238
%l (printf
format), 238
%ld (printf
format), 58
%lx (printf
format), 62
%o (printf
format), 62, 63, 238
%p (printf
format), 95
%u (printf
format), 62, 63
%x (printf
format), 61, 62, 238, 239
-c
(compiler option), 45
-E
(compiler option), 16, 208
-g3
(compiler option), 45
-ggdb
(compiler option), 10
-mcpu=cortex-m0
(compiler option), 45
-mfloat-abi=soft
-mthumb
-o
(compiler option), 45
(compiler option), 45
(compiler option), 10, 45
-O0
(compiler option), 45
-static
-Wa
(compiler option), 12
-Wall
(compiler option), 10, 45
-Wextra
-Wl
(compiler option), 14
(compiler option), 10
(compiler option), 14
.align
(assembler directive), 187, 189
.bss
assembler directive, 187, 189
section, 187, 189, 191
.comm
(assembler directive), 187
.config
section, 195, 202
.data
assembler directive, 187, 189
section, 187, 191, 192
.global
(assembler directive), 187
.isr_vector
.rodata
section, 13, 188, 191
.section
.space
(assembler directive), 188
(assembler directive), 187, 189
.string
.text
section, 190, 191, 194
(assembly directive), 13
section, 188, 191
.text.main
section, 188, 193, 194
.weak
(assembler directive), 164
.word
(assembler directive), 187, 189
__attribute__((packed)),
125, 126, 135
__attribute__((unused)),
152
__attribute__((weak)),
279
__attribute__((section(...)),
__disable_irq,
__enable_irq,
181
181
__HAL_RCC_USART2_CLK_DISABLE,
__HAL_RCC_USART2_CLK_ENABLE,
_ebss
(linker symbol), 192
_edata
195
(linker symbol), 192
155, 202
149, 155, 201
_estack
_sbss
(linker symbol), 192
(linker symbol), 192
_sdata
(linker symbol), 192
+
(addition operation), 54
&
(ampersand)
address of operator, 94
AND operator, 68, 69, 74
*
(asterisk)
dereference operator, 94
multiplication operation, 54
pointer declaration, 94
\\
(backslash), 7
\r
(carriage return), 7, 146, 254
/* ... */
(comment), 8
//
(comment), 8
{}
(curly brackets), 7
--
(decrement operator), 66
/
(division operator), 54
\″
(double quotes), 7
==
(equals operator), 78
=
vs. == bug, 78, 79
^
(exclusive OR operator), 69
>
(greater than operator), 78
>=
(greater than or equal operator), 78
++
(increment operator), 65
preprocessor issues, 210
++x
vs. x++, 66
<< (left shift operator), 69, 70
<
(less than operator), 78
<=
(less than or equal operator), 78
\n
(line feed or newline), 7, 146, 254
!=
(not equals operator), 78
~
(NOT operator), 68, 69
\0
(NUL), 101
+=
operator, 65
|
(OR operator), 67, 68
@param
(parameter), 143
>> (right shift operator), 70
-
(subtraction operation), 54
\t
(tab), 7
A
absolute address, 194
absolute object file, 192
Ac6 STM32 MCU Project, 37
add, integer, 54
adding node, single linked list, 227, 228
addition, fixed-point, 263–265
address, 13
absolute, 194
pointers, 94
printing, 98
sanitizer, 234, 235
address of operator (&), 94
advanced linker usage, 195
align
(assembler directive), 187, 189
aligned data, access, 125–127
alignment, integer, 123, 124
allocate heap (malloc), 224, 225
allocation, local variable, 109, 110
alternatives, floating-point, 262
ambiguity, if/else, 79
analog pin, 41
analysis
assembly language, 180
interrupt code, 177, 179
AND operator (&), 68, 69, 74
anonymous struct, 130
anti-pattern, 88, 89
assignment in while, 89
empty loop, 89
Apple
end of line, 146, 254
USB serial setup, 158
apt-get,
ar
4
command, 275–278
argc
parameter, 250
argument
command line, 249, 250
promotion, 61
argv
parameter, 250
arithmetic, pointer, 97
ARM Cortex-M0, xviii, 57
ARM GCC compiler, 45
arm-none-eabi-objcopy,
arm-none-eabi-size,
46
46
array, 91, 92
declaration, 92
illegal, 92
index, 92, 100
initialization, 93
overflow, 98–100
to pointer assignment, 97
arrays and pointers, relationship between, 97
as,
11
ASCII, 239
assembler, 11, 12
assembler directive
.align,
.bss,
187, 189
187, 189
.comm,
187
.data,
187, 189
.global,
187
.section,
188
.space,
187, 189
.weak,
164
.word,
187, 189
assembly language, 10, 12
analysis, 180
assembly listing, 13
assert
statement, 134, 135
assigning variables, 56
assignment, struct, 128
assignment in while (anti-pattern), 89
asynchronous interrupts, 171
attribute
packed,
125, 126, 135
section,
unused,
weak,
195
152
279
automatic conversion, 258
B
backslash (\\), 7
bare metal, xvii
Basic Settings dialog, 23
baud, 145
rate, 148
big machines, 221, 222
.bin (file extension), 47
binary
file, 243, 244–246
numbers, 59–60
bit
checking, 72, 73
clearing, 72
constant, 71
defining, 71
manipulation, example of, 72–74
meaning, 70
operations, 67
pattern, 60
printing, 74
setting, 71, 72
bitmapped I/O, 71
bitwise AND (&), 68, 69, 74
bitwise invert (~), 68, 69
bitwise exclusive OR (^), 69
bitwise OR (|), 67, 68
blinking LED, 32
bootloader, 204
breakpoint, 49
Breakpoints window, 28
break
statement, 87
bss
assembler directive, 187, 189
ideal memory model, 185, 186
section, 187, 189, 191
size, 46
buffer
circular, 172, 173
log, 178, 179
buffered file I/O, 222, 237–246
vs. raw I/O, 251
buffering, 246
line, 246
serial, 172
bug, = vs. ==, 78, 79
Build Project, IDE, 24, 44
button, 83
get state of, 86
user, 34
byte, 57
order, 131, 132
C
call by value, 128, 129
call stack trace, 183, 184
camel case, 55
carriage return (\r), 7, 146, 254
cc1,
11
CFLAG (make
macro), 9
chapters, 114
char,
91, 101
character
printf,
238, 239
transmit (serial), 150
characters and strings, 100–101
char
constant, 101
initialization, 101
char*
checking, bit, 72, 73
C ideal memory model, 185
circular buffer, 172, 173
interrupt, 173
sending, 173
clean
make
target, 16
project, 44
clearing, bit, 72
clock, 34
serial, 145, 146
close,
252
closing files, 247
C Managed Build, 54
CMSIS directory, 47
code
instrumenting, 177
interrupt analysis, 179
macro, preprocessor, 211–212
combination shaving brush and fountain pen, 162
comm
(assembler directive), 187
command line arguments, 249, 250
comment, 8
comment out code, 218, 219
COMMON
comm
section, 191, 194
section, 188
compilation
conditional, 214, 215
cross, 21
of modules, 268
native, 21
of a program, 5
compiler, 3, 10–16
ARM, 45
compiler flags, 10
-c,
45
-E,
16, 208
-g3,
45
-ggdb,
10
-mcpu=cortex-m0,
45
-mfloat-abi=soft,
-mthumb,
-o,
45
10, 45
-O0,
45
45
-static,
14
, 12
-Wa
-Wall,
10, 45
-Wextra,
-Wl,
10
14
complex data types, 117
conditional compilation, 214, 215
section, 195, 196, 202, 203
CONFIG
configuration items, multiple, 202
Console tab, 44
Console window, 26, 28, 44
const,
71, 91, 114, 118, 209
declaration, 92
demonstration, 102
constant
bit, 71
global, 186
string, 186, 188
const char* const,
const volatile,
continue
101, 102
165
statement, 88, 89
copy file (buffered), 244
core dumped
cpp,
(floating-point exception), 261
11
Cppcheck, 283
CR1
(Control Register 1), 166–169, 173, 175, 176
create mode, 253
creative theft, 282
creative writing, 281
cross-compilation, 21
cross file type checking, 269
curly brackets ({}), 7
custom type, 132, 133
D
data
initialized, 185
type, complex, 117
uninitialized, 185, 186
data
assembler directive, 187, 189
ideal memory model, 185, 186
section, 187, 191, 192
size, 46
deallocate heap (free), 225
deallocation, local variable, 109, 110
Debug configuration, 23
debug connector (JTAG), 34, 35
Debug directory, 47
debugger, 10, 26, 47, 50, 28, 48
external, 194
internal, 195
interrupt, 178, 179
JTAG, xviii, 1, 34–35, 49
local variable, 110
perspective, 27, 28, 48
pointers, 96
stack frame, 111
ST-LINK, 36
struct,
122
variables, 56
dec
(size), 46
decimal, 59
decision statements, 77
declaration
array, 92
const,
92
pointer, 94
variable, 55
decrement operator (--), 66
Default_Handler,
164
define
code, preprocessor, 211–213
conditional code, preprocessor, 214
parameterized, preprocessor, 210
preprocessor, 208
defining bits, 71
deleting node, linked list, 230
demonstration, const, 102
dereference operator (*), 94
designated initializers, 127
deterministic library, 278
development board, 34
diagnostic
(GCC #pragma), 218
directives, preprocessor, 10
directory
CMSIS, 47
Debug, 47
HAL_Driver, 47
inc, 47
startup, 47
disable interrupt, 181
divide, integer, 54
divide by zero, 246
division, fixed-point, 263–265
dnf,
4
double inclusion protection, 270
double, printf,
238
double quotes (\″), 7
do/while
trick, preprocessor, 213
Doxygen, 40, 108, 143, 283
dynamic memory (heap), 221, 223–235
problems, 233
E
E
(compiler option), 16
ebss
(linker symbol), 192
Eclipse, 4, 19–31
edata
(linker symbol), 192
.elf (file extension), 47
elif
(preprocessor), 216
else
statement, 79
embedded computer, xvii
embedded struct, 133, 134
empty loop (anti-pattern), 89
Empty Project, 54
enable interrupt, 181
endif
(preprocessor), 214, 215
end of line, 146, 254
enum
(enumerated type), 117, 118
illegal values, 118, 119
preprocessor trick, 119–121
type, 132, 133
equals bug, 78, 79
equals operator (==), 78
error
(preprocessor), 218
Error_Handler,
ErrorHandler,
152, 199
147
errors, 6
preprocessor, 209–211
(linker symbol), 192
estack
event logging, 177, 178, 179
evil gets, 241
examples, importing, 31
exclusive OR operator (^), 69
executable, 11
file, 184
Executables window, 28
exiting a loop (break), 87
extern,
268–271, 274
external debugger, 194
F
F5 (Step Into), 50
F6 (Step Over), 29, 30, 49, 50
F8 (Resume), 30
factorial, 112, 113
fclose,
fgets,
245, 246
228–230, 241, 243
field, struct, 121, 122
file
binary, 243, 244–246
buffered copy, 244
closing, 242, 246
executable, 184
I/O, buffered, 237–246
main.c, 46
object, 184
opening, 242–243
output.map, 47
program, 184
startup_stm32f030x8.s, 47, 51, 163, 193
stm32f0xx_it.h, 47
stm32f0xxit.c, 46
syscalls.c, 46
Systemstm32f0xx.c, 46
declaration, 242, 245
FILE*
firmware
library, 37
upgrade, 185, 204
fixed-point, 262–265
addition, 263–265
division, 263–265
multiplication, 263–265
subtraction, 263–265
fixing interrupt problem, 181
FLASH,
202, 203
flash (memory), 184
FLASH_EraseInitTypeDef,
197, 200
flash memory programmer, xviii, 34, 43, 48, 195
FLASH
section, 196
floating pin, 85
floating-point
automatic conversion, 258
alternatives, 262
divide exception, 246
exception, 261
guard digit, 259
hardware, 262
implementation, 262
infinity, 260, 261
money, 260
NaN,
260, 261
normalization, 260
numbers, 222, 257–265
precision, 260
problems, 259
rounding error, 259
subnormal, 260, 262
floating vs. integer divide, 258
flushing, 246
fopen,
for
242, 245
loop, 82, 93
for(;;)
fprintf,
fread,
free,
(loop forever), 40, 42, 43, 84, 126
240, 243
244, 245
225
NULL
pointer, 226
function. See procedure
function pointer, typedef, 136
fwrite,
244, 245
G
GCC, 3, 5, 10, 11
address sanitizer, 234–236
arm-none-eabi-gcc,
45
diagnostic (#pragma), 218
installing, 4
-L
(library search), 277
options, 44
warning, suggest parentheses, 79
gcc -E,
208
general purpose input/ouput. See GPIO
gets,
241
ggdb,
10
global
(assembler directive), 187
global
constant, 186
initialized, 186, 187
initialized to zero, 186, 187
uninitialized, 186, 187
variable, 105, 106
GPIO, 70, 71, 83–86, 149, 150
internal wiring, 86
pin, 41, 42
register, 42
GPIOA,
150, 155, 202
GPIO_AF1_USART2,
150, 155
GPIO_InitTypeDef,
42, 43, 83, 84, 155
GPIO_MODE_AF_PP,
150, 155
GPIO_MODE_INPUT,
84
GPIO_MODE_OUTPUT_PP,
GPIO_NOPULL,
42, 43, 153
42, 43, 150, 155
GPIO_PIN_2,
150, 155, 202
GPIO_PIN_3,
150, 155, 202
GPIO_PIN_SET,
86
GPIO_PinState,
83, 84
GPIO_PULLDOWN,
85
GPIO_PULLUP,
85, 153
GPIO_SPEED_FREQ_HIGH,
GPIO_SPEED_FREQ_LOW,
42, 43, 153
150, 155
Gray code, 60
greater than operator (>), 78
greater than or equal operator (>=), 78
guard digit, 259
H
HAL (hardware abstraction layer), 33, 39, 84
library, 41, 42, 47
modules, 267
namespace, 273
HAL_Delay,
42, 43, 147, 153, 154, 167, 176, 198
HAL_Driver
(directory), 47
HAL_FLASH_ERROR_NONE,
200
HAL_FLASH_ERROR_PROG,
200
HAL_FLASH_ERROR_WRP,
HAL_FLASH_Lock,
197, 200
HAL_FLASH_Program,
HAL_FLASH_Unlock,
HAL_GPIO_DeInit,
197, 200
196, 200
HAL_FLASHEx_Erase,
HAL_GPIO_Init,
197, 200
155, 202
42, 43, 83, 84, 153, 199, 201
HAL_GPIO_ReadPin,
84, 86
HAL_GPIO_TogglePin,
HAL_GPIO_WritePin,
HAL_Init,
HAL_OK,
200
42, 43, 49, 153, 198
84, 153, 198
41, 43, 47, 83, 147, 154, 176, 200
148, 199, 200
HAL_StatusTypeDef,
HAL_UART_Init,
200
147, 148, 154, 199
HAL_UART_MspDeInit,
HAL_UART_MspInit,
202
149, 149, 201
HAL_UART_STATE_RESET,
HAL_UNLOCKED,
149
hardware
initialization, 41
specification, 71
149
to struct, 134
heap, 110, 186, 221, 223
hello.c, 5
hello, hello, hello,
108
Hello World, 3, 5–16, 21, 24, 101
ANSI C Project, 22
one-character version, 142–143
serial, 141, 147
serial interrupt, 161, 174–175
hex
(size), 46
hexadecimal, 59
printf,
238, 239
hidden variable, 107–108
I
I/O
bitmapped, 71
buffered, 222
buffered file, 237–246
interrupt, 161, 162
polling, 161, 162
raw, 222, 249–255
IDE, 19–28
Basic Settings dialog, 23
Build Project, 24
Console window, 26
debugging, 26
generated makefile, 30
Problems tab, 21
project creation, 22
Project Explorer, 21
project screen, 20, 21
Run Configurations dialog, 25
Select Configurations dialog, 23
starting, 20
text editor, 21
view, 21
workspace, 20
ideal memory model, 185
bss,
185, 186
data,
185, 186
text,
185, 186
ifdef
(preprocessor), 214–215
ifdef UNDEF
if/else
ifndef
if
(remove code), 219
ambiguity, 79
(preprocessor), 215
statement, 77–79
illegal array index, 92
importing examples, 31
inc directory, 47
include
(preprocessor), 7, 12, 209, 217, 270
include file, 217
inclusion, double protection, 217, 270
increment operator (++), 65–66
index
array, 92
wrong array, 100
Infinite_Loop,
164
infinite recursion, 113
(floating point), 260–261
INFINITY
initialization
array, 93
char*,
101
hardware, 41
string, 101
struct,
127
UART, 147
of variables, 56–57
initialized
data, 185
global variable, 186, 187
local static variable, 189
module only, 186
static local, 187
to zero global, 186, 187
initializers, designated, 127
inline procedure, 211
installing GCC, 4
instrumenting code, 177
int,
56, 114
long,
57
long long,
58
short,
57
int16_t,
61
int32_t,
61, 62
int64_t,
61, 62
int8_t,
61
integer
add, 54
alignment, 123–124
divide, 54
vs. floating divide, 258
modulus, 54
multiply, 54
printf,
238, 239
size, 57–59
subtract, 54
unsigned, 62
integrated development environment. See IDE
internal debugger, 195
interrupt
circular buffer, 173
code, analyzing, 177, 179
data analysis, 165
debugging, 178
disable, 181
enable, 181
handler, 279
hell, 171
I/O, 161, 162
mapping, 170
problem, 177
fixing, 181
routines, 163–164
serial, 174–175
shared variable, 180
interrupt
(nonstandard keyword), 170
interrupt and status register. See ISR
int main(),
7
invert bit, or NOT operator (~), 68, 69
ioctl,
255
isalpha,
103
isnormal,
262
ISR (interrupt and status register), 150–153, 163, 166, 168, 174–1
75, 198
isr_vector
section, 190, 191, 194
J
JTAG
debug connector, 34, 35
debugger, xviii, 1, 34–35, 49
jumpers, 36
L
last in, first out (LIFO), 111
l
as variable name, 55
ld
(linker), 11
LD1 (LED), 37
LD2 (LED), 37, 199
leak, memory, 233
learning to write, 281
LED, 83
blink, 32
LD1, 37
LD2, 37, 199
power, 34
user, 34
LED2, 41, 42
LED2_GPIO_CLK_ENABLE,
LED2_GPIO_PORT,
42, 43, 83–84, 199
42, 43, 49, 83–84, 153, 198–199
led2_Init,
147, 154, 167, 176, 200
LED2_PIN;,
42–43, 49, 83–84, 153, 198–199
left shift operator (<<), 69–70
less than operator (<), 78
less than or equal operator (<=), 78
libc.a, 193
libm.a, 193
library, 11, 193, 273–278
building, 275–278
deterministic, 278
make,
275–277
nondeterministic, 278
STM firmware, 37
LIFO (last in, first out), 111
line
buffering, 246–247
endings, 146
markers, 208
line feed See newline
linked list, 224, 226–233
adding node, 227, 228
printing, 229, 230
linker, 11, 14–15, 45, 183–204
advanced, 195
directive
MEMORY,
196
SECTIONS,
196
library, 193
LinkerScript.ld, 45
map, 14, 15, 184, 185, 193–194
memory configuration, 194
nonstandard section, 190
section
CONFIG,
FLASH,
RAM,
196
196
196
symbol
_ebss,
192
_edata,
192
_estack,
_sbss,
192
192
_sdata,
192
_sidata,
192
LinkerScript.ld, 45
linking
process, 191
symbols, 183
Linux, 4
end of line, 146, 254
USB serial setup, 158
list
linked, 226–233
node, 226
listing, assembly, 13
local include, 270
local static
initialized, 189
uninitialized, 189
local variable, 105–107
allocation, 109, 110
deallocation, 109, 110
debugger, 110
initialized static, 187, 189
uninitialized, 186
uninitialized static, 187
log buffer, 178, 179
logging, event, 178
LOGO,
memory section, 203–204
logo storage, 203
long int,
printf,
57
238
long long int,
58
loop
anti-patterns, 88–90
control, 87
exiting (break), 87
for,
82
forever, 40, 82
restarting (continue), 88, 89
while,
79, 80
looping statements, 80–83
lousy programming, 79
lower layer (interrupt code), 164–165, 179
M
macOS, 4
USB serial setup, 158
macro processor, 12, 207
macros
code, preprocessor, 211–213
parametrized, 210
make,
9, 271, 272
simple, 208
magic number, 93
main,
7
main.c, 46
make,
9, 10, 15
library, 275–277
macros, 9, 271, 272
phony target, 16
make clean,
16
Makefile, 9, 15–16, 31, 47
IDE-generated, 30
library, 275–277
modules, 268, 271
malloc,
224–225
running out of memory, 225
map, linker, 14, 15, 184, 185, 193–194
memory configuration, 194
memory
CONFIG
section, 203
dynamic, 223
flash, 184, 191, 192, 194, 202–203
heap, 223
layout struct, 122–124
leak, 233
LOGO
section, 203
model, 185
RAM, 183–185, 191, 192, 194, 202, 203, 223
stack, 223
MEMORY
(linker directive), 196
microcontroller, 32–51
Microsoft filenames, 243
MinGW (Windows), 4
mistakes, 6
preprocessor, 209–211
mkdir,
5
modular programming, 267–279
module-only symbol
initialized, 186
uninitialized, 186
modules, 267–268
Modules window, 28
modulus, integer, 54
Morse code, 90, 145
multiple configuration items, 202–203
multiplication, fixed-point, 263–265
multiply, integer, 54
N
names, variable, 55
namespace, 272
naming, struct, 129
NaN
(Not a Number), 246, 260–261
native compilation, 21
nested vectored interrupt, 168
newline (\n), 7, 146, 254
node (list), 226
nondeterministic library, 278
nonstandard section, linker, 190
normalization, floating-point, 260
not equals operator (!=), 78
NOT operator (~), 68, 69
NUCLEO-F030R8, xix, 32–51
setup, 35
NUL character (\0), 101
NULL
pointer dereference, 169
numbers, 53
fixed-point, 263–265
floating-point, 257–265
magic, 93
representation, 59
numerical analysis, 260
NVIC_EnableIRQ,
167, 168, 176
O
O
as variable name, 55
O_BINARY,
252–255
objcopy (arm-none-eabi-objcopy),
46
object file, 11, 184
absolute, 192
relocatable, 192, 193
O_CREAT,
252, 253
octal, 59
printf,
238
one-character version of Hello World, 142–143
open flags
O_BINARY,
O_CREAT,
252, 253
O_RDONLY,
open
252–255
252, 253
function, 252, 253
opening files, 242
open mode, file, 243
rb,
245
wb,
245
open source tools, 282–284
operating system, 222
operations, bit, 67
operator
++,
65
+=,
65
--,
66
address of (&), 94
AND (&), 68, 69, 74
decrement (--), 66
dereference (*), 94
equals (==), 78
exclusive OR (^), 69
greater than (>), 78
greater than or equal (>=), 78
increment (++), 65
left shift (<<), 69–70
less than (<), 78
less than or equal (<=), 78
NOT (~), 68, 69
not equals (!=), 78
OR (|), 67, 68
right shift (>>), 70
shorthand, 65
optimizer, 3
O_RDONLY,
252, 253
OR operator (|), 67, 68
Outline window, 28
output.map, 47
overflow, 63–64
array, 98–100
oversampling (serial), 149
P
PA2 pin, 149, 150
PA3 pin, 149, 150
packed
attribute, 125, 126, 135
parameter, pointer, 128, 129
parameterized macros, 210
parentheses warning, 79
permanent memory (flash), 195
perspective, debug, 27, 28, 48
phony target, make, 16
PIC processor, 170
pin
analog, 41
floating, 85
GPIO, 41, 42
PA2, 149, 150
PA3, 149, 150
pulldown, 85
pullup, 85
pointer, 91
arithmetic, 97
scaling, 98
assign from array, 97
debugger, 96
declaration, 94
function, 136
typedef,
136
parameters, 128, 129
printf (%p),
95
size
STM32, 96
x86, 96
struct,
128
and thing, 94
variable panel, 96
polling I/O, 161–162
power connector, 34
power LED, 34
pragma
(preprocessor), 217, 218
pragma diagnostic
(GCC), 218
precision, floating-point, 260
predefined files, 240
preprocessor, 10, 12, 207–219
code macro, 211–213
continuation character, 211–213
#define,
208
code, 211–213
parameterized, 210
do/while,
213
#elif,
216
#endif,
214, 215
trick, 119–121
enum
#error,
218
errors, 209–211
#ifdef,
214, 215
#ifndef,
215
#include,
209, 217
issues, 210
++
line markers, 208
#pragma,
217, 218
symbol, 216
command line, 216
predefined, 217
tricks, 218
#warning,
printf,
218
1, 7, 11, 12, 14, 54, 93, 238, 239
%c,
238, 239
%d,
238, 239
%f,
238
%l,
238
%ld,
58
%lx,
62
%o,
62, 63, 238
%p,
95
%u,
62, 63
%x,
61, 62, 238, 239
printing bits, 74
problems
dynamic memory, 233
floating-point, 259
interrupt, 171, 177
fixing, 181
use after free, 234
Problems tab, IDE, 21, 28
procedure, 105, 106, 108, 109
inline, 211
program file, 184
programming
modular, 267–279
style, 114
project creation, IDE, 22
Project Explorer, IDE, 21
project screen, IDE, 20, 21
project type, 37
promotion, argument, 61
protection
double include, 217
mode, 253
pulldown pin, 85
pullup pin, 85
putchar,
142–143
puts,
14, 101, 108
PuTTY, 156–157
R
RAM, 183, 202, 203, 223
memory, 184–185, 191–192, 194
RAM
section, 196
ranlib
command, 276–277
raw I/O, 222, 249–255
vs. buffered I/O, 251
close,
252
ioctl,
255
open,
252, 253
open flags
O_BINARY,
O_CREAT,
252, 253
O_RDONLY,
read,
252, 253
252, 253
write,
rb
252–255
252, 253
(open mode), 245
read,
252, 253
READ (10),
SCSI, 134
reading data, buffered I/O, 241
recursion, 112, 113
infinite, 113
Red Hat, 4
register
GPIO, 42
I/O, 150, 151
stack (rsp), 110
Registers tab (debug view), 110
Registers window, 28
relative address, 13
Release configuration, 23, 31
relocatable object file, 14, 192–193
representation of numbers, 59
reset, 34, 41, 43
restarting loop (continue), 88, 89
Resume (F8), 30
return,
8, 109
right shift operator (>>), 70
rodata
section, 13, 188, 191
rounding error, floating-point, 259
RS-232 standard (serial), 149
rsp
stack register, 110
Run Configurations dialog, 25
running out of stack, 113
running the program, 43
RX signal (serial), 144
S
sane programming, 106
sanitizer, address, 234–235
sbss
(linker symbol), 192
scaling, pointer arithmetic, 98
scanf,
241
scope, variable, 106–107
screen
program, 158
SCSI (small computer system interface), 133–134
READ (10),
sdata
134
(linker symbol), 192
section
bss,
187, 189, 191
.comm,
188
COMMON,
191, 194
.config,
CONFIG,
data,
195, 202
195, 196
187, 191, 192
FLASH,
196
.isr_vector,
RAM,
190, 191, 194
196
.rodata,
.text,
13, 188, 191
188, 191
.text.main,
188, 193, 194
section
(assembler directive), 188
section
attribute, 195
SECTIONS
linker directive, 196
sections, nonstandard, 190
segment, text, 184
serial “Hello World,” 147
serial clock, 145
serial communication, 146
serial I/O, 2, 34, 35, 141
buffering, 172
history, 145
input, 144
interrupt, 174–175
ISR, 150–153, 163, 166, 168, 174, 175, 198
output, 143
speed, 148
TDR, 150, 151, 153
transmit, 150, 162, 163
to USB, 156
setting bit value, 71, 72
shared variable, interrupt, 180
shorthand operators, 65
short int,
sidata
57
(linker symbol), 192, 192
signal
RX (serial), 144
TX (serial), 143
simple macro, 208
Single Step (F6), 29, 30, 49, 50
singly linked list, 226–233
adding node, 227, 228
printing, 229, 230
size.c, 58
size command (arm-none-eabi-size), 46
sizeof,
58, 95, 224
SOC (system on a chip), xviii
source file, 11
Source window, 28, 29
space
(assembler directive), 187, 189
speed, serial, 148
SQLite, 284
sscanf,
241
s_sin.o, 193
stack, 110–112, 186, 223
frame, 109–112
register (rsp), 110
running out of, 113
trace, 183, 184
Stack Trace window, 28
start bit, 145, 146
startup directory, 47
startup_stm32f030x8.S, 47, 163, 164, 190, 192, 193
statement
break,
87
continue,
88, 89
decision, 77
else,
if,
79
77–79
looping, 79
static
compiler option, 14
initialized local variable, 189
local initialized, 187
local uninitialized, 187
stderr
stdin
predefined file, 240
predefined file, 240
stdint.h, 61, 135
stdout
predefined file, 240
Step Into (F5), 50
Step Over (F6), 29, 30, 49, 50
ST-LINK, 36
STM32F030x4 processor, xviii
stm32f0xx.h, 216
stm32f0xx_hal.c, 50
stm32f0xx_it.h, 47
stm32f0xxit.c, 46
STM32 firmware library, 37
STM32 NUCLEO-F030R8, 32–51
setup, 35
STM32 pointer size, 96
STM HAL modules, 267
stop bit, 145, 146
string, 91, 100–101
constant, 186, 188
initialization, 101
(assembly directive), 13
string
struct,
117, 122–130, 133–135
anonymous, 130
assignment, 128
debugger, 122
embedded, 133–134
field, 121–122
from hardware, 134
initialization, 127
memory layout, 122–124
naming, 129
packed, 125
padding, 123, 124
pointer, 128
typedef,
137
structure. See struct
subnormal floating-point numbers, 260, 262
subtract, integer, 54
subtraction, fixed-point, 263–265
summing two variables, 57
symbol
definition
command line, 216
preprocessor, 216
predefined, 217
weak, 164, 278–279
synchronous communications, 146
syscalls.c, 46l
system on a chip (SOC), xviii
Systemstm32f0xx.c, 46
System Workbench for STM32, 4, 20–31, 33, 37–40, 46, 50, 54, 1
12, 191, 216, 282, 285–288
T
tab character (\t), 7
Tasks window, 28
TDR (transmit data register), 150, 151, 153, 162, 163, 170, 175, 1
98
teletype, 145, 146
text
(ideal memory model), 185, 186, 188, 191
text
(size), 46
text editor, IDE, 21
text.main
text
section, 188, 193, 194
section, 185, 188, 191
text segment, 184
theft, creative, 282
things and pointers to things, 94
toupper,
103
translation, hardware to struct, 134
transmit
serial, 150
serial I/O, 162, 163
transmit data register. See TDR
transmit empty bit. See TXE bit
transmit shift register (TSR), 162, 163
tricks, preprocessor, 218
turning off bit, 72
two’s complement, 64, 65
TX, serial I/O, 143, 162, 163
TXE bit, 151, 152, 198
type
checking across files, 269
custom, 132, 133
enum,
int,
117, 118, 132, 133
56
struct,
union,
117, 121, 122, 132, 133
117, 130, 132, 133
variable, 55
typedef,
117, 135
function pointer, 136
and struct, 136
typeof,
220
U
UART, 41, 146, 150
initialization, 147
UART_ADVFEATURE_NO_INIT,
UART_FLAG_TXE,
148, 154, 199
151–153, 163, 198
UART_HandleTypeDef,
166, 201
UART_HWCONTROL_NONE,
UART_MODE_TX_RX,
148, 154, 199
148, 154, 199
UART_ONE_BIT_SAMPLE_DISABLE,
UART_OVERSAMPLING_16,
UART_PARITY_NONE,
UART_STOPBITS_1,
148, 154, 199
148, 154, 199
148, 154, 199
148, 154, 199
UART_WORDLENGTH_8B,
148, 154, 199
Ubuntu, 4
ugly code removal, 215
uint8_t,
62, 94, 118, 121, 122
uint16_t,
62
uint32_t,
62, 121, 122
uint64_t,
62, 94
unaligned data, access, 125–127
uninitialized
data, 185, 186
global, 186, 187
local, 186
local static variable, 189
module only, 186
static local, 187
variables, 56
union,
117, 132, 133
field assignment, 131
type, 130
unistd.h, 251
universal asynchronous receive-transmitter. See UART
unsigned int,
114
unsigned integers, 62
attribute, 152
unused
upgrade, firmware, 185, 204
upper layer (interrupt code), 164, 165, 179
USART. See UART
USART2,
149, 154, 199, 202
USART2_IRQHandler,
USART2_IRQn,
163, 164, 166, 168
167, 176
USART_CR1_IDLEIE,
USART_CR1_PEIE,
168
USART_CR1_RXNEIE,
USART_CR1_TCIE,
166–169, 173–176
USART_CR1_TXNEIE,
169
169
USART_ISR_ORE,
USART_ISR_PE,
169
169
USART_ISR_IDLE,
USART_ISR_NE,
168
169
USART_ISR_CTSIF,
USART_ISR_FE,
168
168
USART_CR1_TXEIE,
USART_ISR_CMF,
168
169
169
USART_ISR_RXNE,
USART_ISR_TC,
169
169
USART_ISR_TXE,
166, 168, 169, 169, 174, 175
USB
connector, 37
to serial, xviii, 141, 156
serial setup
Linux, 158
MacOS, 158
Windows, 156–157
use after free, 234
USER_BUTTON_GPIO_CLK_ENABLE,
user LED (LED2), 34, 41, 42
user push button, 34
V
Valgrind, 234, 235, 283
variable
assignment, 56
complex, 51
debugger, 56
declaration, 55
global, 105, 106
hidden, 107
initialization, 56, 57
initialized local static, 189
83
local, 105–107
allocation, 109, 110
deallocation, 109, 110
debugger, 110
names, 55
panel, 56, 96, 111
scope, 106, 107
size, 57
type, 55
uninitialized, 56
uninitialized local static, 189
Variables window, 28
void,
109
volatile,
152, 164
W
Wa
(compiler option), 12
Wall
(compiler option), 10
warning
wb
(preprocessor), 218
(open mode), 245
weak
(assembler directive), 164
weak
attribute, 279
weak symbol, 164, 278–280
Wextra
(compiler option), 10
while
assignment in, 89
loop, 79, 80
Windows
terminal emulator (PuTTY), 156–157
USB serial setup, 156–157
Wl
(compiler option), 14
word
(assembler directive), 187, 189
workspace, IDE, 20
write,
252, 253
writing data past the end, 234
wrong array index, 100
X
x86 pointer size, 96
xcode-select,
4
Z
zero, divide by, 246