/


Текст
Windows Command Line
Administration
®
Instant Reference
John Paul Mueller
Acquisitions Editor: Agatha Kim
Development Editor: Jennifer Leland
Technical Editor: Russ Mullen
Production Editor: Liz Britten, Eric Charbonneau
Copy Editor: Cheryl Hauser
Editorial Manager: Pete Gaughan
Production Manager: Tim Tate
Vice President and Executive Group Publisher: Richard Swadley
Vice President and Publisher: Neil Edde
Book Designer: Maureen Forys, Happenstance Type-O-Rama
Compositor: JoAnn Kolonick, Happenstance Type-O-Rama
Proofreader: Jen Larsen, Word One
Indexer: Ted Laux
Project Coordinator, Cover: Lynsey Stanford
Cover Designer: Ryan Sneed
Cover Image: iStockphoto
Copyright © 2010 by Wiley Publishing, Inc., Indianapolis, Indiana
Published simultaneously in Canada
ISBN: 978-0-470-65046-2
No part of this publication may be reproduced, stored in a retrieval system or transmitted in any
form or by any means, electronic, mechanical, photocopying, recording, scanning or otherwise,
except as permitted under Sections 107 or 108 of the 1976 United States Copyright Act, without
either the prior written permission of the Publisher, or authorization through payment of the
appropriate per-copy fee to the Copyright Clearance Center, 222 Rosewood Drive, Danvers, MA
01923, (978) 750-8400, fax (978) 646-8600. Requests to the Publisher for permission should be
addressed to the Permissions Department, John Wiley & Sons, Inc., 111 River Street, Hoboken, NJ
07030, (201) 748-6011, fax (201) 748-6008, or online at http://www.wiley.com/go/permissions.
Limit of Liability/Disclaimer of Warranty: The publisher and the author make no representations
or warranties with respect to the accuracy or completeness of the contents of this work and
specifically disclaim all warranties, including without limitation warranties of fitness for a particular
purpose. No warranty may be created or extended by sales or promotional materials. The advice
and strategies contained herein may not be suitable for every situation. This work is sold with the
understanding that the publisher is not engaged in rendering legal, accounting, or other professional
services. If professional assistance is required, the services of a competent professional person should
be sought. Neither the publisher nor the author shall be liable for damages arising herefrom. The
fact that an organization or Web site is referred to in this work as a citation and/or a potential source
of further information does not mean that the author or the publisher endorses the information the
organization or Web site may provide or recommendations it may make. Further, readers should be
aware that Internet Web sites listed in this work may have changed or disappeared between when
this work was written and when it is read.
For general information on our other products and services or to obtain technical support, please
contact our Customer Care Department within the U.S. at (877) 762-2974, outside the U.S. at
(317) 572-3993 or fax (317) 572-4002.
Wiley also publishes its books in a variety of electronic formats. Some content that appears in print
may not be available in electronic books.
Library of Congress Cataloging-in-Publication Data
Mueller, John, 1958Windows command line administration instant reference / John Paul Mueller.
p. cm.
Includes bibliographical references and index.
ISBN 978-0-470-65046-2 (pbk.), ISBN: 978-0-470-93107-3 (ebk),
ISBN: 978-0-470-93090-8 (ebk), ISBN: 978-0-470-93086-1 (ebk)
1. Command languages (Computer science)—Handbooks, manuals, etc. 2. Microsoft Windows
(Computer file)—Handbooks, manuals, etc. 3. Operating systems (Computers)—Handbooks,
manuals, etc. I. Title.
QA76.7.M79 2010
005.4’46—dc22
2010032265
TRADEMARKS: Wiley, the Wiley logo, and the Sybex logo are trademarks or registered trademarks
of John Wiley & Sons, Inc. and/or its affiliates, in the United States and other countries, and may not
be used without written permission. Windows is a registered trademark of Microsoft Corporation
in the United States and/or other countries. All other trademarks are the property of their respective
owners. Wiley Publishing, Inc., is not associated with any product or vendor mentioned in this book.
10 9 8 7 6 5 4 3 2 1
Dear Reader,
Thank you for choosing Windows Command Line Administration
Instant Reference. This book is part of a family of premium-quality
Sybex books, all of which are written by outstanding authors who combine practical experience with a gift for teaching.
Sybex was founded in 1976. More than 30 years later, we’re still committed to producing consistently exceptional books. With each of our
titles, we’re working hard to set a new standard for the industry. From
the paper we print on, to the authors we work with, our goal is to bring
you the best books available.
I hope you see all that reflected in these pages. I’d be very interested to
hear your comments and get your feedback on how we’re doing. Feel
free to let me know what you think about this or any other Sybex book
by sending me an email at nedde@wiley.com. If you think you’ve found
a technical error in this book, please visit http://sybex.custhelp.com.
Customer feedback is critical to our efforts at Sybex.
Best regards,
Neil Edde
Vice President and Publisher
Sybex, an Imprint of Wiley
This book is dedicated to Claudia Meyer, who has taught me a great
deal about human spirit and the ability to come back after a crisis. She
has been an inspiration to me.
Acknowledgments
T
hanks to my wife, Rebecca, for working with me to get this book
completed. I really don’t know what I would have done without her
help in researching and compiling some of the information that appears
in this book. She also did a fine job of proofreading my rough draft and
page proofing the result. Rebecca also keeps the house running while
I’m buried in work.
Russ Mullen deserves thanks for his technical edit of this book. He
greatly added to the accuracy and depth of the material you see here.
Russ is always providing me with great URLs for new products and
ideas. However, it’s the testing Russ does that helps most. He’s the sanity check for my work. Russ also has different computer equipment
from mine, so he’s able to point out flaws that I might not otherwise
notice.
Matt Wagner, my agent, deserves credit for helping me get the
contract in the first place and taking care of all the details that most
authors don’t really consider. I always appreciate his assistance. It’s
good to know that someone wants to help.
A number of people read all or part of this book to help me refine the
approach, test the coding examples, and generally provide input that all
readers wish they could have. These unpaid volunteers helped in ways
too numerous to mention here. I especially appreciate the efforts of Eva
Beattie, Jonathan S. Weissman, and Osvaldo Téllez Almirall who provided general input, read the entire book, and selflessly devoted themselves to this project.
Finally, I would like to thank Pete Gaughan, Agatha Kim, Jennifer
Leland, Liz Britten, Cheryl Hauser, and the rest of the editorial and production staff at Sybex for their assistance in bringing this book to print.
It’s always nice to work with such a great group of professionals and I
very much appreciate the friendship we’ve built over the few years.
About the Author
J
ohn Mueller is a freelance author and technical editor. He has writing in his blood, having produced 86 books and over 300 articles to
date. The topics range from networking to artificial intelligence and from
database management to heads-down programming. Some of his current
books include a Windows command line reference, books on VBA and
Visio 2007, a C# design and development manual, and an IronPython
programmer’s guide. His technical editing skills have helped over 52
authors refine the content of their manuscripts. John has provided technical editing services to both Data Based Advisor and Coast Compute
magazines. He’s also contributed articles to magazines like DevSource,
InformIT, SQL Server Professional, Visual C++ Developer, Hard Core
Visual Basic, asp.netPRO, Software Test and Performance, and Visual
Basic Developer. Be sure to read John’s blog at
http://www.amazon.com/gp/blog/id/AQOA2QP4X1YWP
When John isn’t working at the computer, you can find him in his
workshop. He’s an avid woodworker and candle maker. On any given
afternoon, you can find him working at a lathe or putting the finishing touches on a bookcase. He also likes making glycerin soap and
candles, which comes in handy for gift baskets. You can reach John on
the Internet at JMueller@mwt.net. John is also setting up a Web site at
http://www.mwt.net/~jmueller/. Feel free to look and make suggestions
on how he can improve it. One of his current projects is creating book
FAQ sheets that should help you find the book information you need
much faster.
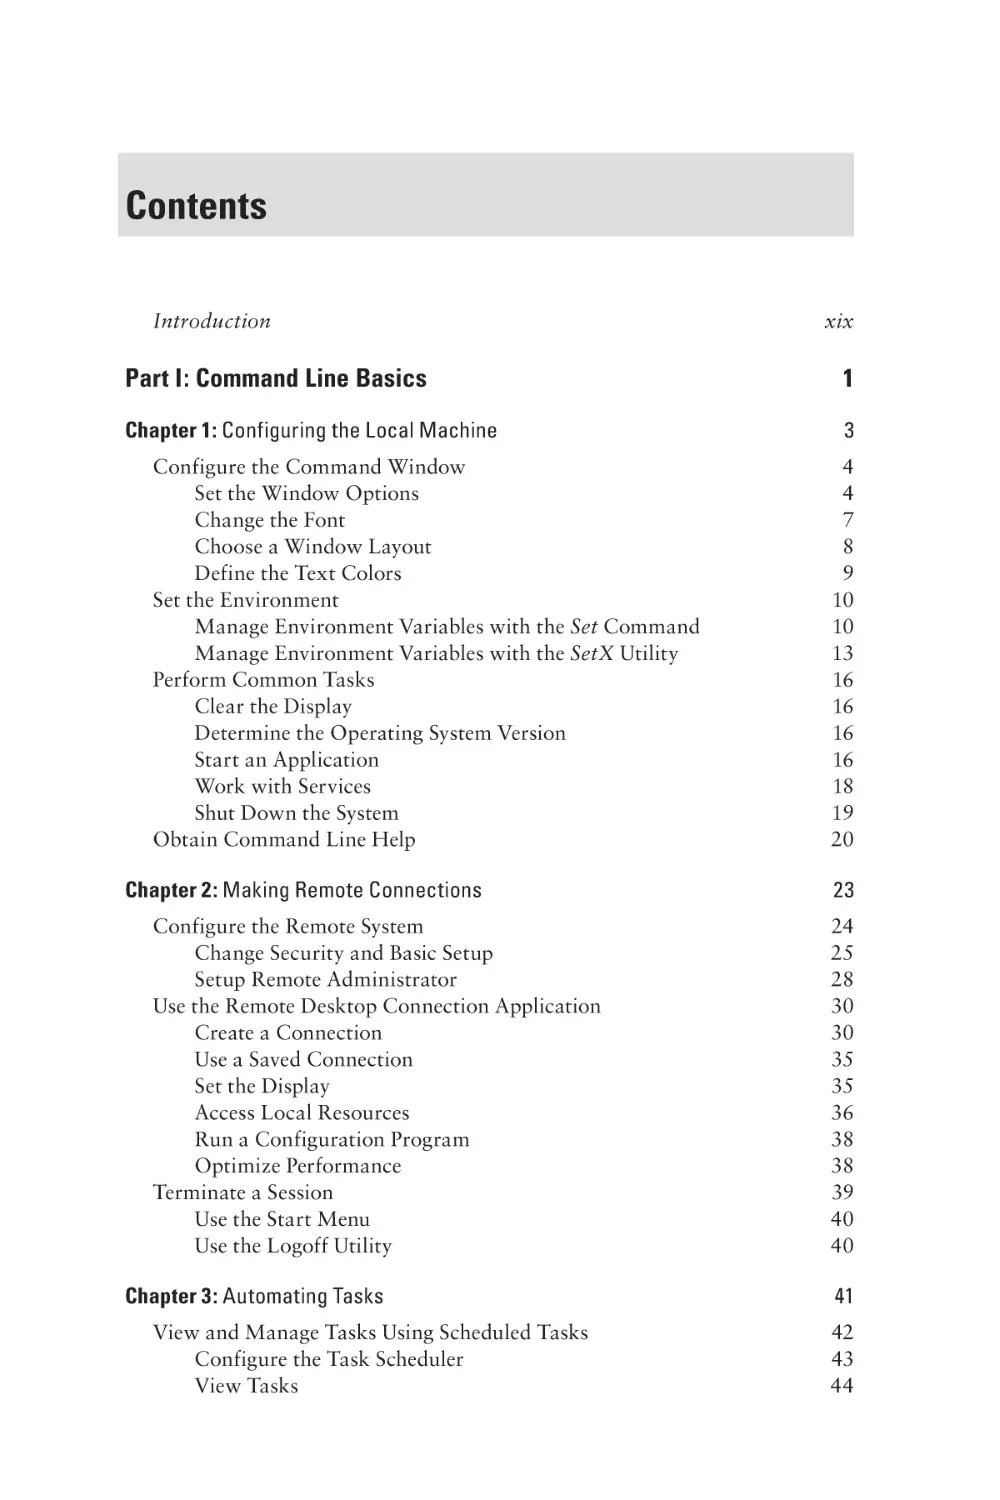
Contents
Introduction
xix
Part I: Command Line Basics
1
Chapter 1: Configuring the Local Machine
3
Configure the Command Window
Set the Window Options
Change the Font
Choose a Window Layout
Define the Text Colors
Set the Environment
Manage Environment Variables with the Set Command
Manage Environment Variables with the SetX Utility
Perform Common Tasks
Clear the Display
Determine the Operating System Version
Start an Application
Work with Services
Shut Down the System
Obtain Command Line Help
Chapter 2: Making Remote Connections
Configure the Remote System
Change Security and Basic Setup
Setup Remote Administrator
Use the Remote Desktop Connection Application
Create a Connection
Use a Saved Connection
Set the Display
Access Local Resources
Run a Configuration Program
Optimize Performance
Terminate a Session
Use the Start Menu
Use the Logoff Utility
Chapter 3: Automating Tasks
View and Manage Tasks Using Scheduled Tasks
Configure the Task Scheduler
View Tasks
4
4
7
8
9
10
10
13
16
16
16
16
18
19
20
23
24
25
28
30
30
35
35
36
38
38
39
40
40
41
42
43
44
viii
Contents
Create New Tasks
Delete Existing Tasks
Manage Tasks Using the SchTasks Command
Use the /Create Switch
Use the /Delete Switch
Use the /Query Switch
Use the /Change Switch
Use the /Run Switch
Use the /End Switch
Part II: Managing Data
Chapter 4: Working with File and Directory Objects
Manage Directory Objects
Find Directories
Find Directories Using Patterns
View the Current Directory
Change the Current Directory
Create Directories
Move Directories
Rename Directories
Remove a Directory
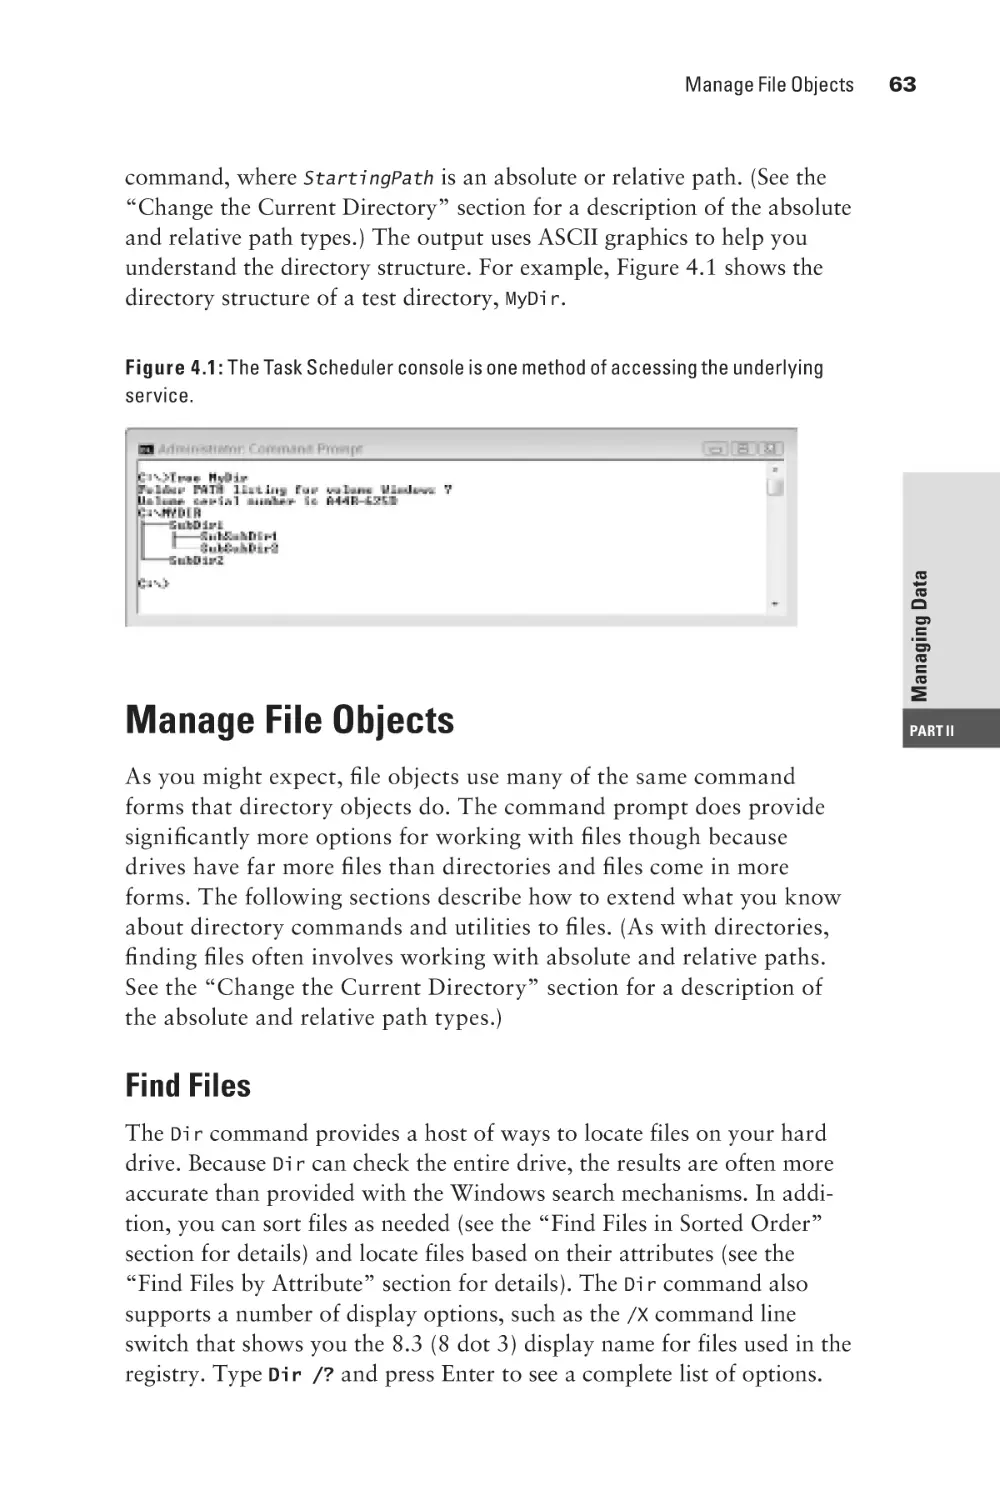
Display a Directory Structure
Manage File Objects
Find Files
Find Files in Sorted Order
Find Files by Attribute
Find Files Using Patterns
Copy Files
Perform Bulk File Transfers
Remove Files
Move Files
Rename a File
Set File Attributes
Work with File Associations and Types
Determine File Associations
Create File Associations
Determine File Types
Create File Types
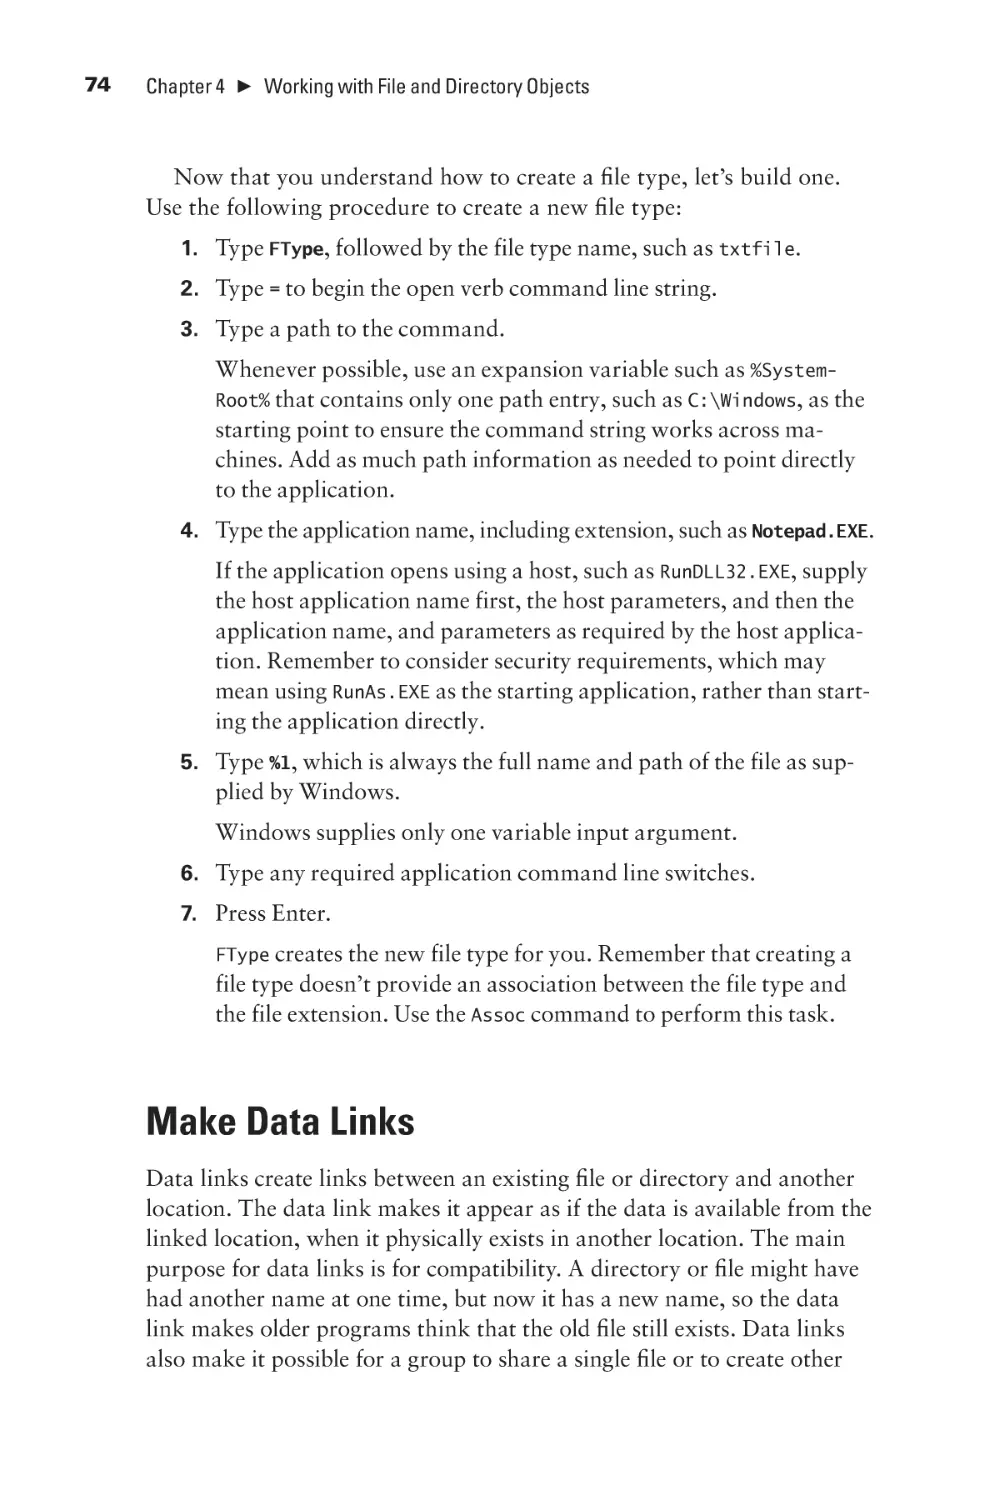
Make Data Links
Create Simple Hard Links
View Simple Hard Links
Delete Simple Hard Links
Create Hard Links Using the New Technique
Create Symbolic Links
Create Junctions
46
50
51
51
53
53
54
54
54
55
57
58
58
59
60
60
61
61
61
62
62
63
63
64
65
66
68
69
70
71
71
71
72
72
73
73
73
74
75
75
75
76
76
77
Contents
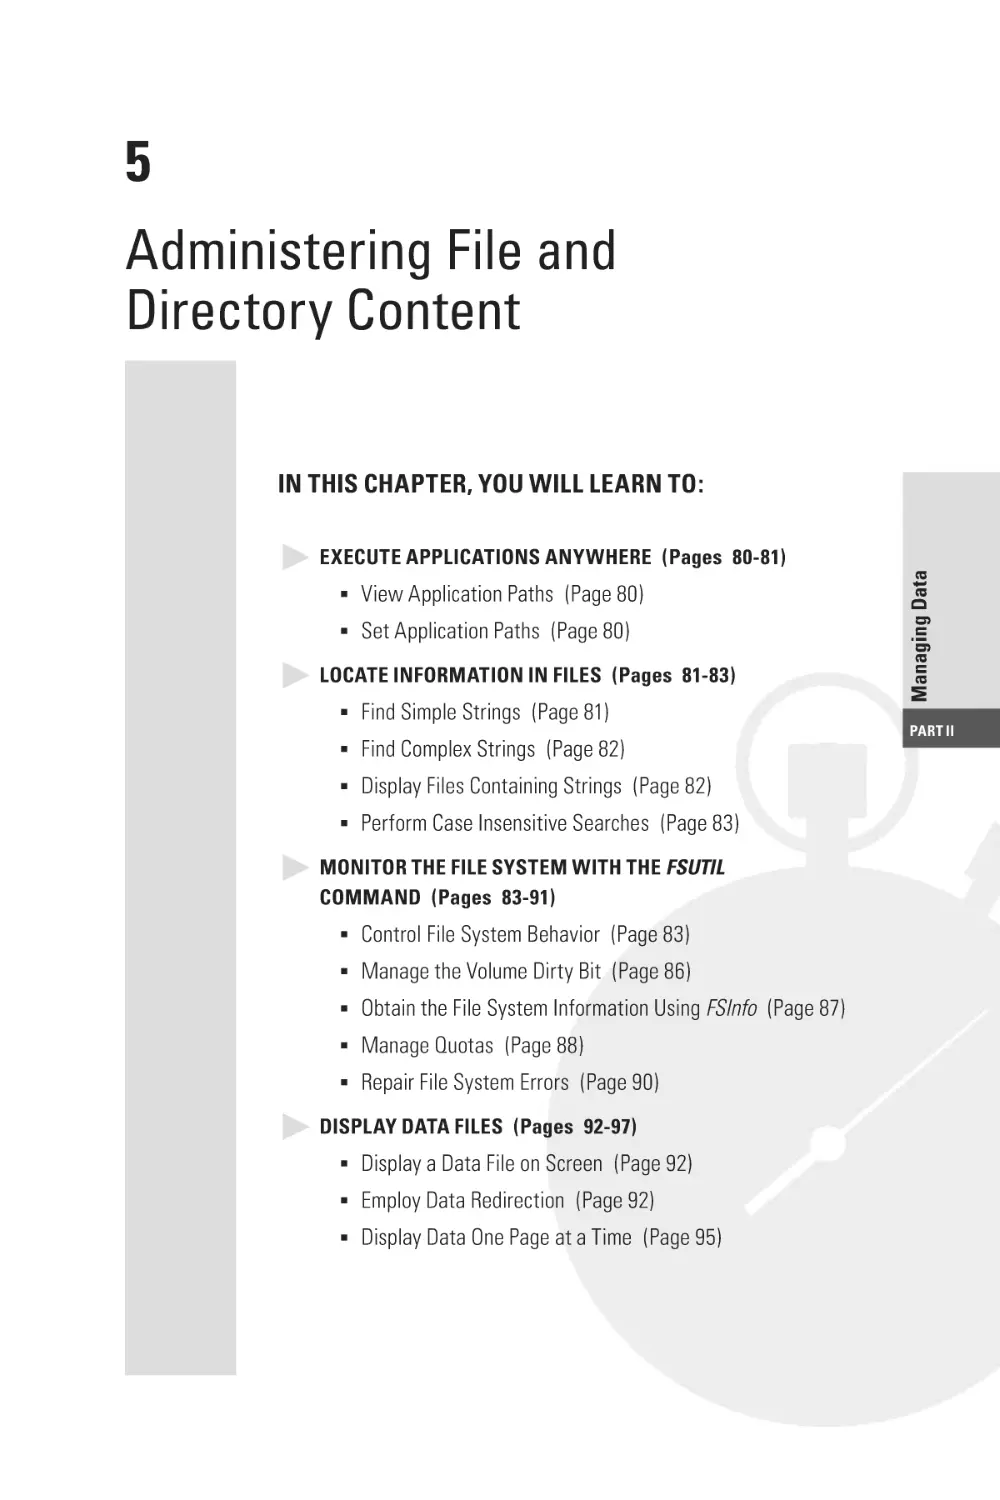
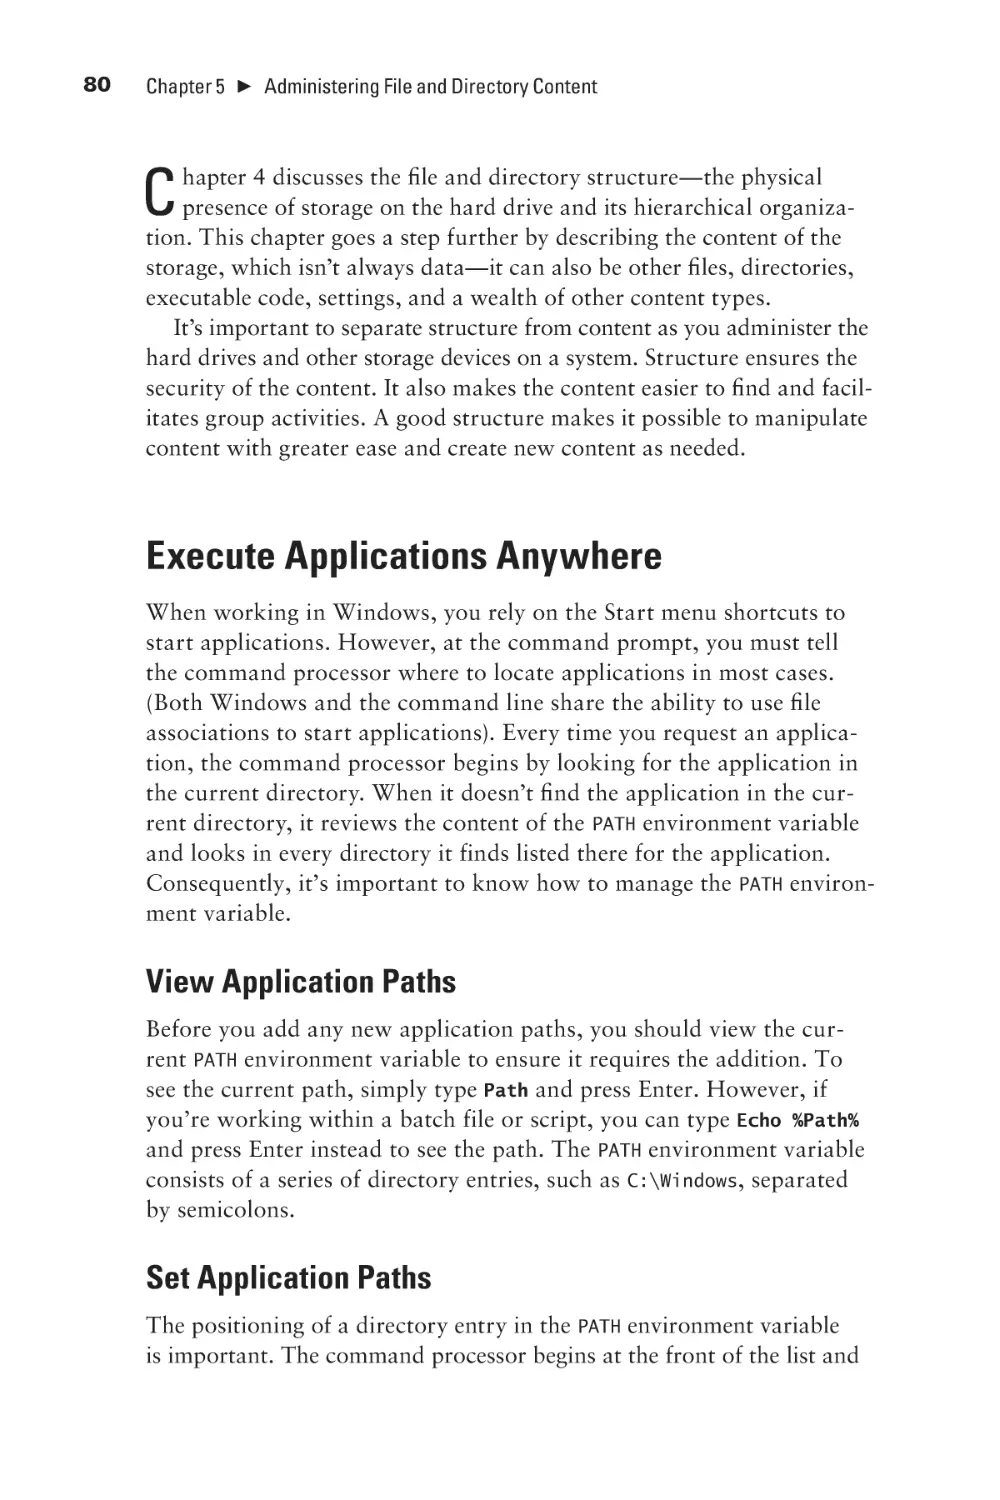
Chapter 5: Administering File and Directory Content
Execute Applications Anywhere
View Application Paths
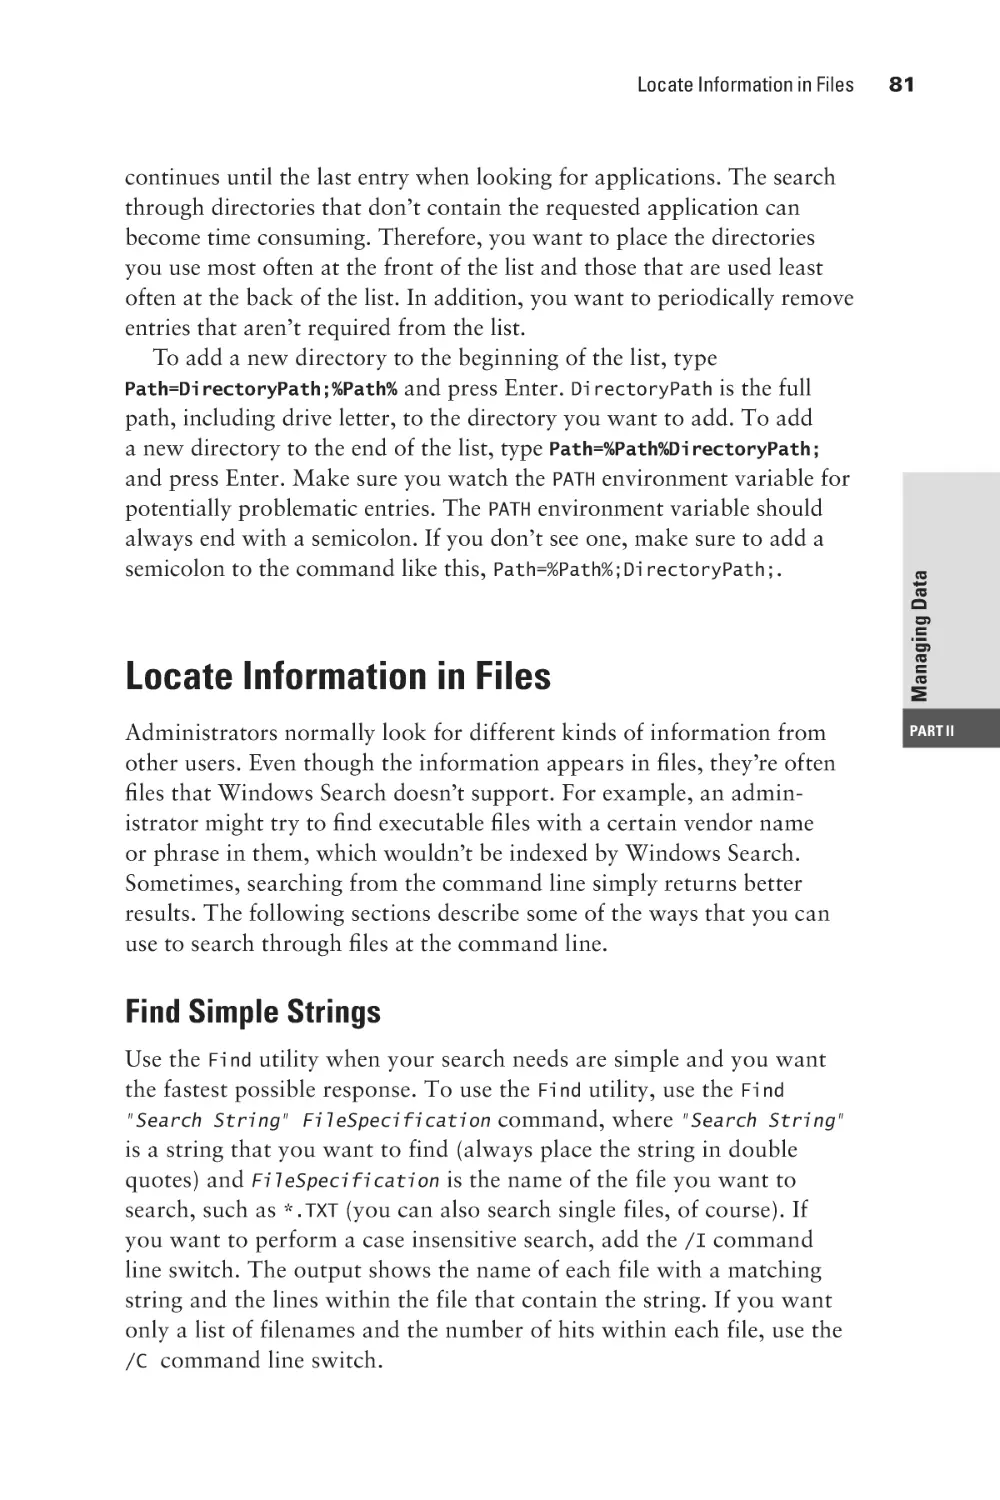
Set Application Paths
Locate Information in Files
Find Simple Strings
Find Complex Strings
Display Files Containing Strings
Perform Case Insensitive Searches
Monitor the File System with the FSUtil Command
Control File System Behavior
Manage the Volume Dirty Bit
Obtain the File System Information Using FSInfo
Manage Quotas
Repair File System Errors
Display Data Files
Display a Data File on Screen
Employ Data Redirection
Display Data One Page at a Time
Chapter 6: Managing the Hard Drive
Save Hard Drive Space
Compress Data
Uncompress Data
View Compression Status
Manage the Volume
Get Volume Information
Manage Volume Labels
Format a Disk
Mount a Volume
Maintain the Volume
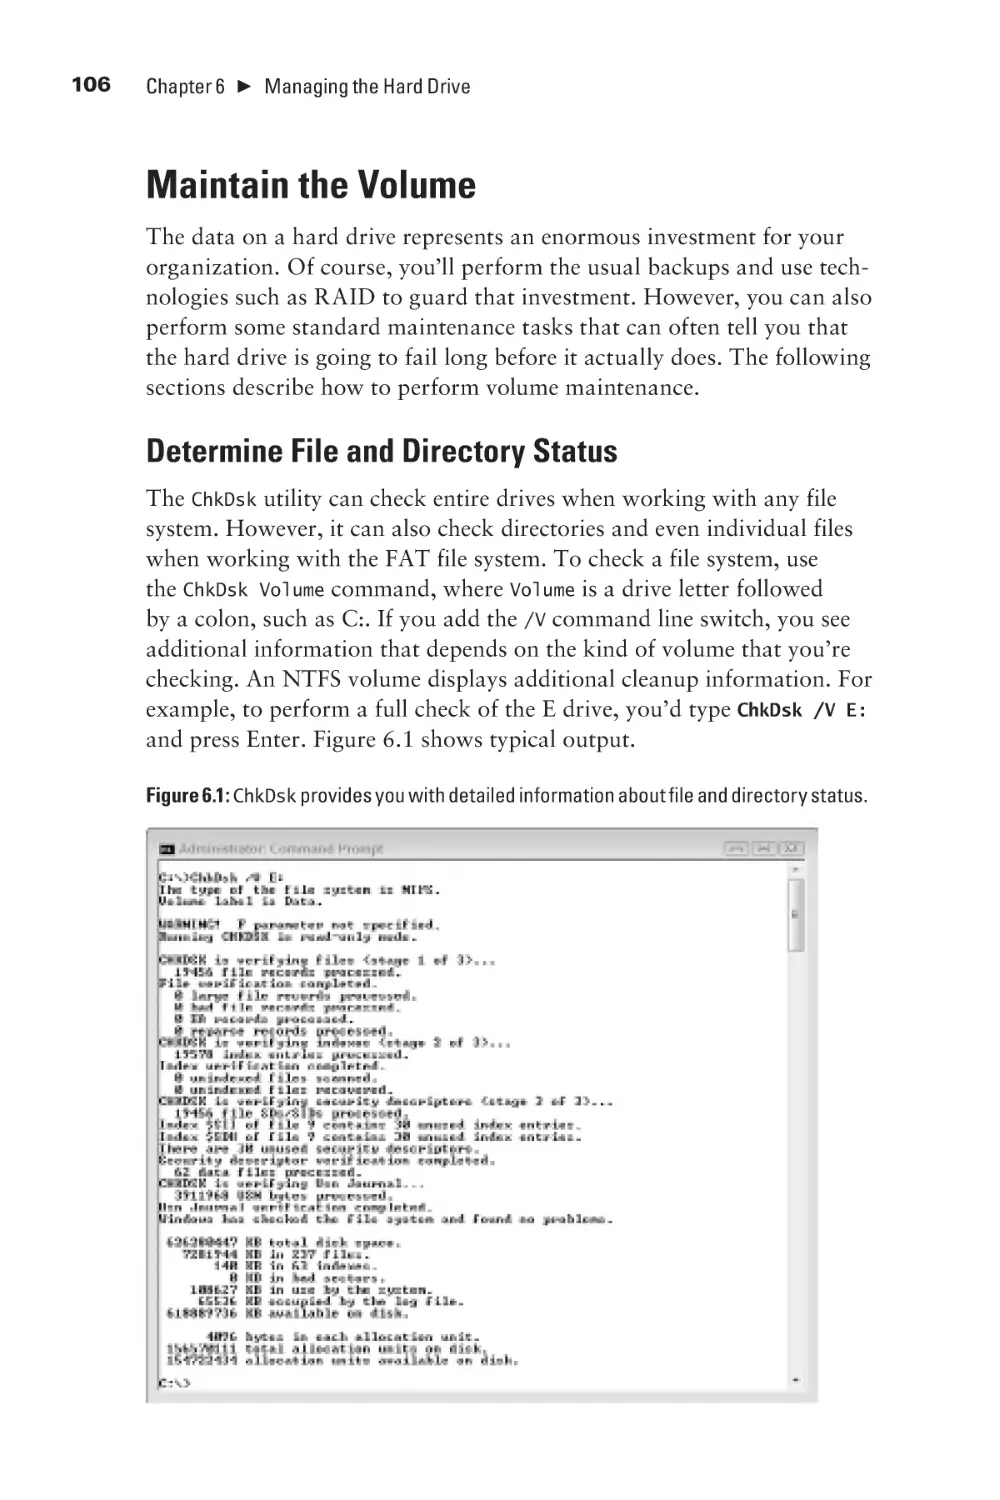
Determine File and Directory Status
Locate Bad Sectors
Perform Boot-Time Disk Checks
Improve Disk Access Performance
Manage Partitions
Start DiskPart
List the Objects
See Object Details
Select an Object
Rescan a Computer for Objects
Create a Partition
Create a Volume
Clean a Drive
Mark a Partition as Active
79
80
80
80
81
81
82
82
83
83
83
86
87
88
90
92
92
92
95
99
101
101
102
102
102
103
103
103
104
106
106
107
108
109
110
110
111
112
113
114
114
116
117
117
ix
x
Contents
Mark a Partition as Inactive
Assign a Drive Letter
Remove a Drive Letter
Extend a Volume
Delete an Object
Exit DiskPart
Chapter 7: Securing the Data
Protect Data
Encrypt a File or Directory
View Encrypted Files and Directories
Encrypt Hidden Files
Back Up Recovery Keys and Certificates
Add a User to a File or Directory
Remove a User from a File or Directory
Decrypt a File or Directory
Change File and Directory Access
Obtain the DACL
Find an SID
Grant Permission
Deny Permission
Remove Permission
Set the Owner
Verify Security
Detect Shared Open Files
Use the Query Option
Use the Disconnect Option
Use the Local Option
Take Ownership of Files
Set Administrator Ownership
Set Other User Ownership
Part III: Managing the Network
Chapter 8: Managing the Network
Get the Media Access Control Information
Interact with the Network Using the Net Utility
Manage Users
Manage Accounts
Manage Domains and Local Groups
Manage Computers
View and Close Sessions
118
118
119
119
120
120
121
122
122
123
124
125
125
126
127
127
127
130
130
131
131
132
132
132
132
133
134
134
134
135
137
139
140
141
141
143
146
149
149
Contents
Perform Server Configuration
View Workstation Configuration
Manage Services
Manage Files
Obtain Help for the Net Utility
Manage Print Jobs
Manage Resources
Obtain Statistics
Configure Time Synchronization
Chapter 9: Working with TCP/IP
Manage the Internet Protocol
Display the IP Information
Renew Addresses for an Adapter
Clear the DNS Resolver Cache
Renew DHCP Addresses and Register DNS Names
Release a Connection
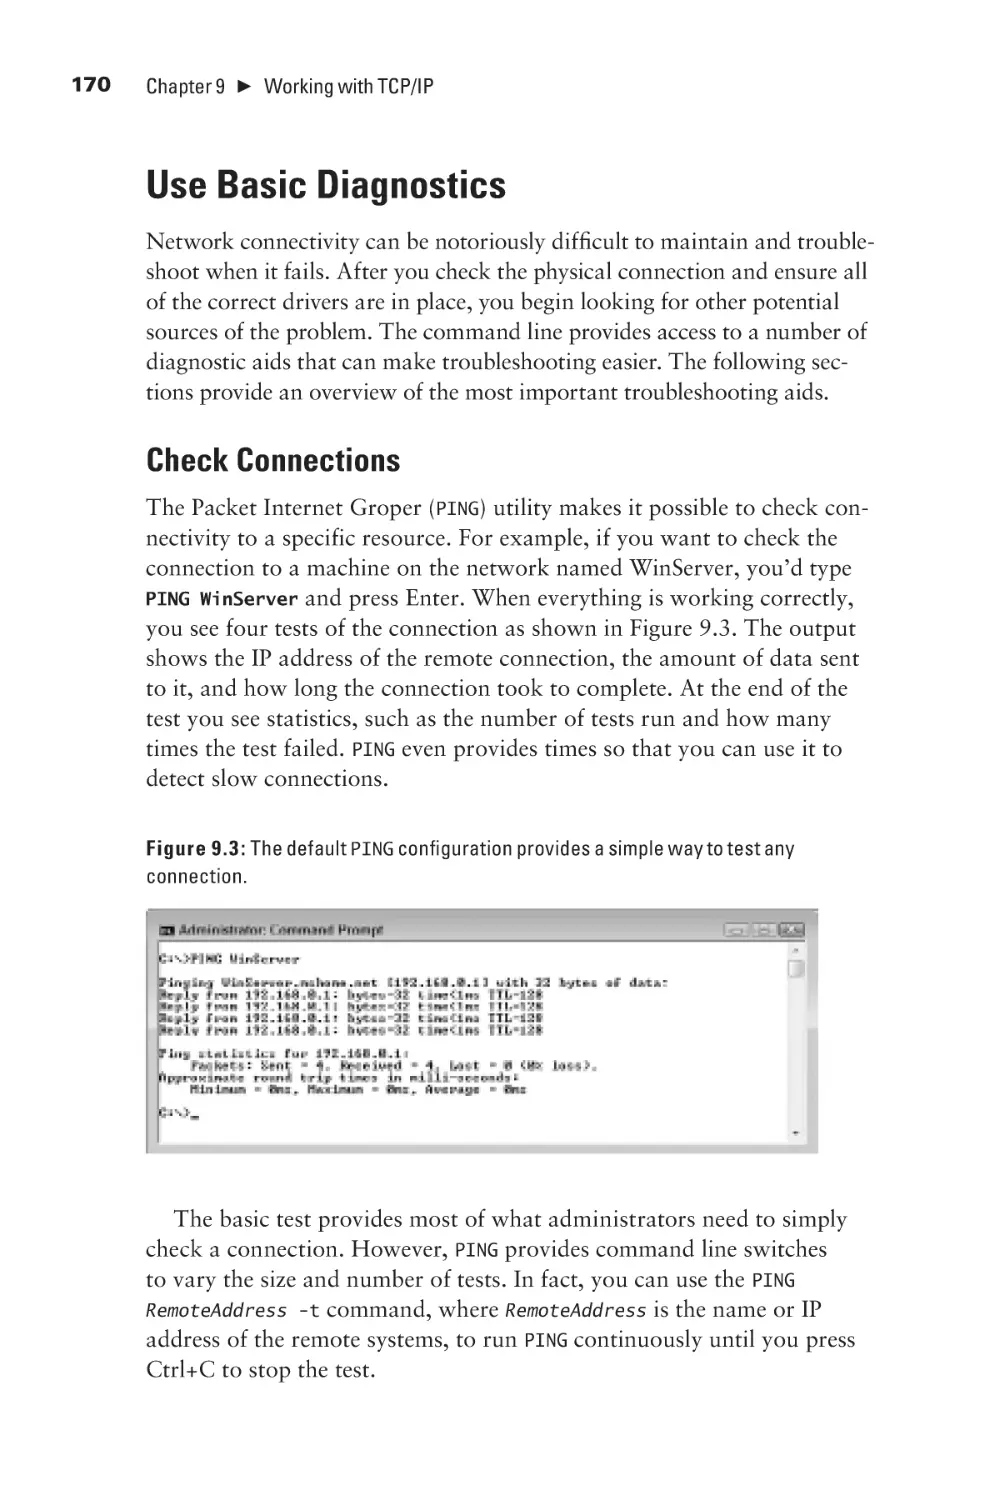
Use Basic Diagnostics
Check Connections
Trace Transmission Paths
Track the Network Path
Perform Detailed Network Diagnostics
Obtain a Copy of NetDiag
Perform a Test
Understand Diagnostics
Locate and Fix Minor Problems
Get Network Statistics
Display All Connections and Ports
Display Application Statistics
Display Ethernet Statistics
Display Protocol Information
Set a Refresh Interval
Manipulate the Network Routing Tables
Print the Routing Tables
Add a New Route
Change a Route
Delete a Route
Chapter 10: Creating System Connections
Perform Remote System Management
Create Remote Connections
Set Up a Telephony Client
Perform Remote Windows Management
Execute Commands on a Remote System
151
153
153
155
156
157
158
161
163
165
166
166
168
168
169
169
170
170
171
172
173
174
175
175
177
177
177
178
179
179
180
180
180
181
182
183
185
186
186
190
191
206
xi
xii
Contents
Work with Terminal Server
Obtain Process Information
Get Session Information
Terminate a Session
Disconnect an Active Session
End Processes
Shut Down the Terminal Server
206
206
207
208
208
208
209
Part IV: Interacting with Active Directory
211
Chapter 11: Configuring Directory Services
213
Manage Directory Services Using the WMIC NTDomain Alias
List the Objects
List Object Properties
Get an Object Property
Set an Object Property
Query an Association
Manage Active Directory with the DSQuery Utility
Interact with Servers
Interact with Users
Interact with Computers
Interact with Contacts
Interact with Groups
Interact with Organizational Units
Manage the Active Directory Database
Issue a Command
Use a Stream
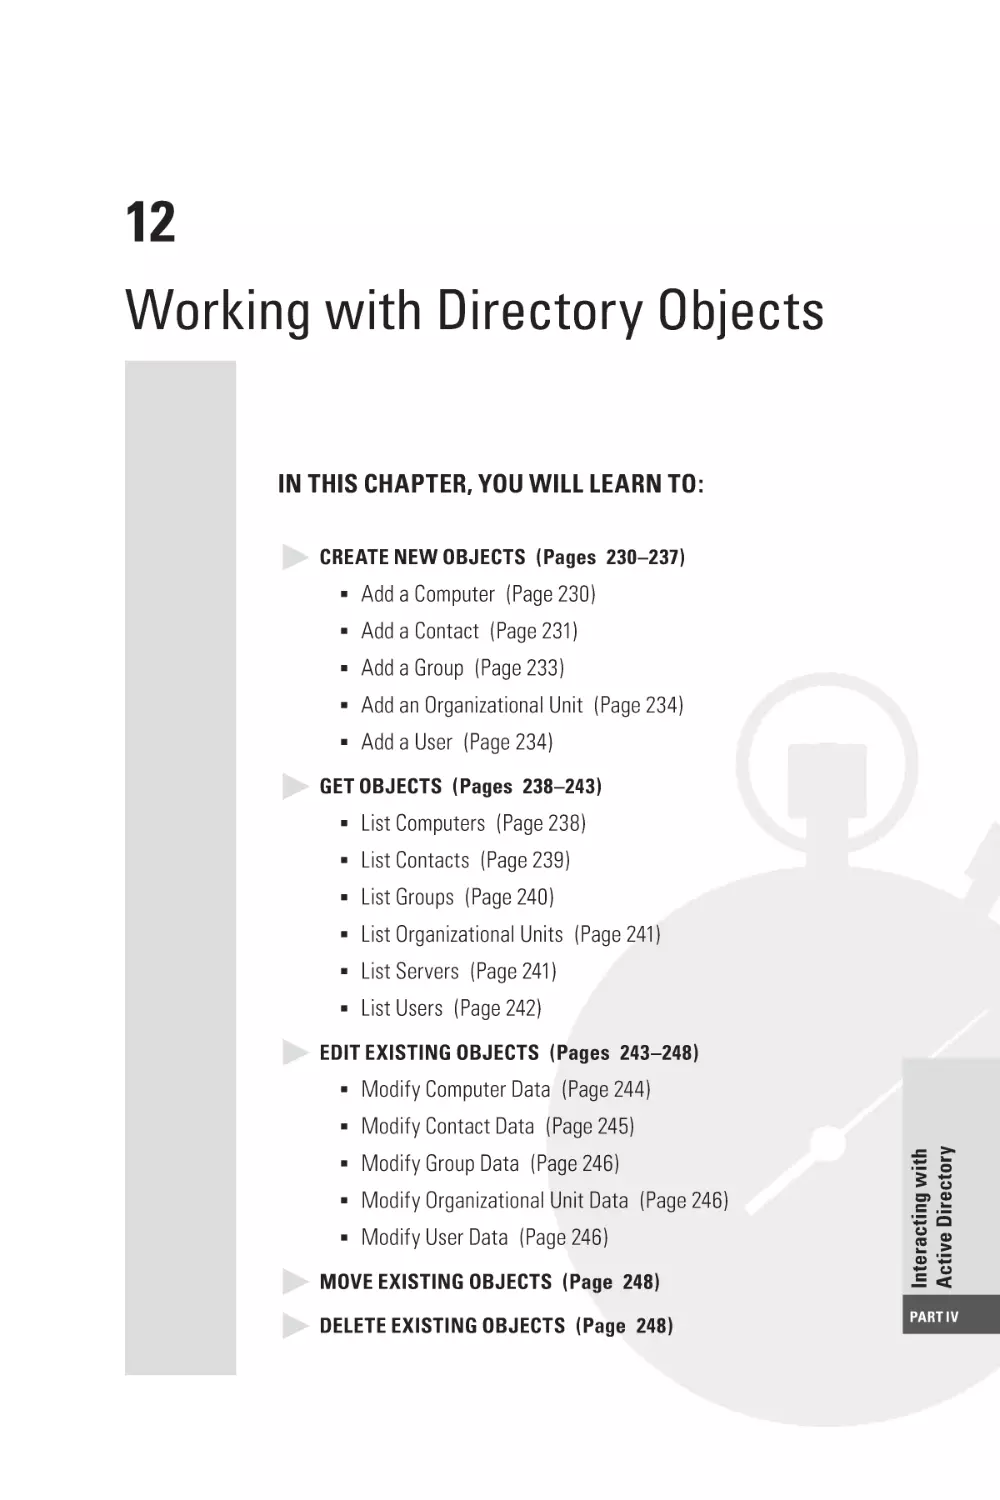
Chapter 12: Working with Directory Objects
Create New Objects
Add a Computer
Add a Contact
Add a Group
Add an Organizational Unit
Add a User
Get Objects
List Computers
List Contacts
List Groups
List Organizational Units
List Servers
List Users
214
215
215
216
217
217
218
218
220
223
223
223
224
225
225
226
229
230
230
231
233
234
234
238
238
239
240
241
241
242
Contents
Edit Existing Objects
Modify Computer Data
Modify Contact Data
Modify Group Data
Modify Organizational Unit Data
Modify User Data
Move Existing Objects
Delete Existing Objects
243
244
245
246
246
246
248
248
Part V: Performing Diagnostics
251
Chapter 13: Monitoring System Events
253
Create Simple System Events
Trigger System Events
Create an Event
Delete an Event
Query an Event
Manage Event Information
Display a List of Publishers
Get a Publisher
Enumerate the Logs
Query Log Events
Get a Log
Get Log Status Information
Set a Log
Export a Log
Archive a Log
Clear a Log
254
257
258
261
261
262
262
262
263
264
267
267
267
269
270
270
Chapter 14: Monitoring System Performance
Add Performance Counters
Load a Performance Counter
Save Performance Counter Settings
Restore Performance Counter Settings
Manage Performance Logs and Alerts
Create a Performance Log
Start Collecting Data
Stop Collecting Data
Query a Collection
Update a Collection
Delete a Collection
Create New Performance Logs from Existing Logs
Remove Performance Counters
Convert Event Trace Logs
271
272
272
273
273
274
274
276
276
277
277
278
278
281
281
xiii
xiv
Contents
Part VI: Performing Maintenance
283
Chapter 15: Performing Basic Maintenance
285
Configure the Server
Understand the SQL Syntax of WMIC
Use Aliases in WMIC
Get Help in WMIC
Format Data in WMIC
Translate Data in WMIC
Activate Windows
Perform an Activation
Display the Activation Information
Change the Product Key
Manage the System Time
Update the Time
Configure a Time Source
Obtain Time Settings Information
Manage the Boot Configuration
Enumerate the Configurations
Get BCDEdit Help
Edit an Existing Boot Setting
Change the Boot Sequence
Set the Default Boot Item
286
287
290
302
306
310
311
311
312
312
312
313
313
314
315
315
316
317
318
318
Chapter 16: Managing System Users
Audit User Access
List the Policies
Get a Policy
Set a Policy
Perform a Backup
Perform a Restore
Clear an Audit Policy
Remove an Audit Policy
Work with Group Policies
Obtain Group Policy Results
Manage Group Policies
Obtain Session Status Information
Get Process Information
Get Session Information
Get User Information
Get Terminal Server Information
Get the User’s Identity
Obtain User Logon Information
Discover User Identity
319
320
321
322
326
327
327
328
328
328
328
330
331
331
331
332
332
332
333
333
Contents
Chapter 17: Securing the System
Add Virus and External Intrusion Protection
Remove Viruses
Detect and Remove Malicious Software
Verify System Files
Verify Drivers
Change the Verifier Settings
Configure Local Security Policies
Perform an Analysis
Configure Security Policies
Export Policies
Import Policies
Validate a Policy File
Work with General Applications
Use TaskKill and TaskList Filters
Terminate Tasks
List Applications
List Services
Chapter 18: Interacting with the Registry
Perform Basic Registry Tasks
Export a Registry Key
Import a Registry Key
Delete a Registry Key
Save the Registry
Restore the Registry
Use the SCRegEdit Script
Set Automatic Updates
Enable Terminal Services
Configure the IP Security (IPSec) Monitor
Manage the DNS Service Priority and Weight
Use the Command Line Reference
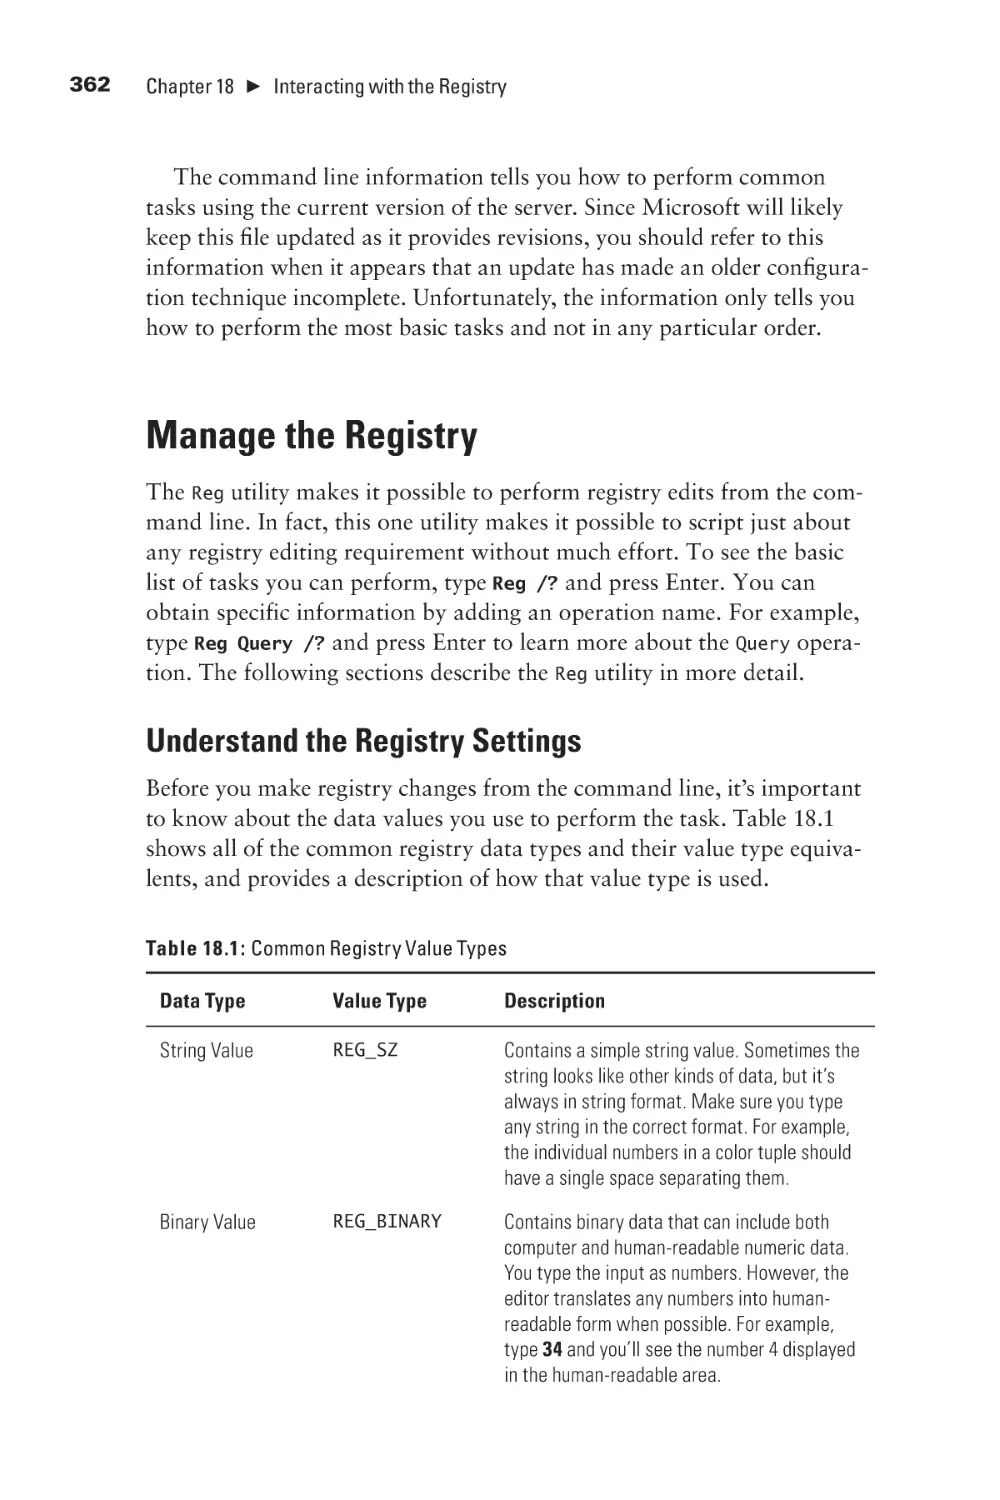
Manage the Registry
Understand the Registry Settings
Query a Registry Entry
Add a Registry Entry
Delete a Registry Entry
Copy a Registry Entry
Compare Registry Entries
Export Registry Entries
Import Registry Entries
Restore Registry Entries
335
337
337
338
339
340
342
344
344
345
345
346
346
347
347
350
350
351
353
354
356
357
357
358
358
358
359
359
360
361
361
362
362
363
364
365
366
366
367
367
368
xv
xvi
Contents
Part VII: Creating Batch Files
369
Chapter 19: Changing the Batch File Environment
371
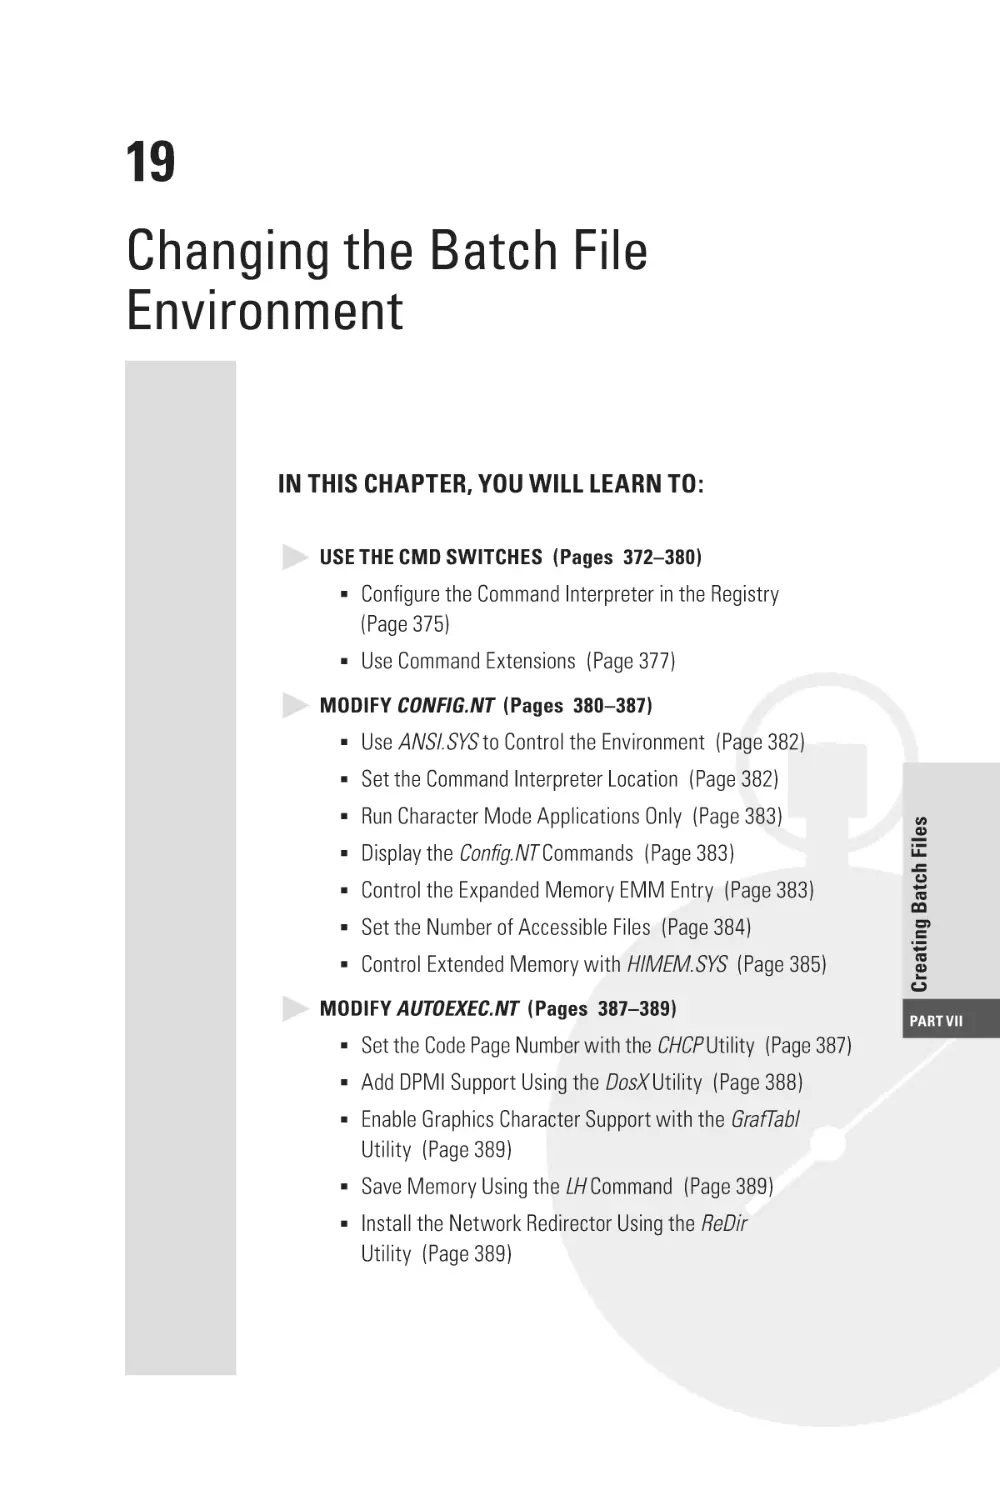
Use the CMD Switches
Configure the Command Interpreter in the Registry
Use Command Extensions
Modify Config.NT
Use ANSI.SYS to Control the Environment
Set the Command Interpreter Location
Run Character Mode Applications Only
Display the Config.NT Commands
Control the Expanded Memory EMM Entry
Set the Number of Accessible Files
Control Extended Memory with HIMEM.SYS
Modify AutoExec.NT
Set the Code Page Number with the CHCP Utility
Add DPMI Support Using the DosX Utility
Enable Graphics Character Support with the GrafTabl Utility
Save Memory Using the LH Command
Install the Network Redirector Using the ReDir Utility
Chapter 20: Working at the Command Prompt
Redirect Command Line Output to the Clipboard
Manage Usernames and Passwords
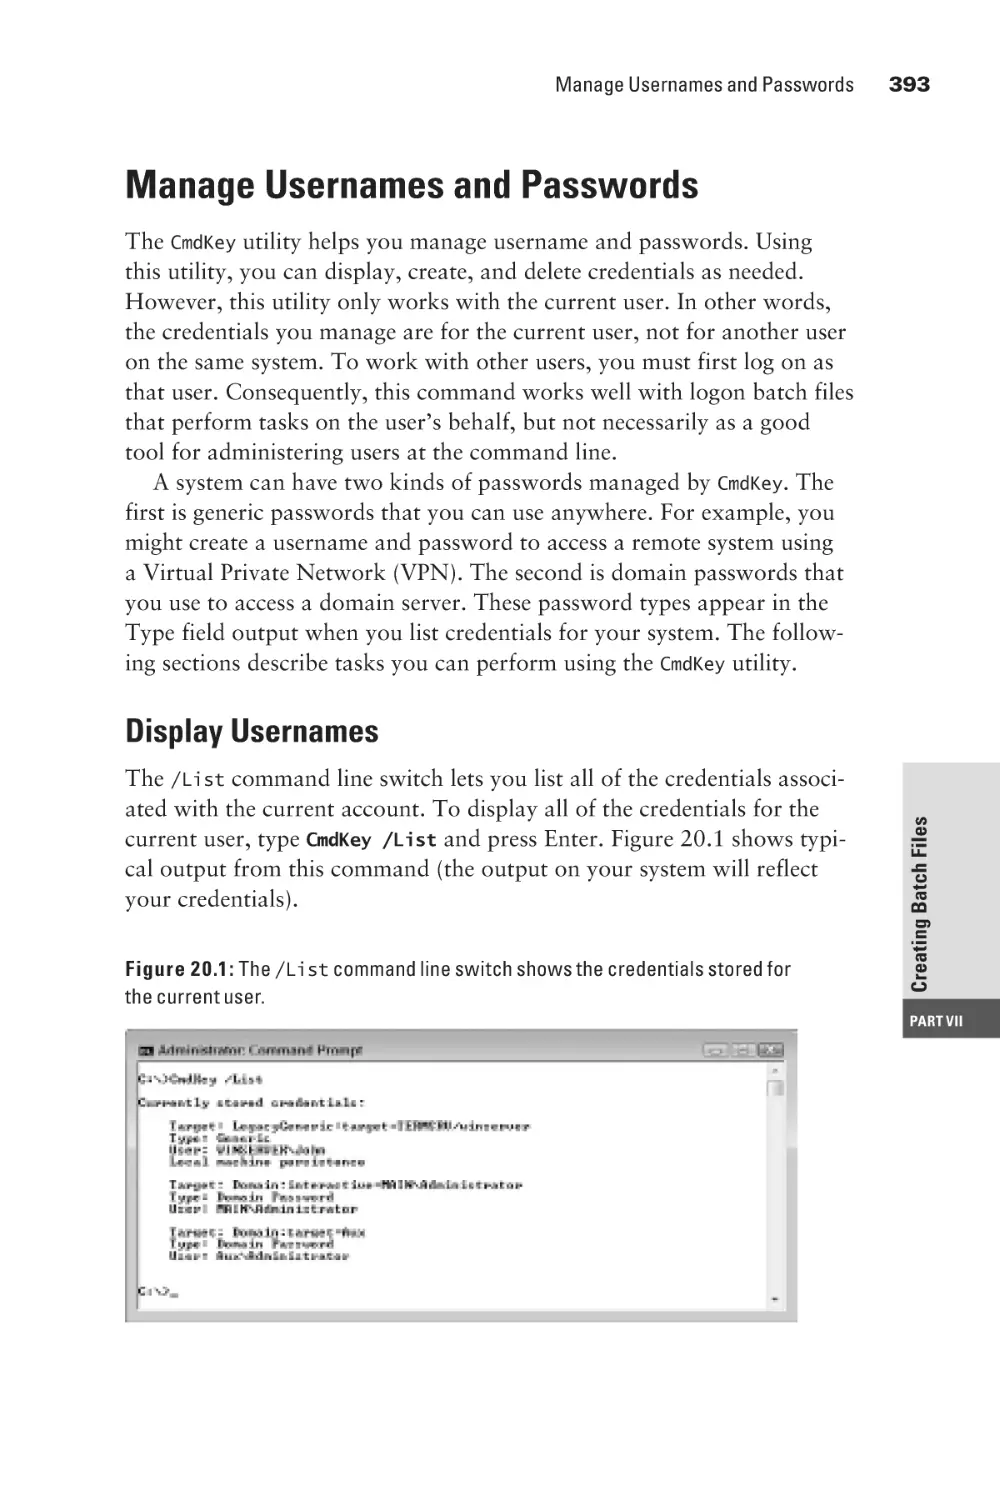
Display Usernames
Create Users
Delete Users
Change Screen Colors
Configure the System Date
Configure the System Time
Change the Command Window Title
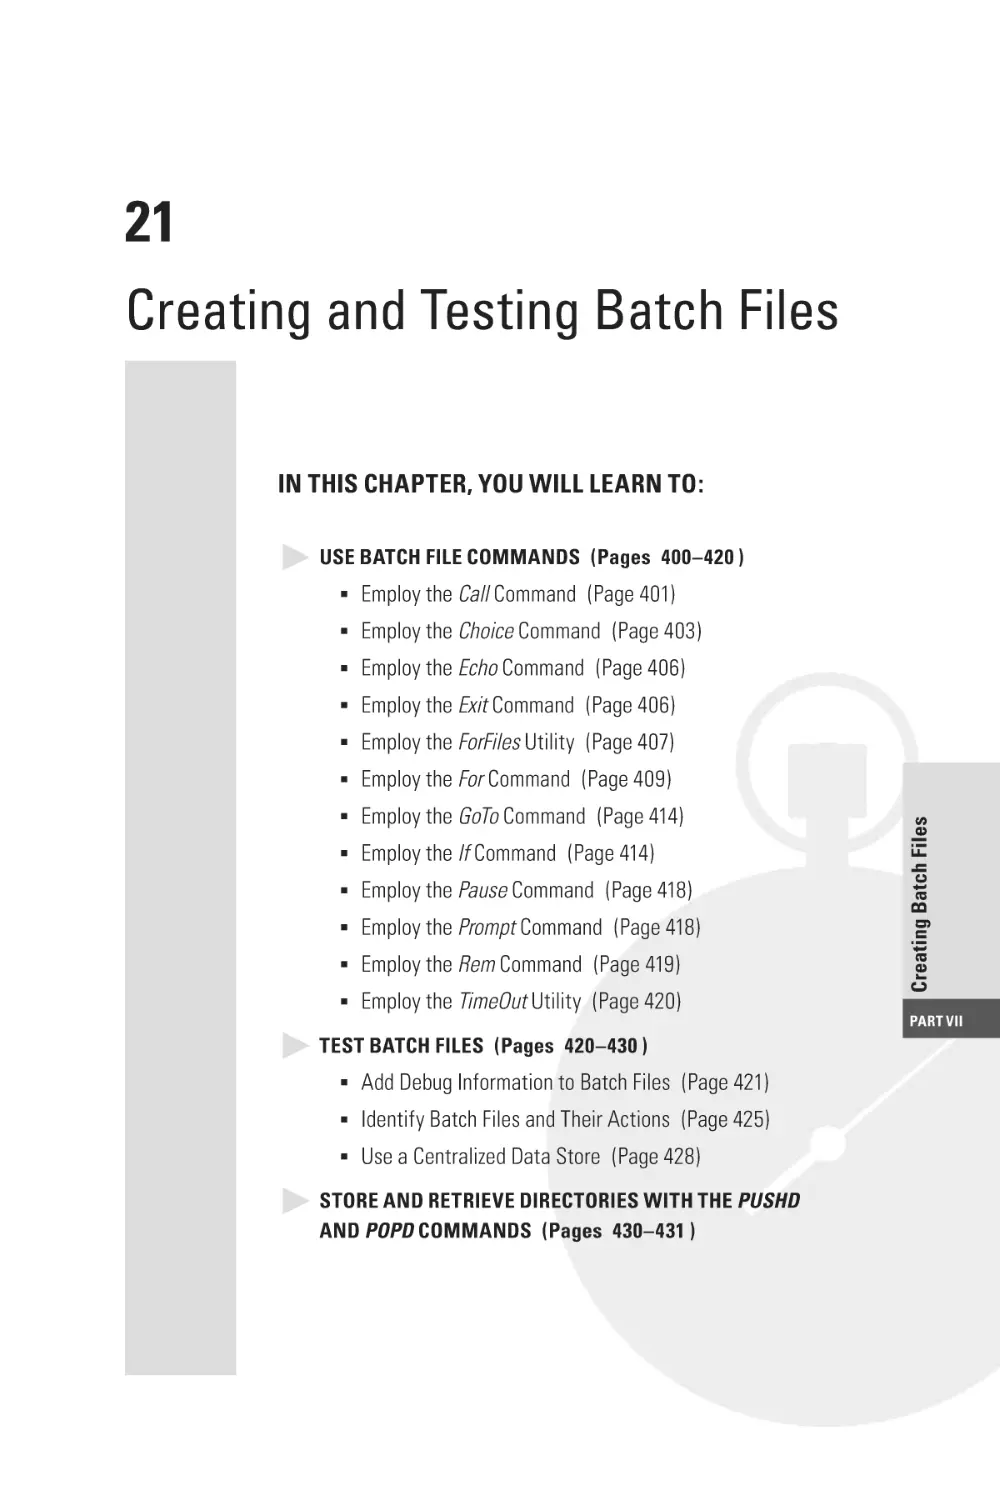
Chapter 21: Creating and Testing Batch Files
Use Batch File Commands
Employ the Call Command
Employ the Choice Command
Employ the Echo Command
Employ the Exit Command
Employ the ForFiles Utility
Employ the For Command
Employ the GoTo Command
Employ the If Command
Employ the Pause Command
Employ the Prompt Command
372
375
377
380
382
382
383
383
383
384
385
387
387
388
389
389
389
391
392
393
393
394
394
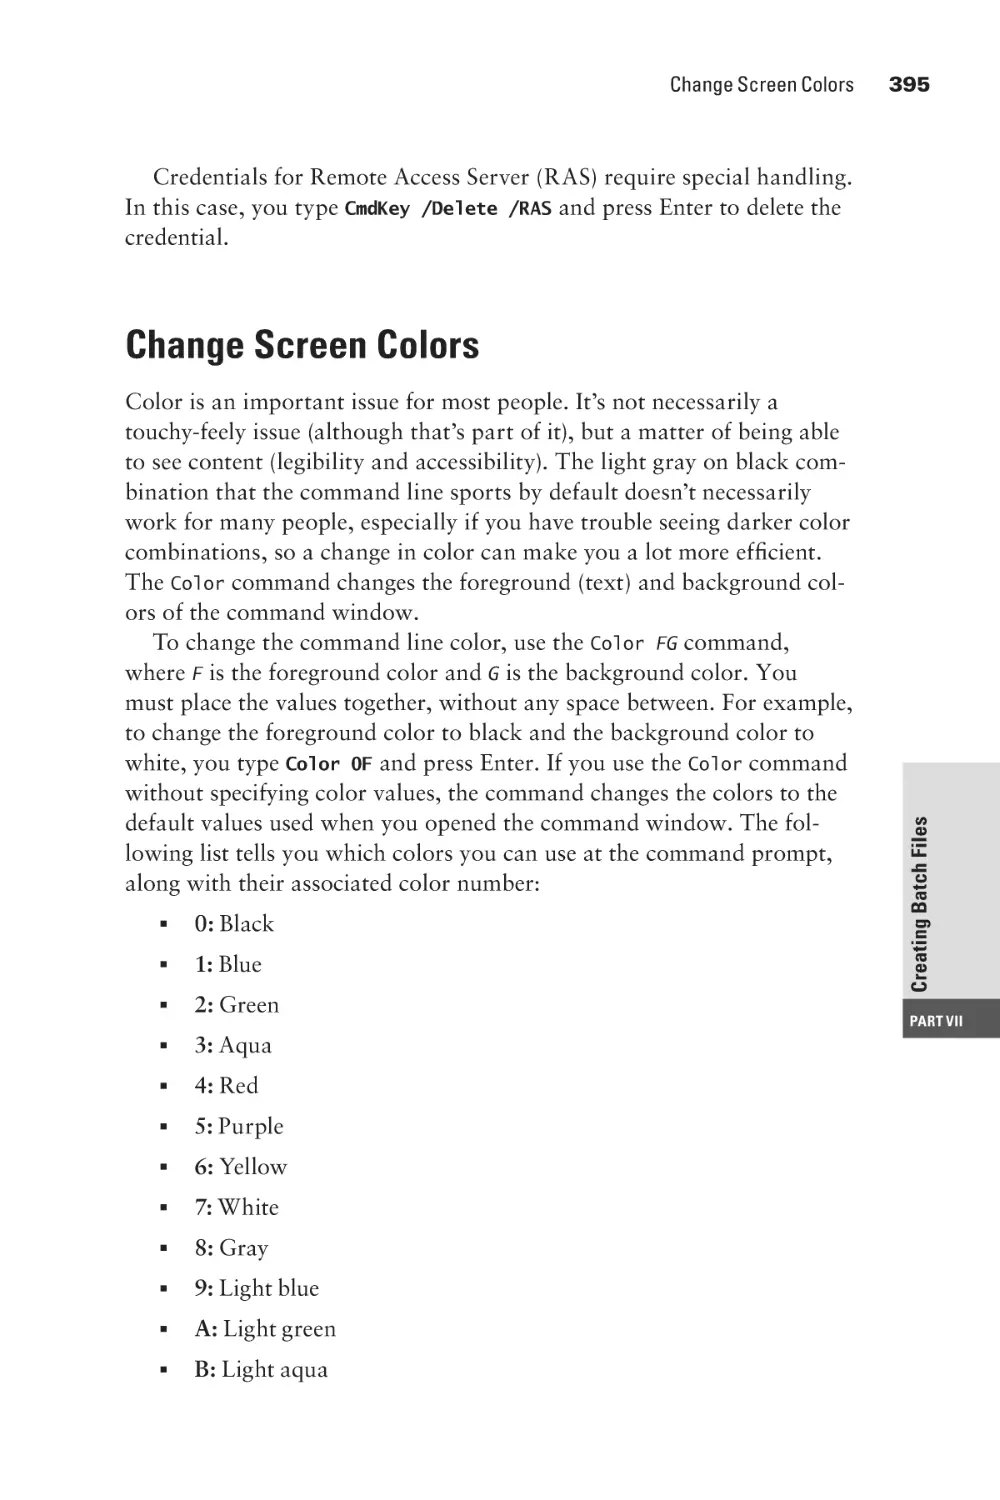
395
396
396
397
399
400
401
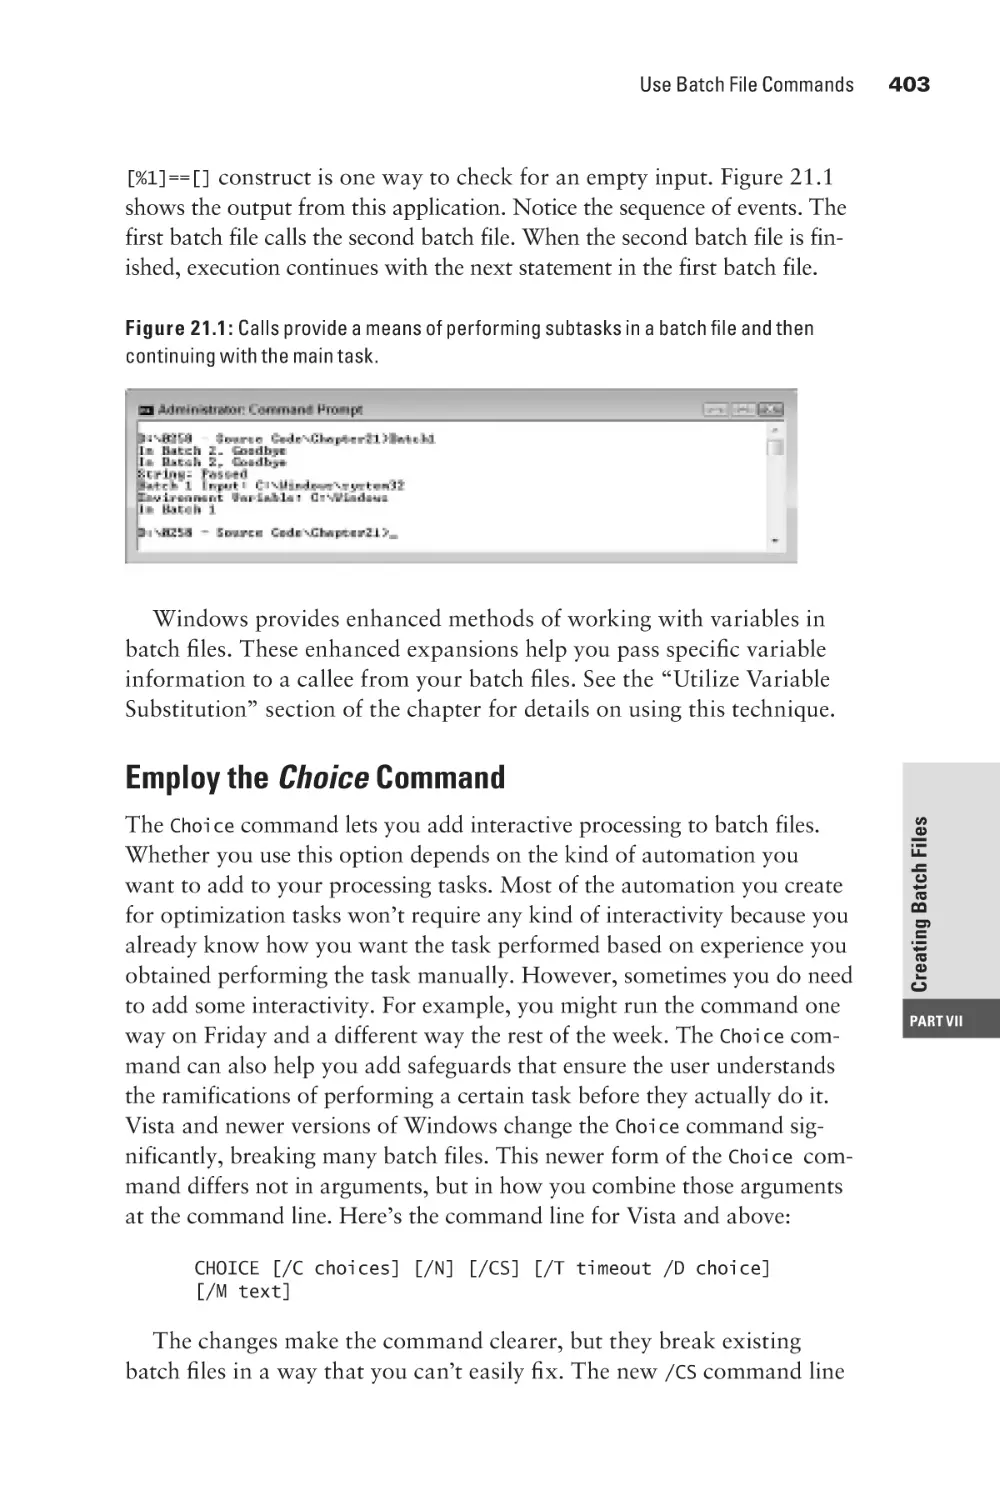
403
406
406
407
409
414
414
418
418
Contents
Employ the Rem Command
Employ the TimeOut Utility
Test Batch Files
Add Debug Information to Batch Files
Identify Batch Files and Their Actions
Use a Centralized Data Store
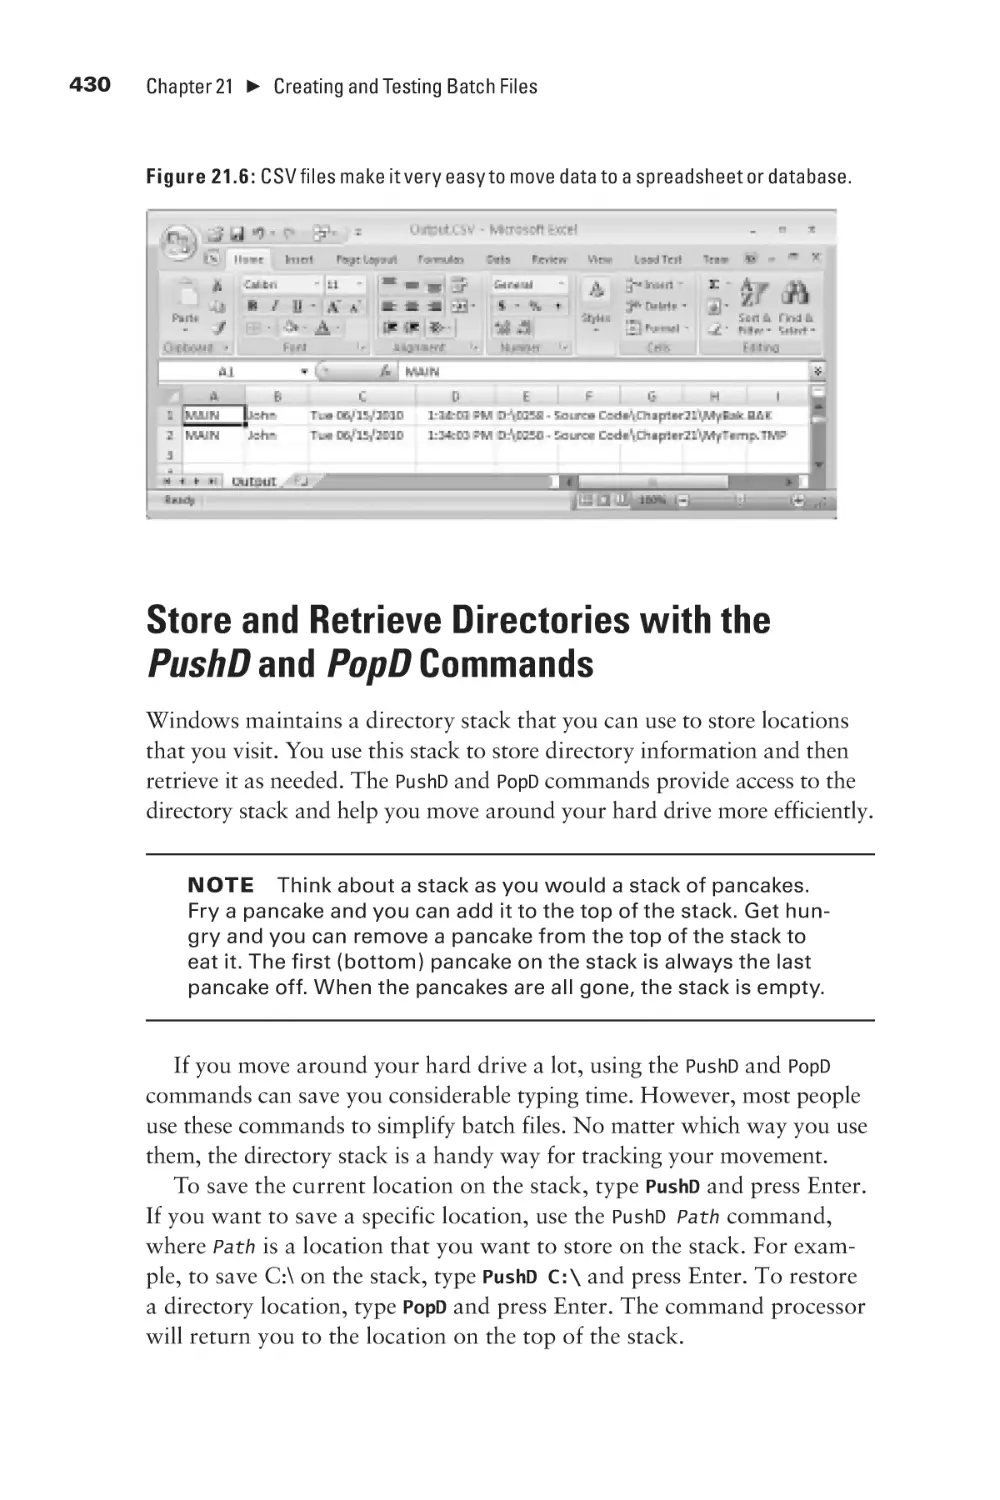
Store and Retrieve Directories with the PushD and PopD Commands
419
420
420
421
425
428
430
Part VIII: Creating Scripts
433
Chapter 22: Discovering Scripting Basics
435
Use Scripting Languages
Learn the Basics of JavaScript
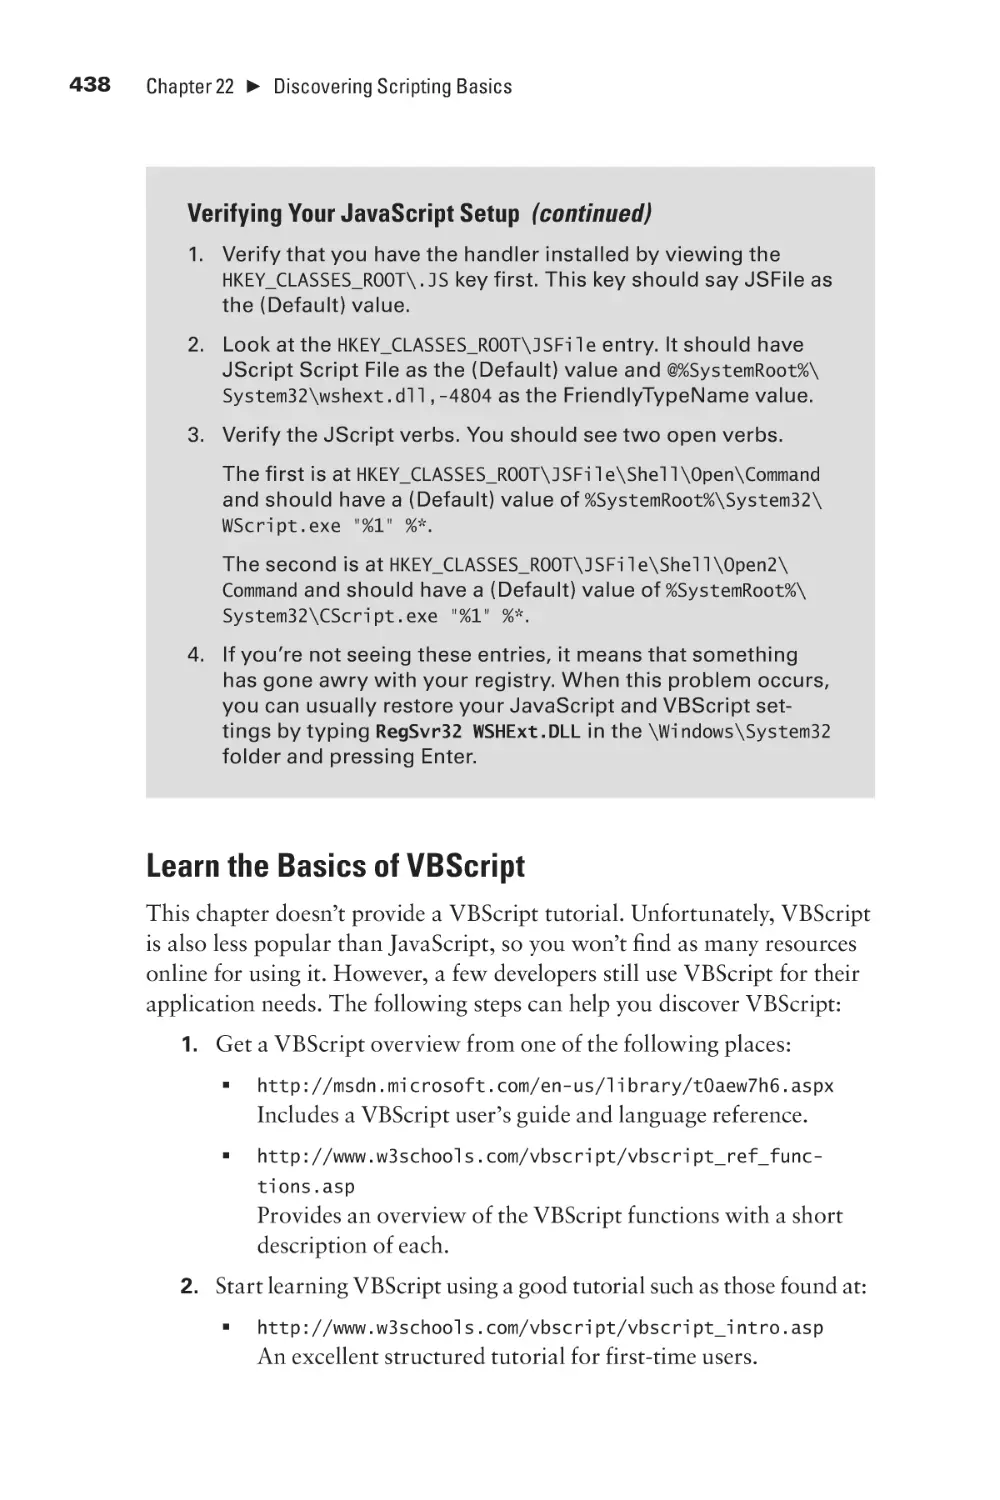
Learn the Basics of VBScript
Use the Windows Scripting File
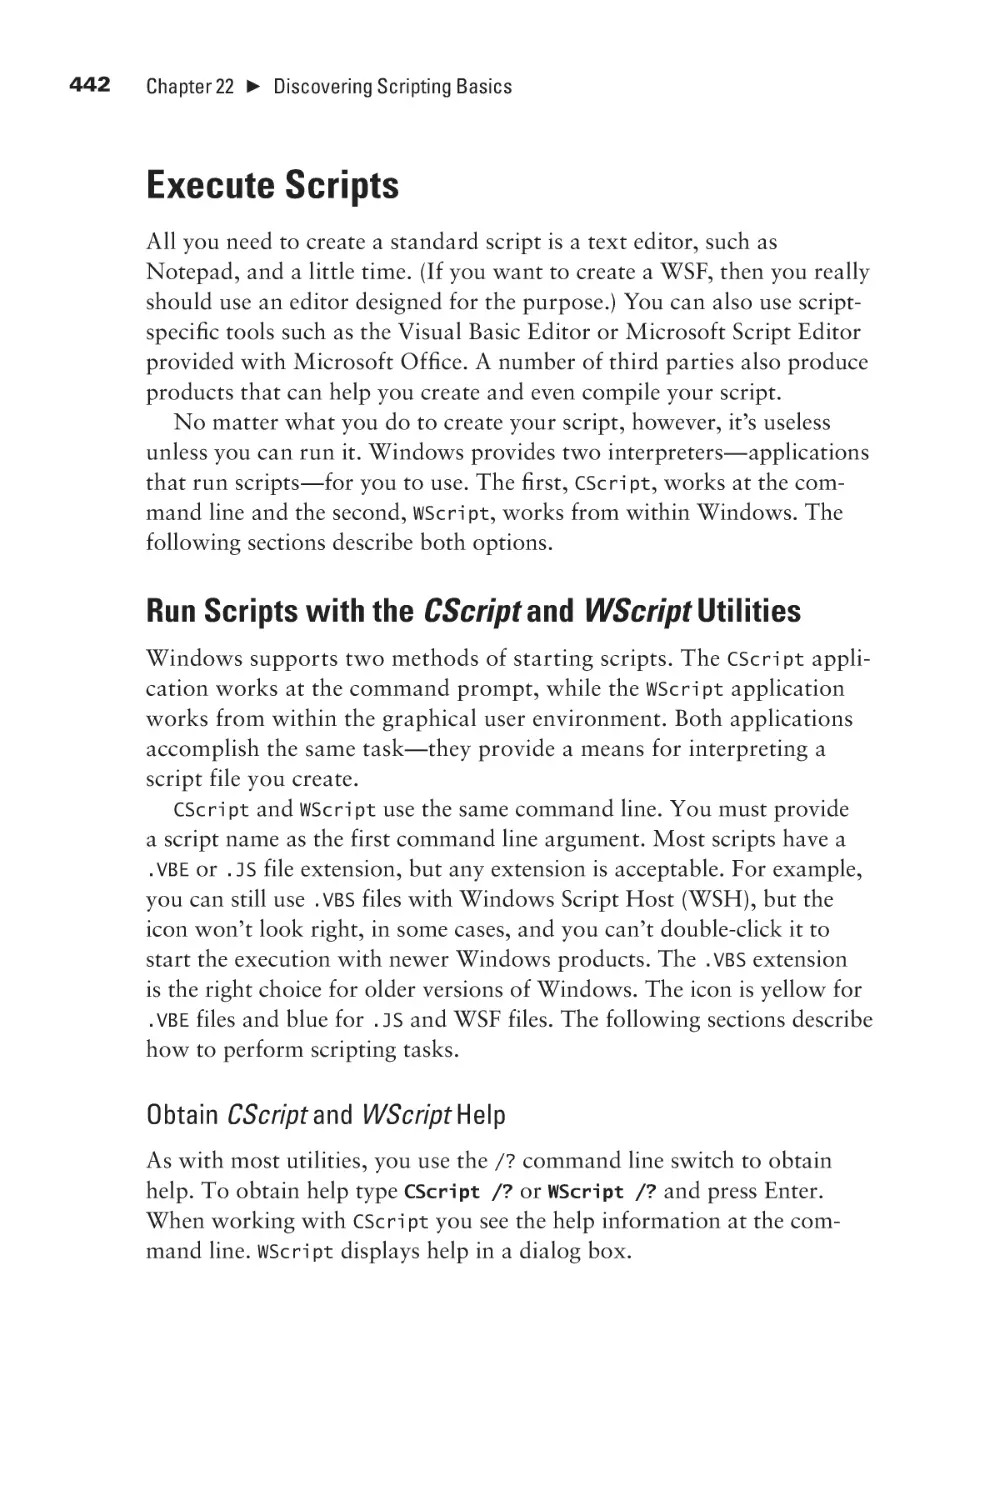
Execute Scripts
Run Scripts with the CScript and WScript Utilities
Configure the Host and Property Page Options
Chapter 23: Using the Scripting Objects
Use the WScript Object
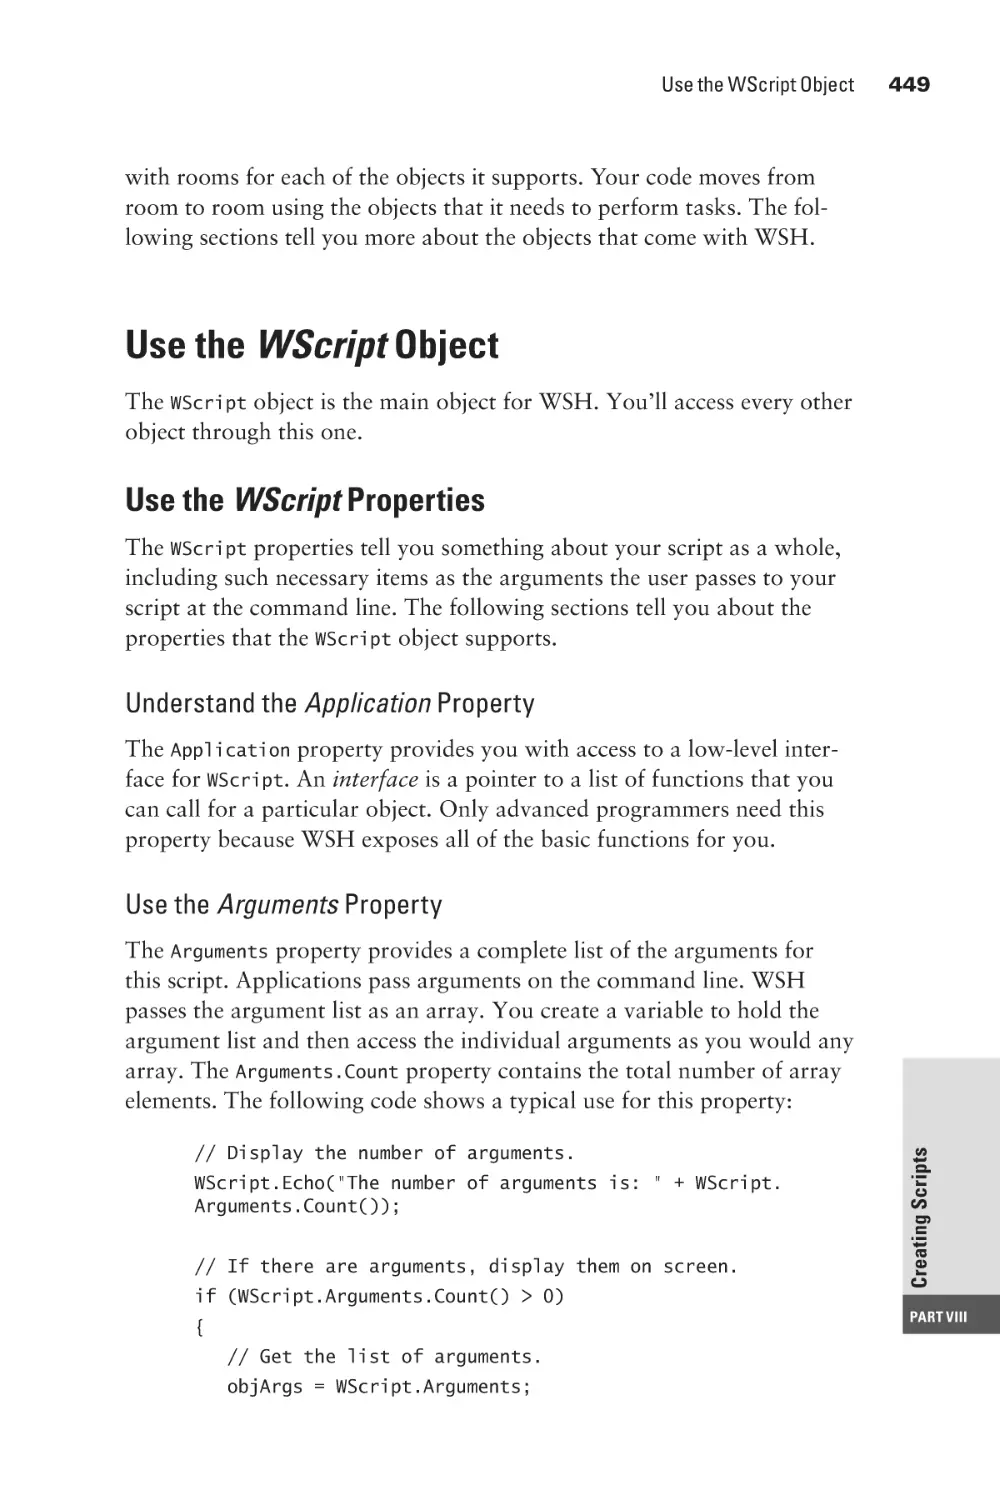
Use the WScript Properties
Use the WScript Methods
Use the WScript.WshArguments Object
Use the WScript.WshShell Object
Use the WScript.WshNetwork Object
Use the WScript.WshNetwork Properties
Use the WScript.WshNetwork Methods
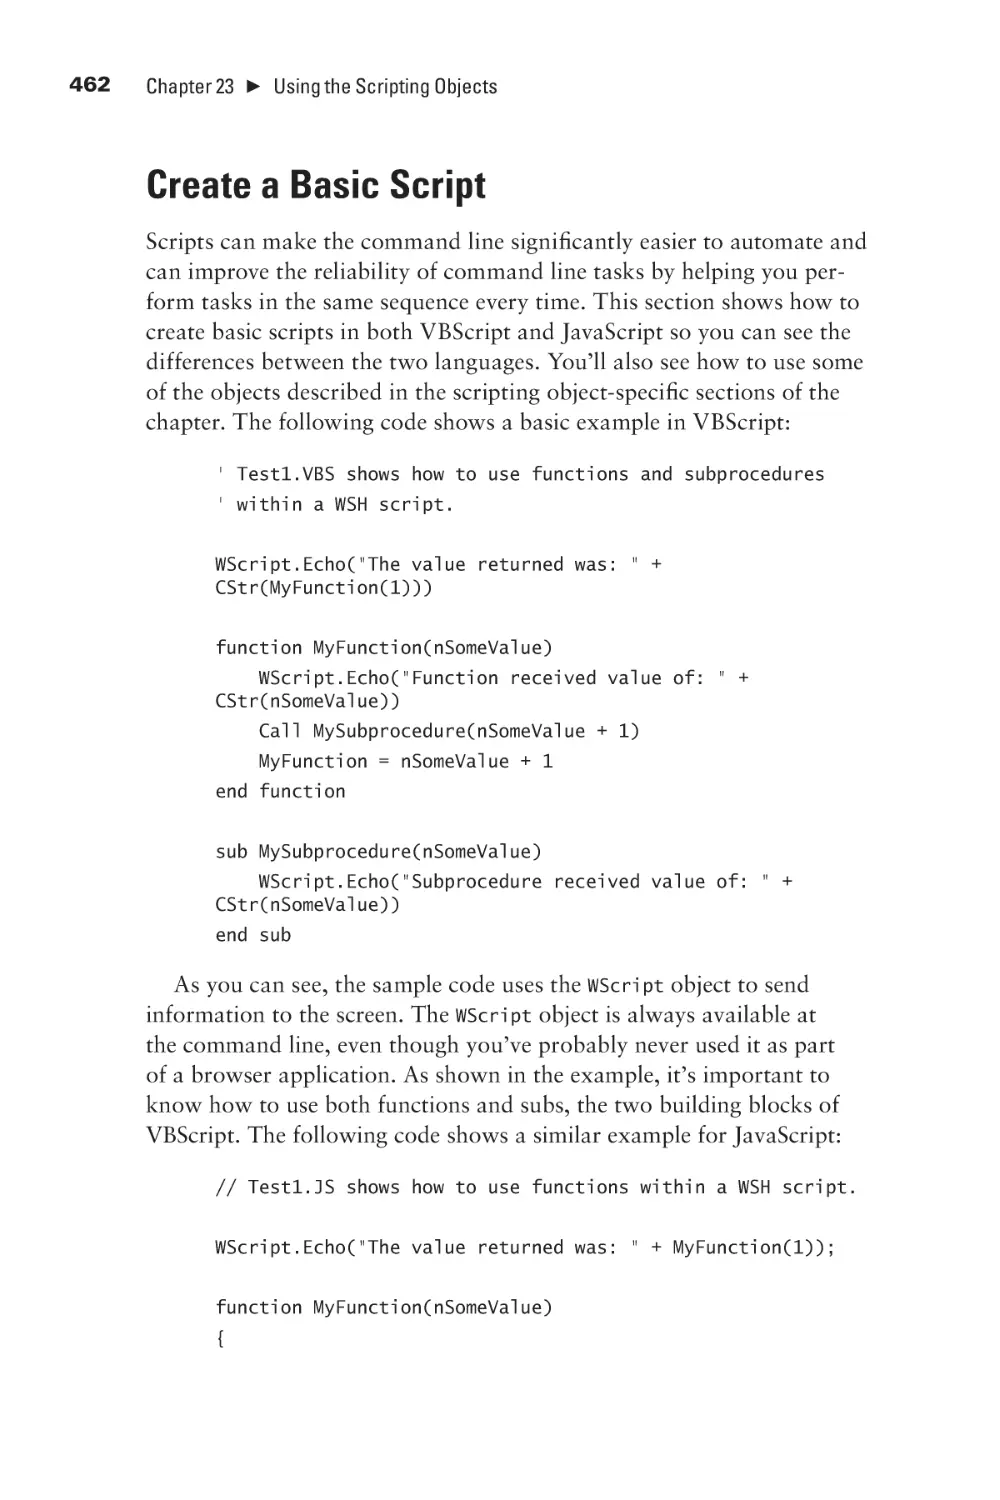
Create a Basic Script
Script the Command Line and System Environment
Script the Registry
Create .LNK Files
436
436
438
439
442
442
444
447
449
449
451
454
455
457
457
458
462
463
466
468
Chapter 24: Creating Advanced Scripting Examples
471
Script Registry Entries
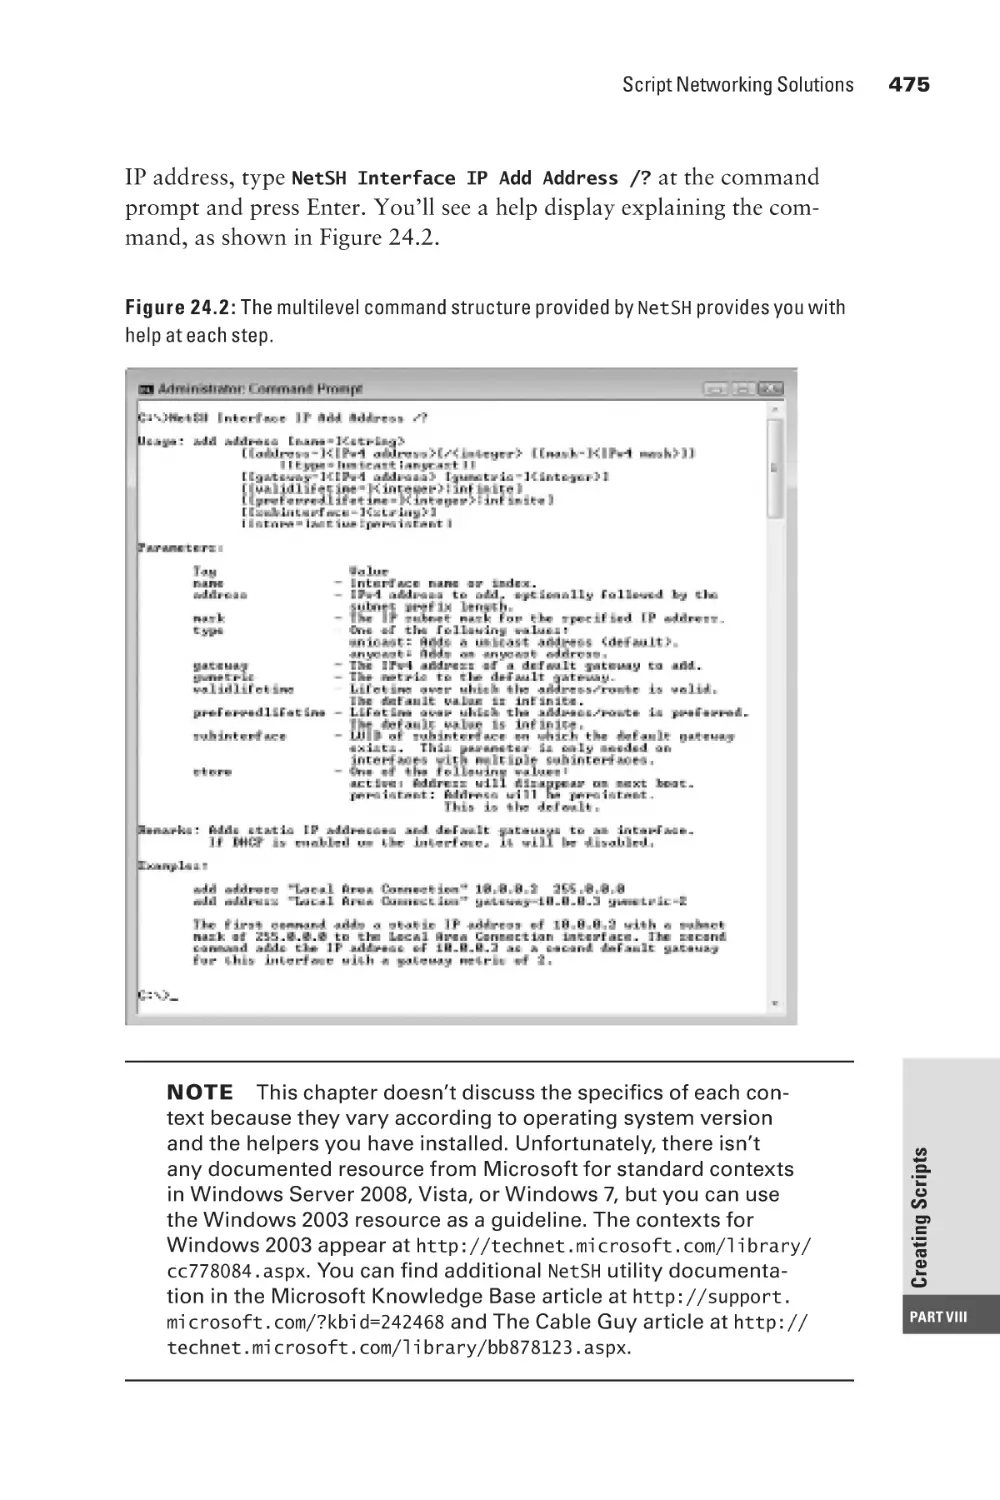
Script Networking Solutions
Discover the NetSH Helper List
Get NetSH Help
Execute NetSH Commands
Understand the Basic NetSH Contexts
Use the Root Context Commands
Impersonate a User
Change the Environment
Change Logons, Ports, and Users
Enable or Disable Session Logons Directly
472
473
473
474
476
476
478
480
481
481
482
xvii
xviii
Contents
List COM Port Mappings
Modify the Install Mode
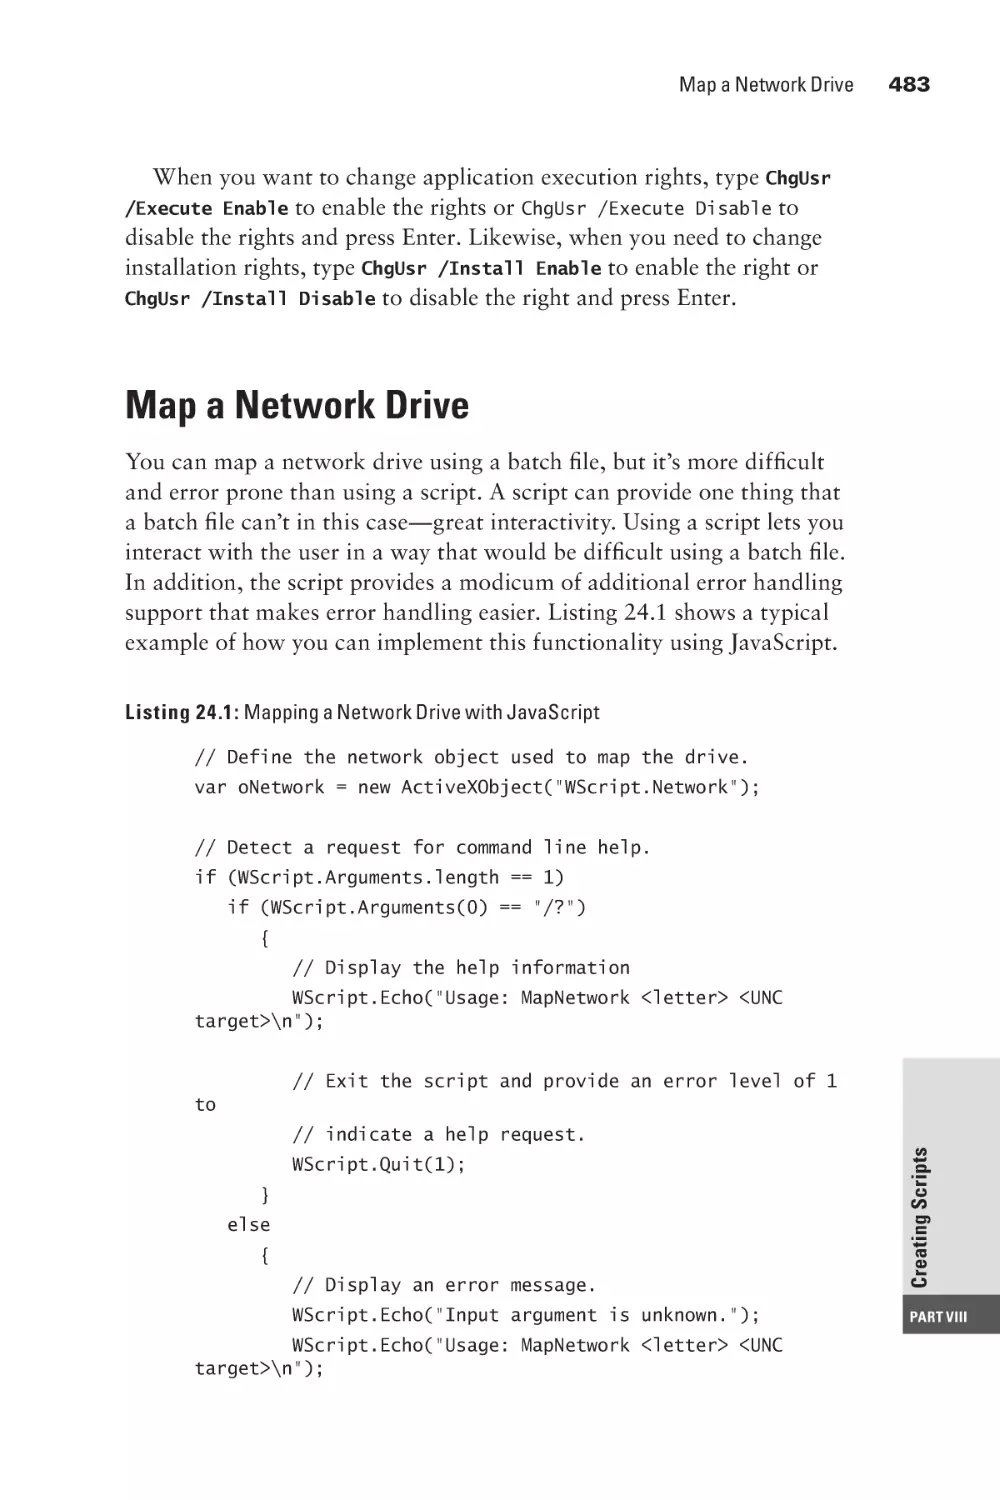
Map a Network Drive
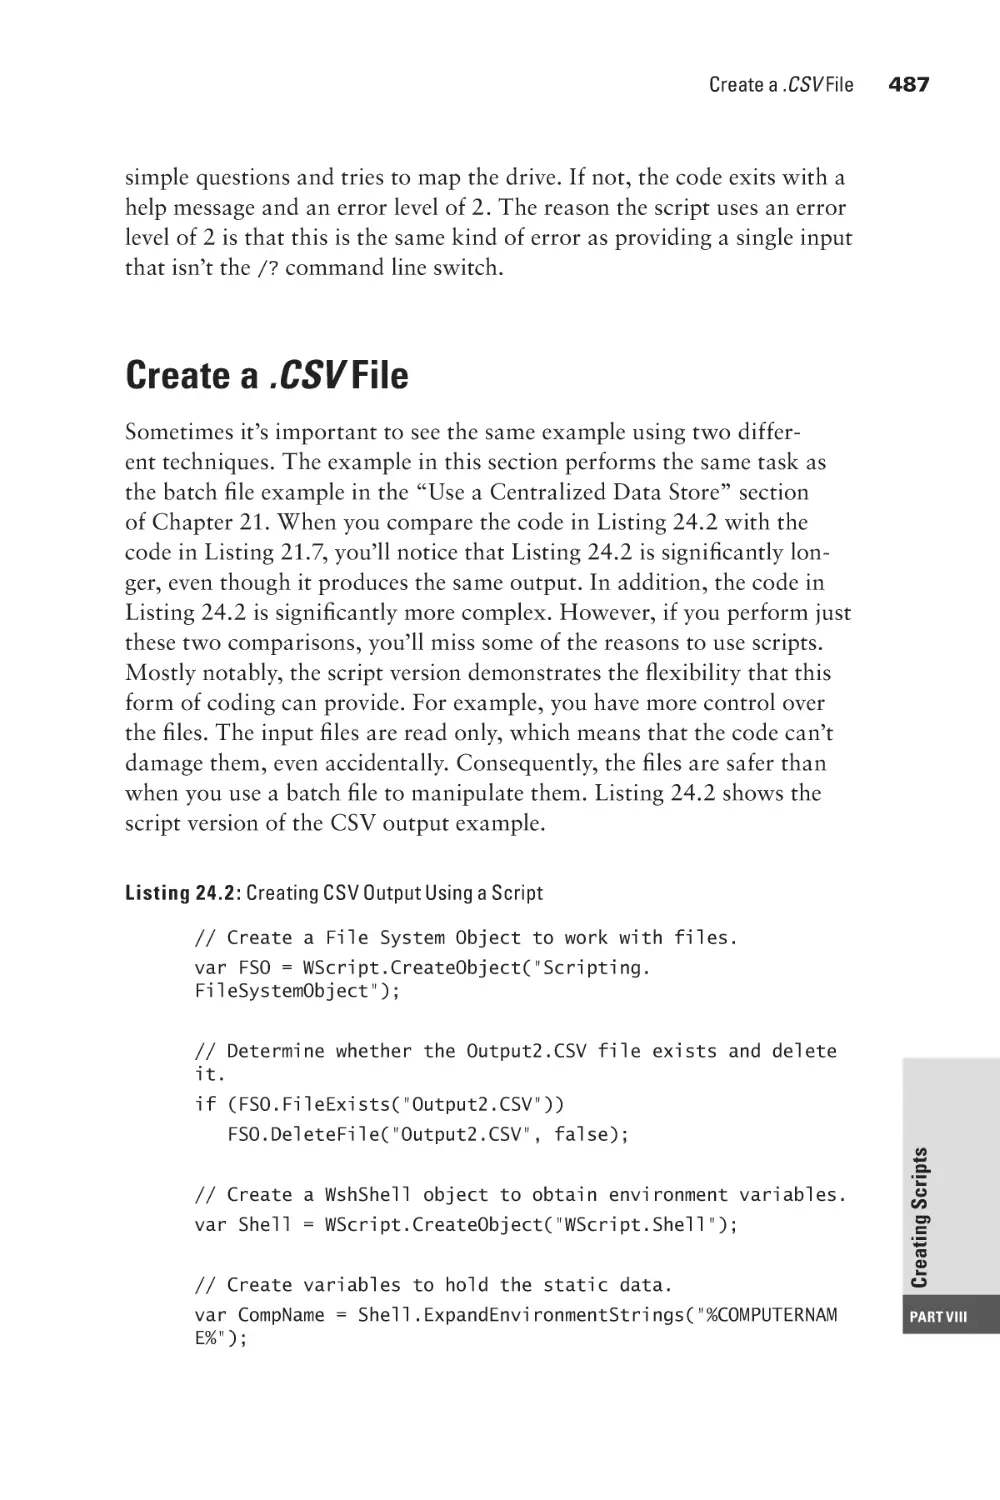
Create a .CSV File
482
482
483
487
Appendix A: Alphabetical Command List
493
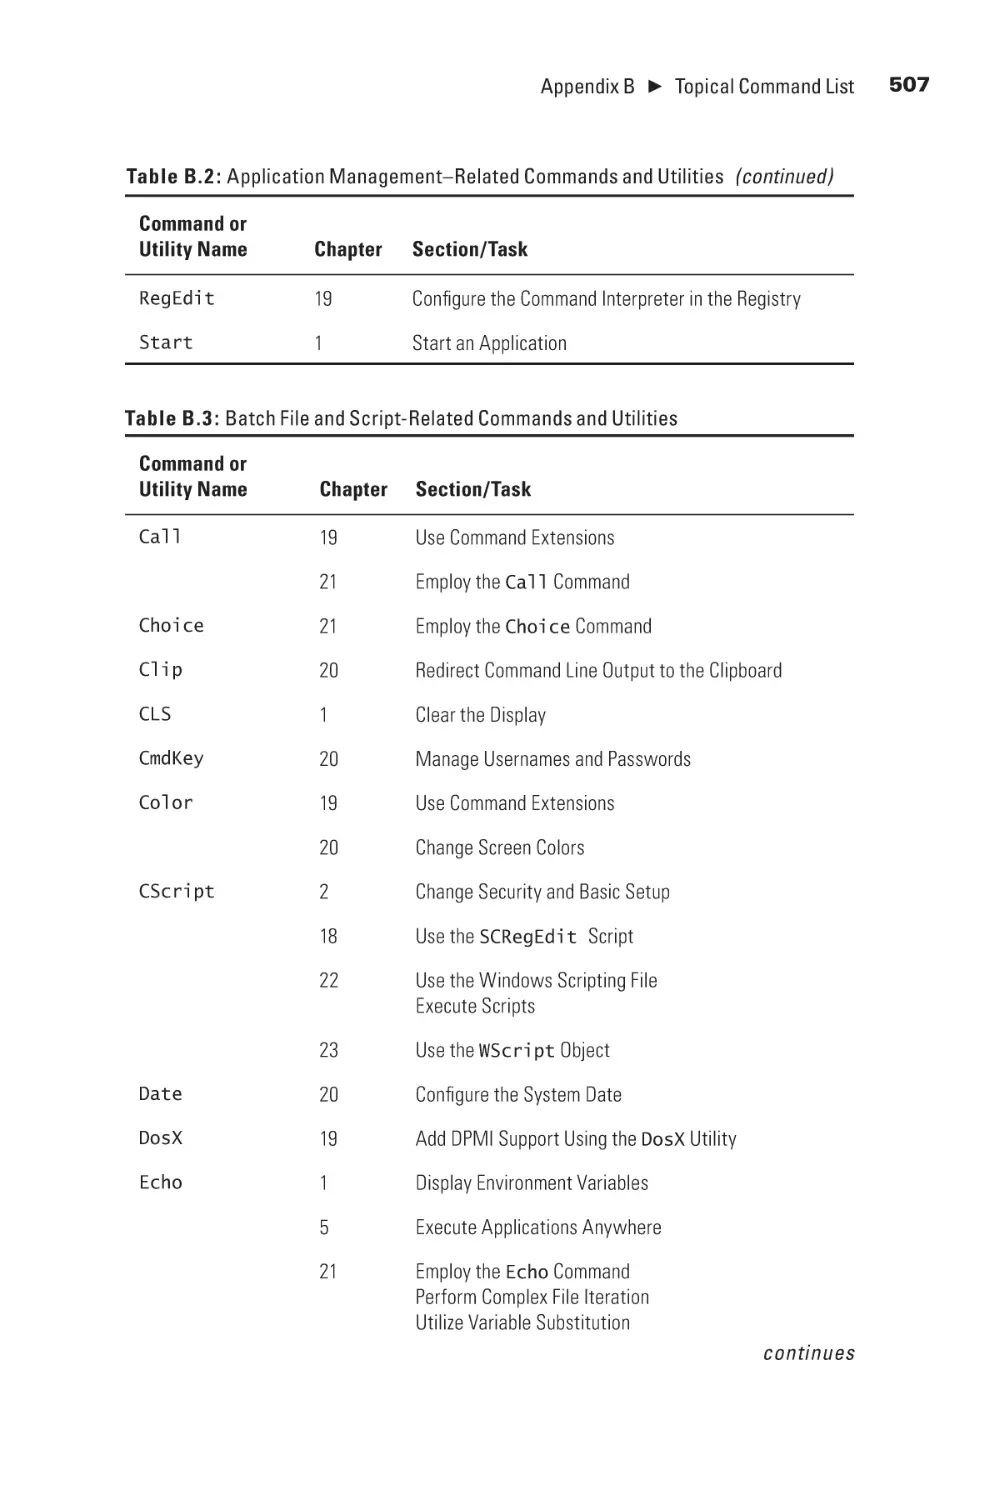
Appendix B: Topical Command List
505
Appendix C: Listing of Best Practices
521
Always Verify the Data
Real Administrators Use Help
Test Your Theories on a Test System
Use Batch Files, Scripts, and Written Procedures
Make Backups
Perform User-Specific Changes during Downtime
522
523
524
525
526
526
Index
529
Introduction
L
et’s face it, while GUI applications are nice and they do provide
significant levels of hand holding, they’re cumbersome and inefficient. The command line is an essential part of the administrator
experience—at least, if the administrator wants to go home at night
and spend weekends somewhere other than work. Using the command
line can often provide faster results with far less effort. In addition, the
command line lends itself to easy automation, so you might not need to
manually perform some tasks at all; you can let the computer do them
while you have a cup of coffee and gab with a friend in the next cubicle.
However, no one can memorize every command, or even a significant
subset of them, so Windows Command-Line Administration Instant
Reference provides you with a quick reference for the common commands and provides examples of their use to help you avoid potential
errors. In short, if you want to spend time doing something other than
adding users to the server, you need this book!
Work Faster and More Efficiently
Have you looked at the Administrative Tools folder of the Control Panel
lately? It typically contains fourteen or more links to consoles that you
use to administer Windows using a GUI. Finding the right console isn’t
always straightforward. For example, most people would be tempted
to look for hardware settings in System Configuration, but they really
appear in Computer Management. Some of the consoles don’t even
appear in the Administrative Tools folder. A typical Windows setup
includes 21 consoles, so one-third of the consoles are missing—you
need to know they exist in order to use them. If you want to set a group
policy, you need to know that you have to use GPEdit.MSC (the Group
Policy Editor) to change them, but don’t count on Windows helping you.
In short, the GUI is disorganized and difficult to use. On the other hand,
if you want to use the command line, you open one item—the command
prompt. How much simpler can things get?
Speaking of group policies, it requires a single command at the
command line to change any group policy. Yes, changing the policy
requires that you create the command, but there is help to do that.
xx
Introduction
Changing a policy such as a Domain Profile for Windows Firewall
using Group Policy Editor, however, requires that you dig down six
levels, figure out which of the policies will actually do what you want,
and then perform upward of five additional steps in order to change
the policy. Now, imagine that you have to change a lot of policies on
a number of machines. When working with the command line, you
can create a batch file that performs the task on every machine on
your network. The batch file will likely require an hour or so to create
and test, while using the GUI may very well require days because the
Group Policy Editor lacks automation.
The command line is great for more than just changing settings.
Have you ever wanted to discover all of the files associated with a
particular application and been frustrated in your efforts? The command line supports a nifty utility called FindStr that lets you look
inside files for copyright statements and other strings. If you have some
idea of what to look for, FindStr will faithfully search every file on the
hard drive for that string—no matter where the file might appear. You
can’t even perform this task using the GUI because Microsoft thinks it
knows better than you how to find things. The GUI doesn’t even index
the inside of every file, just those that Microsoft thinks you should
search. In short, if you want to find anything anywhere, you need the
command line, not a GUI.
It would be easy to go on and on about the benefits of the command
line, but you have an entire book to convince you of the incredible
value of using the command line in place of the GUI in most situations. Of course, every good thing comes with caveats and the command line is no different. The command line does require that you be
able to type commands accurately in order to obtain accurate results.
That’s why you need Windows Command-Line Administration
Instant Reference. This book uses a task-based approach to make
it easy for you to type just the command you need. It’s packed with
hundreds of example commands, some of which will meet your needs
with little or no change. If you want to get more out of your day,
you need to use the command line with Windows Command-Line
Administration Instant Reference.
Goals for Writing This Book
I want you to be able to get started using the command line today to
perform useful work. Starting with the first chapter you’ll find that you
can immediately begin using the command line to work faster and more
Introduction
efficiently. Suddenly, the system that felt so slow just a few minutes earlier will accomplish work quickly because you’ll take command using a
time proven interface. The first and most important goal of this book is
to get you to work now.
Most people don’t realize the immense number of commands and
utilities available at the command line. In fact, there are commands
and utilities to perform some extremely esoteric tasks and you won’t
see them covered in this book. Instead, this book exposes you to the
commands and utilities that you’ll commonly use; 149 of them. That’s
right! You have access to 149 commands and utilities that can make it
faster and more efficient to administer the systems under your control.
Some of these commands and utilities, such as Windows Management
Interface Command line (WMIC) are so powerful that you might decide
never to use the GUI again. The second goal for this book is to expose
you to the most useful commands and utilities that the command line
has to offer. Look at Appendices A and B to see lists of these commands
and utilities.
Automation is one of the major benefits of working at the command line. If you need to perform a particular task often, there isn’t
any reason to keep doing it manually when you can tell the computer
to perform the task for you instead. Using a GUI makes many people
think that it’s normal to manually perform the same repetitious work
over and over again until your eyes glaze over and you fall asleep out of
sheer boredom. Work shouldn’t be boring and the automation that the
command line can provide relieves you of boredom. Many administrators have the mistaken idea that they have to become programmers to
use automation, but this book shows you that you can create perfectly
acceptable batch files to automate tasks without becoming even close
to a programmer. So the third major goal of this book is to help you
understand how automation comes into play using batch files.
Of course, you may find that batch files are limited and after working
with batch files for a while, you might decide that a little programming
isn’t so bad after all. The fourth goal of this book is to demonstrate
that scripting is not only powerful, but that it isn’t very hard either.
Imagine how nice it would be to get all of your work done in half or
even a quarter of the time you do now. Working at the command line
and using the full scope of automation it can provide will help you move
toward that goal. So, the final goal for this book is to help you understand the benefits of scripting. You won’t actually learn how to script
using this book—that’s the topic of another tome, but you’ll get enough
xxi
xxii
Introduction
information to decide whether scripting is right for you. In addition,
you’ll see some pretty nifty scripts that will definitely save you time.
Who Should Read This Book?
This book is designed to meet the needs of administrators who are tired
of letting the GUI slow them down and who want the productivity
advantage of working at the command line. More and more administrators are moving to the command line because it lets them perform tasks
quickly. In addition, the command line lends itself to automation, so
that you don’t spend hours performing precisely the same boring task
over and over again.
Power users will also appreciate this book because it gives them the
edge needed to work quickly in today’s competitive market. There isn’t
any reason to spend hours mousing about when you can complete the
task in a matter of seconds at the command line. For that matter, by
using some of the scheduling techniques found in this book, you can
automate some tasks completely so that you won’t actually perform
them manually again. This book is all about letting the computer do
as much for you as it possibly can so you can spend more time watching the game, reading a book, or doing something else that’s a bit more
interesting than sitting in front of the computer.
I’m assuming that you already know how to use Windows quite well
and that you’ve performed administration tasks in the past. This book
presents you with instructions for performing common tasks at the
command line and the information you need to customize these tasks to
meet your specific needs. However, the complete novice won’t be able to
keep up with the pace of this book.
What You Need to Use This Book
You’ll very likely want to set up a test machine when working through
the examples in this book. A production machine simply isn’t the right
environment in which to learn how to work at the command line. I used
Windows 7 and Windows Server 2008 while writing this book. If you
have some other version of Windows, you may find that your system
doesn’t have some of the features I discuss. You’ll still find plenty to
interest you.
I recommend that you set up the hardware required for a twomachine network as part of your test setup. Otherwise, you really won’t
Introduction
see how some of the client-side tasks are supposed to work. Using a
virtual machine setup may work acceptably, but I opted for using two
physical machines so that the interactions would work just as they do
on your network. There are advantages to using two physical machines,
because virtual machines sometimes lack the differences in environment
that two physical machines provide.
The book contains descriptions of numerous utilities that you can
download and use free for the most part. You may prefer other utilities,
but I used these utilities to create the content for the book. If you find a
technique useful, download the utility that goes with it and try it too.
I’m always on the lookout for new utilities, so please be sure to tell me
about your utilities at JMueller@mwt.net.
Conventions Used in This Book
It always helps to know what the special text means in a book. The
following table provides a list of standard usage conventions. These
conventions make it easier for you to understand what a particular text
element means.
Table 1.1: Standard Usage Conventions
Convention
Explanation
Inline Code
Some code will appear in the text of the book to help explain application
functionality. The code appears in a special font that makes it easy to
see. This monospaced font also makes the code easier to read.
Inline
Variable
As with source code, variable source code information that appears
inline will also appear in a special font that makes it stand out from the
rest of the text. When you see monospaced text in an italic typeface,
you can be sure it’s a variable of some type. Replace this variable with a
specific value. The text will always provide examples of specific values
that you might use.
[ Optional
Code] or
[ Optional
Variable]
In some cases, a command or utility provides an optional entry. The
code form of this entry appears in square brackets. Both code entries
and variables can be optional. Whenever you see the square brackets,
remember that you have a choice to make about typing the code or variables within the square brackets.
User Input
Sometimes I’ll ask you to type something. For example, you might need
to type a particular value into the field of a dialog box. This special font
helps you see what you need to type.
xxiii
xxiv
Introduction
Table 1.1: Standard Usage Conventions (continued)
Convention
Explanation
Filename
A variable name is a value that you need to replace with something
else. For example, you might need to provide the name of your server
as part of a command line argument. Because I don’t know the name
of your server, I’ll provide a variable name instead. The variable name
you’ll see usually provides a clue as to what kind of information you
need to supply. In this case, you’ll need to provide a filename. Although
the book doesn’t provide examples of every variable that you might
encounter, it does provide enough so that you know how to use them
with a particular command.
[Filename]
When you see square brackets around a value, switch, or command, it
means that this is an optional component. You don’t have to include it as
part of the command line or dialog field unless you want the additional
functionality that the value, switch, or command provides.
File ➣ Open
Menus and the selections on them appear with a special menu arrow
symbol. “File ➣ Open” means “Access the File menu and choose Open.”
italic
You’ll normally see words in italic if they have special meaning or if this is
the first use of the term and the text provides a definition for it. Always pay
special attention to words in italic because they’re unique in some way.
Monospace
Some words appear in a monospaced font because they’re easier to see
or require emphasis of some type. For example, all filenames in the book
appear in a monospaced font to make them easier to read.
URLs
URLs will normally appear in a monospaced font so that you can see
them with greater ease. The URLs in this book provide sources of additional information designed to improve your development experience.
URLs often provide sources of interesting information as well.
➦
This is the code continuation arrow. It tells you when a single line of
code in a file actually appears on multiple lines in the book. You don’t
type the code continuation arrow when you use the code from the book
in your own code. Rather, you continue typing the code in the book on a
single line in your code. For example, you would type the following code
on a single line, even though it appears on multiple lines here.
<add connectionString=➦
“Server=MAINVISTA\SQLEXPRESS;➦
Database=ReportServer$SQLExpress;➦
Integrated Security=true” ➦
name=”MySQLConnection” />
Introduction
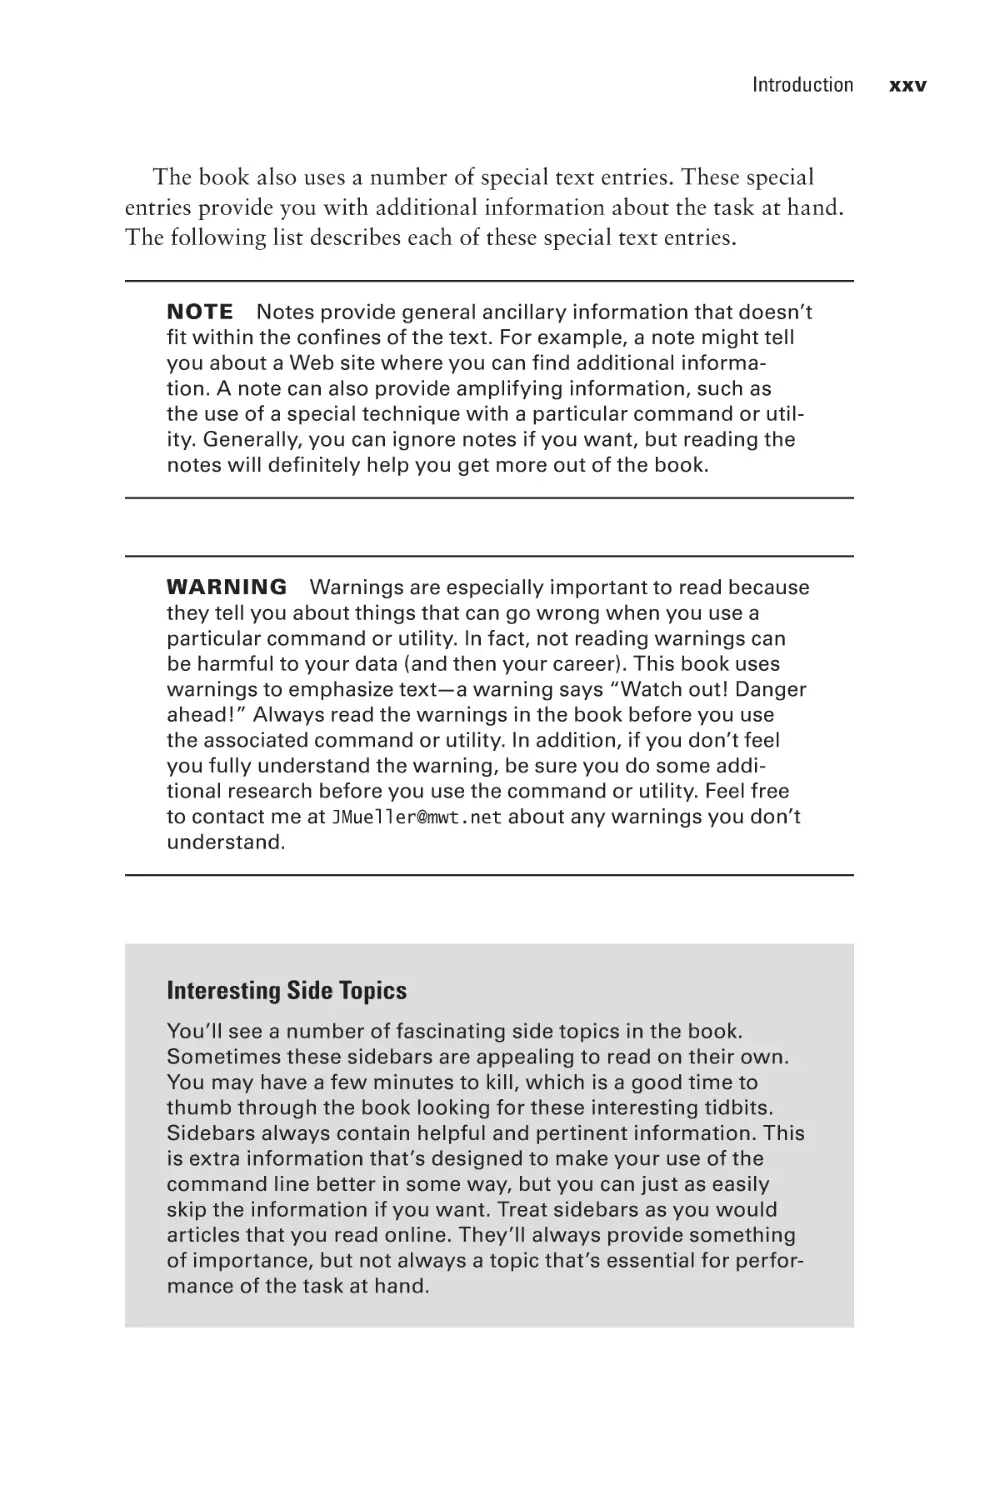
The book also uses a number of special text entries. These special
entries provide you with additional information about the task at hand.
The following list describes each of these special text entries.
Note Notes provide general ancillary information that doesn’t
fit within the confines of the text. For example, a note might tell
you about a Web site where you can find additional information. A note can also provide amplifying information, such as
the use of a special technique with a particular command or utility. Generally, you can ignore notes if you want, but reading the
notes will definitely help you get more out of the book.
Warning Warnings are especially important to read because
they tell you about things that can go wrong when you use a
particular command or utility. In fact, not reading warnings can
be harmful to your data (and then your career). This book uses
warnings to emphasize text—a warning says “Watch out! Danger
ahead!” Always read the warnings in the book before you use
the associated command or utility. In addition, if you don’t feel
you fully understand the warning, be sure you do some additional research before you use the command or utility. Feel free
to contact me at JMueller@mwt.net about any warnings you don’t
understand.
Interesting Side Topics
You’ll see a number of fascinating side topics in the book.
Sometimes these sidebars are appealing to read on their own.
You may have a few minutes to kill, which is a good time to
thumb through the book looking for these interesting tidbits.
Sidebars always contain helpful and pertinent information. This
is extra information that’s designed to make your use of the
command line better in some way, but you can just as easily
skip the information if you want. Treat sidebars as you would
articles that you read online. They’ll always provide something
of importance, but not always a topic that’s essential for performance of the task at hand.
xxv
Command Line
Basics
In This Part
q
CHAPTER 1: Configuring the Local Machine. . . . . . . . . . . . . . . . . . . . . . . . 3
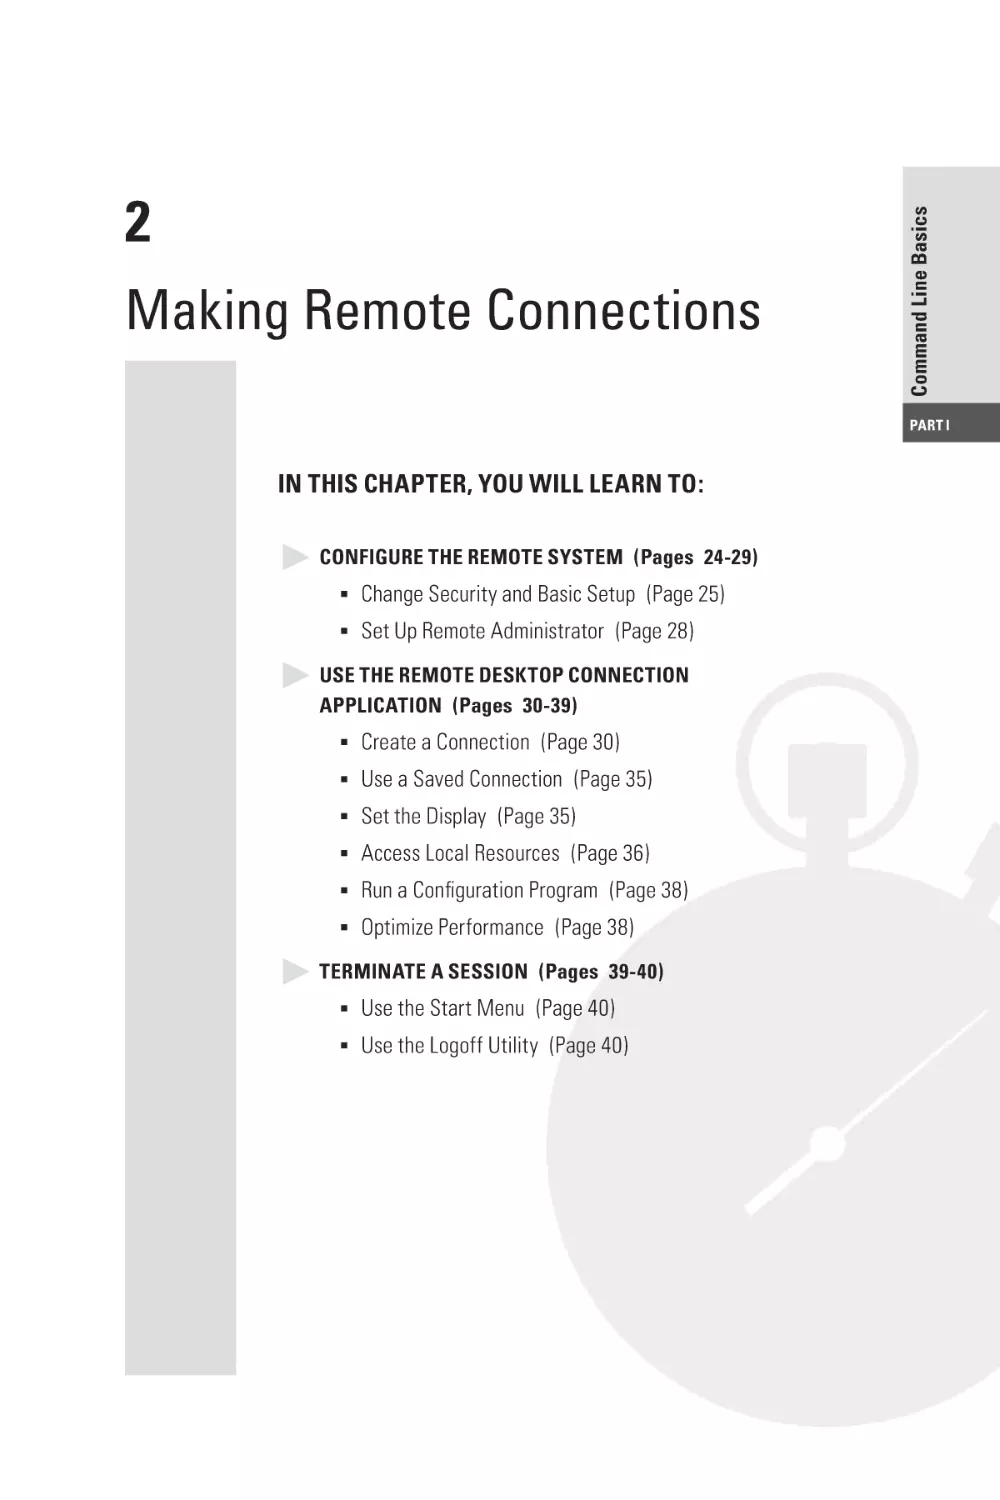
CHAPTER 2: Making Remote Connections. . . . . . . . . . . . . . . . . . . . . . . . 23
CHAPTER 3: Automating Tasks. . . . . . . . . . . . . . . . . . . . . . . . . . . . . . . . . 41
Command Line Basics
PART I
Part I
Configuring the Local Machine
Command Line Basics
1
Part I
In this chapter, you will learn to:
33Set the Window Options (Page 4)
Configure the Command Window (Pages 4-10)
n
n
Change the Font (Page 7)
n
Choose a Window Layout (Page 8)
n
Define the Text Colors (Page 9)
33Manage Environment Variables with the Set
Set the Environment (Pages 10-15)
n
Command (Page 10)
n
Manage Environment Variables with the SetX
Utility (Page 13)
33Clear the Display (Page 16)
Perform Common Tasks (Pages 16-20)
n
n
Determine the Operating System Version (Page 16)
n
Start an Application (Page 16)
n
Work with Services (Page 18)
n
Shut Down the System (Page 19)
33
Obtain Command Line Help (Pages 20-21)
4
Chapter 1
3
Configuring the Local Machine
Y
ou can access the command line anytime you want. Issuing commands will work just fine without doing anything special. However,
if you want to have the best possible experience at the command line,
then you need to perform a few configuration tasks before you proceed.
This chapter describes basic configuration procedures you can use to
enhance your command line experience and make it better.
Configure the Command Window
Many users start the command window, see the typical command prompt,
and just assume that they’ll never see anything else. Fortunately, you can
easily configure the command window to appear as you want, at least
within limits.
You can access these features using these steps:
1. Click the box in the upper left corner of the command window
and choose Properties from the context menu. You’ll see a properties dialog box with four tabs.
2. Set the properties on each tab to meet specific needs, such as dis-
playing the text in another color. Each of these tabs is described in
the sections that follow.
Set the Window Options
The Options tab shown in Figure 1.1 defines how the command window reacts when you open it. The Cursor Size option controls the size
of the cursor, with small being the default. The Large option provides
a block cursor that’s very easy to see. The Display Options determine
whether you see the command window full screen or as a window.
Using the full screen mode when you have a number of tasks to perform
is easier on the eyes.
Figure 1.1: The Options tab helps you control the appearance and behavior of the
command window.
5
Command Line Basics
Configure the Command Window
Part I
NOTE Older versions of Windows let you change the display
mode through a property setting. However, Server Core (the version of Windows Server 2008 that comes without the usual GUI
and relies exclusively on the command line for configuration)
doesn’t let you run the command window in full screen mode
by changing the Display Options setting. This particular option
is missing when you view the dialog box shown in Figure 1.1. In
most cases, you don’t want to run the command window in full
screen mode when working with Server Core because the few
graphical elements it provides can become inaccessible and it’s
already possible to maximize the screen real estate by maximizing the window. Without a Start menu, taskbar, or other graphical elements to consume space, using Windows shouldn’t cause
any problems. (If you really must work in full screen mode, you
must modify the registry to do it.)
6
Chapter 1
3
Configuring the Local Machine
The Command History is especially important. The Buffer Size option
determines the number of commands the buffer will store. Every command requires memory, so increasing this number increases the amount
of memory the command prompt requires. Increase this number when
you plan to perform a number of complex commands. A smaller number
will save memory for larger command line applications. The Number of
Buffers Option controls the number of individual histories. You need one
history for each command process (application environment) you create.
Generally, the four buffers that Figure 1.1 show work fine.
To better understand how buffers work, try this experiment:
1. Open a command window.
2. Type a command such as CLS or Dir and press Enter.
3. Press the Up arrow.
You should see the command you just typed—there’s the buffer.
The command you typed appears in the first buffer. Remember
that you have four buffers that you can use at the command processor when using the default settings.
4. Press Esc. The command processor clears the command from the
prompt so you have a blank prompt to use.
5. Type Cmd and press Enter. You’ve just created a new command pro-
cessor. This command processor uses the second buffer.
6. Press the Up arrow. You don’t see anything because this command
processor is using its own buffer.
7. Now, type a different command (such as CLS or Dir) and press
Enter.
8. Press the Up arrow. You’ll see the command you just typed, but
not any of the commands from the previous command processor.
9. Press Esc to clear the command.
10. Type Exit and press Enter to close the current command proces-
sor. You’re back to the previous command processor.
11. Press the Up arrow twice and you’ll see whatever command you
typed earlier because this command processor is using the first
buffer.
Configure the Command Window
7
13. Type Cmd and press Enter. This action creates a new command pro-
cessor that will use the second buffer.
14. Press the Up arrow.
Wait, what are you seeing here? You see the Exit command. Press
the Up arrow again and you’ll see the command you typed in step
7 for the second buffer. Each buffer retains its content, even if you
close the command processor.
15. Type Exit and press Enter. You return to the first command
processor.
16. Type Exit again and press Enter; the command processor window
closes.
The Edit Options determine how you interact with the command
window. Check the QuickEdit Mode when you want to use the mouse
to work with the entries directly. The only problem with using this feature is that it can interfere with some commands such as Edit that have
a mouse interface of their own. The Insert Mode option lets you paste
text into the command window without replacing the text currently
there. For example, you might copy some information from a Windows
application and paste it as an argument for a command.
Change the Font
The Font tab shown in Figure 1.2 controls the font used to display
text. The font size automatically changes when you resize the window,
but you can also control the font size directly using this tab. The raster
fonts give the typical command line font appearance that works well for
most quick tasks. The Lucida Console font works better in a windowed
environment. It’s easier on the eyes because it’s smoother, but you might
find that some applications won’t work well with it if they create “text
graphics” using some of the extended ASCII characters. The extended
ASCII characters include corners and lines that a developer can use to
draw boxes and add visual detail.
Command Line Basics
12. Press Esc to clear the command.
Part I
8
Chapter 1
3
Configuring the Local Machine
Figure 1.2 : Use the Font tab to control the size of the text in the command window.
Choose a Window Layout
The Layout tab shown in Figure 1.3 has the potential to affect your use
of the command window greatly when working in windowed mode. The
Screen Buffer Size controls the width and height of the screen buffer, the
total area used to display information. When the Window Size setting is
smaller than the Screen Buffer Size, Windows provides scroll bars so you
can move the window around within the buffer area and view all it contains. Some commands require a great deal of space for display purposes.
Adjusting the Screen Buffer Size and Window Size can help you view all
of the information these commands provide.
The Window Position determines where Windows places the command window when you first open it. Some people prefer a specific
position on the screen so they always know where a new command
window will appear. However, it’s generally safe to check Let System
Position Window to allow Windows to place the command window on
screen. Each command window will appear at a different, randomly
chosen, position on screen.
Figure 1.3 : Change the size and positioning of the command window using the
Layout tab.
9
Command Line Basics
Configure the Command Window
Part I
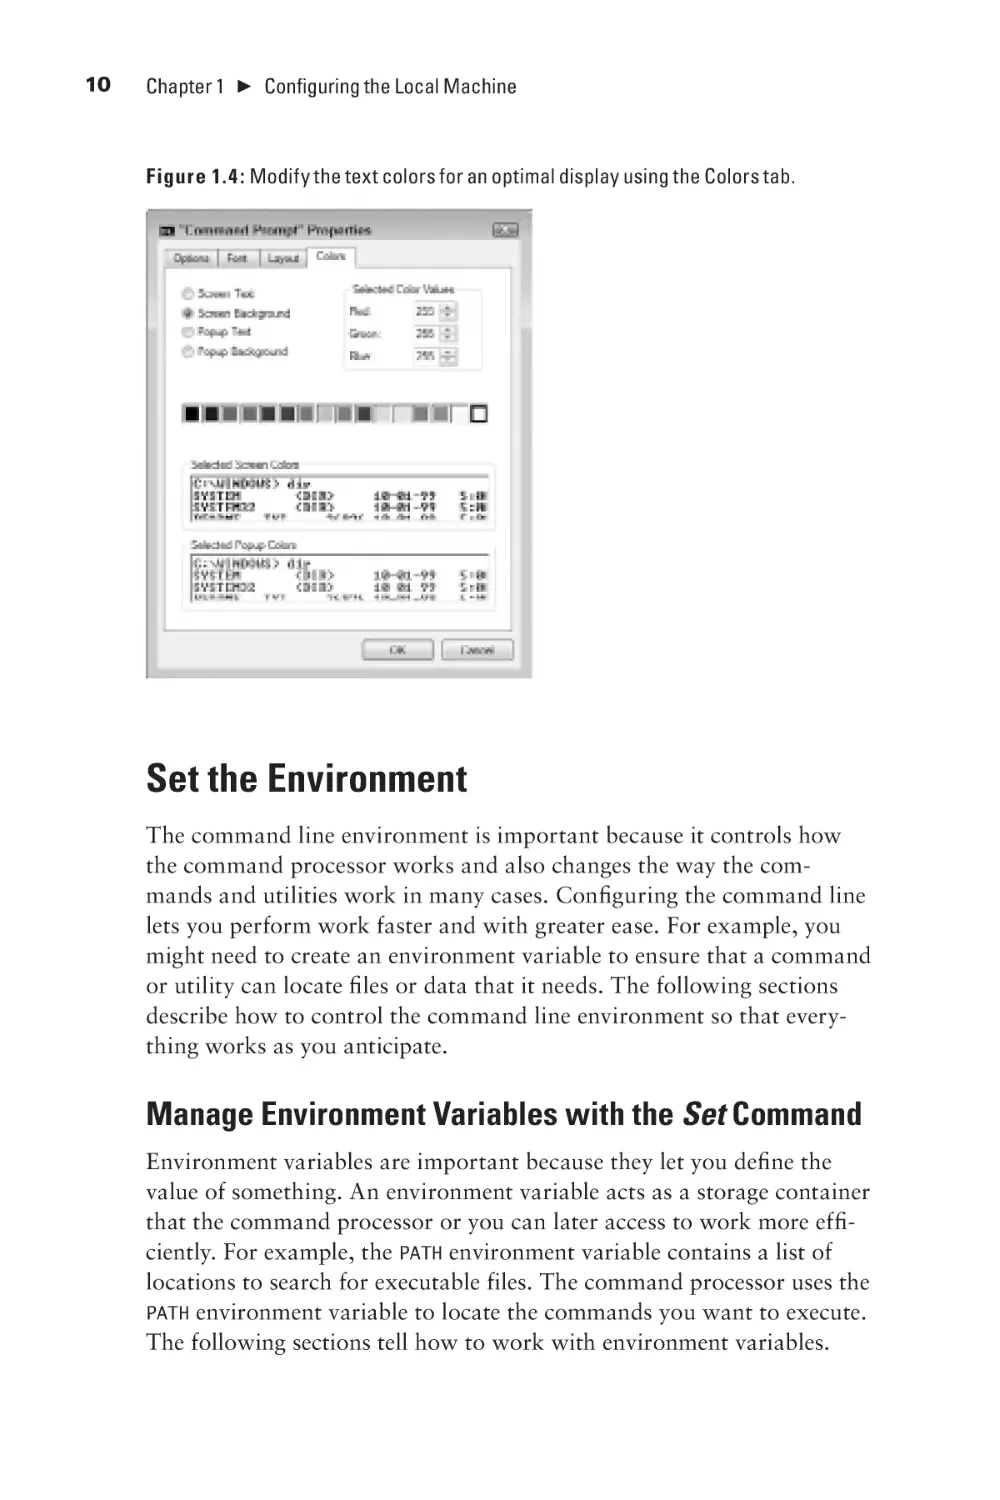
Define the Text Colors
Microsoft assumes that you want a black background with light gray
letters for the command window. Although DOS used this setting all
those years ago, today, many people want a choice. The Color tab lets
you choose different foreground, background, and pop-up colors for the
command window (even though Figure 1.4 doesn’t show the colors, it
does present the dialog box layout). You can modify the window to use
any of the 16 standard color combinations for any of the text options.
Use the Select Color Values options to create custom colors.
10
Chapter 1
3
Configuring the Local Machine
Figure 1.4 : Modify the text colors for an optimal display using the Colors tab.
Set the Environment
The command line environment is important because it controls how
the command processor works and also changes the way the commands and utilities work in many cases. Configuring the command line
lets you perform work faster and with greater ease. For example, you
might need to create an environment variable to ensure that a command
or utility can locate files or data that it needs. The following sections
describe how to control the command line environment so that everything works as you anticipate.
Manage Environment Variables with the Set Command
Environment variables are important because they let you define the
value of something. An environment variable acts as a storage container
that the command processor or you can later access to work more efficiently. For example, the PATH environment variable contains a list of
locations to search for executable files. The command processor uses the
PATH environment variable to locate the commands you want to execute.
The following sections tell how to work with environment variables.
Set the Environment
11
The operating system automatically creates some environment variables
when you open a command prompt. To see a list of these environment
variables, type Set and press Enter. Figure 1.5 shows typical output
from this command.
Figure 1.5 : Display every environment variable using the Set command.
Command Line Basics
Display Environment Variables
Part I
All of the environment variables shown in Figure 1.5 are defined by
default—you don’t create any of them. To display a single environment
variable, you can use either of the following commands.
Set VariableName
or
Echo %VariableName%
In both cases, you type the command, followed by the name of the variable you want to see. For example, if you want to see the value of the PATH
12
Chapter 1
3
Configuring the Local Machine
environment variable, you type either Set PATH or Echo %PATH% and press
Enter. The second form relies on variable expansion. You tell the command processor to expand an environment variable by surrounding the
environment variable name with percent signs (%). Environment variable
expansion has a lot of uses, but you normally use it when systems have the
same setting with a different setting value. For example, the location of the
Windows directory can differ between machines, but every machine will
have a Windows directory. Using environment variable expansion makes it
possible to find the Windows directory location on each machine.
NOTE The PATH environment variable provides a third display
method that isn’t available to other environment variables. You
can simply type PATH and press Enter to display the path.
Create or Change an Environment Variable
In some cases, you must create or change an environment variable. To
create or change an environment variable temporarily, use the following
command line syntax.
Set VariableName=Value
The VariableName defines the name of the variable you want to create
or change, while Value defines the content of the variable. If you type the
name of an existing variable, the command processor changes its value.
When you need to make more permanent changes, you must use the
SetX utility described in the “Manage Environment Variables with the SetX
Utility” section of the chapter instead.
Expand an Environment Variable
Several applications can share an environment variable. The most common example of a shared environment variable is PATH, but there are
other examples. You may find that you need to expand the environment
variable content, rather than change it. For example, you might need
to add another path to the PATH environment variable. In this case, you
expand the current environment variable content and add it to the new
content using this approach:
Set VariableName = %VariableName%;Value
Set the Environment
13
Set VariableName = Value;%VariableName%
For example, let’s say you want to add C:\ to the beginning of the existing PATH environment variable. In this case, you type Set PATH=C:\;%PATH%
and press Enter (remember that paths are separated in the PATH environment variable using semicolons). Using %PATH% expands the content of the
PATH environment variable, just as if you had typed Echo %PATH%. Likewise,
if you want to add C:\ to the end of the PATH environment variable, you
type Set PATH= %PATH%;C:\ and press Enter.
Use Equations in Environment Variables
Normally, the command process places the precise value you type in
the environment variable. For example, if you type Set MyVar=2*3 and
press Enter, MyVar will contain the value 2*3. However, if you type Set /A
MyVar=2*3 and press Enter, MyVar will contain the value 6 instead. The /A
command line switch tells Set to interpret the value as an equation.
Get User Input
You might not know what value to place in an environment variable
when you create a batch file. In this case, you can prompt the user to
obtain the value. For example, if you want to provide a value for MyVar,
you might type Set /P MyVar=”Type a value for MyVar “ and press
Enter. In this case, the user sees the prompt “Type a value for MyVar”
at the command line. To add a value to MyVar, the user types it at the
command line and presses Enter.
Manage Environment Variables with the SetX Utility
Any environment variable that you create or change using the Set command is only valid for the current session. The moment that you close
the command prompt, the environment variable changes back to its
original value or it disappears entirely. You can create or change environment variables permanently using the Environment Variables dialog
box shown in Figure 1.6 (accessed by clicking Environment Variables on
the Advanced tab of the System Properties dialog box). Unfortunately,
having to manually change permanent environment variables using this
approach won’t work when you need to automate tasks. The SetX utility
makes it possible to make such changes from the command prompt.
Command Line Basics
or
Part I
14
Chapter 1
3
Configuring the Local Machine
Figure 1.6 : The Environment Variables dialog box shows permanent environment
variables.
As you can see from Figure 1.6, permanent environment variables can
affect either a single user or the system as a whole. The SetX utility can
create or change environment variables at either level. Use the Set command to display the environment variables you create using the SetX utility. You can also use the SetX utility to change environment variables on
other machines. The following sections tell how to use the SetX utility.
Change the User-Level Environment
User-level environment variables affect only the current user. The system stores them in the HKEY_CURRENT_USER hive of the registry. To create
a permanent user-level environment variable, use the following command line syntax.
SetX VariableName Value
As with the Set command, VariableName contains the name of the
variable you want to create, while Value contains the information you
want to place within the variable. Unlike the Set command, there’s no
equals sign between VariableName and Value. The environment variable
you create won’t affect the current session—to create an environment
variable for the current session, you must also use the Set command.
Set the Environment
15
System-level environment variables affect every user of a particular
machine. The system stores them in the HKEY_LOCAL_MACHINE hive of the
registry. To create a permanent system-level environment variable, use
the following command line syntax.
SetX /M VariableName Value
The /M command line switch tells SetX to create a system-level (also
known as a machine-level) environment variable. As before, VariableName
contains the name of the variable you want to create, while Value contains
the information you want to place within the variable. The new environment variable only affects future sessions. You must use the Set command
to create an environment variable for the current session.
Set Environment Variables on Other Machines
There’s a whole class of commands and utilities that perform tasks
on other machines from a local machine. Administrators can use the
commands and utilities to interact with client systems without actually
going to the client system. In general, you must supply these values:
NN
Machine name (/S command line switch)
NN
Username (/U command line switch)
NN
(Optional) Password (/P command line switch)
The machine name is the fully qualified name of the machine you
want to access. The username must be an account that the person using
the command can access. Adding the password to a batch file is a security risk. Consequently, you should always omit the password. However,
the command won’t execute sometimes if you omit the /P command line
switch. To get around this problem, you can use /P *, which isn’t documented, but always works.
As an example, let’s say you want to add a system-level environment variable named NewVar to a machine named WinMachine using the
Administrator credentials. In this case, you type SetX /S WinMachine /U
Administrator /P * /M NewVar Value and press Enter. The SetX utility
prompts you for the Administrator password. Type the password and
press Enter to complete the task.
Command Line Basics
Change the System-Level Environment
Part I
16
Chapter 1
3
Configuring the Local Machine
Perform Common Tasks
Several common tasks performed at the command line don’t necessarily involve the work you’re trying to accomplish. For example, when
the screen becomes cluttered with too much old information, you might
want to clear it so that all of your new commands are easier to see. The
following sections describe a few of these common tasks.
Clear the Display
After you execute a number of commands, you might find that the display is getting cluttered. Too much information on the screen can slow
you down, so cleaning up every once in a while is a good idea. To clear
the display, type CLS and press Enter. There isn’t any way to just clear
part of the display—you must clear the entire display. However, clearing
the display doesn’t clear the command history. You can still press the Up
and Down arrows to move between previously typed commands.
Determine the Operating System Version
Not every version of the command processor supports every command
and utility. Consequently, you often need to know which version of
the command processor is present on the user’s machine. To perform
this task, type Ver and press Enter. You’ll see an operating system version number, such as Microsoft Windows [Version 6.1.7600], which
indirectly tells you which version of the command processor is installed.
(The command prompt also displays the version number automatically
when you open the window.)
Start an Application
Sometimes you want to start a command line application in a separate window. Perhaps this application requires a special environment
to run and you don’t want to change the current environment to support it. In many other cases, the command line application requires
enhanced rights to run or has some other requirement that makes it
impossible or seriously irresponsible to run it in the current window.
For example, you don’t want to run commands that modify the registry in a window with user-level access—using a separate window is
more secure. It’s also possible to run an application with a higher priority or assign it to a specific processor to help spread the load among
processors on a multi-processor system. The Start utility provides the
answer to all of these needs.
You can use the Start utility with either command line or Windows
GUI applications. For example, if you want to start a separate window
to execute the Ver command, you’d type Start Ver and press Enter. The
command processor will open a separate window, execute the Ver command in it, and wait for you to close the window before continuing.
Of course, you might not want the command to execute in a separate
window, in which case you’d type Start /B Ver and press Enter. The /B
command line switch tells the command processor to use the existing
window. The difference is that using /B disables Ctrl+C usage; you must
issue a break command using Ctrl+Break instead.
It’s also possible to start Windows applications using the Start utility. In fact, you have a wide range of ways to use the Start utility to
start a Windows application. The easiest method is to simply use the
name of the application, such as Notepad. For example, if you want
to start a copy of Notepad, you’d type Start Notepad and press Enter.
Unlike a command line utility, Start automatically resumes once it starts
the Windows application unless you use the /Wait command line switch.
For example, if you type Start /Wait Notepad and press Enter, the Start
utility will wait until you exit Notepad before it begins the next step of a
batch file or returns control to the command prompt. You can also start
Windows applications as minimized using the /Min command line switch
or maximized using the /Max command line switch.
Start can also provide some file-related alternatives for starting
applications. For example, if you type Start Test.TXT and press Enter,
the command processor will look in the registry for the default application for opening files that have a TXT extension, start that application,
and pass the name of the file to it. In this case, you’ll likely see a copy
of Notepad open with Test.TXT loaded in it. When you want to be sure
that the command process uses a specific application, you provide the
name of the application and the file. For example, let’s say you want to
open a specific URL in Firefox. In this case, you might type Start “C:\
Program Files\Mozilla Firefox\Firefox” http://antwrp.gsfc.nasa.
gov/apod/ and press Enter. The command processor will open the URL
at http://antwrp.gsfc.nasa.gov/apod/ in Firefox.
17
Command Line Basics
Perform Common Tasks
Part I
18
Chapter 1
3
Configuring the Local Machine
Work with Services
The Service Control (SC) utility provides a number of methods for
interacting with services on a system. In fact, there are enough ways that
you’re unlikely to use them all. Most administrators need to know how
to start, stop, pause, continue, and view a service. The following sections
describe how to perform common SC tasks.
View Service Status
SC provides an amazing 10 ways to query information about a service.
The most common way is to use the Query or QueryEx options because
they provide you with basic information about the service status and
the features it supports. For example, if you want to see the status of
the W32Time service, you type SC Query W32Time and press Enter. The
output will tell you about the service type, whether it’s running, the
commands it supports (such as Pause), and some flag information that
can prove useful at times when troubleshooting a particular service
(you’d need documentation about these flags before the flag information
becomes useful).
Sometimes you need a little more information. For example, you
might want to know the service description. In this case, you type SC
QDescription W32Time and press Enter. You see the service name and
the full description provided for it in the Services console. A more practical bit of information are the privileges the service requires to work
properly. In this case, you type SC QPrivs W32Time and press Enter. The
output provides a list of privileges that you can decipher at http://
svchost-exe.net/. Of course, administration normally means knowing
how a service is configured. To see the configuration for a service, type
SC QC W32Time and press Enter. The output contains the content of the
TYPE, START_TYPE, ERROR_CONTROL, BINARY_PATH_NAME, LOAD_ORDER_GROUP,
TAG, DISPLAY_NAME, DEPENDENCIES, and SERVICE_START_NAME fields.
Start, Pause, Continue, or Stop a Service
Administrators commonly need to perform four common tasks with
services: start, pause, continue, and stop. Pausing a service differs from
stopping a service in that the service retains all of its data. When you
continue the service after a pause, the service begins right where it
left off. Stopping a service requires that you issue a Start command to
reload it, which means that the service begins from scratch. Almost every
service supports starting and stopping—pause support requires special programming. Here are typical examples of the four service status
changing commands.
NN
SC Start WinMgmt
NN
SC Pause WinMgmt
NN
SC Continue WinMgmt
NN
SC Stop WinMgmt
19
Command Line Basics
Perform Common Tasks
Part I
In all four cases, the SC utility either displays an error message, such
as “[SC] StartService FAILED 1056: An instance of the service is already
running” or it displays a success message that basically repeats the output of the Query switch. The important field of a successful command is
STATE, which tells you the current operational state of the service.
Shut Down the System
Administrators often need to perform a shutdown of the system using
something other than the standard GUI. For example, the system may
require a shutdown after running a script or batch file that performs
an update. Fortunately, the ShutDown utility provides the means of performing both local and remote shutdowns as described in the following
sections.
Log Off the System
Logging off the system simply means that you end the current session.
The system remains operational and someone else can log into it. This
is the most common use of ShutDown for administrators because it lets
the administrator log off the system after performing maintenance and
lets the user take over. To log off a system, type ShutDown \L and press
Enter.
Perform a Shutdown
In some cases, you need to perform a system shutdown, such as after
installing a new application. In this case, you have a number of choices.
The easiest method is to simply type ShutDown /S and press Enter. The
system will perform an orderly shutdown after 30 seconds. If you want
to shut down a remote system, you must also provide the machine name
such as, ShutDown /S /M \\RemoteComputer, and press Enter.
20
Chapter 1
3
Configuring the Local Machine
The larger your organization is, the greater the need to provide a reason for the shutdown. Of course, you have the three major categories:
Planned, Unexpected, and Expected. The three major categories have a
major and minor subcategory associated with them. For example, when
you install a new application, the major category is 4 and the minor category is 2. You can see a list of these codes at http://ss64.com/nt/shutdown.html. These codes feed into the Shutdown Event Tracker, which
creates events that you can see in the Event Viewer (the article at http://
www.topbits.com/the-shutdown-event-tracker.html provides some excellent information about the Shutdown Event Tracker). To shut down a
system with an event, use the /D command line switch. For example, to
show that the system is being shut down as the result of an application
installation, you’d type ShutDown /S /D P:4:2 and press Enter.
A 30-second shutdown is standard. However, you might find that
you need to perform an immediate shutdown in some cases. To perform
an immediate shutdown, type ShutDown /S /T:0 and press Enter. The /T
command line switch provides a timeout interval for the shutdown—a
value of 0 means that the shutdown is immediate.
Shut Down and Restart the System
A shutdown actually turns off the computer in most cases. If you want
to use the computer after the shutdown occurs, then you need to perform a shutdown and restart. The ShutDown utility provides two forms of
restart. The standard restart simply starts up Windows as a fresh session.
To perform this kind of restart, type ShutDown /R and press Enter.
In some cases, you might want to restore the Windows applications that were open at the time of the shutdown. In this case, you
type ShutDown /G and press Enter. Most applications will automatically
reopen when the system restarts.
Obtain Command Line Help
There are a number of ways to obtain help at the command line. In
most cases, you’ll type the name of a command or utility, followed by
the /? command line switch to learn more about it. For example, to
discover more about the Start utility, type Start /? and press Enter.
Some utilities provide layered help. For example, the Net utility provides
multiple layers. If you type Net /? and press Enter, you see the top layer
that lists the subcommands you can type. To discover more about the
Accounts subcommand, type Net Accounts /? and press Enter.
Unfortunately, Microsoft decided to make things difficult in some
cases. For example, some utilities require that you use the /Help command line switch instead or you might have to use the Help utility to
learn more about the command or utility in question. To see a list of
commands and utilities that Help supports, type Help and press Enter.
You could then learn more about a specific command, such as Ver. In
this case, you’d type Help Ver and press Enter
The help supplied at the command line isn’t always complete or accurate. For example, the Start utility seems to indicate that you can run
16-bit applications in a separate memory space using the /Separate command line switch. However, the /Separate command line switch is only
useful when you’re working with 32-bit Windows. The 64-bit version of
Windows won’t run 16-bit applications, even if you use the /Separate
command line switch.
21
Command Line Basics
Obtain Command Line Help
Part I
Making Remote Connections
Command Line Basics
2
Part I
In this chapter, you will learn to:
33Change Security and Basic Setup (Page 25)
Configure the Remote System (Pages 24-29)
n
n
Set Up Remote Administrator (Page 28)
33
Use the Remote Desktop Connection
Application (Pages 30-39)
n
Create a Connection (Page 30)
n
Use a Saved Connection (Page 35)
n
Set the Display (Page 35)
n
Access Local Resources (Page 36)
n
Run a Configuration Program (Page 38)
n
Optimize Performance (Page 38)
33Use the Start Menu (Page 40)
Terminate a Session (Pages 39-40)
n
n
Use the Logoff Utility (Page 4 0)
24
Chapter 2
3
Making Remote Connections
M
ost administration takes place on machines other than the one the
administrator uses, which means making and managing a remote
connection. The command line offers two ways to obtain a remote connection. For those commands that support it, you can specify which
machine to interact with directly at the command line. This book
shows several examples of this type of remote connectivity, such as the
SetX technique described in the “Set Environment Variables on Other
Machines” section of Chapter 1. This chapter uses a different approach,
the Remote Desktop.
The Remote Desktop offers a number of advantages over using commands specifically designed for remote execution. The first advantage
is that you have access to the full array of command line commands
and utilities, even those that don’t support remote access. The second
advantage is that you don’t have to figure out how to execute the command or utility in a remote context, so using the Remote Desktop can
be simpler than using special command line syntaxes. Of course, using
the Remote Desktop requires some additional setup, and you can’t
use the Remote Desktop when automation is required (such as using
a BAT file or a script). Consequently, each form of remote access has
its place. The following sections describe how to configure and use
Remote Desktop to perform command line tasks.
NOTE All newer versions of Windows support remote connections. However, if you still have an ancient copy of Windows
on one of your systems, you might find the remote connections
don’t work. This chapter uses Windows 7 as the basis for making remote connections—remote connections for other versions
of Windows may display slight differences from the version
described in this chapter.
Configure the Remote System
Before you begin working with Remote Desktop, you might have to
perform some configuration. At a minimum, you must ensure that the
remote system allows for access by the Remote Desktop. Some configuration tasks occur on some machines, but not others. For example,
when working with Windows Server 2003, you have access to the root
directory, but you don’t have such access in Windows Server 2008 and
you might require it to perform some tasks. In addition, you might have
to perform some continuing configuration tasks as you work with the
remote system. Security issues are a special concern. The following sections describe the essential configuration tasks.
Change Security and Basic Setup
Security occurs at a number of levels in Windows. This section isn’t
a comprehensive treatment of the topic—it only gets you started. Of
course, the first task you’ll complete is to add an account for yourself
to the system and use shares to make resources available. You can perform this task by relying on GUI tools such as Computer Management
and Windows Explorer. However, many administrators don’t want to
perform tasks manually because they set up a considerable number of
machines—automation is a better approach. The command line offers
a way to automate configuration tasks such as adding accounts and setting security so that you can use Remote Desktop.
The following steps describe a typical setup scenario that you can
modify to meet your specific needs (these steps also include some basic
computer configuration used to make the system easier to access and
more secure):
1. Type Net User YourLoginName YourPassword /Add and press Enter.
(The Net utility is one of the more useful utilities at your disposal
and you’ll find it documented in Chapter 8.) This step sets up an
account for you. Of course, you won’t have administrator level
privileges. If you’re using this setup on a workgroup, you’ll need to
add your account to the Administrator group using a LocalGroup.
If you’re working on a domain, then you’ll need to add your account to the Administrator group using a Group instead.
2. Type Net LocalGroup “Administrators” YourLoginName /Add and
press Enter.
You now are part of the Administrator group and can log in
under your own name to the system. More importantly, you’ve
just gained the ability to access the server remotely using Remote
Desktop without having to perform a significant amount of configuration. You’ll want to know what to call the computer, so you
need to change the name of it next.
25
Command Line Basics
Configure the Remote System
Part I
26
Chapter 2
3
Making Remote Connections
3. Type WMIC ComputerSystem Where Name=”%COMPUTERNAME%” Call
Rename Name=”NewName“ and press Enter.
Make sure you choose a name that will work with your workgroup or domain setup. Of course, the computer isn’t part of the
workgroup or domain yet, so that’s what you need to do next.
NOTE The WMIC command is one of the most powerful configuration features of the command line. Because WMIC is so
incredibly powerful, you’ll find it in several chapters of the
book. Chapter 3 shows how to use WMIC when configuring print
jobs. Chapter 11 shows how to use WMIC with Active Directory.
Chapter 15 shows how to use WMIC to perform maintenance
tasks.
4. Type WMIC ComputerSystem Where Name=”%COMPUTERNAME%” Call
JoinDomainOrWorkgroup Name=”NameOfWorkgroup“ and press Enter.
At this point, you have an account on the system and you’re part
of the Administrator group. Your computer has an easy-to-type
name that you know and it’s part of your workgroup. At this
point, you need to set it up for remote access. (This section shows
the command line technique for granting remote access—the
“Setup Remote Administrator” section shows the GUI technique.)
5. Type WMIC RDToggle Where ServerName=”%COMPUTERNAME%” Call
SetAllowTSConnections AllowTSConnections=”1” and press Enter.
After you reboot the system, it provides Remote Desktop capability. However, the firewall prevents you from making a connection,
so you need to open a port for the Remote Desktop.
6. Type NetSH Firewall Set PortOpening TCP 3389 “Remote Desktop”
and press Enter.
(You’ll use the NetSH utility for more than just the firewall configuration; see the “Script Networking Solutions” section of Chapter
24 for more details.) The firewall now permits you access to the
server. It’s important for some tasks to have access to the C drive
as well, so you need to create a share. The default share automatically provides the required permissions.
7. Type Net Share “Drive_C”=C:\ and press Enter.
Everyone now has access to the C drive. You can refine the permissions later. However, now you have the required account, permissions, computer name, workgroup, remote access, and drive access.
Many of the commands you’ll work with in this book are actually
scripts. The default scripting engine is WScript—Microsoft uses
the graphical engine for compatibility purposes, but the graphical
engine doesn’t work very well in a command line environment. The
next step changes the default scripting engine to the command line
equivalent.
8. Type CScript //H:CScript and press Enter.
(The CScript utility always uses a double slash for its own command line arguments; learn more about this utility in the “Run
Scripts with the CScript and WScript Utilities” section of Chapter
22.) You’ll see a message that tells you that the default scripting engine is now CScript. You should activate your copy of Server Core
using the next step. However, you can skip this step and go right to
step 10 if you prefer.
9. Type SLMGR –ATO and press Enter.
The activation process seems to take forever. However, get a cup
of coffee, and when you get back, you should see a confirmation
message. (When using WScript instead of CScript, you’ll see a confirmation dialog box that you’ll need to dismiss by clicking OK.)
It’s time to reboot the system to ensure all of the changes occur.
10. Type Shutdown /r and press Enter.
(The Shutdown command provides a number of useful command
line switches that you can discover in the “Shutdown the System”
section of Chapter 1.) You’ll see a message telling you that the
system will shut down in a few seconds. The system will reboot and
you’ll find all of the changes you’ve made in place. You should also
be able to access the system using Remote Desktop at this point.
NOTE Sometimes the WMIC RDToggle command won’t work
properly with older clients. In this case, type SCRegEdit /
CS 0 and press Enter. You’ll see a message that the script has
changed the proper registry entry. You must reboot the system
after making this change using the Shutdown /r command.
27
Command Line Basics
Configure the Remote System
Part I
28
Chapter 2
3
Making Remote Connections
Setup Remote Administrator
You may not want to use the manual approach for configuring your
server as described in the “Change Security and Basic Setup” of this
chapter. In fact, very often you’ll accomplish many of the tasks described
in that section during the installation process. However, you still need
to enable remote access to ensure you can use Remote Desktop with the
machine you want to configure.
The following steps describe the GUI approach for obtaining
remote access.
1. Choose Start ➢ Control Panel or Start ➢ Settings ➢ Control
Panel to display the Control Panel.
2. Click System and Security, and then Allow Remote Access in the
System group when using a workstation. If you’re using the classic
view of the Control Panel, double click the System applet and then
choose the Remote tab of the System Properties dialog box. In
both cases, you see the Remote tab of the System Properties dialog
box as shown in Figure 2.1.
Figure 2.1: The Remote tab of the System Properties dialog box contains the remote
access setting.
Configure the Remote System
29
This Computer option. On newer systems check the Allow
Connections from Computers Running Any Version of Remote
Desktop option.
If you have the required software on every system in your workplace, you could always use the Network Level Authentication
option, but most environments don’t include the required software
on every system.
4. Click OK. Windows makes Remote Desktop access available to
administrators.
If you want to allow other accounts to use Remote Desktop (always
a poor choice if you don’t actually need it), then you must configure these other users by clicking Select Users on the Remote tab of
the System Properties dialog box. In this case, you see the Remote
Desktop Users dialog box shown in Figure 2.2. Click Add to add the
new user and select the user you want to add. Use this feature with
extreme care because anything that compromises the account you add
could also compromise the machines the account can access using
Remote Desktop.
Figure 2.2 : Add users who aren’t administrators for Remote Desktop access with
extreme care.
Command Line Basics
3. On older systems, check the Enable Remote Desktop on
Part I
30
Chapter 2
3
Making Remote Connections
Use the Remote Desktop
Connection Application
The Remote Desktop Connection application provides the means to connect to a Windows system for remote management. You only need this
application when you want to access the command prompt on the other
machine. For example, you won’t need this application when you want
to use a console to create a remote connection or when you want to use a
command line utility from a local machine to make the connection. The
Remote Desktop Connection application is exceptionally useful because
it does let you create a direct connection to the server. You can monitor
events and manage the system directly, which reduces one potential cause
of failure (making the remote connection every time you want to perform
a task). Select Start ➢ All Programs ➢ Accessories ➢ Remote Desktop
Connection or Start ➢ Programs ➢ Accessories ➢ Communications ➢
Remote Desktop Connection to start the Remote Desktop Connection
application. The following sections describe how to use this application.
NOTE You must make any changes you want to the Remote
Desktop Connection application configuration before you connect to the remote server. Once you make the connection, you
can’t change the configuration. Consequently, it’s always a good
idea to create a complete configuration first, save it to disk,
and then reopen it as needed for a particular server. Otherwise,
you’ll spend a lot of time reconfiguring the Remote Desktop
Connection every time you want to use it.
Create a Connection
Before you can use the Remote Desktop Connection application (I’ll
refer to it simply as Remote Desktop from this point on), you need to
configure the remote machine to provide remote access connectivity.
The “Configure the Remote System” section of this chapter tells you
how to perform this task. Once the remote machine is ready for a connection, you must configure Remote Desktop to make the connection.
The following procedure helps you make the connection.
NOTE Some versions of Remote Desktop have additional fields
on some of the tabs. The procedure includes information for these
additional fields. However, if you don’t see the additional field,
simply skip that step. The screenshots show the Windows 7 version of Remote Desktop. Your screenshots will vary from those
shown in the book when working with other versions of Windows.
1. Start the application and click Options.
Remote Desktop expands to show the complete list of options
that you can access with it. The General tab shows the connection options as shown in Figure 2.3.
Figure 2.3 : Set the connection parameters for the connection you want to
normally make.
2. Type the server name or select it from the drop-down list in the
Computer field.
3. Type your account name on the server in the User Name field.
If you’re working on a domain, make sure you include the domain
name, followed by a backslash, followed by your name, such as
WinServer\John.
31
Command Line Basics
Use the Remote Desktop Connection Application
Part I
32
Chapter 2
3
Making Remote Connections
4. (Optional) Type your password in the Password field (when this
field is supported).
Make sure you use the password for your account on the remote
system.
5. (Optional) Type the name of the server in the Domain field when
using a workgroup setup.
If you’re using a domain setup, then type the name of the domain
in the Domain field.
6. (Optional) Check Allow Me to Save Credentials (or Save My
Password) if you want Remote Desktop to save your password for
future use.
This feature even works if you provide your password while making the connection.
7. Select the Display tab.
You see display settings like those shown in Figure 2.4. Set the
Display Configuration setting to the size you think you’ll need.
Figure 2.4 : Configure the display so you can see the remote desktop comfortably.
Command line users can usually get by using the 1024 by 768
pixels setting to save screen real estate on the local machine. In addition, a smaller screen makes Remote Desktop faster, something
you definitely want, to enhance productivity. Setting the number
of colors lower will also produce a performance enhancement. See
the “Set the Display” section of the chapter for additional display
settings changes you can make.
8. (Optional) Select the Local Resource tab. Make any settings
changes required to work with the remote system properly.
In most cases, you won’t need audio. However, you may want
to use local drives on the remote system. See the “Access Local
Resources” section of the chapter for details for modifying the use
of local resources with the remote computer.
9. (Optional) Select the Programs tab. Check Start the Following
Program on Connection. Type a location for the program in
the Program Path and Filename field. Type a starting location
for the program in the Start in the Following Folder field.
See the “Run a Configuration Program” section of the chapter for
additional details.
10. Select the Experience tab. Choose the connection speed for your
connection to the remote system.
The connection speed is important because it defines how your
system will interact with the remote system.
11. Clear the checkmarks next to every feature you don’t really need,
to improve performance.
For example, most administrators won’t require Desktop Composition for any purpose, especially not the command line. See
the “Optimize Performance” section of the chapter for additional
information.
12. Select the Advanced tab, if your version of Remote Desktop pro-
vides it. Choose an option that defines what you want to do when
Server Authentication fails.
The best option is to ask Remote Desktop to warn you about the
problem. It’s never a good option to choose Connect and Don’t
Warn Me because you could end up with a less secure connection.
33
Command Line Basics
Use the Remote Desktop Connection Application
Part I
34
Chapter 2
3
Making Remote Connections
13. (Optional) Click Settings in the Connect from Anywhere section.
Use administrator - provided settings to configure the Remote
Desktop Gateway settings. In most cases, the default settings will
work fine and you should keep them in place unless you have a
specific reason for making a change.
14. (Optional) Select the General tab. Click Save As. You’ll see a Save
As dialog box. If you want to save this setup as the default connection, then click Save. Otherwise, type a name for the setup in the
File Name field and click Save.
You can save as many setups as needed for the machines you want
to access. Use the default setup for the machine you access most
often.
15. Click Connect. You’ll see Remote Desktop performing all of
the required connection tasks. Eventually, you’ll see a Remote
Desktop window like the one shown in Figure 2.5.
Figure 2.5 : The remote connection appears in a special Remote Desktop window.
Use the Remote Desktop Connection Application
35
After you create the initial connection, Remote Desktop opens with the
default connection already set up. If you want to use the default connection, all you need to do is click Connect when Remote Desktop starts.
Otherwise, you can follow these steps:
1. Click Options to display the list of options shown in Figure 2.3.
2. Click Open to display the Open dialog box.
3. Choose the connection you want to use from the Open dialog box
and then click Open to open the connection.
4. Click Connect to make the connection. You won’t need to create a
setup more than once if you save it to disk.
It’s also possible to double click the RDP file containing a connection in Windows Explorer to make the connection to the server, so you
can simply place the RDP file on your desktop to make the connection
instantly accessible.
Set the Display
The display settings you use affect how much screen real estate you have
for performing tasks and also affect performance. Using a larger screen
size gives you more space to work. However, a larger screen size also
requires more network bandwidth to transmit the data. Consequently,
you must weigh the need to see as much as possible on the remote server
against the performance requirements for your task. Figure 2.6 shows
the display settings.
The Remote Desktop Size slider lets you change the size of the window, with the smallest size being 640 x 480 pixels, which is normally
too small to work with a GUI system, but can work just fine with the
command line. If you want to use your entire display to work with the
remote system, move the slider all the way to the right. The size will
change to Full Screen and the display will take up your entire display
area. In fact, it will look like you’re working directly at the remote console, rather than using Remote Desktop.
Command Line Basics
Use a Saved Connection
Part I
36
Chapter 2
3
Making Remote Connections
Figure 2.6 : Define a display size that works best for the task you need to perform.
NOTE If you want to continue working with your local system
while managing the remote system, make sure you check the
Display the Connection Bar When in Full Screen Mode option.
Otherwise, you might need to log out every time you want to
regain access to the local system.
Performance isn’t only affected by screen size. Notice that you can
also modify the number of colors that Remote Desktop displays. More
colors translate into a better display, but also reduce performance
because Remote Desktop has to transfer more data for the additional
colors. Because the command line lacks a GUI, you’ll experience a performance gain by setting the number of colors to 256. In most cases,
you won’t even notice the difference in appearance, but you will notice
the difference in performance.
Access Local Resources
Remote Desktop makes it possible to map your local hardware to
respond to events on the remote machine. Figure 2.7 shows the settings
you can use to map resources as needed. The following list describes
each of the resource mapping areas.
Figure 2.7: Perform automatic resource mapping to make local resources available
for use.
37
Command Line Basics
Use the Remote Desktop Connection Application
Part I
Remote Computer Sound Lets you bring sounds from the remote
machine to your local machine. This setting has three options. You
can choose to play the remote sound locally, not play the remote
sound at all (effectively muting the remote system), or play the
sound at the remote location.
Keyboard Controls the use of control key combinations. For
example, when you press Alt+Tab, this setting controls whether you
switch between applications on the local machine or the remote
machine. This setting only affects Remote Desktop when you have
it selected when working in windowed mode. If you press Alt+Tab
when Remote Desktop is working in a window and you don’t have
Remote Desktop selected, then the Alt+Tab combination always
affects the local machine, even when you choose the On the Remote
Computer option. Normally, any control key combinations only
go to the remote machine when you use Remote Desktop in full
screen mode.
Local Devices Determines which local devices you can access
from the remote machine. This may sound like a very odd consideration, but when you’re working with the remote machine, Remote
Desktop shuts off access to local resources such as disk drives,
38
Chapter 2
3
Making Remote Connections
printers, and serial ports. Only your display, keyboard, and mouse
are active on the remote machine unless you tell Remote Desktop to
perform the required mapping. Check any of these options to make
the resources on your local machine available when working at the
remote machine.
Run a Configuration Program
You might find that you want to run a configuration program on the
remote machine when you create the connection. This program can perform any task and you can use both batch and script files, in addition to
standard applications. Figure 2.8 shows the Programs tab. The options
work much like a remote profile. When you want to use a remote program, check Start the Following Program on Connection, type the
name of the application you want to use (including the full path), and
tell Remote Desktop which folder you want to use as a starting point.
Figure 2.8: Use a configuration application as needed to automate Remote Desktop tasks.
Optimize Performance
The connection you use to create a Remote Desktop is important. You
can’t expect the same performance from a dial-up connection that you
do from a high-speed internal network. Consequently, Remote Desktop
provides a method for telling it what to expect in the way of connection
in order to optimize connection performance as shown in Figure 2.9.
Figure 2.9 : Use only the resources you actually need to obtain good performance.
39
Command Line Basics
Terminate a Session
Part I
Choosing one of the default options, such as LAN (10 Mbps
or Higher), automatically sets the options that Remote Desktop
uses. When working with a newer setup, such as the one found in
Windows 7, you have the option of clearing or adding features such
as Desktop Composition. Always use the fewest features possible to
enhance the performance of the connection.
When working with an older copy of Remote Desktop, you can
choose Custom from the list and configure the options you want to use.
Most systems actually work best with the Custom setting, even if you’re
working across a LAN. For example, most systems don’t provide Menu
and Window Animation, so you can clear this option. You’ll probably want to clear the Themes and Show Contents of Window While
Dragging options as well.
Terminate a Session
At some point, you’ll want to end (terminate) your session with Remote
Desktop. You don’t actually use the Remote Desktop utility to perform
40
Chapter 2
3
Making Remote Connections
this task. Instead, you rely on the resources of the remote system to
tell Remote Desktop when the session is over. The following sections
describe how to terminate a session.
Use the Start Menu
By far the easiest way to terminate a session is to use the Start menu.
Simply choose Start ➢ Log Off. The remote system will perform the
normal logoff procedure, at which point Remote Desktop will close.
If you intend to turn the remote system off or reboot it after you
complete maintenance, you can also choose the Start ➢ Shutdown or
Start ➢ Restart commands as needed.
Use the Logoff Utility
The Logoff utility can provide an alternative for logging off the system if you’re working at the command prompt and don’t really want
to access the GUI. In addition, the Logoff utility can provide you with
additional information about the logoff procedure if you think there’s a
problem during this process. To perform a standard logoff, type Logoff
and press Enter. The system will perform a standard logoff procedure,
at which point Remote Desktop will end as usual. To perform a logoff
where you can verify the process that the remote machine is following,
type Logoff /V and press Enter. You’ll see additional information about
the logoff process that you can use for diagnostic purposes.
Automating Tasks
Command Line Basics
3
Part I
In this chapter, you will learn to:
33
View and Manage Tasks Using Scheduled
Tasks (Pages 42-51)
n
Configure the Task Scheduler (Page 4 3)
n
View Tasks (Page 4 4)
n
Create New Tasks (Page 4 6)
n
Delete Existing Tasks (Page 5 0)
33
Manage Tasks Using the SchTasks
Command (Pages 51-54)
n
Use the /Create Switch (Page 51)
n
Use the /Delete Switch (Page 53)
n
Use the /Query Switch (Page 53)
n
Use the /Change Switch (Page 54)
n
Use the /Run Switch (Page 54)
n
Use the /End Switch (Page 54)
42
Chapter 3
3
Automating Tasks
O
ne of the best reasons to work at the command line is to automate
tasks. It’s not that you can forget about the task completely, but you
don’t have to worry about whether the task is scheduled for completion
either. Barring a major problem, such as a power outage, the computer
faithfully starts and completes the task for you automatically. Now,
you may very well have to interpret the results later, but that’s not the
point—the point is that the task is automatically performed as far as the
computer can complete it for you, relieving you of the burden of completing it manually.
This chapter examines task automation from a command line perspective. The goal is to configure the computer’s automation to perform any
task that it can complete automatically. Before you get the idea that automation somehow entails programming, you can use automation for anything. If you want the computer to perform a backup automatically, it can
do it for you. Likewise, you can tell the computer to display a reminder or
anything else that you’d normally use an application to perform. However,
it’s true that you can also use automation with any scripts you create, but
automation and scripting aren’t reliant on each other in any way.
View and Manage Tasks Using
Scheduled Tasks
The Task Scheduler console resides in the Administrative Tools folder of
the Control Panel. It pays to have a familiarity with the Task Scheduler
console before you execute commands at the command line so you have
a better idea of just how Task Scheduler works. The following sections
discuss Task Scheduler as a service and then provide a quick overview
of performing basic tasks using the GUI.
NOTE This book assumes that you have the Administrative
Tools folder displayed on both the All Programs menu and Start
menu. To configure Windows to display the Administrative Tools
folder this way, right-click the taskbar and choose Properties
from the context menu. Select the Start Menu tab of the taskbar
and Start Menu Properties dialog box and click Customize. Scroll
down to the System Administrative Tools entry of the Customize
Start Menu dialog box and select the Display on the All Programs
Menu and the Start Menu option. Click OK twice to close both
dialog boxes.
View and Manage Tasks Using Scheduled Tasks
43
Task Scheduler is a service, not an application as most people would think
about applications. The applications used to access Task Scheduler interact
with the service; they don’t perform any tasks directly. Consequently, you
can also interact with Task Scheduler using the Service Control (SC) utility
described in the “Work with Services” section of Chapter 1. Any servicerelated task you normally perform with SC also works with Task Scheduler.
The following sections describe three tasks that you commonly perform on
Task Scheduler using SC.
Start the Task Scheduler
As a safety precaution, it’s a good idea to set the service to manual and
manually start it as needed. To set the Task Scheduler to start manually, type SC Config Schedule Start= Demand and press Enter. Notice
the space between the equals sign (=) and the value. Of course, if you’re
running tasks every day, the automatic start option makes more sense. In
this case, you type SC Config Schedule Start= Auto and press Enter.
When you want to determine the Task Scheduler status, type SC
QueryEx Schedule and press Enter. Use QueryEx, rather than Query, so
that you obtain the Process Identifier (PID) as part of the output—
many command line utilities require the PID as input. To start the Task
Scheduler, type SC Start Schedule and press Enter.
Stop the Task Scheduler
When you finish using Task Scheduler for a particular task and you know
that no other part of the operating system relies on it, you can stop Task
Scheduler to save processing cycles and to make your system a bit more
secure. To stop Task Scheduler type SC Stop Schedule and press Enter.
Set Task Scheduler Security
The Task Scheduler logs on using the Local System account. Normally,
this account provides more than sufficient rights for local activities.
However, when you automatically perform tasks on remote machines,
you might need to change the account to handle the increased security
requirements. Always make sure you have the Task Scheduler service
running when you need to execute applications automatically. To
change the password to another account, type SC Config Schedule
Obj= “.\AccountName” Password= “AccountPassword” and press Enter.
Command Line Basics
Configure the Task Scheduler
Part I
44
Chapter 3
3
Automating Tasks
Notice that the account name includes both the domain and the username. The use of a period indicates the location machine.
Never give Task Scheduler more rights than it actually requires when
you perform the intended tasks. Use the Local System account whenever
possible. To change the service account back to Local System, type SC
Config Schedule Obj= “.\LocalSystem” Password= “” and press Enter.
It’s important to note that newer versions of Windows tighten security
considerably, so you need to consider the effect of the new security
measures on any tasks you want to perform. In many cases, you’ll need
to change the security settings of any jobs that you want to move from
other servers to the local server to ensure they’ll run correctly.
View Tasks
Before you add any new tasks, you must know which tasks are already
configured on a system.
Use these steps to view the current list of tasks:
1. Choose Start ➢ Administrative Tools ➢ Task Scheduler. You see
the Task Scheduler console shown in Figure 3.1.
Figure 3.1: The Task Scheduler console is one method of accessing the underlying
service.
View and Manage Tasks Using Scheduled Tasks
45
configured on the machine.
As shown in Figure 3.1, the demonstration system has several
tasks configured on it.
3. (Optional) Click Display All Running Tasks in the Actions pane.
You see the list of tasks that are currently running on the system
as shown in Figure 3.2. You must stop these tasks before you can
delete them.
Figure 3.2 : All running tasks are those that Windows is currently executing.
4. (Optional) Click the down arrow next to Task Status.
This list tells you which tasks have executed and whether they
succeeded. Failed tasks require interaction on your part to fix
so that they run properly. In some cases, this means deleting the
task because it can’t succeed due to a lack of resources or a system
configuration issue.
Command Line Basics
2. Click the down arrow next to Active Tasks to see the list of tasks
Part I
46
Chapter 3
3
Automating Tasks
NOTE Windows supports an alternative form of tasks that
were used in older versions of Windows. These Automated
Tasks ( AT) originally appeared as part of the Unix operating
system and are extremely limited in what they can do for you.
You can create these tasks using the AT command. It’s also
possible to manage them using the Windows Management
Instrumentation ( WMI) Command line ( WMIC) utility using the
Job alias. (Chapters 11 and 15 tell you more about practical
uses for WMIC, which are many.) The Task Scheduler GUI lets
you see these tasks, but it doesn’t let you create them. It’s
also possible to use Task Scheduler to configure the AT service account. In general, because the AT service is so limited
(and ancient), you should avoid using it unless you already
have a number of batch files that rely on this older technology.
For this reason, the AT command and WMIC Job alias aren’t
discussed in this book. You can learn more about the AT command at http://support.microsoft.com/kb/313565. The WMIC
Job alias isn’t well documented online, so you’ll need to learn
about it by reading a book such as Administering Windows
Server 2008 Server Core (Sybex, 2008).
Create New Tasks
Eventually, you want to create new tasks. One way to do this is to rely
on the GUI. You can also use the SCHTasks command as described in the
“Manage Tasks Using the SCHTasks Command” section of this chapter.
In short, you have no lack of ways to create new tasks.
The following steps describe the GUI method of creating a basic task:
1. Use the technique described in the “View Tasks” section to ensure
the task isn’t already created.
2. Click Create Task in the Actions pane. You see the Create Task
dialog box shown in Figure 3.3.
3. Type a name for the task in the Name field.
4. Type a task description in the Description field.
Make sure you provide enough details so you know why you created the task, what purpose it serves, and what a successful result
should accomplish.
Figure 3.3 : The Create Task dialog box contains all the options for creating
a new task.
47
Command Line Basics
View and Manage Tasks Using Scheduled Tasks
Part I
5. Choose a running option.
Administrative tasks are normally run whether or not the user is
logged on. Only user configuration or user-specific tasks require
that the user is logged on because the task might need to configure
the system for that particular user.
6. Choose a Configure For option.
For maximum compatibility, select the Windows Server 2003,
Windows XP, or Windows 2000 option. If you want to ensure the
task runs with the best security and can access Window 7 or Windows Server 2008 R2 features, select the Windows 7, Windows
Server 2008 R2 option.
7. Select the Triggers tab. Click New.
You see the New Trigger dialog box shown in Figure 3.4. A trigger defines when to run the task, and you can configure as many
triggers as needed to ensure the task runs when you need it to. Task
Scheduler supports a host of trigger methods, such as on a schedule
or when the user logs onto the system. You can even select specific
system events.
8. Configure the trigger and click OK.
48
Chapter 3
3
Automating Tasks
Figure 3.4 : Define one or more triggers as needed to determine when to run the task.
9. Repeat steps 7 and 8 to configure all of the required triggers. You
should end up with one or more triggers on the Triggers tab as
shown in Figure 3.5.
Figure 3.5 : Every task requires at least one enabled trigger or it will never run.
View and Manage Tasks Using Scheduled Tasks
49
This tab shows the actions that the task will perform—you can
perform more than one task at a time, such as running multiple
applications. Click New. You see the New Action dialog box
shown in Figure 3.6.
Figure 3.6 : Actions determine what the task will perform.
Command Line Basics
10. Select the Actions tab.
Part I
11. Select one of the actions from the Action drop-down list box.
You can choose from starting a program (the most common action), sending an e‑mail, or displaying a message. Fill out the fields
required to perform the task and click OK.
12. Repeat steps 10 and 11 as often as necessary to define all of the
actions required to complete the task. You should end up with one
or more actions, as shown in Figure 3.7.
50
Chapter 3
3
Automating Tasks
Figure 3.7: The list of actions you define determines what the task accomplishes.
13. (Optional) Select the Conditions tab. Configure any required condi-
tions for running that task. The default options normally work fine.
14. (Optional) Select the Settings tab. Define any required settings,
such as letting the task run on demand (rather than on a schedule).
The default options on this tab normally work well.
15. Click OK.
Task Scheduler checks the task for potential errors. If the task
has a trigger that schedules it to run, you see it added to the Active Tasks list shown in Figure 3.1. The task is added to the Task
Scheduler Library if it isn’t configured to run immediately.
Delete Existing Tasks
At some point, you’ll want to remove tasks that you no longer need. To
remove a task, highlight its entry in any of the lists and click Delete in
the Actions pane. Task Scheduler will ask whether you’re certain that
you want to remove the task. Click Yes and Task Scheduler will delete
the task from the list.
WARNING Task deletion is a one-way process—there isn’t
any way to undo this action. Be certain that you actually do want
to delete a task before you click Yes. Even though creating a task
isn’t difficult, it can become time consuming when you have a lot
of triggers or options to configure. A good safeguard is to export
the task before you delete it by clicking Export in the Actions
pane and saving the task as an XML file. You can always import
the XML file to recreate the task later.
51
Command Line Basics
Manage Tasks Using the SchTasks Command
Part I
Manage Tasks Using the SchTasks Command
The SchTasks command replicates the functionality of the Task
Scheduler console using a command line interface rather than a GUI.
The advantage of using SchTasks is that you can manage tasks using
scripts or batch files. Because tasks have to be created on each machine
individually, the SchTasks command makes it possible to automate the
process of adding required tasks to a group of machines. The following
sections describe how to perform Task Scheduler management using the
SchTasks command.
Use the /Create Switch
The /Create switch lets you create new tasks, just like using the Task
Scheduler console. The only real difference is that you use command line
switches to perform the task, which means you can enter a single command at the command prompt to create a task, rather than go through
an entire series of complicated steps. The important thing to remember
is that if you don’t supply a command line switch, the SchTasks command assumes that you want to use a default value. When working
with SchTasks, you should create a list of command line switches using
the same steps as you would when you work with the GUI. The only
required command line switches are /TN, which gives the task a name;
/TR, which provides the name of an application to run; and /SC, which
defines when to run the task.
Here’s a procedure you can use to create a simple task:
1. Define the task name using the /TN Taskname switch, where
Taskname is the name of the task.
52
Chapter 3
3
Automating Tasks
2. Define the application to run using the /TR ApplicationPath
switch, where ApplicationPath is the full path to the application.
The arguments for the application appear after the full application path, such as /TR “Dir *.*”. Notice the use of double quotes
around the application name and the application arguments (*.* in
this case).
3. Define a trigger using the /SC Type switch, where Type is one of the
following selections:
NN
Minute
NN
Hourly
NN
Daily
NN
Weekly
NN
Monthly
NN
Once
NN
OnStart
NN
OnLogon
NN
OnIdle
NN
OnEvent
4. Define a schedule that’s consistent with the selected trigger. The
two most common switches are /ST StartTime and /SD StartDate,
which define a start time and a start date.
5. (Optional) Define an interval for repeating tasks using the /RI
Interval switch, where Interval is a selected interval. You can’t
define an interval for the Minute, Hourly, Onstart, OnLogon, OnIdle,
and Onevent schedule types. The valid interval range is 1 to 599,940
minutes, with a default of 10 minutes. For example, if you want to
run a task once a week, you define the interval as 1,440 minutes.
Using this procedure, you could combine a number of switches
together to create a task using the following command:
SchTasks /Create /TN “My Special Task” /TR “Dir *.*” /SC
Once /ST “14:00:00”
This command creates a task named My Special Task that executes the
Dir *.* command once at 2 PM on the current day. The SchTasks command provides support for every feature that the GUI does. All you need
to do is combine the required command line switches. To see the full list
of command line switches, type SchTasks /Create /? and press Enter.
Use the /Delete Switch
When you finish using a task, you’ll want to delete it. To remove a
task from the list, simply type SchTasks /Delete /TN Taskname, where
Taskname is the name of the task you want to remove.
The SchTasks command normally asks whether you’re certain that
you want to delete a particular task before it actually performs the
task. Unfortunately, you might not want to interact with SchTasks from
within a batch file. In this case, add the /F command line switch—
SchTasks will delete the task without asking whether you’re certain.
Use the /Query Switch
You use the /Query switch in a number of ways. The primary use is to
determine which tasks are running on a particular system. When you
want to view these tasks manually, type SchTasks /Query | More. This
form of the command obtains all of the current tasks, pipes them to the
More command, and displays them one page at a time.
Sometimes, you need to process the list of tasks. For example,
you might want to check the machine setup to ensure it has all of the
required tasks. In this case, you’ll probably want the output to appear
in a file and in a form that’s easier to process with a script or batch file.
In this case, you type (or add to a batch file) SchTasks /Query /FO CSV >
Output.TXT. The /FO switch outputs the list of tasks as Comma Separated
Values (CSV), to make processing easier. The redirection operator (>)
sends the result to Output.TXT.
A query may also include looking for a particular task. In this case,
you use the SchTasks /Query /TN Taskname command, where Taskname
is the name of the task you want to find. As with other forms of query,
you’ll see the next scheduled run and whether the task is ready to run.
53
Command Line Basics
Manage Tasks Using the SchTasks Command
Part I
54
Chapter 3
3
Automating Tasks
Use the /Change Switch
The /Change switch works just like the /Create switch. The only difference is that instead of creating a new task, you’re modifying an existing task. In this case, the task must already exist or you’ll see an error
message. In addition, only the values you supply are changed—existing
properties retain their values.
NOTE The /Change command line switch has one limitation.
You can’t use this switch to change the task name. If you want to
change the task name, you must use the GUI. As an alternative,
you can delete the old task and then create a new one with the
same values and a different name.
Use the /Run Switch
The /Run command line switch lets you run a task whenever you want.
Simply use the SchTasks /Run /TN Taskname command, where Taskname is
the name of the task you want to run.
Use the /End Switch
The /End command line switch lets you end a running task. Simply use
the SchTasks /End /TN Taskname command, where Taskname is the name
of the task you want to end. An odd output of this command is that it
always reports success as long as the task exists, even if the task isn’t
running at the time. Consequently, a success message doesn’t necessarily
mean that you ended a running task—simply that the task isn’t running
once the command completes.
PART II
Managing Data
q
CHAPTER 6: Managing the Hard Drive. . . . . . . . . . . . . . . . . . . . . . . . . . . 99
Managing Data
In This Part
CHAPTER 7: Securing the Data. . . . . . . . . . . . . . . . . . . . . . . . . . . . . . . . 121
Part II
CHAPTER 4: Working with File and Directory Objects. . . . . . . . . . . . . . . 57
CHAPTER 5: Administering File and Directory Content . . . . . . . . . . . . . . 79
4
Working with File and
Directory Objects
In this chapter, you will learn to:
33Find Directories (Page 58)
n
n
Find Directories Using Patterns (Page 59)
n
View and Change the Current Directory (Page 60)
n
Create, Move, or Rename Directories (Page 61)
n
Remove a Directory (Page 62)
n
Display a Directory Structure (Page 62)
33Find Files (Page 63)
Manage File Objects (Pages 63-72)
n
n
Copy Files (Page 68)
n
Perform Bulk File Transfers (Page 69)
n
Remove Files (Page 70)
n
Move or Rename Files (Page 71)
33Determine File Associations (Page 72)
Work with File Associations and Types (Pages 72-74)
n
n
Create File Associations (Page 73)
n
Determine and Create File Types (Page 73)
33Create, View, or Delete Simple Hard Links (Page 75)
Make Data Links (Pages 74-77)
n
n
Create Hard Links Using the New Technique (Page 76)
n
Create Symbolic Links or Junctions (Pages 76-77)
Managing Data
Manage Directory Objects (Pages 58-63)
Part II
58
Chapter 4
3
Working with File and Directory Objects
F
older and directory objects consume a considerable amount of the
administrator’s time because they’re the focus of user activity. The user
doesn’t care much about the application that manipulates the data, but
rather focuses on the data itself, which resides in files. The user doesn’t
understand that double-clicking a file starts a process where Windows
looks for the appropriate application to open the file within the registry
and that security issues, incorrect registry entries, and other problems
can prevent Windows from opening the file. In short, the commands and
utilities described in this chapter probably have one of the most visible
effects on the way the user perceives Windows and how well you’re doing
your job. The following sections describe many of the directory and file
management tools you can access at the command line.
Manage Directory Objects
Directory objects act as storage containers for files. The directory structure begins with the root directory that’s normally specified simply with
a backslash (\). Consequently, when you see C:\, you’re seeing a reference
to the root directory. Directories can hold other directories and files. The
list of directories begins with the ultimate parent, which is the root, and
ends with the bottom directory, the child. Any directory contained within
another directory is the child of the directory and the container directory is
the parent. You can always access the parent by using two periods (..) as a
reference. The overall hierarchical structure of directories (also known as a
directory tree) is hidden from user view in most cases because of the way
that Windows handles directories and files. However, you must be constantly aware of the directory structure as you perform the management
tasks described in the following sections.
Find Directories
Most administrators are aware that the Dir command can help locate
files. However, when you use the /AD command line switch, you can use
the Dir command to locate directories with ease. For example, if you
type Dir /AD C:\Windows and press Enter, you’ll see the children of the
C:\Windows directory. If you further extend the command by typing Dir
/AD /S C:\Windows and press Enter, you’ll obtain a complete directory
tree of the C:\Windows directory. Unfortunately, the directory tree is large
and it’ll pass you by at light speed. Consequently, you need some way to
Manage Directory Objects
59
slow things down. Either of the following commands will let you see the
C:\Windows directory tree at a more reasonable pace.
NN
Dir /AD /S C:\Windows | More
NN
Dir /AD /S C:\Windows > WindowsTree.TXT
Find Directories Using Patterns
Directory names might not be absolute or you might not precisely
remember the name of a directory when you search for it. For example,
many applications add version information to the directory name so
different versions of the application can reside on the same hard drive.
When this problem occurs, you can use patterns to help locate the directory. The Dir command supports the ? (single character replacement) and
* (multiple character replacement) wildcard characters that you can use to
search for directories. For example, the command Dir Win* /AD /S would
locate any directory that begins with Win starting from the current location.
Likewise, the command Dir /AD /S “Microsoft Visual Studio *.?” will
find the directory entries for any version of Microsoft Visual Studio when
executed from the root directory. Notice the use of double quotes around
search patterns that include spaces in them.
Every Windows system has environment variables defined in it and you
can define additional environment variables as needed. Some environment
variables, such as WinDir, provide path information. This path information can vary by machine, but the name of the environment variable is
always the same because Windows defines it for you. Consequently, if
you want to perform a directory listing of the Windows directory, but you
don’t know where that is, you can type Dir %WinDir% and press Enter. The
%WinDir% part of the command expands to the Windows directory, wherever that directory might be on the host machine. The environment variable must contain just one directory for this technique to work, but it’s a
useful technique.
Managing Data
In the first case, the command pipes the output of the Dir command
to the More command, which displays the output one screen at a time.
This form is useful when you simply need to locate a particular child in
the C:\Windows directory tree. In the second case, the command redirects
the output from the console window to the WindowsTree.TXT file. You
won’t actually see the command execute on screen. This form is useful
when you need a more permanent record of the directory tree or if you
need to perform additional processing on the output.
Part II
60
Chapter 4
3
Working with File and Directory Objects
View the Current Directory
The command prompt normally tells you the current directory. If it
doesn’t, then type Prompt $P$G and press Enter. The $P tells Prompt to
display the current path, while $G tells it to display a greater than (>)
sign. However, you might not always be able to see the current directory, such as during the execution of a batch file. In this case, type CD
or ChDir and press Enter to display the current directory. If you want to
output the directory information to a file for processing within a batch
file, you can always use the CD > CurDir.TXT command, which places the
directory information in CurDir.TXT using redirection.
Change the Current Directory
Executing commands in the directory that contains the command or data
that you need to manipulate is more efficient than trying to execute all of
the commands from a single directory. The reason is simple—using paths
is cumbersome and error prone. To move from the current directory to
another directory, use the CD NewDirectory or ChDir NewDirectory command, where NewDirectory is the path that you want to use.
Paths are either absolute, such as C:\Windows or relative. Relative
paths come in two forms:
NN
NN
Parent: Type .. to move to the parent level of the current directory.
Child: Type the directory name without a backslash to move to the
child directory of the current directory.
Here are examples of the three directory change types:
CD C:\Users\John
CD ..\..
CD Windows\System32
In this first case, the directory will change to C:\Users\John (assuming
this directory exists) no matter where you type the command because the
command relies on an absolute directory location. In the second case, the
directory will change to the parent of the parent of the current directory.
For example, if you’re at C:\Users\John, then the directory will change to
the root directory because the root directory is the parent of C:\Users. In
the third case, the directory changes to the C:\Windows\System32 directory
assuming that you’re in the root directory of the C drive.
Manage Directory Objects
61
It’s also possible to combine relative forms to make moving from one
directory to another more efficient. For example, if you’re already in the
C:\Users\John directory and want to move to the C:\Users\Amy directory, then you type CD ..\Amy and press Enter. The first part of the command moves to C:\Users (the parent of C:\Users\John) and the second
part of the command moves to the Amy subdirectory.
To create a new directory, use the MD NewDirectory or MkDir
NewDirectory command, where NewDirectory is the path of the directory
you want create. In many cases, the new directory is simply a child of
the current directory. For example, if you want to create MyDirectory
as a child of the current directory, you type MD MyDirectory and press
Enter. The MD and MkDir commands can use both absolute and relative
directory paths. See the “Change the Current Directory” section for a
description of these path types.
Move Directories
To move a directory to a new location, use the Move OriginalPath NewPath
command, where OriginalPath is the absolute or relative path of the directory you want to move and NewPath is the original or relative path to the
new location. For example, if you want to move MyDir from its current
location to C:\Temp, you’d type Move MyDir C:\Temp\MyDir and press Enter.
Notice that the new location must include the original directory name
or Move will register an error that it can’t rename an existing directory. The
Move command automatically moves any files or subdirectories contained
in the original directory to the new location. See the “Change the Current
Directory” section for a description of the absolute and relative path types.
Rename Directories
To rename a directory, use the Move OriginalName NewName command,
where OriginalName is the original name (and optionally the path) of the
directory and NewName is the new name of the directory. For example, if
you want to rename MyDir to MyNewDir, you’d type Move MyDir MyNewDir
and press Enter. See the “Change the Current Directory” section for a
description of the absolute and relative path types.
Managing Data
Create Directories
Part II
62
Chapter 4
3
Working with File and Directory Objects
The Move command does allow you to combine move and rename
tasks into a single command. To move MyDir to C:\Temp and rename it
to MyNewDir, you’d type Move MyDir C:\Temp\MyNewDir and press Enter.
Remove a Directory
When a directory is no longer needed and contains no files or subdirectories, you can remove it from the system using the RD DirName or RmDir
DirName command, where DirName is the absolute or relative path of the
directory you want to remove. (See the “Change the Current Directory”
section for a description of the absolute and relative path types.) Of
course, the directory might not be empty or you might not be certain
about its content.
Use the following procedure to ensure you remove directories only
when you don’t actually need them. (The procedure uses DirName to represent the directory path you want to remove.)
1. Type Dir DirName /S /B and press Enter.
You see a listing of any files in the directory you want to remove.
As with most command and utilities, the /S command line switch
tells Dir to search all of the subdirectories. Using the /B command
line switch displays the files in bare format, which means that you
don’t see the usual headers and other extraneous information that
could clutter up the list.
2. Review the file list to make sure you don’t need any of the files.
3. Type Del DirName /S /Q and press Enter.
The Del command displays a list of the files it has deleted. Using
the /Q command line switch tells Del to remove the files without
asking you first. Otherwise, you have to answer a question about
deleting each of the files.
4. Type RD DirName /S /Q and press Enter.
The RD command removes the specified directory and all its subdirectories.
Display a Directory Structure
Directory structures can become complex and hard to understand, so
it’s good to know how to display them in a comprehensible form. The
Tree utility provides a means of seeing the directory structure from any
starting point on your hard drive. Simply use the Tree StartingPath
Manage File Objects
63
command, where StartingPath is an absolute or relative path. (See the
“Change the Current Directory” section for a description of the absolute
and relative path types.) The output uses ASCII graphics to help you
understand the directory structure. For example, Figure 4.1 shows the
directory structure of a test directory, MyDir.
Manage File Objects
As you might expect, file objects use many of the same command
forms that directory objects do. The command prompt does provide
significantly more options for working with files though because
drives have far more files than directories and files come in more
forms. The following sections describe how to extend what you know
about directory commands and utilities to files. (As with directories,
finding files often involves working with absolute and relative paths.
See the “Change the Current Directory” section for a description of
the absolute and relative path types.)
Find Files
The Dir command provides a host of ways to locate files on your hard
drive. Because Dir can check the entire drive, the results are often more
accurate than provided with the Windows search mechanisms. In addition, you can sort files as needed (see the “Find Files in Sorted Order”
section for details) and locate files based on their attributes (see the
“Find Files by Attribute” section for details). The Dir command also
supports a number of display options, such as the /X command line
switch that shows you the 8.3 (8 dot 3) display name for files used in the
registry. Type Dir /? and press Enter to see a complete list of options.
Managing Data
Figure 4.1: The Task Scheduler console is one method of accessing the underlying
service.
Part II
64
Chapter 4
3
Working with File and Directory Objects
Use these steps to perform a basic search for files. (The example helps
you build a command line by following each of the steps.)
1. Type Dir Filename, where Filename is the name of the file you want
to locate.
(You can optionally add an absolute or relative path to the file
specification.)
2. (Optional) Type /S if the file is in a subdirectory.
3. (Optional) Type /B if you want the file listing displayed without the
usual header information.
4. (Optional) Type /P if you expect to see more than one screen of file
listings and want the Dir command to pause after each screen.
5. (Optional) Type /Q if you want to see the owner of the file.
6. (Optional) Type /R if you want to see the alternate streams in a file
that contains multiple streams.
(Multiple stream files contain data in a sectionalized manner and
are somewhat rare, even in newer systems.)
7. (Optional) Type /W if you want to see just a list of filenames in the
shortest space possible (in tabular format, three to six filenames
across).
8. (Optional) Type /X if you want to see the 8.3 filenames alongside
the longer filenames.
For example, the Program Files directory becomes PROGRA~1 in 8.3
format and My Interesting File.TXT becomes MYINTE~1.TXT. Files
such as Desktop.INI are already in 8.3 format, so they don’t have
an 8.3 equivalent.
9. Press Enter.
The Dir command shows zero or more files using the criteria you
selected. Of course, you only see a file displayed if the file exists.
Find Files in Sorted Order
When you display a directory listing, the files appear in the order in
which the hard drive stores their entries, which may not always be
very helpful when you need to locate a file. To obtain a sorted list of
Manage File Objects
65
NN
/OD: Sort in date/time order with the oldest dates and times first.
NN
/OE: Sort by extension in alphabetic order, from A to Z.
NN
/OG: Place directories first in the sort order.
NN
/ON: Sort by name in alphabetic order, from A to Z.
NN
/OS: Sort by size with smallest files first.
NN
/O–Order: Reverse the order of the sort. For example, /O–D sorts the
files and directories in date/time order with the newest dates and
times first.
In some cases, a single sort won’t provide the information in the
required order. You can combine multiple order switches to obtain the
desired effect. For example, if you want to sort by size first, and then by
name, type Dir /OS /ON and press Enter.
Find Files by Attribute
File attributes describe files in specific ways. For example, the read-only
attribute defines a file that can’t be written—only read. Directories use
a special directory attribute that sets them apart from files. The Dir /
AAttribute Filename command, where Attribute is the attribute you
want to search for, helps you locate specific kinds of files.
Now that you have some idea of how to find files using an attribute,
it’s time to look at the available attributes. The following list describes
each of the standard attributes:
NN
/AA: Locates files that are ready for archiving.
NN
/AD: Locates directory entries.
NN
/AH: Locates hidden files (these are sometimes visible within
Windows Explorer without any special setup).
NN
/AI: Displays files that aren’t indexed for use in Windows Search.
Managing Data
directories and files, use the Dir /OOrder Filename command, where
Order is an ordering switch.
Now that you have some idea of how to use file ordering, it’s time to
look at the methods available for sorting. The following list describes
each of the sort orders:
Part II
66
Chapter 4
NN
3
Working with File and Directory Objects
/AL: Displays file entries that include reparse points. A reparse
point is special data associated with the file that defines it in a
special way using custom data that’s managed by a filter (such as
the properties set on a Word document that you see on the Details
tab of the file’s Properties dialog box). You can read about reparse
points at http://msdn.microsoft.com/library/aa365503.aspx.
NN
/AR: Locates read-only files.
NN
/AS: Locates system files.
NN
/A–Attribute: A prefix used to negate a standard attribute. For
example, if you want to find all entries except for directories, you
type Dir /A–D and press Enter.
The attributes are important for another reason. The Dir command
won’t display hidden files unless you add the /AH switch. Consequently,
you might not even see some files without using an attribute switch. You
can combine switches to obtain specific effects. For example, the hidden
and system switches are commonly used together for operating system
files. If you want to find just the operating system files on a hard drive,
you can type Dir *.* /AH /AS /S and press Enter.
Find Files Using Patterns
Locating files using patterns is much the same as locating directories.
Everything described for directories in this section of the chapter also
works for files. However, you can take file processing to an entirely new
level using batch files (see Part VII of the book for a description of creating batch files at the command line). Listing 4.1 shows an example of
a batch file that parses the PATH environment variable and locates every
LOG file in that listing.
Listing 4.1: Batch File for Processing a List of Directories
@ECHO OFF
@REM Obtain the current path.
Set DirPath=%PATH%
@REM Process each directory entry in turn.
:LOOP
Manage File Objects
67
@REM Keep processing entries until finished, and then exit.
If “%DirPath%”==”“ GoTo EXIT
@REM Obtain the directory listing in the top directory.
For /F “tokens=1* delims=;” %%a in (“%DirPath%”) Do Dir
%%a\*.LOG
@REM Place the remaining directory entries in DirPath.
For /F “tokens=1* delims=;” %%a in (“%DirPath%”) Do Set
DirPath=%%b
@REM Exit the batch file.
:EXIT
@ECHO ON
In this case, the batch file creates a new environment variable named
DirPath that contains the content of the PATH environment variable at
the outset. However, every time the batch file processes a directory, it
removes that directory from DirPath. Eventually, DirPath will equal “”
(nothing) and the batch file exits.
The entries in the PATH environment variable are separated using semicolons (;), so it’s possible to use the For command to parse (separate)
the individual entries. You’ll discover more about the For command in
Chapter 21, but the first For statement essentially tells the system to grab
the first directory entry and perform a Dir *.LOG command with it. The
second For statement takes everything but the first directory entry and
places it in DirPath (making DirPath one directory entry shorter).
The GoTo LOOP statement simply tells the batch file to go back up to
the :LOOP label. The batch file checks DirPath for any additional directory entries and processes the next directory entry or exits the batch file.
Figure 4.2 shows typical results (your exact results will vary). The point
of this example is that you can create any level of complexity for locating files on your system. It’s possible to change this batch file to look for
any file type in the path or using any other complex environment variable of your choice.
Managing Data
@REM Process the next entry.
GoTo LOOP
Part II
68
Chapter 4
3
Working with File and Directory Objects
Figure 4.2 : Batch files and pattern searches combined can make it possible to find
any file with ease.
Copy Files
Generally, you perform file copies using Windows Explorer when you
plan to perform the task manually because it’s often less work to do so.
However, file copying is handy within a batch process or a script. The
automated process may work with file locally, but then you need to copy
it to a networked or other shared location.
The following steps define what you need to consider when using the
Copy command. (The example helps you build a command line by following each of the steps.)
1. Type Copy SourceFile DestinationFile where SourceFile is the
original filename plus the absolute or relative path as needed and
DestinationFile is the target filename plus the absolute or relative
path of the destination.
2. Type /V to ensure that the copy process is verified.
Manage File Objects
69
Otherwise, you won’t know whether the destination has a good
copy of the file.
3. (Optional) Type /D if the source file is encrypted and you want to
be sure the file is decrypted at the destination.
4. (Optional) Type /Y to suppress overwrite messages.
If you don’t include this command line switch, the batch file could
stop in the middle of a process as it waits for user input, so you
normally do include this command line switch.
5. Press Enter.
Perform Bulk File Transfers
Windows provides several utilities for performing bulk transfers of files.
The most popular of these utilities is XCopy. Of course, you can also use
XCopy to perform a basic file copy. XCopy is a relatively complex command line utility—type XCopy /? and press Enter to see a full list of command line options.
The following steps define what you need to consider when creating
an XCopy command line. (The example helps you build a command line
by following each of the steps.)
1. Type XCopy SourceFile DestinationFile where SourceFile is the
original filename plus the absolute or relative path as needed and
DestinationFile is the target filename plus the absolute or relative
path of the destination.
2. Type /V to ensure that the copy process is verified. Otherwise, you
won’t know whether the destination has a good copy of the file.
3. (Optional) Type /M to copy only files that have the archive bit set.
You can use this option to perform a simple type of backup. Copying the file resets the archive bit. (Use the /A command line switch
if you want to leave the archive bit unchanged.)
4. (Optional) Type /D:m-d-y, where m is the month, d is the day, and
y is the year to copy only the files that were created after the speci-
fied date.
5. (Optional) Type /S to copy all of the files in subdirectories as well
as those in the source directory.
Managing Data
The Copy command performs the copying process and provides
notification of success or errors.
Part II
70
Chapter 4
3
Working with File and Directory Objects
This command line switch preserves the directory structure to create a perfect copy of complex directory setups. (If you want to also
copy empty subdirectories, use the /E command line switch.)
6. (Optional) Type /C to continue copying files, even if an error occurs.
This command line switch helps you overcome the Windows
Explorer limitation where the copy stops immediately after the first
error.
7. (Optional) Type /Q if you want to hide the names of the files as
XCopy copies them.
(Use the /F command line switch if you want to display the full
path for each copied file instead of just the filename.)
8. (Optional) Type /G to copy encrypted files to a destination that
doesn’t support encryption.
9. (Optional) Type /H to copy hidden and system files from the source
directory to the target.
10. (Optional) Type /R to overwrite read-only files in the target direc-
tory. Type /K if you want to preserve the attributes of the source
files as you copy them to the target directory (normally, XCopy
resets the read-only attribute).
11. (Optional) Type /O to copy files with full ownership and Access
Control List (ACL) security information intact.
(If you also want to copy the audit settings, use the /X command
line switch instead.)
12. (Optional) Type /Y to suppress overwrite messages.
If you don’t include this command line switch, the batch file could
stop in the middle of a process as it waits for user input, so you
normally do include this command line switch.
13. Press Enter.
XCopy copies the files from the source directory to the target.
Remove Files
To delete files you no longer need from the hard drive, use the Del
Filename or Erase Filename command, where Filename is the name (and
optionally the path) of the file you want to remove. Unlike deleting files
Manage File Objects
71
in Windows, this form of file deletion is permanent unless you use a file
recovery program—the file doesn’t go to the Recycle Bin. For example,
to remove a file named MyTrashFile.TXT, you’d type Del MyTrashFile.
TXT and press Enter.
Moving a file performs two operations. First, the file is copied from the
current directory to the target directory. Second, the file is deleted from
the current directory. The result is that a single command moves the file
from current directory to the target directory. To move a file, use the
Move Filename Target command, where Filename is the path and name
of the file you want to move and Target is the path and name of the file
in its new location. For example, to move Temp.TXT from the current
directory to C:\Temp\Temp.TXT, you’d type Move Temp.TXT C:\Temp and
press Enter. Unless you plan to rename the file, as well as move it, you
only need to supply the target directory.
Rename a File
To rename a file, use the Ren OldName NewName command, where OldName
is the current name of the file and NewName is the new name of the file.
For example, if you wanted to rename Temp.TXT to NewName.TXT, you’d
type Ren Temp.TXT NewName.TXT and press Enter.
Set File Attributes
Special file and directory attributes control how the system views these
resources and what you can do with them. To set file attributes, use the
Set AttributeSet Target command, where AttributeSet is one or more
attributes and Target is the file or directory that will receive the attribute change. To add an attribute, you precede the attribute letter with
a plus sign (+). Likewise, to remove an attribute, you precede the attribute letter with a minus sign (–). For example, if you wanted to remove
the system attribute from Temp.TXT, you’d type Attrib –S Temp.TXT and
press Enter. Here’s a list of the attributes you can use with the Attrib
command.
NN
R: Read-only file attribute
NN
A: Archive file attribute
Managing Data
Move Files
Part II
72
Chapter 4
3
Working with File and Directory Objects
NN
S: System file attribute
NN
H: Hidden file attribute
NN
I: Don’t index content file attribute
Work with File Associations and Types
Strictly speaking, you don’t need to know anything about file associations or file types to work with files from the command prompt.
However, Windows does need to know this information when working
with files in the GUI. Whenever a user double-clicks a file, Windows
looks up the file association based on the file extension, locates the file
type information, and then executes an application to load the file based
on what it finds. Consequently, knowing something about the file associations and types on your system is important, but it isn’t something
that you’ll use from the command prompt.
Windows provides two commands for working with file associations
and types. You use the Assoc command to determine and set the file associations. The file association connects a specific file type with an extension. The FType command defines the file type information. For example,
you can specify what happens when a particular file type receives a
request to open a file. The file types all rely on verbs, action words, to
define specific tasks. The most common of these verbs are open and print,
but depending on the file type, you might find many others.
The Assoc and the FType commands work together to show the relationships between file extensions and file types, and to allow you to
modify these relationships. For example, an administrator could create a batch file to set up a user machine to use specific applications to
handle certain kinds of files. The following sections describe these two
commands.
Determine File Associations
To determine a file association, use the Assoc FileExtension command, where FileExtension is the extension you want to check. The
FileExtension must include the period. For example, to check the file
association for a TXT file, you type Assoc .TXT and press Enter.
Work with File Associations and Types
73
Create File Associations
To create a new file association, use the Assoc FileExtension=FileType
command, where FileType is the kind of file you want to associate with
the extension. The FileType must exist within the registry (create it if
necessary using the FType command). Always place an equals sign (=)
between the file extension and type. For example, to associate the .TXT
extension with the txtfile type, you’d type Assoc .TXT=txtfile and
press Enter at the command line.
To determine a file type, use the FType FileType command, where
FileType is the kind of file you want to view. A FileType always includes
the file type name and the associated action. For example, if you type
FType txtfile at the command prompt and press Enter, the FType command responds with txtfile=%SystemRoot%\system32\NOTEPAD.EXE %1 on
a system using the default setup. In this case, txtfile is the file type. The
action appears after the equals sign. The %SystemRoot% environment variable points to the Windows directory on your machine. The System32
directory contains many of the executable files including both EXEs
and DLLs. The application that Windows starts to load is a text file in
Notepad. The %1 after Notepad is a placeholder for the file. You can
include as many placeholders as required by the application. The action
can also include any command line switches that the application requires
to handle the file type.
NOTE The FType command can display the open verb action
or set the action for this verb for any file type on your system.
You can also use it to create new file types as needed to express
a specific file requirement. The FType command only works with
the open verb, not any of the other verbs (such as print) that the
file type might contain. Even so, this command is invaluable in
setting up a system quickly.
Create File Types
To create a new file type, use the FType FileType=OpenCommandString
command, where OpenCommandString is the location of the executable
and parameters required to open a file type.
Managing Data
Determine File Types
Part II
74
Chapter 4
3
Working with File and Directory Objects
Now that you understand how to create a file type, let’s build one.
Use the following procedure to create a new file type:
1. Type FType, followed by the file type name, such as txtfile.
2. Type = to begin the open verb command line string.
3. Type a path to the command.
Whenever possible, use an expansion variable such as %SystemRoot% that contains only one path entry, such as C:\Windows, as the
starting point to ensure the command string works across machines. Add as much path information as needed to point directly
to the application.
4. Type the application name, including extension, such as Notepad.EXE.
If the application opens using a host, such as RunDLL32.EXE, supply
the host application name first, the host parameters, and then the
application name, and parameters as required by the host application. Remember to consider security requirements, which may
mean using RunAs.EXE as the starting application, rather than starting the application directly.
5. Type %1, which is always the full name and path of the file as sup-
plied by Windows.
Windows supplies only one variable input argument.
6. Type any required application command line switches.
7. Press Enter.
FType creates the new file type for you. Remember that creating a
file type doesn’t provide an association between the file type and
the file extension. Use the Assoc command to perform this task.
Make Data Links
Data links create links between an existing file or directory and another
location. The data link makes it appear as if the data is available from the
linked location, when it physically exists in another location. The main
purpose for data links is for compatibility. A directory or file might have
had another name at one time, but now it has a new name, so the data
link makes older programs think that the old file still exists. Data links
also make it possible for a group to share a single file or to create other
Make Data Links
75
kinds of sharing situations. For example, you might want to make it possible for a group of people to view a file without being able to change
it—the data link can have read-only rights from a shared folder, while the
actual file retains read/write privileges from the original folder.
Hard links make it possible to create multiple directory entries for a
single file. You could use this feature for creating an entry for a shared file
in each user’s My Documents folder. Every user would see the same information (say a list of contacts) and it would appear that the information
is in their folder, but the file itself could exist in another location. A hard
link is limited to a single volume. For example, you can’t create a hard
link between C:\MyData.TXT and Z:\MyData.TXT, but you can create a hard
link between C:\MyData\MyData.TXT and C :\AnotherLocation\MyData.TXT.
There’s no requirement for the names of the hard links to be the same. For
example, you can create a hard link between ABC.TXT and XYZ.TXT.
To create a simple hard link, use the FSUtil Hardlink Create NewLink
OriginalFile command, where NewLink is the path and filename of the
new directory entry you want to create and OriginalFile is the path and
filename of the original file. For example, if you want to create a hard
link named HardLink.TXT to Temp.TXT, then you’d type FSUtil Hardlink
Create HardLink.TXT Temp.TXT and press Enter.
View Simple Hard Links
It pays to know where hard links appear on the hard drive. To view the
list of hard links associated with a particular file, use the FSUtil Hardlink
List Filename command, where Filename is the name of the file that you
suspect has a hard link. If the file doesn’t have any hard links associated
with it, the command executes without outputting any information. For
example, if you wanted to see the hard links associated with Temp.TXT,
you’d type FSUtil Hardlink List Temp.TXT and press Enter.
Delete Simple Hard Links
When you finish using a hard link, you should delete it from the hard
drive. You can remove hard links in any order. To remove a hard link,
use the Del Filename or Erase Filename command, where Filename is the
name of the hard link you want to remove. Unlike a standard file delete,
the file content remains accessible as long as at least one directory entry
Managing Data
Create Simple Hard Links
Part II
76
Chapter 4
3
Working with File and Directory Objects
is associated with the file. For example, to remove a hard link named
Hardlink.TXT, you’d type Del Hardlink.TXT and press Enter.
Create Hard Links Using the New Technique
The MKLink utility helps you create symbolic or hard links. You use
these links to make it appear that the link is actually part of the system. Unlike the FSUtil utility, you can’t use MKLink to view symbolic or
hard links, or junctions.
NOTE Junctions, another type of link, provide a connection
between a nonexistent directory and an existing directory. For
example, Windows Server 2008 uses a junction to provide support for the Documents and Settings folder that used to appear in
Windows. The real directory is now the Users folder.
To create a hard link using the MKLink utility, use the MKLink /H
NewLink OriginalFile command, where NewLink is the path and filename
of the new directory entry you want to create and OriginalFile is the
path and filename of the original file. For example, if you want to create
a hard link named HardLink.TXT to Temp.TXT, then you’d type MKLink /H
HardLink.TXT Temp.TXT and press Enter.
Create Symbolic Links
To create a symbolic link between two files, use the MKLink NewLink
Target command where NewLink is the path of the new link and Target
is the path to the original file. For example, if you wanted to create a
symbolic link named SymLink.TXT to Temp.TXT, then you’d type MKLink
SymLink.TXT Temp.TXT and press Enter.
Working with directories is a little different from files. To create a
directory symbolic link on the hard drive, use the MKLink /D NewLink
Target command, where Target is the path to the original directory. For
example, if you wanted to create a symbolic directory link named SymDir
to SubDir1, then you’d type MKLink /D SymDir SubDir1 and press Enter.
Unlike hard links, symbolic links are exceptionally easy to see in
the directory listing. The Dir command shows symbolic file links as
<SYMLINK>, with the name of the linked file in square brackets after the
link name, such as SymLink.TXT [Temp.TXT]. Directory symbolic links
are similar—the directory entry shows as <SYMLINKD> (rather than <DIR>)
Make Data Links
77
with the name of the linked directory in square brackets after the link
name, such as SymDir [SubDir1].
Symbolic links are the most flexible type of link. For example, you
can create both absolute and relative symbolic links. Symbolic links can
also include complex components such as junctions or mounted folders.
You can learn more about symbolic links at http://msdn.microsoft.com/
library/aa365680.aspx.
Junctions are a kind of soft link. They work much like hard links do,
except that you have a little more freedom when you work with them.
For example, links can appear on different volumes. The only requirement is that junctions must reference resources on the same computer,
so you can’t use a junction to create a link to a resource on another
machine.
To create a junction between two resources, use the MKLink /J
NewLink Target command, where NewLink is the path of the new link
and Target is the path of the file or directory for which you want to create the link. For example, if you wanted to create a junction between
JuncDir and SubDir1, you’d type MKLink /J JuncDir SubDir1 and press
Enter. Likewise, to create a junction between JuncLink.TXT and Temp.
TXT, you’d type MKLink /J JuncLink.TXT Temp.TXT and press Enter.
Like symbolic links, junctions appear differently from standard files
and directories in the directory listing provided by the Dir command.
You see <JUNCTION> for either files or directories. In addition, the entry
shows the name of the linked file or directory in square brackets after
the link name, such as JuncDir [C:\MyDir\SubDir1] or JuncLink.TXT
[C:\MyDir\Temp.TXT]. Notice that a junction entry always includes the
full path to the linked file or directory.
Managing Data
Create Junctions
Part II
5
Administering File and
Directory Content
In this chapter, you will learn to:
33View Application Paths (Page 80)
n
n
Set Application Paths (Page 80)
33Find Simple Strings (Page 81)
Locate Information in Files (Pages 81-83)
Managing Data
Execute Applications Anywhere (Pages 80-81)
n
n
Find Complex Strings (Page 82)
n
Display Files Containing Strings (Page 82)
n
Perform Case Insensitive Searches (Page 8 3)
33
Monitor the File System with the FSUtil
Command (Pages 83-91)
n
Control File System Behavior (Page 8 3)
n
Manage the Volume Dirty Bit (Page 86)
n
Obtain the File System Information Using FSInfo (Page 87)
n
Manage Quotas (Page 8 8)
n
Repair File System Errors (Page 9 0)
33Display a Data File on Screen (Page 92)
Display Data Files (Pages 92-97)
n
n
Employ Data Redirection (Page 92)
n
Display Data One Page at a Time (Page 95)
Part II
80
Chapter 5
3
Administering File and Directory Content
C
hapter 4 discusses the file and directory structure—the physical
presence of storage on the hard drive and its hierarchical organization. This chapter goes a step further by describing the content of the
storage, which isn’t always data—it can also be other files, directories,
executable code, settings, and a wealth of other content types.
It’s important to separate structure from content as you administer the
hard drives and other storage devices on a system. Structure ensures the
security of the content. It also makes the content easier to find and facilitates group activities. A good structure makes it possible to manipulate
content with greater ease and create new content as needed.
Execute Applications Anywhere
When working in Windows, you rely on the Start menu shortcuts to
start applications. However, at the command prompt, you must tell
the command processor where to locate applications in most cases.
(Both Windows and the command line share the ability to use file
associations to start applications). Every time you request an application, the command processor begins by looking for the application in
the current directory. When it doesn’t find the application in the current directory, it reviews the content of the PATH environment variable
and looks in every directory it finds listed there for the application.
Consequently, it’s important to know how to manage the PATH environment variable.
View Application Paths
Before you add any new application paths, you should view the current PATH environment variable to ensure it requires the addition. To
see the current path, simply type Path and press Enter. However, if
you’re working within a batch file or script, you can type Echo %Path%
and press Enter instead to see the path. The PATH environment variable
consists of a series of directory entries, such as C:\Windows, separated
by semicolons.
Set Application Paths
The positioning of a directory entry in the PATH environment variable
is important. The command processor begins at the front of the list and
continues until the last entry when looking for applications. The search
through directories that don’t contain the requested application can
become time consuming. Therefore, you want to place the directories
you use most often at the front of the list and those that are used least
often at the back of the list. In addition, you want to periodically remove
entries that aren’t required from the list.
To add a new directory to the beginning of the list, type
Path=DirectoryPath;%Path% and press Enter. DirectoryPath is the full
path, including drive letter, to the directory you want to add. To add
a new directory to the end of the list, type Path=%Path%DirectoryPath;
and press Enter. Make sure you watch the PATH environment variable for
potentially problematic entries. The PATH environment variable should
always end with a semicolon. If you don’t see one, make sure to add a
semicolon to the command like this, Path=%Path%;DirectoryPath;.
Locate Information in Files
Administrators normally look for different kinds of information from
other users. Even though the information appears in files, they’re often
files that Windows Search doesn’t support. For example, an administrator might try to find executable files with a certain vendor name
or phrase in them, which wouldn’t be indexed by Windows Search.
Sometimes, searching from the command line simply returns better
results. The following sections describe some of the ways that you can
use to search through files at the command line.
Find Simple Strings
Use the Find utility when your search needs are simple and you want
the fastest possible response. To use the Find utility, use the Find
“Search String” FileSpecification command, where “Search String”
is a string that you want to find (always place the string in double
quotes) and FileSpecification is the name of the file you want to
search, such as *.TXT (you can also search single files, of course). If
you want to perform a case insensitive search, add the /I command
line switch. The output shows the name of each file with a matching
string and the lines within the file that contain the string. If you want
only a list of filenames and the number of hits within each file, use the
/C command line switch.
81
Managing Data
Locate Information in Files
Part II
82
Chapter 5
3
Administering File and Directory Content
Find Complex Strings
The Find utility is limited to simple searches where the string is
straightforward. If you want to perform a complex search, you need
the FindStr utility, which can perform standard, case insensitive,
wildcard, and regular expression searches. For example, to find TXT
files that have words that begin with H and end with o, you can type
FindStr “H*o” *.TXT and press Enter. In this case, the asterisk (*) acts
as a wildcard character. Likewise, if you wanted to find TXT files that
contain the words Hello or World (or both), you can type FindStr
“Hello World” *.TXT and press Enter. If the file must contain both
words as a discrete string, then you use the /C command line switch by
typing FindStr /C:”Hello World” *.TXT and pressing Enter.
Regular expressions are an impressive FindStr feature. For example,
if you want to find TXT files that contain Hello at the beginning of
the line and World at the end of the line, you’d type FindStr “^Hello
$World” *.TXT and press Enter. The caret (^) indicates that Hello must
appear at the beginning of the line and the dollar sign ($) indicates that
World must appear at the end of the line. As with many utilities, type
FindStr /? and press Enter to obtain a full list of features.
Display Files Containing Strings
Normally, FindStr displays the lines within the file that contain the
text. If you want only a list of filenames (especially important when the
strings gain in complexity) use the /M command line switch. For example, if you type FindStr /M “Hello World” *.TXT and press Enter, you see
just a list of filenames that contain either Hello or World.
Unlike the Find utility, you can also use FindStr to search a directory tree. Simply add the /S command line switch to search all of the
child directories of the directory that you specify. When you combine this
feature with redirection, you can create unique file listings for future reference. For example, to find all of the EXE files on a hard drive that contain
a Microsoft copyright and place that list in a text file for future reference,
type FindStr /M /S “Microsoft” *.EXE > MicrosoftEXE.TXT and press
Enter. The resulting listing does come in handy when you need to find the
location of a specific executable later. The same technique works for other
copyrighted files. You may want to locate all of the files from a specific
vendor in order to completely remove a stubborn application from a hard
drive. This technique is a good first step in the right direction.
Monitor the File System with the FSUtil Command
83
Perform Case Insensitive Searches
Monitor the File System with
the FSUtil Command
The File System Utility (FSUtil) is one of the more important utilities to
know about when administering a system. This single utility can perform
a host of tasks on any drive. You’ll find yourself using it relatively often.
In fact, you’ve already seen one use of the FSUtil in the “Make Data
Links” section of Chapter 4. The following sections provide a description of how to use basic FSUtil features. To see a complete list of FSUtil
features, type FSUtil and press Enter. Display help for a particular command by using the FSUtil Command /?, where Command is the name of the
command you want to see, such as Volume.
Control File System Behavior
The FSUtil Behavior command controls how the file system works. For
example, you can modify the use of the older DOS 8-character filename,
with a 3-character file extension. Each setting acts as an on/off switch
for a particular file system behavior. The following sections tell how to
query and set common behaviors.
Control Extended Character Use
The AllowExtChar setting determines whether you can use extended
characters, including diacritic characters used for languages other than
English, in the short filenames on New Technology File System (NTFS)
volumes. The default configuration doesn’t provide a value for this
option. Setting the value to 1, or true, allows you to use the extended
Managing Data
Many administrative searches are case sensitive. If you perform a
case insensitive search, you may have to wait a very long time for the
search to complete due to all of the permutations of capitalization
found in some types of files. However, there are times where you must
perform a case insensitive search. In this case, use the /I command
line switch. For example, to find all of the TXT files that contain the
phrase hello world, no matter how the phrase is capitalized, you’d type
FindStr /I /C:”hello world” *.TXT and press Enter.
Part II
84
Chapter 5
3
Administering File and Directory Content
character set. To view the current AllowExtChar setting, type FSUtil
Behavior Query AllowExtChar and press Enter. To allow use of extended
characters, type FSUtil Behavior Set AllowExtChar 1 and press Enter.
Check for Errors
The BugcheckOnCorrupt setting tells the system to check for bugs on the
NTFS volumes. (This feature first appeared in Vista and isn’t available
with older versions of Windows.) The system issues a 0x00000024
stop error when it encounters corruptions on the volume. This setting
keeps NTFS from silently deleting files when it encounters corruption—
letting the administrator perform a backup of data before self-healing
takes place. Unfortunately, the BugcheckOnCorrupt setting is disabled
by default. To view the current BugcheckOnCorrupt setting, type FSUtil
Behavior Query BugcheckOnCorrupt and press Enter.
Use these steps to set NTFS to provide the 0x00000024 stop error:
1. Type FSUtil Behavior Set BugcheckOnCorrupt 1 and press Enter.
2. Reboot the computer after you make the settings change or it
won’t take effect.
3. Type FSUtil Repair Set C: 0x10 and press Enter to set the C drive
to use the BugcheckOnCorrupt setting.
4. Repeat step 3 for the other drives you want to protect. Substitute
the appropriate drive letter for other drives.
Configure 8.3 Filename Support
The Disable8dot3 setting determines whether Windows supports older
DOS naming conventions or uses extended filenames exclusively. The
older DOS naming conventions relied on an 8-character filename and
a 3-character file extension. Disabling this support could cause some
applications to fail because the 8.3 naming convention is easier to use
reliably within applications and applications don’t really care that much
about long filenames.
The default value is 0, or false, which means that the older DOS naming convention is available. To view the current Disable8dot3 setting on
a pre-Windows 7 system, type FSUtil Behavior Query Disable8dot3 and
press Enter. To allow use of 8.3 character filenames on pre-Windows 7
systems, type FSUtil Behavior Set Disable8dot3 0 and press Enter.
Monitor the File System with the FSUtil Command
85
NN
0: Short name creation enabled for the entire file system
NN
1: Short name creation disabled for the entire file system
NN
2: Short name creation per volume
NN
3: Short name creation on the system volume only
The use of per-volume settings on Windows 7 changes how you work
with 8.3 names. The default value on a Windows 7 system is 2, which lets
you set 8.3 support for each volume. When working with a Windows 7
machine, type FSUtil Behavior Query Disable8dot3 C: (where C: is the
volume you want to check) and press Enter to see the current 8.3 name
support status. To set an individual volume’s 8.3 name support, type
FSUtil Behavior Set Disable8dot3 C: 0 (where C: is the volume you
want to set) and press Enter. If you want to disable 8.3 name support on
a particular volume, type FSUtil Behavior Set Disable8dot3 C: 1 (where
C: is the volume you want to set) and press Enter.
Configure Compression
The DisableCompression setting configures compression for the affected
file system object. The default value is 0, or false, which means that
compression is available. To view the current DisableCompression
setting, type FSUtil Behavior Query DisableCompression and press
Enter. To allow use of file compression, type FSUtil Behavior Set
DisableCompression 0 and press Enter.
Configure Encryption
The DisableEncryption setting configures encryption for the affected
file system object. The default value is 0, or false, which means that
encryption is available. To view the current DisableEncryption setting, type FSUtil Behavior Query DisableEncryption and press
Enter. To allow use of file compression, type FSUtil Behavior Set
DisableEncryption 0 and press Enter.
Managing Data
Windows 7 adds a new wrinkle to the Disable8dot3 setting that
you need to be careful about. When you type FSUtil Behavior Query
Disable8dot3 and press Enter, you can see any of the following values:
Part II
86
Chapter 5
3
Administering File and Directory Content
Control the Last Access Attribute
The DisableLastAccess setting determines whether Windows changes
the last access time stamp for a directory or file each time you list the
directory contents on an NTFS volume. The default setting doesn’t
provide a value for this option under older versions of Windows
(Windows 7 automatically configures this setting to 1). Setting this
option to 1, or true, will increase disk performance slightly, but
then you’ll lack last access time statistics when working with the
drive. To view the current DisableLastAccess setting, type FSUtil
Behavior Query DisableLastAccess and press Enter. To ensure the
system provides last access time statistics, type FSUtil Behavior Set
DisableLastAccess 0 and press Enter.
Encrypt the Paging File
The EncryptPagingFile setting determines whether the system encrypts
the paging file to ensure third parties can’t obtain information about your
system by reading it. For example, it may be possible to read passwords
as part of the paging file under certain conditions. Using this setting
incurs a significant performance penalty. The default value is 0, or false,
which means that the paging file isn’t encrypted. To view the current
EncryptPagingFile setting, type FSUtil Behavior Query EncryptPagingFile
and press Enter. To keep the system from encrypting the paging file, type
FSUtil Behavior Set EncryptPagingFile 0 and press Enter.
Manage the Volume Dirty Bit
The FSUtil Dirty command checks or sets the dirty bit for a volume.
The system automatically performs an AutoChk (a boot time ChkDsk
equivalent) whenever it detects the dirty bit during startup. The AutoChk
utility looks for drive errors. You can repair drive errors using the
FSUtil Repair command.
Query Dirty Bit Status
The Query command determines whether the specified volume is dirty
(requires a check). To view the current status of a volume, type FSUtil
Dirty Query C: and press Enter (where C: is the volume you want to
check). The output tells whether or not the specified volume is dirty.
Monitor the File System with the FSUtil Command
87
Set the Dirty Bit
The Set command lets you set the dirty bit for the specified volume. You
can use this command when you suspect a volume contains errors and
want to check it during the next boot cycle. To set the dirty bit, type
FSUtil Dirty Query C: and press Enter (where C: is the volume you
want to AutoChk). After you set the dirty bit, you can’t clear it, so setting
the dirty bit always results in a drive check during the next boot cycle.
The FSUtil FSInfo command is one of the more interesting and immediately usable commands. It provides you with statistics regarding the file
system. For example, you can use it to obtain a list of active drives on
the current system. You could redirect this list to a text file for use with
a script or output it to a batch file to perform a task on every attached
drive. The following sections describe this command in more detail.
List the Drives
The Drives command displays the current list of active drives on the
system. To see a list of all current drives (both local and remote), type
FSUtil FSInfo Drives and press Enter.
Get the Drive Type
The Drivetype command displays the drive information for the specified
volume. You must specify a volume letter. The output is a generic term
for the drive type such as Fixed Drive or CD-ROM Drive. For example,
if you type FSUtil FSInfo Drivetype C: and press Enter, the utility will
likely tell you that C: is a fixed drive.
Discover the General Volume Information
The VolumeInfo command displays statistics about the specified volume
including the volume name, volume serial number, maximum component length, and file system name. In addition, the output tells whether
the drive supports case sensitive filenames, Unicode in filenames, filebased compression, disk quotas, sparse files, reparse points, object identifiers, the encrypted file system, and named streams. Finally, you can
determine whether the volume preserves the case of filenames, and if it
Managing Data
Obtain the File System Information Using FSInfo
Part II
88
Chapter 5
3
Administering File and Directory Content
preserves and enforces Access Control Lists (ACLs). For example, if you
type FSUtil FSInfo VolumeInfo C: and press Enter, you see the statistics
for the C drive.
Discover the NTFS Volume Information
The NTFSInfo command displays the low-level statistics about the NTFS
volume. This information includes NTFS version, number of sectors,
total clusters, free clusters, total reserved clusters, bytes per sector, bytes
per cluster, bytes per file record segment, and clusters per file record segment. In addition, you can learn the following MFT statistics: valid data
length, start location (MFT1 and MFT2), zone start, and zone end. For
example, if you type FSUtil FSInfo NTFSInfo C: and press Enter, you see
the NTFS statistics for the C drive.
Get the Drive Statistics
The Statistics command displays a list of the operational statistics for
the specified volume. The statistics include the following user information: UserFileReads, UserFileReadBytes, UserDiskReads, UserFileWrites,
UserFileWriteBytes, and UserDiskWrites. These are all standard counters,
so you can also access them using the Performance console. In addition
to user information, you can obtain metadata, MFT, root file, and log
file statistics. For example, if you type FSUtil FSInfo Statistics C: and
press Enter, you see the drive statistics for the C drive.
Manage Quotas
Quotas help keep resource usage under control on systems with multiple
users. Each user receives a specific amount of disk space to use for personal needs. Every file that has the user as an owner counts against the
total. When the user exceeds their quota, the system informs both the
user and the administrator (using a system of violation notifications).
The following sections describe how to perform quota-related tasks.
Enforce Quotas
The Enforce command enables quota enforcement for the specified
resource. This option doesn’t enable tracking. To configure quotas,
you follow a procedure similar to this one (which configures quotas
Monitor the File System with the FSUtil Command
89
for a volume named C: and sets a quota for user John of 20 GB with a
warning at the 80 percent level):
1. Type FSUtil Quota Track C: and press Enter.
2. Type FSUtil Quota Enforce C: and press Enter.
3. Type FSUtil Quota Modify C: 21474836480 17179869184 John and
press Enter.
The first number, 21474836480 (or 20 GB), is the quota in bytes,
while the second number, 17179869184 (or 16 GB), is the threshold at which the user receives a warning in bytes.
4. Perform step 3 for each of the users you want to configure.
quotas set on the system.
6. Verify that each of the quotas is set correctly.
See Existing Quotas
The Query command displays the query settings for the specified
resource. In addition to the actual quota settings, this command displays
the per user settings. This information includes the user SID, change
time, quota used, quota threshold, and quota limit. For example, if you
type FSUtil Quota Query C: and press Enter, you see the current quota
settings for the C drive.
Track Quotas
The Track command enables quota tracking for the specified resource.
This option doesn’t enable enforcement of any rules you have in place.
For example, if you type FSUtil Quota Track C: and press Enter, you
enable quota tracking for the C drive.
View Quota Violations
The Violations command displays a list of quota violations found in the
event log. If the event log doesn’t have any quota violations, the utility
displays a “No quota violations detected” message. The utility checks
both the system and application logs for both quota threshold and quota
Managing Data
5. Type FSUtil Quota Query C: and press Enter. You see a list of the
Part II
90
Chapter 5
3
Administering File and Directory Content
limit violations. To see a list of quota violations, type FSUtil Quota
Violations and press Enter.
Modify Quotas
The Modify command changes the quota settings for a particular user.
You must supply the drive, threshold, limit, and user name when using
this command. For example, if you want to change the settings for user
John to support a 20 GB quota limit and a 16 GB warning threshold on
drive C, you’d type FSUtil Quota Modify C: 21474836480 17179869184
John and press Enter.
Disable Quotas
The Disable command stops quota tracking and enforcement for the
specified resource. For example, if you type FSUtil Quota Disable C:
and press Enter, you disable quotas for the C drive.
Set the Notification Interval
The FSUtil Behavior QuotaNotify command defines the interval between
disk quota violation checks on an NTFS drive. The disk quota system
ensures that a user doesn’t use more resources than the administrator
allows. The default setting is 3,600 seconds or 1 hour when you enable
the quota system. You can supply any value between 1 second and
4,294,967,295 seconds. Longer intervals enhance system performance,
but could result in more quota violations. To determine the current
interval, type FSUtil Behavior Query QuotaNotify and press Enter. To
change the current setting, type FSUtil Behavior Set QuotaNotify 3600
(where 3600 is an interval in seconds) and press Enter. You must reboot
the system for this change to take effect.
Repair File System Errors
The FSUtil Repair command lets you repair a file system object from
the command line. You use it to place the system object in a known
good state. In some cases, repairing the system object could mean data
loss because the object is broken in such a way that repairing it means
losing the data (perhaps due to a pointer or other problem).
Monitor the File System with the FSUtil Command
91
Query Volume Status
The Query command determines the repair status of the specified volume. The repair status defines what kinds of repairs you can perform
on the volume.
The status includes any of the following values:
0x01 The volume supports general repair (also known as selfhealing).
0x10 (Windows Vista and Above) The volume disables automatic
repairs after it encounters corruption for the first time and provides
a 0x00000024 stop error (see the “Check for Errors” section of this
chapter for details).
To query the status of a drive, type FSUtil Repair Query C: and press
Enter, where C: is the volume you want to check. You’ll see a list of
flags set for the volume.
Managing Data
0x08 The volume warns about potential data loss when performing a repair.
Part II
Set the Volume Flags
The Set command changes the repair status of the specified volume. To
set the repair status, type FSUtil Repair Set C: 1 (self-heals silently),
FSUtil Repair Set C: 9 (self-heals with warnings of data loss), or FSUtil
Repair Set C: 0x10 (warns of corruption and disables self-healing) and
press Enter (where C: is the volume you want to change). The number
supplied with the command (the flag) contains a number that specifies
the repair status. See the “Query Volume Status” section for a list of
acceptable values.
Initiate a Repair
The Initiate command performs a repair of the specified file on the
referenced volume. To use this feature, you must provide the segment
number of the file, which means having a detailed knowledge of the
disk organization. For example, to fix a file having a segment number of
0x001600000000123D on drive C, you’d type FSUtil Repair Initiate
C: 0x001600000000123D and press Enter. Normally, you receive the segment number as output from another repair utility such as ChkDsk.
92
Chapter 5
3
Administering File and Directory Content
Display Data Files
Normally, you rely on special applications to see the content of data
files. However, administrators don’t always have a special application
installed when they need it—they may need to see a file quickly before
a system is up and running. Some types of data are also impromptu
and temporary in nature, which means that you need to see it now and
probably won’t need it later. In either case, the administrator can rely on
a number of techniques to obtain the desired results as described in the
following sections.
Display a Data File on Screen
The Type command is one of the simplest commands you can use. It
attempts to display any file you feed it, including executable files. In fact,
except for some beeping and strange visual effects, it’s quite possible
to scan an executable file using just the Type command. To display any
file using the Type command, use the Type Filename command, where
Filename is the name of any file. For example, to see Temp.TXT, you type
Type Temp.TXT and press Enter. The Type command doesn’t provide any
filtering, so you normally need to combine it with some type of data
redirection (described in the “Employ Data Redirection” section of the
chapter) or the More utility (described in the “Display Data One Page at
a Time” section of the chapter).
Employ Data Redirection
Data redirection is the process of sending data from one command or
utility to another command or utility. You can also redirect command
or utility output to a device (see the “Understanding Command Line
Devices” sidebar in this chapter for details on standard devices) or a file.
Redirection provides the means for sending output to a location other
than the standard output device (the console), obtaining input from a
device other than standard input (the keyboard), and using something
other than the standard error device (usually the console) to report
problems. The command line supports three forms of redirection: input,
output, and pipe. Each requires use of specialized symbols.
Display Data Files
93
Understanding Command Line Devices
You can access a number of devices from the command line.
Some devices accept input, others output, and some accept both.
These devices always reference a physical device of some type.
In some cases, the device isn’t attached to your machine, but it’s
accessible from your machine, such as a network printer. Many
commands and utilities let you use a device in place of a drive letter as an argument. For example, the Copy command lets you use
input from a device to create a file. You can also use a file as output to a device. Here’s the standard list of command line devices.
PRN The default printer. You must configure network printers
to provide a port to support a command line device. The port
appears on the Ports tab of the network printer’s Properties dialog box. Even if your printer can provide bidirectional communication, the PRN device is only capable of output.
Managing Data
CON The system console, which is the combination of keyboard and monitor used to access the computer system. Input
comes from the keyboard and output goes to the monitor.
LPT1 through LPT4 The printer attached to the first through
fourth printer (parallel) ports. The device need not physically
attach to the parallel port; Windows can redirect the output to
the physical device for you. You must configure network printers to provide a port to provide a command line device. The port
appears on the Ports tab of the network printer’s Properties dialog box. Even if your printer can provide bidirectional communication, the LPT devices are only capable of output.
Part II
AUX The auxiliary device; the one serviced by the first serial
port (COM1). It’s usually better to reference COM1 directly for
readability in batch files. The AUX device is a holdover from the
early days of DOS.
NUL The output doesn’t go anywhere. The NUL(L) device is
also known as the bit bucket.
CLOCK$ This device is supposed to access the real-time clock.
In reality, the device normally doesn’t work in modern systems
and Windows makes no effort to provide required redirection.
You should avoid using the CLOCK$ device.
COM1 through COM4 The communication device attached to the
first through fourth serial ports. Although standard outputs for this
port include modems, you can connect printers as well. The serial
port can act as both an input and an output device. You can configure network printers to use a COM port instead of an LPT port
using the Ports tab of the network printer’s Properties dialog box.
94
Chapter 5
3
Administering File and Directory Content
One of the most common forms of redirection is the pipe and it uses
the pipe symbol (|) that appears over the backslash on most keyboards. In
fact, the pipe is much older than the PC and appears in the earliest Unix
operating systems (see the history at http://www.linfo.org/pipes.html
for details). The pipe accomplishes what its name implies; it acts as a pipe
between small applications. You connect the applications using the pipe
and data flows between the applications using the pipe. For example, you
can temporarily connect the Dir command to the Sort command to create
a customized directory output using a command like this:
Dir /A-D | Sort /+13
The resulting command obtains a listing of the current directory
without the directory entries, and sorts them by the time column.
Figure 5.1 shows the results of this command.
Figure 5.1: Combining commands and utilities makes the command prompt
extremely flexible.
Redirection always works with a file or other streaming device. You
never use redirection with another command. The two types of redirection are input and output, with output being the most commonly used.
To output the results of a command such as Dir or Sort to a file, you
use a greater than sign (>) or output redirection pointer. Windows clears
the file if it exists and places the command output in it. However, you
might want to place the results of several commands into a file. In this
case, you use two greater than signs (>>). A double output redirection
Display Data Files
95
pointer always appends the output of a command to the existing file.
Here’s an example of sending the output of the Dir command to a file:
In this case, you’d end up with a file called MyFile.TXT that contains a
list of all of the text files in the current directory.
Input relies on the less than symbol (<) or input redirection pointer.
You can always use a file as input to a command that’s expecting text or
record data. In some cases, you can use file input to generate commands
as well. The point is that a file or other streaming device acts as input.
Although it’s extremely uncommon, you also have access to a double
input redirection pointer (<<). This symbol appends input to previous
input for a command.
The combination of an output redirection pointer and an input redirection pointer can be the same as a pipe. Here’s an example of the two
forms of redirection used together:
Dir /A-D > MyFile.TXT
Sort /+13 < MyFile.TXT
In this case, the output of the Dir command appears in MyFile.TXT.
The second command uses MyFile.TXT as input to the Sort command.
The result is the same as the pipe example shown in Figure 5.1.
Although you can only include one redirection symbol on a command line, you can use as many pipes as needed to accomplish a task.
This means that you can create a series of pipes to connect any number of commands and create some interesting command sequences.
For example, you can combine the Dir, Sort, and More commands as
shown here to provide output where you see one display at a time (see
the “Display Data One Page at a Time” section for details on the More
utility).
Dir /A-D | Sort /+13 | More
Display Data One Page at a Time
In many cases, the output of a command spans more than a single page
on the console. If the output is short enough, you can always scroll forward or backward to see the information. However, the output is often so
long that the display buffer fills and the old information is lost, making
Managing Data
Dir *.TXT > MyFile.TXT
Part II
96
Chapter 5
3
Administering File and Directory Content
it impossible to see the results of the entire command. The More utility
makes it possible to see the output a single screen at a time. All you do is
redirect the output of any command, even help, to the More utility using
the pipe. For example, if you want to redirect the output of the Dir command to the More utility, you type Dir | More and press Enter.
The More utility includes an extended mode that you enable using
the /E command line switch. The extended mode provides additional
functionality to make it easier to work with output files. For example,
you can display a few additional lines to see part of a continuation of
data in a file.
The following list describes the extended mode commands, which
you can type at the More prompt:
P n
Displays the next n lines of the file. Type the P command.
You’ll see a Lines prompt. Type the number of lines to display and
press Enter.
S n
Skips the next n lines of the file (doesn’t display them). Type
the S command. You’ll see a Lines prompt. Type the number of lines
to display and press Enter.
F
Displays the next file in the list. If there’s no next file, the More
utility ends. This action doesn’t necessarily end the previous application in the pipe. Press Ctrl+C to end the previous command (such
as Type) as necessary.
Q
Quits the More utility without displaying any additional data.
This action doesn’t necessarily end the previous application in the
pipe. Press Ctrl+C to end the previous command (such as Type) as
necessary.
=
Shows the number of the current line of text. For example, if the
More utility is currently displaying the 49th line in the file, you’ll
see Line: 49 as part of the More prompt.
?
Shows the list of extended commands.
<space>
Displays the next page of the file.
<enter>
Displays the next line of text in the file.
The More utility provides a simple prompt at the bottom of the command window for entering display commands. You can only move forward in a file, not backward. Whenever you enter a command, the More
prompt extends to request any additional information. Figure 5.2 shows
Display Data Files
97
the More prompt after typing the P command. Notice that the prompt contains the Lines: entry that lets you input the number of lines to display.
Managing Data
Figure 5.2 : Using the More utility in extended mode makes it easy to manipulate the
on-screen display.
Part II
6
Managing the Hard Drive
In this chapter, you will learn to:
33Compress or Uncompress Data and View Compression
n
Status (Pages 101-102)
33Get Volume Information and Manage Labels (Page 103)
Manage the Volume (Pages 102-105)
n
n
Format a Disk or Mount a Volume (Page 103-104)
33Determine File and Directory Status (Page 106)
Maintain the Volume (Pages 106-110)
n
n
Locate Bad Sectors (Page 107)
n
Perform Boot-Time Disk Checks (Page 108)
n
Improve Disk Access Performance (Page 109)
33Start DiskPart (Page 110)
Manage Partitions (Pages 110-120)
n
n
List Objects and See Details (Pages 111-112)
n
Select an Object (Page 113)
n
Rescan a Computer for Objects (Page 114)
n
Create a Partition or Volume (Page 114-116)
n
Clean a Drive (Page 117)
n
Mark a Partition as Active or Inactive (Pages 117-118)
n
Assign or Remove a Drive Letter (Pages 118-119)
n
Extend a Volume (Page 119)
n
Delete an Object (Page 120)
Managing Data
Save Hard Drive Space (Pages 101-102)
Part II
100
Chapter 6
3
Managing the Hard Drive
A
s the primary means of data storage and also the only mechanical
part of consequence in most computers, the hard drive merits special attention on the part of the administrator. The mechanical nature
of current hard drive technology means that it has a higher failure rate
than just about any other part in the system (fans also fail, but let’s face
it—a failed fan is hardly going to cause lost sleep). Over time, administrators have come up with all kinds of methods for mitigating some
of the reliability concerns of hard drives. One of those techniques is to
maintain the hard drive in such a way as to find hard drive errors before
they become a problem.
Because a hard drive is all about storage, it must also be managed
appropriately to ensure that everyone gets their fair share. Given the low
cost of storage today, it might seem as if allocating storage would be the
smallest administrator worry, but even with the low cost, ensuring that
everyone has enough space for their ever-expanding data is a problem
for many administrators.
This chapter focuses on techniques you can use to work with hard
drives at the command prompt. Of course, you’ll need additional
techniques that aren’t found in this book to perform tasks such as
managing your Redundant Array of Inexpensive Disks (RAID). The
techniques in this chapter are more general in nature and will help
you work with just about any hard drive setup to improve both reliability and accessibility.
NOTE Many administrators will falsely assume that "hard
drive" refers just to the spinning disks in a system. However,
the hard drive utilities in this chapter also work with solid
state drives. Of course, you must consider the kind of drive
when using a utility. For example, thumb drives (those that
plug into a USB port) usually use the File Allocation Table
(FAT) file system, rather than the New Technology File System
(NTFS) that Windows typically uses for a spinning hard drive.
As a consequence, you must use the utilities in the same way
that you would with a FAT system when working with a thumb
drive. Removable media also benefits from these utilities. For
example, you can use many of these utilities with your erasable DVD drive. In short, if you have a doubt, at least try the
utility with your newer technology drive to see if the utility
will work.
Save Hard Drive Space
101
Save Hard Drive Space
NOTE Some administrators look only at the most obvious use
of the Compact utility, which is to save space on the hard drive.
However, compressing data on the hard drive can have a useful
side effect, which is to improve hard drive performance. A compressed file (one where the compression is high) requires less
time to read from the hard drive and decompressing it on the fly
requires only a few processing cycles. The biggest performance
boost occurs on large files that compress well. Of course, if the
file doesn’t compress very much, it may still require the same
amount of time to read from the hard drive, but now there’s the
additional overhead of decompressing it. Consequently, in some
cases, file compression can also reduce performance. A good
general rule of thumb is that graphics and other data files compress well and provide a reasonable performance boost when
compressed, while executables tend not to compress well and
will actually cause a performance hit.
Compress Data
It’s possible to compress everything from a single file to a directory to
an entire hard drive using a single command. To compress data, use
the Compact /C Object command where Object is a file or directory. If
you want to compress an entire directory tree, include the /S command
line switch. In some cases, errors will occur when you try to compress
files that aren’t normally compressed, such as system files. To ensure
your batch file or script works as anticipated, use the /I command line
switch, which tells Compact to ignore the error. For example, to compress
the C:\MyDir directory and its subdirectories regardless of errors, you’d
type Compact /C /S /I C:\MyDir\*.* and press Enter.
Managing Data
In the day and age of the cheap hard drive, where almost no one seems
to even compress their hard drive any longer, it seems almost silly to
discuss saving hard drive space. However, the reality for most companies is that users still find ways to fill all of the available space on a server’s drive with seemingly limitless quantities of data of dubious worth.
The Compact utility makes it possible to compress and uncompress data
as needed. Perhaps there’s a temporary space crunch and you want to
compress the largest files to make room.
Part II
102
Chapter 6
3
Managing the Hard Drive
Unlike using the GUI, the Compact utility actually provides you with
useful information as output when you type a command. You see the
compression ratios of each file as the utility compresses them, along with
the overall compression ratio for the entire process. This information
helps you make the decision as to whether compression is a good option
for the directory and its content.
Uncompress Data
At some point, you may decide to uncompress data. For example, you
might not achieve the performance boost that you thought you might
when using file compression. To uncompress data use the Compact /U
Object command, where Object is a file or directory. If you want to
uncompress an entire directory tree, include the /S command line switch.
For example, to uncompress the C:\MyDir directory and its subdirectories, you’d type Compact /U /S C:\MyDir\*.* and press Enter. The output
from this command simply tells you whether the file or directory uncompressed successfully.
View Compression Status
You can set Windows Explorer to display compressed files and directories in a different color from other files and directories. However, you
can’t tell whether or not a file or directory is compressed at the command line without issuing a command. To determine the compressed
status of a file or directory, use the Compact Object command, where
Object is a file or directory. If you want to check the status of subdirectories as well, use the /S command line switch. For example, to check
the status of the C:\MyDir directory and its subdirectories, you’d type
Compact /S C:\MyDir\*.* and press Enter. The output shows the current
compression ratio of files. In addition, you can see whether new files
added to a directory are automatically compressed.
Manage the Volume
Hard drive management is one of the more important administrative
tasks and you can perform most (if not all) of these tasks at the command
line. Management means everything from making the hard drive more
Manage the Volume
103
accessible to ensuring that the data remains safe (both secure and reliably
accessible). Of course, you have to maintain security and reliability without overly encumbering the hard drive—making it perform poorly. The
following sections describe many of the hard drive management tasks you
can perform at the command line—from the simple to the complex.
The Vol command is quite simple. To use it, simply type Vol and press
Enter. The output shows the volume name and serial number. The volume name (or label) can be blank, but the serial number always has a
value associated with it.
Someone can easily tamper with the volume name, but the serial
number remains the same until the next time you format the drive
unless you write a special application to make the change (see the
article at www.codeproject.com/KB/system/change_drive_sn.aspx as an
example). Although the serial number isn’t guaranteed to be unique
(it’s normally based on the date you format the drive), you can use it
as a means of validating precisely which drive you’re working with in
any given organization, assuming no one goes around and purposely
changes the serial numbers.
Manage Volume Labels
The Label command makes it easy to give a volume a meaningful name.
For example, if accounting has its own hard drive, you might want to
label that hard drive Accounting. To use the Label command, type Label
followed by the name you want to assign, and then press Enter. For
example, if you want to make drive D the Accounting drive, then you’d
type Label D: Accounting and press Enter. You can change the label
of a hard drive at any time. In addition, if you use the Label command
without supplying a volume name, the command erases the current
label from the hard drive. You can also use the Label command to label
mount points by specifying the /M command line switch.
Format a Disk
Formatting a disk prepares it for use by setting down control tracks that
the drive uses to locate, read, and write data. You can use the Format
utility with any permanent media such as a hard drive. The following
sections describe basic use of the Format utility.
Managing Data
Get Volume Information
Part II
104
Chapter 6
3
Managing the Hard Drive
Perform a Quick Format
Many drives are so large now that performing a full format can require
hours. Drives are now tested during the manufacturing process and
have become more reliable as well, making a full format unnecessary
in many cases. A quick format makes the drive ready for use in just a
few seconds. To perform a quick format, use the Format /Q DriveLetter
command, where DriveLetter is the letter of the drive you want to
format. For example, if you want to format the C drive, you type
Format /Q C: and press Enter.
Create Drives with Specific Characteristics
The Format utility can create drives with a vast array of characteristics that
can do everything from improve compatibility with other systems, increase
storage potential, and enhance security. To improve compatibility, you
can use the /FS:FileSystem command line switch, which determines the
file system used by Format. The current version of the utility supports
FAT, FAT32, exFAT, NTFS, and UDF (Universal Disk Format). When
working with UDF, you can also specify a UDF version number of 1.02,
1.50, 2.00, 2.01, or 2.50 using the /R:Revision command line switch.
Storage potential depends on how allocation units are used. For example, if you store a 1 byte file in a 4,096 byte allocation unit, the hard drive
has 4,095 bytes of wasted space. Tuning the allocation size to meet the
storage demands of the data on the hard drive can improve storage capacity. To tune the allocation units, you use the /A:Size command line switch
with the appropriate allocation unit size. For example, NTFS supports allocation unit sizes of 512, 1,024, 2,048, 4,096, 8,192, 16K, 32K, and 64K.
The /P:Passes command line switch is actually a security feature. This
command line switch writes zeros to every sector on the hard drive for the
number of passes you specify. The more passes you use, the less likely it is
that anyone can ever retrieve any of the information on the hard drive. Of
course, using this command line switch also imposes a performance penalty because you have to wait for the drive to write all those zeros.
Mount a Volume
Simply having a volume available doesn’t mean you can use it. In order
to use a volume, you must mount it. At one time, mounting was a physical process in which the administrator would physically place a volume
on the spindle for reading. Now it’s a logical process—mounting the
Manage the Volume
105
drive simply means to make it available for use. Generally, Windows
automatically mounts all of the volumes on a system during startup. To
disable automatic volume mounting, type MountVol /N and press Enter.
When you want to reenable automatic mounting, type MountVol /E and
press Enter. You dismount the volume to perform certain forms of maintenance on it and then mount it when you’re finished.
Many administrators associate a volume with a drive letter. However,
this isn’t the case when it comes to MountVol. What you really need is the
volume’s Globally Unique Identifier (GUID) as it appears in the registry. In order to get this number, you type MountVol and press Enter. The
beginning of the output shows help information for MountVol, but what
you need is at the end of the output, which shows a list of registry volume entries. These entries appear as:
\\?\Volume{b28876a5-2fd6-11df-9582-806e6f6e6963}\
If the volume is mounted, then you also see a drive letter after the
volume listing. Otherwise, you see a message of:
*** NO MOUNT POINTS ***
Add a Volume
To add (mount) a new volume, you create an association between a
drive letter and a volume entry. For example, let’s say that you have a
volume with a volume entry of \\?\Volume{b28876a5-2fd6-11df-9582806e6f6e6963}\ and you want to associate it with F:. In this case, you
type MountVol F: \\?\Volume{b28876a5-2fd6-11df-9582-806e6f6e6963}\
and press Enter. You won’t see any output when the command is successful. As soon as the drive is mounted, you can begin using it.
Remove a Volume
To remove (dismount) a volume, you remove the association between
the drive letter and the volume entry. This process disassociates the
two and makes the drive inaccessible so that you can perform certain
types of maintenance on it. The /D command line switch dismounts the
volume. For example, if you want to dismount the F drive, you type
MountVol F: /D and press Enter.
Managing Data
List the Volumes
Part II
106
Chapter 6
3
Managing the Hard Drive
Maintain the Volume
The data on a hard drive represents an enormous investment for your
organization. Of course, you’ll perform the usual backups and use technologies such as RAID to guard that investment. However, you can also
perform some standard maintenance tasks that can often tell you that
the hard drive is going to fail long before it actually does. The following
sections describe how to perform volume maintenance.
Determine File and Directory Status
The ChkDsk utility can check entire drives when working with any file
system. However, it can also check directories and even individual files
when working with the FAT file system. To check a file system, use
the ChkDsk Volume command, where Volume is a drive letter followed
by a colon, such as C:. If you add the /V command line switch, you see
additional information that depends on the kind of volume that you’re
checking. An NTFS volume displays additional cleanup information. For
example, to perform a full check of the E drive, you’d type ChkDsk /V E:
and press Enter. Figure 6.1 shows typical output.
Figure 6.1: ChkDsk provides you with detailed information about file and directory status.
Maintain the Volume
107
If this volume had any bad sectors, missing data, incorrect file
entries, or any other errors, they would appear in the output messages.
In this case, the volume is error free, so you don’t see anything other
than the status messages of the utility so that you know what task it
has performed. The most important line appears about two-thirds
down: “Windows has checked the file system and found no problems.”
Using ChkDsk in read-only mode as described in the “Determine File
and Directory Status” provides status information about a volume, but
it doesn’t fix anything. In order to fix something, you must choose the
level of repair you want to perform. The following list tells you about
the command line switches used to repair a volume in order of depth.
NN
NN
/F: Repairs the basic errors encountered on a volume.
/R: Locates any bad sectors on the volume and recovers information from them whenever possible. This option also implies the /F
level of repair.
NN
/B: (NTFS-only) Reevaluates the bad sectors on the volume and
restores them if possible. This option also implies both the /F and
/R levels of repair.
Some volumes require that you dismount them first. If you try to
run ChkDsk for repairs and find that the utility displays an error message
about not being able to use read/write mode, use the /X command line
switch to dismount the volume. Using the /X command line switch automatically invokes the /F command line switch as well.
It’s not advisable to use the ChkDsk utility in read/write mode directly.
Instead, you should follow a careful process of diagnosis and repair. For
example, let’s say you think there’s a problem with the E volume, which
relies on NTFS formatting. You would follow these steps to repair it:
1. Type C: and press Enter to set the drive to the C volume.
2. Type MD Temp and press Enter to create a temporary directory you
can use to store information about the repair.
3. Type ChkDsk /V E: > C:\Temp\Error.TXT and press Enter to deter-
mine whether the volume has errors.
Redirecting the output to Error.TXT will let you see errors that will
potentially scroll off the screen otherwise. Using a directory on a
different volume will minimize potential disruption of files on the
Managing Data
Locate Bad Sectors
Part II
108
Chapter 6
3
Managing the Hard Drive
volume with errors. If the volume doesn’t have errors, exit this
procedure—your volume is safe to use.
4. Perform a backup of the volume.
Make sure you back up the entire volume file by file, rather than
making a mirror image of the volume. Creating a mirror image
will simply move the error from the volume to the backup. You
have to assume that the backup will lack some files currently
found on the volume, that you may see errors during the backup
process, and that some data loss will occur. The backup simply
helps you to save as much data as possible before the repair process occurs.
5. Determine a level of repair suitable for the drive.
If the initial check simply shows a few file errors, you can use the
/F command line switch. Otherwise, you should use either the /R
or /B command line switch (using /B on NTFS volumes is preferred).
6. Type ChkDsk /F E: > C:\Temp\Repairs.TXT or ChkDsk /B E: > C:\
Temp\Repairs.TXT and press Enter.
This step starts the repair process. Redirecting the output to
Repairs.TXT will let you see all of the changes the ChkDsk makes
to the volume.
7. Perform step 6 until ChkDsk reports that all of the errors are repaired.
8. Depending on the repair results, you can attempt to restore miss-
ing or damaged files from earlier backups or the backup you make
in step 4.
Perform Boot-Time Disk Checks
Some volumes aren’t easily checked with ChkDsk. For example, you can’t
check the boot volume using ChkDsk because the system requires the
boot volume for services and can’t dismount it. The best you can hope
to achieve is to obtain status information as described in the “Determine
File and Directory Status” section of the chapter. In these situations, you
can use the ChkNTFS utility to perform a boot-time check of the drive.
To determine whether a drive is already scheduled for a check, use the
ChkNTFS Volume command, where Volume is the volume letter followed
by a colon, such as C:. The ChkNTFS utility reports whether the volume is
dirty (requires a boot-time check) or not.
Maintain the Volume
109
To schedule a volume for a boot-time check, use the ChkNTFS /C
Volume command. This command sets the volume’s dirty bit. For example, if you want to check the E volume, you’d type ChkNTFS /C E: and
press Enter. The next time you boot the system ChkNTFS will automatically run and perform a check of the drive before the operating system
has started (ensuring you get the most accurate results).
Disk fragmentation is a terrible problem, even on today’s hard drives,
because it robs the system of performance in the one area where performance is already poor. Your system already spends considerable time
waiting for the hard drive to fetch data. When the hard drive is fragmented, the fetch process takes even longer. In fact, Microsoft recognizes
disk fragmentation as a serious problem and configures Windows 7 to
automatically schedule disk defragmentation on a regular basis. If your
organization turns off this feature, you need to defragment the drive
manually at a time when the process won’t affect user productivity.
Analyze the Disk
Before you defragment all of the drives on a system, it’s best to know
whether the drives are actually fragmented. To determine which drives
are fragmented, type Defrag /A /C /H and press Enter. The /A command
line switch starts the analysis process. The /C command line switch
performs the task on all of the drives in the system. The /H command
line switch tells Defrag to operate at normal priority so that the analysis
completes in a timely manner (the default priority is low). Otherwise,
you’ll wait a very long time for the results.
Figure 6.2 : To save time, analyze the drives on a system before you defragment them.
Managing Data
Improve Disk Access Performance
Part II
110
Chapter 6
3
Managing the Hard Drive
When the analysis is done, you see a report similar to the one shown in
Figure 6.2 that tells you the status of each drive. In this case, the drive is
0 percent fragmented, so you don’t need to defragment it. Generally, levels of fragmentation 2 percent or less won’t require action on your part.
Defragment the Disk
After a drive becomes fragmented, you need to defragment it to ensure
that it continues to perform acceptably. Let’s say that the D and E drives
are both fragmented. In this case, you’d type Defrag D: E: /M /H and
press Enter. The Defrag utility accepts all of the volumes that require
defragmentation as part of a single command. The /M command line
switch tells Defrag to perform the task on all volumes in parallel, which
makes far better use of your system’s resources that performing the task
on one disk at a time. The /H command line switch performs the task at
normal priority to ensure that the task completes within a reasonable
amount of time. If you want to perform free space consolidation (making larger spaces for new files), simply add the /X command line switch.
Manage Partitions
Managing partitions isn’t something you do very often on a computer system. For one thing, changing the partitions after configuring the computer
could have undesired results. However, every administrator has to work
with partitions at some point during the configuration process and during
updates. The DiskPart utility is an essential tool for managing partitions,
especially during those times when the usual GUI tools simply aren’t available. The following sections describe some common DiskPart tasks.
Start DiskPart
You can use DiskPart with direct command line input or supply a text
file that contains a script of actions for DiskPart to perform. The text file
will simply contain one command per line. You’ll usually have a better
experience with DiskPart if you create a script to perform the required
tasks. Using a script reduces the potential for error. Use the DiskPart
/s ScriptName command to start a script, where ScriptName is the name
of the text file that contains the commands. For example, to use the
MyScript.TXT file, you’d type DiskPart /s MyScript.TXT and press Enter.
Manage Partitions
111
It’s also possible to type commands manually. To start the command
line version of DiskPart, type DiskPart and press Enter. You’ll see the
DISKPART> prompt where you enter specific subcommands. Because
DiskPart is so complex, it comes with its own help system. Simply type
Help and press Enter to see a full list of DiskPart subcommands.
Before you can interact with the disks on a system, you need to know
about them. To see the physical disks (not to be confused with volumes),
type List Disk and press Enter. You’ll see a list of the disks installed and
detected for the current machine. The output includes the disk number,
disk status, total disk size, amount of free space, whether the disk is
basic or dynamic, and the GPT style. The disk with the asterisk (*) is the
one with focus.
You can also see a list of volumes for the current machine. Volumes
are the logical partitions created on a disk. To see the volumes, type
List Volume and press Enter. You’ll see a list of all the volumes on all
disks for the current machine. The output includes the volume number,
volume drive letter, volume label, file system used to support the volume, volume type (such as partition, DVD-ROM, or CD-ROM), the volume size, the volume status, and information about the volume purpose
(such as a system or a boot drive). The volume with the asterisk (*) is
the one with focus.
It’s also possible to see partitions for the current system. However,
you can’t see the partitions immediately. First, you must select a disk.
Let’s say you want to see the partitions for the first disk on the system.
In this case, you’d use this procedure:
1. Type List Disk and press Enter.
You’ll see a list of disks for the system. Make sure you select a disk
that has a status of Online (normally Disk 0, which is the assumption for this procedure).
2. Type Select Disk 0 and press Enter. DiskPart will now report that
Disk 0 is the selected disk. In fact, if you type List Disk again,
you’ll see an asterisk next to its entry.
3. Type List Partition.
You’ll see a list of the partitions for Disk 0. The output includes the
partition number, the partition size, the partition type, and the offset
Managing Data
List the Objects
Part II
112
Chapter 6
3
Managing the Hard Drive
of the partition from the beginning of the disk. On dynamic disks,
these partitions may not correspond to the dynamic volumes on the
disk. This discrepancy occurs because dynamic disks contain entries
in the partition table for the system volume or boot volume (if present on the disk). The partition with the asterisk (*) is the one with
focus.
See Object Details
After you see an object of interest, you probably want to know the
details about it. Starting at the disk level, you can type Detail Disk and
press Enter to see low-level information about the disk drive as shown
in Figure 6.3. The disk details provide more information about the disk
type, which is a RAID in this case. In addition, you get a listing of volumes on the disk.
Figure 6.3 : Disk details tell you how the disk is used and more about the kind of disk.
The next level of information is specific volumes. However, you can’t
access this information without performing a few extra steps:
1. Choose a volume to view from the list of volumes obtained using
either Detail Disk or List Volume.
This example assumes Volume 2, as shown in Figure 6.3.
2. Type Select Volume 2 (or the number of the volume you want to
see) and press Enter.
Manage Partitions
113
DiskPart will tell you that the volume you chose is the selected vol-
ume.
You see volume specifics as shown in Figure 6.4. In this case, the
information is for Windows 7. The information you receive from
earlier versions of Windows will differ. One of the more important
pieces of information you receive is what disks the volume resides
on, which is especially important when working with certain
kinds of volume configurations such as spanned volumes.
After you select a volume to view, you can see the details of the partition associated with it. Simply type Detail Partition and press Enter to
see the partition information. You’ll discover the partition type, whether
the partition is hidden, the partition’s active state, the offset of the partition from the beginning of the disk, and partition-specific information
such as the drive letter and file system.
Figure 6.4 : Volume details tell you information such as whether the volume is hidden
from view.
Select an Object
Before you can do something with an object, you must select it.
DiskPart supports three object types:
NN
Disk
NN
Volume
NN
Partition
Managing Data
3. Type Detail Volume and press Enter.
Part II
114
Chapter 6
3
Managing the Hard Drive
To select a particular object, you use the Select ObjectType
ObjectNumber command, where ObjectType is Disk, Volume, or Partition,
and ObjectNumber is the number of the object you want to work with.
For example, to select the first volume, you type Select Volume 0 and
press Enter.
Rescan a Computer for Objects
In some cases, you might have to scan the computer for new objects. For
example, if you change removable media, the change may not appear
until after you perform a new scan. To perform this task, type Rescan
and press Enter. DiskPart will display two messages. First, it will tell you
to wait while it scans the computer for new devices. Second, you’ll see a
completion message that tells you the scan is finished.
Create a Partition
The Create Partition command helps you create a new partition on
a disk. However, before you can create a partition, you must use the
Select Disk Number command to select a disk (where Number is the number of the disk that will contain the new partition). For example, if you
want to create a new partition on Disk 0, then you’d type Select Disk
0 and press Enter. The disk must have sufficient space to hold the new
partition or the Create Partition command will fail.
Create a Primary Partition
A primary partition is a bootable partition on the drive. You can use it
to hold the operating system. To create a new primary partition, use the
Create Partition Primary Size Offset ID Align NoError command,
where Size is the size of the partition in MB, Offset is the location of the
partition from the beginning of the drive, ID is an identifier, Align is the
alignment value, and NoError is a Boolean value that indicates whether
DiskPart should continue processing a script. Here is a more detailed
description of the arguments:
NN
Size: The utility gives the new partition the focus once the system
creates it. The system snaps the partition size to the cylinder size.
For example, if you specify a size of 500 MB, the system rounds up
the size of the partition to 504 MB. The system uses all of the free
space on the disk when you don’t define a partition size.
Manage Partitions
NN
115
Offset: The offset only affects Master Boot Record (MBR) disks.
The offset defines the byte offset of the partition. If you don’t specify an offset, the partition begins at the beginning of the extended
partition. The offset you specify must allow enough room for the
partition defined by the size argument.
NN
ID: Microsoft sets the ID argument aside for OEMs. Never
specify an ID for a GUID Partition Table (GPT) disk. Use the
up GPT disks. When working with an MBR disk, you can use
the ID to set the disk type. The MBR values include C12A7328F81F-11D2-BA4B-00A0C93EC93B (EFI system partition),
E3C9E316-0B5C-4DB8-817D-F92DF00215AE (MSR partition),
EBD0A0A2-B9E5-4433-87C0-68B6B72699C7 (basic data partition), 5808C8AA-7E8F-42E0-85D2-E1E90434CFB3 (LDM
Metadata partition on a dynamic disk), and AF9B60A0-1431-4F62BC68-3311714A69AD (LDM Data partition on a dynamic disk).
NN
Align: The align argument specifies the alignment of the primary
partition on a disk that isn’t cylinder aligned. You normally use
this value for hardware RAID setups to improve performance. The
value is the number of kilobytes from the beginning of the disk to
the closest alignment boundary.
NN
NoError: Normally, DiskPart will stop performing any processing
the moment it encounters an error to prevent potential data loss or
disk errors. However, when performing a batch process, stopping
may not be an ideal solution, so you add this argument to the command line to ensure processing continues.
Create an Extended Partition
An extended partition is a primary partition that can contain multiple
secondary partitions—each of which can have a drive letter. A disk can
contain only one extended partition. Use the Create Partition Extended
Size Offset NoError to create an extended partition, where Size is the
size of the partition in MB, Offset is the location of the partition from
the beginning of the drive, and NoError is a Boolean value that indicates
whether DiskPart should continue processing a script.
The utility gives the new partition the focus once the system creates it. A disk can only have one extended partition. You must create
an extended partition before you can create logical drives. As with the
Managing Data
Create Partition EFI and Create Partition MSR as needed to set
Part II
116
Chapter 6
3
Managing the Hard Drive
primary partition, the size argument defines the size of the partition.
For example, if you specify a size of 500 MB, the system rounds the size
of the partition up to 504 MB. The system uses all of the free space on
the disk when you don’t define a partition size.
The offset only affects MBR disks. The offset defines the byte offset
of the partition. If you don’t specify an offset, the partition begins at the
beginning of the free space on the disk. The system snaps the partition
size to the cylinder size; it rounds the offset to the closest cylinder boundary. For example, if you specify an offset that’s 27 MB and the cylinder
size is 8 MB, the system rounds the offset to the 24 MB boundary.
Create a Logical Partition
A logical partition is a secondary partition of an extended partition. In
other words, you must first create an extended partition before you can
create a logical partition. After you create the extended partition, you
select it using the Select Partition command as explained in the “Select
an Object” section of the chapter. Only after you perform these initial
tasks can you use the Create Partition Logical Size Offset NoError
command to create a logical partition (where Size is the size of the partition in MB, Offset is the location of the partition from the beginning of
the drive, and NoError is a Boolean value that indicates whether DiskPart
should continue processing a script).
The utility gives the new partition the focus once the system creates
it. The system snaps the partition size to the cylinder size. As with primary and extended partitions, if you specify a size of 500 MB, the system rounds up the size of the partition to 504 MB. The system uses all
of the free space on the disk when you don’t define a partition size.
The offset only affects MBR disks. The offset defines the byte offset
of the partition. If you don’t specify an offset, the partition begins at the
beginning of the extended partition. The offset you specify must allow
enough room for the partition defined by the size argument. If the offset
won’t allow enough space, the system changes the offset so that the logical disk can fit within the extended partition.
Create a Volume
The DiskPart utility can create a number of volume types. However,
modern systems normally implement RAID in hardware. Consequently,
Manage Partitions
117
you normally limit yourself to creating simple volumes using the Create
Volume Simple Size Disk NoError command, where Size is the size of
the volume in MB, Disk is the number of disk to use for the volume, and
NoError is a Boolean value that indicates whether DiskPart should continue processing a script.
The utility automatically changes focus to the new volume once the
system creates it. The size argument defines the size of the volume in
megabytes. The utility uses the entire free space on the disk when you
don’t specify the size argument.
The disk argument specifies the disk to receive the new volume. The
utility uses the current disk when you don’t specify the disk option.
You may want to clean a drive before removing it from the system or
reformatting it for another use. The Clean command removes the partition and volume formatting on the disk with focus. The system overwrites the MBR partitioning information and hidden section information
on MBR disks. The system overwrites the GPT partitioning information, including the Protective MBR, on GPT disks. A GPT disk doesn’t
include hidden sector information. The system completely erases the disk
when you use the Clean All command.
Mark a Partition as Active
The active partition is the one that the system uses to boot. You can
only use primary partitions for boot purposes and only one primary
partition is marked as active at any given time. If you fail to mark a
partition that contains system files as being active, the system may not
boot. DiskPart doesn’t check your partition selection for accuracy.
Use these steps to mark a partition active. The example assumes that
you’re setting Partition 1 on Disk 0 active:
1. Type Select Disk 0 (or whatever disk number you want to use)
and press Enter. DiskPart tells you that it has selected Disk 0.
2. Type Select Partition 1 (or whatever partition on the selected
disk that you want to mark active) and press Enter. DiskPart tells
you that it has selected Partition 1.
3. Type Active and press Enter. DiskPart tells you that the partition is
marked as active.
Managing Data
Clean a Drive
Part II
118
Chapter 6
3
Managing the Hard Drive
Mark a Partition as Inactive
The Inactive command marks the current MBR disk partition inactive, which means you can no longer boot from the partition. When the
computer reboots, the system starts using the next available boot option
specified in the BIOS such as a CD-ROM drive or a Pre-Boot eXecution Environment (PXE)–based boot environment. A PXE can include
Remote Installation Services (RIS). Some computers won’t restart without an active partition, so use this command with care. If you’re unable
to start your computer after marking the system or boot partition as
inactive, insert the Setup CD in the CD-ROM drive, restart the computer, and repair the partition using the FixMBR and FixBoot utilities from
the Recovery Console.
Use the following steps to use this command. The example assumes
that you’re setting Partition 1 on Disk 0 inactive:
1. Type Select Disk 0 (or whatever disk number you want to use)
and press Enter. DiskPart tells you that it has selected Disk 0.
2. Type Select Partition 1 (or whatever partition on the selected
disk that you want to mark inactive) and press Enter. DiskPart tells
you that it has selected Partition 1.
3. Type Inactive and press Enter. DiskPart tells you that the partition
is marked as inactive.
Assign a Drive Letter
The Assign command assigns a drive letter or mount point to the volume
with focus. If you don’t specify a drive letter or mount point, the utility
uses the next available drive letter. The utility generates an error when
you attempt to assign an existing drive letter to the volume. The system
won’t allow you to assign drive letters to system volumes, boot volumes,
or volumes that contain the paging file. In addition, you can’t assign a
drive letter to an OEM partition or any GPT partition other than a basic
data partition.
The following steps show how to assign a drive letter to a volume.
The example assumes that you’re assigning C to Volume 1 on Disk 0:
1. Type Select Disk 0 (or whatever disk number you want to use)
and press Enter. DiskPart tells you that it has selected Disk 0.
Manage Partitions
119
2. Type Select Volume 1 (or whatever volume on the selected disk
that you want to assign a drive letter to) and press Enter. DiskPart
tells you that it has selected Volume 1.
3. Type Assign Letter=C (or whatever letter you want to assign to the
selected volume) and press Enter. DiskPart tells you it has assigned
the new drive letter. If you assign a letter to a volume that already
has a letter, the new letter replaces the existing letter. You can’t
assign two different letters to the same volume.
The Remove command removes a drive letter or mount point from the
volume with focus. If you don’t specify a drive letter or mount point, the
utility removes the first drive letter or mount point that it encounters.
You can’t remove the drive letters on system, boot, or paging volumes,
OEM partitions, any GPT partition with an unrecognized GUID, or any
of the special, nondata GPT partitions such as the EFI system partition.
The following steps show how to remove a drive letter from a volume.
The example assumes that you’re removing C from Volume 1 on Disk 0:
1. Type Select Disk 0 (or whatever disk number you want to use)
and press Enter. DiskPart tells you that it has selected Disk 0.
2. Type Select Volume 1 (or whatever volume on the selected disk
from which you want to remove a drive letter) and press Enter.
DiskPart tells you that it has selected Volume 1.
Type Remove Letter=C (or whatever letter you want to remove
from the selected volume) and press Enter. DiskPart tells you it
has removed the existing drive letter. If you remove a letter from a
volume, the volume still exists, but it has no drive letter, making it
inaccessible from Windows using standard techniques.
Extend a Volume
When you work with an NTFS volume, you can extend it into the next
contiguous unallocated space to increase the volume size. The unallocated space must appear on the same disk. The unallocated space must
also appear after the current partition; the sector number of the unallocated space must be higher than the sector number of the currently
selected volume.
Managing Data
Remove a Drive Letter
Part II
120
Chapter 6
3
Managing the Hard Drive
Use the Extend Size Disk NoError command to perform this task,
where Size defines the amount of space to add to the current partition,
Disk specifies a dynamic disk to use, and NoError is a Boolean value that
indicates whether DiskPart should continue processing a script. If you
don’t specify the Size argument, the system uses all of the contiguous
unallocated space. The Disk argument applies to dynamic disks. Use this
argument to specify the dynamic disk to use to extend the volume. If you
don’t specify the Disk argument, the system uses the current disk.
Delete an Object
When you no longer need a disk configuration, volume, or partition, you can delete it. Type Delete Disk, Delete Volume, or Delete
Partition, and press Enter. The command deletes the currently selected
disk, volume, or partition as appropriate.
You can’t delete the system volume, boot volume, or any volume that
contains the active paging file or crash dump (memory dump). Likewise,
you can’t delete the system partition, boot partition, or any partition
that contains the active paging file or crash dump (memory dump). Use
the Override argument to allow DiskPart to remove disks, volumes, or
partitions of any type on a drive.
Exit DiskPart
After you finish using DiskPart, you’ll want to end the application gracefully to ensure that none of your changes is missed. Type Exit and press
Enter to end the DiskPart utility.
7
Securing the Data
In this chapter, you will learn to:
33Encrypt a File or Directory (Page 122)
n
n
View Encrypted Files and Directories (Page 123)
n
Encrypt Hidden Files (Page 124)
n
Back Up Recovery Keys and Certificates (Page 125)
n
Add a User to a File or Directory (Page 125)
n
Remove a User from a File or Directory (Page 126)
n
Decrypt a File or Directory (Page 127)
33Obtain the DACL (Page 127)
Change File and Directory Access (Pages 127-132)
n
n
Find an SID (Page 130)
n
Grant Permission (Page 130)
n
Deny and Remove Permission (Page 131)
n
Set the Owner (Page 132)
n
Verify Security (Page 132)
33Use the Query Option (Page 132)
Detect Shared Open Files (Pages 132-134)
n
n
Use the Disconnect Option (Page 133)
n
Use the Local Option (Page 13 4)
33Set Administrator Ownership (Page 134)
Take Ownership of Files (Pages 134-135)
n
n
Set Other User Ownership (Page 135)
Managing Data
Protect Data (Pages 122-127)
Part II
122
Chapter 7
3
Securing the Data
S
ecurity takes many forms on computer systems. There are entire
books written about securing the system itself, securing the user,
and securing applications. This chapter describes another category of
security—securing the data. Although the techniques in this chapter
won’t provide a complete protective bubble around your data that’s
both virus and user proof, it does give you a good start. In fact, you
might be a little surprised at how much you can do to protect your data
using just the command line utilities supplied with Windows.
Protect Data
The Cipher utility makes it possible to encrypt the files that hold data
on a hard drive. After encryption, only the user whose key fits the file
can open it for viewing. The encryption and decryption process doesn’t
require any extra work on the user’s part—it all happens in the background. The files do consume a little extra space on the hard drive and
there’s a small performance hit when opening and closing the file due to
the encryption and decryption process. The following sections describe
how to perform essential Cipher utility tasks.
Encrypt a File or Directory
It’s possible to encrypt specific directories or files without affecting the
rest of the files on a hard drive. In fact, because of the size and performance penalties of using encrypting, most administrators will target
data files, rather than all of the files on a hard drive. To encrypt a directory or file, use the Cipher /E Name command, where Name is the directory or filename. For example, if you want to encrypt C:\MyDir, you’d
type Cipher /E C:\MyDir and press Enter. However, this command only
encrypts the directory. If you want to encrypt all of the files and subdirectories within C:\MyDir, then you use these steps:
1. Type Cipher /E /S:C:\MyDir and press Enter.
The Cipher utility displays each file and directory that it encrypts
and a status message so that you know it was successfully encrypted. Notice that there’s a colon between the /S command line switch
and the directory specification. This command format differs from
other utilities.
2. Type Cipher /W:C:\MyDir and press Enter.
Protect Data
123
This second command removes artifacts of plain text from the
directory. Otherwise, you might leave bits of plain text behind
that someone could read. This second command will take a few
minutes to complete, but it’s an important part of the process, so
be patient.
View Encrypted Files and Directories
It’s useful to know whether a file or directory is encrypted. To determine the encryption status, you view it using the Cipher utility using
the Cipher Name command, where Name is the file or directory you wish to
view. When you view a directory, you simply see an E for encrypted
or U for unencrypted. For example, if you want to see the status of
C:\MyDir, you type Cipher C:\MyDir\ and press Enter. The output displays U or E followed by the name of the directory. The output also
tells you whether any new files and subdirectories are automatically
encrypted.
As with directories, files display an E or U depending on their
encrypted or unencrypted state. For example, to see the status of all of
the files and subdirectories of the C:\MyDir directory, you type Cipher
/S:C:\MyDir\ and press Enter. Figure 7.1 shows typical results. Notice
that each of the subdirectories tells whether files and directories added
to it are automatically encrypted.
In some cases, you want more information than just knowing
whether or not a file is encrypted. In this case, you rely on the Cipher
/C Name command, where Name is the name of the file or directory. For
example, if you want to know more information about the encryption
of C:\MyDir, you’d type Cipher /C C:\MyDir and press Enter. Figure 7.2
shows typical output from this command. As you can see, the information includes the compatibility level, encryption algorithm, and key size.
Most importantly, the output tells you which users can decrypt the file.
Managing Data
No matter how you encrypt a file or directory, if this is the first time
you’ve performed an encryption, make sure you back up your key to
removable media. In fact, Windows 7 users will see a notification to
perform the task in the Notification Area. The “Backup Recovery Keys
and Certificates” section describes how to perform this task from the
command line.
Part II
124
Chapter 7
3
Securing the Data
Figure 7.1: An E or U tells you the status of a file or subdirectory.
Figure 7.2 : The /C command line switch provides detailed Cipher information.
Encrypt Hidden Files
Normally, the Cipher utility doesn’t do anything with hidden and system files. Fortunately, the /H command line switch makes hidden and
system files visible so that you can encrypt them. For example, if you
want to encrypt the files and subdirectories with the hidden or system
attribute enabled (in addition to all of the regular files) in C:\MyDir,
you’d type Cipher /H /E /S:C:\MyDir and press Enter.
Protect Data
125
WARNING You must use the /H command line switch with
special care. Encrypting a hidden or system file that the system
needs to boot will make the system unbootable. Generally, you
won’t need to work with hidden or system files unless you specifically set the file attributes as hidden or system.
Back Up Recovery Keys and Certificates
1. Log in as the user whose key you want to back up.
Managing Data
One of the most important things to do when you encrypt files is to
back up your recovery key and certificate. Otherwise, a major system
error could make your data permanently inaccessible. The data might
be just fine, but the encryption would prevent you from accessing it,
making the data just as useless as if it had been damaged.
Use the following procedure to create a backup of your recovery key
and certificate:
2. Type Cipher /R:Filename, where Filename is the name of the recov-
Part II
ery key and certificate.
Only supply a filename, such as JohnKey, and not an extension. The
output will actually contain two files: a CER file that contains the
user’s certificate and a PFX file that contains the certificate and
private key.
3. Type a password for the file and press Enter when asked.
Make sure you choose a complex password or the private key will
become easy to access.
4. Retype the password and press Enter when asked.
5. Copy the resulting CER and PFX files to removable media such as
a flash drive.
Add a User to a File or Directory
You may find that you need to add a user to a file or directory. For example, you might want to encrypt a shared directory. In this case, each user’s
credentials would need to be able to encrypt or decrypt the files independently of the other users. The easiest way to add a user is to generate a
126
Chapter 7
3
Securing the Data
recovery key and certificate for the user using the procedure found in the
“Backup Recovery Keys and Certificates” section of the chapter.
Once you have the CER file, you can use it to add that user to
an encrypted file or directory. Simply use the Cipher /AddUser /
CertFile:Keyname command, where Keyname is the filename of a CER file.
For example, let’s say you have the JohnKey.CER file of a particular user
and you want to add the user to C:\MyDir. In this case, you’d type Cipher
/AddUser /CertFile:JohnKey.CER C:\MyDir and press Enter. The user will
now have access to C:\MyDir. Of course, you can use the /S command
line switch to add the user to all files and subdirectories of a particular
directory.
Remove a User from a File or Directory
At some point, you may have to remove a user from a file or directory.
Use the following steps to remove a user from a file or directory (the
example assumes that you’re working with C:\MyDir):
1. Type Cipher /C C:\MyDir (or the file or directory with which you
want to work).
This command provides a detailed listing of the users who can
access the file or directory. Figure 7.3 shows an example of a
directory that contains two user entries—the example uses the
John entry.
Figure 7.3 : Obtain a list of the users who can access the target file or directory.
Change File and Directory Access
127
2. Right-click the command window and choose Mark from the
context menu. Highlight the Certificate Thumbprint entry for the
user you want to remove and press Enter.
In the case of the example, you’d select 7205 02DA 6546 9770 65A1
7578 8067 6337 45BE 0F3A, which is John’s entry.
3. Type Cipher /RemoveUser /CertHash:”. Right-click the command
window and choose Paste from the context menu. You see the
certification hash code pasted into the window. Type " C:\MyDir.
(The whole command should now read as Cipher /RemoveUser /
CertHash:”7205 02DA 6546 9770 65A1 7578 8067 6337 45BE 0 F3A”
C:\MyDir.) Press Enter. The Cipher utility removes the user from
Decrypt a File or Directory
Decrypting a file or directory is just as easy as encrypting it, as long as
the account that you’re using has the right key associated with it. To
decrypt a directory or file, use the Cipher /D Name command, where
Name is the directory or filename. For example, if you want to decrypt
C:\MyDir, you’d type Cipher /D C:\MyDir and press Enter. However,
this command only encrypts the directory. If you want to encrypt all of
the files and subdirectories within C:\MyDir, then you’d type Cipher /D
/S:C:\MyDir and press Enter.
Change File and Directory Access
File and directory access are essential to maintaining data security. Of
course, you can set file and directory access security using the GUI, but
the ICACLS utility can make automating the task significantly easier. The
following sections describe basic tasks you can perform using ICACLS.
Obtain the DACL
ICACLS is focused on the Discretionary Access Control List (DACL)—the
part of the security setup that controls access, rather than the System
Access Control List (SACL), which helps the administrator monitor user
activity. Use the ICACLS Name command, where Name is the file or directory
Managing Data
the list of users that can access the directory or file.
Part II
128
Chapter 7
3
Securing the Data
you want to check, to obtain the DACL. For example, if you wanted to
check the C:\MyDir directory DACL, then you’d type ICACLS C:\MyDir and
press Enter. Figure 7.4 shows typical output from the command.
Figure 7.4 : The ICACLS utility helps you see the DACL for any file or directory.
Notice the letters in parentheses next to each of the names in the output. These letters tell you the access rights for that person or group. The
rights are grouped into three categories: simple rights, specific rights,
and inheritance rights. Table 7.1 describes each of the simple rights,
Table 7.2 describes each of the specific rights, and Table 7.3 describes
each of the inheritance rights. When a specific right conflicts with a
simple right, the specific right normally takes precedence.
Table 7.1: Simple DACL Rights
Letter
Right
N
No access
F
Full access (the user can read, write, delete, or execute files or
directories)
M
Modify access (the user can read, write, and delete the file or
directory)
RX
Read and execute access
R
Read-only access
W
Write-only access
D
Delete access
Change File and Directory Access
129
Letter
Right
DE
Delete
RC
Read control
WDAC
Write DAC (specifies the user has the right to modify the DACL)
WO
Write owner
S
Synchronize
AS
Access system security
MA
Maximum allowed
GR
Generic read
GW
Generic write
GE
Generic execute
GA
Generic all
RD
Read data/list directory
WD
Write data/add file
AD
Append data/add subdirectory
REA
Read extended attributes
WEA
Write extended attributes
X
Execute/traverse
DC
Delete child
RA
Read attributes
WA
Write attributes
Managing Data
Table 7.2 : Specific DACL Rights
Part II
130
Chapter 7
3
Securing the Data
Table 7.3 : Inheritance Rights
Letter
Inheritance
OI
Object inherit
CI
Container inherit
IO
Inherit only
NP
Don’t propagate inherit
I
Permission inherited from parent container
Looking at Figure 7.4, you can see that user John has inherited rights
to this container from the parent container and that he has full access to
C:\MyDir. However, when you look at the built-in Users account, you see
that most users only have read and execute rights.
Find an SID
It’s sometimes helpful to know whether a file or directory has a particular Security Identifier (SID) associated with it. For example, you may
want to know whether a particular user already has rights to a file or
directory. The ICACLS Location /FindSID SID command, where Location
is the file or directory you want to check and SID is the SID of the user
or group, helps you locate which users and groups have rights to specific
files and directories.
Most administrators associate SIDs with the numeric version, such
as S-1-0. In fact, you can see a list of well-known SIDs at support.
microsoft.com/kb/243330. Every user on the system does have a numeric
SID. Unfortunately, they’re extremely hard to use, so the ICACLS utility
also lets you use common SIDs, essentially, the logon name of the user
or group you want to work with. For example, if you want to determine
whether user John has access to C:\MyDir, you’d type ICACLS C:\MyDir /
FindSID John and press Enter. An output of “SID Found” tells you that
the user has rights to the specified directory.
Grant Permission
Before a user or group can access a file or directory, you must grant
them permission. The ICACLS Location /Grant SID:(Rights) command
(where Location is the target file or directory, SID is the SID for the
Change File and Directory Access
131
user or group, and Rights are the permissions you want to grant) gives
permission. Tables 7.1, 7.2, and 7.3 contain a list of rights that you can
grant. Each of these rights is separated by a comma. For example, if you
want to give user Joe read and write access to C:\Dir, you’d type ICACLS
C:\MyDir /Grant Joe:(R,W) and press Enter.
The total rights that a user has are a combination of inherited, granted,
and denied rights. Rights from a parent directory flow down to child
directories and files. You can also specifically grant rights using the
technique described in the “Grant Permission” section of the chapter.
Denying rights specifically removes permissions from the list of permissions that a user or group would normally have. Use the ICACLS
Location /Deny SID:(Rights) command (where Location is the target file
or directory, SID is the SID for the user or group, and Rights are the permissions you want to deny) to deny permission. Tables 7.1, 7.2, and 7.3
contain a list of rights that you can grant. Each of these rights is separated by a comma. For example, if you want to deny user Joe read and
write access to C:\Dir, you’d type ICACLS C:\MyDir /Deny Joe:(R,W) and
press Enter. Even if a user would normally have rights to a file or directory, specifically denying those rights takes precedence.
Remove Permission
Removing permission is not the same as denying permission. When
you remove permission, it actually clears the Access Control Entries
(ACEs) from the DACL. The ICACLS Location /Remove SID command
(where Location is the target file or directory and SID is the SID for the
user or group) actually removes all of the ACEs for the specified SID.
Consequently, if you type ICACLS C:\MyDir /Remove Joe and press Enter,
Joe’s rights to C:\MyDir revert to his inherited rights to the directory.
You don’t have to remove all of the permissions. It’s possible to
remove just the grant entries or just the deny entries. In this case, you
combine the /Remove command line switch with a :G or a :D. For example, if you want to remove just the deny rights for Joe, you’d type ICACLS
C:\MyDir /Remove:D Joe and press Enter.
Managing Data
Deny Permission
Part II
132
Chapter 7
3
Securing the Data
Set the Owner
You can use ICACLS to safely set the owner of a file or directory. This is
a cooperative change—it won’t force a change that isn’t supported by
the user’s current rights. In order to force a change, you must use the
TakeOwn utility described in the “Take Ownership of Files” section of
the chapter. To change the owner of a file or directory, use the ICACLS
Location /SetOwner SID command, where Location is the target file or
directory and SID is the SID for the user or group. For example, if you
want to give user John ownership of C:\MyDir, you’d type ICACLS C:\
MyDir /SetOwner John and press Enter.
Verify Security
Sometimes the ACEs contained within the DACL for a particular resource
become confused or incorrect—especially if someone has been tampering
with them. Trojans and viruses often make themselves felt through errant
entries, even if you can’t see them in other ways. Use the ICACLS Location
/Verify command, where Location is the target file, to verify the ACEs and
ensure they’re correct. For example, if you want to verify that the ACEs
for C:\MyDir are correct, type ICACLS C:\MyDir /Verify and press Enter. If
there are any errors, ICACLS will display a list of them for you.
Detect Shared Open Files
There are many different ways to detect open files on a system.
However, one of the easiest ways to perform this task is to use the
OpenFiles utility. The following sections describe this utility in more
detail.
Use the Query Option
To see which files are opened on a particular system, type OpenFiles /
Query and press Enter. You’ll see a list of open files that include the file
ID, the account accessing the file, the kind of access performed (normally
Windows), and the filename. The list is probably going to be pretty long
on a typical file server, so you’ll want to combine this command with the
More utility by typing OpenFiles /Query | More and pressing Enter.
From a practical perspective, even if you use the More utility, the
list of files is going to be long and hard to search. Consequently, most
administrators will want to output the list of open files to a text file for
parsing within an application. One way to do this is to output the data
in Comma Separated Value (CSV) format without a header. To do so,
you type OpenFiles /Query /FO CSV /NH > OpenFiles.CSV and press
Enter. This command will output the list of files to OpenFiles.CSV so
that you can import them into an application for further review.
You probably won’t access the server console directly unless you’re
using Remote Desktop. In this case, you can use the /S, /U, and /P
command line switches to obtain the information from the server. For
example, let’s say the server name is MyServer, your name is Amy, and
your password is Hello. In this case, you might type OpenFiles /Query
/S MyServer /U Amy /P Hello and press Enter.
Use the Disconnect Option
In extremely rare conditions, you might need to disconnect a user from
a file. For example, the user’s machine might lock up and leave the file
open. When the user tries to access the file after rebooting the machine,
the file won’t open because the file server already thinks that it’s open.
In this case, a manual disconnect is warranted. However, in most cases,
you don’t want to disconnect a user from a file because data loss could
occur.
The safest way to disconnect a user from a file is using the file ID.
To obtain the file ID, you begin by querying the files as described in the
“Use the Query Option” section. Once you have the ID, you use the
OpenFiles /Disconnect /ID ID command, where ID is the file identifier,
to perform the task. For example, you might want to disconnect the file
identified by number 22. In this case, you’d type OpenFiles /Disconnect
/ID 22 and press Enter.
A user might sometimes open multiple copies of the same file. If a
lockup occurs, all of those copies will remain open. In this case, you
can clear all of the open entries using the OpenFiles /Disconnect /OP
Filename command, where Filename is the full path and filename of the
file you want to disconnect. For example, let’s say the user has multiple
copies of C:\MyDir\MyFile.TXT open. In this case, you’d type OpenFiles /
Disconnect /OP C:\MyDir\MyFile.TXT and press Enter.
133
Managing Data
Detect Shared Open Files
Part II
134
Chapter 7
3
Securing the Data
Use the Local Option
The OpenFiles utility normally doesn’t track files that are opened locally
because doing so would bloat the output list. However, you might
choose to list the local files as part of a security check or simply to verify
that the server is closing a specific file after using it. Tracking local files
is also useful on workstations where you may not have any shared file
use to worry about. In this case, you type OpenFiles /Local On and press
Enter. You must reboot the machine for the change to take effect.
To check the status of the local option, type OpenFiles /Local and
press Enter. The OpenFiles utility will tell you whether or not it’s tracking local file usage. If you want to stop tracking local files, simply type
OpenFiles /Local Off and press Enter.
Take Ownership of Files
The person who creates a file owns the file. Consequently, all of the
files that the Windows Setup application creates during installation are
owned by the administrator. All of your personal data is owned by you.
In most cases, the case for a particular ownership is clear. However,
you may encounter situations where you must change the ownership
of a file. For example, a manager who owns a group of shared files
may leave the company and you’ll need to assign those files to the
new manager. The TakeOwn utility makes it possible to force ownership
changes even if the change normally wouldn’t work due to security rules.
Consequently, you have to use this utility with care. The following sections describe the TakeOwn utility in more detail.
Set Administrator Ownership
The Administrator account is the easiest account to use when assigning
ownership. The TakeOwn /A /F Location command, where Location is the
file or directory that you want to assign, makes it easy to change the ownership of any file or directory. For example, if you want to assign ownership of C:\MyDir to the administrator, you’d type TakeOwn /A /F C:\MyDir
and press Enter.
Assigning ownership of a directory to the administrator doesn’t
change the ownership of any files or subdirectories that the directory
contains. In order to make this change, you must use the /R command
Take Ownership of Files
135
line switch. For example, using the previous example as a starting point,
you’d type TakeOwn /A /R /F C:\MyDir and press Enter. It’s important to
note that TakeOwn doesn’t use the /S command line switch as most utilities do for subdirectories.
The TakeOwn utility normally uses the current user account for ownership
purposes. In other words, if you want to assign ownership of a directory or group of files to a particular user, you must log in as that user.
Consequently, if you want to give user John ownership of all of the files
in C:\MyDir, you’d first log in as John, and then type TakeOwn /R /F C:\
MyDir and press Enter. You’ll see that the ownership changes automatically to user John.
Fortunately, you don’t have to leave your desk to change ownership on another system. You can use the /S, /U, and /P command line
switches to log onto another system from your desk and make the
appropriate change. For example, if you want to give user Amy ownership of C:\MyDir on MyServer, then you’d type TakeOwn /S MyServer /U
Amy /P Hello /R /F C:\MyDir and press Enter.
Managing Data
Set Other User Ownership
Part II
PART III
Managing the
Network
In This Part
q
CHAPTER 8: Managing the Network. . . . . . . . . . . . . . . . . . . . . . . . . . . . 139
CHAPTER 9: Working with TCP/IP. . . . . . . . . . . . . . . . . . . . . . . . . . . . . . 165
Managing the Network
CHAPTER 10: Creating System Connections. . . . . . . . . . . . . . . . . . . . . . 185
Part III
8
Managing the Network
In this chapter, you will learn to:
33
33
Get the Media Access Control
Information (Page 140)
n
Manage Users (Page 141)
n
Manage Accounts (Page 14 3)
n
Manage Domains and Local Groups (Page 14 6)
n
Manage Computers (Page 149)
n
View and Close Sessions (Page 149)
n
Perform Server Configuration (Page 151)
n
View Workstation Configuration (Page 15 3)
n
Manage Services (Page 15 3)
n
Manage Files (Page 155)
n
Obtain Help for the Net Utility (Page 156)
n
Manage Print Jobs (Page 157)
n
Manage Resources (Page 15 8)
n
Obtain Statistics (Page 161)
n
Configure Time Synchronization (Page 16 3)
Managing the Network
Interact with the Network Using the Net
Utility (Pages 141-163)
Part III
140
Chapter 8
3
Managing the Network
E
ntire books are written about network management because networks are incredibly complex. An administrator must consider the
network hardware, protocols, operating systems, peripheral devices,
application software, and services. In fact, some services, such as
Exchange Server, require entire books by themselves (and even those
books are incomplete in some regard).
This single chapter can’t possibly hope to provide complete coverage
of every networking need. It does, however, provide useful information
for managing the network from the Windows command prompt. The
sections that follow address the requirements of working with networks
using just the features offered at the command line without the use of
any other administration software. Even though these offerings might
appear inconsequential at first, you’ll be amazed at how many tasks
you can perform using them. The goal of these sections is to make you
aware of the network at a basic level, rather than the monitoring of any
specific piece of hardware or software.
Get the Media Access Control Information
The Media Access Control (MAC) address is a unique identifier that’s
provided as part of the hardware for a Network Interface Card (NIC)
or other device with direct network access. By querying the MAC
address, you can ensure that you’re actually working with a particular machine. The unique identifier makes system identification easy.
To obtain the MAC address for any given machine, use the GetMAC
command for the local machine and the GetMAC /S System /U User /P
Password command for a remote system, where System is the name of
the remote machine, User is the user account to use, and Password is the
password for the user account. For example, to obtain the MAC address
of each device on MyMachine using Sandra’s account with the password
ThePassword, you’d type GetMAC /S MyMachine /U Sandra /P ThePassword
and press Enter.
The output of the GetMAC utility contains one MAC address for each
NIC or other network device installed. The output also provides the
transport attached to the device. If the device is present, but not connected to the network, then you see Media Disconnected for the transport entry.
Interact with the Network Using the Net Utility
141
Interact with the Network Using
the Net Utility
The Net utility includes a host of subcommands that help you interact
with the network software. For example, you can use the Net utility to
add, view, edit, and delete users. To obtain a complete list of Net subcommands, type Net /? and press Enter. To obtain help on using a specific Net
subcommand, use the Net Subcommand /? command, where Subcommand is
the subcommand that you want to use. For example, to learn more about
the Accounts subcommand, you’d type Net Accounts /? and press Enter.
The following sections describe how to perform common tasks using the
Net utility.
Manage Users
NOTE You can also use the WMIC UserAccount utility to work
with user accounts. There isn’t much difference between it
and the Net User utility. Chapter 15 discusses the WMIC utility
in more detail.
Add a User
Theoretically, you can use the Net User /Add command to add one or
more users at a time. The safest way to add new users is to add them
one command at a time, rather than try to add a group using a single
command. For example, to add user Sam to the computer with a password of D3stiny!, you’d type Net User Sam D3stiny! /Add and press
Enter. The Net utility does allow you to set a number of optional user
account arguments, such as whether the user must supply a password
and whether the user can change their password. However, user account
details such as address and telephone number aren’t available. In order
to change these details you must rely on the WMIC utility.
Managing the Network
One of the most common tasks you perform using the Net utility is managing users. In fact, when you have a lot of users to add, it’s not uncommon
to automate this task so the computer performs the majority of the work.
The following sections describe three common user management tasks.
Part III
142
Chapter 8
3
Managing the Network
For security reasons, you normally include the /LogonPasswordChg:Yes
command line switch to ensure the user changes their password during the
initial logon. Otherwise, the user can rely on the default password you provided, which represents a security risk and opens the company to all kinds
of privacy and other legal issues. In short, you normally type something
like Net User Sam D3stiny! /Add /LogonPasswordChg:Yes and press Enter.
View a User
Viewing a particular user account is easy using the Net User Username
command, where Username is the name of the user you want to view. For
example, you might want to see Sam’s account, so you’d type Net User
Sam and press Enter. Figure 8.1 shows typical output from this command.
Figure 8.1: The user information includes every setting you can change and a
few statistics.
Figure 8.1 shows everything that the Net User command provides,
including all of the settings you can change, such as a user account
comment. One of the more important statistics shown in Figure 8.1 is
Password Last Set, which tells you about the user’s password habits. If
you see that the user is waiting too long to change the password, you
may want to modify system policies to require a shorter change interval.
Interact with the Network Using the Net Utility
143
Delete a User
You can use the Net User Username /Delete command (where Username
is the user you want to delete) to remove users you no longer need. For
example, to remove user Sam’s account, you’d type Net User Sam /Delete
and press Enter. The Net utility will tell you that the command completed
successfully when it finds the name in the list of users.
Manage Accounts
The Net Accounts subcommand helps you perform two tasks: force a
logoff and manage overall password requirements. When you type Net
Accounts and press Enter, you see the current settings for both automatically forcing a logoff and the system password requirements as shown in
Figure 8.2. The following sections tell how to perform both tasks.
Managing the Network
WARNING Deleting a user is permanent. You can’t undo
the action. In addition, there isn’t any way to export the user
account information before you perform a deletion so that you
can simply import an accidental deletion later. Consequently,
you need to make sure you actually want to delete an account
before you delete it. If you accidentally delete an account, you
must re-create it from scratch. Unfortunately, even re-creating
the account won’t create the same account—the account SID
and other security features will be different, so issues such as
losing access to encrypted files will still be a problem. The only
complete cure for the problem is to ensure you have backups
of the user’s certificates (see the “Back Up Recovery Keys and
Certificates” section of Chapter 7 for details).
Part III
Figure 8.2 : Use the Net Accounts subcommand to view forced logoff and
password settings.
144
Chapter 8
3
Managing the Network
Force a Logoff
When you configure a user account, you can define what hours the user
can access the computer. Configuring user hours prevents users from
accessing the computer during off hours and could help reduce security
risks. In addition, setting user hours also helps manage shared resources
so that users don’t access these resources during hours when other users
need them. Of course, some users will try to work past their normal
work hours. In order to manage the account and the resources it uses,
you must force a logoff. The forced logoff setting answers the question
of how long the system should wait for the user to voluntarily log off
before forcing a logoff.
NOTE Make sure you set a policy for user accounts to avoid
inadvertently setting the user’s access times incorrectly. One
administrator could set the user access hours strictly based on
the user’s standard work hours, while another administrator
gives the user 24-hour access to the system. Inconsistent policies and policies that don’t reflect actual user needs can cause a
wealth of problems, including security holes.
To set a forced logoff interval, use the Net Accounts /ForceLogoff:
Minutes subcommand, where Minutes is the number of minutes to wait
before forcing the user to log off. This setting affects every account on
the system. For example, if you feel that it’s reasonable to wait 30 minutes for users to log off, then you’d type Net Accounts /ForceLogoff:30
and press Enter. On the other hand, if you don’t want to force logoffs,
then you’d type Net Accounts /ForceLogoff:No and press Enter.
Configure the Password Requirements
Configuring password requirements can be difficult. For example, setting a long interval between password changes tends to reduce support
costs because users are less likely to forget their password, but using a
long interval also gives outsiders a longer time to use compromised passwords to access your system. (Most security experts recommend you
change your password every 30 to 90 days.) Longer passwords are more
secure, but also harder to remember. Users are likely to write down long
passwords, which means that your company is open to various sorts of
social engineering and physical attacks (such as an office cleaner lifting
the passwords off the user’s monitor). The article at http://technet.
Interact with the Network Using the Net Utility
145
microsoft.com/library/cc784090.aspx provides some best practices that
you can use to configure passwords on your system. Password requirements affect every user of a machine.
The following procedure helps you construct a Net Accounts subcommand that configures passwords:
1. Type Net Accounts to start the subcommand.
2. (Optional) Type /MinPWLen:Length, where Length is the number of
characters the user must supply for a password as a minimum.
The default setting varies by Windows version. For example, Windows 7 has a minimum password length of 0. If you don’t want to
set a minimum password length, type /MinPWLen:0.
3. (Optional) Type /MaxPWAge:Days, where Days is the maximum num-
ber of days the user can use a password before changing it.
If you don’t want to set a maximum password age, type
/MaxPWAge:Unlimited instead. The default setting is 42 days for
Windows 7.
4. (Optional) Type /MinPWAge:Days, where Days is the minimum num-
This setting comes in handy if you have a user who changes their
password often, but tends to forget the new password. Generally,
more password changes are better, but too often can raise support
costs. If you don’t care how often the user changes their password,
type /MinPWAge:0.
5. (Optional) Type /UniquePW:Number, where Number is the number of
unique passwords that the user must provide before repeating an
old password.
This setting prevents users from recycling the same two passwords. The maximum number of passwords that Windows 7 will
track is 24. If you don’t care how often the user relies on the same
password when changing passwords, type /UniquePW:0.
6. (Optional) Type /Domain if you want the command to modify the
domain controller settings, rather than the local machine settings.
7. Press Enter.
The Net Accounts subcommand makes the required changes. For
example, if you want the user to change their password at least
every 90 days but no more than once a month, use a password of
Managing the Network
ber of days that must pass before a user can change their password.
Part III
146
Chapter 8
3
Managing the Network
seven characters, and provide at least five unique passwords, you’d
type Net Accounts /MinPWLen:7 /MaxPWAge:90 /MinPWAge:30 /
UniquePW:5 and press Enter.
Manage Domains and Local Groups
Groups come in two forms for the Net utility. You can either work with
groups at the domain level using the Net Group subcommand or the
local level using the Net LocalGroup subcommand. Both subcommands
provide precisely the same features, so working with one is the same as
working with the other. The examples in the sections that follow assume
you’re working with a local group, but remember that the same commands will work with a domain group if you substitute the Net Group
subcommand for the Net LocalGroup subcommand.
NOTE The Net Group and Net LocalGroup subcommands both
assume you’re working at the local machine, which is probably
your workstation and not the domain controller. Consequently,
if you execute the Net Group subcommand, it always displays
an error telling you it can only execute on a Windows domain
controller (error 3515). Use the /Domain command line switch
to execute Net Group and Net LocalGroup subcommands on the
domain controller (for the current domain), rather than on the
local machine. If you need to perform group management on a
different domain, you must log onto an account for that domain.
The Net utility doesn’t support the /S, /U, and /P command line
switches supported by some other utilities.
Add a Group
Groups make it simpler to manage security and perform other userrelated tasks by categorizing individuals with like needs together. Use
the following procedure to add a new group:
1. Determine whether you want to create a local group or a domain
group. Type Net LocalGroup to create a local group or Net Group to
create a domain group.
2. Type the group name.
3. (Optional) Type /Comment:String, where String is a comment you
want to associate with the group.
Interact with the Network Using the Net Utility
147
Place multi-word comments within double quotes, such as
/Comment:”This is a sample group.”
4. Type /Add.
5. Type /Domain if you want to create the group on the domain con-
troller rather than the local machine.
6. Press Enter.
The Net LocalGroup or Net Group subcommand creates the new
group for you. For example, if you want to create the local group,
MyGroup, with an appropriate comment, you’d type Net LocalGroup MyGroup /Comment:”This is a sample group.” /Add and press
Enter.
View a Group
Figure 8.3 : Determine which groups appear on the machine before querying
a specific group.
Managing the Network
At some point, you’ll want to know who is a member of a particular group. To begin, you need to know the names of the groups on
a system. For example, to see all of the local groups, you type Net
LocalGroup and press Enter. Figure 8.3 shows typical results. The output
simply provides a list of groups on the machine.
Part III
148
Chapter 8
3
Managing the Network
Once you know the name of the group you want to query, you can
request information about that group using the Net LocalGroup GroupName
command where GroupName is the name of the group. For example, if you
want to learn more about MyGroup, you’d type Net LocalGroup MyGroup
and press Enter. Figure 8.4 shows typical output from this subcommand.
The output contains the group name, comment, and a list of members.
Figure 8.4 : Obtain specifics about a particular group.
Delete a Group
Eventually, groups become useless. Perhaps the project has finished or
the company has reorganized the people who relied on the group. When
a group outlives its usefulness, you should remove it from the system to
reduce security risks. Use the Net LocalGroup GroupName /Delete command, where GroupName is the name of the group, to remove a group you
no longer need. For example, if you wanted to remove MyGroup, you’d
type Net LocalGroup MyGroup /Delete and press Enter.
Add a User to a Group
Groups don’t become useful until they contain members. In order to
add a new member to a group, you use the Net LocalGroup GroupName
UserName /Add command, where GroupName is the name of the group
and UserName is the name of the user. For example, to add user John
to MyGroup you’d type Net LocalGroup MyGroup John /Add and press
Enter.
Delete a User from a Group
When users no longer require access to a group, you should remove
them to ensure the system remains secure. In order to delete a member
from a group, you use the Net LocalGroup GroupName UserName /Delete
Interact with the Network Using the Net Utility
149
command, where GroupName is the name of the group and UserName is the
name of the user. For example, to delete user John from MyGroup you’d
type Net LocalGroup MyGroup John /Delete and press Enter.
Manage Computers
Administrators use the Net Computer subcommand only on domain controllers where they use it to add and remove computers from the domain
controller’s list. The following sections describe how to add and remove
computers from a domain controller.
Add a Computer
Remove a Computer
A domain controller will often fail to remove from its list old systems
when they become unavailable. The main reason is that it’s difficult
for the domain controller to determine whether the computer is actually gone or whether it’s simply offline. To remove a computer from the
domain controller, use the Net Computer UNCName /Delete subcommand,
where UNCName is the UNC name of the computer you want to remove.
For example, if you want to remove MyComputer from the domain controller, you’d type Net Computer \\MyComputer /Delete and press Enter.
View and Close Sessions
The Net Session subcommand makes it possible to view and control
sessions on any computer. The sessions listed are those with external
connections to the computer, not the local connection you’re using.
Consequently, unless you share resources on your workstation with
others on the network, you’re unlikely to see anything listed for a typical workstation—this subcommand is more applicable to servers. The
Managing the Network
Normally, the server automatically detects any new computers on the
domain. However, you might find that the automatic detection doesn’t
work, especially as the network gets larger. In this case, you can use
the Net Computer UNCName /Add subcommand, where UNCName is the
Universal Naming Convention (UNC) name of the computer, to add the
computer to the domain controller. For example, if you want to add
MyComputer to the domain controller, you’d type Net Computer \\
MyComputer /Add and press Enter.
Part III
150
Chapter 8
3
Managing the Network
following sections describe common tasks you perform using the Net
Session subcommand.
View All Sessions
Before you view a specific session, you normally check which sessions are
available by viewing all of the sessions. To view all of the sessions, type
Net Session and press Enter. You’ll see an overview of all of the current
sessions that include the computer name or TCP/IP address, the username, the client type, the number of open resources, and the system’s
idle time. The idle time tells you how much time has elapsed since the
computer has performed any action, which you can use to determine
when computers have crashed and are no longer connected to the server.
Deleting those sessions is normally safe after you verify that the user is
no longer connected.
View a Specific Session
Once you know the specific session you want to view, you use the Net
Session ComputerName subcommand, where ComputerName is either the
name or the TCP/IP address of the computer you want to view, to see the
specifics. For example, you want to see the specifics of the computer at
TCP/IP address 192.168.0.244, you’d type Net Session \\192.168.0.244
and press Enter. The output displays the username, computer name,
whether the session is a guest logon, the client type, the idle time, the total
session time, and the number of resources opened on each of the server’s
shares (such as the number of files open on a disk drive).
Delete a Session
Deleting a session essentially disconnects the user from the host
machine. The most common reason for deleting a session is that the client machine has frozen or otherwise become unable to use the session.
The server still has the session open because it doesn’t know that the
session is no longer in use. Use the Net Session ComputerName /Delete
subcommand, where ComputerName is the name or the TCP/IP address of
the computer you want to work with, to delete the session. For example,
if you want to delete the session for the computer at TCP/IP address
192.168.0.244, you’d type Net Session \\192.168.0.244 /Delete and
press Enter.
Interact with the Network Using the Net Utility
151
Perform Server Configuration
The Net Config Server subcommand provides the means to access the
server part of any machine. The machine could be a workstation that
shares resources or a full-fledged domain controller. As long as the
machine is running the Server service, you can configure the server elements on it using this subcommand. In fact, you can see the current
configuration by typing Net Config Server and pressing Enter. You’ll
see statistics like the ones shown in Figure 8.5. The following sections
describe server-related tasks you can perform using this subcommand.
Setting the Autodisconnect Time
The automatic disconnect time controls when the server automatically disconnects a client that’s been idle for too long. For example,
this setting will automatically delete a session for a client that’s frozen or otherwise become unavailable. Use the Net Config Server /
Autodisconnect:Time command, where Time is the number of minutes to
wait, to set the automatic disconnect time. For example, if you want to
automatically disconnect clients after 15 minutes, you’d type Net Config
Server /Autodisconnect:15 and press Enter.
Managing the Network
Figure 8.5 : Any machine that runs the Server service is a server you can configure
using this subcommand.
Part III
152
Chapter 8
3
Managing the Network
NOTE Idle time is essentially inactivity. If the user or application isn’t using processing cycles, then the system considers
the application idle. An automatic disconnect works well if you
want to ensure that documents are closed prior to a maintenance
action, such as a backup. However, the side effect is that the user
can lose the connection to the server and there is a chance of
data loss if the user has left the application open without saving
the local copy of any data changes. If you have users who consistently leave their systems on and documents open overnight,
an automatic disconnect might not work as you intend it to. Make
sure you set automatic disconnects to match company policy
regarding application usage.
Setting a Comment
Comments help users identify the correct server on a network. Even if
you’re configuring a workstation that shares resources, you should provide a server comment to make it easier for users to locate the server.
Use the Net Config Server /SrvComment:Text command, where Text
is a string that contains the server comment, to add a comment to the
server. For example, if you want to add a comment to a workstation
that shares a printer for a workgroup, you might type Net Config Server
/SrvComment:”Workgroup Printer Server” and press Enter. If you want
to remove the comment from a server and not provide anything, you can
type Net Config Server /SrvComment:”“ and press Enter.
Hiding the Server
In some cases, you need to run the Server service on a workstation,
but you don’t want anyone to actually use the workstation to share
resources. For example, you might provide a network backup for all
of the workstations on the network. Having every workstation appear
as a potential source of resources would be confusing, so you’d hide
the workstations that don’t have shareable resources from view. Type
Net Config Server /Hidden:Yes and press Enter to hide a server from
view. To make the server visible again, you’d type Net Config Server
Hidden:No and press Enter.
Interact with the Network Using the Net Utility
153
WARNING Hiding a server from view doesn’t make it inaccessible—it simply means that you must know the name of the
server and its resources to access it. In short, the server isn’t
really any more secure than it was before you hid it, but someone
would need to perform additional work to find the server first.
View Workstation Configuration
The Net utility doesn’t provide any means of configuring a workstation—the client portion of the machine setup. However, you can use the
Net utility to view the workstation configuration. Simply type Net Config
Workstation and press Enter. You’ll see some workstation essentials, as
shown in Figure 8.6.
Managing the Network
Figure 8.6 : The Net utility provides you with some details about workstation
configuration.
Manage Services
Windows services provide background processing. Much of the “magic”
that users see when working with Windows is due to services that detect
an event and then react to it. Of course, services can’t do anything
for you when they aren’t running. It’s important to start, stop, pause,
and continue services at the right time to ensure Windows performs as
expected. The following sections describe how to use the Net utility to
interact with services.
Part III
154
Chapter 8
3
Managing the Network
View Started Services
Generally, you need to know what services are already running before
you make any changes. That said, telling a service to start when it’s
already started won’t do any harm to the system, nor will it generate
an error message. All that you’ll see is a message saying that the service
is already started. To see which services are already started, type Net
Start and press Enter. You’ll see an alphabetical list of started services
(but not all of the services installed on the machine).
Start Service Processing
Starting a service means that the Windows loads the executable file that
supports the service and runs it. In many cases, this means running
a .DLL within the SvcHost.EXE application. However, all you need to
know is the name of the service. To start the service, use the Net Start
ServiceName subcommand, where ServiceName is the name of the service
as it appears in the Services console found in the Administrative Tools
folder of the Control Panel. For example, to start the Bluetooth Support
Service (BthServ), you’d type Net Start “Bluetooth Support Service”
and press Enter.
Stop Service Processing
Stopping a service means unloading the service from memory and
deallocating all of the resources used by the service. In order to use the
service again, you must restart it, which means starting any processing
from scratch. Make sure you want to actually stop the service, rather
than pause the service so that processing can resume. To stop a service,
use the Net Stop ServiceName subcommand, where ServiceName is the
name of the service as it appears in the Services console found in the
Administrative Tools folder of the Control Panel. For example, to stop
the Bluetooth Support Service (BthServ), you’d type Net Stop “Bluetooth
Support Service” and press Enter.
WARNING Never stop a service until you have determined
whether any other services are dependent on it. Stopping a service with dependencies will also stop the dependent services,
which could cause unforeseen problems on the host system.
Interact with the Network Using the Net Utility
155
Pause Service Processing
Pausing a service means that Windows will put the process to sleep
until you need it again. The service state is saved and any resources it
uses will remain in use. When you continue (rather that start) using the
service, the service will begin processing right where it left off, so nothing is lost when you pause the service. You’ll normally stop a service,
rather than pause it, when a service error occurs to ensure that any
data errors or other problems are solved. To pause a service, use the Net
Pause ServiceName subcommand, where ServiceName is the name of the
service as it appears in the Services console found in the Administrative
Tools folder of the Control Panel. For example, to pause the Bluetooth
Support Service (BthServ), you’d type Net Pause “Bluetooth Support
Service” and press Enter.
You can only continue using a service after pausing it. If the service is
stopped, then you must start it to use it. To continue a service, use the Net
Continue ServiceName subcommand, where ServiceName is the name of the
service as it appears in the Services console found in the Administrative
Tools folder of the Control Panel. For example, to continue using
the Bluetooth Support Service (BthServ), you’d type Net Continue
“Bluetooth Support Service” and press Enter.
Manage Files
The Net File subcommand helps you to manage files opened by a client. This subcommand won’t display any locally opened files. The
following sections describe the three tasks you can perform using this
subcommand.
View Files
You’ll normally begin managing files by determining which files are
opened. To see a complete list of the files opened by a client on a server,
type Net File and press Enter. The output of this subcommand displays
the file ID, the full path for the open file, the name of the user who has the
file open, and the number of locks (if any) on the file. Locks are used to
keep other users from accessing the file, so locked files are often a prob-
Managing the Network
Continue Service Processing
Part III
156
Chapter 8
3
Managing the Network
lem that an administrator must address when one user leaves a file that
another user requires in the locked state.
View a File in Detail
In some cases, you need to learn more about an open file before you can
do anything with it. To see file details, use the Net File FileID subcommand, where FileID is an identifier of an open file. For example, to see
the details of file number 22, you’d type Net File 22 and press Enter.
The most important addition to the output is the permissions that the
user has to the file. Often, permissions tell you what a user can do with
the file and why the user is experiencing problems with it (you can’t
modify a file opened as read only).
Close Files
If a client workstation freezes or otherwise becomes unavailable, it can
leave files in the open and locked state. Subsequent attempts to open the
file for writing will fail because of the locks. In this case, you use the
Net File FileID /Close subcommand, where FileID is an identifier of
an open file, to close the file. For example, if you want to close file number 22, you’d type Net File 22 /Close and press Enter.
Obtain Help for the Net Utility
The Net /? command and its derivatives leave something to be desired
when it comes to information. All that these commands really do is
remind you of the command syntax. Because the Net utility is so complex, Microsoft actually provides special help commands for using it.
The following sections describe these special forms of help.
Use Help
If you want to obtain detailed information about any Net subcommand,
use the Net Help Subcommand command, where Subcommand is the subcommand that you want to learn about. For example, if you want to learn
more about the Net File subcommand, you’d type Net Help File and
press Enter. You’ll see the complete command line syntax and details
about each of the command line switches that the subcommand supports.
In some cases, such as the Net Config Server subcommand, you can
go several layers deep in the Net Help subcommand. Simply type the
Interact with the Network Using the Net Utility
157
additional levels as needed. For example, in this case, you’d type Net
Help Config Server and press Enter to obtain the required help.
Use Helpmsg
Whenever the Net utility experiences an error, it provides you with a
general error message. Unfortunately, the general information might not
be enough for you to understand the error. In this case, you use the Net
Helpmsg Number command, where Number is the error number you received,
to discover additional information. For example, when you try to start a
service that’s already started, you see an error number of 2182. To learn
more about this error, you type Net Helpmsg 2182 and press Enter. The
Net utility provides additional information about the error for you.
Manage Print Jobs
NOTE The Net Print subcommand may not be available with
some newer versions of Windows such as Windows 7. In this
case, you can rely on the WMIC PrintJob subcommand to manage
print jobs instead. You can learn more about working with WMIC
in Chapter 15.
View Jobs
Before you can do anything with the print jobs associated with a printer,
you have to have a list of the pending jobs. To see the list of jobs, use the
Net Print \\ComputerName\ShareName command, where ComputerName is
the name of the computer and ShareName is the name of the printer share
(not necessarily the same as the name of the printer). For example, to see
the print jobs on the HP LaserJet 5 queue of WinServer, you’d type Net
Print “\\WinServer\HP LaserJet 5” and press Enter.
The output shows a list of print jobs that includes the print job name,
number, and size. A fourth column shows the job status. The print
job number is the most important part of the list because you use it to
change the print job status.
Managing the Network
The Net Print subcommand helps you work with printers connected
to your system. You can use this subcommand to manage print jobs at
the command line, rather than rely on the GUI. The following sections
describe how to manage print jobs using the Net Print subcommand.
Part III
158
Chapter 8
3
Managing the Network
Hold a Job
In some cases, you might need to hold a job to let higher priority jobs
complete first. To hold a job, you use the Net Print \\ComputerName
JobNumber /Hold command, where ComputerName is the name of the computer and JobNumber is the number of the print job. For example, to hold
print job 4 on WinServer, you’d type Net Print \\WinServer 4 /Hold
and press Enter.
Release a Job
When all of the high priority jobs complete, you can release any lower
priority jobs that you held earlier so that they can complete. To release
a job, you use the Net Print \\ComputerName JobNumber /Release command, where ComputerName is the name of the computer and JobNumber
is the number of the print job. For example, to release print job 4 on
WinServer, you’d type Net Print \\WinServer 4 /Release and press Enter.
Delete a Job
Just about everyone prints something by mistake. Of course, you don’t
want to print something that no one needs, so you delete it from the
queue. To delete a job, you use the Net Print \\ComputerName JobNumber /
Delete command, where ComputerName is the name of the computer and
JobNumber is the number of the print job. For example, to delete print
job 4 on WinServer, you’d type Net Print \\WinServer 4 /Delete and
press Enter.
Manage Resources
Sharing resources (also called simply a share) is one of the more important reasons to have a network. Therefore, it isn’t any surprise that
managing those resources is a top administrator goal. Although the Net
utility doesn’t provide complete resource management, it does provide
some good rudimentary management features that will help you work
with network resources with greater efficiency.
View Resources
Many administrators are unaware of the fact that there are many
default resources on a system—shares that Windows actually creates
during the setup process and never asks you about. Consequently, one
Interact with the Network Using the Net Utility
159
of the first things you should do when working with a new system is to
view these default shares before you add anything new. To see any existing shares, type Net Share and press Enter. Figure 8.7 shows a typical
list of default shares with one addition for the printer.
A shared resource, such as C$, is called an administrative share
because it’s commonly used for administrative tasks and not defined
for general use. When you look at the permissions for such a resource,
you find that only the Administrators group can even access them. The
output from the Net Share subcommand shows the share name, the
resource it accesses, and a remark that tells you more about the resource.
The simple list shown in Figure 8.7 isn’t enough to know who has
access to a resource. To obtain detailed resource information, use the
Net Share ShareName command, where ShareName is the name of the share,
such as C$. For example, if you want to find out who can access the C$
resource, you’d type Net Share C$ and press Enter. The detailed listing
also provides you with the maximum number of users, the users who have
access to the share, and the kind of caching used with the resource.
Share Resources
To provide access to a resource, you must create a share for it. You could
create one monster subcommand to perform this task, but it’s actually
easier to perform the task in steps. Using the stepped approach also
makes it easier to fix mistakes. The following steps create a share for the
Managing the Network
Figure 8.7: Windows provides a number of default shares as part of the setup
process.
Part III
160
Chapter 8
3
Managing the Network
C drive on a system. In this case, the procedure grants full access to the
Administrators group and full access to an individual user named John.
1. Type Net Share Drive_C=C:\ /Grant:Administrators,Full /
Grant:John,Full and press Enter.
This command creates the share. Of course, you can give the share
any useful name—the example simply uses Drive_C as the share
name. You must grant access to the share at the time you create it
using the /Grant command line switch. The /Grant command line
switch can appear any number of times and you can assign rights
to both groups and individuals. The list of rights is: Full, Change,
and Read. If you don’t assign specific rights for the share, the Everyone group gets Read access.
2. (Optional) Type Net Share Drive_C /Remark:”Provides access to
the C drive.” and press Enter.
Any time you create a share, you should assign a remark to it to
make it easier for others to locate and understand the purpose of
the share. The remark can be anything that users will find useful.
3. (Optional) Type Net Share Drive_C /Cache:None and press Enter.
Caching determines how fast a user can access the resource in
many cases. You have a choice of Manual, Documents, Programs,
BranchCache, and None.
4. (Optional) Type Net Share Drive_C /Users:5 and press Enter.
This subcommand determines the maximum number of users for
the resource. If you don’t set a maximum number of users, an unlimited number of users can access the resource. While unlimited
access is fine for a server in most cases, you’ll want to limit shared
resource access on a workstation to keep the workstation usable as
a local resource.
Use Resources
After you create a share, you’ll want to use it. The Net Use subcommand makes it possible to access a share on another system. To create
access to a share, use the Net Use LocalDevice RemoteShare subcommand, where LocalDevice is the name of a local device that will receive
the share and RemoteShare is the name of the share on the remote
Interact with the Network Using the Net Utility
161
machine. For example, if you want to assign \\WinServer\C$ to the
N drive on the local machine, you’d type Net Use N: \\WinServer\C$
and press Enter. If you want to be sure that the resource will be available the next time you boot the system, you add the /Persistent:Yes
command line switch, so you’d type Net Use N: \\WinServer\C$ /
Persistent:Yes and press Enter instead.
If you later decide that you don’t need the resource, then you’d delete
it from the workstation. In this case, you’d type Net Use N: /Delete to
remove resource access.
Remove Resources
Eventually a shared resource outlives its usefulness and you delete it.
To remove a resource, you use the Net Share ShareName /Delete command, where ShareName is the name of the share. For example, to delete
a shared resource named Drive_C, you’d type Net Share Drive_C /Delete
and press Enter.
The Net utility provides a few interesting statistics for both the server and
workstation (client) portion of a machine. For example, when working
with a server, you can see how many permission errors have occurred.
The following sections describe how to view statistics using the Net utility.
View Server Statistics
The server statistics don’t let you modify or configure anything, but
they do tell you a few useful facts about the server portion of a machine.
To see these statistics, type Net Statistics Server and press Enter.
Figure 8.8 shows typical output from this subcommand. These statistics
tell you about the overall health of your server. For example, a large
number of permission errors can tell you that there are security issues
you need to confront. A large number of timed out sessions can tell you
about network issues or workstation configuration problems.
Managing the Network
Obtain Statistics
Part III
162
Chapter 8
3
Managing the Network
Figure 8.8 : Server statistics tell you how many connections are made and other
interesting facts.
Figure 8.9 : Workstation statistics can help you discover the overall health of
the client.
Interact with the Network Using the Net Utility
163
View Workstation Statistics
The workstation statistics tell you about the client portion of a machine.
You can discover how much data the workstation is reading and writing. A more important statistic is the number of network errors the
workstation is encountering. In a perfect environment, the workstation
wouldn’t encounter any network errors. To see the workstation statistics, type Net Statistics Workstation and press Enter. Figure 8.9 shows
typical output from this subcommand.
Configure Time Synchronization
The Net Time subcommand lets you see and set local time based on
another machine on the network. If you want to use an Internet time
source, you need the W32Tm utility described in Chapter 15. The following sections describe how to use this subcommand.
If you want to view the current time on another computer, you can
check it by accessing the computer by name. Simply use the Net Time
\\ComputerName command, where ComputerName is the name of the
remote computer you want to access. For example, to check the time
on WinServer, you’d type Net Time \\WinServer and press Enter.
You can also access the time on a domain controller by using the
/ Domain:ComputerName command line switch or a Reliable Time Source
using the /RTSDomain:ComputerName command line switch.
Set Time Source
When you decide to reset your local clock using a remote computer as
a source, you add the /Set command line switch. For example, to reset
your computer’s clock based on the time on WinServer, you’d type Net
Time \\WinServer /Set and press Enter. The Net utility will ask if you’re
sure you want to reset your local clock based on the time on WinServer.
Type Y and press Enter to complete the task.
Managing the Network
View Time Source
Part III
9
Working with TCP/IP
In this chapter, you will learn to:
33Display the IP Information (Page 166)
Manage the Internet Protocol (Pages 166-169)
n
Renew Addresses for an Adapter (Page 168)
n
Clear the DNS Resolver Cache (Page 168)
n
Renew DHCP Addresses and Register DNS Names (Page 169)
n
Release a Connection (Page 169)
33Check Connections (Page 170)
Use Basic Diagnostics (Pages 170-177)
n
n
Trace Transmission Paths (Page 171)
n
Track the Network Path (Page 172)
n
Obtain a Copy of NetDiag (Page 174)
n
Perform a Test and Understand Diagnostics (Page 175)
n
Locate and Fix Minor Problems (Page 177)
33Display Application and Ethernet Stats or
Get Network Statistics (Pages 177-180)
n
Protocol Information (Pages 178-179)
n
Display Protocol Information (Page 179)
n
Set a Refresh Interval (Page 180)
33
Manipulate the Network Routing
Tables (Pages 180-183)
n
Print the Routing Tables (Page 180)
n
Add, Change, or Delete a Route (Pages 181-183)
Managing the Network
n
Part III
166
Chapter 9
3
Working with TCP/IP
A
t one time, a wide range of network protocols were in use for
PC networks. However, the vast majority of networks today use
TCP/IP for their networking protocol because TCP/IP offers so many
benefits and is ubiquitous—it’s the standard that everyone seems to
rely on today. For example, the Internet won’t work without TCP/IP.
This chapter explores how you can manage TCP/IP networks at the
command line. Even though the coverage isn’t complete, you’ll find
that the command line has a lot to offer when it comes to general
management tasks.
Manage the Internet Protocol
The IPConfig utility is probably one of the most used on workstations
to fix common TCP/IP problems. The precise functionality of IPConfig
depends on the version of Windows that you use, because Microsoft has
put a lot of effort into updating this command line utility to meet the
needs of today’s networks. Of course, the biggest issue to consider today
is support for Internet Protocol version 6 (IPv6) because many companies
are moving in that direction. Whether you believe that the world will run
out of IPv4 addresses sooner, the Internet will eventually embrace IPv6, if
for no other reason than the government will mandate it.
The following sections highlight the IPConfig features available to
Windows 7 and Windows 2008 administrators. Most of these features
are also available with older versions of Windows, but you’ll definitely
see differences if you use an older version of Windows—especially when
it comes to IPv6 support.
Display the IP Information
Most administrators need basic information about their network, such
as which adapters are active and what IP address they have assigned
to them. In this case, type IPConfig and press Enter. You’ll see information similar to the information shown in Figure 9.1. The physical
adapters normally appear first, followed by the tunnel adapters. In this
case, the tunnel adapters are used by IPv6 to IPv4 connectivity and you
don’t really need to worry about them. You might also see entries for
a Virtual Private Network (VPN) if you have one set up. The physical
adapter information includes the IPv4 and IPv6 addresses, along with
the Domain Name System (DNS) suffix, which is mshome.net when you
configure a workgroup.
Manage the Internet Protocol
167
Figure 9.2 : Getting all of the IPConfig information can be overwhelming.
Managing the Network
Figure 9.1: The basic IPConfig information provides everything needed for an
overview of the network.
Part III
168
Chapter 9
3
Working with TCP/IP
In some cases, you do need additional information. To obtain all of the
information that IPConfig has to offer, type IPConfig /All and press Enter.
Figure 9.2 shows a sample of the additional information you receive, which
is substantial (the screenshot would have to be quite large to show everything for the sample system). For example, you now get complete DNS and
Dynamic Host Configuration Protocol (DHCP) information. You also get
the physical adapter’s name and incidentals like the lease times.
Fortunately, IPConfig offers some intermediate levels of information
between these two extremes. For example, you can type IPConfig /
DisplayDNS and press Enter to see the contents of the DNS resolver cache.
Type IPConfig /? and press Enter to see a complete list of display options.
Renew Addresses for an Adapter
Normally, the system takes care of renewing addresses automatically
and the administrator doesn’t have to think about it. In some cases, the
network will suddenly stop working. One of the techniques for reestablishing contact (among many) is to try to renew the addresses for the
network adapter. The fastest way to accomplish this task is to renew all
of the adapters for a system, rather than renewing them one at a time.
To perform this task at the IPv4 level, type IPConfig /Renew and press
Enter. If you want to renew the IPv6 addresses, type IPConfig /Renew6
and press Enter.
NOTE In most cases, you release an address before you renew
it using the IPConfig /Release command. See the “Release a
Connection” section for additional details.
On the rare occasion that you want to renew a particular connection, use the IPConfig /Renew ConnectionName or IPConfig /
Renew6 ConnectionName command, where ConnectionName is the name
of the connection as it appears in the IPConfig output. For example,
Local Area Connection is one of the connections shown in Figure 9.1.
Consequently, if you want to renew the IPv4 address for this connection,
you’d type IPConfig /Renew “Local Area Connection” and press Enter.
Clear the DNS Resolver Cache
In some cases, you run into a problem where the DNS resolver cache
on a system becomes corrupted or outdated. The DNS resolver cache is
Manage the Internet Protocol
169
where the system stores IP addresses of URLs that the user visits. If the
IP address of the URL changes before the DNS resolver cache purges
itself, the user may find it impossible to get to the Web site or other
resource. Type IPConfig /FlushDNS and press Enter to purge the content
of the DNS resolver cache to correct errors of this sort.
The DNS resolver cache can also show where the user has gone on the
Internet. To see how the DNS resolver cache is working and where
the user has been, type IPConfig /DisplayDNS | More and press Enter (the
DNS resolver cache normally contains so many entries that you need to
pipe the output to More to see it). Each entry contains a record name,
record type (see http://en.wikipedia.org/wiki/List_of_DNS_record_types
for a list of standard record types), time to live (the amount of time that
the DNS resolver cache will hold the record), the data length, section, and
record data (normally an IP address or canonical name).
Normally, the system updates DHCP addresses and registers the client
DNS name automatically. However, in some cases, you may find that
the system can’t find the client, the client can’t find the network, or that
some other miscommunication occurs. Type IPConfig /RegisterDNS and
press Enter to correct problems where the server loses track of the client. If you think that the problem only exists for one adapter, you can
use the IPConfig /RegisterDNS Adapter command, where Adapter is the
name of the adapter to register.
NOTE Most IPConfig command line switches accept wildcard characters. For example, if you want to register all of the
connections that begin with Local Area, you’d type IPConfig /
RegisterDNS “Local Area*” and press Enter. The asterisk (*) represents any number of characters, while the question mark (?)
represents a single character.
Release a Connection
If you no longer need a connection or need to perform some troubleshooting, you can release it. In most cases, you’ll use the IPConfig /
Release Adapter command, where Adapter is the name of an adapter,
to release just one adapter. For example, to release the connection for
Local Area Connection 2, you’d type IPConfig /Release “Local Area
Connection 2” and press Enter. Releasing a connection results in loss of
network connectivity if the connection is active.
Managing the Network
Renew DHCP Addresses and Register DNS Names
Part III
170
Chapter 9
3
Working with TCP/IP
Use Basic Diagnostics
Network connectivity can be notoriously difficult to maintain and troubleshoot when it fails. After you check the physical connection and ensure all
of the correct drivers are in place, you begin looking for other potential
sources of the problem. The command line provides access to a number of
diagnostic aids that can make troubleshooting easier. The following sections provide an overview of the most important troubleshooting aids.
Check Connections
The Packet Internet Groper (PING) utility makes it possible to check connectivity to a specific resource. For example, if you want to check the
connection to a machine on the network named WinServer, you’d type
PING WinServer and press Enter. When everything is working correctly,
you see four tests of the connection as shown in Figure 9.3. The output
shows the IP address of the remote connection, the amount of data sent
to it, and how long the connection took to complete. At the end of the
test you see statistics, such as the number of tests run and how many
times the test failed. PING even provides times so that you can use it to
detect slow connections.
Figure 9.3 : The default PING configuration provides a simple way to test any
connection.
The basic test provides most of what administrators need to simply
check a connection. However, PING provides command line switches
to vary the size and number of tests. In fact, you can use the PING
RemoteAddress -t command, where RemoteAddress is the name or IP
address of the remote systems, to run PING continuously until you press
Ctrl+C to stop the test.
Use Basic Diagnostics
171
The default test uses IPv4 unless you have IPv4 disabled on the sending machine. If you want to specifically test IPv6 connectivity, use the
PING RemoteAddress -6 command. PING provides a wealth of other command line switches that modify the default test. Type PING /? and press
Enter to learn more.
Trace Transmission Paths
NOTE Don’t include a protocol when working with PathPing
or other path resolution utilities that work with a domain name.
For example, if you type PathPing http://www.mwt.net and press
Enter, you’ll see an error message, “Unable to resolve target system name http://www.mwt.net” because you’ve included a protocol. PathPing and other utilities require only the domain name
as input. This book will always include the protocol as part of an
URL when the protocol is needed to avoid potential confusion.
Figure 9.4 : Using PathPing shows you the path between the client machine and any
other location.
Managing the Network
Networks are complex and sometimes a packet doesn’t take a direct
path to a destination. In fact, if you’re working with an Internet connection, it’s almost certain that the path is indirect. A slow connection can
simply mean a problem with one of the intermediate locations. Each of
these intermediate connections is a hop. The PathPing utility will trace
the connections between two endpoints up to 30 hops. For example, let’s
say you want to see the path between a client and www.mwt.net. You’d
type PathPing www.mwt.net and press Enter. Figure 9.4 shows typical
output from PathPing.
Part III
172
Chapter 9
3
Working with TCP/IP
The output begins by creating a basic trace between two endpoints.
In this case, the trace requires three hops (the first entry in the output
is always the starting endpoint). Next, PathPing computes statistics for
the various hops. In this case, none of the hops lost data. It takes 3 ms
to send the packet between the starting endpoint and WinServer.mshome.
net, another 60 ms to go to dsl-lavalle2-129.lavalle.mwt.net, and
67 ms to finally reach www.mwt.net. If you’d seen a significant amount
of data loss or excessive transmission times for any of these hops, you
would have found the point of potential data loss and the reason a connection is slow.
PathPing supports a number of additional features that you can see
by typing PathPing /? and pressing Enter. For example, you can force
PathPing to perform an IPv6 test by using the -6 command line switch.
Track the Network Path
The PathPing utility can be a little slow to use, especially when it comes
to computing the network statistics. The TraceRt utility provides a
simple version of the same utility. In this case, all you see is the path
between two endpoints and the time required to traverse those endpoints. For example, if you want to check the connection between a client and www.mwt.net, you’d type TraceRt www.mwt.net and press Enter.
Figure 9.5 shows typical output from this utility.
Figure 9.5 : TraceRt is a simplified version of the PathPing utility.
Perform Detailed Network Diagnostics
173
Using RPCPing and Other Special Connectivity Utilities
Many specialty connection utilities are available, such as
RPCPing, which is commonly used to check connectivity with
Exchange Server and other COM servers (see the Knowledge
Base article at http://support.microsoft.com/kb/831051 for
details). Even if you have a good connection to the server, the
Remote Procedure Call (RPC) functionality required by these
applications might not always work. RPCPing provides a means
of performing a connectivity check using RPC, rather than IP
packets.
In order to create a command line syntax for RPCPing, you must
know something about the remote server and then choose command line switches that provide the information that the server
needs. Type RPCPing /? and press Enter to see a list of these
command line switches. Because RPCPing and other second-level
tools of this sort are so specialized, discussing them in detail in
this book isn’t possible, but you should be aware of their presence and use them whenever possible to locate the source of
application connectivity problems.
Perform Detailed Network Diagnostics
The NetDiag utility can help you perform detailed network tests that
locate specific issues, such as checking DNS for problems. In fact,
NetDiag is one of those utilities that every administrator should know
about and use regularly because it has the potential to save you a great
deal of time, yet is free of charge. Unfortunately, newer versions of
Windows don’t come with NetDiag installed— you have to download
and install it separately, so the first section that follows tells how to
obtain this useful utility. The sections that follow describe how to use
NetDiag to perform network diagnostics.
Managing the Network
The connectivity you’re checking is with a particular server that
relies on RPC. For example, you wouldn’t use RPCPing to check
connectivity to a server named WinServer, but you would use
RPCPing to check connectivity to the Exchange Server installed
on WinServer. In short, RPCPing is a second-level tool— the one
you use after you make the initial check using PING, PathPing, or
TraceRt.
Part III
174
Chapter 9
3
Working with TCP/IP
Obtain a Copy of NetDiag
Newer versions of Windows don’t provide support for the NetDiag utility by default. (If you perform an upgrade install from Windows 2003
or older, you’ll still find it on your system.) Use the following steps to
obtain a copy of NetDiag for your own use:
1. Download a copy of the utility from http://www.microsoft.com/
downloads/details.aspx?familyid=49AE8576-9BB9-4126-9761BA8011FABF38 or http://www.microsoft.com/downloads/details.
aspx?familyid=1EA70814-7E6C-46E5-8C8C-3C439A732E9F.
Of the two downloads, the Windows XP version (the first URL)
works better with newer versions of Windows. In some cases, you
may find that you obtain better results by running this utility at
a client, rather than at the server, due to the security features of
Windows Server 2008.
2. Double-click the WindowsXP-KB838079-SupportTools-ENU.EXE or
NetDiag_Setup.EXE file and follow the installation instructions.
The Windows XP version of the download will detect the operating system you’re using. Use these additional steps to install this
version.
a. Install the Windows XP Support Tools first on a Windows XP
system.
b. Locate the NetDiag.EXE file in the \Program Files\Support
Tools folder.
c. Copy the NetDiag.EXE file to the machine where you want to
use it.
3. Open a command prompt in Administrator mode by right-
clicking the Command Prompt shortcut and choosing Run As
Administrator from the context menu.
You may have to provide a password to use the command prompt
with the higher level credentials.
4. Add the NetDiag.EXE file location to the path by using the
PATH=NetDiagPath;%PATH% command, where NetDiagPath is the
location of NetDiag.EXE.
For example, if you use the default Windows XP Support Tools
path, you’d type PATH=C:\Program Files\Support Tools;%PATH%
and press Enter. Likewise, if you use the default Windows
Perform Detailed Network Diagnostics
175
Server 2000 path, you’d type PATH=C:\Program Files\Resource
Kit\;%PATH% and press Enter. Make sure you modify the path to
meet your specific installation needs.
Perform a Test
NetDiag provides a number of tests. In order to run these tests, simply
type NetDiag and press Enter. You might decide that you want the utility
to output more or less information. In this case, you type NetDiag fol-
lowed by one of the verbosity command line switches in the following
list, and then press Enter:
NN
/L: Doesn’t output any information at all, except to tell you when
the test is done. The output goes to the NetDiag.LOG file instead.
NN
/Q: Output only the error information to screen.
NN
/V: Output error information, the standard test information, and
supplemental test information. The supplemental test information
tells you about each test step and also includes details about adapters such as the adapter statistics.
/Debug: Outputs all of the information supplied with /V, plus
service-related information for each adapter card. This is the maximum amount of information you can receive.
Understand Diagnostics
Generally, the utility performs all tests in an attempt to locate all networking problems on the first pass. You must bind TCP/IP to one or
more adapters before running any of the tests (Windows generally
performs this task automatically for you during installation, but some
versions of Windows, such as Windows Server 2008 Server Core, may
require manual setup). If you’re simply checking the system for problems, then performing all of the tests is a very good idea, especially if
you can perform the tests during a scheduled system maintenance time.
There are situations where you may already have a good idea of what
is wrong with the network or you might need to run specific tests in
the interest of saving time. In this case, you can either run specific tests
using the NetDiag /Test:TestName command or skip specific tests using
the NetDiag /Skip:TestName command, where TestName is the name of
one of the tests in Table 9.1. For example, if you want to perform just
the IPConfig test, you type NetDiag /Test:IpConfig and press Enter.
Managing the Network
NN
Part III
176
Chapter 9
3
Working with TCP/IP
Table 9.1: NetDiag Test Listing
Test Name at Command Line
Full Name
Autonet
Automatic Private IP Addressing (APIPA) address test
Bindings
Bindings test
Browser
Redir and Browser test
DcList
Domain controller list test
DefGw
Default gateway test
DNS
DNS test
DsGetDc
Domain controller discovery test
IpConfig
IP address configuration test
IpLoopBk
IP address loopback ping test
IPX
IPX test
Kerberos
Kerberos test
Ldap
LDAP test
Member
Domain membership test
Modem
Modem diagnostics test
NbtNm
NetBT name test
Ndis
Netcard queries test
NetBTTransports
NetBT transports test
Netstat
Netstat information test
Netware
Netware test
Route
Routing table test
Trust
Trust relationship test
WAN
WAN configuration test
WINS
WINS service test
Winsock
Winsock test
Get Network Statistics
177
Locate and Fix Minor Problems
The NetDiag utility can fix minor network problems automatically. To
check the network completely and automatically fix minor problems,
type NetDiag /Fix and press Enter. You can also combine the /Fix command line switch with any level of verbosity and with switches that limit
the number of tests that NetDiag runs.
Get Network Statistics
Display All Connections and Ports
Connectivity is the basis for network communications. Good connections let applications obtain resources from remote locations. Too many
connections can provide an open door for reprehensible individuals to
enter your network and cause harm. In short, you need to control the
connections and ports to provide just enough connections, but no more
than you actually need to make applications work. To see a list of connections and ports on your system, type NetStat –a and press Enter.
The output of this command will show a list of IPv4 or IPv6
addresses that include port information in most cases. For example,
192.168.0.244:139 is an IPv4 address for port 139. The output will
also tell you whether the port is listening (waiting for something to
use them), established (actually performing useful work), or waiting
(neither listening nor performing useful work, but available). Finally,
you’ll discover whether the connection relies on the Transmission
Control Protocol (TCP) or User Datagram Protocol (UDP). Remember
that address 127.0.0.1 is the loopback (localhost) address used to connect to the local machine.
Managing the Network
Network statistics can often point out hard-to-locate problems in connectivity. For example, a high number of failures can tell you that a particular adapter has failed. Ports that are overwhelmed will show a high
number of errors as well. The NetStat utility won’t precisely tell you that
there’s an error on your network, but it provides indicators that an experienced administrator can use for diagnostic purposes. Even if there isn’t
an error, statistics can point out the need for an upgrade or tell you other
things about your network (such as the probing of some nefarious individual). The following sections describe how to use the NetStat utility.
Part III
178
Chapter 9
3
Working with TCP/IP
In some cases, the information you see in the output won’t make
sense because NetStat uses a shorthand that relies on your knowledge of
network addresses. You can enhance the information you receive by typing NetStat –a –f and pressing Enter. Now the output will contain Fully
Qualified Domain Names (FQDNs) that will tell you more about the
connection and possibly tell you about its source.
The output of NetStat –a can be time consuming to go through if
you’re in a hurry. In this case, type NetStat –n and press Enter to obtain
just a numeric list of connections without the usual protocol information. The list only tells you the basics, which includes whether the connection is established or waiting. The output doesn’t include ports that
are listening. Use these steps if you want to associate the active addresses
and ports with an application:
1. Type NetStat –o and press Enter.
The output is the same as using the NetStat –n command, but
you’ll see a fifth column that contains a Process Identifier (PID).
2. Open Task Manager by right-clicking the taskbar and choosing
Start Task Manager (or simply Task Manager) from the context
menu.
3. Select the Processes tab.
4. Choose View ➢ Select Columns to display the Select Columns
dialog box.
5. Check the PID (Process Identifier) entry and click OK.
6. Locate the PID found in the fifth column in the Task Manager dis-
play to find the application that’s using the connection.
Display Application Statistics
In some cases, you need to know which applications are using a particular IP address and port. To see the application specifics, type NetStat
–b and press Enter. The output tells you which application is using each
active address and port. In addition, you see information such as the
protocol in use (normally TCP or UDP).
Most of the entries will correlate directly to applications you have
opened on the system such as Outlook or Firefox. You might also see
applications such as MSTSC.EXE, which is used by Remote Desktop. One
entry may not have an application associated with it—the microsoft-ds
Get Network Statistics
179
or Directory Services connection on port 1138. Some applications use
well-known or registered port numbers as listed at http://en.wikipedia.
org/wiki/List_of_TCP_and_UDP_port_numbers. Because port usage is so
important, you might consider downloading and using the Microsoft
Port Reporter service from http://www.microsoft.com/downloads/
details.aspx?FamilyId=69BA779B-BAE9-4243-B9D6-63E62B4BCD2E.
Display Ethernet Statistics
You use the Ethernet statistics to get a quick overview of network
health. Simply type NetStat –e and press Enter to obtain this information. The Ethernet statistics are short and to the point. You’ll see numbers for the number of packets sent, unicast packets, and non-unicast
packets. However, the most interesting entries are the number of discards (packets that are malformed, which can point to a network error
or unwanted outside activity), errors (normally network errors that you
should fix), and unknown protocols (normally unwanted outside activity
that you should investigate).
The NetStat utility can display protocol-specific information in a number of ways. If you want to see a list of connections for a specific protocol, use the NetStat –p Protocol command, where Protocol is one of the
following protocols:
NN
TCP
NN
UDP
NN
TCPv6
NN
UDPv6
For example, if you want to see all of the TCP/IPv4 connections,
you’d type NetStat –p TCP and press Enter. You’ll see essentially the
same information you receive when using the NetStat –n command,
except you see just the protocol you requested (see the “Display All
Connections and Ports” section of the chapter for details).
If you want to see detailed protocol statistics, type NetStat –s and
press Enter. In this case, the output contains information such as the
number of packets sent and received. Using the NetStat –s command
displays statistics for all of the protocols. If you combine the –s and –p
Managing the Network
Display Protocol Information
Part III
180
Chapter 9
3
Working with TCP/IP
command line switches, you see just the statistics for the protocol you
specify. In this case, the –p command line switch can use the protocols:
NN
IP
NN
IPv6
NN
ICMP
NN
ICMPv6
NN
TCP
NN
TCPv6
NN
UDP
NN
UDPv6
For example, if you want to see the statistics for TCP/IPv4, you’d type
NetStat –s –p IP and press Enter.
Set a Refresh Interval
Network connections are constantly changing. You may need to see
these connections over time in order to determine the cause of a problem. In this case, you can add an automatic update interval to the
NetStat command. For example, you might want to see a short list of
network connections updated every 30 seconds. In this case, you type
NetStat –n 30 and press Enter. The update interval appears as a number of seconds at the end of the command. To stop displaying statistics,
press Ctrl+C.
Manipulate the Network Routing Tables
The Route utility tells you about routes on your network—the destinations of network connections. For example, if you have a connection
from a client to a server, this utility shows it to you. The following sections tell you about the Route utility.
Print the Routing Tables
Before you can do anything with the routing tables, you need to know
the current routes. To see the entire list of routes for the target system,
type Route Print and press Enter. (An alternative to this command is to
Manipulate the Network Routing Tables
181
type NetStat /R and press Enter.) You’ll see a list of network routes
similar to the one shown in Figure 9.6. The output begins with an interface list that contains all of the adapters for the system and their respective numbers. The next section is a list of IPv4 routes, followed by a list
of IPv6 routes.
Managing the Network
Figure 9.6 : The Route utility can display a list of existing destinations.
Part III
Add a New Route
In most cases, the system automatically configures routes as needed.
However, you might find that you need to add a route manually when
the client can’t find a server.
Use the following process to add a route:
1. Type Route Add.
182
Chapter 9
3
Working with TCP/IP
2. Provide a Destination, where Destination is an IPv4 or IPv6
address.
3. (IPv4 Only) Type Mask, and then provide an IPv4 mask.
4. (Optional) Provide a Gateway address, where Gateway is the IPv4 or
IPv6 address of the system used as a gateway.
If you don’t provide this value, the system will use a default gateway value.
5. Type Metric, and then provide a metric value for the connection.
A lower numbered metric value is faster than a higher numbered
metric value. Use metric values that reflect the true speed of a new
connection when compared to other connections in the routing
table.
6. Type IF, and then provide an IPv4 or IPv6 interface address.
7. (Optional) Type –p to make the connection persistent.
8. (Optional) Type –4 to force an IPv4 route or –6 to force an IPv6
route.
9. Press Enter. The Route utility creates the new route.
Change a Route
The Route utility restricts the changes you can make to the gateway or
the metric. You can’t change the basic address or interface information.
If you need to change more than the gateway or metric, you must delete
the old route and add a new one.
Use this process to change a route:
1. Type Route Change DestinationAddress, where DestinationAddress
is an IPv4 or IPv6 destination address that already appears in the
routing table.
2. (IPv4 Only) Type Mask MaskValue, where MaskValue is the current
mask for the destination address. You can’t change the mask for a
route.
3. (Optional) Type GatewayAddress, where GatewayAddress is either
the existing or a new IPv4 or IPv6 gateway address.
4. Type Metric MetricValue, where MetricValue is either the existing
or new metric value for the route.
Manipulate the Network Routing Tables
183
5. Type IF InterfaceAddress, where InterfaceAddress is the exist-
ing interface address for the route. You can’t change the interface
address for a route.
6. Press Enter. The Route utility changes the gateway and metric
information for the route as needed.
Delete a Route
Managing the Network
You may eventually need to remove a route. In this case, all you need
to do is use the Route Delete DestinationAddress command, where
DestinationAddress is the destination address you want to remove. For
example, if you want to remove the route for 192.168.0.244, then you’d
type Route Delete 192.168.0.244 and press Enter.
Part III
10
Creating System Connections
In this chapter, you will learn to:
33Create Remote Connections (Page 186)
Perform Remote System Management (Pages 186-206)
n
n
Set Up a Telephony Client (Page 19 0)
n
Perform Remote Windows Management (Page 191)
n
Execute Commands on a Remote System (Page 20 6)
33Obtain Process Information (Page 206)
n
n
Get Session Information (Page 207)
n
Terminate a Session (Page 208)
n
Disconnect an Active Session (Page 208)
n
End Processes (Page 208)
n
Shut Down the Terminal Server (Page 209)
Managing the Network
Work with Terminal Server (Pages 206-210)
Part III
186
Chapter 10
3
Creating System Connections
T
here are many ways to create connections between two computers. Previous chapters have concentrated on connectivity hardware,
the operating system at a low level, and protocols such as TCP/IP.
This chapter discusses two services used to create connections at the
command line (rather than as an application): Remote Desktop and
Terminal Server. In addition, you’ll discover a number of utilities that
help you perform remote system management.
The following sections describe how to work with these two useful services so that you can create the remote connections you need to
interact with other machines, especially those servers locked in a room
somewhere (hopefully they’re locked up for security reasons). Of course,
the techniques described in this chapter are also helpful when working
with users and configuring other systems after an initial installation
process completes. The point is to be able to access systems remotely
when command line utilities don’t provide this functionality as a builtin feature using the /S (system), /U (username), and /P (password) command line switches.
Perform Remote System Management
Remote system management involves creating a connection to a
remote system, taking control of remote resources, and then using
those resources to complete a task. For example, you might create a
connection to a remote system for the purpose of managing the hard
drive. You might need to create a partition, defragment the hard drive,
or simply check it for errors. You use remote system management to
improve administrator efficiency. Instead of running to each computer
individually, an administrator can perform tasks from a single location. In addition, the administrator can often perform multiple tasks—
while waiting for a task to complete on one system, the administrator
can perform tasks on another machine. The following sections discuss
several remote system management utilities.
Create Remote Connections
Remote Desktop is possibly the most useful remote system management
tool that comes with Windows. Of course, there are more complete
Perform Remote System Management
187
remote management tools, such as System Center Operations Manager,
but these tools are complex, expensive, and definitely for the high-end
professional. Anyone can use Remote Desktop, even users who simply
need to access their work machine from home. The “Use the Remote
Desktop Connection Application” section of Chapter 2 discusses the
GUI method for working with Remote Desktop. The sections that follow describe the command line utility associated with Remote Desktop,
Microsoft Terminal Services Client (MSTSC).
Edit a Connection File
The Remote Desktop application relies on Remote Desktop Protocol
(RDP) files to store information about connections to remote systems.
The .RDP files are actually text strings that tell the Remote Desktop
application how to configure itself. If you change the extension for an
.RDP file to .TXT and open it using Notepad, you’ll see a list of strings
like those shown in Figure 10.1. In fact, this technique is useful to know
about when an .RDP file becomes corrupted.
Generally, you’ll use the standard editor for changing the content
of an .RDP file. To modify the content of a file, use the MSTSC /Edit
RDPFilename command, where RDPFilename is the name of a connection file. For example, to change the settings of Windows Server.RDP,
you’d type MSTSC /Edit “Windows Server.RDP” and press Enter. You’ll
see a Remote Desktop Connection dialog box like the one shown in
Figure 10.2 where you can change the connection settings as described
in the “Use the Remote Desktop Connection Application” section of
Chapter 2.
Managing the Network
NOTE MSTSC is one of a few command line utilities that
doesn’t provide the standard textual help. When you type
MSTSC /? and press Enter, you see a dialog box that contains
the list of command line switches that are applicable for the
version of MSTSC that you’re using. The graphical help is perfectly normal in this case. Only a few command line utilities
provide graphical help, such as the Windows Scripting engine,
WScript. In most cases, Microsoft is assuming that the graphical help will prove more useful because you normally work
with these utilities in a graphical environment (even though
you execute them at the command line).
Part III
188
Chapter 10
3
Creating System Connections
Figure 10.1: .RDP files are simply a series of strings used to configure the Remote
Desktop application.
Figure 10.2 : The Remote Desktop Connection dialog box lets you change the
connection settings.
Perform Remote System Management
189
Connect to a Server
The MSTSC utility provides several scriptable methods of connecting to
a remote system and you need to choose the best method for your particular needs. The following procedure helps you create a connection
to any server:
1. Select from one of these connection techniques:
NN
Type MSTSC RDPFilename, where RDPFilename is the name of the
.RDP file you want to use. This option offers customized settings for that server but requires an initial setup process.
NN
Type MSTSC /V:ServerName[:Port] /Admin, where ServerName is
the name of the server and Port is an optional port number for
the connection. This option relies on the default connection
configuration, but offers quick connectivity to any system. It
also makes it easier to add general connectivity using a batch
or script file.
Type MSTSC /Public. This option displays the Remote Desktop
Connection dialog box and lets the user set the connection criteria. The dialog box is automatically preconfigured with the
settings found in the default configuration.
2. (Optional) Type /F to start Remote Desktop in full screen mode or
type /W:Width /H:Height (where Width is the width of the window
and Height is the height of the window) to open Remote Desktop
using a specific window size.
3. (Optional) Type /Span to span multiple monitors or /Multimon to
use multiple monitors arranged in a rectangle. Remote Desktop
configures the remote desktop to match the client configuration
so that you have more screen real estate when working with the
remote system.
4. Press Enter. Remote Desktop opens a connection to the remote
system using the connection technique and optional specifications
that you supply.
Migrate an Older Connection File
You might have used earlier versions of Remote Desktop with other versions of Windows. The associated connection files might not work with
the current version of Remote Desktop on your system. Fortunately, you
don’t have to re-create the connection files. Simply use the MSTSC /Migrate
Managing the Network
NN
Part III
190
Chapter 10
3
Creating System Connections
ConnectionFilename command, where ConnectionFilename is the name of
an old connection file, to migrate the settings to a new .RDP file. For example, to migrate MyServer.RDP to a new .RDP format, type MSTSC /Migrate
MyServer.RDP and press Enter. The MSTSC utility doesn’t provide any output
in this situation—you simply try the converted .RDP file to see if it works.
Set Up a Telephony Client
The Telephony Client Management Setup (TCMSetup) utility makes it
possible to configure the Telephony Application Programming Interface
(TAPI) for a system. TAPI is actually used for a number of connection types, including the Private Branch Exchange (PBX) connectivity
required for larger organizations. The precise use of TAPI depends on
the application and server that you set up, so you need to check the
vendor documentation before using this utility. The following sections
describe how to create and disable a connection.
Create a Connection
Before you can use TAPI for a specific purpose on a machine, you have
to create a connection to a server. In order to perform this task, you use
the TCMSetup /C Server command, where Server is the name of the TAPI
server you want to use. For example, if you want to create a TAPI connection to WinServer, you type TCMSetup /C WinServer and press Enter.
The TCMSetup utility will also automatically discover any other servers on your network. In some cases, you might have multiple servers but
want a client to use a specific server. In this case, add the /R command
line switch to restrict discovery to the servers you specify. For example,
if you want to restrict access to just WinServer, then you’d type TCMSetup
/C WinServer /R and press Enter.
Whenever you create a connection, the TCMSetup utility displays a success message. This message appears within a dialog box, which means
that someone has to dismiss it before any script containing the command
can continue. Use the /Q command line switch to suppress the success
message so that the command can run unattended.
Disable a Connection
At some point, you’ll probably need to disable the TAPI connection
you’ve created. To disable the TAPI connection, type TCMSetup /C /D
and press Enter.
Perform Remote System Management
191
Perform Remote Windows Management
The Windows Remote Management (WinRM) utility helps you manage a
remote system from the command line. This utility is Microsoft’s implementation of the WS-Management protocol, which provides a secure
method of connecting local and remote computers using a Web service.
You can learn more about the WS-Management protocol at http://
msdn2.microsoft.com/library/aa384470.aspx. The process for using
WinRM is as follows:
1. Install Internet Information Server (IIS) support on the host sys-
tem if you want to allow remote access to the machine.
2. Type WinRM QuickConfig and press Enter to start the Windows
Remote Management (WS-Management) service, if necessary.
You can execute commands locally or on a remote system, but
the system must have the Windows Remote Management (WSManagement) running in order to respond to requests.
3. Type Y and press Enter when asked whether you want to make the
When working with a remote system that isn’t part of a domain,
you normally have to configure IIS to support the Web service. In
addition, you must enable the required firewall access.
4. Type Y and press Enter when asked whether you want to allow
remote access, if you want to allow such access. Otherwise, type N
and press Enter to deny remote access to the system.
5. Define the Uniform Resource Identifier (URI) that you want to
access.
The URI takes the form \\root\NAMESPACE[\NAMESPACE]\CLASS (see
the “Define a URI” section of the chapter for additional details).
6. Execute a command that defines the task you want to perform.
These commands take the following form:
NN
G[et]: Obtains management information.
NN
S[et]: Modifies the management information. You can also
specify this operation as put.
NN
C[reate]: Defines new instances of management resources.
NN
D[elete]: Removes an instance of a management resource.
Managing the Network
changes required to use WinRM.
Part III
192
Chapter 10
NN
3
Creating System Connections
E[numerate]: Lists the instances of the specified management
resource.
NN
I[nvoke]: Executes a method on a management resource.
NN
Id[entify]: Determines whether WinRM or another compat-
ible WS-Management implementation is running on a remote
machine. This command is always executed using the –Remote
command line switch. For example, if you want to determine
whether WinRM is running on WinServer, you’d type WinRM
Identify -Remote:WinServer and press Enter.
7. Repeat steps 5 and 6 as needed to accomplish all required manage-
ment tasks.
This process is a basic overview of what you can do. The following
sections describe various tasks in greater detail.
Understanding the WinRM Help System
WinRM has a very odd help system when compared to other command line utilities. If you want to discover more information
about a basic task, you use the WinRM CommandName –? command,
where CommandName is a command such as Get or Set. For example, to learn more about the Get command, you’d type WinRM Get
–? and press Enter.
However, if you want to discover more about a supplemental
topic, such as how to create a URI, then you need to use the
WinRM Help Topic command, where Topic is a topic such as URIs.
Here’s a list of supplemental topic commands:
NN
WinRM Help URIs
NN
WinRM Help Aliases
NN
WinRM Help Config
NN
WinRM Help CertMapping
NN
WinRM Help Remoting
NN
WinRM Help Auth
NN
WinRM Help Input
NN
WinRM Help Switches
NN
WinRM Help Proxy
Perform Remote System Management
193
Define a URI
Every resource controlled by WinRM has a unique URI. Using a unique
URI ensures that you can access the resource whenever needed and manage it. The URIs follow a hierarchical path beginning with \\root or you
can use the alias of wmi/root, which stands for Windows Management
Instrumentation (WMI). There’s also a schema approach that uses what
looks like an HTTP address, but you really don’t need to worry about
three different methods of obtaining the same information. In fact, the
wmi\root approach is the most reliable, so that’s what you’ll see used in
this chapter.
The creation of a URI begins with a namespace. A namespace is
simply a collection of like items. The namespace identifies the collection, and then you access resources within the namespace. Of course,
Microsoft wouldn’t make it easy to figure out the namespaces on your
system—you need to know the secret location of the namespace listing for your machine. The following steps tell you how to locate the
namespaces on your machine:
1. Open the Computer Management console found in the
2. Open the Computer Management\Services and Applications\WMI
Control folder.
3. Right-click WMI Control and choose Properties from the context
menu. You’ll see the WMI Control Properties dialog box.
4. Select the Security tab. You’ll see the Root namespace. Click the
plus sign (+) next to Root. You can drill down into the namespaces
for your computer as shown in Figure 10.3.
As Figure 10.3 shows, there are many different namespaces on your
machine. The most important namespace, the one you use most often, is
the Common Information Model version 2 (CIMv2) namespace. This is
a standardized namespace that you can read about at http://www.dmtf.
org/standards/cim/. To reach the CIMv2 namespace, you’d use the wmi\
root\cimv2 URI. Of course, this URI only gets you to the namespace and
doesn’t show you any of the resources the namespace contains.
The resource within a namespace is called a class. A full-fledged URI
then is a combination of wmi/root/Namespace[/Namespace...]/Class,
where Namespace is one or more hierarchical namespaces and Class is a
resource within the selected namespace hierarchy. For example, if you
Managing the Network
Administrative Tools folder of the Control Panel.
Part III
194
Chapter 10
3
Creating System Connections
want to discover the services on a system, then you’d use a URI for wmi/
root/cimv2/Win32_Service. To enumerate (list) all of the services on the
machine, you’d type WinRM Enum wmi/root/cimv2/Win32_Service and
press Enter. The “Enumerate Resources” section of the chapter tells you
more about enumerating resources using WinRM.
Figure 10.3 : The Security tab shows a list of namespaces on your machine.
NOTE Many namespace names are case sensitive. When in
doubt, type the namespace name precisely as you see it capitalized in the Security tab of the WMI Control Properties dialog box.
So far this section has talked about WMI. However, WMI is
Microsoft specific. WMI is actually Microsoft’s implementation of
Web-Based Enterprise Management (WBEM). When you hear WMI,
think Microsoft specific, and when you hear WBEM, think about a
standard used by everyone. In fact, you can see the WBEM standard at
http://www.dmtf.org/standards/wbem. The reason WBEM is so important is that you’ll see a number of references to WBEM in Windows
when Microsoft has tried hard to implement the standard.
One of the utilities you need to know about is WBEMTest. This is a GUI
tool that you won’t see on any menu. To start this utility, type WBEMTest
and press Enter. Figure 10.4 shows the initial screen that you see when
the utility starts.
Perform Remote System Management
195
This utility has many purposes, most of which have nothing to do
with this book. However, you can use the WBEMTest utility to connect to
a namespace and then discover the resources it contains.
Use these steps to discover more about the wmi/root/cimv2
namespace:
1. Click Connect. You see the Connect dialog box shown in
Figure 10.5.
This dialog box has a lot of confusing-looking fields, but the only
field you need to know about is Namespace. The WBEMTest utility
doesn’t precede the namespace with wmi, so the wmi/root/cimv2
namespace becomes simply root/cimv2.
2. Type the namespace you want to review. Click Connect.
The buttons that were disabled in Figure 10.4 are now enabled.
3. Click Enum Classes.
You see a Superclass Info dialog box. You could type the name of
a class here, such as Win32_Service, to drill down into it, but leave
the Enter Superclass Name field blank for now.
4. Click OK.
You see a list of classes (resources) associated with the namespace
you typed in step 1, as shown in Figure 10.6.
Managing the Network
Figure 10.4 : WBEMTest is a useful utility for discovering more about WMI URIs.
Part III
196
Chapter 10
3
Creating System Connections
Figure 10.5 : Enter a namespace in the Namespace field.
Figure 10.6 : Select the resource you want to see from the list shown.
This whole process may seem error prone and difficult. The fact is
that you’ll very likely find a few WMI resources that you need to access
and will include them in scripts, so you won’t spend nearly as much
time constructing URIs as you might think. However, it’s a good idea to
know how to construct a URI when you need it. Fortunately, Microsoft
also provides a number of helpful WMI tools that you can download at
http://www.microsoft.com/downloads/details.aspx?FamilyID=6430F8531120-48DB-8CC5-F2ABDC3ED314. If you find that you need to create URIs
relatively often, download these tools to ease the burden of putting them
Perform Remote System Management
197
together. It’s important to note that these tools require Internet Explorer
because they require the use of ActiveX controls, but because the tools
execute locally, using them is safe.
Enumerating a resource means to list it. However, enumeration is a little
more extensive than that. When you enumerate a resource, WinRM also
examines the resource and prints out its content unless you specifically
limit this output. You’ve already seen some simple examples of enumeration in the “Define a URI” section of the chapter. This section of the
chapter begins looking at ways to get precisely the information you want
as part of the enumeration.
If you looked at the list of Windows services using the WinRM utility
earlier, you noticed that the list is very long and would be difficult to
view even using the More utility. One way to limit the output you receive
is to use the –Shallow command line switch, which displays just the basic
information for each resource. In addition, you can limit the number of
properties that WinRM displays by using the –BasePropertiesOnly command line switch. For example, if you type WinRM Enum wmi/root/cimv2/
Win32_Service -BasePropertiesOnly and press Enter you see a somewhat
shorter list (even though it’s still quite long).
Figure 10.7: It’s easy to output a single service’s data using a filter.
Managing the Network
Enumerate Resources
Part III
198
Chapter 10
3
Creating System Connections
Filtering presents another method of reducing the size of the output.
A filter can use a number of syntaxes. WMI relies on a SQL Server–like
syntax. Let’s say you want to find the BITS service information. In this
case, you’d type WinRM Enum wmi/root/cimv2/* -Filter:”select * from
Win32_Service where Name=\”BITS\” “ and press Enter. Notice that you
don’t provide the name of the class, Win32_Service, as part of the URI,
but you do use an asterisk (*) to specify all classes. The –Filter command line switch specifies a SQL Server-like statement that selects the
BITS service from the Win32_Service class, as shown in Figure 10.7.
SQL Server statements can be difficult to put together, so WinRM
provides a second, some say easier, method of creating a filter. In this
case, you use the –Dialect command line switch to specify that WinRM
rely on a selector syntax instead of SQL Server–like statements. To
make this work, you type WinRM Enum wmi/root/cimv2/Win32_Service
-Dialect:Selector -Filter:{Name=”BITS”} and press Enter. In fact, the
–Dialect command line switch lets you use all kinds of filtering methods,
including exotic options such as XPath. This book assumes that you’re
using either the selector option or the SQL Server–like statements for
filtering purposes.
It isn’t always easy to create a filter that relies on a single property,
such as Name. You might have to combine properties to obtain the results
you want. For example, you might want to see all of the services that are
set to start manually, yet are running on the host system. Because there
are multiple outputs, you might want to add the More utility through
a pipe so you can see the output. In this case, you’d type WinRM Enum
wmi/root/cimv2/Win32_Service -Dialect:Selector -Filter:{StartMo
de=”Manual”;State=”Running”} | More and press Enter. If you prefer
the SQL Server–like syntax, you’d type WinRM Enum wmi/root/cimv2/*
-Filter:”select * from Win32_Service where StartMode=\”Manual\”
and State=\”Running\” “ | More and press Enter.
The enumeration examples to this point have shown text output.
This is the output that you can read easiest at the command line.
However, if you have a lot of output to process, you might decide to
output it as XML, rather than as text, to make it easier to import into
another application or a database. In this case, you use the –Format command line switch to change the format to one of the following options:
NN
XML (unformatted XML)
NN
Pretty (formatted XML)
NN
Text (the default option)
Perform Remote System Management
199
For example, you might choose to output all of the Windows service
entries to an XML file. To perform this task, type WinRM Enum wmi/root/
cimv2/Win32_Service -Format:XML > Output.XML and press Enter. Of
course, you can use any filename you want and combine this technique
with any of the other enumeration command line switches discussed so
far. You can now open Output.XML in an application such as Excel, as
shown in Figure 10.8.
Managing the Network
Figure 10.8 : Converting the WinRM output to XML makes it possible to process it
using Excel.
Part III
Get a Resource
Administrators often have trouble differentiating between enumerating and getting resources because the two processes seem the
same. However, the two processes differ in one important aspect.
Enumerating a resource means listing it. You leave the resource alone
and simply look at it. Getting a resource means opening the resource
in the WMI database and obtaining a copy of it, which means that you
must have additional rights, but you can also do more with the data.
200
Chapter 10
3
Creating System Connections
When you get a resource, you also get a specific instance of it. In
other words, you can’t get all of the Windows services; you get a specific
Windows service (or services) and do something with it. To make this
difference clearer, you can’t issue a command like this: WinRM Get wmi/
root/cimv2/Win32_Service because you’re looking for a nebulous number of resources. What you’d do instead is ask for a specific service, such
as BITS, by typing WinRM Get wmi/root/cimv2/Win32_Service?Name=BITS
and pressing Enter.
Notice that this syntax is much simpler than enumerating a resource
because you’re asking for less information. You simply type the URI as
you normally would, a question mark (?), the key property that identifies the resource you want to obtain, and the value of that property.
Services are identified by their name, so you use the Name property, followed by the value, such as BITS. If you use a non-key property, such as
State, then you see an error message because the result would contain
more than one resource.
Getting a resource is handy because you can use the output as
input to scripts and batch files. The secret is to use the –Fragment
command line switch, which makes it possible to obtain just a little
of the output. For example, you might want to obtain the state of
the BITS service. In this case, you’d type WinRM Get wmi/root/cimv2/
Win32_Service?Name=BITS -Fragment:State/text() and press Enter.
The –Fragment command line switch specifies the State property in this
case. The following slash (/) and the text() function tells WinRM that you
only want the value (Running, Stopped, or Paused) as output. If your
machine isn’t using BITS at the moment, you see Stopped as the output.
Set a Resource
Setting a resource changes the value of a property. For example, you
could change the name of a service if you desired. However, setting a
resource often has more of an effect than simply modifying data. For
example, if you change the State property of a service, you can start,
stop, pause, or continue it. Of course, changing the State property isn’t
the normal way to interact with a service and you won’t commonly do it
that way, but you could.
Perform Remote System Management
201
Let’s say that you want to start the W32Time service; you’d type WinRM
Set wmi/root/cimv2/Win32_Service?Name=W32Time @{State=”Running”}
and press Enter. Notice that the Set command begins with a URI, just like
every other command so far. You access a particular resource using the
same technique as you use with Get. To change the State property, you
begin with the at sign (@) and enclose the property and value pair in curly
braces. After you execute this command, WinRM displays the new property
information for W32Time, which shows the new State property value
of Start Pending. If you subsequently type WinRM Get wmi/root/cimv2/
Win32_Service?Name=W32Time and press Enter, you’ll see that the service is
started. To stop the service, you type WinRM Set wmi/root/cimv2/Win32_
Service?Name=W32Time @{State=”Stopped”} and press Enter.
Managing the Network
Figure 10.9 : WinRM provides a number of configuration settings.
Part III
202
Chapter 10
3
Creating System Connections
A more typical Set change is to configure a setting. For example, you
can change the settings for WinRM to better match your use of it. To see
the WinRM settings, type WinRM Get WinRM/Config and press Enter. You’ll
see the list of entries shown in Figure 10.9. Let’s say you want to change
the maximum number of connections that WinRM will accept from 25 to
30. The MaxConnections setting is actually part of the Service resource,
so you’d use a URI of WinRM/Config/Service to reach the MaxConnection
property. To accomplish this task, you’d type WinRM Set WinRM/Config/
Service @{MaxConnections=”30”} and press Enter. When WinRM executes
the command, you don’t see everything shown in Figure 10.9. What you
do see is the Service part of the resource.
Create a Resource
The resources you access using WMI are in a database of sorts, and as
with any database, you can add new items to it. However, you’ll find
that unlike most databases, you’ll seldom actually need to add anything
to WMI. The one major exception is the listener that WinRM uses for
requests. The default listener relies on HTTP, which means that the connection isn’t secure. To see the current listener, type WinRM Enum WinRM/
Config/Listener and press Enter. Figure 10.10 shows typical output,
which is the HTTP listener.
Figure 10.10 : The default listener relies on HTTP.
As shown in Figure 10.10, WinRM is currently listening to any client
address on port 5985 using a number of local IPv4 and IPv6 addresses,
including the loopback (localhost) address. As long as you only use
WinRM locally and don’t enable firewall access for it, the HTTP listener
Perform Remote System Management
203
should be relatively safe, but administrators won’t normally work
locally, so it’s important to add an HTTPS listener that relies on SSL to
secure the communication. The easiest way to create an HTTPS listener
is to use these two steps:
1. Install a server certificate when using the HTTPS transport.
You can obtain such a certificate from a third-party source such as
VeriSign. It’s also possible to create a self-signed certificate using
the Cert Services feature of Windows Server.
2. Type WinRM QuickConfig -Transport:HTTPS and press Enter.
WinRM creates an HTTPS listener that provides access to all clients
using the default client port, hostname, and local ports.
The WinRM QuickConfig command works fine if you want to use
the defaults. In fact, it’s the suggested approach for most situations.
However, you might find that the defaults won’t work for your organization, which is where the WinRM Create command comes into play. The
following steps describe how to create an HTTPS listener (and also tell
you how to add new entries to the WMI database):
2. Type WinRM Create WinRM/Config/Listener?. This is the common
part of the command.
3. Type Address=*, where * is all addresses.
You may substitute one or more specific addresses for * to ensure
that only certain client addresses can access WinRM. For example,
if you want to provide access only for the localhost address, you’d
use IP:127.0.0.1 as the address.
4. Type +Transport=HTTPS, where HTTPS is the transport you want to
use. You may substitute HTTP if you want to use a different HTTP
address.
5. (HTTPS Only) Type @{ CertificateThumbprint=”CertNumber“},
where CertNumber is the 40-digit hexadecimal number for the certificate you installed in step 1.
Managing the Network
1. Install a server certificate when using the HTTPS transport.
Part III
204
Chapter 10
3
Creating System Connections
NOTE It’s possible to set other listener features within the
@{} structure of a WinRM Create command. Each of these entries
are a key/value pair where the key is the name of one of the
entries shown in Figure 10.10 and the value is a legal value within
double quotes. You can use Hostname, Port, Enabled, URLPrefix,
ListeningOn, and CertificateThumbprint as key names.
Therefore, if you want to set the port for an HTTP listener to
5599, you use Port=”5999” as the key/value pair. Separate the
individual entries using a semicolon. A configuration entry that
sets the Hostname and Port entries would be something like this:
@{Hostname=”LocalHost”;Port=”5999”}.
6. Press Enter. WinRM creates the new resource for you.
Figure 10.11: Use specific addresses for improved security.
The “Delete a Resource” section of the chapter describes how to
remove a resource from the WMI database. You can remove the default
HTTP listener and add specific entries. For example, let’s say you want
to restrict access to WinRM to the localhost address. In this case, after you
delete the original * entry, you’d type WinRM Create WinRM/Config/Listen
er?Address=IP:127.0.0.1+Transport=HTTP and press Enter. Now, let’s say
you decide to add one external address—the address of the administrator
machine, which is 192.168.0.244. To add this second address, you’d type
WinRM Create WinRM/Config/Listener?Address=IP:192.168.0.244+Transp
ort=HTTP and press Enter. Now, type WinRM Enum WinRM/Config/Listener
and press Enter. You see the results shown in Figure 10.11. WinRM is only
Perform Remote System Management
205
listening on two addresses now. Anyone else will get static. The result is
improved security (the system would still be open to IP spoofing, but the
perpetrator would need to know which IP address to use).
Delete a Resource
You’ll likely find that you need to delete a resource at some point. It’s
never a good idea to delete elements from the WMI database that you
aren’t absolutely certain about. In fact, the WMI database will prevent
you from deleting most entries. However, the one entry that you’ll find a
need to delete is the WinRM listener. Use the WinRM Delete WinRM/Config/
Listener?Address=IPAddress+Transport=TransType command, where
IPAddress is either * or a legal IPv4 or IPv6 address and TransType is
either HTTP or HTTPS. For example, to delete the default listener, you
type WinRM Delete WinRM/Config/Listener?Address=*+Transport=HTT
P and press Enter. If you wanted to delete a loopback specific listener,
you’d type WinRM Delete WinRM/Config/Listener?Address=IP:127.0.0.1+
Transport=HTTP and press Enter.
You probably won’t use the WinRM Invoke command very often because
other commands and utilities perform the task better. The WinRM Invoke
command lets you execute a command locally, or when combined with
the –Remote command line switch, on another system. You use the WinRM
Invoke Action ResourceURI [–Switch:Value[,–Switch:Value...]] command, where Action is the action you want to perform, ResourceURI is
the resource you want to use, –Switch is a switch for the resource, and
Value is the switch value. For example, if you want to start a service such
as the Bluetooth Support Service (BthServ), you’d type WinRM Invoke
StartService wmi/root/cimv2/Win32_Service?Name=BthServ and press
Enter. To stop the service, you’d type WinRM Invoke StopService wmi/
root/cimv2/Win32_Service?Name=BthServ and press Enter.
The WMIC utility, described in Chapter 15, is the best way to obtain
a list of actions that a particular resource supports. For example, to
discover the list of methods that a service supports, type WMIC SERVICE
CALL /? and press Enter. You’ll discover the services support Change,
ChangeStartMode, Create, Delete, InterrogateService, PauseService,
ResumeService, StartService, StopService, and UserControlService
as actions.
Managing the Network
Invoke a Method on a Resource
Part III
206
Chapter 10
3
Creating System Connections
Execute Commands on a Remote System
The WinRS utility is extremely flexible. You can use it to execute any
command that a remote system is capable of executing from the command line. The WinRS utility supports a host of command line switches.
To see them all, type WinRS /? and press Enter.
In most cases, however, you use the WinRS –r:MachineURL –u:Username
–p:Password CmdString command, where MachineURL is the machine
name or URL you use to access the remote system, Username is the name
of the user account, Password is the user’s password, and CmdString is
the command plus any required command line switches used to execute
the command, to work with the remote machine. For example, let’s say
Sarah wants to execute Dir C:\ on a remote system named MyServer.
In this case, you’d type WinRS -r:MyServer -u:Sarah -p:Password “Dir
C:\” and press Enter.
Work with Terminal Server
Terminal Server is the support for Terminal Services, which is the basis
for remote desktop connectivity in Windows. Using Terminal Server lets
client systems create a remote connection to the server. For example,
when you use Remote Desktop, you’re relying on Terminal Server to
create a remote connection for you. The following sections provide
an overview of the various command line tasks you can perform with
Terminal Server.
NOTE None of these utilities will work on a remote system
unless you have the proper credentials. Normally, you need
administrator privileges on the remote system to perform
Terminal Server tasks.
Obtain Process Information
The QProcess utility makes it possible to list the processes running on the
specified system. If you type QProcess and press Enter, you see the processes running on the local system for the current user. To see all of the
processes, no matter who started them, type QProcess * and press Enter.
You can also use the QProcess Username command, where Username is a
username (including System, Network Service, and Local Service) that
Work with Terminal Server
207
you want to see. It’s also possible to look for a particular program identifier or session name.
To view processes on another machine, you use the QProcess /
Server:ServerName command, where ServerName is the name of the
remote system. For example, if you want to see the processes on
MyServer, you type QProcess /Server:MyServer and press Enter. You
can combine the /Server command line switch with any of the other
parameters to obtain specific information. To see all of the console processes, you’d type QProcess Console /Server:MyServer and press Enter.
Get Session Information
NOTE It’s important to remember that QWinSta is Terminal
Server–specific. You won’t see other kinds of sessions on the
remote system. For example, a user who is logged in regularly
won’t appear in the output. Only users who are relying on some
form of Remote Desktop or other Terminal Services support will
appear in the list.
To see the sessions on a remote system, use the QWinSta /
Sever:ServerName command, where ServerName is the name of the remote
system. For example, to see the session on MyServer, you’d type QWinSta /
Server:MyServer and press Enter. A session name won’t match the user’s
name in most cases. For example, the user Jeff might actually be logged in
as session RDP-Tcp#2. Consequently, when attempting to find a particular user, you need to look at the username first and then the session name.
It’s possible to look for a session based on the username. Simply use
the QWinSta Username command, where Username is the name of the user
you want to find. For example, to locate the session associated with user
Jeff, type QWinSta Jeff and press Enter. The QWinSta utility provides
other command line switches that you can see by typing QWinSta /? and
pressing Enter.
Managing the Network
Many of the Terminal Server–related commands depend on session
information to work. The QWinSta utility provides session information. To see all of the sessions on the local workstation, type QWinSta
and press Enter. You’ll see the session name, name of the user who is
logged into the session, and a number of other pieces of information
about the session. The most important information for using other
utilities is the session name.
Part III
208
Chapter 10
3
Creating System Connections
Terminate a Session
A user session might freeze or become otherwise inaccessible.
Unfortunately, Windows won’t release the resources used by the session
until you terminate it. To terminate a session, use the Reset SessionName
command, where SessionName is the name of a session. For example, to
terminate session RDP-Tcp#2, you’d type Reset RDP-Tcp#2 and press
Enter. It’s important to note that this command only works on the local
system—you can’t remotely terminate a session. To disconnect an active
user, use the TSDiscon utility instead (see the “Disconnect an Active
Session” section for details).
Disconnect an Active Session
An administrator might have to intervene on a user’s behalf to stop an
active session that has stopped working. You only want to disconnect
an active session as a last resort. It’s far better to try to end the errant
process first using the TSKill utility (see the “End Processes” section
for details). If it becomes evident that you can’t salvage the session (and
therefore save the user’s data), use the TSDiscon SessionName command,
where SessionName is the name of the session that you want to disconnect. For example, to disconnect the RDP-Tcp#2 session, you’d type
TSDiscon RDP-Tcp#2 and press Enter. (It’s also possible to disconnect a
session using the session ID, rather than the name, but using the name is
less likely to cause errors.)
To disconnect a session on another system, use the TSDiscon
SessionName /Server:ServerName command, where ServerName is the
name of the server. For example, to disconnect the RDP-Tcp#2 session
on MyServer, you’d type TSDiscon RDP-Tcp#2 /Server:MyServer and
press Enter.
End Processes
The TSKill utility makes it possible to terminate applications being
run under Terminal Services. You use TSKill to terminate a frozen
application, rather than the entire session, when the session itself is still
responsive. Use the QProcess utility described in the “Obtain Process
Information” section to obtain a list of processes before you begin using
TSKill. Use the TSKill PID command, where PID is a process identifier,
to kill a particular process. For example, to kill process number 2232
you’d type TSKill 2232 and press Enter. As with many of the other
Work with Terminal Server
209
Terminal Server utilities, you rely on the /Server:ServerName command
line switch (where ServerName is the name of the server you want to
access) to kill a process on a remote system.
Shut Down the Terminal Server
Managing the Network
At some point, you may need to shut down the Terminal Server. In this
case, you type TSShutDn and press Enter. This command comes with a
number of additional command line switches for controlling the shutdown. For example, you can use the /Reboot command line switch to
reboot the server and automatically restart it (such as after installing a
patch). Type TSShutDn /? and press Enter to see a complete list of these
command line switches. As with many of the other Terminal Server utilities, you rely on the /Server:ServerName command line switch (where
ServerName is the name of the server you want to access) to perform a
shutdown on a remote system.
Part III
PART IV
Interacting with
Active Directory
In This Part
q
CHAPTER 11: Configuring Directory Services. . . . . . . . . . . . . . . . . . . . . 213
Interacting with
Active Directory
CHAPTER 12: Working with Directory Objects. . . . . . . . . . . . . . . . . . . . 229
Part IV
11
Configuring Directory Services
In this chapter, you will learn to:
33
Manage Directory Services Using the WMIC
NTDomain Alias (Pages 214–218)
n
List the Objects (Page 215)
n
List Object Properties (Page 215)
n
Get an Object Property (Page 216)
n
Set an Object Property (Page 217)
n
Query an Association (Page 217)
33
n
Interact with Servers (Page 218)
n
Interact with Users (Page 220)
n
Interact with Computers (Page 223)
n
Interact with Contacts (Page 223)
n
Interact with Groups (Page 223)
n
Interact with Organizational Units (Page 224)
33
Manage the Active Directory Database
(Pages 225–227)
n
Issue a Command (Page 225)
n
Use a Stream (Page 226)
Interacting with
Active Directory
Manage Active Directory with the DSQuery
Utility (Pages 218–224)
Part IV
214
Chapter 11
3
Configuring Directory Services
A
ctive Directory is an extremely complex database containing everything the system knows about the hardware, software, and users
on a system—at least within the confines of general operating system
requirements. Some software does use Active Directory for configuration storage requirements as well. There are entire books written about
the content of Active Directory, so this single chapter won’t try to tell
you about the content of Active Directory. What this chapter does do is
provide you with an overview of the various utilities that are available
at the command line for managing Active Directory.
NOTE Active Directory is indeed a complex topic and you
may find that you actually require more than one book to obtain
all the required information. A good starting book is Active
Directory for Dummies by Steve Clines and Marcia Loughry (For
Dummies, 2008). If you want something more detailed, try MCTS:
Windows Server 2008 Active Directory Configuration Study
Guide: Exam 70-640 by William Panek and James Chellis (Sybex,
2008). Another good alternative is Active Directory: Designing,
Deploying, and Running Active Directory by Brian Desmond,
Joe Richards, Robbie Allen, and Alistair G. Lowe-Norris (O’Reilly
Media, 2008). Don’t forget that you also have hundreds of online
sources as well, such as the best practices guide provided by
Microsoft at http://www.microsoft.com/downloads/details
.aspx?familyid=631747a3-79e1-48fa-9730-dae7c0a1d6d3.
Manage Directory Services Using the
WMIC NTDomain Alias
The Windows Management Interface Command line (WMIC) utility is
probably the most used administrator utility because it contains so many
features. You could literally perform 80 percent to 90 percent of your
normal work using this one utility (one-time, maintenance, and specialized tasks still require specialized utilities). Because this utility is so huge,
you’ll see parts of it covered in the appropriate places in this book. The
main WMIC coverage appears in Chapter 15. This chapter discusses the
NTDomain alias in the sections that follow. The NTDomain alias helps you
manage domain controllers and their associated workstations using the
WMI database and by interacting with Active Directory.
Manage Directory Services Using the WMIC NTDomain Alias
215
NOTE This chapter doesn’t discuss a number of WMIC features
that appear in Chapter 15. For example, WMIC includes an extensive and labyrinthine help system. In addition, you can format
the data in various ways and even translate it as needed for output to other tools, such as a database. Chapter 15 discusses all of
these features of WMIC, so be sure to look at the “Configure the
Server” section of Chapter 15 for additional information.
List the Objects
Before you can perform any other tasks, you must know what objects
the domain controller supports. To obtain a list of domain objects, type
WMIC NTDomain LIST and press Enter. In most cases, the list will be relatively long, so you’ll want to pipe the data to the More utility by typing
WMIC NTDomain LIST | More and pressing Enter. The common objects you
see listed are:
NN
ClientSiteName
NN
DcSiteName
NN
Description
NN
DnsForestName
NN
DomainControllerAddress
NN
DomainControllerName
NN
DomainName
NN
Roles
NN
Status
The NTDomain objects have properties that describe them. These properties
are normally displayed in a form that’s nearly impossible to read. The output begins with a listing of properties and then each object appears afterward. A better way to see the list is using a list format. To see the object
properties successfully, type WMIC NTDomain GET /Format:LIST | More and
press Enter. You’ll see a list format where each object is listed separately.
The property name is followed by an equals sign (=) and then the property
value (if any).
Interacting with
Active Directory
List Object Properties
Part IV
216
Chapter 11
3
Configuring Directory Services
Get an Object Property
In many cases, you don’t need to see every property that an object has
to offer. In fact, there really is too much information for most administrators to decipher, so requesting just the properties you need clears the
clutter. Use the WMIC NTDomain GET PropertyName[, PropertyName...] /
Format:LIST | More command, where PropertyName is the name of a property you want to see, to obtain just the properties you want. For example,
if you want to see just the Caption and CreationClassName properties,
you’d type WMIC NTDomain GET Caption, CreationClassName /Format:
LIST | More and press Enter.
The following list contains the properties you can request:
NN
Caption
NN
ClientSiteName
NN
CreationClassName
NN
DcSiteName
NN
Description
NN
DnsForestName
NN
DomainControllerAddress
NN
DomainControllerAddressType
NN
DomainControllerName
NN
DomainGuid
NN
DomainName
NN
DSDirectoryServiceFlag
NN
DSDnsControllerFlag
NN
DSDnsDomainFlag
NN
DSDnsForestFlag
NN
DSGlobalCatalogFlag
NN
DSKerberosDistributionCenterFlag
NN
DSPrimaryDomainControllerFlag
NN
DSTimeServiceFlag
NN
DSWritableFlag
NN
InstallDate
Manage Directory Services Using the WMIC NTDomain Alias
NN
Name
NN
NameFormat
NN
PrimaryOwnerContact
NN
PrimaryOwnerName
NN
Roles
NN
Status
217
Set an Object Property
Generally, you don’t want to create or delete NTDomain entries to avoid
contaminating Active Directory or causing problems with your network.
However, you may want to set an object property so that it correctly
reflects your network configuration. However, WMI controls what you
can do even when it comes to setting a property.
Follow this procedure to properly set an object property:
1. Type WMIC NTDomain SET /? and press Enter.
WMIC outputs the usual help information. In addition, at the bottom
of the help listing, you see a list of properties that you can change.
2. Verify that the property you want to change appears on the list.
If not, exit this procedure because WMIC won’t let you change the
property value. You must let the system change the property for
you in some other way (the method depends on the property and
whether the system allows changes to the property value at all).
3. Use the WMIC NTDomain SET PropertyName=Value[,
For example, if you want to set the Roles property to Administrators, you’d type WMIC NTDomain SET Roles=Administrators and
press Enter. Be sure to use double quotes to contain values with
spaces as needed.
Query an Association
An association (or associator in Microsoft parlance) is simply an
instance of a particular object class. When you query the associations
Interacting with
Active Directory
PropertyName=Value] command, where PropertyName is the name
of the property you want to change and Value is the value you
want to assign to the property, to change the properties.
Part IV
218
Chapter 11
3
Configuring Directory Services
for NTDomain, you see all of the instances of this class. To see the associations for NTDomain, type WMIC NTDomain ASSOC and press Enter. The output shows all of the associations in HTML format (using URIs).
Manage Active Directory with the
DSQuery Utility
While WMIC lets you interact with the WMI database (and Active Directory
indirectly), Directory Services Query (DSQuery) lets you interact directly
with Active Directory. You can use DSQuery to obtain information about
nearly any aspect of Active Directory. In fact, there are DSQuery commands
for every major Active Directory object and a special command, *, that
works with any object.
The DSQuery utility is often used in combination with the DSGet utility
described in Chapter 12. DSGet obtains the information set and DSQuery
places a query against that information set. The following sections provide an overview of working with DSQuery to perform specific tasks.
Interact with Servers
One of the more important tasks you can perform with DSQuery is to
obtain a list of servers and then interact with those servers in some way.
The easiest way to obtain a list of servers without too much effort is to
type DSQuery Server and press Enter. DSQuery will output a list of all of
the servers that it can find on the network, but not necessarily a list of
all of the servers. The following sections describe some additional serverlevel tasks you can perform.
Find the Domains
Many organizations have a large number of servers organized into
a number of domains. In fact, you might not even know all of the
domains that are in the organization. To obtain a list of domains in the
current forest, type DSQuery Server /Forest and press Enter. You’ll see
a list of the domains that are accessible in the current forest. There isn’t
any way to query domains in another forest except by logging on to a
machine in that forest and using DQuery on that machine.
Manage Active Directory with the DSQuery Utility
219
Find a Domain
Obtaining a list of domains won’t tell you much about the individual
domain controllers. The following steps will help you locate a domain
controller:
1. Type DSQuery Server /Domain DomainName, where DomainName is
the name of a domain that you either know or obtained using the
DSQuery Server /Forest command.
2. Find the domain controller you want to interact with in the list.
3. Type DSQuery Server /D DCName, where DCName is one of the entries
obtained with the DSQuery Server /Domain command.
Note the use of the /Domain command line switch the first time and
the /D command line the second. The two command line switches aren’t
equivalent. You can add the /U UserName (where UserName is an account
on the server) and /P Password (where Password is the password for the
account on the remote system) command line switches to access the
domain controller using a different account.
Locate a Hidden Server
If a server is hidden for some reason, you can access it by using the
DSQuery Server /S ServerName command, where ServerName is the
name of the server you want to find. Of course, this command assumes
you have access to the server with your default account. You can add the
/U UserName (where UserName is an account on the server) and /P Password
(where Password is the password for the account on the remote system)
command line switches to access the server using a different account.
Anyone working on a large network will attest to the difficulty of remembering all of the hostnames. Even if you work on the network every day,
you’ll run into a server that you don’t work with very often and find yourself scratching your head to remember the hostname. Rather than look
up the name using a graphical utility, where you could spend more than a
few minutes trying to find the hostname you need, you can obtain a quick
list from Active Directory using the following script:
FOR /F “tokens=2 delims==,” %%H IN (‘DSQUERY Server’) DO @
ECHO.%%H
Interacting with
Active Directory
Display a List of Hostnames
Part IV
220
Chapter 11
3
Configuring Directory Services
The focus of this script is the DSQuery Server command, which outputs a list of all of the domain controllers. The rest of the script simply
processes the output of the DSQuery Server command so that you see the
hostnames. Notice how the script uses an at sign (@) in front of the Echo
command so that all you see are the hostnames. It’s important to include
the @ as needed to keep the output of your scripts readable.
Interact with Users
Users present another common use scenario for DSQuery. In many cases,
you need to obtain user information, especially on a large network where
you have hundreds or thousands of users. When working with users,
it’s extremely common to combine DSQuery with DSGet to make the
query manageable. However, you can use DSQuery directly to obtain user
information. The simplest method is to type DSQuery User and press Enter,
but such a query is nearly useless on a large network because you’d spend
hours searching through the results. The following sections describe
some practical ways to interact with users.
Obtain User Information Directly
It’s possible to use DSQuery to obtain user information directly, even if
you’re not quite sure of the user’s name. Use the DSQuery User /Name
UserName command, where UserName is the name of the user you want to
find. If you aren’t quite sure of the user’s name, you can rely on wildcard
character combinations. For example, if you want to find all users whose
names begin with J, you’d type DSQuery User /Name J* and press Enter.
Unfortunately, you might not know enough about the user’s name to
even use a wildcard. In this case, you can use a description (assuming
your organization actually provides a user description, which is always
a good idea). Use the DSQuery User /Desc Description command, where
Description is all or part of a user description to locate, to perform this
task. For example, if you want to obtain a list of all of the support personnel, you’d type DSQuery User /Desc *Support* and press Enter.
Obtain a User’s Logon Name
Sometimes you’ll receive a help desk ticket where the user expects that
you’ll know their logon name, despite the fact that you have several
thousand users to track. In many cases, without the logon name, you
can’t do much for the user. Of course, you could always track down
Manage Active Directory with the DSQuery Utility
221
the user and ask them for the information, but there’s an easier way to
obtain the information for Active Directory users. The following script
displays the logon name for a user based on the last name that you pass:
DSQUERY USER -name %1 | DSGET USER -samid -display
In this case, the input you provide is the user’s last name. The
DSQuery User command sends the user information to the DSGet User
command using a pipe (|). The DSGet utility, in turn, looks up the user’s
Security Accounts Manager (SAM) identifier and provides it as output
on the command line. (When more than one user has the same last
name, you’ll see a list of all of the associated logon names, but at least
the list is shorter than starting from scratch.)
Obtain a User’s Full Name
Sometimes a user will provide you with their email address and a logon
name and that’s it. What you really want is the user’s full name so
that you can understand their needs better by looking up their association with the company. When this problem occurs, you can still
look up the user information using Active Directory. Simply use the
script shown here:
DSQUERY USER -samid %1 | DSGET USER -samid -display
In this case, the input you provide is the user’s logon name. The
DSQuery User command sends the user information, based on a SAM
identifier search, to the DSGet User command using a pipe (|). The DSGet
utility outputs the user’s full name. Note that there’s normally more
than one way to accomplish a task. If you’re using an older version of
Windows or a system that doesn’t have Active Directory installed, you
can achieve the same results using this script:
In this case, you pass the user’s logon name to the Net utility. This
utility outputs all of the information about the user to the Find utility
using a pipe (|). The Find utility, in turn, locates just the name entries.
Discover User Group Membership
Many support problems revolve around security. One of the most
common security problems is a lack of group membership. The user
Interacting with
Active Directory
NET USER %1 | FIND /I “ name “
Part IV
222
Chapter 11
3
Configuring Directory Services
attempts to perform a task that is under the purview of a specific group
and the user doesn’t belong to that particular group. Unfortunately, all
that the user has told you is that the task is impossible to perform and
the boss really needs the task completed today. Rather than play 20
questions trying to discover the user’s group membership, you can use
this simple script to obtain the information from Active Directory:
DSQUERY USER -samid %1 | DSGET USER -memberof -expand
In this case, you pass the user’s logon name to the DSQuery User command. The DSGet utility receives the output from DSQuery through a pipe (|).
The DSGet User command then displays the group membership for the
user and expands the information so you get all of the details.
Reset a User’s Password
One of the tasks that administrators love least, yet perform most
often, is resetting a user’s password. Those users who don’t keep their
password recorded on a sticky note next to their monitor are prone to
forgetting them. After a long weekend or a holiday, the administrator’s office suddenly fills with users who have no clue as to what their
password is. You could use a graphical utility to reset those passwords
one at a time (wasting an entire morning as a result) or you can use this
simple script to reset the password based on the user’s logon name:
DSQUERY USER -samid %1 | DSMOD USER -pwd “newpassword”
In this case, the DSQuery User command obtains the user’s information based on the logon name and passes it to the DSMod utility through a
pipe (|). The DSMod User command uses the –pwd command line switch to
change the user’s password to newpassword. You could extend this script
by passing a second argument to the batch file, but it really isn’t necessary because the user will need to change the password anyway.
NOTE Make sure you turn off Echo when working with scripts
that will reveal password information, even when this information is a default setting as shown in the examples in this book.
You don’t want someone peering over your shoulder to see a
password that should remain private. As an alternative, you can
always replace the password string with an asterisk (*). The utility
will prompt you to provide a password at the appropriate time.
Anything you type will appear as a series of asterisks on screen.
Manage Active Directory with the DSQuery Utility
223
Interact with Computers
Many of the techniques that you use to locate and interact with users
also work with computers. Of course, you could begin by getting a complete list of every computer on the system by typing DSQuery Computer
and pressing Enter. If you’re in a small company, this kind of query will
work fine. However, most administrators will need something better.
For many administrators, the easiest method of finding a computer
will be to search by name. In this case, you use the DSQuery Computer /
Name ComputerName command, where ComputerName is the name of the
computer you want to find. As with users, you can use wildcard characters to find a computer if you aren’t quite sure of the computer name.
It’s also possible to locate a computer based on its description with the
DSQuery Computer /Desc Description command, where Description is all
or part of the computer’s description. As with names, you can use wildcard characters to broaden your search.
In some cases, you might not actually have a complete list of all of
the computers on your network or you might need to update your list.
You can use DSQuery to make this process easier. Simply use the DSQuery
Computer “OU=Servers,DC=MyDomain,DC=Com” /O RDN > C:\Machines.TXT
command to perform the task. You must replace the OU with the organizational unit that contains the list of machines and DC=MyDomain,DC=Com
with the domain you want to check. The /O RDN command line switch
tells DSQuery to output the list of machines without the full name (using
the Relative Distinguished Name, or RDN, instead).
Contacts work precisely the same as users. The difference between
the two kinds of entries is that a user is a member of the company and
likely works in the building. A contact could be anyone who isn’t a
standard user, such as a customer, supplier, or consultant. In general,
you obtain less information when working with contacts, but you use
precisely the same techniques as you do with users to find a contact. Of
course, you’ll use the DSQuery Contact command instead of the DSQuery
User command to locate a contact.
Interact with Groups
Groups help organize users and make it easier to perform tasks such as
managing security. However, groups can also present a problem because
Interacting with
Active Directory
Interact with Contacts
Part IV
224
Chapter 11
3
Configuring Directory Services
the same group name can appear in more than one location on the network. For example, every domain controller will have an Administrators
group. Unless you want to spend days searching for just the right group,
you need a better way to search for groups than those you use when looking for a user (whose logon name is unique across the network).
In most cases, you already know where the group you want to find
resides, so you can provide a starting node for the search. A starting
node can provide a specific location, such as dc=MyCompany,dc=com, the
ForestRoot, or the DomainRoot. For example, you might want to search
for the Accounts user group located somewhere in the MyCompany.com
domain. In this case, you’d type DSQuery Group dc=MyCompany,dc=com /
Name Accounts and press Enter. As another example, you might want to
find all management groups for administrators in the domain root of
the current domain. In this case, you’d type DSQuery DomainRoot /Name
Manage* /Desc *Admin* and press Enter.
Interact with Organizational Units
In most cases, you work with organizational units (OUs) the same way
you work with groups. However, you want to find an OU to do something with it, such as cloning it. Cloning is a common administrative
task. Every time you add a new office, you need to create a new OU for
it. However, it’s likely that you already have an entry that works fine as
a template for the new office. It’s possible to clone an OU by hand, but
definitely time consuming. To accomplish this task, you’d need to use a
script such as the one shown here:
DSQuery OU /Name Old | foreach-object { DSAdd OU “$($_
-replace ‘Old’,’New’)” }
This is one of the few cases where working with Windows Power
Shell provides a decided advantage over older batch file techniques. The
call to DSQuery locates the OU you want to clone. It passes this information to the foreach-object command, which processes all of the objects
contained within the OU. The DSAdd call adds the cloned OU to the
proper location by replacing the old OU name (Old) with the new OU
name (New). Of course, you’d replace Old and New with the names of
the old OU and the new OU you want to use.
Manage the Active Directory Database
225
Manage the Active Directory Database
The Windows NT Directory Services utility (NTDSUtil) is an interactive
utility, for the most part, so you won’t use it with a batch file very often.
However, by entering the correct command at the command prompt,
you can get to the correct area of this utility quickly. The following sections describe how to use the NTDSUtil utility.
Issue a Command
NTDSUtil is an unusual utility in that it’s one of the few that eschews command line switches for the most part and also relies on multi-word commands. When you issue a command to NTDSUtil, you need to provide all
of the words in its rather verbose syntax or the command will fail. Some
commands place NTDSUtil in a specific mode. For example, typing the
LDAP Policies command will place you in the LDAP Policies mode.
NOTE Trying to cover such a robust utility in a section of a
chapter is nearly impossible—it might be possible to write several chapters on the topic without exhausting it. For that reason,
you’ll probably want to find some additional information about
NTDSUtil. You can find a wealth of tutorials online for this utility.
For example, you’ll find an excellent tutorial for the novice on the
ComputerPerformance site at http://www.computerperformance.
co.uk/w2k3/utilities/windows_ntdsutil.htm.
Now that you have a better idea of how commands work, it’s time to
review the NTDSUtil upper-level commands. The following list describes
each of the command line arguments:
NN
Authoritative restore: Restores the Directory Information Tree
NN
Domain management: Prepares the system to create a new domain.
NN
Files: Manages the NTDS database files.
NN
Help: Displays help information about the selected management
function. The help you see depends on the commands you issued
previously. See the Stream command line argument entry for details.
Interacting with
Active Directory
(DIT) database.
Part IV
226
Chapter 11
NN
3
Configuring Directory Services
IPDeny List: Manages the LDAP IP deny list. This list determines
the machines that can access Active Directory remotely.
NN
LDAP policies: Manages the LDAP policies.
NN
Metadata cleanup: Removes old metadata from the system. This
feature includes removing old objects off decommissioned servers.
NN
NN
NN
NN
NN
Popups {On | Off}: Enables or disables popups.
Quit: Ends a particular command level. You must issue multiple
Quit commands, one for each level. See the Stream command line
argument entry for an example. Entering the Quit command at the
NTDSUtil prompt always exits the application.
Roles: Manages the NTDS role owner tokens.
Security account management: Manages the security account database. This command line switch also searches for and removes
duplicate SID entries in the security account database.
Semantic database analysis: Analyzes the database looking for
semantic errors.
You can start NTDSUtil with any of these commands. For example, if
you want to work with the Security Accounts Management (SAM) database, then you’d type NTDSUtil “Security account management” and press
Enter. Notice that the command is actually three words long, so you must
place it within double quotes or NTDSUtil will complain that it doesn’t
understand the command. When working inside the interactive environment, you don’t have to enclose the commands within double quotes.
Use a Stream
Even though the NTDSUtil utility is essentially an interactive environment, you can create a stream of commands to interact with it in a batch
file. This stream specifies multiple commands that NTDSUtil should execute one after another as a sort of script. The commands must appear as
a single string with each command separated with a space. For example,
you can obtain help about the roles task by typing NTDSUtil Roles Help
Quit Quit at the command line and pressing Enter. Here’s a summary of
the sequence of events that occurs with this stream:
1. The NTDSUtil prompt appears where the utility enters the Roles
command. This action displays the Flexible Single Master
Operations (FSMO) maintenance prompt.
Manage the Active Directory Database
227
2. At the FSMO Maintenance prompt, the utility enters the Help
command. You see a help listing for the Roles command.
3. The utility enters the Quit command to exit the FSMO
Maintenance prompt.
4. The utility enters Quit again to exit the NTDSUtil and the command
prompts.
As another example, let’s say you want to check for duplicate
Security Identifiers (SIDs) on a server named MyServer without entering the interactive mode of NTDSUtil. In this case, you’d type NTDSUtil
“Security account management” “Connect to server MyServer” “Check
Duplicate SID” Quit Quit and press Enter. When the command completes, DupSID.LOG contains a list of any duplicate SIDs found on the
Interacting with
Active Directory
target server.
Theoretically, you can create a stream of any size. If you’re working
with a scripting language that supports disk access, you can even place
the script in another file and parse it. All this said, most administrators
will probably use NTDSUtil in interactive mode.
Part IV
12
Working with Directory Objects
In this chapter, you will learn to:
33Add a Computer (Page 230)
Create New Objects (Pages 230–237)
n
n
Add a Contact (Page 231)
n
Add a Group (Page 233)
n
Add an Organizational Unit (Page 23 4)
n
Add a User (Page 23 4)
33List Computers (Page 238)
Get Objects (Pages 238–243)
n
n
List Contacts (Page 239)
n
List Groups (Page 24 0)
n
List Organizational Units (Page 241)
n
List Servers (Page 241)
n
List Users (Page 242)
33Modify Computer Data (Page 244)
Edit Existing Objects (Pages 243–248)
n
Modify Contact Data (Page 24 5)
n
Modify Group Data (Page 24 6)
n
Modify Organizational Unit Data (Page 24 6)
n
Modify User Data (Page 24 6)
33
33
Move Existing Objects (Page 248)
Delete Existing Objects (Page 248)
Interacting with
Active Directory
n
Part IV
230
Chapter 12
3
Working with Directory Objects
C
hapter 11 concerns itself with finding information. Often, an administrator needs to find information before doing anything else. This
chapter discusses the next step (or steps)—managing the information.
In this chapter, you discover the utilities you can use to add, query,
edit, move, and delete objects in Active Directory. In short, this chapter
tells you how to perform tasks with the objects you find once you find
the precise object you want to manage. It’s important to understand
that these utilities tend to work best with precise objects. If you haven’t
found precisely what you want to modify, then you need to use the techniques in Chapter 11 to find it first.
Create New Objects
The Directory Services Add (DSAdd) utility makes it possible to add
new objects to Active Directory. You can add most of the objects with
a GUI utility using this command line utility. The difference is that you
can add the items using a script, rather than manually. The “Interact
with Organizational Units” section of Chapter 11 shows one such
example of adding objects—in this case, you cloned an Organizational
Unit (OU). The following sections describe how to add other kinds of
objects to Active Directory.
NOTE All of the DSAdd commands work with remote systems as
needed (such as when you want to configure a server). You can
use the –s Server or –d Domain command line switches, where
Server is the name of a specific server that you want the computer to use for logins and Domain is the name of a domain where
you want the computer to log on, to log on to a particular part of
the network as needed. This utility also supports the –u Username
and –p Password command line switches, where Username is the
name of an account on the server and Password is the account’s
password, to log on to the server using a different account.
Add a Computer
Normally, computers are automatically added when the system joins
the domain. However, in some cases, you might have to add a computer
manually or you might choose to add the computer before it joins the
domain to obtain additional flexibility in how the computer is added.
Create New Objects
231
The following procedure describes how to add a computer to Active
Directory:
1. Type DSAdd Computer.
2. Type the computer’s Distinguished Name (DN).
A DN consists of the computer name, position within the
organizational unit, and domain context, such as cn=MyComputer,
cn=Computers,dc=MyDomain,dc=com.
3. (Optional) Type -samid SamName, where SamName is the Security
Accounts Manager (SAM) name of the computer.
If you don’t provide a SAM name, the system generates a name
based on the common name provided in step 2.
4. (Optional) Type -desc Description, where Description is a
description of the computer.
5. (Optional) Type -loc Location, where Location is the physical
location of the computer.
6. (Optional) Type -memberof Group, where Group is one or more
group names separated by spaces.
This option joins the computer to the groups that you supply.
7. Press Enter. DSAdd adds the computer to Active Directory.
Add a Contact
1. Type DSAdd Contact.
2. Type the contact’s Distinguished Name (DN).
A DN consists of the username, position within the organizational
unit, and domain context, such as cn=Joe Smith,cn=Users,dc=
MyDomain,dc=com.
3. Type -fn FirstName, where FirstName is the contact’s first name.
Interacting with
Active Directory
The server never adds contacts automatically because contacts are associated with users (or other entities) outside the organization. Unless you
use the GUI to add contacts, you’ll always add them using the command
line utility.
The following procedure describes how to add a contact to Active
Directory:
Part IV
232
Chapter 12
3
Working with Directory Objects
4. (Optional) Type -mi Initial, where Initial is the contact’s
middle initial.
5. Type -ln LastName, where LastName is the contact’s last name.
6. Type -display DisplayName, where DisplayName is how the contact
will appear to anyone accessing the account.
7. (Optional) Type -desc Description, where Description is a
description of the contact.
8. (Optional) Type -office Office, where Office is the location of
the contact’s office.
When the person has an office on site, you can simply provide an
office number. Otherwise, you could probably provide an address.
9. (Optional) Type -tel Phone#, where Phone# is the contact’s most
commonly used telephone number.
In times past, the telephone number would be a land line, but with
many people cutting their land line connection, you may need to
add a cellular telephone number here.
10. (Optional) Type -email Email, where Email is the contact’s main
e‑mail address.
11. (Optional) Type -hometel HomePhone#, where HomePhone# is the
contact’s home telephone number when it differs from their main
telephone number (see step 9).
12. (Optional) Type -pager Pager#, where Pager# is the contact’s pager
number, when the contact has such a device.
13. (Optional) Type -mobile CellPhone#, where CellPhone# is the con-
tact’s mobile telephone number (assuming that you haven’t already
added this number in step 9).
14. (Optional) Type -fax Fax#, where Fax# is the contact’s facsimile
number (assuming the contact relies on a separate device, rather
than using e‑mail).
15. (Optional) Type -iptel IPPhone#, where IPPhone# is the contact’s
Internet Protocol Phone (IPPhone) number, such as Vonage or
Skype.
16. (Optional) Type -title Title, where Title is the contact’s job
title, rather than the title you use to address them.
17. (Optional) Type -dept Department, where Department is the con-
tact’s department within their organization.
Create New Objects
233
18. (Optional) Type -company Company, where Company is the name of
the company that the contact works for.
19. Press Enter. DSAdd adds the contact to Active Directory.
Add a Group
Groups are an essential organizational aid. They make it possible to
perform tasks faster and with greater accuracy. For example, it’s much
easier to set the security requirements for a group one time, rather than
individually for each member of the group. In addition, because you’re
setting security just once, there isn’t any chance of giving one group
member more rights than another group member. You’ll usually enter
groups manually, except when you rely on one of the built-in groups
that comes with Windows.
The following steps describe how to add a group:
1. Type DSAdd Group.
2. Type the group’s Distinguished Name (DN).
A DN consists of the group name, position within the organizational unit, and domain context, such as cn=Accounting,
cn=Groups,dc=MyDomain,dc=com.
3. (Optional) Type -secgrp yes to create a security group (one you
can use for security purposes) or -secgrp no to add a group merely
for organizational purposes.
The default setting is to add a security group.
4. (Optional) Type -scope and then type one of the following scope
NN
l: Defines a local group.
NN
g: Defines a global group, which is the default option.
NN
u: Defines a universal group. (You can’t create universal
groups in a mixed-mode environment, which is an environment that supports older versions of Windows, versus native
mode that supports only the current version.)
5. (Optional) Type -samid SAMName, where SAMName is the SAM name
of the group.
If you don’t provide a SAM name, the system generates a name
based on the distinguished name provided in step 2.
Interacting with
Active Directory
options:
Part IV
234
Chapter 12
3
Working with Directory Objects
6. (Optional) Type -desc Description, where Description is an
explanation of the group and its purpose.
7. (Optional) Type -memberof Group, where Group is a space-separated
listing of groups that this group belongs to.
You must use the DN for each of the groups in the list. Make sure
you enclose any DN with spaces in double quotes.
8. (Optional) Type -members Member, where Member is a space sepa-
rated listing of groups and users that belong to this group.
You must use the DN for each of the users and groups in the list.
Make sure you enclose any DN with spaces in double quotes.
9. Press Enter. DSAdd adds the group to Active Directory.
Add an Organizational Unit
OUs help you organize entries within Active Directory to make them
easier to manage. OUs don’t provide any special functionality outside of
Active Directory, such as groups do. To create an OU, type DSAdd OU DN,
where DN is the OU’s distinguished name. A DN consists of the OU name
and domain context, such as cn=Groups,dc=MyDomain,dc=com. You can
add as many levels of organization as required when creating the OU.
Use the -desc Description command line switch, where Description is
an explanation of the OU and its purpose, to document the entry.
Add a User
Users are part of the organization for the most part. They normally
work as part of the organization, even if they work off site. In most
cases, users have more rights to manage and create data than contacts.
The system won’t create users automatically, but there are many different ways in which to create basic user entries, such as the initial operating system configuration. No matter how you create these basic entries,
they likely won’t contain all of the information needed for a good user
entry, so you’ll need to edit them. A better choice is to manually add
user entries that include complete information from the outset.
The following procedure describes how to create a user entry:
1. Type DSAdd Contact.
2. Type the contact’s Distinguished Name (DN).
Create New Objects
235
A DN consists of the username, position within the organizational unit, and domain context, such as cn=Joe Smith,cn=Users,
dc=MyDomain,dc=com.
3. (Optional) Type -samid SAMName, where SAMName is the SAM name
of the user.
If you don’t provide a SAM name, the system generates a name
based on the distinguished name provided in step 2.
4. (Optional) Type -upn UPN, where UPN is the User Principal Name
(UPN).
The UPN provides an alternative method for logging on to a
server. Instead of typing the username and domain separately, you
type them together as a single entry, such as JSmith@MyDomain.com.
The concept of the UPN is defined by RFC 822 (see the standard at
http://www.faqs.org/rfcs/rfc822.html).
5. Type -fn FirstName, where FirstName is the user’s first name.
6. (Optional) Type -mi Initial, where Initial is the user’s middle
initial.
7. Type -ln LastName, where LastName is the user’s last name.
8. Type -display DisplayName, where DisplayName is how the user
will appear to anyone accessing the account.
9. (Optional) Type -empid EmployeeID, where EmployeeID is the user’s
identifier within the organization.
10. (Optional) Type -pwd Password, where Password is the user’s pass-
word, or -pwd *, to display a secure password entry screen after
you create the account.
11. (Optional) Type -desc Description, where Description is a
description of the user.
list of groups to which the user belongs.
You must use the DN for each of the groups in the list. Make sure
you enclose any DN with spaces in double quotes.
13. (Optional) Type -office Office, where Office is the location of
the user’s office.
14. (Optional) Type -tel Phone#, where Phone# is the user’s telephone
number within the organization (not necessarily a personal, cellular, or other telephone number).
Interacting with
Active Directory
12. (Optional) Type -memberof Group, where Group is a space separated
Part IV
236
Chapter 12
3
Working with Directory Objects
15. (Optional) Type -email Email, where Email is the user’s e‑mail
address within the organization.
16. (Optional) Type -hometel HomePhone#, where HomePhone# is the
user’s home telephone number.
17. (Optional) Type -pager Pager#, where Pager# is the user’s pager
number, when the user has such a device.
18. (Optional) Type -mobile CellPhone#, where CellPhone# is the
user’s mobile telephone number.
19. (Optional) Type -fax Fax#, where Fax# is the user’s facsimile
number (assuming the user relies on a separate device, rather
than using e‑mail).
20. (Optional) Type -iptel IPPhone#, where IPPhone# is the user’s
IPPhone number, such as Vonage or Skype.
21. (Optional) Type -webpg WebPage, where WebPage is the user’s Web
page within the organization.
Theoretically, you could also use this for the user’s personal Web
page if the organization doesn’t provide an organizational Web page.
22. (Optional) Type -title Title, where Title is the user’s job title,
rather than the title you use to address them.
23. (Optional) Type -dept Department, where Department is the user’s
department within the organization.
24. (Optional) Type -company Company, where Company is the name of
the company that the user works for.
This entry is normally left out unless the organization has more
than one subsidiary.
25. (Optional) Type -mgr Manager, where Manager is the name of the
user’s manager.
26. (Optional) Type -hmdir HomeDir, where HomeDir is the main loca-
tion of the user’s data on the server.
This is the location that the system uses when the user first logs on
to the system. When the path is a Universal Naming Convention
(UNC) mapped path, this entry is simply a drive letter.
27. (Optional) Type -hmdrv DriveLtr:, where DriveLtr is the network
drive the system should use to locate user data and other information.
Note that the colon after the drive letter is required.
Create New Objects
237
28. (Optional) Type -profile ProfilePath, where ProfilePath is the
location of the user’s profile information.
29. (Optional) Type -loscr ScriptPath, where ScriptPath is the loca-
tion of the user’s logon script (which may not be the same location
as the user’s profile).
30. (Optional) Type -mustchpwd yes if you want the user to change
their password during the next logon or -mustchpwd no when there
isn’t any need to change the password. The default setting is No.
31. (Optional) Type -canchpwd yes when the user is allowed to change
their password or -canchpwd no when the user is restricted from
changing their password.
The default setting is Yes.
32. (Optional) Type -reversiblepwd yes to store the user password
using reversible encryption or -reversiblepwd no to use stronger,
non-reversible encryption.
The default setting is No.
33. (Optional) Type -pwdneverexpires yes if the user can use the same
password forever or -pwdneverexpires no when the user must
change their password on a regular basis.
The default setting is No.
34. (Optional) Type -acctexpires NumDays, where NumDays is the num-
ber of days before the account expires.
35. (Optional) Type -disabled yes to create the account in a disabled
state or -disabled no to make the account accessible after creation.
The default setting is No.
36. Press Enter. If you typed -pwd * in step 10, you see a password
entry request—the password you type appears as a group of
asterisks (*). DSAdd adds the user to Active Directory.
Interacting with
Active Directory
Automatic account expiration is a helpful security feature for
guest accounts to ensure that guests don’t have continuous access,
even when their access should end. A positive numeric value provides the number of days specified. Using 0 means that the account
expires today, and a negative number indicates that the account
has already expired. The default string, never, indicates that the
account never expires.
Part IV
238
Chapter 12
3
Working with Directory Objects
Get Objects
As with most databases, Active Directory provides a means for accessing
the information it contains. You use the DSGet utility to perform this task.
The DSGet output is unfiltered. What you see is the raw Active Directory
content, which may be more information than you really want. Although
the DSGet commands provide command line switches to limit the output
you see, you may need to combine DSGet with DSQuery to obtain the precise output you want. For example, the “Obtain a User’s Logon Name”
section of Chapter 11 shows how to obtain a specific user’s logon name
from Active Directory. The following sections describe the various DSGet
commands.
Generic DSGET Command Line Switches
All of the DSGet commands work with remote systems as needed
(such as when you want to list elements on a server). You can
use the –s Server or –d Domain command line switches, where
Server is the name of a specific server that you want the computer to use for logons and Domain is the name of a domain where
you want the computer to log on, to log on to a particular part of
the network as needed. This utility also supports the –u Username
and –p Password command line switches, where Username is the
name of an account on the server and Password is the account’s
password, to log on to the server using a different account.
You also have a number of display options when working with
the DSGet commands. The –c command line switch provides
continuous operation, where DSGet continues to display output
even if it encounters an error. The –L command line switch displays the output in list format (where each property appears on
a single line and is followed immediately by the property value).
The default option is to display the output in tabular format,
which saves space, but is also harder to read. Finally, the –q command line switch executes the command without displaying any
output on the standard output device.
List Computers
To obtain basic information about any computer system, type DSGet
Computer DN, where DN is the computer’s distinguished name, and press
Enter. You can specify multiple computers by separating each DN with a
Get Objects
239
space. The basic information isn’t complete. Use the following command
line switches to obtain additional information:
NN
–dn: Display the computer’s DN.
NN
–samid: Display the computer’s SAM identifier.
NN
–sid: Display the computer’s Security Identifier (SID).
NN
–desc: Display the computer’s description.
NN
–loc: Display the computer’s location.
NN
–disabled: Display yes if the computer’s account is disabled or no
if the computer is active.
An alternative form of the DSGet Computer DN command provides
access to the computer’s security information. In this case, you can specify
the following command line switches to obtain additional information:
NN
–memberof: Display the computer’s group membership.
NN
–expand: Expand each of the groups listed using the –memberof
command line switch to show the complete membership hierarchy.
You must use this command line switch with the –memberof command line switch.
List Contacts
NN
–dn: Display the contact’s DN.
NN
–fn: Display the contact’s first name.
NN
–mi: Display the contact’s middle initial.
NN
–ln: Display the contact’s last name.
NN
–display: Display the contact’s display name.
NN
–desc: Display the contact’s description.
NN
–office: Display the contact’s office information.
NN
–tel: Display the contact’s main telephone number.
NN
–email: Display the contact’s main e‑mail address.
Interacting with
Active Directory
To obtain basic information about any contact, type DSGet Contact DN,
where DN is the contact’s distinguished name, and press Enter. You can
specify multiple contacts by separating each DN with a space. The basic
information isn’t complete. Use the following command line switches to
obtain additional information:
Part IV
240
Chapter 12
NN
3
Working with Directory Objects
–hometel: Display the contact’s home telephone number (available
when this number differs from the main telephone number).
NN
–pager: Display the contact’s pager number (available when this
number differs from the main telephone number).
NN
–mobile: Display the contact’s mobile or cellular telephone num-
ber (available when this number differs from the main telephone
number).
NN
–fax: Display the contact’s facsimile telephone number.
NN
–iptel: Display the contact’s IPPhone number (available when this
number differs from the main telephone number).
NN
–title: Display the contact’s job title.
NN
–dept: Display the department in which the contact works.
NN
–company: Display the contact’s company name.
List Groups
To obtain basic information about any group, type DSGet Group DN,
where DN is the group’s distinguished name, and press Enter. You can
specify multiple groups by separating each DN with a space. The basic
information isn’t complete. Use the following command line switches to
obtain additional information:
NN
–dn: Display the group’s DN.
NN
–samid: Display the group’s SAM identifier.
NN
–sid: Display the group’s Security Identifier (SID).
NN
–desc: Display the group’s description.
NN
–secgrp: Display yes if this is a security group or no if it’s not a
security group.
NN
–scope: Display the scope of the group: Local, Global, or
Universal.
An alternative form of the DSGet Group DN command provides access
to the group’s security information. In this case, you can specify the following command line switches to obtain additional information:
NN
–memberof: Display the group’s group membership.
NN
–members: Display the groups and users that are members of this
group.
Get Objects
NN
241
–expand: Expand each of the groups listed using the –memberof or
–members command line switch to show the complete member-
ship hierarchy. You must use this command line switch with the
–memberof or –members command line switch.
List Organizational Units
OUs are simple Active Directory entries, so it pays to display the entire
entry. Type DSGet OU DN -Desc, where DN is the OU’s distinguished name,
and press Enter to obtain all of the available information.
List Servers
To obtain basic information about any server, type DSGet Server DN,
where DN is the server’s distinguished name, and press Enter. You can
specify multiple servers by separating each DN with a space. The basic
information isn’t complete. Use the following command line switches to
obtain additional information:
NN
–dn: Display the server’s DN.
NN
–desc: Display the server’s description.
NN
NN
–dnsname: Display the server’s Domain Name System (DNS)
hostname.
–site: Display the site to which this server belongs.
–isgc: Display yes when the server is a Global Catalog (GC) server
and no when it isn’t.
In some cases, you need information about the security principals that
own objects on the domain controller. To obtain this information, you
type DSGet Server DN -topobjowner Display, where Display is the number
of objects to display, and press Enter. If you provide a value of 0, DSGet
displays all of the security principals. The default number of items to display is 10. The security principals are users, computers, security groups,
and inetOrgPersons. The inetOrgPersons category is a special kind of
Lightweight Directory Access Protocol (LDAP) user defined by RFC 2798
(http://www.faqs.org/rfcs/rfc2798.html). The output of this command is
sorted in order of the security principals that own the most objects.
You may also need to know about the directory partitions on the
server. In this case, you type DSGet Server DN -part and press Enter.
The output includes all of the distinguished names of the directory partitions for the specified server.
Interacting with
Active Directory
NN
Part IV
242
Chapter 12
3
Working with Directory Objects
List Users
To obtain basic information about any user, type DSGet User DN, where
DN is the user’s distinguished name, and press Enter. You can specify
multiple users by separating each DN with a space. The basic information isn’t complete. Use the following command line switches to obtain
additional information:
NN
–dn: Display the user’s DN.
NN
–samid: Display the user’s SAM identifier.
NN
–sid: Display the user’s SID.
NN
–upn: Display the UPN of the user.
NN
–fn: Display the user’s first name.
NN
–mi: Display the user’s middle initial.
NN
–ln: Display the user’s last name.
NN
–display: Display the user’s display name.
NN
–empid: Display the user’s employee identifier.
NN
–desc: Display the user’s description.
NN
–office: Display the user’s office location.
NN
–tel: Display the user’s organizational telephone number.
NN
–email: Display the user’s organizational e‑mail address.
NN
–hometel: Display the user’s home telephone number.
NN
–pager: Display the user’s pager number.
NN
–mobile: Display the user’s mobile or cellular telephone number.
NN
–fax: Display the user’s facsimile number.
NN
–iptel: Display the user’s IPPhone number.
NN
–webpg: Display the user’s organizational or personal web page URL.
NN
–title: Display the user’s job title.
NN
–dept: Display the user’s department.
NN
–company: Display the user’s company name (usually filled only
when subsidiaries are involved).
NN
–mgr: Display the user’s manager’s name.
Edit Existing Objects
NN
243
–hmdir: Display the user’s home directory. When working with a
mapped UNC path, you see just a drive letter.
NN
–hmdrv: Display the user’s home drive.
NN
–profile: Display the user’s profile path.
NN
–loscr: Display the user’s logon script path.
NN
–mustchpwd: Display yes if the user must change their password
during the next logon.
NN
–canchpwd: Display yes if the user can change their password.
NN
–pwdneverexpires: Display yes if the user’s password never expires.
NN
–disabled: Display yes if the user’s account has been disabled.
NN
NN
–acctexpires: Display whether the user account expires. A value of
never indicates that the account never expires. Otherwise, you see
a specific expiration date, even if that date is sometime in the past.
–reversiblepwd: Display yes if the user’s password relies on revers-
ible encryption. Using reversible encryption does make the user’s
account more susceptible to break-in, solely for the reason that the
encryption is reversible.
An alternative form of the DSGet User DN command provides access to
the user’s security information. In this case, you can specify the following command line switches to obtain additional information:
NN
–memberof: Display the user’s group membership.
NN
–expand: Expand each of the groups listed using the –memberof
Edit Existing Objects
Sometimes you need to modify the content of an existing Active
Directory entry. The DSMod utility helps you edit some, but not all, of the
Active Directory objects. You can modify these object types when working with this utility:
NN
Computer
NN
Contact
Interacting with
Active Directory
command line switch to show the complete membership hierarchy.
You must use this command line switch with the –memberof command line switch.
Part IV
244
Chapter 12
3
Working with Directory Objects
NN
Group
NN
OU
NN
Server
NN
User
NN
Quota
NN
Partition
When you need to modify other object types, you must use the GUI
tools. Some objects don’t permit modification—at least, not directly.
In these cases, you must delete the old object and then create a new
one. Make sure you understand the object and its properties before you
attempt to modify it.
All of the DSMod commands work essentially the same way—you
provide the correct base command, the DN for the object, and then a list
of property values. Any property values you provide will modify the old
properties. Otherwise, the properties remain the same as before. You
can’t edit some properties in some objects because the property values
must remain constant for the life of the object. The following sections
describe how the DSMod commands work.
NOTE All of the DSMod commands work with remote systems as
needed (such as when you want to list elements on a server). You
can use the –s Server or –d Domain command line switches, where
Server is the name of a specific server that you want the computer
to use for logons and Domain is the name of a domain where you
want the computer to log on, to log on to a particular part of the
network as needed. This utility also supports the –u Username and
–p Password command line switches, where Username is the name
of an account on the server and Password is the account’s password, to log on to the server using a different account.
Modify Computer Data
To modify the data for a particular computer, type DSMod Computer DN,
where DN is the computer’s distinguished name, and press Enter. The following command line switches let you modify specific computer data:
NN
–desc: Modify the computer’s description.
Edit Existing Objects
NN
–loc: Modify the computer’s location.
NN
–disabled: Type yes if the computer’s account is disabled or no if
245
the computer is active.
In addition to modifying computer data, you can also reset the
computer account. To reset the computer account, type DSMod Computer
DN -reset and press Enter.
Modify Contact Data
To modify the data for a particular contact, type DSMod Contact DN,
where DN is the contact’s distinguished name, and press Enter. The following command line switches let you modify specific contact data:
NN
–fn: Modify the contact’s first name.
NN
–mi: Modify the contact’s middle initial.
NN
–ln: Modify the contact’s last name.
NN
–display: Modify the contact’s display name.
NN
–desc: Modify the contact’s description.
NN
–office: Modify the contact’s office information.
NN
–tel: Modify the contact’s main telephone number.
NN
–email: Modify the contact’s main e‑mail address.
NN
–hometel: Modify the contact’s home telephone number (available
when this number differs from the main telephone number).
NN
–pager: Modify the contact’s pager number (available when this
number differs from the main telephone number).
NN
–mobile: Modify the contact’s mobile or cellular telephone num-
NN
–fax: Modify the contact’s facsimile telephone number.
NN
–iptel: Modify the contact’s IPPhone number (available when this
number differs from the main telephone number).
NN
–title: Modify the contact’s job title.
NN
–dept: Modify the department in which the contact works.
NN
–company: Modify the contact’s company name.
Interacting with
Active Directory
ber (available when this number differs from the main telephone
number).
Part IV
246
Chapter 12
3
Working with Directory Objects
Modify Group Data
To modify the data for a particular group, type DSMod Group DN, where
DN is the group’s distinguished name, and press Enter. The following
command line switches let you modify specific group data:
NN
–samid: Display the group’s SAM identifier.
NN
–desc: Display the group’s description.
NN
–secgrp: Display yes if this is a security group or no if it’s not a
security group.
NN
–scope: Display the scope of the group: Local, Global, or
Universal.
In addition, you can add, remove, or change group membership. Use
the following command line switches to perform this task:
NN
–addmbr Member: Adds members to the group, where Member is one
or more distinguished names separated by spaces.
NN
–rmmbr Member: Removes members from the group, where Member is
one or more distinguished names separated by spaces.
NN
–chmbr Member: Clears the existing members from the group and
creates a new list using the supplied list, where Member is one or
more distinguished names separated by spaces.
Modify Organizational Unit Data
OUs are simple Active Directory entries. The only information you
can change is the OU description. To change the description, type
DSMod OU DN -Desc NewDesc, where DN is the OU’s distinguished name
and NewDesc is the new description you want to use, and press Enter to
make the modification.
Modify User Data
To modify the data for a particular user, type DSMod User DN, where DN
is the user’s distinguished name, and press Enter. The following command line switches let you modify specific user data:
NN
–upn: Modify the UPN of the user.
NN
–fn: Modify the user’s first name.
Edit Existing Objects
NN
–mi: Modify the user’s middle initial.
NN
–ln: Modify the user’s last name.
NN
–display: Modify the user’s display name.
NN
–empid: Modify the user’s employee identifier.
NN
–pwd: Modify the user’s password. You can either supply a password or type an asterisk (*). If you type an asterisk, DSMod will ask
for the password when you press Enter.
NN
–desc: Modify the user’s description.
NN
–office: Modify the user’s office location.
NN
–tel: Modify the user’s organizational telephone number.
NN
–email: Modify the user’s organizational e‑mail address.
NN
–hometel: Modify the user’s home telephone number.
NN
–pager: Modify the user’s pager number.
NN
–mobile: Modify the user’s mobile or cellular telephone number.
NN
–fax: Modify the user’s facsimile number.
NN
–iptel: Modify the user’s IPPhone number.
NN
247
–webpg: Modify the user’s organizational or personal Web page
URL.
NN
–title: Modify the user’s job title.
NN
–dept: Modify the user’s department.
NN
–company: Modify the user’s company name (usually filled only
when subsidiaries are involved).
NN
–mgr: Modify the user’s manager’s name.
NN
–hmdir: Modify the user’s home directory. When working with a
NN
–hmdrv: Modify the user’s home drive.
NN
–profile: Modify the user’s profile path.
NN
–loscr: Modify the user’s logon script path.
NN
–mustchpwd: Type yes if you want the user to change their password
during the next logon.
NN
–canchpwd: Type yes if you want the user to be able to change their
password.
Interacting with
Active Directory
mapped UNC path, you see just a drive letter.
Part IV
248
Chapter 12
NN
3
Working with Directory Objects
–pwdneverexpires: Type yes if you don’t want the user’s password
to expire.
NN
–disabled: Type yes to disable the user’s account.
NN
–acctexpires: Modify to change the user’s account expiration
date. A value of never indicates that the account never expires.
Otherwise, type a positive value to set the number of days before
the account expires.
NN
–reversiblepwd: Type yes to make the user’s password rely on
reversible encryption.
Move Existing Objects
The DSMove utility makes it possible to move Active Directory objects from
one location to another. To move an object, type DSMove DN -newparent
ParentDN, where DN is the object’s distinguished name and ParentDN is the
parent’s distinguished name, and press Enter. Use the -newname Name
(where Name is a distinguished name) command line switch to give the
object a new name.
You can use the DSMove utility to work with remote systems as needed
(such as when you want to move elements on a server). You can use
the –s Server or –d Domain command line switches, where Server is the
name of a specific server that you want the computer to use for logons
and Domain is the name of a domain where you want the computer to log
on, to log on to a particular part of the network as needed. This utility
also supports the –u Username and –p Password command line switches,
where Username is the name of an account on the server and Password is
the account’s password, to log on to the server using a different account.
Delete Existing Objects
It’s important to delete Active Directory objects when you don’t need
them any longer to keep the directory from becoming clogged with old
entries. To delete an object, type DSRm DN, where DN is the object’s distinguished name, and press Enter.
Delete Existing Objects
249
Interacting with
Active Directory
There are a number of command line switches supplied with the
DSRm utility. Type DSRm /? and press Enter to see a complete list of these
command line switches. When working with script or batch files, use
the –noprompt command line switch to delete entries without any output
from the DSRm utility.
Some Active Directory objects, such as OU, are part of a tree where
there are objects in the subtree. If you want to delete all of the objects
within the subtree, use the –subtree command line switch. However, if
you want to preserve the original object (simply eliminating the items in
the subtree), use the –exclude command line switch as well.
You can use the DSRm utility to work with remote systems as needed
(such as when you want to remove elements on a server). You can use
the –s Server or –d Domain command line switches, where Server is the
name of a specific server that you want the computer to use for logons
and Domain is the name of a domain where you want the computer to log
on, to log on to a particular part of the network as needed. This utility
also supports the –u Username and –p Password command line switches,
where Username is the name of an account on the server and Password is
the account’s password, to log on to the server using a different account.
Part IV
Performing
Diagnostics
In This Part
q
CHAPTER 13: Monitoring System Events. . . . . . . . . . . . . . . . . . . . . . . . 253
CHAPTER 14: Monitoring System Performance. . . . . . . . . . . . . . . . . . . 271
Performing Diagnostics
PART V
Part V
Monitoring System Events
Performing Diagnostics
13
Part V
In this chapter, you will learn to:
33
33Create an Event (Page 258)
Create Simple System Events (Pages 254–257)
Trigger System Events (Pages 257–262)
n
n
Delete an Event (Page 261)
n
Query an Event (Page 261)
33Display a List of Publishers (Page 262)
Manage Event Information (Pages 262–270)
n
n
Get a Publisher (Page 262)
n
Enumerate the Logs (Page 26 3)
n
Query Log Events (Page 26 4)
n
Get a Log (Page 267)
n
Get Log Status Information (Page 267)
n
Set a Log (Page 267)
n
Export a Log (Page 269)
n
Archive a Log (Page 270)
n
Clear a Log (Page 270)
254
Chapter 13
3
Monitoring System Events
T
he event log used to be a simple affair that contained a few folders or logs. The System log contained system-level events generated
by the operating system, the Application log contained applicationgenerated events, and the Security log contained security events, such
as audits. Newer versions of Windows also contain these three logs, but
now you have a complex affair of specialty logs for just about every purpose. An administrator could go crazy trying to figure it all out, much
less monitor it using the GUI. Fortunately, the command line makes it
easier to find what you need and you can automate access to specific
entries using batch files or scripts. You can even use the command line
to make entries. For example, you can register events generated by your
batch files or scripts. The following sections tell you more about the
various tasks you can perform with the event system.
Using Event Logs Effectively
Windows records all events in the event log. You can use the
Event Viewer console in the Administrative Tools folder of the
Control Panel to view the events. Educating yourself about the
event log and understanding how to use it effectively are important. You can learn more about the event log in general on the
Microsoft Web site at http://technet.microsoft.com/library/
cc759538.aspx.
However, effective event log usage goes even further. As you
begin writing your own applications (even batch file applications), consider adding event log entries to one of the standard
logs or use a special log for the purpose. The Code Project
article (http://www.codeproject.com/dotnet/evtvwr.asp) shows
how to add new event logs using registry entries. You’ll also
want to review the MSDN “EventLog Key” article at http://
msdn.microsoft.com/library/aa363648.aspx.
Create Simple System Events
It’s extremely helpful to know how to create event log entries from the
command line using the EventCreate utility. Doing so makes it possible
to log events from batch files and other nonstandard sources. Instead
of allowing the batch file to simply terminate without providing any
information as to the cause of the problem, you can provide details
about the failure in the event log (at least, you can provide this information when the failure isn’t catastrophic).
NOTE The EventCreate utility supports the /S Server (where
Server is a server name), /U User (where User is a user account
on the remote system), and /P Password (where Password is
the password for the remote user account) command line
switches, which means that you can create event log entries
on other systems. However, you should only make entries on
remote systems when the entry applies to that system.
No matter what reason you might have for making an event log entry
at the command line, the process is straightforward. The following steps
describe how to create a simple event log entry:
1. Type EventCreate.
2. Type /L Logname, where Logname is the name of the log you want
to use.
The log name determines the name of the log to use for the event
entry. The three standard logs found on every Windows machine
are Application, Security, and System. Many machines include additional event logs installed by applications that the system uses.
3. Type /T ERROR, /T WARNING, or /T INFORMATION to specify the kind of
event to create.
Even though the Windows event log accepts other event types, the
only three acceptable types are error, warning, and information.
These three types reflect three levels of severity, with information
being the least severe and error being the most severe.
4. Type /SO Source, where Source is the source of the event.
You can use any string as the source. However, providing a meaningful application identifier is usually the best idea. Given that
you’ll use this feature from the command line, you might simply
want to use “Command Line” as your source. When working with
a batch file, use the batch filename as the source. Scripts and other
forms of automation should use the script or application name.
5. Type /ID Identifier, where Identifier specifies the event identi-
fier for the event.
255
Performing Diagnostics
Create Simple System Events
Part V
256
Chapter 13
3
Monitoring System Events
The identifier is a number between 1 and 1,000. Whenever practical, provide specific numbers for specific events. For example, you
might assign a value of 500 to all file errors. The event identifier
lets you sort the events in a manner other than type or source, so
you should also keep this in mind when you create the event identifier list for your application.
Figure 13.1: Event log entries appear just as you expect from the command line
entries you provide.
6. Type /D Description, where Description provides an event
description.
The description should tell the viewer what happened to cause the
event, the event effects, and any other pertinent information
the viewer might need to resolve event problems caused by the
event. Even informational events should include significant event
information. For example, you might record that your application started, found no work to do, and terminated. Even though
the application didn’t experience an error, the information is still
important to someone who expected your application to complete useful work.
7. Press Enter. EventCreate defines a new event entry in the event log
that you specified.
As an example, let’s say that you want to add a success message to the
event log to show that your batch file completed its task successfully. In
this case, you might type EventCreate /L Application /T INFORMATION /
SO “My Batch File” /ID 200 /D “Batch Completed Successfully!”
and press Enter. After you press Enter, you’ll see a success message of
“SUCCESS: An event of type ‘INFORMATION’ was created in the
‘Application’ log with ‘My Batch File’ as the source.” When you open
the Event Viewer console found in the Administrative Tools folder of
the Control Panel, you’ll find the success message shown in Figure 13.1
in the Windows Logs\Application folder.
NOTE The event log accepts several additional pieces of information that you can’t add using the EventCreate utility. The event
category requires that you register a specialized .DLL to handle
the category information. Given that you probably won’t add
the required .DLL for a batch file application, Microsoft left this
particular entry out. An event can also register data that amplifies the event description. The lack of support for this feature is
regrettable because you could use it to create better event log
entries. However, you can overcome this problem by providing
a detailed description and possibly including the data as part of
the description rather than as a separate entry.
Trigger System Events
One of the problems with the event log is that it can quickly become
clogged with a lot of information—more information than many network administrators want to wade through to locate a particular event
of importance. Starting with Windows XP, you can set an event trigger on the event log. When an event log entry matching the criteria you
specify appears, you can tell the EventTriggers utility to perform any
number of tasks—anything from sending an e‑mail message to running a
particular application (batch files included).
257
Performing Diagnostics
Trigger System Events
Part V
258
Chapter 13
3
Monitoring System Events
NOTE If you’re using Vista or a newer version of Windows,
you might notice that the EventTriggers utility isn’t included
by default, which is amazing because the utility first appeared
in Windows XP. You can try to use this utility from your older
copy of Windows. As an alternative, Microsoft also provides a
GUI method for associating an event trigger with the event log
that apparently doesn’t have a command line alternative and
therefore isn’t included in this book. You can read about the
GUI method at http://blogs.techrepublic.com.com/window-onwindows/?p=756.
The interesting part about using event triggers is that you can track
problems occurring on any system (local or remote) with greater ease.
Although you might want to look at all of those informational messages in the event log at some point, the SQL Server error message is
the one that you really want to know about the second it occurs. The
SQL Server message is an example of an event log entry that you want
to track using an event trigger. Of course, the entry could just as easily
be from any other application. For example, you might want to know
when the Windows Time service fails to find an online time synchronization source.
The EventTriggers utility provides three modes of operation: Create,
Delete, and Query. Each one of these modes controls a particular aspect
of working with event triggers. The following sections discuss these three
modes of operation and show how you use them to manage event triggers
on your system.
NOTE The EventTriggers utility supports the /S Server (where
Server is a server name), /U User (where User is a user account
on the remote system), and /P Password (where Password is the
password for the remote user account) command line switches,
which means that you can create event trigger entries on other
systems. In fact, you could write a batch file to obtain a list of
computers on the system and place the same event triggers on
every system to ensure any system encountering problems will
send an e‑mail or perform other tasks to handle the trigger.
Create an Event
Before you can use event triggers, you have to create them. The Create
mode helps you add new event triggers. Each event trigger reacts to a
separate event in the event log, so you need one event trigger for each
event log entry that you want to monitor.
The following steps describe how to create an event trigger:
1. Type EventTriggers /Create.
2. Type /TR TriggerName, where TriggerName defines a human-
readable name to associate with the event trigger.
Using names such as MyTrigger probably won’t work well. It’s
important to create a descriptive name that you’ll recognize
easily. Make sure you make the name unique by adding some
elements for the event log entry that it monitors. For example,
WinMgmtWarning63 would be a good name for an event generated by the Windows management service at the warning level
for event identifier number 63.
3. Type /TK TaskName, where TaskName defines the name of the task to
perform when the event trigger fires.
Generally, this is the name of an application (including any required
command line switches), batch file, script, or other executable
entity. For example, you can tell Outlook to send you a message
about the event using Outlook’s command line switches to generate
an e‑mail.
4. (Optionally) Type /L Log, where Log specifies the Windows event
log to monitor.
The three common logs include Application, System, and Security.
The DNS Server and Directory logs commonly appear on servers.
You can also specify any custom log. You can use wildcard characters to define the log name. The default value is “*” (without the
quotes), which is all of the event logs on the specified machine.
5. (Optionally) Type /EID ID, where ID specifies which Event ID to
monitor in the event log.
This value is application-specific, so you need to know which
Event ID an application will use for a particular requirement.
6. (Optionally) Type /T EventType, where EventType specifies the
Event Type to monitor in the event log.
The valid values include ERROR, INFORMATION, WARNING, SUCCESSAUDIT,
and FAILUREAUDIT. The SUCCESSAUDIT and FAILUREAUDIT event types
only appear in Security logs.
259
Performing Diagnostics
Trigger System Events
Part V
260
Chapter 13
3
Monitoring System Events
7. (Optionally) Type /SO Source, where Source specifies the Event
Source to monitor in the event log.
The Event Source varies by application and by entity performing a
task. For example, the system can just as easily generate an event
that a user can generate. Unless you want to monitor the activities
of a specific entity, you should refrain from supplying this command
line switch.
8. (Optionally) Type /D Description, where Description specifies the
Description to monitor in the event log.
Using this command line switch makes the event trigger very specific. In fact, the event trigger becomes so specific that you might
miss events. Use this particular command line switch with caution
and only in cases where you know exactly which message you
want to receive.
9. (Optionally) Type /RU Username, where Username defines the user
account to use to run the task.
Use “” (two quotes) for the system account. The default username
is the current username or the name used to access the remote
system with the /U command line switch.
10. (Optionally) Type /RP Password, where Password defines the pass-
word for the task user account.
The EventTriggers utility ignores this value when working with
the system account. Supply a value of * or None when you want the
EventTriggers utility to prompt for a password.
11. Press Enter. EventTriggers defines a new event trigger using the
criteria you specified.
As an example, let’s say you want to create an event trigger for the
custom event created in the “Create Simple System Events” section
of the chapter. The event trigger will open a copy of Notepad, just
so you can see something happening. You could create the event on
one machine and have the command prompt appear on another. (A
more practical approach would be to send an e‑mail message, but the
example uses this simple approach for clarity.) In this case, you’d type
EventTriggers /Create /TR MyTrigger /TK Notepad /L Application
/EID 200 /T INFORMATION /SO “My Batch File” and press Enter.
EventTriggers will ask you to provide a password for running the task.
Type the password and press Enter. Now, whenever the event occurs,
you’ll see a command prompt open with the success message.
Delete an Event
Use the Delete mode to remove any event triggers you no longer need.
To delete an event trigger type EventTriggers /Delete /TID ID, where
ID specifies the Trigger Identifier (TID) to remove from the list of event
triggers. Every time you create a new event trigger, the system assigns it
an identifier. You can see this identifier by using the Query mode. This
command line switch accepts the * wildcard, which deletes all of the
event triggers on the system.
Query an Event
The Query mode displays a list of all of the event triggers on a system. To see a complete list of all of the current event triggers, type
EventTriggers /Query and press Enter. EventTriggers displays a list of
all of the event triggers in tabular form.
You can use this list for real-time work with the event triggers.
However, by changing the format, you can also use this mode to add
the event triggers to a database for later reference. The following command line switches are helpful when modifying the EventTriggers /
Query command output:
NN
/FO {TABLE | LIST | CSV}: Specifies the output format. The table
columns define the values for output, while each row contains one
event trigger entry. The CSV (comma separated value) output provides the best method for preparing the data for entry in a database.
Use redirection to output the CSV data to a file and then import it to
your database. The list format provides one data element per line.
Each group of data elements defines one event trigger. The utility
separates each event trigger by one blank line. Some people find the
list format more readable when working in verbose mode since the
table format requires multiple lines for each entry (the lines wrap).
NN
/NH: Specifies that the EventTriggers utility shouldn’t display the
column headers. You can use this option when creating pure content
for reports or other needs. The EventTriggers utility accepts this
command line switch only when using the table and CSV formats.
NN
/V: Outputs additional information about each event trigger. The
default output includes the trigger identifier, event trigger name,
and the name of the task the event trigger performs. The additional
information includes the hostname, the event trigger query (the
arguments used to trigger it), the description information, and the
username used to run the task.
261
Performing Diagnostics
Trigger System Events
Part V
262
Chapter 13
3
Monitoring System Events
Manage Event Information
The WEvtUtil utility helps you monitor the event logs on a system. This
utility replaces the other utilities provided in earlier versions of Windows
(you won’t find it in Windows XP or Windows 2003, but it does appear
in Vista and Windows 2008). You might wonder about this change, until
you begin looking at the complexity of the newer Windows event log
setup, which is very complex. (The new event logs are a significant change
from past versions of Windows that contained the same few logs.) The following sections describe how to perform tasks using the WEvtUtil utility.
Display a List of Publishers
In order to publish custom information in the event log as a service or
application, you must become a publisher. Event publishers generally have
their own log in which to place entries, so that the administrator should
theoretically have an easier time finding the information. Unfortunately,
to use this information successfully, you need to know the event publishers. To obtain a list of event publishers, type WEvtUtil EP | More and
press Enter. The More utility is required because even a new Windows
installation has far too many event publishers to see on a single screen.
As an alternative, you can send the list to a file by typing WEvtUtil EP >
EventPublishers.TXT and pressing Enter. What you’ll see in the output
is a list of publisher names, such as Application Error, but no additional
information.
Get a Publisher
Simply having a name doesn’t tell you much about a publisher. In order
to obtain any useful information, you must get the publisher from
WEvtUtil. The easiest way to perform this task is to use the WEvtUtil GP
PublisherName command, where PublisherName is the name of a publisher such as Application Error. For example, to learn more about the
Application Error publisher, type WEvtUtil GP “Application Error” and
press Enter. You’ll see publisher details like those shown in Figure 13.2.
Two special command line switches provide additional information. If
you want to see the actual message that a publisher produces, use the /GM
command line switch. Some publishers also output specific events. You
can obtain this information using the /GE command line switch.
Manage Event Information
263
Performing Diagnostics
Figure 13.2 : Detailed publisher information is helpful in learning about the publisher.
Part V
If you plan to work with the output of this command in another
application or simply want an easier way to view it in a browser, you
can use the /F:XML command line switch. The output is in XML format. For example, if you type WEvtUtil GP “Application Error” /GM /
GE /F:XML > ApplicationError.XML and press Enter, you receive an
XML file that contains detailed publisher information in a form that you
could use in another application.
Enumerate the Logs
The new version of the event log has a host of logs in it. You still have
access to the same three logs of the past: Application, Security, and
System, but the new event log has many others. Besides having more
logs to deal with, the machines on your network might not even have
all the same logs because many logs are application- or service-specific.
Consequently, before you can assume anything about the logs on a system, you must enumerate them by typing WEvtUtil EL | More and pressing Enter.
Unfortunately, just enumerating the logs probably won’t answer the
question of whether a particular log exists with any ease. In this case, use
the WEvtUtil EL | Find /I “SearchTerm“ command, where SearchTerm is
one or more words for the log that you want to find. For example, you
might want to see what media-related logs appear on the system. In this
case, you’d type WEvtUtil EL | Find /I “Media” and press Enter.
264
Chapter 13
3
Monitoring System Events
Query Log Events
The WEvtUtil QE command outputs event information from a log or
log file. The path argument normally contains the name of the log.
For example, if you want to read all of the events in the Application
log in text format (rather than an unreadable form of XML), you type
WEvtUtil QE Application /F:XML and press Enter. However, if you use
the /lf option, then you must provide the physical path to the event log
file. This argument also supports the following options (the long names
appear in parentheses after the option):
NN
/lf:{True | False} (logfile): Specifies that the path argument
contains a physical path to a log file, rather than a log filename.
NN
/sq:{True | False} (structuredquery): Specifies that the path
argument contains a path to a file that contains a structure query.
NN
/q:Value (query): Provides an XPath query to filter the events read
from the log. The utility returns all of the events when you don’t
provide this option. You can’t use this option with the /sq option.
NN
/bm:Value (bookmark): Specifies a path to a file that contains a
bookmark from a previous query. Using a bookmark lets you continue a previous query.
NN
/sbm:Value (savebookmark): Specifies a path to a file that the utility
uses to store a bookmark for the current query. The bookmark file
extension should be XML.
NN
/rd:{True | False} (reversedirection): Defines the direction in
which the utility reads events. The default setting of True returns
the most current events first.
NN
/f:{XML | Text} (format): Determines the output format of the
data. The default setting is Text. When you use XML, the output
appears as an XML file that you can view using any XML viewer
(making the output considerably easier to understand).
NN
NN
NN
/l:LCID (locale): Provides a locale string that defines the locale
used to output text information. This option is only available when
you use the /f option to print events in text format.
/c:Number (count): Defines the maximum number of events to
read. If you combine this switch with the bookmark feature, you
can read a segment of the event log at a time.
/e:RootElementName (element): Defines a root element name to use
to produce well-formed XML.
Unfortunately, displaying every event in the Application log is going
to be time consuming. You’ll want to query the event log in some way,
but most people are daunted by technical terms like XPath. Fortunately,
there’s an easy way to build a query for WEvtUtil. Just follow these steps:
1. Open the Event Viewer.
2. Right-click the log you want to work with and choose Filter
Current Log from the context menu.
The example works with the System log, but you can use any log
you want. You see the Filter Current Log dialog box shown in
Figure 13.3.
Figure 13.3 : The Filter Current Log dialog box makes it easy to create XPath queries.
3. Configure the filter as you normally would.
The example sets the filter to find all Information entries from the
Service Control Manager.
4. Select the XML tab. You see the XML version of the filter shown
in Figure 13.4.
265
Performing Diagnostics
Manage Event Information
Part V
266
Chapter 13
3
Monitoring System Events
Figure 13.4: The XML tab of the Filter Current Log dialog box contains the XPath you need.
5. Select the XPath statement from the Path attribute of the <Select>
element as shown in Figure 13.4.
To do this, place the cursor at the beginning of the statement, and
then press Shift+Right Arrow to highlight the remaining text.
6. Press Ctrl+C to copy the text to the clipboard.
7. Use the XPath text you just copied to create a command with the
/Q command line switch.
The previous example uses the XPath to create the following command that finds just the Information level entries from the Service
Control Manager. (Even though the command occupies multiple
lines in the book, you should type it as a single line command.)
WEvtUtil QE System /F:Text /Q:”*[System[Provider[@
Name=’Service Control Manager’] and (Level=4 or
Level=0)]]”
Manage Event Information
267
It’s helpful to know the current configuration of a log when looking for
places you can make changes in the event log system. Use the WEvtUtil
GL LogName command, where LogName is the name of the log you want
to view, to perform this task. For example, if you want to get the configuration of the Application log, you type WEvtUtil GL Application and
press Enter.
Performing Diagnostics
Get a Log
Get Log Status Information
All of the event logs maintain status information. To obtain the current
statistics about any log, use the WEvtUtil GLI LogName command, where
LogName is the name of the log you want to view, to perform this task.
For example, if you want to determine the status of the Application log,
you type WEvtUtil GLI Application and press Enter. The statistics are:
NN
creationTime
NN
lastAccessTime
NN
lastWriteTime
NN
fileSize
NN
attributes
NN
numberOfLogRecords
NN
oldestRecordNumber
Set a Log
Setting or configuring a log means changing individual log values. For
example, you can enable or disable the log. You use the WEvtUtil SL
LogName command, where LogName is the name of the log you want to
change, to perform this task. You follow the basic command by any of
the following command line switches to configure specific log elements:
NN
NN
/e:{True | False} (enabled): Enables or disables the log. The
default value is True to enable the log.
/i:{System | Application | Custom} (isolation): Defines the
log isolation mode: system, application, or custom. In addition,
the mode identifies the other logs with which the log shares a session, which means these other logs have write permission for the
Part V
268
Chapter 13
3
Monitoring System Events
target log. Use the System mode when a log affects that system as
a whole. The resulting log shares a session with the System log.
The Application mode is the option to use with general applications. Logs in this class share a session with the Application log.
The Custom mode is for private logs that you don’t want to share
a session with any other log. You must use the /ca option to define
security for custom logs.
NN
/lfn:Value (logfilename): Provides the full path to the physical
location of the log on the hard drive.
NN
/rt:{True | False} (retention): Determines whether the log
retains existing entries when the log becomes full. When you
set the log retention mode to True, the log retains earlier entries
when the log becomes full and discards all new entries. The
default value of False discards older entries in favor of new ones.
NN
/ab:{True | False} (autobackup): Performs an automatic backup
of the log when it reaches maximum size. You must set the retention value to True using the /rt option when using this feature.
NN
NN
NN
/ms:Value (maxsize): Specifies the maximum log size in bytes. Log
files are always multiples of 64 KB, so Windows rounds any value
you provide to a multiple of 64 KB.
/l:Value (level): Defines the log level filter (normally critical,
error, warning, information, or verbose). You may use any valid
level value. This feature is only applicable to logs with a dedicated
session (which means that the isolation mode is normally custom).
You can remove a level filter by setting the value to 0.
/k:Value (keywords): Defines the log keyword filter (common key-
words include Audit Failure, Audit Success, Classic, Correlation
Hint, Software Quality Monitoring [SQM], Windows Diagnostics
Infrastructure [WDI] Context, and WDI Diag). The value can
include any valid 64-bit keyword mask. This feature is only applicable to logs with a dedicated session (which means that the isolation mode is normally custom).
NN
/ca:Value (channelaccess): Defines the access permission for an
event log. You must provide a valid security descriptor defined
using the Security Descriptor Definition Language (SDDL). You
can learn more about SDDL at http://msdn2.microsoft.com/
en-us/library/aa379567.aspx.
Manage Event Information
/c:Value (config): Defines a path to a configuration file. The con-
figuration file contains log file settings in the form of an XML file.
When using this feature, you must not specify the logname command line argument because this value is already part of the configuration file. Here’s a typical example of a configuration file:
<?xml version=”1.0” encoding=”UTF-8”?>
<channel name=”Application” isolation=”Application”
xmlns=”http://schemas.microsoft.com/
win/2004/08/events”>
<logging>
<retention>true</retention>
<autoBackup>true</autoBackup>
<maxSize>9000000</maxSize>
</logging>
<publishing>
</publishing>
</channel>
Notice that the <channel> element includes the log filename as
Application and an isolation level (/i) of Application. The logging options appear as part of the <logging> element. Each child
element name is the long name for an option. For example, the
<retention> element corresponds to the /rt command line argument. You can add other configuration options to the log, such as
the publishing options.
As an example of how to use this command, let’s say you want to
change the maximum size of the application log to 1,048,576 bytes.
In this case, you’d type WEvtUtil SL Application /MS:1048576 and
press Enter.
Export a Log
You can choose to export all or part of a log at any time to make a
backup copy of it using the WEvtUtil EPL LogName BackupName command,
where LogName is the name of the log you want to export and BackupName
is the name of the file you want to use for export purposes. For example,
to make a backup copy of the Application log, you type WEvtUtil EPL
Application /BU:ApplicationOld.EVTX and press Enter. This command
also supports the following command line switches:
Performing Diagnostics
NN
269
Part V
270
Chapter 13
NN
3
Monitoring System Events
/lf:{True | False} (logfile): Specifies that the path argument
contains a physical path to a log file, rather than a log filename.
NN
/sq:{True | False} (structuredquery): Specifies that the path
argument contains a path to a file that contains a structure query.
NN
/q:Value (query): Provides an XPath query to filter the events read
from the log. The utility returns all of the events when you don’t
provide this option. You can’t use this option with the /sq option.
See the “Query Log Events” section of the chapter for an example
of using XPath to query the event logs.
Archive a Log
Archiving a log is different from exporting it in that the archive is a selfcontained format designed solely for backup purposes. The WEvtUtil utility
creates the log in a specific folder based on the current locale or a locale
you provide using the /L:Locale (where Locale is the number of the
locale you want to use) command line switch. For example, to archive the
Application log, you type WEvtUtil AL Application and press Enter. Notice
that you don’t provide a backup filename when using this command.
Clear a Log
From time to time you need to clear the event logs or they become quite
large and consume a large amount of hard drive space (not to mention being hard to use). Use the WEvtUtil CL LogName command, where
LogName is the name of the log you want to clear to perform this task.
For example, if you want to clear the Application log, you type WEvtUtil
CL Application and press Enter.
Depending on company policy, you may need to create a backup
of the event log before you clear it. In this case, you rely on the
/BU:BackupName command line switch, where BackupName is the name
of the backup file. For example, if you want to clear the Application
log and back it up to ApplicationOld.EVTX, you’d type WEvtUtil CL
Application /BU:ApplicationOld.EVTX and press Enter.
Monitoring System Performance
Performing Diagnostics
14
Part V
In this chapter, you will learn to:
33Load a Performance Counter (Page 272)
Add Performance Counters (Pages 272–273)
n
n
Save Performance Counter Settings (Page 273)
n
Restore Performance Counter Settings (Page 273)
33
Manage Performance Logs and Alerts
(Pages 274 –278)
n
Create a Performance Log (Page 274)
n
Start Collecting Data (Page 276)
n
Stop Collecting Data (Page 276)
n
Query a Collection (Page 277)
n
Update a Collection (Page 277)
n
Delete a Collection (Page 278)
33
33
33
Create New Performance Logs from Existing
Logs (Pages 278 –281)
Remove Performance Counters (Page 281)
Convert Event Trace Logs (Page 281)
272
Chapter 14
3
Monitoring System Performance
N
o matter what you do with your system, at some point you’ll want
to know how it’s performing. Performance data generally takes two
forms. The static variety acts as a long-term record of the performance
of your system as a whole. You can use it to track the performance of
your system over time. The dynamic variety shows the current performance of your system. You can use it to check for changes in system
status, look for positive gains after optimization, and even use it to
troubleshoot your system (such as when a network card fails to deliver
the throughput you anticipated).
Unlike many of the utilities discussed in this chapter, you can perform
setups using the command line utilities, but actual monitoring usually
occurs using the Performance console found in the Administrative Tools
folder of the Control Panel. This chapter focuses on the command line
tasks—those parts of performance monitoring that other books tend to
ignore. However, you’ll need to augment this information with a usage
guide for the Performance console. This book won’t tell you how to use
the graphical interface. The following sections describe the command line
interface in detail.
Add Performance Counters
Performance monitoring relies on the existence of counters. A counter
is a special piece of code that counts something. The count might reflect
the number of times a user accesses a file or makes a network request.
No matter what the counter monitors, it provides output that the various performance monitoring applications can use to report performance
data. In many cases, the performance counters appear as part of the
application, so they’re available from the moment you install the application. However, you can also obtain external counters. The LodCtr
utility loads a counter into the system so that you can access it from performance monitoring software.
Load a Performance Counter
To load a new performance counter, you use the LodCtr Filename command, where Filename defines the name of a file with an .INI extension that contains the initialization data for a counter. The .INI file
normally contains the name of the .DLL with the counter code, counter
definitions (such as the human-readable name and any required help
text), and the explanation text for an extensible counter .DLL. For
example, to load counters from an .INI file named MyCounter.INI,
you’d type LodCtr MyCounter.INI and press Enter.
Save Performance Counter Settings
You can save all of the current performance counter settings in the
registry to a file. The resulting .INI file makes it easier to set up the
counters on a system after you reconfigure it or move counters to a
new system. To save the current performance counter settings, you use
the LodCtr /S:Filename command, where Filename defines the name of
an initialization file that contains counter registration information. The
registration strings generally include the First Counter, First Help, Last
Counter, and Last Help information for each of the counters. You’ll also
see a [PerfStrings_009] section that includes a list of all the performance
counter strings by number. For example, to save all of the current settings
to a file named MyCounters.INI, you’d type LodCtr /S:MyCounters.INI and
press Enter.
NOTE Even though the documentation for this utility seems
to say that the utility produces a .REG (registry) file, the file isn’t
a registry script. If you try to install the file using the RegEdit
utility, the RegEdit utility displays an error. In fact, the file does
appear in the .INI file format and you should probably give it an
.INI file extension, rather than the .REG file extension Microsoft
recommends.
Restore Performance Counter Settings
If you have an .INI file that contains a list of counter settings, you can
restore those settings to any machine that has the counters installed.
To restore counter settings, you use the LodCtr /R:Filename command, where Filename defines the name of an initialization file that
contains counter registration information. For example, to restore
all of the settings found in a file named MyCounters.INI, you’d type
LodCtr /R:MyCounters.INI and press Enter.
273
Performing Diagnostics
Add Performance Counters
Part V
274
Chapter 14
3
Monitoring System Performance
Manage Performance Logs and Alerts
The Windows performance monitoring software includes the capability
of creating performance logs and of creating alerts. The logs act as a
historical record of the data the performance monitoring software collects. The alerts can perform tasks based on the current system performance. For example, if a system is low on memory or other resources,
you can use an alert to send a message to the administrator to fix the
problem. To perform this task, you use the LogMan Verb CollectionName
command, where Verb is an action term and CollectionName is the name
of the counter you want to interact with. The following sections describe
each of the tasks you can perform using the LogMan utility.
Create a Performance Log
You can use the LogMan Create command to create four different kinds
of performance data collectors: Counter, Trace, Alert, and configuration
(abbreviated as Cfg). As a minimum, you must supply a collector name
using the –N Name command line switch, where Name is the name of the
data collector. For example, if you want to create a Counter data collector named MyCounter, you’d type LogMan Create Counter -N MyCounter
and press Enter. This command creates a blank collector that won’t do
anyone much good, but LogMan accepts it.
To create a useful data collector, you need to add one or more
counters. The –C command line switch helps you perform this task.
Let’s say you want to collect data for % Processor Time, % Idle Time, and
% User Time for all of the processors. To create this data collector, you’d
type LogMan Create Counter -N MyCounter -C “\Processor(_Total)\%
Processor Time” “\Processor(_Total)\% Idle Time” “\Processor
(_Total)\% UserTime” and press Enter. LogMan creates a usable data
collector, but it isn’t started yet. You can either start the data collector
manually or use one of the following command line switches to augment
or start it.
NN
–m [start] [stop]: Modifies the collection to use a manual start or
stop, rather than relying on a scheduled beginning or ending time.
NN
NN
–rf [[hh:]mm:]ss: Runs the collection for the specified time.
–b M/d/yyyy h:mm:ss[{ AM | PM }]: Defines the starting time for the
collection. Collection continues until the specified ending time (see
the –e command line switch) or you manually end the collection
process using the stop verb. The default setting uses the current
day and time. You can input times using a 24-hour clock. When
specifying a time based on a 12-hour clock, add the ~a.m. or ~p.m.
option.
NN
NN
–e M/d/yyyy h:mm:ss[{ AM | PM }]: Defines the ending time for the
collection. The default setting uses the current day and time. You
can input times using a 24-hour clock. When specifying a time
based on a 12-hour clock, add the ~a.m. or ~p.m. option.
–o { Filename | DSN!Log }: Specifies the output information for
the collection. You can use an output file by specifying a path and
filename. As an alternative, you can specify a SQL database (for
any vendor that supports SQL) by including the Open Database
Connectivity (ODBC) DSN and the log set name within the SQL
database. The default setting is to use a file with the same name as
the performance collection and a .BLG extension for counters or an
.ETL extension for traces.
NN
–[–]r: Repeats the collection daily at the specified begin and end
time when used with a single dash. This command is only valid for
begin and end times specified on the same day, month, and year.
NOTE Any entry with an optional dash has both an on and off
state. Using a single dash turns on the feature and using a double
dash turns off the feature. For example, –r repeats the collection
daily, but ––r turns off this feature (removes the daily collection feature).
NN
NN
NN
NN
–[–]a: Appends data to the existing log file when used with a single
dash. Overwrites the existing log file when used with a double dash.
The default setting is to overwrite the existing log file.
–[–]ow: Overwrites any existing file with the same name.
–[–]v [ nnnnnn | mmddhhmm ]: Attaches versioning information (either a number or the current date) to the end of the log
filename when used with a single dash. Removes the versioning
information when used with a double dash.
–[–]rc Filename: Runs a command after the system closes the
log when used with a single dash. Disables running a command
275
Performing Diagnostics
Manage Performance Logs and Alerts
Part V
276
Chapter 14
3
Monitoring System Performance
when used with a double dash. The commands always run in the
foreground (so the user can see them).
NN
NN
–[–]max Size: Defines the maximum log file size in megabytes when
used with a single dash. When the log file exceeds the maximum size,
the system stops collecting data even if other command line arguments specify a longer collection time. This command line switch
specifies the number of records when used with a SQL output.
Removes the log file size restriction when used with a double dash.
–[–]cnf [[[hh:]mm:]ss]: Creates a new file when the specified time
elapses or the file reaches the maximum file size when used with
a single dash. Removes the collection time restriction when used
with a double dash.
NN
–y: Answers yes to all questions without prompting. This feature
lets you set up counters and traces within a batch file without worrying about interruptions.
NN
–ets: Sends commands to event trace sessions without saving or
scheduling.
NOTE Some of these command line switches, such as –ets,
affect other LogMan commands. Type LogMan Verb /? (where Verb
is an action such as Create) and press Enter to see additional
help about any particular LogMan verb.
Start Collecting Data
Unless you set a specified time for data collection to begin, you
must start it manually. To perform this task, use the LogMan Start
CollectorName command, where CollectorName is the name of a data
collector. For example, if you want to start a data collector named
MyCounter, type LogMan Start MyCounter and press Enter.
Stop Collecting Data
Once you collect enough data, you can stop any data collector
manually. To perform this task, use the LogMan Stop CollectorName
command, where CollectorName is the name of a data collector. For
example, if you want to stop a data collector named MyCounter, type
LogMan Stop MyCounter and press Enter.
Query a Collection
LogMan provides two levels of query. The first level is to obtain a list of
data collectors. Simply type LogMan Query and press Enter to see the list.
After you have a list of data collectors, the second level is where
you can obtain more detailed information using the LogMan Query
DataCollector command, where DataCollector is the name of the data
collector (also called a provider) that you want to see. For example, if
you want to see the specifics about MyCounter, you’d type LogMan Query
MyCounter and press Enter. Figure 14.1 shows typical output from a query.
Figure 14.1: LogMan can provide details about the data collectors you create.
Update a Collection
The LogMan Update command works like the LogMan Create command
discussed in the “Create a Performance Log” section of the chapter.
In fact, you use the same techniques. The difference is that you update
(modify) an existing data collector, rather than create a new one, so you
only provide the information you want to change.
It’s important to realize that the LogMan Update command erases the
old content of a setting. For example, if you want to add a counter, then
you must include all of the old counters, plus the new one. For example,
to update MyCounter to include the % Privileged Time counter, you’d
type LogMan Update MyCounter -C “\Processor(_Total)\% Processor
Time” “\Processor(_Total)\% Idle Time” “\Processor(_Total)\%
UserTime” “\Processor(_Total)\% Privileged Time” and press Enter.
277
Performing Diagnostics
Manage Performance Logs and Alerts
Part V
278
Chapter 14
3
Monitoring System Performance
Delete a Collection
When you no longer need a data collector, you should delete it, if for no
other reason than to preserve system resources. Use the LogMan Delete
CollectorName command, where CollectorName is the name of any data
collector, to perform this task. For example, to delete MyCounter, you’d
type LogMan Delete MyCounter and press Enter.
Create New Performance Logs
from Existing Logs
The ReLog utility lets you create new performance logs from existing
performance logs. The new logs can use a different sample rate. In
addition, you can use this utility to convert a log from one format to
another. For example, you can use this utility to convert older logs,
including those from Windows NT 4.0 (such as the compressed log
format) to newer formats.
To perform a basic conversion, use the ReLog InputFile -F Format -O
OutputFile command, where InputFile is the name of the original performance log, Format is an output format, and OutputFile is the name of
an output file. For example, to convert a binary file named MyData.BLG
to CSV format, you’d type ReLog MyData.BLG -F CSV -O MyData.CSV and
press Enter. The acceptable formats are:
NN
binary (Bin)
NN
circular binary (Bincirc)
NN
Comma Separated Value (CSV)
NN
Tab Separated Value (TSV)
NN
SLQ Database (SQL)
When you perform the conversion, you’ll see statistics for the input
and output files like those shown in Figure 14.2. It’s important to view
these statistics to ensure the information you think you’re supposed to
get in the output file is actually there. The use of the wrong command
line switches can make a big difference in the output. Figure 14.3 shows
an Excel view of the resulting output file.
Figure 14.2 : Make sure you check the input and output log statistics from the
conversion.
279
Performing Diagnostics
Create New Performance Logs from Existing Logs
Part V
Figure 14.3 : Excel can easily read the resulting CSV performance log file.
280
Chapter 14
3
Monitoring System Performance
As with many utilities, you can go beyond the basics by adding more
command line switches. The following list contains command line
switches you can use to augment a conversion:
NN
–c CounterPath [CounterPath ...]: Defines one or more counters
to filter from the input log. The output log contains the remaining counters. Each performance counter has a path that begins
with the counter object, specific counter, and finally the instance.
Consequently, the \Process(_Total)\% Processor Time counter path
would collect the _Total instance of the % Processor Time counter
found in the Processor object. Make sure you place each counter
path in double quotes. The counter path can include wildcard
characters. Here’s a list of acceptable counter path formats:
NN
NN
\\machine\object(parent/instance#index)\counter
NN
\\machine\object(parent/instance)\counter
NN
\\machine\object(instance#index)\counter
NN
\\machine\object(instance)\counter
NN
\\machine\object\counter
NN
\object(parent/instance#index)\counter
NN
\object(parent/instance)\counter
NN
\object(instance#index)\counter
NN
\object(instance)\counter
NN
\object\counter
–cf Filename: Specifies a file containing a list of performance coun-
ters to collect. Each counter path must appear on a separate line.
NN
NN
–t value: Changes the sampling rate by writing every nth record
into the output file. For example, if the original file contains one
record for each second, specifying a value of two would change the
sampling rate to one every other second. The default setting writes
every record into the output.
–b M/d/yyyy h:mm:ss[{ AM | PM }]: Defines the starting time for the
collection. Collection continues until the specified ending time (see
the -e command line switch) or you manually end the collection process using the stop verb. The default setting uses the current day and
time. You can input times using a 24-hour clock. When specifying a
time based on a 12-hour clock, add the ~a.m. or ~p.m. option.
Convert Event Trace Logs
–e M/d/yyyy h:mm:ss[{ AM | PM }]: Defines the ending time for the
collection. The default setting uses the current day and time. You
can input times using a 24-hour clock. When specifying a time
based on a 12-hour clock, add the ~a.m. or ~p.m. option.
NN
NN
–config Filename: Specifies a configuration filename that contains
all of the command line options.
–q: Lists all of the performance counters found in the input file.
You can use this list to create input for the -c or -cf command line
switches.
NN
–y: Answers yes to all questions without prompting. This feature
lets you set up counters and traces within a batch file without worrying about interruptions.
Remove Performance Counters
The UnlodCtr utility unloads counters from memory. You won’t generally need this utility unless you loaded a custom counter. To use this
utility, type UnlodCtr CounterName, where CounterName is the name of the
counter that you want to remove, and press Enter.
Convert Event Trace Logs
The TraceRpt utility converts the binary data in the Event Trace Logs
(ETL) for the system into a format that you can use for permanent database storage or other needs. These .ETL files appear all over the hard
drive and they’re used by a variety of applications. Therefore, you need
to know something about the .ETL file to make any sense of the content,
even after you perform the conversion.
The TraceRpt utility supports a number of conversion types. The most
common type uses the TraceRpt InputFile –F Format –O OutputFile
or TraceRpt InputFile –OF Format –O OutputFile command, where
InputFile is the name of the original .ETL file, Format is an output
format, and OutputFile is the name of an output file. The main difference between the –F and –OF command line switches is that –F supports
XML and HTML as output, while –OF supports CSV, Event Extended
Performing Diagnostics
NN
281
Part V
282
Chapter 14
3
Monitoring System Performance
(EVTX), and XML as output. For example, to create an Excel-viewable
CSV file from MyTrace.ETL, you’d type TraceRpt MyTrace.ETL -OF CSV -O
MyTrace.CSV and press Enter.
It’s also possible to create two different reports. The –summary command line switch produces a simple text report named Summary.TXT. The
–report command line switch produces a more detailed report in XML
format named Workload.XML. You can add a filename to either command
line switch to change the output filename. The TraceRpt utility provides
a number of other interesting command line switches to modify the output. Type TraceRprt /? and press Enter to see a complete list of these
switches.
PART VI
CHAPTER 17: Securing the System. . . . . . . . . . . . . . . . . . . . . . . . . . . . . 335
Performing Maintenance
Performing
Maintenance
CHAPTER 18: Interacting with the Registry . . . . . . . . . . . . . . . . . . . . . . 353
Part VI
n This Part
q
CHAPTER 15: Performing Basic Maintenance. . . . . . . . . . . . . . . . . . . . . 285
CHAPTER 16: Managing System Users. . . . . . . . . . . . . . . . . . . . . . . . . . 319
15
In this chapter, you will learn to:
33Understand the SQL Syntax of WMIC (Page 287)
Configure the Server (Pages 286–310)
n
n
Use Aliases in WMIC (Page 290)
n
Get Help in WMIC (Page 302)
n
Format Data in WMIC (Page 306)
n
Translate Data in WMIC (Page 310)
33Perform an Activation (Page 311)
Activate Windows (Pages 311–312)
n
n
Display the Activation Information (Page 312)
n
Change the Product Key (Page 312)
33Update the Time (Page 313)
Manage the System Time (Pages 312–314)
n
n
Configure a Time Source (Page 313)
n
Obtain Time Settings Information (Page 314)
33Enumerate the Configurations (Page 315)
Manage the Boot Configuration (Pages 315–318)
n
n
Get BCDEdit Help (Page 316)
n
Edit an Existing Boot Setting (Page 317)
n
Change the Boot Sequence (Page 318)
n
Set the Default Boot Item (Page 318)
Performing Maintenance
Performing Basic Maintenance
Part VI
286
Chapter 15
3
Performing Basic Maintenance
T
he command line offers an amazing array of maintenance-related
commands. In fact, there are far too many of them to discuss in a
chapter. You could possibly write an entire book on just this aspect of
the command line. Of course, you use some commands far more often
than others. Although it’s important to know how to use the Boot
Configuration Data Store Editor (BCDEdit) to control the boot configuration, you’ll probably use it once or twice during the entire lifetime of a
particular system. (However, every machine will likely require that you
use it at least once, so you can’t forget about BCDEdit either.) On the
other hand, the Windows Management Interface Command (WMIC) utility contains so much functionality that you may very well find yourself
using it every day. With this in mind, this chapter discusses those utilities
that are both important and will require at least occasional use.
Configure the Server
You may wonder what Windows Management Instrumentation (WMI)
is all about, and it’s important to know a little about it. In 1996, BMC
Software, Cisco Systems, Compaq Computer, Intel, and Microsoft
sponsored the Web-Based Enterprise Management (WBEM) initiative.
The whole purpose of WBEM was to make it possible to manage systems across a network even if those systems weren’t normally compatible. For example, using WBEM, you could manage Linux and Windows
servers from the same location with equal ease—at least, that’s the
theory. For the most part, the theory does work and many companies
have adopted WBEM as a basis for performing management tasks without platform considerations. In fact, the Distributed Management Task
Force (DMTF) has a number of standards for WBEM and you can see
them at http://www.dmtf.org/standards/wbem/.
NOTE This book does provide enough information about
WMIC to help you perform most common tasks. It doesn’t document WMI or WMIC completely because the application is large
and complex enough to warrant a book of its own. If you find
that you need additional information about WMI, check out
Understanding WMI Scripting by Alain Lissoir (Digital Press,
2003). This book contains 579 pages on the topic of WMI scripting, including the use of WMIC.
WMI is Microsoft’s next step for WBEM. Even though this is still
supposedly an open standard, WMI builds on WBEM and implements
it at a lower level. The instrumentation takes place through device
drivers, services, and other software, making the entire structure of a
system appear more as a hierarchical database than a collection of statistics that someone could use for management tasks. As a result, WMI
lets you do more than WBEM, but the added functionality also makes
WMI considerably more complex. The point is that WMI looks like a
hierarchical database of any system you want to manage that supports
WMI. You can learn more about WMI at http://www.microsoft.com/
whdc/system/pnppwr/wmi/wmi-acpi.mspx.
WMIC is an extremely powerful utility that you’ll see demonstrated
throughout the book. This utility is the command line interface for
WMI. You’ll probably need to spend some time working with WMIC
before you can make it do everything you want. Because WMI reflects
the setup of your machine and not mine, it’s impossible to provide
detailed particulars of every element of WMIC in this book. However, WMIC
does work well for many common tasks where you know that most
machines will have essentially the same configuration. The following sections describe WMIC in detail.
Understand the SQL Syntax of WMIC
The basic usage technique for WMIC isn’t hard. You have access to a
number of global command line arguments, some aliases for particular
parts of the system, and alias-specific command line switches. The difficulty comes when you begin using the WMIC command for real work.
In most cases, you’ll need to use a SQL Server–like syntax that tells WMIC
precisely what element of your system to work with. Given that WMIC
makes your system look like a hierarchical database, the use of a SQL
Server–like syntax works well. The actual name for this syntax is WMI
Query Language (WQL) and you can find detailed information about it
at http://msdn.microsoft.com/library/aa394552.aspx. As an example of
WQI at work, the WMIC ComputerSystem Where Name=”%COMPUTERNAME%”
Call Rename Name=”NewName“ command, where NewName is the name you
want to assign to your computer, defines a new name for your computer. The rest of this section takes this command apart.
The term ComputerSystem is an alias. It references the computer system
elements of WMI. You need an alias to locate the particular branch of
the database that contains the element that you want to work with.
287
Performing Maintenance
Configure the Server
Part VI
288
Chapter 15
3
Performing Basic Maintenance
The Where clause tells WMIC which property to access within the alias.
In this case, the name of the property must match the %COMPUTERNAME%
expansion variable. This system environment variable appears with every
copy of Windows and it always contains the name of the local system.
Consequently, you can create commands that will run on any system
simply by referencing the expansion variable. The ComputerSystem alias
supports a number of properties including (to see this list for yourself,
type WMIC ComputerSystem and press Enter):
AdminPasswordStatus
AutomaticReset
BootOption
AutomaticReset
Capability
BootOptionOnLimit
BootOptionOnWatchDog
BootROMSupported
BootupState
Caption
ChassisBootupState
CreationClassName
CurrentTimeZone
DaylightInEffect
Description
Domain
DomainRole
EnableDaylight
SavingsTime
FrontPanelReset
Status
InfraredSupported
InitialLoadInfo
InstallDate
KeyboardPassword
Status
LastLoadInfo
Manufacturer
Model
Name
NameFormat
NetworkServer
ModeEnabled
NumberOfProcessors
OEMLogoBitmap
OEMStringArray
PartOfDomain
PauseAfterReset
PowerManagement
Capabilities
PowerManagement
Supported
PowerOnPassword
Status
PowerState
PowerSupplyState
PrimaryOwner
Contact
PrimaryOwnerName
ResetCapability
ResetCount
ResetLimit
Roles
Status
SupportContact
Description
SystemStartupDelay
SystemStartupOptions
SystemStartupSetting
SystemType
ThermalState
TotalPhysicalMemory
UserName
WakeUpType
Workgroup
Configure the Server
289
Every WMIC command can perform an action. The number of actions
depends on the alias that you’re working with. You can see a list of
actions for a particular alias by typing WMIC Alias /? (where Alias is
a WMIC alias that you want to learn about) and pressing Enter. If you
want to learn more about a particular action, type WMIC Alias Action
/? and press Enter. The ComputerSystem alias provides the following
actions (these actions are typical):
ASSOC: Displays a list of the associators of the current alias. Think
again about the hierarchical nature of the WMI database. An associator would be a WMI element that appears as a child of the current node in the database.
NN
CALL: Calls the specified method with the arguments you provide.
Every alias provides special methods for configuration tasks. In the
case of the example, the command calls on the Rename method. The
ComputerSystem alias also provides the JoinDomainOrWorkgroup and
the UnJoinDomainOrWorkgroup methods. To see the list of calls for a
particular alias, type WMIC Alias Call /? and press Enter. The methods normally include input and output arguments. The help listing
tells you about each of these arguments, but you don’t necessarily
need to use all of them. For example, the example call only uses the
Name argument, but it also includes the UserName and Password arguments when you work on a remote system. To use an argument,
provide its name, followed by an equals sign, followed by the value
of that argument in double quotes as shown in the example.
NN
CREATE: Creates a new instance of a particular element. You must
provide the arguments required to create the element. The element
also has optional arguments that you don’t have to provide. If you
don’t supply enough arguments, then WMIC displays an error message that normally tells you what arguments are missing.
NN
NN
DELETE: Removes an existing element. Make sure you use a Where
clause that defines the element completely. Otherwise, you might
delete something you really wanted to keep.
GET: Obtains all of the details for a particular alias. However,
the true power of this action is retrieving individual property
values. For example, if you want to determine the current startup
delay for your system, you’d type WMIC ComputerSystem Where
Name=”%COMPUTERNAME%” GET SystemStartupDelay and press Enter.
In this case, SystemStartupDelay is one of the properties that the
ComputerSystem alias supports.
Performing Maintenance
NN
Part VI
290
Chapter 15
NN
3
Performing Basic Maintenance
LIST: Obtains all of the details for a particular alias. You can
specify how much information to provide using the Brief and Full
settings. For example, if you type WMIC ComputerSystem LIST Brief
and press Enter, WMIC only provides the Domain, Manufacturer,
Model, Name, PrimaryOwnerName, and TotalPhysicalMemory properties as output. You can combine the LIST command with the Where
filter to obtain specific results. For example, let’s say you need to
know about the Microsoft Help Viewer 1.0. In this case, you’d
type WMIC Product Where Name=”Microsoft Help Viewer 1.0” List
and press Enter to see the information for the Microsoft Help
Viewer 1.0, rather than all of the applications on the machine.
NN
SET: Sets the value of a property directly. You must include a
Where clause that specifies which element to change. For exam-
ple, if you want to change the system startup delay (at the boot
manager) to 35 sections, you’d type WMIC ComputerSystem Where
Name=”%COMPUTERNAME%” SET SystemStartupDelay=35 and press
Enter. Type WMIC Alias SET /? and press Enter to see a list of properties you can change. The ComputerSystem alias includes the following writeable properties:
NN
AutomaticResetBootOption
NN
CurrentTimeZone
NN
EnableDaylightSavingsTime
NN
Roles
NN
SystemStartupDelay
NN
SystemStartupOptions
NN
SystemStartupSetting
NN
Workgroup
Use Aliases in WMIC
As mentioned in the “Understand the SQL Syntax of WMIC” section of
the chapter, much of your work with WMIC involves using aliases. Using
an alias means that you don’t have to worry about the physical structure
of WMI—you can access the information you need quickly and easily
(or at least more easily than if you also had to worry about the path to
a particular WMI element). The following list tells you about the aliases
that WMIC supports:
Configure the Server
NN
291
Alias: Provides access to a list of all of the aliases available on the
local system.
NN
NN
Baseboard: Provides access to features on the motherboard (system
board). For example, if you type WMIC Baseboard GET Manufacturer
and press Enter, you’ll see the name of the manufacturer of your
motherboard.
BIOS: Provides access to the Basic Input/Output System (BIOS)
management features. For example, if you type WMIC BIOS GET
BIOSVersion and press Enter, you’ll see the version of the BIOS
installed in the system. This isn’t the same as the firmware
update. To obtain the firmware version, type WMIC BIOS GET
SMBIOSBIOSVersion and press Enter.
BootConfig: Provides access to boot configuration information.
Microsoft may not support this feature with newer versions of
Windows—always use the BCDEdit utility instead for making
changes to the boot configuration.
NN
CDROM: Provides access to all of the CD and DVD devices on the system. For example, if you want to obtain the name and volume of
each of your CD or DVD devices, you would type WMIC CDROM GET
Name, VolumeName and press Enter (notice that you must separate
the individual properties with commas).
NN
ComputerSystem: Manages the computer system configuration.
NN
CPU: Provides access to the CPU. You’ll see one entry for each CPU.
If the CPU is dual (or more) processing, the output displays one
entry for each processor in the CPU. One of the more important
properties is the status indicator, which provides a simple indication of whether the CPU is currently operating within designed
parameters (the output is a simple OK when the CPU is functioning properly). Type WMIC CPU GET Status and press Enter to obtain
the status information.
NN
NN
CSProduct: Provides access to the computer system product information. For example, you’d use this alias to determine the system’s
Universally Unique Identifier (UUID), which is actually better than
a serial number because it’s unique across all systems.
Datafile: Manages information about data files on the system.
This alias locks up the machine if you don’t use it correctly. You
must provide specific data file criteria in order to achieve good
Performing Maintenance
NN
Part VI
292
Chapter 15
3
Performing Basic Maintenance
results. For example, if you want to locate all of the executable files
in the Windows directory, type WMIC DataFile Where “Path=’\\
Windows\\’ and Extension=’exe’” and press Enter. Notice the use
of double quotes to encompass the search criteria and single quotes
to encompass values. In addition, notice the use of double backslashes in the path variable. You can’t use expansion variables in
this case.
NN
DCOMApp: Manages the Distributed Component Object Model
(DCOM) applications on the system. You can use this feature to
start, stop, install, and remove DCOM applications as needed
using a simple batch file. Because DCOM applications can become
quite complex, make sure you understand how to configure DCOM
applications using the Component Services console first.
NN
NN
Desktop: Manages the user’s desktop. Unfortunately, this alias
assumes that the user’s desktop includes a GUI. Consequently, this
alias doesn’t work well with Windows Server 2008 Server Core, but
it works fine with all other versions of Windows. You can obtain
information such as the screen saver that the user is employing and
what the desktop has for a background image.
DesktopMonitor: Provides access to statistics about the configura-
tion of the desktop on the specified system.
NN
DeviceMemoryAddress: Provides access to the memory ranges used
by physical devices installed on the system. You’ll see one entry
for each memory range used by a device. The output of this alias is
somewhat useless because it doesn’t provide names for each of the
devices, but you can still use it to detect a specific memory range.
NN
NN
DiskDrive: Provides access to hard drives and hard drive–like
devices, such as USB flash drives. The output includes formatting,
status, and other statistics that are helpful for managing the hard
drive. For example, if you want to quickly determine drive status,
type WMIC DiskDrive GET Name, Caption, NeedsCleaning, Status
and press Enter.
DiskQuota: Manages disk space usage on Windows NTFS volumes. You must have the disk quota feature enabled to use this
alias. Otherwise, when you type WMIC DiskQuota and press Enter,
you’ll see a list of the partitions on the current drive, but none of
the drives will show that they have any space used. Setting a disk
quota is somewhat complex, partly because you have to provide so
Configure the Server
293
much information to do it. A disk quota is a combination of a user
account and a disk, so you normally specify both. For example,
you may want to set a disk quota for a user named John on the C
drive of 600,000,000 bytes. In this case, you’d type WMIC DiskQuota
drive entry, which includes all of the additional text shown. Once
you know how to select the user and drive, you use the SET verb
to change the WarningLimit property as shown. The best way to
learn how to form this particular command is to spend time selecting users and drives first, and then using what you learn to set the
property values.
NN
DMAChannel: Provides access to Direct Memory Access (DMA)
channel information on the system. You’ll see one entry for each
DMA channel. The output of this alias is somewhat useless because
it doesn’t really tell you anything about DMA channel usage.
NN
Environment: Manages environment variable information. This
alias provides extensive information about the environment variables and makes it easy to query them from a remote system. For
example, you’d type WMIC Environment Where Name=”Path” GET
VariableValue and press Enter to determine the path for a system.
NN
NN
NN
FSDir: Provides specifics about a particular directory or file on a
hard drive. This alias locks up the machine if you don’t use it correctly. You must provide double backslashes for the path. For
example, if you want to determine the statistics for the Windows
directory on the D drive, then you would type WMIC FSDir Where
Name=”D:\\Windows” and press Enter. You can’t use expansion variables in this case.
Group: Manages groups on the specified system. Make sure you
differentiate between the Caption and Name properties. The Caption
property requires that you provide a realm or domain with the
group name. To see the difference between the two, type WMIC
Group LIST Brief and press Enter.
IDEController: Provides access to information about the Integrated
Device Electronics (IDE) controllers on the system.
Performing Maintenance
Where (User=”Win32_Account.Domain=’MAINXP’,Name=’John’”
And QuotaVolume=”Win32_LogicalDisk.DeviceID=’C:’”) SET
WarningLimit=600000000 and press Enter. As you can see, the Where
clause is complex. The User property includes both a domain and
a name value. The QuotaVolume property must reflect the actual C
Part VI
294
Chapter 15
NN
3
Performing Basic Maintenance
IRQ: Provides access to information about the Interrupt Request
(IRQ) lines on the system. You’ll see one entry for each IRQ line.
The output of this alias is somewhat useless because it doesn’t
really tell you anything about IRQ usage.
NN
NN
NN
Job: Manages jobs on the system through the Task Manager.
LoadOrder: Manages the order in which system services load.
Normally, you won’t want to change these entries because a
change in order could prevent a service from starting. However,
this feature is helpful when you suspect a service isn’t starting as
anticipated (make sure you create a copy of the order when the
system is in a known good working state). To create a copy of the
current load order, type WMIC LoadOrder > LoadOrder.TXT and press
Enter. The load order will appear in LoadOrder.TXT.
LogicalDisk: Provides access to information about the logical disks
on the system. The information includes only local drives.
NN
NN
NN
Logon: Provides access to information about the current logon sessions. Unfortunately, the output isn’t very useful because it doesn’t
contain logon names—it provides logon identifiers instead, so you
need to perform additional processing.
MemCache: Provides access to the cache memory information
for a system. To check the status of the Static Random Access
Memory (SRAM) on a system, type WMIC MemCache GET Purpose,
InstalledSize, Status and press Enter.
MemoryChip: Provides information about memory chips installed on
the system. Most systems don’t support this alias.
NN
MemPhysical: Provides information about the physical memory
installed on a system.
NN
NN
NetClient: Provides information about Terminal Services and the
Remote Desktop functionality the service provides.
NetLogin: Provides information about logons for the specified system. This alias requires a little extra work to use because you must
provide a more complex WQI statement. To obtain information
about any particular user, type WMIC NetLogin Where (Name Like
“%UserName”) and press Enter. Once you get past the initial requirement to provide additional information, you can use the standard
actions to obtain specific data.
Configure the Server
NN
295
NetProtocol: Manages the network protocols used on the current
system. When working with this protocol to obtain information,
use the Caption property instead of the Name property to access particular protocols. For example, the Caption property may display
NetBIOS, while the Name property displays MSAFD NetBIOS [\Device\
NetBT_Tcpip_{2CFD1858-4741-4AD2-AD9B-E00D23BF8ED9}] DATAGRAM
2. Use the Name property when you want to modify a specific proto-
col to ensure you change the correct protocol.
NetUse: Manages network connectivity information on the speci-
fied system. For example, you would use this alias to discover
mapped network drives. In this case, you’d type WMIC NetUse Where
ResourceType=”Disk” GET LocalName, RemoteName and press Enter.
NN
NIC: Provides access to information about the Network Interface
Controllers (NICs) installed on the specified system.
NN
NN
NICConfig: Manages the NIC setup. Unlike most of the aliases, this
alias doesn’t include a Name property, so you must use the Caption
property. To obtain a list of NICs on the target system, type WMIC
NICConfig GET Caption and press Enter.
NTDomain: Manages Windows domain information, including sev-
eral useful Active Directory settings.
NN
NTEvent: Displays the entries in the Windows event log. This
alias locks up the machine if you don’t use it correctly (even if
you do use it correctly, the required search can require several
minutes). For example, if you want to discover any System event
log entries with a type greater than 4, type WMIC NTEvent Where
“LogFile=’system’ and Type>’4’” and press Enter. You can’t use
this alias to add new event entries to the log.
NN
NN
NTEventLog: Manages the Windows event logs. Unlike the NTEvent
alias, which helps you manage the actual event log entries, this
alias controls the actual logs. For example, you can use this alias
to manage the event log size. This is also the alias you use to
clear the event log. To clear the System event log, you’d type WMIC
NTEventLog Where LogFileName=”System” CALL ClearEventLog and
press Enter. If you choose to save the log before clearing it, add the
ArchiveFileName argument.
OnBoardDevice: Provides access to adapter devices built onto the
motherboard. At least, it should provide this access. Testing on
Performing Maintenance
NN
Part VI
296
Chapter 15
3
Performing Basic Maintenance
several systems shows that support for this feature is sketchy at
best. You’ll generally manage adapters on the motherboard using
the same techniques that you use to manage stand-alone adapters.
NN
OS: Provides access to statistics about the current operating system.
For example, to obtain the operating system name and build, you’d
type WMIC OS GET Caption, BuildNumber and press Enter.
NN
NN
NN
NN
NN
NN
Pagefile: Provides information about the Windows page file. You
can’t use this alias to control the page file size.
PageFileSet: Manages the Windows page file. However, instead of
using a method to set the page file, you use properties. For example,
to set the page file on drive C to an initial size of 2 GB and a maximum size of 2 GB, you’d type WMIC PageFileSet Where Name=”C:\\
PageFile.SYS” SET InitialSize=2048,MaximumSize=2048 and press
Enter. Notice that you separate the SET arguments with commas and
that you have to use a double backslash for the page file entry, even
though the Name property displays with a single backslash.
Partition: Provides statistics about the partitions on the hard
drive. You can’t use this alias to change the partition sizes.
Port: Provides information about the I/O ports on the system. For
example, if you wanted to detect any failed ports, you could type
WMIC Port Where(NOT Status=”OK”) GET Caption, Description and
press Enter. Notice the use of the word NOT to indicate that the
ports aren’t OK. You’ll see one entry for each port. The output of
this alias is somewhat useless because it doesn’t tell you the name
of each port; you must correlate the address range to the actual
port.
PortConnector: Provides access to the physical ports on the system.
You can use this feature to find the physical port names (such as
LPT1), their connection type, and port type. The listing includes
both internal and external connectors. It even includes the motherboard ports, such as fan connectors. To obtain a listing of the
most commonly used port information, type WMIC PortConnector
GET ConnectorType, InternalReferenceDesignator, PortType and
press Enter.
Printer: Manages the logical printer characteristics for the sys-
tem. The list of printers includes any mapped printer connections.
Use the CALL verb to access any of these management methods:
AddPrinterConnection, CancelAllJobs, Pause, PrintTestPage,
Configure the Server
297
RenamePrinter, Reset, Resume, SetDefaultPrinter, and
SetPowerState. For example, if you wanted to resume printing on
a networked printer named HP LaserJet 5 located on WinServer,
you’d type WMIC Printer Where Caption=”\\\\WinServer\\HP
LaserJet 5” CALL Resume and press Enter. Notice that you must use
four backslashes to begin the UNC location of the printer.
NN
NN
PrinterConfig: Provides information about the physical characteristics of both local and networked printers. The statistics include
the printer resolution, any driver information, and whether the
printer prints in color (along with other useful information).
PrintJob: Manages individual print jobs for the local machine.
You can also use methods to pause and resume individual jobs.
Process: Manages processes on the local machine. You can obtain
a wealth of information about each process, including memory
statistics. The methods associated with this alias let you attach
a debugger to a process, create a new process, obtain process
owner information, set the process priority, and even terminate
the process. Normally, you’ll want to perform all tasks using the
ProcessID property. To obtain a list of Process Identifiers (PIDs)
and their associated application names, type WMIC Process GET
Name,ProcessID and press Enter. Once you have the ProcessID,
you can perform tasks such as terminating the process. To terminate a process with a PID of 688, you’d type WMIC Process Where
ProcessID=688 CALL Terminate and press Enter.
NN
Product: Manages products on the local machine. This alias pro-
vides the equivalent of all of the information you’d find in the Add/
Remove Programs applet (Programs and Features in Vista and
above) in the Control Panel, so it’s an essential aid on Windows
Server 2008 Server Core (because it lacks the GUI required to
access the Add/Remove Programs applet). In addition to the
product name and vendor support information, you can also find
the product uninstall information, which helps you perform the
uninstall at the command line, rather than use the GUI as normal.
Special methods let you configure, install, uninstall, reinstall, or
upgrade application packages as needed.
For example, after you get a product installed, you can use WMIC
to manage it. If you need to change the application configuration,
type WMIC Product Where Name=”ProductName“ Call Configure and
press Enter, where ProductName is the name of the product you
Performing Maintenance
NN
Part VI
298
Chapter 15
3
Performing Basic Maintenance
want to work with. Likewise, you can remove a product that you
no longer need by typing WMIC Product Where Name=”ProductName”
Call Uninstall and pressing Enter. Only the methods that the
setup program supports will work. You can also use the WMIC
Install method when you want to install an advertised product—
one that was previously advertised using the Advertise method.
NN
QFE: Provides a listing of all of the Quick Fix Engineering (QFE)
patches for the Windows system. This alias only lists the fixes and
you can’t use it to manage them in any way.
NN
NN
QuotaSetting: Manages the quota settings on the local hard drive.
You must use the SET verb to change the settings. For example,
if you want to configure the C drive default quota limit to 1 GB,
you would type WMIC QuotaSetting Where Caption=”C:” SET
DefaultLimit=1073741824 and press Enter. To enable the quota you
just set, type WMIC QuotaSetting Where Caption=”C:” SET State=1
and press Enter. If you also want to deny disk space to users who
exceed their quota, you can set the State to 2. Combine this alias
with the DiskQuota alias to create a complete disk quota solution.
RDAccount: Manages the accounts that can access a server using
Remote Desktop. This alias assumes that the Remote Desktop
Listener is active (see the RDToggle alias for details). You need not
add users to the account listing to see that some users have access
by default. Type WMIC RDAccount GET AccountName, press Enter, and
you’ll see this list of standard users:
NN
BUILTIN\Administrators
NN
NT AUTHORITY\LOCAL SERVICE
NN
NT AUTHORITY\NETWORK SERVICE
NN
NT AUTHORITY\SYSTEM
NN
BUILTIN\Remote Desktop Users
Remote access actually depends on two features, the account
name and the terminal name (console or Remote Desktop Protocol-Transmission Control Protocol, RDP-TCP, in most cases).
To remove a user from the list, you must include both the account
name and the terminal name to ensure you delete the right
account. To remove the administrator’s account from console access,
type WMIC RDAccount where “TerminalName=’console’ and
AccountName like ‘%Administrators%’” CALL Delete and press Enter.
Configure the Server
299
Interestingly enough, you can’t add new accounts using the
RDAccount alias; you must use the RDPermissions alias to do it.
NN
NN
RDNIC: Manages the NIC associated with the Remote Desktop connection. You can configure items such as the number of connections allowed.
RDPermissions: Manages permissions for Remote Desktop
connections. To add a user to the console terminal, type WMIC
RDPermissions Where TerminalName=”Console” CALL AddAccount
“Domain\UserName”,2 and press Enter. You must provide a domain
NN
RDToggle: Manages the Remote Desktop listener settings.
Performing Maintenance
and a username as shown. The second value is the permission preset. It uses the following values:
NN
RecoverOS: Manages the system recovery options, including the
Part VI
NN
NN
NN
0: Guest access—the user can only log on to the system.
1: User access—the user has the following permissions: Logon,
Query Information, Send Message, and Connect.
2: Full access—the user has full system access.
memory dump feature.
NN
NN
Registry: Provides access to the physical features of the registry such
as size and location. You can also provide a proposed registry size.
SCSIController: Provides information about any Small Computer
System Interface (SCSI) devices on the selected computer. In addition, this alias provides information about Redundant Array of
Inexpensive Disk (RAID) controllers. You can use calls to set the
power state and to reset the controller.
NN
Server: Provides statistics about the server such as the logon errors
and number of bytes received.
NN
Service: Manages the services running on the target system. You
can use calls to start, stop, pause, continue, and perform other
tasks with services. To determine the status of the services, type
WMIC Service GET Name,State and press Enter. To start a particular service, type WMIC Service Where Name=”ServiceName” CALL
StartService and press Enter.
NN
ShadowCopy: Provides information about volumes with shadow
copy management. You can also use this alias to add shadow copy
management to a volume.
300
Chapter 15
NN
3
Performing Basic Maintenance
ShadowStorage: Provides information about the shadow copy stor-
age areas for the target system. This alias lets you set the maximum
storage area size through a property and create new storage areas
using a method.
NN
Share: Shares the specified resource on the target system.
NOTE The Microsoft documentation provides entries for the
SoftwareElement and SoftwareFeature aliases. However, these
aliases don’t appear to provide any functionality. In fact, during
testing they output an error code of 0x80041010. You should
probably avoid using these aliases until Microsoft makes them
functional and provides better documentation for them.
NN
NN
NN
SoundDev: Provides statistics about any sound devices on your system. You can’t use this alias to change any sound system features.
Startup: Provides information about the applications and services
that run automatically when the computer starts. This feature works
similarly to the Startup tab of the System Configuration Utility
(MSConfig.EXE), except that you can’t make any changes to the setup.
SysAccount: Provides a list of the system accounts that includes
account statistics such as their global SIDs.
NN
SysDriver: Provides a list of the system drivers. The methods pro-
vided with this alias let you pause and resume the service. You can
also interrogate the service for additional information.
NN
SystemEnclosure: Provides statistics about the system enclosure,
such as whether it provides a hot-swappable disk feature.
NN
SystemSlot: Provides information about the system slot configura-
tion of the motherboard. Theoretically, this alias also provides
information about other motherboard connections such as port,
peripheral, and proprietary connection points, but normally you
won’t actually see this information provided.
NN
NN
TapeDrive: Provides information about any tape drives installed on
the target system.
Temperature: Provides information about any temperature sensors
installed on the system. Unfortunately, this feature doesn’t work
at all on older systems and may not work on newer systems either.
When this alias does work, you obtain a considerable amount of
Configure the Server
301
information about the sensor—everything you could ever want
except the temperature. The CurrentReading property should contain the current temperature, but it often doesn’t.
NN
TimeZone: Provides complete information about the time zone set-
tings on the target machine. However, you can’t use this alias to
change any of the settings.
UPS: Provides complete statistics about the Uninterruptible Power
Supply (UPS) attached to the target system. The statistics you
receive depend, in part, on the capabilities of the UPS. Newer UPSs
tend to provide more information than older setups. In some cases,
you can even detect the operating temperature of the UPS. The UPS
must rely on the UPS service in Windows for this feature to work.
You can’t change any of the UPS feature settings using this alias.
NN
UserAccount: Manages user account information. You can add,
delete, or modify user entries as needed. The modifications include
the ability to rename the user account, disable the account, and set
account password requirements. For example, if you want to set
the user’s full name, type WMIC UserAccount Where Name=”UserName”
SET FullName=”FullName” and press Enter.
NN
Voltage: Provides information about any voltage sensors installed
on the system. Unfortunately, this feature doesn’t work at all on
older systems and may not work on newer systems either. When
this alias does work, you obtain a considerable amount of information about the sensor—everything you could ever want except the
power supply voltages. The CurrentReading property should contain the current voltage readings, but it often doesn’t.
NN
Volume: Manages the volumes on the target system. You obtain
detailed statistics about the volume in question. In addition, you
can use methods to add a mount point, start ChkDsk, defragment
the drive (or exclude it from defragmentation), obtain a fragmentation analysis, mount and dismount the drive, and format the drive.
The properties let you change the volume letter, the volume label,
or enable or disable indexing for the volume.
NN
NN
VolumeQuotaSetting: Associates a disk quota setting with the specified volume. See the QuotaSetting alias for additional details.
VolumeUserQuota: Associates a per-user storage setting with
the specified volume. See the DiskQuota alias for additional
information.
Performing Maintenance
NN
Part VI
302
Chapter 15
NN
3
Performing Basic Maintenance
WMISet: Manages the WMI settings for the target system. You’ll
use properties to change the writable settings. For example, if you
wanted to change the maximum log file size to 64 KB, type WMIC
WMISet SET MaxLogFileSize=65536 and press Enter.
Get Help in WMIC
WMIC is a huge utility—perhaps the largest utility you’ll find in Windows.
It’s also an incredibly important utility with extreme flexibility. Authors
have written entire books on this utility and still not covered everything WMIC has to provide (check out books such as Microsoft Windows
Scripting with WMI: Self-Paced Learning Guide by Ed Wilson,
Microsoft Press, 2005). The point is that you are unlikely to find every
answer you need in a book of any sort. It simply isn’t possible for an
author to anticipate your every question and provide an answer that fits
every need. What you really need is an understanding of the WMIC help
system so that you can take the canned answers that you do have and
create your own specific answers.
To get an overview of WMIC, type WMIC /? and press Enter. Unlike
most utilities, you see several pages of help screens like the one shown
in Figure 15.1. The help screens begin with global switches that control
things such as the privileges that WMIC should use when making a request
of the WMI database. The second page of help shows the aliases you can
access. It isn’t until the sixth page of help that you see some additional
command line switches that determine how you enter commands. For
example, you can choose to use the full class or path when specifying a
WMI object rather than the shorter aliases that WMIC normally uses.
Figure 15.1: The WMIC basic help isn’t all that basic and consists of multiple screens.
Configure the Server
303
Even when it comes to something simple like an overview, WMIC
holds some surprises. Microsoft didn’t want to bore you with too many
details, so the help screen shown in Figure 15.1 uses the brief format. To
display the full format, type WMIC /?:Full and press Enter. Figure 15.2
shows the difference in the amount of information you receive. As you
can see, there’s more information. The basic help information goes on
for eleven screens now, instead of the original six.
Performing Maintenance
Figure 15.2 : Full help provides additional useful information but at the cost of additional screens.
Part VI
Every one of the entries shown in Figure 15.1 and Figure 15.2 can
provide additional help. For example, if you want to learn more about
an alias such as CPU, you’d type WMIC CPU /? and press Enter. (The
“Use Aliases in WMIC” section of the chapter provides a full list of the
aliases that WMIC supports.) You see an overview like the one shown
in Figure 15.3. This help screen doesn’t look very useful at first, but it
shows the verbs you can use with a particular alias. The CPU alias supports the ASSOC, CREATE, DELETE, GET, and LIST verbs. Notice that the
CPU alias doesn’t support the SET verb, so you can’t use the SET verb to
modify anything about the CPU (which makes sense because there’s
nothing you can change about the CPU in your system). You can find a
list of these verbs and their meaning in the “Understand the SQL Syntax
of WMIC” section of the chapter.
You can continue drilling down into help as needed to learn more
about WMIC usage. For example, let’s say you want to learn about
the List verb. In this case, type WMIC CPU LIST /? and press Enter.
Figure 15.4 shows the first screen of this help entry. The help screens
304
Chapter 15
3
Performing Basic Maintenance
begin with a listing of the output formats that the List verb supports.
Each output format provides you with a different number of properties, so the format you select is important. The next screen describes the
/Format and /Translate command line switches for this verb (see the
“Format Data in WMIC” and “Translate Data in WMIC” sections of the
chapter for details).
Figure 15.3 : Before you use an alias, determine which verbs it supports.
Figure 15.4 : Verb-specific information tells you all of the adjectives you can use with
the verb.
If you think that the help screens are over at this point, you’re wrong.
You can drill down even further. If you want to learn more about the
Brief output format, you type WMIC CPU LIST Brief /? and press Enter.
Figure 15.5 shows this additional level of detail.
Configure the Server
305
Not satisfied yet? You can go even deeper. Type WMIC CPU LIST
Brief /Format /? and press Enter to see the kinds of formatting you
can perform when working with the Brief adjective. Figure 15.6 shows
the help for this level.
Performing Maintenance
Figure 15.5 : Every verb entry includes subentries for each of the adjectives and command line switches the verb supports.
Part VI
Figure 15.6 : Discover the kinds of formatting you can use with a particular adjective.
306
Chapter 15
3
Performing Basic Maintenance
If you haven’t noticed yet, this section has built a relatively complex
command using the help system. The sad thing is that most administrators don’t get down to this level of help—they have no clue that it exists
because it doesn’t exist for most command line utilities. If you have a
question about creating a WMIC command, simply try to drill down to
whatever level you need using help.
Now that you’ve followed the WMIC CPU List command to this level,
let’s try one of those formats. Type WMIC CPU LIST Brief /Format:LIST and
press Enter. You’ll see CPU details such as those shown in Figure 15.7. Of
course, your details will match the specifics of your system.
Figure 15.7: Create a command you want to use with help and then try it out.
The point of this section is that help can assist you in creating any
command. The reason you need canned commands is to avoid wasting
hours trying dead-ends in help. Canned commands get you to almost the
right place quickly and then you fine-tune your commands using help.
Format Data in WMIC
Formatting doesn’t change the content of the information you obtain
from WMIC. If you type WMIC CPU LIST and press Enter, you’ll receive a
certain amount of information, no matter what /Format command line
switch option you use. However, the default tabular format shown in
Figure 15.8 is a little hard to read and it gets harder when you request
additional information.
The information in Figure 15.8 is definitely usable, but you wouldn’t
want to try to find anything specific. Try typing WMIC CPU List /
Format:List and pressing Enter. Even though the output shown in
Figure 15.9 is significantly larger, it’s also easier to read. (Figure 15.9
doesn’t show all of the information—it shows only about half of it.)
Configure the Server
307
Figure 15.9 : The List format is significantly easier to read than the Table format.
Performing Maintenance
Figure 15.8 : WMIC defaults to a tabular format, which can be hard to read.
Part VI
Humans often need data in formats other than those that are easily
read at the command line. Try typing WMIC CPU LIST /Format:HForm >
MyCPU.HTML and pressing Enter. When you open this file up in a browser,
you see a nicely formatted web page suitable for just about any need, as
shown in Figure 15.10. If you prefer a tabular format for complex data,
type WMIC CPU LIST /Format:HTable > MyCPU2.HTML and press Enter instead
(in fact, try this second command now and compare the two outputs to
see the difference). To see a better use of the HTable format, type WMIC IRQ
LIST /Format:HTable > IRQ.HTML and press Enter to see a list of IRQs. In
short, you don’t have to view WMIC output at the command line to use it.
There are situations where you want to save complex data in HTML or
other formats that make it possible to view the data using the GUI.
308
Chapter 15
3
Performing Basic Maintenance
The output that WMIC provides appears in whatever order it appears in
the WMI database, which may not be the order you want. Fortunately,
you can transform the outputted data as you format it. Transformation
means adding a condition as part of the formatting criteria. For example, you can tell WMIC to sort the information by a certain field using the
sortby keyword (the keywords are case sensitive, as are the field names).
You might decide to sort the IRQ list by the IRQNumber field to make
it easier to find a particular IRQ by typing WMIC IRQ LIST /Format:HTable
:”sortby=IRQNumber” > IRQ.HTML and pressing Enter.
Figure 15.10 : Use the HForm format to create an HTML file suitable for your browser.
All sorting occurs using a text sort, so the output from the sortby
keyword alone might not be sufficient. The previous example does sort
the information, but not in a way that really works with IRQs. In this
case, you can precede the sortby keyword with the datatype keyword
and tell WMIC what data type to use. For example, type WMIC IRQ LIST /
Format:HTable:”datatype=number”:”sortby=IRQNumber” > IRQ.HTML and
press Enter to obtain the results shown in Figure 15.11. Notice that the
IRQs now appear in the order that you probably anticipated earlier.
Notice that you must separate each of the entries with a colon.
Configure the Server
309
Another level of sorting is to tell WMIC to sort in descending, rather than
ascending order. In this case, you’d type WMIC IRQ LIST /Format:HTable:”
datatype=number”:”orderby=descending”:”sortby=IRQNumber” > IRQ.HTML
and press Enter. Notice the addition of the orderby keyword. Again, you
separate each of the formatting criteria using a colon. It’s possible to sort
by any number of fields and each field set can have different criteria. The
rule is to place the criteria (orderby or datatype) before the sortby keyword because WMIC processes each instruction in order.
Performing Maintenance
Figure 15.11: Sorting makes it easier to use some types of output.
Part VI
You may also want to give the output a specific title. In this case, you
use the title keyword. For example, if you want to give the output the
title of My Output, type WMIC IRQ LIST /Format:HTable:”datatype=numbe
r”:”sortby=IRQNumber”:”title=My Output” > IRQ.HTML and press Enter.
Administrators often need to import data from WMIC into a database.
Computers have different data interpretation needs from humans. The
/Format command line switch offers two computer-friendly choices. To
obtain CSV output, type WMIC CPU LIST /Format:CSV > MyCPU.CSV and
press Enter. Most databases will import CSV data without problem.
Sometimes you need data in XML format. In this case, type WMIC CPU
310
Chapter 15
3
Performing Basic Maintenance
LIST /Format:RawXML > MyCPU.XML. The result is a full XML page, not a
partial page or a fragment. Unfortunately, the CSV and XML formats
produced by /Format aren’t always accepted by applications because the
output doesn’t conform to standards. In most cases, you want to translate, rather than format data for import into an application using the
techniques described in the next section.
Translate Data in WMIC
Formatting changes the appearance of the data but doesn’t modify the
content. Translation is an actual change to the structure of the data to
make it work better with applications. Consequently, if you want to
transfer data from WMIC to a database or other application, you typically
translate it, not format it.
Most of the WMIC aliases support two translations. The following list
describes each of these translation types:
NN
NoComma: Creates a fixed field length table that works well for data-
base import. This isn’t a type of CSV output, so you can’t use it for
direct import into an application such as Excel.
NN
BasicXml: Creates XML output that should import directly into
most applications without any problems. The difference between
this output and the /Format switch output is that all of the usual
character substitutions are translated into actual characters.
In most cases, you use /Translate after /Format. The order of the two
switches is important because one feeds into the other. The first command line switch feeds its data into the second. Consequently, to obtain
XML output that works with most applications, you’d type something
like WMIC CPU LIST /Format:RawXML /Translate:BasicXml > MyCPU.XML
and press Enter.
NOTE This book doesn’t cover some specialty utilities and
scripts found only on Windows Server 2008 Server Core. If
you want Server Core–specific information, you should refer
to Administering Windows Server 2008 Server Core by John
Mueller (Sybex, 2008).
Activate Windows
311
The Windows Software License Manager (SLMGR) tool is one of those
tools that you’ll use a few times, but you must use it at least once to
activate your copy of Windows. Otherwise, you’ll find that your copy
becomes useless at some point. You can also use this tool to install a
product key, display the activation information (in case a support person needs it), and reset the licensing status of the system. This tool isn’t
available with older versions of Windows such as Windows Server 2003
and Windows XP. The following sections describe some important uses
for this tool.
NOTE Like many utilities, you can perform tasks on a remote
machine by supplying a machine name, username, and password as the first three arguments to the SLMGR.VBS script. There
aren’t any special command line switches associated with this
information.
Performing Maintenance
Activate Windows
Part VI
Perform an Activation
You must activate your copy of Windows at least once or it’ll stop working. To activate your copy of Windows, type CScript %SYSTEMROOT%\
System32\SLMGR.VBS /ato and press Enter to activate the local machine.
In most cases, if you attempt to use this command more than once, the
script will display an error message telling you that the system is already
activated. Newer versions of Windows, such as Windows 7, simply keep
telling you that the product has been activated.
The /ato command line switch assumes that you have an Internet
connection for activation purposes. You might not have such a connection available. In this case, you’d call Microsoft to activate your copy of
Windows and receive an activation code in return. Once you have the
activation code, you can type CScript %SYSTEMROOT%\System32\SLMGR.VBS
/atp ConfirmationID and press Enter, where ConfirmationID is the code
you receive from Microsoft.
312
Chapter 15
3
Performing Basic Maintenance
Display the Activation Information
At some point, you might need to obtain the activation information for
your machine. To obtain this information, type CScript %SYSTEMROOT%\
System32\SLMGR.VBS /dli and press Enter. The script will output the
licensed status of your system, a partial product key, and the precise version of Windows that you’re using.
In some cases, you need more information about the activation status
of your system than the /dli command line switch provides. To obtain
additional information, type CScript %SYSTEMROOT%\System32\SLMGR.VBS
/dlv and press Enter.
Change the Product Key
If you didn’t provide an appropriate product key during the installation process, you need to supply one before you activate Windows.
To provide a new product key for your installation, use the CScript
%SYSTEMROOT%\System32\SLMGR.VBS /ipk Key command, where Key is the
product key for your Windows installation.
Manage the System Time
Not having the correct time on your system might seem merely inconvenient. However, having the wrong time can have serious implications. For one thing, Kerberos authentication relies on the two
authenticating systems to have the right time. A difference of five minutes between the systems can mean the difference between Kerberos
working and not working. All sorts of applications are time dependent
now too. A time error could prevent something as simple as automatic
updates from working properly. The W32Tm utility is the best method
for working with time on your system. With this in mind, the following sections discuss a few time setting–specific tasks.
NOTE You may have used the Net Time command in the past
to manage time on a system. Microsoft is slowly phasing out
this command and has made some features, such as querying
the time servers, unavailable in newer versions of Windows. It’s
a good idea to update any scripts or batch files you might have
now that rely on Net Time to use W32Tm instead.
Manage the System Time
313
Ensuring that your system has the correct time means getting the time
from a Reliable Time Source (RTS). The reliability of a time source
depends on who is using it and for what purpose. Synchronizing all of
the systems on your network to a single server could work just fine, but
most organizations really need to synchronize to an external source
such as time.nist.gov. Many organizations will have one or two servers
synchronize to the remote source and then have every other system synchronize to the servers. No matter what technique you use, you need an
RTS to ensure the time on your system is accurate. To update the time
on any system, type W32Tm /Resync and press Enter. However, let’s say
you want to use a domain time source instead. In this case, you use the
following procedure:
1. Type W32Tm /Config /SyncFromFlags:DomHier /Update and press
Enter. This command sets the system to rely on the domain
hierarchy.
2. Type Net Stop W32Time and press Enter.
3. Type Net Start W32Time and press Enter. The stopping and start-
ing of the service makes the change to the service settings so that
a resynchronization will use the domain hierarchy in place of an
Internet source.
4. Type W32Tm /Resync /Rediscover and press Enter. This command
resynchronizes the computer to the domain source after rediscovering those sources.
Configure a Time Source
If you’re using a centralized time source, but it isn’t in a domain setting,
then you need to create a manual time source. In other words, you override the default time sources that Windows would normally use. The
easiest way to perform this task is to use the following steps:
1. Type W32Tm /Config /ManualPeerList:Server /
SyncFromFlags:Manual /Update and press Enter, where Server is the
address of a server you want to use for synchronization. If you want
to use multiple servers, create a space-delimited list of server names.
2. Type Net Stop W32Time and press Enter.
Performing Maintenance
Update the Time
Part VI
314
Chapter 15
3
Performing Basic Maintenance
3. Type Net Start W32Time and press Enter. The stopping and start-
ing of the service makes the change to the service settings so that a
resynchronization will use the manual time source in place of an
Internet source.
4. Type W32Tm /Resync /Rediscover and press Enter. This command
resynchronizes the computer to the manual time source after rediscovering those sources.
Obtain Time Settings Information
It pays to know how the W32Time service is configured. Configuration
errors cause all kinds of problems on networks. You can use the W32Tm /
Query command to obtain four different kinds of W32Time service information using the following command line switches:
NN
/Source: Displays the time source for the local computer.
NN
/Configuration: Displays the W32Time service configuration
information. For example, you’ll discover the current time source.
When you add the /Verbose command line switch, you also see any
undefined or unused W32Time service settings.
NN
/Peers: Displays one or more peers used for time updates. If you’re
using an Internet time source, the list contains only the currently
selected source, rather than all of the sources that Windows normally uses.
NN
/Status: Displays the W32Time service status information, includ-
ing the time and date of the last synchronization.
For example, if you want to obtain the current W32Time service status, you type W32Tm /Query /Status and press Enter. You’ll see a number
of interesting statistics, including the time and date of the last synchronization and the source of that synchronization.
In addition to the W32Tm /Query command, you can use the W32Tm /
TZ command to obtain current time zone information. When you type
W32Tm /TZ and press Enter, you obtain the currently selected time zone,
its standard time bias (time change from Greenwich Mean Time), and its
daylight savings time bias (if any).
Manage the Boot Configuration
315
Manage the Boot Configuration
WARNING Using BCDEdit incorrectly can cause significant
problems, including making your system unbootable. Make
changes carefully and one at a time to ensure you don’t cause
yourself problems. Before you make any changes, type BCDEdit
/Export BCDBackup and press Enter. This command creates
a backup of your configuration. If you make a mistake, type
BCDEdit /Import BCDBackup and press Enter to correct it.
Performing Maintenance
You won’t change the boot configuration of a system very often. In
fact, you might not need to ever change the boot configuration of a
system unless something goes wrong or the system has more than one
boot partition on it (such as a system used for testing). Even so, you
need to know how to use the Boot Configuration Data Store Editor
(BCDEdit) utility to make changes to the boot configurations when they
do become necessary.
Part VI
Enumerate the Configurations
Before you can do any work with BCDEdit, you need to know the current
boot configuration. To obtain this information, type BCDEdit /Enum and
press Enter. Figure 15.12 shows one possible configuration that includes
Windows 7 and Windows XP on the same system.
The configuration shown in Figure 15.12 has three sections. The first
section is the boot manager, which is the application that displays the
boot selections when you first start the machine. The boot manager also
loads the correct operating system based on your selection. Notice the
identifier entry in the list—the identifier entry always tells you what type
of configuration entry you’re viewing. The interesting pieces of information for the boot manager are the device (which tells you where the boot
information is stored), the default entry (which tells you the default boot
selection), the displayorder entry (which determines how each of the boot
selections appears on the boot menu), and the timeout (which determines
how long the system waits for you to make a boot selection).
316
Chapter 15
3
Performing Basic Maintenance
Figure 15.12 : Enumerate the current configuration before you make any changes.
The next section is for a legacy operating system. In this case, you’re
looking at a Windows XP configuration. The device and path entries
combine to describe the location of the boot files. The description is
what the user sees during the boot process.
The third section contrasts with the legacy section. In this case,
you’re looking at the kinds of entries that you’ll find for a Vista or
Windows 7 boot configuration. The device, path, and description
entries are the same as for a legacy entry. The osdevice and systemroot entries tell the location of Windows for the boot partition. The
recoveryenabled entry determines whether the boot manager boots
into the recovery screen should it detect a problem with your Windows
configuration.
Get BCDEdit Help
BCDEdit is a relatively complex utility that provides somewhat convoluted
help options. If you type BCDEdit /? and press Enter, you see an overview
of the BCDEdit utility. As with the WMIC utility, you can drill down when
working with BCDEdit. For example, if you want to learn more about the
/Enum command line switch, type BCDEdit /Enum /? and press Enter.
Manage the Boot Configuration
317
However, there’s additional help that you need to know about. For
example, the IDs that you see in Figure 15.12 are consistent across
installations. To learn more about those IDs, you type BCDEdit /? ID
and press Enter. For example, you’ll discover that {memdiag} is an entry
for memory diagnostics. The following list describes special help entries
that BCDEdit supports:
NN
TOPICS: Displays a list of detailed help topics, which includes the
NN
ID: Displays a list of well-known identifiers for the operating system. For example, the {bootmgr} entry refers to the Windows Boot
Manager entry.
NN
NN
TYPES [{BOOTAPP | BOOTMGR | BOOTSECTOR | CUSTOMTYPES |
FWBOOTMGR | MEMDIAG | NTLDR | OSLOADER | RESUME}]: Displays
help information about configuration entry types. Using TYPES
alone displays a list of the available types. Using TYPES with a specific entry, such as TYPES BOOTAPP, displays the type information for
that entry. For example, if you want to learn more about {ntldr}
types, you’d type BCDEdit /? TYPES NTLDR and press Enter.
FORMATS: Displays information about the type information format-
ting rules.
Edit an Existing Boot Setting
In general, it’s dangerous to create or delete boot settings. The installation software makes all of the boot settings you normally need unless
you’re working with something extremely esoteric. However, you’ll have
plenty of opportunity to change boot settings. For example, both the
Vista and Windows 7 installation disks insist on assigning a generic,
non-useful name, to any legacy boot partition on your system. Let’s say
you have Windows XP installed on your machine. If you want the boot
entry to actually read Windows XP, you need to modify its description. To perform this task, you type BCDEdit /Set {ntldr} Description
“Windows XP” and press Enter.
Every BCDEdit /Set command follows the same basic format. You
begin by providing the ID of the section you want to change, which is
{ntldr} in this case. Next, you provide the name of the property you want
to change, which is Description in this case. Finally, you provide the value
you want to assign to the property, which is “Windows XP” in this case.
Performing Maintenance
commands, standard identifiers, data types, and other command
line options.
Part VI
318
Chapter 15
3
Performing Basic Maintenance
Change the Boot Sequence
One of the things that you’ll want to change relatively often is the boot
sequence. The option you use most often may not appear at the top
of the list when you start the system. Look at Figure 15.12 again and
notice that the {ntldr} entry appears first and then the {current} entry.
If you want to change the order of these entries, you type BCDEdit /Set
{bootmgr} displayorder {current} {ntldr} and press Enter. Because the
displayorder property requires two entries, you provide both entries and
use a space to delimit them.
Set the Default Boot Item
If you’re working with a multi-boot setup, you might want to configure the system to automatically boot a particular partition. Look at
Figure 15.12. The {current} partition is the default boot partition. Let’s
say you want to make {ntldr} the default partition. In this case, you
type BCDEdit /Set {bootmgr} default {ntldr} and press Enter.
16
In this chapter, you will learn to:
33List the Policies (Page 321)
Audit User Access (Pages 320–328 )
n
n
Get a Policy (Page 322)
n
Set a Policy (Page 326)
n
Perform a Backup (Page 327)
n
Perform a Restore (Page 327)
n
Clear an Audit Policy (Page 328)
n
Remove an Audit Policy (Page 328)
33Obtain Group Policy Results (Page 328)
Work with Group Policies (Pages 328–330 )
n
n
Manage Group Policies (Page 330)
33Get Process Information (Page 331)
Obtain Session Status Information (Pages 331–332 )
n
n
Get Session Information (Page 331)
n
Get User Information (Page 332)
n
Get Terminal Server Information (Page 332)
33Obtain User Logon Information (Page 333)
Get the User’s Identity (Pages 332–333 )
n
n
Discover User Identity (Page 333)
Performing Maintenance
Managing System Users
Part VI
320
Chapter 16
3
Managing System Users
T
he command line is helpful for automating common user management tasks. For example, configuring the auditing policies for a
group of users is extremely easy at the command line. On the other
hand, the command line can’t easily perform some user management
tasks. If you want to see the overall statistics of user productivity on a
computer, that’s best left to the GUI because seeing that kind of data
is easier using charts and graphs. In short, the command line and GUI
environments each have their particular uses. This chapter focuses on
common tasks that you could probably automate to some extent.
NOTE As with many command line tasks, the tasks in this
chapter usually require administrator privileges. However,
because of the nature of the tasks performed in this chapter,
the requests for administrator-level elevation become quite
annoying after a while when working on Vista or Windows 7
systems. To avoid this problem, right-click the Command
Prompt shortcut and choose Run as Administrator from the
context menu. User Account Control will ask you whether you
want to run the command processor as an administrator. Click
Yes. You can now accomplish all of the required tasks without
continuous interference from Windows.
Audit User Access
Auditing system activity is a necessary process in many situations. Of
course, there’s the obvious use of ensuring the system remains secure
by thwarting any misguided user activity. However, auditing can help
you do more than just check security. For example, careful auditing
can often alert you to potentially damaging system activities or help
you better understand why a system doesn’t perform as well as it
could. Checking object access can help you better define how a user
interacts with a system so that you can make the system more efficient.
A user’s privilege use can help you locate security holes that occur
when a user has too many rights, some of which aren’t even used. The
following sections discuss the AuditPol utility, the command line interface for auditing needs.
Audit User Access
321
List the Policies
Before you can use audit policies, you need to know which policies are
available and whom they affect. Windows applies categories of auditing
policies to specific users, so you actually have two concerns when discovering the current auditing configuration. The AuditPol /List command makes it possible to check users, auditing categories, and auditing
subcategories as described in the following sections.
To discover which users are audited, type AuditPol /List /User and
press Enter. The output of this command provides a list of which
users are audited, but not how they’re being audited. To discover how
the user is being audited, you type AuditPol /Get /User:UserName /
Category:* and press Enter, where UserName is the user’s name (see
the “Get a Policy” section of the chapter for additional information).
If you also want to know the user’s Security Identifier (SID), type
AuditPol /List /User /V and press Enter. The SID comes in useful for
a number of purposes and ensures that you can uniquely identify the
user to the system.
List Audit Categories
Many of the AuditPol commands require that you know a category.
If you want information for all categories, you simply use the asterisk
(*), but often the wildcard search returns far too much information to
be useful unless you limit the output in some other way. Consequently,
knowing the precise category you want is important in many situations. To obtain a basic category listing, type AuditPol /List /
Category and press Enter. In most cases, the basic listing is all you
need. However, if you plan to work with the category at a detailed
level or want to search for its entry in the registry, you need a Globally
Unique Identifier (GUID) that precisely identifies the category to the
system. To obtain this information, type AuditPol /List /Category /V
and press Enter.
Performing Maintenance
List Audit Users
Part VI
322
Chapter 16
3
Managing System Users
List Audit Subcategories
Categories are divided into subcategories. For example, the Object
Access category contains a subcategory of File System (among other
subcategories). You can choose to audit a user’s access to the file system, without monitoring other kinds of Object Access, by specifying
a subcategory. To obtain the subcategories of a specific category, type
AuditPol /List /Subcategory:”CategoryName“ and press Enter, where
CategoryName is the name of any category you want to see.
If you want to see multiple categories, simply create a list separated
by commas of category names. For example, to see the subcategories
of the Account Logon and Account Management categories, you’d type
AuditPol /List /Subcategory:”Account Logon”,”Account Management”
and press Enter. To see all of the subcategories for every category, type
AuditPol /List /Subcategory:* and press Enter. As with categories,
subcategories have GUIDs. To see the GUIDs for the subcategories,
add the /V command line switch.
Get a Policy
Listing a policy simply tells you that the policy exists but doesn’t tell
you the policy setting. Getting a policy won’t tell you that the policy
exists—you must already know that the policy exists. However, it does
tell you how the policy is configured. Even though listing and getting
may sound a lot alike, the two are completely different. The AuditPol /
Get command is all about discovering the system settings.
It’s also important to understand that audit policies are configured at
two levels. First, you can configure an audit policy at the system level,
which means that the policy affects everyone. Second, you can configure
an audit policy for a specific user, which means that the policy affects
only that user. The AuditPol /Get /User command tells you about specific user settings, while the AuditPol /Get /Category and AuditPol /Get
/Subcategory commands tell you about system-level settings.
A special setting level affects the system directly when an audit event
occurs. For example, the CrashOnAuditFail option causes the system to
crash when the auditing system fails for some reason. This is a safety
feature because it ensures that no one can turn off auditing and then
continue to use the system unless they use the standard methods to do so
and have the proper rights. The following sections describe all of these
AuditPol /Get command scenarios.
Audit User Access
323
Get Audit Users
NOTE When you set a user audit policy, it’s either inclusive
or exclusive. An inclusive policy is one that adds to the systemlevel settings. For example, if you audit the user’s failure to log
on to the system, it’s an inclusive policy because it’s in addition
to any system-level settings. However, if the system normally
monitors logon failures, but you don’t want to check a particular
user, then you’d create an exclusive policy. Even though everyone else is monitored, this particular user is excluded from the
policy. It’s unusual to create exclusive policies—inclusive policies are far more common.
You may need to output the user settings in a form that you can
import into a database. In this case, you’d add the /R command line
switch to create Comma Separated Value (CSV) output. For example, if
you need to retrieve the settings for user Jamal and put them in a CSV
file, you’d type AuditPol /Get /User:Jamal /Category:* /R > AuditPol
.CSV and press Enter.
Get Audit Categories
The AuditPol /Get /Category command obtains the system-wide settings
for both categories and subcategories. For example, if you type AuditPol
/Get /Category:* and press Enter, you see output similar to that shown
in Figure 16.1 (which shows only a partial listing of the categories and
subcategories). Of course, you can choose to obtain a specific category
by using the category name in place of *. For example, to obtain the
Logon/Logoff category, you type AuditPol /Get /Category:”Logon/
Logoff” and press Enter. As with the user information, you can output
the categories to CSV format using the /R command line switch.
Performing Maintenance
The AuditPol /Get /User command obtains information about a specific
user. In most cases, you want to know a user’s full rights, so you’ll type
AuditPol /Get /User:UserName /Category:*, where UserName is the name
of the user, and press Enter. However, you can specify a particular category to discover information about just that category or you can use
the /Subcategory command line switch to be even more selective and
discover information about just one setting. The output you see contains
three columns: the name of the category or subcategory, the inclusive
setting, and the exclusive setting.
Part VI
324
Chapter 16
3
Managing System Users
Figure 16.1: Getting the categories also obtains the subcategory information.
Get Audit Subcategories
Use the AuditPol /Get /Subcategory command when you need to
obtain the system-wide setting for a single subcategory. For example, to
retrieve the status of the Logon subcategory, you’d type AuditPol /Get /
Subcategory:”Logon” and press Enter. Unlike the /Category command
line switch, you can’t use * with the /Subcategory command line switch.
Get Audit Options
The AuditPol /Get /Option command retrieves audit policy settings
that affect the system as a whole when certain audit policy events occur.
The following list describes each of these options:
NN
CrashOnAuditFail: When you enable this setting, it forces the
system to crash should the auditing system become unable to log
events. The advantage to this setting is that it forces everyone to
use the auditing policies you set. However, the disadvantage is that
an outsider could use this option to force the server to crash and
cause an apparent Distributed Denial of Service (DDoS) attack.
You need to use this setting with care. After this event occurs, only
administrators can log on to the system. The administrator must
fix whatever caused the crash before the system will allow anyone
to log back on. This setting is generally useful on client systems,
but not recommended for servers.
NN
FullPrivilegeAuditing: When you tell the system to audit privi-
leges, it normally does so for most privileges, but it leaves out a few
Audit User Access
325
commonly used privileges to keep the event log from quickly overflowing, such as the following privileges:
NN
Generate security audit (SeAuditPrivilege)
Bypass traverse checking (SeChangeNotifyPrivilege) debug
programs (SeDebugPrivilege)
NN
Create a token object (SeCreateTokenPrivilege)
NN
Replace process-level token (SeAssignPrimaryTokenPrivilege)
NN
Generate security audits (SeAuditPrivilege)
NN
Back up files and directories (SeBackupPrivilege)
NN
Restore files and directories (SeRestorePrivilege)
Enabling this setting forces the system to audit all privilege changes except SeAuditPrivilege. You can’t audit the
SeAuditPrivilege because it would cause an endless loop—
every access to the audit system generates this privilege and
therefore every entry to the log would generate another
SeAuditPrivilege event.
NN
AuditBaseObjects and AuditBaseDirectories: Kernel objects
come in two forms: container objects and base objects. The
AuditBaseObjects policy affects base objects, those that can’t
contain object objects such as semaphores and mutexes. The
AuditBaseDirectories policy affects container objects, those
that can contain other objects, such as directories. Many kernel
objects are unnamed and rely only on a handle that’s accessible
to just the process that created the object for access. Unnamed
kernel objects are secure, but they don’t allow interprocess communication, which is often necessary in applications. Named
kernel objects do allow interprocess communication, but they
present security risks because another process (other than those
that should use the named process) can interact with the kernel object should it discover the object’s name. Setting either
of these options forces the operating system to assign a System
Access Control List (SACL) to the named objects so that the
auditing system can monitor them. The normal use for these settings is to detect and thwart squatting attacks (see the article at
http://en.wikipedia.org/wiki/Squatting_attack for details). A
problem with these settings is that you normally must reboot the
system before the changes you make take effect.
Performing Maintenance
NN
Part VI
326
Chapter 16
3
Managing System Users
You use these options individually. For example, to obtain the status of
the CrashOnAuditFail, you type AuditPol /Get /Option:CrashOnAuditFail
and press Enter. Unlike other audit policy settings, options are either
enabled or disabled.
Set a Policy
Setting a policy is the act of creating a new entry for the system or a
particular user. These settings work as stated in the “Get a Policy” section of the chapter. When you create a new policy, the user or the system as a whole is monitored for the success or failure of certain actions.
You can also enable or disable audit options that perform a task based
on an audit event (such as crashing the system when someone tries to
override the audit system). The following sections describe how to set
an audit policy.
Set Audit Users
The AuditPol /Set /User command controls settings made to a specific
user. When working with users, you must remember that you can create inclusive settings that add to the system-level settings or exclusive
settings that remove auditing from the system-level settings. Audits can
affect failures and successes. You can also enable or disable a setting.
For example, to set a user account to add (inclusive) failure auditing to
the Object Access category, you’d type AuditPol /Set /User:Username
/Category:”Object Access” /Include /Failure:Enable, where Username
is the name of the user, and press Enter.
All user-level settings follow this same pattern. You provide the
username, a category or subcategory, whether the setting is inclusive or
exclusive, whether the auditing is for a success or failure, and whether
the setting is enabled or disabled. As another example, let’s say you
want to create an exclusion for a user for Logon subcategory auditing
for both success and failure. In this case, you’d type AuditPol /Set
/User:Username /Subcategory:”Logon” /Exclude /Failure:Enable
/Success:Enable and press Enter.
Set Audit Categories
The AuditPol /Set /Category command controls settings made to the
system as a whole. Unlike user-level settings, you simply set the policy
to monitor success or failure. There isn’t any concept of inclusion or
Audit User Access
327
exclusion. For example, to audit Account Logon failures, you’d type
AuditPol /Set /Category:”Account Logon” /Failure:Enable and press
Enter. AuditPol sets all of the subcategories for the entire Account Logon
category to audit failures.
The AuditPol /Set /Subcategory command controls settings made to
the system as a whole, just like the category-level command. However,
this command lets you set the individual subcategory entries, rather than
an entire category. For example, you might want to failure audit the
Credential Validation subcategory of the Account Logon category. To
perform this task, you type AuditPol /Set /Subcategory:”Credential
Validation” /Failure:Enable and press Enter.
Set Audit Options
The AuditPol /Set /Option command controls the audit policy
options described in the “Get Audit Options” section of the
chapter. You either enable or disable these options. For example,
to enable the CrashOnAuditFail option, you type AuditPol /Set
/Option:CrashOnAuditFail /Value:Enable and press Enter.
Perform a Backup
If you have a complex audit policy setup, you’ll want to create a backup
of it occasionally to ensure you don’t lose the settings and have to make
them all over again. You can also create a backup so that you can move
the settings to another machine. No matter what reason you have for
making the backup, type AuditPol /Backup /File:Filename, where
Filename is the name of the backup file you want to use, and press Enter
to create the backup.
Perform a Restore
Restoring a backup will overwrite all of the current settings for the
target system. It’s important to understand that restoring a backup is
the same as making all of the settings changes by hand. To perform this
task, type AuditPol /Restore /File:Filename, where Filename is the
name of the backup file you want to use, and press Enter.
Performing Maintenance
Set Audit Subcategories
Part VI
328
Chapter 16
3
Managing System Users
Clear an Audit Policy
You made a mistake. In fact, you made a really big mistake and the
audit logs are filling up faster than you can clear them. The system is
completely messed up and you don’t know what to do about it. To correct this problem, type AuditPol /Clear and press Enter. This command
essentially resets all of the audit policies to the state they were in when
you installed Windows. Of course, you’ll lose any good changes you
made, but you’ll also get rid of any incorrect settings you made as well.
Remove an Audit Policy
There are times when you simply want to remove the existing audit policies for a user or for all users on a system. A new company policy may
define system-level settings that everyone should use, rather than rely on
special settings for individual users. Alternatively, you might have monitored a particular user for a while, but decided the monitoring is no
longer necessary and want to remove all of the auditing with one command. No matter what reason you have to make the change, you can
type AuditPol /Remove /User:Username, where Username is a particular
user’s name, and press Enter to remove the audit policies for a specific
user. To remove the audit policies for all users, type AuditPol /Remove
/AllUsers and press Enter.
Work with Group Policies
Group policies make it possible to create security and usage configurations for users without having to set every user’s configuration individually. Setting the group policy is one task, working with it is another.
The following sections describe how to work with group policies from
the user’s perspective.
Obtain Group Policy Results
Use the GPResult command to obtain the Resultant Set of Policy (RSoP)
for a particular user on a system. This command considers all of the
security settings for both the computer and the user and creates a resultant policy—the policy that actually affects the user’s security setup on
the system. The GPResult command is one of the few commands where
Work with Group Policies
329
Figure 16.2 : GPResult makes it possible to create a report from the RSoP
information.
Performing Maintenance
typing GPResult and pressing Enter displays the help information. If
you want to see the RSoP for the user and computer, type GPResult /R
and press Enter. This report can be a little long, so GPResult makes it
possible to create an HTML report out of the information. Simply type
GPResult /H MyReport.HTML and press Enter. Figure 16.2 shows typical output from this command. You can likewise use the /X Filename
command line switch (where Filename is the name of the file you want
to use) to output the report in XML format suitable for import into a
database.
Part VI
NOTE Microsoft provides a wealth of articles on RSoP. For
example, you can see how RSoP affects Internet Protocol
Security (IPSec) assignments at http://technet2.microsoft.
com/windowsserver/en/library/35675107-c728-47cd-8ad9-bfd2d5e7fe0a1033.mspx. You’ll also find an excellent article on planning and logging RSoP at http://www.windowsnetworking.com/
articles_tutorials/Resultant-Set-Policy-Planning-Logging
.html.
330
Chapter 16
3
Managing System Users
You may decide you need something other than the default output.
For example, if you need just the computer or the user information, you
can type GPResult /R /Scope:Computer or GPResult /R /Scope:User and
press Enter. Use the /H command line switch in place of the /R command
line switch when you need an HTML report in place of the on-screen
report. If you want even more information than the default report supplies, use the /V command line switch. For example, type GPResult /R /V
/Scope:Computer if you want to discover detailed information about the
computer. The /Z command line switch provides even more information
for those who need it.
The GPResult utility works with the current user by default.
However, you can use the /User command line switch to obtain information about other users. For example, if you want to find information about user Samantha, you’d type GPResult /R /User Samantha
and press Enter. As with many command line utilities and commands,
you can use the /S Server, /U Username, and /P Password command line
switches to access information on remote systems.
Manage Group Policies
The Group Policy Update (GPUpdate) utility lets you update the group
policies on a computer. Use this utility as a replacement for the now
obsolete /refreshpolicy command line switch for the SecEdit utility.
Using this utility ensures that essential group policy changes appear
on a computer, especially systems that are on 24 hours per day. To
ensure that the host system is updated after you make group policy
changes, type GPUpdate and press Enter. If you want to apply only the
computer changes, type GPUpdate /Computer and press Enter. Likewise,
if you want to apply only the user changes, type GPUpdate /User and
press Enter.
Foreground policy changes won’t actually affect the user immediately in most cases. For example, if you give the user additional rights,
the user won’t actually see the change until the user logs back on to the
system after a reboot or a logoff. To ensure foreground changes actually
take effect, type GPUpdate /Boot or GPUpdate /Logoff and press Enter.
Using the /Logoff command line switch is fine for all soft settings, such
as security changes. However, if the policy update affects the hardware
in some way, it’s normally better to use the /Boot command line switch
to force a reset of the hardware.
Obtain Session Status Information
331
Obtain Session Status Information
The Query utility helps you see how users are employing resources on the
current machine. You can learn about the processes users have started,
the sessions that the machine is supporting, information about the users
themselves, and basic Terminal Server information as well. The following sections describe this utility in more detail.
Windows provides a number of ways to display the active processes.
(A process isn’t necessarily just an application—services also create
processes.) For example, if you want to use the GUI approach, you can
rely on Task Manager. The Query Process command provides a quick
way of obtaining a list of running processes from the command line.
If you want to discover the processes started by the current user, type
Query Process and press Enter.
In some cases, you need to know more than the current user. To
see all of the processes started by anyone, type Query Process * and
press Enter. If you want to see the processes started by a specific user,
but not the current user, type Query Process Username and press Enter,
where Username is the name of the user that started the process. For
example, if you want to see all of the system processes, type Query
Process System and press Enter. It’s also possible to see processes
based on a session type. For example, administrators often need to
know which services are running. To see this information, type Query
Process Services and press Enter.
Get Session Information
The Query Session command helps you discover information about
Remote Desktop sessions on the current machine. Actually, the utility
also shows information about the user that’s currently logged on to the
machine and the services session (session 0 on most systems) as well. To
see the basic session information, type Query Session and press Enter. If
you want session statistics (such as the number of sessions the machine
has created), type Query Session /Counter and press Enter.
Performing Maintenance
Get Process Information
Part VI
332
Chapter 16
3
Managing System Users
Get User Information
The Query User command displays information about users logged on to
the machine. To see all of the users logged on to the system, type Query
User and press Enter. If you want to see a specific user’s information,
type Query User Username and press Enter, where Username is the name
of the user you want to see. You can also type the session name to see all
of the users logged on under a particular session or the session identifier.
No matter how you request the information, you see the username, session name, session ID, state, idle time, and logon time as output.
Get Terminal Server Information
The Query TermServer command locates any Remote Desktop Session
Host servers on the domain. It’s important to stress domain in this case
because the command doesn’t appear to work with workgroups. You
have to have Active Directory set up and the whole domain configured
for this command to work (as is the case for a few other commands).
To obtain a list of all of the Remote Desktop Session Host servers on the
network, type Query TermServer and press Enter. If you want to locate a
particular server, type Query TermServer ServerName, where ServerName
is the name of the server you want to locate, and press Enter.
Get the User’s Identity
Batch and script files often require that you know the user’s identity in
order to perform certain tasks. For example, a user might not have the
rights required to perform the entire task, so you can modify the batch
or script file execution to take this issue into account. Knowing the
user’s name (which is part of their identity, along with the user’s security identifier and other elements) can also help make the batch file or
script friendlier because you can use the user’s name in prompts. Finally,
you sometimes need to know the user’s name to accomplish the task,
such as when you need to set user-level auditing. The following sections
describe two ways you can use to detect the user’s identity.
Get the User’s Identity
333
The QUser utility is a very simple way to find the user’s identity. If you
type QUser and press Enter, you see the username, session name, session
ID, state, idle time, and logon time for every user logged on to the system.
In fact, you see all of these statistics whenever you use the QUser utility,
but you can ask for a single user’s information.
If you’re interested in a particular user, then you can use the QUser
Name command, where Name is the user’s name. You might be interested
in a particular kind of session, such as a console session. In this case,
you use the QUser SessionName command, where SessionName is the
name of the session. You’ll see every user logged on using that session
type. Finally, you can see which user is logged on by a session identifier. For example, if you want to see which user is logged on session 1,
then you’d type QUser 1 and press Enter. The first session, session 1, is
normally the local user.
Discover User Identity
The WhoAmI utility is a utility that you used to download as part of the
Windows Resource Kit (see http://www.microsoft.com/downloads/details
.aspx?FamilyID=3e89879d-6c0b-4f92-96c4-1016c187d429). However, starting with Windows XP Professional and Windows 2003, you started getting this utility as part of the operating system. When you type WhoAmI
and press Enter, you see just the logon name of the user. The logon
name consists of the domain name/username. If the user isn’t part of a
domain, then you see machine name/username instead.
Sometimes you need more than just the user’s logon name. To
obtain the user’s User Principal Name (UPN), type WhoAmI /UPN and
press Enter. Likewise, to obtain the user’s Fully Qualified Domain
Name (FQDN), type WhoAmI /FQDN and press Enter. There are a few
situations where you need the user’s logon identifier. Type WhoAmI
/LoginID and press Enter to obtain this information. Don’t confuse
the logon identifier with the user’s Security Identifier (SID).
You can use WhoAmI to obtain more information about the user. For
example, if you want to find the user’s SID, type WhoAmI /User and
press Enter. If you need to know the user’s group affiliations, type
WhoAmI /Groups and press Enter. Acquire the user’s privileges by typing WhoAmI /Priv and press Enter. Finally, if you need everything that
WhoAmI can tell you about the user, type WhoAmI /All and press Enter.
Performing Maintenance
Obtain User Logon Information
Part VI
17
In this chapter, you will learn to:
33
Add Virus and External Intrusion
Protection (Pages 337–341)
n
Remove Viruses (Page 337)
n
Detect and Remove Malicious Software (Page 338)
n
Verify System Files (Page 339)
n
Verify Drivers (Page 34 0)
33
33Perform an Analysis (Page 344)
Change the Verifier Settings (Pages 342–343)
Configure Local Security Policies (Pages 344–347)
n
n
Configure Security Policies (Page 34 5)
n
Export Policies (Page 34 5)
n
Import Policies (Page 34 6)
n
Validate a Policy File (Page 34 6)
33Use TaskKill and TaskList Filters (Page 347)
Work with General Applications (Pages 347–351)
n
n
Terminate Tasks (Page 350)
n
List Applications (Page 35 0)
n
List Services (Page 351)
Performing Maintenance
Securing the System
Part VI
336
Chapter 17
3
Securing the System
S
ecurity is an extremely complex topic and this chapter doesn’t seek
to tell you everything there is to know about security. However, it
does help you understand how to enhance security using command
line tools—an often missed opportunity in other books and articles.
Command line tools can help you automate security to an extent. You
can’t use command line tools to eliminate manual security measures,
but some tasks can easily be automated. For example, there really isn’t a
good reason to manually scan the drivers on every system on a network.
You can easily automate this task and then review a report afterward
to determine remedial actions that you normally perform manually.
Automation can also help you detect viruses and set consistent policies
on a network. This chapter explores these topics to help you enhance
your overall network security.
Setting Basic Security
Other chapters in this book have already helped you start the
security process. For example, Chapter 1 begins the process by
telling you how to work with services. Holes created by services
that you don’t actually need can cause problems, so proper
service management is essential (Chapter 8 provides additional
information on managing services).
Chapter 7 describes how to secure your data using Cipher,
ICACLS, OpenFiles, and TakeOwn. The simple act of restricting data
access makes a big difference in network security because many
companies leave data open to anyone to access. Use the information in Chapter 13 to monitor system events, because these
event entries often point out potential security problems by
helping you see any unusual entry patterns.
Monitoring the user is also important. Chapter 16 shows how
to audit user activities, so that you can detect unusual user
activity. Of course, WMIC is the utility of choice for configuring
user accounts locally and you use the DS* utilities in Chapter 11
and Chapter 12 for domain configuration. All of these utilities,
taken in combination, help you create a basic security screen
for your system.
Add Virus and External Intrusion Protection
337
Virus and external intrusion protection takes several forms. First, you
can erect a wall around your network in the form of firewalls and antivirus software. The following sections help partially with this form of
protection. Second, you can detect and eliminate viruses and intrusions
after the fact. The following sections are more focused on this goal than
on actual prevention. Third, you can educate users not to leave the door
open to virus and intrusions in the first place. The following sections
won’t help with this goal at all. Fourth, you can plug any existing holes
in the operating system, services, drivers, and applications. The following
sections also help in this goal a little by helping you verify the drivers on
your system. In short, the following sections help but won’t be a complete
solution for your virus and external intrusion protection.
NOTE There are many levels of threats to a computer system.
Of course, there are threats to the network as a whole, servers,
and individual machines. A threat can be internal from users,
incorrect configurations, loose security, or external from nefarious individuals who are intent on harming your organization. A
threat can be personal, such as an individual user downloading
a virus, or corporate, such as someone trying to steal the latest
intellectual property from your network. Threats can be directed
at your company personally or the result of a shotgun blast from
a script kiddie picking low-hanging fruit. The point is that you
have many threats to deal with and erecting walls will solve only
a few of them. You must combine preventative and detection
software with training, policies, and other elements to create
an effective defense against all these threats. Most importantly,
the smart administrator is constantly thinking outside the box
because the enemy certainly is.
Remove Viruses
The Blast Clean (BlastCln) utility, supplied with some versions of
Windows such as Windows XP, helps you locate and remove two common viruses on your system, Blaster and Nachi. Microsoft updates
the BlastCln utility monthly through the Windows Update service. In
fact, you’ve probably run this utility every time you visited Windows
Update without really knowing it because this utility appears on the
list every month. However, you might want to check your machine
Performing Maintenance
Add Virus and External Intrusion Protection
Part VI
338
Chapter 17
3
Securing the System
more often than once a month to ensure it remains clean. In addition,
running the utility as part of Windows Update doesn’t provide you
with a detailed report of any potential infestations on your system.
You can learn a little more about this utility from the Knowledge Base
article at http://support.microsoft.com/?kbid=833330. To perform a
detailed manual check of your system, type BlastCln /V and press Enter.
If you want to use BlastCln from within a batch file or script, type
BlastCln /Q and press Enter so that the utility runs without alerting the
user. If you do want detailed information, but don’t want to be bothered
with BlastCln requests as it runs as part of the batch file or script, type
BlastCln /V /U and press Enter.
Detect and Remove Malicious Software
The Malicious software Removal Tool (MRT) helps you remove common malicious software from your system. You can find a description of
this utility in the Knowledge Base article at http://support.microsoft.
com/?id=890830. It’s important to review this Knowledge Base article
relatively often because Microsoft updates it each month with the list
of viruses that MRT can detect. If you’re an administrator, make sure
you check the deployment instructions in the Knowledge Base article at
http://support.microsoft.com/kb/891716. To use the wizard-based GUI
of MRT shown in Figure 17.1, type MRT and press Enter.
Figure 17.1: MRT supports both a GUI and command line interface.
Add Virus and External Intrusion Protection
339
A more common way to use MRT from the command line is to type
MRT /Q and press Enter. This command performs a quick scan of the
system and automatically cleans any infections that the scanner finds.
If you want to perform an extended scan to locate even the most stubborn malicious software that MRT can find, type MRT /F:Y and press
Enter. Some administrators may not feel comfortable letting MRT work
on its own. If you simply want to detect the malicious software and
then manually clean it up, type MRT /N and press Enter.
The System File Scan (SFC) utility can help you keep viruses at bay by
ensuring you have the correct version of the system files on your system.
Viruses often replace system files with patched versions that contain the
virus code. Hitchhiking on an existing system file makes it less likely that
someone will remove the virus and ensures that the virus gets a chance
to run, so virus writers are motivated to use system files whenever they
think they can. The following sections describe how to perform basic
tasks with SFC.
NOTE The syntax of the SFC utility presented in this chapter
is specific to Windows 7, Vista, Windows Server 2008 Full version, and Server Core. The syntax is completely different from
older versions of SFC that you find in products such as Windows
XP. The older Windows products use a command line that looks
like this: SFC [/SCANNOW] [/SCANONCE] [/SCANBOOT] [/REVERT]
[/PURGECACHE] [/CACHESIZE=x]. If you need this and other older
versions of the command line for Windows administration, get
Windows Administration at the Command Line (Sybex, 2007).
Perform a Scan
To scan all of the protected system files immediately and repair any damage found, type SFC /ScanNow and press Enter. The utility normally relies
on the content of the \WINDOWS\system32\dllcache folder to make repairs
to the system files. However, it can also use the Windows DVD, the content of service pack folders, or even online sources when necessary.
In many cases, you’ll want to know what repairs SFC is going to
make before you let SFC make them. In this case, type SFC /VerifyOnly
and press Enter. You’ll see SFC perform a verification process, as
shown in Figure 17.2.
Performing Maintenance
Verify System Files
Part VI
340
Chapter 17
3
Securing the System
Figure 17.2 : The verification process shows any corrupted or compromised files.
Scan a File
The SFC scanning process can require an extended time to complete (up
to 15 minutes on many systems). You probably won’t want to wait all
that time if you suspect only one file is corrupted or tainted in some
way. In this case, type SFC /ScanFile=Filename and press Enter, where
Filename is the name of the file you want to scan. Unless the file is in the
current directory, you need to supply the full path to the file. SFC scans
the file and replaces it with a good copy should it find that the file is
incorrect in some way.
Verify a File
It’s also possible to verify a file, rather than scan it. Verifying the
file saves time in some cases. SFC simply tells you whether or not
the file is corrupt and then you can replace it using whatever technique works best. You might want to use this approach when scanning multiple machines in a batch process. To verify a file, type SFC /
VerifyFile=Filename and press Enter, where Filename is the name of the
file you want to scan. Unless the file is in the current directory, you need
to supply the full path to the file.
Verify Drivers
The Verifier utility performs general driver verification on your system
through the Driver Verifier. Driver vendors are supposed to use this utility to ensure their drivers don’t make illegal system calls or cause system
corruption. You can use Verifier to ensure you do have good drivers
loaded on your system and that a virus hasn’t modified the driver files
on your machine. Most of the drivers on your machine appear in the
Add Virus and External Intrusion Protection
341
\WINDOWS\system32\drivers folder and have a .SYS file extension. If you
want to use the GUI version of the Verifier wizard, type Verifier and
press Enter. The following sections describe common tasks you can perform with the Verifier utility at the command line.
None of the drivers are verified on a new system. However, as the
machine configuration changes and you do verify older drivers, you end
up with a number of drivers that aren’t checked. To obtain a list of drivers that have been verified, type Verifier /Query and press Enter. A new
system will tell you that none of the drivers are verified.
Query the Verifier Settings
When you use Verifier, you can either choose to use the standard settings for checking drivers or create special settings. The standard check
includes the Special Memory Pool, Forcing Interrupt Request Level
(IRQL) Checking, Memory Pool Tracking, I/O Verification (but not the
enhanced version), Deadlock Detection, and DMA Verification checks.
Technically, every driver on your machine should be able to pass a standard check. The driver vendor should provide you with information
about any drivers that won’t pass the Verifier checks. To see the settings, type Verifier /QuerySettings and press Enter. You’ll see a list of
settings like the ones shown in Figure 17.3.
Figure 17.3 : Verifier shows the tests that it runs when you check the drivers.
Performing Maintenance
Perform a Query
Part VI
342
Chapter 17
3
Securing the System
Change the Verifier Settings
Verifier settings come in two forms: volatile (temporary) and perma-
nent. Volatile settings take effect immediately and last until you reboot
the system. You can only perform the Special Memory Pool, Forcing
IRQL Checking, and Low Resources Simulation checks when using
volatile settings on older versions of Windows. Windows 7 allows you
to use volatile settings to perform any test.
Permanent settings don’t take effect immediately. You make the
change to the settings and then reboot the system for these changes to
take effect.
To create a volatile setting, you use the /Volatile /Flags FlagNumber
command line switch combination, where FlagNumber is a number
that you create based on the tests you want to run. To create a permanent setting, you use the /Flags FlagNumber command line switch.
The FlagNumber is based on the following bit values (older versions of
Windows only support Bit 0 through Bit 7):
NN
Bit 0: Special Pool Checking
NN
Bit 1: Force IRQL Checking
NN
Bit 2: Low Resources Simulation
NN
Bit 3: Pool Tracking
NN
Bit 4: I/O Verification
NN
Bit 5: Deadlock Detection
NN
Bit 6: Enhanced I/O Verification (Unused in Windows 7)
NN
Bit 7: DMA Verification
NN
Bit 8: Security Checks
NN
Bit 9: Force Pending I/O Requests
NN
Bit 10: IRP Logging
NN
Bit 11: Miscellaneous Checks
The bit numbers can be a little confusing, but you can use the
Calculator application to make things easier. Use these steps to create
the FlagNumber:
1. Open the Calculator to Scientific view in older versions of
Windows or Programmer view in Windows 7.
Change the Verifier Settings
343
2. Set the Calculator to Binary mode.
3. Beginning with Bit 11, type a 1 if you want to run a test or 0 if
you don’t want to run it. Keep typing 0s and 1s until you finish
all 12 bits (8 bits when working with older versions of Windows
because these older versions start at Bit 7 instead of Bit 11).
4. Set the Calculator to Decimal mode. You see the number you
To set Verifier to temporarily run all tests, type Verifier /
Volatile /Flags 4095 and press Enter. Likewise, to set Verifier to
run all tests permanently, type Verifier /Flags 4095, press Enter, and
reboot the machine.
Clear the Verifier Settings
If you don’t want Verifier to perform any tests, you need to clear the
settings. You can do that using the technique found in the “Change the
Verifier Settings” section of the chapter, or you can type Verifier /Reset
and press Enter.
Check the Drivers
Verifier won’t perform any checks immediately because the drivers are
in use. In order to verify the drivers, you must reboot the system after
telling Verifier what to check. Because of the reboot requirement, the
easiest check in most cases is to verify all of the drivers. To perform this
task, type Verifier /Standard /All (to perform the standard checks) or
Verifier /All (to perform custom checks) and press Enter. Verifier displays a summary screen that shows which checks it will perform and on
which drivers (all of them).
It’s possible to check individual drivers. In this case, you type
Verifier /Standard /Driver DriverName or Verifier /Driver
DriverName and press Enter, where DriverName is the name of the driver
you want to check. As with the all driver checks, you see a summary
screen telling you what Verifier will do during the next reboot.
Performing Maintenance
need to type. For example, if you want to run just Special Pool
Checking and Low Resources Simulation, you get a value of 5
(000000000101 in binary mode). To run all 12 tests in Windows 7,
you use a value of 4,095.
Part VI
344
Chapter 17
3
Securing the System
Configure Local Security Policies
Local security policies are those that exist on the local machine
rather than on the domain. When working with workgroups, local
security policies are all you have. The Security Edit (SecEdit) utility
helps you analyze and manage local security policies on your system.
In some cases, you can also merge local and domain security policies
to create a single policy.
Security policies appear within Security Database (SDB) files.
Unfortunately, Microsoft has used the .SDB file extension for more
than security databases—you’ll find them cropping up all over your
machine (for example, many applications use Setup.SDB to hold their
setup instructions). In general, the security database that you want to
work with appears in the \Windows\security\database directory of the
target machine.
To obtain help when using the SecEdit utility, type SecEdit /? and
press Enter. However, to get command-specific help, type SecEdit
/Command, where Command is the command you want to know about,
and press Enter (without the ?). For example, to get help on the SecEdit
/Analyze command, you type SecEdit /Analyze and press Enter. The
following sections describe how to work with the local security database on any system.
WARNING Always make a copy of the security database
before you do anything with it. Otherwise, you might find that
you need to re-create the security policies from scratch.
Perform an Analysis
You can spend hours looking for security problems on a system or you
can compare the system to a known good database of settings. Use the
SecEdit /Analyze command to compare the settings on the target system
to the settings contained within a database file of known good settings.
For example, if your baseline security database is named SecCheck.SDB,
you type SecEdit /Analyze /DB SecCheck.SDB and press Enter to perform a check of the current system against the baseline. The results from
the check normally appear in \Windows\security\logs\scesrv.LOG, but
you can override this destination using the \Log LogName command line
switch, where LogName is the name of the log you want to use.
Configure Local Security Policies
345
Configure Security Policies
The SecEdit /Configure command makes it possible to configure a system based on the content of the .SDB file you provide. For example, if
you want to configure your system based on the content of SecBasic
.SDB, you type SecEdit /Configure /DB SecBasic.SDB and press Enter.
If you use the basic command, SecEdit replaces the entire target
computer configuration with the configuration you supply. However, in
some cases, you might only want to replace specific areas. In this case,
you use the /Areas Area1 Area2 ... command line switch, where Area1
and Area2 are areas that you want replaced. You can specify multiple
areas by separating each area with a space. The following list contains
the valid security areas:
NN
SECURITYPOLICY: Defines the user security policy, which includes
account policies, audit policies, event log settings, and security
options.
NN
GROUP_MGMT: Defines the restricted group settings.
NN
USER_RIGHTS: Defines the user rights assignments to system objects.
NN
REGKEYS: Defines the registry permissions.
NN
FILESTORE: Defines the file system permissions.
NN
SERVICES: Defines the system service settings.
Export Policies
At some point you’ll want to make a backup of your security policies.
The SecEdit /Export command makes it possible to create a backup of
the security policies on the target system. To use the basic form of this
command, type SecEdit /Export /Cfg Cfg.TXT and press Enter. The /Cfg
command line switch is required.
Performing Maintenance
NOTE Microsoft may supply standard security templates
somewhere, but they apparently aren’t for download. You should
find a security template on your system with the Windows
default security settings as described in the Knowledge Base
article at http://support.microsoft.com/kb/313222. However, to
obtain a database you can use for work with your system, you
need to configure a system as you want it to appear, and then
use the \Windows\security\database\SecEdit.SDB file (renamed)
from that system for SecEdit tasks.
Part VI
346
Chapter 17
3
Securing the System
In some cases, you might want to merge the existing database with a
baseline database. Use the /DB command line switch. For example, if you
want to merge the local settings with SecCheck.SDB, type SecEdit /Export
/Cfg Cfg.TXT /DB SecCheck.SDB and press Enter. It’s also possible to merge
the local and domain security settings into a single backup file. In this case,
type SecEdit /Export /Cfg Cfg.TXT /MergedPolicy and press Enter.
As with configuration, you don’t have to export all of the settings
into a configuration file. You can use the /Areas command line switch
to limit the number of settings that SecEdit saves. See the “Configure
Security Policies” section of the chapter for details about the /Areas
command line switch.
Import Policies
When you need to import settings into an .SDB, you use the SecEdit
/Import command. For example, you might need to import settings
into your basic template used to configure other machines. Unlike
configuration, this command doesn’t necessarily work with the target
machine—you can use it on an arbitrary database. If your database is
named SecEdit.SDB and the configuration file is named CFG.TXT, then
type SecEdit /Import /DB SecEdit.SDB /Cfg CFG.TXT and press Enter to
import the settings from CFG.TXT into SecEdit.SDB.
SecEdit normally tries to mesh the .SDB with the configuration file.
When there’s a conflict, the configuration file (template) always wins.
However, you can change this behavior using the /Overwrite command
line switch. In this case, SecEdit clears the .SDB file first, and then adds
the settings from the configuration file to it, even if the configuration
file isn’t complete.
As with configuration, you don’t have to import all of the settings into
the local security policy. You can use the /Areas command line switch
to limit the number of settings that SecEdit imports. See the “Configure
Security Policies” section of the chapter for details about the /Areas command line switch.
Validate a Policy File
You have a configuration (template) file, but you don’t know whether
the template file is accurate. Use the SecEdit /Validate command to
ensure the accuracy of the configuration file before you use it.
Work with General Applications
347
To validate the content of CFG.TXT against SecEdit.SDB, type SecEdit
/Validate SecEdit.SDB /Cfg CFG.TXT and press Enter. You see a simple
message that tells when the validation completed successfully as output.
The TaskKill and TaskList utilities make it possible to control and
monitor applications running on the system. You can see every utility
that’s running and then terminate anything that shouldn’t be running.
Of course, you always use TaskList first to see which applications are
running and rely on TaskKill only after you determine that the application really shouldn’t be running.
WARNING Terminating an application using TaskKill can
cause data loss because the application ends without saving any
data it’s working with at the time. Use TaskKill as a last resort,
rather than the first option when working with errant applications. Of course, you can always use TaskKill to stop known
Trojans, viruses, and adware.
Use TaskKill and TaskList Filters
Sometimes utilities output too much information for the administrator to use, as is the case with the TaskKill and TaskList utilities. Both
the TaskKill and TaskList utilities support a /FI command line switch
that lets you filter their output. The filters can become complex, so it’s
best to put the filters together one piece at a time until you obtain the
results you want.
Table 17.1 describes the filter criteria. Filters are essential in some
cases, especially when working with the /V command line switch.
For example, if you want verbose information about the applications
you’re using, you can type TaskList /V /FO LIST /FI “USERNAME eq
AUserName“ | More and press Enter, where AUserName is the name of the
user you want to see. Notice that you must enclose the filter criteria in
quotes. In this case, you’re telling the system to filter by username where
the username equals the username you select (System in Figure 17.4). Of
course, you’ll use your name when trying out this command line on your
machine. Figure 17.4 shows typical output from this command.
Performing Maintenance
Work with General Applications
Part VI
348
Chapter 17
3
Securing the System
Figure 17.4 : Use filters with TaskList and TaskKill to keep the amount of output
under control.
Table 17.1: An Overview of TaskKill and TaskList Filters
Comparison
Operators
Filter
Description
Valid Values
STATUS
Use this filter to locate any applications that are no longer responding
so that you can manually end them.
eq, ne
Running or Not
Responding
IMAGENAME
Use this filter to locate a particular
application in the list based on its
filename.
eq, ne
The executable
filename
PID
Use this filter to locate a particular
instance of an application when
there’s more than one copy of the
application running.
eq, ne, gt, lt,
ge, le
Process
Identifier
SESSION
Unless you’re using a sharing application such as Terminal Services,
this filter is useless because every
application running is for the current session.
eq, ne, gt, lt,
ge, le
The session
number
SESSIONNAME
Unless you’re using a sharing application such as Terminal Services,
this filter is useless because every
application running is for the current session.
eq, ne
The name of
the session
Work with General Applications
349
Table 17.1: An Overview of TaskKill and TaskList Filters (continued)
Description
Valid Values
CPUTIME
Use this filter to locate applications that have just started or
have been running a long time.
For example, you might notice a
sudden drop in system performance and can use this filter to
locate applications that have just
started to help determine which
application might have caused the
performance problem.
eq, ne, gt, lt,
ge, le
The amount of
time that the
application has
used the CPU in
hours, minutes,
and seconds
since the session has started
MEMUSAGE
Sometimes you have more applications loaded than the system can
comfortably support. Use this filter
to locate applications that you
can end or possible candidates for
removal from the system.
eq, ne, gt, lt,
ge, le
The amount of
memory the
application uses
in kilobytes
USERNAME
Use this filter to separate applications that the user starts from
those the system starts.
eq, ne
The name of
the user who
started the
application
SERVICES
Use this filter to locate the application hosting a particular service on
the system.
eq, ne
A service name
WINDOWTITLE
Use this filter to locate a particular
application based on the name it
displays to the user.
eq, ne
The name the
application displays to the user
on the title bar
MODULES
Use this filter to locate applications based on the modules they
use. You can use this filter to
help locate a variety of problems,
including .DLL conflicts (when
two applications use the same
.DLL, but they each need a different .DLL version).
eq, ne
The filenames
of any modules
that an application uses
Performing Maintenance
Comparison
Operators
Filter
Part VI
350
Chapter 17
3
Securing the System
In some cases, you must combine multiple filters to get manageable
results. For example, simply looking for processes created by a particular
individual might not be enough to limit the list to a reasonable size. So,
you might decide to add another filtering criterion, such as CPUTIME. For
example, if you type TaskList /V /FO LIST /FI “USERNAME eq System”
/FI “CPUTIME eq 0:00:00” and press Enter, you see all of the processes
created by the system and haven’t used any CPU time.
Terminate Tasks
Terminating applications using TaskKill is always the option of last
resort. However, sometimes an application crashes and you have to end
it using TaskKill. To end an application using TaskKill, type TaskKill
/IM ImageName /T and press Enter, where ImageName is the application’s
executable name. For example, Microsoft Word’s image name is actually
WinWord.EXE. The /T command line switch ensures that the entire application is killed, rather than just the main executable. You can obtain the
image name of an application using the TaskList utility.
There are times when you have multiple copies of the same application running on a system. For example, you can start multiple copies
of Notepad. If you use the image name to kill the application, TaskKill
will terminate every copy of Notepad, not just the one you want terminated. In this case, you must use the Program Identifier (PID) to terminate the application. The PID uniquely identifies every process. Use
the TaskList utility to obtain a list of PIDs. To terminate an application
using a PID, type TaskKill /PID ID /T and press Enter, where ID is the
PID of the process you want to end. To further ensure you locate the
right application, combine the TaskKill utility with a filter as described
in the “Use TaskKill and TaskList Filters” section of the chapter.
List Applications
Use the TaskList utility to list applications running on a system. To see
all of the applications running on a system, type TaskList and press
Enter. You see the image name, PID, session name, session number, and
memory usage for each application.
When you need to see all of the statistics for the applications running
on a system, type TaskList /V and press Enter. The output will now display the image name, PID, session name, session number, memory usage,
status, user name, CPU time, and window title for each application. In
most cases, the output is going to be overwhelming, so you’ll want to
use a filter. See Table 17.1, “An Overview of TaskKill and TaskList
Filters”, for information on using filters.
In some cases, the default tabular format of the TaskList output
doesn’t work well. Trying to see verbose output using tabular format is
difficult because the entries span several lines on a typical console window. To make the output more readable, use the /FO Format command
line switch, where Format is one of the supported formats: Table, List,
or Comma Separated Value (CSV). For example, if you want to create a
verbose list of applications in a form suitable for import into a database,
you’d type TaskList /V /FO CSV > Applications.CSV and press Enter.
List Services
The basic TaskList utility commands don’t show services, which are special applications that run in the background. In order to see services, you
must type TaskList /SVC and press Enter. The output includes the image
name, PID, and services supplied by the process. You can’t use the /SVC
command line switch with the /V or /M command line switches, so you
can’t obtain verbose information about services. Unfortunately, the output
of this command includes all of the applications in addition to the services.
You have a number of ways to get around the problem of seeing
processes with the services. One technique is to rely on the fact that
SvcHost.EXE is the image name of the application that runs most (but
not all) of the services. To find the low-level services (those not associated with applications) running on your system, you type TaskList
/SVC /FI “ImageName eq SvcHost.EXE” and press Enter.
Another way to find services is to rely on the fact that processes display N/A in the Services column of the output. You can pipe the output
of the TaskList utility to the Find utility to obtain a list of all of the services by typing TaskList /SVC | Find “N/A” /V and pressing Enter. This
section approach finds both low-level services and those associated with
applications.
351
Performing Maintenance
Work with General Applications
Part VI
18
In this chapter, you will learn to:
33Export a Registry Key (Page 356)
Perform Basic Registry Tasks (Pages 354–358)
n
n
Import a Registry Key (Page 357)
n
Delete a Registry Key (Page 357)
n
Save the Registry (Page 35 8)
n
Restore the Registry (Page 35 8)
33Set Automatic Updates (Page 359)
Use the SCRegEdit Script (Pages 358–362)
n
n
Enable Terminal Services (Page 359)
n
Configure the IP Security (IPSec) Monitor (Page 360)
n
Manage the DNS Service Priority and Weight (Page 361)
n
Use the Command Line Reference (Page 361)
33Understand the Registry Settings (Page 362)
Manage the Registry (Pages 362–368)
n
n
Query a Registry Entry (Page 36 3)
n
Add a Registry Entry (Page 36 4)
n
Delete a Registry Entry (Page 365)
n
Copy a Registry Entry (Page 366)
n
Compare Registry Entries (Page 366)
n
Export Registry Entries (Page 367)
n
Import Registry Entries (Page 367)
n
Restore Registry Entries (Page 368)
Performing Maintenance
Interacting with the Registry
Part VI
354
Chapter 18
3
Interacting with the Registry
T
he registry affects every part of the Windows experience. It contains
settings for everything from services to applications. Some settings
are personal and others affect the system as a whole. In fact, the registry is an extremely complex database that Windows won’t run without. Any damage to the registry can cause catastrophic results. Most
administrators will face some type of registry damage on user systems
on a regular basis. The causes are many—everything from errant applications to viruses and external intrusions. Microsoft has tried many
times over the years to replace the registry with something else, but it
has so far failed because the registry truly is an essential component of
Windows. The following sections provide insights into working with the
registry from the command line.
WARNING Any change you make to the registry is potentially
dangerous and could result in data loss, an unbootable system,
or other problems. Always create a backup of your registry
before you make any changes. The “Save the Registry” section
of the chapter describes how to create such a backup. You could
also use the material found in the “Export Registry Entries” section to create a backup. Whatever technique you use, always create a backup and make sure it will be accessible should registry
damage occur after a change.
Perform Basic Registry Tasks
You’ll commonly use the Registry Editor (RegEdit.EXE) utility in GUI
mode. To start this utility in GUI mode, simply type RegEdit and press
Enter. You’ll see an initial display like the one shown in Figure 18.1. The
left pane shows hives and keys, while the right pane shows values associated with the hives and keys that you select in the left pane. Anyone who’s
worked with the registry already knows about hives, keys, and values.
Perform Basic Registry Tasks
355
NOTE A hive is a major data storage unit—think of it as an
equivalent of a table within a database because the purpose
is the same. Keys are entries within the hive—you can view
them as individual records within the database. Values contain
the actual registry information—you can view them as fields.
If you don’t already know these three terms, then you don’t
have enough knowledge to begin working with the registry and
should probably not use the information in this chapter until
you do have a good working knowledge of the registry. Making
changes to the registry without the required registry knowledge
will almost certainly damage the database at some point and
could even cause Windows to stop working.
One of the more interesting command line switches is /V. Type
RegEdit /V and press Enter to see the advanced (verbose) mode. If you’re
familiar with the standard registry appearance, you’ll suddenly notice
some registry keys that RegEdit didn’t display before. Use this option
with care; all of the registry settings are editable if you have the proper
permissions and the new settings tend to have dramatic system results.
If you want to edit a registry on another machine, you must configure that machine to allow remote edits by starting the Remote Registry
service. In addition, you must right-click the HKEY_LOCAL_MACHINE\
SYSTEM\CurrentControlSet\Control\SecurePipeServers\winreg key in the
Registry Editor and choose Permissions from the context menu. Ensure
that the Administrators group has full access to this key (and therefore
Performing Maintenance
Figure 18.1: RegEdit provides the means for viewing, creating, deleting, and modifying registry settings.
Part VI
356
Chapter 18
3
Interacting with the Registry
the remote registry). To remotely edit the system-wide settings such as the
HKEY_LOCAL_MACHINE hive found in System.DAT, type RegEdit /L:Path and
press Enter, where Path is the location of the System.DAT file on the remote
system. To remotely edit the user database that appears in the individual
user directories in User.DAT and contains the HKEY_CURRENT_USER hive, type
RegEdit /R:Path and press Enter, where Path is the location of the User.
DAT file on the remote system. The following sections describe other tasks
you can perform using RegEdit.
RegEdit as an Undocumented Utility
The RegEdit utility is extremely powerful, yet it’s one of the
most undocumented utilities available on your machine. The
Microsoft-recommended command line switches for the RegEdit
utility appear in the Knowledge Base article at http://support
.microsoft.com/kb/q82821/. The Knowledge Base article limits
you to the /V and /S command line switches.
Even Windows won’t help much when using this utility. The
RegEdit utility itself doesn’t display any helpful information
when you type RegEdit /? and press Enter. The Windows help
file just barely discusses using the utility in GUI mode. In short,
not only is this utility extremely powerful, you also won’t get
much help from Microsoft in using it. Because RegEdit is so
undocumented, your ability to continue using the command line
switches described in the sections that follow will depend on
Microsoft continuing to support them in an undocumented state.
In short, there’s no guarantee that you’ll have continued access
to these features.
Export a Registry Key
The registry contains a lot of potentially valuable information that’s
incredibly time consuming to retrieve if you don’t use a batch file or
script. You can use the /E command line switch within a batch file
to save user settings prior to a system change. For example, typing
RegEdit /E Test.REG “HKEY_CURRENT_USER\Software\Nico Mak Computing”
and pressing Enter at the command prompt saves the WinZIP application settings to a file named Test.REG (registry files normally use the
.REG extension).
Perform Basic Registry Tasks
357
As a more practical example, if you want to save all of the startup
applications found in the Run key, you type RegEdit /E HKLM_Run.REG
and press Enter. Notice that you must enclose keys with spaces in the
name in double quotes to ensure the RegEdit utility interprets them correctly. In addition, you must use an uppercase /E when working with
newer versions of Windows.
When you specify a particular key, you get the entire tree. For example, if you type RegEdit /E HKCU_Software.REG “HKEY_CURRENT_USER\
Software” and press Enter, you get the entire Software key and associated subkeys. If you want only specific subkeys, then you must export
the subkeys one at a time.
Import a Registry Key
At some point, you’ll need to import the registry files you’ve been collecting. To perform a standard import, type RegEdit RegFilename and
press Enter, where RegFilename is the name of the file that contains the
registry information. However, using this technique displays a warning
message to the user, which would be annoying if you have a lot of files
to import.
A second method to import registry files is to type RegEdit /S
RegFilename and press Enter. The /S command line switch tells RegEdit to
perform tasks silently. The advantage of using this command line switch
is that your batch file or script can proceed without bothering the user. Of
course, the disadvantage is that the silent mode leaves the registry open to
potential abuse. Fortunately, newer versions of Windows require a permission escalation before any registry change can take place, so the user will
be aware of the change, but will only have to allow it once.
Delete a Registry Key
Sometimes you need to remove a registry key. Use the /D command line
switch to perform this task. Simply type RegEdit /D Key and press Enter,
where Key is the registry key (and its associated subkeys) that you want
to delete. This switch appears to work fine on Windows 9x systems, but
doesn’t always work with Windows NT and above. If you need to delete
a registry key using a newer version of Windows, use the Reg utility
described in the “Manage the Registry” section of this chapter.
Performing Maintenance
“HKEY_LOCAL_MACHINE\Software\Microsoft\Windows\CurrentVersion\Run”
Part VI
358
Chapter 18
3
Interacting with the Registry
Save the Registry
It isn’t possible to back up the registry using a standard backup program because the registry files are normally in use when Windows is
running. Of course, you can always boot from the installation DVD
and make a copy of System.DAT and each of the User.DAT files, but
that’s time consuming and error prone at best. A better method is to
export the entire registry and save the exported file. To export the
entire registry, type RegEdit /E RegBackup.REG and press Enter. The
resulting RegBackup.REG file contains the entire registry for the user
who’s currently logged on to the system.
Restore the Registry
Windows always has a registry or it won’t boot. Consequently, to restore
the registry, you must somehow restore the settings while Windows
is running, which seems like a disaster waiting to happen unless you
perform the task carefully. Simply typing RegEdit RegBackup.REG and
pressing Enter won’t do the trick (be sure your replace RegBackup.REG
with the name of your backup file). Yes, any settings in RegBackup.REG
will overwrite the settings in the current registry, assuming you have the
correct permissions. However, you can’t guarantee that the new registry
will precisely match the old registry. In some cases, Windows won’t even
boot after the update. To ensure that you get a precise duplicate, you
must first clear the existing registry and then add the new values. To
perform this task, type RegEdit /C RegBackup.REG and press Enter. The
/C command line switch completely clears the old registry settings and
replaces the registry with the settings you provide. This process is one
way and destructive—there’s no undo button, so make sure you use the
correct registry file.
Use the SCRegEdit Script
Microsoft has begun using a new scripting file format called the
Windows Scripting File (WSF). The SCRegEdit.WSF file on your system
is just one of many .WSF files you should expect to see at some point.
(Not all versions of Windows include this script, but the script works
fine in all versions of Windows.) The purpose of this script is to make it
easier to perform certain types of registry edits. The following sections
Use the SCRegEdit Script
359
detail the kinds of registry edits you can perform and the command line
switches you use to perform the tasks.
Set Automatic Updates
This feature of the SCRegEdit script lets you set the automatic update
feature for Windows without relying on the GUI. To see the current
automatic updates setting, type CScript %WinDir%\System32\SCRegEdit
.WSF /AU /V and press Enter. To change the setting, type CScript
%WinDir%\System32\SCRegEdit.WSF /AU Value and press Enter, where
Value is one of the values shown in the following list:
NN
1: Disable Automatic Updates
NN
4: Enable Automatic Updates
For example, if you want to configure automatic updates so that they
always occur, type CScript %WinDir%\System32\SCRegEdit.WSF /AU 4 and
press Enter. Note that you don’t use a slash with the 4 (this is the most
common mistake people make when using SCRegEdit).
NOTE The SCRegEdit script only supports values 1 and 4. If
you want to use another setting, such as 2 for checking updates,
but allowing the user to decide whether to download and install
them, you must use some other method.
Enable Terminal Services
It’s often helpful to use Remote Desktop to administer any Windows
system. Using this approach lets you combine the benefits of both the
command line and the GUI to get work done faster.
There are two forms of this particular script feature. The first form is
for newer versions such as Vista. This form provides additional security
not provided with previous versions of Windows, so it’s more secure, but
Performing Maintenance
NOTE The “Use the Windows Scripting File” section of
Chapter 22 tells you more about .WSF files. You can’t execute
.WSF scripts on older versions of Windows because the WScript
and CScript utilities aren’t set up to support them.
Part VI
360
Chapter 18
3
Interacting with the Registry
also limits connectivity. To see this form of Terminal Services setting,
type CScript %WinDir%\System32\SCRegEdit.WSF /AR /V and press Enter.
If you want to enable the newer form of Terminal Services connectivity,
type CScript %WinDir%\System32\SCRegEdit.WSF /AR 0 and press Enter.
Likewise, to disable the newer form of Terminal Services connectivity,
type CScript %WinDir%\System32\SCRegEdit.WSF /AR 1 and press Enter.
The second form of Terminal Services connectivity lets older versions of Windows make a connection to the local system. Except for the
amount of security provided, this form works just like the other form of
this feature. When working in secure mode, Terminal Services relies on
the Credential Security Support Provider (CredSSP) to provide security.
Read more about CredSSP at http://blogs.msdn.com/windowsvista
security/archive/2006/08/25/724271.aspx. You may also want to review
the group policy settings for this feature at https://msdn2.microsoft.com/
en-us/library/bb204773.aspx. To see this form of Terminal Services setting, type CScript %WinDir%\System32\SCRegEdit.WSF /CS /V and press
Enter. If you want to enable the older form of Terminal Services connectivity, type CScript %WinDir%\System32\SCRegEdit.WSF /CS 0 and press
Enter. Likewise, to disable the older form of Terminal Services connectivity, type CScript %WinDir%\System32\SCRegEdit.WSF /CS 1 and press Enter.
Configure the IP Security (IPSec) Monitor
You may need to provide remote management capability for the IPSec
feature of Windows. Use this script feature to modify the remote management capability as needed. To see the IPSec Monitor setting, type
CScript %WinDir%\System32\SCRegEdit.WSF /IM /V and press Enter. If
you want to allow IPSec monitoring, type CScript %WinDir%\System32\
SCRegEdit.WSF /IM 1 and press Enter. Likewise, to disallow IPSec
monitoring, type CScript %WinDir%\System32\SCRegEdit.WSF /CS 0
and press Enter.
NOTE The Internet Engineering Task Force (IETF) created
the Internet Protocol (IP) Security Protocol Working Group
to look at the problems of IP security, such as the inability to
encrypt data at the protocol level. It’s currently working on a
wide range of specifications that will ultimately result in more
secure IP transactions. For example, IPSec is used in a variety
of object-based group policy schemes. Windows currently
uses IPSec for network-level authentication, data integrity
checking, and encryption.
Use the SCRegEdit Script
361
The Domain Name System (DNS) service is one of the more important features of Windows because it helps set the addresses for each
node on the network. In fact, the services provided are standardized
across all operating systems as part of RFC 2782 (see http://www.faqs
.org/rfcs/rfc2782.html for details). You’ll normally use this script feature on domain controllers only. The DNS Service (SRV) records have
both a priority and a weight. The priority affects the LdapSrvPriority
registry setting (see http://www.microsoft.com/technet/prodtechnol/
windows2000serv/reskit/regentry/55945.mspx for details).
When two DNS servers have the same priority setting, Windows
relies on the weight setting to determine which server to use. You
set the priority using the /DP command line switch. To see the DNS
Service Priority and Weight setting, type CScript %WinDir%\System32\
SCRegEdit.WSF /DP /V and press Enter. To change the setting, type
CScript %WinDir%\System32\SCRegEdit.WSF /DP Value and press Enter,
where Value is a number between 0 and 65,535 that defines the server
priority. Microsoft recommends a value of 200.
Use the Command Line Reference
The SCRegEdit script also includes a command line reference for performing some common command line tasks. When you type CScript
%WinDir%\System32\SCRegEdit.WSF /CLI and press Enter, you’ll see a
display similar to the one shown in Figure 18.2.
Figure 18.2 : The /CLI command line switch is useful because it provides information
on performing common tasks.
Performing Maintenance
Manage the DNS Service Priority and Weight
Part VI
362
Chapter 18
3
Interacting with the Registry
The command line information tells you how to perform common
tasks using the current version of the server. Since Microsoft will likely
keep this file updated as it provides revisions, you should refer to this
information when it appears that an update has made an older configuration technique incomplete. Unfortunately, the information only tells you
how to perform the most basic tasks and not in any particular order.
Manage the Registry
The Reg utility makes it possible to perform registry edits from the command line. In fact, this one utility makes it possible to script just about
any registry editing requirement without much effort. To see the basic
list of tasks you can perform, type Reg /? and press Enter. You can
obtain specific information by adding an operation name. For example,
type Reg Query /? and press Enter to learn more about the Query operation. The following sections describe the Reg utility in more detail.
Understand the Registry Settings
Before you make registry changes from the command line, it’s important
to know about the data values you use to perform the task. Table 18.1
shows all of the common registry data types and their value type equivalents, and provides a description of how that value type is used.
Table 18.1: Common Registry Value Types
Data Type
Value Type
Description
String Value
REG_SZ
Contains a simple string value. Sometimes the
string looks like other kinds of data, but it’s
always in string format. Make sure you type
any string in the correct format. For example,
the individual numbers in a color tuple should
have a single space separating them.
Binary Value
REG_BINARY
Contains binary data that can include both
computer and human-readable numeric data.
You type the input as numbers. However, the
editor translates any numbers into humanreadable form when possible. For example,
type 34 and you’ll see the number 4 displayed
in the human-readable area.
Manage the Registry
363
Data Type
Value Type
Description
DWORD (32-bit)
Value
REG_DWORD
Contains a 32-bit numeric value.
QWORD (64-bit)
Value
REG_QWORD
Contains a 64-bit numeric value.
Multi-String Value
REG_MULTI_SZ
Contains multiple strings separated by a
carriage return/line feed combination. The
strings appear in a single line in the Registry
Editor value pane. Double-click the entry to
see the individual strings.
Expandable String
Value
REG_EXPAND_SZ
Contains a string that includes expansion
variables, such as %SYSTEMROOT%, that
translate into specific computer data such as
a directory location.
Custom Value
N/A
Custom values are uncommon, but you’ll see
them. Whenever you encounter a custom
value, refer to the vendor data to determine
how to set the value. In some cases, you’ll be
able to use an existing entry as a pattern for
setting your own value.
It’s also important to know about the abbreviations used for each of
the registry hives. The following list defines each of the abbreviations
used with the Reg utility:
NN
HKLM: HKEY_LOCAL_MACHINE
NN
HKCU: HKEY_CURRENT_USER
NN
HKCR: HKEY_CLASSES_ROOT
NN
HKU: HKEY_USERS
NN
HKCC: HKEY_CURRENT_CONFIG
Query a Registry Entry
The Query operation makes it possible to discover existing registry entries.
To perform a basic query, use the Reg Query Key command, where Key
is the registry key you want to find. For example, if you want to see the
current desktop colors, you type Reg Query “HKCU\Control Panel\Colors”
Performing Maintenance
Table 18.1: Common Registry Value Types (continued)
Part VI
364
Chapter 18
3
Interacting with the Registry
and press Enter. If you want to see a specific registry value, add the /V
ValueName command line switch, where ValueName is the name of the
value you want to see. For example, to see the ActiveTitle color, you
type Reg Query “HKCU\Control Panel\Colors” /V ActiveTitle and press
Enter. To see the default value, use the /VE command line switch instead.
Of course, you might not know what you need to find. For example,
you might not know where the ActiveTitle color is located in the registry. In this case, you use the Reg Query KeyRoot /F SearchTerm command, where KeyRoot is a key abbreviation and SearchTerm is the term
you want to find. In most cases, you also need to add the /S command
line switch to search the entire key hierarchy. Consequently, to find
ActiveTitle, you type Reg Query HKCU /F ActiveTitle /S and press
Enter. You can also add the /K command line switch to search within
keys only, the /D command line switch to search within data only, the /C
command line switch to perform case sensitive searches, and the /E command line switch to perform exact searches. It’s even possible to search
for specific data types by using the /T Type command line switch, where
Type is one of the following types: REG_SZ, REG_MULTI_SZ, REG_EXPAND_SZ,
REG_DWORD, REG_QWORD, REG_BINARY, or REG_NONE.
Add a Registry Entry
Registry entries are actually comprised of three parts. First, there’s the
key that holds the data. Second, there’s the data name—the name of
a data element within the key. Third, there’s the data value. In some
cases, all you really need is the key. In this case, you can use the Reg Add
KeyName command, where KeyName is the name of the key you want to
add. For example, to add a key named MyData to the HKEY_CURRENT_USER\
Software branch, you type Reg Add HKCU\Software\MyData and press
Enter.
Values come in two forms. You can add a default value or a named
value. To add a default value, use the Reg Add KeyName /D Value command, where Value is the value you want to add. For example, to add
a default value of Hello to the HKEY_CURRENT_USER\Software\MyData key,
you type Reg Add HKCU\Software\MyData /D Hello and press Enter.
Most values are named. When working with a named value, you use
the Reg Add KeyName /V Name /D Value command, where Name is the
name of the value. For example, to add a named value of TheData with a
value of Hello to the HKEY_CURRENT_USER\Software\MyData key, you type
Reg Add HKCU\Software\MyData /V TheData /D Hello and press Enter.
Manage the Registry
365
Delete a Registry Entry
The Reg utility provides quite a bit of flexibility for deleting registry
entries. You can delete an entire key, the default value, a single named
value, or all of the values. To delete an entire key, use the Reg Delete
KeyName command, where KeyName is the name of the key you want to
delete. For example, to delete the HKEY_CURRENT_USER\Software\MyData
key, you type Reg Delete HKCU\Software\MyData and press Enter. The
Reg utility asks whether you really want to delete the key. Type Y and
press Enter to complete the task. Of course, you can avoid answering the
question by using the /F command line switch. Simply type Reg Delete
HKCU\Software\MyData /F and press Enter to delete the key without any
additional input.
Although you won’t do it very often because most values are named,
it pays to know how to delete the default value. In this case, use the Reg
Delete KeyName /VE command. For example, to delete the default value
for the HKEY_CURRENT_USER\Software\MyData key, you type Reg Delete
HKCU\Software\MyData /VE and press Enter.
Named values require that you provide the value name using the Reg
Delete KeyName /V ValueName command, where ValueName is the name
of the value you want to delete. For example, if you want to delete the
TheData value in the HKEY_CURRENT_USER\Software\MyData key, you type
Reg Delete HKCU\Software\MyData /V TheData and press Enter.
Finally, you might want to simply clear all of the values for a particular
registry key. To perform this task, use the Reg Delete KeyName /VA command. For example, to delete all of the values for the HKEY_CURRENT_USER\
Software\MyData key, you type Reg Delete HKCU\Software\MyData /VA
and press Enter.
Performing Maintenance
All added values have a default type of REG_SZ. Of course, not all registry values are strings. In fact, registry values can include these types:
REG_SZ, REG_MULTI_SZ, REG_EXPAND_SZ, REG_DWORD, REG_QWORD, REG_BINARY,
and REG_NONE (the Reg utility doesn’t support custom types). To add a
named value of a specific type, you use the Reg Add KeyName /V Name
/T Type /D Value command, where Type is one of the type keywords.
For example, to add a DWORD value of 42 to a named value of TheData in
the HKEY_CURRENT_USER\Software\MyData key, you type Reg Add HKCU\
Software\MyData /V TheData /T REG_DWORD /D 42 and press Enter.
Part VI
366
Chapter 18
3
Interacting with the Registry
Copy a Registry Entry
Administrators sometimes use an existing registry key as the basis for
creating a new registry key. Copying the existing registry key saves
time when the two registry keys are nearly the same. The Reg utility
only allows you to copy keys—you can’t copy values. In most cases,
you want to copy the entire registry key hierarchy, so you include the /S
command line switch. To perform this task, use the Reg Copy SourceKey
TargetKey /S command, where SourceKey is the path of the existing key
and TargetKey is the path of the key you want to create. For example, to
copy the HKEY_CURRENT_USER\Software\MyData key to MyData2, you type
Reg Copy HKCU\Software\MyData HKCU\Software\MyData2 /S and press
Enter. Notice that you must provide the full path for both the source
and destination keys.
Compare Registry Entries
The registry can contain repeat entries. For example, two users might
rely on the same application. The application would generate the same
set of registry entries for each user. By comparing the registry entries,
you can see differences in the way the users configure their applications.
The Reg utility makes it possible to perform comparisons using the Reg
Compare Key1 Key2 command, where Key1 is the first key and Key2 is the
second key. For example, if you want to compare MyData with MyData2,
type Reg Compare HKCU\Software\MyData HKCU\Software\MyData2 and
press Enter (notice that you must provide the full path for both keys).
Use the /S command line switch if you also want to compare subkeys of
both keys.
The standard output of the comparison only tells you whether the
two entries compare. However, you sometimes require more information. A series of special command line switches tells Reg about the additional information you require as shown in the following list.
NN
/OA: Output all of differences and matches
NN
/OD: Output only differences
NN
/OS: Output only matches
NN
/ON: No output
You don’t have to compare entire keys. It’s possible to compare individual values. Use the /VE command line switch to compare the default
Manage the Registry
367
values of the keys you provide. For example, to compare the default
values of MyData and MyData2, you type Reg Compare HKCU\Software\
MyData HKCU\Software\MyData2 /VE and press Enter. To compare named
values, use the /V ValueName command line switch, where ValueName is
the name of the value you want to compare. For example, to compare
the TheData named value for each of the previous keys, you type Reg
Compare HKCU\Software\MyData HKCU\Software\MyData2 /V TheData and
press Enter.
The Reg utility makes it possible to create a backup of individual keys or
entire hives (but not individual values). To perform this task, use the Reg
Export KeyName Filename command, where KeyName is the name of a hive
or key that you want to export and Filename is a .REG file you want to use
to store the information. For example, to export the HKEY_CURRENT_USER\
Software\MyData key to MyDataBackup.REG, you type Reg Export HKCU\
Software\MyData MyDataBackup.REG and press Enter.
You can use the /Y command line switch to overwrite an existing .REG file without prompting. For example, to overwrite the
MyDataBackup.REG file containing the HKEY_CURRENT_USER\Software\
MyData key without prompting, you type Reg Export HKCU\Software\
MyData MyDataBackup.REG /Y and press Enter.
NOTE The Reg Save command syntax is precisely the same
as the Reg Export command. The difference is that the Reg
Save command produces a different file format than the
Reg Export command, so the outputs aren’t interchangeable.
However, the Reg Restore command syntax is different from the
Reg Import command. These two commands aren’t the same
and you should use the appropriate command in your batch files
or scripts. To make your batch files and scripts look more consistent, use the Reg Save and Reg Restore commands together and
the Reg Export and Reg Import commands together.
Import Registry Entries
You can also use the Reg utility to import .REG files using the Reg Import
Filename command, where Filename is the name of a .REG file. For example, to import MyDataBackup.REG, you type Reg Import MyDataBackup.REG
Performing Maintenance
Export Registry Entries
Part VI
368
Chapter 18
3
Interacting with the Registry
and press Enter. The one big difference between using Reg and RegEdit
is that the Reg utility never asks whether you’re sure that you want to
import the registry entries.
Restore Registry Entries
Importing registry entries implies placing the registry entries precisely
where you exported them. The HKEY_CURRENT_USER\Software\MyData
key doesn’t suddenly appear in another part of the registry when you
import it. The Restore operation can place a registry entry in a new
location using the Reg Restore RestoreLocation Filename command,
where RestoreLocation is the path to a hive or key that receives the
restored data and Filename is the name of a .REG or .HIV (hive) file.
For example, to restore MyDataBackup.REG to the HKEY_LOCAL_MACHINE\
Software\MyData key, you type Reg Restore HKLM\Software\MyData
MyDataBackup.REG and press Enter.
PART VII
Creating
Batch Files
n This Part
q
CHAPTER 19: Changing the Batch File Environment. . . . . . . . . . . . . . . . 371
CHAPTER 20: Working at the Command Prompt . . . . . . . . . . . . . . . . . . 391
Creating Batch Files
CHAPTER 21: Creating and Testing Batch Files . . . . . . . . . . . . . . . . . . . 399
Part VII
19
Changing the Batch File
Environment
In this chapter, you will learn to:
33Configure the Command Interpreter in the Registry
Use the CMD Switches (Pages 372–380)
n
(Page 375)
n
Use Command Extensions (Page 377)
33Use ANSI.SYS to Control the Environment (Page 382)
Modify Config.NT (Pages 380–387)
n
Set the Command Interpreter Location (Page 382)
n
Run Character Mode Applications Only (Page 38 3)
n
Display the Config.NT Commands (Page 383)
n
Control the Expanded Memory EMM Entry (Page 38 3)
n
Set the Number of Accessible Files (Page 38 4)
n
Control Extended Memory with HIMEM.SYS (Page 385)
33Set the Code Page Number with the CHCP Utility (Page 387)
Modify AutoExec.NT (Pages 387–389)
n
n
n
n
n
Add DPMI Support Using the DosX Utility (Page 388)
Enable Graphics Character Support with the GrafTabl
Utility (Page 389)
Save Memory Using the LH Command (Page 389)
Install the Network Redirector Using the ReDir
Utility (Page 389)
Creating Batch Files
n
Part VII
372
Chapter 19
3
Changing the Batch File Environment
B
atch files are an old technology—they appeared long before
Windows was even a glint in Bill Gates’s eyes. However, even as old
as batch files are, they’re still incredibly useful and represent one of the
simplest automation methods available. Like anything, a batch file can
become complex, but many batch files are a simple list of commands
that you need to run. In many cases, the author of a batch file has little
or no programming skills. Amazingly, Microsoft’s attempts to replace
the simple batch file haven’t met with much success yet simply because
batch files are so simple to use.
One of the more important aspects of using batch files is to ensure
they have the correct environment in which to operate. In many cases,
this simply means ensuring you use the Set command to provide the
correct environment variables (see the “Set the Environment” section of
Chapter 1 for details). However, you need to consider a number of other
environmental concerns when creating a batch file and this chapter discusses them.
Use the CMD Switches
The command interpreter, CMD.EXE, is the most important part of the
command line because it affects everything you do at the command
line. A small change in the command interpreter can make a significant
change in the way your applications run. The default command prompt
setup assumes that you don’t want to use any of the command line
switches and that you want to start in your home directory.
Whenever you want to start a new command processor, you type
CMD and press Enter. To close the command processor, type Exit and
press Enter.
It’s also possible to execute commands automatically when you start
the command processor. If you use the CMD /C String command, where
String contains one or more commands that you want to execute, the
command processor performs the task specified by String and then terminates the command interpreter session. Generally, you won’t get to
see any application output using this technique unless the application
provides graphical output or you use redirection to save the results in a
file. For example, if you type CMD /C “Dir *.* > Output.txt” and press
Enter, the system opens a new command processor, executes the Dir
command, and places the output in Output.txt. Verify that the command
created Output.txt by typing Dir Output.txt and pressing Enter. To see
Use the CMD Switches
373
the result, type Notepad Output.txt and press Enter. You’ll see the result
of the Dir*.* command as part of the content of Output.txt in Notepad.
Old Versus New Command Line
You might also remember a few convenience features from
the days of DOS that no longer appear as part of Windows. For
example, at one time you could create a setup menu by using
the [MENU] entry in Config.SYS. The Config.NT file doesn’t support this setup. The only alternative is to create multiple Config.
NT files and assign them to applications as needed. In short, even
though the command interpreter does many of the same things
that the DOS version does, this command interpreter is different
and you need to proceed with caution about any assumptions
you want to make.
Using the CMD /K String command performs the command specified by
String. The command window remains after execution ends so that you
can see the application results. For example, if you type CMD /K “Dir *.*”
and press Enter, you see the results of the Dir command on screen. To exit
the new command processor session, you must type Exit and press Enter.
NOTE When using either the /C or /K command line switches,
you can specify multiple commands by creating a single string
that contains all of the commands. Separate each command
using a double ampersand (&&). You must enclose the entire
string in double quotes. For example, “Dir *.DOC&&Dir *.TXT”
would perform two Dir commands. The first would search for
any file with a .DOC extension, while the second would search
for any file with a .TXT extension.
Creating Batch Files
Some batch files really are quite old and amazingly, they still
work in many cases. However, it’s dangerous to assume that a
batch file will continue to run no matter how old it is. If you used
the Disk Operating System (DOS) at some point, it’s important
to remember that the command line switches that Windows
supplies for the CMD.EXE command interpreter in no way match
what you used in the past. Microsoft does make some command
line switches available for compatibility purposes. For example,
the /X command line switch is the same as /E:ON, /Y is the same
as /E:OFF, and /R is the same as /C. The command interpreter
ignores all other old switches; you need to use the command
line switches described in this chapter instead.
Part VII
374
Chapter 19
3
Changing the Batch File Environment
There are many reasons to start a new command processor—most
of which revolve around creating a special environment. For example,
you might normally run batch files with echo on so that you can see the
commands as they execute. However, one command might not work
well with echo. In this case, you start a new command processor with
the /Q command line switch, which turns off echo, so that the single
command can execute properly.
Another reason to start a separate command processor is to enable
command extensions using the /E:On command line switch. The command extensions provide added functionality for these commands:
Assoc, Call, ChDir (CD), Color, Del (Erase), EndLocal, For, FType, GoTo,
If, MkDir (MD), PopD, Prompt, PushD, Set, SetLocal, Shift, and Start (also
includes changes to external command processes). The “Use Command
Extensions” section of the chapter tells you how the command extensions affect these commands.
Use the /F:On command line switch to enable file and directory name
completion characters. File and directory completion allow speed typing at the command line. For example, if you want to type Dir Temp,
using directory or file completion, you could type Dir T, and then press
Ctrl+D (for a directory) or Ctrl+F (for a directory or file). The command
interpreter automatically completes the directory or filename for you. If
you type in a partition string that doesn’t match any entries, the command interpreter beeps to signify that the entry is incorrect. When the
command interpreter sees multiple entries that could match the entry
you provide, it displays the first entry in the list. You cycle through the
entries by pressing Ctrl+D or Ctrl+F again. Use the Shift+Ctrl+D and
Shift+Ctrl+F control key combinations to move backward through the
list of choices. You can change the control characters that this feature
uses by changing the associated registry entry. You must enclose any file
or directory names that begin with special characters in quotes. These
characters include <space> & ( ) [ ] { } ^ = ; ! ’ + , ` ~.
In some cases, you even start another command processor for the
sake of the user interface. Use the /T:FG command line switch to set the
foreground (F) and background (G) colors. You must place the values
together, without any space between. The following list tells you which
colors you can use at the command prompt, along with their associated
hexadecimal color number:
NN
0: Black
NN
1: Blue
Use the CMD Switches
NN
2: Green
NN
3: Aqua
NN
4: Red
NN
5: Purple
NN
6: Yellow
NN
7: White
NN
8: Gray
NN
9: Light blue
NN
A: Light green
NN
B: Light aqua
NN
C: Light red
NN
D: Light purple
NN
E: Light yellow
NN
F: Bright white
375
Many of the command line behaviors depend on registry settings. The
following steps help you configure the registry to use the command
interpreter with greater efficiency:
1. Type RegEdit and press Enter. You see the Registry Editor.
2. Locate the settings found in the HKEY_CURRENT_USER\Software\
Microsoft\Command Processor key for the local user or the
HKEY_LOCAL_MACHINE\SOFTWARE\Microsoft\Command Processor
for everyone using the same machine. Figure 19.1 shows the
HKEY_LOCAL_MACHINE setting.
The command interpreter looks for these registry settings when you
don’t provide an appropriate command line switch. If you don’t see
the registry entry, then the command interpreter uses a default setting. Local user settings always override the machine settings, and
command line switches always override the registry settings. Here
are the registry settings and their meanings.
Creating Batch Files
Configure the Command Interpreter in the Registry
Part VII
376
Chapter 19
3
Changing the Batch File Environment
Figure 19.1: The command interpreter receives many settings from the registry.
NOTE If the Command Processor key lacks the appropriate
value, right-click the key and choose one of the value entries
from the New menu. The Registry Editor will create a new value
of the specified type for you. Type the value name and press
Enter. Double-click the new value and type the value data in the
editor dialog box. Click OK to complete the action.
3. (Optional) Double-click the AutoRun value and type the command
you want to run automatically each time the command processor
runs. Click OK to complete the entry.
AutoRun defines the command that you want the command inter-
preter to run every time you open a command prompt. This value
is of type REG_SZ or REG_EXPAND_SZ. Simply provide the executable
name along with any command line switches that the executable
may require. As with the string for the /C and /K command line
switches, you can separate multiple commands using a double
ampersand (&&).
4. (Optional) Double-click the EnableExtensions value and type a
value of 1 to enable extensions or 0 to disable extensions. Click
OK to complete the entry.
EnableExtensions specifies whether the command interpreter has
extensions enabled. See the /E:ON command line switch description
Use the CMD Switches
377
for a list of the applications that this entry affects. This value is of
type REG_DWORD.
5. (Optional) Double-click the CompletionChar value and type a hexa-
decimal value for the completion character. Click OK to complete
the entry.
CompletionChar defines the file completion character (see the
/F:ON command line switch for details). The default character
is Ctrl+F (0x06). Use a value of a space (0x20) to disable this
feature since the space isn’t a valid control character. This value
is of type REG_DWORD.
6. (Optional) Double-click the PathCompletionChar value and type a
hexadecimal value for the path completion character. Click OK to
complete the entry.
PathCompletionChar defines the directory completion character
(see the /F:ON command line switch for details). The default character is Ctrl+D (0x04). Use a value of a space (0x20) to disable
this feature since the space isn’t a valid control character. This
value is of type REG_DWORD.
enable delayed expansion or 0 to disable delayed expansion. Click
OK to complete the entry.
DelayedExpansion specifies whether the command interpreter uses
delayed variable expansion. See the /V:ON command line switch description for additional information. This value is of type REG_DWORD.
8. Close the Registry Editor.
9. Close any open copies of the command interpreter and open a new
command interpreter to see the results of changes that you’ve made.
Use Command Extensions
Command extensions (see the “Use the CMD Switches” section of the
chapter for a list of command line switches to use to enable features
such as command extensions) are additional processing that the command interpreter provides for certain commands. The effects vary by
command, but generally the commands receive additional functionality.
In some cases, such as the del (erase) command, the extensions simply
Creating Batch Files
7. (Optional) Double-click the DelayedExpansion value and type 1 to
Part VII
378
Chapter 19
3
Changing the Batch File Environment
change the way the command works. The following list describes the
command extension changes to each of the affected commands:
NN
NN
NN
Assoc: Microsoft hasn’t documented how command extensions
change the Assoc command. Even though Microsoft lists it as one
of the commands that changes with command extensions, there
isn’t any obvious difference at the command line.
Call: Accepts a label as the target for a call (rather than a filename
as normal). This feature means that you can transfer control from
one portion of a batch file to another. Using extensions means that
you can call the label using call :Label Arguments. Notice that you
must precede the label with a colon.
Chdir (CD): Displays the directory names precisely as they appear
on your hard drive. For example, if a directory name has a space,
you’ll see the space when you change directories. Capitalization is
also the same. A directory name that appears with an initial capital
letter in Windows Explorer also appears that way at the command
prompt. In addition, when you turn off the command extensions,
the command doesn’t treat spaces as delimiters. Consequently, you
don’t need to surround directory names with spaces or with quotes
in order to obtain the correct results from this command.
NN
NN
Color: Microsoft hasn’t documented how command extensions
change the Color command. Even though Microsoft lists it as one
of the commands that changes with command extensions, there
isn’t any obvious difference at the command line.
Del (Erase): Changes the way the /S command line switch works.
The command shows you just the files that it deletes, rather than
showing you all of the files, including those that it couldn’t find.
NN
NN
EndLocal: Restores the command extension settings to their state
before calling the SetLocal command. Normally, the SetLocal
command doesn’t save the state of the command extensions.
For: Implements an expanded number of For command options.
When working with directories, you process directories, rather
than a list of files within a directory, using this call: for /D {%%
| %}Variable in (Set) do Command [CommandLineOptions]. You
can also perform recursive processing of a directory tree. Using
Use the CMD Switches
379
this feature means that a single command can process an entire
tree, rather than using individual commands to process a branch.
Use the for /R [[Drive:]Path] {%% | %}Variable in (Set) do
Command [CommandLineOptions] command line syntax to perform
recursion. It’s also possible to iterate through a range of values,
similar to the functionality of the For loop used in higher level
languages, using this command syntax: for /L {%% | %}Variable
in (Start#,Step#,End#) do Command [CommandLineOptions].
Variable substitution is another useful feature that using command extensions provide. Finally, you can perform complex file
parsing and iteration with the command extension in place.
NN
FType: Microsoft hasn’t documented how command extensions
change the FType command. Even though Microsoft lists it as one
of the commands that changes with command extensions, there
isn’t any obvious difference at the command line.
NN
Goto: Defines a special label called :EOF. If you define a Goto command in a batch file with the :EOF label, the system transfers con-
trol to the end of the current batch file and exits. You don’t need to
define the label in the batch file to make this feature work.
If: Defines additional comparison syntax that makes the If
command considerably more flexible. See the “Employ the
If Command” section of Chapter 21 for details.
NN
MkDir (MD): Lets you create intermediate directories with a single
command. For example, you could define an entire subdirectory
structure using MD MyDir/MySub1/MySub2. If MyDir doesn’t exist, the
system creates it first, then MySub1, and, finally, MySub2. Normally,
you’d need to create each directory separately and use the CD command to move to each lower level to create the next subdirectory.
NN
PopD: Removes any drive letter assignment made by the PushD
command.
NN
Prompt: Supports additional prompt characters. The $+ character
adds one or more plus signs (+) to the command prompt for every
level of the PushD command. Using this feature lets you know how
many levels of redirection the PushD command has saved on the
stack and how many more times you can use the PopD command to
extract them. The $m character adds the remote name associated
Creating Batch Files
NN
Part VII
380
Chapter 19
3
Changing the Batch File Environment
with a drive to the command prompt. The command prompt
doesn’t display any additional information for local drives.
NN
NN
NN
PushD: Allows you to push network paths onto the stack as well as
local drive letters and path information.
Set: Displays all currently defined environment variables when you
use the Set command alone. Displays the specified environment
variable when you supply an environment variable name, but not an
associated value. If you supply only a partial variable name, the Set
command displays all of the variables that could match that name.
SetLocal: Allows the SetLocal command to enable or disable com-
mand extensions as needed to meet specific language requirements.
NN
NN
Shift: Supports the /N command line option, which lets the Shift
command shift variables starting with the nth variable. For example, if you use Shift /2 at the command line, then variables %0 and
%1 are unaffected by the shift, but variables %3 through %9 receive
new variable input.
Start: Microsoft hasn’t documented how command extensions
change the Start command. Even though Microsoft lists it as one
of the commands that changes with command extensions, there
isn’t any obvious difference at the command line.
Modify Config.NT
The Config.NT file contains a number of entries that affect how the system works at the command prompt. At one time, the configuration file
contained a wealth of device drivers and statements that defined how
the command prompt used files and buffers. However, the Config.NT
file rarely contains device drivers and these driver entries are normally
defined by third-party software for you. Even so, Config.NT still contains
settings that modify how the command interpreter works and therefore
has an effect over your session. The following sections describe common
additions you can make to the Config.NT file.
Modify Config.NT
381
Config.NT and AutoExec.NT Considerations
More than a few people are complaining that Windows 7 lacks
the Config.NT and AutoExec.NT files. Microsoft has been moving away from supporting these two files and you may find that
they’re completely missing in your copy of Windows. The main
reason for this change is to improve Windows security by eliminating the need to write files to the %WinDir%\System32 directory.
However, you can add the files for any application that needs
them to your %WinDir%\System32 directory. Some applications will
display a dialog box saying the two files are missing, while others
will simply fail to start (see the vendor documentation for clues
as to whether the missing files are the source of your problem).
Windows 7 may not actually process the commands in these
files, but the commands will be there for applications that require
them. If your application absolutely requires full Config.NT and
AutoExec.NT file support, try using Windows XP Mode (download
the required support from http://www.microsoft.com/windows/
virtual-pc/download.aspx and learn more about Windows XP
Mode at http://www.microsoft.com/windows/virtual-pc/).
One version of Windows that requires special handling when it
comes to Config.NT is Windows Server 2008 Server Core. Given
that Server Core lacks the functionality required for an application server (which means providing complex server-based
applications such as a database-based application), you may
never see a driver entry in Config.NT. However, because ANSI.
SYS affects the command line directly, it’s one of the few device
driver entries that you could see when working with Server Core.
Creating Batch Files
Some people may remember Config.SYS, the file that DOS uses
to perform the same configuration that Windows performs
with Config.NT. In fact, some people try to move Config.SYS to
the Windows environment. Fortunately, the 32-bit version of
Windows accepts many older DOS commands even when it
doesn’t use them. For example, the FastOpen utility provides a
caching feature in DOS to make directory searches faster. Even
though Windows provides this file too, it doesn’t actually use
the functionality and FastOpen doesn’t actually perform any task.
Once you move to the 64-bit versions of Windows, much of this
functionality is missing completely. For example, you can’t create
a Config.NT file that contains a reference to the FastOpen utility.
Part VII
382
Chapter 19
3
Changing the Batch File Environment
Use ANSI.SYS to Control the Environment
The ANSI.SYS device driver provides added functionality for applications
at the command prompt. By using special escape codes, you can create a
character-based user interface for your batch files. You can find a good
listing of ANSI escape codes at http://www.evergreen.edu/biophysics/technotes/program/ansi_esc.htm and on the Microsoft Web site at
http://www.microsoft.com/technet/archive/msdos/comm1.mspx?mfr=true.
To add ANSI.SYS to Config.NT, use the Device=Path/ANSI.SYS command,
where Path is the full path to ANSI.SYS on the host system.
If you’re working with systems for those with special needs, use the /R
command line switch to change the line scrolling functionality to improve
readability when working with screen reader programs. A screen reader
program interprets the screen content and presents it using some other
form of output. Normally, screen reader applications say what’s on screen
to help those with special sight needs understand the content.
Set the Command Interpreter Location
Some command line applications require a large amount of what is
termed as conventional memory—the memory below the 640 KB
boundary that you see when you type Mem and press Enter (the Mem utility
isn’t available on 64-bit systems). This setting affects only 32-bit systems
and normally you don’t need it when working with modern systems and
newer applications. None of the utilities discussed in this book require
this setting. Check the conventional memory requirements for your utility before you change this setting.
To load part of the command processor into the High Memory
Area (HMA) use the DOS=HIGH command. The HMA is a memory area
between the 640 KB boundary and the 1 MB limit normally used by the
command line. The default setting is DOS=LOW (which means that the command processor loads entirely in the 640 KB area). Generally, you want
to load the command environment into high memory to preserve more
conventional memory for applications.
Use the DOS=HIGH, UMB or DOS=LOW, UMB command to tell the command
environment that it should manage the Upper Memory Blocks (UMBs) created by a UMB provider. Windows provides a UMB provider as a default.
DOS users used to rely on a special program named EMM386.EXE to perform
this task. The UMB argument tells the command environment to manage
the UMBs, which frees additional memory for loading applications in areas
other than conventional memory. The default setting is DOS=LOW, NOUMB.
Modify Config.NT
383
Run Character Mode Applications Only
You can execute any kind of application you want from the command
prompt. If you want to start Notepad, simply type Notepad and press
Enter. However, mixing Windows and older DOS applications can
sometimes cause problems. Developers wrote DOS applications with the
expectation that these applications controlled the entire machine, which
can cause myriad problems with Windows applications. If you have
one of these older applications (and they’re quite rare), you can help the
DOS application execute properly by adding the NTCMDPROMPT entry to
Config.NT. This entry tells the operating system to disallow Windows
application execution at the command prompt, which means that the
DOS application continues to feel that it owns the machine. Of course,
you can start your Windows applications from another command
prompt or by using any of the usual techniques, such as the Start menu.
Normally, you won’t see any information about the commands that
execute before the command window opens; all you see is a command
prompt. Adding an ECHOCONFIG to the Config.NT file displays each of the
commands as they execute. Using this feature can help you diagnose
problems with the Config.NT file contents.
Control the Expanded Memory EMM Entry
Older applications, especially character mode (DOS) games, rely on
the Expanded Memory Specification (EMS) memory to overcome command prompt memory limitations. It’s important to remember that the
command line effectively limits the amount of memory available to
DOS applications to 640 KB minus any memory that the operating system uses. Normally, you set the amount of this memory as part of the
application’s Program Information File (PIF). However, the PIF doesn’t
let you control the Expanded Memory Manager (EMM), which is the
application that actually makes the memory accessible. The EMM entry
lets you change how the EMM works. The following steps help you configure EMM support:
1. Type EMM= to start the EMM entry.
2. (Optional) Type A=AltRegSets, where AltRegSets is a number
between 1 and 255, to define how many alternative mapping
Creating Batch Files
Display the Config.NT Commands
Part VII
384
Chapter 19
3
Changing the Batch File Environment
register sets the EMM has available for mapping memory between
extended memory and conventional memory.
The default setting of 8 works fine in most cases. Check your application documentation for additional requirements.
3. (Optional) Type B=BaseSegment, where BaseSegment is a hexadeci-
mal address that defines the base segment, the location where the
EMM places code within the DOS conventional memory area from
extended memory as needed.
Generally, any setting you choose works fine. However, some
applications use specific segments for their use. Using the same
memory segment for two purposes causes memory corruption and
can cause the application to fail. The application documentation
should tell you about any requirements. You can set the base segment to any hexadecimal value between 0x1000 and 0x4000. The
default setting is 0x4000.
4. (Optional) Type RAM to specify that the EMM should only use 64
KB of address space from the UMB area for the EMM page.
Normally, the EMM uses the entire UMB for the EMM page to
improve EMM performance. However, your application may
require more conventional memory than this practice allows. Using the RAM option reduces the EMM page size, which makes it
easier for the command environment to load more applications in
upper memory—freeing conventional memory for application use.
Set the Number of Accessible Files
The Files setting may not seem very important, but every file handle
you provide to the command environment uses conventional memory.
Remember that conventional memory is already quite small and many
older applications barely load in the space provided. The default
Files=40 setting usually provides a good compromise. This setting means
that the command environment can open 40 files, which is more than
sufficient for most older applications. You can increase the number to
as many as 255 when your application complains that it’s out of file
handles or decrease the number to as little as 8 when the application
complains about a lack of memory.
Modify Config.NT
385
Control Extended Memory with HIMEM.SYS
The HIMEM.SYS driver provides extended memory support at the command prompt. (You won’t find this driver supplied with 64-bit versions
of Windows and the old driver won’t work in these newer operating systems.) The eXtended Memory Specification (XMS) is a method that applications use to overcome the DOS memory limitations. You set the amount
of available XMS using the PIF for the application. However, you can
further refine XMS functionality by using the following procedure:
1. Type device=Path/HIMEM.SYS, where Path is the location of HIMEM.
SYS on the host system.
2. (Optional) Type /HMAMIN=m, where m specifies how many KB of
Some applications ask for small pieces of the HMA, which fragments an already small memory area and makes it unavailable for
other applications. It becomes a question of efficient memory use.
An application that can use a larger piece of the HMA will likely
free more conventional memory for use by other applications. You
can specify any value between 0 and 63. The default value is 0.
Setting this command line switch to 0 or omitting it from the command line lets HIMEM.SYS allocate the HMA memory to the first
application that requests it, regardless of how much HMA memory
that application will use.
3. (Optional) Type /INT15=xxxx, where xxxx specifies the amount of
extended memory in kilobytes that HIMEM.SYS should reserve for
the Interrupt 15h interface.
You may wonder what the Interrupt 15h interface is all about; it’s
the method that applications use to interact with XMS. The only
time you need to use this command line switch is if you have an
older DOS application, very likely a game or graphics application,
which relies on XMS memory. The application will very likely
display a nebulous error message that specifically mentions the
Interrupt 15h interface. Make sure you set the amount of XMS
memory to 64 KB larger than the amount required by the application. You can specify any value from 64 KB to 65,535 KB. However, you can’t specify more memory than your system has installed.
Creating Batch Files
HMA memory an application must request in order for HIMEM.SYS
to fulfill the request.
Part VII
386
Chapter 19
3
Changing the Batch File Environment
When you specify a value less than 64, HIMEM.SYS sets the value to
0. The default value is 0.
4. (Optional) Type /NUMHANDLES=n, where n specifies the maximum
number of Extended Memory Block (EMB) handles that the system can use simultaneously.
Every time an application requests more memory, it needs a handle
to access that memory. Generally, you don’t need to provide this
command line switch unless you have an older graphics-intensive
application. You can specify a value from 1 to 128. The default
setting is 32, which is more than enough for most applications.
Changing the number of handles uses more memory for housekeeping chores, so you’ll want to use this command line switch
with care.
5. (Optional) Type /TESTMEM:ON to perform a memory check when
you open the command prompt.
Most people don’t actually know whether the memory they’re
using is good, so checking it from time to time is a way to reduce
unwelcome surprises. However, running the test takes time. You’ll
see a noticeable delay in displaying the command prompt when
you use this command line switch. In most cases, it’s far better
to test your memory using a third-party diagnostic program that
works outside of Windows’s influence. Otherwise, you can’t be
sure that you’re testing all of the memory and won’t know which
surprises Windows has hidden from view. The HIMEM.SYS test is
more thorough than the test that runs when you start your computer, so you can use it when you don’t have any other means of
testing available.
6. Type /VERBOSE to display additional status and error messages
while HIMEM.SYS is loading.
The system normally doesn’t display any messages unless it
encounters a problem loading or initializing HIMEM.SYS. Adding
this command line switch can point out potential problems in your
system setup and aid in diagnosing application problems that you
wouldn’t normally detect. You can abbreviate this command line
switch as /V. Unfortunately, despite the documentation for HIMEM.
Modify AutoExec.NT
387
SYS online, you can’t display the verbose messages by pressing the
Alt key as the system loads HIMEM.SYS into memory; you must use
the /VERBOSE command line switch to see the extended messages.
Modify AutoExec.NT
Set the Code Page Number with the CHCP Utility
A code page defines language support at the command prompt. In the
days of DOS, you needed to provide a code page to obtain proper language support at the command prompt, but Windows doesn’t usually
require you to set a code page. You might need to set a code page for
older character-mode applications. Only the OEM font you installed
as part of Windows displays properly when you use a raster font in a
windowed command prompt. However, you can use any of the supported code pages in full screen mode or with a TrueType font. To
add code page support, use the CHCP nnn command, where nnn defines
the code page to use. The standard code page numbers appear in
Table 19.1. Code pages 874 through 1258 are both OEM and ANSI
implementations that are only available in Windows. You can install
additional code pages as needed. The Web site at http://www.i18nguy
.com/unicode/codepages.html#msftdos shows how these code pages appear.
Creating Batch Files
Although Config.NT offers some interesting low-level methods of changing the command line environment, the AutoExec.NT file provides far
more opportunities. Any application that you can access from the
command line is also a candidate for inclusion in the AutoExec.NT file.
Adding applications that you always use can set up the command line
from the outset, so you see what you need without entering any commands at all. You can also program the AutoExec.NT file as you would
any other batch file.
The sections that follow describe some utilities that you’ll use most
often from within the AutoExec.NT file. These utilities tend to configure the command environment, in some way, to make your computing
experience better. However, don’t limit yourself to these selections—any
command or utility described in the book is a candidate for inclusion.
Part VII
388
Chapter 19
3
Changing the Batch File Environment
Table 19.1: Standard OEM and OEM/ANSI Code Pages
Code Page
Country or Language
437
United States
850
Multilingual (Latin I)
852
Slavic (Latin II)
855
Cyrillic (Russian)
857
Turkish
860
Portuguese
861
Icelandic
863
Canadian-French
865
Nordic
866
Russian
869
Modern Greek
874
Thai
932
Japanese Shift-JIS
936
Simplified Chinese GBK
949
Korean
950
Traditional Chinese Big5
1258
Vietnam
Add DPMI Support Using the DosX Utility
The DOS Protected Mode Interface (DPMI) is one method for a DOS
application to access more than the 640 KB that DOS (the command
line) typically allows. In addition, this interface provides protected
memory access, so the DOS application doesn’t interfere with Windows
operation. You can read about DPMI at http://whatis.techtarget.com/
Modify AutoExec.NT
389
definition/0,,sid9_gci213913,00.html. To use this interface, an applica-
tion developer needs to provide special support in the application; usually
as part of a third-party add-on library. All you need to know is whether
the application (typically a game) supports DPMI to use this feature. To
include DPMI support, add the DOSX command to AutoExec.NT.
Enable Graphics Character Support with the
GrafTabl Utility
Save Memory Using the LH Command
The Load High (LH) command attempts to load a utility into high memory, instead of using application memory. Loading the utility high saves
memory that memory-hungry applications can use to load. Generally,
you should try to load high all of the utilities that you can, including
DosX and ReDir. Windows 64-bit editions don’t support this command.
To load a command high, type LH Command, where Command is the command you want to load. For example, if you want to load DosX high, you
add LH DosX to AutoExec.NT.
Install the Network Redirector Using the ReDir Utility
Use this utility to load the VDM Virtual Device Driver (VDD) redirector. The redirector provides virtual device access from the command
prompt. Essentially, it provides network access. To use this command,
add the ReDir command to AutoExec.NT.
Creating Batch Files
Normally, the system displays any extended characters your application
needs to display as plain text. In some cases, this means the extended
characters won’t display correctly because your system may lack the capability required to display the extended characters properly. The GrafTabl
utility helps Windows display extended characters as graphics, which
means they always display correctly as long as you have the proper code
page support loaded. The GrafTabl utility only affects extended character
display; you need to use the Mode or CHCP utilities to change the console
input. To include this support, add the GrafTabl xxxx command, where
xxxx is a code page number (see Table 19.1 for examples), to AutoExec.NT.
To see the current GrafTabl status, type GrafTabl /Status and press Enter.
Part VII
20
Working at the
Command Prompt
In this chapter, you will learn to:
33
33Display Usernames (Page 393)
Redirect Command Line Output to the
Clipboard (Page 392)
Manage Usernames and Passwords (Pages 393–395)
n
n
Create Users (Page 39 4)
n
Delete Users (Page 39 4)
33
33
33
33
Configure the System Date (Page 396)
Configure the System Time (Pages 396–397)
Change the Command Window Title (Pages 397–398)
Creating Batch Files
Change Screen Colors (Pages 395–396)
Part VII
392
Chapter 20
3
Working at the Command Prompt
C
hapter 19 discusses ways in which you can make the command line
more useful from outside the command line—through the registry,
Config.NT, AutoExec.NT, or other means. You can also type commands
at the command line to improve your efficiency at certain tasks, which is
the topic of this chapter. For example, the simple act of giving your command line a useful title can make it easier to select the correct command
line from a number of command line entries on the taskbar. Changing
the screen colors can make text easier to see. You can also redirect the
clipboard to make it more useful. The following sections describe these,
and other, techniques you can use to make working at the command line
easier.
Redirect Command Line Output
to the Clipboard
Anyone who’s used redirection knows the benefits of sending output
data to another location, such as a file, or getting input from another
location, such as the COM port. The Clip utility lets you perform
redirection using the Windows Clipboard. You use redirection or the
pipe command as you normally do. For example, the Dir | Clip command sends the output for the directory command to the clipboard.
Fortunately, you don’t have to do anything special to use this command—simply type Clip as part of a pipe.
You don’t need to supply any command line switches when using
this command. It works much like the More command. For example,
if you want to place the output of the Dir command on the clipboard,
you would type Dir | Clip and press Enter. At this point, you can type
Notepad and press Enter to start the Notepad utility. Select Edit ➢ Paste
and you’ll see the output of the Dir command in Notepad, where you
can edit the information to suit your needs.
It’s also possible to use Clip with redirection. For example, you might
want to place the content of a file on the clipboard. Let’s say the name
of the file is MyDir.TXT. In this case, you type Clip < MyDir.TXT and press
Enter. The content of MyDir.TXT will appear on the clipboard where you
can paste it into a Windows application.
Manage Usernames and Passwords
393
Manage Usernames and Passwords
The CmdKey utility helps you manage username and passwords. Using
this utility, you can display, create, and delete credentials as needed.
However, this utility only works with the current user. In other words,
the credentials you manage are for the current user, not for another user
on the same system. To work with other users, you must first log on as
that user. Consequently, this command works well with logon batch files
that perform tasks on the user’s behalf, but not necessarily as a good
tool for administering users at the command line.
A system can have two kinds of passwords managed by CmdKey. The
first is generic passwords that you can use anywhere. For example, you
might create a username and password to access a remote system using
a Virtual Private Network (VPN). The second is domain passwords that
you use to access a domain server. These password types appear in the
Type field output when you list credentials for your system. The following sections describe tasks you can perform using the CmdKey utility.
The /List command line switch lets you list all of the credentials associated with the current account. To display all of the credentials for the
current user, type CmdKey /List and press Enter. Figure 20.1 shows typical output from this command (the output on your system will reflect
your credentials).
Figure 20.1: The /List command line switch shows the credentials stored for
the current user.
Creating Batch Files
Display Usernames
Part VII
394
Chapter 20
3
Working at the Command Prompt
If you prefer to see the credentials for a specific target, use the CmdKey /
List:TargetName command, where TargetName is the name of a specific
target (such as a client machine or server). Using Figure 20.1 as a source,
if you wanted to see the credentials for Aux, you’d type CmdKey /List:Aux
and press Enter.
Create Users
The CmdKey utility automatically adds credentials as you supply them
when accessing another system. However, you might want to add a
credential before you need to use it. In this case, you use the CmdKey /
Add:TargetName /User:Username /Pass:Password command, where
TargetName is the name of the system you want to access, Username is the
account you want to use on the remote system, and Password is the password for that system. The /Pass command line switch is optional, but
if you don’t supply it, Windows will still need to ask for the password
before you can access the remote system. For example, if you want to
add a machine named MyServer for an account named Stan with a password of MyPassword, you type CmdKey /Add:MyServer /Username:Stan /
Pass:MyPassword and press Enter.
CmdKey also supports smartcards. In this case, you use the CmdKey /
Add:TargetName /Smartcard command. The CmdKey utility will obtain the
required credentials from the smartcard and store them for you.
If you want to create generic credentials instead of domain credentials, you use the /Generic command line switch in place of the /Add
command line switch. The technique is precisely the same and you can
still use a smartcard to add the credentials if desired.
Delete Users
At some point, you might have credentials that you really don’t need
on your system. Removing unneeded credentials helps keep things fast
because Windows doesn’t have to search through unneeded credentials each time another system asks for verification, which happens far
more often than you might think. In addition, removing these credentials closes a potential security hole because unused accounts are often
used by outsiders to gain access to your network. Use the CmdKey /
Delete:TargetName command, where TargetName is the machine name of
the credential you want to delete, to remove old credentials. For example, if you previously created a credential for a system named Aux, you’d
type CmdKey /Delete:Aux to remove the credential.
Change Screen Colors
395
Credentials for Remote Access Server (RAS) require special handling.
In this case, you type CmdKey /Delete /RAS and press Enter to delete the
credential.
Color is an important issue for most people. It’s not necessarily a
touchy-feely issue (although that’s part of it), but a matter of being able
to see content (legibility and accessibility). The light gray on black combination that the command line sports by default doesn’t necessarily
work for many people, especially if you have trouble seeing darker color
combinations, so a change in color can make you a lot more efficient.
The Color command changes the foreground (text) and background colors of the command window.
To change the command line color, use the Color FG command,
where F is the foreground color and G is the background color. You
must place the values together, without any space between. For example,
to change the foreground color to black and the background color to
white, you type Color 0F and press Enter. If you use the Color command
without specifying color values, the command changes the colors to the
default values used when you opened the command window. The following list tells you which colors you can use at the command prompt,
along with their associated color number:
NN
0: Black
NN
1: Blue
NN
2: Green
NN
3: Aqua
NN
4: Red
NN
5: Purple
NN
6: Yellow
NN
7: White
NN
8: Gray
NN
9: Light blue
NN
A: Light green
NN
B: Light aqua
Creating Batch Files
Change Screen Colors
Part VII
396
Chapter 20
3
Working at the Command Prompt
NN
C: Light red
NN
D: Light purple
NN
E: Light yellow
NN
F: Bright white
Configure the System Date
The Date command displays or sets the system date. To see the current
date, type Date /T and press Enter. You can use redirection to place
the date in a file and then use the file within scripts and batch files as
needed. Using the /T command line switch lets you obtain the date without Windows prompting you for a new date.
NOTE The output of the Time and Date commands appears
unaffected by the settings you use to display time and date within
Windows. Consequently, you always see the date in a MM/DD/
YYYY format and the time in a 12-hour HH:MM AM/PM format.
Normally, you don’t need to set the system date at the command line
because the system date automatically reflects the hardware clock of
the host system. However, there are rare situations when you’re working with a command that requires a date change or the date is incorrect
during a repair. During these times, you can manually set the date so
that it’s correct. To set the date, use the Date NewDate command, where
NewDate is the new date in MM/DD/YYYY format. For example, to set
the current date to 7 June 2010, type Date 06/07/2010 and press Enter.
Configure the System Time
The Time command displays or sets the system time. To see the current
time, type Time /T and press Enter. You can use redirection to place
the time in a file and then use the file within scripts and batch files as
needed. Using the /T command line switch lets you obtain the time without Windows prompting you for a new time.
Change the Command Window Title
397
Normally, you don’t need to set the system time at the command
line because the system time automatically reflects the hardware clock
of the host system. However, there are rare situations when you’re
working with a command that requires a time change or the time
is incorrect during a repair. Time is especially critical when working with security because Kerberos has strict time constraints for the
difference in time between client and server systems. During these
times, you can manually set the time so that it’s correct. To set the
time, use the Time NewTime command, where NewTime is the new time
in HH:MM:SS.SS AM/PM format. Setting the seconds and partial seconds is optional. For example, to set the current time to 12:01 p.m.,
type Time 12:01 PM and press Enter.
NOTE You can use 24-hour time when setting the time.
For example, Time 2:00 PM and Time 14:00 are both the same
command.
The Title command makes it easy to change the title of any command
prompt window you create. The title that a command window displays
might not seem important at first, but it can be important for two reasons:
1. If you have multiple command windows open, using a descriptive
title can make it easier to locate the correct command window on
the Windows taskbar.
2. It’s important to remember that Windows associates settings
changes you make with the command window title.
Changing the title affects how Windows stores the settings changes
you make. The Title command can change the title of a command window. To change the title, use the Title “New Title“ command, where
New Title is a string that describes the new window. For example, to
change the title to My Command Window, you type Title “My Command Window”
and press Enter. Notice that you must enclose the title in double quotes.
Creating Batch Files
Change the Command Window Title
Part VII
398
Chapter 20
3
Working at the Command Prompt
NOTE You may find that you can type Title My Command
Window and press Enter to change the command prompt title on
your machine. Newer versions of the Title command are smart
enough to know that all of the words following the command
are part of the new title. However, typing the command without
double quotes can lead to problematic habits when working with
other commands and utilities. Even though some commands will
work on some systems without the double quotes, it’s always
best to use the double quotes when you have content with
spaces in it to ensure the command interpreter knows that the
content should be treated as a single entity, rather than multiple
entities. Otherwise, you could end up damaging your system
when the command or utility treats your unquoted entries as
individual elements.
21
Creating and Testing Batch Files
In this chapter, you will learn to:
33Employ the Call Command (Page 401)
Use Batch File Commands (Pages 400–420 )
n
Employ the Choice Command (Page 403)
n
Employ the Echo Command (Page 406)
n
Employ the Exit Command (Page 406)
n
Employ the ForFiles Utility (Page 407)
n
Employ the For Command (Page 409)
n
Employ the GoTo Command (Page 414)
n
Employ the If Command (Page 414)
n
Employ the Pause Command (Page 418)
n
Employ the Prompt Command (Page 418)
n
Employ the Rem Command (Page 419)
n
Employ the TimeOut Utility (Page 420)
33Add Debug Information to Batch Files (Page 421)
Test Batch Files (Pages 420–430 )
n
n
Identify Batch Files and Their Actions (Page 425)
n
Use a Centralized Data Store (Page 428)
33
Store and Retrieve Directories with the PushD
and PopD Commands (Pages 430–431 )
Creating Batch Files
n
Part VII
400
Chapter 21
3
Creating and Testing Batch Files
B
atch files have been around since the days of DOS. They’re reliable,
easy to write, exceptionally easy to understand for the most part,
and there’s a large base of batch file code you can download from the
Internet. For these reasons, and many more, you really need to know
how to write batch files—at least, simple batch files. Automating tasks
using batch files makes you far more efficient and frees time that you
need to perform tasks that you really must perform manually. This
chapter can’t provide you with every piece of information about writing batch files. In fact, you can easily find a dozen books whose whole
purpose is to tell you how to write batch files. The purpose of this
chapter is to introduce you to the batch file commands and demonstrate some simple tasks you can perform using them.
Use Batch File Commands
Batch files are a type of simple programming that can help you store
a series of commands that you want to execute more than once. The
batch file normally appears within a file with a .BAT extension. In most
cases, you won’t need to perform any programming to create a batch
file; simply create a file that contains the commands you want to execute one after the other.
NOTE Windows doesn’t support the Break command found
in many older batch files. The original purpose of the Break command was to provide control over the Ctrl+Break key. Setting
Break ON would let someone press Ctrl+Break to stop execution
of a batch file. Windows ignores this command line switch. In
addition, some versions of Windows, such as Windows Server
2008 Server Core, change support for some batch commands
from previous versions of Windows and add new commands.
Consequently, batch files that worked fine in Windows XP may
suddenly stop working in Server Core. (If you’ve already updated
your batch files to work in Vista (or newer versions of Windows),
they should also work fine in Server Core.)
Even with the limitations of a batch file, however, you might be surprised at the number of ways that people use them. For example, if you
find that you’re constantly forgetting how to perform tasks at the command line, create a menu system with your favorite commands. That
way, you only have to look up the command information one time. The
Use Batch File Commands
401
following sections describe the programming features of batch files and
provide you with some sample batch files.
Finding Code Online
It’s beneficial to become a code hound—someone who digs
around online and in books looking for useful pieces of code. If
you can find working code that does almost what you want to
do, all you need to do is make some modifications to that code,
rather than start writing it from scratch. Creating code from
scratch is often harder than using code that’s already tested and
used for some other task.
Employ the Call Command
You use the Call command to call another location within the current
batch file or to start another batch file. When you want to call another
location in the same batch file, you use the label formatting shown here:
Call :MyLabel
Calling another batch file is similar. You provide the drive, path, and
filename of the batch file. In addition, you can provide command line
arguments for the external batch file as shown here:
Call C:\MyBatchFiles\MyBatch.BAT CommandArg1
A call is different from going to another location. When a call completes, the batch file returns to the calling location and executes the next
instruction. In contrast, when you use the GoTo command, the batch file
actually transfers control to the new location. The return feature of the
Creating Batch Files
This chapter contains batch file examples that help you understand basic principles and perform some essential tasks at the
command line. However, if you’re like me, you’ll want more;
you’ll want examples that show you how to perform more
tasks than I could ever include in a single book. You can find
a wealth of batch files for performing administrative or other
essential tasks at the Rob van der Woude Web site at http://
www.robvanderwoude.com/batchfiles.php. In fact, you can find
an entire page of batch file resources at http://www.windowsnetworking.com/kbase/WindowsTips/WindowsNT/AdminTips/
Miscellaneous/Batchfileprogrammingresources.html.
Part VII
402
Chapter 21
3
Creating and Testing Batch Files
Call command lets you create an advanced programming construct called
recursion. Recursion occurs when a batch file calls itself. You must provide an exit strategy, however, or the batch file will enter an endless loop.
The easiest way to see the effect of the Call command is to create
two batch files named Batch1.BAT and Batch2.BAT. Here’s the content
for Batch1.BAT:
@ECHO OFF
Call Batch2.BAT
Call Batch2.BAT Passed %1 %PATH%
ECHO In Batch 1
GOTO :EOF
ECHO Goodbye
Here’s the content for Batch2.BAT:
ECHO In Batch 2, Goodbye
IF NOT [%1]==[] ECHO String: %1
IF NOT [%2]==[] ECHO Batch 1 Input: %2
IF NOT [%3]==[] ECHO Environment Variable: %3
Looking at the Batch1.BAT content, the example begins by turning
off echo. You’ll normally add this code to your batch files so the user
doesn’t see a lot of confusing text that has nothing to do with the current task. Preceding the ECHO command with the @ sign tells the system
not to display the ECHO command either. The first call to Batch2.BAT
doesn’t pass any information, so Batch2.BAT only displays the message
“In Batch 2, Goodbye.” The second call to Batch2.BAT passes the three
kinds of information you can include with a batch file:
NN
A string
NN
A local variable (argument)
NN
A global variable
The code then proceeds to display “In Batch 1” and exits. The GOTO :EOF
statement is special; it tells the batch file to end now. You don’t have to
define a label, in this case, because EOF is built into the command process.
(See the “Employ the GoTo Command” section of this chapter for details.)
The Batch2.BAT file always echoes “In Batch 2, Goodbye.” In this
case the IF statements verify that the caller has passed information
to the batch file. When the caller doesn’t pass the required variables,
then the batch file doesn’t display any information for that input. The
Use Batch File Commands
403
[%1]==[] construct is one way to check for an empty input. Figure 21.1
shows the output from this application. Notice the sequence of events. The
first batch file calls the second batch file. When the second batch file is finished, execution continues with the next statement in the first batch file.
Figure 21.1: Calls provide a means of performing subtasks in a batch file and then
continuing with the main task.
Windows provides enhanced methods of working with variables in
batch files. These enhanced expansions help you pass specific variable
information to a callee from your batch files. See the “Utilize Variable
Substitution” section of the chapter for details on using this technique.
The Choice command lets you add interactive processing to batch files.
Whether you use this option depends on the kind of automation you
want to add to your processing tasks. Most of the automation you create
for optimization tasks won’t require any kind of interactivity because you
already know how you want the task performed based on experience you
obtained performing the task manually. However, sometimes you do need
to add some interactivity. For example, you might run the command one
way on Friday and a different way the rest of the week. The Choice command can also help you add safeguards that ensure the user understands
the ramifications of performing a certain task before they actually do it.
Vista and newer versions of Windows change the Choice command significantly, breaking many batch files. This newer form of the Choice command differs not in arguments, but in how you combine those arguments
at the command line. Here’s the command line for Vista and above:
CHOICE [/C choices] [/N] [/CS] [/T timeout /D choice]
[/M text]
The changes make the command clearer, but they break existing
batch files in a way that you can’t easily fix. The new /CS command line
Creating Batch Files
Employ the Choice Command
Part VII
404
Chapter 21
3
Creating and Testing Batch Files
switch lets you make choices case sensitive, so you can have 26 additional menu choices (for a total of 52 letter combinations). However,
notice that /T no longer takes both a default option and a timeout value.
The new form requires that you provide a choice using the /D command
line switch instead. You must also provide the /M command line switch
to specify optional text. The following sample code performs the same
task, but the first form works in Windows XP and earlier, while the second form works in Vista and newer versions of Windows:
Old Choice Command Form
CHOICE /C:N /N /T:N,15
Vista and Server Core Choice Command Form
CHOICE /C N /N /T 15 /D N
NOTE Vista and newer versions of Windows provide alternatives for the Choice command. The TimeOut utility provides
a specific timeout value without requiring the user to make a
choice. You can learn more about this utility in the “Employ the
TimeOut Utility” section of the chapter. The WaitFor utility lets
you use signaling between systems or applications on the same
system. One application sends a signal and another reacts when
it receives the signal.
When you use Choice by itself, it displays a simple [Y,N] prompt that
doesn’t accomplish much unless you also provide an Echo command to
describe what the user should say yes or no to. Normally, you’ll combine
the Choice command with one or more arguments. Listing 21.1 shows a
simple example of the Choice command at work.
Listing 21.1: Using the Choice Command
Echo Off
REM Keep repeating until the user enters E.
:Repeat
REM Display the choices.
Choice /C DCE /N /T 15 /D E /M “Choose an option (D)isplay,
(C)opy,~CA
or (E)nd.”
REM Act on the user choice.
Use Batch File Commands
405
If ErrorLevel 3 GoTo End
If ErrorLevel 2 GoTo Copy
If ErrorLevel 1 GoTo Display
REM Copy the file.
:Copy
Echo You chose to copy the file.
GoTo Repeat
REM Display the file.
:Display
Echo You chose to display the file.
GoTo Repeat
The code begins by creating a repeat label so the batch file continues
working until the user specifically stops it. Next, the code uses the Choice
command to display the choices to the user. The /C switch tells Choice that
the valid options are D, C, or E instead of the default Y or N. Because the
text specifically defines the characters that the batch file expects, the batch
file uses the /N switch to suppress displaying the valid key choices on the
command line. The /T command line switch tells Choice to automatically
choose E after 10 seconds. The /D command line switch provides the
default choice of E. Finally, the /M command line switch provides the message displayed to the user.
Although this batch file doesn’t actually do anything with a file, it
shows how you’d set up the batch file to process the user choice. Notice
that the batch file uses the ErrorLevel clause of the If statement to
detect the user choice. The ErrorLevel clause detects every choice lower
than the user selection, so you must place the values in reverse order,
as shown. In addition, you must specifically set the batch file to go to
another location because it will process all other statements after the
current error level.
The processing code simply displays a string telling you what choice
the user made. Normally, you’d add tasks that the batch file should
perform based on the user’s selection. Notice that the copy and display
selections tell the batch file to go back to the Repeat label. This is the
Creating Batch Files
REM End the batch processing.
:End
Echo Goodbye
Echo On
Part VII
406
Chapter 21
3
Creating and Testing Batch Files
most common technique for creating a menu loop in a batch file. The
batch file ends by telling the user goodbye and turning echo back on.
Employ the Echo Command
The command line uses the term echo to describe the process where the
system echoes (repeats) every command in a batch file to the command
line. Echo provides a means of seeing which command the system is
processing. However, echo can become confusing for users who aren’t
aware of or don’t care about the commands that are executing. In addition, echo can disrupt visual effects, such as menu systems, that you
create. To turn echo on, type Echo On and press Enter. Likewise, to turn
echo off, type Echo Off and press Enter. Type Echo and press Enter to
display the current echo status.
You can precede the Echo command with the @ sign so it doesn’t
appear as one of the commands. If you type @Echo Off and press Enter,
the command processor would turn off echo without displaying the Echo
command at the command prompt.
Use the ECHO Message command, where Message is the text you want to
display. Simply type the text you want to see after the Echo command. In
this case, the system won’t display the Echo command, just the message
you want to display. For example, if you want to display Hello at the
command line, you type Echo Hello and press Enter. Don’t use the @ sign
with this form of the Echo command or the user won’t see the message.
Employ the Exit Command
Most people associate the Exit command with closing the current command window. Using Exit alone will close the command window.
However, you can also use this command within a batch file to exit the
batch file.
To perform a basic exit, type Exit /B and press enter. This command
specifies that you want to exit a batch file, rather than the current command line session. If you don’t specify this command line switch, the
command window closes, even when you issue the Exit command from
a batch file.
It’s also possible to provide an exit code with your batch file. The
default exit code of 0 tells the caller that the batch file didn’t experience
any errors, but you can provide other exit codes to denote errors. Use
the Exit ExitCode command, where ExitCode is a numeric value, to provide an exit code as output. For example, if you type Exit 5 and press
Use Batch File Commands
407
Enter, the batch file exits with an exit code of 5. You can use exit codes
to alert the caller to errors or special conditions. The exit codes aren’t
defined by the system, so you can define any set of exit codes that you
deem necessary for your application.
Employ the ForFiles Utility
The ForFiles utility provides a means of looping through a list of files
and performing actions on those files one at a time. For example, you
might want to process all files that someone has changed since a certain
date. In most respects, this loop method works precisely the same as the
For command described in the “Employ the For Command” section of
the chapter. Use the following steps to create a ForFiles command:
1. Type ForFiles to start the command.
2. (Optional) Type /P Pathname, where Pathname specifies the starting
point for a search.
The path is the starting folder in the search. The default setting
uses the current directory as the starting point.
3. (Optional) Type /M SearchMask, where SearchMask defines a search
You can use the asterisk (*) and question mark (?) as wildcard
characters, just as you would when using the Directory command.
The default setting searches for all files in the target directory.
4. (Optional) Type /S.
Use the /S command line switch to search all of the subdirectories
of the specified directory.
5. (Optional) Type /C Command, where Command specifies the command
you want to execute for each file.
Always wrap the command in double quotes to ensure it isn’t
interpreted as part of the ForFile command. The default command
is “CMD /C Echo @File”. Always precede internal command processor commands with CMD /C. The “Use the CMD Switches” section of
Chapter 19 tells you about other CMD utility switches that might be
helpful when creating your command. The following list describes
the ForFiles variables that you can use as part of the command:
NN
@File: Returns the name of the file, including the file extension.
NN
@FName: Returns the name of the file without the extension.
Creating Batch Files
mask for the files.
Part VII
408
Chapter 21
NN
NN
NN
3
Creating and Testing Batch Files
@Ext: Returns only the file extension.
@Path: Returns the full path of the file. This information
includes the drive as well as the actual path.
@RelPath: Returns the relative path of the file. The relative path
begins at the starting folder.
NN
@IsDir: Specifies whether the file type is a directory. True indi-
cates a directory entry.
NN
@FSize: Indicates the size of the file in bytes.
NN
@FDate: Indicates the date that someone last modified the file.
NN
@FTime: Indicates the time that someone last modified the file.
NOTE You can include special characters in a command by
using the 0xHH format where HH is a hexadecimal number. For
example, you can specify a tab by typing 0x09.
6. (Optional) Type /D Date, where Date selects files that have a last
modified date within the specified range.
You specify a specific date using the month/day/year (mm/dd/yyyy)
format. Add a plus sign (+) if you want files after the specified date
or a minus sign (–) if you want files before the specified date. For
example, /D -01/01/2008 would select all files modified before
January 1, 2008. You can also specify a relative date by providing
a positive or negative number. For example, /D -7 would select
all files modified within the last seven days. The /D command line
switch accepts any number between 0 and –32,768.
7. Press Enter.
If you type ForFiles and press Enter, you see a list of the files within
the current directory. You could redirect this output to a file for further processing if desired. To see just the filenames without the extensions, you’d type ForFiles /C “CMD /C Echo @FName” and press Enter.
An extension of this command might look for just the batch files in the
current directory. In this case, you type ForFiles /M *.BAT /C “CMD /C
Echo @FName” and press Enter. You might want to look for the batch
files in subdirectories too, so you’d need to type ForFiles /S /M *.BAT
/C “CMD /C Echo @FName” and press Enter. To filter the information even
more, you might look for all of the batch files in the current directory
Use Batch File Commands
409
and its children that have been modified in the last seven days by typing ForFiles /S /M *.BAT /D -7 /C “CMD /C Echo @FName” and pressing
Enter. Of course, you can make the command for working with the file
as complex as desired or even call on another batch file or script to perform the processing.
Employ the For Command
The For command fulfills a special niche in batch file programming. In
many cases, you can make complex file selections for utilities using wildcard characters. Unfortunately, using wildcard characters won’t always
work. Sometimes you need to know the name of the file. A command
line utility might not support wildcard characters or the file argument
doesn’t easily fit within the wildcard method of description. That’s
where the For statement comes into play for batch files. This command
takes the form:
You can also use this command at the command prompt to process
files manually. Instead of using a single percent (%) symbol, you use two
in front of the variable. Here’s a sample of how you can use this command in a batch file:
Echo Off
For %%F In (*.BAT *.TXT) Do Dir %%F /B
Echo On
In this case the For command processes all of the files that have a
.BAT or .TXT extension in the current directory. The command processes
the files in the order in which they appear in the directory and you have
no guarantee what the order is. The %%F variable contains the name of
an individual file. The Dir command is called once for each file with the
%%F variable as an input. In this case, the command outputs the filenames
using the bare format, so you could use this batch file to create a text file
containing a list of files that match the criteria. Additional processing
could archive the files or do anything else that you might like.
It’s important to remember that you can normally achieve the same
output using multiple methods. For example, try typing For %%F In
(*.BAT *.TXT) Do Echo %%F instead and you see the same output. It’s
also quite easy to combine commands using pipes. For example, type
For %%F In (*.BAT *.TXT) Do Dir %%F /B | Find “For” to find all of the
Creating Batch Files
FOR %%variable IN (set) DO command [command-parameters]
Part VII
410
Chapter 21
3
Creating and Testing Batch Files
batch and text files that begin with the word For. Of course, you could do
the same thing by typing For %%F In (For*.BAT For*.TXT) Do Dir %%F /B.
Every For command consists of at least three, and normally four,
components. You always include these elements in the order shown:
1. {%Variable | %%Variable}: Specifies a replaceable parameter; the
argument that will receive the individual members of a set. The
replaceable parameter takes two forms. Use the %Variable form when
you want to use the replaceable parameter as input to another command or utility. Use the %%Variable form when you want to use the
replaceable parameter for activities within the batch file. The variable
names are case sensitive, so %f isn’t the same as %F. In addition, you
must use an alphabetical variable name, such as %A, %B, or %C.
2. (Set): Defines the set to process. The set can include one or more
files, directories, range of values, or text strings that you want
to process with the specified command. For example, you can
use environment variables as the set. The command For %%P In
(%PATH%) Do ECHO %%P would display the members of the PATH
environment variable as individual strings.
3. Command: Specifies the command you want to perform for each
entry in the set.
4. (Optional) CommandLineOptions: Defines the command line options
for the command that you want to perform for each entry in the
set. The command line options are command or utility specific; see
the other entries in this book for details.
Perform Complex File Iteration
You can use the For command to process command output, strings, and
the content of files. In this case the For command begins by breaking the
input into individual lines of content and discarding any blank lines. It
then breaks whatever input you provide into specific tokens based on the
rules you specify. A token can be a control character, a special word, or
anything else you can define as part of the simple syntax for this command. The For command passes the token to a command you specify as
input. Here’s the command line syntax for this form of the For command:
for /F [“ParsingKeywords”] {%% | %}Variable in (FileNameSet)
do Command
[CommandLineOptions]
for /F [“ParsingKeywords”] {%% | %}Variable in
(“LiteralString”) do
Use Batch File Commands
411
Command [CommandLineOptions]
for /F [“ParsingKeywords”] {%% | %}Variable in (‘Command’)
do Command
[CommandLineOptions]
Notice that you need to use a different command line syntax for
each kind of input. A filename appears without quotes, while a string
appears in double quotes and a command appears in single quotes.
The small differences in command format determines how the For
command views the input.
The ParsingKeywords input is a quoted string that specifies the rules for
parsing the input into tokens. These keywords always appear in double
quotes, as shown. The following list describes the keywords you can use:
NN
NN
eol=c: Specifies an end of line character. The For command only
allows you to specify one character.
skip=N: Specifies the number of lines to skip at the beginning of the
file.
delims=xxx: Specifies a delimiter set. The delimiter set defines
which characters the For command views as elements between
tokens. The default setting relies on the space and tab.
Consequently, the For command produces a new token every time
it sees a space or tab within the input.
NN
tokens=X,Y,M-N: Defines which tokens to retrieve from each line of
text to pass to the For command body for each iteration. The For
command allocates one variable for each of the tokens. The M-N
format defines a range of tokens to use as input. Whenever the last
character in a processed string is an asterisk (*), the For command
creates an additional variable to receive the additional text on the
line after the For command parses the last token.
NN
usebackq: Specifies that you can use quotation marks to quote filenames in FileNameSet, a back quoted string is executed as a com-
mand, and a single quoted string is a literal string command.
You need to use a slightly different command line syntax with the
For command when you rely on the usebackq keyword. Here are the
three command lines using this syntax:
for /F [“usebackqParsingKeywords”] {%% | %}Variable in
(“FileNameSet”)
do Command [CommandLineOptions]
for /F [“usebackqParsingKeywords”] {%% | %}Variable in
Creating Batch Files
NN
Part VII
412
Chapter 21
3
Creating and Testing Batch Files
(‘LiteralString’) do Command [CommandLineOptions]
for /F [“usebackqParsingKeywords”] {%% | %}Variable in
(‘Command’) do
Command [CommandLineOptions]
This special parsing form of the For command has a lot of practical
purposes. For example, you could use it to tear a batch file apart into its
constituent parts by typing For /F “tokens=1,*” %%A IN (For1.BAT) DO
Echo Command: %%A Arguments: %%B. In this case the For command looks
into the For1.BAT batch file and processes it one line at a time. The first
word in each line of the batch file is normally a command; the remainder
of the line is its arguments. So the For command separates the batch file
commands from the arguments by using the tokens=1,* parsing keyword. Figure 21.2 shows the output. Notice how tokens=1,* actually
creates two variables—%%A contains the first word and %%B contains the
rest of the string.
Figure 21.2 : Using parsing techniques to take output from commands, files, and
variables apart.
As previously mentioned, the usebackq form requires a little extra
thought. Let’s say you want to obtain a directory listing of just the
filenames and not the extensions. Yet another way to obtain this listing
is to parse the output of the Dir *.BAT /B command by typing FOR /F
“usebackq delims=.” %%i IN (`Dir *.BAT /B`) DO @echo %%i. In this
case, the output of the Dir *.BAT /B command is processed, but only
the filename part appears in the output due to the use of usebackq and
delims with a period as the delimiter.
Utilize Variable Substitution
Variable substitution is the act of exchanging a variable name for the
content of that variable. However, unlike expansion, you don’t necessarily use all of the variable content. For example, instead of using the
entire path for a file, you might just use the drive letter, the path, or the
Use Batch File Commands
413
filename. The following list describes the basic forms of variable substitution available with the For command. (The list assumes that you’re using
a variable named I, which translates into %I at the command line.)
NN
%~I: Removes any surrounding quotation marks from the variable
content.
NN
%~fI: Expands %I to a fully qualified pathname.
NN
%~dI: Expands %I to a drive letter only.
NN
%~pI: Expands %I to a path only.
NN
%~nI: Expands %I to a filename only.
NN
%~xI: Expands %I to a file extension only.
%~sI: Creates a path variable and then changes any long directory
names into their short name equivalents.
NN
%~aI: Obtains the file attributes of the input file.
NN
%~tI: Obtains the date and time of the input file.
NN
%~zI: Obtains the size of the input file.
NN
%~$PATH:I: Searches the directories listed in the PATH environment
variable for the file specified by I. The system then expands the
first match that it finds to a fully qualified filename, which includes
the drive, path, and filename. This variable substitution returns an
empty string when the PATH environment variable is undefined or if
the system can’t find a match for the filename.
Use these variable substitutions to obtain specialized output from
your batch file. For example, you might want to see the full path to the
batch files in the current directory, along with the file attributes. In this
case, you type For %%I In (*.BAT) Do Echo %%~fI %%~aI. Figure 21.3
shows typical output from this command.
Figure 21.3 : Variable substitution can help you obtain specialized output.
Creating Batch Files
NN
Part VII
414
Chapter 21
3
Creating and Testing Batch Files
You can use these variable substitutions in combination to produce
specific results. For example, you might want to create a directory-like
listing of files. The following list provides some ideas on how to use the
variable substitution arguments in combination:
NN
NN
NN
NN
%~dpI: Outputs just the drive letter and path of a file, without
including the filename.
%~nxI: Outputs the filename and extension but leaves out the drive
letter and path.
%~fsI: Outputs the file information using the short name (8.3 format) form only.
%~dp$PATH:I: Locates the file using the PATH environment variable.
The system outputs just the drive letter and path of the first match
found.
NN
%´zaI: Creates the same output as the Dir command. However, the
output is different from the Dir command because the file listing
could span multiple directories. The focus of the listing is different.
Employ the GoTo Command
The GoTo command transfers control from one part of a batch file to
another. You can’t use the GoTo command to transfer control to other
batch files. For this task, you use the Call command described in the
“Employ the Call Command” section of the chapter. The GoTo command takes a simple form: GoTo Label, where Label is a keyword used
to define the transfer point in the batch file. Labels are always preceded by a colon, such as :MyLabel. Listing 21.1 and Listing 21.2 show
the GoTo command in action.
Employ the If Command
To write any reasonably complex batch file, you need to perform flow
control—the active selection of code to run based on current conditions.
For example, you might want to know that the previous task succeeded
before you begin the next task. In some cases, you’ll look for a specific
file or act on user input to the batch file. You can also verify that the
user provided a certain input string. The point is that you can exercise
some control over how the batch files react to system and environmental
conditions. Batch files don’t provide extensive decision-making support,
Use Batch File Commands
415
but you can use these three forms of the If statement to increase the
flexibility of your batch files:
In all three cases, you can add the word “Not” to perform the reverse
of the check. For example, you can perform a task when a given file
doesn’t exist, rather than when it does exist. By combining both versions of the If statement, you can create the equivalent of an If...Else
statement found in most programming languages.
The ErrorLevel argument requires special consideration. Whenever
you run an application, batch file, or script, the system provides a
numeric error level as output. By convention, an error level of 0 always
represents success. Other numbers represent an error or special condition. A special condition isn’t always an error; it’s simply not complete
success. In fact, you might expect an application, batch file, or script to
exit with a special condition. For an example of a command that exits
with special conditions, review the Choice command in the “Employ
the Choice Command” section of the chapter. Error conditions can represent a user, system, or application failure. For example, consider the
XCopy error levels shown in Table 21.1.
Table 21.1: XCopy Error Levels
Error Level
Meaning
0
Success, no error occurred.
1
The system didn’t find any files to copy.
2
The user stopped XCopy by pressing Ctrl+C.
4
The application experienced an initialization error. The system doesn’t
have enough memory or disk space. You may have entered an invalid
drive name or used invalid syntax at the command line.
5
The system experienced a disk write error.
As you can see, the cause of an error varies greatly depending on
conditions. In all cases, you could rightfully say that the application has
experienced an error. However, notice that error level 2 could actually
Creating Batch Files
If [Not] ErrorLevel number command
If [Not] string1==string2 command
If [Not] Exist filename command
Part VII
416
Chapter 21
3
Creating and Testing Batch Files
occur by design. The user recognizes an error and presses Ctrl+C to
stop the copying process before it completes. In this case, you have to
consider whether the error level defines a special condition or an error
by prompting the user and handle it appropriately. Listing 21.2 shows
examples of the various If statement forms at work.
Listing 21.2 : Using the If Statement in Batch Files
Echo Off
REM Verify the user has provided an action.
If %1Err==Err GoTo ProcessError
REM Simulate an error when the file doesn’t exist.
Copy MyFile.TXT MyFile2.TXT
If Not ErrorLevel 1 GoTo CheckFile
Echo The File doesn’t exist so the batch file can’t copy
it.
REM Check for a specific file and process it when it does
exist.
:CheckFile
If Exist MyFile.TXT GoTo ProcessFile
REM If the file doesn’t exist then create it. Display a
message with
REM instructions and then let the user type the text.
Echo Type some text for the test file. Press Ctrl+Z when you
finish.
Pause
Copy CON MyFile.TXT
REM This is a label for processing the file.
:ProcessFile
REM Determine whether the user wants to display the file.
If Not %1==Display GoTo Process2
Echo MyFile.TXT Contains:
Type MyFile.TXT
GoTo TheEnd
Use Batch File Commands
417
REM Determine whether the user wants to delete the file.
:Process2
If Not %1==Delete GoTo ProcessError
Erase MyFile.TXT
Echo Deleted MyFile.TXT
GoTo TheEnd
REM The user didn’t define a processing action.
:ProcessError
Echo You didn’t tell the batch file what to do!
Echo Type UseIf Display to display the file or
Echo UseIf Delete to delete the file.
The first line of this example demonstrates a principle that you
should always use in batch files that you expect someone else will
use—check for errors within the limits of the batch file to do so. In
this case, the batch file expects the user to type UseIf Display or UseIf
Delete and press Enter. When the user doesn’t provide any input value,
then the first input value, %1, is blank so the string Err equals Err and
the code goes to a label named ProcessError. Batch files can work with
up to nine input values at a time using %1 through %9 as variables. The
GoTo statement always tells the code to go to a label within the batch
file. You define a label by preceding the label name with a colon such as
:ProcessError.
The next segment of code attempts to copy a temporary file to
another file. The operation results in an error that you can trap
using the ErrorLevel statement when the file doesn’t exist. When the
ErrorLevel value matches the value you provide, then the If statement
executes the command. In this case, because the code uses the Not clause,
the reverse is true: the If statement only executes the GoTo command
when the error level is not 1. Notice that, in this case, the code uses the
Echo command to display an error message to the user—Echo works not
only for turning messages on or off but for displaying custom messages
to the user that the Echo setting doesn’t hide as well.
Once the code performs these initial steps, it determines whether the
MyFile.TXT file does exist using the Exit clause of the If statement. When
the file exists, the code immediately begins processing it. Otherwise, the
Creating Batch Files
:TheEnd
Echo On
Part VII
418
Chapter 21
3
Creating and Testing Batch Files
code displays a message prompting the user to type information for such
a file. Notice the Pause command, which pauses the batch file execution
until the user presses a key. The Copy command sends whatever the user
types at the console (CON) to the MyFile.TXT file until it detects an end of
file character, which the user creates by pressing Ctrl+Z.
Now that you know the file exists, the batch file can process it. This
batch file provides two options: displaying the file and deleting it. The
problem with batch files is that they use case-sensitive string comparisons—the word Delete is different from the word delete so error trapping can cause false problems. Some developers resolve this problem by
using single character command line switches for batch files. That way,
all you need to do is perform two checks, one for uppercase and another
for lowercase. The example uses a full word for the purpose of demonstration. To see how this works, type UseIf delete and press Enter at
the command line instead of UseIf Delete—the code displays a failure
message. When the user does type UseIf Delete, the batch file erases the
file and displays a success message. Likewise, when the user types UseIf
Display and presses Enter, the code sends the content of MyFile.TXT to
the display. In both cases, the code goes to TheEnd where the batch file
turns Echo back on.
Employ the Pause Command
The Pause command stops batch file execution to give the user time to
react to a particular need. For example, if you need the user to change
media to complete the batch file, you could use the Echo command to
tell the user about the need and then use the Pause command to tell the
user to press any key when the media exchange is complete. To use the
Pause command, type Pause and press Enter.
Employ the Prompt Command
The Prompt command changes the command line prompt. For example,
instead of the usual drive letter, directory, and greater than (>) sign, you
could use the time and date as a prompt. In fact, the prompt can contain
any text you want. Use the Prompt Descriptor command to change the
prompt, where Descriptor is one or more special letters as shown in
Table 21.2. For example, if you want to display the current date and a
greater than sign, you type Prompt $D$G and press Enter.
Use Batch File Commands
419
Combination
Description
$A
& (Ampersand)
$B
| (Pipe)
$C
( (Left parenthesis)
$D
Current date
$E
Escape code (ASCII code 27)
$F
) (Right parenthesis)
$G
> (Greater than sign)
$H
Backspace (erases previous character)
$L
< (Less than sign)
$N
Current drive
$P
Current drive and path
$Q
= (Equals sign)
$S
(Space)
$T
Current time
$V
Windows version number
$_
Carriage return and linefeed
$$
$ (Dollar sign)
$+
Displays zero or more plus sign characters depending on the depth of
the PushD utility directory stack. The display shows one character
for each level you’ve pushed onto the stack. Requires that you have
command extensions enabled.
$M
Displays the remote name associated with the current drive letter.
If this is a local drive, then the system displays an empty string.
Requires that you have command extensions enabled.
Employ the Rem Command
The Rem (Remark) command lets you add comments to your batch files.
Given that batch files often use difficult to read coding sequences and that
Creating Batch Files
Table 21.2 : Prompt Letter Combinations
Part VII
420
Chapter 21
3
Creating and Testing Batch Files
you’ll probably want to modify them at some point, lots of comments
are advisable. In fact, you’ll want to add at least one comment for each
complex line of code in your batch file. Many people have lost the use of
interesting and helpful batch files because they contain complex code that
becomes unreadable after the initial writer forgets what the code means.
Listing 21.1 and Listing 21.2 show how to use the Rem command.
Employ the TimeOut Utility
The TimeOut utility provides a unique feature in that you can tell it to wait
for a specified time period no matter what the user does. Consequently,
unlike the Choice command, when you tell TimeOut to wait 30 seconds, it
waits the entire time period even if the user presses a key. In addition, the
TimeOut utility doesn’t display a message for the timeout, so you can use
this utility where silence is necessary (such as a background task).
To create a pause in your batch file, use the TimeOut /T Value command, where Value specifies the timeout value. You may specify any
value from –1 to 99999 seconds. A value of –1 means that the utility
waits indefinitely for a key press. The utility won’t allow you to combine
a value of –1 with the /NOBREAK command line switch since that would
effectively lock the system. For example, if you want to pause your
application for 10 seconds, you type TimeOut /T 10.
If you want to prevent TimeOut from recognizing key presses, add the
/NoBreak command line switch. The TimeOut utility waits for the specified time period before it exits. For example, to keep the user waiting for
10 seconds, type TimeOut /T 10 /NoBreak.
Test Batch Files
It’s important to remember the place that batch files occupy in the hierarchy of automation. A batch represents a fast and simple way of executing a series of tasks using applications, commands, and utilities. The
batch file possesses basic programming structures and you can perform
amazing tasks at times with those structures, but in the end, batch files
are somewhat limited. Something as simple as a disk being full or a lack
of rights to create a file in a specific location can cause the batch file to
fail. Error trapping in such cases is difficult because you have to check
for error levels from the errant application, command, or utility and not
every one of them supports output error levels. The following sections
Test Batch Files
421
describe some batch file techniques you should consider using, especially
when working with large systems.
Add Debug Information to Batch Files
Developers of most applications know how to add debugging statements
to their code. The debugging statements aren’t for general use; they
simply make it easier to check the application for flaws. In addition,
the debugging statements make it possible to track program flow and
generally help the developer understand the application better. A batch
file can also include debugging information, even though there aren’t
specific statements to perform the task. The following code shows one
method you can use:
In this case, the debug trigger is an environment variable named
DEBUG. You can set this environment variable to any value desired by
using the Set command. Type Set DEBUG= and press Enter to turn off
debugging. The purpose of this debugging statement is to keep echo on
when you’re debugging the batch file. During the debugging cycle, you
want to see all of the statements, so you display them by keeping the
echo on. When the batch file runs normally, the user won’t have an environment variable named DEBUG, and the batch file turns off echo so the
user doesn’t see all of the intervening commands. Using the ECHO command by itself displays the current echo state so you can easily test this
technique for yourself.
Notice that the batch file doesn’t include anything special for the @ECHO
ON statement. It’s bad practice to use conditional statements with commands that set the system back to a default state. In this case, you can
set echo on without considering the current echo state because having
echo on is the default setting.
You can extend debugging to other activities. For example, you
might want to know the current value of a variable within the batch file.
Because you don’t have a debugging environment that you can rely on
to perform such tasks, you’ll need to use other methods with a batch
file. Listing 21.3 shows one technique you can use to extend a batch file
to output debugging information about an internal variable (note that
this example also uses the DEBUG environment variable).
Creating Batch Files
@IF NOT DEFINED DEBUG @ECHO OFF
ECHO
@ECHO ON
Part VII
422
Chapter 21
3
Creating and Testing Batch Files
Listing 21.3 : Adding Simple Debugging to a Batch File
@ECHO OFF
REM Locate all of the temporary files on your hard drive.
@ECHO Locating temporary files to delete.
FOR /F %%F IN (DelFiles.TXT) DO CALL :GetFile %%F
GOTO :NextStep
REM This is the actual code for handling the temporary file
REM processing.
:GetFile
IF DEFINED DEBUG @ECHO Adding %1 to the list.
Dir %1 /B /S >> DeleteMe.TXT
GOTO :EOF
REM You would normally place the next step of the processing
REM task here.
:NextStep
@ECHO ON
This is actually a batch file within a batch file. The code begins by
displaying information to the user that it’s collecting a list of temporary
files. At this point, the user normally waits while the batch file does
its job in complete silence. However, as a developer, you really need to
know what’s going on within the batch file. To make this work, you
need to execute multiple commands. Consequently, the batch file calls a
label named :GetFile and passes it the %%F argument.
Now, look at the :GetFile label and you’ll see two statements. The first
displays the current %%F value when you create an environment variable
named DEBUG. However, notice that it’s called %1 here, not %%F. Whenever
you employ a Call command to pass control to a label within a batch
file, you create a new batch file context. As far as the :GetFile label is
concerned, it exists in a different batch file from the original that called it.
The first batch file passes %%F as an input value, so it appears as %1 to the
:GetFile label code. The second statement in :GetFile is the Dir command
that locates the files you want to delete based on the file specification.
Notice that the :GetFile section ends with GOTO :EOF, which should
end the batch file. It does, in fact, end the :GetFile batch file and returns
control to the FOR command that called it. Now the FOR command can
Test Batch Files
423
process the next file extension in the list. Figure 21.4 gives you a better
idea of how this batch file works with and without DEBUG defined. Notice
the batch file doesn’t display the file extensions the first time because
DEBUG isn’t defined yet.
Figure 21.4 : Batch files can output as little or as much debugging information as
needed.
Listing 21.4 : A Batch File with Multiple Debug Levels Defined
IF NOT DEFINED DEBUG2 @ECHO OFF
REM Set the second level of debugging.
IF DEFINED DEBUG2 SET DEBUG=TRUE
Creating Batch Files
The examples in this section have only shown a single level of debugging so far. However, you can create as many levels of debugging as you
want by adding some additional code. Listing 21.4 shows the example
in Listing 21.3 with a second level of debugging added.
Part VII
REM Locate all of the temporary files on your hard drive.
@ECHO Locating temporary files to delete.
FOR /F %%F IN (DelFiles.TXT) DO CALL :GetFile %%F
GOTO :NextStep
REM This is the actual code for handling the temporary file
REM processing.
:GetFile
IF DEFINED DEBUG @ECHO Adding %1 to the list.
Dir %1 /B /S >> DeleteMe.TXT
GoTo :EOF
424
Chapter 21
3
Creating and Testing Batch Files
REM You would normally place the next step of the processing
REM task here.
:NextStep
REM Always remember to remove additional debugging levels.
IF DEFINED DEBUG2 SET DEBUG=
@ECHO ON
The two levels of debugging for this example are DEBUG and DEBUG2.
When you define the DEBUG2 level, the batch file automatically defines
DEBUG for you and then removes the DEBUG definition when the batch file
ends. As shown in the code, the DEBUG2 level displays all of the batch
code as it executes. Although this display can be handy, as shown in
Figure 21.5, it can also become quite messy. You don’t always need it
to locate a problem in your batch file. In fact, displaying the code can
sometimes hide problems in plain sight.
Figure 21.5 : Display code statements in batch files with care to avoid overwhelming
yourself with too much content.
Test Batch Files
425
Many people claim that batch files don’t offer any form of debugging.
Admittedly, batch files don’t provide the robust debugging features that
full-fledged programming languages do, but batch files don’t require these
advanced levels of debugging either since they normally perform simple
tasks. Using the techniques found in this section, you can provide at least
a modicum of debugging functionality for your batch files.
Identify Batch Files and Their Actions
If you work on a large system, you know that automation isn’t just a
nicety; it’s a requirement if you want to stay on top of maintenance
actions. However, automation brings with it all kinds of problems.
One of the more critical problems is identifying which machine produced a particular data file. After all, if a machine encounters an error,
you want to know which machine to fix. The same concept holds true
for other kinds of data. No matter what data you collect, data without
an attached context is worthless. With this in mind, you can use code
as shown in Listing 21.5 to create a descriptive data file.
Listing 21.5 : Creating a Descriptive Data File Header
REM Add identifying information.
@ECHO Computer: %COMPUTERNAME% > Temps.TXT
@ECHO User: %USERNAME% >> Temps.TXT
REM Add the date and time.
Date /T >> Temps.TXT
Time /T >> Temps.TXT
REM Create a header for the data.
@ECHO. >> Temps.TXT
@ECHO Temporary Files: >> Temps.TXT
@ECHO. >> Temps.TXT
REM Locate all of the temporary files on your hard drive.
@ECHO Locating temporary files to delete.
FOR /F %%F IN (DelFiles.TXT) DO Dir %%F /B /S >> Temps.TXT
@ECHO ON
Creating Batch Files
@ECHO OFF
Part VII
426
Chapter 21
3
Creating and Testing Batch Files
This example uses several techniques to output descriptive data.
First, it combines standard text with environmental variable expansion.
Every Windows machine will include the %COMPUTERNAME% and %USERNAME%
environment variables (or you can define them in the unlikely event that
they don’t exist). Notice the first output contains just a single redirection
(>) symbol, so this first line always erases any existing file.
Second, the example uses the Date and Time utilities to output the
date and the time. Notice the use of the /T command line switch to prevent these utilities from prompting the user for the date or time. It’s a
common error not to include the /T command line switch, so you should
watch for the error in your own code.
Third, the example creates a header for the data. Notice the use
of the special ECHO. command to create a blank space in the output.
The addition of the period prevents echo from displaying its status.
Because there isn’t any other data to display, the ECHO command simply displays a blank line. The remainder of this example outputs a
temporary file listing.
Adding the identifying information to the data file is fine when you
don’t want to maintain backups of previous data and when the data
resides on the original machine. Of course, things change when you
want to create a historical view of the data or store the information in a
centralized location. In this second instance, you need a unique filename
for every submission. Listing 21.6 shows how to add the information to
the filename, rather than the data file.
Listing 21.6 : Adding Descriptive Information to a Data File
@ECHO OFF
REM
REM
REM
SET
SET
Create a new environment variable with the identifying
information for this file. Start with the computer and
user name.
DataStore=%COMPUTERNAME%
DataStore=%DataStore%_%USERNAME%
REM
SET
SET
SET
Add the date.
DataStore=%DataStore%_%DATE:~4,2%
DataStore=%DataStore%_%DATE:~7,2%
DataStore=%DataStore%_%DATE:~10,4%
Test Batch Files
REM
SET
SET
SET
427
Add the time.
DataStore=%DataStore%_%TIME:~0,2%
DataStore=%DataStore%_%TIME:~3,2%
DataStore=%DataStore%_%TIME:~6,2%
REM Add the file extension.
:SetExtension
SET DataStore=%DataStore%.TXT
REM Locate all of the temporary files on your hard drive.
@ECHO Locating temporary files to delete.
@ECHO Saving files to “%DataStore%“.
FOR /F %%F IN (DelFiles.TXT) DO Dir %%F /B /S >>
“%DataStore%“
In this example, the batch files build up an environment variable
named DataStore that contains the computer and usernames, along with
the date and time. Obtaining the computer and usernames are simply a
matter of using the existing %COMPUTERNAME% and %USERNAME% environment
variables. However, the date and time prove more interesting.
Even though the Set command doesn’t show them, Windows dynamically generates several environment variables each time you request them,
including %DATE% and %TIME%. When working at DOS, you had to generate these environment variables yourself, which is a time-consuming and
error-prone process (see the examples at http://www.robvanderwoude
.com/datetime.php for details). Unfortunately, these environment
variables contain characters that you can use for a filename including
the slash (/) and colon (:). Consequently, you can’t use the variables
directly. The solution is to extract the numbers you need. For example, to extract the first two numbers of the time, you use %TIME:~0,2%,
where the first number is the starting point in the string and the second number defines the number of characters to use. Strings in batch
files always rely on a 0-based starting point.
The %DATE% environment variable requires a little more manipulation
than %TIME%. In this case, the string contains the day of the week, so you
must extract that information from the string as well. Consequently, the
month always appears at position 4, rather than 0.
Creating Batch Files
@ECHO ON
Part VII
428
Chapter 21
3
Creating and Testing Batch Files
Now that the batch file has built a unique filename based on the
machine name, username, date, and time, it adds a file extension of
.TXT to it. The result appears in place of the standard filename in the
FOR command for this example. Notice that you must enclose the filename with quotes because it could contain a space.
Use a Centralized Data Store
One problem that none of the examples in the book has addressed so
far is the use of a centralized data store. Overcoming this problem with
scripts is relatively easy because you have access to standard database
objects. With the proper code, you can simply send the data from a client machine to a server and never have to worry about it again except
for analysis purposes. However, batch files don’t support database
objects and the individual machine records discussed so far in the book
are ill suited for import into a database. If you have a large network, it’s
unlikely that you’ll want to view every one of those individual records.
You have options at your disposal when working with individual
commands. For example, many commands and utilities support the
Comma Separated Value (CSV) format. When working with one of
these utilities, you simply specify that you don’t want headers and that
the system should use the CSV format. Unfortunately, these utilities
won’t address special needs, such as error reports or a listing of interesting files on a machine (perhaps an unacceptable or unsupported
application, temporary files, viruses, adware, or spyware). For all of
these needs and many more, you must create the output in a form that
lends itself to use with a database. Fortunately, creating your own CSV
output (a data form commonly accepted by databases) isn’t difficult.
Listing 21.7 shows one way to do it with a list of temporary files.
Listing 21.7: Creating Output for a Database
@ECHO OFF
REM Clean up any existing output file.
IF EXIST Output.CSV Del Output.CSV
REM Create a new environment variable to hold the static
REM data for this session.
SET DataEntry=”%COMPUTERNAME%“
Test Batch Files
429
SET DataEntry=%DataEntry%,”%USERNAME%“
SET DataEntry=%DataEntry%,”%DATE%“
SET DataEntry=%DataEntry%,”%TIME%“
REM Locate all of the temporary files on your hard drive.
@ECHO Locating temporary files to delete.
FOR /F %%F IN (DelFiles.TXT) DO CALL :AddValue %%F
GOTO :Finished
REM Work with the individual directory entries as a set
REM and process them as part of a FOR command.
:AddValue
@ECHO Adding database values for %1.
FOR /F “delims==” %%E IN (‘Dir %1 /B /S’) DO @ECHO
%DataEntry%,”%%E” >> Output.CSV
GOTO :EOF
The idea behind CSV is that you encapsulate the individual data
values in quotes and separate them with commas. This example works
as most batch files that create CSV will work. You begin by creating
one or more static data values that provide a snapshot of this particular session. When you combine this data with other snapshots, the
static information provides the means for separating the individual
data entries.
The example requires two FOR loops in this case. The first FOR command parses the file specifications located in the DelFiles.TXT file and
passes them to a secondary routine.
The secondary FOR loop processes the individual file entries returned
by the Dir command. Notice the two additions to the FOR command.
First, you must provide the “delims==” option so that the FOR loop
doesn’t cut off the paths at the first space. Second, notice that this FOR
loop doesn’t process the data as a file; it uses the command representation instead. Remember that single quotes are for commands and
double quotes are for strings. The resulting Output.CSV file contains a
pure string representation that you could open in Notepad if desired.
However, the power of this particular routine is that you can also open
it as a database in a database application or even in Excel. Figure 21.6
shows typical output presented in Excel.
Creating Batch Files
:Finished
@ECHO ON
Part VII
430
Chapter 21
3
Creating and Testing Batch Files
Figure 21.6 : CSV files make it very easy to move data to a spreadsheet or database.
Store and Retrieve Directories with the
PushD and PopD Commands
Windows maintains a directory stack that you can use to store locations
that you visit. You use this stack to store directory information and then
retrieve it as needed. The PushD and PopD commands provide access to the
directory stack and help you move around your hard drive more efficiently.
NOTE Think about a stack as you would a stack of pancakes.
Fry a pancake and you can add it to the top of the stack. Get hungry and you can remove a pancake from the top of the stack to
eat it. The first (bottom) pancake on the stack is always the last
pancake off. When the pancakes are all gone, the stack is empty.
If you move around your hard drive a lot, using the PushD and PopD
commands can save you considerable typing time. However, most people
use these commands to simplify batch files. No matter which way you use
them, the directory stack is a handy way for tracking your movement.
To save the current location on the stack, type PushD and press Enter.
If you want to save a specific location, use the PushD Path command,
where Path is a location that you want to store on the stack. For example, to save C:\ on the stack, type PushD C:\ and press Enter. To restore
a directory location, type PopD and press Enter. The command processor
will return you to the location on the top of the stack.
Store and Retrieve Directories with the PushD and PopD Commands
431
Creating Batch Files
The PushD and PopD commands can also use command extensions
to change to a network drive. When you use PushD in this manner,
Windows automatically maps a drive to the network path for you. The
PopD command treats the networked drive as it would any other mapped
drive for your system. You can also specify the next directory as the parent directory by using the .. syntax with the PushD command.
Part VII
PART VIII
Creating Scripts
In This Part
q
CHAPTER 22: Discovering Scripting Basics. . . . . . . . . . . . . . . . . . . . . . 435
CHAPTER 23: Using the Scripting Objects . . . . . . . . . . . . . . . . . . . . . . . 447
Creating Scripts
CHAPTER 24: Creating Advanced Scripting Examples. . . . . . . . . . . . . . 471
Part Viii
22
Discovering Scripting Basics
In this chapter, you will learn to:
33Learn the Basics of JavaScript (Page 436)
Use Scripting Languages (Pages 436–441 )
n
n
Learn the Basics of VBScript (Page 4 38)
n
Use the Windows Scripting File (Page 439)
33Run Scripts with the CScript and WScript Utilities
Execute Scripts (Pages 442–445 )
n
(Page 442)
Configure the Host and Property Page Options (Page 44 4)
Creating Scripts
n
Part Viii
436
Chapter 22
3
Discovering Scripting Basics
S
cripts represent a step up from batch files. They provide additional
flexibility and help you perform more tasks. However, along with
these positives, you also have to face a little longer learning curve to use
scripts. Even so, scripting isn’t as difficult as working with many programming languages. If you know how to work with batch files, scripting
becomes significantly easier. In sum, scripting represents the next step up
for administrators who need something more than batch files can provide
in the way of automation. The following sections provide some information you can use to get started with scripting. Of course, there are entire
books written about scripting, so these sections are only an overview.
Use Scripting Languages
There are many scripting languages on the market today. Space won’t
allow me to discuss them all, even if I knew them all. The following sections discuss JavaScript and VBScript for one reason—they’re the languages that Windows supports out of the box so you don’t need to install
anything special to use them. Of the two, JavaScript enjoys greater popularity and you can use it on more than one platform. Consequently, the
scripting examples in the book mainly rely on JavaScript.
NOTE You’ll find that JavaScript comes in several slightly different forms and names. Besides JavaScript, you’ll see this language as LiveScript, JScript, and ECMAScript. You can find an
interesting language history at http://www.webmasterworld.com/
forum91/68.htm (may require a log on).
Learn the Basics of JavaScript
This chapter doesn’t provide a nuts and bolts discussion of JavaScript—it
assumes that you have some experience using this language. Because this
language is used in so many ways, you can find great JavaScript resources
online. Many sites include tutorials, a reference, and sample code. If you
want to be sure your code runs in as many environments as possible,
make sure you download a copy of European Computer Manufacturer’s
Association (ECMA) standard 262 from http://www.ecma-international.
org/publications/standards/Ecma-262.htm, which is the standard for
JavaScript. Here are some steps to follow to discover JavaScript.
Use Scripting Languages
437
1. Get an introduction to JavaScript at http://www.w3schools.com/
js/js_intro.asp.
2. Start learning JavaScript using a good tutorial such as those found at:
NN
http://www.w3schools.com/js/default.asp
An excellent structured tutorial for first-time users.
NN
http://www.cs.brown.edu/courses/bridge/1998/res/
javascript/javascript-tutorial.html
An extremely simple and quick tutorial.
NN
http://www.echoecho.com/javascript.htm
A comprehensive, but less structured tutorial.
3. Get a JavaScript reference from one of the following locations:
NN
http://developer.mozilla.org/en/docs/JavaScript_
Language_Resources
A good standards-based reference.
NN
http://www.microsoft.com/downloads/details.
aspx?FamilyId=01592C48-207D-4BE1-8A76-1C4099D7BBB9
The Microsoft perspective of JavaScript.
4. Discover additional JavaScript resources from places such as
http://msdn.microsoft.com/en-us/library/ms950396.aspx.
You may run into a problem where the scripts in this book don’t
work. Double-clicking the script file doesn’t work and it appears
that you can’t do anything else with the file either. In fact,
Windows might not know anything about the file at all. Although
it does happen with VBScript, most people have problems getting their JavaScript (JS) files to run correctly after they install
certain kinds of software or perform actions with virus detection
software. If you double-click on a JS file and nothing happens,
the problem might be in the registry. For whatever reason (and I
wasn’t able to verify a single specific reason), sometimes people
find Windows or another external application removes their
JavaScript settings.
The main problem is that the registry lacks entries for the .JS
extension handler. Use these steps to repair your JavaScript
Setup.
(continued)
Creating Scripts
Verifying Your JavaScript Setup
Part Viii
438
Chapter 22
3
Discovering Scripting Basics
Verifying Your JavaScript Setup (continued)
33
1. Verify that you have the handler installed by viewing the
HKEY_CLASSES_ROOT\.JS key first. This key should say JSFile as
the (Default) value.
2. Look at the HKEY_CLASSES_ROOT\JSFile entry. It should have
JScript Script File as the (Default) value and @%SystemRoot%\
System32\wshext.dll,-4804 as the FriendlyTypeName value.
3. Verify the JScript verbs. You should see two open verbs.
The first is at HKEY_CLASSES_ROOT\JSFile\Shell\Open\Command
and should have a (Default) value of %SystemRoot%\System32\
WScript.exe “%1” %*.
The second is at HKEY_CLASSES_ROOT\JSFile\Shell\Open2\
Command and should have a (Default) value of %SystemRoot%\
System32\CScript.exe “%1” %*.
4. If you’re not seeing these entries, it means that something
has gone awry with your registry. When this problem occurs,
you can usually restore your JavaScript and VBScript settings by typing RegSvr32 WSHExt.DLL in the \Windows\System32
folder and pressing Enter.
Learn the Basics of VBScript
This chapter doesn’t provide a VBScript tutorial. Unfortunately, VBScript
is also less popular than JavaScript, so you won’t find as many resources
online for using it. However, a few developers still use VBScript for their
application needs. The following steps can help you discover VBScript:
1. Get a VBScript overview from one of the following places:
NN
http://msdn.microsoft.com/en-us/library/t0aew7h6.aspx
Includes a VBScript user’s guide and language reference.
NN
http://www.w3schools.com/vbscript/vbscript_ref_functions.asp
Provides an overview of the VBScript functions with a short
description of each.
2. Start learning VBScript using a good tutorial such as those found at:
NN
http://www.w3schools.com/vbscript/vbscript_intro.asp
An excellent structured tutorial for first-time users.
Use Scripting Languages
NN
439
http://www.w3schools.com/vbscript/vbscript_examples.asp
Provides basic examples you can use to learn how VBScript
works.
NN
http://www.intranetjournal.com/corner/wrox/progref/vbt/
An extremely simple and quick tutorial.
NN
http://www.intranetjournal.com/corner/aitken/vbs-1.shtml
A detailed article that provides VBScript basics.
NN
http://www.tizag.com/vbscriptTutorial/
A tutorial focused on browser programming that also works
well for basic learning purposes.
3. Get a VBScript reference from one of the following locations:
NN
http://msdn.microsoft.com/library/d1wf56tt.aspx
The essential Microsoft perspective of the topic.
NN
http://www.w3schools.com/vbscript/vbscript_ref_functions
.asp
An online reference where clicking a function name displays
details about that function.
4. Discover additional VBScript resources from places such as:
NN
http://www.visualbasicscript.com/
Provides a forum for asking questions about VBScript.
NN
http://www.cetus-links.org/oo_vbscript.html
A centralized list of VBScript links.
NN
http://searchvb.techtarget.com/generic/0,295582,sid8_
gci1158017,00.html?track=NL-283&ad=539962
Additional VBScript resource links.
The Windows Scripting File (WSF) isn’t a new scripting language.
Instead, it’s a new way to package your scripts. Current script technology
doesn’t make it easy to create certain kinds of scripts. For example, if you
have code written in VBScript that you want to combine with code written in JavaScript, you can’t do it. The WSF technology provides a significant number of advantages to the script developer including:
NN
Using Include statements to add external code to your script.
Creating Scripts
Use the Windows Scripting File
Part Viii
440
Chapter 22
NN
NN
NN
NN
3
Discovering Scripting Basics
Using more than a single language per scripting file (of course, you
must have all of the required scripting engines installed on your
system).
Adding type libraries to your script, which means you have access
to type library features such as constants.
Adding XML components to your code by using an XML editor
to create the file.
Including multiple applications in a single file.
Microsoft has only recently begun using the WSF. In fact, you can’t
execute WSF files in older versions of Windows such as Windows XP—
you need Vista or newer versions of Windows to use this technology.
NOTE You can find a wealth of information about Windows
scripting technologies online. However, one of the more interesting places to look is the Batch Scripts for Windows site at
http://www.wilsonmar.com/1wsh.htm. If you want to learn about
WSF files in a hurry, you may want to obtain the video found
at http://www.onscript.com/training-videos/titles/windowsscript-files-unmasked.asp.
The best way to edit a WSF file is to use an editor designed for the
purpose. You may find the combination of XML and scripting code a
little disorienting at first and a good editor can help you overcome that
problem. One of the better editors is Script Editor 2.1 from Brinesoft
(http://script-editor.brinesoft.qarchive.org/).
A WSF file begins with a <job> element. The <job> element can contain an id attribute that you can use later to execute a specific job within
a file. For example, if the source code file contains the following <job>
element:
<job id=”MyJob”>
and the name of the file is MyScript.WSF, you can execute it by typing
CScript //Job:MyJob MyScript.WSF and pressing Enter. Of course, as
with any good XML, you must include the ending </job> element.
Having the <job> element isn’t enough to create a script, however.
You must also include the <script> element. The <script> element
defines the beginning of a scripting area and a job can include more than
one scripting area. Each scripting area can include a single language.
Use Scripting Languages
441
Consequently, the <script> element normally has the language attribute.
When you want to execute a VBScript, you set the language attribute to
VBScript. The <script> element can also include the scr attribute, which
defines the location of external code. Consequently, if your script is in
VBScript and it relies on the MyExternal.VBS file, the <script> element
would include both entries like this:
<script language=”VBScript” src=”MyExternal.VBS”>
The final essential WSF element is the <reference> element. You
use it to reference external code. The type library must appear in the
registry before you can use it. To register a type library, type RegSvr32
TypeLibraryName and press Enter, where TypeLibraryName is the full name
of the type library. Normally, you perform this task in the %SYSTEMROOT%\
System32 directory, but you can perform it in any directory in which the
type library file appears. The <reference> element accesses the external
code using its progid attribute. The actual usage of the external code
looks similar to how you might have worked with it in earlier versions
of Visual Basic. Here’s an example of external code access in a WSF file:
The <reference> element makes it possible to load the external code
contained in the MyComponent file. You access a particular class, MyClass,
within that object and instantiate by setting ObjRef equal to the output
of CreateObject(). Now that the code has an object to use, it can call
the MyMethod() method. The output of this call appears in Result. When
Result contains an unexpected value, the code can display an error message to the user. Although this feature is very simple, it does provide you
with access to a wealth of additional resources and makes your scripts
considerably more flexible.
Creating Scripts
<job id=”ExternalCodeAccess”>
<reference progid=”MyComponent.MyClass”>
<script language=”VBScript”>
Dim ObjRef
Set ObjRef = CreateObject(“MyComponent.MyClass”)
Result = ObjRef.MyMethod
If Result = 0 then
WScript.Echo “An Error Occurred”
End If
</script>
</job>
Part Viii
442
Chapter 22
3
Discovering Scripting Basics
Execute Scripts
All you need to create a standard script is a text editor, such as
Notepad, and a little time. (If you want to create a WSF, then you really
should use an editor designed for the purpose.) You can also use scriptspecific tools such as the Visual Basic Editor or Microsoft Script Editor
provided with Microsoft Office. A number of third parties also produce
products that can help you create and even compile your script.
No matter what you do to create your script, however, it’s useless
unless you can run it. Windows provides two interpreters—applications
that run scripts—for you to use. The first, CScript, works at the command line and the second, WScript, works from within Windows. The
following sections describe both options.
Run Scripts with the CScript and WScript Utilities
Windows supports two methods of starting scripts. The CScript application works at the command prompt, while the WScript application
works from within the graphical user environment. Both applications
accomplish the same task—they provide a means for interpreting a
script file you create.
CScript and WScript use the same command line. You must provide
a script name as the first command line argument. Most scripts have a
.VBE or .JS file extension, but any extension is acceptable. For example,
you can still use .VBS files with Windows Script Host (WSH), but the
icon won’t look right, in some cases, and you can’t double-click it to
start the execution with newer Windows products. The .VBS extension
is the right choice for older versions of Windows. The icon is yellow for
.VBE files and blue for .JS and WSF files. The following sections describe
how to perform scripting tasks.
Obtain CScript and WScript Help
As with most utilities, you use the /? command line switch to obtain
help. To obtain help type CScript /? or WScript /? and press Enter.
When working with CScript you see the help information at the command line. WScript displays help in a dialog box.
Execute Scripts
443
Execute a Script
To execute a script, you use the CScript ScriptName or WScript ScriptName
command, where ScriptName is the name of the script you want to execute.
For example, to execute Test.JS using CScript, you type CScript Test.JS
and press Enter.
If you want to ensure that the script executes without user intervention, use the //B command line switch (notice the double slash
used for CScript and WScript command line switches). For example, if
you want to execute Test.JS in batch mode using CScript, you’d type
CScript //B Test.JS and press Enter.
On the other hand, you might need to provide full interactivity
when working with a script. In this case, you use the //I command line
switch. To execute Test.JS with full interactivity using CScript, you’d
type CSript //I Test.JS.
In some cases, you want your script to execute silently. To help
accomplish this task, you need to execute the script without displaying
a logo using the //NoLogo command line switch. You normally execute
such scripts in batch mode as well. For example, if you want to execute
Test.JS quietly using CScript, you’d type CScript //B //NoLogo Test.JS
and press Enter.
One of the advantages of scripts over batch files is that you gain access
to a debugger—a special program you can use to step through your
script one command at a time to see how it works. There are actually two debugger switches associated with CScript and WScript. The
//D switch enables Active Debugging, which is a setup that shows any
debugging statements within your code. Debugging statements don’t
normally execute—they only execute when you’re actually debugging
your code. To access the debugging statements within Test.JS using
CScript, type CScript //D Test.JS and press Enter.
The //X command line switch actually opens a debugger and loads
your code into it so that you can debug your code even if you don’t have
debugging statements added to it. This is the mode where you can single
step through your application to see how it works. To debug Test.JS in
the debugger using CScript, type CScript //X Test.JS and press Enter.
Errant scripts can cause problems for your system. If you’re debugging your script, it means that the script might end up in an endless
Creating Scripts
Debug a Script
Part Viii
444
Chapter 22
3
Discovering Scripting Basics
loop or freeze in other ways. Fortunately, you can tell the script to stop
running at a certain point using the //T:TimeLimit command line switch
where TimeLimit is the amount of time the script can run in seconds.
For example, to give Test.JS ten seconds to run using CScript, you type
CScript //T:10 Test.JS and press Enter.
Change the Default Application
If you double-click a script file in Windows Explorer or type its name at
the command line, the command processor looks up the default script
application and uses it to execute the script. Consequently, the choice of
default application is important when you want to obtain specific results
from your script. To change the default application, use the //H:CScript
command line switch to select CScript and the //H:WScript command
line switch to select WScript. For example, to select CScript as the default
application using CScript, you type CScript //H:CScript and press Enter.
Configure the Host and Property Page Options
You don’t have to rely exclusively on command line switches to configure WSH; you can configure two WSH options from the Windows
Script Host Settings dialog box shown in Figure 22.1. Type WScript and
press Enter. You’ll see the Windows Script Host Settings dialog box.
Figure 2 2.1: Configure WSH to meet specific needs.
Execute Scripts
445
Creating Scripts
The Stop Script after Specified Number of Seconds check box tells
WSH to stop executing a script after a certain time interval has elapsed.
The edit box below it contains the number of seconds to wait. Setting
this option is like adding the //T command line switch to every script
that you run.
The Display Logo When Script Executed in Command Console check
box determines whether WSH displays WSH logo when running scripts
from the DOS prompt. Normally, Windows checks this option, which is
the same as adding the //Logo command line switch to every script that
you run. Clearing this option tells WSH that you don’t want to display
the logo, which is the same as using the //NoLogo command line switch.
You can also display the Windows Script Host Settings dialog
box for individual scripts. Simply right-click the script file and select
Properties from the context menu. Select the Script tab to see the
options. These settings only affect the individual script file; the options
for WSH in general remain the same.
Part Viii
23
Using the Scripting Objects
In this chapter, you will learn to:
33Use the WScript Properties (Page 449)
Use the WScript Object (Pages 449–454)
n
n
Use the WScript Methods (Page 451)
33
33
33Use the WScript.WshNetwork Properties (Page 457)
Use the WScript.WshArguments Object
(Pages 454–455)
Use the WScript.WshShell Object (Pages 455–457)
Use the WScript.WshNetwork Object (Pages 457–461)
n
n
Use the WScript.WshNetwork Methods (Page 458)
33Script the Command Line and System Environment
Create a Basic Script (Pages 462–469)
n
n
Script the Registry (Page 466)
n
Create .LNK Files (Page 468)
Creating Scripts
(Page 463)
Part Viii
448
Chapter 23
3
Using the Scripting Objects
I
f you had to try to create all of the supporting code used to write a script
by hand, you’d be working quite hard and for a long time. Fortunately,
someone has already written a considerable amount of code for you.
This code appears within objects, which you can think of as boxes that
hold code and data. You really don’t need to know much more about the
objects than the fact that they make it easier to write scripts. You use the
contents of these objects just as you do commands at the command line to
perform tasks. Unlike commands and utilities, however, these objects are
available for use directly within the scripting environment; you don’t even
have to know where they physically reside on the hard drive.
Understanding Properties and Methods
A programming object models real-world objects in several
ways. When working with WSH objects, you have access to
properties and methods. A property or method helps define the
object and tells you what you can do with the object. It helps to
think of the abstract elements, both properties and methods, in
ways that you would think of their real-world equivalents.
A property describes the object in some way. For example,
when you look at an object such as an apple, you see that it has
a color, perhaps red. The color is a property of the apple. In this
case, the color property has a value of red. Just as apples have
all kinds of properties, such as the number of seeds in the core,
WSH objects also have a number of properties that you use to
discover more about the WSH object.
Real-world objects can also perform tasks. A car can move forward or backward. You press the gas pedal, a method, to move
the car forward or backward. Even though you press the gas
pedal in both cases, you must set the gear shift in a different
position to accomplish the task. Likewise, WSH objects have
methods that you use to perform tasks. Settings in properties
often affect how these tasks are performed. Just as pressing the
gas pedal is a car method that’s affected by the gear shift position property, WSH objects have methods that respond differently depending on how you set the properties.
All of these objects are packaged together to make them easy to access
and use. Think about them as being in a special box called the Windows
Scripting Host (WSH) (or sometimes Windows Script Host). You’ll see
WSH mentioned quite often in this chapter because it provides the environment in which your scripts execute. Think of WSH as a sort of house
Use the WScript Object
449
with rooms for each of the objects it supports. Your code moves from
room to room using the objects that it needs to perform tasks. The following sections tell you more about the objects that come with WSH.
Use the WScript Object
The WScript object is the main object for WSH. You’ll access every other
object through this one.
Use the WScript Properties
The WScript properties tell you something about your script as a whole,
including such necessary items as the arguments the user passes to your
script at the command line. The following sections tell you about the
properties that the WScript object supports.
Understand the Application Property
The Application property provides you with access to a low-level interface for WScript. An interface is a pointer to a list of functions that you
can call for a particular object. Only advanced programmers need this
property because WSH exposes all of the basic functions for you.
Use the Arguments Property
// Display the number of arguments.
WScript.Echo(“The number of arguments is: “ + WScript.
Arguments.Count());
// If there are arguments, display them on screen.
if (WScript.Arguments.Count() > 0)
{
// Get the list of arguments.
objArgs = WScript.Arguments;
Creating Scripts
The Arguments property provides a complete list of the arguments for
this script. Applications pass arguments on the command line. WSH
passes the argument list as an array. You create a variable to hold the
argument list and then access the individual arguments as you would any
array. The Arguments.Count property contains the total number of array
elements. The following code shows a typical use for this property:
Part Viii
450
Chapter 23
3
Using the Scripting Objects
// Display each argument in turn.
for (i=0; i<objArgs.length; i++)
{
WScript.Echo(“Argument “ + i + “ is: “ + objArgs(i))
}
}
Use the FullName Property
The FullName property contains the full name of the scripting engine
along with the fully qualified path to it. For example, if you were using
CScript, you might get C:\Windows\System32\CScript.EXE as a return
value. The following code shows a typical use for this property:
// Display the full name of the scripting engine.
WScript.Echo(WScript.FullName);
Use the Interactive Property
The Interactive property returns true if the script is in interactive mode
(the user can interact with the script to perform tasks). The following
code shows a typical use for this property:
// Determine whether the script is in interactive mode.
if (WScript.Interactive)
{
WScript.Echo(“The script is in interactive mode.”);
}
Use the Name Property
The Name property returns the friendly name for WScript. In most cases,
this is Windows Scripting Host. The following code shows a typical use
for this property:
// Show the friendly name for the scripting host.
WScript.Echo(“The friendly name is: “ + WScript.Name);
Use the Path Property
The Path property provides just the path information for the host executable. For example, if you were using CScript, you may get a return
Use the WScript Object
451
value of: C:\Windows\System32\. The following code shows a typical use
for this property:
// Provide the full path to the scripting engine.
WScript.Echo(“The scripting host path is: “ + WScript.Path);
Use the ScriptFullName Property
The ScriptFullName property contains the full name and path of the
script that’s running. The following code shows a typical use for this
property:
// Show the full name of the script that is executing.
WScript.Echo(“The script name and path are: “ + WScript.
ScriptFullName);
Use the ScriptName Property
The ScriptName property provides just the script name. The following
code shows a typical use for this property:
// Show the short name of the script that is executing.
WScript.Echo(“The script name is: “ + WScript.ScriptName);
Use the Version Property
The Version property returns the WSH Version number. The following
code shows a typical use for this property:
Use the WScript Methods
Remember that all of these properties tell you about the WScript object.
You can also use methods to perform tasks with the WScript object. The
following sections provide a brief overview of the more important methods you’ll use with the WScript object. Note that most of these methods
require you pass one or more parameters as input. A parameter is a piece
of data the method uses to perform a task.
Creating Scripts
// Display the version number of WSH.
WScript.Echo(“The WSH version number is: “ + WScript.
Version);
Part Viii
452
Chapter 23
3
Using the Scripting Objects
Use the CreateObject Method
The CreateObject(strProgID) method creates the object specified by
strProgID. This object could be WSH specific, such as “WScript.Network”
or application specific, such as “Excel.Application”. The following code
shows a typical use for this method:
// Create a WSH object.
WshShell = WScript.CreateObject(“WScript.Shell”);
// Use the object to display a popup.
WshShell.Popup(“Hello World!”);
Use the GetObject Method
The GetObject(strPathname [, strProgID]) method retrieves the
requested object. strPathname contains the filename for the object you
want to retrieve. In most cases, this is going to be a data file, but you
can retrieve other kinds of objects as well. As soon as you execute this
command, WSH starts the application associated with that object. For
example, if you specified C:\MyText.TXT as the strPathname, then WSH
may open Notepad to display it. The optional strProgID argument
allows you to override the default processing of the object. For example,
you may want to open the text file with Word instead of Notepad. The
following code shows a typical use for this method:
// Obtain access to the file system object.
FSO = new ActiveXObject(“Scripting.FileSystemObject”);
// Get the current directory.
ScriptPath = FSO.GetFile(WScript.ScriptFullName).
ParentFolder;
// Create the text file path.
TextPath = ScriptPath + “\\Hello.TXT”;
// Open the text file in Notepad.
WScript.Echo(“Opening “ + TextPath);
WScript.GetObject(TextPath);
Use the WScript Object
453
Working with Objects
Scripts have a definite advantage over batch files because you
can use objects in scripts. An object can be anything. For example, you can create an object that contains an Excel worksheet
and use the functionality of Excel to perform tasks at the command line. A worksheet could hold a directory listing, and you
can use the database features of Excel to perform a customized
sort. All you need to do is create the object using the WScript.
CreateObject() method or new ActiveXObject() constructor. If
you already have a data file available to use for your application, then use the WScript.GetObject() method to open the data
file directly. In most cases, you don’t even need to worry about
which application to use because the system uses the correct
application by default.
Applications are an obvious kind of object. Your machine contains literally thousands of objects, all of which are available
for use. For example, you can load an XML document by using
the Msxml2.DOMDocument.5.0 object. Once you create this object,
you can load the XML document using the Load() method and
then process it using the various methods that the object provides. For example, use the TransformNode() method to use XML
Stylesheet Language Transformation (XSLT) to transform the
XML document from one presentation to another.
Make sure you spend time looking at all of the objects described
in the script resource Web pages and coding examples provided
in this chapter. You might be surprised at how much work a
script can perform with only a modicum of work on your part.
Even though the WScript objects described in this section are
your most important resource, don’t neglect the other resources
at your fingertips.
The Echo(AnyArg) method displays text in a window (WScript) or to the
console screen (CScript). AnyArg can contain any type of valid output
value. This can include both strings and numbers. Using Echo without
any arguments displays a blank line. The following code shows a typical
use for this method:
// Display a simple message.
WScript.Echo(“Hello World!”);
Creating Scripts
Use the Echo Method
Part Viii
454
Chapter 23
3
Using the Scripting Objects
Use the GetScriptEngine Method
The GetScriptEngine(strEngineID) method registers an alternative
script engine such as PerlScript (see the PerlScript site at http://www
.xav.com/perl/Components/Windows/PerlScript.html or the Windows
Script Host Resources site at http://labmice.techtarget.com/scripting/WSH.htm for details on this alternative). strEngineID contains the
identifier for the script engine that you want to retrieve. You’ll need
to register the engine using the GetScriptEngine.Register() method
before you can actually use it. A script engine also requires you to provide a default extension. A description of how to work with alternative
script engines is outside the scope of this book.
Use the Quit Method
The Quit(intErrorCode) method exits the script prematurely. The
optional intErrorCode argument returns an error code if necessary. You
can test for this value using the ErrorLevel clause in batch files. The following code shows a typical use for this method:
// Exit prematurely with an exit code of 42.
WScript.Quit(42);
Use the WScript.WshArguments Object
Whenever you start a script, you have the option of passing one or more
arguments to it on the command line. That’s where the WshArguments
object comes into play. It helps you determine the number of arguments and then retrieves them as needed. You’ll always use the WScript.
Arguments property to access this object; it’s not directly accessible. The
following list describes the properties for this object:
NN
Item(intIndex): Retrieves a specific command line argument.
intIndex contains the index of the argument that you want to
retrieve. The array used to hold the arguments is 0 based, so the
first argument number is 0.
NN
Count(): Returns the number of command line arguments.
NN
Length(): Returns the number of command line arguments. WSH
provides this property for JScript compatibility purposes.
Use the WScript.WshShell Object
455
Here’s an example that shows how to use this object:
// Display the number of arguments.
WScript.Echo(“The number of arguments is: “ + WScript.
Arguments.Count());
// If there are arguments, display them on screen.
if (WScript.Arguments.Count() > 0)
{
// Get the list of arguments.
objArgs = WScript.Arguments;
// Display each argument in turn.
for (i=0; i<objArgs.length; i++)
{
WScript.Echo(“Argument “ + i + “ is: “ + objArgs(i))
}
}
Use the WScript.WshShell Object
NN
CreateShortcut(strPathname): Creates a WSH shortcut object.
strPathname contains the location of the shortcut, which will be the
desktop in most cases.
NN
DeleteEnvironmentVariable(strName[, strType]): Deletes the
environment variable specified by strName. The optional strType
argument defines the type of environment variable to delete.
Typical values for strType include System, User, Volatile, and
Process. The default environment variable type is System.
Creating Scripts
You’ll use the WScript.WshShell object to access the Windows shell (the
part of Windows that interacts with applications and creates the user
interface) in a variety of ways. For example, you can use this object to
read the registry or to create a new shortcut on the desktop. This is an
exposed WSH object, which means you can access it directly. However,
you need to access it through the WScript object like this: WScript.
WshShell. The “Script the Command Line and System Environment,”
“Script the Registry,” and “Create .LNK Files” sections of the chapter
provide examples of how to use this object. The WScript.WshShell doesn’t
include any properties. The following list describes the WshShell methods:
Part Viii
456
Chapter 23
NN
NN
NN
3
Using the Scripting Objects
GetEnvironmentVariable(strName[, strType]): Retrieves the
environment variable specified by strName. Default environment
variables include NUMBER_OF_PROCESSORS, OS, COMSPEC, HOMEDRIVE,
HOMEPATH, PATH, PATHEXT, PROMPT, SYSTEMDRIVE, SYSTEMROOT, WINDIR,
TEMP, and TMP. The optional strType argument defines the type of
environment variable to delete. Typical values for strType include
System, User, Volatile, and Process. The default environment variable type is System.
Popup(strText[, intSeconds][, strTitle] [,intType]): Displays
a message dialog box. The return value is an integer defining
which button the user selected including the following values:
OK (1), Cancel (2), Abort (3), Retry (4), Ignore (5), Yes (6), No
(7), Close (8), and Help (9). strText contains the text that you
want to display in the dialog box. intSeconds determines how
long WSH displays the dialog box before it closes the dialog box
and returns a value of –1. strTitle contains the title bar text.
The intType argument can contain values that determine the type
of dialog box you’ll create. The first intType argument determines button type. You have a choice of OK (0), OK and Cancel
(1), Abort, Retry, and Ignore (2), Yes, No, and Cancel (3), Yes
and No (4), and Retry and Cancel (5). The second intType argument determines which icon Windows displays in the dialog box.
You have a choice of the following values: Stop (16), Question (32),
Exclamation (48), and Information (64). Combine the intType argument values to obtain different dialog box effects.
RegDelete(strName): Removes the value or key specified by strName
from the registry. If strName ends in a backslash, then RegDelete
removes a key. You must provide a fully qualified path to the key or
value that you want to delete. In addition, strName must begin with
one of these values: HKEY_CURRENT_USER, HKEY_LOCAL_MACHINE, HKEY_
CLASSES_ROOT, HKEY_USERS, HKEY_CURRENT_CONFIG, or HKEY_DYN_DATA.
NN
RegRead(strName): Reads the value or key specified by strName
from the registry. If strName ends in a backslash, then RegRead
reads a key. You must provide a fully qualified path to the key or
value that you want to read. In addition, strName must begin with
one of these values: HKEY_CURRENT_USER, HKEY_LOCAL_MACHINE, HKEY_
CLASSES_ROOT, HKEY_USERS, HKEY_CURRENT_CONFIG, or HKEY_DYN_DATA.
RegRead can only read specific data types including REG_SZ, REG_
EXPAND_SZ, REG_DWORD, REG_BINARY, and REG_MULTI_SZ. Any other
data types will return an error.
Use the WScript.WshNetwork Object
NN
457
RegWrite(strName, anyValue[, strType]): Writes the data specified by anyValue to a value or key specified by strName to the registry. If strName ends in a backslash, then RegWrite writes a key. You
must provide a fully qualified path to the key or value that you
want to write. In addition, strName must begin with one of these
values: HKEY_CURRENT_USER, HKEY_LOCAL_MACHINE, HKEY_CLASSES_
ROOT, HKEY_USERS, HKEY_CURRENT_CONFIG, or HKEY_DYN_DATA. RegRead
can only write specific data types including REG_SZ, REG_EXPAND_SZ,
REG_DWORD, and REG_BINARY. Any other data types will return an
error.
NN
NN
Run(strCommand[, intWinType][, lWait]): Runs the command or
application specified by strCommand. You can include command
line arguments and switches with the command string. intWinType determines the type of window that the application starts in.
You can force the script to wait for the application to complete by
setting lWait to True; otherwise, the script begins the next line of
execution immediately.
SetEnvironmentVariable(strName, strValue[, strType]): Sets
the environment variable named strName to the value specified
by strValue. The optional strType argument defines the type of
environment variable to create. Typical values for strType include
System, User, Volatile, and Process. The default environment variable type is System.
The WshNetwork object works with network objects such as drives and
printers that the client machine can access. This is an exposed WSH
object, which means you can access it directly using the WScript
.WshNetwork object. The following sections describe the properties and
methods you use when working with the WScript.WshNetwork object.
Use the WScript.WshNetwork Properties
The WScript.WshNetwork object provides identification information for
the network. The following sections describe properties associated with
this object.
Creating Scripts
Use the WScript.WshNetwork Object
Part Viii
458
Chapter 23
3
Using the Scripting Objects
Use the ComputerName Property
The ComputerName property returns a string containing the client computer name. The following code shows a typical use for this property:
// Create the WshNetwork object.
WshNetwork = WScript.CreateObject(“WScript.Network”)
// Show the computer name.
WScript.Echo(WshNetwork.ComputerName);
Use the UserDomain Property
The UserDomain property returns a string containing the name of the
domain that the user has logged into. The following code shows a typical use for this property:
// Create the WshNetwork object.
WshNetwork = WScript.CreateObject(“WScript.Network”)
// Show the domain name.
WScript.Echo(WshNetwork.UserDomain);
Use the UserName Property
The UserName property returns a string containing the name that the user
used to log on to the network. The following code shows a typical use
for this property:
// Create the WshNetwork object.
WshNetwork = WScript.CreateObject(“WScript.Network”)
// Show the username.
WScript.Echo(WshNetwork.UserName);
Use the WScript.WshNetwork Methods
As with any other WSH object, the WshNetwork object uses methods to
work with network resources. The following sections describe the methods associated with this object.
Use the WScript.WshNetwork Object
459
Use the AddPrinterConnection Method
The AddPrinterConnection(strLocal, strRemote [, lUpdate]
[, strUser] [, strPassword]) method creates a new printer connection for the local machine. strLocal contains the local name for
the printer specified by strRemote. The strRemote value must contain
a locatable resource (normally a network printer, but it can be any
locatable resource used for printing) and usually uses a UNC format
such as \\Remote\Printer. Setting lUpdate to True adds the new connection to the user profile, which means Windows makes the connection
available each time the user boots their machine. strUser and strPassword
contain optional username and password values required to log on to the
remote machine and create the connection. The following code shows a
typical use for this method:
// Create the WshNetwork object.
WshNetwork = WScript.CreateObject(“WScript.Network”)
// Add a remote printer connection.
// !!! You must change this code to match your system!!!
WshNetwork.AddPrinterConnection(“LPT1”, “\\\\MyServer\\
Printer”);
Use the EnumNetworkDrives Method
The EnumNetworkDrives()method returns a WshCollection object containing the list of local and remote drives currently mapped from the client
machine. A WshCollection object is essentially a 0-based array of strings.
The following code shows a typical use for this method:
// Get the drive list.
DriveList = WshNetwork.EnumNetworkDrives();
// Enumerate the drives.
for (i=0; i<DriveList.length; i+=2)
{
// The local drive letter is first and then the UNC
location.
Creating Scripts
// Create the WshNetwork object.
WshNetwork = WScript.CreateObject(“WScript.Network”)
Part Viii
460
Chapter 23
3
Using the Scripting Objects
WScript.Echo(“Drive: “ + DriveList.Item(i) + “ is: “ +
DriveList.Item(i+1));
}
Use the EnumPrinterConnections Method
The EnumPrinterConnections() method returns a WshCollection object
containing the list of local and remote printers currently mapped from
the client machine. A WshCollection object is essentially a 0-based array
of strings. The following code shows a typical use for this method:
// Create the WshNetwork object.
WshNetwork = WScript.CreateObject(“WScript.Network”)
// Get the printer list.
PrintList = WshNetwork.EnumPrinterConnections();
// Enumerate the drives.
for (i=0; i<PrintList.length; i+=2)
{
// The local drive letter is first and then the UNC
location.
WScript.Echo(“Printer: “ + PrintList.Item(i) + “ is: “ +
PrintList.Item(i+1));
}
Use the MapNetworkDrive Method
The MapNetworkDrive(strLocal, strRemote [, lUpdate] [, strUser]
[, strPassword]) method creates a new drive connection for the local
machine. strLocal contains the local name for the drive specified by
strRemote. The strRemote value must contain a locatable resource and
usually uses a UNC format such as \\Remote\Drive_C. Setting lUpdate to
True adds the new connection to the user profile, which means Windows
makes the connection available each time the user boots their machine.
strUser and strPassword contain optional username and password values required to log on to the remote machine and create the connection.
The following code shows a typical use for this method:
// Create the WshNetwork object.
WshNetwork = WScript.CreateObject(“WScript.Network”)
Use the WScript.WshNetwork Object
461
// Map a network drive.
// !!! You must change this code to match your system!!!
WshNetwork.MapNetworkDrive(“Z”, “\\\\MyServer\\
ASharedDrive”);
Use the RemoveNetworkDrive Method
The RemoveNetworkDrive(strName [, lForce] [, lUpdate]) method
deletes a previous network drive mapping. If strName contains a local
name, Windows only cancels that connection. If strName contains a
remote name, then Windows cancels all resources associated with
that remote name. Set lForce to True if you want to disconnect from a
resource whether or not that resource is in use. Setting lUpdate to True
removes the connection from the user profile so that it doesn’t appear
the next time that the user logs on to the machine. The following code
shows a typical use for this method:
// Create the WshNetwork object.
WshNetwork = WScript.CreateObject(“WScript.Network”)
// Remove the network drive.
// !!! You must change this code to match your system!!!
WshNetwork.RemoveNetworkDrive(“Z”);
The RemovePrinterConnection(strName [, lForce] [, lUpdate]) method
deletes a previous network printer connection. If strName contains a
local name, Windows only cancels that connection. If strName contains
a remote name, then Windows cancels all resources associated with
that remote name. Set lForce to True if you want to disconnect from a
resource, whether or not that resource is in use. Setting lUpdate to True
removes the connection from the user profile so that it doesn’t appear
the next time that the user logs on to the machine. The following code
shows a typical use for this method:
// Create the WshNetwork object.
WshNetwork = WScript.CreateObject(“WScript.Network”)
// Remove the printer connection.
// !!! You must change this code to match your system!!!
WshNetwork.RemovePrinterConnection(“LPT1”);
Creating Scripts
Use the RemovePrinterConnection Method
Part Viii
462
Chapter 23
3
Using the Scripting Objects
Create a Basic Script
Scripts can make the command line significantly easier to automate and
can improve the reliability of command line tasks by helping you perform tasks in the same sequence every time. This section shows how to
create basic scripts in both VBScript and JavaScript so you can see the
differences between the two languages. You’ll also see how to use some
of the objects described in the scripting object-specific sections of the
chapter. The following code shows a basic example in VBScript:
‘ Test1.VBS shows how to use functions and subprocedures
‘ within a WSH script.
WScript.Echo(“The value returned was: “ +
CStr(MyFunction(1)))
function MyFunction(nSomeValue)
WScript.Echo(“Function received value of: “ +
CStr(nSomeValue))
Call MySubprocedure(nSomeValue + 1)
MyFunction = nSomeValue + 1
end function
sub MySubprocedure(nSomeValue)
WScript.Echo(“Subprocedure received value of: “ +
CStr(nSomeValue))
end sub
As you can see, the sample code uses the WScript object to send
information to the screen. The WScript object is always available at
the command line, even though you’ve probably never used it as part
of a browser application. As shown in the example, it’s important to
know how to use both functions and subs, the two building blocks of
VBScript. The following code shows a similar example for JavaScript:
// Test1.JS shows how to use functions within a WSH script.
WScript.Echo(“The value returned was: “ + MyFunction(1));
function MyFunction(nSomeValue)
{
Create a Basic Script
463
WScript.Echo(“The value received was: “ + nSomeValue);
return nSomeValue + 1;
}
JavaScript only provides functions, so that’s all this example demonstrates. It’s also important to notice that VBScript requires you to
convert numeric values to a string, while JavaScript performs the conversion automatically. The following sections show how to perform certain command line–oriented tasks using scripting.
Script the Command Line and System Environment
Many of your scripts require access to the command line. The command line is where you type switches to modify the behavior of the
script, as many of the utilities described in this book do. The system
environment contains user, application, and operating system values,
such as the user’s name or the version of the operating system. The
JavaScript code in Listing 23.1 retrieves information from the command
line. It also retrieves information about the application environment.
Listing 2 3.1: Working with the Command Line and System Environment
// Create some constants for display purposes (buttons and
icons).
var intOK = 0;
var intOKCancel = 1;
var intAbortRetryIgnore = 2;
var intYesNoCancel = 3;
var intYesNo = 4;
var intRetryCancel = 5;
var intStop = 16;
var intQuestion = 32;
var intExclamation = 48;
var intInformation = 64;
// Create some popup return values.
var intOK = 1;
var intCancel = 2;
Creating Scripts
// ProgInfo.JS determines the specifics about your program
and then
// displays this information on screen.
Part Viii
464
Chapter 23
3
var
var
var
var
var
var
var
Using the Scripting Objects
intAbort = 3;
intRetry = 4;
intIgnore = 5;
intYes = 6;
intNo = 7;
intClose = 8;
intHelp = 9;
// Create a popup display object.
var WshShell = WScript.CreateObject(“WScript.Shell”);
// Create a variable for holding a popup return value.
var intReturn;
// Get the program information and display it.
WshShell.Popup(“Full Name:\t” + WScript.Fullname +
“\r\nInteractive:\t” + WScript.Interactive +
“\r\nName:\t\t” + WScript.Name +
“\r\nPath:\t\t” + WScript.Path +
“\r\nScript Full Name:\t” + WScript.ScriptFullName +
“\r\nScript Name:\t” + WScript.ScriptName +
“\r\nVersion:\t\t” + WScript.Version,
0,
“Program Information Demonstration”,
intOK + intInformation);
// Ask if the user wants to display the argument list.
intReturn = WshShell.Popup(“Do you want to display the
argument list?”,
0,
“Argument List Display”,
intYesNo + intQuestion);
// Determine if the user wants to display the argument list
and
// display an appropriate message.
if (intReturn == intYes)
// See if there are any arguments to display.
DisplayArguments();
else
Create a Basic Script
465
WScript.Echo(“Goodbye”);
function DisplayArguments()
{
// Create some variables.
var strArguments = “Arguments:\r\n\t”;
// Argument
list.
var intCount = 0;
// Loop counter.
// See if there are any arguments, if not, display an
// appropriate message.
if (WScript.Arguments.Length == 0)
WshShell.Popup(“There are no arguments to display.”,
0,
“Argument List Display”,
intOK + intInformation);
// If there are arguments to display, then create a list
// first and display them all at once.
else
{
for (intCount = 0;
intCount < WScript.Arguments.Length;
intCount++)
strArguments = strArguments +
WScript.Arguments.Item(intCount)
WshShell.Popup(strArguments,
0,
“Argument List Display”,
intOK + intInformation);
}
}
When you run this script, you’ll see a dialog box containing all of the
information about the script engine. When you click OK, the program
asks if you want to display the command line arguments. If you say yes,
then you’ll see anything you typed at the command line. Otherwise, the
script displays a Goodbye message.
Creating Scripts
+ “\r\n\t”;
Part Viii
466
Chapter 23
3
Using the Scripting Objects
You should notice a few things about this example. First, the code
creates a WshShell object. You need access to the WshShell object for
many of the tasks you’ll perform with scripts. The code also shows how
to use the Popup() method to obtain information from the user. Finally,
the code uses the Arguments object to access the command line information. Notice the object hierarchy used in this example.
Script the Registry
Many of the utilities described in this book rely on the registry to store
and retrieve data about the machine, the operating system, the user, and
the application itself. Knowing how to access the registry from your script
is important because you also need to access these values in order to discover how a particular utility will react or how the user had configured
the system. You can also use the registry to store and retrieve values for
your script. The example in Listing 23.2 shows how to use VBScript to
access information in the registry. You don’t want to change information
unless you have to, but seeing what’s available in the registry is a good
way to build your knowledge of both scripting and the registry. Note that
this example uses the command line argument to determine which file
extension to look for in the registry. The example uses the .TXT file extension when you don’t supply one.
Listing 2 3.2 : Working with the Registry
‘ RegRead.VBE will display the application extension
information
‘ contained in the registry.
‘ Create an icon and button variable for Popup().
intOK = 0
intInformation = 64
‘ Create a popup display object.
set WshShell = WScript.CreateObject(“WScript.Shell”)
‘ Create variables to hold the information.
strExtension = “”
‘ File extension that we’re looking
for.
strFileType = “”
‘ Holds the main file type.
strFileOpen = “”
‘ File open command.
Create a Basic Script
strFilePrint = “”
strDefaultIcon = “”
467
‘ File print command.
‘ Default icon for file type.
‘ See if the user provided a file extension to look for.
‘ If not, assign strExtension a default file extension.
if (WScript.Arguments.Length > 0) then
strExtension = WScript.Arguments.Item(0)
else
strExtension = “.txt”
end if
‘ Get the file type.
strFileType = WshShell.RegRead(“HKEY_CLASSES_ROOT\“ +_
strExtension + “\“)
‘ Display the results.
WshShell.Popup “File Type:” + vbTab + vbTab + vbTab +
strFileType +_
vbCrLf + “File Open Command:” + vbTab + strFileOpen +_
vbCrLf + “File Print Command:” + vbTab + vbTab +
strFilePrint +_
vbCrLf + “Default Icon:” + vbTab + vbTab +
strDefaultIcon,_
0,_
“RegRead Results”,_
intOK + intInformation
When you run this script, it reads the command line. If you haven’t
supplied a value, the script assigns a default extension of .TXT. The
script uses the extension to locate information in the registry such as
Creating Scripts
‘ Use the file type to get the file open and file print
‘ commands, along with the default icon.
strFileOpen = WshShell.RegRead(“HKEY_CLASSES_ROOT\“ +_
strFileType +_
“\shell\open\command\“)
strFilePrint = WshShell.RegRead(“HKEY_CLASSES_ROOT\“ +_
strFileType +_
“\shell\print\command\“)
strDefaultIcon = WshShell.RegRead(“HKEY_CLASSES_ROOT\“ +_
strFileType +_
“\DefaultIcon\“)
Part Viii
468
Chapter 23
3
Using the Scripting Objects
the file open and print commands. Finally, the script uses the Popup()
method to display the output.
You should notice several differences between this example and the
JavaScript example in Listing 23.1. First, the method for creating an
object requires the use of a set—you can’t simply assign the object to
a variable. You’ll also notice that VBScript has access to all of the standard Visual Basic constants such as vbTab and vbCrLf. Finally, VBScript
handles many of the method calls as subs, not as functions. You need to
exercise care when working in a mixed environment.
Create .LNK Files
Up until now, you may have taken .LNK (link) files for granted in
Windows because they’re exceptionally easy to create. However, sometimes you want to automate the process of creating links on the user’s
machine, so it’s good to know how to create them using a script as well.
You’ll find a ton of references to an elusive Shortcut utility for Windows
online, but you won’t find the actual executable on your hard drive,
which may leave you puzzling for a long time. It’s possible to create .LNK
files using scripts. Listing 23.3 shows a script that places a .LNK file on
your desktop for Notepad. Now you can double-click this .LNK file and
open a copy of Notepad (menu not required).
NOTE Windows Server 2008 Server Core may not display
links on the desktop. In this case, you can still place links in a
common folder, such as %USERPROFILE%, which points to your
user folder. You can still type the .LNK filename and press Enter
to use the link file from the command line. In short, .LNK files
are still useful, even if you can’t see their physical manifestation in the form of an icon.
Listing 2 3.3 : Creating a New .LNK File
‘ Create the shell object.
Set WshShell = WScript.CreateObject(“WScript.Shell”)
‘ Define the location of the LNK file.
LinkFilename = WshShell.ExpandEnvironmentStrings(“%USERPROF
ILE%”)
LinkFilename = LinkFilename + “\Desktop\Notepad.LNK”
Create a Basic Script
469
‘ Create the LNK file object.
Set LNKFile = WshShell.CreateShortcut(LinkFilename)
‘ Set the LNK file contents.
LNKFile.TargetPath = “%SYSTEMROOT%\System32\Notepad.EXE”
LNKFile.Arguments = “”
LNKFile.Description = “Open Notepad”
LNKFile.HotKey = “”
LNKFile.IconLocation = “%SYSTEMROOT%\System32\Notepad.EXE,
1”
LNKFile.WindowStyle = “1”
LNKFile.WorkingDirectory = “C:\”
‘ Save the LNK file to disk.
LNKFile.Save
NOTE You can find a downloadable version of the Shortcut
command at http://www.optimumx.com/download. The
Shortcut command provides the means to create a .LNK file
without resorting to using a script. In addition, you can use it
to create an .INI file that contains all of the .LNK file configuration information. The ReadMe.TXT file that comes with the
Shortcut command tells you about all of the command line
parameters you need to use it.
Creating Scripts
The code begins by creating a Windows Script shell. This shell provides access to features such as environment strings and the function
for creating a shortcut. The next step creates a location name based on
the user’s profile—the \Users\UserName folder for the user. You may
use any of the environment variables that Windows supports to obtain
information for your scripts. It then adds the actual .LNK file location to
the path.
Now that the code has a path to use for creating the .LNK file, it uses
the CreateShortcut() function to create it. At this point, the script sets
the various .LNK file contents. Any field you can change in a .LNK file,
you can also change using a script. Finally, the script saves the results
to the hard drive. It’s essential to perform this final step or the .LNK file
won’t work. Simply type the .LNK filename and press Enter to execute it
at the command line. For example, in this case you would type Notepad.
LNK and press Enter at the command line to start a copy of Notepad.
Part Viii
24
Creating Advanced
Scripting Examples
In this chapter, you will learn to:
33
33Discover the NetSH Helper List (Page 473)
Script Registry Entries (Pages 472–473)
Script Networking Solutions (Pages 473–479)
n
n
Get NetSH Help (Page 474)
n
Execute NetSH Commands (Page 476)
n
Understand the Basic NetSH Contexts (Page 476)
n
Use the Root Context Commands (Page 478)
33
33Change Logons, Ports, and Users (Page 481)
Impersonate a User (Page 480)
Change the Environment (Pages 481–483)
n
n
Enable or Disable Session Logons Directly (Page 482)
n
List COM Port Mappings (Page 482)
n
Modify the Install Mode (Page 482)
33
33
Map a Network Drive (Pages 483–487)
Creating Scripts
Create a . CSV File (Pages 487–491)
Part Viii
472
Chapter 24
3
Creating Advanced Scripting Examples
C
hapters 22 and 23 provide you with some scripting basics and
information sources you can use to learn more about scripting.
This chapter takes things one step further. In this chapter, you find
some advanced scripting techniques you can use to make your scripting experience better. Even if you skip this chapter for now, you can
come back to it later and use it as a reference for scripting techniques
as the need arises.
Script Registry Entries
The RegIni utility lets you perform registry manipulations that involve
security or other configurations. You can also use it to perform a list
of registry modifications as a script, rather than individually using
RegEdit. The most common use of this utility is to modify the security
settings for the registry as explained by the Knowledge Base article at
http://support.microsoft.com/?kbid=245031. The Knowledge Base
article at http://support.microsoft.com/?kbid=237607 has additional
information on using this utility for security purposes. You can find
a more complete discussion of how to use RegIni, including creating
scripts using a number of techniques, on the Windows IT Library site
at http://www.windowsitlibrary.com/Content/237/2.html.
To use this utility, you type RegIni Scriptname and press Enter,
where Scriptname is the name of a file that contains the instructions
you want RegIni to perform. If you want to use this utility to perform
tasks on another system, you include the –m \\ComputerName command line switch where ComputerName is the name of another system
using the UNC format. For example, if you want to execute a script
called MyScript.RegIni on MyServer, you type RegIni –m \\MyServer
MyScript.RegIni and press Enter.
Newer versions of RegIni, such as those found in Windows 7, have
additional rules that older versions of RegIni don’t follow, such as the
requirement to use quoted strings. Because of the new requirements,
Script Networking Solutions
473
old scripts won’t run when using newer versions of RegIni unless you
use the –b command line switch to relax the script requirements. When
using an older script with a newer version of RegIni, type RegIni -b
Scriptname and press Enter. Newer versions of RegIni also include
some usage enhancements that you can see by typing RegIni /? and
pressing Enter.
Script Networking Solutions
Many of the utilities discussed in this book are mini-command processors. For example, the WMIC utility actually opens into a separate environment in which you can execute commands—the command line interface
almost ends up being a scripting environment. The Network Command
Shell (NetSH) utility extends this idea by providing an extensible command
processor. You access the functionality that this utility provides by loading a helper Dynamic Link Library (DLL). Each helper DLL places the
NetSH utility into a different context. The use of helper DLLs theoretically
makes it possible for third-party vendors to add NetSH functionality as part
of their network product installation. The following sections describe the
NetSH utility in more detail.
To discover the NetSH helper list, type NetSH Show Helper and press
Enter. This command displays a list of helper DLLs installed on your
machine, which may differ from the list shown in Figure 24.1 based on
the operating system features you have installed.
Notice the hierarchy of contexts displayed in Figure 24.1. To access
the IPv4 context at the command line, you must type NetSH Interface
IPv4 and then the command you want to use. Likewise, if you want to
access the 6To4 context, you must type NetSH Interface IPv6 6To4 at
the command line.
Creating Scripts
Discover the NetSH Helper List
Part Viii
474
Chapter 24
3
Creating Advanced Scripting Examples
Figure 24.1: Obtain a list of helper DLLs for your setup using the NetSH Show Helper
command.
Get NetSH Help
Like many of the complex utilities that Microsoft provides, such as
WMIC, NetSH uses a hierarchical help structure. Typing any context by
itself (or followed by a question mark (?) or Help) displays the list of
commands for that context. For example, to see help for IPv4, you type
NetSH Interface IPv4 /? and press Enter.
Type a command to see the list of subcommands or the instructions
for using that command. Type a subcommand to see the instructions for
using that subcommand. For example, to discover how to add a new
Script Networking Solutions
475
IP address, type NetSH Interface IP Add Address /? at the command
prompt and press Enter. You’ll see a help display explaining the command, as shown in Figure 24.2.
NOTE This chapter doesn’t discuss the specifics of each context because they vary according to operating system version
and the helpers you have installed. Unfortunately, there isn’t
any documented resource from Microsoft for standard contexts
in Windows Server 2008, Vista, or Windows 7, but you can use
the Windows 2003 resource as a guideline. The contexts for
Windows 2003 appear at http://technet.microsoft.com/library/
cc778084.aspx. You can find additional NetSH utility documentation in the Microsoft Knowledge Base article at http://support.
microsoft.com/?kbid=242468 and The Cable Guy article at http://
technet.microsoft.com/library/bb878123.aspx.
Creating Scripts
Figure 24.2 : The multilevel command structure provided by NetSH provides you with
help at each step.
Part Viii
476
Chapter 24
3
Creating Advanced Scripting Examples
Execute NetSH Commands
The NetSH utility provides access to a broad range of networking functionality using contexts. Each context represents a different functional
network area such as configuring the firewall or modifying security.
You can interact with NetSH at the command line, in an interactive environment, and using scripts. In this case, a script file is simply a list of
commands that you want NetSH to perform. You place these commands
in a text file and pass them to NetSH to execute.
To execute a NetSH command, you use the NetSH Context Command
[Arguments] format, where Context is one or more levels used to access a
specific NetSH context, Command is a command that the context supports,
and the optional Arguments is one or more pieces of data that the command requires. For example, to see the interfaces supported by the local
machine, you type NetSH Interface Show Interface and press Enter. In
this case, Interface is the context, Show is the command, and Interface
is an argument.
If you want to use a script to execute the commands, use the –f
ScriptFile command line switch, where ScriptFile is the name of a file
that contains one command per line. For example, if you want to execute
a script named MyScript, you type NetSH -f MyScript and press Enter.
In some cases, you’ll want to execute commands on another
machine. Unlike most utilities, you can’t specify the password for
the remote system at the command line. Instead, you must provide
the password when the command executes. In this case, you use the
NetSH –r RemoteMachine –u [DomainName\]UserName Context Command
[Arguments] format, where RemoteMachine is the UNC location of a
remote system, DomainName is an optional domain name for the user
account, and UserName is the name of the account you want to use
for the connection. For example, to see the interfaces supported by
MyServer using the Josh account, you type NetSH -r MyServer -u Josh
Interface Show Interface and press Enter.
Understand the Basic NetSH Contexts
The various helper DLLs provide contexts that you can use to perform
specific tasks. You can access some of these contexts directly from the
command line using a command. Table 24.1 describes each of the toplevel contexts.
Script Networking Solutions
477
Table 24.1: Standard NetSH Contexts
Context
Name
Windows
Version
Bridge
Windows XP
and above
Shows configuration information for network adapters
that are part of a network bridge. You can also use this
context to enable or disable Level 3 compatibility mode.
Diag
Windows XP
and above
Performs network diagnostic commands. For example,
you can use this context to display network service
status information or perform diagnostics similar to the
Ping utility. A special NetSH Diag GUI command
displays information in the Help and Support Center that
provides access to the network diagnostics.
Firewall
Windows XP
and above
Provides complete access to the Windows firewall. You
can use this context to add and remove configuration
information, as well as display the current firewall state.
Interface
Windows 2000
and above
Provides access to the network interfaces installed on
your machine, which normally include IP, IPV6 (Windows
XP and above), and standard port proxies. You can use
this context to configure the TCP/IP protocol including
addresses, default gateways, DNS servers, and WINS
servers.
RAS
Windows 2000
and above
Provides access to the Remote Access Server (RAS)
and all of its configuration information. For example,
this context provides access to the Authentication,
Authorization, Accounting, and Auditing (AAAA) subcontext where you perform security setups.
Routing
Windows 2000
and above
Helps you configure the routing features of the system
using a command line interface, rather than rely on
the Routing and Remote Access console. The biggest
advantage of the command line interface, in this case, is
speed. You can access and manage remote servers over
a large network, especially wide area networks (WANs)
much faster using NetSH than you can the graphical
equivalents. In addition, because these configuration
tasks can become quite complex, you gain the advantage
of scripting them once, rather than going through every
required step each time you perform the task.
WinSock
Windows XP
and above
Shows Windows Socket (WinSock) information for the
current system. You can also use this context to dump the
WinSock configuration script.
Creating Scripts
Description
Part Viii
478
Chapter 24
3
Creating Advanced Scripting Examples
Use the Root Context Commands
The default context is the root context, the NetSH utility itself. You can
use specific commands from this context to perform configuration tasks
or access other contexts. The following list describes the command line
arguments, which differ according to the version of Windows that you
use and the networking features you have installed:
NN
add: Adds a configuration entry to the list of entries. When work-
ing at the root context, you can add new helper DLLs to the list.
NN
NN
delete: Deletes a configuration entry from the list of entries.
When working at the root context, you can remove a helper DLL
from the list.
dump: Displays a configuration script. The script is quite long, so
you’ll want to use redirection to store the script to a file.
NN
exec: Executes the specified script file.
NN
interface: Sets NetSH to use the interface context.
NN
ras: Sets NetSH to use the RAS context.
NN
routing: Sets NetSH to use the routing context.
NN
NN
set: Updates the configuration settings. Most versions of NetSH only
allow you to set the machine name when working at the root context.
show: Displays NetSH configuration information. Most versions of
NetSH provide commands to display both the list of aliases and the
list of helpers installed on the system.
Windows XP and above provide additional functionality to support
items such as the firewall. Here are the Windows XP additions:
NN
bridge: Sets NetSH to use the bridge context.
NN
diag: Sets NetSH to use the diag context.
NN
firewall: Sets NetSH to use the firewall context.
NN
winsock: Sets NetSH to use the WinSock context.
Windows 2003 and above supports still more commands. The following list describes the Windows 2003 additions.
NN
cmd: Creates a command window where you can enter NetSH com-
mands manually.
NN
comment: Executes any commands accumulated in offline mode.
Script Networking Solutions
NN
NN
479
flush: Discards the commands accumulated in offline mode.
online: Sets the current mode to online. In online mode, which is
the default for all previous versions of NetSH, the utility executes
immediately any command you issue. Type NetSH show mode and
press Enter to display the current mode.
NN
offline: Sets the current mode to offline. In offline mode, which
was new for Windows 2003, the utility accumulates any commands you issue and executes them as a batch. Using this second
approach on remote servers can greatly enhance performance
without any loss of functionality. Use the show mode command to
display the current mode.
NN
NN
popd: Removes a context from the NetSH stack. Earlier versions
popped the context from the system stack using the PopD command.
pushd: Pushes a context onto the NetSH stack. Earlier versions pushed
context onto the system stack by using the PushD command.
Newer Utilities Can Replace Older Equivalents
As part of keeping track of utility functionality, you must also
monitor the services that Microsoft supports. For example,
Windows 2000 supports the ReSerVation Protocol (RSVP), but
Microsoft no longer supports this service on Windows XP and
newer systems. The loss of this service affects the method you
use to reserve network resources and, consequently, the use of
utilities. See the MSDN article at http://msdn.microsoft.com/
library/aa374137.aspx for details.
Of course, even if the latest version of Windows supports a particular service, you’ll want to ensure the service runs automatically. As an example, Windows XP originally enabled the TelNet
service but disabled it for the SP2 release. You’ll often need to
rely on third-party resources, such as the Web site at http://
www.ss64.com/ntsyntax/services.html, to obtain information
about services because Microsoft tends to hide this information
(or not publish it at all).
Creating Scripts
One of the tricks of the trade when working at the command
line is to look for efficient replacements of old bulky commands.
The NetSH utility is such a replacement. You can use it in place
of a number of older utilities and graphical tools. For example,
the NetSH utility replaces the older RouteMon utility. Even though
you’ll find the RouteMon executable on Windows XP and newer
systems, the executable now tells you to use NetSH instead.
Part Viii
480
Chapter 24
3
Creating Advanced Scripting Examples
Impersonate a User
It’s important to set security on your machine to prevent outside
sources, especially those from email or Web sites, from running scripts
on your machine. Of course, setting security to prevent others from
executing virus-laden code also tends to keep your scripts from running—at least with the credentials of the current user. The RunAs utility provides a way for you to have great security and still allow script
execution too. You use this utility to run a particular application with
credentials other than those used by the current user.
In the most basic form of this command, you type RunAs /
User:UserName Command, where UserName is the account you want to use
in place of the current logon and Command is any executable that you
want to run. When you use RunAs this way, RunAs will prompt you for
a password to use to access the account.
If you use RunAs frequently with a particular account, you can add
the /SaveCred command line switch to save the credentials you provide
in the local password store. After the credentials are saved, RunAs won’t
ask you to provide a password every time you use a particular account.
When a credential applies only for network access, use the /NetOnly
command line switch so that the local store will record the password
properly. If you have a smartcard that you use in place of a password,
add the /SmartCard command line switch to the command.
Other accounts normally have an environment associated with them.
Whenever you use RunAs, it configures the RunAs environment to match
the account you’re using to ensure the command works properly. If the
account is for a user who doesn’t have the same setup as you do, you
can use the /Env command line switch to configure the RunAs environment the same as your own environment.
Likewise, RunAs normally uses the profile of the account you use to
run a command. The /NoProfile command line switch specifies that you
don’t want to load the RunAs user’s profile when running the application. The benefit of using this setting is that the application loads more
quickly. In addition, this setting acts as a safety feature because the
application you want to run is less likely to corrupt the RunAs user’s settings. However, using this feature can prevent some applications from
running, especially when they rely on settings in the user profile to perform certain tasks.
Change the Environment
481
Change the Environment
Windows provides the means to control the user’s environment with
great accuracy through command line utilities. You can define whether
the user can install applications, enable or disable session logons, and
modify port configurations. The Change utility is the most powerful of
the four because you can use it to perform any of these tasks. The other
three utilities provide subsets of the Change functionality. The following
sections describe these environment-changing utilities.
Change Logons, Ports, and Users
The Change utility helps you control the user’s ability to install applications, enable or disable session logons, and control ports. You could
consider each of these actions a specific utility mode, but the utility is
quite simple, so the following sections describe all three tasks.
The Change User command specifies whether the user has execute or
install privileges. To see the user’s current rights, type Change User /
Query and press Enter. The Change utility will show you the user’s rights
to execute and install applications.
If you want to keep the user from executing applications, type Change
User /Execute Disable and press Enter. Likewise, when you want to
enable this right, type Change User /Execute Enable and press Enter.
This command is helpful when you want to ensure the user doesn’t
disturb the environment when you need to perform system updates. In
addition, you could use it for remote sessions where the user should only
access data and not execute applications.
To keep a user from installing applications, type Change User /
Install Disable and press Enter. There are many situations where you
don’t want users installing any application that comes to mind, especially if you want to keep your network as virus free as possible. To reenable this right, type Change User /Install Enable and press Enter.
Enable or Disable Session Logons Using Change
The Change Logon command determines whether Windows enables or disables session logons. Type Change Logon /Query and press Enter to display
the current session logon status. If you want to disable logons, type Change
Creating Scripts
Define the User’s Execution Rights
Part Viii
482
Chapter 24
3
Creating Advanced Scripting Examples
Logon /Disable and press Enter. A common reason to perform this task
is to keep users from logging on to a server that’s in a maintenance mode.
When you finish maintaining the system, type Change Logon /Enable to let
users start logging on to the system again.
Specify the Port Configuration
The Change Port command defines the port configuration. This command
works with serial ports for the most part and you’ll use other commands,
such as WMIC, or a script to specific port assignments. To see the current
port assignments, type Change Port /Query and press Enter. In most cases,
you won’t see a full list of port assignments—just the serial ports.
You can assign a port to a particular device. In this case, type Change
Port LocalName = DeviceName and press Enter, where LocalName is the
name of the device as you’d use it, such as AUX, and DeviceName is the
name of the device, such as \DosDevices\COM1. Use the /D LocalName
command line switch to remove the port assignment.
Enable or Disable Session Logons Directly
Use the ChgLogon utility to enable or disable session logons. To see the
current session logon status, type ChgLogon /Query and press Enter.
When you want to disable session logons, type ChgLogon /Disable and
press Enter. Likewise, to enable session logons, type ChgLogon /Enable
and press Enter.
List COM Port Mappings
The ChgPort utility controls port assignments on the current system.
To see the current port assignments, type ChgPort /Query and press
Enter. When you want to create a new port assignment, type ChgPort
LocalName = DeviceName and press Enter, where LocalName is the name of
the device as you’d use it, such as AUX, and DeviceName is the name of the
device, such as \DosDevices\COM1. If you want to delete an existing port,
type ChgPort /D LocalName and press Enter.
Modify the Install Mode
The ChgUsr utility controls the user’s execute and install privileges
on the system. To see the user’s current rights, type ChgUsr /Query and
press Enter.
Map a Network Drive
483
When you want to change application execution rights, type ChgUsr
/Execute Enable to enable the rights or ChgUsr /Execute Disable to
disable the rights and press Enter. Likewise, when you need to change
installation rights, type ChgUsr /Install Enable to enable the right or
ChgUsr /Install Disable to disable the right and press Enter.
Map a Network Drive
You can map a network drive using a batch file, but it’s more difficult
and error prone than using a script. A script can provide one thing that
a batch file can’t in this case—great interactivity. Using a script lets you
interact with the user in a way that would be difficult using a batch file.
In addition, the script provides a modicum of additional error handling
support that makes error handling easier. Listing 24.1 shows a typical
example of how you can implement this functionality using JavaScript.
Listing 24.1: Mapping a Network Drive with JavaScript
// Define the network object used to map the drive.
var oNetwork = new ActiveXObject(“WScript.Network”);
// Detect a request for command line help.
if (WScript.Arguments.length == 1)
if (WScript.Arguments(0) == “/?”)
{
// Display the help information
WScript.Echo(“Usage: MapNetwork <letter> <UNC
target>\n”);
// Exit the script and provide an error level of 1
// indicate a help request.
WScript.Quit(1);
}
else
{
// Display an error message.
WScript.Echo(“Input argument is unknown.”);
WScript.Echo(“Usage: MapNetwork <letter> <UNC
target>\n”);
Creating Scripts
to
Part Viii
484
Chapter 24
3
Creating Advanced Scripting Examples
// Exit the script and provide an error level of 2
to
// indicate a data entry error.
WScript.Quit(2);
}
// Create variables to hold the drive letter and the UNC
location.
var DriveLtr;
var UNCName;
// Detect the correct number of input arguments.
if ( WScript.Arguments.length < 2 )
{
// Ask whether the user wants to continue.
WScript.Echo(“No input provided! Provide it
interactively? [Y | N]“);
var Answer = WScript.StdIn.ReadLine();
// If the user doesn’t want to continue, display help and
exit.
// Use an exit code of 2 to indicate a data entry error.
if (Answer.toUpperCase() == “N”)
{
WScript.Echo(“Usage: MapNetwork <letter> <UNC
target>\n”);
WScript.Quit(2);
}
// Input the drive letter.
WScript.Echo(“Type the local drive letter (X:).”);
DriveLtr = WScript.StdIn.ReadLine();
// Input the UNC drive on the remote machine.
WScript.Echo(“Type the UNC location (\\MyServer\
MyDrive).”);
UNCName = WScript.StdIn.ReadLine();
}
else
{
// Obtain the required inputs from the command line.
DriveLtr = WScript.Arguments(0);
Map a Network Drive
485
UNCName = WScript.Arguments(1);
}
// Tell the user which drive is mapped.
WScript.Echo(“Mapping drive “ + DriveLtr + “ to “ +
UNCName);
The example begins by creating a network object to create the connection. In this case, the code uses the new ActiveXObject() method.
You can also use WScript.CreateObject() to perform the same task.
The method you use depends on personal taste in most cases. This
example uses the ActiveXObject() method for the sake of completeness.
If you want to use the other method, you would replace this line of code
with var oNetwork = WScript.CreateObject(“WScript.Network”);.
The next section of code addresses the need to handle the /? command line switch. The help displayed in this example is decidedly weak.
You’d provide a lot more help in a fully functional production script.
The command and utility examples in this book provide you with a
good idea of the kind of information you need to provide to make a
script useful for everyone. Notice how the code detects the number of
arguments first, and then handles the special case of the /? command
line switch. Notice how the code exits with an error level of 1, so you
can trap the help request in a batch file if desired.
Of course, you also need to handle the case where someone provides
a single input, but it isn’t the /? command line switch. The code displays
a special error message along with the same help that you would normally display for the /? command line switch. Notice that in this case
Creating Scripts
// Attempt to create the connection.
try
{
// Perform the drive mapping function.
oNetwork.MapNetworkDrive(DriveLtr, UNCName);
}
catch(e)
{
// Display an error when the task fails.
WScript.Echo(“Couldn’t map the drive!\n” +
e.description);
WScript.Quit(3);
}
Part Viii
486
Chapter 24
3
Creating Advanced Scripting Examples
the script exits with an error level of 2. Using a different error level lets
you trap this particular problem in a batch file.
At this point, the code begins looking at the input. The input must
provide two arguments to map a network drive to a local drive letter.
Consequently, when the script detects two input arguments, it places
them in the appropriate variables and attempts to map the network
drive. You might wonder why the script doesn’t perform all kinds of
odd error checking on the input arguments. The try...catch statement
is the secret in this case. If the user provides incorrect input, the
oNetwork.MapNetworkDrive(DriveLtr, UNCName) call fails and the catch
part of the statement traps the error. The script displays an error message in this case and exits again. Because this is another kind of error,
the script sets the error level to 3. Notice that the script conveniently
disregards any more than two inputs.
Using Scripting Effectively
Sometimes you do need to use scripting techniques to ensure
you get the right results from your command line activities. The
best rule of thumb to follow is that anything that requires direct
application access through something other than command line
switches requires a script, rather than a batch file. In addition,
if you’ve just spent five hours trying to get a batch file to work
and feel that you still haven’t made any progress, then perhaps
you’re not using the right tool for the job.
It’s this second point where many people get into endless discussions about the suitability of one technique over another. In
many cases, it’s part personal preference and part skill or special
need. For example, at one time some people tried to use spreadsheets in place of word processors (it really was common in the
1980s). However, anyone who has used both products today
knows that each tool has a particular job to perform and it’s
better to use the right tool for the job. The same rule applies to
scripts versus batch files. You might be able to use batch files to
meet most of your needs, but eventually, you’ll run into a complex task that simply requires a script to perform adequately.
At this point, all the code needs to handle is the case where the user
doesn’t provide any input arguments. This is where the interactive features of scripting pay off. The script begins by asking the user whether
they want to provide the input interactively. If so, the code asks some
Create a .CSV File
487
simple questions and tries to map the drive. If not, the code exits with a
help message and an error level of 2. The reason the script uses an error
level of 2 is that this is the same kind of error as providing a single input
that isn’t the /? command line switch.
Create a .CSV File
Sometimes it’s important to see the same example using two different techniques. The example in this section performs the same task as
the batch file example in the “Use a Centralized Data Store” section
of Chapter 21. When you compare the code in Listing 24.2 with the
code in Listing 21.7, you’ll notice that Listing 24.2 is significantly longer, even though it produces the same output. In addition, the code in
Listing 24.2 is significantly more complex. However, if you perform just
these two comparisons, you’ll miss some of the reasons to use scripts.
Mostly notably, the script version demonstrates the flexibility that this
form of coding can provide. For example, you have more control over
the files. The input files are read only, which means that the code can’t
damage them, even accidentally. Consequently, the files are safer than
when you use a batch file to manipulate them. Listing 24.2 shows the
script version of the CSV output example.
Listing 24.2 : Creating CSV Output Using a Script
// Create a File System Object to work with files.
var FSO = WScript.CreateObject(“Scripting.
FileSystemObject”);
// Create a WshShell object to obtain environment variables.
var Shell = WScript.CreateObject(“WScript.Shell”);
// Create variables to hold the static data.
var CompName = Shell.ExpandEnvironmentStrings(“%COMPUTERNAM
E%“);
Creating Scripts
// Determine whether the Output2.CSV file exists and delete
it.
if (FSO.FileExists(“Output2.CSV”))
FSO.DeleteFile(“Output2.CSV”, false);
Part Viii
488
Chapter 24
3
Creating Advanced Scripting Examples
var UserName = Shell.ExpandEnvironmentStrings(“%USERNAME%“);
var DateTime = new Date();
// Obtain the list of file specifications.
WScript.Echo(“Locating temporary files to delete.”);
var DirSpec = FSO.OpenTextFile(“DelFiles.TXT”, 1);
// Process each entry in the file.
while (!DirSpec.AtEndOfStream)
{
// Get a single file specification.
var ThisSpec = DirSpec.ReadLine();
// Process the directory specification.
WScript.Echo(“Adding database values for “ + ThisSpec);
Shell.Run(
“Cmd /C Dir “ + ThisSpec + “ /B /S > TmpDirFiles.TXT”,
0, true);
// Open the file containing the individual file entries.
var Files = FSO.OpenTextFile(“TmpDirFiles.TXT”, 1);
// Open the CSV file to accept the file entries.
var Output = FSO.OpenTextFile(“Output2.CSV”, 8, true);
// Process each of the file entries in turn.
while (!Files.AtEndOfStream)
{
// Get an individual file entry.
var File = Files.ReadLine();
// Create the CSV file entry. Begin with the computer
name and
// the username.
Output.Write(“\“”);
Output.Write(CompName);
Output.Write(“\“,\“”);
Output.Write(UserName);
Output.Write(“\“,\“”);
// Processing the date requires a little additional
work. You
Create a .CSV File
489
Output.Write(DateTime.getMonth() + 1);
Output.Write(“/“ + DateTime.getDate() +
“/“ + DateTime.getFullYear());
Output.Write(“\“,\“”);
// Extract the time from DateTime.
Output.Write(DateTime.getHours() + “:” +
DateTime.getMinutes() + “:” +
DateTime.getSeconds());
Output.Write(“\“,\“”);
Creating Scripts
// must extract the individual elements and put them
together as
// desired. Begin by converting the day number to a
day string.
var DayNum = DateTime.getDay();
switch (DayNum)
{
case 0:
Output.Write(“Sun “);
break;
case 1:
Output.Write(“Mon “);
break;
case 2:
Output.Write(“Tue “);
break;
case 3:
Output.Write(“Wed “);
break;
case 4:
Output.Write(“Thu “);
break;
case 5:
Output.Write(“Fri “);
break;
case 6:
Output.Write(“Sat “);
break;
}
Part Viii
490
Chapter 24
3
Creating Advanced Scripting Examples
// Finally, add the filename to the output.
Output.Write(File);
Output.WriteLine(“\“”);
}
// Close the working files.
Files.Close();
Output.Close();
}
// Close the file containing the file specifications.
DirSpec.Close();
The code begins by removing any existing output file. JavaScript and
VBScript lack file support. However, you have access to the Scripting.
FileSystemObject object, which does provide full file system support.
You can use this object to perform a multitude of tasks with files,
including creating, deleting, and editing them. The FileSystemObject
also includes functionality for working with folders.
The next step is to retrieve the username, computer name, date, and
time. In many cases, you can simply use the ExpandEnvironmentStrings()
method to obtain the information you need from the system. Notice that
the example code uses the Date object in place of obtaining the date from
the environment variables using the Shell.ExpandEnvironmentStrings
(“%DATE%“) method. When working with JavaScript, you can only access
the environment variables that you can see with the Set command.
JavaScript doesn’t support the extended functionality that’s available
at the command line. In fact, you’ll find that this general rule applies
to both VBScript and JavaScript; neither scripting language supports
the extensions that you can access from a batch file at the command
prompt. The Date object also provides time support, so you don’t need a
separate Time variable.
At this point, it’s time to begin collecting a list of temporary files on
the system. This example, like its batch file counter, relies on an external file to hold the file specifications. The code opens the file and begins
processing it one line at a time. The use of a constant value of 1 for the
FSO.OpenTextFile() method opens the file in read-only mode. The code
processes the file one line at a time (one file specification at a time) using
the DirSpec.ReadLine() method. You can read one character at a time
using the DirSpec.Read() method instead.
Create a .CSV File
491
Creating Scripts
This example points out a very special feature of the scripting languages. Notice the use of the Shell.Run() method. You can use this
method to run any application. To use this feature at the command
prompt, you have to begin by creating a command processor using the
CMD utility as shown. In this case, the code runs the Dir command with
the file specification obtained from DelFiles.TXT. This line of code begs
the question of why the code doesn’t use the FileSystemObject. In this
particular case, you can perform the task faster and without any loss
of functionally by using the Dir command. The point is that you don’t
always have to use a scripting object; sometimes a command line tool
works just as well or even better.
The code now has two files to work with. The first is an input file,
TmpDirFiles.TXT, which contains the list of temporary files. The second
is an output file, Output2.CSV, which contains the database of file entries.
The FSO.OpenTextFile() constant of 8 opens the file in append (read/
write) mode. If the file doesn’t exist, the code raises an error unless you
also set the third argument to True, which tells the method to create the
file when it doesn’t exist.
Now all the code needs to do is process the data and output it. The
user and computer names are straightforward. Processing the date
requires the most code because the code has to put the date string
together. The downside of all this code is that it makes the example
harder to read than the batch file. The plus side is that you can create a
date string in any format required, even nonstandard formats.
As a final note on this example, make sure you close files when you
finish working with them. Otherwise, the script raises an error when
you try to open the file again. In some cases, the file could remain open
until you reboot the system, making it inaccessible to everyone.
Part Viii
A
Alphabetical Command List
494
Appendix A
3
Alphabetical Command List
T
his appendix provides you with an alphabetical listing of all of the
commands and utilities found in the book. You can use Table A.1 as
a quick reference guide to make it easier to locate a particular command
or utility. Given that the book provides you with details on using 149
different commands and utilities, locating a particular entry can prove
difficult, which is why I included this appendix. If you can’t find the
command or utility you want, try the topical listing found in Appendix
B. Please contact me at JMueller@mwt.net with any comments that will
make this appendix more useful.
NOTE Remember that most commands and utilities support
the /? command line switch. If you see a command or utility in
this list that looks interesting, simply type Name /? and press
Enter, where Name is the name of the command or utility, to get
additional information.
Table A.1: Alphabetical Reference to Commands and Utilities
Command or
Utility Name
Chapter
Section/Task
ANSI.SYS
19
Use ANSI.SYS to Control the Environment
Assoc
4
Determine File Associations
Create File Associations
19
Use Command Extensions
Attrib
4
Set File Attributes
AuditPol
16
Audit User Access
AutoChk
5
Manage the Volume Dirty Bit
BCDEdit
15
Manage the Boot Configuration
BlastCln
17
Remove Viruses
Call
19
Use Command Extensions
21
Employ the Call Command
4
View the Current Directory
Change the Current Directory
19
Use Command Extensions
24
Change the Environment
CD
Change
Appendix A
3
Alphabetical Command List
Table A.1: Alphabetical Reference to Commands and Utilities (continued)
Command or
Utility Name
Chapter
Section/Task
CHCP
19
Set the Code Page Number with the CHCP Utility
ChDir
4
View the Current Directory
Change the Current Directory
19
Use Command Extensions
ChgLogon
24
Enable or Disable Session Logons
ChgPort
24
List COM Port Mappings
ChgUsr
24
Modify the Install Mode
ChkDsk
6
Determine File and Directory Status
Locate Bad Sectors
ChkNTFS
6
Perform Boot Time Disk Checks
Choice
21
Employ the Choice Command
Cipher
7
Protect Data
Clip
20
Redirect Command Line Output to the Clipboard
CLS
1
Clear the Display
CMD
19
Use the CMD Switches
CmdKey
20
Manage Usernames and Passwords
Color
19
Use Command Extensions
20
Change Screen Colors
Compact
6
Save Hard Drive Space
Copy
4
Copy Files
CScript
2
Change Security and Basic Setup
18
Use the SCRegEdit Script
22
Use the Windows Scripting File
Execute Scripts
23
Use the WScript Object
20
Configure the System Date
Date
continues
495
496
Appendix A
3
Alphabetical Command List
Table A.1: Alphabetical Reference to Commands and Utilities (continued)
Command or
Utility Name
Chapter
Section/Task
Defrag
6
Improve Disk Access Performance
Del
4
Remove a Directory
Remove Files
19
Use Command Extensions
4
Find Directories
Find Directories Using Patterns
Remove a Directory
Find Files
Find Files in Sorted Order
Find Files by Attribute
Find Files Using Patterns
5
Employ Data Redirection
Display Data One Page at a Time
DiskPart
6
Manage Partitions
DosX
19
Add DPMI Support Using the DosX Utility
DSAdd
11
Interact with Organizational Units
12
Create New Objects
11
Interact with Users
12
Get Objects
11
Reset a User’s Password
12
Edit Existing Objects
DSMove
12
Move Existing Objects
DSQuery
11
Manage Active Directory with the DSQuery Utility
DSRm
12
Delete Existing Objects
Echo
1
Display Environment Variables
5
Execute Applications Anywhere
21
Employ the Echo Command
Perform Complex File Iteration
Utilize Variable Substitution
Dir
DSGet
DSMod
Appendix A
3
Alphabetical Command List
Table A.1: Alphabetical Reference to Commands and Utilities (continued)
Command or
Utility Name
Chapter
Section/Task
EMM.SYS
19
Control the Expanded Memory EMM Entry
EndLocal
19
Use Command Extensions
Erase
4
Remove Files
19
Use Command Extensions
EventCreate
13
Create Simple System Events
EventTriggers
13
Trigger System Events
Exit
21
Employ the Exit Command
Find
5
Find Simple Strings
11
Obtain a User’s Full Name
13
Enumerate the Logs
17
List Services
FindStr
5
Find Complex Strings
Display Files Containing Strings
Perform Case Insensitive Searches
For
4
Find Files Using Patterns
19
Use Command Extensions
21
Employ the For Command
ForFiles
21
Employ the ForFiles Utility
Format
6
Format a Disk
FSUtil
4
Create Simple Hard Links
View Simple Hard Links
Delete Simple Hard Links
5
Monitor the File System with the FSUtil Command
4
Determine File Types
Create File Types
19
Use Command Extensions
8
Get the Media Access Control Information
FType
GetMAC
continues
497
498
Appendix A
3
Alphabetical Command List
Table A.1: Alphabetical Reference to Commands and Utilities (continued)
Command or
Utility Name
Chapter
Section/Task
Goto
4
Find Files Using Patterns
19
Use Command Extensions
21
Employ the GoTo Command
GPResult
16
Obtain Group Policy Results
GPUpdate
16
Manage Group Policies
GrafTabl
19
Enable Graphics Character Support with the
GrafTabl Utility
Help
1
Obtain Command Line Help
HIMEM.SYS
19
Control Extended Memory with HIMEM.SYS
ICACLS
7
Change File and Directory Access
If
4
Find Files Using Patterns
19
Use Command Extensions
21
Employ the If Command
IPConfig
9
Manage the Internet Protocol
Label
6
Manage Volume Labels
LH
19
Save Memory Using the LH Command
LodCtr
14
Add Performance Counters
LogMan
14
Manage Performance Logs and Alerts
Logoff
2
Use the Logoff Utility
MD
4
Create Directories
19
Use Command Extensions
Mem
19
Set the Command Interpreter Location
MkDir
4
Create Directories
MKLink
4
Create Hard Links Using the New Technique
Create Symbolic Links
Create Junctions
Appendix A
3
Alphabetical Command List
Table A.1: Alphabetical Reference to Commands and Utilities (continued)
Command or
Utility Name
Chapter
Section/Task
MKLink
19
Use Command Extensions
More
5
Display Data One Page at a Time
7
Use the Query Option
11
Manage Directory Services Using the WMIC
NTDomain Alias
13
Display a List of Publishers
Enumerate the Logs
17
Use TaskKill and TaskList Filters
MountVol
6
Mount a Volume
Move
4
Move Directories
Rename Directories
Move Files
MRT
17
Detect and Remove Malicious Software
MSTSC
10
Create Remote Connections
Net
2
Change Security and Basic Setup
8
Interact with the Network Using the Net Utility
15
Configure a Time Source
NetDiag
9
Perform Detailed Network Diagnostics
NetSH
2
Change Security and Basic Setup
24
Script Networking Solutions
NetStat
9
Get Network Statistics
NTDSUtil
11
Manage the Active Directory Database
OpenFiles
7
Detect Shared Open Files
Path
4
Find Files Using Patterns
5
Execute Applications Anywhere
9
Trace Transmission Paths
PathPing
continues
499
500
Appendix A
3
Alphabetical Command List
Table A.1: Alphabetical Reference to Commands and Utilities (continued)
Command or
Utility Name
Chapter
Section/Task
Pause
21
Employ the Pause Command
PING
9
Check Connections
PopD
19
Use Command Extensions
21
Store and Retrieve Directories with the PushD and
PopD Commands
4
View the Current Directory
19
Use Command Extensions
21
Employ the Prompt Command
19
Use Command Extensions
21
Store and Retrieve Directories with the PushD and
PopD Commands
QProcess
10
Obtain Process Information
Query
16
Obtain Session Status Information
QUser
16
Obtain User Logon Information
QWinSta
10
Get Session Information
RD
4
Remove a Directory
ReDir
19
Install the Network Redirector Using the ReDir Utility
Reg
18
Manage the Registry
RegEdit
18
Perform Basic Registry Tasks
19
Configure the Command Interpreter in the Registry
RegIni
24
Script Registry Entries
RegSvr32
22
Use the Windows Scripting File
ReLog
14
Create New Performance Logs from Existing Logs
Rem
21
Employ the Rem Command
Ren
4
Rename a File
Prompt
PushD
Appendix A
3
Alphabetical Command List
Table A.1: Alphabetical Reference to Commands and Utilities (continued)
Command or
Utility Name
Chapter
Section/Task
Rename
4
Rename a File
Reset
10
Terminate a Session
RmDir
4
Remove a Directory
Route
9
Manipulate the Network Routing Tables
RunAs
24
Impersonate a User
SC
1
Work with Services
3
Configure the Task Scheduler
SCHTasks
3
Manage Tasks Using the SchTasks Command
SCRegEdit
18
Use the SCRegEdit Script
SecEdit
17
Configure Local Security Policies
Set
1
Manage Environment Variables with the Set
Command
19
Use Command Extensions
21
Add Debug Information to Batch Files
SetLocal
19
Use Command Extensions
SetX
1
Manage Environment Variables with the SetX Utility
SFC
17
Verify System Files
Shift
19
Use Command Extensions
ShutDown
1
Shut Down the System
2
Change Security and Basic Setup
2
Change Security and Basic Setup
15
Activate Windows
Sort
5
Employ Data Redirection
Start
1
Start an Application
19
Use Command Extensions
SLMGR
continues
501
502
Appendix A
3
Alphabetical Command List
Table A.1: Alphabetical Reference to Commands and Utilities (continued)
Command or
Utility Name
Chapter
Section/Task
TakeOwn
7
Take Ownership of Files
TaskKill
17
Use TaskKill and TaskList Filters
Terminate Tasks
TaskList
17
Use TaskKill and TaskList Filters
List Applications
List Services
TCMSetup
10
Set Up a Telephony Client
Time
20
Configure the System Time
TimeOut
21
Employ the Choice Command
Employ the TimeOut Utility
Title
20
Change the Command Window Title
TraceRpt
14
Convert Event Trace Logs
TraceRt
9
Track the Network Path
Tree
4
Display a Directory Structure
TSDiscon
10
Disconnect an Active Session
TSKill
10
End Processes
TSShutDn
10
Shut Down the Terminal Server
Type
5
Display a Data File on Screen
UnlodCtr
14
Remove Performance Counters
Ver
1
Determine the Operating System Version
Verifier
17
Verify Drivers
Vol
6
Get Volume Information
W32Tm
8
Configure Time Synchronization
15
Manage the System Time
WaitFor
21
Employ the Choice Command
WEvtUtil
13
Manage Event Information
Appendix A
3
Alphabetical Command List
Table A.1: Alphabetical Reference to Commands and Utilities (continued)
Command or
Utility Name
Chapter
Section/Task
WhoAmI
16
Discover User Identity
WinRM
10
Perform Remote Windows Management
WinRS
10
Execute Commands on a Remote System
WMIC
2
Change Security and Basic Setup
10
Define a URI
11
Manage Directory Services Using the WMIC
NTDomain Alias
15
Configure the Server
WScript
22
Execute Scripts
Configure the Host and Property Page Options
XCopy
4
Perform Bulk File Transfers
21
Employ the If Command
503
B
Topical Command List
506
Appendix B
3
Topical Command List
T
his appendix provides you with a topical (categorical) listing of
all 149 commands and utilities found in the book. You can use
Tables B.1 through B.14 to locate commands and utilities by topic
(category). If you can’t find the command or utility you want, try the
alphabetical listing found in Appendix A. Please contact me at JMueller
@mwt.net with any comments that will make this appendix more useful.
NOTE Remember that most commands and utilities support
the /? command line switch. If you see a command or utility in
this list that looks interesting, simply type Name /? and press
Enter, where Name is the name of the command or utility, to get
additional information.
Table B.1: Active Directory–Related Commands and Utilities
Command or
Utility Name
Chapter
Section/Task
DSAdd
11
Interact with Organizational Units
12
Create New Objects
11
Interact with Users
12
Get Objects
11
Reset a User’s Password
12
Edit Existing Objects
DSMove
12
Move Existing Objects
DSQuery
11
Manage Active Directory with the DSQuery Utility
DSRm
12
Delete Existing Objects
NTDSUtil
11
Manage the Active Directory Database
DSGet
DSMod
Table B.2 : Application Management–Related Commands and Utilities
Command or
Utility Name
Chapter
Section/Task
Reg
18
Manage the Registry
RegEdit
18
Perform Basic Registry Tasks
Appendix B
3
Topical Command List
Table B.2 : Application Management–Related Commands and Utilities (continued)
Command or
Utility Name
Chapter
Section/Task
RegEdit
19
Configure the Command Interpreter in the Registry
Start
1
Start an Application
Table B.3 : Batch File and Script-Related Commands and Utilities
Command or
Utility Name
Chapter
Section/Task
Call
19
Use Command Extensions
21
Employ the Call Command
Choice
21
Employ the Choice Command
Clip
20
Redirect Command Line Output to the Clipboard
CLS
1
Clear the Display
CmdKey
20
Manage Usernames and Passwords
Color
19
Use Command Extensions
20
Change Screen Colors
2
Change Security and Basic Setup
18
Use the SCRegEdit Script
22
Use the Windows Scripting File
Execute Scripts
23
Use the WScript Object
Date
20
Configure the System Date
DosX
19
Add DPMI Support Using the DosX Utility
Echo
1
Display Environment Variables
5
Execute Applications Anywhere
21
Employ the Echo Command
Perform Complex File Iteration
Utilize Variable Substitution
CScript
continues
507
508
Appendix B
3
Topical Command List
Table B.3 : Batch File and Script-Related Commands and Utilities (continued)
Command or
Utility Name
Chapter
Section/Task
EventCreate
13
Create Simple System Events
EventTriggers
13
Trigger System Events
Exit
21
Employ the Exit Command
For
4
Find Files Using Patterns
19
Use Command Extensions
21
Employ the For Command
ForFiles
21
Employ the ForFiles Utility
GoTo
4
Find Files Using Patterns
19
Use Command Extensions
21
Employ the GoTo Command
GrafTabl
19
Enable Graphics Character Support with the
GrafTabl Utility
If
4
Find Files Using Patterns
19
Use Command Extensions
21
Employ the If Command
LH
19
Save Memory Using the LH Command
Logoff
2
Use the Logoff Utility
More
5
Display Data One Page at a Time
7
Use the Query Option
11
Manage Directory Services Using the WMIC
NTDomain Alias
13
Display a List of Publishers
Enumerate the Logs
17
Use TaskKill and TaskList Filters
2
Change Security and Basic Setup
8
Interact with the Network Using the Net Utility
Net
Appendix B
3
Topical Command List
Table B.3 : Batch File and Script-Related Commands and Utilities (continued)
Command or
Utility Name
Chapter
Section/Task
Net
15
Configure a Time Source
NetSH
2
Change Security and Basic Setup
24
Script Networking Solutions
4
Find Files Using Patterns
5
Execute Applications Anywhere
Pause
21
Employ the Pause Command
PopD
19
Use Command Extensions
21
Store and Retrieve Directories with the PushD and
PopD Commands
4
View the Current Directory
19
Use Command Extensions
21
Employ the Prompt Command
19
Use Command Extensions
21
Store and Retrieve Directories with the PushD and
PopD Commands
Rem
21
Employ the Rem Command
RunAs
24
Impersonate a User
SCHTasks
3
Manage Tasks Using the SCHTasks Command
SCRegEdit
18
Use the SCRegEdit Script
Set
1
Manage Environment Variables with the Set
Command
19
Use Command Extensions
21
Add Debug Information to Batch Files
SetX
1
Manage Environment Variables with the SetX Utility
Shift
19
Use Command Extensions
Start
1
Start an Application
Path
Prompt
PushD
continues
509
510
Appendix B
3
Topical Command List
Table B.3 : Batch File and Script-Related Commands and Utilities (continued)
Command or
Utility Name
Chapter
Section/Task
Time
20
Configure the System Time
TimeOut
21
Employ the Choice Command
Employ the TimeOut Utility
Title
20
Change the Command Window Title
Ver
1
Determine the Operating System Version
Vol
6
Get Volume Information
WaitFor
21
Employ the Choice Command
WhoAmI
16
Discover User Identity
WScript
22
Execute Scripts
Configure the Host and Property Page Options
Table B.4 : Command Line–Related Commands and Utilities
Command or
Utility Name
Chapter
Section/Task
ANSI.SYS
19
Use ANSI.SYS to Control the Environment
CHCP
19
Set the Code Page Number with the CHCP Utility
Clip
20
Redirect Command Line Output to the Clipboard
CLS
1
Clear the Display
CMD
19
Use the CMD Switches
Color
19
Use Command Extensions
20
Change Screen Colors
Date
20
Configure the System Date
EMM.SYS
19
Control the Expanded Memory EMM Entry
EndLocal
19
Use Command Extensions
EventCreate
13
Create Simple System Events
Appendix B
3
Topical Command List
Table B.4 : Command Line–Related Commands and Utilities (continued)
Command or
Utility Name
Chapter
Section/Task
EventTriggers
13
Trigger System Events
Help
1
Obtain Command Line Help
HIMEM.SYS
19
Control Extended Memory with HIMEM.SYS
More
5
Display Data One Page at a Time
7
Use the Query Option
11
Manage Directory Services Using the WMIC
NTDomain Alias
13
Display a List of Publishers
Enumerate the Logs
17
Use TaskKill and TaskList Filters
4
Find Files Using Patterns
5
Execute Applications Anywhere
PopD
19
Use Command Extensions
PushD
19
Use Command Extensions
RunAs
24
Impersonate a User
Set
1
Manage Environment Variables with the Set
Command
19
Use Command Extensions
SetLocal
19
Use Command Extensions
SetX
1
Manage Environment Variables with the SetX Utility
Time
20
Configure the System Time
Title
20
Change the Command Window Title
TraceRpt
14
Convert Event Trace Logs
Ver
1
Determine the Operating System Version
Vol
6
Get Volume Information
Path
511
512
Appendix B
3
Topical Command List
Table B.5 : Diagnostics-Related Commands and Utilities
Command or
Utility Name
Chapter
Section/Task
EventCreate
13
Create Simple System Events
EventTriggers
13
Trigger System Events
NetDiag
9
Perform Detailed Network Diagnostics
PathPing
9
Trace Transmission Paths
PING
9
Check Connections
SFC
17
Verify System Files
TaskKill
17
Use TaskKill and TaskList Filters
Terminate Tasks
TaskList
17
Use TaskKill and TaskList Filters
List Applications
List Services
TraceRpt
14
Convert Event Trace Logs
WEvtUtil
13
Manage Event Information
WinRM
10
Perform Remote Windows Management
Table B.6 : Disk Management–Related Commands and Utilities
Command or
Utility Name
Chapter
Section/Task
AutoChk
5
Manage the Volume Dirty Bit
CD
4
View the Current Directory
Change the Current Directory
19
Use Command Extensions
4
View the Current Directory
Change the Current Directory
19
Use Command Extensions
ChDir
Appendix B
3
Topical Command List
Table B.6 : Disk Management–Related Commands and Utilities (continued)
Command or
Utility Name
Chapter
Section/Task
ChkDsk
6
Determine File and Directory Status
Locate Bad Sectors
ChkNTFS
6
Perform Boot Time Disk Checks
Defrag
6
Improve Disk Access Performance
DiskPart
6
Manage Partitions
Format
6
Format a Disk
Label
6
Manage Volume Labels
MD
4
Create Directories
19
Use Command Extensions
4
Create Directories
19
Use Command Extensions
MKLink
4
Create Hard Links Using the New Technique
Create Symbolic Links
Create Junctions
MountVol
6
Mount a Volume
Move
4
Move Directories
Rename Directories
Move Files
Path
4
Find Files Using Patterns
5
Execute Applications Anywhere
RD
4
Remove a Directory
RmDir
4
Remove a Directory
TakeOwn
7
Take Ownership of Files
Tree
4
Display a Directory Structure
MkDir
513
514
Appendix B
3
Topical Command List
Table B.7: File Management–Related Commands and Utilities
Command or
Utility Name
Chapter
Section/Task
Assoc
4
Determine File Associations
Create File Associations
Assoc
19
Use Command Extensions
Attrib
4
Set File Attributes
Cipher
7
Protect Data
Compact
6
Save Hard Drive Space
Copy
4
Copy Files
Del
4
Remove a Directory
Remove Files
19
Use Command Extensions
4
Find Directories
Find Directories Using Patterns
Remove a Directory
Find Files
Find Files in Sorted Order
Find Files by Attribute
Find Files Using Patterns
5
Employ Data Redirection
Display Data One Page at a Time
4
Remove Files
19
Use Command Extensions
5
Find Simple Strings
11
Obtain a User’s Full Name
13
Enumerate the Logs
17
List Services
5
Find Complex Strings
Display Files Containing Strings
Perform Case Insensitive Searches
Dir
Erase
Find1
FindStr
Appendix B
3
Topical Command List
Table B.7: File Management–Related Commands and Utilities (continued)
Command or
Utility Name
Chapter
Section/Task
FSUtil
4
Create Simple Hard Links
View Simple Hard Links
Delete Simple Hard Links
FSUtil
5
Monitor the File System with the FSUtil Command
FType
4
Determine File Types
Create File Types
19
Use Command Extensions
ICACLS
7
Change File and Directory Access
Move
4
Move Directories
Rename Directories
Move Files
OpenFiles
7
Detect Shared Open Files
Ren
4
Rename a File
Rename
4
Rename a File
SFC
17
Verify System Files
Sort
5
Employ Data Redirection
Type
5
Display a Data File on Screen
XCopy
4
Perform Bulk File Transfers
21
Employ the If Command
Table B.8 : Hardware Configuration–Related Commands and Utilities
Command or Utility
Name
Chapter
Section/Task
Change
24
Change the Environment
ChgPort
24
List COM Port Mappings
Verifier
17
Verify Drivers
515
516
Appendix B
3
Topical Command List
Table B.9 : Networking-Related Commands and Utilities
Command or
Utility Name
Chapter
Section/Task
GetMAC
8
Get the Media Access Control Information
ICACLS
7
Change File and Directory Access
IPConfig
9
Manage the Internet Protocol
MSTSC
10
Create Remote Connections
Net
2
Change Security and Basic Setup
8
Interact with the Network Using the Net Utility
15
Configure a Time Source
NetDiag
9
Perform Detailed Network Diagnostics
NetSH
2
Change Security and Basic Setup
24
Script Networking Solutions
NetStat
9
Get Network Statistics
PathPing
9
Trace Transmission Paths
PING
9
Check Connections
ReDir
19
Install the Network Redirector Using the ReDir Utility
Route
9
Manipulate the Network Routing Tables
TraceRt
9
Track the Network Path
Table B.10 : Remote Access–Related Commands and Utilities
Command or
Utility Name
Chapter
Section/Task
QProcess
10
Obtain Process Information
Reset
10
Terminate a Session
TSDiscon
10
Disconnect an Active Session
TSKill
10
End Processes
TSShutDn
10
Shut Down the Terminal Server
WinRM
10
Perform Remote Windows Management
WinRS
10
Execute Commands on a Remote System
Appendix B
3
Topical Command List
Table B.11: Server Configuration–Related Commands and Utilities
Command or
Utility Name
Chapter
Section/Task
BCDEdit
15
Manage the Boot Configuration
Net
2
Change Security and Basic Setup
8
Interact with the Network Using the Net Utility
15
Configure a Time Source
2
Change Security and Basic Setup
24
Script Networking Solutions
Reg
18
Manage the Registry
RegEdit
18
Perform Basic Registry Tasks
19
Configure the Command Interpreter in the Registry
RegIni
24
Script Registry Entries
RegSvr32
22
Use the Windows Scripting File
SC
1
Work with Services
3
Configure the Task Scheduler
SCRegEdit
18
Use the SCRegEdit Script
ShutDown
1
Shut Down the System
2
Change Security and Basic Setup
2
Change Security and Basic Setup
15
Activate Windows
TCMSetup
10
Set Up a Telephony Client
W32Tm
8
Configure Time Synchronization
15
Manage the System Time
2
Change Security and Basic Setup
10
Define a URI
11
Manage Directory Services Using the WMIC NTDomain Alias
15
Configure the Server
NetSH
SLMGR
WMIC
517
518
Appendix B
3
Topical Command List
Table B.12 : Session Management–Related Commands and Utilities
Command or
Utility Name
Chapter
Section/Task
ChgLogon
24
Enable or Disable Session Logons
Logoff
2
Use the Logoff Utility
Query
16
Obtain Session Status Information
QUser
16
Obtain User Logon Information
QWinSta
10
Get Session Information
Reset
10
Terminate a Session
Table B.13 : System Monitoring–Related Commands and Utilities
Command or
Utility Name
Chapter
Section/Task
AuditPol
16
Audit User Access
BlastCln
17
Remove Viruses
EventCreate
13
Create Simple System Events
EventTriggers
13
Trigger System Events
FSUtil
4
Create Simple Hard Links
View Simple Hard Links
Delete Simple Hard Links
5
Monitor the File System with the FSUtil Command
LodCtr
14
Add Performance Counters
LogMan
14
Manage Performance Logs and Alerts
Mem
19
Set the Command Interpreter Location
MRT
17
Detect and Remove Malicious Software
NetStat
9
Get Network Statistics
OpenFiles
7
Detect Shared Open Files
QProcess
10
Obtain Process Information
Appendix B
3
Topical Command List
Table B.13 : System Monitoring–Related Commands and Utilities (continued)
Command or
Utility Name
Chapter
Section/Task
ReLog
14
Create New Performance Logs from Existing Logs
TaskList
17
Use TaskKill and TaskList Filters
List Applications
List Services
UnlodCtr
14
Remove Performance Counters
WhoAmI
16
Discover User Identity
Table B.14 : User Management–Related Commands and Utilities
Command or
Utility Name
Chapter
Section/Task
AuditPol
16
Audit User Access
Change
24
Change the Environment
ChgLogon
24
Enable or Disable Session Logons
ChgUsr
24
Modify the Install Mode
CmdKey
20
Manage Usernames and Passwords
GPResult
16
Obtain Group Policy Results
GPUpdate
16
Manage Group Policies
ICACLS
7
Change File and Directory Access
Net
2
Change Security and Basic Setup
8
Interact with the Network Using the Net Utility
15
Configure a Time Source
QProcess
10
Obtain Process Information
QUser
16
Obtain User Logon Information
SecEdit
17
Configure Local Security Policies
WhoAmI
16
Discover User Identity
519
C
Listing of Best Practices
In this chapter, you will learn to:
33
33
33
33
33
33
Always Verify the Data (Page 522)
Real Administrators Use Help (Page 523)
Test Your Theories on a Test System (Page 524)
Use Batch Files, Scripts, and Written
Procedures (Page 525)
Make Backups (Page 526)
Perform User-Specific Changes during
Downtime (Pages 526-527)
522
Appendix C
3
Listing of Best Practices
M
ost administrators are used to following best practices when
working with the Windows GUI. There are principles you follow
to ensure you get the right results, at least most of the time. Likewise,
when you work at the command line, you can follow best practices to
ensure you get good results, at least most of the time. This appendix
tells you about the best practices I’ve created while working at the
command line over the last 20 years. These are time-tested techniques
you can use to obtain good results. They won’t always provide perfect
results; only practice on your part will produce the perfect results you
seek, but they’ll help considerably. I’d love to hear your best practices as
well—feel free to contact me at JMueller@mwt.net.
Always Verify the Data
It always pays to verify the data you’re going to use with a command
or utility. Unlike the GUI environment, the command line environment
doesn’t ever provide you with a list of acceptable choices. Consequently,
you may find that something incredibly small can produce extremely
bad results. For example, you may have two employees and one is
named Newman, while the other is named Neumann. The difference of
two characters can make a huge difference. When working with a GUI,
you’d probably see both names and choose the right one or ask someone
if you weren’t sure. When working at the command line you may not
ever know that both names exist. That’s why you always want to verify
any data you use.
Get the data in written form whenever possible. Obtaining it in
a form that you can cut and paste to the command line is even better. Not only does such a practice save you typing time, but doing so
makes it considerably more difficult to make a mistake. Typos are
understandably a significant source of problems at the command line.
Anything you can do to verify data before you complete a command
is a plus. Copying and pasting are essential parts of working at the
command line.
Appendix C
3
Listing of Best Practices
NOTE To copy any text in a GUI window, highlight the text and
then press Ctrl+C. To paste the text from the clipboard into the
command line window, right-click the command line window
and choose Paste from the context menu. It’s also possible to
move information in the other direction. In this case, right-click
the command line window and choose Mark from the context
menu. Highlight the text you want to copy and then press Enter.
To paste the text into any GUI window, place the cursor at the
insertion point and press Ctrl+V.
Real Administrators Use Help
This book contains 149 commands and utilities. These are the commands and utilities that you find in most versions of Windows (depending on which version you use, you’ll actually find considerably more
commands and utilities). Add to these commands and utilities the commands and utilities that come with any applications you install, and it’s
pretty easy to see that you aren’t going to memorize them all.
Unfortunately, some administrators don’t want to admit that they
lack a photographic memory and attempt to execute commands without
looking at the help the command provides. No, this help isn’t enough
to help you learn how to use the command or utility in most cases, but
it’s enough to jog the memory of an experienced administrator. All you
need to do is type the name of the command followed by the /? command line switch (in most cases) and the command will output help
information for you.
Although this top-level help is enough to understand simple commands such as Dir, it’s not enough to understand complex utilities such
as WMIC. In this case, you have to drill down to the level of help you need.
You can start by typing WMIC /? and pressing Enter to obtain a list of
aliases. After you decide on something like the CPU alias, type WMIC CPU
/? and press Enter to see the list of actions you can perform. After you
decide on an action, such as GET, type WMIC CPU GET /? and press Enter
to obtain the information you need about the GET action for the CPU
alias. Of course, you can always save yourself a lot of time and simply
look up the help for WMIC in this book (see Appendix A for an alphabetical list of commands and utilities).
523
524
Appendix C
3
Listing of Best Practices
Test Your Theories on a Test System
Nothing is as unforgiving as the command prompt when it comes to
experimentation. You can completely trash your hard drive in a matter of seconds and may not even realize it. It’s possible to kill groups,
eliminate users, remove applications, destroy data wholesale, and
completely ruin your career without a single word of warning from the
command line.
This isn’t the place to test out something without realizing that things
can go horribly wrong dreadfully fast. In fact, the reason that many
administrators moved from the command line to the GUI is to avoid
such errors, but now many administrators are moving back to the command line because using a GUI is excessively slow and they simply don’t
have the time to wait for the GUI to get around to doing something. To
try anything new, always use a test system that’s configured like your
real server. You’ll appreciate the safety net that such an arrangement
provides the first time you have to reformat the test machine drive due
to unforeseen complications.
Write down absolutely everything as you test a new process. Don’t use
a file on the server to store this information—it may not be there in a few
moments. If you don’t have a secondary machine you can use, then write
down your procedure on paper. Verify everything you write down to
make sure you wrote it correctly. Execute a command only after you verify that you’ve written it down correctly and used help to ensure you’ve
formatted the command correctly. If something does go horribly wrong,
having a written record can make it possible for someone to help you fix
the problem. Even if you can’t get help, at least you know not to try that
command line syntax again. In some cases, you have to be willing to fail
in order to make progress. Of course, the safety net of your test system
makes such failure nonfatal (but still aggravating).
Even after you create a complete procedure that works in every way,
test it several more times on the test system before you begin using it in
a production environment. Otherwise you may find that the procedure
isn’t as bug free as you anticipated.
Appendix C
3
Listing of Best Practices
Use Batch Files, Scripts, and Written
Procedures
Documentation of all sorts will save you time and effort. A single command or utility probably won’t do everything you want. Consequently,
you need some method of documenting the command or utility
sequence that helps you accomplish useful work on your server. Batch
files, scripts, and written procedures all provide useful ways to record
sequences that you’ll use more than once.
Of course, you’ll want to make sure that you write these items in a
way that makes it easy to figure out what you did the next time you need
to perform the task. Add copious comments to batch files and scripts to
ensure they are documented fully. Make sure your comments are useful. Place an emphasis on what something does, why you did it that way,
and how to work with it. Otherwise, the information you save is useless.
Writing ideas down has a number of additional benefits that you should
consider as part of the payback for the work you’ll perform, such as:
NN
NN
NN
NN
NN
Any time you write down something, it makes it easier to perform
the task again and it also reduces the time required to do it.
You’ll perform the task with fewer mistakes.
The documentation also makes it possible for someone working
for you to accomplish the task when you’re not available—such as
when you’re home watching the game over the weekend and really
don’t want to hear about the latest network failure.
You can document precisely what you have done when you do
need outside help in fixing a problem.
Approved procedures tend to reduce the risk of making the problem worse.
The one thing to avoid is using someone else’s batch file, script, or
written procedure without testing it first, especially if the item was written for another system. Yes, the information can be helpful, but your
system is different from the one for which the batch file, script, or written procedure was designed. Differences between systems can cause significant damage, so you have to know that this external information is
actually going to work. Of course, you don’t want to reinvent the wheel
either. Getting information from someone else can often help you create
your own custom solution faster.
525
526
Appendix C
3
Listing of Best Practices
Make Backups
Before you begin any major configuration exercise on your server, make
a backup. It seems like obvious advice, but administrators often fail
to take it. They think that a little configuration job won’t cause much
trouble until they’re picking up the pieces later. You should already have
a good backup program in place because your server contains valuable data. If you aren’t backing up your server regularly (“regularly” is
defined as at least once a day and probably more often than that), then
you’re already setting yourself up for a major surprise at the worst possible moment. Don’t cause that moment to occur by performing a task
on a server that hasn’t been backed up for the last month.
Try to perform any configuration tasks as soon as possible after the
backup completes so that a disaster will cause as little loss as possible.
In fact, if you can perform the tasks before anyone starts working with
the server, you’ll likely have better results.
Perform User-Specific Changes during
Downtime
Some changes you make to a user account affect the user immediately;
other changes wait until the next time the user logs onto the system.
Think about this issue for a moment and you’ll figure out that this
scenario can create instabilities. The user is likely to become unhappy
because their account won’t work as anticipated. In fact, the account
can become unstable. In a worst case scenario, the instabilities could
cause system crashes and data loss (this scenario is rare, but you always
have to work as if you’ll be the unlucky individual who has it happen to
them). If you can’t make the changes before the user gets into work, specifically have the user log out of the system, perform the configuration
task, and ask the user to log back on. Using this approach will reduce
user frustration.
The same approach also applies to a group. Many group level
changes can cause instabilities in the affected accounts. Normally, you’ll
want to make group changes when everyone is logged out to ensure that
the changes take effect the next time the users of the group log back
onto the system.
Appendix C
3
Listing of Best Practices
NOTE Some users are invariably going to cheat. It’s possible
to stand behind the user, watch them log out, and then go back
to your office to perform the reconfiguration while they log back
onto the system. Inevitably the user will call back sometime later
saying they were logged out, yet the instabilities that they’re telling you about can only occur if they were logged on while you
made the required account changes. If this occurs, have the user
log back out and back onto the system again.
527
Index
Note to the Reader: Throughout this index boldfaced page numbers indicate
primary discussions of a topic. Italicized page numbers indicate illustrations.
A
absolute paths, 60
access
audits. See audit policies
files and directories, 127–132, 128
hard drives, 109–110, 109
local resources, 36–38, 37
registry, 466–468
Access Control Entries (ACEs), 131–132
Access Control Lists (ACLs), 88, 127–131, 128
accessible files, number of, 384
accounts, network, 143–146, 143
Actions tab, 49
activating Windows, 311–312
Active Debugging feature, 443
Active Directory, 214
accessing, 238
commands for, 506
computers
adding, 230–231
editing, 244–245
interaction with, 222
listing, 238–239
contacts
adding, 231–233
editing, 245
interaction with, 222
listing, 239–240
database, 225–227
directory services, 214–218
DSQuery utility, 218–224
editing overview, 243–244
groups
adding, 233–234
editing, 246
interaction with, 222–223
listing, 240–241
objects
associations, 217–218
deleting, 248–249
listing, 215
moving, 248
properties, 215–217
organizational units
adding, 234
editing, 246
interaction with, 223
listing, 241
servers
interaction with, 218–220
listing, 241
users
adding, 234–237
editing, 246–248
interaction with, 220–222
listing, 242–243
active partitions, 117
ActiveXObject method, 453, 485
adapter addresses, renewing, 168
AddPrinterConnection method, 459
addresses
adapter, 168
DHCP, 169
MAC, 140
administrative shares, 159
Administrator account ownership, 134–135
Administrator group, 25
advanced mode for registry, 355
Advanced tab
environment variables, 13
Remote Desktop Connection, 33
alerts, 274
aliases
Job, 46
WMIC, 290–302
Align setting for primary partitions, 115
Allow Connections from Computers Running
Any Version of Remote Desktop option,
29
Allow Me to Save Credentials option, 32
Allow Remote Access option, 28
AllowExtChar option, 83–84
analysis
hard drives, 109–110, 109
local security policies, 344–345
ANSI.SYS file, 382
appending output to files, 95
530
Application log
Application log, 254–255
Application property, 449
applications
character mode, 383
listing, 350–351
management commands, 506–507
paths, 80–81
security, 347–351, 348
starting, 16–17
statistics, 178–179
archiving logs, 270
arguments
command line, 401
WScript, 449–450
Arguments property, 449–450
Assign command, 118–119
ASSOC action in WMIC, 289
Assoc command
extensions, 378
file associations, 72–74
associations
aliases, 289
files, 72–74
NTDomain, 218
querying, 217–218
asterisks (*)
audit categories, 321
connection registrations, 169
directory searches, 59
disk objects, 111
ForFiles loops, 407
passwords, 222
string searches, 82
system events, 261
AT command, 46
at signs (@)
Echo command, 220, 406
WinRM properties, 201
attributes, file
finding files by, 65–66
setting, 71–72
audit policies, 320
backups, 327
clearing, 328
listing, 321–322
obtaining, 322–326, 324
removing, 328
restoring, 327
setting, 326–327
AuditBaseDirectories option, 325
AuditBaseObjects option, 325
AuditPol utility, 320
AuditPol /Backup command, 327
AuditPol /Clear command, 328
AuditPol /Get /Category command,
322–323
AuditPol /Get /Option command, 324, 326
AuditPol /Get /Subcategory command, 322,
324
AuditPol /Get /User command, 321–323
AuditPol /List command, 321
AuditPol /List /Category command, 321
AuditPol /List /Subcategory, 322
AuditPol /List /User command, 321
AuditPol /Remove /AllUsers command, 328
AuditPol /Remove /User command, 328
AuditPol /Restore /File command, 327
AuditPol /Set /Category command, 326–327
AuditPol /Set /Option command, 327
AuditPol /Set /Subcategory command, 327
AuditPol /Set /User command, 326
AutoChk utility, 86
AutoExec.NT file, 381, 387
code page numbers, 387–388
DPMI support, 388–389
graphics character support, 389
LH command, 389
ReDir utility, 389
Automated Tasks (AT), 46
automatic disconnect time for servers, 151
automatic updates, 359
automating tasks
SchTasks, 51–54
Task Scheduler. See Task Scheduler
AUX (auxiliary) devices, 93
B
background color, 395
backups
best practices, 526
logs, 270
policies, 327, 345–346
recovery keys and certificates, 125
bad hard drive sectors, 107–108
Baseboard alias, 291
BasicXml data translation type, 310
batch files, 372
accessible files setting, 384
ANSI.SYS for, 382
AutoExec.NT modifications, 387–389
best practices, 525
centralized data store, 428–429, 429
character mode applications, 383
CMD switches, 372–375
code online for, 401
command interpreter
location, 382
in registry, 375–377, 376
commands
Call, 401–403, 402
Choice, 403–406
Echo, 406
Exit, 406–407
CmdKey utility
extensions, 377–380
For, 409–414, 412–413
ForFiles, 407–409
GoTo, 414
If, 414–418
list, 507–510
Pause, 418
Prompt, 418–419
Rem, 419–420
working with, 400–401
Config.NT
commands, 383
modifications, 380
debug information, 421–425, 423–424
expanded memory, 383–384
extended memory, 385–387
identifying, 425–428
storing and retrieving directories, 430–431
testing, 420–429, 423–424, 430
TimeOut utility, 420
BCDEdit (Boot Configuration Data Store
Editor) utility, 286, 315
BCDEdit /Enum command, 315
BCDEdit /Export command, 315
BCDEdit /Set command, 317–318
help, 316–317
best practices, 522
backups, 526
batch files, scripts, and written procedures,
525
data verification, 522
help, 523
testing, 524
user-specific changes, 526–527
BIOS alias, 291
Blast Clean (BlastCln) utility, 337–338
Blaster virus, 337
boot configuration, 315
BCDEdit help, 316–317
default partitions, 318
editing, 317
enumerating, 315–316, 316
sequence setting, 318
Boot Configuration Data Store Editor. See
BCDEdit (Boot Configuration Data
Store Editor) utility
boot-time disk checks, 108–109
BootConfig alias, 291
Break command, 400
Bridge context in NetSH, 477
Buffer Size option, 6
buffers
command history, 6
screen, 8
BugcheckOnCorrupt option, 84
bulk file transfers, 69–70
C
C$ share, 159
CALL action in WMIC, 289
Call command
batch files, 401–403, 402
extensions, 378
carets (^) in string searches, 82
case insensitive string searches, 83
categories, audit
listing, 321–322
obtaining, 323–324, 324
setting, 326–327
CD command, 60
CDROM alias, 291
centralized data stores, 428–429, 429
CER files, 126
certificates, server, 203
Change utility, 481
Change Logon command, 481–482
Change Port command, 482
Change User command, 481
character mode applications, 383
CHCP Utility, 387–388
ChDir command
extensions, 378
overview, 60
ChgLogon utility, 482
ChgPort utility, 482
ChgUsr utility, 482–483
child directories, 60
ChkDsk utility, 106–108
ChkNTFS utility, 108–109
Choice command, 403–406
Cipher utility, 122–126, 124, 126
Clean command, 117
Clean All command, 117
cleaning hard drives, 117
clearing
display, 16
logs, 270
policies, 328
Verifier settings, 343
Clip utility, 392
Clipboard, redirecting output to, 392
CLOCK$ device, 93
cloning OUs, 224
closing network files, 156
CLS command, 16
CMD.EXE, 372
CMD /C command, 372–373
CMD /E command, 374
CMD /F command, 374
CMD /K command, 373
CMD /Q command, 374
CMD /T command, 374
CmdKey utility, 393
531
532
code page numbers
CmdKey /Add command, 394
CmdKey /Delete command, 394–395
CmdKey /List command, 393–394, 393
code page numbers, 387–388
Code Project article, 254
color
command processor, 374–375
command window text, 9, 10
Remote Desktop, 36
screen, 395–396
Color command
extensions, 378
overview, 395
Colors tab, 9, 10
COM port mappings, 482
COM1 through COM4 devices, 93
Comma Separated Value (CSV) format
application lists, 351
audit user output, 323
centralized data stores, 428–429
scripts for, 487–491
shared open files, 133
Command History, 6
command interpreter
location, 382
in registry, 375–377, 376
command line
arguments, 401
commands for, 510–511
devices, 93
help, 20–21
old vs. new , 373
output redirection to Clipboard, 392
scripts, 361–362, 362, 463–466
Command Processor key, 376
command prompt, 392
command window title, 397–398
output to Clipboard, 392
screen colors, 395–396
system date, 396
system time, 396–397
usernames and passwords, 393–395, 393
command window, 4
fonts, 7, 8
layout, 8–9, 9
options, 4–7, 5
text color, 9, 10
title, 397–398
commands overview
Active Directory related, 506
alphabetical list, 494–503
application management related, 506–507
batch files. See batch files
command line related, 510–511
diagnostics related, 512
disk management related, 512–513
extensions, 374, 377–380
file management related, 514–515
hardware related, 515
network related, 516
NTDSUtil, 225–226
remote access related, 516
remote systems, 206
script related, 507–510
server related, 517
session related, 518
system monitoring related, 518–519
user management related, 520
comments
Rem command, 419–420
servers, 152
Compact utility, 101–102
comparing registry entries, 366–367
completion characters, 374, 377
complex file iterations, 410–412, 412
compressing
files, 85
hard drives, 101–102
%COMPUTERNAME% environment
variable, 287–288, 426–427
ComputerName property, 458
computers
Active Directory
adding, 230–231
editing, 244–245
interaction with, 223
listing, 238–239
networks, 149
ComputerSystem alias, 287–288, 291
CON device, 93
Conditions tab, 50
Config.NT file
commands, 383
considerations, 381
modifying, 380
Config.SYS file, 381
Configure For option, 47
Connect and Don’t Warn Me option, 33
Connect dialog box, 195, 196
connection files
editing, 187, 188
migrating, 189–190
connections
checking, 170–171, 170
displaying, 177–178
network paths, 172–173, 172
refresh intervals, 180
releasing, 169
remote. See remote connections; remote
system management
Remote Desktop Connection, 30–35, 31–32,
34
telephony clients, 190
tracing transmission paths, 171–172, 171
detecting malicious software
contacts in Active Directory
adding, 231–233
editing, 245
interaction with, 223
listing, 239–240
contexts in NetSH, 476–479
continuing services, 18–19, 155
Control Panel, 28
converting event trace logs, 281–282
Copy command, 68–69
copying
files, 68–69
registry entries, 366
text, 523
Count property, 454
counters, performance, 272–276
CPU alias, 291
CPUTIME filter, 349
CrashOnAuditFail option, 322, 324, 326–327
CREATE action in WMIC, 289
Create Partition command, 114–116
Create Task dialog box, 46–50, 47– 48, 50
Create Volume Simple command, 117
CreateObject method, 441, 452–453, 485
CreateShortcut method, 455, 469
Credential Security Support Provider
(CredSSP), 360
credentials of users, 393–395
CScript utility, 27, 442
debugging scripts, 443–444
default scripts, 444
executing scripts, 443
help, 442
CSProduct alias, 291
CSV (Comma Separated Value) format
application lists, 351
audit user output, 323
centralized data stores, 428–429
scripts for, 487–491
shared open files, 133
Ctrl+Break key, 400
curly braces ({}) for WinRM properties, 201
current directory, 60–61
Cursor Size option, 4
Customize Start Menu dialog box, 42
cylinder size, 116
D
DACLs (Discretionary Access Control Lists),
127–131, 128
data
redirection, 92, 94–95, 94
verifying, 522
data files, displaying, 92–97, 94, 97
data links, 74–77
databases
Active Directory, 225–227
WMI, 214
Datafile alias, 291–292
date, system, 396
Date command, 396
%DATE% environment variable, 427
Date object, 490
DCOMApp alias, 292
DEBUG environment variable, 421–424
debug information in batch files, 421–425,
423– 424
debugging scripts, 443–444
decryption, 127
defaults
boot partitions, 318
scripts, 444
Defrag utility, 109–110
defragmenting, 109–110, 109
Del command
extensions, 378
files, 62, 70
hard links, 75–76
DELETE action in WMIC, 289
Delete Disk command, 120
Delete Volume command, 120
DeleteEnvironmentVariable method, 455
DeletePartition command, 120
deleting. See also removing
Active Directory objects, 248–249
disk objects, 120
files, 70–71
groups, 148
hard links, 75–76
log collections, 278
network users, 143
print jobs, 158
registry entries, 357, 365
resources, 205
routes, 183
sessions, 150
system events, 261
tasks, 50–51, 53
users
credentials, 394–395
from groups, 148–149
delims keyword, 411
denying permissions, 131
descriptions for events, 256
Desktop alias, 292
DesktopMemoryAddress alias, 292
DesktopMonitor alias, 292
Detail Disk command, 112
Detail Partition command, 113
Detail Volume command, 113
details for disk objects, 112–113, 112–113
detecting malicious software, 338–339, 338
533
534
Diag context in NetSH
Diag context in NetSH, 477
diagnostics
commands for, 512
system events. See system events
TCP/IP, 170–173, 170–172
Dir command
Dir /A command, 65–66
Dir /AD command, 58–59
Dir /O command, 65
switches, 63–64
symbolic links, 76
directories, 58
access, 127–132, 128
completion characters, 374, 377
creating, 61
current, 60–61
encrypting. See encryption
finding, 58–59
moving, 61
owners, 132
ownership, 134–135
removing, 62
renaming, 61–62
status, 106–107, 106
store and retrieve, 430–431
structure, 62–63, 63
users, 125–127, 126
directory services
objects
getting properties, 216–217
listing, 215
listing properties, 215
querying associations, 217–218
setting properties, 217
overview, 214–215
Directory Services Add. See DSAdd (Directory
Services Add) utility
Directory Services Query. See DSQuery
(Directory Services Query) utility
DirPath environment variable, 67
dirty bit for volumes, 86–87
Disable command for quotas, 90
Disable8dot3 setting, 84
DisableCompression setting, 85
DisableEncryption setting, 85
DisableLastAccess setting, 86
disabling
quotas, 90
session logons, 481–482
telephony client connections, 190
disconnect time for servers, 151
disconnecting
sessions, 208
users from files, 133
Discretionary Access Control Lists (DACLs),
127–131, 128
Disk Operating System (DOS), 373
DiskDrive alias, 292
DiskPart utility, 110–111
Exit command, 120
partitions, 113–114
volumes, 116–117
DiskQuota alias, 292–293
disks and disk drives, 100
access performance, 109–110, 109
bad sectors, 107–108
boot-time checks, 108–109
cleaning, 117
details, 112–113, 112–113
drive letters, 118–119
formatting, 103–104
listing, 87, 111–113
management commands, 512–513
mapping, 483–487
partitions. See partitions
performance, 101
repairing, 86
selecting, 113–114
space savings, 101–102
statistics, 88
type, 87
volumes. See volumes
dismounting volumes, 105
display
clearing, 16
colors, 395–396
Remote Desktop Connection settings,
35–36, 36
size, 8, 35
Display All Running Tasks option, 45
Display Configuration setting, 32
Display Logo When Script Executed in
Command Console option, 445
Display Options setting, 4–5
Display tab, 32, 32, 36, 36
Display the Connection Bar When in Full
Screen Mode option, 36
displaying. See also viewing
activation information, 312
active processes, 331
Config.NT commands, 383
connections and ports, 177–178
data files, 92–97, 94, 97
IP information, 166–168, 167
system event publishers, 262
usernames, 393–394, 393
Distinguished Names (DNs), 231
Distributed Management Task Force (DMTF),
286
DLLs (Dynamic Link Libraries), 473, 474
DMAChannel alias, 293
DMTF (Distributed Management Task Force),
286
DNs (Distinguished Names), 231
Environment alias
dollar signs ($) in string searches, 82
domain controllers, time on, 163
Domain Name System (DNS) service
priority and weight, 361
resolver cache, 168–169
domains
finding, 218–219
passwords, 393
DOS (Disk Operating System), 373
DOS Protected Mode Interface (DPMI),
388–389
DosX utility, 388–389
double quotes (“)
command window titles, 398
file names, 374, 411
DPMI (DOS Protected Mode Interface),
388–389
drivers, verifying, 340–341, 341, 343
drives. See disks and disk drives
Drives command, 87
Drivetype command, 87
DSAdd (Directory Services Add) utility, 230
DSAdd Computer command, 231
DSAdd Contact command, 231–237
DSAdd DomainRoute command, 224
DSAdd Group command, 224, 233–234
DSAdd OU command, 224, 234
DSGet utility, 218, 220–221, 238
DSGet Computer command, 238–239
DSGet Contact command, 239–240
DSGet Group command, 240–241
DSGet OU command, 241
DSGet Server command, 241
DSGet User command, 221–222, 242–243
DSMod utility, 222, 243–244
DSMod Computer command, 244–245
DSMod Contact command, 245
DSMod Group command, 246
DSMod OU command, 246
DSMod User command, 222, 246–248
DSMove utility, 248
DSQuery (Directory Services Query) utility,
218
computer interaction, 223
contact interaction, 223
DSQuery Computer command, 223
DSQuery Contact command, 223
DSQuery DomainRoot command, 224
DSQuery Group command, 224
DSQuery OU command, 224
DSQuery Server /Domain command, 219
DSQuery Server /Forest command, 218
DSQuery User command, 220–222
group interaction, 223–224
organizational unit interaction, 224
server interaction, 218–220
user interaction, 220–222
DSRm utility, 248–249
Dynamic Link Libraries (DLLs), 473, 474
E
Echo command, 220, 426
batch files, 406
environment variables, 11–12
Echo method in WScript, 453
ECHOCONFIG command, 383
Edit Options setting, 7
editing
boot settings, 317
computers, 244–245
connection, 187, 188
connection files, 187, 188
contacts, 245
groups, 246
organizational units, 246
users, 246–248
8.3 filename support, 84–85
EMB (Extended Memory Block) handles, 386
EMM (Expanded Memory Manager),
383–384
EMM396.EXE file, 382
Enable Remote Desktop on This Computer
option, 29
EnableExtensions value, 376
enabling
session logons, 481–482
Terminal Services, 359–360
encryption
decryption, 127
files, 85
hidden files, 124–125
process, 122–123
recovery keys, 125
viewing encrypted objects, 123, 124
EncryptPagingFile setting, 86
ending
processes, 208–209
tasks, 54
endless loops in batch files, 402
EndLocal command extension, 378
Enforce command for quotas, 88–89
enumerating
boot configuration, 315–316, 316
logs, 263
resources, 197–199, 197, 199
EnumNetworkDrives method, 459–460
EnumPrinterConnections method, 460
environment
local machine, 10–15, 11, 14
scripts for, 481–483
Environment alias, 293
535
536
environment variables
environment variables
creating and changing, 12
displaying, 11–12, 12
equations in, 13
expanding, 12–13
on other machines, 15
Set command, 10–13, 11
SetX utility, 13–15
system-level, 15
user input, 13
user-level, 14
Environment Variables dialog box, 13–14, 14
eol keyword, 411
equal signs (=) for properties, 215
equations in environment variables, 13
Erase command
extensions, 378
files, 70
hard links, 75–76
ErrorLevel clause, 405, 415
errors
drive, 86
file systems, 84
try...catch statements, 486
escape codes in ANSI.SYS, 382
Ethernet statistics, 179
event logs, 254–256, 256
Event Trace Logs (ETL), 281–282
Event Viewer, 20
EventCreate utility, 254–255, 257
events, system. See system events
EventTriggers utility, 257–259
EventTriggers /Delete command, 261
EventTriggers /Query command, 261
executing scripts, 442–445
execution rights, 481–483
Exit command
batch files, 406–407
command processor, 372
DiskPart, 120
Expanded Memory Manager (EMM),
383–384
ExpandEnvironmentStrings method, 490
expanding environment variables, 12–13
Expected shutdown category, 20
Experience tab for Remote Desktop
Connection, 33, 38–39, 39
exporting
local security policies, 345–346
logs, 269–270
registry entries, 356–357, 367
expressions, regular, 82
Extend command, 120
extended characters in filenames, 83–84
extended memory, 385–387
Extended Memory Block (EMB) handles, 386
Extended Memory Specification (XMS), 385
extended partitions, 115–116
extending volumes, 119–120
extensions, command, 374, 377–380
external intrusion protection. See viruses and
external intrusions
F
FastOpen utility, 381
file IDs, 133
File System Utility. See FSUtil (File System
Utility)
file systems
information on, 87–88
monitoring, 83–86
repairing, 90–91
filenames
completion characters, 374
extended characters in, 83–84
support, 84–85
files
access, 127–132, 128
accessible, 384
associations, 72–74
attributes, 71–72
batch. See batch files
bulk transfers, 69–70
compressing, 85
copying, 68–69
data, displaying, 92–97, 94, 97
data links, 74–77
dirty bit, 86–87
disconnecting users from, 133
encryption, 85, 122–125
finding, 63–67, 68
finding strings in, 81–83
iterating with For command, 410–412, 412
looping through lists of, 407–409
management commands, 514–515
moving, 71
networks, 155–156
owners, 132
ownership, 134–135
quotas, 88–90
removing, 70–71
renaming, 71
scanning, 339, 340
shared, detecting, 132–134
status, 106–107, 106
types, 73–74
users, 125–127, 126
Files setting, 384
FileSystemObject object, 490
Filter Current Log dialog box, 265, 265–266
help
filters
logs, 265–266, 265–266
TaskKill and TaskList, 347–350, 348
WinRM, 197, 198
Find utility, 81–82
finding
directories, 58–59
domains, 218–219
files, 63–64
by attribute, 65–66
with patterns, 66–67, 68
sorted order, 64–65
strings in, 81–83
hidden servers, 219
SIDs, 130
FindStr utility, 82–83
Firewall context, 477
FixBoot utility, 118
FixMBR utility, 118
flags
Verifier settings, 342–343
volumes, 91
Flexible Single Master Operations (FSMO),
226–227
flow control in batch files, 414–418
Font tab, 7, 8
fonts for command window, 7, 8
For command, 409–410
complex file iterations, 410–412
extensions, 378–379
variable substitution, 412–414
forcing logoffs, 144
foreground color, 395
forests, 218
ForFiles utility, 407–409
Format utility, 103–104
formatting data in WMIC, 306–310, 307–309
formatting disks, 103–104
FQDNs (Fully Qualified Domain Names),
178, 333
fragmentation, 109–110, 109
FSDir alias, 293
FSMO (Flexible Single Master Operations),
226–227
FSUtil (File System Utility), 83
FSUtil Behavior command, 83–86
FSUtil Behavior QuotaNotify command, 90
FSUtil Dirty command, 86–87
FSUtil FSInfo command, 87–88
FSUtil Hardlink command, 75
FSUtil Quota command, 89–90
FSUtil Repair command, 84, 86, 90–91
FType command
extensions, 379
overview, 72–74
full screen for command window, 4
full user names, 221
FullName property, 450
FullPrivilegeAuditing option, 324–325
Fully Qualified Domain Names (FQDNs),
178, 333
G
$G prompt, 60
general applications security, 347–351, 348
General tab for Remote Desktop Connection,
31, 31, 34
GET action in WMIC, 289
GetEnvironmentVariable method, 456
GetMAC command, 140
GetObject method, 452–453
GetScriptEngine method, 454
Globally Unique Identifiers (GUIDs), 105,
321–322
GoTo command
extensions, 379
overview, 414
GPResult command, 328–330
GPUpdate command, 330
GrafTabl Utility, 389
granting permissions, 130–131
graphics character support, 389
greater than signs (>) as output redirection
pointer, 94–95
Group alias, 293
group policies, 328
managing, 330
results, 328–330
Group Policy Update (GPUpdate) utility, 330
groups
Active Directory
adding, 233–234
editing, 246
interaction with, 223–224
listing, 240–241
networks
adding, 146–147
deleting, 148
users, 148–149
viewing, 147–148, 147–148
user membership, 221–222
GUIDs (Globally Unique Identifiers), 105,
321–322
H
hard drives. See disks and disk drives
hard links, 75–76
hardware commands, 515
help
BCDEdit, 316–317
best practices, 523
537
538
Help utility
command line, 20–21
CScript and WScript, 442
Net utility, 156–157
NetSH command, 474–475, 475
SecEdit, 344
WinRM, 192
WMIC, 302–306, 302–306
Help utility, 21
helper DLLs, 473, 474
hidden files, encrypting, 124–125
hidden servers, finding, 219
hiding servers, 152–153
High Memory Area (HMA), 382
HIMEM.SYS driver, 385–387
history, command, 6
hives, registry, 354–355, 355
HMA (High Memory Area), 382
holding print jobs, 158
hostnames, listing, 219–220
HTTPS listeners, 202–204, 202
I
ICACLS utility, 127–128, 128
ICACLS /Deny command, 131
ICACLS /FindSID command, 130
ICACLS /Grant command, 130–131
ICACLS /Remove command, 131
ICACLS /SetOwner command, 132
ICACLS /Verify command, 132
ID setting for primary partitions, 115
IDEController alias, 293
identity of system users, 332–333
If command
extensions, 379
overview, 414–418
IMAGENAME filter, 348
impersonating users, 480
importing
local security policies, 346
registry entries, 357, 367–368
Inactive command, 118
inactive partitions, 118
inheritance rights, 128, 130
Initiate command for volume repair, 91
input redirection, 95
install mode, 482–483
interactive processing in batch files, 403–406
Interactive property, 450
Interface context in NetSH, 477
interfaces for WScript, 449
Internet Protocol (IP), 166
DNS resolver cache, 168–169
information for, 166–168, 167
releasing connections, 169
renewing adapter addresses, 168
renewing DHCP addresses and registering
DNS names, 169
Internet Protocol (IP) Security Protocol
Working Group, 360
Interrupt 15h interface, 385
intervals
connection refresh, 180
repeating tasks, 52
intrusion protection. See viruses and external
intrusions
invoking methods on resources, 205
IP Security (IPSec) monitor, 360
IPConfig utility, 166, 167
IPConfig /DisplayDNS, 168
IPConfig /FlushDNS command, 169
IPConfig /RegisterDNS command, 169
IPConfig /Release command, 169
IPConfig /Renew command, 168
IPConfig /Renew6 command, 168
IPSec (IP Security) monitor, 360
IRQ alias, 294
Item property, 454
J
JavaScript
basics, 436–438
mapping network drives, 483–487
Job alias, 46, 294
junctions, 77
K
Kerberos authentication, 312, 397
keyboards for remote computers, 37
keys, registry, 354–355, 355
deleting, 357
exporting, 356–357
importing, 357
L
Label command, 103
labels for volumes, 103
language attribute, 441
language support, 387–388
Large option for cursor, 4
last access attribute, 86
layout for command window, 8–9, 9
Layout tab, 8, 9
LDAP Policies command, 225
Length property, 454
less than symbols (<) as input redirection
pointer, 95
MkDir command
Let System Position Window option, 8–9
LH (Load High) command, 389
links
file data, 74–77
symbolic, 76–77
LIST action in WMIC, 290
List Disk command, 111
List Partition command, 111
List Volume command, 111
listeners in HTTPS, 202–204, 202
listing
applications, 350–351
audit categories, 321–322
audit users, 321
computers, 238–239
contacts, 239–240
disk objects, 111–112
drives, 87
groups, 240–241
hostnames, 219–220
object properties, 215
organizational units, 241
policies, 321–322
processes, 206–207
servers, 241
services, 351
users, 242–243
volumes, 105
.lnk files, 468–469
Load High (LH) command, 389
Load method, 453
loading performance counters, 272–273
LoadOrder alias, 294
local devices for remote computers, 37–38
local files, tracking, 134
local machine, 4
command line help, 20–21
command window, 4–9, 5, 8–10
common tasks, 16–20
environment, 10–15, 11, 14
Local Resource tab, 33, 36–38, 37
local resources in remote access, 36–38, 37
local security policies, 344
analysis, 344–345
configuring, 345
exporting, 345–346
importing, 346
validating, 346–347
LocalGroup for remote systems, 25
LodCtr utility, 272–273
logical partitions, 116
LogicalDisk alias, 294
LogMan utility, 274
LogMan Create Counter command,
274–276
LogMan Delete command, 278
LogMan Query command, 277
LogMan Start command, 276
LogMan Stop command, 276
LogMan Update command, 277
Logoff utility, 40
logoffs
forcing, 144
system, 19
Logon alias, 294
logons
scripts for, 481–482
user information, 333
user names, 220–221
logs
archiving, 270
clearing, 270
enumerating, 263
events, 254–256, 256
exporting, 269–270
obtaining, 267
performance. See performance logs
querying, 264–266, 265–266
setting, 267–269
looping in batch files, 407–409
LPT1 through LPT4 devices, 93
M
MAC (Media Access Control) addresses, 140
machine names, 15
malicious software, 338–339, 338
Malicious software Removal Tool (MRT),
338–339, 338
MapNetworkDrive method, 460–461
mapping
COM ports, 482
network drives, 483–487
MaxConnections setting, 202
MD command, 61
Media Access Control (MAC) addresses, 140
Mem utility, 382
Memcache alias, 294
memory
command interpreter location, 382
expanded, 383–384
extended, 385–387
saving, 389
MemoryChip alias, 294
MemoryPhysical alias, 294
MEMUSAGE filter, 349
methods, 448
Microsoft Port Reporter service, 179
Microsoft Terminal Services Client (MSTSC)
utility, 187, 189–190
migrating connection files, 189–190
minus signs (-) for file attributes, 71
MkDir command
extensions, 379
overview, 61
539
540
MKLink utility
MKLink utility, 76–77
Modify command for quotas, 90
MODULES filter, 349
monitoring
commands for, 518–519
file systems, 83–86
system events. See system events
system performance, 272
counters, 272–273
logs. See performance logs
More utility, 95–97
mount points, 118–119
mounting volumes, 104–105
MountVol command, 105
Move command
directories, 61–62
files, 71
moving
Active Directory objects, 248
directories, 61–62
files, 71
MRT (Malicious software Removal Tool),
338–339, 338
MSTSC (Microsoft Terminal Services Client)
utility, 187, 189–190
N
Nachi virus, 337
Name property, 450
named values in registry, 364
names
completion characters, 374, 377
computers, 149
directories, 61–62
files, 71
logon, 220–221
users, 221
volumes, 103
namespaces, 193–195, 196
Net utility
help, 141, 156–157
Net Accounts command, 143, 143, 145–146
Net Accounts /ForceLogoff command, 144
Net Computer command, 149
Net Computer /Add command, 149
Net Computer /Delete command, 149
Net Config Server command, 151, 156
Net Config Server /Autodisconnect
command, 151
Net Config Server /Comment command, 152
Net Config Server /Hidden command, 152
Net Config Workstation command, 153
Net Continue command, 155
Net File command, 155
Net File /Close command, 156
Net Group command, 146–147
Net Help command, 156
Net Helpmsg command, 157
Net LocalGroup command, 25, 146–148
Net LocalGroup /Add command, 148
Net LocalGroup /Delete command, 148–149
Net Pause command, 155
Net Print command, 157
Net Print /Delete command, 158
Net Print /Hold command, 158
Net Print /Release command, 158
Net Session command, 149–150
Net Session /Delete command, 150
Net Share command, 159
Net Share /Delete, 161
Net Share Drive command, 160
Net Start command, 154
Net Start W32Time command, 313–314
Net Statistics Server command, 161
Net Statistics Workstation command, 163
Net Stop command, 154
Net Stop W32Time command, 313–314
Net Time command, 163, 312
Net Use command, 160–161
Net Use /Delete command, 161
Net Use LocalDevice RemoteShare
command, 160
Net User /Add command, 25, 141–143
Net User /Delete command, 143
NetClient alias, 294
NetDiag utility, 173
diagnostics, 175–176
NetDiag /Fix command, 177
NetDiag /Test command, 175
obtaining, 174–175
tests, 175
NetLogin alias, 294
NetProtocol alias, 295
NetSH (Network Command Shell) utility, 26
command execution, 476
contexts, 476–479
help, 474–475, 475
helper list, 473, 474
NetSH Interface command, 473–475
NetStat utility, 177–181
NetUse alias, 295
Network Command Shell. See NetSH
(Network Command Shell) utility
Network Interface Cards (NICs), 140
Network Level Authentication option, 29
networks
accounts, 143–146, 143
commands for, 516
computers, 149
drive mapping, 483–487
files, 155–156
partitions
groups
adding, 146–147
deleting, 148
users, 148–149
viewing, 147–148, 147–148
MAC addresses, 140
path tracking, 172–173, 172
print jobs, 157–158
resources, 158–161, 159
routing tables, 180–183, 181
scripts for, 473–479
server configuration, 151–153, 151
services, 153–155
sessions, 149–150
statistics, 161–163, 162, 177–180
system connections. See remote system
management
TCP/IP. See TCP/IP
time synchronization, 163
users
adding, 141–142
deleting, 143
forcing logoffs, 144
password requirements, 144–146
viewing, 142, 142
workstation configuration, 153, 153
New Action dialog box, 49, 49
New Trigger dialog box, 47, 48
NIC alias, 295
NICConfig alias, 295
NICs (Network Interface Cards), 140
NoComma data translation type, 310
NoError setting, 115
notification interval for quotas, 90
NTCMDPROMPT entry, 383
NTDomain alias, 214, 295
NTDSUtil (NT Directory Services utility),
225–227
NTEvent alias, 295
NTEventLog alias, 295
NTFS volume information, 88
NTFSInfo command, 88
NUL device, 93
Number of Buffers Option, 6
O
objects
Active Directory. See Active Directory
disks
deleting, 120
details, 112–113, 112–113
listing, 111–112
rescanning, 114
selecting, 113–114
scripts
working with, 448–449
WScript. See WScript object
working with, 453
OEM/ANSI Code Pages, 388–389
Offset setting for primary partitions, 115
On the Remote Computer option, 37
OnBoardDevice alias, 295–296
Open dialog box for remote connections, 35
open files, shared, 132–134
OpenFiles utility
OpenFiles /Disconnect command, 133
OpenFiles /Local command, 134
OpenFiles /Query command, 132–133
OpenTextFile method, 490
operating system versions, 16
Options tab, 4, 5
organizational units (OUs)
adding, 234
editing, 246
interaction with, 224
listing, 241
OS alias, 296
output redirection, 94–95
ownership of files and directories
setting, 132
taking, 134–135
P
$P prompt, 60
Packet Internet Groper (PING) utility,
170–171, 170
Pagefile alias, 296
PageFileSet alias, 296
paging files, 86
parameters for methods, 451
parent directories, 60
Partition alias, 296
partitions, 110–111
active, 117
creating, 114–116
default boot, 318
inactive, 118
logical, 116
objects
deleting, 120
details, 112–113, 112–113
listing, 111–112
rescanning for, 114
selecting, 113–114
primary, 114–115
volumes
drive letters, 118–119
extending, 119–120
541
542
passwords
passwords
command prompt, 393–395, 393
domains, 393
environment variables on other machines,
15
with NetSH, 476
network users, 142
Remote Desktop Connection, 32
requirements, 144–146
users, 222
PATH environment variable, 10–13
application paths, 80–81
directories, 67
Path property, 450–451
PathPing utility, 171–172, 171
paths
applications, 80–81
directories, 60
network, 172–173, 172
scripts, 450–451
transmission, 171–172, 171
patterns
directory searches, 59
file searches, 66–67, 68
Pause command, 418
pausing
batch files, 418
services, 18–19, 155
PBX (Private Branch Exchange) connectivity,
190
percent signs (%)
environment variables, 12
For command, 409
performance
counters, 272–273
hard drives, 101, 109–110, 109
Remote Desktop Connection application,
38–39, 39
performance logs
creating
from existing logs, 278–281, 279
new, 274–276
data collection for
deleting, 278
querying, 277, 277
starting, 276
stopping, 276
updating, 277
periods (..) in directories, 58
permanent Verifier settings, 342
permissions
denying, 131
grating, 130–131
removing, 131
PID filter, 348
PIDs (Program Identifiers), 43, 350
PIFs (Program Information Files), 383
PING (Packet Internet Groper) utility,
170–171, 170
pipe symbol (|) for redirection, 94
Planned shutdown category, 20
plus sign (+) for file attributes, 71
policies
backups, 327, 345–346
clearing, 328
group, 328–330
listings, 321–322
local, 344–347
obtaining, 322–326, 324
removing, 328
restoring, 327
setting, 326–327
PopD command
extensions, 379
overview, 430–431
Popup method, 456, 466, 468
Port alias, 296
PortConnector alias, 296
ports
displaying, 177–178
network printers, 93
scripts for, 482
Ports tab, 93
Pre-Boot Execution Environment (PXE)-based
boot environments, 118
primary partitions, 114–115
print jobs, 157–158
Printer alias, 296–297
PrinterConfig alias, 297
printing routing tables, 180–181, 181
PrintJob alias, 297
PrintJob command, 157
priority in DNS service, 361
Private Branch Exchange (PBX) connectivity,
190
PRN device, 93
Process alias, 297
Process Identifiers (PIDs), 43
processes
displaying, 331
ending, 208–209
information, 206–207
Product alias, 297–298
product keys, 312
Program Identifiers (PIDs), 43, 350
Program Information Files (PIFs), 383
Programs tab for Remote Desktop
Connection, 33, 38, 38
Prompt command
extensions, 379–380
overview, 418–419
Prompt $P$G command, 60
properties
directory objects
getting, 216–217
RegRead method
setting, 217
scripting objects, 448
protecting data. See security
protocol information, 179–180
publishers for system events, 262–263, 263
PushD command
extensions, 380
overview, 430–431
PXE (Pre-Boot Execution Environment)-based
boot environments, 118
Q
QFE alias, 298
QProcess utility, 206–208
Query command
dirty bit status, 86
volume repair status, 91
Query utility, 331
Query Process command, 331
Query Session command, 331
Query TermServer command, 332
Query User command, 332
querying
associations, 217–218
drivers, 341
log collections, 277, 277
logs, 264–266, 265–266
registry entries, 363–364
service status, 18
system events, 261
tasks, 53
Verifier settings, 341, 341
question marks (?)
command line help, 20–21
connection registrations, 169
directory searches, 59
ForFiles loops, 407
WimRM resources, 200
quick formats, 104
QuickEdit Mode option, 7
Quit method, 454
quotas for files, 88–90
QuotaSetting alias, 298
quotes (“)
command window titles, 398
file names, 374, 411
QUser utility, 333
QWinSta utility, 207
R
RAS (Remote Access Service), 395
RAS context in NetSH, 477
RD command, 62
RDAccount alias, 298–299
RDNIC alias, 299
RDP (Remote Desktop Protocol) files, 187,
188
RDPermissions alias, 299
RDToggle alias, 299
Read method, 490
ReadLine method, 490
RecoverOS alias, 299
recovery keys, 125
recursion in batch files, 402
Recycle Bin, 71
ReDir command, 389
redirection
to Clipboard, 392
data, 92, 94–95, 94
refresh intervals for connections, 180
Reg utility
Reg Add command, 364–365
Reg Compare command, 366–367
Reg Copy command, 366
Reg Delete command, 365
Reg Export command, 367
Reg Query command, 363–364
Reg Restore command, 367–368
Reg Save command, 367
RegDelete method, 456
RegIni utility, 472–473
registering DNS names, 169
Registry alias, 299
registry and Registry Editor, 354–356
command interpreter in, 375–377, 376
entries
adding, 364–365
comparing, 366–367
copying, 366
deleting, 365
exporting, 367
importing, 367–368
querying, 363–364
restoring, 368
scripts for, 472–473
keys
deleting, 357
exporting, 356–357
importing, 357
and LodCtr, 273
restoring, 358
saving, 358
SCRegEdit script, 358–362, 361
script access, 466–468
settings, 362–363
tasks, 354–356
undocumented features, 356
RegRead method, 456
543
544
regular expressions
regular expressions, 82
RegWrite method, 457
relative paths, 60
releasing
connections, 169
print jobs, 158
Reliable Time Source (RTS), 313
ReLog utility, 278–281, 279
Rem (Remark) command, 419–420
Remote Access Service (RAS), 395
remote administrator setup, 28–29, 28–29
remote connections, 24, 186–187
commands for, 516
connection files, 187–190, 188
Remote Desktop Connection. See Remote
Desktop Connection application
remote system configuration, 24–29
server connections, 189
Remote Desktop, 24
Remote Desktop Connection application, 30
configuration programs, 38, 38
connections, 30–35, 31–32, 34
display settings, 35–36, 36
local resources access, 36–38, 37
optimizing performance, 38–39, 39
session termination, 39–40
Remote Desktop Connection dialog box, 187,
188
Remote Desktop Protocol (RDP) files, 187,
188
Remote Desktop Size slider, 35
Remote Desktop Users dialog box, 29, 29
Remote Procedure Call (RPC), 173
remote system management
command execution, 206
remote connections, 186–190, 188
telephony clients, 190
Terminal Server, 206–209
WinRM. See WinRM (Windows Remote
Management) utility
Remote tab, 28–29
Remove command for drive Letters, 119
RemoveNetworkDrive method, 461
RemovePrinterConnection method, 461
removing. See also deleting
directories, 62
drive letters, 119
files, 70–71
malicious software, 338–339, 338
network computers, 149
network resources, 161
performance counters, 281
permissions, 131
policies, 328
users from files and directories, 126–127
viruses, 337–338
volumes, 105
Ren command, 71
renaming
directories, 61–62
files, 71
renewing
adapter addresses, 168
DHCP addresses, 169
repairing
drive errors, 86
file systems, 90–91
reparse points, 66
rescanning for disk objects, 114
Reservation Protocol (RSVP), 479
Reset command, 208
resetting user passwords, 222
resolver cache in DNS, 168–169
resources
creating, 202–205, 202, 204
deleting, 205
enumerating, 197–199, 197, 199
invoking methods on, 205
networks, 158–161, 159
obtaining, 199–200
setting, 200–202, 201
restarting system, 20
restoring
performance counter settings, 273
policies, 327
registry, 358, 368
Resultant Set of Policy (RSoP), 328–330
results of group policies, 328–330
retrieving directories, 430–431
rights
DACLs, 127–131, 128
users, 481–483
RmDir command, 62
root context in NetSH, 478–479
root directory, 58
Route utility, 180
Route Add command, 181–182
Route Change command, 182–183
Route Delete command, 183
Route Print command, 180–181
RouteMon utility, 479
Routing context in NetSH, 477
routing tables, 180
printing, 180–181, 181
routes
adding, 181–182
changing, 182–183
deleting, 183
RPC (Remote Procedure Call), 173
RPCPing utility, 173
RSoP (Resultant Set of Policy), 328–329
RSVP (Reservation Protocol), 479
RTS (Reliable Time Source), 313
Run method, 457, 491
RunAs command, 480
running scripts, 442–445
Server Core
S
SACLs (System Access Control Lists), 127, 325
SAM (Security Accounts Manager) name, 231
Save As dialog box, 34
saved remote connections, 35
saving
hard drive space, 101–102
performance counter settings, 273
registry, 358
SC (Service Control) utility, 18, 43
scanning system files, 339, 340
scheduling
boot-time checks, 109
tasks. See Task Scheduler
SchTasks utility, 51
SchTasks /Change command, 54
SchTasks /Create command, 51–53
SchTasks /Delete command, 53
SchTasks /End command, 54
SchTasks /Query command, 53
SchTasks /Run command, 54
scr attribute, 441
screen
clearing, 16
colors, 395–396
Remote Desktop Connection settings,
35–36, 36
size, 8, 35
Screen Buffer Size setting, 8
SCRegEdit script, 358–359
automatic updates, 359
command line reference, 361–362, 362
DNS service priority and weight, 361
IP Security monitor, 360
Terminal Services, 359–360
Script tab, 445
ScriptFullName property, 451
ScriptName property, 451
scripts, 436
best practices, 525
command line and system environment,
361–362, 362, 463–466
commands for, 507–510
creating, 462–463
.CSV files, 487–491
debugging, 443–444
default, 444
effective, 486
environment changes, 481–483
executing, 442–445
JavaScript basics, 436–438
.lnk files, 468–469
network drive mapping, 483–487
networks, 473–479
objects. See WScript object
registry access, 466–468
registry entries, 472–473
SCRegEdit. See SCRegEdit script
user impersonation, 480
VBScript basics, 438–439
Windows Scripting File, 439–441
SCSIController alias, 299
SDB (Security Database) files, 344
searching. See finding
SecCheck.SDB file, 344–346
SecEdit (Security Edit) utility, 330, 344
SecEdit /Analyze command, 344
SecEdit /Configure command, 345
SecEdit /Export command, 345–346
SecEdit /Import command, 346
SecEdit /Validate command, 346–347
sectors, bad, 107–108
security, 122, 336
audits. See audit policies
drives, 104
encryption, 122–125, 124
files and directories
access, 127–132, 128
users for, 125–127, 126
general applications, 347–351, 348
remote systems, 25–27
Task Scheduler, 43–44
time settings for, 397
user impersonation, 480
viruses. See viruses and external intrusions
Security Accounts Manager (SAM) name, 231
Security Database (SDB) files, 344
Security Edit. See SecEdit (Security Edit)
utility
Security Identifiers (SIDs), 130, 321, 333
Security log, 255
Security tab in WMI, 193–194, 194
Select Color Values options, 9
Select Columns dialog box, 178
Select Disk Number command, 114
Select Partition command, 116
selecting disk objects, 113–114
self-signed certificates, 203
semi-colons (;) for environment variables, 67
serial numbers for volumes, 103
Server alias, 299
server certificates, 203
server configuration, 286–287
networks, 151–153, 151
WMIC
aliases, 290–302
formatting data, 306–310, 307–309
help, 302–306, 302–306
syntax, 287–290
translating data, 310
Server Core, 5
545
546
servers
servers
commands for, 517
hidden, 219
hiding, 152–153
interacting with, 218–220
listing, 241
remote connections, 189
statistics, 161–162, 162
Service alias, 299
Service Control (SC) utility, 18, 43
services
listing, 351
managing, 153–155
starting, pausing, continuing, and stopping,
18–19
status, 18
Terminal Services, 206–209
SERVICES filter, 349
SESSION filter, 348
SESSIONNAME filter, 348
sessions
commands for, 518
disconnecting, 208
information, 207
logon scripts, 481–482
networks, 149–150
status information, 331–332
terminating, 39–40, 208
SET action in WMIC, 290
Set command
dirty bit, 87
environment variables, 10–13, 11
extensions, 380
file attributes, 71
volume flags, 91
Set DEBUG command, 421
SetEnvironmentVariable method, 457–461
SetLocal command, 380
setting
logs, 267–269
policies, 326–327
tasks, 49
volume flags, 91
settings in registry, 362–363
Settings tab, 50
SetX utility, 13–15
SFC (System File Scan) utility, 339, 340
SFC /ScanFile command, 340
SFC /ScanNow command, 339
SFC /VerifyFile command, 340
SFC /VerifyOnly command, 339
ShadowCopy alias, 299
ShadowStorage alias, 300
Share alias, 300
shared open files detection, 132–134
shares for network resources, 159–160
Shift command, 380
Shortcut command, 469
Show Contents of Window While Dragging
option, 39
Shutdown command, 27
Shutdown Event Tracker, 20
ShutDown utility, 19–20
shutting down
options, 19–20
Terminal Server, 209
SIDs (Security Identifiers), 130, 321, 333
single quotes (‘) for filenames, 411
size
cursor, 4
extended partitions, 116
primary partitions, 114
screen buffer, 8
volumes, 117
Size setting, 114
skip keyword, 411
Software License Manager (SLMGR) tool,
27, 311
sorted order, finding files in, 64–65
sorting WMIC data, 308–309, 309
sound with remote computers, 37
SoundDev alias, 300
sources, time, 163, 313–314
special characters in commands, 408
special environments, command processors
for, 374
SQL syntax, 287–290
stacks for directory, 430–431
standard code pages, 388–389
Start command
extensions, 380
services, 18
Start menu for Remote Desktop Connection,
40
Start Menu Properties dialog box, 42
Start Menu tab, 42
Start the Following Program on Connection
option, 33, 38
Start utility, 17
starting
applications, 16–17
log data collection, 276
services, 18–19, 154
Task Scheduler, 43
Startup alias, 300
State property, 200–201
statistics
drives, 88
networks, 161–163, 162, 177–180
Statistics command, 88
status
files and directories, 106–107, 106
hard drive compression, 102
logs, 267
Terminal Server
services, 18
sessions, 331–332
STATUS filter, 348
Stop Script after Specified Number of Seconds
option, 445
stopping
log data collection, 276
services, 18–19, 154
Task Scheduler, 43
storing directories, 430–431
streams with NTDSUtil, 226–227
strings, finding in files, 81–83
structure of directories, 62–63, 63
subdirectories, string searches in, 82
substitution, variable, 412–414
Superclass Info dialog box, 195
switches for CMD, 372–375
symbolic links, 76–77
synchronization, 163, 313–314
SysAccount alias, 300
SysDriver alias, 300
System Access Control Lists (SACLs), 127, 325
System Center Operations Manager, 187
system connections, 186
remote system management. See remote
system management
Terminal Server. See Terminal Server
system date, 396
system environment, scripts for, 463–466
system events, 254
creating, 254–260, 256
deleting, 261
logs
archiving, 270
clearing, 270
enumerating, 263
exporting, 269–270
getting, 267
querying, 264–266, 265–266
setting, 267–269
status information, 267
publishers, 262–263, 263
querying, 261
triggers, 257–260
System File Scan. See SFC (System File Scan)
utility
system files, verifying, 339–340, 340
system-level environment variables, 15
System log, 254–255
system monitoring commands, 518–519
system performance, 272
counters, 272–273
logs. See performance logs
System Properties dialog box
environment variables, 13
remote administration, 28, 28
system time, 312–314, 396–397
system users, 320
audits. See audit policies
group policies, 328–330
identity, 332–333
session status information, 331–332
System32 directory, 73
SystemEnclosure alias, 300
SystemSlot alias, 300
T
TakeOwn utility, 132, 134–135
TapeDrive alias, 300
TAPI (Telephony Application Programming
Interface), 190
Task Scheduler, 42
security, 43–44
starting, 43
stopping, 43
tasks
creating, 46–50, 47–50
deleting, 50–51
viewing, 44–45, 44
Task Scheduler Library, 50
taskbar on Start menu, 42
TaskKill filters, 347–350, 348
TaskList utility
filters, 347–350, 348
listing applications, 350–351
listing services, 351
tasks
automating
SchTasks, 51–54
Task Scheduler. See Task Scheduler
terminating, 350
TCMSetup (Telephony Client Management
Setup) utility, 190
TCP/IP, 166
basic diagnostics, 170–173, 170–172
Internet Protocol, 166–169, 167
network diagnostics, 173–177
network routing tables, 180–183, 181
network statistics, 177
Telephony Application Programming Interface
(TAPI), 190
Telephony Client Management Setup
(TCMSetup) utility, 190
Temperature alias, 300–301
Terminal Server, 206
information on, 332
processes
ending, 208–209
information, 206–207
sessions
disconnecting, 208
information, 207
terminating, 208
shutting down, 209
547
548
Terminal Services
Terminal Services, 359–360
terminating
Remote Desktop Connection sessions,
39–40
tasks, 350
Terminal Server sessions, 208
testing
batch files, 420–421
centralized data store, 428–429, 429
debug information, 421–425, 423–424
identifying batch files and actions,
425–428
best practices for, 524
text
color, 9, 10, 395
copying, 523
Themes option, 39
threats, 337
thumb drives, 100
TIDs (Trigger Identifiers), 261
time
synchronization, 163, 313–314
system, 312–314, 396–397
Time command, 396
%TIME% environment variable, 427
TimeOut utility, 404, 420
TimeZone alias, 301
Title command, 397–398
titles for command window, 397–398
tokens keyword, 411–412
trace logs, 281–282
TraceRpt utility, 281–282
TraceRt utility, 172, 172
tracing transmission paths, 171–172, 171
Track command, 89
tracking
network paths, 172–173, 172
quotas, 89
transfers, bulk file, 69–70
TransformNode method, 453
translating WMIC data, 310
transmission paths, tracing, 171–172, 171
Tree utility, 62–63
Trigger Identifiers (TIDs), 261
triggers
system events, 257–260
tasks, 47–48, 47–48, 52
Triggers tab, 47–48, 47
troubleshooting TCP/IP, 170–173, 170–172
try...catch statements, 486
TSDiscon utility, 208
TSKill utility, 208
TSShutDn command, 209
Type command for data files, 92
types
drives, 87
files, 73–74
U
UDF (Universal Disk Format), 104
UMBs (Upper Memory Blocks), 382, 384
UNC (Universal Naming Convention) names,
149
uncompressing hard drives, 102
undocumented utilities, 356
Unexpected shutdown category, 20
Uniform Resource Identifiers (URIs), 191,
193–197, 194–196
Universal Disk Format (UDF), 104
Universal Naming Convention (UNC) names,
149
UnlodCtr utility, 281
updates
automatic, 359
log collections, 277
time, 313
UPNs (User Principal Names), 333
Upper Memory Blocks (UMBs), 382, 384
UPS alias, 301
URIs (Uniform Resource Identifiers), 191,
193–197, 194–196
usebackq keyword, 411
user input environment variables, 13
user-level environment variables, 14
User Principal Names (UPNs), 333
user-specific changes, best practices for,
526–527
UserAccount utility, 141, 301
UserDomain property, 458
%USERNAME% environment variable,
426–427
USERNAME filter, 349
UserName property, 458
usernames
command prompt, 393–395, 393
environment variables on other machines,
15
users
Active Directory
adding, 234–237
editing, 246–248
interaction with, 220–222
listing, 242–243
creating, 394
deleting, 394–395
disconnecting from files, 133
execution rights, 481–483
file and directories, 125–127, 126
full names, 221
group membership, 221–222
in groups, 148–149
impersonating, 480
logged in, 332
logon names, 220–221
wildcards
management commands, 520
networks
adding, 141–142
deleting, 143
forcing logoffs, 144
password requirements, 144–146
viewing, 142, 142
passwords, 222
scripts for, 481–482
system. See system users
V
validating local security policy files, 346–347
values in registry, 364
van der Woude, Rob, 401
variables
environment. See environment variables
substitution, 412–414
VBScript, 438–439
VDM Virtual Device Driver (VDD) redirector,
389
Ver command, 16
verbose mode in registry, 355
Verifier utility
drivers, 340–341, 341, 343
settings, 342–343
Verifier /Query command, 341
Verifier /QuerySettings command, 341
Verifier /Standard command, 343
Verifier /Volatile command, 342–343
verifying
data, 522
drivers, 340–341, 341, 343
security, 132
system files, 339–340, 340
Version property, 451
versions of operating systems, 16
viewing. See also displaying
encrypted files and directories, 123, 124
groups, 147–148, 147–148
network files, 155–156
network resources, 158–159, 159
network users, 142, 142
print jobs, 157
services, 154
sessions, 149–150
tasks, 44–45, 44
time source, 163
Violations command, 89–90
violations of quotas, 89–90
Virtual Private Networks (VPNs), 166
viruses and external intrusions, 337
drivers, 340–341, 341
local security policies, 344–347
malicious software detection and removal,
338–339, 338
system files, 339–340, 340
Verifier settings, 342–343
virus removal, 337–338
Vol command, 103
volatile Verifier settings, 342
Voltage alias, 301
Volume alias, 301
VolumeInfo command, 87–88
VolumeQuotaSetting alias, 301
volumes, 102–103
creating, 116–117
dirty bit, 86–87
drive letters, 118–119
extending, 119–120
flags, 91
information on, 103
labels, 103
listing, 105
maintaining, 106–110
mounting, 104–105
NTFS information, 88
removing, 105
VolumeUserQuota alias, 301
VPNs (Virtual Private Networks), 166
W
W32Tm utility, 163, 312–313
W32Tm /Config command, 313
W32Tm /Query command, 314
W32Tm /Resync command, 313–314
WaitFor utility, 404
WBEMTest utility, 194–195, 195
Web-Based Enterprise Management (WBEM),
194, 286–287
weight in DNS service, 361
WEvtUtil utility, 262
WEvtUtil AL command, 270
WEvtUtil CL command, 270
WEvtUtil EL command, 263
WEvtUtil EP command, 262
WEvtUtil EPL command, 269
WEvtUtil GL command, 267
WEvtUtil GLI command, 267
WEvtUtil GP command, 262–263
WEvtUtil QE command, 264, 266
WEvtUtil SL command, 267, 269
WhoAmI utility, 333
wildcards
computers, 223
connection registrations, 169
directory searches, 59
ForFiles loops, 407
549
550
WinDir environment variable
string searches, 82
system events, 261
user names, 220
WinDir environment variable, 59
Window Position setting, 8
Window Size setting, 8
Windows, activating, 311–312
Windows directory, 59
Windows Management Instrumentation
(WMI), 46, 193, 194, 286–287
Windows Management Interface Command
line. See WMIC (Windows Management
Interface Command line) utility
Windows Remote Management. See WinRM
(Windows Remote Management) utility
Windows Script Host (WSH), 442
configuring, 444–445, 444
objects
working with, 448–449
WScript. See WScript object
Windows Script Host Settings dialog box,
444–445, 444
Windows Scripting File (WSF) language, 358,
439–441
Windows Update, 337–338
WINDOWTITLE filter, 349
WinRM (Windows Remote Management)
utility, 191–192, 206
help system, 192
resources
creating, 202–205, 202, 204
deleting, 205
enumerating, 197–199, 197, 199
invoking methods on, 205
obtaining, 199–200
setting, 200–202, 201
URIs, 193–197, 194–196
WinRM Create command, 203–204
WinRM Delete command, 205
WinRM Enum command, 197–199, 202
WinRM Get command, 200–202
WinRM Identity command, 192
WinRM Invoke command, 205
WinRM QuickConfig command, 191, 203
WinRM Set command, 202
WinSock context in NetSH, 477
WMI (Windows Management
Instrumentation), 46, 193, 194,
286–287
WMI Control Properties dialog box, 193, 194
WMI Query Language (WQL), 287
WMIC (Windows Management Interface
Command line) utility, 26
aliases, 290–302
directory services, 214–218
formatting data, 306–310, 307–309
help, 302–306, 302–306
service methods, 205
syntax, 287–290
tasks, 46
translating data, 310
WMIC CPU LIST command, 304–307, 305
WMIC NTDomain ASSOC command, 218
WMIC NTDomain GET command,
215–216
WMIC NTDomain LIST command, 215
WMIC NTDomain SET command, 217
WMIC RDToggle command, 27
WMISet alias, 302
workstations
configuring, 153, 153
statistics, 162, 163
WQL (WMI Query Language), 287
written procedures best practices, 525
WScript, 27, 442
debugging scripts, 443–444
default scripts, 444
executing scripts, 443
help, 442
WScript object, 449
methods, 451–454
properties, 449–451
WshArguments object, 454–455
WshShell object, 455–457
WSF (Windows Scripting File) language, 358,
439–441
WSH (Windows Scripting Host), 442
configuring, 444–445, 444
objects
working with, 448–449
WScript. See WScript object
WshArguments object, 454–455
WshCollection object, 460
WshNetwork object, 457
methods, 458–461
properties, 457–458
WshShell object, 455–457
X
XCopy command
bulk file transfers, 69–70
error levels, 415
XML format
logs, 265, 266
system event publishers, 263
tasks, 51
WinRM output, 198–199, 199
XML tab, 265, 266
XMS (Extended Memory Specification), 385
XPath statement, 266