/


Теги: weapons
Год: 1942
Текст
NOT TO BE PUBLISHED
THe information given in this document
is not to be communicated, either directly
or indirectly, to the Press or to any person
not holding an official position in His
Majesty's Service.
Small Arms Training
Volume L, Pamphlet No. 8
Mortar (2-mch)
1942
(This pamphlet supersedes the 1939 edition and that
reprinted with amendments (Nos. 1 and 2), 1942)
By Command of the Army Council,
The War Office,
I5/A July, 1942
Printed under the Authority of HIS NtAJESTY’S STATIONERY OFFIGa
by Keliher, Hudson 4 Reams, Ltd., Loudon, S.E.L
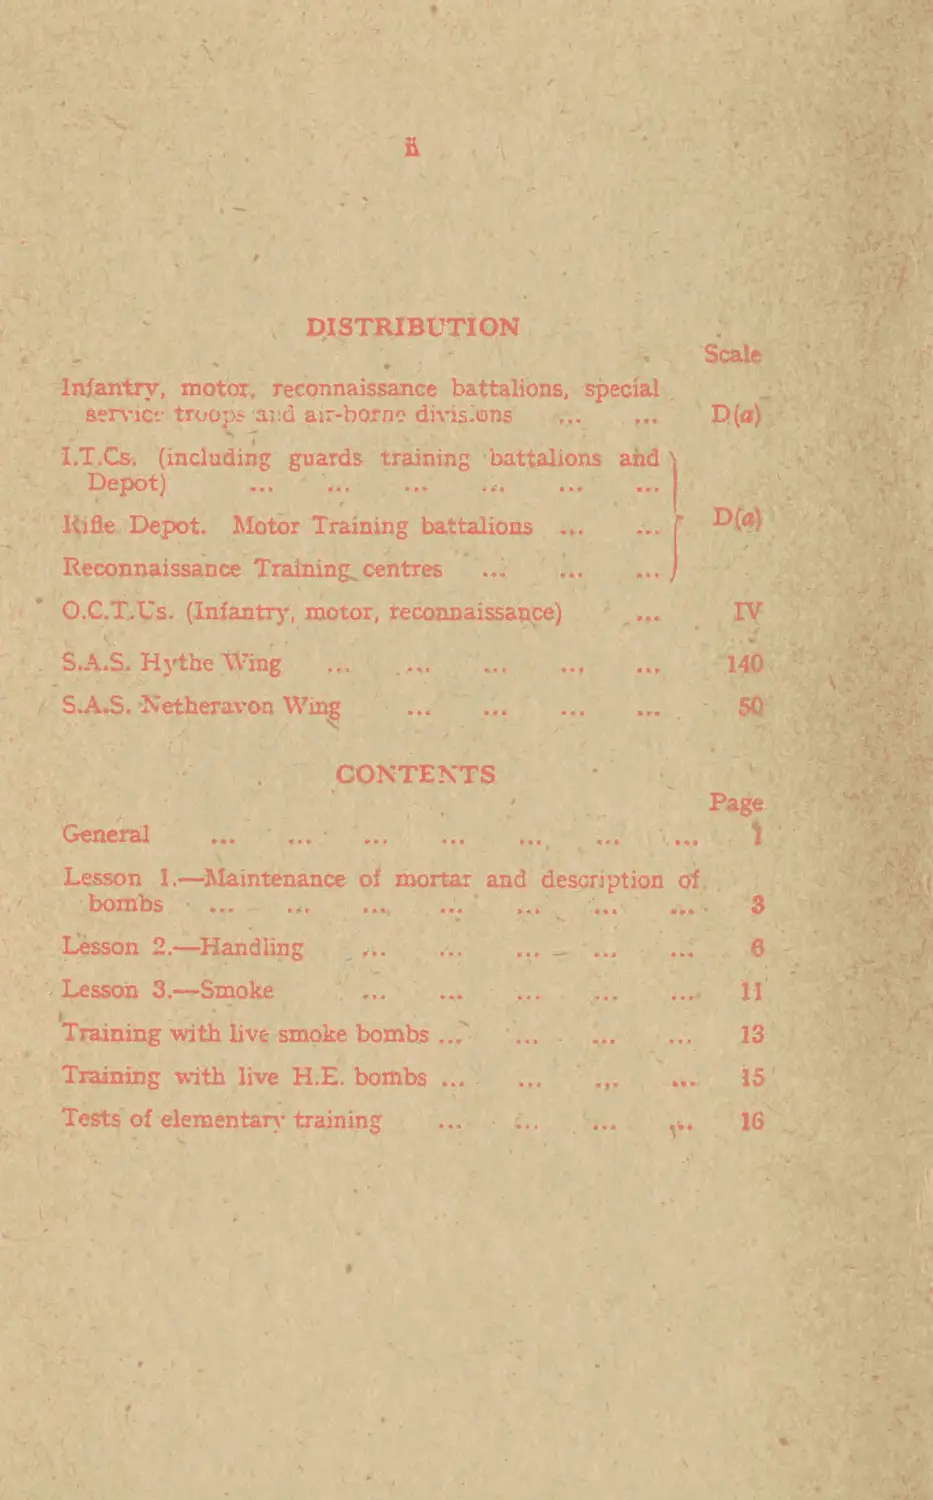
DISTRIBUTION
Infantry, motor, reconnaissance battalions, special
service troops and air-borne divisions
I.T.Cs-. (including guards training battalions and
Depot) ... ........................
Rifle Depot. Motor Training battalions ...
Reconnaissance Trainings centres ... .......
O.CXVs. (Infantry’, motor, reconnaissance) ...
S.A.S. Hythe Wing
S.A.S. Netheravon Wing
CONTENTS
Page
Scale
D(a)
IV
140
50
General ........... .................t ... ... 1
Lesson 1.—Maintenance of mortar and description of.
bombs ... .. ’ ... ... ... • 3
Lesson 2.—Handling ... —... ... 6
Lesson 3.—Smoke ... ... ...* 11
Training with live smoke bombs ..? ... 13
Training with live H.E. bombs ... ... ... ... 15
Tests of elementary training ... 16
1
GENERAL
1. Object
The sole object of weapon training is to teach all ranks the
most efficient way of handling their weapons in order to kill
the enemy. Instructors will always bear this fact in mind,
and will continually impress it upon those whom they instruct.
2. Characteristics, range, rate of fire, etc.
The chief characteristics of this weapon are, first, its
ability to make a smoke screen to hide movement, and,
secondly, its high trajectory, which enables it to engage, with
H.E., targets which are immune to small arms fire.
The number of bombs which can be carried into action is
stnctly limited by their weight. They should be used
sparingly, and as part of a definite plan only.
Rates of fire depend on wind and circumstances. The
maximum rate with accuracy is from seven to eight bombs
a minute. The distance within which the H.E. bomb is
practically certain to be effective against personnel in the
open is about 8 yds. in all directions from the point of burst.
Large fragments may, however, have sufficient velocity to
infiict wounds up to 150 yds. or more, particularly if the
burst is on stony ground.
The mortar can be fired either high angle or low angle.
The former gives the bomb a steep angle of descent, but a
considerable allowance must be made for any wind. The
latter is much less affected by wind, as the trajectory is
comparatively fiat. The range in either case is 100 to
500 yds. The tactical handling of the 2-in. mortar is dealt
with in Infantry Training and Infantry Section Leading.
The best way of carrying the mortar is so to adjust the
barrel that it forms an angle of 90° with the baseplate. It
can then be carried across the back supported by both hands.
The firer is responsible at all times that he does not endanger
his own troops, but all troops must be trained not to mask
the fire of the mortar unnecessarily.
3. Recruit instruction
Instructors must appreciate that, while the lessons are
designed to be taught in one period, more time will be necessary
to allow for sufficient practice to obtain proficiency.
2
4. Trained soldier instruction
The exercising of the trained soldier will be concentrated :—
i. on “ handling of the mortar ”, making the best use
of cover;
ii. on the laying of efiective smoke screens under varying
conditions of wind (Lesson 3) ;
iii. on ensuring that, when ammunition is available, live
rounds shall be fired as part of a simple tactical
scheme (field firing).
5. Safety precautions
the beginning of any lesson the instructors will
inspect bombs and utility pouches. For special precautions
with live bombs see page 15.
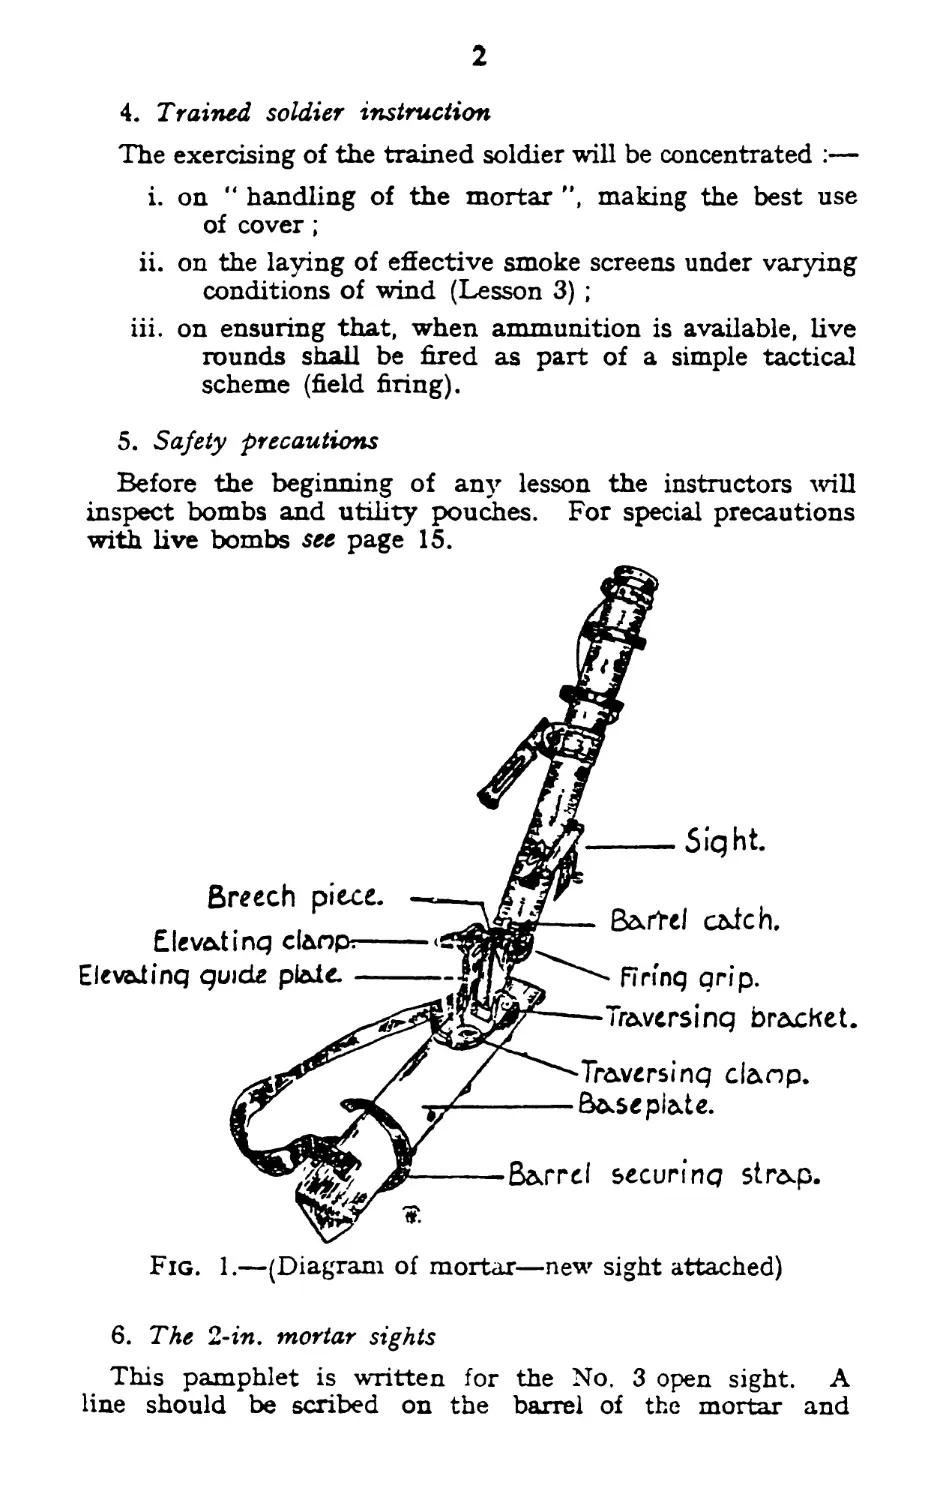
Fig. 1.—(Diagram of mortar—new sight attached)
6. The 2-in. mortar sights
This pamphlet is written for the No. 3 open sight. A
line should be scribed on the barrel of the mortar and
3
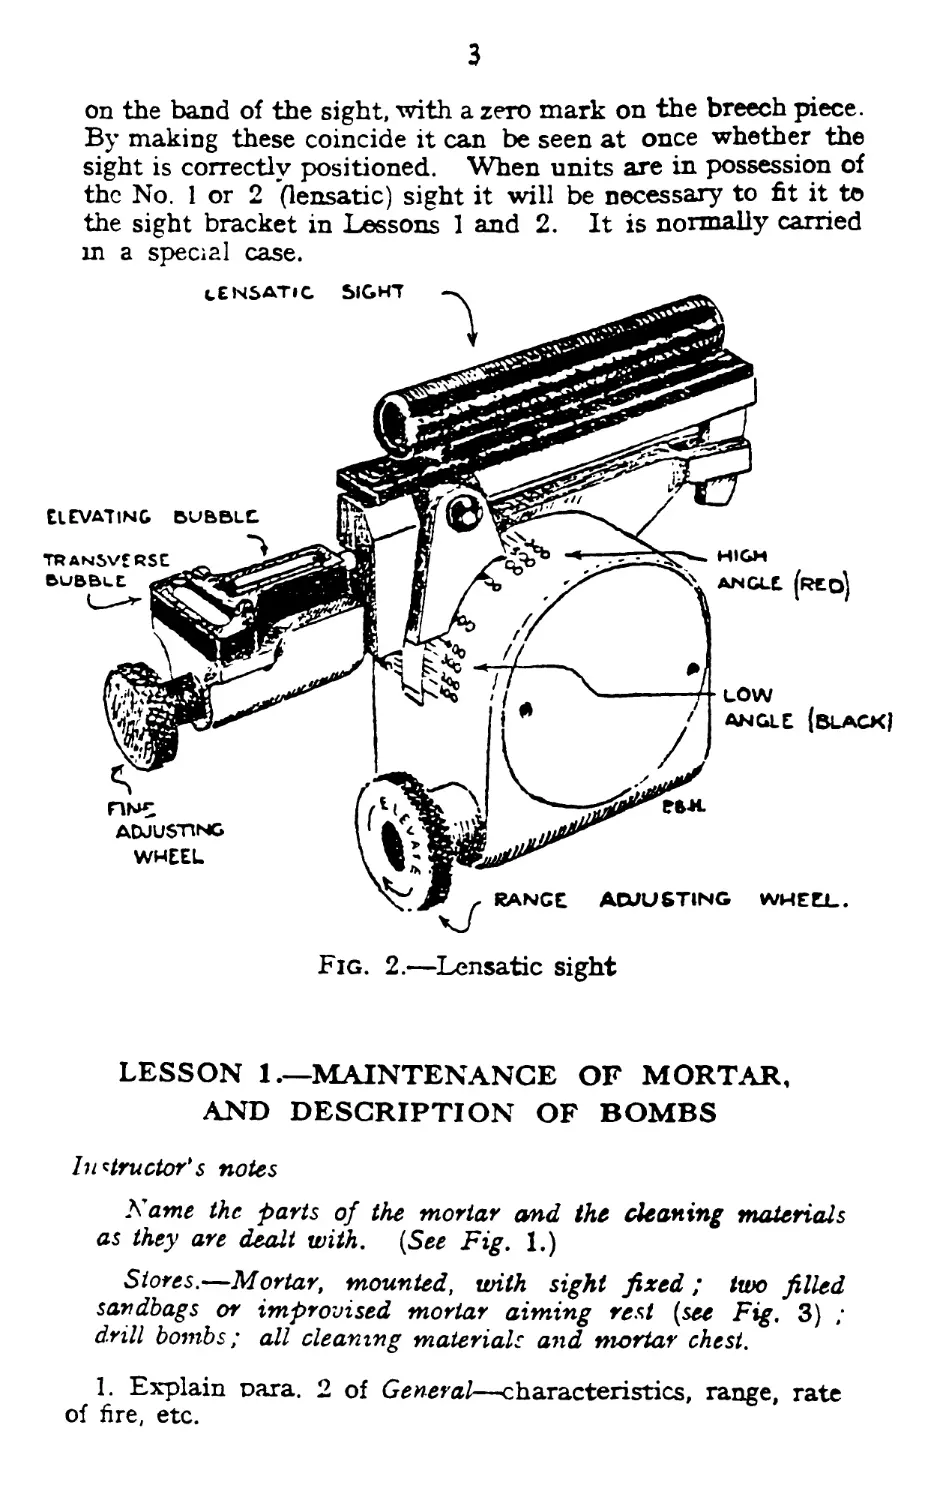
on the band of the sight, with a zero mark on the breech piece.
By making these coincide it can be seen at once whether the
sight is correctly positioned. When units are in possession of
the No. 1 or 2 (lensatic) sight it will be necessary to fit it to
the sight bracket in Lessons 1 and 2. It is normally carried
in a special case.
Fig. 2.—Lensatic sight
LESSON 1.—MAINTENANCE OF MORTAR,
AND DESCRIPTION OF BOMBS
Instructor's notes
Xante the parts of the mortar and the cleaning materials
as they are dealt with. (See Fig. 1.)
Stores.—Mortar, mounted, with sight fixed; two filled
sandbags or improvised mortar aiming rest (see Fig. 3) ;
drill bombs; all cleaning materials and mortar chest.
1. Explain Dara. 2 of General—characteristics, range, rate
of fire, etc.
4
2. Stripping and cleaning
Explain and demonstrate :—
i. To strip the mortar, press down the barrel catch and
unscrew the barrel. Remove the steel pad, firing
pin, and spring.
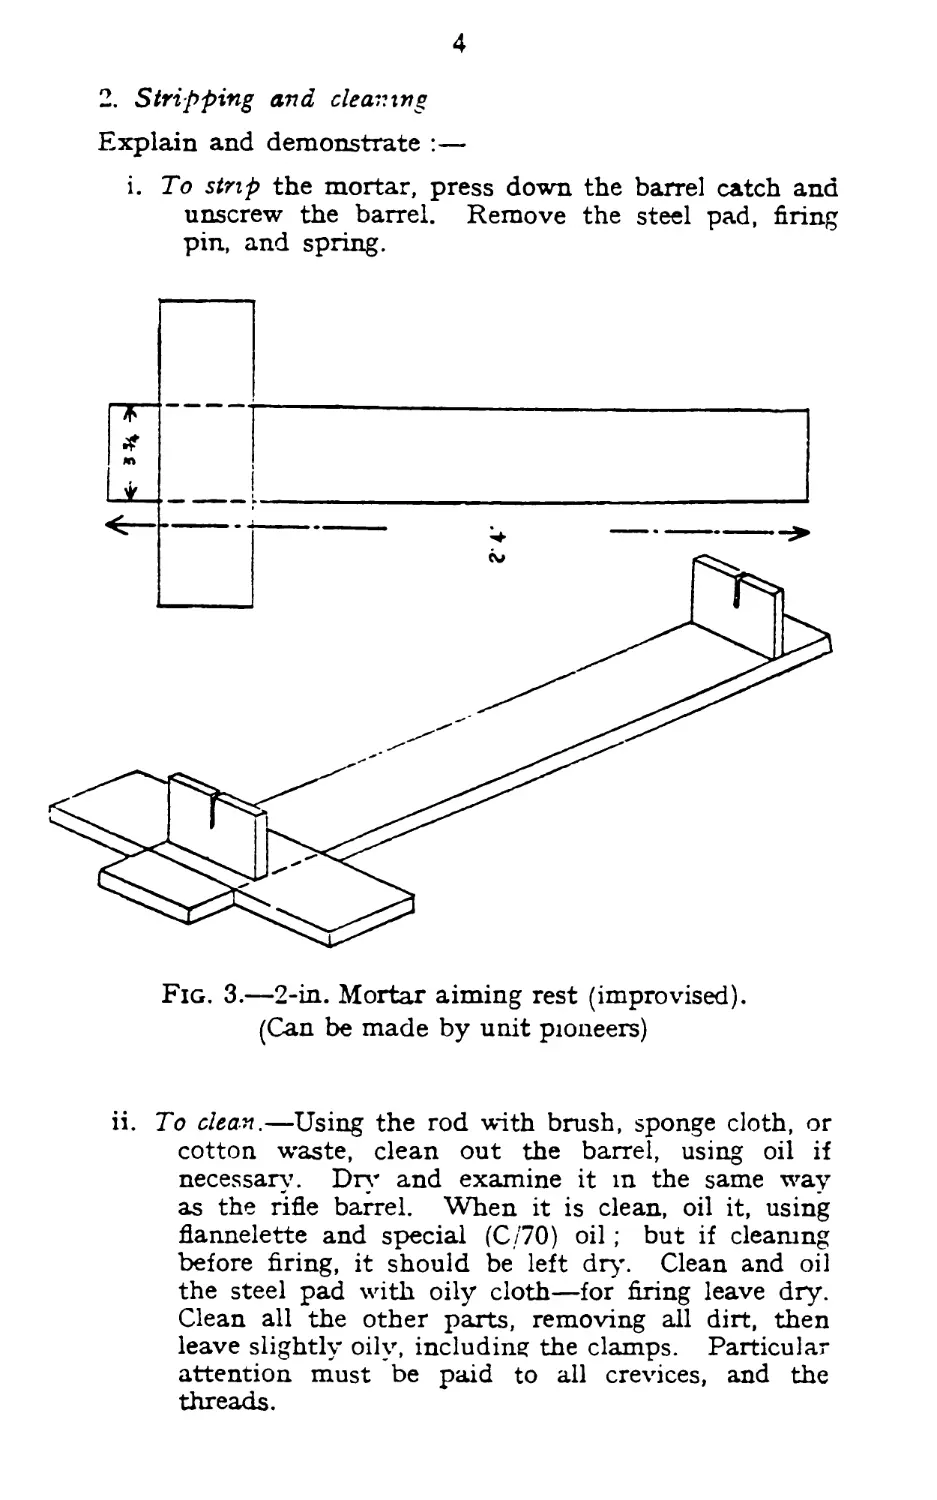
Fig. 3.—2-in. Mortar aiming rest (improvised).
(Can be made by unit pioneers)
ii. To clean.—Using the rod with brush, sponge cloth, or
cotton waste, clean out the barrel, using oil if
necessary’. Dry* and examine it m the same way
as the rifle barrel. When it is clean, oil it, using
flannelette and special (C/70) oil; but if cleaning
before firing, it should be left dry. Clean and oil
the steel pad with oily cloth—for firing leave dry.
Clean all the other parts, removing all dirt, then
leave slightly oily, including the clamps. Particular
attention must be paid to all crevices, and the
threads.
5
iii. To assemble mortar.—Replace firing pin and spring,
steel pad and barrel.
Notes
(a) When stripping and assembling, also cleaning,
great care must be taken to see that the
clamps and the threads are not damaged.
(d) During firing, the barrel should be removed at
intervals and all dirt cleaned off the steel pad—
this will prevent misfires.
(c) After a gas attack, clean as for the rifle.
(d) The muzzle cover will always be replaced when
the mortar is not in use.
3. Practise and question squad.
4. Explain and demonstrate :—
Packing of mortar and cleaning kit in chest.
The sight must be correctly positioned on taking the mortar
from the chest.
5. Describe :—
i. Smoke bomb
(a) Fired by a cartridge in the base, covered by a
screw cap.
(6) Vanes on the tail to make it drop head first.
(c) Body filled with smoke composition : this is
ignited by the flash from the cartridge.
(d) Painted green with a red band.
ii. H.E. bomb
(a) Fired by a cartridge in the base, covered by a
screw cap.
(6) Vanes on the tail to make it drop head first.
(c) Body filled with high explosive. This is ex-
ploded by a percussion fuze in the nose. The
fuze is covered by a screw-on cap, which must
be removed before firing.
(d) Painted yellow, with a red and a green band.
iii. Illuminating bomb
Marked “ Illg, with parachute ”.
iv. Signal bomb
Single and multi star. Marked with coloured band
to denote red or green.
6
v. All bombs are packed in containers, each holding six
bombs. Those with H.E. are marked with yellov
band ; smoke—green band. Containers are packed
in green boxes, three to each box. When issued,
the boxes are marked H.E., smoke, or illuminating.
6. Question squad.
LESSON 2,—HANDLING
Instructor's notes
Stores.—Mortar with sight fixed ; drill bombs; utility
pouches or container. Dress: battle order.
Position should be chosen where the height of the cover
will normally force the firer to use auxiliary aiming marks
close to his position. Previous reconnaissance is necessary.
The recruit should be taught and practised in pqras. 1-3
inclusive; paras. 4 and 5 of the lesson being dealt with in
later periods.
1. Explain :—
Normally there will be two men to fire and maintain the
mortar in action. It is their duty to get the mortar into
action when required and to carry the requisite number of
bombs for the task allotted. Since the maximum range of the
mortar is 500 yds. only, firing will normally be from behind
bullet-proof cover, whether engaging a target with H.E. or
laying a smoke screen. When behind cover it will not be
possible for the firer to see the target using the sights, hence
auxiliary aiming marks must be used. The method of use
will be demonstrated during the lesson. It is the duty of
the No. 2 to assist the No. 4 in every way possible. This
duty includes positioning the auxiliary aiming marks and
observing the fire. Should a third man be available for the
mortar detachment, his duties will be to carry additional
ammunition and to replace casualties.
2. Explain and demonstrate :—
i. Auxiliary aiming marks.—Choose the approximate
position for the mortar. Adopt a position which will
enable the target to be seen. Judge the strength
and direction of the wind and select a point (aiming
mark) which will give the necessary allowance.
No. 2, acting under the direction of No. 1, will place
an auxiliary aiming mark just below the top of the
cover. He will then place a second auxiliary aiming
7
mark nearer to the mortar position, No. 1 ensuring
that both auxiliaries are in direct alignment with the
target or aiming mark. The further the aiming
marks can be placed apart, and the mortar from
them, the greater will be the accuracy in laying.
ii. Squad view auxiliary aiming marks.
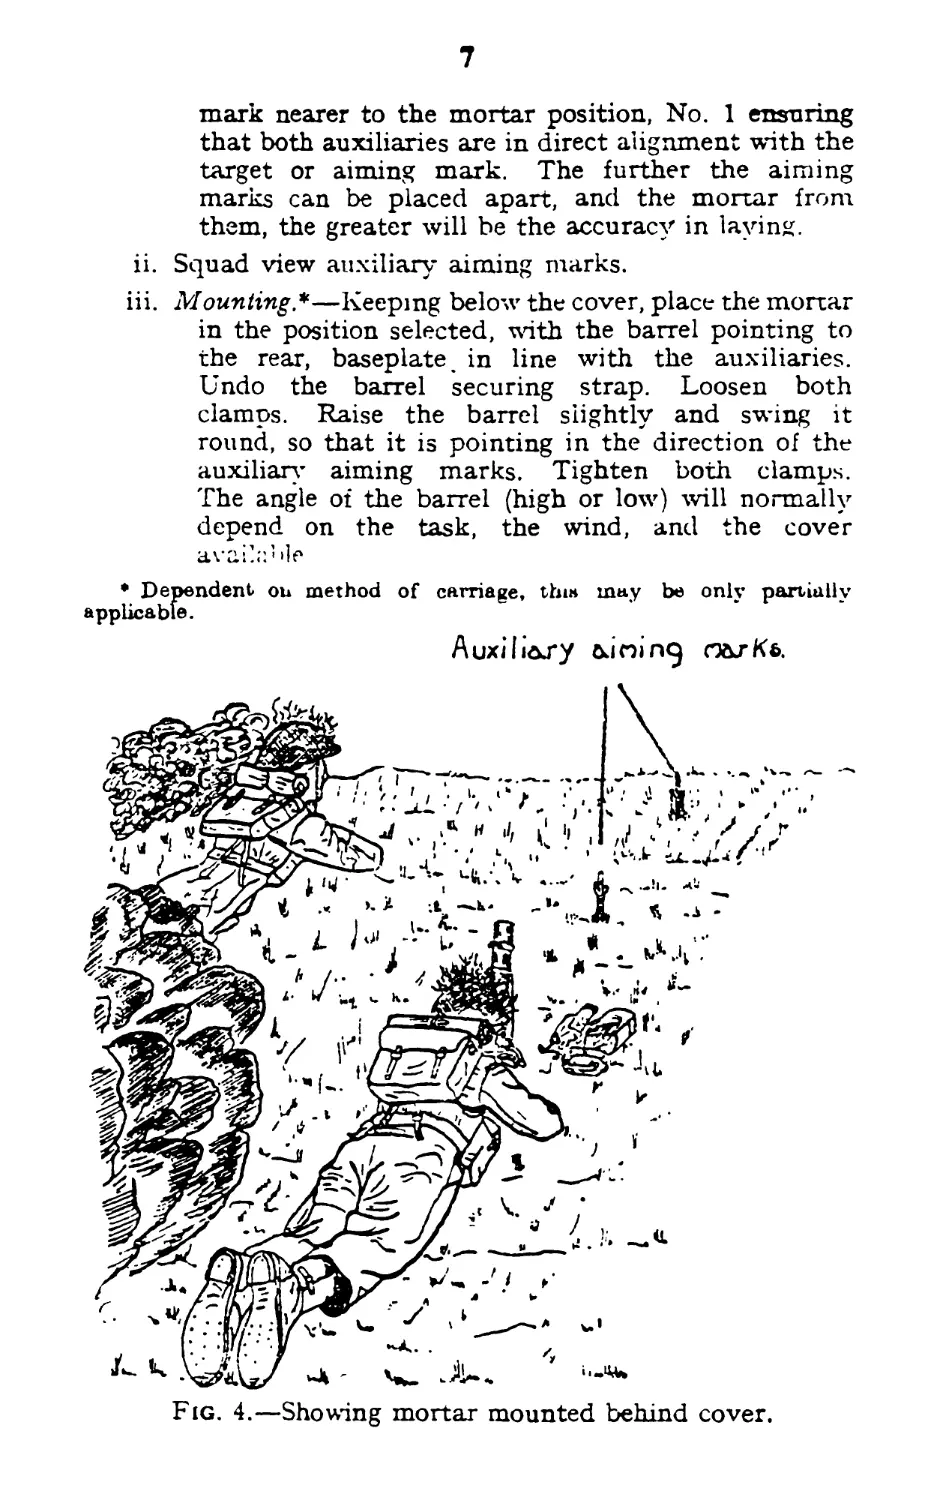
iii. Mounting *—Keeping below the cover, place the mortar
in the position selected, with the barrel pointing to
the rear, baseplate in line with the auxiliaries.
Undo the barrel securing strap. Loosen both
clamps. Raise the barrel slightly and swing it
round, so that it is pointing in the direction of the
auxiliary aiming marks. Tighten both clamps.
The angle of the barrel (high or low) will normally
depend on the task, the wind, and the cover
avaiki’ >le
♦ Dependent ou method of carriage, thm may be only partially
applicable.
Auxiliary oJning гэагКб.
Fig. 4.—Showing mortar mounted behind cover.
8
iv. Loading.—The firer will lie with his chest-on the base-
plate, left hand holding the barrel above the sight.
To load, remove the muzzle cover, take a bomb from
the utility pouches or container, remove the safety
cap if it is H.E., and place it in the barrel, tail first.
Ensure that the bomb has reached the bottom of
the barrel, by shaking it if necessary.
v. Aiming.—Set range. Loosen the elevating clamp
handle, ensure bubble is central and clamp up.
Ensure transverse ' bubble is central. Loosen
traversing clamp, look along sight and turn barrel
until sights are in alignment with both auxiliary
aiming marks, and clamp up. Ensure that both
bubbles are central.
vi. Squad view aim.
vii. Firing.—Hold the mortar steady with the left hand
above the sight, ensure that the aim is correct, and
then turn the firing gnp to the rear. (This will only
be done when a bomb is in the barrel.) Re-load
immediately. No. 2, from a position behind cover,
must observe the fall of the bombs and inform
No. 1, in order that he can make any alteration
necessary in range or aiming point. Such an
alteration is best made by “Up 50,” “ Down 100,”
“ slightly right ’’ or “ left.” Two bombs should be
fired before alterations are made. Carry on firing
in a similar manner until the task is completed.
viii. Action on misfire.—Turn the mortar on its side and
shake out the bomb. If it is H.E., replace the
safety cap. Examine the cartridge. If the cap is
struck, put the bomb on one side, load, and
carry on firing. If the cap is not struck, remove
any fouling from the steel pad and threads, and
change the firing pin if broken.
Note.—On completion of this demonstration, do
not place a bomb in the barrel, thus leaving the
mortar readj7 for the next part of the lesson.
ix. Dismounting.—Dismount in the reverse order.
3. Practise squad in pairs behind varying types of cover.
Note 1.—If teaching the Nos. 1 or 2 (lensatic) sight (set
Fig. 2), it should be remembered that this is kept in the sight
case. On mounting the mortar, the sight is taken from the
sight case and placed in the sight bracket of the mortar.
9
Teach aiming as follows :—
Set range by turning range 'adjusting wheel. Loosen
elevating clamp, ensure that the bubble is central, and
clamp up. Ensure that the transverse bubble is central.
Loosen traversing clamp, look through the sight and turn
the barrel until the apex of the triangle is in the same vertical
line as the auxiliary aiming marks, and clamp up. Ensure
that both bubbles are central. Let squad view aim.
The sight will be removed before dismounting the mortar,
and returned to the case.
Note 2.—It is an advantage if a degree scale is marked on
the baseplate of the mortar. Sub-divisions of 5° onty are
necessary, to the maximum of 20° right and left. They can
be read in conjunction with the corners of the traversing
bracket.
Corrections in direction can then be readily made, the No. 1
giving the necessary correction by measurement with his
hand. Moreover a quick switch to a fresh target can very
quickly be made without the necessity of putting out fresh
auxiliary aiming marks.
It must be remembered when corrections are given by
the No. 1, the No. 2 must read the scale in the opposite
direction, thereby bringing the barrel over in the required
direction.
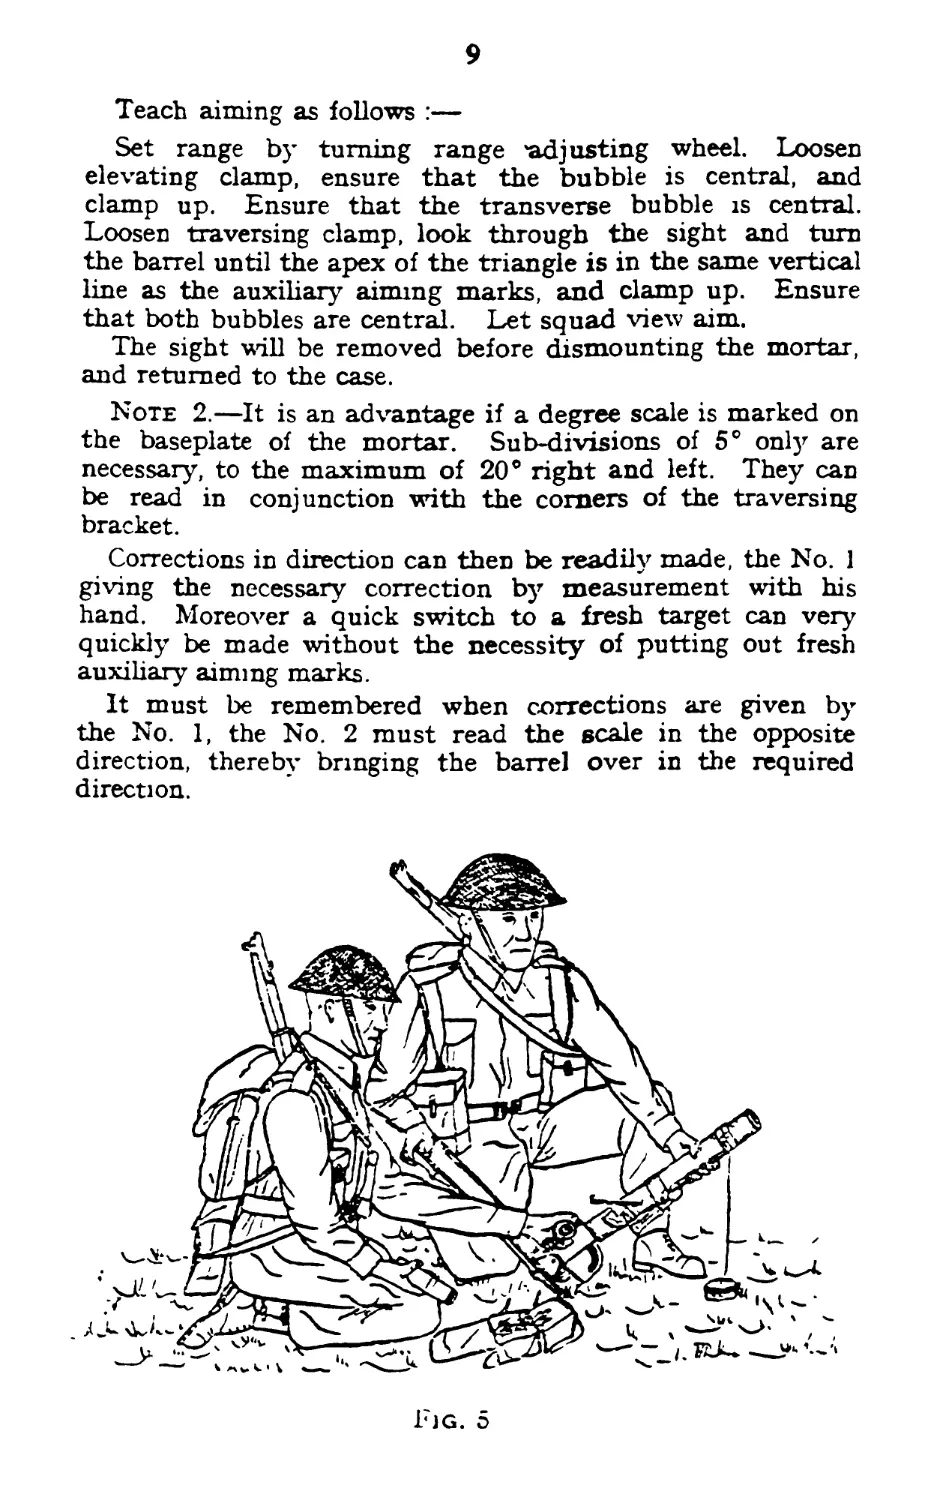
Fig. 5
10
4. Explain that, depending on the type of fire required and
the nature of the task, cover, etc., it will not always be
necessary to use auxiliary aiming marks. Examples are
given as follows :—
i. When there is some prominent object or mark, in line
with the chosen aiming point and beyond it, which
can be seen by the firer in the mortar position. In
Fig. 6
11
this instance this object or mark alone can be used
for obtaining direction without the use of auxiliary
aiming marks
ii. When firing smoke and great accuracy is not required,
some object in the vicinity of the required direction
may suffice.
iii. When speed in firing is the main consideration, the
mortar, if carried in such a way that the barrel forms
an angle of 90 degrees to the baseplate, can be
fired with the barrel so adjusted by raising or lowering
the near end of the baseplate. This method is
accurate for direction and elevation at close ranges.
(See Figs. 5 and 6.)
iv. When direct observation of the target is possible.
This will be rare.
5. Give practice in the complete lesson, demanding the
correct use of the mortar under varying conditions. Discuss
the length of time both of getting into action and of obtaining
fire effect. The occupation of alternative positions must also
be practised.
LESSON 3—SMOKE
Instructor's notes
Stores.—If using mortar : Mortar with sight fixed ; smoke
bombs; statable cover. If using smoke candles : Smoke
candles ; fatiguemen ; signalling flag.
Diagrams will be used.
1. Explain :—
i. The object of using smoke is to screen movement from
aimed fire or observation. It may also be used to
distract the enemy’s attention.
ii. Only a limited number of bombs is carried, so they
must be used sparingly and systematically as part of
a definite plan.
Before using smoke always consider whether it may
not mask the fire of a neighbouring sub-unit.
The above remarks are merely warnings which
should always be borne in mind. They are not
intended to discourage the use of smoke when con-
ditions are suitable. The usual tendency is to fail
to use smoke when it should be used, rather than
to use it unnecessarily.
12
iii. The filer must know :—
(a) The enemy position to be screened.
(b) The position of his own*troops and the position
for which they are making.
(c) How long the screen must last.
(d) The strength and direction of the wind.
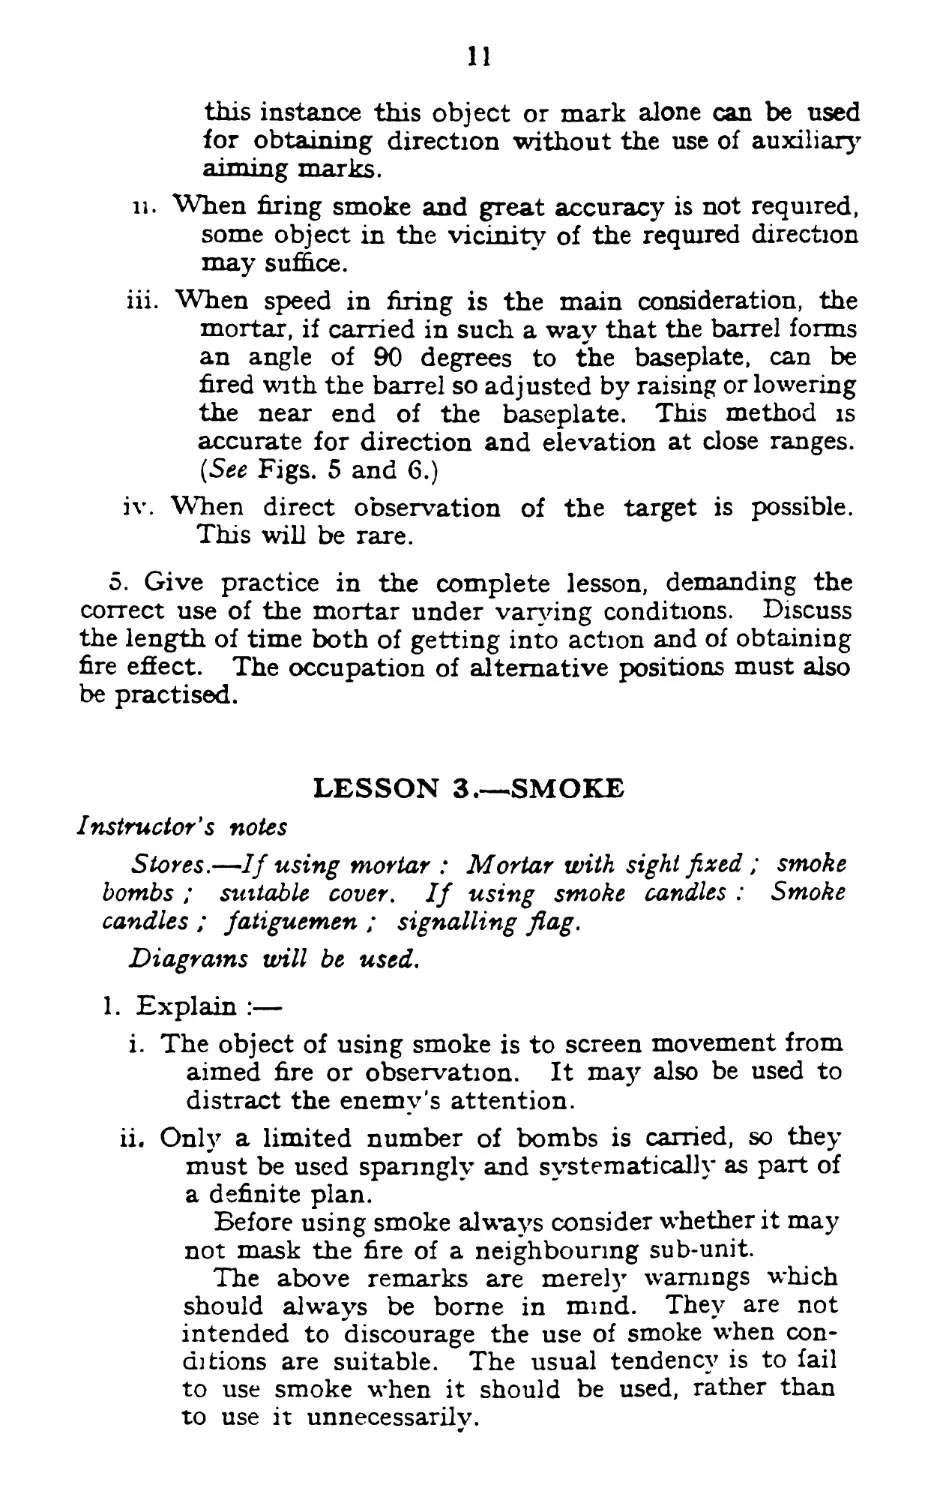
2. Explain and demonstrate (using diagrams) :—
i. Cross wind
The bomb should be dropped slightly in front and upwind
of the target. As soon as the firer has found his correct point
of burst he should fire another bomb immediately, and
then feed the screen as and when necessary. One bomb lasts
about two minutes {see Fig. 7).
ж
Lin« of
of Own troops
Fig. 7.—Diagram of smoke screen cross wind.
ii. Following wind
Diagram (Fig. 8) shows one method of using smoke in a
following wind. Since at least two points of burst have to be
fed, a considerable expenditure of bombs will be necessary.
Firing and feeding are the same as for a cross wind.
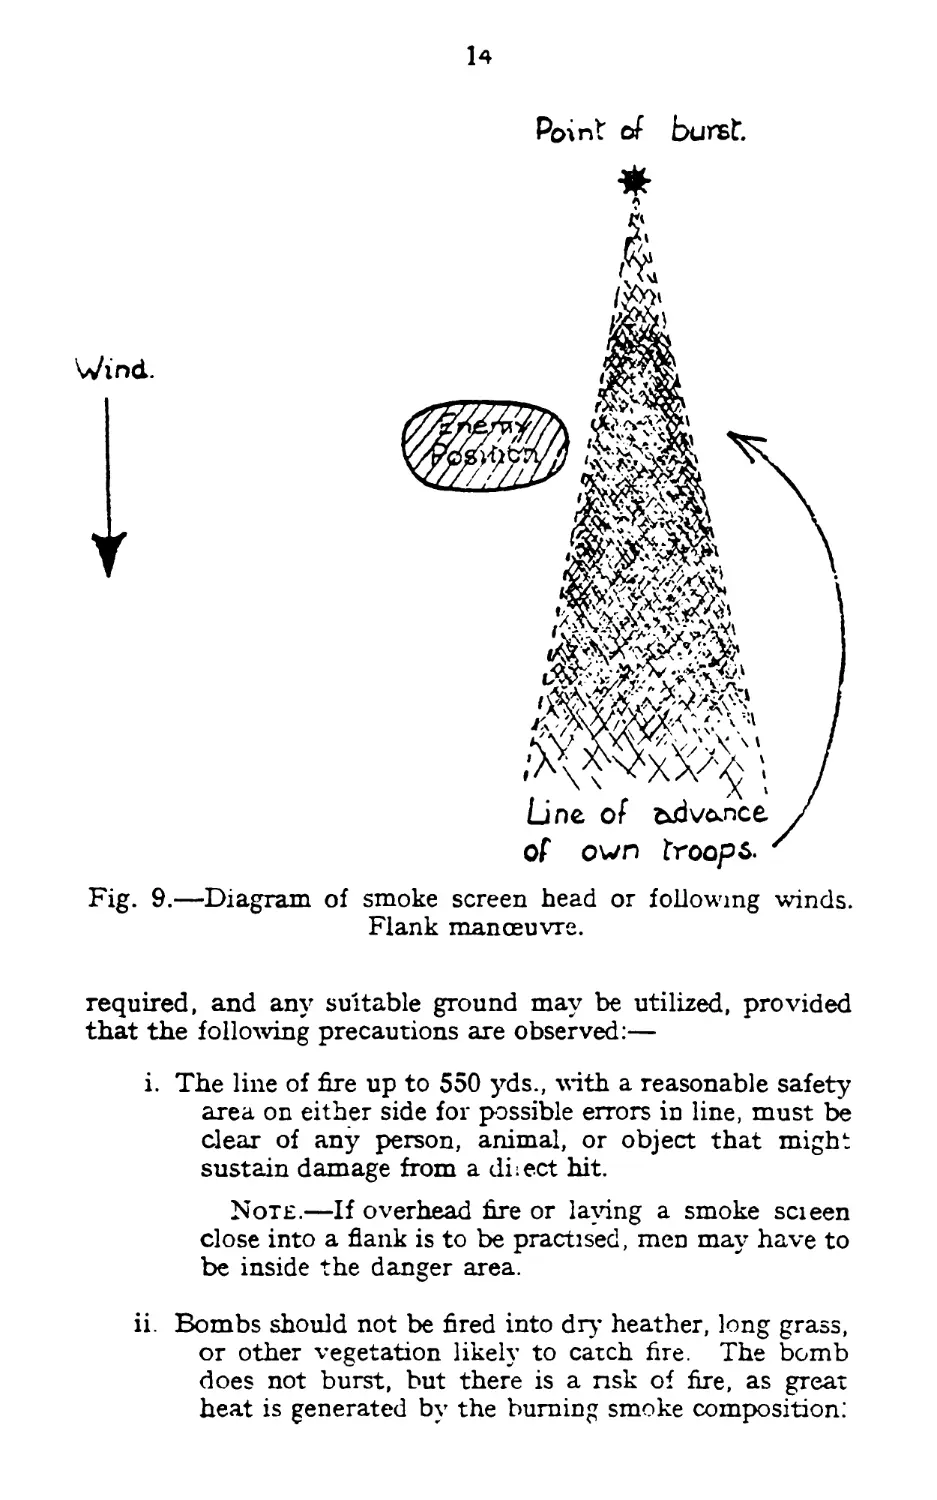
An alternative method, when manoeuvre is possible, is
illustrated in Fig. 9.
iii. Headwind
It is rarely practical to use smoke with a headwind, except
to cover manoeuvre from a flank, as in Fig. 9. In this instance
the point of burst must be behind the enemy position and on
the required flank.
13
Points of burst.
Line of advance
of own troops
Fig. 8.—Diagram of smoke screen following wind.
3. Practise squad either with bombs or with fatiguemen
carrying smoke candles. Practice will be carried out as
follows :—
The instructor will indicate a position to be blinded to the
firer and imaginary’ position of own troops. The firer will
inform the instructor what point or points of burst he has
chosen and, with smoke candles, a fatigueman will light them
on the points selected. The instructor will comment on
the point or points of burst chosen and on the allowance made
for wind. Practice in “ feeding ” a screen will not be carried
out, until either bombs or smoke candles are plentiful.
TRAINING WITH LIVE SMOKE BOMBS
1. The value and effectiveness of the 2-in. mortar smoke
bomb should be frequently demonstrated No special range is
14
Wind.
Point of burst
Fig. 9.—Diagram of smoke screen head or following winds.
Flank manoeuvre.
required, and any suitable ground may be utilized, provided
that the following precautions are observed:—
i. The line of fire up to 550 yds., with a reasonable safety
area on either side for possible errors in line, must be
clear of any person, animal, or object that might
sustain damage from a diiect hit.
Note.—If overhead lire or laying a smoke scieen
close into a flank is to be practised, men may have to
be inside the danger area.
ii. Bombs should not be fired into dry* heather, long grass,
or other vegetation likely to catch fire. The bomb
does not burst, but there is a nsk of fire, as great
heat is generated by the burning smoke composition:
15
iii. Should a blind occur, the metal sealing discs should
be pierced and the smoke composition ignited.
A N.C.O. must be detailed to each mortar to watch
for and mark the position of blinds.
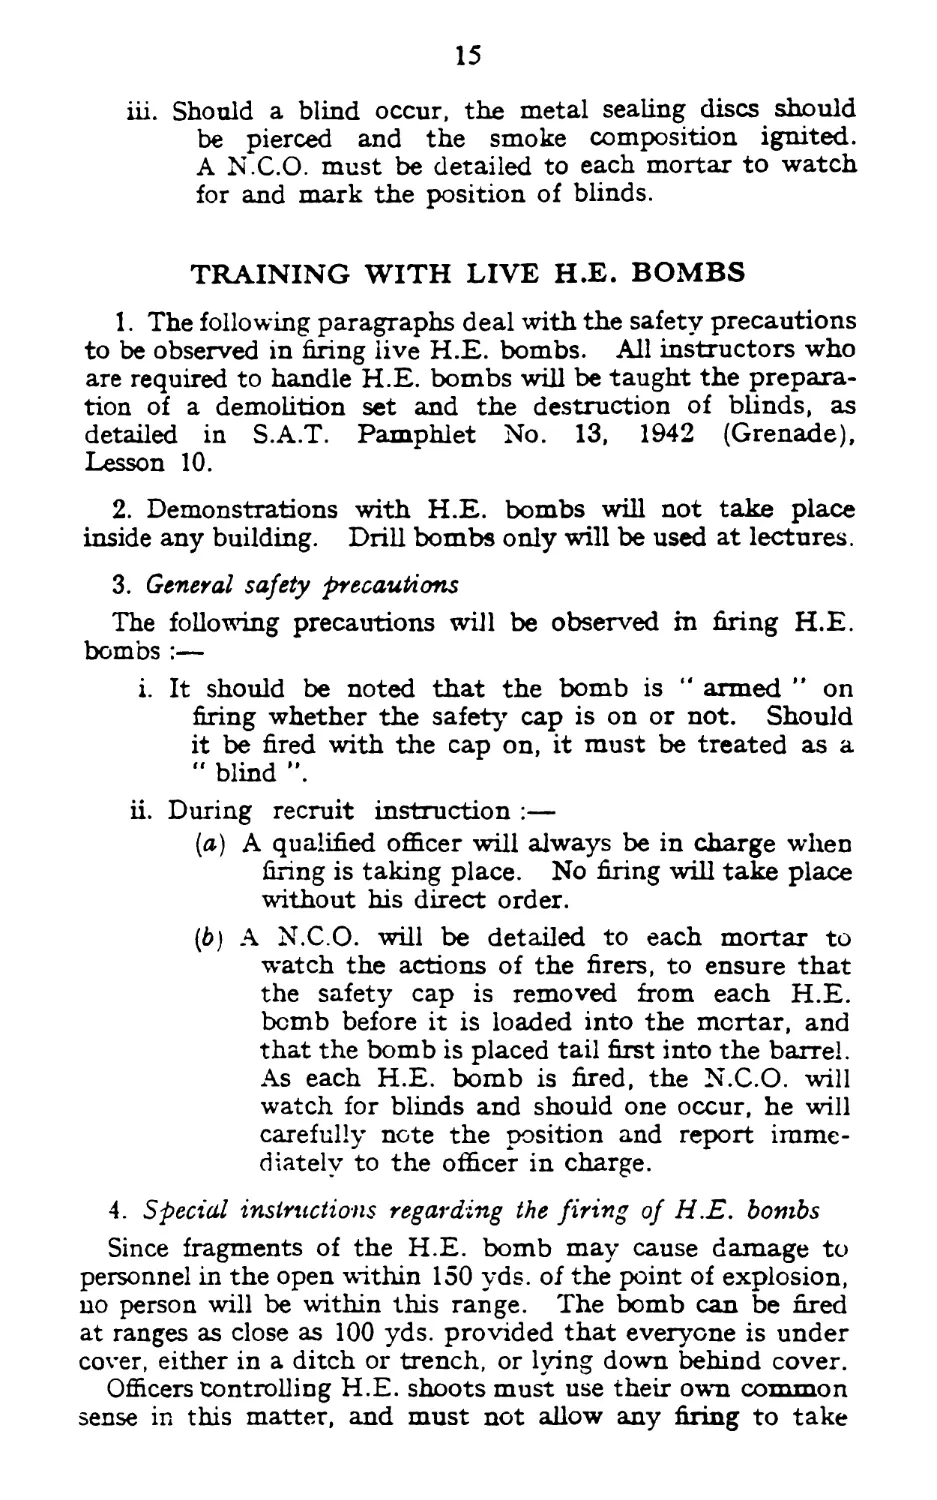
TRAINING WITH LIVE H.E. BOMBS
1. The following paragraphs deal with the safety precautions
to be observed in filing live H.E. bombs. All instructors who
are required to handle H.E. bombs will be taught the prepara-
tion of a demolition set and the destruction of blinds, as
detailed in S.A.T. Pamphlet No. 13, 1942 (Grenade),
Lesson 10.
2. Demonstrations with H.E. bombs will not take place
inside any building. Drill bombs only will be used at lectures.
3. General safety precautions
The following precautions will be observed in firing H.E.
bombs :—
i. It should be noted that the bomb is “ armed ” on
firing whether the safety cap is on or not. Should
it be fired with the cap on, it must be treated as a
“ blind ”.
ii. During recruit instruction :—
(a) A qualified officer will always be in charge when
firing is taking place. No firing will take place
without his direct order.
(d) A N.C.O. will be detailed to each mortar to
watch the actions of the firers, to ensure that
the safety cap is removed from each H.E.
bomb before it is loaded into the mortar, and
that the bomb is placed tail first into the barrel.
As each H.E. bomb is fired, the N.C.O. will
watch for blinds and should one occur, he will
carefully note the position and report imme-
diately to the officer in charge.
4. Special instructions regarding the firing of H.E. bombs
Since fragments of the H.E. bomb may cause damage to
personnel in the open within 150 yds. of the point of explosion,
no person will be within this range. The bomb can be fired
at ranges as close as 100 yds. provided that everyone is under
cover, either in a ditch or trench, or lying down behind cover.
Officers controlling H.E. shoots must use their own common
sense in this matter, and must not allow any firing to take
16
place until they are satisfied that everyone is sufficiently safe.
The greatest care must be taken, however, that every blind
is located and destroyed. As far as possible, firing with
H.E. bombs should not take place in areas containing long
grass, etc.
5. Blinds
i. On a range with a closed target area.—Blinds will be
left in situ and no attempt will be made to destroy
them. Should, however, a bomb be observed to fall
outside the closed area, the officer in charge of the
firing will act as in ii, below.
ii. On a range with no closed target area.—The officer in
charge will personally destroy the bomb in the manner
laid down for destroying H.E. grenades (S.A.T.
Pamphlet No. 13, 1942, Lesson 10). Should he be
unable to locate it, he will report the occurrence to
higher authority after firing is completed.
iii. A demolition box will always be on the range during
H.E. firing.
TESTS OF ELEMENTARY TRAINING
1. Action
This test will be carried out behind natural cover, which
necessitates crawling. The firer will be lying down 5 yds
in rear of the action position, with mortar folded up and
barrel strap fastened. On the command “ Action ” the firer
will mount the mortar and adopt the correct firing position.
Time limit—30 seconds.
Two out of three attempts must be carried out correctly
within the time limit.
Note.—If the lensatic type of sight is being used, it will
be in the case slung over No. 1’s shoulder before the test
begins. Time will be 40 seconds.
2. Handling
The firer will be tested in Lesson 2 complete, behind various
types of cover. He will be assisted by a No. 2. Serious
faults, e.g. in aiming, over exposure, remedying a misfire,
etc., will entail failure.
(17025) G.794 100,000 6/42 КЯ.К. GpJ/7