/


Автор: Vermeulen S.
Теги: programming languages programming packt publisher selinux linux operation system
ISBN: 978-1-78712-695-4
Год: 2016


Текст
SELinux System Administration
Second Edition
Ward off traditional security permissions and effectively
secure your Linux systems with SELinux
Sven Vermeulen
BIRMINGHAM - MUMBAI
SELinux System Administration
Second Edition
Copyright © 2016 Packt Publishing
All rights reserved. No part of this book may be reproduced, stored in a retrieval system, or
transmitted in any form or by any means, without the prior written permission of the
publisher, except in the case of brief quotations embedded in critical articles or reviews.
Every effort has been made in the preparation of this book to ensure the accuracy of the
information presented. However, the information contained in this book is sold without
warranty, either express or implied. Neither the author, nor Packt Publishing, and its
dealers and distributors will be held liable for any damages caused or alleged to be caused
directly or indirectly by this book.
Packt Publishing has endeavored to provide trademark information about all of the
companies and products mentioned in this book by the appropriate use of capitals.
However, Packt Publishing cannot guarantee the accuracy of this information.
First published: September 2013
Second edition: December 2016
Production reference: 1131216
Published by Packt Publishing Ltd.
Livery Place
35 Livery Street
Birmingham
B3 2PB, UK.
ISBN 978-1-78712-695-4
www.packtpub.com
Credits
Author
Sven Vermeulen
Copy Editor
Madhusudan Uchil
Reviewers
David Quigley
Sam Wilson
Project Coordinator
Judie Jose
Commissioning Editor
Kartikey Pandey
Proofreader
Safis Editing
Acquisition Editor
Namrata Patil
Indexer
Pratik Shirodkar
Content Development Editor
Amedh Gemraram Pohad
Graphics
Kirk D'Penha
Technical Editors
Vishal Kamal Mewada
Khushbu Sutar
Production Coordinator
Shantanu N. Zagade
About the Author
Sven Vermeulen is a long-term contributor to various free software projects and the author
of various online guides and resources. He got his first taste of free software in 1997 and
never looked back. In 2003, he joined the ranks of the Gentoo Linux project as a
documentation developer and has since worked in several roles, including Gentoo
Foundation trustee, council member, project lead for various documentation initiatives, and
(his current role) project lead for Gentoo Hardened SELinux integration and the system
integrity project.
During this time, Sven gained expertise in several technologies, ranging from OS-level
knowledge to application servers. He used his interest in security to guide his projects
further in the areas of security guides using SCAP languages, mandatory access controls
through SELinux, authentication with PAM, (application) firewalling, and more.
Within SELinux, Sven contributed several policies to the Reference Policy project, and he is
an active participant in policy development and user space development projects.
In his daily job, Sven is an IT architect in a European financial institution as well as a selfemployed solution engineer and consultant. The secure implementation of infrastructures
(and the surrounding architectural integration) is, of course, an important part of this. Prior
to this, he graduated with an MSc in computer engineering from Ghent University and MSc
in ICT enterprise architecture from http://inno.com/, and he worked as a web application
infrastructure engineer.
Sven is the main author of the Gentoo Handbook, which covers the installation and
configuration of Gentoo Linux on several architectures. He also authored the Linux Sea
online publication, which is a basic introduction to Linux for novice system administrators,
and SELinux System Administration and SELinux Cookbook for Packt Publishing.
I would like to thank the open source / free software community for its never ending drive
to create great software, documentation, artwork and services. It is through this drive that
companies and organizations around the world are enjoying high quality services with all
the freedom that this software provides. Specifically, I would like to thank the Gentoo
community as it provides a great meta-distribution and operating system. The people I
meet there are all greatly motivated, highly experienced and/or experts in particular fields.
Being around in the community makes me eager to learn more.
About the Reviewers
David Quigley started his career as a computer systems researcher for the National
Information Assurance Research Lab at the NSA, where he worked as a member of the
SELinux team. David lead the design and implementation efforts to provide Labeled-NFS
support for SELinux. David has previously contributed to the open source community
through maintaining the Unionfs 1.0 code base and through code contributions to various
other projects. David has presented at conferences such as the Ottawa Linux Symposium,
the StorageSS workshop, LinuxCon, and several local Linux User Group meetings where
presentation topics have included storage, file systems, and security. David currently
works as a ZFS kernel engineer for the High Performance Data Division at Intel. He
previously reviewed SELinux Cookbook, published by Packt publishing.
I would like to thank my wonderful wife, Kathy, for all she does to make sure I have the
time to do things like review this book and travel to give presentations on SELinux. She is
the joy of my life and has helped me become the man I am today. I'd also like to thank all
my children past and present: Zoe Jane and Caroline, who remind us to love and cherish
the time we have as a family.
Sam Wilson is a senior systems and security engineer with a newly acquired passion for
radio hardware and a focus on Red Hat Enterprise Linux. Because of his extensive security
knowledge spanning microservices, infrastructure, and SecOps, Sam is approached
regularly for SELinux mentorship and advice across the organizations he collaborates and
works with. Sam has been active in GNU/Linux communities since early 2007 and has
volunteered his time for NTFreenet, Darwin Community Arts, Ansible, and the Fedora
project.
More recently, Sam can be found being a cranky neckbeard at https://www.cycloptivity.
netas well working with the Atlassian Security Intelligence team on visibility, operational
security, and controls to support and protect Atlassian customers in the cloud.
www.PacktPub.com
For support files and downloads related to your book, please visit www.PacktPub.com.
Did you know that Packt offers eBook versions of every book published, with PDF and
ePub files available? You can upgrade to the eBook version at www.PacktPub.com and as a
print book customer, you are entitled to a discount on the eBook copy. Get in touch with us
at service@packtpub.com for more details.
At www.PacktPub.com, you can also read a collection of free technical articles, sign up for a
range of free newsletters and receive exclusive discounts and offers on Packt books and
eBooks.
https://www.packtpub.com/mapt
Get the most in-demand software skills with Mapt. Mapt gives you full access to all Packt
books and video courses, as well as industry-leading tools to help you plan your personal
development and advance your career.
Why subscribe?
Fully searchable across every book published by Packt
Copy and paste, print, and bookmark content
On demand and accessible via a web browser
Table of Contents
Preface
Chapter 1: Fundamental SELinux Concepts
Providing more security to Linux
Using Linux security modules
Extending regular DAC with SELinux
Restricting root privileges
Reducing the impact of vulnerabilities
Enabling SELinux support
Labeling all resources and objects
Dissecting the SELinux context
Enforcing access through types
Granting domain access through roles
Limiting roles through users
Controlling information flow through sensitivities
Defining and distributing policies
Writing SELinux policies
Distributing policies through modules
Bundling modules in a policy store
Distinguishing between policies
Supporting MLS
Dealing with unknown permissions
Supporting unconfined domains
Limiting cross-user sharing
Incrementing policy versions
Different policy content
Summary
1
6
6
8
10
11
11
13
13
15
17
18
19
21
22
23
24
26
27
27
28
28
29
30
32
33
Chapter 2: Understanding SELinux Decisions and Logging
34
Switching SELinux on and off
Setting the global SELinux state
Switching to permissive (or enforcing) mode
Using kernel boot parameters
Disabling SELinux protections for a single service
Understanding SELinux-aware applications
SELinux logging and auditing
34
35
36
38
40
42
42
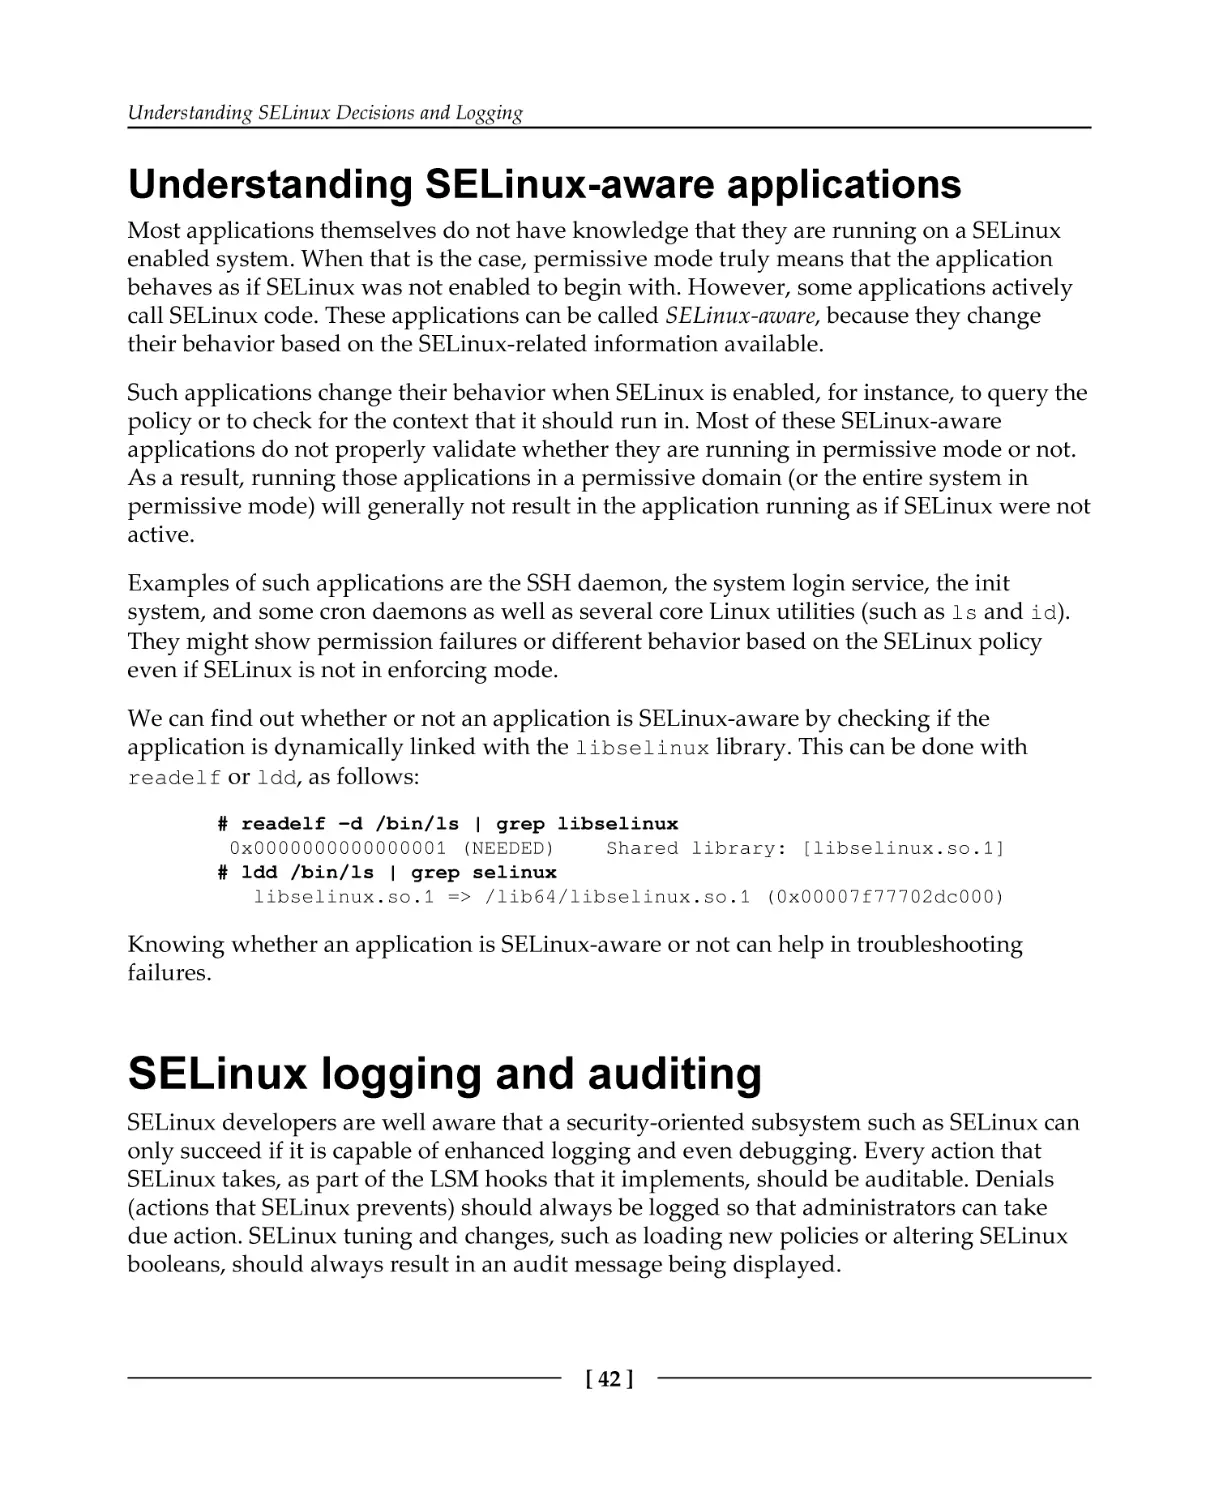
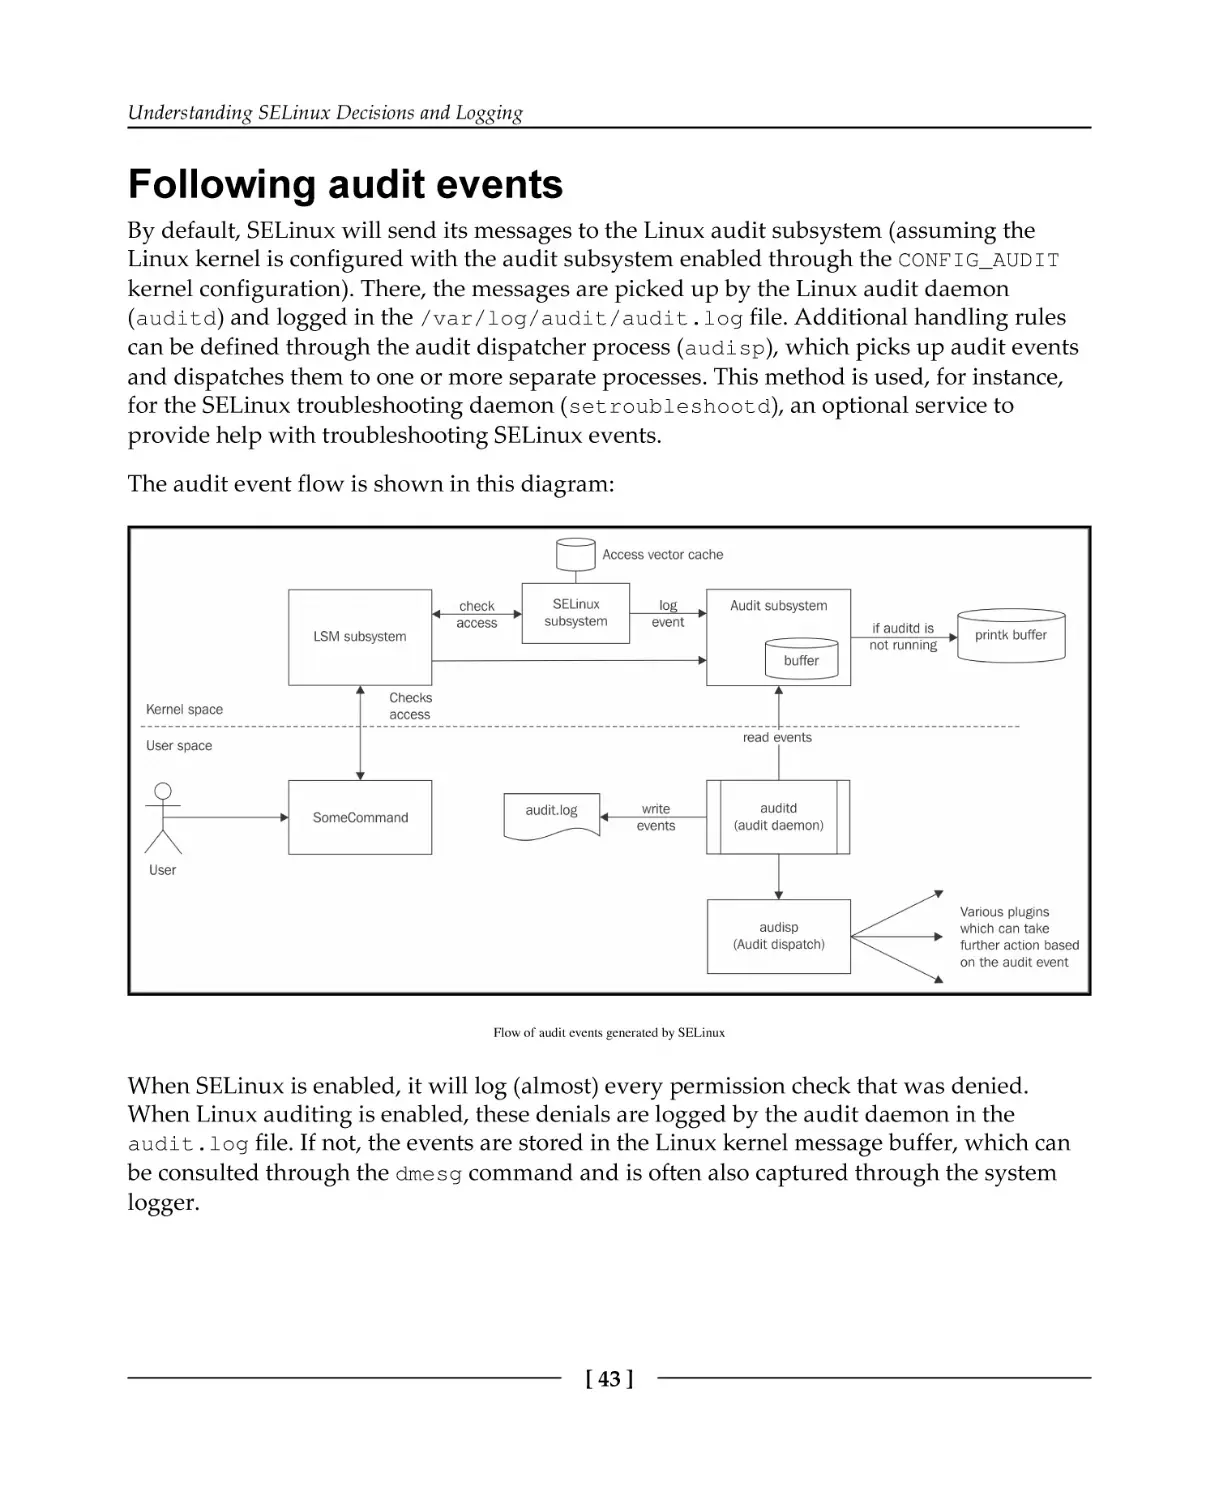
Following audit events
Uncovering more logging
Configuring Linux auditing
Configuring the local system logger
Reading SELinux denials
Other SELinux-related event types
USER_AVC
SELINUX_ERR
MAC_POLICY_LOAD
MAC_CONFIG_CHANGE
MAC_STATUS
NetLabel events
Labeled IPsec events
Using ausearch
Getting help with denials
Troubleshooting with setroubleshoot
Sending e-mails when SELinux denials occur
Using audit2why
Interacting with systemd-journal
Using common sense
Summary
Chapter 3: Managing User Logins
43
45
45
47
48
53
53
54
54
55
55
55
56
57
58
58
60
61
62
63
64
65
User-oriented SELinux contexts
Understanding domain complexity
Querying for unconfined domains
SELinux users and roles
Listing SELinux user mappings
Mapping logins to SELinux users
Customizing logins towards services
Creating SELinux users
Listing accessible domains
Managing categories
Handling SELinux roles
Defining allowed SELinux contexts
Validating contexts with getseuser
Switching roles with newrole
Managing role access through sudo
Reaching other domains using runcon
Switching to the system role
SELinux and PAM
[ ii ]
65
66
68
69
69
71
72
73
74
75
77
77
78
79
80
81
81
83
Assigning contexts through PAM
Prohibiting access during permissive mode
Polyinstantiating directories
Summary
Chapter 4: Process Domains and File-Level Access Controls
About SELinux file contexts
Getting context information
Interpreting SELinux context types
Keeping or ignoring contexts
Inheriting the default context
Querying transition rules
Copying and moving files
Temporarily changing file contexts
Placing categories on files and directories
Using multilevel security on files
Backing up and restoring extended attributes
Using mount options to set SELinux contexts
SELinux file context expressions
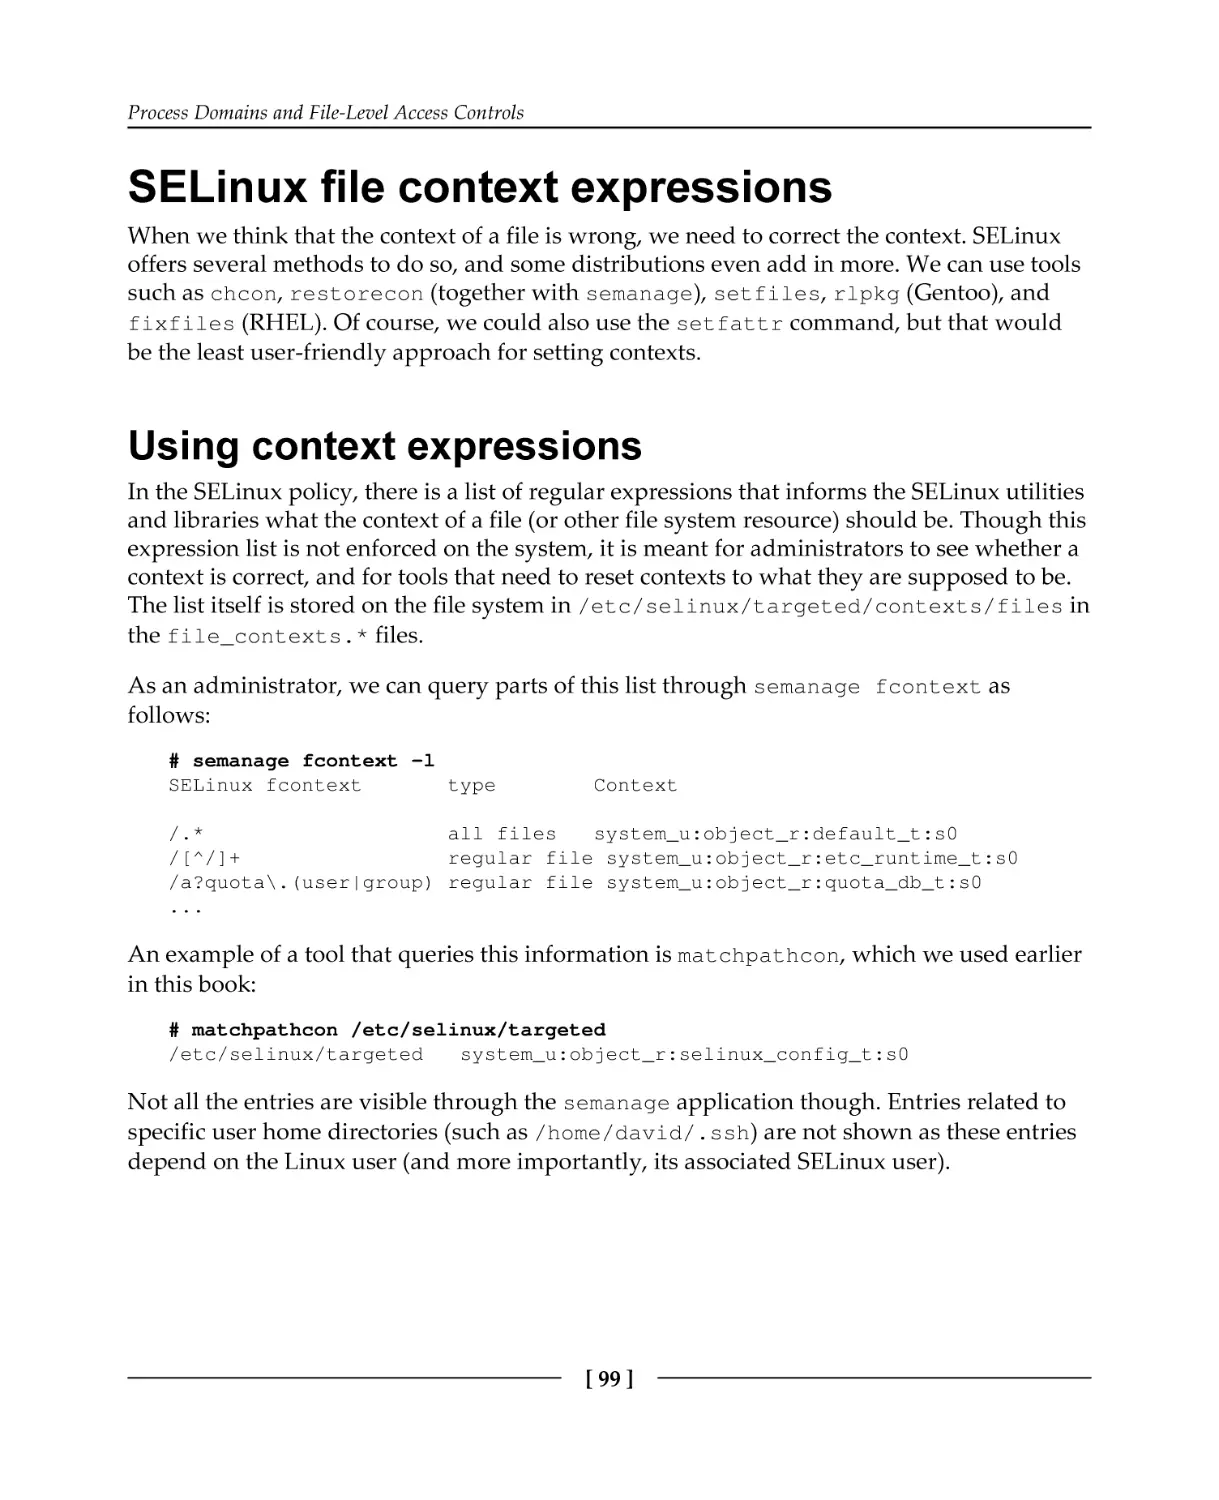
Using context expressions
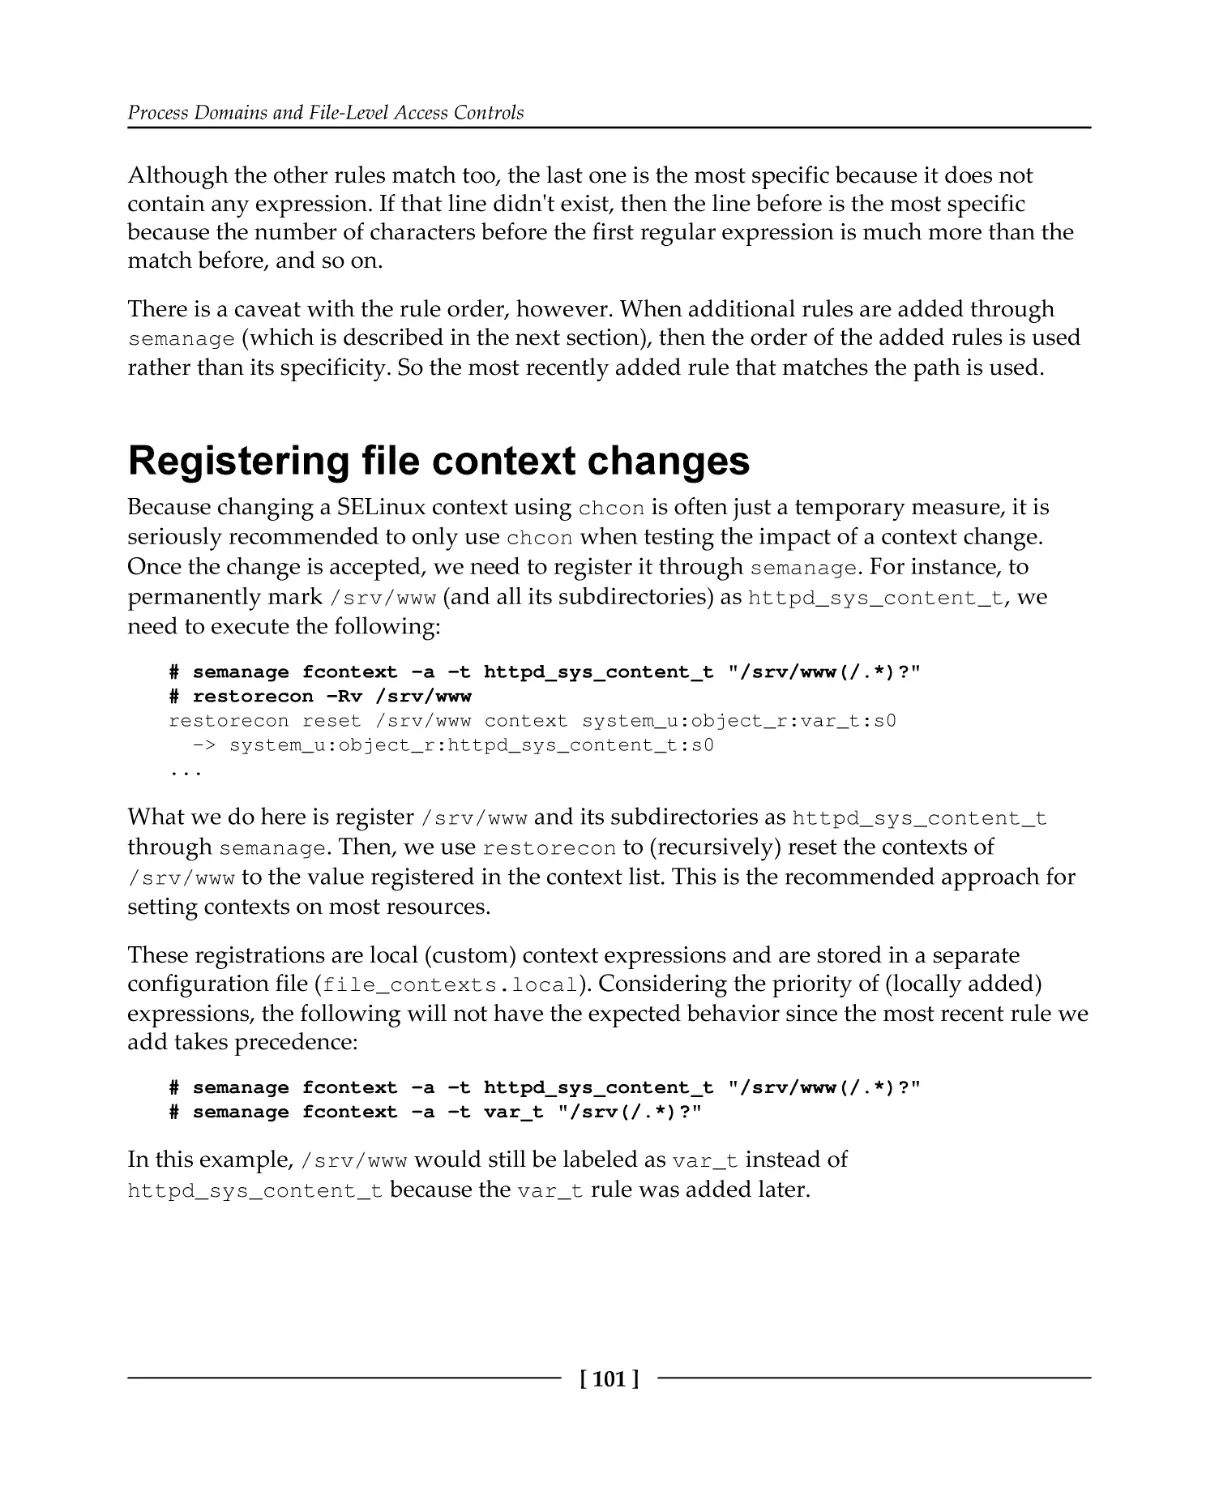
Registering file context changes
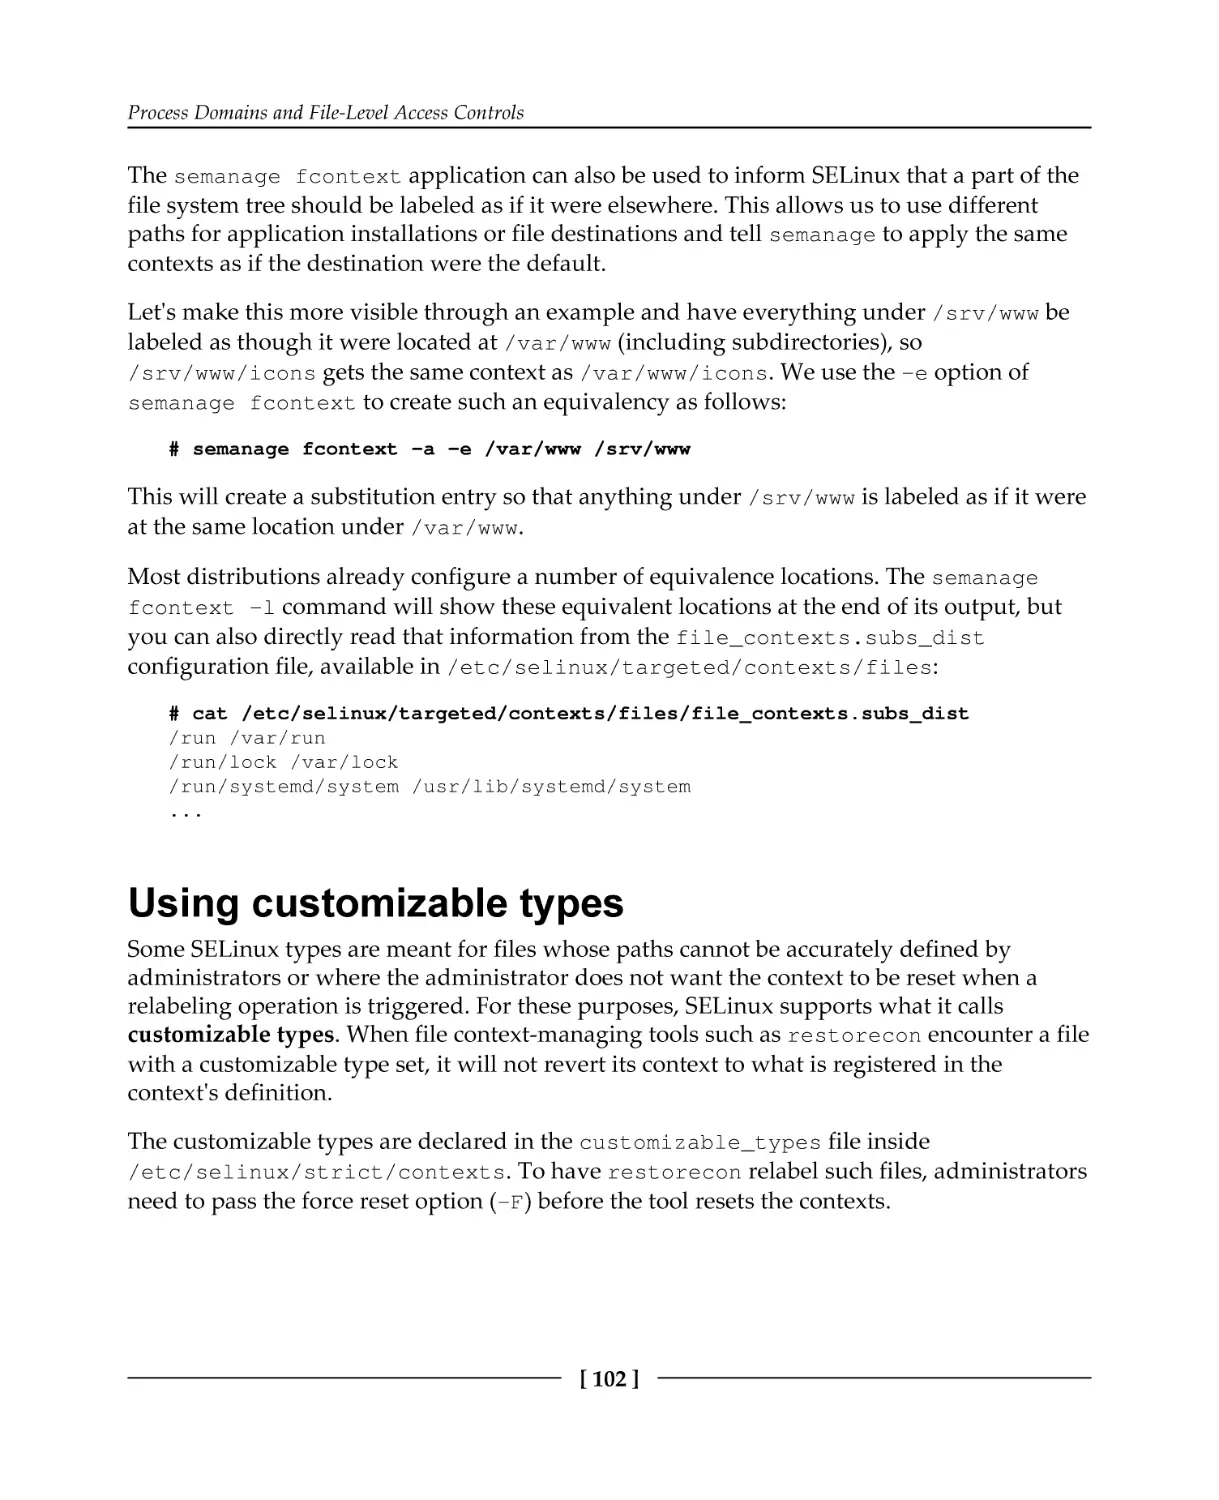
Using customizable types
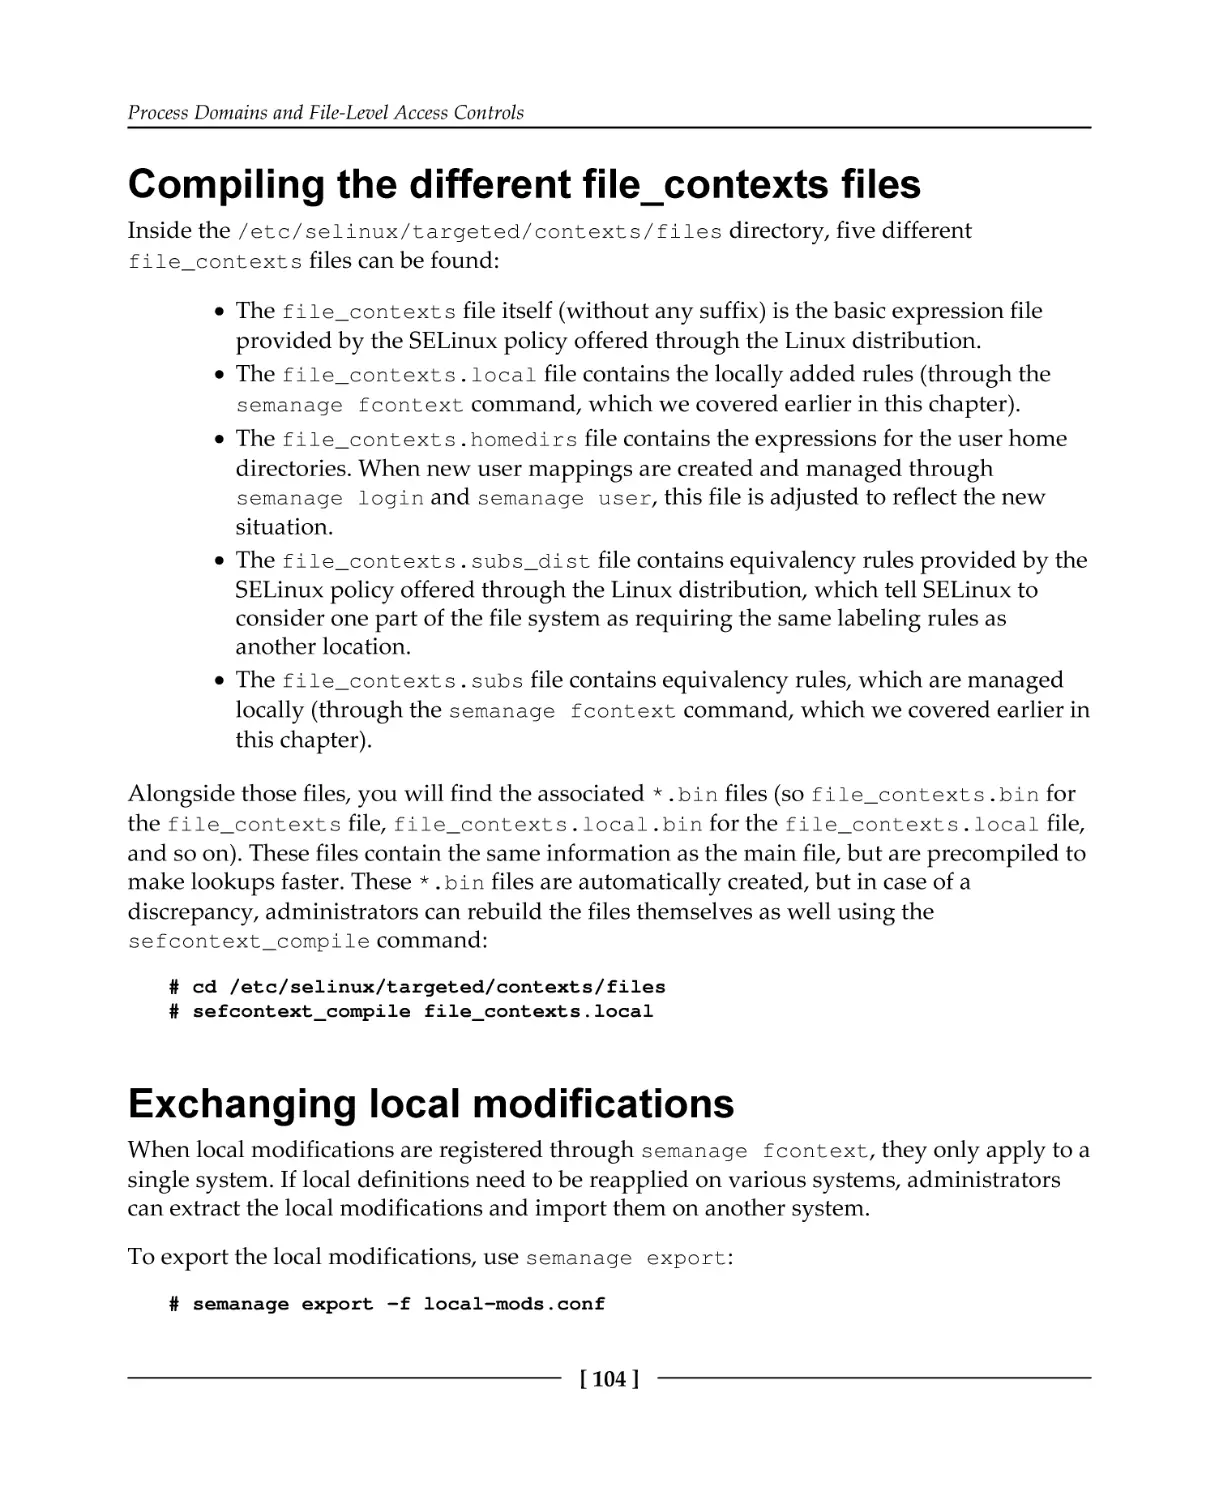
Compiling the different file_contexts files
Exchanging local modifications
Modifying file contexts
Using setfiles, rlpkg, and fixfiles
Relabeling the entire file system
Automatically setting contexts with restorecond
The context of a process
Getting a process context
Transitioning towards a domain
Verifying a target context
Other supported transitions
Querying initial contexts
Limiting the scope of transitions
Sanitizing environments on transition
Disabling unconstrained transitions
Using Linux's NO_NEW_PRIVS
Types, permissions, and constraints
Understanding type attributes
[ iii ]
83
84
85
86
88
89
89
90
92
92
92
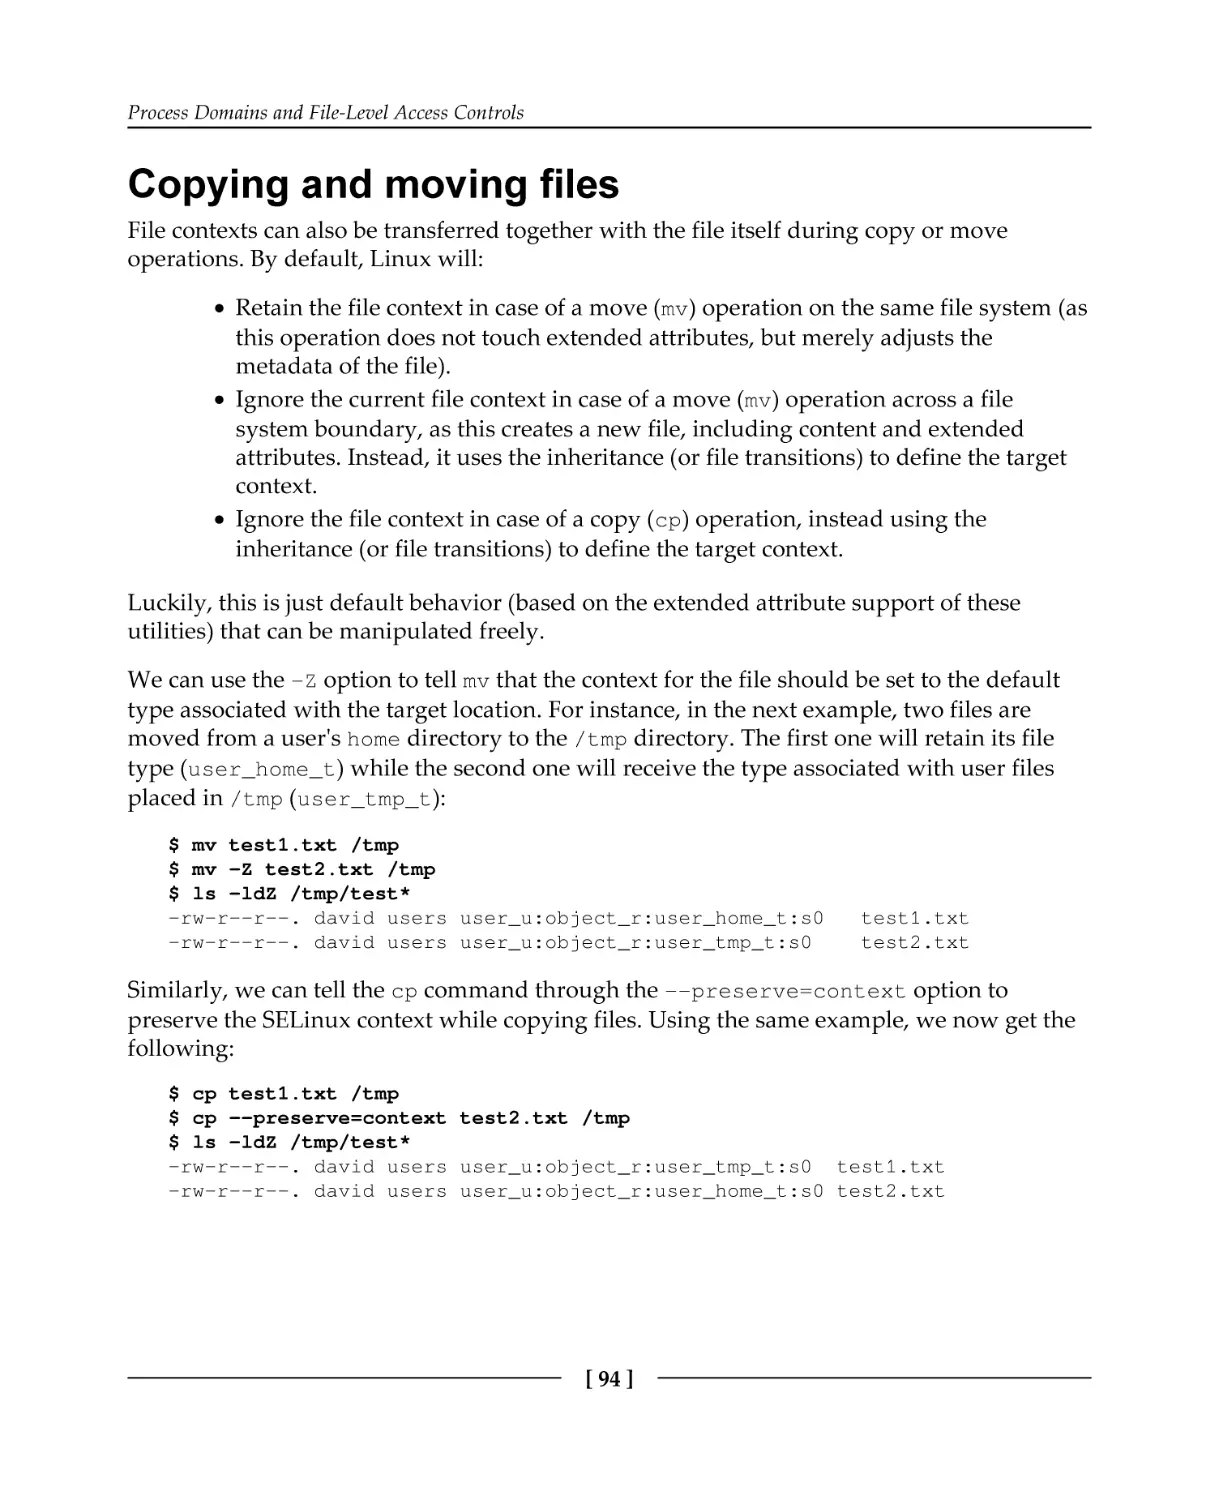
94
95
96
97
97
97
99
99
101
102
104
104
105
105
106
106
107
107
108
111
111
112
112
112
113
114
115
116
Querying domain permissions
Learning about constraints
Summary
117
118
119
Chapter 5: Controlling Network Communications
From IPC to TCP and UDP sockets
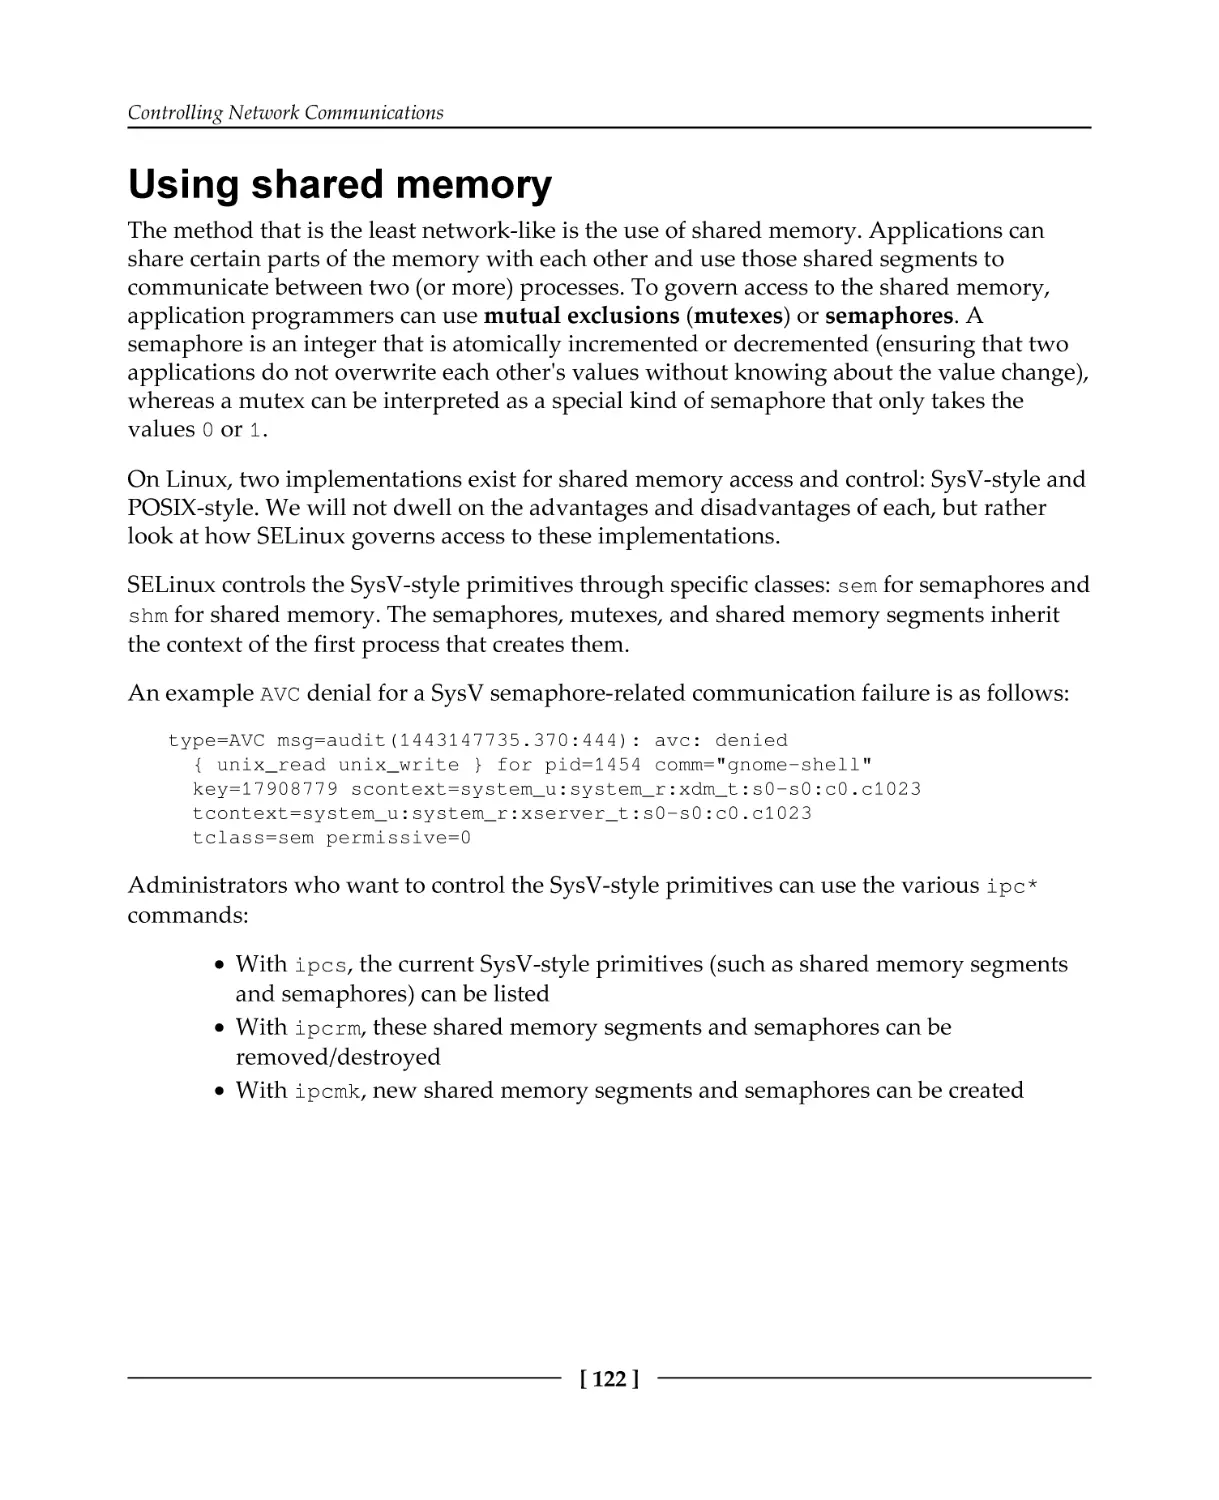
Using shared memory
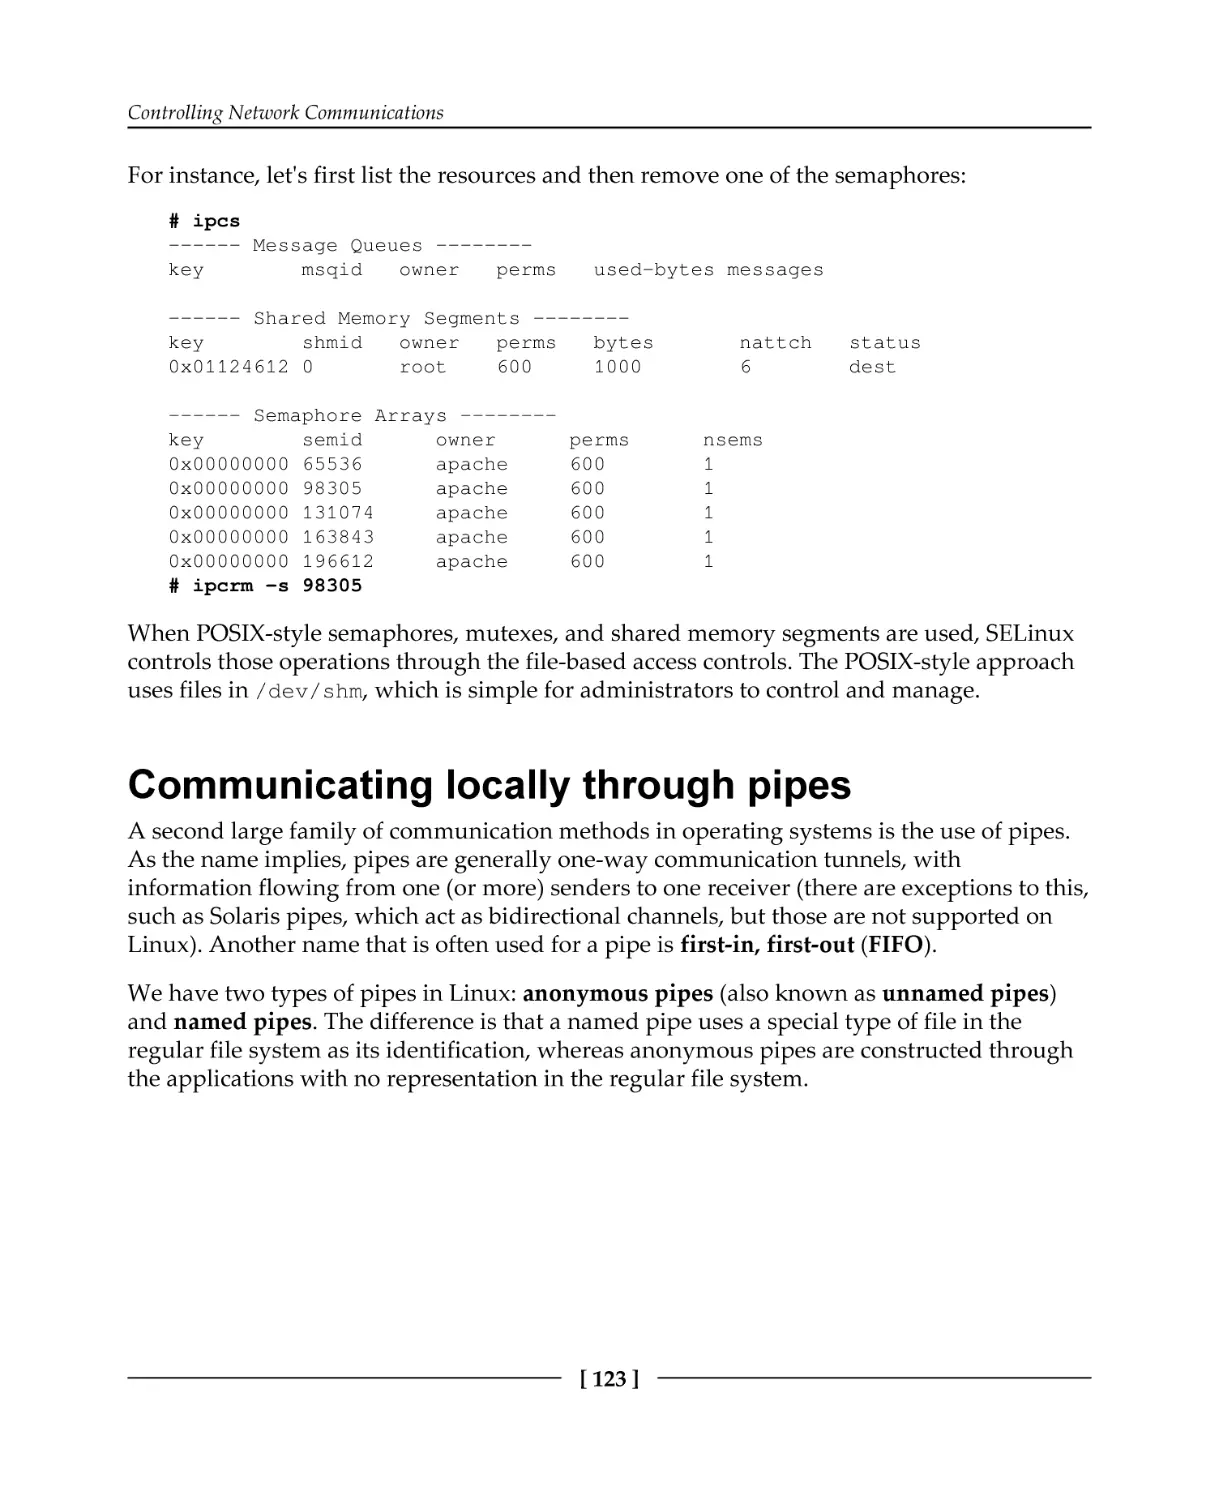
Communicating locally through pipes
Conversing over UNIX domain sockets
Understanding netlink sockets
Dealing with TCP and UDP sockets
Listing connection contexts
Linux netfilter and SECMARK support
Introducing netfilter
Implementing security markings
Assigning labels to packets
Labeled networking
Fallback labeling with NetLabel
Limiting flows based on the network interface
Accepting peer communication from selected hosts
Verifying peer-to-peer flow
Using old-style controls
Labeled IPsec
Setting up regular IPsec
Enabling labeled IPsec
Using Libreswan
NetLabel/CIPSO
Configuring CIPSO mappings
Adding domain-specific mappings
Using local CIPSO definitions
Supporting IPv6 CALIPSO
Summary
Chapter 6: sVirt and Docker Support
SELinux-secured virtualization
Introducing virtualization
Reviewing the risks of virtualization
Using nondynamic security models
Reusing existing virtualization domains
Understanding MCS
[ iv ]
121
121
122
123
124
126
126
128
128
129
130
131
133
134
135
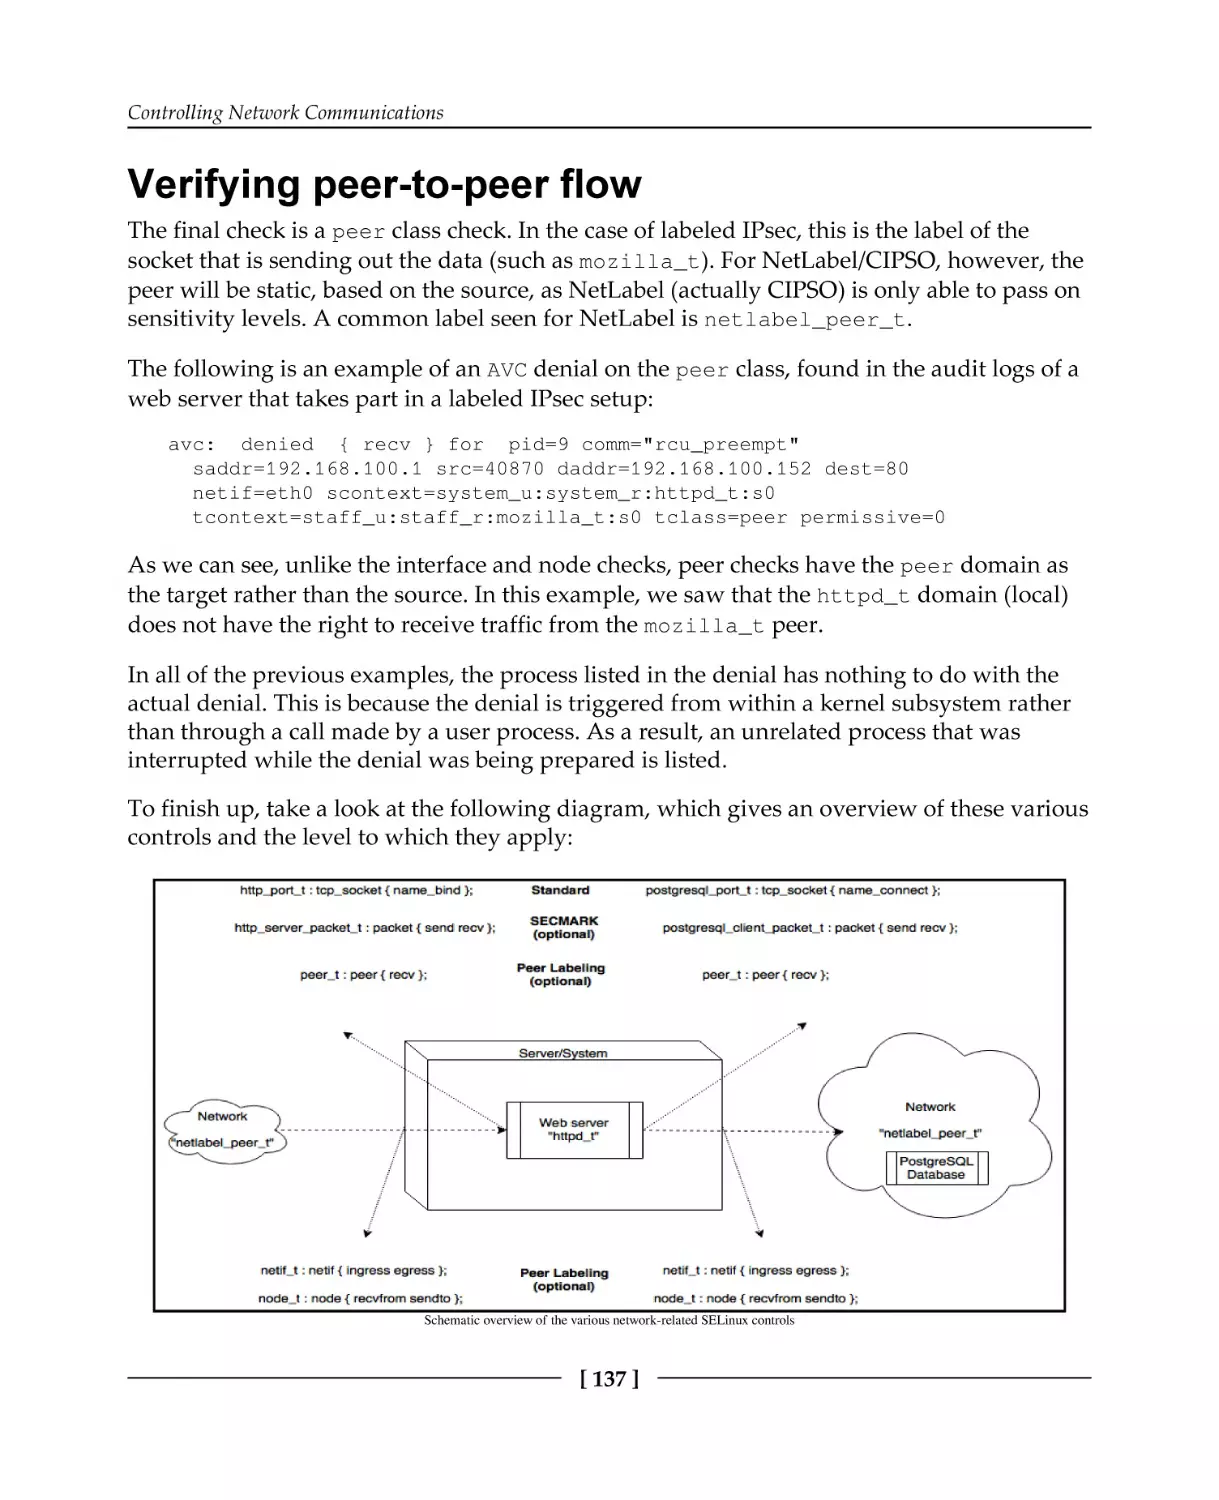
136
137
138
138
141
141
142
143
144
146
146
147
147
148
148
149
150
151
152
153
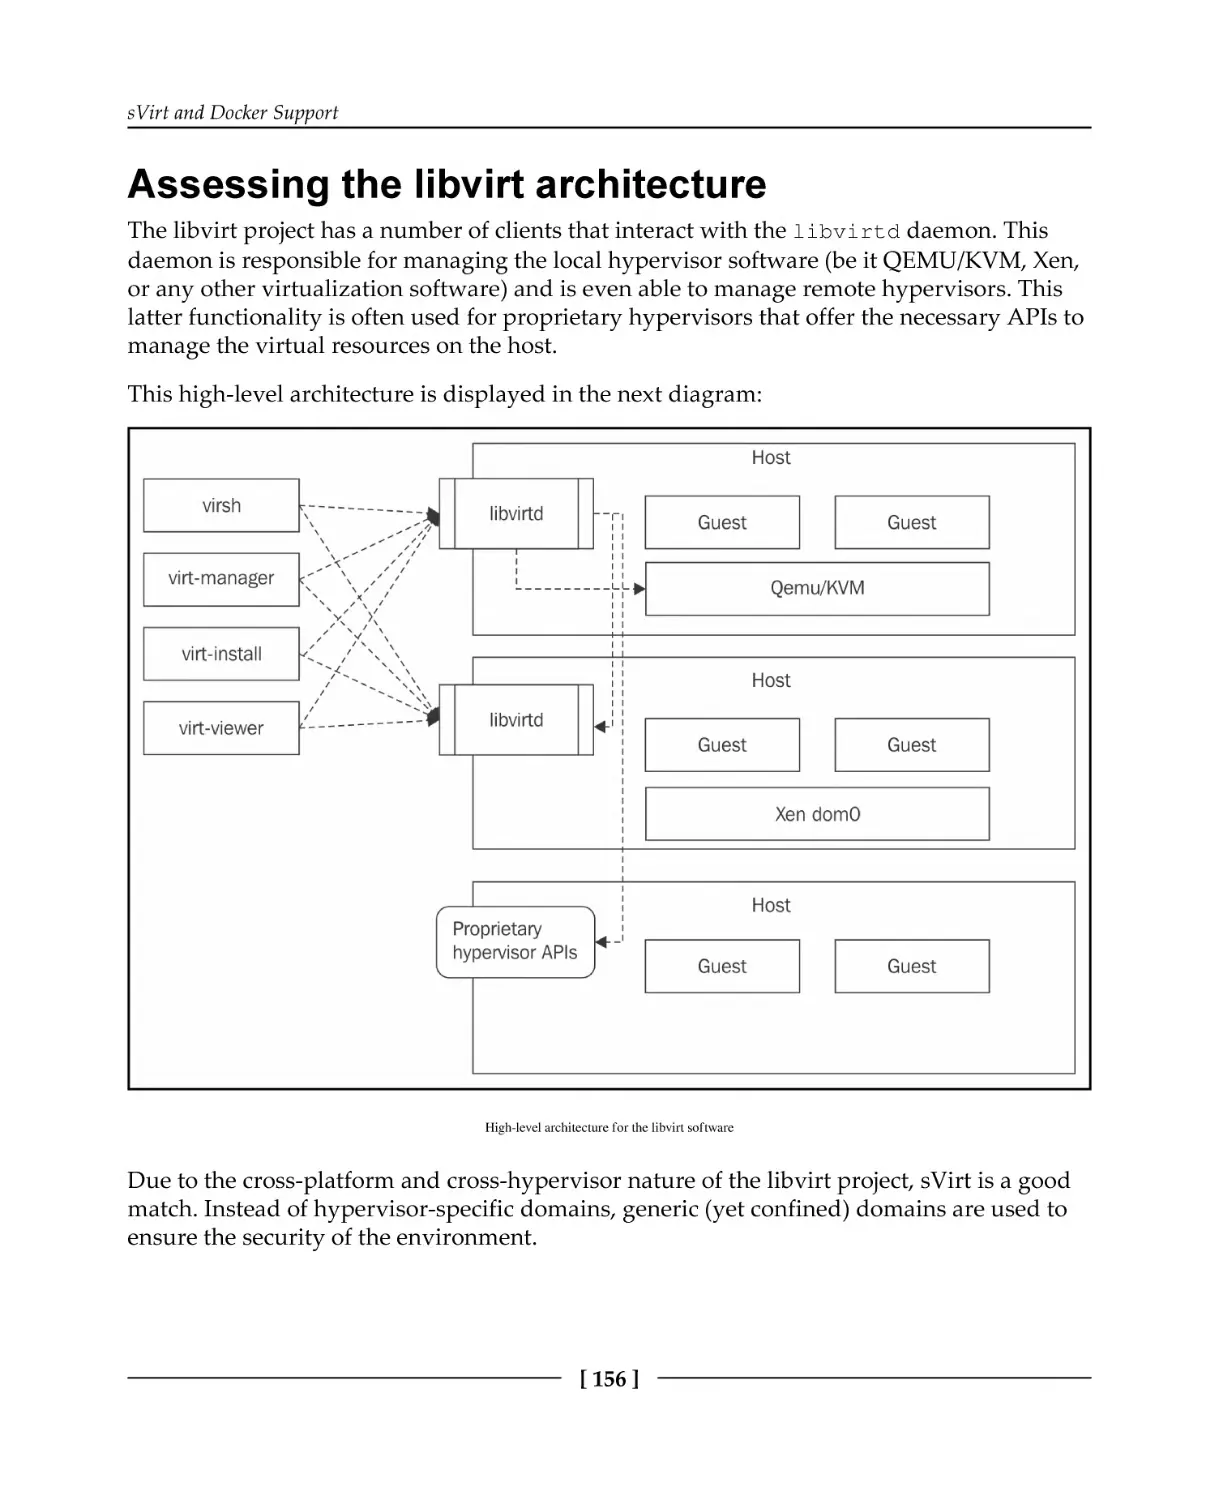
libvirt SELinux support
Differentiating between shared and dedicated resources
Assessing the libvirt architecture
Configuring libvirt for sVirt
Using static labels
Customizing labels
Using different storage pool locations
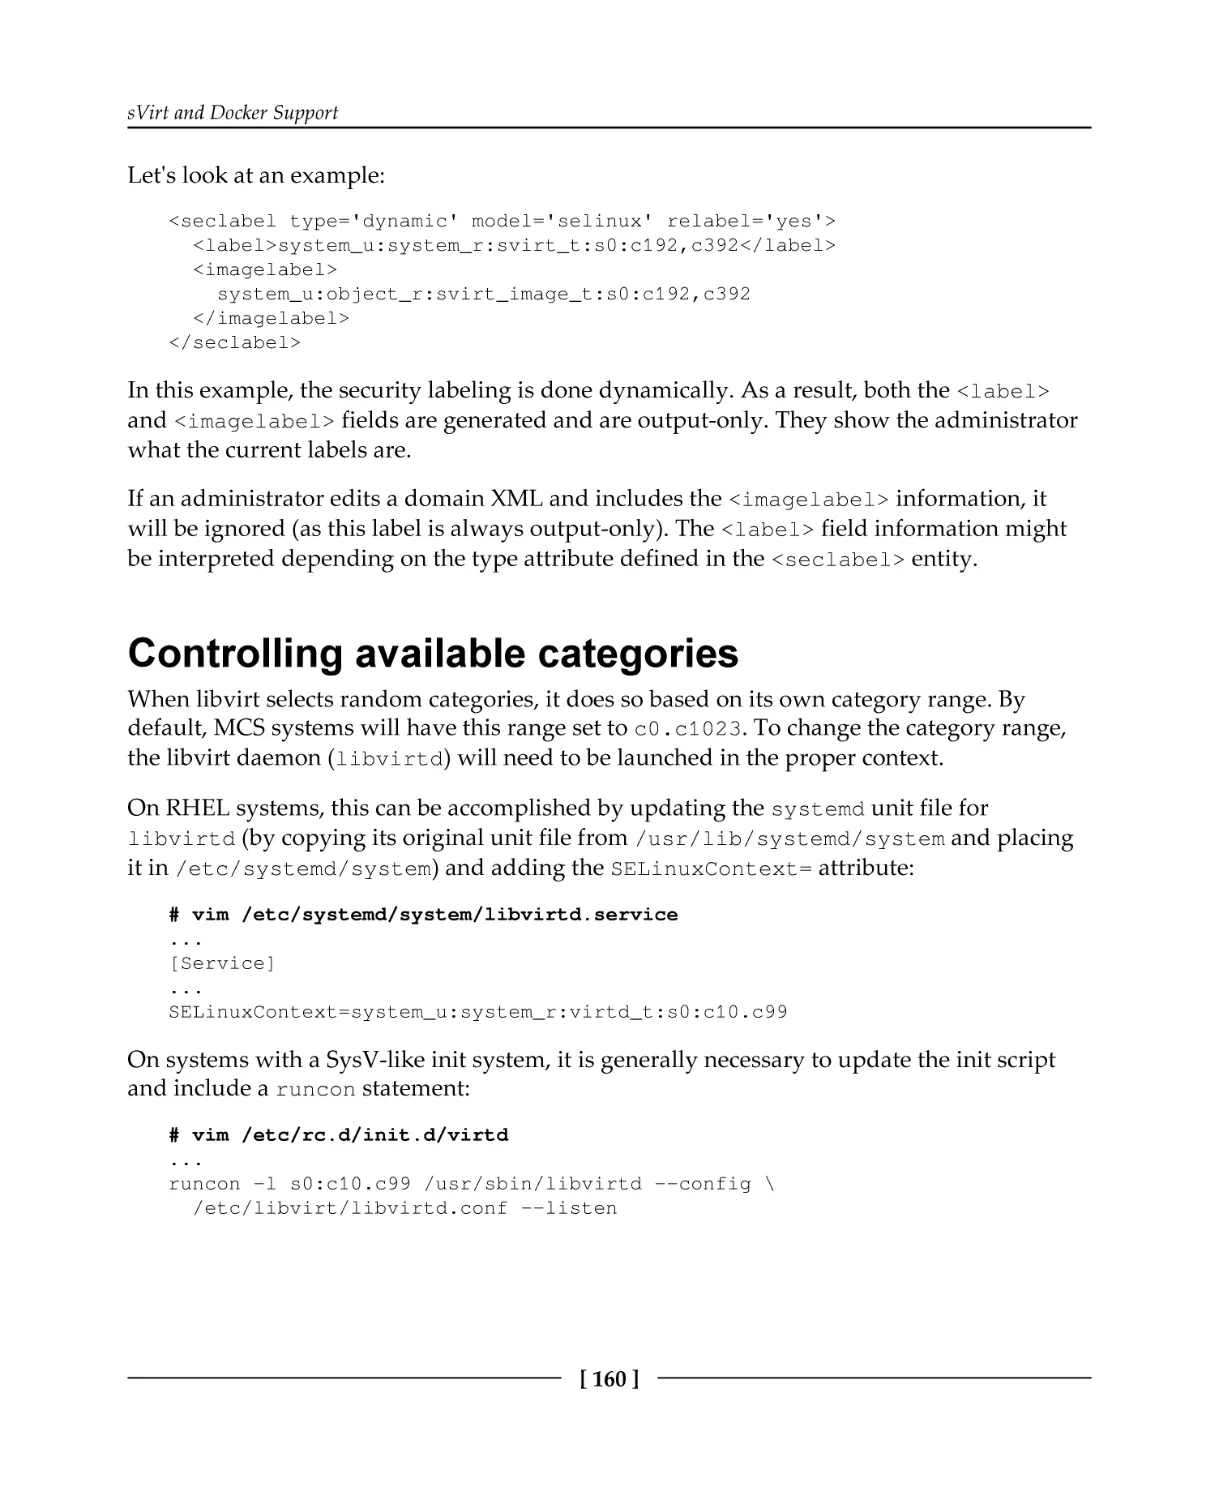
Interpreting output-only label information
Controlling available categories
Limiting supported hosts in a cluster
Modifying default contexts
Securing Docker containers
Understanding container security
Controlling non-sVirt Docker SELinux integration
Aligning Docker security with sVirt
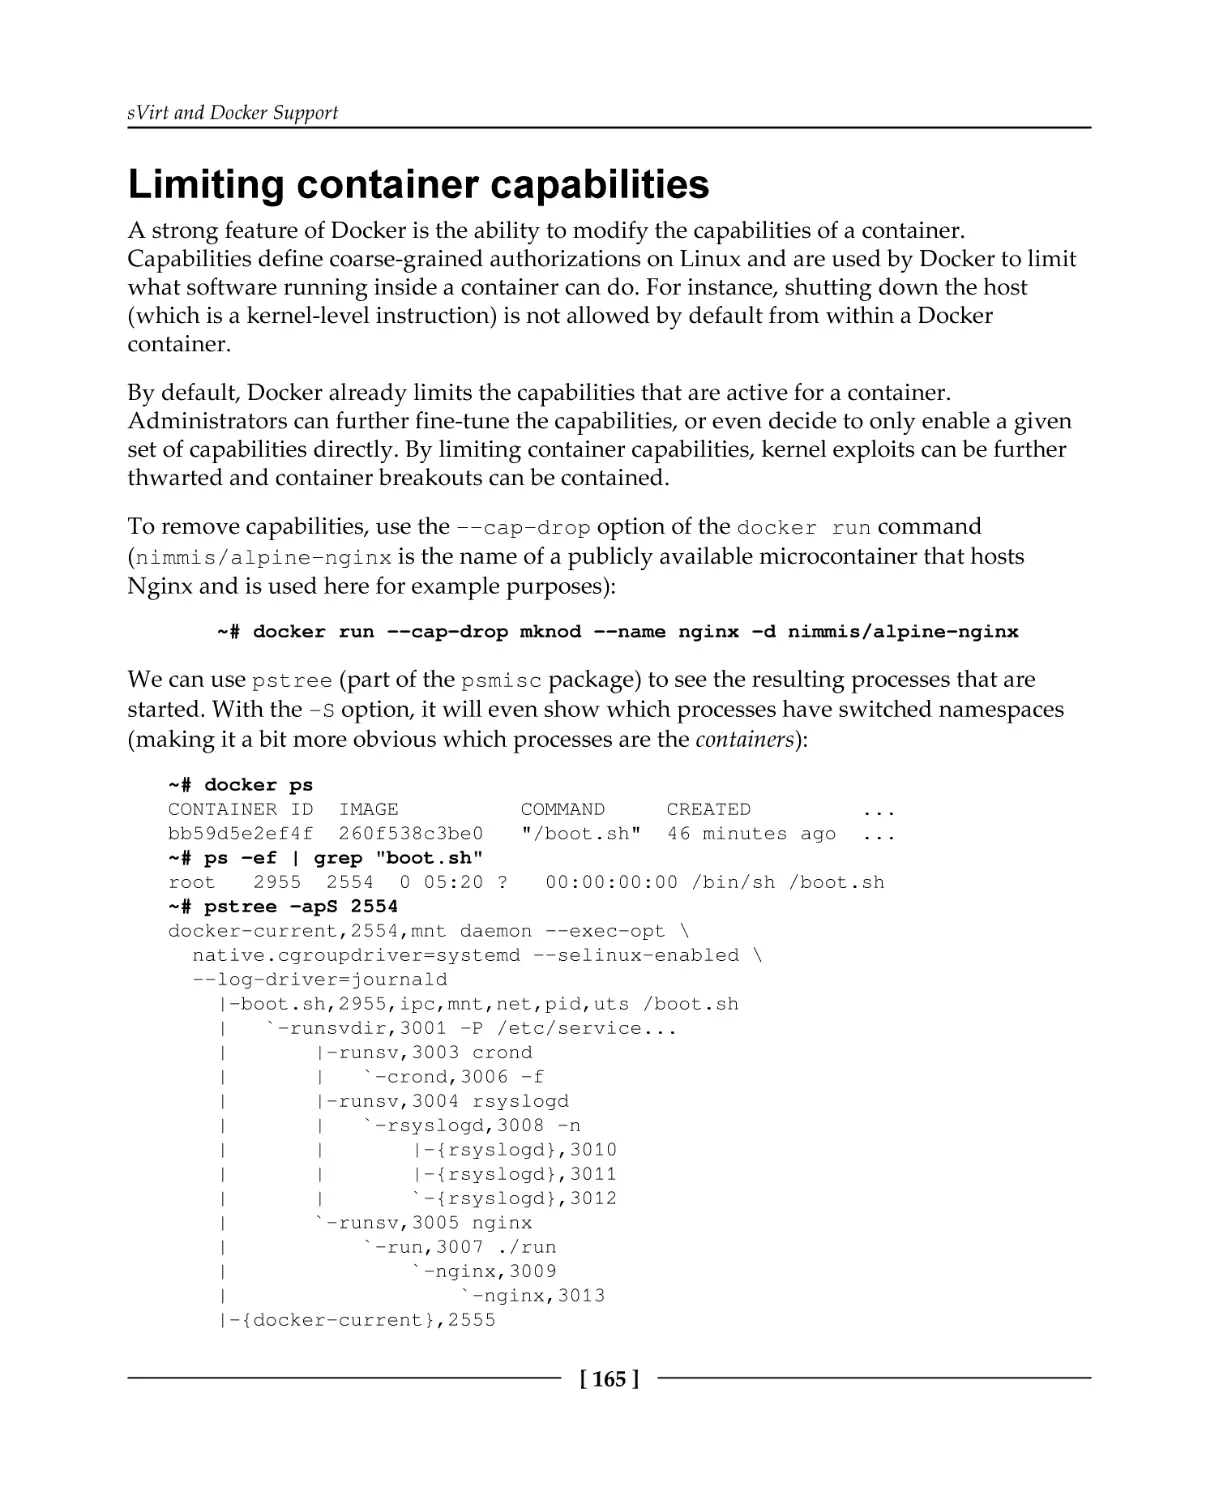
Limiting container capabilities
Using different SELinux contexts
Relabeling volume mounts
Lowering SELinux controls for specific containers
Modifying default contexts
Summary
Chapter 7: D-Bus and systemd
155
155
156
157
158
159
159
159
160
161
162
162
162
163
164
165
167
168
169
170
170
172
The system daemon (systemd)
Service support in systemd
Understanding unit files
Setting the SELinux context for a service
Using transient services
Requiring SELinux for a service
Relabeling files during service startup
Using socket-based activation
Governing unit operations access
Logging with systemd
Retrieving SELinux-related information
Querying logs given a SELinux context
Using setroubleshoot integration with journal
Using systemd containers
Initializing a systemd container
Using a specific SELinux context
Handling device files
[v]
172
173
174
175
176
176
178
180
181
182
182
182
183
185
185
186
186
Using udev rules
Setting a SELinux label on a device node
D-Bus communication
Understanding D-Bus
Controlling service acquisition with SELinux
Governing message flows
Summary
Chapter 8: Working with SELinux Policies
SELinux booleans
Listing SELinux booleans
Changing boolean values
Inspecting the impact of a boolean
Enhancing SELinux policies
Listing policy modules
Loading and removing policy modules
Creating policies using audit2allow
Using sensible module names
Using refpolicy macros with audit2allow
Using selocal
Creating custom modules
Building SELinux native modules
Building reference policy modules
Building CIL policy modules
Adding file context definitions
Creating roles and user domains
Creating the pgsql_admin.te file
Creating the user rights
Granting interactive shell access
Generating skeleton user policy files
Creating new application domains
Creating the mojomojo.* files
Creating policy interfaces
Generating skeleton application policy files
Replacing existing policies
Replacing RHEL policies
Replacing Gentoo policies
Other uses of policy enhancements
Creating customized SECMARK types
Auditing access attempts
[ vi ]
187
188
189
189
191
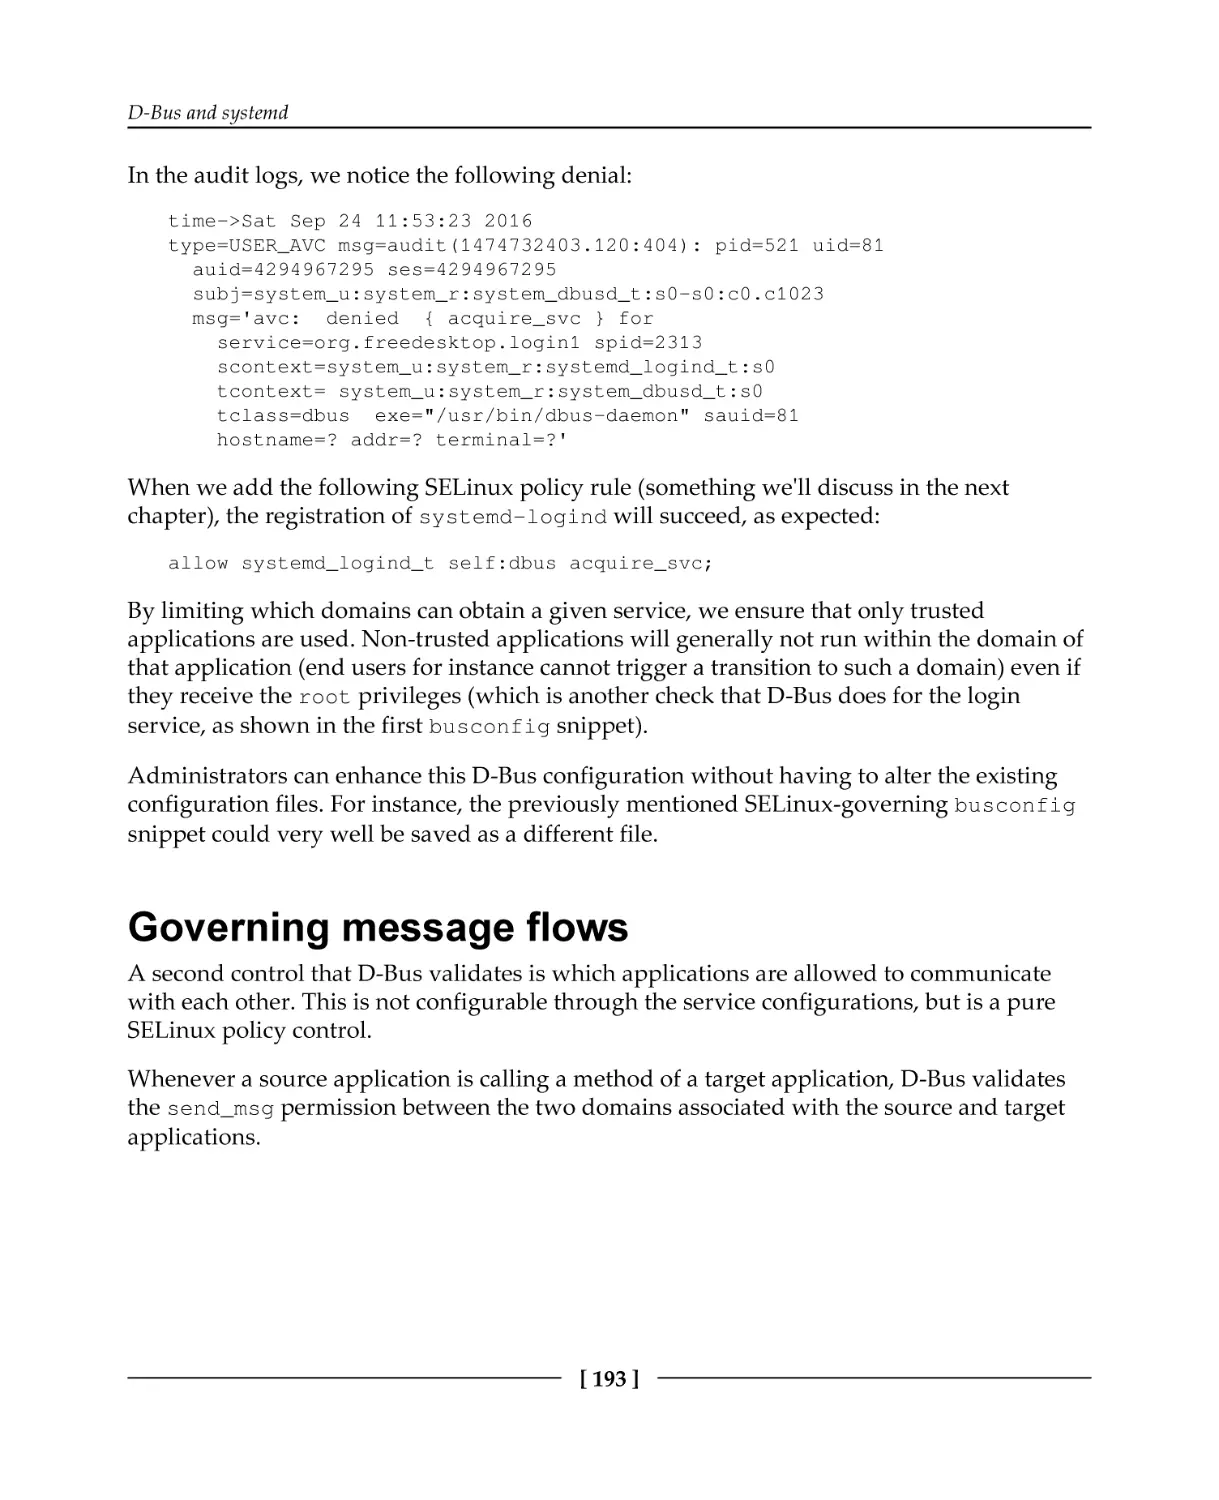
193
194
195
195
196
197
198
199
199
200
201
203
204
205
206
207
208
209
209
210
211
212
213
214
215
215
216
217
218
218
219
220
220
221
Creating customizable types
Summary
222
223
Chapter 9: Analyzing Policy Behavior
Single-step analysis
Using different SELinux policy files
Displaying policy object information
Understanding sesearch
Querying allow rules
Querying type transition rules
Querying other type rules
Querying role related rules
Browsing with apol
Domain transition analysis
Using apol for domain transition analysis
Using sedta for domain transition analysis
Information flow analysis
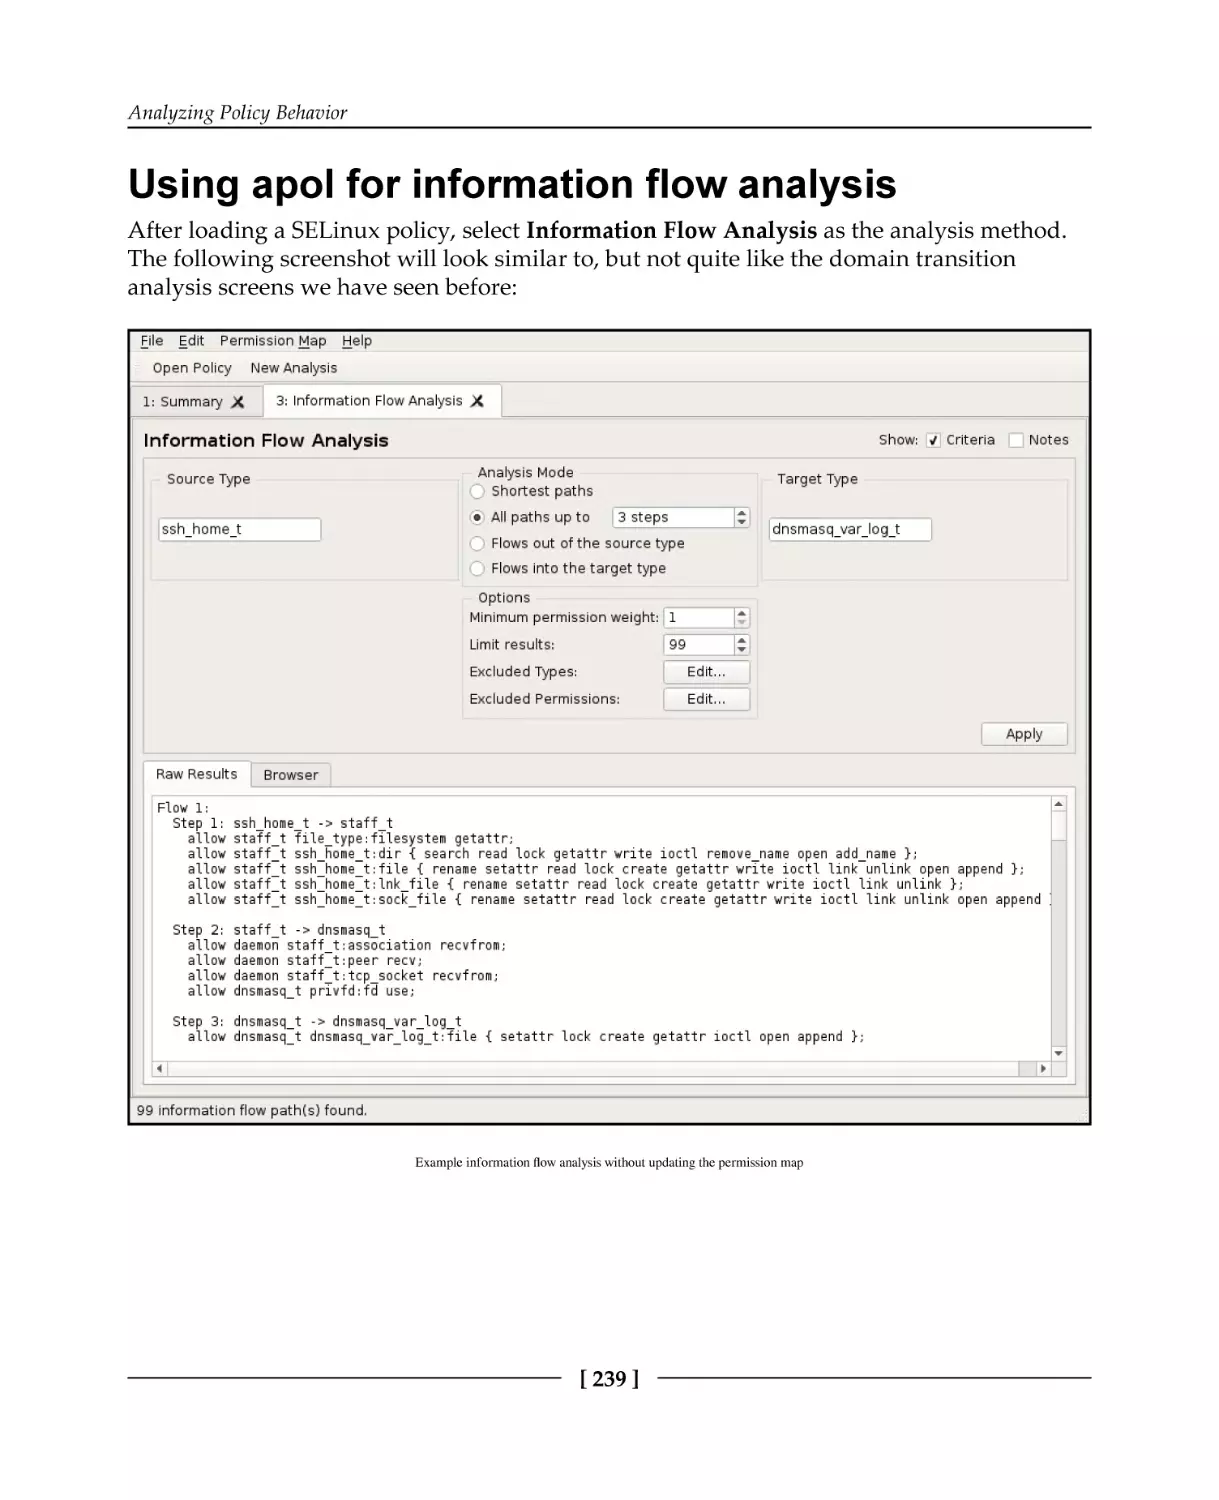
Using apol for information flow analysis
Using seinfoflow for information flow analysis
Other policy analysis
Comparing policies with sediff
Analyzing policies with sepolicy
Summary
Chapter 10: SELinux Use Cases
224
224
225
225
227
228
228
229
229
230
235
235
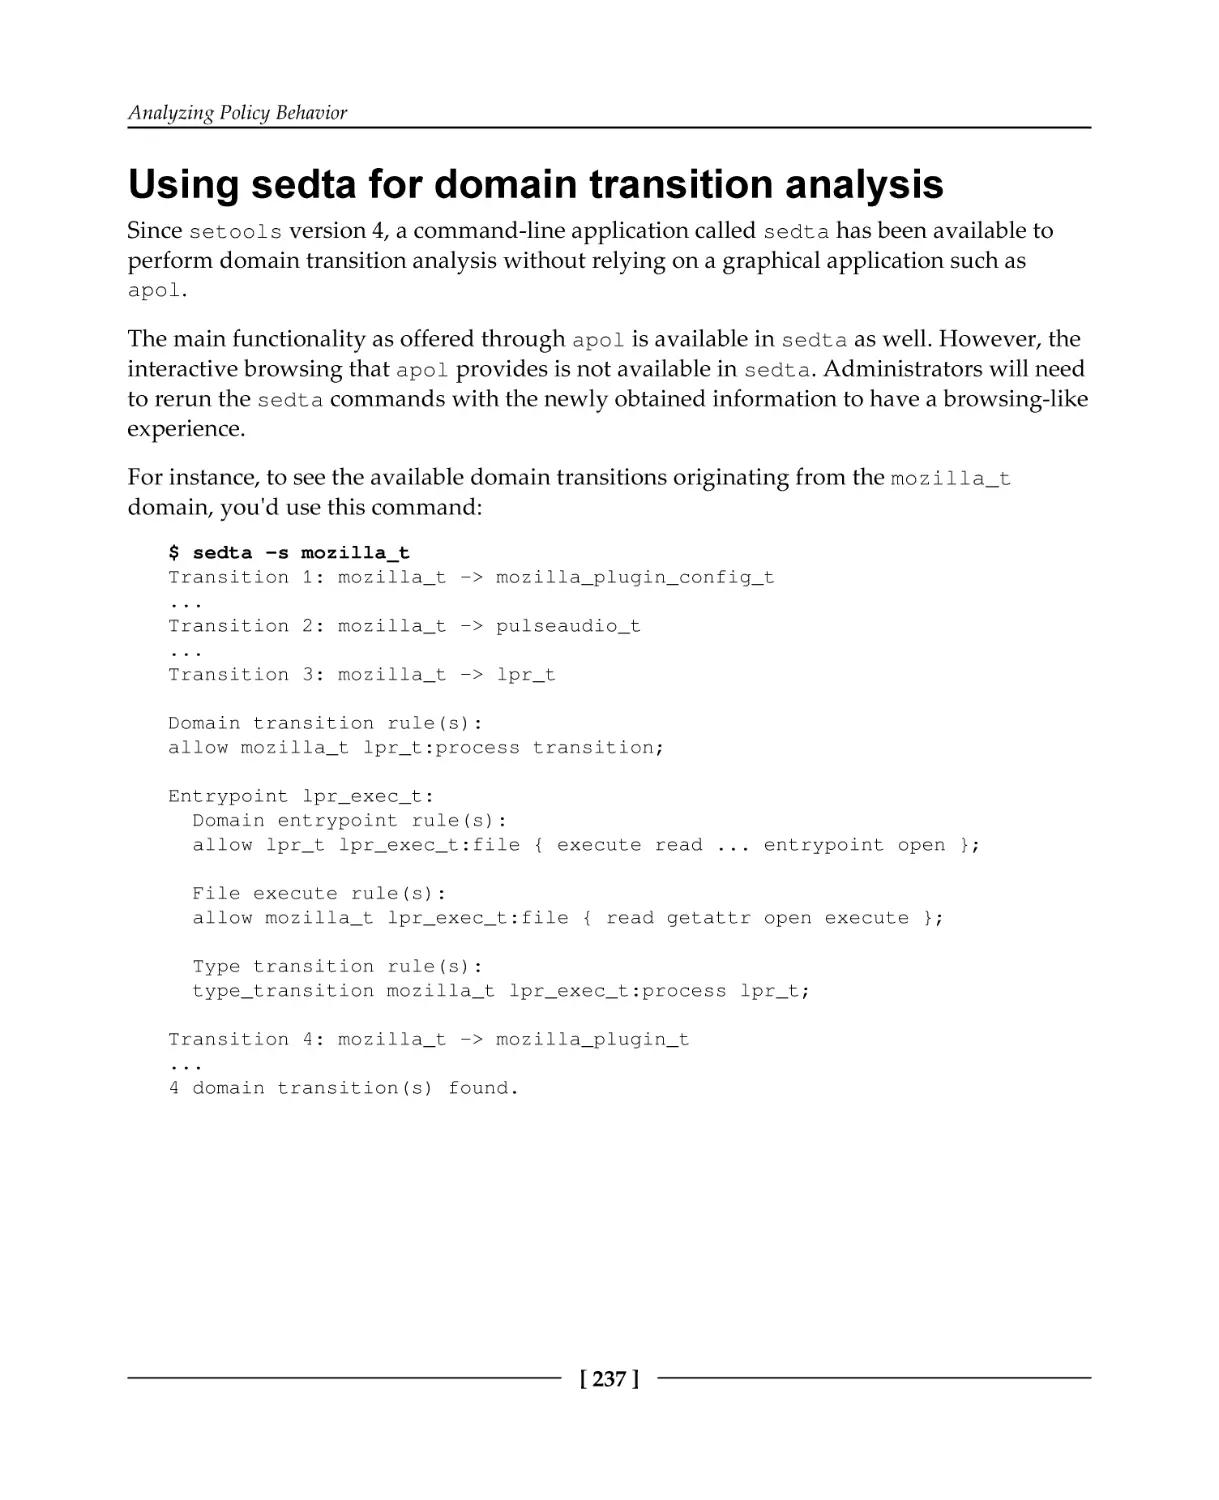
237
238
239
241
242
242
243
244
246
Hardening web servers
Describing the situation
Configuring for a multi-instance setup
Creating the SELinux categories
Choosing the right contexts
Enabling administrative accounts
Handling web server behavior
Dealing with content updates
Tuning the network and firewall rules
Securing shell services
Splitting SSH over multiple instances
Updating the network rules
Configuring for chrooted access
Associating SELinux mappings based on access
Tuning SSH SELinux rules
[ vii ]
246
247
249
250
250
252
252
254
255
256
256
258
259
260
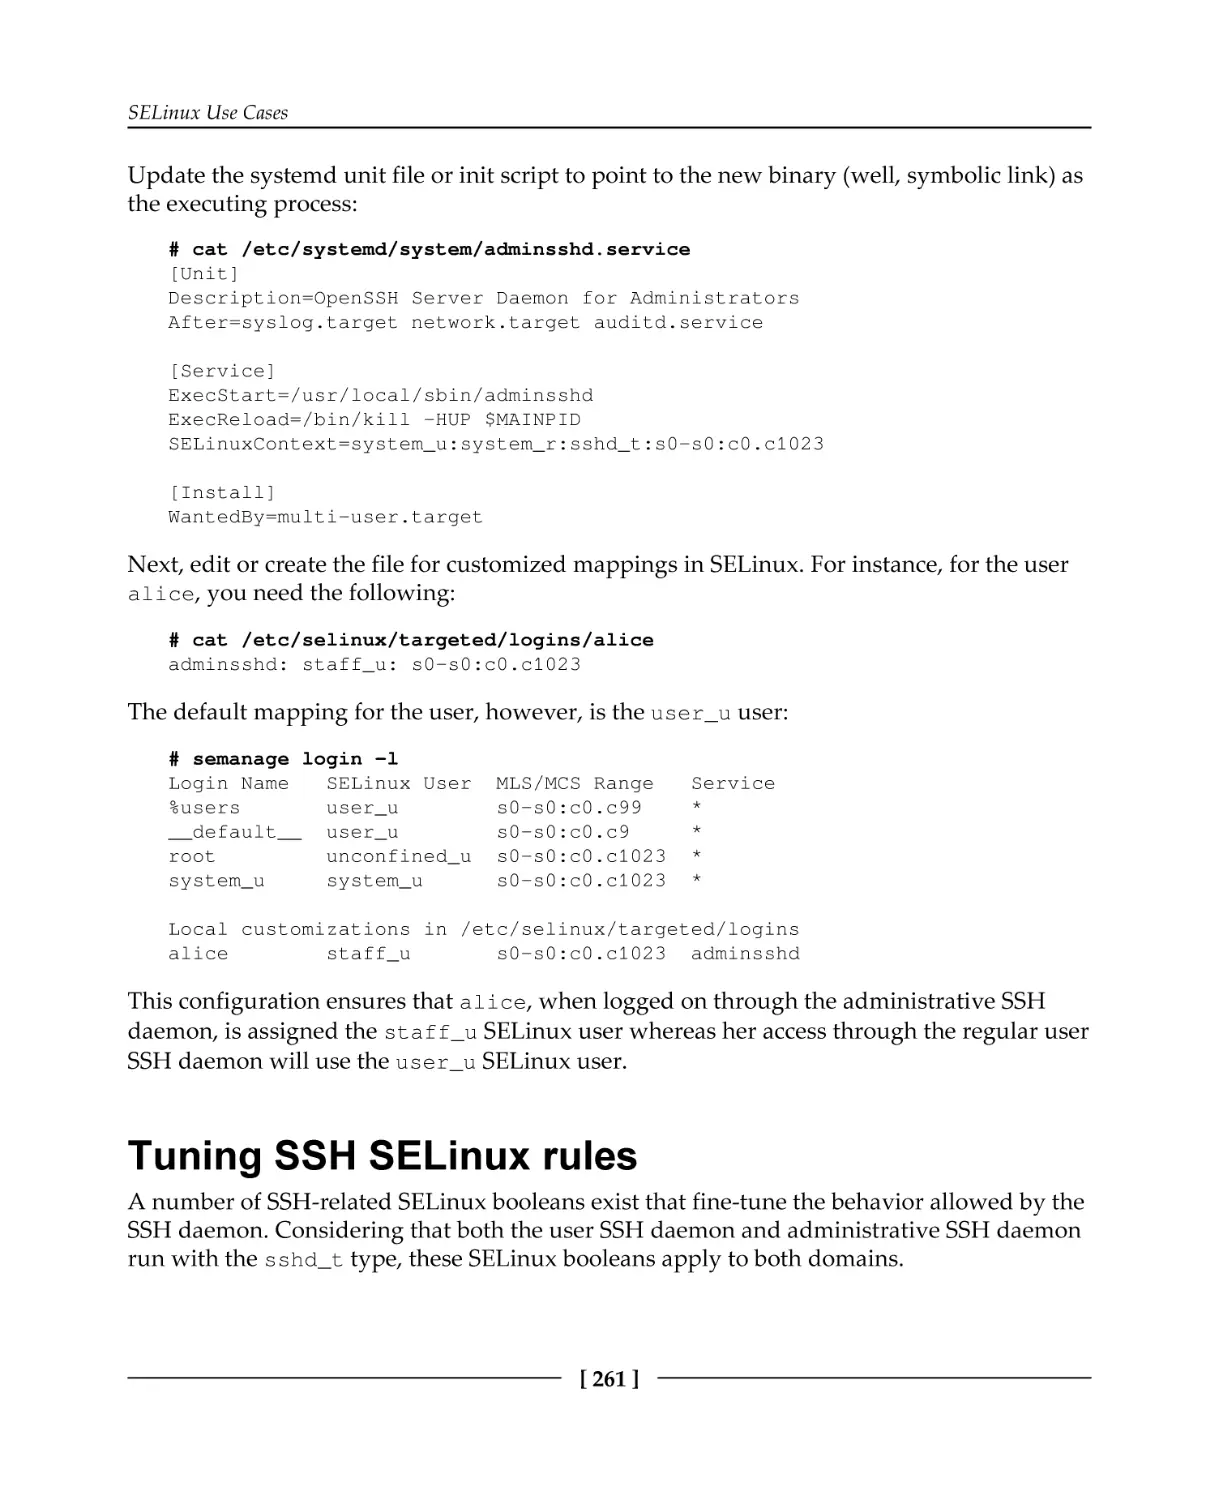
261
Enabling multi-tenancy on the user level
File sharing through NFS
Setting up basic NFS
Enabling NFS support
Tuning the NFS SELinux rules
Using context mounts
Working with labeled NFS
Comparing Samba with NFS
Summary
Index
262
263
263
264
265
265
266
267
268
269
[ viii ]
Preface
The secure state of an operating system or service is the result of a layered security
approach. Systems can be shielded from the outside world through firewalls, operating
systems have to be kept up to date with the latest security patches, services have to be
configured properly, separation of duties has to be implemented for end users, and so forth.
Access controls are another layer that administrators have to look into. With Security
Enhanced Linux (SELinux), the Linux ecosystem has a robust and established mandatory
access control (MAC) system in place. Some distributions enable SELinux by default, others
allow administrators to enable SELinux easily. Android, one of the most popular mobile
device operating systems, has also embraced SELinux technology under the SEAndroid
name.
But unlike Android, where users and applications are tightly controlled and where
deviation from the setup and organization of files and resources is not allowed, desktops,
workstations, and servers that implement Linux have greater diversity. As a result,
configuring and tuning SELinux on these systems requires more knowledge of what
SELinux is, how it works, and how it can be configured.
In this book, we discuss what SELinux is and how it is embedded in the Linux operating
system. We go through various configuration aspects of SELinux and deal with several use
cases that leverage SELinux’s strengths to further harden the system and services hosted on
it.
What this book covers
Chapter 1, Fundamental SELinux Concepts, gives administrators insight into what SELinux is
and how it is enforced through the Linux kernel. It explains the differences in SELinux
implementations between distributions and describes the SELinux-specific terminology that
administrators will often read about when diving deeper into the SELinux technology.
Chapter 2, Understanding SELinux Decisions and Logging, covers the various enforcement
states of SELinux and shows where SELinux logs its events. The chapter takes great care to
teach administrators how to interpret and analyze those events.
Chapter 3, Managing User Logins, explains to administrators how to manage Linux users
and their permissions and map those users to the various roles that SELinux supports
through its own user space support and Linux’s pluggable authentication modules.
Preface
Furthermore, the chapter deals with SELinux’s category support.
Chapter 4, Process Domains and File-Level Access Controls, introduces administrators to
SELinux labels and how these labels are stored on the file system or represented for other
resources. It then educates administrators and end users on how to set and update these
labels.
Chapter 5, Controlling Network Communications, further develops the standard network
security services, iptables and IPSec, with SELinux features. Administrators are trained to
understand and enable SELinux support in those security services and even enable crosssystem labeling through Labeled IPSec and NetLabel/CIPSO.
Chapter 6, sVirt and Docker Support, clarifies how Red Hat has devised the secured
virtualization (sVirt) technology and implemented it on both operating system
virtualization (through libvirt) and containers (through Docker). The chapter learns how to
tune these services with SELinux support and control resources between the guests or
containers.
Chapter 7, D-Bus and systemd, goes into the realms of the mentioned core system services
and how they use SELinux rules to further harden their own services and features. With this
knowledge at hand, administrators are then shown how to tune the D-Bus service controls
as well as handle SELinux’s access controls enforced through systemd.
Chapter 8, Working with SELinux Policies, looks at tuning and controlling the SELinux
policies themselves. It shows how custom policy enhancements can be created or even
replace the distribution-provided policy.
Chapter 9, Analyzing Policy Behavior, dives into the analysis tools that allow engineers and
administrators to query the SELinux policy more in depth to assert for themselves that the
policy is contained and behaves as expected.
Chapter 10, SELinux Use Cases, covers a number of common server use cases, such as web
servers and file servers, and how SELinux can be used to secure those services. It covers
how isolation through SELinux is possible, allowing administrators to set up a multi-tenant,
hardened environment.
What you need for this book
As SELinux is a core component of a Linux distribution, readers will need to have a Linux
system at their disposal that already has SELinux enabled. Converting an installation to
SELinux is not in the scope of this book—please consult your distribution's documentation
for this.
[2]
Preface
Furthermore, tuning and configuring the security of a system requires administrative
privileges on the system.
Who this book is for
This book targets Linux system administrators who have reasonable experience with
maintaining Linux systems and want to understand and work with the SELinux technology.
Moreover, this book can be enlightening for IT architects to understand how SELinux can be
positioned to enhance the security of Linux systems and Linux-hosted services within their
organization.
Conventions
In this book, you will find a number of text styles that distinguish between different kinds
of information. Here are some examples of these styles and an explanation of their meaning.
Code words in text, database table names, folder names, filenames, file extensions,
pathnames, dummy URLs, user input, and Twitter handles are shown as follows: "We
accomplish this through the semanage login command."
A block of code is set as follows:
dbadm_r
Dominated roles:
dbadm_r
Types:
qmail_inject_t
dbadm_t
...
user_mail_t
Any command-line input or output is written as follows:
# seinfo -amcs_constrained_type -x | grep virt_
New terms and important words are shown in bold. Words that you see on the screen, for
example, in menus or dialog boxes, appear in the text like this: "Once loaded, select New
Analysis to initiate the policy analysis functions."
Warnings or important notes appear in a box like this.
[3]
Preface
Tips and tricks appear like this.
Reader feedback
Feedback from our readers is always welcome. Let us know what you think about this
book—what you liked or disliked. Reader feedback is important for us as it helps us
develop titles that you will really get the most out of.
To send us general feedback, simply e-mail feedback@packtpub.com, and mention the
book's title in the subject of your message.
If there is a topic that you have expertise in and you are interested in either writing or
contributing to a book, see our author guide at www.packtpub.com/authors.
Customer support
Now that you are the proud owner of a Packt book, we have a number of things to help you
to get the most from your purchase.
Errata
Although we have taken every care to ensure the accuracy of our content, mistakes do
happen. If you find a mistake in one of our books—maybe a mistake in the text or the
code—we would be grateful if you could report this to us. By doing so, you can save other
readers from frustration and help us improve subsequent versions of this book. If you find
any errata, please report them by visiting http://www.packtpub.com/submit-errata,
selecting your book, clicking on the Errata Submission Form link, and entering the details of
your errata. Once your errata are verified, your submission will be accepted and the errata
will be uploaded to our website or added to any list of existing errata under the Errata
section of that title.
To view the previously submitted errata, go to https://www.packtpub.com/books/conten
t/support and enter the name of the book in the search field. The required information will
appear under the Errata section.
[4]
Preface
Piracy
Piracy of copyrighted material on the Internet is an ongoing problem across all media. At
Packt, we take the protection of our copyright and licenses very seriously. If you come
across any illegal copies of our works in any form on the Internet, please provide us with
the location address or website name immediately so that we can pursue a remedy.
Please contact us at copyright@packtpub.com with a link to the suspected pirated
material.
We appreciate your help in protecting our authors and our ability to bring you valuable
content.
Questions
If you have a problem with any aspect of this book, you can contact us at
questions@packtpub.com, and we will do our best to address the problem.
[5]
1
Fundamental SELinux
Concepts
Security Enhanced Linux (SELinux) brings additional security measures to your Linux
system to further protect its resources.
In this chapter, we will cover:
Why SELinux uses labels to identify resources
How SELinux differs from traditional Linux access controls by enforcing security
rules
How the access control rules enforced by SELinux are provided through policy
files
In the end, we will cover an overview of the differences between SELinux implementations
across Linux distributions.
Providing more security to Linux
Seasoned Linux administrators and security engineers already know that they need to put
some trust in the users and processes on their system in order for the system to remain
secure. This is partially because users can attempt to exploit vulnerabilities found in the
software running on the system, but a large contribution to this trust level is because the
secure state of the system depends on the behavior of the users. A Linux user with access to
sensitive information could easily leak that out to the public, manipulate the behavior of the
applications he or she launches, and do many other things that affect the security of the
system. The default access controls that are active on a regular Linux system are
discretionary; it is up to the users how the access controls should behave.
Fundamental SELinux Concepts
The Linux discretionary access control (DAC) mechanism is based on the user and/or
group information of the process and is matched against the user and/or group information
of the file, directory, or other resource being manipulated. Consider the /etc/shadow file,
which contains the password and account information of the local Linux accounts:
$ ls -l /etc/shadow
-rw------- 1 root root 1010 Apr 25 22:05 /etc/shadow
Without additional access control mechanisms in place, this file is readable and writable by
any process that is owned by the root user, regardless of the purpose of the process on the
system. The shadow file is a typical example of a sensitive file that we don't want to see
leaked or abused in any other fashion. Yet the moment someone has access to the file, that
user can copy it elsewhere, for example to a home directory, or even mail it to a different
computer and attempt to attack the password hashes stored within.
Another example of how Linux DAC requires trust from its users is when a database is
hosted on the system. Database files themselves are (hopefully) only accessible to runtime
users of the database management system (DBMS) and the Linux root user. Properly
secured systems will only grant trusted users access to these files (for instance, through
sudo) by allowing them to change their effective user ID from their personal user to the
database runtime user or even root account, and this for a well-defined set of commands.
These users too, can analyze the database files and gain access to potentially confidential
information in the database without going through the DBMS.
However, regular users are not the only reason for securing a system. Lots of software
daemons run as the Linux root user or have significant privileges on the system. Errors
within those daemons can easily lead to information leakage or might even lead to remotely
exploitable vulnerabilities. Backup software, monitoring software, change management
software, scheduling software, and so on: they all often run with the highest privileged
account possible on a regular Linux system. Even when the administrator does not allow
privileged users, their interaction with daemons induces a potential security risk. As such,
the users are still trusted to correctly interact with these applications in order for the system
to function properly. Through this, the administrator leaves the security of the system to the
discretion of its (many) users.
[7]
Fundamental SELinux Concepts
Enter SELinux, which provides an additional access control layer on top of the standard
Linux DAC mechanism. SELinux provides a mandatory access control (MAC) system that,
unlike its DAC counterpart, gives the administrator full control over what is allowed on the
system and what isn't. It accomplishes this by supporting a policy-driven approach over
what processes are and aren't allowed to do and by enforcing this policy through the Linux
kernel.
Mandatory means that access control is enforced by the operating system and defined solely
by the policy rules that the system administrator (or security administrator) has enabled.
Users and processes do not have permission to change the security rules, so they cannot
work around the access controls; security is not left to their discretion anymore.
The word mandatory here, just like the word discretionary before, was not chosen by accident
to describe the abilities of the access control system: both are known terms in the security
research field and have been described in many other publications, including the Trusted
Computer System Evaluation Criteria (TCSEC) (http://csrc.nist.gov/publications/h
istory/dod85.pdf) standard (also known as the Orange Book) by the Department of
Defense in the United States of America in 1985. This publication has led to the Common
Criteria standard for computer security certification (ISO/IEC 15408), available at http://ww
w.commoncriteriaportal.org/cc/.
Using Linux security modules
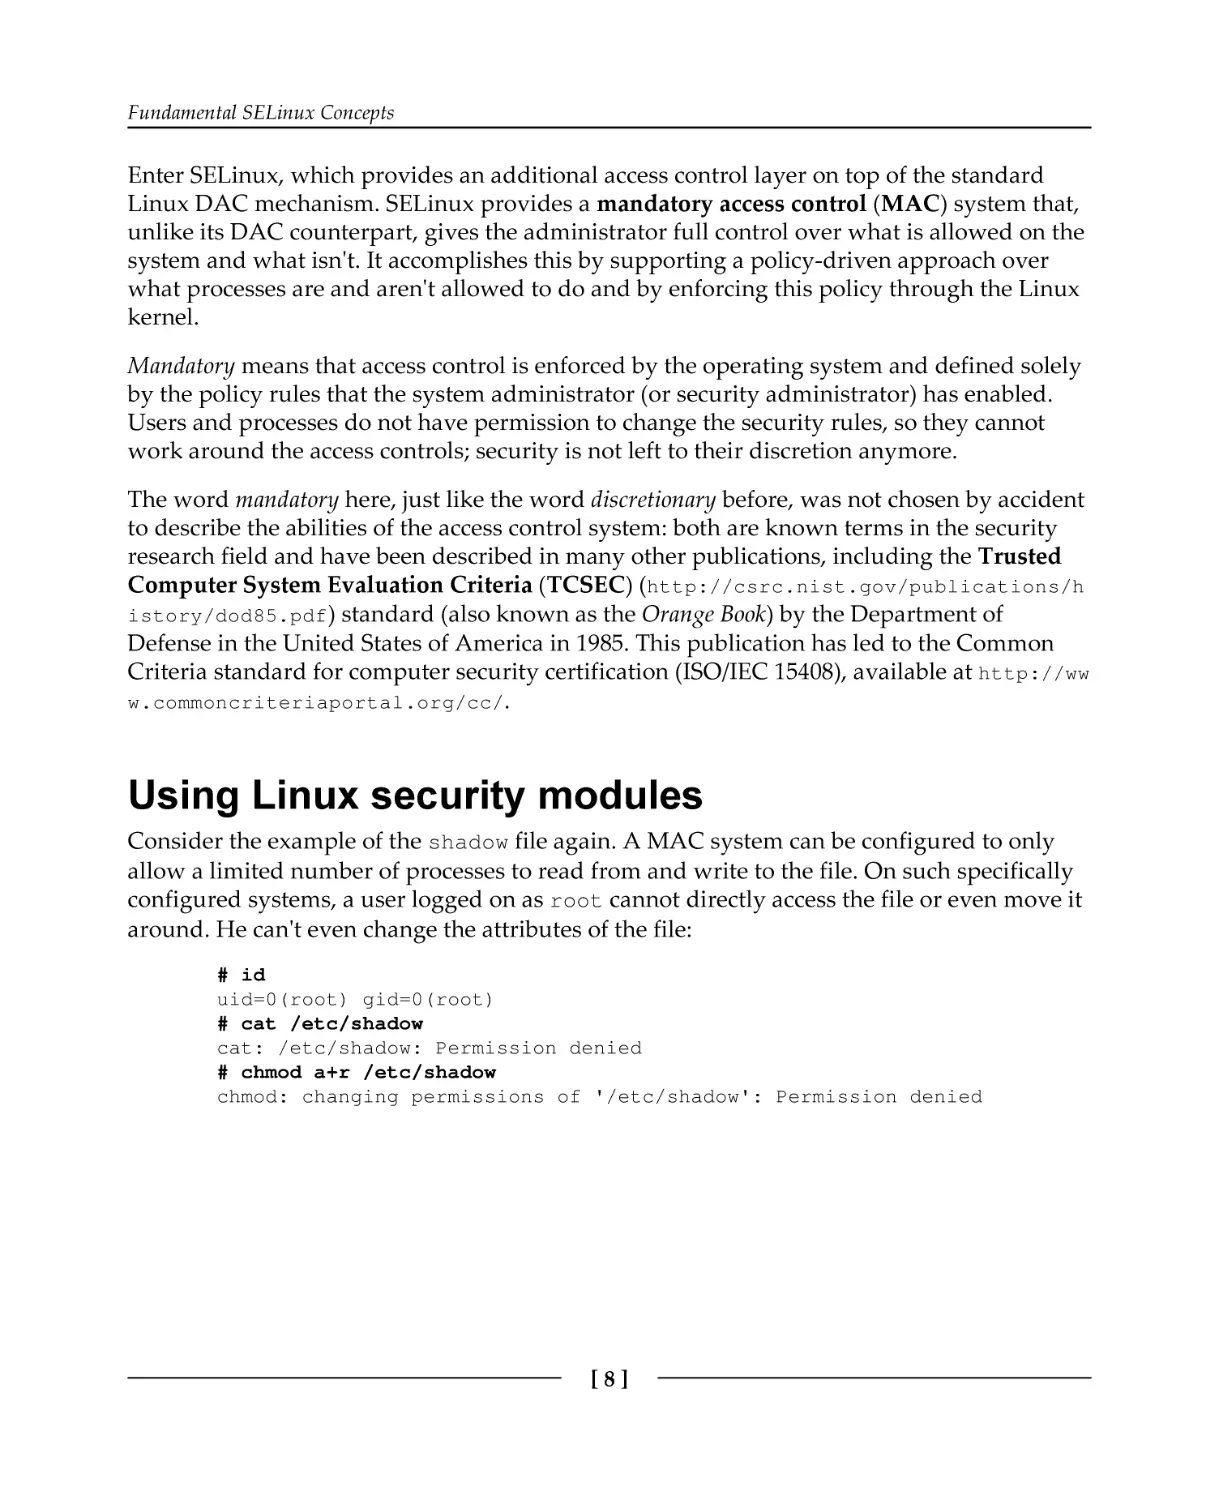
Consider the example of the shadow file again. A MAC system can be configured to only
allow a limited number of processes to read from and write to the file. On such specifically
configured systems, a user logged on as root cannot directly access the file or even move it
around. He can't even change the attributes of the file:
# id
uid=0(root) gid=0(root)
# cat /etc/shadow
cat: /etc/shadow: Permission denied
# chmod a+r /etc/shadow
chmod: changing permissions of '/etc/shadow': Permission denied
[8]
Fundamental SELinux Concepts
This is enforced through rules that describe when the contents of a file can be read. With
SELinux, these rules are defined in the SELinux policy and are loaded when the system
boots. It is the Linux kernel itself that is responsible for enforcing the rules. Mandatory
access control systems such as SELinux can be easily integrated into the Linux kernel
through its support for Linux Security Modules (LSM):
High-level overview of how LSM is integrated into the Linux kernel
[9]
Fundamental SELinux Concepts
LSM has been available in the Linux kernel since version 2.6, released sometime in
December 2003. It is a framework that provides hooks inside the Linux kernel on various
locations, including the system call entry points, and allows a security implementation such
as SELinux to provide functions to be called when a hook is triggered. These functions
check the policy and other information before returning a go/no-go back. LSM by itself does
not provide any security functionality; instead, it relies on security implementations that do
the heavy lifting. SELinux is one implementation that uses LSM. There are however, several
other implementations: AppArmor, Smack, TOMOYO Linux, and Yama, to name a few.
At the time of writing this book, only one main security implementation can be active
through the LSM hooks. Although a built kernel can contain multiple security
implementations, only one can be active at the same time. Work is underway to enable
stacking multiple security implementations, allowing system administrators to have more
than one implementation active. Recent work has already allowed multiple
implementations to be defined (but not simultaneously active). When supported, this will
allow administrators to pick the best features of a number of implementations and activate
smaller LSM-implemented security controls on top of the more complete security model
implementations, such as SELinux, TOMOYO, Smack, or AppArmor.
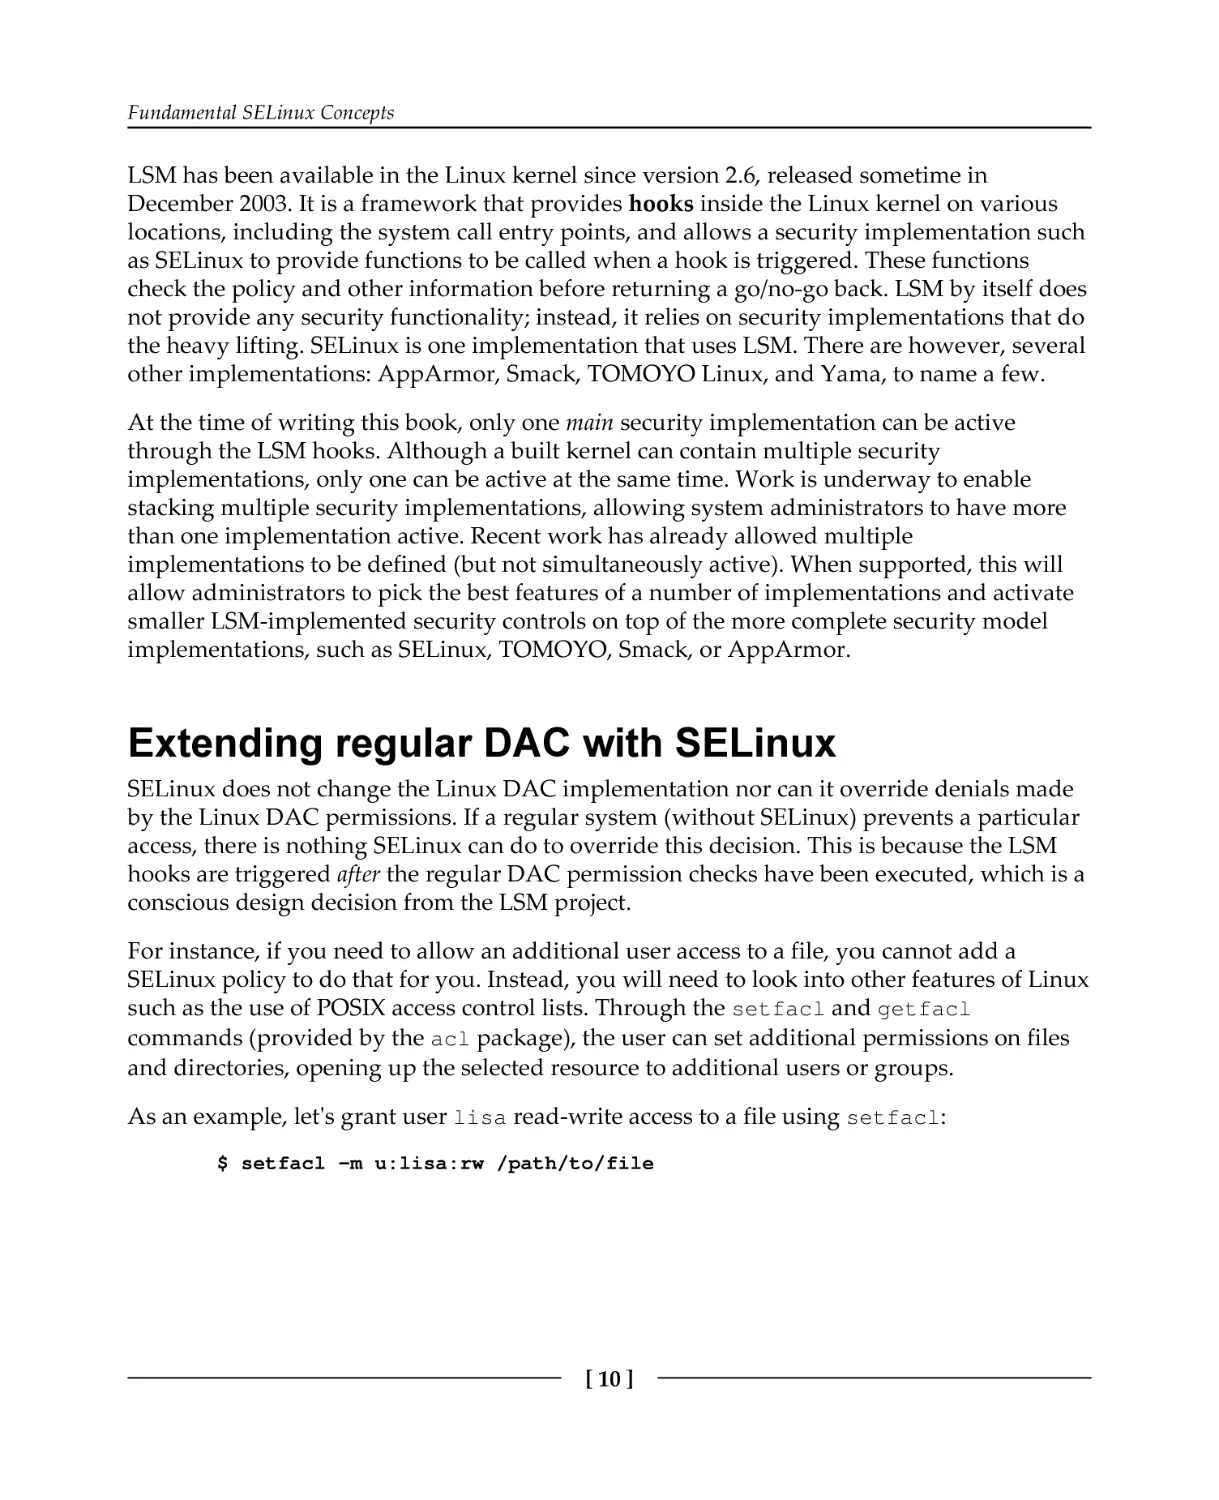
Extending regular DAC with SELinux
SELinux does not change the Linux DAC implementation nor can it override denials made
by the Linux DAC permissions. If a regular system (without SELinux) prevents a particular
access, there is nothing SELinux can do to override this decision. This is because the LSM
hooks are triggered after the regular DAC permission checks have been executed, which is a
conscious design decision from the LSM project.
For instance, if you need to allow an additional user access to a file, you cannot add a
SELinux policy to do that for you. Instead, you will need to look into other features of Linux
such as the use of POSIX access control lists. Through the setfacl and getfacl
commands (provided by the acl package), the user can set additional permissions on files
and directories, opening up the selected resource to additional users or groups.
As an example, let's grant user lisa read-write access to a file using setfacl:
$ setfacl -m u:lisa:rw /path/to/file
[ 10 ]
Fundamental SELinux Concepts
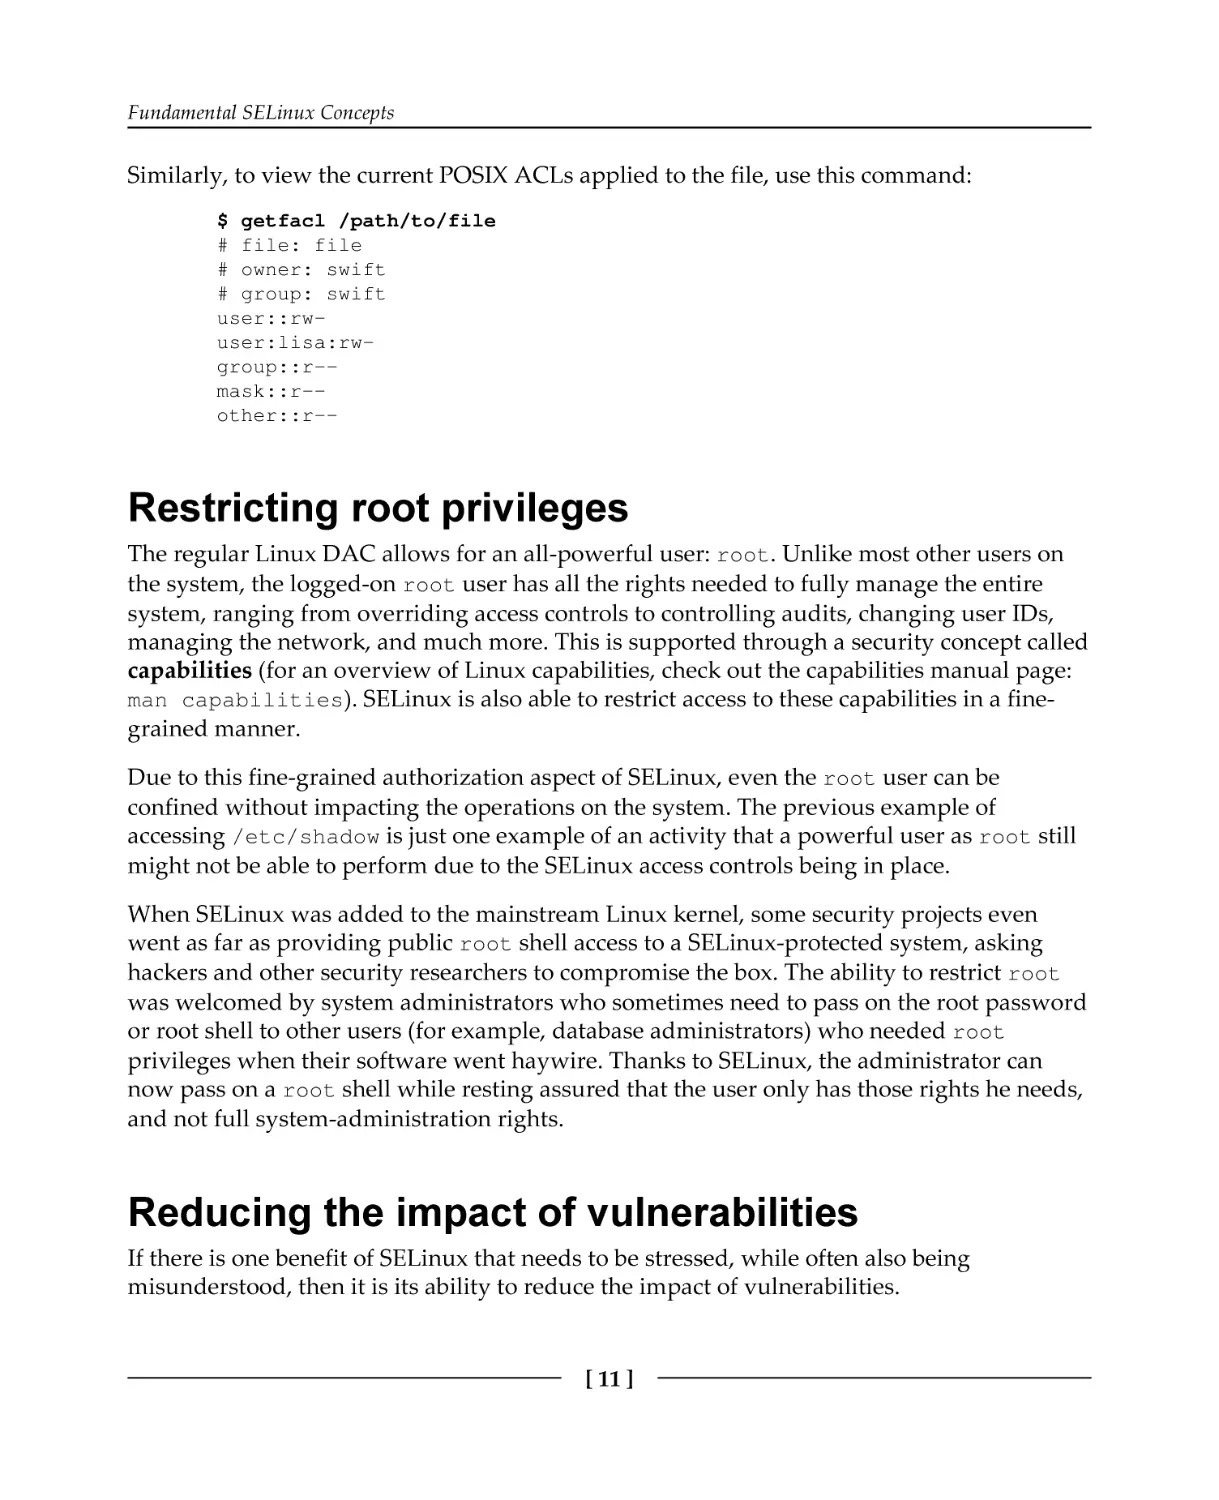
Similarly, to view the current POSIX ACLs applied to the file, use this command:
$ getfacl /path/to/file
# file: file
# owner: swift
# group: swift
user::rwuser:lisa:rwgroup::r-mask::r-other::r--
Restricting root privileges
The regular Linux DAC allows for an all-powerful user: root. Unlike most other users on
the system, the logged-on root user has all the rights needed to fully manage the entire
system, ranging from overriding access controls to controlling audits, changing user IDs,
managing the network, and much more. This is supported through a security concept called
capabilities (for an overview of Linux capabilities, check out the capabilities manual page:
man capabilities). SELinux is also able to restrict access to these capabilities in a finegrained manner.
Due to this fine-grained authorization aspect of SELinux, even the root user can be
confined without impacting the operations on the system. The previous example of
accessing /etc/shadow is just one example of an activity that a powerful user as root still
might not be able to perform due to the SELinux access controls being in place.
When SELinux was added to the mainstream Linux kernel, some security projects even
went as far as providing public root shell access to a SELinux-protected system, asking
hackers and other security researchers to compromise the box. The ability to restrict root
was welcomed by system administrators who sometimes need to pass on the root password
or root shell to other users (for example, database administrators) who needed root
privileges when their software went haywire. Thanks to SELinux, the administrator can
now pass on a root shell while resting assured that the user only has those rights he needs,
and not full system-administration rights.
Reducing the impact of vulnerabilities
If there is one benefit of SELinux that needs to be stressed, while often also being
misunderstood, then it is its ability to reduce the impact of vulnerabilities.
[ 11 ]
Fundamental SELinux Concepts
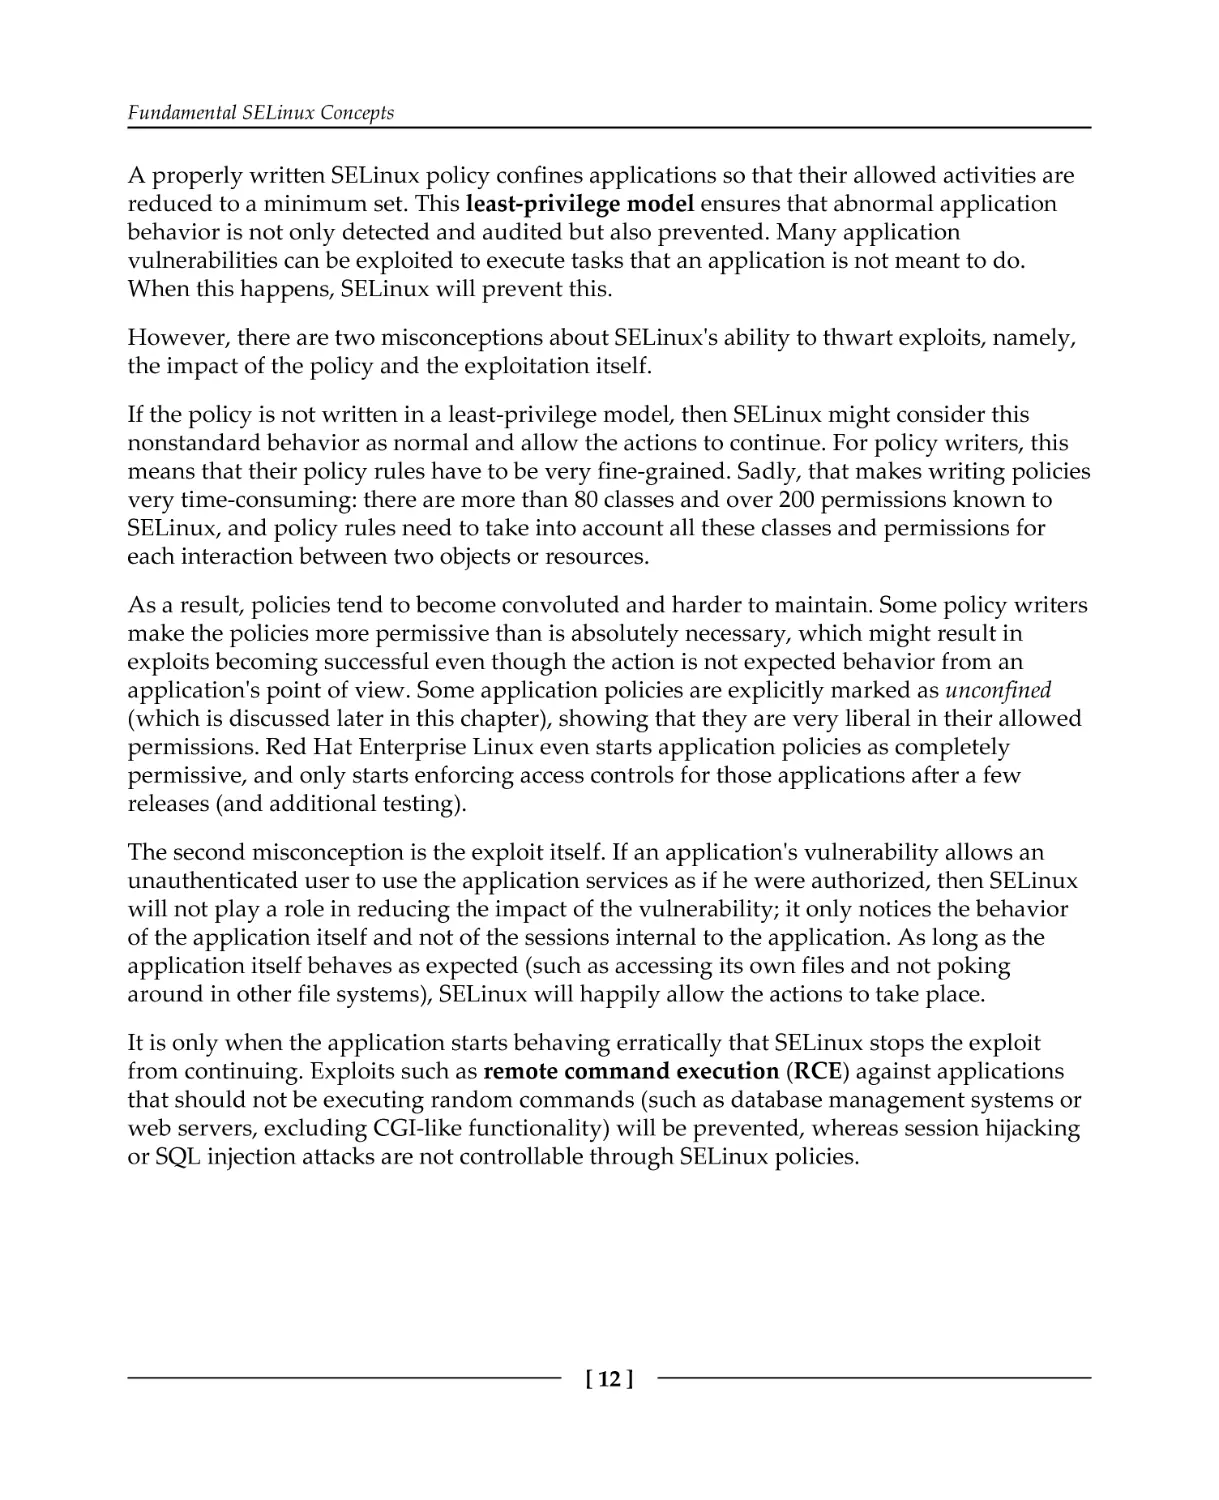
A properly written SELinux policy confines applications so that their allowed activities are
reduced to a minimum set. This least-privilege model ensures that abnormal application
behavior is not only detected and audited but also prevented. Many application
vulnerabilities can be exploited to execute tasks that an application is not meant to do.
When this happens, SELinux will prevent this.
However, there are two misconceptions about SELinux's ability to thwart exploits, namely,
the impact of the policy and the exploitation itself.
If the policy is not written in a least-privilege model, then SELinux might consider this
nonstandard behavior as normal and allow the actions to continue. For policy writers, this
means that their policy rules have to be very fine-grained. Sadly, that makes writing policies
very time-consuming: there are more than 80 classes and over 200 permissions known to
SELinux, and policy rules need to take into account all these classes and permissions for
each interaction between two objects or resources.
As a result, policies tend to become convoluted and harder to maintain. Some policy writers
make the policies more permissive than is absolutely necessary, which might result in
exploits becoming successful even though the action is not expected behavior from an
application's point of view. Some application policies are explicitly marked as unconfined
(which is discussed later in this chapter), showing that they are very liberal in their allowed
permissions. Red Hat Enterprise Linux even starts application policies as completely
permissive, and only starts enforcing access controls for those applications after a few
releases (and additional testing).
The second misconception is the exploit itself. If an application's vulnerability allows an
unauthenticated user to use the application services as if he were authorized, then SELinux
will not play a role in reducing the impact of the vulnerability; it only notices the behavior
of the application itself and not of the sessions internal to the application. As long as the
application itself behaves as expected (such as accessing its own files and not poking
around in other file systems), SELinux will happily allow the actions to take place.
It is only when the application starts behaving erratically that SELinux stops the exploit
from continuing. Exploits such as remote command execution (RCE) against applications
that should not be executing random commands (such as database management systems or
web servers, excluding CGI-like functionality) will be prevented, whereas session hijacking
or SQL injection attacks are not controllable through SELinux policies.
[ 12 ]
Fundamental SELinux Concepts
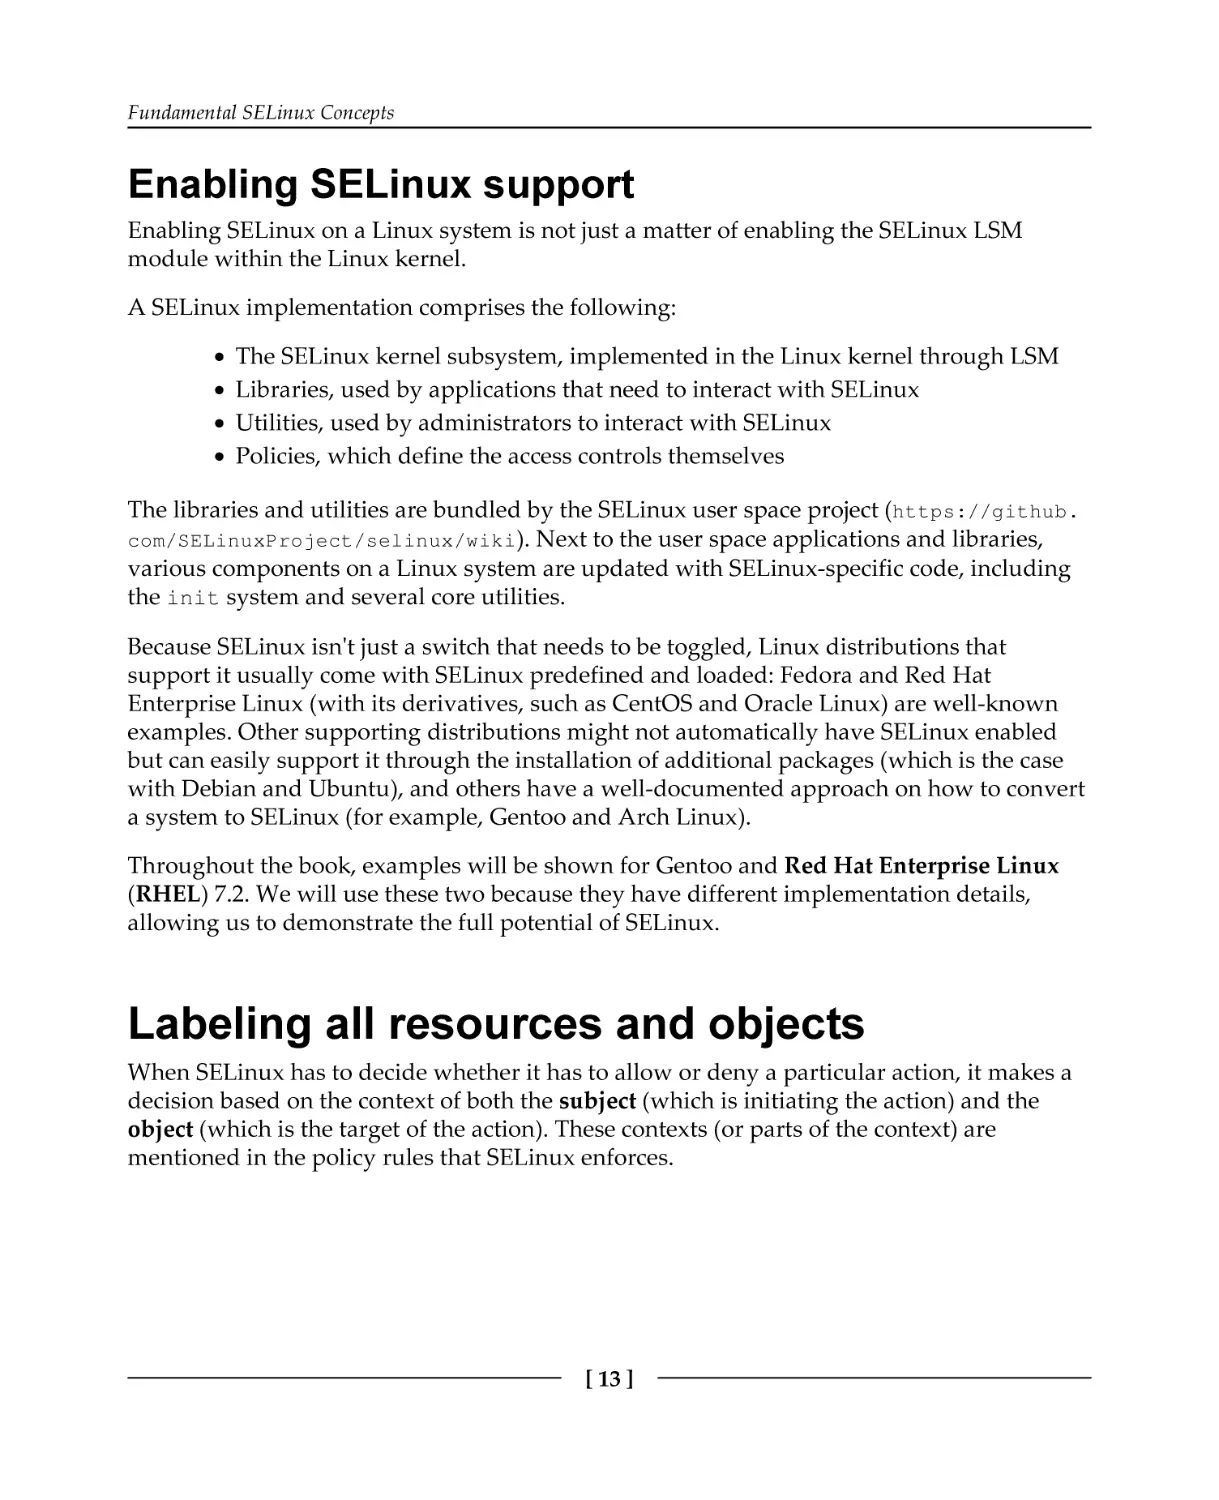
Enabling SELinux support
Enabling SELinux on a Linux system is not just a matter of enabling the SELinux LSM
module within the Linux kernel.
A SELinux implementation comprises the following:
The SELinux kernel subsystem, implemented in the Linux kernel through LSM
Libraries, used by applications that need to interact with SELinux
Utilities, used by administrators to interact with SELinux
Policies, which define the access controls themselves
The libraries and utilities are bundled by the SELinux user space project (https://github.
com/SELinuxProject/selinux/wiki). Next to the user space applications and libraries,
various components on a Linux system are updated with SELinux-specific code, including
the init system and several core utilities.
Because SELinux isn't just a switch that needs to be toggled, Linux distributions that
support it usually come with SELinux predefined and loaded: Fedora and Red Hat
Enterprise Linux (with its derivatives, such as CentOS and Oracle Linux) are well-known
examples. Other supporting distributions might not automatically have SELinux enabled
but can easily support it through the installation of additional packages (which is the case
with Debian and Ubuntu), and others have a well-documented approach on how to convert
a system to SELinux (for example, Gentoo and Arch Linux).
Throughout the book, examples will be shown for Gentoo and Red Hat Enterprise Linux
(RHEL) 7.2. We will use these two because they have different implementation details,
allowing us to demonstrate the full potential of SELinux.
Labeling all resources and objects
When SELinux has to decide whether it has to allow or deny a particular action, it makes a
decision based on the context of both the subject (which is initiating the action) and the
object (which is the target of the action). These contexts (or parts of the context) are
mentioned in the policy rules that SELinux enforces.
[ 13 ]
Fundamental SELinux Concepts
The context of a process is what identifies the process to SELinux. SELinux has no notion of
Linux process ownership and, once running, does not care how the process is called, which
process ID it has, and what account the process runs as. All it wants to know is what the
context of that process is, which is represented to users and administrators as a label. Label
and context are often used interchangeably, and although there is a technical distinction
(one is a representation of the other), we will not dwell on that much.
Let's look at an example label: the context of the current user (try it out yourself if you are
on a SELinux-enabled system):
$ id -Z
unconfined_u:unconfined_r:unconfined_t:s0-s0:c0.c1023
The id command, which returns information about the current user, is executed here with
the -Z switch (a commonly agreed-upon switch for displaying additional security
information obtained from the LSM-based security subsystems). It shows us the context of
the current user (actually the context of the id process itself when it was executing). As we
can see, the context has a string representation and looks as if it has five fields (it doesn't; it
has four fields–the last field just happens to contain a :).
SELinux developers decided to use labels instead of real process and file (or other resource)
metadata for its access controls. This is different to MAC systems such as AppArmor, which
uses the path of the binary (and thus the process name) and the paths of the resources to
handle permission checks. The decision to make SELinux a label-based mandatory access
control was taken for various reasons, which are as follows:
Using paths might be easier to comprehend for administrators, but this doesn't
allow us to keep the context information close to the resource. If a file or directory
is moved or remounted or a process has a different namespace view on the files,
then the access controls might behave differently as they look at the path instead
of the file. With label-based contexts, this information is retained and the system
keeps controlling the resource properly.
Contexts reveal the purpose of the process very well. The same binary application
can be launched in different contexts depending on how it got started. The
context value (such as the one shown in the id -Z output earlier) is exactly what
the administrator needs. With it, he knows what the rights are of each of the
running instances, but he can also deduce from it how the process might have
been launched and what its purpose is.
Contexts also make abstractions of the object itself. We are used to talking about
processes and files, but contexts are also applicable to less tangible resources such
as pipes (inter-process communication) or database objects. Path-based
identification only works as long as you can write a path.
[ 14 ]
Fundamental SELinux Concepts
As an example, consider the following policies:
Allow the httpd processes to bind to TCP port 80
Allow the processes labeled with httpd_t to bind to TCP ports labeled with
http_port_t
In the first example, we cannot easily reuse this policy when the web server process isn't
using the httpd binary (perhaps because it was renamed or it isn't Apache but another web
server) or when we want to have HTTP access on a different port. With the labeled
approach, the binary can be called apache2 or MyWebServer.py; as long as the process is
labeled httpd_t, the policy applies. The same happens with the port definition: you can
label the port 8080 with http_port_t and thus allow the web servers to bind to that port
as well.
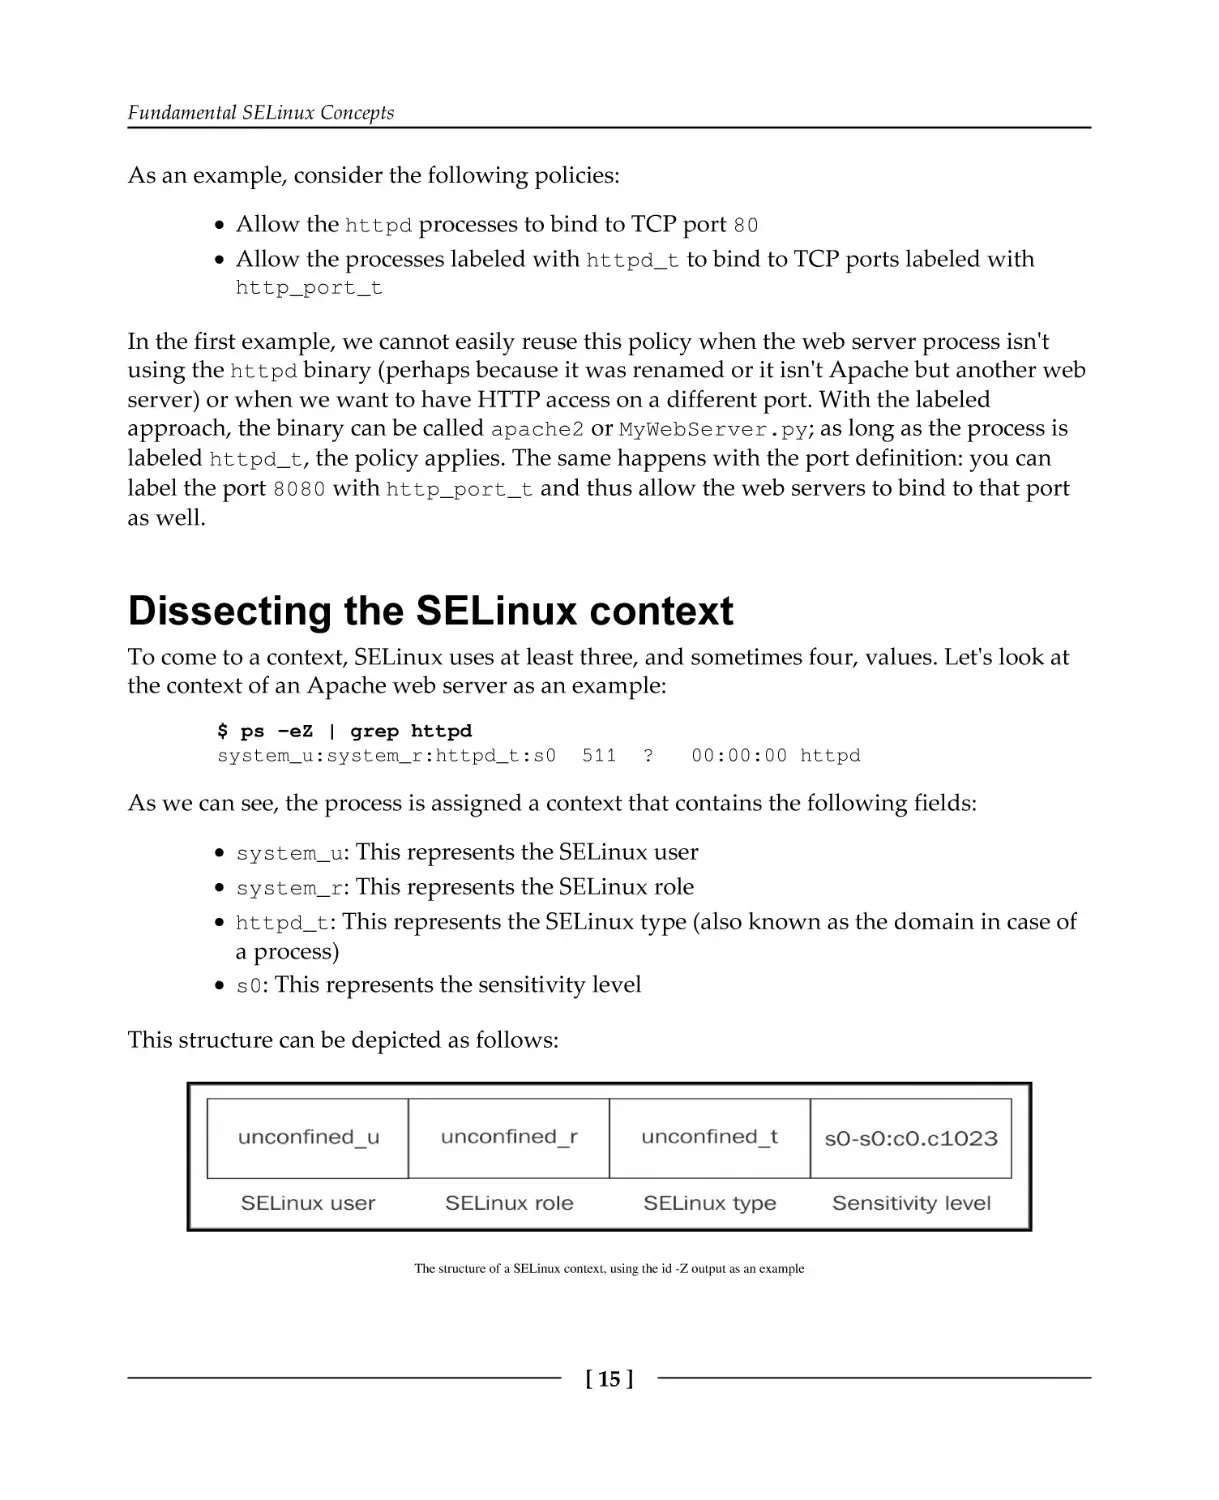
Dissecting the SELinux context
To come to a context, SELinux uses at least three, and sometimes four, values. Let's look at
the context of an Apache web server as an example:
$ ps -eZ | grep httpd
system_u:system_r:httpd_t:s0
511
?
00:00:00 httpd
As we can see, the process is assigned a context that contains the following fields:
system_u: This represents the SELinux user
system_r: This represents the SELinux role
httpd_t: This represents the SELinux type (also known as the domain in case of
a process)
s0: This represents the sensitivity level
This structure can be depicted as follows:
The structure of a SELinux context, using the id -Z output as an example
[ 15 ]
Fundamental SELinux Concepts
When we work with SELinux, contexts are all we need. In the majority of cases, it is the
third field (called the domain or type) that is most important since the majority of SELinux
policy rules (over 99 percent) consists of rules related to the interaction between two types
(without mentioning roles, users, or sensitivity levels).
SELinux contexts are aligned with LSM security attributes and exposed to the user space in
a standardized manner (compatible with multiple LSM implementations), allowing end
users and applications to easily query the contexts. An interesting place where these
attributes are presented is within the /proc pseudo file system.
Inside each process's /proc/<pid> location we find a subdirectory called attr, inside of
which the following files can be found:
$ ls /proc/$$/attr
current
fscreate
exec
keycreate
prev
sockcreate
All these files, if read, display either nothing or a SELinux context. If it is empty, then that
means the application has not explicitly set a context for that particular purpose, and the
SELinux context will be deduced either from the policy or inherited from its parent.
The meaning of the files are as follows:
The current file displays the current SELinux context of the process.
The exec file displays the SELinux context that will be assigned by the next
application execution done through this application. It is usually empty.
The fscreate file displays the SELinux context that will be assigned to the next
file that is written by the application. It is usually empty.
The keycreate file displays the SELinux context that will be assigned to the keys
cached in the kernel by this application. It is usually empty.
The prev file displays the previous SELinux context for this particular process.
This is usually the context of its parent application.
The sockcreate file displays the SELinux context that will be assigned to the
next socket created by the application. It is usually empty.
If an application has multiple subtasks, then the same information is available in each
subtask directory at /proc/<pid>/task/<taskid>/attr.
[ 16 ]
Fundamental SELinux Concepts
Enforcing access through types
The SELinux type (the third part of an SELinux context) of a process (called the domain) is
the basis of the fine-grained access controls of that process with respect to itself and other
types (which can be processes, files, sockets, network interfaces, and more). In most
SELinux literature, SELinux's label-based access control mechanism is fine-tuned to say that
SELinux is a type enforcement mandatory access control system: when some actions are
denied, the (absence of the) fine-grained access controls on the type level are most likely to
blame.
With type enforcement, SELinux is able to control what an application is allowed to do
based on how it got executed in the first place: a web server that is launched interactively by
a user will run with a different type than a web server executed through the init system,
even though the process binary and path are the same. The web server launched from the
init system is most likely trusted (and thus allowed to do whatever web servers are
supposed to do), whereas a manually launched web server is less likely to be considered
normal behavior and as such will have different privileges.
The majority of SELinux resources will focus on types. Even though the
SELinux type is just the third part of a SELinux context, it is the most
important one for most administrators. Most documentation will even just
talk about a type such as httpd_t rather than a full SELinux context.
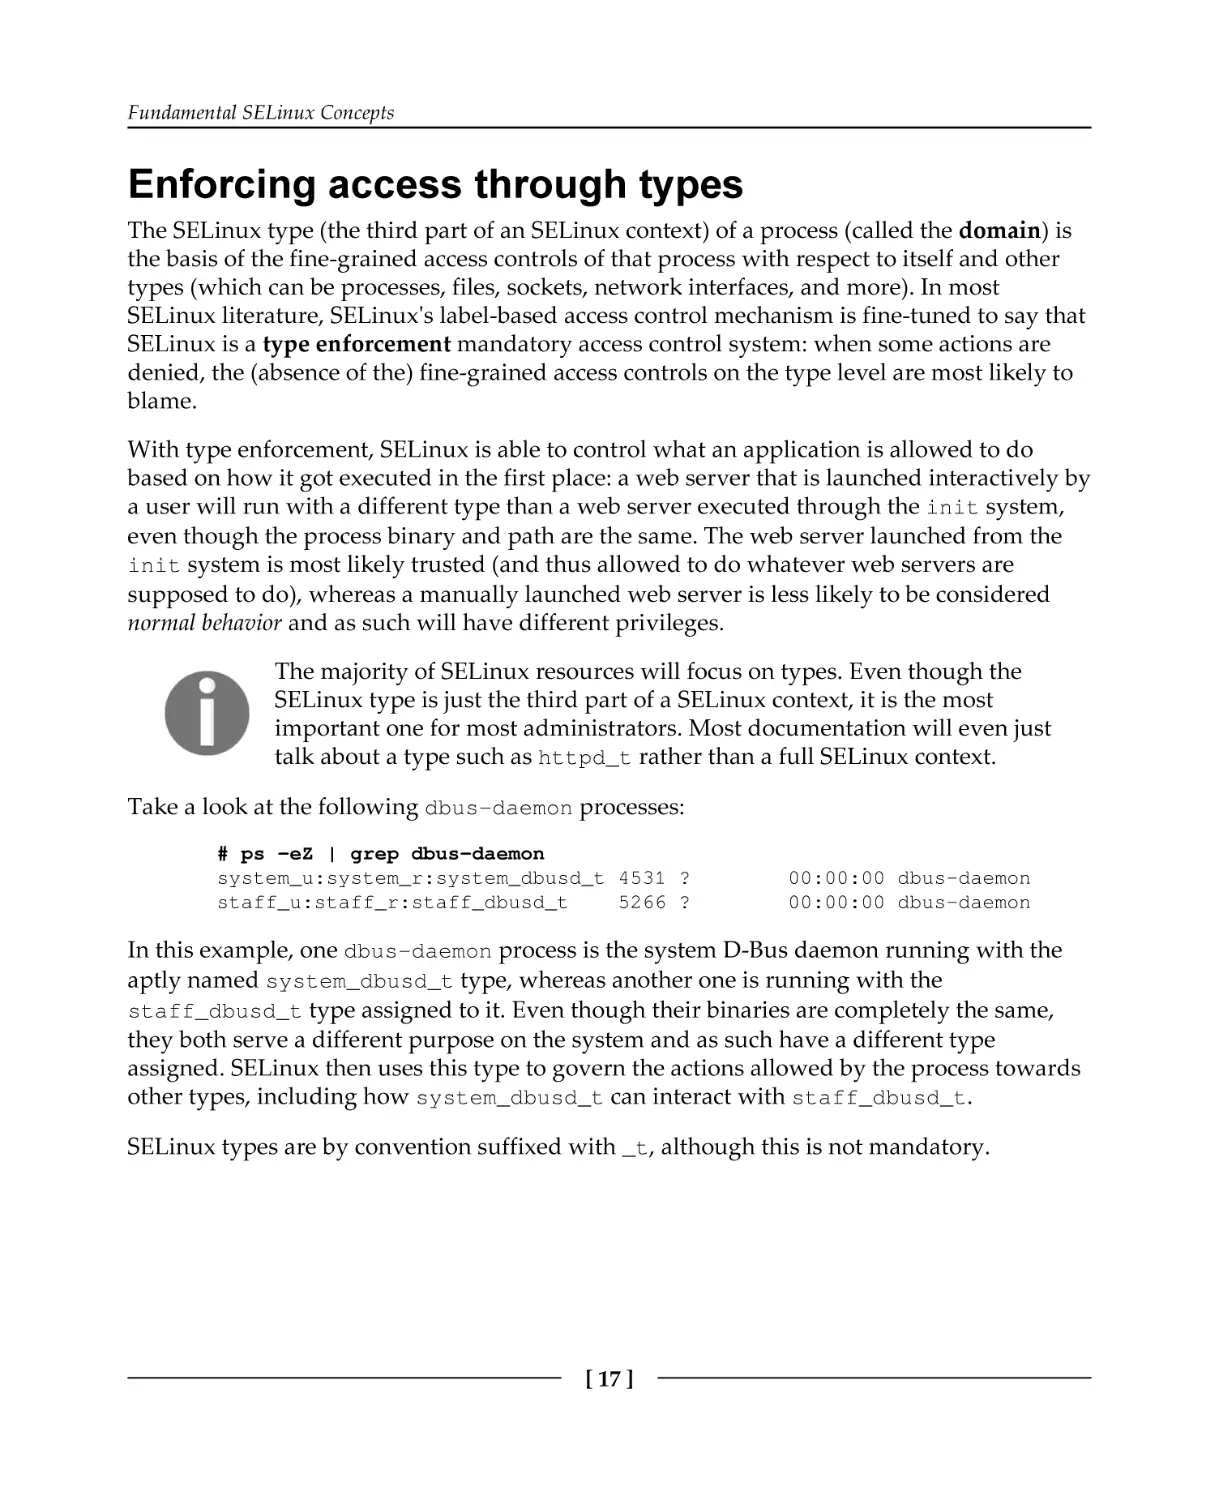
Take a look at the following dbus-daemon processes:
# ps -eZ | grep dbus-daemon
system_u:system_r:system_dbusd_t 4531 ?
staff_u:staff_r:staff_dbusd_t
5266 ?
00:00:00 dbus-daemon
00:00:00 dbus-daemon
In this example, one dbus-daemon process is the system D-Bus daemon running with the
aptly named system_dbusd_t type, whereas another one is running with the
staff_dbusd_t type assigned to it. Even though their binaries are completely the same,
they both serve a different purpose on the system and as such have a different type
assigned. SELinux then uses this type to govern the actions allowed by the process towards
other types, including how system_dbusd_t can interact with staff_dbusd_t.
SELinux types are by convention suffixed with _t, although this is not mandatory.
[ 17 ]
Fundamental SELinux Concepts
Granting domain access through roles
SELinux roles (the second part of a SELinux context) allow SELinux to support role-based
access controls. Although type enforcement is the most used (and known) part of SELinux,
role-based access control is an important method to keep a system secure, especially from
malicious user attempts. SELinux roles define the allowed types (domains) processes can
run with. These types (domains) on their part define the permissions. As such, SELinux
roles help define what a user (which has access to one or more roles) can and cannot do.
By convention, SELinux roles are defined with an _r suffix. On most SELinux-enabled
systems, the following roles are made available to be assigned to users:
Roles
Description
user_r
This role is meant for restricted users: the user_r SELinux role is only
allowed to have processes with types specific to end-user applications.
Privileged types, including those used to switch to another Linux user, are
not allowed for this role.
staff_r
This role is meant for non-critical operations: the SELinux staff_r role is
generally restricted to the same applications as the restricted user, but it has
the ability to switch roles. It is the default role for operators to be in (so as to
keep those users in the least privileged role as long as possible).
sysadm_r
This role is meant for system administrators: the sysadm_r SELinux role is
very privileged, enabling various system administration tasks. However,
certain end-user application types might not be supported (especially if those
types are used for potentially vulnerable or untrusted software) to keep the
system free from infections.
secadm_r
This role is meant for security administrators: the secadm_r SELinux role is
allowed to change the SELinux policy and manipulate the SELinux controls.
It is generally used when separation of duties is needed between system
administrators and system policy management.
system_r
This role is meant for daemons and background processes: the system_r
SELinux role is quite privileged, supporting the various daemon and system
process types. However, end-user application types and other administrative
types are not allowed in this role.
[ 18 ]
Fundamental SELinux Concepts
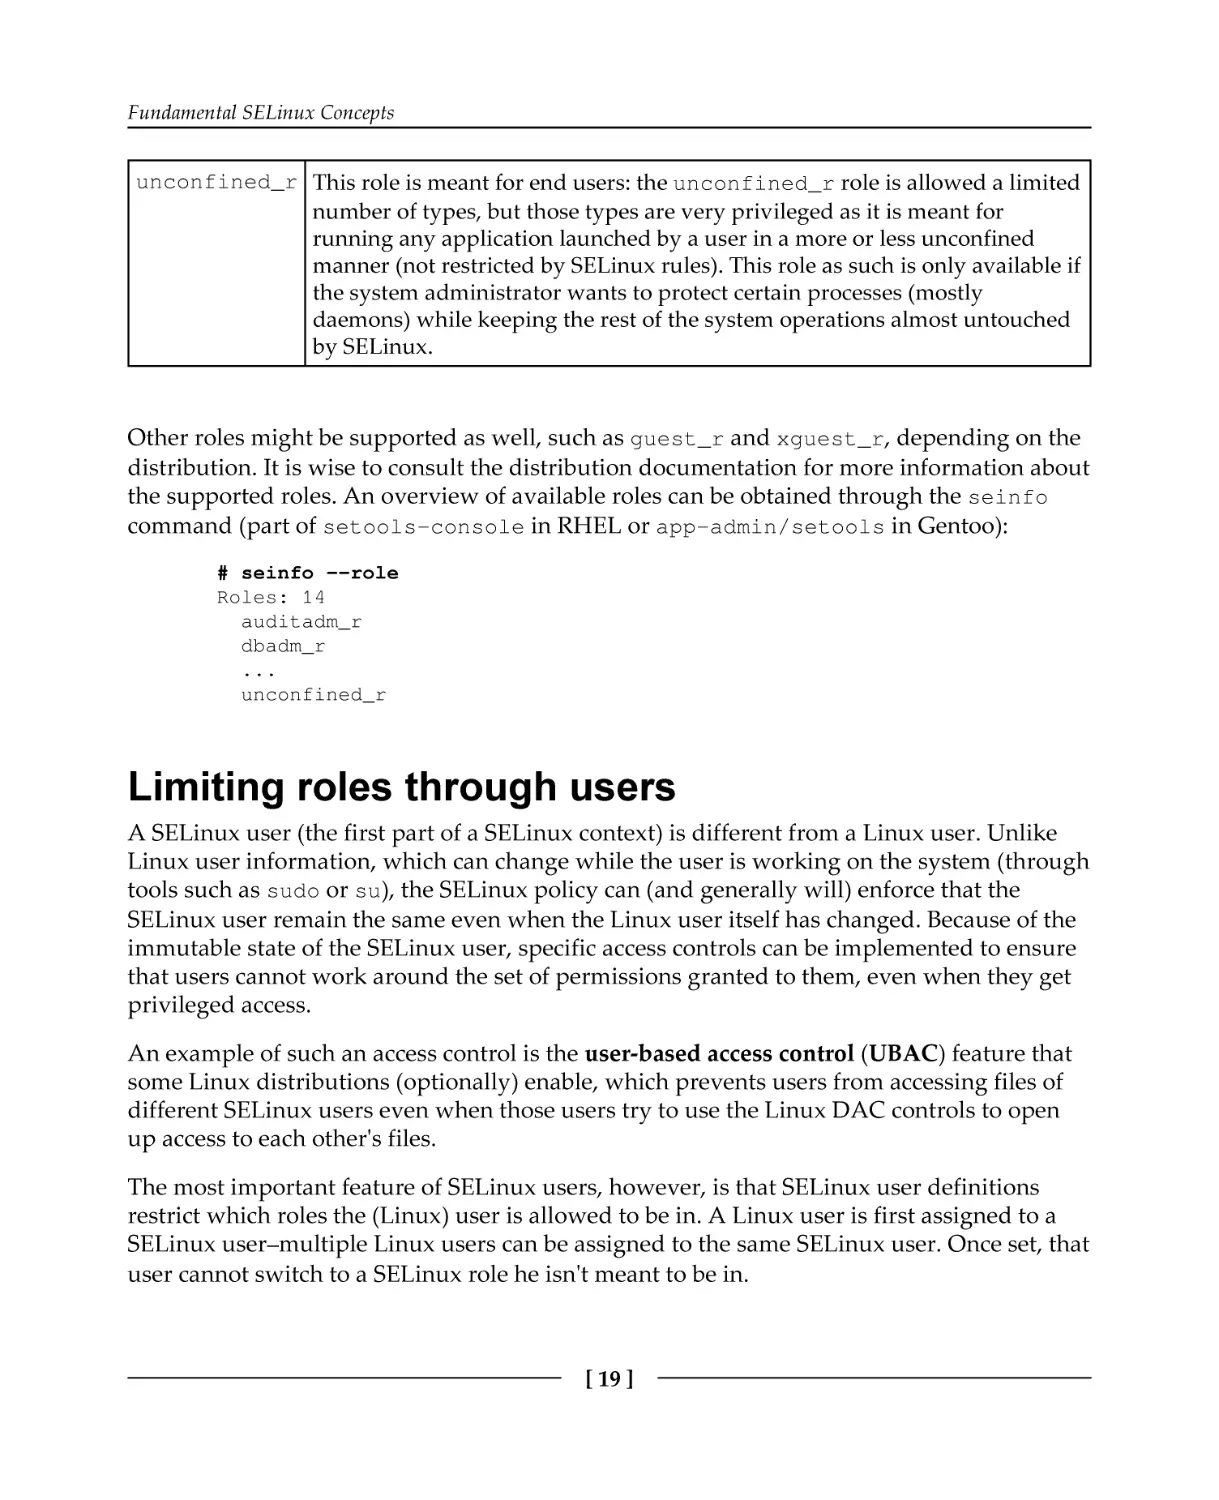
unconfined_r This role is meant for end users: the unconfined_r role is allowed a limited
number of types, but those types are very privileged as it is meant for
running any application launched by a user in a more or less unconfined
manner (not restricted by SELinux rules). This role as such is only available if
the system administrator wants to protect certain processes (mostly
daemons) while keeping the rest of the system operations almost untouched
by SELinux.
Other roles might be supported as well, such as guest_r and xguest_r, depending on the
distribution. It is wise to consult the distribution documentation for more information about
the supported roles. An overview of available roles can be obtained through the seinfo
command (part of setools-console in RHEL or app-admin/setools in Gentoo):
# seinfo --role
Roles: 14
auditadm_r
dbadm_r
...
unconfined_r
Limiting roles through users
A SELinux user (the first part of a SELinux context) is different from a Linux user. Unlike
Linux user information, which can change while the user is working on the system (through
tools such as sudo or su), the SELinux policy can (and generally will) enforce that the
SELinux user remain the same even when the Linux user itself has changed. Because of the
immutable state of the SELinux user, specific access controls can be implemented to ensure
that users cannot work around the set of permissions granted to them, even when they get
privileged access.
An example of such an access control is the user-based access control (UBAC) feature that
some Linux distributions (optionally) enable, which prevents users from accessing files of
different SELinux users even when those users try to use the Linux DAC controls to open
up access to each other's files.
The most important feature of SELinux users, however, is that SELinux user definitions
restrict which roles the (Linux) user is allowed to be in. A Linux user is first assigned to a
SELinux user–multiple Linux users can be assigned to the same SELinux user. Once set, that
user cannot switch to a SELinux role he isn't meant to be in.
[ 19 ]
Fundamental SELinux Concepts
This is the role-based access control implementation of SELinux:
Mapping Linux accounts to SELinux users
SELinux users are, by convention, defined with an _u suffix, although this is not
mandatory. The SELinux users that most distributions have available are named after the
role they represent, but instead of ending with _r, they end with _u. For instance, for the
sysadm_r role, there is a sysadm_u SELinux user.
[ 20 ]
Fundamental SELinux Concepts
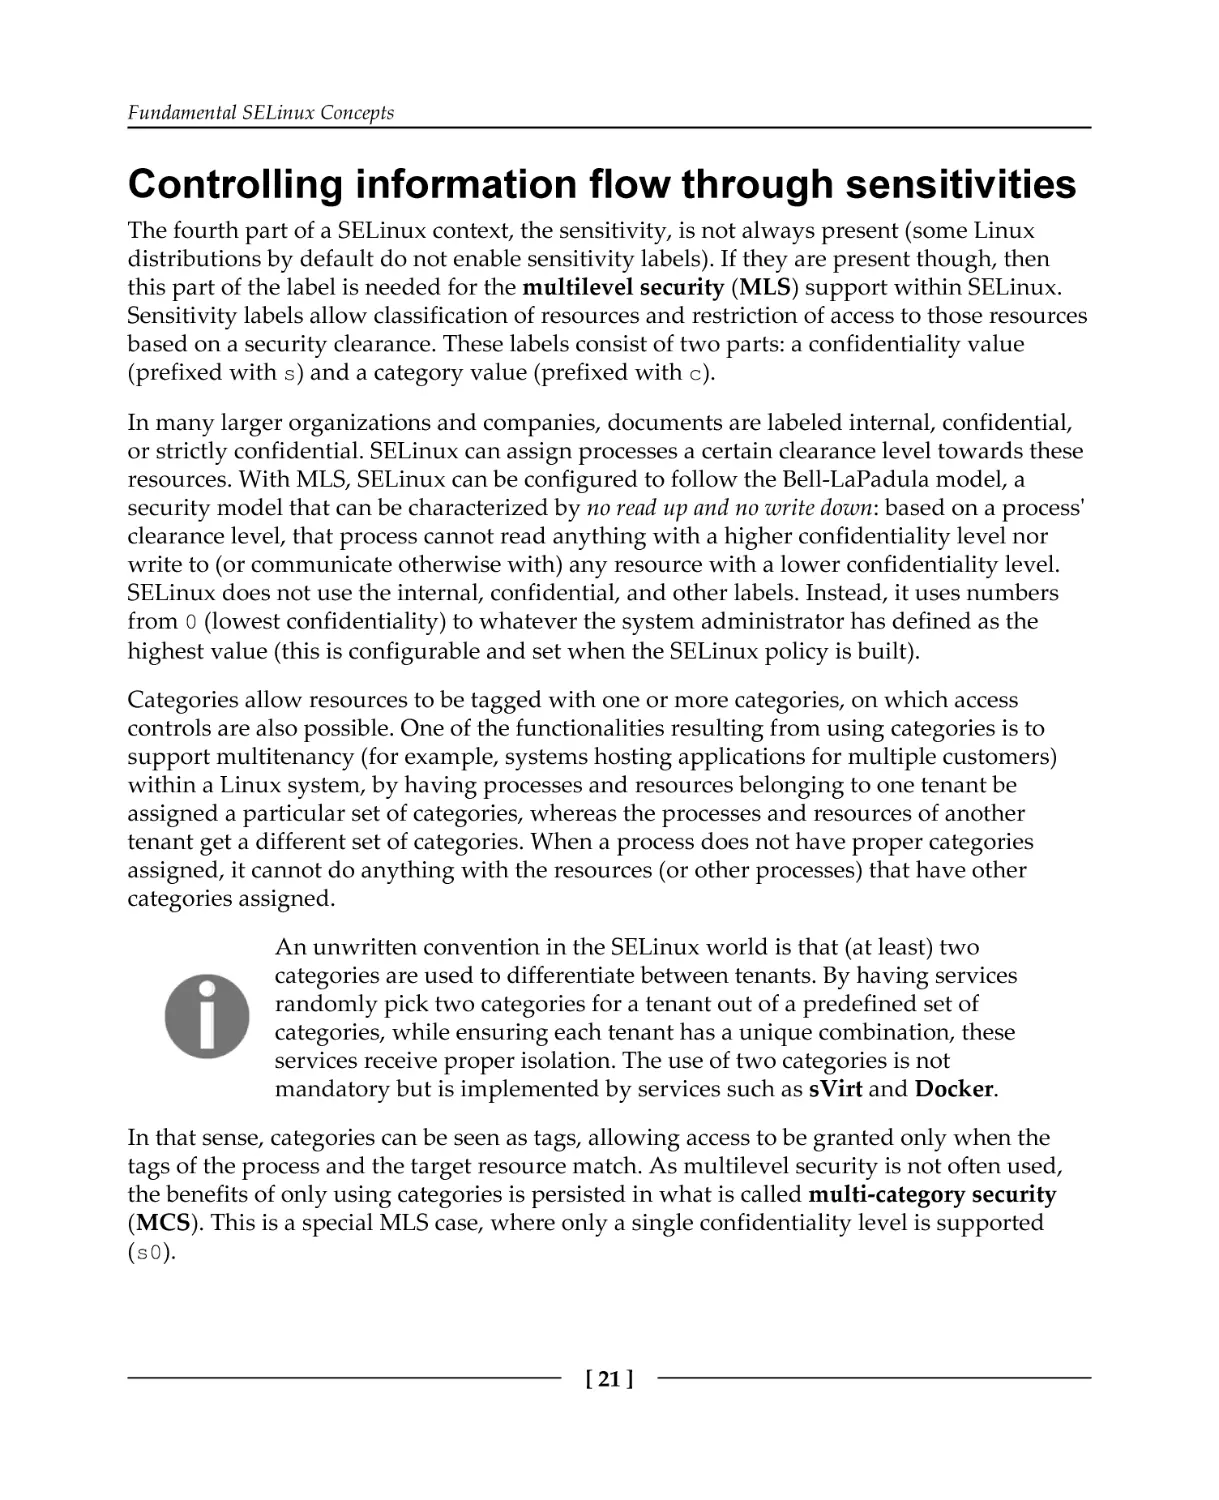
Controlling information flow through sensitivities
The fourth part of a SELinux context, the sensitivity, is not always present (some Linux
distributions by default do not enable sensitivity labels). If they are present though, then
this part of the label is needed for the multilevel security (MLS) support within SELinux.
Sensitivity labels allow classification of resources and restriction of access to those resources
based on a security clearance. These labels consist of two parts: a confidentiality value
(prefixed with s) and a category value (prefixed with c).
In many larger organizations and companies, documents are labeled internal, confidential,
or strictly confidential. SELinux can assign processes a certain clearance level towards these
resources. With MLS, SELinux can be configured to follow the Bell-LaPadula model, a
security model that can be characterized by no read up and no write down: based on a process'
clearance level, that process cannot read anything with a higher confidentiality level nor
write to (or communicate otherwise with) any resource with a lower confidentiality level.
SELinux does not use the internal, confidential, and other labels. Instead, it uses numbers
from 0 (lowest confidentiality) to whatever the system administrator has defined as the
highest value (this is configurable and set when the SELinux policy is built).
Categories allow resources to be tagged with one or more categories, on which access
controls are also possible. One of the functionalities resulting from using categories is to
support multitenancy (for example, systems hosting applications for multiple customers)
within a Linux system, by having processes and resources belonging to one tenant be
assigned a particular set of categories, whereas the processes and resources of another
tenant get a different set of categories. When a process does not have proper categories
assigned, it cannot do anything with the resources (or other processes) that have other
categories assigned.
An unwritten convention in the SELinux world is that (at least) two
categories are used to differentiate between tenants. By having services
randomly pick two categories for a tenant out of a predefined set of
categories, while ensuring each tenant has a unique combination, these
services receive proper isolation. The use of two categories is not
mandatory but is implemented by services such as sVirt and Docker.
In that sense, categories can be seen as tags, allowing access to be granted only when the
tags of the process and the target resource match. As multilevel security is not often used,
the benefits of only using categories is persisted in what is called multi-category security
(MCS). This is a special MLS case, where only a single confidentiality level is supported
(s0).
[ 21 ]
Fundamental SELinux Concepts
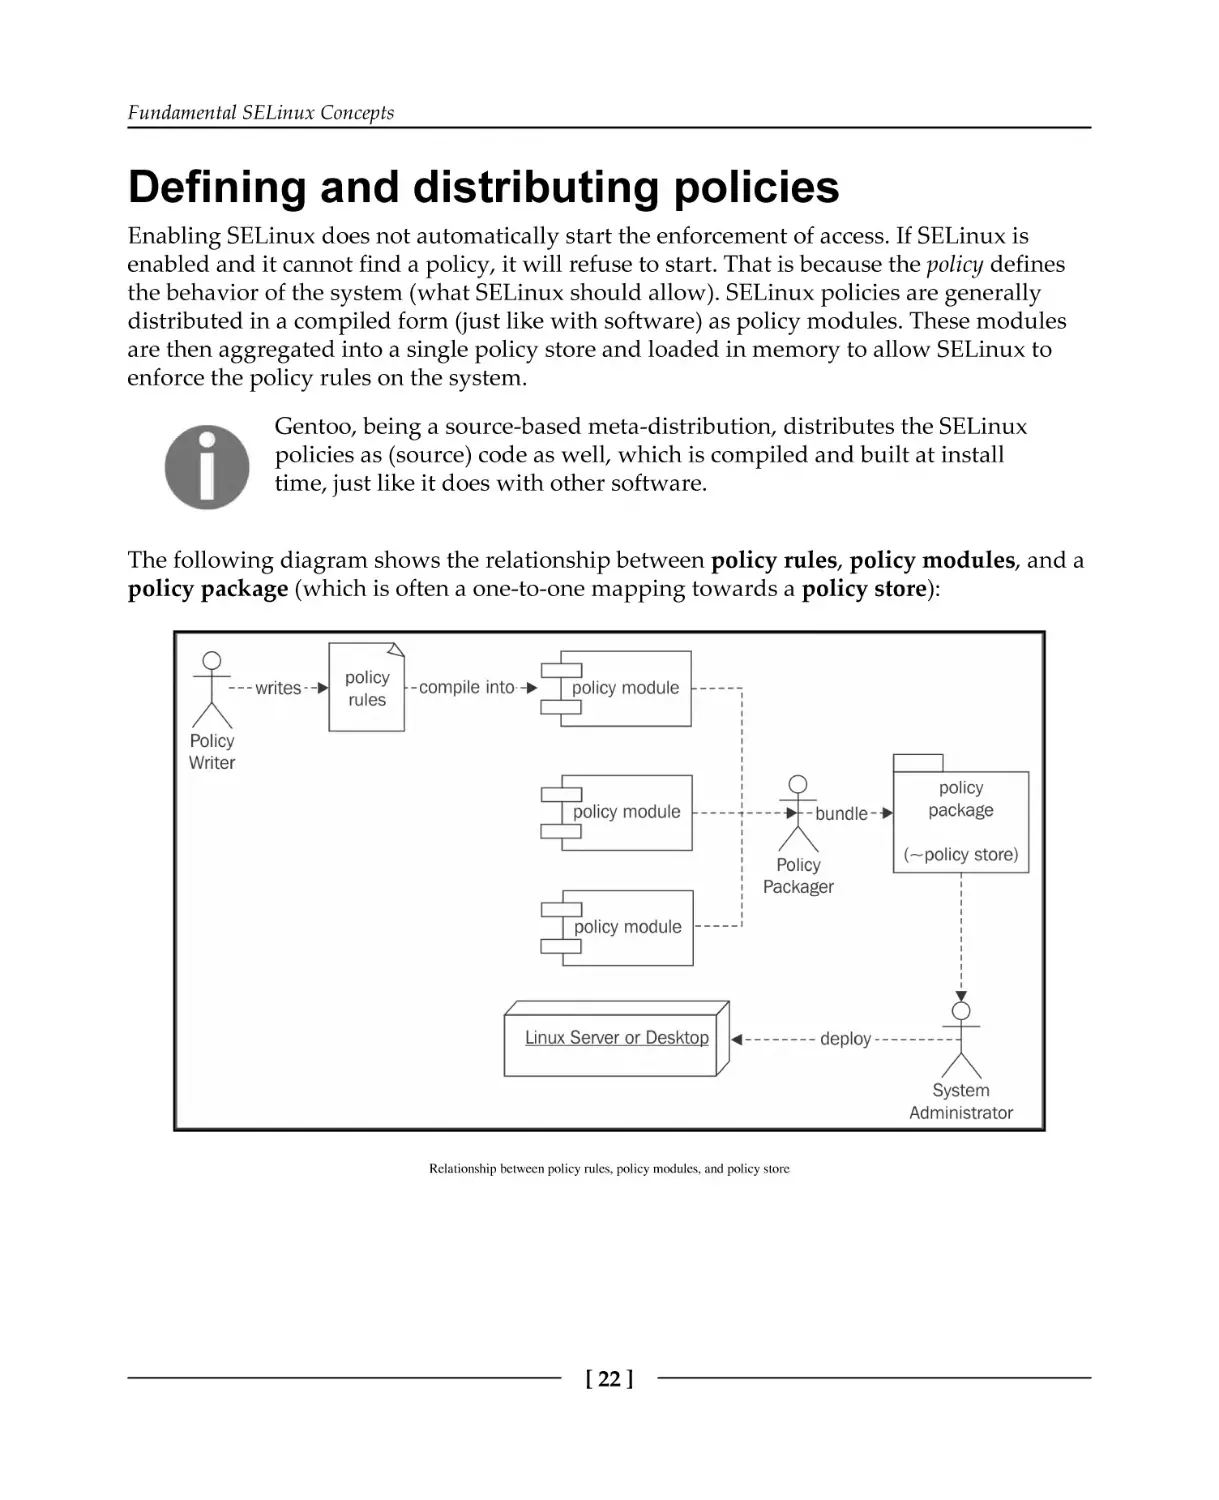
Defining and distributing policies
Enabling SELinux does not automatically start the enforcement of access. If SELinux is
enabled and it cannot find a policy, it will refuse to start. That is because the policy defines
the behavior of the system (what SELinux should allow). SELinux policies are generally
distributed in a compiled form (just like with software) as policy modules. These modules
are then aggregated into a single policy store and loaded in memory to allow SELinux to
enforce the policy rules on the system.
Gentoo, being a source-based meta-distribution, distributes the SELinux
policies as (source) code as well, which is compiled and built at install
time, just like it does with other software.
The following diagram shows the relationship between policy rules, policy modules, and a
policy package (which is often a one-to-one mapping towards a policy store):
Relationship between policy rules, policy modules, and policy store
[ 22 ]
Fundamental SELinux Concepts
Writing SELinux policies
A SELinux policy writer can (currently) write down the policy rules in three possible
languages:
In standard SELinux source format–a human-readable and well-established
language for writing SELinux policies
In reference policy style–this extends the standard SELinux source format with
M4 macros to facilitate the development of policies
In the SELinux common intermediate language (CIL)–a computer-readable (and
with some effort human-readable) format for SELinux policies
Most SELinux supporting distributions base their policy on the reference policy (https://g
ithub.com/TresysTechnology/refpolicy/wiki), a fully functional SELinux policy set
managed as a free software project. This allows distributions to ship with a functional
policy set rather than having to write one themselves. Many project contributors are
distribution developers, trying to push changes of their distribution to the reference policy
project itself, where the changes are peer-reviewed to make sure no rules are brought into
the project that might jeopardize the security of any platform. It easily becomes very
troublesome to write reusable policy modules without the extensive set of M4 macros
offered by the reference policy project.
The SELinux CIL format is quite recent (RHEL 7.2 does not support it yet), and although it
is very much in use already (the recent SELinux user space converts everything in CIL in
the background), it is not that common yet for policy writers to use it directly.
As an example, consider the web server rule we discussed earlier, repeated here for your
convenience: allow the processes labeled with httpd_t to bind to TCP ports labeled with
http_port_t.
In the standard SELinux source format, this is written down as follows:
allow httpd_t http_port_t : tcp_socket { name_bind };
Using reference policy style, this rule is part of the following macro call:
corenet_tcp_bind_http_port(httpd_t)
[ 23 ]
Fundamental SELinux Concepts
In CIL language, the rule would be expressed as follows:
(allow httpd_t http_port_t (tcp_socket (name_bind)))
In most representations, we can see what the rule is about:
The subject (who is taking the action); in this case, this is the set of processes
labeled with the httpd_t type.
The target resource or object (the target for the action); in this case, it is the set of
TCP sockets (tcp_socket) labeled with the http_port_t type. In reference
policy style, this is implied by the function name.
The action or permission; in this case, it is the action of binding to a port
(name_bind). In reference policy style, this is implied by the function name.
The result that the policy will enforce; in this case, it is that the action is allowed
(allow). In reference policy style, this is implied by the function name.
A policy is generally written for an application or set of applications. So the preceding
example will be part of the policy written for web servers.
Policy writers will generally create three files per application or application set:
A .te file, which contains the type enforcement rules.
An .if file, which contains interface and template definitions, allowing policy
writers to easily use the newly-generated policy rules to enhance other policies
with. You can compare this to header files in other programming languages.
An .fc file, which contains file context expressions. These are rules that assign
labels to resources on the file system.
A finished policy will then be packaged into a SELinux policy module.
Distributing policies through modules
Initially, SELinux used a single, monolithic policy approach: all possible access control rules
were maintained in a single policy file. It quickly became clear that this is not manageable in
the long term, and the idea of developing a modular policy approach was born.
[ 24 ]
Fundamental SELinux Concepts
Within the modular approach, policy developers can write isolated policy sets for a
particular application (or set of applications), roles, and so on. These policies then get built
and distributed as policy modules. Platforms that need access controls for a particular
application load the SELinux policy module that defines the access rules for that
application.
The process of building policy modules is shown in the next diagram. It also shows where
CIL comes into play, even when the policy rules themselves are not written in CIL. For
distributions that do not yet support CIL, semodule will directly go from the .pp file to the
policy.## file.
Build process from policy rule to policy store
With the recent SELinux user space, the *.pp files (which are the SELinux policy modules)
are considered to be written in a high-level language (HLL). Do not assume that this means
they are human-readable: these files are binary files. The consideration here is that SELinux
wants to support writing SELinux policies in a number of formats, which it calls high-level
languages, as long as it has a parser that can convert the files into CIL. Marking the binary
module formats as high-level allowed the SELinux project to introduce the distinction
between high-level languages and CIL in a backwards-compatible manner.
[ 25 ]
Fundamental SELinux Concepts
When distributing SELinux policy modules, most Linux distributions place the *.pp
SELinux policy modules inside /usr/share/selinux, usually within a subdirectory
named after the policy store (such as targeted). There, these modules are ready for
administrators to activate them.
When activating a module, the semodule command (part of the policycoreutils
package) will copy those modules into a dedicated directory:
/etc/selinux/targeted/modules/active/modules (RHEL) or
/var/lib/selinux/mcs/active/modules (Gentoo). This location is defined by the
version of the SELinux user space–more recent versions use the /var/lib location. When
all modules are aggregated in a single location, the final policy binary is compiled, resulting
in /etc/selinux/targeted/policy/policy.30 (or some other number) and loaded in
memory.
On RHEL, the SELinux policies are provided by the selinux-policy-targeted (or minimum or -mls) package. On Gentoo, they are provided by the various secpolicy/selinux-* packages (Gentoo uses separate packages for each module, reducing
the number of SELinux policies that are loaded on an average system).
Bundling modules in a policy store
A policy store contains a single comprehensive policy, and only a single policy can be
active on a system at any point in time. Administrators can switch policy stores, although
this often requires the system to be rebooted and might even require relabeling the entire
system (relabeling is the act of resetting the contexts on all files and resources available on
that system).
The active policy on the system can be queried using sestatus (SELinux status, provided
through the policycoreutils package), as follows:
# sestatus | grep "Loaded policy name"
Loaded policy name:
targeted
In this example, the currently loaded policy (store) is named targeted. The policy name
that SELinux will use upon its next reboot is defined in the /etc/selinux/config
configuration file as the SELINUXTYPE parameter.
[ 26 ]
Fundamental SELinux Concepts
It is the system's init system (be it a SysV-compatible init system or systemd) that is
generally responsible for loading the SELinux policy, effectively activating SELinux support
on the system. The init system reads the configuration, locates the policy store, and loads
the policy file in memory. If the init system does not support this (in other words, it is not
SELinux-aware) then the policy can be loaded through the load_policy command, part of
the policycoreutils package.
Distinguishing between policies
The most common SELinux policy store names are strict, targeted, mcs, and mls. None
of the names assigned to policy stores are fixed, though, so it is a matter of convention.
Hence, it is recommended to consult the distribution documentation to verify what the
proper name of the policy should be. Still, the name often provides some information about
the SELinux options that are enabled through the policy.
Supporting MLS
One of the options that can be enabled is MLS support. If it is disabled, then the SELinux
context will not have a fourth field with sensitivity information in it, making the contexts of
processes and files look as follows:
staff_u:sysadm_r:sysadm_t
To check whether or not MLS is enabled, it is sufficient to see if the context, indeed, doesn't
contain such a fourth field, but it can also be acquired from the Policy MLS status line in
the output of sestatus:
# sestatus | grep MLS
Policy MLS Status:
disabled
Another method would be to look into the pseudo file, /sys/fs/selinux/mls. A value of
0 means disabled, whereas a value of 1 means enabled:
# cat /sys/fs/selinux/mls
0
Policy stores that have MLS enabled are generally targeted, mcs, and mls, whereas
strict generally has MLS disabled.
[ 27 ]
Fundamental SELinux Concepts
Dealing with unknown permissions
Permissions (such as read, open, and lock) are defined both in the Linux kernel and in the
policy itself. However, sometimes, newer Linux kernels support permissions that the
current policy does not yet understand.
Take the block_suspend permission (to be able to block system suspension) as an
example. If the Linux kernel supports (and checks) this permission but the loaded SELinux
policy does not understand that permission yet, then SELinux has to decide how it should
deal with the permission. SELinux can be configured to do one of the following actions:
allow: Assume everything that is not understood is allowed
deny: Assume no one is allowed to perform this action
reject: Stop and halt the system
This is configured through the deny_unknown value. To see the state for unknown
permissions, look for the Policy deny_unknown status line in sestatus:
# sestatus | grep deny_unknown
Policy deny_unknown status:
denied
Administrators can set this for themselves in the /etc/selinux/semanage.conf file
through the handle-unknown variable (with allow, deny, or reject).
RHEL by default allows unknown permissions, whereas Gentoo by default denies them.
Supporting unconfined domains
A SELinux policy can be very strict, limiting applications as close as possible to their actual
behavior, but it can also be very liberal in what applications are allowed to do. One of the
concepts available in many SELinux policies is the idea of unconfined domains. When
enabled, it means that certain SELinux domains (process contexts) are allowed to do almost
anything they want (of course, within the boundaries of the regular Linux DAC
permissions, which still hold) and only a select number of domains are truly confined
(restricted) in their actions.
[ 28 ]
Fundamental SELinux Concepts
Unconfined domains have been brought forward to allow SELinux to be active on desktops
and servers where administrators do not want to fully restrict the entire system, but only a
few of the applications running on it. Generally, these implementations focus on
constraining network-facing services (such as web servers and database management
systems) while allowing end users and administrators to roam around unrestricted.
With other MAC systems, such as AppArmor, unconfinement is inherently part of the design
of the system as they only restrict actions for well-defined applications or users. However,
SELinux was designed to be a full mandatory access control system and thus needs to
provide access control rules even for those applications that shouldn't need any. By
marking these applications as unconfined, almost no additional restrictions are imposed by
SELinux.
We can see whether or not unconfined domains are enabled on the system through seinfo,
which we use to query the policy for the unconfined_t SELinux type. On a system where
unconfined domains are supported, this type will be available:
# seinfo -tunconfined_t
unconfined_t
For a system where unconfined domains are not supported, the type will not be part of the
policy:
# seinfo -tunconfined_t
ERROR: could not find datum for type unconfined_t
Most distributions that enable unconfined domains call their policy targeted, but this is
just a convention that is not always followed. Hence, it is always best to consult the policy
using seinfo. RHEL enables unconfined domains, whereas with Gentoo, this is a
configurable setting through the unconfined USE flag.
Limiting cross-user sharing
When UBAC is enabled, certain SELinux types will be protected by additional constraints.
This will ensure that one SELinux user cannot access files (or other specific resources) of
another user, even when those users are sharing their data through the regular Linux
permissions. UBAC provides some additional control over information flow between
resources, but it is far from perfect. In essence, it is made to isolate SELinux users from one
another.
[ 29 ]
Fundamental SELinux Concepts
A constraint in SELinux is an access control rule that uses all parts of a
context to make its decision. Unlike type enforcement rules, which are
purely based on the type, constraints can take the SELinux user, SELinux
role, or sensitivity label into account. Constraints are generally developed
once and left untouched, otherwise–most policy writers will not touch
constraints during their development efforts.
Many Linux distributions, including RHEL, disable UBAC. Gentoo allows users to select
whether or not they want UBAC through the Gentoo ubac USE flag (which is enabled by
default).
Incrementing policy versions
While checking the output of sestatus, we see that there is also a notion of policy
versions:
# sestatus | grep version
Max kernel policy version:
28
This version has nothing to do with the versioning of policy rules but with the SELinux
features that the currently running kernel supports. In the preceding output, 28 is the
highest policy version the kernel supports. Every time a new feature is added to SELinux,
the version number is increased. The policy file itself (which contains all the SELinux rules
loaded at boot time by the system) can be found in /etc/selinux/targeted/policy
(where targeted refers to the policy store used, so if the system uses a policy store named
strict, then the path would be /etc/selinux/strict/policy).
If multiple policy files exist, we can use the output of seinfo to find out which policy file is
used:
# seinfo
Statistics for policy file: /etc/selinux/targeted/policy/policy.30
Policy Version & Type: v.30 (binary, mls)
...
[ 30 ]
Fundamental SELinux Concepts
The next table provides the current list of policy feature enhancements and the Linux kernel
version in which that feature is introduced. Many of the features are only of concern to the
policy developers, but knowing the evolution of the features gives us a good idea about the
evolution of SELinux:
Version Linux kernel Description
12
The “old API” for SELinux, now deprecated.
15
2.6.0
Introduced the new API for SELinux.
16
2.6.5
Added support for conditional policy extensions.
17
2.6.6
Added support for IPv6.
18
2.6.8
Added support for fine-grained netlink socket permissions.
19
2.6.12
Added support for MLS.
20
2.6.14
Reduced the size of the access vector table.
21
2.6.19
Added support for MLS range transitions.
22
2.6.25
Introduced policy capabilities.
23
2.6.26
Added support for per-domain permissive mode.
24
2.6.28
Added support for explicit hierarchy (type bounds).
25
2.6.39
Added support for filename-based transitions.
26
3.0
Added support for role transitions for non-process classes.
Added support for role attributes.
27
3.5
Added support for flexible inheritance of user and role for newlycreated objects.
28
3.5
Added support for flexible inheritance of type for newly-created
objects.
29
3.14
Added support for attributes within SELinux constraints.
30
4.3
Added support for extended permissions and implemented first
on IOCTL controls.
Enhanced SELinux XEN support.
History of SELinux feature evolution
[ 31 ]
Fundamental SELinux Concepts
By default, when a SELinux policy is built, the highest supported version as defined by the
Linux kernel and libsepol (the library responsible for building the SELinux policy binary)
is used. Administrators can force a version to be lower using the policy-version
parameter in /etc/selinux/semanage.conf.
Different policy content
Besides the policy capabilities described above, the main difference between policies (and
distributions) is the policy content itself. We already covered that most distributions base
their policy on the reference policy project. But although that project is considered the
master for most distributions, each distribution has its own deviation from the main policy
set.
Many distributions make extensive additions to the policy without directly passing the
policies to the upstream reference policy project. There are several possible reasons why
this is not directly done:
The policy enhancements or additions are still immature: Red Hat initially starts
with policies being active but permissive, meaning the policies are not enforced.
Instead, SELinux logs what it would have prevented and, based on those logs, the
policies are then enhanced. This means that a policy is only ready after a few
releases.
The policy enhancements or additions are too specific to the distribution: If a
policy set is not reusable for other distributions, then some distributions will opt
to keep those policies to themselves as the act of pushing changes to upstream
projects takes quite some effort.
The policy enhancements or additions haven't followed the upstream rules and
guidelines: The reference policy has a set of guidelines that policies need to
adhere to. If a policy set does not comply with these rules, then it will not be
accepted.
The policy enhancements or additions are not implementing the same security
model as the reference policy project wants: As SELinux is a very extensive
mandatory access control system, it is possible to write completely different
policies.
The distribution does not have the time or resources to push changes upstream.
[ 32 ]
Fundamental SELinux Concepts
This means that SELinux policies between distributions (and even releases of the same
distribution) can, content-wise, be quite different. Gentoo for instance aims to follow the
reference policy project closely, with changes being merged within a matter of weeks.
Summary
In this chapter, we saw that SELinux offers a more fine-grained access control mechanism
on top of the Linux access controls. SELinux is implemented through Linux Security
Modules and uses labels to identify its resources and processes based on ownership (user),
role, type, and even the security sensitivity and categorization of the resource. We covered
how SELinux policies are handled within a SELinux-enabled system and briefly touched
upon how policy writers structure policies.
Linux distributions implement SELinux policies, which might be a bit different from each
other based on supporting features, such as sensitivity labels, default behavior for unknown
permissions, support for confinement levels, or specific constraints put in place such as
UBAC. However, most of the policy rules themselves are similar and are even based on the
same upstream reference policy project.
Switching between SELinux enforcement modes and understanding the log events that
SELinux creates when it prohibits a certain access is the subject of our next chapter. In it, we
will also cover how to approach the often-heard requirement of disabling SELinux and why
it is the wrong solution to implement.
[ 33 ]
2
Understanding SELinux
Decisions and Logging
Once SELinux is enabled on a system, it starts its access control functionality, as described
in the previous chapter. This however might have some unknown side effects, so in this
chapter, we will:
Switch between SELinux in full-enforcement mode (resembling a host-based
intrusion prevention system) versus its permissive, logging-only mode
(resembling a host-based intrusion detection system)
Use various methods to toggle the SELinux state (enabled or disabled, permissive
or enforcing)
Disable SELinux's enforcement for a single domain rather than the entire system
Learn to interpret the SELinux log events that describe which activities SELinux
has prevented
We will finish with an overview of common methods for analyzing these logging events in
day-to-day operations.
Switching SELinux on and off
This is perhaps a weird section to begin with, but disabling SELinux is a commonly
requested activity. Some vendors do not support their application running on a platform
that has SELinux enabled. System administrators are generally reluctant to use security
controls they do not understand or find too complex to maintain. Luckily, this number is
diminishing, and SELinux is also capable of selectively disabling its access controls for a
part of the system rather than requiring us to completely disable it.
Understanding SELinux Decisions and Logging
Setting the global SELinux state
SELinux supports three major states that it can be in: disabled, permissive, and enforcing.
These states are set in the /etc/selinux/config file, through the SELINUX variable. Take
a look at the current setting:
$ grep ^SELINUX= /etc/selinux/config
SELINUX=enforcing
When the system init process loads the SELinux policy, the SELinux code checks the state
that the administrator has configured. The states are described as follows:
If the state is disabled, then the SELinux code disables further support, booting
the system further without activating SELinux.
If the state is permissive, then SELinux is active but will not enforce its policy
on the system. Instead, any violation against the policy will be reported but
remain allowed. This is sometimes called host intrusion detection as it works in
a reporting-only mode.
If the state is enforcing, then SELinux is active and will enforce its policy on the
system. Violations are reported and also denied. This is sometimes called host
intrusion prevention, as it enforces the rules while logging the actions it takes.
We can use the getenforce command (provided by the libselinux-utils package in
RHEL or sys-libs/libselinux in Gentoo) or the sestatus command to get information
about the current state of SELinux, like so:
# sestatus | grep mode
Current mode: enforcing
# getenforce
Enforcing
It is also possible to query the pseudo-file /sys/fs/selinux/enforce to get similar
information. If the file returns 1, then SELinux is in the enforcing mode. If it returns 0,
then it is in the permissive mode:
# cat /sys/fs/selinux/enforce
1
[ 35 ]
Understanding SELinux Decisions and Logging
If the /etc/selinux/config file is changed, then the system needs to be rebooted for the
changes to take effect. However, if a system has been booted without SELinux support
(disabled), re-enabling SELinux support alone will not suffice: the administrator will need
to make sure that all files on the system are relabeled (the context of all files needs to be set).
Without SELinux support, Linux will create and update files without updating or setting
the SELinux labels on those files. When the system is later rebooted with SELinux support,
SELinux will not have any knowledge of the context of a file unless the labels are reset.
Relabeling the file system is covered in Chapter 4, Process Domains and File-Level Access
Controls.
In many situations, administrators often want to disable SELinux when it starts preventing
certain tasks. This is careless to say the least, and here's why:
SELinux is a security component, part of the operating system. Disabling SELinux
is like disabling a firewall completely because it is blocking some communication.
It might help because it's a faster way of getting something to work again, but
you're removing measures that were enabled to protect you.
Just like with a firewall, SELinux is configurable by rules. If an application is
prevented from working correctly, we need to update the rules for that
application, just like the way additional firewall rules can be enabled to allow
particular flows.
In the worst case, when we want to allow every action an application performs
unconditionally, we can still leave SELinux on and just run this application
without SELinux access controls enabled.
Distributions put a lot of effort into integrating SELinux with their product, and they have
awesome support channels to help you out if all things fail.
Switching to permissive (or enforcing) mode
Most distribution-provided kernels allow switching between enforcing and permissive
mode through a simple administrative command. This feature is called the SELinux
development mode and is set through the CONFIG_SECURITY_SELINUX_DEVELOP kernel
configuration parameter. Although this can be considered a risk (all a malicious person
would need to do is switch SELinux to permissive mode to disable its access controls),
switching the mode requires strong administrative privileges, which most application
domains don't have.
[ 36 ]
Understanding SELinux Decisions and Logging
The command to switch between permissive mode and enforcing mode is the setenforce
command (part of the libselinux-utils package in RHEL or sys-libs/libselinux in
Gentoo). It takes a single argument: 0 (permissive) or 1 (enforcing). The strings
permissive and enforcing are allowed by the command as well.
The change takes effect immediately. For instance, the following command is used to switch
to permissive mode:
# setenforce 0
The effect of setenforce is the same as writing the right integer value into the
/sys/fs/selinux/enforce pseudo file:
# echo 0 > /sys/fs/selinux/enforce
The ability to switch between permissive and enforcing mode can be of interest for policy
developers or system administrators who are modifying the system to use SELinux
properly. It can also be used to quickly verify whether an application warning or error is
due to SELinux access controls or not–assuming the application is not SELinux-aware,
which we will talk about later in this chapter.
On production systems, it might be of interest to disable the ability to switch to permissive
mode. Disabling this feature usually requires rebuilding the Linux kernel, but SELinux
policy developers have also thought of a different way to disallow users from toggling the
SELinux state. The privileges that users need to switch to permissive mode are conditional,
and system administrators can easily toggle this to disable switching back from enforcing
mode to permissive mode. The conditional is implemented through a SELinux boolean
called secure_mode_policyload whose default value is off (meaning switching SELinux
state is allowed).
SELinux booleans are configurable options that take on a single value (on or off, although
true/false and 1/0 are valid values as well) and manipulate parts of the active SELinux
policy. The value of the conditionals can be persisted (meaning they survive reboots) or be
kept only during the current boot session. To persist the value across reboots, add -P to the
setsebool command (part of the policycoreutils package) used to toggle it:
# setsebool -P secure_mode_policyload on
[ 37 ]
Understanding SELinux Decisions and Logging
To get an overview of the available SELinux booleans along with a small description of
what they control, use semanage boolean:
# semanage boolean -l
SELinux boolean State Default Description
ftp_home_dir
(off , off)
Determine whether ftpd can read
and write files in user home
directories
xdm_sysadm_login (off , off)
Allow the graphical login program
to login directly as
sysadm_r:sysadm_t
xen_use_nfs
(off , off)
Allow xen to manage nfs files
...
The semanage command is part of the policycoreutils-python package in RHEL or
sys-apps/policycoreutils in Gentoo. SELinux booleans are covered in more depth in
Chapter 8, Working with SELinux Policies.
The use of the secure_mode_policyload SELinux boolean allows administrators to
restrict switching from enforcing mode back to permissive. However, switching to or from
the disabled state is not supported: if SELinux is active (in either permissive or
enforcing mode) and its policy is loaded, then only a reboot can effectively disable
SELinux again.
Using kernel boot parameters
Using the setenforce command makes sense when we want to switch to the permissive
or enforcing mode at a point in time when we have interactive access to the system. But
what if we need this on system boot? If the system refuses to boot properly due to SELinux
access controls, we cannot edit the /etc/selinux/config file. Luckily, we can change the
SELinux state through other means as well.
The solution is to use kernel boot parameters. We can boot a Linux system with one or two
parameters that take precedence over the /etc/selinux/config setting, as follows:
selinux=0: This informs the system to disable SELinux completely, and has the
same effect as setting SELINUX=disabled in the config file. When set, the other
parameter (enforcing) is not consulted. Please remember that booting a system
with SELinux disabled means that to enable it again, the file system must be
relabeled completely.
[ 38 ]
Understanding SELinux Decisions and Logging
enforcing=0: This informs the system to run SELinux in the permissive mode,
and has the same effect as setting SELINUX=permissive in the config file.
enforcing=1: This informs the system to run SELinux in the enforcing mode,
and has the same effect as setting SELINUX=enforcing in the config file.
Consider a Linux system that uses GRUB2 as its boot loader. We want to add enforcing=0
to the boot entry. This can be accomplished during boot as follows:
1. Reboot the system until the GRUB2 boot screen comes up.
2. Navigate with the arrow keys to the boot entry for which the SELinux state has to
be altered. This is usually the default boot entry and already selected.
3. Press the E key to edit the boot entry line. Do this before the GRUB2 timer
reaches zero; otherwise, the system will continue to boot.
4. Use the arrow keys to go to the end of the line that starts with linux, linux16,
or linuxefi.
5. Add enforcing=0 to the end of this line.
6. Press Ctrl + X or F10 to boot the entry.
Other boot loaders have similar approaches to changing the boot line without persisting it
for every reboot. Consult your distribution documentation for more details.
Support for the selinux= boot parameters is enabled through a kernel configuration
parameter, CONFIG_SECURITY_SELINUX_BOOTPARAM. The enforcing= boot parameter is
supported through the CONFIG_SECURITY_SELINUX_DEVELOP configuration parameter,
which we've already encountered.
When using SELinux in production, it might be wise to either disable the options or
properly protect the boot menu, for instance, by password-protecting the menu and
regularly verifying the integrity of the boot menu files.
[ 39 ]
Understanding SELinux Decisions and Logging
Disabling SELinux protections for a single
service
Since policy version 23 (which came with Linux 2.6.26), SELinux also supports a more
granular approach to switching between permissive and enforcing mode: the use of
permissive domains. As mentioned before, a domain is a term that SELinux uses for types
(labels) assigned to processes. With permissive domains, we can mark one particular
domain as being permissive (and as such not enforcing the SELinux rules) even though the
rest of the system is still running in enforcing mode.
Let's say we run a Digital Living Network Alliance (DLNA) server to serve our holiday
pictures to other media devices at our place or to present the latest internal company videos
to a distributed set of monitors throughout the campus. Somehow, it fails to show the
media recently made available, and we find out it is SELinux that is preventing it. Even
though it is strongly recommended to instead resolve the issue or even fine-tune the policy,
we might be pushed to fix (read: work around) the problem first and implement the proper
fix later. Instead of fully disabling SELinux controls, we can mark the domain in which the
DLNA server runs (most likely minidlna_t) as a permissive domain.
To make a domain permissive, we use the semanage command:
# semanage permissive -a minidlna_t
With the same semanage command, we can list the currently defined permissive domains.
On RHEL, a number of domains will, by default, run in the permissive mode since that is
part of their policy development life cycle approach:
# semanage permissive -l
Customized Permissive Types
minidlna_t
Builtin Permissive Types
mon_procd_t
mon_statd_t
...
ptp4l_t
[ 40 ]
Understanding SELinux Decisions and Logging
Another method for listing the custom permissive types (those not marked as permissive
through the distribution) is to use the semodule command. In the previous chapter, we
briefly touched on this command when talking about SELinux policy modules. We can use
it to list the SELinux policy modules that have permissive_ in their name, because the
semanage permissive command will actually generate a small SELinux policy module in
which the domain is marked as permissive:
# semodule -l | grep permissive_
permissive_minidlna_t
1.0
Distributions that have a more recent SELinux user space, such as Gentoo,
will not display a version.
To remove the permissive mode from the domain, pass the -d argument to the semanage
command. This is only possible for domains that were marked as permissive by the
administrator though–distribution-provided permissive domains cannot be switched to
enforcing through this approach:
# semanage permissive -d minidlna_t
When a domain is marked as permissive, the application should behave as if SELinux is not
enabled on the system, making it easier for us to find out whether SELinux really is the
cause of a permission issue. Note though, that other domains, including those that interact
with a permissive domain, are themselves still governed and enforced through the SELinux
access controls.
Another use for permissive domains is for policy writers. When an application is running in
a permissive domain, every action it takes that is not already allowed by the policy will be
logged by SELinux. Policy writers can run the application through various use cases and
then use the generated logs to build a policy for it.
There is a significant downside to this approach, which is that some
applications will trigger actions (resulting in SELinux logging) that the
application does not actually need (such as scanning through all binaries
to locate its own helper scripts). Policy writers will need to be careful
when updating policies through this approach.
If an application requires SELinux to be disabled, it makes much more sense to make a
dummy domain for it and mark its domain as permissive rather than disabling SELinux
protections for the entire system.
[ 41 ]
Understanding SELinux Decisions and Logging
Understanding SELinux-aware applications
Most applications themselves do not have knowledge that they are running on a SELinux
enabled system. When that is the case, permissive mode truly means that the application
behaves as if SELinux was not enabled to begin with. However, some applications actively
call SELinux code. These applications can be called SELinux-aware, because they change
their behavior based on the SELinux-related information available.
Such applications change their behavior when SELinux is enabled, for instance, to query the
policy or to check for the context that it should run in. Most of these SELinux-aware
applications do not properly validate whether they are running in permissive mode or not.
As a result, running those applications in a permissive domain (or the entire system in
permissive mode) will generally not result in the application running as if SELinux were not
active.
Examples of such applications are the SSH daemon, the system login service, the init
system, and some cron daemons as well as several core Linux utilities (such as ls and id).
They might show permission failures or different behavior based on the SELinux policy
even if SELinux is not in enforcing mode.
We can find out whether or not an application is SELinux-aware by checking if the
application is dynamically linked with the libselinux library. This can be done with
readelf or ldd, as follows:
# readelf -d /bin/ls | grep libselinux
0x0000000000000001 (NEEDED)
Shared library: [libselinux.so.1]
# ldd /bin/ls | grep selinux
libselinux.so.1 => /lib64/libselinux.so.1 (0x00007f77702dc000)
Knowing whether an application is SELinux-aware or not can help in troubleshooting
failures.
SELinux logging and auditing
SELinux developers are well aware that a security-oriented subsystem such as SELinux can
only succeed if it is capable of enhanced logging and even debugging. Every action that
SELinux takes, as part of the LSM hooks that it implements, should be auditable. Denials
(actions that SELinux prevents) should always be logged so that administrators can take
due action. SELinux tuning and changes, such as loading new policies or altering SELinux
booleans, should always result in an audit message being displayed.
[ 42 ]
Understanding SELinux Decisions and Logging
Following audit events
By default, SELinux will send its messages to the Linux audit subsystem (assuming the
Linux kernel is configured with the audit subsystem enabled through the CONFIG_AUDIT
kernel configuration). There, the messages are picked up by the Linux audit daemon
(auditd) and logged in the /var/log/audit/audit.log file. Additional handling rules
can be defined through the audit dispatcher process (audisp), which picks up audit events
and dispatches them to one or more separate processes. This method is used, for instance,
for the SELinux troubleshooting daemon (setroubleshootd), an optional service to
provide help with troubleshooting SELinux events.
The audit event flow is shown in this diagram:
Flow of audit events generated by SELinux
When SELinux is enabled, it will log (almost) every permission check that was denied.
When Linux auditing is enabled, these denials are logged by the audit daemon in the
audit.log file. If not, the events are stored in the Linux kernel message buffer, which can
be consulted through the dmesg command and is often also captured through the system
logger.
[ 43 ]
Understanding SELinux Decisions and Logging
If the SELinux troubleshooting daemon is installed (part of the setroubleshoot-server
package in RHEL), then the audit daemon will, alongside its logging, also dispatch the
events through the audit dispatch system towards the sedispatch command. This
command will further handle the event and send it through D-Bus (a system bus
implementation popular on Linux systems) to the SELinux troubleshooting daemon. This
daemon will analyze the event and might suggest one or more fixes to the administrator.
We will cover the SELinux troubleshooting daemon later in this chapter.
Whenever SELinux verifies a particular access, it does not always go over the entire policy.
Instead, it has an access vector cache (AVC), in which it stores the results of previous access
attempts. This cache ensures that SELinux can quickly react to activities without a huge
performance impact. The abbreviation of this cache is used as the message type for most
SELinux events, as we can see in the following example:
type=AVC msg=audit(1470312632.027:4702304): avc: denied { append }
for pid=14352 comm="rsyslogd" name="oracle_audit.log" dev="dm-2"
ino=387512
scontext=system_u:system_r:syslogd_t:s0
tcontext=system_u:object_r:usr_t:s0 tclass=file permissive=0
The AVC cache can be slightly tuned, by setting the size of the cache. This is handled by the
/sys/fs/selinux/avc/cache_threshold pseudo-file. For instance, to increase the cache
size to 768 (the default is 512), the following command would be used:
# echo 768 > /sys/fs/selinux/avc/cache_threshold
The current AVC hash statistics can be read through the hash_stats pseudo-file:
# cat /sys/fs/selinux/avc/hash_stats
entries: 510
buckets used: 287/512
longest chain: 6
If administrators suspect that lower system performance is due to SELinux, it is advised to
look at the longest chain output in hash_stats. If it is longer than 10, then some
performance impact can be expected, and updating the cache size might help.
Any permission that needs to be checked is represented as an access vector, and the cache is
then consulted to see whether that particular permission has been checked before or not. If
it has, then the decision is taken from the cache; otherwise, the policy itself is consulted and
the cache updated. This inner working of SELinux is less relevant to most administrators,
but at least now we know where the term AVC comes from.
[ 44 ]
Understanding SELinux Decisions and Logging
Uncovering more logging
There is an important SELinux policy directive that also takes part in the AVC, and that is
dontaudit. A dontaudit rule in the SELinux policy tells SELinux that a particular access
denial should not be logged. This is the only example where SELinux won't log a denial–the
SELinux policy writer has explicitly disabled auditing the events. This is usually done to
remove clutter from the logs and hide cosmetic denials that have no influence on the
security of the system.
The seinfo utility can tell us how many of these rules as well as its sibling rule
auditallow (log events even though they are allowed by the policy) are currently active:
# seinfo --stats | grep -i audit
Auditallow:
152 Dontaudit:
8381
Luckily, these dontaudit rules can be disabled at will. Through the following semodule
command, these rules are removed from the active policy:
# semodule --disable_dontaudit --build
The arguments can also be abbreviated to -D and -B respectively. To re-enable the
dontaudit rules, just rebuild the policy like so:
# semodule -B
Disabling the dontaudit rules can sometimes help in troubleshooting failures that do not
result in any useful audit event being logged. Generally speaking though, audit events that
policy writers mark as cosmetic are not the cause of a failure.
Configuring Linux auditing
SELinux will try to use the audit subsystem when available and will fall back to the regular
system logging when it isn't. This can either be because the Linux kernel audit subsystem is
not configured or because the Linux audit daemon itself is not running.
[ 45 ]
Understanding SELinux Decisions and Logging
For the Linux audit, we usually do not need to configure anything as SELinux AVC denials
are logged by default. The denials will be shown in the audit log file
(/var/log/audit/audit.log), usually together with the system call that triggered it:
time->Thu Aug 4 08:28:57 2016
type=SYSCALL msg=audit(1470313737.195:322): arch=c000003e
syscall=105 success=yes exit=0 a0=0 a1=7f9c3fdde1d0
a2=800020 a3=7f9c37ae92e0 items=0 ppid=14542 pid=14544
auid=1001 uid=1001 gid=1001 euid=0 suid=0 fsuid=0 egid=1001
sgid=1001 fsgid=1001 tty=pts0 ses=6 comm="su"
exe="/usr/bin/su" subj=user_u:user_r:user_t:s0 key=(null)
type=AVC msg=audit(1470313737.195:322): avc: denied { setuid }
for
pid=14544 comm="su" capability=7
context=user_u:user_r:user_t:s0
tcontext=user_u:user_r:user_t:s0 tclass=capability
The target log file for the audit system can be configured through the log_file parameter
in /etc/audit/auditd.conf.
To enable remote audit logging (to centralize audit events from multiple hosts on a single
system), you have the option of either enabling syslog forwarding or enabling the audispremote plugin.
With syslog forwarding, the audit dispatch daemon is configured to send audit events to
the local system logger as well. It is then up to the administrator to configure the local
system logger to pass on events towards a remote system.
Edit the /etc/audisp/plugins.d/syslog.conf file, and set active to yes:
# vi /etc/audisp/plugins.d/syslog.conf
active = yes
direction = out
path = builtin_syslog
type = builtin
args = LOG_INFO
format = string
Using the system logger to centralize audit events might not be the best option though, as
system loggers generally use unencrypted, and often not even guaranteed, data delivery.
With the audisp-remote plugin, audit events can be sent encrypted and with guaranteed
delivery to a remote auditd server.
[ 46 ]
Understanding SELinux Decisions and Logging
First, configure the audit daemon on the target server to accept audit logs from remote hosts
by enabling the audit daemon to listen on port 60:
# vi /etc/audit/auditd.conf
tcp_listen_port = 60
Next, configure the audisp-remote plugin to connect to the target server's audit daemon:
# vi /etc/audisp/audisp-remote.conf
remote_server = <targethostname>
port = 60
Finally, enable the audisp-remote plugin:
# vi /etc/audisp/plugins.d/au-remote.conf
active = yes
The audisp-remote plugin is offered through the audispd-plugins package in RHEL or
through the standard sys-process/audit package in Gentoo.
It is recommended you use the Linux audit subsystem at all times. Not only does it
integrate nicely with troubleshooting utilities, it also allows administrators to use the audit
tools to query the audit logs or even generate reports, such as with aureport:
# aureport --avc --start recent
AVC Report
========================================================
# date time comm subj syscall class permission obj event
========================================================
...
12. 08/04/2016 09:00:38 su user_u:user_r:user_t:s0 105 capability
setuid user_u:user_r:user_t:s0 denied 376
Configuring the local system logger
When auditing is not enabled, or the Linux audit daemon is not running, then the SELinux
events will be captured by the system logger through the kernel logging facility (kern.*).
Most system loggers will save these kernel log events in a general log file, such as
/var/log/messages.
[ 47 ]
Understanding SELinux Decisions and Logging
We can configure the system logger to direct SELinux AVC messages into its own log file,
such as /var/log/avc.log. For instance, with the syslog-ng system logger, the
configuration could be as follows:
source kernsrc { file("/proc/kmsg"); };
destination avc { file("/var/log/avc.log"); };
filter f_avc { message(".*avc: .*"); };
log { source(kernsrc); filter(f_avc); destination(avc); };
For the rsyslog system logger, the rule could look like so:
:msg, contains, "avc: "
-/var/log/avc.log
When SELinux logging is handled through the local system logger, an easy method to
quickly obtain the latest AVC denials (or other messages) is through the dmesg command:
# dmesg | grep avc | tail
Be aware though that unlike the audit logs, many systems allow the dmesg content to be
read by regular users. This might result in some information leakage to untrusted users. For
this reason, some SELinux policies do not allow regular users to access the kernel ring
buffer (and as such use dmesg) unless the user_dmesg SELinux boolean is set to on:
# setsebool user_dmesg on
The user_dmesg SELinux boolean is not available on RHEL though. There, only the
standard unconfined user type as well as the administrative user type have access to the
kernel ring buffer. To prevent other users from reading this information, they need to be
mapped to non-administrative SELinux users, such as user_u or (x)guest_u.
Reading SELinux denials
The one thing every one of us will have to do several times with SELinux systems is to read
and interpret SELinux denial information. When SELinux prohibits an access and there is
no dontaudit rule in place to hide it, SELinux will log it. If nothing is logged, it was
probably not SELinux that was the culprit of the failure. Remember, SELinux comes after
Linux DAC checks, so if a regular permission doesn't allow a certain activity, then SELinux
is never consulted.
[ 48 ]
Understanding SELinux Decisions and Logging
SELinux denial messages are logged the moment SELinux prevents some access from
occurring. When SELinux is in the enforcing mode, the application usually returns a
Permission denied error, although sometimes it might be a bit more obscure. For example,
the following attempt of an unprivileged user using su to switch to root shows a different
error:
$ su Password: (correct password given)
su: incorrect password
Most of the time, though, the error is a permission error:
$ ls /proc/1
ls: cannot open directory /proc/1: Permission denied
# ls -ldZ /proc/1
dr-xr-xr-x. root root system_u:system_r:init_t:s0
/proc/1
So, what does a denial message look like? The following command output shows a denial
from the audit subsystem, which we can query through the ausearch command:
# ausearch -m avc -ts recent
---time->Thu Aug 4 09:00:38 2016
type=AVC msg=audit(1470315638.218:376): avc: denied { search }
for pid=5005 comm="dnsmasq" name="net" dev="proc" ino=5403
scontext=system_u:system_r:dnsmasq_t
tcontext=system_u:object_r:sysctl_net_t tclass=dir permissive=0
Let's break up this denial into its individual components. The following table gives more
information about each part of the preceding denials. As an administrator, knowing how to
read denials is extremely important, so take enough time for this:
Field name
Description
Example
SELinux
action
The action that SELinux denied
took or would take if run
in the enforcing mode.
This is usually denied,
although some actions
are explicitly marked to
be audited as well and
would result in
granted.
[ 49 ]
Understanding SELinux Decisions and Logging
Permissions
{ search }
The permissions that
were checked (action
performed by the
process). This usually is a
single permission,
although it can
sometimes be a set of
permissions (for
example, read write).
Process ID
The ID of the process
that was performing the
action.
for pid=5005
comm="dnsmasq"
Process name The process name
(command). It doesn't
display any arguments to
the command though.
Target name
The name of the target
(resource) that the
process is performing an
action on. If the target is
a file, then the name is
usually the filename or
directory.
name="net"
Target device The device on which the dev="proc"
target resource resides.
Together with the next
field (inode number) this
allows us to uniquely
identify the resource on a
system.
Target file
inode
number
The inode number of the ino=5403
target file or directory.
Together with the device,
this allows us to find the
file on the file system.
Source
context
The context in which the
process resides (the
domain of the process).
scontext=system_u:system_r:dnsmasq_t
[ 50 ]
Understanding SELinux Decisions and Logging
Target
context
The context of the target
resource.
Object class
tclass=dir
The class of the target
object, for instance, a
directory, file, socket,
node, pipe, file
descriptor, file system, or
capability.
Permissive
mode
The mode in which the
domain was when the
action was executed. If
set to 0, then SELinux
was in the enforcing
mode, otherwise it was
permissive.
This field is available
since Linux kernel 3.16.
tcontext=system_u:object_r:sysctl_net_t
permissive=0
The previous denial can be read as follows:
SELinux has denied the search operation by the dnsmasq process (with PID 5005) against
the net directory (with inode 5403) within the proc device. The dnsmasq process ran with
the system_u:system_r:dnsmasq_t label, and the net directory had the
system_u:object_r:sysctl_net_t label. SELinux was in the enforcing mode when it
happened.
Some denials have different fields, such as this one:
avc: denied { send_msg } for msgtype=method_call
interface=org.gnome.DisplayManager.Settings
member=GetValue dest=org.gnome.DisplayManager
spid=3705 tpid=2864
scontext=unconfined_u:unconfined_r:unconfined_t:s0-s0:c0.c1023
tcontext=system_u:system_r:xdm_t:s0-s0:c0.c1023
tclass=dbus permissive=0
[ 51 ]
Understanding SELinux Decisions and Logging
Although it has a few different fields, it is still readable and can be interpreted as follows:
SELinux has denied the process with PID 3705 to invoke a D-Bus remote method call (the
GetValue method of the org.gnome.DisplayManager.Settings interface) against the
org.gnome.DisplayManager implementation offered by the process with PID 2864. The
source process ran with the unconfined_u:unconfined_r:unconfined_t:s0s0.c0.c1023 label, and the target process with the system_u:system_r:xdm_t:s0s0:c0.c1023 label.
Depending on the action and the target class, SELinux uses different fields to give all the
information we need to troubleshoot a problem. Consider the following denial:
avc: denied { name_bind } for pid=23849
comm="postgres" src=6030
scontext=system_u:system_r:postgresql_t
tcontext=system_u:object_r:unreserved_port_t
tclass=tcp_socket permissive=0
The preceding denial came up because the PostgreSQL database was configured to listen on
a non-default port (6030 instead of the default 5432).
Identifying the problem is a matter of understanding how the operations work, and
properly reading the denials. The preceding D-Bus denial is difficult to troubleshoot if we
do not know how D-Bus works (or how it uses message types, members, and interfaces in
its underlying protocols). For troubleshooting, the denial logs give us enough to get us
started. It gives a clear idea what was denied.
It is wrong to immediately consider allowing the specific action (by adding an allow rule to
the SELinux policy as described in Chapter 8, Working with SELinux Policies) because other
options exist and are usually better, such as these:
Providing the right label on the target resource (usually the case when the target
is a non-default port, non-default location, and so on)
Switching booleans (flags that manipulate the SELinux policy) to allow additional
privileges
Providing the right label on the source process (often the case when the acting
application is not installed by the distribution package manager)
Using the application as intended instead of through other means (as SELinux
only allows expected behavior), such as starting a daemon through a service (init
script or systemd unit) instead of through a command-line operation
[ 52 ]
Understanding SELinux Decisions and Logging
Other SELinux-related event types
Although most of the SELinux log events are AVC related, they aren't the sole event types
an administrator will have to deal with. Most audit events will show SELinux information
as part of the event even though SELinux has little to do with the event itself. But a few
audit event types are directly concerned with SELinux.
Looking through all possible audit event types:
A full list of all possible audit events can be found in the linux/audit.h
header file available in /usr/include (installed through the kernelheaders package in RHEL).
USER_AVC
The USER_AVC event is similar to the regular AVC audit events, but now the source is a user
space object manager. These are applications that use SELinux policy rules, but they enforce
these rules themselves rather than through the kernel.
The following example is such an event, generated by D-Bus:
type=USER_AVC msg=audit(1467890899.875:266): pid=693 uid=81
auid=4294967295 ses=4294967295
subj=system_u:system_r:system_dbusd_t:s0-s0:c0.c1023
msg='avc: denied { acquire_svc }
for service=org.freedesktop.resolve1 spid=1434
scontext=system_u:system_r:systemd_resolved_t:s0
tcontext=system_u:system_r:system_dbusd_t:s0-s0:c0.c1023
tclass=dbus exe="/usr/bin/dbus-daemon" sauid=81
hostname=? addr=? terminal=?'
The event has two parts. Everything up to the msg= string is information about the user
space object manager that generated the event. The true event itself is stored within the
msg= part and includes similar fields as we already know from regular AVCs.
[ 53 ]
Understanding SELinux Decisions and Logging
SELINUX_ERR
The SELINUX_ERR event comes up when SELinux is asked to do something that not just
violates an access control, but actually violates the policy. It cannot be resolved by SELinux
policy writers by just allowing the operation. These events usually point to a misuse of
applications and services that the policy is not tailored to accomplish:
type=SELINUX_ERR msg=audit(1387729595.732:156): security_compute_sid:
invalid context unconfined_u:system_r:hddtemp_t:s0-s0:c0.c1023 for
scontext=unconfined_u:unconfined_r:unconfined_t:s0-s0:c0.c1023
tcontext=system_u:object_r:hddtemp_exec_t:s0 tclass=process
In the preceding example, a user (running in the unconfined_t domain) was executing
hddtemp (with hddtemp_exec_t as the label), and the policy wanted to transition to the
hddtemp_t domain. However, that resulted in a full context of
unconfined_u:system_r:hddtemp_t:s0-s0:c0.c1023, which is not a valid context.
The unconfined_u SELinux user is not meant to use the system_r role.
MAC_POLICY_LOAD
The MAC_POLICY_LOAD event occurs whenever the system loads a new SELinux policy in
memory. This occurs when the administrator loads a new or updated SELinux policy
module, rebuilds the policy with the dontaudit rules disabled, or toggles a SELinux
boolean that needs to be persisted across reboots:
type=MAC_POLICY_LOAD msg=audit(1470381810.215:178): policy loaded
auid=1001 ses=2
When a MAC_POLICY_LOAD event occurs, it might be followed by a
USER_MAC_POLICY_LOAD event. This is when a user space object manager detects that the
policy was updated and has taken action. Note that not all user space object managers will
send out this event: some object managers will query the live policy and as such do not need
to take any action when a new policy is loaded.
[ 54 ]
Understanding SELinux Decisions and Logging
MAC_CONFIG_CHANGE
When a SELinux boolean is changed but not persisted, then a MAC_CONFIG_CHANGE event
will be dispatched. This tells the administrator that the active policy has been instructed to
change its behavior slightly, but within the bounds of the existing loaded policy:
type=MAC_CONFIG_CHANGE msg=audit(1470381810.200:177):
bool=user_ping val=0 old_val=1 auid=1001 ses=2
In the preceding example, the user_ping SELinux boolean was changed from the value 1
(on) to 0 (off).
MAC_STATUS
The MAC_STATUS event is displayed when the state of SELinux has been changed. For
instance, when an administrator uses setenforce 0 to put SELinux in the permissive
mode, then the following event occurs:
type=SYSCALL msg=audit(1470383274.576:74): arch=c000003e syscall=1
success=yes exit=1 a0=3 a1=7ffe4d5ee270 a2=1 a3=7ffe4d5edff0
items=0 ppid=8977 pid=9226 auid=0 uid=0 gid=0 euid=0 suid=0
fsuid=0 egid=0 sgid=0 fsgid=0 tty=tty1 ses=1 comm="setenforce"
exe="/usr/sbin/setenforce"
subj=unconfined_u:unconfined_r:unconfined_t:s0-s0:c0.c1023
key=(null)
type=MAC_STATUS msg=audit(1470383274.576:74): enforcing=0
old_enforcing=1 auid=0 ses=1
Here, the SYSCALL event is displayed alongside the event as it offers more detail about the
action: who changed the state, through which command, and so on. When available, the
ausearch command will group all related events (including the SYSCALL event) to give the
administrator a full view of what has happened.
NetLabel events
NetLabel is a Linux kernel project to support labeled network packets, allowing security
contexts such as SELinux contexts to be passed on between hosts. One of the protocols that
the NetLabel implementation supports in Linux is Common IP Security Option (CIPSO)
labeling, which we will cover in Chapter 5, Controlling Network Communications.
[ 55 ]
Understanding SELinux Decisions and Logging
The following audit events are related to the NetLabel capability:
The MAC_UNLBL_STCADD and MAC_UNLBL_STCDEL events are triggered when a
static label is added or removed, respectively. Static labeling means that if a
packet is received or sent and it does not have a label, then this static label is
assigned as a sort of default.
The MAC_MAP_ADD and MAC_MAP_DEL events are triggered when a mapping
between a labeling protocol (such as CIPSO) and its parameters against a LSM
(SELinux) domain is added or removed from the configuration, respectively.
The MAC_CIPSOV4_ADD and MAC_CIPSOV4_DEL events are triggered when a
CIPSO (IPv4) configuration is added or removed, respectively.
Labeled IPsec events
Another labeled network protocol that Linux supports is labeled IPsec. Through this, the
SELinux context of the source process (which is communicating over the IPsec tunnel
towards a target resource) is known by the IPsec daemons on both ends of the tunnel.
Furthermore, SELinux will contain rules about which domains can communicate over an
IPsec tunnel and which domains are allowed to communicate with each other networkwise.
The following audit events are related to IPsec:
The MAC_IPSEC_ADDSA and MAC_IPSEC_DELSA events are used when a security
association is added or removed (new IPsec tunnels are defined or deleted),
respectively.
The MAC_IPSEC_ADDSPD and MAC_IPSEC_DELSPD events are used when a
security policy definition is added or removed, respectively. Security policies
generally describe whether network packets need to be handled by IPsec and, if
so, through which security association.
The MAC_IPSEC_EVENT event is a generic event for IPsec audit messages.
SELinux support for labeled IPsec is described in Chapter 5, Controlling Network
Communications.
[ 56 ]
Understanding SELinux Decisions and Logging
Using ausearch
The ausearch command, which is part of the audit package, is a frequently used
command for querying the audit events stored on the system. We already briefly covered it
when taking a first look at an AVC denial, but only briefly mentioning it won't do it justice.
With ausearch, we can search for events that originated after a particular time period. We
used the -ts recent (time start) option in the past, which displays events that occurred
during the past 10 minutes. The argument can also be a timestamp. Other supported
shorthand values are:
today: This means starting at 1 second past midnight on the current day
yesterday: This means starting at 1 second past midnight the previous day
this-week, this-month or this-year: These mean starting at 1 second past
midnight on the first day of the current week, current month, or current year,
respectively
checkpoint: This uses the timestamp mentioned in a checkpoint.txt file
The use of checkpoint is particularly useful when troubleshooting SELinux issues as it
allows us to show the denials (and other SELinux events) since the last invocation of the
ausearch command:
# ausearch --checkpoint /root/ausearch-checkpoint.txt -ts checkpoint
This allows administrators to perform minor tweaks and reproduce the problem and only
see the events since then, instead of going through all events over and over again.
By default, the ausearch command displays all the events that occur in the audit log. On
busy systems, this can be very verbose and result in unwanted events to be displayed as
well. Luckily, users can limit the type of events that are queried through the ausearch
command.
For SELinux troubleshooting, using avc, user_avc, and selinux_err limits the events
nicely to those needed for the job:
# ausearch -m avc,user_avc,selinux_err -ts recent
[ 57 ]
Understanding SELinux Decisions and Logging
If the numeric display of fields such as the user IDs and timestamps is too confusing, then it
is possible for ausearch to look up and translate user IDs to usernames and timestamps to
formatted time fields. Add the -i option to ausearch to have it interpret these fields and
display the interpreted values instead.
Getting help with denials
On some distributions, additional support tools are available that help us identify the cause
of a denial. These tools have some knowledge of the common mistakes (for instance, setting
the right context on application files in order for the web server to be able to read them).
Other distributions require us to use our experience to make proper decisions, supporting
us through the distribution mailing lists, bug tracking sites, and other cooperation locations,
for example, IRC.
Troubleshooting with setroubleshoot
In Fedora and RHEL, additional tools are present that help us troubleshoot denials. The
tools work together to catch a denial, look for a plausible solution, and inform the
administrator about the denial and its suggested resolutions.
When used on a graphical workstation, denials can even result in popups that ask the
administrator to review them immediately. Install the setroubleshoot package to get this
support. On servers without a graphical environment, administrators can see the
information in the system logs or can even configure the system to send out SELinux denial
messages via e-mail. Install the setroubleshoot-server package to get this support.
Under the hood, it is the audit daemon that triggers its audit event dispatcher application
(audispd). This application supports plugins, something the SELinux folks gratefully
implemented. They built an application called sedispatch that will act as a plugin for
audispd. The sedispatch application checks whether the audit event is a SELinux denial
and, if so, forwards the event to D-Bus. D-Bus then forwards the event to the
setroubleshootd application (or launches the application if it isn't running yet), which
analyzes the denial and prepares feedback for the administrator.
[ 58 ]
Understanding SELinux Decisions and Logging
When running on a workstation, seapplet is triggered to show a popup on the
administrator workstation:
Example popup when a SELinux security alert comes up
The administrator can then select Show to view more details. But the information is readily
available even without graphical support. The analyzed feedback is stored on the file
system, and a message is displayed in the system logs:
Jun 03 10:41:48 localhost setroubleshoot: SELinux is preventing
/usr/sbin/httpd from 'getattr' accesses on the directory
/var/www/html/infocenter. For complete SELinux messages, run
sealert -l 26d2a1c3-a134-452e-c69b-4ef233e20909
We can then look at the complete explanation through the sealert command as
mentioned in the log:
# sealert -l 26d2a1c3-a134-452e-c69b-4ef233e20909
SELinux is preventing /usr/sbin/httpd from getattr access on the
directory infocenter
***** Plugin restorecon (99.5 confidence) suggests *****
If you want to fix the label.
/var/www/html/infocenter default label should be httpd_sys_content_t.
Then you can run restorecon.
Do
# /sbin/restorecon -v /var/www/html/infocenter
Additional Information:
Source Context
system_u:system_r:httpd_t:s0
Target Context
unconfined_u:object_r:user_home_t:s0
Target Objects
infocenter [ dir ]
Source
httpd
Source Path
/usr/sbin/httpd
Port
<Unknown>
Host
<Unknown>
Source RPM Packages
httpd-2.4.6-40.el7.x86_64
Target RPM Packages
Policy RPM
selinux-policy-3.13.1-23.el7.noarch
Selinux Enabled
True
[ 59 ]
Understanding SELinux Decisions and Logging
Policy Type
Enforcing Mode
Host Name
Platform
x86_64
Alert Count
First Seen
Last Seen
targeted
Enforcing
localhost.localdomain
Linux localhost.localdomain
3.10.0-327.13.1.el7.x86_64 #1
SMP Fri Jun 3 11:36:42 UTC 2016 x86_64
2
2016-06-03 10:33:21 EDT
2016-06-03 10:41:48 EDT
The sealert application is a command-line application that parses the information stored
by the setroubleshoot daemon (in /var/lib/setroubleshoot).
It will provide us with a set of options to resolve the denial. In case of the Apache-related
denial shown earlier, sealert gives us one option with a certain confidence score.
Depending on the problem, multiple options can be shown.
As we can see from this example, the setroubleshoot application itself uses plugins to
analyze denials. These plugins (offered through the setroubleshoot-plugins package)
look at a denial to check whether they match a particular, well-known use case (for
example, when booleans need to be changed or when a target context is wrong) and give
feedback to setroubleshoot about how certain the plugin is so that this denial can be
resolved through its recommended method.
Sending e-mails when SELinux denials occur
Once a system is fine-tuned and denials no longer occur regularly, administrators can opt to
have setroubleshootd send e-mails whenever a new denial comes up. This truly brings
SELinux's host intrusion-detection/prevention capabilities on top, as administrators do not
need to constantly watch their logs for information.
Open /etc/setroubleshoot/setroubleshoot.conf in a text editor such as vi and
locate the [email] section. Update the parameters to match the local mailing
infrastructure:
# vi /etc/setroubleshoot/setroubleshoot.conf
...
[email]
recipients_filepath = /var/lib/setroubleshoot/email_alert_recipients
smtp_port = 25
smtp_host = localhost
from_address = selinux@infra.example.com
subject = [infra] SELinux Alert for host infra.example.com
[ 60 ]
Understanding SELinux Decisions and Logging
Next, edit the email_alert_recipients file (as referenced through the
recipients_filepath variable), and add the e-mail addresses that need to be notified
when a SELinux alert comes up.
Finally, restart the D-Bus daemon (as setroubleshootd is handled through D-Bus):
# systemctl restart dbus
When working on a non-systemd system, use this instead:
# service dbus restart
Using audit2why
If setroubleshoot and sealert are not available in the Linux distribution, we can still
get some information about a denial. Although it isn't as extensible as the plugins offered by
setroubleshoot, the audit2why utility (which is short for audit2allow -w and is
provided by the policycoreutils-python package in RHEL) does provide some
feedback on a denial. Sadly, it isn't always right in its deduction.
Let us try it out against the same denial for which we used sealert:
# ausearch -m avc -ts today | audit2why
type=AVC msg=audit(1371204434.608:475): avc: denied { getattr }
for pid=1376 comm="httpd" path="/var/www/html/infocenter"
dev="dm-1" ino=1183070 scontext=system_u:system_r:httpd_t:s0
tcontext=unconfined_u:object_r:user_home_t:s0 tclass=dir
Was caused by:
The boolean httpd_read_user_content was set incorrectly.
Description:
Determine whether httpd can read generic user home content files.
Allow access by executing:
# setsebool -P httpd_read_user_content 1
The audit2why utility here didn't consider that the context of the target location was
wrong, and it suggests us to enable the web server to read user content.
[ 61 ]
Understanding SELinux Decisions and Logging
Interacting with systemd-journal
Alongside the Linux audit system, which is used for most of the SELinux logging and
events, information can also be gathered through other logging systems. Systemd's journal,
for instance, captures SELinux context information with the events and allows
administrators to use this information while querying the journal.
For instance, to see the events in systemd-journal that are generated by an application
associated with the user_u:user_r:user_t:s0 context, the following command can be
used:
# journalctl _SELINUX_CONTEXT="user_u:user_r:user_t:s0"
-- Logs begin at Fri 2016-08-05 03:12:39 EDT, end at Fri
2016-08-05 05:46:36 EDT. -Aug 05 04:31:25 selinuxtest su[11586]: pam_unix(su-l:auth):
authentication failure; logname=lisa uid=1001 euid=0 tty=pts/0
ruser=lisa rhost= user=root
Aug 05 04:31:25 selinuxtest su[11586]: pam_succeed_if(su-l:auth):
requirement "uid >= 1000" not met by user "root"
Aug 05 04:31:27 selinuxtest su[11586]: FAILED SU (to root)
lisa on pts/0
Because systemd-journal adds the SELinux context of the originating application, it is
harder for malicious applications to generate fake events. Whereas regular system loggers
just capture string events, systemd-journal retrieves the SELinux context from the
system.
Making fake events (such as authentication events originating from a service that does not
have any authentication services) might still be possible, but through the use of the SELinux
context, it is easy to group events across applications and have a higher guarantee that
events come from a particular application.
When the bash-completion application is installed, we can even use it to see which
SELinux contexts are already present in the systemd-journal logs, which makes querying
the journal logs much easier:
# journalctl _SELINUX_CONTEXT=<tab><tab>
system_u:system_r:audisp_t:s0 system_u:system_r:rpcd_t:s0
system_u:system_r:auditd_t:s0 system_u:system_r:sshd_t:s0-s0:c0.c1023
...
system_u:system_r:rhnsd_t:s0 user_u:user_r:user_t:s0
[ 62 ]
Understanding SELinux Decisions and Logging
But systemd-journal goes further than just capturing the SELinux contexts. There is
decent integration between systemd-journal and setroubleshoot (which we talked
about previously). When debugging an issue with, say, Apache, we can ask journalctl to
show all events related to the httpd binary–and it will include the SELinux events captured
by setroubleshoot as well.
Using common sense
Common sense is not easy to document, but reading a denial often leads to the right
solution when we have some experience with file labels (and what they are used for). If we
look at the previous denial example (the one about /var/www/html/infocenter), then
seeing that its context is user_home_t should ring a bell. The user_home_t context is used
for end-user home files, not system files inside /var.
One way to make sure that the context of the target resource is correct is to verify it with
matchpathcon (provided through the libselinux-utils package in RHEL or syslibs/libselinux in Gentoo). This utility returns the context as it should be according to
the SELinux policy:
# matchpathcon /var/www/html/infocenter
/var/www/html/infocenter
system_u:object_r:httpd_sys_content_t:s0
Performing this for denials related to files and directories might help in finding a proper
solution quickly.
Furthermore, many domains have specific manual pages that inform the reader about types
that are commonly used for each domain as well as how to deal with the domain in more
detail (for example, the available booleans, common mistakes made, and so on). These
manual pages start with the main service and are suffixed with _selinux:
$ man ftpd_selinux
[ 63 ]
Understanding SELinux Decisions and Logging
In most cases, the approach to handling denials can be best described as follows:
Is the target resource label (such as the file label) the right one? Verify this with
matchpathcon, or compare with labels of similar resources that do not result in
denials.
Is the source label (the domain) the expected one? An SSH daemon should run in
the sshd_t domain, not the init_t domain. If this is not the case, make sure that
the labels of the application itself (such as its executable binary) are correct
(again, use matchpathcon for this).
Is the denial one that might be optional? There might be a SELinux boolean to
allow the rule. This will be reported by setroubleshootd if it is the case, and
usually, the manual page of the domain (such as httpd_selinux) will also cover
the available SELinux booleans. Querying SELinux booleans is covered in
Chapter 8, Working with SELinux Policies.
Changing file labels will be discussed in more detail in Chapter 4, Process Domains and FileLevel Access Controls.
Summary
In this chapter, we saw how to enable and disable SELinux both on a complete system level
as well as a per-service level using various methods: kernel boot options, SELinux
configuration file, or plain commands. One of the commands is semanage permissive,
which can disable SELinux protections for a single service.
Next, we saw where SELinux logs its events and how to interpret them, which is one of the
most important capabilities of an administrator dealing with SELinux. To assist us with this
interpretation, there are tools such as setroubleshoot, sealert, and audit2why. We also
dived into several utilities related to Linux auditing to help us sift through various events.
In the next chapter, we will look at the first administrative task on SELinux systems:
managing user accounts, their associated SELinux roles, and security clearances for the
resources on the system.
[ 64 ]
3
Managing User Logins
When we log in to a SELinux-enabled system, we are assigned a default context to work in.
This context contains a SELinux user, a SELinux role, a domain, and optionally, a sensitivity
range.
In this chapter, we will:
Define users that have sufficient rights to do their jobs, ranging from regular
users with strict SELinux protections to fully privileged, administrative users
with few SELinux protections
Create and assign categories and sensitivities
Assign roles to users and use various tools to switch roles
We will end the chapter by learning how SELinux integrates with the Linux authentication
process.
User-oriented SELinux contexts
Once logged in to a system, our user will run inside a certain context. This user context
defines the rights and privileges that we, as a user, have on the system. The command to
obtain current user information, id, also supports SELinux context information:
$ id -Z
unconfined_u:unconfined_r:unconfined_t
Managing User Logins
On SELinux systems with a targeted policy type, chances are very high that all users are
logged in as unconfined_u (the first part of the context). On more restricted systems, the
user can be user_u (regular restricted users), staff_u (operators), sysadm_u (system
administrators), or any of the other SELinux user types.
The SELinux user defines the roles that the user can switch to. SELinux roles define the
application domains that the user can use. By default, a fixed number of SELinux users are
available on the system, but administrators can create additional SELinux users. It is also
the administrator's task to assign Linux logins to SELinux users.
SELinux roles on the other hand cannot be created through administrative commands. For
this, the SELinux policy needs to be enhanced with additional rules that create the role. To
view the currently available roles, use seinfo:
# seinfo --role
Roles: 14
auditadm_r
dbadm_r
...
unconfined_r
Before looking at SELinux users and roles, let's look at the various complexity levels that
policies can reflect since they will direct our choice of the right SELinux user and role later
on. For instance, they will guide us in differentiating between a coarse-grained user (such as
sysadm_u) and a functionality-oriented user (such as dbadm_u).
Understanding domain complexity
SELinux is able to provide full system confinement: each and every application runs in its
own restricted environment that it cannot break out of. But that requires fine-grained
policies that are developed as quickly as the new releases of all the applications that they
confine.
[ 66 ]
Managing User Logins
The following diagram shows this relation between the policies, the domain scope towards
multiple processes, and the development effort. As an example, postfix_cleanup_t is
shown as a very fine-grained policy domain (which is used for the cleanup process involved
in the Postfix mail infrastructure) whereas the unconfined_t domain is shown in the
example as a very broad, almost unlimited access domain:
Relationship between domain development complexity and the associated SELinux access controls
Policy complexity can be roughly categorized as follows:
Fine-grained policy, with separate domains for individual applications and
commands
Policy on application level
Category-wide policy, reusable for multiple applications implementing similar
functionality
Coarse-grained policy sets, including unconfined system access
[ 67 ]
Managing User Logins
Let's discuss policy complexity in depth:
Fine-grained policies: These policies have the advantage that they really attempt
to restrict applications as much as possible. And through that, roles developed
with users and administrators in mind become fine grained as well. The
disadvantage of such policies is that they are hard to maintain, requiring frequent
updates as the application itself evolves. The policies also need to take into
account the impact of the various configuration options that the application
supports:
Such fine-grained policies are not frequently found. An example is the policy
set provided for the Postfix mail infrastructure. Each sub-service of the Postfix
infrastructure has its own domain.
Application-level policies: These use a single domain for an application,
regardless of its sub-components. This balances the requirement for application
confinement versus the maintainability of the application. Such application-level
policies are the most common in most distribution policies.
Category-wide policies: These policies use a single domain definition for a set of
applications that implement the same functionality. This is popular for services
that act very similarly and whose user-role definitions can be described without
really thinking about the specific application:
A popular example of a category-wide policy is the policy for web servers.
Initially written just for the Apache HTTP daemon, the policy has become
reusable for a number of web servers, such as those provided by the Cherokee,
Hiawatha, Nginx, and Lighttpd projects.
Coarse-grained policies: These policies are used for applications or services
whose behavior is very hard to define. End user domains are a good example of
this, as is the unconfined domain, which puts almost no restrictions on what a
domain can do.
Querying for unconfined domains
The freedom in policy complexity results in different policy models being implemented and
supported by different Linux distributions. RHEL for instance focuses its attention on the
targeted policy store, where network-facing services are confined but user activities are
generally not. This is handled by assigning the unconfined_u SELinux user,
unconfined_r SELinux role, and unconfined_t SELinux type to the end users.
[ 68 ]
Managing User Logins
Moving on from the user domains, we also have unconfined process domains for daemons
and other applications. Some of these run in the unconfined_t domain as well, but most of
them run in their own domain even though they are still unconfined.
To find out whether a domain is unconfined, we can query the SELinux policy to show us
those domains that have a SELinux attribute associated with unconfined domains. SELinux
attributes enable us to group multiple SELinux types and assign permissions to them. A
common unconfined attribute type is the unconfined_domain_type attribute. We can
query which SELinux types have this attribute assigned through the seinfo tool:
# seinfo -aunconfined_domain_type -x
unconfined_domain_type
sosreport_t
bootloader_t
...
Administrators cannot switch individual unconfined domains to confined
ones.
SELinux users and roles
Within SELinux systems, the moment a user logs in, the login system checks which SELinux
user his or her login is mapped to. Then, when a SELinux user is found, the system looks up
the role and domain that the user should be in and sets that as the user's context.
Listing SELinux user mappings
When logged in to the system, we can use id -Z to obtain the current SELinux context. For
many users, this context will be unconfined_u:unconfined_r:unconfined_t:s0s0:c0.c1023, regardless of their username. If not that, it will be a context based on one of
sysadm_u, staff_u, or user_u. This is because the majority of Linux distributions will
only provide a limited set of SELinux users by default, aligned with the SELinux roles that
they support.
[ 69 ]
Managing User Logins
When the login process is triggered, a local definition file will be checked to see which
SELinux user is mapped to the Linux account. Let's take a look at the existing login
mappings using semanage login -l. The following output is the default output on a
RHEL system:
# semanage login -l
Login Name
__default__
root
system_u
SELinux User
unconfined_u
unconfined_u
system_u
MLS/MCS Range
s0-s0:c0.c1023
s0-s0:c0.c1023
s0-s0:c0.c1023
Service
*
*
*
In the output, one mapping is shown per line. Each mapping consists of:
The Login Name for which the mapping is applicable
The SELinux User to which the login is mapped
The MLS/MCS Range to which the login is mapped
The Service for which the mapping applies (this is used for local
customizations, which we will tackle later)
The login name can contain a few special values that do not map directly to a single Linux
account:
__default__ is a catchall rule. If none of the other rules match, then the users
are mapped to the SELinux user identified through this line. In the given
example, all users are mapped to the unconfined_u SELinux user, meaning
regular Linux users are hardly confined in their actions. When this isn't meant to
happen, administrators usually map regular logins to restricted SELinux users,
while administrative logins are mapped to the staff_u or sysadm_u SELinux
users.
Login names starting with % will map to groups. This allows administrators to
map a group of people directly to a SELinux user rather than having to manage
the mappings individually.
The system_u line is meant for system processes (non-interactively logged in
Linux accounts). It should never be assigned to end user logins.
When both an individual user mapping and group mapping match, then
the individual user mapping takes precedence. When multiple group
definitions exist, then the first group mapping (in the order that the
semanage login command shows) that matches the user is used.
[ 70 ]
Managing User Logins
In case of an MLS- or MCS-enabled system, the mapping contains information about the
sensitivity range in which the user is allowed to work (MLS/MCS range). This way, two
users might both be mapped to the same restricted SELinux user, but one might only be
allowed to access the low sensitivity (s0) whereas another user might also have access to
higher sensitivities (for example, s1) or different categories.
Mapping logins to SELinux users
Let's use a few examples to show how these mappings work. We'll assume we have a Linux
user called lisa, and we want her account to be mapped to the staff_u SELinux user,
whereas all other users in the users group are mapped to the user_u SELinux user.
We can accomplish this through the semanage login command, using the -a (add)
option:
# semanage login -a -s staff_u lisa
# semanage login -a -s user_u %users
The -s parameter is used to assign the SELinux user, whereas the sensitivity (and
categories) can be handled with the -r parameter. For instance, let's modify (using -m
instead of -a) the recently-created group-based mapping by mapping to the staff_u user
instead and limiting these users to the s0-s0 sensitivity range and c0 to c4 categories:
# semanage login -m -s staff_u -r "s0-s0:c0.c4" %users
The sensitivity range of a login mapping may not exceed the range that is
assigned to the SELinux user. For example, if the staff_u SELinux user
itself would only be granted access to s0-s0:c0.c3, then the previous
command will fail as it is trying to assign a broader access range. We'll
discuss how to define SELinux users and their range later in this chapter.
The changes take effect when a new login occurs, so we should force a logout for these
users. The following command kills all the processes of a user, forcing a logout for that user:
# pkill -KILL -u lisa
[ 71 ]
Managing User Logins
Also, when a user is modified, we should also reset the contexts of that user's home
directory (while that user is not logged in). To accomplish this, use restorecon with the -F
(force reset) and -R (recursively) options, as follows:
# restorecon -RF /home/lisa
Running this command will also reset file contexts that the user has
manually set using tools such as chcon. Define SELinux user mappings up
front, or recursively change only the SELinux user using chcon -R -u.
The chcon application and file contexts are discussed in the next chapter.
To remove a login mapping, use the -d (delete) option. Don't forget to run the restorecon
command afterward:
# semanage login -d lisa
# restorecon -RF /home/lisa
Customizing logins towards services
When login mappings are added using semanage login, they apply to all services. There
is no option in semanage to allow customizing the mappings based on the service.
However, that does not mean it is not possible.
The SELinux user space tools and libraries will consult two configuration files to know
what the mappings are:
The /etc/selinux/targeted/seusers file contains the standard, serviceagnostic mappings. This file is managed by semanage login and should not be
updated through any other means.
The /etc/selinux/targeted/logins directory contains customized
mappings, one file per Linux account. So the custom mapping for the root user
will be in /etc/selinux/targeted/logins/root.
Inside the files for customized mappings, administrators can define, per service, a different
SELinux user to map to. The services are the pluggable authentication module (PAM)
services through which a user can log on.
For instance, to have the root user through SSH be mapped to the user_u SELinux user
rather than his default unconfined_u user, the root file would contain the following:
sshd:user_u:s0
[ 72 ]
Managing User Logins
When querying the current mapping, semanage login will show this customization as
follows:
# semanage login -l
Login Name
SELinux User
MLS/MCS Range
%users
staff_u
s0-s0:c0.c4
__default__
unconfined_u
s0-s0:c0.c1023
root
unconfined_u
s0-s0:c0.c1023
system_u
system_u
s0-s0:c0.c1023
Local customization in /etc/selinux/targeted/logins
root
user_u
s0
Service
*
*
*
*
sshd
Of course, this customization does not need to be as drastic. It can also be used to limit the
MLS/MCS Range through which the user is logged on. For instance, to limit the categories to
c0.c8 (rather than the default c0.c1023 range) you'd use this:
sshd:unconfined_u:s0-s0:c0.c8
Creating SELinux users
By default, only a small number of SELinux users are available to which logins can be
mapped. If we want more control over the Linux accounts and their mappings, we need to
create additional SELinux users.
First, list the current known SELinux users using the semanage user -l command, as
follows:
# semanage user -l
SELinux
Labeling MLS/
User
Prefix
MCS
Level
guest_u
user
s0
root
user
s0
staff_u
user
s0
sysadm_u
system_u
unconfined_u
user_u
xguest_u
user
user
user
user
user
s0
s0
s0
s0
s0
MLS/
MCS
SELinux Roles
Range
s0
guest_r
s0-s0:c0.c1023 staff_r sysadm_r system_r
unconfined_r
s0-s0:c0.c1023 staff_r sysadm_r system_r
unconfined_r
s0-s0:c0.c1023 sysadm_r
s0-s0:c0.c1023 system_r unconfined_r
s0-s0:c0.c1023 system_r unconfined_r
s0
user_r
s0
xguest_r
[ 73 ]
Managing User Logins
Next, create a new SELinux user with semanage user, using the -a (add) option. We need
to give SELinux additional information about this SELinux user, such as:
The default sensitivity (using the -L option) for the SELinux user. This is the
sensitivity that the user starts with.
The security clearance (using the -r option) applicable to the SELinux user. This
is the range that is valid for the user.
The role or roles (using the -R option) that the SELinux user is allowed to have.
In the following example, we're configuring the SELinux user finance_u:
# semanage user -a -L s0 -r "s0-s0:c0.c127" -R user_r finance_u
SELinux roles are enabled through the SELinux user that a Linux account
is mapped to. When an administrator wants to introduce support for
additional roles, he either updates existing SELinux mappings to include
the new role(s) or creates a new SELinux user that has access to the new
role(s).
When the SELinux user is created, its information is made part of the SELinux policy. From
this point onwards, Linux accounts can be mapped to use this SELinux user.
Just like with login mappings, semanage user also accepts the -m option to modify an
existing entry or -d to delete one. For instance, the following command deletes the
finance_u SELinux user:
# semanage user -d finance_u
Separate SELinux users enhance the audit information since SELinux users do not change
during a user's session, whereas the Linux effective user ID can. If the user creates files or
other resources, these resources also inherit the SELinux-user part in their security context.
Listing accessible domains
When creating SELinux users, one of the parameters that needs to be provided is the role or
roles for a SELinux user. Most of the roles are self-explanatory: the dbadm_r role is for
DBAs, while the webadm_r role is for web application infrastructure administrators. If a
role is not clear or an administrator is not certain which accesses are part of a role, he can
still query the SELinux policy for more information.
[ 74 ]
Managing User Logins
As documented earlier, roles define which domains are accessible for the users associated
with the role. We saw that seinfo can show us the available roles, but it can do more. It can
list the domains that are accessible for a role as well, using the -x option:
# seinfo -rdbadm_r -x
dbadm_r
Dominated Roles:
dbadm_r
Types:
qmail_inject_t
dbadm_t
...
user_mail_t
In this example, users that are running with the dbadm_r role as part of their security
context will be able to transition to, for instance, the qmail_inject_t (the domain used to
read e-mail messages and pass those on to the qmail queue) and user_mail_t (the
domain used for generic e-mail-sending command-line applications) domains.
The information provided through the dominated roles is usually not of concern to
administrators. Role dominance, although supported in SELinux core, is not used by Linux
distribution policies. It signifies which (other) roles types are inherited from, but it will
always just show the queried role.
Managing categories
Sensitivity labels and their associated categories are identified through numeric values,
which is great for computers but not that obvious for users. Luckily, the SELinux utilities
support translating the levels and categories to human-readable values, even though they
are still stored as numbers. As a result, almost all tools that are capable of showing contexts
will show the translated rather than numerical values.
The translations are managed through the setrans.conf file, located in
/etc/selinux/targeted. Inside this file, we can name specific values (for example,
s0:c102) or ranges (similar to s0-s0:c1.c127) with a string that is much easier for
administrators to use. However, for translations to be performed, mcstransd—the MCS
translation daemon—needs to run. Not all Linux distributions have it installed by default
though. For RHEL, the mcstrans package needs to be installed first. Don't forget to have it
launched automatically after installation:
# yum install mcstrans
# systemctl enable mcstransd
# systemctl start mcstransd
[ 75 ]
Managing User Logins
Consider our example of the finance_u SELinux user who was allowed access to the
c0.c127 category range. Two of the categories within that range are c102, which we will
tag as Contracts, and c103, which we will tag as Salaries. The c1.c127 range will be
labeled as FinanceData. The following diagram shows the relationship between these
various categories:
Relationship of the example categories and category ranges
To accomplish this, the following should be placed in the setrans.conf file:
s0:c102=Contracts
s0:c103=Salaries
s0-s0:c1.c127=FinanceData
After editing the setrans.conf file, the mcstransd application will need
to be restarted.
These translations are handled by the SELinux utilities, which connect to the mcstransd
daemon through the .setrans-unix socket located in /var/run/setrans to query the
setrans.conf file. If the daemon is not running or the communication with the daemon
fails, the numeric sensitivity and category values are displayed.
For instance, with the daemon running, the output of id -Z is now as follows:
# id -Z
unconfined_u:unconfined_r:unconfined_t:SystemLow-SystemHigh
[ 76 ]
Managing User Logins
We can view the available sensitivities and their human-readable counterparts using the
chcat tool (part of the policycoreutils Python package in RHEL or sysapps/policycoreutils in Gentoo). The following example displays the translations after
adding the finance-related ones:
$ chcat -L
s0
s0-s0:c0.c1023
s0:c0.c1023
s0:c102
s0:c103
s0:c1.c127
SystemLow
SystemLow-SystemHigh
SystemHigh
Contracts
Salaries
FinanceData
The same chcat utility can be used to assign categories to users. For instance, to grant the
Salaries category (assuming it is defined in setrans.conf) to the lisa Linux user, we'd
use the following command:
# chcat -l -- +Salaries lisa
If no SELinux user mapping exists for the given Linux user yet, one will be
added automatically.
Using the preceding command, the Salaries category (c103) is granted to the Linux user
lisa. The user mapping is immediately updated with this information. Again, the lisa
user needs to log out for the changes to take effect.
Handling SELinux roles
We saw how SELinux users define the role(s) that a user can be in. But how does SELinux
enforce which role a user logs on through? And when logged on, how can a user switch his
active role?
Defining allowed SELinux contexts
To select the context that a successfully authenticated user is assigned to, SELinux
introduces the notion of a default context. Based on the context of the tool through which a
user is logged in (or through which it executes commands), the right user context is
selected.
[ 77 ]
Managing User Logins
Inside the /etc/selinux/targeted/contexts directory, a file called
default_contexts exists. Each line in this file starts with the SELinux context information
of the parent process and is then followed by an ordered list of all the contexts that could be
picked based on the role(s) that the user is allowed to be in.
Consider the following line of code for the sshd_t context:
system_r:sshd_t:s0
user_r:user_t:s0 staff_r:staff_t:s0 \
sysadm_r:sysadm_t:s0 \
unconfined_r:unconfined_t:s0
This line of code mentions that when a user logs in through a process running in the
sshd_t domain, the listed roles are checked against the roles of the user. The first role that a
user is assigned that is mentioned in the list is the role (and related domain) that the user is
transitioned to.
For instance, assume we are mapped to a SELinux user that is assigned the staff_r and
sysadm_r roles. In that case, we will log in as staff_r:staff_t since that is the first
match.
However, like the seusers file for the Linux account mappings, the default_contexts
file is a default file that can be overruled through specific customizations. These
customizations are stored in the /etc/selinux/targeted/contexts/users/
subdirectory. These files are named after the SELinux user for which they take effect. This
allows us to assign different contexts for particular SELinux users even if they share the
same roles with other SELinux users. And because SELinux checks the entries per line, we
do not need to copy the entire content of the default_contexts file; only the lines for
those services that we want to implement a deviating configuration for need to be listed.
Let's modify the default contexts so that the dbadm_u SELinux user logs in with the
dbadm_r role (with the dbadm_t type) when logged in through SSH. To do so, use the
sshd_t line, but set dbadm_r:dbadm_t:s0 as the only possible context, and save the result
as /etc/selinux/targeted/contexts/users/dbadm_u:
system_r:sshd_t:s0
dbadm_r:dbadm_t:s0
Validating contexts with getseuser
To validate whether our change succeeded, we can ask SELinux what the result of a context
choice will be without having to parse the files ourselves. This is accomplished through the
getseuser command, which takes two arguments: the Linux user account and the context
of the process that switches the user context.
[ 78 ]
Managing User Logins
The getseuser command is a helper utility offered by the SELinux user
space project, but is not made available on all distributions. RHEL users
for instance will search in vain for the getseuser command.
Here's an example that checks what the context would be for the lisa user when she logs
in through a process running in the sshd_t domain:
# getseuser lisa system_u:system_r:sshd_t
seuser: dbadm_u, level (null)
Context 0
dbadm_u:dbadm_r:dbadm_t
One of the advantages of the getseuser command is that it asks the SELinux code what
the context would be, which not only looks through the default_contexts and
customized files, but also checks whether the target context can be reached or not and that
there are no other constraints that prohibit the change to the context.
Switching roles with newrole
After being successfully authenticated and logged in, users will be assigned the context
through the configuration mentioned previously. If the SELinux user however, has access to
multiple roles, then the Linux user can use the newrole application to transition from one
role to another.
Consider a SELinux system without unconfined domains and where we are, by default,
logged in as the staff_r role. In order to perform administrative tasks, we need to switch
to the sysadm_r administrative role, which we can do with the newrole command (part of
the policycoreutils-newrole package in RHEL or the sys-apps/policycoreutils
package in Gentoo). This command only works when working through a secure terminal,
listed in /etc/securetty:
$ id -Z
staff_u:staff_r:staff_t
$ newrole -r sysadm_r
Password:
$ id -Z
staff_u:sysadm_r:sysadm_t
Notice how the SELinux user remains constant, but the role and domain have changed.
[ 79 ]
Managing User Logins
The newrole command can also be used to transition to a specific sensitivity, as follows:
$ newrole -l s0-s0:c0.c100
When we switch toward another role or sensitivity, a new session is used (with a new shell).
It does not change the context of the current session, nor does it exit from the current
session. We can return from our assigned role and go back to the first session by exiting
(through exit, logout, or Ctrl + D).
Managing role access through sudo
Most administrators use sudo for privilege delegation: allowing users to run certain
commands in a more privileged context than the user is otherwise allowed. The sudo
application is also capable of handling SELinux roles and types.
We can pass the target role and type to sudo directly. For instance, we can tell sudo to
switch to the database administrative role when we edit a PostgreSQL configuration file:
$ sudo -r dbadm_r -t dbadm_t vim /etc/postgresql/pg_hba.conf
However, we can also configure sudo through the /etc/sudoers file to allow users to run
particular commands within a certain role or type or get a shell within a certain context.
Consider a user that has access to both the user_r and dbadm_r roles (with the dbadm_r
role being a role designated for database administrators). Within the sudoers file, the
following line allows the myuser user to run any command through sudo which, when
triggered, will run with the dbadm_r role and within the dbadm_t domain:
myuser ALL=(ALL) TYPE=dbadm_t ROLE=dbadm_r ALL
Often, sudo is preferred over newrole as most operations that we need another role for
require switching effective user IDs (toward root or a service-specific runtime account)
anyway. The sudo application also has great logging capabilities, and we can even have
commands switching roles without requiring the end user to explicitly mention the target
role and type. Sadly, it does not support changing sensitivities.
[ 80 ]
Managing User Logins
Reaching other domains using runcon
Another application that can switch roles and sensitivities is the runcon application. The
runcon command is available for all users and is used to launch a specific command as a
different role, type, and/or sensitivity. It even supports changing the SELinux
user—assuming the SELinux policy lets you.
The runcon command does not have its own domain—it runs in the context of the user
executing the command, so any change in role, type, sensitivity, or even SELinux user is
governed by the privileges of the user domain itself.
Most of the time, runcon is used to launch applications with a particular category. This
allows users to take advantage of the MCS approach in SELinux without requiring their
applications to be MCS-enabled.
For instance, to run a shell session with the Salaries category (prohibiting it from
accessing resources that do not have the same or fewer categories set), enter the following:
$ runcon -l Salaries bash
$ id -Z
unconfined_u:unconfined_r:unconfined_t:Salaries
Switching to the system role
Sometimes, administrators will need to invoke applications that should not run under their
current SELinux user context but instead as the system_u SELinux user with the system_r
SELinux role. This is acknowledged by the SELinux policy administrators, who allow a very
limited set of domains to switch the SELinux user to a different user—perhaps contrary to
the purpose of the immutability of SELinux users mentioned earlier. Yet, as there are cases
where this is needed, SELinux will need to accommodate this. One of the applications that
is allowed to switch the SELinux user is run_init.
The run_init application is used mainly (almost exclusively) to start background system
services on a Linux system. Using this application, the daemons do not run under the user's
SELinux context but the system's, as required by SELinux policies.
[ 81 ]
Managing User Logins
As this is only needed on systems where launching additional services is done through
service scripts, distributions that use systemd do not require the use of run_init.
systemd already runs as the system_r role and is responsible for starting additional
services. As such, no role transition is needed. Other init systems, such as Gentoo's
OpenRC, integrate run_init so that administrators do not generally need to invoke
run_init manually.
Still, there might be a situation it is needed in, so let's launch a service script with run_init
and validate that it indeed is running with the system_u SELinux user:
# run_init /etc/rc.d/init.d/mcstrans start
# ps -Z $(pidof mcstransd)
system_u:system_r:setrans_t 7972 ? Ss 0:00
mcstransd
Most SELinux policies enable role-managed support for selective service management (for
non systemd distributions). This allows users that do not have complete system
administration rights to still manipulate particular services on a Linux system if allowed by
the SELinux policy. These users are to be granted the system_r role, but once that has been
accomplished, they do not need to call run_init to manipulate specific services anymore.
The transitions happen automatically and only for the services that are assigned to the userother services cannot be launched by these users.
To grant the finance_u SELinux user access to the system_r role, first look at the
currently assigned roles, and then modify the role set to include system_r:
# semanage user -l
...
finance_u
user
s0
s0
user_r
# semanage user -m -R user_r -R system_r finance_u
Granting a SELinux user access to the system_r role does not mean that that user is
capable of always transitioning to this role—it will only be allowed through a limited, welldefined set of domains governed by the SELinux policy.
With the system_r role granted to the SELinux user, and assuming that the SELinux user is
granted the permissions to handle the PostgreSQL service, the user can now directly
execute the postgresql service (preferably through sudo), as follows:
$ sudo /etc/rc.d/init.d/postgresql stop
[ 82 ]
Managing User Logins
If users have access to run_init (more precisely, the run_init_t domain), then they can
launch any service they want. For this reason, it is preferred to grant the necessary power
users the right to use the system_r role and transition through specific accesses rather than
granting them the privilege to use the run_init tool.
SELinux and PAM
With all the information about SELinux users and roles, we have not touched upon how
exactly applications are able to create and assign a SELinux context to a user.
Assigning contexts through PAM
End users log in to a Linux system through either a login process (triggered through a
getty process), a networked service (for example, the OpenSSH daemon), or through a
graphical login manager (xdm, kdm, gdm, slim, and so on).
These services are responsible for switching our effective user ID (upon successful
authentication, of course) so that we are not logged on to the system as the root user. In the
case of SELinux systems, these processes also need to switch the SELinux user (and role)
accordingly, as otherwise, the context will be inherited from the service, which is obviously
wrong for any interactive session.
In theory, all these applications can be made fully SELinux aware, linking with the SELinux
user space libraries to get information about Linux mappings and SELinux users. But
instead of converting all these applications, the developers decided to take the
authentication route to the next level using the PAM services that Linux systems provide.
PAM offers a very flexible interface for handling different authentication methods on a
Linux (and Unix) system. All applications mentioned earlier use PAM for their
authentication steps. To enable SELinux support for these applications, we need to update
their PAM configuration files to include the pam_selinux.so library.
[ 83 ]
Managing User Logins
The following code listing is an excerpt from the Gentoo /etc/pam.d/system-login file,
limited to PAM's session service directives. It triggers the pam_selinux.so library code as
part of the authentication process, as follows:
session
required
pam_selinux.so close
session
optional
pam_loginuid.so
session
required
pam_env.so
session
optional
pam_lastlog.so
session
include
system-auth
session
optional
pam_ck_connector.so nox11
# Note: modules that run in the user's context must come after this
line.
session
required
pam_selinux.so multiple open
session
optional
pam_motd.so motd=/etc/motd
session
optional
pam_mail.so
The arguments supported by the pam_selinux code are described in the pam_selinux
manual page. In the preceding example, the close option clears the current context (if any),
whereas the open option sets the context of the user. The pam_selinux module takes care
of querying the SELinux configuration and finding the right mappings and context based
on the service name used by the daemon.
Prohibiting access during permissive mode
Having SELinux active and enforcing on a system improves its resilience against successful
exploits and other malicious activities, especially when the system is used as a shell server
(or provides other interactive services) and the users are confined—meaning they are
mapped to user_u or other confined SELinux users.
But some administrators might want to temporarily switch the system to permissive mode.
This could be to troubleshoot issues or to support some changes on the system. When using
permissive mode, it would be a good idea to ensure that the interactive services are not
usable for regular users.
With pam_sepermit, this can be enforced on the system. The PAM module will deny a set
of documented users access to a system if the system is in permissive mode. By default,
these users are mentioned in /etc/security/sepermit.conf, but a different file can be
configured through the conf= option inside the PAM configuration itself.
[ 84 ]
Managing User Logins
In the sepermit.conf file, there are three approaches to document which users are to be
denied access when the system is in permissive mode:
Regular usernames
Group names, prefixed with the @ sign
SELinux usernames, prefixed with the % sign
Each is mentioned on a single line and can be enhanced with one or two options. These
options are documented in the sepermit.conf manual page.
To enable pam_sepermit, it's sufficient to enable the module in the auth PAM service:
auth
required pam_sepermit.so
Of course, don't forget to remove all active user sessions when switching to permissive
mode as any running session is otherwise left untouched.
Polyinstantiating directories
The last PAM module we'll look at is pam_namespace.so. Before diving in how to
configure this module, let's first look at what polyinstantiation is about.
Polyinstantiation is an approach where, when a user logs on to a system, he gets a view on
file system resources specific to his session, while hiding the resources of other users. This
differs from regular access controls, where the other resources are still visible, but might
just be inaccessible.
This session-specific view however does not just use regular mounts. The module uses the
Linux kernel namespace technology to force a particular view on the file system isolated
and specific to the user session. Other users have a different view on the file system.
Let's use a common example. Assume that all users, except root, should not have access to
the home directories of other users, nor should they have access to the temporary files
generated by those users. With standard access controls, these resources would still be
visible (perhaps not readable, but their existence would be visible). Instead, with
polyinstantiation, a user will only see his own /home based home directory, with his own
/tmp and /var/tmp view.
[ 85 ]
Managing User Logins
The following setting in /etc/security/namespace.conf will remap these three
locations:
/tmp
/var/tmp
$HOME
/tmp-inst/
/var/tmp/tmp-inst/
$HOME/$USER.inst/
level
level
level
root
root
root
On the real file system, those locations will be remapped to a subdirectory inside /tmpinst, /var/tmp/tmp-inst and /home/<user>/<user>.inst. The end users do not
know or see the remapped locations—for them, /tmp, /var/tmp and their HOME directory
are as they would expect.
In the previous example, only the root user is exempt from these namespace changes.
Additional users can be listed (comma-separated), or an explicit list of users can be given
for which polyinstantiation needs to be enabled (if the user list is preceded by the ~
character). To allow the namespace changes to take place, the target locations need to be
available on the system with the 000 permission:
# mkdir /tmp-inst && chmod 000 /tmp-inst
Next, enable pam_namespace.so in the PAM configuration files at the session service:
session
required
pam_namespace.so
Finally, make sure that SELinux allows polyinstantiated directories. On RHEL, this is
governed through the polyinstantiation_enabled SELinux boolean. Other
distributions will have it through the allow_polyinstantiation SELinux boolean:
# setsebool polyinstantiation_enabled on
Summary
SELinux maps Linux users onto SELinux users and defines the roles that a user is allowed
to be in through the SELinux user definitions. We learned how to manage those mappings
and SELinux users with the semanage application and were able to grant the right roles to
the right people.
We also saw how the same commands are used to grant the proper sensitivity to the user
and how we can describe these levels in the setrans.conf file. We used the chcat tool to
do most of the category-related management activities.
[ 86 ]
Managing User Logins
After assigning roles to the users, we saw how to jump from one role to another using
newrole, sudo, runcon, and run_init. We ended this chapter with important insight into
how SELinux integrates in the Linux authentication process and how to tune a Linux
system further using a couple of SELinux-aware PAM modules.
In the next chapter, we will learn to manage the labels on files and processes and see how
we can query the SELinux policy rules.
[ 87 ]
4
Process Domains and FileLevel Access Controls
When we work on a SELinux-enabled system, gathering information about the contexts
associated with files and processes is a necessary basic capability. We need to understand
how these contexts are used in policies and what the applicable security rules and access
controls are for a specific process.
In this chapter, we will:
Work with file contexts and learn where they are stored
Understand how contexts are assigned
Learn and obtain information about how and when processes get into their
current context
Get a first taste of a SELinux policy and how to query it
We will end with another SELinux feature called constraints and learn how they are used to
provide the user-based access control feature.
Process Domains and File-Level Access Controls
About SELinux file contexts
Throughout this chapter, we will be using a web-based application deployment as an
example: DokuWiki. This is a popular PHP wiki that uses files rather than a database as its
backend system and is easy to install and manage.
Getting context information
Let's assume that the DokuWiki application is hosted at
/srv/web/localhost/htdocs/dokuwiki and stores its wiki pages (user content) in
subdirectories of the data/ directory. This can be accomplished by downloading the latest
DokuWiki tarball from the project site and extracting it in this location. Some distributions
might have a different location for the DokuWiki application (such as
/var/lib/dokuwiki) which is correctly labeled already. The example here generally
follows the same labeling regardless of the distribution, allowing us to show various context
related actions.
The contexts of files can easily be acquired using the -Z option of the ls command. Most
utilities that are able to provide feedback on contexts will try to do so using the -Z option,
as we saw with the id utility.
Let's look at the current context of the dokuwiki directory itself:
# ls -dZ /srv/web/localhost/htdocs/dokuwiki
drwxr-xr-x. root root system_u:object_r:var_t:s0 dokuwiki
The context displayed here is var_t. Later, we will change this to the correct context (as
var_t is too generic and not meant for hosting web content).
File and directory contexts are stored in the file system as extended attributes when the file
system supports this. An extended attribute (often abbreviated to xattr) is a key/value
combination associated with a resource's inode (an information block that represents a file,
directory, or symbolic link on a file system). Each resource can have multiple extended
attributes, but only one value per unique key. Also, by convention, extended attributes on
Linux use the following syntax:
<namespace>.<attribute>=<value>
[ 89 ]
Process Domains and File-Level Access Controls
The namespace of an extended attribute allows for additional access controls or features. Of
the currently supported extended attribute namespaces (security, system, trusted, and
user), the security namespace enforces specific restrictions on manipulating the attribute:
if no security module is loaded (for instance, SELinux is not enabled) then only processes
with the CAP_SYS_ADMIN capability (basically root or similarly privileged processes) are
able to modify this parameter.
We can query the existing extended attributes using the getfattr application (provided
through the attr package in RHEL or sys-apps/attr in Gentoo), as shown in the
following example:
$ getfattr -m . -d dokuwiki
# file: dokuwiki
security.selinux="system_u:object_r:var_t:s0"
As we can see, a SELinux context is defined through the security.selinux extended
attribute. This ensures that the SELinux context of a file cannot be altered by nonadministrative users when SELinux is disabled and that manipulating contexts is controlled
through the SELinux policy when SELinux is enabled.
The stat application can also be used to show SELinux contexts:
$ stat dokuwiki
File: 'dokuwiki'
Size: 4096
Blocks: 8
IO Block: 4096
directory
Device: fd01h/64769d
Inode: 8570035
Links: 8
Access: (0755/drwxr-xr-x) Uid: (
0/
root) Gid: (
0/
root)
Context: system_u:object_r:var_t:s0
Access: 2016-08-16 13:46:44.573764039 -0400
Modify: 2016-08-16 13:36:59.698275931 -0400
Change: 2016-08-16 13:36: 59.698275931 -0400
Birth: -
Getting context information from a file or directory should be as common to an
administrator as getting regular access control information (read (r), write (w), and execute
(x) flags).
Interpreting SELinux context types
After using SELinux for a while, the motive behind using file labels becomes somewhat
clearer. File contexts are named after their purpose, allowing administrators to more easily
see whether a context is correctly assigned or not.
[ 90 ]
Process Domains and File-Level Access Controls
Consider the contexts of a user file in its home directory (user_home_t), a temporary
directory in /tmp for a Java application (java_tmp_t), and a socket of rpcbind
(rpcbind_var_run_t). All these files or directories have considerably different purposes
on the file system, and this is reflected in their assigned contexts.
Policy writers will always try to name the context consistently, making it easier for us to
understand the purpose of the file, but also to make the policy almost self-explanatory.
For the regular file system, for instance, files are labeled with a context resembling their
root location. For example, we find binaries in the /bin folder (and /usr/bin) to be
labeled with bin_t, boot files in /boot labeled boot_t, generic system resources in /usr
labeled usr_t, and so on.
The more interesting labels are those for a particular application. For instance, for the
MySQL database server (or compatible databases such as MariaDB), we have:
The mysqld_t context, meant for the application itself (process type or domain)
The mysqld_port_t context, meant for the TCP port on which the MySQL
daemon listens
The mysqld_server_packet_t and mysqld_client_packet_t contexts,
which are types associated with network packets received (server) or sent to
(client) the MySQL port
The mysql_exec_t type, which is assigned to the mysqld binary
The various mysql_* types for specific file system locations related to the
daemon, such as mysqld_var_run_t (for in /var/run), mysqld_etc_t (for in
/etc), mysqld_log_t (for in /var/log), and mysqld_tmp_t (for in /tmp)
The mysqld_home_t type for end user (administrator) files specific to MySQL
management (such as the ~/.my.cnf file)
Based on the context of a file or resource, administrators can easily detect anomalies in the
system setup. An example of an anomaly is when a file is moved from the user's home
directory to the web server location. When this occurs, it retains the user_home_t context
as extended attributes are moved with it. As the web server process isn't allowed to access
user_home_t by default, it will not be able to serve this file to its users.
[ 91 ]
Process Domains and File-Level Access Controls
Keeping or ignoring contexts
Now that we are aware that file contexts are stored as extended attributes, how do we
ensure that files receive the correct label when they are written or modified? For that, a
number of guidelines exist, ranging from inheritance rules to explicit commands, to set a
SELinux context on a file system resource.
Inheriting the default context
By default, the SELinux security subsystem uses context inheritance to identify which
context should be assigned to a file (or directory, socket, and so on) when it is created. A file
created in a directory with a var_t context will be assigned the var_t context as well. This
means that inheritance is based on the parent directory and not on the context of the
executing process.
There are a few exceptions to this though:
In the case of SELinux-aware applications, the application can force the context of
a file to be different (assuming the SELinux policy allows it, of course). As this is
completely within the realm of the software itself, this behavior cannot be
generally configured.
An application called restorecond can be used that enforces contexts on a
number of paths/files based on SELinux's context rules. We will cover these rules
and the restorecond application later in this chapter.
The SELinux policy allows for transition rules that take into account the context
of the process that is creating new files or directories.
It is these transition rules we will cover next.
Querying transition rules
Type transition rules are policy rules that force the use of a different type upon certain
conditions. In the case of file contexts, such a type transition rule can be as follows: if a
process running in the httpd_t domain creates a file in a directory labeled var_log_t,
then the type identifier of the file becomes httpd_log_t instead of var_log_t.
Basically, this rule ensures that any file placed in a log directory by web servers is assigned
the httpd_log_t web server log context rather than the default var_log_t, which would
be the case when standard inheritance was used.
[ 92 ]
Process Domains and File-Level Access Controls
We can query these type transition rules using sesearch, part of the setools-console
package in RHEL or app-admin/setools in Gentoo. The sesearch application is one of
the most important tools available to query the current SELinux policy. For the previous
example, we need the (source) domain and the (target) context of the directory: httpd_t
and var_log_t. In the following example, we use sesearch to find the type transition
declaration related to the httpd_t domain for the var_log_t context:
$ sesearch -T -s httpd_t -t var_log_t
Found 1 semantic te rules:
type_transition httpd_t var_log_t : file httpd_log_t;
The type_transition line is a SELinux policy rule, which maps perfectly to the
description. Let's look at another set of type transition rules for the tmp_t label (assigned to
the top directory of temporary file locations, such as /tmp and /var/tmp):
$ sesearch -T -s httpd_t -t tmp_t
Found 4 semantic te rules:
type_transition httpd_t tmp_t :
type_transition httpd_t tmp_t :
type_transition httpd_t tmp_t :
type_transition httpd_t tmp_t :
file httpd_tmp_t;
dir httpd_tmp_t;
lnk_file httpd_tmp_t;
sock_file httpd_tmp_t;
Found 2 named file transition rules:
type_transition httpd_t tmp_t : file krb5_host_rcache_t "HTTP_23";
type_transition httpd_t tmp_t : file krb5_host_rcache_t "HTTP_48";
The policy tells us that if a file, directory, symbolic link, or socket is created in a directory
labeled tmp_t, then this resource gets the httpd_tmp_t context assigned (and not the
default, inherited tmp_t one). But it also contains two named file transitions, which is a
more flexible type of transition rule. The example also shows the granularity of SELinux
again, with type transition rules for various classes: regular files, directories, and symbolic
links or socket files. Other file system-related resource classes that SELinux supports are
block devices (blk_file), character devices (chr_file) and pipes (fifo_file).
With named file transitions, the policy can take into account the name of the file (or
directory) created to differentiate the target context. In the preceding example, if a file
named HTTP_23 or HTTP_48 is created in a directory labeled tmp_t, then it does not get the
assigned httpd_tmp_t context (as would be implied by the regular type transition rules),
but the krb5_host_rcache_t type (used for Kerberos implementations) instead.
Type transitions not only give us insight into what labels are going to be assigned, but also
give us some clues as to which types are related to a particular domain. In the web server
example, we found out by querying the policy that its log files are most likely labeled
httpd_log_t and its temporary files httpd_tmp_t.
[ 93 ]
Process Domains and File-Level Access Controls
Copying and moving files
File contexts can also be transferred together with the file itself during copy or move
operations. By default, Linux will:
Retain the file context in case of a move (mv) operation on the same file system (as
this operation does not touch extended attributes, but merely adjusts the
metadata of the file).
Ignore the current file context in case of a move (mv) operation across a file
system boundary, as this creates a new file, including content and extended
attributes. Instead, it uses the inheritance (or file transitions) to define the target
context.
Ignore the file context in case of a copy (cp) operation, instead using the
inheritance (or file transitions) to define the target context.
Luckily, this is just default behavior (based on the extended attribute support of these
utilities) that can be manipulated freely.
We can use the -Z option to tell mv that the context for the file should be set to the default
type associated with the target location. For instance, in the next example, two files are
moved from a user's home directory to the /tmp directory. The first one will retain its file
type (user_home_t) while the second one will receive the type associated with user files
placed in /tmp (user_tmp_t):
$ mv test1.txt /tmp
$ mv -Z test2.txt /tmp
$ ls -ldZ /tmp/test*
-rw-r--r--. david users user_u:object_r:user_home_t:s0
-rw-r--r--. david users user_u:object_r:user_tmp_t:s0
test1.txt
test2.txt
Similarly, we can tell the cp command through the --preserve=context option to
preserve the SELinux context while copying files. Using the same example, we now get the
following:
$ cp test1.txt /tmp
$ cp --preserve=context test2.txt /tmp
$ ls -ldZ /tmp/test*
-rw-r--r--. david users user_u:object_r:user_tmp_t:s0 test1.txt
-rw-r--r--. david users user_u:object_r:user_home_t:s0 test2.txt
[ 94 ]
Process Domains and File-Level Access Controls
Most of the utilities that are provided through the coreutils package support the -Z
option: mkdir (to create a directory), mknod (to create a device file), mkfifo (to create a
named pipe), and so on. Even more so, many of these utilities allow the user to explicitly
provide a context through the --context option.
For instance, to create a directory /tmp/foo with context user_home_t, using mkdir by
default would not work:
$ sesearch -s user_t -t tmp_t -T -c dir
type_transition user_t tmp_t : dir user_tmp_t
With the --context option, we can tell the utility to set a particular context:
$ mkdir --context=user_u:object_r:user_home_t:s0 /tmp/foo
$ ls -ldZ /tmp/foo
drwxr-xr-x. lisa lisa user_u:object_r:user_home_t:s0 foo/
For other utilities, it is best to consult the manual page and see how the utility deals with
extended attributes. For instance, to have rsync preserve the extended attributes, use the X or --xattrs option:
$ rsync -av -X <source> <destination>
Temporarily changing file contexts
We can use the chcon tool to update the context of the file (or files) directly. In our previous
example, we noticed that the DokuWiki files were labeled with var_t. This is a generic type
for variable data and is not the right context for web content. We can use chcon to put the
httpd_sys_content_t label on these files, which would allow web servers to have read
access on these resources:
$ chcon -R -t httpd_sys_content_t /srv/www
Another feature that chcon offers is to tell it to label a file with the same context as a
different file. In the next example, we use chcon to label /srv/www/index.html similarly
to the context used for the /var/www/index.html file:
$ chcon --reference /var/www/index.html /srv/www/index.html
If we change the context of a file through chcon and set it to a context different from the
one in the context list, then there is a possibility that the context will be reverted later:
package managers might reset the file contexts back to their intended value, or the system
administrator might trigger a full file system relabeling operation.
[ 95 ]
Process Domains and File-Level Access Controls
Up until now, we've only focused on the type part of a context. Contexts, however, also
include a role part and SELinux user part. If UBAC is not enabled, then the SELinux user
has no influence on any decisions, and resetting it has little value. If UBAC is enabled,
though, it might be necessary to reset the SELinux user values on files. Utilities such as
chcon are able to set the SELinux user as well:
# chcon -u system_u -R /srv/www
The role for a file is usually object_r as roles currently only make sense for users
(processes).
In order to be able to change contexts, we do need the proper SELinux
privileges, which are named relabelfrom and relabelto. These rights
are granted on domains to indicate whether the domain is allowed to
change a label from (relabelfrom) a particular type (such as
user_home_t) and to (relabelto) another type (such as
httpd_sys_content_t). If we find denials in the audit log related to
these permissions, then it means that the domain is prohibited from
changing the contexts.
Placing categories on files and directories
We focused primarily on changing types and briefly touched SELinux users, but another
important part is to support categories (and sensitivity levels). With chcon, we can add
sensitivity levels and categories as follows:
$ chcon -l s0:c0,c2 index.html
Another tool that can be used to assign categories is the chcat tool. With chcat, we can
assign additional categories rather than having to reiterate them, as is the case with chcon,
and even enjoy the human-readable category levels provided by the setrans.conf file:
$ chcat -- +Customer2 index.html
To remove a category, just use the minus sign:
$ chcat -- -Customer2 index.html
To remove all categories, use the -d option:
$ chcat -d index.html
[ 96 ]
Process Domains and File-Level Access Controls
Users and administrators should keep in mind that applications generally do not set
categories themselves, so they need to be added ad hoc.
Using multilevel security on files
When the system uses an MLS policy, the chcon tool needs to be used. The syntax is the
same as with categories. For instance, to set the sensitivity s1 and category set c2 and c4 to
c10 on all files of a particular user's home directory, you'd do the following:
$ chcon -R -l s1:c2,c4.c10 /home/lisa
Keep in mind that the context of the user executing chcon and the context of the user who
is going to use the data must of course be able to deal with the mentioned sensitivity.
Backing up and restoring extended attributes
Like with the regular file operation tools (such as mv and cp), backup software too needs to
consider SELinux contexts. In fact, there are two important requirements for a backup tool
when working with SELinux-enabled systems:
The backup tool must run in a SELinux context that is capable of reading all files
that are in the scope of the backup and restoring those files as well. If there is no
specific SELinux policy for the backup tool, then it might need to run in an
unconfined or highly privileged domain to succeed.
The backup tool must be able to back up and restore extended attributes.
A popular tool for taking backups (or archives) is the tar application. When creating a tar
archive, add --selinux to include SELinux contexts (both during the creation of the
archive as well as when extracting files from the archive):
# tar cvjf home-20160815.tar.bz2 /home --selinux
Using mount options to set SELinux contexts
Not all file systems support extended attributes. When a file system is used without
extended attribute support, then the SELinux context of a file is either based on the file
system type itself (each file system has its own associated context) or is passed on to the
system through a mount option.
[ 97 ]
Process Domains and File-Level Access Controls
The most used mount option in these situations is the context= option. When set, it will
use the mentioned context as the context for all the resources in the file system. For instance,
to mount an external USB drive that hosts a FAT file system while ensuring that end users
can write to it, we could mount it with the user_home_t context:
# mount -o context="user_u:object_r:user_home_t:s0" /dev/sdc1 /media/usb
If the file system supports extended attributes but doesn't have all files labeled yet, then we
can use the defcontext= option to tell Linux that if no SELinux context is available, then
the provided default context should be used:
# mount -o defcontext="system_u:object_r:var_t:s0" /dev/sdc1 /srv/backups
Another mount option is fscontext=. This assigns a context on the file system type rather
than the context of the files on the file system. For instance, a CD/DVD file system can be
ISO 9660, Joliet or UDF. SELinux-wise, a compatible file system type is iso9660_t. This
type definition on a file system level is used by SELinux to map permissions such as mount
operations and file creation. Administrators might not want to allow an iso9660_t file
system to be mounted anywhere else but inside /media. With the fscontext= option, this
file system type can be set differently from what the default file system type would be.
The fscontext= option has little bearing on the contexts of the files inside this file system.
For instance, a mounted ISO 9660 file system will probably use iso9660_t for the file
system itself, while having its files accessible through the removable_t type:
# mount -o fscontext="system_u:object_r:iso9660_t:s0" /dev/sdc1 /mnt
The last option that can be used when mounting file systems is the rootcontext= option.
This will force the root inode of the file system to have the given context even before the
file system is visible to the user space. A file system root context can vary depending on
where it is mounted, so forcing this through a mount option allows administrators to use
consistent labeling regardless of the location:
# mount -o rootcontext="system_u:object_r:tmp_t:s0" -t tmpfs \
none /var/cache/eix
That's it—these are all the context-related mount options. A final note though: the
context= option is mutually exclusive to the defcontext= and fscontext= options. So
while the defcontext= and fscontext= options can be used together, they cannot be
used with the context= option.
[ 98 ]
Process Domains and File-Level Access Controls
SELinux file context expressions
When we think that the context of a file is wrong, we need to correct the context. SELinux
offers several methods to do so, and some distributions even add in more. We can use tools
such as chcon, restorecon (together with semanage), setfiles, rlpkg (Gentoo), and
fixfiles (RHEL). Of course, we could also use the setfattr command, but that would
be the least user-friendly approach for setting contexts.
Using context expressions
In the SELinux policy, there is a list of regular expressions that informs the SELinux utilities
and libraries what the context of a file (or other file system resource) should be. Though this
expression list is not enforced on the system, it is meant for administrators to see whether a
context is correct, and for tools that need to reset contexts to what they are supposed to be.
The list itself is stored on the file system in /etc/selinux/targeted/contexts/files in
the file_contexts.* files.
As an administrator, we can query parts of this list through semanage fcontext as
follows:
# semanage fcontext -l
SELinux fcontext
type
Context
/.*
all files
system_u:object_r:default_t:s0
/[^/]+
regular file system_u:object_r:etc_runtime_t:s0
/a?quota\.(user|group) regular file system_u:object_r:quota_db_t:s0
...
An example of a tool that queries this information is matchpathcon, which we used earlier
in this book:
# matchpathcon /etc/selinux/targeted
/etc/selinux/targeted
system_u:object_r:selinux_config_t:s0
Not all the entries are visible through the semanage application though. Entries related to
specific user home directories (such as /home/david/.ssh) are not shown as these entries
depend on the Linux user (and more importantly, its associated SELinux user).
[ 99 ]
Process Domains and File-Level Access Controls
But for all other entries, the output of the command contains:
A regular expression that matches one or more paths
The classes to which the rule is applicable, but translated in a more humanreadable format
The context to assign to the resources that match the expression and class list
The class list allows us to differentiate contexts based on the resource class. The semanage
fcontext output uses human-readable identifiers, but for completeness' sake, we will
cover the related options as well: resource classes can be a regular file (--), a directory (-d),
a socket (-s), a named pipe (-p), a block device (-b), a character device (-c), or a symbolic
link (-l). When it says all files, the line is valid regardless of the class.
Right now, we have not defined such rules yet, but after the next section, even defining
custom SELinux context expressions will no longer hold any secrets. An important property
of the context list is how it is prioritized—after all, we could easily have two expressions
that both match. Within SELinux, the rule that is the most specific wins. The logic used is as
follows (in order):
If line A has a regular expression and line B doesn't, then line B is more specific
If the number of characters before the first regular expression in line A is less than
the number of characters before the first regular expression in line B, then line B
is more specific
If the number of characters in line A is less than in line B, then line B is more
specific
If line A does not map to a specific SELinux type (the policy editor has explicitly
told SELinux not to assign a type) and line B does, then line B is more specific
Consider all the rules that match /usr/lib/pgsql/test/regress/pg_regress (shown
through the findcon application, provided through the setools-console package in
RHEL):
$ findcon /etc/selinux/strict/contexts/files/file_contexts -p \
/usr/lib/pgsql/test/regress/pg_regress
/.*
system_u:object_r:default_t
/usr/.*
system_u:object_r:usr_t
/usr/(.*/)?lib(/.*)?
system_u:object_r:lib_t
/usr/lib/pgsql/test/regress(/.*)? system_u:object_r:postgresql_db_t
/usr/lib/pgsql/test/regress/pg_regress -- \
system_u:object_r:postgresql_exec_t
[ 100 ]
Process Domains and File-Level Access Controls
Although the other rules match too, the last one is the most specific because it does not
contain any expression. If that line didn't exist, then the line before is the most specific
because the number of characters before the first regular expression is much more than the
match before, and so on.
There is a caveat with the rule order, however. When additional rules are added through
semanage (which is described in the next section), then the order of the added rules is used
rather than its specificity. So the most recently added rule that matches the path is used.
Registering file context changes
Because changing a SELinux context using chcon is often just a temporary measure, it is
seriously recommended to only use chcon when testing the impact of a context change.
Once the change is accepted, we need to register it through semanage. For instance, to
permanently mark /srv/www (and all its subdirectories) as httpd_sys_content_t, we
need to execute the following:
# semanage fcontext -a -t httpd_sys_content_t "/srv/www(/.*)?"
# restorecon -Rv /srv/www
restorecon reset /srv/www context system_u:object_r:var_t:s0
-> system_u:object_r:httpd_sys_content_t:s0
...
What we do here is register /srv/www and its subdirectories as httpd_sys_content_t
through semanage. Then, we use restorecon to (recursively) reset the contexts of
/srv/www to the value registered in the context list. This is the recommended approach for
setting contexts on most resources.
These registrations are local (custom) context expressions and are stored in a separate
configuration file (file_contexts.local). Considering the priority of (locally added)
expressions, the following will not have the expected behavior since the most recent rule we
add takes precedence:
# semanage fcontext -a -t httpd_sys_content_t "/srv/www(/.*)?"
# semanage fcontext -a -t var_t "/srv(/.*)?"
In this example, /srv/www would still be labeled as var_t instead of
httpd_sys_content_t because the var_t rule was added later.
[ 101 ]
Process Domains and File-Level Access Controls
The semanage fcontext application can also be used to inform SELinux that a part of the
file system tree should be labeled as if it were elsewhere. This allows us to use different
paths for application installations or file destinations and tell semanage to apply the same
contexts as if the destination were the default.
Let's make this more visible through an example and have everything under /srv/www be
labeled as though it were located at /var/www (including subdirectories), so
/srv/www/icons gets the same context as /var/www/icons. We use the -e option of
semanage fcontext to create such an equivalency as follows:
# semanage fcontext -a -e /var/www /srv/www
This will create a substitution entry so that anything under /srv/www is labeled as if it were
at the same location under /var/www.
Most distributions already configure a number of equivalence locations. The semanage
fcontext -l command will show these equivalent locations at the end of its output, but
you can also directly read that information from the file_contexts.subs_dist
configuration file, available in /etc/selinux/targeted/contexts/files:
# cat /etc/selinux/targeted/contexts/files/file_contexts.subs_dist
/run /var/run
/run/lock /var/lock
/run/systemd/system /usr/lib/systemd/system
...
Using customizable types
Some SELinux types are meant for files whose paths cannot be accurately defined by
administrators or where the administrator does not want the context to be reset when a
relabeling operation is triggered. For these purposes, SELinux supports what it calls
customizable types. When file context-managing tools such as restorecon encounter a file
with a customizable type set, it will not revert its context to what is registered in the
context's definition.
The customizable types are declared in the customizable_types file inside
/etc/selinux/strict/contexts. To have restorecon relabel such files, administrators
need to pass the force reset option (-F) before the tool resets the contexts.
[ 102 ]
Process Domains and File-Level Access Controls
Let's take a look at the contents of this customizable_types file:
$ cat /etc/selinux/strict/contexts/customizable_types
sandbox_file_t
svirt_image_t
home_bin_t
...
user_tty_device_t
As an example, we can mark a file in a home directory (in this example, the file is called
convert.sh) as home_bin_t, which is a customizable type and as such will not be
relabeled back to user_home_t when a file system relabeling operation is done:
$ chcon -t home_bin_t
~/convert.sh
For now, marking types as customizable requires updating the customizable_types file.
Because this file can be overwritten when a new policy package (by the distribution) is
pushed to the system, it needs to be governed carefully.
That said, the use of customizable types has its advantages. As an administrator, we might
want to create and support specific types usable by end users who can use chcon to set the
contexts of individual files in their home directory. By having those types marked as
customizable types, a relabeling operation against /home will not reset those contexts.
Most of the time, however, it is preferred you use semanage fcontext to add an
expression and restorecon to fix the context of the files. Taking the convert.sh file as an
example again, this would result in the following commands:
# semanage fcontext -a -t home_bin_t /home/myuser/convert\.sh
# restorecon -F /home/myuser/convert.sh
Most administrators will prefer to use directory-based labeling. User binaries and scripts
are then located in the ~/bin directory, with the context definition being as follows:
# semanage fcontext -a -t home_bin_t "/home/[^/]*/bin(/.*)?"
[ 103 ]
Process Domains and File-Level Access Controls
Compiling the different file_contexts files
Inside the /etc/selinux/targeted/contexts/files directory, five different
file_contexts files can be found:
The file_contexts file itself (without any suffix) is the basic expression file
provided by the SELinux policy offered through the Linux distribution.
The file_contexts.local file contains the locally added rules (through the
semanage fcontext command, which we covered earlier in this chapter).
The file_contexts.homedirs file contains the expressions for the user home
directories. When new user mappings are created and managed through
semanage login and semanage user, this file is adjusted to reflect the new
situation.
The file_contexts.subs_dist file contains equivalency rules provided by the
SELinux policy offered through the Linux distribution, which tell SELinux to
consider one part of the file system as requiring the same labeling rules as
another location.
The file_contexts.subs file contains equivalency rules, which are managed
locally (through the semanage fcontext command, which we covered earlier in
this chapter).
Alongside those files, you will find the associated *.bin files (so file_contexts.bin for
the file_contexts file, file_contexts.local.bin for the file_contexts.local file,
and so on). These files contain the same information as the main file, but are precompiled to
make lookups faster. These *.bin files are automatically created, but in case of a
discrepancy, administrators can rebuild the files themselves as well using the
sefcontext_compile command:
# cd /etc/selinux/targeted/contexts/files
# sefcontext_compile file_contexts.local
Exchanging local modifications
When local modifications are registered through semanage fcontext, they only apply to a
single system. If local definitions need to be reapplied on various systems, administrators
can extract the local modifications and import them on another system.
To export the local modifications, use semanage export:
# semanage export -f local-mods.conf
[ 104 ]
Process Domains and File-Level Access Controls
The file where the local modifications are now stored (local-mods.conf in the example)
can be adjusted at will. For instance, administrators can remove all lines except those they
want to apply on other systems.
With the local modifications stored in the file, transport the file to the other system(s) and
import them:
# semanage import -f ./local-mods.conf
The imported settings are immediately registered. Of course, in case of file system changes
(semanage fcontext), don't forget to run restorecon against the target directories.
Modifying file contexts
We now know how to set SELinux contexts, both directly through tools such as chcon as
well as through the restorecon application, which queries the SELinux context list to
know what context a file should have. But restorecon is not the only application that
considers this context list.
Using setfiles, rlpkg, and fixfiles
Using semanage fcontext and restorecon is the preferred method for changing file
contexts, but other tools exist that impact file contexts on a system.
The setfiles application is an older one, which requires the path to the context list file
itself in order to reset contexts. Although it is often used under the hood of other
applications, most administrators do not need to call setfiles directly anymore:
# setfiles /etc/selinux/targeted/contexts/files/file_contexts /srv/www
Another set of tools are the rlpkg (Gentoo) and fixfiles (RHEL) applications. Both these
applications have a nice feature: they can be used to reset the contexts of the files of a
particular application rather than having to iterate over the files manually and
run restorecon against them. In the next example, we're using these tools to restore the
contexts of the files provided by the openssh package:
# rlpkg openssh
# fixfiles -R openssh restore
[ 105 ]
Process Domains and File-Level Access Controls
Another feature of both applications is that they can be used to relabel the entire file system
without the need to perform a system reboot, like so:
# rlpkg -a -r
# fixfiles -f -F relabel
Relabeling the entire file system
The rlpkg and fixfiles commands are not the only available approaches for relabeling
the entire file system when working with a RHEL (or derived) distribution. There are two
other methods of asking the system to perform a full file system relabeling operation during
(re)boot: a touch file or a kernel parameter.
The touch file is called .autorelabel and should be placed in the root file system. Once
set, the system needs to be rebooted:
# touch /.autorelabel
# reboot
The same behavior is triggered if the autorelabel parameter is added to the kernel boot
parameter list (similar to how the selinux= and enforcing= parameters can be set as
discussed in Chapter 2, Understanding SELinux Decisions and Logging).
Asking the system to perform a full file system relabeling operation will take a while. When
finished, the system will reboot again. If a touch file was used to trigger the relabeling
operation, it will be removed automatically.
Automatically setting contexts with restorecond
Contexts can also be forced by the restorecond daemon. The purpose of this daemon is to
enforce the expression list rules onto a configurable set of locations, defined in the
/etc/selinux/restorecond.conf file.
The following set of files and directories is an example list of locations configured in the
restorecond.conf file so that restorecond automatically enforces the SELinux contexts
on these files and directories whenever it detects a context change:
/etc/resolv.conf
/etc/mtab
/var/run/utmp
/root/*
~/public_html
[ 106 ]
Process Domains and File-Level Access Controls
~/.mozilla/plugins/libflashplayer.so
In this case, if a file matches any of the previously created paths, restorecond will be
notified of it (through the Linux inotify subsystem) and will relabel the file according to the
expression list.
The use of restorecond is primarily for historical reasons, for back when
SELinux didn't support named file transitions. Writing resolv.conf in
/etc could not be differentiated from writing to the passwd file in /etc.
The introduction of named file transitions has considerably reduced the
need for restorecond.
The context of a process
As everything in SELinux works with labels, even processes are assigned a label, also
known as the domain.
Getting a process context
We saw that the Apache web server runs in the httpd_t domain, which can be seen with
the ps -eZ command, as follows:
# ps -eZ | grep httpd
system_u:system_r:httpd_t:s0 2270 ?
00:00:00 httpd
There are a number of other ways to obtain the process context as well. Although the
method with ps is the most obvious, these other methods can prove useful in scripted
approaches or through monitoring services.
A first approach is to read the /proc/<pid>/attr/current pseudo-file, which we've
already encountered previously in the book. It displays a process' current security context:
# pidof httpd
1952 1951 1950 1949 1948 1947
# cat /proc/1952/attr/current
system_u:system_r:httpd_t:s0
[ 107 ]
Process Domains and File-Level Access Controls
To receive a somewhat more human-readable output, use the secon command for the
given process ID (PID):
# secon --pid 1952
user: system_u
role: system_r
type: httpd_t
sensitivity: s0
clearance: s0
mls-range: s0
Finally, the SELinux user space project has a helper utility called getpidcon, which is
provided through the libselinux library. Although this utility is not available on RHEL,
other distributions such as Gentoo have it. The utility requires a single PID and returns its
context:
# getpidcon 1950
system_u:system_r:httpd_t:s0
Now, the Apache processes don't themselves inform SELinux that they need to run in the
httpd_t domain. For that, transition rules exist in the SELinux policy that govern when
and how processes are executed in a particular domain.
Transitioning towards a domain
Just as we have seen with files, if a process forks and creates a new process, this process by
default inherits the context of the parent process. In the case of the web server, the main
process is running in the httpd_t domain, so all the worker processes that are launched
inherit the httpd_t domain from it.
In order to differentiate one process from another, domain transitions can be defined. A
domain transition (also known as a process transition) is a rule in SELinux that tells
SELinux another domain is to be used for a forked process (actually, it is when the parent
process calls the execve() function, most likely after a fork() operation).
[ 108 ]
Process Domains and File-Level Access Controls
Similar to the files, domain transitions can be queried using sesearch. Let's look into the
domains that are allowed to transition to the httpd_t domain:
$ sesearch -T |
type_transition
type_transition
type_transition
...
type_transition
grep "process httpd_t"
piranha_pulse_t httpd_exec_t : process httpd_t;
kdumpctl_t httpd_exec_t : process httpd_t;
initrc_t httpd_exec_t : process httpd_t;
init_t httpd_exec_t : process httpd_t;
In this case, SELinux will switch the context of a launched web server to httpd_t if the
parent process is running in one of the mentioned domains (such as the initrc_t domain)
and is executing a file labeled as httpd_exec_t (which is the label assigned to the httpd
binary).
But in order for this to truly happen, a number of other permissions (next to the type
transition) need to be in place. The following list describes these various permissions:
The source process (such as initrc_t) needs to be allowed to transition to the
httpd_t domain, which is governed by the transition privilege on the
process class:
$ sesearch -s initrc_t -t httpd_t -c process -p transition -A
The source process (such as initrc_t) needs to have the execute right on the
file it is launching (httpd_exec_t):
$ sesearch -s initrc_t -t httpd_exec_t -c file -p execute -A
The httpd_exec_t type must be identified as an entry point for the httpd_t
domain. An entrypoint is used by SELinux to ensure that a domain transition
only occurs when that particular file context is used on the executing binary or
script:
$ sesearch -s httpd_t -t httpd_exec_t -c file -p entrypoint -A
The target domain must be allowed for the role that the parent process is in. In
case of system daemons, the role is system_r:
$ seinfo -rsystem_r -x | grep httpd_t
[ 109 ]
Process Domains and File-Level Access Controls
A graphical representation of these rights is as follows:
Graphical overview of the permissions involved in successfully transitioning from one domain to another
Only when all these privileges are allowed will a domain transition occur. If not, then either
the execution of the application fails (if the domain has no execute or execute_no_trans
rights on the file), or it executes but remains running in the same domain as the parent
process.
Domain transitions are an important concept as they inform the administrator how an
application gets into its privileged context. To analyze this, many security administrators
look at how one context can transition to the next. This is documented further in Chapter 9,
Analyzing Policy Behavior.
For policy writers, deciding when to create a domain transition and when to keep the
processes running in the same (source) context is a matter of design. Generally, policy
developers will try to keep the parent context confined so that every additional privilege is
a source of consideration for switching to another domain (which has that particular
privilege). In other words, a transition is prepared when the target application requires
more or different permissions than the source domain.
[ 110 ]
Process Domains and File-Level Access Controls
That is also why the unconfined_t domain has few transitions when executing user
applications compared to the confined user domains user_t or guest_t: the
unconfined_t domain already holds many privileges, so there is little value in
transitioning to a different domain. Note that this is a decision made by the policy writers or
Linux distribution, not by the SELinux technology itself. All SELinux does is enforce the
policy rules.
Verifying a target context
When executing applications, the SELinux policy might force the command to run in a
different domain. Although we could start querying all rules with sesearch, there is a
simpler command that tells us what the target context is when we execute a command or
script.
The utility is called selinuxexeccon and is provided by the libselinux-utils package
in RHEL or sys-libs/libselinux in Gentoo. It requires at least one argument (the path
of the binary or script that would be executed) and an optional second (the source context).
For instance, to find out in which domain the passwd command would run when executed
from the current context, we'd use this command:
# selinuxexeccon /usr/bin/passwd
unconfined_u:unconfined_r:passwd_t:s0
The following command would be used to find out in which domain the web server will
run when executed from the init_t domain:
# selinuxexeccon /usr/sbin/httpd system_u:system_r:init_t:s0
system_u:system_r:httpd_t:s0
Other supported transitions
Regular domain transitions are the most common transitions in SELinux, but there are other
transitions as well.
For instance, some applications (such as cron or login) are SELinux aware and will specify
which domain to transition to. These applications call the setexeccon() method to specify
the target domain and do not use a type transition rule. The other privilege requirements,
however, still hold.
[ 111 ]
Process Domains and File-Level Access Controls
Some SELinux-aware applications are even able to change their current context (and not just
the context of the application they execute). In order to do so, the application domain needs
the dyntransition privilege (one of the privileges supported for process-level activities).
One example of such an application is OpenSSH, which by default runs in the sshd_t
domain but can transition to the sftpd_t type.
Querying initial contexts
If a label is absent (or invalid), SELinux will show the process as unlabeled_t. This is
because for files, unlabeled_t is defined as the initial security context for a security ID
(SID).
The initial contexts for various security IDs can be queried using seinfo:
# seinfo --initialsid -x
Initial SID: 27
devnull: system_u:object_r:null_device_t:s0
scmp_packet: system_u:object_r:unlabeled_t:s0
...
file: system_u:object_r:unlabeled_t:s0
kernel: system_u:system_r:kernel_t:s0
Limiting the scope of transitions
For security reasons, Linux systems can reduce the ability for processes to gain elevated
privileges under certain situations or provide additional constraints to reduce the likelihood
of vulnerabilities to be exploitable. The SELinux developers too honor these situations.
Sanitizing environments on transition
When a higher-privileged command is executed (be it a setuid application or one where
capabilities are added to the session), the GNU C Library (glibc) will sanitize the
environment. This means that a set of sensitive environment variables is discarded to make
sure that attackers or malicious persons or applications cannot influence the session.
[ 112 ]
Process Domains and File-Level Access Controls
This secure execution is controlled through an Executable and Linkable Format (ELF)
auxiliary vector called AT_SECURE. When set, environment variables such as LD_PRELOAD,
LD_AUDIT, LD_DEBUG, TMPDIR, and NLSPATH are removed from the session.
SELinux will force this sanitation on domain transitions as well, ensuring that the newly
executed domain does not have access to these sensitive environment variables. Of course,
sometimes the transitioned domain requires these variables (not all domains are security
sensitive, so dropping the environment variables at all times might result in unusable
application domains).
To allow transitions without sanitizing the environment, the noatsecure permission can
be granted to domain transitions. For instance, when a Firefox plugin is executed (which
results in a domain transition to mozilla_plugin_t) the environment variables need to be
kept. As such, these transitions have noatsecure set:
# sesearch -t mozilla_plugin_t -p noatsecure -A
Found 4 semantic av rules:
allow xguest_t mozilla_plugin_t : process { ... noatsecure };
allow staff_t mozilla_plugin_t : process { ... noatsecure };
allow user_t mozilla_plugin_t : process { ... noatsecure };
allow unconfined_t mozilla_plugin_t : process { ... noatsecure };
Disabling unconstrained transitions
A second security constraint that Linux supports is to mount a file system with the nosuid
option. When set, no setuid and setgid binaries on that file system will have any effect
on the effective user or group ID of the executing session. In other words, a setuid
application on a file system mounted with nosuid will act as if there were no setuid bit
set.
For SELinux, any executable with a file context that would result in a domain transition will
only result in a domain transition if the target domain is bounded by the parent domain. If
it is not bounded, then the domain transition will not occur and the session will remain in
the current context (or the command will fail to execute if the application is not allowed to
run in the current context).
A bounded domain is not just calculated live based on the permissions though. SELinux has
an explicit rule that enforces a target domain to be bounded by a parent domain. Even when
permissions are later added to the bounded domain, they will be denied by the SELinux
security subsystem as long as they aren't part of the parent domain either.
[ 113 ]
Process Domains and File-Level Access Controls
To view the current bounded domains, the seinfo application can be used. However, this
functionality was only recently introduced (with the setools v4 release) and most
distributions do not provide it yet. On Gentoo, the application is available:
# seinfo --typebounds
Typebounds: 1
typebounds mozilla_t mozilla_plugin_t;
Using Linux's NO_NEW_PRIVS
The use of file systems mounted with nosuid is a specific case of Linux's No New Privilege
(NNP) support. NNP is a process-specific attribute that tells the Linux kernel that the
process is not to be granted additional privileges any more. From that point onwards, the
constraints as mentioned before hold, and SELinux will only allow domain transitions if it is
towards a bounded domain.
The parameter can be set by applications themselves using the process control function
prctl(), but users can also influence this. The setpriv command can be used to launch
applications with PR_SET_NO_NEW_PRIVS set (which is the parameter that applications can
pass through the prctl() function).
As an example, create the following simple Python-based CGI script in a regular user's
home directory:
$ mkdir ~/cgi-bin
$ cat > ~/cgi-bin/test.py << EOF
#!/usr/bin/env python
import sys, time
import subprocess
import cgi, cgitb
cgitb.enable()
print 'Content-Type: text/html;charset=utf-8\n'
PIPE = subprocess.PIPE
STDOUT = subprocess.STDOUT
pd = subprocess.Popen(['ping','-c','1','localhost'], stdout=PIPE,
stderr=STDOUT)
while True:
output = pd.stdout.read(1)
if output == '' and pd.poll() != None:
break
if output != '':
sys.stdout.write(output)
sys.stdout.flush()
EOF
[ 114 ]
Process Domains and File-Level Access Controls
With this CGI script now available, first launch a simple CGI-capable web server (we will
pick port 6020 as unprivileged users should be able to have processes bind to this port) and
connect to it:
$ python -m CGIHTTPServer 6020
In a different session, connect to the web server and call the test.py CGI script:
$ curl http://localhost:6020/cgi-bin/test.py
PING localhost (127.0.0.1) 56(84) bytes of data
64 bytes from localhost (127.0.0.1): icmp_seq=1 ttl=64 time=0.002 ms
-- localhost ping statistics -1 packets transmitted, 1 received, 0% packet loss, time 0ms
rtt min/avg/max/mdev = 0.002/0.002/0.002/0.000 ms
Now, launch the same CGI-capable web server, but with NNP enabled:
$ setpriv --no-new-privs python -m CGIHTTPServer 6020
Again, connect to the web server and call the test.py CGI script:
$ curl http://localhost:6020/cgi-bin/test.py
ping: icmp open socket: Permission denied
Because Linux's NNP is enabled, the ping command is not able to obtain the higher
privileges needed to open the socket.
Sometimes, the SELinux policy doesn't even allow an application to be executed without
transitioning. In that case, an execute_no_trans denial will show up:
type=AVC msg=audit(1150125191.592:740): avc: denied
{ execute_no_trans } for pid=2793 comm="pipe"
name="PostFix.mail.SpamAssassin.spamfilter.sh" dev=md9 ino=56842
scontext=system_u:system_r:postfix_pipe_t:s0
tcontext=system_u:object_r:ql_spamassassin_client_exec_t:s0
tclass=file permissive=0
Types, permissions, and constraints
Now that we know more about types (both for processes as well as files and other
resources), let's look into how these are used in the SELinux policy in more detail.
[ 115 ]
Process Domains and File-Level Access Controls
Understanding type attributes
We have discussed the sesearch application already and how it can be used to query the
current SELinux policy. Let's look again at the process transitions:
$ sesearch -s initrc_t -t httpd_t -c process -p transition -A
Found 1 semantic av rules:
allow initrc_domain daemon : process transition ;
Even though we asked for the rules related to the initrc_t source domain and the
httpd_t target, we get a rule back for the initrc_domain source domain and the daemon
target. What sesearch did here was show us how the requested permission is allowed by
SELinux, but through attributes assigned to the initrc_t and httpd_t types.
Type attributes in SELinux are used to group multiple types and assign privileges to those
groups rather than having to assign the privileges to each type individually. In the case of
initrc_domain, the following types are all tagged with the initrc_domain attribute, as
can be seen through the seinfo application:
$ seinfo -ainitrc_domain -x
initrc_domain
piranha_pulse_t
initrc_t
openshift_initrc_t
kdumpctl_t
init_t
glusterd_t
cluster_t
condor_startd_t
As we can see, the initrc_t type is indeed one of the types tagged with initrc_domain.
Similarly, the daemon attribute is assigned to several types (several hundred, even). So the
single allow rule mentioned earlier consolidates more than a thousand rules into one
(hundreds of allow rules, each for the preceding eight initrc domains).
Attributes are being used increasingly in the policy as a way of consolidating and
simplifying policy development. With seinfo -a, you can get an overview of all attributes
supported in the current policy.
[ 116 ]
Process Domains and File-Level Access Controls
Querying domain permissions
The most common rules in SELinux are the allow rules, informing the SELinux subsystem
what permissions a domain has. Allow rules use the following syntax:
allow <source> <destination> : <class> <permissions>;
The <source> field is almost always a domain, whereas the <destination> field can be of
any kind of type.
The <class> field allows us to differentiate privileges based on the resource, whether it is
for a regular file, a directory, a TCP socket, a capability, and so on. A full overview of all
supported classes can be obtained from seinfo -c. Each class has a set of permissions
assigned to it that SELinux can control. For instance, the sem class (used for semaphore
access) has the following permissions associated with it:
$ seinfo -csem -x
sem
associate
create
write
unix_read
destroy
getattr
setattr
read
unix_write
In the <permissions> field, most rules will bundle a set of permissions through the use of
curly brackets ({}):
allow user_t etc_t : file { ioctl read getattr lock execute
execute_no_trans open };
This syntax allows policy developers to make very fine-grained permission controls. We can
use the sesearch command to query these rules. The more options that are given to the
sesearch command, the finer-grained our search parameters become. For instance,
sesearch -A would give us all allow rules currently in place. Adding a source (-s) filters
the output to only show the allow rules for this domain. Adding a destination or target (-t)
filters the output even more. Other options that can be used to filter through allow rules
with sesearch are the class (-c) and permission (-p) options.
[ 117 ]
Process Domains and File-Level Access Controls
The syntax also perfectly matches the information provided by the AVC denials:
type=AVC msg=audit(1371993742.009:15990): avc: denied
{ getattr } for pid=31069 comm="aide"
path="/usr/lib64/postgresql-9.2/bin/postgres"
dev="dm-3" ino=803161 scontext=root:sysadm_r:aide_t
tcontext=system_u:object_r:postgresql_exec_t tclass=file
If we wanted to fix this denial by granting it through a SELinux policy rule, then that rule
would be as follows:
allow aide_t postgresql_exec_t : file { getattr };
Learning about constraints
The allow statements in SELinux, however, only focus on the type-related permissions.
Sometimes, though, we need to restrict certain actions based on the user or role information.
In SELinux, this is supported through constraints.
Constraints in SELinux are rules that are applied against a class and a set of its permissions
that have to be true in order for SELinux to further allow the request. Consider the
following constraint on process transitions:
constrain process
{ transition dyntransition noatsecure siginh rlimitinh }
(
u1 == u2 or
(
t1 == can_change_process_identity and
t2 == process_user_target
) or (
t1 == cron_source_domain and
(
t2 == cron_job_domain or
u2 == system_u
)
) or (
t1 == can_system_change and
u2 == system_u
) or (
t1 == process_uncond_exempt
)
);
[ 118 ]
Process Domains and File-Level Access Controls
This constraint says that at least one of the following rules has to be true if a transition,
dyntransition, or any of the other three mentioned process permissions is invoked:
The SELinux user of the source (u1) and that of the target (u2) have to be the
same
The SELinux type of the source (t1) has to have the
can_change_process_identity attribute set, and the SELinux type of the
target (t2) has to have the process_user_target attribute set
The SELinux type of the source (t1) has to have the cron_source_domain
attribute set, and either the target type (t2) should have cron_job_domain as an
attribute or the target SELinux user (u2) should be system_u
The SELinux type of the source (t1) has to have the can_system_change
attribute set, and the SELinux user of the target (u2) has to be system_u
The SELinux type of the source (t1) has to have the process_uncond_exempt
attribute set
It is through constraints that UBAC is implemented, as follows:
u1
or
or
or
or
==
u1
u2
t1
t2
u2
==
==
!=
!=
system_u
system_u
ubac_constrained_type
ubac_constrained_type
You can list the currently enabled constraints using seinfo --constrain, but the output
expands the attributes immediately and uses a postfix notation, making it not that obvious
to read.
Summary
In this chapter, we learned how file contexts are stored as extended attributes on the file
system and how we can manipulate the contexts of files and other file system resources.
Next, we found out where SELinux keeps its definitions on what contexts are to be assigned
to which files.
We also learned to work with the semanage tool to manipulate this information and
worked with a few tools that use this information to enforce contexts on resources.
[ 119 ]
Process Domains and File-Level Access Controls
On the process level, we got our first taste of SELinux policies, identifying when a process is
launched inside a certain SELinux domain. With it, we covered the sesearch and seinfo
applications to query the SELinux policy. Finally, we looked at some of Linux's security
implementations that limit the transition scope of applications, which also influences
SELinux domain transitions.
In the next chapter, we will expand our knowledge of protecting the operating system
through the networking-related features of SELinux.
[ 120 ]
5
Controlling Network
Communications
The SELinux mandatory access controls go much beyond its file and process access controls.
One of the features provided by SELinux is the ability to control network communications.
By default, the socket-based access control mechanism is used for general network access
controls, but more detailed approaches are also possible.
In this chapter, we will:
Learn how network access controls are governed by SELinux
Cover what administrators can do to further strengthen network communications
using iptables
Describe how SELinux policies can be used for cross-system security through
labeled IPsec
We'll finish the chapter with an introduction to CIPSO labeling and its integration with
SELinux.
From IPC to TCP and UDP sockets
Linux applications communicate with each other either directly or over a network. But the
difference between direct communication and networked communication, from an
application programmer's point of view, is not always that big. Let's look at the various
communication methods that Linux supports and how SELinux aligns with them.
Controlling Network Communications
Using shared memory
The method that is the least network-like is the use of shared memory. Applications can
share certain parts of the memory with each other and use those shared segments to
communicate between two (or more) processes. To govern access to the shared memory,
application programmers can use mutual exclusions (mutexes) or semaphores. A
semaphore is an integer that is atomically incremented or decremented (ensuring that two
applications do not overwrite each other's values without knowing about the value change),
whereas a mutex can be interpreted as a special kind of semaphore that only takes the
values 0 or 1.
On Linux, two implementations exist for shared memory access and control: SysV-style and
POSIX-style. We will not dwell on the advantages and disadvantages of each, but rather
look at how SELinux governs access to these implementations.
SELinux controls the SysV-style primitives through specific classes: sem for semaphores and
shm for shared memory. The semaphores, mutexes, and shared memory segments inherit
the context of the first process that creates them.
An example AVC denial for a SysV semaphore-related communication failure is as follows:
type=AVC msg=audit(1443147735.370:444): avc: denied
{ unix_read unix_write } for pid=1454 comm="gnome-shell"
key=17908779 scontext=system_u:system_r:xdm_t:s0-s0:c0.c1023
tcontext=system_u:system_r:xserver_t:s0-s0:c0.c1023
tclass=sem permissive=0
Administrators who want to control the SysV-style primitives can use the various ipc*
commands:
With ipcs, the current SysV-style primitives (such as shared memory segments
and semaphores) can be listed
With ipcrm, these shared memory segments and semaphores can be
removed/destroyed
With ipcmk, new shared memory segments and semaphores can be created
[ 122 ]
Controlling Network Communications
For instance, let's first list the resources and then remove one of the semaphores:
# ipcs
------ Message Queues -------key
msqid
owner
perms
used-bytes messages
------ Shared Memory Segments -------key
shmid
owner
perms
bytes
0x01124612 0
root
600
1000
------ Semaphore Arrays -------key
semid
owner
0x00000000 65536
apache
0x00000000 98305
apache
0x00000000 131074
apache
0x00000000 163843
apache
0x00000000 196612
apache
# ipcrm -s 98305
perms
600
600
600
600
600
nattch
6
status
dest
nsems
1
1
1
1
1
When POSIX-style semaphores, mutexes, and shared memory segments are used, SELinux
controls those operations through the file-based access controls. The POSIX-style approach
uses files in /dev/shm, which is simple for administrators to control and manage.
Communicating locally through pipes
A second large family of communication methods in operating systems is the use of pipes.
As the name implies, pipes are generally one-way communication tunnels, with
information flowing from one (or more) senders to one receiver (there are exceptions to this,
such as Solaris pipes, which act as bidirectional channels, but those are not supported on
Linux). Another name that is often used for a pipe is first-in, first-out (FIFO).
We have two types of pipes in Linux: anonymous pipes (also known as unnamed pipes)
and named pipes. The difference is that a named pipe uses a special type of file in the
regular file system as its identification, whereas anonymous pipes are constructed through
the applications with no representation in the regular file system.
[ 123 ]
Controlling Network Communications
In both cases, SELinux will see the pipes as files of the fifo_file class. Named pipes will
have their path associated with the regular file system and are created using the mknod or
mkfifo commands (or through the mkfifo() function when handled within applications).
Anonymous pipes, however, will be shown as being part of the pipefs file system. This is a
pseudo-file system, not accessible to users but still represented as a file system through
Linux's virtual file system (VFS) abstraction.
The following are two denials associated with FIFOs: the first one is a named pipe with the
/run/systemd/initctl/fifo path while the second one is an anonymous one. Notice
how the second is shown to be part of the pipefs device:
avc: denied { getattr } for pid=16755 comm="su"
path="/run/systemd/initctl/fifo" dev="tmpfs" ino=822
scontext=staff_u:sysadm_:sysadm_su_t:s0-s15:c0.c1023
tcontext=system_u:object_r:initctl_t:s0
tclass=fifo_file permissive=0
avc: denied { write } for pid=4445 comm="entrypoint.sh"
path="pipe:[596879]" dev="pipefs" ino=596879
scontext=system_u:system_r:svirt_lxc_net_t:s0:c845,c982
tcontext=system_u:system_r:kernel_t:s0
tclass=fifo_file permissive=0
From a SELinux policy point of view, access control is handled on the FIFO file level. Two
domains that both have the correct set of privileges toward the context of the FIFO file will
be able to communicate with each other.
Administrators can find out which process is communicating over FIFOs with other
processes through tools such as lsof or by querying the /proc file system (as part of the
/proc/<pid>/fd listings). For instance, the following snippet from lsof shows the pipebased communication setup between two Postfix-related processes (the NODE column shows
the FIFO identifier, which is the same for the two processes):
COMMAND PID USER
FD TYPE DEVICE SIZE/OFF NODE
master 1320 root
5r FIFO 0,8
0t0
17553
qmgr
1345 postfix 92w FIFO 0,8
0t0
17553
NAME
pipe
pipe
Conversing over UNIX domain sockets
With pipes being for one-way communication only, any type of conversation between two
processes would require two pipes. Also, true client/server-like communication with pipes
is challenging to implement. To accomplish the more advanced communication flows
between processes, sockets were introduced.
[ 124 ]
Controlling Network Communications
Most administrators are aware that TCP and UDP communication occurs over sockets.
Applications can bind to a socket and listen for incoming communications or use the socket
to connect to other, remote services. But even on a single Linux system, sockets can be used
to facilitate the communication flows. These sockets are called UNIX domain sockets.
We can distinguish between two socket definitions, similar to pipes: unnamed sockets and
named sockets. And like pipes, the distinction is in the path that is used to identify a socket.
Named sockets are created on the regular file system, while unnamed sockets are part of the
sockfs pseudo-file system. Similarly, sockets can be queried through utilities such as lsof
or through the /proc/<pid>/fd listings.
There is another distinction regarding UNIX domain sockets though, and that is the type of
communication that the UNIX domain socket allows. UNIX domain sockets can be created
as datagram sockets (data sent to the socket is read in same-sized chunks and format) or
streaming sockets (data sent to the socket can be read in different-sized chunks). This has
some repercussions on the SELinux policy rules.
For SELinux, communicating over UNIX domain sockets requires both domains to have the
proper communication privileges toward the socket file type (open, read, and write),
depending on the direction of the communication.
Additionally, the sending (client) domain requires the following privileges as well toward
the receiving (server) domain, which depends on the type of communication across the
socket:
The connectto privilege toward the unix_stream_socket class of the
receiving (server) domain (in the case of stream sockets)
The sendto privilege toward the unix_dgram_socket class of the receiving
(server) domain (in the case of datagram sockets)
Like with pipes, SELinux denials will also reveal the type of UNIX domain socket used:
avc: denied { connectto } for pid=2597 comm="nginx"
path="/home/git/gitlab/tmp/sockets/gitlab.socket"
scontext=system_u:system_r:httpd_t:s0
tcontext=system_u:system_r:initrc_t:s0
tclass=unix_stream_socket permissive=0
avc: denied { read write } for pid=31230 comm="iptables"
path="socket:[224507]" dev=sockfs ino=224507
scontext=unconfined_u:system_r:iptables_t:s0
tcontext=unconfined_u:system_r:fail2ban_t:s0
tclass=unix_stream_socket permissive=0
[ 125 ]
Controlling Network Communications
Understanding netlink sockets
A special case of UNIX domain sockets are netlink sockets. These are sockets that allow user
space applications to communicate and interact with kernel processes. Unlike the regular
UNIX domain sockets, whose target context is associated with the owner of that socket,
netlink sockets are always local to the SELinux context.
In other words, when a domain such as sysadm_t wants to manipulate the kernel's routing
information, it will open and communicate with the kernel through a netlink route socket,
identified through the netlink_route_socket class:
# sesearch -s sysadm_t -t sysadm_t -c netlink_route_socket -A
allow sysadm_t sysadm_t : netlink_route_socket { ioctl... nlmsg_read };
As applications gain more features, it might be that some of these features are no longer
allowed by the current SELinux policy. Administrators will then need to update the
SELinux policy to allow the netlink communication.
An overview of supported netlink sockets can be devised from the netlink information in its
manual page:
# man netlink
For instance, the NETLINK_XFRM socket is supported through the SELinux
netlink_xfrm_socket class.
Dealing with TCP and UDP sockets
When we go further up the chain, we look at socket communication over TCP and UDP
sockets. In this case, rather than the communication being directly between processes (and
thus in Linux terminology between SELinux domains), the flows are from and to TCP and
UDP sockets.
SELinux will assign types to TCP and UDP ports as well, and these types are then the types
to use for the socket communication. For SELinux, a client application connecting to the
DNS port (TCP port 53, which is assigned the dns_port_t type in most SELinux policies)
uses the name_connect permission over the tcp_socket class toward the typed port. For
UDP services (and the udp_socket class), name_connect is not used. Daemon
applications, on the other hand, use the name_bind privilege to bind themselves to the port.
[ 126 ]
Controlling Network Communications
Administrators can fine-tune which label is assigned to which TCP or UDP port. For this,
the semanage port command can be used. For instance, to list the current port definitions,
you'd use this command:
# semanage port -l
SELinux Port Type
adb_port_t
afs3_callback_port_t
...
http_cache_port_t
http_port_t
Proto
tcp
tcp
Port Number
5037
7001
tcp
tcp
3128, 8080, 8118, 10001-10010
80,443,488,8008,8009,8443
In this example, we see that the http_port_t label is assigned to a set of TCP ports. Web
server domains that are allowed to bind to http_port_t are as such allowed to bind to any
of the mentioned ports.
To allow a daemon, such as an SSH server, to bind to other (or additional) ports, we need to
tell SELinux to map this port to the appropriate label. For instance, to allow the SSH server
to bind to port 10122, we first check whether this port already holds a dedicated label or
not. This can be accomplished using the sepolicy command (part of policycoreutilsdevel in RHEL or sys-apps/policycoreutils in Gentoo):
# sepolicy network -p 10122
10122: tcp unreserved_port_t 1024-32767
10122: udp unreserved_port_t 1024-32767
The unreserved_port_t label is not a dedicated one, so we can assign the ssh_port_t
label to it:
# semanage port -a -t ssh_port_t -p tcp 10122
Removing a port definition works similarly:
# semanage port -d -t ssh_port_t -p tcp 10122
When a specific port type is already assigned, then the utility will give the following error:
# semanage port -a -t ssh_port_t -p tcp 80
ValueError: Port tcp/80 already defined
If this is the case and another port cannot be used, then there is no other option than to
modify the SELinux policy.
[ 127 ]
Controlling Network Communications
Listing connection contexts
Many of the tools in an administrator's arsenal are able to display security context
information. Like with the core utilities, most of these tools use the -Z option for this. For
instance, to list the running network-bound services, netstat can be used:
# netstat -naptZ | grep ':80'
tcp
0
0 0.0.0.0:80
0.0.0.0:*
system_u:system_r:httpd_t:s0
LISTEN
2267/httpd \
Even lsof displays the context when asked to:
# lsof -i :80 -Z | grep httpd
httpd 2267 system_u:system_r:httpd_t:s0 root
0t0
TCP *:http (LISTEN)
3u IPv4
15962 \
Another advanced command for querying connections is the ss command. Just calling ss
will display all the connections of the current system. When adding -Z, it adds the context
information as well.
For instance, the following command queries for listening TCP services:
# ss -ltnZ
State
Recv-Q Send-Q Local Address:Port Peer Address:Port
LISTEN 0
128
*:22
*:* \
users:(("sshd",pid=747, \
proc_ctx=system_u:system_r:sshd_t:s0-s0:c0.c1023,fd=3))
More advanced queries can be called as well–consult the ss manual page for more
information.
Linux netfilter and SECMARK support
The approach with TCP and UDP ports has a few downsides. One of them is that there is no
knowledge of the target host, so you cannot govern where an application can connect to.
There is also no way of limiting daemons from binding on any interface: in a multi-homed
situation, we might want to make sure that a daemon only binds on the interface facing the
internal network and not the Internet-facing one, or vice versa.
[ 128 ]
Controlling Network Communications
In the past, SELinux allowed support for this binding issue through the interface and node
labels: a domain could only be allowed to bind to one interface and not on any other, or
even on a particular address (referred to as the node). This support had its flaws though,
and has been largely deprecated in favor of SECMARK filtering.
Introducing netfilter
Before explaining SECMARK and how administrators can control it, let's first take a quick
look at Linux's netfilter subsystem, which is the de facto standard for local firewall
capabilities on Linux systems.
Similar to LSM, the Linux netfilter subsystem provides hooks in various stages of its
networking stack processing framework, which can then be implemented by one or more
modules. For instance, ip_tables (which uses the iptables command as its control
application) is one of those modules, while ip6_tables and ebtables are other examples
of netfilter modules. When implementing processing logic on a hook, each module also tells
the netfilter framework which priority the hook should be processed at. This enables
controllable ordering in the execution of modules (as multiple calls for the same hook can
and will be used together).
The ip_tables framework is the one we will be looking at in more detail, because it
supports the SECMARK approach. As it is commonly best known through its control
application, iptables, we will use iptables as the overarching name of this framework
from now on.
iptables offers several tables, which are functionally oriented classifications for network
processing. The common ones are as follows:
The filter table enables the standard network-filtering capabilities
The nat table is meant for modifying routing-related information from packets,
such as the source and/or destination address
The mangle table is used for modifying most of a packet's fields
The raw table is enabled when administrators want to opt out certain
packets/flows from the connection tracking capabilities of netfilter
The security table is offered to allow administrators to label packets after
regular processing is done
[ 129 ]
Controlling Network Communications
Within each table, iptables offers a default set of chains. These default chains specify
where in the processing flow (and thus which hook in the netfilter framework) rules are to
be processed. Each chain has a default policy, which is the default return value if none of
the rules in a chain match. Within the chain, administrators can add several rules, which are
processed sequentially. When a rule matches, a particular action is executed. This action can
be to allow the packet to flow through this particular hook in the netfilter framework, be
denied, or perform additional processing.
Commonly provided chains (not all chains are offered for all tables) are:
The PREROUTING chain, which is the first packet-processing step once a packet is
received
The INPUT chain, which is for processing packets meant for the local system
The FORWARD chain, which is for processing packets meant to be forwarded to
another remote system
The OUTPUT chain, which is for processing packets originating from the local
system
The POSTROUTING chain, which is the last packet-processing step before a packet
is sent
Overly simplified, the implementation of these tables and their chains roughly associates
with the priority of the calls within the netfilter framework. The chains are easily associated
with the hooks provided by the netfilter framework, whereas the table tells netfilter which
chain implementations are to be executed first.
Implementing security markings
With packet labeling, we can use the filtering capabilities of iptables (and ip6tables) to
assign labels to packets and connections. The idea is that the local firewall is used to tag
packets and connections and then use SELinux to grant (or deny) application domains the
right to use those tagged packets and connections.
This packet labeling is known as SECurity MARKings (SECMARK). Although we use the
term SECMARK, there are actually two markings: one for packets (SECMARK) and one for
connections (CONNSECMARK). The SECMARK capabilities are offered through two tables:
mangle and security. Only these tables currently have the action of tagging packets and
connections available in their rule set.
[ 130 ]
Controlling Network Communications
The mangle table has a higher execution priority than most other tables. Implementing
SECMARK rules on this level is generally done when all packets need to be labeled, even
when many of these packets will eventually be dropped.
The security table is next in execution priority after the filter table. This allows the
regular firewall rules to be executed first and only tag those packets that are allowed by the
regular firewall to continue. Using the security table allows the filter table to
implement the discretionary access control rules first and have SELinux execute its
mandatory access control logic only if the DAC rules are executed successfully.
Once a SECMARK action is triggered, it will assign a packet type to the packet or
communication. SELinux policy rules will then validate whether a domain is allowed to
receive (recv) or send packets of a particular type. For instance, the Firefox application
(running in the mozilla_t domain) will be allowed to send and receive HTTP client
packets:
allow mozilla_t http_client_packet_t : packet { send recv };
Another supported permission set for SECMARK related packets is
forward_in and forward_out. These permissions are checked when
using forwarding in netfilter.
Important to know is that once a SECMARK action is defined, then all the packets that
eventually reach the operating system's applications will have a label associated with
them–even if no SECMARK rule was executed for that particular packet or connection. If that
occurs, then the default unlabeled_t label is set. The default SELinux policy implemented
in RHEL allows all domains to send and receive unlabeled_t packets, but this is not true
for all Linux distributions.
Assigning labels to packets
When no SECMARK related rules are loaded in the netfilter subsystem, then SECMARK is not
enabled and none of the SELinux rules related to SECMARK permissions are checked. The
network packets are not labeled, so no enforcement can be applied to them. Of course, the
regular socket-related access controls still apply–SECMARK is just an additional control
measure.
[ 131 ]
Controlling Network Communications
Once a SECMARK rule is enabled, SECMARK becomes active and SELinux starts enforcing the
packet-label mechanism. This means that all of the network packets now need a label on
them (as SELinux can only deal with labeled resources). The default label (the initial
security context) for packets is unlabeled_t, which means that no marking rule matches
this particular network packet.
Because SECMARK rules are now being enforced, all domains that interact with network
packets are checked to see whether they are allowed to send or receive these packets. In
order to simplify management, some distributions enable send and receive rights against
the unlabeled_t packets for all domains. Without these rules, all network services would
stop functioning properly the moment a single SECMARK rule were enabled.
To assign a label to a packet, we need to define a set of rules that match a particular
network flow and then call the SECMARK logic (to tag the packet or communication with a
label), and perhaps immediately the ACCEPT target as well in order to allow this particular
communication to reach the system.
Let's implement two rules: one is to allow communication toward websites (port 80) and tag
the related network packets with the http_client_packet_t type (so that web browsers
are allowed to send and receive these packets), while the other one is to allow
communication toward the locally running web server (port 80) and tag its related network
packets with the http_server_packet_t type (so that web servers are allowed to send
and receive these packets). For each rule set, we also enable connection tracking so that
related packets are automatically labeled correctly and passed.
Use these commands for the web server traffic:
# iptables -t filter -A INPUT -m conntrack \
--ctstate ESTABLISHED,RELATED -j ACCEPT
# iptables -t filter -A INPUT -p tcp -d 192.168.100.15 \
--dport 80 -j ACCEPT
# iptables -t security -A INPUT -p tcp --dport 80 -j SECMARK \
--selctx "system_u:object_r:http_server_packet_t:s0"
# iptables -t security -A INPUT -p tcp --dport 80 \
-j CONNSECMARK --save
[ 132 ]
Controlling Network Communications
Use these for the browser traffic:
# iptables -t filter -A OUTPUT -m conntrack \
--ctstate ESTABLISHED -j ACCEPT
# iptables -t filter -A OUTPUT -p tcp --dport 80 -j ACCEPT
# iptables -t security -A OUTPUT -p tcp --dport 80 -j SECMARK \
--selctx "system_u:object_r:http_client_packet_t:s0"
# iptables -t security -A OUTPUT -p tcp --dport 80 \
-j CONNSECMARK --save
Finally, to copy connection labels to the established and related packets, use these:
# iptables -t security -A INPUT -m state \
--state ESTABLISHED,RELATED -j CONNSECMARK --restore
# iptables -t security -A OUTPUT -m state \
--state ESTABLISHED,RELATED -j CONNSECMARK --restore
Even this simple example shows that firewall rule definitions are an art by themselves, and
that the SECMARK labeling is just a small part of it. However, using the SECMARK rules makes
it possible to allow certain traffic while still ensuring that only well-defined domains are
allowed to interact with that traffic. For instance, it can be implemented on kiosk systems to
only allow one browser to communicate with the Internet while all other browsers and
commands aren't: tag all browsing-related traffic with a particular label, and only allow that
browser domain the send and recv permissions on that label.
Labeled networking
Another approach to further fine-tune the access controls on the network level is to
introduce labeled networking. With labeled networking, security information is passed on
between hosts (unlike SECMARK, which only starts when the packet is received by the
netfilter subsystem). This is also known as peer labeling, as the security information is
passed on between hosts (peers).
The advantage of labeled networking is that security information is retained across the
network, allowing an end-to-end enforcement on mandatory access-control settings
between systems as well as retaining the sensitivity level of communication flows between
systems. The major downside however is that this requires an additional network
technology (protocol) that is able to manage labels on network packets or flows.
[ 133 ]
Controlling Network Communications
SELinux currently supports two implementations as part of the labeled networking
approach: NetLabel and labeled IPsec. With NetLabel, two implementations exist: fallback
labeling and CIPSO. In both cases, only the sensitivity of the source domain is retained
across the communication. Labeled IPsec supports transporting the entire security context
with it.
There is actually an exception to this: NetLabel supports loopback-enabled
full-label support. In that case, the full label (and not only the sensitivity
and categories) is passed on. However, this only works for
communications that go through the loopback interface.
Quite some time ago, support for NetLabel/CIPSO and labeled IPsec was merged into a
common framework, which introduces three additional privilege checks in SELinux:
interface checking, node checking, and peer checking.
These privilege checks are only active when labeled traffic is being used; without labeled
traffic, these checks are simply ignored.
Fallback labeling with NetLabel
The NetLabel project supports fallback labeling, where administrators can assign labels to
traffic from or to network locations that don't actually use labeled networking. By using
fallback labeling, the peer controls that are mentioned in the next few sections can be
applied even without labeled IPsec or NetLabel/CIPSO being in place.
Install the netlabel_tools package to obtain the netlabelctl command, which is used
to control the NetLabel configurations. Once that is accomplished, we can start adding
rules. Let's create a fallback label assignment for all traffic originating from the
192.168.100.1 address:
# netlabelctl unlbl add interface:eth0 address:192.168.100.1 \
label:system_u:object_r:netlabel_peer_t:s0
To list the current definitions, use the following command:
# netlabelctl -p unlbl list
Accept unlabeled packets : on
Configured NetLabel address mappings (1)
interface: eth0
address: 192.168.100.1/32
label: "system_u:object_r:netlabel_peer_t:s0"
[ 134 ]
Controlling Network Communications
With this rule in place, labeled networking is active. Any traffic originating from the
192.168.100.1 address will be labeled with the netlabel_peer_t:s0 label, while all
other traffic will be labeled with the (default) unlabeled_t:s0 label.
Of course, the SELinux policy must allow all domains to have the recv permission from
either the unlabeled_t peers or the netlabel_peer_t peers. If not, the following AVC
denial will prevent that domain from receiving the network traffic:
avc: denied { recv } for saddr=1.2.3.4 src=500 daddr=4.3.2.1
dest=500 netif=eth0
context=system_u:system_r:racoon_t:s0-s15:c0.c1023
tcontext=system_u:object_r:unlabeled_t:s15:c0.c1023
tclass=peer permissive=0
Fallback labeling is useful for supporting a mix of labeled networking environments and
non-labeled networks.
Limiting flows based on the network interface
The idea behind interface checking is that each packet that comes into a system passes an
ingress check on an interface, whereas a packet that goes out of a system passes an
egress check. ingress and egress are the SELinux permissions involved, whereas
interfaces are given a security context.
Interface labels can be granted using the semanage tool and are especially useful for
assigning sensitivity levels and categories to interfaces, as we will do in the following
example where the categories for the tap0 interface are set:
# semanage interface -a -t netif_t -r s0-s0:c0.c128 tap0
Similar to the other semanage commands, we can also view the current mappings as
follows:
# semanage interface -l
SELinux Interface
Context
tap0
system_u:object_r:netif_t:s0-s0:c0.c128
Keep in mind that for inbound communications, the acting domain is the peer. In the case of
labeled IPsec, this would be the client domain initiating the connection, whereas in
NetLabel/CIPSO, this is the associated peer label (such as netlabel_peer_t).
[ 135 ]
Controlling Network Communications
This is shown in the following denial:
avc: denied { ingress } for saddr=147.32.127.222 src=21
daddr=10.0.2.15 dest=53060 netif=eth0
scontext=system_u:object_r:netlabel_peer_t:s0
tcontext=system_u:object_r:netif_t:s0-s15:c0.c1023
tclass=netif permissive=0
By default, the interface is labeled with netif_t and without category constraints. This
will, however, not be shown in the semanage interface -l output as its default output
is empty.
Accepting peer communication from selected
hosts
Nodes represent specific hosts (or a network of hosts) that data is sent toward (sendto) or
received from (recvfrom) and are handled through the SELinux node class. Just like
interfaces, these can be listed and defined by the semanage tool. In the following example,
we mark the 10.0.0.0/8 network with the node_t type and associate a set of categories to
it:
# semanage node -a -t node_t -p ipv4 -M 255.255.255.255 \
-r s0-s0:c0.c128 192.168.100.1
Again, we can list the current definitions too:
# semanage node -l
IP Address
Netmask
Protocol Context
192.168.100.1 255.255.255.255 ipv4
\
system_u:object_r:node_t:s0-s0:c0.c128
Similarly to the network interface flow control, the acting domain for incoming
communications is the peer label. This can be seen from the following AVC denial:
avc: denied { recvfrom } for pid=7204 comm="client.pl"
saddr=10.4.2.1 src=56403 daddr=10.4.2.112 dest=7081
netif=eth0 scontext=system_u:object_r:netlabel_peer_t:s0
tcontext=system_u:object_r:node_t:s0 tclass=node permissive=0
By default, nodes are labeled with node_t and without category constraints. This will,
however, not be shown in the semanage node -l output as its default output is empty.
[ 136 ]
Controlling Network Communications
Verifying peer-to-peer flow
The final check is a peer class check. In the case of labeled IPsec, this is the label of the
socket that is sending out the data (such as mozilla_t). For NetLabel/CIPSO, however, the
peer will be static, based on the source, as NetLabel (actually CIPSO) is only able to pass on
sensitivity levels. A common label seen for NetLabel is netlabel_peer_t.
The following is an example of an AVC denial on the peer class, found in the audit logs of a
web server that takes part in a labeled IPsec setup:
avc: denied { recv } for pid=9 comm="rcu_preempt"
saddr=192.168.100.1 src=40870 daddr=192.168.100.152 dest=80
netif=eth0 scontext=system_u:system_r:httpd_t:s0
tcontext=staff_u:staff_r:mozilla_t:s0 tclass=peer permissive=0
As we can see, unlike the interface and node checks, peer checks have the peer domain as
the target rather than the source. In this example, we saw that the httpd_t domain (local)
does not have the right to receive traffic from the mozilla_t peer.
In all of the previous examples, the process listed in the denial has nothing to do with the
actual denial. This is because the denial is triggered from within a kernel subsystem rather
than through a call made by a user process. As a result, an unrelated process that was
interrupted while the denial was being prepared is listed.
To finish up, take a look at the following diagram, which gives an overview of these various
controls and the level to which they apply:
Schematic overview of the various network-related SELinux controls
[ 137 ]
Controlling Network Communications
The top-level controls are handled on the domain level (such as httpd_t) whereas the
bottom-level controls are on the peer level (such as netlabel_peer_t).
Using old-style controls
Most Linux distributions enable what is called the network_peer_control capability.
This is an enhancement within the SELinux subsystem that uses the previously mentioned
peer class for verifying peer-to-peer flow.
However, SELinux policies can opt to return to the previous approach, where peer-to-peer
flow is no longer controlled over the peer class, but uses the tcp_socket class for
communication. In that case, the tcp_socket class will be used against the peer domain,
and it will also use the recvfrom permission (on top of the existing tcp_socket
permissions).
The current value of the network_peer_control capability can be queried through the
SELinux file system:
# cat /sys/fs/selinux/policy_capabilities/network_peer_controls
1
If the value is 0, then the previously mentioned peer controls will be handled through the
tcp_socket class instead of the peer class.
Policy capabilities cannot be controlled by the administrator: they are hardcoded by the
SELinux policy itself.
Labeled IPsec
Although setting up and maintaining an IPsec setup is far beyond the scope of this book,
let's look at a simple IPsec example to show how labeled IPsec is enabled on such a system.
Remember that the labeled network controls on the interface, node, and peer levels, as
mentioned earlier, are automatically enabled the moment labeled IPsec is used.
[ 138 ]
Controlling Network Communications
In an IPsec setup, there are two important concepts to be aware of:
The security policy database (SPD) contains the rules and information for the
kernel to know when communication has to be handled by a particular IP policy
(and as a result, handled through a security association).
The security association database (SAD) contains the individual security
associations. A security association (SA) is a one-way channel between two hosts
and contains all the security information about the channel. In the case of labeled
IPsec, it also contains the context information of the client that caused the security
association to materialize.
Security associations with a labeled IPsec setup are no longer purely indexed by the source
and target address, but also the source context. As such, a Linux system that participates in
a labeled IPsec setup will easily have several dozen SAs for a single communication flow, as
each SA now also represents a particular client domain.
Labeled IPsec introduces a number of additional access controls through SELinux:
Individual entries in the SPD are given a context. Domains that want to obtain an
SA need to have the polmatch privilege (part of the association class) against
this context. Also, they need to have the setcontext privilege (also part of the
association class) against their own domain to allow them to initiate an SA.
Only authorized domains are allowed to make modifications to the SPD, which is
also governed through the setcontext privilege, but now also against the SPD
context entries. This privilege is generally granted to IPsec tools such as setkey
(setkey_t) and Racoon (racoon_t).
Domains that participate in IPsec communication must have the sendto
privilege to their own association and the recvfrom privilege to the association
of the peer domain. The receiving domain also requires the recv privilege from
the peer class associated with the peer domain.
[ 139 ]
Controlling Network Communications
So while labeled IPsec cannot govern whether mozilla_t can communicate to httpd_t (as
mozilla_t needs to be able to send to its own association), it can control whether httpd_t
allows or denies incoming communication from mozilla_t (as it requires the recvfrom
privilege). This perhaps complex game of privileges is displayed in the following diagram:
SELinux controls for labeled IPsec, mainly seen from the Firefox-to-Apache communication flow
In the next example, a simple IPsec tunnel is set up between two hosts using the ipsectools applications. Instructions for Libreswan are given after these sections.
[ 140 ]
Controlling Network Communications
Setting up regular IPsec
First, the racoon daemon is configured with information about the pre-shared key (to use
during the handshake with the remote side), handshake details for the remote side, and
association information for the joined networks. The following code is an excerpt from the
racoon configuration file:
# File contains remote address with a shared key, like:
# 192.178.100.153 ThisIsABigSecret
path pre_shared_key "/etc/racoon/psk.txt";
remote 192.168.100.153 { ... };
sainfo address 10.1.2.0/24 any address 10.1.3.0/24 any { ... };
Most distributions offer sane defaults for the racoon configuration. In the preceding
example, the 192.168.100.153 IP address is the address of the remote side, whereas the
sainfo address ranges are used for the VPN (10.1.2.0/24 is local, 10.1.3.0/24 is
remote).
The setkey information (to manipulate the IPsec SA/SP databases) looks like this:
#!/usr/sbin/setkey -f
flush; spdflush;
spdadd 10.1.2.0/24 10.1.3.0/24 any
-P out ipsec esp/tunnel/192.168.1.5-192.168.100.153/require;
spdadd 10.1.3.0/24 10.1.2.0/24 any
-P in ipsec esp/tunnel/192.168.100.153-192.168.1.5/require;
Finally, we adjust the system routing information so that any communication toward the
10.1.3.0/24 network is done over the 10.1.2.1 VPN gateway:
# ip addr add 10.1.2.1/24 dev eth0
# ip route add to 10.1.3.0/24 via 10.1.2.1 src 10.1.2.1
Enabling labeled IPsec
To enable labeled IPsec, we need to inform IPsec to add a context on the security policy
database entries. Once enabled, racoon will automatically negotiate labeled IPsec support.
Adding a context to the SPD is a matter of adding a -ctx option to the spdadd commands
in the setkey configuration. For instance, we can add the ipsec_spd_t context to an IPsec
security policy as follows:
spdadd ... -ctx 1 1 "system_u:object_r:ipsec_spd_t:s0" -P out ipsec ...
[ 141 ]
Controlling Network Communications
With this change in place, we can see the context in the output of setkey -DP, which
displays the current SPD:
# setkey -DP
...
10.1.2.0/24[any] 10.1.3.0/24[any] 255
out prio def ipsec
esp/tunnel/192.168.100.152-192.168.100.153/require
created: Jul 4 21:45:44 2013 lastused:
lifetime: 0(s) validtime: 0(s)
security context doi: 1
security context algorithm: 1
security context length: 33
security context: system_u:object_r:ipsec_spd_t:s0
spid=1 seq=0 pid=3237
refcnt=1
When an application tries to communicate over IPsec with remote domains, Racoon (or any
other IKEv2 client that supports labeled IPsec, such as Libreswan's pluto) will exchange the
necessary information (including context) with the other side. Both sides will then update
the SPD with the necessary SAs and associate the same security policy information (SPI)
with it. From that point onward, the sending side will add the agreed-upon SPI information
to the IPsec packets so that the remote side can immediately associate the right context to it
again.
The huge advantage here is that the client and server contexts, including sensitivity and
categories, are synchronized (they are not actually sent over the wire with each packet, but
exchanged initially when the security associations are set up).
Using Libreswan
The previous instructions were related to the ipsec-tools applications. However, many
other IPsec supporting utilities exist. RHEL uses Libreswan as its IPsec provider.
Configuring Libreswan is a matter of configuring Libreswan's main configuration file
(ipsec.conf). Most distributions will use an include directory (such as /etc/ipsec.d)
in which connection-specific settings can be placed. Generally, this include directory is
used for the actual IPsec configurations, whereas the general ipsec.conf file is for
Libreswan behavior.
[ 142 ]
Controlling Network Communications
To use labeled IPsec with Libreswan, use the labeled_ipsec and policy_label
directives in the IPsec definition. For instance, to set up an IPsec definition between two
hosts (10.1.2.1 and 10.1.3.1), the following configuration setting can be used:
# cat /etc/ipsec.d/selinuxtest.conf
conn selinuxtest
auto=start
rekey=no
authby=secret
type=transport
left=10.1.2.1
right=10.1.3.1
ike=3des-sha1
phase2=esp
phase2alg=aes-sha1
labeled-ipsec=yes
policy-label=system_u:object_r:ipsec_spd_t:s0
leftprotoport=tcp
rightprotoport=tcp
The shared secrets used to authenticate the two sides of a connection are stored in
/etc/ipsec.secrets. In RHEL, this file includes the secrets from
/etc/ipsec.d/*.secrets so that IPsec definitions can be easily tuned through separate
files.
For instance, for the preceding configuration, the secret could look like so:
# cat /etc/ipsec.d/selinuxtest.secrets
10.1.2.1 10.1.3.1: PSK "some preshared key"
When using Libreswan and ipsec-tools together in a single IPsec setup,
it might be necessary to configure Libreswan to use the same attribute
value for the security contexts as ipsec-tools does. ipsec-tools
hardcodes this value to 10, so we must adapt Libreswan to use this value
as well. This is done in the config setup section, defined in the
ipsec.conf file, where secctx-attr-value = 10 has to be set.
NetLabel/CIPSO
With NetLabel/CIPSO support, traffic is labeled with sensitivity information that can be
used across the network. Unlike labeled IPsec, no other context information is sent or
synchronized. So when we see communication flows, they will originate from a single base
context but will have sensitivity labels based on the sensitivity label of the remote side.
[ 143 ]
Controlling Network Communications
With NetLabel, mappings are defined that inform the system which communication flows
(from particular interfaces, or even from particular IP addresses) are for a certain Domain
of Interpretation (DOI). The CIPSO standard defines the DOI as a collection of systems that
interpret the CIPSO label similarly or, in our case, use the same SELinux policy and
configuration of sensitivity labels.
With the mappings in place, NetLabel/CIPSO will pass on the sensitivity information (and
categories) between hosts. The context we will see on the communication flows will be
netlabel_peer_t, a default context assigned to NetLabel/CIPSO originated traffic.
Consider the following AVC denial:
type=AVC msg=audit(1368735963.286:1998): avc: denied { recv }
for pid=4773 comm="python-thinlinc" saddr=192.168.100.15
src=46092 daddr=192.168.100.11 dest=9000 netif=eth0
scontext=system_u:system_r:httpd_t:s0-s2:c0.c32
tcontext=system_u:object_r:netlabel_peer_t:s0:c102
tclass=peer permissive=0
The denial shows that traffic was received from a peer system with category c102, which is
not allowed for the current httpd_t context (s0-s2:c0.c32).
Through this approach, we can start daemons with a particular sensitivity range and thus
only accept connections from users or clients that have the right security clearance, even on
remote, NetLabel/CIPSO-enabled systems.
Configuring CIPSO mappings
A preliminary requirement for having a good CIPSO-enabled network is to have a common
understanding of which DOI will be used and what its consequences are. Labeled networks
can use different Domains of Interpretation for specific purposes.
Along with the DOI, we also need to take care of how the categories and sensitivities are
passed on over the CIPSO-enabled network. This is controlled by the CIPSO tag. There are
three supported values for the tag:
With tag:1, the categories are provided in the CIPSO package in a bitmap
approach. This is the most common approach, but limits the amount of supported
categories to 240 (from 0 to 239).
[ 144 ]
Controlling Network Communications
With tag:2, the categories are enumerated separately. This allows a wider range
of categories (up to 65,534), but only supports at most 15 enumerated categories.
Try to use tag:2 when you have many categories but for each scope, only a few
categories need to be supported.
With tag:5, the categories can be mentioned in a ranged approach (lowest and
highest), with at most seven such low/high pairs.
Note that the CIPSO tag results are handled under the hood: system administrators only
need to configure the NetLabel mapping to use a particular tag value.
Let's assume that we have two CIPSO-enabled networks, which have 10.1.0.0/16
associated with doi:1 and 10.2.0.0/16 associated with doi:2. Both use the tag value 1.
First, we enable CIPSO and allow it to pass CIPSO-labeled packages with the DOI set to
either 1 or 2. We don't perform any translations (so the category and sensitivity set on the
CIPSO package is the one used by SELinux):
# netlabelctl cipsov4 add pass doi:1 tags:1
# netlabelctl cipsov4 add pass doi:2 tags:1
If we need to translate (say that we use sensitivity s0 - s3 while the CIPSO network uses
sensitivity 100 - 103), a command could look like so:
# netlabelctl cipsov4 add std doi:1 tags:1 levels:0=100,1=101,2=102
Next, we implement mapping rules, telling the NetLabel configuration which network
traffic is to be associated with doi:1 or doi:2:
# netlabelctl map del default
# netlabelctl map add default address:10.1.0.0/16 protocol:cipsov4,1
# netlabelctl map add default address:10.2.0.0/16 protocol:cipsov4,2
That's it. We removed the initial default mapping (as that would prevent adding new
default mappings) and then configured NetLabel to tag traffic for the given networks with
the right CIPSO configuration.
[ 145 ]
Controlling Network Communications
Adding domain-specific mappings
NetLabel can also be configured to ensure that particular SELinux domains use a welldefined DOI rather than the default one configured earlier on. For instance, to have the SSH
daemon (running in the sshd_t domain) have its network traffic labeled with CIPSO
doi:3, we'd use this:
# netlabelctl cipsov4 add pass doi:3 tags:1
# netlabelctl map add domain:sshd_t protocol:cipsov4,3
The mapping rules can even be more selective than that. We can tell NetLabel to use doi:2
for SSH traffic originating from one network, use doi:3 for SSH traffic originating from
another network, and even use unlabeled network traffic when it comes from any other
network.
#
#
#
#
netlabelctl
netlabelctl
netlabelctl
netlabelctl
map
map
map
map
del
add
add
add
domain:sshd_t
domain:sshd_t
domain:sshd_t
domain:sshd_t
protocol:cipsov4,3
address:10.1.0.0/16 protocol:cipsov4,1
address:10.4.0.0/16 protocol:cipsov4,3
address:0.0.0.0/0 protocol:unlbl
The NetLabel framework will try to match the most specific rule first, so 0.0.0.0/0 is only
matched when no other rule matches.
Using local CIPSO definitions
As mentioned before, NetLabel by default only passes the sensitivity and categories.
However, when using local CIPSO (that is, over the loopback interface), it is possible to use
full label controls. When enabled, peer controls will not be toward the default
netlabel_peer_t type, but immediately toward the client or server domain.
To use local CIPSO definitions, first declare the DOI for local use:
# netlabelctl cipsov4 add local doi:5
Next, have the local communication use the defined DOI (5 in our example):
# netlabelctl map add default address:127.0.0.1 protocol:cipsov4,5
With this enabled, local communication will be associated with doi:5 and use the local
mapping, passing the full label toward the mandatory access-control system (SELinux).
[ 146 ]
Controlling Network Communications
Supporting IPv6 CALIPSO
Work is ongoing to implement the Common Architecture Label IPv6 Security Option
(CALIPSO) by the NetLabel project. When CALIPSO support is needed, the protocol target
is calipso rather than cipsov4.
There are a few small differences when using CALIPSO versus CIPSO in NetLabel, though:
There is only one tag type supported (unlike CIPSO's three tag types). As such,
there is no need to specify tag:# anywhere.
CALIPSO only uses pass-through mode. Translations are not supported.
The NetLabel CALIPSO implementation currently does not support local mode,
in which the full label is passed on.
Beyond these differences, the use of CALIPSO is similar:
# netlabelctl calipso add pass doi:5
# netlabelctl map add domain:httpd_t protocol:calipso,5
Summary
SELinux by default uses access controls based on the file representation of communication
primitives or the sockets that are used. In the case of TCP and UDP ports, administrators
have some leeway in handling the controls through the semanage command without
resorting to SELinux policy updates. Once we go into the realms of network-based
communication, more advanced communication control can be accomplished through
Linux netfilter support, using the SECMARK labeling, and through peer labeling.
In the case of SECMARK labeling, local firewall rules are used to map contexts to packets,
which are then governed through SELinux policy. In the case of peer labeling, either the
application context itself (in the case of labeled IPsec) or its sensitivity level (in the case of
netfilter/CIPSO support) is used. This allows an almost application-to-application network
flow control through SELinux policies.
In the next chapter, we will take a look at two platforms that use SELinux for their
additional security controls: Linux virtualization and containerization with sVirt and
Docker.
[ 147 ]
6
sVirt and Docker Support
More and more system tools have built-in support for SELinux or use SELinux's features to
further harden their own service offerings. When we look at virtualization, two open source
projects will definitely come to mind: libvirt and Docker. While the former supports full
virtualization, the latter focuses on container management. In this chapter, administrators
will:
Learn how SELinux can help reduce the risks of virtualization
Understand how SELinux's policy is tuned to support these services
Deal with the secure virtualization option supported through the libvirt API
We'll end the chapter with a section on Securing Docker containers with SELinux.
SELinux-secured virtualization
Virtualization is part of many infrastructural services. Ever since its inception in the early
70s as a means of isolating workloads and abstracting hardware dependencies,
virtualization implementations have grown. When we look at service offerings today, we
realize that many cloud providers would be out of service if it weren't for virtualization.
One of the services that virtualization offers is isolation, which SELinux can support and
augment quite nicely.
sVirt and Docker Support
Introducing virtualization
When we look at virtualization, we look at the abstraction layers it provides in order to hide
certain resource views (such as hardware or processing power). Virtualization contributes
to the development of more efficient hardware usage (which results in better cost control),
centralized views on resources and systems, more flexibility in the number of operating
systems that the company can deal with, standardization of resource allocation, and even
improved security services.
There are a number of virtualization types around:
Full system emulation, where hardware is completely emulated through
software. QEMU is an emulation software that is capable of handling full system
emulation.
Native virtualization, where main parts of the hardware are shared across
instances, and guests can run unmodified on them. Linux's Kernel-based Virtual
Machine (KVM), which is also supported through QEMU, is an example of this
kind of virtualization.
Paravirtualization, where the guest operating system uses specific APIs offered
by the virtualization layer (on which unmodified operating systems cannot be
hosted). Initial releases of Xen only supported paravirtualization. Using KVM
with VirtIO drivers is another example.
OS-level virtualization or containerization, where the guest uses the host
operating system (kernel) but does not see the processes and other resources
running on the host. Docker containers or LXC containers are examples of OSlevel virtualization.
Application virtualization, where the application runs under a specialized
software runtime. A popular example here is the support for Java applications,
running on the Java Virtual Machine (JVM).
Many virtualization platforms support a number of virtualizations. QEMU can range from
full emulation to paravirtualization, depending on its configuration.
[ 149 ]
sVirt and Docker Support
When we work with virtualization layers, a number of terms come up frequently:
The host is the (native) operating system or server on which the virtualization
software is running
The guest is the virtualized service (generally an operating system or container)
that runs on the host
The hypervisor is the specialized virtualization software that manages the
hardware abstraction and resource-sharing capabilities of the virtualization
platform
An image is a file or set of files that represent the file system of a guest
A virtual machine is the abstracted hardware or resource set in which the guest
runs
Reviewing the risks of virtualization
Virtualization comes with a number of risks though. If we ask architects or other riskconscious people about virtualization, they will talk about VM sprawl, challenges related to
the secure or insecure APIs, the higher complexity of virtualized services, and what not.
Going over the challenges of virtualization itself is beyond the scope of this chapter, but
there are a few risks that play directly into SELinux's field. If we can integrate SELinux with
a virtualization layer, then we can mitigate these risks more easily.
The first risk is data sensitivity within a virtual machine. Whenever multiple virtual
machines are hosted together, you could have the risk that one guest is able (be it through a
flaw in the virtualization software or its networking capabilities or through side-channel
attacks) to access sensitive data on another virtual machine.
With SELinux, data sensitivity can be controlled through the use of MLS. Guests can run
with different MLS labels so that the data sensitivity is guaranteed even on the
virtualization layer.
Another risk is the security of offline guest images. Here, either administrators or
misconfigured virtual machines might gain access to another guest image. SELinux can
prevent this through properly labeled guest images and ensuring that images of offline
virtual machines are typed differently from online virtual machines.
[ 150 ]
sVirt and Docker Support
Virtual machines can also exhaust the resources on a system. On Linux systems, resources
can be controlled through the control groups (cgroups) subsystem. As this subsystem is
governed through regular file APIs, SELinux can be used to further control access to this
facility, ensuring that the control groups maintained by Docker, for instance, remain solely
under the control of Docker.
Break-out attacks, where vulnerabilities within the hypervisor are exploited to try and
reach the host operating system, can be mitigated through SELinux's type enforcement as
even a hypervisor does not require full administrative access to everything on the host.
SELinux can also be used to authorize access to the hypervisor, ensuring that only the right
teams (through the role-based access controls) are able to control the hypervisor and its
definitions
Finally, SELinux also offers improved guest isolation, which goes beyond just the guest
image accesses. Thanks to SELinux's MCS implementation, guests can be separated from
each other in a mandatory approach. And with type enforcement, the allowed behavior of
guests can be defined and controlled. This is a key capability used by hosting providers as
they allow running (for them) untrusted guest virtual machines.
Using nondynamic security models
SELinux, however, is not a full security solution for virtualization providers. One main
disadvantage of SELinux is that it is not dynamic. When we assign a type to a virtual
machine, this type is rigid and set in stone. Virtual machines, however, will have different
behavior characteristics depending on the software that is running on them.
A virtual machine running a web server has a different behavior than one running a
database or an e-mail gateway. Although SELinux policy administrators would be capable
of creating new domains for each virtual machine, this is not efficient. As a result, most
SELinux policies will only offer a few domains usable by the virtual machine with broad
characteristics.
On RHEL, these domains are part of its sVirt implementation.
[ 151 ]
sVirt and Docker Support
Reusing existing virtualization domains
With sVirt, Red Hat offers a reusable approach for supporting virtualization and
containerization through SELinux. It does so through a number of domains and types that
can be used regardless of the underlying virtualization platform.
These domains and types are as follows:
The virtd_t domain is used by the hypervisor software.
The svirt_t domain is used by guests (virtual machines) that do not require
general use of host resources.
The svirt_qemu_net_t, svirt_kvm_net_t, and svirt_lxc_net_t domains
are used by guests that require more interaction with the host (be it due to
paravirtualization or due to a semi-virtualization approach such as
containerization).
The svirt_tcg_t domain is used by guests that require more flexible memory
accesses (executing writable memory segments). This is used for guests whose
emulation/virtualization requires the use of a Tiny Code Generator (TCG).
The svirt_image_t type is assigned to the image file that contains a guest's
data.
The virt_image_t type is assigned to image files that are not in use at the
moment.
The virt_content_t type is assigned to image files when they are used in a
read-only fashion.
To enable some flexibility in what the domains are allowed to do, additional SELinux
booleans are put in effect. To query these booleans and their current value, use the
semanage boolean command, like so:
# semanage boolean -l | grep virt_
virt_rw_qemu_ga_data
(off , off)
Allow qemu-ga to manage qemu-ga date.
virt_use_nfs
(on
,
on)
Allow confined virtual guests to manage nfs files
virt_use_comm
(off , off)
Allow confined virtual guests to use serial/parallel communication ports
virt_sandbox_use_fusefs
(off , off)
Allow virt to sandbox use fusefs
...
virt_use_samba
(off , off)
Allow confined virtual guests to manage cifs files
[ 152 ]
sVirt and Docker Support
For instance, to allow virtual machines to manage NFS files, we'd use this command:
# setsebool -P virt_use_nfs on
Using SELinux booleans to control the confinement of virtualization domains should be
carefully handled. Booleans influence the SELinux policy on the host level and cannot be
used to change the access controls of individual guests. As such, the previous example
allowing virtual machines to manage NFS files is applicable to all virtual machines running
on the host.
If security-sensitive operations have to be allowed for a guest, it is advisable to run those
guests on an isolated host where these operations are allowed, while running the other
guests on hosts where the policy does not allow this particular action.
Administrators can also use different SELinux domains for specific guests, fine-tuning the
access controls for an individual virtual machine. How this is accomplished depends on the
underlying technology, of course. Later in this chapter, we will introduce this for libvirtbased virtualization and Docker-based containerization.
Understanding MCS
The SELinux domains and the mentioned types, however, are not sufficient to implement
proper confinement and isolation between guests. sVirt adds another layer of security by
using Multi-Category Security (MCS).
Within SELinux, some domains are marked as an MCS-constrained type. When this is the
case, the domain will not be able to access resources that do not have the same set of
categories (or more) assigned as the current context.
[ 153 ]
sVirt and Docker Support
The sVirt implementation ensures that the virtualization domains mentioned earlier are all
marked as such MCS-constrained types. This can be confirmed by asking the system which
types are associated with the mcs_constrained_type attribute:
# seinfo -amcs_constrained_type -x | grep virt_
svirt_kvm_net_t
svirt_lxc_net_t
svirt_tcg_t
svirt_t
svirt_qemu_net_t
If SELinux policy writers want to create a custom domain for use with the
virtualization software, they will either need to mark it as an MCSconstrained type as well (using the mcs_constrained() macro) or mark
it as a virtualization domain (using the virt_domain_template()
macro). Building custom policies is briefly touched upon in Chapter 8,
Working with SELinux Policies. A more extensive policy developmentoriented resource is Packt's SELinux Cookbook (https://www.packtpub.co
m/networking-and-servers/selinux-cookbook).
Through the MCS constraints, sVirt enables proper isolation between guests. Every running
virtual machine (generally running as svirt_t ) will be assigned two (random) SELinux
categories. The images that that virtual machine needs to use are assigned the same two
SELinux categories.
Whenever a virtual machine wants to access a wrong image, the difference in MCS
categories will result in SELinux denying the access. Similarly, if one virtual machine is
trying to connect to/attack another virtual machine, the MCS protections will once again
prevent these actions from happening.
sVirt selects two categories to allow a large amount of guests to run even when there are
only a few categories available. Assume for instance that the hypervisor is running with the
c10.c99 category range. That means that the hypervisor can only select 90 categories. If
each guest only receives a single category, then the hypervisor can support 90 guests before
allowing multiple guests to interact with each other (assuming a vulnerability is found that
allows that, of course–the hypervisor software will generally disallow such accesses as
well). With two categories, however, the number of supported simultaneously running
guests becomes 4005 (the number of unique pairs in a set of 90, obtained through the
formula n*(n-1)/2).
[ 154 ]
sVirt and Docker Support
libvirt SELinux support
The libvirt project offers a virtualization abstraction layer, through which administrators
can manage virtual machines without direct knowledge of or expertise in the underlying
virtualization platform. As such, administrators can use the libvirt-offered tools to manage
virtual machines running on QEMU, QEMU/KVM, Xen, and so forth.
To use the sVirt approach, libvirt can be built with SELinux support. When this is the case
and the guests are marked as being governed (security-wise) through SELinux, then the
sVirt domains and types are used/enforced by libvirt. The libvirt code will also perform the
category selection to enforce guest isolation and will ensure that the image files are assigned
the right label (image files that are in use should get a different label than inactive image
files).
Thanks to the sVirt implementation, Red Hat was able to obtain a Common Criteria at
Evaluation Assurance Level 4+ (CC EAL 4+) certification (a measure of security
trustworthiness of a platform) for the virtualization based on RHEL and KVM. This is of
course not solely due to the sVirt technology, but it has contributed to this certification.
Differentiating between shared and dedicated
resources
The different labels for images allow different use cases. The image that is used to host the
main operating system (of the guest) is generally labeled with svirt_image_t and is
assigned the same pair of categories as the guest runtime itself (running as svirt_t). This
image is writable by the guest.
When an image is selected that needs to be writable for multiple guests, then libvirt can opt
not to assign any categories to the file. Without categories, MCS constraints don't apply
(well, they still apply, but any set of categories dominates an empty set, and as such, actions
against those properly labeled files are allowed).
Images that need to be mounted read-only for a guest (such as bootable media) are assigned
the virt_content_t type. If they are dedicated, then categories can be assigned as well.
For shared read access, no categories need to be assigned.
Note that these label differences apply mainly to virtualization technologies and not
container technologies.
[ 155 ]
sVirt and Docker Support
Assessing the libvirt architecture
The libvirt project has a number of clients that interact with the libvirtd daemon. This
daemon is responsible for managing the local hypervisor software (be it QEMU/KVM, Xen,
or any other virtualization software) and is even able to manage remote hypervisors. This
latter functionality is often used for proprietary hypervisors that offer the necessary APIs to
manage the virtual resources on the host.
This high-level architecture is displayed in the next diagram:
High-level architecture for the libvirt software
Due to the cross-platform and cross-hypervisor nature of the libvirt project, sVirt is a good
match. Instead of hypervisor-specific domains, generic (yet confined) domains are used to
ensure the security of the environment.
[ 156 ]
sVirt and Docker Support
Configuring libvirt for sVirt
Most systems that support libvirt on SELinux systems (such as on RHEL) will have SELinux
support automatically enabled. If this is not the case but SELinux support is possible, then
all that it takes is to configure libvirt to allow the SELinux security model. For instance, for
the QEMU-based virtualization driver, you'd do this:
# vim /etc/libvirt/qemu.conf
security_driver = "selinux"
When a guest is running on the platform, we can see proof of the use of sVirt through the
assigned labels:
# ps -wwC qemu-kvm -o label,command
LABEL
system_u:system_r:svirt_t:s0:c23,c89
system_u:system_r:svirt_t:s0:c48,c52
COMMAND
/usr/bin/qemu-kvm ...
/usr/bin/qemu-kvm ...
To list the currently defined guests (called domains in libvirt), use this command:
# virsh list
Id
Name
State
-----------------------------------10
wastomcat1
running
12
wastomcat2
running
The current domain configuration can be queried using the dumpxml command with virsh:
# virsh dumpxml wastomcat1
<domain type='kvm' id='10'>
<name>wastomcat1</name>
...
<seclabel type='dynamic' model='selinux' relabel='yes'>
<label>system_u:system_r:svirt_t:s0:c23,c89</label>
<imagelabel>
system_u:object_r:svirt_image_t:s0:c23,c89
</imagelabel>
</seclabel>
</domain>
The security label settings, part of the domain definition, tell libvirt how to apply security
policies to this domain. In the previous example, the security model is based on SELinux
(look at model='selinux') and libvirt is allowed to dynamically allocate the labels and
category sets (type='dynamic' and relabel='yes').
[ 157 ]
sVirt and Docker Support
Creating domains can be done using the virt-install command. As a result, an XML
definition is created, which can be further edited. It is also possible to define a new domain
through an XML file and then use that:
# virsh define SomeDomainDefinition.xml
To configure the domain definition with sVirt, use the virsh edit command:
# virsh edit wastomcat1
The next few subsections will show you how to update domains with specific SELinuxrelated tunings.
Using static labels
When managing domain definitions within libvirt, administrators can enforce the use of
static labels. This will ensure that libvirt will not dynamically allocate labels and categories.
Instead, the label defined by the administrator will be used.
In the case of static labels, the administrator can opt to enable or disable relabeling. If
enabled, then libvirt will try to ensure that the resource (image file) label is
applied/enforced on the images even though the domain label itself is fixed. If the
administrator disables the relabeling, then libvirt will assume that the label on the resource
(image file) is correct.
To set static labels, edit the domain and use the type='static' attribute in the seclabel
entity:
# virsh edit wastomcat1
<domain>
<name>wastomcat1</name>
...
<seclabel type='static' model='selinux' relabel='no'>
<label>system_u:system_r:svirt_t:c1,c2</label>
</seclabel>
...
</domain>
[ 158 ]
sVirt and Docker Support
Customizing labels
Administrators can choose to have different labels while retaining the dynamic nature of
libvirt. For instance, administrators can request libvirt to use a particular domain but still
govern the MCS categories, by selecting a base label:
# virsh edit wastomcat1
...
<seclabel type='dynamic' model='selinux'>
<baselabel>system_u:system_r:custom_svirt_t:s0</baselabel>
</seclabel>
The dynamic model automatically implies relabeling on the resources.
Using different storage pool locations
When the storage location of the libvirt images differs from /var/lib/libvirt/images/,
administrators will need to make sure that the new location is using the virt_image_t
type. This is mandatory as the libvirt daemon can only relabel files with a virtualization
label associated with it (except in RHEL, where libvirtd is running in a more unconfined
domain and as such has more privileges).
For instance, if /srv/virt/images is used, we'd have this:
# semanage fcontext -a -t virt_var_lib_t "/srv/virt(/.*)?"
# semanage fcontext -a -t virt_image_t "/srv/virt/images(/.*)?"
# restorecon -R /srv/virt
If the storage pool is hosted on an NFS-mounted location, then enable the virt_use_nfs
SELinux boolean:
# setsebool -P virt_use_nfs on
Interpreting output-only label information
When reading libvirt XML output, some security label information is added that cannot be
altered. This is output-only information, specifically pertaining to the image (file) label.
[ 159 ]
sVirt and Docker Support
Let's look at an example:
<seclabel type='dynamic' model='selinux' relabel='yes'>
<label>system_u:system_r:svirt_t:s0:c192,c392</label>
<imagelabel>
system_u:object_r:svirt_image_t:s0:c192,c392
</imagelabel>
</seclabel>
In this example, the security labeling is done dynamically. As a result, both the <label>
and <imagelabel> fields are generated and are output-only. They show the administrator
what the current labels are.
If an administrator edits a domain XML and includes the <imagelabel> information, it
will be ignored (as this label is always output-only). The <label> field information might
be interpreted depending on the type attribute defined in the <seclabel> entity.
Controlling available categories
When libvirt selects random categories, it does so based on its own category range. By
default, MCS systems will have this range set to c0.c1023. To change the category range,
the libvirt daemon (libvirtd) will need to be launched in the proper context.
On RHEL systems, this can be accomplished by updating the systemd unit file for
libvirtd (by copying its original unit file from /usr/lib/systemd/system and placing
it in /etc/systemd/system) and adding the SELinuxContext= attribute:
# vim /etc/systemd/system/libvirtd.service
...
[Service]
...
SELinuxContext=system_u:system_r:virtd_t:s0:c10.c99
On systems with a SysV-like init system, it is generally necessary to update the init script
and include a runcon statement:
# vim /etc/rc.d/init.d/virtd
...
runcon -l s0:c10.c99 /usr/sbin/libvirtd --config \
/etc/libvirt/libvirtd.conf --listen
[ 160 ]
sVirt and Docker Support
Every time a new guest is launched, the libvirt code will randomly select two categories and
check whether these categories are part of its own range as well as whether these two
categories are already assigned to a guest. If they are, a new pair of categories is selected
until a free pair is found.
Limiting supported hosts in a cluster
The libvirt project supports managing an environment spanning multiple hosts (cluster)
and migrating guests from one host to another. When libvirt uses SELinux, one could
imagine that each host must be running the same SELinux policy (or at least a policy that
uses the same interpretation) as otherwise the security model definition used on the domain
level cannot be guaranteed.
Although this approach is possible, it is not mandatory. With libvirt, administrators can tag
the hosts that use the same SELinux policy and, while doing so, ensure that domains are
only migrated between hosts with the same SELinux policy (or policy interpretation).
To accomplish this, libvirt uses the concept of a domain of interpretation (DOI). We have
already seen a DOI, when talking about NetLabel/CIPSO. The DOI for libvirt has nothing to
do with NetLabel/CIPSO, but serves a similar purpose. And just like the DOI with CIPSO,
libvirt uses integers to differentiate systems with different policy implementations.
For instance, we could envision hosts where an MLS policy is enabled versus hosts where a
default MCS policy is enabled. The hosts with an MLS policy could be assigned the DOI
value 1 (one) whereas the others use a DOI value of 0 (zero).
The DOI setting can be configured by editing the proper virtualization configuration file
(which depends on the virtualization technology being used) in /etc/libvirt and
reviewed on the host using the virsh capabilities command:
# virsh capabilities
Connecting to uri: qemu:///system
<capabilities>
<host>
...
<secmodel>
<model>selinux</model>
<doi>0</doi>
</secmodel>
</host>
...
</capabilities>
[ 161 ]
sVirt and Docker Support
Modifying default contexts
When libvirt decides on a domain label, it uses svirt_t or svirt_tcg_t as a default label.
This is not hardcoded in libvirt but managed through a default context file. Two files, inside
/etc/selinux/targeted/contexts, are used by libvirt to find default contexts:
The virtual_domain_context file contains the default domain contexts for
running guests (virtual machines)
The virtual_image_context file contains the default types for images
Administrators can update these files to use different defaults but must keep in mind that
these files are generally overwritten when a new policy package is deployed.
Therefore, it is advised to stick to the labeling options of libvirt itself.
Securing Docker containers
Until now, we've looked at libvirt and full virtualization. But a new type of virtualization
has been gaining traction, called containerization–more specifically, Docker containers.
When working with containers, administrators have to be well aware that containers do not
virtualize everything: the Linux kernel itself is shared, and all software running inside the
container is interacting with the Linux kernel, just like software running outside the
container. That does not mean that containers don't isolate, though. They are built based on
Linux features such as namespaces and control groups.
Understanding container security
As the Linux kernel is shared, exploits on the kernel level impact the entire host and can
compromise not only the container through which an exploit is executed, but also all other
containers and software running on the host.
Generally, one could imagine using SELinux to prevent vulnerabilities to be exploited.
Policies could be used to ensure that software running in the container cannot perform any
action that is not acceptable behavior for that software.
However, as the Linux kernel is shared, containers have a different approach to SELinux
support. While full virtualization allows the guest operating system to use SELinux as well,
containers do not have this luxury. Right now, if in-container software checks whether
SELinux is enabled, it receives a disabled status, even when this is not the case.
[ 162 ]
sVirt and Docker Support
The reason behind this is that SELinux itself is not namespace-aware, while namespace
isolation is the key part of containers on Linux. SELinux is part of the Linux kernel, and the
policy is applicable to the entire host. As long as SELinux does not support policy layers
(host-level policy and container-level policies) and namespace-aware access controls
(ensuring that container-level policies cannot extend beyond the namespace scope), we will
need to deal with SELinux on the host level only.
Controlling non-sVirt Docker SELinux integration
When the Docker installation is one that doesn't use sVirt technology, then most of the
subsections following this one do not apply. But that does not mean that SELinux does not
play a role. Containers will run through the docker_t or container_runtime_t type
(which is an almost unconfined type), which has but a few handles that administrators can
tune, using SELinux booleans.
There is no distinction between docker_t and container_runtime_t.
The type name was changed to reflect the support of generic container
runtimes (and not only Docker). In the remainder of this chapter, we stick
to docker_t.
The important SELinux booleans that influence docker_t access controls are:
The docker_connect_any boolean, which allows the docker_t type to connect
to any TCP port (rather than just those specific to Docker management)
The selinuxuser_execheap and selinuxuser_execstack booleans (on
RHEL) or allow_execheap and allow_execmem booleans (on Gentoo), which
generally (so more than just for the docker_t type) allow to execute writable
memory segments
Of the security controls that are mentioned in the following subsections, the using different
SELinux contexts subsection can be used even when the local Docker instance does not
support sVirt. However, it requires Docker to be compiled with SELinux support and
requires a SELinux policy that supports the necessary domain transitions.
[ 163 ]
sVirt and Docker Support
Aligning Docker security with sVirt
Docker has a similar approach to virtualization as most other hypervisor-like solutions. It
has a management component (the Docker daemon) and runs guests in which the container
software runs. The guests here are processes that enable new namespaces–hiding the hostlevel view of files, processes, users, and so on–and run the container software as
subprocesses.
By default, Docker does not have the sVirt technology (or the principles behind it) built in.
This means that when running Docker on a SELinux-enabled host, the processes that act as
the containers will run with the docker_t type, the type used for the Docker management
daemon. And often, this works just like expected–but it does not isolate the guests much.
Red Hat is adapting Docker to support the sVirt principles. When running with Red Hat's
Docker, new guests run within isolated domains (svirt_lxc_net_t) and receive a set of
MCS categories to provide isolation between containers. We can expect Docker to further
grow and embrace more SELinux access controls, and Red Hat's approach might become
the standard in the near future.
For instance, an Nginx process running inside a Docker container is shown to be labeled
with the svirt_lxc_net_t type and an MCS category pair:
~# ps -wwC nginx -o label,command
LABEL
COMMAND
system_u:system_r:svirt_lxc_net_t:s0:c232,c590 nginx: master ...
system_u:system_r:svirt_lxc_net_t:s0:c232,c590 nginx: worker ...
As Docker does not use the same concept of images as higher virtualization technologies
(those supported through libvirt), the image-related types (such as svirt_image_t and
virt_content_t) do not apply to the svirt_lxc_net_t type enforcement. Instead, hostlevel file types are used (such as usr_t for read-only access) with only the
svirt_sandbox_file_t type being explicitly used for resources that can be fully managed
by a container.
Unlike libvirt, Docker containers are not defined through XML files. Changing SELinux
controls on containers is handled through the command line.
[ 164 ]
sVirt and Docker Support
Limiting container capabilities
A strong feature of Docker is the ability to modify the capabilities of a container.
Capabilities define coarse-grained authorizations on Linux and are used by Docker to limit
what software running inside a container can do. For instance, shutting down the host
(which is a kernel-level instruction) is not allowed by default from within a Docker
container.
By default, Docker already limits the capabilities that are active for a container.
Administrators can further fine-tune the capabilities, or even decide to only enable a given
set of capabilities directly. By limiting container capabilities, kernel exploits can be further
thwarted and container breakouts can be contained.
To remove capabilities, use the --cap-drop option of the docker run command
(nimmis/alpine-nginx is the name of a publicly available microcontainer that hosts
Nginx and is used here for example purposes):
~# docker run --cap-drop mknod --name nginx -d nimmis/alpine-nginx
We can use pstree (part of the psmisc package) to see the resulting processes that are
started. With the -S option, it will even show which processes have switched namespaces
(making it a bit more obvious which processes are the containers):
~# docker ps
CONTAINER ID IMAGE
COMMAND
CREATED
...
bb59d5e2ef4f 260f538c3be0
"/boot.sh" 46 minutes ago ...
~# ps -ef | grep "boot.sh"
root
2955 2554 0 05:20 ?
00:00:00:00 /bin/sh /boot.sh
~# pstree -apS 2554
docker-current,2554,mnt daemon --exec-opt \
native.cgroupdriver=systemd --selinux-enabled \
--log-driver=journald
|-boot.sh,2955,ipc,mnt,net,pid,uts /boot.sh
|
`-runsvdir,3001 -P /etc/service...
|
|-runsv,3003 crond
|
|
`-crond,3006 -f
|
|-runsv,3004 rsyslogd
|
|
`-rsyslogd,3008 -n
|
|
|-{rsyslogd},3010
|
|
|-{rsyslogd},3011
|
|
`-{rsyslogd},3012
|
`-runsv,3005 nginx
|
`-run,3007 ./run
|
`-nginx,3009
|
`-nginx,3013
|-{docker-current},2555
[ 165 ]
sVirt and Docker Support
|-{docker-current},2556
|-{docker-current},2557
|-{docker-current},2558
|-{docker-current},2559
|-{docker-current},2560
|-{docker-current},2613
|-{docker-current},2692
|-{docker-current},2696
|-{docker-current},2697
`-{docker-current},2815
The capabilities of this running container can be checked through the status pseudo-file for
the given PID (in the previous example, 2955):
~# grep
CapInh:
CapPrm:
CapEff:
CapBnd:
Cap /proc/2955/status
00000000a00425fb
00000000a00425fb
00000000a00425fb
00000000a00425fb
As this is a bitmap of the capabilities (CapEff showing the effectively active capabilities), it
might be hard to deduce that the mknod capability is not active. We can use the pscap
command (part of the libcap-ng-utils package on RHEL or sys-libs/libcap-ng on
Gentoo) to show the current capabilities in a more human-readable format:
~# pscap | grep 2955
2554 2955 root boot.sh chown, dac_override, fowner, fsetid,
kill, setgid, setuid, setpcap, net_bind_service, net_raw,
sys_chroot, audit_write, setfcap
Administrators can also drop all capabilities for a container and only add those that are
needed:
~# docker run -d --cap-drop all --cap-add chown \
--cap-add dac_override ...
Of course, we might want to adapt SELinux to accommodate the new capability list as well.
After all, the default domain under which containers run (with sVirt support) will have a
number of capabilities enabled as well.
[ 166 ]
sVirt and Docker Support
There are a few SELinux booleans (only on RHEL) that influence the supported capabilities,
but these booleans apply to all containers running on the same host. These are:
virt_sandbox_use_sys_admin, which enables the CAP_SYS_ADMIN capability
for the containers. This allows many system-administrative privileges, so it is
wise to keep this off.
virt_sandbox_use_mknod, which enables the CAP_MKNOD capability for the
containers.
virt_sandbox_use_audit, which enables the CAP_AUDIT_WRITE capability for
the containers.
virt_sandbox_use_all_caps, which enables all possible capabilities for the
containers. This makes the sandbox run with full root privileges (SELinux-wise)
and should only be used when the containers on the host are fully trusted.
A more fine-grained approach is to use separate SELinux domains for individual containers
that require additional capabilities to be set. The next subsection describes how to set
different SELinux contexts for Docker containers.
Using different SELinux contexts
Docker containers can be started with a different SELinux label through the --securityopt option. The security options that can be passed use the following syntax:
label:<key>:<value>
The following possible keys can be used:
The user key sets the SELinux user for the container
The role key sets the SELinux role for the container
The type key sets the SELinux type (domain) for the container
The level key sets the SELinux sensitivity level (MLS/MCS information) for the
container
The disable key (which takes no value) disables confinement for the container
For instance, to have a container run with the custom_lxc_net_t type rather than the
default svirt_lxc_net_t, you'd use this command:
~# docker run --security-opt label:type:custom_lxc_net_t ...
[ 167 ]
sVirt and Docker Support
Similarly, you'd use this when a container needs to run with a specific category set:
~# docker run --security-opt label:level:s0:c3.c5,c128 ...
The domains that Docker is allowed to transition to (SELinux-wise) is of course enforced
through the policy. By default, docker_t can transition to guest domains that have the
svirt_sandbox_domain attribute set:
~# seinfo -asvirt_sandbox_domain -x
svirt_sandbox_domain
svirt_kvm_net_t
svirt_lxc_net_t
openshift_initrc_t
svirt_qemu_net_t
If custom domains are used, the SELinux policy administrator will need to ensure that the
docker_t type can transition to the custom domain.
Relabeling volume mounts
Docker has a nice feature called volume mounts. When used, parts of the host file system
are mounted into the container's file system view, allowing the container software to read
or even write resources to a remote location. This is particularly useful for containers that
need to persist data across container reboots, as containers by default do not persist their
changes in their own environment: every time a container is started, it is pristine again.
Here's an example that mounts a host's /srv/web/tomcat1 location into a container's
/srv/web view:
~# docker run -v /srv/web/tomcat1:/srv/web -d --name wastomcat1 ...
With SELinux enabled though, volume mounts might not be readily accessible by the
container. After all, the container is running within a confined domain
(svirt_lxc_net_t), which might not have write access to the /srv/web/tomcat1
location (which might be labeled as httpd_sys_content_t).
Administrators can relabel the resources manually, but luckily Docker has this covered.
[ 168 ]
sVirt and Docker Support
When adding :z to the volume mount, Docker will relabel the content with the
svirt_sandbox_file_t type, which is a type that sVirt containers have full manage rights
on:
~# docker run -v /srv/web/tomcat1:/srv/web:z -d --name wastomcat1 ...
When adding :Z to the volume mount (notice the capitalized Z), Docker will not only
relabel the content with the svirt_sandbox_file_t type, but will also assign the MCS
category set of that particular container. As a result, the files will only be manageable by
that particular container (and not be reusable by other containers):
~# docker run -v /srv/web/tomcat1:/srv/web:Z -d --name wastomcat1 ...
If you want to enable a location but with read-only access, administrators will need to
relabel the files manually. Docker has no option (yet) for automatically relabeling content
for read-only use.
Lowering SELinux controls for specific
containers
Some Docker containers need to run with high privileges. Such containers are used to host
management utilities (often to manage containers themselves) on hosts that are hardened
and only contain the bare minimum for hosting Docker containers (such as CoreOS-based
hosting).
When administrators run containers with SELinux confinement disabled (using the
disable key with the security-opt option) Docker will run these containers in a much
more privileged domain called spc_t. Think of the domain as being a super-privileged
container, hence the spc_t name:
~# docker run --security-opt label:disable ...
This still has the container run confined from Docker's perspective, but no longer confined
from the SELinux perspective. To even remove Docker's own confinement (such as the
dropped capabilities), use the --privileged option:
~# docker run --privileged ...
[ 169 ]
sVirt and Docker Support
Modifying default contexts
The sVirt technology supports modifying the default contexts. Docker does not hardcode
the domain types and resource labels but obtains these values from a SELinux-provided
configuration file, lxc_contexts, which is stored inside
/etc/selinux/targeted/contexts.
The following snippet shows the default contents of this file and defines the labels used for
various purposes:
process = "system_u:system_r:svirt_lxc_net_t:s0"
content = "system_u:object_r:virt_var_lib_t:s0"
file = "system_u:object_r:svirt_sandbox_file_t:s0"
sandbox_kvm_process = "system_u:system_r:svirt_qemu_net_t:s0"
sandbox_lxc_process = "system_u:system_r:svirt_lxc_net_t:s0"
Administrators can modify these defaults, but they must be aware that these files are part of
the SELinux policy packages and might be overwritten when an updated policy is
deployed.
Therefore, it is advised to stick to the labeling features of Docker itself.
Summary
In this chapter, we looked at virtualization and the risks associated with it. We discussed
how some of these risks can be mitigated through the same set of controls that SELinux
offers, such as type enforcement (limiting what guests can do) and MCS confinement
(isolating guests from each other).
Next, we covered how libvirt supports several virtualization technologies on Linux
platforms and how it includes a technology called sVirt that enables SELinux integration,
offering guest isolation and access controls. We saw how administrators can manipulate the
sVirt logic within libvirt, such as using different domain labels or category sets.
[ 170 ]
sVirt and Docker Support
Finally, we looked at Docker, a popular container technology, and how here too sVirt can
provide container confinement both from an access control approach (limiting exploits and
break-outs) as well as isolation (protecting one container from the actions of another). Here
too, we looked at how the various SELinux controls can be fine-tuned by administrators,
ranging from defining the domain label of a container up to volume-mounted SELinux
labeling.
In the next chapter, we'll look at another pair of SELinux-aware technologies: D-Bus and
systemd.
[ 171 ]
7
D-Bus and systemd
System-controlling services such as D-Bus and systemd are core components of a Linux
system, now more than ever. Where D-Bus offers system- and session-wide cross-service
communication and process life cycle management, systemd is a core daemon offering
multiple features. Both services use SELinux to further harden their operations, and allow
administrators to fine-tune the access controls applicable.
In this chapter, we will learn about:
SELinux's policy implementation for D-Bus and systemd
Tuning service access controls on D-Bus
Handling access permissions for services
We will end the chapter with an explanation of how D-Bus can use SELinux as its policy
source for tightening the authorizations on its services.
The system daemon (systemd)
Systemd is a core component of many Linux distributions. Since its birth in 2010, systemd
has gradually been adopted as the core init system, responsible for handling services and
boot-up operations.
D-Bus and systemd
Throughout its development phase, several other components have been added to the
systemd portfolio:
D-Bus has been merged with systemd and offers a system and session bus
service, allowing the use of D-Bus for inter-application communication
Udev has been merged with systemd as well, offering a flexible device-node
management application
Login capabilities have been added to systemd, enabling fine-grained control
over user sessions
The journald daemon has been added to provide a new approach to system and
service logging, replacing some of the functionality of standard system loggers
The timerd daemon provides support for the time-based execution of tasks,
replacing some of the functionality of standard cron daemons
Network configurations can be managed by systemd-networkd
This ongoing approach of absorbing several system services into a single application suite
has not gone unnoticed and isn't without controversy. Some distributions even refuse to
have systemd as the default init system.
Gentoo Linux gives users the choice of which init system they want: OpenRC or systemd.
With RHEL (from version 7 onward), systemd is the only available option.
The systemd project has included SELinux support for most of its services. The specific
details of this SELinux support is detailed next.
Service support in systemd
The main capability of the system daemon that most people know is its support for system
services. Unlike the traditional SysV-compatible init systems, systemd does not use scripts
to manage services. Instead, it uses a declarative approach for the various services,
documenting the wanted state and configuration parameters while using its own logic to
ensure that the right set of services is started in due time.
[ 173 ]
D-Bus and systemd
Understanding unit files
Systemd uses unit files to declare how a service should behave. These unit files use the INIstyle syntax, supporting sections and key/value pairs within each file. A service can have
multiple unit files that influence the service at large. It is important to remember that
different unit files for the same service are all related:
The *.service unit files define how a system service should be launched, what
its dependencies are, how systemd should treat sudden failures, and so on.
The *.socket unit files define which socket(s) should be created and which
permissions should be assigned to it. This is used for services that can be
launched on request rather than directly at boot.
The *.timer unit files define what time or frequency the service should be
launched at. This is used for services that do not necessarily run daemonized but
need to execute a certain logic at defined intervals.
Other unit files exist as well, although those have more in common with generic system
configurations (such as slice definitions, paths, and automount settings) and less with
particular services.
When an application is installed on a system, it places its default unit files inside
/usr/lib/systemd/system, from where they are picked up by systemd. At runtime,
updates can be placed inside /run/systemd/system, which will override the unit files in
the default location. System administrators can override the configurations by placing unit
files in /etc/systemd/system. These unit files override settings in
/run/systemd/system and /usr/lib/systemd/system.
As an example, check out the default dnsmasq service unit file:
# cat /usr/lib/systemd/system/dnsmasq.service
[Unit]
Description=DNS caching server
After=network.target
[Service]
ExecStart=/usr/sbin/dnsmasq -k
[Install]
WantedBy=multi-user.target
[ 174 ]
D-Bus and systemd
This unit file declares the command to use to launch dnsmasq and informs systemd that the
service should be launched after the network target has been reached (which is a kind of
milestone in the boot process, allowing proper dependency handling) and is needed for the
multi-user target (which is the equivalent of the default run level when using SysV-style
init services).
Setting the SELinux context for a service
When systemd launches a service, it executes the command defined through the
ExecStart= configuration entry in the service unit file. By default, a standard domain
transition will occur as defined through the SELinux policy.
When a SysV-style init script is used, the service is launched from within
the initrc_t context. With systemd, the context is the one from the
daemon itself, generally init_t. Not all Linux distributions have a
SELinux policy that is already modified to suit the systemd service
approach and might be missing domain transitions from init_t to the
various service daemons.
Package developers and system administrators can, however, update the service unit files
to have the service launched in an explicitly mentioned domain. To accomplish this, the
[Service] section of the unit file can be extended with the SELinuxContext=
configuration entry.
For instance, to ensure that dnsmasq is launched with the dnsmasq_t:s0:c0.c128
context, you'd use this:
[Unit]
Description=DNS caching server
After=network.target
[Service]
ExecStart=/usr/sbin/dnsmasq -k
SELinuxContext=system_u:system_r:dnsmasq_t:s0:c0.c128
[Install]
WantedBy=multi-user.target
[ 175 ]
D-Bus and systemd
Of course, it is also possible to use this to have a service running with a completely different
context, which can be useful when developing custom policies for daemons.
Using transient services
Systemd can also be used to launch applications as if they are services and have them under
systemd's control. Such applications are then called transient services, as they lack the unit
files that generally declare how systemd should behave.
Transient services are launched through the systemd-run application:
# systemd-run bittorrent-sync
Running as unit run-2603.service
As transient services do not have unit files to manage, changing the SELinux context has to
be accomplished through the command line as well. Of course, this is only needed if the
standard domain transitions defined in the policy do not result in the wanted behavior.
The systemd-run application supports this (starting with systemd version v230) through
the --property or -p option:
# systemd-run \
-p SELinuxContext=system_u:system_r:bittorrent_sync_t:s0 \
bittorrent-sync
Running as unit run-6523.service
Requiring SELinux for a service
Some services should only run when SELinux is enabled or disabled. With systemd, this can
be defined through its conditional parameters.
A service unit file can contain a number of conditions that need to be valid before systemd
will consider the service. These conditionals can point to the system type (virtualized or
not), kernel command-line parameters, files that do or don't exist, and so on. The one we are
interested in is ConditionSecurity, which is true if the given security system is enabled.
For instance, look at the rhel-autorelabel.service unit file:
# cat /usr/lib/systemd/system/rhel-autorelabel.service
[Unit]
Description=Relabel all filesystems, if necessary
DefaultDependencies=no
Requires=local-fs.target
[ 176 ]
D-Bus and systemd
Conflicts=shutdown.target
After=local-fs.target
Before=sysinit.target shutdown.target
ConditionSecurity=selinux
ConditionKernelCommandLine=|autorelabel
ConditionPathExists=|/.autorelabel
[Service]
ExecStart=/lib/systemd/rhel-autorelabel
Type=oneshot
TimeoutSec=0
RemainAfterExit=yes
StandardInput=tty
This unit file declares three conditionals:
The ConditionSecurity=selinux condition ensures that the service is only
launched if SELinux is active
The ConditionKernelCommandLine=|autorelabel condition informs
systemd that the kernel command line should be checked, and if it contains
autorelabel, this service should be triggered (the | prefix makes this
conditional a trigger)
The ConditionPathExists=|/.autorelabel condition informs systemd that
the /.autorelabel file should be searched, and if it exists, this service should be
triggered
Similarly, the rhel-autorelabel-mark.service file is provided by RHEL. This service
ensures that if the system is booted without SELinux being active and no /.autorelabel
file exists yet, then this file needs to be created to ensure that when the system is rebooted
with SELinux support, the relabeling operation occurs.
We can see this check by looking at the rhel-autorelabel-mark.service file:
# cat /usr/lib/systemd/rhel-autorelabel-mark.service
[Unit]
Description=Mark the need to relabel after reboot
DefaultDependencies=no
Requires=local-fs.target
Conflicts=shutdown.target
After=local-fs.target
Before=sysinit.target shutdown.target
ConditionSecurity=!selinux
ConditionPathIsDirectory=/etc/selinux
ConditionPathExists=!/.autorelabel
[ 177 ]
D-Bus and systemd
[Service]
ExecStart=-/bin/touch /.autorelabel
Type=oneshot
RemainAfterExit=yes
Relabeling files during service startup
Due to its more declarative approach to service management, a number of services are
harder to control through systemd than they were when using SysV-style service scripts.
This is of course due to the open and flexible use of scripts to perform any service-specific
preparation, which is harder to accomplish with systemd.
One of the actions that many services require is the preparation of service-specific runtime
directories, such as /run/httpd for the Apache service. Systemd has resolved this by
supporting what it calls tmpfiles.d. These are files and locations that are requested to be
provided or updated immediately (at boot time) but are not placed in the (persisted) file
system.
For instance, the package that provides the Apache daemon installs the following definition
by default on the system:
# cat /usr/lib/tmpfiles.d/httpd.conf
d /run/httpd
710 root apache
d /run/httpd/htcacheclean 700 apache apache
Similar to the systemd unit files, the files that contain these settings should be declared in
one of the following three locations. Each of these locations overrides the settings of the
previous one.
The default, package-provided location is /usr/lib/tmpfiles.d
Runtime declarations can be placed in /run/tmpfiles.d
Local sysadmin-provided declarations are placed in /etc/tmpfiles.d
The definitions can go much further than just directory creation. Through the tmpfiles.d
application, definitions can be set to create files, empty directories up front, create subvolumes, manage special files such as symbolic links or block devices, set extended
attributes, and more.
[ 178 ]
D-Bus and systemd
One of its features is to set the file mode and ownership and restore the SELinux context on
a file (z) or recursively against a location (Z). This can be used to change contexts on files
that have a proper context definition in the policy but whose context is not properly
assigned.
For instance, Red Hat has the following definition active:
#
z
Z
z
w
cat /usr/lib/tmpfiles.d/selinux-policy.conf
/sys/devices/system/cpu/online - - /sys/class/net - - /sys/kernel/uevent_helper - - /sys/fs/selinux/checkreqprot - - - - 0
The relabeling inside /sys is needed because this location will, by default, be labeled with
sysfs_t, whereas some of its files are requested to have a different label. The
/sys/devices/system/cpu/online file for instance needs to be labeled with
cpu_online_t:
# matchpathcon /sys/devices/system/cpu/online
/sys/devices/system/cpu/one system_u:object_r:cpu_online_t:s0
The definition ensures that this (pseudo-)file is relabeled at boot so that all other processes
that rely on the file being labeled with cpu_online_t can happily continue working.
The other arguments to the definition are explicitly marked with a dash (-) in the previous
example, meaning that there are no other parameters to be set. They can be used to set the
mode, UID, GID, age, and argument related to the rule.
An example configuration that uses some of these other parameters with the z or Z state is
the systemd.conf file:
#
z
Z
z
z
grep ^[zZ] /usr/lib/tmpfiles.d/systemd.conf
/run/log/journal 2755 root systemd-journal - /run/log/journal/%m ~2750 root systemd-journal - /var/log/journal 2755 root systemd-journal - /var/log/journal/%m 2755 root systemd-journal - -
For more information about the definition format, see man tmpfiles.d.
[ 179 ]
D-Bus and systemd
Using socket-based activation
The system daemon also supports socket-based activation. When configured, systemd will
create the socket on which the daemon usually listens and will have the daemon launched
when the socket is used. This allows systems to be booted quickly (as many daemons do not
need to be launched immediately).
When a client only places information in the socket (such as with the /dev/log socket), the
client does not even need to wait for the daemon to be activated. The data is stored in a
buffer until the daemon can read it–only when the buffer is full will the operation block
until the daemon has flushed the buffer.
Take a look at the systemd-journald socket unit file:
# cat /usr/lib/systemd/system/systemd-journald.socket
[Unit]
Description=Journal Socket
DefaultDependencies=no
Before=sockets.target
IgnoreOnIsolate=yes
[Socket]
ListenStream=/run/systemd/journal/stdout
ListenDatagram=/run/systemd/journal/socket
ListenDatagram=/dev/log
SocketMode=0666
PassCredentials=yes
PassSecurity=yes
ReceiveBuffer=8M
If one of the mentioned sockets (/run/systemd/journal/stdout,
/run/systemd/journal/socket, or /dev/log) is used, then the systemdjournald.service unit file is used to launch the service.
Inside the [Socket] section, a SELinux-specific entry can be defined:
SELinuxContextFromNet=true. When this entry is set, the MLS/MCS information is
obtained from the client context (the application connecting to the socket) and appended to
the context of the service.
[ 180 ]
D-Bus and systemd
Governing unit operations access
Until now, we've looked at configuration settings related to systemd's SELinux support. But
systemd also uses SELinux to control access to services defined through the unit files. When
a user wants to perform a particular operation against a unit (such as starting a service or
checking the state of a running service), systemd queries the SELinux policy to see whether
this operation is allowed.
The system daemon uses the service class to validate whether an operation is allowed or
not. For instance, to validate whether a user context user_t is allowed to view the status of
the service associated with the sshd.service unit file, it checks the context of this file
(such as sshd_unit_file_t) and then validates if the status permission is granted:
# sesearch -s user_t -t sshd_unit_file_t -c service -p status -A
In this case, no output is shown, so the user does not have the permissions to query this
information. Other supported permissions are disable, enable, kill, load, reload,
start, and stop.
Whenever the SELinux policy denies the operation, it will be shown as follows:
# systemctl status sshd
Failed to issue method call: SELinux policy denies access.
In the audit logs, this will be available through a USER_AVC denial message:
type=USER_AVC msg=audit(1348750450.105:135): pid=1 uid=0
auid=4294967295 ses=4294967295 subj=system_u:system_r:init_t:s0
msg='avc: denied { status } for auid=3267 uid=0 gid=0
path="/usr/lib/systemd/system/sshd.service"
cmdline="/bin/systemctl status sshd.service"
scontext=user_u:user_r:user_t:s0-s0:c0.c1023
tcontext=system_u:object_r:sshd_unit_file_t:s0
tclass=service exe="/usr/lib/systemd/systemd" sauid=0
hostname=? addr=? terminal=?'
What is important to know here is that the SELinux policy contains the access rules related
to these service operations but is not responsible for enforcing the rules. It is systemd that
acts based on the policy content (unlike file system operations, which are governed by the
Linux kernel and are as such enforced through the kernel as well).
[ 181 ]
D-Bus and systemd
Logging with systemd
As mentioned before, systemd is not only responsible for service management: it takes up
several other tasks as well. One of these tasks is log management, which is traditionally
implemented through a system logger.
While systemd still supports running with a traditional system logger, it now suggests the
use of systemd-journald. One of the advantages of the journal daemon is that it is not
limited to textual, single-line log messages. Daemons can now use binaries as well as
multiline messages as part of its logging capabilities.
The journal daemon also registers information about the sending process alongside the log
messages itself. This additional information contains ownership data (process owner)
including the SELinux context of the sending process.
Retrieving SELinux-related information
The traditional approach to receive SELinux-related information (excluding the audit events
we tackled before) is to grep through the log information. With the journal daemon, this is
accomplished like so:
# journalctl -b | grep -i selinux
The -b option passed on to the journal control application informs the journal daemon that
we are only interested in the log messages that originated for a specific boot.
Querying logs given a SELinux context
A unique feature of the journal daemon is to use the information associated with the log
messages as part of the query to be launched against the journal database. For instance, we
can ask the journal daemon to only show those messages that originated from a daemon or
application running in the udev_t context:
# journalctl _SELINUX_CONTEXT=system_u:system_r:udev_t:s0-s0:c0.c1023
-- Logs begin at Sat 2016-09-24 05:04:58 EDT,
end at Sat 2016-09-24 10:35:04 EDT. -Sep 24 05:04:59 selinuxtest systemd-udevd[429]: starting version 219
Sep 24 05:04:59 selinuxtest systemd-udevd[429]: Network interface
NamePolicy= disabled on kernel command line, ignoring.
Sep 24 07:00:37 selinuxtest systemd-udevd[4507]: starting version 219
Sep 24 07:00:37 selinuxtest systemd-udevd[4507]: Network interface
NamePolicy= disabled on kernel command line, ignoring.
[ 182 ]
D-Bus and systemd
Sep 24 07:00:38 selinuxtest systemd-udevd[4507]: Network interface
NamePolicy= disabled on kernel command line, ignoring.
Using setroubleshoot integration with journal
On RHEL systems, the SELinux troubleshooting daemon is also integrated with systemdjournald. Any alert that comes up from setroubleshootd is also available through the
journal daemon.
This helps administrators as they will quickly find out about SELinux denials when
investigating problems. For instance, when the Apache web server is not working properly,
a quick investigation of the status of the service will reveal that the SELinux policy is
preventing some actions:
# systemctl status httpd
* httpd.service - The Apache HTTP Server
Loaded: loaded (/usr/lib/systemd/system/httpd.service; disabled;
vendor preset: disabled)
Active: active (running) since Sat 2016-09-24 13:47:23 EDT;
8min ago
Docs: man:httpd(8)
man:apachectl(8)
Main PID: 3183 (httpd)
Status: "Total requests: 9; Current requests/sec: 0;
Current traffic:
0 B/sec"
CGroup: /system.slice/httpd.service
├─3183 /usr/sbin/httpd -DFOREGROUND
├─3184 /usr/sbin/httpd -DFOREGROUND
├─3185 /usr/sbin/httpd -DFOREGROUND
├─3186 /usr/sbin/httpd -DFOREGROUND
├─3187 /usr/sbin/httpd -DFOREGROUND
├─3188 /usr/sbin/httpd -DFOREGROUND
└─3336 /usr/sbin/httpd -DFOREGROUND
Sep 24 13:47:23 selinuxtest systemd[1]: Starting The Apache HTTP Server...
Sep 24 13:47:23 selinuxtest systemd[1]: Started The Apache HTTP Server.
Sep 24 13:48:12 selinuxtest python[10112]: SELinux is preventing
/usr/sbin/httpd from read access on the file
/srv/web/localhost/htdocs/dokuwiki/doku.php
[ 183 ]
D-Bus and systemd
To get more information about the message, use journalctl:
# journalctl -r -o verbose -u httpd.service
-- Logs begin at Sat 2016-09-24 12:04:39 EDT, end at
Sat 2016-09-24 13:59:34 EDT. -Sat 2016-09-24 13:48:12.382005 EDT
[s=0e131d2da8174be59dc9dd50b5aa7aa9;i=772;b=e0177f4aefb046ab807e22725b85086
d;m=16f715bc2;t=53d447cbcf970;x=72b681410ee05ceb]
PRIORITY=6
_UID=0
_GID=0
_BOOT_ID=e0177f4aefb046ab807e22725b85086d
_MACHINE_ID=02f1ddb1415c4feba9880b2b8c4c5925
_HOSTNAME=selinuxtest
SYSLOG_FACILITY=3
SYSLOG_IDENTIFIER=systemd
_TRANSPORT=journal
_PID=1
_COMM=setroubleshootd
_EXE=/usr/bin/python27
_CMDLINE=/usr/bin/python27 -Es /usr/sbin/setroubleshootd -f
_CAP_EFFECTIVE=1fffffffff
_SYSTEMD_CGROUP=/
_SELINUX_CONTEXT=system_u:system_r:setroubleshootd_t:s0-s0:c0.c1023
MESSAGE_ID=39f53479d3a045ac8e11786248231fbf
RESULT=done
UNIT=httpd.service
MESSAGE= SELinux is preventing /usr/sbin/httpd from read access on the
file /srv/web/localhost/htdocs/dokuwiki/doku.php
***** Plugin restorecon (92.2 confidence) suggests
****************
If you want to fix the label.
/srv/web/localhost/htdocs/dokuwiki/doku.php default label should be
httpd_sys_content_t.
Then you can run restoreon.
Do
# /sbin/restorecon -v /srv/web/localhost/htdocs/dokuwiki/doku.php
***** Plugin catchall_boolean (7.83 confidence) suggests
****************
...
[ 184 ]
D-Bus and systemd
Using systemd containers
Another feature that systemd supports is systemd-nspawn. This service provides container
capabilities in systemd and allows systemd to manage these containers. It uses the same
primitives as the LXC project and Docker. SELinux-wise, the software that is running inside
the container will not have a correct view on the SELinux state (as is the case with Docker).
However, unlike Docker and libvirt, the systemd-nspawn approach does not support the
sVirt technology that we covered in the previous chapter. In other words, it will not
dynamically reset the SELinux contexts of the used files, nor will it search for a free category
pair to associate with the files and the processes.
Initializing a systemd container
To create a systemd container, first create a root file system in which the software that the
container should run is deployed. It is advised to use the /var/lib/machines location,
with a subdirectory per container, as this location will be the default location for further
automation within systemd-nspawn.
For instance, an nginx container would have its root file system at
/var/lib/machines/nginx.
The root file system of the container must look like an operating system
tree, as otherwise systemd will refuse to start it. Use tools such as
debootstrap or dnf to build a minimal operating system environment
inside this location.
Next, to start the container, use the systemd-nspawn command like so:
# systemd-nspawn -D /var/lib/machines/nginx
If the container hosts a relatively complete distribution, use the -b option:
# systemd-nspawn -bD /var/lib/machines/nginx
Support for systemd-managed containers is still nascent at the time of writing this. In the
near future, the machinectl command will be used to manage containers.
[ 185 ]
D-Bus and systemd
Using a specific SELinux context
Like with Docker, systemd-nspawn also allows administrators to pass on the SELinux
context in which the processes of the container should run as well as the context that should
be used for the files of the container.
To accomplish this, systemd-nspawn supports the following two options:
The --selinux-context= option allows the administrator to define the
SELinux context for the runtime processes of the container
The --selinux-apifs-context= option allows the administrator to define the
SELinux context for the files and file system of the container
Here's an example that runs a container with the svirt_lxc_net_t type, the
svirt_image_t type for the files, and the c32,c42 categories:
# systemd-nspawn \
--selinux-context=system_u:system_r:svirt_lxc_net_t:s0:c32,c42 \
--selinux-apifs-context=system_u:object_r:svirt_image_t:s0:c32,c42
-D /var/lib/machines/nginx
Handling device files
Linux has had a long history of device managers. Initially, administrators needed to make
sure that the device nodes were already present on the file system (/dev was part of the
persisted file system). Gradually, more dynamic approaches were used for device
management.
Nowadays, device files are managed through a combination of a pseudo file system
(devtmpfs) and a user space device manager called udev. This device manager has been
merged in systemd as well, becoming systemd-udevd.
There are projects, such as eudev, which provide udev functionality
without requiring systemd to be installed and enabled on the system.
[ 186 ]
D-Bus and systemd
The device manager listens on a kernel socket for kernel events. These events inform the
device manager about detected or plugged-in devices (or the removal of such devices) and
allow the device manager to take appropriate action. For udev, these actions are defined in
udev rules.
Using udev rules
The main configuration of udev is handled through udev rules. These rules are one-liners
that contain a matching part and an action part.
The matching part is made up of validations that are executed against the event(s) that udev
receives from the Linux kernel. This is based on key/value pairs that are obtained from the
event and include the kernel-provided device name (KERNEL), device subsystem
(SUBSYSTEM), kernel driver (DRIVER), specific attributes (ATTR), and environment variables
that are active (ENV).
The Linux kernel will also inform the device manager about the device hierarchy. This
allows rules to be defined based on, for instance, the USB controller through which a USB
device is plugged in. Hierarchically related information is provided through key/value
pairs whose key is defined in plural form: SUBSYSTEMS instead of SUBSYSTEM, DRIVERS
instead of DRIVER, and so on.
For instance, to match a particular USB webcam, the match-related pairs could look like so:
KERNEL=="video[0-9]*", SUBSYSTEM=="video4linux", \
SUBSYSTEMS="usb", ATTR{idVendor}=="05a9", ATTR{idProduct}=="4519"
The second part of a udev rule is the action to take. The most common action is to create a
symbolic link to the created device file, ensuring that applications can always reach the
same device through the same symbolic link, even when the device from the kernel point of
view is named differently. The preceding example could for instance become this:
KERNEL=="video[0-9]*", SUBSYSTEM=="video4linux", \
SUBSYSTEMS="usb", ATTR{idVendor}=="05a9", \
ATTR{idProduct}=="4519", SYMLINK+="webcam1"
[ 187 ]
D-Bus and systemd
The udev application supports many more actions than just defining symbolic links, of
course. It can associate ownership (OWNER) or group membership (GROUP) on the device,
controlling who can access the devices. Udev can also set environment variables (ENV) and
be configured to run a command (RUN). It is probably sensible to only run a command when
the device is added, in which case a match such as ACTION=="add" should be added.
ENV can be seen as both a matching key as well as an action key. The
difference is with the operation (single = sign or double) that is performed.
ENV{envvar}=="value" is a match (is the envvar environment variable
set to "value"?) whereas ENV{envvar}="value" is an action (the
envvar environment variable is set to "value").
Udev rules are by default provided through the /usr/lib/udev/rules.d location. This is
where distributions and applications/drivers will store their default rules. Additional rules
or rule overrides can be placed in /etc/udev/rules.d.
Important to remember is that udev will continue processing rules even when a matching
rule is found and executed. This can be changed on a per-rule basis through the OPTIONS
action, like with OPTIONS+="last_rule", which informs udev that it can stop processing
further rules for this event.
Setting a SELinux label on a device node
One of the actions that udev supports is to assign a particular SELinux context on the device
node. This is done through the SECLABEL{selinux} action:
KERNEL=="fd0", ..., \
SECLABEL{selinux}="system_u:object_r:my_device_t"
Note that this action is only applicable to the device node that is created. If the rule also sets
a symbolic link, then the symbolic link itself is left untouched (and will inherit the default
device_t context).
[ 188 ]
D-Bus and systemd
D-Bus communication
The D-Bus daemon provides an inter-process communication channel between applications.
Unlike the traditional IPC methods, D-Bus is a higher-level communication channel that
offers more than simple signaling or memory sharing. Applications that want to chat over
the D-Bus link with one of the many D-Bus compatible libraries, such as libdbus, sd-bus
(part of systemd), GDBus, and QtDBus.
The D-Bus daemon is part of the systemd application suite.
Understanding D-Bus
Linux generally supports two D-Bus types: system-wide and session-specific D-Bus
instances:
The system-wide D-Bus is the main instance used for system communication.
Many services or daemons will associate themselves with the system D-Bus to
allow others to communicate with them through D-Bus.
The session-specific D-Bus is an instance running for a particular, logged-in user.
It is commonly used by graphical applications to communicate with each other
within a user session.
Both D-Bus instances are provided through the dbus-daemon application. However, the
system-wide D-Bus will run with the --system option whereas a session-specific instance
will run with the --session option.
Applications register themselves against the D-Bus through a particular namespace.
Conventionally, this namespace is based on the domain name of the project. For instance,
systemd uses the org.freedesktop.systemd1 namespace whereas D-Bus is at
org.freedesktop.DBus.
The currently associated applications can be queried using D-Bus clients, such as qdbus
(provided through the qt package):
# qdbus --system
:1.1
org.freedesktop.login1
:1.186
:1.2
org.fedoraproject.FirewallD1
:1.3
com.redhat.ifcfgrh1
[ 189 ]
D-Bus and systemd
org.freedesktop.NetworkManager
:1.4
:1.5
fi.epitest.hostap.WPASupplicant
fi.w1.wpa_supplicant1
:1.6
org.freedesktop.PolicyKit1
:1.65
org.freedesktop.systemd1
:1.66
com.redhat.tuned
org.freedesktop.DBus
Each application then provides objects on the bus that can be reached by other objects (other
applications)—of course, assuming they have the privileges to do so. These objects are
represented through a path-like syntax and generally also use the domain of the project as a
prefix.
For instance, to list the objects currently associated with org.freedesktop.systemd1,
you'd use this command:
# qdbus --system org.freedesktop.systemd1
/
/org/freedesktop/systemd1/unit/firewalld_2eservice
/org/freedesktop/systemd1/unit/machines_2etarget
/org/freedesktop/systemd1/unit/sys_2ddevices_2dpnp0_2d00_3a05_2dtty_2dttyS0
_2edevice
/org/freedesktop/systemd1/unit/getty_2etarget
/org/freedesktop/systemd1/unit/lvm2_2dlvmpolld_2eservice
...
Applications can then trigger methods on these objects or through these methods send
messages to the applications that are bound to these objects.
For instance, to read all properties exposed by the hostname service, we call the
org.freedesktop.DBus.Properties.GetAll method of the object bound at
/org/freedesktop/hostname1 provided by org.freedesktop.hostname1. We pass on
the org.freedesktop.hostname1 string to this method:
# dbus-send --system --print-reply --type=method_call \
--dest=org.freedesktop.hostname1 \
/org/freedesktop/hostname1 \
org.freedesktop.DBus.Properties.GetAll \
string:"org.freedesktop.hostname1"
method return sender=:1.192 -> dest=:1.193 reply_serial=2
array [
dict entry(
[ 190 ]
D-Bus and systemd
string "Hostname"
variant
string "selinuxtest"
)
...
dict entry(
string "KernelName"
variant
string "Linux"
)
dict entry(
string "KernelRelease"
variant
string "3.10.0-327.13.1.el7.x86_64"
)
dict entry(
string "KernelVersion"
variant
string "#1 SMP Thu Mar 31 11:10:31 CDT 2016"
)
dict entry(
string "OperatingSystemPrettyName"
variant
string "Red Hat Enterprise Linux Server 7.2 (Maipo)"
)
dict entry(
string "OperatingSystemCPEName"
variant
string \
"cpe:/o:redhat:enterprise_linux:7.2:GA:server"
)
]
Controlling service acquisition with SELinux
The D-Bus application, like systemd, will query the SELinux policy to identify whether a
particular operation is allowed. Again, it is the D-Bus application itself that enforces the
policy and not a Linux kernel subsystem.
The first control that administrators can enable within D-Bus is to ensure that only wellestablished domains can acquire a particular object within D-Bus. Without this control,
malicious code could register itself as being org.freedesktop.login1, for instance, and
act as a system daemon on the bus. Other applications might mistakenly send out sensitive
information to the application.
[ 191 ]
D-Bus and systemd
Applications store this policy information in files hosted in /etc/dbus-1/system.d/. The
login service for instance has the following policy snippet installed:
# cat /etc/dbus-1/system.d/org.freedesktop.login1.conf
<?xml version="1.0"?>
<!DOCTYPE busconfig PUBLIC
"-//freedesktop//DTD D-BUS Bus Configurqtion 1.0//EN"
"http://www.freedesktop.org/standards/dbus/1.0/busconfig.dtd">
<busconfig>
<policy user="root">
<allow own="org.freedesktop.login1" />
<allow send_destination="org.freedesktop.login1" />
<allow receive_sender="org.freedesktop.login1" />
</policy>
<policy context="default">
...
</policy>
</busconfig>
As the login daemon runs in the systemd_logind_t domain, we could enhance this
configuration as follows:
<?xml version="1.0"?>
<!DOCTYPE busconfig PUBLIC
"-//freedesktop//DTD D-BUS Bus Configurqtion 1.0//EN"
"http://www.freedesktop.org/standards/dbus/1.0/busconfig.dtd">
<busconfig>
<selinux>
<associate
own="org.freedesktop.login1"
context="system_u:system_r:systemd_logind_t:s0" />
</selinux>
</busconfig>
D-Bus will then check whether the application (which we presume is running in the
systemd_logind_t context) has the acquire_svc permission (of the dbus class) against
the systemd_logind_t context. By default, the SELinux policy does not have this
permission, and as such, the registration fails:
systemd-logind[538]: Failed to register name: Permission denied
systemd-logind[538]: Failed to fully start up daemon:
Permission denied
[ 192 ]
D-Bus and systemd
In the audit logs, we notice the following denial:
time->Sat Sep 24 11:53:23 2016
type=USER_AVC msg=audit(1474732403.120:404): pid=521 uid=81
auid=4294967295 ses=4294967295
subj=system_u:system_r:system_dbusd_t:s0-s0:c0.c1023
msg='avc: denied { acquire_svc } for
service=org.freedesktop.login1 spid=2313
scontext=system_u:system_r:systemd_logind_t:s0
tcontext= system_u:system_r:system_dbusd_t:s0
tclass=dbus exe="/usr/bin/dbus-daemon" sauid=81
hostname=? addr=? terminal=?'
When we add the following SELinux policy rule (something we'll discuss in the next
chapter), the registration of systemd-logind will succeed, as expected:
allow systemd_logind_t self:dbus acquire_svc;
By limiting which domains can obtain a given service, we ensure that only trusted
applications are used. Non-trusted applications will generally not run within the domain of
that application (end users for instance cannot trigger a transition to such a domain) even if
they receive the root privileges (which is another check that D-Bus does for the login
service, as shown in the first busconfig snippet).
Administrators can enhance this D-Bus configuration without having to alter the existing
configuration files. For instance, the previously mentioned SELinux-governing busconfig
snippet could very well be saved as a different file.
Governing message flows
A second control that D-Bus validates is which applications are allowed to communicate
with each other. This is not configurable through the service configurations, but is a pure
SELinux policy control.
Whenever a source application is calling a method of a target application, D-Bus validates
the send_msg permission between the two domains associated with the source and target
applications.
[ 193 ]
D-Bus and systemd
For instance, communication over D-Bus between a user domain (sysadm_t) and service
domain (systemd_logind_t) will check the following permissions:
allow sysadm_t systemd_logind_t : dbus send_msg;
allow systemd_logind_t sysadm_t : dbus send_msg;
If these permissions are not in effect, then D-Bus will not allow the communication to
happen.
If at any point the application context cannot be obtained (which is not possible with UNIX
domain sockets, but might occur if D-Bus eventually supports other communication
approaches), then the bus daemon context will be used.
Summary
In this chapter, we started out with an introduction to systemd and a strong focus on the
service management capabilities that systemd offers. We learned how to start a service with
a custom SELinux context as well as how additional files can be properly labeled upon boot.
Alongside the service management, through systemd's unit files, this chapter also covered
transient services and how to immediately associate the right SELinux context.
Other systemd capabilities and services were touched upon as well. We saw how SELinux
contexts are registered as part of the systemd journal and how to query for events using this
context. Journal daemon integration with the SELinux troubleshooting daemon was
covered as well. We learned how systemd supports containers and what administrators can
do to fine-tune the SELinux context associated with the container. Finally, we took a brief
look at udev and how its rules can be used to support administrators in managing devices.
One of its actions is to set the SELinux context of the device node.
We finished the chapter with an introduction to D-Bus, how SELinux can be used to control
the association of applications with services, and how D-Bus uses the send_msg permission
to validate communications across its channels.
In the next chapter, we will learn how the SELinux policy can be tuned and even how
custom SELinux policies can be developed and loaded.
[ 194 ]
8
Working with SELinux Policies
Until now, we have been working with an existing SELinux policy by tuning our system to
deal with the proper SELinux contexts and assigning the right labels to files, directories, and
even network ports. In this chapter, we will:
Manipulate conditional SELinux policy rules through booleans
Learn to create new custom SELinux policy modules
Develop user and application domains
Replace existing policies with new, custom ones
We'll end the chapter with a few examples of custom policies that augment our SELinux
experience and fine-tune the policy to match the security requirements that the
administrator has in mind.
SELinux booleans
One of the methods of manipulating SELinux policies is by toggling SELinux booleans. Ever
since Chapter 2, Understanding SELinux Decisions and Logging, in which we used the
secure_mode_policyload boolean, these tunable settings have been popping up over the
course of this book. With their simple on/off state, they enable or disable parts of the
SELinux policy. Policy administrators use SELinux booleans to manage parts of the policy
that are not always needed (or wanted) but still have a common use case.
Working with SELinux Policies
Listing SELinux booleans
An overview of SELinux booleans can be obtained using the semanage command with the
boolean option. On a regular system, we can easily find over a hundred SELinux booleans,
so it is necessary to filter out the description of the boolean we need:
# semanage boolean -l | grep policyload
secure_mode_policyload
(off, off)
Boolean to determine whether the system permits loading policy, setting enforcing mode,
and changing boolean values. Set this to true and you have to reboot to set it back.
The output not only gives us a brief description of the boolean, but also the current value
(actually, it gives us the value that is pending a policy change and the current value, but this
will almost always be the same).
Another method for getting the current value of a boolean is through the getsebool
application, as follows:
# getsebool secure_mode_policyload
secure_mode_policyload --> off
If the name of the boolean is not exactly known, we can ask for an overview of all booleans
(and their values) and filter out the one we need:
# getsebool -a | grep policy
secure_mode_policyload --> off
Another utility that can be used to view SELinux boolean descriptions is the sepolicy
booleans command:
# sepolicy booleans -b secure_mode_policyload
secure_mode_policyload=_("Boolean to determine whether the system
permits loading policy, setting enforcing mode, and changing
boolean values. Set this to true and you have to reboot to
set it back.")
This command, however, does not show the current value of the boolean.
Finally, booleans are also represented through the /sys/fs/selinux file system:
# cat /sys/fs/selinux/booleans/secure_mode_policyload
0
[ 196 ]
Working with SELinux Policies
Here, booleans can be read as if they were regular files, and they return the value 0 (zero)
for off, and 1 (one) for on.
Changing boolean values
We can change the value of a boolean using the setsebool command. For instance, to
toggle the SELinux boolean, we can use httpd_can_sendmail (which enables or disables
the policy rules that allow web servers to send e-mails):
# setsebool httpd_can_sendmail on
On Gentoo Linux, another command called togglesebool exists, which
just flips the current state of a boolean. This command is provided by
libselinux, but is absent in RHEL.
SELinux booleans have a default state defined by the policy administrator. Changing the
value using setsebool updates the current access controls, but this does not persist across
reboots.
In order to keep the changes permanently, add the -P option to setsebool as follows:
# setsebool -P httpd_can_sendmail on
In the background, the updated SELinux boolean value is included in the policy store: the
current policy file is rebuilt and loaded. As a result, the policy file (called policy.29, for
instance, inside /etc/selinux/targeted/policy/) is regenerated.
Another way to change and persist the boolean settings is to use the semanage boolean
command, as follows:
# semanage boolean -m --on httpd_can_sendmail
In this case, the boolean value is modified (-m) to on (--on).
Persisting the changes will take a while as the SELinux policy is being rebuilt (nonpersistent changes are almost instantaneous). The larger the SELinux policy on a system, the
more time it takes.
[ 197 ]
Working with SELinux Policies
Inspecting the impact of a boolean
To find out what policy rules a boolean manipulates, the description usually suffices, but
sometimes, we might want to know which SELinux rules change when a boolean is toggled.
With the sesearch application, we can query the SELinux policy, displaying the rules that
are affected by a boolean. To show this information in detail, we use the -b option (for the
boolean), -A option (show allow rules), and -C option (to show conditional rules):
# sesearch -b httpd_can_sendmail -AC
Found 46 semantic av rules:
DT allow httpd_sys_script_t bin_t : dir { getattr search open } ;
[ httpd_can_sendmail ]
DT allow httpd_sys_script_t bin_t : lnk_file { read getattr } ;
[ httpd_can_sendmail ]
DT allow system_mail_t httpd_suexec_t : process sigchld ;
[ httpd_can_sendmail ]
DT allow system_mail_t httpd_suexec_t : fd use ;
[ httpd_can_sendmail ]
DT allow system_mail_t httpd_suexec_t : fifo_file { ioctl ... } ;
[ httpd_can_sendmail ]
DT allow httpd_t bin_t : dir { getattr search open } ;
[ httpd_can_sendmail ]
DT allow httpd_t bin_t : lnk_file { read getattr } ;
[ httpd_can_sendmail ]
DT allow httpd_t smtp_client_packet_t : packet { send recv } ;
[ httpd_can_sendmail ]
...
In the example, we can see that the rules are prefixed with two characters: DT. These inform
us about the state of the boolean in the policy (first character) and when the SELinux rule is
enabled (second character).
With setools version 4, the -C option is no longer available in the
sesearch command. When a boolean is selected using the -b option, only
those rules affected by the boolean are shown. The output is also slightly
different, showing only the active state of the rule (true or false) rather
than the two-character state that is displayed in the previous example.
The state reflects whether the SELinux policy rule is currently enabled (E) or disabled (D)
and whether the rule becomes active when the boolean is on/true (T) or off/false (F). So DT
means that the rule is currently not active but will become active if the boolean is toggled to
the on state.
[ 198 ]
Working with SELinux Policies
When we query the SELinux policy, it makes sense to always add the conditional option so
that we can easily see whether the policy supports a certain access based on one or more
booleans.
Consider the web server domain (httpd_t), which has many policy rules governed
through SELinux booleans. We might want to see which rules are applicable between the
web server domain (httpd_t) and user content type (user_home_t):
# sesearch -s httpd_t -t user_home_t -AC
Found 7 semantic av rules:
allow daemon user_home_t : file { getattr append } ;
allow httpd_t file_type : filesystem getattr ;
allow httpd_t file_type : dir { getattr search open } ;
DT allow httpd_t user_home_type : file
{ ioctl read getattr lock open }
; [ httpd_read_user_content ]
DT allow httpd_t user_home_type : dir { getattr search open } ;
[ httpd_enable_homedirs ]
DT allow httpd_t user_home_type : dir
{ ioctl read getattr lock search open } ;
[ httpd_read_user_content ]
DT allow httpd_t user_home_type : lnk_file { read getattr } ;
[ httpd_enable_homedirs ]
Enhancing SELinux policies
Not all situations can be perfectly defined by policy writers. At times, we will need to make
modifications to the SELinux policy. As long as the changes involve adding rules, we can
create additional SELinux modules to enhance the policy. If the change is more intrusive,
we might need to remove an existing SELinux module and replace it with an updated one.
Listing policy modules
SELinux policy modules are, as mentioned at the beginning of this book, sets of SELinux
rules that can be loaded and unloaded. These modules, with .pp or .cil suffixes, can be
loaded and unloaded as needed by the administrator. Once loaded, the policy module is
part of the SELinux policy store and will be loaded even after a system reboot.
[ 199 ]
Working with SELinux Policies
To list currently loaded SELinux policy modules, it is recommended to use the semodule
command. Depending on the version of the SELinux user space tools (in this case, the
version of the policycoreutils package), listing modules will show module versions as
well (old version) or just the module name (new version). On RHEL 7.2, the old SELinux
user space is still active:
# semodule
abrt
accountsd
acct
afs
...
-l
1.4.1
1.1.0
1.6.0
1.9.0
The more recent SELinux user space no longer uses module versions but instead introduces
priorities. Modules can be loaded with a higher priority, overriding previous modules, or
with lower priority (in which case the module is loaded but not active). On Gentoo Linux,
for instance, we get the following output, which shows the priority as well as policy
module format:
# semodule --list-modules=full
400 also
pp
400 android
pp
400 application pp
400 archi
pp
...
The SELinux utilities will copy the active policy modules into a policy-specific location. As
such, listing this directory also provides an overview of the currently loaded modules:
# ls /etc/selinux/targeted/modules/active/modules/
abrt.pp
cockpit.pp
gitosis.pp
lvm.pp
oracleasm.pp
...
On older SELinux user space versions, this location is at /etc/selinux whereas the more
recent SELinux user space has it at /var/lib/selinux.
Loading and removing policy modules
In later sections in this chapter, we will learn how to write new policy modules. Once
created, they need to be loaded and removed. This is done with semodule as well,
regardless of the policy format (.pp or .cil):
# semodule -i screen.pp
[ 200 ]
Working with SELinux Policies
On recent SELinux user space utilities, administrators can pass on a priority. This allows
administrators to load an updated module with a higher priority while retaining the older
one (just inactive). For instance, you'd use this command to load the archi.cil policy
module with a priority 500:
# semodule -i archi.cil -X 500
Removing modules is done with the --remove or -r option. In this case, we are not
referring to the package format but to the loaded module, so no package suffix needs to be
provided:
# semodule -r screen
Again, with the newer SELinux user space, it is possible to remove a module from a given
priority. Here's an example to remove the archi module from priority 300:
# semodule -r archi -X 300
Finally, it is possible to keep a module but disable it. This keeps the module in the policy
store but disables all the SELinux policy rules inside of it. We use the --disable or -d
option to accomplish this:
# semodule -d archi
Re-enabling the policy is done with the --enable or -e option:
# semodule -e archi
Creating policies using audit2allow
When SELinux prevents certain actions, we already know it will log the appropriate denial
in the audit logs. This denial can be used as the source to generate a custom SELinux policy
that allows the activity.
Consider the following denials, which occurred when a user called setkey after switching
his active SELinux role to sysadm_r through the newrole command:
type=AVC msg=audit(1373121736.897:6882): avc: denied { use } for
pid=15069 comm="setkey" path="/dev/pts/0" dev="devpts" ino=3
scontext=root:sysadm_r:setkey_t:s0-s0:c0.c1023
tcontext=root:staff_r:newrole_t:s0-s0:c0.c1023
tclass=fd permissive=0
type=AVC msg=audit(1373121736.907:6883): avc: denied { search }
for pid=15069 comm="setkey" name="/" dev="dm-4" ino=2
scontext=root:sysadm_r:setkey_t:s0-s0:c0.c1023
[ 201 ]
Working with SELinux Policies
tcontext=system_u:object_r:var_t:s0
tclass=dir permissive=0
If there is no solution offered by sealert other than running audit2allow, and a quick
investigation reveals that there are no SELinux booleans that we can toggle to allow this,
then we only have a few options left. We can refuse to handle this solution, telling the user
to trigger the setkey command through a different path (without switching the SELinux
role), as a sort of work around. But if we are certain that the action is correct and there is no
mismatch of contexts of any kind, then we might want to allow the currently denied
actions.
The audit2allow application transforms a denial or a set of denials into SELinux allow
rules. These rules can then be saved in a file, ready to build into a SELinux policy module
based on these allow rules, which we can then load in memory.
To generate SELinux policy allow rules, pipe the denials through the audit2allow
application:
# grep setkey /var/log/audit/audit.log | audit2allow
#============= setkey_t ==============
allow setkey_t newrole_t:fd use;
allow setkey_t var_t:dir search;
Based on the denials, two allow rules are prepared. We can also ask audit2allow to
immediately create a SELinux module, as follows:
# grep setkey /var/log/audit/audit.log | audit2allow -M localpolicy
********** IMPORTANT **********
To make this policy package active, execute:
semodule -i localpolicy.pp
A file called localpolicy.pp will be available in the current directory, which we can load
in memory using the given command.
If the denials that occurred are, however, cosmetic in nature (meaning that the system
functions as expected), you can use audit2allow to generate dontaudit rules rather than
allow rules. In that case, the denials will no longer occur even though the action is not
allowed:
# grep setkey /var/log/audit/audit.log | audit2allow -D -M localpolicy
********** IMPORTANT **********
To make this policy package active, execute:
semodule -i localpolicy.pp
[ 202 ]
Working with SELinux Policies
It is likely, after including the necessary rules (assuming the rules are allow rules), that the
action that was taken still fails. It just fails in another phase, which it couldn't reach before.
As long as the previous AVC denials are still available in the audit logs, it is sufficient to
regenerate the policy and continue. After all, audit2allow will take into account all AVC
denials that it encountered, even those that were present before the new policy was loaded.
Another approach would be to put the system (or the specific domain) in permissive mode
to generate and fill up the audit logs with all the AVC denials related to the action.
Although this generates more AVC denials to work with, it could also result in wrong
decisions being taken by the audit2allow command. Always verify the denials before
generating new policy constructs!
When the previous AVC denials are no longer available inside the audit log, a new policy
module needs to be generated, as otherwise, the previously fixed accesses will be denied
again: the newly generated policy will no longer contain the allow rules that were hit
before, and when the new policy is loaded, the old one is no longer active.
Using sensible module names
In the previous example, the audit2allow command was instructed to generate a policy
module named localpolicy. However, this is bad practice.
Once a (binary) policy is created (the localpolicy.pp file), it is very hard for
administrators to find out which rules were part of this module. Although it is possible to
unpack the .pp file (using semodule_unpackage) and then disassemble the resulting .mod
file into a .te file, it requires software that is not readily available on most distributions (the
dismod application, which is part of the checkpolicy software, is not often included). To
just get insight into the rules that are part of a module, this is a very elaborate and timeintensive approach.
On systems with a recent SELinux user space, the content of a module can be somewhat
deduced from the generated Common Intermediate Language (CIL) code. For instance, an
active screen module will have its code available at
/var/lib/selinux/mcs/active/modules/400/screen in a file called cil. Still, having
to dive into the rules to know what localpolicy is actually about is not only bad practice,
but also requires sufficient privileges to be able to read these files.
[ 203 ]
Working with SELinux Policies
Instead, it is a best practice to name the generated modules for their intended purpose. A
SELinux policy module that fixes a few AVC denials that come up when setkey is
executed after a role-switch operation triggered by newrole is better called
custom_setkey_newrole.
It is also recommended to prefix (or suffix) the custom policies with a string that identifies
that the module has been added by the administrator (or organization) and not through the
distribution's policy. In the previous example, having all custom policies start with
custom_ makes it easier to see which of the currently installed policies are custom ones:
# semodule -l | grep ^custom_
custom_setkey_newrole
custom_sysadmin_powertop
custom_debug_xorg
custom_alsa_qemu
Using refpolicy macros with audit2allow
The reference policy project provides distributions and policy writers with a set of functions
that simplify the development of SELinux policies. As an example, let's see what the macros
can do with the previous situation:
# grep setkey /var/log/audit/audit.log | audit2allow -R
require {
type setkey_t;
type newrole_t;
class fd use;
}
#============= setkey_t ==============
allow setkey_t newrole_t:fd use;
files_search_var(setkey_t)
As audit2allow -R uses an automated approach for finding potential functions, we need
to review the results carefully. Sometimes it selects a method that creates far more
privileges for a domain than needed.
One of the rules in the example has been written as files_search_var(setkey_t). This
is a reference policy macro that explains a particular SELinux rule (or set of rules) in a more
human-readable way. In this case, it allows the setkey_t domain to search through the
var_t labeled directories.
[ 204 ]
Working with SELinux Policies
All major distributions base their SELinux policies upon the macros and content provided
by the reference policy. The list of methods we can call while building SELinux policies is
available online (http://oss.tresys.com/docs/refpolicy/api/) but can also be installed
on the local file system at /usr/share/doc/selinux-base-* (for Gentoo, with
USE="doc" enabled while building the sec-policy/selinux-base package) or
/usr/share/doc/selinux-policy (for RHEL, after installing the selinux-policy-doc
package).
These named methods bundle a set of rules that are related to the functionality that SELinux
policy administrators want to enable. For instance, the storage_read_tape() method
allows us to enhance a SELinux policy module to allow the given domain read access to
storage tape devices.
Using selocal
On Gentoo, a script called selocal is available that allows administrators to add simple,
one-line rules to the policy. These are then made part of a policy module managed by
selocal (by default called selocal).
For instance, to allow all domains to send and receive unlabeled packets, we could execute
selocal as follows:
# selocal -a "allow domain unlabeled_t:packet { send recv };" -Lb
As a more advanced example, let's go back to the denials related to setkey_t we
encountered previously. Here, setkey_t was trying to use a newrole_t file descriptor. If
we investigate the newrole_t type a bit further, we can use seinfo to view its associated
attributes. Here, we see that newrole_t has an attribute called privfd:
$ seinfo -tnewrole_t -x
newrole_t
privfd
mlsprocsetsl
can_change_object_identity
kernel_system_state_reader
...
One of the reference policy methods available is domain_use_interactive_fds(), which
allows the domains to use file descriptors of types with the privfd attribute set.
[ 205 ]
Working with SELinux Policies
We can allow this for the setkey_t domain using selocal:
# selocal -a "domain_use_interactive_fds(setkey_t)" \
-c "Get output of setkey after newrole" -L -b
Understanding which method to call and when to call it is a matter of
SELinux development principles. In this chapter, we touch upon basic
SELinux policy-development aspects. However, in-depth development of
SELinux policies is outside the scope of this book. For this, I recommend
SELinux Cookbook at https://www.packtpub.com/networking-and-serve
rs/selinux-cookbook, another Packt publication, which focuses on
SELinux policy development intensively.
The selocal application by default maintains a single SELinux policy module, unlike
audit2allow, where we need to continuously create new SELinux policy modules as time
goes by. The application also builds this module on request (-b) and loads it in memory (L).
To list the currently available SELinux rules in the selocal managed policy, use the
selocal -l command:
# selocal -l
23: files_mountpoint(portage_tmp_t) # Mount tmpfs on /var/tmp/portage
24: domain_use_interactive_fds(setkey_t)
# Get output of setkey after newrole
To remove a specific line, pass on the line number displayed in the listing output. For
instance, to remove the previously added line, use this command:
# selocal -d 24
Removing line 24 from module selocal (/root/.selocal/selocal.te)
Removed following line: domain_use_interactive_fds(setkey_t) \
# Get output of setkey after newrole
Creating custom modules
We can always maintain our own SELinux policy modules as well. To accomplish this, we
either need to have at least a file with the .te suffix (which stands for type enforcement)
and optionally a file context (.fc) file and interface (.if) file or, when using the new policy
format, a .cil file. All these files need to have the same base name, which will be used as a
module name later.
[ 206 ]
Working with SELinux Policies
There are several formats in which SELinux policy modules can be written:
The first format we call SELinux native. It does not understand reference policy
macros, but it is the base policy development approach that is still in use. The
reference project even relies on this format to build its own set of rules.
The second format we call reference policy style. Here, macros are provided that
facilitate SELinux policy development while still supporting most of the syntax
that SELinux native uses. Transitioning from SELinux native to reference policy
style is therefore quite simple.
The third format is CIL. This is a completely new language for SELinux policy
development, but of course still maps to the well-known SELinux language
constructs. The recent SELinux user space will translate the first two formats into
CIL format under the hood.
The use of custom modules (instead of relying on audit2allow) is preferred as it provides
the administrator more control over the added policy rules. It also allows administrators to
keep track of policy updates, including comments inside the policy rules explaining why
the rules were added.
We will briefly look at the three approaches in the next few subsections.
Building SELinux native modules
A native SELinux policy language module starts with a line defining the name of the
module, followed by a set of requirements (types or attributes, classes, and permissions)
and then the rules themselves.
An example of this is given through the following policy file:
# cat localpolicy.te
module localpolicy 1.0;
require {
type setkey_t;
type newrole_t;
class fd { use };
}
allow setkey_t newrole_t:fd use;
[ 207 ]
Working with SELinux Policies
The localpolicy.te file can then be transformed into an intermediate module file, which
will be called localpolicy.mod. This is accomplished using the checkmodule command,
as follows:
$ checkmodule -M -m -o localpolicy.mod localpolicy.te
Finally, the SELinux policy module is built, generating a loadable localpolicy.pp
module. For this, we use the semodule_package command:
$ semodule_package -o localpolicy.pp -m localpolicy.mod
The resulting localpolicy.pp file can now be loaded in memory using the semodule
application.
Building reference policy modules
In the case of a reference policy module, a similar structure as with the native format is
used, but now leveraging functions provided by the various SELinux policy module
definitions. Again, it starts with a module declaration, followed by a declaration of required
types (or other SELinux objects), and finally, the set of policy rules that the module holds.
What's important is that the first line calls a macro, namely, the policy_module() method:
# cat localpolicy.te
policy_module(localpolicy, 1.0)
gen_require('
type setkey_t;
')
domain_use_interactive_fds(setkey_t)
The localpolicy.te file can then be built using a reference policy project provided
Makefile, which transforms the functions to the raw SELinux policy rules and builds the
policy packages afterwards.
[ 208 ]
Working with SELinux Policies
On Gentoo systems, this Makefile resides in /usr/share/selinux/targeted/include,
while RHEL has it in /usr/share/selinux/devel:
$ make -f /usr/share/selinux/devel/Makefile localpolicy.pp
Compiling targeted localpolicy module
/usr/bin/checkmodule: loading policy configuration from
tmp/localpolicy.tmp
/usr/bin/checkmodule: policy configuration loaded
/usr/bin/checkmodule: writing binary representation (version 17) to
tmp/localpolicy.mod
Creating targeted localpolicy.pp policy package
rm tmp/localpolicy.mod.fc tmp/localpolicy.mod
Afterward, the localpolicy.pp file can be loaded using the semodule application.
Building CIL policy modules
The CIL format uses a different policy development style, which might make it easier for
software to parse but sometimes more challenging for users to develop. Still, there are a
number of advantages to CIL files that will make it a popular approach. Note, however, that
CIL support is only available in the recent SELinux user space. RHEL 7.2 does not support
CIL yet.
The following localpolicy.cil file has similar content as the SELinux native example
given earlier on:
# cat localpolicy.cil
(allow setkey_t privfd (fd (use)))
One of the advantages of using CIL is that it does not require packaging commands. Hence,
the generated file can be loaded immediately:
# semodule -i localpolicy.cil
Adding file context definitions
SELinux policy modules can also contain context definitions, which inform the user space
what label to assign to file system resources. For instance, we might want to assign the
httpd_sys_content_t label to /opt/dokuwiki/htdocs content.
[ 209 ]
Working with SELinux Policies
Although we have seen that semanage fcontext can be used to assign contexts to the
right location on the file system, the use of context definitions inside modules gives us the
advantage that they become part of the main policy (and thus are validated using the
specificity rules as described in Chapter 4, Process Domains and File-Level Access Controls).
For SELinux native development, this would be written as follows:
# cat localpolicy.fc
/opt/dokuwiki/htdocs(/.*)?
\
system_u:object_r:httpd_sys_content_t:s0
# checkmodule -M -m -o localpolicy.mod localpolicy.te
# semodule_package -o localpolicy.pp -m localpolicy.mod -f localpolicy.fc
For reference policy style, this would be written as follows:
# cat localpolicy.fc
/opt/dokuwiki/htdocs(/.*)?
\
gen_context(system_u:object_r:httpd_sys_content_t,s0)
# make -f /usr/share/selinux/devel/Makefile localpolicy.pp
For CIL style, this is added to the .cil file itself:
# cat localpolicy.cil
(filecon "/opt/dokuwiki/htdocs(/.*)?" any
(system_u object_r httpd_sys_content_t ((s0) (s0)))
)
Creating roles and user domains
One of the best features of SELinux is its ability to confine end users and only grant them
the rights they need to do their job. To accomplish this, we need to create a restricted user
domain that these users should use (either immediately or after switching from their
standard role to the more privileged role).
Such user domains and roles need to be created through SELinux policy enhancements.
These enhancements, however, require a deep understanding of the available permission
checks, reference policy macros, and more, which one can only obtain through experience
(or assistance). Still, that shouldn't prevent us from providing a working example of how to
create a special end user role and domain for the PostgreSQL administration.
[ 210 ]
Working with SELinux Policies
Creating the pgsql_admin.te file
First, let's look at the SELinux policy file that includes our user related rules. Each line is
commented to explain why the next policy line is used.
The pgsql_admin.te file looks as follows:
# cat pgsql_admin.te
policy_module(pgsql_admin, 1.0)
# Define the pgsql_admin_r role
role pgsql_admin_r;
# Create a pgsql_admin_t type that has minimal rights a regular
# user domain would need in order to work on a Linux system
userdom_base_user_template(pgsql_admin)
# Allow the pgsql_admin_t type to execute regular binaries
# such as id.
corecmd_exec_bin(pgsql_admin_t)
# Allow the user domain to read its own selinux context
selinux_getattr_fs(pgsql_admin_t)
# Allow the user to administer postgresql, but do not fail
# if no postgresql SELinux module is loaded yet
optional_policy(`
postgresql_admin(pgsql_admin_t, pgsql_admin_r)
')
# Allow transitioning from staff_r to pgsql_admin_r
gen_require(`
role staff_r;
')
allow staff_r pgsql_admin_r;
This policy file can be built (using the reference policy approach) and loaded.
[ 211 ]
Working with SELinux Policies
Creating the user rights
With this policy loaded, the pgsql_admin_r role and pgsql_admin_t type are now
available. Next, we create a SELinux user called pgsql_admin_u that is allowed access to
the staff_r role (for non-privileged activities), system_r role (for handling the
PostgreSQL service), and pgsql_admin_r role (for administering the PostgreSQL files and
commands).
As seen in Chapter 3, Managing User Logins, we can accomplish this with the semanage
user command:
# semanage user -a -R staff_r -R system_r -R pgsql_admin_r \
pgsql_admin_u
In the same chapter, we saw how to map this to Linux users. Assuming the Linux user is
called janedoe, we assign the pgsql_admin_u SELinux user to her as follows:
# semanage login -a -s pgsql_admin_u janedoe
Now, we need to reset the contexts of the user, as the contexts of all files now need to be
changed. We use restorecon for this:
# restorecon -RvF /home/janedoe
Finally we need to edit the sudoers file so that every command the user launches through
sudo will be with the pgsql_admin_r role (and in the pgsql_admin_t domain).
The following /etc/sudoers snippet should suffice:
janedoe ALL=(ALL) ROLE=pgsql_admin_r TYPE=pgsql_admin_t ALL
With these changes in place, the user can now log in and handle PostgreSQL. By default,
janedoe will remain logged in through the staff_r role (and in the staff_t domain) so
that most end user commands work. The moment a more privileged activity needs to be
launched, janedoe has to use sudo. As the user is not in the wheel group, using su to get a
root shell is not possible.
The pgsql_admin_t domain has enough rights to manage PostgreSQL. For instance, the
janedoe user can restart the service and even edit its configuration file:
$ sudo rc-service postgresql-9.2 start
* Starting PostgreSQL...
[ ok ]
$ sudo vim /etc/postgresql-9.2/pg_hba.conf
[ 212 ]
Working with SELinux Policies
As additional rights are most likely going to be needed, all the administrator has to do is
update the pgsql_admin.te file accordingly, rebuild the policy, and load it. This allows
the pgsql_admin_t domain to become a better match for the requirements that the users
have while retaining the secure state of the system.
Granting interactive shell access
Eventually, users might want to ask for shell access, either indirectly (through sudo) or
perhaps immediately after login (so that the user can log in to the pgsql_admin_r role
directly). This is not a problem for SELinux, even if that user were granted a root shell:
SELinux still prevents the user from making changes or performing activities that the user
is not allowed to.
The most common approach to allowing interactive shell usage within a SELinux role is to
use the userdom_login_user_template() call instead of the
userdom_base_user_template() call. If the generated role is a more privileged
administrative role, it might even be better to use userdom_admin_user_template(). By
switching the template that is called in the policy file (pgsql_admin.te in our case),
additional SELinux rules are added that are meant for more interactive use.
If we want a user to be logged in directly to the new type, a few more changes are needed.
First, we need to create a default context file for the SELinux user (in
/etc/selinux/mcs/contexts). We can work from a copy (for instance, from staff_u)
and substitute staff_r with pgsql_admin_r everywhere. This file will tell SELinux what
the default type should be when a login is handled through one of the mentioned contexts.
Next, the /etc/selinux/mcs/default_type file has to be updated to tell SELinux that
the pgsql_admin_t domain is the default type for the pgsql_admin_r role (as a fallback).
With these changes in place, we can update the role mappings for the user to only contain
pgsql_admin_r system_r (don't forget to reset the contexts of the user files afterwards),
as follows:
# semanage user -m -R "pgsql_admin_r system_r" pgsql_admin_u
[ 213 ]
Working with SELinux Policies
Generating skeleton user policy files
The SELinux user space utilities offer a tool that generates skeleton files for custom policies.
This tool is called sepolgen (or sepolicy generate) and is provided through the
policycoreutils-devel package (in RHEL) or sys-apps/policycoreutils (in
Gentoo).
To generate a skeleton file set for the pgsql_admin role, we can use the --term_user
option to generate code for interactive users:
# sepolgen --term_user -n pgsql_admin
Created the following files:
pgsql_admin.te # Type Enforcement file
pgsql_admin.if # Interface file
pgsql_admin.fc # File Contexts file
pgsql_admin_selinux.spec # Spec file
pgsql_admin.sh # Setup Script
The first three files are the same files we created earlier on. The two additional files allow
administrators to quickly introduce the generated policies on their systems:
The pgsql_admin_selinux.spec file is used to build RPM (originally named
Red Hat Package Manager) files, allowing administrators to deploy custom
policies through their standard software life cycle management system
The pgsql_admin.sh script, which builds the policy, loads it on the system,
generates a standard manual page for the module, updates the context files on
the system to accommodate the new user, and finally builds the RPM package
(using the .spec file mentioned earlier)
The use of sepolgen (or sepolicy generate) allows administrators to easily start off
with a common set of policy files.
Other supported user templates with sepolgen are as follows:
--admin_user for administrative, privileged user domains
--confined_admin for administrative, but otherwise limited user domains
--desktop_user for standard end user domains
--x_user for low-privilege end user domains that can use the X server
[ 214 ]
Working with SELinux Policies
Creating new application domains
By default, Linux distributions come with many prepackaged application domains.
However, we will most likely come across situations where we need to build our own
application policy or include a custom policy that is offered through third-party means.
Unlike users and roles, application domains usually have file context-related information
with them.
Creating the mojomojo.* files
The following SELinux policy is for mojomojo, an open source, catalyst-based wiki. The
code is pretty lightweight as it is a relatively simple web application (infrastructure-wise).
In it, we call the apache_content_template(), which provides most of the necessary
rules out of the box:
# cat mojomojo.te
policy_module(mojomojo, 1.1.0)
# Create all types based on the apache content template
apache_content_template(mojomojo)
# Only call creation of alias on RHEL systems
ifdef(`distro_rhel',`
apache_content_alias_template(mojomojo,mojomojo)
')
# Needed by the mojomojo application
allow httpd_mojomojo_script_t httpd_t:unix_stream_socket
rw_stream_socket_perms;
# Network connectivity
corenet_sendrecv_smtp_client_packets(httpd_mojomojo_script_t)
corenet_tcp_connect_smtp_port(httpd_mojomojo_script_t)
corenet_sendrecv_smtp_client_packets(httpd_mojomojo_script_t)
# Additional File system access
files_search_var_lib(httpd_mojomojo_script_t)
# Networking related activities (name resolving & mail sending)
sysnet_dns_name_resolve(httpd_mojomojo_script_t)
mta_send_mail(httpd_mojomojo_script_t)
[ 215 ]
Working with SELinux Policies
This is not much different from the user domain module we created earlier. Obviously,
there are lots of different calls, but the method is the same.
Let's look at the file context definition file (mojomojo.fc):
# cat mojomojo.fc
/usr/bin/mojomojo_fastcgi\.pl
-gen_context(system_u:object_r:httpd_mojomojo_script_exec_t,s0)
/usr/share/mojomojo/root(/.*)?
gen_context(system_u:object_r:httpd_mojomojo_content_t,s0)
/var/lib/mojomojo(/.*)?
gen_context(system_u:object_r:httpd_mojomojo_rw_content_t,s0)
The first column is the same as we used with the semanage fcontext command. The -in the first line tells the SELinux policy that the regular expression is only for a regular
file–again, just like what we could do with semanage fcontext.
The last column is again a reference policy macro. The macro generates the right context
based on the target policy. If the target policy is MLS enabled, then the sensitivity level is
also used (s0); otherwise, it is dropped.
Creating policy interfaces
When we are building a policy for end user applications, we will eventually need to tell
SELinux that existing (and new) roles and types are allowed to execute the new application.
Although we can do this through standard SELinux rules, it is much more flexible to create
an interface for this. Regular rules that refer to several types break the isolation provided by
SELinux policy modules. Interfaces allow us to group rules coherently.
As an example, let's look at the interfaces of the zosremote module (in the zosremote.if
file), which can be found in the contrib/ subdirectory of
/usr/share/selinux/devel/include/ (for RHEL) or
/usr/share/selinux/targeted/include/ (for Gentoo Linux). If we ignore the
comments, then its contents are as follows:
# cat zosremote.if
interface(`zosremote_domtrans',`
gen_require(`
type zos_remote_t, zos_remote_exec_t;
')
corecmd_search_bin($1)
domtrans_pattern($1, zos_remote_exec_t, zos_remote_t)
')
interface(`zosremote_run',`
[ 216 ]
Working with SELinux Policies
gen_require(`
attribute_role zos_remote_roles;
')
zosremote_domtrans($1)
roleattribute $2 zos_remote_roles;
')
The interface file provides the following interfaces:
zosremote_domtrans allows a given domain to transition to the zosremote_t
domain upon executing a file labeled zos_remote_exec_t
zosremote_run allows a given domain to transition to the zosremote_t
domain, but also ensures that zosremote_t is allowed for the given role
The difference lies with the use: zosremote_domtrans will be used for transitions between
applications, whereas zosremote_run will be used for users (and user roles). For instance,
to allow our PostgreSQL user to run zosremote applications, we need to include the
following SELinux policy rule code in the pgsql_admin.te file:
zosremote_run(pgsql_admin_t, pgsql_admin_r)
When building custom interface files, the interface file (such as mojomojo.if) needs to be
available in either the current directory (where other custom policy modules are built) or in
/usr/share/selinux/devel/include, in either the contrib/ location or the apps/
location. Otherwise, policies that would use the interfaces of the mojomojo module will not
be able to locate the interface definitions.
Generating skeleton application policy files
Similar to the user policy files, we can use sepolgen to generate application-directed
policies. In the case of mojomojo, we can use the --cgi template:
# sepolicy generate --cgi -n mojomojo /usr/bin/mojomojo_fastcgi.pl
Loaded plugins: fastestmirror
Created the following files:
mojomojo.te # Type Enforcement file
mojomojo.if # Interface file
mojomojo.fc # File Contexts file
mojomojo_selinux.spec # Spec file
mojomojo.sh # Setup Script
[ 217 ]
Working with SELinux Policies
For applications, the sepolicy generate command requires the main command to be
passed on as an argument. This will be used to generate a simple file context (.fc) file.
Other supported application-related templates for sepolicy generate are as follows:
--application to generate standard, command-line application policies
--dbus to generate D-Bus managed applications
--inetd to generate inetd-operated system service domains (daemons)
--init to generate system service domains (daemons)
Replacing existing policies
When adding custom SELinux policies, all that users can do is to add more allow rules.
SELinux does not have a deny rule that can be used to remove currently allowed access rules
from the active policy.
If the current policy is too permissive to the administrator's liking, then the administrator
will need to update the policy rather than just enhance it. And that implies that the
administrator has access to the current SELinux policy rules used.
Replacing existing policies depends on the SELinux user space utilities (the more recent one
supports priority-based loading) and the source of the current policy. Let's look at two
approaches: one for RHEL and another for Gentoo Linux.
Replacing RHEL policies
To replace an active Red Hat policy, we need to download the source RPM of the SELinux
policy package and use the rpmbuild application to extract the files. Once extracted, we
update the policy files, rebuild them, and then install them on the system.
First, find out what the current version of the SELinux policy is:
# rpm -qi selinux-policy
Name
: selinux-policy
Version
: 3.13.1
Release
: 60.el7_2.9
Architecture: noarch
Install Date: Sat 24 Sep 2016 07:00:07 AM EDT
Group
: System Environment/Base
Size
: 180
License
: GPLv2+
[ 218 ]
Working with SELinux Policies
Signature
: DSA/SHA1, Thu 15 Sep 2016 11:05:48 AM EDT, Key ID
b0b4183f192a7d7d
Source RPM : selinux-policy-3.13.1-60.el7_2.9.src.rpm
Build Date : Wed 14 Sep 2016 01:19:26 PM EDT
Build Host : sl7.fnal.gov
Relocations : (not relocatable)
Packager
: Scientific Linux
Vendor
: Scientific Linux
URL
: http://oss.tresys.com/repos/refpolicy/
Summary
: SELinux policy configuration
Description :
SELinux Reference Policy - modular.
Based off of reference policy: Checked out revision 2.20091117
Next, we try to obtain the source RPM shown in the output. If the system does not use an
active subscription, then the source RPM can still be obtained through third-party
repositories, such as those offered by CentOS. If the package is really difficult to find, you
can try to find it through https://rpmfind.net.
Download the source RPM, and then install it on the system:
# rpm -i selinux-policy-3.13.1-60.el7_2.src.rpm
Next, use the rpmbuild utility (part of the rpm-build package) to extract the source RPM:
# rpmbuild -bp ~/rpmbuild/SPECS/selinux-policy.spec
When finished, the SELinux policy source code can be found inside
~/rpmbuild/BUILD/serefpolicy-3.13.1. For instance, the screen.te file can be
found in the ./policy/modules/contrib subdirectory.
The policy files can now safely be copied over, manipulated at will, and built to replace the
existing policy. It is not necessary to first remove the module from the policy; just inserting
the new policy module (with the same name) will replace it.
Replacing Gentoo policies
To replace Gentoo Linux SELinux policies, we will first download the policies through Git
and then check out the state of the repository for a given version. Then, we can copy over
the files, update them, and insert them at a higher priority.
[ 219 ]
Working with SELinux Policies
The repository for the Gentoo Linux SELinux policy is called hardened-refpolicy.git:
# git clone https://anongit.gentoo.org/git/proj/hardened-refpolicy.git
Cloning into 'hardened-refpolicy'...
remote: Counting objects: 23027, done.
remote: Compressing objects: 100% (7186/7186), done.
remote: Total 23027 (delta 18788), reused 19384 (delta 15768)
Receiving objects: 100% (23027/23027), 3.98 MiB | 3.38 MiB/s, done.
Resolving deltas: 100% (18788/18788), done.
Next, find the current version of the policy that is installed:
# qlist -ICv selinux-base-policy
sec-policy/selinux-base-policy-2.20151208-r4
Now check out the 2.20151208-r4 tag (or whatever the current version on the system is)
in the git repository:
# git checkout tags/2.20151208-r4
The source code can now be copied over, manipulated, and built. Once a build is ready,
load it at a higher priority than the default (for instance, use priority 500):
# semodule -i screen.pp -X 500
Other uses of policy enhancements
Throughout the book, we've covered quite a few technological features of SELinux. By
creating our own SELinux policies, we can augment this further.
Creating customized SECMARK types
A use case for building our own policy is to create a custom SECMARK type and make sure
that a particular domain is the only domain that is allowed to handle this communication.
The following SELinux rules create an invalid_packet_t type (to match packets that
should not be sent out: for example, the PostgreSQL communication that is directed to the
Internet rather than the internal network) and an intranet_packet_t type (to match
packets being sent to an intranet server):
# cat custom_packets.te
policy_module(custom_packets, 1.0)
[ 220 ]
Working with SELinux Policies
type invalid_packet_t;
corenet_packet(invalid_packet_t)
type intranet_packet_t;
corenet_packet(intranet_packet_t)
With these rules loaded, we can now create SECMARK rules that label packets with
invalid_packet_t and intranet_packet_t.
The next step is to allow certain domains to send and receive intranet_packet_t. For
instance, for nginx_t (a reverse proxy application), you'd use this:
allow nginx_t intranet_packet_t:packet { send recv };
We could also create an interface to accomplish the same:
# cat custom_packets.if
interface(`corenet_sendrecv_intranet_packets',`
gen_require(`
type intranet_packet_t;
')
allow $1 intranet_packet_t : packet { send recv };
')
With that interface in place, the Nginx policy would be enhanced with the following:
corenet_sendrecv_intranet_packets(nginx_t)
Auditing access attempts
Some applications have privileges that we still want to be notified about when they are
used. The Linux auditing subsystem has powerful features to be notified about various
activities on the system, and SELinux enhances those capabilities by supporting the
auditallow statement.
The auditallow SELinux statement has a similar syntax as the regular allow statement.
But instead of telling SELinux that the access is allowed, it tells SELinux that the access, if it
is allowed, should still be logged to the audit subsystem.
For instance, to audit write accesses to files labeled with the etc_runtime_t type, you'd
use this:
auditallow domain etc_runtime_t : file { write };
[ 221 ]
Working with SELinux Policies
When this occurs, we will see a granted statement (rather than a denial), as follows:
type=AVC msg=audit(1373135944.183:209339): avc: granted { write }
for pid=23128 comm="umount" path="/etc/mtab" dev="md3" ino=135500
scontext=pgsql_admin_u:sysadm_r:mount_t
tcontext=root:object_r:etc_runtime_t
tclass=file permissive=0
From the (granted) message, we can deduce that the pgsql_admin_u SELinux user called
umount, which resulted in the modification of /etc/mtab.
Creating customizable types
To create a customizable type, we need to create the type definition in SELinux (which is a
regular file type), grant the correct users (and applications) access to the type, and then
register the type as customizable (so that a relabel operation does not change the type back).
For instance, we want to have a separate type for an embedded database file used by end
users through the sqlite3 command (which does not run in its own domain, but in the
caller domain, so user_t or staff_t). By using a separate type, other access to the file (by
non-privileged applications that run in a different domain) is by default denied, even when
those other applications have access to the (standard) user_home_t type:
# cat custom_mydb_embedded.te
policy_module(custom_mydb_embedded, 1.0)
type mydb_embedded_t;
files_type(mydb_embedded_t)
gen_require(`
type user_t;
')
admin_pattern(user_t, mydb_embedded_t, mydb_embedded_t)
Next, we edit the /etc/selinux/targeted/contexts/customizable_types file and
add the mydb_embedded_t type to it.
With those steps completed, all users (in the user_t domain) can now use the chcon
command to label a file as mydb_embedded_t and (still) use this file through sqlite (or
other application programs that run in the user domain).
[ 222 ]
Working with SELinux Policies
Summary
We saw how to toggle SELinux policy booleans using tools such as setsebool and how to
get more information about booleans, both from their description (using the semanage
boolean command) and the rules they influence (using sesearch).
Next, we saw how custom SELinux policy modules can be loaded and removed and which
different types of development formats can be used for building custom SELinux policies.
We created our own policy modules to enhance the SELinux policy using various examples
such as user domain definitions, web application types, and SECMARK types.
We also saw how existing policies can be replaced rather than just augmented with
additional rules. Replacing policies is, after all, the only way that a policy can be reduced
(less permissive).
In the next chapter, we will use various tools to analyze the existing SELinux policy. This is
needed for administrators to verify that the policy supports the security rules that the
administrator has in mind and that confined users cannot break out of the confined
domains.
[ 223 ]
9
Analyzing Policy Behavior
Although SELinux policies enforce wanted behavior on a system, knowing how a policy
will act up front is necessary for administrators. It assists in the execution of assessments as
well as root-cause analysis activities. In this chapter, we will:
Learn how to query the SELinux policy in depth
Use a multitude of tools to query process transitions
Be able to analyze information flows
We'll end the chapter with a few smaller analysis tools, including one that shows the
differences between two policy files.
Single-step analysis
In the previous chapters, we covered a few methods of analyzing SELinux policies through
command-line utilities such as seinfo and sesearch. These utilities are able to assist users
in performing single-step analysis: they either provide immediate information about a
SELinux object (which is mainly what seinfo is about) or are capable of querying direct
SELinux rules (which is the scope of sesearch).
These utilities are provided through the setools package. This package
has recently received an overhaul with the release of setools version 4,
but at the time of writing this, it has not been included yet by RHEL. It
offers new capabilities but also a slightly adjusted output. Throughout this
chapter, the displayed outputs will not be accompanied with a warning
that the output might be different from system to system.
Analyzing Policy Behavior
Not all capabilities of the seinfo and sesearch utilities have been discussed yet though.
The next few subsections will go a bit deeper into how these utilities can be used to query
and analyze a SELinux policy.
Using different SELinux policy files
The seinfo and sesearch utilities can do their job for the currently loaded policy or for a
selected policy file. The latter allows developers to query SELinux policies of systems they
do not have direct access to or for which direct access is cumbersome (such as mobile
devices, where Android has its SELinux policy available as the /sepolicy file).
For instance, to analyze an Android SELinux policy file named sepolicy, the following
command applies:
$ seinfo sepolicy
When it is not passed on a policy file, the seinfo or sesearch applications will try to
query the current active policy (and not necessarily the last installed one) through the
/sys/fs/selinux/policy pseudo-file.
Displaying policy object information
The main purpose of the seinfo application is to display SELinux object information. This
information is presented through the types of objects that SELinux (and the seinfo
application) supports. Various SELinux object types are supported, ranging from the wellknown types, attributes, roles, and users to the more specialized fs_use_* declarations or
genfscon statements.
A complete list of supported object types (and their resulting seinfo options) can be found
in the seinfo manual page, or through the direct help utility:
$ seinfo --help
usage: seinfo [-h] [--version] [-x] [--flat] [-v] [--debug] [-a [ATTR]]
[-b [BOOL]] [-c [CLASS]] [-r [ROLE]] [-t [TYPE]] [-u [USER]]
[--category [CAT]] [--common [COMMON]] [--constrain [CLASS]]
[--default [CLASS]] [--fs_use [FS_TYPE]] [--genfscon
[FS_TYPE]]
[--initialsid [NAME]] [--netifcon [DEVICE]] [--nodecon
[ADDR]]
[--permissive [TYPE]] [--polcap [NAME]]
[--portcon [PORTNUM[-PORTNUM]]] [--sensitivity [SENS]]
[--typebounds [BOUND_TYPE]] [--validatetrans [CLASS]] [--all]
[ 225 ]
Analyzing Policy Behavior
[--ioportcon] [--iomemcon] [--pcidevicecon] [--pirqcon]
[--devicetreecon]
[policy]
...
Regardless of the object type that the user is interested in, seinfo has three main modus
operandi.
In the first mode, it lists the objects of a given type. For this, only the option has to be
passed on, without additional information. For instance, to list all object classes available in
the policy, you'd use this command:
$ seinfo --class
Classes: 83
appletalk_socket
association
blk_file
capability
capability2
...
In the second mode, it can confirm (or deny) the presence of an object instance. To
accomplish this, add the instance name to the command. For instance, to validate whether
the memprotect class is available in the policy, use this command:
$ seinfo --class memprotect
Classes: 1
memprotect
Sadly, if the given instance is not available, it is only shown as part of the output. The return
code of the application is the same, regardless of whether the instance has been found or
not. This makes it less interesting to use in scripts, where the use of grep is recommended:
$ seinfo --class | grep -q -E "^[ ]*memprotect$"
The third mode displays expanded information about a selected instance. Although not all
information objects support an expanded set, most of the common ones do. The expanded
information generally shows a list of (different) instances that are related to the initial
query.
[ 226 ]
Analyzing Policy Behavior
For instance, for class information, the expanded information displays the supported
permissions of this class:
$ seinfo --class memprotect -x
Classes: 1
class memprotect
{
mmap_zero
}
Finally, seinfo can display all information immediately through the --all option. This
will not show the expanded information though:
$ seinfo --all
Understanding sesearch
Where the seinfo application displays information about SELinux objects, the sesearch
application is used to query SELinux rules and behavior information between a source and
a target resource.
We have been using the sesearch application to query standard allow rules (type
enforcement related access controls) as well as the impact of SELinux booleans on these
allow rules. The sesearch application allows us to not just query rules based on the rule
type, but also filter out those rules that match a given source expression using --source (s) and/or target expression using --target (-t).
The sesearch application can deal with indirect source or target
information. For instance, when querying information related to the
java_domain attribute, it will also display rules of all types that have this
attribute. In the previous setools versions, this behavior can be disabled
with the -d option. In the recent setools versions, this can be selectively
used on either source (using -ds) or target (using -dt).
As this provides the bulk of SELinux's behavior, let's go through the various rules and the
impact they have on a system.
[ 227 ]
Analyzing Policy Behavior
Querying allow rules
The first set of rules are the allow rules, which provide type enforcement to allow a source
domain to take a type of action against a target resource, assuming the resource class
matches:
$ sesearch --allow -s guest_t -t cgroup_t -c dir
allow guest_usertype cgroup_t:dir { search read lock ... open };
allow guest_usertype filesystem_type:dir { getattr open search };
In the recent SELinux policy support (in the Linux kernel) and setools
package, this includes support for the allowxperm rule, which is an
extended allow rule that takes additional information into account
(extended permission information-hence the name). This is used to finetune access controls related to IO operations currently, but might be
extended further in the future.
Related to the allow rules are the auditallow rules (showing which allow rules, when
used, result in audit events being logged) and dontaudit rules (showing which actions,
when triggered by a domain but not allowed by the policy, will not result in audit events
being logged).
Querying type transition rules
A second set of rules are type transition rules. These show how actions (such as creating
new files, directories, or even processes) result in a change in security context. A very
common analysis done here is to see which type transitions occur that result in a different
domain:
$ sesearch -T -s guest_t -c process
type_transition guest_t abrt_helper_exec_t:process abrt_helper_t;
type_transition guest_t chfn_exec_t:process chfn_t;
...
In this output, we can see that even the guest domain (guest_t) has a number of rules that
allow transitioning into different domains.
This kind of analysis will be used later too when we look at domain transition analysis.
[ 228 ]
Analyzing Policy Behavior
Querying other type rules
After the type transition rules, there are two other translation-related rules that are part of
the SELinux policy, but are not enforced through the operation itself but through a
SELinux-aware application which queries these rules.
The first rule is the type_change rule, which tells the SELinux-aware application that when
it is asked to relabel a certain resource (target) for a given domain (source), then the
relabeling operation should result in the given type. This is used when a resource is created
first by another (parent) domain, after which it is handed over to the source domain. In this
case, the parent domain will invoke SELinux functions to ensure that the generated resource
gets the right context.
To query it using sesearch, use the --type_change option:
$ sesearch --type_change -s guest_t
type_change guest_t ajaxterm_devpts_t:chr_file user_devpts_t;
type_change guest_t console_device_t:chr_file user_tty_device_t;
...
The second rule is the type_member rule, which is used for polyinstantiated resources.
Here, again, the parent application that initiates the polyinstantiation is SELinux aware and
will call the necessary SELinux functions to ensure that the instantiated resource gets the
right context.
To query it using the sesearch application, use the --type_member option:
$ sesearch --type_member -s guest_t
type_member guest_t tmp_t:dir user_tmp_t;
type_member guest_t user_home_dir_t:dir user_home_dir_t;
Querying role related rules
The previous set of rules was strictly related to types. However, SELinux also has rules
related to role activities. With the sesearch application, we can query which roles are
allowed to be accessed from other roles and when a role transition (such as switching from
a user role to the system role) is performed.
[ 229 ]
Analyzing Policy Behavior
The --role_allow option shows the allowed roles:
$ sesearch --role_allow -s webadm_r
allow webadm_r system_r;
With --role_trans, we can see when an automatic transition takes place:
$ sesearch --role_trans -s webadm_r
role_transition webadm_r httpd_initrc_exec_t:process system_r;
Analyzing role transitions and role allow rules helps administrators deduce which roles are
powerful or could result in potential security issues. For instance, having the webadm_r role
be able to switch to the system_r role through the httpd_initrc_exec_t type might
allow that role to invoke actions outside its scope if it has the rights to modify
httpd_initrc_exec_t resources.
According to the following query, this does not seem to be the case:
$ sesearch -s webadm_t -t httpd_initrc_exec_t -A
allow webadm_t httpd_initrc_exec_t:file { read open ... execute };
However, it is not sufficient to just look at the main user type. A decent analysis would
need to include all types that are reachable by the webadm_r role. This in-depth, multi-step
analysis is the subject of the next few sections.
Browsing with apol
A decent tool to perform policy analysis is apol, offered through the setools package. The
apol tool is graphical in nature and allows analysts and administrators to perform a wealth
of analytical actions against the SELinux policy.
Once started, the first action to take with apol is to load a target policy (either the currently
active policy or a file copied over from a different system). This can be accomplished
through the Open Policy button or by navigating to File | Open Policy.
[ 230 ]
Analyzing Policy Behavior
The tool will then display a generic overview of the loaded policy:
The apol application after loading a policy file
Most analytical functions in apol are supported in both setools version
3 and 4. The graphical interface has been revamped though. The
screenshots used in this chapter are from setools version 4.
[ 231 ]
Analyzing Policy Behavior
Once it has been loaded, select New Analysis to initiate the policy analysis functions:
Apol's overview of supported analysis methods
[ 232 ]
Analyzing Policy Behavior
A number of analysis methods are provided. Let's select Types to find the next screen,
allowing us to browse through the available types, or select an attribute to find out which
domains are assigned said attribute:
Type browsing within apol: the result pane shows which types are associated with the alsadomain attribute
[ 233 ]
Analyzing Policy Behavior
Similarly, with the TE Rules analysis, we can perform the same analysis as with the
sesearch application:
Sample run within apol, querying the type enforcement rules between two types
[ 234 ]
Analyzing Policy Behavior
Domain transition analysis
An important analytical approach when dealing with SELinux policies is to perform a
domain transition analysis. Domains are bounded by the access controls that are in place for
a given domain, but users (sessions) can transition to other domains by executing the right
set of applications.
Analyzing if, and how, a transition can occur between two domains allows administrators
to validate the secure state of the policy. Given the mandatory nature of SELinux,
adversaries will find it difficult to be able to execute target applications if a domain
transition analysis shows that the source domain cannot execute said application, either
directly or indirectly.
Use domain transition analysis to confirm whether a domain is correctly confined and that
vulnerabilities within a domain cannot lead to privilege escalations.
Using apol for domain transition analysis
After starting apol, to perform a domain transition analysis, select New Analysis. A
number of analytical services are displayed. At the top, we find Domain Transition
Analysis. The analysis screen shows us a number of possible analysis approaches:
With Shortest paths, apol will show domain transitions between the source
domain and target domain and will stop for that particular transition after it has
found a transition path.
When using All paths up to, apol can potentially show multiple domain
transitions between the source and target domain, but only through at most the
given number of steps. An immediate transition from source to target is a single
step (and could easily be deduced using tools such as sesearch).
Transitions out of the source domain shows which kind of domain transitions
are allowed for a given source domain. The user can then drill down further in
the presented tree.
[ 235 ]
Analyzing Policy Behavior
Transitions into the target domain shows which kind of domain transitions
result in the given target domain to be reached. This is a reverse domain
transition analysis.
Example output after asking apol to show the transitions out of a source domain
To make analysis more flexible, a number of options can be added as well. For instance, it is
possible to exclude certain types from being used in the domain transition analysis.
Applications that the administrator holds trustworthy can be excluded from the analysis,
such as the *_sudo_t domains. These domains would otherwise provide plenty of
potential transition steps toward a multitude of application domains.
[ 236 ]
Analyzing Policy Behavior
Using sedta for domain transition analysis
Since setools version 4, a command-line application called sedta has been available to
perform domain transition analysis without relying on a graphical application such as
apol.
The main functionality as offered through apol is available in sedta as well. However, the
interactive browsing that apol provides is not available in sedta. Administrators will need
to rerun the sedta commands with the newly obtained information to have a browsing-like
experience.
For instance, to see the available domain transitions originating from the mozilla_t
domain, you'd use this command:
$ sedta -s
Transition
...
Transition
...
Transition
mozilla_t
1: mozilla_t -> mozilla_plugin_config_t
2: mozilla_t -> pulseaudio_t
3: mozilla_t -> lpr_t
Domain transition rule(s):
allow mozilla_t lpr_t:process transition;
Entrypoint lpr_exec_t:
Domain entrypoint rule(s):
allow lpr_t lpr_exec_t:file { execute read ... entrypoint open };
File execute rule(s):
allow mozilla_t lpr_exec_t:file { read getattr open execute };
Type transition rule(s):
type_transition mozilla_t lpr_exec_t:process lpr_t;
Transition 4: mozilla_t -> mozilla_plugin_t
...
4 domain transition(s) found.
[ 237 ]
Analyzing Policy Behavior
Another example is to analyze if (and how) regular user accounts can execute the Google
Talk plugin:
$ sedta -s user_t -t googletalk_plugin_t -S
Domain transition path 1:
Step 1: user_t -> googletalk_plugin_t
Domain transition rule(s):
allow user_t googletalk_plugin_t:process transition;
Entrypoint googletalk_plugin_exec_t:
Domain entrypoint rule(s):
allow googletalk_plugin_t googletalk_plugin_exec_t:file \
{ execute read lock getattr ioctl entrypoint open };
File execute rule(s):
allow user_t googletalk_plugin_exec_t:file \
{ read getattr open execute };
allow user_t application_exec_type:file \
{ execute read lock getattr execute_no_trans ioctl open };
Type transition rule(s):
type_transition user_t googletalk_plugin_exec_t:process
googletalk_plugin_t;
1 domain transition path(s) found.
Information flow analysis
Another analytical investigation of SELinux policy is information flow analysis. Unlike
domain transitions, which look at how one domain can gain a certain set of permissions
through transitions toward other domains, information flow analysis looks at how a
domain could leak (purposefully or not) information toward another domain.
Information flow analysis is performed by looking at all operations that occur between two
types. A source type can be read by a domain, which subsequently can write information to
another type. This simple approach is a two-step flow analysis.
However, it is not as simple as just checking read and write operations (although that is of
course perfectly possible). Information can be leaked through file names, file descriptors,
and more. Information flow analysis must take all these approaches into account.
[ 238 ]
Analyzing Policy Behavior
Using apol for information flow analysis
After loading a SELinux policy, select Information Flow Analysis as the analysis method.
The following screenshot will look similar to, but not quite like the domain transition
analysis screens we have seen before:
Example information flow analysis without updating the permission map
[ 239 ]
Analyzing Policy Behavior
As you can see from the screenshot, 99 information flow paths were found (after which the
tool stopped as the results were limited to 99 in number) between ssh_home_t and
dnsmasq_home_t. The first-shown flow informs the user that ssh_home_t content can be
read by the staff_t domain. The dnsmasq_t domain is able to receive information from
staff_t (due to dnsmasq_t being a daemon domain) and is of course able to append to its
log files (dnsmasq_var_log_t).
To perform a decent information flow analysis, it is necessary to fine-tune the search criteria
and most likely create a permission map as well.
The analysis mode offers similar options as the domain transition analysis method:
With Shortest paths, the tool will stop processing a particular information flow
(one between source and target) when a flow has been found. If there are
multiple flows for the same path size, all these flows will be displayed though.
With All paths up to, the tool will find all information flows up to the number of
steps (resource read by a domain or a domain writing information to a resource)
for a given source and target type.
Flows out of the source type provides a tree-like overview of all communication
flows from a given type. Users can then browse through the various domains and
types that information can flow to and continue analyzing the flow further.
Flows into the target type provides a reverse information flow analysis, starting
from the target type and browsing upward to various source domains and types
that can be eventually leaked to the target type.
There are a few options that can be set for information flow analysis:
Minimum permission weight allows users to only look at permissions (actions)
of a particular weight (and higher). Each action is given a weight in the tool, from
a low priority one (such as the lock operation, given the weight 1) to a high
priority one (such as the write operation, given the weight 10). The weights are
defined in the permission map, which is covered later.
Limit results will have the tool stop after the given number of flows have been
found.
Excluded Types allows users to remove particular types and domains from being
part of the analysis. Trusted domains or types can as such be removed from the
flow analysis, allowing users to focus on the less trusted types.
Excluded Permissions allows users to remove permissions (such as ioctl, lock,
and listen) from the analysis.
[ 240 ]
Analyzing Policy Behavior
The last option allows users to manipulate the active permission map. In information flow
analysis, creating a trustworthy permission map is an important and not-to-beunderestimated step.
The default permission map is available as /usr/share/setools/perm_map. In it, all
classes are mentioned with all permissions. For each permission, the map informs the tool
whether the permission is a read-like permission, write-like permission, dual channel (so
both read and write behavior), or not related to information flows. Next, a weight is given
to each of these permissions.
To limit the flow analysis to a particular set of classes, update the permission map (either
directly or through the tool) and then rerun the analysis.
Using seinfoflow for information flow analysis
The seinfoflow application is a command-line application, offered through setools
version 4, which offers information flow analysis capabilities like apol.
Every invocation of seinfoflow requires a permission map to be passed on for its analysis.
Although users can point it to the default permission map at
/usr/share/setools/perm_map, it is advised to use a custom permission map instead.
For instance, when analyzing non-network-related information flows, administrators can
create a permission map that excludes all classes related to network communication. As a
result, the tool will exclude those permissions from being relevant in an information flow.
As an example, let's look at the information flows between the ssh_home_t type and
dnsmasq_var_log_t type, given a custom map and using the shortest path approach, only
using the maximum weighted permissions (-w 10). We also exclude a few domains that are
either not applicable (such as nfsd_t on a system that has no NFS daemon running) or are
trusted:
$ seinfoflow -m perm_map -s ssh_home_t -t dnsmasq_var_log_t \
-S -w 10 \
setfiles_t restorecond_t tmpfiles_t nfsd_t kernel_t
Flow 1:
Step 1: ssh_home_t -> portage_t
allow portage_t file_type:dir { read ... write };
allow portage_t file_type:fifo_file { read ... write };
allow portage_t file_type:file { read ... write };
allow portage_t file_type:sock_file { read ... write };
allow portage_t non_auth_file_type:dir { read ... };
allow portage_t non_auth_file_type:file { read ... };
[ 241 ]
Analyzing Policy Behavior
Step 2:
allow
allow
allow
allow
Flow 2:
Step 1:
allow
allow
allow
allow
allow
allow
allow
allow
Step 2:
allow
allow
allow
allow
allow
allow
allow
allow
portage_t
portage_t
portage_t
portage_t
portage_t
-> dnsmasq_var_log_t
file_type:dir { read ... write };
file_type:fifo_file { read ... write };
file_type:file { read ... write };
file_type:sock_file { read ... write };
ssh_home_t -> sysadm_t
sysadm_t file_type:dir { read ... };
sysadm_t non_auth_file_type:dir { read ... write };
sysadm_t non_auth_file_type:fifo_file { read ... write };
sysadm_t non_auth_file_type:file { read ... write };
sysadm_t non_auth_file_type:sock_file { read ... write };
sysadm_t ssh_home_t:dir { read ... write };
sysadm_t ssh_home_t:file { read ... write };
sysadm_t ssh_home_t:sock_file { read ... write };
sysadm_t
sysadm_t
sysadm_t
sysadm_t
sysadm_t
sysadm_t
sysadm_t
sysadm_t
sysadm_t
-> dnsmasq_var_log_t
dnsmasq_var_log_t:dir { read ... write };
dnsmasq_var_log_t:fifo_file { read ... write };
dnsmasq_var_log_t:file { read ... write };
dnsmasq_var_log_t:sock_file { read ... write };
non_auth_file_type:dir { read ... write };
non_auth_file_type:fifo_file { read ... write };
non_auth_file_type:file { read ... write };
non_auth_file_type:sock_file { read ... write };
2 information flow(s) found.
Other policy analysis
Two additional tools (sediff and sepolicy) exist that provide some insight into the
current SELinux policy. The next two subsections cover these in more detail.
Comparing policies with sediff
The sediff tool, part of the setools package, looks at the differences between two policy
files and reports the differences to the user. It does not provide patch-like capabilities
(which the regular diff does) but is powerful to find and analyze small differences.
[ 242 ]
Analyzing Policy Behavior
A common use case for the sediff tool is to validate that a source-built policy file is the
same as the distribution-provided binary policy file. Administrators can then be certain that
the source code they used to build a policy file is the same as that used by the distribution
to generate the provided policy.
Its basic usage is simply to provide the two binary files:
$ sediff distro-policy.30 selfbuilt-policy.30
Policy Properties (0 Modified)
Booleans (0 Added, 0 Removed, 1 Modified)
Modified Booleans: 1
* mcelog_exec_scripts (Modified default state)
+ True
- False
It is possible to direct sediff to only show differences in a particular area (such as
available types, roles, booleans, or type enforcement rules).
For instance, to view the difference between a Gentoo Linux policy file and a RHEL policy
file on the type level, you'd use this command:
$ sediff --type gentoo-policy.29 rhel-policy.29 | grep Types
Types (3220 Added, 269 Removed, 369 Modified)
Added Types: 3220
Removed Types: 269
Modified Types: 369
Through this, we notice that the Gentoo policy has far fewer types (3220) than Red Hat's
policy. This is because Gentoo only deploys SELinux policy modules when a package is
installed that uses that policy.
The complete set of supported comparison fields is available in the sediff manual page or
through the direct help option:
$ sediff --help
Analyzing policies with sepolicy
Another tool, provided through the policycoreutils package, is the sepolicy
application. We have already seen this application in action as it shows basic information
about a SELinux policy, such as boolean information. The utility has a few other tricks up its
sleeve, however.
[ 243 ]
Analyzing Policy Behavior
With the sepolicy communicate command, administrators can quickly see whether two
domains can communicate with each other through a single intermediate step on the file
level. This is similar to the information flow analysis we saw before, but it only focuses on
files:
$ sepolicy communicate -s mozilla_t -t chrome_sandbox_t
config_home_t
cifs_t
xserver_tmpfs_t
ecryptfs_t
fusefs_t
user_fonts_cache_t
cache_home_t
nfs_t
Another analysis that sepolicy offers is a bit like domain transition analysis. It shows
which domain transitions can occur in order for one domain to reach another. It does so
through the sepolicy transition command:
$ sepolicy transition -s user_t -t lpr_t
user_t ... mozilla_plugin_t @ lpr_exec_t --> lpr_t
user_t ... vmtools_helper_t ... vmtools_t ... ifconfig_t \
... iptables_t ... insmod_t ... mount_t ... glusterd_t \
... initrc_t ... realmd_t ... sshd_t ... unconfined_t \
... openshift_initrc_t ... apmd_t ... system_cronjob_t \
... munin_t @ lpr_exec_t --> lpr_t
Summary
In this chapter, we looked at various methods for analyzing SELinux policies.
We started with single-step analysis, using the sesearch and seinfo tools that we've
already used throughout the book. In it, we discovered that those tools have a lot of
information to offer to administrators who want to analyze the active SELinux policy.
Next, we used the apol, sedta, and seinfoflow tools to perform more in-depth analysis
of the SELinux policy. These tools offered us insight into domain transitions (which
domains are reachable from other domains) and information flow analysis (which
information can eventually–given the right actions and perhaps vulnerabilities in the
software–be made available without SELinux preventing the flows).
[ 244 ]
Analyzing Policy Behavior
We ended the chapter with a few other analytical utilities. One of these was the use of the
sediff command, which displays the differences between two policy files, allowing
administrators to ascertain whether an active policy on one system resembles another.
In the next and final chapter, we will use the knowledge from all these chapters to show
how SELinux can be tailored to suit a number of use cases.
[ 245 ]
10
SELinux Use Cases
The previously described SELinux operational controls need to be aligned to suit
administrators' goals and requirements. In this chapter, several cases will be described that
will teach administrators to:
Harden web servers through SELinux category support and proper file labeling
Secure shell services through the separation of SSH instances and different PAM
service usage of the SSH daemon
Configure the NFS server to deal with different SELinux file contexts and tune
applications to use the NFS-exposed files
We'll end the chapter with a small comparison of Samba's SELinux implementation and the
NFS configuration documented earlier.
Hardening web servers
Web servers are a common infrastructural service in many architectures. They are also often
exposed to the Internet (either directly or behind a reverse proxy, which might enable
additional security controls) and as such are more vulnerable to attacks than backend
services such as database systems.
SELinux Use Cases
Web servers can host various types of content, ranging from static websites to dynamic
websites, right on to web services that are used in a microservice architecture. Regardless of
their application focus, SELinux is ready to support the web server.
Describing the situation
Before embarking on a SELinux configuration and tuning spree, it is wise to describe the
situation properly. By looking at the situation and investigating its various requirements,
administrators will be able to get a better view of the architecture and make decisions that
benefit the secure state of the system. It often pays off to draw the situation as well, as a
schematic is often more powerful than an elaborate description of a particular situation.
When describing such architectures, take several dimensions into account. Each of those has
impact on the security-related settings and advises the administrator in a particular
direction:
Look at which user groups are going to connect to the web server. Are all user
groups equally trustworthy? Do they all require the same capabilities on the web
application(s) they use? Are these user groups connecting from the same
locations?
Consider how the web server will be managed, and by whom. There are two
main points here: system and web server administration (which often requires
interactive shell access to the system) versus web content administration. The
latter does not need highly privileged access to the system.
Check whether different web applications require different behavior from the
web server. If one web application is only hosting static content while another
requires connections to databases and other remotely hosted services, then it
might be wise to split these web applications and host them on different systems.
[ 247 ]
SELinux Use Cases
Assume that after looking at the hosting requirements, we come up with the following
situation: sites are divided across six web server instances, across three website hosting
servers. Public Users connect to a public-facing reverse proxy, whereas Internal Users have
their own internal-facing reverse proxy. Depending on the sites that are accessible, the
reverse proxies filter out which web server instances they connect to:
High-level overview of website deployment
[ 248 ]
SELinux Use Cases
For each of the web server hosting components (which includes the Nginx systems),
different SELinux configurations and tunings are recommended. We will focus primarily on
the instances as those handle the bulk of the workload. However, hardening the reverse
proxies should not be forgotten as they are the first line of defense in the suggested
architecture.
Configuring for a multi-instance setup
Many of the servers that were identified earlier will run multiple Apache (or other web
server software) instances. We might want to ensure that these instances run on different
ports (assuming there aren't multiple IP addresses assigned to the server) and even run
with different SELinux categories.
First, make sure that the configurations of each of the described instances are located in
separate directories, preferably named after the instance itself. Mixing configurations in the
same directory might make it harder to separate the instances later on:
# mkdir /etc/apache2/instance1 /etc/apache2/instance2 ...
Next, update the web server software unit file (when using systemd) or init script (when
using a SysV-compatible init system) to support multiple instances. With systemd, the unit
file could be updated to support multiple instances. On Gentoo, the init script can be
updated to support symbolic-link init scripts. By naming the targets according to the
created instances, the init system can easily deduce where the active configuration file is.
For instance, for systemd, we'd do this:
# cat /etc/systemd/service/
[Unit]
Description=Apache web server
ConditionPathExists=/etc/apache2/%i/httpd.conf
After=network.target
[Service]
Type=forking
EnvironmentFile=/etc/sysconfig/httpd.%i
PIDFile=/run/apache2/%i.pid
ExecStart=/usr/sbin/apache2 -f /etc/apache2/%i/httpd.conf
ExecReload=/usr/sbin/httpd -k restart -f /etc/apache2/%i/httpd.conf
ExecStop=/usr/sbin/httpd -k stop -f /etc/apache2/%i/httpd.conf
SELinuxContext=system_u:system_r:httpd_t:%i
Restart=always
[Install]
[ 249 ]
SELinux Use Cases
WantedBy=multi-user.target
Through this approach, each instance is assigned its own configuration file as well as its
own SELinux category.
Creating the SELinux categories
To support the named categories (for instance, instance1 and instance2) we need to
enable the mcstransd service and configure the categories in the setrans.conf file, as
was discussed in Chapter 3, Managing User Logins:
# cat /etc/selinux/targeted/setrans.conf
s0-s0:c0,c101.c106=WebAdmin
s0:c101=instance1
s0:c102=instance2
...
This is required since the unit file or init script will refer to the instance name as part of the
category. It is not possible to use the actual fields in the unit files and would require some
scripting in the init scripts.
Choosing the right contexts
Web servers have a multitude of SELinux contexts at their disposal. Pick the correct context
for the website content, as it will ensure that the web server correctly handles the files, even
when the discretionary access controls would enable more access patterns:
The httpd_sys_content_t type should be used for read-only, static web
content. Consider this for images, CSS files, HTML files, PHP files, and more as
long as the web server does not need to modify it.
The httpd_sys_rw_content_t type should be used for read/write web content.
For instance, a wiki system that uses a particular data/ directory for storing the
wiki pages would use this type on the data/ directory, while the rest of the
website content (such as the configuration file) remains at
httpd_sys_content_t.
The httpd_sys_ra_content_t type should be used for content that should
only be appended. This can be used for files that are not completely rewritten
upon save operations, such as application loggings.
[ 250 ]
SELinux Use Cases
The httpd_sys_htaccess_t type should be assigned to the .htaccess and
perhaps .htpasswd files, which should not be displayed to users, but are read by
the web server.
The httpd_sys_script_exec_t type should be used for CGI scripts, allowing
the web server to execute the scripts.
The httpd_sys_script_rw_t, httpd_sys_script_ra_t, and
httpd_sys_script_t types are used for files that are only handled by the CGI
(and other web server invoked) scripts. These can be read/write, append-only, or
read-only.
The httpd_user_*_t types are similar to the httpd_sys_*_t scripts, but now
meant for user-specific content. Web servers might support user directories (such
as through Apache's UserDir directive), in which case the httpd_user_*_t
types are used.
The public_content_rw_t type is a special case. It is assigned to files that are
accessed and handled by several services. For instance, if the web server will be
hosting content that is uploaded through FTP, it might make sense to use the
public_content_rw_t type for it (as an FTP server would not have any manage
rights on the httpd_*_content_t types).
Several web applications have dedicated policies available. These policies declare
the necessary content- and script-related types as well. For instance, for
MediaWiki, there is httpd_mediawiki_content_t and
httpd_mediawiki_script_exec_t. The types used for these specific web
applications should all follow the same rules, as they are generated through the
main web server policy.
Put the right label on the content. Many administrators would probably use the semanage
fcontext command to associate the right label with the content, like so:
# semanage fcontext -a -t httpd_sys_rw_content_t \
"/srv/web/instance1/htdocs/data(/.*)?"
# semanage fcontext -a -t httpd_sys_content_t \
"/srv/web/instance1/htdocs(/.*)?"
# semanage fcontext -a -t httpd_mediawiki_content_t \
"/srv/web/instance3/htdocs/wiki(/.*)?"
However, to ensure reproducibility and to benefit from the ordering rules and processing
that is used by the SELinux libraries, it might be a better idea to create a (perhaps otherwise
empty) SELinux policy module that associates the right context with the locations.
[ 251 ]
SELinux Use Cases
For instance, to create such a policy using SELinux CIL syntax, we'd use the following:
# cat custom_mediawiki.cil
(filecon "/srv/web/instance1/htdocs/data(/.*)?" any
(system_u object_r httpd_sys_rw_content_t ((s0) (s0)))
)
(filecon "/srv/web/instance1/htdocs(/.*)?" any
(system_u object_r httpd_sys_content_t ((s0) (s0)))
)
(filecon "/srv/web/instance3/htdocs/wiki(/.*)?" any
(system_u object_r httpd_mediawiki_content_t ((s0) (s0)))
)
This module can then be loaded and used directly:
# semodule -i custom_mediawiki.cil
# restorecon -RvF /srv/web/instance*
Enabling administrative accounts
If the web servers will be managed by different users or teams, it might be a good idea to
associate different roles with them. In Chapter 8, Working with SELinux Policies, we saw
how to create additional roles and user types, whereas Chapter 3, Managing User Logins,
showed us how to associate users and groups with different SELinux users.
We could create a user group called webadmins and then assign the members of this group
to the webadm_u SELinux user:
# semanage login -a -s webadm_u -r WebAdmin %webadmins
The website administrators should be associated with the proper security sensitivity and
category range. The WebAdmin name is defined in the setrans.conf file that was created
previously.
Handling web server behavior
When the web server is in use, its behavior needs to be properly tuned as well. A static
website does not need any of the dynamic access controls that might be enabled otherwise.
And even dynamic web application servers do not often require full privileges for both file
access and process behavior.
[ 252 ]
SELinux Use Cases
Our design separates the behavior into three areas:
Static websites will not have any additional behavioral rules active. The web
servers will not be able to connect to other systems, for instance.
Dynamic websites have a common set of behavioral rules active. However, the
security-sensitive ones are not enabled.
High-risk websites have more security-sensitive rules active. These systems are
generally more strongly hardened than those hosting regular dynamic websites.
If needed, multiple high-risk website hosting systems can be used. Thanks to virtualization
(in which SELinux also plays a role, as we saw in Chapter 6, sVirt and Docker Support), we
can easily create dedicated systems with a particular security mitigation strategy active.
Tuning the behavior access controls is handled mainly through SELinux booleans. There are
over 40 SELinux booleans applicable to a web server environment. The following set shows
the granularity and sensitivity of the rules nicely:
The httpd_can_* SELinux booleans enable or disable rules related to the action
that the SELinux boolean mentions. For instance, httpd_can_connect_ftp
allows a web server to connect to an FTP server. This might be necessary if one of
the web applications is a web-based FTP client. httpd_can_network_connect
allows the web server to connect to any network-facing service, which should
generally not be allowed. A more fine-grained SELinux boolean,
httpd_can_network_connect_db, allows web servers to connect to networkfacing database systems, which is at least a lot less than all possible network
services. These SELinux booleans would be disabled on static websites, with finegrained SELinux booleans used on the dynamic websites and the general
SELinux booleans on the high-risk websites.
The httpd_anon_write SELinux boolean allows web servers to write to files
that are labeled with public_content_rw_t. This type can be in use when the
content is managed by a multitude of services, such as a web server, FTP server,
and file-share server.
The httpd_builtin_scripting SELinux boolean has to be enabled when
dynamic languages such as PHP are to be used. It will generally be disabled for
static websites and enabled on dynamic and high-risk websites.
The httpd_dbus_* SELinux booleans (such as httpd_dbus_sssd) allows the
web server to communicate with other services through D-Bus. It should be
disabled for static websites, but could be enabled on dynamic or high-risk
websites.
[ 253 ]
SELinux Use Cases
The httpd_use_* SELinux booleans (such as httpd_use_nfs) allow the web
server to use a particular service or command. The httpd_use_nfs example
allows the web server to serve content from NFS-mounted locations, whereas
httpd_use_gpg would allow the web server to call the GnuPG application.
Some SELinux booleans are very specific. For instance, the httpd_tmp_exec
SELinux boolean allows the web server to execute content from /tmp (or other
temporary locations). This is considered a security risk (as attackers might be able
to influence temporary content more easily than other content). Many _exec
booleans (such as httpd_execmem) are considered security risks and should only
be enabled when the system is otherwise sufficiently hardened.
Toggling the SELinux booleans is done with setsebool:
# setsebool -P httpd_use_nfs on
If the behavior of a SELinux boolean is not certain yet, enable it without persisting its value
in the policy store, and then verify whether the changed SELinux boolean influences the
supported rules in the expected manner:
# setsebool httpd_use_nfs on
Dealing with content updates
In the presented architecture, we use a Git repository for the website content. This is, of
course, not the only possible content provider. We could be using NFS mounts (as
described later on in this chapter) or use interactive shell services to allow users to upload
their own content.
The advantage of using a Git repository here is that we can have a locally running batch job
responsible for updating the Git repository for each of the websites. Content administrators
do not need to log on to the system to update the website, but rather need to push to the
right branch in the Git repository. The locally running batch job then pulls in the data while
ensuring that the file labels are set correctly.
[ 254 ]
SELinux Use Cases
Suppose we want the /srv/web/instance1 location to be pulled from
gitserver:/proj/instance1. In that case, the system administrator (or web service
administrator) could create a one-time clone and then create an update script. The one-time
clone uses unauthenticated access here (as we do not need any update privileges), which
later helps us in automating the Git pull (as no sensitive credentials need to be provided):
# cd /srv/web
# git clone https://gitserver/proj/instance1.git instance1
# restorecon -RvF instance1
As the root user of the site (./instance1/htdocs) does not contain the .git/ folder
(./instance1/.git), the site content has basic security control over what data is exposed
through the website and which content isn't. Of course, this does mean that the directory
structure has proper labeling in place.
The locally running job can ensure that the labels (and categories) are properly assigned:
# cat /usr/local/bin/update-instance1.sh
#!/bin/sh
cd /srv/web/instance1 || exit 1;
git pull || exit 2;
restorecon -RvF /srv/web/instance1/ || exit 3;
The job itself has to run with sufficient privileges to execute these commands. By default,
cronjobs run with the cronjob_t type, which has basic binary execution rights. The
privilege to relabel resources is not granted. This can either be added to the cronjob_t
type, or a custom domain that contains the right set of permissions can be created for the
web content updates.
Tuning the network and firewall rules
Firewalls have long been part of a security approach surrounding systems. Systems that
host web servers should also be using a proper firewall setting to ensure that only
authorized locations can access the services.
When hosting multiple instances, we might want to restrict access to the instances in a finegrained manner. The instance3 web server only needs to be accessible from internal
systems, whereas instance4 is accessible both from the outside world and internally.
Given that both websites are first handled through a reverse proxy, the firewall should
make sure that only those systems hosting the reverse proxy can connect to the instance.
[ 255 ]
SELinux Use Cases
We can enable SECMARK on the firewall rules as well, ensuring that the web server instances
can receive only the right network packets (through category labeling):
# iptables -t security -A INPUT -p tcp --dport 8081 -j SECMARK \
--selctx "system_u:object_r:http_server_packet_t:s0:c101"
# iptables -t security -A INPUT -p tcp --dport 8082 -j SECMARK \
--selctx "system_u:object_r:http_server_packet_t:s0:c102"
The preceding rules only show part of the configuration. More in-depth coverage of using
SECMARK was handled in Chapter 5, Controlling Network Communications.
As we run the instances on different ports, we also need to configure SELinux to allow the
web server to use those ports:
# semanage port -a -t http_port_t -p tcp 8081
# semanage port -a -t http_port_t -p tcp 8082
Securing shell services
Another infrastructural service that is security sensitive is a shell service. Whereas malicious
individuals would be happy to get remote command execution (RCE) vulnerabilities on
systems to exploit, shell services immediately provide an interactive environment. Of
course, securing shell services is an important strategy for administrators.
Splitting SSH over multiple instances
One potential approach to harden a shell-service-providing server is to split the access for
administrators and users.
The user-facing SSH server could possibly require just user ID and password authentication
or key-based authentication. It'll be running on the default port 22 and perhaps enables
chrooted SSH so that the regular users do not have access to the entire file system but only a
particular location, such as /var/jail. Additional safeguarding approaches such as
enabling a service like fail2ban (which checks the logs for the IP addresses that are trying
a brute-force attack against the SSH server and then bans those IP addresses by updating
the local firewall) can be enabled on the user-facing SSH server as well. Other similar
projects are sshguard, sshblock, and sshit.
[ 256 ]
SELinux Use Cases
The administrative SSH server would be hardened to a greater extent. It would require both
password- and key-based authentication or any other chained authorization provider. It
runs on a non-default port (such as 4971) and only allows members of an administrative
group to log on through it:
Splitting SSH access based on user role
The SSH daemon configurations can be stored as /etc/ssh/user/sshd_config and
/etc/ssh/admin/sshd_config. The systemd unit files or init scripts are updated to point
to the right instance, similar to the approach used with the web server in the previous
section.
Using separate instances on SSH has other advantages beyond the security measures and
controls. We might want to run the user SSH daemon with a lower sensitivity or restricted
category set (s0-s0:c0.c99) whereas the administrative SSH daemon either runs with a
higher sensitivity (if an MLS SELinux policy is used) or at least with the entire category
range (s0-s0:c0.c1023). This is different from the multi-instance deployment for web
servers, as we did not need a range there.
Here, the users might be split further, with one user having access to category c7 while
another has access to the category range c8.c10. Such a separation will be enforced
through PAM, but that is only possible if the SSH daemon through which they connect
dominates the category range associated with the users.
[ 257 ]
SELinux Use Cases
Separate instances also allow administrators to temporarily lock down the service (by
shutting down the user SSH daemon, for instance) while still allowing SSH access for
themselves.
Updating the network rules
Similar to the web server tuning, we need to look at the firewall rules. But unlike the web
server, we do not intend to use a strongly different SECMARK labeling here (unless we use
SECMARK to differentiate based on the source addresses, ensuring that administrators only
log on through a known set of source systems).
Instead, we just enable the SECMARK labeling at the packet level (and omitting the categorybased labeling). This SECMARK labeling is still useful (or even mandatory if another
SECMARK label was activated already) to ensure that the communication toward the two
SSH services are marked as SSH communication:
# iptables -t security -A INPUT -p tcp --dport 22 -j SECMARK \
--selctx "system_u:object_r:ssh_server_packet_t:s0"
# iptables -t security -A INPUT -p tcp --dport 4971 -j SECMARK \
--selctx "system_u:object_r:ssh_server_packet_t:s0"
We need to change the port type declaration in SELinux for the non-default port 4971. This
port will have the unreserved_port_t type assigned by default, and this needs to be
switched to the ssh_port_t type:
# semanage port -a -t ssh_port_t -p tcp 4971
Usually, administrators log in from a more limited set of systems than customers or regular
users of the shell-service-providing system. Limiting this access can be done through
multiple settings.
The firewall could be updated to only allow communications to port 4971 from authorized
subnets. This will ensure that the service is hidden from other subnets.
If the administrative communication originates from a different network interface, then the
SSH daemon can even be configured to only listen on that network interface, while the user
SSH daemon listens on all available interfaces.
[ 258 ]
SELinux Use Cases
Configuring for chrooted access
If the user SSH daemon enforces chrooting the users into a sub-location on the file system,
we need to tell SELinux that this sub-location should be labeled as if it were a root file
system itself.
For instance, to have /var/jail/* be labeled as if it were at /, you'd do this:
# semanage fcontext -a -e / /var/jail/
# restorecon -RvF /var/jail
The file context equality rules, however, might not be properly addressed for user home
directories. As such, it might still be necessary to create custom rules for the individual
users. If all users map to the same SELinux user, then this is just a matter of enabling the
following rules:
# semanage fcontext -a -t user_home_dir_t -f d /var/jail/home/.*
# semanage fcontext -a -t user_home_t /var/jail/home/.*/.*
# restorecon -RvF /var/jail/home
The chroot jail needs to be built up, of course–an empty directory makes for a bad chroot
environment if shell services need to be provided. Such jail locations can be filled with tools
such as debootstrap or jailkit.
For instance, to create such a jail environment with jailkit, create the basic jail location
and pass on a number of environments to jailkit to preload the environment with
common binaries:
# jk_init -v /var/jail netutils basicshell jk_lsh
The supported environments (or other binary kits that jailkit can
introduce in the jail) can be obtained through the
/etc/jailkit/jk_init.ini file.
When the chroot jail is ready, the user SSH daemon can be updated to use chrooted access:
# cat /etc/ssh/user/sshd_config
...
Match group sshusers
ChrootDirectory /var/jail/
AllowTcpForwarding no
[ 259 ]
SELinux Use Cases
A different approach would be to immediately jail the users system-wide (and not only
through the SSH daemon). However, this means that any other interaction with the system
will either result in the home directories of the jail location being used or all logons to be
directly in the jail. As we might want to have different behavior based on which SSH
daemon a user logs on through, this is not what we'll look at here.
Associating SELinux mappings based on access
It is recommended that administrators have a different account for administrative tasks
than they have for testing the functionality of the services that they run. Test accounts allow
them to verify that a service works for a customer or client as it should–testing with
administrative accounts is not preferred.
But using test accounts is not always possible, or the situation is such that the same user still
needs to connect to both services (for instance, the administrative SSH and the user-directed
SSH). With SELinux, we can still associate different SELinux contexts depending on the
access context.
We could have the standard sshd PAM service used for regular users whereas we use an
adminsshd PAM service for the administrative SSH daemon. Then, we can use the local
customizations discussed in Chapter 3, Managing User Logins, to differentiate the mappings.
First, configure the administrative SSH daemon to use the adminsshd service name, which
results in the administrative SSH daemon to using the /etc/pam.d/adminsshd
configuration instead of the /etc/pam.d/sshd one. This allows administrators to even
further harden or secure the service on the PAM level.
To accomplish this, we need to make sure that the administrative SSH daemon is launched
through an adminsshd binary (rather than the default sshd one).
Creating a symbolic link is the first step for accomplishing this:
# ln -s /usr/sbin/sshd /usr/local/sbin/adminsshd
[ 260 ]
SELinux Use Cases
Update the systemd unit file or init script to point to the new binary (well, symbolic link) as
the executing process:
# cat /etc/systemd/system/adminsshd.service
[Unit]
Description=OpenSSH Server Daemon for Administrators
After=syslog.target network.target auditd.service
[Service]
ExecStart=/usr/local/sbin/adminsshd
ExecReload=/bin/kill -HUP $MAINPID
SELinuxContext=system_u:system_r:sshd_t:s0-s0:c0.c1023
[Install]
WantedBy=multi-user.target
Next, edit or create the file for customized mappings in SELinux. For instance, for the user
alice, you need the following:
# cat /etc/selinux/targeted/logins/alice
adminsshd: staff_u: s0-s0:c0.c1023
The default mapping for the user, however, is the user_u user:
# semanage login -l
Login Name
SELinux User
%users
user_u
__default__ user_u
root
unconfined_u
system_u
system_u
MLS/MCS Range
s0-s0:c0.c99
s0-s0:c0.c9
s0-s0:c0.c1023
s0-s0:c0.c1023
Service
*
*
*
*
Local customizations in /etc/selinux/targeted/logins
alice
staff_u
s0-s0:c0.c1023 adminsshd
This configuration ensures that alice, when logged on through the administrative SSH
daemon, is assigned the staff_u SELinux user whereas her access through the regular user
SSH daemon will use the user_u SELinux user.
Tuning SSH SELinux rules
A number of SSH-related SELinux booleans exist that fine-tune the behavior allowed by the
SSH daemon. Considering that both the user SSH daemon and administrative SSH daemon
run with the sshd_t type, these SELinux booleans apply to both domains.
[ 261 ]
SELinux Use Cases
If this is not wanted, then it might be necessary to create a custom domain for one or both
SSH daemons. We assume here that this is not needed, as creating custom domains for SSH
is a significant endeavor on its own.
The ssh_chroot_rw_homedirs SELinux boolean is not applicable when the standard
interactive SSH chroot support is used. However, if the SFTP chroot capability of the SSH
daemon is used, then the chrooted users will be running with a different context
(chroot_user_t) rather than their user domain. In this case, the
ssh_chroot_rw_homedirs SELinux boolean allows those users to read and write to the
chrooted home directories.
Similarly, ssh_chroot_full_access is toggled when these same chrooted users (running
in the chroot_user_t domain) need to access various files, even outside their initial home
directory (or in their home directory but labeled with other types).
If the required access is toward web server content instead (such as the
httpd_sys_content_t type as described in the previous section) then full access is too
much. Instead, the ssh_chroot_manage_apache_content SELinux boolean can be
enabled.
To allow users to log in as sysadm_t, the ssh_sysadm_login SELinux boolean needs to be
enabled. Note that in the configuration described earlier, we map administrative users (such
as alice) to the staff_u SELinux user. As a result, these users are assigned the staff_r
role and staff_t domain. These users can then use commands such as newrole or sudo to
switch to the more administrative sysadm_r role.
As such, this SELinux boolean does not need to be enabled for our use case.
Enabling multi-tenancy on the user level
Finally, if the shell-service-providing server is shared across multiple user groups, we might
want to enable multi-tenancy on that level.
[ 262 ]
SELinux Use Cases
In the preceding instructions, we've mapped regular users to the s0-s0:c0.c99 range. We
could create a more fine-grained set, similar to the instance separation done on the web
server systems beforehand:
# cat /etc/selinux/targeted/setrans.conf
s0-s0:c1=Customer1
s0-s0:c2=Customer2
...
The users can then be grouped into specific groups:
# getent group customer1
customer1:x:160348:andreas,bob,chelsea,dana
Thanks to SSH's PAM support, all that we need to do is to fine-tune the logins of the
groups. The pam_selinux module, which is called by the sshd PAM service, will do the
rest:
# semanage login -l
Login Name
SELinux User
%customer1
user_u
%customer2
user_u
__default__ user_u
root
unconfined_u
system_u
system_u
MLS/MCS Range
s0-s0:c1
s0-s0:c2
s0-s0:c0.c9
s0-s0:c0.c1023
s0-s0:c0.c1023
Service
*
*
*
*
*
File sharing through NFS
When systems need to share access to the same data set, they commonly use databases
when the data is structured or a file server share when the data is unstructured. One of the
most popular file-sharing capabilities in Linux is the use of the Network File System (NFS)
service.
However, by default, NFS is not capable of handling extended attributes (needed for
keeping track of the SELinux contexts). A number of possible implementations can be
followed to enable NFS support on SELinux systems without great difficulty.
Setting up basic NFS
Start with the basic NFS setup to host the content. For instance, we might want to host the
content under the /export location, with two subdirectories: instance1 and instance2.
These subdirectories could then be mounted on web-server-hosting systems.
[ 263 ]
SELinux Use Cases
In the /etc/exports file, put the file system to export through NFS together with the client
list (a sort of coarse-grained access control list) and the options:
# cat /etc/exports
/export 192.168.1.0/255.255.255.0(ro,sync)
Start the NFS services, and then validate that the location is exported:
# systemctl start nfs# exportfs
/export 192.168.1.0/255.255.255.0
Enabling NFS support
The first and foremost approach used to handle NFS mounts on SELinux systems is to
ensure that the services that depend on the NFS-mounted files can deal with the nfs_t
type, which is by default associated with all NFS mounts. This is generally accomplished
through SELinux booleans that need to be set on the client systems, not on the NFS server
itself.
For most services, this is supported through the *_use_nfs SELinux booleans. For instance,
cobbler_use_nfs allows the Cobbler software (a Linux installation server that enables
quick networked installations) to use NFS-hosted files. Similarly, ftpd_use_nfs allows
FTP servers to host and manage NFS-mounted file systems as the user-oriented targets.
A special mention goes to the httpd_use_nfs SELinux boolean. This one allows web
server domains to use NFS-exported file systems as the content for the website. If the
current NFS server will be used by the previously discussed web server systems, then this
SELinux boolean would be a good idea to enable.
A special SELinux boolean is the use_nfs_home_dirs one. When set, several services that
handle user home directories are now allowed to have those home directories hosted on an
NFS share. Here, the focus is on the target (home directories) rather than the service.
[ 264 ]
SELinux Use Cases
Tuning the NFS SELinux rules
The NFS server itself is also governed through a number of SELinux rules. There are three
main NFS-related SELinux booleans to consider on an NFS server:
The nfsd_anon_write SELinux boolean, if set, allows the NFS server to modify
files labeled with the public_content_rw_t type. This is similar to the
httpd_anon_write boolean mentioned earlier in this chapter, focusing on
resources handled by several otherwise unrelated services.
The nfs_export_all_ro SELinux boolean ensures that the NFS server can only
serve the content in a read-only fashion. If a vulnerability exists in the NFS server
that allows forced writes or if a misconfiguration would allow writeable mounts,
then this setting enforces that the NFS server still cannot write to the exported
resources.
The nfs_export_all_rw SELinux boolean allows the NFS server to share files
in a read/write fashion, regardless of the SELinux contexts that these files
currently hold.
For instance, for exposed web content, the read/write mode should be enabled as the
dynamic websites might require writing to the exposed file system:
# setsebool -P nfs_export_all_rw on
Using context mounts
Whereas the default NFS-mounted locations are exposed as nfs_t file systems,
administrators can opt to mount shares with different contexts. These contexts are only
known on the systems where the NFS mount is active, not on the NFS server itself:
# mount nfsserver:/export/web /srv/web/instance1/htdocs \
-o context="system_u:object_r:httpd_sys_content_t:s0"
Sadly, if another location on the same system and from the same NFS server is mounted
with a different context, an error occurs:
# mount nfsserver:/export/wiki /srv/web/instance3/htdocs/wiki \
-o context="system_u:object_r:httpd_sys_rw_content_t:s0"
kernel: SELinux: mount invalid. Same superblock,
different security settings for (dev 0:17, type nfs)
[ 265 ]
SELinux Use Cases
This is because a metadata cache is used on the system, which prohibits using different
contexts for mounts. Luckily, this behavior can be changed through the nosharecache
option during the mounting process:
# mount nfsserver:/export/web /srv/web/instance1/htdocs \
-o nosharecache,context="system_u:object_r:httpd_sys_content_t:s0"
# mount nfsserver:/export/wiki /srv/web/instance3/htdocs/wiki -o \
nosharecache,context="system_u:object_r:httpd_sys_rw_content_t:s0"
Working with labeled NFS
Recent NFS servers and versions (at least NFS version 4.2) have support for labeled NFS.
This enables NFS servers to store and handle SELinux security context information. With
labeled NFS enabled, clients can use the NFS mount as if it were a local file system with full
extended attribute support.
The use of labeled NFS does require both the NFS server and all the client systems that
mount file systems from the NFS server to use the same SELinux policy. When using
labeled NFS, the file context of the NFS-server-hosted file system is exposed, and the NFS
server will handle and pass through requests for relabeling operations to its local kernel.
To enable labeled NFS, make sure that the NFS daemon is launched with the -V 4.2
option. For instance, on RHEL, this is handled by updating the /etc/sysconfig/nfs file:
# cat /etc/sysconfig/nfs
# Optional arguments passed to rpc.nfsd. See rpc.nfsd(8)
RPCNFSDARGS="-V 4.2"
On Gentoo, this is handled through the /etc/conf.d/nfs file:
# cat /etc/conf.d/nfs
# Start with 8 threads, and disable version 2, 3, 4 and 4.1
OPTS_RPC_NFSD="8 -N 2 -N 3 -N 4 -N 4.1 -V 4.2"
Restart the NFS service:
# systemctl restart nfs
On the clients, make sure that the mounts use NFS v4.2:
# mount -o v4.2 nfsserver:/export/web /srv/web/instance1/htdocs
On the NFS server itself, the exported location has to be properly labeled.
[ 266 ]
SELinux Use Cases
Comparing Samba with NFS
Another popular file sharing service is Samba, a free reimplementation of the Server
Message Block/Common Internet File System (SMB/CIFS) networking protocol. It is
positioned similarly to NFS, although the administration of Samba versus NFS is slightly
different.
From a SELinux point of view, NFS and Samba have similar considerations.
When we look at the available SELinux booleans, similar SELinux booleans exist for Samba:
The allow_smbd_anon_write SELinux boolean allows the Samba daemon to
write to the public_content_rw_t type.
The samba_create_home_dirs SELinux boolean allows the Samba daemon to
create new home directories. This can be triggered through the Samba PAM
modules.
With samba_enable_home_dirs, Samba is allowed to share user home
directories.
The samba_export_all_ro and samba_export_all_rw SELinux booleans act
similarly to the nfs_export_all_ro and nfs_export_all_rw SELinux
booleans. When set, it allows Samba to export any file or directory (regardless of
its type) in either a read-only mode or in read/write mode.
The samba_share_nfs SELinux boolean allows Samba to access NFS shares. A
better name would be samba_use_nfs, but sadly, this (unwritten) convention
was not followed by the SELinux policy developers.
Exposed Samba shares are shown with the cifs_t type, similar to NFS shares being
exposed as nfs_t. And to allow applications to access resources labeled with the cifs_t
type, a number of SELinux booleans exist that generally use the *_use_samba syntax.
For instance, the virt_use_samba SELinux boolean allows virtual guests to use content
(images) stored on Samba shares. Similarly, the sanlock_use_samba SELinux boolean
allows the sanlock application to handle Samba shares.
There is a major difference between NFS and Samba as well, though. Samba shares need to
be labeled as samba_share_t on the Samba server itself. This dedicated labeling is not a
requirement for NFS.
[ 267 ]
SELinux Use Cases
Summary
In this chapter, we looked at a number of SELinux use cases and tuned the system to use
SELinux capabilities to enhance the security of the services.
For the web server, we architected the entire setup to manage the different risk profiles of
the websites across multiple systems, tuning SELinux on each of those systems. We saw
how multiple instances can be started, each with its own category set, and how their content
can be managed in a secure manner. We also saw how to differentiate between
administrative roles for the same system, and we finished with network-related tunings.
Next, we saw how a shell-service-providing server can be hardened further, splitting the
SSH daemon for two different purposes and running both with a different category set. We
looked at fine-tuning the file system for chrooted access, and we even used a customized
login so that a user receives a different SELinux context based on the SSH instance he (or
she) logs in through.
Finally, we looked at an NFS server and discussed the various tuning parameters (handled
through SELinux booleans) and mount options that influence the SELinux context of the
shared resources. We then moved toward using an NFS server capable of handling
extended attributes and showed how it can be used to support SELinux contexts. We
finished the section with a small comparison of Samba's SELinux implementation with the
NFS SELinux implementation.
[ 268 ]
Index
A
access vector cache (AVC) 44
access
attempts, auditing 221, 222
enforcing, through types 17
accessible domains
listing 74, 75
administrative accounts
enabling 252
allow rules
querying 228
apol tool
browsing with 230, 231, 232, 233, 234
audit events 43, 44
audit2allow application
refpolicy macros, using 204, 205
used, for creating policies 201, 203
audit2why utility
using 61
ausearch command
using 57, 58
B
Break-out attacks 151
C
capabilities 11
categories
controlling 160, 161
mana 76
managing 75, 77
chrooted access
configuring 259, 260
Common Architecture Label IPv6 Security Option
(CALIPSO) 147
Common Criteria at Evaluation Assurance Level 4+
(CC EAL 4+) 155
Common Criteria
URL 8
common intermediate language (CIL) 23, 203
policy modules, building 209
Common Internet File System (CIFS) 267
Common IP Security Option (CIPSO) 55
about 143, 144
mappings, configuring 144, 145
connection context
listing 128
constraints
about 115
learning 118, 119
content updates
dealing with 254, 255
control groups (cgroups) 151
cross-user limits
sharing 29, 30
custom application domains
creating 215
mojomojo.* files, creating 215, 216
policy interface, creating 216
skeleton application policy files, generating 217,
218
custom modules
CIL policy modules, building 209
creating 206, 207
file context definitions, adding 209, 210
reference policy module, building 208, 209
SELinux native modules, building 207, 208
custom SECMARK types
creating 220
customizable types
about 102
creating 222
using 102, 103
D
D-Bus
about 189
communication 189
message flows, governing 193, 194
service acquisition, controlling with SELinux 191,
192, 193
session-specific D-Bus 189
system-wide D-Bus 189
data sensitivity 150
database management system (DBMS) 7
datagram sockets 125
dedicated resources
versus shared resources 155
default contexts
modifying 162, 170
denials
audit2why utility, used 61
e-mails, sending with SELinux denials 60
logic, used 63, 64
obtaining 58
systemd-journal, interacting with 62, 63
troubleshooting, with setroubleshoot package 58,
59
device files
handling 186, 187
SELinux label, setting on device node 188
udev rules, used 187, 188
Digital Living Network Alliance (DLNA) server 40
directories
polyinstantiating 85, 86
discretionary access control (DAC) 7
extending, with SELinux 10, 11
Docker 21
Docker containers
capabilities, limiting 165, 167
default contexts, modifying 170
Docker security, aligning with sVirt 164
non-sVirt Docker SELinux integration, controlling
163
securing 162, 163
SELinux context, used 167, 168
SELinux controls, lowering 169
volume mounts, relabeling 168, 169
Docker security
aligning, with sVirt 164
domain 17
domain access
providing, through roles 18
Domain of Interpretation (DOI) 144
domain of interpretation (DOI) 161
domain permissions
querying 117, 118
domain transition 108, 109
domain transition analysis
about 235
apol, used 235, 236
sedta command, used 237, 238
domain-specific mappings
adding 146
domain
transitioning 108, 109, 110, 111
dominated roles 75
E
Executable and Linkable Format (ELF) 113
existing policies
Gentoo policies, replacing 219, 220
replacing 218
RHEL policies, replacing 218
extended attribute 89
F
fallback labeling
with NetLabel 134, 135
file context definitions
adding 209, 210
file
sharing, through Network File System (NFS) 263
file_contexts files
compiling 104
file_contexts 104
file_contexts.homedirs 104
file_contexts.local 104
file_contexts.subs 104
file_contexts.subs_dist 104
files
relabeling, on service startup 178, 179
firewall rules
tuning 255, 256
[ 270 ]
first-in, first-out (FIFO) 123
flows based
limiting, on network interface 135, 136
G
Gentoo
policies, replacing 219, 220
getseuser
contexts, validating 78, 79
GNU C Library (glibc) 112
Google Talk plugin 238
H
high-level language (HLL) 25
host intrusion detection 35
host intrusion prevention 35
hosts
limiting, in cluster 161
I
information flow analysis 238
apol, used 239, 240, 241
seinfoflow application, used 241
information flow
controlling, through sensitivities 21
initial context
querying 112
inode 89
interactive shell access
granting 213
interface labels 129
Internal Users 248
IPv6 CALIPSO
supporting 147
J
Java Virtual Machine (JVM) 149
K
Kerberos implementations 93
kernel boot parameters
using 38, 39
Kernel-based Virtual Machine (KVM) 149
L
labeled IPsec event
about 56
MAC_IPSEC_ADDSA event 56
MAC_IPSEC_ADDSPD event 56
MAC_IPSEC_DELSA event 56
MAC_IPSEC_DELSPD event 56
MAC_IPSEC_EVENT event 56
labeled IPsec
about 138, 139, 140
access controls, through SELinux 139
enabling 141, 142
Libreswan, used 142, 143
regular IPsec, setting up 141
security association database (SAD) 139
security policy database (SPD) 139
labeled networking
about 133, 134
fallback labeling, with NetLabel 134, 135
flows based, limiting on network interface 135,
136
old-style controls, used 138
peer communication, accepting from selected
hosts 136
peer-to-peer flow, verifying 137, 138
labels
customizing 159
least-privilege model 12
Libreswan
using 142, 143
libvirt
architecture, accessing 156
building, with SELinux support 155
categories, controlling 160, 161
configuring, for sVirt 157, 158
default contexts, modifying 162
hosts, limiting in cluster 161
labels, customizing 159
output-only label information, interpreting 159,
160
shared resources, versus dedicated resources
155
static labels, used 158
storage pool locations, used 159
Linux audit
[ 271 ]
configuring 45, 46, 47
Linux netfilter
about 128, 129, 130
Linux Security Modules (LSM)
about 9
using 8, 9, 10
Linux's No New Privilege (NNP)
using 114, 115
Linux
DAC, extending with SELinux 10, 11
LSM, using 8, 9, 10
root privileges, restricting 11
security, providing 6, 7, 8
SELinux, support enabling 13
vulnerabilities impact, reducing 12
local CIPSO definitions
using 146
local system logger
configuring 47, 48
log
querying 182
uncovering 45
logins
customizing, towards services 72, 73
mapping, to SELinux users 71, 72
M
MAC_CONFIG_CHANGE event 55
MAC_POLICY_LOAD event 54
MAC_STATUS event 55
mandatory access control (MAC) 8
message flows
governing 193, 194
modules
bundling, in policy store 26, 27
SELinux policies, distributing 24, 25, 26
mojomojo.* files
creating 215, 216
multi-category security (MCS) 21
Multi-Category Security (MCS) 154
multi-category security (MCS)
about 153
multi-instance setup
configuring 249
multi-tenancy
enabling, on user level 262, 263
multilevel security (MLS) 21
supporting 27
mutual exclusions (mutexes) 122
N
named file transitions 93
NetLabel event
about 55, 56
MAC_CIPSOV4_ADD event 56
MAC_CIPSOV4_DEL event 56
MAC_MAP_ADD event 56
MAC_MAP_DEL event 56
MAC_UNLBL_STCADD event 56
MAC_UNLBL_STCDEL event 56
NetLabel
about 143, 144
domain-specific mappings, adding 146
local CIPSO definitions, used 146
Network File System (NFS)
context mounts, used 265, 266
enabling 264
file, sharing 263
labeled NFS, working 266
nfs_export_all_ro SELinux boolean 265
nfs_export_all_rw SELinux boolean 265
nfsd_anon_write SELinux boolean 265
Samba, comparing with 267
SELinux rules, tuning 265
setting up 263, 264
network rules
tuning 255, 256
updating 258
node labels 129
non-sVirt Docker SELinux integration
controlling 163
nondynamic security models
using 151
O
object
about 13
labelling 14
objects
labelling 13, 15
[ 272 ]
old-style controls
using 138
output-only label information
interpreting 159, 160
P
peer communication
accepting, from selected hosts 136
peer labeling 133
peer-to-peer flow
verifying 137, 138
permissions 115
permissive domains 40
permissive mode
access, prohibiting 84, 85
switching to 36, 37, 38
pgsql_admin.te file
creating 211
pipes
anonymous pipes 123
communicating 123, 124
named pipes 123
pluggable authentication module (PAM) 72
about 83
access, prohibiting during permissive mode 84,
85
contexts, assigning through 83, 84
directories, polyinstantiating 85, 86
policy content 32
policy enhancements
access attempts, auditing 221, 222
customizable types, creating 222
customized SECMARK types, creating 220
uses 220
policy modules 22
policy package 22
policy rules 22
policy store 22, 26
modules, bundling 26, 27
policy versions
incrementing 30, 31, 32
process context
about 107
domain, transitioning 108, 109, 110, 111
initial context, querying 112
obtaining 107, 108
other transitions 111, 112
target context, verifying 111
process ID (PID) 108
process transition 108
Public Users 248
R
Red Hat Enterprise Linux (RHEL) 13
policies, replacing 218
reference policy style
about 207
modules, building 208, 209
remote command execution (RCE) 12, 256
resources
labelling 13, 14, 15
role related rules
querying 230
roles
access, managing through sudo 80
creating 210
domain access, providing through 18
interactive shell access, granting 213
limiting, through users 19, 20
pgsql_admin.te file, creating 211
secadm_r 18
staff_r 18
switching, with newrole 79, 80
sysadm_r 18
system_r 18
unconfined_r 19
user rights, creating 212, 213
user_r 18
root privileges
restricting 11
RPM
URL 219
runcon
used, for domains reaching 81
S
Samba
allow_smbd_anon_write SELinux boolean 267
comparing, with NFS 267
samba_create_home_dirs SELinux boolean 267
[ 273 ]
samba_enable_home_dirs SELinux boolean 267
samba_export_all_ro and samba_export_all_rw
SELinux boolean 267
samba_share_nfs SELinux boolean 267
security association (SA) 139
Security Enhanced Linux (SELinux)
about 6, 83
access, enforcing through types 17
accessible domains, listing 74, 75
audit event types 53
audit events 43, 44
auditing 42
ausearch, used 57, 58
categories, managing 75, 76, 77
context, dissecting 15, 16
contexts, defining 77, 78
contexts, validating with getseuser 78, 79
DAC, extending 11
denials, reading 48, 49, 52
disabled state 35
domain access, providing through roles 18
domain complexity 66, 67
domains, reaching runcon used 81
enforcing state 35
information flow, controlling through sensitivies
21
kernel boot parameters, used 38, 39
labeled IPsec event 56
Linux audit, configuring 45, 46, 47
local system logger, configuring 47, 48
log, uncovering 45
logging 42
logins, customizing towards services 72, 73
MAC_CONFIG_CHANGE event 55
MAC_POLICY_LOAD event 54
MAC_STATUS event 55
NetLabel event 55, 56
objects, labelling 13, 14, 15
permissive mode, switching to 36, 37, 38
permissive state 35
protections, disabling for single service 40, 41
regular DAC, extending 10
resources, labelling 13, 14, 15
role, access managing through sudo 80
roles 69
roles, handling 77
roles, limiting through users 19, 20
roles, switching with newrole 79, 80
SELinux policies, writing 23, 24
SELinux-aware applications 42
SELINUX_ERR event 54
state, setting 35, 36
support, enabling 13
switching off 34
switching on 34
system role, switching to 81, 82, 83
unconfined domains, querying 68, 69
user maps, listing 69, 70, 71
user-oriented, contexts 65, 66
USER_AVC event 53
users 69
users, creating 73, 74
users, logins mapping 71, 72
security ID (SID) 112
SECurity MARKings (SECMARK)
about 128, 129, 130
implementing 130, 131
labels, assigning to packets 131, 132, 133
security of offline guest images 150
security policy information (SPI) 142
security
providing, to Linux 6, 7, 8
seinfo application
modes 226
SELinux booleans 37
about 195
allow_execmem boolean 163
docker_connect_any boolean 163
listing 196, 197
rules, inspecting 198, 199
selinuxuser_execheap boolean 163
selinuxuser_execstack boolean 163
values, changing 197
virt_sandbox_use_all_caps 167
virt_sandbox_use_audit 167
virt_sandbox_use_mknod 167
virt_sandbox_use_sys_admin 167
SELinux categories
creating 250
SELinux context
[ 274 ]
selecting 250, 251, 252
setting, for service 175, 176
using 167, 168, 186
SELinux controls
lowering 169
SELinux Cookbook
reference link 154
SELinux development mode 36
SELinux file context
about 89
categories, placing on directories 96, 97
categories, placing on files 96, 97
changes, registering 101, 102
changing 95, 96
copying 94, 95
customizable types, used 102, 103
expressions 99
expressions, used 99, 100, 101
extended attributes, backing up 97
extended attributes, restoring 97
file system, relabeling 106
file_context files, compiling 104
fixfiles, used 105, 106
ignoring 92
information, obtaining 89, 90
keeping 92
local modifications, exchanging 104, 105
modifying 105
mount options, used 97, 98
moving 94, 95
multilevel security, used on files 97
rlpkg, used 105, 106
SELinux security subsystem, inheriting 92
setfiles, used 105, 106
setting, with restorecond 106
transition rules, querying 92, 93
types, interpreting 90, 91
SELinux label
setting, on device node 188
SELinux mappings
associating 260, 261
SELinux native
about 207
modules, building 207, 208
SELinux policies
allow rules, querying 228
analysis 242
analyzing, with sepolicy application 243, 244
apol tool, browsing with 230, 231, 232, 233,
234
comparing, with sediff tool 242, 243
creating, with audit2allow application 201, 203
cross-user limits, sharing 29, 30
defining 22
differentiating 27
distributing 22
distributing, through modules 24, 25, 26
enhancing 199
files, used 225
MLS, supporting 27
module names, using 203, 204
modules, building in policy store 26
modules, listing 199, 200
modules, loading 200, 201
modules, removing 200, 201
object information, displaying 225, 227
reference link 23
refpolicy macros, using with audit2allow
application 204, 205
role related rules, querying 229, 230
selocal, using 205, 206
sesearch application 227
single-step analysis 224, 225
translation-related rules, querying 229
type transition rules, querying 228
unconfined domains, supporting 28, 29
unknown permissions, dealing with 28
URL 205
SELinux security subsystem
inheriting 92
SELinux user space
reference link 13
SELinux-aware applications 42
SELinux-related information
retrieving 182
SELinux-secured virtualization
about 148
Multi-Category Security (MCS) 154
multi-category security (MCS) 153
nondynamic security models, used 151
[ 275 ]
virtualization 149
virtualization domains, reusing 152, 153
virtualization, risks reviewing 150, 151
SELinux
connection context, listing 128
from IPC sockets to TCP sockets 121
from IPC sockets to UDP sockets 121
netlink sockets 126
pipes, communicating 123, 124
requiring, for service 176
shared memory, used 122, 123
TCP sockets, dealing with 126, 127
UDP sockets, dealing with 126, 127
UNIX domain sockets, conversing 124, 125
SELINUX_ERR event 54
selocal
using 205, 206
semaphores 122
Server Message Block (SMB) 267
service acquisition
controlling, with SELinux 191, 192, 193
sesearch application 227
setroubleshoot integration
used, with journal 183, 184
shared memory
using 122, 123
shared resources
versus dedicated resources 155
shell services
chrooted access, configuring 259, 260
multi-tenancy, enabling on user level 262, 263
network rules, updating 258
securing 256
SELinux mappings, associating 260, 261
SSH SELinux rules, tuning 261, 262
SSH, splitting over multiple instances 256, 257,
258
skeleton files
application policy, generating 217, 218
user policy, generating 214
socket-based activation
using 180
SSH SELinux rules
tuning 261, 262
SSH
splitting, over multiple instances 256, 257, 258
static labels
using 158
storage pool locations
using 159
streaming sockets 125
subject 13
sudo
role, access managing through 80
super-privileged container 169
sVirt 21
system daemon (systemd)
about 172, 173
container, initializing 185
container, used 185
files, relabeling on service startup 178, 179
logging with 182
logs, querying 182
SELinux context, setting for service 175, 176
SELinux context, used 186
SELinux, requiring for service 176
SELinux-related information, retrieving 182
setroubleshoot integration, used with journal
183, 184
socket-based activation, used 180
system service, supporting in 173
transient services, used 176
unit files, used 174, 175
unit operation access, governing 181
system role
switching to 81, 82, 83
system service
supporting, in system daemon (systemd) 173
systemd-journal
interacting with 62, 63
T
target context
verifying 111
TCP sockets
dealing with 126
Tiny Code Generator (TCG) 152
transient services
about 176
using 176
[ 276 ]
transition rules
querying 92, 93
transition
environments, sanitizing on 112, 113
limiting 112
Linux's No New Privilege (NNP), used 114, 115
unconstrained transition, disabling 113, 114
translation-related rules
querying 229
type_change rule 229
type_member rule 229
Trusted Computer System Evaluation Criteria
(TCSEC) 8
reference link 8
type attributes 116
type transition rules
querying 228
types 115
U
udev rules
about 186
using 187, 188
UDP sockets
dealing with 126
unconfined domains
querying 68, 69
supporting 28, 29
unconstrained transition
disabling 113, 114
unit files
using 174, 175
unit operations access
governing 181
UNIX domain sockets
about 125
conversing 124, 125
unknown permissions
dealing with 28
user domains
creating 210
interactive shell access, granting 213
pgsql_admin.te file, creating 211
skeleton user policy files, generating 214
user rights, creating 212, 213
user-based access control (UBAC) 19
USER_AVC event 53
V
virtual file system (VFS) 124
virtualization domains
reusing 152, 153
types 152
virtualization
about 149, 150
application virtualization 149
containerization 149
full system emulation 149
guest 150
host 150
hypervisor 150
image 150
native virtualization 149
OS-level virtualization 149
paravirtualization 149
risks, reviewing 150
virtual machine 150
volume mounts
about 168
relabeling 168, 169
vulnerabilities impact
reducing 11
W
web servers
administrative accounts, enabling 252
content updates, dealing with 254, 255
describing 247, 248, 249
firewall rules, tuning 255, 256
handling 252, 253, 254
hardening 246, 247
multi-instance setup, configuring 249
network rules, tuning 255, 256
SELinux categories, creating 250
SELinux context, selecting 250, 251, 252