/


Текст
rAft Al LAX
IM1WI tW
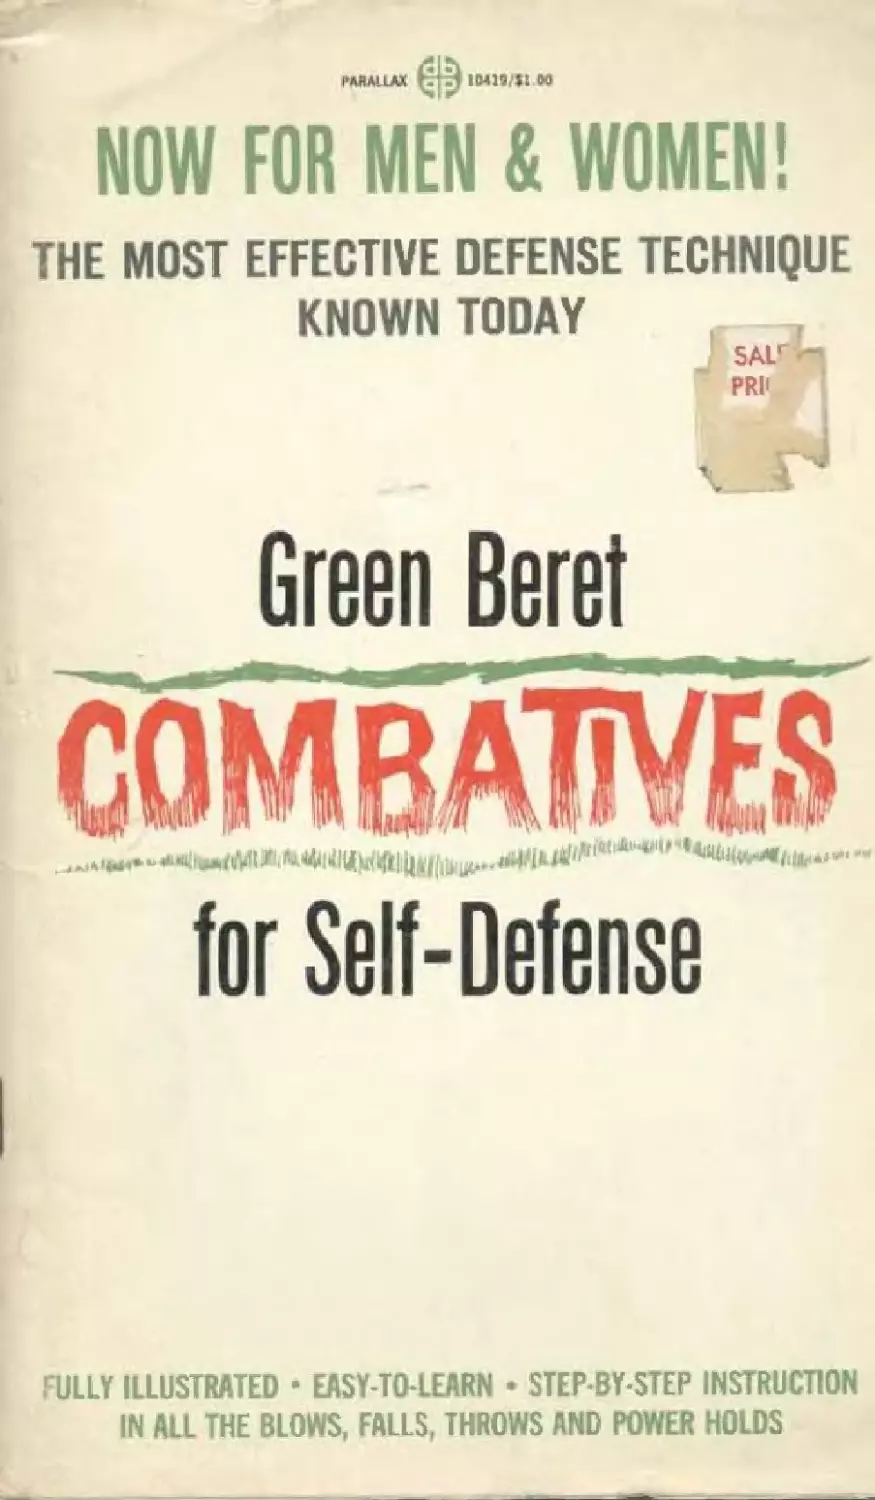
NOW FOR MEN & WOMEN!
THE MOST EFFECTIVE DEFENSE TECHNIQUE
KNOWN TODAY
ULLY ILLUSTRATED EASY-TO-LEARN • STEP-BY-STEP INSTRUCTION
IN ALL THE BLOWS, FALLS THROWS AND POWER HOLDS
Green Beret
lor Self-Defense -
Parallax Publishing Com рапу, Inc
Distributed by Simon & Schuster, Inc
I’ul>b*hrd '.ггпиИэП'лиНг in the U«i icd Stale* and C*nidi by Pars Publishing Cjktiji >#y, ln»c ,
211 Eetf 51bt Sircel New fork N*"w York 10025 Dirfnbuirtj Ьу&пто* A Schirsti», Inc
B Q f lit!) *me, Neu ¥06 Kt*w York 10020
CnpyTFghf 194 7 ay Рапных Publishing Co.t inc
A'l ngfiГц re&drwc
Printed ил lb United Stal-n ol Airadca
DEFAPTMENT 0ЕТНЕАЯМГ MWU1AL =FM 21-150 —CO ^AllYES
SPECIALLY ADAPTED BY ДДЙ0Я BANKS
BOOK DESIGN flYULRNARD SPRJNiiSIEEL
Ф
PHOTOG RAPrlS BY JUSTIN KE RR
With grateful acknowledgement to
the United States Department of the Army
and special thanks to the Information
Officers Of Fort Benning and Fort Bragg„
TABLE OF CONTENTS
1. INTRODUCTION................7
2. FUNDAMENTALS............13
3. BLOWS...................19
4. FALLS...................29
5. BASIC THROWS & TAKEDOWNS . 35
6. HOLDS...................47
7. ESCAPING FROM HOLDS ... 51
Introduction
there
Wherever you live — city, country or small town
is the chance that someday, somewhere, you may be called upon
to protect your home, your family, even your life. The purpose of
this book is to give you the techniques and the self-confidence
to defeat your attacker and save yourself. Here you will find the
defensive methods off our Special Forces adapted for men and
women in civilian life.
The streets near your office and the roads by youi home
don 1 hold the dangers of the territory patroled by the Green
Berets, but the individual who attacks you at your front doorstep
may be just as dangerous as the Vietcong guerrilla Every phy-
sical conflict at some point involves man-to man fighting. In
every war there has been an Infantryman, a Ranger, a Commando
who lias had to go it alone. And now you can learn to defend your
self the way the cream of our troops do — the Green Beret way.
Of course you may never be attacked, but the possibility is
there: read the newspaper or look at a police blotter. In any case,
you’ll feel great after working oul with this book: great because
you’ve got new confidence, and great because it s stimulating
exercise that's contributed to your new sense of physical fitness.
Three Basic Rules for Civilians
Unlike the serviceman on active duty, your prime object is
defense, not attack No matter how expert you become at the
Green Beret tactics, always keep in mind the following:
1- IF YOU CAN, RUN. Leave your money, your pride, and iff
you can escape, do so. Confident as you may feel after master-
ing the techniques of this book, it never pays to chance the fight.
But, if you can t run. don’t let yourself be hurl or killed. If you
really feel your life is at stake, do the best with what you ve got
Polite or not, get your attacker where it will hurt him the most.
2. DON’T YOU START ANYTHING. Be sure your opponent
ready plans to assault you. Don't knock down the noisy drunk at
your local bar, the unfriendly derelect, the nervous petty thief.
Use your judgment.
3. YOUR OBJECT IS TO ESCAPE. NOT TO KILL Some of the
methods described in this book can be fatal if pressed too far.
Remember, you don t want to end up faced with a law suit. Lay
off the lethal blows unless absolutely necessary. Work hard at
learning the throws, the takedowns and the falls. Be a tiger, not
a killer.
8
To the Gentler Sex
И one prime rule is to run. another is certainly to scream.
When a woman is attacked; she often сап I bring herself la shout.
So if you can find someplace isolated enough, try it. If not. as
you walk along in whai seem to be threatening circumstances —
think AAAIIEEE!! Picture yourself shrieking. Prepaie yourself
psychologically. It’s the wrong time to worry about feeling silly.
Aside from the possibility of getting help, you may just scare off
the attacker.
Another scare tactic: face him.
If you don't chink you can
escape by running, a bit of bravado may work Not ever/body is
out for blood, or even your purse. An apparent attacker may just
be a pest. In any case, you stand a better chance of defending
yourself face to face. Of course, itr$ natural not to want to look
when you suspect you re being followed. But not looking doesn’t
make “iC* go away. So if changing your route doesn 't help, turn.
And don’t think that as a girl you have no chance against a
husky attacker. This isn t true. Even the American serviceman
is told to assume that his opponent is stronger, and to make use
of his wits and superior training. The great thing about these
techniques is that you may be 97 pounds and turn out to be
nothing less than a Mary Marvel at throws and takedowns But
if you picture yourself as more of a Little Orphan Annte, you can
master a few handy tricks*— like what to aim for and how. The
meanest and nastiest blows in this book
for you.
may well be just the ones
Pounding on an attacker’s chest with your fists will do noth
ing much but wear you out. You II learn that a linger in his eye
works better. You'll also learn that balance is important. So if
you’re worried about defending yourself in high heels, and have
the time, take them off — but hang on to them. Well aimed, heels
are an excellent weapon in the hand; If you can cope with them
on, a healthy heekstep on your attackers instep is effective
Along with heels, one more feminine fortification is the
y?u prefer instead to
handbag.
There are small protective devices you can carry in it like
a police whistle, or a tear gas bomb. But if
squeeze an eyelash curler into your already overstaffed bag.
there’s still your regular collection of missiles on hand, If your
assailant is almost on top of you. you might throw the whole bag
at his head. It wifi win you a second or two. But if he gives you
the opportunity, throw anything in it that is heavy enough to do
9
damage —
bag until he gets closer. And remember a long hat pin doesn’t
take up much space.
Of course, one of the smartest things you can do is to avoid
trouble altogether. Outdoors: Don’t walk on dark streets d you
can help it and if you must, avoid unlit doorways and alleys
metal compact, perfume atomizer — and hold you?
Indoors: Good police locks are a must If you plan to get home
alter siark, leave on a light. And when it comes to letting in
strangers, well you should have learned the dangers of that
years ago!
Practice conditions — some pointers
and safety musts
Now for the essential part of the book
throws, falls, and blows of the Green Berets.
In your practice sessions it is all right to work out on grass
or soft dirt, but cushions are better still, and if at all possible —
real judo or wiest ling mats
In addition you should have a full-length mirror, or someone
to correct you. so that you can compare your stances and tech-
niques with the photographs in this book, and. if need be, cor-
rect yourself accordingly,
Ideally your partner should be an expert rn self-defense
methods so that he can act as your instructor. Such a person
would also be able to vary the degree of his resistance, increas-
ing it as you become more proficient.
No matter who you practice with, you must establish ground
particularly a way to stop your partner when you feel
learning the
rules
yourve had it Smacking the ground firmly is the standard signal
to halt since you can't always count on having enough breath to
say anything clearer than Arggh, particularly if you’ve got an arm
around your throat. And a yelp for help may just sound like one
of the grunts you make in the course of practice.
Although self-defense techniques do not require great mus-
cles or overwhelming strength, it’s certainly important to be fit
before approaching man-to-man combat
mentj it is only with the skinny guy next doorfi Exercise first on a
regular basis for as many days as you need to feel limber enough
to be thrown without being hurt.
And before the exercises, or if you feel any breathlessness
or other signs of over-exertion when you begin to work out (espe-
cially if you’re over 35 or 401. check with your doctor as to
even if, for the mo
10
whether all this is O.K. for you.
Seif defense methods, unlike exercise plans, don t have to
be run through on a daily basis Naturally it would be best if you
could lit in a practice session with a partner each day, plus lime
by yourself, perfecting your stances, movements, and sequences.
But don4 go too fast. Each technique should be learned so that
it comes naturally; each gesture should be done smoothly —
another important safety factor Jerky, jolting movements can
hurt both you and your partner; and, for the "real thing
encounter in the street —
more wearing on yourself.
You must also keep going back over the techniques you’ve
learned earlier. As you master new routines be sure to practice
all that came before. If that review becomes too time consuming
cut down on maneuvers you feel most sure of But go back over
everything from time to time. Every fourth day your partner
should give you an "official
Wear wliatever youll be comfortable in, or are willing to
knock around in, but practice in street clothes as well. This is
particularly true for women, who should certainly learn the tech-
niques in dresses and high heels if that’s what they usually wear.
In short — practice. Learning the mechanics without mas-
tering the technique, like learning the steps of a dance but not
feeling the beat, is something of a waste. Bui don t overdo it —
and use your sense as to where and how you learn the Green Beret
way of self-defense.
that
they prove far less effective and are
test.
Background and Basics
Before going on to the techniques themselves there are five
important points to keep in mind.
1. If attacked, use any object at hand as a weapon. И you are
carrying a package, swing it. If you can pick up a rock, throw it.
handful ol did tossed in your assailant’s face can give
aimed kick
pages
Even
you a temporary advantage.
2. When no weapon is handy, remember your feet. A well-
the best method is described in the following
can gain you just enough time to run.
3. At all times keep in mind the most vulnerable parts of
your attacker. Some of these areas are obvious, but a detailed
list will be given to you including certain parts of the body that
you might not be aware of Your best defense is to aim for your
opponents weakest spots.
4. Balance is equally vital. Your aim is to trip, throw, or trick
your assailant into losing his balance while maintaining your own.
More on this later, too.
5. And if it s ever one against two, remember this one essen-
tia’ rule: Go to the outside of either opponent -— Don t get caught
between them.
Now you are ready to start learning the techniques. You
will want to practice each thoroughly, master it and then work
for speed Your chief objective is to become so familiar with each
maneuver that, if and when the moment comes when you are
called upon to fight, you will be able to defend yourself as naturally
as if you too were qualified to wear the special badge of the
Green Beret.
Your Natural Weapons
Your best natural weapon is often your foot. A kick, if done
correctly, can throw your attacker off guard and let you escape.
The best method is to use the outside or inside edge of your shoe.
The toe is loo small a striking surface and may not have much
effect,
If your opponent persists, you will be forced to use your
hands, but you should use them the special combative way.
1. THE KNIFE EDGE OF YOUR HAND (fig. 1).
Extend your fingers rigidly so the little linger edge of your
hand is as hard as possible. Keep your thumb pressed against
and slightly under your forefinger Bend your first finger joints
slightly. Using your tensed hand in this fashion allows you to
strike disabling blows.
14
tig. 1
2, THE SMALL FIST (fig. 2).
The average fist covers an area of about eight square inches
To form the small fist fold your fingers at the second knuckles
to make a striking surface about two inches square, producing
a sharper edge for a more penetrating blow. Keep your thumb
pressed tightly against the forefinger to stiffen your hand and
keep your wrist straight.
X THE POINTED FIST (fig. 3).
Fold your middle finger at the second knuckle and wedge the
second knuckle of the two adjacent fingers into its side Keep
the end of your thumb over the fingernail of your middle linger
and keep your wrist straight The raised knuckle can be rammed
against vulnerable points about the body.
15
4. THE PADDED FIST (fig. 4).
When using the little-finger edge of your fist as a weapon,
strike blows in the same motion
padded fist blows to the temple: these can kill an opponent
5. THE HEEL OF YOUR HAND (fig. 5).
Keep your fingers slightly curled and force the back ot your
I land toward your wrist to make the heel of your hand as solid
as possible. You can deliver a more damaging blow with the heel
of your hand than with your fist. The curled fingers can be used
to attack an assailant's eyes.
s when using an ice pick Avoid
angle. Your lett leg is in front. The left heel on
Balance and the Guard Position
Keeping your balance while engaging an opponent is essen-
tial. Assume the guard position for best all-round protection and
balance. Spread your feet shoulderwidih apart and face your
opponent on a 45
line with your right toe. (Left-handed people should switch sides
throughout instructions), Stand upright and bend your left knee
slightly. Your right knee is straight giving firm support. Hold your
hands in front of your face. The left hand at eye level; the right
hand behind and at chin level The knife edge of your hands is
facing out. As you practice the stance, you will become more com-
fortable and find that you will be able to knock your opponent
off-balance by practicing the maneuvers presented in this manual
(fig. 6).
16
FRONT VIEW
SIDE VIEW
Vulnerable Points
Untrained, your natural inclination may be to hit your at-
tacker on the jaw with your fist. But you’ve already learned that
the plain fist is by no means your best natural weapon. Now you
will see that the jaw is also not your best target.
Before going on to the rest of the maneuvers, make sure
that you learn the vulnerable points of the body thoroughly. Such
knowledge will help y. <u beat off your attacker in the most effi-
cient manner.
The body is divided into three regions: The head and neck,
the trunk and the limbs. The major vulnerable points (fig. 7) of
each region are listed below
HEAD & NECK
Ears
Temple
Eyes
Nose
Upper lip
Chin
Adam's Apple
Base of throat
Side cf neck
Nape of neck
TRUNK
Collarbone
Armpit
Solar plexus
(center, below
chest area)
Stomach
Groin
Floating ribs
Kidney
Spine
LIMBS
Fingers
Wrist
Elbow
Shoulder
Knee
Ankle
Instep
17
BRIDGE OF NOSE
UFPE
LIP
collarbone
5OLAR PLEXUS
FLOATING RIBS
GROIN
INSTEP
5-lNt -
WRIST
SIDE OF \ECK
STOMACH
Fl BHVV
ADAMS APPLE
£ of throat
CARE
SHOULDt H
FtNG E RS
18
Blows
The following blows which are directed to vulnerable points
of the body can disable an assailant in seconds. They do not re-
quire great strength to deliver and can provide a quick means
women.
effectively by men and
Attacking the Head and Neck
1. EARS. Cup your hands and clap them simultaneously
over your assailant's ears (fig. 8). This is a dangerous blow and
may burst his eardrums, cause nerve shock, or result in internal
bleeding. Exercise care: A sharp enough blow can cause brain
concussion or death.
2. TEMPLE. A blow to the temple can kill or cause a concus-
sion (fig. 9) The bone structure at this spot is weak and an artery
and a large nerve lie close to the skin, If fighting for your life
attack the temple with the knife edge of your hand or with a
padded fist. A jab with the point of your elbow is also effective
3. EYES. Fingertips driven into an opponent’s eyes will prob-
ably blind him Hold your forefinger and index linger rigidly
together and jab them into one eyes. Keep your fingers and wrist
stiff (fig. 10). You can also use the knuckles (second row) of two
adjacent lingers in a sharp thrust at the eyes.
4. NOSE. When attacking the noser strike a forceful blow
with the knife edge of your hand across the bridge (fig. 11) This
blow can break the thin bone, causing your assailant extreme
pain and temporary blindness. Caution! A very sharp blow could
be instantly lethal. You can also use the outside edge of your
closed fist. When fighting at close quarters, strike the nose by
hitting the bottom of it an upward blow with the heel of your hand.
fig. 10
5. UPPER LIP. A vulnerable pari of the Lice is the upper lip
where the nose cartilage joins the bone. The nerves here are
close to the skin. This area can be attacked by delivering a sharp
blow with the knife edge of your hand at a slightly upward angle
(fig- 12). A very sharp blow can cause unconsciousness. A lesser
blow causes extreme pain. You might also use a jab with the small
fist
6. CHIN- You can deliver an effective blow to your assail-
ant s chin with the heel cl your hand (fig. 13) Do not use your
fist: you may break a bone in your hand.
7. ADAMS APPLE, Attack the Adam’s apple only if desperate.
A severe blow can result in death by severing the windpipe. A
lesser blow is painful and causes your opponent to gag. Use the
knife edge of your hand (fig. 14). your fist. toe3 or клее, depend-
ing upon your opponent’s position. Another effective, but danger
ous, method is squeezing or pulling it outward with the fingers
and thumb.
8. BASE OF THE THROAT. One way to break an assailant's
hold on you is to thrust one or two extended fingers quickly into
the small indentation at the base of his throat (fig. 15). The blow
is painful and causes him to cough. Exercise care as severe in-
jury can result if The thin layer of skin at this point is pierced.
22
fig. 14
9. SIDE OF THE NECK. One way to knock your attacker un-
conscious is to deliver a sharp blow with the knife edge of your
hand to the side of the neck, below and slightly to the front of
die ear (fig. 16). You can deliver the blow in two ways; a back*
hand strike with the palm down; or a forward slash with the palm
up This type blow causes unconsciousness by shock produced
when the jugu.ar vein the carotid artery, and vagus nerve are
struck. It is not particularly dangerous.
10. NAPE OF THE NECK. This is another area that you
should attack only if you feel your own life is at stake. A blow
with the knife edge of your hand to your assailant’s nape (rabbit
punch) can kill him instantly (fig. 17). You can also strike with
the outside edge of your fist. Use this blow if your opponent
charges low and his hands are not guarding the upper regions
of his body.
Attacking the Trunk Region
1. COLLARBONE. A forcelul blow delivered straight down
on the collarbone at ti e side of the neck with the knife edge ot
your I land can fracture the bones and cause уош assailant Io
drop to his knees (fig. 18). Another way of attacking this point,
and a particularly good way if your opponent is shorter than you
is to drive your elbow down into the collarbone.
2. ARMPIT, A large nerve is close to the skin in each armpit.
A blow to this area causes severe pain and temporary partial
paralysis. If you succeed in knocking your attacker down, kick
the armpit with your toe (fig. 19).
3. SOLAR PLEXUS. The solar plexus is at the bottom of the
rib cage, just beneath the breastbone. To attack this area, thrust
sharply with the pointed fist (fig
penetration and is„ therefore, more effective than striking this
small target with the whole fist or the knife edge of your hand.
Any penetrating blow to the solar plexus causes extreme pain and
may either bend your opponent forward or drop him to his knees
Caution! Death may resul t from a severe blow.
4, STOMACH. A blow to your attackeris stomach with the
small fist will cause him to loosen his hold on you (fig. 21). If he
bends forward strike him in the face with your knee. The knuckle
blow1 gives deeper penetration than a blow with the elbow or fist
You can also use a toe kick or knee lift — though this could
cause serious injury.
. This method permits deep
2*1
5. GROIN. When closing with an assailant, keep in mind that
one of your uest blows is to the groin. Kick up forcefully with your
knee (hg. 22). You can also use your closed fistr the knife edge
of your hand, a toe kick, or a violent handgrasp to subdue your
opponent,
6. FLOATING RIBS, Attack the floating ribs from either the
front or the rear, but if possible, strike the blow to your op-
ponent’s right side. The liver is located here just below the ribs,
and the blow causes terrific shock to this organ. Attack this area
with the knife edge of your hand (fig. 23); the outside edge of
your fist, the knuckles folded at the second joints; your heel;
your toe; or your knee.
CM
CM
fig- 23
7. KIDNEY. Certain large nerves, branching from the spine,
are close to the skin surface over tlx? kidneys. Caution; A blow
here can rupture the kidney and cause severe nervous shock or
death unless the victim receives immediate medical attention
II desperate, strike this area with the knife edge of your hand
(fig. 24). Other effective blows can be delivered with lingers
folded at the second joints, the outside edge of your fist, the
knee, or a toe kick.
8. SPINE. Try to avoid attacking the spine. The spinal
cofumn houses the spinal cord and a blow here can dislocate the
column resulting tn paralysis or death. И you succeed in knock
ing your assailant down, a blow with your knee, your elbow, your
heel or toe (fig. 25) can be fatal.
fig. 24
lig, 25
Attacking the Limbs
1. FINGERS. To break a rear underarm hold round your
waist, grab any one of your opponent s fingers with one hand
while securing his wrist with your other hand (fig. 26). Firmly
hold his wrist and. at the same time, bend his finger back toward
his wrist. This will cause severe pain and if carried to extreme
will break the finger.
2. WRIST. Bending your opponent s wrisft excessively in
any direction causes severe pain. Place both your thumbs on the
back of his hand. Bend hts wrist at a right angle to his forearm
(fig. 27). You can control your assailant, when frontally attacked,
when you get him in this position.
26
26
3. ELBOW. The eibow joint is a comparatively weak part of
the body and a forceful blow can dislocate it. Grab your attacker’s
wrist or forearm and pull it behind him. stiffening his arm (tig 28).
As you do this, give his elbow a sharp blow with the heel of your
hand. You can also use the knife edge of your hand or your knee.
4. KNEE. Kick your opponent’s knee or kneecap with the
edge of your shoe (fig. 29). The blow will tear ligaments and car
tilage, causing him extreme pain. If you succeed in getting be
hind your assailant, a direct toe kick to the back of his knee could
penetrate his flesh and injure his nerves.
5. ANKLE. Kick your attacker on the outside of his annle
with the outside edge of your shoe. Do not use a toe kick because
it may s ip off your opponent's ankle without doing any damage.
6 INSTEP. You can break the small bones of the instep
with a foot stomp; this causes severe pain to your attacker and
hinders his movement. When facing your opponent deliver a
foot stomp with rhe edge of your left foot to his left instep
(fig. 30). or with the edge of your right foot to his right instep.
This manner of delivery protects your groin areas as you turn.
Follow the blow to the instep with a blow to the ankle.
28
Falls
You must learn the falls before you attempt the throws.
Practice here is essential so that if your opponent or an attacker
throws you. you will be able to avoid injury.
Right Side Fall Position
The points to check for the right fall position (fig, 31) are as
follows:
1. Your left foot is driven to the ground taking up the initial
shock of the fall. It strikes the ground behind your right leg at
the knee. The sole of your foot is flat on the ground.
2. Your right arm is the ‘bearing arm and takes up addi-
tional shock. Extend it along the grcunde palm down with fingers
extended and joined at an angle of 45 to the body, This arm
makes contact with the ground at the same time as your left foot.
3. Your chin is tucked into your chest, keeping your head
off the ground Your neck remains tense to prevent your head
from striking the ground and being injured.
4. Your left arm is held across the face. This prevents in-
jury to your left elbow and offers some protection to the head
and throat from the blows of your opponent.
5. The entire right side oi your body makes solid contact
with the ground. To prevent your right leg from being injured re-
lax it by bending it slightly at the knee.
30
Left Side Fall Position
The points to check for the left side fail position are the same
as those for the right side fall position. Simply substitute the
words "left'' for
rtghl and "right" for “left" (hg 32)
Practicing The Right Fall
STARTING POSITION (fig. 33). First lie on your back, then
raise your body off the ground supporting your weight on your
left hand and left foot* Hold your right arm across your face and
extend your right leg pa rah el with the ground or slightly higher.
2, EXECUTION. Bend your left arm and left teg slightly,
canting your entire body to the left. Watch the ground over your
right shoulder. Simultaneously swing the right arm forcefully to
the right, and thrust your body into the air in a rolling motion to
the right by extending your left arm and left teg vigorously. Your
r«ght hand and left foot strike the ground first, taking the initial
shock of the fall. Keep your chin tucked lightly into your chest
to prevent your head from striking the ground. The completed
fa: should be the same as in figure 31
fig- 33
Practicing the Left Side Fall
The starting position (fig. 34) and execution (fig. 32) to
practice the left side fall are the same as those for the right side:
just substitute the words”left*11 for “right” and "right” for "left.”
Rear Fall Position
The points to check for the rear fall position (fig. 35) are
as follows:
L The soles of your (eel are driven to the ground about
shoulder width apart keeping your fower legs at a 90 angle to
the ground. This takes up the initial shock of the fall.
2. Both hands strike the ground in a slapping motion al the
same time as your feel. The arms are fully extended, forming a
45* degree angle to your body, and the palms of your hands are
down. This slapping motion gives you contact with the ground
along both arms and across the shoulders making up additional
shock of the fall.
3. Keep your stomach muscles tightened so your buttocks
will not strike the ground when you land, This prevents injury
to your spine.
4. Tuck your chin into your chest so that your head does
not strike the ground.
32
Practicing the Rear Fall Position
1. STARTING POSITION (fig. 36).
Squat and place your hands between your knees, with the
palms flat on the ground and fingers pointing toward each other.
Arch your back and tuck your chin into your chest to keep your
head from striking the ground,
2. EXECUTION
width apart and simultaneously slap both hands to the ground.
The arms are fully extended with the hands palm down, forming
at 45 angle to your body. Keep your chin tucked tightly into your
chest to prevent your head from hitting the ground.
Advance Falling Practice
1. RIGHT SIDE FALL
Start from the standing position and raise your left arm over
your head with the palm of your hand facing to the left. Take
several steps forward to build up momentum. When your left foot
strikes the ground, swing your raised 'eft ami down in an arc
through your legs so that you go into a forward somersault. Keep
your chin tucked into your chest. At the peak of your forward roll
thrust your flexed legs so that your body is propelled into the air
feet first and parallel to the ground in an extended position. The
sole of your left foot and the palm of the right hand are driven
to the ground and make the initial contact to absorb most of the
shock The completed fall position should be the same as in
figure 31.
2. LEFT SIDE FALL
The left side fall position can be practiced in a similar man-
ner, substituting the words left’1 for “right and ’’right’8 for
-left/"
3. REAR FALL POSITION
Start from the standing position and take a few steps for-
ward to build up momentum. Then execute the fall as described
on page 33.
34
Basic Throws
Takedowns
Sometimes in fighting oh an assailant you have to throw
him to the ground before you can subdue him. The basic throws
and takedowns used are ihe hip throw, the reverse hip throw
the overshoulder throw, and the cross hock takedown. Variations
of the throws and takedown can be used and new ones learned
after you have mastered the basics.
1. Speed is the primary factor in throwing an opponent. In
training, however, strive for precision and accuracy. Do each
phase of a throw or takedown with deliberate action. Speed will
come with constant practice.
2. In the beginning your partner should offer no resistance.
He should cooperate and permit you to execute the throw or
takedown while he concentrates on assuming a good fall position.
3. The throws and takedowns described may be executed
from either side simply by substituting the words 'Tight" for
‘left” and “left" for “right.”
Hip Throw
1- You are assailed face to face (fig. 37). Place your left
foot in front and slightly inside of your opponent’s left foot. At
the same time stnke your opponent vigorously on his right
shoulder with the heel of your left hand and grab his clothing at
the shoulder(fig.3S) This blow knocks him off balance.
2. Pivot to your left a full haltcircle on the ball of your left
foot (fig. 39). During the pivot place your right arm about your
attacker s waist and jerk him forward forcefully with both arms,
driving ms midsection into your buttocks. This maneuver bends
your opponent over your right hip at the waist and leaves him
partially suspended in this position. At the completion of the
maneuver, your knees are bent (hg. 40).
3. Straighten your legs quickly, thrusting your buttocks
forcefully into your opponent's midsection. At the same time
bend forward at the waist and pull forward and downward with
both arms, driving your opponent to the ground (fig« 41 )B Use
your hip as a fulcrum, throwing the man over your right hip and
not over the outside of your leg. Your opponent lands in the left
side fal l position and you are poised to deliver a blow to a vulner-
able part of his body if you feel you can’t get away by just
running.
зе
Variation Hip Throw #1.
Both of your assailant s arms are securely pinned, his right
arm locked in your left elbow and his left arm clasped at the
elbow by your right hand (fig. 42).
Variation Hip Throw #2.
You grab your opponents right arm with both hands and
use your hip as a fulcrum (tig. 43).
Variation Hip Throw #3.
Place your right arm around your opponent s neck as you
pivot, rather than around his waist. Your left hand locks your
right arm (fig. 44).
39
Reverse Hip Throw
1. You are attacked face to face. Move slightly closer to
your assailant than in the hip throw maneuver Take a long step
forward with your left foot and place it slightly outside of and a
few inches beyond your oponenfs right foot. Most of your weight
is on your left foot. At the same time, str ike your opponent force
fully on his right upper arm or shoulder with your left hand and
grab his arm. This blow causes him to lose his balance to ilie
rear. (fig. 45 ).
2« Step around your opponent with your right foot and place
it directly behind him. At the same lime grab him around the
waist with your right arm. Thrust your hips to your right as far as
possible to gain buttock4o-buttock contact, pulling your oppon-
ent into position on your right hip and suspending him in midair,
how lock your opponent's right arm to your side with your left
elbow (fig. 46) (fig. 47)
3. Straighten уош legs, use your right hip as a fulcrum and
slam your opponent to the ground (fig 48). Be sure to throw him
over your hip and not over the side of your right leg, You retain
the armlock on your opponent’s right arm. He assumes the left
side fall position. In actual fighting this fall may knock your
attacker unconscious.
1
Variation Reverse Hip Throw #1.
Follow step 1 of the Reverse Hip Throw and go on to step 2,
but instead of placing your right arm around your opponent’s
waist, get a strangle hold around his throat, (fig., 49).
a
Variation Reverse Hip Throw #2.
Grab the hand of your arm which you placed around your
opponent's throat as described in Variation Reverse Hip Throw
This gives you a better strangle hold (fig. 50).
Overshoulder Throw
1. When being attacked from the front by an overhead stab-
bing motion assume the guard position. Grab your assailant’s
right wrist with your left hand. Hold his wrist firmly and pivot a
half-circle (180 j to your left. Bend your knees and your body,
pulling him slightly forward as you turn (fig. 51), (fig. 52)
2. Grasp his right upper arm with your right hand prefer-
ably placing your hand over his arm. Roll your right shoulder
forward and downwards throwing your opponent over it to the
ground (fig. 53).
Overshoulder Throw Variation
From a position facing your opponent, grab his left lapel
with your right hand. Maintain this hold and pivot a half circle to
executing the pivot. Throw him over your right shoulder (fig. 54).
Cross-Hock Takedown
1. Start ihe cross hock takedown from the guard position
(facing your opponent). Step in with your left foot placing it
slightly outside of your opponent s right foot Simultaneously
strike your opponent vigorously on both shoulders with the heel
of your hands and grab his clothing,. This blow knocks him off bal-
ance to the rear (fig, 55).
2. Mow forward shifting your weight to your left foot main-
taining your hold on his shoulders. As you shift your weight,
swing your right leg forward in an arc between you;' left leg and
your opponent’s right leg until it reaches a point parallel with
the ground (fig. 56).
3. Swing your raised right leg downward forcefully striking
your opponent’s right leg. and drive his shoulders into the
ground (hg. 57) (fig. 58) (fig. 59).
vulnerable point if necessary.
Follow with a blow to a
45
FRONT VIEW
SIDE VIEW
46
The main purpose of a hold Is to keep your opponent still
until you can follow through with a blow to a vulnerable part of
his body and escape.
Front Strangle Hold
1. The front strangle hold is particularly good against a low
frontal attack. As your opponent charges, strike his right
shouldei with your left hand to slow his momentum and slip your
right forearm under his throat and clamp his head under yoin
right arm. Clasp your left wrist with your right hand. (fig. 60),
Apply pressure by leaning backward and lifting with your right
forearm.
2. Another method of executing this hold, and one which
acts more swiftly, is to grab the knife edge ot your right hand with
the fingers of your left hand (fig. 61). Pull forcefully toward your
chest and, at the same time, lean backward. Properly executed,
any strangle hold can cause unconsciousness in approximately
10 seconds. Caution! Continued pressure may kill a man.
Side Collar Strangle Hold
Grip your assailant well back on his collar with both hands,
palms down (fig- 62). Use the back of his front collar for leverage
and roil the second knuckles of your forefingers into the cartoid
arteries at the sides of his neck. Place both your thumbs below
his Adam s apple, applying continuous pressure inward and up-
ward. This hold is best used when your attacker is on the ground
and unable to hit at your groin. Caution! It causes unconscious-
ness and eventually may cause death.
Cross Collar Strangle Hold
lc be effective, this hold must be executed on an opponent
who is wearing an open collar or who has open lapels on his coat
or jacket. Cross your hands at the wrists and grab the collar
openings with your fingers on the inside and your thumbs on tne
outside (fig. 63). Pull with your lingers and scissor your hands
against your opponent's th oat. He will drop to the ground un*
conscious if the hold is properly executed* This strangle hold
can also be executed from the rear* Cross your arms in front of
•our opponent’s throat, seize his clothing at the neck, and press
your hands into his throat by pulling back.
Full Nelson
1. Execute this hold from the rear. Place both arms well up
mto your opponent’s armpits and place your hands on the back
of his head Interlock your lingers (fig, 64)
2. Apply downward pressure on Ins head and upward pres-
sure under his arms. This should subdue him.
Hammer lock
1. To execute tlie hammerlack from the rear, grab your
opponent’s hand or wrist and pull backward. Then force his fore-
arm up toward his head. Caution! By keeping your right hand
at his right elbow and continuing to force his arm up, you can dis-
locate his shoulder (fig. 65).
2. To execute the hammeriock when facing your opponent,
grab his right wrist with both hands. Pivot half a circle to your
left. During the pivot, raise your opponent’s arm above your head
and step beneath it and behind him at the comptctaon of your
turn.
If your assailant succeeds in getting a hold on you, you must
Bile, kick, or hit him at vulnerable points to help loosen
break it
or break the hold before he can apply pressure.
Escape from Choke Hold #1.
1. When your assailant attempts to choke you, use a round-
house arm swing to break his hold (fig. 66) (fig. 67).
2. Swing your arm over his arms in a forceful roundhouse
blow. As you do this, pivot in the direction of your swing to gel
as much of your body weight as possible behind your arm swing
(fig. 68). This causes your opponent to loosen his hold. Be pre-
pared to strike him about the face or neck with a backward, knife
edge blow of your hand before he recovers
3. This escape can also be used against a choke hold from
the rear. Swing your arms and pivot around facing your opponent
Escape from Choke Hold #2.
When an assailant who is f.icing you h ies to choke you, grab
each of his thumbs (fig, 69). Pull them down sharply, twisting
them to the outside (fig. 70). At the same time, bend your knees
and body forward forcing your attacker to his knees (fig. 71).
Escape from Choke Hold #3.
1. As your attacker gains the choke hold, clasp your hands
together (fig. 72). Grip the knife edge of your left hand with the
lingers of your right hand and tightly wrap the left thumb around
the right thumb. Do not interlock your fingers.
2. Drive your hands up between your opponent's arms, foro
mg hrm to loosen his hold (fig. 73).
3. From this position, smash your clasped hands on the
bridge of his nose or grab the back of his head (fig. 74) and pull
it down, meeting it with a kene lift. You can also separate your
hand's after breaking the hold and strike his collarbone with the
knife edge of your hands,
Escaping a Two-Handed Front Strangle Hold
This maneuver is particularly good if you are backed against
a wall.
1. Ordinarily an assailant attempting to strangle you while
your back is to a wall extends his arms, squeezes liis fingers, and
pushes you backwards (fig. 75 ).
2. To escape this hold you place the heel of your right hand
on his left elbow and the hee« of your left hand on his right elbow.
Apply pressure inward and away from yourself (fig. 76). This pre
vents your assailant from using the power of his fingers and he
cannot choke you.
Force him back (fig. 77), and drive your knee or toe into his
groin.
Escaping a Rear Overarm Body Hold #1
1. An assailant may grab you around the body and pin both
your arms in a rear overarm body hold (tig. 78).
2. Raise your elbows shoulder high and at the same time
lower your body slightly by bending your knees (fig. 79).
3. Turning your body slightly to the left, drive your elbow
forcefull into your opponents side or midseclion so he will re-
lease his grip (fig. 80).
1 w
Escaping a Rear Overarm Body Hold ~ 2
1. As in the previous escape, swing your arms upward, but
this time clasp your hands interlocking the lingers (fig. 81)
2. Look to your left to locate your opponent's left foot. At
the same time raise your own left foot (fig. 82).
3, Now bring your raised foot sharply down on his left in-
step This maneuver can be done to the right side. Just substi-
tute "right" for ’Meft” and “left” for “right” in the directions.
Lscapmg a Front Overarm Beat Hug
1 To escape an assailant who has grabbed you around the
body and pinned your arms in a front overarm bear hug (he. 84)
bring your thumbs into his groin iorcmg his h,ps backward and
eavmg a space between your bodies (fig 85)
Escape from a Trout Underarm Bear Hug
I. An assailant may lock bus arms around your waist and
attempt to bend you over backwards with a front underarm bear
hug (fig 86).
2. To escape this hold place your right hand under your on
ponent s chin. Put your tef1 arm around hns waist (hg. 87).
pressing with your right hana and pulling his waist toward you.
he either loosens his gnp or is forced backward (fig. 38k
3. You can perform this maneuver starting with your left
hand, Just substitute “right” for “left” and “left” for “right” in
the directions.
Escaping a Two Hand Grip on One Wrist
1. Your assailant may grab you with a two handed grip on
your right wi isT (fig. 89).
2. To escape step forward with усшг right foot and bend
both knees. Keeping the trunk of your body upright, bring your
qght elbow close to your stomach and reach across with your
left hand and grab your right fist (lig. 9G)=
3- By straightening you legs and pulling back with the
power of ycur body and arms, you bring pressure on your op-
ponent’s thumbs, forcing him to release I is hold (fig. 91). At the
completion of the escape you are m position to deliver a blow to
your opponent's head or neck with the knife edge of your right
hand (i!g. 92) (fig. 93)
4. If your assailant grabs your left wnst, you can perform
the same maneuver just substituting 'deft” for 'Tight ’ and
“fight" f эг ’left ' in the above directions
fig- 89 fig. 90 fig. 91
59
fig. 93
Escaping an Overhand Grip on Both Wrists
1. Your attacker may grab you with an overharid grip on
both wrists (fig. 94).
2. To escape, step forward with either font and bend boih
knees. At the same time, herd your arms so the elbows are close
to your lower abdomen. I all your opponent forward and down-
ward (lig. 95).
3. . Execute the escape by straightening your legs pulling
back with your body, and pushing усы arms upward in one mo-
tion Speed is important И the escape movement is to be effective
(fig* 96 X
Escaping a One Arm Strangle Hold from the Rear
L An assailant may artack you from the rear with a strai igie
hold us r his eft arm (fig 9d).
2. Reach up with your right hand and grab his left forearm.
Puli down on his forearm and at the same time tuck your chin
into your chest so he cannot choke you. Grab your opponent's
left shoulder with your left hand (fig. 99 ).
3. Drive vour buttocks against hus midsection retaining
your bold oti his forearm and shoulder with Doth hands. By bend-
ing from the waist and straightening your legs swiftly you can
throw your opponent over your head and to the ground (fig 100).
4. f your attacker grabs you from the rear using h>s right
.arm, oerform the same maneuver simply substituting ‘left" for
“right and "right for "left’ in the directions.
Escape from Rear Underarm Body Hold 1.
1. An assdHdn! may grab you around the body in a rear
underarm body hold (fig. 1C1).
2, Reach down with your right hand and place it just above
his right knee Press down un this spot w th must of your weight
(fig. 102).
3. You now have a firm base on which to pivot. Switch your
right leg behind your opponent’s leR leg. As soon as your feet
are firmty planted on lhe ground, bring your right hand under
your opponent s right knee and your left hand under his left knee
(fig. 103),
4. Lift up a.nd taise your opponent off the ground lifting his
leet as h'gh as possi )le (fig. 104 ).
5. Il your opponent releases his hold, you can drive his
head backwards to the ground. If he maintains his hold, fall on
him and force hs head to the ground.
6. You can perform the same maneuver starting with your
left hand above his left knee* Simply substitute ‘ left for “right”
рнН "neht ' fnr ••left*’ in tliA rlirpr-tmn^
Escape from a Re<:r Underarm Body Hald #2.
1. Your opponent uses the same grasp around your waist
aS explained on page 62, bu! this time he braces himseil by
placing one leg between your tegs and putting his head behnd
your shoulder blade out of reach of your arms (fig 105),
2. Tc break this nold. bend swiftly from the waist and grab
the ankle and straighten your body (fig 106). This puts pressure
on your opponents knee causing him to release his hold and drop
on his back (fig. 107). И he keeps his hold; you should tell back on
(op ct him so that your weight hits h s mids^chon.
63
DON’T EXPECT YOUR ATTACKER
TO FOLLOW THE RULES
Here, for the first time, is a realistic, workable
guide to self-defense that shews you. man or
woman, how to be fully and effectively prepared
for the unexpected. Make no mistake, Comba-
fives a' e not exercises! They are oangerous; they
can be deadly. They are blows, throws, falls,
holds and escapes designed specifically by com
bat experts for one purpose only—to save your
life.
Clearly illustrated with dozens of photographs
and step-by-step instructions, Combatives is the
one book that teaches you all the ‘ musts of self
defense.
INCLUDING: Your natural weapons
The vulnerable points of tne body
Whereto hit and how
How to handle more than one assailant
► Falls and feints
Psychological strategies
Power holds and escapes
and much, much more_____
SECURITY IS MORE THAN A LOCK ON YOUR DOOR.
LEARN HOW TO PROTECT YtOSFLF AND FAMILY NOW!
L__________________________________-______________I
Frin’r r fi US A
RJBL.SHED BY PARALLAX PUBUsMINr, COMPANY. «NCta
DISTRIBUTED BY SIMON A SCHOSTEFL INC.