/


Теги: military military training
Год: 1916


Текст
[Crown Copyright, Reserved,
“bayonet тв^давд
1916.
(PROVISIONAlSQ2c£S
HEADQUARTER GYMNASIUM, ALDERSHOT.
LONDON:
PRINTED UNDER THE AUTHORITY OF HIS MAJESTY 8 STATIONERY OFFICE
Dr HARRISON and SONS, 45-47, St. Martin's Lane, W.C.,
Printers in Ordinary to И is Majesty.
To bo purchased, either dlreetly or through any Bookseller, from
WYMAN and SONS, Limited, 29, Breams Buildings, Fetter Lane, E.C., and
51. St. Mary street, Cardiff ; or
П.М. STATIONERY OFFICE (Scottish Branch), 23, Forth Street, Edinburgh ; or
E. POnsonby, Limited, iig, Grafton street, Dublin;
or from the Agencies In the British Colonics and Dependencies,
the Un lied States of America and o1 her Fortdgn Countries of
T. FISHER UNWIN, LIMITED, LONDON, W.C.
Price One Penny.
2
BAYONET TRAINING, 1916.
(PROVISIONAL.)
SECTION 1.
Special Features of the Bayonet.
Essential 1. To attack with the bayonet effectively requires Good
bayonetf.,he Direction, Strength and Quickness, during a state of
will! excitement and probably physical exhaustion. The
limit of the range of a bayonet is about 5 feet (measured
from the opponent’s eyes), but more often the killing is at
close quarters, at a range of 2 feet or less, when troops are
struggling corps a corps in trenches or darkness.
The bayonet is essentially an offensive weapon—go straight
at an opponent with the point threatening his throat and
deliver the point wherever an opening presents itself. If no
opening is obvious, one must be created by7 beating off the
opponent’s weapon or making a “feint point” in order to
make him uncover himself.
Han<i-to- 2. Hand-to-hand fighting with the bayonet is individual,
which means that a man must think and act for himself and
rely on his own resource and skill ; but, as in games, he
must play for his side and not only for himself. In a
bayonet assault all ranks go forward to kill or be killed, and
only those who have developed skill and strength by7 constant
training will be able to kill.
(в 11747) Wt. 51076—G09 175м 2'16 II &S P. 15/928
3
3. The spirit of the bayonet must be inculcated into all The spirit
ranks so that they go forward with that aggressive deter- j^yp®et
urination and confidence of superiority born of continual
practice, without which a bayonet assault will not be
effective,
4. T1 le technical points of bayonet fighting are extremely Continuity
few and simple. The essence of bayonet training— <1f tr»hnng.
continuity.
SECTION 2.
Method of Cabryino ovt Bayonet Thaining and Hints
to Instructors.
5. An important point to be kept in mind in bayonet Develop-
training is the development of the individual by teaching JSdVviauai1 e
him to think and act for himself. The simplest means of
attaining this is to make men use their brains and eyes to
the fullest extent by carrying out the practices, so far as
possible, without words of command, i.e., point at a shifting
target as soon as it is stationary, parry sticks, &c. The
class should, whenever possible, work in pairs and act on the
principle of “Master and Pupil.” This, in itself, develops
individuality and confidence. Sharp jerky words of com-
mand which tend to make men act mechanically, should be
omitted. Teach rapidity of movement and alertness by com-
petition in fixing and unfixing the bayonet and by other
such “ quickening movements.”
6. As the technique of bayonet fighting is so simple, long Duration ot
detail is quite unnecessary and makes the work monotonous, рп^нсе"?'1
All instructions should be carried out on common sense lines.
It should seldom be necessary to give the detail of a “ point"
or “parry” more than two or three times, after which the
(в 11747) л 2
4
classes should acquire the correct positions by practice. For
this reason a lesson or daily practice should rarely last
more than half-an-hour. Kemeniber nothing kills interest
so easily as monotony.
Spirltofthe "?• Arouse the spirit of the bayonet by describing the
bayonet. special features of bayonet and hand-to hand fighting.
Endeavour to make the men practice bayonet fighting in
the same spirit and with the same enthusiasm which animate
them when training for their games and look upon their
instructor as a trainer and helper.
Work made S. Create an interest in the work by explaining the reason
interesting, for the various positions, the method of handling the rifle
and bayonet and the uses of the “points.” Question the men
to find out whether they understand these reasons. When
men realise the object of their work they naturally take a
greater interest in it.
Progression. Progression in the training is regulated first by obtain-
ing correct positions and good direction, then quickness.
Strength is the outcome of continual practice.
Cultivate 10. In order to encourage dash and gradually strengthen
dash and tfie ]eg muscie3 from the commencement of their training,
° ’ classes should be frequently practised in charging short
distances.
Officers'and 11- All company officers and N.C.Os. should be taught
I10"’ t° instruct in bayonet fighting in order that they may
c pe abje t]iejr platoons, &c., this very important part
of a soldier’s training, which must be regularly practised
during the whole of his service at home, and during his
periods of rest behind the firing line.
Sacks. 12- Sacks for dummies should be filled with vertical layers
of straw and thin sods (grass or heather), leaves, shavings,
&c., in such a way as to give the greatest resistance without
injury to the bayonet. A realistic effect, necessitating a
5
strong withdrawal as if gripped by a bone, is obtained by
insetting pieces of hard wood J-inch thick (old cheese cases,
oak palings, &c.), between the stuffing and the sack—
broadside on facing the attacker with the grain vertical.
These sack dummies can be made to stand on end by fixing
a wooden cross or star (two or three pieces of wood about
2 inches broad and f inch thick nailed across one another) in
the base of the sack before filling it. They can also be
placed with good effect on rough tripods, or tied to improvised
stools. Dummy sacks should be hung from gallows by a
double suspension from the cross-bar to the top corners and
tethered to the ground from the bottom coiners.
13. The greatest care should be taken that the object c«re<>r
representing the opponent and its support should be ««чюпч.
incapable of injuring the bayonet or butt, and only light
sticks must be used for parrying practice.
The chief causes of injury to the bayonet are insufficient
instruction in the bayonet fighting lessons, the bayonet
not being withdrawn clear of the dummy before advancing
and the dummies being placed on hard unprepared ground.
14. The upkeep and proper filling of dummies, the repair Care of
of assault practice courses, &c., form part of the duties of npi>.aratii«.
Stall'and Assistant Instructors.
15. For practising direction there must always be a mark to Discs,
aim at on the dmnniy. Caidboard dises for this purpose are
supplied by the Stationery Office. By continually changing
the position of the mark the “ life ” of the dummies is con-
siderably prolonged. Should the supply of discs fail, they
can be improvised out of cardboard or thick paper, or five
or six numbers can be painted on the dummies as marks.
(u 11717)
’ G
Class
arrange-
ments.
Recruit’s
Course.
SECTION 3,
Pkeliminary Bayonet Lessons.
16. Open ranks for bayonet practice as follows:—“Bear
Bank—About turn ” ; “ Odd numbers of the front rank and
even numbers of the rear rank—Six paces forward—March,”
“About turn”; “The whole, one pace right close—
March.”
Small classes should be opened out from single rank.
Classes should always work with bayonets fixed.
When teaching a new position, face the class to a flank
and let them “rest.” First show them the position, ex-
plaining essential points, and giving the reasons for them.
Then show the position a second time, making the class
observe each movement, so that, from the very commence-
ment of the bayonet training, a man is taught to use his eyes
and brain. Face the ranks and order them to assume the
position explained and shown. Pickont the man who shows
the best position and let the class look at and copy him.
Bemember, his may not be an ideal position, but it is more
correct than those shown by the remainder who, being
beginners, cannot distinguish the difference between a good
position and an ideal one. Many instructors err by trying
to get a class of beginners to idealise at once.
17. The Becruit’s Course consists of five lessons. Each
lesson takes about half-an-hour, and the course, with daily
instruction, should last from five to six weeks. The training
should be carried out chiefly in a “free and easy” kit, but
men should be accustomed to use their bayonets when
wearing belt and pouches, and packs may be worn when
required to carry out a test efficiency. For the “pointing”
and “parrying” practices a light stick 5 feet to 5 feet
G inches long and between inches and 3 inches in
circumference must be provided for every two men.
18. Ilalf-an-hour a day, at least five days a week, should Daily
be devoted to the Daily Practice in bayonet fighting for 1’ractice.
trained soldiers. In the practice, good direction, quickness,
and strength are developed, and a soldier is accustomed to
using the bayonet under conditions which approximate to
actual fighting. This half-hour should be apportioned to
(1) Pointing at the body ; (2) Pointing at paper balls on
light sticks at varying distances and directions ; (3) Parrying
light sticks ; (4) Dummy work and, when sufficiently
proficient (5) The Final Assault Practice.
Lesson 1.
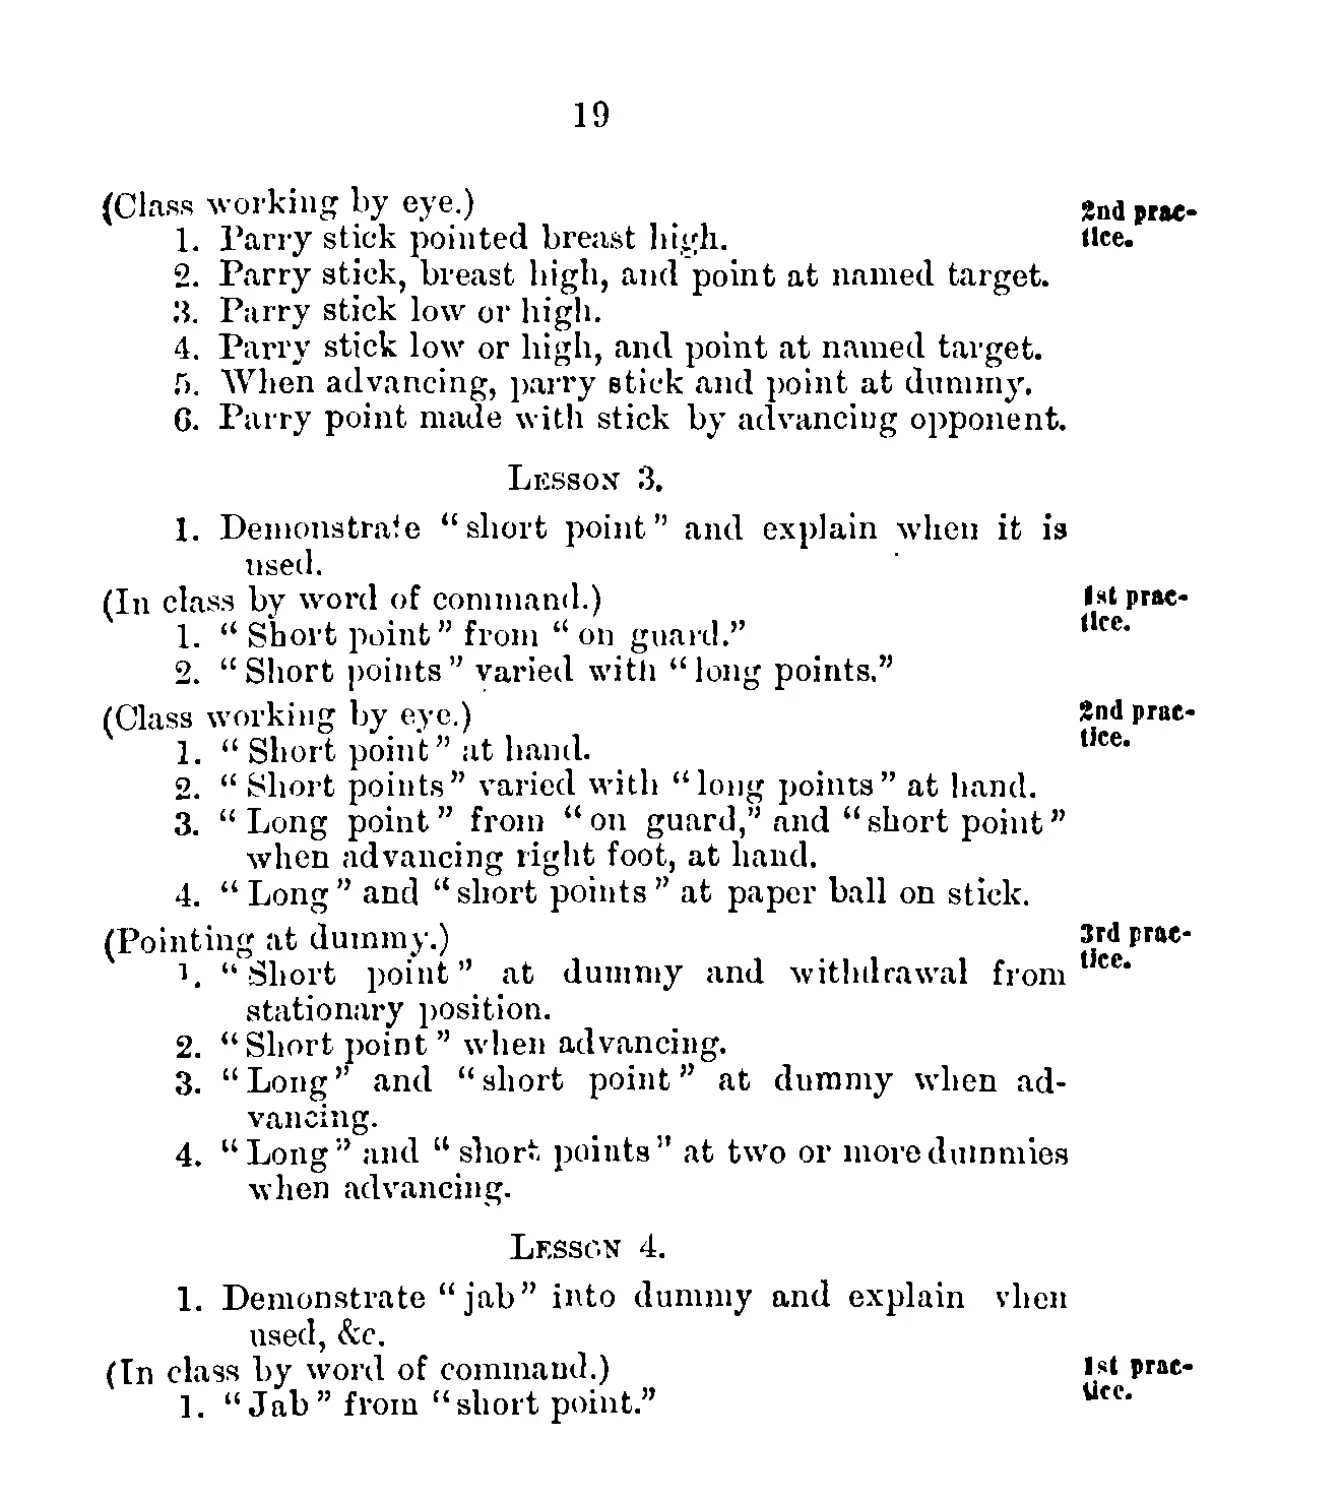
19. Point of the bayonet directed at the base of the “On
opponent’s throat, the rifle held easily and naturally with both G““r<1,
hands, the barrel inclined slightly (about 30°) to the left, the
right hand over the navel grasping the small of the butt, the
left hand holding the rifle at the most convenient position in
front of the backsight so that the left arm is only slightly
bent, i.e., making an angle of about 150°. The legs well
separated in a natural position such as a man walking might
adopt on meeting with resistance, left knee slightly
bent, right foot flat on the ground with too inclined to the
right front.
The position should not be constrained in anyway but be
one of aggression, alertness, and readiness to go forward for
immediate attack.
(в Ш!1;) л 4
8
Common Faults.
1. Leaning body back.
2. Left arm too much bent.
3. Right hand held too low and too far back.
4. Rille grasped too rigidly, restraining all freedom of
movement.
•‘Rest.’ Assume a position of “rest” in the easiest way without
moving the feet.
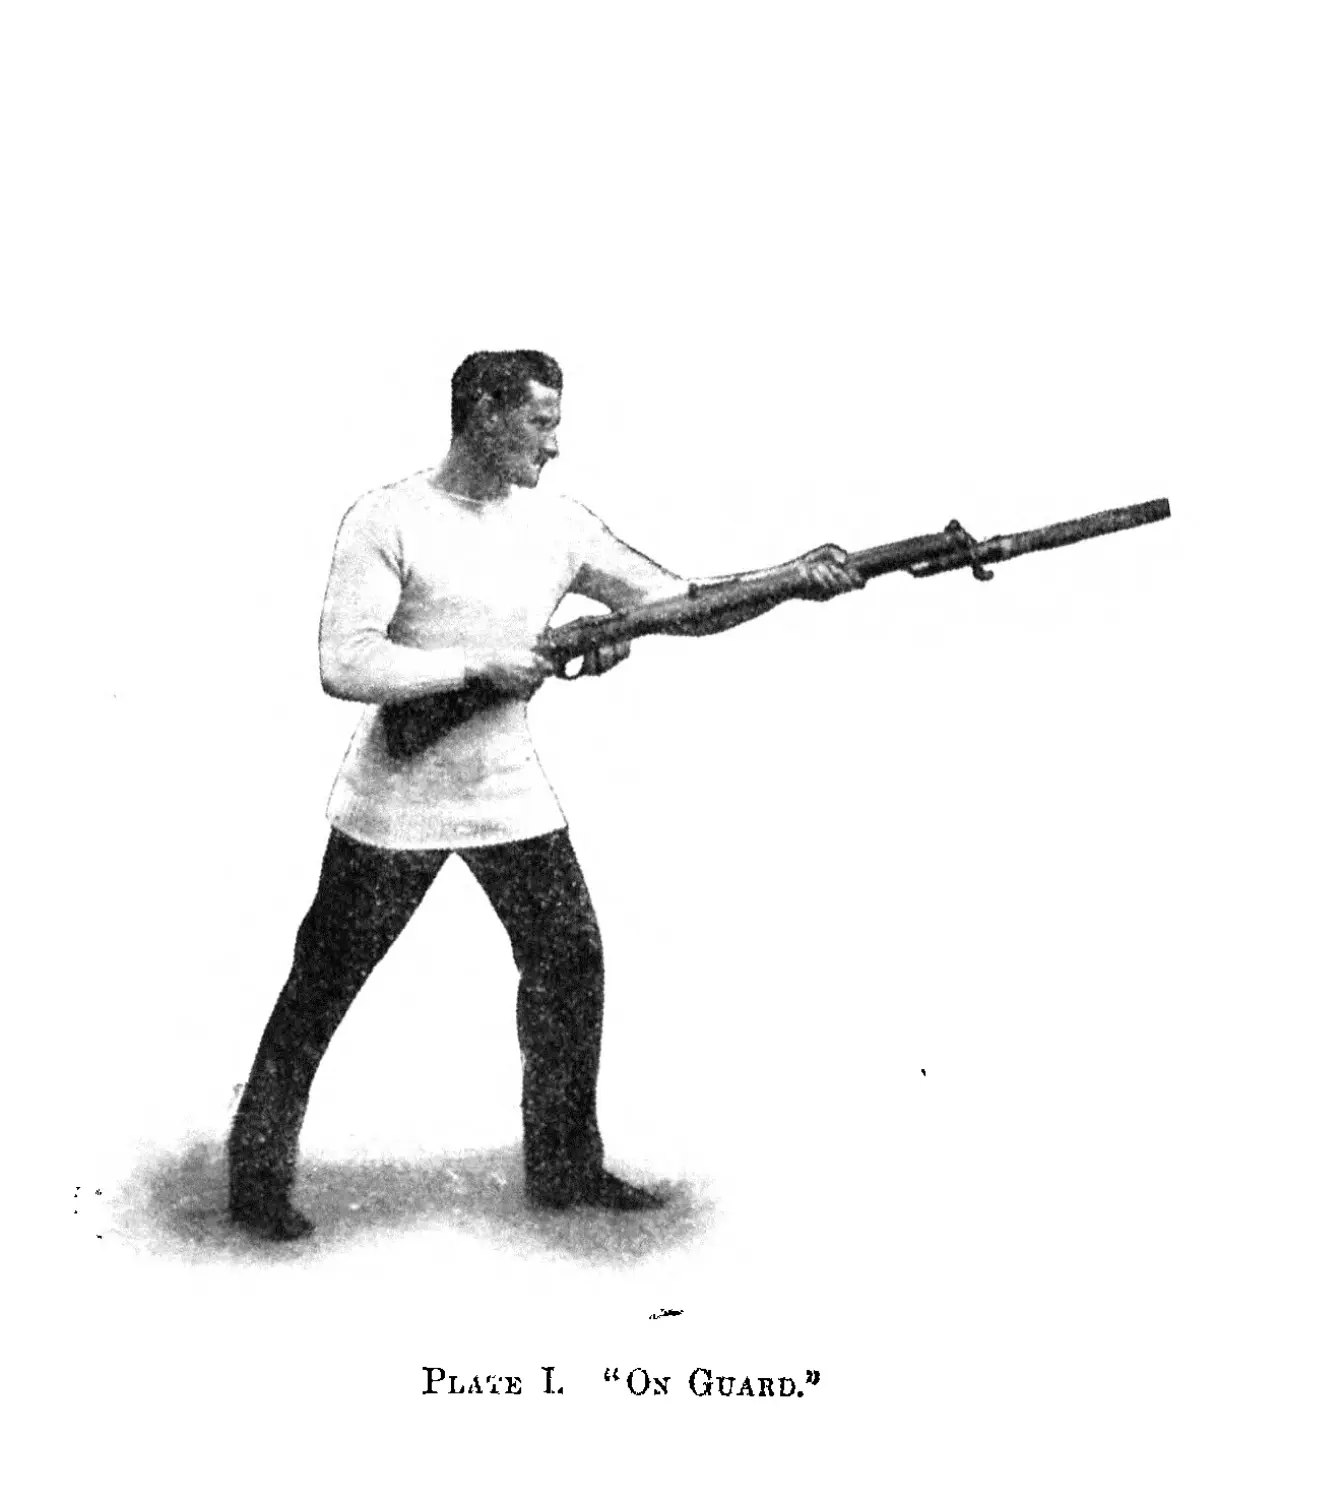
"Long 20. Grasping the rifle firmly, vigorously deliver the point
Ronu.’ front the “on guard” position to tho full extent of the left
arm, butt running alongside and kept close to the right
forearm. Body inclined forward ; left knee well bent ;
right leg braced, and weight of the body’ pressed well
forward with the fore part of the right foot, heel raised.
The chief power in a point is derived from the right arm
with the weight of the body behind it, the left arm being
used more to direct the point of the bayonet. The eyes
must be fixed on the object pointed at. In making points
other than straight to the front, the left foot should move
in the same direction as that in which the point is made.
During the latter stages of this lesson the men should be
practised in stepping forward with the light foot when
delivering the point.
Common Faults.
1. Rifle drawn back before delivering the point.
2. Butt of the rille held as high as or against the right
shoulder.
3. The eyes not directed on the object aimed at.
4. Left knee not sufficiently bent.
5. Body not thrust sufficiently forward.
9
Remarks.
The long point is made against an opponent at a range of Hie wlth-
about four to five feet from the attacker’s eye. iirawai.
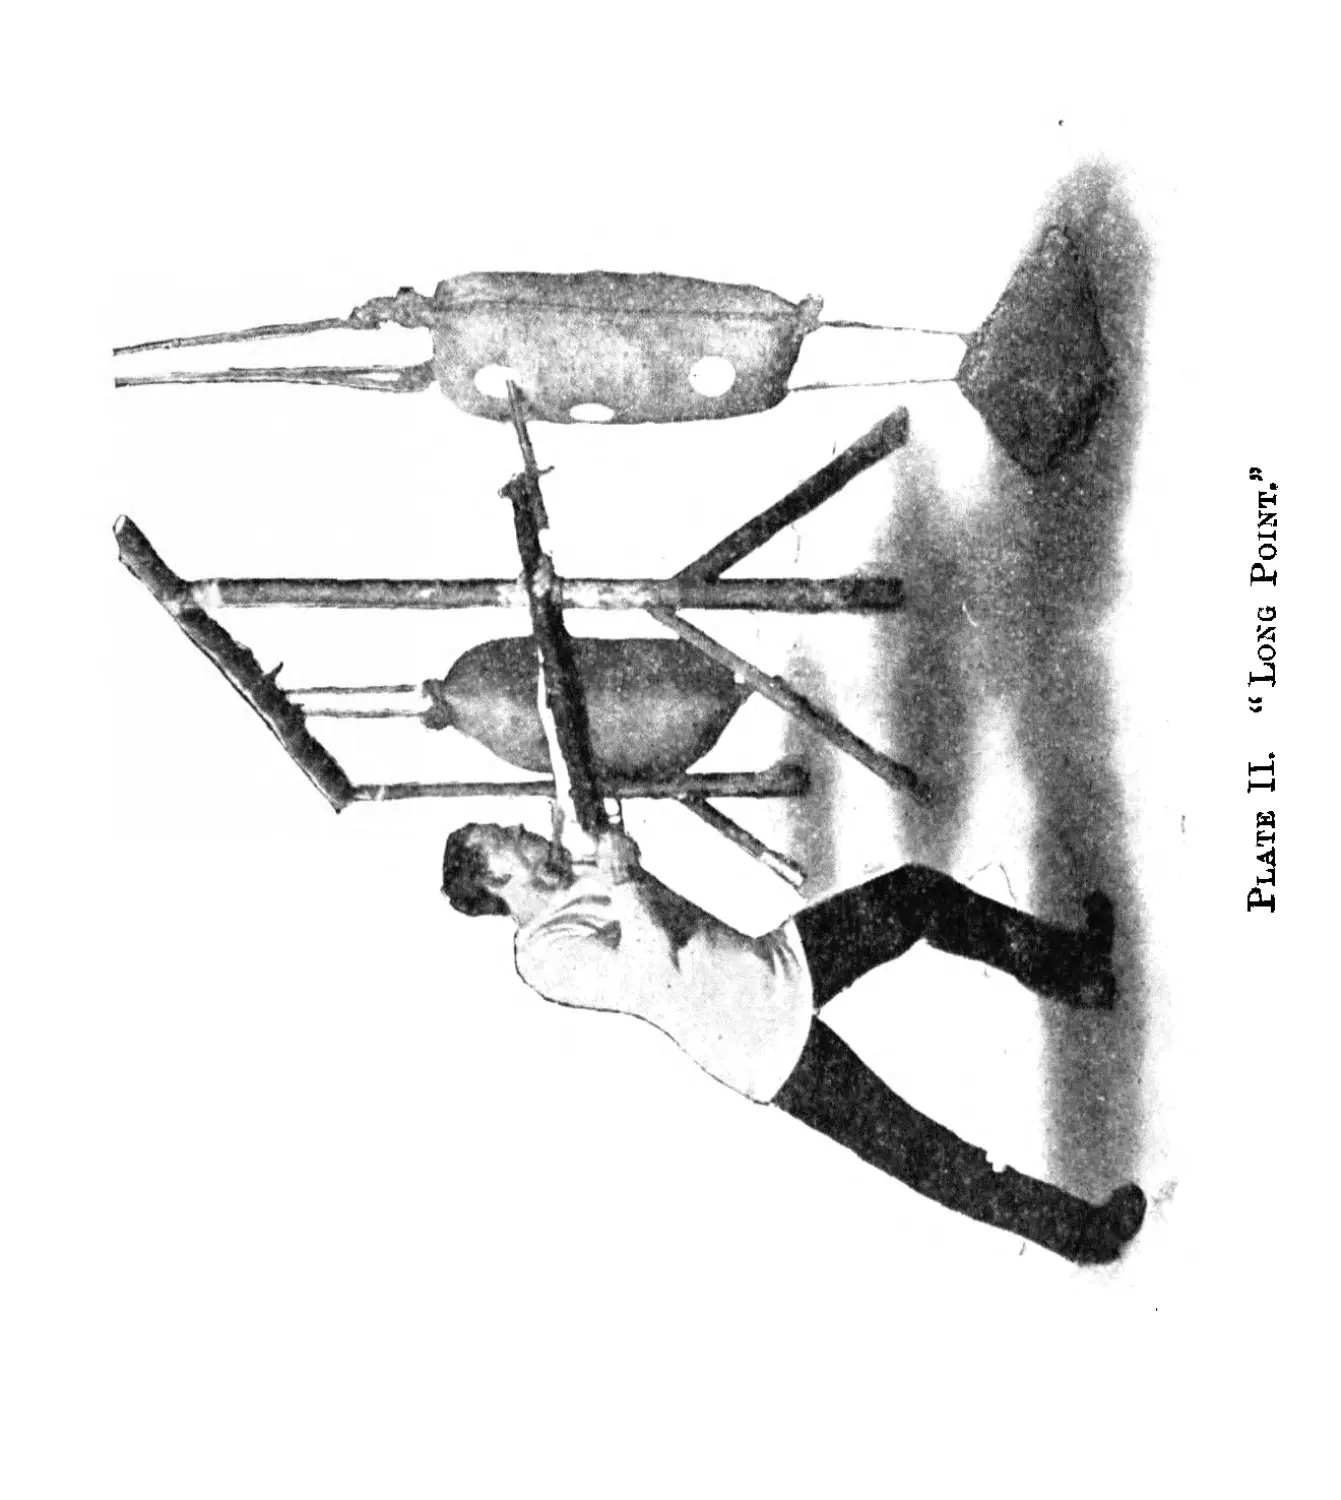
Я1. To withdraw the bayonet after a “ long point ” has
been delivered, draw the rifle straight back until the right
hand is well behind the hip, and immediately resume the
“ on guard ” position. If the leverage or proximity to tho
object transfixed renders it necessary, the left hand must
first be slipped up close to the muzzle, and when a pupil has
reached that stage of the lesson when he delivers a point
advancing on a dummy, he will adopt this method.
After every “point,” a rapid withdrawal, essential to
quick work with the bayonet, should be practised before
returning to the “ on guard ” position.
Progression.
22. .Men should always be made to point at a target— lst
e.g., ata named part of the body of the opposite man : “At
the right eye” (long pause to commence with), “point” (a Pointing nt
pause), “ withdrawn” Oblique “ points ” should be practised of the
by pointing at the men to the right and left fronts. °'
As progress is attained, the pause between the “point”
and the “withdraw” should be shortened until the men
reach a stage when they “ withdraw ” and come “ on guard ”
directly after making a “ point,” judging their own time.
They should be taught to point at two or more parts of the
body as “ First at the ncse, then at the right thigh—point.”
To practise action against a retreating foe, turn the inside
ranks about and let them “rest.” Show the position of the
kidneys (small of tho back, either side of the spine), and
make tho outside ranks point at those of the inside ranks,
and rice reran
10
Vulnerable 23. If possible, the point of the bayonet should be
parts of the directed against an opponent’s throat, especially in corps a
corps fighting, as the point will enter easily and make a fatal
wound on penetrating a few inches and, being near the eyes,
makes an opponent “funk.” Other vulnerable and usually
exposed pairs are the face, chest, lower abdomen and thighs,
and the region of the kidneys when the back is turned.
Four to six inches penetration is sufficient to incapacitate
and allow for a quick withdrawal, whereas, if a bayonet is
driven home too far it is often impossible to withdraw
it. In such cases a round should be fired to break up the
obstruction.
2nd prac- 24. Tho class, working in pairs, with the Instructor super-
vising, should be practised in pointing in various directions
ciniwhfv'11 —(1) ^ie °PP0S^e man’s hand, which lie places in various
targets.11’ positions on and off his body ; (2) at balls of paper tied on
the ends of sticks.
This practice should be done without word of command,
so that the eye and brain may be trained.
3rd prac- 25. First teach the men to transfix a disc or number
.• . painted on a duinmv, at a distance of about five feet (i.e.,
discs on the extreme range of the bayonet), then advancing from
dummies, three or more paces from the dummy. The advance must
be made in the most practical and natural way, and should
be practised with either foot to the front when the “point”
is delivered.
The rifle must never be drawn back when making a “long
point” in a forward movement. The impetus of the body
and the forward stretching of the arms supply sufficient
force.
The bayonet must be withdrawn immediately after the
“ point ” has been delivered and a forward threatening
attitude assumed to the side of or beyond the dummy.
11.
Unless the rifle is firmly gripped it is liable to injure the
hand.
To guard against accidents the men must be at least five
feet apart when the practice is carried out collectively.
The principles of this practice should be applied when
pointing at dummies in trenches, standing upright on the
ground, suspended on gallows, &e., at first slowly and de-
liberately, for no attempt must be made to carry out the
Final Assault Practicebefore the men have been carefully
instructed in, and have thoroughly mastered, the pre-
liminary lessons.
Lesson 2.
The Right and Left Pabiiy.
26. From the “ on guard ” position force the rifle forward far Hight (left)
enough to the right (left) to beat off the adversary’s weapon, lliirry-
straightening the left arm without bending the wrist or
twisting the rifle in the hand.
In making a low parry, care should be taken that the
point of the bayonet is sufficiently deflected to ensure
the opponent’s weapon being beaten oil and not missed
altogether.
The eyes must be kept on the weapon which is being
parried.
Common Faults.
1. Wide sweeping parry with no forward movement
in it.
2. Eyes taken off the weapon to be parried.
N.B.—Men should be taught to regard the parry as part
of an offensive as well as defensive movement, and that it
12
1st prac-
tice.
Parries by
word of
command.
2nd prac-
tice.
Parrying
light slick?.
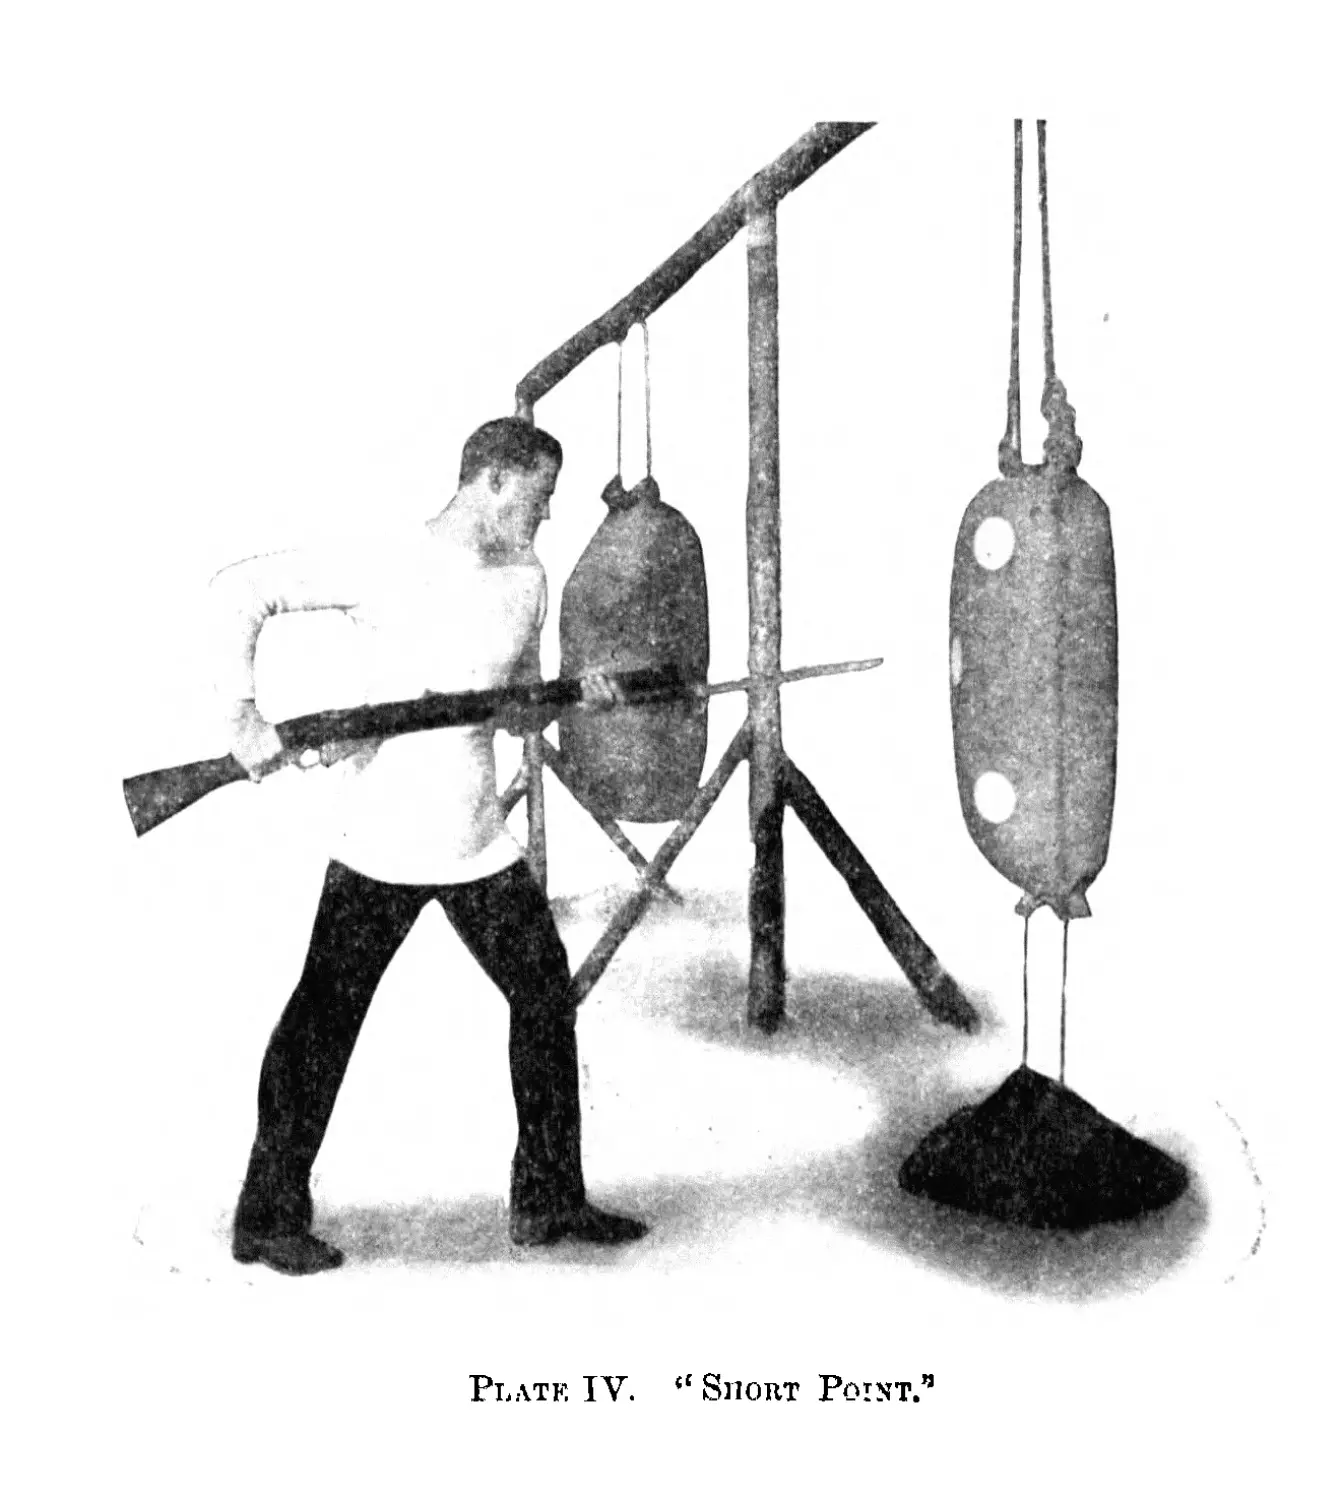
The short
point.
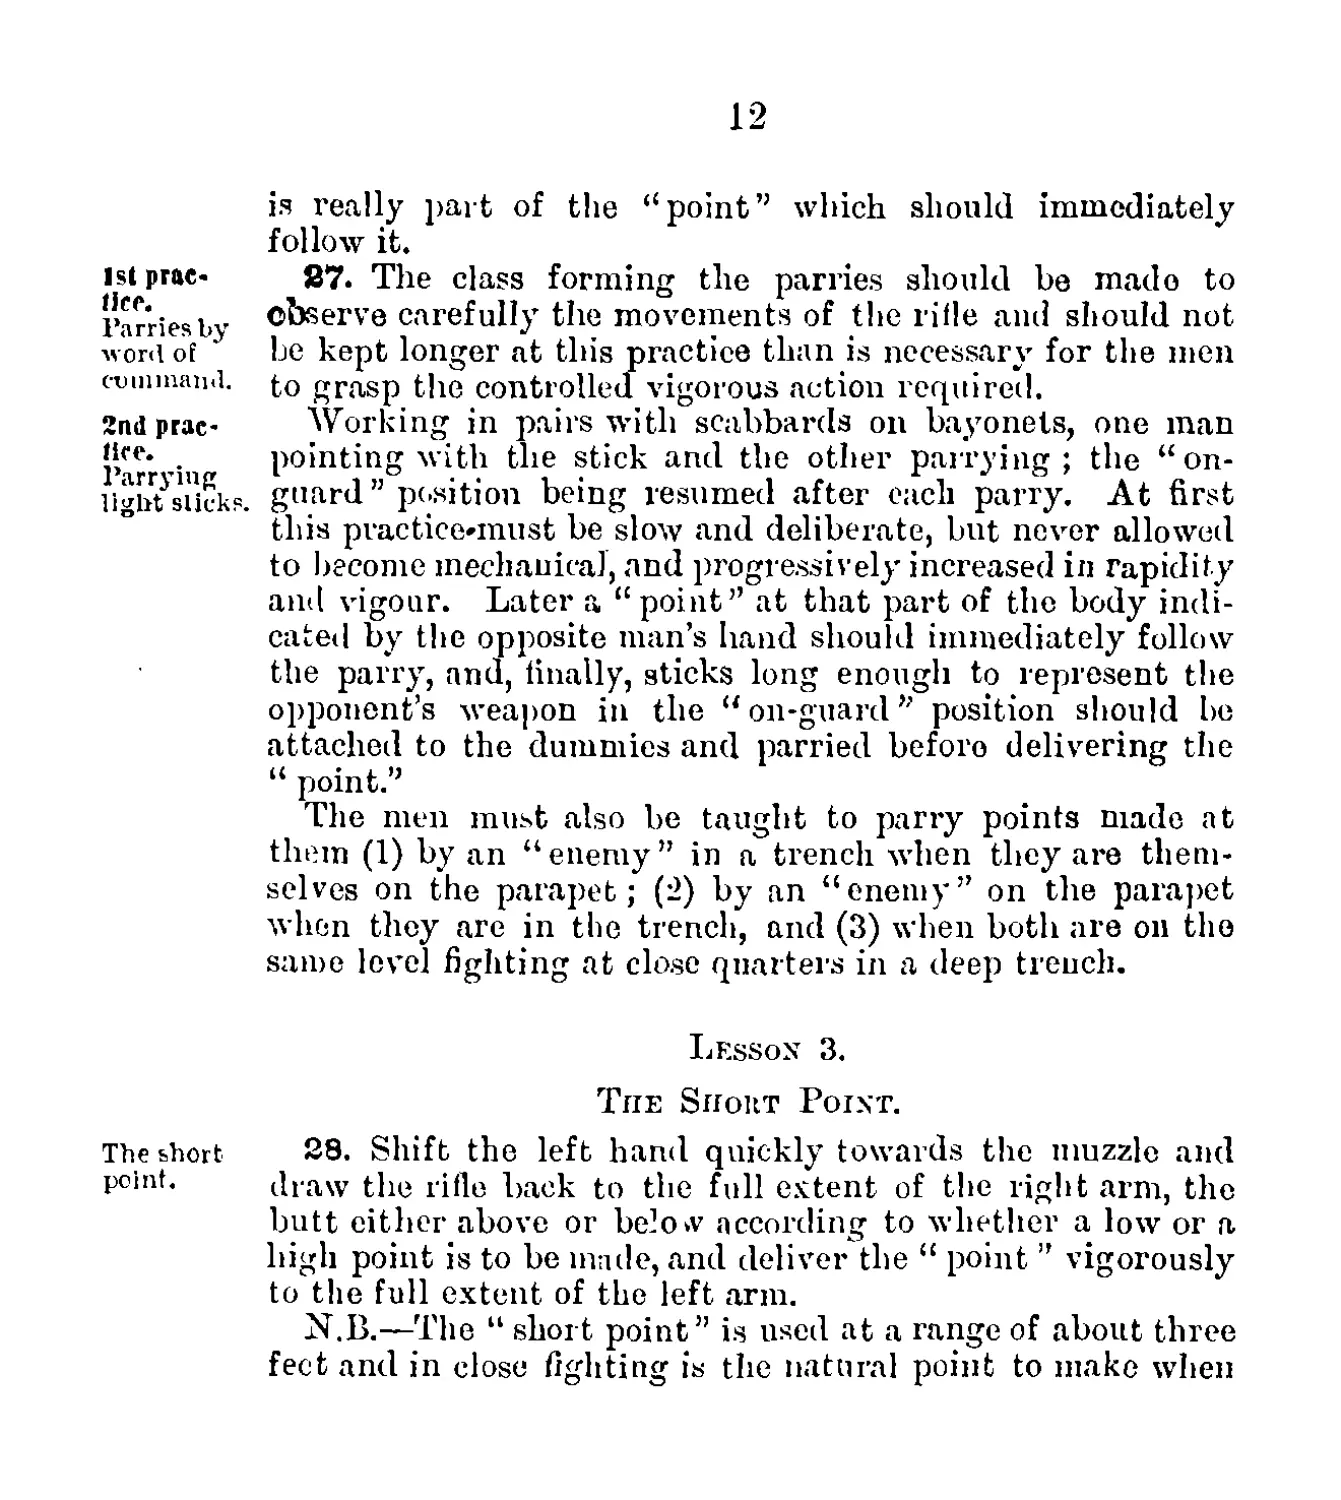
is really part of the “point” which should immediately
follow it.
27. The class forming the parries should be made to
observe carefully the movements of the rifle and should not
be kept longer at this practice than is necessary for the men
to grasp the controlled vigorous action required.
Working in pairs with scabbards on bayonets, one man
pointing with the stick and the other parrying; the “ on-
guard ” position being resumed after each parry. At first
this practice-must be slow and deliberate, but never allowed
to become mechanical, and progressively increased in rapidity
and vigour. Later a “point” at that part of the body indi-
cated by the opposite man’s hand should immediately follow
the parry, and, finally, sticks long enough to represent the
opponent’s weapon in the “on-guard” position should be
attached to the dummies and parried before delivering the
“ point.”
The men must also be taught to parry points made at
them (1) by an “enemy” in a trench when they are them-
selves on the parapet; (2) by an “enemy” on the parapet
when they are in the trench, and (3) when both are on the
same level fighting at close quarters in a deep trench.
Lesson 3.
The Shout Point.
28. Shift the left hand quickly towards the muzzle and
draw the rifle back to the full extent of the right arm, the
butt either above or below according to whether a low or a
high point is to be made, and deliver the “ point ” vigorously
to the full extent of the left arm.
N.B.—The “ short point” is used at a range of about three
feet and in close fighting is the natural point to make when
13
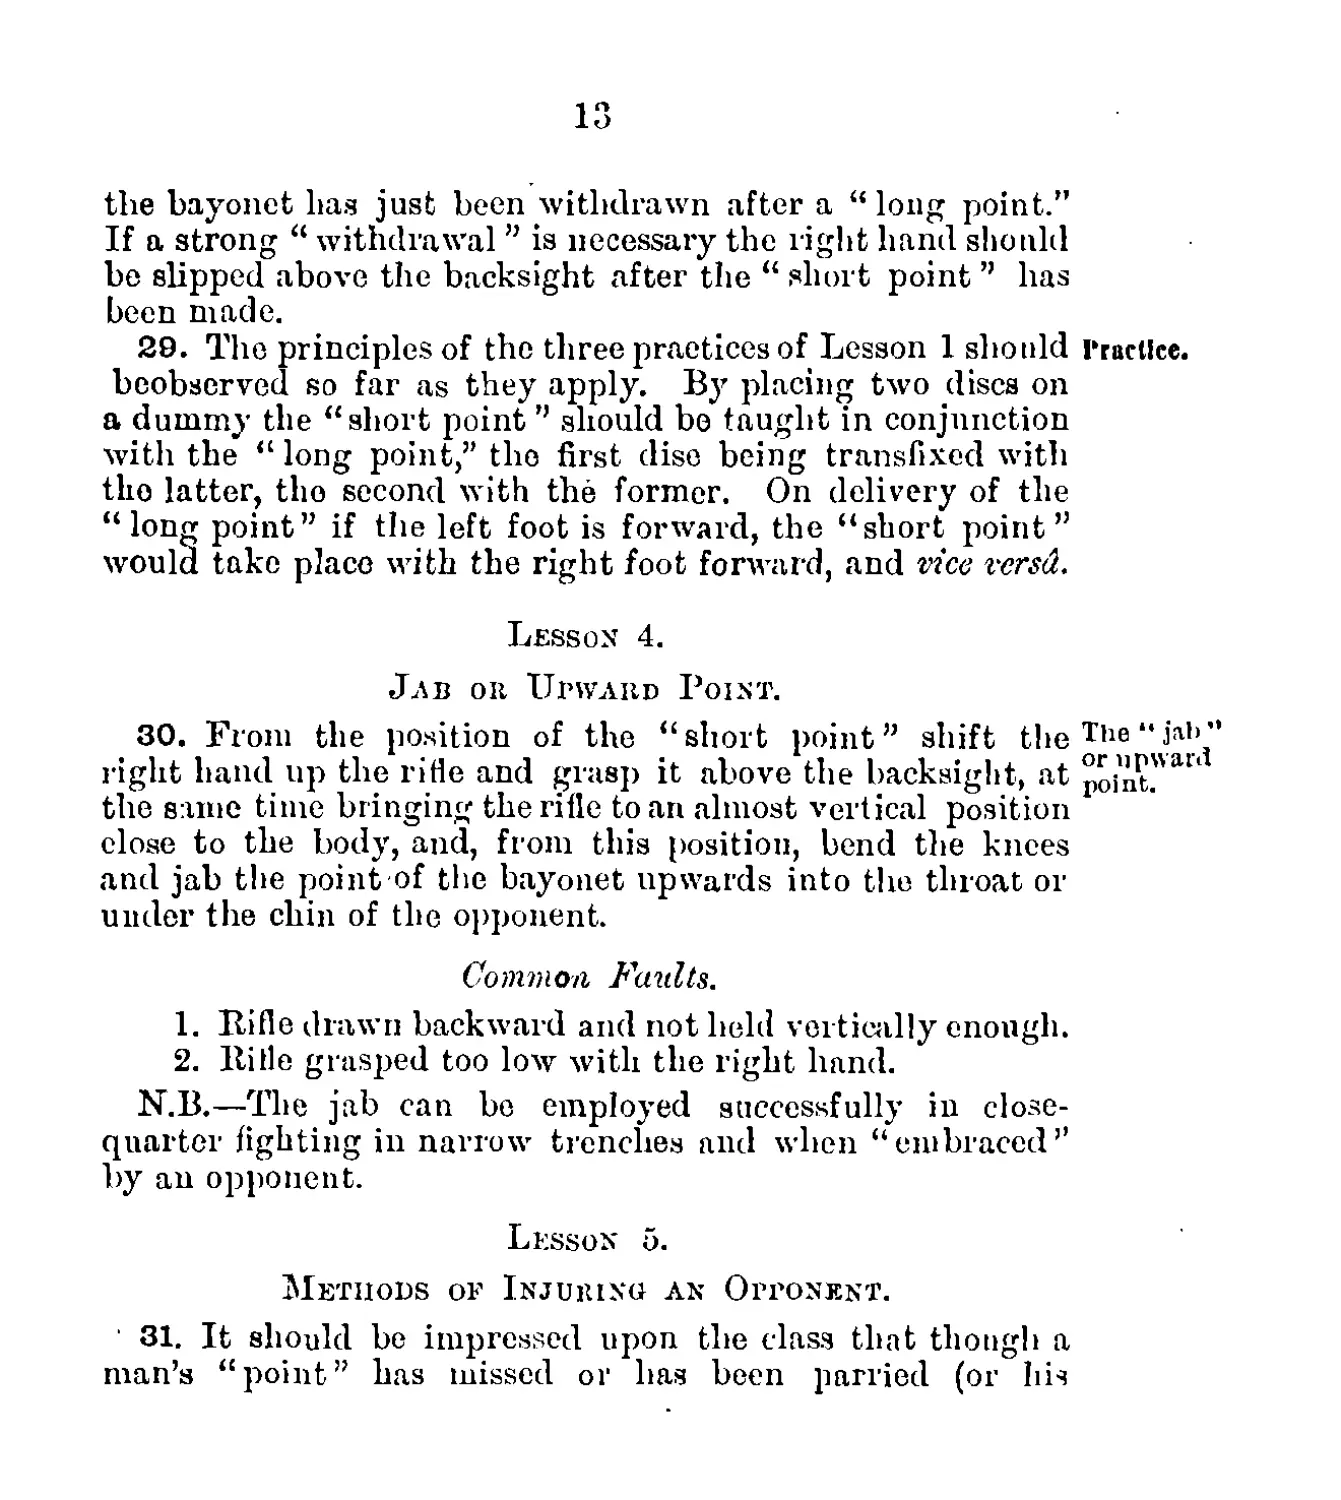
the bayonet lias just been withdrawn after a “long point.”
If a strong “ withdrawal ” is necessary the right hand should
be slipped above the backsight after the “ short point ” has
been made.
29. The principles of the three practices of Lesson 1 should Practice,
beobserved so far as they apply. By placing two discs on
a dummy the “short point ” should be taught in conjunction
with the “ long point,” the first disc being transfixed with
the latter, tho second with the former. On delivery of the
“long point” if the left foot is forward, the “short point”
would take place with the right foot forward, and vice versa.
Lesson 4.
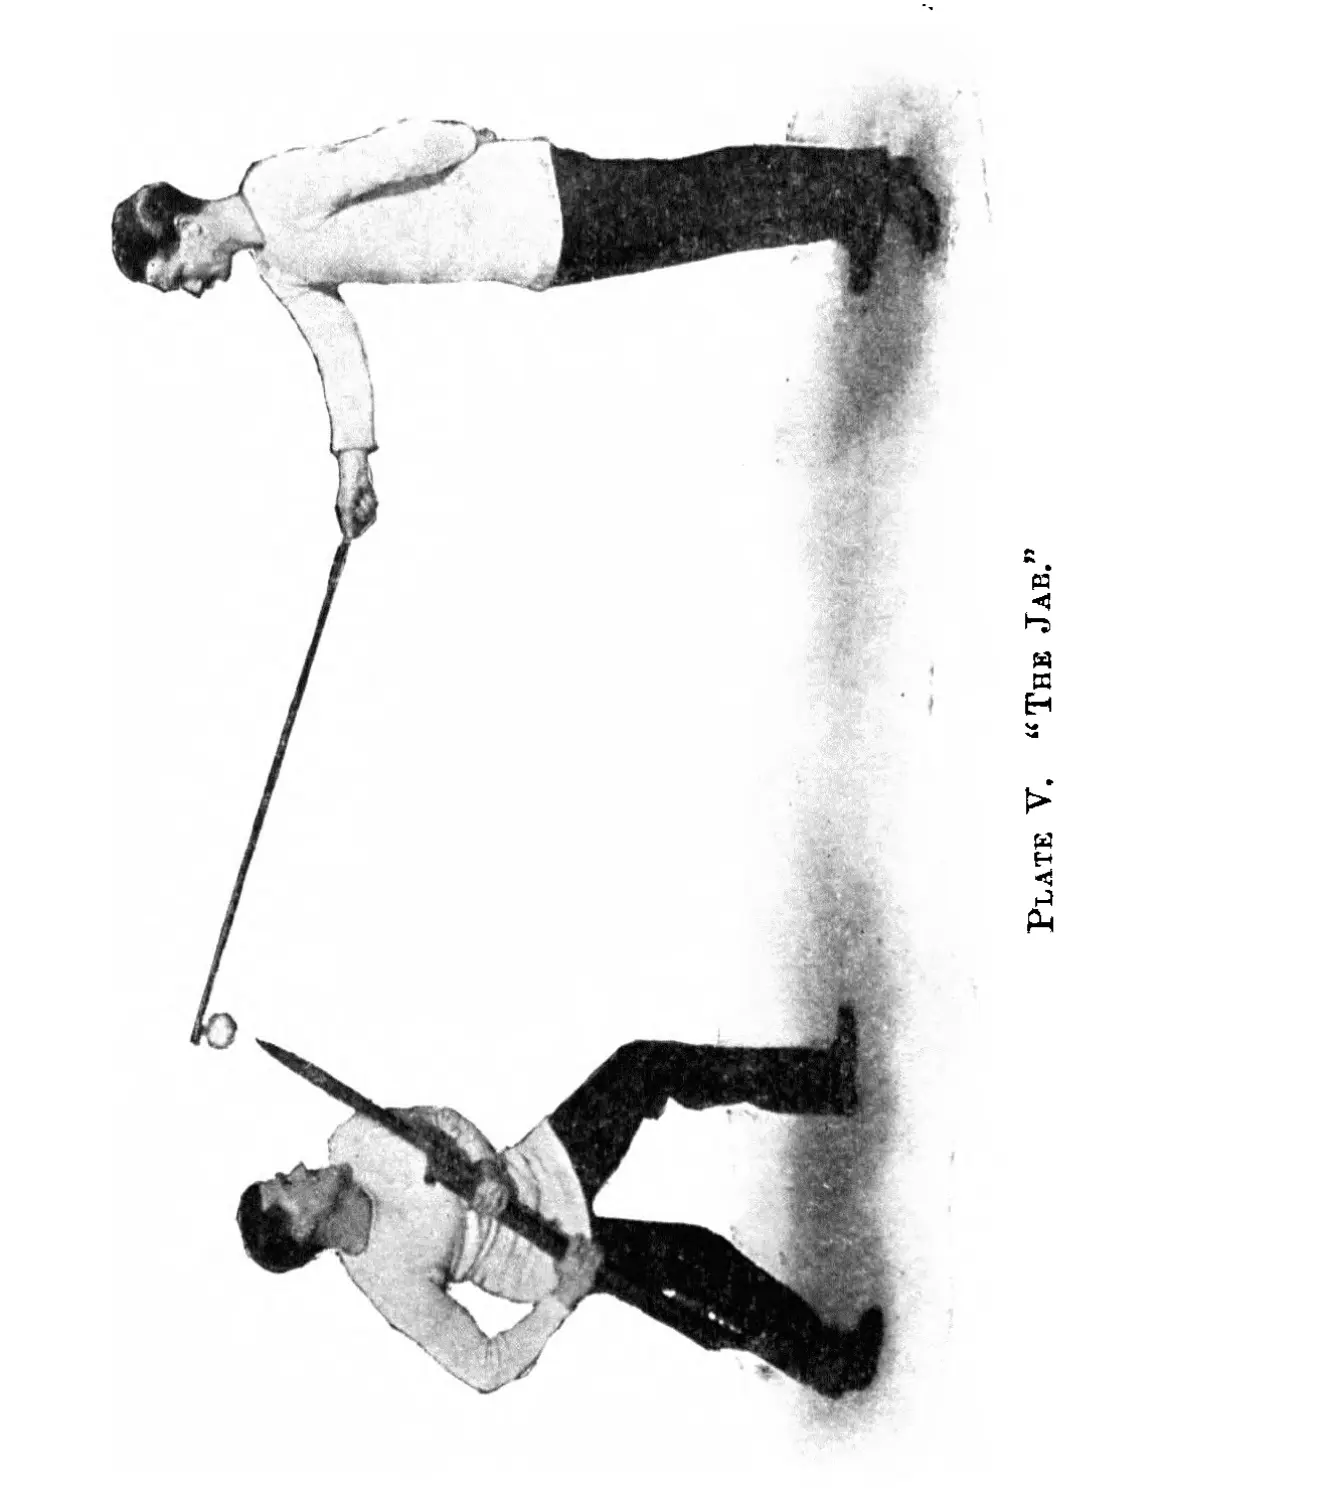
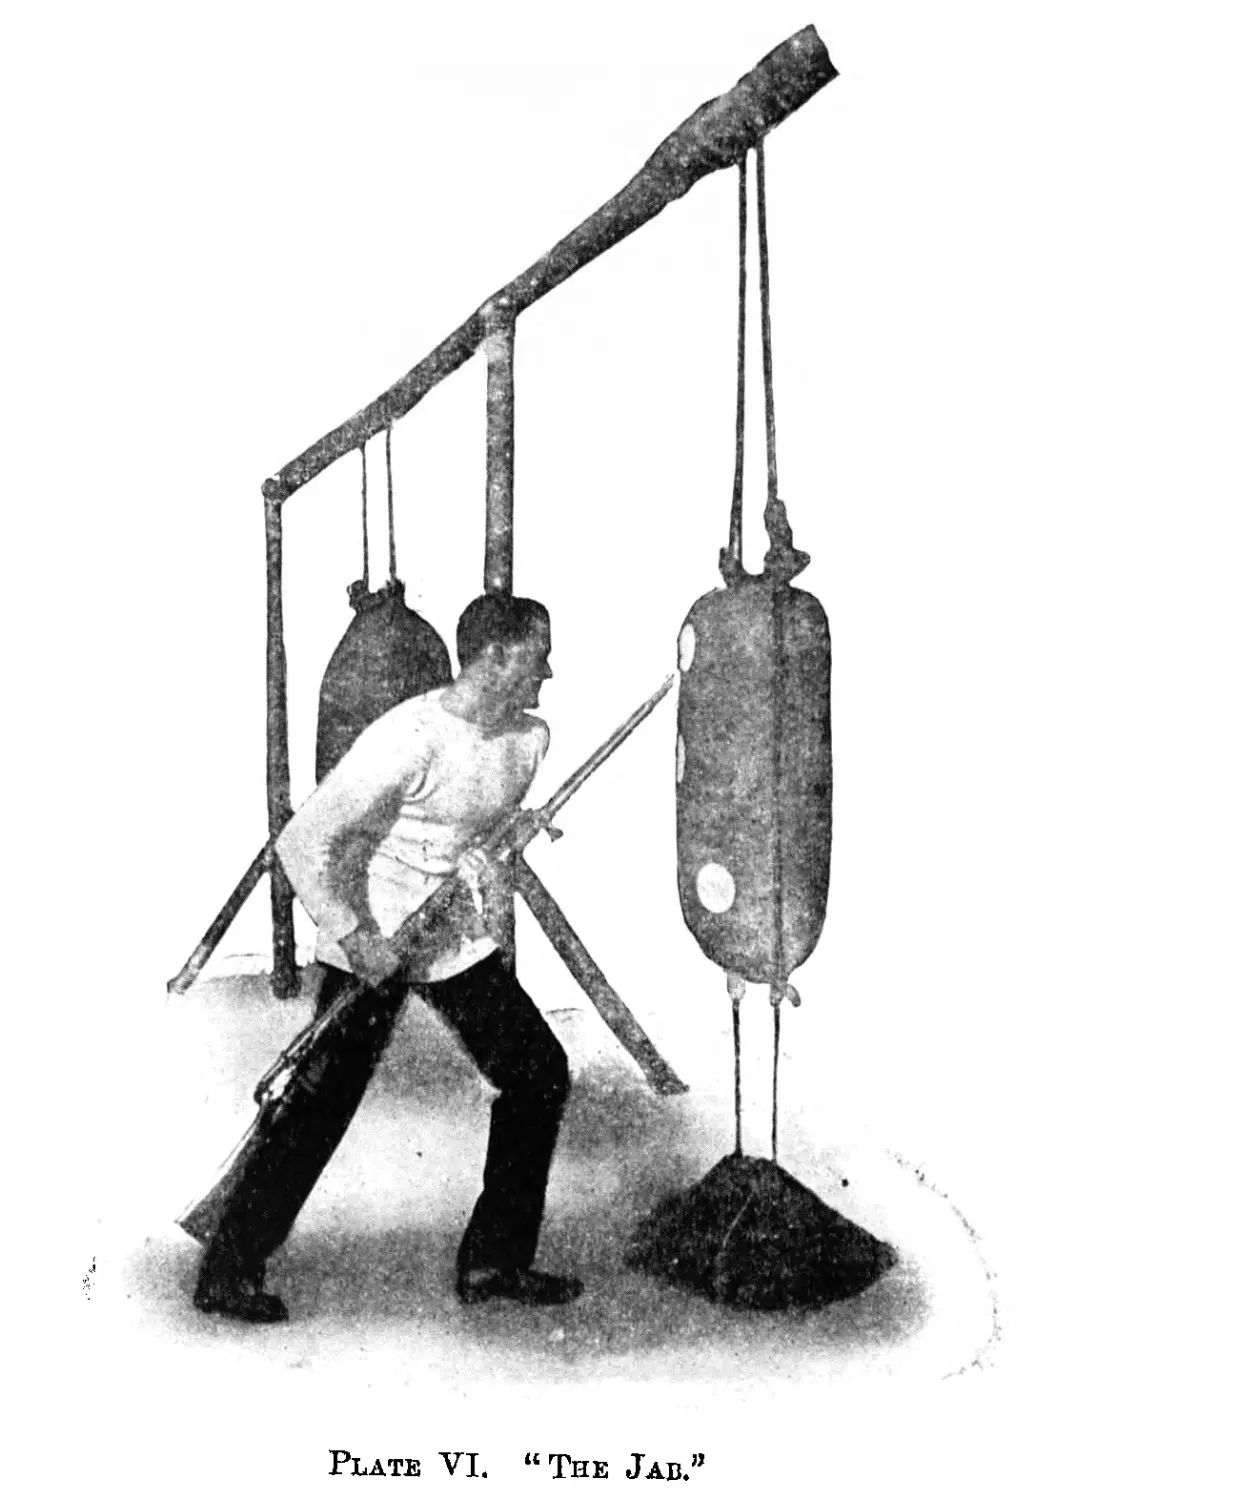
J л и or Upward Point.
30. From the position of the “short point” shift the The" iab
right hand up the rifle and grasp it above the backsight, at poi'nt."a"
the same time bringing the rifle to an almost vertical position
close to the body, and, from this position, bend the knees
and jab the point of the bayonet upwards into the throat or
under the chin of the opponent.
Common Faults.
1. Rifle drawn backward and not held vertically enough.
2. Rille grasped too low with the right hand.
N.B.—The jab can be employed successfully in close-
quarter fighting in narrow trenches and when “embraced’’
by an opponent.
Lesson 5.
Methods of Injuring an Opponent.
’ 31. It should be impressed upon the class that though a
man’s “point” has missed or has been parried (or his
14
The butt
Magazine or
trigger
guard.
Use of the
knee.
Tripping.
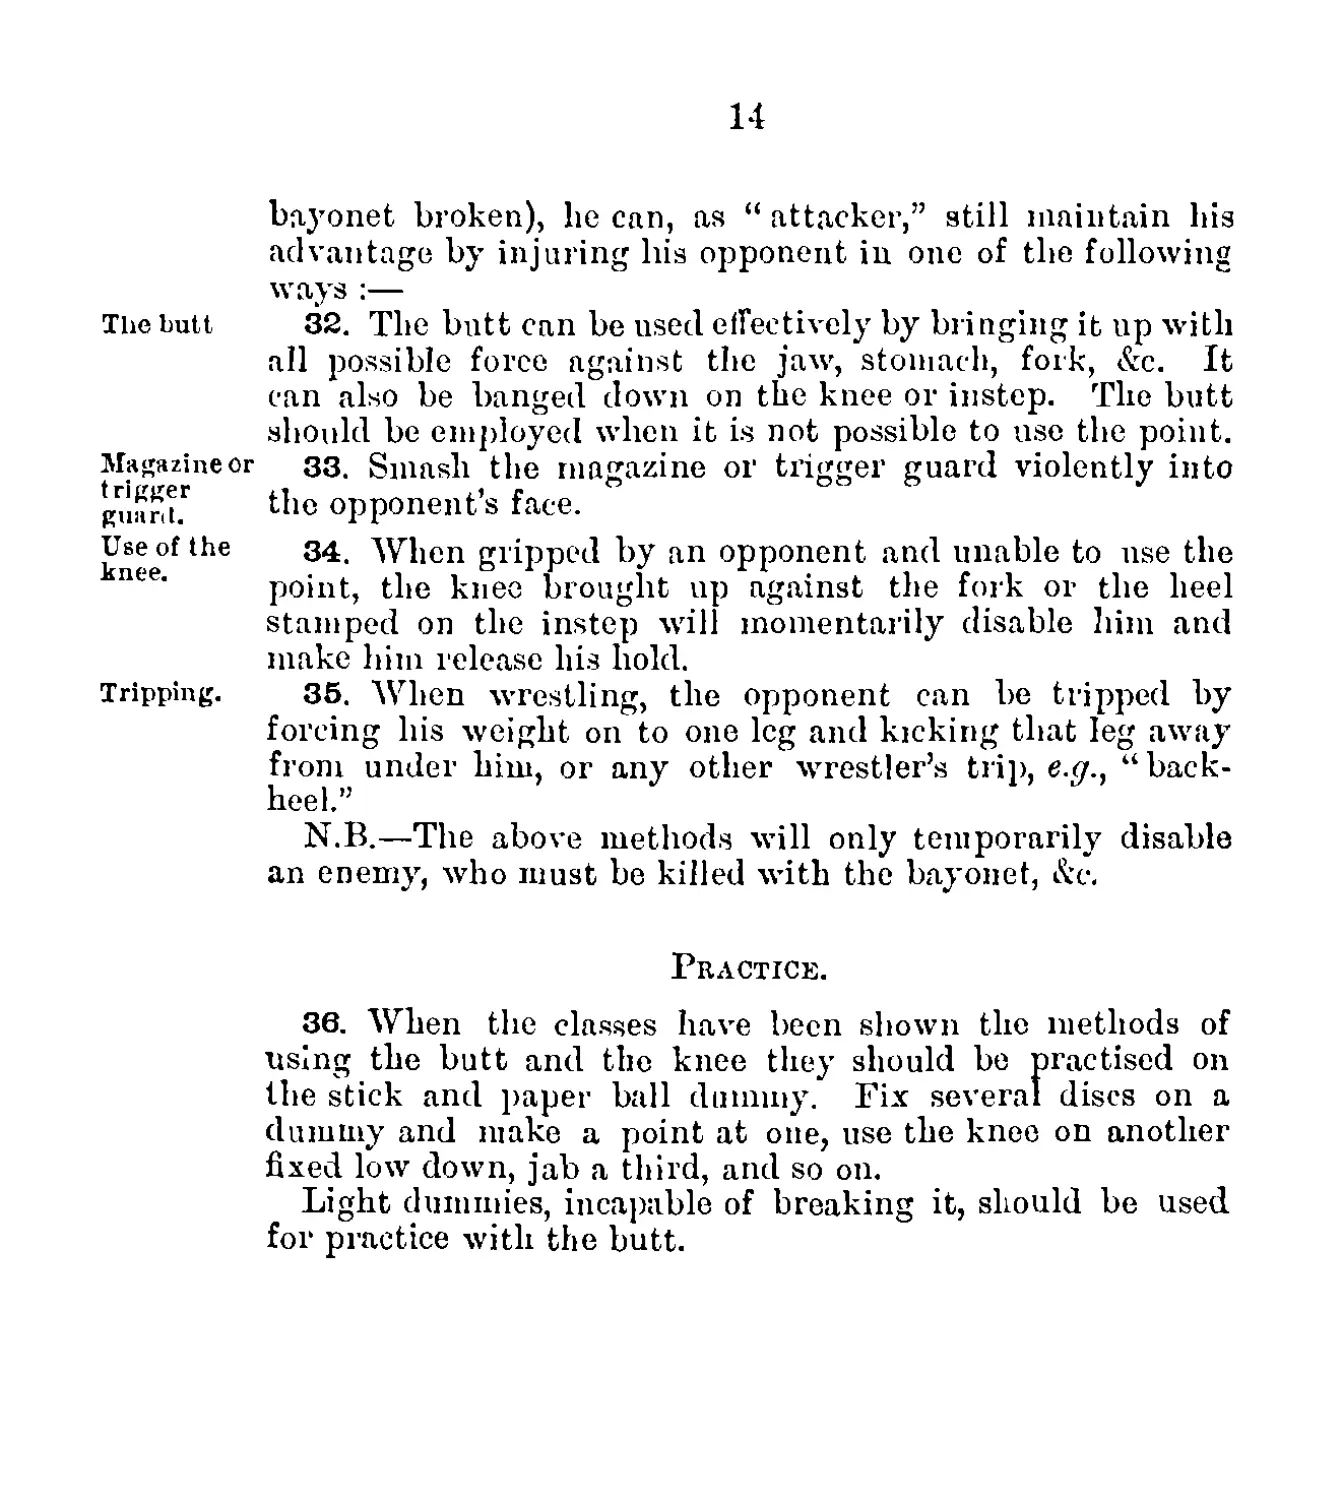
bayonet broken), lie can, as “ attacker,” still maintain his
advantage by injuring his opponent in one of the following
ways :—
32. The butt can be used effectively by bringing it up with
all possible force against the jaw, stomach, fork, &c. It
can also be banged down on the knee or instep. The butt
should be employed when it is not possible to use the point.
33. Smash the magazine or trigger guard violently into
the opponent’s face.
34. When gripped by an opponent and unable to use the
point, the knee brought up against the fork or the heel
stamped on the instep will momentarily disable him and
make him release his hold.
35. When wrestling, the opponent can be tripped by
forcing his weight on to one leg and kicking that leg away
from under him, or any other wrestler’s trip, e.g., “back-
heel.”
N.B.—The above methods will only temporarily disable
an enemy, who must be killed with the bayonet, &c.
Practice.
36. When the classes have been shown the methods of
using the butt and the knee they should be practised on
the stick and paper ball dummy. Fix several discs on a
dummy and make a point at one, use the knee on another
fixed low down, jab a third, and so on.
Light dummies, incapable of breaking it, should be used
for practice with the butt.
15
SECTION 4.
Tactical Application of the Bayonet.
37. Л bayonet assault should preferably be made under Practical
cover of fire, surprise, or darkness. In these circumstances J^y ie
the prospect of success is greatest, for a bayonet is useless
at any range except hand-to-hand.
38. At night all these covers can be utilised. On the Night
other hand, confusion is inherent in fighting by night, and "or
the execution of a successful night attack with the bayonet,
therefore, requires considerable and lengthy training. Units
should be frequently practised in night work with the
bayonet.
39. The bayonet is essentially a weapon of offence which Bayonet an
must be used with skill and vigour or it has but little effect.
To await passively an opportunity of using the bayonet
entails defeat, since an approaching enemy will merely
stand out of bayonet range and shoot down the defenders.
In charging short distances across the open in close forma-
tion the ritle should be carried at the “high port’’—the
safest position in this formation.
40. In an assault the enemy should be killed with the No firing
bayonet Firing should be avoided, for in the niix-up a asJaum"'
bullet, after passing through an opponent’s body, may kill
a friend who happens to be in the line of fire.
Final Assault Practice.
41. Only to be carried out after the men have been
thoroughly trained in all the preliminary lessons, and
have acquired complete control of their weapons; otherwise
injury to rifles and bayonets will result from improper
Final
Assault
Practice
Course.
1G
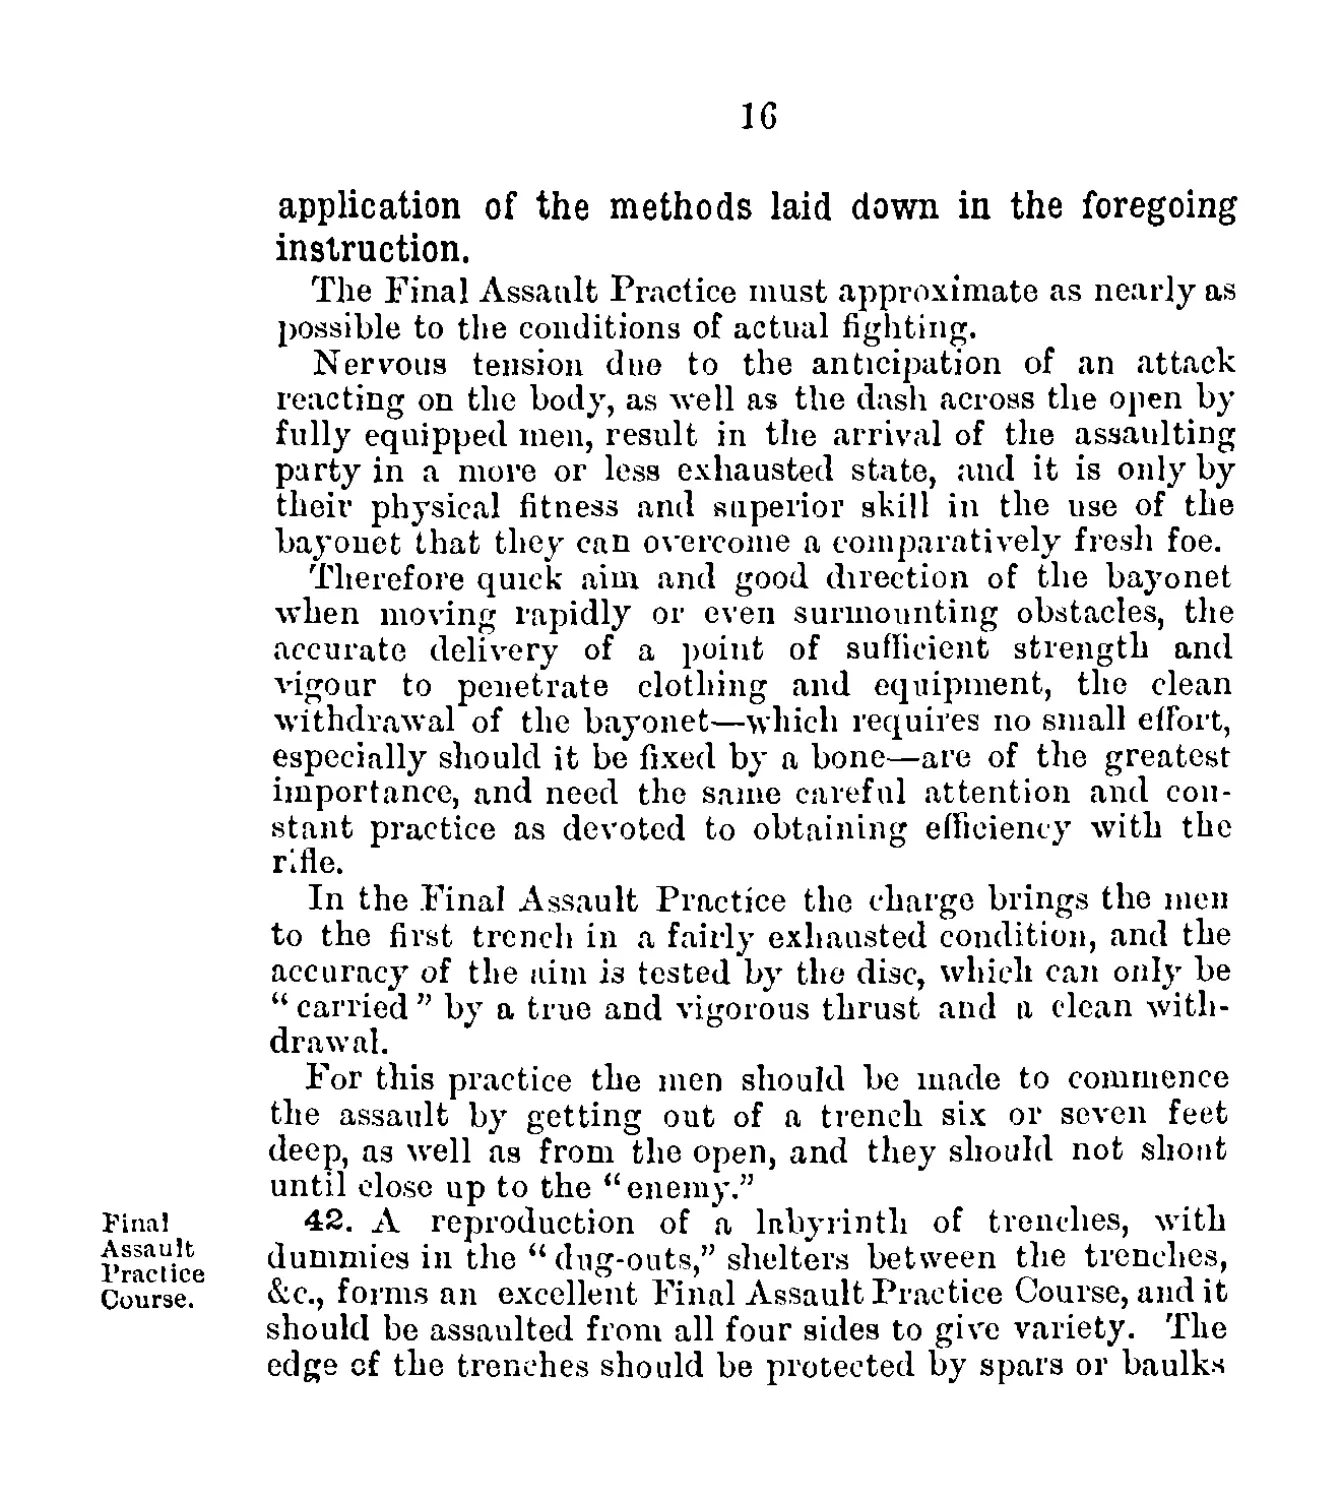
application of the methods laid down in the foregoing
instruction.
The Final Assault Practice must approximate as nearly as
possible to the conditions of actual fighting.
Nervous tension due to the anticipation of an attack
reacting on the body, as well as the dash across the open by
fully equipped men, result in the arrival of the assaulting
party in a more or less exhausted state, and it is only by
their physical fitness and superior skill in the use of the
bayouet that they can overcome a comparatively fresh foe.
Therefore quick aim and good direction of the bayonet
when moving rapidly or even surmounting obstacles, the
accurate delivery of a point of sufficient strength and
vigour to penetrate clothing and equipment, the clean
withdrawal of the bayonet—which requires no small effort,
especially should it be fixed by a bone—are of the greatest
importance, and need the same careful attention and con-
stant practice as devoted to obtaining efficiency with the
rifle.
In the Final Assault Practice the charge brings the men
to the first trench in a fairly exhausted condition, and the
accuracy of the aim is tested by the disc, which can only be
“ carried ” by a true and vigorous thrust and u clean with-
drawal.
For this practice the men should be made to commence
the assault by getting out of a trench six or seven feet
deep, as well as from the open, and they should not shout
until close up to the “enemy.”
42. A reproduction of a labyrinth of trenches, with
dummies in the “ dug-outs,” shelters between the trenches,
&c., forms an excellent Final Assault Practice Course, audit
should be assaulted from all four sides to give variety. The
edge of the trenches should be protected by spars or baulks
17
anchored back, otherwise constant use will soon wear out
the course. Cinders scattered over the coarse prevent the
incn slipping. The number, length and construction of
trenches is regulated by the ground available and by the
ingenuity of commanding officers. If gallows cannot be
erected, sack dummies should be placed on tripods or
standing on end, as well as lying in trenches or on the
parapets, with soft earth free from stones under them, &e.
Staff and Assistant Instructors are responsible for the
upkeep of Final Assault Practice Courses.
43. Extremely interesting and practical schemes in Tactical
trench warfare can be arranged by combining the Final schemes.
Assault Practice with other branches of training. In these
schemes bayonet work should be dove-tailed with bombing,
building up of sandbags, entrenching, the duties of
“ bayonet ” and “ observation ” men, &e.
44. Competitions can be arranged by allotting marks for Competi-
(1) number of discs transfixed and carried on a bayonet,
(2) time taken from signal to charge until the last man of
the team passes the finishing post, and (3) style.
Competitions should never be carried out until the men
have completed their lessons in bayonet training and
thoroughly mastered the handling of the bayonet in the
Final Assault Practice.
18
SUMMARY OF PROGRESSIVE STEPS IN
BAYONET TRAINING.
1. Class arrangements. Explain hand-to-hand fighting and inculcate the spirit of the bayonet. Lesson 1. 1. Teach “ on guard ” and “rest.”
(lief. para. 20.) 2. Make squad charge short distance. Repeat occasion- ally during all lessons.
1st prac- tice. (In class by word of command.) 1. Teach “long point” and “withdraw.” 2. Two or more “long points,” withdrawing after each.
2nd prac- tice. (Class working by eye.) I. Pointing at hand of opposite man in various positions.
(Kef. para 20.) 2. Pointing when advancing with right foot. 3. Point from “on guard,” followed by point when advancing with right foot. 4. Pointing at ball of paper on stick.
3rd prac- tice. (Pointing at dummy.) 1. Pointing and withdrawing at extreme range of bayonet. 2. Pointing and withdrawing when advancing. 3. Pointing at two or more dummies.
Lesson 2.
1. Explain value of parries.
Асе*1™*' c'asS by word of command.)
1. Teach right and left parries.
2. Right and left parries followed by point.
19
(Class working by eye.) »nd prae.
1. Parry stick pointed breast high. (Ice.
2. Parry stick, breast high, and point at named target.
3. Parry stick low or high.
4. Parry stick low or high, and point at named target.
5. When advancing, parry stick and point at dummy.
G. Parry point made with stick by advancing opponent.
Lesson 3.
I. Demonstrate “short point” and explain when it is
used.
(In class by word of command.) I’t prae-
1. “ Short point ” from “ on guard.” *lcc‘
2. “Short points” varied witli “long points.”
(Class working by eye.) Sndprae-
1. “ Short point ” at hand. * ce>
2. “ Short points” varied with “long points” at hand.
3. “Long point” from “on guard,” and “short point”
when advancing right foot, at hand.
4. “Long” and “short points" at paper ball on stick.
(Pointing at dummy.) 3rd prae-
L “Short point” at dummy and withdrawal from ,,ce‘
stationary position.
2. “ Short point ” when advancing.
3. “Long” and “short point” at dummy when ad-
vancing.
4. “Long” and “ short points” at two or more dummies
when advancing.
Lesson 4.
1. Demonstrate “ jab” into dummy and explain vhen
used, &c.
(In class by word of command.) 1st prac-
1. “Jab” from “short point.” Utc‘
20
2. “Jab ” from “ long point.”
3. “ Long point,” “ short point,” and “ jab.”
4. “ Short point,” “jab,” and “long point.”
2nd prac- (Class working by eye.)
ct‘ 1. “Jab,” “short point,” and “long point” varied at
paper ball.
3rd prac- (Pointing at dummy.)
1. Standing, “jab” at dummy.
2. Standing, “jab” from “short point” at duiumy.
3. Standing, “long point,” “short point,” and “jab”
at dummy.
4. Advancing, “long point” and “jab,” “short point”
and “jab” at dummy.
5. Advancing, “ long and short point ” and two or
more “jabs ” at dummy.
6. Advancing, “ long and short points” and “jabs” in
varying order at two or more dummies.
Lesson 5.
1. Methods of disabling opponent by means of the butt,
&e. Occasion when used.
tstprac- (Tn class by word of command.)
l,cc’ 1. Class to practise butt stroke.
2nd prac- (At target.)
Utc- 1. Practise butt strokes at paper balls.
2. The “trip” practised by men working in pairs.
^prac- (On dummy.)
1. Butt strokes on light dummies.
2. Points, “jab” at dummies, butt strokes at light
dummies.
Plate I. “Ox Guard.®
Plate IL “ Loss Point.'
Plate Ш. “Withdraw.'’ Practice 3. Lesson 1.
Plate IV. “ Short Point.'
Plate V.
The Jab.’
Plate VI. “The Jab?