/


Теги: magazine magazine fabric vine
Год: 2016


Текст
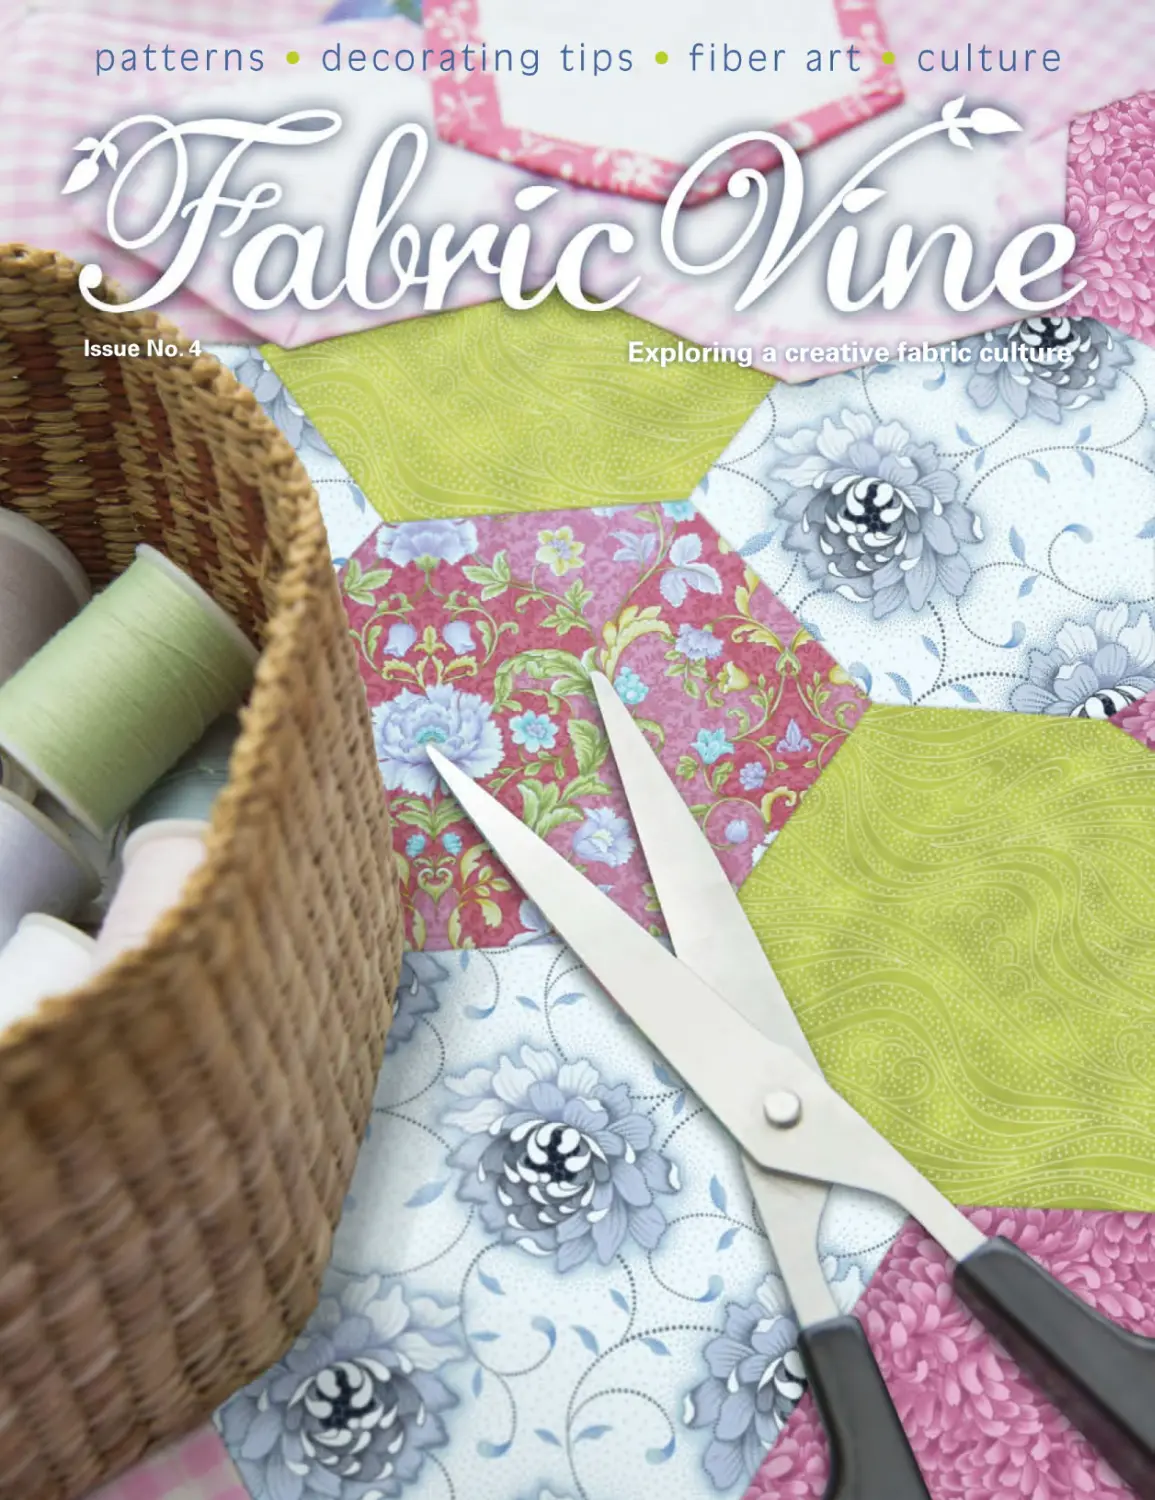
                    patterns • decorating tips • fiber art • culture

Issue No. 4

Exploring a creative fabric culture

click quilt for
free pattern
download

Grace

Color
Movement
In stores now

contents

Vol 1 Issue 4

Spectrum Bed Quilt

quilts

A honeycomb effect against the neutral background creates a bed quilt with pillow tuck 10

Pillows Galore
A collection of pillows inspired by other
projects in this issue

21

Winter Flowers Wall Quilt
Uplift your spirits by making and displaying
the beauty of these winter flowers

29

Graceful Flight Lap Quilt
The cranes captured in the these blocks are
a favorite subject in many Asian arts

44

Year of the Monkey
Table/Wall Quilt
2016 is the Year of the Monkey, honor your
year by displaying the year’s lucky colors

Year of the Monkey Hot Pads
Burst of Color Placemat
& Table Runner
A dramatic burst of color dazzingly
displayed against a dark background

55
59

96

I Love You This MUCH!
Bib & Apron
Mommy’s little helper will look adorable
wearing this apron

103

Special thanks to:

Used exclusively and
recommended by Asian Fabric™

6 fabric vine 2016

features
Trellis Gate Wine
Quiltcon
Presented by The Modern Quilt Guild

74
87

departments
Publisher’s Note

8

How To Use the Magazine

9

Book Review
Kraft•tex Style: Compiled by Roxane Cerda

Food
Red Velvet Cupcakes

38
66

Travel
Pasadena: The City of Roses
(and Modern Quilters)

76

General Instructions

114

Guess Who
is in the
Wine Business?
Here’s a hint...
He has been bringing you
beautiful fabric for over 20
years. See page 74 to
find out more.
2016 fabric vine 7

publisher’s note

Let’s see a show of
hands. How many of you
enjoy moving a home or
a business? Just what I
thought… only one out of
ten. The only thing about
moving that I may like is that
it forces you to go through
years of accumulation and
decide what you really really
need to keep. How people
can downsize to the point
where they can move into
the tiny houses I see on TV is Above: Ollie Lama and Isaac Mewton… New fans of Kona Bay—join us for
fan fun on Facebook!
beyond me.
Kona Bay Fabrics and Fabric
gorgeous fabrics designed to inspire quilters and
Vine magazine are in the process of moving
sewists around the globe. If you haven’t visited
from Redmond, WA to about three miles away
our site recently, stop by www.konabay.com.
in Sammamish, WA. These days, we only have
Our latest releases now featured on our web
offices to move as our fabric shipping operation
site are:
is a joint venture with Clothworks and In the
• Nobu Fujiyama’s FUJI MOON (release date
Beginning. Collectively, our fabric is warehoused
is May)
in Seattle, WA.
• KOI GATHERING –our first ever digital print
Another possible upside is that I’ll start out
(release date is April)
freshly organized and situated, yet again. Let’s
• PETALS tonal group (release date is April)
see how long that lasts before the hoarding
• BAROQUE tonal group (release date is April)
syndrome kicks into play. I’m sure I inherited
We’re proud to offer you a variety of amazing
that gene from my dear Mom.
projects by our ever talented designer, Georgie
Kona Bay Fabrics started in 1991 in beautiful
Gerl. I have no doubt you’ll find several to add to
scenic Honolulu, Hawaii. By 1992, I realized I
your to-do list.
couldn’t get the UPS trucks to drive across the
Thank you very much for your patience while
Pacific Ocean so we moved our warehouse to Las
we move and although I was tempted to reach
Vegas. In 1994, we moved to the gorgeous Pacific
out to everyone for their help in packing and
Northwest. It wasn’t too long after that our
unpacking, I decided to keep you as our friend
offices and admin people moved to Redmond as
and supporter instead.
well to join our warehouse staff.
Mahalo and Aloha! Please enjoy our latest
Please know that our phone and fax numbers
issue of Fabric Vine magazine.
remain the same as well as our email—
konabay@konabay.com.
Our new mailing address is now 4630 E. Lake
Sammamish Parkway NE, Sammamish, WA
Da Textile Samurai aka the Wine Eagle
98074. Please remember, we are a wholesale
Publisher • douglas@konabay.com
office and not a retail store.
http://www.facebook.com/pages/Kona-Bay-Fabrics-SeattleAfter the move is completed, it’s business
Bay-Fabrics-and-Asian-Fabric-Magazine/106593046936?ref=ts
as usual where we will continue to develop

8 fabric vine 2016

Make the most of Fabric Vine
patterns • decorating tips • fiber art • culture

Issue #4 2016 • VOL 1 ISSUE 4

Quilting and design ideas for inspired minds

Issue No. 2

Publisher
douglas Eagleson
Quilt designer & EDITOR
Georgie Gerl ggerldesigner@
comcast.net
Facebook: Georgie Gerl Designer

SPECIAL CONTRIBUTORs
bakedbree.com
ASSISTANTS TO PUBLISHER
urai

The Textile Sam

is making wine!

Doris Eagleson 1923–2010
Cheryl Hamai
Brittany Eagleson

Subscriptions

pg 10

Kona Bay Fabrics
www.konabay.com
4630 E Lake Sammamish Parkway NE
Sammamish, WA 98074

advertising and
editorial inquiries

Share it with a
friend
1. Click here and
choose a method to
share.
2. Follow prompts.

Use the easy links
As you scroll over a
page, active links will
be highlighted in blue.
This enables you to
connect to additional
pages and download
additional patterns.

Print pages
You must log in and download
the publication before you are
able to print.
1. Click Share and then choose
the light gray Download link
below.
2. Open the .pdf to view and
print pages as you wish.

Eagle Publishing
www.PublishingPeople.com
328 E. Indiana Ave
Spokane, WA 99207
866-638-1115
Editor and associate publisher
Vicki Dar nwwoman@mac.com
graphic design
www.tyann.portfoliobox.me

Kona Bay Fabrics © 2016

Subscribe for FREE—
It’s easy!
1. Go to www.konabay.com
2. Click on “Subscribe”
3. Complete the information

Fabric Vine™ is produced six times a year
by Eagle Publishing for Kona Bay Fabrics.
The magazine accepts no responsibility for
unsolicited manuscripts or artwork; they
will not be returned unless accompanied
by a stamped, self-addressed envelope. ©
Kona Bay Fabrics. All rights reserved. No
piece, in part or full, may be reproduced
without permission.

2016 fabric vine 9

92” x 114”
Bed Quilt with pillow tuck

Spectrum
Bed Quilt
Designer: Georgie Gerl
Intertwining bands of colors form
a honeycomb effect against this
neutral background to create a bed
quilt with a pillow tuck.

Spectrum Bed Quilt Cutting Chart & Material List

Spectrum Bed Quilt
(with a pillow tuck)
92” x 114”

material list

Read Let’s Begin purchasing
fabric tip before buying and
cutting Fabrics B, C, D, E, and F.

Backing !)4 yards
Batting !))" x !@@"

Extra fabric may be needed for
“Fussy Cut" pieces; amount varies
depending on motif selection and
fabric repeat.

Cut strips as indicated in chart
then cut smaller pieces listed
from these strips

Fabric Name, Placement & Yardage

First Cuts

%
Fabric F
GRAC-01 Red
Small Accent Squares

Next Cuts

@2" x $@" *) @2" squares

s yard
Fabric G
TONE-06 Forest
Block Border

Fabric Name, Placement & Yardage

Fabric A
GRAC-03 Cream
Background

$s yards

First Cuts
$
%
^
#)

%2" x $@"
%" x $@"
$2" x $@"
@2" x $@"

!@
$)
#*
!$
*)
* Cut once $
diagonally. !*
$

Next Cuts
%2" x !#2"
%" squares*
$2" x %2"
@2" x !#2"
@2" x (2"
@2" x ^2"
@2" x %2"
@2" x $2"

$ (2" squares “Fussy Cut”
Fabric B
GRAC-01 Blue
Block Center 2-w yard
!) (2" squares “Fussy Cut”
Fabric C
GRAC-02 Blue
Block Center !-!2 yards
^ (2" squares “Fussy Cut”
Fabric D
GRAC-03 Blue
Block Center w-!4 yards
#! %2" squares “Fussy Cut”
Fabric E
GRAC-03 Red
Medium Accent Squares !-!2 yards

12 fabric vine 2016

d yard

!
$

$8" squares**
@2" x &2"
@2" x %2
@2" squares

!
$

$8" squares**
@2" x &2"
@2" x %2
@2" squares

$8" x $@" *
@2" x $@" *
*
** Cut twice diagonally. *

$8" x $@" *
@2" x $@" @
!$
** Cut twice diagonally. !$

Fabric J
TONE-06 Gold
Block Border

s yard

@
%

$8" x $@" !@ $8" squares**
@2" x $@" !% @2" x &2"
( @2" x %2
** Cut twice diagonally. ( @2" squares

Fabric I
GRAC-04 Red
Block Border

s yard

$8" x $@" !@ $8" squares**
@2" x $@" @$ @2" x &2"

** Cut twice diagonally.

Fabric H
TONE-01 Blue
Block Border

d yard

@
%

Fabric K
GRAC-04 Purple
Border

#*

# yards
Fabric L
!!
TONE-06 Blue
Binding !8 yards

@2" x $@" ^@ @2" x &2"
!* @2" x $2
!&* @2" squares

@w" x $@"

Let’s Begin
Before you begin read all instructions.
Referring to project Cutting Chart, cut
First Cuts strips as indicated in chart
then cut smaller pieces listed under Next
Cuts from these strips. Refer to General
Instructions (pages 114-115) for Accurate
Seam Allowances and Assembly Line Method
to construct this quilt. Use a 4”-wide seam
allowance throughout this project. Press
seams in direction of arrows as indicated in
each diagram.

To make it easier to determine how much
fabric you will need for “Fussy Cutting”
here’s a simple tool. Trace and cut from clear
template plastic a (2” and %2” squares. Open
fabric so right side of fabric is showing. Using
the appropriate template square determine
which elements you want feature in your
quilt. Make sure you allow for the quantity
of squares needed for that particular fabric.
Normally Georgie will cut one or two extra
squares to be able to play with placement
when laying out the quilt.

2.		Sew two Fabric H triangles to one @2”
Fabric F square as shown. Press. Sew one
Fabric A large triangle to unit from this step.
Press. Make twenty-four and label Unit 2.
Square unit to measure $2”.
@2”

@2”
Unit 2

Make 24
Square to $2”

3.		Sew two Fabric I triangles to one @2”
Fabric F square as shown. Press. Sew one
Fabric A large triangle to unit from this step.
Press. Make sixteen and label Unit 3. Square
unit to measure $2”.
@2”

@2”
Unit 3

Making the Quilt

1.		Sew two Fabric G triangles to one @2”
Fabric F square as shown. Press. Sew one
Fabric A large triangle to unit from this step.
Press. Make twenty-four and label Unit 1.
Square unit to measure $2”.
@2”

Make 16
Square to $2”

4.		Sew two Fabric J triangles to one @2”
Fabric F square as shown. Press. Sew one
Fabric A large triangle to unit from this step.
Press. Make sixteen and label Unit 4.
@2”

@2”
Unit 1

@2”
Unit 4

Make 24
Square to $2”
Make 16
Square to $2”

2016 fabric vine 13

5.		 Sew one @2” x $2” Fabric A strip to one
Unit 1 as shown. Press. Sew one @2” x ^2”
Fabric A strip to unit from this step. Press.
Make two, one of each variation.
$2”

8.		 Sew one @2” x %2” Fabric A strip to one
@2” Fabric K square as shown. Press. Make
eighteen.
@2”

@2”

Make 18

9.		Sew one
&2”unit from this step
&2” to one @2” x
&2” Fabric G strip. Press. Make seven.

Make 2
@2”

@2”

%2”

&2”
@2”

@2”

Make 2

^2”

@2”

Make 2

^2”

@2”
Make 7

6.		 Sew one @2” x $2” Fabric A strip to one
Unit 2 as shown. Press. Sew one @2” x ^2”
Fabric A strip to unit from this step. Press.
Make two, one of each variation.

10.		 Sew one @2” x $2” Fabric K strip to one
unit from step 9 as shown. Press. Make seven.
@2”

$2”

$2”

@2”

Make 7

11. Sew one unit from step 10 to one Unit 5
as shown. Press. Make seven and label Unit 6.

Make 2
@2”

Unit 6

@2”
^2”

^2”

7.		 Refer to General Instructions (page 114)
for Simple Triangles technique. Draw a
diagonal line on the wrong side of two @2”
Fabric K squares. This will be your sewing
line. Place two marked squares on one @2” x
(2” Fabric A piece as shown. Stitch on drawn
line, trim 4” away from stitch lines and press.
Make eighty.
Unit 5

Fabric K- @2” squares
Fabric A- @2””” x (2”””
Make *)

14 fabric vine 2016

Make 7

12.		 Sew one unit from step 8 to one @2” x &2”
Fabric H strip. Press. Make seven.
&2”

@2”
Make 7

13.		 Sew one @2” x $2” Fabric K strip to one
unit from step 12 as shown. Press. Make
seven.
@2”

$2”

17.		Sew one unit from step 8 to one @2” x
&2” Fabric J strip as shown. Press. Sew one
@2” x $2” Fabric K strip to unit from this step.
Press. Make two.
&2”

@2”

$2”

@2”

Make 7

14. Sew one unit from step 13 to one Unit 5
as shown. Press. Make seven and label Unit 7.
Unit 7

Make 2

Make 2

18.		Sew one unit from step 17 to one Unit 5
as shown. Press. Make two and label Unit 9.
Unit 9

Make 7

15.		 Sew one unit from step 8 to one @2” x &2”
Fabric I strip as shown. Press. Make two.
@2”

&2”

$2”
@2”
Make 2

Make 2

16. Sew one unit from step 15 to one Unit 5
as shown. Press. Make two and label Unit 8.

Make 2

19.		 Sew one $2” x %2” Fabric A piece between
one Unit 1 and one Unit 2 as shown. Press.
Sew @2” x !#2” Fabric A strip to unit from
this step as shown. Press. Make three and
label Unit 10.
Unit 1

%2”

Unit 2

$2”

Unit 8

Unit 10
!#2”
@2”
Make 2

Make 3

2016 fabric vine 15

20.		 Sew one $2” x %2” Fabric A piece
between one Unit 2 and one Unit 1 as shown.
Press. Sew @2” x !#2” Fabric A strip to unit
from this step as shown. Press. Make three
and label Unit 11.
Unit 2

%2”

Unit 1

$2”

22.		 Sew one $2” x %2” Fabric A piece
between one Unit 2 and one Unit 4 as shown.
Press. Make eight and label Unit 14. Sew one
$2” x %2” Fabric A piece between one Unit 4
and one Unit 2 as shown. Press. Make eight
and label Unit 15.
Unit 14

Unit 2

%2”

Unit 4

$2”
Unit 11
!#2”
@2”

Make 8
Unit 4

Unit 15
%2”

Unit 2
$2”

Make 3

21.		 Sew one $2” x %2” Fabric A piece
between one Unit 3 and one Unit 1 as shown.
Press. Make eight and label Unit 12. Sew one
$2” x %2” Fabric A piece between one Unit 1
and one Unit 3 as shown. Press. Make eight
and label Unit 13.
Unit 12

Unit 3

%2”

Unit 1

Make 8

23.		 Sew one %2” Fabric E square to one @2” x
%2” Fabric H strip as shown. Press. Sew this
unit to one @2” x &2” Fabric K strip. Press.
Sew one @2” x &2” Fabric G strip to unit as
shown. Press. Make nine.
%2”

@2”

%2”

$2”
&2”

Make 8

@2”

Unit 13
Unit 1

%2”

Unit 3
&2”
$2”

Make 8

16 fabric vine 2016

@2”
Make 9

24.		 Sew one @2” x &2” Fabric K strip to one
@2” Fabric H square as shown. Press. Sew
this unit to one unit from step 23. Press. Sew
unit from this step between two of Unit 5 as
shown. Press. Make nine and label Block 1.
&2”

@2”

26.		 Sew one @2” x &2” Fabric K strip to one
@2” Fabric I square, as shown. Press. Sew
this unit to one unit from step 25. Press. Sew
unit from this step between two of Unit 5 as
shown. Press. Make eight and label Block 2.
&2”

@2”

@2”

@2”

Block 1

Block 2

Make 9

Make 8

25.		 Sew one %2” Fabric E square to one @2”
x %2” Fabric I strip as shown. Press. Sew this
unit to one @2” x &2” Fabric K strip. Press.
Sew one @2” x &2” Fabric G strip to unit as
shown. Press. Make eight.
%2”

@2”

27.		 Sew one %2” Fabric E square to one @2”
x %2” Fabric J strip as shown. Press. Sew this
unit to one @2” x &2” Fabric K strip. Press.
Sew one @2” x &2” Fabric H strip to unit as
shown. Press. Make eight.
%2”

@2”

%2”

&2”

%2”

&2”

@2”

@2”

&2”
@2”

&2”
@2”

Make 8

Make 8

2016 fabric vine 17

28.		 Sew one @2” x &2” Fabric K strip to one
@2” Fabric J square, as shown. Press. Sew
this unit to one unit from step 27. Press. Sew
unit from this step between two of Unit 5 as
shown. Press. Make eight and label Block 3.
&2”

@2”

29.		 Sew one %2” Fabric E square to one @2”
x %2” Fabric J strip as shown. Press. Sew this
unit to one @2” x &2” Fabric K strip. Press.
Sew one @2” x &2” Fabric I strip to unit as
shown. Press. Make six.
%2”

@2”

@2”
%2”
Block 3
&2”

@2”

&2”
@2”
Make 8

Make 6

30.		 Sew one @2” x &2” Fabric K strip to one
@2” Fabric J square, as shown. Press. Sew
this unit to one unit from step 29. Press. Sew
unit from this step between two of Unit 5 as
shown. Press. Make six and label Block 4.
&2”

@2”

@2”

Block 4

Make 6

92” x 114”
Bed Quilt with pillow tuck

18 fabric vine 2016

31.		 Arrange and sew together one unit from step 5, two of Unit 6, two of Unit 10, two of Unit 7, one Unit
11, and one unit from step 6. Press, and label Row 1.
step 5

Unit 6

Unit 10

Unit 7

Unit 11

Unit 6

Unit 10

Unit 7

step 6

Row 1

32.		Arrange and sew together, one of Unit 6, two (2” Fabric C squares, three of Block 1, two (2” Fabric
D squares, and one Unit 7 as shown. Press. Make three, and label Rows 2, 6, and 10.

Unit 6

(2”

Block 1

(2”

Block 1

(2”

Block 1

(2”

Unit 7

(2”

Make 3 and label Rows 2, 6 & 10

33.		 Arrange and sew together, two @2” x !#2” Fabric A strips, two of Unit 12, two of Block 2, two of Unit
13, three %2” x !#2” Fabric A strips, two of Unit 15, two of Unit 14, and two of Block 3 as shown. Press.
Make two and label Rows 3 and 7.

@2” Unit 12

Block 2

Unit 13

%21”

Unit 15

Block 3

Unit 14

%2” Unit 12

Block 2

Unit 13

%21” Unit 15

Block 3

Unit 14 @2”

1!#2”

Make 2 and label Rows 3 & 7

34.		Arrange and sew together, one of Unit 8, two (2” Fabric B squares, three of Block 4, two (2” Fabric
C squares, and one Unit 9 as shown. Press. Make two, and label Rows 4 and 8.

Unit 8

(2”

Block 4

(2”

Block 4

(2”

Block 4

(2”

Unit 9

(2”

Make 2 and label Rows 4 & 8

2016 fabric vine 19

35.		Arrange and sew together, two @2” x !#2” Fabric A strips, two of Unit 13, two of Block 2, two of Unit
12, three %2” x !#2” Fabric A strips, two of Unit 14, two of Unit 15, and two of Block 3 as shown. Press.
Make two and label Rows 5 and 9.

@2” Unit 13

Block 2

Unit 12

%21” Unit 14

Block 3

Unit 15

%21” Unit 13

Block 2

Unit 12

%21” Unit 14

Block 3

Unit 15 @2”

1!#2”

Make2 and label Rows 5 & 9

36.		Arrange and sew together, one unit from step 5, two of Unit 6, two of Unit 11, two of Unit 7, one Unit
10, and one unit from step 6 as shown. Press and label Row 11.
step 5

Unit 6

Unit 11

Unit 7

Unit 10

Unit 6

Unit 11

Unit 7

step 6

Row 11

37.		Referring to layout arrange and sew together Rows 1-11. Press.

38.		Sew @2” x $@” Fabric K strips end-to-end to make one continuous @2”-wide Fabric K strip. Press.
Measure quilt from side to side. Cut two @2”-wide strips to this measurement. Sew to top, and bottom of
quilt. Press seams toward border.
39.		Measure quilt through center from top to bottom, including borders just added. Cut two @2”-wide
Fabric K strips to that measurement. Sew to sides of quilt and press.

Finishing the Quilt

1.		 Cut backing fabric piece into three equal pieces. Sew pieces together to make one !@)” x !@#” approximate
backing piece. Press and trim backing to measure !))” x 1!@#”.

2.		 Press backing and quilt top trimming all excess threads. Refer to General Instructions (pages 114–115)
for Finishing the Quilt. Layer and baste backing, batting, and quilt top together. Hand or machine quilt as
desired. Refer to Binding the Quilt and bind as desired.

20 fabric vine 2016

Designer: Georgie Gerl
Pillows adorn beds, chairs, sofas and even
larger size pillows are great for extra
seating on the floor. This collection of
pillows was inspired from other projects in
this issue and can easily be made in colors
to fit your decorating style.

2016 fabric vine 00

Let’s Begin
Before you begin select the pillow and read all instructions. Pre-purchase pillow forms are
used but if you can’t find the desired size then read Making the Pillow Form tip (page 28)
to make one in the size needed. Refer to the Finishing the Pillow tip (page 28) to complete
project. Use a 4”-wide seam allowance and press seams in the direction of arrows as indicated
in each diagram.
Pillows Galore: Graceful Flight
Boudoir Pillow
1!@" x !^"

Boudoir Pillow Form

Batting & Lining
16" x 20" for each

Graceful Flight Boudoir Pillow

1.		Arrange and sew together one @” x ^2”
Fabric F strip, one !4” x ^2” Fabric E strip, one
@” x ^2” Fabric D strip, one !4” x ^2” Fabric C
strip, and one @” x ^2” Fabric B strip as shown.
Press. Make two.
^2”

@”

Lining will not show

Fabric

!4”

Cuts

Fabric A
@
SOAR-04 Black
Feature Fat Eighth

^2" squares

@
Fabric B
EXOT-06 Tan
Accent Fat Eighth

@" x ^2"

@”
!4”
@”
Make 2

@ !4" x ^2"
Fabric C
EXOT-06 Gold
Accent Fat Eighth
@ @" x ^2"
Fabric D
TONE-02 Cream
Accent Fat Eighth
Fabric E
BCAR-06 Black

@
@
Accent & Backing @
2 yard

!!" x !@2"
@2" x !@2"
!4" x ^2"

@ @" x ^2"
Fabric F
TONE-06 Taupe
Accent Fat Eighth

22 fabric vine 2016

2.		Sew one ^2” Fabric A square to one unit
from step 1 as shown. Press Make two. Note:
One row will be turned 1800 during the block
construction. If using directional fabric, adjust
Fabric B motif direction prior to sewing.
^2”
^2”

Make 2

3.		Sew units from step 2 together as shown.
Press. Sew this unit between two @2” x !@2”
Fabric E strip as shown. Press.

@2”

4.		Referring to Making a Pillow Form and
Finishing the Pillow on page 28, use !!” x
!@2” Fabric E backing pieces to complete
pillow.

@2”

!@2”

Pillows Galore: Year of the Monkey
!*” square or
!$” square with a
@”pillow flange
Batting & Pillow
Lining 22" x 22"

of each

18” or 14” Pillow Form
Lining will not show

Fabric
Fabric A
SOAR-03 Indigo
Background

Cuts
@
@

^” squares
@2” x &2”

Fat Quarter
Fabric B
EXOT-06 Blue
Background

@
@
$

^” squares
@2” x ^2”
!2” squares

@
@
@
$
$

!@” x !*2”
@2” x !*2”
@2” x !$2”
!2” x ^2”
!2” x %2”

BFat Quarter
Fabric C
TONE-02 Cream
Borders &
Backing

w yard

Year of the Monkey Pillow
1.		Refer to General Instructions (pages 114)
for Half-Square Triangles. Draw a diagonal line
on one ^” Fabric B square. Place marked square
and one ^” Fabric A square right sides together.
Sew a scant 4” away from drawn line on both
sides, cut on drawn line, and press. Make two.
Trim squares to %2” to make four half-square
triangle units.

Fabric B- ^””” square
Fabric A-”” ^””” square
Make @

Square to %2”””
Make $
Half-square Triangles Units

2.		Sew one unit from step 1 to one !2” x %2”
Fabric C strip. Sew this unit to one !2” x ^2”
Fabric C strip as shown. Press. Make two.
!2”

%2”

^2”
!2”

Make 2
2016 fabric vine 23

3.		 Sew one unit from step 1 to one !2” x %2”
Fabric C strip. Press. Sew this unit to one !2” x
^2” Fabric C strip as shown. Press. Make two.
%2”

!2”

6.		 Sew unit from step 5 between two units
from step 4 as shown. Press.

^2”
!2”
Make 2

4.		 Sew one @2” x ^2” Fabric B strip between
one unit from step 2 and one unit from step
3 as shown. Press. Make two.
@2”

^2”

7.		Sew unit from step 6 between two @2”
x !$2” Fabric C strips. Press seams toward
Fabric C. Sew this unit between two @2” x
!*2” Fabric C strips. Press.
@2”

@2”

Make 2

5.		Refer to General Instructions (page 114)
for Simple Triangles technique. Draw a
diagonal line on the wrong side of two !2”
Fabric B squares. This will be your sewing line.
Place one marked square on one @2” x &2”
Fabric A piece as shown. Stitch on drawn line,
trim 4” away from stitch lines and press. Sew
remaining marked square to piece as shown.
Trim and press. Make two. Sew these two units
together as shown. Press seams open.
Fabric B- !2” square
Fabric A-”” @2””” x &2”””
Make @
Press seam open

24 fabric vine 2016

!*2”

8.		Referring to Making a Pillow Form and
Finishing the Pillow on page 28, use !@” x
!*2” Fabric E backing pieces to complete
pillow.

Pillows Galore: Burst of Color
1!*" square

Batting & Pillow
Lining 22" x 22" of each

Pillow Form !*" square
Lining will not show

Fabric
Fabric A
FLIG-11 Black
Center 4 yard

Cuts
#

$2" squares*

@ !2" x !@2"
Fabric C
BUBB-01 Orange
Accent Border 8 yard
@
@

@
@
Border & Backing @

Fabric B- @2” squares
Fabric A- $2” square
Make #

2.		Sew three units from step 1 together as
shown. Press.

@" x !@2"
@" x (2"

Fabric E
@ !2" x !%2"
RAIN-22 Red
Accent Border 8 yard
Fabric F
Solid Black

1.		Refer to General Instructions (pages 114) for
Simple Triangles technique. Draw a diagonal line
on the wrong side of four @2” Fabric B squares.
This will be your sewing line. Place two marked
squares on one $2” Fabric A square as shown.
Stitch on drawn line, trim 4” away from stitch
lines and press. Sew remaining marked square to
piece as shown. Trim and press. Make three.

*Fussy Cut

!@ @2" squares
Fabric B
BUBB-01 Blue
Background 6 yard

Fabric D
BCAR-06 Purple
Border 4 yard

Burst of Color Pillow

3.		Sew one unit from step 2 between two !2”
x !@2” Fabric C strips as shown. Press.
!@2”

!2”

!@" x !*2"
$" x !%2"
@" x !*2"

!2”

q yard

4.		 Sew one unit from step 3 between two @” x
!@2” Fabric D strips. Press seams toward Fabric
D. Sew this unit between two @” x (2” Fabric D
strips as shown. Press.
@”

@”

(2”

2016 fabric vine 25

5.		Sew unit from step 4 between two !2” x
!%2” Fabric E strips as shown. Press. Make two.
!%2”

!2”

6.		Sew unit from step 5 between two $” x
!%2” Fabric F pieces as shown. Press.
!%2”

$”

!2”

$”

7.		Sew unit from step 6 between two @” x
!*2” Fabric F strips as shown. Press.
@”

@”

!*2”

8.		Referring to Making a Pillow Form and
Finishing the Pillow on page 28, use !@” x
!*2” Fabric E backing pieces to complete
pillow.

26 fabric vine 2016

Pillows Galore: Flower Pillow
!^2” square

Batting &
Lining 20" x 20"
of each
Pillow Form !^" square

Flower Pillow
1.		 Sew one !” x !#” Fabric B strip to one !” x
@” Fabric C piece as shown. Press. Sew one @”
x !$2” Fabric C strip to unit from this step as
shown. Press.
!#”

@”

!”

Lining will not show

!$2”

Fabric
Fabric A
GRAC-02 Red
Center

Cuts
!

!@2" square
“Fussy Cut”

2 yard
Fabric B
TONE-06 Gold

Fat Eighth
Fabric C
GRAC-04 Red
Border

q yard

!
!
!
!

!2" square
!" x !#"
!" x !@"
!" x @"

@
!
!
!
!
!
!
!
@

!!" x !^2"
@2" x !$2"
@2" x !@2"
@2" x !2"
@" x !$2"
@" x !#2"
@" x !2"
!2" square
!" x @"

@”

2.		Sew one !@2” Fabric A square to one @2”
x !@2” Fabric C strip as shown. Press.
!@2”

!@2”

@2”

3.		Sew unit from step 2 between one @2” x
!$2” Fabric C strip and unit from step 1 as
shown. Press.
@2”

!$2”

2016 fabric vine 27

4.		 Sew one !” x @” Fabric C piece to one !” x
!@” Fabric B strip as shown. Press. Sew one @”
x !#2” Fabric C piece to unit from this step.
Press.
@”

!@”

!”

!#2”
@”

5.		Sew one @” x !2” Fabric C piece to one
!” x @” Fabric B piece as shown. Press. Sew
one !2” Fabric C square to one !2” Fabric B
square. Press. Sew units from this step to one
@2” x !2” Fabric C piece as shown. Press.
!2”

!2”

@”

@2”

!”

6.		Sew unit from step 4 to unit from step 5
as shown. Press.
7.		Sew unit from step 6 to unit from step 3
as shown. Press.

8.		Referring to Making a Pillow Form and
Finishing the Pillow on page 28, use !!” x
!^2” Fabric E backing pieces to complete
pillow.

28 fabric vine 2016

Making a Pillow Form
Measure pillow top prior to quilting and
cut two pieces of fabric to this measurement.
Using 4”-wide seam sew around all edges
leaving a 4” opening for turning. Stuff pillow
to desired fullness with polyester fiberfill.
Hand stitch opening closed.

Finishing the Pillows

1.		Layer batting between pillow top and
lining piece wrong side of fabric against
batting. Hand or machine quilt as desired.
Trim batting and lining even with pillow top.

2.		On one long edge of backing piece fold
under 4” to the wrong side and press. Turn
under an additional 4” and press. Stitch along
folded edge. Repeat for other backing piece.

3.		Place quilted pillow top and two backing
pieces right sides together matching raw
edges and overlapping backing pieces
(finished hem edges toward center) Using
a 4” wide seam sew around all edges, clip
corners and turn right side out. Press. Insert
pillow form.

Designer: Georgie Gerl

The weather bringing your spirits down, uplift them by
making and displaying the beauty of these winter flowers.
Don’t forget if you want some sparkle and twinkle to your
piece add crystals and beadwork to the flowers for a little
spark or for a striking statement incorporate these elements
in the quilted background area.
2016 fabric vine 00

Winter Flowers Wall Quilt Cutting Chart & Material List
Winter Flowers
Wall Quilt
22" x 28"

material list
Appliqué Fabric Assorted Scraps
Lightweight Fusible Web ! yard
Stabilizer ! yard
Backing ! yard
Batting @^”x #@”

First Cuts

Fabric Name, Placement & Yardage

!
Fabric A
TONE-07 Charcoal $
Background

Next Cuts

!%" x @!"
@w" x $@" (Binding)

!
@

6 yard

Fabric C
TONE-06 Red
Accent Border

!
@

6 yard

Fabric D
GRAC-03 Cream
Border 8 yard

30 fabric vine 2016

Fabric E
TONE-06 Gold
Accent Border

Next Cuts

!

!2" x $@"

!
!

!2" x !(2"
!2" x !#2"

!

!2" x $@"

!
!

!2" x !(2"
!2" x !#2"

!

#2" x $@"

@

@" x $@"

!

!2" x $@"

@
@
@
@
@
@
@
$

#2" x ^2"
#2" x @2"
@" x !(2"
@" x !#2"
!2" x @2"
!2" x @"
!2" squares
!" x @"

8 yard

! yard
Fabric B
TONE-01 Red
Accent Border

First Cuts

Fabric Name, Placement & Yardage

@

!2" square
!
!" x $@"
!
!
!
!

!" x @)2"
!" x !*"
!" x !#2"
!" x !@"
!" x !2"

!2" square
!
!" x $@"
!
!
!
!

!" x @)2"
!" x !*"
!" x !#2"
!" x !@"
!" x !2"

@
@

!" x @!2"
!" x !$2"

!" x $@"

Fabric F
GRAC-04 Gold
Accent Border

8 yard
Fabric I
GRAC-03 Red
Outside Border

2 yard

Cut strips as indicated in chart then cut smaller pieces listed from
these strips

Let’s Begin
Before you begin read all instructions.
Referring to project Cutting Chart, cut
First Cuts strips as indicated in chart
then cut smaller pieces listed under Next
Cuts from these strips. Refer to General
Instructions (pages 114-115) for Accurate
Seam Allowances and Assembly Line Method
to construct this quilt. Use a 4”-wide seam
allowance throughout this project. Press
seams in direction of arrows as indicated in
each diagram.

Adding the Appliqué

The instructions given are for Quick Fused
Appliqué Method for other methods refer to
General Instructions (pages 114-115) for
Appliqué Technique. Note: It is recommended
to use removable stabilizer on the wrong side
of the fabric when machine appliquéing. This
will give stability to the piece, even stitching,
and prevent puckering of fabric. Appliqué
templates provided are reversed for the quick
fused method, if using a different method,
templates may need to be reversed back to
the finished quilt images. Option: This project
can use the raw edge appliqué method, if
using this method delete step 4 and wait
to stitch down appliqué edges during the
quilting process.

1.		To trace full size flower templates, align
straight and placement lines before tracing.
Page 34 shows both reduced-scale reverse
and finished quilt images. Trace all flowers,
leaves and stems patterns on pages 34–36 on
paper side of lightweight fusible web leaving
2” space between pieces. Cut approximately
4” away from trace line.

2.		With fusible web paper-side up, fuse
to wrong side of fabric scraps following
manufacturer’s instructions. Cut on traced
line.

3.		Refer to layout on page 30 to arrange
and fuse appliqués to 15” x 21” Fabric A
piece, centering design elements on fabric
(unit will be trim after all stitching has been
completed). Tip: For easy placement of
flowers on background fabric use an appliqué
pressing sheet (page 115) to make appliqué
units prior to fusing elements to background.

4.		Finish all appliqué edges with machine
satin stitch or decorative stitching as desired.
5.		After all stitching is complete remove
stabilizer and trim appliqué unit to measure
!#2” x !(2”.

Making The Quilt

1.		 Sew appliqué unit between one !” x 1!#2”
Fabric B strip (top) and one !” x !#2” Fabric
C strip (bottom). Press seams toward accent
border. Sew this unit between one !” x @)2”
Fabric C strip (left) and one !” x @)2” Fabric
B strip (right) as shown. Press.
!”

!”

@)2”

2016 fabric vine 31

2.		Sew unit from step 1 between two !” x !$2”
Fabric D strips. Press seam toward Fabric D. Sew
this unit between two !” x @!2” Fabric D strips as
shown. Press.
!”

!”

5.		 Sew one #2” x @2” Fabric I piece to Unit
1 from step 4 as shown. Press. Sew one #2”
x @2” Fabric I piece to Unit 2 from step 4.
Press.
@2”

Unit 1

#2”

@2”

Unit 2
#2”

@!2”
Make 2
one of each variation

3.		 Sew one !” x @” Fabric I piece to one !” x !@” Fabric
B strip as shown. Press and label Unit 1. Sew one !” x
@” Fabric I piece to one !” x !@” Fabric C strip. Press
and label Unit 2.

6.		 Sew unit from step 2 between Unit 1 (top)
and Unit 2 (bottom) from step 5 as shown.
Press.

Unit 1

@”

!@”

!”
Unit 2
@”

!@”
!”

Make 2
one of each variation

4. Sew Unit 1 from step 3 between one @” x !#2”
Fabric I strip and one !2” x !#2” Fabric E strip as
shown. Press and re-label Unit 1. Sew Unit 2 from
step 3 between one @” x !#2” Fabric D strip and one
!2” x !#2” Fabric F strip. Press and re-label Unit 2.
Unit 1

Unit 2

!#2”

!#2”

Make 2
one of each variation

@”

@”

!2”

!2”

7.		Sew one !” x @” Fabric I piece to one !” x
!*” Fabric B strip as shown. Press and label
Unit 3. Sew one !” x @” Fabric I piece to one
!” x !*” Fabric C strip. Press and label Unit 4.
Unit 3

@”

!*”

!”
Unit 4
@”

!*”
!”

Make 2
one of each variation

32 fabric vine 2016

8.		 Sew Unit 3 between one !2” x !(2” Fabric
E strip and one @” x !(2” Fabric I strip as
shown. Press. And re-label Unit 3. Sew Unit
4 between one !2” x !(2” Fabric F strip and
one @” x !(2” Fabric I strip as shown. Press
and re-label Unit 4.
Unit 3

11.		Sew one #2” x ^2” Fabric I piece to Unit 3
from step 8 and unit from step 9 as shown. Press,
and re-label Unit 3. Sew #2” x ^2” Fabric I piece
to Unit 4 from step 8 and unit from step 10. Press,
and re-label Unit 4.
^2”

Unit 3

#2”

!(2”

!2”
@”

^2”

#2”

Unit 4
!(2”
!2”
@”

9.		Sew one !” x !2” Fabric B piece to one
!2” x @” Fabric I piece as shown. Press. Sew
one !2” Fabric B square to one !2” Fabric I
square. Press. Arrange and sew units from this
step to one !2” x @2” Fabric I piece. Press.
!” @”

Make 2
one of each variation

12.		Sew unit from step 6 between Unit 4 from
step 11 (left) and Unit 3 (right) as shown. Press.

@2”

!2” !2”

!2”

Unit 4

!2”
!2”

10.		Sew one !” x !2” Fabric C piece to one
!2” x @” Fabric I piece as shown. Press. Sew
one !2” Fabric C square to one !2” Fabric I
square. Press. Arrange and sew units from
this step to one !2” x @2” Fabric I piece.
Press.
!” @”

@2”

!2” !2”

!2”

!2”
!2”

Finishing the Quilt
Press backing and quilt top trimming all
excess threads. Refer to General Instructions
(pages 115) for Finishing the Quilt. Layer and
baste backing, batting, and quilt top together.
Hand or machine quilt as desired. Refer to
Binding the Quilt and bind as desired.

2016 fabric vine 33

Trace Line
Placement Line

Appliqué Templates are reversed
for Quick-Fused Method
(shown below)

Pattern design image after being fused
to background fabric piece.

34 fabric vine 2016

Trace Line
Placement Line

2016 fabric vine 35

Trace Line
Placement Line

36 fabric vine 2016

SHAD-24 forest

JETS-01 teal

SHAD-12 teal

MOVE-01 teal

EXOT-06 teal

LAIR-04 teal

BCAR-06 teal

s
w

s Oranges
Red
Ye
2
llo
1
2

ens
Gre
3

Blues
Pu
4
rp
5

CONTENTS

SHAD-12 topaz
les

utrals Blacks
Ne
7
6

Blues
MIKO-03 blue

MOVE-01 topaz

LAIR-03 blue

BUBB-01 blue

MIDN-01 blue

MUMM-01 indigo

uar y 2015
Catalog • JanLAIR-05
blue

Kona Bay Fabrics
Tonal Collection
MOVE-01 sapphire

EXOT-06 blue

check it out here
00 fabric
vine 2015
EXOT-06
indigo

MOVE-01 lapis

BCAR-06 blue

RFOR-01 blue

• BOOK REVIEW •
Kraft• tex Style: Complied by
Roxane Cerda
by Vicki Dar

Have you ever looked longingly at the
photos of projects made of Kraft•tex? Or
maybe you’ve seen and touched a stylish
bag that started out as a roll of the material that, as they say, combines the best
of leather and fabric. Or maybe you’ve
never heard of Kraft•tex. Whichever the

formats—a roll, which measures 18-19”

case, invest a few minutes to read on.

x 54” and a bolt that runs 19” x 10 yards.

Kraft•tex Style shows you, step by

When you take the roll out of the wrap-

step, just how easy it is to create a small

per, it resembles a piece of rolled up cov-

arsenal of 27 sewn projects which this

er stock paper similar to the weight of

wonder material at their foundation.

light poster board. To imagine it morph-

The book will show you how to trans-

ing into a supple leather-like handbag,

form small pieces of fabric in your stash

a modern one-of-a-kind wallet or a host

into stylish and memorable gifts. It

of other creative ideas you’ll find in the

would also make a delightful last min-

book, is nearly impossible at this point.

ute gift itself. Valentine’s Day is right

It’s easy to find yourself smitten with

around the corner. Consider pairing it

this eco-friendly paper products cha-

with a roll of Kraft-tex and the recipient

meleon which can stand up as a viable

will be ready to begin a creative adven-

substitute for fabric, leather or vinyl.

ture in the new year.
A brilliant product distributed by C
& T Publishing, Kraft•tex is sold in two

As is the trend these days in project
books, a wealth of talent has been gathered to bring you a collective tornado
2016 fabric vine 39

not list. Kraft•tex is almost oddly indestructible. Instead, a battered piece tends
to take on a romantic patina, looking like
its fibers carry a story and history you
want to know better.
Kraft•tex is sold in several colors and
can be used in its natural, rigid form or
machine washed for a more malleable
feel. The texture of washed Kraft•tex
of creativity. Roxane Cerda, an Indiana

mimics what would be the marriage of

artist, spends her days as the Acquisitions

handmade paper and well loved leather.

Editor for Stash Books, a division of C & T

Not wanting to take away the enjoyment

Publishing. She has enthusiastically com-

of discovery, we won’t delve deeper into

piled the projects and their creators for

the long list of possible ways to transform

Kraft•tex Style. Roxane and the other 17

the material.

artists she has gathered, bring the perfect

After you’ve learned the many ways

variety of projects to the table. Whether

you can work with Kraft•tex, you’ll find

you have an hour or a day, follow along

five chapters of inspiration and know

and you’ll enjoy the satisfaction of com-

how—At Home, Bags, Accessorize, For Fun

pleting a useful and stylish project.

and, last but not least, Scraps & More. The

If this is your first foray into the

project range offers more variety than the

world of Kraft•tex, it’s unlikely it will be

simple chapter titles indicate. The range

your last.

of ideas is extensive.

The first several pages of Kraft•tex

At Home addresses both function and

Style focuses of what you can and can-

style as well as offering almost instant

not do with this innovative material.

gratification. Attractive storage solutions

The can do side far outnumbers the can

leap beyond function with customizable

40 fabric vine 2016

touches. An entire page is devoted to educating you on the formula to make the
box size of your choice. Hang onto this.
Once you’ve made one box, you’ll no doubt
want make more in the future.
Several different bag styles are featured in the next chapter. Cheryl Kuczek,
a designer who, resides in Seattle, and
has contributed to our magazine on several occasions is one of the featured artists. Her Saddlebag Purse is a fun useful
design and also shows how well Kraft•tex
responds to being painted.
The inspiration continues in the last
three chapters. Scraps & More shows you
how to use every last inch of your Kraft•tex
roll. Kraft•tex is easy to fall in love with
but Kraft•tex Style will insure your relationship with this unique product gets off
to a smooth and fail-proof start.
Look for Kraft•tex Style in your local
quilt shop. You can also buy the book or an
eBook version directly from C & T Publishing at ctpub.com. The book sells for $21.95
while the eBook goes for $14.99. You can
also purchase rolls and bolts at the site.

Entire collection also
available in Indigo colorway

click quilt for free pattern

Grace

eful Flight Lap Quilt

The soaring spirit of
the cranes is captured
in the center of our
blocks, a magnificent
bird that is a favorite
subject in many Asian
arts. The crane (tsuru)
symbolizes longevity,
good luck, happiness,
and monogamous
relationship. The open
areas in this quilt can
showcase your quilting
skills, our quilt feature
kanji symbols (templates
provided) that reflect
these majestic birds
symbolism.

Designer: Georgie Gerl

Graceful Flight Lap Quilt Cutting Chart & Material List
First Cuts

Fabric Name, Placement & Yardage

Next Cuts

Fabric A
@ !$2" squares “Fussy Cut”
SOAR-01 Black
Block Center s]! yard
Fabric B
EXOT-06 Black
Background

!8 yards

Fabric C
TONE-02 Green
Accent Border

@
@
!
$

!$2" x $@"
!)2" x $@"
%2" x $@"
@2" x $@"

!

!2" x $@"

!%

!2" x $@"

@
*
*
@
*
!^

!$2" x #*2"
!)2" x &2"
%2" x $2"
@2" x #*2"
@2" x $"
!2" x @2"

$
$
$

!2" x !^2"
!2" x !$2"
!2" x !1!2"

*
*
*
*

!2" x ^2"
!2" x %2"
!2" x $"
!2" x #2"

d yard
Fabric D
@ @2" x $@"
EXOT-06 Dark Gray
Accent Border–4 yard
Fabric E
SOAR-03 Black
Border & Binding

*
@

@w" x $@"
!2" x $@"

! yard
Fabric F
@ @2" x $@"
EXOT-06 White
Accent Border 4 yard

Graceful Flight Lap Quilt
61” x 90”
material list
Note: If mitering seams for
Fabric J an extra strip will be
needed. This strip can be cut
from yardage listed. Extra
fabric may be needed for
“Fussy Cut" pieces; amount
varies depending on motif

46 fabric vine 2016

Backing %2 yards
Batting ^(" x (*"
Read Cutting Tip prior to
cutting fabrics.
Cut strips as indicated in chart
then cut smaller pieces listed
from these strips

&

!2" x $@"

*

$2" x *2" “Fussy Cut”

Fabric I
$
SOAR-02 Black
Block a]s yard

*2" square “Fussy Cut”

Fabric G
EXOT-06 Gold
Block Border

2 yard
Fabric H
SOAR-05 Black
Block 2]w yard

Fabric J
& %2" x $@"
SOAR-04 Black
Outside Border !2 yards

Let’s Begin
Before you begin read all instructions.
Referring to project Cutting Chart, cut
First Cuts strips as indicated in chart
then cut smaller pieces listed under Next
Cuts from these strips. Refer to General
Instructions (pages 114–115) for Accurate
Seam Allowances and Assembly Line Method
to construct this quilt. Use a 4”-wide seam
allowance throughout this project. Press
seams in direction of arrows as indicated
in each diagram. If using directional fabrics
red arrows noted in step instructions shows
fabric design direction.

Making the Quilt

1.		 Sew one !2” x @2” Fabric B piece to one
!2” x %2” Fabric G strip as shown. Press.
Make eight and label Unit 1. Sew one !2” x
@2” Fabric B piece to one !2” x #2” Fabric G
piece as shown. Press. Make eight and label
Unit 2.
Unit 1

@2”

Unit 2A

Unit 2B

$2”

$2”

%2”

Make 4

%2”

Make 4

4.		Sew together lengthwise one !2” x $@”
Fabric G strip, one @2” x $@” Fabric F strip,
one !2” x $@” Fabric E strip, and one @2” x $@”
Fabric D strip as shown. Press. Make two. Cut
one strip set into eight $2”-wide segments
as shown. The other strip set will be used in
step 5.
$@”

!2”
@2”
!2”
@2”

Unit 2

%2”

@2”

#2”

!2”
Make 8

!2”

Make 2 strip sets
$2”

Make 8

2.		 Sew one !)12” x &2” Fabric B piece to one
Unit 1 from step 1 as shown noting direction
of Unit 1. Press. Make eight, four of each
variation and label Unit 1A or Unit 1B.
Unit 1A

Unit 1B

&2”

&2”

!)2”

Make 4

3.		 Sew one %12” x $2” Fabric B piece to one
Unit 2 from step 1 as shown noting direction
of Unit 2. Press. Make eight, four of each
variation and label Unit 2A or Unit 2B.

Cut 8 segments $2”-wide

!)2”

Make 4

2016 fabric vine 47

5.		 Sew remaining strip set from step
4 to one @2” x $@” Fabric B strip as
shown. Press. Cut strip set into eight
$2”-wide segments as shown.
$@”

8.		 Sew one !2” x $” Fabric G piece between one @2” x $” Fabric
B piece, and one $” x *2” Fabric H piece as shown. Press. Make
eight. Sew one !2” x !!2” Fabric C strip between two units from
this step. Press. Make four and label Unit 3.
$”

Unit 3
!2”

@2”
!2”
@2”

!!2”

*2”

$2”
Make 8

9.
Arrange

Cut 8 segments $2”-wide

6.		Sew one !2” x ^2” Fabric G
strip to one segment from step 4 as
shown. Press. Make eight, four of each
variation. Label units either Unit 2A or
Unit 2B.
!2” Unit 2A

Make 4

and sew together one Unit 1A, one Unit 2A, one
Unit 3, one Unit 2B, and one Unit 1B as shown. Press. Make four,
two of each variation.
Unit 1A

Unit 2 A

Unit 3

Unit 2 B

Unit 1B

Unit 1B

Unit 2 B

Unit 3

Unit 2 A

Unit 1A

Unit 2B !2”

^2”

^2”

Make 4

Make 4

7.		 Sew one Unit 2A from step 3 to one
Unit 2A from step 6 as shown. Press.
Make four and label Unit 2A. Sew one
Unit 2B from step 3 to one Unit 2B
from step 6 as shown. Press. Make four
and label Unit 2B.
Unit 2A

Unit 2B

Make 4
(two of each variation)

10. Sew one *2” Fabric I square between two segments from
step 5 as shown. Press. Make four, two of each variation.
*2”

*2”

*2”

Make 2
Make 4

48 fabric vine 2016

Make 4

*2”

Make 2

11.		 Sew one !$2” Fabric A square
between two 1!2” x !$2” Fabric C strips.
Press seams toward Fabric C. Sew this
unit between two !2” x !^2” Fabric C
strips as shown. Press. Make two.
!2”

Peace Quilt Design

!2”

!^2”

Make 2

12.		 Sew one unit from step 11 between
two units from step 10, one of each
variation as shown. Press. Make two.
Happiness Quilt Design

Make 2

2016 fabric vine 49

13.		Referring to center of diagram, sew one unit from step 12 between two units from step 9,
one of each variation. Press. Make two. Sew this unit between one !$2” x #*2” Fabric B piece
and one @2” x #*2” Fabric B strip as shown. Press. Make two, one of each variation.
!$2”

@2”

#*2”

@2”

!$2”

#*2”

Make 2 (one of each variation)

14.		 Sew !2” x $@” Fabric C strips end-to-end to make one continuous !2”-wide Fabric C
strip. Press. Measure rows from step 13 from side to side. Cut three !2”-wide strips to this
measurement. Referring to layout, sew strips to rows from step 13, alternating Fabric C strips.
Press seams toward border.
15.		Measure quilt through center from top to bottom, including borders just added. Cut two
!2”-wide Fabric C strips to that measurement. Sew to sides of quilt and press.

50 fabric vine 2016

Octaagon shape used in
all Kanji areas.

Love Quilt Design
(Top)

Longevity Quilt Design

2016 fabric vine 51

16.		 Referring to steps 14 and
15 to join, measure, trim,
and sew %2”-wide Fabric J
border, strips to top, bottom,
and sides of quilt. Press.

Crane Quilt Design

Finishing the Quilt

1.		 Cut backing fabric piece
into two equal pieces. Sew
pieces together to make
one *)” x (*” approximate
backing piece. Press and
trim backing to measure ^(”
x (*”.

2.		Press backing and quilt
top trimming all excess
threads. Refer to General
Instructions (pages 115) for
Finishing the Quilt. Layer
and baste backing, batting,
and quilt top together.
Hand or machine quilt as
desired. Note: If using
quilting templates provided
or other quilting templates
mark quilting lines to quilt
using a fabric removable
marker prior to layer pieces
together.
3.		Refer to Binding the
Quilt and bind as desired.

52 fabric vine 2016

Good Fortune Quilt Design

Background Fabric Quilting Recommendation

Using removable fabric marker, draw quilting lines, octagon shapes, and kanji shapes on background area. If trapunto kanji
symbols are desired use you favorite method. There are several different approaches for trapunto, check your local library,
quilt shops, magazine, and on-line to determine your prefer method. The symbols on the quilt top left side are crane, longevity, happiness, and peace. The symbols on the right of the quilt are, love, tranquility, health, and good fortune.
2016 fabric vine 53

Healthy Quilt Design

Tranquility Quilt Design

54 fabric vine 2016

Designer: Georgie Gerl
2016 is the Year of the Monkey, honor your year by
bringing the year’s lucky colors into your projects
white, gold, and blue. This kitchen table or wall quilt
first started as a traditional monkey wrench design
and then evolved into this quilt.
2016 fabric vine 00

Year of the Monkey Quilt Cutting Chart & Material List

Year of the Monkey
Table or Wall Quilt

Let’s Begin
Before you begin read all instructions.
Referring to project Cutting Chart, cut First
Cuts strips as indicated in chart then cut
smaller pieces listed under Next Cuts from
these strips. Refer to General Instructions
(pages 114–115) for Accurate Seam
Allowances and Assembly Line Method to
construct this quilt. Use a 4”-wide seam
allowance throughout this project. Press
seams in direction of arrows as indicated
in each diagram.

Year of the Monkey Table or
Wall Quilt

material list
Backing !6 yards
Batting 40" x 40"

35" square
If “Fussy Cutting” Fabric A, additonal
yardage may be needed depending on
motif selection.
First Cuts

Fabric Name, Placement & Yardage

Fabric A
SOAR-03 Indigo
Background

@
@

^" x $@"
@2" x $@"

Next Cuts
*
*

^" squares
@2" x &2"

q yard
@
@
!

^" x $@"
@2" x $@"
!2" x $@"

*
*
!^

^" squares
@2" x ^2"
!2" squares

Fabric C
TONE-02 Blue
Borders

%

@2" x $@"

d yard

^

!2" x $@"

%
$
!)
!^
!^

@2" x !$2"
@2"Fabric
x *2"B- ^””” square
@2"Fabric
x ^2"A-”” ^””” square
Make
!2" x ^2"*
!2" x %2"

!@

@2" squares

Fabric B
DFOS-01 Cream
Background

1.		Refer to General Instructions (page
114) for Half-Square Triangles. Draw a
diagonal line on one ^” Fabric B square.
Place marked square and one ^” Fabric A
square right sides together. Sew a scant 4”
away from drawn line on both sides, cut
on drawn line, and press. Make eight. Trim
squares to %2” to make sixteen half-square
triangle units.

Fabric B- ^””” square
Fabric A-”” ^””” square
Make *

w yard
B

Fabric D
! @2" x $@"
MOVE-01 Yellow
Accent Squares 8 yard

B
$
Fabric E
TONE-02 Cream
Binding 2 yard

56 fabric vine 2016

@w" x $@"

Square to %2”””
Make !^
Half-square Triangles Units

Square to %2”””
Make !^
Half-square Triangles Un

2.		 Sew one unit from step 1 to one !2” x %2”
Fabric C strip. Press. Sew this unit to one !2” x
^2” Fabric C strip as shown. Press. Make eight.
^2”

!2”

6.		 Sew unit from step 5 between two units
from step 4 as shown. Press. Make four.

%2”
!2”
Make 8

3.		 Sew one unit from step 1 to one !2” x %2”
Fabric C strip. Press. Sew this unit to one !2” x
^2” Fabric C strip as shown. Press. Make eight.
!2”

^2”

%2”

Make 4

7.		 Sew one @2” Fabric D square between two
@2” x ^2” Fabric C strips as shown. Press.
Make two.
^2”

@2”

^2”

@2”

!2”
Make 2

Make 8

4.		 Sew one @2” x ^2” Fabric B strip between
one unit from step 2 and one unit from step
3 as shown. Press. Make eight.

8.		Sew one unit from step 7 between two
units from step 6 as shown. Press. Make two.

@2”

^2”

Make 8

5.		 Refer to General Instructions (page 114)
for Simple Triangles technique. Draw a
diagonal line on the wrong side of two !2”
Fabric B squares. This will be your sewing
line. Place one marked square on one @2”
x &2” Fabric A piece as shown. Stitch on
drawn line, trim 4” away from stitch lines
and press. Sew remaining marked square to
piece as shown. Trim and press. Make eight.
Sew these two units together as shown. Press
seams open.

Make 2

Fabric B- !2” squares
Fabric A-”” @2””” x &2”””
Make 8
Press seam open
2016 fabric vine 57

9.		 Arrange and sew together two @2” x ^2” Fabric C strips,
two @2” Fabric D squares, and one @2” x !$2” Fabric C strip
as shown. Press. Make three.
^2”

@2”

!$2”

@2”

^2”

@2”
Make 3

10.		Referring to step 12 diagram center section, sew three
rows from step 9 and two rows from step 8 together. Press
seams toward borders.
11.		 Arrange and sew together two @2” x *2” Fabric C strips,
two @2” Fabric D squares, and one @2” x !$2” Fabric C strip
as shown. Press. Make two.
*2”

@2”

!$2”

@2”

*2”

@2”
Make 2

12.		 Sew unit from step 10 between two rows from step 11 as
shown. Press.

58 fabric vine 2016

Finishing the Quilt
1.		Press backing and quilt top
trimming all excess threads.
Refer to General Instructions
(page 115) for Finishing the
Quilt. Layer and baste backing,
batting, and quilt top together.
Hand or machine quilt as desired.
2.		 Refer to Binding the Quilt and
bind as desired.

Designer: Georgie Gerl
The year of the monkey lucky
numbers are 1, 7, and 8 keeping
that in mind this ensemble was
created. These easy hot pads
reflect this year’s lucky
numbers; one light/dark triangle
unit makes the Light vs. Dark Hot Pad,
seven stripes are constructed in the
Lucky Seven Hot Pad, and eight blue
triangles are in the Eight Dancing
Triangles Hot Pad.
2016 fabric vine 00

Let’s Begin
A product call Insul-Bright is a needle-punched, insulated material ideal for hot pads, oven
mitts, casserole covers and other items instead of batting. It is made with polyester fibers,
needle-punched through a reflective metalized film and won’t break down with washing.
Since it has metal in this product it cannot be placed in a microwave. Use a 4”-wide seam
allowance throughout this project. Press seams in direction of arrows as indicated in each
diagram. Binding can be sewn straight or miter corners. Cut one @w” x $@” strip and from
remaining fabric cut one @w” x ^” strip. Depending on technique used it may be necessary
to cut additional @w” x length needed from leftover fabric piece.
Light vs. Dark Hot Pad
1!)” square

Backing 12” square
Insul-Bright 12” square

Fabric
Fabric A
TONE-07 Indigo
Dark Triangle

Cuts
!

*” square

!

*” square

Making the Light vs. Dark Hot Pad

1.		 Refer to General Instructions (page 114) for
Half-Square Triangles. Draw a diagonal line on
one *” Fabric B square. Place marked square and
one *” Fabric A square right sides together. Sew
a scant 4” away from drawn line on both sides,
cut on drawn line, and press. This will make two
half-square units, only one unit will be used for
this project. Optional: Use this remaining unit for
another hot pad or make two and use one for the
backing.

Fat Quarter
Fabric B
DFOS-01 Cream
Light Triangle

BFat Quarter
Fabric C
MOVE 01 Yellow
Border

Fabric B- *” square
Fabric A-”” *””” square
@
@

!2” x (2”
!2” x &2”

!
!

@w” x $@”
@w” x ^”

Fat Quarter
Fabric D
EXOT-06 Blue
Binding
B4 yard

Square to &2”””
Make @

2.		 Sew unit from step 1 between two !2” x &2”
Fabric C strips. Press seams toward border. Sew
this unit between two !2” x (2” Fabric C strips
as shown. Press.
!2"

!2"

Lucky Seven Hot Pad
1!)” square

(2"

3.		Refer to Finishing the Hot Pad section
(page 63) and using Fabric D binding strips to
12” square
completeBacking
this project.
Insul-Bright 12” square

60 fabric vine 2016

Fabric

Fabric A

Cuts

!

@w” x $@”

Eight Dancing Triangles Hot Pad

Lucky Seven Hot Pad
1!)” square

1!)” square

Backing 12” square
Insul-Bright 12” square

Backing 12” square
Insul-Bright 12” square

Fabric
Fabric A
SOAR-03 Indigo
Stripes & Binding

6 yard
Fabric B
TONE-07 Butter
Stripes

Cuts
!
!
@

@w” x $@”
@w” x ^”
@” x (2”

!
@

@2” x (2”
!2” x (2”

Cuts

!
Fabric A
SOAR-03 Indigo @
@
Background

%” square
!2” x (2”
!2” x &2”

Fat Quarter
!

%” square

Fabric C
@
TONE-07 Cream
Background

%” squares

Fabric B
EXOT-06 Blue
Background

BFat Quarter

BFat Quarter
Fabric C
TONE-07 Cream
Stripes
8 yard

Fabric

@

!2” x (2”

Fat Quarter

Making the Lucky Seven Hot Pad
1.		 Arrange and sew together, two !2” x (2”
Fabric B strips, two !2” x (2” Fabric C strips,
two @” x (2” Fabric A strips, and one @2” x
(2” Fabric B strip as shown. Press.
!2"!2" @" @2" @" !2"!2"

(2"

2.		Refer to Finishing the Hot Pad section
(page 62) and using Fabric A binding strips
to complete this project.

Fabric D
TONE-07 Butter
Border

@
@

!” x &2”
!” x ^2”

!
!1

@w” x $@”
@w” x ^”

BFat Quarter
Fabric E
TONE-02 Blue
Binding

4 yard

Making the Eight Dancing Triangles
Hot Pad
1.		 Refer to General Instructions (page 114)
for Half-Square Triangles. Draw a diagonal
line on one %” Fabric C square. Place marked
square and one %” Fabric A square right sides
together. Sew a scant 4” away from drawn line
on both sides, cut on drawn line, and press.
Makes two half-square triangle units.
Fabric C- %” square
Fabric A-”” %””” square

Make @
Half-square triangle units

2016 fabric vine 61

2.		 Making half-square triangles, sew one 5”
Fabric C square to one 5” Fabric B square as
shown. Press. Makes two half-square triangle
units.
Fabric B- %” square
Fabric A-”” %””” square

Square to #2”””
Make $
Quarter-square Triangles Units

4.		Sew two units from step 3 as shown,
checking orientation of units prior to sewing.
Press. Make two. Sew these units together.
Press.

62 fabric vine 2016

!”

!”

&2”

Make @
Half square
triangle units

3.		 Quarter-Square Triangles are made from
step 1 and step 2 half-square triangle units.
Draw diagonal line on wrong side of unit from
step 1 in opposite direction from seam shown.
Place right sides together with unmarked unit
from step 2, matching seam allowances and
placing Fabric A triangle on top of Fabric C or
B triangle. Sew a scant 4” away from drawn
line on both sides, cut on drawn line, and
press. Make two. Square unit to #2”. This will
make four quarter-square triangle units.

Make 2

5.		 Sew unit from step 4 between two !” x ^2”
Fabric D strips. Press seams toward accent
border. Sew this unit between two !” x &2”
Fabric D strips. As shown. Press.

6.		Sew unit from step 5 between two !2”
x &2” Fabric A strips. Press seams toward
border. Sew this unit between two !2” x (2”
Fabric A strips. Press.
!2”

!2”

(2”

7.		Refer to Finishing the Hot Pad section
(page 63) and using Fabric E binding strips
to complete this project.

Finishing the Hot Pads
1.		Press backing and top trimming
all excess threads. Refer to General
Instructions (page 115) for Finishing
the Quilt. Layer and baste backing, InsulBright, and top together. Hand or machine
quilt as desired.

3.		Fold unit from step 2 in half, place
on backing side, matching raw edges as
shown in photo. Baste in place.

2.		Fold @w” x ^” binding strip in half
lengthwise and press. Unfold and bring
raw edges in to center press line. Press.
Fold strip in half again and press. Stitch
close to outside edge on both sides.
press line

press line
fold to center line & press
fold to center line & press
press line
Fold in half and
stitch close to edges

Front
Back

4.		 Refer to Binding the Quilt (page 115)
and bind as desired. Flip loop toward the
outside and baste it close to the binding
seam line to hold in place.

2016 fabric vine 63

Dragon Moon

click quilt for free
pattern download,
available in March

W

hat can I say about red velvet cupcakes that has not
already been said? Everywhere you go you see two
things. Cupcakes and red velvet cupcakes. I hesitated
to share the these with you for that reason, but then something
happened. William asked me to make these for class
Valentine’s Day party. I tried to talk him into something else
but he insisted on red velvet. I remembered how hard they are
to resist. They are what cupcake dreams are made of. Sweet
and mildly chocolaty with a tart cream cheese frosting.
What can I say? My kid has good taste.
This red velvet cupcake and cream cheese frosting recipes
come from Martha Stewart Cupcakes.
66 fabric vine 2016

Red velvet

Cupcakes

ingredients
cupcakes
2½ cups cake flour
2 Tablespoons unsweetened cocoa powder
1 teaspoon salt
1½ cups sugar
1½ cups vegetable oil
2 eggs at room temperature
½ teaspoon red gel paste food coloring
1 teaspoon vanilla
1 cup buttermilk
1½ teaspoons baking soda
2 teaspoons white vinegar

cream cheese frosting
2 sticks room temperature butter
12 ounces room temperature cream
cheese
4 cups confectioners sugar
1 teaspoon vanilla

2016 fabric vine 67

4. Add the flour in three batches alternating
with the buttermilk.

instructions
1. Sift together the cake flour, cocoa power,
and salt. Set aside.

5. In a small bowl, mix together the baking
soda and vinegar. Add to the batter and mix
to combine.
2. Mix together the sugar and oil until
incorporated. Add the eggs one at a time.

3. Add the food coloring and vanilla.

68 fabric vine 2016

6. Line two muffin tins with paper liners.
Fill the tins three quarters of the way
through. Bake in a preheated 350 degree
oven for about 20 minutes. Let the
cupcakes cool completely on a wire rack.

8. I used a piping bag fitted with a large
round tip to pipe the cream cheese frosting.
7. Make the cream cheese frosting by
creaming together the butter and cream
cheese. Slowly add the powdered sugar.
Add the vanilla.

9. To make these cupcakes really special
for the kids, I wrapped them in individual
cupcake boxes. How cute are these?

I cut out some hearts freehand and
attached them with some cute
twine from The Twinery. Wouldn’t
you love to get a box like this?

2016 fabric vine 69

w w w.bakedbree.com

Bree started Baked Bree in February of 2010 and loves to cook. She gets lots of practice
having three children with three distinctive palates. She started blogging with the goal
of documenting her life in the kitchen and keeping track of her overflowing collection of
recipes.
Over time, Baked Bree has evolved into an inspirational atlas of living life well. It
reflects all that is Bree—motherhood, marriage military life, travel, photography, kids,
house and home.
Her husband is a pilot in the Coast Guard so they have moved many times, most
recently calling Cape Cod, MA home. You can see the influence of her extensive travels
and interests in her delightful blog posts.
The last thing that cannot go without mention is Bree’s mastery of photographic
excellence. In her life before Baked Bree, she had a portrait studio. The photos you
encounter as you wander the pages of Baked Bree are guaranteed to bring a touch of
visual happiness to your day.
Bree studied as an undergraduate at College of Charleston, graduating with a BS
in Elementary Education. She received her nutrition training and certification from
Bauman College. Bree is the founder of bakedbree.com and was named a Top 100 Food
Blogger. She is a regular contributor to Simple As That. Her work has been featured on
Oprah.com, Pinhole Press, Martha Stewart Weddings, Apartment Therapy, Parents.com,
Yogalife, Philadelphia Magazine, Babble, and The Huffington Post.
We feel fortunate to have Bree join us in bringing you a delicious and beautiful
cupcake to carry you into 2016.

70 fabric vine 2016

Debsews is known the world over for its
beautiful Asian and Quilting fabrics. Online
since 1999 with over 15,000 satisfied customers.

10% discount
use code: WELCOME

FREE SHIPPING on domestic orders over $50

2015 fabric vine 00

Quilt and bag
patterns here

Geisha
Gathering

Breaking News!
Awarded
Trellis Gate wine an
outstanding score of

88

MEOWser!
Is that Kona Bay
on the label?!

Trellis Gate

Available
Now • Shippin
in Sept

2012

Red
Mountain
Cabernet
Sauvignon

© Kona Bay Fabrics

ng

Red
Mountain
Cabernet
Sauvignon

Red
Mountain
Cabernet
Sauvignon

© Kona Bay Fabrics

1 bottle
$24.95

© Kona Bay Fabrics

© Kona Bay Fabrics

Trellis Gate

2012

2012

2012

Red
Mountain
Cabernet
Sauvignon

Red
Mountain
Cabernet
Sauvignon

2012

Red
© Kona Bay Fabrics
Mountain
Cabernet
Sauvignon

© Kona Bay Fabrics

Ordered by

Deliver to

Name

Name

Address

Address
State

Zip Code

Telephone

© Kona Bay Fabrics

3 bottles
$64.85 $74.85

2 bottles
$44.90 $49.90

City

Print this form if
you prefer to send
in your payment
and order via mail
or fax
—or—
order online

Trellis Gate

Red
Mountain
Cabernet
Sauvignon

Trellis Gate

2012

2012

Trellis Gate

Trellis Gate

Trellis Gate

Trellis Gate Printable Order Form

Same as Ordered by

City

State

Zip Code

Telephone

Email

Shipping for 1 or 3 bottles is the same!
Buy 3 and save even more!

Please add me to your email newsletter list

Wine order option

Quantity

Unit Price

1 bottle of Trellis Gate

$24.95

2 bottles of Trellis Gate

$44.90

3 bottles of Trellis Gate

$64.85


Line Total

PLEASE NOTE:
By making this
purchase, you are
stating that you
are 21 years of age
or over.

Sub-total


Shipping—Please refer to WineFromWashington.com
or call 800.531.7913 for shipping rate

Taxes—WA residents add 9.5%
TOTAL
Payment information

Thank
you

Credit card below

Check enclosed

We accept VISA,
MC, American
Express, Discover
and checks

Please call me at

Credit card number
Exp Date

CVC Code

Signature

Mail: Wine From Washington, 4630 E Lake Sammamish Parkway NE, Sammamish, WA 98074
Fax: 425.867.3054 Email: Sales@WineFromWashington.com Phone: 800.531.7913

Pasa

The City of Roses (an

adena

nd Modern Quilters)

travel

Pasadena is more than just the host
of the Rose Bowl and the Tournament
of Roses Parade. It’s a center for arts
and culture in Los Angeles County.
Packed with museums, theaters and
gracious estates the city is a fantastic
destination. Residents love to boast that
their charming city is far preferable to
nearby Los Angeles. Pasadena has a much
smaller population, and its relatively
slow growth rate since its founding in
1886 mean that it has been allowed to

78 Asian Fabric 2016

mature gracefully and thoughtfully.
That careful growth is evident
in Pasadena’s eminently-walkable
downtown district and in the preservation
of many of the community’s original
homes. The city even has a beautiful
quarter known as Bungalow Heaven
where approximately 800 craftsman
style homes are lovingly preserved. Each
was built between 1900 and 1930, making
for a lovely neighborhood that’s just
begging to be explored on foot.

Native Americans lived in the area
now known as Pasadena long before
European settlers arrived. In fact,
Pasadena was actually part of a
Mexican land grant, the last owner
of which was Manuel Garfias. After
California became a state, Garfias began
selling off parcels of land to settlers
like Dr. Benjamin Eaton and Benjamin
Wilson, General George S. Patton’s
grandfather. Wilson established one
of the earliest vineyards in the region.
Pasadena’s favorable climate and
beautiful landscape attracted settlers
from across the country. By the middle
of the 1880s it had become a stop
on the Atchison, Topeka and Santa
Fe Railway. Well-to-do Easterners
journeyed to Pasadena to escape the
bleak winter months in warmth and
comfort. Several gracious hotels were

constructed to accommodate the
travelers, and some of these structures
still exist.
The coming of the 20th century
ushered in the craftsman era. Pasadena
boasts a number of particularly good
examples of the style, including the
Gamble House, which is open for
tours, and the Robert R. Blacker House.
The Blacker House is still a private
residence that is no doubt treasured
for the unparalleled attention to
detail that the Greene and Greene
architecture firm lavished on the
home.
World War II brought an economic
boom to the community. A number
of scientific and technical concerns
set up shop in the area, and Pasadena
remains a center for technological
developments. It also boasts a thriving
2016 Asian Fabric 79

higher education scene with institutions
like the California Institute of Technology
and the Art Center College of Design.
This emphasis on education and
reputation for cultural interests have
brought a number of prestigious museums
to the city. The most notable of these is
the complex containing the Huntington
Library, Art Collections & Botanical
Gardens. It would be easy to spend days
browsing through these impressive
col l ect i on s. H ou sed on t h e on ceprivate estate of railroad tycoon Henry
Huntington, the complex may be one of
the best reasons for visiting Pasadena.
Huntington bequeathed the estate and its
broad art collection to the city upon his
death. Now thousands of visitors come
there every year to enjoy masterpieces by
many European painters. Among the most
famous works are Thomas Lawrence’s
Pinkie and Thomas Gainsborough’s the
Blue Boy. Mary Cassatt’s Breakfast in Bed
is another favorite for many visitors.

80 Asian Fabric 2016

The library contains a genuine vellum
Guttenberg Bible along with a rare
folio of Audubon’s Birds of America. A
first folio edition of Shakespeare is on
display as is an illuminated manuscript
of The Canterbury Tales. Guests are
also free to roam around the gracious
and meticulously-maintained gardens.
A total of 12 diverse landscapes are
presented. These range from a Chinese
Garden and Australian Garden to a ranch
garden and lily ponds. The garden hosts
periodic lectures and plants sales which
are not to be missed by the gardening
enthusiast.
The Norton Simon Museum is the
city’s other important art collection.
It boasts a fabulous array of European
works spanning the centuries between
the Renaissance to the 20th century.
They also have a particularly broad
collection of Southeast Asian art. Initially
the collection of noted local industrialist
Norton Simon, the museum is now

considered one of the largest and most
eclectic of its kind. People visit the
institution from all corners of the world.
The Pasadena Museum of History
offers a particularly illuminating look
at the region’s past. Once again, this is a
Pasadena museum with a great deal of
gorgeous art with some fine examples of
plein air works by Benjamin Chambers
Brown and Carl Oscar Borg. However, there
is also a dazzling selection of textiles,
porcelain and furniture representing
the San Gabriel Valley’s history from
approximately 1830 to the present.
Pasadena is also renowned for its
thriving arts scene. It’s the home of
the Pasadena Playhouse, which has
been named the official State Theatre
of California. Established in 1917, the
Playhouse continues to delight locals
and visitors with high quality live
theatrical performances. Arts patrons
also enjoy performances by the California
Philharmonic Orchestra and the free
2016 Asian Fabric

81

88 Asian Fabric 2014

offerings that are put on at the gracious Levitt
Pavilion.
Perhaps the best way to get to know the
city is by joining the Old Pasadena Walking
Tour. Given on the first Saturday of most
months, the tour is an opportunity to touch
the city’s past while also appreciating its
charming present. Joining the tour provides
visitors with an opportunity to glimpse
the remarkably well preserved details that
still adorn the downtown area. Filled with
charming shops and delightful eateries,
many people who take the tour spend a few
more hours exploring and shopping after the
tour’s end.
Other great shopping in Pasadena is found
at Distant Lands Bookstore and Outfitters
on Raymond Avenue. Shoppers will find an
impressive collection of travel literature for
sale along with useful travel gadgets and
accessories. Those who love scoring vintage

finds will be delighted with the Pasadena
Antique Center and Annex, which is found
on South Fair Oaks Boulevard. The hardest
temptation for shoppers to resist would have
to be the famous Rose Bowl Flea Market.
While the Rose Bowl is home to big events
like the annual football game that bears its
name it also hosts the state’s largest monthly
swap meet. Patrons never know what they’ll
find at this eclectic flea market, and many
of them are there when it opens at seven to
score the best finds.
With so much to explore around the city
it’s no trouble working up a good appetite.
Fortunately, Pasadena is prepared to offer
a satisfying meal of virtually any size or
description. Located in the former Santa
Fe Railroad Station, the La Grande Orange
specializes in delectable fare that includes
starters like deviled eggs and the luscious
Del Mar salad featuring jumbo lump crab
2016 Asian Fabric

83

and shrimp. The wood burning rotisserie
produces excellently well prepared chicken
and prime rib throughout the day.
Perhaps the best place to get a steak
in the city is at the locally-owned Arroyo
Chop House. A favorite for locals who are
hosting a business dinner or celebrating
a special occasion, the Arroyo also makes
for a wonderful dinner for visitors.
Offerings include USDA prime beef as
well as a broad range of seafood. For
something a little more offbeat but no
less enticing many locals swear by the
French Asian fusion menu at Maison
Akira. Head chef and owner Akira Hirose
turns out imaginative and irresistible
dishes on a daily basis. Chef Akira was
born and raised in Kyoto but received
his culinary training in France where
he studied with world-renowned chefs
and spent some time in the kitchen at
Maxime’s in Paris. The result of this
eclectic background is a number of
unusual and irresistible menu items.
Visitors craving pizza will love the
offerings at Avanti Cafe. Their wood-fired
pizza oven promises the perfect crust
on every pie with wonderful toppings
like bacon julienne, red onions and
gorgonzola cheese. Even those not in the
mood for pizza will be satisfied with the
rich array of pastas, salads and calzone.
Vegetarian selections are available.

84 Asian Fabric 2016

Pasadena is a haven for travelers
with a taste for art and culture. With
many wonderful restaurants and a
surprisingly walkable downtown district
the city is truly designed for exploration
and discovery. Be sure to visit the
official Pasadena visitor’s site www.
visitpasadena.com. It has a wealth of
information and resources. You can even
purchase tickets for an assortment of
attractions, events and tours.

Rain Forest

2016 fabric vine 00

P

eople who are passionate
about a hobby love to gather
to learn new techniques,
connect with others and gain
inspiration. That certainly
describes the atmosphere at
QuiltCon 2016. If you grew up with
a needle in your hand or are
thinking of picking one up for the
first time QuiltCon 2016 is the show
for you.
QuiltCon’s 2016 show is
happening February 18-21 in
Pasadena, California. A spacious,
state-of-the-art convention center
is the ideal venue to host four days

88 fabric vine 2016

of lectures, workshops, vendors and
more. As in years past, organizers
expect to see thousands of
attendees from all over the world.
This is the largest event featuring
modern quilting anywhere, and it’s
a can’t-miss opportunity to find
knowledge and inspiration for
quilters of every level.
Pasadena is located 10 minutes
outside of Los Angeles. A recognized
center of arts and culture, this city
might be the perfect place for
modern quilters to gather. The
weather promises to be sunny and
mild in February, and with a
wealth of restaurants and
museums Pasadena is an excellent
place to spend a few days. Several

airports are within easy driving
distance of the city. The convention
center is also conveniently close to
the light rail gold line which
connects to downtown Los Angeles.
QuiltCon is hosted by the Modern
Quilt Guild (MQG), an organization
that brings together quilters from
around the world. The founding
guild was established in 2009
thanks to the strong online
presence of quilters. As more
makers developed blogs, websites
and online businesses it became
clear that everyone wanted more
opportunities to meet and connect
with quilters across town or on the
other side of the world.
Los Angeles was the site of the
first guild, and many others soon
followed. This thriving community
of artists and makers is growing
all the time. There are many
benefits to becoming a member of
the MQG. Getting discounts on the
price of admission and lectures at
QuiltCon is just one of these.
Membership in the MQG is an
opportunity to develop lasting
friendships with local quilters who
are passionate about art, and
attending QuiltCon makes it
possible to connect with quilters
from all corners of the globe.
Moreover, membership in the MQG
2016 fabric vine 89

presents priceless opportunities to
forge new creative relationships
and to find inspiration right when
it’s needed most.
Members of the MQG are all
passionate about modern quilting.
This medium is distinctive from
traditional quilting yet the precise
definition remains fluid to allow for
the many different forms of
expression that the members
employ. Modern quilters are
inspired by the latest design
innovations. Their creations are
mainly functional, and often
feature bold colors and sharp
contrasts. Improvisational piecing is
one of the hallmarks of the practice.
Pieces that use alternate grid work
or minimalism are very popular.
Quilting experts believe that the
modern style has existed for much
of the last century. However, the

90 fabric vine 2016

medium began to be more clearly
defined starting in 1998 when the
Martha Stewart Living publication
described quilter Denyse Schmidt’s
work as having a “chic, modern
aesthetic.” The modern quilting
movement has only grown from
there. Many quilters are drawn to
the style, and are excited about the
freedom and possibilities that
come from pushing the boundaries
of traditional needlecraft.
QuiltCon 2016 in Pasadena
promises to be an excellent
opportunity to further than
exploration. Participants may
choose to attend various lectures
and workshops. Hundreds of
vendors will be on site
demonstrating tools, techniques
and materials that represent the
latest innovations in the quilting
world. Attendees also won’t want to

2016 fabric vine 00

miss the quilt show where
hundreds of quilts will be on
display. QuiltCon 2016 participants
will have a lot to pack in to those
four days.
The schedule of lectures and
workshops at QuiltCon 2016 runs
virtually from dawn to dusk on all
four days. Artists who will be
presenting lectures or leading
classes have built worldwide
reputations for their work. Many of

00 fabric vine 2016

them have been quilting, sewing
and crafting for years, and most of
them have developed their passion
into a career. Various presenters
are published authors, award
winners and have seen their work
publicized on national and
international levels. Despite their
unique biographies and
backgrounds each one is eager to
share their experience with others.
The keynote speaker for the 2016
event is noted quilt teacher Gwen
Marston. Marston will be
presenting a number of workshops,
and a special exhibit of her work
will be on display for the entirety
of the event. Since the 1970s,
Marston has lectured about
quilting and related topics in both
national and international forums.
Her pioneering technique, known
as “Liberated,” involves quilting
without being bound by any
pattern. As the author of nearly 30
books and the subject of as many
solo exhibits, Marston is
exceptionally well qualified to be
QuiltCon’s 2016 keynote speaker.
Event participants can sign up
for any number of fascinating
workshops and lectures that range
widely in subject matter.
Workshops related to working with
wool, minimalism, improvisation,
paper piecing and working with
curves are just a few examples.

Perhaps one of the most interesting
lectures will be the From Maker to
Making a Living panel discussion
which will explore how quilters
can transform their passion into a
career. Other lectures relating to
self-publishing of patterns, color
theory and art history should also
draw large crowds.
Most attendees won’t be able to
resist spending a few hours gazing
at the creations in the quilt show.
The MQG expects to receive
approximately 1,500 submissions
to the contest. About 400 of these
will be selected as part of the
juried show. At each QuiltCon,
thousands of dollars in prizes are
given to the winners in each of
nearly a dozen categories. Seeing
these spectacular creations is an
excellent reason to attend QuiltCon
2016 for at least a day.
QuiltCon 2016 promises to be a
fun and fascinating gathering of
quilters of all levels of ability.
Registration for QuiltCon 2016 is
now open, and many workshops
and lectures are still available. You
can browse them all at
quiltconwest.com/conference/
workshops. More info about the
show is available at quiltcon.com.

2016 fabric vine 93

click quilt for
free pattern
download


Burst of Color

Placemat &
Table Runner

Designer: Georgie Gerl
A dramatic burst of color is dazzlingly
displayed against the dark background
fabric, but if a gentle hint of color is all you
need a second lighter version is also shown.

Burst of Color Cutting Chart and Material List

Burst of Color
Table Runner
16" x 51"

material list
Backing w yard
Batting 20"x 54"
Read Cutting Tip prior to
cutting fabrics.
Cut strips as indicated in chart
then cut smaller pieces listed from
these strips

Extra fabric may be needed for “Fussy Cut"
pieces; amount varies depending on motif
selection and fabric repeat.
Featuring fabrics from Flights of Color, Bubbles,
Swirl, Rainbow Garden Swirl, Dragon Fossils, &
Tonal Collections.
Fabric Name, Placement & Yardage

Fabric A
FLIG-11 Black
Center

First Cuts
!

Next Cuts

Fabric F
BCAR-06 Purple
Outside Border

#)12" x !)2"

! yard
Fabric B
BUBB-01 Blue
Accent Border

!
#

$12" x $@"
!2" x $@"

@
@
@

@

!4" x $@"

$

$2" squares
!2" x #@2"
!2" x !)2"

!4" x !@2"

6 yard
Fabric D
RAIN-22 Purple
Background

4 yard

98 fabric vine 2016

$

Next Cuts

@" x $@"

@

@" x !@2"

Fabric G
! @" x $@"
RAIN-22 Red
Accent Border 8 yard

@

!2" x !%2"

@

!" x !@2"

Fabric H
Solid Black
Binding 2 yard

#
!

@w" x $@"
!" x $@"

Light Version Fabrics
@

@2" x $@"

@$

@2" squares

4 yard
Fabric E
BUBB-01 Orange
Accent Squares

First Cuts

a yard

2 yard
Fabric C
RAIN-22 Orange
Accent Border

Fabric Name, Placement & Yardage

!

$2" x $@"

$

$2" squares

Fabric A
FLIG-10 Cream

Fabric E
DFOS-01 Blue

Fabric B
BUBB-01 Blue

Fabric F
BCAR-06 Cream

Fabric G
RAIN-22 Red

Fabric C
MOVE-01 Yellow

Fabric D
RAIN-22 Orange

Fabric H
BUBB-01 Orange

Let’s Begin
Before you begin read all instructions. Use
a 4”-wide seam allowance throughout this
project. Press seams in direction of arrows
as indicated in each diagram. Fabric A is
“Fussy Cut,” fabric amount needed may vary
depending on motif selection.

Making the Table Runner

1.		 Refer to General Instructions (page 114)
for Simple Triangles technique. Draw a
diagonal line on the wrong side of four @2”
Fabric D squares. This will be your sewing
line. Place two marked squares on one $2”
Fabric E square as shown. Stitch on drawn
line, trim 4” away from stitch lines and press.
Sew remaining marked square to piece as
shown. Trim and press. Make four.
Fabric D- @2” squares
Fabric E- $2” square
Make $

2.		Making simple triangles, sew four @2”
Fabric D squares to one $2” Fabric B square
as shown. Press. Make two.

4.		 Sew one !” x 1@2” Fabric H strip between
two !4” x 1@2” Fabric C strips as shown.
Press. Make two.
!@2”

!4”
!”

!4”
Make 2

5.		 Sew one unit from step 3 between one @”
x !@2” Fabric F strip and one unit from step
4 as shown. Press. Make two.
!@2”

@”

Make 2

6.		Sew one #)2” x !)2” Fabric A piece
between two !2” x !)2” Fabric B strips.
Press seams toward Fabric B. Sew this unit
between two !2” x #@2” Fabric B strips as
shown. Press.
#@2”

!2”

!2”
Fabric D- @2” squares
Fabric B- $2” square
Make @

3.		Sew one unit from step 2 between two
units from step 1 as shown. Press. Make two.
Make 2

2016 fabric vine 99

7.		 Sew one unit from step 6 between two units from step
5 as shown. Press.

8.		Refer to step 9 diagram center section. Sew @” x $@”
Fabric F strips end-to-end to make one @”-wide Fabric F
strip. Press. Measure unit from step 7 length. Cut two strips
to this measurement. Sew step 7 unit between two @”-wide
Fabric F strips. Press seams toward Fabric F.
9.		 Sew unit from step 8 between two !2” x !%2” Fabric
G strips as shown. Press.
!2”

!2”

10.		Cut backing fabric piece into two equal long pieces.
Sew pieces together to make one @)” x %$” approximate
backing piece. Refer to General Instructions (page 115)
for Finishing the Quilt. Layer and baste backing, batting,
and quilt top together. Hand or machine quilt as desired.
Refer to Binding the Quilt and bind as desired.

100 fabric vine 2016

Burst of Color Cutting Chart and Material List

(Burst of Color Table Runner
companion project)

Burst of Color Placemats
16" x 12"

Let’s Begin

Instructions for two placemats

material list
Backing s yard
Batting two 20"x 16"
First Cuts

Fabric Name, Placement & Yardage

Fabric A
FLIG-11 Black
Center 4 yard

^

Next Cuts

$2" squares “Fussy Cut”

Fabric B
@ @2" x $@"
BUBB-01 Blue
Background 3 yard

@$

@2" squares

Fabric C
@ !2" x $@"
BUBB-01 Orange
Accent Border 4 yard

$

!2" x !@2"

Fabric D
BCAR-06 Purple
Border a yard

$
$

@" x !@2"
@" x (2"

$

!2" x !%2"

#

@" x $@"

Fabric E
@ !2" x $@"
RAIN-22 Red
Accent Border 4 yard
Fabric F
Solid Black
Binding 2 yard

$

Burst of Color Placemats

@w" x $@"

B e fo re yo u b e g i n re a d a l l
instructions. Use a 4”-wide seam
allowance throughout this project.
Press seams in direction of arrows
as indicated in each diagram. The
instructions are for two placemats
if more are desired then adjust
yardage and cut pieces accordingly.
Fabric A is “Fussy Cut,” fabric
amount needed may vary depending
on motif selection.
1.		Refer to General Instructions
(page 114) for Simple Triangles
technique. Draw a diagonal line on
the wrong side of four @2” Fabric B
squares. This will be your sewing
line. Place two marked squares on
one $2” Fabric A square as shown.
Stitch on drawn line, trim 4” away
from stitch lines and press. Sew
remaining marked square to piece
as shown. Trim and press. Make six.
Fabric B- @2” squares
Fabric A- $2” square
Make ^

2.		Sew three units from step 1
together as shown. Press. Make two.

Light Version Fabric s
Fabric A
FLIG-10 Cream

Fabric D
BCAR-06 Cream

Fabric B
BUBB-01 Blue

Fabric E
RAIN-22 Red

Fabric C
MOVE-01 Yellow

Fabric F
BUBB-01 Orange

Make 2

2016 fabric vine 101

3.		Sew one unit from step 2 between two
!2” x !@2” Fabric C strips as shown. Press.
Make two.
!@2”

!2”

!2”
Make 2

4.		 Sew one unit from step 3 between two @”
x !@2” Fabric D strips. Press seams toward
Fabric D. Sew this unit between two @” x (2”
Fabric D strips as shown. Press. Make two.
@”

@”

(2”

Make 2

5.		Sew one unit from step 4 between two
!2” x !%2” Fabric E strips as shown. Press.
Make two.
!%2”

!2”

!2”
Make 2

6.		From backing fabric cut two @)” x !^”
pieces. Refer to General Instructions (page
115) for Finishing the Quilt. Layer and baste
backing, batting, and quilt top together. Hand
or machine quilt as desired. Refer to Binding
the Quilt and bind as desired.

102 fabric vine 2016

I Love You
This MUCH!
Bib and Apron
Designer: Georgie Gerl
Mommy’s little helper will look
adorable wearing this apron while
helping to prepare meals in the
kitchen. Of course we didn’t forget
the littlest one as they sit in their
high chair watching big sister or
brother work wearing their bib being
designated as Mom’s official tester.

2015 fabric vine 00

Let’s Begin
Read all instructions prior to cutting and sewing projects. The apron can be one piece of
fabric or a reversible apron can be made with a monkey appliqué on one side and decorative
fabric on the back.
I Love You This MUCH! Apron
Appliqués
Assorted Scraps
Lightweight
Fusible Web
For a reversible
apron only
Backing ½ yard

Making the Apron

I Love You This MUCH! Bib
1.		 Refer to diagram to make a paper pattern of
the apron shape. Draw a 16” x 21” rectangle on
a piece of paper. Measure 8” down from top and
mark both top sides to this measurement this
will be the bottom of the curve. Find top center
Backing Fat
and measure #4” on both side of center and
Quarter
Batting
mark—this will be the top curve points. Draw
a 12" x 14"
Appliqué Fabrics
curve from marks as shown. Round off bottom
Assorted Scraps
corner, this will make finishing the apron easier
Hook & Loop Tape
Lightweight
when binding edges.
Fusible Web

Fabric

Cuts

Fabric A
FANT-03 Blue
Background
½ yard

Appliqué is sewn
first prior to
cutting apron
shape from fabric

Fabric B
MOVE-01 Yellow
Bias Binding

!

@)” square
Cut once
diagonally

^2"

Fabric

Fabric A
MOVE-01 Yellow
Background

*"

Fat Quarter
@!"
!#"

Fabric B
TONE-06 Blue
Bias Binding

Cuts

Appliqué is sewn
first prior to
cutting bib shap
from fabric
!

BFat Quarter

BFat Quarter

!^"

2.		Place apron pattern on fabric and roughly
cut fabric 1” larger than pattern on all sides.
Sometimes finishing the appliqué edges may
shrink the fabric area cutting the piece larger
will allow for any shrinkage. Refer to Adding
the Appliqué on page 105 to fuse monkey and
finishing the edges.
3.		 Replace apron pattern on unit, centering the
appliqué design and cut out apron.

104 fabric vine 2016

Optional: For a reversible apron, use pattern
to cut out apron from backing fabric piece.
Layer front and back apron pieces, wrong sides
together matching raw edges. Stitch close to
edge to hold pieces in place.

!%” square
Cut once
diagonally

Adding the Appliqué
The instructions given are for Quick Fused
Appliqué Method for other methods refer to
General Instructions (pages 114–115) for
Appliqué Technique. Read instruction tip on
pattern page 109. Note: It is recommended to
use removable stabilizer on the wrong side of the
fabric when machine appliquéing. This will give
stability to the piece, even stitching, and prevent
puckering of fabric.
1.		 Trace all monkey pattern pieces on page 109
on paper side of lightweight fusible web leaving
2” space between pieces. Cut approximately 4”
away from trace line. Trace stitching lines to
paper pieces.
2.		With fusible web paper-side up, fuse
to wrong side of fabric scraps following
manufacturer’s instructions. Cut on traced line.
Use a fabric removable marker to trace stitching
lines to fabric pieces.

3.		 Refer to layout on page 103, to arrange and
fuse appliqués to fabric as shown. Tip: For easy
placement of appliqué on fabric use an appliqué
pressing sheet to make appliqué units. Finish
all appliqué edges with machine satin stitch or
decorative stitching as desired. Satin stitch or
triple stitch monkey details (face, hand, legs and
feet) on marked stitch lines.

Finishing the Apron

2.		 Cut three @2” x $)” and one @2” x *” Fabric
B strips from step 2 strip. Two strips will be
used for neck/waist ties. Fold those two short
strips ends 4” to the wrong side and press, this
will finish the ends in final step. Fold all strips
in half lengthwise and press.
Fold each neck/waist ends 4"
to the wrong side and press.
press line

3.		 Referring to Binding the Quilt (page 115),
sew top edge and bottom curve edges. Trim
excess strip length to match apron edge.

4.		 Measure 11”-12” from top corner as shown
and start sewing binding to apron at this point.
!!-!@"

1.		Sew Fabric B triangles as shown. Mark
wrong side of fabric every @2”. Align mark lines,
offsetting the lines by one, to form a tube. Cut
on marked lines to make one continuous bias
binding strip.

Align dots to offset by one line

5.		Edge-stitch all sides of binding to finish.

2016 fabric vine 105

I Love You This MUCH! Bib

I Love You This MUCH! Burp Cloth

Backing 2 yard
Lightweight Batting
!#" x @$"
Appliqué Fabrics
Assorted Scraps
Lightweight Fusible Web

Backing Fat
Quarter
Batting 12" x 14"
Appliqué Fabrics
Assorted Scraps
Hook & Loop Tape
Lightweight
Fusible Web

Fabric
Fabric A
MOVE-01 Yellow
Background

Fat Quarter
Fabric B
TONE-06 Blue
Bias Binding

Cuts

Option: Cloth Diapers or
terry cloth can be used for
backing if desired.

Fabric

Cuts

Appliqué is sewn
first prior to
cutting bib shape
from fabric

Fabric A
FANT-03 Yellow
Background
2 yard

Appliqué is sewn
first prior to
cutting burp cloth
shape from fabric

!

Fabric B
TONE-06 Blue
Bias Binding

!

!%” square
Cut once
diagonally

BFat Quarter

!*” square
Cut once
diagonally

BFat Quarter

Making the Bib

Making the Burp Cloth

1.		Refer to Bib Pattern, pages 107–108, to
make a whole bib pattern. Place pattern on
Fabric A piece and roughly cut fabric 1” larger
than pattern on all sides.

1.		 Refer to Bib Bottom Pattern (page 108) to
make the burp cloth pattern. Place pattern on
Fabric A piece and roughly cut fabric 1” larger
than pattern on all sides.

2.		 Refer to Adding the Appliqué instruction
(page 105) to cut pieces, fuse to bib, and
finish appliqué raw edges.
3.		Layer and baste backing, batting, and
quilt top together. Hand or machine quilt as
desired.

4.		 Refer to Finishing the Apron on page 105,
for bias binding instructions. Sew binding to
bib.
5.		Sew hook and loop tape to bib.

106 fabric vine 2016

2.		Refer to Adding the Appliqué on page
109 to cut, fuse to cloth, and finish appliqué
edges. Replace pattern centering the appliqué
design on one end of burp cloth and cut out
shape.
3.		Layer and baste backing, batting, and
quilt top together. Hand or machine quilt as
desired.

4.		 Refer to Finishing the Apron on page 105
for bias binding instructions. Sew binding to
burp cloth.

I Love You This MUCH!
Bib
Top Section

Trace top and bottom sections matching placment lines to
make a whole Bib pattern.

Tracing Line
Placement Line

2016 fabric vine 107

Tracing Line
Placement Line
Burp Cloth Alignment Line

I Love You This MUCH!
Bib
Bottom Section

Trace top and bottom sections matching placment lines to
make a whole Bib pattern.

Burp Cloth

• Trace a 9" square on pattern paper.
• Align the green placement line on one side of the

108 fabric vine 2016

Burp Cloth
9" square

Bottom Section

Bottom Section

square and trace bottom curve line.
• Repeat for opposite side to make a whole pattern.

Refer to I Love You This MUCH! Apron Adding the Appliqué section on page 105. Trace one of each appliqué
piece starting with the furthest back. Draw these appliqué pieces slightly larger (z-8”””) only on the side
where they go underneath another piece. It is recommended to use an appliqué-pressing sheet to fuse all
appliqué pieces together this will allow it to be removed as one unit after the piece has cool.
A variety of fusible webs are on the market use your prefer brand. Georgie likes to use Soft Fuse Premium™
for garments since it doesn’t add the stiffness found in so many fusible products.
Tracing Line
Stitching Line
Appliqué is reversed image for quick
fused method if using another method
adjusts appliqué accordingly.

Georgie Gerl’s Monkey design

I Love you This MUCH!

This pattern is for personal use only and may not be produced for sale in any form what so ever without written
permission from Georgie Gerl (ggerldesigner@comcast.net).
Classes may be offer by quilt shops charging for teacher’s fees, overhead and supplies but no charge for the
actual pattern itself. Since it is on-line for free a printed copy can be included with the class or project kits.

2016 fabric vine 109

Peony
Prairie
available now

click quilt
for free
pattern

Torii
Gate

available now

click quilt
for free pattern

general instructions

How-to Help You!
Before You Begin
We recommend washing and pressing
your fabric prior to cutting it into strips
and pieces. To help prevent fabric from
fraying in the washer, clip corners at a 45
degree angle removing a small triangle
piece.

Achieving
a Perfect Block
Accurate Seam Allowance
Use 4”-wide seam allowance for all
projects in this magazine unless otherwise
stated. If seam allowances differ as little
as z” assembling blocks will be difficult,
especially when incorporating several
block designs in a quilt. To check your
seam allowances follow these steps.

Half Square Triangles

without breaking threads, continue this
process to stitch additional units. Cut
sections apart, press and continue with
next step.

Fussy Cut
This process is the selection and
cutting of a particular motif pattern which
is featured in a cut piece. Remember to
center design and always allow for seam
allowance.

Simple Triangles
This is an easy way to make triangles
from squares.

Step 1 Draw a diagonal line on the
wrong side of fabric square that will
become the triangle. This will be your
stitch line.

Step 1 Cut three 12” x 6” pieces of
fabric from assorted scraps. Sew pieces
together to make one 32” x 6” piece.
Press.

Step 2 Center strip should measure 1”
x 6”. If piece measures differently check
to see if seams have been pressed flat. If
the piece still differs cut new strips and
adjust seam allowance until you achieve
the perfect stitch.

Pressing
Press using steam or dry heat setting.
Always use an “up and down” motion
since a side-to-side motion can distort
the block or unit.

Assembly Line Method
Use this method when making
multiple pieces or blocks.

Step 2 Place marked square on
fabric piece shown in construction step
matching raw edges. Sew on drawn line
and trim 4” away from stitching.

Fabric A- 2 2" x 2 2"
Fabric B- 2 2" x 6 2"

Step 3 Press seams as indicated in
construction diagram. Measure sewn
piece to check accuracy.

Tip: There is a waste factor with
this technique but you can stitch an
additional 2” away from stitch line.
Cut piece between stitching saving the
smaller version for some future project.
Diagram 3

Step 1

Position pieces right sides
together, stitch unit.

Step 2 Align and sew the next unit

114

FABRIC VINE 2016

This technique differs from the Simple
Triangle method; you will be making two
triangles at one time.

Step 1 Draw a diagonal line on the
wrong side of one fabric square. Place
marked square and one corresponding
square right sides together. Sew a scant
4” away from drawn line on both sides,
cut on drawn line, and press.

Fabric F- 2 2" x 2 2"
Fabric D- 2 2" x 2 2"

Square to 2”
Make 2

Step 2 Measure unit and trim as
indicated in construction diagram.

Applique Technique
Quick Fused Method
This method joins fabric to each
other with the use of fusible web. There
are many types on the market and you
will need to refer to manufacturer’s
instruction for specific requirements. If
quilt does not require laundering you
can use heavy-weight fusible web and
follow steps 1-4. If your quilt will require
laundering use lightweight fusible web
and follow all steps. Remember that
appliqués when pressed to background
fabric will be a reverse image from patterns
provided.

Step 1 Trace all appliqué pieces on
the paper side of lightweight fusible
web leaving 2” space between pieces.
Cut approximately 4” away from traced
line.

Step 2 With fusible web paper side
up, fuse to the wrong side of fabric scraps
following manufacturer’s instructions.

Step 3 Cut on draw line. Remove
future project

paper backing, a thin film of adhesive
will remain on fabric.

General Instructions

Step 4 Referring to project photo,
position and fuse all pieces of one
appliqué design at a time onto
background.

Tip: An Appliqué Pressing Sheet
is very helpful when there are many
elements to a design. Place your pattern
(reverse image from pattern provided)
under the pressing sheet as a guide.
Arrange pieces on sheet and press
following manufacturer’s instructions.
Allow piece to cool, remove appliqué
unit and arrange on background to fuse
unit in place. If the piece is not cooled,
the fusible web could remain on the
sheet instead of the fabric.

Step 5 If using a machine, cut a
piece of stabilizer larger than appliqué
area and pin to wrong side of fabric.
Stabilizer is used to achieve an even
stitch. Using a satin stitch, blanket stitch
or other decorative stitching to secure
appliqué in place. Start stitching from the
background to the foreground. Option:
use a hand embroidery stitch instead.

Hand Appliqué
If project spe es quick-fuse you
will need to reverse all patterns and add
4”- wide seam allowance. The steps that
follow will add the seam allowance after
pattern is traced onto fabric.

Step 1 Make a template of all pattern
pieces and indicate where pieces overlap.
Place template on right side of selected
fabric.

Step 2 Trace around template using
a removable fabric marker. This will be
your turn under guide. Cut out shapes
approximately 4” beyond traced line.
Step 3 When layering and positioning
pieces always work from the background
to the foreground.

Step 4 Enter from the wrong side of
applique shape bringing the needle up
on the traced line. Using the tip of the

needle turn under a small portion of the
fabric along trace line and secure with
thumb. Using a blind stitch, stitch along
folded edge to join piece to background.
Stitch is hidden under fabric.

Option 1
Step 1 Position binding away from
corner leaving 8” free of stitches and
aligning raw edges with the edge of the
quilt. Sew using a 4”-wide seam.

Step 2 Stop sewing 4” from quilt top

Blind Stitch

Finishing the Quilt

edge and backstitch. Clip threads and turn
quilt. Fold binding up at a 45 degree angle
to create the mitered corner as shown.

Diagram 1

Backing fabric and batting should
be 4”-8” larger than the quilt top. Press
backing and quilt top trimming all excess
threads from quilt prior to basting.

Step 1 Lay backing right side down,
batting and quilt top (right side up)
on top.

Step 2 Backing and batting need to

Step 3 Fold the binding back down
aligning top fold with edge of quilt and
matching raw edges. Start stitching 4”
Diagram
2 for all corners.
from quilt
edge. Repeat

be taut prior to basting quilt. Start in the
center and work out toward edges. You
can hand stitch, pin or use a specialty
tool to baste quilt together.

Step 3 Check batting instruction for
quilting requirements. Hand or machine
quilt as desired. Remove basting.

Binding the Quilt
Two options are given for binding the
quilt. For both options trim batting and
backing 4” beyond raw edge of quilt,
this will give fullness to the binding. Sew
binding stripes end-to-end to make one
continuous strip. Fold and press binding
strips in half lengthwise with wrong sides
together. To reduce bulk when joining
strips, cut ends at 450 angle and sew
together as shown.

Step 4 Determine length needed for
binding strip ends, trim and sew ends
together. Stitch binding to quilt. Fold
binding to back of quilt, a diagonal fold
will form at the corners. Hand-stitch
binding to back of quilt.

Option 2
Step 1 Measure quilt through center
from side to side. Cut two binding strips
to this measurement. Sew to top and
bottom of quilt matching raw edges with
edge of quilt. Press binding away from
quilt top.

Step 2 Measure quilt through center
from top to bottom including the
binding just added. Cut two strips to
this measurement and sew to sides of
quilt. Press.

Step 3 Fold top and bottom strips to
the back and pin in place. Repeat for
sides. Hand-stitch binding to quilt.
2016 FABRIC VINE

115