/


Похожие

Текст
JUMPSTARTING C
LEARN THE PROGRAMMING LANGUAGE
THAT LETS YOU INTERFACE WITH YOUR
COMPUTER’S HARDWARE AND MEMORY
Wolfram Donat
Maker Media, Inc.
San Francisco
Copyright © 2017. Wolfram Donat. All rights reserved.
Published by
Maker Media, Inc.
1700 Montgomery Street, Suite 240
San Francisco, CA 94111
Maker Media books may be purchased for educational, business, or
sales promotional use. Online editions are also available for most titles
(safaribooksonline.com). For more information, contact our corporate/
institutional sales department: 800-998-9938 or corporate@oreilly.com.
Publisher: Roger Stewart
Editor: Patrick DiJusto
Copy Editor and Proofreader: Elizabeth Welch, Happenstance Type-O-Rama
Interior Designer and Compositor: Maureen Forys, Happenstance
Type-O-Rama
Cover Designer: Maureen Forys, Happenstance Type-O-Rama
December 2017: First Edition
Revision History for the First Edition
2017-12-13 First Release
See oreilly.com/catalog/errata.csp?isbn=9781680454284 for release details.
Make:, Maker Shed, and Maker Faire are registered trademarks of Maker
Media, Inc. The Maker Media logo is a trademark of Maker Media, Inc. Jumpstarting C and related trade dress are trademarks of Maker Media, Inc.
Many of the designations used by manufacturers and sellers to distinguish
their products are claimed as trademarks. Where those designations appear
in this book, and Maker Media, Inc. was aware of a trademark claim, the
designations have been printed in caps or initial caps. While the publisher
and the author have used good faith efforts to ensure that the information
and instructions contained in this work are accurate, the publisher and the
author disclaim all responsibility for errors or omissions, including without
limitation responsibility for damages resulting from the use of or reliance on
this work. Use of the information and instructions contained in this work is
at your own risk. If any code samples or other technology this work contains
or describes is subject to open source licenses or the intellectual property
rights of others, it is your responsibility to ensure that your use thereof
complies with such licenses and/or rights.
978-1-68045-428-4
Safari® Books Online
Safari Books Online is an on-demand digital library that delivers expert
content in both book and video form from the world’s leading authors in
technology and business. Technology professionals, software developers,
web designers, and business and creative professionals use Safari Books
Online as their primary resource for research, problem solving, learning,
and certification training. Safari Books Online offers a range of plans and
pricing for enterprise, government, education, and individuals. Members
have access to thousands of books, training videos, and prepublication
manuscripts in one fully searchable database from publishers like O’Reilly
Media, Prentice Hall Professional, Addison-Wesley Professional, Microsoft
Press, Sams, Que, Peachpit Press, Focal Press, Cisco Press, John Wiley &
Sons, Syngress, Morgan Kaufmann, IBM Redbooks, Packt, Adobe Press, FT
Press, Apress, Manning, New Riders, McGraw-Hill, Jones & Bartlett, Course
Technology, and hundreds more. For more information about Safari Books
Online, please visit us online.
How to Contact Us
Please address comments and questions to the publisher:
Maker Media, Inc.
1700 Montgomery Street, Suite 240
San Francisco, CA 94111
You can send comments and questions to us by email at
books@makermedia.com.
Maker Media unites, inspires, informs, and entertains a growing community
of resourceful people who undertake amazing projects in their backyards,
basements, and garages. Maker Media celebrates your right to tweak, hack,
and bend any Technology to your will. The Maker Media audience continues
to be a growing culture and community that believes in bettering ourselves,
our environment, our educational system—our entire world. This is much
more than an audience, it’s a worldwide movement that Maker Media is
leading. We call it the Maker Movement.
To learn more about Make: visit us at makezine.com. You can learn more
about the company at the following websites:
Maker Media: makermedia.com
Maker Faire: makerfaire.com
Maker Shed: makershed.com
Maker Share: makershare.com
CONTENTS
Preface
1 Installing the Required Bits and Pieces
The Compiler
The IDE
2 Your First Programs
Hello, World!
Data Types
Hello, You Entered…
if/then/else Conditions
Loops
A Few Notes about Syntax
vii
1
2
4
7
8
10
11
12
14
16
3 Your First Project
17
Functions
blink
Read a Button Press
17
20
25
4 Simon Says
Building the Game
The Code
Running the Program
Things to Try
Conclusion
29
30
31
41
41
42
v
PREFACE
A
sk almost any computer hardware or software engineer
which programming language she learned first, and the answer
is bound to be C or C++. Many computer scientists start with Java
or C’s stepchild, C#, but engineers normally learn C. It’s the best
way, after all, to get into the basics of algorithms and operating
systems. The Windows, Mac, and Linux kernels, after all, are all
written mostly in C. Aside from assembly, it’s probably one of the
most basic programming languages.
C is powerful, fast, and unsexy. It’s got built-in errors you may
have never heard of (“What the hell is a segmentation fault?!”)
and lets you mess with actual memory heaps and registers. There
are no classes or even strings—you’re dealing with character
arrays here, folks. There’s no fancy garbage collection; if you use
some memory for an array, you’ll probably want to free up that
memory when you’re done, or you’ll have a memory leak that
could crash your program later.
C is cross-platform, but not in the same way that Python is
cross-platform. Python code written on a Linux box can, with a
few exceptions, run on a Windows machine without alterations.
Most C written on a Linux computer will run on a Windows computer, but it will need to be recompiled first. C executables are
specific to the machine on which they’re compiled, and transferring between operating systems can pose some unique
challenges.
If you take the time to learn C (and its big brother, C++), your
programming will benefit, even if you’re already an experienced
Python, Java, or even web programmer. Programming in C brings
you back to basics, doesn’t let you cut corners, and truly makes
vii
you think about what you’re trying to do and the best way to do
it. Yes, it can be incredibly frustrating—I have lost literally hours
trying to debug a piece of code, only to find it was merely missing
one semicolon—but it can also be quite rewarding. There’s something about programming “close to the metal” that reminds me
why I became a computer engineer in the first place.
I’m assuming that you, the reader, bring the following to this
book:
** A computer, and the ability to access the Internet
** Some knowledge of programming, even very basic
** A Raspberry Pi Zero or Zero W and all assorted cables
** Some LEDs, resistors, a breadboard, and some jumper wires
So if you’re wanting to expand your horizons, and learn some
new languages and some new skills, follow along and I’ll teach
you some C!
viii
Jumpstarting C
Installing the
Required Bits
and Pieces
1
In this chapter, you’ll learn about C and C++ IDEs and compil-
ers, and I’ll walk you through the process of installing them on
your favorite computer. Be warned, however, that the projects in
chapters 3 and 4 will be running on a Raspberry Pi Zero, which
is a Linux-based system.
If you already have a Pi Zero or another Linux machine, I
recommend you set it up now. The basic programs that we’ll go
through in chapters 1 and 2 will run on any system, but if you’re
already familiar with Linux and the Pi, so much the better.
If you’d like to get started learning with Linux but don’t have a
computer on which to install it, I suggest you check out VirtualBox
(http://www.virtualbox.org) from Oracle. VirtualBox is free and
lets you install almost any client operating system (Windows,
Linux, and a few others) onto a virtual computer running inside
your host machine (Windows, Mac, or Linux). Since everything
is free, you can download VirtualBox for your current computer,
download a free Linux version (Ubuntu is probably the most popular, but you have many to choose from), start up your new virtual
computer, and follow along with this book.
That being said, however, you can indeed learn to program
in C on any machine, be it Mac, Linux, or Windows, and I’ll show
you how to get started on any of those.
To program in C on any computer, you’ll need at least two
things: an editor, or IDE, and a compiler. Let’s look at the compiler first.
THE COMPILER
The compiler is the piece of software that converts the code
you write to language that the computer can understand.
This end result is a collection of 1s and 0s called assembly
language, machine code, or object code. There are different
compilers for different systems and different programming
languages, but when it comes to C, the most common compiler by far is gcc (Gnu Compiler Collection). It comes pre
installed on most Linux distributions, and versions exist for
both Windows and Mac.
Linux
To make sure you have gcc installed, type gcc --version in your
terminal. You should be greeted with a message similar to this:
gcc (Ubuntu 5.4.0-6ubuntu1~16.04.4) 5.4.0 20160609
(This may vary based on your distribution, of course.) If by
chance gcc is not installed, you should be able to install it from the
standard Linux package repositories; try sudo apt-get install gcc
or sudo yum install gcc.
2
Jumpstarting C
Mac
To use gcc on the Mac, you’ll need to install it, since it’s not
included by default. This means you’ll have to download and
install the developer’s command-line tools. Luckily, on newer
versions of the OS—El Capitan, Yosemite, and newer—you no
longer need to download and install Xcode (Apple’s bulky software developer package) first. Instead, you can download the
command-line tools separately.
To do this, open a terminal and enter
xcode-select --install
You’ll get a software update pop-up window that asks you to
confirm that you wish to install the tools. Click Install and agree
to the terms of service; then wait for the 130 MB download to
finish. The installer should finish on its own; when it does, type
gcc --version
into your terminal window and you should see something like
this:
gcc (GCC) 4.8.0 20130113 (experimental)
NOTE If you’re a Homebrew user, you can skip all this with
a simple
brew install gcc
You now have gcc installed on your Mac!
Windows
gcc does work on Windows machines, though you’ll need to
install it and a Linux-like environment for it. Alternatively, you
can download the Visual Studio Community package (see the
Installing the Required Bits and Pieces
3
next section) and you’ll have access to gcc as part of its available
add-ons. This is my recommended course of action, since installing and using the GNU-like environments for Windows, Cygwin,
and MinGW is not a trivial process.
THE IDE
When it comes to writing your code, the IDE (integrated development environment) is where you’re going to have the most
choices available to you. As a matter of fact, it’s kind of a dirty
little secret among programmers that you don’t need to use a
fancy development environment like Microsoft’s Visual Studio or
Eclipse at all. You can write perfectly good, functional C code
with any standard text editor, like emacs, vim, Sublime Text, or
even Windows’ Notepad or the Mac’s TextEdit.
That being said, however, it’s definitely to your advantage to
use a development environment of some sort, especially when
you’re learning. The basic functions that come with an IDE, such
as automatically adding closing parentheses and brackets ({ }),
can be immeasurably helpful. It’s a feature that you’ll get used to
pretty quickly.
If you’d prefer to use a full-featured IDE, which is probably a
good idea for beginners, many options—both free and otherwise—
are available. Many people like NetBeans (http://netbeans.org), and
Eclipse’s C/C++ extension (http://eclipse.org/cdt) is also popular. If
you’re on a Mac or Windows, you can get the community edition
of Microsoft’s Visual Studio IDE for free (http://visualstudio.com/
downloads).
NetBeans is a free IDE that has extensions available for many
different languages, including Java, HTML, PHP, and C/C++.
It’s supported on all three major platforms. When you visit the
download page, choose your OS first at the top left of the page,
4
Jumpstarting C
and then choose the C/C++ bundle appropriate to your platform
(32- or 64-bit).
Eclipse is also popular, though many (myself included) find its
C/C++ interface sort of clunky. Like NetBeans, it’s available for
all three major operating systems, and it’s also free. Visit their
download page; download the .zip, .dmg, or .tar file appropriate
for your platform; and follow the installation instructions.
If you’re using a Mac or a Windows box, I recommend getting the free Visual Studio Community edition from Microsoft. Be
warned: If you install all the available packages (such as Android
and iOS development on the Mac), it’s a hefty download. However, once it’s installed, it does give you an all-in-one application
for all your coding projects.
If you’re confident in your coding skills, you can use any text
editor, and as I mentioned, some have add-ons and extensions
that make programming more accessible. Sublime Text (www.
sublimetext.com/3) is my usual choice; it has automatic keyword
coloring and parentheses- and brace-closing built in. I’m also an
emacs user (and I know that by saying that I’m inviting hate mail
from vi users!), and I use it when I do programming remotely, such
as during an SSH session on a remote device. Notepad++ (http://
notepad-plus-plus.org) is also a popular choice for a text editor
development environment.
Installing the Required Bits and Pieces
5
2
Your First Programs
O
nce you’ve got your IDE and your compiler installed, it’s time
to start working on your first program. We’re going to follow a
tradition that dates back to the prehistoric days of computing
(1967!), and make your first program print out the simple text
message “Hello, World!”
What about C++?
As an aside, this seems like as good a place as any to mention
C’s big brother, C++, and why I’m not going into it in much depth.
C++ is quite a step up from C and learning it would require a
book by itself. C++ can do so much more than C that it could
almost be considered a completely different language; however,
they’re similar enough that you can often compile programs
written in C with the C++ compiler, g++. It’s not uncommon for
new programmers to have a mix of C (.c) and C++ (.cpp) files
in a project; although those files will most likely compile and
run, it’s best if you stick to one language or the other. All of the
syntax and instructions you see here are equally valid in C++.
In the screenshots for this chapter, I’ll be using emacs on a
Linux machine, but since C is so portable, you can follow along
with whatever environment you happen to be using.
HELLO, WORLD!
Your first program in C is short, simple, and to the point. Fire up
your development environment and save a new file as hello.c.
Enter the following:
#include <stdio.h>
void main()
{
printf("Hello, world!\n");
}
Save the file, and then compile it. If you’re using an IDE, this
can be done from the menu—there’s most likely a Save and Compile button or menu item. If you’re just using a text editor, then
go to your terminal and enter
gcc hello.c -o hello
Assuming everything is done correctly, you should now have
a new file in your directory, hello. When you don’t specify a name
for your compiled program, gcc uses the default name of a.out.
The -o flag in your gcc command gives your compiled executable
the name hello.
Now run your program. In a terminal, enter
./hello
and you should be greeted with Hello, world! in your terminal
(Figure 2.1).
Pretty simple, right? Let’s take a look at the program, line
by line.
8
Jumpstarting C
FIGURE 2.1: Output of hello.c
The first line tells the compiler to include a common header
file, stdio.h, when it compiles. The filename stands for standard
input output. It provides you with all the code you need for getting input and printing output to the terminal or other physical
devices supported by your system.
The void main() block of code, surrounded by opening and
closing brackets, is the main function in your program. The word
void means that the function is not expected to return anything,
and the empty parentheses after main show that the function
takes no arguments.
Inside the main function block, the printf function prints
Hello, world! to the screen, followed by a carriage return (the \n).
This is a pretty simple program; I’d expect it to compile without errors. If you do have errors, it will probably be from a missing
semicolon at the end of a line or from a missing closing bracket.
In that case, gcc should alert you during the compilation process.
Your First Programs
9
In the case of a missing semicolon, you should get a message
along the lines of
error: expected ',' or ';' before 'char'
NOTE gcc’s error messages can be a bit cryptic, but with
practice you’ll learn to interpret them and find your errors.
DATA TYPES
With your first program up and running, let’s take a moment to
talk about C’s data types.
C has data types similar to other programming languages;
these types include int, char, short, long, double, float, and various combinations of those (e.g., long double). Table 2.1 shows
the most common data types and the range of values each can
have. You can have multiple variables of the same type, but each
variable must have a unique name. C is case-sensitive, so number
is different from Number and NUMBER.
TABLE 2.1: Common data types
WILDCARD VALUE RANGE
10
UNSIGNED
RANGE
int
%d
−32,767 to +32,767
0 to 65535
char
%c
–127 to 127
0 to 255
short
%i
−32,767 to +32,767
0 to 65535
long
%l
−2,147,483,647 to
+2,147,483,647
0 to
4,294,967,295
float
%f
1.17549435e-38 to
3.40282347e+38
n/a
double
%g
2.2250738585072014e-308
to 1.7976931348623157e+308
n/a
Jumpstarting C
One important thing to remember is that, unlike languages
like Python, C requires you to declare your variable types, and
to do so ahead of time. In other words, Python’s dynamic typing
(for example) allows you to enter
x = 15
y = "Your mother is a hamster!"
and Python understands that x is an integer and y is a string. In
C, you must explicitly state that:
int x = 15;
char y[26] = "Your mother is a hamster!";
(Note that y is an array of characters, not a string.) With
older versions of gcc, declaring variables was even more inconvenient—you had to declare the variable first, and then set it. In
other words, you had to type
int x;
x = 15;
on separate lines, rather than combining them into one statement. Luckily, C standards progressed and C now allows declaring and setting in one statement.
So assuming your program compiled and ran, let’s make it a
bit more interesting by adding some input from the user.
HELLO, YOU ENTERED…
Open hello.c again in your editor. Modify the main() function to
reflect the following:
int main()
{
int number;
printf("Please enter a number: ");
scanf("%d", &number);
printf("Hello, you entered %d\n", number);
return number;
}
Your First Programs
11
Save the file and then compile it, again with
gcc hello.c -o hello
and run it with
./hello
Your terminal prompt should now ask you for a number and
then repeat that number back to you. Again, it’s pretty simple.
Let’s take a look at the additions to the program.
After declaring number to be an integer (see the previous section “Data Types”), the program asks for a number and then reads
the input from the user by using the scanf function. The %d tells
the program to expect an integer, which is then placed into the
memory location called number that we initialized earlier. Then the
program prints the entered number, again using %d to specify an
integer.
Finally, we changed the function type from void, which returns
nothing, to int, which returns an integer. Specifically, it returns
the integer you entered. Here, the program does nothing with
the information, but you can use this type of function to get input
from any source and return it to the main program.
Now that you’ve gotten a quick introduction with some working programs, let’s dig a little deeper into C’s syntax.
IF/THEN/ELSE CONDITIONS
As in many other programming languages, C allows you to make
decisions regarding the flow of code with if/then/else and switch
statements.
The syntax of the if/then/else statement is simple:
if (x == 4)
{
printf("Yup, it's four!\n");
}
12
Jumpstarting C
else if (x ==5)
{
printf("Nope, it's five!\n");
}
else
{
printf("It's something else entirely.\n");
}
The logic here is as follows: The program checks to see if x
is equal to 4. If it is, it prints the first printf statement and then
skips the rest of the conditional checks and moves on. If x doesn’t
equal 4, the program checks to see if x equals 5. If it does, the
program prints that printf statement and jumps out of the conditional loop. Finally, if x is neither 4 nor 5, the last else covers all
other bases. The program prints the last line, and then continues.
NOTE An important thing to notice here is the conditional
check: to see if x equals 4, you use if (x == 4), not if (x = 4).
A double equals is a conditional; a single equals is an assignment.
It’s a mistake every programmer makes, but just be aware of it.
Obviously, if you have to compare x against 15 different integers and perform a different task in each case, the standard
if/then statement can get a bit unwieldy. In that case, C has the
switch statement, which is more elegant.
switch (x)
{
case 1:
printf("It's one!\n");
break;
case 2:
printf("It's two!\n");
break;
case 3:
printf("It's three!\n");
Your First Programs
13
break;
default:
printf("It's something else entirely!\n");
}
The logic here should be pretty self-explanatory; the program
checks x against each case and executes the appropriate printf
statement. The break statement is necessary to break the code
out of the conditional loop. Without it, the program will execute
each line after the successful case. The default statement is
optional and covers “everything else.” It comes at the end of the
switch statement and is executed only if none of the previous
cases applied.
LOOPS
The ability to have a program repeat one task over and over again
is just as important in C as in any other language. C has three
types of loops: for, while, and do/while. Let’s look at them.
for
int i;
for (i=0; i<4; i++)
{
printf("This is loop number %d\n", i);
}
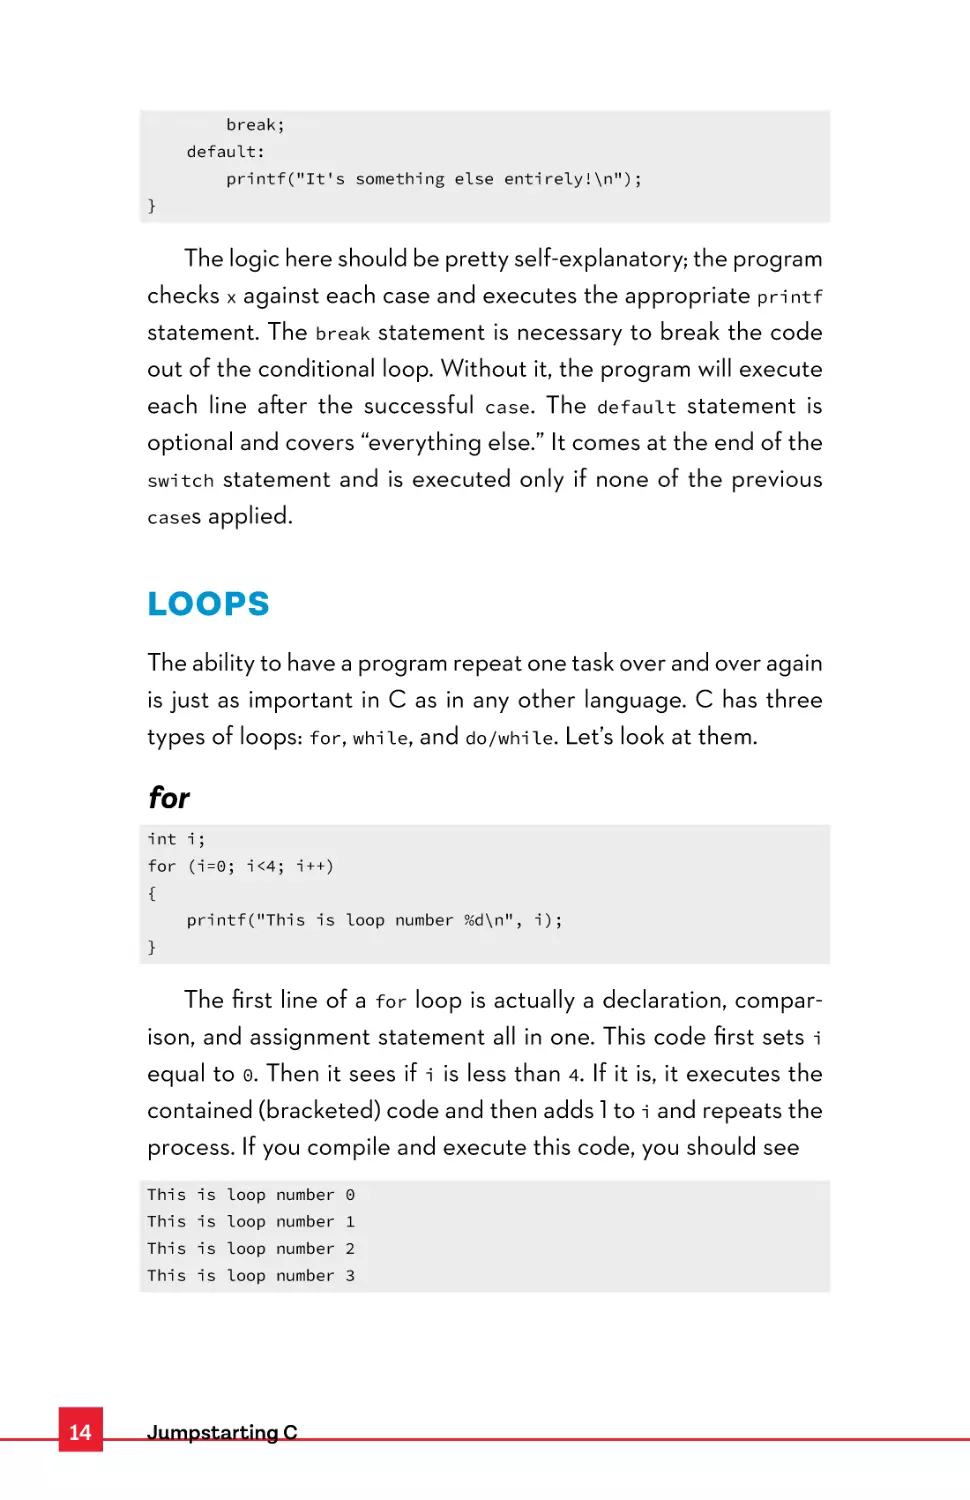
The first line of a for loop is actually a declaration, comparison, and assignment statement all in one. This code first sets i
equal to 0. Then it sees if i is less than 4. If it is, it executes the
contained (bracketed) code and then adds 1 to i and repeats the
process. If you compile and execute this code, you should see
This is loop number 0
This is loop number 1
This is loop number 2
This is loop number 3
14
Jumpstarting C
An important thing to note here is that if i is equal to 4, the
code doesn’t execute. In this case, it still executes four times,
since i starts at 0 (like many loops in programming), but if you
set your loop with different starting and ending points, keep in
mind that the less-than (<) symbol might end your loop earlier
than you thought.
while
int x = 0;
while (x < 10)
{
printf("x equals %d\n", x);
x++;
}
is similar to the for loop. In fact, it’s so similar that you
might be inclined to wonder why you would use this particular
loop at all. The while loop is most useful if you are constantly
checking a condition that might be updated by another part of
your code. Here, obviously, we set and update x ourselves, but if
we were monitoring a sensor, we could continue to loop until the
sensor return reached a particular value.
while
do/while
do/while
is almost exactly like the while loop:
int x = 4;
do
{
printf("Still happening!\n");
}
while (x == 4);
The difference is that here, the condition (is x equal to 4?) is
checked only after the printf line is executed, so it always executes at least once. A while loop says “Loop while this is true, and
Your First Programs
15
do this,” whereas a do/while loop says “Do this, and then keep
doing it while this is true.” A small difference, but an important one.
A FEW NOTES ABOUT SYNTAX
C is pretty easy to understand, syntax-wise. All statements must
end in a semicolon. If you see a line that doesn’t, it’s because that
statement is continued on another line. A for loop, for example,
is just one long statement.
Comments, which you should use often, start with //. Anything that comes after a double forward slash is ignored by the
compiler. To comment out a block of code, use a matching pair
of /* and */:
/*
Anything within this block can be ignored.
*/
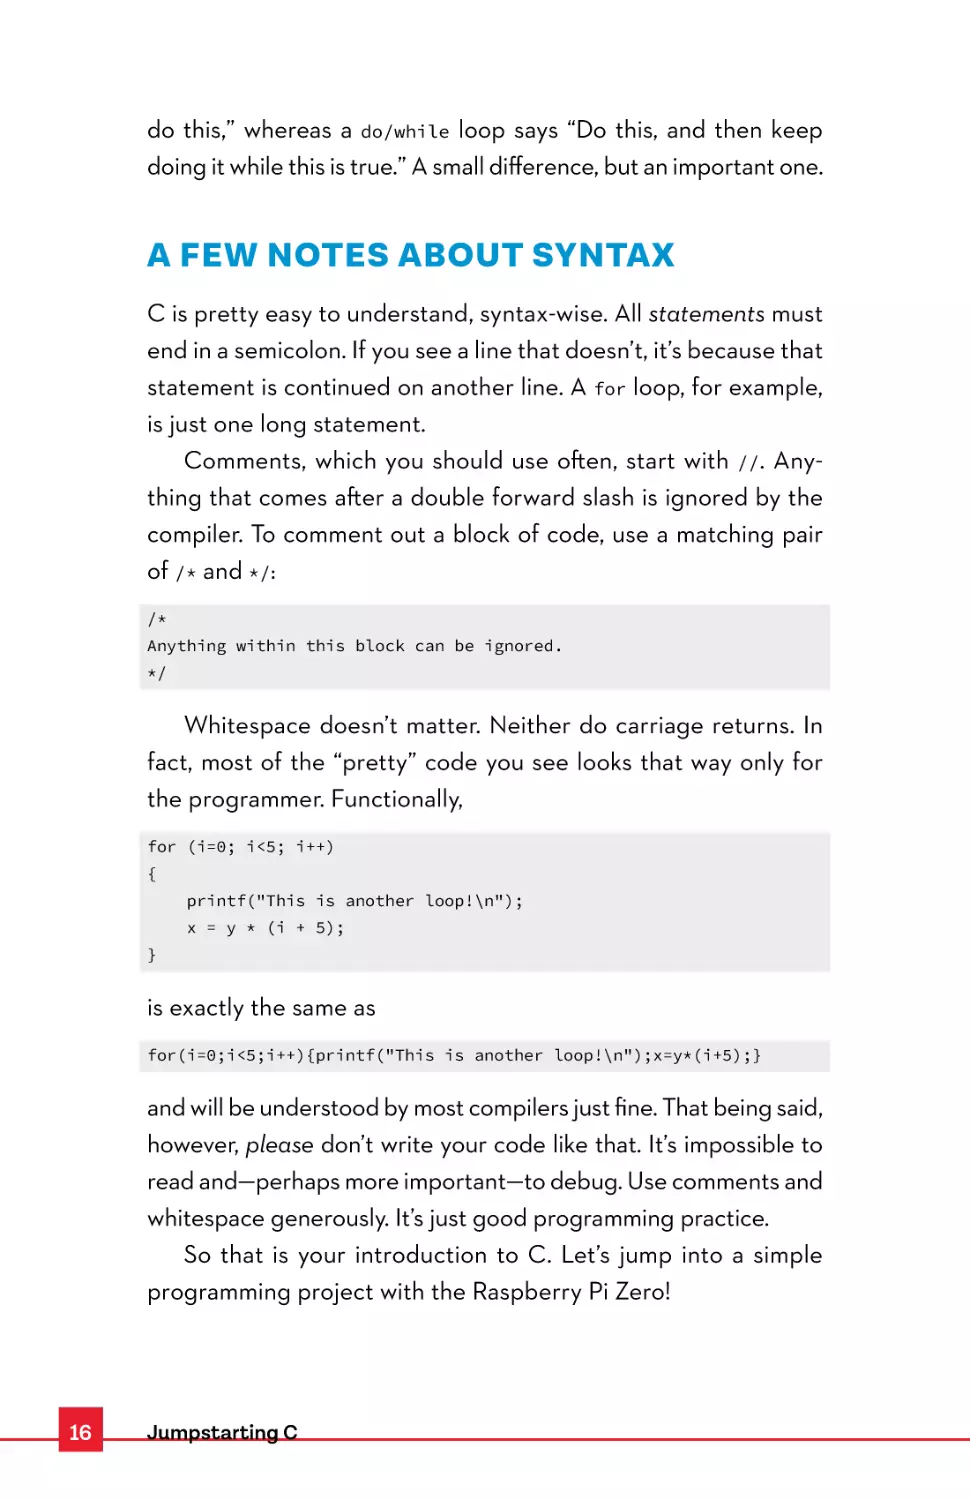
Whitespace doesn’t matter. Neither do carriage returns. In
fact, most of the “pretty” code you see looks that way only for
the programmer. Functionally,
for (i=0; i<5; i++)
{
printf("This is another loop!\n");
x = y * (i + 5);
}
is exactly the same as
for(i=0;i<5;i++){printf("This is another loop!\n");x=y*(i+5);}
and will be understood by most compilers just fine. That being said,
however, please don’t write your code like that. It’s impossible to
read and—perhaps more important—to debug. Use comments and
whitespace generously. It’s just good programming practice.
So that is your introduction to C. Let’s jump into a simple
programming project with the Raspberry Pi Zero!
16
Jumpstarting C
3
Your First Project
I
n this chapter I’ll introduce you to the use of functions, and then
we’ll use a few small projects to learn how to interact with the
Raspberry Pi Zero’s GPIO pins using C and an external library.
(As it happens, all of these projects will work on any Pi you have
around; I decided to use the Zero because if you don’t currently
have a Pi, the Zero is a small and cheap board.)
FUNCTIONS
You learned the concept of functions in the Hello, world program
in Chapter 2, “Your First Programs”:
void main()
{
. . . .
}
Here, main() is an example of a function. Functions encapsulate tasks within your program, allowing you to condense
many instructions into a single line of code. Most programming
languages have many built-in functions that you use without realizing it: printf() in C, for example, is a function.
The best way to illustrate functions is to write a few. Suppose
we wanted to write a program that asks the user for a type of
shape, and then computes the area of that shape. We could use
different functions—one for circles, one for squares and rectangles, and one for triangles. We could start with this:
#include <stdio.h>
#include <string.h>
void main()
{
int x, y;
double area;
char shape[10];
printf("What shape would you like to find the area of?\n");
scanf("%s", &shape);
}
What the program does next depends on what shape the
user inputs, so we’ll use a separate function for each possibility.
Continuing on the next line:
if (strcmp(shape, "circle") == 0)
{
printf("Enter radius: ");
scanf("%d", &x);
area = circle(x);
}
Here we’re using the string.h library we included to compare
the user’s input with the string "circle". If they’re the same (if
strcmp equals 0), then we ask for the radius and call the circle()
function, using the radius (x) as a parameter. Continuing:
else if (strcmp(shape, "rectangle") == 0
|| strcmp(shape, "square") == 0)
{
printf("Enter height: ");
scanf("%d", &x);
printf("Enter width: ");
18
Jumpstarting C
scanf("%d", &y);
area = square(x, y);
}
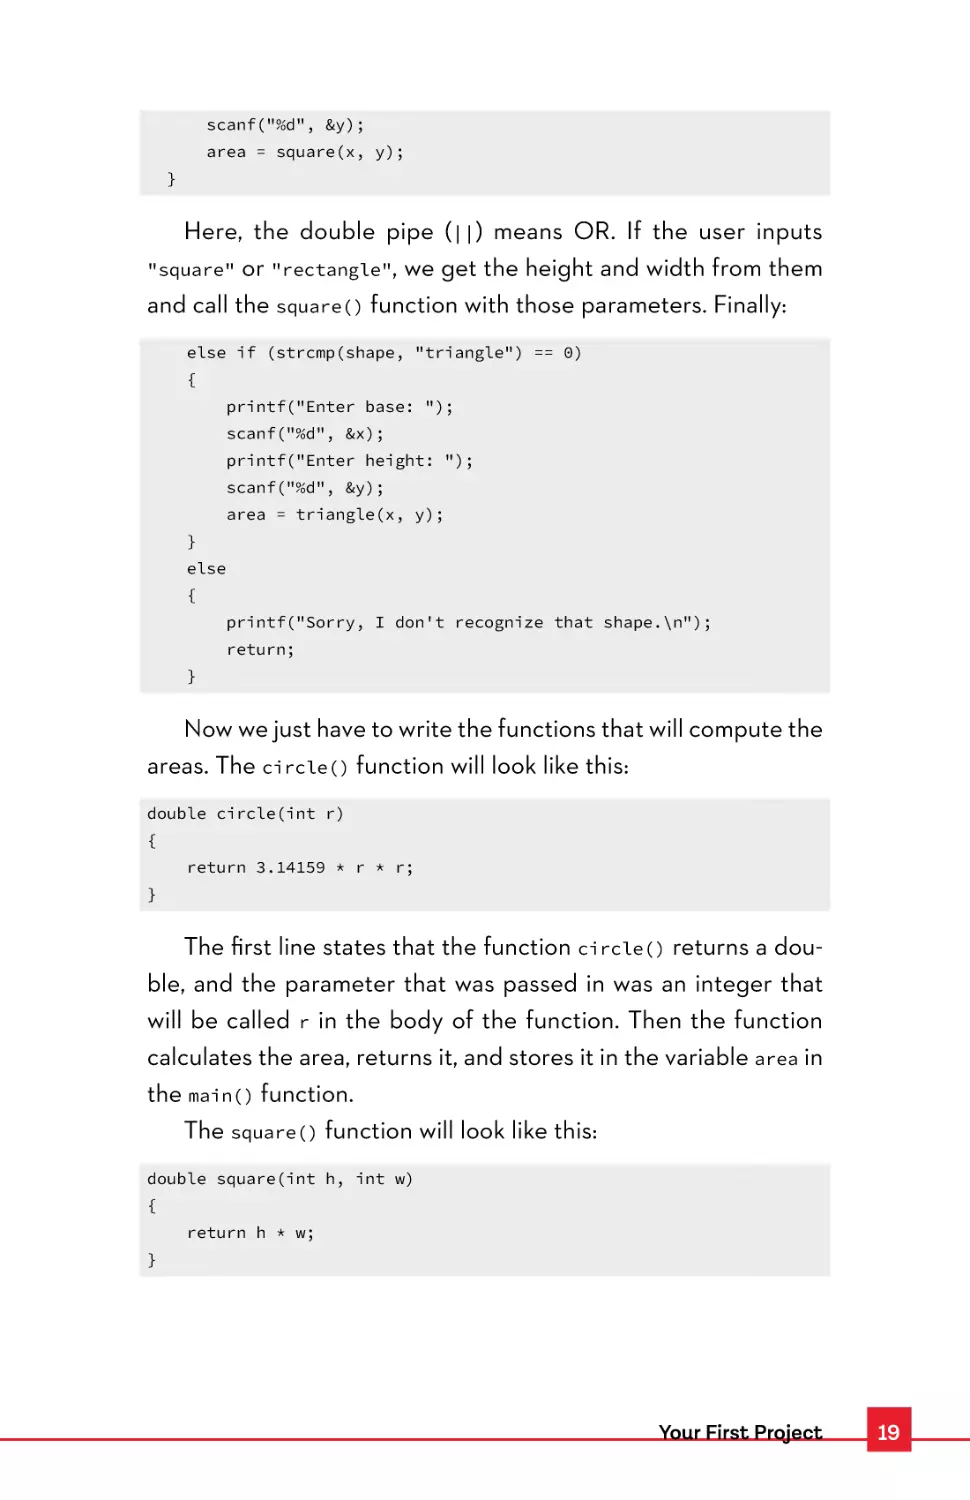
Here, the double pipe (||) means OR. If the user inputs
"square" or "rectangle", we get the height and width from them
and call the square() function with those parameters. Finally:
else if (strcmp(shape, "triangle") == 0)
{
printf("Enter base: ");
scanf("%d", &x);
printf("Enter height: ");
scanf("%d", &y);
area = triangle(x, y);
}
else
{
printf("Sorry, I don't recognize that shape.\n");
return;
}
Now we just have to write the functions that will compute the
areas. The circle() function will look like this:
double circle(int r)
{
return 3.14159 * r * r;
}
The first line states that the function circle() returns a double, and the parameter that was passed in was an integer that
will be called r in the body of the function. Then the function
calculates the area, returns it, and stores it in the variable area in
the main() function.
The square() function will look like this:
double square(int h, int w)
{
return h * w;
}
Your First Project
19
Here, the x and y parameters we passed in are called h and
in that order, and the function multiplies them together and
returns the result in the area variable. The triangle() function is
just as easy:
w,
double triangle(int b, int h)
{
return 0.5 * b * h;
}
Finally, we can add the last line to our main() function:
printf("The area of the %s is %f\n", shape, area);
Bear in mind that each of the functions we wrote could be
much more complex. The idea is the same, however; each function encapsulates a particular set of calculations or blocks of
code.
To test your program, compile it with gcc -o shape shape.c
and then run it with ./shape.
BLINK
Now that you’ve been introduced to functions, let’s write some
code for the Pi Zero, starting with the old Arduino favorite, blink.
Start by downloading and installing the pigpio library. Make
sure you’re connected to the Internet and enter the following
commands in your Pi’s terminal:
pi@raspberrypi:~ $ wget abyz.co.uk/rpi/pigpio/pigpio.zip
pi@raspberrypi:~ $ unzip pigpio.zip
pi@raspberrypi:~ $ cd PIGPIO
pi@raspberrypi:~ $ make
pi@raspberrypi:~ $ sudo make install
If you’re using a Pi Zero, the make command may take a few
minutes.
20
Jumpstarting C
The pigpio library enables you to access the Pi’s GPIO pins
using a variety of programming languages, including C. Let’s
start with a simple program to make two LEDs blink on and off,
similar to the Arduino’s basic blink sketch. Start a new document,
blink.c, and enter the following:
#include <stdio.h>
#include <pigpio.h>
void main()
{
if (gpioInitialise() < 0)
{
printf("pigpio initialization failed\n");
return;
}
gpioSetMode(14, PI_OUTPUT);
gpioSetMode(15, PI_OUTPUT);
while (1)
{
gpioWrite(14, 1);
gpioWrite(15, 1);
time_sleep(0.5);
gpioWrite(14, 0);
gpioWrite(15, 0);
time_sleep(0.5);
}
gpioTerminate();
}
After including the necessary pigpio header file, the program makes sure that everything is initialized correctly. Then it
sets pins 14 and 15 to be outputs. (The pigpio library refers to
all GPIO pins with their Broadcom numbers, not their physical
pin numbers—see the following sidebar.) Finally, in the while(1)
loop, it sends 1s and 0s (ON and OFF signals, respectively) to
the two pins.
Your First Project
21
GPIO Pin Numbers
You may have noticed as you work with the Raspberry Pi that
many of the GPIO pins have two different numbers—the physical pin number, and the GPIO number. For instance, as you look
down on the board with the SD card at the top, the GPIO pin
at the bottom right is pin number 40, but it’s also referred to
as GPIO21.
These GPIO numbers are also called Broadcom numbers. Some
libraries that let you access the pins allow you to choose beforehand whether you’ll refer to the pins in code with their physical
numbers or their Broadcom numbers (the ServoBlaster library
is a good example of this). The pigpio library, however, refers
to the pins only with their Broadcom numbers, so keep that in
mind as you write your code. It’s a good idea to keep a diagram
of the pin header close by (an image search for “Raspberry Pi
3 gpio layout” will bring up plenty of results to choose from).
You remember how we compiled our first hello.c program:
gcc -o hello hello.c
In this statement, the -o is called a compiler flag. This command
tells the compiler to compile hello.c and to call the resulting
executable, hello. Compiler flags are used to influence how the
compiler does its work, from using particular libraries, to naming executables, to optimizing the compilation process to take
advantage of a particular computer’s architecture. There are literally hundreds of flags available; to take a look at them, in your
Linux terminal enter
man gcc
and spend some time scrolling. I’ll wait.
22
Jumpstarting C
When we compile
look at them briefly.
blink.c,
we use a few new flags, so let’s
gcc -Wall -pthread -o blink blink.c -lpigpio -lrt
The first flag used here is -Wall and, strictly speaking, is not
really necessary. -Wall (which is a contraction of warning:all)
enables all of the compiler’s warning messages. This means warnings that don’t affect the compilation process are now displayed.
I don’t often use this flag, but if you’re learning a new language
it can be very illustrative to see the process and the errors that
may arise.
The -pthread flag adds support for multithreading by utilizing
the pthreads library. Although this may not seem to be a big deal
with our little program here, it’s necessary when compiling various header files that pigpio uses.
The -o flag you’ve seen—it just names the executable blink.
The last two flags both begin with -l, which specifies a
library that gcc should link to during compilation. In this case,
-lpigpio informs gcc that it should link to pigpio’s library files,
which are the files that are placed on your machine during the
installation process. -lrt refers to the librt library, which deals
with various interfaces to the POSIX.1b Realtime Extensions
Library.
Compile your program with the previous command, but don’t
try to run it yet—without some LEDs hooked up, you won’t see
anything!
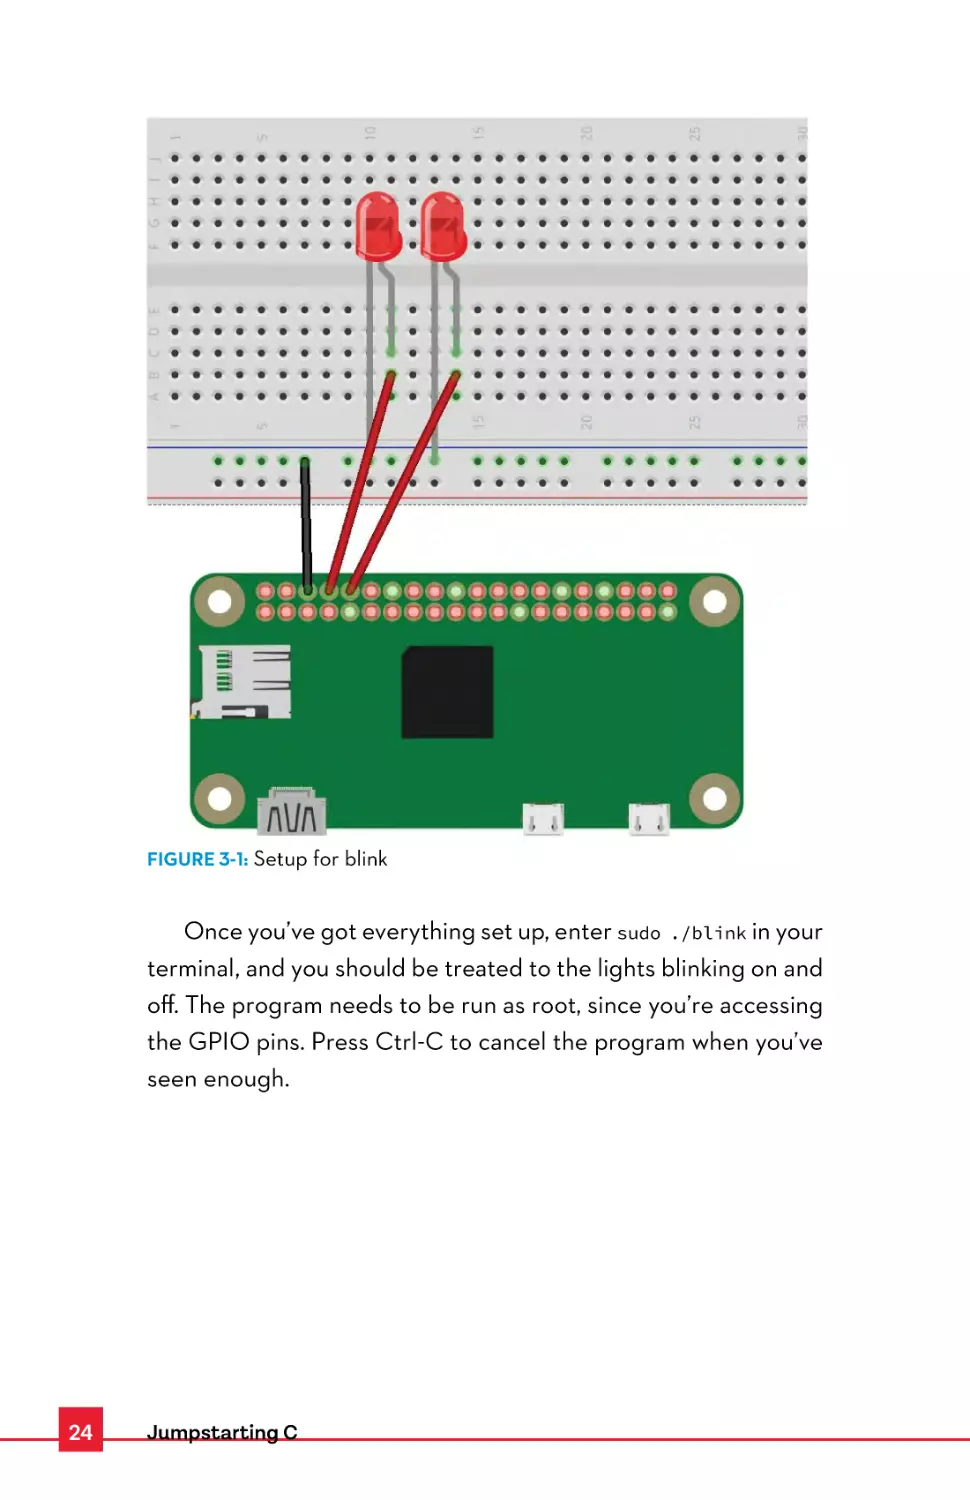
To hook up your LEDs, simply connect the anodes (the long,
positive legs) of two LEDs to pins 14 and 15, and connect their
cathodes (the short, negative legs) to a ground pin. Your setup
should look like Figure 3.1.
Your First Project
23
FIGURE 3-1: Setup for blink
Once you’ve got everything set up, enter sudo ./blink in your
terminal, and you should be treated to the lights blinking on and
off. The program needs to be run as root, since you’re accessing
the GPIO pins. Press Ctrl-C to cancel the program when you’ve
seen enough.
24
Jumpstarting C
READ A BUTTON PRESS
For our last simple project, let’s read from a GPIO pin to see
whether or not a button has been pressed.
Start a new script and call it read.c.
#include <stdio.h>
#include <pigpio.h>
void main()
{
int x;
if (gpioInitialise() < 0)
{
printf("pigpio initialization failed\n");
}
gpioSetMode(14, PI_INPUT);
gpioSetPullUpDown(14, PI_PUD_UP);
while (1)
{
x = gpioRead(14);
if (x == 1)
{
printf("Button is not pushed.\n");
}
else
{
printf("Button is pushed.\n");
}
time_sleep(0.5);
}
gpioTerminate();
}
Here again we initialize the pigpio library, and then set pin
14 to be an input. We also set a pull-up resistor on that pin so
that it will always read 1 (or HIGH) unless it’s directly connected
to ground. Then, in the while(1) loop, we simply read the value
of pin 14 and determine whether or not the button has been
pushed.
Your First Project
25
To wire this up, you’ll need a momentary pushbutton switch.
Connect one side of the switch to pin 14 on the Pi, and connect
the other to ground (Figure 3.2).
FIGURE 3.2: Momentary switch connection
Compile your program with
gcc -Wall -pthread -o read read.c -lpigpio -lrt
And then run it with sudo ./read. You should be greeted with a
line of text scrolling up your terminal, changing depending on
whether or not you’re pushing the button (Figure 3.3).
26
Jumpstarting C
FIGURE 3.3: Reading a button push
That completes our simple projects using C and the pigpio
library. In the next chapter, we’ll do something a bit more complicated: a game!
Your First Project
27
Simon Says
4
Now that you’re familiar with C’s syntax and how to interface
with the Pi’s GPIO pins, let’s use the skills you learned in the
last chapter to create our own version of the electronic “Simon
Says” game. In case you’re not familiar with the game, the original
design has four colored light-up buttons, each of which plays a
sound. The machine lights the buttons in a random sequence,
and the player has to repeat the sequence exactly. If they match
the sequence, the computer adds another random step, and
the game continues. Our version will differ in that it won’t play
a musical tone, and we’re going to use five LEDs and switches
rather than four. When the player gets the sequence wrong, all
five LEDs will flash and the game will end.
BUILDING THE GAME
To begin, you’ll need to construct your game “board.” You’ll need
five different colored LEDs—I used red, white, yellow, blue, and
green—and five momentary pushbutton switches. Using a prototyping breadboard or something similar, connect your switches
to GPIO pins 13, 19, 26, 20, and 21, in that order. Your switch
should connect the pin to ground, the way we did in Chapter 3,
“Your First Project.”
Then connect the five LEDs to GPIO pins 14, 15, 18, 23, and
24, in that order. The LED anodes (+) should be connected to
the GPIO pins, and the cathodes (–) should be connected to a
ground pin. Figure 4.1 shows the wiring setup, and your physical
design might look something like Figure 4.2.
FIGURE 4.1: Wiring up Simon Says
30
Jumpstarting C
FIGURE 4.2: Physical Simon Says setup
THE CODE
When you’ve got it all wired up, go back to your terminal on the
Pi and start a new file, simon.c. Start by including the necessary
libraries:
#include <stdio.h>
#include <pigpio.h>
Simon Says
31
Add a new one as well:
#include <stdlib.h>
This library is the one we’ll use to generate a random number
when the computer (“Simon”) is generat`ing the sequence of
lights.
Before we write the main() function, which is where the actual
game play will take place, let’s write the external functions to
take care of things like lighting LEDs, choosing numbers, and
so on. As you write these, just remember that we’ll be initializing
the variables and setting up the LEDs and buttons as soon as we
start the main() function.
To start with, we should be able to turn off all of the LEDs if
we need to, and we need to be able to flash them all three times
when the player loses. For these abilities, we’ll create functions
that take the LED array as a parameter and don’t return any values. In your simon.c program, before the main() function, add the
following functions:
void allOff(int leds[])
{
int LED;
for (LED=0; LED<5; LED++)
{
gpioWrite(leds[LED], 0);
}
return;
}
void allFlash(int leds[])
{
int LED, i;
for (i=0; i<3; i++)
{
for (LED=0; LED<5; LED++)
{
gpioWrite(leds[LED], 1);
}
time_sleep(0.2);
32
Jumpstarting C
for (LED=0; LED<5; LED++);
{
gpioWrite(leds[LED], 0);
}
time_sleep(0.2);
}
}
simply cycles through the array and writes a 0 to
each member, and allFlash() briefly turns each LED on and off.
Of course, since we have a function to do something when
you lose, we should add a function to do something special if you
win. Let’s have the LEDs light sequentially a few times, from one
end to the other.
allOff()
void youWin(int leds[])
{
int LED, i;
for (i=0; i<3; i++)
{
for (LED=0; LED<5; LED++)
{
gpioWrite(leds[LED], 1);
time_sleep(0.1);
gpioWrite(leds[LED], 0);
time_sleep(0.1);
}
}
}
Our next external function is going to be very simple. This is
how Simon chooses an LED to light, based on a random number.
int computerTurn()
{
return rand() %5;
}
Like I said, it’s very simple. We’ll seed the random number
generator in the main() function when we start the program,
so now we’re just choosing one between 0 and 4, inclusive, and
returning it.
Simon Says
33
The next function is the one that will play the sequence of
LEDs. This sequence will be stored as an array of numbers corresponding to the numbers of the LEDs. This function will take
that array (as leds[]) and the length of that array as parameters.
void playPattern(int leds[], int numTurns)
{
int LED;
for (LED=0; LED<numTurns; LED++)
{
gpioWrite(leds[LED], 1);
time_sleep(0.5);
gpioWrite(leds[LED], 0);
time_sleep(0.5);
}
return;
}
playPattern() goes through the sequence, one by one, lighting each LED for a half second, turning it off again, waiting a half
second, and then moving to the next LED.
The final external function we need is the one that reads the
player’s button press, returning the number of the corresponding LED. This is very similar to the button-pressing program we
created earlier; the computer waits, using a while() loop, until it
detects a button press on one of the five input pins. When that
happens, it returns the number of that pin. main() will then check
that number against the number of the corresponding LED.
int getPlayerTurn()
{
while(1)
{
if (gpioRead(13) == 0) return 13;
else if (gpioRead(19) == 0) return 19;
else if (gpioRead(26) == 0) return 26;
else if (gpioRead(20) == 0) return 20;
else if (gpioRead(21) == 0) return 21;
}
}
34
Jumpstarting C
That takes care of all of the external functions. Now let’s write
the main() function and the mechanics of the game play.
Here it can sometimes be useful to stop a moment and figure
out the sequence of events of the game. If you’re familiar with
flowcharts, they can be extremely helpful, especially as the intricacy of your program grows. This game is pretty straightforward,
however:
** The computer will start the game by turning off all LEDs.
** It will choose a random LED and add it to a sequence in its
memory.
** It will play that sequence.
** It will then wait for the player to press a button (corre-
sponding to an LED).
** It will compare that LED to the array in its memory. If it
matches, it will wait for the next button press and compare
it, and so on. If it doesn’t match, the game will end.
** If the player successfully imitates the sequence, the process
will start over, with the computer choosing another random
LED and adding it to the sequence.
Now that we have a plan of action, let’s write main().
We’ll start by initializing the pigpio library as we did before,
seeding the random number generator, and then we’ll set up the
buttons and LEDs.
int main()
{
if (gpioInitialise() < 0)
{
printf("pigpio initialisation failed\n");
return 1;
}
// Initialize random number generator
Simon Says
35
time_t t;
srand((unsigned) time(&t));
// Declare buttons
int butOne = 13;
int butTwo = 19;
int butThr = 26;
int butFor = 20;
int butFiv = 21;
// Declare LED pins
int ledOne = 14;
int ledTwo = 15;
int ledThr = 18;
int ledFor = 23;
int ledFiv = 24;
int ledArray[5] = {ledOne, ledTwo, ledThr, ledFor, ledFiv};
// Set up buttons as inputs
gpioSetMode(butOne, PI_INPUT);
gpioSetMode(butTwo, PI_INPUT);
gpioSetMode(butThr, PI_INPUT);
gpioSetMode(butFor, PI_INPUT);
gpioSetMode(butFiv, PI_INPUT);
gpioSetPullUpDown(butOne, PI_PUD_UP);
gpioSetPullUpDown(butTwo, PI_PUD_UP);
gpioSetPullUpDown(butThr, PI_PUD_UP);
gpioSetPullUpDown(butFor, PI_PUD_UP);
gpioSetPullUpDown(butFiv, PI_PUD_UP);
//Set up LEDs as outputs
gpioSetMode(ledOne, PI_OUTPUT);
gpioSetMode(ledTwo, PI_OUTPUT);
gpioSetMode(ledThr, PI_OUTPUT);
gpioSetMode(ledFor, PI_OUTPUT);
gpioSetMode(ledFiv, PI_OUTPUT);
Now let’s declare the variables we’re going to need:
// Declare computer array and turn counter
int simon[50];
int turns;
// Counter variables
int i, x, compareSteps;
The simon array is where the computer will store the sequence
of numbers. For simplicity’s sake, the game code as shown will
36
Jumpstarting C
end if the player is able to repeat 50 steps successfully. If you’d
like to make the game a bit easier (or shorter), change the length
of the simon array from 50 to your chosen number.
Now that we’ve set up all the LEDs, buttons, and variables, we
can start the actual game play.
// Turn off all LEDs to start
allOff(ledArray);
// Start game (50 turns)
for (turns = 0; turns<50; turns++)
{
// Computer adds random number
x = computerTurn();
switch(x)
{
case 0:
simon[turns] = ledOne;
break;
case 1:
simon[turns] = ledTwo;
break;
case 2:
simon[turns] = ledThr;
break;
case 3:
simon[turns] = ledFor;
break;
case 4:
simon[turns] = ledFiv;
break;
}
// Computer plays pattern
playPattern(simon, turns);
time_sleep(1);
Again, if you’re setting up a shorter game, change the value
of turns here from 50 to your chosen number.
At this point in the for(turns) loop, the simon array now contains a list of LEDs that has as many members as there have been
turns. Now we need to cycle through that array, one by one, getting the player’s input, lighting that LED, and comparing it to the
Simon Says
37
current array index. If they match, we’ll move on to the next LED,
and if they don’t we’ll end the game. As you might imagine, the
easiest way to do this is with another switch() statement:
for (compareSteps=0; compareSteps<turns; compareSteps++)
{
i = getPlayerTurn();
switch(i)
{
case 13:
gpioWrite(ledOne, 1);
time_sleep(0.5);
gpioWrite(ledOne, 0);
if (simon[compareSteps] != ledOne)
{
allFlash(ledArray);
printf("You lose!\n");
return 0;
}
break;
case 19:
gpioWrite(ledTwo, 1);
time_sleep(0.5);
gpioWrite(ledTwo, 0);
if (simon[compareSteps] != ledTwo)
{
allFlash(ledArray);
printf("You lose!\n");
return 0;
}
break;
case 26:
gpioWrite(ledThr, 1);
time_sleep(0.5);
gpioWrite(ledThr, 0);
if (simon[compareSteps] != ledThr)
{
allFlash(ledArray);
printf("You lose!\n");
return 0;
}
break;
case 20:
gpioWrite(ledFor, 1);
38
Jumpstarting C
time_sleep(0.5);
gpioWrite(ledFor, 0);
if (simon[compareSteps] != ledFor)
{
allFlash(ledArray);
printf("You lose!\n");
return 0;
}
break;
case 21:
gpioWrite(ledFiv, 1);
time_sleep(0.5);
gpioWrite(ledFiv, 0);
if (simon[compareSteps] != ledFiv)
{
allFlash(ledArray);
printf("You lose!\n");
return 0;
}
break;
}
} // end for (y) loop
time_sleep(1);
} // end for(turns) loop
Finally, if you’ve successfully imitated the sequence through
all of the turns, you’ve won the game!
// If you've reached this far, you've won
printf("You won!\n");
youWin(ledArray);
gpioTerminate();
} // end main
There are a few things I’d like to point out here as you look
over this program. The first has to do with legibility. As you learn
C, you’ll find that there are two schools of thought regarding
the placement of brackets ({ }) for functions and loops. Some
programmers prefer
for (x=0; x<5; x++) {
printf("Spam!");
}
Simon Says
39
and others prefer
for (x=0; x<5; x++)
{
printf("Spam!");
}
with the opening bracket on its own new line. Either way is correct, and it’s entirely up to you which one you use.
The second thing I’d like to mention is in closing brackets. If
you’re not using an IDE that automatically adds the closing bracket
for you when you type an opening bracket, get in the habit of typing an opening bracket, hitting Enter/Return, typing the matching
closing bracket, and then filling code in between them.
void main()
{
}
This will ensure that all of your blocks of code are bracketed
correctly; if they’re not, the compiler errors can sometimes be
extremely obtuse. Unfortunately, gcc has no error message:
Error: opening bracket (line 13) has no corresponding close
And finally, if you have a lot of loops and long functions in your
code, it can be helpful to add a comment after the closing bracket
that says what exactly it’s closing (as I did with the two for loops
and the main() function). It helps if you need to add code within a
loop, and you’re not sure which loop or function you’re actually in.
} // end for (x)
printf("Avocados!\n");
} // end main
That is the end of the Simon Says program. If you need to see
it in its entirety, it’s available to inspect or download at https://
github.com/wdonat/jumpstarting_c. To compile it, use the flags
we discussed earlier:
gcc -Wall -pthread -o simon simon.c -lpigpio -lrt
40
Jumpstarting C
and run it with
sudo ./simon
(Remember that you have to run it using
accessing the GPIO pins.)
sudo,
since you’re
RUNNING THE PROGRAM
The program will initialize all the LEDs and buttons and turn
them all off. The computer then flashes an LED, and waits for
you to press the appropriate button corresponding to that LED.
If you get it right, the game then continues, adding LEDs to
the sequence, and you have to press the appropriate buttons
matching each LED in the sequence. If you make a mistake, all
the LEDs flash to indicate that you’ve lost the game. If you win, the
LEDs will light sequentially in a sort of celebration loop.
THINGS TO TRY
This is obviously a very basic implementation of Simon Says, and
there are many things you could try to make the game more
difficult or fun to play.
** The button placement should correspond to the LED place-
ment—the leftmost button controls the leftmost LED, for
instance. What if you programmed the buttons backward
so that the left button controlled the right LED, and vice
versa? Can you make that into an “expert” level?
** Try adjusting the speed of the game, as found in the
function, so that the game subtly speeds up
with each turn.
time_sleep()
** The original game had a musical note associated with each
LED. How would you attach a speaker and program the
Raspberry Pi to play a sound for each LED?
Simon Says
41
CONCLUSION
I hope this little book has been helpful, introducing you to this
powerful language and showing you that it’s not exceedingly difficult to learn. Of course, this is just an introduction, and you
can spend years learning about all that C can do. That learning
process can definitely be worth it, however. There are environments and projects where a low-level language such as C is the
only thing that will work (small embedded systems, for example,
often use C or a subset of the language). Good luck in your future
projects, and I look forward to seeing what you come up with!
42
Jumpstarting C