/


Автор: Iyengar A.
Теги: programming languages programming computer science microprocessors packt publisher reverse engineering
ISBN: 978-1-80181-254-2
Год: 2023
Похожие


Текст
Build Your Own Web Framework
in Elixir
Develop lightning-fast web applications using Phoenix
and metaprogramming
Aditya Iyengar
BIRMINGHAM—MUMBAI
Build Your Own Web Framework in Elixir
Copyright © 2023 Packt Publishing
All rights reserved. No part of this book may be reproduced, stored in a retrieval system, or transmitted
in any form or by any means, without the prior written permission of the publisher, except in the case
of brief quotations embedded in critical articles or reviews.
Every effort has been made in the preparation of this book to ensure the accuracy of the information
presented. However, the information contained in this book is sold without warranty, either express
or implied. Neither the author, nor Packt Publishing or its dealers and distributors, will be held liable
for any damages caused or alleged to have been caused directly or indirectly by this book.
Packt Publishing has endeavored to provide trademark information about all of the companies and
products mentioned in this book by the appropriate use of capitals. However, Packt Publishing cannot
guarantee the accuracy of this information.
Group Product Manager: Rohit Rajkumar
Publishing Product Manager: Aaron Tanna
Senior Editor: Mark D’Souza
Senior Content Development Editor: Feza Shaikh
Technical Editor: Saurabh Kadave
Copy Editor: Safis Editing
Project Coordinator: Manthan Patel
Proofreader: Safis Editing
Indexer: Pratik Shirodkar
Production Designer: Jyoti Chauhan
Marketing Coordinator: Anamika Singh, Namita Velgekar, and Nivedita Pandey
First published: June 2023
Production reference: 1170523
Published by Packt Publishing Ltd.
Livery Place
35 Livery Street
Birmingham
B3 2PB, UK.
ISBN 978-1-80181-254-2
www.packtpub.com
To my wife, Susan Walker, and my parents, Nirmal and Madhu Iyengar, without whose
encouragement and support I wouldn’t have even thought of writing a book.
– Aditya Iyengar
Foreword
I first met Adi when he applied to work at Annkissam in 2015. I was the Chief Technology Officer
(CTO) at the time, but I wasn’t involved in his formal interview process. It was fortunate that I saw him
between interviews and we chatted about error correction code (ECC) memory and Hamming codes.
I came away excited and had strong opinions that I needed to share with the hiring team. Thankfully,
they agreed, and soon after, I had the opportunity to manage and mentor a brilliant developer.
At that time, our organization was running into concurrency issues with Ruby. I had looked into several
technologies, but the Phoenix framework was the most impressive. It had just reached its 1.0 release,
and with it came the benefits of Elixir and Open Telecom Platform (OTPs). We trained Adi on Rails
for his first few weeks, but within a month, he helped me build a Phoenix clone of a Rails app, and
its speed was impressive. We launched our first Phoenix application into production that same year.
Coming from Ruby on Rails (RoR), we lost a lot of convenient gems. Elixir was a newer ecosystem,
but we were tech evangelists. The solution was to build everything we needed and open source as
much as possible. No pagination module? Adi built Rummage. Our deployment strategy needed
updating. Adi built Akd. DevOps? I used his tool to configure my last several laptops. My guidance
during that time was to write tests, predict where other developers would have difficulty, and always
read the code you’re using.
It’s that foundation that I see in this book and why I was so humbled that Adi asked me to write
this foreword. While Phoenix is ubiquitous today, most guides focus on how to use it. In this book,
you’ll learn how it is built. You’ll cover not just the fundamentals of web development but also how
they’re implemented. You’ll learn how the framework has such elegant syntax and how you can use
metaprogramming to do the same in your code. You’ll also be shown plenty of examples to put it into
context and ensure you can incorporate them into your own work.
The attention to detail you’ll find in this book extends to its very publishing. Adi wanted to ensure
the code samples were accurate, so he wrote unit-tested code, annotated that code, and then wrote a
library to extract that code and combine it with the text to produce the final copy. He’s always talking
about 100% code coverage, so it’s fitting he’s extended that to printed work. It’s that level of care which
makes him a great mentor, and you’ll find it throughout this book.
What I’m most excited about is that this book reminds us to continue asking how. Going deeper than
the README.md file and hexdocs will make you a better developer. With Adi’s guidance, this book
does that for one of the most significant libraries in Elixir.
Eric Sullivan
Senior Software Engineer at PepsiCo, Ex-CTO, Ex-Founder
Contributors
About the author
Adi Iyengar is a staff software engineer who has worked with Elixir since 2015. Over those years, he has
worked across a wide array of applications and authored/contributed to several open source projects,
including Elixir itself. Adi has also advised and continues to advise several start-ups on engineering
and product, and helps them adopt Elixir and Phoenix to build functional and scalable minimal viable
products (MVPs) from the ground up. He is passionate about mentoring and sharing his knowledge
with others, which is why he actively mentors other engineers. He loves Elixir, functional programming,
and test-driven development (TDD). Adi is also the co-host of the Elixir Mix podcast. When not
coding, Adi can be seen playing billiards, playing the guitar, or breakdancing. Adi also spends a good
amount of his time keeping up with new developments in particle physics.
Adi is also the co-host of the Elixir Mix podcast which is a weekly Elixir podcast where the panel
discusses Functional Programming, the Elixir ecosystem and building real-world applications using
Elixir based tools and frameworks.
I have been extremely lucky in getting a lot of opportunities to learn and grow as an engineer, and
I’d like to thank everyone who has contributed to my career, including my family, friends, mentors,
and mentees. Thanks to every engineer who has contributed to this book in one way or another
(in no particular order): Susan Walker, Eric Sullivan, Jeffrey Matthias, Josh Scott Adams, Sophie
Debenedetto, Tuomo Hopia, Bruce Tate, Evan Kaplan, Andrea Leopardi, Sascha Wolf, Allen Wyma,
and Charles Max Wood. Lastly, special thanks to a special company, Annkissam, because of whom I
started walking the path to learning this amazing language.
About the reviewers
Henry Clinton is a versatile engineer with extensive experience in electronics and communication.
He has honed his skills as a senior Elixir developer, delivering end-to-end execution of several pivotal
projects at Iteron Technologies. Henry’s passion for technology is infectious, and his insatiable curiosity
drives him to explore and master a wide range of topics. He combines his technical expertise with a
creative mindset to come up with innovative solutions to complex problems. His attention to detail
and commitment to excellence is unparalleled, making him a valuable asset and instrumental in
bringing his work to fruition.
Lubien is a software developer who specializes in Elixir and JavaScript languages. Previously focused
on frontend work with JavaScript frameworks, he’s now looking forward to technologies that handle
the frontend on the backend, such as LiveView and LiveWire. He is passionate about teaching the
latest trends in the industry. He enjoys working with Devs Norte to build a developer community
in his hometown of Belém do Pará. He also posts content on his YouTube channel in Portuguese,
@lubiendev, to help newcomers to Phoenix LiveView and writes English content under Fly.io
Phoenix Files.
Nikhil More is a senior software developer with over nine years of experience. He has working
experience in the domains of banking and finance, defense, logistics, mobility, and internet of
things (IoT). Prior to working on Elixir since 2016, he also worked on C++, .Net, PHP, JSP, and so
on. His current interests include the Semantic Web, IoT, project management, Agile, and artificial
intelligence (deep learning and genetic algorithms). Nikhil has taught deep learning at Usha Mittal
Institute of Technology, Mumbai. He is currently working on his own software consultancy called
Infoquarry Technologies Pvt. Ltd. Some of his previous notable employers are Electronics and Radar
Development Establishment, Bengaluru, which is a premier laboratory of the Ministry of Defence,
India, Western Railway, under the Ministry of Railways, India, Central Bank of India, BlockFi Inc.,
Volansys Technologies Pvt. Ltd, and Ahmedabad. Other mentions of the projects he has worked on are
for a car-sharing application owned by a large Japanese automobile manufacturer and a Wi-Fi mesh
device for a large US entity. He is also an active member of various technical meetup communities
in Ahmedabad, Bengaluru, Mumbai, and Pune. He also conducts training sessions on functional
programming and Elixir development.
Parvatham Raghuchander is an experienced enterprise cloud solutions architect with expertise in
messaging and voice-over IP (VoIP). She has developed, designed, re-engineered, and integrated
enterprise solutions for a wide range of organizations. Her programming experience is mostly
in Erlang, Elixir, and Golang, with specializations in Phoenix, the Cowboy framework, AWS,
Azure, Docker, Kubernetes, NoSQL, and SQL databases.
Table of Contents
Prefacexi
Part 1: Web Server Fundamentals
1
Introducing the Cowboy Web Server
Technical requirements
4
What is a web server?
4
Exploring the client-server architecture 5
Understanding HTTP
5
Understanding Cowboy’s architecture 7
Building a web application using
Cowboy8
Creating a new Mix project
8
3
Adding a handler and router to Cowboy
9
Supervising the web server
12
Adding routes with bindings
14
Validating HTTP methods
18
Responding with HTML files
20
Testing the web server with ExUnit
23
Summary26
Exercises26
2
Building an HTTP Server in Elixir
Technical requirements
28
Listening over a TCP socket using
:gen_tcp28
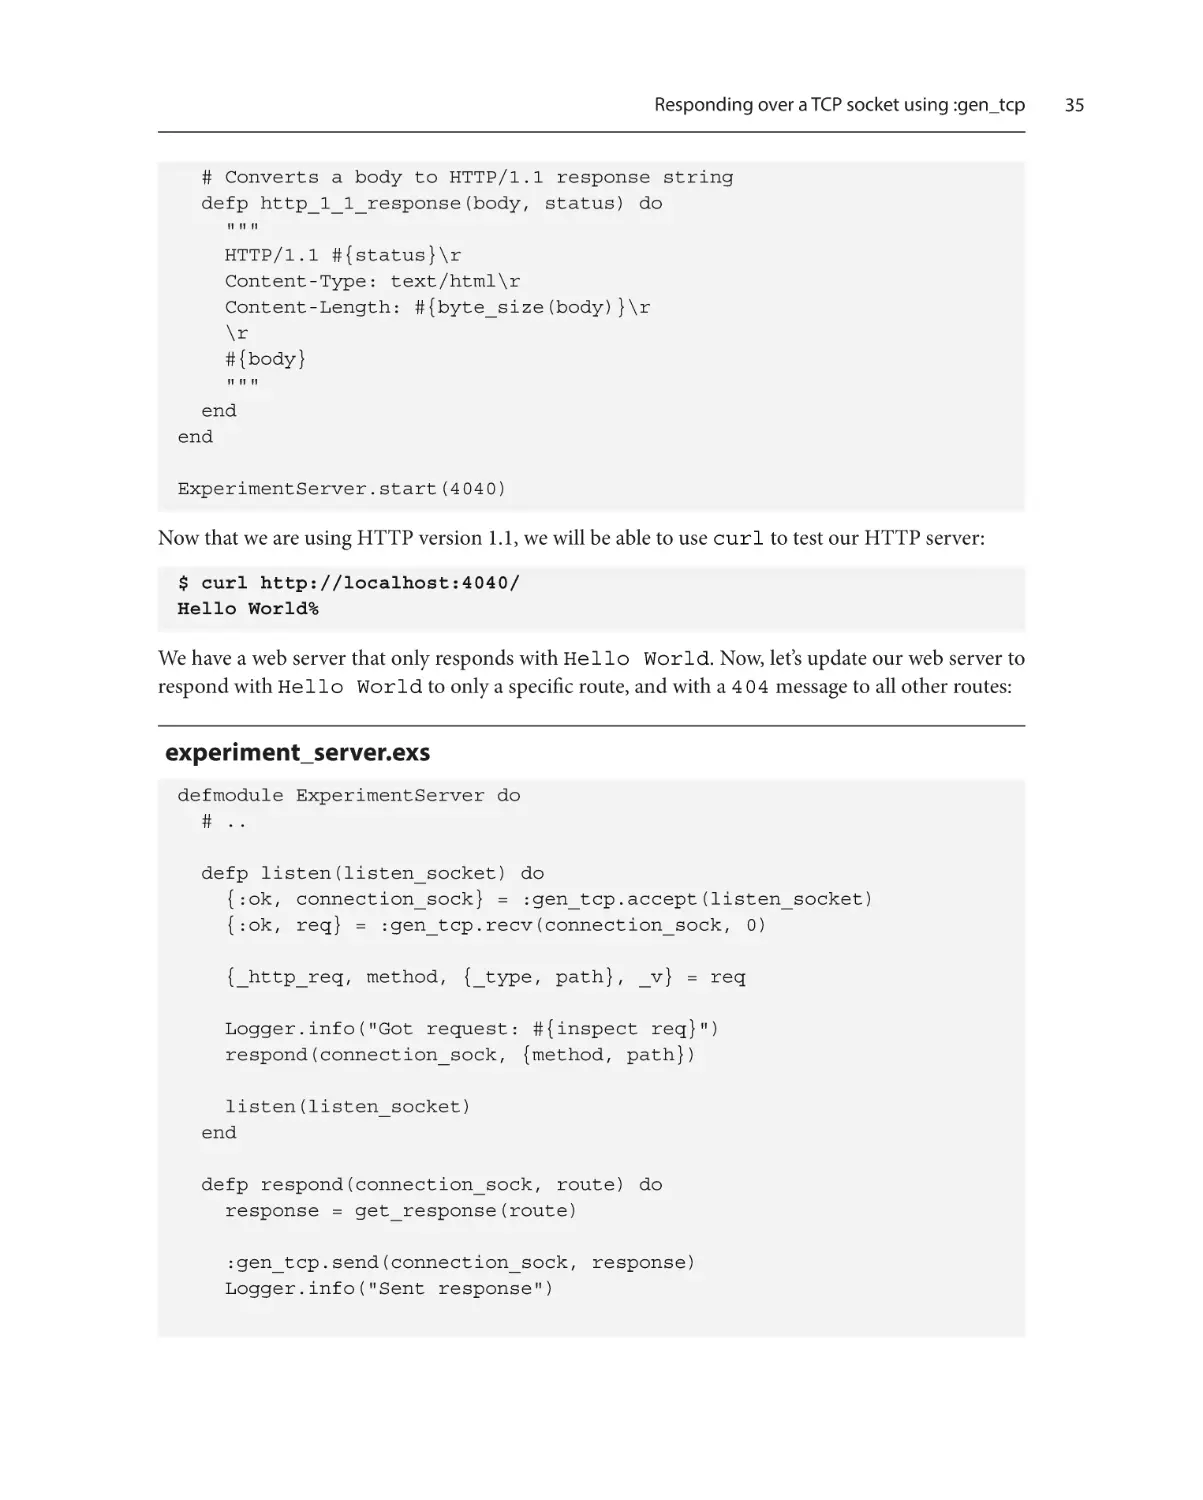
Responding over a TCP socket using
:gen_tcp32
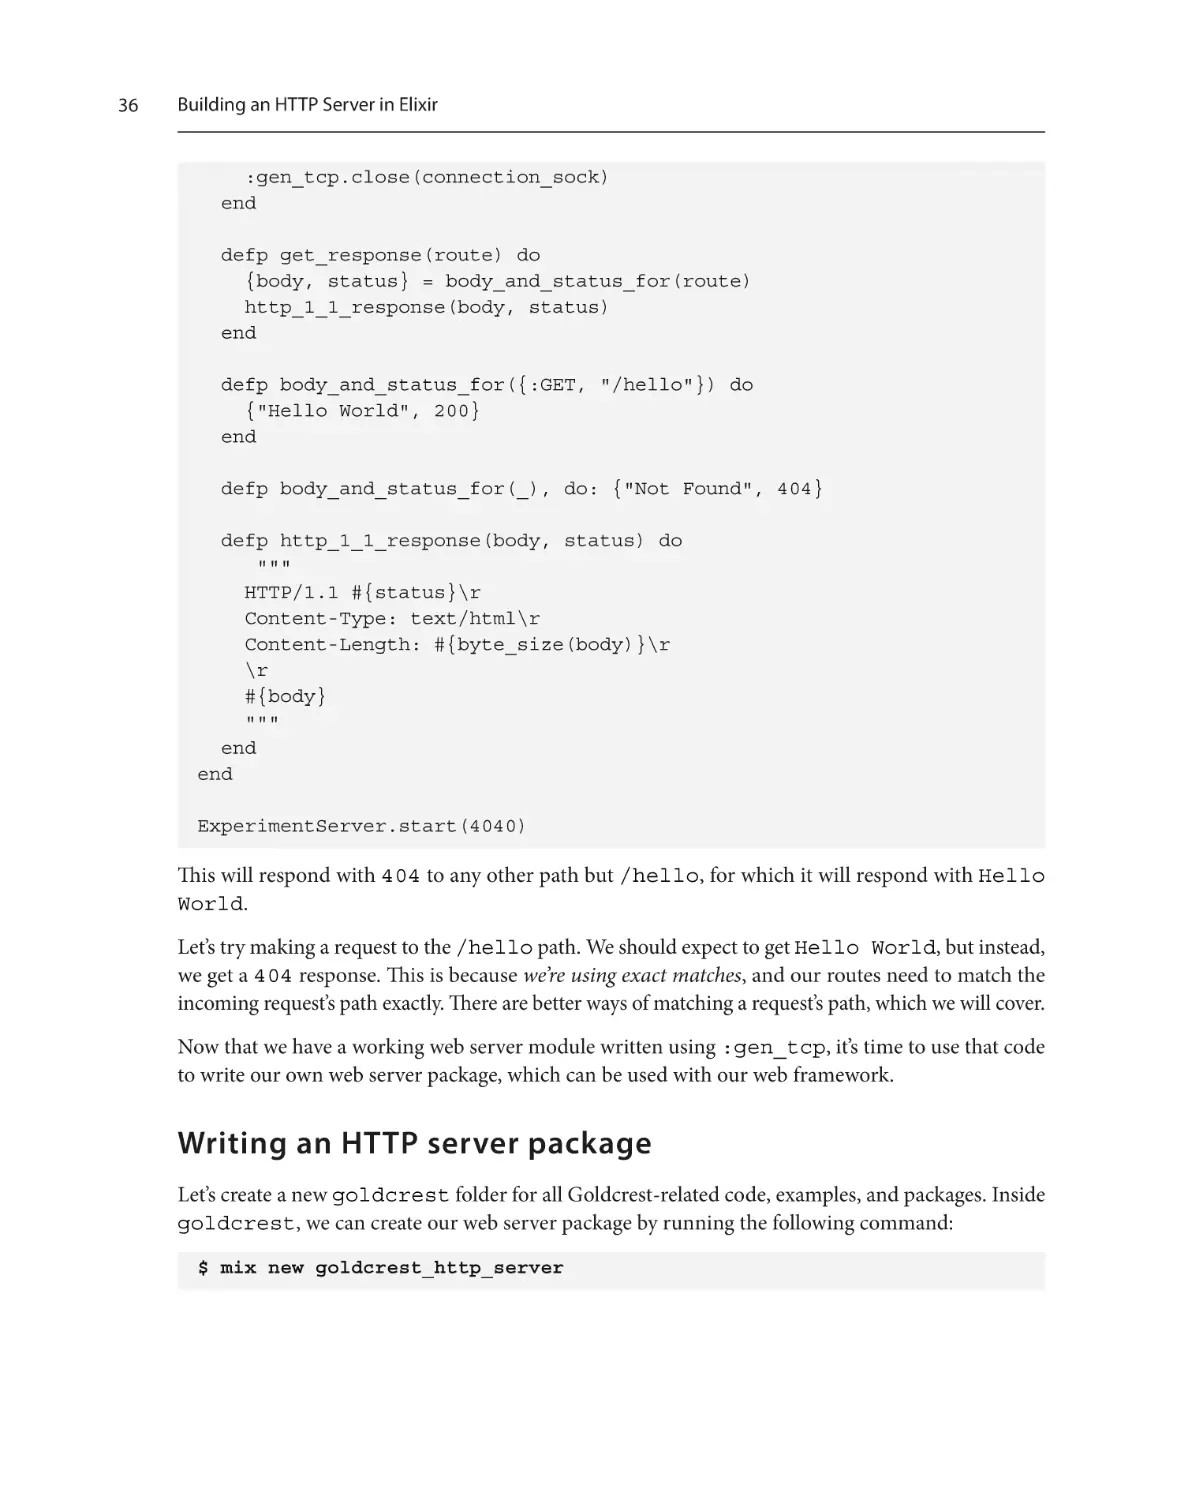
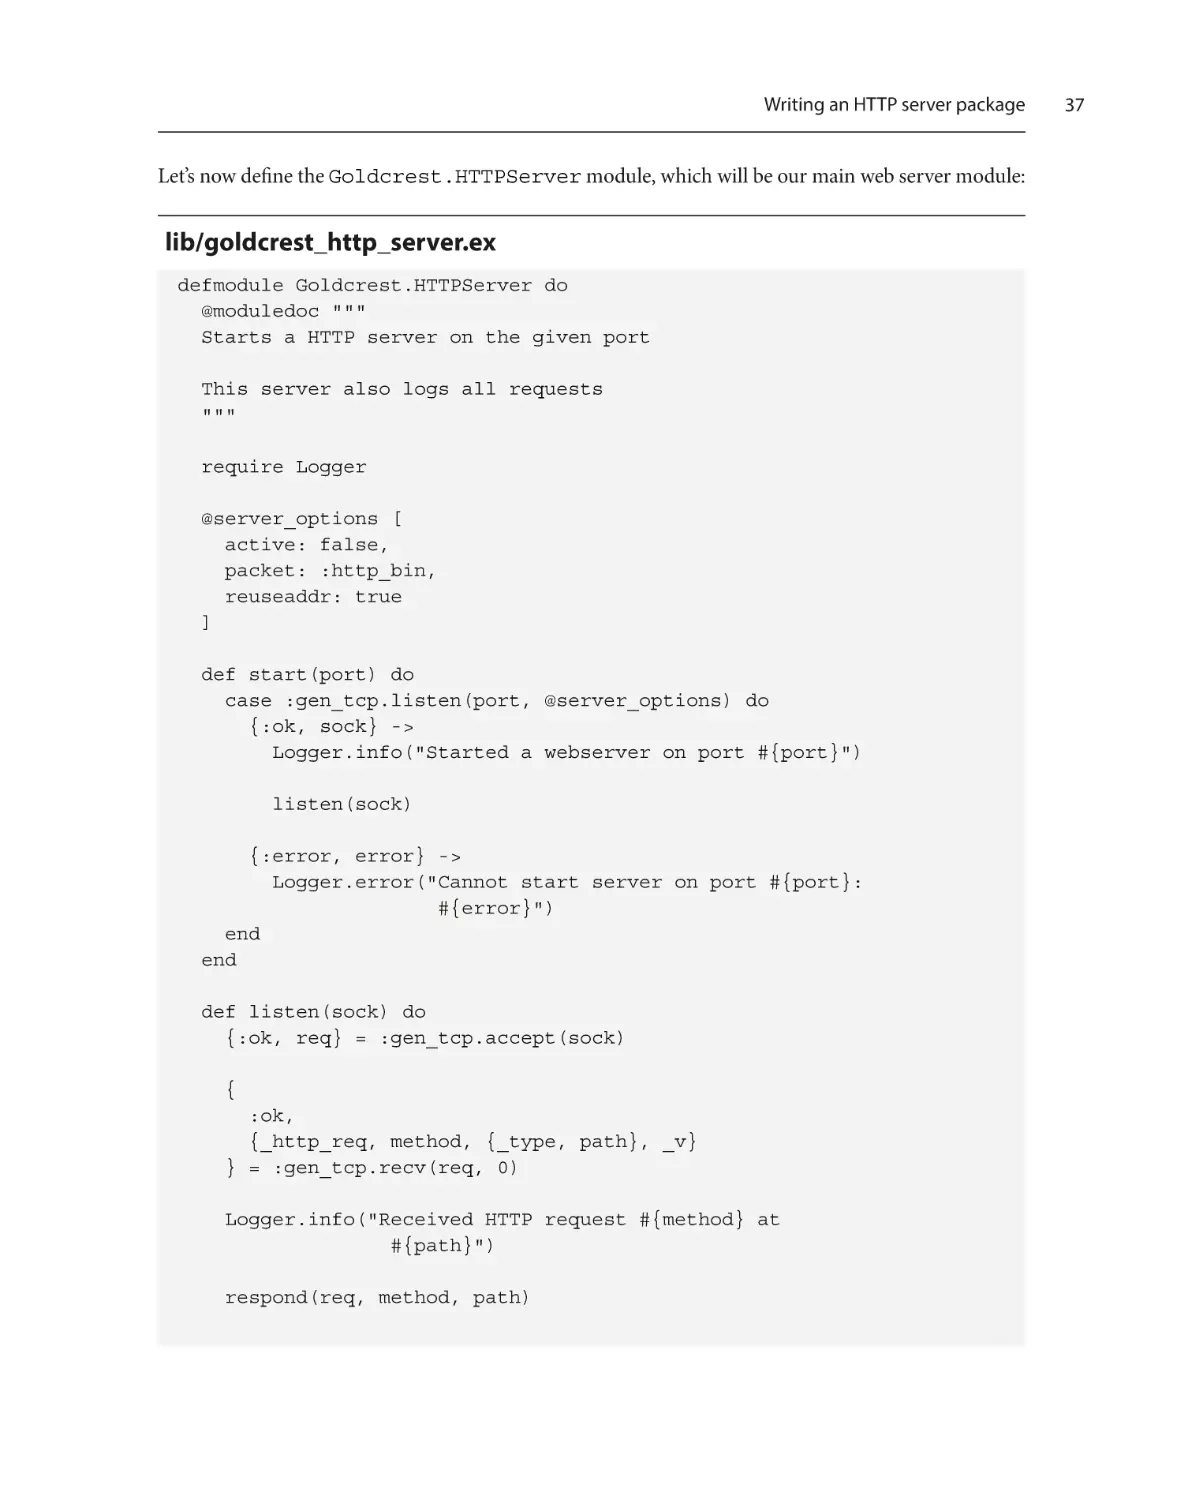
Writing an HTTP server package
36
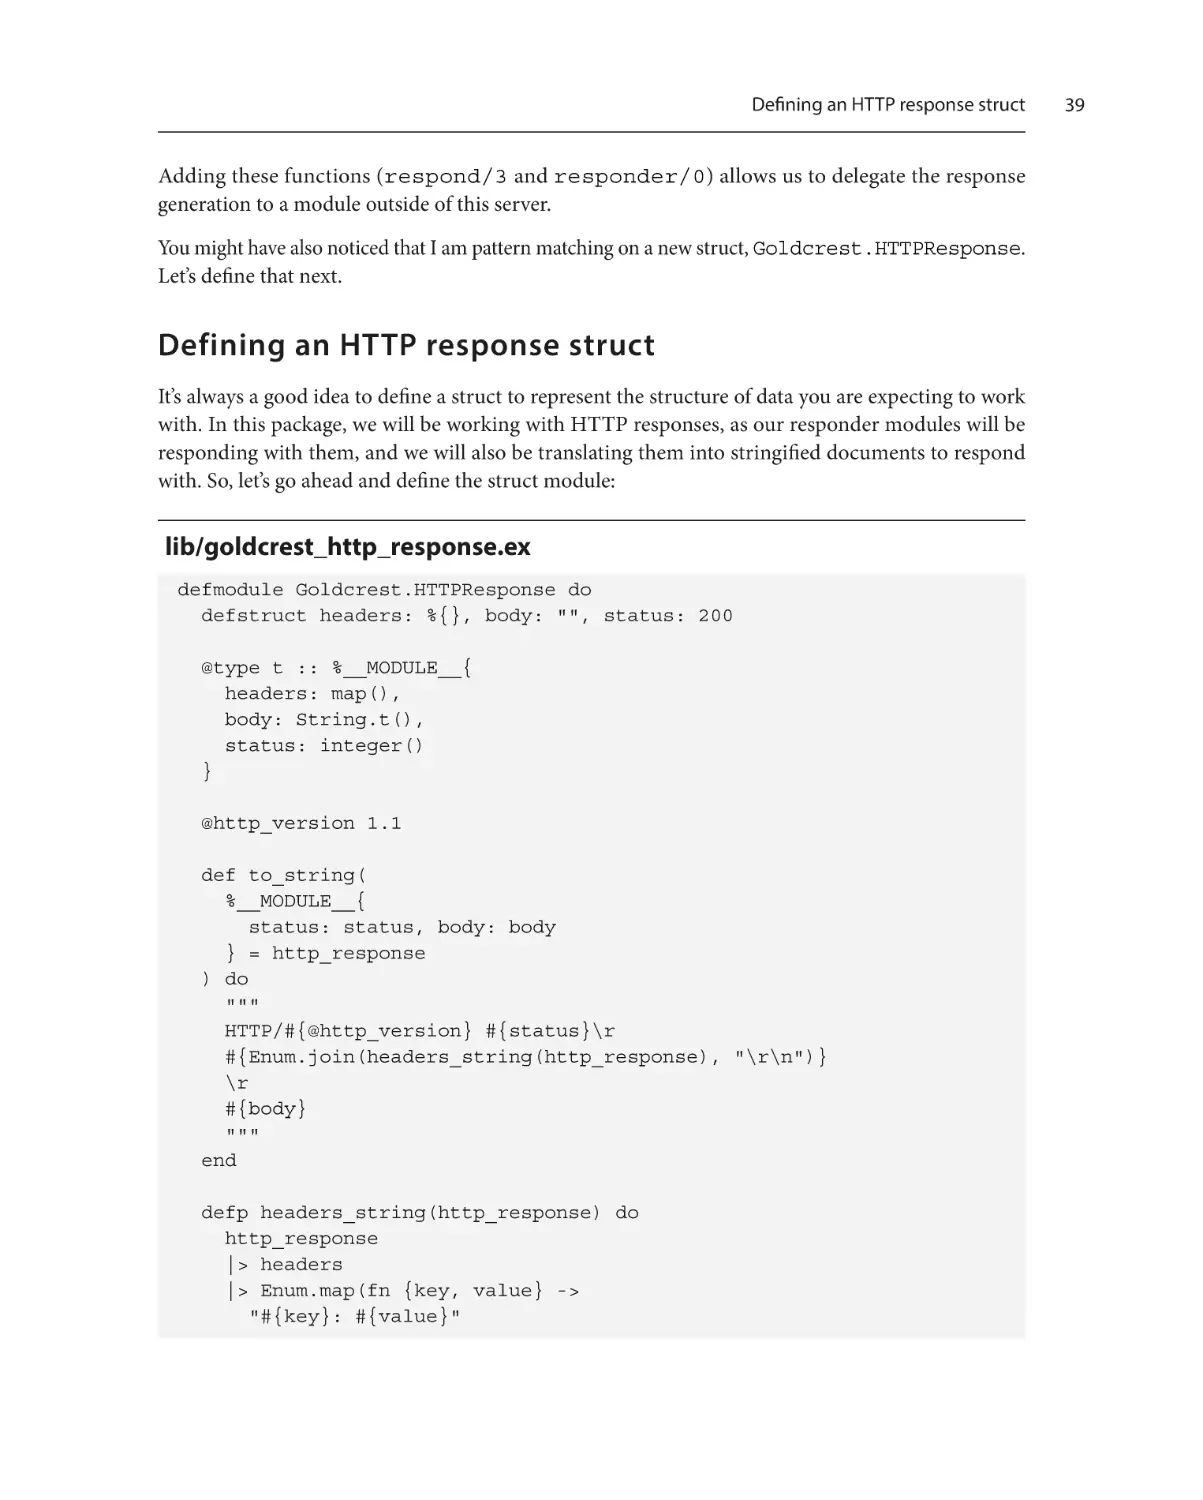
Defining an HTTP response struct
39
27
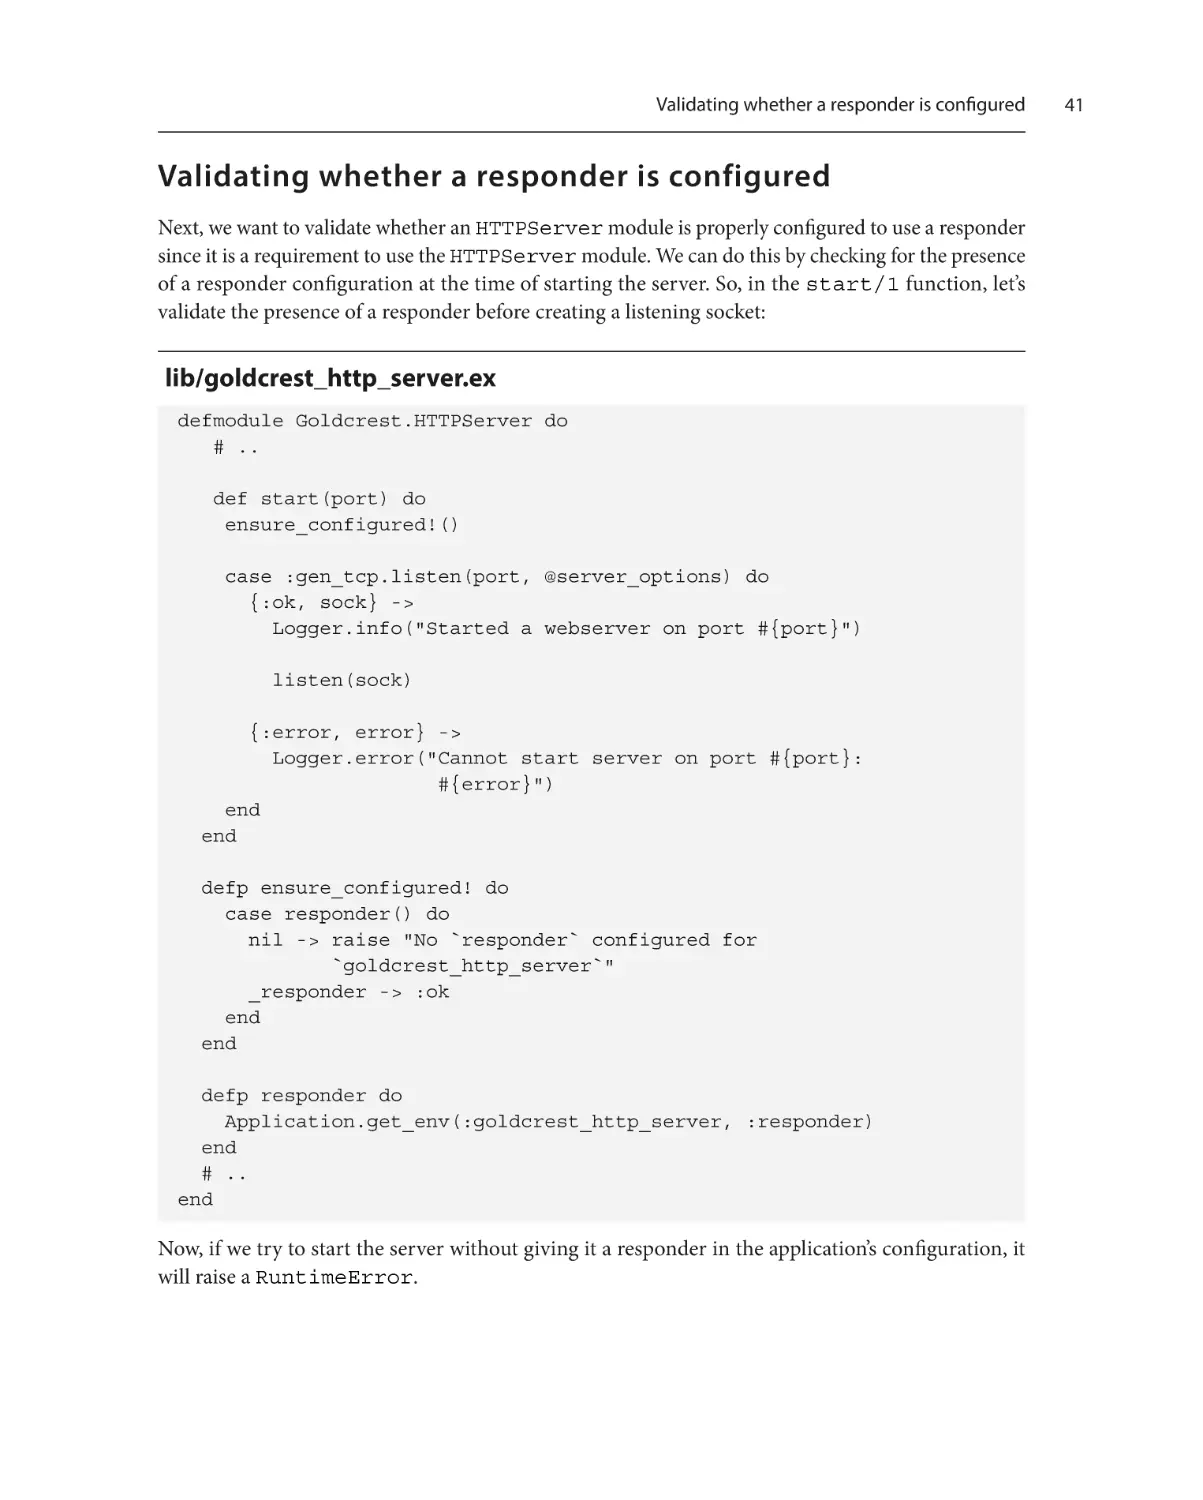
Validating whether a responder
is configured
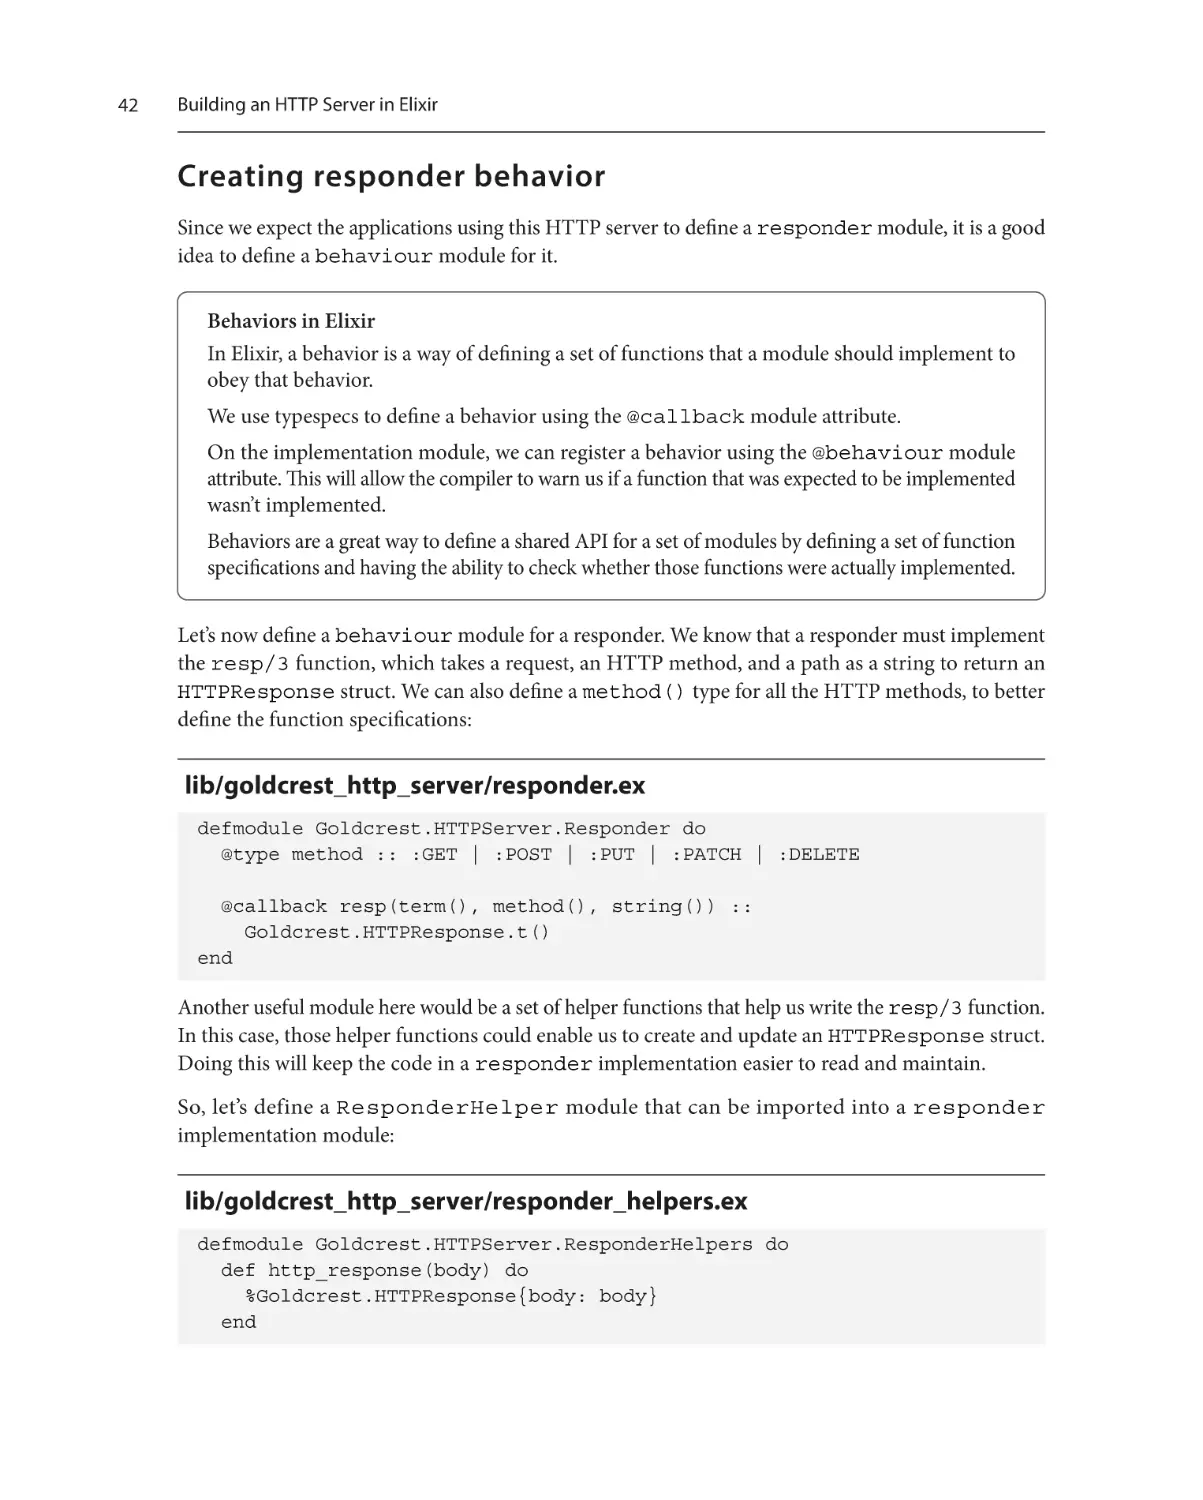
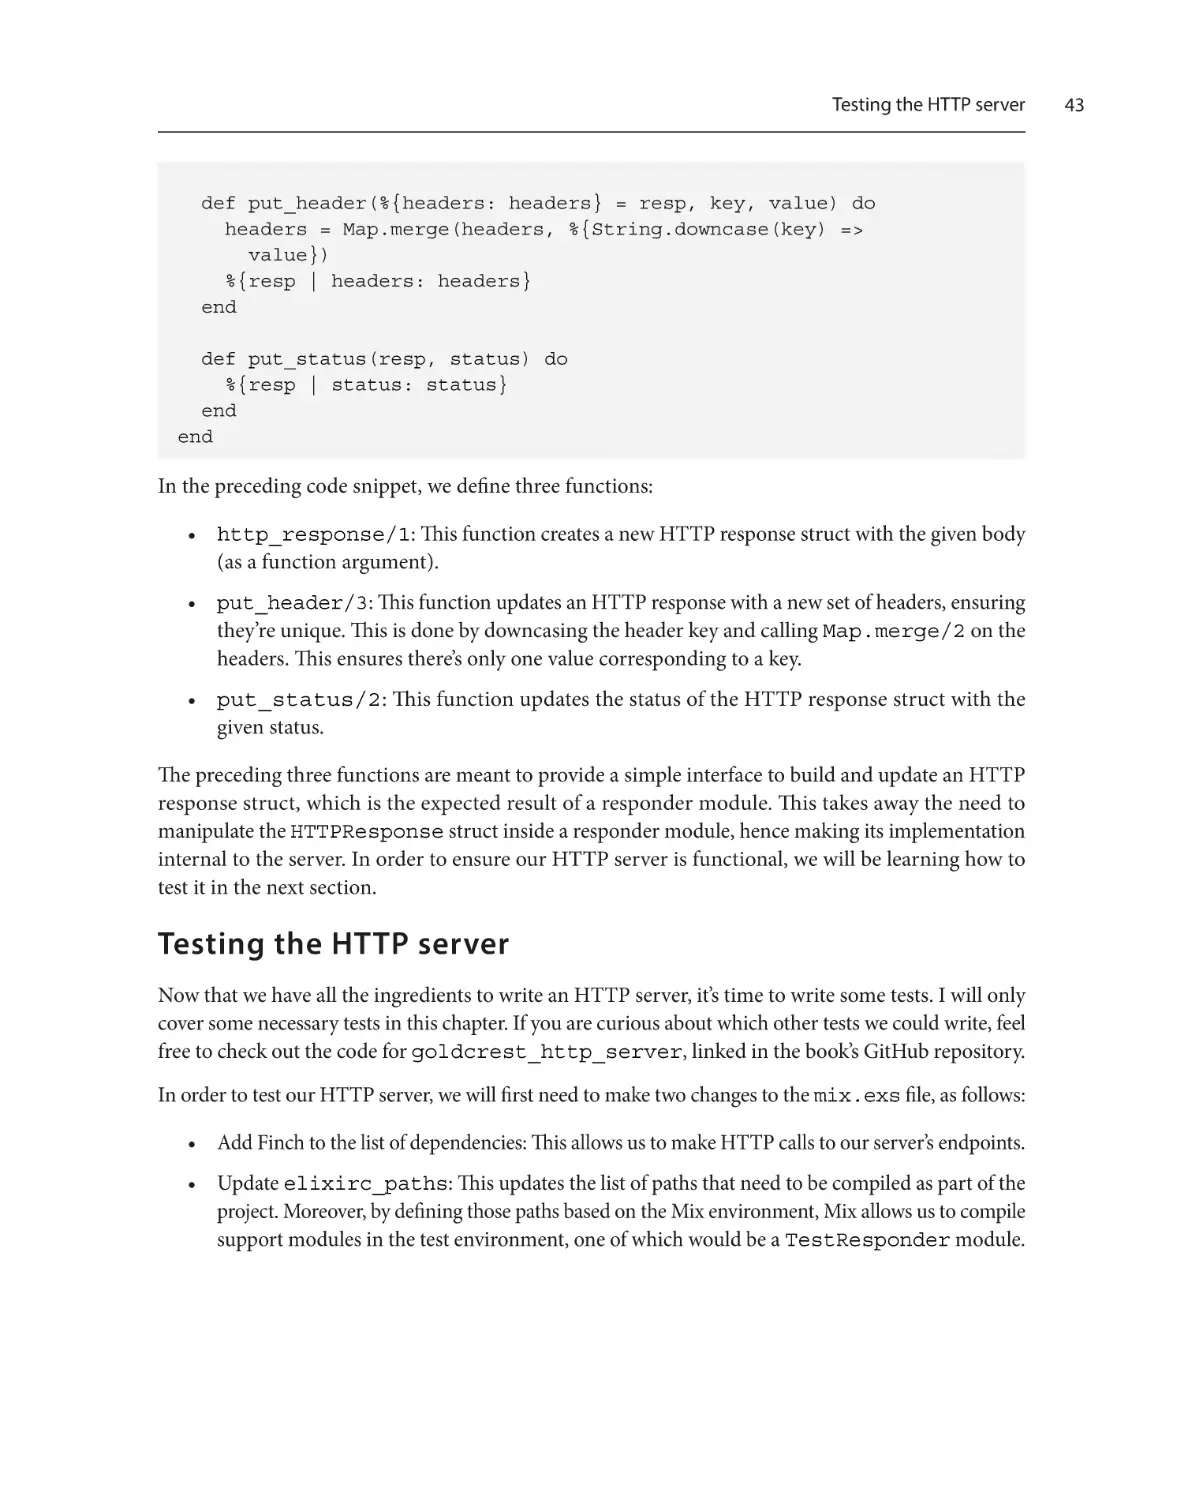
Creating responder behavior
Testing the HTTP server
Running the HTTP server with a
sample application
Adding concurrency to the server
41
42
43
47
50
viii
Table of Contents
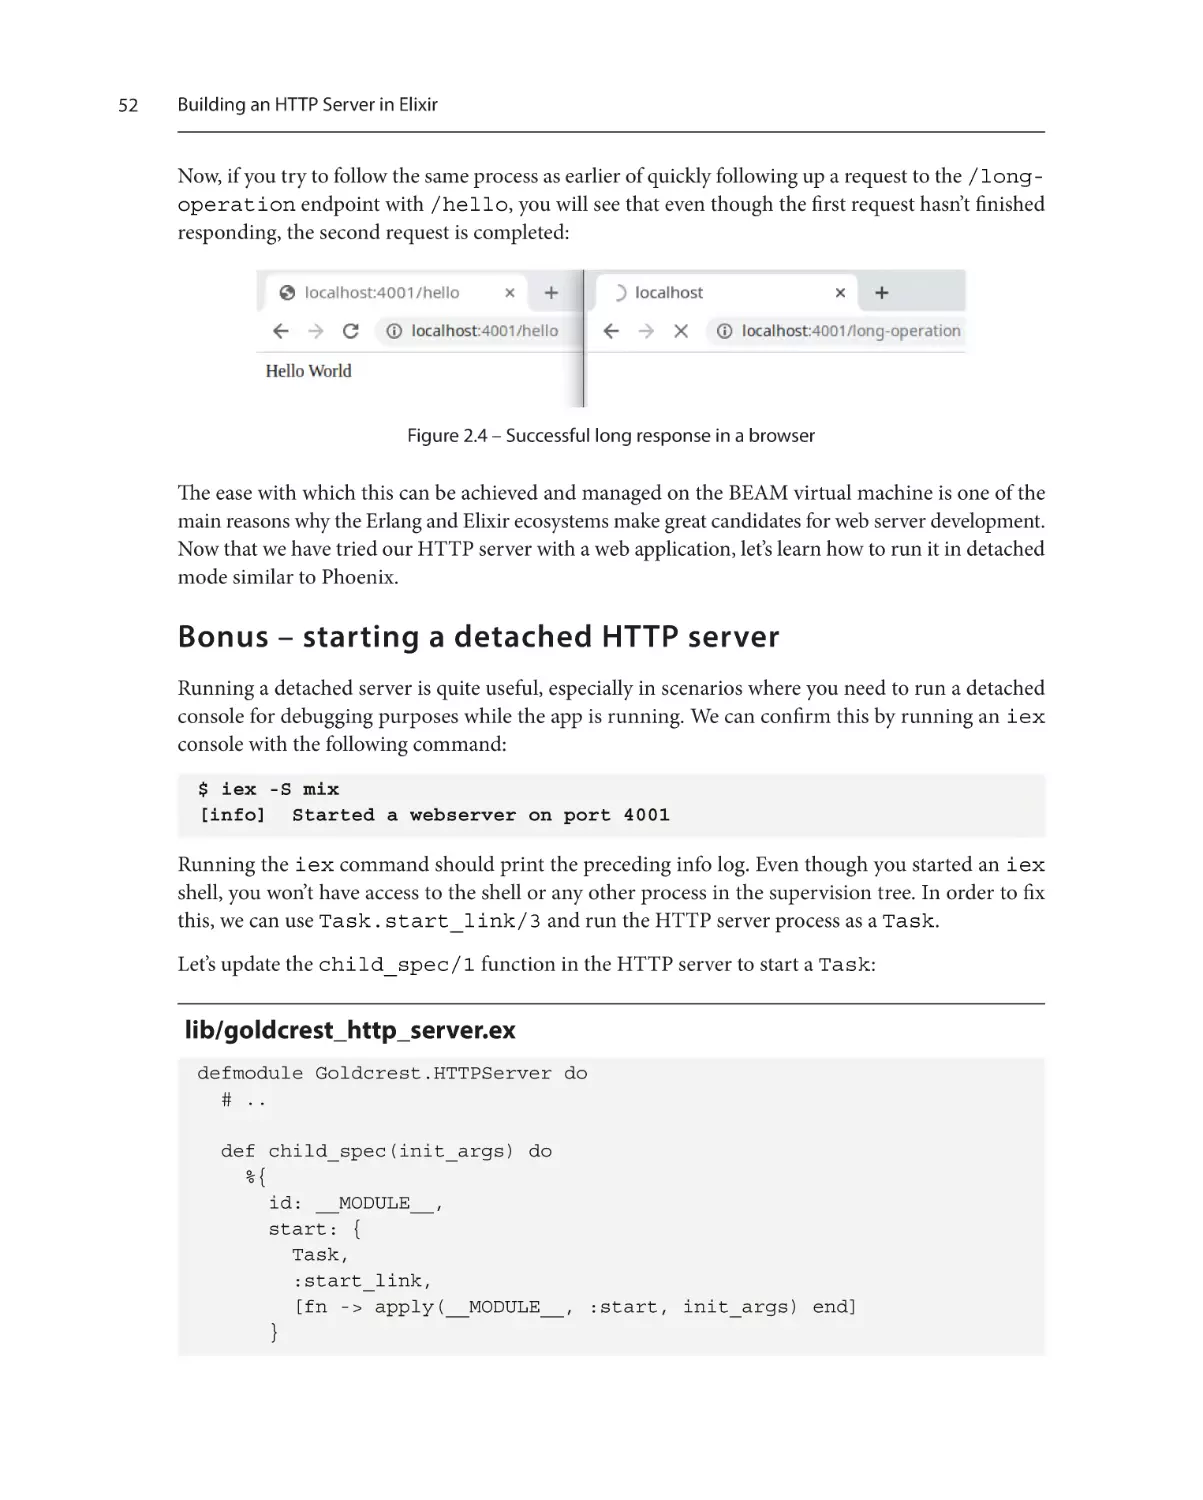
Bonus – starting a detached
HTTP server
52
Summary53
Exercise53
Part 2: Router, Controller, and View
3
Defining Web Application Specifications Using Plug
Technical requirements
58
What is Plug?
58
Representing the state of the
connection with the Plug.Conn struct 58
57
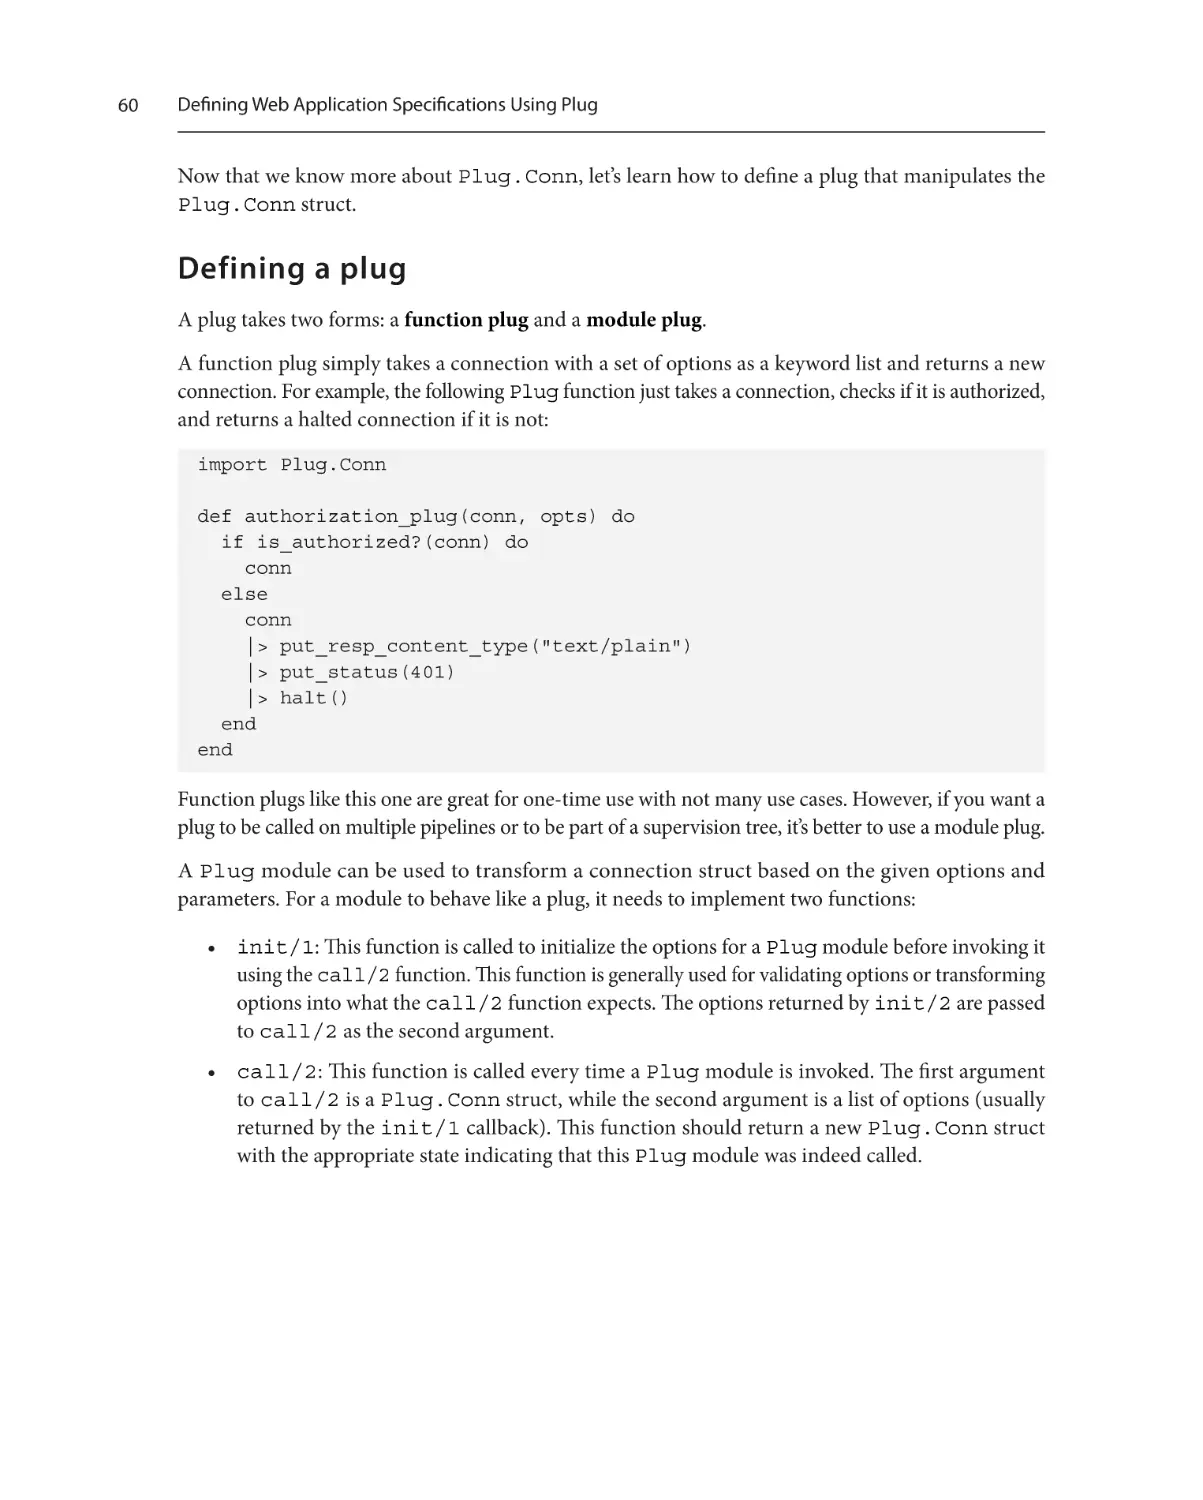
Defining a plug
60
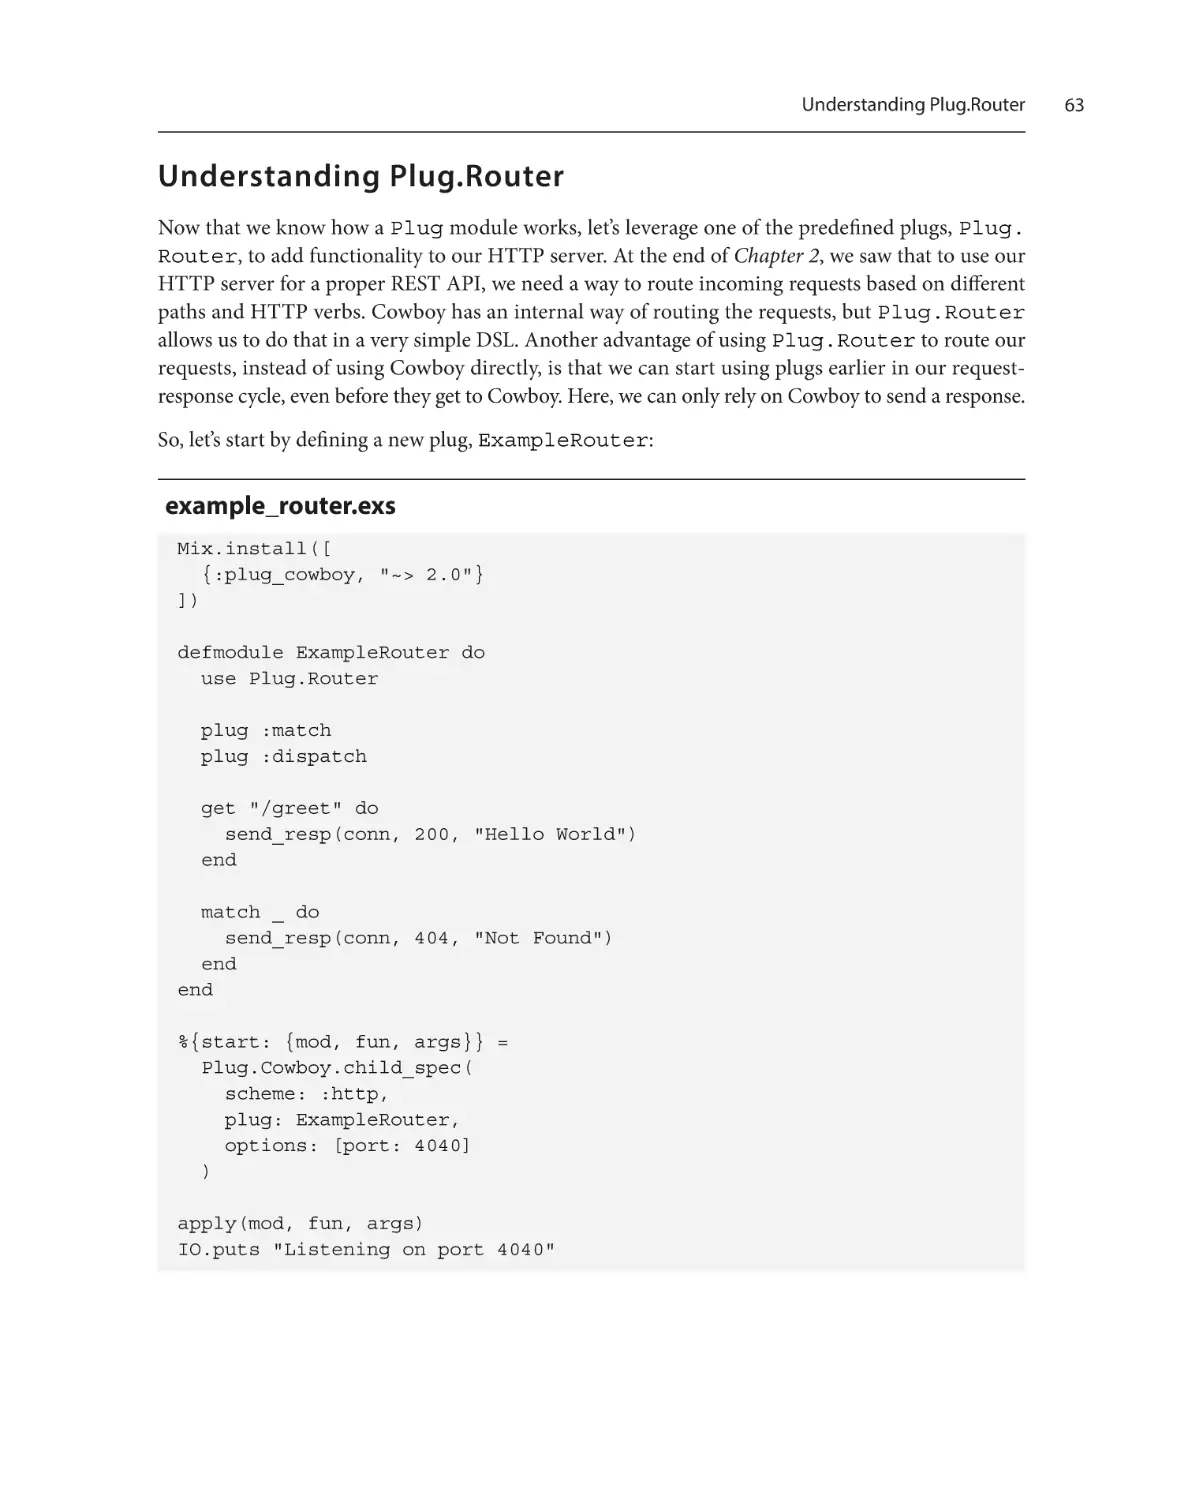
Understanding Plug.Router
63
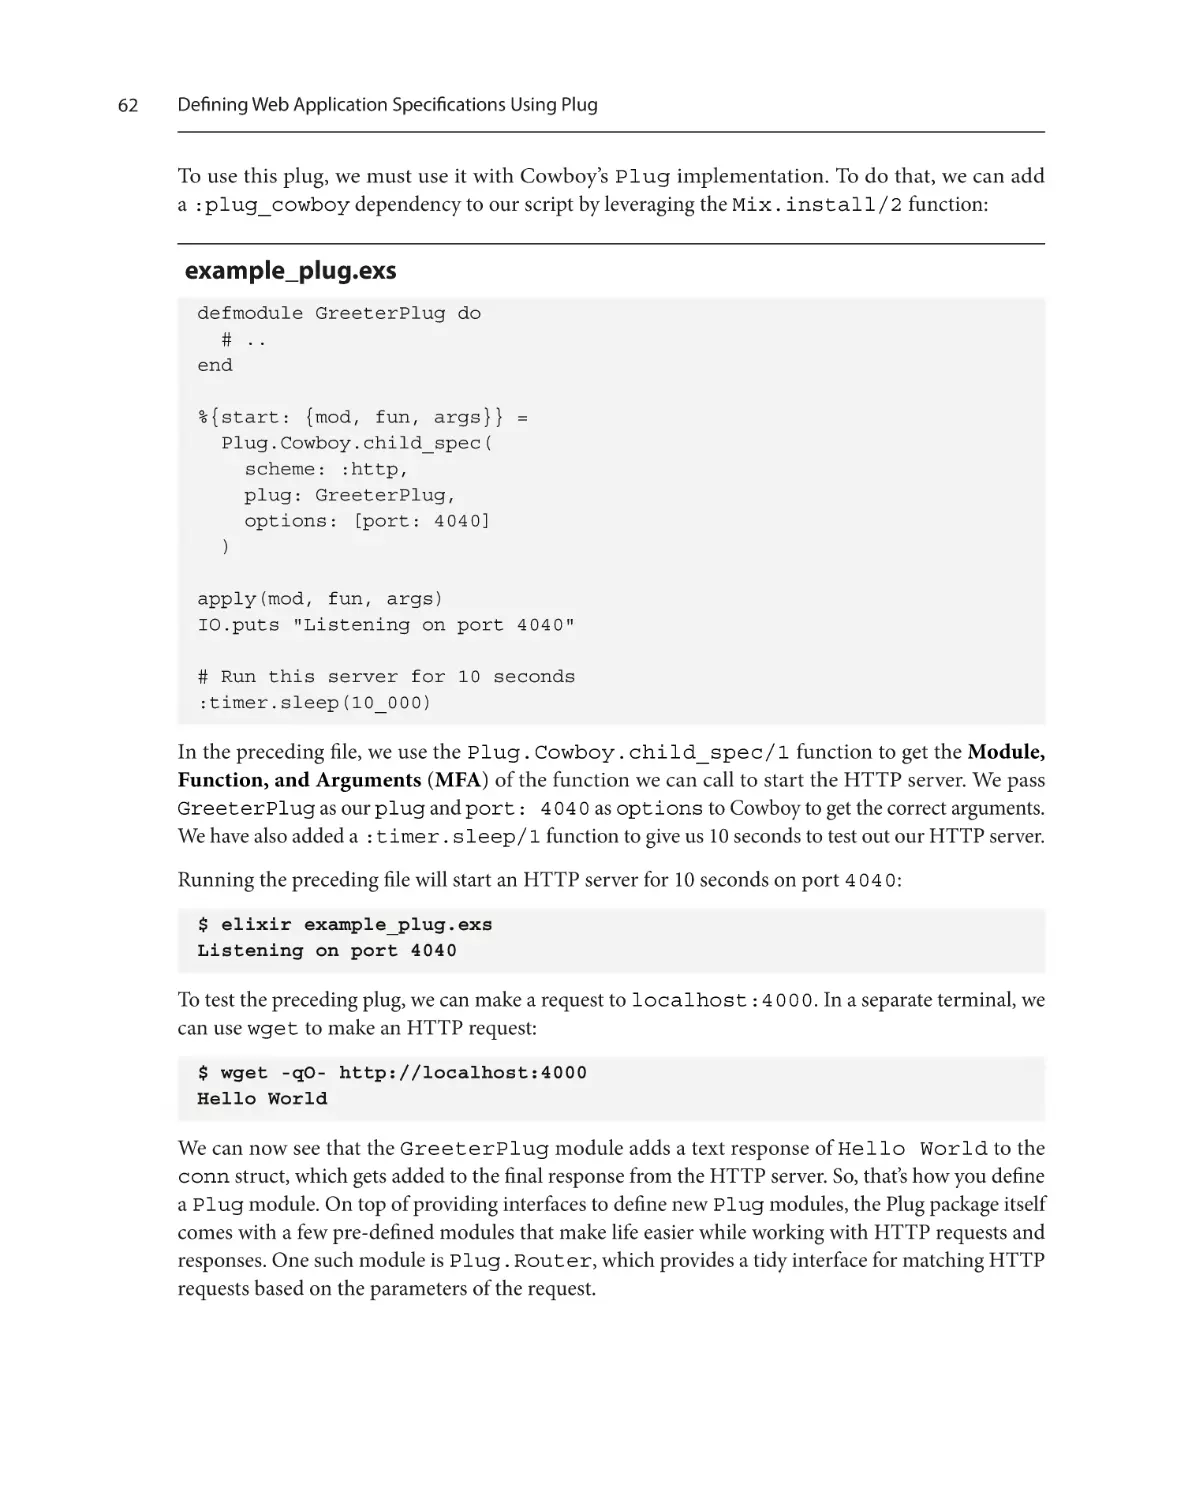
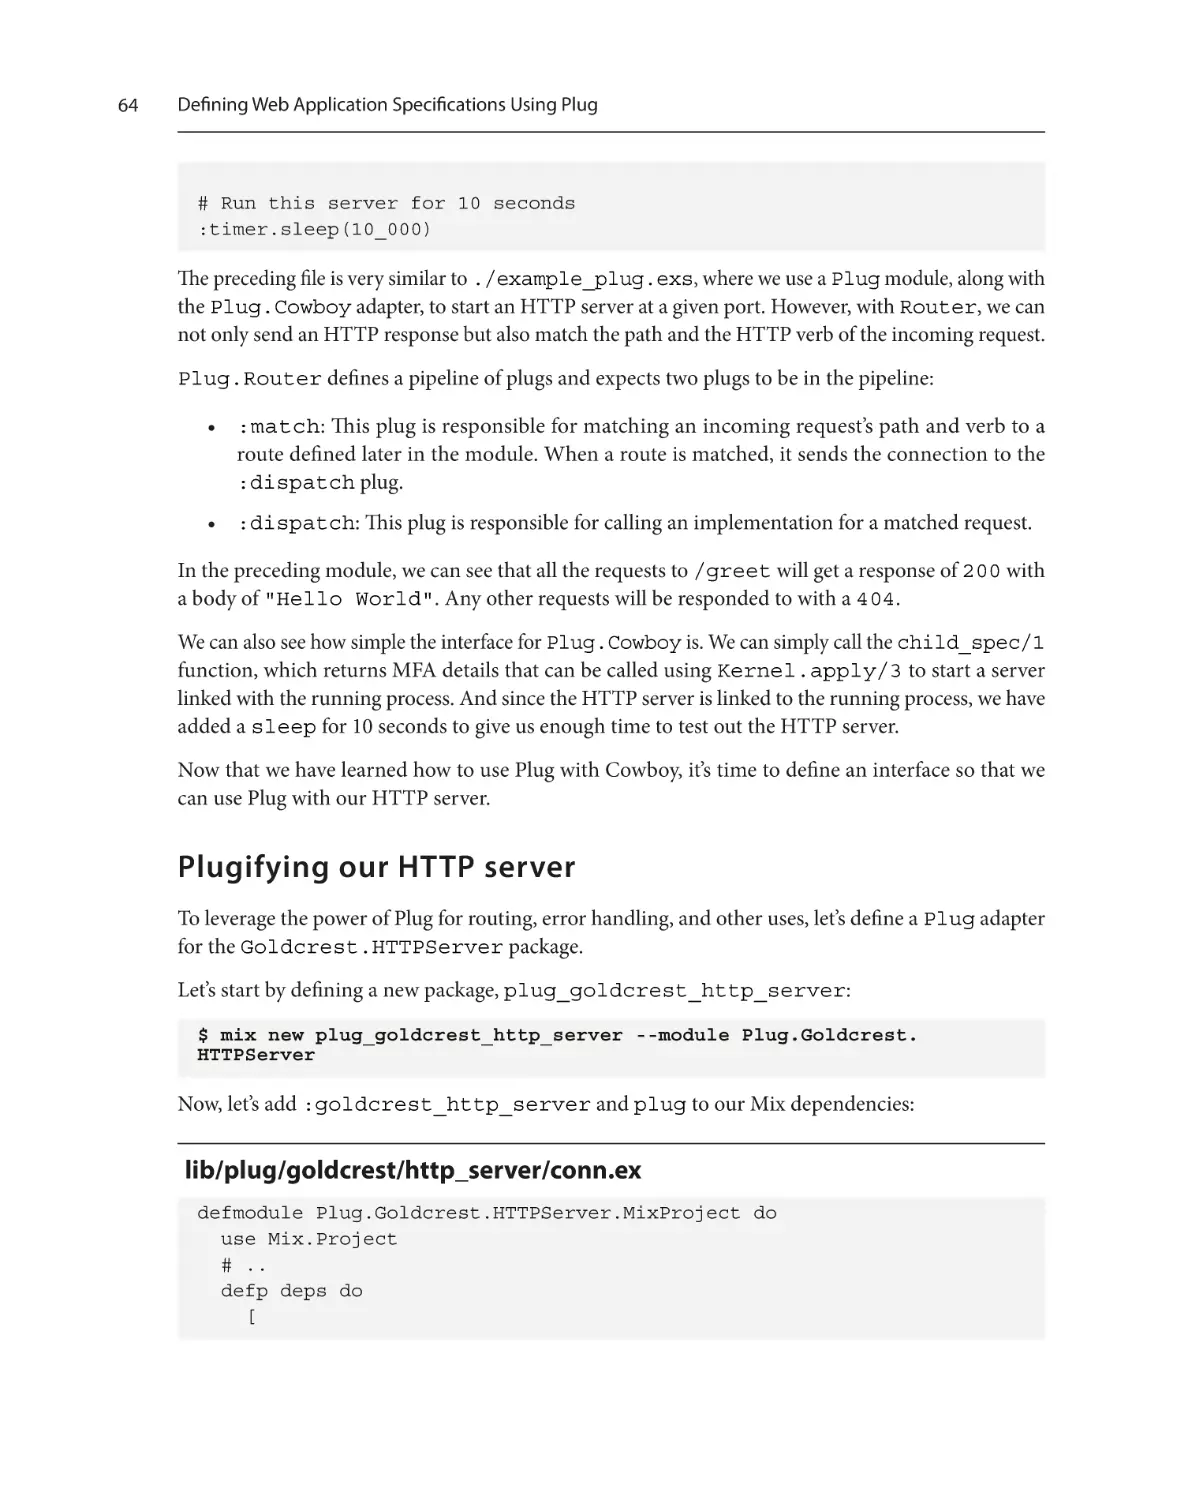
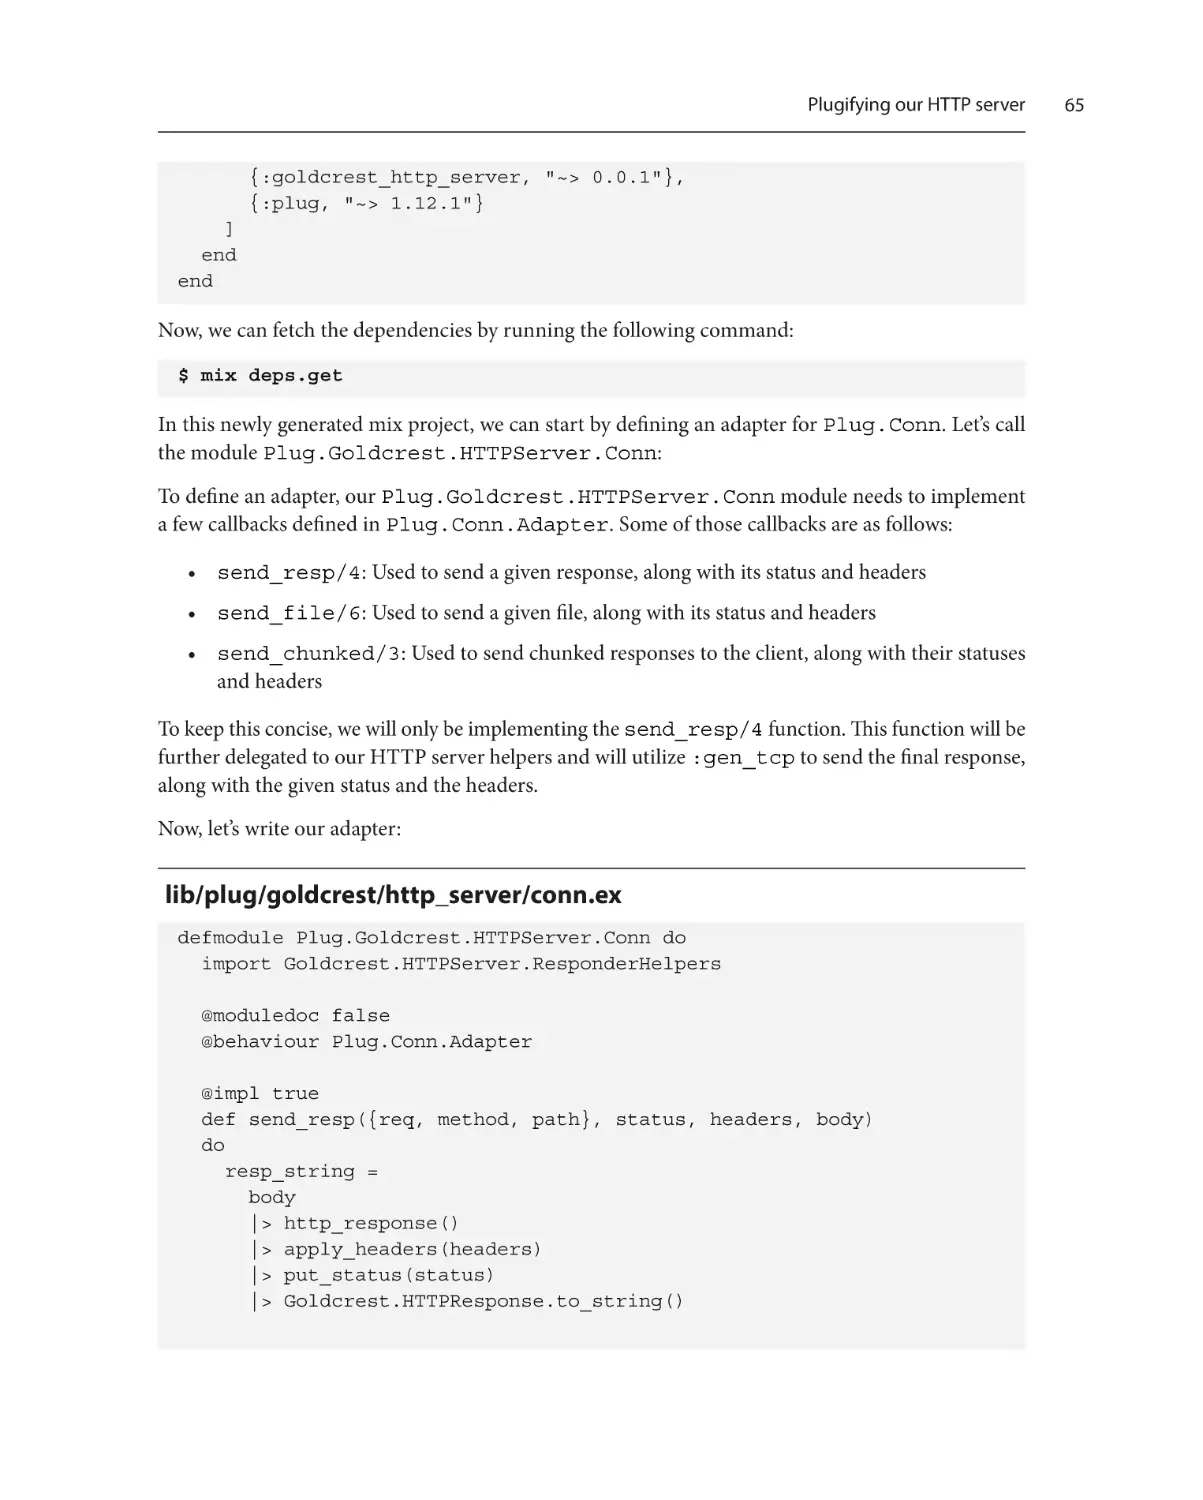
Plugifying our HTTP server
64
Summary72
4
Working with Controllers
Technical requirements
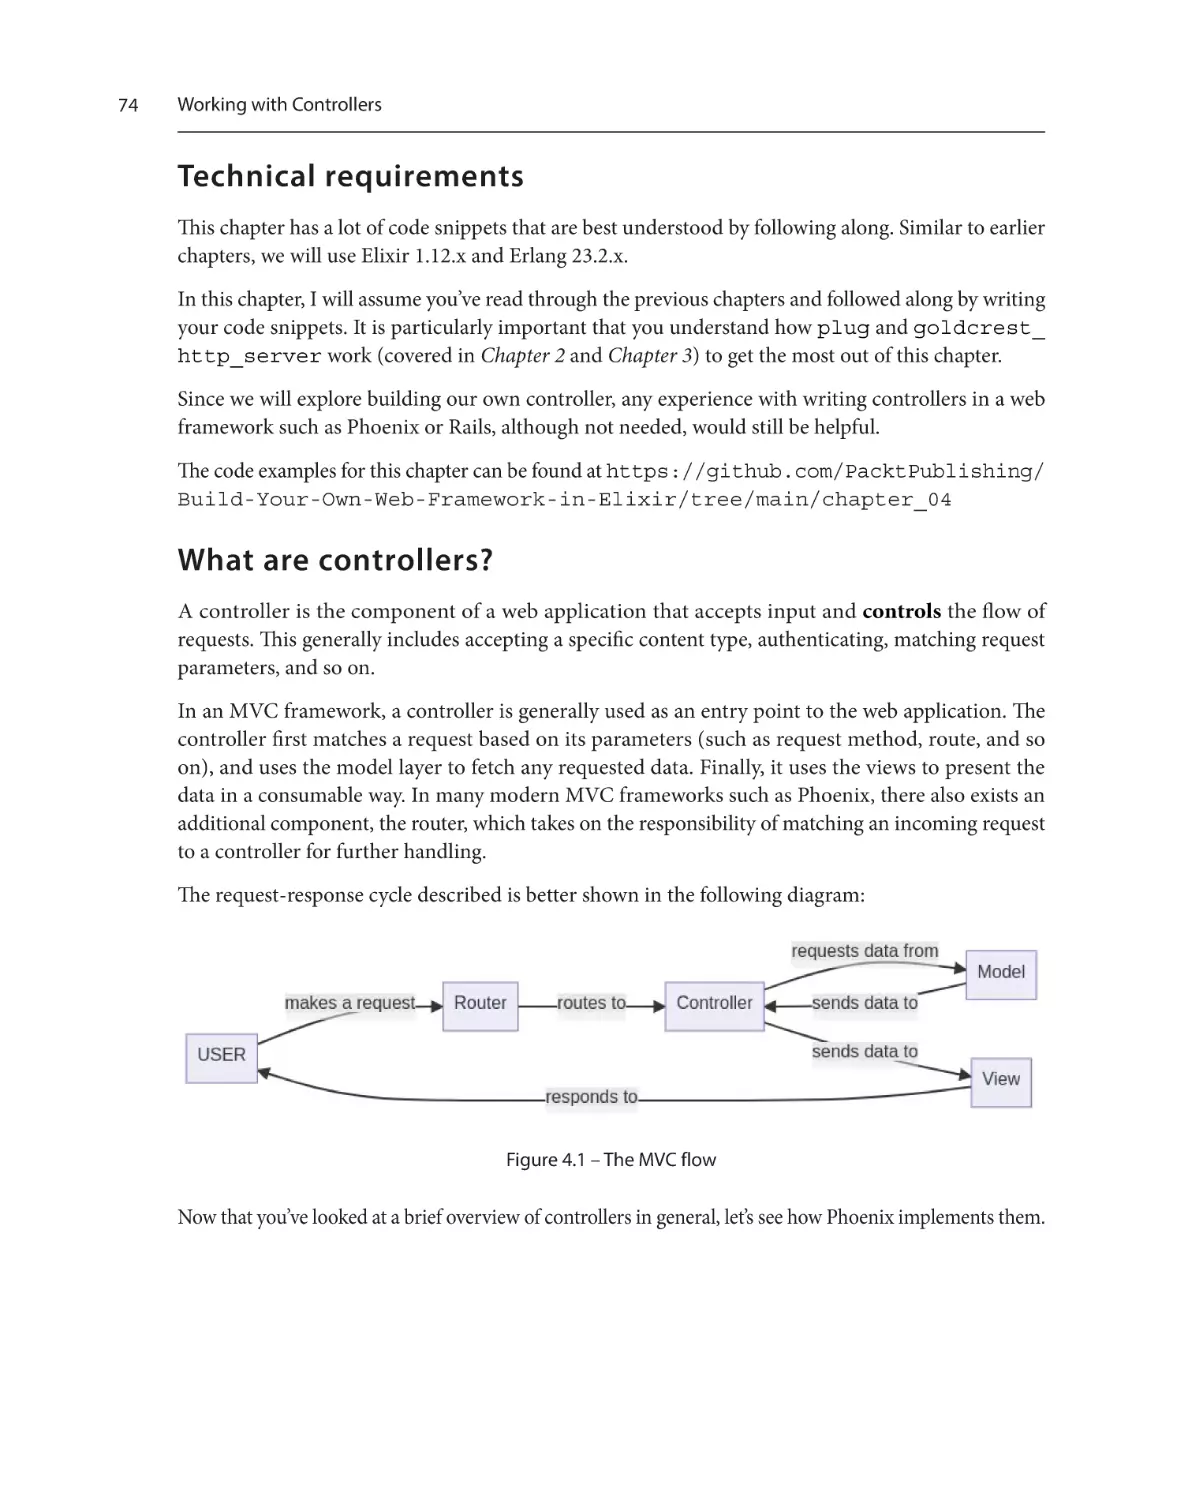
What are controllers?
Controllers in Phoenix
Building a controller interface
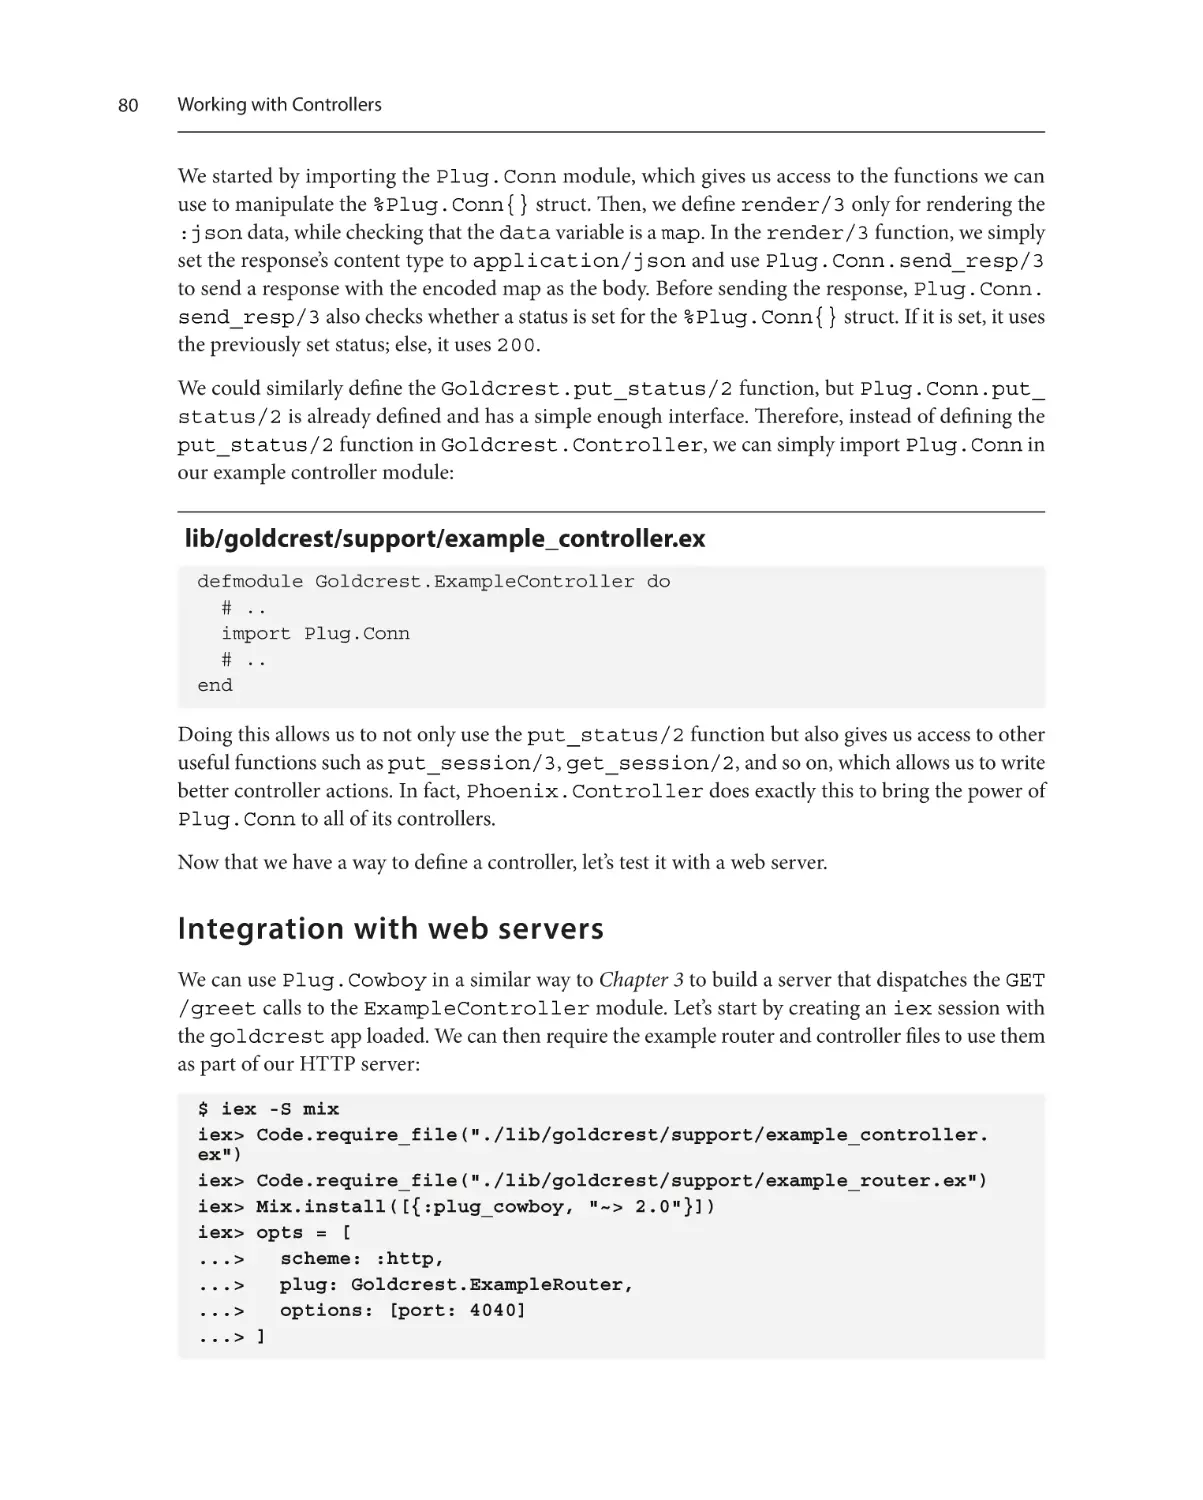
Integration with web servers
73
74
74
75
76
80
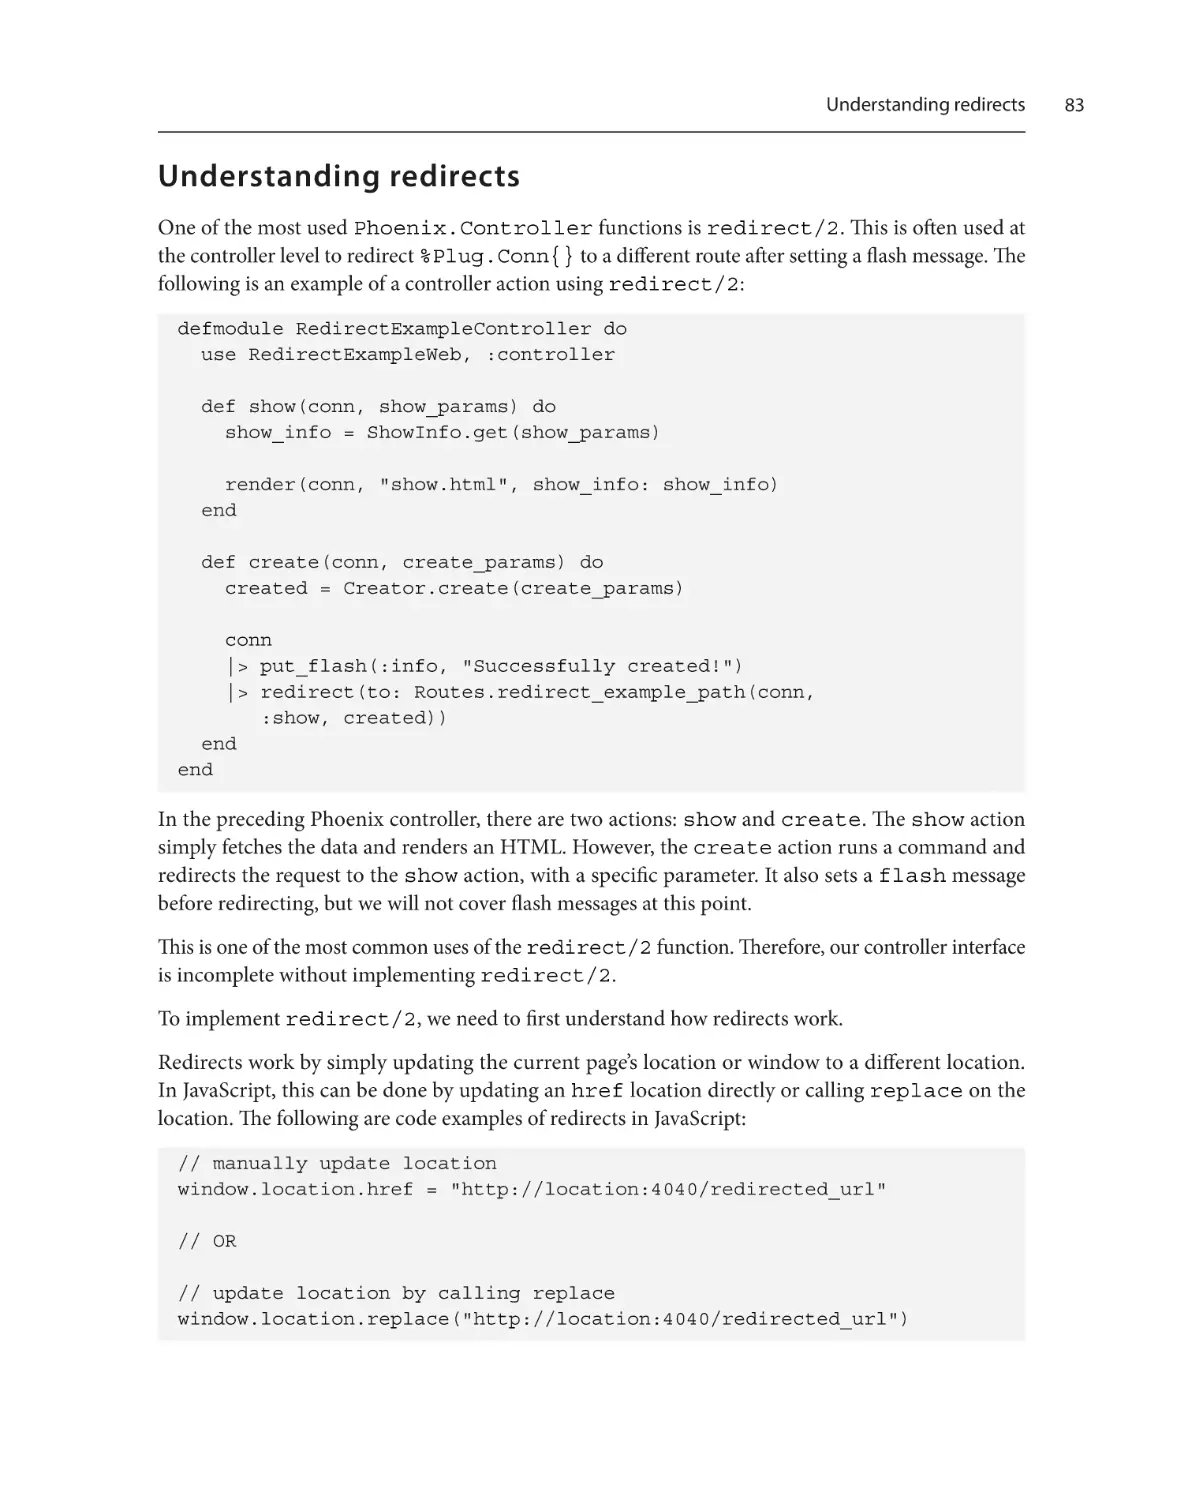
Understanding redirects
83
Testing the controller
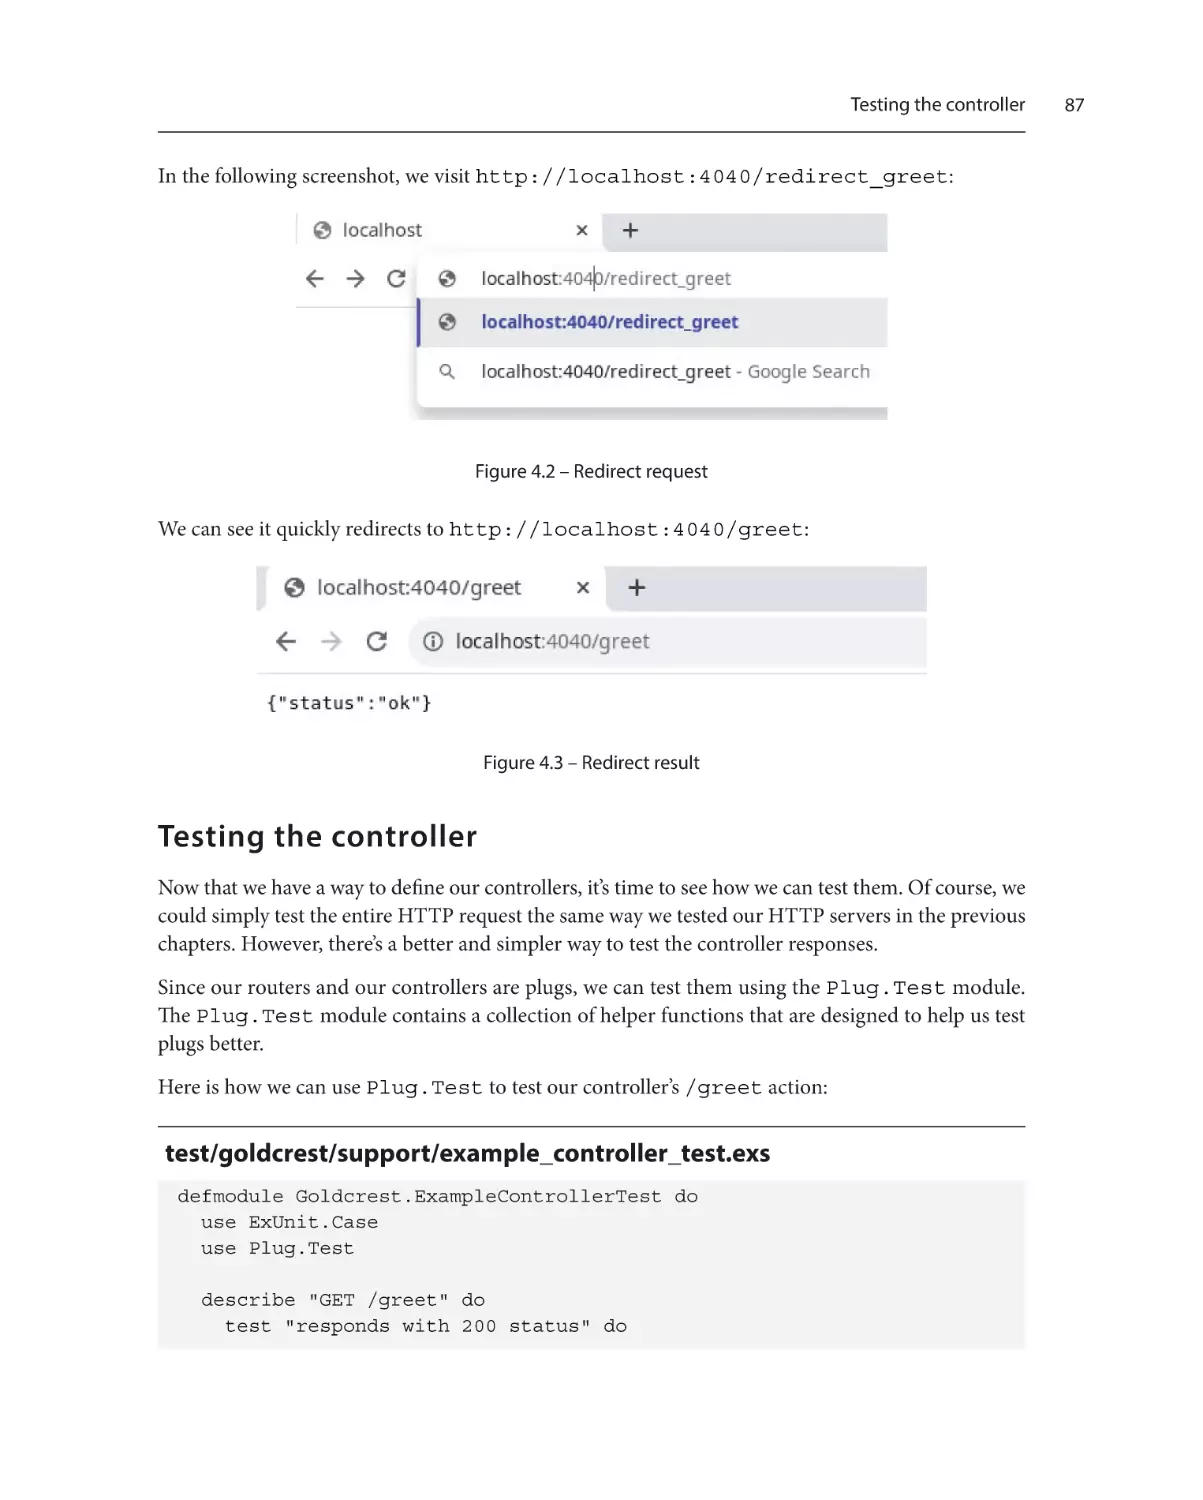
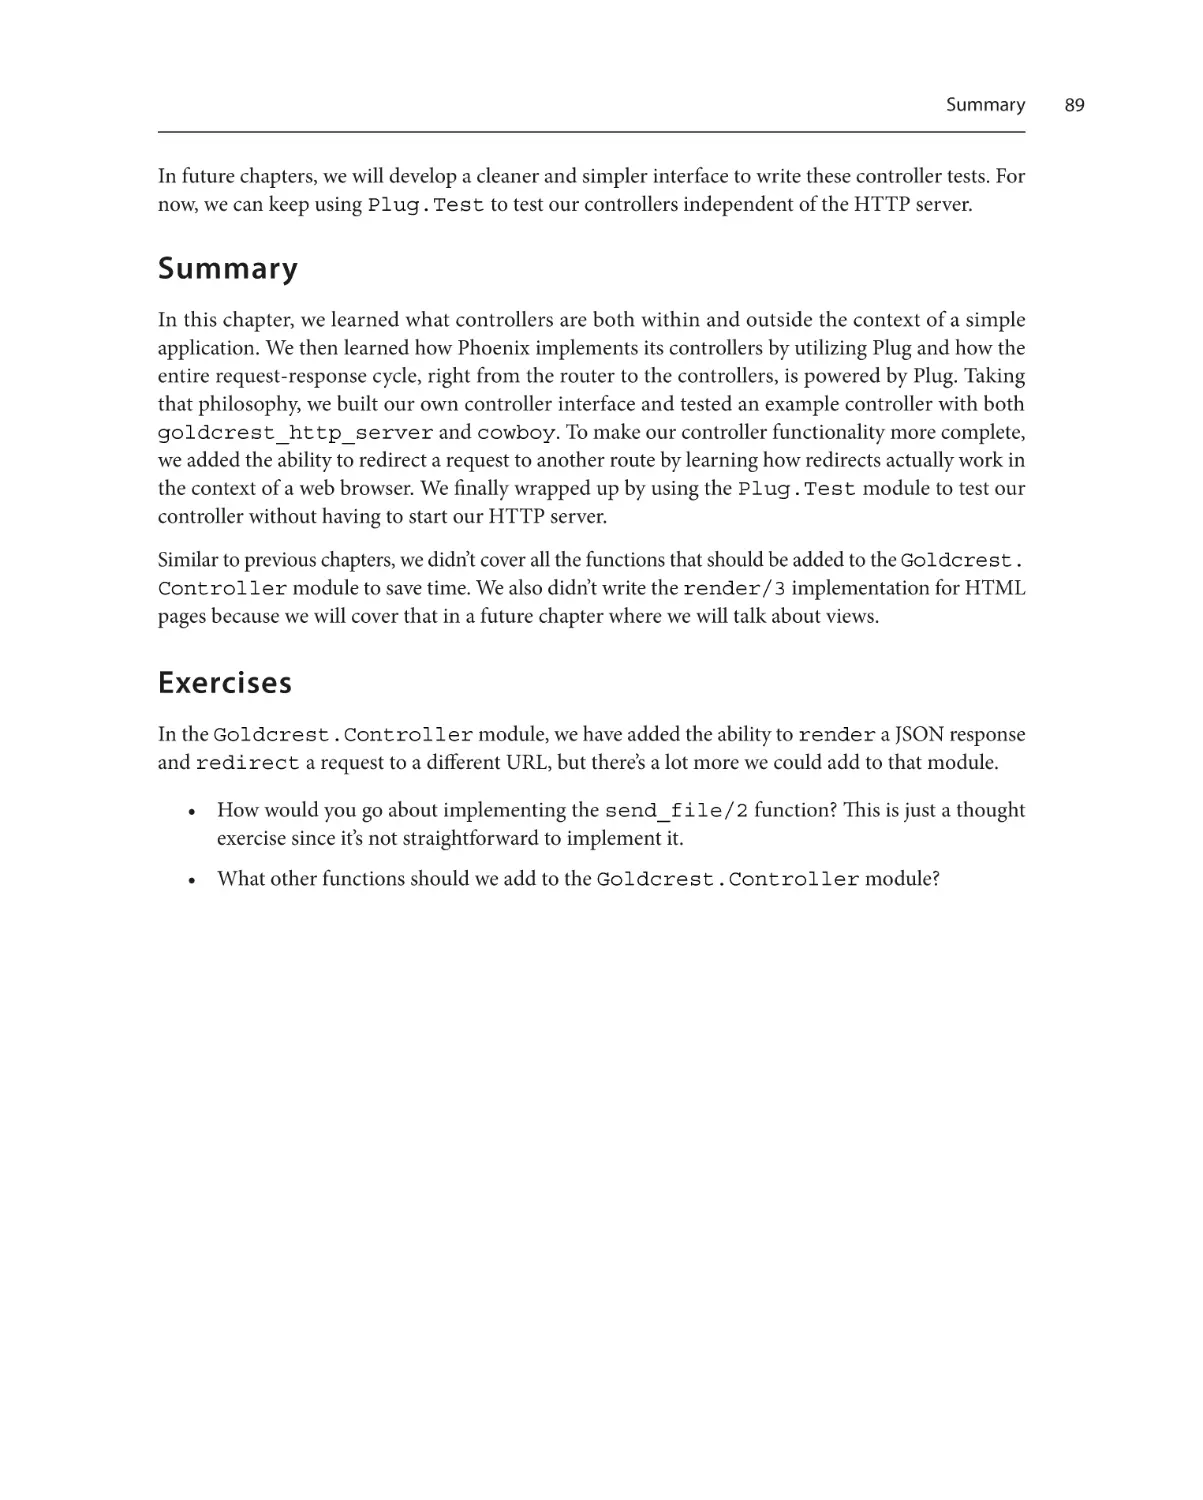
87
Summary89
Exercises89
5
Adding Controller Plugs and Action Fallback
Technical requirements
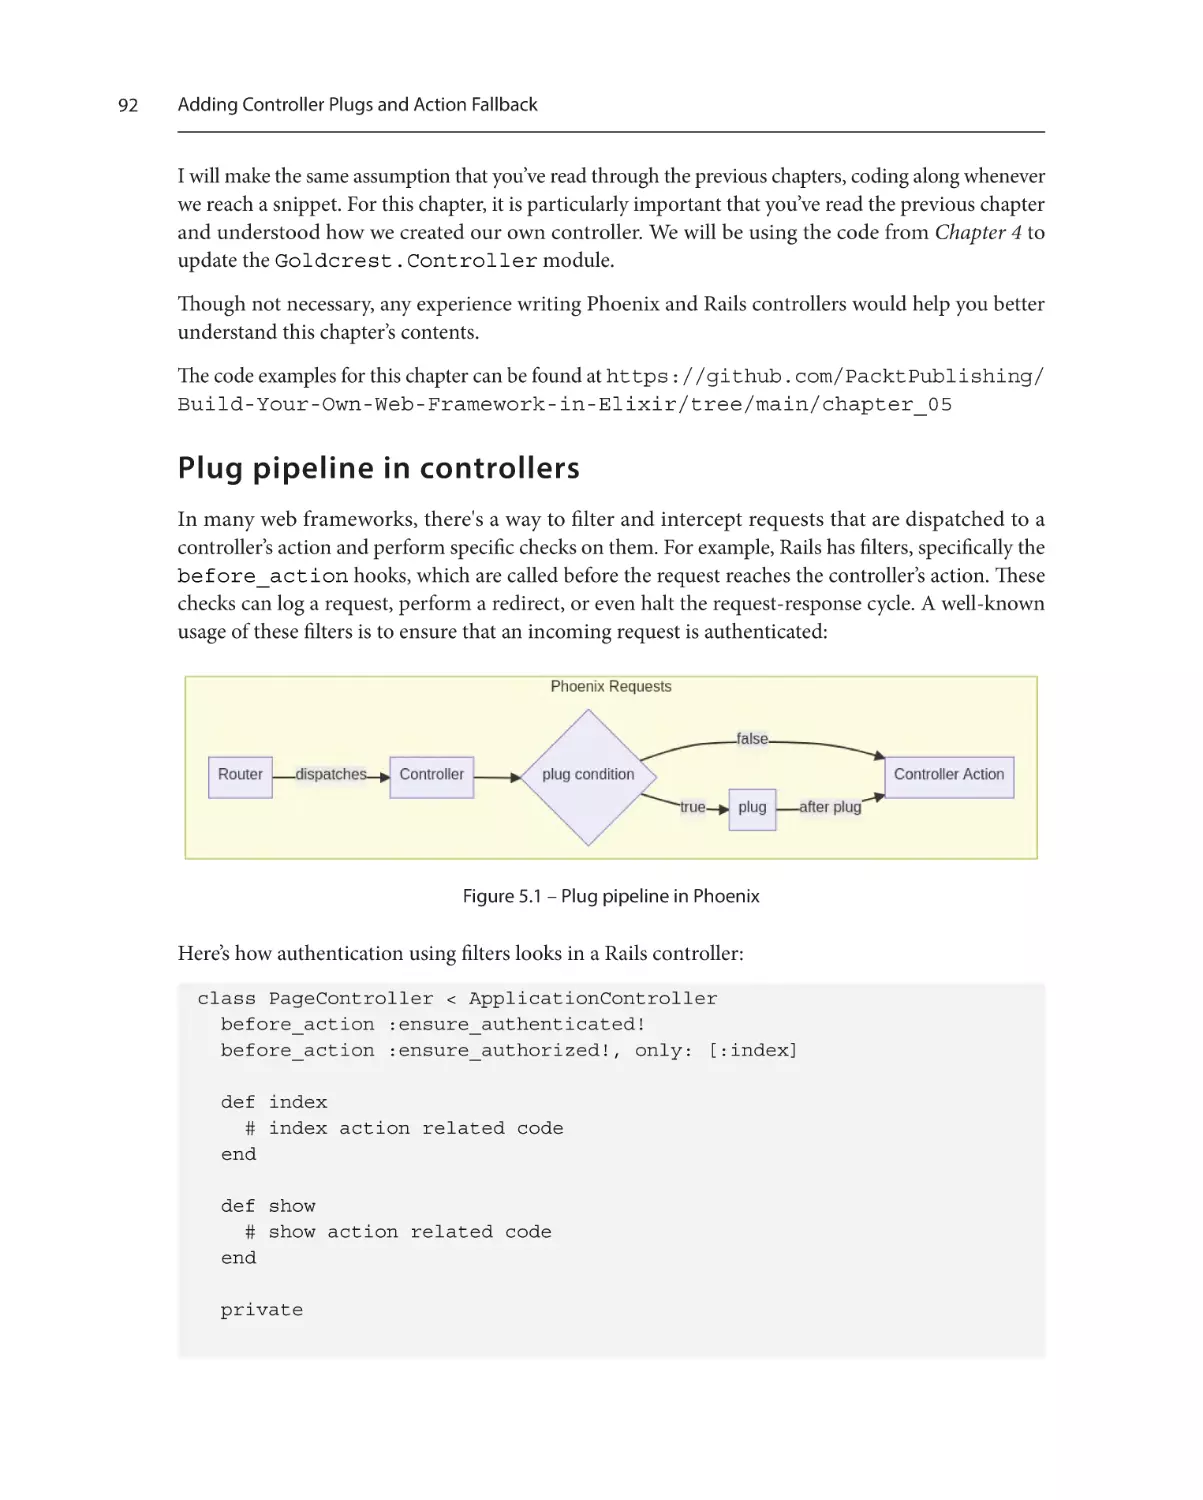
Plug pipeline in controllers
Understanding the
Plug.Builder module
91
92
94
91
Building the controller pipeline
98
Implementing action fallback
103
Summary107
Table of Contents
6
Working with HTML and Embedded Elixir
Technical requirements
Understanding and exploring
embedded elixir
Defining functions dynamically in a module
Compiling a template with a module
Working with EEx options
Using EEx Smart Engine
109
109
Understanding custom markers
Building a custom EEx engine
110
Responding with html.eex files
118
Testing our templates
122
Testing with Floki
123
Summary125
111
112
113
114
115
115
7
Working with Views
Technical requirements
127
What is a view?
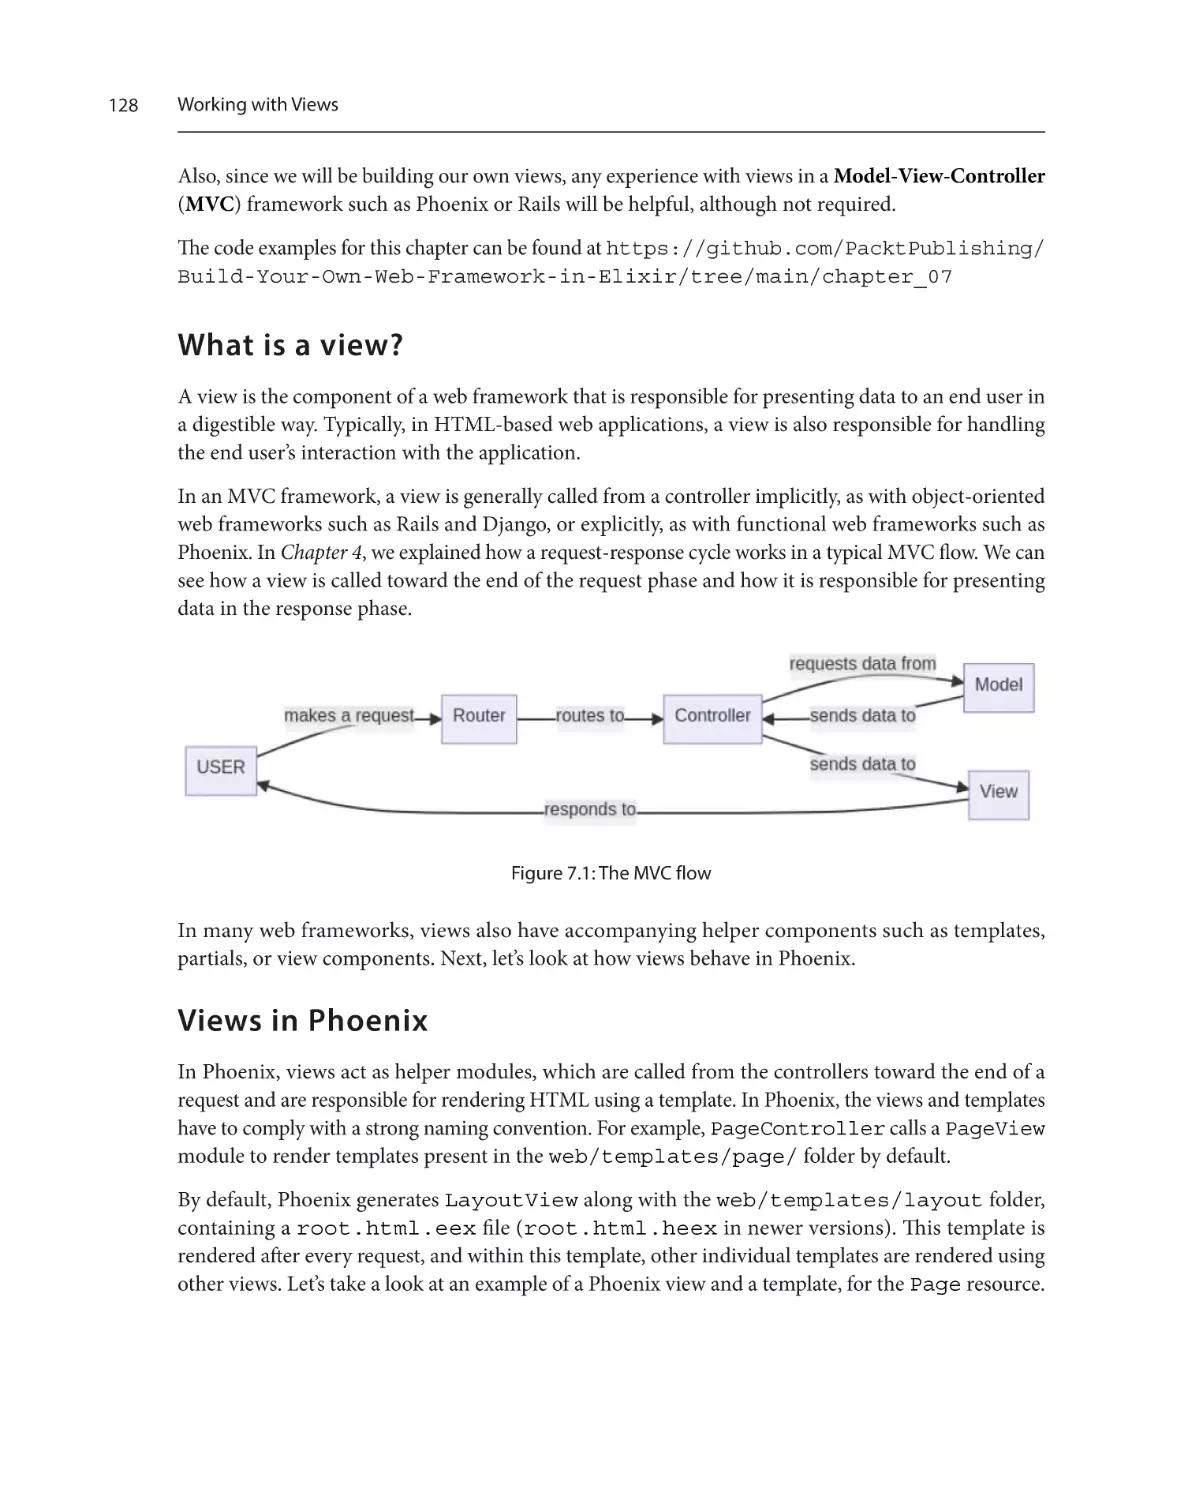
128
Views in Phoenix
128
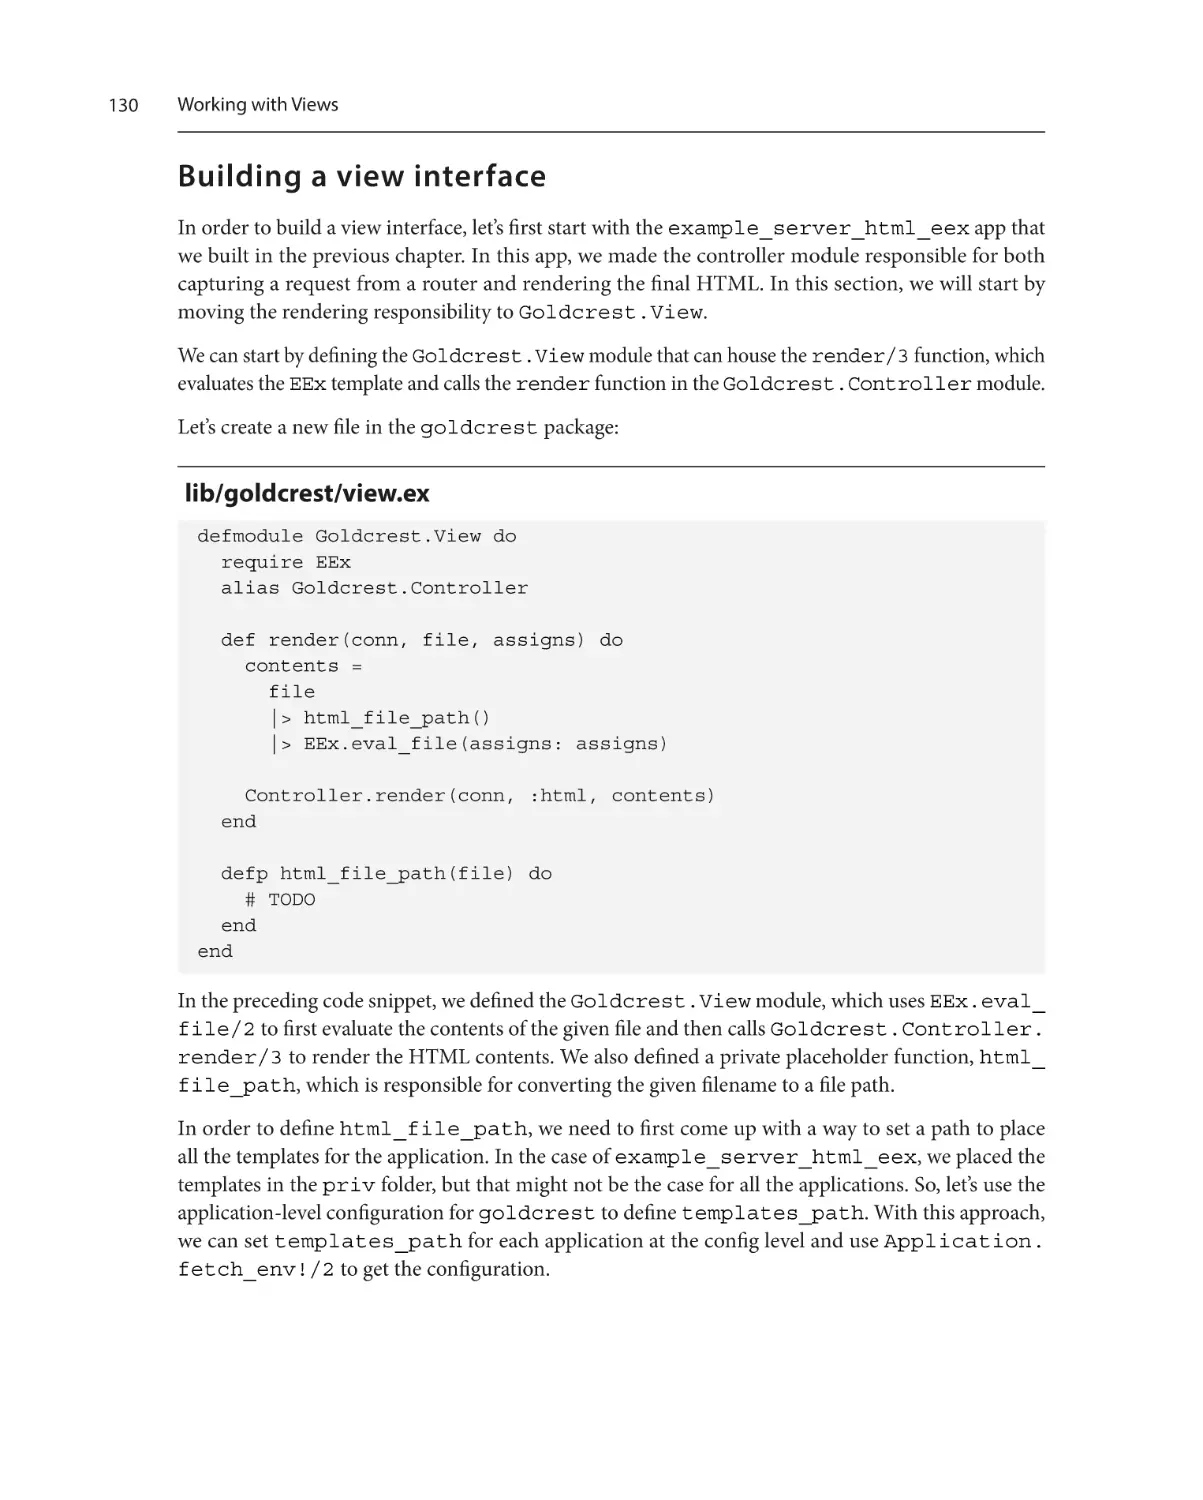
Building a view interface
130
Passing helper functions to templates 132
Taking Goldcrest for a spin
134
127
Defining a store
The index action
The create action
The delete action
137
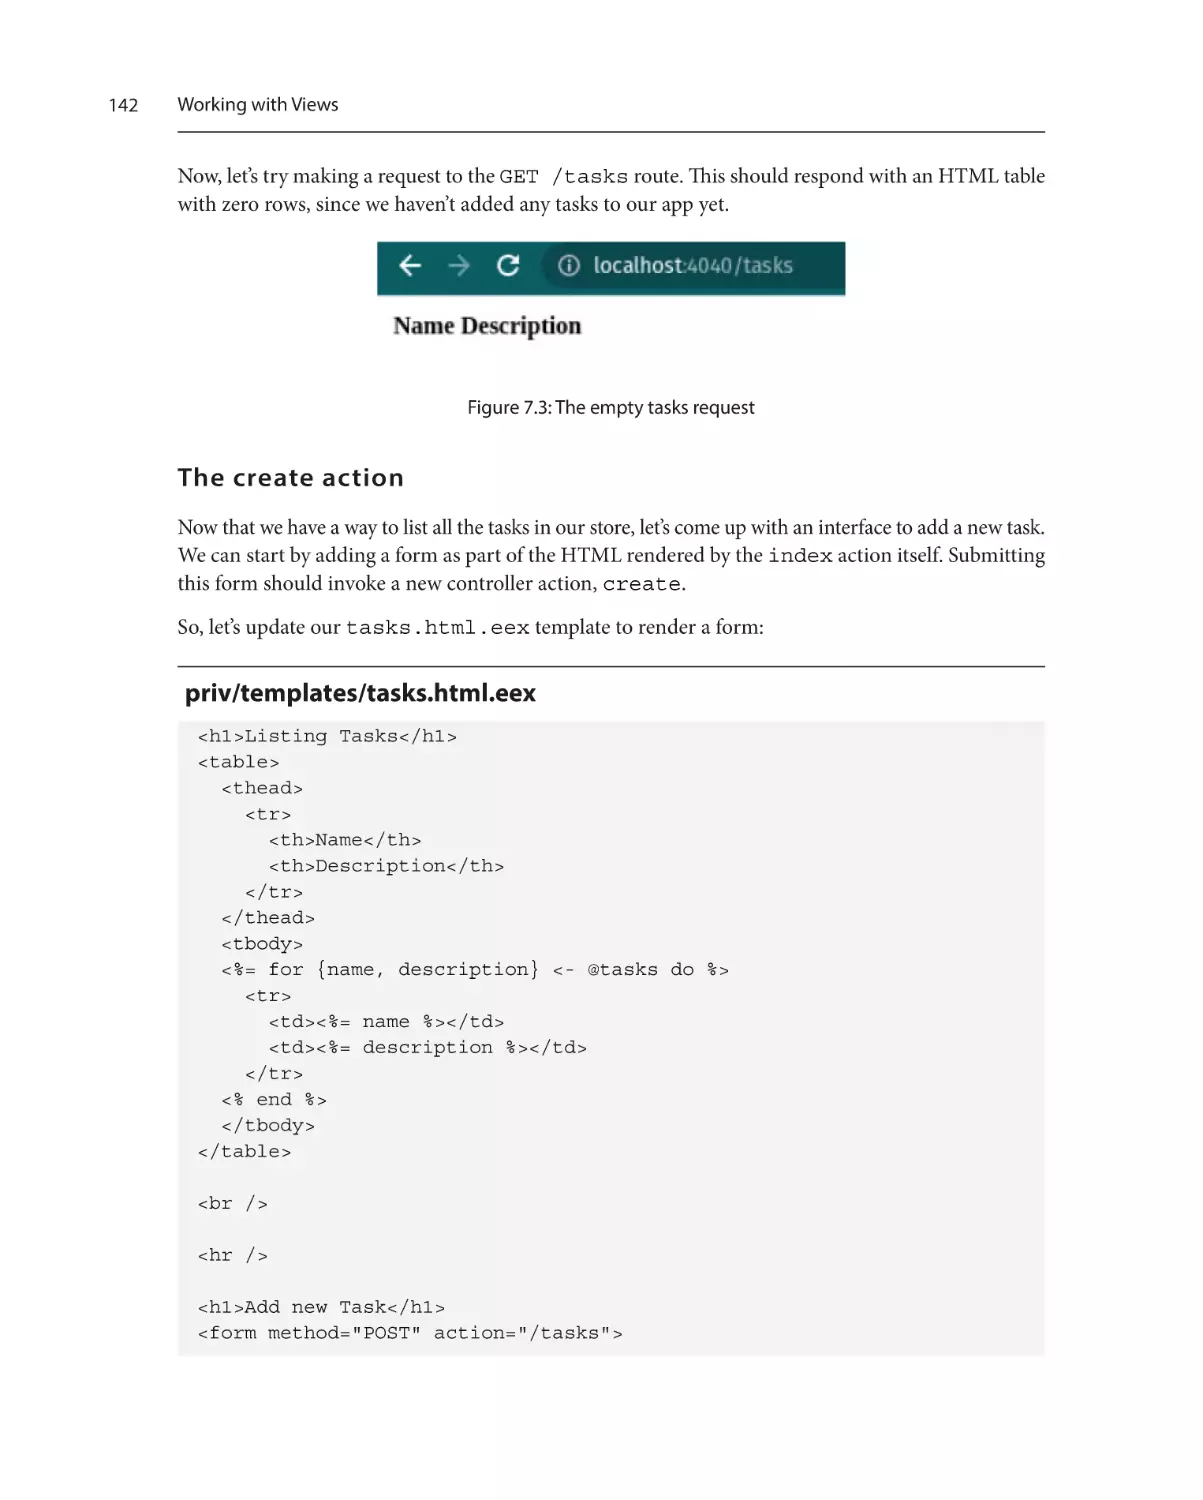
139
142
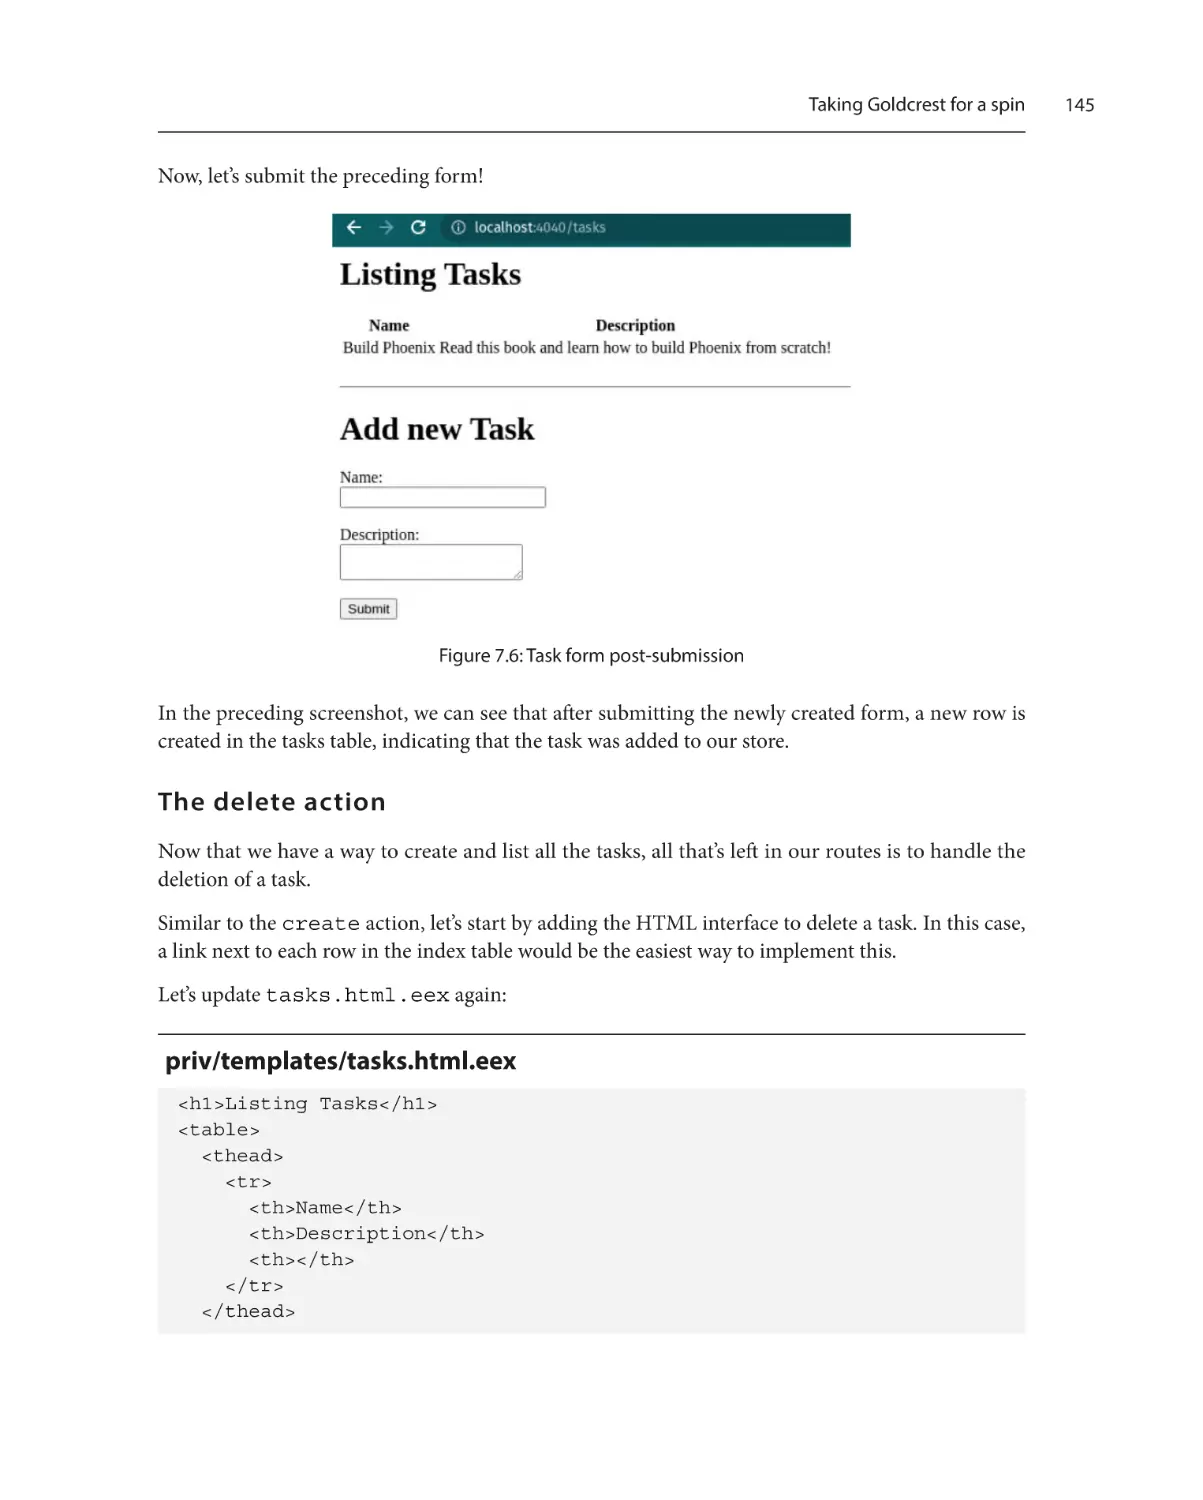
145
Summary148
Exercises148
Part 3: DSL Design
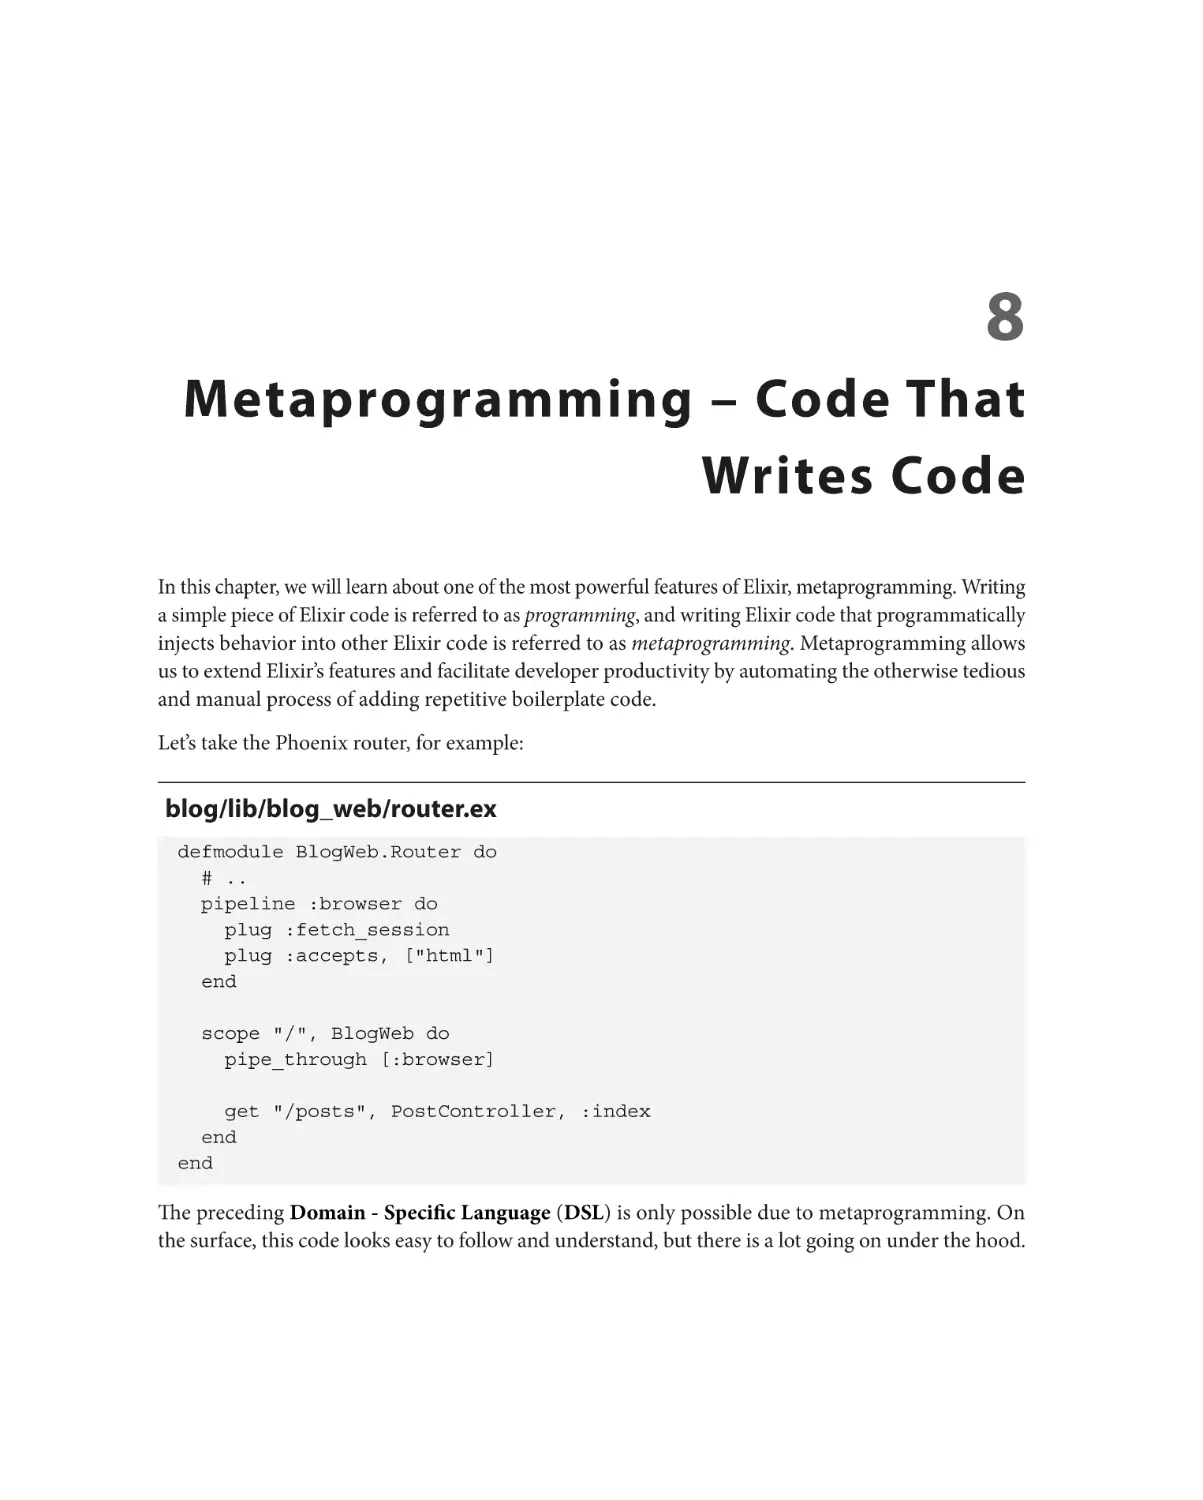
8
Metaprogramming – Code That Writes Code
Technical requirements
152
The pros and cons of
metaprogramming153
When to use metaprogramming
154
Metaprogramming in Elixir
155
Understanding quoted literals
156
Evaluating quoted literals
158
The hygienic evaluation of quotes
Adding dynamic behavior to quotes
Code injection using evaluation
Code injection using macros
The using macro
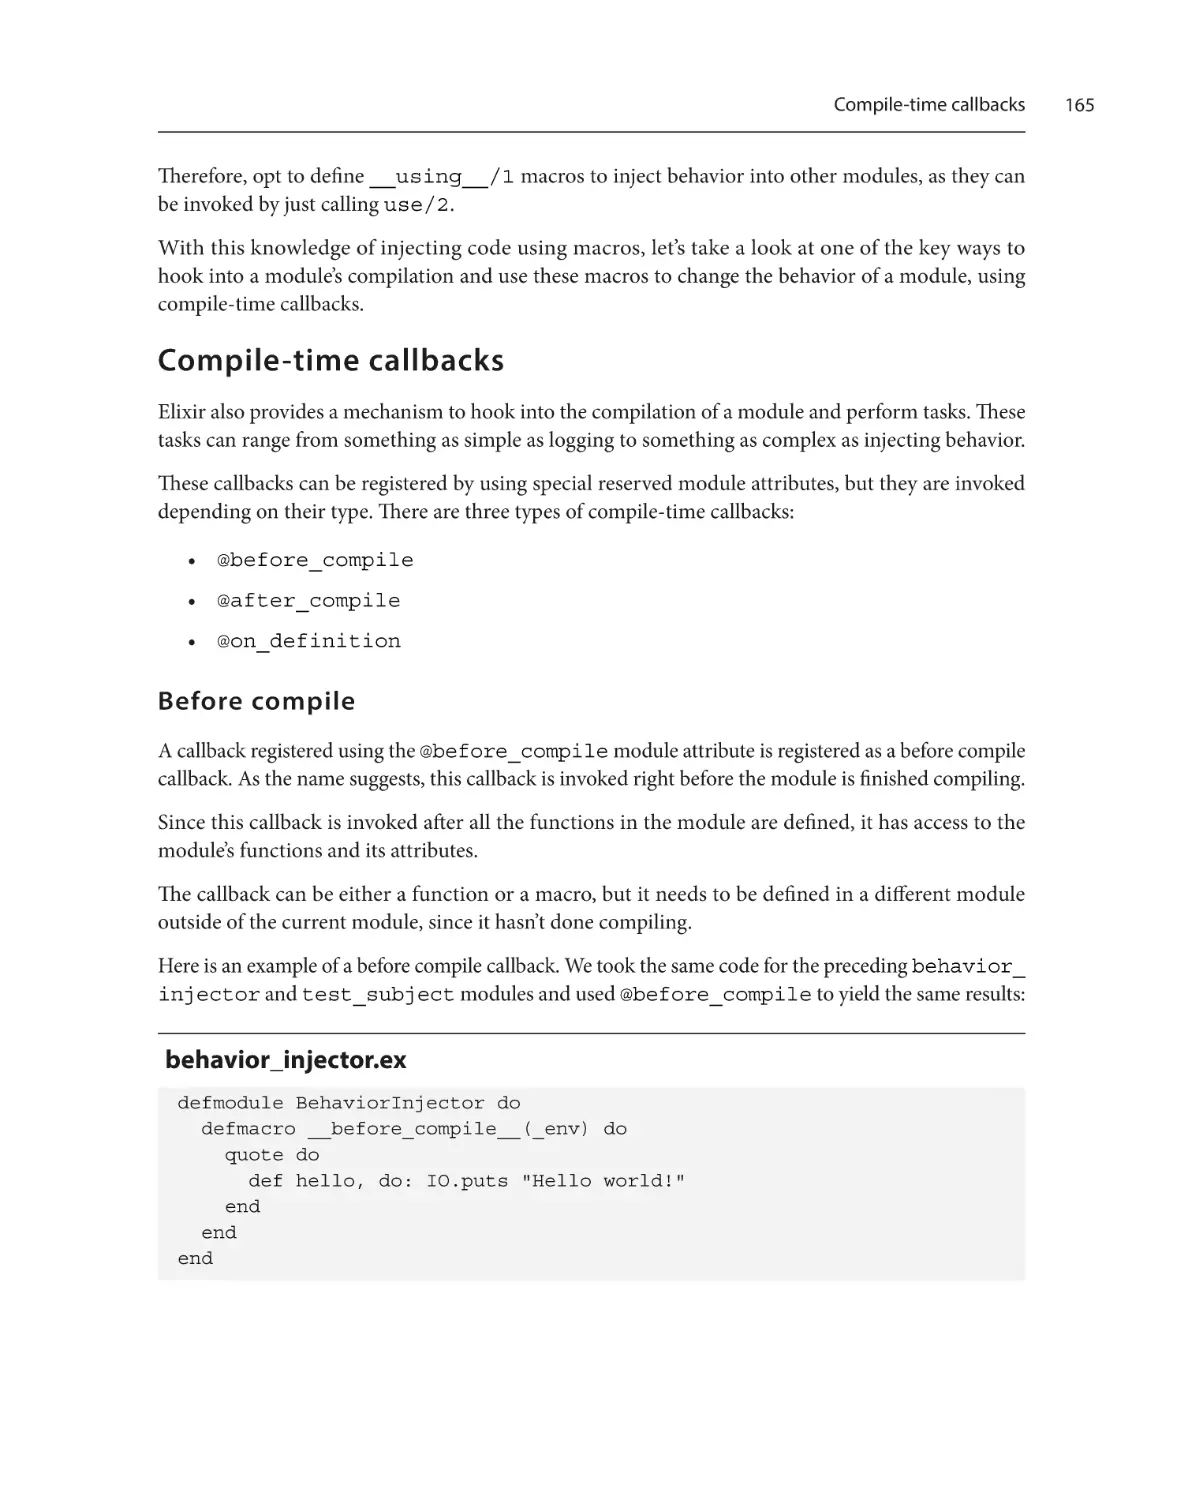
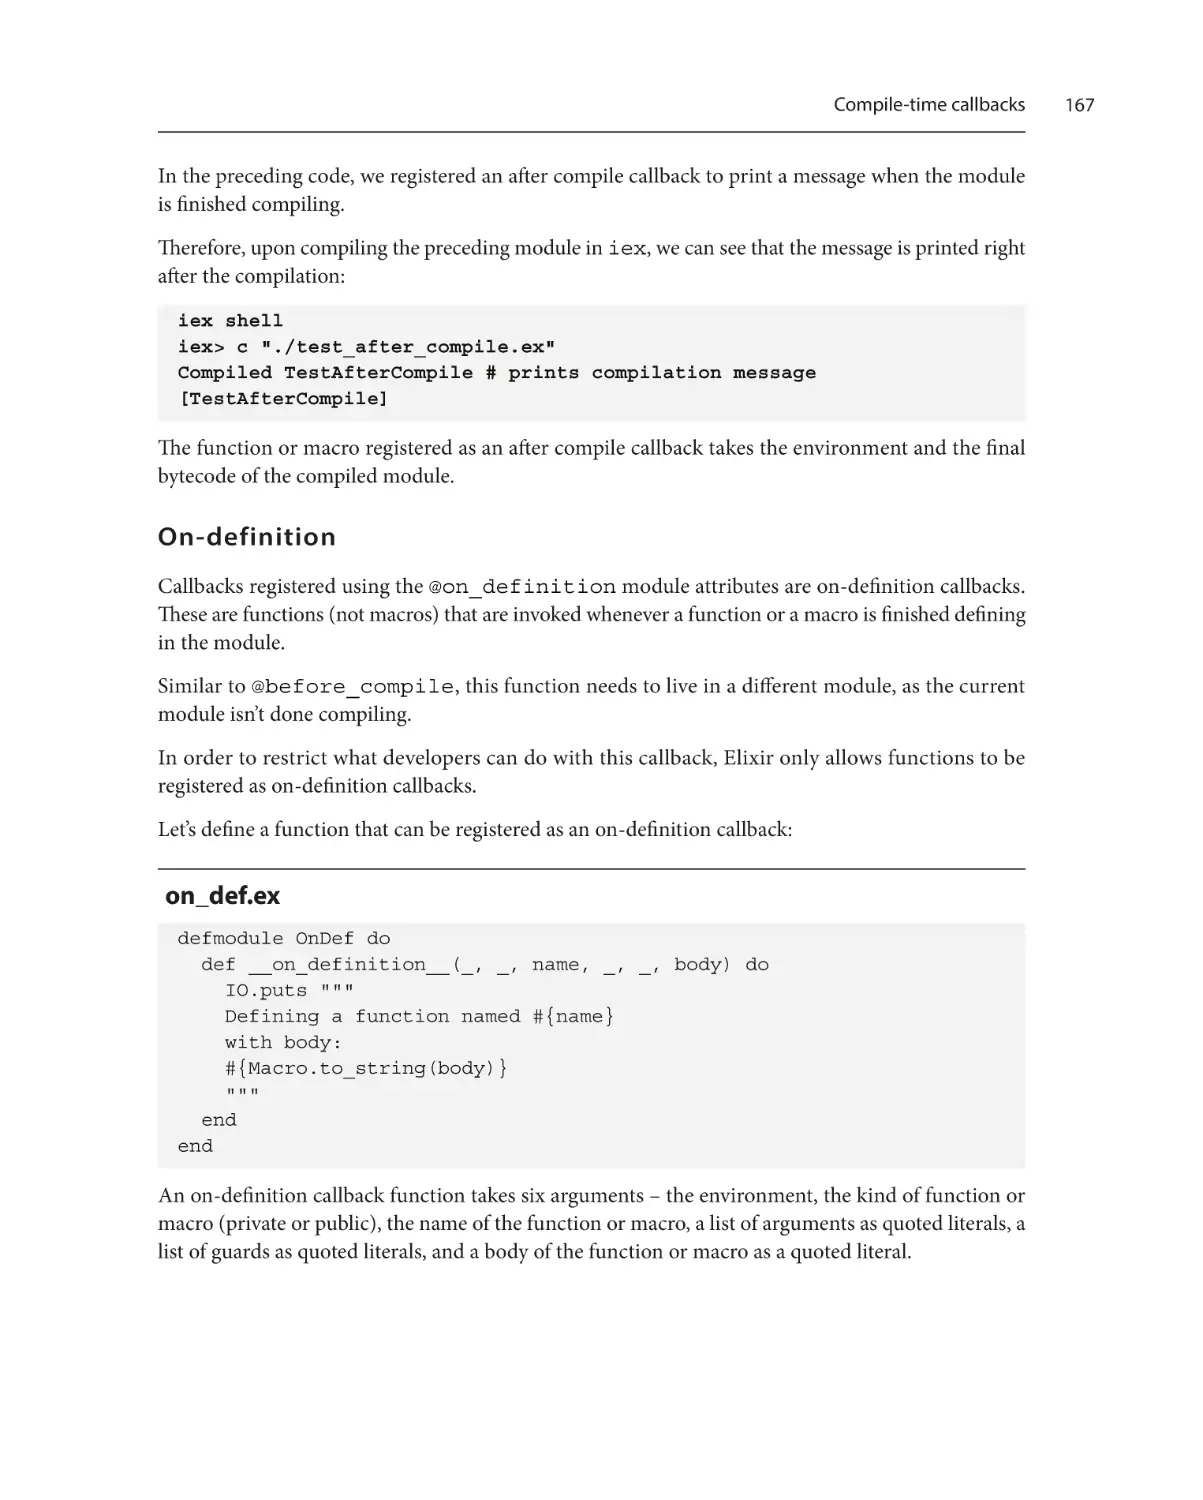
Compile-time callbacks
Before compile
151
159
160
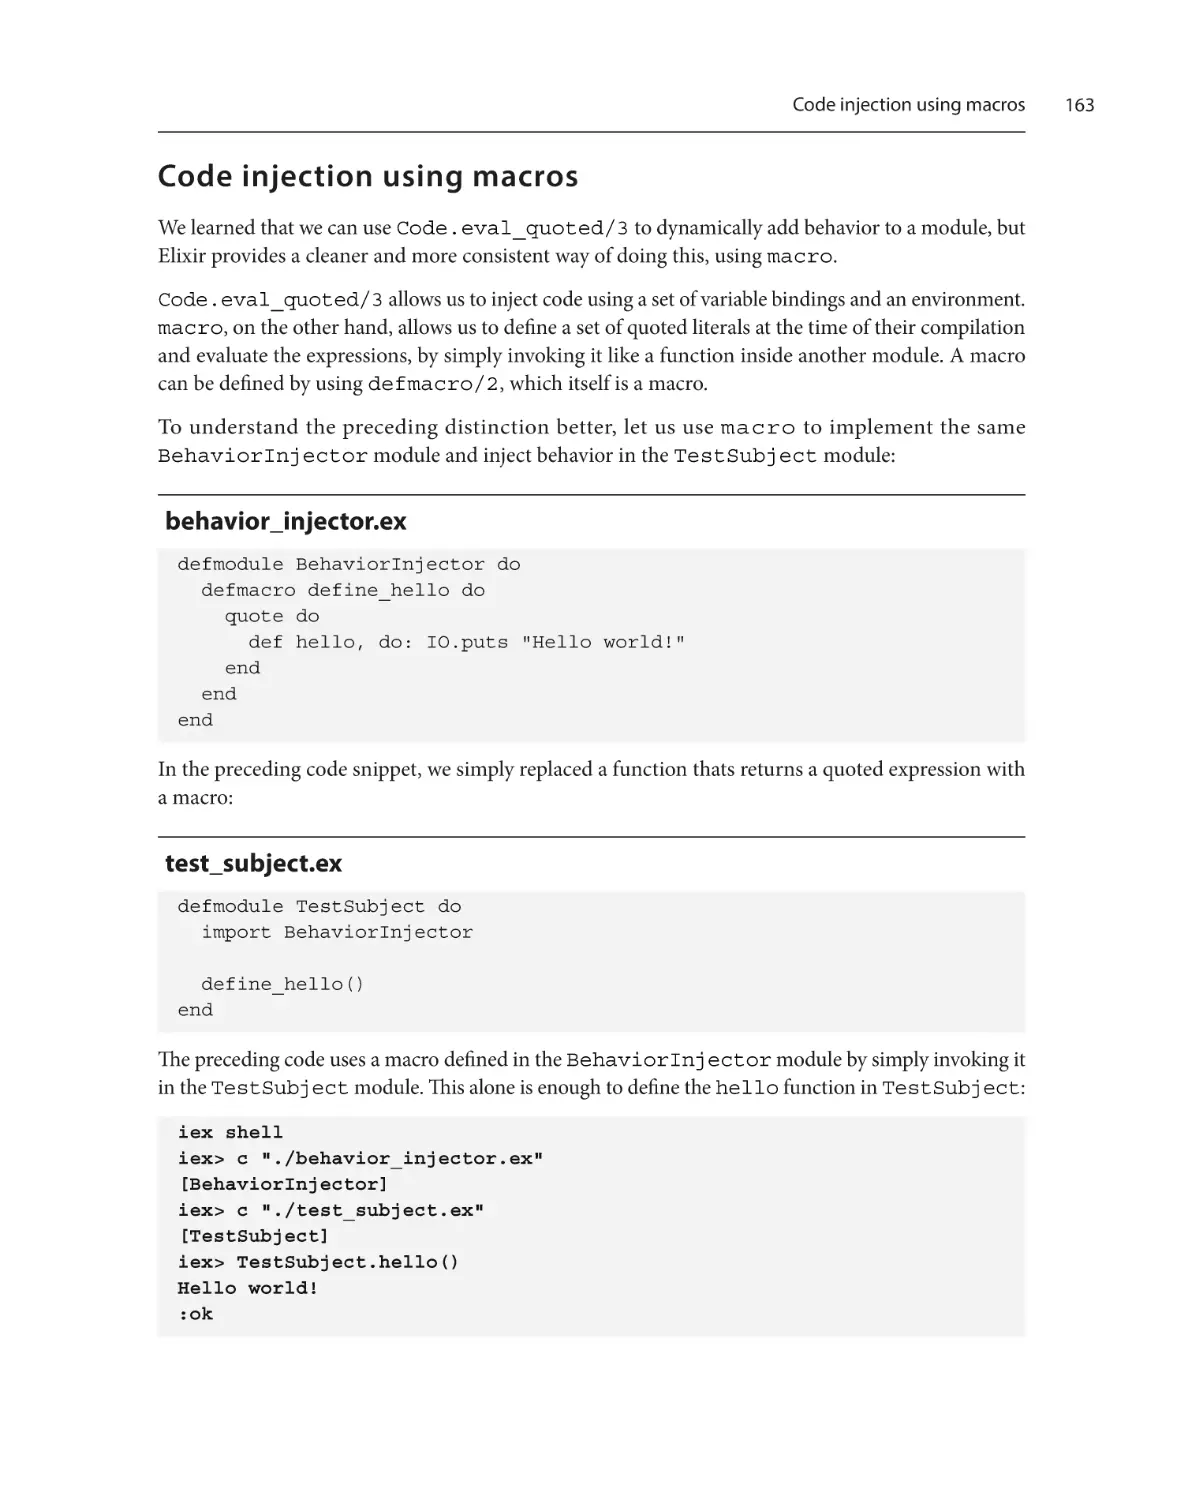
162
163
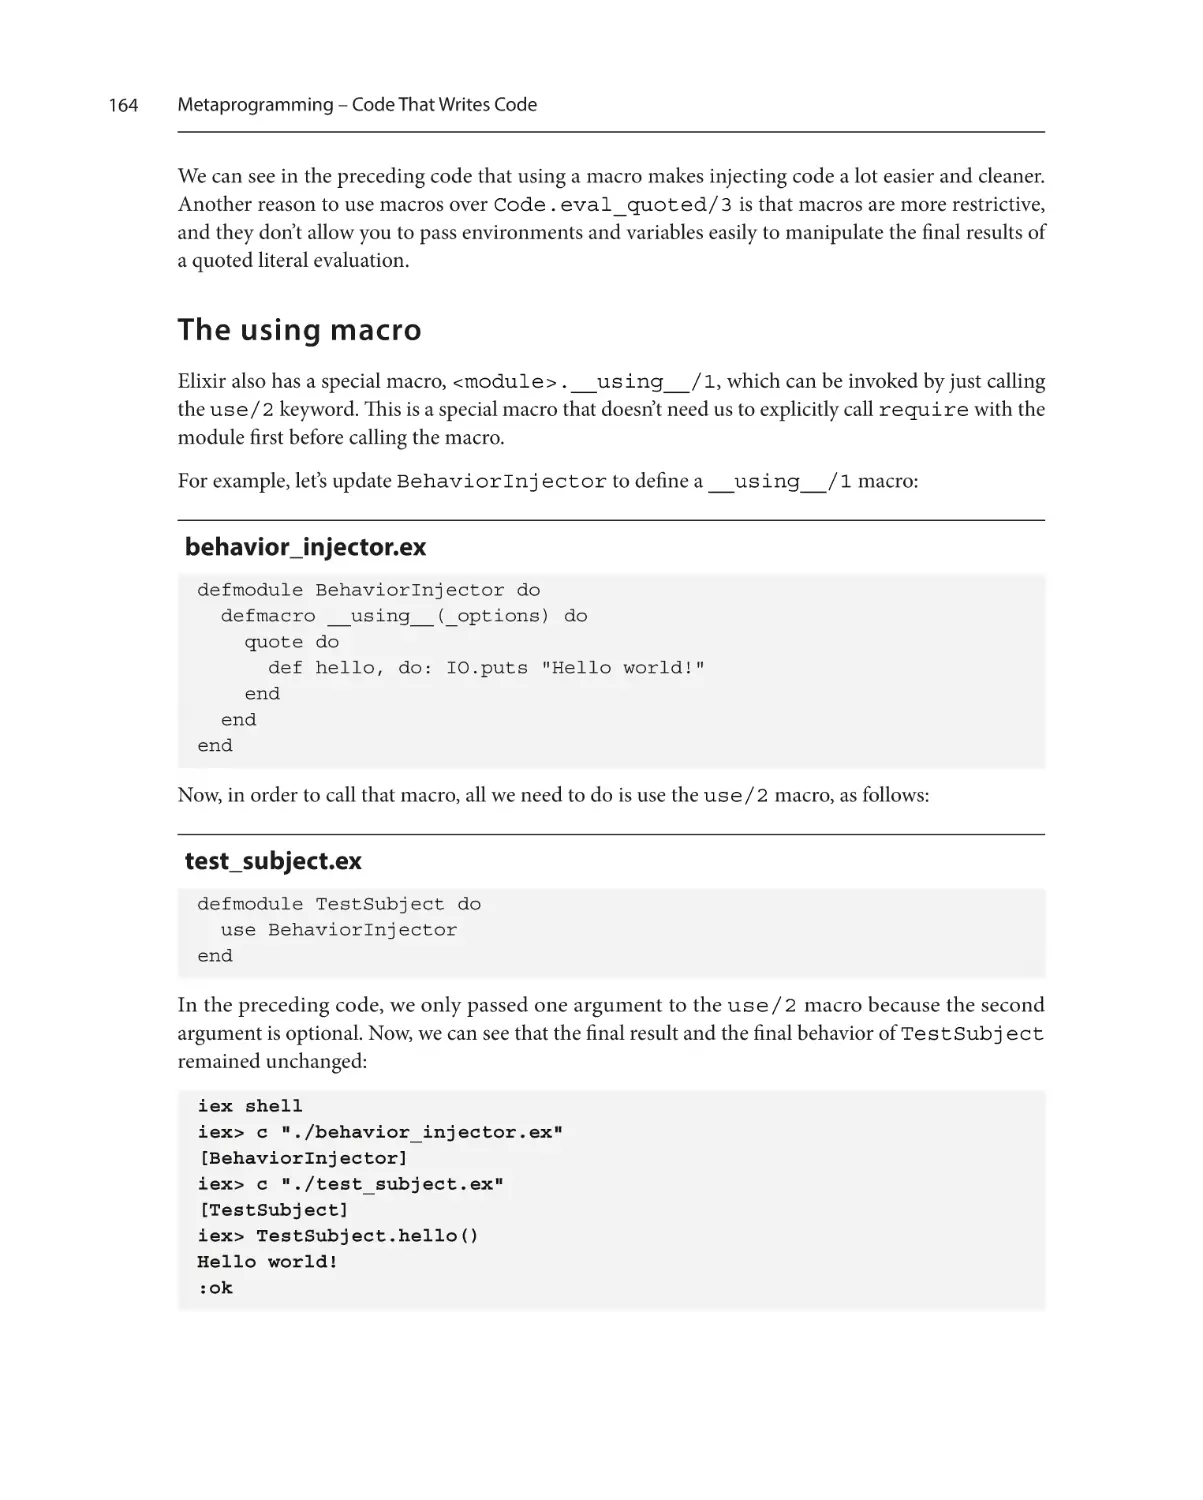
164
165
165
ix
x
Table of Contents
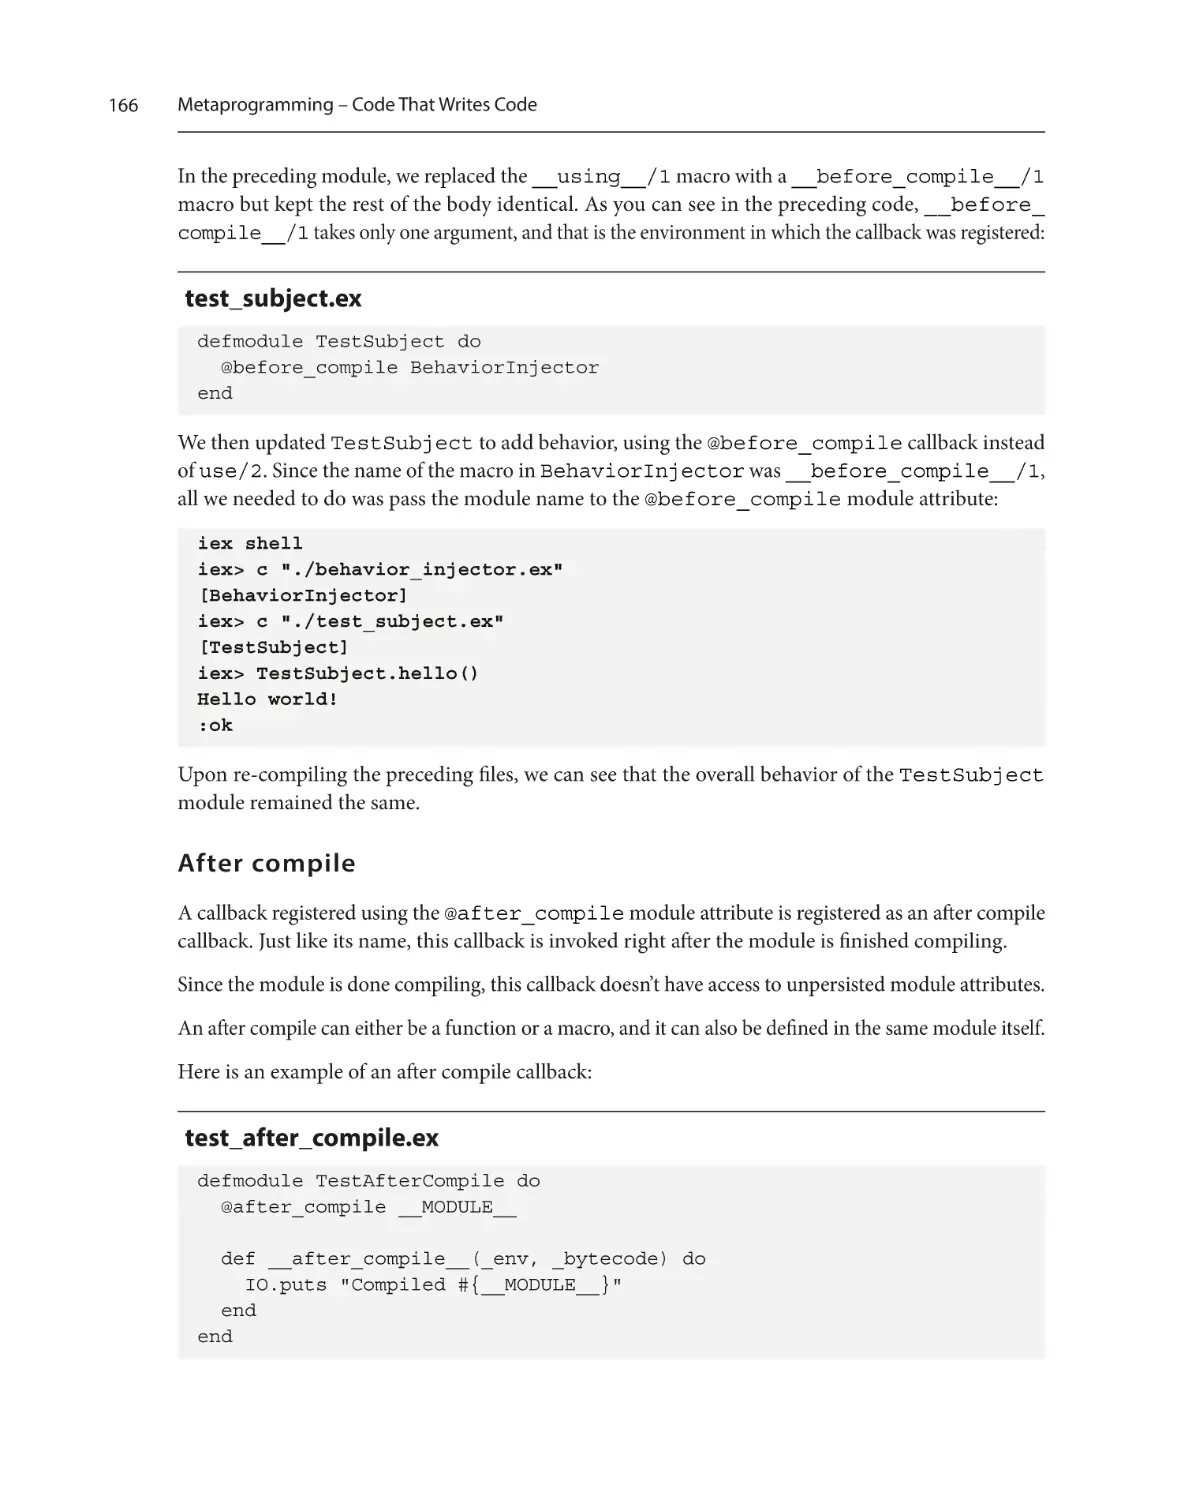
After compile
166
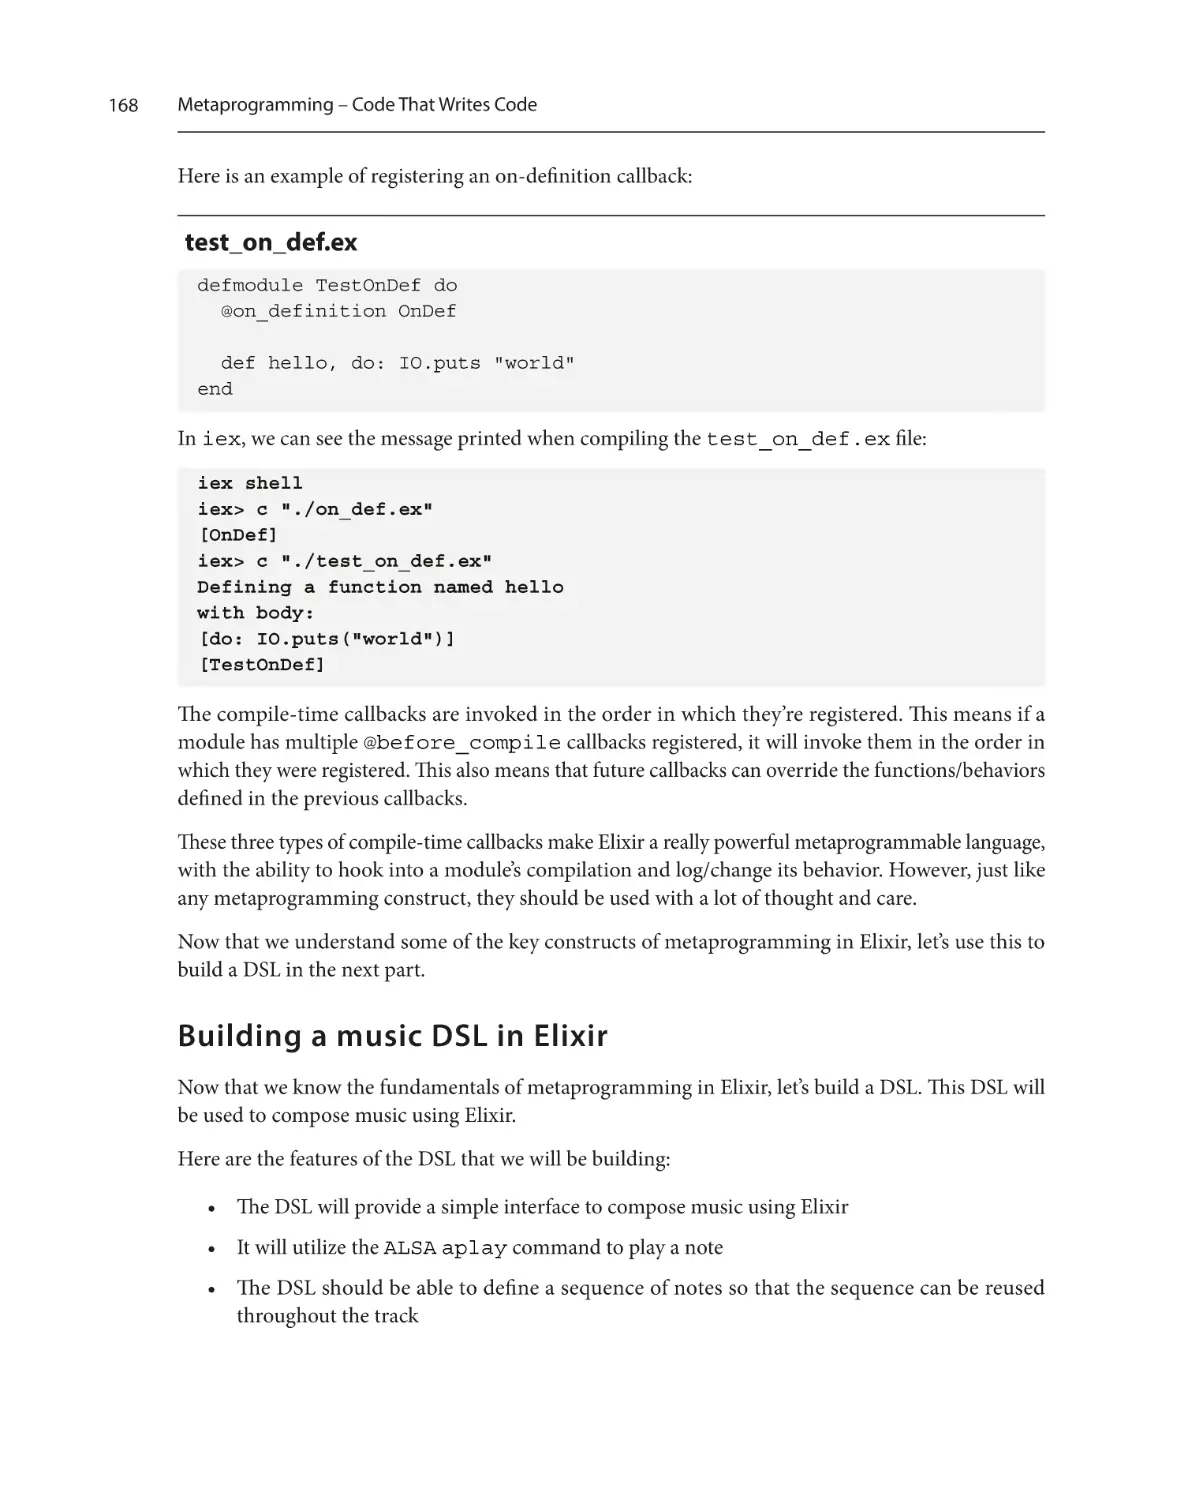
On-definition167
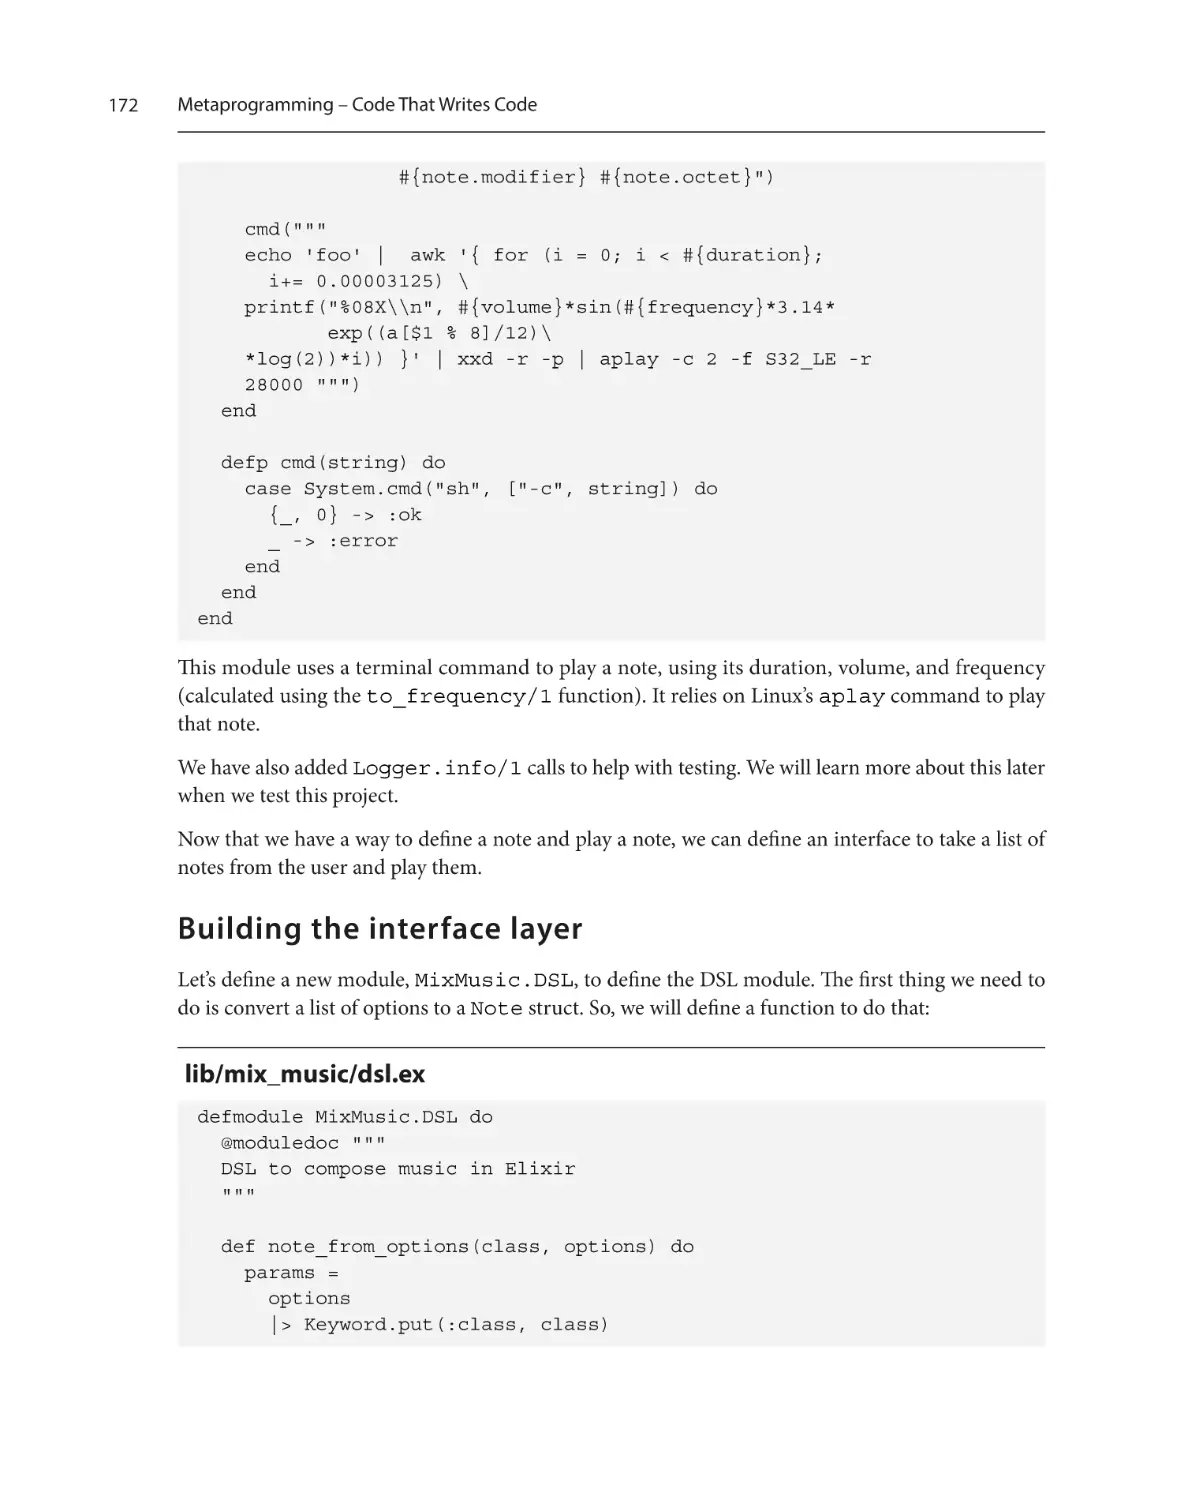
Building a music DSL in Elixir
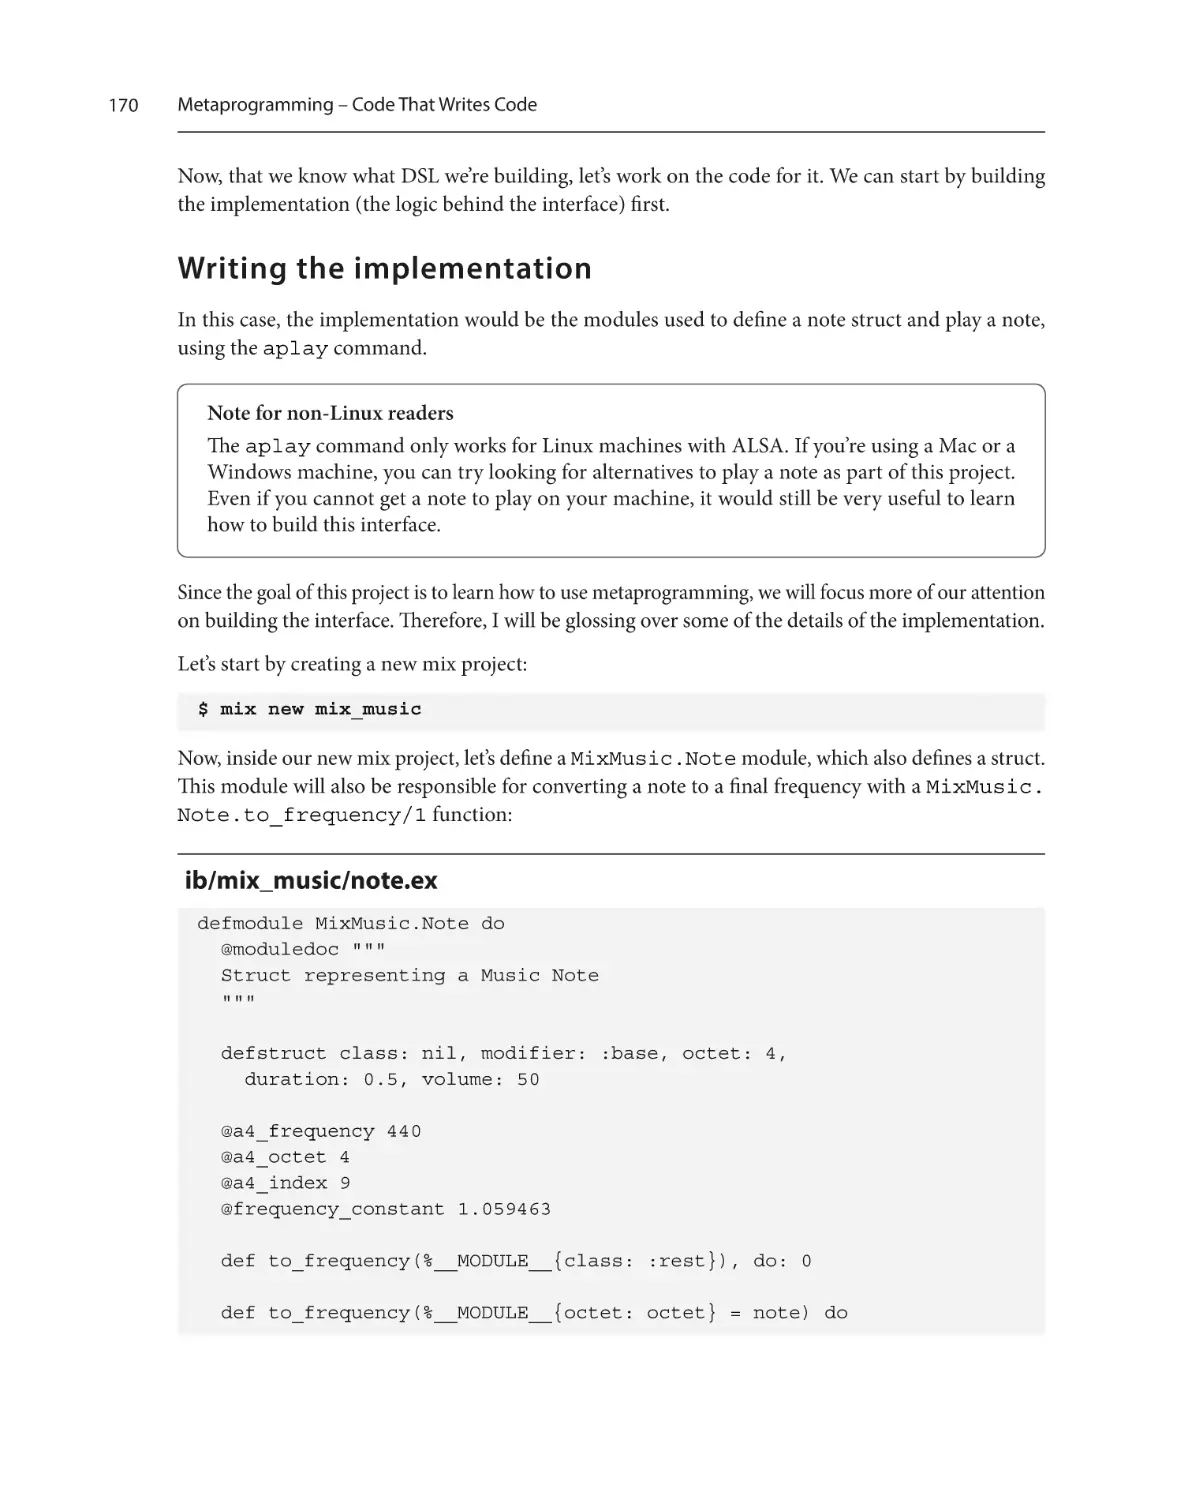
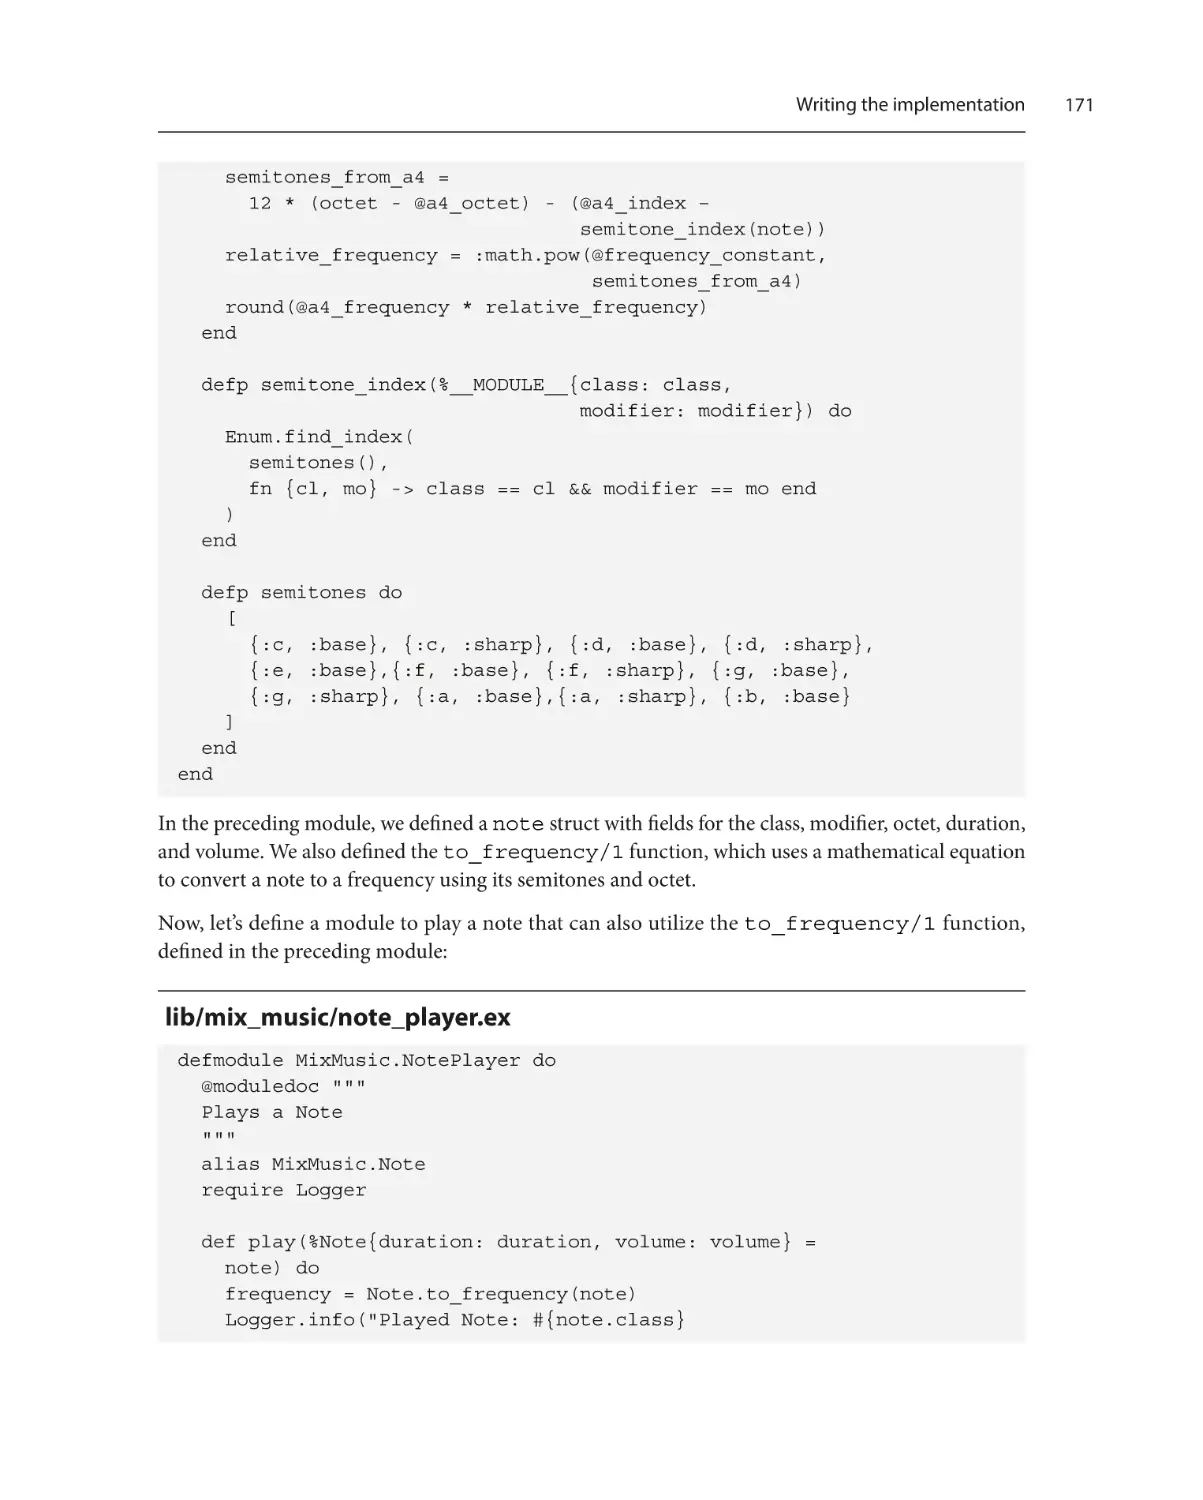
Writing the implementation
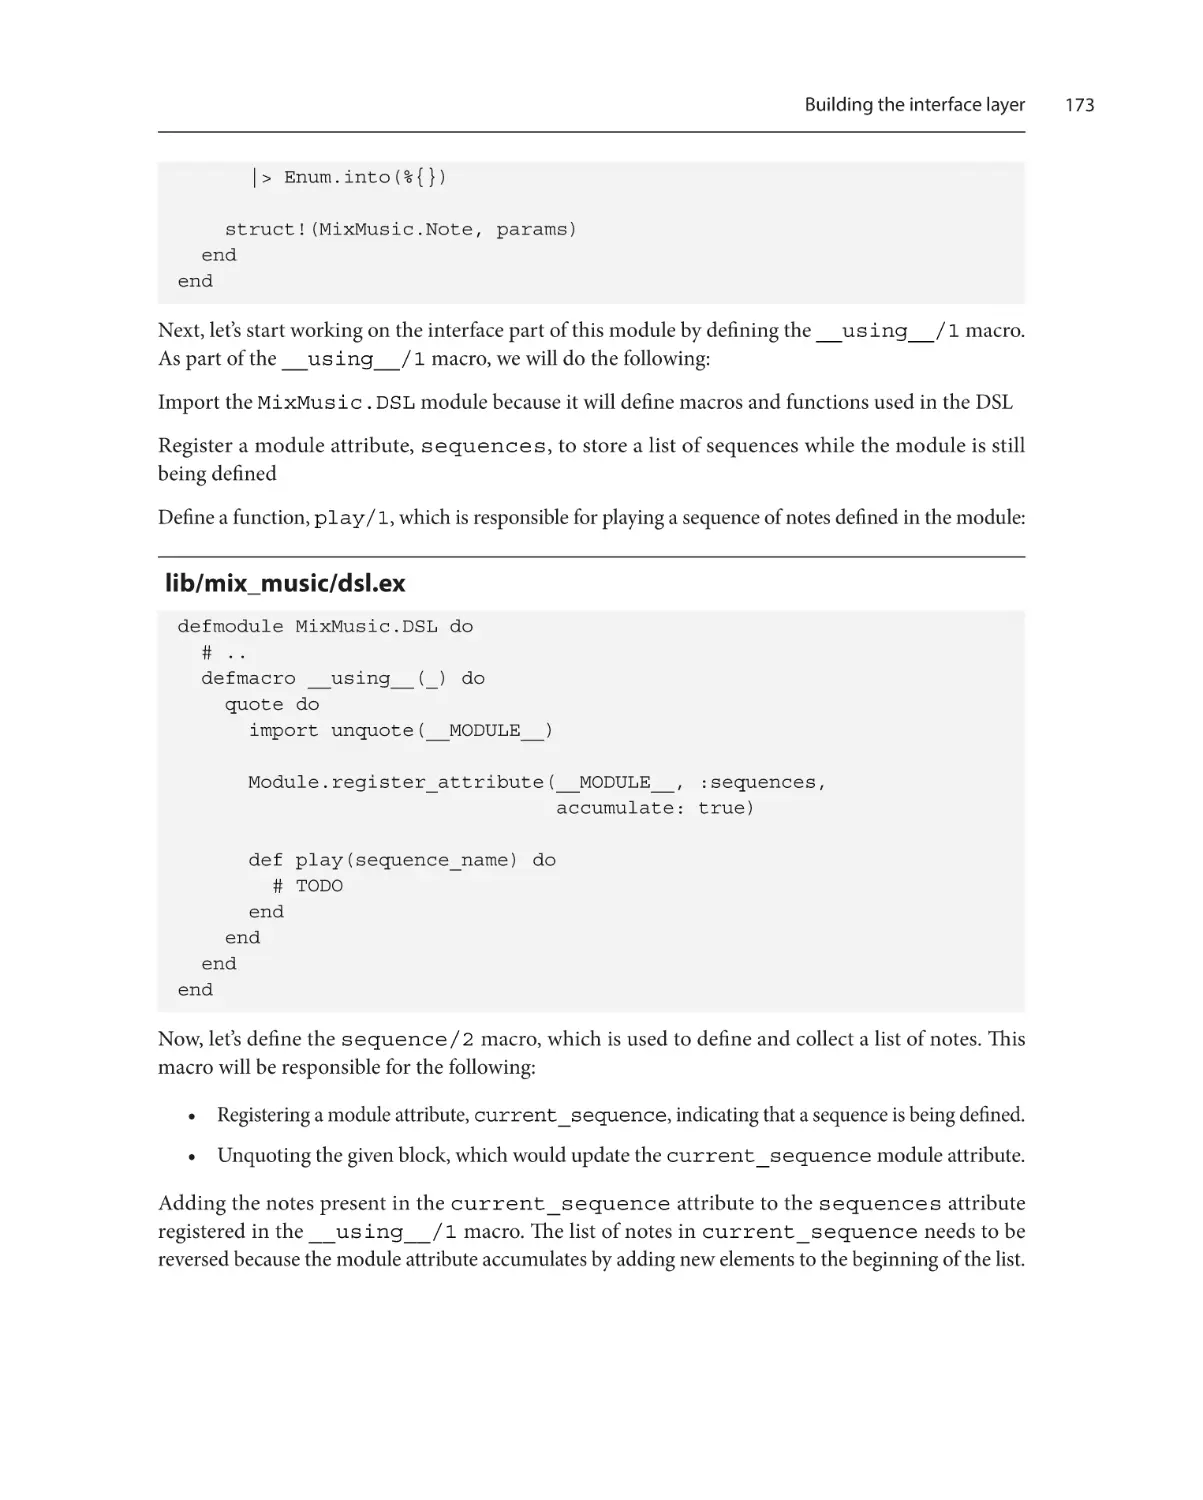
Building the interface layer
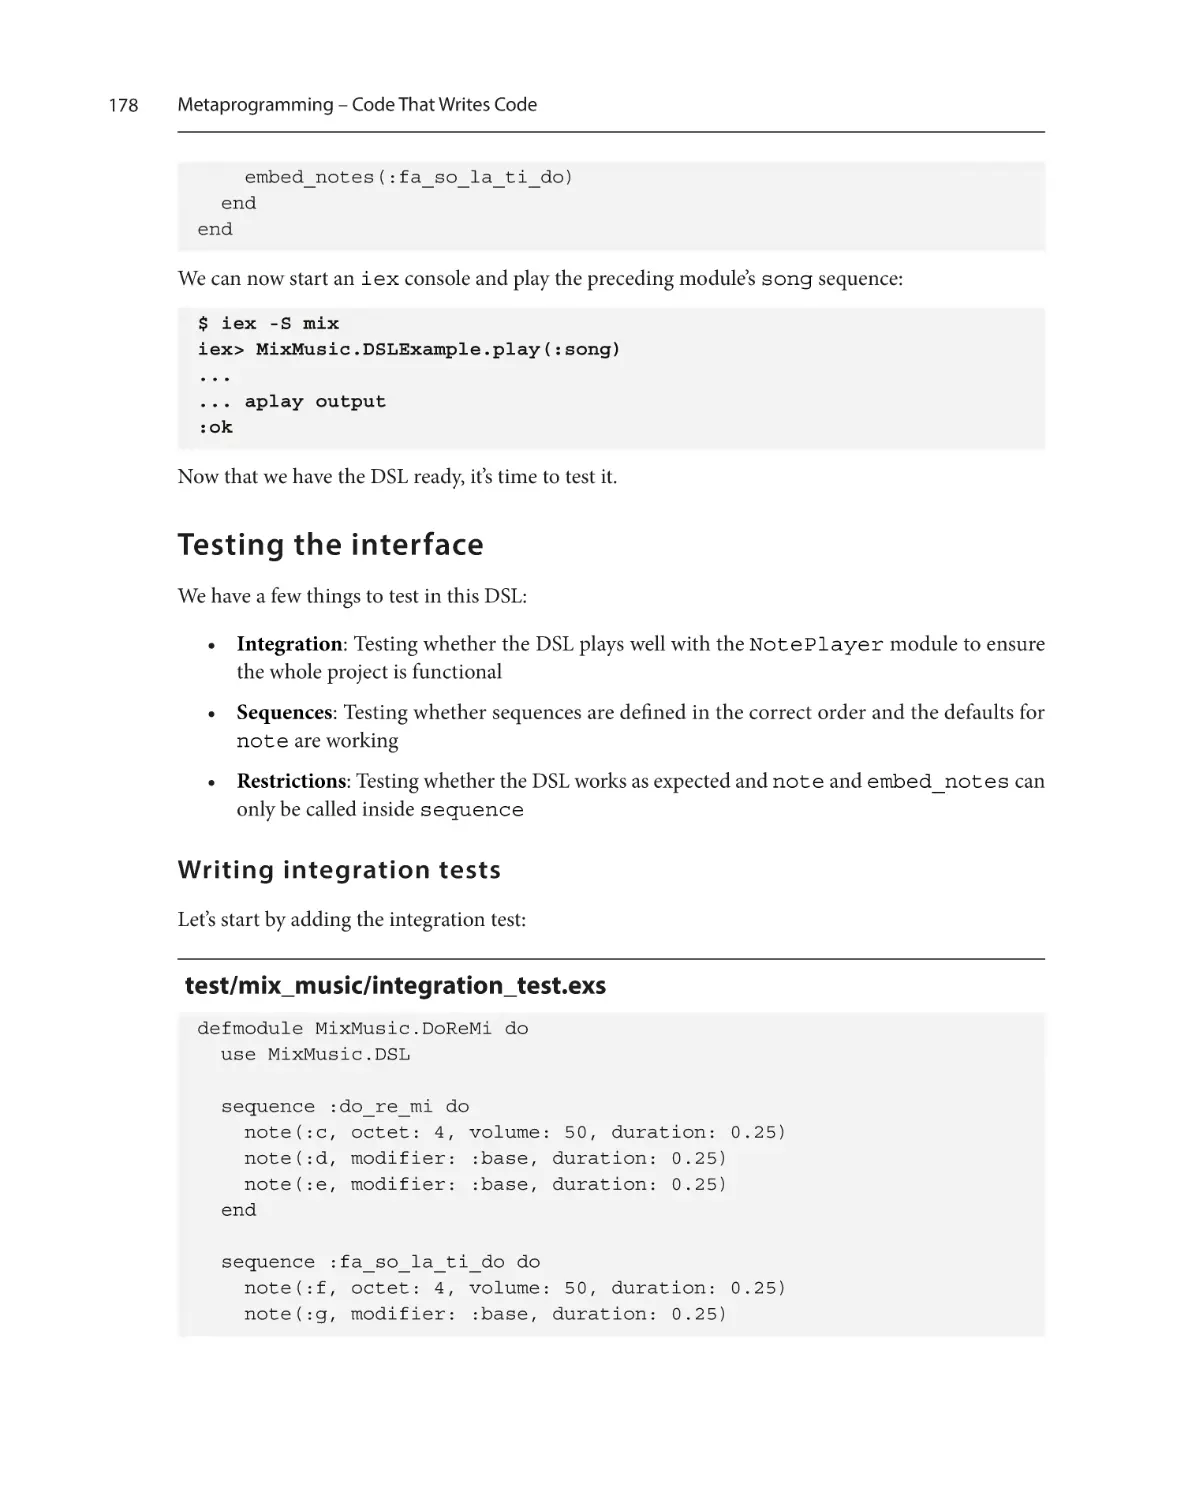
Testing the interface
168
170
172
178
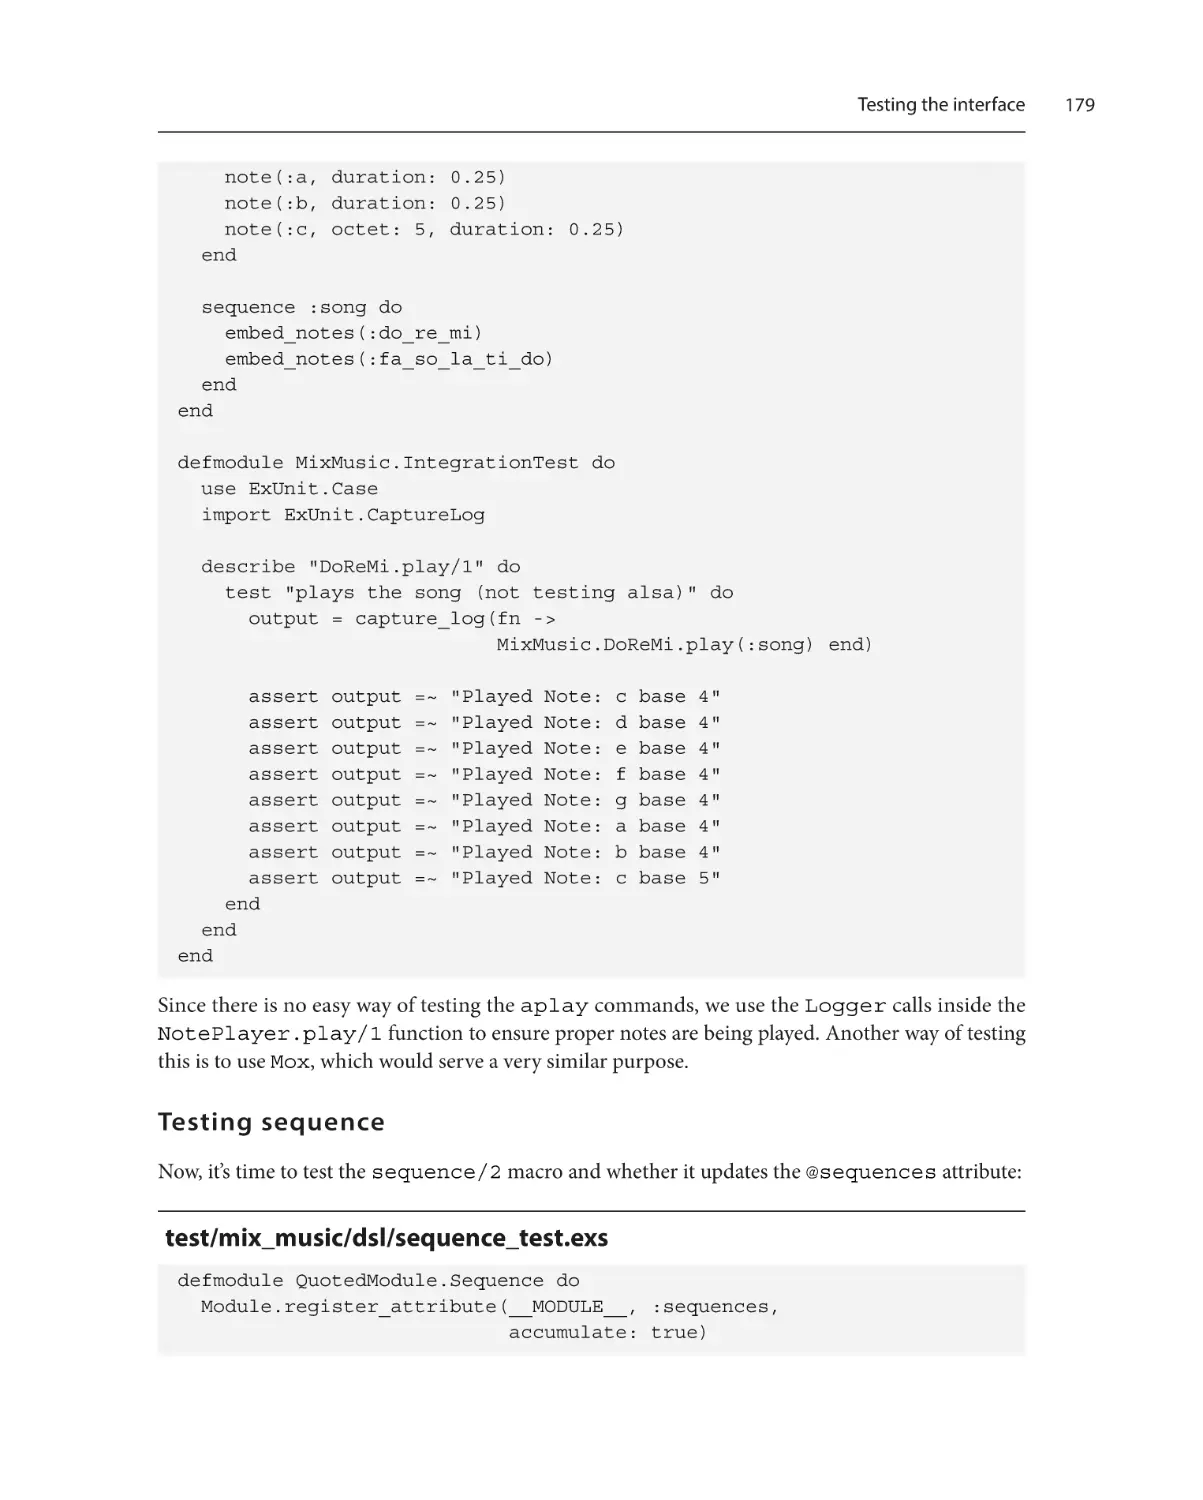
Writing integration tests
Testing sequence
Testing note and embed_notes
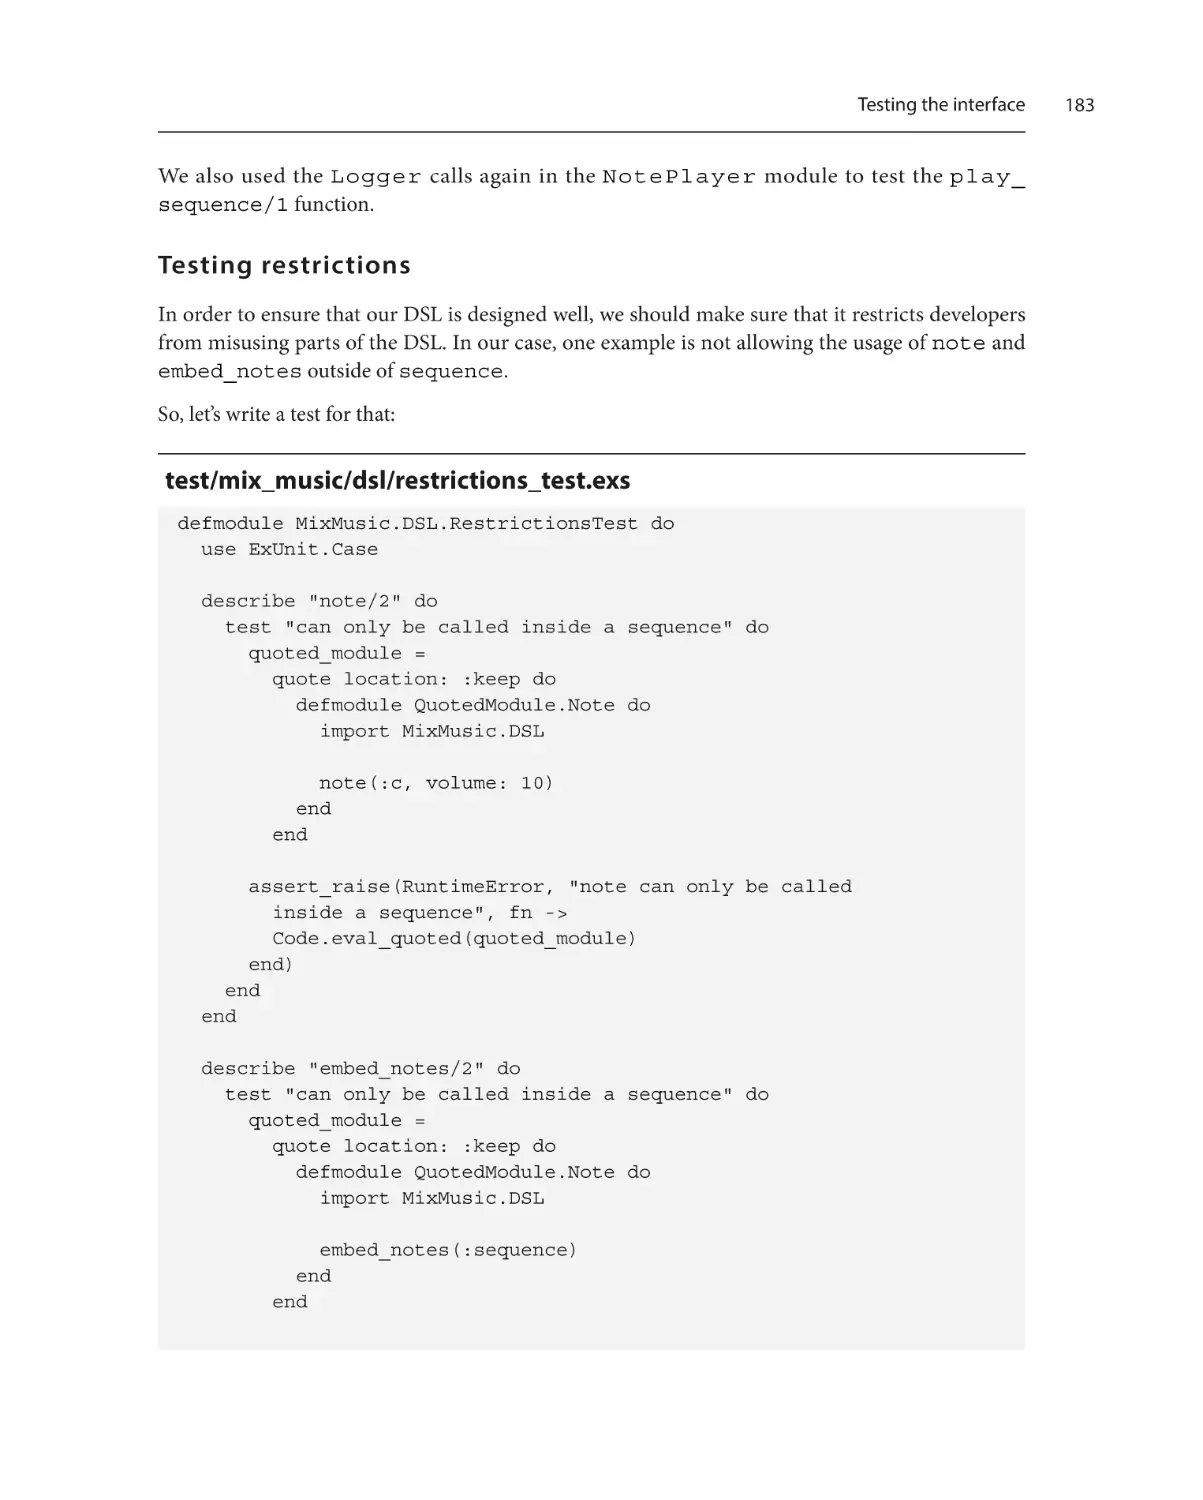
Testing restrictions
178
179
180
183
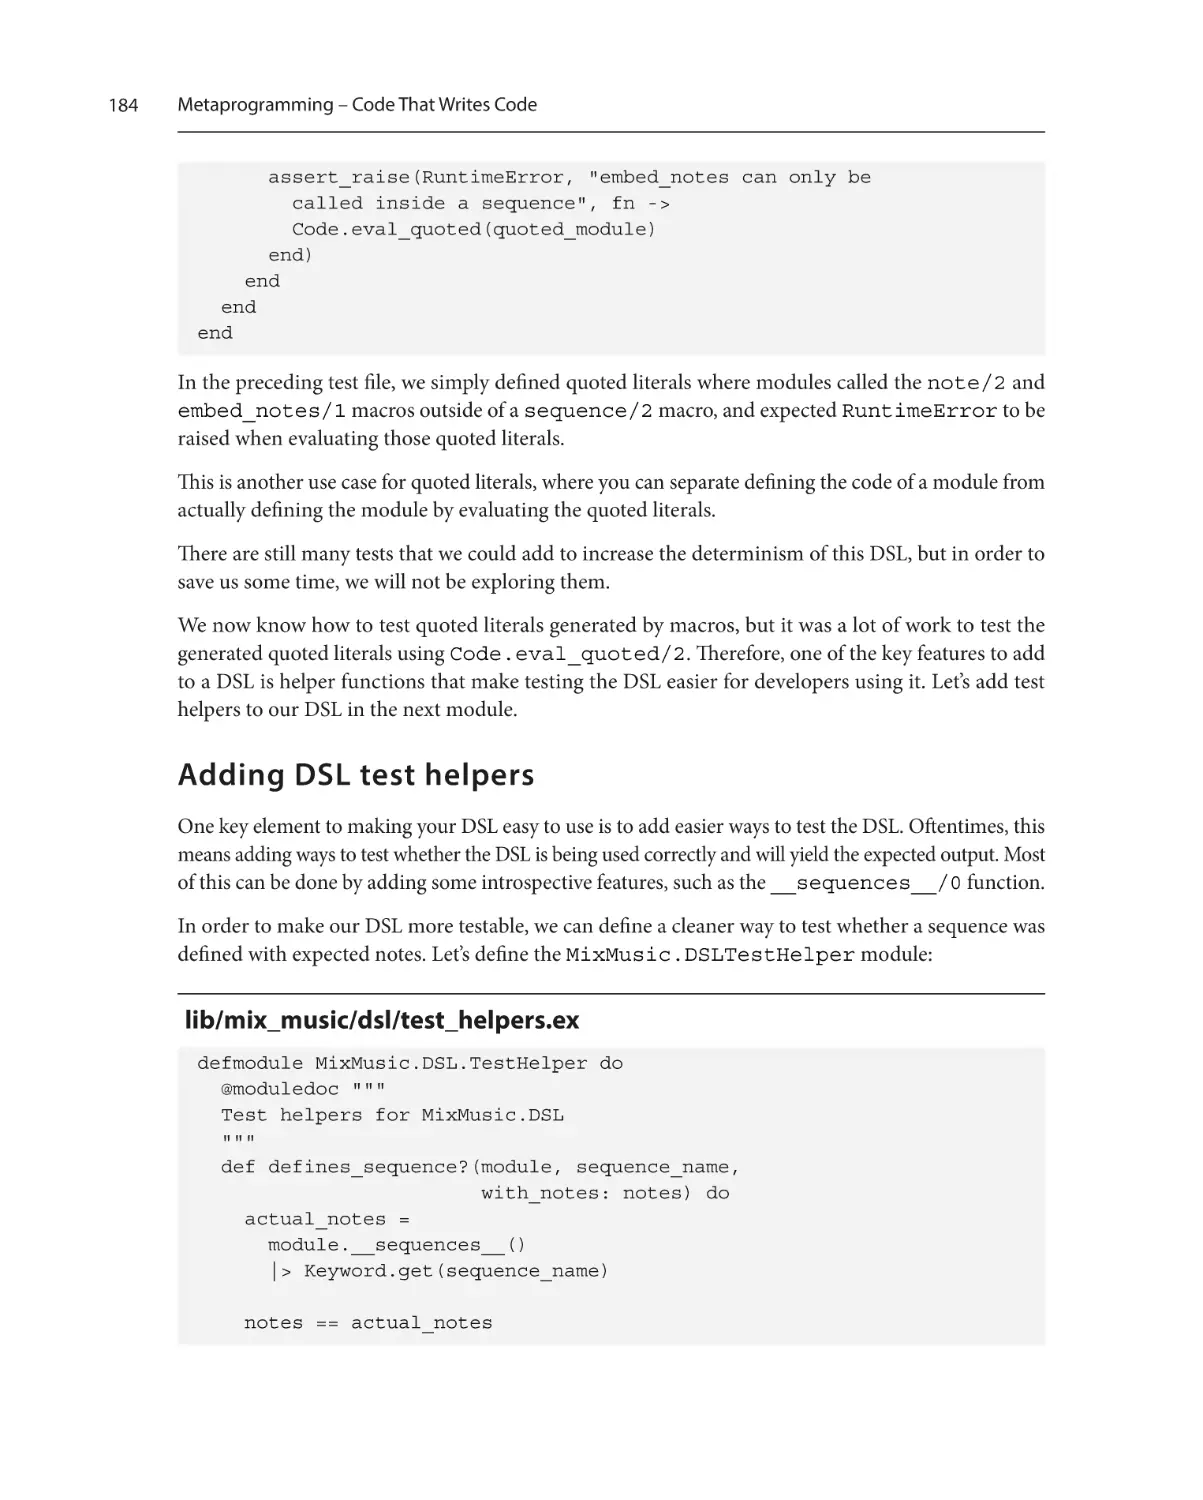
Adding DSL test helpers
184
Summary186
Exercises186
9
Controller and View DSL
Technical requirements
Why use metaprogramming here?
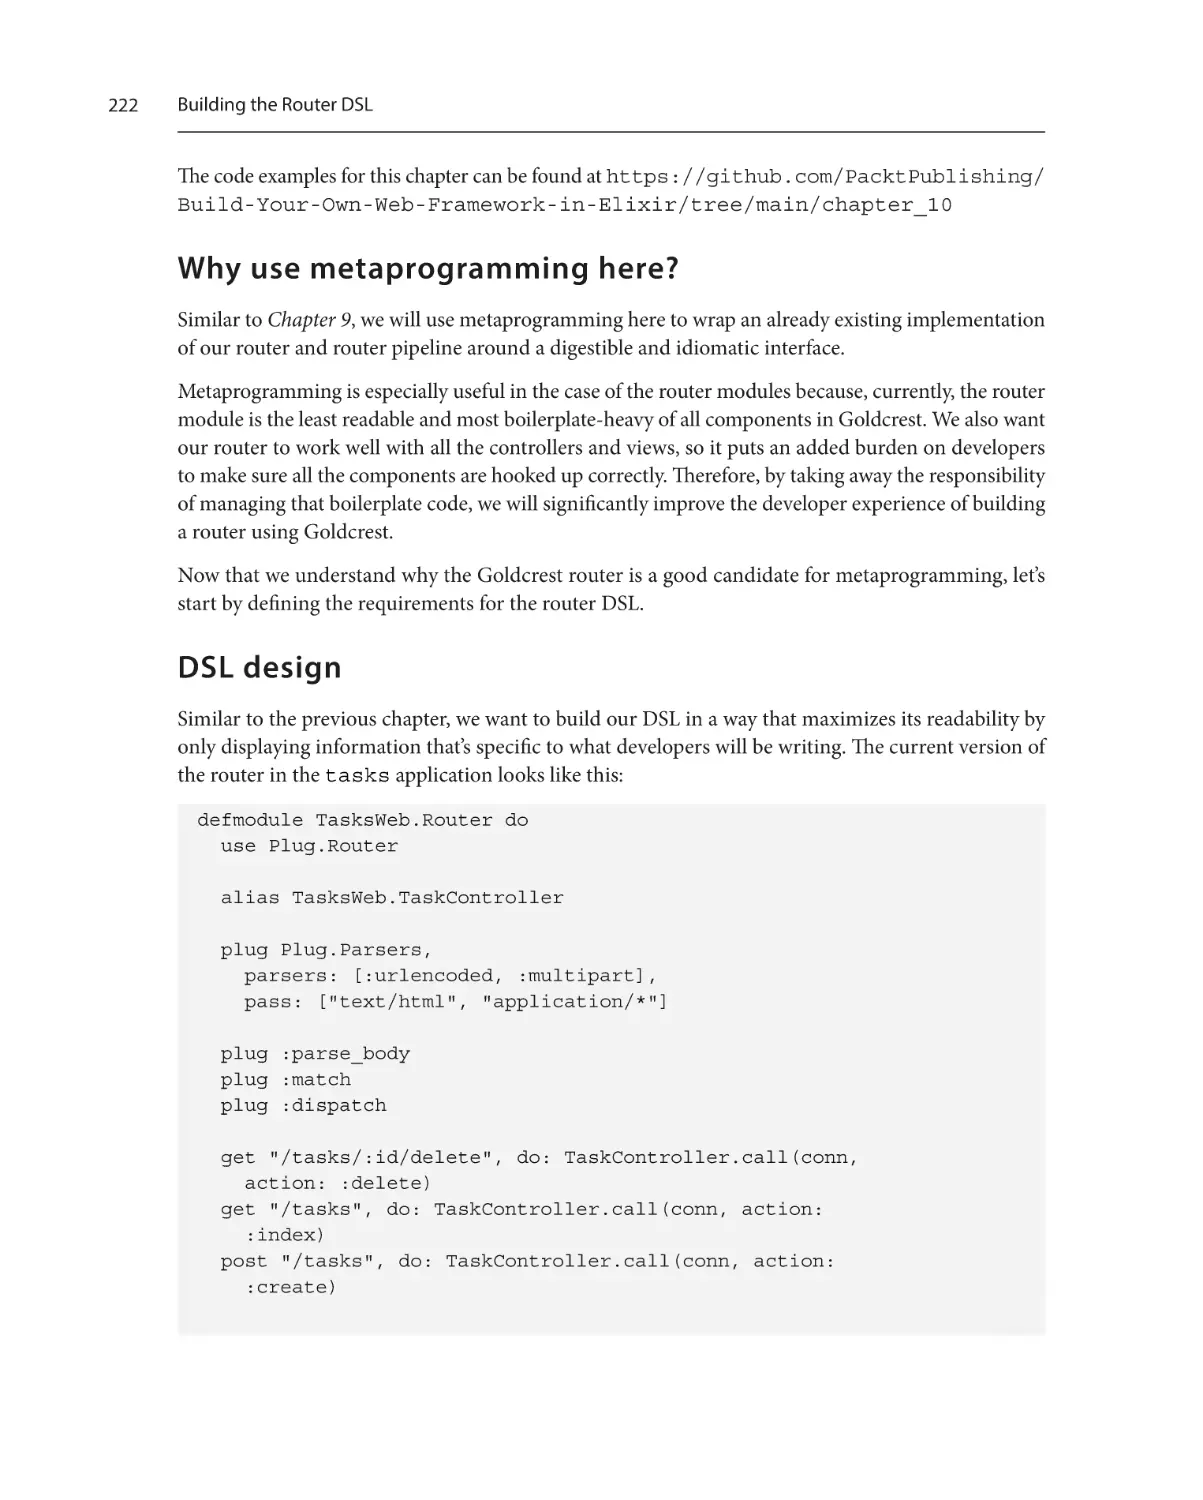
DSL design
Building the controller DSL
Adding reflections
Reflective plugs
187
187
188
188
191
192
195
Extracting response helpers
198
Building the View DSL
201
Building a web app using the DSLs 205
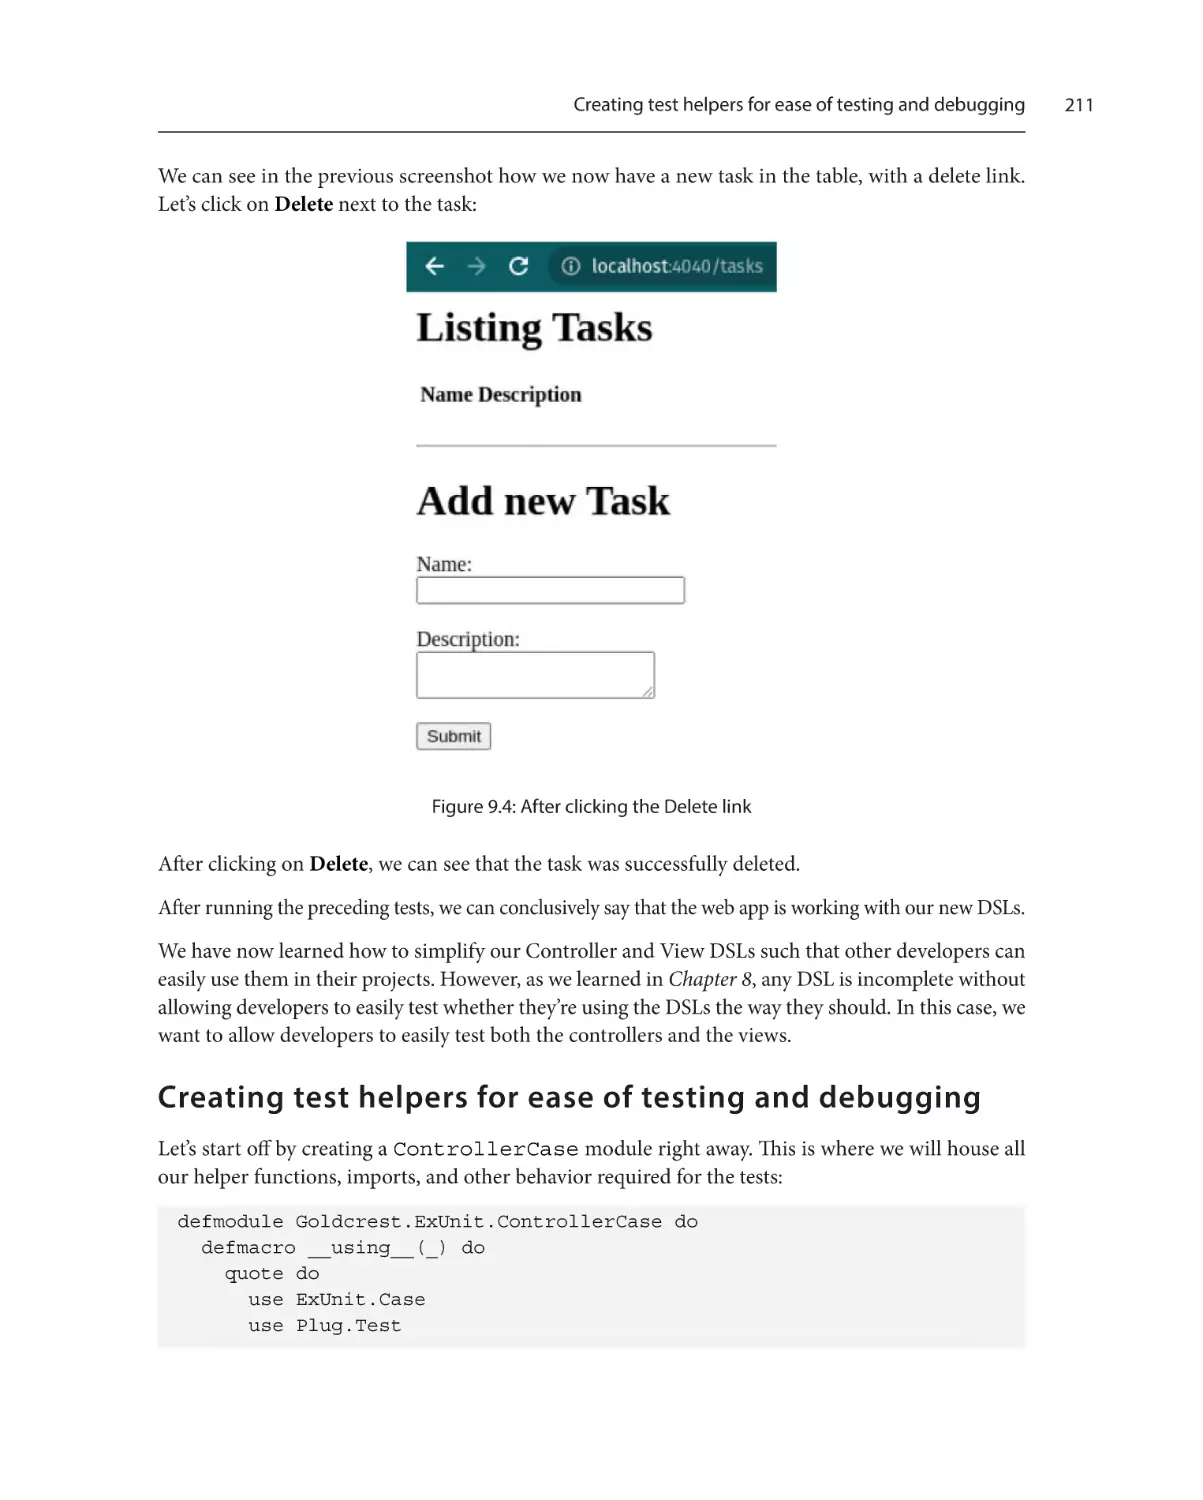
Creating test helpers for ease of
testing and debugging
211
Summary220
Exercises220
10
Building the Router DSL
Technical requirements
Why use metaprogramming here?
DSL design
Building the router DSL
Adding reflections
221
221
222
222
224
231
Reflective routes
232
Building router helpers
234
Creating test helpers
242
Summary246
Exercises247
Index249
Preface
There’s an old story about the person who wished his computer were as easy to
use as his telephone. That wish has come true since I no longer know
how to use my telephone.
– Bjarne Stroustrup
The preceding quote from Stroustrup shows just how fast technology is evolving. We’re building
more complex software day by day while also building it at an ever-increasing rate. However, as the
complexity of software increases, so do abstractions around its fundamentals. As a result, it is easier to
build software using those abstractions but harder to completely understand how a piece of software
works the way it does. This is true for programming languages, deployment tools, and several other
types of tools we use. Another one of those tools is a web framework.
A web framework is a tool or a set of tools that assists in building and releasing a web application.
This is accomplished through the process of standardization and building abstractions around those
standardized models. Web frameworks usually include tools for server management, data management,
templating, and so on. From the 1990s to 2021, we have seen the evolution of web frameworks from
Java Servlets and ASP.NET to Rails and Elixir’s Phoenix. Over the course of this period, we have
significantly decreased the average amount of effort required to build a web application. However,
since Phoenix facilitates productive web development, I frequently come across developers being
bewildered by its “magic.” That “magic” is often one obstacle that stands in the way of an Elixir web
developer to cross the seemingly never-ending bridge of mid-level to senior-level. It is also one of the
key factors that determines how confident they feel as a developer.
This book aims to help developers overcome that obstacle by building a web framework from scratch
using Elixir. The goal is to demystify the aforementioned Phoenix magic by breaking it down into
components and designing/building them from the ground up while testing their expected behaviors.
I expect developers to feel more confident in their web development skills and Elixir knowledge
after reading this book. Maybe, some will even go on to make contributions to the Elixir open
source community.
Who this book is for
This book is for web developers looking to understand how Elixir components are used in the Phoenix
framework. Basic knowledge of Elixir will be useful to understand the concepts covered in the book
more effectively.
xii
Preface
What this book covers
Chapter 1, Introducing the Cowboy Web Server, covers how an HTTP server is designed and the details
of Cowboy, the most used web server in the Elixir ecosystem. It also covers how to use Cowboy to
build a simple web application that serves HTML. Finally, it details how to test the web application
built using Cowboy.
Chapter 2, Building an HTTP Server in Elixir, uses the conclusions from Chapter 1 and extends them
to build a brand new HTTP server in Elixir. It covers setting up a TCP socket using :gen_tcp, and
wrapping it in an idiomatic interface. This chapter also covers how to test a web application built
using the new web server, as well as how to test the web server itself. Finally, it covers how to add
concurrency to the new web server. This HTTP server will finally be used in the web framework that’s
being built in this book, Goldcrest.
Chapter 3, Defining Web Application Specifications Using Plug, covers the Plug package and the Plug.
Conn construct, which together act as building blocks of a Phoenix HTTP request. This chapter covers
the components of the Plug package and the philosophy of using it. It takes a deeper dive into Plug.
Router and covers how to use it to build a routing layer to a web application. It then covers how to
build a Plug adapter for a web server by taking a look at Cowboy’s Plug adapter. Finally, it uses all
this knowledge to build a new Plug adapter for the web server built in Chapter 2. This will allow us
to use Plug with the new web server.
Chapter 4, Working with Controllers, leverages what we learned in Chapter 3 about Plug and uses it to
build a controller interface for the web framework, Goldcrest. It covers the basics of a controller in
Phoenix and building a controller interface that follows a similar pattern. It also details how redirection
works in Phoenix and how to add that functionality to the new controller interface. Finally, it uses
the Plug.Test module to test the newly built controller.
Chapter 5, Adding Controller Plugs and Action Fallback, extends the controller interface built in
Chapter 4 by adding the ability to intercept a request at the controller level before letting the controller
handlers handle it. This chapter covers how Phoenix handles such use cases and how we can simply
use Plug to handle this. It details the Plug.Builder module that comes with the Plug package and
the different approaches to test it. Finally, this chapter covers adding the ability to provide a fallback
option to the controller, which handles any failed responses from all the handlers.
Chapter 6, Working with HTML and Embedded Elixir, explains how HTML is rendered on the server
side by Phoenix. It introduces the EEx module, which allows us to embed Elixir between non-Elixir
text, and it covers how we can use EEx to respond with dynamic server-side rendered HTML. Finally,
it covers how to test the dynamically generated HTML.
Chapter 7, Working with Views, covers how to build the View interface for the web framework,
Goldcrest. It goes over some of the key functionalities that can be extracted from the HTML
rendering aspect of the controller and leverages the EEx module’s ability to pass helper functions at
the time of evaluation. Like all the other chapters, it ends by covering strategies to test the changes
explained in the chapter.
Preface
Chapter 8, Metaprogramming – Code That Writes Code, covers metaprogramming in Elixir. It covers
the constructs such as quote, code injection, abstract syntax trees, and so on that allow Phoenix to
have such a simple interface and breaks them down in a digestible manner. It also covers macros and
compile-time hooks while using these constructs to build a new domain-specific language (DSL) to
produce music in Elixir, as an example. Finally, it covers several ways to test the meta code to make
it more deterministic.
Chapter 9, Controller and View DSL, uses the concepts covered in the previous chapter to build a
DSL around the controller and view built in Chapter 3 to Chapter 7. This chapter also covers ways of
making the interface easier to work with by making it easier to test and more introspective. Finally,
it covers ways of testing the new Controller and View interfaces.
sw, Building the Router DSL, uses the metaprogramming concepts from Chapter 8 to build a new DSL.
This DSL will be for the router functionality, and this chapter covers ways to mimic Phoenix’s router
DSL. Like the previous chapter, it covers ways of making the DSL easier to use and test. Finally, it
updates the example app built in the first part of the book to use the Router, Controller, and
View interfaces built in the last two chapters.
To get the most out of this book
This book is very code-heavy, and in order to maximize what you learn from this book, it is recommended
to code along with every code snippet. Make sure you’re using the correct Elixir and Erlang versions (as
recommended at the beginning of the chapters). If you are new to Elixir or haven’t used it in a while,
doing some practice exercises to shake off the dust before you dig into this book is also recommended.
Hardware/software covered in this book:
This book relies on Elixir 1.11.x and Erlang 23.2.x. Ensure you have asdf or some other package
manager installed on your system. This will allow you to easily switch back and forth between
Elixir and Erlang versions. This book was tested on macOS and Linux, so you may experience some
inconsistencies when using Windows.
If you are using the digital version of this book, we advise you to type the code yourself or access
the code from the book’s GitHub repository (a link is available in the next section). Doing so will
help you avoid any potential errors related to the copying and pasting of code.
Download the example code files
You can download the example code files for this book from GitHub at https://github.com/
PacktPublishing/Build-Your-Own-Web-Framework-in-Elixir. If there’s an update
to the code, it will be updated in the GitHub repository.
xiii
xiv
Preface
We also have other code bundles from our rich catalog of books and videos available at https://
github.com/PacktPublishing/. Check them out!
Download the color images
We also provide a PDF file that has color images of the screenshots and diagrams used in this book.
You can download it here: https://packt.link/jQVwi.
Conventions used
There are a number of text conventions used throughout this book.
Code in text: Indicates code words in text, database table names, folder names, filenames, file
extensions, pathnames, dummy URLs, user input, and Twitter handles. Here is an example: “In the
preceding code snippet, we added a start/1 function, which listens using the default listener_
options variable and creates a listening socket to accept incoming connections.”
A block of code is set as follows:
defmodule ExperimentServer do
# ..
defp recv(connection_sock, messages \\ []) do
case :gen_tcp.recv(connection_sock, 0) do
{:ok, message} ->
IO.puts """
Got message: #{inspect(message)}
"""
recv(connection_sock, [message | messages])
{:error, :closed} ->
IO.puts "Socket closed"
{:ok, messages}
end
end
end
ExperimentServer.start(4040)
When we wish to draw your attention to a particular part of a code block, the relevant lines or items
are set in bold.
Any command-line input or output is written as follows:
$ elixir experiment_server.exs
Listening on port 4040
Preface
Bold: Indicates a new term, an important word, or words that you see onscreen. For instance, words
in menus or dialog boxes appear in bold.
Tips or important notes
Appear like this.
Get in touch
Feedback from our readers is always welcome.
General feedback: If you have questions about any aspect of this book, email us at customercare@
packtpub.com and mention the book title in the subject of your message.
Errata: Although we have taken every care to ensure the accuracy of our content, mistakes do happen.
If you have found a mistake in this book, we would be grateful if you would report this to us. Please
visit www.packtpub.com/support/errata and fill in the form.
Piracy: If you come across any illegal copies of our works in any form on the internet, we would
be grateful if you would provide us with the location address or website name. Please contact us at
copyright@packt.com with a link to the material.
If you are interested in becoming an author: If there is a topic that you have expertise in and you
are interested in either writing or contributing to a book, please visit authors.packtpub.com.
Share Your Thoughts
Once you’ve read Build Your Own Web Framework in Elixir, we’d love to hear your thoughts! Please
click here to go straight to the Amazon review page for this book and share
your feedback.
Your review is important to us and the tech community and will help us make sure we’re delivering
excellent quality content..
xv
xvi
Preface
Download a free PDF copy of this book
Thanks for purchasing this book!
Do you like to read on the go but are unable to carry your print books everywhere?
Is your eBook purchase not compatible with the device of your choice?
Don’t worry, now with every Packt book you get a DRM-free PDF version of that book at no cost.
Read anywhere, any place, on any device. Search, copy, and paste code from your favorite technical
books directly into your application.
The perks don’t stop there, you can get exclusive access to discounts, newsletters, and great free content
in your inbox daily
Follow these simple steps to get the benefits:
1.
Scan the QR code or visit the link below
https://packt.link/free-ebook/9781801812542
2.
Submit your proof of purchase
3.
That’s it! We’ll send your free PDF and other benefits to your email directly
Part 1:
Web Server Fundamentals
In this part, you will learn what this book is about, the basics of web development, and how to build
a web server in Elixir.
This part includes the following chapters:
• Chapter 1, Introducing the Cowboy Web Server
•
Chapter 2, Building an HTTP Server in Elixir
1
Introducing the Cowboy
Web Server
“Web servers are written in C, and if they’re not, they’re written in Java or C++,
which are C derivatives, or Python or Ruby, which are implemented in C.”
– Rob Pike, co-creator of Go
The web server is a key component of any modern-day web framework. Expanding on the point
made in the preceding quote by Rob Pike, the Cowboy web server, written in Erlang, is also in a way
implemented in C. Cowboy is the default web server used by Phoenix, the ubiquitous web framework
in Elixir.
In this chapter, we will not be learning C, unfortunately, but we will take a closer look at how a web
server is designed. We will provide some background on how a web server is built and set up to
communicate with a client using HyperText Markup Language (HTML).
We will also learn the fundamentals of how HTTP requests and responses work, including their
anatomy. We will then learn how to construct an HTTP response and send it using a web server.
Moreover, we will learn the fundamentals of web server architecture by examining the components
of Cowboy. Lastly, we will learn ways to test a web server and measure its performance. Doing this
will put us in a better position to build our own web server in the next chapter.
The following are the topics we will cover in this chapter:
• What is a web server?
• Fundamentals of client-server architecture
• Fundamentals of HTTP
• How an HTTP server works
• Using Cowboy to build a web server
4
Introducing the Cowboy Web Server
• Using dynamic routes with Cowboy
• Serving HTML
• Testing the web server
Going through these topics and looking at Cowboy will allow us to build our own HTTP server in
Chapter 2.
Technical requirements
The best way to work through this chapter is by following along with the code on your computer. So,
having a computer with Elixir and Erlang ready to go would be ideal. I recommend using a version
manager such as asdf to install Elixir 1.11.x and Erlang 23.2.x, to get similar results as the code written
in the book. We will also be using an HTTP client such as cURL or Wget to make HTTP requests to
our server, and a web browser to render HTML responses.
Although most of the code in this chapter is relatively simple, basic knowledge of Elixir and/or Erlang
would also come in handy. It will allow you to get more out of this chapter while setting the foundation
for other chapters.
Since most of this chapter isn’t coding, you can also choose to read without coding, but the same
doesn’t apply to other chapters.
The code examples for this chapter can be found at https://github.com/PacktPublishing/
Build-Your-Own-Web-Framework-in-Elixir/tree/main/chapter_01
What is a web server?
A web server is an entity that delivers the content of a site to the end user. A web server is typically a
long-running process, listening for requests on a port, and upon receiving a request, the web server
responds with a document. This way of communication is standardized by the Transmission Control
Protocol/Internet Protocol (TCP/IP) model, which provides a set of communication protocols used by
any communication network. There are other layers of standardization, such as the HyperText Transfer
Protocol (HTTP) and File Transfer Protocol (FTP), which dictate standards of communication at
the application layer based on different applications such as web applications in the case of HTTP,
and file transfer applications in the case of FTP, while still using TCP/IP at the network layer. In this
book, we will be primarily focusing on a web server using HTTP at the application layer.
Exploring the client-server architecture
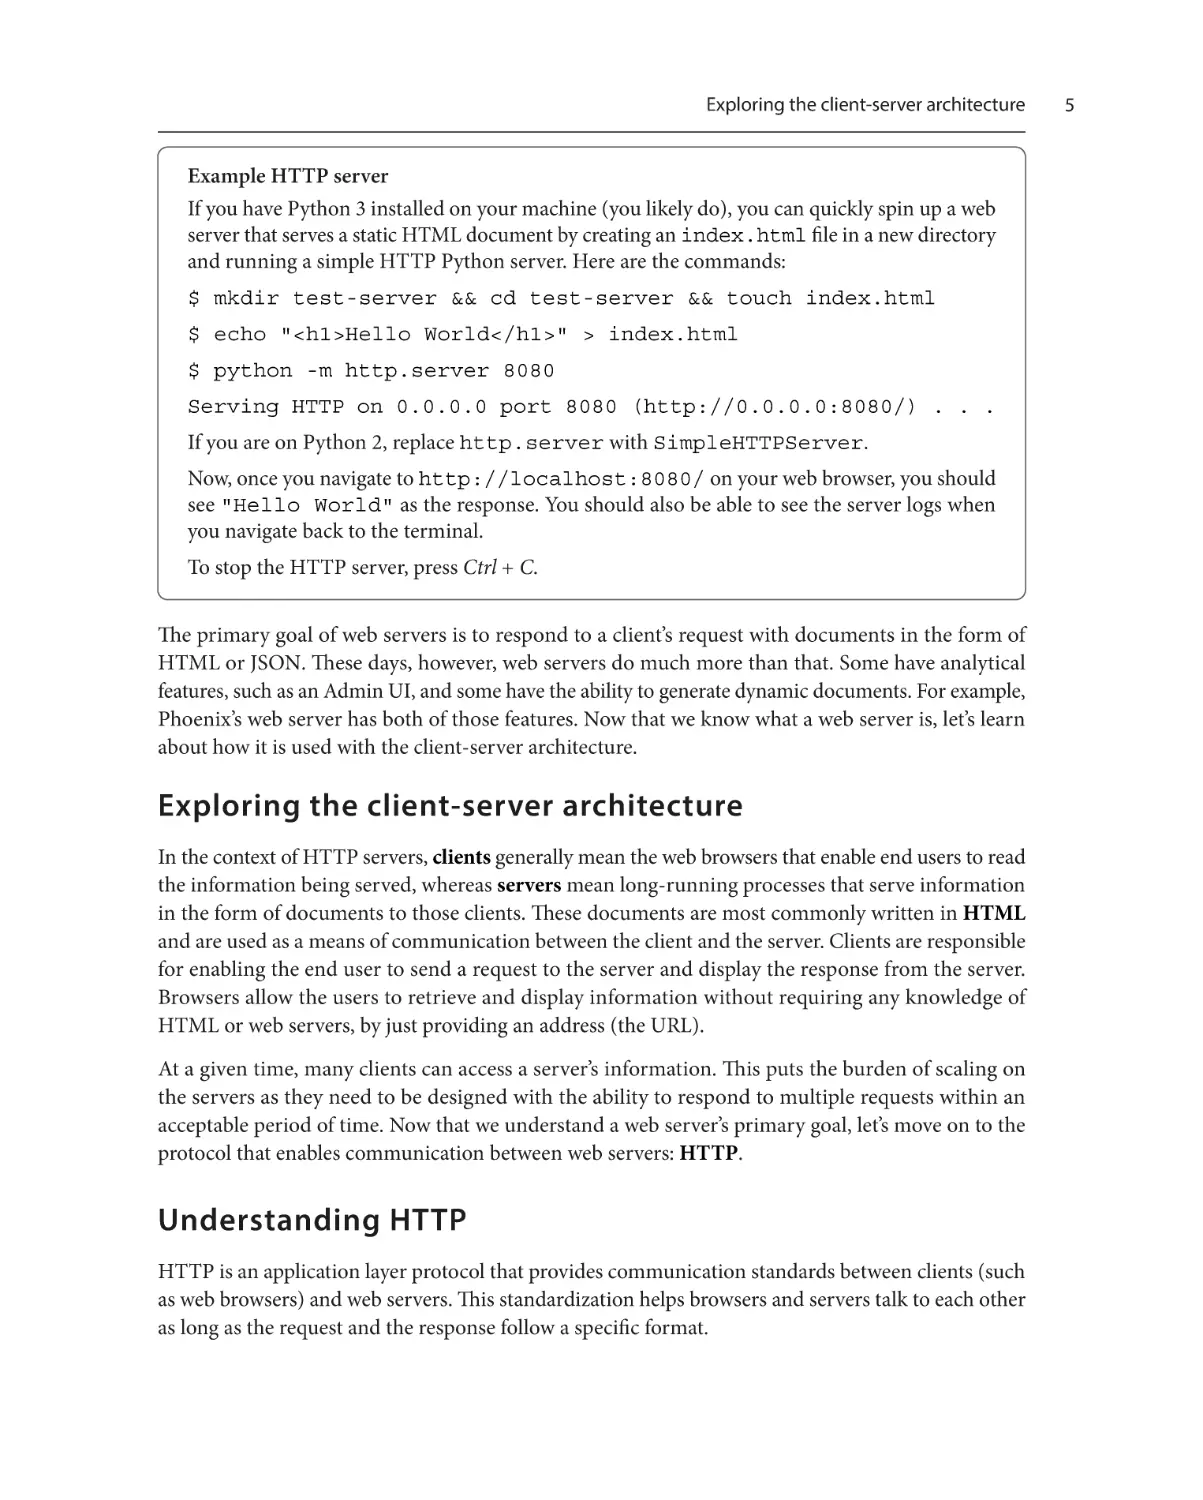
Example HTTP server
If you have Python 3 installed on your machine (you likely do), you can quickly spin up a web
server that serves a static HTML document by creating an index.html file in a new directory
and running a simple HTTP Python server. Here are the commands:
$ mkdir test-server && cd test-server && touch index.html
$ echo "<h1>Hello World</h1>" > index.html
$ python -m http.server 8080
Serving HTTP on 0.0.0.0 port 8080 (http://0.0.0.0:8080/) . . .
If you are on Python 2, replace http.server with SimpleHTTPServer.
Now, once you navigate to http://localhost:8080/ on your web browser, you should
see "Hello World" as the response. You should also be able to see the server logs when
you navigate back to the terminal.
To stop the HTTP server, press Ctrl + C.
The primary goal of web servers is to respond to a client’s request with documents in the form of
HTML or JSON. These days, however, web servers do much more than that. Some have analytical
features, such as an Admin UI, and some have the ability to generate dynamic documents. For example,
Phoenix’s web server has both of those features. Now that we know what a web server is, let’s learn
about how it is used with the client-server architecture.
Exploring the client-server architecture
In the context of HTTP servers, clients generally mean the web browsers that enable end users to read
the information being served, whereas servers mean long-running processes that serve information
in the form of documents to those clients. These documents are most commonly written in HTML
and are used as a means of communication between the client and the server. Clients are responsible
for enabling the end user to send a request to the server and display the response from the server.
Browsers allow the users to retrieve and display information without requiring any knowledge of
HTML or web servers, by just providing an address (the URL).
At a given time, many clients can access a server’s information. This puts the burden of scaling on
the servers as they need to be designed with the ability to respond to multiple requests within an
acceptable period of time. Now that we understand a web server’s primary goal, let’s move on to the
protocol that enables communication between web servers: HTTP.
Understanding HTTP
HTTP is an application layer protocol that provides communication standards between clients (such
as web browsers) and web servers. This standardization helps browsers and servers talk to each other
as long as the request and the response follow a specific format.
5
6
Introducing the Cowboy Web Server
An HTTP request is a text document with four elements:
• Request line: This line contains the HTTP method, the resource requested (URI), and the
HTTP version being used for the request. The HTTP method generally symbolizes the intended
action being performed on the requested resource. For example, GET is used to retrieve resource
information, whereas POST is used to send new resource information as a form.
• Request headers: The next group of lines contains headers, which contain information about
the request and the client. These headers are usually used for authorization, determining the
type of request or resource, storing web browser information, and so on.
• Line break: This indicates the end of the request headers.
• Request body (optional): If present, this information contains data to be passed to the server.
This is generally used to submit domain-specific forms.
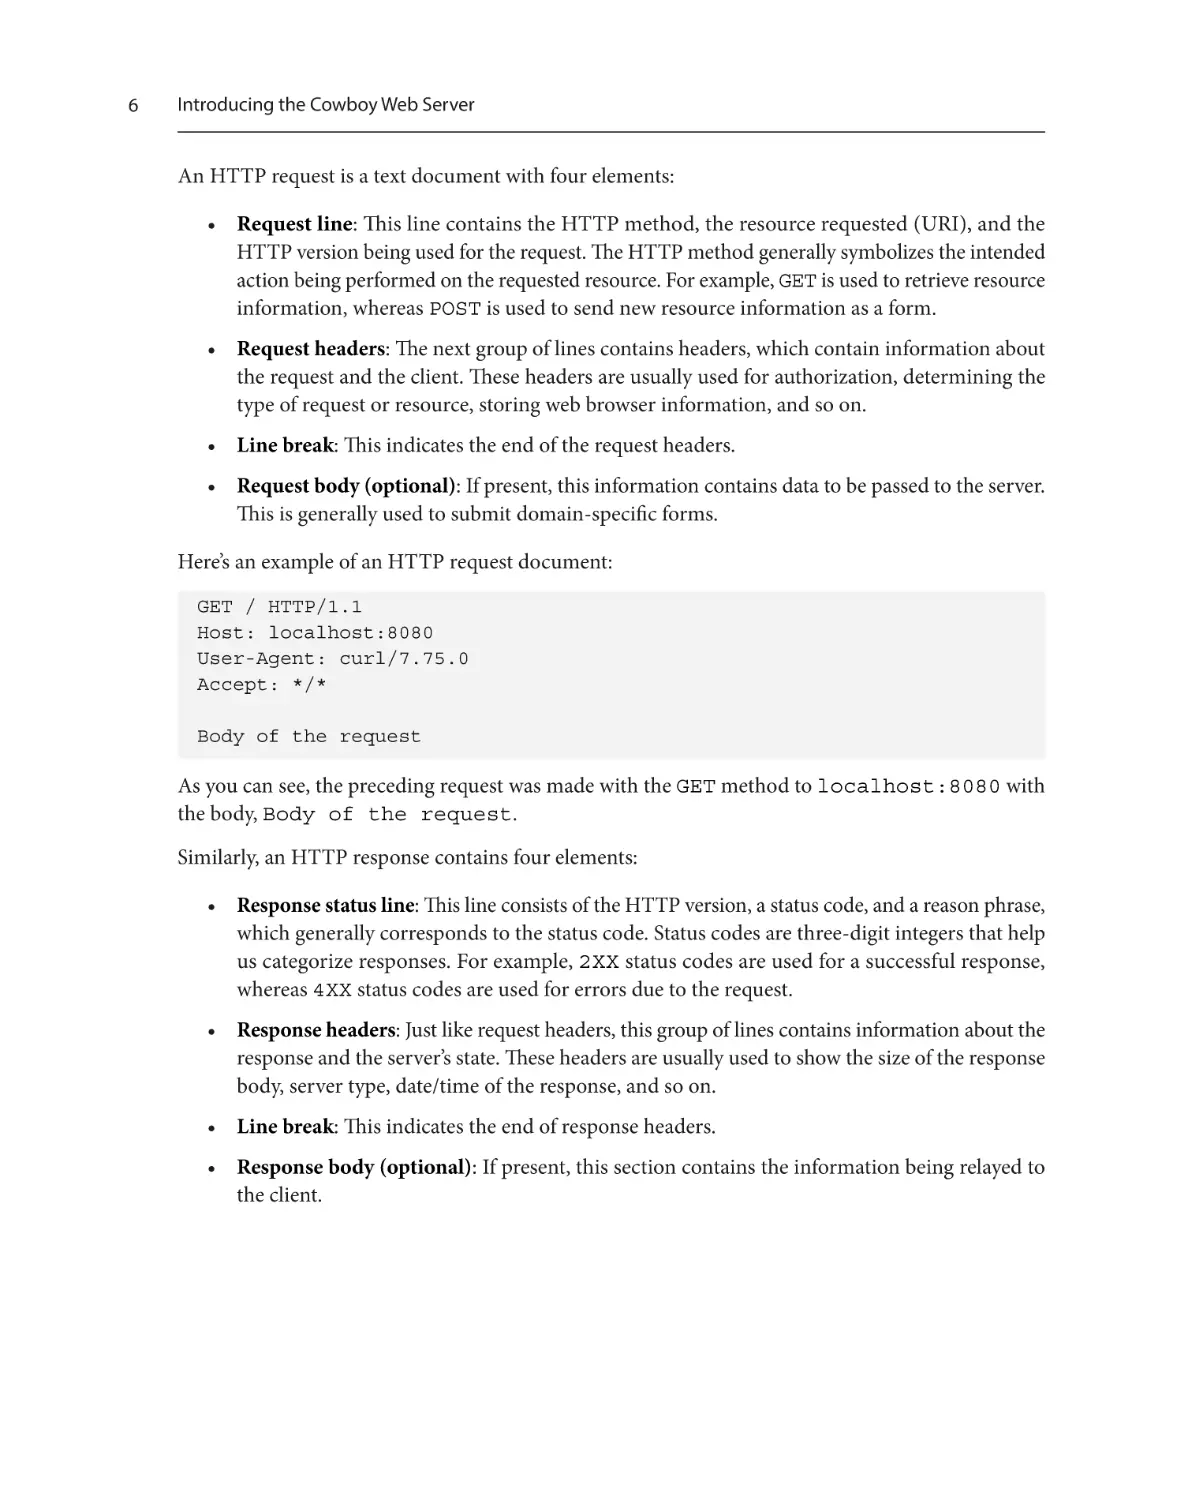
Here’s an example of an HTTP request document:
GET / HTTP/1.1
Host: localhost:8080
User-Agent: curl/7.75.0
Accept: */*
Body of the request
As you can see, the preceding request was made with the GET method to localhost:8080 with
the body, Body of the request.
Similarly, an HTTP response contains four elements:
• Response status line: This line consists of the HTTP version, a status code, and a reason phrase,
which generally corresponds to the status code. Status codes are three-digit integers that help
us categorize responses. For example, 2XX status codes are used for a successful response,
whereas 4XX status codes are used for errors due to the request.
• Response headers: Just like request headers, this group of lines contains information about the
response and the server’s state. These headers are usually used to show the size of the response
body, server type, date/time of the response, and so on.
• Line break: This indicates the end of response headers.
• Response body (optional): If present, this section contains the information being relayed to
the client.
Understanding Cowboy’s architecture
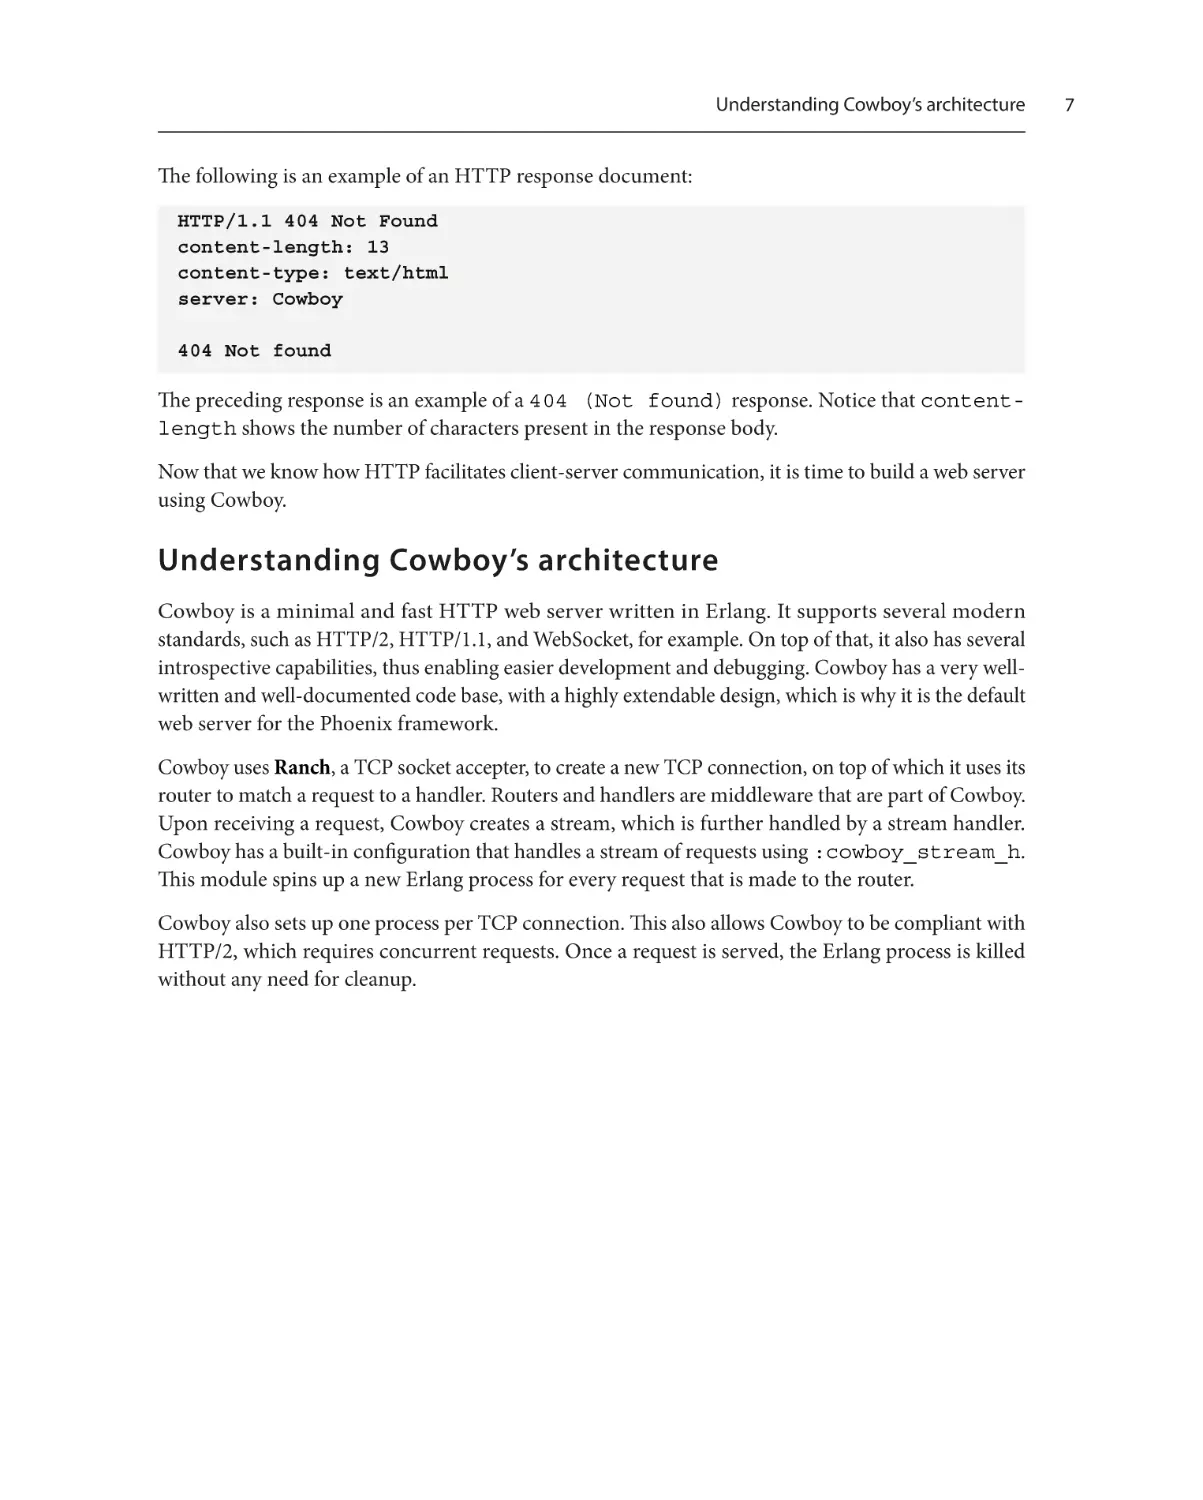
The following is an example of an HTTP response document:
HTTP/1.1 404 Not Found
content-length: 13
content-type: text/html
server: Cowboy
404 Not found
The preceding response is an example of a 404 (Not found) response. Notice that contentlength shows the number of characters present in the response body.
Now that we know how HTTP facilitates client-server communication, it is time to build a web server
using Cowboy.
Understanding Cowboy’s architecture
Cowboy is a minimal and fast HTTP web server written in Erlang. It supports several modern
standards, such as HTTP/2, HTTP/1.1, and WebSocket, for example. On top of that, it also has several
introspective capabilities, thus enabling easier development and debugging. Cowboy has a very wellwritten and well-documented code base, with a highly extendable design, which is why it is the default
web server for the Phoenix framework.
Cowboy uses Ranch, a TCP socket accepter, to create a new TCP connection, on top of which it uses its
router to match a request to a handler. Routers and handlers are middleware that are part of Cowboy.
Upon receiving a request, Cowboy creates a stream, which is further handled by a stream handler.
Cowboy has a built-in configuration that handles a stream of requests using :cowboy_stream_h.
This module spins up a new Erlang process for every request that is made to the router.
Cowboy also sets up one process per TCP connection. This also allows Cowboy to be compliant with
HTTP/2, which requires concurrent requests. Once a request is served, the Erlang process is killed
without any need for cleanup.
7
8
Introducing the Cowboy Web Server
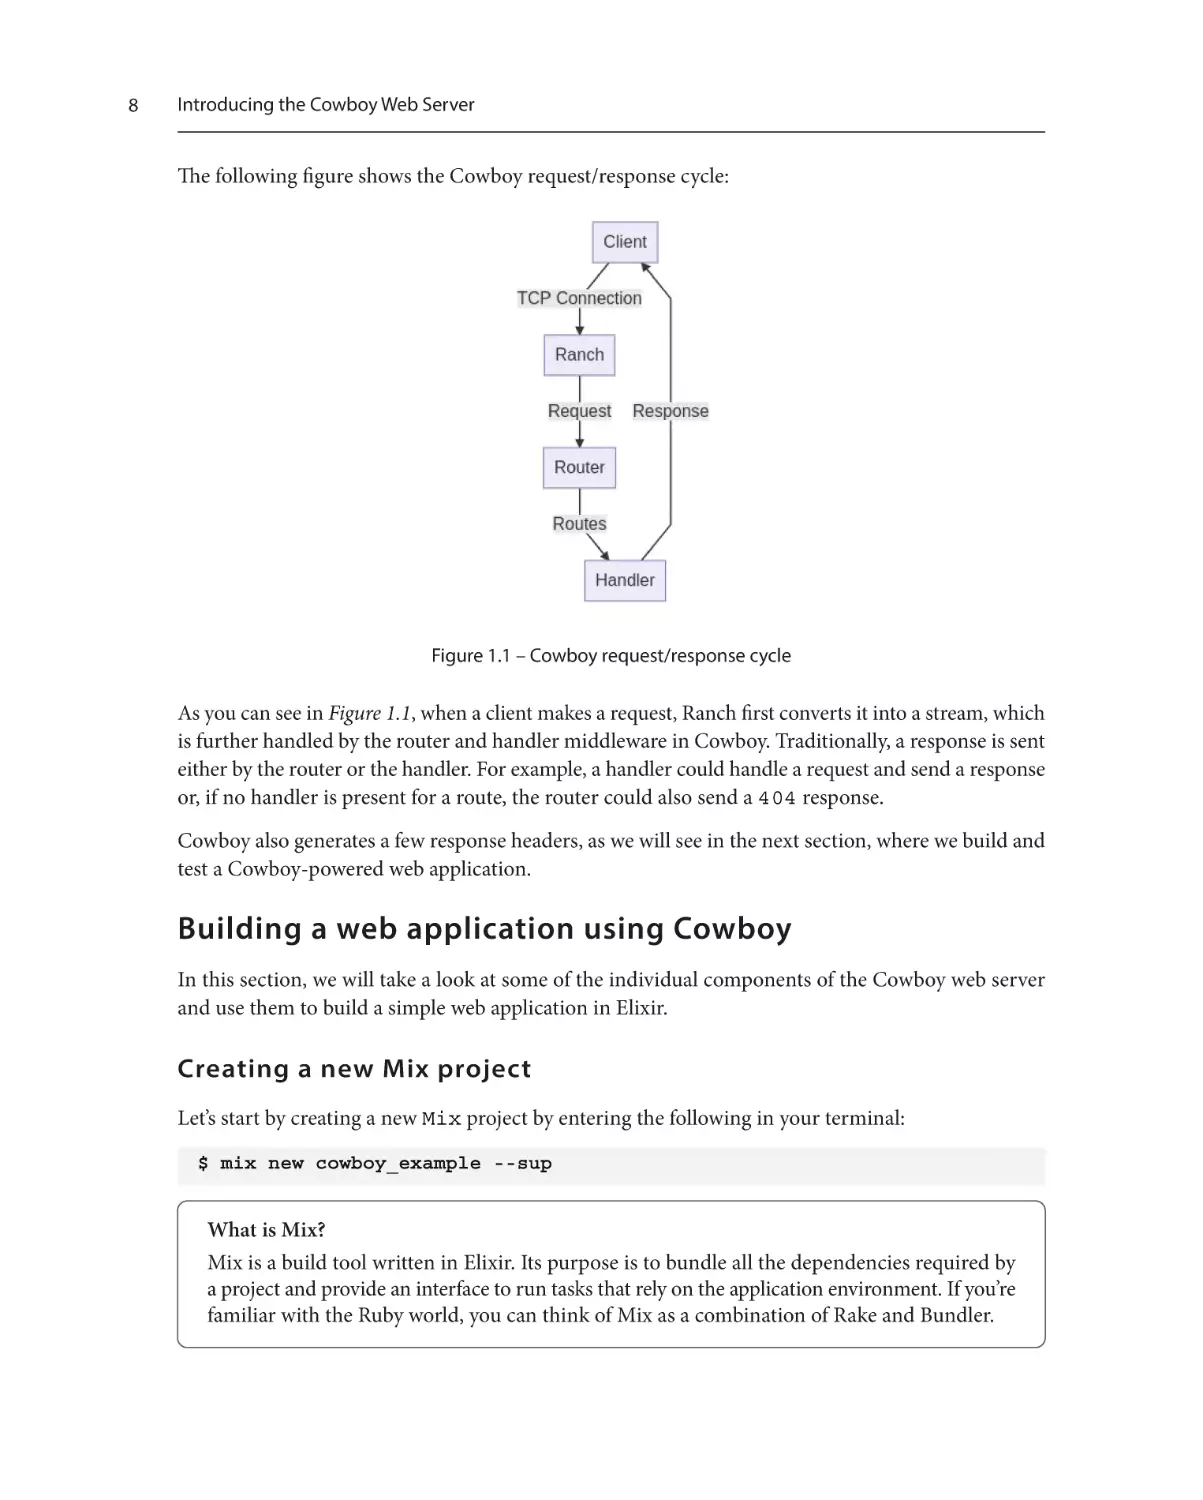
The following figure shows the Cowboy request/response cycle:
Figure 1.1 – Cowboy request/response cycle
As you can see in Figure 1.1, when a client makes a request, Ranch first converts it into a stream, which
is further handled by the router and handler middleware in Cowboy. Traditionally, a response is sent
either by the router or the handler. For example, a handler could handle a request and send a response
or, if no handler is present for a route, the router could also send a 404 response.
Cowboy also generates a few response headers, as we will see in the next section, where we build and
test a Cowboy-powered web application.
Building a web application using Cowboy
In this section, we will take a look at some of the individual components of the Cowboy web server
and use them to build a simple web application in Elixir.
Creating a new Mix project
Let’s start by creating a new Mix project by entering the following in your terminal:
$ mix new cowboy_example --sup
What is Mix?
Mix is a build tool written in Elixir. Its purpose is to bundle all the dependencies required by
a project and provide an interface to run tasks that rely on the application environment. If you’re
familiar with the Ruby world, you can think of Mix as a combination of Rake and Bundler.
Building a web application using Cowboy
Passing the --sup option to the mix new command allows us to create a Mix project with a
supervision tree. A supervision tree (or a supervisor) is a process that simply monitors other processes
and is responsible for automatically restarting any process within the tree if it fails or crashes. We will
be using the supervision tree in this application to start and supervise our web server process to make
sure it is started when the application is started and to ensure that it keeps running.
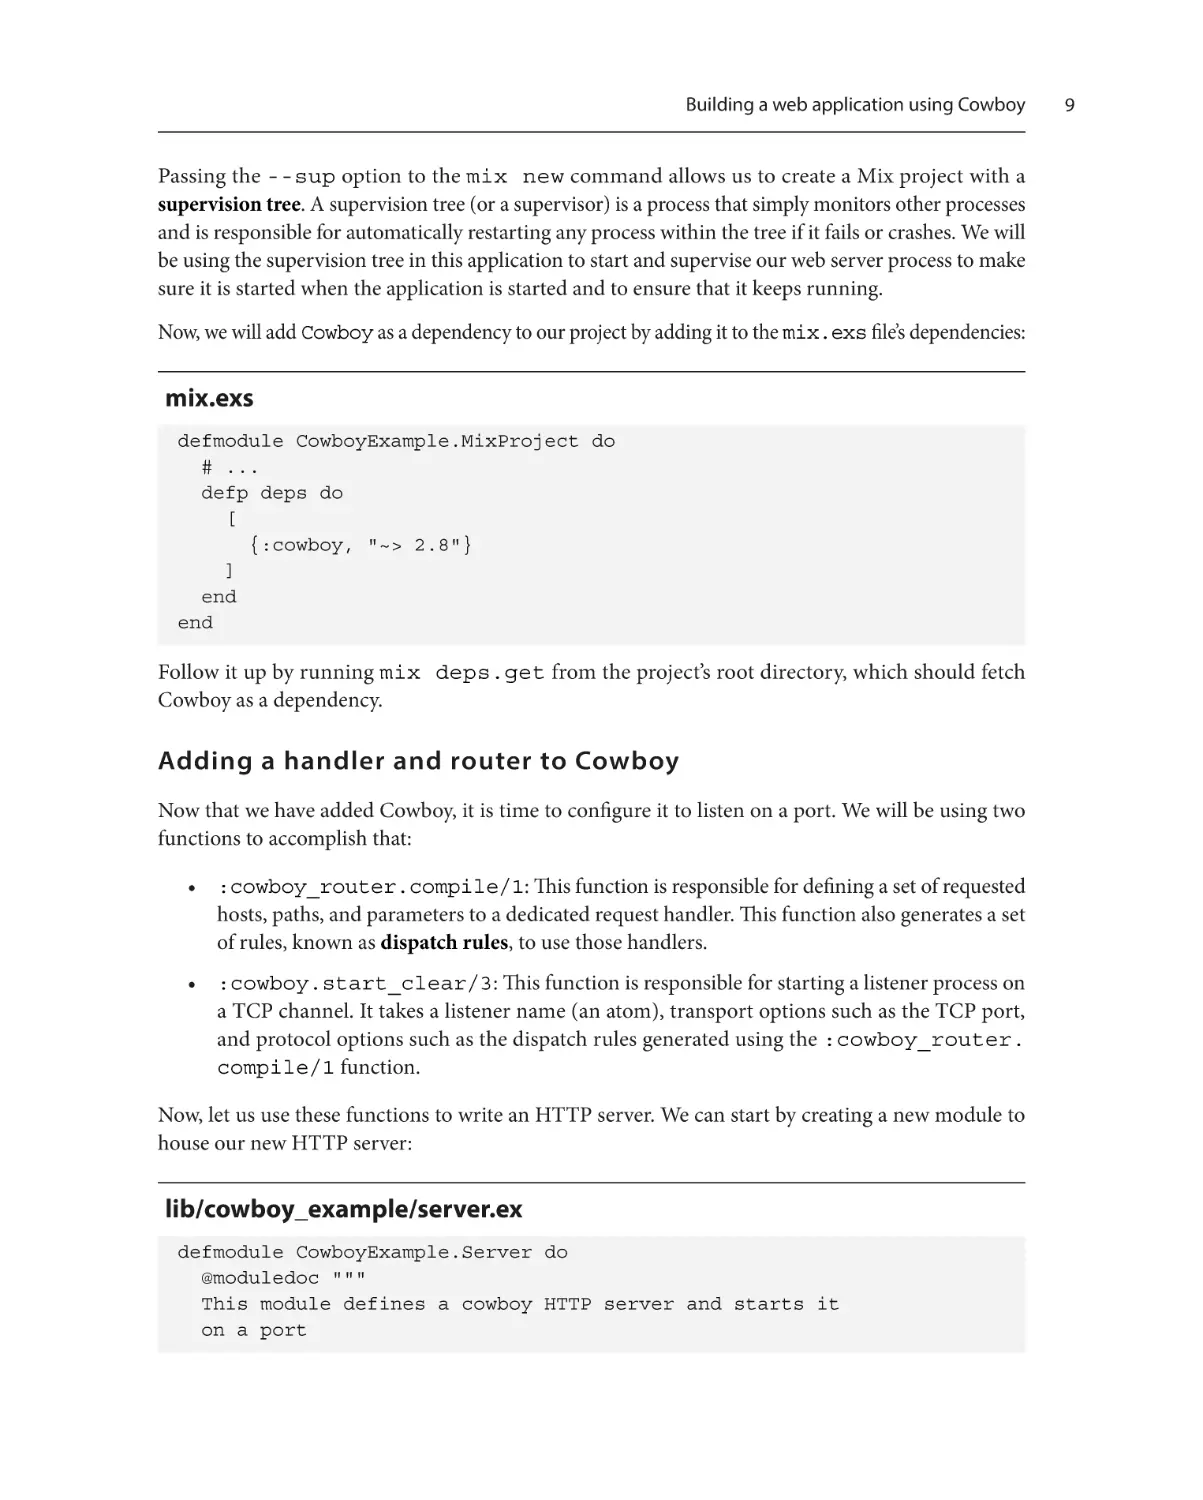
Now, we will add Cowboy as a dependency to our project by adding it to the mix.exs file’s dependencies:
mix.exs
defmodule CowboyExample.MixProject do
# ...
defp deps do
[
{:cowboy, "~> 2.8"}
]
end
end
Follow it up by running mix deps.get from the project’s root directory, which should fetch
Cowboy as a dependency.
Adding a handler and router to Cowboy
Now that we have added Cowboy, it is time to configure it to listen on a port. We will be using two
functions to accomplish that:
• :cowboy_router.compile/1: This function is responsible for defining a set of requested
hosts, paths, and parameters to a dedicated request handler. This function also generates a set
of rules, known as dispatch rules, to use those handlers.
• :cowboy.start_clear/3: This function is responsible for starting a listener process on
a TCP channel. It takes a listener name (an atom), transport options such as the TCP port,
and protocol options such as the dispatch rules generated using the :cowboy_router.
compile/1 function.
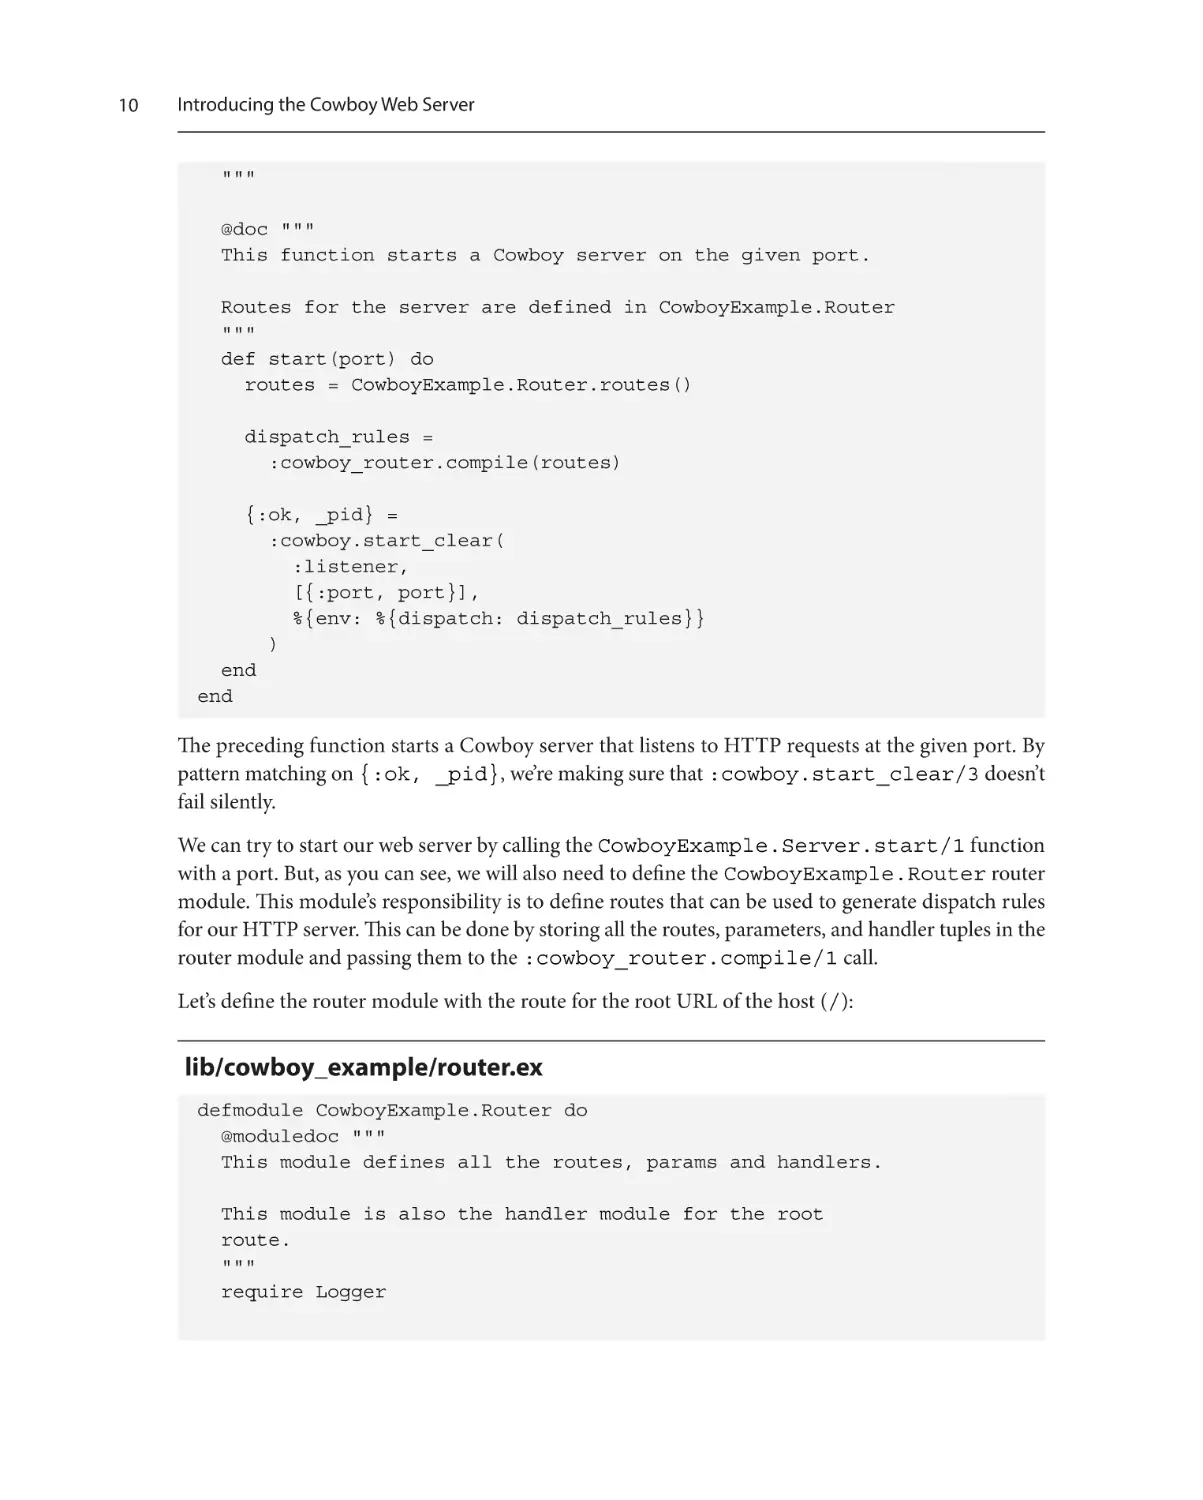
Now, let us use these functions to write an HTTP server. We can start by creating a new module to
house our new HTTP server:
lib/cowboy_example/server.ex
defmodule CowboyExample.Server do
@moduledoc """
This module defines a cowboy HTTP server and starts it
on a port
9
10
Introducing the Cowboy Web Server
"""
@doc """
This function starts a Cowboy server on the given port.
Routes for the server are defined in CowboyExample.Router
"""
def start(port) do
routes = CowboyExample.Router.routes()
dispatch_rules =
:cowboy_router.compile(routes)
{:ok, _pid} =
:cowboy.start_clear(
:listener,
[{:port, port}],
%{env: %{dispatch: dispatch_rules}}
)
end
end
The preceding function starts a Cowboy server that listens to HTTP requests at the given port. By
pattern matching on {:ok, _pid}, we’re making sure that :cowboy.start_clear/3 doesn’t
fail silently.
We can try to start our web server by calling the CowboyExample.Server.start/1 function
with a port. But, as you can see, we will also need to define the CowboyExample.Router router
module. This module’s responsibility is to define routes that can be used to generate dispatch rules
for our HTTP server. This can be done by storing all the routes, parameters, and handler tuples in the
router module and passing them to the :cowboy_router.compile/1 call.
Let’s define the router module with the route for the root URL of the host (/):
lib/cowboy_example/router.ex
defmodule CowboyExample.Router do
@moduledoc """
This module defines all the routes, params and handlers.
This module is also the handler module for the root
route.
"""
require Logger
Building a web application using Cowboy
@doc """
Returns the list of routes configured by this web server
"""
def routes do
[
# For now, this module itself will handle root
# requests
{:_, [{"/", __MODULE__, []}]}
]
end
end
We will also be using CowboyExample.Router itself as the handler for that route, which means
we have to define the init/2 function, which takes the request and its initial state.
So, let us define the init/2 function:
lib/cowboy_example/router.ex
defmodule CowboyExample.Router do
# ..
@doc """
This function handles the root route, logs the requests
and responds with Hello World as the body
"""
def init(req0, state) do
Logger.info("Received request: #{inspect req0}")
req1 =
:cowboy_req.reply(
200,
%{"content-type" => "text/html"},
"Hello World",
req0
)
{:ok, req1, state}
end
end
11
12
Introducing the Cowboy Web Server
As you can see in the preceding code, we have defined the routes/0 function, which returns the
dispatch rules routes for our web application. For the handler module, we’re currently using the
CowboyExample.Router module itself by defining the init/2 function, which responds
with "Hello World" and a status of 200, whenever invoked. We have also added a call to the
Logger module to log all requests to the handler. This will increase visibility while running it in the
development environment.
In order for our web server to start up when the app is started, we need to add it to our application’s
supervision tree.
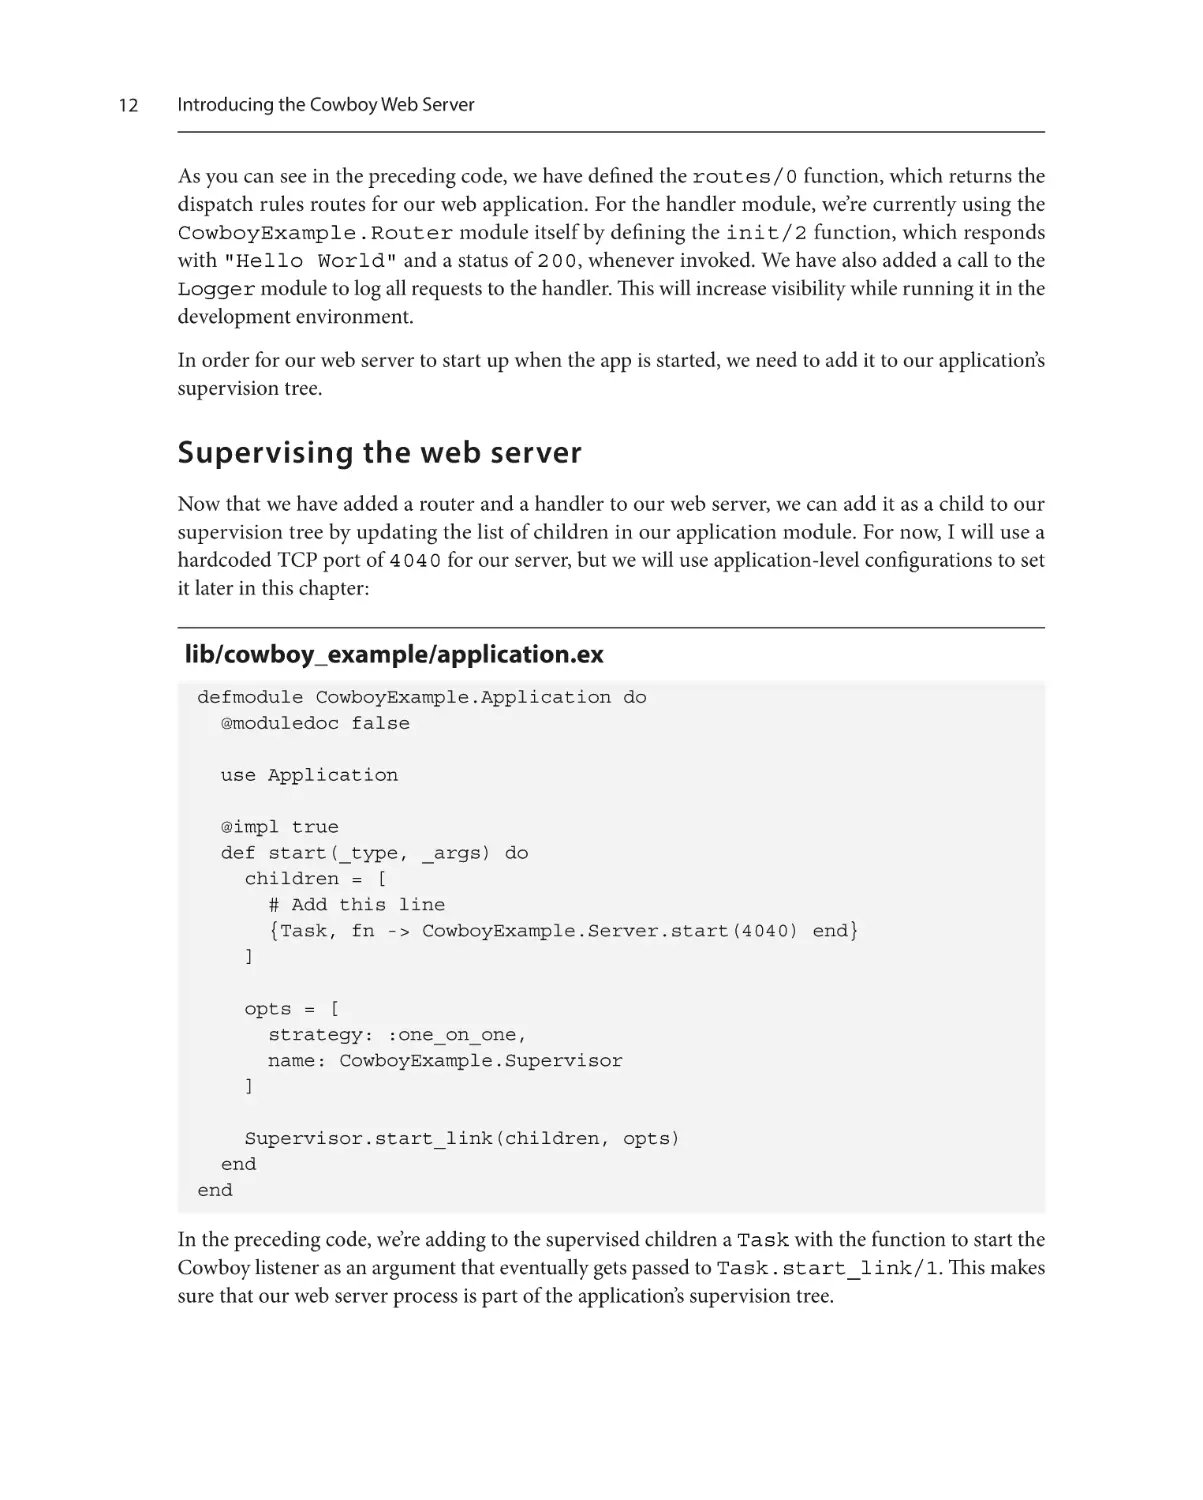
Supervising the web server
Now that we have added a router and a handler to our web server, we can add it as a child to our
supervision tree by updating the list of children in our application module. For now, I will use a
hardcoded TCP port of 4040 for our server, but we will use application-level configurations to set
it later in this chapter:
lib/cowboy_example/application.ex
defmodule CowboyExample.Application do
@moduledoc false
use Application
@impl true
def start(_type, _args) do
children = [
# Add this line
{Task, fn -> CowboyExample.Server.start(4040) end}
]
opts = [
strategy: :one_on_one,
name: CowboyExample.Supervisor
]
Supervisor.start_link(children, opts)
end
end
In the preceding code, we’re adding to the supervised children a Task with the function to start the
Cowboy listener as an argument that eventually gets passed to Task.start_link/1. This makes
sure that our web server process is part of the application’s supervision tree.
Supervising the web server
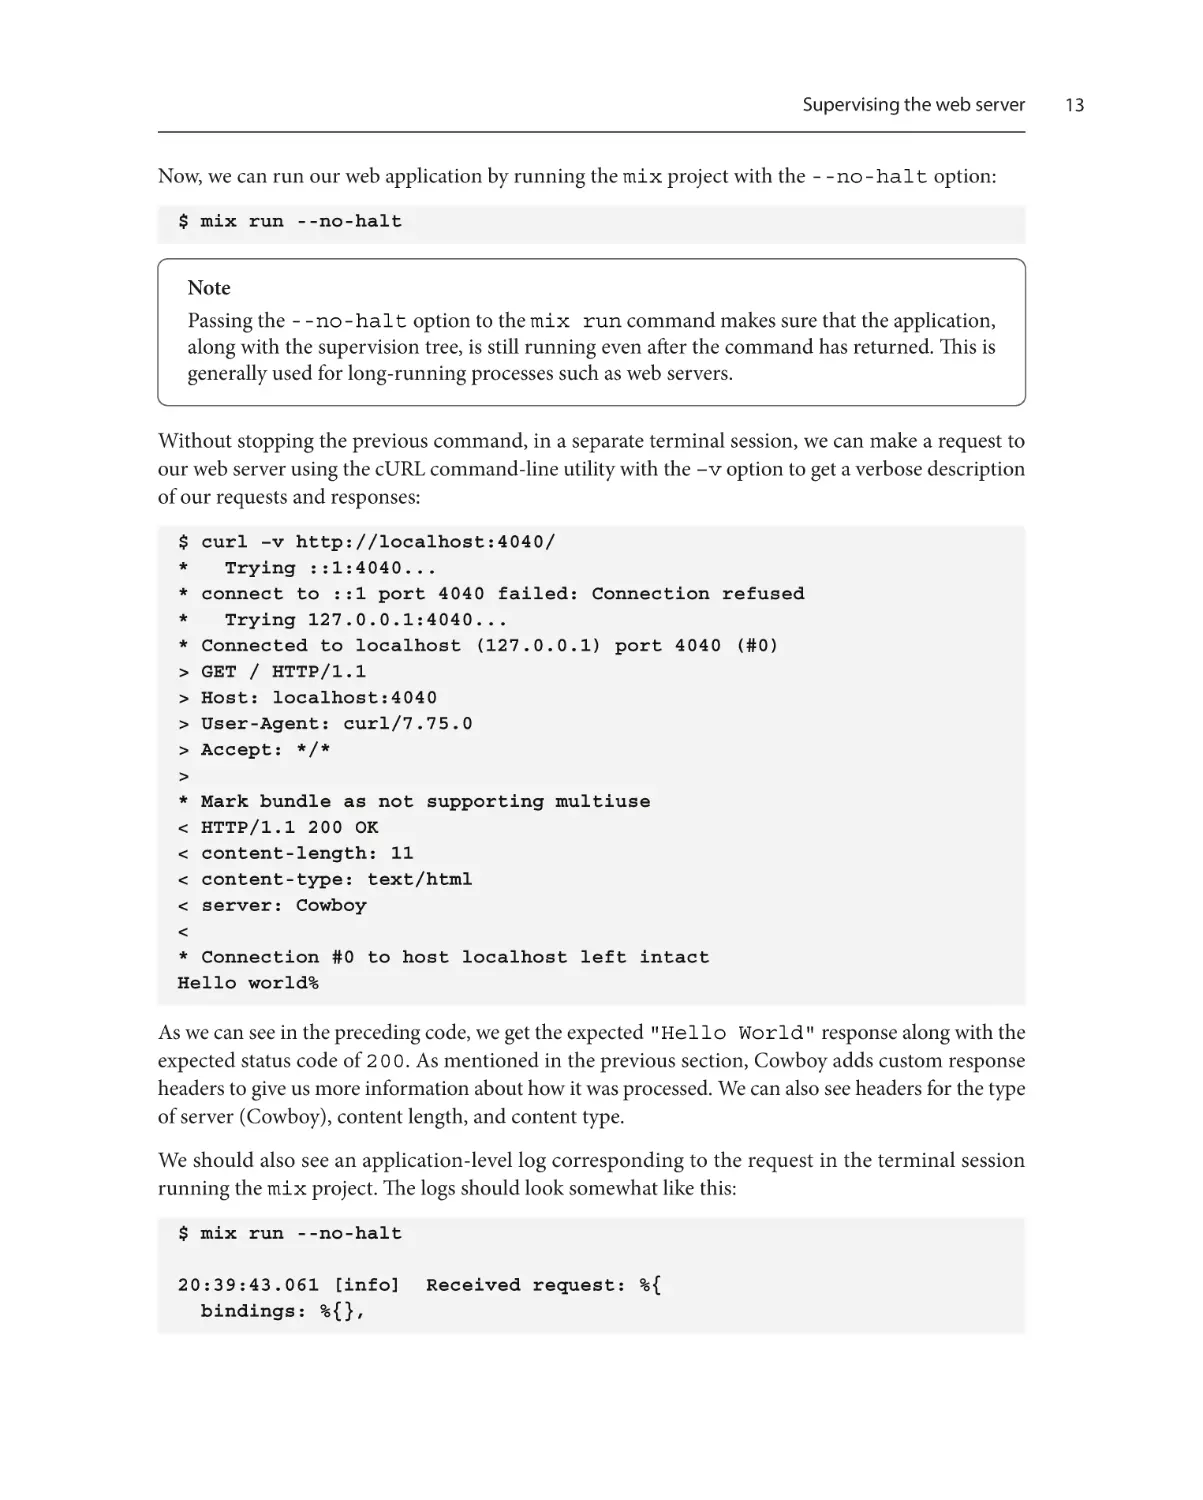
Now, we can run our web application by running the mix project with the --no-halt option:
$ mix run --no-halt
Note
Passing the --no-halt option to the mix run command makes sure that the application,
along with the supervision tree, is still running even after the command has returned. This is
generally used for long-running processes such as web servers.
Without stopping the previous command, in a separate terminal session, we can make a request to
our web server using the cURL command-line utility with the –v option to get a verbose description
of our requests and responses:
$ curl –v http://localhost:4040/
* Trying ::1:4040...
* connect to ::1 port 4040 failed: Connection refused
* Trying 127.0.0.1:4040...
* Connected to localhost (127.0.0.1) port 4040 (#0)
> GET / HTTP/1.1
> Host: localhost:4040
> User-Agent: curl/7.75.0
> Accept: */*
>
* Mark bundle as not supporting multiuse
< HTTP/1.1 200 OK
< content-length: 11
< content-type: text/html
< server: Cowboy
<
* Connection #0 to host localhost left intact
Hello world%
As we can see in the preceding code, we get the expected "Hello World" response along with the
expected status code of 200. As mentioned in the previous section, Cowboy adds custom response
headers to give us more information about how it was processed. We can also see headers for the type
of server (Cowboy), content length, and content type.
We should also see an application-level log corresponding to the request in the terminal session
running the mix project. The logs should look somewhat like this:
$ mix run --no-halt
20:39:43.061 [info] Received request: %{
bindings: %{},
13
14
Introducing the Cowboy Web Server
body_length: 0,
cert: :undefined,
has_body: false,
headers: %{
"accept" => "*/*",
"host" => "localhost:4040",
"user-agent" => "curl/7.75.0"
},
host: "localhost",
host_info: :undefined,
method: "GET",
path: "/",
path_info: :undefined,
peer: {{127, 0, 0, 1}, 35260},
pid: #PID<0.271.0>,
port: 4040,
qs: "",
ref: :listener,
scheme: "http",
sock: {{127, 0, 0, 1}, 4040},
streamid: 1,
version: :"HTTP/1.1"
}
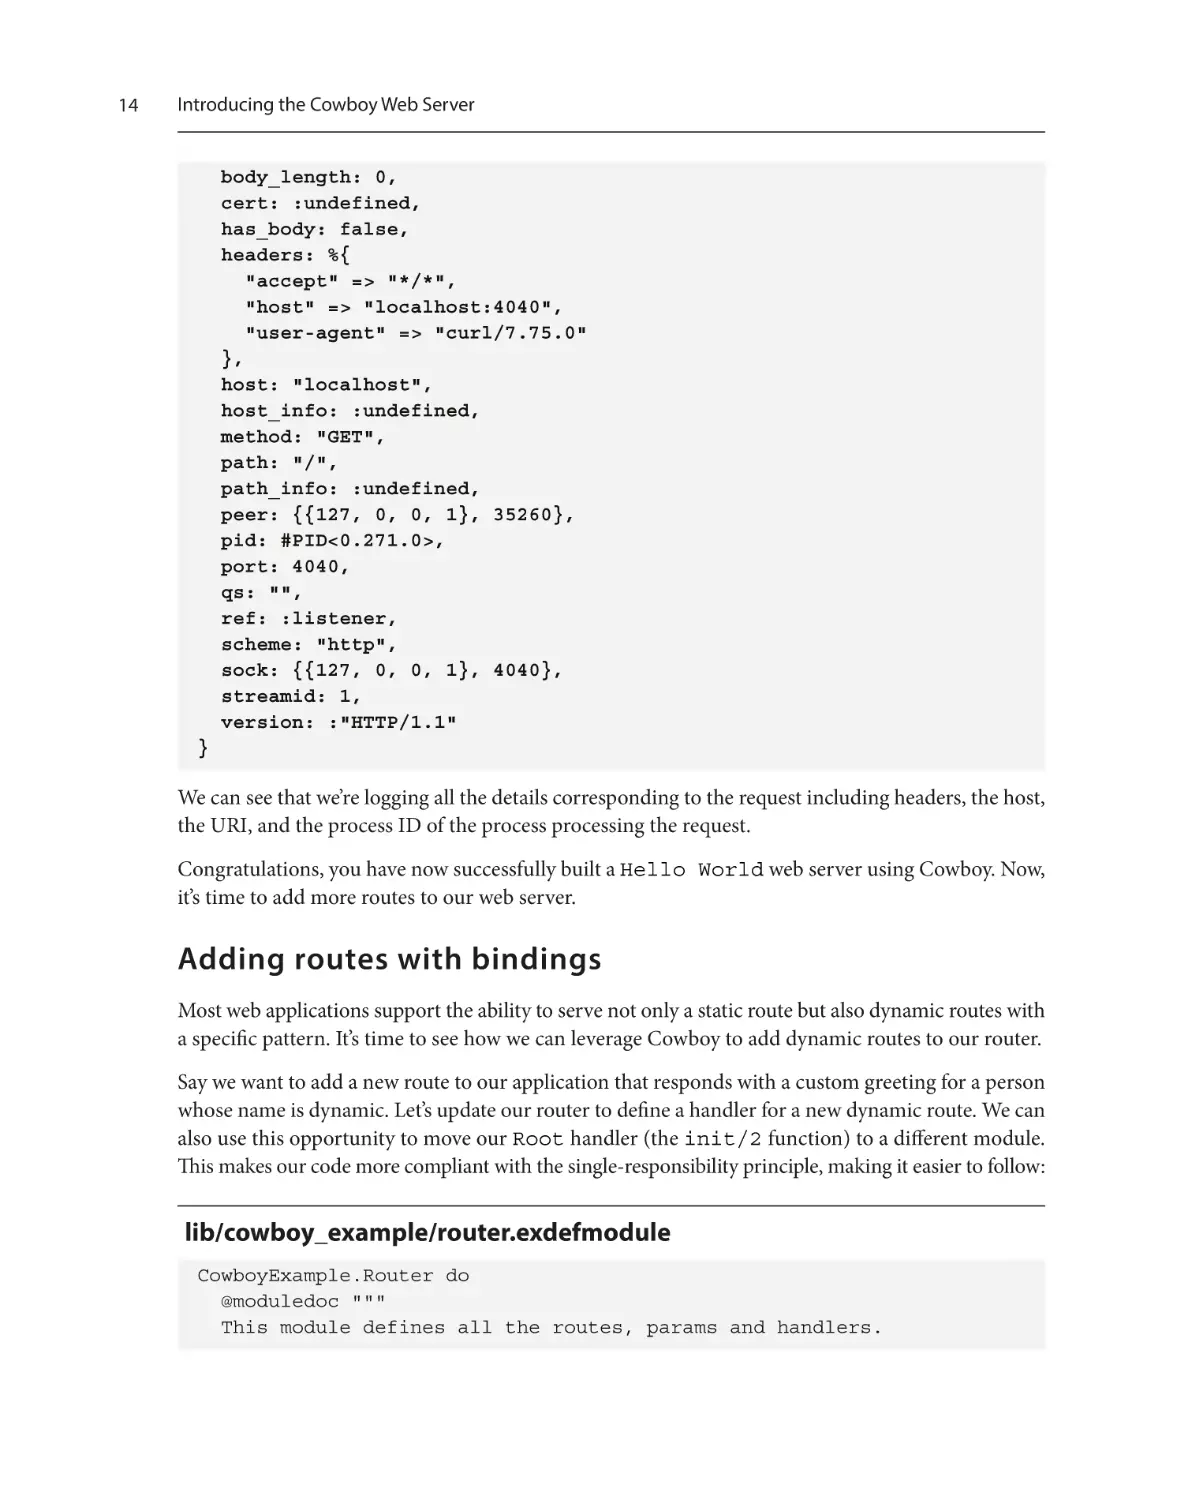
We can see that we’re logging all the details corresponding to the request including headers, the host,
the URI, and the process ID of the process processing the request.
Congratulations, you have now successfully built a Hello World web server using Cowboy. Now,
it’s time to add more routes to our web server.
Adding routes with bindings
Most web applications support the ability to serve not only a static route but also dynamic routes with
a specific pattern. It’s time to see how we can leverage Cowboy to add dynamic routes to our router.
Say we want to add a new route to our application that responds with a custom greeting for a person
whose name is dynamic. Let’s update our router to define a handler for a new dynamic route. We can
also use this opportunity to move our Root handler (the init/2 function) to a different module.
This makes our code more compliant with the single-responsibility principle, making it easier to follow:
lib/cowboy_example/router.exdefmodule
CowboyExample.Router do
@moduledoc """
This module defines all the routes, params and handlers.
Adding routes with bindings
"""
alias CowboyExample.Router.Handlers.{Root, Greet}
@doc """
Returns the list of routes configured by this web server
"""
def routes do
[
{:_, [
{"/", Root, []},
# Add this line
{"/greet/:who", [who: :nonempty], Greet, []}
]}
]
end
end
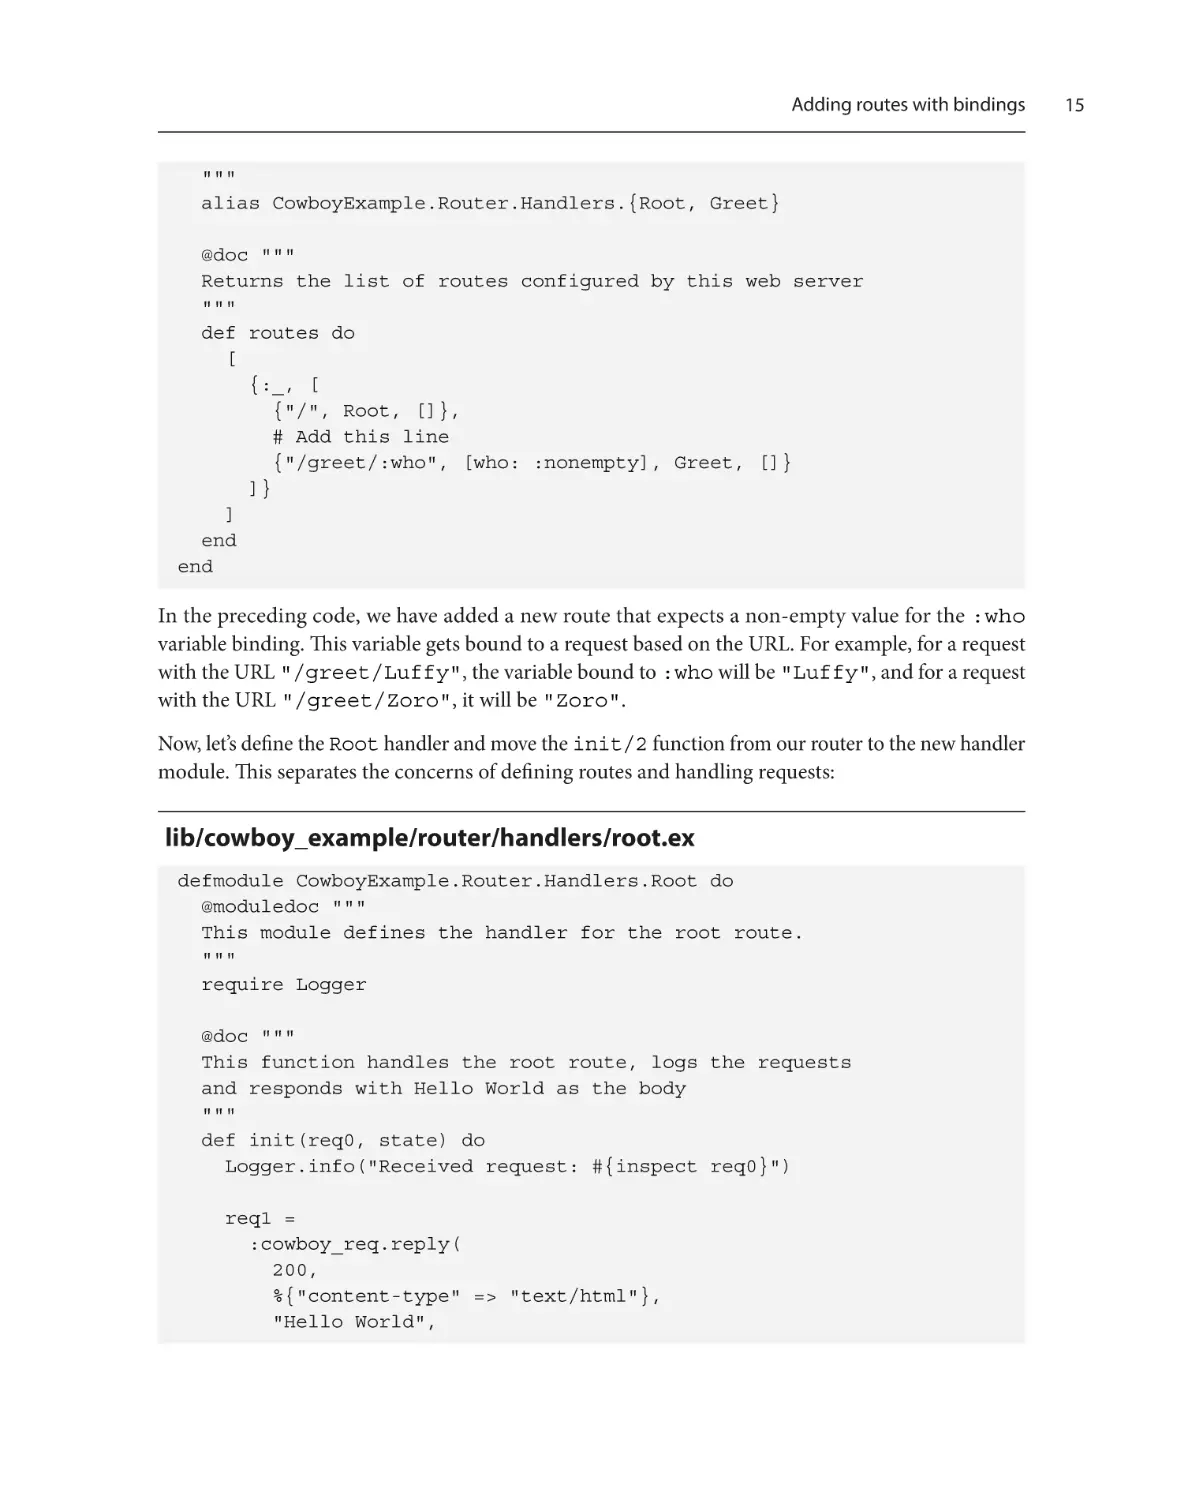
In the preceding code, we have added a new route that expects a non-empty value for the :who
variable binding. This variable gets bound to a request based on the URL. For example, for a request
with the URL "/greet/Luffy", the variable bound to :who will be "Luffy", and for a request
with the URL "/greet/Zoro", it will be "Zoro".
Now, let’s define the Root handler and move the init/2 function from our router to the new handler
module. This separates the concerns of defining routes and handling requests:
lib/cowboy_example/router/handlers/root.ex
defmodule CowboyExample.Router.Handlers.Root do
@moduledoc """
This module defines the handler for the root route.
"""
require Logger
@doc """
This function handles the root route, logs the requests
and responds with Hello World as the body
"""
def init(req0, state) do
Logger.info("Received request: #{inspect req0}")
req1 =
:cowboy_req.reply(
200,
%{"content-type" => "text/html"},
"Hello World",
15
16
Introducing the Cowboy Web Server
req0
)
{:ok, req1, state}
end
end
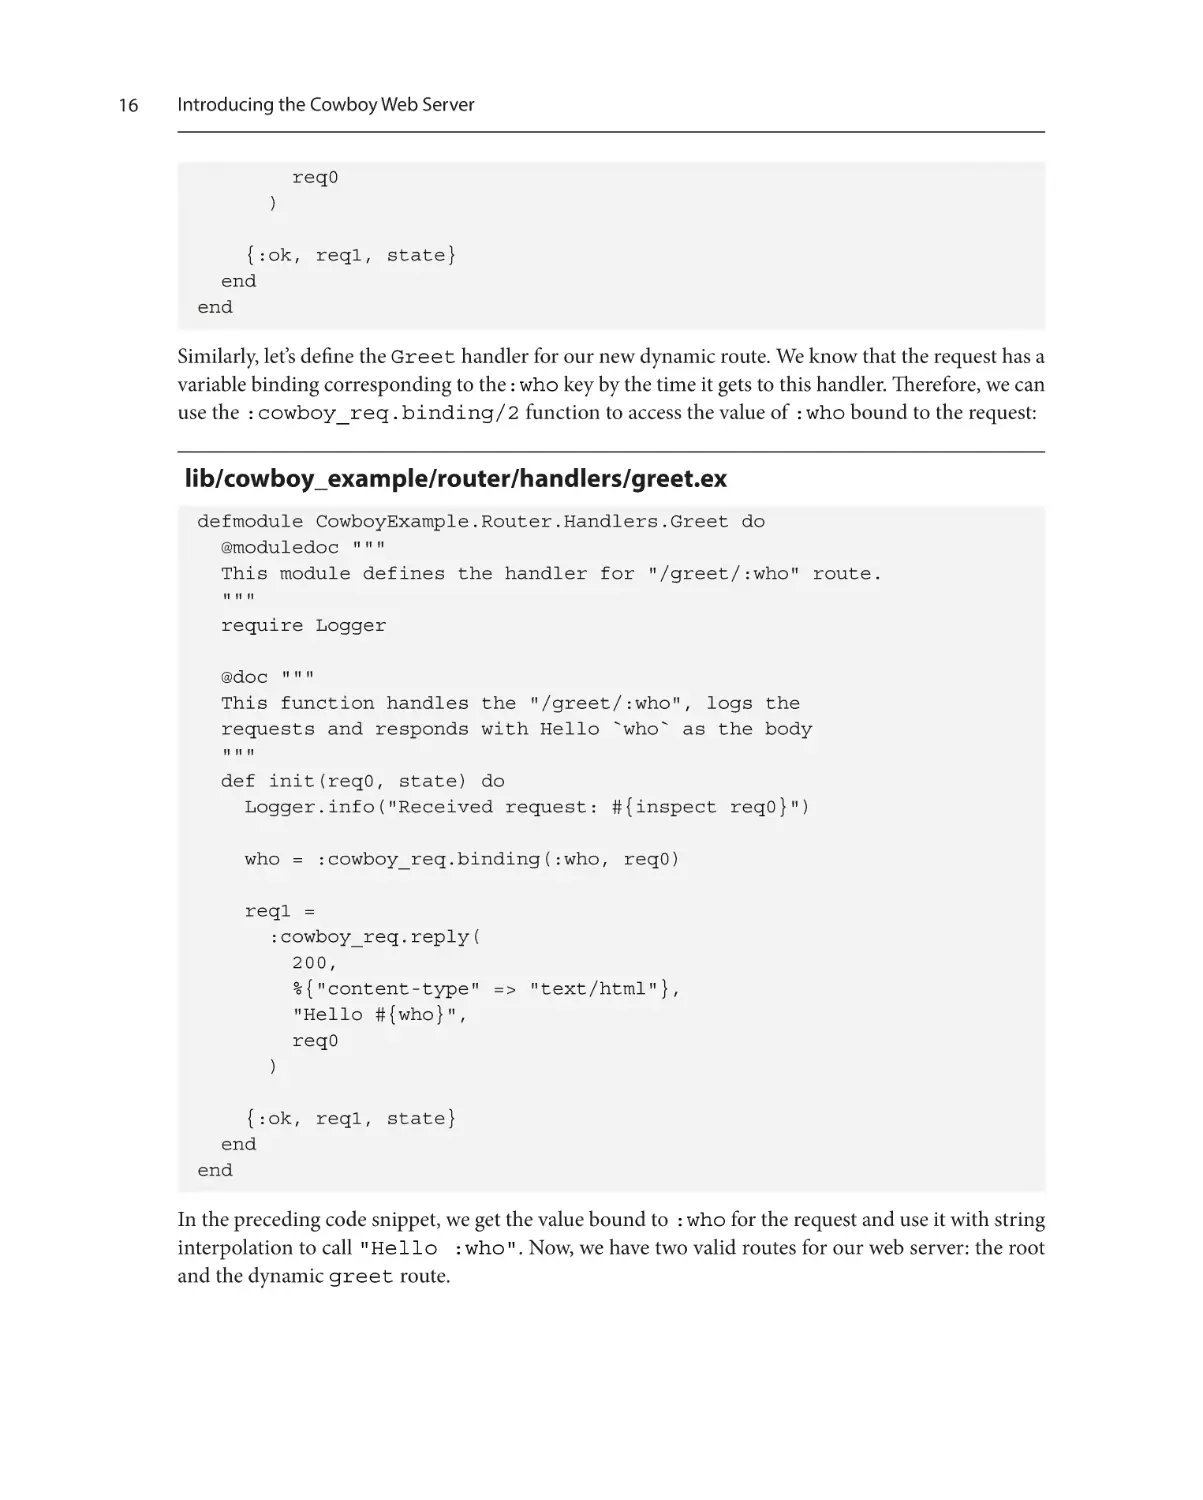
Similarly, let’s define the Greet handler for our new dynamic route. We know that the request has a
variable binding corresponding to the:who key by the time it gets to this handler. Therefore, we can
use the :cowboy_req.binding/2 function to access the value of :who bound to the request:
lib/cowboy_example/router/handlers/greet.ex
defmodule CowboyExample.Router.Handlers.Greet do
@moduledoc """
This module defines the handler for "/greet/:who" route.
"""
require Logger
@doc """
This function handles the "/greet/:who", logs the
requests and responds with Hello `who` as the body
"""
def init(req0, state) do
Logger.info("Received request: #{inspect req0}")
who = :cowboy_req.binding(:who, req0)
req1 =
:cowboy_req.reply(
200,
%{"content-type" => "text/html"},
"Hello #{who}",
req0
)
{:ok, req1, state}
end
end
In the preceding code snippet, we get the value bound to :who for the request and use it with string
interpolation to call "Hello :who". Now, we have two valid routes for our web server: the root
and the dynamic greet route.
Adding routes with bindings
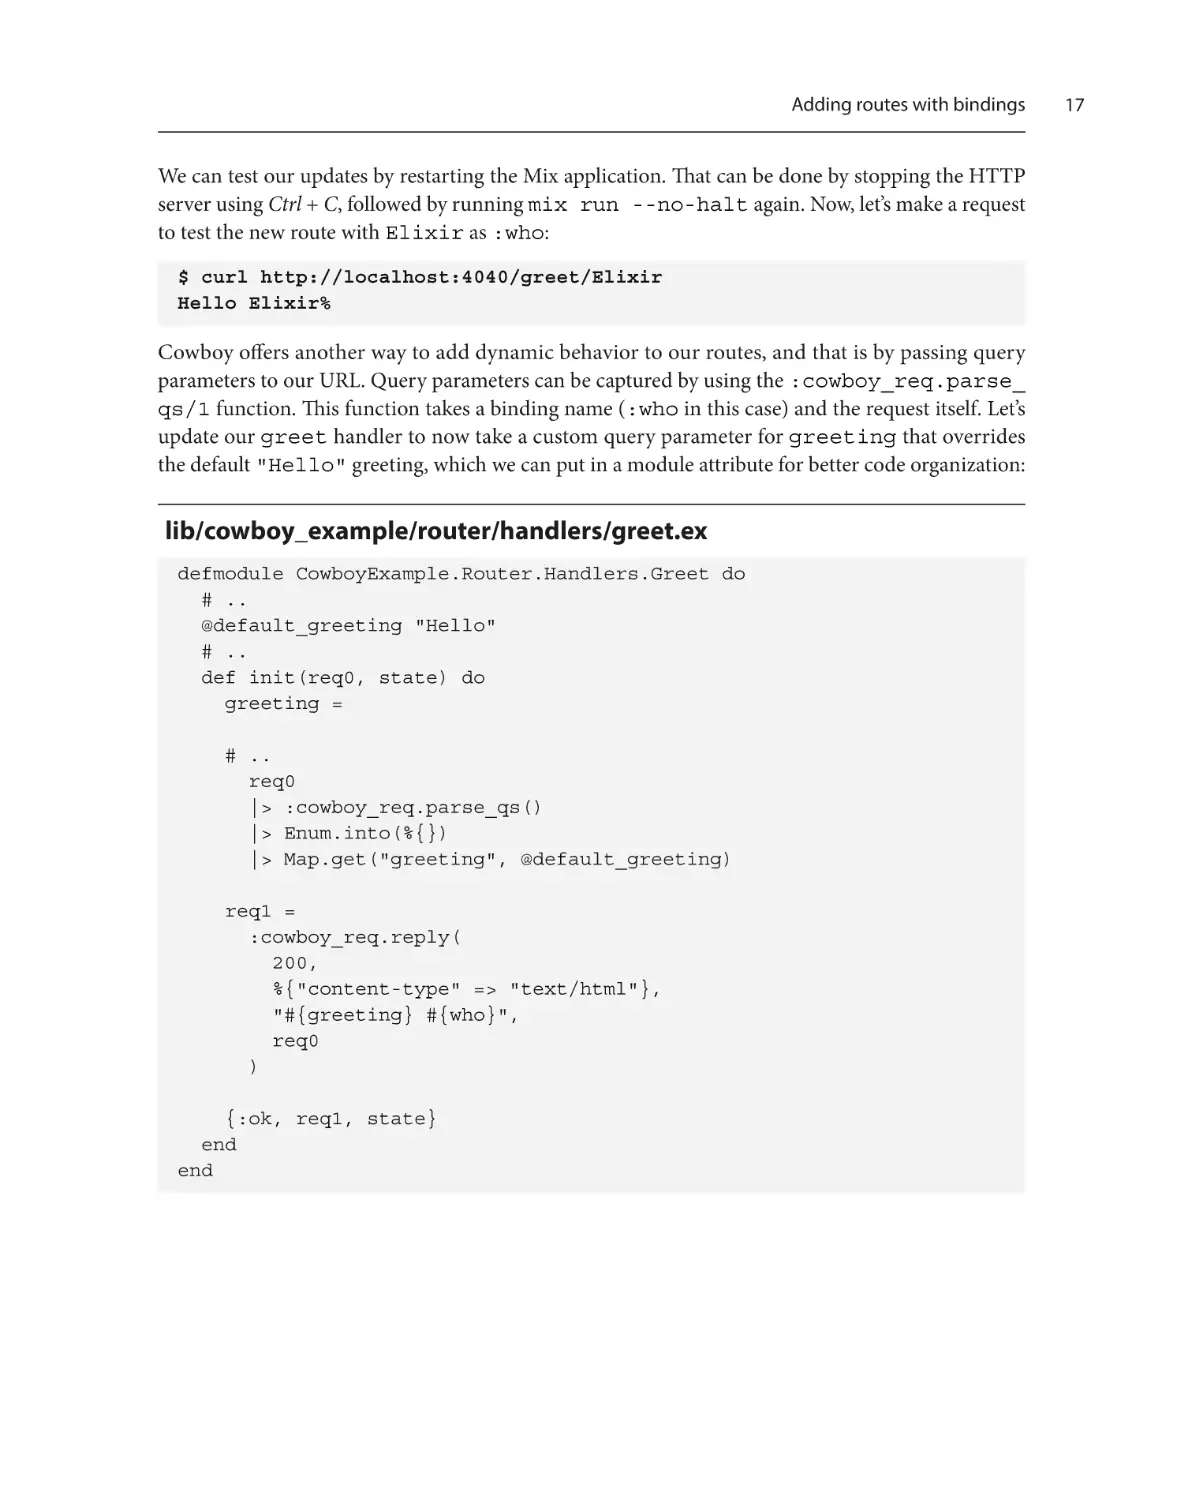
We can test our updates by restarting the Mix application. That can be done by stopping the HTTP
server using Ctrl + C, followed by running mix run --no-halt again. Now, let’s make a request
to test the new route with Elixir as :who:
$ curl http://localhost:4040/greet/Elixir
Hello Elixir%
Cowboy offers another way to add dynamic behavior to our routes, and that is by passing query
parameters to our URL. Query parameters can be captured by using the :cowboy_req.parse_
qs/1 function. This function takes a binding name (:who in this case) and the request itself. Let’s
update our greet handler to now take a custom query parameter for greeting that overrides
the default "Hello" greeting, which we can put in a module attribute for better code organization:
lib/cowboy_example/router/handlers/greet.ex
defmodule CowboyExample.Router.Handlers.Greet do
# ..
@default_greeting "Hello"
# ..
def init(req0, state) do
greeting =
# ..
req0
|> :cowboy_req.parse_qs()
|> Enum.into(%{})
|> Map.get("greeting", @default_greeting)
req1 =
:cowboy_req.reply(
200,
%{"content-type" => "text/html"},
"#{greeting} #{who}",
req0
)
{:ok, req1, state}
end
end
17
18
Introducing the Cowboy Web Server
We have now updated our greet handler to use :cowboy.parse_qs/1 to fetch query parameters
from the request. We then put those matched parameters into a map and get the value in the map
corresponding to the "greeting" key, with a default of "Hello". Now, the greet route should
take a “greeting” query parameter to update the greeting used to greet someone in the response.
We can test our updates again by restarting the application and making a request to test the route
with a custom greeting parameter:
$ curl http://localhost:4040/greet/Elixir\?greeting=Hola
Hola Elixir%
We now have a web server with a fully functional dynamic route. You might have noticed that we
didn’t specify any HTTP method while defining the routes. Let us see what happens when we try to
make a request to the root with the POST method:
$ curl -X POST http://localhost:4040/
Hello World%
As you can see in the example, our web server still responded to the POST request in the same manner
as GET. We don’t want that behavior so, in the next section, we will see how to validate the HTTP
method of a request and restrict the root of our application to only respond to GET requests.
Validating HTTP methods
Most modern web applications have a way of restricting requests to a route based on the HTTP
method. In this section, we will see how to restrict our handlers to work with a specific HTTP method
in a Cowboy-based web application. The simplest way of accomplishing that in a Cowboy handler is
by pattern matching on the first argument of the init/2 function, which is the request. A Cowboy
request contains a lot of information, including the HTTP method used to make the request. So,
by pattern matching on the request with a specific HTTP method, we can filter requests based on
HTTP methods. However, we will also be needing a general clause for the init/2 function, which
responds with a 404 error.
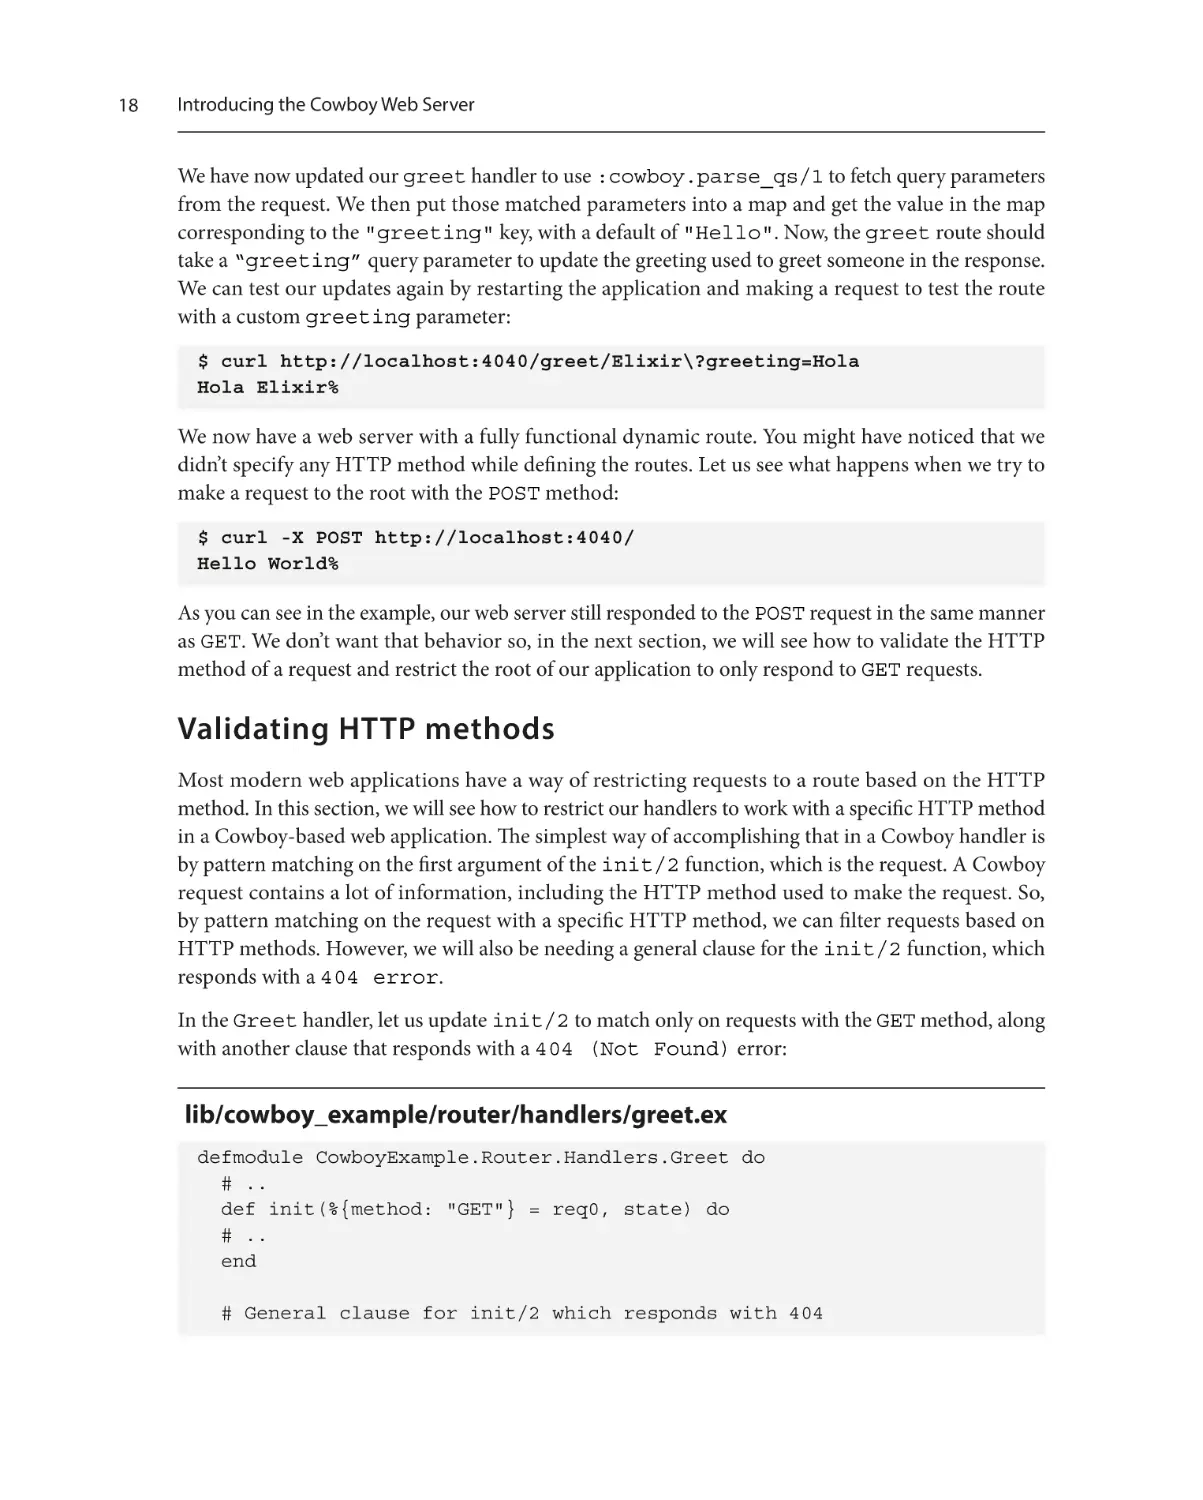
In the Greet handler, let us update init/2 to match only on requests with the GET method, along
with another clause that responds with a 404 (Not Found) error:
lib/cowboy_example/router/handlers/greet.ex
defmodule CowboyExample.Router.Handlers.Greet do
# ..
def init(%{method: "GET"} = req0, state) do
# ..
end
# General clause for init/2 which responds with 404
Validating HTTP methods
def init(req0, state) do
Logger.info("Received request: #{inspect req0}")
req1 =
:cowboy_req.reply(
404,
%{"content-type" => "text/html"},
"404 Not found",
req0
)
{:ok, req1, state}
end
end
Now, let’s make sure only GET requests are accepted by our server for the route. Let’s first make sure
GET requests are working:
$ curl http://localhost:4040/greet/Elixir\?greeting=Hola
Hola Elixir%
It’s time to check that a POST request for the greet route returns a 404 error:
$ curl http://localhost:4040/greet/Elixir\?greeting=Hola -X POST
404 Not found%
This ensures that our route works only for GET requests. Another way of validating HTTP methods of
our requests would be by using Cowboy middleware, but we will not be covering that in this chapter.
Cowboy middleware
In Cowboy, middleware is a way to process an incoming request. Every request has to go
through two types of middleware (the router and the handler), but Cowboy allows us to
define our own custom middleware module, which gets executed in the given order. A
custom middleware module just needs to implement the execute/2 callback defined in the
cowboy_middleware behavior.
Great! We have successfully enforced a method type for a route. Next, we will learn how to serve
HTML files instead of raw strings.
19
20
Introducing the Cowboy Web Server
Responding with HTML files
Generally, when we write web servers, we do not write our HTML as strings in handlers. We write our
HTML in separate files that are served by our server. We will use our application’s priv directory to
store these static files. So, let’s create a priv/static folder in the root of our project and add an
index.html file in that folder. To add some HTML, we can use this command:
$ echo "<h1>Hello World</h1>" > priv/static/index.html
The priv directory in OTP
In OTP (Open Telecom Platform or Erlang) and Elixir, the priv directory is a directory specific
to an application that is intended to store files needed by the application when it is running.
Phoenix, for example, uses the priv/static directory to store processed JavaScript and
CSS assets for runtime usage.
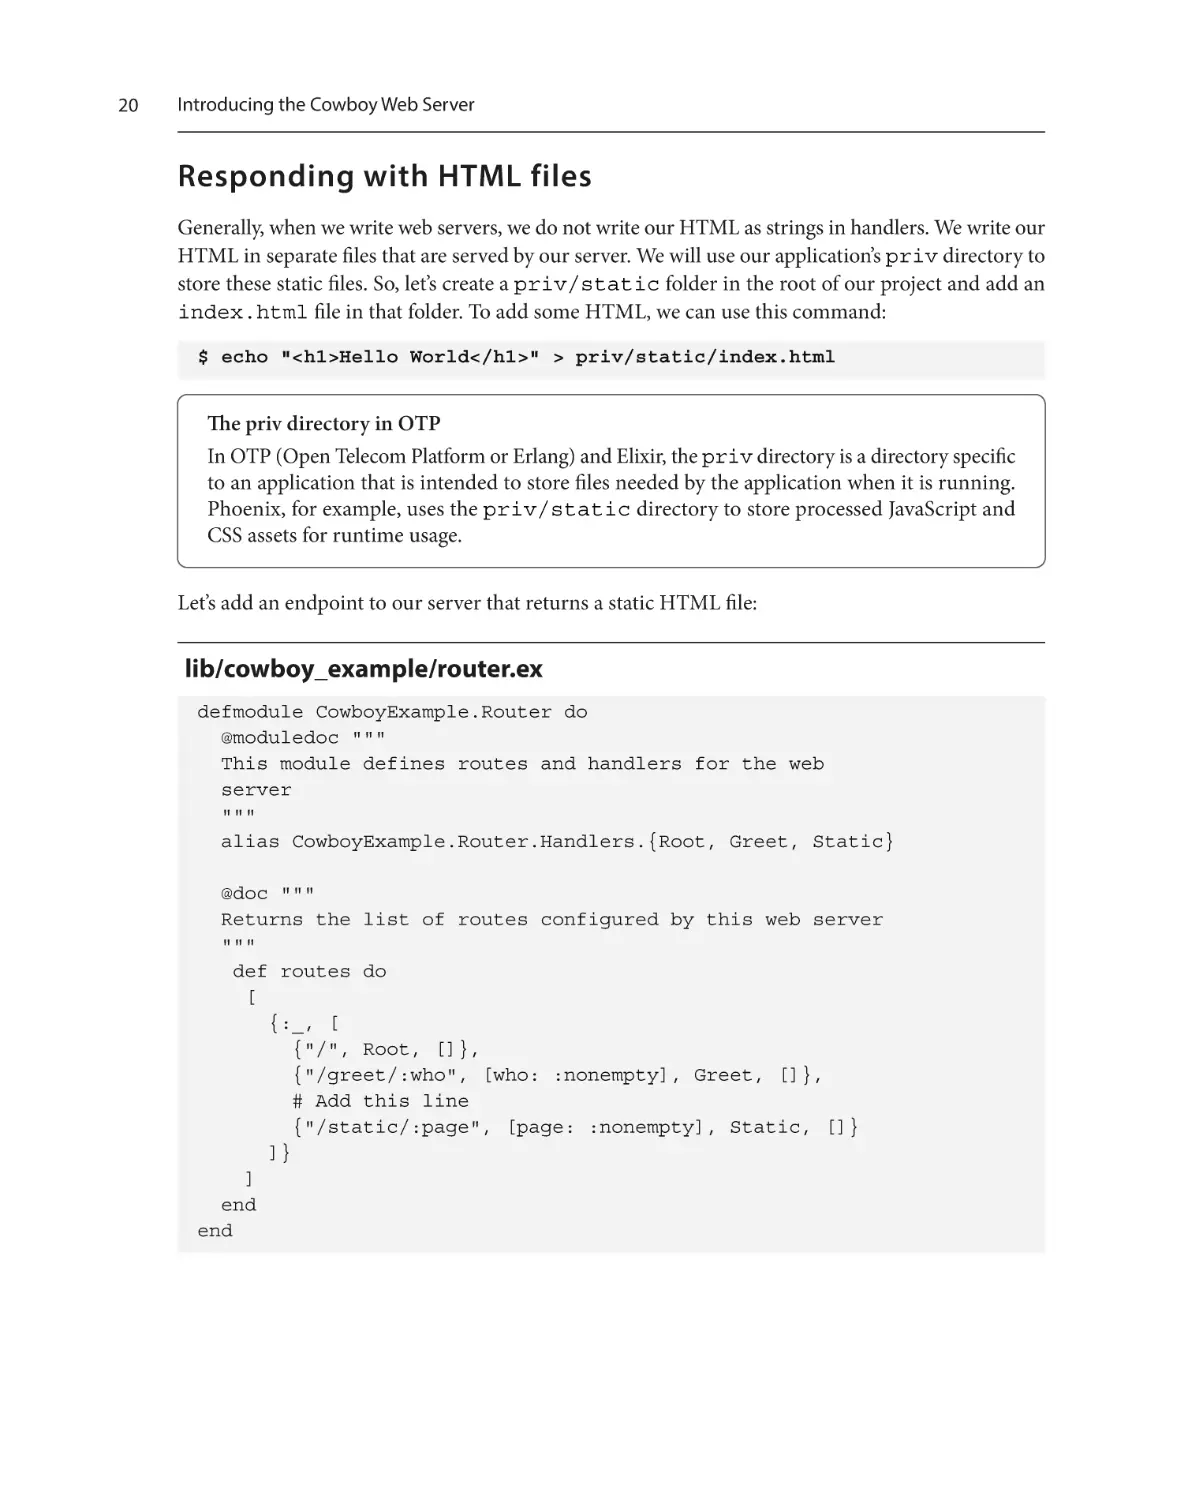
Let’s add an endpoint to our server that returns a static HTML file:
lib/cowboy_example/router.ex
defmodule CowboyExample.Router do
@moduledoc """
This module defines routes and handlers for the web
server
"""
alias CowboyExample.Router.Handlers.{Root, Greet, Static}
@doc """
Returns the list of routes configured by this web server
"""
def routes do
[
{:_, [
{"/", Root, []},
{"/greet/:who", [who: :nonempty], Greet, []},
# Add this line
{"/static/:page", [page: :nonempty], Static, []}
]}
]
end
end
Responding with HTML files
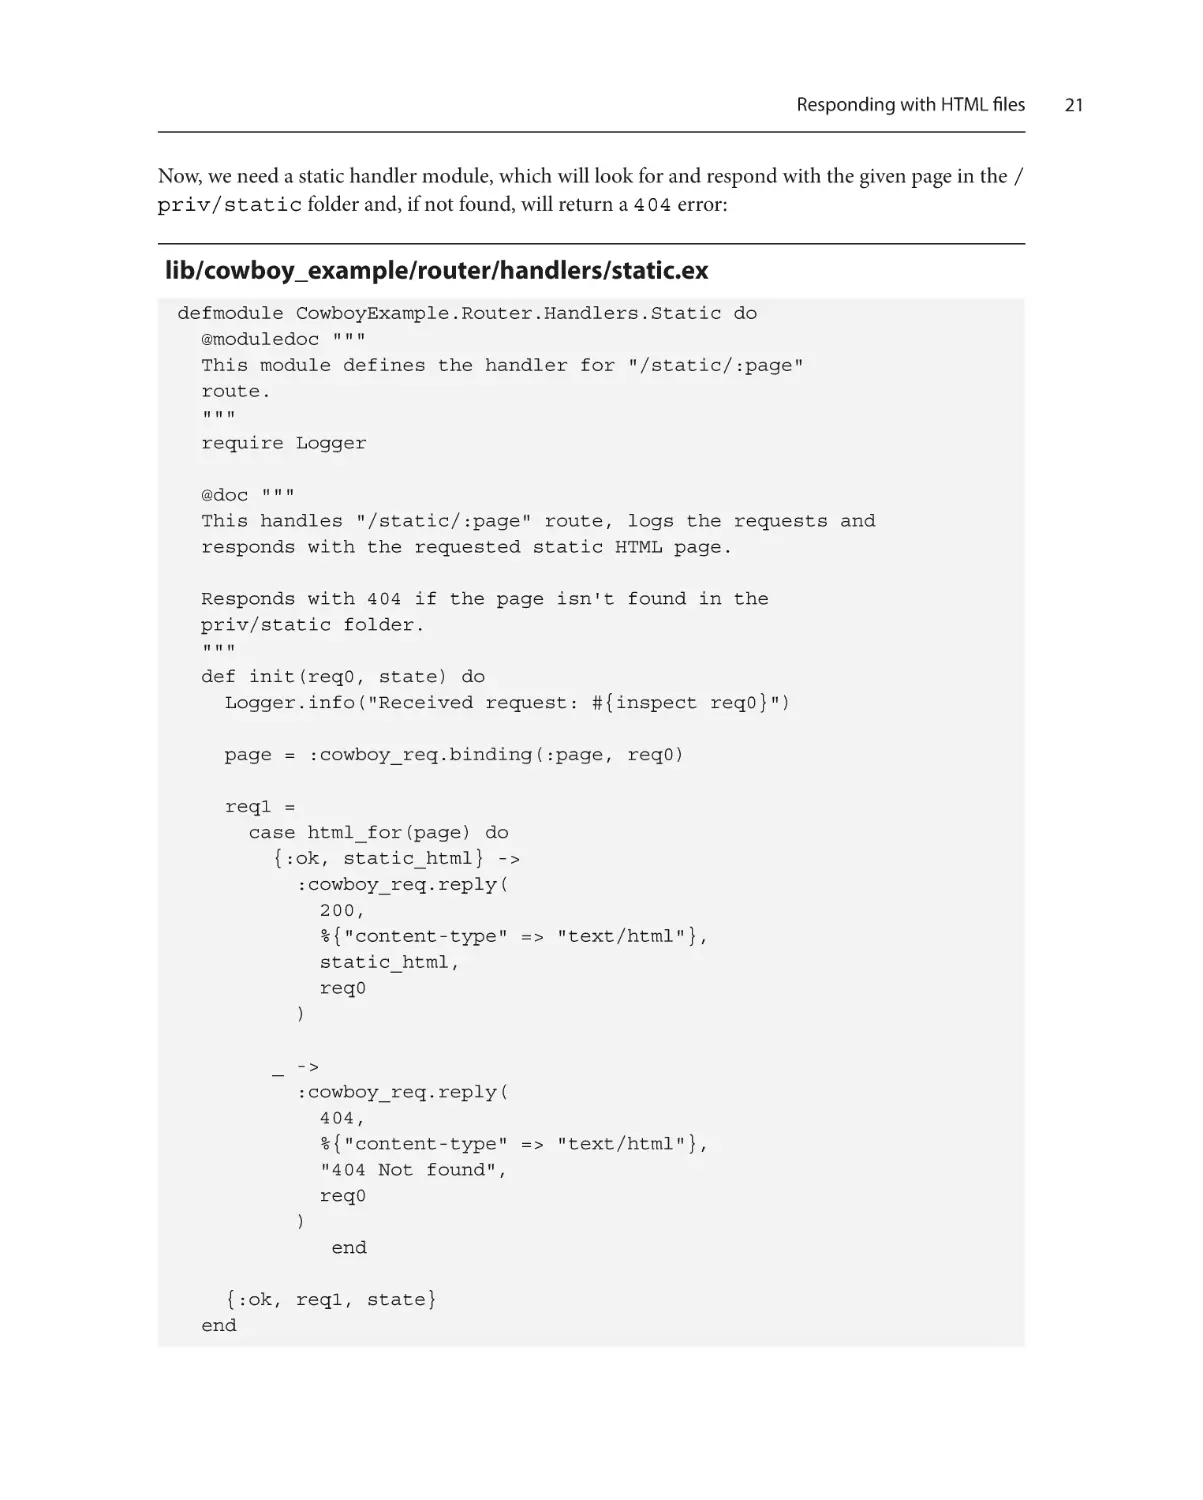
Now, we need a static handler module, which will look for and respond with the given page in the /
priv/static folder and, if not found, will return a 404 error:
lib/cowboy_example/router/handlers/static.ex
defmodule CowboyExample.Router.Handlers.Static do
@moduledoc """
This module defines the handler for "/static/:page"
route.
"""
require Logger
@doc """
This handles "/static/:page" route, logs the requests and
responds with the requested static HTML page.
Responds with 404 if the page isn't found in the
priv/static folder.
"""
def init(req0, state) do
Logger.info("Received request: #{inspect req0}")
page = :cowboy_req.binding(:page, req0)
req1 =
case html_for(page) do
{:ok, static_html} ->
:cowboy_req.reply(
200,
%{"content-type" => "text/html"},
static_html,
req0
)
_ ->
:cowboy_req.reply(
404,
%{"content-type" => "text/html"},
"404 Not found",
req0
)
end
{:ok, req1, state}
end
21
22
Introducing the Cowboy Web Server
defp html_for(page) do
priv_dir =
:cowboy_example
|> :code.priv_dir()
|> to_string()
page_path = priv_dir <> "/static/#{page}"
File.read(page_path)
end
end
In the preceding module, the html_for/1 function is responsible for fetching the HTML files
from our application’s priv directory, for a given path. If the file is present, the function returns
{:ok, <file_contents>}, >}; otherwise, it returns an error, upon which we will respond
with a 404 message.
We can test the preceding route by restarting our server again and making a request to the /static/
index.html path. But this time, let us use the web browser in order to render the HTML contents
properly. Here’s what you should see:
Figure 1.2 – Successful HTML response
Also, to make sure our 404 handler is working correctly, let’s make a browser request to /static/
bad.html, a file not present in our application’s priv directory. You should see a 404 message:
Figure 1.3 – Failed HTML response
Now, we have a web server that can respond with static HTML files. It’s time to see how we can go
about testing it.
Testing the web server with ExUnit
Testing the web server with ExUnit
Automated testing is a key part of any software, especially in a dynamic-typed language such as Elixir.
It is one of the catalysts for writing deterministic software while documenting the expected behaviors
of its components. Due to this reason, we will be making an effort to test everything we build in this
book, including the Cowboy-powered web application we have built in this chapter.
In order to test our web application, we first need to be able to run our application on a different port in
the test environment. This is to ensure that other /static/bad.html environments do not interfere
with our tests. We also can use an application-level configuration to set a port on which the Cowboy
server listens to all the requests. This will allow us to separate the test port from the development port.
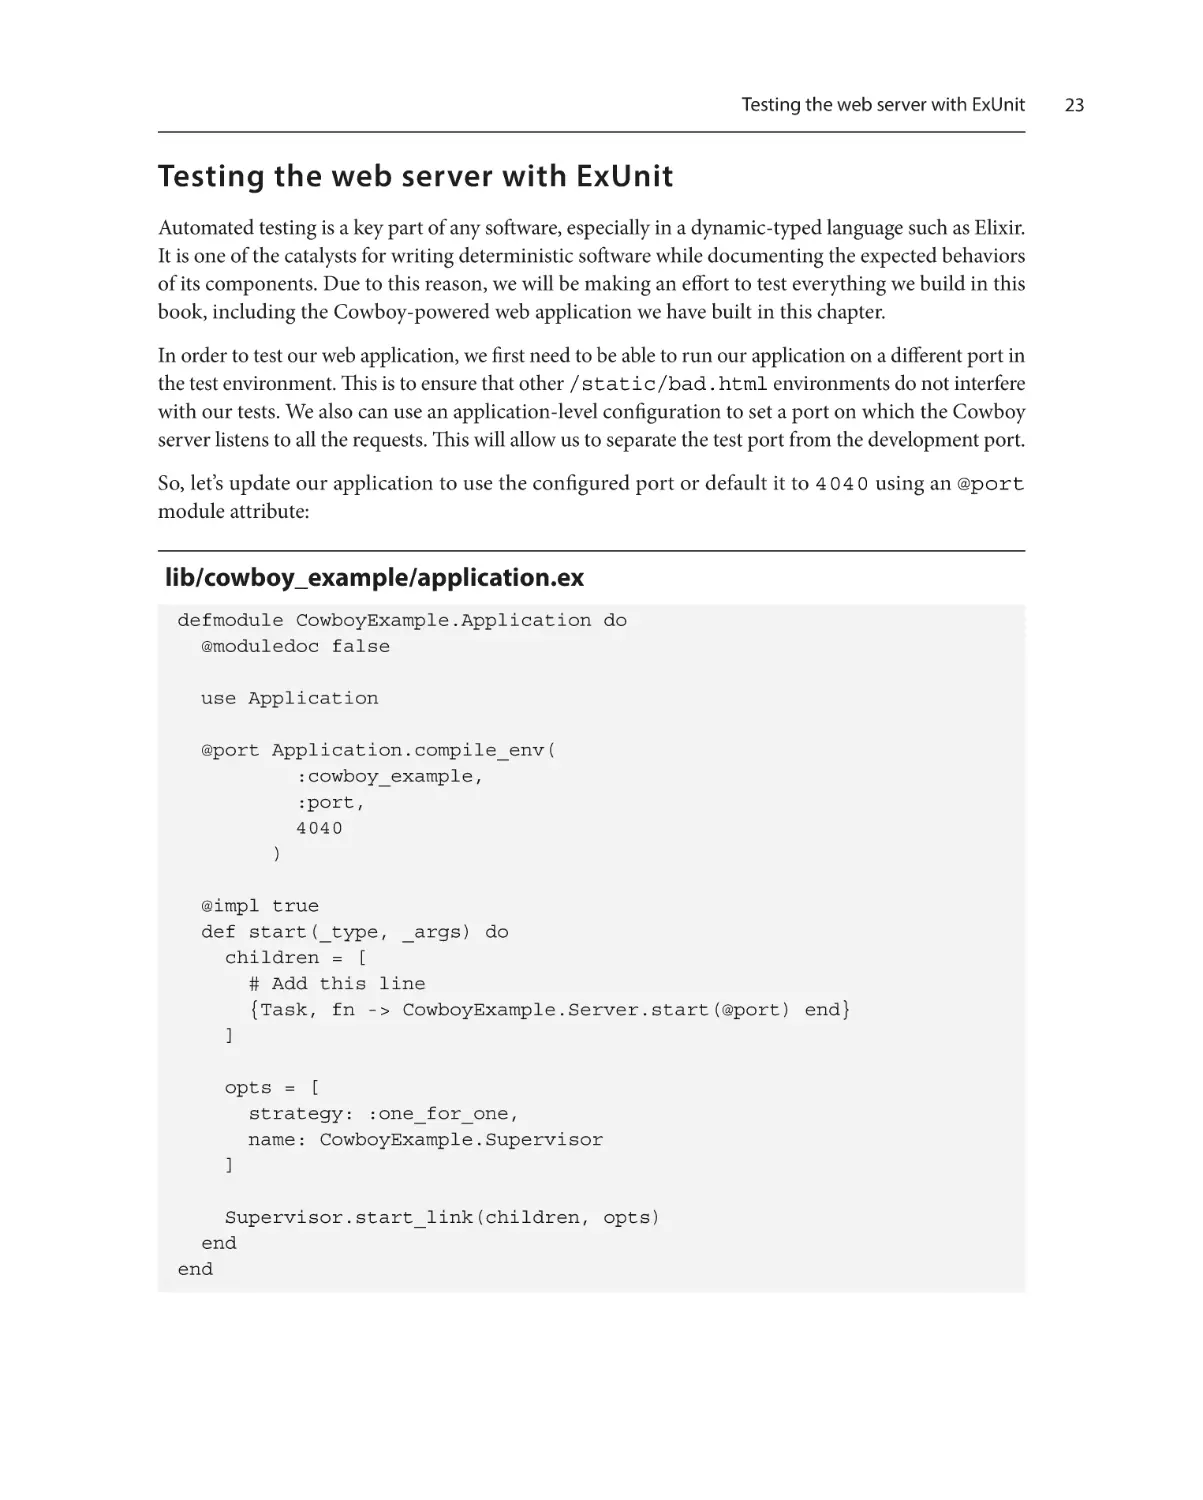
So, let’s update our application to use the configured port or default it to 4040 using an @port
module attribute:
lib/cowboy_example/application.ex
defmodule CowboyExample.Application do
@moduledoc false
use Application
@port Application.compile_env(
:cowboy_example,
:port,
4040
)
@impl true
def start(_type, _args) do
children = [
# Add this line
{Task, fn -> CowboyExample.Server.start(@port) end}
]
opts = [
strategy: :one_for_one,
name: CowboyExample.Supervisor
]
Supervisor.start_link(children, opts)
end
end
23
24
Introducing the Cowboy Web Server
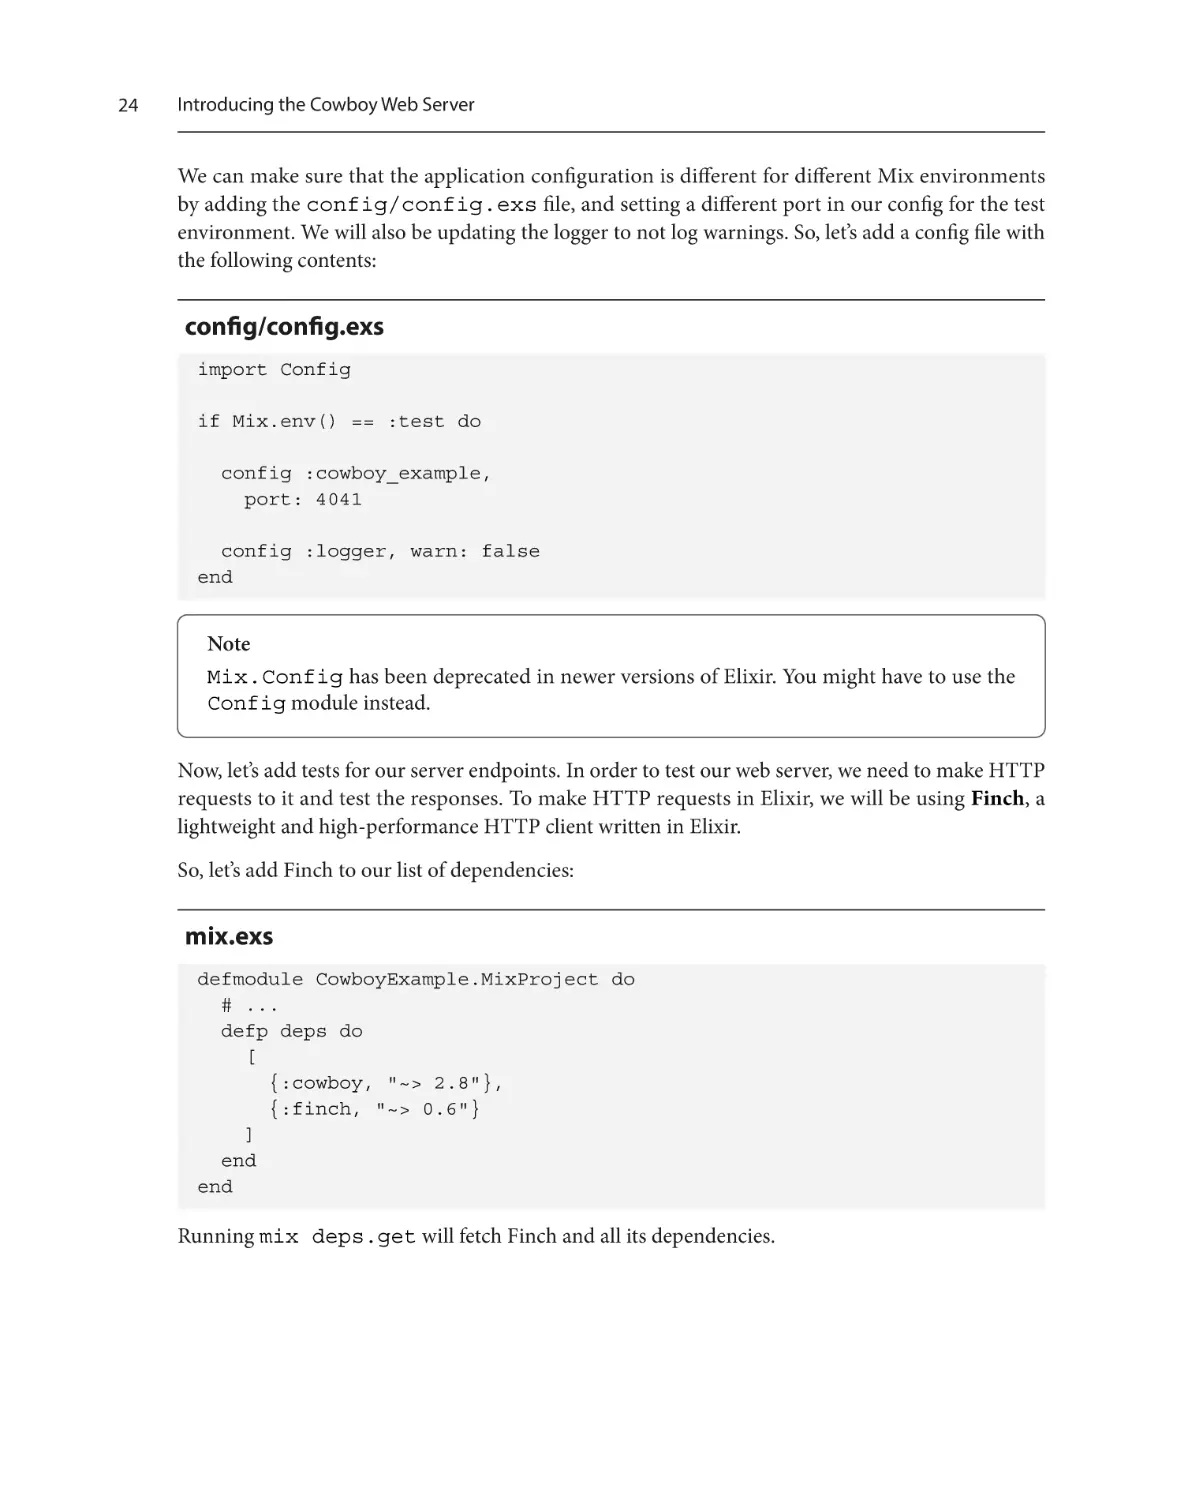
We can make sure that the application configuration is different for different Mix environments
by adding the config/config.exs file, and setting a different port in our config for the test
environment. We will also be updating the logger to not log warnings. So, let’s add a config file with
the following contents:
config/config.exs
import Config
if Mix.env() == :test do
config :cowboy_example,
port: 4041
config :logger, warn: false
end
Note
Mix.Config has been deprecated in newer versions of Elixir. You might have to use the
Config module instead.
Now, let’s add tests for our server endpoints. In order to test our web server, we need to make HTTP
requests to it and test the responses. To make HTTP requests in Elixir, we will be using Finch, a
lightweight and high-performance HTTP client written in Elixir.
So, let’s add Finch to our list of dependencies:
mix.exs
defmodule CowboyExample.MixProject do
# ...
defp deps do
[
{:cowboy, "~> 2.8"},
{:finch, "~> 0.6"}
]
end
end
Running mix deps.get will fetch Finch and all its dependencies.
Testing the web server with ExUnit
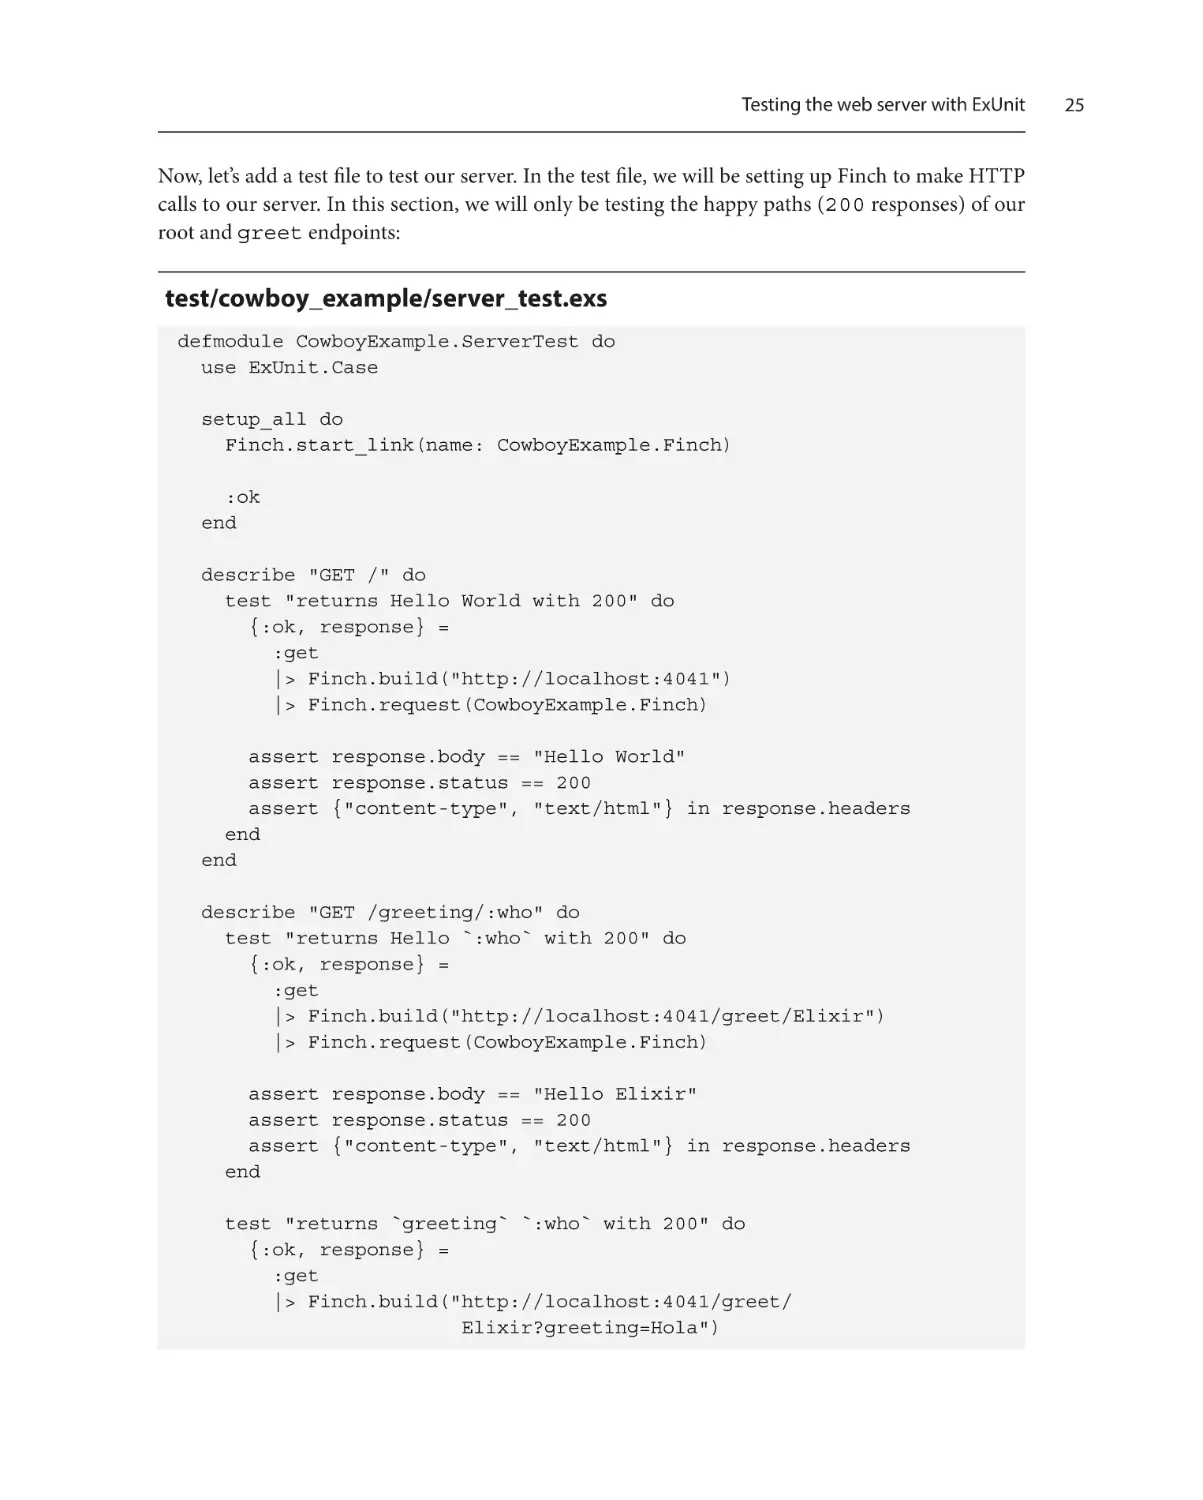
Now, let’s add a test file to test our server. In the test file, we will be setting up Finch to make HTTP
calls to our server. In this section, we will only be testing the happy paths (200 responses) of our
root and greet endpoints:
test/cowboy_example/server_test.exs
defmodule CowboyExample.ServerTest do
use ExUnit.Case
setup_all do
Finch.start_link(name: CowboyExample.Finch)
:ok
end
describe "GET /" do
test "returns Hello World with 200" do
{:ok, response} =
:get
|> Finch.build("http://localhost:4041")
|> Finch.request(CowboyExample.Finch)
assert response.body == "Hello World"
assert response.status == 200
assert {"content-type", "text/html"} in response.headers
end
end
describe "GET /greeting/:who" do
test "returns Hello `:who` with 200" do
{:ok, response} =
:get
|> Finch.build("http://localhost:4041/greet/Elixir")
|> Finch.request(CowboyExample.Finch)
assert response.body == "Hello Elixir"
assert response.status == 200
assert {"content-type", "text/html"} in response.headers
end
test "returns `greeting` `:who` with 200" do
{:ok, response} =
:get
|> Finch.build("http://localhost:4041/greet/
Elixir?greeting=Hola")
25
26
Introducing the Cowboy Web Server
|> Finch.request(CowboyExample.Finch)
assert response.body == "Hola Elixir"
assert response.status == 200
assert {"content-type", "text/html"} in response.headers
end
end
end
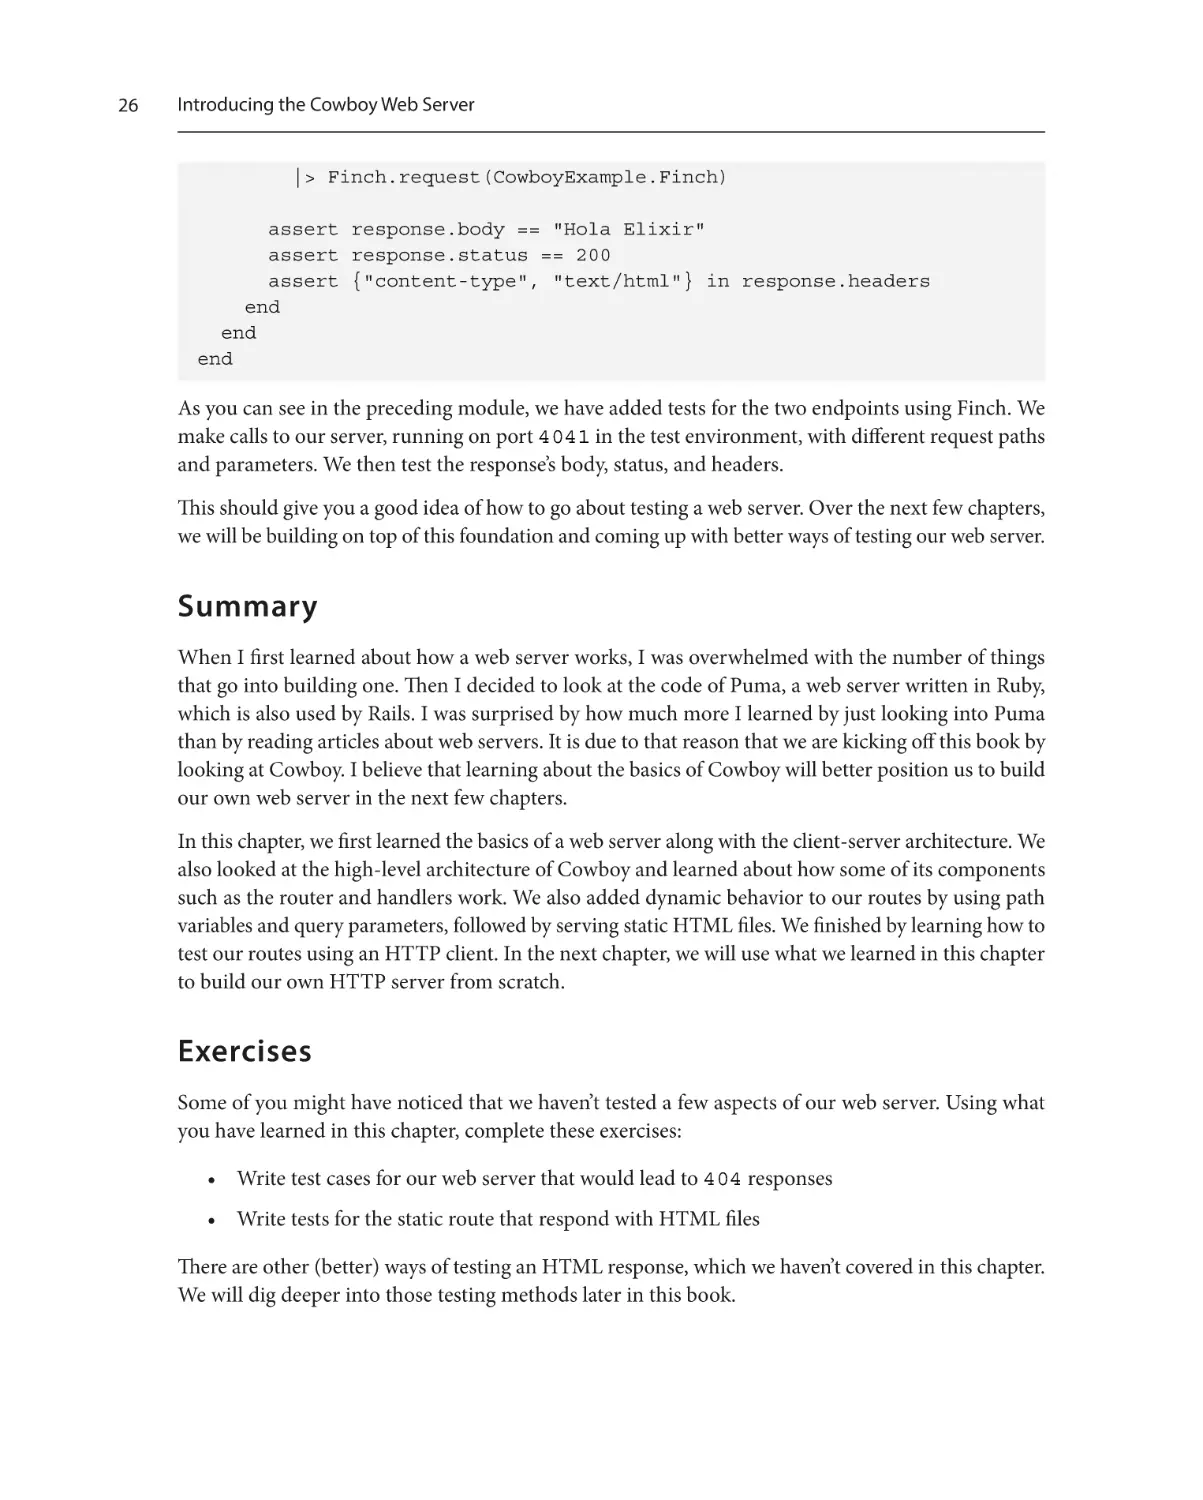
As you can see in the preceding module, we have added tests for the two endpoints using Finch. We
make calls to our server, running on port 4041 in the test environment, with different request paths
and parameters. We then test the response’s body, status, and headers.
This should give you a good idea of how to go about testing a web server. Over the next few chapters,
we will be building on top of this foundation and coming up with better ways of testing our web server.
Summary
When I first learned about how a web server works, I was overwhelmed with the number of things
that go into building one. Then I decided to look at the code of Puma, a web server written in Ruby,
which is also used by Rails. I was surprised by how much more I learned by just looking into Puma
than by reading articles about web servers. It is due to that reason that we are kicking off this book by
looking at Cowboy. I believe that learning about the basics of Cowboy will better position us to build
our own web server in the next few chapters.
In this chapter, we first learned the basics of a web server along with the client-server architecture. We
also looked at the high-level architecture of Cowboy and learned about how some of its components
such as the router and handlers work. We also added dynamic behavior to our routes by using path
variables and query parameters, followed by serving static HTML files. We finished by learning how to
test our routes using an HTTP client. In the next chapter, we will use what we learned in this chapter
to build our own HTTP server from scratch.
Exercises
Some of you might have noticed that we haven’t tested a few aspects of our web server. Using what
you have learned in this chapter, complete these exercises:
• Write test cases for our web server that would lead to 404 responses
• Write tests for the static route that respond with HTML files
There are other (better) ways of testing an HTML response, which we haven’t covered in this chapter.
We will dig deeper into those testing methods later in this book.
2
Building an HTTP
Server in Elixir
After learning the basics of a web server and taking a deeper look into Cowboy in the previous chapter,
in this chapter, we will see how to build an HTTP server in Elixir. In order to build the HTTP server,
we will leverage Erlang’s :gen_tcp module. Using that module, we will create a TCP/IP connection
between the client and the server, just like in Cowboy. We will then write a configurable web server
package that will allow other apps to provide their own handlers to respond with. We will also be
testing our HTTP server thoroughly using unit tests and a helper application. We will close up by
making our HTTP server concurrent.
After reading through this chapter, you will be able to build an HTTP server from scratch using Elixir
and have a better understanding of how TCP works to facilitate communication using sockets. We
will be covering the following topics:
• Listening over a TCP socket using :gen_tcp
• Responding over a TCP socket using :gen_tcp
• Writing a web server package in Elixir
• Leveraging application configuration to make the web server flexible
• Testing the newly written web server package using unit tests
• Testing the web server package using another application
• Adding concurrency to the web server
28
Building an HTTP Server in Elixir
Technical requirements
This chapter is very code-heavy since we will be implementing most of Cowboy’s features that we
learned about in Chapter 1. In order to get the most out of this chapter, it is recommended to code
along with every snippet and use Elixir 1.11.x and Erlang 23.2.x to get similar results. We will also be
using the cURL and Wget command-line utilities, so having both of those ready on your machine
will be useful.
As far as technical knowledge goes, I have tried to keep this chapter self-sufficient. However, basic
knowledge of Elixir, Erlang, supervision trees, and TCP/IP will help you understand this chapter faster.
In order to better understand some of the technical terms explained in this chapter, please read this
chapter after Chapter 1.
The code examples for this chapter can be found at https://github.com/PacktPublishing/
Build-Your-Own-Web-Framework-in-Elixir/tree/main/chapter_02
Listening over a TCP socket using :gen_tcp
Cowboy uses Ranch to create and manage a TCP connection, but in our web server, we will be using
the :gen_tcp module. This module allows two entities to communicate using TCP/IP sockets and
is shipped as a part of Erlang’s Open Telecom Platform (OTP).
We need to first listen on a TCP/IP port and accept requests on a TCP socket. Once the request is
processed and a response is sent, we also need to close the connection and socket.
Here are the functions we will be using:
• :gen_tcp.listen/2: Accepts a listening port and server options. Creates a listening socket
that listens on a given TCP/IP port.
• :gen_tcp.accept/2: Accepts a listening socket returned by :gen_tcp.listen/2
and a timeout, which defaults to infinity. This function creates another socket that represents
a connection between the server and the client. This socket is used to send a response to the
client from the server. Since web servers are long-running processes in Elixir, we will be using
the default timeout of infinity in this chapter.
• :gen_tcp.recv/2: Accepts a socket, length, and timeout. The socket here is the socket used
to respond to the client, which is the same as the socket returned by :gen_tcp.accept/2.
Length corresponds to the length of the bytes returned. We will be using 0 as our length,
which implies that all the bytes are returned. The timeout here also defaults to infinity, which
we will be using for our web server. This function responds with a packet tuple that contains
information corresponding to the request that can further be used for route-matching and
method validations.
Listening over a TCP socket using :gen_tcp
Let us start by creating a .exs file to run our experiments in a separate folder:
$ touch experiment_server.exs
This is where we will write our server using :gen_tcp and eventually extract relevant code into a
web server module that will be packaged with Goldcrest, our web framework.
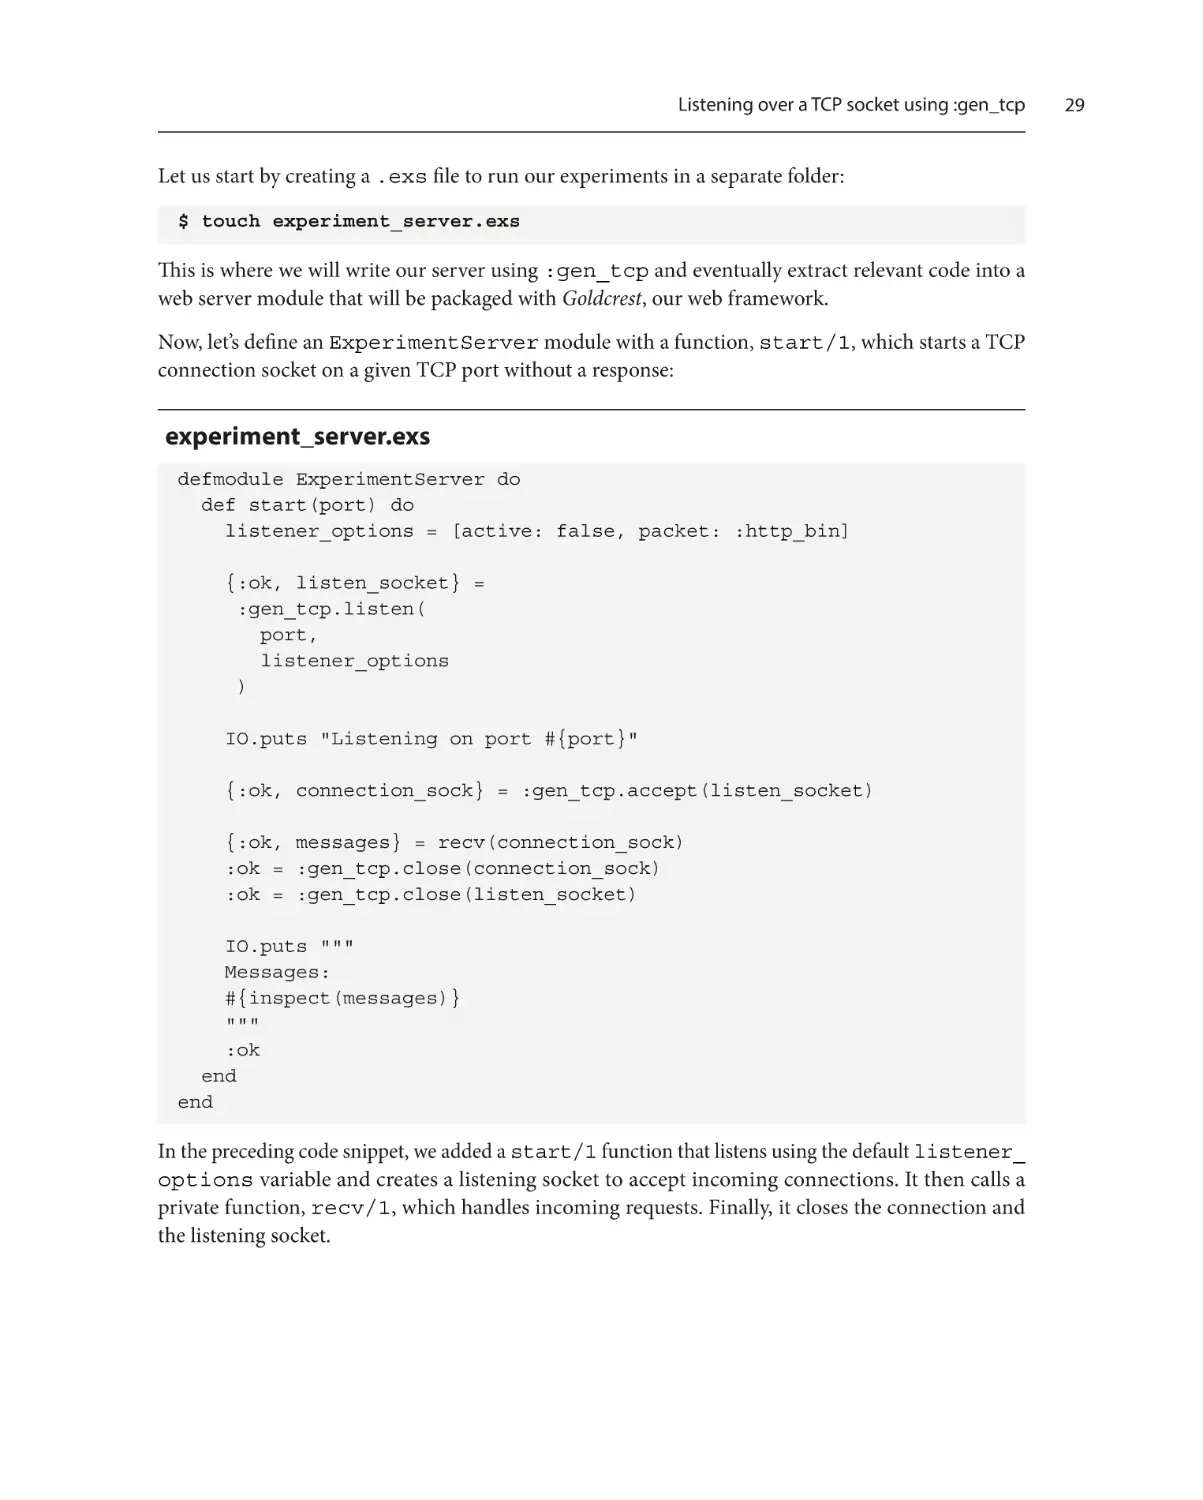
Now, let’s define an ExperimentServer module with a function, start/1, which starts a TCP
connection socket on a given TCP port without a response:
experiment_server.exs
defmodule ExperimentServer do
def start(port) do
listener_options = [active: false, packet: :http_bin]
{:ok, listen_socket} =
:gen_tcp.listen(
port,
listener_options
)
IO.puts "Listening on port #{port}"
{:ok, connection_sock} = :gen_tcp.accept(listen_socket)
{:ok, messages} = recv(connection_sock)
:ok = :gen_tcp.close(connection_sock)
:ok = :gen_tcp.close(listen_socket)
IO.puts """
Messages:
#{inspect(messages)}
"""
:ok
end
end
In the preceding code snippet, we added a start/1 function that listens using the default listener_
options variable and creates a listening socket to accept incoming connections. It then calls a
private function, recv/1, which handles incoming requests. Finally, it closes the connection and
the listening socket.
29
30
Building an HTTP Server in Elixir
Let’s now implement the recv/1 function:
experiment_server.exs
defmodule ExperimentServer do
# ..
defp recv(connection_sock, messages \\ []) do
case :gen_tcp.recv(connection_sock, 0) do
{:ok, message} ->
IO.puts """
Got message: #{inspect(message)}
"""
recv(connection_sock, [message | messages])
{:error, :closed} ->
IO.puts "Socket closed"
{:ok, messages}
end
end
end
ExperimentServer.start(4040)
To create a listening socket, we used :gen_tcp.listen/2 with [active: false, packet:
http_bin] listener options. Let’s have a look at this in more detail:
• active: false: Means packets will not be delivered as messages but will be retrieved by
calling :gen_tcp.recv/2
• packet: :http_bin: Sets the expected format of the packets as an HTTP binary packet,
which will further be used by :erlang.decode_packet/3 to decode the incoming packet
We then passed the listening socket to the :gen_tcp.accept/2 function, which created a connection
socket that we can further use with :gen_tcp.recv/2 to receive a message on the connection
socket. We also added a receive loop to keep receiving messages on that connection socket until
the connection is closed by the client. We did that by writing the recv/2 recursive function.
Once the socket is closed (for example, by receiving a Ctrl + C from the client side), all the messages
received on that connection are printed and both the listening socket and the connection socket
are closed.
Finally, to start the process, we call ExperimentServer.start/1 on port 4040.
Listening over a TCP socket using :gen_tcp
We can now run the preceding .exs file to start the TCP listener process:
$ elixir experiment_server.exs
Listening on port 4040
Now, without stopping the process, let’s send HTTP calls to that port using curl:
$ curl –v http://localhost:4040/
* Trying ::1:4040...
* connect to ::1 port 4040 failed: Connection refused
* Trying 127.0.0.1:4040...
* Connected to localhost (127.0.0.1) port 4040 (#0)
> GET / HTTP/1.1
> Host: localhost:4040
> User-Agent: curl/7.75.0
> Accept: */*
>
You will see logs in the session running our TCP process as well:
Listening on port 4040
Got message:
{:http_request, :GET, {:abs_path, "/"}, {1, 1}}
Got message:
{:http_header, 14, :Host, "Host", "localhost:4040"}
Got message:
{:http_header, 24, :"User-Agent", "User-Agent",
"curl/7.75.0"}
Got message:
{:http_header, 8, :Accept, "Accept", "*/*"}
Got message: :http_eoh
To close the socket, hit Ctrl + C from the session running the curl request.
This will close the connection socket and print the messages as received on the connection, as follows:
$ elixir experiment_server.exs
Listening on port 4040
Got message:
{:http_request, :GET, {:abs_path, "/"}, {1, 1}}
31
32
Building an HTTP Server in Elixir
Got message:
{:http_header, 14, :Host, "Host", "localhost:4040"}
Got message:
{:http_header, 24, :"User-Agent", "User-Agent",
"curl/7.75.0"}
Got message:
{:http_header, 8, :Accept, "Accept", "*/*"}
Got message: :http_eoh
Socket closed
Messages:
[
:http_eoh,
{:http_header, 8, :Accept, "Accept", "*/*"},
{:http_header, 24, :"User-Agent", "User-Agent",
"curl/7.75.0"},
{:http_header, 14, :Host, "Host", "localhost:4040"},
{:http_request, :GET, {:abs_path, "/"}, {1, 1}}
]
We now know how to use :gen_tcp to establish a TCP connection. Next, we will update the
ExperimentServer module to respond to incoming requests.
Responding over a TCP socket using :gen_tcp
Now that we know how to use :gen_tcp to initiate a TCP/IP connection, the next step is to
respond using that connection. In order to respond to a request, we will be using the :gen_tcp.
send/2 function.
The :gen_tcp.send/2 function allows us to send I/O data (generally string) on a connection
socket. It doesn’t support send timeout, so it only takes a connection socket and data that needs to be
sent. We can use the connection socket returned by the :gen_tcp.accept/1 call in the previous
section to send an HTTP response.
In order to send data over a connection socket, let’s restructure our ExperimentServer module:
experiment_server.exs
defmodule ExperimentServer do
require Logger
Responding over a TCP socket using :gen_tcp
def start(port) do
listener_options = [
active: false,
packet: :http_bin,
reuseaddr: true
]
{:ok, listen_socket} =
:gen_tcp.listen(
port,
listener_options
)
Logger.info("Listening on port #{port}")
listen(listen_socket)
:gen_tcp.close(listen_socket)
end
defp listen(listen_socket) do
{:ok, connection_sock} = :gen_tcp.accept(listen_socket)
{:ok, req} = :gen_tcp.recv(connection_sock, 0)
Logger.info("Got request: #{inspect req}")
respond(connection_sock)
listen(listen_socket)
end
defp respond(connection_sock) do
:gen_tcp.send(connection_sock, "Hello World")
Logger.info("Sent response")
:gen_tcp.close(connection_sock)
end
end
ExperimentServer.start(4040)
In the preceding code snippet, we added a new option to the :gen_tcp.listen/2 call, reuseaddr.
Using reuseaddr allows us to create a new listening socket even if the previously open socket isn’t
properly closed.
33
34
Building an HTTP Server in Elixir
We also added the listen/1 function in which we make a call to :gen_tcp.accept/1 to create
a connection socket. We further use that connection socket to send a "Hello World" response
to the client before closing it.
Now, let’s try to make a request to the server.
If you are using cURL to test the API, you might get the following response:
$ curl http://localhost:4040/
curl: (1) Received HTTP/0.9 when not allowed
So, I recommend using Wget for this specific request. Using Wget yields the expected results, as
shown here:
$ wget –qO- http://localhost:4040/
Hello World
As you can see from this, we have successfully sent a "Hello World" response from the HTTP
server. However, the response is using HTTP version 0.9, which isn’t supported by many clients anymore.
cURL and HTTP/0.9
By default, using send/2 sends an HTTP response using HTTP/0.9.
However, cURL doesn’t support HTTP versions less than 1.0. Therefore, in order to test the
previous API call, we used Wget. The best way forward here isn’t using Wget but updating our
server to send an HTTP 1.X response.
Let us update the ExperimentServer module to send an HTTP response with version 1.1,
along with some headers and statuses. We will follow the HTTP response format we learned
about in the first chapter.
So, let’s update ExperimentServer to send a response using HTTP version 1.1:
experiment_server.exs
defmodule ExperimentServer do
# ..
defp respond(connection_sock) do
# Send a proper HTTP/1.1 response with status
response = http_1_1_response("Hello World", 200)
:gen_tcp.send(connection_sock, response)
Logger.info("Sent response")
:gen_tcp.close(connection_sock)
end
Responding over a TCP socket using :gen_tcp
# Converts a body to HTTP/1.1 response string
defp http_1_1_response(body, status) do
"""
HTTP/1.1 #{status}\r
Content-Type: text/html\r
Content-Length: #{byte_size(body)}\r
\r
#{body}
"""
end
end
ExperimentServer.start(4040)
Now that we are using HTTP version 1.1, we will be able to use curl to test our HTTP server:
$ curl http://localhost:4040/
Hello World%
We have a web server that only responds with Hello World. Now, let’s update our web server to
respond with Hello World to only a specific route, and with a 404 message to all other routes:
experiment_server.exs
defmodule ExperimentServer do
# ..
defp listen(listen_socket) do
{:ok, connection_sock} = :gen_tcp.accept(listen_socket)
{:ok, req} = :gen_tcp.recv(connection_sock, 0)
{_http_req, method, {_type, path}, _v} = req
Logger.info("Got request: #{inspect req}")
respond(connection_sock, {method, path})
listen(listen_socket)
end
defp respond(connection_sock, route) do
response = get_response(route)
:gen_tcp.send(connection_sock, response)
Logger.info("Sent response")
35
36
Building an HTTP Server in Elixir
:gen_tcp.close(connection_sock)
end
defp get_response(route) do
{body, status} = body_and_status_for(route)
http_1_1_response(body, status)
end
defp body_and_status_for({:GET, "/hello"}) do
{"Hello World", 200}
end
defp body_and_status_for(_), do: {"Not Found", 404}
defp http_1_1_response(body, status) do
"""
HTTP/1.1 #{status}\r
Content-Type: text/html\r
Content-Length: #{byte_size(body)}\r
\r
#{body}
"""
end
end
ExperimentServer.start(4040)
This will respond with 404 to any other path but /hello, for which it will respond with Hello
World.
Let’s try making a request to the /hello path. We should expect to get Hello World, but instead,
we get a 404 response. This is because we’re using exact matches, and our routes need to match the
incoming request’s path exactly. There are better ways of matching a request’s path, which we will cover.
Now that we have a working web server module written using :gen_tcp, it’s time to use that code
to write our own web server package, which can be used with our web framework.
Writing an HTTP server package
Let’s create a new goldcrest folder for all Goldcrest-related code, examples, and packages. Inside
goldcrest, we can create our web server package by running the following command:
$ mix new goldcrest_http_server
Writing an HTTP server package
Let’s now define the Goldcrest.HTTPServer module, which will be our main web server module:
lib/goldcrest_http_server.ex
defmodule Goldcrest.HTTPServer do
@moduledoc """
Starts a HTTP server on the given port
This server also logs all requests
"""
require Logger
@server_options [
active: false,
packet: :http_bin,
reuseaddr: true
]
def start(port) do
case :gen_tcp.listen(port, @server_options) do
{:ok, sock} ->
Logger.info("Started a webserver on port #{port}")
listen(sock)
{:error, error} ->
Logger.error("Cannot start server on port #{port}:
#{error}")
end
end
def listen(sock) do
{:ok, req} = :gen_tcp.accept(sock)
{
:ok,
{_http_req, method, {_type, path}, _v}
} = :gen_tcp.recv(req, 0)
Logger.info("Received HTTP request #{method} at
#{path}")
respond(req, method, path)
37
38
Building an HTTP Server in Elixir
listen(sock)
end
defp respond(req, method, path) do
# This part is different for different applications
:gen_tcp.send(req, resp_string)
Logger.info("Response sent: \n#{resp_string}")
:gen_tcp.close(req)
end
end
Most of the code in the preceding snippet was taken from the ExperimentServer module written
earlier in this chapter. We have purposefully left the respond/3 function incomplete because we
know that apps will respond differently to different requests. In order to make that part of the server
configurable, we can delegate getting a response to a responder module that can be configured at the
application level.
We can do that by defining a responder/0 function that returns the configured responder module
and makes a call to a resp/3 function in the configured module:
lib/goldcrest_http_server.ex
defmodule Goldcrest.HTTPServer do
# ..
def respond(req, method, path) do
%Goldcrest.HTTPResponse{} = resp =
responder().resp(req, method, path)
resp_string = Goldcrest.HTTPResponse.to_string(resp)
:gen_tcp.send(req, resp_string)
Logger.info("Response sent: \n#{resp_string}")
:gen_tcp.close(req)
end
defp responder do
Application.get_env(:goldcrest_http_server, :responder)
end
end
Defining an HTTP response struct
Adding these functions (respond/3 and responder/0) allows us to delegate the response
generation to a module outside of this server.
You might have also noticed that I am pattern matching on a new struct, Goldcrest.HTTPResponse.
Let’s define that next.
Defining an HTTP response struct
It’s always a good idea to define a struct to represent the structure of data you are expecting to work
with. In this package, we will be working with HTTP responses, as our responder modules will be
responding with them, and we will also be translating them into stringified documents to respond
with. So, let’s go ahead and define the struct module:
lib/goldcrest_http_response.ex
defmodule Goldcrest.HTTPResponse do
defstruct headers: %{}, body: "", status: 200
@type t :: %__MODULE__{
headers: map(),
body: String.t(),
status: integer()
}
@http_version 1.1
def to_string(
%__MODULE__{
status: status, body: body
} = http_response
) do
"""
HTTP/#{@http_version} #{status}\r
#{Enum.join(headers_string(http_response), "\r\n")}
\r
#{body}
"""
end
defp headers_string(http_response) do
http_response
|> headers
|> Enum.map(fn {key, value} ->
"#{key}: #{value}"
39
40
Building an HTTP Server in Elixir
end)
end
defp headers(%__MODULE__{body: body, headers: headers}) do
headers = prep_headers(headers)
body
|> default_headers()
|> Map.merge(headers)
end
defp default_headers(body) do
%{
"content-type" => "text/html",
"content-length" => byte_size(body)
}
end
defp prep_headers(headers) do
headers
|> Enum.map(fn {key, value} ->
{String.downcase(key), value}
end)
|> Enum.into(%{})
end
end
The module defined in the preceding code snippet defines a struct with the following fields:
• headers: Defaults to an empty map type. We chose the map type here because HTTP headers
are generally unique and need to have unique keys.
• body: Defaults to an empty string. Represents the body of a response.
• status: Defaults to 200 (success).
On top of defining the struct, we have also defined a helper function that converts an HTTPResponse
struct to the string version of the document, which can be used to respond with. We are also lowercasing all our header keys because HTTP headers are case-insensitive, and lower-casing them before
validating is a quick way to ensure that they are unique.
Now, we can use this module in our HTTP server to generate response documents.
Validating whether a responder is configured
Validating whether a responder is configured
Next, we want to validate whether an HTTPServer module is properly configured to use a responder
since it is a requirement to use the HTTPServer module. We can do this by checking for the presence
of a responder configuration at the time of starting the server. So, in the start/1 function, let’s
validate the presence of a responder before creating a listening socket:
lib/goldcrest_http_server.ex
defmodule Goldcrest.HTTPServer do
# ..
def start(port) do
ensure_configured!()
case :gen_tcp.listen(port, @server_options) do
{:ok, sock} ->
Logger.info("Started a webserver on port #{port}")
listen(sock)
{:error, error} ->
Logger.error("Cannot start server on port #{port}:
#{error}")
end
end
defp ensure_configured! do
case responder() do
nil -> raise "No `responder` configured for
`goldcrest_http_server`"
_responder -> :ok
end
end
defp responder do
Application.get_env(:goldcrest_http_server, :responder)
end
# ..
end
Now, if we try to start the server without giving it a responder in the application’s configuration, it
will raise a RuntimeError.
41
42
Building an HTTP Server in Elixir
Creating responder behavior
Since we expect the applications using this HTTP server to define a responder module, it is a good
idea to define a behaviour module for it.
Behaviors in Elixir
In Elixir, a behavior is a way of defining a set of functions that a module should implement to
obey that behavior.
We use typespecs to define a behavior using the @callback module attribute.
On the implementation module, we can register a behavior using the @behaviour module
attribute. This will allow the compiler to warn us if a function that was expected to be implemented
wasn’t implemented.
Behaviors are a great way to define a shared API for a set of modules by defining a set of function
specifications and having the ability to check whether those functions were actually implemented.
Let’s now define a behaviour module for a responder. We know that a responder must implement
the resp/3 function, which takes a request, an HTTP method, and a path as a string to return an
HTTPResponse struct. We can also define a method() type for all the HTTP methods, to better
define the function specifications:
lib/goldcrest_http_server/responder.ex
defmodule Goldcrest.HTTPServer.Responder do
@type method :: :GET | :POST | :PUT | :PATCH | :DELETE
@callback resp(term(), method(), string()) ::
Goldcrest.HTTPResponse.t()
end
Another useful module here would be a set of helper functions that help us write the resp/3 function.
In this case, those helper functions could enable us to create and update an HTTPResponse struct.
Doing this will keep the code in a responder implementation easier to read and maintain.
So, let’s define a ResponderHelper module that can be imported into a responder
implementation module:
lib/goldcrest_http_server/responder_helpers.ex
defmodule Goldcrest.HTTPServer.ResponderHelpers do
def http_response(body) do
%Goldcrest.HTTPResponse{body: body}
end
Testing the HTTP server
def put_header(%{headers: headers} = resp, key, value) do
headers = Map.merge(headers, %{String.downcase(key) =>
value})
%{resp | headers: headers}
end
def put_status(resp, status) do
%{resp | status: status}
end
end
In the preceding code snippet, we define three functions:
• http_response/1: This function creates a new HTTP response struct with the given body
(as a function argument).
• put_header/3: This function updates an HTTP response with a new set of headers, ensuring
they’re unique. This is done by downcasing the header key and calling Map.merge/2 on the
headers. This ensures there’s only one value corresponding to a key.
• put_status/2: This function updates the status of the HTTP response struct with the
given status.
The preceding three functions are meant to provide a simple interface to build and update an HTTP
response struct, which is the expected result of a responder module. This takes away the need to
manipulate the HTTPResponse struct inside a responder module, hence making its implementation
internal to the server. In order to ensure our HTTP server is functional, we will be learning how to
test it in the next section.
Testing the HTTP server
Now that we have all the ingredients to write an HTTP server, it’s time to write some tests. I will only
cover some necessary tests in this chapter. If you are curious about which other tests we could write, feel
free to check out the code for goldcrest_http_server, linked in the book’s GitHub repository.
In order to test our HTTP server, we will first need to make two changes to the mix.exs file, as follows:
• Add Finch to the list of dependencies: This allows us to make HTTP calls to our server’s endpoints.
• Update elixirc_paths: This updates the list of paths that need to be compiled as part of the
project. Moreover, by defining those paths based on the Mix environment, Mix allows us to compile
support modules in the test environment, one of which would be a TestResponder module.
43
44
Building an HTTP Server in Elixir
Let’s go ahead and make these changes:
mix.exs
defmoduleGoldcrestHttpServer.MixProject do
use Mix.Project
# ..
def project do
[
# ..
elixirc_paths: elixirc_paths(Mix.env()),
deps: deps()
]
end
# ..
defp elixirc_paths(:test), do: ["lib", "test/support"]
defp elixirc_paths(_), do: ["lib"]
# ..
end
Now that we have added the test/support folder to the elixirc path for the test environment,
we can define the TestResponder module in test/support/test_responder.ex. We
can use this responder to test API calls.
In this responder module, we will define a route for /hello, which responds with Hello World
with a 200 status and has the ability to respond with 404 for any other requests:
test/support/test_responder.exs
defmodule Goldcrest.TestResponder do
import Goldcrest.HTTPServer.ResponderHelpers
@behaviour Goldcrest.HTTPServer.Responder
@impl true
def resp(_req, method, path) do
cond do
method == :GET && path == "/hello" ->
"Hello World"
|> http_response()
|> put_header("Content-type", "text/html")
|> put_status(200)
Testing the HTTP server
true ->
"Not Found"
|> http_response()
|> put_header("Content-type", "text/html")
|> put_status(404)
end
end
end
Note how in the preceding code snippet, ResponderHelpers make building and modifying the
HTTPResponse struct more ergonomic.
Now, we can use Finch and TestResponder to test our HTTP server:
test/goldcrest_http_server_test.exs
defmodule Goldcres.HTTPServerTest do
use ExUnit.Case, async: false
setup_all do
Finch.start_link(name: Goldcrest.Finch)
:ok
end
describe "start/2" do
setup tags do
responder = tags[:responder]
old_responder =
Application.get_env(
:goldcrest_http_server,
:responder
)
Application.put_env(
:goldcrest_http_server,
:responder,
responder
)
on_exit(fn ->
Application.put_env(
:goldcrest_http_server,
:responder,
45
46
Building an HTTP Server in Elixir
old_responder
)
end)
:ok
end
@tag responder: nil
test "raises when responder not configured" do
assert_raise(
RuntimeError,
"No `responder` configured for
`goldcrest_http_server`",
fn -> Goldcrest.HTTPServer.start(4041) end
)
end
@tag responder: Goldcrest.TestResponder
test "starts a server when responder is configured" do
Task.start_link(fn ->
Goldcrest.HTTPServer.start(4041)
end)
{:ok, response} =
:get
|> Finch.build("http://localhost:4041/hello")
|> Finch.request(Goldcrest.Finch)
assert response.body == "Hello World"
assert response.status == 200
assert {"content-type", "text/html"} in
response.headers
{:ok, response} =
:get
|> Finch.build("http://localhost:4041/bad")
|> Finch.request(Goldcrest.Finch)
assert response.body == "Not Found"
assert response.status == 404
assert {"content-type", "text/html"} in
response.headers
end
Running the HTTP server with a sample application
end
end
In the preceding module, we have tested the following two use cases:
• When no responder is configured: In this case, we expect a RuntimeError saying a responder
configuration is required to start the server
• When TestResponder is configured: In this case, we expect the /hello path to respond
with a 200 status and any other request to respond with 404
We have used a setup block that sets a responder configuration. We then use ExUnit tags to pass a
responder corresponding to each test.
This test can be run using the following command:
$ mix test
Assuming both the test cases pass, it’s time to test our HTTP server with a sample application.
Running the HTTP server with a sample application
In order to test the HTTP server package with a sample application, we can create a new application
with the --sup option so that we can start the HTTP server with the application. This can be done
by running the following command in the root of the HTTP server package itself:
$ mix new test_goldcrest_http_server --sup
Next, we can add goldcrest_http_server to mix dependencies using relative paths. This is
a great way to test a package since you can be sure to always use the current version of the package
while running your tests:
mix.exs
defmodule TestGoldcrestHTTPServer.MixProject do
# ..
defp deps do
[
{:goldcrest_http_server, path:
"../goldcrest_http_server"}
]
end
end
47
48
Building an HTTP Server in Elixir
Next up is defining a Responder. We can define a resp/3 function just as with the TestResponder
module and define the same two routes:
lib/test_goldcrest_http_server/responder.exs
defmodule TestGoldcrestHTTPServer.Responder do
import Goldcrest.HTTPServer.ResponderHelpers
def resp(_req, method, path) do
cond do
method == :GET && path == "/hello" ->
http_response("Hello World")
|> put_header("Content-type", "text/html")
|> put_status(200)
true ->
http_response("Not Found")
|> put_header("Content-type", "text/html")
|> put_status(404)
end
end
end
We will also need to configure the responder to be the Responder module we created in the last
code snippet:
config.exs
import Config
config :goldcrest_http_server,
responder: TestGoldcrestHTTPServer.Responder
In order to add the HTTP server to a supervision tree, it’s best to define a child_spec/1 function.
This allows us to add HTTPServer as a long-running process to the application’s supervision tree:
lib/goldcrest_http_server.ex
defmodule Goldcrest.HTTPServer do
# ..
def child_spec(init_args) do
%{
id: __MODULE__,
start: {__MODULE__, :start, init_args}
}
Running the HTTP server with a sample application
end
end
The child_spec/1 function in the previous snippet defines a way to start the HTTPServer
module when it’s added to a supervision tree, by just calling the Goldcrest.HTTPServer.
start/1 function.
Now, we can add the HTTP server to the sample application’s supervision tree with port 4001:
lib/test_goldcrest_http_server/application.ex
defmodule TestGoldcrestHTTPServer.Application do
@moduledoc false
use Application
@port 4001
@impl true
def start(_type, _args) do
children = [
{Goldcrest.HTTPServer, [@port]}
]
opts = [
strategy: :one_for_one,
name: TestGoldcrestHTTPServer.Supervisor
]
Supervisor.start_link(children, opts)
end
end
Now, if we start the application, it will also start the HTTP server with the routes defined in the
responder. We can start the application using the following command:
$ mix run --no-halt
We can confirm that the HTTP server is running by hitting the /hello endpoint and confirming
that we get a Hello World response:
Figure 2.1 – Successful HTML response in a browser
49
50
Building an HTTP Server in Elixir
We can also confirm to see that other routes produce a 404 response:
Figure 2.2 – Not Found HTML response in a browser
Now that our server is properly responding to HTTP requests with proper HTML documents, it’s
time to learn how and why to make it concurrent.
Adding concurrency to the server
In this section, we will learn how to add concurrency to the HTTP server. First, let us see why we
need to add concurrency to our server. In order to understand that better, let’s add another route to
the Responder module, which performs a long-running operation. We can simulate that here by
just sleeping for five seconds:
lib/test_goldcrest_http_server/responder.exs
defmodule TestGoldcrestHTTPServer.Responder do
import Goldcrest.HTTPServer.ResponderHelpers
def resp(_req, method, path) do
cond do
# ..
method == :GET && path == "/long-operation" ->
# sleep for 5 seconds
:timer.sleep(5000)
http_response("Hello World LONG LONG")
|> put_header("Content-type", "text/html")
|> put_status(200)
true ->
http_response("Not Found")
|> put_header("Content-type", "text/html")
|> put_status(404)
end
end
end
Adding concurrency to the server
Upon restarting the application, if we try to first hit the /long-operation endpoint promptly
followed by the /hello endpoint, we will see that even though /hello isn’t a costly operation, it
takes a while to respond.
This is because our server is processing all of the requests sequentially. This means that when it
received the /hello request, it was still waiting to process the first /long-operation request.
This isn’t a very scalable design as a single long-running endpoint could potentially slow down the
entire application:
Figure 2.3 – Failed long response in a browser
We can fix this problem by using Elixir’s concurrency model. By spawning a new process every time
the server processes a request, we can ensure that even if one request is still being processed, another
process can pick up a new request. We can do this by spawning a new process when calling the
respond/3 function. This would also require us to make the respond/3 function public so that
it can be called with the spawn/3 command:
lib/goldcrest_http_server.ex
defmodule Goldcrest.HTTPServer do
# ..
def listen(sock) do
{:ok, req} = :gen_tcp.accept(sock)
{
:ok,
{_http_req, method, {_type, path}, _v}
} = :gen_tcp.recv(req, 0)
Logger.info("Received HTTP request #{method} at
#{path}")
spawn(__MODULE__, :respond, [req, method, path])
listen(sock)
end
end
51
52
Building an HTTP Server in Elixir
Now, if you try to follow the same process as earlier of quickly following up a request to the /longoperation endpoint with /hello, you will see that even though the first request hasn’t finished
responding, the second request is completed:
Figure 2.4 – Successful long response in a browser
The ease with which this can be achieved and managed on the BEAM virtual machine is one of the
main reasons why the Erlang and Elixir ecosystems make great candidates for web server development.
Now that we have tried our HTTP server with a web application, let’s learn how to run it in detached
mode similar to Phoenix.
Bonus – starting a detached HTTP server
Running a detached server is quite useful, especially in scenarios where you need to run a detached
console for debugging purposes while the app is running. We can confirm this by running an iex
console with the following command:
$ iex -S mix
[info] Started a webserver on port 4001
Running the iex command should print the preceding info log. Even though you started an iex
shell, you won’t have access to the shell or any other process in the supervision tree. In order to fix
this, we can use Task.start_link/3 and run the HTTP server process as a Task.
Let’s update the child_spec/1 function in the HTTP server to start a Task:
lib/goldcrest_http_server.ex
defmodule Goldcrest.HTTPServer do
# ..
def child_spec(init_args) do
%{
id: __MODULE__,
start: {
Task,
:start_link,
[fn -> apply(__MODULE__, :start, init_args) end]
}
Summary
}
end
# ..
end
Now, running the iex shell again should start the server without stopping you from accessing the shell:
$ iex –S mix
Interactive Elixir (1.11.3) - press Ctrl+C to exit (type h() ENTER for
help)
[info] Started a webserver on port 4001
iex(1)>
Summary
In this chapter, we covered the basics of the :gen_tcp module. We saw how :gen_tcp allows us
to create a connection using a TCP/IP socket, and how we can use it to write our own HTTP server.
We then wrapped the HTTP server into a package while making the implementation for its response
configurable using an application environment.
Later, we learned how to test our HTTP server using the Finch HTTP client, and made the server
concurrent by spinning up a new process for every HTTP request, similar to what Cowboy does. We also
updated our HTTP server to have the ability to run in detached mode just like Phoenix and Cowboy.
Now that we have our own HTTP server up and running, we have to make it easier to define routes
and responses. For a complex web application, matching the routes the way we did in Responder
modules wouldn’t be very helpful. Luckily, the Elixir community has a Plug package that helps us with
the entire request-response data manipulation process; we will be covering this in the next chapter.
Exercise
To solidify what you’ve learned in this chapter, you can attempt to write tests for the test_goldcrest_
http_server sample app.
53
Part 2:
Router, Controller, and View
In this part, you will learn how to build the core part of the web framework, Goldcrest, which includes
the router, controller, and view.
This part includes the following chapters:
• Chapter 3, Defining Web Application Specifications Using Plug
• Chapter 4, Working with Controllers
• Chapter 5, Adding Controller Plugs and Action Fallback
• Chapter 6, Working with HTML and Embedded Elixir
• Chapter 7, Working with Views
3
Defining Web Application
Specifications Using Plug
In the previous chapters, we took a deep dive into Cowboy to learn about some of its fundamentals.
Then, using that knowledge, we built a web server using :gen_tcp. However, in both those chapters,
we didn’t deal with any sort of complex route matching or other request formats. We will now learn how
to accomplish that using the Plug package. In this chapter, we will learn how Plug works, understand
some of its main components, and how we can use them to make our web server more usable.
By the end of this chapter, you will know the ins and outs of the Plug package and how Plug enables
us to use Cowboy efficiently. You will also learn how to make Plug work with the HTTP server we
built in the previous chapter.
In this chapter, we will cover the following topics:
• Philosophy of Plug
• Components of Plug
• The Plug.Conn struct
• What happens when you send a response using Plug?
• Function plugs and module plugs
• Using Plug to write a router for our requests
• Using the Plug adapter for Cowboy
• Creating a Plug adapter for an HTTP server
• Using Plug along with the HTTP server we built in Chapter 2
• Simplifying the interface for calling our new Plug adapter
58
Defining Web Application Specifications Using Plug
Technical requirements
This chapter contains a lot of code snippets that are best understood by following along. Just like in
the previous chapters, we will use Elixir 1.12.x and Erlang 23.2.x. We will also be using cURL to test
our HTTP server and running multiple commands on the terminal to both run our server and test
it using cURL. So, a way to multiplex your terminal would be useful.
The code examples for this chapter can be found at https://github.com/PacktPublishing/
Build-Your-Own-Web-Framework-in-Elixir/tree/main/chapter_03
What is Plug?
Plug is an Elixir module that allows us to easily define the specifications of a web application. If you
are from the Ruby world, you can think of Plug as somewhat like Rack, which allows us to define
middleware to read and transform requests/responses in a web application.
Plug allows us to add middleware-like behavior by defining a set of composable operations on a
connection struct, Plug.Conn. This allows us to define behavior in the form of a plug, which can
transform the attributes of a Conn. Unlike in Rack, Conn contains information related to both the
request and the response. This, along with Elixir’s |> operator, allows us to define the entire requestresponse cycle in a single pipeline of composable operations:
Figure 3.1 – Plug life cycle
Representing the state of the connection with the Plug.
Conn struct
Plug uses the Plug.Conn struct to represent the state of a connection at a point in time. This includes
information related to the request, cookies, response, and status codes.
Representing the state of the connection with the Plug.Conn struct
This struct fits well into the philosophy of using plugs, which involves using a plug in a functional way
to transform the attributes of a Plug.Conn struct. This also means that a plug receives a Plug.
Conn with a state denoting that the response has already been set or that the connection was halted;
this plug ignores that connection.
Some of the other useful information that Plug.Conn tracks are as follows:
• req_headers: Represents the downcased version of request headers. This is super helpful
for operations such as authentication or caching.
• params: Denotes merged map parameters sent as path params and body params.
• cookies: Request and response cookies.
• status: Response status.
• assigns: A place to store user data and share it across plugs.
• private: Another way to share data across plugs. This is usually reserved for libraries and
frameworks that leverage plugs, such as Phoenix.
• adapter: This indicates how Plug.Conn will be used. This field is generally used by HTTP
servers to handle events such as sending a response or sending a file. Later in this chapter, we
will define an adapter for the HTTP server we created in Chapter 2.
The Plug.Conn module also provides us with helper functions to update the state of the Plug.
Conn struct:
• assign/3: Used to store a value corresponding to a key in a connection to update the assigns
map. The assigns map is used to pass information between plugs in a pipeline of plugs.
• halt/1: Sets the halted state for a Plug.Conn struct to true. This prevents any further
plugs from being called in the pipeline.
• send_resp/3: Sends a response with the given HTTP status and the body.
What happens when you send_resp/3?
When we call Plug.Conn.send_resp/3, Plug first checks the state of the Plug.Conn
struct. If the state is not set (nil), it raises an error, indicating that the state is nil, while if the
state is set to :sent (or anything else), it raises AlreadySentError. If the state is :set,
indicating that the connection is ready to be sent, it calls the send_resp/4 function of the
adapter module set in the Plug.Conn struct. In the case of the Plug.Cowboy adapter, the
response gets sent using the Cowboy web server. This function also sends a message to the
process that owns the connection, indicating that a response was sent. Finally, the function
returns a connection with the :sent state.
A very similar workflow occurs for other functions, including put_status/2, send_file/4,
send_chunked/2, and others.
59
60
Defining Web Application Specifications Using Plug
Now that we know more about Plug.Conn, let’s learn how to define a plug that manipulates the
Plug.Conn struct.
Defining a plug
A plug takes two forms: a function plug and a module plug.
A function plug simply takes a connection with a set of options as a keyword list and returns a new
connection. For example, the following Plug function just takes a connection, checks if it is authorized,
and returns a halted connection if it is not:
import Plug.Conn
def authorization_plug(conn, opts) do
if is_authorized?(conn) do
conn
else
conn
|> put_resp_content_type("text/plain")
|> put_status(401)
|> halt()
end
end
Function plugs like this one are great for one-time use with not many use cases. However, if you want a
plug to be called on multiple pipelines or to be part of a supervision tree, it’s better to use a module plug.
A Plug module can be used to transform a connection struct based on the given options and
parameters. For a module to behave like a plug, it needs to implement two functions:
• init/1: This function is called to initialize the options for a Plug module before invoking it
using the call/2 function. This function is generally used for validating options or transforming
options into what the call/2 function expects. The options returned by init/2 are passed
to call/2 as the second argument.
• call/2: This function is called every time a Plug module is invoked. The first argument
to call/2 is a Plug.Conn struct, while the second argument is a list of options (usually
returned by the init/1 callback). This function should return a new Plug.Conn struct
with the appropriate state indicating that this Plug module was indeed called.
Defining a plug
Now, let’s define a new Plug module with these two functions:
example_plug.exs
Mix.install([
{:plug_cowboy, "~> 2.0"}
])
defmodule GreeterPlug do
@moduledoc """
This plug greets the world based on the given greeting
"""
import Plug.Conn
@doc """
Validates options.
Ensures a greeting is present
"""
def init(options) do
greeting = Keyword.get(options, :greeting, "Hello")
[greeting: greeting]
end
@doc """
Returns a conn with a greeting response
"""
def call(conn, greeting: greeting) do
conn
|> put_resp_content_type("text/plain")
|> send_resp(200, "#{greeting} World!")
end
end
The preceding Plug will be responsible for adding a response based on the given options.
In the GreeterPlug module, we expect to get a greeting as an option, which otherwise defaults
to "Hello". This is handled by the init/1 function, which translates the options into a keyword
list with only one key, :greeting.
Since init/1 always returns a keyword with the :greeting key, the call/2 function matches
on the greeting: greeting pattern as the second argument. It then returns a conn with a
response stating "#{greeting} World!".
61
62
Defining Web Application Specifications Using Plug
To use this plug, we must use it with Cowboy’s Plug implementation. To do that, we can add
a :plug_cowboy dependency to our script by leveraging the Mix.install/2 function:
example_plug.exs
defmodule GreeterPlug do
# ..
end
%{start: {mod, fun, args}} =
Plug.Cowboy.child_spec(
scheme: :http,
plug: GreeterPlug,
options: [port: 4040]
)
apply(mod, fun, args)
IO.puts "Listening on port 4040"
# Run this server for 10 seconds
:timer.sleep(10_000)
In the preceding file, we use the Plug.Cowboy.child_spec/1 function to get the Module,
Function, and Arguments (MFA) of the function we can call to start the HTTP server. We pass
GreeterPlug as our plug and port: 4040 as options to Cowboy to get the correct arguments.
We have also added a :timer.sleep/1 function to give us 10 seconds to test out our HTTP server.
Running the preceding file will start an HTTP server for 10 seconds on port 4040:
$ elixir example_plug.exs
Listening on port 4040
To test the preceding plug, we can make a request to localhost:4000. In a separate terminal, we
can use wget to make an HTTP request:
$ wget -qO- http://localhost:4000
Hello World
We can now see that the GreeterPlug module adds a text response of Hello World to the
conn struct, which gets added to the final response from the HTTP server. So, that’s how you define
a Plug module. On top of providing interfaces to define new Plug modules, the Plug package itself
comes with a few pre-defined modules that make life easier while working with HTTP requests and
responses. One such module is Plug.Router, which provides a tidy interface for matching HTTP
requests based on the parameters of the request.
Understanding Plug.Router
Understanding Plug.Router
Now that we know how a Plug module works, let’s leverage one of the predefined plugs, Plug.
Router, to add functionality to our HTTP server. At the end of Chapter 2, we saw that to use our
HTTP server for a proper REST API, we need a way to route incoming requests based on different
paths and HTTP verbs. Cowboy has an internal way of routing the requests, but Plug.Router
allows us to do that in a very simple DSL. Another advantage of using Plug.Router to route our
requests, instead of using Cowboy directly, is that we can start using plugs earlier in our requestresponse cycle, even before they get to Cowboy. Here, we can only rely on Cowboy to send a response.
So, let’s start by defining a new plug, ExampleRouter:
example_router.exs
Mix.install([
{:plug_cowboy, "~> 2.0"}
])
defmodule ExampleRouter do
use Plug.Router
plug :match
plug :dispatch
get "/greet" do
send_resp(conn, 200, "Hello World")
end
match _ do
send_resp(conn, 404, "Not Found")
end
end
%{start: {mod, fun, args}} =
Plug.Cowboy.child_spec(
scheme: :http,
plug: ExampleRouter,
options: [port: 4040]
)
apply(mod, fun, args)
IO.puts "Listening on port 4040"
63
64
Defining Web Application Specifications Using Plug
# Run this server for 10 seconds
:timer.sleep(10_000)
The preceding file is very similar to ./example_plug.exs, where we use a Plug module, along with
the Plug.Cowboy adapter, to start an HTTP server at a given port. However, with Router, we can
not only send an HTTP response but also match the path and the HTTP verb of the incoming request.
Plug.Router defines a pipeline of plugs and expects two plugs to be in the pipeline:
• :match: This plug is responsible for matching an incoming request’s path and verb to a
route defined later in the module. When a route is matched, it sends the connection to the
:dispatch plug.
• :dispatch: This plug is responsible for calling an implementation for a matched request.
In the preceding module, we can see that all the requests to /greet will get a response of 200 with
a body of "Hello World". Any other requests will be responded to with a 404.
We can also see how simple the interface for Plug.Cowboy is. We can simply call the child_spec/1
function, which returns MFA details that can be called using Kernel.apply/3 to start a server
linked with the running process. And since the HTTP server is linked to the running process, we have
added a sleep for 10 seconds to give us enough time to test out the HTTP server.
Now that we have learned how to use Plug with Cowboy, it’s time to define an interface so that we
can use Plug with our HTTP server.
Plugifying our HTTP server
To leverage the power of Plug for routing, error handling, and other uses, let’s define a Plug adapter
for the Goldcrest.HTTPServer package.
Let’s start by defining a new package, plug_goldcrest_http_server:
$ mix new plug_goldcrest_http_server --module Plug.Goldcrest.
HTTPServer
Now, let’s add :goldcrest_http_server and plug to our Mix dependencies:
lib/plug/goldcrest/http_server/conn.ex
defmodule Plug.Goldcrest.HTTPServer.MixProject do
use Mix.Project
# ..
defp deps do
[
Plugifying our HTTP server
{:goldcrest_http_server, "~> 0.0.1"},
{:plug, "~> 1.12.1"}
]
end
end
Now, we can fetch the dependencies by running the following command:
$ mix deps.get
In this newly generated mix project, we can start by defining an adapter for Plug.Conn. Let’s call
the module Plug.Goldcrest.HTTPServer.Conn:
To define an adapter, our Plug.Goldcrest.HTTPServer.Conn module needs to implement
a few callbacks defined in Plug.Conn.Adapter. Some of those callbacks are as follows:
• send_resp/4: Used to send a given response, along with its status and headers
• send_file/6: Used to send a given file, along with its status and headers
• send_chunked/3: Used to send chunked responses to the client, along with their statuses
and headers
To keep this concise, we will only be implementing the send_resp/4 function. This function will be
further delegated to our HTTP server helpers and will utilize :gen_tcp to send the final response,
along with the given status and the headers.
Now, let’s write our adapter:
lib/plug/goldcrest/http_server/conn.ex
defmodule Plug.Goldcrest.HTTPServer.Conn do
import Goldcrest.HTTPServer.ResponderHelpers
@moduledoc false
@behaviour Plug.Conn.Adapter
@impl true
def send_resp({req, method, path}, status, headers, body)
do
resp_string =
body
|> http_response()
|> apply_headers(headers)
|> put_status(status)
|> Goldcrest.HTTPResponse.to_string()
65
66
Defining Web Application Specifications Using Plug
:gen_tcp.send(req, resp_string)
:gen_tcp.close(req)
{:ok, nil, {req, method, path}}
end
defp apply_headers(resp, headers) do
Enum.reduce(headers, resp, fn {k, v}, resp ->
put_header(resp, k, v)
end)
end
end
In the preceding code, we imported the helper module we defined in Chapter 2, Goldcrest.
HTTPServer.ResponderHelpers. This module contains the http_response/1, put_
header/3, and put_status/2 functions. We used these imported functions in send_resp/3
to construct our HTTP response with proper headers and statuses.
Once we had the final response string, we used the request socket, which was passed along with
method and the request’s path to send_resp/3, to send the final response to the client using
:gen_tcp.send/2. We followed that up by closing the connection socket using :gen_tcp.
close/1 and responded with {:ok, nil, {req, method, path}}. In this way, req,
method, and path can be used by other upcoming plugs.
Keep in mind that the state of the connection is set to :sent, which will prevent other plugs from being
called after a response is sent via send_resp/3. All of this is handled by the Plug package itself.
Now, we need a way to initialize the plug operations for our HTTP server. To do that, we first need
a way to build a Plug.Conn struct from a request received using Goldcrest.HTTPServer.
We know that the adapter property for that Plug.Conn struct will contain Plug.Goldcrest.
HTTPServer, so it can use functions such as send_resp/3, which we define in that module. And,
since the first argument for send_resp/3 is the second element of the tuple corresponding to the
value of the :adapter field in the Plug.Conn struct, we will need to use {Plug.Goldcrest.
HTTPServer, {req, method, path}} as the value for the adapter property for the
Plug.Conn struct.
We can also use the method and path properties we get from HTTPServer to fill the method and
path fields for the struct. We can use :inet.sockname/1 to get the value for the remote_ip
field, and we can split path using Path.relative_to/2 and Path.split/1 to get path_
info, which needs to be a list of path components.
We will be skipping the host and port fields since we will not be using them in this chapter.
We will also be using default values for scheme as :http.
Plugifying our HTTP server
Finally, we will be using URI.parse/1 to get path and query information from the given
request’s URI.
So, let’s define the conn_from_req function in the Plug.Goldcrest.HTTPServer module:
lib/plug/goldcrest/http_server.ex
defmodule Plug.Goldcrest.HTTPServer do
@moduledoc """
Documentation for `Plug.Goldcrest.HTTPServer`.
"""
def conn_from_req(req, method, path) do
{:ok, {remote_ip, _}} = :inet.sockname(req)
%URI{path: path, query: qs} = URI.parse(path)
%Plug.Conn{
adapter: {@adapter, {req, method, path}},
host: nil,
method: Atom.to_string(method),
owner: self(),
path_info: path |> Path.relative_to("/") |>
Path.split(),
port: nil,
remote_ip: remote_ip,
query_string: qs,
req_headers: [],
request_path: path,
scheme: :http
}
end
end
The preceding function takes a request socket, req, an HTTP method, method, and a request path,
path (containing the query string). It uses the :inet, URI, and Path module’s functions to get
information from the req socket and path to finally return a Plug.Conn struct that’s ready to be
used by our HTTP server.
We have also made this function public so that it can be used by other parts of the system in the future
for testing, debugging, and writing plugs easily.
67
68
Defining Web Application Specifications Using Plug
Now that we have a way to initialize a Plug.Conn struct from a request, we are ready to define an
init/4 function that can be used to initialize our plug:
lib/plug/goldcrest/http_server.ex
defmodule Plug.Goldcrest.HTTPServer do
# ..
def init(req, method, path, plug: plug, options: opts) do
conn = conn_from_req(req, method, path)
%{adapter: {@adapter, _}} =
conn
|> plug.call(opts)
|> maybe_send(plug)
{:ok, req, {plug, opts}}
end
defp maybe_send(%Plug.Conn{state: :unset}, _plug) do
raise(Plug.Conn.NotSentError)
end
defp maybe_send(%Plug.Conn{state: :set} = conn, _plug) do
Plug.Conn.send_resp(conn)
end
defp maybe_send(%Plug.Conn{} = conn, _plug), do: conn
defp maybe_send(other, plug) do
raise "Goldcrest adapter expected #{inspect(plug)} to "
<>
"return Plug.Conn but got: #{inspect(other)}"
end
end
In the preceding code, we added the init/4 function, which takes a request socket, a method, a
path, and a plug as an option. The plug option could be a router, which can be used to route requests
to a handler. The init/4 function then calls the conn_from_req/3 function to initialize a
Plug.Conn struct from a request and starts the Plug pipeline with the given options. After that,
maybe_send is called to make sure that any connections with state :set are sent using the
send_resp/3 callback defined earlier in this chapter. Finally, the function returns the connection
socket, along with the plug and its options.
Plugifying our HTTP server
Now that we have defined adapters for our HTTP server, let’s test them out using a plug. To do that,
we will start by defining a new router:
temp/example_router.ex
defmodule ExampleRouter do
use Plug.Router
plug :match
plug :dispatch
get "/greet" do
send_resp(conn, 200, "Hello World")
end
match _ do
send_resp(conn, 404, "Not Found")
end
end
The preceding router simply responds with "Hello World" when it receives a GET request at the
/greet path and returns a 404 for everything else.
Now, let’s open an iex shell with the mix project loaded:
$ iex -S mix
iex> Code.require_file("./temp/example_router.ex")
iex> options = {Plug.Goldcrest.HTTPServer, [plug: ExampleRouter,
options: []]}
iex(1)> Application.put_env(:goldcrest_http_server, :dispatcher,
options)
iex(2)> Goldcrest.HTTPServer.start(4040)
21:40:21.771 [info] Started a webserver on port 4040
21:40:36.402 [info] Received HTTP request GET at /greet
The preceding snippet loads the file that defines the ExampleRouter module. Then, it updates the
:dispatcher environment for :goldcrest_http_server to the new plug module that we
created earlier in this chapter. This allows our HTTP server to delegate the handling of the request to the
Plug.Goldcrest.HTTPServer module. It then starts the Goldcrest HTTP server at port 4040.
69
70
Defining Web Application Specifications Using Plug
While this server is running, in a separate shell, let’s make an HTTP request to our server to test
whether our router is working:
$ curl -v http://localhost:4040/greet
* Trying 127.0.0.1:4040...
* Connected to localhost (127.0.0.1) port 4040 (#0)
> GET /greet HTTP/1.1
> Host: localhost:4040
> User-Agent: curl/7.79.1
> Accept: */*
>
* Mark bundle as not supporting multiuse
< HTTP/1.1 200
< cache-control: max-age=0, private, must-revalidate
< content-length: 11
< content-type: text/html
<
* Excess found in a read: excess = 1, size = 11, maxdownload = 11,
bytecount = 0
* Closing connection 0
Hello World
The preceding request responds with "Hello World" and a 200 as expected. Now, let’s make a
request to a bad path to test our 404 matching logic:
$ curl -v http://localhost:4040/other
* Trying 127.0.0.1:4040...
* Connected to localhost (127.0.0.1) port 4040 (#0)
> GET /other HTTP/1.1
> Host: localhost:4040
> User-Agent: curl/7.79.1
> Accept: */*
>
* Mark bundle as not supporting multiuse
< HTTP/1.1 404
< cache-control: max-age=0, private, must-revalidate
< content-length: 9
< content-type: text/html
<
* Excess found in a read: excess = 1, size = 9, maxdownload = 9,
bytecount = 0
* Closing connection 0
Not Found
As expected, the request returns a 404 with "Not Found".
Plugifying our HTTP server
Next, we will make our plug easier to use by defining the child_spec/1 function in a similar way
to how we defined Plug.Cowboy.child_spec/1, which can make it easier for us to start the
HTTP server that’s linked to the running process, similar to Plug.Cowboy. We can also define
a function, start_linked_server/1, to start an HTTP server process linked to the current
process. So, let’s define the child_spec/1 and start_linked_server/1 functions:
lib/plug/goldcrest/http_server.ex
defmodule Plug.Goldcrest.HTTPServer do
# ...
def child_spec(plug: plug, port: port, options: options)
do
Application.put_env(
:goldcrest_http_server,
:dispatcher,
{__MODULE__, [plug: plug, options: options]}
)
%{start: {__MODULE__, :start_linked_server, [port]}}
end
def start_linked_server(port) do
Task.start_link(fn ->
Goldcrest.HTTPServer.start(port)
end)
end
end
In the preceding code snippet, we added the child_spec/1 and start_linked_server/1
functions to the Plug.Goldcrest.HTTPServer module. The child_spec/1 function
updates the :dispatcher environment with the given attributes (plug and options). Then, it
returns a specification with the value for start as an MFA. The function referenced by the MFA is
the new Plug.Goldcrest.HTTPServer.start_linked_server/1 function, with the
port as the argument, which starts a Goldcrest.HTTPServer process as a child process linked
to the current process.
Now, we can simply start our server by calling apply on the MFA returned by the child_spec/1
function. Let’s test it out in iex:
$ iex -S mix
iex> Code.require_file("./temp/example_router.ex")
iex> opts = [plug: ExampleRouter, port: 4040, options: []]
iex> %{start: {mod, fun, args}} = Plug.Goldcrest.HTTPServer.child_
spec(opts)
iex> apply(mod, fun, args)
71
72
Defining Web Application Specifications Using Plug
{:ok, #PID<0.232.0>}
22:42:49.877 [info] Started a webserver on port 4040
Now that our server’s plug is easy to use, we can use it in a similar way to Plug.Cowboy. With that,
our HTTP server is ready to be used with a web framework.
Summary
In this chapter, we learned how to leverage the Plug library to define a router to route incoming
requests to a specific handler. We also learned about the Plug philosophy and why using Plug for web
applications makes sense. We then used Plug.Conn.Adapter behavior to define an adapter for
the HTTP server we defined in the previous chapter. Finally, we wrapped up by defining a cleaner
interface for using the plug.
In this chapter, we didn’t define all the implementations for callbacks defined in the Plug.Conn.
Adapter module. This was done to save time. We also didn’t write automated tests for this chapter
because most of what we wrote can be tested similar to how HTTP servers were defined in previous
chapters. We do intend on writing a better testing interface for our HTTP server, but we will do that
in the DSL design part of this book.
In the next chapter, we will use our knowledge of Plug to build a controller interface to manage the
flow of an incoming HTTP request.
4
Working with Controllers
In the previous chapter, we learned how to use the Plug package to simplify a pipeline of operations that
are applied to an HTTP connection, represented by the %Plug.Conn{} struct. We also learned how
we can leverage the Plug.Router plug to handle a request matching an HTTP method and path.
In this chapter, we will take our Plug knowledge to the next level by applying the same philosophy (of
updating a connection struct in a pipeline) to implement a controller. We will also take a quick look
at how Phoenix implements its controllers and take inspiration from that to build our own controllers.
Before doing any of that, however, we will learn what controllers are in a Model-View-Controller
(MVC) framework and understand some of their basics.
By the end of this chapter, you will have learned the ins and outs of controllers in Phoenix, and how
Phoenix uses Plug and Cowboy to route HTTP requests to proper handlers. You’ll also have learned
the fundamentals of redirects and testing a request-response cycle in a web application.
In this chapter, we will cover the following key topics:
• What are controllers?
• Controllers in Phoenix
• Building our own controller
• Controllers as plugs
• Using our controller with plug_cowboy
• Using our controller with plug_goldcrest_http_server
• How do URL redirections work?
• Using Plug.Test
• Testing our controller
74
Working with Controllers
Technical requirements
This chapter has a lot of code snippets that are best understood by following along. Similar to earlier
chapters, we will use Elixir 1.12.x and Erlang 23.2.x.
In this chapter, I will assume you’ve read through the previous chapters and followed along by writing
your code snippets. It is particularly important that you understand how plug and goldcrest_
http_server work (covered in Chapter 2 and Chapter 3) to get the most out of this chapter.
Since we will explore building our own controller, any experience with writing controllers in a web
framework such as Phoenix or Rails, although not needed, would still be helpful.
The code examples for this chapter can be found at https://github.com/PacktPublishing/
Build-Your-Own-Web-Framework-in-Elixir/tree/main/chapter_04
What are controllers?
A controller is the component of a web application that accepts input and controls the flow of
requests. This generally includes accepting a specific content type, authenticating, matching request
parameters, and so on.
In an MVC framework, a controller is generally used as an entry point to the web application. The
controller first matches a request based on its parameters (such as request method, route, and so
on), and uses the model layer to fetch any requested data. Finally, it uses the views to present the
data in a consumable way. In many modern MVC frameworks such as Phoenix, there also exists an
additional component, the router, which takes on the responsibility of matching an incoming request
to a controller for further handling.
The request-response cycle described is better shown in the following diagram:
Figure 4.1 – The MVC flow
Now that you’ve looked at a brief overview of controllers in general, let’s see how Phoenix implements them.
Controllers in Phoenix
Controllers in Phoenix
In Phoenix, controllers are plugs. This is an extension of the plug philosophy that we covered in
Chapter 3, where a web request goes through a pipeline of plugs that transform the connection, the
%Plug.Conn{} struct, to indicate that a plug was called. Therefore, a router and a controller are
both plugs responsible for transforming the connection and responding to the end user.
A controller is a module that contains several request handlers as functions. A Phoenix controller is
called by a router based on the route of the incoming request. The request is also properly delegated
to a particular request handler function in the controller depending on the route defined in the router.
The controller functions that are responsible for handling a request are called actions. By default,
a Phoenix controller’s action has an arity of 2. It takes a Plug.Conn struct as the first argument and
request parameters as a Map as the second argument.
Here’s an example of a Phoenix controller:
defmodule ExampleWeb.PageController do
use ExampleWeb, :controller
def index(conn, params) do
case Example.Page.load_data(params) do
{:ok, data} ->
render(conn, "index.html", data: data)
{:error, error} ->
conn
|> put_flash(:error, error)
|> redirect(to: "/")
end
end
end
In the preceding code, we can see that a controller is defined as a module that calls use ExampleWeb,
:controller. We will talk more about the use macro in Chapter 8, but for the purposes of this
chapter, all this does is enable this module to act like a controller by importing several functions and
defining compile-time callbacks that would assist in request handling.
In the index/2 function, we can see two arguments being passed. The first argument, conn, is a
Plug.Conn struct, which holds a lot of information about the request, as we learned in the previous
chapter. The second argument, params, is a Map that stores the request params (and more), allowing
the application to fetch relevant information using Example.Page.load_data/1.
75
76
Working with Controllers
We can also see that there are two possible paths for the request to go based on the outcome of the
Example.Page.load_data/1 call. If the call is a success, it renders "index.html" with
the loaded data; otherwise, it redirects to the root ("") with an error message. Both of these actions
are performed by the helper functions, render/3 and redirect/2, imported as a result of the
use call on line 2.
Now that we know what a Phoenix controller module looks like, we can apply the same philosophy
and structure to create a controller construct for our web framework.
Building a controller interface
In this section, we will learn what it takes to build a controller by leveraging the Plug package and
everything we’ve learned about it.
To build our own controller, let’s start by creating a new Mix project by running the following command:
$ mix new goldcrest
Now, our goal is to be able to write a controller that looks something like a Phoenix controller:
defmodule ExampleController do
# .. TODO: use/import modules
def greet(conn, _params) do
conn
|> put_status(200)
|> render(:json, %{data: "hello world"})
end
end
The previous controller defines one action, greet/2, which responds with a status of 200 along
with the {"data": "hello world"} JSON body.
We have hidden the complexity of the use or import modules to introduce controller-like behavior
to our module, but we will figure that part out in this section of the chapter.
To implement the preceding controller, we will first need to add plug as a dependency to the
goldcrest app. We will also need to add jason as a dependency to decode and encode the JSON
body for the request-response cycle:
mix.exs
defmodule Goldcrest.MixProject do
# ...
defp deps do
[
Building a controller interface
{:jason, "~> 1.2.2"},
{:plug, "~> 1.12.1"}
]
end
end
We can then run $ mix deps.get to fetch those dependencies for our Mix project.
To test our controller, we will need a router and an HTTP server.
Let’s start by creating a router using the Plug.Router module:
lib/goldcrest/support/example_router.ex
defmodule Goldcrest.ExampleRouter do
use Plug.Router
plug :match
plug :dispatch
match _ do
send_resp(conn, 404, "Not Found")
end
end
The preceding router matches all the incoming requests and sends a 404 response indicating that no
route has been implemented.
Now, let’s create a new route, /greet, which we can direct to a controller plug:
lib/goldcrest/support/example_router.ex
defmodule Goldcrest.ExampleRouter do
use Plug.Router
# ..
get "/greet" do
Goldcrest.ExampleController.call(conn, action: :greet)
end
# ..
end
As you can see in the preceding code, we have added a new route, GET /greet, which dispatches any
matching requests to the Goldcrest..ExampleController plug module. For now, we’re explicitly
invoking the controller like a plug using the call/2 function with :action as the option with the
:greet value, indicating that this request should go to a Goldcrest.ExampleController.
greet/2 controller action.
77
78
Working with Controllers
Now that we know what our controller should look like, let’s go ahead and write it. We will need to
define two functions in our controller:
• call/2: This consumes all the requests. This will be responsible for the plug-like behavior of
the Goldcrest.ExampleController module.
• greet/2: This consumes requests matching the GET /greet route. This will be the controller
action responsible for requests matching that route:
lib/goldcrest/support/example_controller.ex
defmodule Goldcrest.ExampleController do
# Goldcrest.Controller should define all the helper functions
import Goldcrest.Controller
def call(conn, action: action) do
apply(__MODULE__, action, [conn, conn.params])
end
end
We start by importing the Goldcrest.Controller module. We haven’t written this yet, but
this module will be responsible for defining the helper functions we will use in Goldcrest.
ExampleController, such as render/3.
Then, we defined a call/2 function. This is the function that is explicitly invoked from the
Goldcrest.ExampleRouter module along with conn as the first argument and :action
as a key in the list of options. Therefore, we’re matching for the presence of :action. Once called,
this function calls the function in the module matching the given action by using apply/3 with
multi-factor authentication (MFA).
apply/3 and __MODULE__
Elixir provides a way to dynamically invoke functions with the module name, function name,
or arguments defined at runtime by using the Kernel.apply/3 function. The arguments
to the apply/3 function are in the MFA format described in the previous chapters, where
the first argument is the module name, the second is the function name, and the third is the
list of arguments to be passed to the function. When the module name is the current module,
use __MODULE__, which is the shorthand for referring to the current module.
In cases like the ExampleController.call/2 function where we didn’t know what
action needed to be invoked at compile time, apply/3 is used to add that dynamic behavior.
However, if you do know the function name and the number of arguments at the time of
compilation, it is advised to use the module.function(arg1, ..., argN) syntax
because it’s more explicit. Contrary to popular belief, there isn’t a performance benefit to using
either because of compiler optimization.
Building a controller interface
Next, let’s define the greet/2 function:
lib/goldcrest/support/example_controller.ex
defmodule Goldcrest.ExampleController do
# ...
def greet(conn, _params) do
conn
|> put_status(200)
|> render(:json, %{data: "hello world"})
end
end
In the preceding code snippet, we added the greet/2 function to our controller. This function acts
as the controller action for the GET /greet route and simply responds with a 200 status and a
JSON message.
For our controller to work, we need to define the Goldcrest.Controller module, which was
imported into our Goldcrest.ExampleController module, and define helper functions such
as put_status/2 and render/3.
Since our controller actions are plugs, which involve transforming the %Plug.Conn{} struct, we
can derive a lot of our functionality from the Plug.Conn module.
So, let’s define the Goldcrest.Controller module:
lib/goldcrest_controller.ex
defmodule Goldcrest.Controller do
import Plug.Conn
def render(conn, :json, data) when is_map(data) do
status = conn.status || 200
conn
|> put_resp_content_type("application/json")
|> send_resp(status, Jason.encode!(data))
end
end
79
80
Working with Controllers
We started by importing the Plug.Conn module, which gives us access to the functions we can
use to manipulate the %Plug.Conn{} struct. Then, we define render/3 only for rendering the
:json data, while checking that the data variable is a map. In the render/3 function, we simply
set the response’s content type to application/json and use Plug.Conn.send_resp/3
to send a response with the encoded map as the body. Before sending the response, Plug.Conn.
send_resp/3 also checks whether a status is set for the %Plug.Conn{} struct. If it is set, it uses
the previously set status; else, it uses 200.
We could similarly define the Goldcrest.put_status/2 function, but Plug.Conn.put_
status/2 is already defined and has a simple enough interface. Therefore, instead of defining the
put_status/2 function in Goldcrest.Controller, we can simply import Plug.Conn in
our example controller module:
lib/goldcrest/support/example_controller.ex
defmodule Goldcrest.ExampleController do
# ..
import Plug.Conn
# ..
end
Doing this allows us to not only use the put_status/2 function but also gives us access to other
useful functions such as put_session/3, get_session/2, and so on, which allows us to write
better controller actions. In fact, Phoenix.Controller does exactly this to bring the power of
Plug.Conn to all of its controllers.
Now that we have a way to define a controller, let’s test it with a web server.
Integration with web servers
We can use Plug.Cowboy in a similar way to Chapter 3 to build a server that dispatches the GET
/greet calls to the ExampleController module. Let’s start by creating an iex session with
the goldcrest app loaded. We can then require the example router and controller files to use them
as part of our HTTP server:
$ iex -S mix
iex> Code.require_file("./lib/goldcrest/support/example_controller.
ex")
iex> Code.require_file("./lib/goldcrest/support/example_router.ex")
iex> Mix.install([{:plug_cowboy, "~> 2.0"}])
iex> opts = [
...> scheme: :http,
...> plug: Goldcrest.ExampleRouter,
...> options: [port: 4040]
...> ]
Integration with web servers
iex> %{start: {mod, fun, args}} = Plug.Cowboy.child_spec(opts)
iex> apply(mod, fun, args)
{:ok, #PID<_,_,_>}
Calling the preceding list of functions from iex starts a Cowboy HTTP server on port 4040. We
can now use curl to test our HTTP server with the controller:
$ curl -v http://localhost:4040/greet
* Trying 127.0.0.1:4040...
* Connected to localhost (127.0.0.1) port 4040 (#0)
> GET /greet/ HTTP/1.1
> Host: localhost:4040
> User-Agent: curl/7.79.1
> Accept: */*
>
* Mark bundle as not supporting multiuse
< HTTP/1.1 200 OK
< cache-control: max-age=0, private, must-revalidate
< content-length: 15
< content-type: application/json; charset=utf-8
< date: Sun, 21 Nov 2021 23:44:29 GMT
< server: Cowboy
<
* Connection #0 to host localhost left intact
{"status":"ok"}%
In the preceding response, we can also see that the HTTP status was 200 OK, as expected.
To kill the Cowboy HTTP server, run the following commands in the same iex session:
$ iex -S mix
# .... same iex session
{:ok, #PID<_,_,_>}
iex> {:ok, pid} = v()
iex> Process.exit(pid, :kill)
[error] GenServer #PID<_._._> terminating
** (stop) killed
nil
Similarly, we can test this with plug_goldcrest_http_server to ensure our controller works
with our own HTTP server:
$ iex -S mix
iex> Code.require_file("./lib/goldcrest/support/example_controller.
ex")
iex> Code.require_file("./lib/goldcrest/support/example_router.ex")
iex> Mix.install([{:plug_goldcrest_http_server, "~> 0.1.0"}])
81
82
Working with Controllers
iex> opts = [
...> plug: Goldcrest.ExampleRouter,
...> port: 4040,
...> options: []
...> ]
iex> %{start: {mod, fun, args}} = Plug.Goldcrest.HTTPServer.child_
spec(opts)
iex> apply(mod, fun, args)
{:ok, #PID<_,_,_>}
22:42:49.877 [info] Started a webserver on port 4040
Now, by running the curl request again, we can see the controller works well with our HTTP server:
$ curl -v http://localhost:4040/greet
* Trying 127.0.0.1:4040...
* Connected to localhost (127.0.0.1) port 4040 (#0)
> GET /greet/ HTTP/1.1
> Host: localhost:4040
> User-Agent: curl/7.79.1
> Accept: */*
>
* Mark bundle as not supporting multiuse
< HTTP/1.1 200
< cache-control: max-age=0, private, must-revalidate
< content-length: 15
< content-type: application/json; charset=utf-8
<
* Excess found in a read: excess = 1, size = 15, maxdownload = 15,
bytecount = 0
* Closing connection 0
{"status":"ok"}%
Similar to the Cowboy server’s response, we can see that the HTTP status for the response is 200 OK.
Now, we have a fully functioning controller that can handle HTTP requests. One of the key responses
of a controller, however, is sending a redirect response, which invokes a redirect action on the browser
side. We will see how to implement that in the next section.
Understanding redirects
Understanding redirects
One of the most used Phoenix.Controller functions is redirect/2. This is often used at
the controller level to redirect %Plug.Conn{} to a different route after setting a flash message. The
following is an example of a controller action using redirect/2:
defmodule RedirectExampleController do
use RedirectExampleWeb, :controller
def show(conn, show_params) do
show_info = ShowInfo.get(show_params)
render(conn, "show.html", show_info: show_info)
end
def create(conn, create_params) do
created = Creator.create(create_params)
conn
|> put_flash(:info, "Successfully created!")
|> redirect(to: Routes.redirect_example_path(conn,
:show, created))
end
end
In the preceding Phoenix controller, there are two actions: show and create. The show action
simply fetches the data and renders an HTML. However, the create action runs a command and
redirects the request to the show action, with a specific parameter. It also sets a flash message
before redirecting, but we will not cover flash messages at this point.
This is one of the most common uses of the redirect/2 function. Therefore, our controller interface
is incomplete without implementing redirect/2.
To implement redirect/2, we need to first understand how redirects work.
Redirects work by simply updating the current page’s location or window to a different location.
In JavaScript, this can be done by updating an href location directly or calling replace on the
location. The following are code examples of redirects in JavaScript:
// manually update location
window.location.href = "http://location:4040/redirected_url"
// OR
// update location by calling replace
window.location.replace("http://location:4040/redirected_url")
83
84
Working with Controllers
Either way, we need a way to update the browser’s location programmatically from the server’s response.
The best way to signal a browser to change the window’s location (redirect) is by sending HTTP codes
with a 3XX status, specifically 302, with a location header. This response lets a browser know that
the request wants it to perform a URL redirection, and the page being redirected to is Found, which
means it’s expected to exist.
Here’s an example response with a redirect:
HTTP/1.1 302 Found
cache-control: max-age=0, private, must-revalidate
content-length: 72
content-type: text/html; charset=utf-8
location: http://location:4040/redirected_url
...
<html>
<body>
You are being redirected
to:
<a href="/some-url">
a different site
</a>
</body>
</html>
Another thing to note here is that adding a body to a 302 response is optional, but often for introspective
and debugging purposes, HTTP servers/web frameworks add a body indicating that the request is
being redirected.
Now that we know what we need to do to implement redirects, let’s add the redirect/2 function
to the Goldcrest.Controller module:
lib/goldcrest_controller.ex
defmodule Goldcrest.Controller do
# ..
def redirect(conn, to: url) do
body = redirection_body(url)
status = conn.status || 302
conn
|> put_resp_header("location", url)
|> content_type("text/html")
|> send_resp(302, body)
Understanding redirects
end
defp redirection_body(url) do
html = Plug.HTML.html_escape(url)
"<html><body>You are being <a href=\"#{html}\">
redirected</a>" <>
".</body></html>"
end
In the preceding code snippet, we have defined a new redirect/2 function, which takes a %Plug.
Conn{} struct and :to as an option indicating what URL to redirect to.
The redirect/2 function first generates a response body using the redirection_body private
function. Note the use of Plug.HTML.html_escape/1 to avoid any conflicts before injecting
url as an HTML string.
The generated body is then used as the response body along with the 302 status code, indicating
that this is a URL redirection. Before sending the response, it also sets the location header of the
response to the given url.
Now, it’s time to test the redirect/2 function. Let’s create a new route in our router:
lib/goldcrest/support/example_router.ex
defmodule Goldcrest.ExampleRouter do
use Plug.Router
# ..
get "/greet" do
Goldcrest.ExampleController.call(conn, action: :greet)
end
get "/redirect_greet" do
Goldcrest.ExampleController.call(conn,
action: :redirect_greet)
end
# ..
end
Next, let’s define the action, :redirect_greet, which the new route will dispatch requests to:
lib/goldcrest/support/example_controller.ex
defmodule Goldcrest.ExampleController do
# ...
def greet(conn, _params) do
85
86
Working with Controllers
conn
|> put_status(200)
|> render(:json, %{data: "hello world"})
end
def redirect_greet(conn, _params) do
conn
|> redirect(to: "/greet")
end
end
In the preceding code snippet, we have added a new action to the ExampleController module,
redirect_greet/2, which simply redirects the incoming conn to the GET /greet route.
We can test whether we’re getting the expected response with the correct HTML, HTTP code, and
location by running a curl request again:
$ curl -v http://localhost:4040/redirect_greet
* Trying 127.0.0.1:4040...
* Connected to localhost (127.0.0.1) port 4040 (#0)
> GET /redirect_greet HTTP/1.1
> Host: localhost:4040
> User-Agent: curl/7.79.1
> Accept: */*
>
* Mark bundle as not supporting multiuse
< HTTP/1.1 302
< cache-control: max-age=0, private, must-revalidate
< content-length: 72
< content-type: text/html; charset=utf-8
< location: /greet
<
* Excess found in a read: excess = 1, size = 72, maxdownload = 72,
bytecount = 0
* Closing connection 0
<html>
<body>
Redirecting you to <a href="/greet">this site</a>.
</body>
</html>
We can see that the HTML body is as expected, along with a 302 HTTP response code with the
location header pointing to /greet.
We can further test the redirection by visiting http://localhost:4040/redirect_greet
from a web browser and expecting to be redirected to http://localhost:4040/greet.
Testing the controller
In the following screenshot, we visit http://localhost:4040/redirect_greet:
Figure 4.2 – Redirect request
We can see it quickly redirects to http://localhost:4040/greet:
Figure 4.3 – Redirect result
Testing the controller
Now that we have a way to define our controllers, it’s time to see how we can test them. Of course, we
could simply test the entire HTTP request the same way we tested our HTTP servers in the previous
chapters. However, there’s a better and simpler way to test the controller responses.
Since our routers and our controllers are plugs, we can test them using the Plug.Test module.
The Plug.Test module contains a collection of helper functions that are designed to help us test
plugs better.
Here is how we can use Plug.Test to test our controller’s /greet action:
test/goldcrest/support/example_controller_test.exs
defmodule Goldcrest.ExampleControllerTest do
use ExUnit.Case
use Plug.Test
describe "GET /greet" do
test "responds with 200 status" do
87
88
Working with Controllers
conn = conn(:get, "/greet")
conn = Goldcrest.ExampleRouter.call(conn, [])
assert conn.status == 200
assert conn.resp_body == Jason.encode!(%{status:
"ok"})
end
end
end
In the preceding test, we see how to test a controller just as a plug without explicitly starting the HTTP
server. We are creating a %Plug.Conn{} struct by calling the conn/2 function imported by the
Plug.Test module. Then, we’re explicitly calling the ExampleRouter plug and capturing the
returned conn to analyze the results.
This allows us to write smaller tests that are much quicker to execute because the requests don’t have
to go through the TCP layer of our application.
Similarly, we can test the /redirect_greet route as follows:
test/goldcrest/support/example_controller_test.exs
defmodule Goldcrest.ExampleControllerTest do
# ...
describe "GET /redirect_greet" do
test "responds with a redirect status" do
conn = conn(:get, "/redirect_greet")
conn = Goldcrest.ExampleRouter.call(conn, [])
assert conn.status == 302
assert conn.resp_body =~ "You are being"
assert conn.resp_body =~ "redirected"
assert Plug.Conn.get_resp_header(conn, "location") ==
["/greet"]
end
end
end
In the preceding code snippet, we wrote a test for the /redirect_greet route. The test is quite
similar to the one for the /greet route; the differences are that we’re testing for the status to equal
302 and expecting the location header to be properly set.
Summary
In future chapters, we will develop a cleaner and simpler interface to write these controller tests. For
now, we can keep using Plug.Test to test our controllers independent of the HTTP server.
Summary
In this chapter, we learned what controllers are both within and outside the context of a simple
application. We then learned how Phoenix implements its controllers by utilizing Plug and how the
entire request-response cycle, right from the router to the controllers, is powered by Plug. Taking
that philosophy, we built our own controller interface and tested an example controller with both
goldcrest_http_server and cowboy. To make our controller functionality more complete,
we added the ability to redirect a request to another route by learning how redirects actually work in
the context of a web browser. We finally wrapped up by using the Plug.Test module to test our
controller without having to start our HTTP server.
Similar to previous chapters, we didn’t cover all the functions that should be added to the Goldcrest.
Controller module to save time. We also didn’t write the render/3 implementation for HTML
pages because we will cover that in a future chapter where we will talk about views.
Exercises
In the Goldcrest.Controller module, we have added the ability to render a JSON response
and redirect a request to a different URL, but there’s a lot more we could add to that module.
• How would you go about implementing the send_file/2 function? This is just a thought
exercise since it’s not straightforward to implement it.
• What other functions should we add to the Goldcrest.Controller module?
89
5
Adding Controller Plugs and
Action Fallback
In the last chapter, we built a framework to write a controller and wrapped it inside the Goldcrest.
Controller module. In this chapter, we will learn about extending the functionality of our controllers
by intercepting an incoming request and calling specific plugs on it based on the controller’s definition
before letting the controller’s actions handle that request. This will give developers the means to add
better control of the request flow while keeping their controller code simple and digestible. We will
learn how to use the Plug.Builder module to build a pipeline of plugs in a controller. We will
then learn how to apply a pipeline of plugs to an action and how to define a fallback controller to
capture any errors.
By the end of the chapter, you will understand Plug.Builder enough to build complex plug
pipelines without needing Phoenix or any other libraries other than Plug itself. You will also learn
how Phoenix implements the fallback controller using the same philosophy as Plug.Builder.
Here are the exact topics we will cover in this chapter:
• Understanding Plug.Builder
• Using Plug.Builder to extend our controller’s functionality
• Testing the Plug.Builder pipelines
• Defining a fallback module for controller errors
• Testing fallback controller errors
Technical requirements
This chapter, just like the previous one, is loaded with code snippets. It is recommended that readers
follow along with the coding. We will still use Elixir 1.12.x and Erlang 23.2.x, so ensure those are
installed on your computer.
92
Adding Controller Plugs and Action Fallback
I will make the same assumption that you’ve read through the previous chapters, coding along whenever
we reach a snippet. For this chapter, it is particularly important that you’ve read the previous chapter
and understood how we created our own controller. We will be using the code from Chapter 4 to
update the Goldcrest.Controller module.
Though not necessary, any experience writing Phoenix and Rails controllers would help you better
understand this chapter’s contents.
The code examples for this chapter can be found at https://github.com/PacktPublishing/
Build-Your-Own-Web-Framework-in-Elixir/tree/main/chapter_05
Plug pipeline in controllers
In many web frameworks, there's a way to filter and intercept requests that are dispatched to a
controller’s action and perform specific checks on them. For example, Rails has filters, specifically the
before_action hooks, which are called before the request reaches the controller’s action. These
checks can log a request, perform a redirect, or even halt the request-response cycle. A well-known
usage of these filters is to ensure that an incoming request is authenticated:
Figure 5.1 – Plug pipeline in Phoenix
Here’s how authentication using filters looks in a Rails controller:
class PageController < ApplicationController
before_action :ensure_authenticated!
before_action :ensure_authorized!, only: [:index]
def index
# index action related code
end
def show
# show action related code
end
private
Plug pipeline in controllers
def ensure_authenticated!
unless authenticated?
flash[:error] = "Please Sign-in"
redirect_to new_sign_in_url
end
end
def ensure_authorized!
unless admin?
head :forbidden
end
end
end
In the preceding code snippet, we see that all actions in PageController need to go through a
before_action call to ensure_authenticated!, and only the index action needs to go
through ensure_authorized!. The before_action interface makes it very easy to define a
list of filters a request must go through before hitting a controller action.
Phoenix has something very similar to before_action. Just like a Phoenix router, a Phoenix
controller can define its own pipeline. Unlike the routers, though, a controller only has a single pipeline,
which can optionally be called for an action or specific guard clause.
Let’s take a look at the following Phoenix controller:
defmodule ExampleWeb.PageController do
use ExampleWeb, :controller
plug :ensure_authenticated!
plug :ensure_authorized!,
role: :admin when action == :index
def index(conn, _) do
# index action related code
end
def show(conn, _) do
# show action related code
end
def ensure_authenticated!(conn, _options) do
if authenticated(conn) do
conn
else
conn
|> put_flash(:error, "Please Sign-in")
93
94
Adding Controller Plugs and Action Fallback
|> redirect(to: "/sign_in")
|> halt()
end
end
def ensure_authorized!(conn, role: role) do
if Enum.member?(roles(conn), role) do
conn
else
conn
|> put_status(403)
|> halt()
end
end
end
Similar to the Rails code snippet, this controller calls ensure_authenticated! for all of its
actions and ensure_authorized! for only the index/2 action. We are also halting a connection
in those plugs if a set of conditions isn't met. A Phoenix controller knows not to call the action if a
connection is halted in a previously invoked plug.
Now that we know how controller-level plugs look in Phoenix and Rails, let’s learn how to implement
in our web framework.
Understanding the Plug.Builder module
To add a similar plug pipeline to our controller, we will need to keep track of all the plug/3 calls in
the controller and apply those plugs in the correct order whenever the controller receives a request.
This sounds like a lot of work to do from scratch, but fortunately, the Plug package provides a module
that could help – the Plug.Builder module.
The Plug.Builder module can be used to define a pipeline of plugs that are executed one after
the other. It defines a plug/2 macro, which is the main interface to build a pipeline by adding a
plug to the list of already registered plugs. The plugs in the pipeline are executed in the order of their
definition, and the connection returned by the final plug is then passed along to the main plug call.
Here’s an example of this:
defmodule ExamplePlugPipeline do
use Plug.Builder
plug :plug1
plug :plug2
def plug1(conn, _opts) do
Understanding the Plug.Builder module
conn
|> put_session(:plug1, true)
end
def plug2(conn, _opts) do
conn
|> put_session(:plug2, true)
|> send_resp(200, "Done!")
end
end
As you can see from the preceding module, calling use with Plug.Builder also imports the Plug.
Conn module. This gives us access to functions such as put_session/3 and send_resp/3,
further helping us write cleaner plugs for the pipeline.
The act of using Plug.Builder makes a module a plug. This is because it defines a set of functions
and behavior inside the module, which allows it to be invoked just like a Plug module.
Plug.Builder can be used with the following options:
• log_on_halt: This allows us to configure what log level to use when a pipeline is halted.
• init_mode: This allows us to configure when to initialize the plug options. This can either
be set to :compile or :runtime. It defaults to :compile, but an example of using this
at :runtime would be when using a runtime configuration to authorize a request.
How is Plug.Builder implemented?
The Plug.Builder module itself is a plug under the hood. It implements the Plug behavior.
Therefore, it has implementations defined for init/2 and call/2. This makes it extremely
easy to integrate Plug.Builder with any HTTP server or a pre-existing Plug application.
Plug.Builder stores the list of “registered” plugs added to the pipeline by calling the
plug/2 macro as a module attribute: @plugs. Then, when it’s finally invoked using the
call/2 function, it uses the @plugs attribute to get a list of registered plugs and invokes
them in the correct order.
As part of the call/2 function, Plug.Builder checks whether the connection struct that
was returned from the previous plug is halted or not. If it is halted, it returns the connection
without calling the next plug. Otherwise, it proceeds with the rest of the plug pipeline.
The Plug API functions implemented in the Plug.Builder module can also be overridden to
further extend the module’s behavior.
95
96
Adding Controller Plugs and Action Fallback
However, overriding the call/2 function means overriding the Plug.Builder module’s
functionality, which sequentially invokes the list of plugs defined by the plug/2 macro. Therefore,
generally, when the Plug.Builder module’s call/2 is overridden, it is accompanied by manually
invoking its original implementation to access the ability to sequentially call the defined plug pipeline.
Let’s look at the following code snippet:
defmodule ExamplePlugPipeline do
use Plug.Builder
plug :plug1
plug :plug2
def call(conn, opts) do
conn
|> super(opts) # calls the original implementation
|> assign(:called_plugs, @plugs)
end
# ..
end
In the preceding module, we overrode the call/2 function and simply added a call to the assign/3
function, which sets the connection’s assigns value for the :called_plugs key to the @plugs
module attribute. At the time of compilation, the module attribute contains a list of all the plugs
registered until that point in the file. Therefore, this is a quick way of adding a list of plugs to the
connection after they are called.
defoverridable and super in Elixir
In Elixir, we can use defoverridable to make a function overridable outside the current
module. This is possible because of macros. Once a function is marked as overridable, Elixir
knows to define that function lazily, allowing developers to override it in the context of the
same module later in the module definition.
Elixir also provides a way to call the original implementation of an overridable function while
it’s being overridden. This is done by using the super/1 macro defined in the Kernel.
SpecialForms module. This allows the developers to override a function while still keeping
some of its functionality.
Elixir also allows developers to override a list of callbacks defined using a “behavior” by simply
defining the “behavior” module as overridable.
Once a plug returns a halted connection, Plug.Builder prevents any further plugs in the pipeline
from being called and therefore returns the halted connection.
Understanding the Plug.Builder module
For example, in the following code snippet, we have a pipeline of two plugs:
defmodule HaltPlugPipeline do
use Plug.Builder
plug :plug1
plug :halt
plug :plug2
def plug1(conn, _) do
conn
|> put_session(:plug1_called, true)
end
def halt(conn, _) do
conn
|> halt()
end
def plug2(conn, _) do
conn
|> put_session(:plug2_called, true)
end
end
In the preceding plug pipeline, plug2 will never be invoked because halt always returns a halted
connection. Therefore, Plug.Builder will prevent :plug2 from being called.
Let’s test this assertion by using the Plug.Test module, as shown in the following code snippet:
defmodule HaltPlugPipelineTest do
use ExUnit.Case
use Plug.Test
describe "call/2" do
test "invokes only plug1 and returns a halted
connection" do
conn = conn(:get, "/")
conn = HaltPlugPipeline.call(conn, [])
# Returns a halted connection
assert conn.halted
# Calls plug1
assert get_session(conn, :plug1_called)
97
98
Adding Controller Plugs and Action Fallback
# Doesn't call plug2
refute get_session(conn, :plug2_called)
end
end
end
In the preceding test, we’re invoking the HaltPlugPipeline plug defined by calling use with
the Plug.Builder module. We can see that the test returns a halted connection due to a call to the
halt/2 function. We also test that the returned connection has a session for :plug1_called set to
true but not :plug2_called, implying that the pipeline didn’t proceed after the :halt plug call.
Now that we have learned how the Plug.Builder module works, we can use that to implement
our own controller pipeline.
Building the controller pipeline
Let’s start with the example controller we created in the previous chapter as part of an example for
the Goldcrest.Controller module:
lib/goldcrest/support/example_controller.ex
defmodule Goldcrest.ExampleController do
import Plug.Conn
import Goldcrest.Controller
def call(conn, action: action) do
apply(__MODULE__, action, [conn, conn.params])
end
def greet(conn, _params) do
conn
|> put_status(200)
|> render(:json, %{status: "ok"})
end
# ..
end
And just as in the previous chapter, we can start an HTTP server serving the preceding controller by
running an iex shell and loading the controller and router files:
$ iex -S mix
iex> Code.require_file("./lib/goldcrest/support/example_controller.
ex")
Building the controller pipeline
iex> Code.require_file("./lib/goldcrest/support/example_router.ex")
iex> Mix.install([{:plug_cowboy, "~> 2.0"}])
iex> opts = [
...> scheme: :http,
...> plug: Goldcrest.ExampleRouter,
...> options: [port: 4040]
...> ]
iex> %{start: {mod, fun, args}} = Plug.Cowboy.child_spec(opts)
iex> apply(mod, fun, args)
{:ok, #PID<_,_,_>}
We can then ensure the server is working by making a curl request:
$ curl -v http://localhost:4040/greet
* Trying 127.0.0.1:4040...
* Connected to localhost (127.0.0.1) port 4040 (#0)
> GET /greet/ HTTP/1.1
> Accept: */*
>
* Mark bundle as not supporting multiuse
< HTTP/1.1 200 OK
< cache-control: max-age=0, private, must-revalidate
< content-length: 15
< content-type: application/json; charset=utf-8
< server: Cowboy
<
{"status":"ok"}%
Now, let’s add the Plug.Builder module to our controller and define a plug pipeline that checks
for an authorization header in an incoming request:
lib/goldcrest/support/example_controller.ex
defmodule Goldcrest.ExampleController do
use Plug.Builder
import Plug.Conn
import Goldcrest.Controller
def call(conn, action: action) do
conn = super(conn, [])
unless conn.state == :sent or conn.halted do
apply(__MODULE__, action, [conn, conn.params])
else
conn
99
100
Adding Controller Plugs and Action Fallback
end
end
# ..
end
In the preceding code snippet, we added a use call to the Plug.Builder module. As we learned
earlier in this chapter, Plug.Builder already defines an overridable call/2 function. Therefore,
we used the super/2 macro to invoke Plug.Builder.call/2 (the original implementation)
to call any plugs defined in the pipeline. We then check the state of the returned connection, and if
it’s not :sent or halted, we call the controller action.
Now, we can add a plug, ensure_authorized!, which checks for an authorization header in the
incoming connection:
lib/goldcrest/support/example_controller.ex
defmodule Goldcrest.ExampleController do
use Plug.Builder
import Goldcrest.Controller
plug :ensure_authorized!
# ..
defp ensure_authorized!(conn, _opts) do
if authorized?(conn) do
conn
else
conn
|> put_status(401)
|> render(:json, %{status: "Unauthorized"})
|> halt()
end
end
defp authorized?(conn) do
auth_header = get_req_header(conn, "authorization")
auth_header == ["Bearer #{token()}"]
end
defp token, do: "secret"
end
Building the controller pipeline
In the preceding code snippet, we used the Plug.Conn functions imported from calling use with
the Plug.Builder module to check whether the request header contains the correct authorization
token. For the sake of simplicity, we’re setting the token to a compile-time value of "secret".
Let’s restart our server:
$ iex -S mix
iex> Code.require_file("./lib/support/example_controller.ex")
iex> Code.require_file("./lib/support/example_router.ex")
iex> Mix.install([{:plug_cowboy, "~> 2.0"}])
iex> opts = [
...> scheme: :http,
...> plug: Goldcrest.ExampleRouter,
...> options: [port: 4040]
...> ]
iex> %{start: {mod, fun, args}} = Plug.Cowboy.child_spec(opts)
iex> apply(mod, fun, args)
{:ok, #PID<_,_,_>}
We can now see that making a request without an authorization header returns a 401 response:
$ curl -v http://localhost:4040/greet
* Trying 127.0.0.1:4040...
* Connected to localhost (127.0.0.1) port 4040 (#0)
> GET /greet HTTP/1.1
> Host: localhost:4040
> User-Agent: curl/7.79.1
> Accept: */*
>
* Mark bundle as not supporting multiuse
< HTTP/1.1 200 OK
< cache-control: max-age=0, private, must-revalidate
< content-length: 25
< content-type: application/json; charset=utf-8
< server: Cowboy
<
* Connection #0 to host localhost left intact
{"status":"Unauthorized"}%
If we pass the wrong authorization header, it still returns a 401 response:
$ curl --header "Authorization: Bearer badtoken" -v http://
localhost:4040/greet
* Trying 127.0.0.1:4040...
* Connected to localhost (127.0.0.1) port 4040 (#0)
> GET /greet HTTP/1.1
> Host: localhost:4040
101
102
Adding Controller Plugs and Action Fallback
> User-Agent: curl/7.79.1
> Accept: */*
> Authorization: Bearer badtoken
>
* Mark bundle as not supporting multiuse
< HTTP/1.1 200 OK
< cache-control: max-age=0, private, must-revalidate
< content-length: 25
< content-type: application/json; charset=utf-8
< server: Cowboy
<
* Connection #0 to host localhost left intact
{"status":"Unauthorized"}%
If, however, we pass the correct authorization header, we get a 200 (successful) response:
$ curl --header "Authorization: Bearer secret" -v http://
localhost:4040/greet
* Trying 127.0.0.1:4040...
* Connected to localhost (127.0.0.1) port 4040 (#0)
> GET /greet/ HTTP/1.1
> Host: localhost:4040
> User-Agent: curl/7.79.1
> Accept: */*
> Authorization: Bearer secret
>
* Mark bundle as not supporting multiuse
< HTTP/1.1 200 OK
< cache-control: max-age=0, private, must-revalidate
< content-length: 15
< content-type: application/json; charset=utf-8
< server: Cowboy
<
* Connection #0 to host localhost left intact
{"status":"ok"}%
Now, we can define a plug pipeline for our controller. Unlike Phoenix, however, our controller cannot
define plugs that are conditionally invoked based on a guard clause. We will work on adding this
functionality once we’ve covered metaprogramming in the next section.
Implementing action fallback
Implementing action fallback
Phoenix supports using a plug as a fallback to any controller action. This plug can be used to translate data
returned by a controller action that is not a %Plug.Conn{} struct into a %Plug.Conn{} struct. The
fallback plug is registered by calling the Phoenix.Controller.action_fallback/1 macro.
The following is a controller that uses action_fallback:
defmodule ExampleWeb.PageController do
use Phoenix.Controller
action_fallback ExampleWeb.FallbackController
def index(conn, params) do
case list_pages(params) do
{:ok, pages} -> render(conn, "index.html",
pages: pages)
other -> other # includes {:error, :bad_params}
end
end
# ..
end
We can see in the preceding controller that if list_pages/1 doesn’t return {:ok, pages}, the
action itself doesn’t return a connection. Phoenix, very smartly, delegates anything other than a %Plug.
Conn{} struct to the module registered as action_fallback, along with the original connection
that was passed to the action. In this case, if list_pages/1 returns {:error, :bad_params},
it calls ExampleWeb.FallbackController.call(conn, {:error, :bad_params}).
An advantage of doing something like this is that it allows developers to centralize error handling from
all the controllers to one plug while focusing on the happy paths in the controller itself.
Let’s now look at an example of a fallback plug:
defmodule ExampleWeb.FallbackController do
use Phoenix.Controller
def call(conn, {:error, :bad_params}) do
conn
|> put_status(500)
|> put_view(ExampleWeb.ErrorView)
|> render("500.html")
end
end
103
104
Adding Controller Plugs and Action Fallback
In the preceding plug, we define a call function that knows how to handle any unhandled controller
actions that return {:error, :bad_params}. In this case, it simply updates the status to 500
and renders an error page.
Now, that we’ve seen action_fallback in action, let’s try implementing it for our controller. We
can start by updating an action, redirect_greet/2, to conditionally return something other
than %Plug.Conn{}, preferably an error tuple ({:error, term()}):
defmodule Goldcrest.Controller.ExampleController do
# ..
def redirect_greet(conn, params) do
case validate_params(params) do
:ok ->
conn
|> redirect(to: "/greet")
other ->
other
end
end
defp validate_params(%{"greet" => "true"}), do: :ok
defp validate_params(_), do: {:error, :bad_params}
# ..
end
After making the preceding change, redirect_greet/2 only redirects if it is called with the
%{"greet" => "true"} parameters. Otherwise, it delegates the error to a fallback module,
which we will work on next.
Now, let’s update the call/2 function to invoke a registered fallback plug if an action doesn’t return
the %Plug.Conn{} struct. We can do that by first extracting out the apply/3 call into a simpler
function called apply_action/2, and then updating apply_action/2 to check for the return
value when an action is invoked:
defmodule Goldcrest.Controller.ExampleController do
# ..
@fallback_plug Goldcrest.Controller.ExampleFallback
def call(conn, action: action) do
conn = super(conn, [])
unless conn.state == :sent or conn.halted do
apply_action(conn, action)
else
Implementing action fallback
conn
end
end
defp apply_action(conn, action) do
case apply(__MODULE__, action, [conn, conn.params]) do
%Plug.Conn{} = conn -> conn
other -> @fallback_plug.call(conn, other)
end
end
# ..
end
In the preceding code snippet, we have defined fallback_plug as a module attribute, @fallback_
plug, which gets called whenever an action doesn’t return a connection.
Now, let’s go ahead and implement the Goldcrest.Controller.ExampleFallback plug:
defmodule Goldcrest.Controller.ExampleFallback do
import Plug.Conn
import Goldcrest.Controller
def call(conn, {:error, :bad_params}) do
conn
|> put_status(500)
|> render(:json, %{error: "bad params"})
end
end
In the preceding module, we defined a call/2 function similar to the call/2 function that was
defined in the Phoenix callback module earlier. This function knows how to handle the {:error,
:bad_params} response from a controller action.
For this to work, we need to test out our controller action with some query parameters. We just need
one more plug to translate the URL’s query parameters into the parameters assigned to the connection.
Let’s add a Plug.Parsers call to our router, which will parse the query string and add it to our
connection for further use by the controller:
defmodule Goldcrest.ExampleRouter do
use Plug.Router
# Add this plug
plug Plug.Parsers,
parsers: [:urlencoded, :json],
json_decoder: Jason
105
106
Adding Controller Plugs and Action Fallback
# ..
end
Now, we’re ready to test out our controller with the fallback plug. Let’s restart our server and make a
curl request to the redirect_greet path without the parameter first:
$ curl --header "Authorization: Bearer secret" -v \
"http://localhost:4040/redirect_greet"
* Trying 127.0.0.1:4040...
* Connected to localhost (127.0.0.1) port 4040 (#0)
> GET /redirect_greet HTTP/1.1
> Host: localhost:4040
> User-Agent: curl/7.79.1
> Accept: */*
> Authorization: Bearer secret
>
* Mark bundle as not supporting multiuse
< HTTP/1.1 200 OK
< cache-control: max-age=0, private, must-revalidate
< content-length: 22
< content-type: application/json; charset=utf-8
< server: Cowboy
<
* Connection #0 to host localhost left intact
{"error":"bad params"}%
We can see that the preceding response was {"error": "bad params"}. Therefore, our fallback
is working as expected.
Now, to make sure redirect_greet is also working, let’s make a final request with the
proper parameters:
$ curl --header "Authorization: Bearer secret" -v \
"http://localhost:4040/redirect_greet?greet=true"
* Trying 127.0.0.1:4040...
* Connected to localhost (127.0.0.1) port 4040 (#0)
> GET /redirect_greet?greet=true HTTP/1.1
> Host: localhost:4040
> User-Agent: curl/7.79.1
> Accept: */*
> Authorization: Bearer secret
>
* Mark bundle as not supporting multiuse
< HTTP/1.1 302 Found
< cache-control: max-age=0, private, must-revalidate
Summary
< content-length: 72
< content-type: text/html; charset=utf-8
< location: /greet
< server: Cowboy
<
* Connection #0 to host localhost left intact
<html><body>You are being <a href="/greet">redirected</a>.</body></
html>%
As expected, we got a redirected response. Therefore, we can conclude that the redirect_greet/2
action works as expected with our new fallback module.
Summary
In this chapter, we learned how modern web frameworks such as Rails and Phoenix define a way to
hook into a request from a controller, check for certain conditions, and in some cases, halt the request
pipeline. We then learned about the details of the Plug.Builder module, how to implement it,
and how we can use it to add that feature into our controller.
After learning how to test our Plug.Builder module, we learned how to use the overridable
call/2 function to define a fallback plug for a controller action. In this way, we can standardize
the error handling across many controllers, allowing developers to focus on the happy path while
writing the controllers.
Now that we have a working set of controllers and routers for our web framework, we will focus on
adding views and HTML templates in a dynamic, server-rendered manner in the next chapter.
107
6
Working with HTML and
Embedded Elixir
In the previous chapter, we learned how to leverage plugs to implement controllers and routers for
our web framework. We were able to receive an HTTP request from our web server and, using our
controllers, respond with HTML content. However, the HTML content was always static. In order to
support server-side rendering of HTML in a more dynamic way, we need the ability to define HTML
templates that have parts that can be dynamically evaluated right before responding. Rails does this
using HTML files embedded with Ruby code, which is dynamically evaluated right before the response.
Phoenix, before version 1.6, used a similar strategy using the EEx package.
In this chapter, we will dig into the EEx library and learn how to use its API. We will learn how it
works and how it can be used to add templating abilities to our server-side rendered HTML responses.
In this chapter, we will cover the following topics:
• What is EEx?
• How to use EEx
• Integrating with EEx to send dynamic HTML content
• Testing dynamically generated HTML conventionally
• Using Floki, an HTML parser, to test dynamically generated HTML
Technical requirements
This chapter relies on Elixir 1.12.x and Erlang 23.2.x. The code snippets in this chapter are
relatively simple, so if you’re short on time, this would be a good chapter to not code along with. I
still recommend following along, especially if you’re new to Elixir.
Also, similar to previous chapters, we will be using curl to test the responses from our HTTP server.
Therefore, a terminal multiplexer would again be helpful.
110
Working with HTML and Embedded Elixir
The code examples for this chapter can be found at https://github.com/PacktPublishing/
Build-Your-Own-Web-Framework-in-Elixir/tree/main/chapter_06
Understanding and exploring embedded elixir
Embedded Elixir allows us to embed Elixir code inside a string in a consistent and robust way, outlined
by the EEx package. This further allows us to write templates that can be dynamically evaluated
using Elixir.
EEx makes the following code possible:
$ iex
iex> string = "Hello <%= @person %>"
"Hello <%= @person %>"
iex> EEx.eval_string(string, assigns: [person: "World"])
"Hello World"
In the preceding code snippet, we were able to add the ability to evaluate an otherwise static string
dynamically using Elixir. In the string, anything inside the <% and %> tags is evaluated as Elixir.
Therefore, if we have the variables or functions in the context of evaluation, inside those tags they will
get evaluated on calling EEx.eval_string/3. Here’s an example where we evaluate a function
inside a string using embedded Elixir:
$ iex
iex> string = "Hello <%= String.downcase(@person) %>"
"Hello <%= String.downcase(@person) %>"
iex> EEx.eval_string(string, assigns: [person: "World"])
"Hello world"
Since we called String.downcase/1 inside the tags this time, it downcased the given string,
"World", during evaluation.
We can also use EEx to evaluate the contents of a file. Let’s create a new file, message.eex:
./message.eex
Hello <%= String.capitalize(@person) %>
Now, let’s use the message.eex file as a template to generate a string:
$ iex
iex> EEx.eval_file("message.eex", assigns: [person: "world"])
"Hello World"
Understanding and exploring embedded elixir
In the preceding example, we can see that calling EEx.eval_file/3 returns the string with a
capitalized World, since we’re calling String.capitalize/1 inside the eex tags.
Defining functions dynamically in a module
Just as we used EEx.eval_file/3 to evaluate the contents of a file dynamically, we can also use
EEx.function_from_file/5 to dynamically define functions in a module at compile time.
Let’s define the contents of a function in a file:
./function_body.eex
<% IO.puts "This function was called with #{a} and #{b}" %>
<%= a + b %>
In the preceding file, we do two operations. First, we print (for logging purposes) what the function
is called with. Since we wrapped the IO.puts/1 call in <% without =, it will not be part of the final
string, which is the result of the evaluation of the file.
Now, let’s use the preceding file to define a function in a new module:
./module_a.ex
defmodule ModuleA do
require EEx
EEx.function_from_file(:def, :fun_a, "function_body.eex",
[:a, :b])
end
In the preceding module, we use EEx.function_from_file/5 to indicate that we’re defining
a public function named fun_a, which takes two arguments, a and b, and returns the string that is
the result of evaluating function_body.eex with the passed values for a and b.
We can test this function out in iex:
$ iex
iex> Code.require_file("module_a.ex")
[
{ModuleA,
<<70, 79, 82, 49, 0, 0, 7, 240, 66, 69, 65, 77, 65, 116,
85, 56, 0, 0, 0, 200, 0, 0, 0, 21, 14, 69, 108, 105,
120, 105, 114, 46, 77, 111, 100, 117, 108, 101, 65, 8,
95, 95, 105, 110, 102, 111, 95, ...>>}
]
iex> return_value = ModuleA.fun_a(1, 2)
111
112
Working with HTML and Embedded Elixir
This function was called with 1 and 2
"\n3\n"
iex> return_value
"\n3\n"
As expected, calling ModuleA.fun_a/2 with two arguments first prints a message and then sets
the stringified version of the sum of two arguments as the return value.
Now that we know how to compile the contents of eex as a function, let’s take a look at compiling
the template as part of the module’s AST itself.
Compiling a template with a module
EEx also provides a way to use a template file at compile time to generate an Elixir Abstract Syntax
Tree (AST). We will learn more about what ASTs are and how they work in Elixir in Chapter 7, but
to summarize, it is a tree representation of Elixir code.
Let’s start by defining another embedded file, ast.eex:
./ast.eex
"<%= a %> <%= b %>"
The preceding code returns a concatenated string, consisting of two embedded variables, a and b.
Now, let’s compile the preceding file using EEx.compile_file/2 in an iex shell:
$ iex
iex> EEx.compile_file("ast.eex")
{:__block__, [],
[
{:=, [],
[
{:arg0, [], EEx.Engine},
{{:., [],
[{:__aliases__, [alias: false], [:String, :Chars]},
:to_string]}, [],
[{:a, [line: 1], nil}]}
]},
{:=, [],
[
{:arg1, [], EEx.Engine},
{{:., [],
[{:__aliases__, [alias: false], [:String, :Chars]},
:to_string]}, [],
[{:b, [line: 1], nil}]}
Understanding and exploring embedded elixir
]},
{:<<>>, [],
[
"\"",
{:"::", [], [{:arg0, [], EEx.Engine}, {:binary, [],
EEx.Engine}]},
" ",
{:"::", [], [{:arg1, [], EEx.Engine}, {:binary, [],
EEx.Engine}]},
"\"\n"
]}
]}
We can see in the preceding output that calling EEx.compile_file/2 on ast.eex returns a
three-element nested tuple. That tuple is the Elixir version of the AST we will learn more about in
Chapter 7. Let’s see what happens after we evaluate that AST:
$ iex
iex> ast = EEx.compile_file("ast.eex")
# output hidden
iex> {output, _} = Code.eval_quoted(ast, a: "Hello", b: "World")
iex> output
"\"Hello World\"\n"
As we can see in the preceding code, calling Code.eval_quoted/2 on the AST returned by
EEx.compile_file/2, with a as Hello and b as World, returned the Hello World output.
Working with EEx options
All functions in the EEx module support several options. We will be covering some of the important
ones in this section and how they affect the final output of the evaluation:
• :file: This defaults to "nofile" when a string is being compiled, or the template file path
where eex is defined. This can also be used for debugging purposes.
• :line: Similar to :file, this defaults to the line on the template file or 1 if being compiled
from a string.
• :trim: This defaults to false, but it can be set to true when we want to remove white space
around the evaluated string. This ensures that at least one newline is retained.
• :indentation: This defaults to 0, but it can be set to a positive integer when an indentation
is desired for the final string.
• :engine: EEx Engine is used to evaluate the template. This defaults to EEx.SmartEngine.
113
114
Working with HTML and Embedded Elixir
Using EEx Smart Engine
EEx comes with the ability to override the engine that is being used to evaluate a template. The default
engine used by EEx is EEx.SmartEngine. This module is built on top of the regular EEx.Engine
but provides a way to speed up evaluation of a template by adding a special type of binding, assigns.
Let’s first take a look at an example:
./assigns.eex
<%= @a %> <%= @b %>
Now, let’s use the preceding template file to define a function in a module:
./module_b.ex
defmodule ModuleB do
require EEx
EEx.function_from_file(:def, :fun_b, "assigns.eex", [:assigns])
end
Updating our template and function to only take :assigns allows us to send different assigns
without having to re-compile the template.
Now, let’s test out ModuleB.fun_b/1:
$ iex
iex> Code.require_file("module_b.ex")
[
{ModuleB,
<<70, 79, 82, 49, 0, 0, 7, 68, 66, 69, 65, 77, 65, 116,
85, 56, 0, 0, 0,218, 0, 0, 0, 22, 14, 69, 108, 105,
120, 105, 114, 46, 77, 111, 100, 117, 108, 101, 66,
8, 95, 95, 105, 110, 102, 111, 95, ...>>}
]
iex> ModuleB.fun_b(a: "Hello", b: "World")
"Hello World\n"
iex> ModuleB.fun_b(a: "Hola", b: "World")
"Hola World\n"
This is super helpful to speed up the evaluation of templates while keeping the interface to use the
templates simple and consistent. Phoenix uses a similar strategy to evaluate its templates.
Understanding and exploring embedded elixir
Understanding custom markers
EEx supports many markers that can be used alongside <% tags. An example of those markers is =.
When the tag is used with = as <%=, it lets the default engine know that the result of the statement
must be added to the evaluated string.
Similar to =, EEx supports other markers that can be used when writing a custom engine:
• "": No marker. In the default engine, this implies that the statement needs to be part of the
AST, but it shouldn’t be part of the final binary that will be returned as the final result.
• "=": As explained earlier, this lets the default engine know to evaluate and return the statement
as part of the final result.
• "|": No default implementation. This raises a syntax error.
• "/": No default implementation. This raises a syntax error.
The aforementioned markers can be used to write a custom EEx engine that implements EEx.
Engine behavior, which we will discuss in the next section.
Building a custom EEx engine
Now, that we’ve seen how the default EEx.SmartEngine works, it’s time for us to write a custom engine
of our own. As part of this engine, we will be extending the functionality of EEx.SmartEngine by
adding a new implementation for the | marker, and delegating the rest to EEx.SmartEngine itself.
Now, let’s define a custom EEx engine that behaves like the EEx.Engine module. Let’s also start
by delegating all the functions to EEx.SmartEngine:
./custom_engine.ex
defmodule CustomEngine do
@behaviour EEx.Engine
@delegate_to EEx.SmartEngine
@impl true
defdelegate init(opts), to: @delegate_to
@impl true
defdelegate handle_body(state), to: @delegate_to
@impl true
defdelegate handle_begin(state), to: @delegate_to
@impl true
115
116
Working with HTML and Embedded Elixir
defdelegate handle_end(state), to: @delegate_to
@impl true
defdelegate handle_text(state, meta, text),
to: @delegate_to
@impl true
def handle_expr(state, marker, expr), to: @delegate_to
end
In the preceding module, we have defined a custom engine module that simply delegates all its behavior
to EEx.SmartEngine.
Now, let’s override the handle_expr/3 function only for the "|" marker. For the purposes of this
example, let’s say the desired behavior for this marker is calling IO.inspect/2 on the result of the
expression. So, let’s add two clauses for handle_expr/3. The first one matches on the "|" marker,
and the second one is the general clause that delegates to EEx.SmartEngine.
Let’s make changes to the CustomEngine module:
./custom_engine.ex
defmodule CustomEngine do
# ..
@impl true
def handle_expr(state, "|", expr) do
expr =
quote do
IO.inspect(unquote(expr))
end
handle_expr(state, "", expr)
end
# General clause
def handle_expr(state, marker, expr) do
EEx.SmartEngine.handle_expr(state, marker, expr)
end
end
Understanding and exploring embedded elixir
In the preceding code, we have defined a general clause for handle_expr/3, which simply delegates
to EEx.SmartEngine, along with a clause that matches on "|" as the marker. In the matching
clause, we simply update the expression to call IO.inspect/2 on the given expr, and then call
handle_expr/3 with the given state, the updated expression, and "" as the marker, indicating
that we don’t want the final string to be part of the result.
Now, it’s time to test our custom engine module. Let’s start by defining a new template:
./custom_ast.eex
<%| a + b %>
<%= a %> <%= b %>
In the preceding template, we first call <%| on the a + b expression, indicating that we want to
inspect the output of a + b. We then print the result of concatenating a and b. Therefore, the final
result must only contain the concatenation, but evaluating the template should print/inspect a + b.
Now, let’s evaluate the preceding template. Let’s first use EEx.SmartEngine to evaluate it to make
sure it results in EEx.SyntaxError:
$ iex
iex> EEx.eval_file("custom_ast.eex", [a: 1, b: 2])
** (EEx.SyntaxError) ::: unsupported EEx syntax <%| %>
(the syntax is valid but not supported by the current
EEx engine)
lib/eex/engine.ex:211: EEx.Engine.handle_expr/3
lib/eex.ex:275: EEx.eval_file/3
As we can see in the preceding code, the "|" marker isn’t implemented by default. Therefore, let’s now
evaluate it with CustomEngine as engine. For that, we’ll first need to require the file, custom_
engine.ex, and then call EEx.eval_file/3 with CustomEngine as the option for engine:
$ iex
iex> Code.require_file("custom_engine.ex")
[
{CustomEngine,
<<70, 79, 82, 49, 0, 0, 10, 152, 66, 69, 65, 77, 65,
116, 85, 56, 0, 0, 0, 244, 0, 0, 0, 21, 19, 69, 108,
105, 120, 105, 114, 46, 67, 117, 115, 116,111, 109,
69, 110, 103, 105, 110, 101, 8, 95, 95, ...>>}
]
iex> return_val = EEx.eval_file(
...> "custom_ast.eex",
...> [a: 1, b: 2],
...> engine: CustomEngine
...> )
117
118
Working with HTML and Embedded Elixir
3
"\n1 2\n"
iex> return_val
"\n1 2\n"
As we can see, only the stringified result of the concatenation of a and b is returned by the expression,
and the result of a + b is printed/inspected on evaluation, as expected.
This was one simple application of a custom EEx engine. Next, let’s learn how to update our HTTP
server to respond with HTML rendered using EEx templates.
Responding with html.eex files
Now that we know how to use EEx to create templates using Elixir, it’s time to start responding with
embedded Elixir with our HTTP server.
Let’s start by creating a new mix project:
$ mix new example_server_html_eex
In order to use Goldcrest with this new app, let’s start by adding goldcrest as a mix dependency
in example_server_html_eex:
mix.exs
defmodule ExampleServerHtmlEex.MixProject do
# ..
defp deps do
[
{:goldcrest, "~> 0.0.1"}
]
end
end
We can fetch the dependency by running $ mix deps.get, and once fetched, let’s add a Router
module. This router will be very similar to the one we created in Chapter 5, with the only difference
being the content type of the response. For this router, we will respond with the text/html content:
lib/example_server_html_eex/router.ex
defmodule ExampleServerHtmlEex.Router do
use Plug.Router
alias ExampleServerHtmlEex.Controller
Responding with html.eex files
plug Plug.Parsers,
parsers: [:urlencoded, :multipart],
pass: ["text/html", "application/*"]
plug :match
plug :dispatch
get "/greet", do: Controller.call(conn, action: :greet)
match _ do
send_resp(conn, 404, "<h1>Not Found</h1>")
end
end
In the preceding router, we use the Plug.Router plug with the parsers, allowing requests text/
html content type. We also use match and the dispatch plug explained in Chapter 5 to control
the flow of the request. Finally, we define a GET route on the /greet path, which routes the request
to the ExampleServerHtmlEex.Controller module’s greet action, and return a 404
response for any other matches.
Now, it’s time to define ExampleServerHtmlEex.Controller with the :greet action,
which returns the text/html content that points to a file. This controller will be similar to the one
we wrote in Chapter 5, which uses Plug.Builder and imports Plug.Conn and Goldcrest.
Controller to get useful functions and behaviors to build a controller:
lib/example_server_html_eex/controller.ex
defmodule ExampleServerHtmlEex.Controller do
use Plug.Builder
import Plug.Conn
import Goldcrest.Controller
def call(conn, action: action) do
conn = super(conn, [])
apply(__MODULE__, action, [conn, conn.params])
end
def greet(conn, _params) do
conn
|> put_status(200)
|> render(:html, "<h1>Hello World</h1>")
119
120
Working with HTML and Embedded Elixir
end
end
The preceding controller defines a call/2 function similar to Chapter 5. It also defines a greet/2
function that simply returns a 200 response with static HTML content, Hello World.
Let’s spin up iex and start a server to test this controller:
$ iex -S mix
iex> opts = [
...> scheme: :http,
...> plug: ExampleServerHtmlEex.Router,
...> options: [port: 4040]
...> ]
iex> %{start: {mod, fun, args}} = Plug.Cowboy.child_spec(opts)
iex> apply(mod, fun, args)
{:ok, #PID<0.313.0>}
Now, without quitting the preceding session, visit http://localhost:4040/greet on your
web browser. Doing this should yield the following result.
Figure 6.1: The greet response
Now that we have a controller set up to respond with static text/html content, it’s time to use the
power of EEx to make our HTML content dynamic.
Let’s start by defining our HTML template in the priv/templates folder:
priv/templates/greet.html.eex
<h1><%= @greeting %> World!</h1>
In the preceding template file, we have the final HTML dynamic by making @greeting a variable.
By using @ variables in the template, we also imply that we will be using the EEx.SmartEngine
:assigns feature, described earlier in the chapter.
Responding with html.eex files
Now, it’s time to update the controller to first take a custom greeting as a parameter, and respond with
the HTML template in the greet.html.eex file with the given greeting:
lib/example_server_html_eex/controller.ex
defmodule ExampleServerHtmlEex.Controller do
# ..
def greet(conn, %{"greeting" => greeting}) do
conn
|> put_status(200)
|> render_html("greet.html.eex", greeting: greeting)
end
require EEx
# wrapper around `Goldcrest.Controller.render/3` to
# render html.eex templates from `priv/templates` folder.
defp render_html(conn, file, assigns) do
contents =
file
|> html_file_path()
|> EEx.eval_file(assigns: assigns)
render(conn, :html, contents)
end
# fetches html file from `priv/templates` directory
defp html_file_path(file) do
Path.join([
:code.priv_dir(:example_server_html_eex),
"templates",
file
])
end
end
In the preceding code snippet, we updated the ExampleServerHtmlEex.Controller.
greet/2 function to match on the parameters. It now expects a greeting to be present when the
greet action is invoked.
We have also defined two private functions, render_html/3 and html_file_path/1, that are
responsible for fetching, reading, and evaluating an HTML template from the priv/templates
folder and rendering its HTML contents, using EEx.SmartEngine’s assigns.
121
122
Working with HTML and Embedded Elixir
Now, it’s time to test the new /greet endpoint. Let’s restart our server:
$ iex -S mix
iex> opts = [
...> scheme: :http,
...> plug: ExampleServerHtmlEex.Router,
...> options: [port: 4040]
...> ]
iex> %{start: {mod, fun, args}} = Plug.Cowboy.child_spec(opts)
iex> apply(mod, fun, args)
{:ok, #PID<0.313.0>}
Now, in a new browser window, let’s visit the URL for greet with a greeting parameter, http://
localhost:4040/greet?greeting=Hola. We should see something that looks like the
following page:
Figure 6.2: The greet response with a custom greeting
Great! We have successfully managed to respond with a dynamic server-rendered HTML document
using our web framework. Now, it’s time to test out our controllers with the HTML response.
Testing our templates
In order to test our controllers with HTML responses, we will again leverage the Plug.Test module.
Let’s start by creating a test module:
test/example_server_html_eex/controller_test.exs
defmodule ExampleServerHtmlEex.ControllerTest do
use ExUnit.Case
use Plug.Test
describe "GET /greet" do
test "responds with an HTML document" do
conn = conn(:get, "/greet?greeting=Hola")
conn = ExampleServerHtmlEex.Router.call(conn, [])
assert conn.status == 200
Testing with Floki
assert conn.resp_body =~ "<h1>Hola World!</h1>"
end
end
end
In the preceding code, we make a GET request to /greet, with the greeting query parameter
set to Hola. Therefore, we expect the resulting HTML to contain <h1>Hola World!</h1> and
respond with a status of 200.
We can write similar tests for another use case where we don’t send a greeting as a parameter:
test/example_server_html_eex/controller_test.exs
defmodule ExampleServerHtmlEex.ControllerTest do
# ..
test "raises error if no greeting provided" do
conn = conn(:get, "/greet")
assert_raise(Plug.Conn.WrapperError, fn ->
ExampleServerHtmlEex.Router.call(conn, [])
end)
end
end
end
When running the preceding test file, we should get two green tests:
$ mix test
..
Finished in 0.1 seconds (0.00s async, 0.1s sync)
2 tests, 0 failures
Randomized with seed 849460
In the preceding test file, we test the HTML body of the response as a string and check whether the
string contains <h1>Hola World!</h1>. There are better ways to test HTML content using
HTML parsers. Let’s take a look at that in the next section.
Testing with Floki
In this section, we will update our controller test written in the previous section to test HTML elements
returned by the response body. This will allow us to better ensure that the final HTML rendered by
the controller is correct. In order to do this, we will use floki.
123
124
Working with HTML and Embedded Elixir
Floki is an HTML parser written purely in Elixir. With floki, we can parse an HTML string into
a struct and search for notes using HTML and CSS selectors. It’s a great tool to programmatically
interpret HTML in Elixir, such as web scraping. One of its other common uses is to test server-side
rendered HTML in Phoenix and other Elixir web applications.
Let’s start by adding floki to the mix.exs dependencies:
mix.exs
defmodule ExampleServerHtmlEex.MixProject do
# ..
defp deps do
[
{:goldcrest, "~> 0.0.1"},
{:floki, ">= 0.0.0", only: :test}
]
end
end
After running $ mix deps.get, we can update our controller test to test the actual content of the
HTML returned by the GET /greet endpoint:
test/example_server_html_eex/controller_test.exs
defmodule ExampleServerHtmlEex.ControllerTest do
# ..
describe "GET /greet" do
test "responds with an HTML document" do
conn = conn(:get, "/greet?greeting=Hola")
conn = ExampleServerHtmlEex.Router.call(conn, [])
assert conn.status == 200
{:ok, html} = Floki.parse_document(conn.resp_body)
heading =
html
|> Floki.find("h1")
|> Floki.text()
assert heading == "Hola World!"
end
Summary
end
end
In the preceding test, we first called Floki.parse_document/1 on the HTML response to
ensure that the HTML document returned by GET /greet is valid. We then found the first element
of type h1 by using Floki.find/2. Finally, we piped the element into Floki.text/1 to get
the value of the heading. This is just one example of how Floki can help us write better tests for our
HTML responses.
Summary
In this chapter, we first learned what EEx is. We covered several ways of using it, from dynamically
evaluating a string to using a template file for a module’s compilation. We also learned about EEx.
SmartEngine, the default engine used by EEx for templating. We wrote a custom engine,
CustomEngine, which used a marker that inspected the result of an element.
We then used all those concepts to update our HTTP server to return server-rendered HTML. We
wrapped up by writing tests for our HTTP server and added Floki, an HTML parser, to write tests
that allow us to validate an HTML response and test the attributes of an element.
In the next chapter, we will add the logic to define view modules, which will make using templates
easier by housing some shared helper functions made accessible in the templates.
125
7
Working with Views
In the last few chapters, we learned how to render an HTML response for our web framework using
the controller itself. In this chapter, we will learn about the view component that will be responsible
for performing that rendering in a much better way. We will first extract some of the rendering and
EEx logic to the new view module, and then define helper functions that will help us to render HTML
and can be called in from the EEx template itself. We will then write a complete example application
using the current state of our web framework.
The following are the topics that this chapter will cover:
• What is a view and what are its responsibilities?
• Defining a view module
• Calling a view module from the controller module
• Using EEx to pass helper functions at the time of evaluation
• Testing the view module
• Creating a new web application using Goldcrest
By the end, we will have an interface to simplify defining EEx templates with an appropriate place to
house all the view helper functions.
Technical requirements
This chapter also relies on Elixir 1.12.x and Erlang 23.2.x. Most of this chapter includes extracting
logic from the controller to the view component and exposing it in a way that makes sense. Therefore,
while still recommended, it’s not required you code along while reading this chapter.
In this chapter, I will also assume that you’ve read through and followed along with the previous
chapter’s code snippets. Since we will be expanding on how EEx engines work, it is important that
you understand how EEx works and how we used EEx in the previous chapter to respond with
server-rendered HTML.
128
Working with Views
Also, since we will be building our own views, any experience with views in a Model-View-Controller
(MVC) framework such as Phoenix or Rails will be helpful, although not required.
The code examples for this chapter can be found at https://github.com/PacktPublishing/
Build-Your-Own-Web-Framework-in-Elixir/tree/main/chapter_07
What is a view?
A view is the component of a web framework that is responsible for presenting data to an end user in
a digestible way. Typically, in HTML-based web applications, a view is also responsible for handling
the end user’s interaction with the application.
In an MVC framework, a view is generally called from a controller implicitly, as with object-oriented
web frameworks such as Rails and Django, or explicitly, as with functional web frameworks such as
Phoenix. In Chapter 4, we explained how a request-response cycle works in a typical MVC flow. We can
see how a view is called toward the end of the request phase and how it is responsible for presenting
data in the response phase.
Figure 7.1: The MVC flow
In many web frameworks, views also have accompanying helper components such as templates,
partials, or view components. Next, let’s look at how views behave in Phoenix.
Views in Phoenix
In Phoenix, views act as helper modules, which are called from the controllers toward the end of a
request and are responsible for rendering HTML using a template. In Phoenix, the views and templates
have to comply with a strong naming convention. For example, PageController calls a PageView
module to render templates present in the web/templates/page/ folder by default.
By default, Phoenix generates LayoutView along with the web/templates/layout folder,
containing a root.html.eex file (root.html.heex in newer versions). This template is
rendered after every request, and within this template, other individual templates are rendered using
other views. Let’s take a look at an example of a Phoenix view and a template, for the Page resource.
Views in Phoenix
Let’s first look at the controller again:
defmodule ExampleWeb.PageController do
use ExampleWeb, :controller
def index(conn, params) do
case Example.Page.load_data(params) do
{:ok, data} ->
render(conn, "index.html", data: data)
{:error, error} ->
conn
|> put_flash(:error, error)
|> redirect(to: "/")
end
end
end
The preceding controller calls the render/3 function, which gets delegated to PageView, defined
in the following code snippet, which further renders the index.html.eex template.
The following is an example of a view module:
defmodule ExampleWeb.PageView do
use ExampleWeb, :view
def heading, do: "Index Page"
end
In the aforementioned code snippet, we can see that a view module by default is just a simple
module that inherits most of its behavior from the use macro. Doing this enables PageView to
act like a Phoenix view and render templates with given assigns. We can also see that it defines a
heading/0 function, which simply responds with a string. To understand views better, let’s look at
the corresponding index.html.eex:
<h1><%= heading() %></h1>
We can see how the preceding HTML embeds Elixir, very similar to how we used EEx in the previous
chapter. One thing worth noticing is how the heading/0 function defined in the view module
can be called in the eex template. This isn’t something we have implemented yet, but it is a key
feature in cleaning up our templates with reusable helper functions. We will implement this in the
following sections.
129
130
Working with Views
Building a view interface
In order to build a view interface, let’s first start with the example_server_html_eex app that
we built in the previous chapter. In this app, we made the controller module responsible for both
capturing a request from a router and rendering the final HTML. In this section, we will start by
moving the rendering responsibility to Goldcrest.View.
We can start by defining the Goldcrest.View module that can house the render/3 function, which
evaluates the EEx template and calls the render function in the Goldcrest.Controller module.
Let’s create a new file in the goldcrest package:
lib/goldcrest/view.ex
defmodule Goldcrest.View do
require EEx
alias Goldcrest.Controller
def render(conn, file, assigns) do
contents =
file
|> html_file_path()
|> EEx.eval_file(assigns: assigns)
Controller.render(conn, :html, contents)
end
defp html_file_path(file) do
# TODO
end
end
In the preceding code snippet, we defined the Goldcrest.View module, which uses EEx.eval_
file/2 to first evaluate the contents of the given file and then calls Goldcrest.Controller.
render/3 to render the HTML contents. We also defined a private placeholder function, html_
file_path, which is responsible for converting the given filename to a file path.
In order to define html_file_path, we need to first come up with a way to set a path to place
all the templates for the application. In the case of example_server_html_eex, we placed the
templates in the priv folder, but that might not be the case for all the applications. So, let’s use the
application-level configuration for goldcrest to define templates_path. With this approach,
we can set templates_path for each application at the config level and use Application.
fetch_env!/2 to get the configuration.
Building a view interface
Let’s implement html_file_path now:
lib/goldcrest/view.ex
defmodule Goldcrest.View do
# ..
defp html_file_path(file) do
templates_path()
|> Path.join(file)
end
defp templates_path do
Application.fetch_env!(:goldcrest, :templates_path)
end
end
Now that we have successfully moved the rendering responsibility to the view, we can update the
controller module in example_server_html_eex to just call Goldcrest.View directly:
lib/example_server_html_eex/controller.ex
defmodule ExampleServerHtmlEex.Controller do
# ..
# Update render to call `Goldcrest.View` here
defp render(conn, file, assigns) do
Goldcrest.View.render(conn, file, assigns)
end
end
In Phoenix, we saw how each resource had a controller and a view module, so in order to keep that
pattern, let’s move the responsibility of rendering to a view module:
lib/example_server_html_eex/controller.ex
defmodule ExampleServerHtmlEex.Controller do
# Update render to call `ExampleServerHtmlEex.View` here
defp render(conn, file, assigns) do
ExampleServerHtmlEex.View.render(conn, file, assigns)
end
end
131
132
Working with Views
Now, let’s define our view module with a render/3 function that simply delegates to Goldcrest.
View.render/3:
lib/example_server_html_eex/view.ex
defmodule ExampleServerHtmlEex.View do
def render(conn, file, assigns) do
Goldcrest.View.render(conn, file, assigns)
end
end
Now, we have successfully moved our functions to define a central view interface for the controller.
Next, we will update Goldcrest.View.render/3 to allow us to pass helper functions from our
view module to the templates, similar to Phoenix.
Passing helper functions to templates
We saw earlier in the chapter how Phoenix allows us to use functions defined in the view module inside
the templates. This further allows us to clean up the templates and extract shared/complex logic in the
templates, by moving it to the views. In this section, we will learn how we can use the EEx module
to pass functions to the HTML templates.
In the previous chapter, we used the first two arguments of EEx.eval_file/3 to pass a file path
and list of variable bindings to the template. The third argument of this function is a list of options,
one of which is :functions. By using the :functions key, we can pass a list of functions that
are accessible to the template at the time of its evaluation. We can use this feature to pass a list of
functions defined in the view module to our HTML template.
Now that we know how to pass a list of functions to a template, we just need a way to get a list of
all the public functions defined in the view module. Once we have that list, we can pass the list of
functions as a value to the :functions option for the EEx.eval_file/3 call. We can use the
Module.__info__/1 function to get that information.
Passing helper functions to templates
The__info__1 callback
Elixir defines a function __info__1 on every module that's defined in memory. The purpose
of this function is to get information related to the metadata of every module. This includes
functions, macros, attributes, hashes , and so on.
The__info__1 function takes one atom as the argument. The atom can be one of the following:
:attributes: To get a list of persisted module attributes defined
:functions: To get a list of public functions along with their arity
:macros: To get a list of public macros along with their arity
:module: To get the atomified name of a module
:md5: To get the unique MD5 hash of the module
:compile: To get the module’s compile-time metadata
Now, let’s update Goldcrest.View to take the view module as the first argument. This will allow
us to pass a list of functions defined in the view module at the time of the template evaluation:
lib/goldcrest/view.ex
defmodule Goldcrest.View do
# ..
def render(view_module, conn, file, assigns) do
functions = view_module.__info__(:functions)
contents =
file
|> html_file_path()
|> EEx.eval_file(
[assigns: assigns],
functions: [
{view_module, functions}
]
)
Controller.render(conn, :html, contents)
end
end
133
134
Working with Views
In the preceding code snippet, we used the __info__/1 reflection function for the given view
module to evaluate a template using EEx, which has access to all the public functions defined in
the view module. Now, we can update the render function in the ExampleServerHtmlEex.
View module to send itself as the first argument to the Goldcrest.View.render/4 function:
lib/example_server_html_eex/view.ex
defmodule ExampleServerHtmlEex.View do
def render(conn, file, assigns) do
# sends `__MODULE__` as the first argument.
Goldcrest.View.render(__MODULE__, conn, file, assigns)
end
end
Now, we can use our view module as a helper module whose functions can be accessed in the
templates for better organization. I know it’s not ideal to have to manually pass the module name to
the render function, but we can improve the interface in Part 3 of the book, where we will learn about
metaprogramming and build a cleaner interface around all our components.
Taking Goldcrest for a spin
In this section, we will use what we’ve built, and the features we’ve added to Goldcrest up to this point,
to build an example web application. This application will support routes that respond with both
HTML and JSON. We will also test out the new feature added to Goldcrest.View, which allows
us to call a helper function inside an HTML template.
Let’s start by creating a new mix project and adding goldcrest to its mix dependencies:
mix.exs
$ mix new tasks_web --sup
..
$ cd tasks_web
defmodule TasksWeb.MixProject do
# ..
# Run "mix help deps" to learn about dependencies.
defp deps do
[
{:goldcrest, path: "../goldcrest"}
]
end
end
Taking Goldcrest for a spin
Running mix deps.get should resolve hex dependencies for the tasks_web app.
Now, let’s add a router module with a default 404 handler. This should be very similar to the one we
added in earlier chapters:
lib/tasks_web/router.ex
defmodule TasksWeb.Router do
use Plug.Router
plug Plug.Parsers,
parsers: [:urlencoded, :multipart],
pass: ["text/html", "application/*"]
plug :match
plug :dispatch
match _ do
send_resp(conn, 404, "<h1>Not Found</h1>")
end
end
In order for our requests to reach our router, we need to hook it up to a web server. Let’s update our
application supervision tree to start an HTTP server that routes to TasksWeb.Router:
lib/tasks_web/application.ex
defmodule TasksWeb.Application do
# ..
@impl true
def start(_type, _args) do
children = [
{
Plug.Goldcrest.HTTPServer,
[
plug: TasksWeb.Router,
port: 4040,
options: []
]
}
]
# See https://hexdocs.pm/elixir/Supervisor.html
# for other strategies and supported options
135
136
Working with Views
opts = [strategy: :one_for_one,
name: TasksWeb.Supervisor]
Supervisor.start_link(children, opts)
end
end
Now, we have a web server running, which simply responds with a 404 message to all incoming
requests. Let’s start our server and try it:
$ mix run --no-halt
01:02:40.650 [info] Started a webserver on port 4040
In a separate terminal window, we can make a request to our running server:
$ curl http://localhost:4040
<h1>Not Found</h1>
Let’s now add a new controller, TasksWeb.TaskController, which is a way to manage a task
resource. In order to keep our infrastructure simple, we will avoid the use of any database or ecto;
therefore, we will store tasks in a running process using the Agent interface.
We will define three actions in our TasksWeb.TaskController:
• GET index (HTML): This will be an HTML interface to get a list of all the tasks added to
our application.
• POST create (HTML): This will be an HTML interface that provides a way to add tasks
to our application.
• GET delete (JSON): This will also be an HTML interface, to remove tasks from our
application. We’re making this action GET instead of DELETE to ensure easier HTML in the
latter part of the chapter.
In order to support the preceding actions, we will first have to add the corresponding routes to our router:
lib/tasks_web/router.ex
defmodule TasksWeb.Router do
# ..
alias TasksWeb.TaskController
get "/tasks/:id/delete", do: TaskController.call(conn,
action: :delete)
get "/tasks", do: TaskController.call(conn,
action: :index)
post "/tasks", do: TaskController.call(conn,
action: :create)
Taking Goldcrest for a spin
match _ do
send_resp(conn, 404, "<h1>Not Found</h1>")
end
end
In the preceding code snippet, we add three new routes to the Router module, which delegate to
the appropriate TaskController’s actions. As usual, we also add a general match clause for any
requests that don’t match any defined routes. This simply responds with a 404 HTML page.
Defining a store
In order to properly implement these controller actions, let’s first define our store. As mentioned
earlier, we will use Elixir’s Agent interface to store a list of tasks, represented by a two-element tuple
(a name and a description). The best way to store them is in a long-running process, which is part
of the application’s supervision tree. Let’s define a TasksWeb.Tasks module, which provides an
interface to interact with the Agent process that will store all the tasks.
We will use three functions defined in the Agent module:
• Agent.start_link/2: This is used to start a long-running process with an initial state
and given name. We will be using the name of the module (TasksWeb.Tasks) for easier
access in future functions.
• Agent.get/2: This is used to list all the elements (tasks) stored in the agent with a given name.
• Agent.update/2: This is used to add or delete an element from the list of elements stored
in the agent with the given name:
lib/tasks_web/tasks.ex
defmodule TasksWeb.Tasks do
@moduledoc """
In-memory, volatile store for tasks. Relies on Agent
interface.
"""
def start_link, do: Agent.start_link(fn -> [] end,
name: __MODULE__)
def child_spec(opts) do
%{
id: __MODULE__,
start: {__MODULE__, :start_link, opts},
type: :worker,
137
138
Working with Views
restart: :permanent,
shutdown: 500
}
end
def list, do: Agent.get(__MODULE__, & &1)
def add(name, description) do
Agent.update(__MODULE__, & &1 ++ [{name, description}])
end
def delete(index) do
Agent.update(__MODULE__, &List.delete_at(&1, index))
end
end
In the preceding code snippet, we define an interface to manage the process, which stores a list of
tasks as its state. We define functions such as start_link/0, add/2, delete/1, and list/0
to interact with the process and perform Create Read Update Delete (CRUD) actions on the list of
tasks. Furthermore, we define a child_spec/1 function, which returns a specification that can be
used to add this process to Supervisor as part of the application’s supervision tree.
Next, let’s use the child_spec/1 function to add TasksWeb.Tasks to the supervision tree
children defined in the TasksWeb.Application module:
lib/tasks_web/application.ex
defmodule TasksWeb.Application do
# ..
@impl true
def start(_type, _args) do
children = [
{
Plug.Goldcrest.HTTPServer,
[
plug: TasksWeb.Router,
port: 4040,
options: []
]
},
{
TasksWeb.Tasks,
[]
}
Taking Goldcrest for a spin
]
# See https://hexdocs.pm/elixir/Supervisor.html
# for other strategies and supported options
opts = [strategy: :one_for_one,
name: TasksWeb.Supervisor]
Supervisor.start_link(children, opts)
end
end
Similar to Plug.Goldcrest.HTTPServer, we’ve also added TasksWeb.Tasks to the list of
children being supervised by TasksWeb.Supervisor. In the case of TasksWeb.Tasks, we’ve
provided an empty list as options, which get delegated to the initial list of tasks when the process is
started. This will ensure that on the application’s startup, the state of the TasksWeb.Tasks process
is an empty list.
Now that we have a way to store and interact with the tasks stored in our application, we can call
the functions defined in the TasksWeb.Tasks module in the TasksWeb.TaskController
module as part of the controller actions.
The index action
Let’s start by defining the index action. We can take most of the code in this new module from the
code provided in the ExampleServerHtmlEex.Controller module. This includes the use
and import statements, the call/2 and render/3 functions, and the arity of the controller
actions. Once we have those functions, we can define the index/2 function in the TasksWeb.
TaskController module:
lib/tasks_web/controllers/task_controller.ex
defmodule TasksWeb.TaskController do
use Plug.Builder
import Plug.Conn
alias TasksWeb.Tasks
# Taken from other examples
def call(conn, action: action) do
conn = super(conn, [])
apply(__MODULE__, action, [conn, conn.params])
end
def index(conn, _params) do
tasks = Tasks.list()
139
140
Working with Views
conn
|> put_status(200)
|> render("tasks.html.eex", tasks: tasks)
end
# Taken from other examples
defp render(conn, file, assigns) do
TasksWeb.TaskView.render(conn, file, assigns)
end
end
In the preceding code snippet, we’ve taken some code from other example controllers as indicated
previously and have defined an index/2 function, which corresponds to the get action in the
controller. In the action, we use the TasksWeb.Tasks module’s function, list/0, to get the
list of tasks defined in the module, and we call render/2 with the name of the html.eex file to
be rendered.
In order for our controller to now compile, we must define a view module, TasksWeb.TaskView,
which defines the render/3 function, much like the ExampleServerHtmlEex.View module:
lib/tasks_web/view/task_view.ex
defmodule TasksWeb.TaskView do
def render(conn, file, assigns) do
Goldcrest.View.render(__MODULE__, conn, file, assigns)
end
end
The preceding code snippet is identical to the ExampleServerHtmlEex.View module, as it
simply delegates the render/3 function to the Goldcrest.View.render/4 function.
Next, we need to update the configurations to specify templates_path as part of our mix
project, :goldcrest:
config/config.exs
use Mix.Config
config :goldcrest,
templates_path: "priv/templates"
Taking Goldcrest for a spin
Now that we have set templates_path to "priv/templates", we can add the template
that is rendered as part of the index action of the controller, tasks.html.eex, in the priv/
templates folder:
priv/templates/tasks.html.eex
<table>
<thead>
<tr>
<th>Name</th>
<th>Description</th>
</tr>
</thead>
<tbody>
<%= for {name, description} <- @tasks do %>
<tr>
<td><%= name %></td>
<td><%= description %></td>
</tr>
<% end %>
</tbody>
</table>
In the preceding code snippet, we simply use a list comprehension (for) to render a list of tasks
in a list of table rows. This file looks very similar to a Phoenix template, where the list of tasks is
accessed by the @tasks attribute, which is passed to the template at the time of its evaluation by
EEx.SmartEngine, which was covered in the previous chapter.
Now, let’s test out our web application. We can start our application by running mix run --no-halt.
Let’s first hit a route that doesn’t exist, / (root). We should see a 404 response with the HTML body
saying Not Found.
Figure 7.2: The Not Found request
141
142
Working with Views
Now, let’s try making a request to the GET /tasks route. This should respond with an HTML table
with zero rows, since we haven’t added any tasks to our app yet.
Figure 7.3: The empty tasks request
The create action
Now that we have a way to list all the tasks in our store, let’s come up with an interface to add a new task.
We can start by adding a form as part of the HTML rendered by the index action itself. Submitting
this form should invoke a new controller action, create.
So, let’s update our tasks.html.eex template to render a form:
priv/templates/tasks.html.eex
<h1>Listing Tasks</h1>
<table>
<thead>
<tr>
<th>Name</th>
<th>Description</th>
</tr>
</thead>
<tbody>
<%= for {name, description} <- @tasks do %>
<tr>
<td><%= name %></td>
<td><%= description %></td>
</tr>
<% end %>
</tbody>
</table>
<br />
<hr />
<h1>Add new Task</h1>
<form method="POST" action="/tasks">
Taking Goldcrest for a spin
<label for="name">Name:</label>
<br />
<input type="text" id="name" name="name">
<br><br>
<label for="description">Description:</label>
<br>
<textarea id="description" name="description">
</textarea>
<br><br>
<input type="submit">
</form>
In the preceding code snippet, we add a new section to the HTML, rendered as part of the GET /
tasks request. This new section is a form that POST to the /tasks path with the form parameters.
Let’s try making the same GET /tasks request again by restarting our web application.
$ mix run --no-halt
Figure 7.4: Tasks with a form
143
144
Working with Views
Now that we have a form, let’s define a controller action, create/2, which takes parameters from
this form and inserts a new task in our store:
lib/tasks_web/controllers/task_controller.ex
defmodule TasksWeb.TaskController do
use Plug.Builder
import Plug.Conn
alias TasksWeb.Tasks
def create(conn, %{"name" => name, "description" =>
description}) do
Tasks.add(name, description)
conn
|> Goldcrest.Controller.redirect(to: "/tasks")
end
end
In the preceding code snippet, we define a create/2 action that simply takes two parameters – a
name and a description. It uses those two parameters coming from the form to create a new task and
then redirects back to the index action.
It’s time to restart our app and try submitting a form to create a new task. Since the action redirects
back to the index page, we should see a new task that is created by submitting the form.
$ mix run --no-halt
Figure 7.5: Task form submission
Taking Goldcrest for a spin
Now, let’s submit the preceding form!
Figure 7.6: Task form post-submission
In the preceding screenshot, we can see that after submitting the newly created form, a new row is
created in the tasks table, indicating that the task was added to our store.
The delete action
Now that we have a way to create and list all the tasks, all that’s left in our routes is to handle the
deletion of a task.
Similar to the create action, let’s start by adding the HTML interface to delete a task. In this case,
a link next to each row in the index table would be the easiest way to implement this.
Let’s update tasks.html.eex again:
priv/templates/tasks.html.eex
<h1>Listing Tasks</h1>
<table>
<thead>
<tr>
<th>Name</th>
<th>Description</th>
<th></th>
</tr>
</thead>
145
146
Working with Views
<tbody>
<%= for {{name, description}, index} < Enum.with_index(@tasks) do %>
<tr>
<td><%= name %></td>
<td><%= description %></td>
<td>
<a href="/tasks/<%= index %>/delete">Delete</a>
</td>
</tr>
<% end %>
</tbody>
</table>
</form>
In the preceding code snippet, we add a new header with no text and a new column to reach the row
of the tasks table. This column will contain a link to delete a specific task using its index.
Let’s render this page with a new task. We should see a similar page to the one shown here.
Figure 7.7: Task with a Delete link
Taking Goldcrest for a spin
Now, let’s define the delete action in the TaskController module:
lib/tasks_web/controllers/task_controller.ex
defmodule TasksWeb.TaskController do
use Plug.Builder
import Plug.Conn
alias TasksWeb.Tasks
def delete(conn, %{"id" => id}) do
id
|> String.to_integer()
|> Tasks.delete()
conn
|> Goldcrest.Controller.redirect(to: "/tasks")
end
end
Now, let’s restart our app again, add a new task, and try clicking the Delete link:
$ mix run --no-halt
Figure 7.8: Empty task
147
148
Working with Views
A new task is added with the Delete link.
Figure 7.9: After clicking the Delete link
Now that we have implemented all three controller actions, this concludes the features we will be
adding to our web framework. From here onwards, we will leverage one of Elixir’s most powerful
features, metaprogramming, to wrap everything we’ve built within a simple, idiomatic interface, just
like Phoenix.
Summary
In this chapter, we learned the concept of a view and a view helper. We learned how Phoenix implements
a view and how it makes defining templates a lot easier. We then learned how we can pass helper
functions to an EEx template and used that information to define our own view interface.
Finally, we wrapped up by combining all the previously written code and building a fully functional
web application with an in-memory data store, using Elixir’s Agent interface. This chapter also
marks an end to the non-metaprogramming parts of this book. From here on out, our goal is to define
a better and reusable interface for all the code we’ve written until now.
Exercises
While building the TasksWeb application, we didn’t write tests for all the routes and requests. We
instead relied on viewing the final rendered HTML. How would you go about testing all the routes
and controller actions defined in this app? What use cases and edge cases would you like to test?
Part 3:
DSL Design
In this part, you will learn about metaprogramming in Elixir and how to wrap the functionality built
in Part 2 in an interface that’s easy to use and read.
This part includes the following chapters:
• Chapter 8, Metaprogramming – Code That Writes Code
• Chapter 9, Controller and View DSL
• Chapter 10, Building the Router DSL
8
Metaprogramming – Code That
Writes Code
In this chapter, we will learn about one of the most powerful features of Elixir, metaprogramming. Writing
a simple piece of Elixir code is referred to as programming, and writing Elixir code that programmatically
injects behavior into other Elixir code is referred to as metaprogramming. Metaprogramming allows
us to extend Elixir’s features and facilitate developer productivity by automating the otherwise tedious
and manual process of adding repetitive boilerplate code.
Let’s take the Phoenix router, for example:
blog/lib/blog_web/router.ex
defmodule BlogWeb.Router do
# ..
pipeline :browser do
plug :fetch_session
plug :accepts, ["html"]
end
scope "/", BlogWeb do
pipe_through [:browser]
get "/posts", PostController, :index
end
end
The preceding Domain - Specific Language (DSL) is only possible due to metaprogramming. On
the surface, this code looks easy to follow and understand, but there is a lot going on under the hood.
152
Metaprogramming – Code That Writes Code
In this chapter, we will uncover some of the constructs that allow us to write DSLs, such as the Phoenix
router. We will not only cover the fundamentals of metaprogramming in Elixir but also understand
some of the risks involved in using it, and how to minimize them. We will then finish by covering
different ways to test that code.
We will cover the following topics in this chapter:
• The pros and cons of metaprogramming
• When to use metaprogramming
• How to use metaprogramming sustainably
• Abstract syntax trees
• Quoted literals in Elixir
• Code injection
• The hygienic evaluation of quoted literals
• Macros
• The Elixir compilation process
• Compile-time callbacks
• Building a DSL in Elixir
Technical requirements
This chapter is filled with a lot of iex examples, along with the usual Elixir code snippets. To get
the most out of this chapter, I recommend following along with all the iex examples and trying to
change a few things to see how that changes the final results.
Just like the rest of this book, this code in this chapter was run using Elixir 1.12.x and Erlang 23.2.x.
This chapter is one of the harder chapters to understand in this book because of the nature of
metaprogramming. Therefore, reading it multiple times and experimenting with the code in the chapter
is the key to setting up a good metaprogramming foundation for the rest of the book.
The code examples for this chapter can be found at https://github.com/PacktPublishing/
Build-Your-Own-Web-Framework-in-Elixir/tree/main/chapter_08
The pros and cons of metaprogramming
The pros and cons of metaprogramming
Let’s take a look at the router example again:
blog/lib/blog_web/router.ex
defmodule BlogWeb.Router do
# ..
pipeline :browser do
plug :fetch_session
plug :accepts, ["html"]
end
scope "/", BlogWeb do
pipe_through [:browser]
get "/posts", PostController, :index
end
end
In the preceding code example, we can easily define a /posts route that accepts html requests and
routes requests to the PostController.index/2 action. The code is concise, standardized,
and easy to digest.
Here are the pros of metaprogramming. Metaprogramming can do the following:
• Hide the complexity of implementation under a simple and concise layer of abstraction. This
is often referred to as a DSL.
• Increase developer productivity because the amount of code that needs to be written could be
drastically reduced, as seen in the preceding router example.
• Automate and standardize repetitive boilerplate code. This way, we won’t have to worry
about supporting multiple implementations of the same problem because it is enforced via a
simpler interface.
Metaprogramming, as with any other powerful feature, has a lot of cons as well. The following are
some of those:
• Metaprogramming decreases code transparency. This comes hand in hand with hiding the
complexity of implementation. Since it’s easier to digest the DSL part of code, it becomes a lot
harder to understand the implementation. This also means it can be very hard to do things
that don’t follow a convention.
153
154
Metaprogramming – Code That Writes Code
• Metaprogramming increases overall code complexity. This should be an expected result because
when you write metaprogrammed code, you’re writing code of a higher order. It’s code that takes
other code as arguments, and therefore, it is oftentimes harder to test, maintain, and debug.
Metaprogramming is extremely powerful, and with this great power comes great responsibility. This
responsibility mostly entails using it thoughtfully.
When to use metaprogramming
Now that we know that metaprogramming has its own pros and cons, it is very important to learn
about when to use it and how to decide whether you need it or not. The simplest answer to this
question is almost never. In other words, before even considering metaprogramming, you should try
to implement your solution without it. There are two advantages to this:
• You will most likely write a good, less complex solution that doesn’t rely on metaprogramming,
and has low maintenance costs.
• You will write an almost complete solution that will exist independent of any metaprogrammed
code. This also sets you up to decouple your interface (the metaprogrammed code) from your
implementation (the non-metaprogrammed code).
Here are some other points for you to consider when considering metaprogramming. Use
metaprogramming in the following situations:
• When you have exhausted all the other options. As mentioned previously, metaprogramming
is complex and should be used as the very last resort.
• When you are writing a DSL that will be used in multiple places. Using metaprogramming
prematurely is one of the most common mistakes developers make. If you have requirements for
DSL that will be used only for one project, there is generally no need to wrap it in an interface
(especially a metaprogrammed interface). Waiting for future implementations allows you to
first see whether you need to write a DSL to avoid copying the code, and also gauge how the
requirements change between those use cases. This will further allow you to better define your
interface. Remember that flexibility comes at the cost of complexity, so there’s no need to write
a flexible interface prematurely.
• When you have minimized metaprogrammed code – that is, separated your interface from your
implementation. This will significantly cut the cost of maintaining the code base.
• When you have maximized its determinism by adding thorough unit tests and integration
tests. Since metaprogramming is more complex than your everyday code, it relies a lot more
on automated tests. If your interface is complex enough, it might even make sense to add
property-based tests to increase your confidence in its behavior. This is also another place where
separating the interface from the implementation will help. This way, you can more easily test your
metaprogrammed code (the interface) without necessarily having to test your implementation.
Metaprogramming in Elixir
• When you have maximized its inspectability. Most metaprograms are not inspectable. Therefore,
they are not very debuggable. Putting thought into adding introspective features to a DSL could
significantly decrease the pain of debugging and extending the interface.
• When the cost of failure is minimal. It’s always easier to use metaprogramming for something
such as tests than production code. This is not to say that tests are not important, but at least
the cost of failure for them wouldn’t suddenly impact your application.
To summarize, metaprogramming is a great tool and it’s not evil. However, it needs to be used very
thoughtfully, with an understanding that you’re adding code of a higher order of complexity.
Metaprogramming in Elixir
In Elixir, metaprogramming is mostly used as a way to extend the language’s functionality and design
DSL to make code more readable and digestible. However, unlike many other metaprogrammable
languages, Elixir metaprogramming is quite restrictive. There are some safety mechanisms baked into
Elixir’s core library to prevent developers from doing something that could easily break the language.
For example, you cannot define a function in a module after it has already been defined. We will cover
more such mechanisms later in this chapter.
Metaprogramming in Elixir revolves around three main pillars:
• Quoted literals: The Elixir representation of an Abstract Syntax Tree (AST) of an Elixir program
• Dynamic code injection: Injecting behavior into existing code dynamically
• Compile-time callbacks: Updating a module or the behavior of a function before or after its
elements are defined
We will first start by understanding how an AST is represented in Elixir.
Abstract Syntax Tree
An Abstract Syntax Tree is a tree representation of the structure of source code written in
a programming language. This tree doesn’t represent all of the detail that appears in the code,
but just shows the basic structure that would impact its execution.
The tree is generated using the process of lexical analysis of code, also known as tokenization,
followed by the process of syntactical analysis, also known as parsing. Tokenization gets a list
of tokens (functions, operators, etc.) and, as part of the parsing process, those tokens are added
as nodes to a tree, which is the Abstract Syntax Tree.
For example, consider the following pseudo code:
log(pow(4, 2) + 5, 3)
155
156
Metaprogramming – Code That Writes Code
The preceding code will generate the following AST:
Figure 8.1: The AST for log(pow(4, 2) + 5, 3)
In the preceding diagram, we can see the tree representation of tokens generated after the lexical
analysis of the log(pow(4, 2) + 5, 3) expression, where each node is a function or a nested
function, and each leaf is an argument to the function.
Now that we understand what an AST is, let’s take a look at quoted literals, which are an AST
representation of Elixir code.
Understanding quoted literals
To properly understand metaprogramming in Elixir, you first have to see how Elixir represents its
code internally, and to do that, you have to understand the structure of an AST in Elixir. For any Elixir
code, there exists an AST representation in Elixir. This feature helps Elixir to be bootstrapped, where
most of Elixir is written in Elixir itself. Note that the Elixir representation of an AST is different from
the final AST generated by the Elixir code.
The Elixir representation of a program’s abstract syntax tree is referred to as quoted literals or quoted
expressions. Internally, every quoted literal in Elixir is composed of a three-element tuple.
Let’s look at the following code, for example:
{:*, [context: Elixir, import: Kernel], [a, b]} # AST for a * b
Understanding quoted literals
In the preceding code, we use a three-element tuple to represent an AST:
• The first element is the function being called. In this case, it is :*.
• The second element is the metadata. This has information about what modules are imported
and in what context an expression was quoted.
• The third element is the list of arguments for the function in the first element of the tuple. In
this case, it is a and b.
Elixir also provides the quote construct to convert vanilla Elixir code to its AST representation. Let’s
take a look at the following code:
iex> quote do: 1 * 2
{:*, [context: Elixir, import: Kernel], [1, 2]}
The preceding snippet shows the quoted version of an Elixir expression obtained using the quote/2
macro. It can be represented as a tree, using the first and the last elements of the tuple, as follows:
Figure 8.2: AST for 1 * 2
Now that we understand how an AST is represented in Elixir, we can take a look at a quoted literal
for a more complex block of code:
iex shell
iex> quote do
...> import IO
...> def hello, do: puts "Hello World!"
...> end
{:__block__, [],
[
{:import, [context: Elixir], [{:__aliases__,
[alias: false], [:IO]}]},
{:def, [context: Elixir, import: Kernel],
[{:hello, [context: Elixir], Elixir}, [do: {:puts, [],
157
158
Metaprogramming – Code That Writes Code
["Hello World!"]}]]}
]}
Let’s represent the final quoted literal in an AST, using the first and third elements of all the tuples.
Figure 8.3: AST for the above quoted literal
As you can see in the preceding figure, the quoted literal follows a tree-like structure where the first
element is the token (an operator or a function), the second element is metadata related to the code, and
the third element is a list of arguments that can also be another quoted literal as a three-element tuple.
Evaluating quoted literals
In Elixir, we can quickly evaluate a quoted literal using the Code.eval_quoted/3 function. So,
let’s use that function to better understand quoted literals:
iex shell
iex> quoted_expr = quote do: 1 + 1
{:+, [context: Elixir, import: Kernel], [1, 1]}
iex> Code.eval_quoted(quoted_expr)
{2, []}
The hygienic evaluation of quotes
The preceding quoted literal gets evaluated as expected. You might have noticed that Code.eval_
quoted/3 returns a two-element tuple. The first element is the result of the evaluation, and the
second element is binding (variables defined) with which the quoted literal was evaluated. Now,
let’s introduce some dynamic behavior to the expression:
iex shell
iex> quoted_expr = quote do: 1 + b
{:+, [context: Elixir, import: Kernel], [1, {:b, [], Elixir}]}
iex> Code.eval_quoted(quoted_expr)
** (CompileError) nofile:1: undefined function b/0
The preceding code shows us a variable to the quoted literal. The variable needs to be defined during
the time of its evaluation. A quick way of doing that is to merge the quoted literal with another one
that defines the b variable, another quoted literal (a quoted Elixir block):
iex shell
iex> quoted_expr = quote do: 1 + b
{:+, [context: Elixir, import: Kernel], [1, {:b, [], Elixir}]}
iex> quoted_expr2 = quote do: b = 2
{:=, [], [{:b, [], Elixir}, 2]}
iex> container_quoted_expr = {:__block__, [], [quoted_expr2, quoted_
expr]}
{:__block__, [],
[
{:=, [], [{:b, [], Elixir}, 2]},
{:+, [context: Elixir, import: Kernel], [1, {:b, [], Elixir}]}
]}
iex> Code.eval_quoted(container_quoted_expr)
{3, [{{:b, Elixir}, 2}]}
The preceding code returns what the expression evaluates to, 3, along with the variable bindings. Note
how we added quoted_expr2 to the container before quoted_expr. This is because we need
the b variable defined before we call 1 + b.
The hygienic evaluation of quotes
In Elixir, quoted literals are evaluated hygienically. This means variables defined outside the scope of
the quoted literals do not get defined inside the quoted literal scope. It also means that the variables
defined inside the quoted literals do not get defined outside the scope, even upon evaluation.
Let’s take a look at the following code:
iex shell
iex> expr = quote do: b = 2
{:=, [], [{:b, [], Elixir}, 2]}
159
160
Metaprogramming – Code That Writes Code
iex> Code.eval_quoted(expr)
{2, [{{:b, Elixir}, 2}]}
iex> b
** (CompileError) iex: undefined function b/0
As you can see in the preceding code, anything defined inside a quoted literal upon its evaluation isn’t
defined outside its scope. Even though the b variable was defined inside the scope of the expression
when it was evaluated, trying to reference it outside that scope raised an error.
Now, let’s look at the following code snippet:
iex shell
iex> a = 1
1
iex> expr = quote do: 1 + a
{:+, [context: Elixir, import: Kernel], [1, {:a, [], Elixir}]}
iex> Code.eval_quoted(expr)
warning: variable "a" does not exist and is being expanded to "a()",
please use
parentheses to remove the ambiguity or change the variable name
nofile:1
** (CompileError) nofile:1: undefined function a/0
The preceding code snippet shows that a variable defined outside the scope of a quoted literal cannot
be referenced inside the quoted literal. We can see that a was defined outside the quoted literal, but
referencing a inside the quoted literal raised an error upon evaluating it.
The hygienic evaluation of quoted literals was added to ensure that variables don’t leak in and out of
the scopes. This is to ensure that quoted blocks behave the way you expect them to at the time of their
definition and not depending on the environment in which they are evaluated.
Even though hygiene was added to quote evaluation as a safety mechanism, there are ways to bypass
it to add more dynamic behavior to quoted literals.
Adding dynamic behavior to quotes
As you might guess, it’s not feasible to merge two quoted literals manually every time we need to add
dynamic behavior to one. So, Elixir provides other constructs that allow us to manipulate a quoted
literal. We’re going to closely look at two of those next – unquote and var!.
Adding dynamic behavior to quotes
In Elixir, unquote is a way to add behavior to a quoted literal at the time of its definition. For example,
the following code uses unquote inside a quoted literal:
iex shell
iex> b = 3
iex> quoted_expr = quote do: 1 + unquote(b)
{:+, [context: Elixir, import: Kernel], [1, 3]}
As you can see, instead of returning [1, b] as the third element of the tuple, unquote evaluates
the value of b to return [1, 3] as the third element. Therefore, unquote updates a quoted literal
at the time of its definition.
We can use var! to add behavior to a quoted literal at the time of its evaluation.
Now, consider the following code:
iex shell
iex> b = 3
iex> quoted_expr = quote do: 1 + var!(b)
{:+, [context: Elixir, import: Kernel],
[1, {:var!, [context: Elixir, import: Kernel], [{:b, [], Elixir}]}]}
iex> Code.eval_quoted(quoted_expr, b: b)
{4, [b: 3]}
The preceding code uses var!/2, which allows us to evaluate a quoted literal at the time of its
evaluation, using the binding passed to Code.eval_quoted/3.
Unhygienic evaluation with var!
var! is a way to make an evaluation of a quoted literal (or an expansion of a macro) unhygienic.
This could lead to the quoted and unquoted environments conflicting with each other and result
in unexpected behavior of the final code. Therefore, it is important to be very careful before
using var!, as it could directly change the user environment.
Now that we know how to dynamically evaluate a quoted literal in a hygienic way, let’s put it to the
test by using it to inject behavior into a module at the time of its compilation.
161
162
Metaprogramming – Code That Writes Code
Code injection using evaluation
Now that we understand how Code.eval_quoted/3 works, we can use that function to inject
behavior into a module from another module.
The following is a module that defines a function that returns a quoted literal. The quoted literal,
when evaluated, further defines a hello function inside the module it is evaluated in. The function
is defined as a simple hello world function:
behavior_injector.ex
defmodule BehaviorInjector do
def behaviour_quoted_expr do
quote do
def hello, do: IO.puts "Hello world!"
end
end
end
Now, let’s use the previously defined module’s function inside another module:
test_subject.ex
defmodule TestSubject do
Code.eval_quoted(BehaviorInjector.behaviour_quoted_expr(), [], __
ENV__)
end
In the preceding code snippet, we need to provide __ENV__ in order to pass compile-time information
of the TestSubject module to properly inject behavior inside it. Now, it’s time to try it out in iex:
iex shell
iex> c "./behavior_injector.ex"
[BehaviorInjector]
iex> c "./test_subject.ex"
[TestSubject]
iex> TestSubject.hello()
Hello world!
:ok
We were able to successfully inject behavior from one module to another using the preceding method.
However, there is a cleaner (and correct) way to do it using the macro construct.
Code injection using macros
Code injection using macros
We learned that we can use Code.eval_quoted/3 to dynamically add behavior to a module, but
Elixir provides a cleaner and more consistent way of doing this, using macro.
Code.eval_quoted/3 allows us to inject code using a set of variable bindings and an environment.
macro, on the other hand, allows us to define a set of quoted literals at the time of their compilation
and evaluate the expressions, by simply invoking it like a function inside another module. A macro
can be defined by using defmacro/2, which itself is a macro.
To understand the preceding distinction better, let us use macro to implement the same
BehaviorInjector module and inject behavior in the TestSubject module:
behavior_injector.ex
defmodule BehaviorInjector do
defmacro define_hello do
quote do
def hello, do: IO.puts "Hello world!"
end
end
end
In the preceding code snippet, we simply replaced a function thats returns a quoted expression with
a macro:
test_subject.ex
defmodule TestSubject do
import BehaviorInjector
define_hello()
end
The preceding code uses a macro defined in the BehaviorInjector module by simply invoking it
in the TestSubject module. This alone is enough to define the hello function in TestSubject:
iex shell
iex> c "./behavior_injector.ex"
[BehaviorInjector]
iex> c "./test_subject.ex"
[TestSubject]
iex> TestSubject.hello()
Hello world!
:ok
163
164
Metaprogramming – Code That Writes Code
We can see in the preceding code that using a macro makes injecting code a lot easier and cleaner.
Another reason to use macros over Code.eval_quoted/3 is that macros are more restrictive,
and they don’t allow you to pass environments and variables easily to manipulate the final results of
a quoted literal evaluation.
The using macro
Elixir also has a special macro, <module>.__using__/1, which can be invoked by just calling
the use/2 keyword. This is a special macro that doesn’t need us to explicitly call require with the
module first before calling the macro.
For example, let’s update BehaviorInjector to define a __using__/1 macro:
behavior_injector.ex
defmodule BehaviorInjector do
defmacro __using__(_options) do
quote do
def hello, do: IO.puts "Hello world!"
end
end
end
Now, in order to call that macro, all we need to do is use the use/2 macro, as follows:
test_subject.ex
defmodule TestSubject do
use BehaviorInjector
end
In the preceding code, we only passed one argument to the use/2 macro because the second
argument is optional. Now, we can see that the final result and the final behavior of TestSubject
remained unchanged:
iex shell
iex> c "./behavior_injector.ex"
[BehaviorInjector]
iex> c "./test_subject.ex"
[TestSubject]
iex> TestSubject.hello()
Hello world!
:ok
Compile-time callbacks
Therefore, opt to define __using__/1 macros to inject behavior into other modules, as they can
be invoked by just calling use/2.
With this knowledge of injecting code using macros, let’s take a look at one of the key ways to
hook into a module’s compilation and use these macros to change the behavior of a module, using
compile-time callbacks.
Compile-time callbacks
Elixir also provides a mechanism to hook into the compilation of a module and perform tasks. These
tasks can range from something as simple as logging to something as complex as injecting behavior.
These callbacks can be registered by using special reserved module attributes, but they are invoked
depending on their type. There are three types of compile-time callbacks:
• @before_compile
• @after_compile
• @on_definition
Before compile
A callback registered using the @before_compile module attribute is registered as a before compile
callback. As the name suggests, this callback is invoked right before the module is finished compiling.
Since this callback is invoked after all the functions in the module are defined, it has access to the
module’s functions and its attributes.
The callback can be either a function or a macro, but it needs to be defined in a different module
outside of the current module, since it hasn’t done compiling.
Here is an example of a before compile callback. We took the same code for the preceding behavior_
injector and test_subject modules and used @before_compile to yield the same results:
behavior_injector.ex
defmodule BehaviorInjector do
defmacro __before_compile__(_env) do
quote do
def hello, do: IO.puts "Hello world!"
end
end
end
165
166
Metaprogramming – Code That Writes Code
In the preceding module, we replaced the __using__/1 macro with a __before_compile__/1
macro but kept the rest of the body identical. As you can see in the preceding code, __before_
compile__/1 takes only one argument, and that is the environment in which the callback was registered:
test_subject.ex
defmodule TestSubject do
@before_compile BehaviorInjector
end
We then updated TestSubject to add behavior, using the @before_compile callback instead
of use/2. Since the name of the macro in BehaviorInjector was __before_compile__/1,
all we needed to do was pass the module name to the @before_compile module attribute:
iex shell
iex> c "./behavior_injector.ex"
[BehaviorInjector]
iex> c "./test_subject.ex"
[TestSubject]
iex> TestSubject.hello()
Hello world!
:ok
Upon re-compiling the preceding files, we can see that the overall behavior of the TestSubject
module remained the same.
After compile
A callback registered using the @after_compile module attribute is registered as an after compile
callback. Just like its name, this callback is invoked right after the module is finished compiling.
Since the module is done compiling, this callback doesn’t have access to unpersisted module attributes.
An after compile can either be a function or a macro, and it can also be defined in the same module itself.
Here is an example of an after compile callback:
test_after_compile.ex
defmodule TestAfterCompile do
@after_compile __MODULE__
def __after_compile__(_env, _bytecode) do
IO.puts "Compiled #{__MODULE__}"
end
end
Compile-time callbacks
In the preceding code, we registered an after compile callback to print a message when the module
is finished compiling.
Therefore, upon compiling the preceding module in iex, we can see that the message is printed right
after the compilation:
iex shell
iex> c "./test_after_compile.ex"
Compiled TestAfterCompile # prints compilation message
[TestAfterCompile]
The function or macro registered as an after compile callback takes the environment and the final
bytecode of the compiled module.
On-definition
Callbacks registered using the @on_definition module attributes are on-definition callbacks.
These are functions (not macros) that are invoked whenever a function or a macro is finished defining
in the module.
Similar to @before_compile, this function needs to live in a different module, as the current
module isn’t done compiling.
In order to restrict what developers can do with this callback, Elixir only allows functions to be
registered as on-definition callbacks.
Let’s define a function that can be registered as an on-definition callback:
on_def.ex
defmodule OnDef do
def __on_definition__(_, _, name, _, _, body) do
IO.puts """
Defining a function named #{name}
with body:
#{Macro.to_string(body)}
"""
end
end
An on-definition callback function takes six arguments – the environment, the kind of function or
macro (private or public), the name of the function or macro, a list of arguments as quoted literals, a
list of guards as quoted literals, and a body of the function or macro as a quoted literal.
167
168
Metaprogramming – Code That Writes Code
Here is an example of registering an on-definition callback:
test_on_def.ex
defmodule TestOnDef do
@on_definition OnDef
def hello, do: IO.puts "world"
end
In iex, we can see the message printed when compiling the test_on_def.ex file:
iex shell
iex> c "./on_def.ex"
[OnDef]
iex> c "./test_on_def.ex"
Defining a function named hello
with body:
[do: IO.puts("world")]
[TestOnDef]
The compile-time callbacks are invoked in the order in which they’re registered. This means if a
module has multiple @before_compile callbacks registered, it will invoke them in the order in
which they were registered. This also means that future callbacks can override the functions/behaviors
defined in the previous callbacks.
These three types of compile-time callbacks make Elixir a really powerful metaprogrammable language,
with the ability to hook into a module’s compilation and log/change its behavior. However, just like
any metaprogramming construct, they should be used with a lot of thought and care.
Now that we understand some of the key constructs of metaprogramming in Elixir, let’s use this to
build a DSL in the next part.
Building a music DSL in Elixir
Now that we know the fundamentals of metaprogramming in Elixir, let’s build a DSL. This DSL will
be used to compose music using Elixir.
Here are the features of the DSL that we will be building:
• The DSL will provide a simple interface to compose music using Elixir
• It will utilize the ALSA aplay command to play a note
• The DSL should be able to define a sequence of notes so that the sequence can be reused
throughout the track
Building a music DSL in Elixir
• A note should have the following attributes:
A class: C, D, E, F, G, A, B, or rest
A modifier: sharp or base
A duration in seconds
A volume
An octet to determine the final frequency
• A sequence should be able to embed notes from another sequence
• The DSL should be easy to read, idiomatic, and deterministic
Now, let’s come up with the shape of the DSL.
One of my favorite DSLs in Elixir is the Phoenix router. The interface is very simple and easy to learn,
while still giving a lot of transparency to the developer using the DSL. So, taking inspiration from the
Phoenix router, the following is the DSL I came up with for this project:
defmodule Music.DSLExample do
use Music.DSL
sequence :do_re_mi do
note(:c, octet: 4, volume: 50, duration: 0.25)
note(:d, modifier: :base, duration: 0.25)
note(:e, modifier: :base, duration: 0.25)
end
sequence :fa_so_la_ti_do do
note(:f, octet: 4, volume: 50, duration: 0.25)
note(:g, modifier: :base, duration: 0.25)
note(:a, duration: 0.25)
note(:b, duration: 0.25)
note(:c, octet: 5, duration: 0.25)
end
sequence :song do
embed_notes(:do_re_mi)
embed_notes(:fa_so_la_ti_do)
end
end
The preceding code shows the DSL we will be building today. As mentioned previously, it’s heavily
inspired by the Phoenix router’s pipeline and plug DSL.
169
170
Metaprogramming – Code That Writes Code
Now, that we know what DSL we’re building, let’s work on the code for it. We can start by building
the implementation (the logic behind the interface) first.
Writing the implementation
In this case, the implementation would be the modules used to define a note struct and play a note,
using the aplay command.
Note for non-Linux readers
The aplay command only works for Linux machines with ALSA. If you’re using a Mac or a
Windows machine, you can try looking for alternatives to play a note as part of this project.
Even if you cannot get a note to play on your machine, it would still be very useful to learn
how to build this interface.
Since the goal of this project is to learn how to use metaprogramming, we will focus more of our attention
on building the interface. Therefore, I will be glossing over some of the details of the implementation.
Let’s start by creating a new mix project:
$ mix new mix_music
Now, inside our new mix project, let’s define a MixMusic.Note module, which also defines a struct.
This module will also be responsible for converting a note to a final frequency with a MixMusic.
Note.to_frequency/1 function:
ib/mix_music/note.ex
defmodule MixMusic.Note do
@moduledoc """
Struct representing a Music Note
"""
defstruct class: nil, modifier: :base, octet: 4,
duration: 0.5, volume: 50
@a4_frequency 440
@a4_octet 4
@a4_index 9
@frequency_constant 1.059463
def to_frequency(%__MODULE__{class: :rest}), do: 0
def to_frequency(%__MODULE__{octet: octet} = note) do
Writing the implementation
semitones_from_a4 =
12 * (octet - @a4_octet) - (@a4_index –
semitone_index(note))
relative_frequency = :math.pow(@frequency_constant,
semitones_from_a4)
round(@a4_frequency * relative_frequency)
end
defp semitone_index(%__MODULE__{class: class,
modifier: modifier}) do
Enum.find_index(
semitones(),
fn {cl, mo} -> class == cl && modifier == mo end
)
end
defp semitones do
[
{:c, :base}, {:c, :sharp}, {:d, :base}, {:d, :sharp},
{:e, :base},{:f, :base}, {:f, :sharp}, {:g, :base},
{:g, :sharp}, {:a, :base},{:a, :sharp}, {:b, :base}
]
end
end
In the preceding module, we defined a note struct with fields for the class, modifier, octet, duration,
and volume. We also defined the to_frequency/1 function, which uses a mathematical equation
to convert a note to a frequency using its semitones and octet.
Now, let’s define a module to play a note that can also utilize the to_frequency/1 function,
defined in the preceding module:
lib/mix_music/note_player.ex
defmodule MixMusic.NotePlayer do
@moduledoc """
Plays a Note
"""
alias MixMusic.Note
require Logger
def play(%Note{duration: duration, volume: volume} =
note) do
frequency = Note.to_frequency(note)
Logger.info("Played Note: #{note.class}
171
172
Metaprogramming – Code That Writes Code
#{note.modifier} #{note.octet}")
cmd("""
echo 'foo' | awk '{ for (i = 0; i < #{duration};
i+= 0.00003125) \
printf("%08X\\n", #{volume}*sin(#{frequency}*3.14*
exp((a[$1 % 8]/12)\
*log(2))*i)) }' | xxd -r -p | aplay -c 2 -f S32_LE -r
28000 """)
end
defp cmd(string) do
case System.cmd("sh", ["-c", string]) do
{_, 0} -> :ok
_ -> :error
end
end
end
This module uses a terminal command to play a note, using its duration, volume, and frequency
(calculated using the to_frequency/1 function). It relies on Linux’s aplay command to play
that note.
We have also added Logger.info/1 calls to help with testing. We will learn more about this later
when we test this project.
Now that we have a way to define a note and play a note, we can define an interface to take a list of
notes from the user and play them.
Building the interface layer
Let’s define a new module, MixMusic.DSL, to define the DSL module. The first thing we need to
do is convert a list of options to a Note struct. So, we will define a function to do that:
lib/mix_music/dsl.ex
defmodule MixMusic.DSL do
@moduledoc """
DSL to compose music in Elixir
"""
def note_from_options(class, options) do
params =
options
|> Keyword.put(:class, class)
Building the interface layer
|> Enum.into(%{})
struct!(MixMusic.Note, params)
end
end
Next, let’s start working on the interface part of this module by defining the __using__/1 macro.
As part of the __using__/1 macro, we will do the following:
Import the MixMusic.DSL module because it will define macros and functions used in the DSL
Register a module attribute, sequences, to store a list of sequences while the module is still
being defined
Define a function, play/1, which is responsible for playing a sequence of notes defined in the module:
lib/mix_music/dsl.ex
defmodule MixMusic.DSL do
# ..
defmacro __using__(_) do
quote do
import unquote(__MODULE__)
Module.register_attribute(__MODULE__, :sequences,
accumulate: true)
def play(sequence_name) do
# TODO
end
end
end
end
Now, let’s define the sequence/2 macro, which is used to define and collect a list of notes. This
macro will be responsible for the following:
• Registering a module attribute, current_sequence, indicating that a sequence is being defined.
• Unquoting the given block, which would update the current_sequence module attribute.
Adding the notes present in the current_sequence attribute to the sequences attribute
registered in the __using__/1 macro. The list of notes in current_sequence needs to be
reversed because the module attribute accumulates by adding new elements to the beginning of the list.
173
174
Metaprogramming – Code That Writes Code
Deleting the current_sequence module attribute, indicating that we’ve finished defining the
current sequence:
lib/mix_music/dsl.ex
defmodule MixMusic.DSL do
# ..
defmacro sequence(sequence_name, do: block) do
quote do
Module.register_attribute(__MODULE__,
:current_sequence, accumulate: true)
unquote(block)
@sequences {unquote(sequence_name),
@current_sequence |> Enum.reverse()}
Module.delete_attribute(__MODULE__,
:current_sequence)
end
end
end
Now that we have a way to define a sequence, let’s define the note/2 macro, which will be responsible
for updating the current sequence. The note/2 macro will be responsible for the following:
• Checking whether a sequence is currently being defined by checking the @current_sequence
module attribute. This is important because we want to restrict calling the note/2 macro to
inside the sequence/2 macro. This is consistent with what we learned earlier in the chapter
about making a DSL as restrictive as possible, in order to make its behavior more deterministic.
Using the note_from_options/2 function defined previously to add the new note to the @
current_sequence attribute:
lib/mix_music/dsl.ex
defmodule MixMusic.DSL do
# ...
defmacro note(class, options) do
quote do
if @current_sequence do
@current_sequence note_from_options(unquote(class),
unquote(options))
else
raise "note can only be called inside a sequence"
end
end
Building the interface layer
end
end
Similar to the note/2 macro, we also need the embed_notes/1 macro, which will be used to
embed notes from one sequence to another. The embed_notes/1 macro will be responsible for
the following:
Checking whether @current_sequence is defined (similar to note/2)
Fetching a list of notes from an already defined sequence and adding each of them to the @current_
sequence attribute:
lib/mix_music/dsl.ex
defmodule MixMusic.DSL do
# ..
defmacro embed_notes(sequence_name) do
quote do
if @current_sequence do
notes = notes_from_sequence(__MODULE__,
unquote(sequence_name))
for note <- notes do
@current_sequence note
end
else
raise "embed_notes can only be called inside a
sequence"
end
end
end
def notes_from_sequence(mod, sequence_name) do
mod
|> Module.get_attribute(:sequences)
|> Keyword.get(sequence_name)
end
end
We also defined a helper function, notes_from_sequence/2, to get notes from an already
defined sequence for a module while it’s still being compiled.
175
176
Metaprogramming – Code That Writes Code
Now, we have a list of sequences defined for any module in the @sequences module attribute. We
can use a @before_compile hook to utilize that module attribute, to define a function at the end
of the module’s compilation:
lib/mix_music/dsl.ex
defmodule MixMusic.DSL do
# ..
defmacro __using__(_) do
quote do
@before_compile unquote(__MODULE__)
import unquote(__MODULE__)
Module.register_attribute(__MODULE__, :sequences,
accumulate: true)
def play(sequence_name) do
# TODO
end
end
end
end
# ..
defmacro __before_compile__(_) do
quote do
def __sequences__, do: @sequences
end
end
end
Now, at the end of the compilation of a module using MixMusic.DSL, there will be a __
sequences__/0 function defined, which returns a Keyword list of sequence names that has a
list of notes, for all the sequences in the module. Defining this function also increases the introspective
features of this DSL.
Now that we have a way to get a list of notes for a sequence, we can define a way to play a sequence for a
module. This function will use the MixMusic.NotePlayer.play/1 function defined previously
to do that. We will also update the play/1 function defined inside the __using__/1 macro:
lib/mix_music/dsl.ex
defmodule MixMusic.DSL do
# ..
defmacro __using__(_) do
quote do
Building the interface layer
@before_compile unquote(__MODULE__)
import unquote(__MODULE__)
Module.register_attribute(__MODULE__, :sequences,
accumulate: true)
def play(sequence_name) do
play_sequence(__MODULE__, sequence_name)
end
end
end
# ..
def play_sequence(mod, sequence_name) do
case Keyword.get(mod.__sequences__, sequence_name) do
nil -> raise "sequence #{sequence_name} not defined"
notes -> Enum.each(notes,
&MixMusic.NotePlayer.play/1)
end
end
end
With the preceding code, we can now play any sequence defined in a module. Now, our DSL can be
used as follows:
lib/mix_music/dsl_example.ex
defmodule MixMusic.DSLExample do
use MixMusic.DSL
sequence :do_re_mi do
note(:c, octet: 4, volume: 50, duration: 0.25)
note(:d, modifier: :base, duration: 0.25)
note(:e, modifier: :base, duration: 0.25)
end
sequence :fa_so_la_ti_do do
note(:f, octet: 4, volume: 50, duration: 0.25)
note(:g, modifier: :base, duration: 0.25)
note(:a, duration: 0.25)
note(:b, duration: 0.25)
note(:c, octet: 5, duration: 0.25)
end
sequence :song do
embed_notes(:do_re_mi)
177
178
Metaprogramming – Code That Writes Code
embed_notes(:fa_so_la_ti_do)
end
end
We can now start an iex console and play the preceding module’s song sequence:
$ iex -S mix
iex> MixMusic.DSLExample.play(:song)
...
... aplay output
:ok
Now that we have the DSL ready, it’s time to test it.
Testing the interface
We have a few things to test in this DSL:
• Integration: Testing whether the DSL plays well with the NotePlayer module to ensure
the whole project is functional
• Sequences: Testing whether sequences are defined in the correct order and the defaults for
note are working
• Restrictions: Testing whether the DSL works as expected and note and embed_notes can
only be called inside sequence
Writing integration tests
Let’s start by adding the integration test:
test/mix_music/integration_test.exs
defmodule MixMusic.DoReMi do
use MixMusic.DSL
sequence :do_re_mi do
note(:c, octet: 4, volume: 50, duration: 0.25)
note(:d, modifier: :base, duration: 0.25)
note(:e, modifier: :base, duration: 0.25)
end
sequence :fa_so_la_ti_do do
note(:f, octet: 4, volume: 50, duration: 0.25)
note(:g, modifier: :base, duration: 0.25)
Testing the interface
note(:a, duration: 0.25)
note(:b, duration: 0.25)
note(:c, octet: 5, duration: 0.25)
end
sequence :song do
embed_notes(:do_re_mi)
embed_notes(:fa_so_la_ti_do)
end
end
defmodule MixMusic.IntegrationTest do
use ExUnit.Case
import ExUnit.CaptureLog
describe "DoReMi.play/1" do
test "plays the song (not testing alsa)" do
output = capture_log(fn ->
MixMusic.DoReMi.play(:song) end)
assert
assert
assert
assert
assert
assert
assert
assert
end
end
end
output
output
output
output
output
output
output
output
=~
=~
=~
=~
=~
=~
=~
=~
"Played
"Played
"Played
"Played
"Played
"Played
"Played
"Played
Note:
Note:
Note:
Note:
Note:
Note:
Note:
Note:
c
d
e
f
g
a
b
c
base
base
base
base
base
base
base
base
4"
4"
4"
4"
4"
4"
4"
5"
Since there is no easy way of testing the aplay commands, we use the Logger calls inside the
NotePlayer.play/1 function to ensure proper notes are being played. Another way of testing
this is to use Mox, which would serve a very similar purpose.
Testing sequence
Now, it’s time to test the sequence/2 macro and whether it updates the @sequences attribute:
test/mix_music/dsl/sequence_test.exs
defmodule QuotedModule.Sequence do
Module.register_attribute(__MODULE__, :sequences,
accumulate: true)
179
180
Metaprogramming – Code That Writes Code
def sequences_before, do: @sequences
require MixMusic.DSL
MixMusic.DSL.sequence :test do
@current_sequence 5
@current_sequence 10
end
def sequences_after, do: @sequences
end
defmodule MixMusic.DSL.SequenceTest do
use ExUnit.Case
describe "sequence/2" do
test "updates `@sequences`" do
assert QuotedModule.Sequence.sequences_before() == []
assert QuotedModule.Sequence.sequences_after() ==
[test: [5, 10]]
end
end
end
We can test the sequence/2 macro in isolation by testing whether calling it updates the @sequences
module attribute, as expected. We can define a sequences_before/0 function, which stores the
state of the module attribute before calling sequence/2. Similarly, we can define a sequences_
after/0 function, which stores the state of the @sequences attribute after the sequence/2
call. Then, we can test to ensure that sequences_before/0 is [] and sequences_after/0
is the updated state of @sequences, as expected. This way, we can ensure that the sequence/2
macro works as expected in isolation with note/2 and the embed_notes/1 macro.
Testing note and embed_notes
In order to test whether note and embed_notes work well with sequence/2, it’s best to define
a module that uses sequence as expected.
Let’s first define a support module to test the DSL:
test/support/mix_music/dsl_tester.ex
defmodule MixMusic.DSLTester do
use MixMusic.DSL
Testing the interface
sequence :do_re_mi do
note(:c, octet: 4, volume: 50, duration: 0.25)
note(:d, modifier: :base, duration: 0.25)
note(:e, modifier: :base, duration: 0.25)
end
sequence :fa_so_la_ti_do do
note(:f, octet: 4, volume: 50, duration: 0.25)
note(:g, modifier: :base, duration: 0.25)
note(:a, duration: 0.25)
note(:b, duration: 0.25)
note(:c, octet: 5, duration: 0.25)
end
sequence :song do
embed_notes(:do_re_mi)
embed_notes(:fa_so_la_ti_do)
end
end
We can now write a test file that utilizes the preceding DSLTester module. We will write a test to
ensure the following:
• play_sequence/2 works as expected for a valid sequence
• play_sequence/2 raises an error for an invalid sequence
• __before_compile__/1 defines a __sequences__/0 function that returns the state
of the @sequences module attribute:
test/mix_music/dsl_test.exs
Code.require_file("test/support/mix_music/dsl/tester.ex")
defmodule MixMusic.DSLTest do
use ExUnit.Case
import ExUnit.CaptureLog
alias MixMusic.{DSL, DSLTester}
describe "play_sequence/2" do
test "raises when calling a sequence that's not
defined" do
assert_raise(RuntimeError,
~r/sequence bad_sequence not defined/, fn ->
DSLTester.play(:bad_sequence)
181
182
Metaprogramming – Code That Writes Code
end)
end
test "plays a sequence when it's defined" do
output = capture_log(fn -> DSLTester.play(:do_re_mi)
end)
assert output =~ "Played Note: c base 4"
assert output =~ "Played Note: d base 4"
assert output =~ "Played Note: e base 4"
end
end
describe "__before_compile__/1" do
require DSL
test "defines a function `__sequences__` which
delegates to `@sequences`" do
expected =
quote do
def __sequences__, do: @sequences
end
expr = quote do: DSL.__before_compile__(nil)
expanded = Macro.expand_once(expr, __ENV__)
assert Macro.to_string(expected) ==
Macro.to_string(expanded)
end
test "defines `DSLTester.__sequences__/0`" do
sequences = Keyword.keys(DSLTester.__sequences__())
assert :song in sequences
assert :do_re_mi in sequences
assert :fa_so_la_ti_do in sequences
end
end
end
The preceding test utilizes tools like Macro.to_string/1 to compare the quoted literal defined
in a macro with the expected quoted literal, which defines a __sequences__/1 function. I have
found this technique extremely helpful to test macros in smaller chunks without having to test the
entire DSL.
Testing the interface
We also used the Logger calls again in the NotePlayer module to test the play_
sequence/1 function.
Testing restrictions
In order to ensure that our DSL is designed well, we should make sure that it restricts developers
from misusing parts of the DSL. In our case, one example is not allowing the usage of note and
embed_notes outside of sequence.
So, let’s write a test for that:
test/mix_music/dsl/restrictions_test.exs
defmodule MixMusic.DSL.RestrictionsTest do
use ExUnit.Case
describe "note/2" do
test "can only be called inside a sequence" do
quoted_module =
quote location: :keep do
defmodule QuotedModule.Note do
import MixMusic.DSL
note(:c, volume: 10)
end
end
assert_raise(RuntimeError, "note can only be called
inside a sequence", fn ->
Code.eval_quoted(quoted_module)
end)
end
end
describe "embed_notes/2" do
test "can only be called inside a sequence" do
quoted_module =
quote location: :keep do
defmodule QuotedModule.Note do
import MixMusic.DSL
embed_notes(:sequence)
end
end
183
184
Metaprogramming – Code That Writes Code
assert_raise(RuntimeError, "embed_notes can only be
called inside a sequence", fn ->
Code.eval_quoted(quoted_module)
end)
end
end
end
In the preceding test file, we simply defined quoted literals where modules called the note/2 and
embed_notes/1 macros outside of a sequence/2 macro, and expected RuntimeError to be
raised when evaluating those quoted literals.
This is another use case for quoted literals, where you can separate defining the code of a module from
actually defining the module by evaluating the quoted literals.
There are still many tests that we could add to increase the determinism of this DSL, but in order to
save us some time, we will not be exploring them.
We now know how to test quoted literals generated by macros, but it was a lot of work to test the
generated quoted literals using Code.eval_quoted/2. Therefore, one of the key features to add
to a DSL is helper functions that make testing the DSL easier for developers using it. Let’s add test
helpers to our DSL in the next module.
Adding DSL test helpers
One key element to making your DSL easy to use is to add easier ways to test the DSL. Oftentimes, this
means adding ways to test whether the DSL is being used correctly and will yield the expected output. Most
of this can be done by adding some introspective features, such as the __sequences__/0 function.
In order to make our DSL more testable, we can define a cleaner way to test whether a sequence was
defined with expected notes. Let’s define the MixMusic.DSLTestHelper module:
lib/mix_music/dsl/test_helpers.ex
defmodule MixMusic.DSL.TestHelper do
@moduledoc """
Test helpers for MixMusic.DSL
"""
def defines_sequence?(module, sequence_name,
with_notes: notes) do
actual_notes =
module.__sequences__()
|> Keyword.get(sequence_name)
notes == actual_notes
Adding DSL test helpers
end
def sequence_note(class, options) do
MixMusic.DSL.note_from_options(class, options)
end
end
In the preceding module, we can use the defines_sequence? function to test whether a
module defines a sequence with a list of notes. In order to keep the DSL simple, I have also defined
a sequence_note/2 function, which can be used to test whether a list of notes is in sequence.
Here is an example of using the DSL.TestHelper module to test the MixMusic.DSLTester
module defined earlier:
test/mix_music/dsl/test_helpers_test.exs
Code.require_file("test/support/mix_music/dsl/tester.ex")
defmodule MixMusic.DSL.TestHelperTest do
use ExUnit.Case
import MixMusic.DSL.TestHelper
describe "test DSL" do
test "defines do_re_mi with correct notes" do
assert defines_sequence?(
MixMusic.DSLTester,
:do_re_mi,
with_notes: [
sequence_note(:c, octet: 4, volume: 50,
duration: 0.25),
sequence_note(:d, modifier: :base,
duration: 0.25),
sequence_note(:e, modifier: :base,
duration: 0.25)
]
)
end
end
end
This way, we can more easily test a module using MixMusic.DSL, without having to write an
integration test or use Mox.
185
186
Metaprogramming – Code That Writes Code
Summary
In this chapter, we started by learning what metaprogramming is and its pros and cons. We also learned
that metaprogramming should be used carefully, as it makes code more complex, and outlined cases
when it is okay to leverage metaprogramming.
We learned that in Elixir, metaprogramming revolves around three constructs – quoted literals,
macros, and compile-time callbacks. We saw how quoted literals are Elixir’s representation of an AST,
which facilitates most metaprogramming. We then learned how to use macros to inject behavior,
using quoted literals in a module at compile time. We also learned that quoted literals and macros are
evaluated hygienically, but var!/2 can be used to bypass the hygiene and define variables outside
of the scope of a quote. We then took a look at compile-time callbacks, which are used to run tasks
(or add behavior) by hooking into the compilation of a module.
We then proceeded to see how a DSL should be designed and that it should be idiomatic, introspective,
testable, and clearly separated from the implementation. Finally, we built a functional and fully tested
DSL to build music using Elixir.
In the next chapter, we will use the concepts of metaprogramming covered in this chapter to build
a DSL for our controller’s interface and the view interface from scratch.
Exercises
One of the ways we can improve the DSL is to add better integration tests. I previously mentioned
using Mox, but can you think of any other ways to test the DSL using some of the metaprogramming
concepts that we have learned in this chapter?
9
Controller and View DSL
In this chapter, we will use the metaprogramming skills learned in the previous chapter to make our
controller and view modules easier to read and extend. We will first define the requirements for our
interface, understand why we need metaprogramming, and build an idiomatic interface to properly
define future controllers and views.
We will cover the following topics in this chapter:
• Understanding why it makes sense to use metaprogramming here
• Designing the DSL for controllers based on requirements
• Using concepts covered in the previous chapter to build a DSL for controllers
• Adding reflections to make it easier to debug and test the controller DSL
• Making plug calls more introspective and reflective
• Designing and building the DSL for views
• Adding reflections to make it easier to debug and test the view DSL
• Building an app to test out the new DSLs
• Creating test helper modules to make it easier to test the DSLs
At the end of this chapter, we will have a functioning domain-specific language (DSL), which will
simplify defining controllers and views when used with the Goldcrest web framework.
Technical requirements
In this chapter, we will return to the example web application we built in Part 2 of this book. We will
look at the controllers and views in those applications and use those to define the requirements of
our DSLs.
188
Controller and View DSL
Similar to previous chapters, Elixir 1.12.x and Erlang 23.2.x are required to properly run the
code snippets in this chapter. I’d also recommend coding along and understanding why we decided
to use metaprogramming for this use case.
The code examples for this chapter can be found at https://github.com/PacktPublishing/
Build-Your-Own-Web-Framework-in-Elixir/tree/main/chapter_09
Why use metaprogramming here?
Based on what we learned in Chapter 8, we should use metaprogramming only after trying to implement
our solution without using any metaprogramming. We spent Chapter 1 to Chapter 7 learning how to
build a web framework without metaprogramming, so now it’s a good time to consider whether or
not we should use it.
Here are the reasons why we should use metaprogramming for Goldcrest:
• We will be building DSLs that will be used in multiple places, by multiple controllers that use
Goldcrest. This will allow us to standardize how controllers and views behave in Goldcrest.
• We have a clear set of requirements that we don’t anticipate changing very often. This allows
us to build a stable DSL for the Goldcrest controllers and views.
• Our implementation without a DSL is too complex to read when developers just need to make
simple changes to define a controller. That’s a clear indication that this is a great candidate to
build a DSL to wrap around the complexities of the implementation.
Now that we have understood why a DSL in conjunction with metaprogramming will be a good fit
here, let’s take a look at the final design of the DSL we want to build.
DSL design
For our DSL to be readable and easier to digest, it must show only the information that’s needed in our
controller. Let’s take the following controller as an example. This is how we would write a controller
today for it to work well with Goldcrest:
defmodule TasksWeb.TaskController do
use Plug.Builder
import Goldcrest.Controller
import Plug.Conn
alias TasksWeb.Tasks
plug :ensure_authorized!
def call(conn, action: action) do
DSL design
conn = super(conn, [])
apply(__MODULE__, action, [conn, conn.params])
end
def index(conn, _params) do
tasks = Tasks.list()
conn
|> put_status(200)
|> render("tasks.html.eex", tasks: tasks)
end
def create(conn, %{"name" => name, "description" =>
description}) do
Tasks.add(name, description)
conn
|> redirect(to: "/tasks")
end
def delete(conn, %{"id" => id}) do
id
|> String.to_integer()
|> Tasks.delete()
conn
|> redirect(to: "/tasks")
end
# ..
defp render(conn, file, assigns) do
TasksWeb.TaskView.render(conn, file, assigns)
end
end
189
190
Controller and View DSL
In the preceding controller, we need the use Plug.Builder line so we can invoke the plug/2
macro, which provides a simple way to call function plugs before every request. We also need import
Plug.Conn, as most of the time, our controllers will be manipulating a Plug.Conn struct and
the Plug.Conn module provides several functions that can be used to accomplish that. Finally, we
also need the call/2 function because that’s what gets called from our router as part of the match
and dispatch process. Therefore, a good final interface for our controller would be removing those
items and substituting them with a use statement. We can also remove the render/3 function at
the bottom and define that within the use statement to increase readability:
defmodule TasksWeb.TaskController do
use Goldcrest.Controller
alias TasksWeb.Tasks
plug :ensure_authorized!
def index(conn, _params) do
tasks = Tasks.list()
conn
|> put_status(200)
|> render("tasks.html.eex", tasks: tasks)
end
def create(conn, %{"name" => name, "description" => description}) do
Tasks.add(name, description)
conn
|> redirect(to: "/tasks")
end
def delete(conn, %{"id" => id}) do
id
|> String.to_integer()
|> Tasks.delete()
conn
|> redirect(to: "/tasks")
end
end
In the preceding code, we have restricted the code that adds the controller behavior to our module to
a single line, use Goldcrest.Controller. This makes the TaskController module easier
to read and maintain while enforcing a standard pattern of creating controller modules.
Building the controller DSL
Building the controller DSL
To successfully call the use Goldcrest.Controller statement, we will need to define a __
using__/1 macro in Goldcrest.Controller, which is responsible for injecting a controllerlike behavior into a module.
Let’s start by simply moving the Plug.Builder call, the Plug.Conn call, and the call/2
function to the Goldcrest.Controller.__using__/1 macro:
defmodule Goldcrest.Controller do
import Plug.Conn
defmacro __using__(_) do
quote do
use Plug.Builder
import Plug.Conn
def call(conn, action: action) do
conn = super(conn, [])
apply(__MODULE__, action, [conn, conn.params])
end
end
end
# ..
end
In the previous code snippet, we’ve added a new __using__/1 macro, which defines how a controller
should look in Goldcrest.
There’s one more piece of controller code that we need to extract, the render/3 function. This one’s
a little tricky because the render/3 function calls the render/3 function defined in the view
module, which is similarly named to the controller module. Therefore, we will need to do some string
jujitsu to get the view name. We’ll keep it simple for now and add the following code to the controller:
defmodule Goldcrest.Controller do
defmacro __using__(opts) do
quote do
# ..
@opts unquote(opts)
@default_view_module __MODULE__
|> Module.split()
|> List.update_at(-1, fn str ->
String.replace(str,
191
192
Controller and View DSL
"Controller", "View")
end)
|> Module.concat()
@view_module @opts[:view_module] ||
@default_view_module
def render(conn, file, assigns) do
@view_module.render(conn, file, assigns)
end
def call(conn, action: action) do
conn = super(conn, [])
apply(__MODULE__, action, [conn, conn.params])
end
end
end
# ..
end
We used the current module name in the preceding code snippet to get the corresponding View
module name. We first use Module.split/1 to split the controller module’s name by namespaces.
We then replace the Controller substring in the last element of the split list with View to get the
default view name. Since it’s possible that the view name doesn’t follow the same naming conventions
as the controller modules, we also allow it to be overridden by using the optional argument with the
use call. This allows us to have a reasonable default for the view module name while still giving
developers the ability to override it. We then define the render/3 function, which further delegates
to the view module.
Now that we have added a base structure for defining a controller, let’s add some reflections to help
us better test and inspect our code.
Adding reflections
In this section, we will add reflections to Goldcrest.Controller. These functions are similar
to the introspective __sequences__/0 function we added in Chapter 8, where they will allow us
to test, debug, and inspect our DSL better.
Building the controller DSL
Let’s start by adding functions to return the options that use Goldcrest.Controller was
called with:
defmodule Goldcrest.Controller do
defmacro __using__(opts) do
quote do
# ..
@opts unquote(opts)
@default_view_module __MODULE__
|> Module.split()
|> List.update_at(-1, fn str ->
String.replace(str,
"Controller", "View")
end)
|> Module.concat()
@view_module @opts[:view_module] ||
@default_view_module
def render(conn, file, assigns) do
@view_module.render(conn, file, assigns)
end
def __goldcrest_controller_using_options__, do: @opts
def call(conn, action: action) do
conn = super(conn, [])
apply(__MODULE__, action, [conn, conn.params])
end
end
end
# ..
end
In the preceding code, we have defined a __goldcrest_controller_using_options__/0
function that returns the compile-time value of the @opts module attribute. As we can see,
@opts gets assigned using the unquote/1 macro to the opts value passed to the __using__/1
macro. In this way, even after compilation, we can easily tell what options were passed to the use
Goldcrest.Controller call, by simply calling the __goldcrest_controller_using_
options__/0 function.
193
194
Controller and View DSL
Naming Reflection functions
Traditionally, reflection functions are named with surrounding __ (two underscores). This makes
it such that the iex completion helpers ignore these functions, making it very clear that their
intended use is within the library that’s defining them. I like to think of the two underscores
as a reflective surface of sorts, so I think it’s a pretty good convention for reflective functions.
I'm not sure whether that was intended by the Elixir core team.
I also like to be very explicit while naming my reflections. Instead of just naming them __
options__, I prefer __controller_using_options__. This significantly decreases the likelihood of
collisions and makes it clear what the reflection is about and which library it is being used for.
Similarly, we will define a function to return the view_module that represents the module of the
controller. This can simply be the view_module passed along in the opts or default_view_
module based on the controller module name:
defmodule Goldcrest.Controller do
defmacro __using__(opts) do
quote do
# ..
@opts unquote(opts)
@default_view_module __MODULE__
|> Module.split()
|> List.update_at(-1, fn str ->
String.replace(str,
"Controller", "View")
end)
|> Module.concat()
@view_module @opts[:view_module] ||
@default_view_module
def render(conn, file, assigns) do
@view_module.render(conn, file, assigns)
end
def __goldcrest_controller_using_options__, do: @opts
def __goldcrest_controller_view_module__, do:
@view_module
def call(conn, action: action) do
conn = super(conn, [])
apply(__MODULE__, action, [conn, conn.params])
Building the controller DSL
end
end
end
# ..
end
We can now tell at runtime which module or view the render function is being delegated to. Now
that we have added some of the simpler reflections, let’s take a look at one of the more complex ones
that allow us to inspect all the plug/2 calls.
Reflective plugs
One of the tricky things to test in a controller is all the combinations of plugs registered using the
plug/2 call. They might interfere with each other, and since testing them is hard, developers often
prefer not to test them properly. On top of that, it’s hard to know what plugs will be called and in
what order they will be called at runtime. One way of fixing both of these problems is by adding
reflective functions.
In this section, we will learn how to use metaprogramming tools to add a reflective function to fetch
all the plugs registered using the plug/2 call in a controller’s compile-time context.
Let’s start by returning to Chapter 5, where we learned the Plug.Builder module stores the list of
all the registered plugs that were registered using the plug/2 macro in a @plugs collectible module
attribute. This means that when the final call/2 function is invoked, it will have access to all the
plugs using the @plugs module attribute. If we could access the attribute at runtime, that would solve
our problem, but the way Plug.Builder defines the attribute, it’s not accessible after compilation.
If we were to add a __goldcrest_controller_plugs__/0 function at the very end of the
controller module, it would work:
defmodule TasksWeb.TaskController do
# ..
def __goldcrest_controller_plugs__, do: @plugs
end
The preceding code snippet allows us to register all the plugs using the plug/2 call by simply calling
__goldcrest_controller_plugs__/0. This works because the function is defined at compile
time when the attribute is accessible and because it is added to the very end of the module. Adding this
function to the end of the controller module allows it access to all the plug/2 calls made before it.
Keeping this in mind, let’s now try adding this to the Goldcrest.Controller.__using__/1 macro:
defmodule Goldcrest.Controller do
defmacro __using__(opts) do
quote do
195
196
Controller and View DSL
@opts unquote(opts)
@default_view_module __MODULE__
|> Module.split()
|> List.update_at(-1, fn str ->
String.replace(str,
"Controller", "View")
end)
|> Module.concat()
@view_module @opts[:view_module] ||
@default_view_module
def render(conn, file, assigns) do
@view_module.render(conn, file, assigns)
end
def __goldcrest_controller_using_options__, do: @opts
def __goldcrest_controller_view_module__, do:
@view_module
def __goldcrest_controller_plugs__, do: @plugs
def call(conn, action: action) do
conn = super(conn, [])
apply(__MODULE__, action, [conn, conn.params])
end
end
end
# ..
end
In the previous code snippet, we defined the __goldcrest_controller_plugs__/0 function
at the end of the __using__/1 macro, not at the end of the compilation of the module. Now, let’s
take the following controller module as an example:
defmodule ExampleController do
use Goldcrest.Controller
plug :test_plug
plug :test_plug2
Building the controller DSL
# ..
end
In the preceding code, since __goldcrest_controller_plugs__/0 gets defined on line 2 as
part of the use Goldcrest.Controller call, it never captures the updated @plugs attribute
after line 4 and line 5, where two new plugs are added to the pipeline. Therefore, we need to ensure
that the function is not just defined at the end of the __using__/1 macro, but also at the end of the
module right before the module gets compiled. This is the perfect candidate for a @before_compile
hook, as we learned in Chapter 8.
Let’s start by defining a helper module that houses the before_compile macro. Remember, the
before_compile macro cannot be defined in the same module in which it’s registered:
defmodule Goldcrest.Controller.BeforeCompileHelpers do
defmacro __before_compile__(_macro_env) do
quote do
def __goldcrest_controller_plugs__, do: @plugs
end
end
end
The preceding module defines a macro, which on invoking, defines the __goldcrest_controller_
plugs__/0 function. Now, all that’s left is registering this macro as a @before_compile callback
in Goldcrest.Controller:
defmodule Goldcrest.Controller do
defmacro __using__(opts) do
quote do
@opts unquote(opts)
@default_view_module __MODULE__
|> Module.split()
|> List.update_at(-1, fn str ->
String.replace(str,
"Controller", "View")
end)
|> Module.concat()
@view_module @opts[:view_module] ||
@default_view_module
def render(conn, file, assigns) do
@view_module.render(conn, file, assigns)
end
def __goldcrest_controller_using_options__, do: @opts
197
198
Controller and View DSL
def __goldcrest_controller_view_module__, do:
@view_module
def call(conn, action: action) do
conn = super(conn, [])
apply(__MODULE__, action, [conn, conn.params])
end
@before_compile
Goldcrest.Controller.BeforeCompileHelpers
end
end
# ..
end
In the preceding code, we added a @before_compile callback, which gets called at the very end
of the controller’s compilation. This allows it to register all the plug/2 calls and capture the final
state of the @plugs module attribute.
Now that we have the controller DSL done, it’s time to work on building a simpler interface for views.
Extracting response helpers
First, let’s move the render functions in Goldcrest.View to a helper module, which can also be
imported into the Goldcrest.Controller.__using__/1 macro, allowing the controller to
use functions such as redirect and render:
defmodule Goldcrest.ResponseHelpers do
@moduledoc false
import Plug.Conn
require EEx
def render(conn, :json, data) when is_map(data) do
conn
|> content_type("application/json")
|> send_resp(200, Jason.encode!(data))
end
def render(conn, :json, data) when is_binary(data) do
data = ensure_json!(data)
Extracting response helpers
conn
|> content_type("application/json")
|> send_resp(conn.status || 200, data)
end
def render(conn, :html, data) when is_binary(data) do
conn
|> content_type("text/html")
|> send_resp(200, data)
end
def render(conn, file, opts) do
contents =
file
|> html_file_path()
|> EEx.eval_file(opts)
render(conn, :html, contents)
end
defp html_file_path(file) do
templates_path()
|> Path.join(file)
end
defp templates_path do
Application.fetch_env!(:goldcrest, :templates_path)
end
def content_type(conn, content_type) do
put_resp_content_type(conn, content_type)
end
def redirect(conn, to: url) do
body = redirection_body(url)
conn
|> put_resp_header("location", url)
|> content_type("text/html")
|> send_resp(conn.status || 302, body)
end
defp redirection_body(url) do
html = Plug.HTML.html_escape(url)
199
200
Controller and View DSL
"<html><body>You are being <a href=\"#{html}\">
redirected</a>" <>
".</body></html>"
end
defp ensure_json!(data) do
data
|> Jason.decode!()
|> Jason.encode!()
end
end
In the preceding code snippet, we moved the render/3 function, the redirect/2 function, and
the content_type/2 function to a new Goldcrest.ResponseHelpers helper module. We
also used the Jason.encode!/1 and Jason.decode!/2 functions to define a clause for the
render/3 function, which handles the application/json type request.
We also handle clauses where we can send either a map or a string to a json rendering clause, and
Goldcrest.ResponseHelpers handles both cases. For a map, Goldcrest.ResponseHelpers
uses Jason.encode!/1 to send a JSON response. In this way, anything inside a map with the
Jason.Encoder protocol implemented can be sent to Goldcrest.ResponseHelpers as
part of the response body. When a string is sent to Goldcrest.ResponseHelpers, it first
ensures that the string is a valid json response by piping the raw string to Jason.decode!/1
and then Jason.encode!/1. If this function doesn’t raise, it simply sends the raw string as the
body of the response.
Now that we have a central place to define all response-related functions, we can update Goldcrest.
Controller to import it. Doing this really simplifies the Goldcrest.Controller module:
defmodule Goldcrest.Controller do
import Plug.Conn
defmacro __using__(opts) do
quote do
use Plug.Builder
import Plug.Conn
import Goldcrest.ResponseHelpers, except: [render: 3]
@opts unquote(opts)
@default_view_module __MODULE__
|> Module.split()
|> List.update_at(-1, fn str ->
String.replace(str,
Building the View DSL
"Controller", "View")
end)
|> Module.concat()
@view_module @opts[:view_module] ||
@default_view_module
def render(conn, file, assigns) do
@view_module.render(conn, file, assigns)
end
def __goldcrest_controller_using_options__, do: @opts
def __goldcrest_controller_view_module__, do:
@view_module
@before_compile
Goldcrest.Controller.BeforeCompileHelpers
def call(conn, action: action) do
conn = super(conn, [])
apply(__MODULE__, action, [conn, conn.params])
end
end
end
end
In the previous code snippet, we added the import Goldcrest.ResponseHelpers call, but
we’re not importing render/3 from Goldcrest.ResponseHelpers. This is because we want to
go through the View layer for rendering. This will allow us to define rendering-related helper functions
in the View module, keeping the View module completely responsible for any render/3 calls. Now
that we have extracted response helper functions and simplified the Goldcrest.Controller
module, it’s time to build our View DSL.
Building the View DSL
Let’s first start by understanding what our view modules should look like. Let’s take a look at the
following view module:
defmodule TasksWeb.TaskView do
use Goldcrest.View
def stringify_task(_task = {name, description}) do
201
202
Controller and View DSL
"#{name} - #{description}"
end
end
In the preceding module, we have defined a helper function that converts a task to a string, which
can be further used in a template as shown in the following code snippet:
<h1>Listing Tasks</h1>
<table>
<thead>
<tr>
<th>Task</th>
<th></th>
</tr>
</thead>
<tbody>
<%= for {task, index} <- Enum.with_index(@tasks) do %>
<tr>
<td><%= stringify_task(task) %></td>
<td>
<a href="/tasks/<%= index %>/delete">Delete</a>
</td>
</tr>
<% end %>
</tbody>
</table>
<br />
<hr />
<h1>Add new Task</h1>
<form method="POST" action="/tasks">
<label for="name">Name:</label>
<br />
<input type="text" id="name" name="name">
<br><br>
<label for="description">Description:</label>
<br>
<textarea id="description" name="description">
</textarea>
<br><br>
Building the View DSL
<input type="submit">
</form>
The preceding HTML template was taken from Chapter 7, where we list all the tasks in our system. We
just updated the table body to use the stringify_task/1 function that’s responsible for printing
each task. For this to work, we will need all the functions defined in the view module to be accessible
at the time of evaluation of the template. We can do that by leveraging the :functions option that
can be passed to the EEx.eval_file/3 function. Let’s first start off by adding a __using__/1
macro to Goldcrest.View:
defmodule Goldcrest.View do
defmacro __using__(opts) do
quote do
@opts unquote(opts)
def __goldcrest_view_using_options__, do: @opts
def render(conn, file, assigns) do
Goldcrest.ResponseHelpers.render(
conn,
file,
assigns
)
end
end
end
end
In the preceding code snippet, we defined a __using__/1 macro in Goldcrest.View, which
defines a __goldcrest_view_using_options__/0 function similar to __goldcrest_
controller_using_options__/0 in Goldcrest.Controller. We also defined a
render/3 function that simply delegates to Goldcrest.ResponseHelpers.render/3.
To pass helper functions to the evaluation of templates, we will need to update the render/3 clause
that evaluates the template file in the Goldcrest.ResponseHelpers module:
defmodule Goldcrest.ResponseHelpers do
# ..
def render(conn, file, %{assigns: assigns, opts: opts}) do
contents =
file
|> html_file_path()
|> EEx.eval_file([assigns: assigns], opts)
render(conn, :html, contents)
203
204
Controller and View DSL
end
#..
end
In the preceding code snippet, we changed the generic function clause for render/3, where we can
pass both the assigns keyword and additional options as opts to the EEx.eval_file/3 call.
This allows us to pass :functions as part of the opts Keyword list.
Next, we will be updating Goldcrest.View to call render/3 with proper arguments when the
second argument is a string. In this way, it will not interfere with other render/3 clauses in the
Goldcrest.ResponseHelpers module:
defmodule Goldcrest.View do
defmacro __using__(opts) do
quote do
alias Goldcrest.ResponseHelpers
@opts unquote(opts)
def __goldcrest_view_using_options__, do: @opts
def render(conn, file, assigns) when is_binary(file)
do
ResponseHelpers.render(
conn,
file,
%{
assigns: assigns,
opts: [
functions: helper_functions()
]
}
)
end
def render(conn, type, data) do
ResponseHelpers.render(conn, type, data)
end
defp helper_functions do
[{
__MODULE__,
:functions
|> __MODULE__.__info__()
|> List.delete(
Building a web app using the DSLs
{:__goldcrest_view_using_options__, 0})
|> List.delete({:render, 3})
}]
end
end
end
end
In the preceding code snippet, we update render/3 to call the newly updated Goldcrest.
ResponseHelpers.render/3 function when the second argument is a binary, which means it’s a
filename. We pass assigns and opts containing :functions as the third argument to the function.
This allows us to evaluate the template by calling any functions returned by helper_functions/0.
We also added a private helper_functions/0 function, which uses the __MODULE__.__
info__/1 reflection provided by Elixir to get a list of all non-private functions defined in the view
module. We then filter out __goldcrest_view_using_options__/0 and render/3 as
they’ll not be used inside the template. In this way, any non-private function defined in a view module
can be used in the corresponding template during evaluation.
Finally, we added a generic clause for render/3 that simply delegates to Goldcrest.
ResponseHelpers.render/3 for other use cases.
This wraps up our View DSL. Now that we have both the Controller and View DSLs built, it’s
time to build a web app using these DSLs.
Building a web app using the DSLs
Let’s take the web app we built in Chapter 7 as a starting point. Before making any changes, let’s ensure
the app is still running properly by running the following command:
$ mix run --no-halt
205
206
Controller and View DSL
Let’s go to http://localhost:4040/tasks in our browsers to make sure the page is rendered
as follows:
Figure 9.1: Expected page
At this point, the TasksWeb.TaskController module should look as follows:
lib/tasks_web/controller/task_controller.ex
defmodule TasksWeb.TaskController do
use Plug.Builder
import Plug.Conn
alias TasksWeb.Tasks
def call(conn, action: action) do
conn = super(conn, [])
apply(__MODULE__, action, [conn, conn.params])
end
def index(conn, _params) do
tasks = Tasks.list()
conn
|> put_status(200)
Building a web app using the DSLs
|> render("tasks.html.eex", tasks: tasks)
end
# ..
end
Let’s remove the render/3 and call/2 functions with all the code besides the controller actions
and replace it with use Goldcrest.Controller.
Our controller module should now look exactly as follows:
lib/tasks_web/controller/task_controller.ex
defmodule TasksWeb.TaskController do
use Goldcrest.Controller
alias TasksWeb.Tasks
def index(conn, _params) do
tasks = Tasks.list()
conn
|> put_status(200)
|> render("tasks.html.eex", tasks: tasks)
end
def create(conn, %{"name" => name, "description" =>
description}) do
Tasks.add(name, description)
conn
|> redirect(to: "/tasks")
end
def delete(conn, %{"id" => id}) do
id
|> String.to_integer()
|> Tasks.delete()
conn
|> redirect(to: "/tasks")
end
end
Make sure any other references are removed.
207
208
Controller and View DSL
Next, let’s do the same for the TasksWeb.TaskView module, which starts as follows:
lib/tasks_web/view/task_view.ex
defmodule TasksWeb.TaskView do
def render(conn, file, assigns) do
Goldcrest.View.render(__MODULE__, conn, file, assigns)
end
end
Let’s update the view module such that it only has use Goldcrest.View:
lib/tasks_web/view/task_view.ex
defmodule TasksWeb.TaskView do
use Goldcrest.View
end
While we’re updating the view module, let’s also add the stringify_task/1 helper function to
test whether functions are being properly passed to EEx.eval_file/3 when evaluating templates:
lib/tasks_web/view/task_view.ex
defmodule TasksWeb.TaskView do
use Goldcrest.View
def stringify_task({name, description}) do
"#{name} - #{description}"
end
end
Now, the only thing that’s missing is updating the tasks.html.eex template to utilize the
stringify_task/1 helper. Let’s update the template to look like the following file:
priv/templates/tasks.html.eex
<h1>Listing Tasks</h1>
<table>
<thead>
<tr>
<th>Task</th>
<th></th>
</tr>
</thead>
<tbody>
Building a web app using the DSLs
<%= for {task, index} <- Enum.with_index(@tasks) do %>
<tr>
<td><%= stringify_task(task) %></td>
<td>
<a href="/tasks/<%= index %>/delete">Delete</a>
</td>
</tr>
<% end %>
</tbody>
</table>
<br />
<hr />
<h1>Add new Task</h1>
<form method="POST" action="/tasks">
<label for="name">Name:</label>
<br />
<input type="text" id="name" name="name">
<br><br>
<label for="description">Description:</label>
<br>
<textarea id="description" name="description">
</textarea>
<br><br>
<input type="submit">
</form>
The preceding file updates the table to just have one column instead of two and lets stringify_
task/1 display the task in a user-friendly manner.
Now, let’s restart our app again and test the entire functionality, from creating a task, listing tasks,
and deleting a task:
$ mix run --no-halt
209
210
Controller and View DSL
Figure 9.2: Empty tasks
In the preceding screenshot, we start with zero tasks in our store. We then add a new task by adding
a name and a description and clicking Submit:
Figure 9.3: A new task added with a Delete link
Creating test helpers for ease of testing and debugging
We can see in the previous screenshot how we now have a new task in the table, with a delete link.
Let’s click on Delete next to the task:
Figure 9.4: After clicking the Delete link
After clicking on Delete, we can see that the task was successfully deleted.
After running the preceding tests, we can conclusively say that the web app is working with our new DSLs.
We have now learned how to simplify our Controller and View DSLs such that other developers can
easily use them in their projects. However, as we learned in Chapter 8, any DSL is incomplete without
allowing developers to easily test whether they’re using the DSLs the way they should. In this case, we
want to allow developers to easily test both the controllers and the views.
Creating test helpers for ease of testing and debugging
Let’s start off by creating a ControllerCase module right away. This is where we will house all
our helper functions, imports, and other behavior required for the tests:
defmodule Goldcrest.ExUnit.ControllerCase do
defmacro __using__(_) do
quote do
use ExUnit.Case
use Plug.Test
211
212
Controller and View DSL
end
end
end
In the preceding code snippet, we added a __using__/1 macro, which uses two modules, ExUnit.
Case and Plug.Test. We will need ExUnit.Case since we will be using ExUnit for tests.
We will also need Plug.Test as seen in Chapter 5, as it provides several helpful functions, such as
conn/2, get_session/2, and so on, which are needed to properly test a controller.
Let’s start by writing a controller test for TasksWeb.TaskController:
defmodule TasksWeb.TaskControllerTest do
use Goldcrest.ExUnit.ControllerCase
describe "GET /tasks -- index/2" do
test "renders a list of tasks" do
conn = conn(:get, "/tasks")
conn = TasksWeb.Router.call(conn, [])
IO.inspect(conn.resp_body)
assert true
end
end
end
In the preceding test module, we use the Plug.Test.conn/2 function to initialize a %Plug.
Conn{} struct, which we can further use while calling a plug module. For any controller test, the
plug module will be the router, in this case, TasksWeb.Router. Let’s run the preceding test and
see what it prints as conn.resp_body:
$ mix test
.."<h1>Listing Tasks</h1>\
n<table>\n <thead>\n <tr>\n <th>Task</th>\n
<th></th>\n </tr>\n </thead>\n <tbody>\n \n </tbody>\n</
table>\n\n<br />
\n\n <hr />\n\n<h1>Add new Task</h1>\n<form method=\"POST\" action=\"/
tasks\">\n
<label for=\"name\">Name:</label>\n <br />\n <input type=\"text\"
id=\"name\"
name=\"name\">\n <br><br>\n\n <label
for=\"description\">Description:</label>
\n <br>\n <textarea id=\"description\" name=\"description\">\n </
textarea>\n
<br><br>\n\n <input type=\"submit\">\n</form>\n"
.
Creating test helpers for ease of testing and debugging
Finished in 0.04 seconds (0.00s async, 0.04s sync)
1 doctest, 2 tests, 0 failures
As we can see, the HTML body in conn.resp_body is what we’d expect it to be. We can see that
the HTML body has no tasks because we haven’t added any.
Now, let’s add a task to Task.Store and rerun the test:
defmodule TasksWeb.TaskControllerTest do
use Goldcrest.ExUnit.ControllerCase
describe "GET /tasks -- index/2" do
test "renders a list of tasks" do
conn = conn(:get, "/tasks")
# Adding a task
name = "Test Name"
description = "Test Description"
Tasks.add(name, description)
conn = TasksWeb.Router.call(conn, [])
IO.inspect(conn.resp_body)
assert true
end
end
end
In the preceding code snippet, we added a call to Tasks.add/2 right before we made the call to
the router plug. Let’s run the test again:
$ mix test
.."<h1>Listing Tasks</h1>\
n<table>\n <thead>\n <tr>\n <th>Task</th>\n
<th></th>\n </tr>\n </thead>\n <tbody>\n \n <tr>\n
<td>Test Name - Test Description</td>\n <td>\n
<a href=\"/tasks/0/delete\">Delete</a>\n </td>\n </
tr>\n \n </tbody>\n
</table>\n\n<br />\n\n<hr />\n\n<h1>Add new Task</h1>\n<form
method=\"POST\"
action=\"/tasks\">\n <label for=\"name\">Name:</label>\n <br
/>\n <input
type=\"text\" id=\"name\" name=\"name\">\n <br><br>\n\n <label
for=\"description\">Description:</label>\n <br>\n <textarea
id=\"description\"
213
214
Controller and View DSL
name=\"description\">\n </textarea>\n <br><br>\n\n <input
type=\"submit\">
\n</form>\n"
.
Finished in 0.04 seconds (0.00s async, 0.04s sync)
1 doctest, 2 tests, 0 failures
We can see that now the table isn’t empty, and it renders the newly added task. So, let’s add an assertion
to check that:
defmodule TasksWeb.TaskControllerTest do
use Goldcrest.ExUnit.ControllerCase
alias TasksWeb.Tasks
describe "GET /tasks -- index/2" do
test "renders a list of tasks" do
conn = conn(:get, "/tasks")
# Adding a task
name = "Test Name"
description = "Test Description"
Tasks.add(name, description)
conn = TasksWeb.Router.call(conn, [])
assert conn.resp_body =~ "Listing Tasks"
stringified_task = TasksWeb.TaskView.stringify_task({
name, description})
assert conn.resp_body =~ stringified_task
end
end
end
In the preceding code, we’ve added two assertions. The first one checks at a very high level whether the
correct page is rendered by checking whether the heading exists. The second one, more specifically,
checks whether the newly added tasks are visible in the rendered HTML.
We can further simplify the interface by wrapping up the calls to conn/2 and the router call in a single
function. Let’s define these helper functions in the Goldcrest.ExUnit.ControllerCase module:
defmodule Goldcrest.ExUnit.ControllerCase do
defmacro __using__(_) do
quote do
Creating test helpers for ease of testing and debugging
use ExUnit.Case
use Plug.Test
end
end
def request(method, path, params_or_body \\ nil, router)
def request(method, path, params, router) when
is_map(params) do
request(method, path, Jason.encode!(params), router)
end
def request(method, path, params_or_body, router) do
conn = Plug.Test.conn(method, path, params_or_body)
router.call(conn, [])
end
end
We started by adding a request/4 function that takes a method, a path, params, and a router, and
returns a %Plug.Conn{} struct with the response attributes. We made the request/4 function
dynamic enough that we can pass both a map and an encoded body as the params_or_body
argument. This allows us to write cleaner controller tests that rely on sending parameters as maps.
We’re not done yet; to make this even more idiomatic, we should get rid of the parameters that
can be inferred at compile time. In this case, we know that the router module will be the same for
a controller test. Therefore, we can let a controller test pass the :router option while using the
ControllerCase module. Similar to Goldcrest.Controller, we can also have a default
router based on namespacing. Let’s go ahead and add this to our module:
defmodule Goldcrest.ExUnit.ControllerCase do
defmacro __using__(opts) do
quote do
use ExUnit.Case
use Plug.Test
@opts unquote(opts)
@default_router_module __MODULE__
|> Module.split()
|> Enum.take(1)
|> List.insert_at(1, ".Router")
|> Module.concat()
@router_module @opts[:router] ||
215
216
Controller and View DSL
@default_router_module
@helper_module unquote(__MODULE__)
def get(path, params_or_body \\ nil) do
@helper_module.request(:get, path, params_or_body,
@router_module)
end
def post(path, params_or_body \\ nil) do
@helper_module.request(:post, path, params_or_body,
@router_module)
end
def put(path, params_or_body \\ nil) do
@helper_module.request(:put, path, params_or_body,
@router_module)
end
def patch(path, params_or_body \\ nil) do
@helper_module.request(:patch, path,
params_or_body, @router_module)
end
def delete(path, params_or_body \\ nil) do
@helper_module.request(:delete, path,
params_or_body, @router_module)
end
end
end
def request(method, path, params_or_body \\ nil, router)
def request(method, path, params, router) when
is_map(params) do
request(method, path, Jason.encode!(params), router)
end
def request(method, path, params_or_body, router) do
conn = Plug.Test.conn(method, path, params_or_body)
router.call(conn, [])
end
end
Creating test helpers for ease of testing and debugging
In the preceding code snippet, we added the get, post, put, patch, and delete functions, each
corresponding to an HTTP verb. All these functions simply delegate to the Goldcrest.ExUnit.
ControllerCase.request/4 function. We also allow developers to pass the :router parameter
as an option while using ControllerCase, but default it to the topmost namespaced Router
module, which is the convention. This allows us to simply call get(path) to test a GET request.
Now, let’s use these newly created helper functions to test our controller thoroughly:
defmodule TasksWeb.TaskControllerTest do
use Goldcrest.ExUnit.ControllerCase
alias TasksWeb.Tasks
describe "GET /tasks -- index/2" do
setup do
name = "Test Name"
description = "Test Description"
Tasks.add(name, description)
{:ok, name: name, description: description}
end
test "renders a list of tasks", %{name: name,
description: description} do
conn = get("/tasks")
assert conn.resp_body =~ "Listing Tasks"
stringified_task = TasksWeb.TaskView.stringify_task({
name, description})
assert conn.resp_body =~ stringified_task
end
end
end
In the previous code snippet, we updated TasksWeb.TaskControllerTest to use the get/1
function to test the index action. Let’s test the create/2 and delete/2 actions next. Keep in mind
it’s always best to delete all data in the store between tests so they don’t interfere with each other. So,
we’ll need to implement a function to clear the store as well between all tests:
defmodule TasksWeb.TaskControllerTest do
use Goldcrest.ExUnit.ControllerCase
alias TasksWeb.Tasks
setup do
217
218
Controller and View DSL
clear_store()
:ok
end
describe "GET /tasks -- index/2" do
setup do
name = "Test Name"
description = "Test Description"
Tasks.add(name, description)
{:ok, name: name, description: description}
end
test "renders a list of tasks", %{name: name,
description: description} do
conn = get("/tasks")
assert conn.resp_body =~ "Listing Tasks"
stringified_task = TasksWeb.TaskView.stringify_task({
name, description})
assert conn.resp_body =~ stringified_task
end
end
describe "POST /tasks -- create/2" do
test "creates a new task and redirects to index" do
name = "Test Name"
description = "Test Description"
stringified_task = TasksWeb.TaskView.stringify_task({
name, description})
# Task
conn =
assert
refute
doesn't exist at first
get("/tasks")
conn.resp_body =~ "Listing Tasks"
conn.resp_body =~ stringified_task
conn = post("/tasks", %{name: name,
description: description})
# Redirects to index
assert conn.status == 302
Creating test helpers for ease of testing and debugging
assert {"location", "/tasks"} in conn.resp_headers
# Task exists on the index page
conn = get("/tasks")
assert conn.resp_body =~ stringified_task
end
end
describe "GET /tasks/:id -- delete/2" do
setup do
name = "Test Name"
description = "Test Description"
Tasks.add(name, description)
{:ok, name: name, description: description}
end
test "deletes the task", %{name: name, description:
description} do
conn = get("/tasks")
assert conn.resp_body =~ "Listing Tasks"
# Task appears in the list at first
stringified_task = TasksWeb.TaskView.stringify_task({
name, description})
assert conn.resp_body =~ stringified_task
conn = get("/tasks/1/delete")
# Redirects to index
assert conn.status == 302
assert {"location", "/tasks"} in conn.resp_headers
conn = get("/tasks")
# Task doesn't appear in the list
stringified_task = TasksWeb.TaskView.stringify_task({
name, description})
assert conn.resp_body =~ stringified_task
end
end
defp clear_store do
219
220
Controller and View DSL
Agent.update(TasksWeb.Tasks, fn _ -> [] end)
end
end
We updated TasksWeb.TaskControllerTest to run clear_store/0 before every test,
ensuring a clean database. We also added test cases for the create/2 action using the post/2 call
and the delete/2 action using the get/1 call. We can see that we’re using a map as the request
body for the post/2 call, which is a lot easier to read than translating it into json.
We now have an idiomatic and concise way of testing our controllers. There are a lot more improvements
that could be made to this, but those are beyond the scope of this chapter.
Summary
In this chapter, we first looked at our use case and evaluated whether it makes sense to use
metaprogramming here. Since we’re building a DSL with clear requirements and proper implementation
already done, it was an easy choice to make the interface cleaner by adding a layer of metaprogramming.
Then, we designed our DSL based on what would provide the best experience for developers using our
project. Once we had the requirements and design ready, we used the constructs of metaprogramming
we learned in Chapter 8 to build DSLs for both Controller and View.
Just as we learned in Chapter 8, building a DSL is only half a job done. We proceeded to add introspective
features and test helpers to allow for easier adoption, testing, maintenance, and debugging. We also
updated the web app from Chapter 7 to work with the new DSL and ensured everything worked the
way we expected it to.
Now that we have built a DSL for our Controller and View modules, the book’s last chapter focuses
on building a cleaner DSL for our Router module to create a synergy between all the components
of Goldcrest.
Exercises
Test your knowledge by trying to implement the following:
• Build a test helper for the View module. Does it make sense to have test helpers for views?
Which parts of the views need to be tested and why?
• Update Goldcrest.ExUnit.ControllerCase.request/4 so that you can pass
it a %Plug.Conn{}struct. This will help us to send conn with a specific setup, such as
authorization headers or session data.
10
Building the Router DSL
In this chapter, we will continue using the metaprogramming skills learned in Chapter 8 to make
Goldcrest easier to use and adopt. In the previous chapter, we used metaprogramming to create
a DSL around our controller and view modules. Doing this eliminated a lot of boilerplate code while
significantly increasing the readability of those modules. We also added reflections and test helpers
to allow us to test and debug those modules well. In this chapter, we will do the same for the router
module. Similar to Chapter 9, we will start by defining the requirements for our router interface, see
why metaprogramming makes sense for this use case, and finally, build the DSL along with high
reflectivity and testability.
We will cover the following topics in this chapter:
• Designing the DSL for routers based on requirements
• Using Elixir’s pillars of metaprogramming to build the router DSL
• Adding reflections to make it easier to debug and test the router DSL
• Updating the tasks app to use the router DSL
• Creating test helper modules for the router DSL
At the end of this chapter, we will have a functional DSL to define routers that work well with a
controller and view the DSLs defined in the previous chapter, making it easier to define, test, and
debug code related to a router.
Technical requirements
In this chapter, we go back to the example web application we built in Part 2 of this book. We will
look at the routers and router plugs in those applications, along with the controllers and views built
in the previous chapter, and use those to define the requirements of the router DSL.
Similar to previous chapters, Elixir 1.12.x and Erlang 23.2.x are required to properly run the
code snippets in this chapter. I’d also recommend coding along and understanding why we decided
to use metaprogramming for this use case.
222
Building the Router DSL
The code examples for this chapter can be found at https://github.com/PacktPublishing/
Build-Your-Own-Web-Framework-in-Elixir/tree/main/chapter_10
Why use metaprogramming here?
Similar to Chapter 9, we will use metaprogramming here to wrap an already existing implementation
of our router and router pipeline around a digestible and idiomatic interface.
Metaprogramming is especially useful in the case of the router modules because, currently, the router
module is the least readable and most boilerplate-heavy of all components in Goldcrest. We also want
our router to work well with all the controllers and views, so it puts an added burden on developers
to make sure all the components are hooked up correctly. Therefore, by taking away the responsibility
of managing that boilerplate code, we will significantly improve the developer experience of building
a router using Goldcrest.
Now that we understand why the Goldcrest router is a good candidate for metaprogramming, let’s
start by defining the requirements for the router DSL.
DSL design
Similar to the previous chapter, we want to build our DSL in a way that maximizes its readability by
only displaying information that’s specific to what developers will be writing. The current version of
the router in the tasks application looks like this:
defmodule TasksWeb.Router do
use Plug.Router
alias TasksWeb.TaskController
plug Plug.Parsers,
parsers: [:urlencoded, :multipart],
pass: ["text/html", "application/*"]
plug :parse_body
plug :match
plug :dispatch
get "/tasks/:id/delete", do: TaskController.call(conn,
action: :delete)
get "/tasks", do: TaskController.call(conn, action:
:index)
post "/tasks", do: TaskController.call(conn, action:
:create)
DSL design
match _ do
send_resp(conn, 404, "<h1>Not Found</h1>")
end
defp parse_body(conn, _opts) do
{:ok, body, conn} = Plug.Conn.read_body(conn,
length: 1_000_000)
body_params = decode_body_params(body)
params = Map.merge(conn.params, body_params)
conn = %{conn | body_params: body_params,
params: params }
conn
end
defp decode_body_params(""), do: %{}
defp decode_body_params(binary),
do: Jason.decode!(binary)
end
In the preceding router, we need the use Plug.Router line so that we can leverage the predefined
plug, Plug.Router, which allows us to define a pipeline of plugs that handle a request by matching
on a method and a path. We also need Plug.Parsers, which makes it easier for us to parse the
body of a request by using built-in parsers for HTML and JSON. We also define a custom plug,
:parse_body, which simply decodes the body of the conn struct, before calling the match and
dispatch plugs, which are both needed for requests to be properly routed to a controller. Finally,
we also have a default match clause to handle any requests that don’t match explicitly defined routes.
This allows us to properly handle 404 requests. Therefore, the only lines that are custom to a router
are the routes that are defined using calls such as get and post. We also should give a router the
ability to pass options to the Plug.Parsers plug for different parsing strategies.
After removing all the boilerplate code, our router DSL should look a lot simpler and digestible, as
shown here:
defmodule TasksWeb.Router do
use Goldcrest.Router,
parser_options: [
parsers: [:urlencoded, :multipart],
pass: ["text/html", "application/*"]
]
alias TasksWeb.TaskController
get "/tasks/:id/delete", TaskController, :delete
223
224
Building the Router DSL
get "/tasks", TaskController, :index
post "/tasks", TaskController, :create
end
In the preceding code, we have limited the code that adds the router behavior to our module to the
use statement. We also pass parser_options, which can simply be forwarded to the options for
Plug.Parsers. We can also see that defining a route is a lot easier to read, as it simply involves a
controller module and an action name, instead of calling the TaskController.call/2 function.
Now that we have a goal set for our DSL, let’s start building it.
Building the router DSL
In order for the use Goldcrest.Router, ... statement to work, we will first need to define
a __using__/1 macro in the Goldcrest.Router module. This macro will be responsible for
injecting all the router behavior into a module.
Let’s start by simply moving all the plug calls and private parse_body and decode_body_params
functions to the __using__/1 macro:
defmodule Goldcrest.Router do
import Plug.Conn
defmacro __using__(opts) do
quote do
use Plug.Router
@opts unquote(opts)
plug Plug.Parsers,
parsers: [:urlencoded, :multipart],
pass: ["text/html", "application/*"]
plug :parse_body
plug :match
plug :dispatch
defp parse_body(conn, _opts) do
{:ok, body, conn} = Plug.Conn.read_body(conn,
length: 1_000_000)
body_params = decode_body_params(body)
params = Map.merge(conn.params, body_params)
conn = %{conn | body_params: body_params,
params: params }
Building the router DSL
conn
end
defp decode_body_params(""), do: %{}
defp decode_body_params(binary),
do: Jason.decode!(binary)
end
end
end
In the preceding code snippet, we simply moved all the plug calls and private functions in our old
router to the using macro, as they will mostly be the same for other routes too. One thing to keep
in mind is that we will likely need to make the Plug.Parsers call more dynamic for requests that
use different Accept headers.
Now, we can update the TasksWeb.Router module to work with the Goldcrest.Router
__using__/1 macro. Since we have extracted everything but the routes and match clauses, we can
replace all of that code with the use statement:
defmodule TasksWeb.Router do
use Goldcrest.Router
alias TasksWeb.TaskController
get "/tasks/:id/delete", do: TaskController.call(conn,
action: :delete)
get "/tasks", do: TaskController.call(conn,
action: :index)
post "/tasks", do: TaskController.call(conn,
action: :create)
match _ do
send_resp(conn, 404, "<h1>Not Found</h1>")
end
end
Now that we have access to options passed with the use statement call, we can use that to specify
options to be used with the Plug.Parsers call and forward them to that plug. Let’s update the
Plug.Parsers call to use options from the __using__/1 macro:
defmodule Goldcrest.Router do
import Plug.Conn
defmacro __using__(opts) do
quote do
225
226
Building the Router DSL
use Plug.Router
@opts unquote(opts)
plug(Plug.Parsers, @opts[:parser_options])
# ..
end
end
end
In the preceding code snippet, we updated the Goldcrest.Router.__using__/1 macro to
take :parser_options as a key in the opts Keyword list. We can now update TasksWeb.
Router to send parser_options, along with the use call:
defmodule TasksWeb.Router do
use Goldcrest.Router,
parser_options: [
parsers: [:urlencoded, :multipart],
pass: ["text/html", "application/*"]
]
alias TasksWeb.TaskController
get "/tasks/:id/delete", do: TaskController.call(conn,
action: :delete)
get "/tasks", do: TaskController.call(conn,
action: :index)
post "/tasks", do: TaskController.call(conn,
action: :create)
match _ do
send_resp(conn, 404, "<h1>Not Found</h1>")
end
end
In the preceding code snippet, we still have the generic match statement, which is responsible for
handling the requests that don’t match any routes previously defined. However, we can’t simply move
the match statement in the __using__/1 macro because it needs to be called after all the routes
are defined.
Building the router DSL
Since we need to define the match clause at the very end of the router’s compilation, we can use the @
before_compile callback. Let’s register the @before_compile callback in the Goldcrest.
Router.__using__/1 macro:
defmodule Goldcrest.Router do
import Plug.Conn
defmacro __using__(opts) do
quote do
use Plug.Router
@opts unquote(opts)
@before_compile
unquote(__MODULE__).BeforeCompileHelpers
# ..
end
end
end
Now that we have registered the @before_compile callback, let’s define the __before_
compile__/1 macro in the Goldcrest.Router.BeforeCompileHelpers module. This
macro simply adds the generic match clause, which sends a 404 response:
defmodule Goldcrest.Router.BeforeCompileHelpers do
defmacro __before_compile__(_macro_env) do
quote do
match _ do
send_resp(conn, 404, "<h1>Not Found</h1>")
end
end
end
end
Now, we can remove the generic match clause from TasksWeb.Router:
defmodule TasksWeb.Router do
use Goldcrest.Router,
parser_options: [
parsers: [:urlencoded, :multipart],
pass: ["text/html", "application/*"]
]
alias TasksWeb.TaskController
227
228
Building the Router DSL
get "/tasks/:id/delete", do: TaskController.call(conn,
action: :delete)
get "/tasks", do: TaskController.call(conn,
action: :index)
post "/tasks", do: TaskController.call(conn,
action: :create)
end
In the preceding code snippet, we simplified the TasksWeb.Router module to work with Goldcrest.
Router. However, if we try to compile the tasks_web application, we get a compilation error:
$ mix compile
==> goldcrest
Compiling 1 file (.ex)
==> tasks_web
Compiling 1 file (.ex)
== Compilation error in file lib/tasks_web/router.ex ==
** (CompileError) lib/tasks_web/router.ex:1: undefined function
match/2
(goldcrest 0.1.0) expanding macro:
Goldcrest.Router.BeforeCompileHelpers.__before_compile__/1
lib/tasks_web/router.ex:1: TasksWeb.Router (module)
So, it seems we can’t define a match clause in the __before_compile__/1 macro. After taking a
look at Plug’s router module on GitHub, it was clear that macros such as match, forward, and get
end up invoking a private function named compile/5, which is responsible for dynamically defining
functions that correspond to a defined route. The function clause that finally ends up being defined is
for a private function, do_match/4. This means if we simply define a function clause for do_match/4
that takes a Plug.Conn struct as the first argument, as part of the __before_compile__/1 macro,
that should accomplish what a generic match statement does for the TasksWeb.Router module.
So, let’s update Goldcrest.Router.BeforeCompileHelpers.__before_compile__/1
to define a generic clause for the __before_compile__/1 macro:
defmodule Goldcrest.Router.BeforeCompileHelpers do
defmacro __before_compile__(_macro_env) do
quote do
defp do_match(conn, _, _, _) do
conn = send_resp(conn, 404, "<h1>Not Found</h1>")
Plug.Router.__put_route__(conn, conn.request_path,
fn conn, _ ->
conn
end)
end
Building the router DSL
end
end
end
Now, if we try to compile tasks_web, it should succeed:
$ mix compile
==> goldcrest
Compiling 1 file (.ex)
==> tasks_web
Compiling 1 file (.ex)
$
Now that we have removed the need to add a generic match statement to the router, the last thing left
to build our DSL is simplifying the process of defining the routes. Currently, we use get/3, post/3,
and so on, defined in the Plug.Router module to define each route, but for us to simplify it such that
it takes a controller name and an action name, we will have to build a wrapper around those functions.
We can start by importing all the functions from Plug.Router, except get/3, post/3, and so on.
We have to do this because use Plug.Router also imports Plug.Router, so invoking another
import with an except option will override the first import, called as part of use Plug.Router:
defmodule Goldcrest.Router do
import Plug.Conn
defmacro __using__(opts) do
quote location: :keep do
use Plug.Router
import Plug.Router, except: [get: 3, post: 3, put: 3,
patch: 3, delete: 3]
# ..
end
end
end
Now, we need to define new macros such as get/3 and post/3, which will work with the new DSL.
Let’s define them in Goldcrest.Router, instead of defining them inside of the __using__/1
macro. This way, we can simply import Goldcrest.Router inside the Goldcrest.Router.__
using__/1 macro, which will allow us to use the get/3 and post/3 macros in the TasksWeb.
Router module:
defmodule Goldcrest.Router do
import Plug.Conn
defmacro __using__(opts) do
quote location: :keep do
229
230
Building the Router DSL
use Plug.Router
import Plug.Router, except: [get: 3, post: 3, put: 3,
patch: 3, delete: 3]
import unquote(__MODULE__)
# ..
end
end
defmacro get(path, controller, action) do
quote location: :keep do
Plug.Router.get(
unquote(path),
to: unquote(controller),
init_opts: [
action: unquote(action)
]
)
end
end
defmacro post(path, controller, action) do
quote location: :keep do
Plug.Router.post(
unquote(path),
to: unquote(controller),
init_opts: [
action: unquote(action)
]
)
end
end
end
In the preceding code snippet, we defined the get/3 and post/3 macros, which take a path, a
controller, and an action. Inside the quote block, they simply call Plug.Router.get/2
or Plug.Router.post/2 and delegate to the controller module as a plug. This invokes the
call function in the controller module, with :init_opts set to [action: <actionname>]. We now have the get/3 and post/3 wrapper macros, which translate calls from a more
idiomatic path-controller-action format to Plug.Router’s preferred format. We can
similarly define macros for put/3, patch/3, and delete/3.
Building the router DSL
Now that we have defined new macros to define routes, let’s update our router to use these macros:
defmodule TasksWeb.Router do
use Goldcrest.Router,
parser_options: [
parsers: [:urlencoded, :multipart],
pass: ["text/html", "application/*"]
]
alias TasksWeb.TaskController
get "/tasks/:id/delete", TaskController, :delete
get "/tasks", TaskController, :index
post "/tasks", TaskController, :create
end
In the preceding code snippet, we managed to strip off most of the boilerplate code, and we can see
the difference in readability and ease of maintenance when compared to the original router file at the
beginning of this chapter.
Now that we have built our router DSL, it’s time to add reflections to facilitate the ease of debugging,
maintenance, and testing of routers defined using Goldcrest.
Adding reflections
In this section, we will add reflections to Goldcrest.Router. These functions will allow us to
test, debug, and inspect our router DSL better.
Let’s start by updating the __using__/1 macro to define a reflection function that returns the
options with which it was invoked, similar to the DSLs designed in the previous chapter:
defmodule Goldcrest.Router do
import Plug.Conn
defmacro __using__(opts) do
quote do
use Plug.Router
@opts unquote(opts)
# Add this line
def __goldcrest_router_using_options__, do: @opts
# ..
231
232
Building the Router DSL
end
end
end
In the preceding code, we defined a __goldcrest_router_using_options__/0 function
that returns the compile-time value of the module attribute, @opts. As we can see in the preceding
code, @opts gets assigned, using the unquote/1 macro, to the value of opts passed to the __
using__/1 macro. This way, even after compilation, we can easily tell what options were passed
to use the Goldcrest.Router call, by simply calling the __goldcrest_router_using_
options__/0 function.
We can now tell at runtime what options are used with Goldcrest.Router. Now that we have
added a simpler reflection, let’s add a more complex function that allows us to inspect all the routes
defined in a router at runtime.
Reflective routes
One thing that Phoenix’s router allows us to do is introspect at runtime on what routes are defined in
the router and what pipeline a request goes through for a route. To give the same level of introspection,
we will also store all the routes defined using the Goldcrest.Router macros.
A great way of doing this is by using module attributes in a similar way to how our controller DSLs
store all the defined plugs. So, let’s update the get/3 and post/3 macros to define and update an
accumulating module attribute, @__routes__:
defmodule Goldcrest.Router do
import Plug.Conn
defmacro __using__(opts) do
quote location: :keep do
use Plug.Router
import Plug.Router, except: [get: 3, post: 3, put: 3,
patch: 3, delete: 3]
import unquote(__MODULE__)
@before_compile
unquote(__MODULE__).BeforeCompileHelpers
@opts unquote(opts)
def __goldcrest_router_using_options__, do: @opts
Module.register_attribute(__MODULE__, :__routes__,
accumulate: true)
Building the router DSL
plug(Plug.Parsers, @opts[:parser_options])
end
end
defmacro get(path, controller, action) do
quote location: :keep do
Module.put_attribute(
__MODULE__,
:__routes__,
{{:get, unquote(path)}, {unquote(controller),
unquote(action)}}
)
Plug.Router.get(
unquote(path),
to: unquote(controller),
init_opts: [
action: unquote(action)
]
)
end
end
defmacro post(path, controller, action) do
quote location: :keep do
Module.put_attribute(
__MODULE__,
:__routes__,
{{:post, unquote(path)}, {unquote(controller),
unquote(action)}}
)
Plug.Router.post(
unquote(path),
to: unquote(controller),
init_opts: [
action: unquote(action)
]
)
end
end
end
233
234
Building the Router DSL
In the preceding code snippet, we updated the __using__/1 macro to define a module attribute
that accumulates when Module.put_attribute/3 is called. This allows us to call Module.
put_attribute/3 in the get/3 and post/3 macros. In those macros, we simply update the
@__routes__ module attribute in the {{method, path}, {controller, action}}
format. This way, at the end of the compilation of a router module, we will have access to all the routes
in the @__routes__ module attribute.
Now, we can add a function to the __before_compile__/1 macro, which simply returns the
state of @__routes__ right at the end of the compilation:
defmodule Goldcrest.Router.BeforeCompileHelpers do
defmacro __before_compile__(_macro_env) do
quote do
defp do_match(conn, _, _, _) do
conn = send_resp(conn, 404, "<h1>Not Found</h1>")
Plug.Router.__put_route__(conn, conn.request_path,
fn conn, _ ->
conn
end)
end
def __goldcrest_router_routes__, do: @__routes__
end
end
end
We now have access to all the routes defined in a router by simply calling the __goldcrest_
router_routes__/0 function. We can use this function to build a helper module for routes
similar to Phoenix.
Building router helpers
One of the most used features of the Phoenix router is the helper functions defined in a router helper
module. Phoenix generates this module when a router is compiled. However, to keep our compilation
simple, we can decouple router helper modules from the router and define Goldcrest.Router.
Helpers, which can be used to define a helper module:
defmodule Goldcrest.Router.Helpers do
@moduledoc false
defmacro __using__(opts) do
quote do
@opts unquote(opts)
Building router helpers
@default_router_module __MODULE__
|> Module.split()
|> Enum.take(1)
|> List.insert_at(1, ".Router")
|> Module.concat()
@router_module @opts[:router] ||
@default_router_module
end
end
end
In the preceding code snippet, we added the __using__/1 macro to the Goldcrest.Router.
Helpers module, which takes a :router option. The router defaults to a module based on the top
namespace of the current module, similar to Goldcrest.Controller with the view module.
Now, we will define a path/3 function, which takes a controller, an action, and a list of bindings and
returns the final path as a string. In order to simplify the compilation process, we can delegate path/3,
defined inside the __using__/1 macro, to a path/4 function, defined in the Goldcrest.
Router.Helpers module:
defmodule Goldcrest.Router.Helpers do
@moduledoc false
defmacro __using__(opts) do
quote do
@opts unquote(opts)
@default_router_module __MODULE__
|> Module.split()
|> Enum.take(1)
|> List.insert_at(1, ".Router")
|> Module.concat()
@router_module @opts[:router] ||
@default_router_module
def path(controller, action, bindings \\ []) do
unquote(__MODULE__).path(
@router_module,
controller,
action,
bindings
)
end
end
235
236
Building the Router DSL
end
def path(router, controller, action, bindings \\ []) do
routes = router.__goldcrest_router_routes__()
route =
Enum.find(routes, fn
{{_action, _path}, {^controller, ^action}} -> true
_ -> false
end)
apply_bindings(route, bindings)
end
defp apply_bindings({{_action, path}, {_, _}}, bindings)
do
Enum.reduce(bindings, path, fn {key, value}, acc ->
String.replace(acc, ":#{key}", to_string(value))
end)
end
end
In the preceding code snippet, we added a path/3 function that gets defined for a router module
and calls the path/4 function, with the router module as the first argument. In the Goldcrest.
Router.Helpers.path/4 function, we use the __goldcrest_router_routes__/0
reflection function, to get all the routes defined for the given router. We then use the list of routes to
find a matching route for the given controller and action. Finally, we replace any path variables with
the given bindings.
Next up, we can define the router helper module when the router module is compiled:
defmodule Goldcrest.Router do
import Plug.Conn
defmacro __using__(opts) do
caller = __CALLER__.module
quote location: :keep do
use Plug.Router
import Plug.Router, except: [get: 3, post: 3, put: 3,
patch: 3, delete: 3]
import unquote(__MODULE__)
@before_compile
unquote(__MODULE__).BeforeCompileHelpers
Building router helpers
@opts unquote(opts)
def __goldcrest_router_using_options__, do: @opts
Module.register_attribute(__MODULE__, :__routes__,
accumulate: true)
plug(Plug.Parsers, @opts[:parser_options])
plug(:parse_body)
plug(:match)
plug(:dispatch)
def parse_body(conn, _opts) do
{:ok, body, conn} = read_body(conn, length:
1_000_000)
body_params = decode_body_params(body)
params = Map.merge(conn.params, body_params)
conn = %{conn | body_params: body_params,
params: params}
conn
end
defp decode_body_params(""), do: %{}
defp decode_body_params(binary),
do: Jason.decode!(binary)
defmodule Helpers do
use Goldcrest.Router.Helpers,
router: unquote(caller)
end
end
end
defmacro get(path, controller, action) do
quote location: :keep do
Module.put_attribute(
__MODULE__,
:__routes__,
{{:get, unquote(path)}, {unquote(controller),
unquote(action)}}
237
238
Building the Router DSL
)
Plug.Router.get(
unquote(path),
to: unquote(controller),
init_opts: [
action: unquote(action)
]
)
end
end
defmacro post(path, controller, action) do
quote location: :keep do
Module.put_attribute(
__MODULE__,
:__routes__,
{{:post, unquote(path)}, {unquote(controller),
unquote(action)}}
)
Plug.Router.post(
unquote(path),
to: unquote(controller),
init_opts: [
action: unquote(action)
]
)
end
end
end
In the preceding code snippet, we defined a new module named Helpers, which will be under the
namespace of the final router module. This module calls use Goldcrest.Router.Helpers
with the given router. We also use the __CALLER__/0 macro outside the quote to get the name of
the router module, which we finally use in the use statement.
Now, let’s re-compile the tasks_web application and run an iex shell to test out the router
helper module:
$ iex -S mix
iex> TasksWeb.Router.Helpers.path(TasksWeb.TaskController, :index)
"/tasks"
iex> TasksWeb.Router.Helpers.path(TasksWeb.TaskController, :delete)
"/tasks/:id/delete"
iex> TasksWeb.Router.Helpers.path(TasksWeb.TaskController, :delete,
Building router helpers
id: 1)
"/tasks/1/delete"
We can see that all the routes are properly working. We even saw that for routes such as :delete that
rely on bindings, the helpers default to path variables but apply those bindings when a value is given.
Now, we can update the Goldcrest.View module to import the router helper module, so we can
use the path helper functions in our templates:
defmodule Goldcrest.View do
defmacro __using__(opts) do
quote do
alias Goldcrest.ResponseHelpers
@opts unquote(opts)
@default_router_module __MODULE__
|> Module.split()
|> List.update_at(-1, fn str ->
String.replace(str,
"Controller", "Router")
end)
|> Module.concat()
@router_module @opts[:router_module] ||
@default_router_module
import @router_module.Helpers, as: Routes
end
end
end
Finally, we can update the index template to use Routes.path/3 helper
function instead of hard-coded routes.
<h1>Listing Tasks</h1>
<table>
<thead>
<tr>
<th>Task</th>
<th></th>
</tr>
</thead>
<tbody>
<%= for {task, index} <- Enum.with_index(@tasks) do %>
<tr>
<td><%= stringify_task(task) %></td>
<td>
239
240
Building the Router DSL
<a href="<%= Routes.path(TaskWeb.TaskController,
:delete, id: index) %>">Delete</a>
</td>
</tr>
<% end %>
</tbody>
</table>
<br />
<hr />
<h1>Add new Task</h1>
<form method="POST" action="<%= Routes.path(TaskWeb.TaskController,
:create) %>">
<label for="name">Name:</label>
<br />
<input type="text" id="name" name="name">
<br><br>
<label for="description">Description:</label>
<br>
<textarea id="description" name="description">
</textarea>
<br><br>
<input type="submit">
</form>
Now, let’s restart our app again and test out the entire functionality, including creating a task, listing
tasks, and deleting a task:
$ mix run --no-halt
Building router helpers
Figure 10.1: Empty tasks
In the previous screenshot, we start with zero tasks in our store. We then add a new task by adding a
name and a description and clicking Submit.
Figure 10.2: A new task added with the Delete link
241
242
Building the Router DSL
We can see in the previous screenshot that we now have a new task in the table, with a Delete link.
Let’s click on Delete, next to the task.
Figure 10.3: After clicking the Delete link
After clicking on Delete in the previous screenshot, we can see that the task was successfully deleted.
After visiting the preceding URLs and performing those actions, we can conclusively say that the web
app is working with the new router DSL and router helper module.
Now that we have a fully functional router DSL, it’s time to add test helpers that will allow us to better
test our routes.
Creating test helpers
One thing I always felt was missing from Phoenix’s testing framework was the ability to simply test
whether a set of routes is defined in a router. With our reflection function, it should be relatively easy
to add that ability to Goldcrest.
Let’s start by defining a RouterCase module that will house the logic for the assert_route_
defined? function. We want to be able to call this function in the most idiomatic way possible;
therefore, we will write this function to work with a given router, set as a module attribute in the
__using__/1 macro. This means a test module using RouterCase will be a singleton to one
router. Let’s go ahead and define that macro:
defmodule Goldcrest.ExUnit.RouterCase do
defmacro __using__(opts) do
quote do
Creating test helpers
use ExUnit.Case
@opts unquote(opts)
@default_router_module __MODULE__
|> Module.split()
|> Enum.take(1)
|> List.insert_at(1, ".Router")
|> Module.concat()
@router_module @opts[:router] ||
@default_router_module
@helper_module unquote(__MODULE__)
def assert_route_defined?(method, match, controller,
action) do
routes =
@router_module.__goldcrest_router_routes__()
expected_route = {{method, match}, {controller,
action}}
ExUnit.Assertions.assert(
expected_route in routes,
"""
Expected the following route to be defined in the
router, but it was not:
#{@helper_module.humanize_route(expected_route)}.
Defined routes:
#{@helper_module.humanize_routes(routes)}
"""
)
end
end
end
def humanize_routes(routes) when is_list(routes) do
routes
|> Enum.map(&humanize_route/1)
|> Enum.join("\n")
end
def humanize_route({{method, match}, {controller,
243
244
Building the Router DSL
action}}) do
"#{inspect(method)} #{match}, #{controller}, #{action}"
end
end
In the preceding code snippet, we defined a Goldcrest.ExUnit.RouterCase module, which
defines a __using__/1 macro. This macro sets a router module for the entire test module. This
macro also adds ExUnit capabilities to the router test module and also defines the assert_route_
defined?/4 function, which checks whether a route is defined for the set router with the given
HTTP method, path, controller, and action. We use ExUnit.Assertions.assert/2 to add
ExUnit capabilities to the assert_route_defined?/4 function, and we also add a custom
failure message that lists all the routes defined in the given router.
Now that we have a RouterCase module defined, let’s use it to test the TasksWeb.Router module:
defmodule TasksWeb.RouterTest do
use Goldcrest.ExUnit.RouterCase
alias TasksWeb.TaskController
describe "routes" do
test "defines GET /tasks routed to
TaskController#index" do
assert_route_defined?(:get, "/tasks", TaskController,
:index)
end
test "defines GET /tasks/:id/delete routed to
TaskController#delete" do
assert_route_defined?(:get, "/tasks/:id/delete",
TaskController, :delete)
end
test "defines POST /tasks routed to
TaskController#create" do
assert_route_defined?(:post, "/tasks",
TaskController, :create)
end
end
end
In the preceding code snippet, we tested whether all the routes are defined in the given router. Each
test case is simple and easy to read, ensuring that if a route is changed, we have a breaking test suite.
Creating test helpers
In order to run our tests, we can simply run the following command from the tasks_web folder:
$ mix test
......
Finished in 0.07 seconds (0.00s async, 0.07s sync)
6 tests, 0 failures
If we add a route that doesn’t exist in the system, it will yield an appropriate test failure. Let’s consider
the following code snippet:
defmodule TasksWeb.RouterTest do
use Goldcrest.ExUnit.RouterCase
alias TasksWeb.TaskController
describe "routes" do
test "defines GET /tasks routed to
TaskController#index" do
assert_route_defined?(:get, "/tasks", TaskController,
:index)
end
test "defines GET /tasks/:id/delete routed to
TaskController#delete" do
assert_route_defined?(:get, "/tasks/:id/delete",
TaskController, :delete)
end
test "defines POST /tasks routed to
TaskController#create" do
assert_route_defined?(:post, "/tasks",
TaskController, :create)
end
test "(expected to fail) POST /bad-route" do
assert_route_defined?(:post, "/bad-route",
TaskController, :bad_route)
end
end
end
245
246
Building the Router DSL
Now, if we run the test suite, we will get a test failure with a custom message, as configured in the
RouterCase module:
$ mix test
....
1) test routes (expected to fail) POST /bad-route (TasksWeb.
RouterTest)
test/tasks_web/router_test.exs:19
Expected the following route to be defined in the router, but it
was
not:
:post /bad-route, Elixir.TasksWeb.TaskController, bad_route.
Defined routes:
:post /tasks, Elixir.TasksWeb.TaskController, create
:get /tasks, Elixir.TasksWeb.TaskController, index
:get /tasks/:id/delete,
Elixir.TasksWeb.TaskController, delete
code: assert_route_defined?(:post, "/bad-route",
TaskController, :bad_route)
stacktrace:
test/tasks_web/router_test.exs:20: (test)
..
Finished in 0.07 seconds (0.00s async, 0.07s sync)
7 tests, 1 failure
Randomized with seed 299996
We now have an idiomatic, replicable, and concise way of defining, testing, and inspecting routers
using the Goldcrest framework.
Summary
In this chapter, we first defined the desired DSL for our router module. We also understood why we
use metaprogramming here, similar to the previous chapter.
Then, we took a look at the state of our router before this chapter and identified the lines that could
be moved out of the router to the DSL. We started to build our DSL by moving all the plug calls to
the __using__/1 macro in Goldcrest.Router. We then found a way to add a generic match
clause to get a default 404 response. We made the use statement dynamic by allowing it to pass
options to the Plug.Parsers call as part of the use call.
Exercises
We then worked on adding reflections and introspective features to the router DSL, similar to what
we did in Chapter 9 for controllers and views. We also defined helper functions and helper modules
that allow us to reference a path by using a controller and action, similar to Phoenix. Finally, we added
test helpers along with an example test for a router.
This concludes our minimal web framework, Goldcrest. We learned how to build our own HTTP
server, how to use plugs to use the server effectively, and how controllers, views, templates, and routers
work in Phoenix, building similar tools from the ground up. Finally, we learned how to wrap those
into DSLs using metaprogramming. There are still many features that we can add to Goldcrest that
are analogous to Phoenix, such as LiveView, better HTML support using Phoenix.HTML, and
smarter EEx parsing using HEEx. We can also add more test helper modules to make testing even
easier. Overall, my goal in writing this book was to somehow demystify modern-day web frameworks
for software engineers and learn more about Elixir while doing so. A great next step after this book
is to check out Phoenix’s code base on GitHub and build more functionality on top of Goldcrest on
your own. Hopefully, this hands-on book was able to reduce the barrier of entry for some developers
so that they can start contributing to libraries such as Phoenix.
Exercises
Test your knowledge by implementing the following:
• What other test helpers could we add to Goldcrest.ExUnit.RouterCase? How would
those tests help us build a more deterministic web application?
• Currently, the generic match clause only handles a 404 with HTML response. How can we
update it to handle other types of responses?
247
Index
Symbols
C
:dispatch plug 64
:gen_tcp
used, for listening over TCP socket 28-32
used, for responding over TCP socket 32-36
:match plug 64
__MODULE__ 78
call/2 function 60
client-server architecture
exploring 5
code injection
evaluation, using 162
macros, using 163, 164
compile-time callbacks 165
after compile module 166
before compile module 165, 166
on-definition module 167, 168
concurrency
adding, to server 50-52
controller DSL
building 191, 192
reflections, adding 192-195
reflective plugs 195-198
controller interface
building 76-80
controller pipeline
building 98-102
controllers 74
in Phoenix 75
testing 87, 88
testing, with HTML responses 122, 123
controllers plug pipeline 92-94
A
Abstract Syntax Tree (AST) 112, 155
action fallback
implementing 103-107
after compile module 166
aplay command
implementation, writing 170-172
apply/3 78
B
before compile module 165, 166
bindings
routes, adding 14-18
250
Index
Cowboy
handler, adding 9-12
router, adding 9
used, for building web application 8
Cowboy architecture 7, 8
Cowboy functions
cowboy_router.compile/1 9
cowboy.start_clear/3 9
Cowboy middleware 19
Cowboy web server 3
create action 142-145
Create Read Update Delete (CRUD) 138
cURL 34
D
delete action 145-148
detached HTTP server
initiating 52, 53
dispatch rules 9
domain-specific language (DSL) 151, 187
design 188-224
test helpers, adding 184, 185
used, for building web app 205-211
E
Elixir
behavior 42
metaprogramming 155, 156
music DSL, building 168, 169
embedded elixir
custom EEx engine, building 115-118
custom markers 115
EEx options, working with 113
EEx Smart Engine, using 114
exploring 110, 111
functions dynamically, defining
in module 111, 112
template, compiling with module 112, 113
ExUnit
used, for testing web server 23-26
F
File Transfer Protocol (FTP) 4
Floki
testing with 123-125
function plug 60
G
Goldcrest
create action 142-145
delete action 145-148
index action 139-141
store, defining 137-139
testing 134-137
H
helper functions
passing, to templates 132-134
html.eex files
responding with 118-122
HTML files
responding with 20-22
HTML responses
used, for testing controllers 122, 123
HTTP/0.9 34
HTTP methods
validating 18, 19
HTTP request
line break 6
request body 6
Index
request headers 6
request line 6
HTTP response
line break 6
request status line 6
response body 6
response headers 6
used, for testing controllers 122, 123
HTTP response struct
defining 39, 40
HTTP server
package, writing 36-39
Plug, using with 64-72
running, with sample application 47-50
testing 43-47
HyperText Markup Language (HTML) 3
Hypertext Transfer Protocol (HTTP) 4-7
I
index action 139-141
init/1 function 60
interface
embed_notes, testing 180-182
integration tests, writing 178, 179
note, testing 180-182
restrictions, testing 183, 184
sequence, testing 179, 180
testing 178
interface layer
building 172-178
M
macro
using 164
metaprogramming 151, 222
benefits 222
cons 153
in Elixir 155, 156
need for 188
pros 153
usage 154, 155
Mix tool 8
Model-View-Controller (MVC) 73, 128
Module, Function, and
Arguments (MFA) 62
module plug 60
multi-factor authentication (MFA) 78
music DSL
building, in Elixir 168, 169
MVC framework 128
N
Naming Reflection Functions 194
O
on-definition module 167, 168
Open Telecom Platform (OTP) 20, 28
P
Parsing 155
Phoenix
controller 75, 76
views 128, 129
Plug 58
defining 60-62
using, with HTTP server 64-72
Plug.Builder module 94-98
implementing 95
251
252
Index
init_mode 95
log_on_halt 95
Plug.Conn.send_resp/3 59
Plug.Conn struct
used, for representing state of
connection 58, 59
Plug.Router 63, 64
priv directory 20
Q
quoted literals 156-158
evaluating 158, 159
quotes
dynamic behavior, adding 160, 161
hygienic evaluation 159, 160
R
Ranch 7
redirects 83-86
responder behavior
creating 42, 43
responder configuration
validating 41
response helpers
extracting 198-201
restrictions 178
router DSL
building 224-231
reflections, adding 231, 232
reflective routes 232, 234
router helpers
building 234-242
routes
adding, with bindings 14-18
S
sequences 178
server
concurrency, adding to 50-52
state of connection
representing, with Plug.Conn struct 58, 59
store
defining 137-139
supervision tree 9
T
TasksWeb.TaskController
actions 136
TCP socket
listening over, with :gen_tcp 28-32
responding over, with :gen_tcp 32-36
templates
helper functions, passing to 132-134
test helpers
creating 242-246
creating, for debug 211-220
creating, for tests 211-220
Tokenization 155
Transmission Control Protocol/
Internet Protocol (TCP/IP) 4
V
view 128
in Phoenix 128, 129
View DSL
building 201-205
view interface
building 130-132
Index
W
web application
building, with Cowboy 8
building, with DSL 205-211
Mix project, creating 8, 9
web server 4, 5
integration with 80-82
supervising 12-14
testing, with ExUnit 23-26
253
Packtpub.com
Subscribe to our online digital library for full access to over 7,000 books and videos, as well as
industry leading tools to help you plan your personal development and advance your career. For more
information, please visit our website.
Why subscribe?
• Spend less time learning and more time coding with practical eBooks and Videos from over
4,000 industry professionals
• Improve your learning with Skill Plans built especially for you
• Get a free eBook or video every month
• Fully searchable for easy access to vital information
• Copy and paste, print, and bookmark content
Did you know that Packt offers eBook versions of every book published, with PDF and ePub files
available? You can upgrade to the eBook version at packtpub.com and as a print book customer, you
are entitled to a discount on the eBook copy. Get in touch with us at customercare@packtpub.
com for more details.
At www.packtpub.com, you can also read a collection of free technical articles, sign up for a range
of free newsletters, and receive exclusive discounts and offers on Packt books and eBooks.
256
Packt is searching for authors like you
If you’re interested in becoming an author for Packt, please visit authors.packtpub.com and
apply today. We have worked with thousands of developers and tech professionals, just like you, to
help them share their insight with the global tech community. You can make a general application,
apply for a specific hot topic that we are recruiting an author for, or submit your own idea.
Hi!
I, Adi Iyengar, author of Build Your Own Web Framework in Elixir, really hope you enjoyed reading
this book and found it useful for increasing your productivity and efficiency in Elixir and Phoenix.
It would really help us (and other potential readers!) if you could leave a review on Amazon sharing
your thoughts on the book and what you learned from it.
Go to the link below to leave your review:
https://packt.link/r/1801812543
Your review will help us to understand what’s worked well in this book, and what could be improved
upon for future editions, so it really is appreciated.
Best wishes,
Adi Iyengar
257
Download a free PDF copy of this book
Thanks for purchasing this book!
Do you like to read on the go but are unable to carry your print books everywhere?
Is your eBook purchase not compatible with the device of your choice?
Don’t worry, now with every Packt book you get a DRM-free PDF version of that book at no cost.
Read anywhere, any place, on any device. Search, copy, and paste code from your favorite technical
books directly into your application.
The perks don’t stop there, you can get exclusive access to discounts, newsletters, and great free content
in your inbox daily
Follow these simple steps to get the benefits:
1.
Scan the QR code or visit the link below
https://packt.link/free-ebook/9781801812542
2.
Submit your proof of purchase
3.
That’s it! We’ll send your free PDF and other benefits to your email directly