


Автор: Repasky L. Hamada J.
Теги: knitting knitting magazine handmade miniature punchneedle embroidery magazine
ISBN: 1-56477-646-8
Год: 2006


Текст
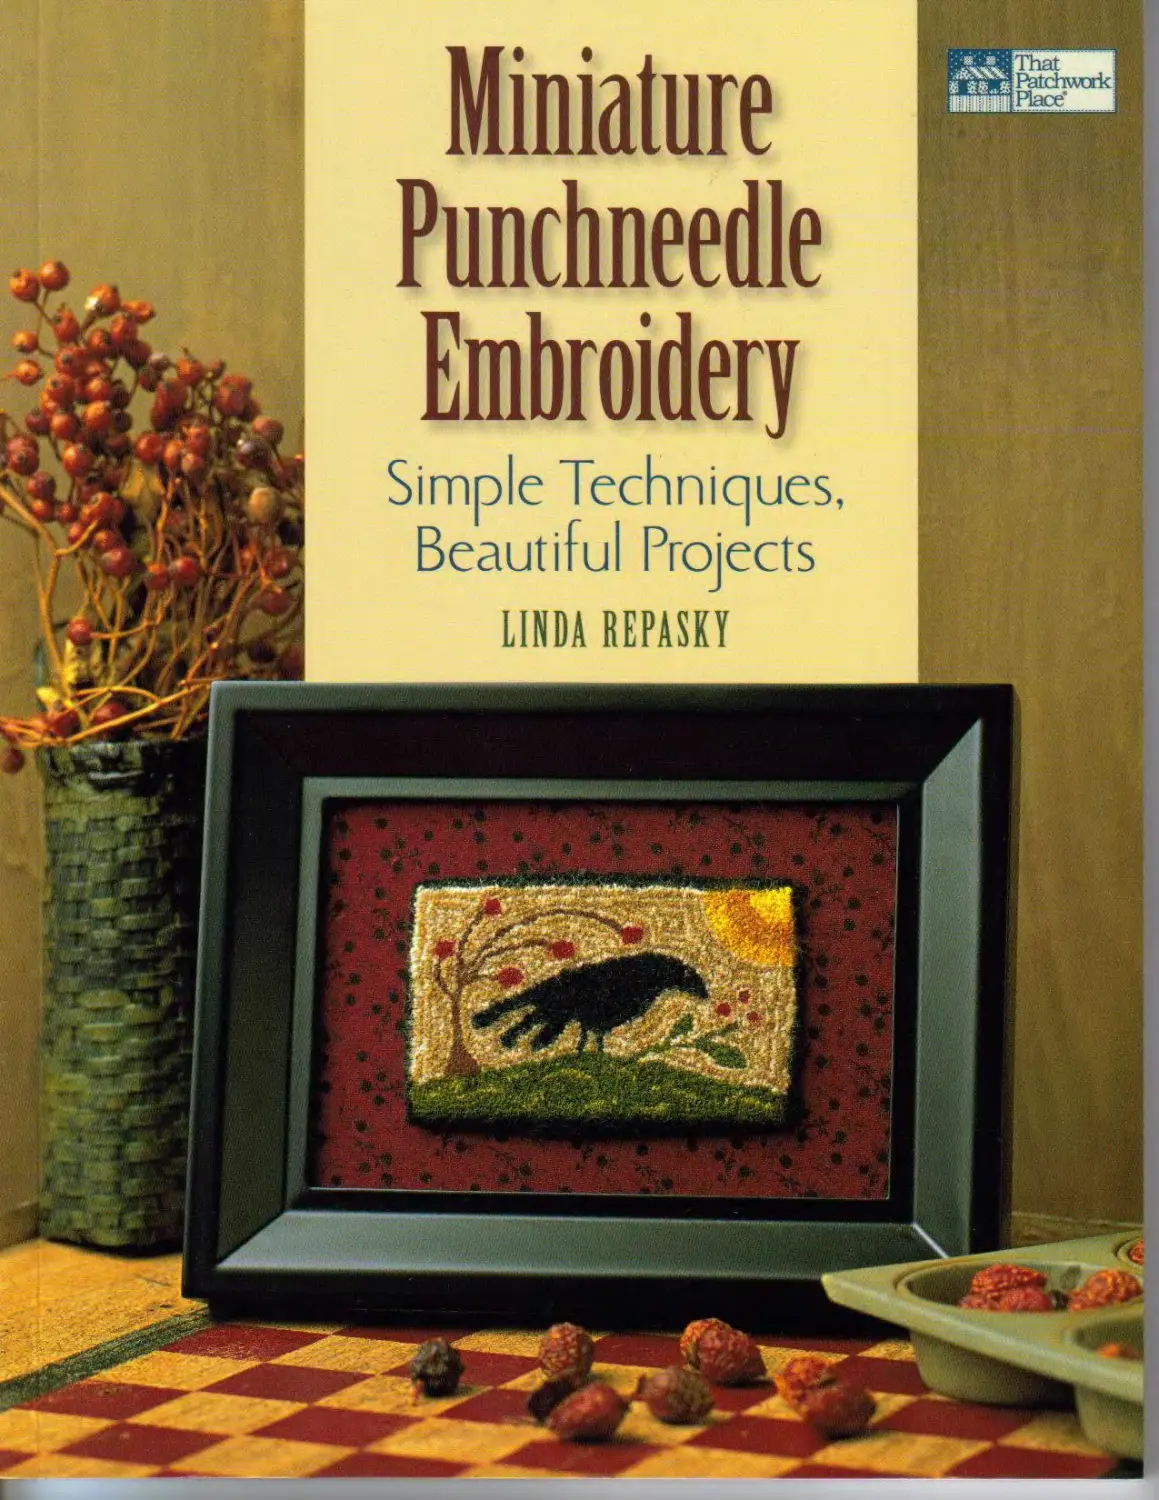
                    Miniature
Punchneedle
Embroidery
Simple Techniques,
Beautiful Projects
LINDA REPASKY
Miniature
Punchneedle Embroidery
Simple Techniques,
Beautiful Projects
LINDA REPASKY
cA(attoiaa/e*
& C 0 M - P /a n y
Miniature Punchneedle Embroidery:
Simple Techniques, Beautiful Projects
© 2006 by Linda Repasky
olfarf/w/a/e
& С 0 M .P/А n y
That Patchwork Place® is an imprint of
Martingale & Company®.
Martingale & Company
20205 144th Avenue NE
Woodinville, WA 98072-8478 USA
www.martingale-pub.com
Credits
President: Nancy J. Martin
CEO: Daniel J. Martin
VP and General Manager: Tom Wierzbicki
Publisher: Jane Hamada
Editorial Director: Mary V. Green
Managing Editor: Tina Cook
Technical Editor: Karen Costello Soltys
Copy Editor: Liz McGehee
Design Director: Stan Green
Illustrator: Laurel Strand
Cover and Text Designer: Stan Green
Photographer: Brent Kane
Printed in China
11 10 09 08 07 06	8 765432 1
Library of Congress Cataloging-in-Publication Data
Repasky, Linda.
Miniature punchneedle embroidery : simple
techniques, beautiful projects / Linda Repasky
p. cm.
ISBN 1-56477-646-8
1. Embroidery. 2. Punched work. I. Title.
TT770.R45 2006
746.44—dc22
2005018349
Mission Statement
Dedicated to providing quality products and
service to inspire creativity.
Acknowledgments
This book has been a labor of love, made possible only with
the encouragement and support of many other people. From
the enthusiastic students in my punching classes to my many
rug-hooking teachers and friends, I have learned so much
and have been inspired to no end.
My local hooking group cheerfully endured many nights of
frenzied punching as I worked on models for the projects. Pat
Cross planted the seeds for this book and stood by my side as
I dove into putting pen to paper. Karen Soltys offered edito-
rial insights that polished my words and turned a fledgling
manuscript into the book that you now hold. And Linda Van
Wyk graciously allowed us to photograph all the projects in
her shop, the Speckled Hen, in Snohomish, Washington.
I am so grateful, too, to my mother, Janet, who consistently
nurtured creativity through her quiet example, and to my
sister, Marci, whose many talents have always been an inspi-
ration. And most of all, to the love of my life, Kevin, thank
you for always being at my side, through thick and thin, with
patience and good humor.
No part of this product may be reproduced in any form,
unless otherwise stated, in which case reproduction is
limited to the use of the purchaser. The written instructions,
photographs, designs, projects, and patterns are intended
for the personal, noncommercial use of the retail purchaser
and are under federal copyright laws; they are not to be
reproduced by any electronic, mechanical, or other means,
including informational storage or retrieval systems, for
commercial use. Permission is granted to photocopy
patterns for the personal use of the retail purchaser.
The information in this book is presented in good faith,
but no warranty is given nor results guaranteed. Since
Martingale & Company has no control over choice of
materials or procedures, the company assumes no responsi-
bility for the use of this information.
Contents
The World of Punchneedle Embroidery............6
Getting Started: Tools and Supplies............1
Getting Ready: Prepping Your Floss and Fabric..11
Getting Loopy: The Punching Technique.........15
Exploring Threads and Foundations.............25
Finishing Your Punched Piece..................26
Framing and Other Display Options.............51
The Projects.................54
Crow Pin.....................55
Antique Cat..................57
Shelburne Goat...............40
Crockful of Posies...........42
A Pooch with Heart...........44
Chicken Little...............46
Crow in the Berries..........48
Portrait of a Sheep...........50
Best Friends..................52
Tulip Cross.................  54
The Trout.....................56
Punchneedle Patterns.........59
Resources.................    61
About the Author..............65
The World of Punchneedle Embroidery
П today's high-tech, hurry-up world, where nearly every hour seems scheduled, many of us
are longing to do some handwork and create something unique. We begin projects, only to find
that they cake so much longer than we’d expected, and they end up being put aside for lack of time.
Who among us doesn’t have a collection of unfinished pieces of handwork?
Yet as busy as we are, we still feel pulled toward
expressing our creativity, to make something special
with our hands. What we really need is something that
can be picked up and set down without a lot of prepa-
ration or fuss, something that doesn’t require counting
stitches and slavishly following a pattern, something
that we can easily take along with us on car trips and
into waiting rooms.
It may be these very desires that have brought
miniature punchneedle embroidery out of the history
books and into our hands. This delightful centuries-old
needle art creates stunningly beautiful pieces with a
richness of texture and color that belie the fact that
they can be created in only a few hours. Resembling
miniaturized versions of traditional hooked rugs, these
punched pieces have an appeal that few other forms
of needlework can claim. Pins, appliques, dollhouse
rugs, and framed artwork are among the many finished
pieces that can be created using only a punchneedle
and a few inexpensive supplies. Once you learn the
basic technique, there’s no limit to the variety of
designs you can create using the punchneedle.
Not only is miniature punchneedle embroidery
beautiful, easy, and quick, but it’s also freeing. Rather
than tediously counting stitches, you simply fill in
areas of a design with color. It’s freeing, too, to work
on a project that doesn’t require a great deal of concen-
tration. Do your punching and talk with your family,
watch TV, or chat on the phone. Miniature punch-
needle embroidery is also incredibly portable. With
such diminutive equipment, it’s easy to toss everything
you need into a bag and take your project along so
it can be worked in spare moments. And it makes
the perfect travel companion on family and business
trips, since it’s easy to pack all your supplies into a tiny
corner of a suitcase. (If you’re traveling on a plane, it’ll
have to go in your checked bag, however.)
Because of its simplicity, it’s easy to learn how to
use the punchneedle. Children as young as seven or
eight years old can readily learn to punch (with appro-
priate precautions about the very sharp point of the
needle). Young or old, newcomers to punching quickly
learn to create lush loops and can complete their first
project in a couple of hours. Even your tenuous first
attempt at punching will likely produce a great-looking
finished piece, since you’ll quickly become comfortable
with the basic technique.
This book covers everything you need to know
about creating miniature punched pieces, step by step,
from threading such a peculiar-looking tool to forming
luscious little loops on your fabric. We’ll also spend
some time learning about finishing and framing your
work, with an eye toward using archival methods that
will preserve your creations. And you’ll get a chance
to put your newly learned skills to use on a number of
projects that are based on American primitive folk art.
At the end of the book, you’ll find a resource section to
help you find supplies that may not be available locally.
Just a word of caution: punching can be addictive!
It’s so simple and so rewarding that you may begin
seeing potential punched pieces everywhere you look.
6
Getting Started: Tools and Supplies
Happily, miniature punchneedle embroidery requires relatively few supplies.
In fact, there’s a good chance that you already have on hand many of the things you’ll need.
Here’s the “must have” list for your first project:
•	Punchneedie
•	’4 yard weaver’s cloth for backing fabric (this is
what you’ll be punching into)
•	4" embroidery hoop
•	Embroidery floss
•	Small, sharp scissors
•	Good lighting (try a full-spectrum bulb)
•	Small plastic box with lid
	4"-long adhesive-backed magnetic strip
Note what is not on the list—a magnifier. Believe it
or not, you don’t need 20/20 eyesight or magnifica-
tion to do this tiny form of needlework. Much of
what you’ll be doing doesn’t require great precision.
Rather, you’ll be punching outlines and then filling
them in. Most people find that having good lighting
is much more important than using any form of
magnification.
Bow Punchneedles Work
L'nlike most other forms of needlework, punchneedle
embroidery creates a lush surface, which is raised
above the base fabric on which it is worked. Only one
stitch is used when embroidering with the miniature
?anchneedle. Each stitch creates a tiny loop of thread.
The loops quickly multiply to create a solid, almost
veh’etlike surface.
The punchneedle itself is very simple—a hollow
needle set into a handle. A piece of thread or floss
runs inside the hollow handle and needle and is
then threaded through the needle’s eye. The needle is
pushed through a foundation fabric to create loops.
Selecting a Punchneedie
Punch needles come in a variety of sizes and styles.
Many of rhe punchneedles that you might find at yard
sales and antique shops are designed for thick yarns,
which are used for making floor rugs. As you can
imagine, these are too large for the kind of work you’ll
be doing.
Instead, you’re going to use a much smaller version
of punchneedle, which is generically referred to as a
“Russian punchneedle.” There are two distinct styles of
these small punchneedles, and you can use either kind.
One style typically has a long plastic handle and an
adjustable spring mechanism so you can set the length
of the loops to a few predetermined lengths. The other
style has a metal handle and is adjusted manually to
make loops the precise length that you’d like (see page
8). Needle choice is a matter of personal preference;
for our discussion here, I’ll refer to one style as the
“plastic-handled” punchneedle, and the other style as
the “metal-handled” punchneedle.
Plastic-Handled Punchneedle
This punchneedle offers an all-in-one approach. You
can adjust the length of loops quickly and easily by
turning a knob or by clicking a spring-loaded mecha-
nism to one of the preset levels. The plastic handle is
long, which some people find easier to grasp. On the
other hand, the handle is also relatively thick, which
some people find more difficult to hold comfortably.
Some brands have a single needle, while others offer
two or three different sizes of interchangeable needles
that you can remove and insert at will to accommo-
date all sizes of floss and thread.
7
Some of today's plastic-handled punchneedles (top to
bottom): Purr-feet Punch, Pretty Punch, Cameo Ultra-
Punch, Wonder Punch, Clover Embroidery Stitching Tool
Three of the most popular metal-handled punchneedles
(left to right): CTR, Bernadine's Russian Punch Needle,
Igolochkoy Russian Punchneedle
Metal-Handled Punchneedle
Unlike the plastic-handled punchneedle, each metal-
handled punchneedle has only one size of needle; the
needles aren’t interchangeable. To adjust the length
of the loops, you cut a piece of plastic tubing (called a
gauge) to make loops of the precise length you want.
Additionally, the handles tend to be shorter and thin-
ner than those of plastic-handled punchneedles. This
type of punchneedle comes in three sizes:
One-strand. This is the finest, thinnest needle. You
use only one strand of the six-stranded embroidery
floss. It creates the most delicate and tiniest designs.
Most plastic-handled punchneedles do not have a
needle that is as fine as this.
Three-strand. This needle is a good, all-purpose size.
You can use two or three strands of the six-stranded
embroidery floss.
Six-strand. This is the largest of the Russian
punchneedles. You can use four, five, or six strands
of embroidery floss. This needle is used for larger,
less-detailed designs.
With so many choices, you may be wondering
which type of punchneedle to buy. As you’ve likely
suspected, there is no single answer. There are pros and
cons to both types. The metal-handled punchneedles
tend to be more expensive, but they are popular
because they allow you to precisely customize the
length of your loops; many people feel that they give
you greater control over your punching. The plastic-
handled punchneedles cost less and will work well for
many of your punching projects. However, they can
be somewhat limiting, since they have predetermined
settings for the length of your loops.
Many needlework and craft stores carry punch-
needles, so check with your local shop. If you can’t
find what you’re looking for locally, you can easily
buy punchneedles by mail or via the Internet. See
“Resources” on page 61 for a number of sources.
In this book, I’ll be explaining punching based
on using the metal-handled punchneedle. The projects
in this book are designed for the three-strand punch-
needle, so they are also suitable for plastic-handled
needles.
Other Supplies You’ll Need
Happily, you won’t need to be very persnickety about
the other supplies you’ll be using, and you won’t need
8
The basic supplies include weaver's cloth, an embroidery
hoop, threads, and embroidery scissors or thread snips.
The fine metal teeth of the gripper frame grab and hold
the fabric extremely taut, making a gripper frame a great
alternative to a hoop.
to spend a fortune on them. Once you buy the punch-
needie, the other supplies are relatively inexpensive.
Following is the rundown on what we’ll be using.
Woven Fabric
Using woven fabric for the backing of your punch-
needie embroidery is critical, because it’s the weave of
the fabric that is going to hold your loops in place. If
you’re not sure whether a fabric is woven or not, look
closely at the cloth. If you see threads crisscrossing at
right angles, then you’re holding a woven fabric. There
are hundreds of options, but you’ll want to use one that
is somewhat tightly woven.
When you look at a fabric and don’t see any threads
at all, or if you see threads that have been knit to form a
fabric (sweatshirts, for example), then these are not the
woven fabrics you’re looking for.
For your first projects, I recommend that you use
weaver’s cloth. This woven fabric is a blend of 45%
cotton—55% polyester. You can buy it in nearly any
fabric store, right off the bolt, at a very low cost. The
polyester content helps make this fabric more resilient
than purely cotton fabrics—and resiliency is what you’ll
want as you’re learning to punch. Resiliency will allow
you to pull out loops that you’re not satisfied with and
then repunch into the same section of fabric. Using
white or off-white fabric will make it easier to transfer
your pattern and punch your design.
Embroidery Hoop or Frame
An embroidery hoop is critical for punching. If you’ve
got an old wooden hoop tucked away in a drawer,
leave it there! You need a hoop with an interlocking
lip that will grip fabric and hold it drum-tight. The
most readily available brand is the plastic Susan Bates
Hoop-La, which is available in needlework shops, craft
stores, and discount stores. Since our work will be
small, you need only a 4" hoop to start.
For needleworkers who are serious about punching,
there is another option called a gripper frame (shown
above). Modeled after the frames used by rug hookers,
this frame features carding strips that have thousands
of tiny metal needles (or teeth), which grab the fabric
and hang on to it. This frame is more expensive than
the plastic hoop, but also does a far better job of
holding the fabric taut. This frame is not manufac-
tured commercially, but can be found through a few
specialty online sources (see “Resources” on page 61).
9
Cotton Embroidery Floss
Rummage through your sewing basket and drawers,
and you’ll surely find some skeins of cotton embroidery
floss, which is the standard for miniature punchneedle
embroidery. New or old, any cotton embroidery floss
that can be separated into six strands will work perfectly
with your punchneedle. Nearly all floss has six strands,
but note that the floss marketed as “craft floss” typically
cannot be separated, so stay away from this.
Common brands of floss are DMC and Anchor,
which are perfect for your first projects. In “Exploring
Threads and Foundations” on page 23, we’ll look at
overdyed cotton floss as well as other types of threads
and fibers, but for now, collect some skeins of ordinary
cotton floss in colors you like.
Scissors
Use the smallest, sharpest embroidery scissors that
you can get your hands on. You’ll need scissors that
are small and thin enough to clip the ends of the floss
as close as possible to the backing fabric. The sharper
and thinner the blades, the easier it will be for you to
make clean cuts close to the fabric. Many people use
curved embroidery scissors. Another option is metal
spring-action snips, which provide a nice, close cut. I
use Havel’s Snip-Eze scissors (shown on page 9), which
let me easily clip right at the surface of the fabric.
Adequate Lighting
Good lighting is essential to being a happy puncher.
You don’t need anything fancy. As long as you use a
lamp that produces bright lighting, you’ll be fine. It’s
nice to have a lamp that can be adjusted, so a simple,
old-fashioned gooseneck desk lamp is great. I like to
use a bulb that doesn’t produce a lot of heat, so I use a
full-spectrum bulb in my lamp rather than a halogen
bulb. Full-spectrum lighting is especially helpful at
night, when it’s generally harder to see colors accu-
rately. You can buy full-spectrum incandescent bulbs
at the grocery or hardware store.
Miscellaneous Supplies
You will soon discover that punchneedles come with
an essential tool—a threader. The threader is incred-
ibly fine, made of wire that is as thin as a single strand
of hair. The threader is not something you want to
drop or you may never find it again. For that reason,
I recommend that you buy a small plastic box to
hold your punchneedle and supplies. Then attach a
4" length of adhesive-backed magnetic strip to the
inside lid of the box. The magnet will do a great job of
holding the threader with little risk of loss. Get into
the habit of immediately placing the threader onto the
magnet after every use.
A small box with a magnet adhered to the lid
GET A GRIP
Some punchneedles have very narrow brass or
metal handles. If you find yourselfwishingfora
thicker handle, you can use a standard pencil grip
for the CTR punchneedle. Other brands are too
narrow for a pencil grip, so you'll need to impro-
vise. Try using a high-density foam hair curler.
Simply remove the inner metal rod and cut off
a 1"-long piece.
Slip this comfort-
ably soft-yet-firm
foam onto the
thinnest of
punchneedle
handles for a
great grip. Make a cushioned grip from a
foam hair curler.
10
Getting Ready: Prepping Your Floss and Fabric
Once you’ve gathered your basic supplies, you’ll be eager to get started. But before you punch
your first loop, you’ll want to take a close look at this odd-looking tool and learn how to get it ready
for punching.
Notice that the needle is hollow like a hypodermic
needle and that the tip of the needle has an unusual
point. Rather than gently angling to a point on all
sides, the needle is cut sharply from one side to the
other. When you punch, you
will want to know which
direction this beveled edge is
facing; it plays a key role in
creating good loops.
Beveled' ’ needle
point
The "business" end of the punchneedle.
Note the beveled point.
Also notice that your punchneedle has plastic
tubing slipped over the needle. This is called the gauge.
The gauge is what controls the length of your loops.
Every time your needle pokes into the fabric, it’s going
to go as far as it can until that gauge hits the fabric.
You can make the gauge longer or shorter to change
rhe length of the loops.
He Igolochkoy punchneedle with its red gauge
If you don’t see any plastic tubing, it’s likely that
you have a plastic-handled punchneedle that is spring-
loaded. Rather than using plastic tubing to stop the
needle, this type of punchneedle simply uses the end of
the handle to stop it. A spring mechanism or screwlike
threads inside the handle make the needle shorter or
longer and therefore adjust the length of your loops.
Note that the plastic-handled punchneedle does not have a
plastic gauge.
Preparing the Backing Fabric
Cut an 8” square of weaver’s cloth. If you can’t find
weaver’s cloth, use a piece of muslin. Using a per-
manent felt-tipped marker, draw a few shapes onto
the center of the fabric—some straight lines, a box, a
curvy squiggle, a heart. You can draw these freehand,
or use the pattern on the following page. These shapes
will help you become accustomed to using the punch-
needle and will also help you get a feel for the spacing
of the loops, particularly for filling in large areas.
11
Use rhe practice pattern below to try your hand
at punching straight lines and curves and at filling in
closed spaces.
Practice pattern
Now you’re ready to insert the fabric into the
hoop. There is definitely a right way and a wrong way
to do this, so follow these steps carefully.
1.	Find the imprinted wording “this side up” on the
edge of the inner (smaller) ring of the hoop. Set the
inner ring down on a flat surface, with the wording
facing up.
Make sure you can read "this side up" on the
innerring.
2.	Place your fabric over the inner ring of the hoop,
with the drawn shapes facing up. This is the side
that you’ll be working on. Your drawing is on the
side that will become the back of the piece when
you’re done. The front side—the pretty loopy
side—will be on the underside of the hoop as
you’re working.
3.	Loosen the outer ring of the hoop quite a bit, place
it on top of the fabric-covered inner ring, and push
it down over the inner ring. Listen for a “click” as
the outer hoop slides over the lip. You’ll also feel
the outer ring slip over the lip and settle in.
The hoop above has the fabric inserted correctly (note
the raised surface of the fabric).
This hoop has the inner ring inserted upside down and
thus will not hold the fabric well.
4.	Use the screw on the hoop to tighten the outer
ring. Slowly and gently, keep tightening the screw
and tugging the fabric until the surface of the
fabric is taut and square in the hoop. Very taut
fabric is critical for making good loops.
12
THE TIGHTER THE BETTER
The fabric in the hoop should be as taut as a tam-
bourine. When you think it's tight enough, tug at it
some more to get it even tighter! As you're tugging
on the fabric, do your best to keep the fabric grain
straight. The weave of the fabric should be vertical
and horizontal—not wobbly or diagonal—to avoid
distorting your design.
Preparing the Floss for Punching
To find out how many strands of floss you’ll need,
check the instructions that accompany the pattern.
Some projects require only one strand; others require
two or sometimes three strands. In this book, the
projects all use two strands of cotton embroidery
floss or one strand of wool thread. For punching the
shapes on the practice piece, use two strands of cotton
embroidery floss in the three-strand punchneedle.
Here’s a good way to work with the strands without
creating a tangled mess. Pull a generous length of floss
from the skein, about 30" to 36" long, and cut it. Grab
the end of one of the six strands with your left hand,
and hold the rest of the cut floss a few inches away
with your right hand. Gently pull on the single strand
with your left hand while maintaining a gentle grip
on the remaining strands in your right hand. You’ll see
the one strand come out easily in your left hand, and
the remaining strands will bunch up near the fingers of
your right hand. As soon as you finish pulling out the
one strand, the rest of the floss will unbunch itself.
Separating the strands of cotton floss
Repeat this process for your second strand. Don’t
be tempted to take a shortcut by pulling out two or
three strands at the same time unless you enjoy trying
to untangle six strands of snarled floss.
Threading lhe Needle
Plastic- and metal-handled needles are threaded
slightly differently. We’ll cover the method used for
the metal-handled punchneedles here. Plastic-handled
punchneedles follow the same concept, but generally
require a slightly different process. See the instructions
that accompany your punchneedle.
Threading the needle may seem counterintuitive
at first because you’ll be working from the bottom
of the needle, but after you’ve threaded your needle
a few times, it becomes easy. First, get to know your
threader. Notice that one end is folded with a twist,
and the other end is joined or soldered. Each end plays
an important role in the threading process.
Soldered end	Folded end
The threader
1.	Hold the threader in your dominant hand. Hold
the punchneedle in your other hand, with the tip
of the needle facing your dominant hand.
2.	Insert the looped end of the threader into the
punchneedle, moving from the pointed end of the
needle toward the handle. The soldered end of the
threader should go through the needle last.
Insert the threader, folded end first.
13
3.	Pull the threader through the top of the handle
until about an inch or two of the threader pokes
out. Don’t pull the threader out all the way! Leave
most of the threader inside the punchneedle.
4.	Insert the floss into the looped tip of the threader
so that 4" to 5" of floss is through the loop. Gently
tug on the floss toward the fold in the threader, so
that the fold can grip the floss and keep it in place
as you continue.
Slip one end of the floss into the threader, and give a
slight tug to catch it in the fold.
5.	Using your dominant hand, grab the soldered end
of the threader (the end that’s coming out of the
tip of the needle) and pull the threader through
the handle, and then completely out of the punch-
needie. Pull about 8" of floss through the needle
with the threader still attached.
Pull the threader from the soldered end until the folded
end and floss are pulled out of the needle.
6.	Insert the soldered end of the threader (the end
that’s not holding the floss) into the eye of the
needle, moving from the hollow portion of the
needle toward the outside of the needle.
Thread the eye of the needle from the hollow inside
toward the outside.
7.	Pull the entire threader through the hole, along
with several inches of floss. Release the floss from
the wire threader, and voila, you’ve threaded the
punch needle.
Pull the threader through the eye along with about
8" of floss.
Remember to put away the threader immediately!
Slip it back into the tube that the punchneedle came
in, or use the box with magnet described on page 10 to
save yourself much frustration. The threading process
is the trickiest part of learning to use the punchneedle.
Pat yourself on the back, and know that the rest of
punching will be a cakewalk.
14

Gelling Loopy: The Punching Technique
YOU ve threaded your needle. Your fabric is in the hoop. Get settled in a comfortable
chair and you’re ready to punch.
The Basics of Punching
Below is a short checklist of points to keep in mind
while you’re punching. Following this list are complete
step-by-step directions for using your punchneedle.
•	Work from right to left if you’re right-handed or
from left to right if you’re left-handed.
•	Keep the beveled side of the needle facing in the
direction you’re punching, and the tail of the floss
trailing away in the opposite direction.
•	Push the needle down as far as it will go each and
every time.
•	Barely lift the needle off the fabric as you finish a
loop—just scrape across the fabric while you move
the needle.
1.	Hold the hoop in your nondominant hand. Don’t
punch onto a hoop that’s lying flat on a table,
because you can damage the point of the needle
if it hits the table, and you’ll also risk straining
your neck.
2.	Adjust the floss So
that only about a l"-long
tail is coming out of the
eye of the needle. You
should have a long length
of floss coming out of the
top of the handle.
Only a short length of floss
extends from the eye
of the threaded punchneedle.
3.	Hold the punchneedle in an upright position, at a
90° angle (perpendicular) to the fabric in the hoop
as you punch. Try to avoid grasping the punch-
needie as you would hold a pencil, since that would
angle the punchneedle too deeply.
Hold the punchneedle upright.
4. Work from right to left if you are right-handed,
and from left to right if you are left-handed. Hold
the punchneedle so that the hollowed/angled side
of the needle is feeing the direction toward which
you’ll be punching. In other
words, if you’re right-handed,
the angled edge of the needle
should face left, and the
1" end of the floss will be
trailing off to the right.
Left-handers will have the
angle facing right and
the floss trailing to
the left.
Direction of punching
This side view shows
the direction of punching.
The beveled edge leads, and
the tail of floss trails behind.
15
5. Insert the pointed end of the needle into the fabric
and push the needle down as far as it will go. Every
time you push the needle into the fabric, you will
want to feel the fabric hit something solid (depend-
ing on the type of punchneedle you’re using, this
will be the gauge or the bottom of the handle).
Punching the needle as far as it will go every time
is the key to making sure that your loops will be an
even height.
Note that the needle can go no farther, because the
plastic gauge is stopping it.
7. Move the needle just a tiny bit to the left (or to the
right if you’re left-handed), scraping the surface of
the fabric with the tip of the needle. Try to move it
over only one or two threads in the fabric.
8. After moving the needle over, punch again, push-
ing the needle as far as it can go. Pull up so that
the needle is just barely beyond the surface of
the fabric, move the needle over a thread or two
by scraping it along the surface of the fabric, and
punch again.
Repeat this process,
punching slowly
and steadily.
Before long, you’ll
develop a rhythm,
and punching will
happen effortlessly.
Loops should appear on the underside of your
fabric only, not on the side you're working on.
6. When the needle has gone as far as it can, pull it
up gently. You want the tip of the needle to just
barely come back through the fabric; take care not
to lift the needle far from the surface of the fabric.
If you do, you’ll discover that you’ve pulled out
part or all of the previous loop.
CURVES AHEAD
As you punch curves, turn the hoop, rather than
turning the needle. This helps keep the needle
facing in the correct direction as you punch.
After making a loop, pull the needle out of the fabric,
but don't lift it away from the fabric surface.
Ending the Floss
Continue making loops until you reach the end of
your floss. You’ll know the floss has run out when
the needle makes empty holes in the fabric. You’ll
probably hear a difference in the sound of the punch-
ing, too. Simply lift the needle, rethread it, and start
punching where the next stitch would have been.
The end of the floss you were using will likely
leave a slightly longer tail on the loopy surface of your
punching. You can go back later to fix this (see “Final
Manicuring” on page 26).
16
When you need to change colors before you reach
the end of your floss, use a fingertip on your non-
punching hand to hold the floss at the base of the last
loop you created. Press firmly onto the backing fabric
to hold the floss in place and pull the needle several
inches away from the fabric; then clip the floss as close
as possible to the fabric before you move on.
Hold the floss tightly against the fabric as you pull the
punchneedle away.
dip the thread as close to the surface as you can.
Bandy Punchneedle Pointers
• It’s important to clip the tail of each new piece
of floss after you’ve punched a few loops. A loose
thread can easily be pulled or snagged, which
could lead to accidentally pulling out all of
your work.
Try to rest the side of your hand that’s holding the
needle on the edge of the embroidery hoop. This
helps provide some stability to your punching.
Don’t obstruct the flow of floss through the needle.
It’s all too easy to end up with the floss under your
hand or arm, without even realizing it, and this
can prevent the loops from forming evenly or from
forming at all. To avoid this situation, lay the floss
on top of your arm, from your wrist to your elbow.
Keep your hand that’s holding the hoop away from
the underside of the fabric. The punchneedle is
sharp!
Try to avoid punching into previously punched
loops. If this happens (and it surely will), the
needle will push the existing loop into an elongated
shape that will rise far above the other loops (see
“Final Manicuring” on page 26 for how to fix this).
Aim for a smooth surface on the back of your
piece. If you’re seeing bumps and loops on the
back of your work (the side you’re working on), it
probably means that you’re lifting the needle too
high as it’s coming out of the fabric. Your goal is to
make the back of your piece very smooth—loops
should appear only on the front side of your piece.
Aim for stitches that produce a flat, smooth surface on
the back of your piece.
• Flip your work over often to check your progress
and catch any problems sooner rather than later.
17
It’s hard to know how the loops are looking on the
front when you’re working from the back.
When you need to set aside your punching, there’s
no need to unthread your needle. Instead, just poke
the needle down into the excess backing fabric at
the side of the piece to park it. It will stay securely
in place until you return to it.
blade to cut the spare plastic tubing into very short
pieces—about kie" long—and slip them onto the
needle. (The gauge is so tiny that cutting it with
scissors is awkward.) To make longer loops, slip off
the gauge that came on the needle when you bought
it, and cut a small piece off of it. When you put it back
on the needle, it will make longer loops.
Changing the Length of Your Loops
1 usually have my gauge set at %", which is measured
from the eye of the needle to the end of the gauge that
hits the backing fabric. This creates short loops, which
will be your mainstay. However, experiment to see
what length loop you like best.
Adjusting the length of your loops varies based on
the kind of punchneedle you’re using. If you have a
plastic-handled punchneedle, you can usually change
the loop length by adjusting the spring mechanism to
move the needle up or down. Try punching a number
of loops to see if you like the new look of your loops
and readjust if needed.
Many plastic-handled punchneedles use notches on the
side of the handle to regulate the length of loops.
If you have a metal-handled punchneedle, adjust
the loop length by changing the length of the plastic
gauge. Your punchneedle comes with some extra
plastic tubing. To make shorter loops, use a razor
Use a razor blade and self-healing cutting mat to cut the
plastic gauge to precisely the length you want.
You may want to make tiny adjustments even to
short loops, to see what length most suits the piece
that you’re working on. Simply shorten the gauge by
slipping off one of the short pieces you’ve added to
the needle to make slightly longer loops. A word of
caution: if your loops are too short, they may not stay
in the fabric.
You can also create interesting effects with long
loops. Leave them long and floppy, or clip the tops of
the loops to give your work a plush, velvety appear-
ance. You can even shape the loops as you clip them,
to create a sculptured effect.
If you find that the small pieces of gauge slide
around on the needle, hold a short piece of sewing
thread beside the needle when you slip the gauge onto
it. The added thickness of the thread will keep the
gauge in place.
Don’t throw away the cut lengths of gauge. Store
them on a safety pin for the next time you need to
adjust your gauge. And remember: longer gauge =
shorter loops; shorter gauge = longer loops.
18
Punching Sequence
When you’re punching a design, work from the center
of your project toward the border. First, outline the
portion of design you’ll be working on. Then fill in
with loops. You can follow the lines of the design as
you fill it in, or you can punch in free-form, squiggly
lines—do whatever feels most comfortable. Make your
rows of punched loops about a needle width apart. Your
individual stitches (loops) should be very close together,
but the lines or rows of punched loops will be a bit
farther apart. Be sure to completely fill in each area of
your design. When you finish punching one motif in a
design, move on to the next, outlining that motif and
filling in, and continue to move out toward the borders.
Individual stitches form loops
that are very close together,
while the rows of loops
are spaced farther apart
Punching truly straight lines can be tricky. You will
likely find that it’s easiest to punch straight lines by
feel, following along a thread of the backing fabric,
rather than drawing a line and trying to follow it.
A drawn line can obscure the threads of the fabric,
making it more difficult to punch in a straight line. Of
course, if a few loops stray to either side of the line, it’s
likely that they won’t even be noticed.
Punching the Background
Backgrounds are fun, because they give you plenty
of opportunity to be creative. Before you work the
background, punch a single line of loops around the
outside border of your piece to keep the edges of your
work nice and straight.
In addition, punch a single row of loops directly
outside the outlines of all your motifs. Say, for
example, that your design features a crow standing on
a pumpkin. Before you fill in the background, use the
background color to punch a line of loops all the way
around these shapes, right beside the outlining loops.
This step helps your motifs keep their shape as you
continue to punch.
After all motifs are outlined, you’re ready to fill in
the background. For any background, you can punch
in rows that echo the shapes of your design until you
reach the outer border of your piece. Or you could
punch in random squiggles or swirls—a subtle way to
create interest in the background.
Arrows show the direction
of punching on background.
MAKING MOTIFS STAND OUT
If your background color is close in color to any
of your motifs, punch one or two rows of loops in
a lighter or contrasting color around the motifs
to help the shapes stand out. For instance, if you
want your crow on a pumpkin to be in a night sky,
the dark sky surrounding the crow would make
the bird almost invisible. Punching a row or two
of light gray or tan loops around the crow before
you punch the sky will make him noticeable.
Backgrounds are also the perfect place to use over-
dyed floss because their variations in color help create
a subtle, mottled appearance that makes a piece more
interesting to look at. See “Thread Choices for Punch-
ing” on page 23 for more information on overdyed
floss. You can create a similar look by using two or
more similar shades of solid floss. See page 24 for tips
on blending floss colors.
19
MISHMASH OF LOOPS
If you're like most punchers, at first you'll think
your punching looks awful and you'll wonder
what you've done wrong. Most likely, you haven't
done anything wrong at all. When you begin
punching a design, you'll find that the loops are
floppy and the design doesn't have much shape
or definition. When you flip the hoop over to
admire your work, all you'll see is a mishmash of
loops leaning in every direction.
Don’t worry. As you continue to fill in areas with
more and more loops, the loops support one
another and begin to stand upright. Before you
know it, your loops begin looking like a design!
Every design looks messy when you first begin
punching. The cat's eyes and nose appear to be a
shapeless blob at first.
Once you fill in more loops, the design begins to
take shape.
Fill in all of the background with loops so that you
can’t see any backing fabric showing through on the
front side. It’s a good idea to flip your hoop over to
check on your work periodically so that you can catch
any bare areas before you change floss colors.
Drawing Designs and Transferring Patterns
You can purchase kits with designs already marked on
the fabric. However, to use any of the designs in this
book, or when you want to create your own designs,
you’ll need to know how to get your design onto
the backing fabric. Here are three relatively simple
methods that you can use.
Method 1: Drawing Freehand
If you’re one of those lucky souls who draws well
enough to just put pen to fabric, grab a fine-point
permanent marker and draw to your heart’s content.
Be sure to choose one (such as the Pigma Micron pen
in size .05) that’s designed to be used on fabric—other
choices might bleed on the cloth.
NOTE: You’ll need to reverse any lettering or numbers
when you draw them on the backing fabric because
you’ll be punching from the wrong side.
Method 2: Using a Transfer Pen or Pencil
Happily, iron-on transfer pencils and pens are readily
available for those of us who don’t have the confidence
to draw freehand. Use your transfer pen or pencil to
trace your design on regular paper; then, following the
directions that came with your pen or pencil, transfer
the design to your backing fabric using your iron. This
method automatically reverses your design, which is
particularly handy if letters are involved.
Method 3: Using a Light Box
This is my favorite way to transfer a design. If you
don’t happen to have a light box lying around the
house, you can buy one at a craft store. Or you can
20
create a makeshift light box by placing a piece of glass
or Plexiglas between two chairs and putting a light
underneath. Some people use a glass coffee table as a
light box by simply putting a lamp under the table.
Set the pattern on the glass and place your fabric
over the pattern. The light underneath illuminates
the pattern so that you can see it clearly through the
fabric. Trace the design onto your square of cloth with
a fine-point permanent marker and you’re done. To use
the patterns in this book, you may want to photocopy
them first so that the patterns on the opposite side of
the page don’t show through. If you’re including any
words or numbers, remember to reverse them so diat
they read properly from the right side.
Drawing Straight Borderlines
You might think that this is the simplest part of trans-
ferring a design. Alas, I haven’t found that to be so.
Because it’s so difficult to perfectly align the border
of your drawn design with the threads in the backing
fabric, you may want to skip drawing these outer lines
when you’re transferring the rest of your design. If you
do draw them, you’ll most likely end up with lines
that aren’t perfectly on the straight of the grain of the
backing fabric.
An alternative is to simply mark each corner of
the outside borders with a dot. Many people find
that these dots are enough of a guide that they don’t
need to mark lines on the fabric to show the borders.
In fact, my preference is to not draw lines, since they
can obscure the weave of the fabric that guides me in
punching a straight line.
If you prefer to have a drawn line to follow, use a
hard-lead pencil with a sharp point and slip the point
into the “groove” that’s between two threads in the
weave of the fabric. Run the point of your pencil in
this groove from one corner to the next. If you hold
the fabric tightly at the side nearest the starting point,
the tautness of the fabric will help your pencil stay in
that groove. Repeat this at each corner until you’ve got
the entire outside border drawn.
GOING WITH THE GRAIN
Regardless of how you transfer the design onto
the backing fabric, try to get it on the straight of
the grain. If you draw your design on the diagonal
(the bias), your work will likely look distorted
because the fabric stretches most in this direction.
Working on the straight of grain will also help
your design keep its shape when you punch the
border around it.
Dealing with Mistakes
Maybe you’ve accidentally caught the floss under your
hand and pulled out loops. Or, the loops are too short
or nonexistent in a section of your work. Or, perhaps
you don’t like a color you’re using and want to replace
it with something better. Whatever the situation, it’s a
simple matter to pull out the loops you don’t like and
repunch them.
To pull out loops, be sure that you’re aiming for
precisely the area that you want to remove. To remove
an area that you’ve just punched—which means that
the floss is still attached to your needle—simply grab
the floss near the backing fabric and pull until you’ve
undone the loops you don’t like and then clip the floss.
If you need to remove loops in an area you punched
earlier and there’s no tail of floss to grab with your
fingers, use the tip of your needle to gently pull up the
floss from the back side of your piece. These stitches
will be tiny, so it may take a little effort to reach under
them. Once you’ve loosened the floss with your needle,
you can gently pull on the floss until all the offending
loops have been removed. Clip the ends of the floss
close to the fabric and throw away this piece of floss.
Before repunching in areas where you’ve removed
loops, gently scrape your fingernail back and forth
across the fabric to restore the fabric to its original
weave. Then punch again. Weaver’s cloth is particularly
forgiving and allows you to repeatedly remove floss and
punch in the same area without damaging the fabric.
21
TROUBLESHOOTING POINTERS FOR WHEN THINGS GO WRONG
It won't take long at all for you to become comfortable with the punchneedle. In the beginning, though, you
might find that things aren't working as smoothly as you'd like. Here are solutions to some common problems.
I What's Wrong	—» Try This
My loops won't stay in; they keep pulling out.	•	Move the needle from one stitch to the next with the very tiniest of movements. •	When you finish punching one loop and are ready to move to the next one, take care not to lift the needle into the air. Try to slide it along the surface of the fabric. •	Remember that your needle should be moving from right to left if you’re right-handed and from left to right if you're left-handed. •	Is your fabric drum-tight? Make it as taut as you can. •	Make sure that the floss isn’t getting caught under your wrist or arm, and that it’s not too thick for your needle. •	Double-check to make sure that you’ve threaded the floss not just through the handle, but also through the hole in the needle. •	Are your loops long enough to stay in the fabric? If not, make your loops longer by shortening the gauge. •	Make sure the needle isn’t too big for the thread you’re using. If the needle leaves too big a hole in the fabric, the loops won’t stay in place.
My loops are uneven.	•	Push the needle into the fabric as far as it will go, every time you punch. This should create loops that are the same height. •	Make sure that you aren’t unwittingly catching the loose thread under your hand. If there’s any pressure at all on the floss, the tugging action will prevent even loops from forming.
My loops look floppy and shapeless.	• This happens at the start of every piece. The more stitches you make, the more support each loop will get from its neighbors, and before long, your loops will be standing up straight and tall, and your design will take shape.
I've repunched so many times that 1 think I've ripped the fabric backing.	•	Maybe you haven’t really torn the fabric. Punching can loosen the weave, so you may be able to scratch the surface with your fingernail and bring it back into shape. •	If the fabric is torn, apply a small piece of woven, iron-on interfacing to the back side of your backing fabric and punch through that.
22
Iff
Exploring Threads and Foundations
Now that you have a good grasp of the punching technique, let’s explore some of
the other options for working with your punchneedle. Needleworkers are usually thrilled
to learn that they can use many of the beautiful fibers they’ve been accumulating over the years.
Below are some of the choices that are available, not only for threads, but also for backing fabrics.
Thread Choices for Punching
You have virtually unlimited options when it comes
to threads for punching. What’s critical in selecting a
thread is to be sure that it will run through the needle
smoothly, without catching. If the thread gets caught
inside the needle or is too thick to flow smoothly, then
you’ll have a hard time making any loops. Using a
thread with nubs probably isn’t a good choice, since
the "bumps” in the thread will likely snag in the
needle. Remember to use the appropriate size of needle
for the thread thickness. Using a very fine thread in a
very large or wide needle won’t work well, because the
needle will leave a hole in the fabric that’s too big to
hold the loops in place.
Cotton embroidery floss is the most well-known and
readily available choice. It’s relatively inexpensive, plus
it comes in more than 400 colors, so most likely you’ll
be able to find the precise hues that you’re looking for.
Just a few of the many varieties of threads and flosses suitable for punching
23
Raid your floss stash from cross-stitch projects you
never finished, buy some floss the next time you visit a
needlework or craft store, or watch for it at yard sales.
Anchor and DMC are well-known brands of cotton
embroidery floss, but any kind of cotton embroidery
floss can be used as long as it can be separated—usu-
ally into six strands. The only kind of floss to avoid is
“craft” floss, which cannot be separated into strands.
Overdyed cotton embroidery floss is a newer product
that has become extremely popular with needlework
artists. Overdyed floss is simply ordinary embroidery
floss that has been re-dyed in a way that creates
variations in color and value, from gently mottled to
dramatically varied. Some overdyed floss has several
different colors within a skein, for example, moving
from green to blue to purple, or even red to blue
to white. Other overdyed floss is more subtle in its
variations, using a single color in a range of values
from medium to dark, for example. Punching with
overdyed floss produces shading and variation, which
creates more interest to the eye and gives move-
ment to your piece. This floss is somewhat more
expensive than solid-colored floss. The three largest
manufacturers of overdyed cotton embroidery floss
are The Gentle Art, Weeks Dye Works, and Needle
Necessities (see “Threads and Flosses” on page 62).
You may also find other brands locally or online, as
more dyers are beginning to make and sell their own
overdyed cotton floss. All of them work beautifully in
the punchneedle, so experiment with their colors and
see which you like best.
Wool thread can give your piece a really special look.
It has a duller, softer look than cotton floss and also
has a slight fuzziness. Wool threads are also a bit more
expensive than cotton floss. Wool thread that is fine
enough for the three-strand needle can be found at
many needlework shops. DMC Medicis wool works
perfectly in the three-strand needle, as does naturally
dyed imported wool from Renaissance Dyeing. You
can also find overdyed wool thread made by Needle
Necessities to use with your three-strand needle. And
don’t overlook the wool-acrylic blends, including
Madeira Burmilana and Aurifil Lana.
The cottons and wools described above are used
most often, but they’re not your only choices. Poke
around your house—or in needlework and craft
shops—to see what else might work. For example, a
single length of size 8 pearl cotton will work in your
three-strand needle, and creates a lovely effect. Fine
crochet cotton and tatting cotton will work, too, al-
though they come in a more limited number of colors.
Flower thread works wonderfully in the three-strand
needle, too. You can even use regular sewing thread,
right off the spool in a one-strand needle.
Silk floss comes in a wonderful array of colors.
Rayon floss is deliciously shiny when you punch with
it. It’s also a lot slipperier than many other fibers,
which may make it a bit harder to work with. You
might want to try using some of the metallic threads,
either alone or together with another fiber, for some
interesting effects. Don’t feel limited by the options
shown and described here, though. If you see a thread
that looks interesting, it’s worth trying in the punch-
needle. If it flows through the needle and you like how
it looks, then you’re off and running.
Creating a Mottled Look with Solid Threads
Uneven coloring can add a lot of interest and move-
ment to your work in subtle but effective ways. Over-
dyed cotton and wool have considerable variations of
color within a single skein and easily add a pleasantly
mottled look to your punched work. But if you can’t
find them in the colors you want, there are other ways
that you can achieve this effect.
One way is to punch alternating rows or adjacent
areas with threads of similar, but slightly different
colors or values, such as a row of beige next to a row
of tan. (See “Crow in the Berries” on page 48.) Or use
similar colors by two different manufacturers (tomato
red from DMC and tomato red from Anchor). Each
company has its own dye formulas, so it’s unlikely that
their colors would be precisely the same. Continue
punching in an alternating pattern and you will
quickly see a gently striated effect begin to appear.
24
You can also achieve a mottled look using differ-
ent colors in similar values. By alternating rows or
areas of dark colors—black, charcoal gray, and dark
purple—you can make a rich night sky with real
depth and subtle movement. The background will look
more interesting than if you had used a solid block of
pure black.
Using Two Colors Simultaneously
Another way to create visual texture in your work
is by using two or more colors in your needle at the
same time. When you punch with two similar colors
together, the result is usually a bit more subtle than
the mottled look of overdyed threads. However, if you
punch with two highly contrasting colors blended
in the needle, you can create a much more dramatic
effect. As you fill in an area with your blended threads,
you’ll see a richness and depth that can’t be matched
by using a single solid color. Experiment with color
combinations to see what kinds of results you can get.
Two similar values of gold blended in the needle create
subtle shading, while two high-contrast values make more
of a tweed effect.
Fabrics lor Punching
As mentioned earlier, the best fabric for punchneedle
work, regardless of your skill level, is weavers cloth.
Other woven fabrics will work well, too. Cotton fab-
rics such as muslin and flannel are good for punching.
Linen and linen/cotton blends work nicely, too. But
these natural-fiber fabrics have more of a tendency to
tear, particularly if you have to repunch your loops.
Try to avoid extremely thin and fine fabrics, such as
cotton lawn, because they are too delicate to stand up
to punching.
TIPS FOR USING NONTRADITIONAL FABRICS
If you're determined to use a fabric that's got a
loose weave—or no weave—you'll need to take
an extra step before you can put it into the hoop
and begin punching.
A loosely woven fabric, by itself, just won't be
able to hold your loops. And knit fabric, such as
T-shirt or sweatshirt fabric, is too stretchy to
punch into on its own. You can overcome these
problems by ironing a piece of woven interfac-
ing to the back side of the fabric. Select a woven
interfacing (one with threads that you can see)
that is heat-fusible. Look for one that has a fairly
tight weave so that it can do the work of holding
the loops.
1.	Cut a piece of interfacing that's about У2" smaller
than the fabric you'll be working with. Transfer
your design onto the nonfusible side of the
interfacing.
2.	Preheat your iron to the temperature recom-
mended for the interfacing. Iron the interfacing
onto your loosely woven or knit fabric, let it cool,
and you're ready to punch.
3.	You may need to shorten the gauge of your
punchneedle to make longer loops since you'll
now be punching through two layers of fabric.
You may have to shorten the gauge even more
for thicker fabrics, such as sweatshirt material.
4.	If you can't fit the hoop onto the fabric—for
instance, a thick sweatshirt—you might find it
easier to punch into weaver's cloth and then
applique the completed design onto the sweat-
shirt with fabric glue, fusible web, or thread.
25
Finishing Your Punched Piece
Whether you want to frame your finished piece or turn it into a piece of wearable art,
you’ll first need to finish the edges. In this chapter we’ll learn how to fix bare spots and deal
with any loose threads or thread tails, finish the fabric edges in three ways, and steam or press the
piece to make sure it blocks flat and true.
Final Manicuring
Before you take your finished piece out of the hoop,
you’ll want to double-check it to make sure that you
don’t have any bare spots in your work. Take a close
look at the loopy surface on the front of your piece
for any areas where the backing fabric may be show-
ing. Stick a straight pin into any area that needs a few
more loops, and turn your work to the back. Tire pin
will mark the precise area where you’ll need to do a bit
more punching. Thread your punchneedle with the
appropriate color and fill in with more loops.
Once you’ve filled any gaps, turn over your piece
to the front again and check for any thread ends or
extra-long loops that may be poking above the surface
of your work. You won’t want to leave those strays in
place. You can deal with them in one of two ways.
Trimming
Clip the longer threads and loops with your scissors
or snips so that they’re even with the other loops.
This is quick and easy to do, but there’s a downside,
too. When you cut the threads, there will be a slight
difference in color; the cut threads will appear to be
darker, particularly with cotton floss. It’s just a slight
difference, and many people won’t notice it, so if it
doesn’t bother you, clipping those offending strays is
quick and easy.
Adjusting with a Crochet Hook
If you don’t like the idea of having darker spots on
your piece, use a tiny steel crochet hook (0.75mm) to
pull the extra-long loops and loose ends to the back
of your piece. Slip the tip of the crochet hook into the
fabric from the back side, grab the errant thread or
elongated loop with the hook, and gently pull it until
it’s even with the other loops or pull it completely back
to the underside of your piece. You may need to gently
wiggle the crochet hook to help it get back through
the backing fabric. If you've pulled any threads com-
pletely through to the back side, snip them off right
away with your scissors.
While you’re looking at the back side, also check to
see if you have any other loose threads. Snip them off
as close as you can to the backing fabric so that they
won’t get caught by a needle or finger, which could
result in a string of ripped-out loops.
Steaming or Pressing
To remove your punching from the hoop, loosen the
nut on the outer hoop and slip out the piece. How
does it look? The goal is to have a finished piece
that lies fairly flat, without curling or cupping. If it’s
not perfectly flat, that’s OK. Remember that you’ve
put a lot of loops into a relatively small area. When
you release the fabric from the hoop, it’s no longer
stretched tight, so the fibers relax and the weave
tightens up, pulling all your loops along with it. That
means that sometimes your piece will cup very gently.
If you’ve punched far too many loops, it’s possible
that you’ve overpacked them. This can easily happen if
you’ve punched your rows too close together, and can
cause severe curling of your piece. Steaming or press-
ing can help straighten it out and make it lie flat. But
26
remember to leave a bit more space between rows on
your next project.
To steam your piece, heat your iron to the cotton
setting and set it on “steam.” Place your punched
work, loopy side up, on the ironing board. Hold your
iron about an inch or two over the punched piece for
5 to 10 seconds. Then let the piece sit on the ironing
board for several hours so that it can dry flat. This pro-
cess works with most fibers. However, some metallic
threads are made with plastic, so be careful steaming
them so you don’t melt the loops. Rayons and silks
need to be treated with more care, too. You may want
to test a strand of these types of threads with your iron
before pressing or steaming the final punched piece.
They require a cooler iron than cotton and wool fibers.
If your piece still cups or curls, you may want to
press it. Find an old white towel that is still soft and
squishy, and lay it on your ironing board. Then place
your punched piece on the towel, with the loopy side
facedown. Wet a small piece of white cotton fabric
to use as a pressing cloth. Get it really wet and then
wring it out enough so that it isn’t dripping but it’s
a bit wetter than damp. Place the wet pressing cloth
on the back of your piece and press with your iron.
Simply hold your iron in place, without moving it, for
five seconds or so. Then flip your piece over, rewet the
pressing cloth, and repeat on the front side. Remove
the pressing cloth, but leave your piece on the ironing
board. Don’t move it until it’s completely dry.
If your piece seems to be curling a lot, in addition
to pressing it, let it dry with some weight on it. Place a
white paper towel on top of your punched piece, and
then lay two or three books on top of that. Let your
piece dry for 24 hours before you move it.
Finishing the Edges
Well cover three different ways to finish your punched
work. It’s purely a personal choice as to which method
you use. No matter which finishing method you use,
each serves two important purposes: ensuring that the
fabric backing doesn’t fray and loosen, and preventing
any of the light background fabric from showing
around the edges of your finished piece.
The two quicker methods involve the use of an
adhesive—we’ll refer to these as the fold-and-glue
method and the glue-and-cut method—while the
archival method is slightly more involved and uses
a needle and thread rather than glue. There are pros
and cons to each of these approaches. Using glue is
fast. You can apply the glue in just a few seconds.
The downside is that, over time, the glue might stain
or otherwise affect your work. The archival method
preserves your work for generations to come, but it
takes a little more time and effort.
Don’t feel compelled to use only the archival
method. There are going to be a lot of pieces you don’t
intend to be heirlooms, and you can guiltlessly decide
to use glue on these. In fact, you may want to use glue
on all your work. It’s a perfectly good way to finish a
piece. However, when you want to be sure that your
punching won’t be discolored or “eaten” over time by
the chemicals in glue, use the archival method.
The Fold-and-Glue Method
This method works particularly well with all-cotton
fabrics and for pieces with straight borders. If you’ve
used a blend with a synthetic content, such as weaver’s
cloth, then it may be a little more challenging. The
synthetic fibers resist staying folded, which in turn
will make it hard for the glue to hold as it dries. If you
find that this is a problem, use the archival or glue-
and-cut method.
1.	Cut away the excess fabric, leaving about !4" of
fabric around each side of your punched piece.
2.	Fold back the excess fabric right at the edge of
your punching, starting with the corners. Fold the
corners diagonally and then fold each of the four
sides of your punched piece. You want each fold to
be right up against the edge of the punched border,
so that you can’t see the white fabric at all when
you look at the front of your work.
27
3.	Firmly crease the folds, using your fingers or finger-
nails, so that the folds will somewhat hold in place.
4.	Using fabric glue, squeeze a thin bead of glue
diagonally across the underside of each folded
corner. Simply lift up each corner so you can get
the glue underneath. Refold the corners and gently
press down. Don’t use too much glue or it will seep
through to the front of your piece.
5.	Apply a thin bead of fabric glue to the underside
of the folded-fabric edges. Spread the line of glue
with a small paintbrush or your fingertip. Refold
the fabric and press down gently to ensure that
all edges adhere to the back of the piece. Here,
too, you want to use only enough glue to hold the
fabric, to prevent any excess glue from appearing
on the front of your piece.
6.	Lay the piece on a flat surface to dry for several
hours. You can place a heavy book on top of it
so that it will stay perfectly flat. Slip a piece of
wax paper under and on top of your punching to
protect your book and work surface from the glue.
The Glue-and-Cut Method
This is the method to use if your piece has curved
edges. You’ll be trimming all excess fabric away from
your punched piece so you won’t have to deal with the
bulk of folding back curved edges.
1.	Place your finished piece facedown on a piece of
wax paper. Apply a thin bead of fabric glue all
the way around the edges of the wrong side of
the punched design. Use your finger to smear the
glue into the threads of the excess fabric all the
way around the design. The glue should cover
about 14" from the last row of loops. Spread it onto
the last few rows of loops as well. Try to make
a thin coating of glue on the backs of the outer
loops—enough so that the adhesive will hold them
in place snugly, but not so much that the glue seeps
through from the back onto the front of your piece.
Gray area shows where to apply glue
on the back of your piece.
2.	Let the glue dry thoroughly. If you don’t want co
wait while nature rakes its course, you can speed
things up by using a hair dryer.
3.	Once the glue is completely dry, cut off the excess
backing fabric, using a pair of sharp scissors (but
not your good fabric scissors). Trim as close as you
can to the last row of loops, but go slowly to make
sure that the blades of the scissors don’t cut into
any of the loops.
Trim the excess fabric away from the punching, cutting
as close as possible to the outer row of loops.
28
The Archival Method
This method works on any fabric, but is easiest to use
on pieces with straight outer edges. Curves can be
tricky to manipulate. Begin by following steps 1—3
of the fold-and-glue method on page 27. Once you’ve
folded and finger-pressed the excess fabric, you’re
ready to proceed.
1. Thread a hand-sewing needle with ordinary sewing
thread. Any color is fine, since it won’t be seen.
2. Working from the back of your piece, stitch the
mitered folds at one corner to hold them in place.
Take five or six stitches into the folded backing
fabric only; you don’t want to catch any of the
punching with your sewing needle. Knot the
thread so that it will stay in place, and clip it off.
Don’t worry about how your stitches look. They
just need to hold the excess fabric firmly in place.
Stitch across the folded mitered corners.
You wouldn’t want its effect to be marred by white
fabric peeking out around the edges.
Making a twisted cord is simple and gives a beauti-
ful, polished edge to your work. The instructions may
look long and complicated, but once you understand
the concept, making cords is a cinch.
1.	Measure the outside dimensions of your finished
piece. If your punching is 2!6" x 2", then you’ll
add together 2" + 2" + 2Уг' + 2*/У', for a total of 9".
You’ll need a piece of finished cord that is at least
9" long.
2.	Cut two pieces of floss that are each four times
as long as the length of finished cord you’ll need.
Continuing with our example, cut each piece 36"
long (9" x 4 = 36”).
SUBTLE OR BOLD EDGING?
You can use either two pieces of the same color
floss or one piece each of two different colors for
the twisted cord. For an edge that blends with
your punched piece, use the same floss or thread
you used in the outermost border of your piece.
If you'd like a more prominent edging, use two
contrasting colors. You can also adjust the thick-
ness of your cording by increasing or decreasing
the number of strands you use. Experiment!
3.	Stitch the three remaining corners in the same
manner.
Adding Twisted-Cord Edging
This decorative finish is optional. If you can’t see the
white of the backing fabric from the front or the side
of your piece, you can skip this process. However, if
you’ve used the glue-and-cut method, or if you can
detect any folded backing fabric at the edges, then
you’ll want to make twisted cord and stitch it to your
piece to hide the backing fabric. This is particularly
important if the last row of punching is a dark color.
3.	Knot the two pieces of floss together at both ends.
Slip one knotted end over a hook on the wall. I use
a hook that’s attached to a suction cup, something
you can buy in any hardware store. I attach the
suction cup to a window or a mirror and then
remove it when I’m done.
Knot	Knot
Make a large loop by tying knots
at each end of two lengths of floss.
4.	Hold the other knotted end of the floss in your
hand and begin twisting the cord. Most people
29
find it easiest to slip the loose end of the folded
floss over their forefinger and draw little circles in
the air, as if dialing a telephone.
Twist the floss by using
your finger to "dial" a phone.
The floss will quickly twist.
5.	Keep enough tension on the floss so that it stays
taut as you twist. Every so often, stop twisting and
slightly release the tension on the floss to see if it
will twist onto itself. If it doesn’t kink, then pull
your hand back slightly to increase the tension and
continue “dialing the phone” for more twists. You’ve
twisted enough when the floss is eager to tightly
twist upon itself when you loosen the tension.
6.	Keeping the floss taut, put a finger at the half-
way point on the length of floss and hold it there
while you use your other hand to fold the floss in
half. Bring the two knotted ends of floss together.
Your finger should continue to hold tension at the
midway point of the floss.
Fold the twisted cord in half, with one hand holding
the midpoint taut, and hold both ends together at
the hook.
7.	Hold the two ends of floss together and remove
your finger from the fold in the floss. As soon as
you take your finger away, you’ll see the floss wildly
twisting upon itself. When the twisting stops, tie
together the two knotted ends of floss, and the
cord will stay twisted. For quick and easy twist-
ing, you may want to try the Spinster, a gadget
for making cord that can be found at needlework
shops or on the Internet.
The finished cord
8.	Lay the twisted cord at the edge of your punch-
ing, against the exposed edge of fabric at the side
of your piece. Then, using sewing thread that
matches the last row of punching or a single strand
of matching embroidery floss, make small overcast
stitches every Ц" or so to attach the cord. When
you’ve sewn the cording all the way around, cut ofF
any excess cord. Stitch five or six times over the cut
end of the cord to make sure that it won’t fray, and
knot your thread to finish it off.
30
Framing and Other Display Options
Once the edges of your completed punched piece have been finished, you may
want to take things a step further by framing it or making it into a pin. In this chapter,
you’ll gain an understanding of how to do both of these things.
Framing
Framing offers countless options. You can use a frame
that has an opening the same size as your finished
piece; however, many punched pieces are particularly
attractive when they’re placed in a somewhat larger
frame. This way, they can be set off by a complemen-
tary mat, and the larger frame gives the artwork more
of a presence. In this chapter, you’ll learn how to
frame your piece using an acid-free, archival method
with fabric as your mat.
Supplies
•	Purchased frame
•	Fabric for mat
•	Acid-free mat board
•	Small, sharp craft knife (such as X-Acto)
•	Needle and thread
Take your punched piece along when you go frame
shopping, so that you can try it out at the store. You’ll
want a frame with proportions that will suit your
work. In general, you’ll find that a frame with massive,
wide molding will overwhelm your diminutive work.
Selecting Fabric for the Mat
When it comes to selecting fabric for the mat, the
options are staggering. You’ll definitely want to have
rour needlework with you as you search for fabric,
whether you rummage through your personal stash at
home or head to the local fabric or quilt shop.
My best advice to you is to shop for fabric with an
open mind. If you have a preconceived idea of what
will work, you may not be able to find exactly what
you had in mind. Or if you do find it, it may not look
nearly as good as you expected. Most likely, you’ll
know the right fabric for your piece when you see it.
Start with color. Do you want a light or dark mat?
Are there any colors in the punched piece that you
want to draw out by using a mat in that particular
color? Do you want high contrast, so that your piece
pops out at the viewer, or do you prefer low contrast,
so that your piece melds gently into the mat?
Look at the size of the print. A large-scale print—
life-size Hawaiian flowers, for example—would be
difficult to use effectively. Smaller prints seem to work
better. Another consideration is the busyness of the
print. Is it so busy that it competes with your work?
Then it’s probably not the best choice. Prints with
low-contrast colors might be the best option.
Consider what type of texture you'd like your
mat to have. You’ll have rhe widest variety of fabric
selections in cotton. But what about using a soft, fuzzy
wool? Or velvet? Silk has a subtle sheen that can give
your piece extra richness. Even a coarsely woven fabric
like burlap might give you precisely the look
you want.
Select the fabric that you think will work best.
Then set it aside for a few days and come back to look
at it with fresh eyes. Do you still like it? Will it work?
Then let’s get started on the framing.
Preparing the Mat
1.	Using a craft knife, cut a piece of acid-free mat
board to fit inside the opening of your frame. Cut
it just a smidgen smaller than the frame’s opening
to accommodate the thickness of the fabric you’ve
31
selected, because you’ll be folding the fabric around
the edges of the mat board.
2.	Iron the fabric you’ve chosen for your mat, and
cut it several inches longer and wider than the mat
board. For example, if your mat board is 4" x 6",
then cut your fabric 8" x 10". That will give you 2"
of extra fabric on each side to wrap around the mat
board.
3.	Find the center of your fabric by folding it in half,
first in one direction and then the other. The point
where the folds intersect is the center of the fabric.
Place your finished punched piece onto the fabric
and center it. There’s no need to measure. Simply
“eyeball” the center of your punching and place it
on the center of your fabric.
4.	Thread a hand-sewing needle with sewing thread
that matches the outside border and twisted cord
on your piece. Hold the punched piece in place at
the center of the fabric with one hand while you
sew the needlework onto the fabric. You only need
to catch a few threads at the corners to hold it in
place. Try to avoid sewing into the punched area if
you can; it’s better to stitch into the piece’s backing
fabric so that you don’t accidentally catch any of
the loops.
5.	Center your punched piece, which is now on the
fabric, on the mat board. Lay a spare piece of mat
board on top to keep everything in position and
then flip the mat board over so you can work from
the back. Fold the excess fabric around the edge of
the mat board, mitering the corners as you do so.
Stitch rhe corners enough to hold them in place,
and then sew the excess fabric together by stitching
back and forth across the back of the mat board in
a way that is similar to lacing a shoe. First sew
the top and bottom fabric together and then
sew the two sides together to hold the fabric firmly
in place.
Fasten your piece onto mat board,
sewing from top to bottom and side to side.
6.	Insert the mat into the frame, and you’re done.
Making a Fin
Pins make great gifts. They’re also wonderful con-
versation starters. When you wear one, people will
undoubtedly be intrigued by this unusual form of
needlework. Best of all, pins are easy to make. The
“Crow Pin” on page 35 and “Portrait of a Sheep” on
page 50 are both pins, but you could convert any of
the projects into a pin if you like.
First, finish the edges of your piece, using any of the
three methods described in “Finishing Your Punched
Piece” on page 26. Because you’ll need to use glue
during the pin-making process, you might find it easier
to use either of the glue methods rather than the sewing
option for finishing the edges. Do not add twisted cord
yet. That step will come later.
32
You’ll need something to stiffen the punched work
so that it can be worn as a pin without being floppy. I
generally use quilter’s template plastic. Pin backs can
be found at most fabric and craft-supply stores or at
online retailers.
Supplies
•	Small piece of thin cardboard, plastic canvas, or
heavyweight quilter’s template plastic for stiffener
•	Fabric glue
•	Small piece of wool fabric or felt for pin backing
•	114" metal pin back
•	Needle and thread
Assembling the Pin
1.	Using all-purpose scissors, cut the stiffener so
that it is roughly 14" smaller all around than your
punched piece.
Be sure to cut the stiffener a bit smaller
than your finished piece.
2.	Spread fabric glue onto the underside of your pin-
stiffener material, and center it on the back of
your punched piece. Allow to dry.
3.	While the glue is drying, cut a piece of felt or wool
fabric 1" wider and longer than your pin. Choose a
fabric color that complements the outer row of your
punching for a professional-looking finished piece.
4.	Center the pin back on the piece of felt or wool and
sew it in place, stitching through the holes of the
pin back several times to secure it. If you’re right-
handed, the clasp end of the pin back is ordinarily
on your left as you’re sewing.
5.	Apply fabric glue to the stiffener that is already
attached to your punching. Then carefully place
the fabric pin back on the stiffener, so that you’ve
got a sandwich of punching, stiffener, and felt or
wool with the pin back. Center the pin back side to
side, but position it a little higher than the vertical
center so that the pin won’t flop over when you
wear it. Press the felt or wool into the glue for a
firm hold and allow it to dry.
6.	Cut away the excess felt or wool fabric, so that only
a smidgen of it extends beyond the edge of your
punching. By doing this, you create a very skinny
“ledge” that will help support the twisted cord.
7.	Make a twisted cord, referring to page 29, and lay
it around the edge of your punching on the ledge
of exposed felt or wool fabric. Sew the cording
to the pin, using sewing thread or a single strand
of matching floss. Use small overcast stitches
every 14" or so, making sure that your needle
catches the fabric on the back and at the edge
of the punching. When you’ve sewn all the way
around your punched piece, snip off the extra
cording and stitch over the cut cording several
times to prevent fraying.
The Projects
There are endless design possibilities for punchneedle work, if you’re not quite ready to draw
your own patterns, then plunge into punching with any of the projects in this book. The patterns are
designed to build and expand your skills, with the easiest projects appearing first and later projects becoming
progressively more challenging. Remember, though, this isn’t rocket science—even the most advanced project in
this book is readily doable by anyone who has mastered the basics of punching.
Each project has detailed instructions, but feel free
to do your own thing. After all, this is your project,
and you should make it fit your preferences as well
as the materials you can get your hands on. If the
instructions call for wool thread and you can’t find any,
go ahead and use cotton. I used Anchor floss for my
cotton projects, but if you want to punch with your
stash of DMC, we’ve given the substitutions you’ll
need. (Conversion charts are available in needlework
shops as well as online, too.) If you hate orange,
substitute a color that you like better. Experiment!
Sometimes the unlikeliest color combinations turn out
to be spectacular. If you try something that you really
don’t like, just pull out the offending color and try
another one.
And don’t limit yourself to the designs in this
book. Many needlework shops carry punchneedle
embroidery patterns from a variety of artists, so check
to see what’s available. Even better, develop your own
designs. You don’t need to be a “real” artist to come up
with patterns. In fact, simple drawings often make the
most charming punched pieces.
What You'll Need for the Projects
Each of the projects in this chapter requires the fol-
lowing supplies:
•	8" square of weaver’s cloth or other tightly woven
foundation fabric
•	Transfer pen or pencil and iron, or a light box
(see page 20 for instructions on transferring the
design onto your fabric)
•	4" hoop with interlocking lip
•	Three-strand punchneedle
•	Cotton floss or wool threads (see each project for
specific color recommendations)
Thread Charts
The charts for cotton floss or wool thread that accom-
pany each project refer to the following types of
threads:
Anchor: Six-strand cotton embroidery floss in solid
colors from Anchor
DMC: Six-strand cotton embroidery floss in solid colors
from DMC
Gentle Art: Overdyed six-strand cotton embroidery
floss from The Gentle Art
Weeks: Overdyed six-strand cotton embroidery floss
from Weeks Dye Works
Medicis: Fine wool thread in solid colors from DMC
French Wool Overdyed: Overdyed fine wool thread
from Needle Necessities
34
This handsome pin is a great
first project. It will give you
a strong foundation in the basics of
punching and prepare you for more
challenging projects. You’ll get com-
fortable with punching by learning to
punch an outline and then filling it in
with a single color. You’ll also have a
chance to see what happens when you
blend two colors in the needle as you
punch the background. As a bonus,
this piece lets you make a free-form
pin without having to worry about
punching a truly straight line. Have
fun with this little guy!
Punching the CrowPin
Use two strands of cotton floss throughout. See floss
color chart on page 36.
1.	Transfer the pattern on page 59 onto an 8" square
of weaver’s cloth, using one of the methods
described on pages 20—21. Then insert the weaver’s
cloth into your embroidery hoop (see “Preparing
the Backing Fabric” on page 11).
2.	Using two strands of black floss, outline the crow.
You can start anywhere, but punch the complete
outline, including the beak.
ROTATE AS YOU GO
Remember to turn the hoop as you work around
the bird, so that the beveled edge of the needle is
always pointing in the direction you're punching.
(If you're right-handed, you'll be punching from
right to left.)
3.	Fill in the body with more loops. Simply echo the
shape of the crow’s outline, row by row, to fill in
35
his body. Try to punch each successive row of loops
about one needle width apart.
Arrows show the direction
of punching for motif.
COTTON EMBROIDERY FLOSS
The crow shown was punched using one skein of
each Anchor color listed; DMC color substitutions
are provided.
Used For	Color	Anchor	DMC
Crow	Black	403	310
Background	Light gold Medium gold	1002 1048	977 3776
4.	Punch his legs with black floss. I punched only one
row of loops for each leg, but if you prefer chubby
legs, punch two rows of loops close together for
each leg.
5.	Thread the needle with one strand of light gold
and one strand of medium gold. Using these two
colors together will create a subtly blended look in
the background. First, punch a single row of loops
of gold all the way around the crow, including
around each leg. Outlining the shapes first will
help the crow keep his shape nicely. Then punch
a single row of loops at the outside border of the
background, using the same two gold colors. This
row of punching will create the border of your pin
and will keep the outside shape of the pin nice and
smooth.
6.	Fill in the background. You can punch in concen-
tric rows around the shape of the crow, making
ever-wider echoes until you reach the row of
loops that forms the border. Because the lines of
echo punching follow the shape of the crow, your
background rows will reach the border sooner in
some places than in others. Go back and fill in the
empty areas with rows of loops that echo those
smaller spaces.
Direction of punching in
the background echoes the motif.
Finishing
1. Check your work before removing it from the
hoop. Fill in any bare spots with loops and clip off
stray threads.
2. See page 28 for details on finishing the edges of
your piece and page 32 for instructions and sup-
plies needed for turning the crow into a pin.
36
Antique Cat
Reminiscent of the cats that
frequently appeared in very
old, primitive hooked rugs, this kitty
is simple and folksy, and his shape is a bit
distorted. By using colors that appear some-
what faded and old, you will create an instant
“antique.” This project builds on your skills
by encouraging you to use multiple solid
colors in the cat to create the fur’s texture.
You’re also introduced to a “manipulated”
background that uses small squiggles of solid
colors to create a surface with movement and
interest. Overdyed threads can also be used
for the cat and the background.
Finished Size: W x 2"

Punching the Antique Cat
Use two strands of cotton floss or one strand of wool
thread throughout. See floss color chart on page 38.
1.	Transfer the pattern on page 59 onto an 8" square
of weaver’s cloth, using one of the methods
described on pages 20—21. Then insert the weaver’s
cloth into your embroidery hoop (see “Preparing
the Backing Fabric” on page 11).
2.	Punch the cat’s eyes and nose using the dark
brown floss or wool. Punch three or four loops,
close together, for each eye. Similarly, punch three
or four loops for the cat’s nose.
The eyes and nose will initially look like shapeless
blobs, so you might be tempted to pull them out
and repunch them. Resist that temptation, since
they will likely look perfectly fine when you later
punch the rest of the face.
3.	Using the medium blue floss or wool, punch the
kitty’s collar, making two rows of loops.
37
4.	Using the cream floss or wool, punch a single row
of loops to outline the light patch on the cat’s
chest. Then fill in this area with more loops.
5.	Using the lightest brown floss or wool, outline the
cat with a single row of loops. When outlining, you
can either continue punching along the side edges
of the collar—since many cats have fur that drapes
over their collars—or you can stop punching just
as you reach one edge of the collar and then start
again on the other side.
6.	Using the same light brown floss or wool, outline
areas inside the cat. Punch a single row of loops
around each eye and the nose to help give them
shape. And punch a row of loops on both sides of
the collar, as well as around the creamy patch on
his chest.
7.	Fill in the rest of the cat using all three colors of
the light brown floss or wool. Create small, random
blotches of the various light browns. Punch in
curved lines that echo the shape of the cat until
he is completely filled in with loops. Punch little
squiggles, too, to create narrow areas of color.
8.	For the background, use dark brown floss or wool
and outline the cat with a single row of loops. Pay
particular attention to the area between his legs
and tail. The background needs to be distinct so
that you can easily see the shape of each leg and
the tail.
9.	With the same floss or wool, punch a single row of
loops at the outer border of the piece. Try to make
this line as straight as possible, because these loops
form the outer edge of your piece. Following along
one of the threads in the backing fabric will help
you punch in a straight line.
10.	Fill in the rest of the background with random
areas and squiggles of the dark brown flosses or
wool thread. Punch in echo lines around the cat, or
punch in small patches or chunks.
WOOL THREAD OR COTTON EMBROIDERY FLOSS
The cat shown was punched using one skein of each of the Medicis wool threads listed. Anchor and DMC colors
are provided if you prefer to punch with cotton embroidery floss.
Used For	Color	Medicis	Anchor	DMC
Eyes and nose	Dark brown	8500	1088	838
Collar	Medium blue	8409	1068	3808
Cat’s chest	Cream	8502	390	822
Cat’s body*	Light brown	8611	1082	3864
		8503	1084	950
		8308	1080	3863
Background**	Dark brown	8500 (primary)	1088 (primary)	838 (primary)
		8306	360	898
		8309	1084	840
		8610	358	839
*If you’re using cotton floss, instead of using a blend of the three solid colors for the cat’s body, try using an
overdyed floss: Cidermill Brown from Gentle Art or Mocha 1236 from Weeks.
**Likewise, try using two shades of either of the overdyed flosses for the background: Dark Chocolate and
Maple Syrup from Gentle Art or Swamp Water 4129 and Molasses 1268 from Weeks.
38
WORKING WITH SOLID COLORS
If you are using solid-colored threads, use the
lightest brown for outlining the cat. Then begin
to fill in the cat, using the same light brown to fill
in patches here and there. Switch to another light
brown and do the same. Continue this way with
the third light brown to give the finished cat a
mottled look.
For the background, use the darkest of your
browns to outline the cat and punch the border
row. Then punch some squiggles in the back-
ground with the other browns. Fill in around the
squiggles with the darkest brown.
Finishing
1. Check your work before removing it from the
hoop. Fill in any bare spots with loops and clip off
stray threads.
2. See page 27 for details on finishing the edges of
your piece and page 31 for instructions and sup-
plies needed for framing it.
39
Shelburne Goal
Punching the Shelburne Goat
Use two strands of cotton floss or one strand of wool
thread throughout. See floss color chart, opposite.
1.	Transfer the pattern on page 59 onto an 8" square
of weaver’s cloth, using one of the methods
described on pages 20-21. 'Then insert the weaver’s
cloth into your embroidery hoop (see “Preparing
the Backing Fabric” on page 11).
2.	Punch the vertical squiggly lines in the goat’s body,
using tan floss or wool. Punch a single row of loops
for each line.
3.	Punch the goat’s nose and eye, using the brown
floss or wool. Make only three or four loops for the
eye and six or seven loops for the nose, because you
won’t want them to grow out of proportion to the
rest of his face.
4.	Use the cream floss or wool to punch a single row
of loops to outline the goat’s body and head. (Do
not outline the beard, horn, or legs with cream.)
Then outline around each of the tan vertical lines
in his body, using the same cream floss. Punch
a single row of loops around the goat’s eye and
around his nose. When all the cream outlining is
40
WOOL THREAD OR COTTON EMBROIDERY FLOSS
This piece was punched using one skein each of the Medicis wool thread listed. Anchor and DMC colors are
provided if you prefer to punch with cotton embroidery floss.
Used For Beard, legs, horn, squiggly lines in body	Color Tan	Medicis 8308	Anchor 832	DMC 612
Eye and nose	Brown	8306	358	433
Head and body	Cream	8502	391	3033
Background*	Dark green	8404	862	895
*If you’re using wool thread, you can substitute French Wool Overdyed 33 for the background color. If you’re
using cotton floss, instead of using a solid for the background, try Blue Spruce (Gentle Art) or Juniper 2158
(Weeks) overdyed cotton floss.
done, fill in the rest of his head and body with the
cream thread.
5.	Using the tan floss or wool, punch a single row of
loops to outline the beard. Be sure to go all the
way around, including under the chin where you’ve
already punched in cream. Then fill in the rest of
the beard with more tan loops. Repeat this process
for each of his horns and legs, using the same tan
thread.
6.	Using the dark green floss or wool, punch a single
row of loops all the way around the goat to create
an outline. Then punch a single row of loops along
the outer border of the piece. Strive to make this
line as straight as possible, since it will be the outer
edge of your work. Then simply punch throughout
the background to fill it in.
Finishing
1. Check your work before removing it from the
hoop. Fill in any bare spots with loops and clip off
stray threads.
2. See page TJ for details on finishing the edges of
your piece and page 31 for instructions and sup-
plies needed for framing it.
41
Crockful of Posies
Punching the Crockful of Posies
Use two strands of cotton floss or one strand of wool
thread throughout. See floss color chart, opposite.
1.	Transfer the pattern on page 59 onto an 8" square
of weaver’s cloth, using one of the methods
described on pages 20-21. Then insert the weavers
cloth into your embroidery hoop (see “Preparing
the Backing Fabric” on page 11).
2.	Because there are two colors along the edge of the
crock, outline it in sections. Outline the deep blue
areas first. Punch a single row of loops to outline
the blue stripe in the lower portion of the pot. Fill
in the area between the outlines with more blue.
Using the same blue thread, outline the squiggly
line on the top half of the pot, using a single line of
loops. Then fill in between the blue outlines.
3.	Using light brown floss or wool, outline rhe
bottom section of the crock. Punch a single row
along the bottom of the pot, up about Vi" along
the side of the crock, across the crock just below
the blue stripe, and back down the side. Fill in this
42
WOOL THREAD OR COTTON EMBROIDERY FLOSS
The crock of posies shown was punched using one skein of each of the Medicis and French Wool Overdyed
threads. Anchor and DMC colors are provided if you prefer to punch with cotton embroidery floss; you will need
one skein each of either the Anchor or DMC colors listed. Then use either the Gentle Art or Weeks overdyed
flosses for the background and the crock.
Used For	Color	Medicis	French Wool Overdyed	Anchor	DMC	Gentle Art	Weeks
Lines on crock	Dark antique blue	8206		1036	3750
Crock	Light brown		23			Cidermill Brown	Oak 1219
Stems and leaves	Light khaki green	8420		843	3012
Flowers	Medium blue	8209		779	932
Flowers	Gold	8303		363	436
Flowers	Red	8106		1014	3830
Background	Black		17			Black Crow	Mascara 3910
area with more loops. Next, punch an outline of
the middle section, between the blue stripe and the
squiggly blue line, and fill that in. Finally, punch
an outline of the top section of the crock with
more light brown loops and then fill that in.
4.	Using the light khaki green floss or wool, punch
the stems with a single row of loops. Outline each
leaf and fill it in.
5.	Outline the flowers and then fill them in, referring
to the photograph for color placement.
6.	Using the overdyed black cotton floss or wool,
punch a single row of loops around the crock and
around every stem, leaf, and flower. The stems are
narrow, so take care not to get your black loops
entangled between green loops.
7.	Using the same floss or wool, punch a single row of
loops along the outer border of the piece, following
along a thread in the backing fabric to help you
punch a straight line. To fill in the background,
you can punch in lines that echo the crock and
flowers, or punch in arbitrary lines and patches.
Finishing
1. Check your work before removing it from the
hoop. Fill in any bare spots with loops and clip off
stray threads.
2. See page 27 for details on finishing the edges of
your piece and page 31 for instructions and sup-
plies needed for framing it.
43
A Pooch with Heart
Our furry four-footed
friends certainly find
a way into our hearts. This
slightly more challenging piece
gives you the chance to really
play with the background,
since a single skein of the
overdyed wool has several
sumptuous colors that blend
beautifully. The uneven colors
of the wool used for the dog
and the heart add to the rich-
ness of this piece.
Punching the Pooch with Heart
Use one strand of wool thread throughout. See color
chart, opposite.
1.	Transfer the pattern on page 59 onto an 8" square
of weaver’s cloth, using one of the methods
described on pages 20—21. Then insert the weavers
cloth into your embroidery hoop (see “Preparing
the Backing Fabric” on page 11).
2.	Using red wool, outline the heart by punching a
single row of loops. Then continue punching the
interior of the heart by following the contours of
the outline until it is completely filled in.
3.	Using the black wool, punch the dog’s eye with
three closely spaced loops. Punch his nose by
outlining and then filling it in.
4.	Using the coffee brown wool, punch a single row of
loops to outline the dog’s ear. Use the same thread
to punch a single row of loops to outline the dog’s
chest down to his front leg. (This will create a clear
separation between rhe two front legs.) Similarly,
outline the dog’s belly by his hind legs. (Again, to
create visual separation between the two legs.)
5.	Using rhe dark blue green, punch the dog’s collar.
The collar will need only two, or at most, three
rows of loops.
44
WOOL THREAD The dog shown was punched us Used for Heart	ng one skein of each of the solid anc Color Variegated red	overdyed wo Medicis	d! colors listed. French Wool Overdyed Voodoo Flame 55
Eye and nose	Black	Noir
Outline of ear and legs	Coffee brown	8306
Collar	Dark blue green	8409
Dog body	Variegated tan		Driftwood 22
Inner border	Medium-dark garnet	8102
Outer border	Ultradark delft blue	8200
Background	Medium blue green Variegated blues and purples	8407	Jewel of the Nile 83
6.	Using the overdyed tan wool, outline the dog with
one row of loops. Then punch a single row of loops
around his eye, nose, ear, and collar. Also punch a
row of loops against the brown outlines of the legs.
Then fill in the rest of the dog with the tan wool.
7.	Using the garnet wool, punch a single row of loops
along the borderline drawn on the pattern.
8.	Using the dark blue wool, punch two rows of loops
just outside the garnet inner border.
9.	To fill in the background, first punch two or
three rows of loops around the dog’s nose using
the medium blue green. (This will help the nose
to stand out and keep it from disappearing into
the background.) Then punch several random
patches of this color in the background. Switch to
the overdyed blue/purple wool and punch a single
row of loops to completely outline the dog and
the heart. Also punch a single row of loops against
the inner red border. Then continue filling in the
background with the same wool. You can punch in
curvy lines, in swirls, or in patches—the overdyed
wool will create interesting effects of color as you
punch.
Finishing
1. Check your work before removing it from the
hoop. Fill in any bare spots with loops and clip off
stray threads.
2. See page 27 for details on finishing the edges
of your piece and page 31 for instructions and
supplies needed for framing it.
45
Chicken Lillie


Punching Chicken Little
Use two strands of cotton floss throughout. See floss
color chart, opposite.
1.	Transfer the pattern on page 59 onto an 8" square
of weaver’s cloth, using one of the methods
described on pages 20-21. Then insert the weavers
cloth into your embroidery hoop (see “Preparing the
Backing Fabric” on page 11).
2.	Using the light brown floss, punch the lines inside
of the chicken’s body and tail.
3.	Use the black floss to punch three or four loops for
the chicken’s eye, keeping them very close together.
While you still have black floss in the needle, punch
a single row of loops along the outer borderline.
4.	Using the beige floss, punch a single row of loops
to outline the chicken’s body. Punch all the way
around the body, including her face, but don’t
outline the beak or comb.
5.	Fill in her body with loops, using the same beige
floss. First punch a single row of loops around the
brown squiggles and lines you’ve already punched.
Then punch around the eye and fill in the rest of
the body, echoing the lines of the existing loops.
6.	Using the orange floss, outline the beak, including
the side where it adjoins the chicken’s face. Then fill
it in. Punch the comb in the same manner. Switch
to the gold floss and punch one row of loops per leg.
7.	For each lamb’s tongue in the border, first punch
the outside section—the one that will be against
46
COTTON EMBROIDERY FLOSS
The chicken shown was punched using one skein each of the Anchor solid and Gentle Art overdyed cotton floss
colors. The DMC solid colors and Weeks overdyed colors are listed as alternatives.
Used For Squiggles in chicken’s body	Color Light brown	Anchor 903	DMC 3790	Gentle Art	Weeks
Eye and outside borderline	Black	403	310
Chicken’s body	Beige			Shaker White	Oak 1219
Beak and comb	Orange	323	722
Legs and feet	Old gold	307	783
Lamb’s-tongue border	Variety of bright, medium, and light colors
Background*	Black			Black Crow	Onyx 1304
*For a more interesting background, add occasional squiggles of other dark colors, such as Anchor 72, 150, 381,
403, 683, and 1041; or DMC 336, 938, 310, 500, and 844.
the dark background. Then continue punching,
alternating colors, to fill in each lamb’s tongue.
8.	Using the black floss, punch a single row of loops
around all the lamb’s tongues to outline them. Also
punch an outline row of loops around all parts
of the chicken, including the legs. Fill in the rest
of the background with black floss. For a more
interesting background, punch occasional random
squiggles using very dark shades of several colors,
such as dark green, burgundy, purple, and dark
brown, and fill in around them with black. These
little bits of color add a slight sense of sparkle.
HAVE FUN WITH COLOR
For the lamb's-tongue border, select colors for
the outer row of each lamb's tongue that are light
or bright enough that they don't disappear into
the background. You'll want enough contrast
between the outer edge of the tongues and the
background so that each tongue stands out.
Finishing
1. Check your work before removing it from the
hoop. Fill in any bare spots with loops and clip off
stray threads.
2. See page 27 for details on finishing the edges of
your piece and page 31 for instructions and sup-
plies needed for framing it.
47
Punching the Crow in the Berries
Use one strand of wool thread or two strands of cotton
floss throughout. See floss color chart, opposite.
1.	Transfer the pattern on page 60 onto an 8"
square of weaver’s cloth, using one of rhe methods
described on pages 20-21. Then insen the weaver’s
cloth into your embroidery hoop (see “Preparing the
Backing Fabric” on page 11).
2.	Using the taupe floss or wool, punch three or four
loops for the crow’s eye. Punch them very close
together and avoid making too many loops. (You
wouldn’t want your crow to have a bulging eyeball,
would you?)
3.	Using the black floss or wool, punch a single row of
loops to outline the crow. Punch two rows of loops,
fairly close together, for each leg. Punch a single
row of loops in a small circle around the taupe eye
to help hold its shape. Then fill in the rest of the
crow with black loops.
4.	Still using black, punch a single row of loops all the
way around the outside border of the piece, making
these lines as straight as possible.
5.	Using the light green floss or wool, punch some
random curved lines in the grassy hill area for
highlights.
6.	Using the dark green floss or wool, outline the
grassy hill on all four sides. Outline the light green
48
WOOL THREAD OR COTTON EMBROIDERY FLOSS
This piece was punched using one skein each of the solid-colored Medicis wool threads listed. Anchor and
DMC colors are provided if yoi Used For Eye and background	prefer to punch with cotto Color Taupe	n embroidery flos Medicis 8505	s. Anchor 831	DMC 613
Crow and outer border	Black	Noir	403	310
Grass	Light mossy green	8412	843	522
Grass, stems, and leaves	Dark mossy green	8417	269	937
Tree trunk and branches	Chocolate brown	8838	936	632
Berries	Red	8100	44	815
Inner ring of sun	Goldenrod	8026	305	725
Center ring of sun	Dark old gold	8324	309	781
Outer ring of sun	Olive gold	8304	907	3852
Background	Beige	8512	832	612
curved lines and then fill in the rest of the hill. Still
using the dark green, punch the stem and leaves of
the berry plant.
7.	Outline the tree trunk and branches and then fill
in the trunk, using the brown floss or wool.
8.	Punch the berries on the tree and the plant, using
the red floss or wool. Outline the berries first to
define the round shape and then fill them in with
more loops.
9.	Using the three shades of gold, punch the sun in
concentric rings as shown in the photo. Remember
to outline each ring on all sides before filling in
with loops.
10.	Using the beige floss or wool, punch a single row
of loops to outline around all the motifs. Punch
completely around the tree and its branches and
berries, the crow and the hill he’s standing on,
the berry plant, and the sun.
11.	Switch to the taupe thread and punch a single
echo line all the way around the motifs, right
beside the beige outlining. When you finish with
the taupe row, switch back to the beige thread
and punch yet another echo line. Continue
alternating these colors until the background is
completely filled in.
Finishing
1. Check your work before removing it from the
hoop. Fill in any bare spots with loops and clip off
stray threads.
2. See page 27 for details on finishing the edges
of your piece and page 31 for instructions and
supplies needed for framing it.
49

Portrait of a Sheep
Punching the Portrait of a Sheep
Use one strand of wool thread throughout. See color
chart, opposite.
1.	Transfer the pattern on page 60 onto an 8" square of
weaver s cloth, using one of the methods described
on pages 20—21. Then insert the weaver’s cloth into
your embroidery hoop (see “Preparing the Backing
Fabric” on page 11).
2.	Using the dark taupe wool, punch a single row of
loops to outline the side of the head and ear adjoin-
ing his body. This will ensure that the sheep’s face
doesn’t get lost as you fill him in.
3.	Using the dark teal wool, punch three or four
loops very close together for each eye. Rethread the
punchneedle with the medium brown wool, and
punch the outline of his nose and a hint of a mouth.
4.	Rather than outlining the entire sheep, work just on
the head for now. Using the light-colored overdyed
wool, punch a single row of loops along the side
of the head and ear that will be against the grassy
background. Once this is done, punch a single row
of loops just inside the taupe outline on the other
side of the head. Then outline each eye and the nose
with a single row of loops. When the inner outlining
50
WOOL THREAD
The sheep shown was punched using one skein each of the solid and overdyed wool colors listed.
Used For Outline of sheep’s ear and head	Color Dark taupe	Medicis 8839	French Wool Overdyed
Eyes	Dark teal	8409
Nose and mouth	Medium brown	8306
Head and body	Shades of beiges		Driftwood 22
Background	Shades of greens		Meadow Green 32
is finished, fill in the rest of the sheep’s head and
ears, using the same color of wool.
5.	Continue using the light-colored overdyed wool to
outline the sheep’s body. Punch across the sheep’s
back, alongside his head and ear, and down his
chest. Continue punching a single row of loops
along the curved portion of the border. Then fill in
his body with more of the light-colored wool.
GOING IN CIRCLES
It's fun to see what effects you can achieve with
the varied values and colors of the overdyed wool.
For example, try punching lots of small spirals as
you fill in the body. The sheep's wooly coat is the
perfect place to experiment.
6.	Using the green overdyed wool, punch a single row
of loops along the curved outline of the border,
beginning at the top of the sheep’s back to the
bottom of his chest. Take care to punch the outline
with only the darker sections of the variegated wool
thread. When you begin to make loops that are
light yellow, stop punching and clip the thread.
Pull a length of thread out of the needle until you
reach a dark green portion, and resume punch-
ing. This will ensure that you have good contrast
between the sheep and the background. There’s
no need to punch a green outline along the curved
border where the sheep’s body meets the border
unless you prefer to have a green border all the way
around the oval.
7.	Fill in the rest of the green background. Just
as with the sheep’s body, you may want to experi-
ment with a variety of different directions as
you punch.
Finishing
1. Check your work before removing it from the
hoop. Fill in any bare spots with loops and clip off
stray threads.
2. See page 28 for details on finishing the edges
of your piece and page 32 for instructions and
supplies needed for turning the sheep into a pin.
51
Best Friends
L eaturing a horse and dog amid
1 hearts and bubbles, this piece
is an adaptation of an antique
quilt. It provides you with the oppor-
tunity to play with variations of color
in the background. When I used the
overdyed wool on this piece, I didn’t
care for all of the colors within a single
skein, so I punched with only those
sections of the thread that appealed to
me. It’s not hard to do, but it takes a bit
of extra time with so much starting and
stopping. This is a good example of how
to manipulate threads.
? -A
Finished Size: 2" x 2’/i"
Punching Best Friends
Use two strands of cotton floss or one strand of wool
thread throughout. See floss color chart, opposite.
1.	Transfer the pattern on page 60 onto an 8" square of
weaver’s cloth, using one of the methods described
on pages 20-21. Then insert the weaver’s cloth into
your embroidery hoop (see “Preparing the Backing
Fabric” on page 11).
2.	Using light brown floss or wool, punch three loops
for the dog’s eye and the horse’s eye. Then outline
the dog’s ear and fill it in with the same color.
3.	Using the reddish brown overdyed floss or wool,
outline the dog with a single row of loops. Punch
a row of loops very close around his eye so that the
eye stays small. Also punch a row around his ear.
Fill in the rest of the dog. Repeat this for the horse.
4.	Using the dark red overdyed floss or wool, outline
each heart and then fill in the hearts.
5.	Punch the yellow, gold, teal, and red circles. As
with the hearts, first punch a single row of loops to
outline each circle before filling it in.
6.	Using the overdyed green floss or wool, outline
each motif in this piece—dog, horse, hearts, and
52
WOOL THREAD OR COTTON EMBROIDERY FLOSS
This piece was punched using one skein each of the Medicis and French Wool Overdyed threads listed. If you
prefer to punch with cotton embroidery floss, use one skein each of either the Anchor or DMC solid colors and
one skein each of either the Gentle Art or Weeks overdyed colors.
Used For	Color	Medicis	French Wool Overdyed	Anchor	DMC	Gentle Art	Weeks
Eyes and ear outline	Light brown	8308		1084	841
Dog and horse	Reddish brown		25			Sarsaparilla	Rust 1326
Hearts	Dark red		53
						Wine	Red 1333
Circles	Yellow Gold Teal Red	8484 8302 8416 8102		307 1001 851 1006	783 976 3808 304
Background	Medium greens		39			Shutter Green	Kudzu 2200
circles—with a single row of loops. Using the same
thread, punch a single row of loops to create the
outside border, making the lines as straight as you
can. Then fill in the background. Punch randomly
or make echoing lines around the motifs.
USE WHAT YOU LIKE
When I used the overdyed wool to punch this
piece, I found that the skein had sections of color
that, to my eye, didn't fit the piece. So, I punched
only with the colors I liked (green and very light
green), and avoided the colors I didn't want in my
piece. I punched with the wool until I saw loops
in the color I didn't want. I stopped, pulled out
the loops of the offending color, and snipped off
the thread right up against the fabric. Then I cut
off the section of color I didn't want to use, and
started punching again with the green that I liked.
Finishing
1. Check your work before removing it from the hoop.
Fill in any bare spots with loops and clip ofF stray
threads.
2. See page 27 for details on finishing the edges of your
piece. This piece is attached to a piece of fabric in the
same manner as described in “Framing” on page 31.
However, rather than putting the matted piece in a
frame, I put it in a painted wooden box (see page 62
for source).
53
Tulip Cross
This project is adapted
from a much-beloved
antique quilt block, the
Tulip Cross. It is both
beautiful and challenging, in
great part because of its many
small sections. Your well-
honed threading skills will
pay off with this project, since
you’ll need to change colors
Punching the Tulip Cross
Use one strand of wool thread throughout. See color
chart, opposite.
1.	Transfer the pattern on page 60 onto an 8"
square of weaver’s cloth, using one of the methods
described on pages 20-21. Then insert the weaver’s
cloth into your embroidery hoop (see “Preparing
the Backing Fabric” on page 11).
2.	Using the sky blue wool, punch four or five loops
close together for the center of the flower in the
center of the design.
3.	Switch to the dark blue wool and punch a single
row of outlining to define the middle section
of the flower. Then punch more loops to fill in
the area between the sky blue center and the
outlining.
4.	Using the sky blue wool, outline the outer edge of
the center flower. Also punch a row along the inner
edge of the outer section of the flower, right up
against the dark blue loops. Fill in this area with
sky blue loops.
5.	Using one strand of the green wool, outline one of
the large, long leaves and then fill it in. Repeat for
54
WOOL THREAD
The Tulip Cross was made using one skein each of the Medicis wool threads listed.
Used For	Color	Medicis
Center flower and borderline	Sky blue	8208
Middle section of center flower	Dark blue	8205
Stems and leaves	Mossy green	8411
Tulip bases, border tulips, and centers of small flowers	Rusty gold	8302
Tulip centers	Medium taupe	8840
Small flowers	Brighter gold	8325
Background	Black	Noir
the remaining three large leaves. Using the same
wool, punch a single row of loops for one of the
tulip stems and punch one or two rows of loops for
each tiny leaf. Repeat for each of the other three
stems with leaves.
6.	Using the rusty gold wool, punch the outline of the
base of each tulip—these are the flowers that point
toward the corners—and then fill each one in.
With the same wool, punch three or four loops for
the center of each of the eight small flowers— these
are the flowers that are on both sides of the tulips.
7.	Using the taupe wool, outline and fill in the centers
of the tulips in the four corners.
8.	Using the brighter gold wool, outline the small
flowers and then fill them in with the same color.
9.	Using the rusty gold wool, punch the stylized
tulips in the border. Punch an outline of each tulip
and then fill it in. Repeat all the way around the
border.
10.	Switching back to the sky blue wool, punch the
lines between the tulips in the border. You can
use a single row of loops, or you can punch two
rows of loops very close together to make your
blue border stand out more.
11.	Using the black wool, punch a single row of loops
at the outer edge of the piece to create an outer
border. Follow along a thread in the backing
fabric to help keep your punching straight. Then
outline every portion of the design with the black
wool. Fill in the rest of the background, using
the black wool. Make sure you’ve filled in all the
miniscule gaps.
Finishing
1. Congratulations! You’ve finished a really chal-
lenging piece. Check your work before removing
it from the hoop. Fill in any bare spots with loops
and clip off stray threads.
2. See page 27 for details on finishing the edges of
your piece and page 31 for directions and supplies
needed for framing it.
55
The Trout
Punching Hie Trout
Use two strands of cotton floss or one strand of wool
thread throughout. See floss color chart, opposite.
1.	Transfer the pattern on page 60 onto an 8"
square of weaver’s cloth, using one of the methods
described on pages 20-21. "Then insert the weaver’s
cloth into your embroidery hoop (see “Preparing
the Backing Fabric” on page 11).
2.	Outline the fish with a single row of black loops.
Referring to the photograph on page 58, notice
that the entire fish body is outlined, as well as the
top and bottom fins. Still using the black floss or
wool, punch three loops very close together for its
eye. Punch the two curved gill lines behind the
eye. Outline and fill in the small fin on the front
portion of the lower belly. Finally, create all those
little black spots. Outline each small spot and fill it
in as you go. Each spot will take just a few loops.
NOTE: Don’t be alarmed when you flip your piece over
to take a peek at how it looks. Until the body of the
fish is punched, the black loops will look like a sloppy
mishmash. But don’t rip them out. Wait to see how
the spots look after you’ve filled in more of the fish.
56
WOOL THREAD OR COTTON EMBROIDERY FLOSS
The trout was punched using one skein each of the Medicis and French Wool Overdyed threads listed. If you
prefer to punch with cotton embroidery floss, use one skein each of the Anchor or DMC solid colors and one
skein each of either the Gentle Art or Weeks colors.
Used For Outline, eye, gills, spots, and border	Color Black	Medicis Noir	French Wool Overdyed	Anchor 403	DMC 310	Gentle Art	Weeks
Fish body	Green		32 Meadow Green			Shutter Green	2198
Fish belly, fins, and tail	Variegated yellow/ orange/red		43 Sedona Rust 79 Salsa 91 Sunfire			Fragrant Cloves, Harvest Moon	Fiesta 4131
Background	Variegated medium blue		13 Azure Blue			Morning Glory	Periwinkle 2337
3.	Using the black floss or wool, punch the border
outline and then punch another row just inside
of the first row. Take care to make these lines as
straight as possible.
4.	Using the green overdyed floss or wool, punch a
single row of loops inside the black outline on the
top portion of the fish. Refer to the photograph to
see which portions of the fish are green. To finish
outlining the green portion of the fish, I opted
to make a squiggly row of punching along the
midsection of the fish. This gives a more natural-
looking transition of colors on the belly.
NOTE: I manipulated the thread a bit, since I didn’t
care for the wide range of values in the wool I was
using. See the “Use What You Like” box on page 53
for tips on thread manipulation.
5.	Still using the overdyed green thread, punch
around the eye, gills, and fin. Then punch around
each of the fish’s spots. Here, too, I continued to
clip off those sections of thread that had the color I
didn’t want. Fill in the rest of the outlined portion
of the fish’s body.
6.	The underbelly of the fish is where you’ll have fun
with the transitions of color, from green to yellow
to rusty orange to red. Here, too, I was picky about
the sections of wool thread that I used. "Thread
your needle with any of the overdyed threads for
the belly and begin blending the colors and letting
them gently shift into one another. The overdyed
thread works very well for this, since the changes
in color within the thread will help you create the
effect you want. This is your fish, and he doesn’t
need to be realistic—use the sections of color that
please you most.
7.	Working with the overdyed threads, punch the
three fins, gently transitioning from one color to
another, using the colors you like best.
57
8.	For the tail, I outlined portions with light yellow
green sections of the overdyed thread, and other
sections with darker greens. I used these same two
colors as well as a section of the thread that con-
tained some red to fill in the tail. You can follow
the same color scheme or select colors that you feel
will look best on your fish.
9.	For the background, use the overdyed blue floss
or wool to punch a single row of loops all the way
around the outline of the fish. Next, punch a row
of loops right up against the black border; then
fill in the background. Try punching in swirls or
squiggly lines to create the impression of water.
Finishing
1.	Check your work before removing it from the
hoop. Fill in any bare spots with loops and clip off
stray threads.
2.	See page 27 for details on finishing the edges of
your piece.
3.	This piece is attached to a small fabric pouch used
to store crochet hooks. This pouch is equally handy
for carrying your punchneedle supplies (see “Other
Supplies” on page 62). Stitch the punched piece to
the flap of the pouch as you would to a fabric mat
when framing a piece (see page 31 for details).
58
Punchneedle Patterns
All patterns are full size and are ready to transfer to
your background fabric. They are the mirror image of
the final punched design because you’ll be working
from the back of each piece.
Crow Pin
Antique Cat
Shelburne Goat
Crockful of Posies
A Pooch with Heart
Chicken Little
59
Crow in the Berries
Portrait of a Sheep
Tulip Cross
The Trout
60
Resources
Look for punchneedles in your local needlework shop. You can also purchase them online from a wide
range of needlework retailers. One online store, www.punchneedlemarketplace.com, carries an extensive
array of punchneedles. Below is information on the makers of some of the most popular punchneedles
currently available. Sources for other punchneedle supplies can be found on the following pages.
Metal Handled Punchneedles
Bernadine's Punch Needles
Bernadine’s Needle Art
PO Box 287
Arthur, IL 61911
217-543-2996
Web site: www.bernadinesneedleart.com
Email: bernadines@consolidated.net
CTR Punch Needles
CTR Inc.
1334 Indian Creek Valley Rd.
PO Box 154
Melcroft, PA 15462
724-455-2111
Web site: www.ctrneedleworks.com
Email: info@ctrmachineandfab.com
Igolochkoy Russian Punchneedles
Birdhouse Enterprises
4438 G St.
Sacramento, CA 95819
916-452-5212
Web site: www.igolochkoy.com
Email: gail@gailbird.com
Plastic-Handled Punchneedles
Cameo Ultra-Punch
Distributed in the U.S. by:
Punch Needle Marketplace
Brohman’s Inc.
333-335 Pam Dr.
Derrien Springs, MI 49103
1-800-272-1966
Web site: www.punchneedlemarketplace.com
Email: sales@punchneedlemarketplace.com
Clover Embroidery Stitching Tool
Clover Needlecraft Inc.
13438 Alondra Blvd.
Cerritos, CA 90703
Web site: www.clover-usa.com
Email: cni@clover-usa.com
Pretty Punch
710 West Broadway, Ste. 504
Mesa, AZ 85210
1-800-486-1234
Web site: www.prettypunch.com
Email: info@prettypunch.com
61
Threads and Flosses
Cotton embroidery floss is the mainstay of miniature
punchneedle work. Both DMC and Anchor offer very
high-quality floss in an extensive array of solid colors.
Look for these ar your local needlework or craft shop,
or online.
Overdyed Cotton Embroidery Floss
The Gentle Art
www.thegentleart.com
Needle Necessities
www.needlenecessities.com/catalog/catalog.html
Weeks Dye Works
www.weeksdyeworks.com
Wool Thread
DMC
DMC Medicis and other wool-thread brands are avail-
able at needlework shops and online retailers.
French Wool Overdyed
www.needlenecessities.com/catalog/catalog.html
Renaiisance Dyeing
www.naturaldyeing.co.uk
Other Supplies
Fabric
Weaver’s cloth can be found in nearly all fabric stores
or online at www.woolenwhimsies.com.
Scissors
Snip-Eze from Havel's, Inc.
1-800-638-4770
www.havels.com
Embroidery Hoops
Susan Bates Hoop-La
These are available at many needlework and craft
shops, as well as discount and online retailers.
Gripper Frame
www.woolenwhimsies.com
Fabric Pouch
www.lacis.com (Item LF27)
Wooden Box with Hinged Lid
Unpainted box available at Michaels
www.michaels.com
62
About the Author
Linda Repasky is a “pusher”—not of any illicit drugs or contra-
band, mind you, but of the amazing art form of punchneedle
embroidery. She loves to watch people become entranced by
using a tiny needle and thread to make rich, lush creations, and
she knows that many of them will develop an addiction to this
miniature form of needlework.
She hasn’t always been this way. Before punching took over
much of her life, she dabbled in a variety of arts and crafts. And
then she found primitive rug hooking, which she adopted with a
passion. Colorful strips of wool fabric took over her life. In short
order, she became a “hooker."
It was only within the past few years that
she stumbled across miniature punchneedle
work. After teaching herself how to punch,
she delved into learning all she could about
this form of needlework and focused on
perfecting her skills. Her miniature hooked
rugs were so distinctive that they caught the
attention of many and led her to develop
courses where she could share this long-
forgotten technique.
Linda lives in rural western Massachusetts,
where she savors the quiet country life and
continues to hook rugs and do punchneedle
work. She finds the creativity and rhythm
of hooking and punching to be a pleasant
counterpoint to her full-time work as a man-
ager in the federal government. She also de-
signs and publishes patterns under the name
Woolen Whimsies (www.woolenwhimsies.com)
and teaches throughout New England. Linda
has been recognized as one the country’s
top 200 artisans in Early American Life
magazine’s 2005 Directory of Traditional
American Crafts. She welcomes readers’
questions and comments via email at
Linda@woolenwhimsies.com.
63
Crafts / Embroidery
Miniature Punchneedle Embroidery
Simple Techniques, Beautiful Projects
Learn the techniques in minutes and finish your first design
in a few hours! Find everything you need to know about
punchneedle embroidery in this comprehensive guidebook—
from tools and supplies to finishing and framing.
•	Choose from 11 folk-art-inspired designs, such as a crow,
a dog, and flowers
•	Get started right away with super-simple techniques
and inexpensive embroidery' floss
•	Tuck any of these charming little designs into your bag
for a great take-along project
Start a tiny work of art today... and show it off tomorrow!
B758