/


Текст
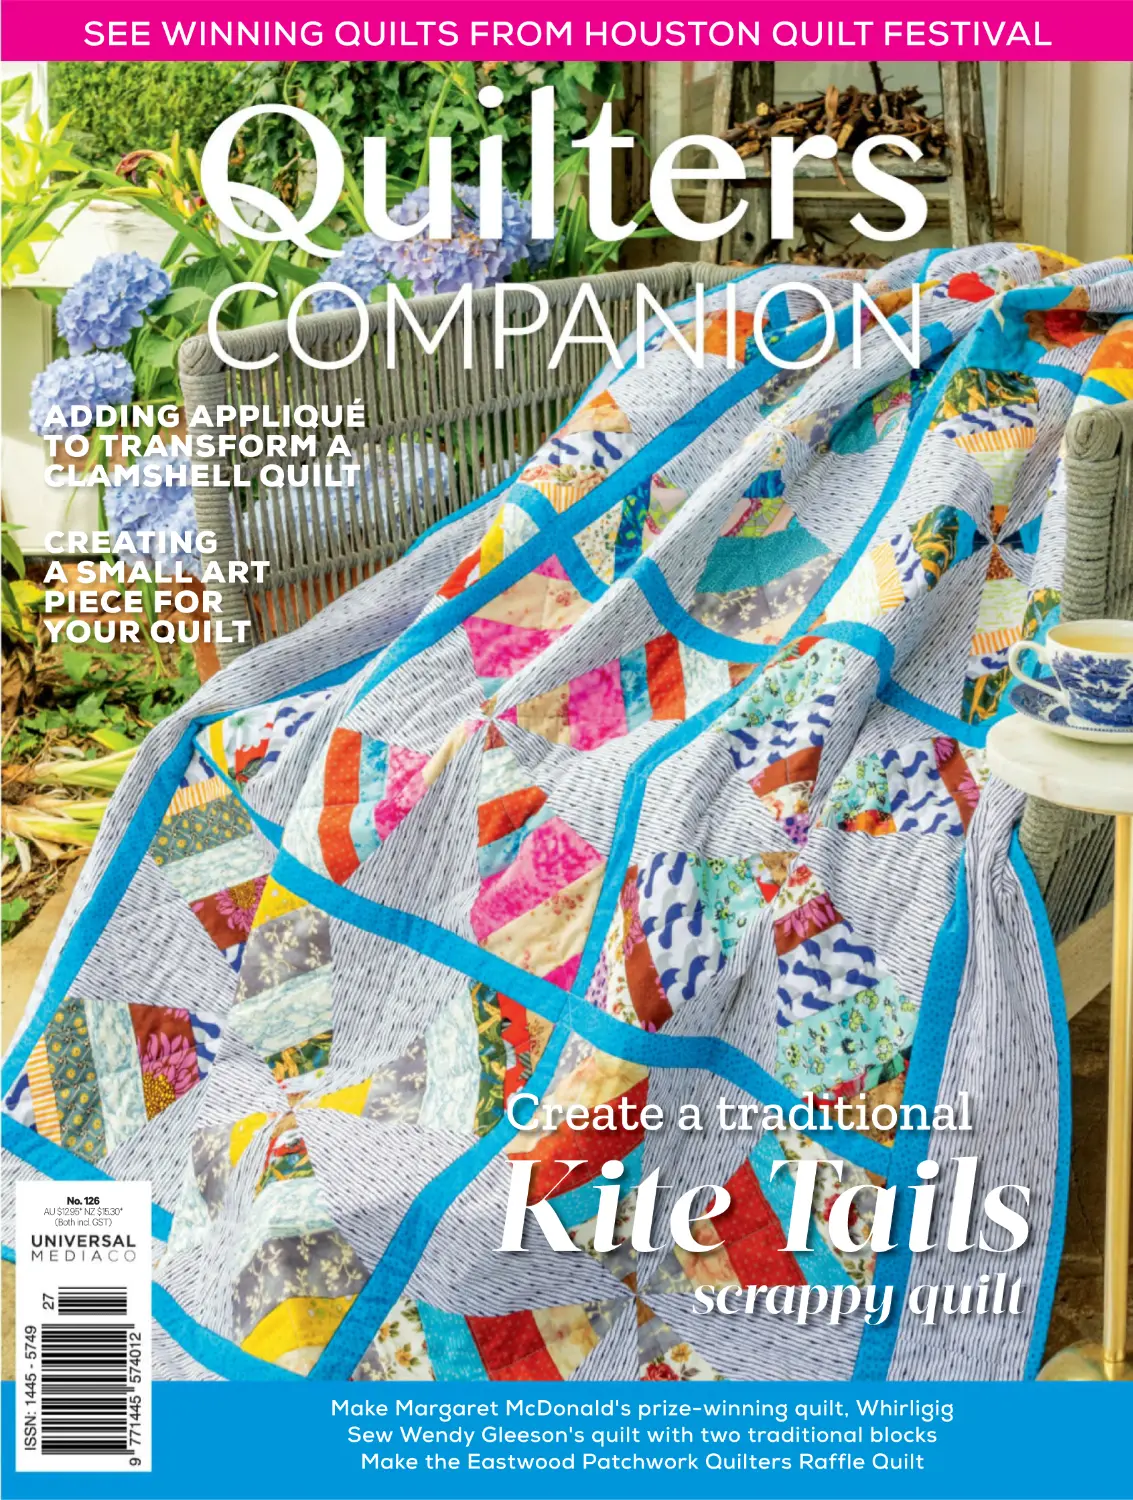
SEE WINNING QUILTS FROM HOUSTON QUILT FESTIVAL
ADDING APPLIQUÉ
TO TRANSFORM A
CLAMSHELL QUILT
CREATING
A SMALL ART
PIECE FOR
YOUR QUILT
Create a traditional
No. 126
AU $12.95* NZ $15.30*
(Both incl. GST)
Kitescrappy
Tails
quilt
Make Margaret McDonald's prize-winning quilt, Whirligig
Sew Wendy Gleeson's quilt with two traditional blocks
Make the Eastwood Patchwork Quilters Raffle Quilt
B 790 PRO
The next level of sewing, quilting
and embroidery.
Designed to bring you even more features to enhance the
joy of creating. Meet the new BERNINA 790 PRO.
Enriched with exciting new sewing, quilting and embroidery
features and the next generation stitchprecision2 Technology,
the B 790 PRO is more precise than ever, for outstanding results
every time.
Innovations including the BERNINA Pinpoint Laser, 4-Point
Placement and WiFi Connectivity bring you the joy of
precision and control!
NEW BERNINA STITCHP
PRECISION2
The B 790 PRO features the next generation BERNINA stitchprecision2
Technology that makes your sewing, quilting and embroidery experience
quieter, more accurate and enjoyable! Swiss innovations deliver
superior stitch quality and up to 33% faster embroidery speed with
the SDT technology.
NEW BERNINA PINPOINT LASER
Enjoy pinpoint precision by seeing exactly where the needle will
enter the fabric in every needle position. The BERNINA Pinpoint Laser
marks your start and travel points as you sew and embroider.
NEW AUTOMATIC NEEDLE THREADER
The Automatic Needle Threader helps you get started with a different
thread, conveniently and quickly, every single time.
STITCH DESIGNER
Create your own stitches by drawing your ideas directly onto the touch
screen. The B 790 PRO transforms your design into a stitch pattern or
alters existing stitches as you wish. Save your very own stitch creations
to expand your stitch library.
TIPS AND TRICKS
The Sewing and Embroidery Consultants, built-in Tutorials and
On-screen Help offer support and answers to your questions
whenever you need them.
Scan QR code to watch
our B 790 PRO video
For further information
Free Call 1800 237 646
bernina@bernina.com.au
bernina.com.au
shop.bernina.com.au
The B 790 PRO includes the
BERNINA embroidery module L with
SDT and extra-large embroidery area (400
mm × 210mm, 15.7” × 8.3”)
New innovations bring you
the joy of precision and control.
4-point placement with morphing
WIFI connectivity and BERNINA Stitchout App
Customisable quilt designs
Alignment of lettering and designs
Shape designer
Colour wheel
56
26
84
March – April 2024
48
Projects
26
Whirligig
Margaret McDonald
40
Kite Tails
Heather Friend
48
Noughts and Crosses
Eastwood Patchworker Quilters
56
Brassica Fields
Wendy Gleeson
64
Fancy Dance
Cheryl Filby
84
Hope and Harmony
Kim Diehl
92
Daisy Dreams
Dawn Hay
104
Arcadia BOM Part 5
Keryn Emmerson
4
40
Features
14
Quilt Gallery
Quilt Festival Houston 2023
36
Domestic Machine Quilting –
Anita Ellis
Creating a small art piece: Painting the lily
74
Quilt Gallery
Queensland Quilt Show 2023
64
Regulars
6
Editor’s Journal
8
Quilty Treasures
100 Off the Shelf
115
Kits
120 In the Market
130 On the Road
135
Diary Dates
136
Basics
137
Stockists
138
Next Issue
Subscribe
Check out our fantastic subscription offers on page 128.
Don’t forget that you can also find us digitally on Zinio and Apple Newsstand
5
Editor’s Journal
QC No. 126 Vol.21 No.2
MARCH – APRIL 2024
Editor Deborah Segaert
Technical Editor Megan Fisher
Contributors Anita Ellis, Megan Fisher,
Pattern Artist Susan Cadzow
Designer Kate Atkinson
Photographer Ken Brass
Stylist Sandra Hinton
Advertising
Rob Jordan 0411 424 196
Fax (02) 9805 0714
Email rjordan@umco.com.au
Advertising Production Deeva Kalia
Associate Publisher Emma Perera
Welcome to the March issue of Quilters
Companion. Inside you will find some
great quilt projects that we hope will
stimulate your creativity and inspire you
to start a new creation!
Talented quilt designer and longarm quilter, Wendy Gleeson shares a
magnificent quilt that is made from two
blocks and features a stunning cabbage
rose feature fabric. Margaret McDonald
shares her award-winning quilt that is
constructed of on-point blocks, setting
triangles and gorgeous appliqué. Heather
Friend’s quilt is made of Kite Blocks
and sashing in a stash-busting array of
scraps. Dawn Hay’s quilt, a favourite from
a past issue of Homespun magazine, is
a cheery outdoor quilt perfect for family
picnics in the park. Cheryl Filby shares
another of her amazing quilt designs
featuring piecing and appliqué.
We also share a project from the
recently re-released book, Simple
Double-dipped Quilts by Kim Diehl. She
has combined the classic clamshell
pattern with simple almond-shaped
leaves to completely transform the
clamshell into blooms.
The members of the Eastwood
Patchwork Quilters group have shared
their 2024 raffle quilt, Noughts
and Crosses. Designed by Rebecca
Hastings, it is compiled of simple lowvolume background fabrics with pops
of bright colours in the crosses. The
quilt will be raffled to raise funds for the
Silver Coin Project. Turn to page 48 to
find out more. Maybe you can enter the
raffle rather than make the quilt?
Part 5 of the 2023 Block of the
Month, Arcadia, includes the instructions
to make the four corner panels, featuring
the printed images of children.
Our galleries include marvellous
winning quilts. We share quilts from the
annual, well-known, International Quilt
Festival held in Houston last November,
and we showcase winning quilts from
the annual Queensland Quilters’ Quilt
Show held last October.
Anita Ellis presents the first of a threepart series showing how to creating a
small art piece. She covers the choice
of subject matter and preparing the
fabric to create the project. The second
and third issue will take you through the
painting and quilting techniques. This is a
great opportunity to increase your skills!
Until next time, keep your needle
threaded!
How to keep in touch
Mail: The Editor, Quilters Companion, Universal Media Co.
Locked Bag 154, North Ryde NSW 1670
Email: dsegaert@umco.com.au
Facebook: https://www.facebook.com/QuiltersCompanion
Instagram: http://instagram.com/quilters_companion
Pinterest: http://www.pinterest.com/qcmag/
Don’t forget that you can also find us digitally on Zinio and Apple Newsstand.
6
Chairman/CEO
Prema Perera
Publisher
Janice Williams
Chief Financial Officer
Vicky Mahadeva
Associate Publisher
Emma Perera
Circulation Business Development Manager
Mark McTaggart
Quilters Companion No. 126 is published by Universal Magazines.
Unit 5, 6-8 Byfield Street, North Ryde NSW 2113.
Phone: (02) 9805 0399, Fax: (02) 9805 0714.
Melbourne office, Unit 4, Level 1, 150 Albert Road, South Melbourne
Vic 3205. Phone: (03) 9694 6444, Fax: (03) 9699 7890.
Printed by:
Distributed by:
NZ Distributors:
UK Distributors:
USA Distributors:
KHL Printing Co Pte Ltd, in Singapore.
Gordon and Gotch: 1300 650 666
Needlecraft: 0800 909 600
Website: www.needlecraft.co.nz
Gordon and Gotch New Zealand:
(09) 979 3018
Manor House Magazines:
+44 (0) 167 251 4288,
info@manorhousemagazines.co.uk
Brewer Quilting & Sewing Supplies
Phone: 630 820 5695 / 800 676 6543
Email: info@brewersewing.com
Subscriptions phone 1300 303 414
This book is copyright. Apart from any fair dealing for the purpose of
private study, research, criticism or review as permitted under the
Copyright Act, no part may be reproduced by any process without
written permission. Enquiries should be addressed to the publishers.
The publishers believe all the information supplied in this book to be
correct at the time of printing. They are not, however, in a position
to make a guarantee to this effect and accept no liability in the event
of any information proving inaccurate. Prices, addresses and phone
numbers were, after investigation, and to the best of our knowledge
and belief, up to date at the time of printing, but the shifting sands
of time may change them in some cases. It is not possible for the
publishers to ensure that advertisements which appear in this
publication comply with the Competition and Consumer Act 2010 (Cth)
and the Australian Consumer Law. The responsibility must therefore
be on the person, company or advertising agency submitting the
advertisements for publication. While every endeavour has been
made to ensure complete accuracy, the publishers cannot be held
responsible for any errors or omissions.
*Recommended retail price
ISSN 1445-5749
Copyright © Universal Magazines MMXXIV
ACN 003 026 944
www.umco.com.au
Please pass on or recycle this magazine.
We are a member of:
y
t
l
i
u
Q
s
e
r
u
s
Trea
Helen Murray’s (right) and Debbie Love’s (below)
quilts took out the major prizes at last year’s
exhibition of the Phillip Island Patchworkers.
8
Photos by Marj Wagland
Treasure island
Phillip Island, just off the south coast
of Victoria, is world-renowned for
its fairy penguins, grand prix circuit
and spectacular beaches. But it’s
also home to a vibrant group of
quiltmakers who held an exhibition of
members’ work late last year to help
raise funds for their local emergency
services. Helen Murray took out the
President’s Choice prize for her quilt
Oh Say Can You Sew, a queen-size
quilt designed by Lisa Bongean
of Primitive Gatherings. Debbie
Love took out the Viewers’ Choice
prize with her wool felt appliquéd
wallhanging, Round the Garden.
Hop to it
There’s not long to go before Easter, so if you’re planning to create some
seasonal projects, you’ll need to get a wiggle on. There are patterns
available for a number of small Easter projects at Cosy Project, including
Marg Low’s wool appliqué table runner (above left) and Bronwyn Hayes’
Easter Eden basket for the annual Easter egg hunt (above). Go to
www.cosyproject.com
We also found several free patterns for Easter patchwork on the
internet, including a scrappy mini quilt at https://lakegirlquilts.com/easteregg-quilt-a-scrappy-mini-quilt-pattern; another possible design for an
Easter egg basket at https://sewcanshe.com/how-to-sew-easy-basketswith-10-squares-layer-cake-leftover-project; and two bunny-themed
wallhangings at https://thecraftyquilter.com/2014/04/patchwork-peterrabbit-tutorial and www.shinyhappyworld.com/2015/03/mix-matchfree-bunny-applique-pattern.html
9
Quilty Treasures
Little wonders
These earring kits are surely the perfect
accessory for every quiltmaker. They’re made
by Melbourne-based textile artist Robyn J
Cuthbertson and are available in a number
of different patchwork block designs from her
website, https://robynjdesigns.com.au. Each kit
includes the timber frames for a pair of earrings,
a pair of 20mm stainless-steel earring hoops,
foundation papers and full instructions. Explore
an endless array of colourways to create a pair
for every outfit and occasion.
TOP Annette Baxendell took out the prize for Best
Landscape/Pictorial quilt with her piece, My Canterbury.
ABOVE Hong Kong Water Lily by Heather Craig won
the award for Best Kit/Class Work at the Christchurch
exhibition last October.
Fractured
Quiltmakers in Christchurch, New Zealand, celebrated their 30th
anniversary with their largest-ever exhibition of members’ quilts
— 160 in all. There was a diversity of contemporary, modern, art,
pictorial, landscape, traditional and upcycled quilts. There were
also two guest exhibitions from Aotearoa Quilters: ‘Light it Up’
and the Red Challenge.
10
On the mend
Rotary cutters and scissors can lead to cuts. Hand
quilting might cause blisters. Accidents happen.
Patch yourself up with these ‘Sewing Mends the
Soul’ bandaids. Made by Riley Blake, there are four
different designs and 40 bandaids per box. Buy
them at your local quilt shop.
ALL GRACE PRODUCTS AVAILABLE IN AUSTRALIA
CREATE YOUR PERFECT
QUILTING SYSTEM
Transform your domestic machine into a free motion quilting system with a hoop frame.
Then level up your efÞciency with a long arm machine. Finally, top it off with automation and
accessories, and you’re ready to go! No matter where you are on your quilting journey, we are
here to help you take the next step. Let’s get you started!
LARGER WORK AREA FOR ULTIMATE FREEDOM.
Easily quilt larger projects with more throat space! By eliminating
the need to reroll, fold, or reposition the quilt, a larger throat
area allows plenty of room for the quilt to roll up as you go
without getting bunched. This also eliminates the need for pin
basting, enables quilters to use thicker batting, create larger
patterns, and accomplish breathtaking projects.
NEW
HOW DOES A QUILTING
FRAME HELP ME?
Evolve in your quilting
Most quilters face the challenge
of having to choose between
quilting space, and the size of
the quilt they can create. Are
you one of them?
Simple Fabric Control
Easy-to-use rails and clamps keep
your fabric securely in place while
you quilt, allowing you to focus on
your creativity instead of worrying
about extra fabric.
Multiple Sizes
CREATIVE FREEDOM FOR
MACHINE QUILTERS
Quilting frames have come a long way from their
humble beginnings. Modern day quilters rely on
their frames to make each of their projects easier,
more convenient and more beautiful! Whether you
are a professional or a hobbyist, and no-matter
what kind of quilting machine you use, there is a
quilting frame that would work for you!
Know-How Sewing Essentials
T. 02 4871 3936 | mail@knowhowsewing.com.au
Hans Mob: 0405 506 656 | Roswitha Mob: 0404 865 354
With sizes ranging from four to
twelve feet, you can Þnd a frame
that gets the job done without
feeling out of place in your home.
Use Your Machine
Our frames can accommodate
many home sewing machines and
longarm quilting machines up to
21”, so you can quilt at your own
comfort level.
www.knowhowsewing.com.au
Join the experts and a like-minded group
on these wonderful Quilting and Yarn Tours
Join Deborah Segaert
Editor of Quilters Companion Magazine
on a wonderful tour of the
Visit the Royal School of Needlework, William
Marris Gallery, the York Castle Museum and
enjoy afternoon tea at the Pump Room in
Bath. We also visit many Quilting shops.
Including the
Birmingham
Festival of Quilts
United Kingdom
21 Jul to 9 Aug 2024
York
Manchester
Birmingham
London
Bath
Start
End
Winchester
Travel on A-Rosa Sena river boat for 7 nights,
visit Bruges Lace Centre, Royal Delft Factory,
sightseeing tours of the UNESCO world
heritage cities of Luxemburg and Bruges. Work
on unique projects designed by Natalie Bird.
11 to 29 Sep 2024
Join Natalie Bird for
Patchwork
on the Rhine
visiting the European
Patchwork Meeting
visit
Quilt Week
in Alsace
Amsterdam
Rotterdam
Bruges
Antwerp
Cologne
Frankfurt
Luxemburg
Start
End
Obernai
Visiting markets, yarn shops and museums,
dyeing workshops at Yamamoto Roketsu
Dyeing Studio and Shibori studio. Tour
members will work on an original project
designed by Robyn.
31 Oct to 17 Nov 2024
Start
End
2 NIGHTS
Kanazwa
3 NIGHTS
Takayama
5 NIGHTS
Kyoto
2 NIGHTS
Kawaguchiko
3 NIGHTS
Tokyo
Join Robyn Hicks on a
Yarn tour of Japan
Travelrite International
E: balwyn@travelrite.com.au www.travelrite.com.au
Join Michelle Marvig on these great Quilting Tours
Brno International Textile Exhibition 2025
PPM Quilt Show Brno, Czech Republic
14 Apr to 3 May 2025
Start
End
Hamburg
Berlin
Dresden
Prague
Visit fabric shops, textile museums, included
sightseeing tours in the cities visited and work on
an original quilting project designed by Michelle.
Brno
Cesky Krumlov
Budapest
Italy and the Greek Islands
Includes 10-night cruise on Celebrity Equinox
5 nights Siena, visiting gorgeous Tuscan villages,
cruise aboard Celebrity Equinox, visit Gaudi’s
unusual cathedral – Sagrada Familia.
Visit many fabric shops, work on unique
projects designed by Michelle Marvig.
8 to 27 Sep 2024
Start
End
Siena
Rome
Barcelona
Athens
Katakolon
Valletta
Mykonos
Santorini
Ephesus
Please call for a brochure
Toll
Free
1800 630 343
Tours only available through Travelrite International
ATAS accreditation #A10538
Gallery
Quilt Festival
Houston 2023
There were more than 1600 quilts and other unique works of textile art on
display at the Quilt Festival held in Houston, Texas, in November last year.
Some of the special exhibitions for the festival can be previewed online
at www.quilts.com/special-exhibit, and you can see all of the winning
quilts from the competition at
www.quilts.com/quilt-festival/judged-show-winners-2023
The 2024 International Quilt Festival will be held October 31-November 3
at the George R. Brown Convention Center, Houston, Texas.
14
Best of Show
Monkeys in My Hair — (Evie), 104cm x 122cm (41in x 48in), Deborah Hyde
Artist’s statement: “This art is a celebration of my granddaughter Evie, her portrait and her
personality.” Original design
15
Gallery
Master Award for Machine Artistry
Filigree Calligraphy, 152cm x 193cm (60in x 76in), Janet Stone
Artist’s statement: “I wanted to use linen fabrics, a collection of solid hand-dyed fabrics and incorporate a
free-motion embroidered alphabet. This is the 25th quilt in my Alphabet Quilt series.”
Original design
16
Master Award for Traditional Artistry
Beauty in the Broken, 180cm x 180cm (71in x 71in), Kathy K. Wylie
Artist’s statement: “In the same way that stars can only be seen at night, there is beauty that is
only experienced in hardship. This quilt was inspired by those profound moments of love amid our
suffering, laughter in our sorrow, hope in our despair. The beauty in the broken.”
Original design
17
Gallery
Master Award for Contemporary Artistry
Summer Shower, 193cm x 196cm (76in x 77in), Akiko Matsumura
Artist’s statement: “On a summer morning, when I looked up on the walkway where I usually walk,
I saw a slight blue sky among the many leaves. The sight was very pleasant to me and I love this
place. I made this quilt with that feeling in mind.”
Original design
18
Pieced — First
Prickly Pear, 157cm x 157cm (62in x 62in), Susan Braverman
Artist’s statement: “The familiar New York Beauty block gets an unexpected makeover with scale and vivid
colour. Blocks are all made from the same fabrics, but dense straight-line quilting with different thread
colours provides a nuance of visual variation and definition. The graphic blocks bring to mind colourful
blooms, sharp spines and round shapes of the prickly pear cactus.”
Original design
19
Gallery
Abstract — First
Swamp (Pond Series #5), 107cm x 147cm (42in x 58in), Roberta Lagomarsini
Artist’s statement: “The fifth in my Pond Series, this quilt depicts a swamp, the interface between the
pond and land, where often there are very cool things going on. In my swamp, there are decaying plants
which form the basis for the next crop of plants, the roots and seeds of pond plants, insect larva nymphs,
fish and amphibian eggs, oxygen and other gases bubbling towards the surface. Plants are piercing the
surface, reaching to the sunlight. Renewal and regrowth.”
Original design
20
A Celebration of Colour 2023 — Best Quilt
Joy, 203cm x 135cm (80in x 53in), Cole Whitaker
Artist’s statement: “This quilt was designed based on a picture that I
took of a friend. I designed the quilt, pieced it, quilted it, and designed
some of the fabrics that were included in it. I named the quilt Joy
because that is what the picture embodies for me.”
Original design
21
Gallery
The Superior Threads Master Award for Thread Artistry
Fullness, 208cm x 170cm (82in x 67in), Yoshiyuki Ishizaki
Artist’s Statement: “Embroidery has been added to the traditional Baltimore to
make the appliqué stand out. Look for the hidden chameleon and praying mantis.
Even the sparrows that come to the balcony joined in!”
Original design
22
1
2
4
3
1. Past Times Quilt
Size approx 155cm x 205cm
cm
An Anna Marie Horner blend
end of fabrics
in “Love Always” and “Made My Day”
ranges. It’s an absolute beauty.
Kit $199.00. Pattern $15.00.
3. Elderberry Fairies Quilt
Size approx 115cm x 165cm
For that special little person who loves all
things fairy!! Kit $105.00. Pattern $15.00.
2. Make My Day Throw
Size approx 155cm x 110cm
A bright mix of Anna Maria Horner
fabrics to add a pop to any room.
Kit $130.00. Pattern $15.00.
4. The Dress Quilt
Size approx 132cm x 150cm
A pretty, whimsical quilt.
Kit $110.00. Pattern $15.00.
All kits contain fabrics for top and binding and pattern, plus postage. We deliver to your door Australia wide!
42 Liverpool Street, Port Lincoln SA 5606 p: 08 8682 3636
e: rubyandkate@me.com Open Mon to Fri 9am-5pm, Sat 9am-12pm
www.rubyandkate.com.au
Gallery
Pictorial, Large – First
Ice Lillies, 112cm x 150cm (44in x 59½in), Andrea Brokenshire
Artist’s Statement: “I have always love Stargazer Lilies and this one is planted next to my Great Grandmother’s
Snowball bush. I love the juxtaposition between the smooth leaves of the Lily next to the serrated leaves of the
Snowball bush. The challenge for me in this quilt was to create the different textures between the two. My focus was
the left stems and leaves, but of course, the lilies themselves are just wonderful too.”
Original design
24
/
/
/
/
/
/
/
/
/
/
/
/
/
&
)
/
)
)
/
/
/
&
/
/
/
/
0DUHH6W&ODLU4XLOWV
0DUHH6W&ODLU4XLOWV
6YCSJEHF4USFFU 4USBUIèFMETBZF 0O(PPHMF.BQT
01&/#:"110*/5.&/5.0/%":504"563%":
1-&"4&5&9550#00,*/"5-&"45)063413*03
/05"7"*-"#-&46/%":
(SPVQTXFMDPNF
5&95
&NBJMJOGP!NBSFFTUDMBJSRVJMUTDPNBV
)OLMBIJMNI=EżìF;LAĔL;HAĔI@L?JLI>O=NCIř@;<LC=żNBL?;>ż
HINCIHż;HčQĔG;HO@;=NOLĔIřMCNĔìıFŐL;HAĔI@
";Hč*C?=CHĴ;Hč HAFCMĽ*;J?L*C?=CHĴJLI>O=Nż
P?LSNBCHĴQĔB;PĔCżIřNBĔQ?úCNĔQQQ G;L??MN=F;CLKOCFNż =Iŕ ;Ƈ
+DYH\RXYLVLWHGRXU<RX7XEH&KDQQHO"
<RXFDQILQG)5((YLGHRWXWRULDOVRIGLIIHUHQWDSSOLTXH
WHFKQLTXHVDVZHOODV,QVWUXFWLRQDO9LGHRVRIRXU4XLOWLQJ
7HPSODWH6HWV
8FNBLFBMBSHFSBOHFPGUFNQMBUFTGPS5SBEJUJPOBM#MPDLT
̷
This quilt is constructed with five blocks that are set on point, with
setting triangles on each side and one on each corner. The block is
20in square with 24 spiral wedges and an outer band of diamonds and
triangles, and a small circle over the centre of the spiral. This design
has great potential for creating a traditional or a contemporary quilt
by using a small range of fabrics or even a scrappy quilt with lots of
different fabrics. The leafy appliqués were completed by hand with a
buttonhole stitch using a 50-weight machine cotton thread. The leaf
appliqués were drawn by Margaret from her photographs of ferns in
the Daintree National Park in Far North Queensland.
Finished size: 168cm (79½in) square
Finished block size: 20in square
Designer: Margaret McDonald
info@margaretmcdonald.com.au
26
www.margaretmcdonald.com.au
Piecing &
Appliqué
27
28
Materials
• 2.9m (3¼yd) orange-red tone-ontone print fabric
• 50cm (⅝yd) each of six print fabrics
(whirligig swirls). Margaret used Kaffe
Fassett prints in her quilt
• 10cm (⅛yd) each of 15 fabrics (outer
bands around the whirligig swirls)
• 60cm (1yd) turquoise print fabric #1
(appliqué)
• 40cm (½yd) each of four print fabrics
(zigzag frame)
• 2m (2¼yd) turquoise print fabric #2
(border)
• 60cm (¾yd) orange-red print fabric
(binding)
• 2.3m (2½yd) extra-wide
(275cm/108in) backing fabric
• Batting at least 185cm (88in) square
• Thread to match the appliqué fabric.
Margaret appliquéd by hand using a
50-weight machine cotton thread
• Fusible web
• Spray starch
• Freezer paper or baking paper (for
blocking the blocks)
• Scrap of light cardstock
• Template plastic and fine
permanent-marking pen
• Pencil or erasable fabric-marking pen
• Fine chalk pencil
• Rotary cutter, large square quilter’s
ruler, long quilter’s ruler and cutting
mat
• 1m (1⅛yd) steel ruler
• Sewing machine with ¼in foot
• General sewing supplies
Preparation and cutting
1
Trace Shapes A–E and G and H for this
project from the Pattern Sheet onto
template plastic using a fine permanentmarking pen. Trace each shape twice:
trace one on the outer broken line — this
shape includes a ¼in seam allowance.
Then trace one on the inner unbroken
line — this shape does not include a seam
allowance. Label each shape, mark the
grainline on them and then cut them out
on the traced lines.
Use the templates that include
seam allowances to cut the fabric:
lay them on the wrong side of the
fabrics, align the grainlines with the
selvedge, trace around them and then
cut the shapes on the traced lines — use
a rotary cutter and ruler to cut straight
edges and scissors to cut curved edges.
Trace the F circle for the block
centre onto paper. Cut it out
roughly and glue it to cardstock. Once
the glue has dried, cut the circle out on
the traced line.
2
3
From the orange-red tone-on-tone
print fabric, cut:
• three strips, 21in x width of fabric.
Cross cut them to yield five squares,
21in (block backgrounds)
• one square, 22in. Cut it twice on
the diagonals to yield four quartersquare triangles (setting triangles)
• two squares, 17in. Cut them once on
the diagonal to yield four half-square
triangles (corner triangles)
Fold each of the 21in squares in
half horizontally and vertically,
right sides together, and press. Unfold.
Lay Template E in each quadrant
of the square in turn, matching the
straight edges of the template with the
outer raw edges of the square. Trace
the curved edge on to the fabric. Cut
the centre circle out on the curved line.
Spray each of the six print fabrics
for the whirligig swirls lightly with
spray starch and, once the spray has
soaked into the fabric, press them. This
will make it easier to handle the fabrics
while you cut and sew.
From each of these six print fabrics, cut:
• 20 Template A using the template
that includes the seam allowance —
a total of 120 Template A shapes
Lay the F circle on five of these
print fabrics and cut the fabric out
about ½in by eye outside the edge of
the cardboard template.
Arrange the assortment of 15
fabrics for the outer bands
into five groups of three fabrics that
contrast with each other. Repeat
Step 6 to starch them prior to cutting
shapes. Decide which fabric you will
use for the inner triangles (Template
B), the kite shapes (Template C) and
the outer triangles (Template D).
Note that the longest edges of
Templates B and D are slightly
curved. It is important that you
maintain this curve as you trace, cut
and sew these shapes.
From each of the five fabrics you’ve
chosen for the inner triangles, cut:
• 24 Template B using the template
that includes the seam allowance —
a total of 120 Template B shapes
From each of the five fabrics you’ve
chosen for the kites, cut:
• 24 Template C using the template
that includes the seam allowance —
a total of 120 Template C shapes
From each of the five fabrics you’ve
chosen for the outer triangles, cut:
• 24 Template D using the template
that includes the seam allowance —
a total of 120 Template D shapes
4
5
6
7
From each of the four print fabrics for
the zigzag frame, cut:
• 66 Template G shapes
• 66 Template H shapes
From turquoise print fabric #2, cut:
• four strips, 6in down the length of the
fabric (border)
From the orange-red print fabric, cut:
• nine strips, 2½in x width of fabric
(binding)
Whirligig blocks
1
To make one Whirligig block, you
need:
• four A shapes cut from each of the six
assorted print fabrics — 24 A shapes
in all (inner swirls)
• 24 B shapes all cut from the same
print fabric
• 24 C shapes all cut from the same
print fabric
• 24 D shapes all cut from the same
print fabric
• one F circle
• one red-orange square with a
circular hole cut in its centre.
For each A–D fabric shape,
centre the template that doesn’t
include the seam on the wrong side
and trace around it. These will be your
stitching lines.
2
8
29
Diagram 1
Whirligig blocks — Steps 4 and 5
3
Fold each of the A shapes in
half and finger press creases to
mark the centre of each long edge.
See Diagram 1. Make a short snip into
the seam allowance near the centre
crease of the inside curve. Lay out the
shapes in a circle. Rearrange them
until you have an array of colours and
prints that you like.
To sew the shapes together, pick
up two adjacent shapes from the
circle. Lay one of them near the foot on
your sewing machine, right side facing
up, with one end near the needle and
4
Whirligig blocks — Step 6
30
the other end extending out in front
of it and curving to the right. Lay the
second shape right side down, one
corner matching the first shape and
with the shape curving to the left.
Sew the shapes together on the line
you traced in Step 2. Sew slowly,
bringing the raw edges of the shapes
together just in front of the machine
needle. Check that the centre creases
match and stop often to pivot the fabric
under the needle to ensure a smooth
curve. Check your stitching for accuracy
and unpick and resew if necessary.
5
Unpick some seams and resew them
until the block lies flat.
The outer band around the block
centre is made from 24 B+C+D
shapes stitched together. Lay out 24
groups of a B + a C + a D shape.
Sew each group of three shapes
together. Press both seams in
each unit in the same direction. Press
the seams in 12 of the units towards
the outer triangle and the seams in the
other 12 units towards the inner triangle.
Sew the units together to create
a complete circle, alternating
between a unit with seams pressed
in one direction and one with seams
pressed in the opposite direction.
Lay the swirl circle right side facing
up. Lay the outer band circle
around it, also right side facing up. Turn
over the inner edge of the outer band by
¼in so that it is right sides together with
the outer edge of the swirl circle. Pin the
point of each kite shape to match a seam
line between two A shapes. Gradually
work your way around the circle doing
this. Take care not to stretch the outer
edge of the swirl circle.
Slowly machine stitch the seam:
stop often to pivot the fabric under
the needle to ensure a smooth curve.
Check your stitching for accuracy and
unpick and resew if necessary. Press.
Lay your block right side facing
up. Lay the red-orange block
background on top of it, also right side
facing up. Turn over the inner edge of
the block background so that it is right
sides together with the outer edge of
the block. At each of the creases in
the red-orange fabric, pin through the
point of every sixth kite. Then add pins
between these first four, gradually
working your way around the block.
Repeat Step 11 to sew the
block background to the
block. Margaret recommends sewing
with the block uppermost and the
block background on the bed of the
sewing machine.
Draw a 21in square on a piece
of freezer or baking paper. Pin it
to your ironing board. Lightly spray the
block with water. Match the edges of
the block with the square you’ve drawn,
gently easing it to fit. Pin in each corner
and every 1½in–2in along all four edges.
Press the block with a steam
iron — just lift the iron on and
off the fabric; don’t rub it across the
fabric. Continue until the block is dry
and square. Leave it pinned to the
paper for 30 minutes. Then remove
the pins and the block.
7
8
Whirligig blocks — Step 7
Whirligig blocks — Step 9
Diagram 2
6
Sew all the shapes together in
pairs. Press seams so they’ll all
be pressed in the same direction in
the block. Then repeat the process
to join the pairs into groups of four
shapes; then into groups of eight
shapes; and finally into a complete
circular block with a hole in the centre.
If the block doesn’t lie flat but arches
up in the centre, you have been using
a seam allowance that is too narrow.
Resew every second seam very
slightly wider. If the centre of the block
pulls in, your seam has been too wide.
To prepare the F circle for
appliqué, begin by sewing a line
of running stitch around the fabric
circle about ⅛in from the edge, leaving
long thread tails at the beginning
and end. Place the cardboard circle
template in the centre of the fabric on
the wrong side and pull up the thread
to gather the seam allowance over to
the back evenly and firmly, as shown
in Diagram 2.
Spray the fabric with starch. Once
the starch has soaked into the
fabric, press the shape well on both
sides. Carefully remove the stitches and
the template and press again.
Pin or glue baste the circle in
the centre of the block. Check
that it covers all the raw edges of the
swirl shapes. Appliqué it in place using
small stitches.
Trim the block to measure 20½in,
keeping the circle centred. This will
mean trimming ¼in off all four edges.
Repeat Steps 1–19 to make a
total of five Whirligig blocks.
9
17
10
18
19
20
Assembly
11
1
12
2
13
Quilt Centre Layout Diagram
16
14
15
Lay out the five Whirligig blocks,
the four quarter-square setting
triangles and the four half-square
triangles in diagonal rows, as shown in
the Quilt Centre Layout Diagram.
Sew the squares and triangles
in each diagonal row together.
Then sew the rows together, carefully
matching seams. Press.
Appliqué
1
Trace the fern leaf shape from the
Pattern Sheet onto template plastic
using a fine permanent-marking pen.
Cut it out on the traced lines.
Fold the turquoise print fabric #1
in half, long raw edges matching,
and press to crease. Unfold. Cut the
fabric on the crease to yield two strips
about 11½in x width of fabric.
From the fusible web, cut:
• two strips, 11in x 41in or sufficient
smaller pieces that can be combined
to cover this area
Fuse the web to the wrong side of
the strips of turquoise print fabric.
If you need to use several pieces of web,
just butt them up against each other
until the entire strip of fabric is covered.
Use the template to trace a
total of 12 ferns on the paper
side of the fusible web. You will need
to place them very close to each
other to fit six shapes on each strip.
Use sharp scissors to cut each shape
out on the lines.
2
3
4
31
Appliqué — Step 7
Borders — Step 4
Borders — Step 9
Borders — Step 5
5
Peel the backing paper off four
fern shapes. Position them in the
area between two Whirligig blocks plus
some of the setting triangles, matching
their stem ends. Refer to the photo of
Margaret’s quilt as a guide. Once you
are satisfied with the placement, fuse
the shapes in place.
Repeat Step 5 to fuse all the
remaining ferns to the quilt top.
Appliqué around the raw edges
of the ferns. You could use either
a fine zigzag or buttonhole stitch on
your machine or a buttonhole stitch
worked by hand.
Trim the edges of the quilt top
so that they are straight and the
corners are perfect 90-degree right
angles.
6
7
8
Borders
1
Measure your quilt top horizontally
across the centre. Trim two of the 6in
strips of turquoise print #2 to this length.
Sew them to the top and bottom edges
of the quilt top. Press seams outwards.
Measure your quilt top vertically
down the centre. Trim the
remaining two 6in strips of turquoise
print #2 to this measurement. Sew
them to the left and right edges of the
quilt top. Press seams outwards.
2
32
3
4
Sew each G shape to an H shape
cut from a different fabric. Press
seams open.
Join the G+H pairs together to
create four rows of shapes, 29
pairs long. Turn under the short angled
edges of each G and H shape in the
rows and baste them.
Lay the four rows out on the quilt
top, over the seam line between
the quilt centre and the turquoise
border, to form a square frame. Check
that the rows will match neatly at the
inner corners and that the frame is
centred on the quilt top.
Draw a square on the quilt centre
using a long steel ruler and a
chalk pencil to indicate the position
of the inner points between the G+H
pairs. Stitch a long basting stitch
around the edge of the quilt top on the
chalk line. This will be the placement
line for the zigzag border.
Lay the rows on the quilt top
with the inner basted points on
the placement line. When positioning
the zigzag border, begin by placing a
'valley' at the centre of the border. Pin
or glue baste the rows to the quilt top,
then appliqué the inner edges in place.
Remove the basting stitches. Press.
Appliqué the outer edges in place
on the turquoise border. As you
position the zigzag border, check that
the four bias corners are a mirror
image.
5
6
7
8
9
Margaret finds the easiest way to
finish this 45-degree angle is to
draw a 45-degree line on both sides
of the zigzag border, then trim both
edges, leaving at least a ½in seam
allowance on both edges. Then fold one
edge along the 45-degree line, tuck
the other side under the folded edge
and baste. The last step is to appliqué
it in place.
Finishing
1
The quilt top, backing and batting
are ready for a long-arm quilting
machine as they are. If you’re doing
the quilting by hand or on a domestic
sewing machine, follow the instructions
for Preparing the Quilt Sandwich in the
free downloadable Basics Guide* to
pin or baste the quilt top, batting and
backing together.
Quilt as desired. Margaret’s quilt
was custom machine quilted.
Trim the excess backing fabric
and batting ¼in outside the edge
of the quilt top.
Follow the instructions in Binding
the Quilt in The Basics Guide*
to bind the quilt using the nine 2½in
strips of orange-red print fabric cut
for the binding.
2
3
4
* The free Basics Guide is available as
a download online from https://www.
cosyproject.com/blog/quilting-guide
Official distributor for
Olympus Thread products
including sashiko, kogin,
crochet & embroidery
Wholesale enquiries
welcome
Sashiko
Embroidery
Yarn Dyed Fabrics
Kogin
Boro
Crochet
Patterns & Kits
Shop online & in the studio
Tues-Fri 9am-5pm
02 6621 9188 | contact@bebebold.com
www.bebebold.com
Kit $88.80
Paern on
ly $19.00
A
ll includin
g postage
Kit $57.00
Paern on
ly $19.00
A
ll includin
g postage
kanga pocket bag
little essentials bag
7KLVURRP\EDJKDVODUJHSRFNHWVHDFKVLGHSOXVRQH
LQVLGHSRFNHW%DJPHDVXUHV´Z[´K[ò´G.LWFRQWDLQV
DOOWKHIDEULFVEXWWRQVDQGZDGGLQJWRFRPSOHWHWKHEDJ
7KLVVPDOOEDJZLOOKROGDOO\RXUHVVHQWLDOVIRUDGD\RXWRUXVH
IRU\RXUODWHVWFDUU\DORQJSURMHFW%DJPHDVXUHV´Z[´K[´G
.LWDYDLODEOHLQ\RXUFRORXUFKRLFH)DEULFVZLOOYDU\IURPWKRVHSLFWXUHG
Kit $60.00
Paern on
ly $19.00
A
ll includin
g postage
Kit $96.50
Paern on
ly $19.00
A
ll includin
g postage
easy squares bag
quilters retreat bag
$QHDV\TXLFNWRPDNHEDJZKLFKFDQEHPDGHLQGLႇHUHQW
VL]HV2QHLQVLGHSRFNHWDQGEODFNWULP.LWLQFOXGHVDOO
IDEULFVZDGGLQJDQGEXWWRQWRFRPSOHWH\RXUEDJ
$ODUJHEDJSHUIHFWIRUDZHHNHQGDZD\:LWKWZRRXWVLGHSRFNHWVDQGWZRIXOOZLGWK
LQVLGHSRFNHWVWKLVEDJDOVRPDNHVDJUHDWEDE\EDJ=LSFORVXUHDQGEODFNWULP%DJ
PHDVXUHV´Z[´K[´G.LWFRQWDLQVDOOIDEULFVWRPDNHWKHEDJ]LSVDQGWDSH
63 Princes Highway, Trafalgar | Phone 03 5633 2311 | Email sales@littlepatch.com.au | www.littlepatch.com.au
Machine Quilting
MACHINE QUILTING
with Anita Ellis
Creating a small art piece
Painting the lily
In the next three issues, I am going to show you how I create small
art pieces. There is not a lot of investment in materials and I hope
you come along for the ride. To make this project achievable by
everyone in a timely fashion, I am going to work on an A4-size piece,
but of course the size can be increased if you choose. The techniques
stay the same — they just take longer to execute.
Anita Ellis
36
www.hillsidequilting.com.au
LEFT The final piece
TOP Final image chosen
ABOVE Photos to select from
I
n this issue I am going to cover a choice
of subject matter and preparing the
fabric to create the project. The second
issue will involve the painting and
colouring of the image and some easy
techniques that everyone can try. The
final issue of the series will be focused
on the quilting and finishing of the piece.
• Medium black or red Sharpie pen
• iPad with drawing app (definitely
optional, but if you are technically
inclined, great to use)
• Blue water-soluble fabric marking pen
— I like the blue Sewline Styla pen and
Aqua Eraser.
when I am about to start a new piece, I
trawl through them to find inspiration.
This doesn’t always mean I find just one
image to copy; it might be part of an
image or a colour that catches my eye.
On the topic of copyright — always
take time to check that any images
you use do not belong to other people.
Better still, take your own photos and
start the creative process from scratch.
It is so rewarding to create a piece that
is wholly yours.
Above is a series of photos that I took
in the Botanical Gardens in Adelaide.
In the first photo there was a lot of
background noise in the image and I
wanted a clean simple shot of just a
couple of flowers. The image I finally
chose was a small section of the flowers
with great colour definition and clean
lines. All very useful when transferring
the details to another medium, fabric.
Choosing the subject matter
Choosing and laying out the
design ready for colouring
Materials required for the first part of
the project:
• Images from your phone, copied
as per instructions in the section
Preparing the image for copying
• Lightbox or a sunlit window
• Painter’s tape — I find the 1in blue
one the most useful
• Fat quarter of linen cotton-blend
fabric. Refer to Fabric choice
Get this right and you are halfway
there. I take a lot of photos on my
phone as I go about my life. Some are
just there as a record of where I have
been, others of objects or scenes that
inspire me or I would like to include in a
piece of work someday. The photos you
take for the purpose of creating a small
art piece do not necessarily need to be
top quality, although mobile phones do
take amazing images these days. Most
never see the light of day again, but
Preparing the image for copying
So, you have your photo on your phone
or camera that you want to print off.
You can do this on your home computer
and printer or go to a copy shop and
get them to do it. Tell them the final
size of the image and they will do the
maths. I generally get one colour print
and at least two black and white prints.
I would maybe get a couple of sizes of
the black and white prints if I wasn’t
sure which one I finally wanted to use.
37
Machine Quilting
FROM LEFT Marking the fabric using a light box; Fabric ready for the next stage
ABOVE Black and white copy with
shapes marked
Just plain paper is fine — no fancy
photo paper required.
The colour image will be referred to
at the painting stage and the black and
white images will be used to transfer
the shapes to the fabric. Take one of
the black and white copies and use a
Sharpie pen to draw around the major
shapes of the subject matter. In my
case, this is the outside of the flowers
and shapes of the leaves but not all the
individual stamens. It is always useful
to have a back-up black and white copy
just in case you make a mistake. The
shapes on the black and white image are
so much clearer than the colour image.
In the photo above I have marked
the areas that I want to transfer to the
fabric. This makes the lines easier to
trace through the lightbox and keeps the
proportions of the final piece correct.
I have used a red pen so you can see
where I have marked, but a thicker black
pen works just as well.
If you are so inclined, you can open
the photo on an iPad, convert it to a
black and white image and draw the
lines on the iPad, then print off the
image. I like to do this, but the handdrawn paper copy works just as well.
Fabric choice
My favourite choice of fabric is a cotton/
linen mix with a little texture. This takes
the fabric paints and pencils well and
does not shrink very much.
Shrinkage in fabric can be an issue.
While you probably won’t wash the
piece, the fabric paints can be quite wet
and cause the base fabric to pucker up.
38
I like to test my fabrics first to see how
they might shrink. You are going to be
putting time and effort into this piece
and you do not want it to distort.
I have found that calico can shrink by
different amounts in length and width.
This is fine if the piece of fabric has
been prewashed and is large enough to
give you the space for your work.
I find that cotton/linen mix fabric only
shrinks around ¼in evenly across the full
width and length of the fabric. I can live
with that and therefore I do not need
to prewash, which gives a nice crisp
surface to work with.
I generally use the natural linen
colour for my work as this offers good
clear colours and allows the paints to
be used in different densities such as
background colour washes or opaque
objects. There will be more on the
painting techniques in the next issue.
Be sure to press your fabric so it is
nice and flat for the tracing process.
Fabric size
Use a generously sized piece of fabric
so that you have the choice at the end
of how to finish the work. For example,
you may want to mount it onto stretch
canvas bars and will need a good few
inches of excess all around.
A larger piece of fabric also allows
you to play around with the placement
of images and backgrounds.
For my final A4-size image I will use a
fat quarter so that I have choices. It also
gives me a bit of space at the edges to
try out colours. It could probably be a
little smaller but I do have space to play
with on the edges. An A3 image would
also work on a fat quarter of fabric.
Transferring the image to fabric
It can seem a little daunting to transfer
an image to fabric: will the marks show
up? Will the marks disappear when I
want them to? What pen shall I use?
I will answer these questions for you
as I have perfected my techniques for
painting images on fabric by trial and
error, so you do not need to make the
mistakes I have made.
The biggest thing to consider is which
marking tool to use. I find that with the
water-based paints that I recommend,
and the Inktense pencils that some
people like to use, the blue water-soluble
fabric markers work great. As you colour
the piece, the paint or the fabric medium
used with the pencils dissolve the pen
marks and they disappear.
The only thing to watch out for is to
remove any remaining marks before
you heat set the piece. I like the Sewline
Aqua Eraser for this, but a Q-tip and
water also works. As most of us have
found out the hard way, once blue
water-soluble markers are heat set,
they cannot be removed.
As with everything quilting and
marking, test, test, test! Much easier
that wiping up the tears later.
To transfer the markings to the
fabric, tape the image to the lightbox
(or window) and then tape down the
fabric in the place you want the image
to be. If you think you may add more
background to the piece, be sure to
allow for this with the placement.
Using your chosen marking tool,
trace the main shapes that have been
marked on the black and white copy.
Remove the fabric from the lightbox.
You are now ready for the next stage,
the painting of the image. I look forward
to sharing my painting techniques in the
next issue.
Have fun! Keeping the piece small
means you will complete this and it will
not join the UFOs in the cupboard.
Till next time
Anita
Kit includes
pattern and
all fabrics
to complete
quilt top.
6RQLD0HOYLOOH
6R
6
RRQQLD
LD0
0HOY
0 Y
Craftbasket
&UDIWEDVNHW32%R[
2UERVW9LFWRULD
7HOHSKRQH
www.thecraftbasket.com.au
aps
Susunrebsu76rinsxt76Sincchr. Kit $285
Mea
Prices exclude postage
Heather decided to make this quilt as a stash buster using only fabrics
from her stash. She found that the colours in the kite pieces needed a
lighter colour to finish off the blocks. The sashings and backing also came
from her stash, which was good, so she had all of the fabrics on hand
(although her stash does not seem any smaller …). Can you make this quilt
from your stash, or are some new purchases required?
Finished size: 166.5cm x 134.5cm (65½in x 53in)
Finished block size: 14in square
Designer: Heather Friend
thefriends@bigpond.com
40
Stash
Buster
41
42
Materials
• Assorted print fabrics to total about
2m (2¼yd)
• 2.1m (2¼yd) grey print fabric
• 1m (1⅛yd) dark turquoise toneon-tone print fabric (sashings and
binding)
• 3.1m (3⅜yd) backing fabric
• Batting at least 185cm x 150cm
(72in x 60in)
• Template plastic and fine
permanent-marking pen
• Rotary cutter, ruler and mat
• Sewing machine with ¼in foot
• General sewing supplies
Preparation and cutting
1
Trace the kite shape from the
Pattern Sheet onto template plastic
using a fine permanent-marking pen.
Cut it out accurately on the lines.
From the assorted print fabrics, cut:
• strips about 21in long and in a variety
of different widths
From the grey print fabric, cut:
• four strips, 12in x width of fabric
• three strips, 3½in x width of fabric
(top and bottom border)
• four strips, 4½in x width of fabric
(left and right border)
From the dark turquoise tone-on-tone
print fabric, cut:
• 12 strips, 1½in x width of fabric
(sashings)
• seven strips, 2½in x width of fabric
(binding)
Kite Tail blocks
1
2
Sew strips of assorted print fabrics
together, long edges matching, to
make a panel at least 12in x 21in.
Lay the template on the panel
with the seam lines lying
horizontally beneath it and trace
around it. Rotate the template 180
degrees and trace another kite shape.
Repeat to rotate and trace two more
shapes, as shown in Diagram 1. To
create pairs of kite shapes that match
each other, position the template the
same distance from the top edge of
the panel for one pair and the same
distance from the bottom edge of the
panel for the other pair. Use a rotary
cutter and ruler to cut the shapes out
on the traced lines.
Lay one of the 12in strips of grey
print fabric horizontally on your
cutting mat. Position the template on
it so that the left and right corners
match the top raw edge of the strip,
as shown in Diagram 2. Trace around
the template. Rotate the template and
position it so that the left and right
corners match the bottom raw edge of
the strip. Trace around the template.
Repeat to trace 12 shapes on the fabric
3
Diagram 1
Diagram 2
43
Kite Tail Block Layout Diagram
strip. Use a rotary cutter and ruler to
cut the triangles out on the traced lines.
Lay out the kite shapes from
Step 2 and four triangles from
Step 3 as shown in the Kite Tail Block
Layout Diagram. Check that the
matching kite shapes are diagonally
opposite each other.
Sew each kite shape to a grey
triangle. Press. Then join the
pairs of shapes to make two half
blocks. Finally, sew the two half-blocks
together to complete the block. Press
this seam open to reduce bulk.
Fold the block in half horizontally
and vertically and finger press
creases at the edges to mark the
centre. Trim the block to measure 14in
square from raw edge to raw edge – to
do this, start by matching the 7in line
on your ruler with the creases in the
top and bottom edges of the block.
The line should lie through the centre
of the block. Trim the overhanging right
edge. Rotate the block 90 degrees and
repeat. Continue in the same way until
all four edges have been trimmed.
Repeat Steps 1–6 to make a total
of 12 blocks using a variety of print
fabrics in the panels.
4
5
4
Assembly
Join six 1½in strips of dark
turquoise print fabric together,
end to end, to make one long strip.
Cross cut it to yield five strips, 1½in
x 43in. Add them to the layout by
putting a strip between pairs of block
rows and at the top and bottom edges
of the layout.
Sew the sashing strips and block
rows together. Press seams
towards the sashing strips.
Join the last three 1½in strips
of dark turquoise print fabric
together, end to end, to make one long
strip. Measure your quilt top vertically
through the centre. Cut two strips this
length from the long strip. Sew them to
the left and right edges of the quilt top.
Press seams outwards.
1
Border
6
7
Lay out the blocks in four rows of
three blocks each. Leave space
between the blocks. Swap them around
until you have an array of colours and
prints that you like.
Join three 1½in strips of dark
turquoise print fabric together, end
to end, to make one long strip. Cross cut
it to yield eight strips, 1½in x 14in.
Add one of these strips vertically
between pairs of blocks in each of
the four rows. Sew the blocks and strips
in each row together. Your block rows
should measure 14in x 43in, from raw
edge to raw edge.
2
3
44
5
6
1
2
Join the three 3½in strips of grey
print fabric together, end to end, to
make one long strip.
Measure your quilt top horizontally
across the centre. Cut two strips
this length from the long strip. Sew
them to the top and bottom edges of
the quilt top. Press seams outwards.
Join the four 4½in strips of grey
print fabric together, end to end,
in pairs to make two long strips.
Measure your quilt top vertically
through the centre. Trim the two
3
4
strips to this length. Sew them to the
left and right edges of the quilt top.
Press seams outwards.
Finishing
1
Remove the selvedges from the
backing fabric and cut it into two
equal lengths. Sew the pieces together
side by side with a ½in seam and press
the seam open.
The quilt top, backing and batting
are ready for a long-arm quilting
machine as they are. If you’re doing
the quilting by hand or on a domestic
sewing machine, follow the instructions
for Preparing the Quilt Sandwich in the
free downloadable Basics Guide* to
pin or baste the quilt top, batting and
backing together.
Quilt as desired. Heather’s quilt
was machine quilted with straight
lines within the blocks.
Trim the excess backing fabric and
batting ¼in outside the edge of
the quilt top.
Follow the instructions in Binding
the Quilt in The Basics Guide* to
bind the quilt using the seven 2½in
strips of dark turquoise fabric cut for
the binding.
2
3
4
5
* The free Basics Guide is available as
a download online from https://www.
cosyproject.com/blog/quilting-guide
45
Faeries in My Garden
Beautiful Designs ~ Exquisite Fabrics
“My Happy Place”
ǦʹͲʹͶ̱ȋͶͷdzȌǤ
ǡ ̱
ϐǤǯǨ
ǡͲǡ ǡͶͲͳȋͲȌ͵ͺͻͲͺͲͺ
ǤǤ Ǥ̷Ǥ
Faeries in My Garden
Beautiful Designs ~ Exquisite Fabrics
“Heavenly Stitches”
Collection includes: a Large Satchel with pockets inside, a Square Tote Bag with drop-down sides, a Large Embroidery Cushion,
a dainty Needle Case & a sweet little Pincushion, all made from one Lecien Panel with some lovely coordinates.
Ǥ
ϐǡ
Ǥ
Ǥ
ǯǨ
ǡͲǡ ǡͶͲͳȋͲȌ͵ͺͻͲͺͲͺ
ǤǤ Ǥ̷Ǥ
Noughts and
Crosses
Designed by Rebecca Hastings, this quilt was made by members of
the Eastwood Patchwork Quilters group to be raffled at their 2024
quilt show. The funds raised will go to The Silver Coin Project
(www.thesilvercoinproject.com) based in Ingleburn, NSW. It is a
family-run organisation that supports the Macarthur region of
Sydney’s local primary schools by assisting disadvantaged students.
See the end of the instructions for details of the 2024 exhibition.
Finished size: 204.5cm x 166.5cm (80½in x 65½in)
Finished block size: 7½in
Eastwood Patchwork Quilters
www.eastwoodpatchworkquilters.com
Eastwood Patchwork Quilters
48
@eastwoodpatchworkquilters
Raf îe
Quilt
49
50
Materials
• 20 fat eighths of black and white and
grey and white print fabrics
• 8in square of 80 different solid/
mottled print fabrics. The Eastwood
Patchwork Quilters used eight
shades of each of the following
colours: dark blue, mauve, purple,
pink, red, orange, yellow, green, teal
and light blue
• 70cm (¾yd) white on black print
fabric (circles and border corners)
• 55cm (⅝yd) solid black fabric
(border)
• 60cm (¾yd) grey print fabric
(binding)
• 4.4m (4⅞yd) backing fabric
• Batting at least 220cm x 185cm
(88in x 72in)
• Mylar heat resistant plastic or light
cardboard and fine permanentmarking pen
• Spray starch
• Rotary cutter, ruler and mat
• Sewing machine with ¼in and
walking feet
• General sewing supplies
Preparation and cutting
From each of the 20 fat eighths of
black/grey and white print fabrics, cut:
• eight squares, 3in
From each of the 8in squares of
coloured fabrics, cut:
• one square 3in
• 12 squares, 1¾in. See Diagram 1
To make a template for the
appliquéd circles, trace the circle
from the Pattern Sheet onto Mylar
heat resistant plastic. Cut it out on
the traced line. If you don’t have
Mylar, trace the circle onto paper, cut
it out roughly, glue the paper to light
cardboard and, once the glue has
dried, cut the circle on the traced line.
1
Diagram 1
From the white on black print fabric, cut:
• two strips, 3in x width of fabric. From
each strip, cross cut two rectangles,
3in x 8in and two rectangles, 3in x
10¼in (border corners)
Place the template on the
remaining white on black print
fabric and cut the fabric ¼in by eye
outside the edge of the template. You
need to cut 63 fabric circles.
From the solid black fabric, cut:
• six strips, 3in x width of fabric (border)
2
From the grey print fabric, cut:
• eight strips, 2¼in x width of fabric
(binding)
Cross blocks
1
To make one block, you need:
• all the squares cut from one
coloured fabric
• all the squares cut from one black/
grey and white print fabric.
Draw a diagonal line from corner
to corner on the wrong side of
2
Diagram 2
51
Diagram 3
Cross Block Layout Diagram
Diagram 4
Diagram 5
52
all of the 1¾in coloured squares. Pin
a square in one corner of each of
the black/grey squares, as shown in
Diagram 2. Sew on the line, trim the
corner ¼in outside the seam, flip the
black/grey fabric over and press.
On four of these units, pin another
coloured square on the adjacent
corner, stitch, trim, flip and press, as
shown in Diagram 3.
Lay out the four units left over
from Step 2, the four units from
Step 3 and the 3in square of coloured
fabric in three rows, as shown in the
Cross Block Layout Diagram.
Sew the units in each row
together. Press the seams in
3
the top and bottom rows outwards;
press the seams in the middle row
inwards. Then join the rows, carefully
matching seams. Your block should
measure 8in square from raw edge
to raw edge.
Repeat Steps 1–5 to make a total
of 80 Cross blocks.
6
Assembly
4
1
5
2
Lay out the blocks in 10 rows of
eight blocks each. Swap their
positions until you have an array of
colours and prints that you like.
Sew the blocks in each row
together. Press rows in the oddnumbered rows in one direction and
or cardboard circle template in the
centre of the fabric on the wrong
side and pull up the thread to gather
the seam allowance over to the
back evenly and firmly, as shown in
Diagram 5.
Spray the fabric with starch. Once
the starch has soaked into the
fabric, press the shape well on both
sides. Carefully remove the stitches and
the template and press again.
Repeat this process to prepare
63 circles.
Fold each circle in half,
horizontally and vertically, and
finger press light creases. Pin or glue
baste a circle over the intersection
where the corners of four Cross blocks
meet, matching the creases in the
circle with the seam lines. Appliqué it
in place using small stitches. Repeat to
appliqué a circle on each intersection.
2
3
4
Finishing
1
Remove the selvedges from the
backing fabric and cut it into two
equal lengths. Sew the pieces together
side by side with a ½in seam and press
the seam open.
The quilt top, backing and batting
are ready for a long-arm quilting
machine as they are. If you’re doing
the quilting by hand or on a domestic
sewing machine, follow the instructions
for Preparing the Quilt Sandwich in the
free downloadable Basics Guide* to
pin or baste the quilt top, batting and
backing together.
Quilt as desired. The Eastwood
Patchwork Quilters machine
quilted a variety of designs on the quilt.
Trim the excess backing fabric and
batting ¼in outside the edge of
the quilt top.
Follow the instructions in Binding
the Quilt in The Basics Guide* to
bind the quilt using the eight 2¼in strips
of grey print fabric cut for the binding.
2
in the even-numbered rows in the
opposite direction.
Sew the rows together, carefully
matching seams.
3
Border
1
2
Join the 3in strips of solid black
fabric together, end to end, to make
one long strip.
Measure the length of your quilt
top from the seam between rows
1 and 2 to the seam between rows 9
and 10, as shown by the red lines in
Diagram 4. Measure through the centre
of the quilt top, not along its edges.
Add ½in to this measurement and
cut two strips this length from
the long black strip. Sew a 3in x 8in
rectangle of white on black to each end
of these strips.
Measure the width of your quilt top
from the seam between columns
1 and 2 to the seam between columns
7 and 8, as shown by the purple lines in
Diagram 4. Measure through the centre
of the quilt top, not along its edges.
Add ½in to this measurement
and cut two strips this length
from the remainder of the long black
3
4
5
strip. Sew a 3in x 10¼in rectangle of
white on black print fabric to each
end of these strips.
Sew the border strips from Step 3
to the left and right edges of the
quilt top. Press seams outwards.
Sew the border strips from Step 5
to the top and bottom edges of the
quilt top. Press seams outwards.
6
7
Appliqué
1
To prepare the white on black
circles for appliqué, begin by
sewing a line of running stitch around
the fabric circle about ⅛in from the
edge, leaving long thread tails at the
beginning and end. Place the Mylar
3
4
5
* The free Basics Guide is available as
a download online from https://www.
cosyproject.com/blog/quilting-guide
EASTWOOD PATCHWORK
QUILTERS' EXHIBITION
July 19–21, 10am–4pm daily
Roselea Community Centre
645–671 Pennant Hills Road, Beecroft, NSW
Instagram: @eastwoodpatchworkquilters
Website: www.eastwoodpatchworkquilters.com
Facebook: Eastwood Patchwork Quilters
53
2OG3RUW5G$OEHUW3DUN6$
PH: 08 7120 6788 or 0408 060 796
karen@sewfocus.com.au | www.sewfocus.com.au
MACHINES • ACCESSORIES • PATTERNS • QUILT FABRICS • CLASSES
Sew Focus is on Tour
around Australia
Subscribe to our You Tube Channel and
follow our journey @sewfocusontour
Or visit our website
for more information
Lots of prizes to be given
away to our subscribers !
We are passionate about sewing, quilting and embroidery,
and look forward to assisting you with your creative journey
Follow us on Facebook and
Instagram for inspiration and fun
@sewfocus
6833257,1*
) 5 ( ((
$XVWUDOLDQ 1HZ
=HDODQGGHVLJQHUV
32 67$ *
: ,7 +$ //
2 5' (5 62 9 (5
7$&.,7($6<(33)2/',1*
722/
Stay out of sticky situations and create
measure perfect edges with Tack-it-Easy
folding gadget for English paper piecing
hexies using the glue technique.
Gadget comes in seven sizes. Buy individually
or as a set. Buy just the gadget or pair it with a
perspex template for easier cutting of fabric.
Prices start at $3.25 for a single 1/2” gadget
only, up to $60 for the full set of seven
gadgets and templates with the following
sizes: ½”, ¾”, 1”, 1 ¼”, 1 ½”, 1 ¾” and 2”
Purchase online at
www.creaturecrafts.net.au
or for a more personal
experience why not come
and see us at our brand new
bricks and mortar shop.
Located at 4/68 Myrtle St,
Myrtleford Victoria. Look
out for the flag with the
lady bug on it.
ZZZFUHDWXUHFUDIWVQHWDX
0\UWOH6W0\UWOHIRUG9LF(0$,/
FUHDWXUHFUDIWV#ELJSRQGFRP3+21(
NEW
PREMISES!
Wiradjuri Country
Shop 2 /
300 Stewart St
Bathurst NSW 2795
02 6331 6975
FABRIC
CLASSES
NOTIONS
Monday-Friday
9.30-5.00
Saturdays
9.30-1.30
www.thecraftypeacock.com.au
the.crfty.peacock
the.crfty.peacock
Brassica Fields
Wendy fell in love with the focal fabric of this quilt many years ago
and had always wanted to make a quilt to feature it. Finally, it has
come to fruition! This quilt uses a vast selection of low-volume prints;
many were just smaller off-cuts from other projects. The blocks are
large and the quilt grows very quickly.
Finished size: 269cm (106in) square
Finished block size: 12in square
Designer: Wendy Gleeson
www.cleverducksquilting.com
56
@clever_ducks_quilting_
Clever Ducks Quilting Co
Two Blio
ck
Quilt
57
58
Materials
• 1.9m (2⅛yd) cream print fabric
• 5m (5¾yd) large-scale feature print
fabric (blocks, border and binding)
• 20 fat eighths of large-scale print
fabrics to coordinate with the feature
print fabric
• Assorted low-volume print fabrics to
total about 2.25m (2⅝yd)
• Assorted tone-on-tone print fabrics
to total about 75cm (1yd)
• 1.1m (1¼yd) green and pink print
fabric (setting triangles)
• 9m (10½yd) backing fabric
• Batting at least 290cm (120in) square
• Template plastic and fine
permanent-marking pen
• Pencil or erasable fabric-marking pen
• Rotary cutter, 6½in square quilter’s
ruler, long quilter’s ruler and cutting
mat
• Sewing machine with ¼in foot
• General sewing supplies
Preparation and cutting
1
Trace the two shapes from the
Pattern Sheet onto template plastic
using a fine permanent-marking pen.
Label them and then cut them out
on the traced lines. These templates
include ¼in seam allowances.
To use these templates, lay them
on the wrong side of the fabrics,
trace around them, then use a rotary
cutter and quilter’s ruler to cut the
shapes on the traced lines. To cut a
shape in reverse, flip the template over
before tracing and cutting.
From the cream print fabric, cut:
• four strips, 4½in x width of fabric.
Cross cut them to yield 64 rectangles,
2½in x 4½in
• 10 strips, 2⅞in x width of fabric.
Cross cut them to yield 128 squares,
2⅞in. Cut each square once on the
diagonal to yield 256 half-square
triangles
• three strips, 6½in x width of fabric.
Cross cut them to yield 16 squares,
6½in (setting triangles)
From large-scale feature print fabric,
cut:
• six strips, 35/16in. Cross cut them to
yield 64 squares, 35/16in
• six strips, 4½in x width of fabric.
Cross cut them to yield 16 squares,
4½in and 64 rectangles, 2½in x 4½in
• 10 strips, 6½in x width of fabric
(border)
• 11 strips, 2½in x width of fabric
(binding)
From each of the 20 fat eighths of
large-scale print fabrics, cut:
2
• five Template A shapes — a total of
100 shapes in all
From the assorted low-volume print
fabrics, cut:
• 100 sets of Template B shapes, where
a set is one Template B shape and one
Template B reversed shape cut from
the same fabric — 200 shapes in all
From the pink and green print fabric, cut:
• three strips, 10in x width of fabric.
Cross cut them to yield nine squares,
10in. Cut each square twice on
the diagonals to yield a total of 36
quarter-square triangles (setting
triangles)
• two squares, 9in. Cut each square
once on the diagonal to yield four
half-square triangles (corners)
Squirrel in a Cage blocks
centre. Fold each feature print 35/16in
square in half, horizontally and vertically,
and finger press creases to mark the
centre of each edge.
Sew a cream triangle to opposite
edges of a square, matching
centre creases. Press seams inwards.
Sew cream triangles to the remaining
two edges of the square to complete
a Square in a Square unit. It should
measure 4½in square from raw edge
to raw edge.
Repeat Step 4 to make four
Square in a Square units exactly
the same.
Lay out the units you’ve made
and the 4½in square of feature
print fabric in three rows, as shown
in the Squirrel in a Cage Block Layout
Diagram. Sew the units in each row
4
5
6
1
To make one Squirrel in a Cage
block, you need:
• one feature print square, 4½in
• four feature print rectangles,
2½in x 4½in
• four feature print squares, 35/16in
• four cream print rectangles, 2½in x
4½in
• 16 cream print half-square triangles.
Sew each feature print rectangle
to a cream print rectangle on one
long edge. Press seams towards the
feature print fabric.
Fold each of the cream half-square
triangles in half and finger press a
crease in their longest edge to mark the
2
3
59
Squirrel in a Cage Block Layout Diagram
¼in
45°
3¼in
¼in
Kite Block Trimming Diagram
together, then join the rows, carefully
matching seams. Your block should
measure 12½in square from raw edge
to raw edge.
Repeat Steps 1–6 to make a total
of 16 Squirrel in a Cage blocks.
7
Kite blocks
Four-block Layout Diagram
1
To make one Kite block, you need:
• four A shapes, all cut from different
fabrics
• four sets of B+B reversed shapes. The
B and B reversed shapes in each set
should be cut from the same fabric,
but the four sets should be cut from
different fabrics.
Sew a B and a B reversed shape
cut from the same fabric to the
two long angled edges of each A shape.
Press seams away from the A shape.
Trim the units to measure 6½in
square from raw edge to raw edge.
2
Four-patch Block Layout Diagram
3
To do this, lay a 6½in square quilter’s
rule on each unit. The 45-degree
diagonal line on the ruler should run
down the centre of the A shape and
through the point at its bottom edge.
The ¼in vertical and horizontal lines
should meet at the bottom edge of the A
shape and the 3¼in marks should match
the seam lines on two edges, as shown
in the Kite Block Trimming Diagram.
Once you’ve aligned the ruler correctly,
trim the edges of your block so that it
measures precisely 6½in square from
raw edge to raw edge.
Repeat Steps 1–3 to make a total
of 100 Kite blocks using a variety
of fabrics.
Choose four blocks to join
together. Lay them out in two
rows of two, as shown in the Fourblock Layout Diagram. Sew the blocks
together in rows, then join the rows,
carefully matching seams. Your Fourblock unit should measure 12½in square
from raw edge to raw edge.
Repeat Step 5 to make a total of
25 Four-block units.
4
5
6
Setting Triangle Layout Diagram — make 8
Setting triangles and units
1
•
•
Reverse Setting Triangle Layout
Diagram — make 8
60
•
•
To make one setting triangle,
you need:
four 3½in squares of assorted lowvolume print fabrics
four 3½in squares of assorted print
fabrics
one 6½in square of cream print fabric
two quarter-square triangles of
green and pink print fabric.
End Unit Layout Diagram — make 4
Corner Unit Layout Diagram — make 2
¼in
Diagram 1
2
Lay out two 3½in squares of lowvolume print fabrics and two 3½in
squares of print fabrics, as shown in the
Four-patch Block Layout Diagram. Sew
the squares together in pairs, then sew
the pairs together, carefully matching
the centre seam to make a Four-patch
block. It should measure 6½in square
from raw edge to raw edge.
Repeat Step 2 to make a second
Four-patch block.
Lay out the blocks and patches
in three rows as shown in the
Setting Triangle Layout Diagram. Sew
them together in rows, then join the
rows, carefully matching seams.
Repeat Steps 1–4 to make a total
of eight setting triangles.
Then repeat Steps 1–4 to make
another eight setting triangles,
but this time, assemble them in reverse,
as shown in the Reverse Setting
Triangle Layout Diagram.
For the end units, sew four
assorted print squares and
four assorted low-volume squares
together, as shown in the End Unit
Layout Diagram. Make four end units.
To make a corner unit, sew a
pink and green quarter-square
triangle to each end of one of the end
units, as shown in the Corner Unit
Layout Diagram. Make another corner
unit — meaning that you will now have
two end units and two corner units.
3
4
Quilt Centre Layout Diagram
Assembly
1
Lay out the Squirrel in a Cage
blocks, the Four-block Kite blocks,
the setting triangles, end units and
corner units in diagonal rows, as
shown in the Quilt Centre Layout
Diagram. Add the half-square pink
and green triangles in the four
corners.
Sew the blocks and triangles and
units together in diagonal rows.
Press. Then join the rows, carefully
matching seams. Press.
Trim the edges of the quilt
top ¼in outside the corners of
the Four-patch units, as shown in
Diagram 1. Check that the edges are
straight and the corners are perfect
90-degree right angles.
2
5
6
3
7
Border
8
1
2
Join the 6½in strips of large-scale
feature print fabric together, end to
end, to make one long strip.
Measure your quilt top horizontally
across the centre. Cut two strips
this long from the long strip. Sew them
to the top and bottom edges of the
quilt top. Press seams outwards.
Measure your quilt top vertically
down the centre. Cut two strips
this long from the remainder of the
3
long strip. Sew them to the left and
right edges of the quilt top. Press
seams outwards.
Finishing
1
Remove the selvedges from the
backing fabric and cut it into three
equal lengths. Sew the pieces together
side by side with ½in seams and press
the seams open.
The quilt top, backing and batting
are ready for a long-arm quilting
machine as they are. If you’re doing
the quilting by hand or on a domestic
sewing machine, follow the instructions
for Preparing the Quilt Sandwich in the
free downloadable Basics Guide* to
pin or baste the quilt top, batting and
backing together.
Quilt as desired. Wendy’s quilt
was custom machine quilted.
Trim the excess backing fabric
and batting ¼in outside the edge
of the quilt top.
Follow the instructions in Binding
the Quilt in The Basics Guide* to
bind the quilt using the eleven 2½in strips
of feature print fabric cut for the binding.
2
3
4
5
* The free Basics Guide is available as
a download online from https://www.
cosyproject.com/blog/quilting-guide
61
THE SOURCE FOR ALL
YOUR QUILTING SUPPLIES
Fantastic selection of Fabrics, Precuts including Jelly Rolls, Layer Cakes, Charm Squares and Fat Quarter Bundles.
Stockists of: Moda, Ruby Star, Tilda, Riley Blake, Art Gallery Fabrics,
Andover Fabrics, Free Spirit Fabrics and many more.
www.fabricsauce.com.au
0427 847 384 | info@fabricsauce.com.au
A QUALITY FILLING MAKES A
QUALITY QUILT
Nu-Wool wadding is soft and thick with an even
texture, making it a great pleasure to work with.
A unique blend of 60% wool and 40% man-made
fibre, specially treated with Hi-Loft process which
increases loft and resilience, improves washability and
reduces the possibility of any loose fibres. Nu-Wool has
effective dust mites control and lasting freshness.
Natural wool - Naturally safe & non-allergenic
Made in Australia for over 30 years.
For further enquiries
08 8349 0200 | reception@qualityalways.com
THE HOME OF AUSTRALIAN QUALITY WOOL BEDDING
AUSTRALIAN FABRICS
Bring a little of Australia inside, with these lovely digitally printed fabrics
ALL DIGITALLY PRINTED AND AVAILABLE NOW
18 Alford Street, Kingaroy Qld 4610 Telephone: (07) 4162 2040 Open Monday to Saturday (occasional Sundays)
www.somethingscountry.com.au
Somethings Country - My Quilting Shop
Fresh, bright colours with a touch of black for drama!
The fabric is Florence’s Fancy by Betsy Chutchian.
Machine piecing and raw-edge appliqué with hand-stitched
blanket stitch combine to make this stunning quilt.
Finished size: 217cm (85½in) square
Finished block size: 15in square
Designer: Cheryl Filby
fimchc2@gmail.com
64
@cherylfilby
Original
Design
65
66
Materials
• 4m (4⅜yd) cream print fabric
• 1.7m (2yd) black print fabric (appliqué
and binding)
• 1.1m (1⅛yd) red print fabric (appliqué
and Border 2)
• 70cm (¾yd) red stripe print fabric
(appliqué and Border 2)
• 70cm (¾yd) light blue and red print
fabric (appliqué and Border 2)
• 50cm (⅝yd) mid-blue and red print
fabric (appliqué and Border 2)
• 50cm (⅝yd) yellow print fabric
(sashings)
• 50cm (⅝yd) green print fabric
(sashings)
• 50cm (⅝yd) purple print fabric
(Border 2)
• 1.7m (2yd) black floral print fabric
(Border 3)
• 2.4m (2⅝yd) extra-wide
(275cm/108in) backing fabric
• Batting at least 235cm (94in) square
• Fusible web
• Stranded embroidery floss in shades
to match appliqué fabrics
• Rotary cutter, ruler and mat
• Sewing machine with ¼in foot
• General sewing supplies
Cutting
From the cream print fabric, cut:
• five strips, 16in x width of fabric.
Cross cut them to yield nine squares,
16in (appliqué background)
• seven strips, 4in x width of fabric
(Border 1)
• five strips, 2½in x width of fabric.
Cross cut them to yield 76 squares,
2½in (Border 2)
• 18 strips, 1½in x width of fabric
(sashing)
From the black print fabric, cut:
• nine strips, 2½in x width of fabric
(binding)
From the red print fabric, cut:
• three strips, 6½in x width of
fabric. Cross cut them to yield 80
rectangles, 1½in x 6½in (Border 2)
• three strips, 4½in x width of
fabric. Cross cut them to yield 80
rectangles, 1½in x 4½in (Border 2)
From the red stripe print fabric, cut:
• three strips, 3in x width of fabric.
Cross cut them to yield 80
rectangles, 1½in x 3in (Border 2)
From the light blue and red print fabric,
cut:
• five strips, 4½in x width of fabric.
Cross cut them to yield 40 squares,
4½in (Border 2)
From the mid-blue and red print fabric,
cut:
• two strips, 1½in x width of fabric.
Cross cut them to yield 40 squares,
1½in (Border 2)
From the yellow print fabric, cut:
• 10 strips, 1½in x width of fabric. Cross
cut one of these strips to yield 16
squares, 1½in (sashing cornerstones)
From the green print fabric, cut:
• four strips, 3½in x width of fabric.
Cross cut them to yield 104
rectangles, 1½in x 3½in and four
squares, 1½in (sashing and sashing
cornerstones)
• one strip, 1½in x width of fabric. Cross
cut it to yield another 28 squares,
1½in (sashing cornerstones)
From the purple print fabric, cut:
• eight strips, 2in x width of fabric.
Cross cut them to yield 160 squares,
2in (Border 2)
From the black floral print fabric, cut:
• nine strips, 5in x width of fabric
(Border 3)
• six strips, 2½in x width of fabric.
Cross cut them to yield 84 squares,
2½in (Border 2)
Block 1
1
Trace one A shape, eight B shapes
and one C shape from the Pattern
Sheet onto the paper side of the fusible
web, leaving about ½in between them.
Cut the shapes out about ¼in outside
the traced lines.
Fuse the A shape to the wrong
side of the black print fabric,
the B shapes to the wrong side of the
2
67
mid-blue and red print fabric and the C
circle to the wrong side of the red print
fabric. Cut all the shapes out of fabric
on the lines.
Fold a 16in cream background
square in half horizontally,
vertically and on each diagonal and
finger press light creases. Unfold.
Peel the backing paper from
each shape as it is needed.
Using Diagram 1 as a guide, centre
each blue B shape over one of the
creases, with their outer tips 6½in
from the block centre. Place the
black A shape in the centre of the
background: its outer tips should
be centred between each pair of B
shapes. Place the red C circle in the
centre of the block. Fuse the shapes in
place with a hot dry iron.
Appliqué the shapes to the
background fabric with blanket
stitch worked over all the raw edges in
two strands of embroidery floss that
matches the appliqué fabric.
Press the block lightly from the
wrong side. Trim it to measure 15½in
square, keeping the appliqué centred.
Repeat Steps 1–6 to make a total
of five Block 1 exactly the same.
3
4
6½in
Diagram 1
5
6
7
Block 2
6½in
Diagram 2
1
Trace one D shape, eight E shapes
and one F shape from the Pattern
Sheet onto the paper side of the fusible
web, leaving about ½in between them.
Cut the shapes out about ¼in outside
the traced lines.
Fuse the D shape to the wrong
side of the black print fabric and
the F circle to the wrong side of the
light blue and red print fabric.
Fuse the E shapes to the wrong
side of the red stripe print fabric,
positioning each shape so that the
same part of the stripe print is centred
on the shape. Cut all the shapes out of
fabric on the lines.
2
3½in
3½in
Diagram 3
Diagram 4
3
4
Fold a 16in cream background
square in half horizontally,
vertically and on each diagonal and
finger press light creases. Unfold.
Peel the backing paper from
each shape as it is needed. Using
Diagram 2 as a guide, centre the black
D shape on the block, with its outer tips
centred between creases. Then position
a red E shape under each black tip so
that their outer points are 6½in from
the block centre. Place the light blue F
circle in the centre of the block. Fuse
the shapes in place with a hot dry iron.
Appliqué the shapes to the
background fabric with blanket
stitch worked over all the raw edges in
two strands of embroidery floss that
matches the appliqué fabric.
Press the block lightly from the
wrong side. Trim it to measure 15½in
square, keeping the appliqué centred.
Repeat Steps 1–7 to make a total
of four Block 2 exactly the same.
5
6
7
8
Sashings
1
Sew a 1½in strip of cream print
fabric to each long edge of a 1½in
strip of yellow print fabric. Press seams
towards the yellow strip. Make a total
of nine strip sets exactly the same.
Cut each strip set into 3½in
segments, as shown in Diagram 3.
You need 96 segments in all.
Lay out four segments and three
1½in x 3½in rectangles of green
print fabric as shown in Diagram 4. Sew
them together to complete a sashing
panel. Press seams towards the green
rectangles. Your panel should measure
15½in x 3½in from raw edge to raw edge.
Repeat Step 3 to make a total 24
sashing panels.
To make a sashing cornerstone,
you need:
• one yellow 1½in square
• two green 1½in squares
• two green 1½in x 3½in rectangles.
Sew the green squares to opposite
edges of the yellow square. Press
seams towards the green fabric.
Sew the green rectangles to each
long edge of this unit to complete
the cornerstone. See Diagram 5. It
should measure 3½in square from raw
edge to raw edge.
Repeat Steps 5–7 to make a total
of 16 sashing cornerstones.
2
3
4
5
6
7
8
Quilt centre assembly
1
Diagram 5
68
Lay out the five Block 1 and the
four Block 2 in three rows of three,
alternating the block types. Leave
space between them.
Quilt Centre Layout Diagram
Diagram 6
Diagram 7
Corner Block Diagram
Diagram 8
2
Add a sashing panel between
the blocks in each row and at the
beginning and end of the rows, as shown
in the Quilt Centre Layout Diagram.
Sew the blocks and sashing
panels in each row together.
Press seams towards the blocks.
To make a sashing row, lay out
three sashing panels and four
sashing cornerstones. Sew the panels
and cornerstones together. Press
3
4
seams towards the cornerstones.
Repeat to make four sashing rows
exactly the same.
Add the sashing rows to the
layout – between the block rows
and at the top and bottom edges
of the layout. Sew the sashing rows
and block rows together, carefully
matching seams. Press. Your quilt top
should measure 57½in square from
raw edge to raw edge.
5
Border 1
1
Sew the seven 4in strips of cream
print fabric together, end to end,
to make one long strip. From it, cut
two strips, 4in x 57½in and two strips
4in x 64½in.
Sew the shorter strips to the left
and right edges of the quilt top.
Press seam outwards.
Sew the longer strips to the top
and bottom edges of the quilt
2
3
69
top. Press seams outwards. Your quilt
top should now measure 64½in square
from raw edge to raw edge.
Border 2
1
To make one block for Border 2,
you need:
• four 2in purple squares
• one 4½in square of light blue and red
print fabric
• two 1½in x 4½in and two 1½in x 6½in
red print rectangles
• two 2½in cream squares
• two 2½in black floral print squares.
Rule a diagonal line from corner
to corner on the wrong side of
the four purple squares. Pin a square
on each corner of the 4½in light blue
square as shown in Diagram 6.
Sew on the lines, trim the corners
¼in outside the stitching, flip the
purple triangles over and press. Your
block centre should measure 4½in
square from raw edge to raw edge.
Sew a 1½in x 4½in red rectangle
to the left and right edges of the
block. Press seams outwards. Then
sew a 1½in x 6½in red rectangle to the
top and bottom edges of the block.
Press seams outwards. Your block
should now measure 6½in square from
raw edge to raw edge.
Rule a diagonal line from corner
to corner on the wrong side of the
cream and the black 2½in squares. Pin
a square to each corner of the block,
as shown in Diagram 7. If, like Cheryl,
you are using a stripe print fabric in the
centre of your blocks, check that the
stripes are lying vertically in the block.
Sew on the lines, trim the corners
¼in outside the stitching, flip the
triangles over and press. Your block
should measure 6½in square from raw
edge to raw edge.
Repeat Steps 1–6 to make a total
of 36 Border 2 blocks exactly the
same.
You also need to make corner
blocks for this border. They are
made in the same way as the other 36
blocks except instead of adding two
cream 2½in squares and two black
2½in squares in the final stage, use one
cream 2½in square and three black
2½in squares to make a block as shown
in the Corner Block Diagram. Make four
Corner Blocks. If you are using a stripe
2
3
4
5
print fabric in the centre of your blocks,
be careful about which corner you add
the cream square to – it’s the corner
that will be closest to the quilt centre.
To make the units that lie between
the border blocks, you need:
• two 1½in x 3in rectangles of red
stripe print fabric
• one 1½in square of mid-blue and red
print fabric.
Sew the rectangles to opposite
edges of the square. See
Diagram 8. Press seams towards the
square. The unit should measure 1½in x
6½in from raw edge to raw edge.
Repeat Steps 9 and 10 to make a
total of 40 of these units.
Lay out nine Border 2 blocks side
by side, leaving space between
them. If you are using a stripe print
fabric, check that the stripes all lie
vertically in the blocks. Also check that
the cream triangles are in the upper
corners and the black floral triangles
are in the lower corners. Add a unit
from Step 11 between each pair of
blocks and at the beginning and end of
the row of blocks. See Diagram 9.
Sew the units and blocks together.
Press seams towards the units.
Your row should measure 6½in x 64½in
from raw edge to raw edge.
Repeat Steps 11 and 12 to make
four Border 2 rows exactly the
same.
Sew a Border 2 row to the left
and right edges of the quilt top,
with the cream triangles in the Border
2 blocks closer to the quilt centre and
the black triangles on the outer edges.
Press seams inwards.
Lay the remaining two Border 2
rows next to the top and bottom
edges of your quilt top. Add a corner
block to the layout, checking that the
9
10
11
12
6
13
7
8
14
15
16
Diagram 9
70
cream triangle in each corner block is
closest to the centre of the quilt.
Sew a corner block to the left
and right edges of each of these
Border 2 rows. Then sew the rows to
the top and bottom edges of the quilt
top. Press seams inwards.
17
Border 3
1
Join two of the 5in strips of black
floral print fabric together, end to
end, to make one long strip. Repeat to
make another long strip.
Measure your quilt top vertically
through the centre. Trim each of
the long strips to this length. Sew them
to the left and right edges of the quilt
top. Press seams outwards.
Join the remaining five 5in strips
of black floral print fabric together,
end to end, to make one long strip.
Measure your quilt top horizontally
through the centre. Cut two strips
this length from the long strip. Sew
them to the top and bottom edges of
the quilt top. Press sems outwards.
2
3
4
Finishing
1
The quilt top, extra-wide backing
and batting are ready for a longarm quilting machine as they are. If
you’re doing the quilting by hand or
on a domestic sewing machine, follow
the instructions for Preparing the Quilt
Sandwich in the free downloadable
Basics Guide* to pin or baste the quilt
top, batting and backing together.
Quilt as desired. Cheryl quilted
a large meander on her quilt by
machine, avoiding the appliquéd shapes.
Trim the excess backing fabric and
batting ¼in outside the edge of
the quilt top.
Follow the instructions in Binding
the Quilt in The Basics Guide* to
bind the quilt using the nine 2½in strips
of black print fabric.
2
3
4
* The free Basics Guide is available as
a download online from https://www.
cosyproject.com/blog/quilting-guide
±ųŖĂȟȞȾų
qĪƚȔȑȶȫE
ŸɊ
ǎȤĪȼǘȖȼȟƘ
$45
including shipping
and backing
ŖūșȞȸȯDžȣǠșȶǘ
MĪǻȑȳŸȑȞ§ȾȿƚȞŖȼ
±DžƥȠșȭȫƎDȜƥɁȕDžȣ
MĪǻȑȳŸȑȞÓȹȸŎŖȢ
͎ÓĪňțɃÿȑňțɃǎģȯȨȾŸƎȕȣ
ǻĪȓȵȁȚȑȭƋȩȽˤňƥȝ
7UDQTXLOLW\
&5$)76µ16833/,(6
37 Holmes Rd, Moonee Ponds 3039
Telephone: 03 9375 3575
Email: tranquilitycrafts@bigpond.com.au
“BUGS IN BOXES”
The perfect ‘young man’s’ quilt.
This quilt measures 42” x 52” and is all rotary cut.
Fabric kit contains all pattern, all fabrics for quilt top
and binding for $85.00 (plus p& p). Suitable for an
advanced beginner.
Bug panel can be purchesed separately.
““HIDDEN MOMENTS”
O
S”
Hidden Moments when completed measures 25” square
approx. It is English Paper pieced and then appliquéd
to the background. The kit is available for $105.00 (plus
postage) which includes pattern, EPP papers and fabrics
for the top and binding. Pattern and EPP paper is also
available for $38.50 (plus postage).
“SAMSARA”
Samsara is a quilt measuring 78” x 90” and has been
designed by Heidi Pridemore. The quilt can be rotary
cut and machine pieced. Complete kit which includes
all the fabrics for the quilt top, binding and pattern is
available for $265.00 (plus postage).
P&H l
iona
addit
DRAGONFLY FABRICS
CLOTHWORKS
JUNGLE DRUMS
INCLUDING A
24" TREEHOUSE
PANEL $20 AND A
36" STORYBOOK
PANEL $30.
AT LAST NIGHTSHADE
DEJA VU $30/METRE.
SASHIKO PANELS NEEDLES AND THREADS
ONLY AT
Dragonfly Fabrics
DARWIN’S EXCLUSIVE PATCHWORK & QUILTING SHOP
www.dragonfabric.com.au
Shops 2 & 3, 53 Alawa Cres. ALAWA NT 0810 p. (08) 8948 0691 e. dragonfabric@bigpond.com
Gallery
Queensland Quilt
Show 2023
The Queensland Quilters' annual quilt show was held at the Brisbane
Convention & Exhibition Centre in mid-October 2023. The quilts
hanging in the show exhibit the talents of individual members,
affiliated groups and special interest groups. There was also a
display of the Our Challenge, Modern Challenge and the STATE
of the ART Quilt Exhibition and the Best of Australia quilts were
showcased along with other special displays.
These are a few of the wonderful winning quilts, you can see more at:
www.qldquilters.com
74
75
Gallery
Bernina Best of Show
Best Professional
Time Traveller, 211cm x 211cm (83in x 83in), Jude Kerle
Artist’s statement: “These are mostly my own designs, created for a project in 1994–95 and
finally made for myself. I changed some of the blocks and put in some old favourites. I chose
more joyful colours to create a feminine, brighter look. Hand appliqué, free-motion and
hand-guided machine quilted.”
76
Best Hand Quilting
Spring Time, 189cm x 213cm (75½in x 84in), Janet Wood
Artist’s statement: “Quilt pattern from the book Organic Appliqué by Kathy Doughty. I used techniques
from two of the quilts in the book.
Hand quilted with quilting thread and perle 8 whip stitching the perle 8 quilting stitches.
The book was a prize from another quilt show so I decided to make a quilt from the book, something
different for me as I have not done any appliqué for many years. I am happy with the way it turned out.”
77
Gallery
Open Modern – First
Fantastic Plastic, 145cm x 172cm (57in x 68in), Catherine Butterworth
Artist’s statement: “I was delighted to find pink and orange neon fabrics. Teaming them with
the black plastic fabric was a match made in heaven. This modern adaptation of the traditional
Winding Ways block presents yet another twist when viewed as a flash photograph.”
78
Professional Pieced, Large – First
My Grand Bazaar, 200cm x 214cm (79in x 84in), Lyn Oberhardt
Artist’s statement: “Each month a delicious pack of plain-coloured fabrics arrived to create my version of
Spice Market by Wendy Williams.
The freedom to choose colour placement whilst learning new techniques such as perfect circles, reverse appliqué
and foundation piecing, sparked my colourful memories of the Grand Bazaar in Istanbul.
The pieced shapes represent a maze of twisted alleys and surprises on the way.
I chose the background colour to add some sizzle to my curry and I quilted the border to show all laneways lead
you to the incredible Spice Pavillion in the Grand Bazaar.”
79
Gallery
Amateur Art Pictorial – First
Two Ponies and a Dog, 142cm x 194cm (56in x 76in), Jocelyn Trembath
Artist’s statement: “I was inspired to make a horse art quilt after viewing the draught horses on the silos in
Victoria. I chose fabric collage, which is a fun technique. It is finding that perfect piece of fabric. It is keeping
all your scraps because one day you might be able to use them. It is bringing your subject to life, well
hopefully. This quilt is my own design and I quilted it on a domestic sewing machine. I added the dog last as it
needed an extra something!”
80
Best Traditional
Open Appliqué – First
Ripples and Blooms, 200cm
x 200cm (79in x 79in),
Joanne Johnson
Artist’s statement: “This
appliqué quilt was inspired by
my collection of colourful fabrics
by designers such as Anna Marie
Horner, Jennifer Paganelli and
Tula Pink. The centre design of
nine large and four small circular
appliqué blocks incorporates
English paper piecing and fussy
cutting. The border is of flowers
constructed from circles. I
framed the quilt with rows of 3in
squares with circles appliquéd
over the joins of four squares.
Hand quilted.”
^ƉĞĐŝĂůŝƐŝŶŐŝŶŵŽĚĞƌŶĚĞƐŝŐŶĞƌĨĂďƌŝĐ͘
ŝĚLJŽƵŬŶŽǁLJŽƵĐĂŶƉƌĞͲŽƌĚĞƌLJŽƵƌĨĂǀŽƵƌŝƚĞ
ĚĞƐŝŐŶĞƌ͛ƐƵƉĐŽŵŝŶŐƌĂŶŐĞǁŝƚŚƵƐ͍
EĞǀĞƌŵŝƐƐŽƵƚĂŐĂŝŶ͘
ůŽŶŐǁŝƚŚƐƚƵŶŶŝŶŐĨĂďƌŝĐLJŽƵ͛ůůĮŶĚŵŽĚĞƌŶƋƵŝůƚ͕ďĂŐΘ
ƐĞǁŝŶŐƉĂƩĞƌŶƐ͕ƐĞǁŝŶŐŶŽƟŽŶƐ͕ďĞƐƉŽŬĞǁŽƌŬƐŚŽƉƐ͕Ă
ǁŝĚĞǀĂƌŝĞƚLJŽĨƚŚƌĞĂĚƐΘ:ƵŬŝƐĞǁŝŶŐŵĂĐŚŝŶĞƐ͘
^ŚŽƉŽŶůŝŶĞ͕ƉƌĞͲŽƌĚĞƌŽƌŬĂĐůĂƐƐ
www.myfabricology.com.au
KƌǀŝƐŝƚŽƵƌŬŶŽǁůĞĚŐĞĂďůĞƐƚĂīĂƚ
hŶŝƚϯϯͬϰtŝĐŬƐ^ƚƌĞĞƚ͕
ĂLJƐǁĂƚĞƌ͕tĞƐƚĞƌŶƵƐƚƌĂůŝĂ
dƵĞƐĚĂLJƚŽ&ƌŝĚĂLJϵ͘ϯϬĂŵͲϰƉŵ
^ĂƚƵƌĚĂLJϵ͘ϯϬĂŵͲϯƉŵ
ΛŵLJĨĂďƌŝĐŽůŽŐLJ
WƐƐƚ͘͘͘tĂŶƚƚŚĞůĂƚĞƐƚΘŐƌĞĂƚĞƐƚĨĂďƌŝĐŶĞǁƐ͍
^ƵďƐĐƌŝďĞƚŽŽƵƌŶĞǁƐůĞƩĞƌ͊
81
97B Henry Street , Penrith NSW 2750
Phone: 02 4711 4114
NEW
E
FABRIC RANG
FORMERLY PENRITH PATCHWORK
S
Shop Hours:
Mon, Tue,Thur & Fri 9am-4pm
Wed 9am -9pm
Sat 9am – 1pm
CIVIL WAR
RAL
FRENCH GENE
AND MUCH MO
RE
Plus Classes by Katrina Hadjimichael • Patchwork and machine embroidery classes • Kids classes during holidays
Follow us on FB @Quilting Queen and Instagram @quiltingqueenpenrith
Batik Club
our customers.
We specialise in batik fabrics, it is a favourite among
tage and you
Join the Cynthia’s Ark Batik Club. $32 a month plus pos
width of fabric).
receive 1.2 metres each month (generally 4 x 30cm
r with your pack.
You will also receive 2 bonus products during the yea
.com.au
lala SA 5502 | 08 8527 2120 | www.cynthiasark
Mal
Rd
leys
Was
7
|
ne
pho
by
or
e
onlin
,
store
in
Purchase
NEW FABRICS IN STOCK READY TO CREATE YOUR OWN DESIGN
Quilters Road Trip
Caravanners
VISIT
WWW.LILYLANE.COM.AU FOR MANY MORE NEW FABRICS
26-28 Prince St, Rosedale VIC 3847
Prompt mail outs are our priority
P: 03 5199 2777 E: jennifer@lilylane.com.au
WWW.LILYLANE.COM.AU
Hope and
Harmony
Having seen so many different layouts and approaches to the classic
clamshell during her years as a quilter, Kim wondered, could it be
double-dipped to put an entirely new spin on it? You bet it could! The
addition of simple, but plentiful almond-shaped leaves completely
transforms the clamshell, and suddenly it’s not just the shell of a
shape, but a blossom in full bloom.
Finished size: 161cm x 153.5cm (63½in x 60½in)
Finished block size: 10in x 9in
Designer: Kim Diehl
kim_diehl_quilts
84
Double
Dipped
85
86
the pattern for the clamshell printed on
the Pattern Sheet with the non-waxy
side of the paper facing up. Trace the
shape. To use the freezer paper most
efficiently, trace the leaf shape under
the lower curve of the clamshell.
Fold the freezer paper in half,
waxy sides together. Use a hot
dry iron to fuse the layers of paper
together. Cut the two appliqué shapes
out on the traced lines. The double
layer of freezer paper means that your
templates are sturdy enough to be
used over and over.
Cut 42 pieces of freezer paper
8½in square. Use the templates
you’ve made to trace a clamshell and
as many leaves as will comfortably
fit onto the paper side of one of the
squares. Layer five plain squares one
on top of the other and place the one
you’ve traced the shapes onto on top.
Staple the layers together. Cut the
shapes out on the traced lines through
3
4
Materials
• 60cm (¾yd) each of six assorted
cream print fabrics (block
backgrounds)
• 42 chubby sixteenths (25cm x
28cm/9in x 10½in) of assorted
medium and dark print fabrics
(appliqué and binding)
• 3.5m (3¾yd) backing fabric
• Batting at least 180cm x 172cm
(71in x 68in)
• Freezer paper
• Fabric glue stick
• Basting glue
• Fray Check or similar (optional)
9½in
Press crease
10½in
Diagram 1
• Smoke monofilament thread
(machine appliqué)
• Rotary cutter, ruler and mat
• Sewing machine with ¼in foot
• General sewing supplies
Preparation and cutting
From each of the six assorted cream
print fabrics, cut:
• two strips, 10½in x width of fabric.
Cross cut them to yield seven
rectangles, 10½in x 9½in — a total of
42 rectangles in all
Fold each of these rectangles in half,
9½in edges matching, as shown in
Diagram 1. Press lightly. Kim recommends
applying a thin line of Fray Check around
the edges of each rectangle to protect
them from fraying as you handle them
during the appliqué steps.
From 32 of the assorted medium and
dark print fabrics, cut:
• one strip, 2½in down the (9in) length
of the fabric (binding)
Cut a piece of freezer paper about
9in x 18in. Lay one end of it over
1
2
We are delighted to share a
project from the book Simple
Double-Dipped Quilts by Kim
Diehl. Double dipping is Kim’s
term for taking a tried-and-true
quilt block and adding a twist
that makes it unique. She shows
how to do just that in 10 stunning
patterns ranging from bed-size to
mini in this resurrected title. The
scrappy colour schemes will make
you want to dive into your stash
or stock up on new prints at your
favourite quilt shop. The book is
published by C&T Publishing, and
the pattern appears here with
their permission.
The pattern has been edited
to Quilters Companion
editorial style.
87
Diagram 2
all six layers. Remove any staples that
are positioned within the shapes.
Repeat the process described in
Step 4 with the remaining freezer
paper squares to cut a total of 42
clamshells and 546 leaves. You may
need additional freezer paper to bring
the total number of leaves up to 546.
Dab the paper side of each
clamshell shape with a small
amount of fabric glue and glue them
to the wrong side of the remainder of
each of the 42 assorted print fabrics.
Cut the shapes out ¼in by eye outside
the edge of the paper.
Repeat the process described in
Step 6 to cut 13 leaves from each
of the 42 assorted print fabrics.
5
6
Diagram 3
7
Clamshell Flower blocks
1
To make one Clamshell Flower
block, choose one prepared cream
rectangle, one clamshell appliqué shape
and 13 assorted print leaf shapes.
To prepare each appliqué shape,
smooth the fabric seam allowance
over onto the waxy side of the freezer
paper and fuse it in place with the point
of a hot dry iron. Work on a small section
of seam allowance at a time. To achieve
sharp points, press the seam allowance
so the folded edge of the fabric extends
beyond the first side of the point of the
paper, snuggling the fabric firmly up
against the paper edge. Then fold over
the seam allowance on the other side of
the point. After the seam allowance of
the entire shape has been pressed, use
a glue stick to apply a small amount of
glue to the bottom of the folded flap of
fabric on the second side of the point,
then touch it with the point of the iron to
heat set the glue and fuse it in place.
Fold the top of the prepared
clamshell appliqué in half vertically,
with right sides together, and finger
press a short crease at the top edge.
Align the clamshell’s top crease with
2
Diagram 4
3
Start
End
Diagram 5
88
the crease in the centre of the block
background. Centre the clamshell’s
narrow bottom end over the crease,
with the straight raw edge matching the
bottom edge of the background. See
Diagram 2. Use basting glue to baste
the clamshell in place.
Position and baste one leaf at
each clamshell side corner and
one leaf at the top of the clamshell, as
shown in Diagram 3, using the crease
in the background to perfectly centre
the top leaf.
Position and glue baste five
additional leaves on each side
of the clamshell, spacing them evenly
between the first three leaves, as shown
in Diagram 4, to complete the design.
Thread your machine with smoke
monofilament thread in the
upper machine and an all-purpose
neutral coloured 50-weight thread in
the bobbin. Set the machine to sew a
narrow zigzag stitch, with a width and
length of 1.
Machine stitch around the raw
edges of all the shapes. As you
stitch, aim to have the inner part of the
stitch two or three threads inside the
edge of the appliqué shape and the outer
part of the stitch piercing the background
fabric immediately next to the appliqué
shape. When you’ve stitched all the
way around a shape, overlap the first
few stitches by about ½in. To simplify
the machine stitching and eliminate the
need for a lot of starts and stops, follow
the continuous stitching path Kim used,
shown in Diagram 5.
Turn the block over to the back.
Use small embroidery scissors to
cut through the background fabric (but
not through the appliquéd fabric) at
least ¼in inside the appliqué stitching.
Gently pull the freezer paper out, using
tweezers if necessary. Press the block
from the back to avoid applying heat
directly to the monofilament thread.
4
5
6
7
8
9
Repeat Steps 1–8 to complete
42 blocks.
Assembly
1
Referring to the Quilt Layout
Diagram, lay out the Clamshell
Blossom blocks in seven rows of six
blocks each. Swap them around
until you have an array of prints and
colours that you like.
Sew the blocks in each row. Press
the seams in odd-numbered rows
in the opposite direction to those in
even-numbered rows.
Sew the rows together, carefully
matching seams. Press.
2
3
Finishing
1
Quilt Layout Diagram
SCRAPPINESS WITH A PLAN
Kim’s scrappy quilt is very cheerful and colourful, but it takes on a whole
different feel when made in the classic red-and-green colour scheme using
a planned scrappy approach. By “planned scrappy” she means that there
are two loosely planned versions of the block — red clamshells with scrappy
green leaves, and green clamshells with scrappy red leaves. To stitch this
quilt in the alternative colour scheme, substitute 21 assorted red and 21
assorted green chubby sixteenths for the 42 assorted prints originally
called for, and use the diagram below as a guide while appliquéing and
assembling your new classic design!
Remove the selvedges from the
backing fabric and cut it into two
equal lengths. Sew the pieces together
side by side with a ½in seam and press
the seam open.
The quilt top, backing and
batting are ready for a long-arm
quilting machine as they are. If you’re
doing the quilting by hand or on a
domestic sewing machine, follow the
instructions for Preparing the Quilt
Sandwich in the free downloadable
Basics Guide* to pin or baste the quilt
top, batting and backing together.
Quilt as desired. Kim’s quilt was
machine quilted with a different
pattern in each clamshell, ranging from
double curved and straight crosshatches
to double lines positioned at different
angles. The top blossom edge of each
clamshell was encased with a curved
line to mimic the shape of the clamshell
and a small cluster of three feathers
filled each leaf. A miniature clamshell
shape was quilted onto the background
between the clamshell blossoms, with a
string of pearls crowning the top edge
and a cathedral window and double lines
used as filler. Horizontal meandering
feathered vines filled the remaining
background areas between the rows of
clamshell blossoms.
Trim the excess backing fabric and
batting ¼in outside the edge of
the quilt top.
Trim the assorted 2½in x 9in strips
of assorted print fabrics cut for
the binding to random lengths. Sew
them together, end to end, to make
one long strip. Follow the instructions in
Binding the Quilt in The Basics Guide* to
bind the quilt using this strip.
2
3
4
5
* The free Basics Guide is available as
a download online from https://www.
cosyproject.com/blog/quilting-guide
89
Find fabrics online and in store.
Michelle, Lark, Kylie and Kathy
specialise in modern, batiks
and reproduction fabrics.
They are the Port Macquarie
Dealership for Bernina, Janome,
Pfaff, Baby Lock and Handy Quilter.
Machines are serviced and repaired
locally by Adam at Prosew.
The shop has two workshop areas
where social sewing groups meet
and classes are held by local and
well-known visiting tutors.
Under the one roof is Sue
of SuziQ Quilting with her longarm quilting machine to complete
your masterpiece.
Their mission is to promote
and develop patchwork, quilting
and textile art in a fun environment.
02 6581 3338
Unit 18, 14 Acacia Ave
Port Macquarie, NSW 2444
stitchednframed.com.au
WE DELIVER TO YOUR DOOR AUSTRALIA WIDE
ONLINE
STORE
FEATURING
e,
Tilda, Riley Blak
,
Robert Kaufman
Batik Australia
& many more
N OW
WITH TWO
COMPUTERIS
MACHINES ED
Two Handi Quilter
Computerised Longarm
Machines. Edge to
edge and custom
quilting available.
1100’s of patterns to
choose from starting at
cho
the low price of $3.50
th
per square foot.
FFree return shipping
Australia wide.
Quality Matildas
Own wadding and
backings available
or use your own.
Very fast turnaround,
Ve
see website for details.
se
www.stitchesbythesea.net
h b th
t | E
E. iinfostitchesbythesea@gmail.com | P. 0412 355 438
Pattern $65
ALSO AVAILABLE
We are now able to offer the pattern
for That Blooming Quilt which has
been wholly and solely designed by
Sharon and Alison at The Quilt Shop.
We have a limited number of starter
packs available and are also able to
offer the sashing/binding stripe.
The Quilt Shop 2/38 Bridge Street, Eltham VIC 3095 | Ph 03 8418 6770
Facebook The Quilt Shop | Instagram @thequiltshop
www.thequiltshop.com.au
This cheery outdoor quilt is perfect for family picnics in the park. Here’s the
reality — way too pretty to be muddied by the great outdoors!
Strips, curves and appliqué by machine or hand make this bright quilt.
Finished size: 160cm (63in) square
Designer: Dawn Hay
www.kittyrosecottage.com
92
0412 302 773
kittyrosecottage.com
Homespu
n
Favourite
93
94
Materials
• 10cm (⅛yd) each of 17 assorted print
fabrics (strip piecing)
• 1.4m (1⅝yd) white homespun fabric
(appliqué background)
• 1.7m (1⅞yd) solid grey homespun
fabric — see Note (border)
• Four squares, 25cm (10in) in solid
red, coral, yellow and aqua fabrics
(appliqué flowers)
• 25cm (10in) square of green print
fabric (flower centres)
• 55cm (⅝yd) binding fabric — see Note
• 3.6m (4yd) backing fabric
• Batting at least 180cm (71in) square
• Fusible web
• Stranded embroidery cottons to
match the appliqué fabrics plus black
for the quilting (optional)
• Rotary cutter, ruler and mat
• Sewing machine with ¼in and
walking feet
• General sewing supplies
From the binding fabric, cut:
• seven strips, 2½in x width of the
fabric
From the solid grey homespun fabric, cut:
• four strips, 6½in down the length of the
fabric (top, bottom and side borders)
Trace five large flowers, 13 small
flowers and 13 flower centres
from the Pattern Sheet onto the
paper side of the fusible web, leaving
about ½in between the shapes. Cut
them out roughly and fuse the flower
shapes, glue side down, to the wrong
side of the red, coral, yellow and aqua
fabric squares and the flower centres
to the wrong side of the green print
fabric square. Cut all the shapes out
accurately on the lines.
Trace the curved pattern five times
onto paper and cut them out on
the lines. Tape the pieces together to
form one long wavy pattern.
2
3
Assembly
Stitches used: Blanket stitch, whipped
backstitch variation
Note: Dawn used the same fabric
for the border and binding (with
stitching added to the binding). If you
wish to do the same, you’ll need 2.2m
(2⅜yd). Refer to Preparation and
cutting Step 1 and cut the amount for
the binding then cut the border strips
down the length of the remaining
fabric as described.
Preparation and cutting
From each of the 17 assorted print
fabrics, cut:
• one strip, 3½in x width of the fabric.
(strip piecing)
From the white homespun fabric, cut:
• one strip, 10½in down the length of
the fabric (appliqué background)
Refer to Dawn’s Special Binding
Tip before cutting the binding. If
you’re doing the stitching as she did,
cut a 20in strip across the width of the
grey fabric and stitch it before cutting
it into strips.
1
Arrange the 17 fabric strips in a
pleasing order. When you’re happy
with the arrangement, sew the strips
together side by side, keeping the ends
level at one end to minimise trimming.
Press the seams in one direction.
Pin the curved pattern across the
uneven end of the joined strips,
positioning the top of the curves very
close to the edge of the fabric. Cut
carefully along the curved pattern to
shape the top of the strip-pieced panel.
See Diagram 1.
Measure the width of the pieced
panel through the centre. It should
measure 51½in, but a little variation
from this won’t matter. Trim the strip
of white homespun to the same
measurement.
Lay the white homespun strip
right side up on a table. Lay the
curved end of the strip-pieced panel
on top of it, also right side facing up
and with the short edges matching.
The lowest point of the curve on the
strip-pieced panel should overlap the
bottom long edge of the white fabric
by ½in, as shown in Diagram 2. Pin the
layers together along the curve. Use
two strands of white thread to blanket
stitch the curve to the white fabric.
4
Appliqué
1
Peel the backing paper from the
appliqué shapes and arrange the
flowers across the white panel, referring
to the photograph for placement. Layer
smaller flowers over the five larger
ones and scatter the remaining smaller
flowers between them. Add a green
centre to each flower. When you’re
happy with the arrangement, use a hot
iron to fuse all the shapes in place.
Work blanket stitch around all
the flowers and centres using two
strands of matching thread.
2
Finishing
2
1
3
2
Measure the quilt top vertically
down the centre. Trim two of the
6½in solid grey strips to this length.
Sew the strips to the left and right
edges of the quilt top. Press the seams
towards the border strips.
Measure the width of the quilt
top through the centre and trim
the other two solid grey strips to this
length. Sew the strips to the top and
1
Diagram 1
95
stitched the curved line along the
edge of the appliqué panel.
To accentuate the quilting lines on
the white background fabric, Dawn
used one strand of black embroidery
thread to whip over the machine
stitches by hand in the same way as is
done for whipped backstitch.
Trim the excess backing fabric and
batting ¼in outside the edge of
the quilt top.
Follow the instructions in Binding
the Quilt in The Basics Guide* to
bind the quilt using the seven 2½in strips
of solid grey fabric cut for the binding.
7
8
9
* The free Basics Guide is available as
a download online from https://www.
cosyproject.com/blog/quilting-guide
DAWN’S
SPECIAL
BINDING
TIP
Diagram 2
bottom of the quilt top. Press the
seams outwards.
Remove the selvedges and cut
the backing fabric into two equal
lengths. Sew the pieces together side
by side with a ½in seam and press
it open. The quilt top, backing and
batting are ready to take to a longarm quilter as they are.
If you plan to do the quilting
yourself in a pattern similar to
Dawn’s, she recommends using an
erasable pen to rule a 2½ diagonal
cross-hatch pattern on just the
white and solid grey fabrics before
you prepare the top for quilting.
3
4
96
Alternatively, rule just one line in each
direction and use a quilting guide to
space the subsequent lines evenly.
Follow the instructions for
Preparing the Quilt Sandwich in
the free downloadable Basics Guide* to
pin or baste the quilt top, batting and
backing together.
Quilt as desired. Dawn used a
walking foot and white thread
to sew a 2½in diagonal cross-hatch
pattern over the grey borders and
appliqué background, but not over
the flowers. She quilted along each
side of the 17 strips a machine footwidth from the seams and ditch-
5
6
I used the same
fabric as the
border for my
binding, but
before cutting it
into 2½in strips, I
machine-stitched
coloured lines every ½in parallel
with the selvedge. I marked the
top edge every 2in and sewed a
red line at those intervals. Then I
sewed green, yellow and blue lines
at ½in spacings between them
to create a striped effect on my
binding that coordinated with the
fabrics in the quilt. The thread I
used (12wt Wonderfil) was a little
thicker than regular machinesewing thread.
DAWN’S
RESIZING TIP
If this quilt isn’t big enough for your
purposes, add a few extra strips
of fabric or make the border or
appliqué panel wider. Don’t over
think the fabric choices — just go
with the flow.
6(:
0$1<
67,7&+(6
ALL AT COMPETITIVE PRICES
FREE LESSONS
,QVWRUH&ODVVHVIRUSDWFKZRUNLQJSLHFLQJTXLOWLQJ
NEW RANGE
order online or instore
-DQRPH'& -DQRPH'&
:HKDYHDODUJHUDQJH
RISDWFKZRUN TXLOWLQJ
IDEULFHYHU\WKLQJ\RX
QHHGWRJLYH\RXUSURMHFW
DSHUIHFW¿QLVK
%URWKHU$
0$&+,1($&&(6625,(6_6(:,1*0$&+,1(6_6&$11&87_)$%5,&6_7+5($'6_+$%(5'$6+(5<
_4XHHQ6W&DPSEHOOWRZQ16:_VHZPDQ\VWLWFKHVFRPDX
and
s
n
r
e
t
t
All pa vailable
a
kits are zzy Bee
i
from B work
Patch
Flowers Symphony Patterns by Margott Jenek
Peace and Tranquility - Pattern
by Bizzy Bee Patchwork
Plants In Pots Patterns by Margott Jenek
Crooked Houses - Pattern by Margott Jenek
Phone: 0403 883 347
Email: bizzybeepatchwork@yahoo.com
Bizzy Bee Patchwork is renowned for its extensive range of Japanese
Yarn-Dyed Fabric. There are 9 colourways available in red, pink,
brown, charcoal, blue, grey, yellow, green and cream. 1/16th packs (5
different fabrics) also available for $17 each in all colourways that work
beautifully with appliqué, EPP and piecing. Please ring to order.
THE
Quilting ROOM
21 Doulton Crescent, Modbury Heights SA 5092
Open by Appointment Only
0411 417 087 | www.thequiltingroom.com.au
Featuring Lori Holt’s
Autumn fabric range
HOW TO BUILD A SCARECROW
Lori Holt Stitch-along
12 month BOM
$45 per month plus P&H
Would you like to build a scarecrow? Join
Lori Holt’s Stitch-along commencing
20th May 2024. Your kit includes the How
to Build a Scarecrow Sew Along Guide
by Lori Holt, Autumn fabric range by Lori
Holt for the quilt top, Sew Simple Shapes,
Vintage Trim & binding.
Quilt Size 74” x 87”
THE QUILTED
SCARECROW
Designed by
Lori Holt
6 month BOM $60 per
month plus P&H
Quilt Size 80½” x 85½”
CROWS IN
THE CORN
Designed by Lori Holt
6 month BOM $55 per
month plus P&H
Quilt size 69” x 77”
Kit Options
Available
Visit
www.thequiltingroom.com.au
for prices
Book reviews
Off the Shelf
Enjoy this selection of new and recently released books on
patchwork and quilting topics and techniques.
Korean Patchwork Quilting:
37 Modern Bojagi Style Projects
Choi Yangsook
Perfectly Pieced Quilt Backs:
The Scrap-Smart Guide to Finishing Quilts
with Two-Sided Appeal
Kelly Young
If you’ve always wanted to make the back of a quilt
as beautiful and interesting as the front, this is the
ultimate guide for you. With a total of 30 pieced
quilt backing designs, this book will inspire you to
take your quilts to the next level. Featuring helpful
sections on quilt back basics, as well as guidance on
basting and how to finish a quilt, there are also 18
downloadable quilt front patterns that coordinate
with all 30 back designs. Colourful, fun and perfect
for quilters of all skill levels, this book is an excellent
source of inspiration to try something new.
Published by Landauer Publishing
100
From its origins as wrapping cloths made from
scraps of fabric to its place in contemporary textile
art shows, Bojagi — the traditional art of Korean
patchwork quilting — is a wonderfully versatile mode of
expression that can transform a room or a wardrobe.
This Korean folk craft has played an important role
in Korean culture for centuries. The distinct ‘window
pane’ appearance of a Bojagi quilt often resembles a
modern abstract painting or stained-glass window,
but can also be made of single-colour fabric for an
elegant look. Choi Yangsook teaches you step-bystep techniques through the art of assembling bits
of lightweight fabric by means of invisible seams to
create contemporary pieces for your home and life.
Lessons, diagrams and templates, along with a few
simple knotting and embroidery techniques, present a
wide range of projects that novices can try their hand
at and more experienced quilters can enjoy as
a satisfying challenge.
Published by Tuttle
Kaffe
Fassett’s
Quilts by
the Sea
Kaffe Fassett
Kaffe Fassett
has chosen the
southern coast
of England as
the inspiration
for his new
collection of
quilts. The
forward-thinking
new designs
are made with
his
the quilt designs,
hi classic
l
i fabrics.
f b i
IIn addition
dditi
tto th
Quilts by the Sea includes detailed step-by-step
instructions, accompanied by a flat shot of each
quilt with the relevant block or quilt assembly
diagram, while a how-to section offers more
detailed guidance.
The gallery section of the book showcases 21 new
designs, all brilliantly photographed on location by
Debbie Patterson.
Published by Taunton Press
3-D Magic!
Simple Blocks,
Striking Quilts
Marci Baker &
Sara Nephew
Prepare to be amazed
by simple techniques
that make flat fabrics
into surreal landscapes
and rising cubes with various textures. The key is not
crumpling, folding or bunching material, but rather
playing with light, medium and dark fabric. You’ll learn
to piece 13 easy 3D quilt blocks without y-seams or setin seams. The magic lies in the simplicity of the piecing
method taught in the book. You can individually select
and piece your fabric or use strip piecing! Make 13
stunning 3D blocks and explore instructions for creating
the blocks in alternate sizes. Plus you can browse
through a large gallery of quilts by imaginative quilters
for inspiration.
Published by C&T Publishing
NEW in Quilting
ISBN: 978-1644030233
ISBN: 978-1644030974
ISBN: 978-1644031346
Folk Art Garden Appliqué Sampler:
Fanciful Wool Blocks to Stitch
Erica Kaprow
ISBN: 978-1644030844
ISBN: 978-1617459610 ISBN: 978-1644031001
Available from Search Press Australia.
Please go to searchpress.com.au for details.
email: sales@searchpress.com.au or call at Tel: 02 47228323
Folk art and nature motifs come together to
create a gorgeous 30-block wool appliqué
sampler quilt. A black background and simple
embroidery embellishment highlight beautiful
jewel-toned colours. Erica shows you how easy it is
to get lost in wool appliqué; the craft is incredibly
portable and perfect for a wool appliqué class or
personal challenge.
Published by C&T Publishing
101
$YLVLWWRVSHFLDOLVWHPEURLGHU\ TXLOWLQJVKRS6WLWFK:LWFKHVLV\RXURSSRUWXQLW\WREHLQVSLUHG
Stitch Witches – Suzanne, Donna & Sue –
are experienced embroiderers who provide top
quality supplies to anyone who loves picking up a
needle and thread. And because they’re stitchers
too, you know they know what they’re talking about.
,IWKH\GRQ¶WKDYHZKDW\RXZDQWMXVWDVN
DQGWKH\¶OOGRWKHLUEHVWWRJHWLWIRU\RX
1193
93 Hanover Street, Dunedin • P 03 473 7188
Open
O
pen Tuesday-Friday 10-5; Saturday 10-4.
Fi
ind us on Facebook:
Find
#VWLWFKZLWFKHVQ]
9LHZRXUH[WHQVLYHSURGXFWUDQJHDW
ZZZVWLWFKZLWFKHVFRQ]
9LHZ
9
Hettie’s
Patch
This French Pocket is an
update on the original. The
shoulder strap enables it to
be worn as a small holdall or
a cross body bag. You can, if
you wish, make ties and wear
it around your waist
French
pocket Bag
Kits are $67.95 and
patterns are $17.95.
Available at
hettiespatch.com
Patchwork & Quilting Fabric & Supplies | hettiespatch.com
&RQWDFWXVIRU
PDFKLQHVDOHV
VHUYLFLQJ
UHSDLUV
A paerns are available from
hettiespatch.com
Online store as print patterns.
hettiespatch
hettiespatch
Pockets are an
essential item of
dress and have been
for many centuries.
The Àrst pockets were
decorative, standalone
pockets for personal
possessions and were
often embroidered and
decorated by women.
They were hidden
beneath their clothes
and tied around the
waist. A slit in their outer
garments allowed access
to the pocket. It is only
relatively recently that
pockets were integrated
into clothing.
WE THREE BIRDS
W
E\1DWDOLH%LUG 7KH%LUGKRXVH
3DWWHUQ
SOXV3 +
.LWDQGSDWWHUQ
SOXV3 +
DANCING CHICKEN & FLYING PIGS
E\+DWFKHGDQG3DWFKHG
3DWWHUQ
%ORFNRIWKH0RQWKSOXV3 +
)HOWSDFNLQFOXGHG
VINTAGE TREASURES
E\/LEE\5LFKDUGVRQ
3DWWHUQ
&RORXUUDQJH
UHGEOXHPXOWL
%ORFNRIWKH0RQWK
SOXV3 +
)HOWSDFNLQFOXGHG
3)$)) -$120( +864$59$1$9,.,1*
+$1',48,/7(5 $&&848,/7&877,1*0$&+,1(
%RXQGDU\6W
%XQGDEHUJ4/'
ZZZEXQGDEHUJSDWFKZRUNFRP
WKHTXLOWHUVVKDFN#SDWFKZRUNDQGFXSFDNHVZFRP
)DFHERRNLQVWDJUDP#7KH4XLOWHUV6KDFN
Arcadia
Part 5
In this instalment you will make the four corner panels. Each corner features
printed images of the children. When you have completed them, your quilt will
measure 52½in square from raw edge to raw edge, ready for the three borders
to be made and attached in the last instalment.
Proudly brought to you by Quilters Companion
Designed, sewn and quilted by Keryn Emmerson, Kin Quilting Designs
keryn@kerynemmerson.com
@artisanartist
www.kerynemmerson.com
Fabric designed by Kim Hurley, l’uccello
info@luccello.com.au
104
@luccellomelbourne
@luccello
Sew along with us
on our special
Facebook group:
Quilters Companion
Block of the Month
2023 – Arcadia
undertaking,
This quilt is a major
tting and piecing
requiring accurate cu
e fits precisely
to ensure each fram
the quilt. Refer to
around the edge of
e specific fabrics
the Fabric Key for th
oject if you wish
Keryn used in her pr
tical to hers.
to create a quilt iden
¼in are used
Seam allowances of
ecing.
throughout for the pi
105
Finished size: 167cm (66½in) square
This Block of the Month project is being published over six
issues of Quilters Companion, from issue #122 to issue #127.
The materials required to make the complete quilt were
included in Part 1 of the instructions, published in Quilters
Companion #122. Contact our subscriptions department to
order a subscription or back issues, or log on to Zinio or the
Apple/Google Play newsstands to get the issues digitally.
106
A
B
C
D
St Etienne Bridgitte – Cream
(DV 5805)
St Etienne Bridgitte – Pink
(DV 5807)
St Etienne Lisette –
Pale Teal (DV 5810)
St Etienne Camille – Teal
(DV 5812)
E
F
G
H
St Etienne Etoile – Pink
(DV 5818)
St Etienne Etoile – Teal
(DV 5819)
St Etienne Cosette – Teal
(DV 5821)
St Etienne Cosette – Pink
(DV 5822)
I
J
K
Rue Floriane Jean-Marie
(DV 5107)
Comptoir de Toile Lucie
(DV 5122)
Comptoir de Toile Lucie
(DV 5124)
L
Comptoir de Toile Amalie –
Dusty Rose (DV 5127)
Our fabrics
M
N
Comptoir de Toile Lucie –
Rose (DV 5145)
St Etienne Colette –
Pink (DV 5801)
This quilt uses a large variety of
print fabrics from the St Etienne,
Rue Floriane and Comptoir De Toile
collections designed by Kim Hurley of
l’uccello for Devonstone Collection.
They are distributed in Australia by
Two Green Zebras.
107
Corner Layout Diagram
1in
5in
1in
2½in
2½in
1in
5in
1in
Diagram 1
Diagram 2
Picture Panels
From Fabric F, cut:
• eight strips, 2in x width of fabric. Trim
four strips to measure 2in x 35¼in;
trim two strips to measure 2in x
23½in; and trim the final two strips to
measure 2in x 22½in
• nine strips, 2in down the length of the
remaining fabric. Cross cut them to
yield 24 rectangles, 2in x 5½in
Retrieve all the Fabric A patches
that you pre-cut in Part 1 of this
project.
Retrieve the six 2in strips of Fabric
E that were cut down the length
of the fabric in Part 3 of this project.
Cross cut one strip to yield four strips,
2in x 8⅜in. Cross cut another two of the
strips to yield four strips, 2in x 20⅜in.
Lay out the 5½in Fabric A squares
and triangles and strips of Fabrics
E and F on point for each corner of the
quilt. The arrows in the Corner Layout
Diagram indicate the direction in which
1
2
3
108
the printed motifs of the children should
be facing in each corner.
Work on one corner panel at a
time. Sew the triangles, strips and
squares in each diagonal row together.
Press seams towards the strips.
Fold the long Fabric E sashing
strip in half and finger press a
crease to mark its centre. Measure
2½in on each side of the crease and
make a light mark on the wrong side of
the fabric on each long edge. Measure
out another 1in and make marks, then
another 5in and then another 1in, as
shown in Diagram 1.
Join the block rows and Fabric E
sashing strip together: the marks
you’ve made on the long Fabric E
sashing strip will align with the Fabric
F vertical sashing strips between the
blocks in each row. Press.
Finish the corner panel by sewing
the Fabric A half-square triangle
to the top edge. Press. Then trim the
4
5
6
7
edges of the Fabric A half-square
triangle and the sashing strip even
with the edges of the setting triangles,
as shown in Diagram 2. The two short
edges of the corner panel should
measure just under 21½in and the base
should measure 30⅜in.
Sew a 22½in Fabric F strip to
one short edge of the corner
panel, matching one short edge of
the strip with right angle of the corner
panel. Press the seam towards the
strip. Sew a 23½in Fabric F strip to the
other short edge of the panel, again
matching one short edge of the strip
with the right angle of the panel. Press
the seam towards the strip. Trim the
ends of the strips even with the long
edge of the corner panel.
Fold the corner panel in half, short
edges matching and finger press
a crease to mark the centre of the long
edge. Fold a 35¼in Fabric F strip in half
and finger press a crease to mark its
8
9
109
centre. Sew the Fabric F strip to the base
of the corner panel, matching the centre
creases. Trim the ends of the strip even
with the sides of the corner panel. Press
seams towards the strip. The corner
panel should now measure 35⅛in across
the base and 24⅞in on each short edge.
Repeat Steps 4–9 to make all
four corner panels. Take care to
ensure that you’re sewing the Fabric
A ‘children’ squares with the printed
motifs right way up in the finished quilt.
10
110
Each corner is different.
Assembly
1
2
Fold each corner panel in half
and finger press a crease in their
longest edge.
Arrange the corner panels around
the edges of your quilt top on
a design wall or the floor to double
check that the children in the Fabric A
squares are all going to be facing the
right way in each corner.
3
Sew a corner panel to each edge
of your quilt top, matching the
crease in the edge of the panel with
the outer point on the middle Fabric H
square. Press seams outwards.
Your quilt top should now
measure 52½in square from raw
edge to raw edge.
4
In the final instalment of this project,
you’ll add three borders, quilt your top
and bind the completed quilt. Hooray!
111
Proudly presented by
Available in
complete kits
&RQWDFWDVWRFNLV
WFORVHVWWR
\RX
/LPLWHGVXSSOLHV
%RRNQRZ
Two Green Zebras | T. (02) 9553 7201 | W. twogreenzebras.com
6WRFNLVWV
NSW
Fabric Pixie (Online)
GHDQQH#IDEULFSL[LHFRPDX
ZZZIDEULFSL[LHFRPDX
Lotus Fabrics
0DLWODQG
ORXLVH#ORWXVIDEULFVFRPDX
ZZZORWXVIDEULFVFRPDX
Lyn’s Fine Needlework
%DXONKDP+LOOV
VDOHV#O\QV¿QHQHHGOHZRUNFRPDX
ZZZO\QV¿QHQHHGOHZRUNFRPDX
Post Office Patchwork
*OHQEURRN
SRS#SRVWR൶
FHSDWFKZRUNQHWDX
ZZZSRVWR൶
FHSDWFKZRUNQHWDX
Stitched N Framed
3RUW0DFTXDULH
LQIR#VWLWFKHGQIUDPHGFRPDX
ZZZVWLWFKHGQIUDPHGFRPDX
Whatever Where-ever Crafts
+RZORQJ
LQIR#ZKDWHYHUZKHUHHYHUFRPDX
ZZZZKDWHYHUZKHUHHYHUFRPDX
Qld
Fifi’s Fabricology
%XUOHLJK+HDGV
VDOHV#¿¿VFRPDX
ZZZ¿¿VIDEULFRORJ\FRPDX
Just Country Crafts
*XOOLYHU
MXVWFRXQWU\FUDIWV#JPDLOFRP
ZZZIDFHERRNFRP
MXVWFRXQWU\FUDIWVWVY
Stitches from the Bush
*RRQGLZLQGL
VWLWFKHVIURPWKHEXVK#ELJSRQGFRP
VWLWFKHVIURPWKHEXVKFRPDX
The Quilters Shack
%XQGDEHUJ
WKHTXLOWHUVVKDFN#SDWFKZRUNDQGFXSFDNHV
FRP
ZZZEXQGDEHUJSDWFKZRUNFRP
SA
Cynthia’s Ark
0DOODOD
F\Q#F\QWKLDVDUNFRPDX
ZZZF\QWKLDVDUNFRPDX
The Quilting Room
0RGEXU\+HLJKWV
WKHTXLOWLQJURRP#DDSWQHWDX
ZZZWKHTXLOWLQJURRPFRPDX
Vic
Creature Crafts
0\UWOHIRUG
FUHDWXUHFUDIWV#ELJSRQGFRP
ZZZFUHDWXUHFUDIWVQHWDX
l’uccello
0HOERXUQH
LQIR#OXFFHOORFRPDX
ZZZOXFFHOORFRPDX
Maree St Clair Quilts
6WUDWK¿HOGVD\H
VWFODLU#ELJSRQGQHWDX
ZZZPDUHHVWFODLUTXLOWVFRPDX
WA
Craft Collections
%XQEXU\
VWX൵QEHDUV#ZHVWQHWFRPDX
ZZZFUDIWFROOHFWLRQVFRPDX
NZ
House Of Patchwork Ltd
+HOHQVYLOOH
KRXVHRISDWFKZRUNOWG#JPDLOFRP
)DFHERRN
+RXVHRI3DWFKZRUN
www.foxscottage.co.nz
4XLOWLQJDQG:RRO
6KRS6RXWKHUQ&URVV&RPSOH[
6WDWH+LJKZD\2QH)R[WRQ
FQU3XUFHOO6W 6+
VKRS#IR[VFRWWDJHFRQ]
Block Of
The Month
Pr o gr a m s
& kits
R is for
Rainbow
QUILT TOP KIT
61 inches x 61 inches.
Fabric for top and
instructions in the kit.
$150 plus p & h
Welcome to our new block of the month
and kits section where each issue we will
bring you a diverse selection of block of the
month programs and kits for purchase.
These product cover a variety of styles,
colours and techniques.
Kits and block of the month programs are popular choices
for quilters for a number of reasons. How many times has
a quilt caught your eye and you think “Wow I would love
to make that exact same quilt with the same fabrics and
colours”? When you buy a kit for a quilt you see you can
do just that – make it exactly in the colours and fabrics you
see. Kits also take the often difficult job of select fabrics
and colours out of the equation. The hard part is done for
you so you can just enjoy the sewing.
26-28 Prince Street, Rosedale VIC 3847
p. (03) 5199 2777 e. jennifer@lilylane.com.au
www.lilylane.com.au
cosyproject.com
ALPHABITS
Alphabits by Michael Miller is
a bright alphabet panel with
animals featured on the letters.
Matching all over and stripe
fabric available. 60cm panel
$28.25 plus postage. Use the
link below to order from the
website. Shop Online – A Little
Patch of Country
63 Princes Highway, Trafalgar
Phone 03 5633 2311 | Email sales@littlepatch.com.au
www.littlepatch.com.au
Pharaoh
Fashion Bag
115
Handmade by Margott
The
Fairytale
Cottages
Turbo
Speed Quilt
Full kit $183.50
A fun quilt for
Cars, cars, cars!!
small.
car lovers big or
ic for top,
Kit includes fabr
g.
ions and bindin
pattern/instruct
6 x 167cm
Finished size: 14 0
Kit: $14
Pattern: $15
Available online
and in-store
Includes pattern,
kit and postage.
All kits and patterns plus postage
Available in store and online
We deliver to your door Australia wide
42 Liverpool Street, Port Lincoln SA 5606
Phone: 08 8682 3636 | Email: rubyandkate@me.com
www.rubyandkate.com.au
Please phone for orders: 0403 883 347
15 Brooking Street, South Guildford, WA 6055
PAULS POND
QUILT FROM
SUZY BEE
Completed as shown measures
40” × 44” or 1m × 1.1m.
Available as a Navy or
Aqua option.
Complete kit including backing
$139 also available
without backing.
116
Friendship
quilt by Libby
Richardson.
ALL PATTERNS
AND FABRIC
KIT $299.95
Shops 2 & 3, 53 Alawa Cres. ALAWA NT 0810
p. (08) 8948 0691 e. dragonfabric@bigpond.com
18 Alford Street, Kingaroy Qld 4610 p. (07) 4162 2040
www.dragonfabric.com.au
www.somethingscountry.com.au
Introducing ‘My Summer House’
Bunny Hill Designs 26th fabric
collection with Moda Fabrics.
My Summer House is a carefree and
playful fabric line. It’s perfect for summer
quilts and lots more. In shades of red,
pink, grey, aqua, and cream.
Fabrics, patterns, kits and pre-cuts available now.
www.littlepatchofheaven.com.au
linda@littlepatchofheaven.com.au
0447 244452 @lpoheaven
The Patchy Affair
Your Easy & Affordable Online Quilting Shop
Great Customer Service
With an extensive fabric range available online it’s easy to search
& find that special one. Ranges include Tilda, Reproductions,
Japanese & Liberty Cotton just to name a few. Check out the range of
patterns available – By Annie Designs, Hugs n Kisses,
Natalie Bird, Sue Allen & Arabesque Scissors.
The Jubilee
collection
celebrates Tilda’s
25th Birthday.
In store
NOW
FREE
POSTAGE
ON ALL
ONLINE
ORDERS
Check out our NEW online store to see and BUY the entire range or contact us for more information.
1972 Maitland Rd, Cunningham SA 5571 (4km from Ardrossan)
Studio hours: Mon-Sun 10am to 4pm by appointment | Contact: Julie
Groups are welcome by prior arrangement.
thepatchyaffair.com.au
www.lynsfineneedlework.com.au
Unit 2, No. 9 Seven Hills Rd Baulkham Hills NSW 2153
(Next to the Bull & Bush Hotel)
EMAIL: sales@lynsfineneedlework.com.au PHONE: 02 9686 2325
FACEBOOK/INSTAGRAM: @lynsfineneedlework
Many more
block of the
Patchwork
months can be
By Sea is
seen on our
website.
excited to
offer Solare as a
block of the month.
Over 13 months you
will receive the full paern
and all fabrics needed to
complete your quilt top
and binding.
Finished size 99" x 99"
In month 13 you will also
receive fabrics to make a
co-ordinating 24" pillow/
wall hanging.
Made completely using Banyan Batiks. Month by month
online tutorials are also available for this BOM.
Run over 13 month Solare costs $37.50 per month plus postage.
Patchwork By Sea
186 Main South Rd, Morphett Vale SA 5162
Phone. 08 8384 8881 | Email. pbysea@bigpond.com
www.patchworkbysea.com.au
Shop 10, Boronia Village
159 Boronia Road
Boronia VIC 3155
+61-3 9761 2088
www.lillypatches.com.au
NOW
AVAILABLE!
3$7&+:25.
1(('/(&5$)7
Edyta Sitar from Laundry Basket Quilts continues to inspire quilters with
her designs in books and patterns. Her range of fabrics, “The Seamstress”,
features a beautiful floral that would lend itself to fussy cutting or Broderie Perse.
Many designs feature both piecing and appliqué. Why not start a new quilt today?
For further information contact: Cath and Pat Guilfoyle,
Onpoint Patchwork & Needlecraft, 61a Station St, Waratah NSW 2298
Telephone: 02 4968 0094 Email: onpatch61@yahoo.com
Onpoint Patchwork and Needlecraft
CRA FT PAT T E RNS A ND CL AS S ES DE L IV E R ED S T RA I G HT TO YOU R IN BOX
Bird Walk Cushion
Come Fly With Me
Photo Album Cover
cosyproject.com
c
cosy
Baby Bear Doll
QU
UILT IN G | S EW IN G
EM B
R O ID E RY | KN I T T ING
BR
CR
OC
RO
CHE T IN G | T UTO RIA L S
In the Market
IN THE
Have a look through the next few pages to discover what fantastic
new products, ideas and designs are In The Market to inspire you.
NEW Horizon
Memory Craft 9480
QC Professional
Have you seen the NEW
Horizon Memory Craft
9480QCP? Workspace
of 11in (280mm); New
Superior needle threader
2 which pulls the thread
through the eye of the
needle; Maximum stitching
speed 1,060 stitches per
minute; Bright LED lighting
illuminates the workspace
from four locations. The
HMC9480QCP also offers
ASR Janome’s Accurate
Stitch Regulator with
four ASR feet, one being
an ASR Rulerwork foot;
Floating Mode for stitching
delicate fabrics, stitching
over bulky seams or fabrics with a pile and stitching
on a curve or piecing on the curve.
For more information or a demonstration, visit an
authorised Janome Retailer www.janome.com.au/
find-a-dealer
120
JANOME AUSTRALIA
Phone: 1300 JANOME (1300 526 663)
Email: enquiries@janome.com.au
Website: www.janome.com.au
Quality Always
Australian Wool Wadding.
MiniJumbuk Nu-Wool
wadding is made to high
and exacting standards in
Adelaide, South Australia.
Buying Nu-Wool supports
Australian jobs and Australian farmers. This wool
batting is simply the best there is and provides great
drape as well as providing natural temperature
regulation. Available from all good craft stores.
QUALITY ALWAYS
Phone: (08) 8349 0200
Email: reception@qualityalways.com
Website: www.minijumbuk.com.au/wadding
Burrows & Boughs BOM
Finished Size 66in x 66in. BOM includes the fabric to
complete quilt, acrylic templates and a pattern.
WHATEVER WHERE-EVER
Phone: (02) 6026 5489
Email: info@whateverwhereever.com.au
Website: www.whateverwhereever.com.au
Designer Digital Prints
eQuilter has the largest online selection of highquality quilt fabrics and related products, including
exceptionally detailed Designer Digital Prints by the
Rubin Design Studio, created exclusively for eQuilter.
2% of all purchases are donated to international nonprofits, totaling US$1.9 million so far. Sign up for the
weekly e-newsletters and try the Free Pattern designer.
50% discount on international shipping for orders
over US$100.
eQuilter
Phone: USA 303-527-0856
Email: service@equilter.com
Website: www.equilter.com
Summertime Panel
Chase the sun with this pretty seaside panel. Lots of
lovely summer flowers with yachts on the sea in the
background. Panel is framed with seashells and fish.
Summertime panel by Dear Stella is 110cm x 90cm.
$38.65 plus postage.
A LITTLE PATCH OF COUNTRY
Phone: 03 5633 2311
Email: sales@littlepatch.com.au
Website: www.littlepatch.com.au
121
In the Market
Boxed Block of the Month Quilt Kit
Heavenly Stitches
A beautiful collection of sewing accessories featuring
a large project satchel, embroidery pillow, square
bag with drop-down sides, needle case and
pincushion. Made from a beautiful Lecien panel.
(Kitten not included!)
FAERIES IN MY GARDEN
Phone: (07) 3869 0808
Email: shopatfaeries@bigpond.com
Website: www.faeriesinmygarden.com.au
My Summer House — Boxed Block of the Month Quilt
Kit featuring My Summer House fabric collection by
Bunny Hill Designs for Moda Fabrics. Quilt Kit includes
My Summer House block of the month quilt pattern
by Bunny Hill Designs, all the My Summer House
fabric needed to complete the quilt top and binding.
Comes in a beautiful decorative box from Moda,
finished size: 73in x 82in. The full block of the month
pattern is also available in store.
LITTLE PATCH OF HEAVEN
Phone: 0447 244 452
Email: linda@littlepatchofheaven.com.au
Website: www.littlepatchofheaven.com.au
Susan Felicity Design and Fabrics
Susan Felicity Design fabrics are digitally designed in
Western Australia from local wildflower inspiration.
Designs are printed on 100% quilters’ weight cotton
in South Korea in the high quality Ecotex standard.
Fabrics available as meterage or precut 5in, 10in
squares or 2½in rolls x 40 designs. The Bluebells and
Orchid Patch collections offer a variety of 40 different
designs in modern bright colourways, with coordinating
and blender fabrics to accompany the hero patterns.
SUSAN FELICITY DESIGN AND FABRICS
Phone: 0459 961 016
Email: susan@susanfelicitydesign.com
Website: www.susanfelicitydesign.com
122
Fabric Cutting Dies
We make fabric cutting dies for quilters and
craftspeople; English Paper Piecing (EPP) to classic
blocks and applique. Our dies come with a mat
included and clear lids on the 6in x 12in dies and are
an optional extra on the larger dies. Our dies work
in most brands of cutters available in Australia, any
questions please call or email us.
A1 CRAFT AND QUILTING
Phone: 0438 877 664
Email: admin@a1craftandquilting.com.au
Website: a1craftandquilting.com.au
The Cutest Baby Quilt Ever
Online Shopping Offer
Purchase products to the value of $50* on our
website throughout March and April 2024 and
receive a free quilt panel valued at $15—$25.
(*excludes cost of postage)
SEW FOCUS
Phone: (08) 7120 6788
Email: karen@sewfocus.com.au
Website: www.sewfocus.com.au
Our baby quilt pattern, The Cutest Baby Quilt Ever,
is a great way to use large prints and border strips.
It is so easy and once you get going you will churn
them out! PLUS we have just added a single bed size
version to our pattern. Pattern available as a PDF
download — type ‘baby quilt pattern’ in the search
bar. Kits available or can be made up on demand.
Join our Easy Baby Quilt class to make your own —
a great first quilt!
HANDZON
Phone: +64 3 423 3544
Email: helpinghand@handzon.co.nz
Website: www.handzon.co.nz
Sunkissed Sojourn
Take your stitching on a summer
holiday with Sunkissed Sojourn, the
fun new fabric range by Natalie Bird
for Devonstone Collection! A beach
holiday themed stitchery panel in
Nat’s trademark whimsical style is
complemented by a selection of classic
summer motifs such as beach huts,
scuttling crabs and seagulls nabbing hot
chips, all in a country colour palette.
Contact Two Green Zebras for stockists.
TWO GREEN ZEBRAS
Phone: (07) 3132 8990
Email: sales@twogreenzebras.com
Website: www.twogreenzebras.com
123
In the Market
25 Years of Tilda Designs
Tilda’s Jubilee collection celebrates 25 years of Tilda
designs with this gorgeous range of favourite past
collections. Filled with fun prints in cherry, sunshine,
bright blue and minty aqua, it will be a must-have
collection for any Tilda lover. Make sure to order your
bundle soon so you don’t miss out!
MY FABRICOLOGY
Phone: 0493 063 224
Email: orders@myfabricology.com.au
Website: www.myfabricology.com.au
The Fabric of War: The Annette
Gero Collection of Quilts from
Military Fabrics
Historical quilts featuring brightly-coloured
military fabrics from the 18th and 19th century
uniforms will be on display in this extraordinary
final exhibition, revealing new treasures from
the private collection of Annette Gero. This is an
Adelaide-exclusive not to be missed.
February 15 — May 18, 2024 | Tue—Sat 10am—4pm,
Adult $12 | Concession $10 | Children under 12 FREE
THE DAVID ROCHE FOUNDATION
Phone: (08) 8267 3677
Email: info@rochefoundation.org.au
Website: www.rochefoundation.com.au
124
Market Tote
Our Market Tote pattern is a super simple, super
quick, fantastic size bag to take anywhere and fill
with anything.
The exterior of the Market Tote is made from a linen/
cotton blend and is fully lined.
Kit and pattern available online — Market Tote Kit (as
pictured) $45, Market Tote Pattern only $10
THE QUILT SHOP
Phone: 0468 336 146
Email: sales@thequiltshop.com.au
Website: www.thequiltshop.com.au
Hand Dyed Wool
Bundles
Beautiful hand-dyed
felted-wool bundles from
Sue Spargo and Primitive
Gatherings are now
available from The Quilting
Room’s new Wool Club. Choose from a selection of
either different textures of the same colour or colour
collections. Membership for Sue Spargo bundles (six
pieces 8in x 12½in) $60 per month plus p&h, and/or
membership for Primitive Gatherings bundles (eight
pieces 7in x 8in) $48 per month plus p&h.
THE QUILTING ROOM
Phone: 0411 417 087
Email: thequiltingroom@aapt.net.au
Website: www.thequiltingroom@aapt.net.au
Wacky Jacky’s Retreats
Our retreat with one of the Australian QAYG
masters has completely sold out, and we needed to
open a new slot!
Wacky Jacky’s retreats are highly personalised,
as we curate the most unique Bali experience for
like-minded ladies who are in love with textiles,
quilting and adventure. You’ll fully immerse yourself
in the island’s textile history and strong cultural
influences while enjoying its natural beauty. With
Jacky hosting and skilled international tutors, it’s a
unique lifetime experience!
WACKY JACKY’S TEXTILES
Email: jacky@wackyjackys.com.au
Website: www.wackyjackys.com/bali-retreats
Daisy (Hinagiku) Cushion Cover
Enjoy making the Daisy (Hinagiku) Cushion Cover
designed by Jane MacDonald. The daisy sashiko
pattern is lots of fun to stitch, and the finished cushion
cover is a wonderful statement piece for your home.
BEBE BOLD
Phone: (02) 66219188
Email: contact@bebebold.com
Website: www.bebebold.com
by Annie
Limited offer during March & April!
Come into Lilly Patches for a wide range of patterns
and notions by Annie. With lots of different
projects to complete that are practical and useful,
Annie’s patterns will appeal to all. There are
over 200 patterns for quilts, fashion accessories,
organisational items and more, whether you are a
beginner or more experienced at sewing.
LILLY PATCHES
Phone: (03) 9761 2088
Email: info@lillypatches.com.au
Website: www.lillypatches.com.au
For every ‘by Annie.com’ pattern purchased online
you will receive a complimentary by Annie.com
pattern free.
Buy 2 receive 2 free, buy 3 receive 3 free, buy 4
receive 4 four – maximum 4 available.
Check out the website as postage is free within
Australia on all online orders.
THE PATCHY AFFAIR
Phone: 0418 891 601
Email: julie@thepatchyaffair.com.au
Website: thepatchyaffair.com.au
125
Our lowest price yet to celebrate
12 ISSUES
Quilters Companion magazine
RRP $155.40
PLUS 2 SPECIAL-EDITION ISSUES
Great Australian Quilts
RRP $25.90
For Only$135
OVER
$46
WOR TH
OF
SAVINGS
SUBSCRIBE NOW
To receive this offer, call 1300 303 414 and quote the code: QC126. HURRY! Offer ends 4th May, 2024
Subscription Offer
6 issues of Quilters Companion magazine
+ 1 issue of Great Australian Quilts
FOR ONLY $75
12 issues of Quilters Companion magazine
+ 2 issues of Great Australian Quilts
FOR ONLY $135
My Personal Details
*Mr/Mrs/Miss/Ms First name:
*Surname:
*Address:
*Suburb:
*State:
*Postcode:
*Daytime telephone: (
)
*Email:
Gift Subscription To
Mr/Mrs/Miss/Ms First name:
Surname:
Address:
Suburb:
State:
Postcode:
Daytime telephone: (
)
Email:
Payment Options
Cheque/money order for AU$
(Please make cheques payable to Universal Magazines Pty Ltd)
Please charge my:
American Express
Card number:
Diners
MasterCard
Visa
Expiry date:
(must be included)
Cardholder’s name:
Use this very special offer to:
Cardholder’s signature:
•
Buy a gift subscription for
your mum or a friend today
Subscribing Made Easy
•
Treat yourself to a regular dose
of Quilters Companion
•
Extend your current subscription
1300 303 414
SEND COUPON
and quote the code QC126
Subscriptions Department,
Reply Paid 75687,
North Ryde NSW 1670
universalshop.com.au
and enter code QC126
(02) 9805 0714
mailorder@umco.com.au
This offer is only available while stocks last, or until expiration date.
T&Cs: Subscriptions will commence with the first available issue. Existing subscriptions will simply be extended. Free gifts arrive
separately to the magazine subscription and are sent as soon as possible. Free gift offers do not apply to subscribers currently
on the Easy Payment Plan. Offer open to Australian residents only. By subscribing you acknowledge that you understand that
‘tip-ons’ and gifts or bonus issues that may be available with non-subscriber copies of this magazine may not be provided to
subscribers and is at the discretion of Universal Magazines Pty Ltd. The Promoter shall not be liable for any loss or damage
which is suffered or sustained (including but not limited to, indirect or consequential loss) or for personal injury which is suffered
or sustained as a result of taking part in this or any other gift offer. By subscribing, you consent to receive any direct marketing
material including emails which inform the recipient of the Promoter’s other publications, products, services or events and
to receive promotional material from third parties. Please tick the box if you do NOT wish us to use this information for the
purposes stated above . This offer is only available while stocks last, or until expiration date.
Level up your crafting skills with these
Special Quilting Books
Quilted Workshop for
Beginners Bookazine
($12)
With the beginner in mind,
each quilt block in this bookk
is a different technique
and the entire quilt making
g
process is covered, from
choosing fabrics to binding
g
your quilt.
Quilted Gifts ($12)
From cushions to patchwork
bags, Santa wall hangers
and quilt designs for
children, there’s a design
available in this book for you
to create and give out as
gifts for your loved ones on
their most special days.
Visit www.universalshop.com.au/Books/craft-books
or call 1300 303 414 to order your copies today.
Creative Stash & Scrap
Quilts ($12)
Feeling guilty about how
much money you have
spent on fabric, or how
much fabric you have lying
around? This book offers
you 21 gorgeous projects
designed to work through
d
tthe fabrics that you have
already purchased.
a
Vintage Quilts ($19.95)
Check out theull range of the
most stunning quilts in this
superb Quilters Companion
publication. This perfect
read is full of your favourite
designs and quilt patterns,
bringing a new meaning to
the word “vintage”.
On the Road
ON THE
AUSTRALIA AND NEW ZEALAND GUIDE TO
CRAFT, SEWING AND PATCHWORK SHOPS
130
RIVERINA
ACT
The Sewing Shoppe
6/51 Tennant Street,
Fyshwick 2609
Ph: (02) 6239 1214
sales@sewingshoppe.com.au
www.sewingshoppe.com.au
Open: Wed–Sun 10am–4pm
NSW
SYDNEY
Lyn’s Fine Needlework
2/9 Seven Hills Road,
Baulkham Hills, 2153
Ph: (02) 9686 2325
lynsneedlework@aol.com
www.lynsfineneedlework.com.au
Open: Mon–Fri 9am–5pm,
Sat 9am–4pm
NEPEAN/BLUE MOUNTAINS
Cowra Patchwork
Shop 2/119 Kendal Street, Cowra 2794
Ph: (02) 6342 3854
www.cowra-patchwork.business.site
Open: Mon–Fri 8.30am–5pm,
Sat 8.30am–12.30pm
Post Office Patchwork
33 Ross Street, Glenbrook 2773
Ph: (02) 4739 9555
pop@postofficepatchwork.net.au
www.postofficepatchwork.com.au
Open: Mon–Fri 10am–5pm,
Sat 10am–3pm
Sew Can I
3/21 Lavin Crescent,
Werrington County 2747
Ph: (02) 9623 4570
sewcani@yahoo.com.au
https://www.sewcani.com.au
Open: Mon 9am–4.30pm,
Tue 9am–9pm, Wed–Sat 9am–4.30pm
Sunday by appointment
Sew Many Stitches
Shop 4, Level 2, 147 Queen Street,
Campbelltown 2560
Ph: (02) 4628 4437
sewmanystitches@outlook.com
www.sewmanystitches.com.au
Open: Tue-Fri 9am–5pm, Sat 9am–4pm
Coleambally Stitch in Time
13 Brolga Place, Coleambally 2707
Ph: (02) 6954 4242
coleamballystitchintime@allthingsquilting.
com.au, www.coleamballystitchintime.
allthingsquilting.com.au
Open: Mon–Fri 9am–5pm,
Sat 9am–12 noon
Nel’s Fabric Place
188 Hoskins Street, Temora 2666
Ph: (02) 6977 1760
nelstoyandbookhaven@bigpond.com
www.188nelsfabrics.wixsite.com/temora
Open: Mon–Fri 9am–5pm,
Sat 9am–12 noon
Sew Fab
111 East Street, Narrandera 2700
Ph: (02) 6959 9819
leanne@sewfab.com.au
www.sewfab.com.au
Open: Tues–Fri 9am–4:30pm,
Sat 9am–12:30pm,
Mon by appointment only
The Cotton Merchants
48 Wynyard Street,Tumut 2720
Ph: (02) 6947 2800
thecottonmerchants@gmail.com
www.thecottonmerchants.com.au
Open: Mon–Fri 9.30am–4.30pm,
Sat 9.30am–1 pm
The Fabric Farm
36 Kurrajong Avenue, Leeton 2705
Ph: (02) 6953 7718
sales@thefabricfarm.com.au
Open: Wed–Fri 10am–5pm,
Sat 10am–1pm
Whatever Where-ever Crafts
26 Fairway Close, Howlong 2643
Ph: (02) 6026 5489
info@whateverwhereever.com.au
www.whateverwhereever.com.au
Open: Wed–Fri 10am–5pm,
Sat 9am–1pm
Hanging by a Thread
Wallace Street,
Macksville 2447
Ph: (02) 5509 1664,
0483 804 032
admin@hangingbyathread.com.au
www.hangingbyathread.com.au
Open: Tue–Fri 9.30am–5pm,
Sat 9am–1pm
Stitched ‘n Framed
14 Acacia Avenue,
Port Macquarie 2444
Ph: (02) 6581 3338
info@stitchednframed.com.au
www.stitchednframed.com.au
Open: Mon–Fri 9.30am–4pm,
Sat 9.30am–2pm
Stitches by
the Sea
10 Gundagai Street,
Coffs Harbour 2450
Ph: 0412 355 438
infostitchesbythesea@gmail.com
www.stitchesbythesea.net
Tue–Fri 9.30am–4.30pm,
Sat 10am–1pm
HAWKESBURY
True Blue Stitches
5/3 Terrace Road,
North Richmond 2754
Ph: (02) 4508 4052
enquiries@truebluestitches.com.au
www.truebluestitches.com.au
Open: Mon–Fri 9am–5pm,
Sat 9am–1pm
SOUTH WEST
Hen Tea Craft Store
28 Sladen Street, Henty 2658
Ph: 0414 581 620
cpayne2@live.com
www.etsy.com/au/shop/braidcraft
Open: By appointment
MID NORTH COAST
CENTRAL WEST
Connie’s Fabrics
1 Verge Street, Kempsey 2440
Ph: (02) 6562 7792
conniesfabrics@outlook.com
Facebook: Connie’s Fabrics
Open: Mon–Fri 9am–5pm,
Sat 9am–12.30pm
Country Pickin’s Sewing Centre
Unit 2, 1a Blackbutt Road,
Port Macquarie 2444
Ph: 0448 306 589
info@countrypickins.com.au
www.countrypickins.com.au
Open: Mon–Fri 9.30am–5pm
Sat 9.30am–2pm
Country Pickin’s Sewing Centre
29 Pulteney Street,
Taree 2430
Ph: (02) 6552 2092
info@countrypickins.com.au
www.countrypickins.com.au
Open: Mon–Fri 9.30am–5pm
Sat 9.30am–2pm
Hobbysew Orange
221 Peisley Street,
Orange 2800
Ph: (02) 6361 7420
patriciajcole@gmail.com
Open: Mon–Fri 9.30am–5pm,
Sat 10am–2pm
The Crafter’s Cottage
62 Dalgarno Street,
Coonabarabran 2357
Ph: 0407 940 792
info@thecrafterscottage.net
www.thecrafterscottage.net
Open: Tue–Fri 9am–4.30pm,
Sat 9am–12 noon
The Crafty Peacock
17 Bradwardine Road,
Bathurst 2795
Ph: (02) 6331 6975
info@thecraftypeacock.com.au
www.thecraftypeacock.com.au
Open: Tue–Fri 9.30am–5pm,
Sat 9.30am–3.30pm
131
On the Road
NORTH WEST
Stitch2340
(formerly known as
Stitch Between the Bridges)
230 Peel Street, Tamworth 2340
Ph: 0413 556 369
stitchtbt2340@gmail.com
stitchbetweenthebridges.com.au
Open: Tue–Fri 9.30am–4.30pm,
Sat 9am–4pm
Ursh’s Sewing
1 Cunningham Close, Narrabri 2390
Ph: 0419 492 370
FB: urshs-sewing
Mon–Wed 9am–5pm, Fri 9am–5pm,
Sat 11am–1pm
NORTHERN NSW
Handa Crafts and Curtains
149 Canterbury Street, Casino 2470
Ph: 0484 899 472
hello@handacraftsandcurtains.com.au,
www.handacraftsandcurtains.com.au
Open: Mon–Fri 9am–5pm,
Sat 9am–12 noon
Rainbow Patchwork
75 Union Street, South Lismore 2480
Ph: 0432 417 228
www.rainbowpatchwork.com.au
Open: Tue–Fri 10am–5pm,
Sat 9am–12 noon
Palm Beach Quilting
Unit 7/2 Industry Boulevard,
Carrum Downs 3201
Ph: (03) 9775 1601
sales@palmbeachquilting.com.au
www.palmbeachquilting.com.au
Open: Mon–Fri 10am–4pm,
Sat 9am–12 noon
The Quilt Shop
2/38 Bridge Street, Eltham 3095
Ph: (03) 8418 6770
sales@thequiltshop.com.au
www.thequiltshop.com.au
Open: Mon–Sat 9.30am–4pm
Tranquility Crafts ‘N’ Supplies
37 Holmes Road,
Moonee Ponds 3039
Ph: (03) 9375 3575
tranquilitycrafts@bigpond.com.au
www.tranquilitycrafts.allthings
quilting.com.au
Open: Tue–Fri 10am–5.30pm,
Sat 9.30am–1pm
NORTH CENTRAL
Maree St Clair Quilts
Ph: 0429 393 757
maree@mareestclairquilts.com.au
www.mareestclairquilts.com.au
Open: By Appointment Only
NORTH EAST
NEWCASTLE
Morisset Fabrics
and Crafts
47 Dora Street, Morisset 2264
Ph: (02) 4973 3837
jendi@aapt.net.au
www.facebook.com/morissetfabrics
Open: Mon–Fri 9am–5pm,
Sat 9am–1pm
SOUTHERN HIGHLANDS
Know How Sewing Essentials
Unit 2, 3–7 Frankland Street
Ph: (02) 4871 3936
mail@knowhowsewing.com.au
www.knowhowsewing.com.au
Open: Mon–Fri 9am–3pm
VIC
MELBOURNE
Lilly Patches
Shop 10 Boronia Village,
159 Boronia Road, Boronia 3155
Ph: (03) 9761 2088
info@lillypatches.com.au
www.lillypatches.com.au
Open: Tue–Sat 9.30am–5pm,
Thu open until 6pm
132
Little Patch of Heaven
7 Pickering Place, Wodonga 3690
Ph: 0447 244 452
lpoheaven@bigpond.com
www.littlepatchofheaven.com.au
Open: By appointment only
Creature Crafts
Shop 4, 68 Myrtle Street,
Myrtleford 3737
Ph: 0428 503 951
creaturecrafts@bigpond.com
www.creaturecrafts.net.au
Open: Mon–Fri 9.30am–3pm,
Sat 10am–2pm
SOUTH EAST
A Little Patch of Country
63 Princes Highway, Trafalgar 3824
Ph: (03) 5633 2311
www.littlepatch.com.au
sales@littlepatch.com.au
Open: Mon–Fri 9am–5pm
Craft Quarters
140–146 Station Street, Koo Wee Rup 3981
Ph: (03) 5997 1779
sales@craftquarters.com.au
www.craftquarters.com.au
Open: Mon–Fri 9am–4pm,
Sat 9am–1pm
The Sewing Bee Cafe
80 Baxter-Tooradin Road,
Baxter 3911
Ph: (03) 5971 5737
thesewingbeecafe@gmail.com
www.sewingbeecafe.com.au
Open: Mon–Fri 9.30am–4pm,
Sat 9am–12 noon
SOUTH WEST
Molly Bear Designs
208 Diproses Road,
Bulart 3314
Ph: 0488 136 961
mollybeardesigns@hotmail.com
www.etsy.com/au/shop/Mollybeardesigns
Open: by appointment
Port Fairy Textiles
Shop 1, 54 Sackville Street,
Port Fairy 3284
Ph: 0493 289 375
hello@portfairytextiles.com.au
www.portfairytextiles.com.au
Open: 7 days, from 10am
Updates on Instagram/FB @
portfairytextiles
EAST
The Craft Basket
110A Nicholson Street,
Orbost 3888
Ph: (03) 5154 1151
soniamelville_craftbasket@hotmail.com
www.thecraftbasket.com.au
Open: Tue-Fri 9am-3pm,
Sat 9am-12 noon
Lily Lane Patchwork
26 Prince Street,
Rosedale 3847
Ph: (03) 5199 2777
jennifer@lilylane.com.au
www.lilylane.com.au
Open: Mon, Wed, Thu,
Fri 9.30am–4pm,
Sat 10am–2pm
WEST
Cobden Sewing Machines
31 Curdie Street,
Cobden 3266
Ph: 0408 104 912
cobdensewing@bigpond.com
www.cobdensewingmachines.com.au
Open: Tue–Fri 9.30am–4pm,
Sat 9am–12 noon
Heights Sewing Centre
176 Pakington Street,
Geelong West 3218
Ph: (03) 5229 3558
heightsewing@bigpond.com
www.heightsewing.com.au
Open: Mon–Fri 9am–5.30pm,
Sat 9am–1pm
Little Desert Quilts
2204 Kaniva–Edenhope Road,
Kaniva 3419
Ph: (03) 5392 2234
littledesertquilts@skymesh.com.au
FB: Little Desert Quilts
Open: by appointment
Michelle’s Patchwork
230 Moffats Road,
Dereel 3352
Ph: 0439 005 301
mde17978@hotmail.com
www.michellespatchwork.com
Open: Mon–Fri 9am–5pm,
Sat 10am–4pm
QLD
CENTRAL COAST
Just Country Crafts
72 Perroux Street, Gulliver 4814
Ph: (07) 4795 7414
justcountrycrafts@gmail.com
Facebook @ Just Country Crafts
Open: Mon–Fri 9am–3pm,
Sat 8.30am–1.30pm
Somethings Country
18 Alford Street, Kingaroy 4610
Ph: (07) 4162 2040
somethingscountry@bigpond.com
www.somethingscountry.com
Open: Mon–Fri 9am–5pm,
Sat 9.30am–12.30pm
CENTRAL HIGHLANDS
Emerald Fabric Boutique
Shop 3, 107 Clermont Street,
Emerald 4720
Ph: (07) 4982 4286
jenita@emfab.com.au
www.emfab.com.au
Open: Mon–Fri 9am–5pm,
Sat 9am–12 noon
TOOWOOMBA
The Sewing Room
16b Prescott Street, Toowoomba 4350
Ph: (07) 4638 8288
info@thesewingroom.net.au
www.thesewingroom.net.au
Open: Mon–Fri 9am–3:30pm,
Sat 9am–1pm
BUNDABERG
The Quilter’s Shack
77 Boundary Street, Bundaberg 4670
Ph: (07) 4154 4486
thequiltersshack@
patchworkandcupcakes.com
www.bundabergpatchwork.com
Open: Mon–Fri 9am–4pm
Sat 9am–12.30pm
SUNSHINE COAST
SOUTH EAST
KIMZ Sewing and Patchwork
1/5 Main Drive, Warana 4575
Ph: (07) 5493 4977
kimzsewing@bigpond.com
kimzsewing.com
Open: Mon–Fri 9am–4pm,
Sat 9am–1pm
Sand Salt SEW
1/53 Gateway Drive,
Noosaville 4566
0411 688 142
sandsaltsew@icloud.com
Open: Tue–Fri 9.30am–4pm,
Sat 9am–1pm
Clair’s Fabrics
22 Gough Street.
Kingston 5275
Ph: 0439 220 779
clair@clairsfabrics.com
www.clairsfabrics.com
Open: By appointment only
Creatively Sewn
1 Anthony Street,
Mount Gambier 5290
Ph: (08) 8725 4933
kerry@ringwood-designs.com
www.creativelysewn.com.au
Open: Mon–Fri 9.30am–4.30pm,
Sat 9.30am–12.30pm
Habit Patch
31b George Street,
Millicent 5280
Ph: (08) 8733 1155
info@habitpatch.com.au
www.habitpatch.com.au
Open: Mon–Fri 9am–4.30pm
The Rural Stitch Co
40 Bool Lagoon West Road,
Bool Lagoon 5271
Ph: 0417 408 796
sales@theruralstitchco.com.au
www.theruralstitchco.com.au
Open: Sat–Sun 10am–4pm,
Weekdays by appointment
SA
ADELAIDE
Patchwork by the Sea
186 Main South Road,
Morphett Vale 5162
Ph: (08) 8384 8881
pbysea@bigpond.com
www.patchworkbysea.com.au
Open: Mon–Sat 9.30am–4.30pm
Riverlea Cottage Quilts
330 Unley Road,
Hyde Park 5061
Ph: (08) 8373 0653
riverlea.quilts@live.com
www.riverleaquilts.com
Open: Mon–Fri 10am–5pm,
Sat 10am–2.30pm
Sew Focus
8/1064–1066 Old Port Road,
Albert Park 5014
Ph: (08) 7120 6788
karen@sewfocus.com.au
www.sewfocus.com.au
Open: Mon–Fri 9am–5pm,
Sat 9am–3pm
Widebacks Australia
22 Farrow Circuit, Seaford 5169
Ph: (08) 8370 7546
brenda@widebacks.com.au
www.widebacks.com.au
Open: Mon–Fri 9.30am–3pm,
Sat 9.30am–12.30pm
NORTH
Janome Townsville
Olive Branch Quilts
Shop A/263 Charters
Towers Road, Mysterton 4812
Ph: (07) 4755 2336
shop@janometsv.com.au
www.olivebranchquilts.com.au
Open: Mon-Wed 9am–5pm,
Thu 9am–4.30pm, Fri 8.30am–4.30pm,
Sat 9am–1pm
NORTH EAST
Ezy Quiltz & Stitching
232 Bookmark Avenue,
Renmark 5341
Ph: 0427 282 047
ezyquiltz@gmail.com
www.ezyquiltzandstitching.com.au
Open: Online 24/7
YORKE PENINSULA
Heart ‘n Soul Patchwork
1/59 Main Street,
Minlaton 5575
Ph: (08) 8813 9710
heartnsoulpatchwork@gmail.com
gostitch.com.au/business/
heart-n-soul-patchwork
Open: Tue-Fri 10am–4pm,
Sat 10am–12 noon
The Patchy Affair
1972 Maitland Road,
Cunningham 5571
Ph: 0418 891 601
thepatchyaffair@bigpond.com
www.thepatchyaffair.com.au
Open: By appointment only,
7 days a week 10am–4pm
BAROSSA
Cynthia’s Ark
7 Wasleys Road,
Mallala 5502
Ph: (08) 8527 2120
cyn@cynthiasark.com.au
www.cynthiasark.com.au
Open: Thu 12.30pm–3pm,
Fri–Sat 9.30am–3pm,
Sun 10am–3pm
EYRE PENINSULA
ruby & kate
42 Liverpool Street,
Port Lincoln 5606
Ph: (08) 8682 3636
rubyandkate@me.com
www.rubyandkate.com.au
Open: Mon–Fri 9am–5pm,
Sat 9am–12.30pm
133
On the Road
MID NORTH
NZ
Brook Fabrics
33 Bowman Street, Crystal Brook 5523
Ph: (08) 8636 2685
FB: Brook Fabrics
Open: Mon–Fri 9.30am–4.30pm
Charlene’s
80 Ayr Street, Jamestown 5491
Ph: (08) 8664 1511
Open: Mon–Fri 10am–5pm,
Sat 9am–11.30
NORTH ISLAND
WA
Susan Felicity Design and Fabrics
Ph: 0459 961 016
susan@susanfelicitydesign.com
www.susanfelicitydesign.com
24/7 Online Orders Only
PERTH
NT
Dragonfly Fabrics
Shops 2 and 3, 53 Alawa Crescent,
Alawa 0810
Ph: (08) 8948 0691
dragonfabric@bigpond.com
www.dragonfabric.com.au
Open: Mon–Fri 9am–5pm,
Sat 9am–4pm
TAS
Patchwork Plus
14 Anne Street,
George Town 7253
Ph: (03) 63823999
www.patchworksplus.com.au
Open: Tue–Fri 9.30am–4.30pm,
Sat 9.30am–12.30pm
Quarter Inch (Hugs n Kisses)
224 Campbell Street, North Hobart 7000
Ph: (03) 6200 1304
helen@quarterinch.com.au
www.quarterinch.wequilt.com.au
Open: Mon–Fri 9am–4pm,
Sat 10am–2pm
BALI
Wacky Jacky’s Textiles
Jalan Raya Candidasa,
Candidasa, Bali
Ph: +62 812 3880 0277
jacky@wackyjackys.com.au
Open: 7am-4pm 7 days a week
134
JR’s Fabrics
8 Simmental Place, Oakford 6121
Ph: (08) 9526 2113
admin@jrsfabrics.com
www.jrsfabrics.com
Open: Mon–Fri 8am–11.30am,
other times by appointment
My Fabricology
33/4 Wicks Street,
Bayswater 6053
Ph: 0493 063 224
orders@myfabricology.com.au
www.myfabricology.com.au
Open: Tue–Fri 9.30am–4pm,
Sat 9.30am–3pm
Southlands Fabric
& Sewing Centre
26 Yampi Way,
Willetton 6155
Ph: (08) 9259 4844
helen@sewingperth.com.au
www.sewingperth.com.au
Open: Mon–Fri 9am–4.30pm,
Sat 9am–3pm, Sun 10am–3pm
Cottage Flair
1129 Eruera Street,
Rotorua 3010
Ph: +64 07 357 5955
info@cottagefair.co.nz
cottageflair.co.nz
Open: Mon–Fri 9.30am–4.30pm,
Sat 9.30am–3 pm
Fox’s Cottage
1 Purcell Street, Foxton 4814
Ph: +64 06 363 5880
shop@foxscottage.co.nz
www.foxscottage.co.nz
Open: Mon–Fri 9am–5pm
House of Patchwork
16 Porter Crescent,
Helensville, Auckland 0800
Ph: +64 09 420 6355
houseofpatchworkltd@gmail.com
www.facebook.com/House-of-Patchwork
Open: Tue–Sat 10am–4pm
SOUTH ISLAND
Handzon
1 Alfred Street,
Rangiora
Ph: +64 03 423 3544
helpinghand@handzon.co.nz
www.handzon.co.nz
Open: Mon–Sat 9.30am–5.30pm,
Sun 10am–3pm
Stitch Witches
193 Hanover Street, Dunedin 9016
Ph: +64 03 471 7388
stitchwitchesnz@gmail.com
www.stitchwitches.co.nz
Open: Tue–Fri 10am–5pm,
Sat 10am–4pm
The Quilter’s Barn
The Vines Village,
193 Rapaura Road, Blenheim
Ph: +64 03 572 7240
info@thequiltersbarn.co.nz
www.thequiltersbarn.co.nz
Open: Mon–Fri 9.30am–4.30pm,
Sat–Sun 10am–4pm
BUNBURY
Craft Collections
1/13 Mummery Crescent,
Bunbury 6230
Ph: 0419 616 714
stuffnbears@westnet.com.au
craftcollections.com.au
Open: Mon–Fri 9am–
4.30pm, Sat 9am–12 noon
MANDURAH
Classic Stitches
1/18 Galbraith Loop,
Erskine 6210
Ph: (08) 9582 7567
info@classicstitches.com.au
www.classicstitches.com.au
Open: Mon–Fri 10am–4pm,
Sat by Appointment
USA
eQuilter.com
6201 Spine Road, Boulder,
Colorado 80301
Ph: +0011 1 303 527 0856
service@equilter.com
Open: Mon–Fri 7:30am–5pm
Diary dates
NSW
April 26—28
Blue Mountains Quilt Show
Wycliffe School Hall,
Rickard Road, Warrimoo
More information:
www.bluemountainsquilters.com
April 27—28
Queanbeyan Quilters’
Exhibition of Quilts
Bicentennial Hall,
253 Crawford Street, Queanbeyan
More information:
queanbeyanquilters@gmail.com
May 3 — June 23
The New Quilt 2024
Hawkesbury Regional Gallery
300 George Street, Windsor
More information:
thenewquilt@quiltnsw.com
Qld
May 2024
Henzell Street Quilters’
Biennial Quilt Show
Redcliffe Showground,
Webb Street, Redcliffe
More information:
henzellquilters@gmail.com
Victoria
New Zealand
July 3—6
Sydney Craft & Quilt Fair and
The Australian Quilt Show
ICC Sydney, Exhibition Centre,
Darling Harbour
More information:
www.craftfair.com.au
July 19—21
The Eastwood Patchwork Quilters’
Quilt Exhibition
Roselea Community Centre,
645-671 Pennant Hills Road,
Beecroft
More information:
www.eastwoodpatchworkquilters.com
August 23—25
Wangi Quilters’ Club
Biennial Quilt Show
Wangi District Workers’ Club
11-19 Market Street, Wangi Wangi
More information:
wangiquilters@gmail.com
March 29 — April 1
March 15—17
Bendigo and District Quilters’
Biennial Exhibition
A Parade of Quilts
St Andrew’s Uniting Church Hall,
26 Myers Street, Bendigo
More information:
Christine Bourke 0400 543 069
Feilding Kowhai Quilting Group
Quilts @ The Coach House
The Coach House Museum,
127 South Street, Feilding,
North Island
More information:
Marion Hamilton —
marionh48@yahoo.com
South Australia
July 5—7
SA Quilters’ Festival of Quilts
Adelaide Showgrounds,
39 Goodwood Road, Wayville
More information:
www.saquilters.org.au/
festival-of-quilts
Waikato Quilt Symposium
Cambridge High School,
25 Swayne Road, Cambridge
More information:
info@quiltsymposium.co.nz
England
August 1–4
September 19—22
Sydney Quilt Show
Rosehill Gardens Racecourse,
James Ruse Drive, Rosehill
More information:
www.quiltnsw.com
October 2—6
Join Michelle Marvig and Deborah
Segaert on Quilters Companion
Quilters’ Tours to major quilt shows
around the world! Turn to pages
12–13 for more information.
Festival of Quilts
National Exhibition Centre,
Birmingham
More information:
www.thefestivalofquilts.co.uk
135
The Basics Guide provides information and explanations about
tools and techniques required to make a quilt. Many of the
items needed are general sewing supplies, and the specialist
quilting tools can be found at your favourite patchwork shop.
The Basics Guide is available as a free downloadable document
that you can refer to as required.
You can download it and save it to your computer
and/or print it out for easy reference.
You will find your Free Basics Guide here: www.cosyproject.com/blog/quilting-guide
136
Stockists & Contacts
Stockists & Contacts
2 Green Zebras
Ph: (02) 9553 7201,
website: www.twogreenzebras.com
Know-How Sewing Essentials
Ph: (02) 4871 3936, website:
www.knowhowsewing.com.au
Stitches by the Sea
Ph: 0412 355 438,
website: www.stitchesbythesea.net
A1 Craft and Quilting
Ph: 0438 877 664,
website: www.a1craftandquilting.com.au
Lilly Patches
Ph: (03) 9761 2088,
website: www.lillypatches.com.au
Stitch Witches
Ph: +64 3 471 7388,
website: www.stitchwitches.co.nz
A Little Patch of Country
Ph: (03) 5633 2311,
website: www.littlepatch.com.au
Lily Lane
Ph: (03) 5199 2777,
website: www.lilylane.com.au
BeBe Bold
Ph: 0416 219 107,
website: www.bebebold.com
Little Patch of Heaven
Ph: 0447 244 452,
website: www.littlepatchofheaven.com.au
Susan Felicity
Design and Fabrics
Ph: 0459 961 016,
website: www.susanfelicitydesign.com
Bernina Australia
Ph: (02) 9899 1188,
website: www.bernina.com/en-AU
Lyn’s Fine Needlework
Ph: (02) 9686 2325,
website: www.lynsfineneedlework.com.au
Bizzy Bee Patchwork
Ph: 0403 883 347,
Facebook: Bizzy Bee Patchwork
Maree St Clair Quilts
Ph: 0429 393 757,
website: www.mareestclairquilts.com.au
Creature Crafts
Ph: (03) 5752 1494,
website: www.creaturecrafts.net.au
My Fabricology
Ph: 0416 048 324,
website: www.myfabricology.com.au
Cynthia’s Ark
Ph: (08) 8527 2120,
website: www.cynthiasark.com.au
On Point Patchwork
and Needlecraft
Ph: (02) 4968 0094, website:
www.onpointpatchworkandneedlecraft.com
Dragonfly Fabrics
Ph: (08) 8948 0691,
email: dragonfabric@bigpond.com
Fabric Sauce
Ph: 0427 847 384,
website: www.fabricsauce.com.au
Faeries in My Garden
Ph: (07) 3869 0808,
website: www.faeriesinmygarden.com.au
Fox’s Cottage
Ph: +64 6 363 5880, website:
www.foxscottage.co.nz
Handzon
Ph: +64 3 423 3544
website: www.handzon.co.nz
Heights Sewing Centre
Ph: (03) 5229 3558,
website: www.heightsewing.com.au
Hettie’s Patch
Ph: 0421 174 550,
website: www.hettiespatch.com
Janome
Ph: Toll-free 1300 JANOME;
website: www.janome.com.au
The Craft Basket
Ph: (03) 5154 1151,
website: www.thecraftbasket.com.au
The Crafty Peacock
Ph: (02) 6331 6975, website:
www.thecraftypeacock.com.au
The David Roche Foundation
Ph: (08) 8267 3677, website:
www.rochefoundation.com.au
The Patchy Affair
Ph: 0418 891 601,
website: www.thepatchyaffair.com.au
The Quilters Shack
Ph: (07) 4154 4486,
Facebook: The Quilters Shack
Patchwork by Sea
Ph: (08) 8384 8881, website:
www.patchworkbysea.com.au
The Quilting Room
Ph: 0411 417 087,
website: www.thequiltingroom.com.au
Quality Always
Email: reception@qualityalways.com,
website: www.minijumbuk.com.au
The Quilt Shop
Ph: (03) 8418 6770,
website: www.thequiltshop.com.au
Quilting Queen
Ph: (02) 4711 4114,
Facebook: Quilting-Queen
The Strawberry Thief
Ph: (08) 6114 9653,
website: www.thestrawberrythief.com.au
ruby & kate
Ph: (08) 8682 3636,
website: www.rubyandkate.com.au
Tranquility Crafts
‘N Supplies
Ph: (03) 9375 3575,
Facebook: TranquilityCraftsnSupplies
Sew Focus
Ph: (08) 7120 6788,
website: www.sewfocus.com.au
Sew Many Stitches
Ph: (02) 4628 4437,
email: sewstitches@bigpond.com
Somethings Country
Ph: (07) 4162 2040,
email: somethingscountry@bigpond.com
Stitched ‘n’ Framed
Ph: (02) 6581 3338,
website: www.stitchednframed.com.au
Travelrite International
Ph: (03) 9836 2522,
website: www.travelrite.com.au
Wacky Jacky’s
Email: jacky@wackyjackys.com.au,
website: www.wackyjackys.com.au
Whatever Where-Ever Crafts
Ph: (02) 6026 5489,
email: whateverwhereever@bigpond.com
137
On sale May 2024
Make this shimmering
quilt with Pat Forster
Sew this classic
quilt pattern,
Fandango, with
Wendy Whellum
Create a
striking quilt
with simple
piecing and
colours with
Chris Austin
Don’t miss the 2024 BOM Sneak Peek in the next issue! We will
introduce you to the designer and share some sneaky photos with you.
We also share an article on the highly anticipated exhibition, A Century
of Quilts, to be held at the National Gallery of Australia.
The next issue will have wonderful quilt patterns for you to make!
Anita Ellis shares part two of a three-part series showing
you how to create a small art piece.
138
FREE
P O ST
AG
Chicken
Scratch
ON O
R
OVER DERS
$150
A
USTR
AL
ONLY IA
Finished Size 40” x 46”
Kit Price $140.00
(including free postage).
Kit includes all fabric for quilt
top, binding and pattern.
ly
t
n
e
r
Cur ing
s to c k i a
d
A rc a
Funny
Bunny
Finished size is 50 x 56”
Kit Price $160.00
(including free postage).
Kit includes all fabric for quilt
top, binding and pattern.
26 Fairway Close, Howlong NSW 2643
p. 02 6026 5489 | m. 0428 577 957
e. info@whateverwhereever.com.au
www.whateverwhereever.com.au
E