/


Теги: means of protection
Год: 2000


Текст
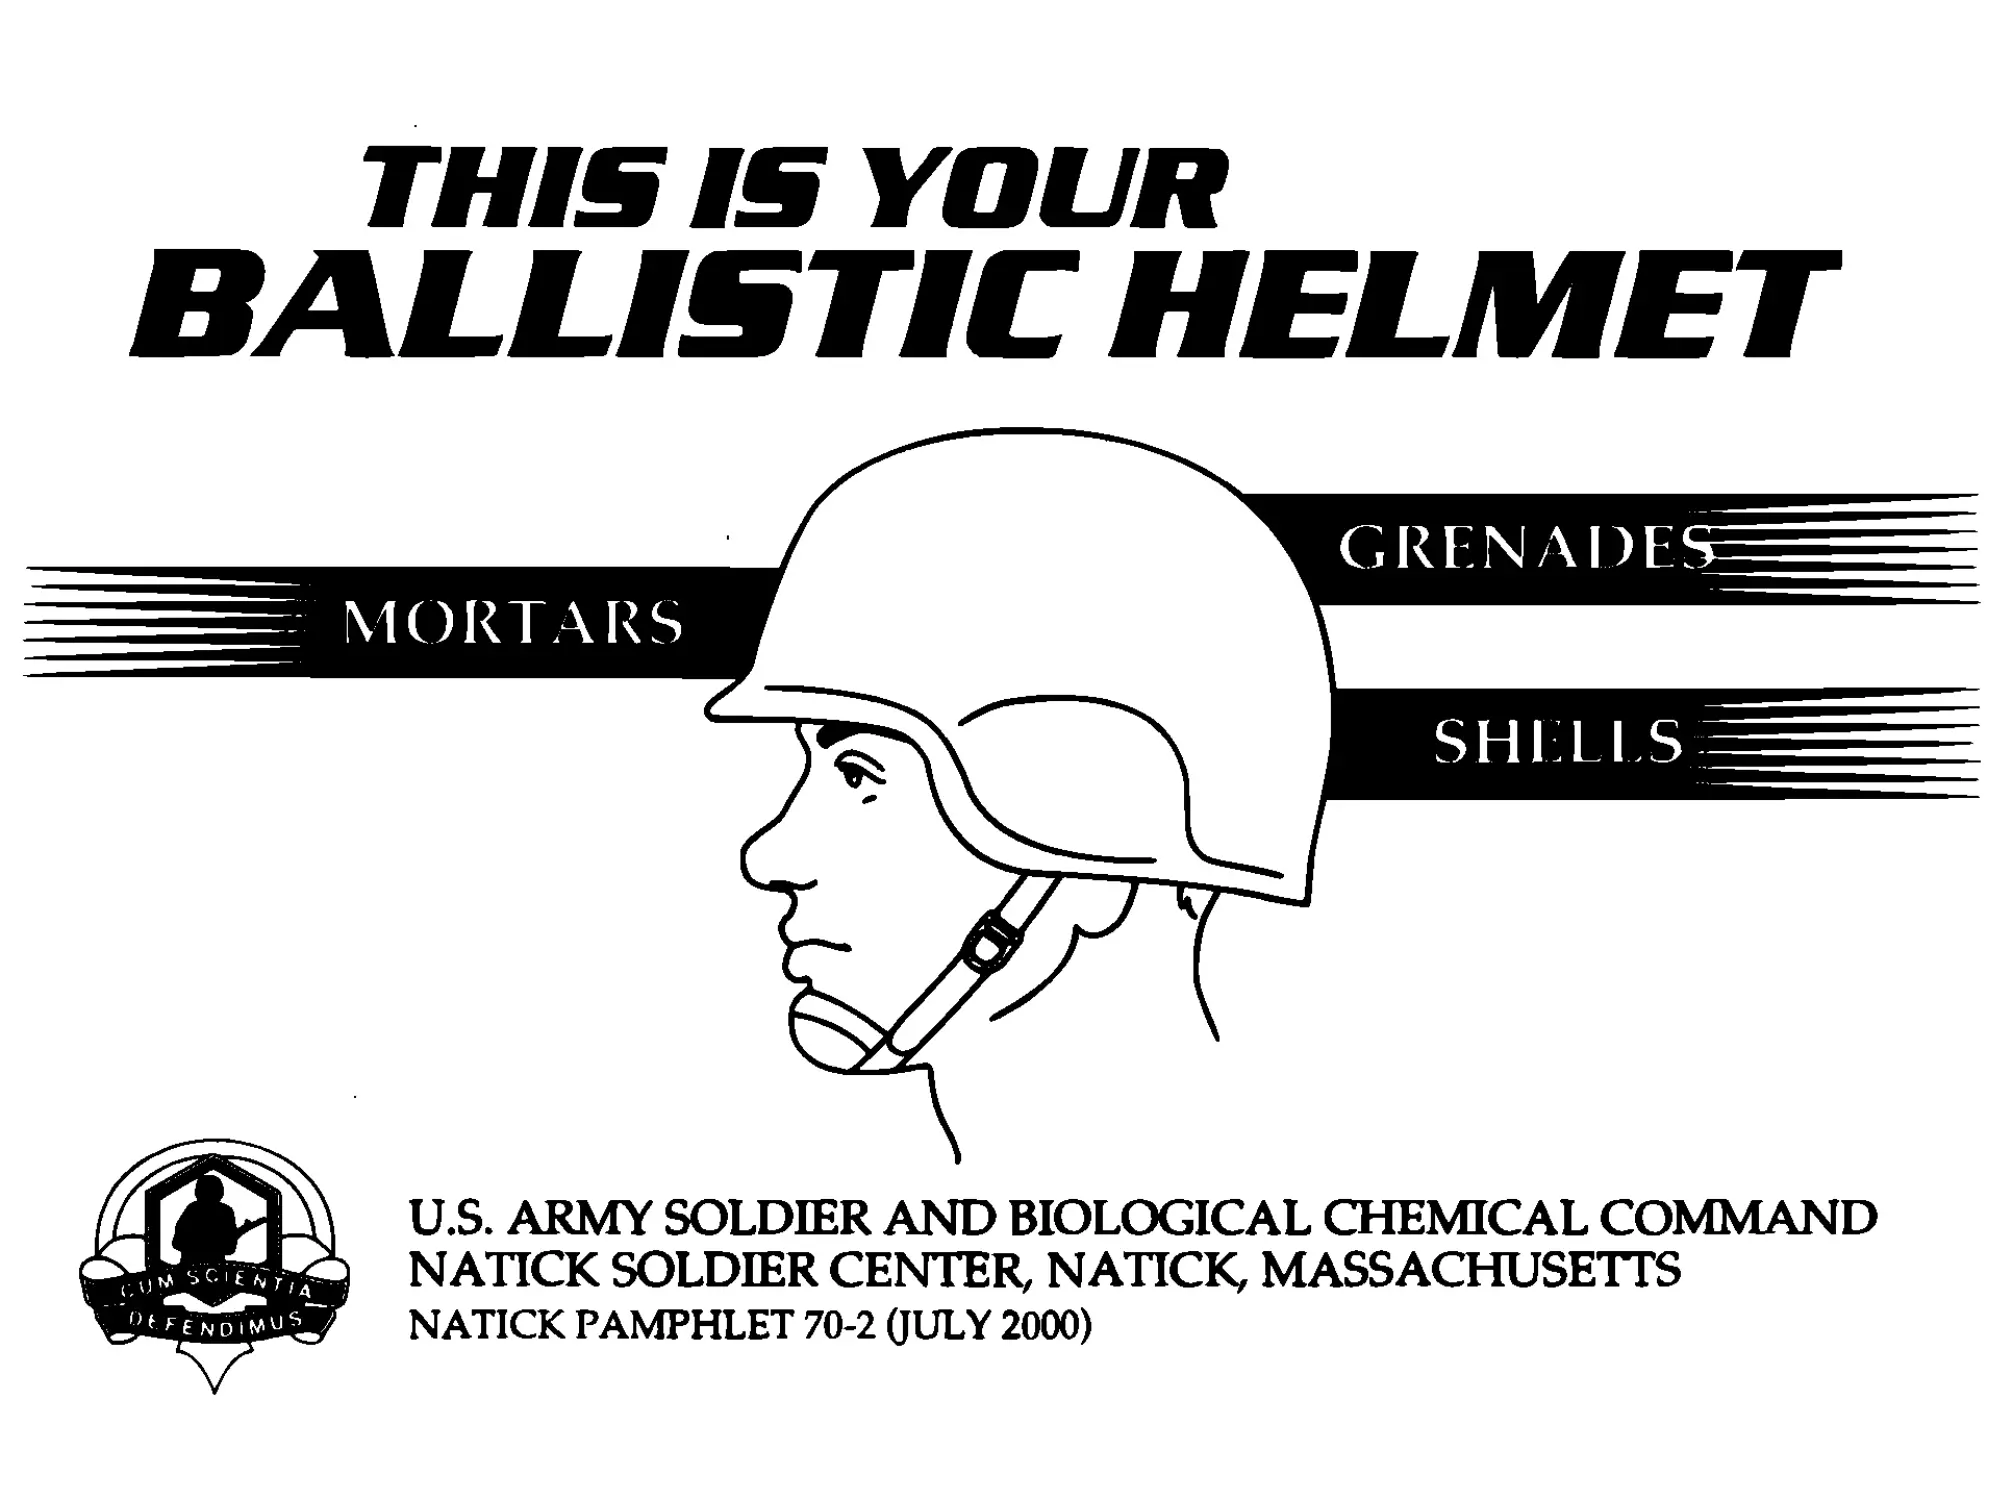
THIS IS YOUR
BALLISTIC HELMET
U.S. ARMY SOLDIER AND BIOLOGICAL CHEMICAL COMMAND
NATICK SOLDIER CENTER NATICK, MASSACHUSETTS
NATICK PAMPHLET 70-2 (JULY 2000)
IT REALLY WORKS-IF IT'S THE CORRECT SIZEI
These are actual accounts from soldiers who survived
the battlefield because of the Personnel Armor System,
Ground Troops Helmet’s ballistic protection.
GRENADA 1ЯВЗ
1.20mm mortar barrage.
Hit by 22 fragments in
helmet.
No injury to head
2. Sniper attack from close
range. Hit by AK-47
round, one hit to helmet.
Minor concussion; life saved
IS YOUR HELMET THECORRECTSIZE?
- YOUR LIFE MAY DEPEND UPON IT
1
TABLE OF CONTENTS
1. THE PROPER HEAD MEASURING PROCEDURE...........3
2. HE AD/HELMET SIZING CHART ....................4
3. HELMET PARTS..................................9
4. SUSPENSION ASSEMBLY..........................11
5. HEADBAND.....................................12
6. CHIN STRAP...................................16
7. CAMOUFLAGE COVER.............................18
8. CHEMICAL PROTECTIVE COVER....................19
9. PARACHUTIST PAD & RETENTION STRAP............21
10. CAMOUFLAGE COVER ADJUSTMENT FOR PARACHUTISTS.22
11. PARACHUTIST IMPACT LINER.....................23
12. REPLACEMENT OF SUSPENSION....................26
13. WASHING INSTRUCTIONS.........................29
14. REPAIR AND MAINTENANCE.......................30
2
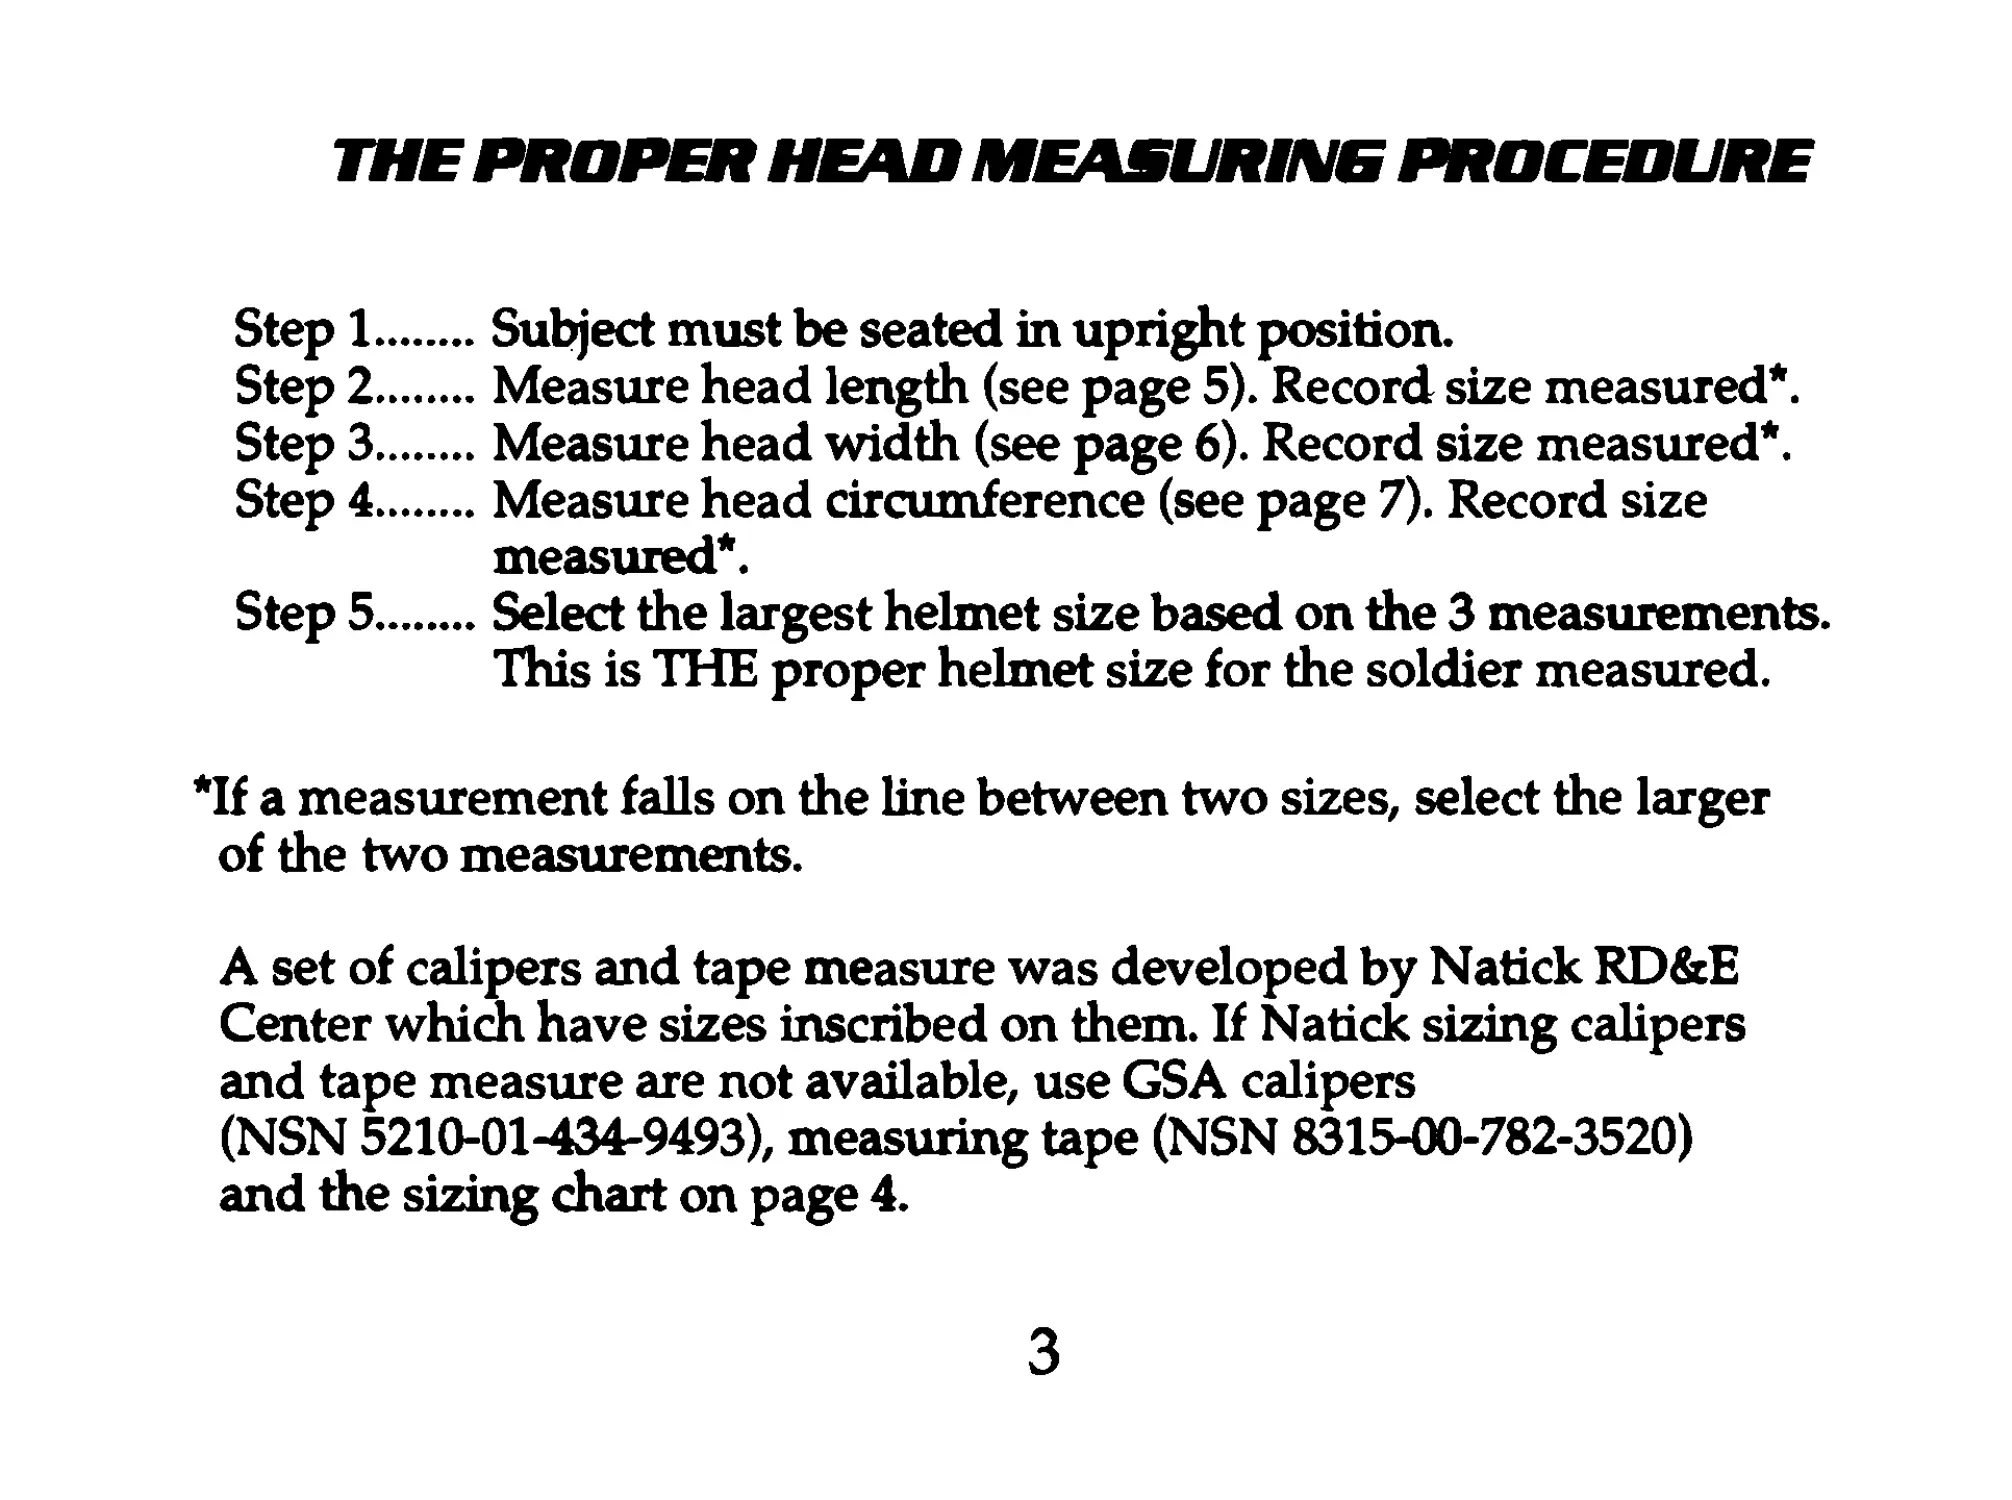
THE PROPER HEAD MEASURING PROCEDURE
Step 1....Subject must be seated in upright position.
Step 2....Measure head length (see page 5). Record size measured*.
Step 3....Measure head width (see page 6). Record size measured*.
Step 4....Measure head circumference (see page 7). Record size
measured*.
Step 5....Select the largest helmet size based on the 3 measurements.
This is THE proper helmet size for the soldier measured.
If a measurement falls on the line between two sizes, select the larger
of the two measurements.
A set of calipers and tape measure was developed by Natick RD&E
Center which have sizes inscribed on them. If Natick sizing calipers
and tape measure are not available, use GSA calipers
(NSN 5210-01-434-9493), measuring tape (NSN 8315-00-782-3520)
and the sizing chart on page 4.
3
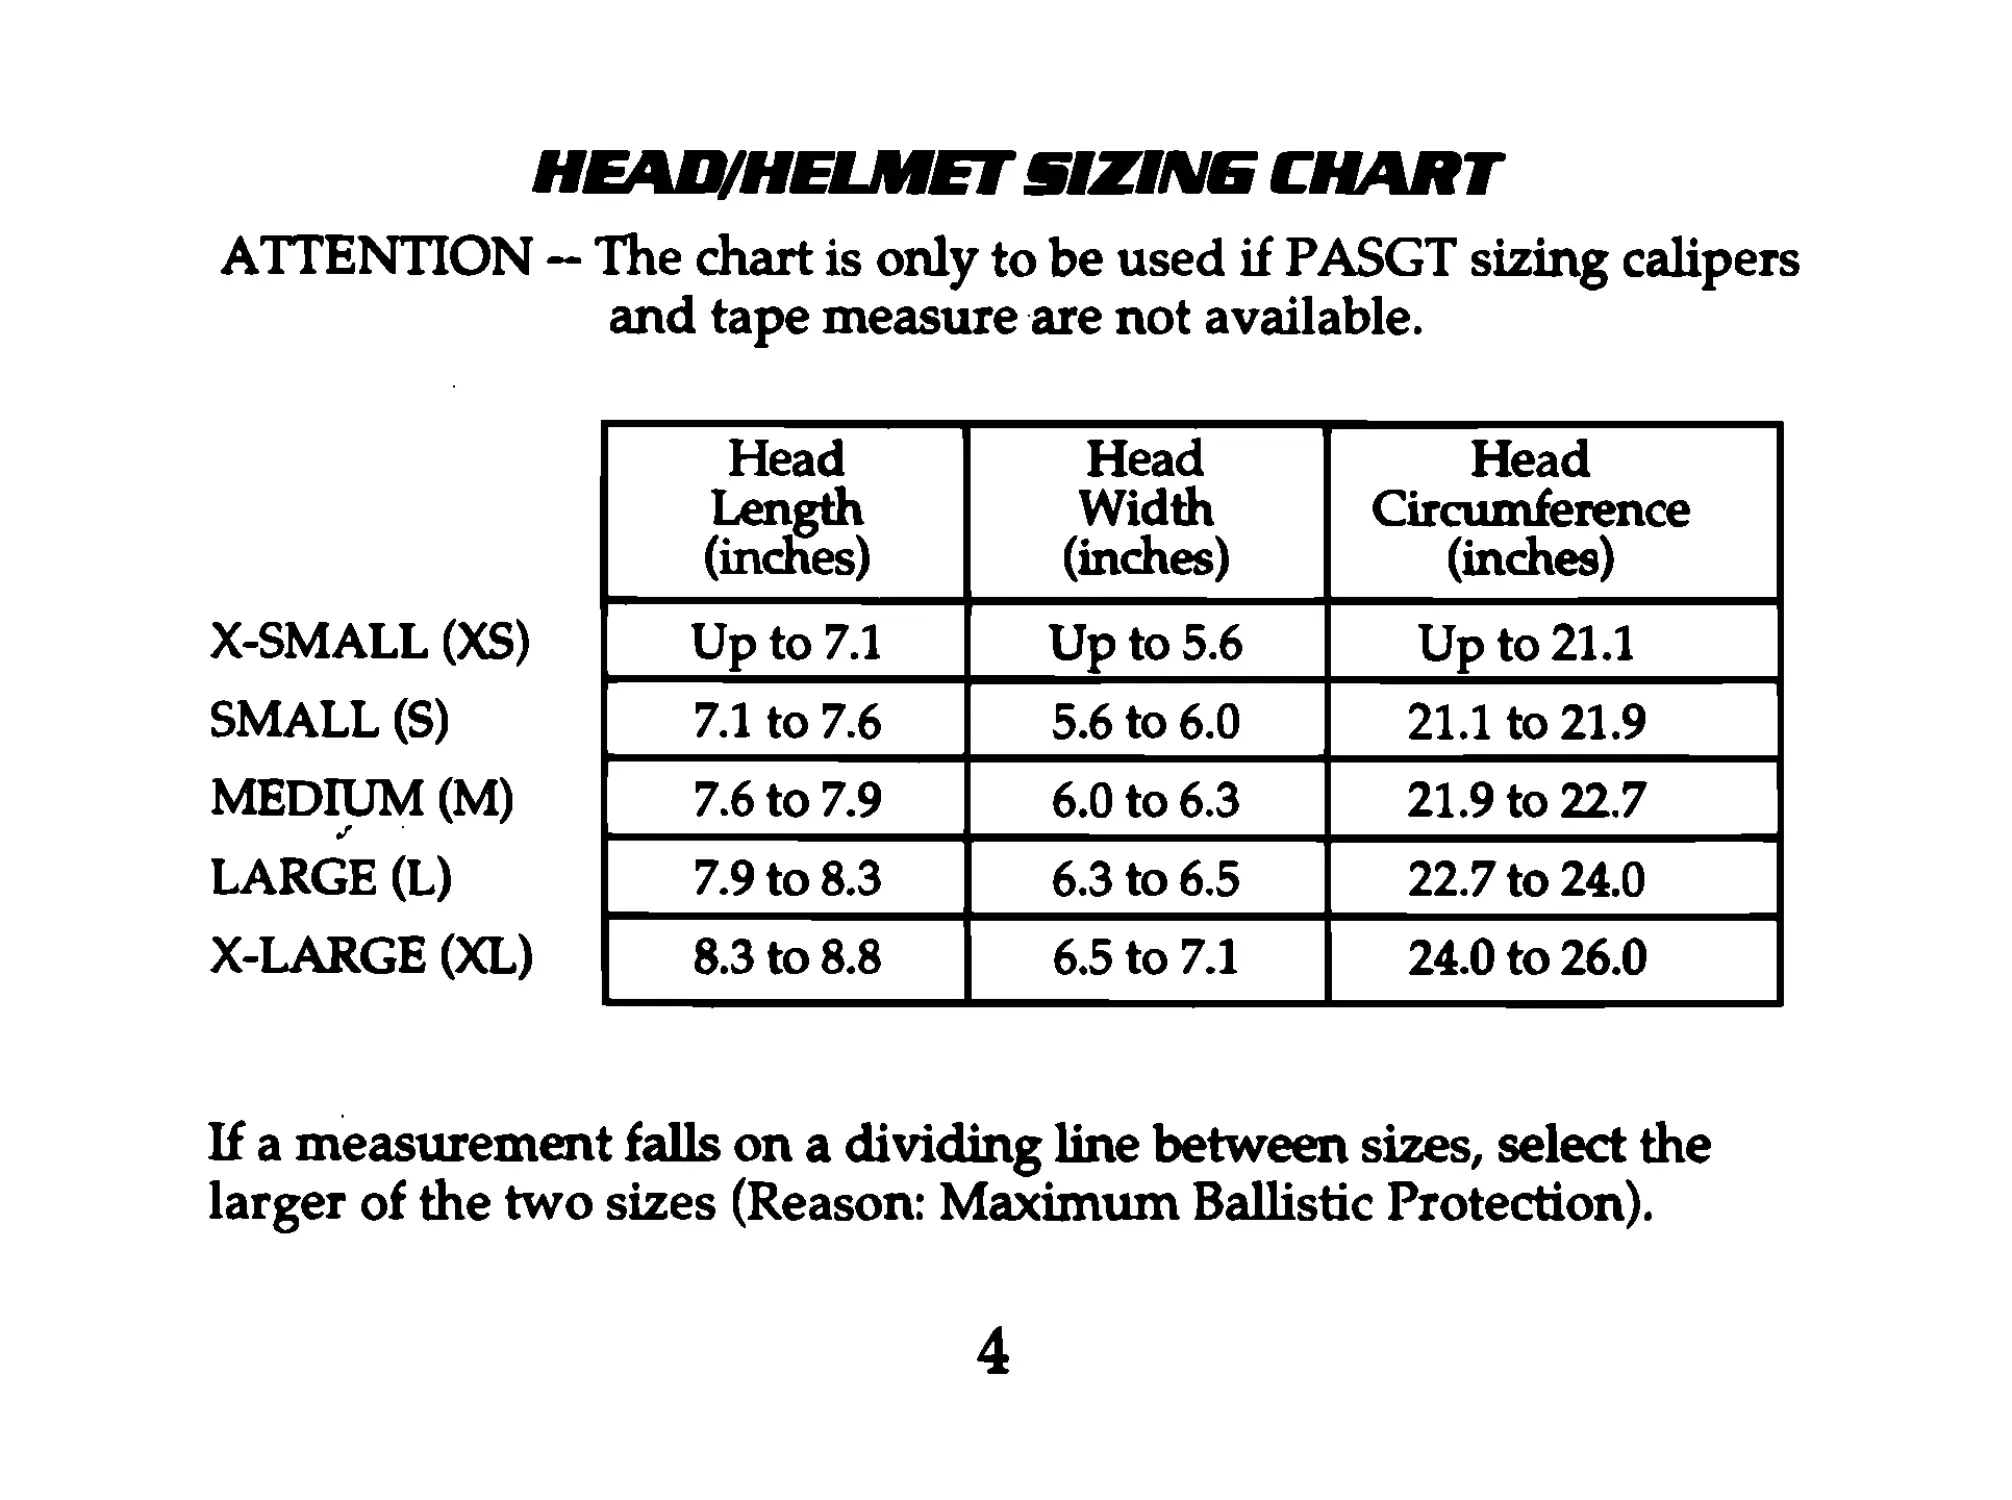
HEAD/HELMETSIZINE CHART
ATTENTION — The chart is only to be used if PASGT sizing calipers
and tape measure are not available.
X-SMALL (XS)
SMALL (S)
MEDIUM (M)
LARGE (L)
X-LARGE (XL)
Head Length (inches) Head Width (inches) Head Circumference (inches)
Up to 7.1 Up to 5.6 Up to 21.1
7.1 to 7.6 5.6 to 6.0 21.1 to 21.9
7.6 to 7.9 6.0 to 6.3 21.9 to 22.7
7.9 to 8.3 6.3 to 6.5 22.7 to 24.0
8.3 to 8.8 6.5 to 7.1 24.0 to 26.0
If a measurement falls on a dividing line between sizes, select the
larger of the two sizes (Reason: Maximum Ballistic Protection).
4
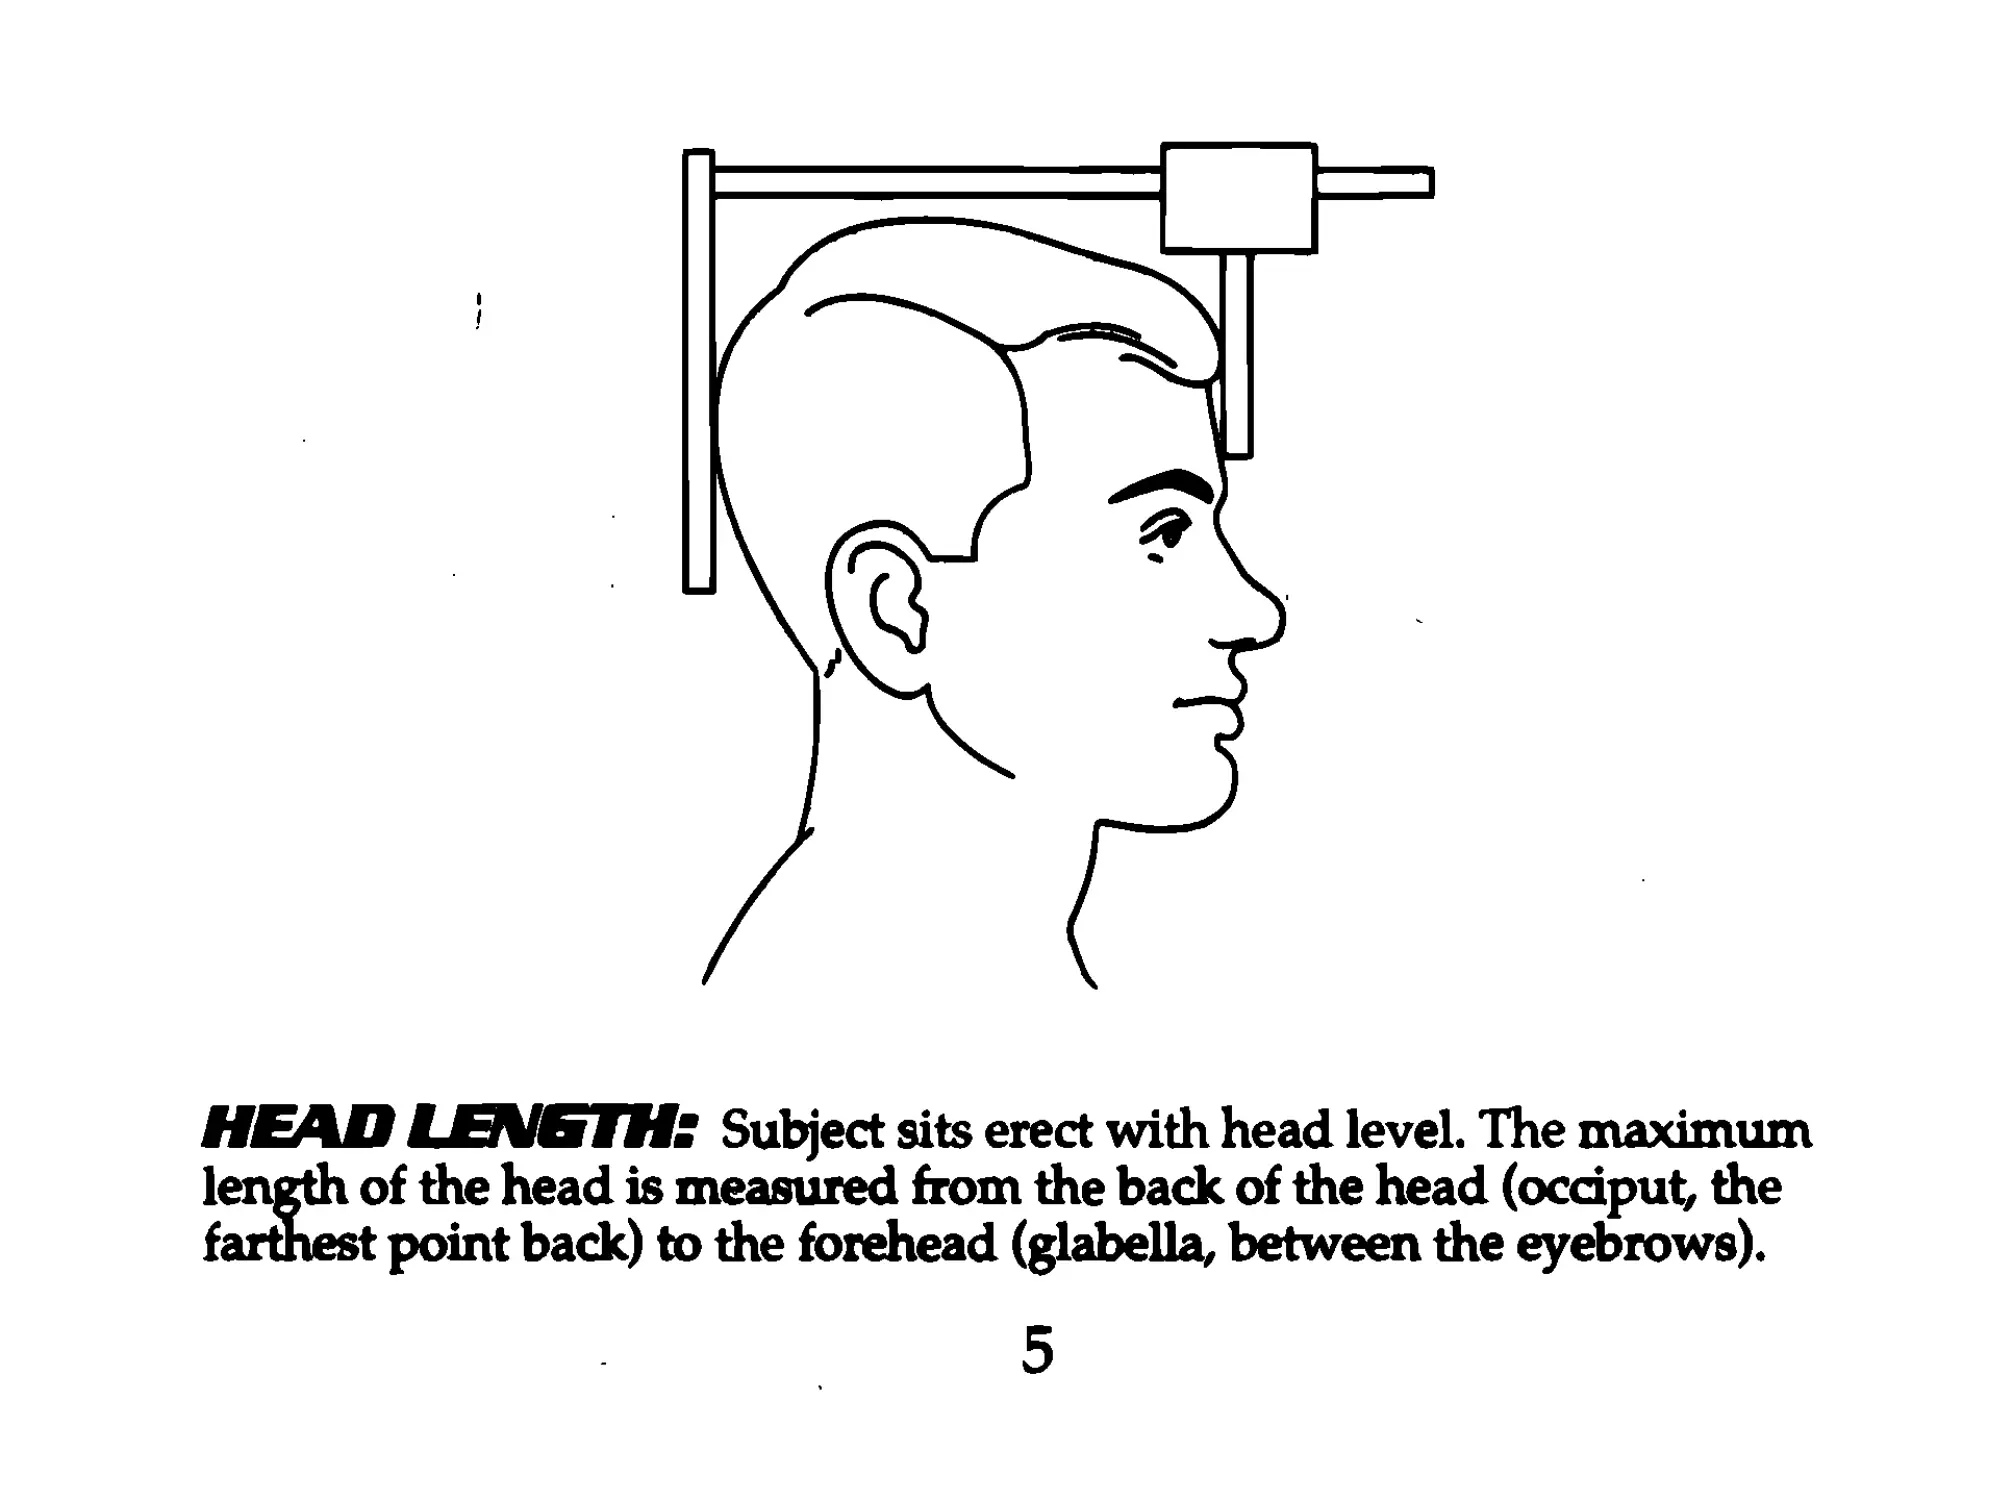
HEADLE\IKTH: Subject sits erect with head level. The maximum
length of the head is measured from the back of the head (occiput, die
farthest point back) to the forehead (glabella, between the eyebrows).
5
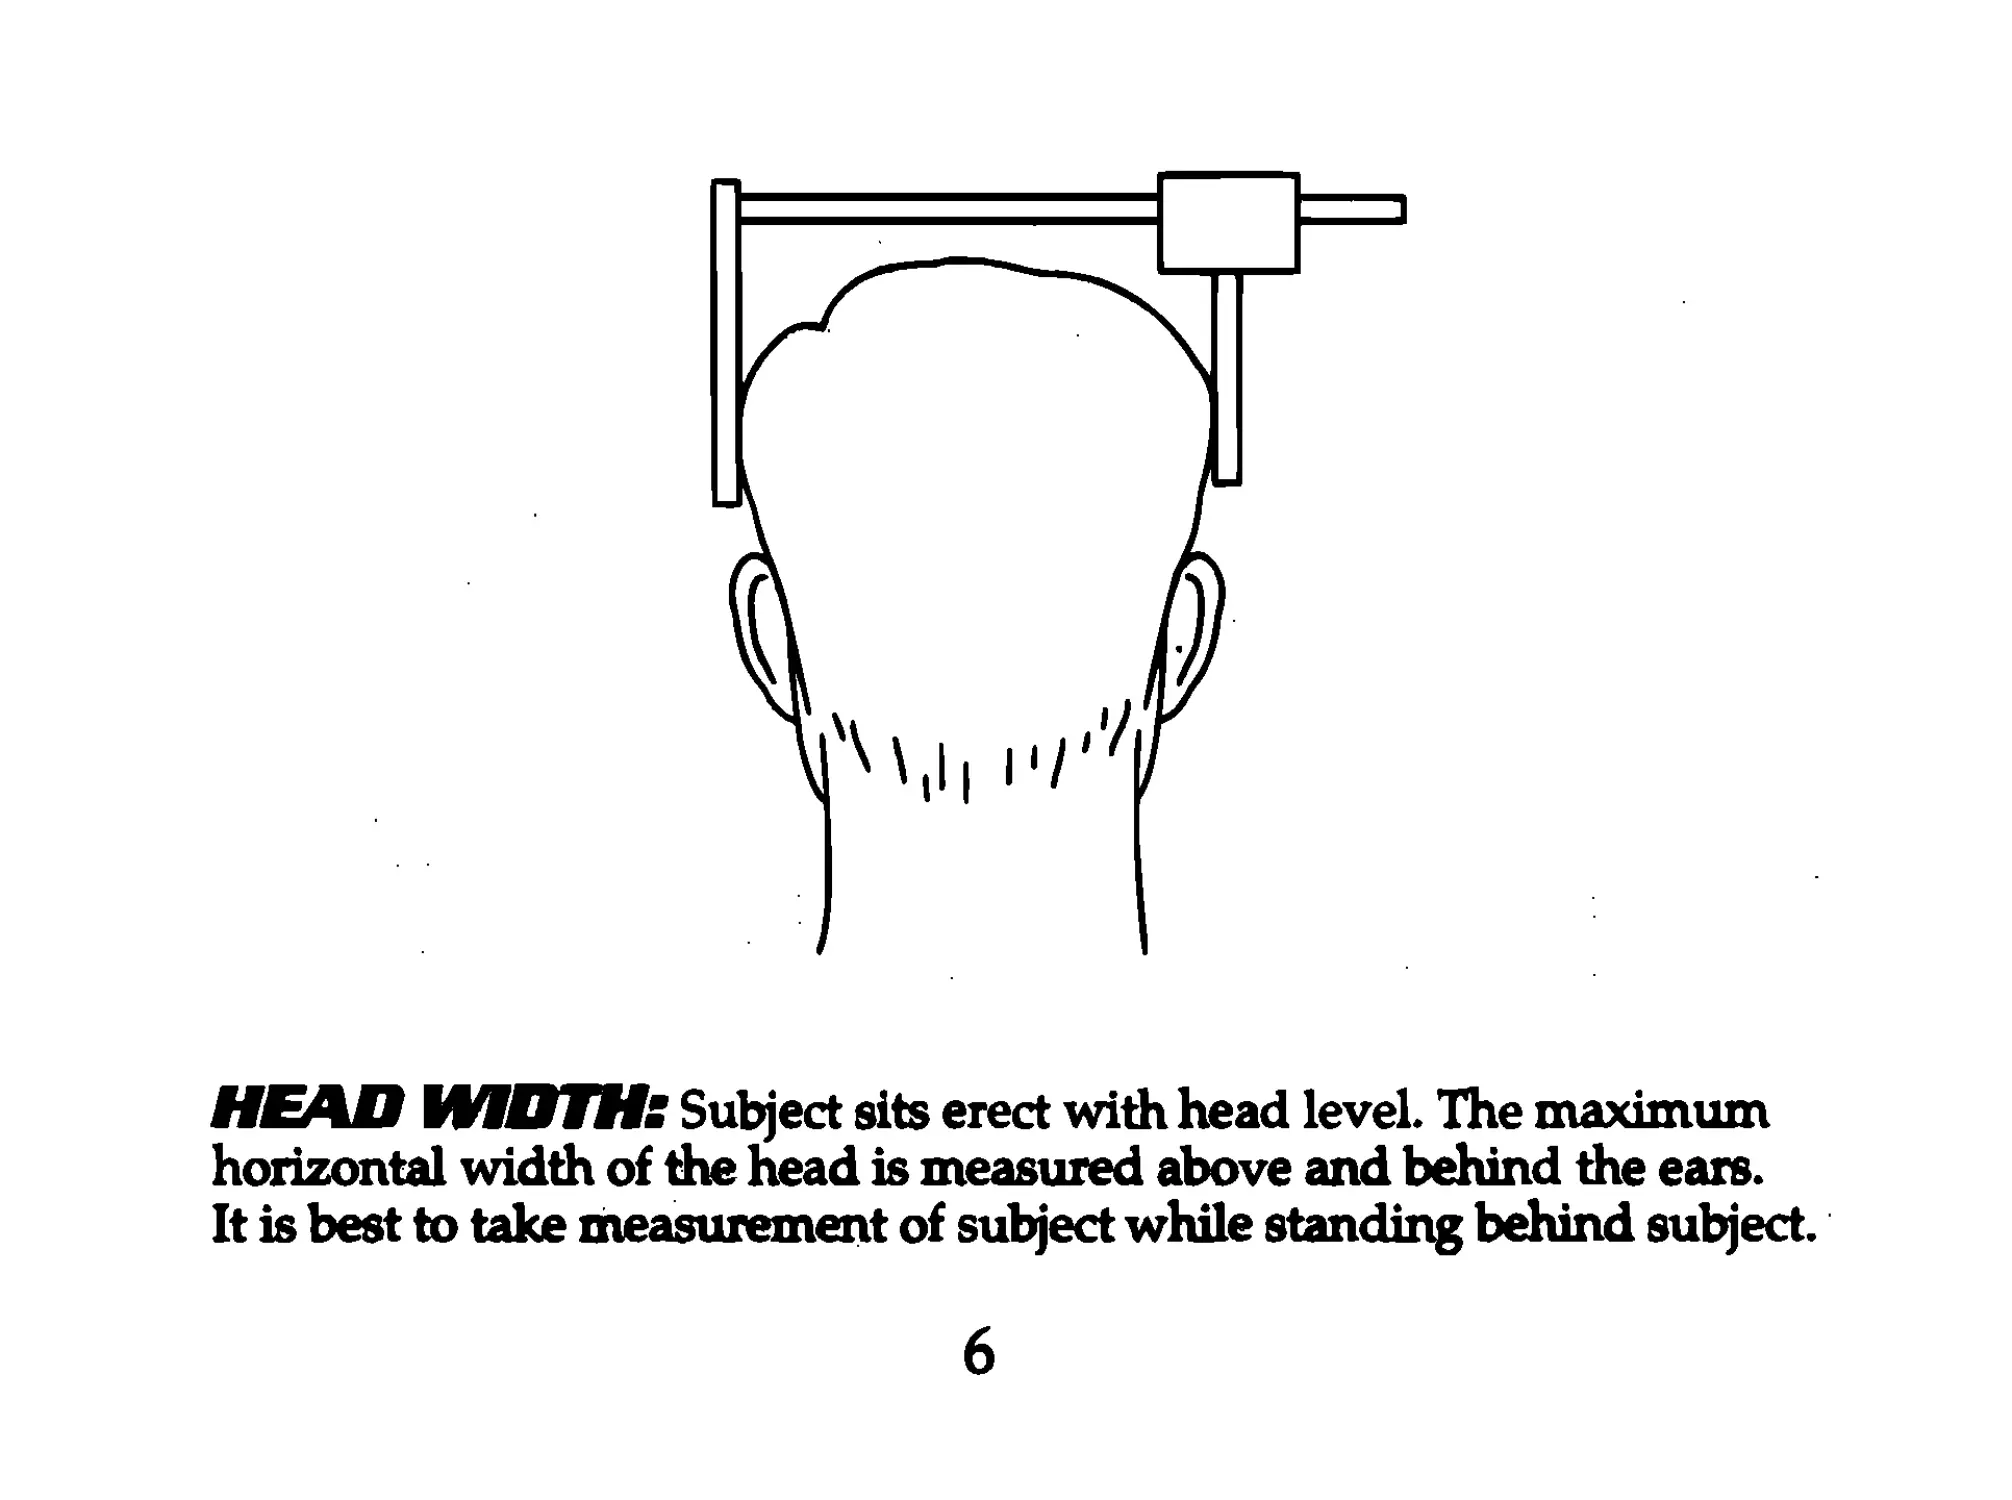
HEAD WIDTH: Subject sits erect with head level. The maximum
horizontal width of the head is measured above and behind the ears.
It is best to take measurement of subject while standing behind subject.
6
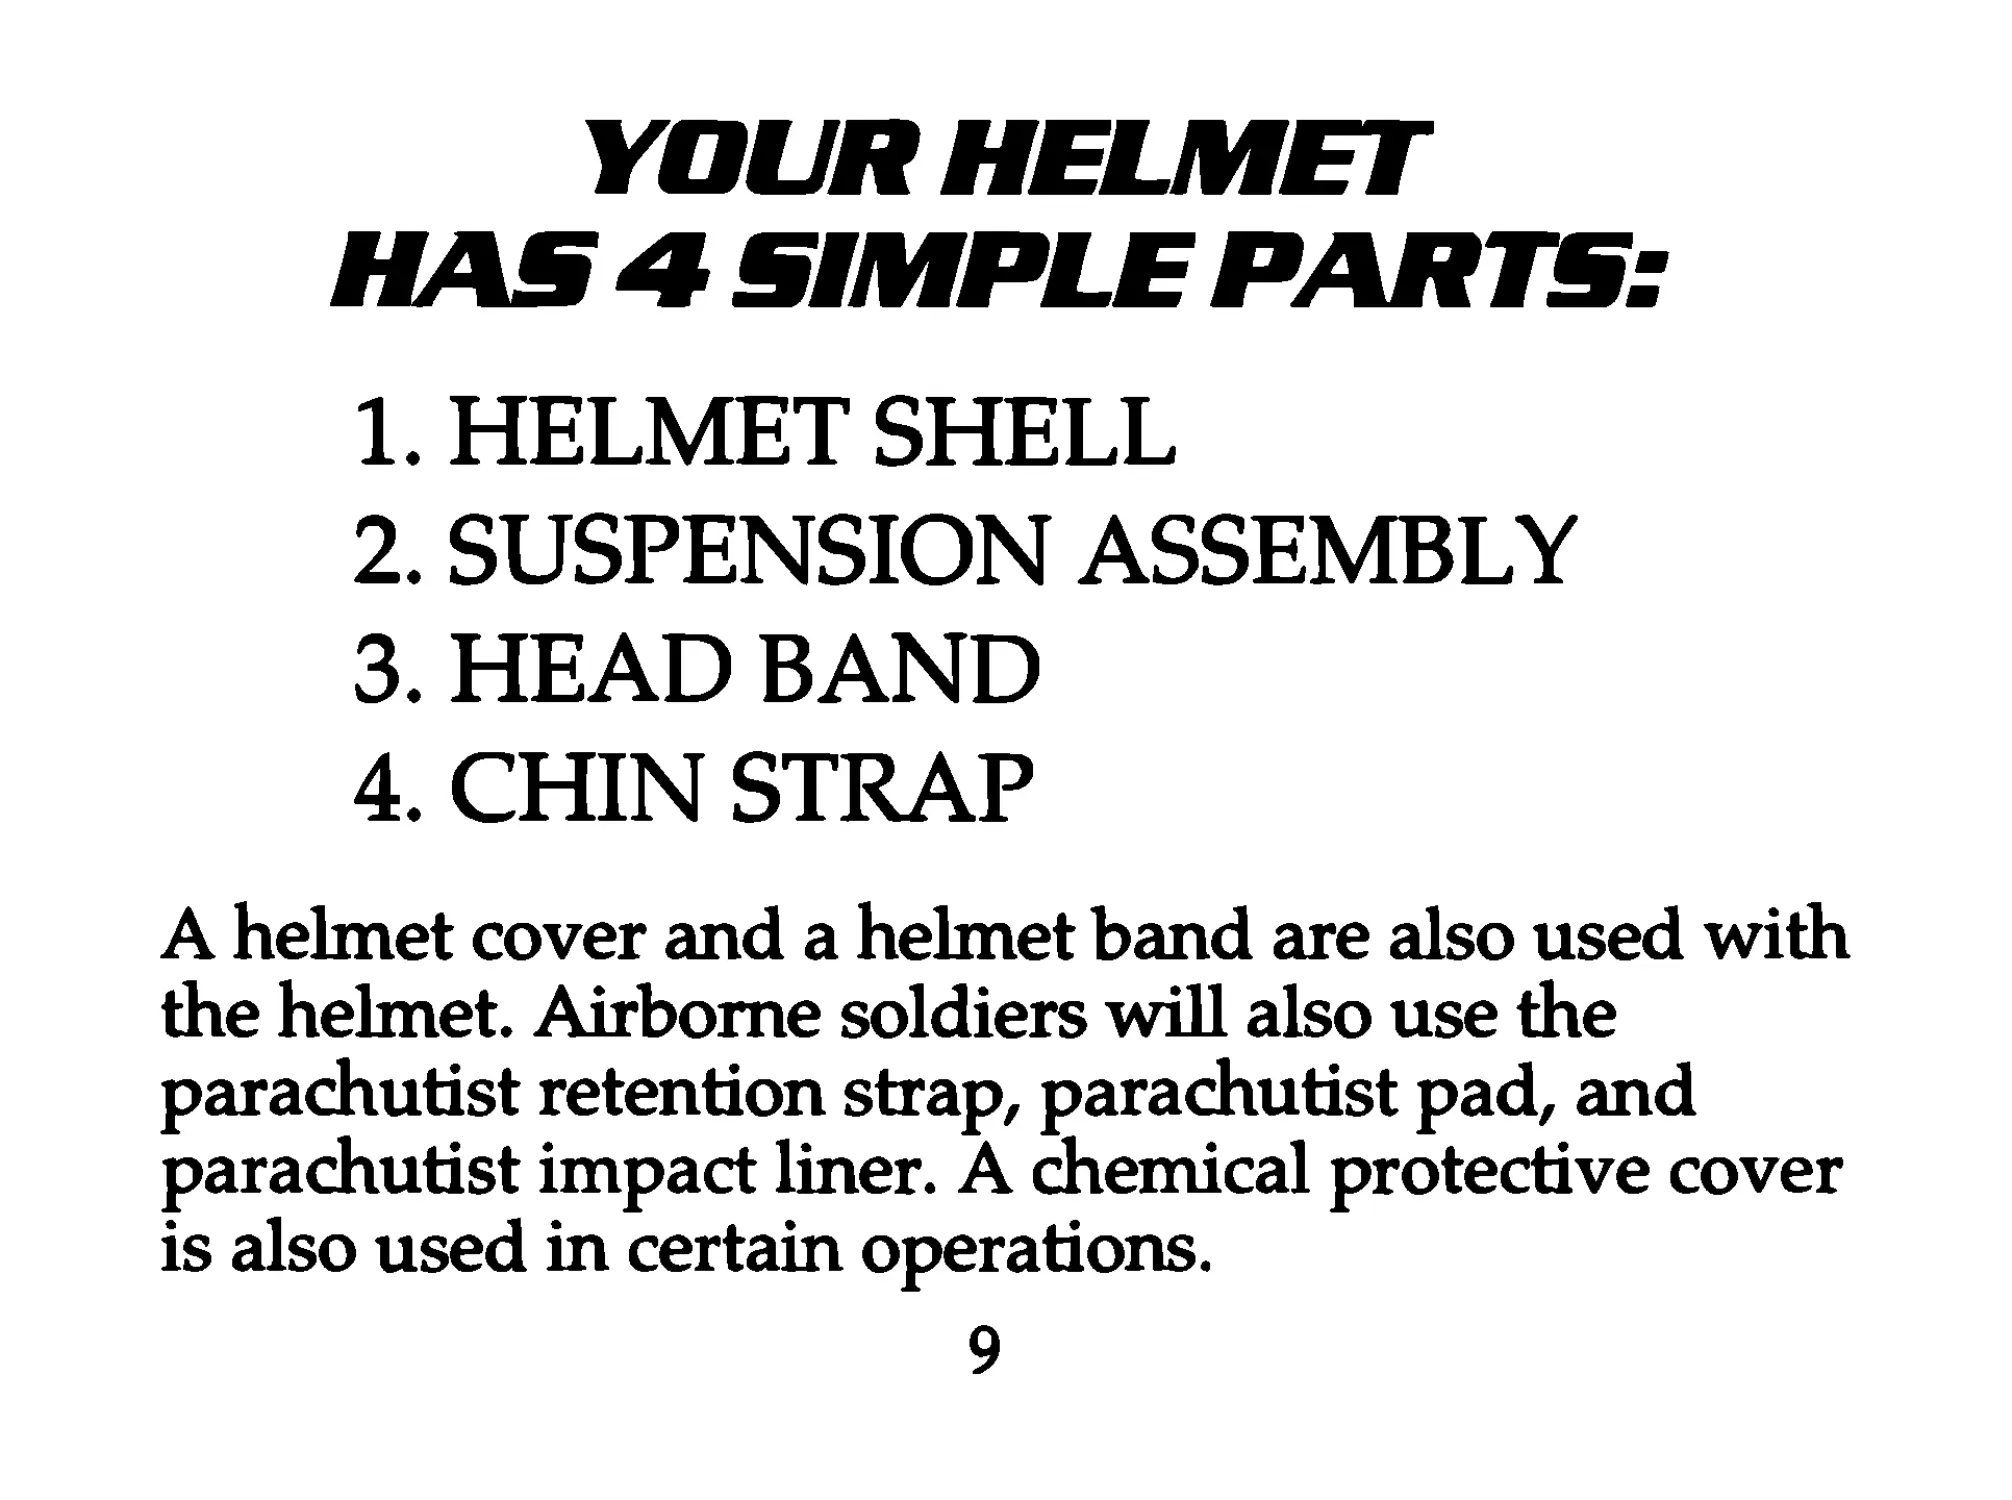
YOUR HELMET
HAS 4 SIMPLE PARTS:
1. HELMET SHELL
2. SUSPENSION ASSEMBLY
3. HEAD BAND
4. CHIN STRAP
A helmet cover and a helmet band are also used with
the helmet. Airborne soldiers will also use the
parachutist retention strap, parachutist pad, and
parachutist impact liner. A chemical protective cover
is also used in certain operations.
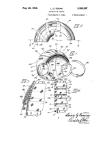
9
10
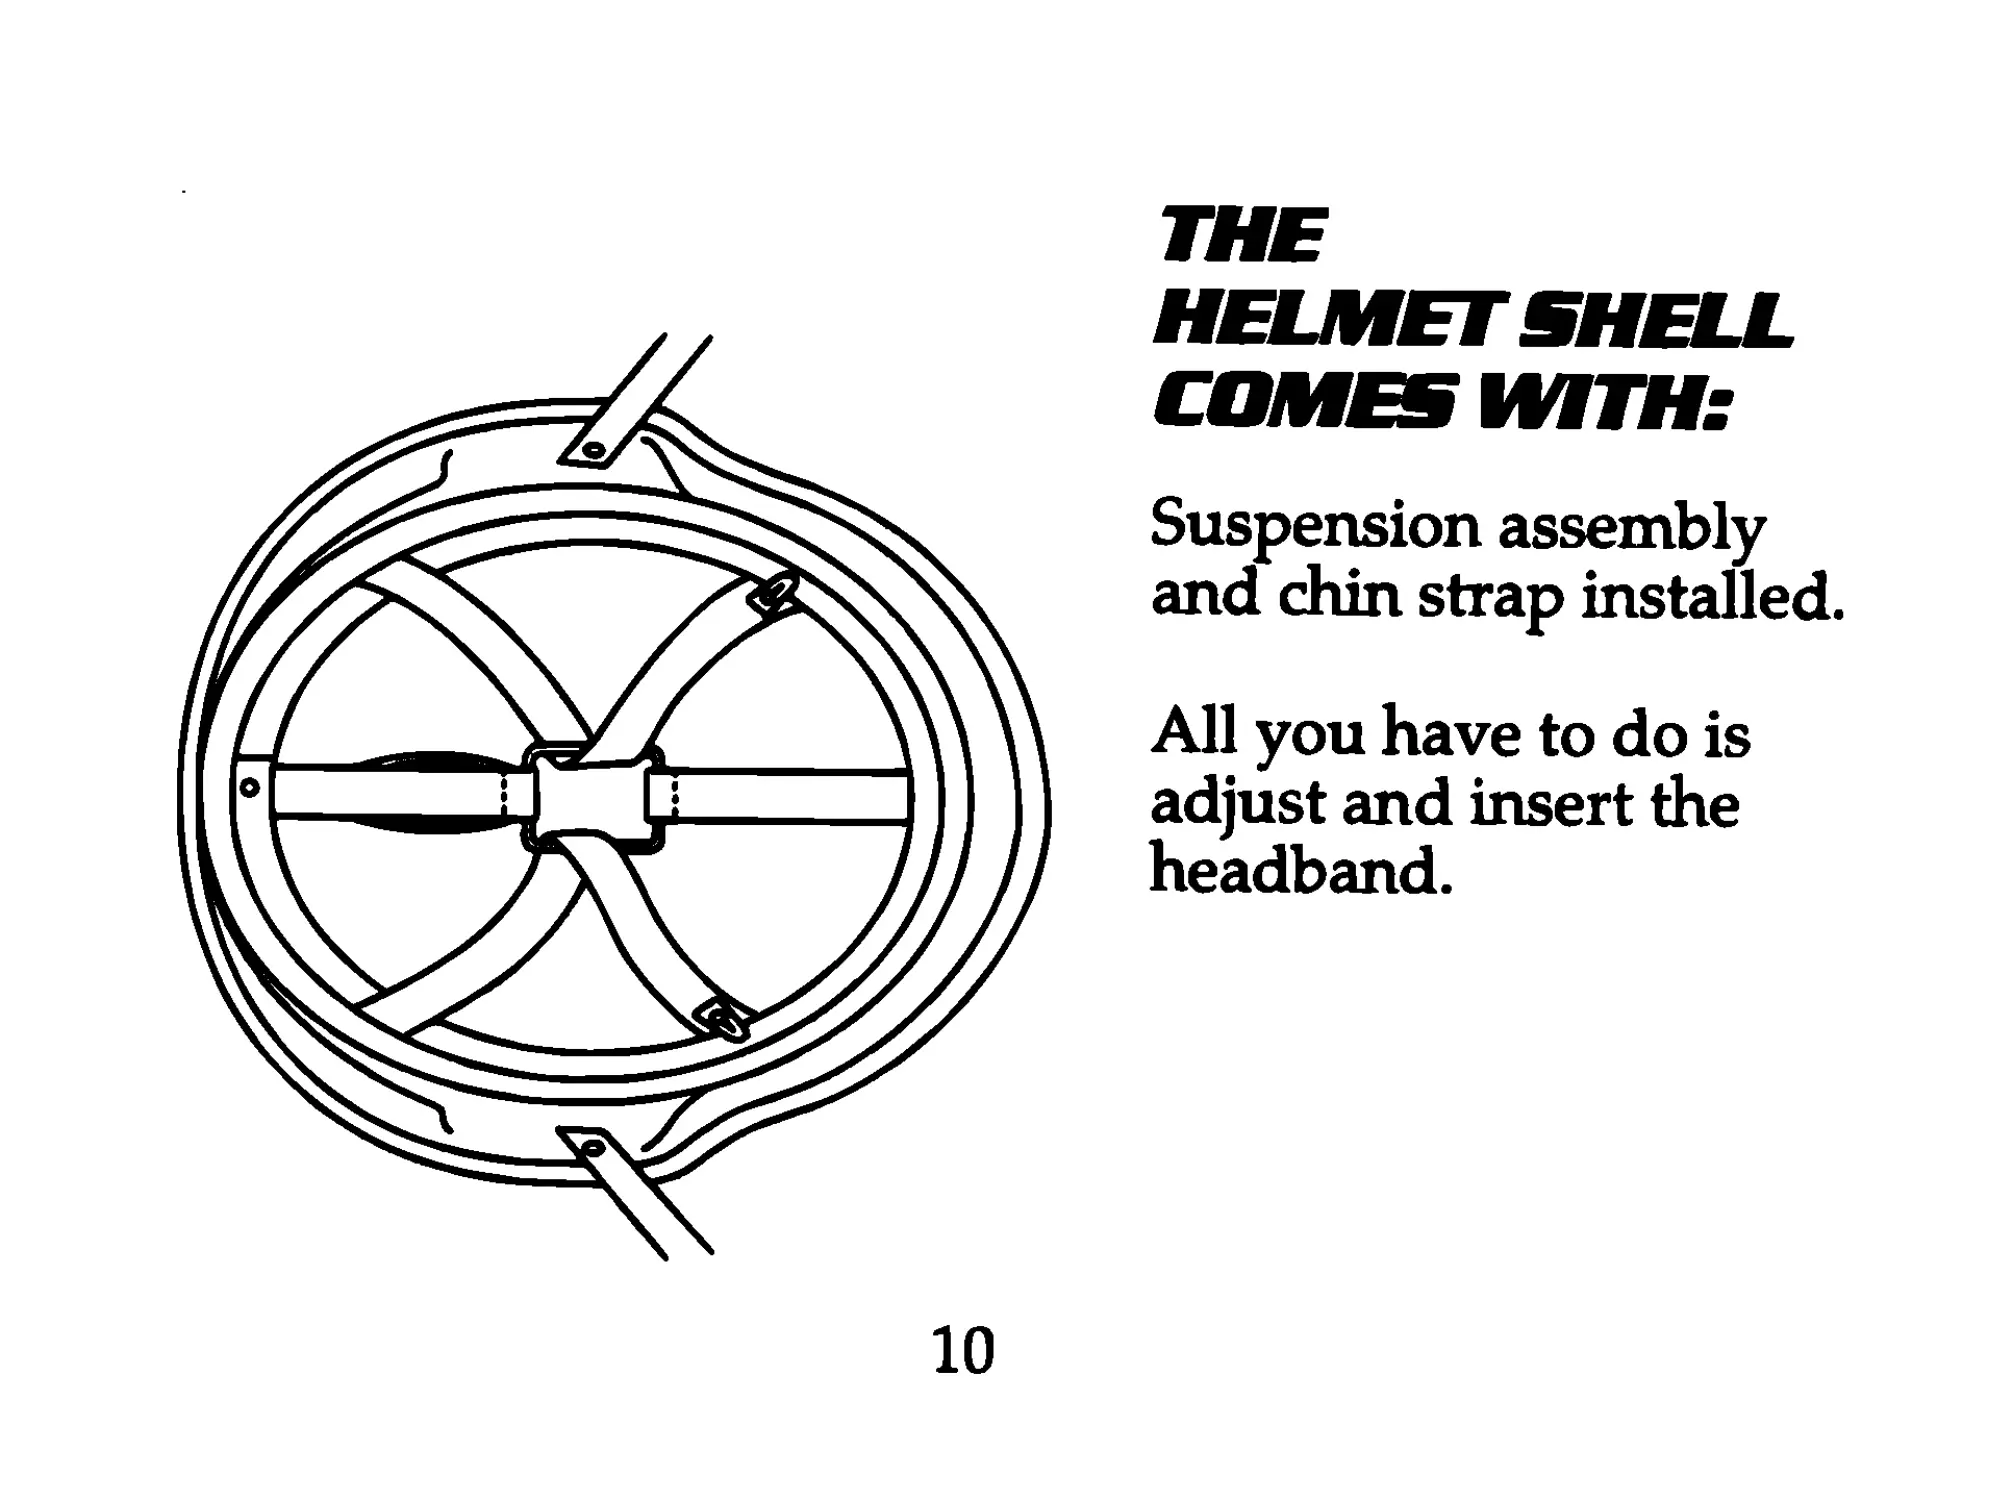
THE
HELMET SHELL
COMES WITH:
Suspension assembly
and chin strap installed.
All you have to do is
adjust and insert the
headband.
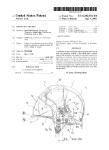
SUSPENSION
ASSEMBLY
FRONT STRAP
LOOPED SIDE
STRAP
LOOP
FASTENER
REAR
STRAP
YOUR SUSPENSION
ASSEMBLY CONSISTS OF THE
FOLLOWING:
1. Two looped side straps and
one each front and rear
straps.
2. A fixed web strap to which
the ends of the crown straps
are attached.
3. Drawstring and adjustable
tab.
ADJUSTABLE TAB FIXED WEB
STRAP
DRAWSTRING
11
HEADBAND
REAR HOOK AND LOOP ADJUSTMENT
SIX OUTSIDE
HOOK ,
FASTENERS
Your headband is a padded leather-lined web strap. A hook and
loop fastener in the back adjusts the headband's length to fit your
head.
Attached to the strap's outside are six hook fasteners. These are
used to attach the headband to the fixed loop fasteners web strap
of the suspension assembly.
12
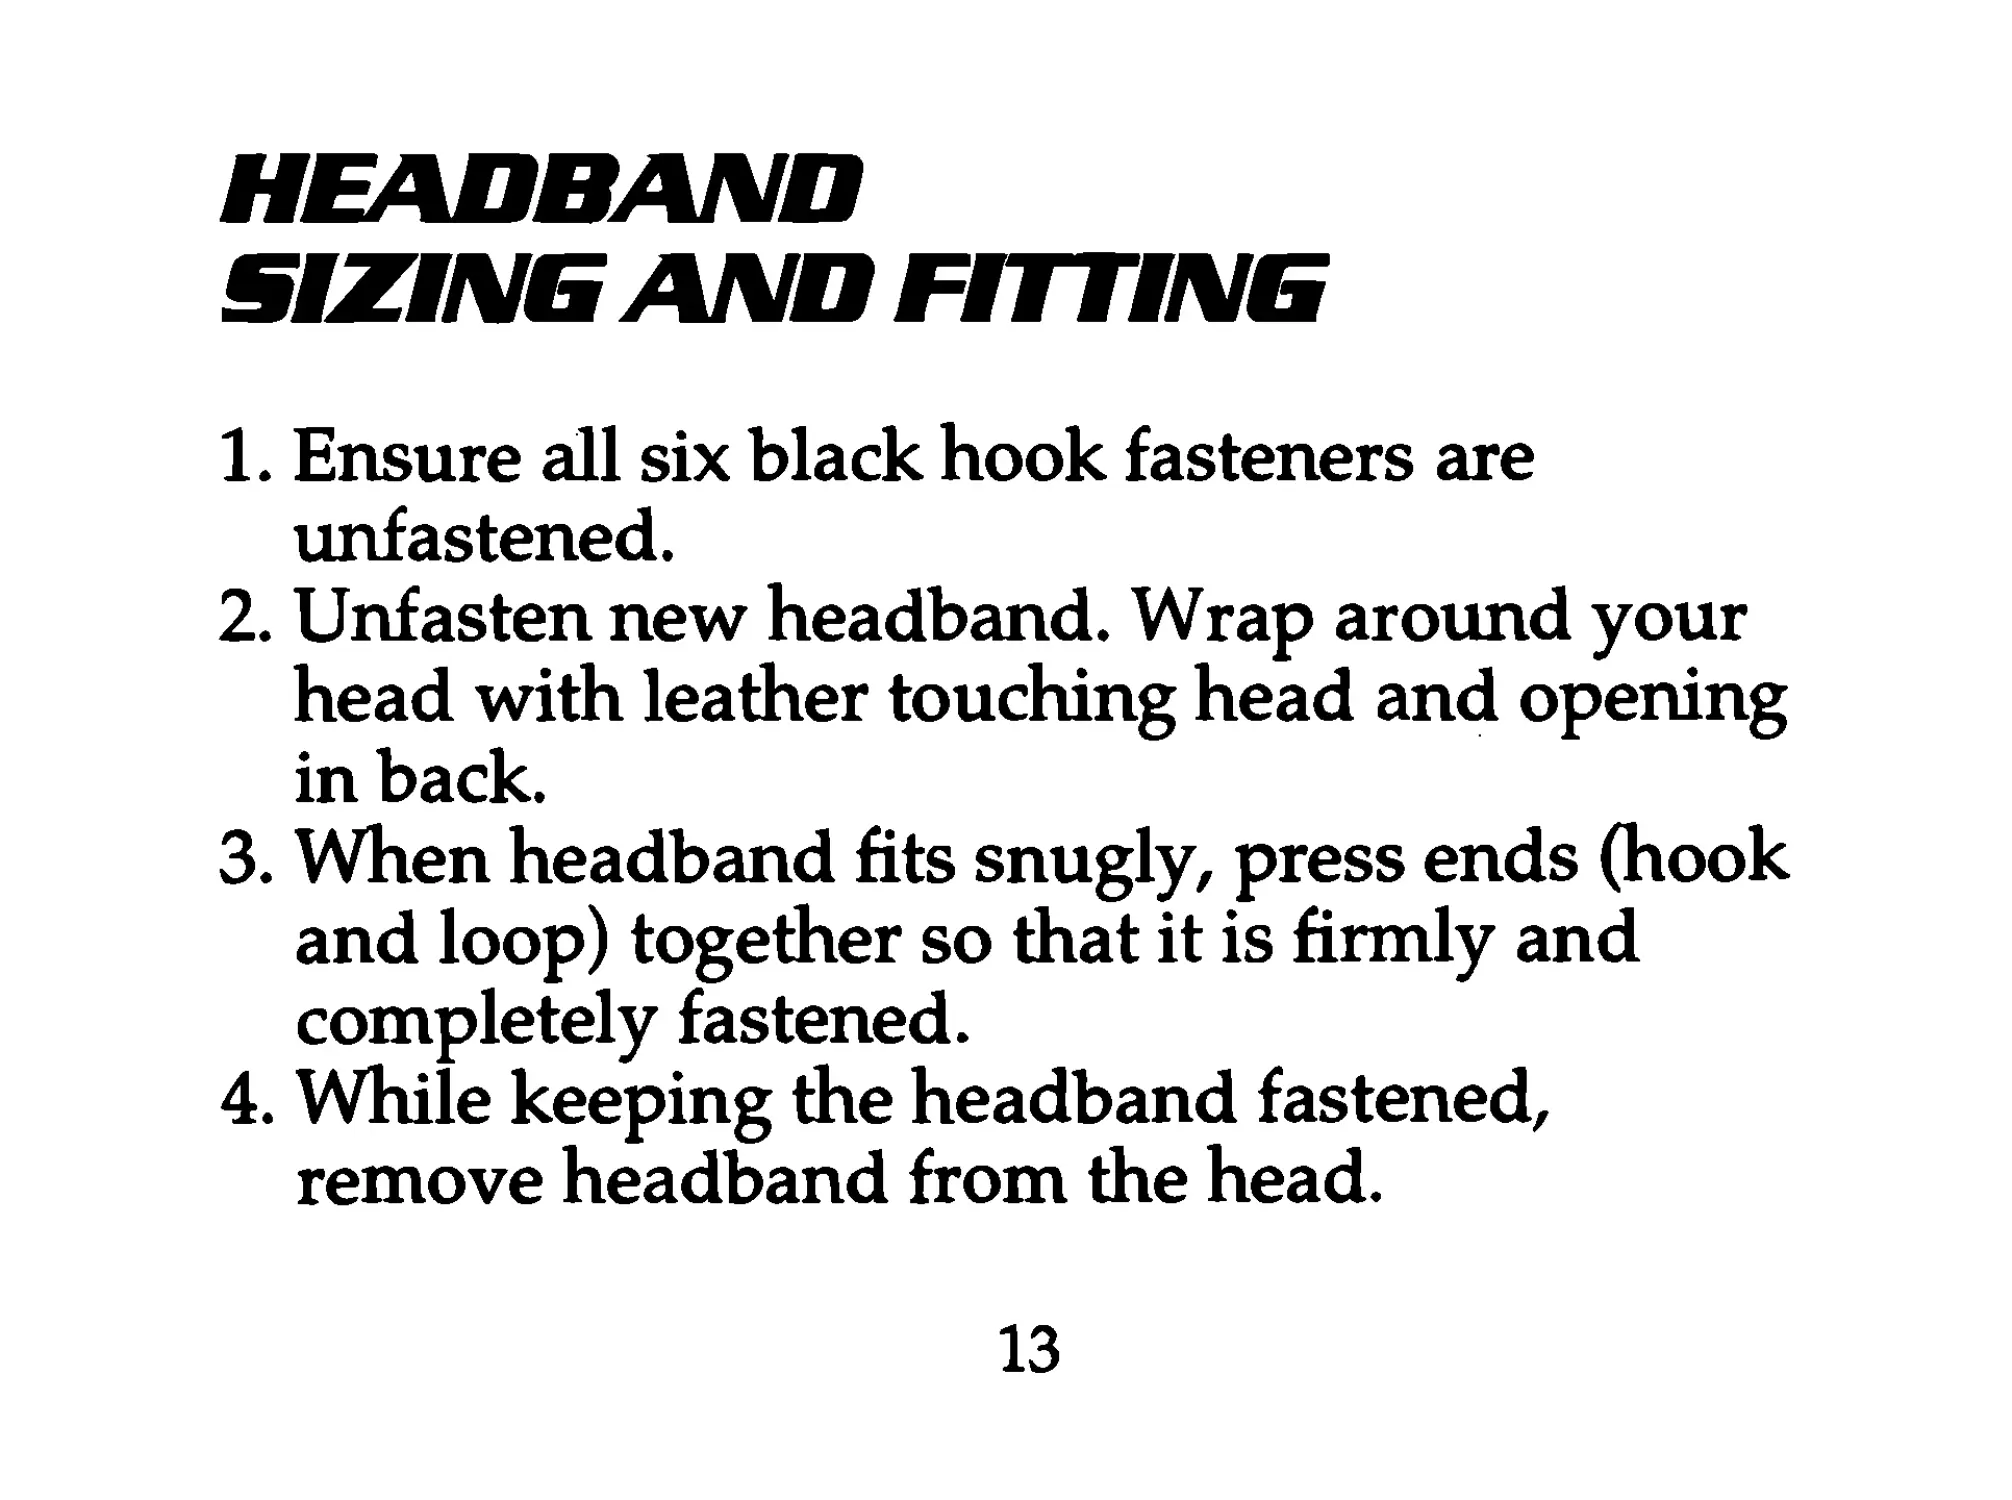
HEADBAND
SUING AND FITTING
1. Ensure all six black hook fasteners are
unfastened.
2. Unfasten new headband. Wrap around your
head with leather touching head and opening
in back.
3. When headband fits snugly, press ends (hook
and loop) together so that it is firmly and
completely fastened.
4. While keeping the headband fastened,
remove headband from the head.
13
ATTACH HEADBAND TO
SUSPENSION ASSEMBLY
1. Ensure all of the six black hook and loop fasteners of the new headband
are unfastened.
2. Place the shell with suspension assembly installed upside down in front of
you on a flat surface.
3. Place your headband inside the suspension assembly with the folded
edge of the leather facing up (toward you). Line up the back of the
suspension system (where drawstring adjustment tab is) and
adjustment area of the headband (where there is no leather) so they are
next to each other.
4. Ensure the hook and loop fasteners are around the suspension's fixed
web strap and not caught between the fixed web strap and headband.
5. Wrap the hook and loop fasteners snugly around the suspension strap
and lift leather side of headband up so tnat hook section can be fastened
to the loop section underneath.
6. Repeat step #3 with other five hook and loop fasteners, working
around the headband from front to back to front again.
14
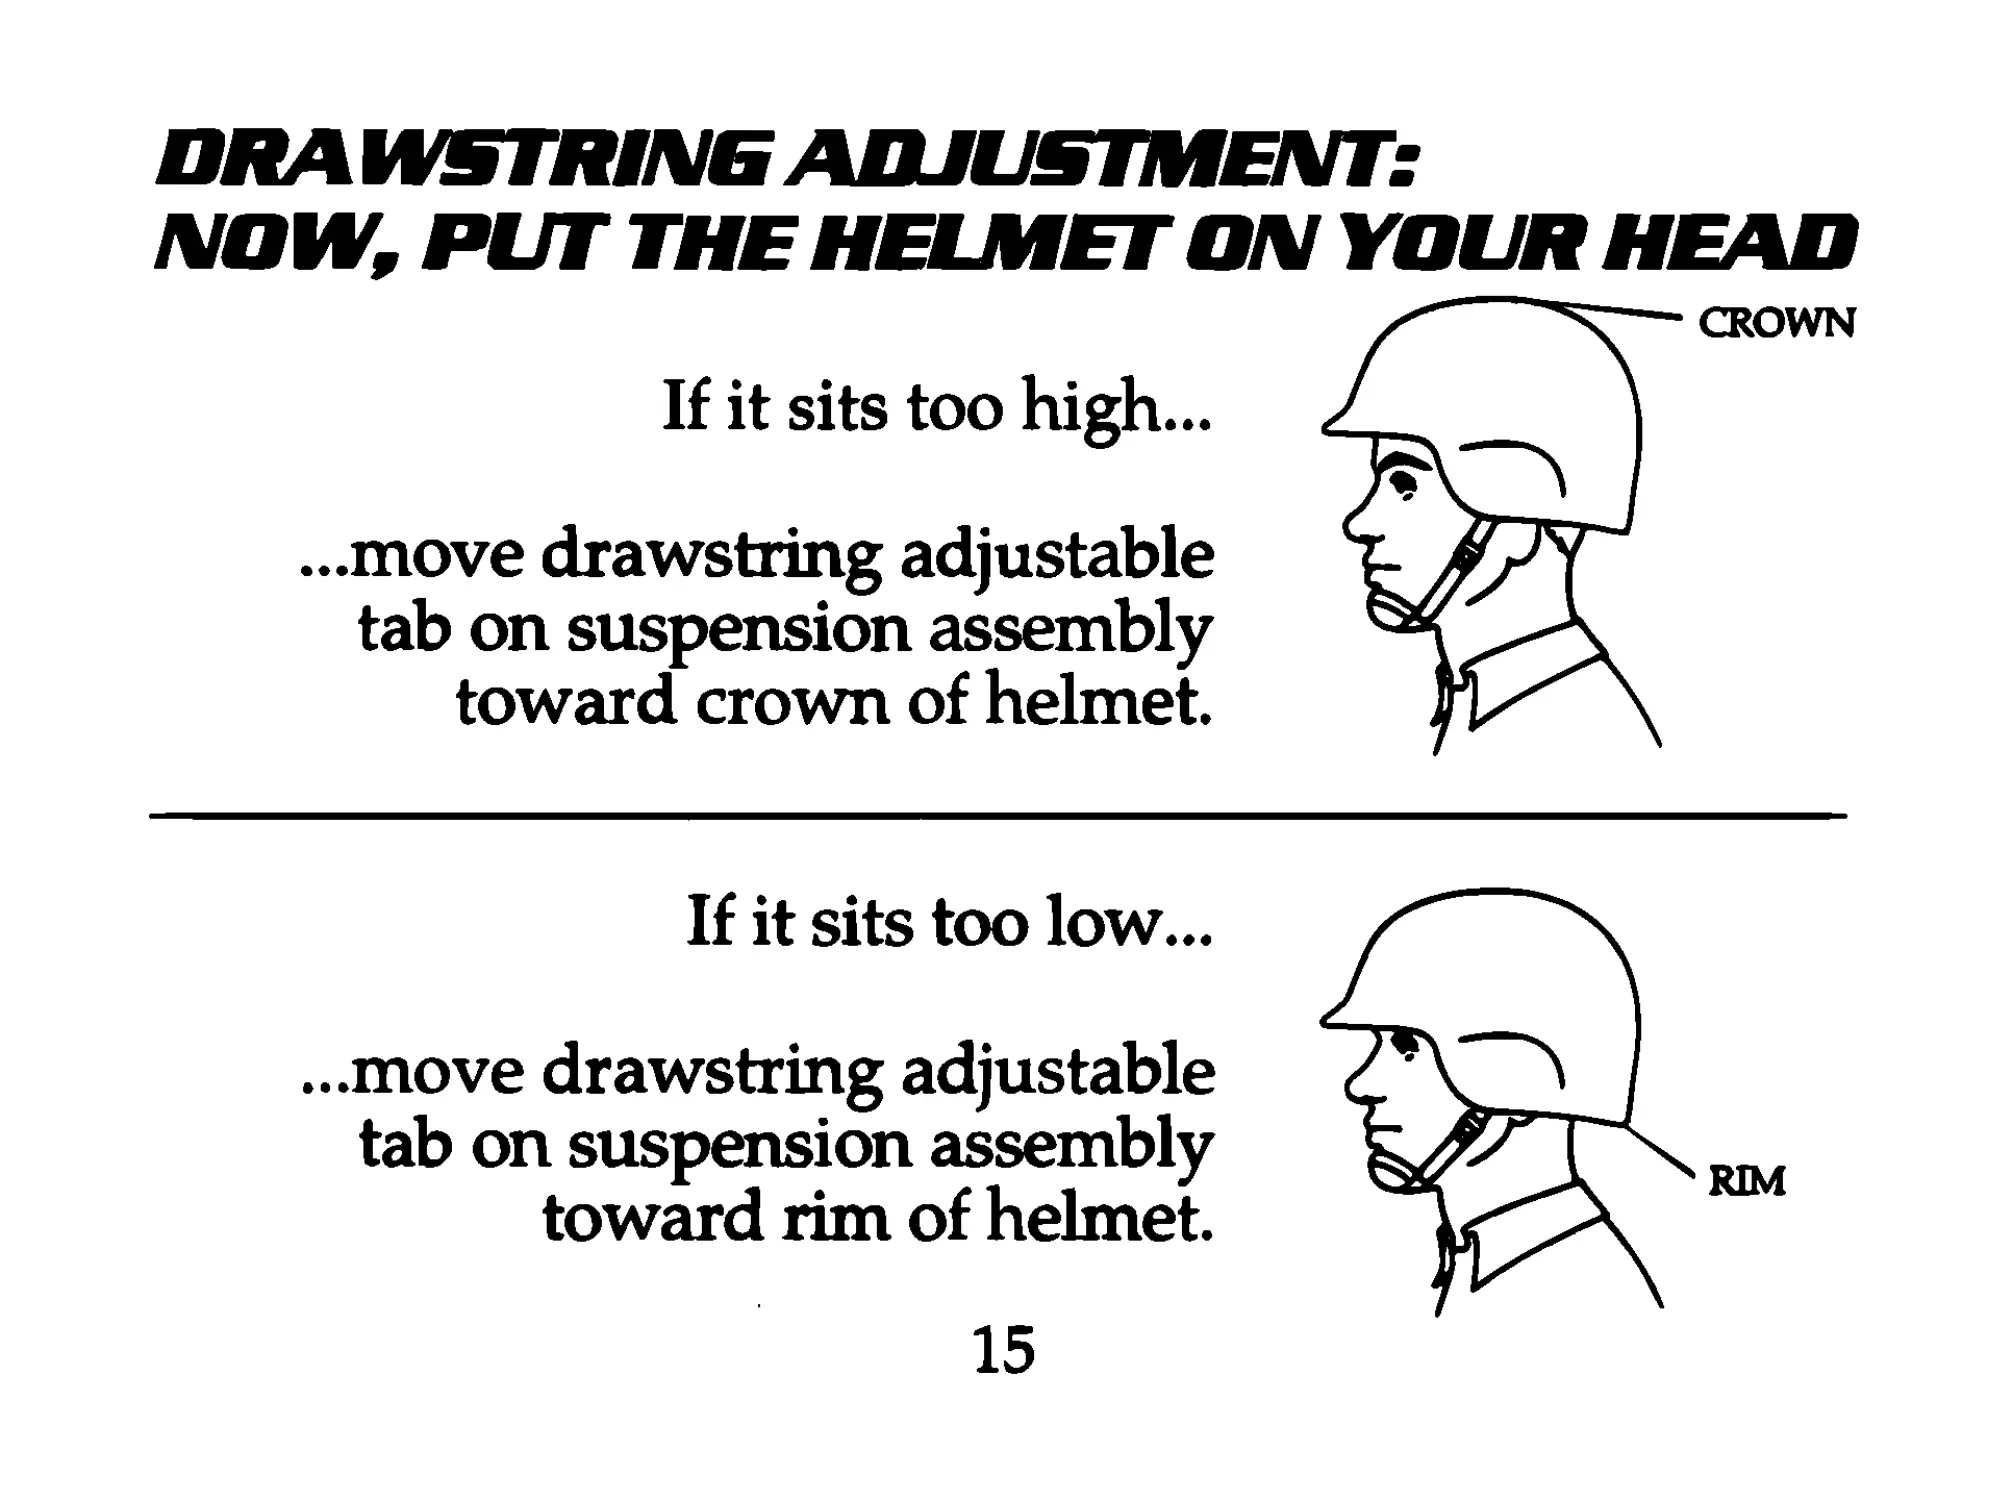
DRAWSTRING ADJUSTMENT:
NOW, PUT THE HELMET ON YOUR HEAD
CROWN
If it sits too high...
...move drawstring adjustable
tab on suspension assembly
toward crown of helmet.
If it sits too low...
...move drawstring adjustable
tab on suspension assembly
toward rim of helmet.
15
16
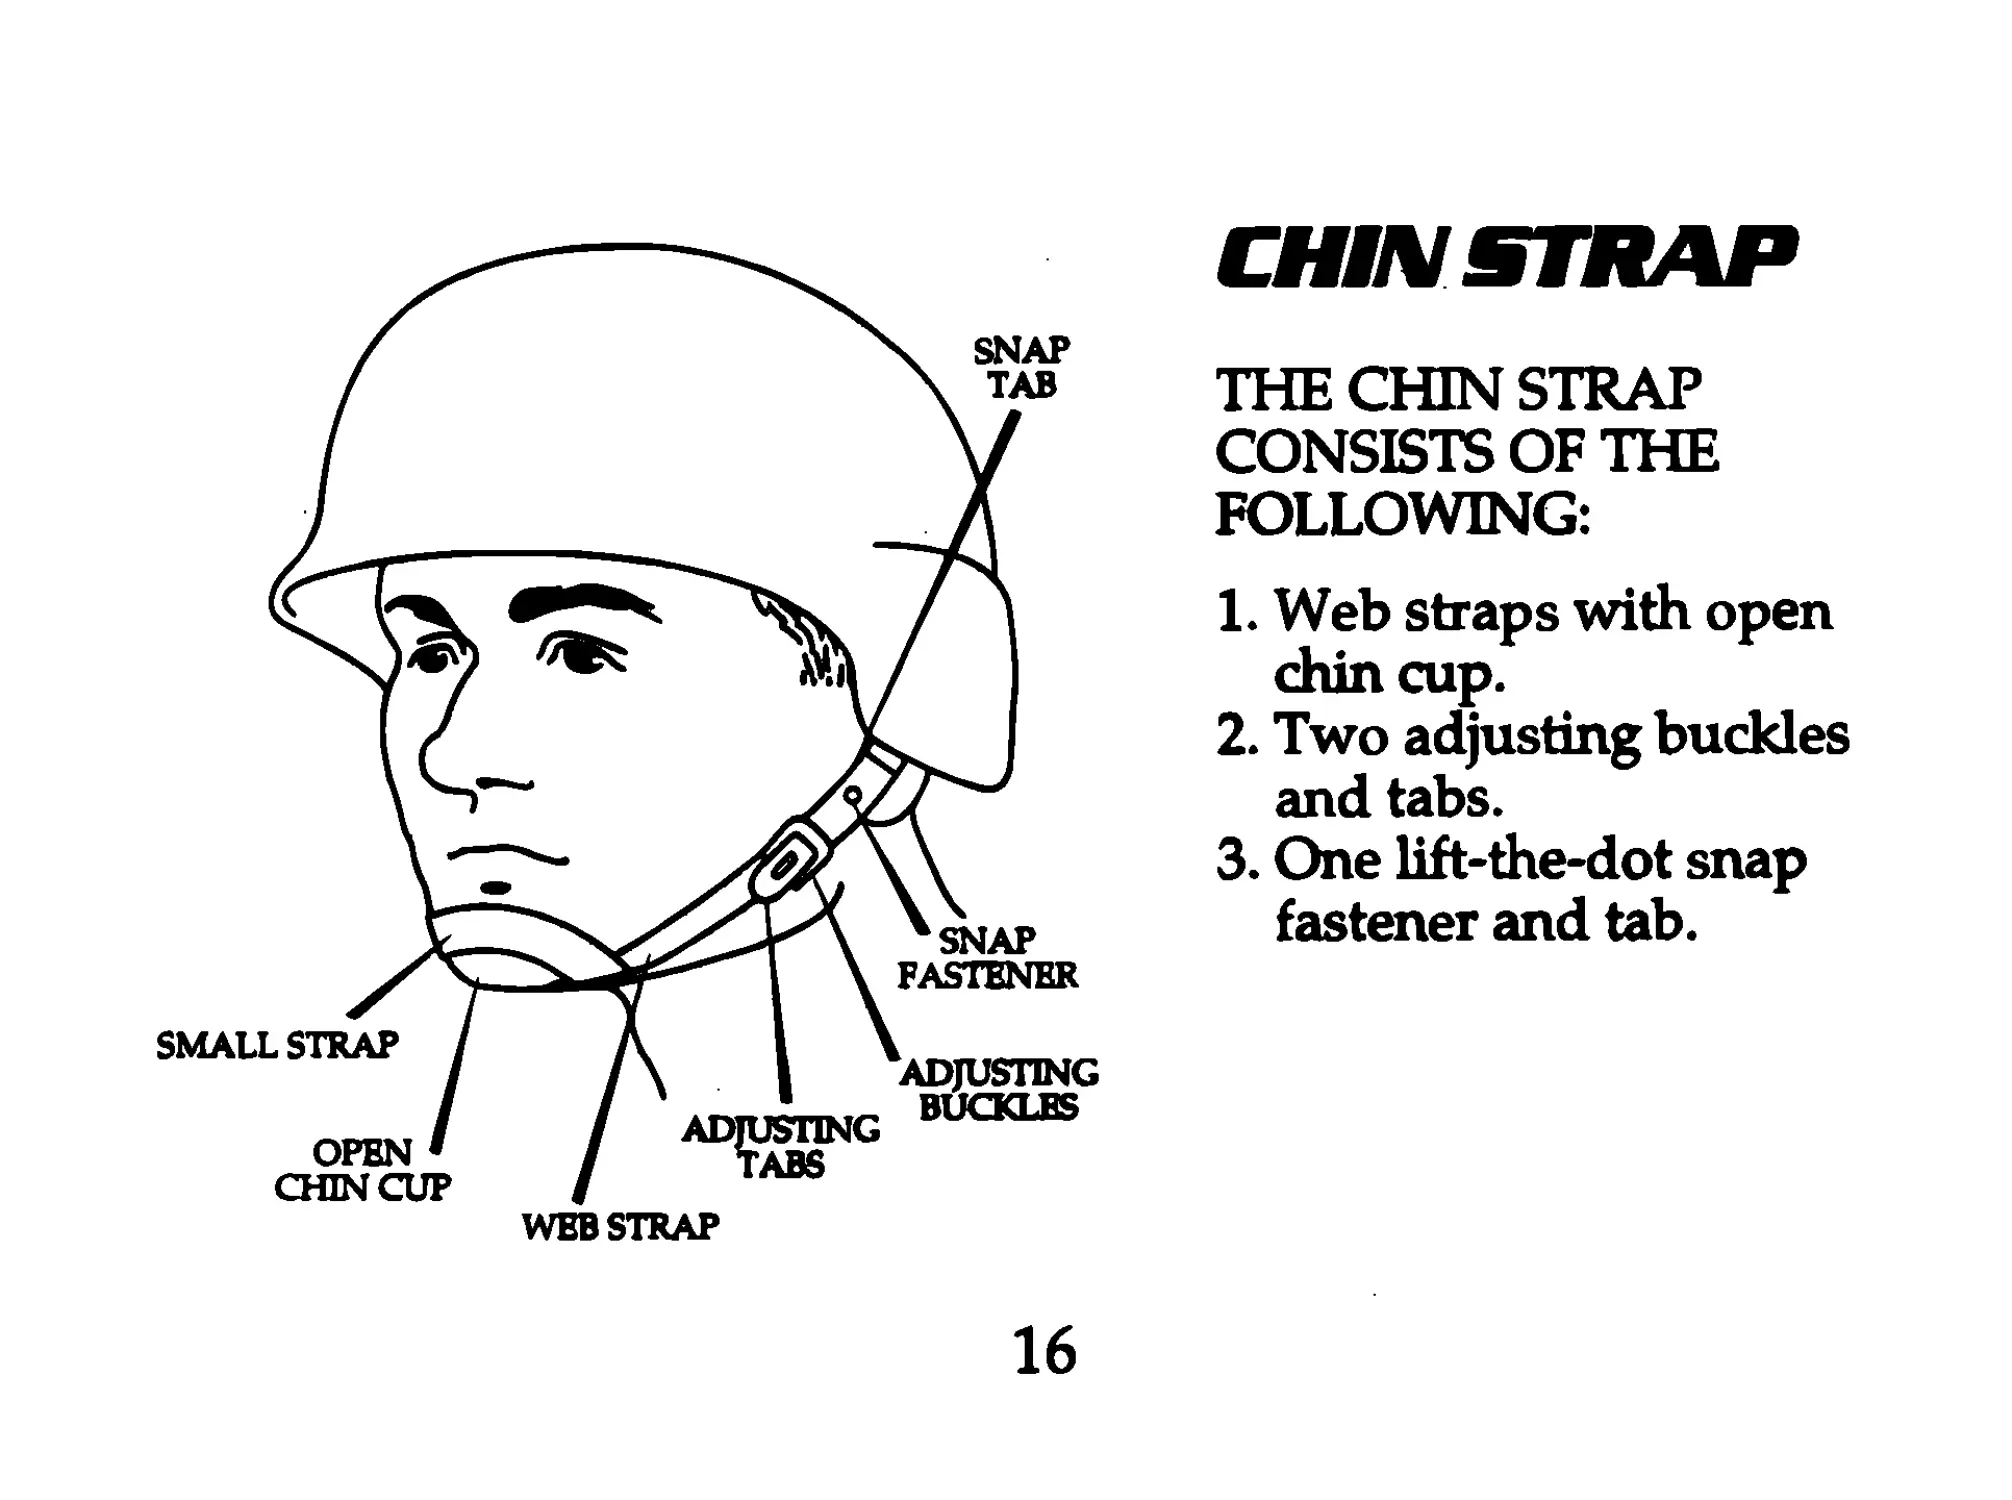
CHIN STRAP
THE CHIN STRAP
CONSISTS OF THE
FOLLOWING:
1. Web straps with open
chin cup.
2. Two adjusting buckles
and tabs.
3. One lift-the-dot snap
fastener and tab.
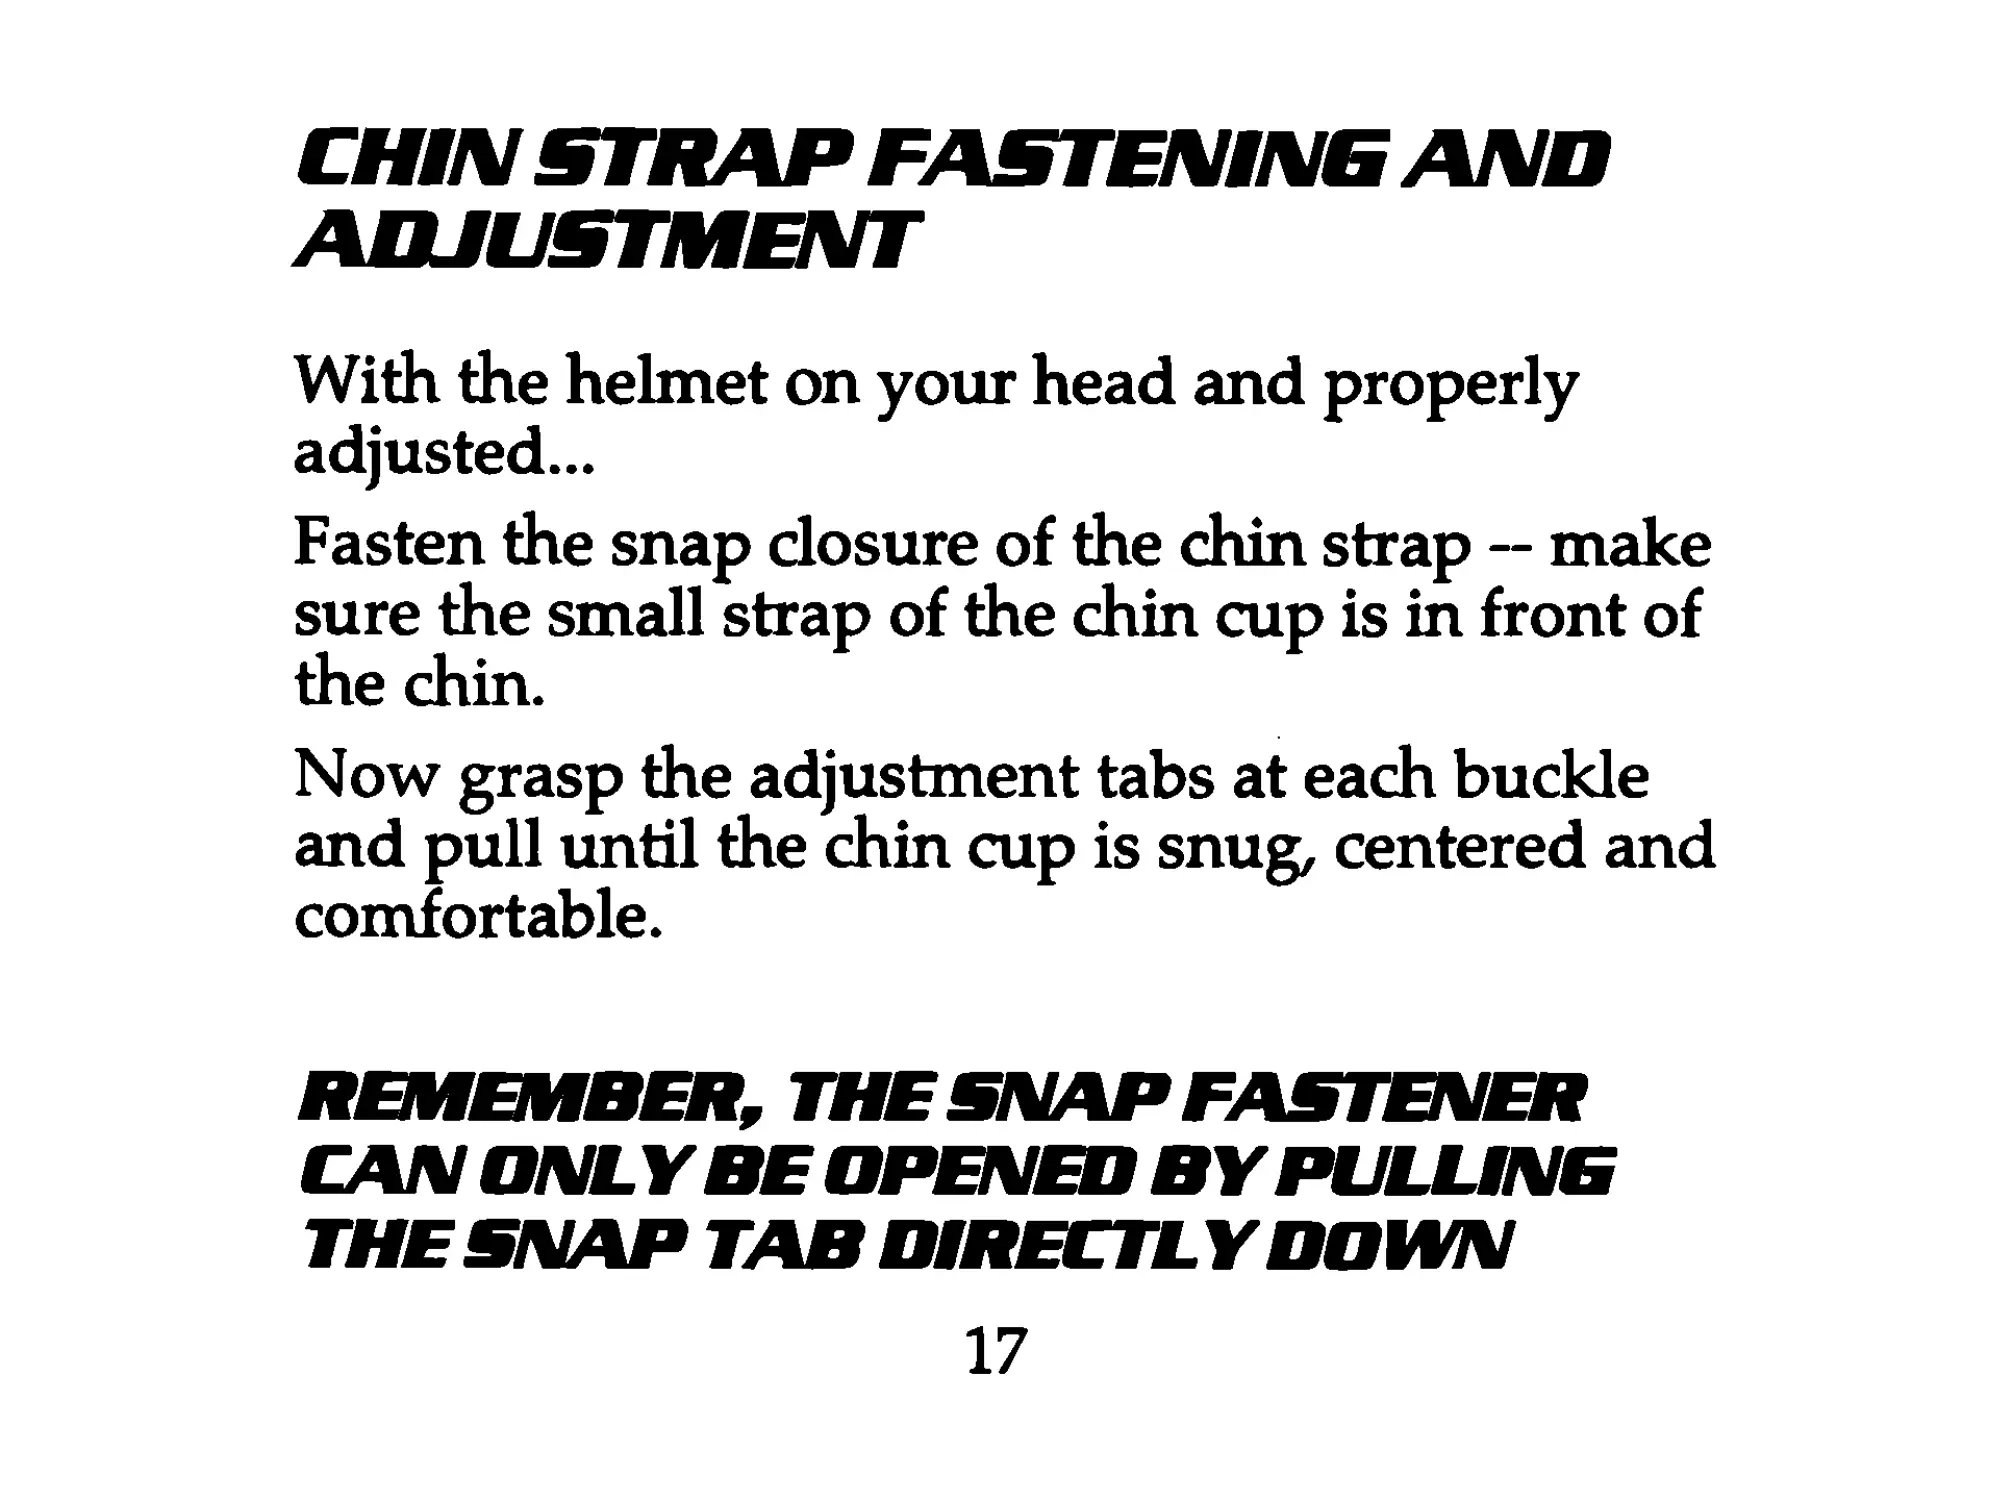
CHIN STRAP FASTENING AND
ADJUSTMENT
With the helmet on your head and properly
adjusted...
Fasten the snap closure of the chin strap -- make
sure the small strap of the chin cup is in front of
the chin.
Now grasp the adjustment tabs at each buckle
and pull until the chin cup is snug, centered and
comfortable.
REMEMBER, THE SNAP FASTENER
CAN ONLY BE OPENED BY PULLING
THE SNAP TAB DIRECTLY DOWN
17
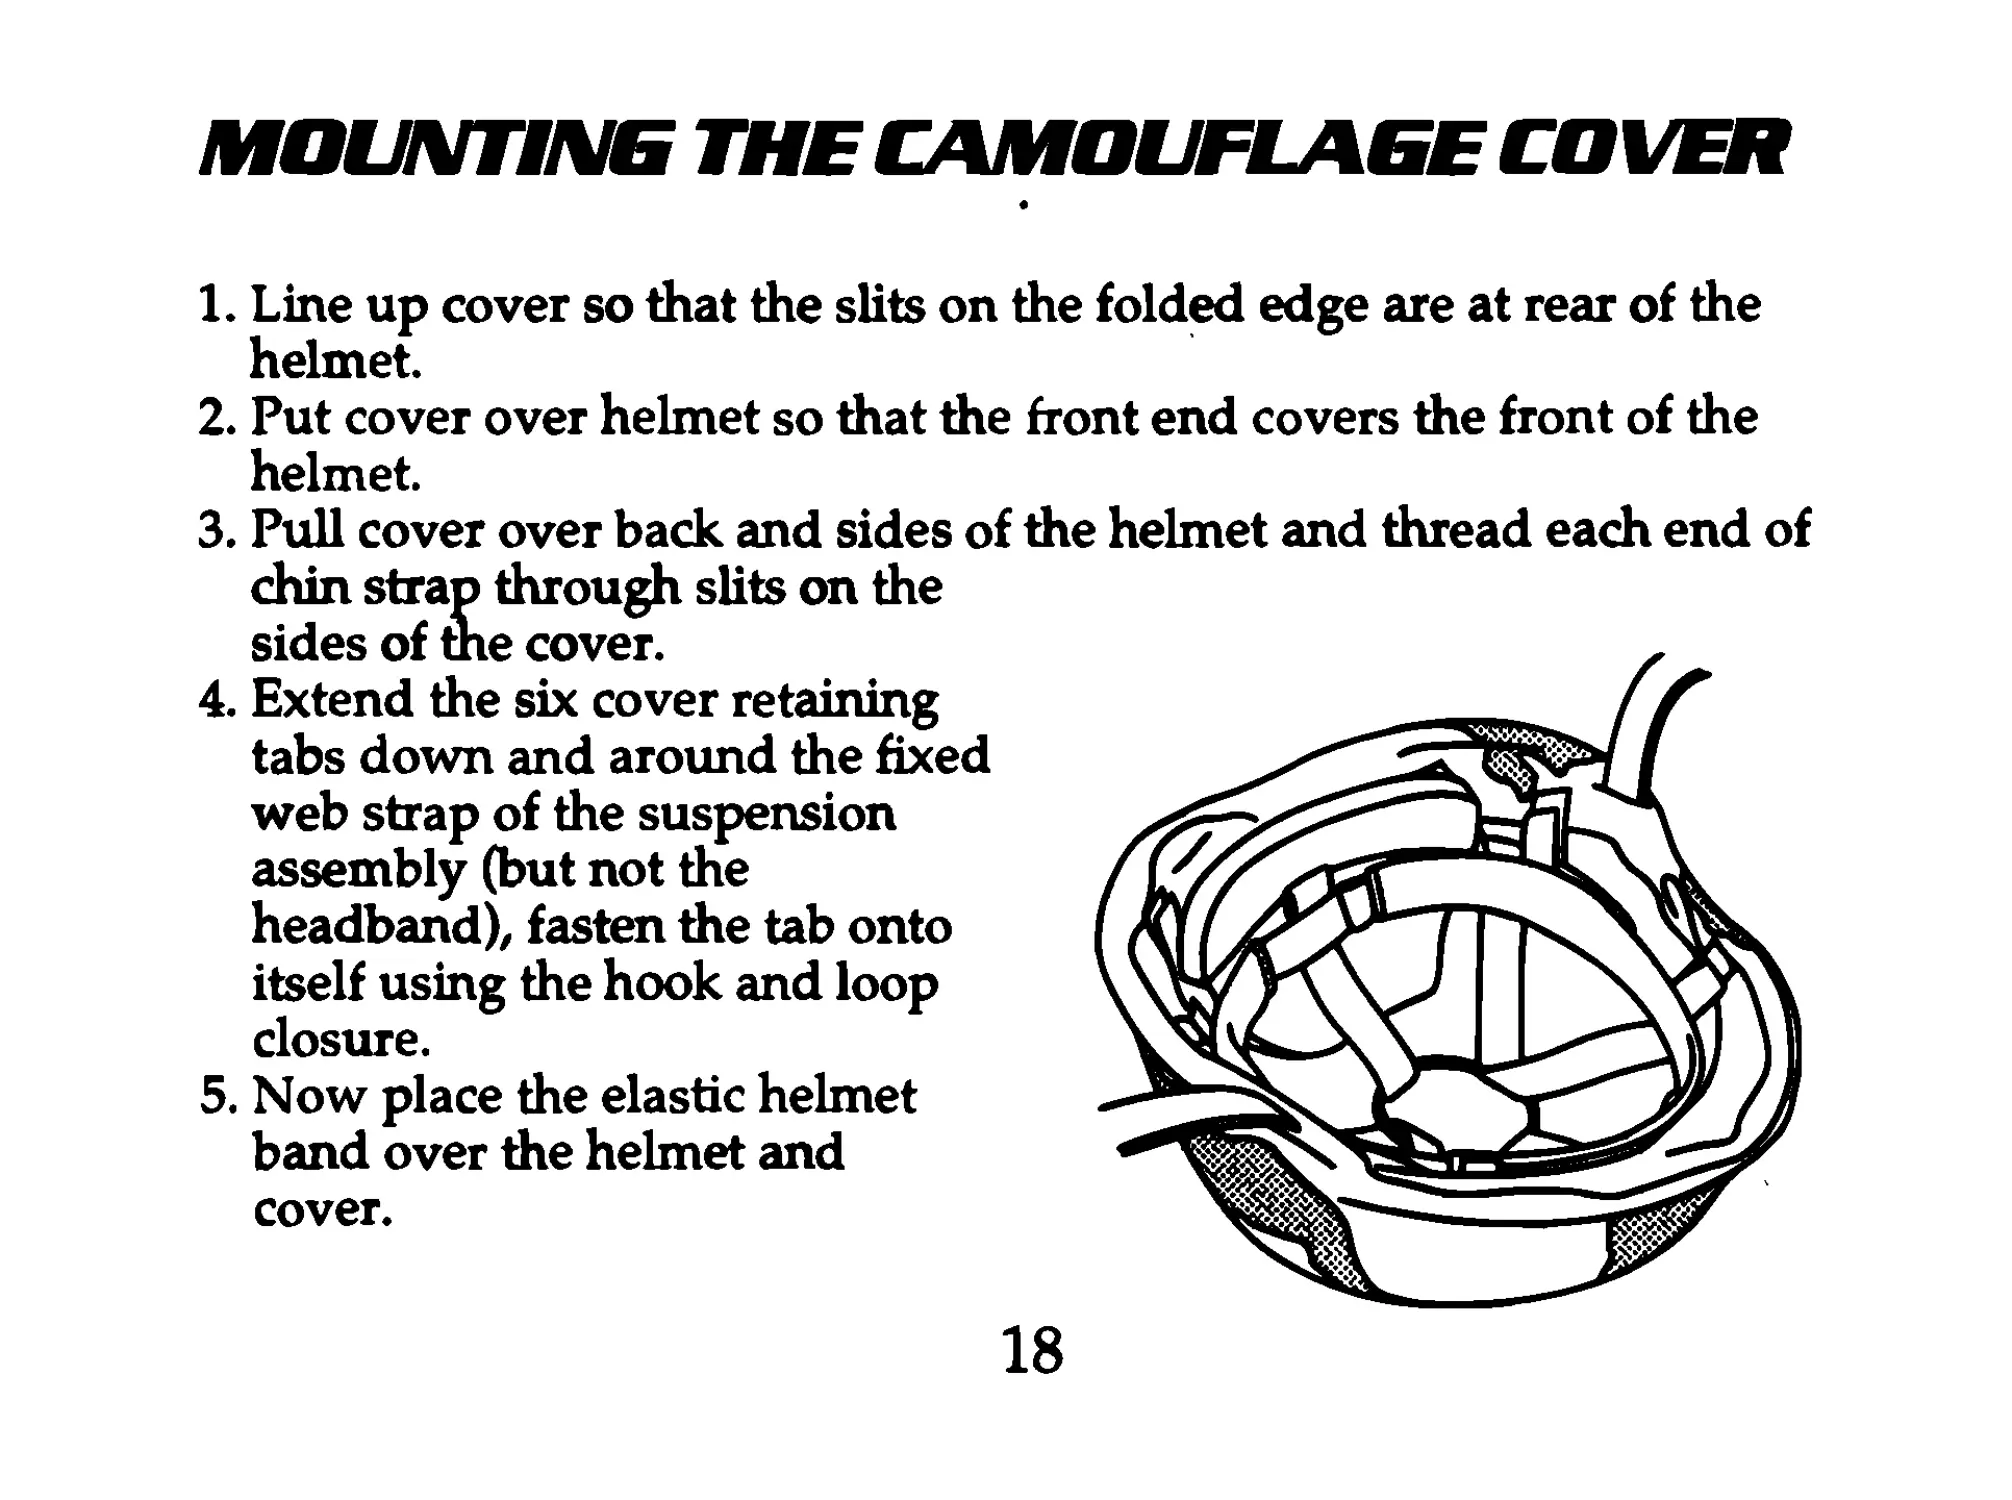
MOUMTIME THE CAMOUFLAGE COVER
1. Line up cover so that the slits on the folded edge are at rear of the
helmet.
2. Put cover over helmet so that the front end covers the front of the
helmet.
3. Pull cover over back and sides of the helmet and thread each end of
chin strap through slits on the
sides of me cover.
4. Extend the six cover retaining
tabs down and around the fixed
web strap of the suspension
assembly (but not the
headband), fasten the tab onto
itself using the hook and loop
closure.
5. Now place the elastic helmet
band over the helmet and
cover.
18
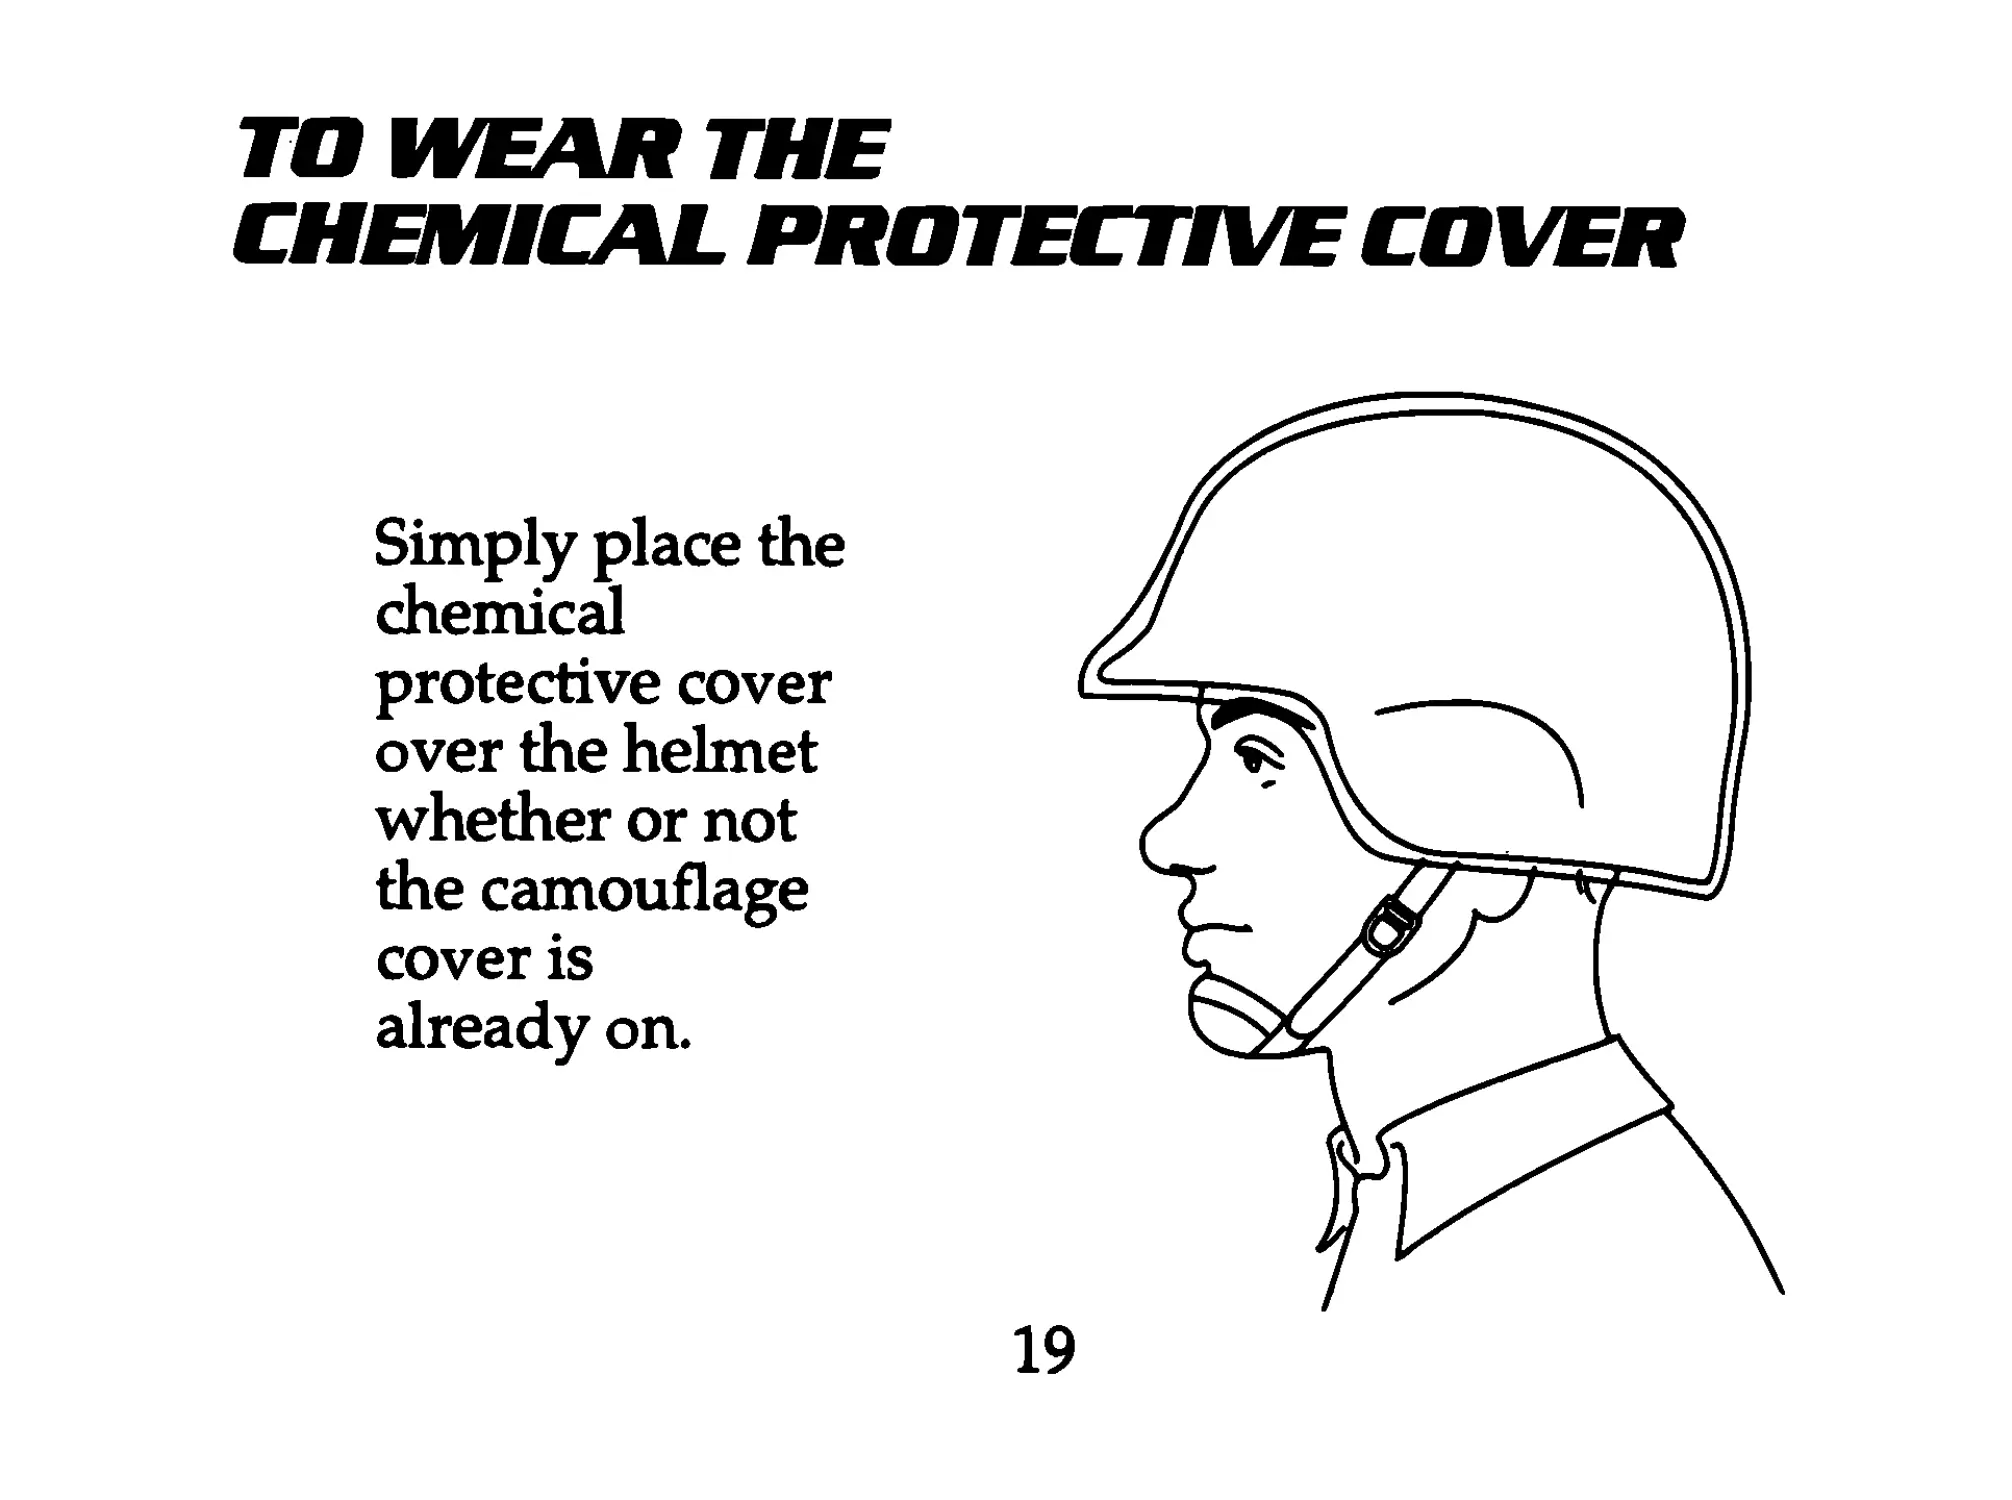
TO WEAR THE
CHEMICAL PROTECTIVE COVER
Simply place the
chemical
protective cover
over the helmet
whether or not
the camouflage
cover is
already on.
19
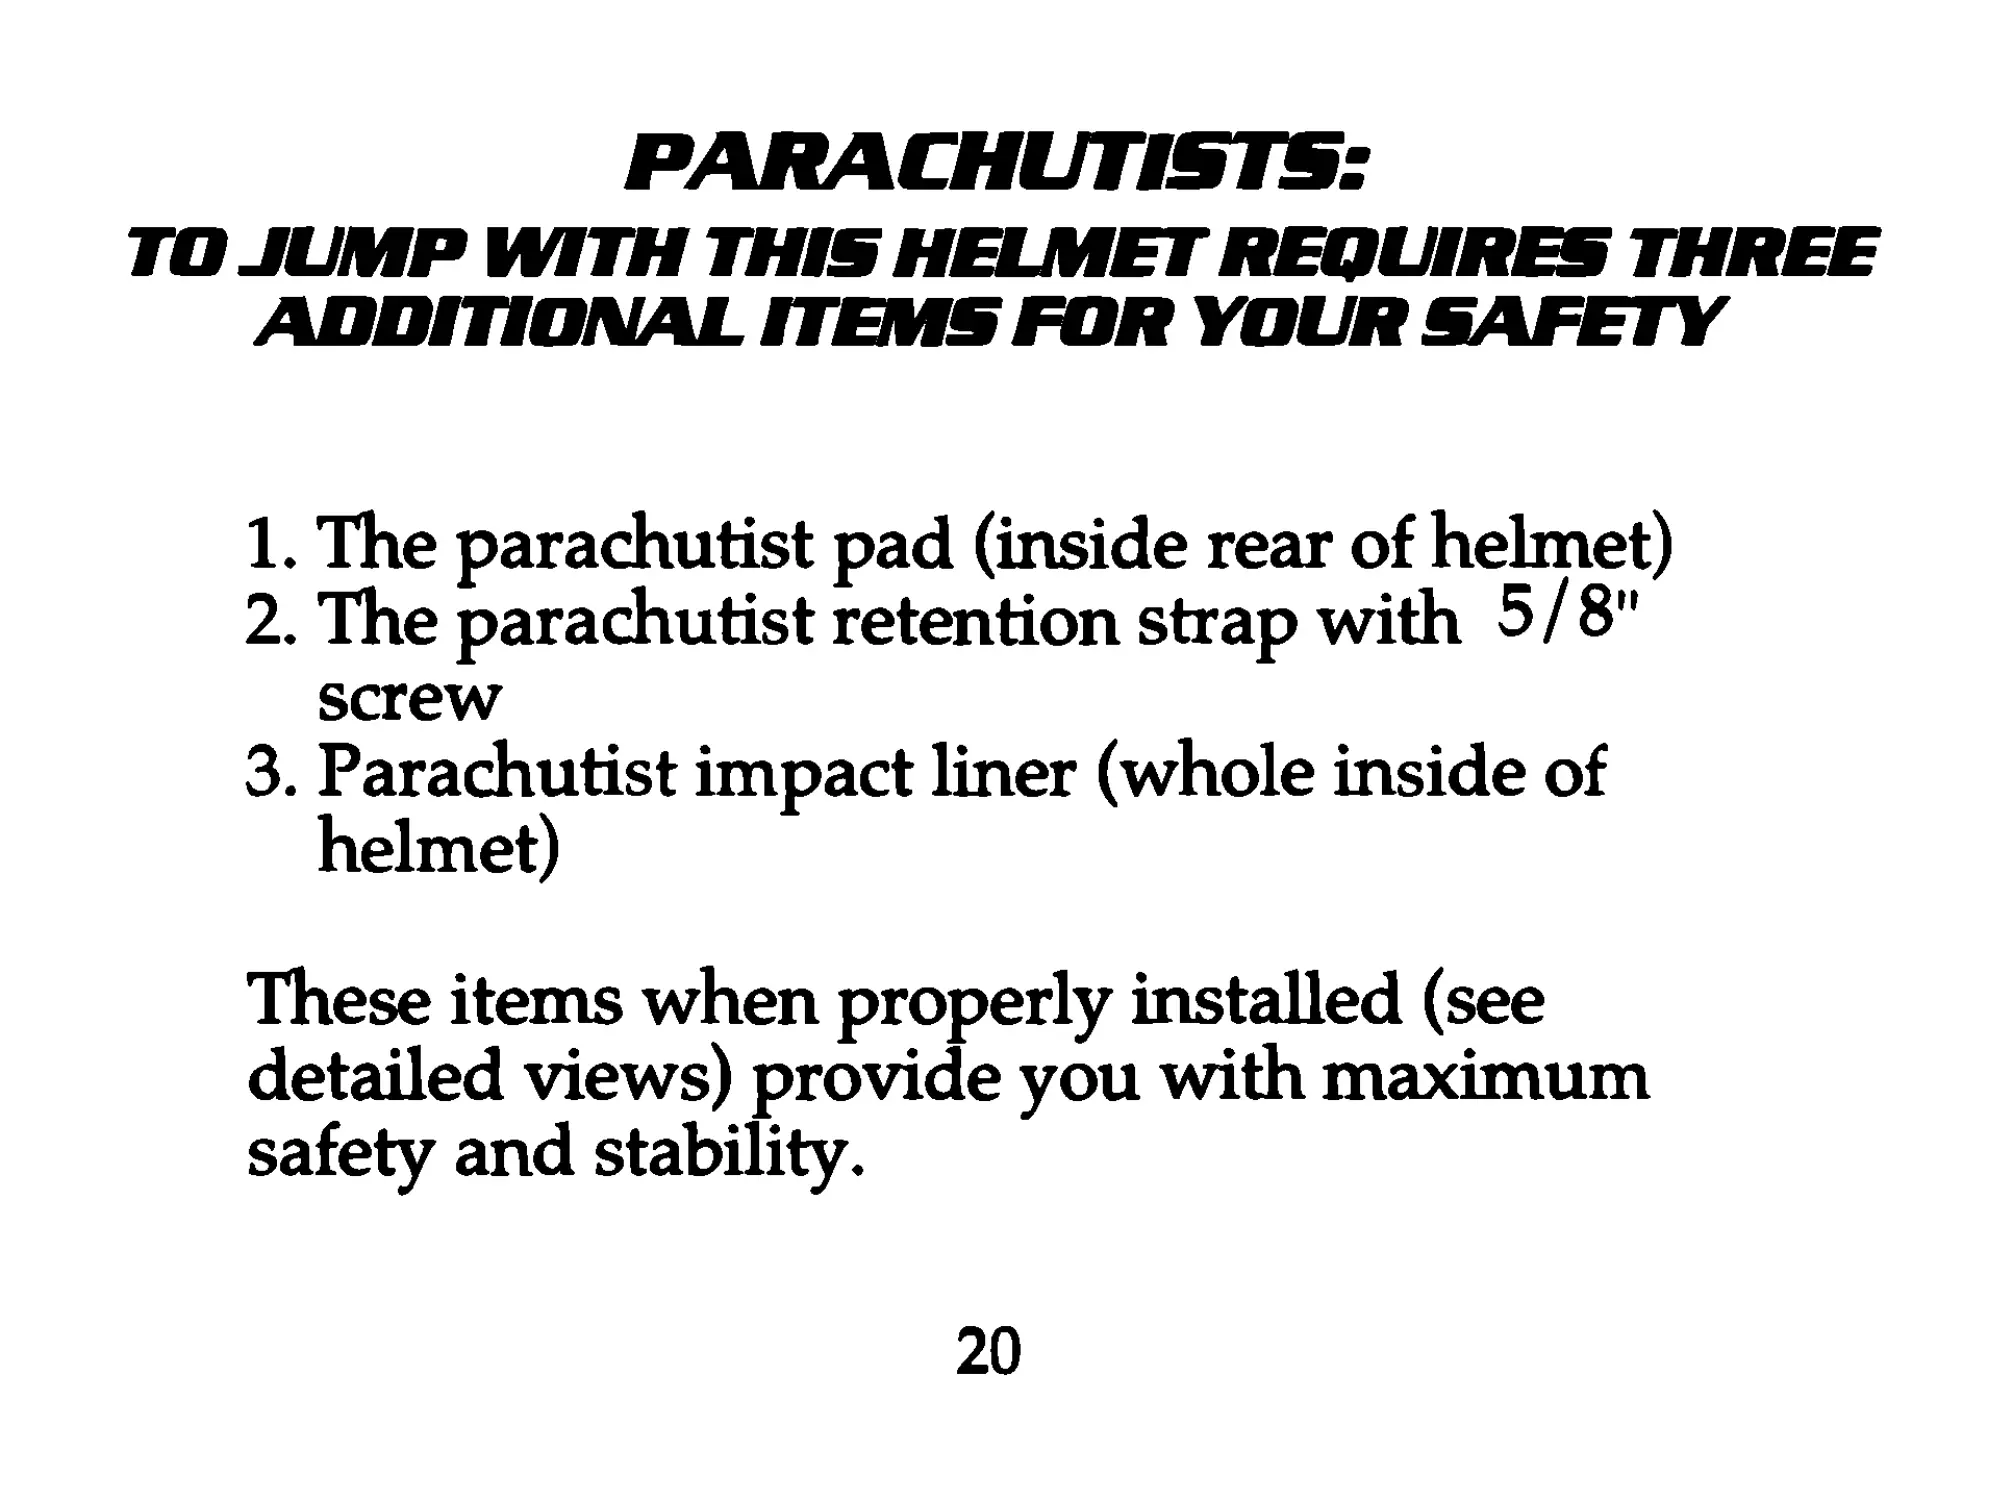
PARACHUTISTS:
TO JUMP WITH THIS HELMET REQUIRES THREE
ADDITIONAL ITEMS FOR YOUR SAFETY
1. The parachutist pad (inside rear of helmet)
2. The parachutist retention strap with 5/ 8"
screw
3. Parachutist impact liner (whole inside of
helmet)
These items when properly installed (see
detailed views) provide you with maximum
safety and stability.
20
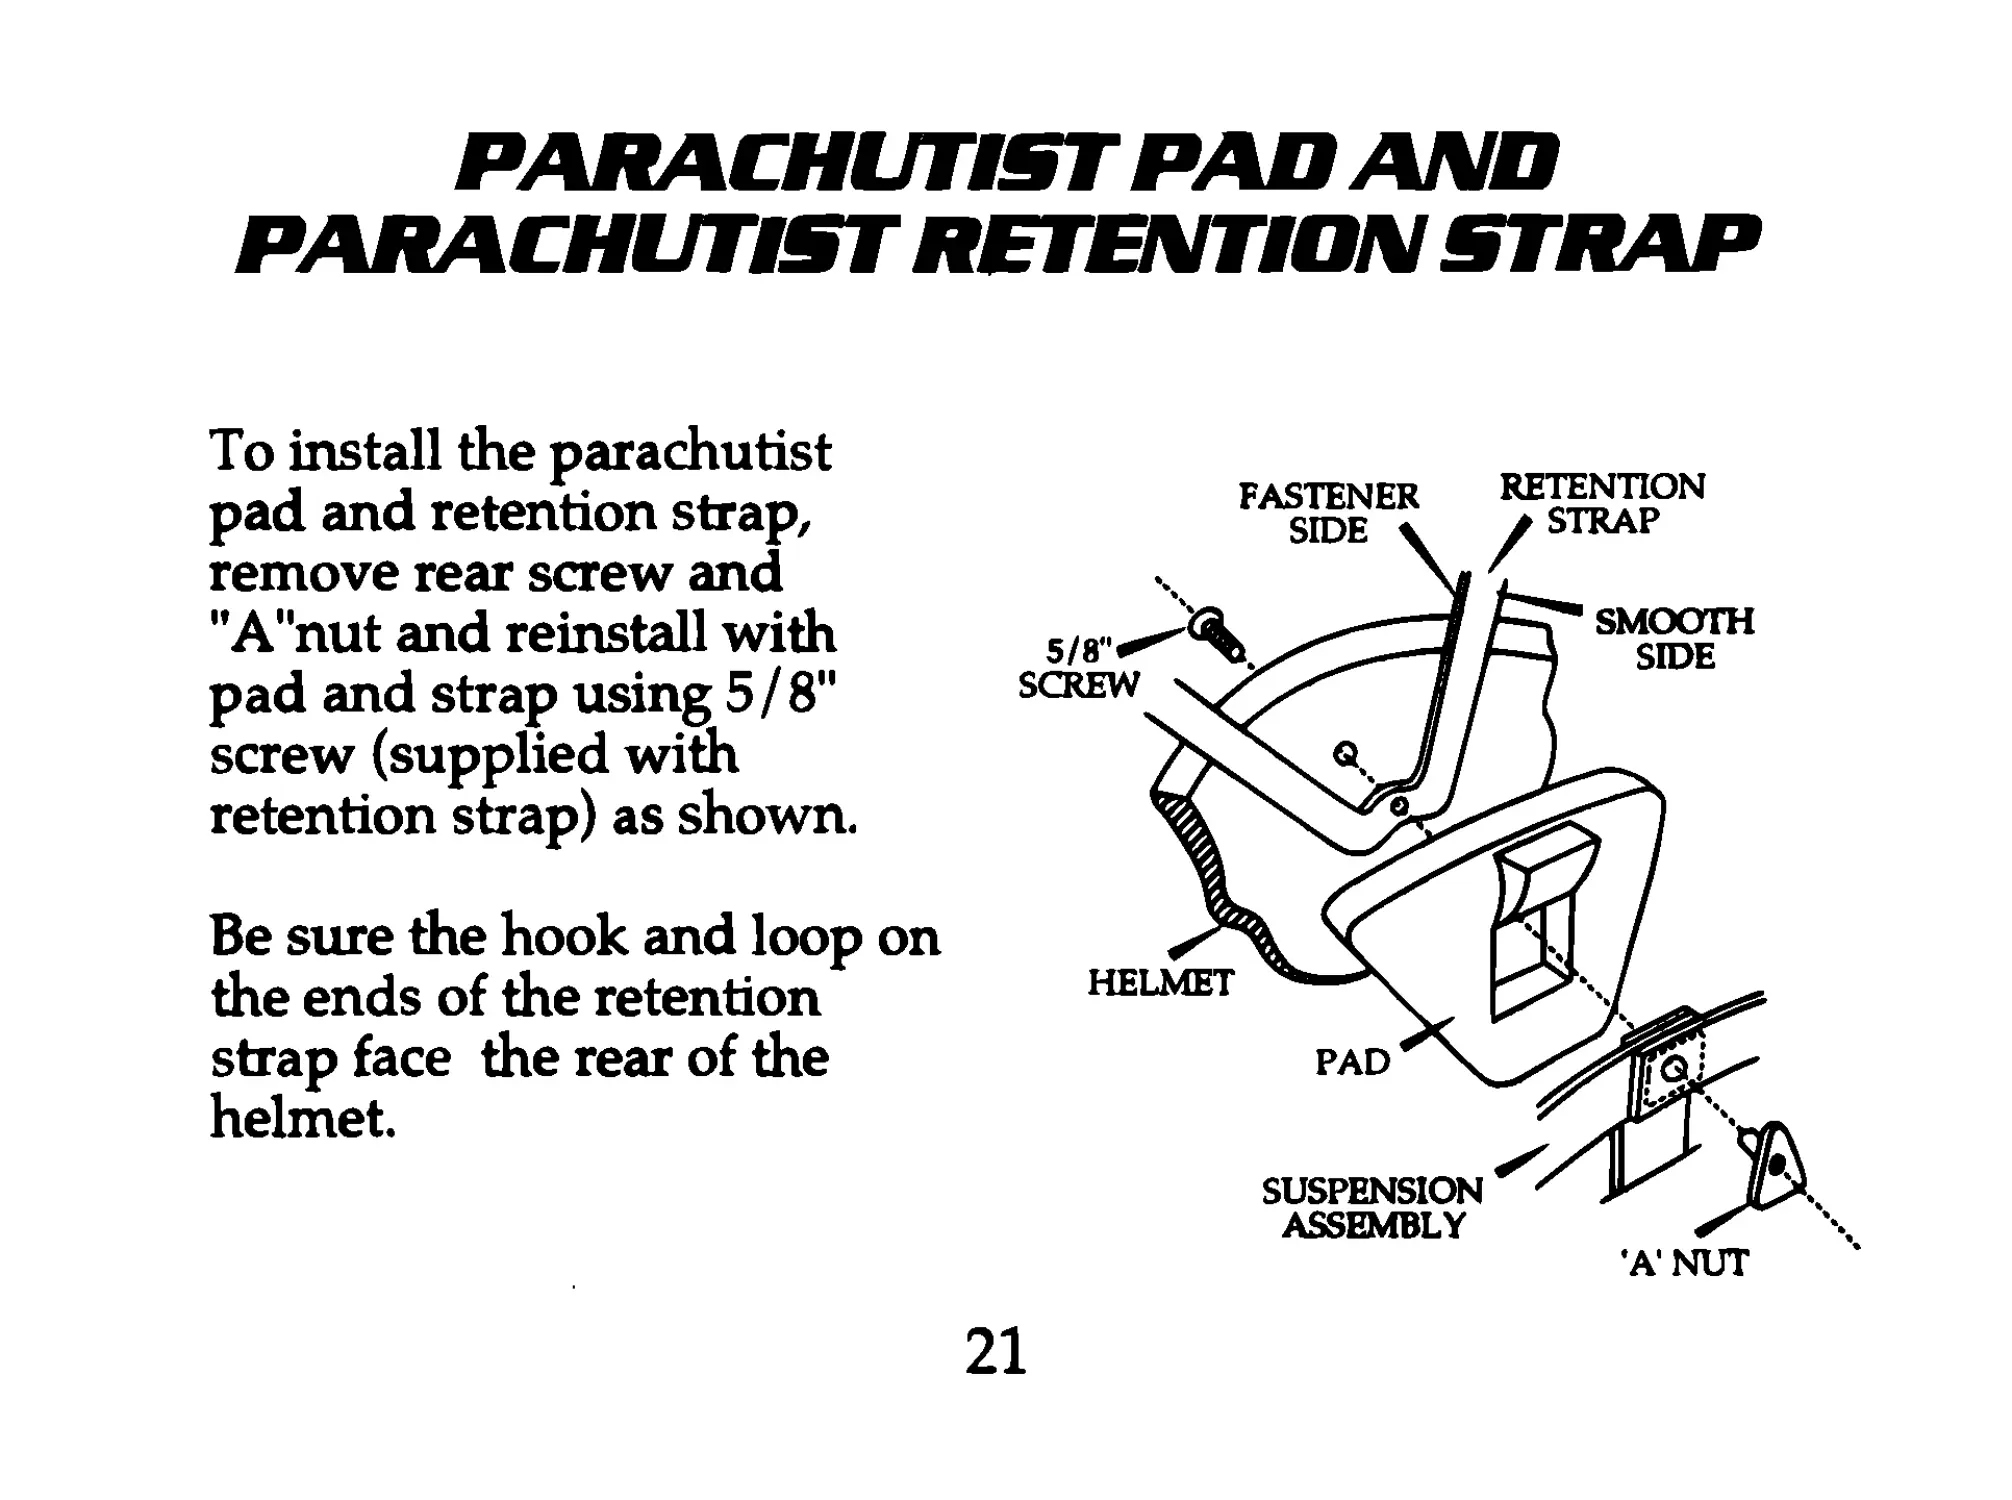
PARACHUTIST PAD AND
PARACHUTIST RETENTION STRAP
To install the parachutist
pad and retention strap,
remove rear screw and
"A"nut and reinstall with
pad and strap using 5/ 8"
screw (supplied with
retention strap) as shown.
Be sure the hook and loop on
the ends of the retention
strap face the rear of the
helmet.
21
CAMOUFLAGE COVER ADJUSTMENT
FUR PARACHUTISTS
After installing the retention strap and the parachutist
pad, replace the camouflage cover as before (see page
18), except -
thread the ends of
the retention strap
through the two
slits on the back
of the cover at the
rim (see figure).
CHIN STRAP
SLIT
RETENTION
STRAP
COVER
RETAINING
STRAPS
CAMOUFLAGE
COVER
22
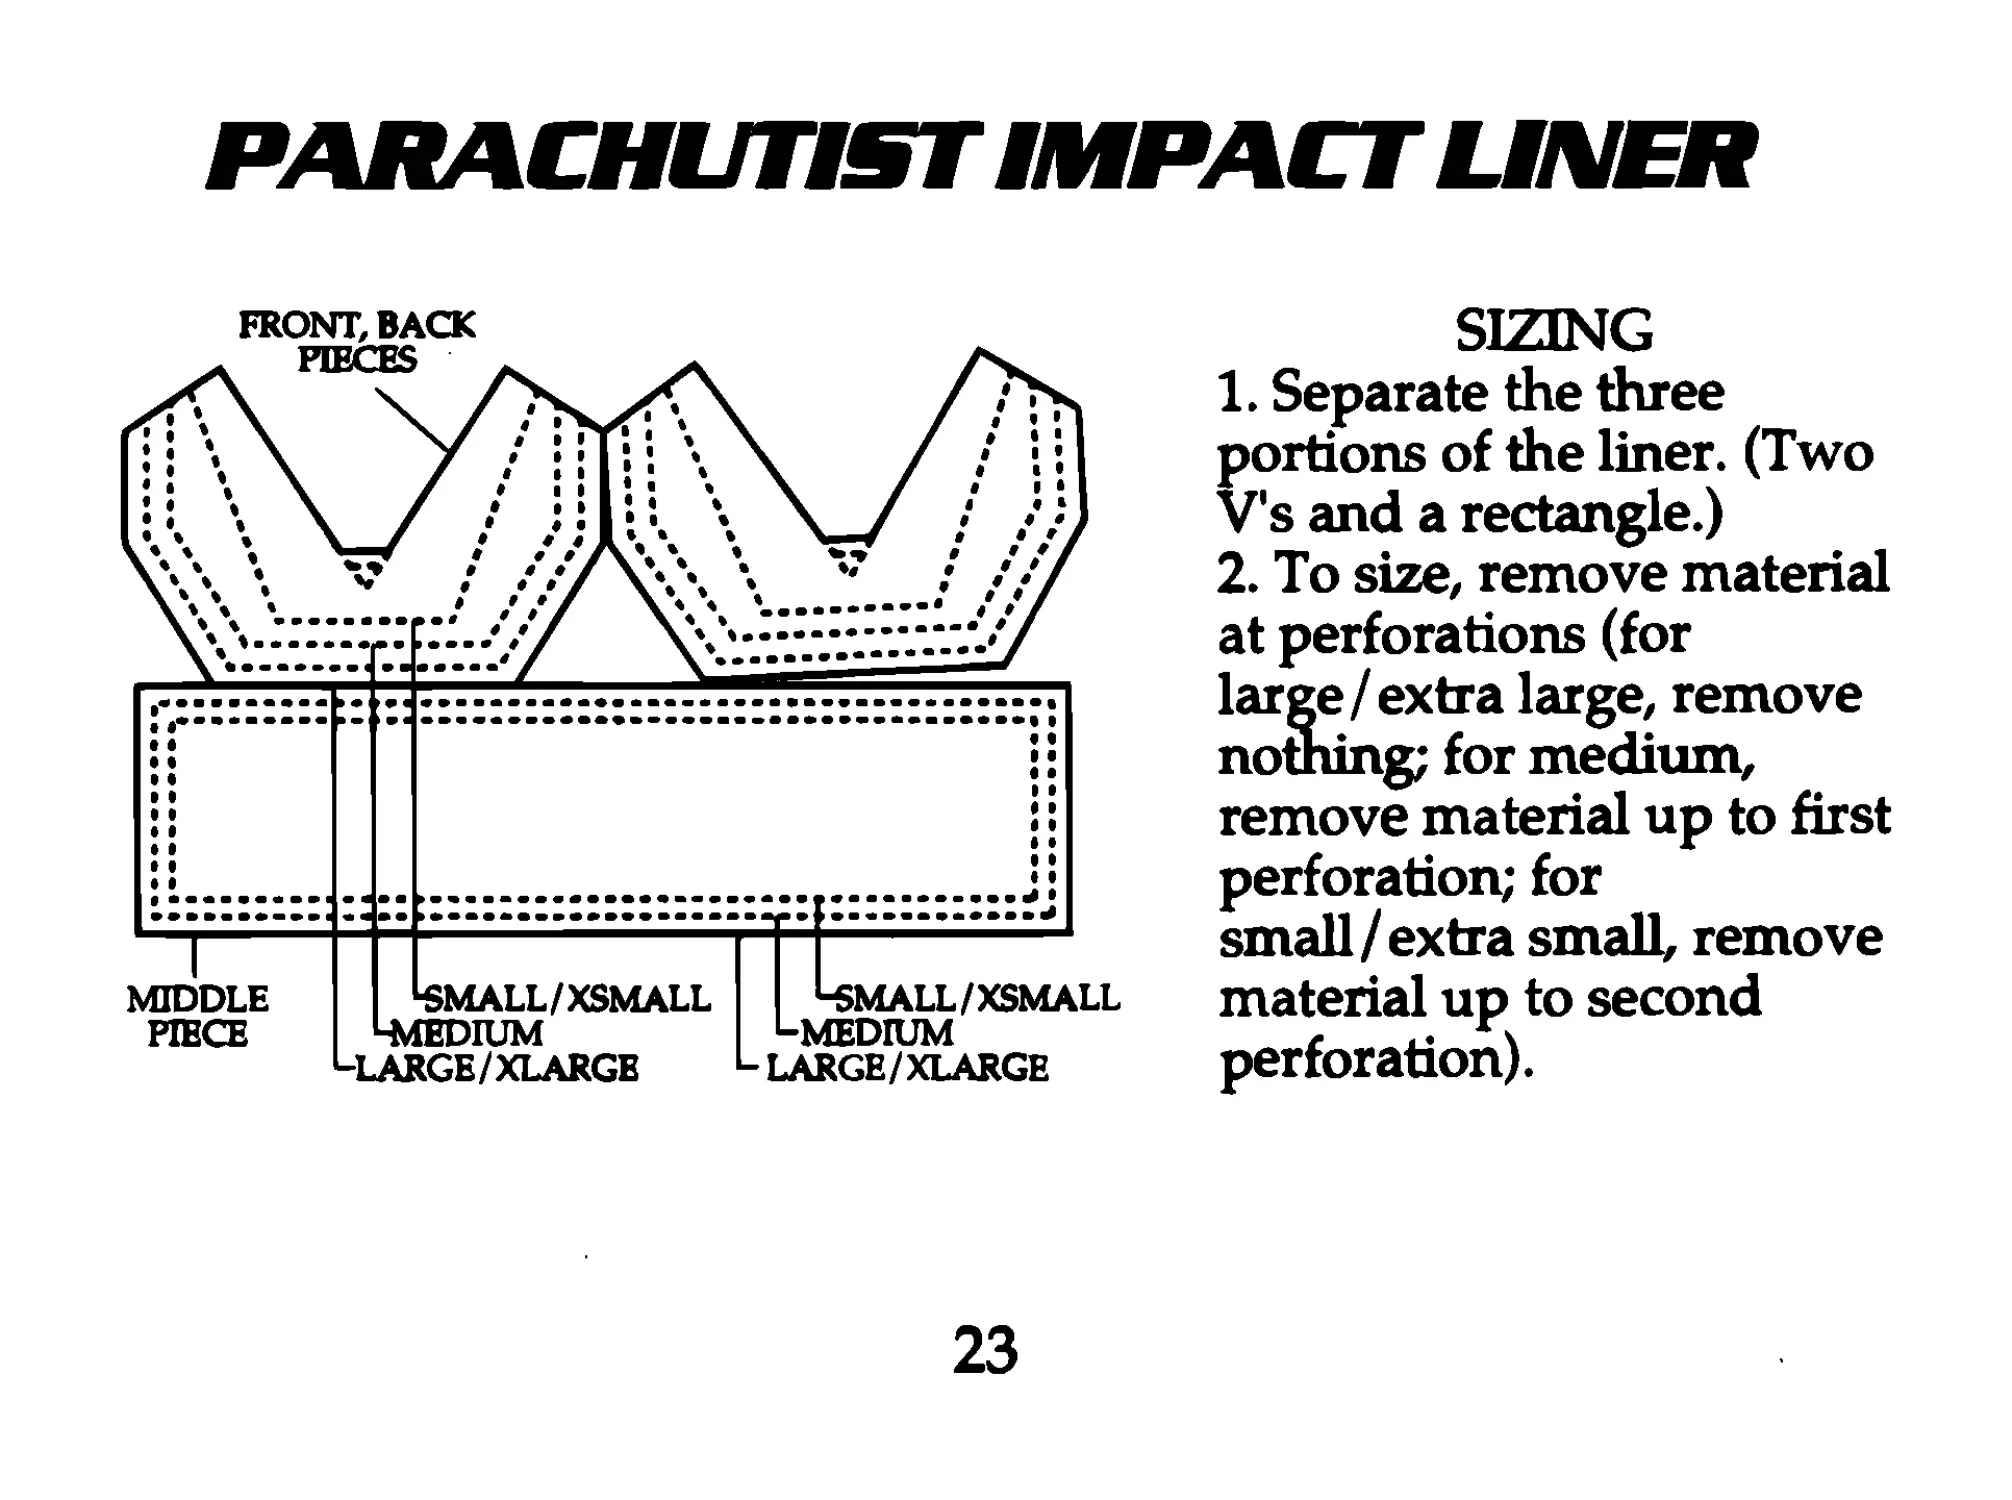
PARACHUTIST IMPACT LINER
SIZING
1. Separate the three
portions of the liner. (Two
Vs and a rectangle.)
2. To size, remove material
at perforations (for
large/extra large, remove
notning; for medium,
remove material up to first
perforation; for
small/extra small, remove
material up to second
perforation).
23
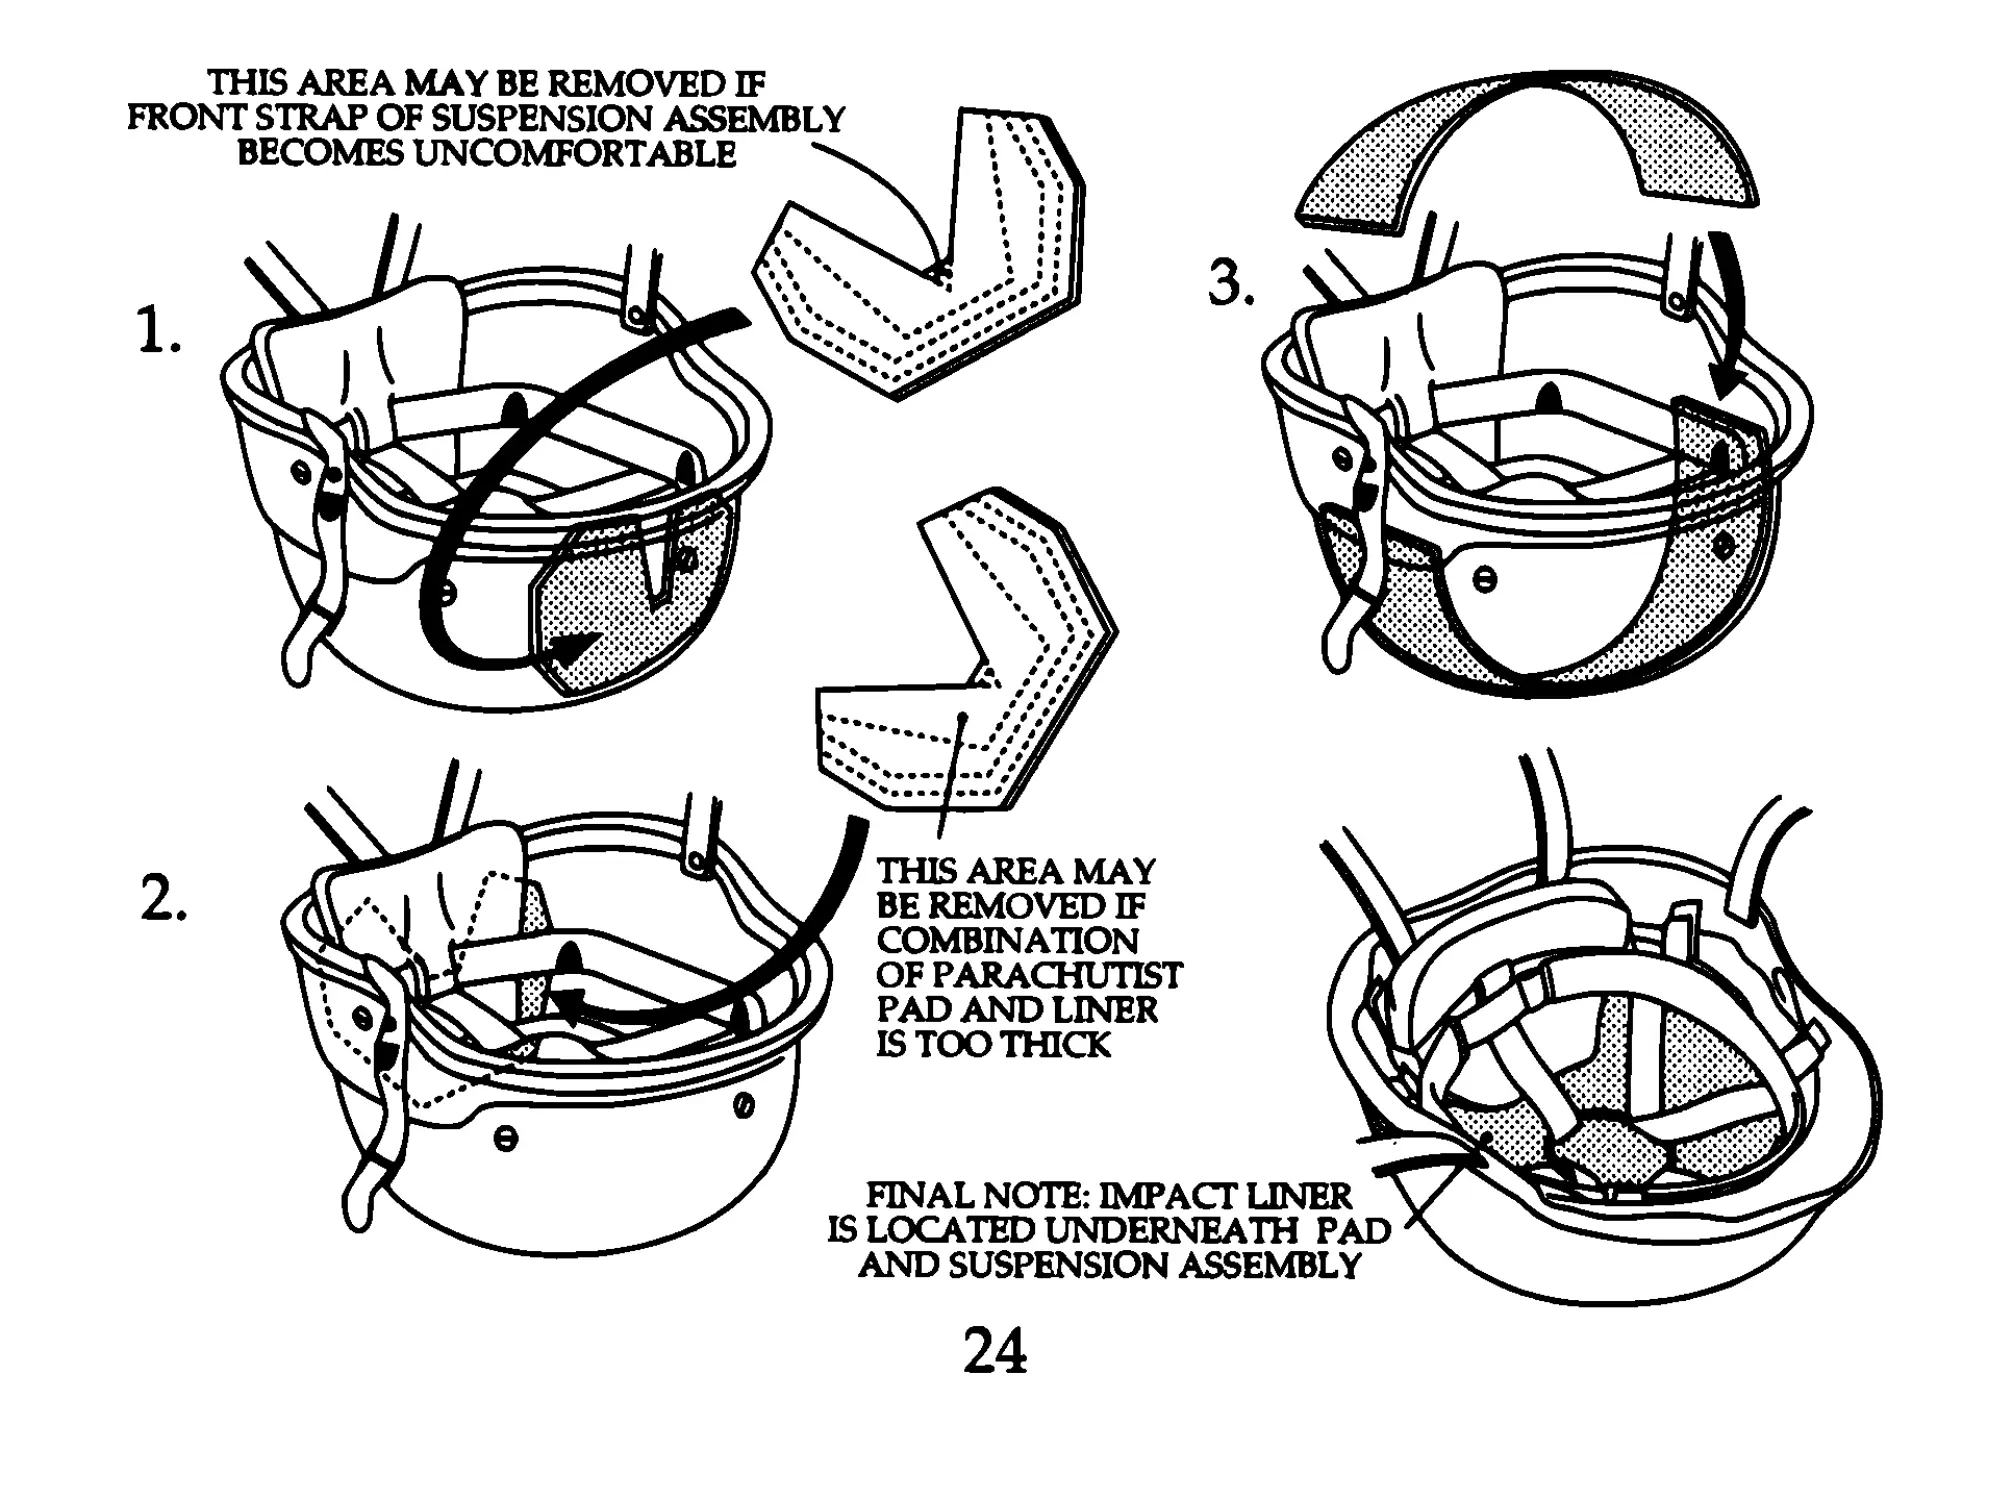
24
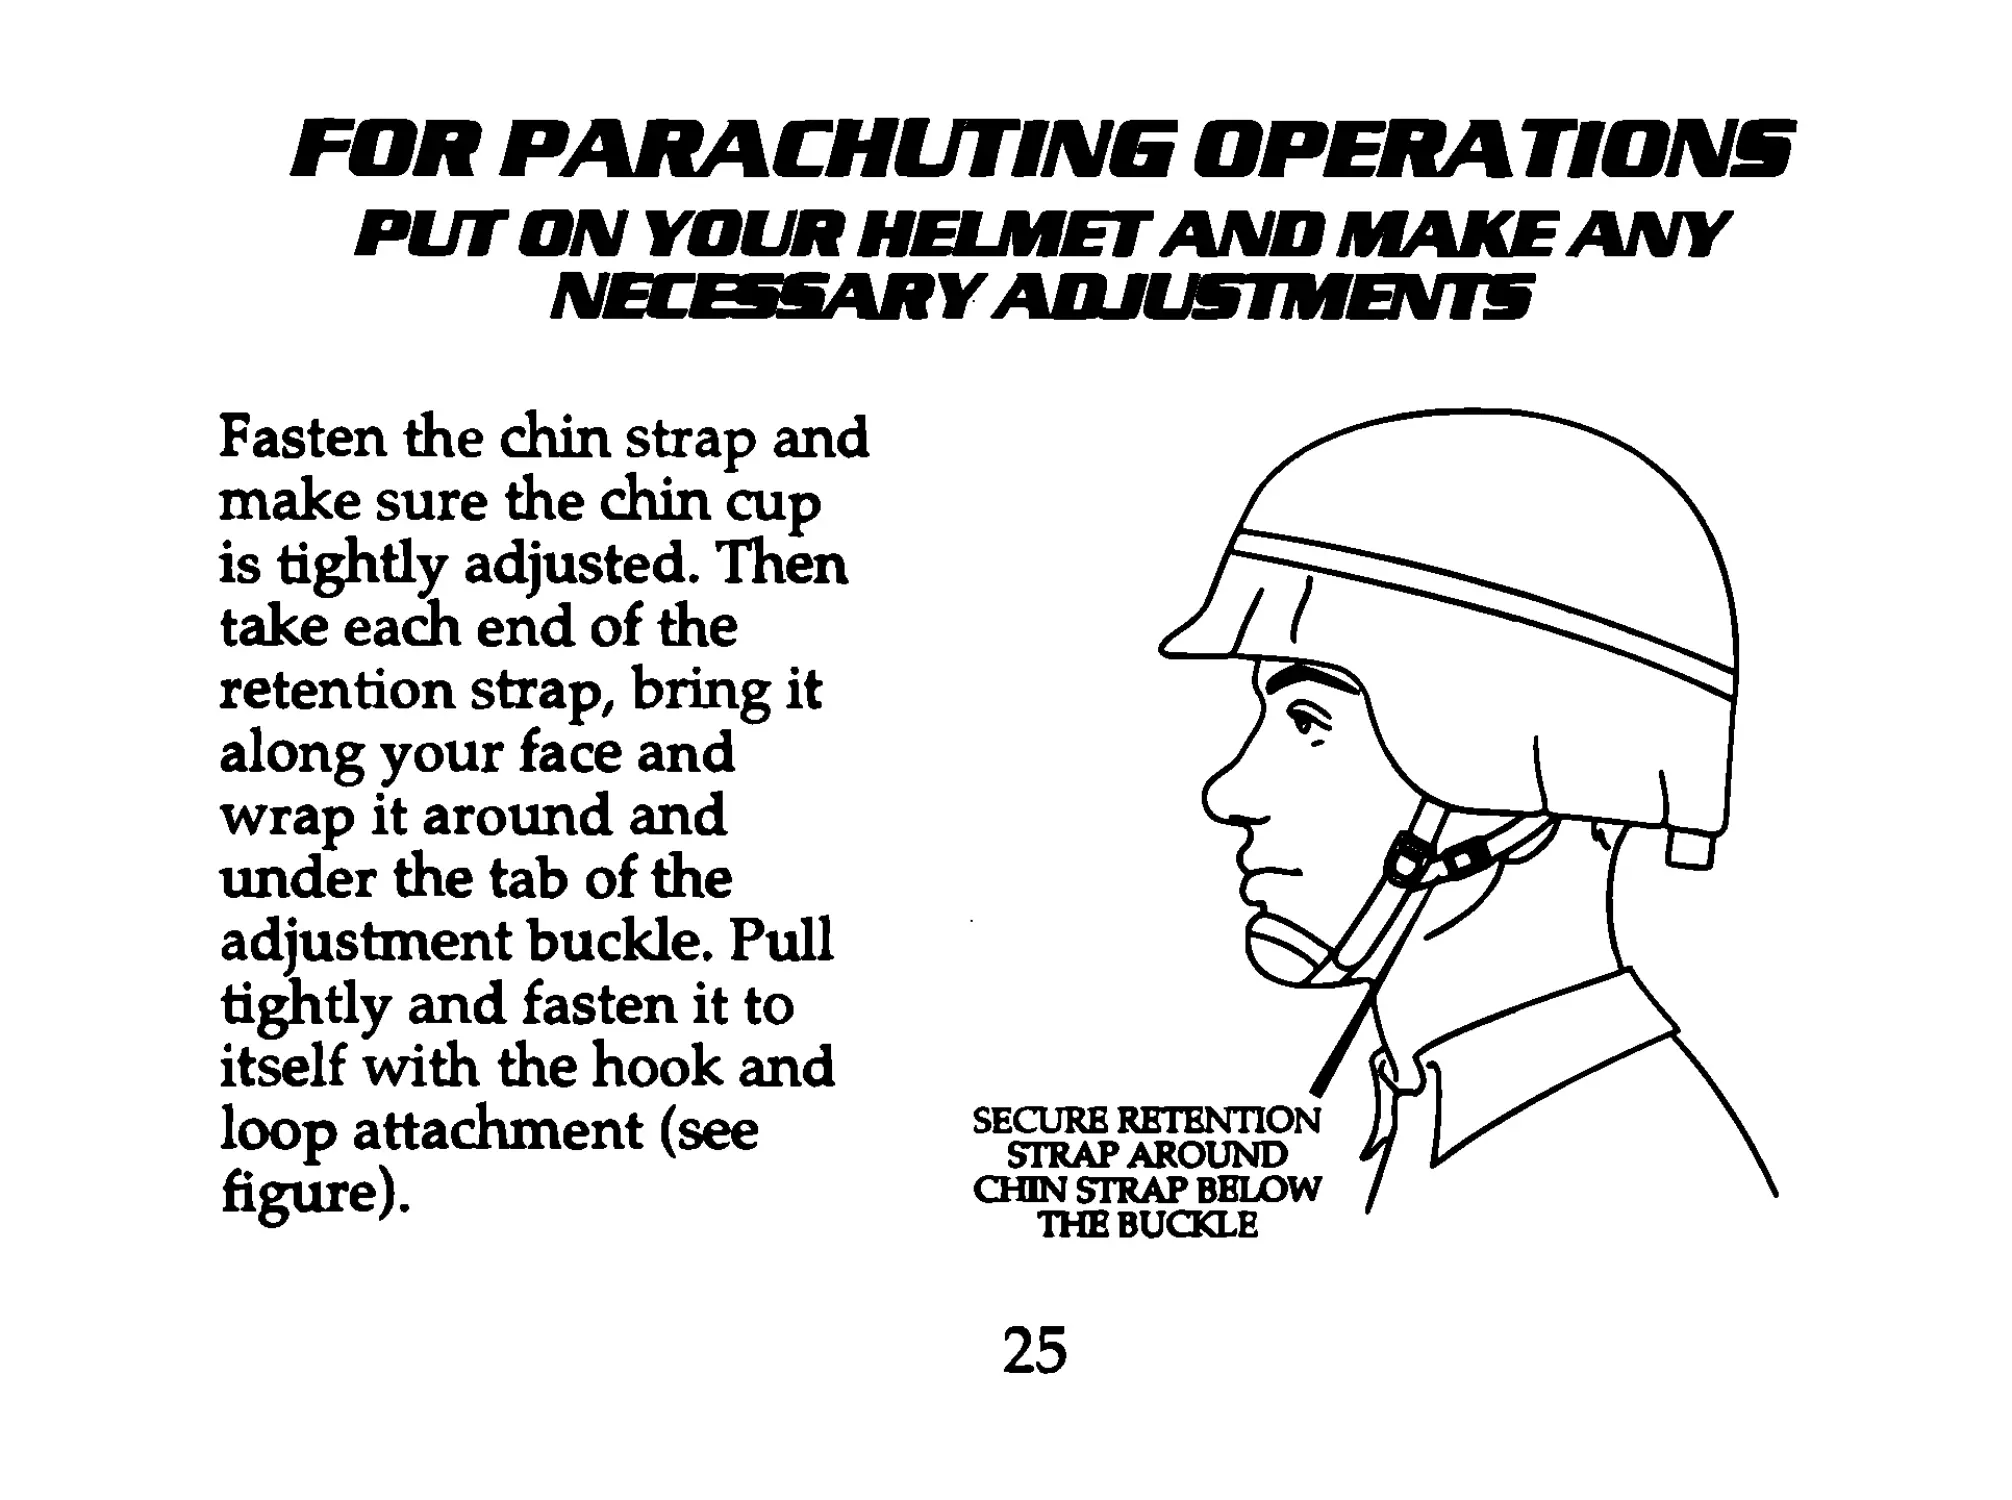
FDR PARACHUTED OPERATIONS
PUT ON YOUR HELMET AND MAKE ANY
NECESSARY ADJUSTMENTS
Fasten the chin strap and
make sure the chin cup
is tightly adjusted. Then
take each end of the
retention strap, bring it
along your face and
wrap it around and
under the tab of the
adjustment buckle. Pull
tightly and fasten it to
itself with the hook and
loop attachment (see
figure).
SECURE RETENTION
STRAPAROUND
CHIN STRAP BELOW
THE BUCKLE
25
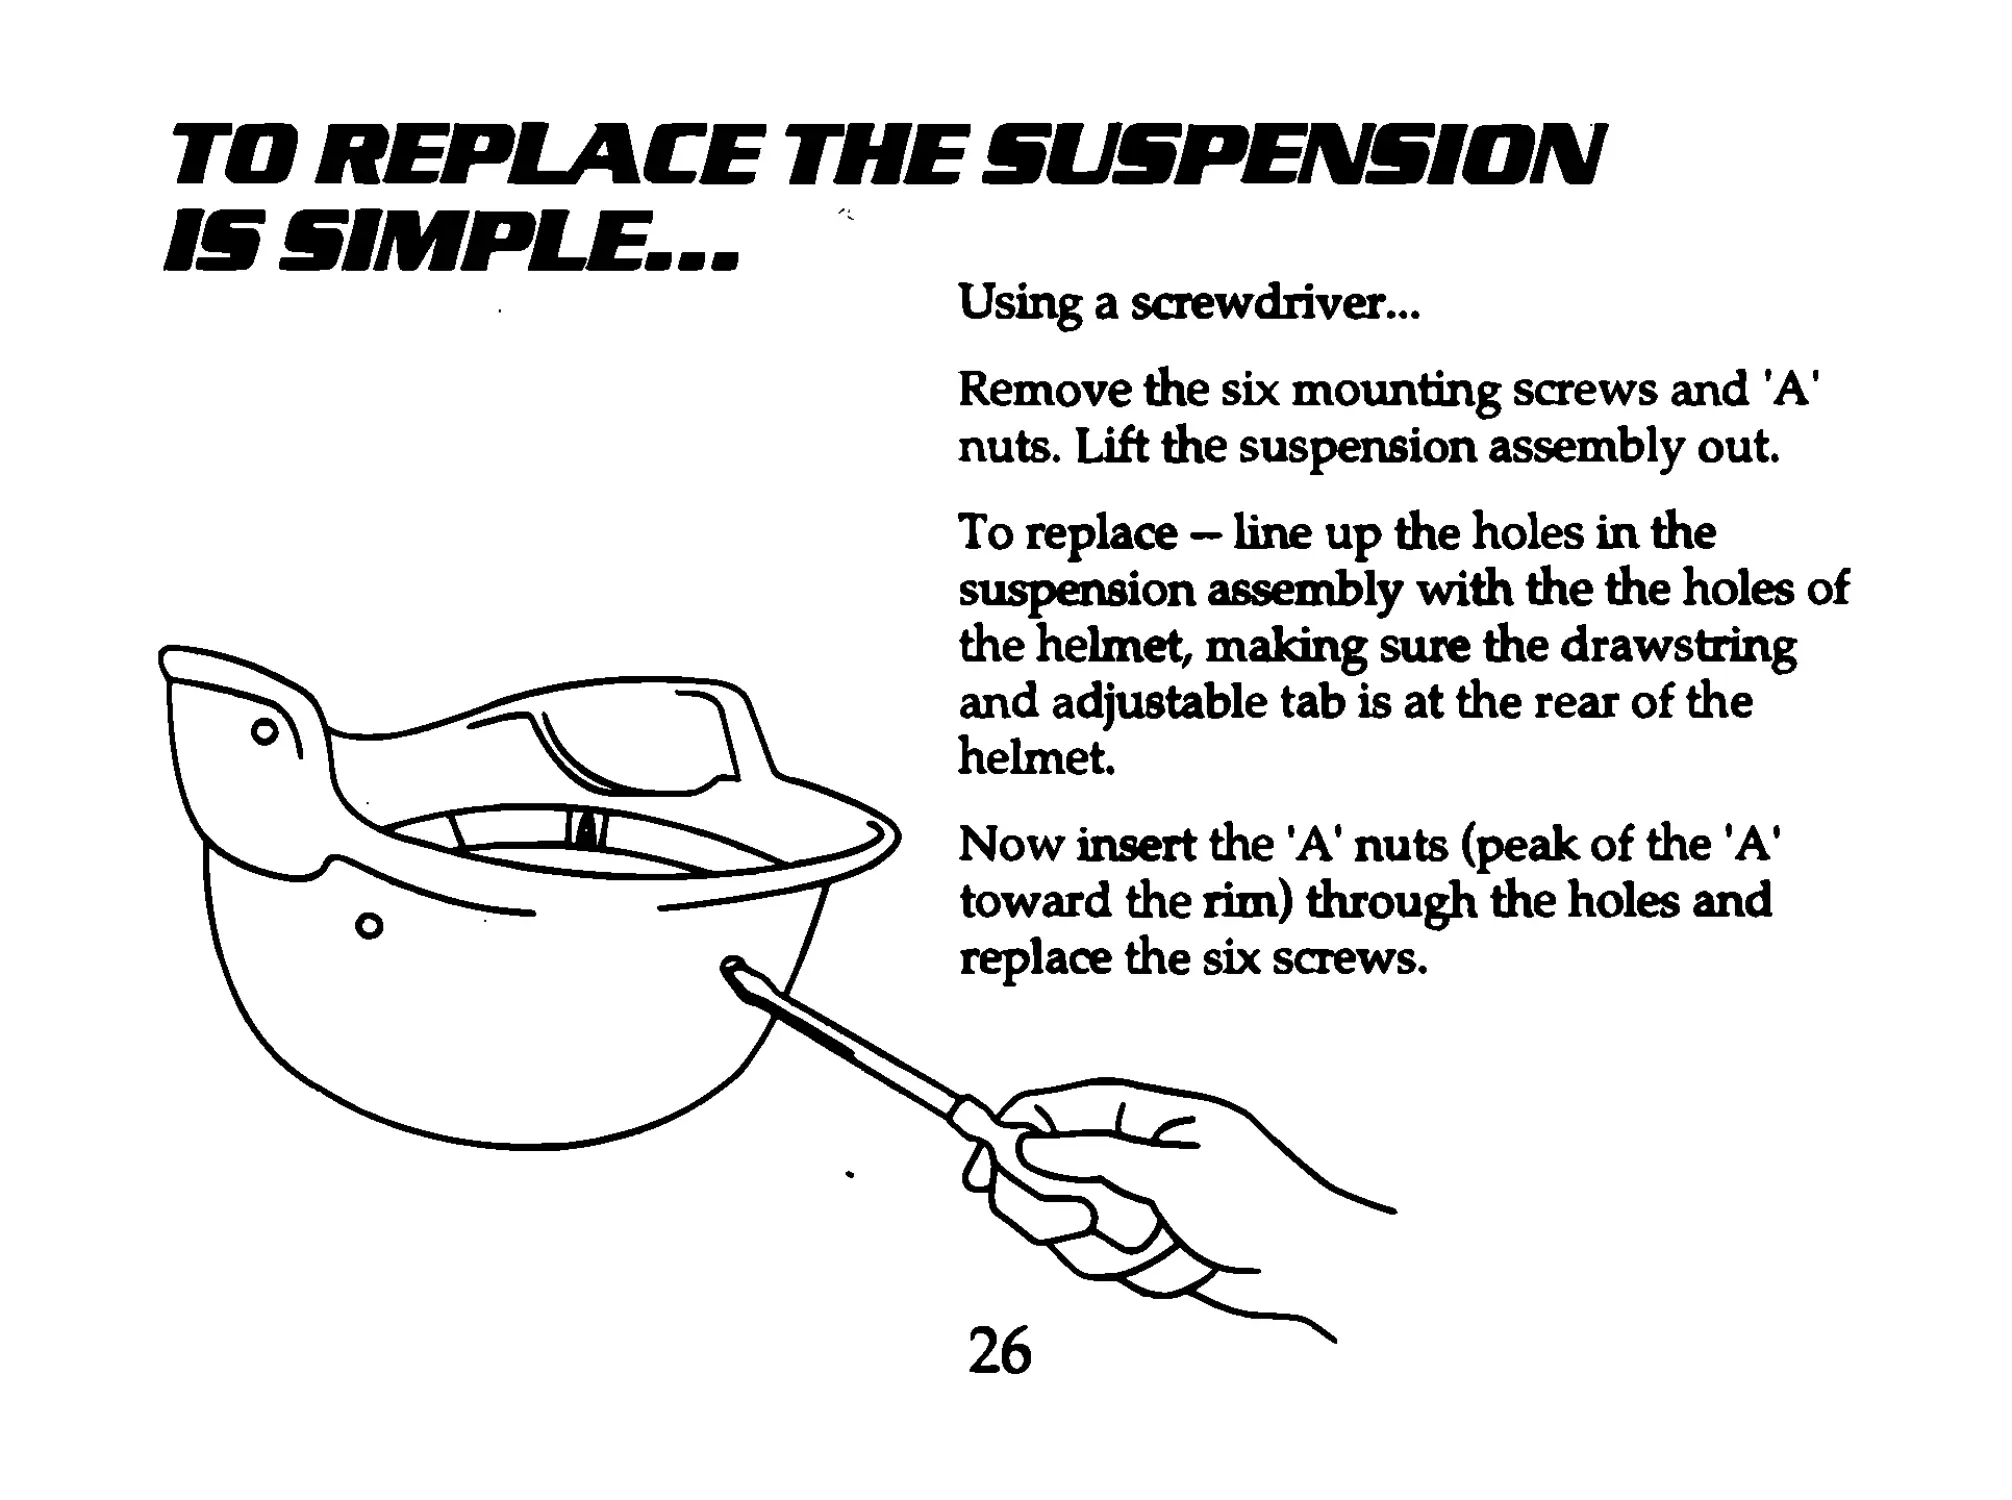
TO REPLACE THE SUSPENSION
IS SIMPLE...
Using a screwdriver...
Remove the six mounting screws and 'A'
nuts. Lift the suspension assembly out.
To replace — line up the holes in the
suspension assembly with the the holes of
the helmet, making sure the drawstring
and adjustable tab is at the rear of the
helmet.
Now insert the 'A' nuts (peak of the 'A'
toward the rim) through the holes and
replace the six screws.
26
TAKE CARE OF YOUR HELMET
DON'T HEAT WATER IN IT
DON'T HAMMER WITH ГГ
DON'T DIG WITH ГГ
USE IT - DON'T ABUSE IT!
27
SOLDIER, your helmet is the best ballistic
protective helmet in the world. Make sure you're
wearing the proper size.
It is made of a high strength laminate, the strength of
which surpasses that of steel...and which pound for
pound has better ballistic protection than steel. This
helmet along with the vest makes up your body
armor system. It will protect you against fragments
from exploding munitions.
WEAR IT AND LIVE!
WEAR THE CORRECT SIZE
28
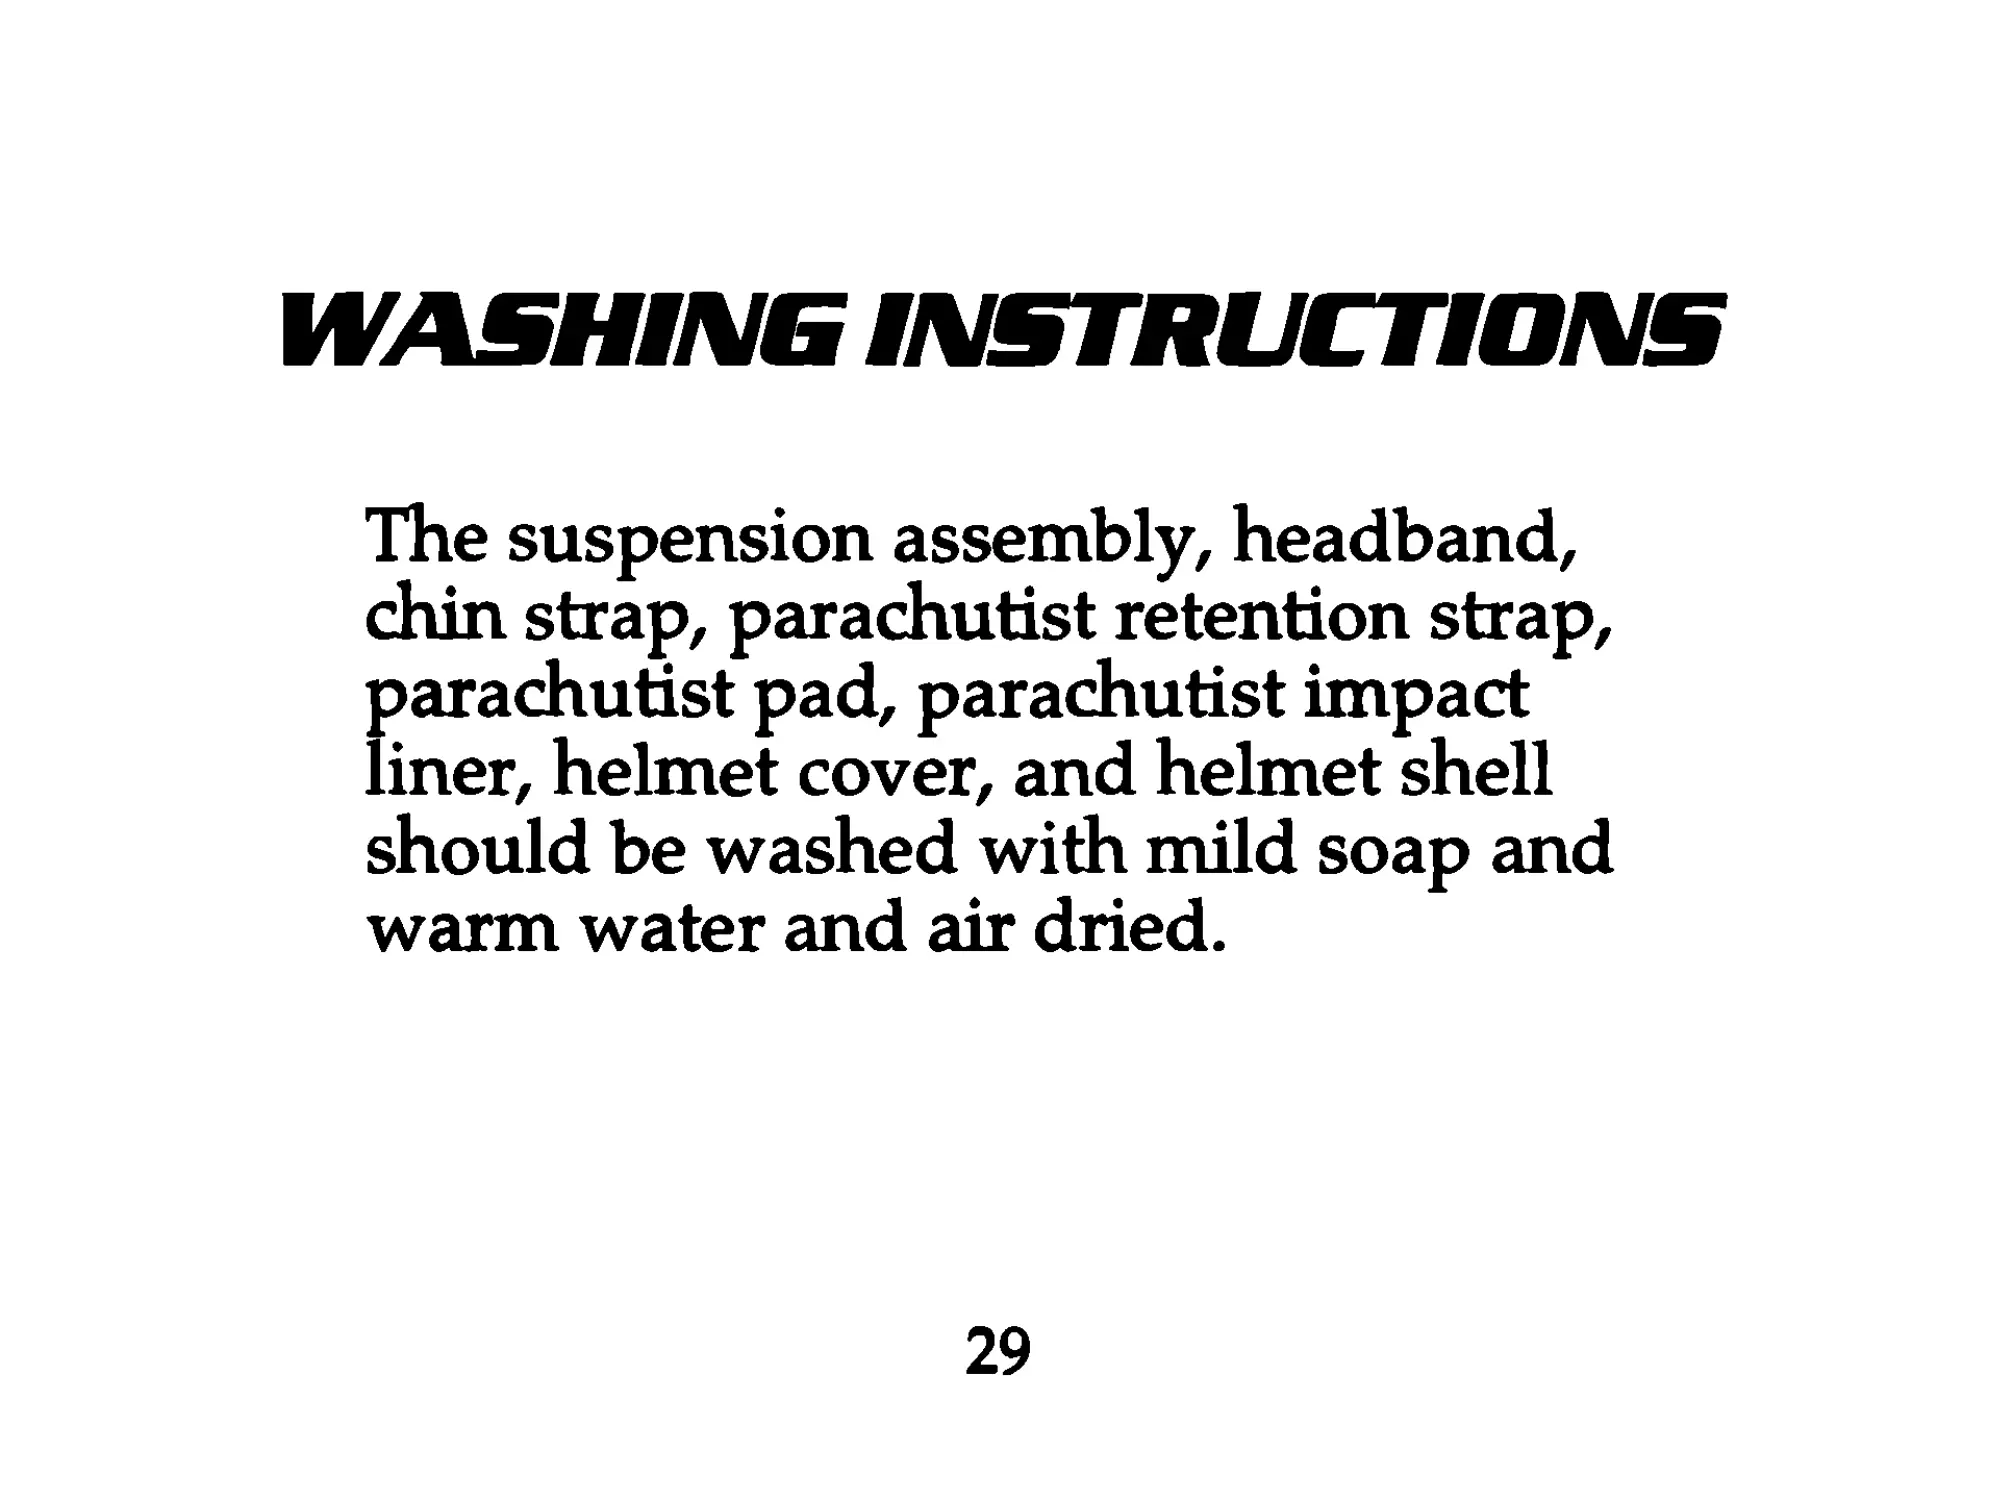
WASHING INSTRUCTIONS
The suspension assembly, headband,
chin strap, parachutist retention strap,
parachutist pad, parachutist impact
liner, helmet cover, and helmet shell
should be washed with mild soap and
warm water and air dried.
29
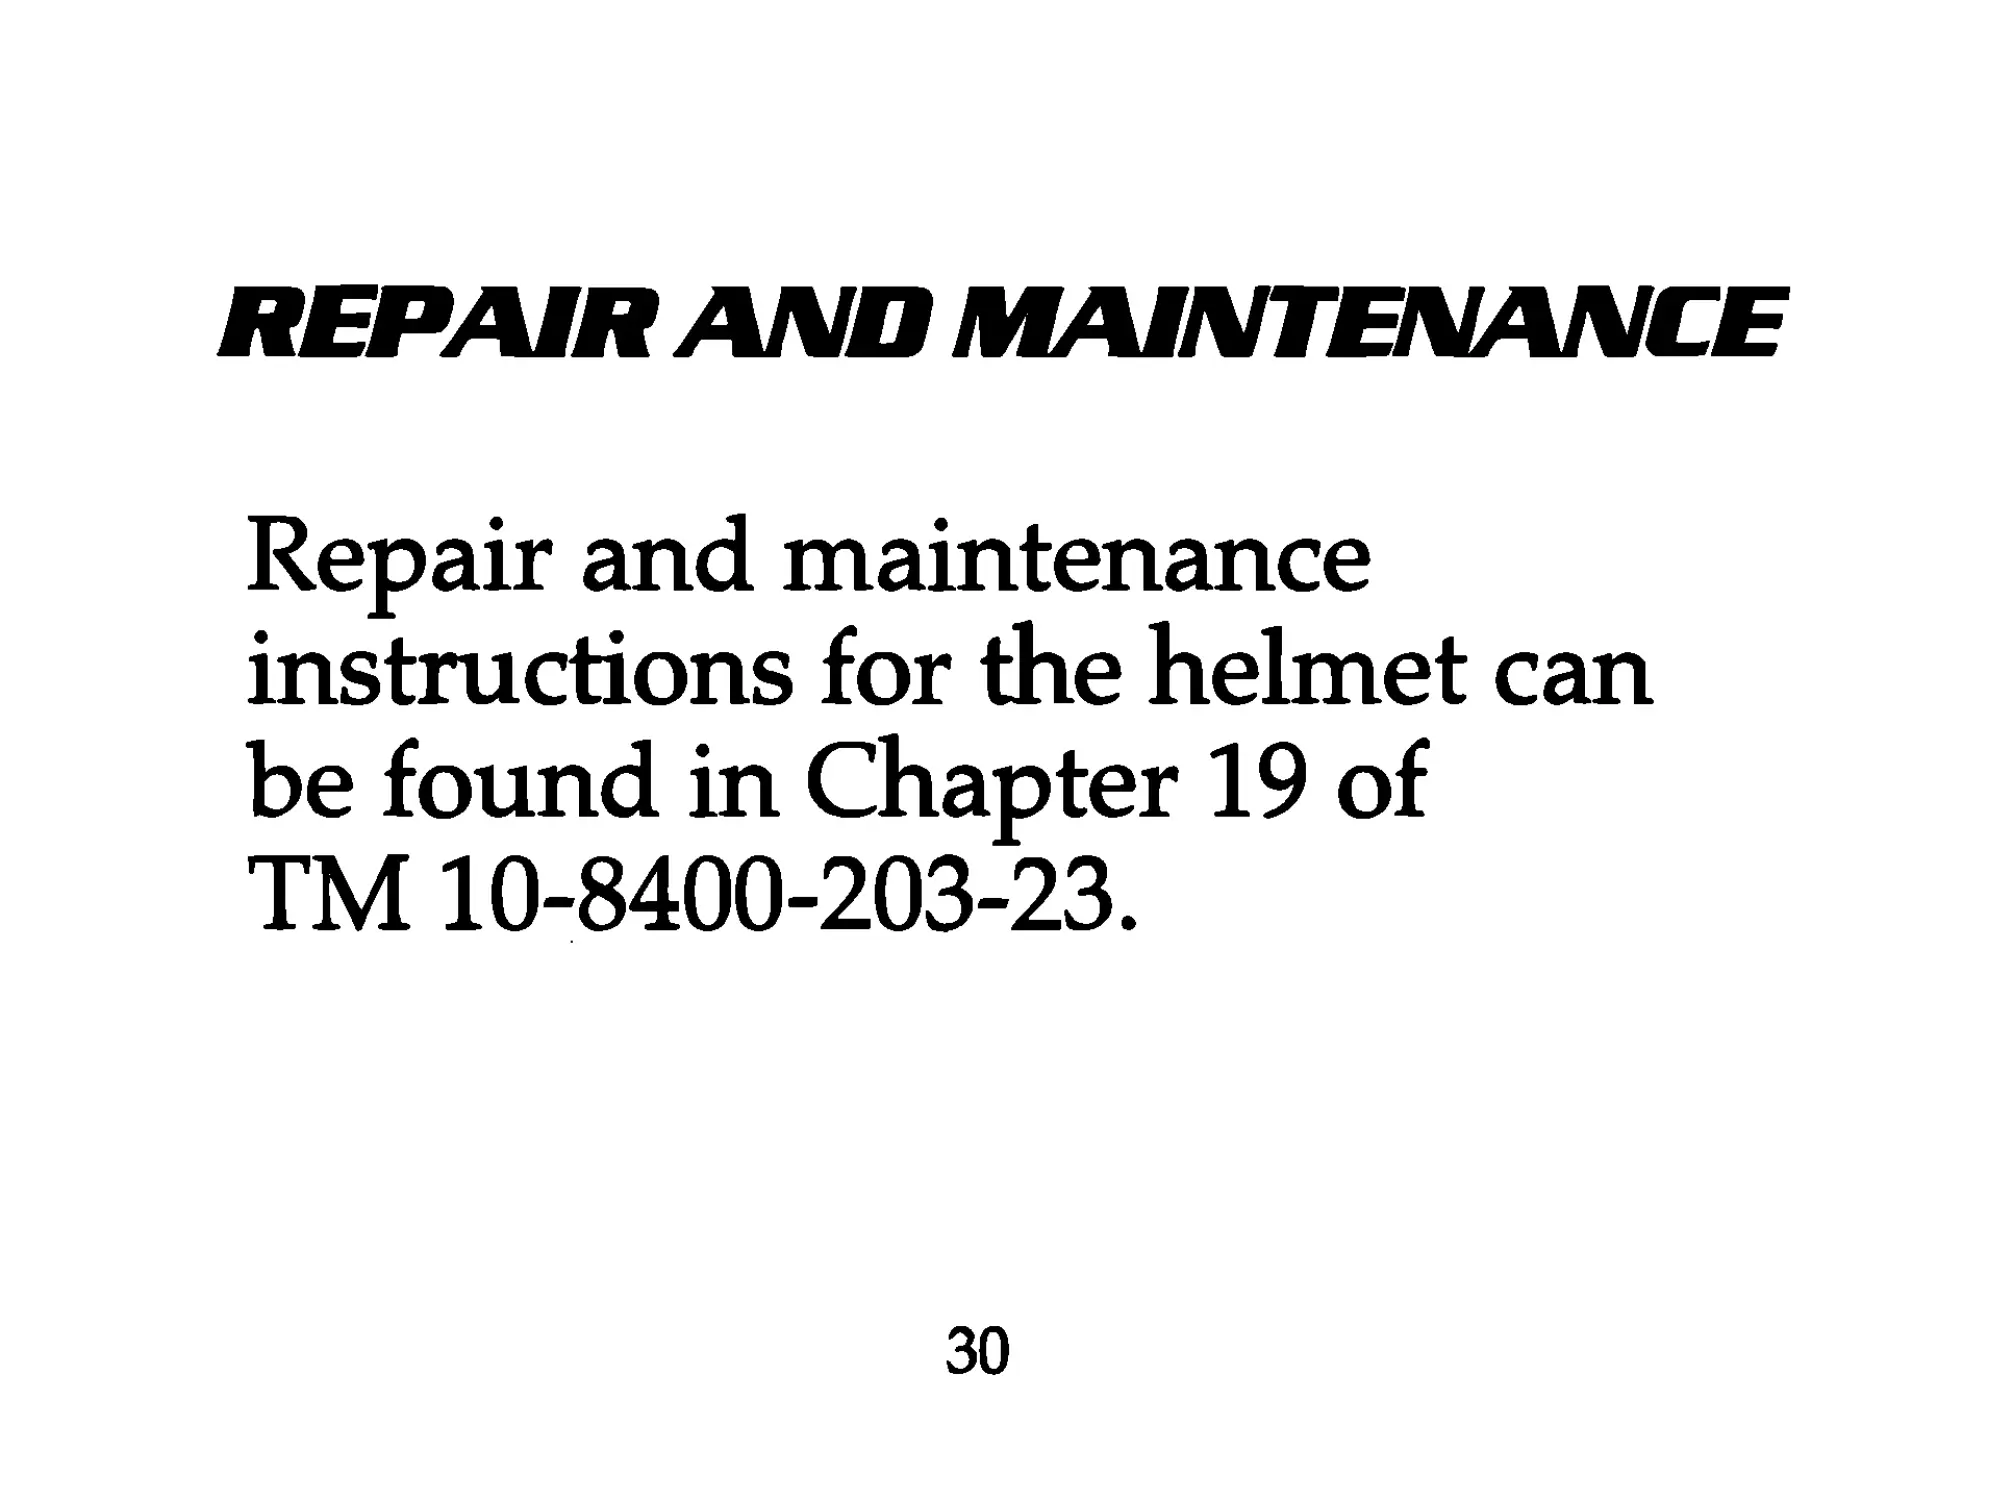
REPAIR AND MAINTENANCE
Repair and maintenance
instructions for the helmet can
be found in Chapter 19 of
TM10-8400-203-23.
30
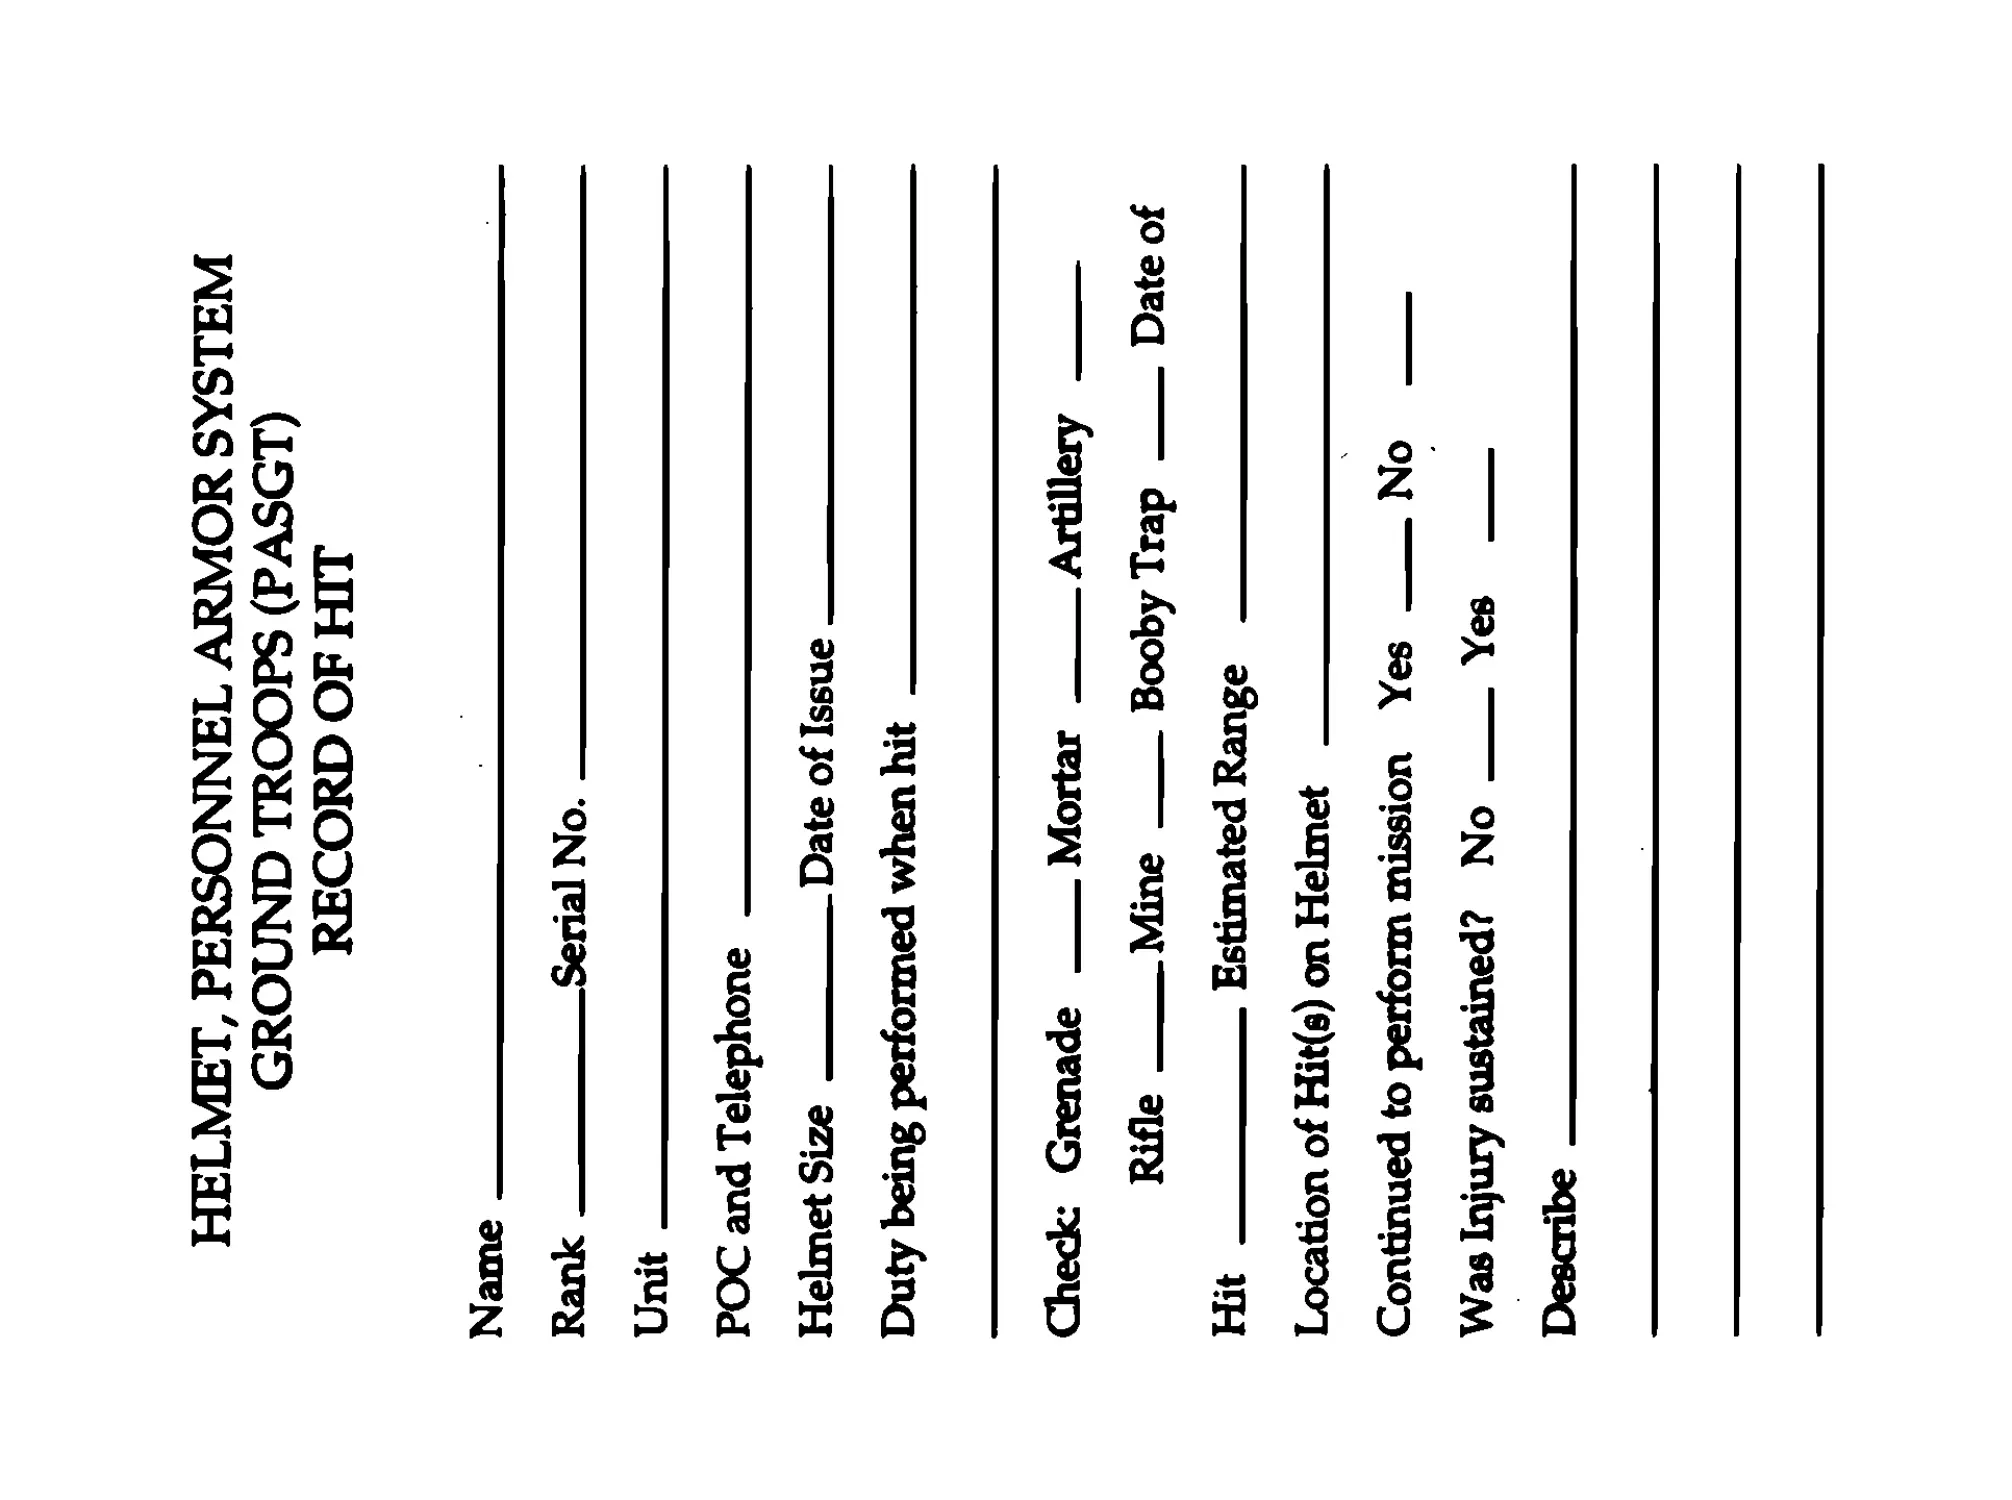
HELMET, PERSONNEL ARMOR SYSTEM
GROUND TROOPS (PASGT)
RECORD OF HIT
Name______________________;_________________________
Rank____________Serial No.__________________________
Unit________________________________________________
РОС and Telephone __________________________________
Helmet Size Date of Issue
Duty being performed when hit
Check* Grenade _____Mortar Artillery
Rifle Mine ________Booby Trap ______Date of
Hit Estimated Range
Location of Hit(s) on Helmet _______________________
Continued to perform mission Yes ___No _______
Was Injury sustained? No ____Yes _______
Describe____________________________________________
DEPARTMENT OF THE ARMY
NATICK SOLDIER CENTER
ATTN: AMSSB-PM-RST-E(N)
NATICK, MA 01760-5019
OFFICIAL BUSINESS
POSTAGE AND
FEES PAID
TO: COMMANDER,
US ARMY SOLDIER AND BIOLOGICAL
CHEMICAL COMMAND
ATTN: AMSSB-PM-RST-E(N)
NATICK, MA 01760-5019