/


Текст
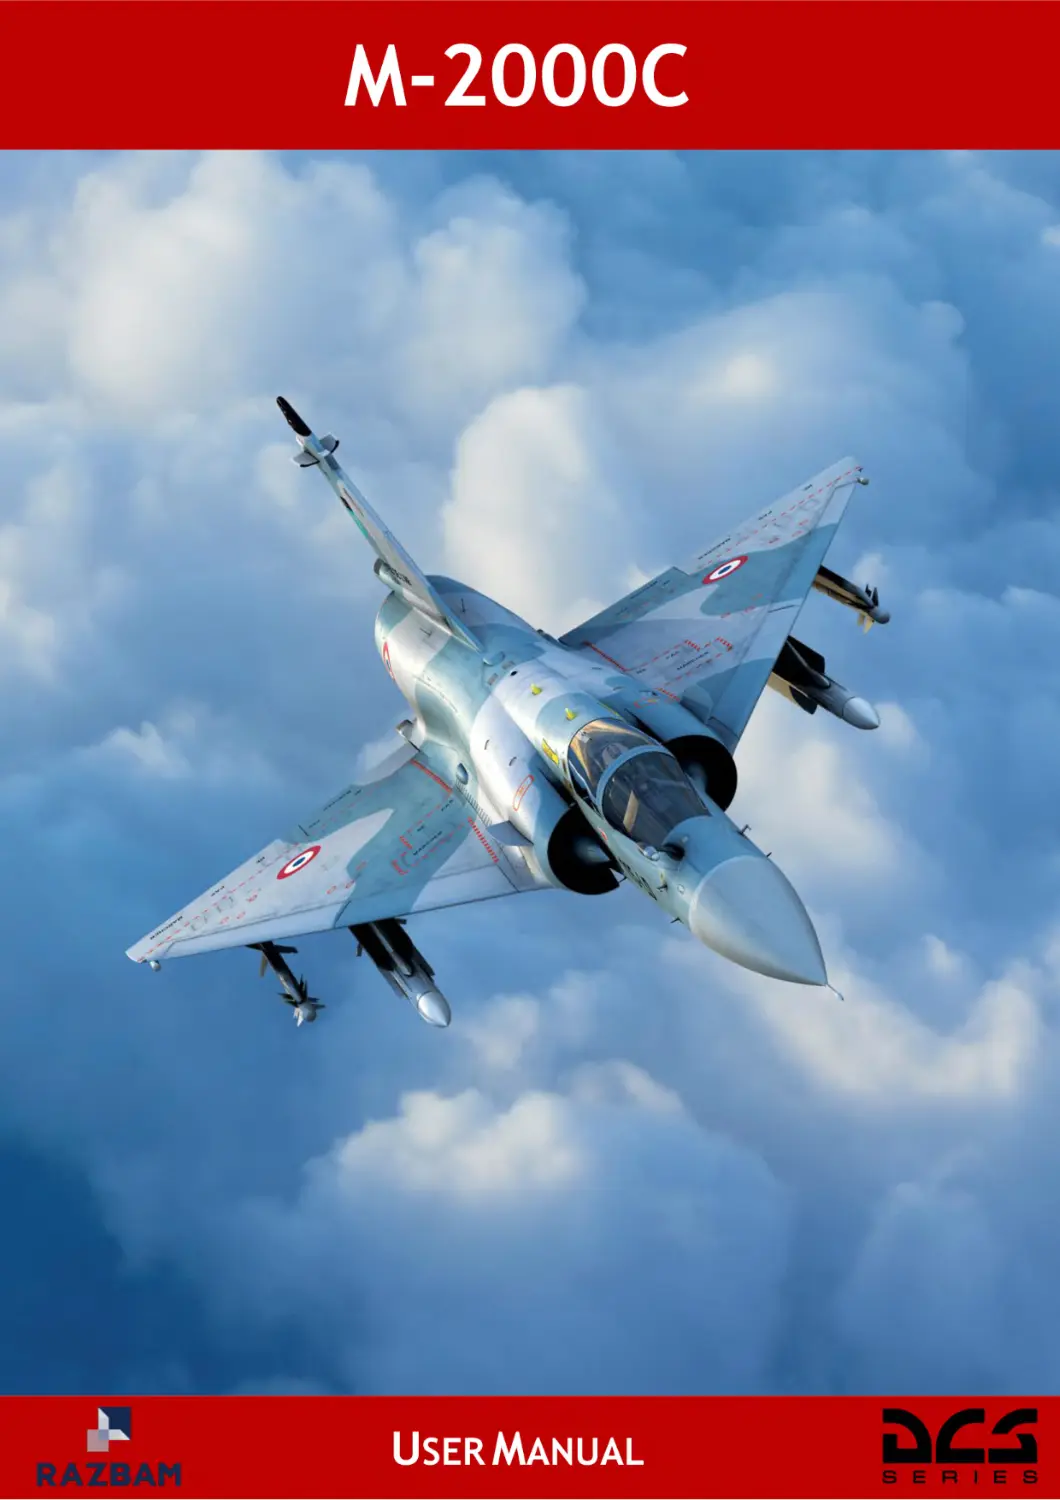
M-2000C
USER MANUAL
Introduction....................................................................................................... 14
Effectivity ................................................................................................................................ 14
Sound judgement ................................................................................................................... 14
Version .................................................................................................................................... 14
Definitions............................................................................................................................... 15
Glossary .................................................................................................................................. 16
Acknowledgements ................................................................................................................ 18
Effective changes ................................................................................................................... 19
Aircraft ............................................................................................................... 21
1 – 1 - General information .................................................................................................... 22
Basic information............................................................................................................... 22
Power plant ........................................................................................................................ 23
Performances ..................................................................................................................... 23
Aircraft dimensions and weight ........................................................................................ 23
Weapons............................................................................................................................. 23
History ................................................................................................................................ 24
Cockpit ............................................................................................................................... 25
Engine................................................................................................................................. 25
Payload and armaments .................................................................................................... 25
Sensors and avionics ........................................................................................................ 26
1 – 2 - Cockpit layout .............................................................................................................. 27
Front Dash .......................................................................................................................... 27
Center pylon ....................................................................................................................... 29
Left vertical panel .............................................................................................................. 30
Right vertical panel ............................................................................................................ 31
Left console........................................................................................................................ 32
Left wall .............................................................................................................................. 34
Right console ..................................................................................................................... 35
Right wall ............................................................................................................................ 37
Seat ..................................................................................................................................... 38
Canopy ............................................................................................................................... 39
1 – 3 - Hands on throttle and stick system ........................................................................... 40
Stick and throttle controls ................................................................................................. 40
Engine................................................................................................................ 44
2 – 1 - Engine information ...................................................................................................... 45
Introduction ........................................................................................................................ 45
General characteristics ..................................................................................................... 45
Page 1
2 – 2 - Engine controls ........................................................................................................... 46
Throttle ............................................................................................................................... 46
Engine’s airflow controls .................................................................................................. 47
Engine RPM and temperature indicator ........................................................................... 49
Engine status and warning lights ..................................................................................... 50
2 – 3 - Engine startup ............................................................................................................. 51
Introduction ........................................................................................................................ 51
Engine startup panel ......................................................................................................... 52
2 – 4 - Engine operation ......................................................................................................... 53
Introduction ........................................................................................................................ 53
Startup ................................................................................................................................ 54
Throttle usage .................................................................................................................... 55
Shutdown ........................................................................................................................... 55
Inflight restart..................................................................................................................... 56
2 – 5 - Engine limits ................................................................................................................ 58
Introduction ........................................................................................................................ 58
Limits .................................................................................................................................. 58
2 – 6 - Engine emergency controls........................................................................................ 59
Introduction ........................................................................................................................ 59
CALC emergency and rearm switch ................................................................................. 60
Emergency fuel throttle and switch .................................................................................. 61
Emergency oil switch ........................................................................................................ 62
Emergency afterburner cut-off switch.............................................................................. 63
Inflight restart switch......................................................................................................... 64
2 – 7 - Engine performance .................................................................................................... 65
Introduction ........................................................................................................................ 65
Thrust ................................................................................................................................. 66
Fuel consumption .............................................................................................................. 67
Electrical system .............................................................................................. 68
3 – 1 - Electrical power supply system ................................................................................. 69
Introduction ........................................................................................................................ 69
Power distribution schematics ......................................................................................... 69
Electrical power emergency conditions ........................................................................... 71
3 – 2 - Electrical Power Controls ........................................................................................... 73
Power control switches ..................................................................................................... 73
Circuit breaker panel ......................................................................................................... 73
Fuel system ....................................................................................................... 74
Page 2
4 – 1 - Fuel tanks and transfer ............................................................................................... 75
Fuel tanks ........................................................................................................................... 75
Fuel transfer ....................................................................................................................... 77
4 – 2 - Fuel controls ................................................................................................................ 78
Fuel control panel .............................................................................................................. 78
Fuel consumption and transfer diagram .......................................................................... 80
Fuel flow indicator and BINGO selector ........................................................................... 81
External tanks fuel dump button ...................................................................................... 81
Hydraulic system .............................................................................................. 82
Introduction ........................................................................................................................ 83
Hydraulic systems description ......................................................................................... 83
Hydraulic system schematics ........................................................................................... 84
Hydraulic pressure indicator and selector ....................................................................... 84
Flight controls .................................................................................................. 85
6 – 1 - Mobile surfaces ........................................................................................................... 86
Introduction ........................................................................................................................ 86
Normal Operation............................................................................................................... 86
Scoops/inlet cones/slats control panel ............................................................................ 87
6 – 2 - Fly-by-wire ................................................................................................................... 88
Introduction ........................................................................................................................ 88
FBW modes Switch............................................................................................................ 89
Degraded and emergency mode operation ...................................................................... 90
Autopilot and trim ............................................................................................ 91
7 – 1 - Autopilot ...................................................................................................................... 92
Introduction ........................................................................................................................ 92
Operational limits............................................................................................................... 92
Audio warning .................................................................................................................... 92
Autopilot control panel and altitude selector .................................................................. 93
Autopilot operation ............................................................................................................ 94
Autopilot modes ................................................................................................................ 95
Autopilot test...................................................................................................................... 99
Alert altitude ..................................................................................................................... 100
Abnormal operation ......................................................................................................... 100
7 – 2 - Trim system ............................................................................................................... 101
Trimming the aircraft ....................................................................................................... 101
Trimming with the autopilot ............................................................................................ 101
Page 3
Landing gear ................................................................................................... 102
Introduction ...................................................................................................................... 103
Landing gear controls ..................................................................................................... 104
Landing configuration panel ........................................................................................... 106
Avionics........................................................................................................... 107
9 – 1 - Flight instruments ..................................................................................................... 108
Altimeter ........................................................................................................................... 108
Anemomachmeter............................................................................................................ 108
Vertical velocity indicator................................................................................................ 108
Main attitude indicator ..................................................................................................... 109
Angle of attack indicator ................................................................................................. 109
Standby attitude indicator ............................................................................................... 110
Accelerometer .................................................................................................................. 110
9 – 2 - Navigation indicator .................................................................................................. 111
Introduction ...................................................................................................................... 111
Navigation indicator ........................................................................................................ 111
IDN modes ........................................................................................................................ 113
9 – 3 - Aircraft sound configuration panel .......................................................................... 114
Onboard radios ............................................................................................. 115
Introduction ...................................................................................................................... 116
10 – 1 - Radio preset channels ............................................................................................ 117
10 – 2 - V/UHF radio command panel .................................................................................. 119
10 – 3 - UHF Radio command panel .................................................................................... 122
10 – 4 - EVF panel ................................................................................................................. 123
10 – 5 - V/UHF frequency repeater....................................................................................... 125
Navigation and weapon system .................................................................. 126
Introduction ...................................................................................................................... 127
11 – 1 - SNA modes selection .............................................................................................. 128
Priority selection .............................................................................................................. 128
PCA selection................................................................................................................... 128
Selective jettison ............................................................................................................. 129
Air-to-ground sub-modes ................................................................................................ 129
11 – 2 - HOTAS SNA commands.......................................................................................... 130
Weapon system command .............................................................................................. 130
Weapon system paddle ................................................................................................... 131
MAGIC search/Vertical fix command .............................................................................. 131
Page 4
CNM switch ...................................................................................................................... 132
11 – 3 - MAGIC search .......................................................................................................... 133
Search sectors ................................................................................................................. 133
MAGIC background search ............................................................................................. 134
Weapons control panel ................................................................................ 135
12 – 1 - Weapon control panel ............................................................................................. 136
12 – 2 - SNA options ............................................................................................................. 137
Introduction ...................................................................................................................... 137
SNA in navigation mode .................................................................................................. 137
SNA in air-to-air mode ..................................................................................................... 138
SNA in air-to-ground mode ............................................................................................. 139
12 – 3 - Loaded stores .......................................................................................................... 140
12 – 4 - Selective jettison ..................................................................................................... 141
Weapons preparation panel ........................................................................ 142
Weapon preparation panel .............................................................................................. 143
Head-up display ............................................................................................ 146
Introduction ...................................................................................................................... 147
14 – 1 - Head-up command panel ........................................................................................ 148
14 – 2 - VTH master modes .................................................................................................. 150
14 – 3 - Common symbology ............................................................................................... 152
Base symbology .............................................................................................................. 152
Auto-pilot symbology ...................................................................................................... 155
14 – 4 - NAV mode ................................................................................................................ 156
Heading error sub-mode ................................................................................................. 156
Ground sub-mode ............................................................................................................ 158
Approach sub-mode ........................................................................................................ 159
Desired heading option ................................................................................................... 163
Desired time option ......................................................................................................... 164
Radar fix sub-mode ......................................................................................................... 165
14 – 5 - Air-to-air mode......................................................................................................... 166
Common symbology ....................................................................................................... 166
Common symbology with radar lock.............................................................................. 167
MAGIC sub-mode ............................................................................................................. 172
Air-to-air gun sub-mode .................................................................................................. 179
530 sub-mode................................................................................................................... 183
Police sub-mode .............................................................................................................. 188
Auto-acquisition options ................................................................................................. 190
Page 5
DO TAF symbology.......................................................................................................... 194
14 – 6 - Air-to-ground mode ................................................................................................. 196
Common symbology ....................................................................................................... 196
BL sub-mode .................................................................................................................... 197
BL PI sub-mode ............................................................................................................... 199
BF sub-mode .................................................................................................................... 201
BF PI sub-mode ............................................................................................................... 204
CAS sub-mode ................................................................................................................. 208
RK sub-mode ................................................................................................................... 210
14 – 7 - Other symbology ..................................................................................................... 212
Back-up fixed sight .......................................................................................................... 212
Jamming symbology ....................................................................................................... 213
14 – 8 - Warning symbology ................................................................................................ 215
Warning system ............................................................................................ 216
15 – 1 - Fault indicator button .............................................................................................. 217
15 – 2 - Alarm panel .............................................................................................................. 218
Introduction ...................................................................................................................... 218
Fault lights description.................................................................................................... 218
Lighting ......................................................................................................... 220
16 – 1 - Cockpit lighting ....................................................................................................... 221
Introduction ...................................................................................................................... 221
Internal lighting controls ................................................................................................. 221
16 – 2 - Exterior lights .......................................................................................................... 223
Introduction ...................................................................................................................... 223
External lights switches .................................................................................................. 223
Exterior lights................................................................................................................... 225
16 – 3 - Night vision goggles ............................................................................................... 228
Other systems .............................................................................................. 229
17 – 1 - Drag chute ............................................................................................................... 230
Introduction ...................................................................................................................... 230
Controls ............................................................................................................................ 230
17 – 2 - Canopy ..................................................................................................................... 231
Introduction ...................................................................................................................... 231
Canopy lever .................................................................................................................... 232
Half-opening handle ........................................................................................................ 233
Canopy handles ............................................................................................................... 233
Canopy fracture lever ...................................................................................................... 234
Page 6
Canopy operation ............................................................................................................ 235
Radio navigation .......................................................................................... 237
Introduction ...................................................................................................................... 238
18 – 1 - TACAN...................................................................................................................... 239
Introduction ...................................................................................................................... 239
TACAN panel .................................................................................................................... 239
18 – 2 - VOR and ILS............................................................................................................. 240
Introduction ...................................................................................................................... 240
VOR/ILS panel .................................................................................................................. 240
INS.................................................................................................................. 241
19 – 1 - INS introduction ...................................................................................................... 242
INS Operating principle ................................................................................................... 242
Sagem ULISS 52 UNI ....................................................................................................... 242
Platform drift .................................................................................................................... 244
19 – 2 - Mode selector panel ................................................................................................ 245
19 – 3 - Navigation control panel ......................................................................................... 246
19 – 4 - Using the PCN ......................................................................................................... 249
Introduction ...................................................................................................................... 249
Data visualization............................................................................................................. 250
Data edition ...................................................................................................................... 258
BUT ................................................................................................................................... 259
BAD ................................................................................................................................... 262
MRQ .................................................................................................................................. 264
VTB BUT display .............................................................................................................. 265
19 – 5 - Alignment ................................................................................................................. 266
Introduction ...................................................................................................................... 266
Normal alignment............................................................................................................. 267
Interrupted normal alignment ......................................................................................... 270
Stored heading alignment ............................................................................................... 273
19 – 6 - Data cartridge .......................................................................................................... 275
Introduction ...................................................................................................................... 275
Loading the data .............................................................................................................. 276
Creating a data cartridge ................................................................................................. 276
19 – 7 - Position fix ............................................................................................................... 277
Introduction ...................................................................................................................... 277
Overfly fix ......................................................................................................................... 278
Radar fix ........................................................................................................................... 279
Page 7
IFF .................................................................................................................. 280
Introduction ...................................................................................................................... 281
20 – 1 - IFF transponder ....................................................................................................... 282
20 – 2 - IFF Interrogator panel ............................................................................................. 285
Radar ............................................................................................................. 286
21 – 1 - RDI ............................................................................................................................ 287
Introduction ...................................................................................................................... 287
Operational modes .......................................................................................................... 288
Radar theory..................................................................................................................... 289
Air-to-air modes ............................................................................................................... 293
Air-to-ground modes ....................................................................................................... 304
Target designation ........................................................................................................... 305
Radar emission channel .................................................................................................. 306
21 – 2 - Radar control panel ................................................................................................. 307
21 – 3 - VTB commands ....................................................................................................... 310
21 – 4 - VTB symbology ....................................................................................................... 312
Introduction ...................................................................................................................... 312
Common symbology ....................................................................................................... 312
Radar OFF ........................................................................................................................ 314
Radar in pre-heating ........................................................................................................ 315
Radar in standby .............................................................................................................. 316
Bar search ........................................................................................................................ 317
Azimuth markers .............................................................................................................. 318
Range marker ................................................................................................................... 319
Antenna elevation symbology ........................................................................................ 320
TDC ................................................................................................................................... 321
Navigation symbology ..................................................................................................... 323
HFR symbology ............................................................................................................... 324
BFR symbology ............................................................................................................... 326
Tracked target symbology .............................................................................................. 327
IFF symbology ................................................................................................................. 328
Persistence mode ............................................................................................................ 331
PSID .................................................................................................................................. 332
PSIC .................................................................................................................................. 333
SHB ................................................................................................................................... 334
Close combat modes ....................................................................................................... 335
Air-to-ground ranging ...................................................................................................... 338
Page 8
Ground avoidance ........................................................................................................... 339
Ground mapping .............................................................................................................. 341
Jamming symbology ....................................................................................................... 342
B display mode particularities ........................................................................................ 346
Manual target designation............................................................................................... 347
Radar target designation ................................................................................................. 350
Remote target designation .............................................................................................. 351
Radar emission channel .................................................................................................. 354
Rear presentation ............................................................................................................ 355
Stores visualization ......................................................................................................... 356
21 – 5 - HOTAS controls ....................................................................................................... 357
Introduction ...................................................................................................................... 357
Weapon system command .............................................................................................. 357
PSIC toggle....................................................................................................................... 358
NWS/IFF Interrogator ....................................................................................................... 358
Radar designator joystick ............................................................................................... 358
Antenna elevation controls ............................................................................................. 359
Electronic warfare ........................................................................................ 361
Introduction ...................................................................................................................... 362
22 – 1 - PCCM........................................................................................................................ 363
22 – 2 - Countermeasure display ......................................................................................... 365
Introduction ...................................................................................................................... 365
Threat display .................................................................................................................. 365
Symbology ....................................................................................................................... 367
Threats classification ...................................................................................................... 369
Audio warnings ................................................................................................................ 372
Suite status indicators .................................................................................................... 373
22 – 3 - Serval ....................................................................................................................... 374
22 – 4 - Spirale ...................................................................................................................... 375
Spirale system ................................................................................................................. 375
Decoy launcher indicator panel ...................................................................................... 376
Countermeasure programs ............................................................................................. 377
HOTAS controls ............................................................................................................... 378
22 – 5 - Sabre ........................................................................................................................ 379
Introduction ...................................................................................................................... 379
HOTAS controls ............................................................................................................... 380
22 – 6 - Éclair ........................................................................................................................ 381
Page 9
22 – 7 - D2M ........................................................................................................................... 382
Aircraft employment .................................................................................... 383
Introduction ...................................................................................................................... 384
23 – 1 - Ground operations .................................................................................................. 385
Introduction ...................................................................................................................... 385
Pre-flight ........................................................................................................................... 386
Ramp-start with ground power ....................................................................................... 394
Ramp-start without ground power .................................................................................. 404
Shutdown ......................................................................................................................... 413
23 – 2 - Airport operations ................................................................................................... 418
Introduction ...................................................................................................................... 418
Taxi ................................................................................................................................... 418
VFR take-off...................................................................................................................... 418
IFR take-off ....................................................................................................................... 418
VFR landing ...................................................................................................................... 418
VFR break landing ........................................................................................................... 418
IFR landing ....................................................................................................................... 418
23 – 3 - Autonomous navigation.......................................................................................... 419
Introduction ...................................................................................................................... 419
Creating a BUT ................................................................................................................. 420
Using a BUT ..................................................................................................................... 426
Creating a BAD ................................................................................................................ 429
Using a BAD ..................................................................................................................... 439
Creating an MRQ .............................................................................................................. 441
Using an MRQ .................................................................................................................. 442
Setting up a RD ................................................................................................................ 444
Using a RD ....................................................................................................................... 446
Setting up a TD ................................................................................................................ 448
Using a TD ........................................................................................................................ 450
Executing a navigation fix ............................................................................................... 452
23 – 4 - Radio navigation ..................................................................................................... 453
Introduction ...................................................................................................................... 453
Using a TACAN ................................................................................................................ 454
Using a VOR ..................................................................................................................... 457
23 – 5 - Night operations ...................................................................................................... 458
Installing NVGs ................................................................................................................ 458
Using NVGs ...................................................................................................................... 459
Page 10
23 – 6 - Flight-plan creation ................................................................................................. 460
Introduction ...................................................................................................................... 460
From the mission editor .................................................................................................. 460
From the cockpit .............................................................................................................. 460
Weapons........................................................................................................ 461
Introduction ...................................................................................................................... 462
Weapon profiles ............................................................................................................... 463
Air-to-ground weapon mix .............................................................................................. 463
Bombs delivery mode ...................................................................................................... 464
24 – 1 - Loadout chart .......................................................................................................... 465
24 – 2 - Internal cannon........................................................................................................ 468
DEFA 554 .......................................................................................................................... 468
24 – 3 - Missiles .................................................................................................................... 470
Super 530D ....................................................................................................................... 470
MAGIC II............................................................................................................................ 473
24 – 4 - Low drag bombs ...................................................................................................... 476
Introduction ...................................................................................................................... 476
SAMP-250 ......................................................................................................................... 477
Mark-82 ............................................................................................................................. 479
GBU-12 ............................................................................................................................. 481
GBU-16 ............................................................................................................................. 483
GBU-24 ............................................................................................................................. 485
24 – 5 - High drag bombs ..................................................................................................... 487
Introduction ...................................................................................................................... 487
SAMP-250 HD ................................................................................................................... 488
Mark-82 Snakeye .............................................................................................................. 490
Mark-82 Air ....................................................................................................................... 492
BLG-66 Belouga ............................................................................................................... 494
BAP-100 ............................................................................................................................ 497
24 – 6 - Rockets .................................................................................................................... 499
Type F4 ............................................................................................................................. 499
24 – 7 - External fuel tanks................................................................................................... 501
RPL-522 ............................................................................................................................ 501
RPL-541/542 ..................................................................................................................... 502
Air-to-air employment .................................................................................. 503
Introduction ...................................................................................................................... 504
25 – 1 - DEFA 554 ................................................................................................................. 505
Page 11
Symbology ....................................................................................................................... 505
Employment ..................................................................................................................... 512
25 – 2 - Super 530D .............................................................................................................. 524
Symbology ....................................................................................................................... 524
Employment ..................................................................................................................... 530
25 – 3 - MAGIC II ................................................................................................................... 541
Symbology ....................................................................................................................... 541
Employment ..................................................................................................................... 548
25 – 4 - Tactics ...................................................................................................................... 555
Beyond visual range ........................................................................................................ 555
Within visual range .......................................................................................................... 555
Target designation ........................................................................................................... 555
25 – 5 - Communications ..................................................................................................... 556
With the AWACS/GCI ....................................................................................................... 556
With a wingman ............................................................................................................... 556
Air-to-ground employment .......................................................................... 557
Introduction ...................................................................................................................... 558
Sensors ............................................................................................................................ 558
26 – 1 - Low drag bombs ...................................................................................................... 560
Introduction ...................................................................................................................... 560
Symbology ....................................................................................................................... 562
Profiles ............................................................................................................................. 566
Employment ..................................................................................................................... 577
Degraded employment .................................................................................................... 600
26 – 2 - high drag bombs ..................................................................................................... 601
Introduction ...................................................................................................................... 601
Symbology ....................................................................................................................... 603
Profiles ............................................................................................................................. 608
Employment ..................................................................................................................... 610
Degraded employment .................................................................................................... 631
26 – 3 - Rockets and guns.................................................................................................... 632
Introduction ...................................................................................................................... 632
Symbology ....................................................................................................................... 633
Profiles ............................................................................................................................. 636
Employment ..................................................................................................................... 637
Degraded employment .................................................................................................... 658
Aircraft procedures ...................................................................................... 659
Page 12
27 – 1 - Pilot memo ............................................................................................................... 660
Standard configurations.................................................................................................. 660
Take-off – ISA meteorological conditions ...................................................................... 660
Climb – Best efficiency .................................................................................................... 661
Landing – Remaining fuel/MLW ...................................................................................... 661
27 – 2 - Checklists ................................................................................................................ 662
Preflight ............................................................................................................................ 662
Ramp-start with ground power ....................................................................................... 665
Ramp-start without ground power .................................................................................. 667
Taxiing .............................................................................................................................. 670
Take-off............................................................................................................................. 671
Landing............................................................................................................................. 672
Runway Vacated .............................................................................................................. 673
Parking ............................................................................................................................. 673
Campaign ...................................................................................................... 674
28 – 1 - Campaign notes ...................................................................................................... 675
Introduction ...................................................................................................................... 675
The Story So Far .............................................................................................................. 675
Campaign ......................................................................................................................... 676
Difficulty ........................................................................................................................... 677
28 – 2 - Credits and thanks .................................................................................................. 679
Annexes......................................................................................................... 680
Abbreviations ................................................................................................................... 681
Page 13
SECTION 0
INTRODUCTION
M-2000C FLIGHT MANUAL
INTRODUCTION
The following chapters describe the Mirage 2000C on-board systems and their
employment.
The description sections cover the systems, control panels and indicators. The
employment section describes systems procedures and settings for efficient use.
Only the features implemented in DCS are covered.
You will find the check-lists at the end of the document.
EFFECTIVITY
At the beginning of the flight manual you will find the list of effective changes. It points
to the pages where changes in the document occurred since last release, permitting
the virtual pilot to identify instantly where to look for new information without having
to run through the whole document.
SOUND JUDGEMENT
These instructions provide you with a general knowledge of the aircraft, its
characteristics, normal and emergency procedures. The instructions in this manual
are for a crew inexperienced in this airplane and provide the best possible operating
instructions under most circumstances. It is not a substitute for sound judgment.
Multiple emergencies, adverse weather terrain, tactical environment etc... may
require modifications to these procedures.
VERSION
The latest version of this manual is 2.2.0 (23/06/2022).
Page 14
SECTION 0
INTRODUCTION
DEFINITIONS
The following definitions apply to warnings, cautions and notes found throughout the
document.
WARNING
Operational procedures, techniques, etc., which may result in
personal injury or loss of life if not carefully followed.
CAUTION
Operational procedures, techniques, etc., which may result in
damage to equipment if not carefully followed.
NOTE
Important information to memorize.
NOT FUNCTIONAL
This feature has not been added to the module or is not
yet functional.
INCORRECT
This feature is incorrectly implemented, or just not present
in the real aircraft.
WORK IN PROGRESS
Indicate that this part of the manual is still being worked
on.
NO FUNCTION
This command has no function in the real aircraft and is
present in reserve or is a remnant of a removed
functionality.
X SECTION
Interactive link to another section/sub-section within the
manual.
Page 15
SECTION 0
INTRODUCTION
GLOSSARY
The first aircraft were destined to the French Air Force, and thus the associated
documentation was written in French. Therefore, all systems designation and cockpit
lettering are in French.
When an abbreviation is in French, the corresponding meaning is in italic, followed
by the English translation. This is valid throughout the document. You will find the full
list of abbreviations in ANNEXES SECTION.
INS: Inertial navigation system
UNI (Unité de navigation inertielle): Inertial navigation system.
PCA (Poste de commande armement): Weapon control panel.
PCR (Poste de commande radar): Radar control panel.
PPA (Poste de préparation armement): Weapons preparation panel.
PCN (Poste de commande navigation): Navigation control panel.
AOA: Angle-of-attack.
PSM: Poste sélecteur de modes. Mode selector panel.
ECM: Electronic countermeasures.
AP: Autopilot.
AAR: Air-to-air Refuelling.
QFE: Atmospheric pressure measured at the active runway threshold.
QNH: Calculated runway atmospheric pressure at medium sea level.
HOTAS: Hands on throttle and stick.
FBW: Fly-by-wire.
CDVE (Commandes de vol electriques): Fly-by-wire (FBW) flight controls.
RWR: Radar warning receiver.
DA (Détecteur d'alerte): Radar warning receiver.
AAM: Air-to-air Missile.
D²M (Détecteur de départ missile): Missile launch warning system.
1013: Standard (STD) atmospheric pressure setting.
RDI (Radar doppler à impulsions): Pulse doppler radar.
Gal US: US gallons.
mph: Statute miles per Hour.
kt: Knots (Nautical miles per hour).
nm: Nautical miles.
Page 16
SECTION 0
INTRODUCTION
km: Kilometers.
m: Meters.
mi: Miles.
ft/min: Feet per minute.
l: Liters.
AB: Afterburner.
PC: (Post-Combustion): Afterburner.
HUD: Head-up display.
VTH (Visualisation tête haute): Head-up display.
HDD: Head-down display.
VTB (Visualisation tête basse): Head-down display.
A (Arrêt): Off.
S.A. (Semi-automatique): Semi automatic.
SNA (Systeme de navigation et d’armement): Navigation and weapon system.
CNM (Cannon neutre MAGIC): Gun neutral MAGIC HOTAS command.
Page 17
SECTION 0
INTRODUCTION
ACKNOWLEDGEMENTS
We would like to take a moment first to thank the following people involved on the
project and who made possible the release of this aircraft.
RAZBAM TEAM
Ronald “Prowler” Zambrano – Team lead.
Tim Taylor, Metal2Mesh – 3d modeller and texturizer.
Larry “Zeus” Zambrano – Cockpit Coder.
CJ “CaptSmiley” Soques – Flight Model Coder.
Galinette – Systems rework coder, INS guru, radar wizard and engine tamer.
EAGLE DYNAMICS
Alex O’kean, for all the help above and beyond.
Matt Wagner, for opening doors to us.
OTHERS
Joël L. – Data miner, beta tester and Mirage 2000C enthusiast.
Rlaxoxo – Sound modder. For his help in getting this bird sound right.
Baltic Dragon – Campaign and training mission designer. Author of the updated
manual.
Eric “Hadès” G. – author of several chapters and schematics used in the text.
C.B. (bzzz) – for proof reading the manual, pointing out (hundreds of) bugs and
inconsistencies and adding a lot of really useful real - life background information.
Helljumper – Author of the update to the updated manual.
Ybuqc – Proof reading of the manual.
Page 18
SECTION 0
INTRODUCTION
EFFECTIVE CHANGES
DATE
VERSION SECTION
DESCRIPTION
1-2
Updated cockpit layout photos and instrument descriptions
1-3
Updated description of WSC and CNM switches in HOTAS part.
9-2
9-2
Updated frequency ranges for V/UHF and UHF radios
10-2
Updated the HUD master modes part.
10-3
Added triangle (magic + radar lock) to HUD symbology
12-3
12-5
Completely re-written the part and instructions for V/UHF radio.
Changed PCN picture, updated text to remove the ENC button
Changed PCN picture, updated text to remove the ENC button
Added description of new waypoint increase / decrease buttons
New contact symbols heading added
27/01/2020
1.1.0
13-1
Added information about RDI target identification capabilities
Added information about HUD FLOOD combat mode
Updated RWR codes
13-2
Added Spirale Box description, table of programs and description of
modes.
14-2
Updated description of interior cockpit lighting knobs
14-3
Added whole new section on NVGs
15-2
Updates to Weapons Management section to include new functions
15-3
Updates to section about the use of Magic 2 missiles
Added Spiral Hud Scan description
19-1
Added full list of French abbreviations and their English meanings.
ALL
Fixed typos and updated text in almost all section
28/03/2020
1.1.1
10-3
15-3
Added MAV search patterns
17/11/2021
2.0.0
ALL
Total rework of the manual.
1-2
Added TAF panel.
10
Added onboard radios as its own section.
16/03/2022
2.1.0
10-4
Added EVF panel sub-section.
10-5
Added DO TAF symbology description.
21-1
Added target designation description.
21-4
Added manual target designation, radar target designation and remote
target designation symbology description.
1-3
Changed name and description of the jammer PCM override toggle.
22
Re-organization and rework of the EW section.
14-1
Added turn on delay for VTH.
21-3
Added turn on delay for VTB.
Page 19
SECTION 0
INTRODUCTION
21-1
21-4
Added radar emission channel description.
ALL
Typo and system description fixes.
1-3
Fix the manual, semi-automatic decoy release and police light switch /
decoy panic release HOTAS commands names and function.
2
2-2
Updated scoop extention law.
7-1
Improved the autopilot sub-section, added alert altitude and autopilot
test description.
16-2
Fixed police light description.
17
23/06/2022
2.2.0
Reworked and improved engine section.
Improved drag chute as well as canopy description and operation.
19-6
Added data cartridge sub-section.
21-1
Fixed radar range ambiguity error and added range resolution.
22-4
22-6
Added caution about decoy slider quantities.
23-3
Improved Aircraft employment – Autonomous navigation sub-section.
24-2
Added DEFA 554 image.
24-3
Updated MAGIC II missile images.
24-4
Added SAMP-250.
25-5
Added SAMP-250 HD.
26
Removed optional mention for PI designation in CCPL PI and CCPI PI
modes.
Page 20
SECTION 1
AIRCRAFT
AIRCRAFT
Page 21
SECTION 1
1–1
AIRCRAFT
GENERAL INFORMATION
1 – 1 - GENERAL INFORMATION
BASIC INFORMATION
The Mirage 2000C is a fourth generation, single-seat, single-engine supersonic jet
fighter aircraft. It is primarily a medium-range interceptor, but has limited secondary
air-to-ground capability.
It has a delta-shaped wing, with 2-part leading edge slats and elevons on the trailing
edge. These elevons act at the same time as elevators and ailerons.
Aircraft control is performed by means of a fly-by-wire system.
Air to air refueling capability is provided via a removable probe on the right side of
the windshield. It is compatible with drogue type tankers such as the KC-130, KC135 MPRS, S-3B and IL-78M.
Mirage 2000C
Page 22
SECTION 1
1–1
AIRCRAFT
GENERAL INFORMATION
POWER PLANT
Power is supplied by one SNECMA M53-P2 afterburning turbofan engine.
THRUST
MIL power thrust: 64.3 kN (14,500 lbf).
Thrust with maximum afterburner: 95.1 kN (21,400 lbf).
PERFORMANCES
SPEED
Mach 2.2 (2,530+ km/h, 1,500+ mph) at high altitude.
Mach 1 (1,110 km/h, 690 mph) at low altitude.
RANGE
1,550 km (837 NM, 963 mi) with drop tanks.
CEILING
17,060 m (59,000 ft).
AIRCRAFT DIMENSIONS AND WEIGHT
WINGSPAN 9.13 m (29 ft).
LENGTH
14.36 m (47 ft 1 in) (14.66 m with air data probe on the nose)
HEIGHT
5.20 m (17 ft).
WEIGHT
Empty weight: 7 600 kg (16,750 lb)
Loaded weight: 13 800 kg (30,420 lb)
Maximum takeoff weight: 16 500 kg (36,400 lb)
WEAPONS
PYLONS
4 wing pylons, 4 lateral fuselage pylons and 1 center fuselage pylon
ARMAMENT 2×30 mm (1.18 in) DEFA 554 revolver cannon, 125 rounds per gun
Matra R550 Magic-II infrared homing missiles
Matra Super 530D semi-active radar guided missiles.
Matra 68 mm unguided rocket pods, 18 rockets per pod.
Mk-82 general purpose 250 kg bombs
Mk-82Snakeye high drag 250 kg bombs
Mk-82Air high drag 250 kg bombs
BLG-66 "Beluga" cluster bombs
BAP-100 anti-runway bombs
GBU-12 250 kg (500 lb) laser guided bombs
GBU-16 500 kg (1,000 lb) laser guided bombs
GBU-24 1 000 kg (2,000 lb) laser guided bombs
OTHER
Under-wing tanks, Fuselage centreline tank
Countermeasure suite with chaff, flares and radar jammer
Page 23
SECTION 1
1–1
AIRCRAFT
GENERAL INFORMATION
HISTORY
The Mirage 2000C is a French single engine fourth generation fighter. Designed in
the late 1970s as a lightweight fighter for the French Air Force (Armée de l'Air). Later
evolved into a multirole aircraft with several variants developed, with sales to a
number of nations. Over 600 aircraft were built and it has been in service with nine
nations.
The Mirage 2000 was initially intended to replace the previous generation Mirage III
for the export market, and was smaller and cheaper than the aircraft proposed to the
French Air Force, called the Avion de Combat Futur ACF (Futur Combat Aircraft).
The project was first known as the “Super Mirage III”, then “Delta 1000”, “Delta 2000”,
“Super Mirage 2000” to finally settle for “Mirage 2000”.
Unlike the ACF, which was a strike aircraft with secondary capabilities as interceptor,
the Mirage 2000 was designed as an interceptor. When the ACF project was
cancelled, the Mirage 2000 was offered as a cheaper alternative to the French
government and was approved on December 1978.
The Mirage 2000 was also designed to compete with the General Dynamics F-16 in
the lucrative European market, which was interested in small, but agile, lightweight
fighters.
The Mirage 2000 features a low-set thin delta wing with cambered section, 58
degrees leading-edge sweep and moderately blended root. The flight surfaces on the
wings are composed of 4 elevons and 4 leading edge slats. Its center of lift is in front
of its center of gravity, giving the fighter relaxed stability to enhance maneuverability.
It incorporates fly-by-wire controls with 4 analog computers and a fifth, ultimate backup one. Airbrakes are fitted above and below each wing in an arrangement very
similar to that of the Mirage III and IV. A noticeably taller tailfin allows the pilot to
retain control at higher angles of attack, assisted by the small strakes mounted along
each air intake.
The aircraft uses retractable tricycle type landing gear. A runway tailhook or a fairing
for a brake parachute can be fitted under the tail, which can operate in conjunction
with the landing gear's carbon brakes to shorten landing distances. A removable
refueling probe can be attached in front of the cockpit, offset slightly to the right of
center.
Page 24
SECTION 1
1–1
AIRCRAFT
GENERAL INFORMATION
COCKPIT
The Mirage 2000 is available as a single-seat or two-seat multi-role fighter. The pilot
flies the aircraft by means of a center stick and left side throttle, with both
incorporating hands-on-throttle-and-stick (HOTAS) controls. The pilot sits on a
license-built version of the British Martin-Baker Mark 10 zero-zero ejection seat.
The instrument panel is dominated by the head-up display which presents data
relating to flight control, navigation, target engagement and weapon firing, and the
radar screen (or head - down display) located centrally below it. To the lower left is a
stores management panel, above which are the flight instruments. The right half of
the instrument panel accommodates the navigation, engine and systems displays.
Located on the left side of the cockpit, just ahead of the throttle, are controls for the
communications equipment.
ENGINE
The SNECMA M53 afterburning turbofan was developed for the ACF, and was
available for the Mirage 2000 project. The first 37 aircraft were equipped with the
SNECMA M53-5 engine version; later aircraft were equipped with the more powerful
SNECMA M53-P2 version. The M53-P2 provides 64.3 kilonewtons (14,500 lbf) of
thrust at MIL power and 95.1 kilonewtons (21,400 lbf) in maximum afterburner. The
air intakes are fitted with an adjustable half-inlet cone-shaped center body (named
souris - mouse - in French), which provides an inclined shock of air pressure for highly
efficient air intake. Total internal fuel capacity is 3,978 liters (1,051 US gal). There
are also provisions for a jettisonable 1,300-litre (340 US gal) centerline fuselage fuel
tank and for a 1,700-litre (450 US gal) or 2,000-litre (528 US gal) drop tank under
each wing.
PAYLOAD AND ARMAMENTS
The Mirage 2000C is equipped with built-in twin DEFA 554 30 mm revolver-type
cannons with 125 rounds each. The cannons have selectable fire rates of 1,200 or
1,800 rounds per minute.
The aircraft can carry up to 6.3 tons (13,900 lb) of stores on 9 pylons, with 2 pylons
on each wing and five under the fuselage. External stores can include Matra Super
530D medium-range semi-active radar guided air-to-air missile on the inboard wing,
and Matra Magic II short-range infrared-seeking AAM on either wing pylons.
Page 25
SECTION 1
1–1
AIRCRAFT
GENERAL INFORMATION
SENSORS AND AVIONICS
Avionics for the Mirage 2000C include the Sagem ULISS 52 inertial navigation
system (INS), TRT radio altimeter, Dassault Electronique Type 2084 central digital
computer, Digibus digital data bus and Sextant Avionique Type 90 air data computer.
The communication equipment package includes the LMT NRAI-7C IFF transponder,
IO-300-A marker beacon receiver, TRT ERA 7000 V/UHF com transceiver, TRT ERA
7200 UHF or EAS secure voice communications.
The aircraft has a redundant fly-by-wire automatic flight control system, providing a
high degree of agility and easier handling, together with stability and precise control
in all situations. The fighter's airframe is naturally unstable, and so it is coupled with
FBW commands to obtain the best agility; however, in override mode it is still possible
to exceed a 270 deg/sec roll rate and allows the aircraft to reach 11 g (within the 12
g structural limit), instead of 9 g when engaged.
The aircraft uses the RDI pulse-Doppler radar with an operating range of 54 nm (100
km / 62 miles). This unit is a new development, the first French HFR radar,
specialized for air-to-air duties and the first to provide serious look-down/shoot-down
capabilities.
The Mirage 2000C is equipped with the SERVAL radar warning receiver (RWR) with
antennas on the wingtips and on the rear of the top of the tail fin. It is also equipped
with the SABRE radar jamming and deception system in a pod below the bottom of
the tail fin, with the antenna in a fairing on the front of the tail fin. Countermeasures
are provided by Spirale dispensers, each fitted on the extensions behind the rear of
each wing root, giving a total capacity of 112 chaff cartridges, the flares dispensers
are located under the wing roots with a total of 16 cartridges.
An additional ÉCLAIR or ÉCLAIR-M pod can be mounted under the rear fuselage,
providing a bigger countermeasure payload at the expense of the brake chute or
hook.
Page 26
SECTION 1
1–2
AIRCRAFT
COCKPIT LAYOUT
1 – 2 - COCKPIT LAYOUT
FRONT DASH
1
24
25
26
27
28
3
4
5
6
23
29
7
22
30
8
2
21
9
20
10
11
15
12
19
18
17
16
14
13
HEAD-UP DISPLAY (VTH – Visualisation tête haute): Reflective glass displaying
navigation and weapon employment information.
VTH CONTROL PANEL (PCTH – Poste de commande tête haute): Sets VTH operation
and parameters.
ACCELEROMETER (Accéléromètre): Indicates current load factor.
DECOY LAUNCHER INDICATOR PANEL (Tableau de signalisation lance-leurre): Indicates
the status of the decoy launcher system.
COUNTERMEASURE DISPLAY (VCM - Visualisation contre-mesures): Displays radar
signals and countermeasure system status.
AFTER BURNER LIGHT (Voyant post-combustion): Indicates that the engine after-burner
is activated.
ENGINE START LIGHT (Voyant démarrage): Indicates that the engine is starting up.
ENGINE RPM AND TEMPERATURE INDICATOR (Indicateur N-Tt7): Indicates the engine
RPM and temperature.
Page 27
SECTION 1
1–2
AIRCRAFT
COCKPIT LAYOUT
FUEL FLOW INDICATOR (Indicateur de débit instantané): Indicates the engine current
fuel flow to the engine.
BINGO SELECTOR (Afficheur BINGO): Sets the aircraft BINGO.
ENGINE FIRE LIGHTS (Voyant feu double): Indicates an engine overtemp or fire.
FUEL CONTROL PANEL (Tableau de contrôle carburant): Displays and controls the
aircraft fuel.
NAVIGATION INDICATOR (IDN – Indicateur de navigation): Main navigation instrument.
WEAPON PREPARATION PANEL (PPA – Poste de préparation armement): Allows
weapon delivery configuration.
HEADS DOWN DISPLAY (VTB – Visualisation tête basse): Displays the radar and aircraft
loadout.
BACKUP ATTITUDE INDICATOR (Horizon de secours): Backup attitude indicator.
WEAPON CONTROL PANEL (PCA – Poste de commande armement): Selects NAV
modes, weapons, weapon modes and parameters.
ALTIMETER (Altimètre): Displays the current altitude in feet.
ANEMOMACHMETER (Anémomachmètre): Analogue instrument displaying the aircraft
airspeed in knots and mach.
ONBOARD CHRONOGRAPH (Chronographe de bord): Analogue clock with chronometer.
DEST BUT INCREMENT/DECREMENT BUTTONS (boutons d’incrémentation/
décrémentation BUT de DEST): Increments or decrements the DEST BUT.
ALTITUDE SELECTOR (Boitier d’affichage d’altitude): Sets the auto-pilot selected
altitude.
VERTICAL VELOCITY INDICATOR (Variomètre): Indicates the current vertical velocity in
feet per minutes.
SPIN SWITCH (Inverseur VRILLE): Switches the aircraft’s FBW in VRILLE mode to
allow spin recovery.
AUTO-PILOT CONTROL PANEL (Poste de commande pilote automatique): Selects autopilot modes.
NIGHT VISION GOGGLES MOUNT (Support repos JVN): Holds the night vision goggles.
FAULT INDICATOR BUTTON (Voyant-poussoir répétiteur de PANNE): Lit-up to indicate a
caution or a warning and allows their acknowledgment.
ANGLE OF ATTACK INDICATOR (Indicateur d’incidence): Indicates current angle of
attack.
V/UHF FREQUENCY REPEATER (Répétiteur de fréquence V/UHF): Displays current
V/UHF frequencies.
MAIN ATTITUDE INDICATOR (IS - Indicateur sphérique): Provides current attitude and
bearing information as well as ILS guidance.
Page 28
SECTION 1
1–2
AIRCRAFT
COCKPIT LAYOUT
CENTER PYLON
1
5
2
4
3
IFF TRANSPONDER (Répondeur IFF): IFF transponder configuration panel.
HYDRAULIC PRESSURE SELECTOR (Inverseur sélection de pressions hydrauliques):
NOT FUNCTIONAL.
COCKPIT ALTIMETER (Altimètre cabine): Indicates the altitude equivalent to the
atmospheric pressure inside the cockpit.
HYDRAULIC PRESSURE INDICATOR (Indicateur double de pressions hydrauliques):
Indicates pressure of the different hydraulic systems.
RUDDER PEDALS ADJUSTMENT LEVER (Commande réglage pédalier): Used to adjust
the rudder pedals position.
Page 29
SECTION 1
1–2
AIRCRAFT
COCKPIT LAYOUT
LEFT VERTICAL PANEL
1
9
2
3
8
4
7
6
5
EMERGENCY GEAR HANDLE (Poignée secours train): Deploys the landing gear by the
emergency system.
EMERGENCY JETTISON BUTTON (Poussoir de largage détresse): Triggers the
emergency jettison procedure.
LANDING CONFIGURATION PANEL (Tableau de configuration): Displays the status of the
landing related systems.
FBW MODE SWITCH (Inverseur Air-Air/charges): Selects the FBW mode.
FBW REARM BUTTON (Poussoir de réarmement CDVE): Rearms the FBW system.
CONTROL SURFACES POSITION INDICATOR (Indicateur de position gouvernes): Indicates
the position of the elevons and rudder.
EMERGENCY FBW GAIN SWITCH (Interrupteur GAIN CDVE): Selects the emergency
BFW gain mode.
GEAR HANDLE (Commutateur de commande de train): Sets the landing gear position.
GUN SAFETY SWITCH (Interupteur sécurité canon): Arms the guns.
Page 30
SECTION 1
1–2
AIRCRAFT
COCKPIT LAYOUT
RIGHT VERTICAL PANEL
2
1
3
4
O2 BLINKER (Blinker O2): Indicates oxygen mask flow.
O2 INDICATOR (Indicateur O2): Indicates O2 level.
ALARM PANEL (Tableau d’alarmes): Displays all the aircraft warning lights and hosts
the electrical switches.
QRA SWITCH (Inverseur réseau alerte): Sets the aircraft in QRA mode.
Page 31
SECTION 1
1–2
AIRCRAFT
COCKPIT LAYOUT
LEFT CONSOLE
14
15
16
17
18
19
20
21
22
23
10
9
8
7
6
5
4
3
2
13
12
11
1
UHF RADIO COMMAND PANEL (Boite de commande UHF): Configures the UHF (red)
radio.
V/UHF RADIO COMMAND PANEL (Boite de commande V/UHF HAVE QUICK):
Configures the V/UHF (green) radio.
BRAKE SYSTEM SWITCH (Inverseur FREINS 1-2): Selects which brake system to use.
REFUELING LIGHT LUMINOSITY ROTATOR (Potentiomètre réglage luminositée phare
ravitaillement): Sets the refueling light luminosity. NOT FUNCTIONAL
SCOOPS/INLET CONES/SLATS CONTROL PANEL (Poste de commande PELLES/SOURIS/
BECS): Selects the operation mode for the scoops, inlet cones and slats
aerodynamic devices.
ENGINE CUT-OFF BUTTON (Interupteur arrêt moteur): Allows the throttle to go in the
engine cut-off position.
RADAR CONTROL PANEL (PCR - Poste de commande radar): Controls de radar
operation.
AIRCRAFT SOUND CONFIGURATION PANEL (SIB – Système d’intercommunication de
bord): Sets the different aircraft sound levels.
EMERGENCY TRIM PANEL (Boitier trims secours): Sets the emergency trim.
EXTERNAL TANKS FUEL DUMP BUTTON (Poussoir vide-vite réservoirs larguables):
Activates the external tank fuel dump.
CALC EMERGENCY AND REARM SWITCH (Inverseur secours et réarmement calculateur):
Sets the engine computer in emergency mode.
FBW AND AP TEST PANEL (Boitier de commande test CDVE et PA): Starts and
visualize the results of the FBW and AP tests.
FBW CHANNEL 5 SWITCH (Interupteur chaine 5 CDVE): NOT FUNCTIONAL.
Page 32
SECTION 1
1–2
AIRCRAFT
COCKPIT LAYOUT
EMERGENCY OIL SWITCH (Inverseur secours d’huile): Activates the engine emergency
oil.
EMERGENCY AFTERBURNER CUT-OFF SWITCH (Inverseur coupure secours PC):
Disables the afterburner.
RADAR GROUND EMISSION SWITCH (Inverseur magnétique émission radar au sol):
Allows radar emission while the aircraft has weight on wheels.
TAPE RECORDER SWITCH (Interupteur magnétophone): NO FUNCTION
INFLIGHT RESTART SWITCH (Inverseur magnétique de rallumage en vol): Starts the
engine inflight restart procedure.
EMERGENCY FUEL THROTTLE AND SWITCH (Inverseur et manipulateur secours
carburant): Turns on and uses the emergency fuel throttle system.
EXTERNAL LIGHTS SWITCHES (Sélecteur feux externes): Turns on or off the 3 aircraft
external lights.
RECORDER SWITCH (Inverseur AMM SERPAM): Turns on and select the mode of the
flight recorder. NOT FUNCTIONAL
LANDING AND TAXI LIGHT SWITCH (Sélecteur phare d’atterissage et de roulage):
Toggles the landing light mode.
POLICE LIGHT SWITCH (Interupteur phare de police): Toggles the Police light activation.
Page 33
SECTION 1
1–2
AIRCRAFT
COCKPIT LAYOUT
LEFT WALL
2
1
4
3
CANOPY FRACTURE LEVER (Commande fragilisation verrière): Detonates the canopy
fracture cords.
BRAKE CHUTE LEVER (Commande parachute frein): Deploys and jettison the brake
chute.
INFLIGHT REFUELING SWITCH (Inverseur commande ravitaillement en vol): Sets the
inflight refueling mode.
COCKPIT FLASHLIGHT (Baladeuse): Cockpit flash light, directly connected to the
battery.
Page 34
SECTION 1
1–2
AIRCRAFT
COCKPIT LAYOUT
RIGHT CONSOLE
18
17
16
15
14
13
12
11
1
2
3
4
5
6
7
8
9
10
NAVIGATION CONTROL PANEL (PCN – Poste commande navigation): Displays and
inputs information for the INS.
IFF INTERROGATOR PANEL (Poste de commande interrogateur décodeur IFF):
Configures the radar IFF interrogator system.
COUNTERMEASURE PANEL (PCCM - Poste de commande contre-mesure): Configures
the countermeasure system.
VOR/ILS CONFIGURATION PANEL (Boite de commande VOR/ILS): Configures the VOR
and ILS system.
NAVIGATION CONFIGURATION PANEL (PSM – Poste sélecteur de modes): Sets the INS
operational modes.
ENVIRONNENT CONTROL PANEL (Boite de commande conditionnement): Sets the
cockpit environnemental conditions.
NVG SWITCH (Inverseur JVN): Sets the cockpit light to NVG compatible.
INTEROR LIGHTS PANEL (Boite de commande éclairage): Configures the cockpit
lighting.
STARTUP PANEL (Poste de commande démarrage): Hosts the fuel pumps and startup
switches and buttons.
FUSE PANEL (Boitier disjoncteurs): Hosts the aircraft fuses. NOT FUNCTIONAL
PARKING BRAKE HANDLE (Manette de freinage parking): Sets the parking brake.
NVG BAG (Housse JVN): Hosts the NVG goggles.
EVF PANEL (Poste de commande EVF): Selects the frequency hopping channel for
TAF link.
EMERGENCY ATTITUDE AND HEADING SWITCH (Sélecteur cap-horizon secours): Sets the
emergency attitude and heading operational mode.
Page 35
SECTION 1
1–2
AIRCRAFT
COCKPIT LAYOUT
TACAN CONFIGURATION PANEL (Boite de commande TACAN): Configures the TACAN
system.
PITOT HEAT SWITCH (Interrupteur réchauffage anémo-indicence): Enables the pitot
heat system.
WARNING SOUND SWITCH (Interrupteur avertisseur sonore): Enables the audio
warnings.
ELECTRIC PUMP SWITCH (Inverseur commande éléctro-pompe): Sets the emergency
electric pump operation.
Page 36
SECTION 1
1–2
AIRCRAFT
COCKPIT LAYOUT
RIGHT WALL
3
2
1
4
5
EMERGENCY COMPAS (Compas de secours escamotable): Indicates the magnetic
north.
LIFEBUOY PUNCHER (Crève dinghy): Tool that allow the puncture of the seat lifebuoy
if it were to inflate inflight. NOT FUNCTIONAL
CANOPY LEVER (Commande verrière): Secures the canopy.
FREQUENCY BOOKLET (Livret de fréquences): Hosts important frequencies and
corresponding presets for the radios. NOT FUNCTIONAL
MAP HOLDER (Porte-cartes): Holds mission related maps. NOT FUNCTIONAL
Page 37
SECTION 1
1–2
AIRCRAFT
COCKPIT LAYOUT
SEAT
1
2
3
OXYGEN CONTROL PANEL (Poste de gestion oxygène): Sets the pilots oxygen
consumption.
EJECTION HANDLE (Poignée d’éjection): Starts the ejection sequence.
SEAT HEIGHT SWITCH (Inverseur de hauteur du siège): Sets the seat height.
Page 38
SECTION 1
1–2
AIRCRAFT
COCKPIT LAYOUT
CANOPY
3
2
1
1
CANOPY HANDLES (Poignées ouverture verrière): Used to open and close the canopy.
HALF-OPENING HANDLE (Poignée entrebailleur): Used to keep the canopy half opened.
REAR VIEW MIRROR (Rétroviseur de contrôle): Mostly used to check for wingman
position.
Page 39
SECTION 1
1–3
AIRCRAFT
HOTAS
1 – 3 - HANDS ON THROTTLE AND STICK SYSTEM
The Mirage 2000C has an integral HOTAS system that allows the pilot to control
multiple functions without having to let go of the flight stick and/or throttle. Some
controls will have multiple function depending on the SNA mode and weapon
selection.
STICK AND THROTTLE CONTROLS
Page 40
SECTION 1
1–3
AIRCRAFT
HOTAS
CONTROL STICK
NO.
CONTROL NAME
TRIGGER SAFETY
1
INDICATOR
Sécuritée détente
DESCRIPTION
COMMAND NAME
DEFAULT KEY
When visible, the trigger is activated
to fire weapons.
Automatically set in accordance with
the master arm switch.
Not applicable
Not applicable
Nav Update/Magic
unlock
None
Trims the aircraft in roll and pitch.
When the autopilot is engaged, it is
used to control the commanded
heading and pitch attitude.
For more information see the
AUTOPILOT section.
Trim DOWN
Trim LEFT
Trim RIGHT
Trim UP
RCtrl + W
RCtrl + A
RCtrl + D
RCtrl + S
Releases the countermeasure program selected by the PCCM decoy
dispenser program selector.
For more information see the
COUNTERMEASURES section.
Decoy Program
release
Delete
Depending on the selected navigation or attack mode:
2
3
MAGIC SEARCH /
• INS position update by overflying
VERTICAL FIX
a ground reference point.
•
MAGIC unlock and return to
Recherche MAGIC /
search mode.
Recallage vertical
• Switching between MAGIC scan
modes.
TRIM CONTROL
Manipulateur trim
MANUAL DECOY
4
RELEASE
Leurrage manuel
Depending on the selected weapon:
W EAPONS SYSTEM
5
COMMAND
Commande temps
reél SNA
• SNA in air-to-ground: Switches
between the different sub-modes.
• SNA in navigation or air-to-air:
Selects the different radar autoacquisition modes.
Weapons
SystemCMD FWD
Weapons
SystemCMD Depress
Weapons
SystemCMD AFT
None
MiCRoB/Trigger 1st
Stage
MiCRoB/Trigger 2nd
Stage
None
None
None
2 stages trigger:
6
7
8
MICROB TRIGGER
Détente de tir
MiCRoB
• First stage: Activates the gun cam
and the virtual tracers in air-to-air
gun mode.
• Second stage: Releases the
selected weapon.
MiCRoB means “missiles, guns,
rockets, bombs” (Missiles, canons,
roquettes, bombes)
Sets the autopilot in standby when
AP STANDBY PADDLE engaged, allowing the pilot the
Palette débrayage control the aircraft. The autopilot will
resume as soon as the paddle is
PA
released.
PSIC TOGGLE
Fonction PSIC
Toggles between PSIC and PSID
locks.
Page 41
Space
Autopilot Standby
Mode
LAlt + A
STT/TWS Toggle
Enter
SECTION 1
1–3
AIRCRAFT
HOTAS
Depending on the gear position:
• Gear down: Toggles the NWS
INTERROGATOR
(DIRAV).
•
Gear up: Starts a radar IFF
DIRAV-sol / IFF-vol
interrogation.
MWS / IFF
9
Nosewheel
Steering/IFF
Interrogate
S
Autopilot
Disconnect/Exceed
Elastic Limit
LShift + A
Depending on whether the autopilot
is connected:
AP DISCONNECT
10
TRIGGER
Gâchette de
déconnexion PA
• Connected: Disables all autopilot
modes.
• Disconnected: Allows the stick to
exceed the elastic limit.
The ability to exceed the elastic limit
using this command is a DCS feature
implemented as a way to simulate the
elastic and mechanical stops for the
stick.
THROTTLE
No.
Control name
RADAR/COUNTERMEASURE
1
PRIORITY TOGGLE
Inverseur PR/PCM
2
Description
Toggles the jammer into forced
PCM emission mode.
RADIO SELECTION SWITCH 2 “push to talk” buttons for
Sélecteur alternat radio transmission both radios.
Command name Default key
Jammer PCM
override toggle
E
V/UHF GREEN
Radio PTT
UHF RED Radio PTT
None
None
None
TDC DOWN
TDC LEFT
TDC RIGHT
TDC UP
.
,
/
;
Airbrake TOGGLE
Airbrake ON
Airbrake OFF
B
LShift + B
LCtrl + B
Decoy PANIC
release
Insert
None
SEMI-AUTOMATIC DECOY
3
RELEASE
Leurrage semiautomatique
RADAR DESIGNATOR
4
JOYSTICK
Manipulateur alidade /
accrochage radar
Unused
Controls the movements of the
radar TDC as well as target
designation.
This 3 positions switch with the
following functions:
5
6
• Aft: Extends the A/B; springAIRBRAKES CONTROL
loaded position.
•
Middle: Retracts the A/B; stable
Manipulateur aérofreins
position.
• Forward: Extends the A/B;
stable position.
POLICE LIGHT SWITCH /
DECOY PANIC RELEASE
Commande phare de
police / Leurrage
d’urgence
Depending on the SNA mode as
well as the landing and police light
switches position:
• Releases the panic decoy
program.
• Toggles the police identification
light.
Page 42
SECTION 1
1–3
AIRCRAFT
7
HOTAS
CNM SWITCH
Sélecteur armement
CNM
Allows MAGIC or air-to-air gun
selection by overriding the PCA
selection.
CNM AA Gun
CNM Neutral (PCA
select)
CNM MAGIC
C
None
None
Depending on the VTH mode and
weapon selection:
8
• APP: Hides the ILS symbology.
W EAPON SYSTEM PADDLE • OBL: Designates the surface
feature for the radar fix.
Palette SNA
• MAG or MAV selected: Slaves
the MAGICs to the radar or the
radar to the MAGICs.
ANTENNA ELEVATION
9
CONTROL
Manipulateur calage
antenne
This 2 button wheel adjusts the
radar antenna elevation.
Page 43
Magic Slave/AG
Designate/INS
Position Update
None
Radar Antenna UP
Radar antenna
DOWN
None
None
SECTION 2
ENGINE
ENGINE
Page 44
SECTION 2
2–1
ENGINE
ENGINE INFORMATION
2 – 1 - ENGINE INFORMATION
INTRODUCTION
The Mirage 2000C uses the SNECMA M53-P2 afterburning turbofan engine, which
is the most widely used version of the M53 engine family.
While it has been used on a few prototypes and demonstrators like an improved
Mirage F1 or the Super-Mirage 4000, the only production aircraft equipped with an
M53 engine are Mirage 2000 variants.
In the French Air Force, the first Mirage 2000C came out equipped with the M53-5
engine until 1985, after which all further producted Mirage 2000 (C and other types)
were equipped with the upgraded M53-P2 engine. All aircraft equipped with M53-5
engines were either upgraded or sold to other nations by 2008.
The M53-P2 is the most widely used version of the M53 engine, providing improved
thust and faster throttle response compared to the older M53-5 version.
Its single shaft design was choosen for the engine to be simpler and cheaper while
maintaining high performance and reliability as well as “care free” handling.
GENERAL CHARACTERISTICS
TYPE
Afterburning single-shaft turbofan
LENGTH
5,070 mm (199.60 in)
DIAMETER
796 mm (31.33 in) inlet
DRY WEIGHT
1,515 kg (3,340 lb)
COMPRESSOR
8-stage axial compressor
COMBUSTORS
Annular
TURBINE
2-stage axial turbine
MIL POWER THRUST
64.7 kN (6,600 kgp / 14,500 lbf)
MAXIMUM AFTERBURNING THRUST
95.1 kN (9,700 kgp / 21,400 lbf)
Page 45
SECTION 2
2–2
ENGINE
ENGINE CONTROLS
2 – 2 - ENGINE CONTROLS
THROTTLE
The main M53-P2 engine control is the throttle, located on the left console, that slides
forward and backward along a slit right of the radar control panel.
The throttle travel has two bypassable stops located before the ends of travel on each
side:
• Idle stop at the rear before the engine cut-off end of travel position that can be
bypassed by using the idle cut-off button.
• MIL power stop at the front before the afterburner zone that can be bypassed by
applying more force forward.
The throttle does not control the engine directly, its position is sent to the FADEC (full
authority digital engine control) system called CALC (calculateur), which commands
the different engine parameters to achieve the desired RPM and afterburner stage.
The CALC commanded fuel flow is then passed onto a hyromechanical regulator that
balances it against the engine RPM to ensure smooth and stable operation.
The CALC system reads the throttle position and determine the desired RPM based
on the current conditions. It then changes the engine parameters to achieve the
desired RPM.
To achieve the commanded RPM and afterburner stage, the CALC controls the
following parameters:
• Engine fuel flow
• Nozzle position
• Bypass flaps
• Afterburner ramps
In order to maintain optimum and safe conditions for the engine, the CALC monitors
the following parameters:
• External pressure
• Total pressure
• HP stage pressure
• Tt7 temperature
• RPM
Page 46
SECTION 2
2–2
ENGINE
ENGINE CONTROLS
ENGINE’S AIRFLOW CONTROLS
In order to provide sufficient air flow to the engine, the Mirage uses 3 devices located
on the intakes:
• INLET CONES (Souris): Mounted on the fuselage, at the start of both intakes, they
slow down the intake air to subsonic speed when the aircraft is supersonic. They
start to extend at 1.2 Mach up to the aircraft max speed.
• SCOOPS (Pelles): Present just behind the bottom air inlet, the scoops extend to
provide more air to the engine when at high AoA.
The scoops extend in the following conditions:
• Altitude above 25100 ft.
• Mach speed between 0,5 and 1,2.
• CAS below 430 kt.
• AoA above 12°.
• AIR INLETS (Tapettes d’entrées d’air): Present on the top and bottom of the intakes,
those inlets open by negative pressure inside the intake or are forced open
aerodynamically by the scoops.
Page 47
SECTION 2
2–2
ENGINE
ENGINE CONTROLS
SCOOPS/INLET CONES/SLATS CONTROL PANEL
These devices are automatically operated and do not require pilot intervention except
during emergencies. The inlet cones and scoops can be forced retracted on the
scoops/inlet cones/slats control panel.
1
2
SCOOPS OPERATION SWITCH (Inverseur pelles):
• AUTO (Automatique – Automatic): The scoops position is handled
automatically.
• R (Rentrés – Retracted): The scoops are maintained in the retracted position.
INLET CONES OPERATION SWITCH (Inverseur de commande souris):
• AUTO (Automatique – Automatic): The inlet cones position is handled
automatically.
• R (Rentrés – Retracted): The inlet cones are maintained in the retracted
position.
Page 48
SECTION 2
2–2
ENGINE
ENGINE CONTROLS
ENGINE RPM AND TEMPERATURE INDICATOR
The engine RPM and temperature indicator is located on the right side of the front
dash.
1
2
ENGINE RPM (Indicateur N): Indicates the percentage of engine power used from 00%
to 103%. The analog dial is doubled by a drum indicator.
The RPM percentage is coming from the CALC system and is representing current
engine RPM compared to the maximum available RPM in the current conditions. This
means that this instrument does not reflect the raw engine power but the percentage
of the available power is used.
ENGINE TT7 TEMPERATURE INDICATOR (Indicateur Tt7): Indicates the engine
temperature in hundreds of degrees Celsius taken in the exhaust between the turbine
and afterburner ramps.
Page 49
SECTION 2
2–2
ENGINE
ENGINE CONTROLS
ENGINE STATUS AND WARNING LIGHTS
2
1
3
4
STARTUP LIGHT (Voyant DEMAR): Indicates a starter overspeed. It also flashes to
indicates that the starter disengages from the engine, which happens at 45% RPM
in normal conditions.
AFTER BURNER LIGHT (Voyant post-combustion): Indicates that all afterburner ramps
are in use. If only the first or second ramps are in use, the light remains out.
The light will flash to indicate that the engine nozzle is stuck in the open position,
greatly reducing engine thrust, particularly at MIL power.
ENGINE FIRE LIGHTS (Voyant feu SEC): Illuminates when a fire or abnormal
temperature is detected in the engine's secondary chamber.
AFTERBURNER FIRE LIGHTS (Voyant feu PC): Illuminates when a fire or abnormal
temperature is detected in the afterburner chamber.
Page 50
SECTION 2
2–3
ENGINE
ENGINE STARTUP
2 – 3 - ENGINE STARTUP
INTRODUCTION
The Mirage 2000C does not have an Auxiliary Power Unit, instead it relies on a jet
fuel starter (MicroTurbo Noelle 180) to start the SNECMA M53-P2 engine.
The Mirage jet fuel starter (JFS) is a gas turbine composed of an electric starter, a
compressor, a combustion chamber, a turbine assembly and a clutch. The JFS starts
the engine via a drive shaft and accessory drive. When the engine is stable at ground
idle, the JFS is stopped.
The JFS can use the internal battery power, although a ground power is preferred to
prevent draining the battery. The battery can sustain about 4 aborted starts.
Page 51
SECTION 2
2–3
ENGINE
ENGINE STARTUP
ENGINE STARTUP PANEL
The startup panel controls the feeder and starter pumps as well JFS startup
sequence. It is located at the rear of the right console.
1
3
2
4
STARTER FUEL PUMP (Interrupteur pompe démarrage): Used to supply fuel to the
engine during start sequence, even when only DC power (from battery) is available.
It is automatically switched to the ON position when the starter button cover is
opened.
BOOST FUEL PUMPS (Interrupteurs pompes BP): Turns on and off the low pressure fuel
pumps.
IGNITION/VENTILATION SWITCH (Sélecteur allumage ventilation): 3 positions switch:
• Vent (Ventilation - Crank): For dry runs of the engine
• G (Gauche - Left): Selects the left plug for ignition.
• D (Droit - Right): Selects the right plug for ignition.
FUEL SHUT-OFF VALVE SWITCH (Inverseur robinet BP): Shuts-off the engine fuel
supply.
5
STARTER BUTTON AND COVER (Poussoir de démarrage et couvercle): Starts the JFS
engine starter. The cover is spring loaded and will automatically close a few seconds
after being opened.
Page 52
SECTION 2
2–4
ENGINE
ENGINE OPERATION
2 – 4 - ENGINE OPERATION
INTRODUCTION
In normal conditions the engine can be handled in a “care free” manner, meaning
that the pilot does not need to constantly monitor the engine instruments or watch
the way he uses the controls. This is thanks to the CALC (FADEC) system handling
of the engine coupled with its simple and robust design.
The engine parameters are constantly monitored by the aircraft and a caution or a
warning will sound in most cases if a failure or damage occurs.
The only step where the pilot can damage or destoy the engine is during the startup
where the engine can suffer premature wear, damage or even catch fire.
Page 53
SECTION 2
2–4
ENGINE
ENGINE OPERATION
STARTUP
In order to start the engine, the aircraft needs to have electrical power supplied either
by the battery or by ground power. Using ground power is advised as running the jet
fuel starter (JFS) on the battery will drain it fast.
WARNING
Before starting the startup procedure, ensure that the throttle is in the
cut-off position and not the idle position.
Starting the engine with the throttle in the idle position will lead to an
engine overtemp and even fire if not immediately aborted.
The engine startup should be done according to the following procedure:
Set the fuel shut-off switch to the right position, cover closed, allowing fuel flow to the
engine.
Inverse the spark plug selection using the ignition/ventilation switch.
Turn on the starter fuel pump to feed fuel to the engine from the fuel line and power
the JFS. Check that the B.P warning light is off.
Turn on the left and right low pressure fuel pumps, feeding fuel to the fuel line from
the feeder tanks. Check that the BP G and BP D caution lights are off.
Open the starter button cover and hold the starter button for 2 second.
Watch the engine RPM, Tt7 temperature and startup light.
RPM should climb steadly and the startup light should say off.
Once the RPM are between 10% and 12%, push the throttle forward out of the cutoff position and into the idle position. This will inject fuel into the engine.
Tt7 will rise but should not exceed 950°C.
If Tt7 exceeds 950°C, immediately abort the start-up by pressing the throttle cut-off
button, then set the ignition/ventilation switch to the VENT position and wait for the
JFS to automatically shut down.
With the RPM at 45%, the starter light should illuminate then turn off, indicating that
the JFS is disengaged from the engine and turned off.
The RPM should peak at 60% then stabilize between 48% and 51%.
On the alarm panel, no warning or caution light should be on except PARK, HYD.S,
ANEMO, DECOL, P CAB and CALC.
Page 54
SECTION 2
2–4
ENGINE
ENGINE OPERATION
THROTTLE USAGE
When operating the engine in normal conditions, throttle usage needs little care from
the pilot as the CALC (FADEC) system handles it for the pilot.
A single rule still needs to be followed by the pilot:
When flying above Mach 1.4, the throttle should be set to no less than MIL power.
Retarding the throttle bellow MIL power can lead to engine flameout.
A flameout in these conditions can be hard to diagnose as the engine windmilling will
keep the RPM above the RPM warning light threshold, and can surprise the pilot.
SHUTDOWN
Shuting down the engine is pretty straight forward and should be done when all the
other aircraft equipment has been powered off to prevent potential damage from
voltage spikes.
The warning sound switch should be set to the off position before starting the
shutdown procedure to prevent warning and caution from distracting the pilot.
The engine shutdown should be done according to the following procedure:
Wait 1 minute at ground idle.
Press the engine cut-off button and pull the throttle from the idle position to the cutoff position, stopping fuel injection into the engine.
Wait for the RPM to read zero and the Tt7 temperature to drop
Turn off the starter fuel pump and left and right low pressure fuel pumps.
Set the fuel shut-off switch to the left position, cover opened, stopping fuel flow to the
engine.
Page 55
SECTION 2
2–4
ENGINE
ENGINE OPERATION
INFLIGHT RESTART
In case of an engine flameout, an inflight restart can be attempted. This restart does
not use the JFS, but the speed of the aircraft to “windmill” the engine up to ignition
speed.
Restarting the engine is a process that can take a few minutes and is only to be
attempted if the aircraft is at altitude. If the altitude is not sufficient, the pilot should
not attempt to restart the engine and eject.
An inflight restart of the engine can only be achieved in a specific speed and altitude
domain:
The inflight restart domain is also more restricted when in SEC CALC or SEC CARB
mode.
A simplified inflight restart procedure is displayed in the cockpit, above the canopy
fracture lever.
Page 56
SECTION 2
2–4
ENGINE
ENGINE OPERATION
The engine inflight restart should be done according to the following procedure:
Press the engine cut-off button and pull the throttle from the idle position to the cutoff position, stopping fuel injection into the engine.
Turn on the emergency afterburner cut-off switch to cut-off the fuel line to the
afterburner ramps.
Set the slats position switch to the RENTRES (retracted) position, this will reduce the
wing drag.
Fly the aircraft to be inside the appropriate inflight restart domain.
Check that the indicated RPM is higher than 13%, if not, increase the airspeed.
Check that the CALC caution light is off, if not, rearm it using the CALC emergency
and rearm switch.
Push the inflight restart switch forward, it is held magnetically for 30 during which the
engine ignition system is kept on.
Push the throttle forward out of the cut-off position and into the idle position, this will
inject fuel into the engine.
When the engine is restarted and maintains flight idle, set the slat position switch to
the AUTO position, turn off the emergency afterburner cut-off switch and pull the
inflight restart switch back.
If after 30 second the engine has not restarted, wait 30 seconds and try again but
select SEC CARB mode instead of pushing the throttle into idle.
Restarting the engine inflight will most likely be a mission ending event as during
windmilling, the engine will no longer power many mission critical systems like the
INS and radar.
Page 57
SECTION 2
2–5
ENGINE
ENGINE LIMITS
2 – 5 - ENGINE LIMITS
INTRODUCTION
While using the engine in normal conditions can be considered “carefree”, the use of
emergency modes, engine wear and battle damage can push the engine to exceed
its limits. These limits need to be known and understood by the pilot for him to be
able to correctly use the engine in these situations.
Exceeding these limits will induce wear or cause a flamout of the engine. Exceeding
these limits for a long time or by a wide margin will cause damage up to catastrophic
blade containment failure and engine fire.
LIMITS
MINIMUM RPM
45%
MINIMUM THROTTLE POSITION ABOVE MACH 1.4
MIL power
MAXIMUM RPM
105%
MAXIMUM RPM WHILE IN SEC HUILE
88%
MAXIMUM TT7 TEMPERATURE
950°C
MAXIMUM MACH SPEED
2.25
Page 58
SECTION 2
2–6
ENGINE
EMERGENCY CONTROLS
2 – 6 - ENGINE EMERGENCY CONTROLS
INTRODUCTION
The engine emergency controls are all located on the left console and consists of:
• CALC emergency and rearm switch.
• Emergency fuel throttle and switch.
• Emergency oil switch.
• Emergency afterburner cut-off switch.
• Inflight restart switch
Page 59
SECTION 2
2–6
ENGINE
EMERGENCY CONTROLS
CALC EMERGENCY AND REARM SWITCH
The CALC emergency and rearm switch (inverseur secours et réarmement
calculateur) is located on the left console, between the emergency trim and FBW/AP
test panels. It is used to select or confirm the selection of the emergency CALC (SEC
CALC) mode and rearm the main CALC mode.
• Rearm (Rearm): If the CALC has automatically switched itself in SEC CALC mode,
returns in the main CALC mode.
• Sec CALC (Secours calculateur – Emergency CALC): Garded, selects or confirms
the selection of the SEC CALC mode.
The engine CALC system monitors the engine RPM and Tt7 temperature for any
anomany, if one is detected, the CALC will automatically switch to SEC CALC mode.
Manually switching to SEC CALC mode is indicated in the following conditions:
• Constant engine overspeed.
• Inability to relight the engine inflight in normal mode.
While in SEC CALC mode, measures are taken to ensure safe operation of a
degraded engine:
• Bypass flaps opened
• Nozzle position rule change
These changes result in less thurst, especially at MIL power.
The afterburner cannot be engaged but will remain if the SEC CALC mode is selected
while the afterburner was already engaged.
In this mode the throttle bypasses the CALC system directly commanding the fuel
flow to the regulator, resulting in a less linerar throttle response.
CAUTION
SEC CALC mode still protects the engine from overtemp and
overspeed but might momentarily overshoot these limits, requiring
smooth throttle movement and constant engine monitoring from the
pilot.
The SEC CALC mode is indicated by the CALC caution light on the alarm panel.
Page 60
SECTION 2
2–6
ENGINE
EMERGENCY CONTROLS
EMERGENCY FUEL THROTTLE AND SWITCH
The emergency throttle and switch (inverseur et manipulateur secours carburant) are
located on the left console, left of the radar control panel against the left wall. It is
used to select the emergency fuel mode (SEC CARB) and control the engine fuel
flow while in this mode.
2
1
EMERGENCY FUEL THROTTLE (Manipulateur secours carburant): Only accessible when
the emergency fuel switch is in the SEC CARB position, increases or decreases the
fuel flow to the engine when in SEC CARB mode.
EMERGENCY FUEL SWITCH (Inverseur secours carburant): When switched down,
selects the SEC CARB mode.
Switching to SEC CARB mode is indicated in the following conditions:
• Loss of efficiency of the throttle.
• Non-recoverable engine RPM drop.
• Constant engine overspeed not recoverable via SEC CALC.
• Mechanical failure of the normal driveline.
• Inability to relight the engine inflight in normal or SEC CALC mode.
In SEC CARB mode the throttle and throttle cut-off button are shunted and have no
effect on the engine. The engine needs to be controlled using the emergency fuel
throttle. This throttle directly controls the fuel flow to the engine by bypassing the fuel
regulator and using a simple valve to control the fuel flow.
WARNING
It is crucial that the pilot monitor the engine RPM and temperature to
keep them within limits. In most cases requiring maximum possible fuel
flow to the engine will result in overspeed, greatly damaging the
engine.
Afterburner is not available in SEC CARB and idle RPM is higher than normal.
In order to shut down the engine in SEC CARB, the engine startup panel fuel shutoff valve switch must be used to starve the engine.
Page 61
SECTION 2
2–6
ENGINE
EMERGENCY CONTROLS
EMERGENCY OIL SWITCH
The emergency oil switch (inverseur secours d’huile) is located on the left console,
between the emergency trim and FBW/AP test panels. It switches the engine
lubrication method to the emergency oil (SEC HUILE) system.
Switching to the SEC HUILE system is indicated when the main lubricating system is
not functioning, generally indicated by the HUILE warning light on the alarm panel
The SEC HUILE system sprays oil from a secondary reservoir. This mode has 20
minutes of autonomy and only is lubricates the compressor, while the main lubricating
system also lubricates the turbine. Due to this difference the engine will accumulate
wear when pushed above 88% RPM while in SEC HUILE.
Once the secondary oil reservoir is empty, the engine will no longer be lubricated,
even if the main system is still operational.
CAUTION
A non-lubricated engine will lead to a rapid wear of its components and
an increase of temperature. This will continue until the engine has
accrued too much damage and cannot run anymore.
Page 62
SECTION 2
2–6
ENGINE
EMERGENCY CONTROLS
EMERGENCY AFTERBURNER CUT-OFF SWITCH
The emergency afterburner cut-off switch (inverseur coupure secours PC) is located
on the left console, between the emergency trim and FBW/AP test panels. It cuts-off
the fuel line to the afterburner ramps.
The emergency afterburner cut-off should be used when the afterburner remains lit
after pulling the throttle from the afterburner zone. It should also be used when the
engine nozzle is damaged or malfuncitonning, to prevent the afterburner from melting
it.
Page 63
SECTION 2
2–6
ENGINE
EMERGENCY CONTROLS
INFLIGHT RESTART SWITCH
The inflight restart switch (inverseur magnétique de rallumage en vol) is located on
the left console, left of the aircraft sound configuration panel against the left wall. It is
used to relight the engine inflight in case of a flameout.
Once pushed forward, the switch is electromagnetically held for 30 seconds during
which the ignition system is kept on in an attempt to reignite the engine.
Page 64
SECTION 2
2–7
ENGINE
ENGINE PERFORMANCE
2 – 7 - ENGINE PERFORMANCE
INTRODUCTION
The following graphs represent the aircraft thrust and fuel consumption for a standard
and perfect atmosphere (1013,25 hPa and 15°C at sea level).
They would represent “test bed” or best-case performance, not taking engine wear
into account.
Page 65
SECTION 2
2–7
ENGINE
ENGINE PERFORMANCE
THRUST
MIL POWER
MAXIMUM AFTERBURNER POWER
Page 66
SECTION 2
2–7
ENGINE
ENGINE PERFORMANCE
FUEL CONSUMPTION
MIL POWER
MAXIMUM AFTERBURNER POWER
Page 67
SECTION 3
ELECTRICAL SYSTEM
ELECTRICAL SYSTEM
Page 68
SECTION 3
3–1
ELECTRICAL SYSTEM
POWER SUPPLY SYSTEM
3 – 1 - ELECTRICAL POWER SUPPLY SYSTEM
INTRODUCTION
The Mirage 2000C power supply system consists of an alternating current (AC) and
a direct current (DC) circuits.
• 2x 115/200 V, 20 KVA three-phase alternators (57 A per phase).
• 2x 150 A/28 V transformers-regulators (one for normal use, the other intended for
emergencies).
• 1x 24 V, 40 A/h rechargeable battery.
• 1x 200 VA power converter.
• 1x 100 VA three-phase converter for the flight computer.
The aircraft also has connectors for external power supply that is used in most startup
procedures.
POWER DISTRIBUTION SCHEMATICS
Both the AC and DC circuits are divided into the following buses:
1. 6x AC buses
1.1. AC 1 Main bus
1.2. AC “réseau d’alerte” (QRA) bus
1.3. AC 1 Emergency bus
1.4. AC 1 Secondary (load-sheddable) bus
1.5. AC 2 Main bus
1.6. AC 2 Secondary (load-sheddable) bus
2. 4x DC buses
2.1. DC Main bus
2.2. DC "réseau d'alerte" (QRA) bus
2.3. DC Secondary (load-sheddable) bus
2.4. Battery bus
NOTE
These are in fact part of the AC main 1 bus and the DC main bus, that
can be powered separately, only when the aircraft is on the ground
(with GPU) on QRA duties; those busses allow some devices to
remain powered during alert so that startup and take-off will be
speeded up (most obvious example: the INS, which remain powered
= aligned = ready to go). In the air, "Alert Network" switch being off,
those buses are powered from the AC main 1 bus and the DC main
bus.
Page 69
SECTION 3
3–1
ELECTRICAL SYSTEM
POWER SUPPLY SYSTEM
Page 70
SECTION 3
3–1
ELECTRICAL SYSTEM
POWER SUPPLY SYSTEM
ELECTRICAL POWER EMERGENCY CONDITIONS
SITUATION
ALARM LIGHTS
AC BUSES
DC BUSES
REMARKS
GPU ON
ALT.1 ALT.2
All ON
All ON
The lights indicate that the
alternators are offline due
to the ground power.
GPU ON + BATT
switch OFF
ALT.1 ALT.2
BATT
All ON
All ON
The battery powers its own
bus but does not power the
main DC buses and is not
recharging.
GPU ON + QRA
switch ON (up)
None
AC QRA ON
All others OFF
DC QRA ON
All others OFF
Normal situation when the
QRA switch is on. NOT
FUNCTIONAL
All ON
The
AC
main
bus
connected to the failing or
OFF alternator is powered
by the other alternator
through
the
automatic
transfer box.
Both AC sec. buses are
disconnected
by
the
automatic load shielding.
Double alternator
AC emergency ON
failure or switched ALT.1 ALT.2 TR
All others OFF
OFF
All ON
The AC emergency bus is
powered by the battery via
an emergency inverter.
The DC buses are powered
by the battery, this will lead
to a quick CC failure due to
battery discharge.
TRN failure and TR
switch up
All ON
The DC buses are powered
by the TRS.
The DC buses are powered
by the battery, this will lead
to a quick CC failure due to
battery discharge.
ALT failure or
switched OFF
ALT.1 or ALT.2
TR
AC sec. 1 OFF
AC sec. 2 OFF
All others OFF
All ON
TRS failure and TR
switch down
or TRN + TRS
failure
TR
All ON
All ON
Tension on DC
buses < 26 V
TR CC
All ON
DC sec. OFF
All others ON
ALT.1 TR
AC main 1 OFF
AC sec. 1 OFF
AC emergency ON
AC QRA OFF
AC main 2 ON
AC sec. 2 OFF
All ON
The DC buses are powered
through the TRS
The AC emergency bus is
powered by the battery
though the emergency
inverter
ALT.2
AC main 1 ON
AC sec. 1 OFF
AC emergency ON
AC QRA OFF
AC main 2 OFF
AC sec. 2 OFF
All ON
Both AC sec. buses are
disconnected
by
the
automatic load shielding.
AC main 1 failure
AC main 2 failure
Page 71
Battery is discharging.
SECTION 3
3–1
ELECTRICAL SYSTEM
POWER SUPPLY SYSTEM
Battery bus OFF Only the battery bus is lost,
the battery switch comes
All others ON
down automatically.
Battery failure
BATT
All ON
Battery isolated
(switch down)
BATT
All ON
All ON
Battery isolated
(switch down) +
TRN and TRS
failure
None
The alarm panel
is not powered
anymore
All ON
Battery bus ON
All others OFF
Battery failure +
TRN and TRS
failure
None
The alarm panel
is not powered
anymore
All ON
All OFF
Page 72
The battery is not
recharged anymore.
Only the DC battery bus is
powered and the battery is
not recharged.
Total DC failure.
SECTION 3
3–2
ELECTRICAL SYSTEM
POWER CONTROLS
3 – 2 - ELECTRICAL POWER CONTROLS
POWER CONTROL SWITCHES
The aircraft power supply is controlled by 4 switches located on the right vertical
panel, at the top of the alarm panel.
1
2
3
4
5
BATTERY SWITCH (Interrupteur et réarmement batterie): Turns on or rearms the
battery.
TRANSFORMER-RECTIFIER SWITCH (Inverseur transfo-redresseur): Enables the main
converter (up) or the emergency converter (down).
ALTERNATOR 1 SWITCH (Interrupteur alternateur 1): Enables the first alternator to
power the AC 1 main bus.
ALTERNATOR 2 SWITCH (Interrupteur alternateur 2): Enables the second alternator to
power the AC 2 main bus.
LIGHTS TEST SWITCH (Inverseur tests voyant): Used to test all the cockpit lights. Each
of the 2 positions tests 1 of the lights for each alarm panel cell.
CIRCUIT BREAKER PANEL
CIRCUIT BREAKER PANEL: Located below the Engine Start Panel, it
governs several systems and allows for quick disabling the electrical
power for several systems. NOT FUNCTIONAL
Page 73
SECTION 4
FUEL SYSTEM
FUEL SYSTEM
Page 74
SECTION 4
4–1
FUEL SYSTEM
FUEL TANKS AND TRANSFER
4 – 1 - FUEL TANKS AND TRANSFER
FUEL TANKS
The Mirage 2000C fuel system is divided into 2 groups:
• LEFT GROUP (Group gauche): Consists of the left feeder tank, left wing tanks and
left fuselage tank.
• RIGHT GROUP (Groupe droit): Consists of the right feeder tank, right wing tanks and
right fuselage tank.
Additionally, a central tank just aft of the cockpit transfers into the 2 fuselage tanks.
The left and right fuselage tanks and central tank are called forward group (groupe
avant).
Also, 3 external tanks (RL – réservoir larguable or RP – réservoir pendulaire) can be
loaded on the aircraft:
• 1 RP-522: On the centerline pylon.
• 2 RP-541: On the inboard pylon of each wings.
The aircraft has aerial refueling capability using a detachable probe on the starboard
side forward of the cockpit.
Page 75
SECTION 4
4–1
FUEL SYSTEM
FUEL TANKS AND TRANSFER
NO.
DESCRIPTION
KG
LBS.
US GALS
LITERS
1
Right group forward tank
304.0
670.0
101.7
385.0
2
Right group wing tanks
523.0
1154.0
175.0
662.5
3
Right group feeder tank
592.5
1306.0
198.1
750.0
4
Left group feeder tank
592.5
1306.0
198.1
750.0
5
Center tank
320.0
705.0
107.0
405.0
6
Left group forward tank
304.0
670.0
101.7
385.0
7
Left group wing tanks
523.0
1154.0
175.0
662.5
TOTAL INTERNAL FUEL
3160.0
6966.0
1056.6
4000.0
RP-522 centerline tank
990.0
2182.6
343.4
1300.0
TOTAL INTERNAL + RP-522
4150.0
9146.6
1400.0
5260.0
RP-541/542 wing tank (each)
1580.0
3482.3
528.6
1700.0
TOTAL INTERNAL + RP-522 + RP-541/542
7310.0
16111.2
2457.2
8660.0
Page 76
SECTION 4
4–1
FUEL SYSTEM
FUEL TANKS AND TRANSFER
FUEL TRANSFER
Fuel is supplied to the engine by 2 electrical pumps BP (basse pression) on the
feeder tanks. These pumps are powered by the AC 1 main bus or, in case of failure,
the AC 2 main bus.
The feeder tanks are filled in order by:
• The external tanks.
• The left and right groups and the center tank.
The above tanks are pressurized by engine bleed air, allowing the transfer to be done
by pressure difference with the feeder tanks. A dynamic balancer ensures the
balance of fuel between the fuselage and wing tanks to maintain weight centering.
If engine bleed air in not available only the fuel in the feeder tanks is usable.
Page 77
SECTION 4
4–2
FUEL SYSTEM
FUEL CONTROLS
4 – 2 - FUEL CONTROLS
FUEL CONTROL PANEL
1
2
3
4
5
6
7
7
8
REFUEL TRANSFER LIGHT (Voyant ravitaillement en vol): Indicates that the aircraft is
receiving fuel from aerial refueling.
JAUG FUEL AMOUNT COUNTER (Jaugeur reservoirs interne): Displays the aircrafts
internal fuel quantity in Kg.
This number obtained by sensors inside the fuel tanks. The wing tanks don’t have a
sensor but their level is deduced from the forward tanks. This means that if there is
a fuel transfer problem, the JAUG counter will be incorrect.
DETOT FUEL AMOUNT COUNTER (Débimètre détotalisateur): Displays the total fuel
available to the aircraft including external tanks.
The DETOT is manually set by the pilot or mechanic using the AFF DETOT switch.
The engine fuel consumption is subtracted to the displayed value to obtain the
updated fuel quantity. This means that this display can be inaccurate if it has been
set incorrectly.
CAUTION
When spawning, the DETOT will be set to the total fuel quantity by the
ground crew, but it won’t be updated when refueling on the ground or
in the air. The kneeboard “Pilot signout sheet” page contains a refueling
section that is updated each time the aircraft is refueled.
AFF DETOT SWITCH (Inverseur de réglage DETOT): Sets the DETOT fuel quantity.
Page 78
SECTION 4
4–2
FUEL SYSTEM
FUEL CONTROLS
END OF TRANSFER LIGHTS (Indicateurs de fin de transfert): Indicates that the
corresponding fuel tank is not transferring fuel anymore. This can indicate that the
tank is empty or that there is a transfer failure.
• RL (Réservoirs largables - External tanks): 1 light for each external tank.
• AV (Groupe avant - Forward group): 1 light for each fuselage tank. Since the
central tank is connected to both fuselage tanks, both lights turning on indicate
that the forward group is empty.
• V (Voilure - Wing tanks): 1 light for each wing.
TRANSF TEST SWITCH: Test Fuel Transfer circuit and fuel control panel. NOT
FUNCTIONAL
LEFT AND RIGHT FEEDER TANKS LEVEL INDICATOR (Bandeaux nourrices): Indicates the
fuel quantity in the feeder tanks. The level indicators also show 3 markers:
• The top yellow mark indicates the maximum tank capacity, 600Kg for each
tank. It is also the level at which the external tanks transfer fuel.
• The middle yellow mark indicates the level (450kg for each tank) at which the
left and right groups as well as the central tank starts to transfer fuel.
• The bottom red mark indicates that there is only 250Kg in each feeder tank.
Passing this level in either tank triggers the NIVEAU caution light on the alarm
panel. This alarm indicates that the aircraft is low on fuel or a failure in fuel
transfer.
FEEDER TANKS INTERCOM CONTROL (Robinet INTERCOM): Allows for fuel to transfer
between the 2 feeder tanks to balance the weight in case of transfer failure. NOT
FUNCTIONAL
Page 79
SECTION 4
4–2
FUEL SYSTEM
FUEL CONTROLS
FUEL CONSUMPTION AND TRANSFER DIAGRAM
Page 80
SECTION 4
4–2
FUEL SYSTEM
FUEL CONTROLS
FUEL FLOW INDICATOR AND BINGO SELECTOR
FUEL
FLOW INDICATOR (Indicateur de débit instantané): Displays the engine fuel
instantaneous consumption in kilograms per minute (Kg/min).
BINGO SELECTOR (Afficheur BINGO): The drums are used to set the JAUG fuel
quantity at which the BINGO alarm will turn on.
BINGO is used to indicate the minimum amount of fuel required for a safe return to
base. It can also be used for other fuel states like JOKER (fuel quantity at which the
pilot should end his mission).
EXTERNAL TANKS FUEL DUMP BUTTON
The Mirage 2000C can only dump the fuel in the external tanks. The fuel
dump is triggered by the external tanks fuel dump button and cannot be
stopped once started. The button is guarded with a yellow/black stripped
cover.
FUEL DUMP TIMES: RP-522 = 2 minutes 30 seconds
RP-541 = 4 minutes
Page 81
SECTION 5
HYDRAULIC SYSTEM
HYDRAULIC SYSTEM
Page 82
SECTION 5
HYDRAULIC SYSTEM
INTRODUCTION
The aircraft’s hydraulic system includes 2 independent systems with the same power.
Each system has a 110 liter/min self-regulating pump with 280 bars of pressure.
Additionally, there is a back-up electrical pump (EP – Eléctro-pompe) which is
connected to system 2 and that automatically starts when the pressure in system 2
falls below 160 bars. This pump provides only 190 bars of pressure.
Each hydraulic system also features a hydro-alternator; those provide electric power,
independently of the main electric system, to the #1 and #2 FBW channels computers
respectively, so that even in case of total failure of the main electric system, the FBW
remains operational as long as there is hydraulic power.
HYDRAULIC SYSTEMS DESCRIPTION
SYSTEM 1
• Air brakes
• Slats (Becs)
• Inlet cones (Souris)
• Scoops (Pelles)
• Landing gear
• Wheel brakes
SYSTEM 2
• Emergency landing gear actuator.
• NWS
• Emergency brakes
• Parking brake
Page 83
SECTION 5
HYDRAULIC SYSTEM
HYDRAULIC SYSTEM SCHEMATICS
HYDRAULIC PRESSURE INDICATOR AND SELECTOR
HYDRAULIC PRESSURE INDICATOR (Indicateur double de pressions hydrauliques):
Displays hydraulic pressure for both systems.
HYDRAULIC PRESSURE SELECTOR (Inverseur selection de pressions hydrauliques):
Used to select which system to display in the hydraulic pressure gauge. NOT
FUNCTIONAL
Page 84
SECTION 6
FLIGHT CONTROLS
FLIGHT CONTROLS
Page 85
SECTION 6
6–1
FLIGHT CONTROLS
MOBILE SURFACES
6 – 1 - MOBILE SURFACES
INTRODUCTION
The Mirage 2000C flights controls include the following mobile surfaces:
• 4 elevons for pitch and roll control.
• 1 rudder.
• 2 pairs of automatic slats (becs).
The elevons and the rudder are controlled by an electro-hydraulic servo connected
to the 2 hydraulic circuits (HYD1 and HYD2, see the HYDRAULIC SYSTEM SECTION).
The servos are connected to 2 motor-servos (NORMAL and EMERGENCY).
The slats are controlled by a pair of motors that are actuated by HYD1 and move
depending on the flight conditions.
NORMAL OPERATION
ELEVATORS
Stick displacement:
UP
Elastic stop at 43.2 mm
Mechanical stop at 54 mm
DOWN
Mechanical stop at 30 mm
The elastic stop provides a restraint that limits the load factor or AOA while allowing
override during hard maneuvers.
NOTE
In DCS, the ability to exceed the elastic stop is provided by the AP
Disconnect/Exceed Elastic Limit command, as flight sim joysticks don’t
include an elastic stop on the pitch axis.
The stick movement is filtered and reduced so that the total displacement + trim does
not exceed the elastic stop unless that is the pilot’s will.
AILERONS
Stick displacement: ±12º
The stick movement is filtered and reduced to maintain the roll speed limit, as a
function of elevator command and load factor in order to reduce the roll speed and
acceleration during high AOA and wing loads.
The aileron trim is added to the stick movement.
Aircraft stabilization is achieved as a function of roll angular speed.
Page 86
SECTION 6
6–1
FLIGHT CONTROLS
MOBILE SURFACES
RUDDER
Pedals displacement: ± 28.5 mm
Rudder authority is limited by stick pull-up command.
A transverse accelerometer provides static stabilization.
A yaw gyro provides with dynamic dampening.
SLATS
The automatic slats (becs) are actuated in function of the AoA. They begin to operate
at 4º of AoA and are fully extended at 10º of AoA. The slats are automatically
retracted when the landing gear is down.
The use of leading-edge slats also increases the aspect ratio during combat
maneuvers.
SCOOPS/INLET CONES/SLATS CONTROL PANEL
The slats can be manually extended or retracted using the BECS switch on the
scoops/inlet cones/slats control panel.
1
SLATS POSITION SWITCH (Sélécteur de commande becs): SORTIS (Extended) / AUTO
(Default) / RENTRES (Retracted).
Page 87
SECTION 6
6–2
FLIGHT CONTROLS
FLY-BY-WIRE
6 – 2 - FLY-BY-WIRE
INTRODUCTION
A fly-by-wire system replaces the conventional flight controls with an electronic
interface that execute the commands sent by the pilot using the stick and rudder. The
stick and rudder position as well as attitude, AoA, altitude, speed and acceleration in
all directions is sent to a computer that will command flight surfaces to achieve the
desired result. This means that the pilot is never in direct control, but rather he
commands the computer to fly the aircraft.
The Mirage 2000 is naturally unstable aircraft that would be too complicated to control
by conventional means. This unstable design allows for better performances and
reduces de delta-wing configuration drawbacks. The FBW system allows great
control over the aircraft nose and load factor, removes most of the parasitic behaviors
and provide a more “care-free” control as it prevents exceeding the aircraft
operational limits.
The FBW will limit load factor, AoA and roll rate to prevent stalls and maintain
structural integrity. The limits are:
• 11±0.5 g longitudinal load factor
• 29° of angle of attack
• 270°/s of roll rate.
The control scheme for the pitch is different depending on the corrected airspeed.
At speeds above 300 knots, the stick commands a longitudinal load factor, this means
that in straight level flight, trimming is not necessary. But when climbing or
descending, the aircraft will tend to bring the nose up to maintain the longitudinal 1G
neutral trim.
At speeds below 300 knots, the stick commands angle of attack (AoA). Trimming is
then very necessary due to the high AoA amplitude at slow speeds.
There is short transition between the 2 control types at 300 kt.
Rudder is not necessary during turns as the FBW provides yaw stabilization that
maintains zero lateral acceleration during steady flight. If active, rudder trim is
redundant since both devices tend to cancel each other out.
NOTE
The rudder has a limited role in steering the aircraft. It is unnecessary
except in certain regiments as during air-to-ground targeting or
crosswind landing. To cover the latter case, the authority of the rudder
is increased when the landing gear is down.
Page 88
SECTION 6
6–2
FLIGHT CONTROLS
FLY-BY-WIRE
FBW MODES SWITCH
The FBW mode switch (Inverseur Air-Air/Charges) is used by the
pilot to adapt the FBW system to the stores loaded into the aircraft.
2 modes are available: Air/Air and Charges (Load).
AIR-TO-AIR MODE
• 9±0.5 g of longitudinal load factor at the elastic stop.
• 11±0.5 g of longitudinal load factor at the mechanical stop.
• 29° of AoA or 27º under 100 knots.
• 270º/s of roll rate and angular acceleration.
• Audio warning when AoA is above or equal to 29º, stick at full aft position or
indicated air speed is below 100 knots.
This mode is allowed when the aircraft is clean (no load), or with a load limited to airto-air missiles (Magic and/or 530D) and/or an empty centerline fuel tank.
CHARGES MODE
• 6±0.5 g of longitudinal load factor at the elastic stop.
• 9±0.5 g of longitudinal load factor at the mechanical stop.
• 29° of AoA or 27º under 100 knots.
• 150º/s of roll rate and angular acceleration.
• Audio warning when AoA is above or equal to 20º.
This mode must be used when the aircraft carries any of the following load:
• Non-empty centerline droppable fuel tank.
• Any wing droppable fuel tank.
• Any bomb or rockets pod.
This mode can also be used for air-to-air refueling as is provides finer controls on the
aircraft.
CAUTION
Using air-to-air mode while the aircraft should be in the charge mode
can lead to structure and load-out damage.
NOTE
Both modes are covered to greater extent in the stock campaign
available with the module.
Page 89
SECTION 6
6–2
FLIGHT CONTROLS
FLY-BY-WIRE
DEGRADED AND EMERGENCY MODE OPERATION
One thing to know about the Mirage FBW system is that there is no way to disengage
or turn it off as there is not mechanical connection between the stick and the control
surfaces.
The aircraft will handle the activation of FBW emergency modes by itself most of the
times as it has a lot of redundancies. However, it is possible to activate some
emergency modes if needed.
SPIN SWITCH:
The SPIN switch (Inverseur VRILLE) is located at the top of the
left front dash. Placing it in the VRILLE position gives full yaw and
roll authority to the pilot. This mode primary use is to allow the
pilot to recover from a flat spin.
WARNING
Using this mode while in normal flight can lead to stalls, spins and even
structural damage at high speed as yaw stability is no longer
guaranteed by the FBW system.
EMERGENCY FBW GAIN SWITCH:
The emergency FBW gain switch (Interrupteur GAIN CDVE) is
located on the left vertical panel. Placing it in the emergency position
will isolate the FBW computer from the air data computer. This
means that the FBW system will no longer take speed, altitude,
attitude, AoA and slip into account. This mode is primarily used
when some component of the air data computer is damaged and
normal FBW operation are resulting in unstable flight.
WARNING
Switching to this mode is irreversible and should only be done in case
of emergency as the aircraft stability is then dependent on the pilot.
Page 90
SECTION 7
AUTOPILOT AND TRIM
AUTOPILOT AND TRIM
Page 91
SECTION 7
7–1
AUTOPILOT AND TRIM
AUTOPILOT
7 – 1 - AUTOPILOT
INTRODUCTION
The autopilot (AP) provides automatic flight path control through basic and advanced
modes. Its capabilities are:
• Hold pitch and roll angles.
• Hold barometric altitude.
• Fly a selected bearing.
• Level off at a selected barometric altitude.
• Fly an ILS approach.
• Trim the aircraft for the current speed, AoA and attitude.
OPERATIONAL LIMITS
MAX ALTITUDE
50,000 feet
MAX PITCH ANGLE
±40º
MAX AOA
18º
MAX ROLL
65º (will return to 60º when engaged)
MAX SPEED
50 kt IAS less than the operational limit for current configuration
MINIMUM SPEED
200 kt IAS (unless in approach, limit is 18o AoA)
MINIMUM ALTITUDE Normal mode: 500 feet
Localizer and Glideslope hold: 200 feet
Selected altitude hold: 1,000 feet
CAUTION
Speed limits are to be respected by the pilot as the system will not
disengage itself with outside these limits. Keeping the autopilot
engaged over its maximum speed can lead to pitch oscillations while
keeping the autopilot engaged under its minimum speed can lead to
pitch oscillation and stalling.
AUDIO WARNING
The autopilot will generate a “gong” audio warning to alert the pilot on the status of
the altitude hold mode and to indicate that the aircraft is passing the alert altitude.
The gong will sound in the following conditions:
• Disconnecting the autopilot.
• Disconnecting the altitude hold mode.
• The difference between the held altitude and aircraft altitude is more than 200 ft in
altitude hold mode.
• The aircraft barometric altitude is 1000 ft above or 300 ft below the altitude set on
the altitude selector, only when the aircraft is descending.
Page 92
SECTION 7
7–1
AUTOPILOT AND TRIM
AUTOPILOT
AUTOPILOT CONTROL PANEL AND ALTITUDE SELECTOR
TEST PUSHBUTTON (Bouton test PA): Tests the panel lights and the autopilot “gong”
audio warning.
AP ENGAGEMENT PUSHBUTTON (Bouton mise en service PA): Activates the autopilot in
the attitude hold mode.
ALTITUDE HOLD MODE PUSHBUTTON (Bouton tenue d’altitude): Activates the altitude
hold mode.
DISPLAYED ALTITUDE MODE PUSHBUTTON (Bouton tenue d’altitude affichée): Activates
the displayed altitude hold mode.
Not used
AUTOMATIC APPROACH MODE PUSHBUTTON (Bouton approche automatique): Activates
the automatic approach mode.
ALTITUDE SELECTOR (Boitier d’affichage d’altitude): Used to set a target altitude for the
AP displayed altitude mode as well as the alert altitude. The altitude is dependent on
the altimeter pressure setting.
Page 93
SECTION 7
7–1
AUTOPILOT AND TRIM
AUTOPILOT
AUTOPILOT OPERATION
The attitude hold mode is the basic mode for the autopilot, it is engaged by using the
AP engagement pushbutton. All the other autopilot modes are advanced modes that
require the attitude mode to be engaged first. All advanced modes are exclusive
except the automatic approach mode and the altitude hold mode that can be engaged
simultaneously.
Once an advanced mode is engaged, selecting another advanced mode or pressing
the mode pushbutton again will disengage it. Pressing the AP engagement
pushbutton or the AP disconnect trigger while in attitude hold or any advanced mode
will disengage all autopilot modes.
The Mirage 2000C autopilot is designed to be used in most phases of flight thanks
the AP standby command. The AP standby command is a long vertical paddle behind
the stick that puts the autopilot in standby, memorizing the current modes, allowing
the pilot to easily change the aircraft attitude and re-engage the auto-pilot by
releasing the paddle. The paddle is naturally pressed when the pilot holds the stick.
When engaged the pilot can also command the pitch and bearing followed by the
autopilot using the trim command on the stick. The selected pitch is set by moving
an asterisk up and down on the VTH which represent where the autopilot will aim to
place the FPM. The selected bearing is set by moving the AP bearing index on the
IDN or the AP commanded bearing on the VTH.
1
3
2
AUTOPILOT BEARING INDEX (Index d’écart de route): Indicates the selected bearing for
the autopilot as well as the aircraft bearing.
AUTOPILOT COMMANDED SLOPE (Pente commandée pilote automatique): Represents
the pitch the autopilot is aiming to place the FPM at.
AUTOPILOT COMMANDED BEARING (Route commandée pilote automatique): Indicates
the autopilot commanded bearing. If the commanded bearing is outside the heading
scale limits, the commanded bearing is displayed below the indicator.
Page 94
SECTION 7
7–1
AUTOPILOT AND TRIM
AUTOPILOT
AUTOPILOT MODES
ATTITUDE MODE
The attitude hold mode is the only basic mode of the autopilot, it needs to be engaged
before any advanced mode can be selected. It is engaged using the AP engagement
pushbutton.
The green half with an A marking will light up indicating that the mode is engaged.
When the autopilot is in standby the green half will turn off and the amber half with a
P marking will turn on.
When disengaged by pressing the AP engagement pushbutton or using the AP
disconnect trigger, the AP gong is sounded.
PITCH
The aircraft will hold the FPM position on the pitch ladder. The pitch can be adjusted
by moving the asterisk using the trim hat, the autopilot will adjust the pitch of the
aircraft to place the FPM on the new asterisk position.
ROLL
2 sub-modes:
• ROLL HOLD: This sub-mode is selected if the aircraft has a bank angle over 10° when
engaged or re-engaged. The autopilot will hold the aircraft bank angle up to 60°. If
a bearing has been selected using the trim, the aircraft will switch to bearing hold
once it has been reached.
• BEARING HOLD: This sub-mode is selected if the aircraft has an angle of bank under
10° when engaged or re-engaged. The autopilot will hold the bearing of the aircraft
or bank to follow the selected bearing set by the pilot using the trim hat. The bank
angle used by the autopilot depends on the difference between the selected and
current bearing:
• ≤ 15°: The bank angle is 30°.
• > 15°: The bank angle depends on the aircraft indicated airspeed:
• < 200 kt: The bank angle is 30°.
• ≥ 200 kt and ≤ 450 kt: The bank angle increases gradually from 30° at
200 kt to 60° at 450 kt.
• > 450 kt: The bank angle is 60°.
Page 95
SECTION 7
7–1
AUTOPILOT AND TRIM
AUTOPILOT
ALTITUDE HOLD MODE
The altitude hold mode is the first advanced mode of the autopilot, the attitude mode
needs to be engaged first before it can be selected. It is engaged using the altitude
mode hold pushbutton.
When this mode is engaged and the autopilot is set to standby using the AP standby
command, the mode is memorized and the AP will return to the held altitude. The
altitude hold mode is disengaged if the altitude difference between the aircraft and
the held altitude is above 200 ft.
The green half with an ALT marking will light up indicating that the mode is engaged.
When the autopilot is in standby the green half will turn off and the amber half with
no marking will turn on. Both halves being lit up indicates that the difference between
the held altitude and the aircraft altitude is more than 200 ft this is accompanied by
the AP gong.
The amber half also blinks for 10 seconds when the altitude mode hold is disengaged
by the pilot or automatically, this is accompanied by the AP gong.
PITCH
The aircraft will adjust it to fly the barometric altitude the aircraft had at the time it was
engaged. This means that when climbing or descending the aircraft will first adjust
the pitch to get back to the target altitude and then hold it.
The held barometric altitude does not take the altimeter barometric setting into
account, the barometric altitude reference is for a 1013 hPa setting. Changing the
altimeter barometric setting has no effect on the autopilot.
ROLL
The aircraft will follow the attitude mode behavior.
Page 96
SECTION 7
7–1
AUTOPILOT AND TRIM
AUTOPILOT
DISPLAYED ALTITUDE MODE
The displayed altitude mode is an advanced mode of the autopilot, the attitude mode
needs to be engaged first before it can be selected. It is engaged using the displayed
altitude mode pushbutton.
The green half with an ALT marking will light up indicating that the mode is currently
capturing the displayed altitude. The amber half with an AFF marking will light up
indicating that the mode is in standby or waiting to reach the displayed altitude.
The amber half will flash to indicate that the selected altitude is not valid.
This mode first requires setting an altitude on the altitude selector, it is this altitude
that will be captured by the autopilot. This altitude is relative to the barometric
altimeter taking into account the pressure setting.
When the altitude is captured, the displayed altitude mode will disengage and the
altitude hold mode will engage.
PITCH
2 sub-modes:
• PITCH HOLD: The aircraft will hold the FPM position on the pitch ladder. The pitch
can be adjusted by moving the asterisk using the trim hat.
• ALTITUDE CAPTURE: The aircraft will adjust the pitch to level off at the displayed
altitude. In this sub-mode, any pitch action on the trim hat will disable the displayed
altitude mode.
ROLL
The aircraft will follow the attitude mode behavior.
Page 97
SECTION 7
7–1
AUTOPILOT AND TRIM
AUTOPILOT
AUTOMATIC APPROACH MODE
The automatic approach mode is an advanced mode of the autopilot, the attitude
mode needs to be engaged first before it can be selected. It is engaged using the
automatic approach mode pushbutton.
For this autopilot mode to work, the aircraft needs to receive the ILS signal from an
airport as well as having the runway heading (CP - cap vrai piste) and glideslope (PD
– pente désirée) set in the current DEST BUT.
WARNING
Having a wrong CP or PD will result in degraded performance for the
autopilot and can lead to missed approaches and even a crash. Be sure
to set them correctly and cross check the autopilot action with the ILS
needles on the IS.
The button lights are divided into 2 sides, the localizer side (left) and the glide side
(right). They function in the same manner.
The green quarter with an L or G marking will light up to indicate that the aircraft is
following the ILS localizer or glide. The amber quarter with no markings will light up
to indicate that the aircraft is not following the ILS localizer or glide. Both the green
and amber quarters lighting up indicate that the deviation from the ILS localizer or
glide is excessive.
PITCH
The aircraft will follow the set attitude or altitude if the altitude hold mode is engaged
until it receives the ILS glideslope signal. It will then disengage the altitude mode and
fly the ILS glideslope. At this point, any pitch trim will disengage the autopilot in glide,
to reengage it, the pilot needs to deselect and reselect the automatic approach mode.
The autopilot can’t follow the glideslope until it receives the localizer signal.
ROLL
The aircraft will follow the attitude mode behavior until it receives the ILS localizer
signal. It will then fly the ILS glideslope. At this point, any roll trim will disengage the
autopilot in localizer, to reengage it, the pilot needs to deselect and reselect the
automatic approach mode. The autopilot can follow the localizer when not receiving
the glideslope signal.
WARNING
The automatic approach autopilot will guide the aircraft on the ILS until
the decision height that is at 200ft most of the time. It will not land the
aircraft, the pilot needs to take control as soon as he has the runway in
sight or at the decision height to continue or fly a missed approach.
Page 98
SECTION 7
7–1
AUTOPILOT AND TRIM
AUTOPILOT
AUTOPILOT TEST
The autopilot test should be done at each startup after engine start, just before taxing.
The test consists of a series of operation designed to determine if the autopilot failure
detection mechanisms are working as intended. This test lasts at most 12 seconds
The autopilot test is triggered by placing the FBW and AP test panel autopilot test
switch on the M position.
During the test, the FBW and AP test panel red and green lights will flash and the
alarm panel red AP warning light will turn on. The AP pushbutton will also illuminate
following a pattern indicating the operation currently being executed by the test.
The pilot should not move the stick or rudder during the test as it can fail the test.
Once the test is finished, the green light stays on to indicate that the test is successful
while the red light indicates that the test has failed. The altitude hold mode pushbutton
amber half, and automatic approach pushbutton localizer amber half will keep
flashing after the test, this can be stopped by pressing the AP engagement
pushbutton.
Page 99
SECTION 7
7–1
AUTOPILOT AND TRIM
AUTOPILOT
ALERT ALTITUDE
If the altitude selector is set to any altitude above 1000ft, the AP gong is sounded
when the aircraft barometric altitude is 1000 ft above and 300 ft below the selected
altitude, only when the aircraft is descending. This alert is sounded irrelevant of the
autopilot status.
ABNORMAL OPERATION
AUTOPILOT FAILURE
If the AP fails, the alarm panel red AP warning light comes on and is indicated by the
AP gong.
The AP is automatically disengaged and manual control reverted to the pilot.
Page 100
SECTION 7
7–2
AUTOPILOT AND TRIM
TRIM SYSTEM
7 – 2 - TRIM SYSTEM
TRIMMING THE AIRCRAFT
Due to the FBW command laws, pitch trim is not needed in straight level flight above
300 kt, but below that trim is needed to set the AoA the FBW will maintain with the
stick neutral in pitch. This is particularly useful in approach to maintain 14° of AoA.
When climbing or descending, trim is needed in order to keep the nose at the same
pitch angle as the aircraft will maintain longitudinal load factor.
Roll trim is needed in case of internal fuel imbalance or when external ordinance is
not symmetrical in weight or drag.
Trimming is done by using the trim hat on the stick or using the autopilot. The
autopilot will trim the aircraft for the current speed, attitude and altitude.
TRIMMING WITH THE AUTOPILOT
With the autopilot engaged, the trim hat will command pitch attitude and bearing to
the autopilot. The pitch attitude is set by moving the asterisk on the VTH along the
pitch ladder, the autopilot will then place the FPM over that asterisk. The bearing is
set with the AP bearing index on the IDN or the AP commanded bearing on the VTH.
Page 101
SECTION 8
LANDING GEAR
LANDING GEAR
Page 102
SECTION 8
LANDING GEAR
INTRODUCTION
The Mirage 2000C has a tricycle landing gear. The nose wheel composed of 2 small
tires with steering assembly and the main gear have a single large tire each and are
equipped with carbon disk brakes. The aircraft is equipped with the SPAD anti-skid
system and a parking brake.
The nose wheel steering is performed by the DIRAV (Dirigeabilité Roue Avant)
system. It is linked to the rudder pedals and assures a proportional steering that
reduce the risks of understeering up to 40 kt. Above that speed, the nose wheel no
longer steers and the system acts as anti-shimmy.
The normal braking pressure provided by the primary hydraulic system is 100 bars.
It goes up to 280 bars with weight on wheels and RPM above 80%, it is called holding
point pressure (pression de point fixe) and allows the aircraft to hold position with MIL
power in dry ground conditions.
The emergency braking pressure provided by the secondary hydraulic system is 65
bars.
The parking brake pressure is provided by the secondary hydraulic system at 85 bars
The SPAD (système perfectionné anti-dérapant) system prevents tire lockup when
braking that could lead to loss of control on the ground or tire damage. The system
works by comparing the main landing gear wheel speed with the front landing gear
wheel speed. As the front wheels are not braked, if there is a difference it means that
the rear tires are locking up. The system will then reduce the braking force until the
nose gear and main gear wheel speed is equivalent.
Page 103
SECTION 8
LANDING GEAR
LANDING GEAR CONTROLS
3
1
2
LANDING CONFIGURATION PANEL (Tableau de configuration): Displays the status of the
landing gear, airbrakes and emergency tail hook. More details below.
GEAR HANDLE (Commutateur de commande de train): Raises and lower the landing
gear, also serves as landing gear warning light and blinks red whenever the gear is
being lowered or raised and when the landing gear is up and then speed drops below
230 kt.
EMERGENCY GEAR HANDLE (Poignée secours train): Lowers the landing gear using the
secondary hydraulic system in case of primary system failure.
Page 104
SECTION 8
LANDING GEAR
4
BRAKES SYSTEM SWITCH: Selects which hydraulic system the brakes will use. If
pressure is lost in the primary hydraulic circuit, the change should be automatic. The
most common use for the emergency position is SPAD failure.
• In the default (forward) position, the brakes will use the primary hydraulic
system and will use the SPAD anti-skid system.
• In emergency (rearward) position, the brakes will use the primary hydraulic
system and will not use the SPAD anti-skid system.
CAUTION
WARNING
After landing AVOID applying brakes until your speed is below 100
knots. At these speeds, aero-braking and air-brakes are more efficient.
SPAD is very inefficient while the front gear wheels are in the air, avoid
applying brakes until the front landing gear is down and the wheels
have caught up the ground speed.
Page 105
SECTION 8
LANDING GEAR
LANDING CONFIGURATION PANEL
Located on the left vertical panel, the landing configuration panel (tableau de
configuration) indicates the status of the landing systems and airbrakes.
AIRBRAKES ADVISORY LIGHT (Voyant aéro-freins): Indicates that the airbrakes are not
in the retracted position.
NOSE WHEEL STEERING ADVISORY LIGHT (Voyant Dirigeabilité roue avant): Indicates
that the nose wheel steering is engaged. Be aware that the NWS automatically
disconnects when ground speed reaches 40 knots.
TAIL HOOK ADVISORY LIGHT (Voyant crosse): Indicates that the emergency tail hook is
down or that the parachute has been deployed. NOT FUNCTIONAL
BRAKES ADVISORY LIGHT (Voyant freins): Indicates that there is more than 25 bars of
pressure in the normal brake system.
ANTI-SKID WARNING LIGHT (Voyant système perfectionné anti-dérapant): Indicates that
the Anti-Skid system is disconnected or that the anti-skid test failed. Flashes when
the landing gear is in transition.
GEAR DOORS UNLOCKED ADVISORY LIGHTS (Voyant trapes non verrouillé): Indicates
that the landing gear doors are not in the locked-up positions.
LOCKED LANDING GEAR ADVISORY LIGHTS (Indicateur de train verrouillé): Indicates that
each landing gear is down and locked.
Page 106
SECTION 9
AVIONICS
AVIONICS
Page 107
SECTION 9
9–1
AVIONICS
FLIGHT INSTRUMENTS
9 – 1 - FLIGHT INSTRUMENTS
ALTIMETER
The altimeter (altimètre) displays the aircraft's barometric
altitude in feet. The readings are taken from the PS2 static
port, part of the air data probe on the nose of the aircraft.
Hundreds of feet indicator.
Thousands of feet indicators.
Barometric setting adjustment knob.
Barometric setting display (in millibars).
ANEMOMACHMETER
The anemomachmeter (anémomachmètre) displays the
aircraft's speed in knots and mach. The needle rotates
around the indicator while the Mach wheel rotates
underneath, correlating to the knots' needle position to
display the mach speed.
Speed indicator in hundreds of knots.
Speed indicator in Mach.
VERTICAL VELOCITY INDICATOR
The vertical velocity indicator (VVI - Variomètre) displays the
aircraft vertical velocity in thousands of feet per minute.
Page 108
SECTION 9
9–1
AVIONICS
FLIGHT INSTRUMENTS
MAIN ATTITUDE INDICATOR
The main attitude indicator (IS - Indicateur sphérique)
provides aircraft attitude, heading, marker overfly
indication as well as ILS localizer and glideslope
deviation. The instrument gets its attitude and
heading from the INS.
On the sphere each pitch markings indicate 10° and
each heading markings indicate 10°. The Bank
markings indicate 10° with bigger markings at each
30°.
The pole command locks the instrument in the south
pole position to prevent the display of incorrect
information to the pilot in case of malfunction of the
instrument or the INS.
Roll angle indicator.
Malfunction flag.
Aircraft symbol (fixed).
Marker light.
Turn slip ball.
Course deviation needle.
Glideslope deviation needle.
Pole command.
ANGLE OF ATTACK INDICATOR
The angle of attack indicator (AoA - indicateur d’incidence) displays the
vertical angle between the aircraft’s waterline and its flight path. The
instrument displays AoA values from -2º to 32º, with a green mark
between 13° and 15° for the optimal approach AoA.
An off flag appears when the instrument is not powered or the AoA value
is outside of the display.
Page 109
SECTION 9
9–1
AVIONICS
FLIGHT INSTRUMENTS
STANDBY ATTITUDE INDICATOR
The backup attitude indicator (Horizon de secours)
provides pitch and roll information. It is a self-contained
system with its own gyros. It is powered by the emergency
attitude and heading switch.
Aircraft symbol (adjustable).
OFF flag.
Roll angle indicator.
Cage/Aircraft symbol adjustment knob.
ACCELEROMETER
The Accelerometer (Accéléromètre) displays the aircraft
longitudinal load factor in g.
Page 110
SECTION 9
9–2
AVIONICS
NAVIGATION INDICATOR
9 – 2 - NAVIGATION INDICATOR
INTRODUCTION
The navigation indicator (IDN - indicateur de navigation) is the Mirage main
navigation and radio-navigation instrument. It displays the aircraft heading, distance
and heading to the DEST BUT, TACAN or VAD, heading to the VOR station, and
autopilot bearing index.
The IDN hosts a mode selector that controls the type of data that is displayed on the
instrument. It also controls what north reference is used by all the aircraft navigation
systems: true or magnetic. The PCN is the only instrument where the headings are
always in true north.
NAVIGATION INDICATOR
1
3
5
4
2
7
8
6
9
10
11
12
HEADING INDICATOR (Indicateur de cap): The heading indicator Indicates the aircraft
current heading relative to the mobile compass rose.
COMPASS ROSE (Rose de cap): Rotates relative to the heading indicator to indicate
current aircraft heading. The compass is graduated each 5°, with a longer mark each
10°. The azimuth is present every 30° in tens of degrees except for the 000° where
it is replaced with the N letter.
AUTOPILOT BEARING INDEX (Index d’écart de route): Indicates the selected bearing for
the autopilot as well as the aircraft bearing. See the AUTOPILOT SUB-SECTION for more
information.
Page 111
SECTION 9
9–2
AVIONICS
NAVIGATION INDICATOR
DISTANCE WINDOW (Compteur de distance): Indicates the distance to the DEST BUT,
TACAN or VAD and the VAD azimuth in θ mode. A malfunction flag is present over
the numbers if there is no distance information available.
LARGE NEEDLE (Aiguille large): Indicates the direction to the DEST BUT, TACAN or
VAD relative to the compass rose.
THIN NEEDLE (Aiguille fine): Indicates the direction of the VOR beacon.
THIN NEEDLE FLAG (Drapeau panne aiguille fine): Indicates that the thin needle is
malfunctioning or not indicating anything.
LARGE NEEDLE FLAG (Drapeau panne aiguille large): Indicates that the large needle
is malfunctioning or not indicating anything.
HEADING FLAG (Drapeau panne CAP): Indicates that the compass rose is
malfunctioning or that the INS does not provide heading information to the
instrument. If heading information is available on the VTH, IS, or VTB, crosscheck it
with the emergency compass.
MODE SELECTOR (Sélécteur de mode): Moves the selected mode indicator.
VAD KNOB (Affichage vecteur additionnel): Sets the VAD parameters.
SELECTED MODE INDICATOR (Indicateur de mode): Indicates the IDN operation mode,
more information in the next section.
Page 112
SECTION 9
9–2
AVIONICS
NAVIGATION INDICATOR
IDN MODES
The source of the information displayed on the IDN depends on the selected mode
indicator position. The indicator position also sets the north used by the IDN, IS, VTH
and VTB: true or magnetic.
IDN INDICATION TABLE
MODE SELECTOR
POSITION
COMPASS ROSE
HEADING FLAG
WIDE NEEDLE
WIDE NEEDLE
FLAG
CV NAV CM NAV
FLAG
DISTANCE
WINDOW
DISTANCE
WINDOW FLAG
VAD
True
heading
Ρ
Θ
TEL
Magnetic heading
Indicates a heading malfunction on the instrument or that the INS does not
provide heading information.
DEST BUT bearing
TACAN
bearing
VAD
bearing
VAD
heading
from
TACAN
VAD
heading
from
TACAN
TAF target
bearing
Indicates that the wide needle is malfunctioning or that the TAF is not providing
target information. The wide needle will place itself 135° relative to the heading
indicator.
THIN NEEDLE
THIN NEEDLE
TAC
TAF
commanded
bearing
VOR bearing
Indicates that the thin needle is malfunctioning, that no VOR signal is received
or that the TAF is not providing target information. The wide needle will place
itself 225° relative to the heading indicator.
DEST BUT distance
TACAN
distance
VAD
distance
VAD
distance
from
TACAN
VAD
bearing
from
TACAN
TAF target
distance
Indicates that the distance window is malfunctioning, that no TACAN signal is
received or that the TAF is not providing target information.
Page 113
SECTION 9
9–3
AVIONICS
SIB
9 – 3 - AIRCRAFT SOUND CONFIGURATION PANEL
The aircraft sound configuration panel (SIB - Système d’intercommunication de bord)
is located on the left console, aft of the radar control panel and throttle. Its main
function is to adjust the aircraft sounds.
For each knob, rotating clockwise increases and counter-clockwise decreases the
audio level.
2
3
4
1
5
6
7
8
AMPLIFIER SELECTOR SWITCH (Sélecteur d’amplis): Selects which amplification chain
is used.
VOR/ILS VOLUME CONTROL KNOB (Potentiomètre VOR/ILS): Sets the volume for the
VOR/ILS Morse code.
TACAN VOLUME CONTROL KNOB (Potentiomètre TACAN): Sets the volume for TACAN
beacon identification Morse code.
MISSILE VOLUME CONTROL KNOB (Potentiomètre missiles): Sets the volume of the
missile tones.
INTERCOM/CALL VOLUME CONTROL KNOB (Touche potentiomètrique téléphone de bord
et appel): The intercom is only used in the Mirage 2000B two-seater aircraft. The call
pushbutton is unused. This knob is unused in the Mirage 2000C. NO FUNCTION
GROUND
COMMUNICATIONS/MARKER/ELECTRONIC
COUNTERMEASURES
CONTROL KNOB (Touche potentiomètrique téléphone de piste, marker
VOLUME
et contremesures électronique): Sets the audio volume of the ground communications,
marker beacon and electronic countermeasure. When pressed with the ground
communication cord connected, the throttle radio selection switch is inhibited.
UHF RADIO VOLUME CONTROL KNOB (Potentiomètre d’écoute UHF): Sets the volume
of the red (UHF - auxiliary) radio. The radio gets its name from the color of the knob.
V/UHF RADIO VOLUME CONTROL KNOB (Potentiomètre d’écoute V/UHF): Sets the
volume of the green (V/UHF - main) radio. The radio gets its name from the color of
the knob.
Page 114
SECTION 10
ONBOARD RADIOS
ONBOARD RADIOS
Page 115
SECTION 10
ONBOARD RADIOS
INTRODUCTION
The Mirage 2000C is equipped with 2 onboard radios for communication with other
aircrafts and ground stations. The pilot can listen to both radios at the same time but
can only transmit on one at a time.
The transmission is controlled by a momentary 3 way switch on the throttle called the
radio selection switch (sélecteur alternat radio).
Page 116
SECTION 10
10–1
ONBOARD RADIOS
RADIO PRESET CHANNELS
10 – 1 - RADIO PRESET CHANNELS
The preset channels for both radios are set up by the ground crew before each
mission at the pilot request, this allows the pilot to only remember presets in place of
frequencies. Preset channels require careful planning from the pilot as they are not
editable in flight.
The radio preset channels are set in the mission editor group options, radio preset
menu.
Page 117
SECTION 10
10–1
ONBOARD RADIOS
RADIO PRESET CHANNELS
While in the cockpit, preset channels can be checked on the “Radio preset channels”
kneeboard page and in the data-card kneeboard page in the campaign missions.
Page 118
SECTION 10
10–2
ONBOARD RADIOS
V/UHF RADIO
10 – 2 - V/UHF RADIO COMMAND PANEL
The V/UHF radio provides two-way voice communication on VHF and UHF frequency
range. Frequencies can be set manually or selected via a preset memory rotator. The
radio also features a buffer memory that stores the last selected radio frequency so
it can be quickly selected.
The V/UHF radio frequency range is:
• VHF: 118.000 to 155.975 MHz
• UHF: 225.000 to 339.975 MHz
When turned on, the radio executes a 5 second self-test indicated on the radio
frequency display by the text “TEST INI”. During this test the radio cannot transmit,
receive or be configured.
The V/UHF radio is referenced as the “green” radio, as the associated volume control
knob on the aircraft sound configuration panel is colored green. It can also be called
the main radio.
The V/UHF radio frequency display is repeated on the bottom row of the V/UHF
frequency repeater.
2
1
3
7
4
5
6
RADIO FREQUENCY DISPLAY (Afficheur de fréquence): Displays the operation mode,
the currently selected preset channel (indicated by a P followed by the preset
number) or frequency.
MEM/CLR BUTTON (Bouton MEM/CLR):
• MEM (Memory): Displays the value recorded in the radio’s buffer memory (can
be a channel or frequency) on the V/UHF radio display.
• CLR (Clear): Deletes the previous input.
Page 119
SECTION 10
10–2
ONBOARD RADIOS
V/UHF RADIO
XFR/VAL BUTTON (Bouton XFR/VAL):
• XFR (Transfer): Selects the buffer memory frequency as the active frequency.
• VAL (Validate): Validates the input displayed on the V/UHF radio display.
OPERATION MODE SWITCH (Sélécteur de mode d’opération): Selects the radio
operation mode:
• 0 (Off): No power is applied, the display remains blank.
• FF (Fixed frequency): Normal operating mode.
• HQ (Have quick): NOT FUNCTIONAL
• SV (Secure voice): NO FUNCTION
• DL (Data link): NO FUNCTION
• G (Guard): Sets the radio frequency to 243.000 MHz.
• EN (Settings): NOT FUNCTIONAL
RADIO KEYPAD (Clavier de configuration radio): Selects the preset radio channel or
sets the manual frequency. The keys can also display a green dot indicating that the
key CONF option is active. Can also set radio option when in configuration mode.
CONF BUTTON (Bouton CONF): CONF (configuration), switches the radio keypad
between configuration and normal mode.
PRESET CHANNEL SELECTOR (Sélecteur canal radio): Selects the V/UHF radio preset
channel. If the radio frequency was set manually, it will switch back to preset
channels.
SELECT A RADIO PRESET CHANNEL
The V/UHF radio preset channel can be set by 2 ways:
• Using the preset channel selector, the pilot needs to rotate the selector clockwise
to increase or counterclockwise to decrease the selected preset channel. The new
preset channel will be displayed on the radio frequency display.
• Using the keypad, the pilot needs to input the 1 or 2 digits of the preset channel
number and press VAL. If the preset channel number is not valid, the radio will stay
on the current preset channel.
SET A MANUAL FREQUENCY
On the V/UHF radio, the frequency can be set manually using the keypad. The pilot
needs to input the 5 digits of the frequency using the keypad. The radio frequency
display will show the manual frequency input and when the VAL button is pressed
the new frequency will be saved as the active frequency. If the inserted frequency
input is not valid, the radio will stay on the current preset channel or manual
frequency.
Page 120
SECTION 10
10–2
ONBOARD RADIOS
V/UHF RADIO
RADIO KEYPAD CONFIGURATION MODE
1
2
3
6
4
5
READ: Displays the frequency of the selected preset channel.
SQL (Squelch). Toggles squelch on and off.
GR: (Guard). Enables the background monitoring of the guard frequency (243.000
MHz).
5/20: Selects the transmission power for the radio. NOT FUNCTIONAL
TONE: NOT FUNCTIONAL
TOD (Time of day): NOT FUNCTIONAL
Page 121
SECTION 10
10–3
ONBOARD RADIOS
UHF RADIO
10 – 3 - UHF RADIO COMMAND PANEL
The UHF radio provides two-way voice communication on the UHF frequency range.
Frequencies are memorized in 20 preset channels.
The UHF radio frequency range is 225.000 to 399.975 MHz.
The UHF radio is referenced as the “red” radio, as the associated volume control
knob on the aircraft sound configuration panel is colored red. It can also be called the
auxiliary or secondary radio.
1
8
2
7
3
4
5
6
TRANSMIT POWER SELECTOR (Inverseur de puissance d’émission): Selects the radio
transmission power. NO FUNCTION
SIL SWITCH (Inverseur SIL): Switches ON or OFF the automatic noise suppression
feature.
TEST SWITCH (Sélecteur de test): NOT FUNCTIONAL
PRESET CHANNEL SELECTOR (Sélecteur canal radio): Selects the UHF radio preset
channel.
PRESET CHANNEL INDICATOR (Indicateur canal radio): Displays the currently selected
preset channel.
TEST BUTTON (Bouton de test): Tests the radio function, static should be heard.
OPERATION MODE SWITCH (Sélecteur de mode d’opération): Selects the radio
operation mode:
• AR (Arrêt): Off, no power is applied.
• M (Marche): On, power is applied and the radio is set to the preset channel
displayed on the preset channel indicator.
• F1 (Reception F1): Sets the radio for secure communication with the CDC
trough the EVF panel.
• H (Homing): NO FUNCTION
SECURE ENCRYPTION LIGHT (Voyant d’encryption): NO FUNCTION
Page 122
SECTION 10
10–4
ONBOARD RADIOS
EVF PANEL
10 – 4 - EVF PANEL
The EVF (évasion fréquence – frequency hopping) panel works in conjunction with
the UHF radio to establish secure communication between the aircraft and a CDC
(centre de commandement et de contrôle – command and control center). This
secure communication link is then used by the CDC to transmit TAF target
information to the aircraft.
In order to obtain the secure communication link to CDC, the UHF radio needs to be
slaved to the EVF pannel, this is done by placing the UHF radio operation mode
switch to the F1 position. In this mode, the UHF radio cannot be used for voice
communication anymore.
20 TAF channel are available from 01 to 20.
1
4
2
3
EVF LIGHT (Voyant EVF): Indicates that the secure communication has been
established with the CDC using frequency hopping methods.
NOTE
In DCS, this light will only light up when the TAF channel is occupied
by a player though the LotAtc software.
For more information see the LotAtc TAF tutorial on LOTATC.COM.
SELECTED TAF CHANNEL DISPLAY (Afficheur canal TAF): Indicates the currently
selected TAF channel.
TAF CHANNEL SELECTION SWITCH (Sélecteur canal TAF): Selects the TAF channel.
EVF PANNEL TEST BUTTON (Voyant-poussoir test panneau EVF): Tests the the EVF
panel lights and display.
Page 123
SECTION 10
10–4
ONBOARD RADIOS
EVF PANEL
TAF channels are automatically assigned to coalition airbases and ground radars in
order of closeness from the aircraft starting point. The TAF channel assignation list
is available on the kneeboard “TAF GCI channel” page.
Ground radar units are identified by the unit name and the MGRS grid where the
unit is located. When the aircraft is rearmed, this list is updated.
Page 124
SECTION 10
10–5
ONBOARD RADIOS
EDITING RADIO PRESETS
10 – 5 - V/UHF FREQUENCY REPEATER
The V/HUF frequency repeater repeats the V/UHF radio frequency display.
3
1
2
4
UHF RADIO REPEATER (Répétition radio UHF): Would indicate current UHF radio
frequency in MHz.
As the Mirage’s UHF radio is not compatible with the frequency repeater, only
asterisks are displayed.
V/UHF RADIO REPEATER (Répétition radio V/UHF): Mirrors the V/UHF radio frequency
display. Flashes to indicate that the radio is transmitting.
UHF RADIO RECEIVE LIGHT (Voyant de réception UHF): Would lights up to indicate that
the aircraft is receiving on the V/UHF radio.
As the Mirage’s UHF radio is not compatible with the frequency repeater, this light
has no function.
V/UHF RADIO RECEIVE LIGHT (Voyant de réception V/UHF): Lights up to indicate that
the aircraft is receiving on the V/UHF radio.
Page 125
SECTION 11
SNA
NAVIGATION AND WEAPON SYSTEM
Page 126
SECTION 11
SNA
INTRODUCTION
The navigation and weapon system (SNA – système de navigation et d’armement)
represents the operating system that is in charge of the interface between the pilot
and the different systems of the aircraft. The SNA is organized in modes with options
that the pilot can select through PCA and HOTAS commands.
There are 4 SNA modes:
• Navigation mode
• Air-to-air mode
• Air-to-ground mode
• Jettison mode
These modes can be selected by 3 ways:
• Priority selection
• PCA selection
• Selective jettison
Additionally, the air-to-ground mode has 3 sub-modes:
• Pre-selected
• Selected
• Memorized
The HOTAS commands that interact with the SNA are:
• Weapon system command
• Weapon system paddle
• MAGIC search/Vertical fix command
• CNM switch
The SNA also controls the MAGIC background search (MAV – MAGIC veille) and
selected search sector.
Page 127
SECTION 11
11–1
SNA
SNA MODES SELECTION
11 – 1 - SNA MODES SELECTION
PRIORITY SELECTION
The priority selection overrides any other previously selected normal or jettison
mode. They are selected when the CNM HOTAS command is in the C (cannon airair – air-to-air gun) or M (MAGIC) position.
The previously selected mode and options are memorized while a priority mode is
active, they are restored once the CNM HOTAS command is returned to the N (neutre
– neutral) position.
AIR-TO-AIR GUN
Selected when the CNM HOTAS command is in the C (cannon air-air – air-to-air gun)
position, it sets the SNA in air-to-air mode.
MAGIC
Selected when the CNM HOTAS command is in the M (MAGIC) position, it sets the
SNA in air-to-air mode
PCA SELECTION
The PCA selection is only possible if the HOTAS CNM command is in the N (neutre
– neutral) position and the selective jettison switch is in the N position.
Navigation options selected on the PCA are kept when switching between navigation
and air-to-ground mode.
NAV
Active when no weapon is selected on the PCA, it sets the SNA in navigation mode.
BL
Active when any BLx or BLF is selected on the PCA bottom row, it sets the the SNA
in air-to-ground mode.
BF
Active when any BFx or BFF is selected on the PCA bottom row, it sets the SNA in
air-to-ground mode.
CAS OR RK
Active when RK, RKF or CAS is selected on the PCA bottom row, it sets the SNA in
air-to-ground mode.
POLICE
Active when the POL option is selected on the PCA top row, it sets the SNA is in airto-air mode.
Page 128
SECTION 11
11–1
SNA
SNA MODES SELECTION
530
Active when 530 is selected on the PCA bottom row, it sets the SNA in air-to-air
mode.
SELECTIVE JETTISON
The selective jettison mode is selected by placing the selective jettison switch in the
SEL position. This mode can only be selected if the HOTAS CNM command is in the
N (neutre – neutral) position.
The previously selected mode and options are memorized while this mode is active.
They are restored once the selective jettison switch is returned to the N position.
AIR-TO-GROUND SUB-MODES
The air-to-ground sub-modes are select through the HOTAS weapon system
command (WSC).
PRE-SELECTED
Default mode when the SNA is set to air-to-ground mode, in this mode, the VTH stays
in NAV mode and the PCA displays the weapon options on the top row.
SELECTED
Active when the SNA is in air-to-ground mode and the WSC forward has been
pressed. In this mode, the VTH displays weapon employment symbology and the
PCA displays the weapon options on the top row. The radar is forced into emission
in TAS mode if the TAS option is selected on the PCA.
MEMORIZED
Active when the SNA is in air-to-ground mode and the WSC aft has been pressed.
In this mode, the VTH stays in NAV mode and the PCA displays navigation options
on the top row.
Page 129
SECTION 11
11–2
SNA
HOTAS SNA COMMANDS
11 – 2 - HOTAS SNA COMMANDS
WEAPON SYSTEM COMMAND
The weapon system command (commande temps réel SNA – WSC) has different
functions depending on the SNA mode.
SNA IN AIR-TO-GROUND MODE
With the SNA in air-to-ground mode, 3 sub-mode can be selected:
• SELECTED (Sélectionné): The PCA top row displays weapon options and the VTH
displays the weapon employment symbology.
• PRE-SELECTED (Pré-sélectionné): The PCA top row displays weapon options and
the VTH is in NAV mode.
• MEMORIZED (Mémorisé): The PCA top row displays NAV options and the VTH is in
NAV mode.
The SNA defaults to the pre-selected mode when an AG weapon is selected on the
PCA. The mode can be changed using the weapon system command forward and
aft. The weapon system command will follow the following logic:
• Forward: Sets the SNA in air-to-ground selected mode.
• Depress: No function.
• Aft: Each press will switch between the SNA pre-selected and memorized mode.
This logic results in the following behavior:
• While in selected:
• Forward: No action.
• Aft: The SNA is set to air-to-ground memorized mode.
• While in pre-selected:
• Forward: The SNA is set to air-to-ground selected mode.
• Aft: The SNA is set to air-to-ground memorized mode.
• While in memorized:
• Forward: The SNA is set to air-to-ground selected mode.
• Aft: The SNA is set to air-to-ground pre-selected mode.
SNA IN NAV OR AIR-TO-AIR MODE
With no weapon or an air-to-air weapon selected, WSC forward and aft select close
combat modes while WSC depress returns the radar to line search. For more
information, see the RADAR HOTAS CONTROLS SUB-SECTION.
Page 130
SECTION 11
0
SNA
WEAPON SYSTEM PADDLE
The weapon system paddle (palette SNA) has different functions depending on the
SNA mode.
In any other SNA modes, the paddle has no function.
NAVIGATION
• Radar fix: Execute a navigation fix at the position of the designation diamond on
the VTH.
• Approach: Toggle the declutter of the VTH ILS symbology.
AIR-TO-GROUND SELECTED
• CCPL: Designate the intended impact point for the bombs to the position of the
designation diamond on the VTH.
• CCPL PI: Execute a navigation fix at the position of the designation diamond on
the VTH.
If the weapon delivery mode is not CCPL or CCPL PI, the paddle has no function.
MAGIC SUB-MODE OR MAV SELECTED
• Radar locked: Slave the MAGIC missiles to the radar line of sight in an attempt
lock the radar target.
• MAGIC locked: Slave the radar to the MAGIC missiles line of sight in an attempt
lock the MAGIC target.
If the radar and MAGIC are locked on different target or none of them are locked, the
paddle has no function.
MAGIC SEARCH/VERTICAL FIX COMMAND
The MAGIC search/vertical fix command (recherche MAGIC/recalage vertical) has
different functions depending on the SNA mode.
NAVIGATION
Initiates a vertical navigation fix, same function as the REC key on the PCN.
MAGIC SUB-MODE OR MAV SELECTED
Switches between the available MAGIC search sectors.
This function has priority over the other, if MAV is selected while the SNA is in MAV
mode, the MAGIC search/vertical fix command can’t be used to initiate a vertical
navigation fix.
Page 131
SECTION 11
0
SNA
CNM SWITCH
The CNM switch (sélecteur armement CNM) function is the same irrelevant of the
SNA mode.
• C (Canons air-air – Air-to-air guns): Rightmost position, selects the air-to-air gun
and sets the SNA in air-to-air mode.
• N (Neutre – Neutral): Center position, returns to the previously selected SNA mode
and weapon.
• M (MAGIC): Leftmost position, selects the MAGICs and sets the SNA in air-to-air
mode.
There is a 0,5 second delay before the CNM switch to neutral position is registered
to allow the SNA to be switched between air-to-air gun and MAGIC modes without
returning to the previous selection.
Page 132
SECTION 11
11–3
SNA
MAGIC SEARCH
11 – 3 - MAGIC SEARCH
On the Mirage 2000C, the MAGIC missiles can search and track aircraft
independently of the radar. This search function is automatically executed when the
MAGICs or air-to-air guns are selected but can also be manually selected in most
modes by selecting MAV (MAGIC veille – MAGIC background search) mode.
SEARCH SECTORS
When the MAGICs, air-to-air guns or MAV are selected, the MAGIC missile will
perform a target acquisition search following a specific pattern. Multiple search
pattern exists and are defined by the sector they scan:
• VERTICAL WIDE (Vertical large): A 18° wide and 37° tall rectangle shaped search
sector with its bottom located 6,5° below the gun cross position.
This search sector is selected by default when the MAGICs or air-to-air guns are
selected.
It is represented on the VTH by the MAGIC search sector symbology, a vertical
double arrow right of the selected sub-mode.
• VERTICAL NARROW (Vertical étroit): A 7° box shaped search sector centered on the
gun cross position.
This search sector is selected pressing the MAGIC search/vertical fix HOTAS
command while in vertical wide mode.
While in vertical narrow, another MAGIC search/vertical fix HOTAS command press
will return the search sector to vertical wide.
It is represented on the VTH by the MAGIC search sector symbology, a vertical
double arrow right of the selected sub-mode and the MAGIC narrow search
symbology, the corners of a square located around the gun cross position.
The MAGIC narrow search symbology represents the limits of the search sector.
• HORIZONTAL WIDE (Horizontal large): With a missile on each side, a 68° wide, 14°
tall rectangle shaped search sector with its bottom located 2° above the gun cross
position.
With only 1 missile, a 35° wide, 14° tall rectangle shaped search sector with its
bottom located 2° above the gun cross position.
This search sector is selected by default when in MAV mode.
It is represented on the VTH by the MAGIC search sector symbology, a horizontal
double arrow right of the selected sub-mode.
• HORIZONTAL NARROW (Horizontal étroit): A 7° box shaped search sector centered
on the gun cross position.
This search sector is selected pressing the MAGIC search/vertical fix HOTAS
command while in horizontal wide.
While in horizontal narrow, another MAGIC search/vertical fix HOTAS command
press will return the search sector to horizontal wide.
It is represented on the VTH by the MAGIC search sector symbology, a horizontal
double arrow right of the selected sub-mode and the MAGIC narrow search
symbology, the corners of a square located around the gun cross position.
Page 133
SECTION 11
11–3
SNA
MAGIC SEARCH
The MAGIC narrow search symbology represents the limits of the search sector.
MAGIC BACKGROUND SEARCH
MAGIC background search (MAV – MAGIC Veille) allows the MAGIC missile to
perform a contact acquisition search pattern when the MAGICs or air-to-air guns are
not selected. It is selected by pressing the PCA weapon selection button under the
MAG window. The MAG window will read MAV to indicate that MAGIC background
search is active. The vertical search sectors are not available when MAV is selected.
MAV can be selected in any SNA mode and sub-mode but will be inactive in air-toground selected. MAV selection will be memorized between SNA modes and submodes.
MAV can also be selected while the MAGICs or air-to-air guns are selected to access
the horizontal search sectors.
When the SNA is in NAV mode and MAV is selected, the MAGIC search/vertical fix
HOTAS command won’t initiate a vertical navigation fix, it will toggle between the
horizontal wide and narrow search sectors.
Page 134
SECTION 12
PCA
WEAPONS CONTROL PANEL
Page 135
SECTION 12
12–1
PCA
WEAPON CONTROL PANEL
12 – 1 - WEAPON CONTROL PANEL
The weapon control panel (PCA – poste de commande armement) is located to the
left of the VTB. It consists of 2 rows of five LCD displays with buttons below them,
the master arm switch, the selective jettison guarded switch and an additional button
for the air-to-ground gun mode.
The PCA controls the SNA modes and is used to select weapons for employment or
jettison. The options displayed in the top row change based on the SNA mode while
the bottom row displays the aircraft underwing ordinance.
4
1
5
2
6
3
7
MASTER ARM SWITCH (Sécurité armement): Allows weapon release.
SELECTIVE JETTISON SWITCH (Inverseur sélectif): Sets the SNA into selective jettison
mode.
AIR-TO-GROUND GUNS SELECTION BUTTON (CAS - Touche de sélection canons air-sol):
Selects the air-to-ground gun mode.
SNA OPTION DISPLAY (Affichage des options du mode SNA): Displays the curent SNA
mode and sub-mode options. The display is divided into 5 sections, each containing
a 3 letters segment display. Different options are displayed depending on the SNA
mode, sub-mode and selected weapon.
SNA OPTION SELECTION BUTTONS (Touches de sélection des options SNA): Selects
the option displayed in the SNA mode option display section on top of it. A yellow S
is lit up on the button to indicate that the SNA option is selected.
LOADED STORES DISPLAY (Affichage des emports présents): Displays the aircraft’s
loaded stores as set by the ground crew at rearming. Can also display fictive weapon
for training and stores configuration errors.
STORE SELECTION BUTTONS (Touches de sélection des emports sous voilure): Selects
the store displayed in the loaded store display on top of the button. A yellow S is lit
up on the button to indicate that the store is selected and a yellow P to indicate that
the store is ready to be fired or released.
Page 136
SECTION 12
12–2
PCA
SNA OPTIONS
12 – 2 - SNA OPTIONS
INTRODUCTION
The PCA top row displays the options for the current SNA mode. The listed options
depend on the SNA mode, sub-mode and selected weapon.
The SNA options are selected using the corresponding SNA option selection button,
a yellow S is lit up on the button to indicate that the SNA option is selected.
SNA IN NAVIGATION MODE
With the SNA in navigation mode, the PCA top row will display navigation options
and police mode selection.
• TOP (Go): Displays the speed guidance symbology on the VTH and start the speed
•
•
•
•
guidance according to the TD (temps désiré – time to target) set for the current
DEST BUT.
POL (Police): Selects the police mode and set the SNA in air-to-air mode.
APP (Approche – Approach): Selects the approach sub-mode for the VTH.
RD (Route désirée – Desired heading): Displays the desired heading symbology
on the VTH.
OBL (Recallage oblique – Radar navigation fix): Displays the radar navigation fix
symbology on the VTH.
Page 137
SECTION 12
12–2
PCA
SNA OPTIONS
SNA IN AIR-TO-AIR MODE
With the SNA in air-to-air mode, the PCA top row will display weapon and radar
options depending on the selected weapon.
POLICE
530
MAGIC
AIR-TO-AIR GUNS
• RDO (Raliement désignation d’objectif – Radar target designation): Selects or
•
•
•
•
•
deselects the radar target designation generation. Selected by default when an airto-air weapon is selected.
POL (Police): Selects or deselects the police mode.
TAF (Téléaffichage – Remote target designation): Toggles the display of the remote
target designation on the VTB.
ARR (Arrière – Rear): Changes the interception director behavior to guide the
aircraft to the rear of the locked target.
LEN (Lent – Low): Selects the low (1200 rounds/min) rate of fire for the guns.
RAP (Rapide – High): Selects the high (1800 rounds/min) rate of fire for the guns.
Selected by default.
Page 138
SECTION 12
12–2
PCA
SNA OPTIONS
SNA IN AIR-TO-GROUND MODE
With the SNA in air-to-ground mode, the PCA top row depends on the selected submode. In memory mode, the top row will display the same options as in NAV mode,
while in selected and pre-selected mode, the PCA top row will display weapon
options and ranging selection depending on the selected weapon.
LOW AND HIGH DRAG BOMBS
LOW AND HIGH DRAG BOMBS WITH PI SELECTED
ROCKETS
AIR-TO-GROUND GUNS
• TAS (Télémétrie air-sol – Radar ranging): The radar is used to determine the
•
•
•
•
•
•
•
distance to the impact point.
RS (Radio-sonde – Radar altimeter): The radar altimeter is used to determine the
aircraft’s altitude over the ground. This information coupled with the aircraft attitude
is then used to determine the range to the impact point.
ZBI (Altitude barométrique – Baro-altimetric ranging): The altitude difference
between the aircraft and the impact point altitude is used to know the aircraft’s
altitude over the impact point. This information coupled with the aircraft attitude is
then used to determine the range to the impact point.
PI (Point initial – Initial point): Selects the PI mode for the current bomb mode.
EXT (Extérieur – Outboard): The outboard pylons are selected for rocket firing. Only
displayed if rockets pods are loaded on both the external and internal wing
hardpoints.
INT (Intérieur – Inboard): The inboard pylons are selected for rocket firing. Only
displayed if rockets pods are loaded on both the external and internal wing
hardpoints.
LEN (Lent – Low): Selects the low (1200 round/min) rate of fire for the guns.
RAP (Rapide – High): Selects the high (1800 round/min) rate of fire for the guns.
Selected by default.
Page 139
SECTION 12
12–3
PCA
LOADED STORES
12 – 3 - LOADED STORES
The PCA bottom row displays and allow the selection of the stores loaded on the
aircraft. The stores are displayed in the following order:
• MAGICs
• Super 530D
• External tanks
• Low drag bombs
• High drag bombs
• Rockets
• Fictive weapons in the same order as real weapons.
The stores are represented by a 2 or 3 digit code, for more information see the
WEAPONS LOADOUT CHART SUB-SECTION.
The stores displayed on the bottom row correspond to the stores loaded on the
aircraft after rearming. The display does not update itself when a store is no longer
present on the aircraft.
The leftmost window is reserved for the MAGICs, if the missiles are not loaded on
the aircraft, the window is blank.
The stores are selected using corresponding store selection button, a yellow S is lit
up on the button to indicate that the store is selected. A yellow P indicates that the
store is ready to be fired or released.
The store selection button under the MAGIC window will not select the MAGICs but
select and deselect the MAV (magic veille – magic background search) mode, for
more information see the NAVIGATION AND WEAPON SYSTEM MAGIC SEARCH SUBSECTION.
External fuel tanks cannot be selected.
Page 140
SECTION 12
12–4
PCA
SELECTIVE JETTISON
12 – 4 - SELECTIVE JETTISON
In selective jettison mode, the PCA top row is blank while the bottom row displays
the stores that can be jettisoned from the aircraft. Only the stores that are still present
and can be jettisoned from the aircraft are displayed.
The stores are selected for jettison with the corresponding weapon selection button,
a yellow S is lit up on the button to indicate that the store is selected for jettison. The
selected stores are then jettisoned using the MiCRoB second stage trigger.
Page 141
SECTION 13
PPA
WEAPONS PREPARATION PANEL
Page 142
SECTION 13
PPA
WEAPON PREPARATION PANEL
The weapon preparation panel (PPA – poste de préparation armement) is located to
the right of the VTB. It is divided into 5 areas, each with their functions:
• Top-left: Super 530 missile selection, preparation and status.
• Top-center: Magic missile preparation and status.
• Top-right: Lights test and VTB aircraft loadout switch.
• Bottom-left: Bomb release configuration and fusing.
• Bottom-right: Weapon ripple selection.
2
3
1
4
5
7
8
11
6
9
10
MISSILE SELECTION SWITCH (Sélecteur du missile à tirer): Selects which Super-530D
missile has the priority:
• G (Gauche – Left): The left missile has priority.
• AUTO (Automatique – Automatic): The SNA selects which missile has priority.
• D (Droite – Right): The right missile has priority.
S530 PREPARATION BUTTON (Touche de préparation S530): Selects or deselects the
preparation of the Super 530D missiles. The button also has 2 yellow lights:
• P (Préparation – Warm-up):
• Steady, indicates that the Super 530D missiles are ready.
• Flashing, indicates that the Super 530D missiles are either in the poststartup delay mode or executing the preparation sequence.
• MIS (Missile): Indicates that Super 530D missiles are loaded on the aircraft.
Page 143
SECTION 13
PPA
S530 FIRE SELECTION BUTTON (Touche de sélection tir automatique/manuel): Selects
either the automatic or manual fire mode for the Super 530D missiles:
• AUT (Automatique – Automatic): The weapon fire command act as a weapon
release consent, the aircraft fire the missile when the condition provides a
good probability of kill
• MAN (Manuel – Manual): The weapon fire command fires the missile when
pressed.
This button is a remnant of earlier 2000C RDM versions and has no effect in our
2000C S-5 RDI. NO FUNCTION
MAGIC PREPARATION BUTTON (Touche de préparation MAGIC): Selects or deselects
the preparation of the MAGIC II missiles. The button also has 2 yellow lights:
• P (Préparation – Warm-up):
• Steady, indicates that the MAGIC II missiles are ready.
• Flashing, indicates that the MAGIC II missiles are either in the poststartup delay mode or executing the preparation sequence.
• MAG (MAGIC): Indicates that MAGIC II missiles are loaded on the aircraft.
LIGHT TEST AND STORES VISUALIZATION SWITCH (Sélecteur de test touches et
visualisation des présences): 2 functions momentary switch:
• TEST: Turns on all the PCA and PPA buttons yellow lights.
• PRES (Présences – Stores): Displays the stores visualization screen on the
VTB display. For more information see the RADAR VTB SYMBOLOGY SUBSECTION.
FUSE SELECTION SWITCH (Inverseur de sélection des fusées): Selects which fuse to
use for the selected weapon. This selection only impact bombs:
• INST. (Instantané – Instantaneous):
• Mk-82, Mk-82Snakeye/Air, GBU-12/16/24: Arms the nose and tail fuse.
• BAP-100: Arms the retarded fuse.
• BLG-66: Selects the short dispersion area.
• RET. (Retardé – Retarded):
• Mk-82, Mk-82Snakeye/Air, GBU-12/16/24: Arms the tail fuse.
• BAP-100: Arms the retarded fuse.
• BLG-66: Selects the long dispersion area.
• INERT. (Inerte – Inert): No fuse is armed, the bombs won’t explode.
SALVO BOMB QUANTITY SWITCH (Inverseur nombre de bombes en salve): Selects the
quantity of bombs released per salvo as displayed on the salvo bomb quantity
display.
SALVO BOMB QUANTITY DISPLAY (Afficheur nombre de bombes en salve): Displays the
selected quantity of bomb released per salvo, from 00 to 18.
Page 144
SECTION 13
PPA
SALVO BOMB INTERVAL SWITCH (Inverseur intervalle entre les bombes en salve):
Selects the interval between the impact point of each bombs of the salvo as displayed
on the salvo bomb interval display.
SALVO BOMB INTERVAL DISPLAY (Afficheur intervalle entre les bombes en salve):
Displays the selected interval between the impact point of each bomb of the salvo in
tens of meters, from 00 to 20.
WEAPON SALVO SELECTION BUTTON (Touche de sélection salve): Selects between the
salvo or total release for the guns, rockets and Super 530D missiles. The button has
2 yellow lights:
• TOT (Total):
• Guns: The guns fire as long as the trigger is pressed.
• Rockets: The rockets fire as long as the trigger is pressed.
• Super 530: The 2nd missile will fire 2 seconds after the first if the trigger
is held pressed.
• PAR (Partiel – Partial):
• Guns: The guns fire in salvo of 0,5 or 1 second.
• Rockets: The rockets fire in salvo of 1, 3 or 6 rockets.
• Super 530: Only 1 missile is fired per trigger press.
Page 145
SECTION 14
VTH
HEAD-UP DISPLAY
Page 146
SECTION 14
VTH
INTRODUCTION
The head-up display (VTH – visualisation tête haute) is a transparent display used to
display navigation and weapon employment symbology. It works by reflecting the
light generated by a CRT display on an angled glass in front of the pilot.
The VTH image is collimated to infinity, meaning that in order to see the symbology
the pilot eyes needs to be focused on the outside word, not the glass.
It is also parallax free, the image position relative to the outside word is fixed,
irrelevant to the pilot’s eyes position.
The Mirage 2000C VTH displayed all the important information relative to the aircraft
attitude, altitude and speed at all times and specific symbology for landing, take-off
as well as employment symbology for radar and weapon. It is the first advanced VTH
in use by the French Air Force.
The Mirage’s VTH can be used as a primary instrument, the aircraft can take-off,
navigate and land only using the VTH.
Page 147
SECTION 14
14–1
VTH
PCTH
14 – 1 - HEAD-UP COMMAND PANEL
The head-up command panel (PCTH – poste de commande tête haute) is located at
the center dash, just above the VTB.
1
3
9
4
11
10
2
6
7
5
8
DECLUTTER SWITCH (ALL – Allègement): Toggles the decluttering of the VTH
symbology, the up position is momentary.
TARGET WINGSPAN SCALE (ENV – Envergure): Sets the target wingspan for the tracer
line in AA gun mode. The available values are between 7 and 40 meters.
FICTIVE MASTER ARM BUTTON (EFF – Effacement): Used as a safety for training or
fictive weapons. NOT FUNCTIONAL
GUN SHOOT INCITATION SWITCH (Incitation au tir canon): Chooses if the gun shoot
incitation symbology is activated or not.
• CCLT (Calcul continu de la ligne de traceurs – Continuously calculated tracer
line): Default mode, no incitation.
• PRED (Prédiction – Predictive): The target objective square or coincidence
triangle will duplicate if the shooting reticle is going to cross the target.
BRIGHTNESS CONTROL (LUM – Luminosité): Increases or decreases the VTH
brightness.
POWER SWITCH: Used to power up and run the VTH test.
• A (Arrêt – Off): Turns the VTH off.
• M (Marche – On): Turns the VTH on. The VTH will turn on after a 30 second
delay during which the system will heat up to operating temperature.
• TEST: The VTH enters in test mode. This position is momentary. NOT
FUNCTIONAL
BACKUP FIXED SIGHT (Hausse manuelle): Displays the back-up sight for when the main
symbology is not usable.
Page 148
SECTION 14
14–1
VTH
PCTH
BACKUP FIXED SIGHT ADJUSTMENT: Sets the back-up sight deflection based on ballistic
tables for the desired range for weapon delivery.
ALTITUDE DISPLAY SELECTOR SWITCH. Selects the altitudes to display on the VTH:
• ZB: Only the barometric altitude is displayed.
• H: The radar altitude is displayed in addition to the barometric altitude.
• SELH: Displays the selected minimum altitude as well as the barometric
altitude.
RADAR ALTIMETER SWITCH. Turns on and start the self-test of the radar altimeter.
CAUTION
Be aware that the radar altimeter has a limit of 5,000 feet AGL.
Asterisks will be displayed when the aircraft AGL altitude is above
5,000 feet. Asterisks will also be displayed whenever the aircraft roll
angle is higher than 20º, since at that angle the radar altimeter beam
cannot give a reliable measure.
MINIMUM ALTITUDE SELECTOR (RAD ALT – Radar altitude): The Minimum Altitude (HG
- Hauteur de garde) is the altitude at which the minimum altitude arrow will be
displayed on the VTH an VTB. The minimum altitude selector is used to set the HG
when the altitude display selector is in the SELH position. During landings and when
the VTH is in APP mode, the HG also works as the Decision Height selector.
Page 149
SECTION 14
14–2
VTH
VTH MASTER MODES
14 – 2 - VTH MASTER MODES
The VTH displays information based on the master mode and sub-mode or option.
There are 3 master modes, each one has a number of sub-modes and options. Submodes are exclusive and options can be combined between them and with some
sub-modes.
• NAV MODE: Default mode when no weapon is selected or when an air-to-ground
weapon is selected but the SNA is in air-to-ground pre-selected or memorized submode.
• HEADING ERROR (Erreur de route): Default navigation mode, the VTH will
display BUT navigation symbology.
• GROUND (Roulage): Automatically displayed when the plane has weight on
wheels.
• APPROACH (Approche): Selected with the APP button on the PCA, used for
approaches and landings.
• RADAR FIX (Recalage oblique): Selected with the OBL button on the PCA, used
to perform an INS radar fix.
The following options can be selected at the same time:
• DESIRED HEADING (Route désirée): Selected with the RD button on the PCA,
used for navigation on a BUT while flying on a selected Heading.
• DESIRED TIME (Temps désiré): Selected with the TOP button on the PCA, used
to arrive to a BUT at a predefined time.
• AIR-TO-AIR MODE: Displayed when any air-to-air weapon is selected and in police
mode.
• MAGIC: Displayed when the MAGIC II missile is selected.
• AIR-TO-AIR GUN: Displayed when the gun is selected in air-to-air mode.
• 530: Displayed when the Super 530D missiles is selected.
• POLICE: Used to intercept aircraft in peace times. Selected using the POL
button on the PCA.
The following options can be selected at the same time:
• AUTO-LOCK: Indicates the currently selected auto-lock mode.
Page 150
SECTION 14
14–2
VTH
VTH MASTER MODES
• AIR-TO-GROUND MODE: Displayed when an air-to-ground weapon is selected on the
PCA and the SNA is in air-to-ground selected sub-mode.
• AIR-TO-GROUND GUN OR ROCKET: Displayed when the CAS (canon air-sol –
air-to-ground gun) or the rockets are selected.
• CCPI (Calcul continu du point d’impact – Continuously calculated impact
point): Displayed when a high drag (freinée) or very high drag (hyperfreinée)
bomb is selected.
• CCPL (Calcul continu du point de larguage – Continuously calculated release
point): Displayed when a low drag (lisse) or guided (guidée) bomb is selected.
The following options can be selected at the same time:
• PI (Point initial – Initial point): Displayed with the PI button when a high drag,
very high drag, low drag or guided bomb is selected.
Page 151
SECTION 14
14–3
VTH
COMMON SYMBOLOGY
14 – 3 - COMMON SYMBOLOGY
BASE SYMBOLOGY
No matter what Master Mode/Sub-mode is active, all of them share the following
symbology.
3
1
4
2
5
8
9
6
7
CALIBRATED AIR SPEED (Vitesse conventionnelle): Located to the left of the Heading
Scale, it shows the current aircraft airspeed in knots. Only shown when the airspeed
is above 30 knots.
MACH NUMBER (Mach): The Mach number is displayed in all modes and only when
the value is above 0.6 Mach.
HEADING SCALE (Echelle de cap): The Heading Scale is located at the top and center
of the VTH and moves horizontally against a fixed index caret indicating aircraft
heading from 0º to 360º. The scale is numbered tens of degrees, with a dot
representing the 5 degrees halfway mark.
• The vertical line | represents the aircraft heading (cap), meaning the direction
where the nose of the aircraft is pointing.
• The triangle Δ represents the aircraft bearing (route), meaning the direction
where the aircraft is flying. There might be a difference between the aircraft
heading and bearing due to the wind.
BARO-INERTIAL ALTITUDE (Altitude baro-recalée): Located to the right of the Heading
Scale, it shows the current aircraft altitude above sea level. The bigger numbers
represent the flight level and it can be negative.
Page 152
SECTION 14
14–3
VTH
COMMON SYMBOLOGY
CAUTION
The altitude value displayed here is the same as the one presented on
the altimeter, it is therefore dependent on the altimeter pressure setting.
SELECTED MINIMUM ALTITUDE (Hauteur de garde radio-altimètre): Shows the selected
minimum altitude. Only displayed when the altitude display selector switch is in the
SELH position.
All the above symbology is shifted to the middle left of the VTH in APP sub-mode and
some AA and AG modes. The heading scale only moves in the APP sub-mode
FLIGHT PATH MARKER (Réticule vecteur vitesse): The FPM, also known as the Velocity
Vector Indicator (VVI), is an aircraft shaped symbol that represent the aircraft’s
instantaneous flight path on the VTH. The wings of the symbol always remain parallel
to the wings of the aircraft. The lateral position of the FPM takes the wind into account
and will indicate the true path of the aircraft compared to the ground.
In air-to-air modes and above 20000ft in NAV mode (except in APP), the FPM lateral
position drift due to the wind is corrected.
HORIZON LINE (Barre principale d’horizon): A component of the Flight Path Pitch
Ladder in, it indicates the position of the horizon and covers the VTH width.
FLIGHT PATH PITCH LADDER (Barres d’horizon): The ladder (FPPL) represents the
aircraft pitch and roll on the VTH. It moves laterally in relation to FPM. The angle lines
are displayed for each 5º with the angle value being displayed every 10º between 0
and ±90º. Positive pitch lines are solid and negative pitch lines are dashed. The tabs
at the end of each segment point towards the horizon.
ACCELERATION CHEVRONS (Chevrons d’accélération): Represents the aircraft
longitudinal acceleration. The chevrons move in relation to the FPM:
• When the aircraft is neither accelerating nor decelerating the chevrons and
the FPM are at the same level.
• When the aircraft is accelerating the chevrons are above the FPM.
• When the aircraft is decelerating the chevrons are below the FPM.
The position difference between the FPM and the chevrons is relative to the
acceleration or deceleration rate.
Page 153
SECTION 14
14–3
VTH
COMMON SYMBOLOGY
10
11
RADAR ALTIMETER (Hauteur radio-altimètre): Shows the altitude above the ground in
feet. Asterisks will be displayed whenever the aircraft roll angle is higher than 20º or
the altitude is higher than 5000 feet. Only displayed when the altitude display selector
switch is in the H position. Can be shifted to the middle left of the VTH in APP submode and some AA and AG modes.
MINIMUM ALTITUDE ALERT (Alerte en hauteur radio-alimètre): Displayed when the
current radar altitude is below the selected minimum altitude. Flashing if the altitude
display selector switch is in the SELH position, steady in the H position
Page 154
SECTION 14
14–3
VTH
COMMON SYMBOLOGY
AUTO-PILOT SYMBOLOGY
2
1
AUTOPILOT COMMANDED SLOPE (Pente commandée pilote automatique): Displayed
when any mode is engaged and the autopilot is not on standby. Represents the pitch
the autopilot is aiming to place the FPM at. The asterisk stays aligned with the center
of the pitch ladder.
AUTOPILOT COMMANDED BEARING (Route commandée pilote automatique): The open
triangle indicates the autopilot commanded bearing. If the commanded bearing is
outside the heading scale limits, the commanded bearing is displayed below the
indicator. When the commanded bearing is reached or the autopilot is disconnected,
the commanded bearing symbol is merged with the aircraft bearing symbol.
Page 155
SECTION 14
14–4
VTH
NAV MODE
14 – 4 - NAV MODE
Navigation mode (NAV) is the aircraft’s default Master Mode. It is automatically
selected when no weapon is selected or when an air-to-ground weapon is selected
but the SNA is in air-to-ground pre-selected or memorized sub-mode. Its ground submode overrides any other master and sub-modes when the aircraft has weight on
wheels.
HEADING ERROR SUB-MODE
Default navigation mode (Erreur de route), the VTH will display BUT navigation
symbology.
3
1
2
DISTANCE TO BUT (Distance au BUT): Indicates the distance to the currently selected
DEST BUT in nautical miles. When the distance is below 10 nm, tenth of nm will also
be displayed.
BUT NUMBER (Numéro du BUT): Separated from the distance to BUT by a N, indicate
the current DEST BUT number.
HEADING ERROR INDICATOR (Erreur de route): Indicates the heading error to the
current DEST BUT. It moves on a line parallel to the horizon, passing by the FPM.
Its lateral offset to the FPM represents the heading error at the 1/7 scale. The
orientation of the symbol indicates if the aircraft is fly toward the BUT or from the
BUT.
• Tip at the top, the BUT is in front of the aircraft.
• Tip at the bottom, the BUT is behind the aircraft.
Page 156
SECTION 14
14–4
VTH
NAV MODE
4
5
BAD SELECTED INDICATOR (Rappel de la sélection BAD): When present, the asterisk
indicates that the current navigation informations are relative to the BAD.
BUT POSITION INDICATOR (Réticule BUT): When the distance to BUT is less than 10
nautical miles and the BUT physical position is in the VTH field of view, the heading
error indicator is replaced by the BUT indicator which is projected at the exact
geographical position of the BUT.
Page 157
SECTION 14
14–4
VTH
NAV MODE
GROUND SUB-MODE
When the aircraft has weight on wheels, the VTH will be automatically switched to
the ground sub-mode (Roulage). The VTH will display 2 specific symbologies.
1
2
LONGITUDINAL ACCELERATION (Accélération longitudinale): Shows the longitudinal
acceleration/deceleration (Lx) in Gs. It can be negative and is used to check engine
performance at take-off.
TAKE-OFF ROTATION INDEX (Assiette de consigne au décollage): Fixed at -13° to the
horizon line, it is displayed when on the ground until 5 second after the gear is
unlocked from the down position. Indicate the pitch to maintain at rotation when
placed on the horizon line and can also be used for aero-braking.
Page 158
SECTION 14
14–4
VTH
NAV MODE
APPROACH SUB-MODE
Selected using the PCA, the approach sub-mode (approche) displays VFR or IFR
landing symbology. The calibrated airspeed, mach number, heading tape, baroinertial altitude, and radar altitude are shifted to the center of the VTH. This is done
to allow the pilot to raise his seat and have a better visibility during landing.
The IFR related symbologies of the APP sub-mode depend on ILS and the current
DEST BUT CP/PD INS parameters. See the RADIO NAVIGATION VOR AND ILS SUBSECTION and INS SECTION for more information.
APPROACH MODE WITHOUT ILS
If the aircraft is not receiving an ILS signal it will display the VFR symbology.
4
3
2
1
5
ANGLE OF ATTACK GUIDE (Guidage en incidence): Indicates the optimum angle of
attack for landing the aircraft relative to the FPM. The brackets represent an AoA
value of 14º ± 0.5º and they flash when the difference between the aircraft AoA and
the approach AoA is bigger than 3°. Approach AoA is achieved by placing the FPM
inside the brackets.
DESIRED SLOPE MARKERS (Pente désirée): Indicates the desired slope as set in the
current DEST BUT PD parameter. If the current DEST BUT PD parameter has not
been set, the PD markers are merged in the horizon line as the default value is 00.0.
TRUE RUNWAY HEADING MARKER (Repère cap vrai piste): Displayed on top of the
horizon line, it indicates the runway true heading as set in the current DEST BUT CP
parameter.
CAUTION
If the current DEST BUT CP parameter has not been set, it will be at
000.0 by default and the true runway heading marker will be shown at
that heading. This can create confusion and lead to accidents, always
be sure that this parameter is set correctly and that you selected to
correct DEST BUT when in APP sub-mode.
Page 159
SECTION 14
14–4
VTH
NAV MODE
MARKER INDICATION (Symbole marker): Indicates that the aircraft is passing through
the beam of an airfield marker beacon. The “M” flashed at the same frequency than
the beacon.
DECISION HEIGHT (Hauteur de décision): Replaces the radar altitude and is displayed
just below the FPM when the radar attitude is below the minimum altitude set by the
pilot on the PCTH.
APPROACH MODE WITH ILS, LOC ONLY
If the aircraft is only receiving localizer signal from the ILS it will only display LOC
guidance.
In this case the gear is still up and the VTH still displays the distance to BUT, BUT
number and heading error indicator symbology.
2
1
RUNWAY AXIS LINE (Axe de piste): Represents a projection of the runway axis on the
ground starting at the true runway heading marker and passing through the runway.
ILS DIRECTOR LOC ONLY (Fenêtre de guidage): Guides the aircraft on the ILS
localizer. Placed on the horizon line, the pilot needs to place the FPM inside the box
to lineup on the LOC. It is always displayed and keeps indicating the guidance
direction when on the edge on the VTH field of view.
Page 160
SECTION 14
14–4
VTH
NAV MODE
APPROACH MODE WITH ILS, LOC AND GLIDE
If the aircraft is receiving localizer and glide slope signals from the ILS it will display
LOC and GLIDE guidance as well as the synthetic runway.
1
2
ILS DIRECTOR. (Fenêtre de guidage): Guides the aircraft on the ILS localizer and glide
slope. The pilot needs to place the FPM inside the box to be guided on the LOC and
GLIDE. It is always displayed and keeps indicating the guidance direction when on
the edge on the VTH field of view.
SYNTHETIC RUNWAY (Piste synthétique): The synthetic runway is an aid for locating
the real runway, especially during low visibility conditions. It is only visible when:
• The INS is NAV and functioning correctly.
• The CP/PD data for the current DEST BUT correspond to the landing runway.
• Both localizer and glideslope have been captured
• The runway is less than 10 nautical miles away.
• Lateral deviation is less than 7º.
The synthetic runway is removed from the VTH as soon as there is weight on the
main landing gear wheels.
CAUTION
The synthetic runway and ILS director depend on the accuracy of the
CP/PD parameter data, even a 0.1 degree error can throw off the
representation. Always cross-check with the ILS needles of the IS as
they show deviation from the LOC and GLIDE and are not dependent
on the INS.
CAUTION
The synthetic runway is not a perfect tool, it will often be displayed to
the sides, before or after the real runway when the lateral or vertical
deviation is too high from the ILS. But when on LOC and GLIDE, the
representation should be very accurate.
Page 161
SECTION 14
14–4
VTH
NAV MODE
3
EXCESSIVE DEVIATION INDICATORS (Indicateurs d’écarts excessifs): If the deviation
from either glideslope or course is too large, a flashing triangle will appear indicating
the direction of the required maneuver.
APPROACH MODE WITH ILS AND DECLUTERED
When in the ILS symbology is displayed, part of it can be hidden to allow better view
of the runway. This is done using the Magic Slave/AG Designate/INS Position Update
throttle command. All the ILS symbology will be hidden except the runway axis line
and the desired slope symbology will be displayed.
Page 162
SECTION 14
14–4
VTH
NAV MODE
DESIRED HEADING OPTION
Selected using the PCA, the desired heading option (route désirée), provides lateral
guidance on the VTH.
1
LATERAL GUIDANCE (Guidage latéral): Guides the aircraft on the desired heading.
Vertically aligned on the FPM, the pilot needs to place the FPM inside the symbology
to be guided on the RD.
Page 163
SECTION 14
14–4
VTH
NAV MODE
DESIRED TIME OPTION
Selected using the PCA, the desired time option (temps désiré), provides speed
guidance on the VTH.
1
SPEED GUIDANCE (Guidage en vitesse): Guides the aircraft in speed to attain the BUT
as the desired time. Horizontally aligned on the FPM and vertically dependent on the
needed speed change, the pilot needs to vertically align the acceleration chevron
with the symbology to be guided in speed.
Page 164
SECTION 14
14–4
VTH
NAV MODE
RADAR FIX SUB-MODE
2
1
FIX/DESIGNATION DIAMOND (Réticule de recalage/désignation): Representation of the
aiming point of the radar, must be placed over the surface feature.
RADAR SLANT RANGE (Distance air-sol): Indicates the slant distance to the ground at
the currently radar designated point in kilometers.
Page 165
SECTION 14
14–5
VTH
AIR-TO-AIR MODE
14 – 5 - AIR-TO-AIR MODE
Air-to-air mode is automatically displayed when an air-to-air weapon or police mode
is selected.
COMMON SYMBOLOGY
In every air-to-air sub-mode, the following symbology will be displayed.
1
2
AIR-TO-AIR SUB-MODE (Mode en cours): Represents the selected air-to-air sub-mode.
Possible values are MAG, CAN, 530 and POL. Flashes if the master arm switch is
not in the armed position, except in POL.
AIRCRAFT LOAD FACTOR (Facteur de charge chasseur): Represents the current load
factor of the aircraft.
Page 166
SECTION 14
14–5
VTH
AIR-TO-AIR MODE
COMMON SYMBOLOGY WITH RADAR LOCK
In every air-to-air sub-mode with a PSID, SHB or PSIC radar lock, the following
symbology will be displayed.
1
6
3
2
5
7
4
RADAR TARGET POSITION (Carré but): Displayed at the position of the contact on the
VTH. If the contact position is outside the VTH field of view a dashed square will be
displayed in the direction of the contact. The square will flash during a radar slave to
MAGIC or when the radar is in RRAS auto-acquisition mode.
INTERCEPTION DIRECTOR CIRCLE (Cercle du directeur d’ordre): Fixed diameter circle
placed at the center of the VTH. Flashes if the radar antenna is close to its gimbal
limits or the target is flying an evasive maneuver.
INTERCEPTION DIRECTOR POINT (Point du directeur d’ordre): Positioned relative to the
center of the interception director circle, indicates the maneuvers necessary to place
the aircraft in the currently selected weapon employment zone. The pilot needs to
place the point at the center of the interception director circle.
RANGE SCALE (Echelle de distance): Provides a range scale to the target range
symbology. Possible max scale distances: 80, 40, 20, 10 and 2 nm.
TARGET RANGE (Distance cible): Represents the radar target range relative to the
range scale. Displayed in nautical mile, with tenths and the unit under 10nm and in
hectometers under 2nm.
TARGET CLOSING SPEED (Vitesse de rapprochement cible): Represents the combined
speed of the aircraft and the target in knots. Positive when closing, negative when
opening.
TARGET ASPECT ANGLE (Angle de présentation cible): Represents the target aspect
angle (0 is nose cold, 180 is nose hot) from 0° to 180° and 5° by 5°.
Page 167
SECTION 14
14–5
VTH
AIR-TO-AIR MODE
8
TURNAROUND LOAD FACTOR (Facteur de charge de retournement): Indicates the load
factor required for the turn around maneuver to place the aircraft in a tail chasse from
the target. Only displayed if the required load factor is over 1.3G.
This information is displayed in police and air-to-air gun sub-modes as well as MAGIC
and 530 sub-modes when the ARR PCA option is selected.
Page 168
SECTION 14
14–5
VTH
AIR-TO-AIR MODE
10
9
IFF INTERROGATION IN PROGRESS (Interrogation IFF en cours): Indicate that the radar
target is being interrogated by the IFF system.
IFF CORRELATION (Corrélation IFF): The A inside the radar target position symbology
indicates that the radar target has replied as a friend to the IFF interrogation.
The A is replaced by a D if radar as received a friendly reply from the target but the
position of the IFF replying aircraft does not correspond to the target position.
Page 169
SECTION 14
14–5
VTH
AIR-TO-AIR MODE
11
MEMORY MODE INDICATION (Indication mode mémoire): The M inside the interception
director circle indicates that the radar has lost the target and is in memory mode. In
PSIC, the radar memory mode lasts 5 seconds during which the radar will continue
to illuminate the last known trajectory of the target and try to reacquire the lock. Once
those 5 seconds are elapsed, the radar will return to bar search.
12
JAMMING RADAR TARGET POSITION (Carré but brouillé): The hollowed out cross inside
the radar target position square indicates that a jammer is hindering the radar. Only
displayed when the radar is in PSIC.
Page 170
SECTION 14
14–5
VTH
AIR-TO-AIR MODE
13
14
SWITCH TO PSIC INCITATION (Incitation à passer en PSIC): Displayed flashing when in
PSID and the radar estimates that the noise to signal ratio from the contact is too low
to maintain the PSID lock and that switching to PSIC is advised.
STAY IN PSIC INCITATION (Incitation à rester en PSIC): Displayed steady for 3 seconds
in PSIC when the pilot has pressed PSIC toggle HOTAS command to switch to PSID
but the radar estimates that the contact noise to signal ratio is too low to maintain a
PSID lock. The radar can be forced in PSID if the PSIC toggle HOTAS command is
pressed while the symbol is displayed.
Page 171
SECTION 14
14–5
VTH
AIR-TO-AIR MODE
MAGIC SUB-MODE
Displayed when the MAGIC II missiles are selected. In this mode, the calibrated
airspeed, mach number, baro-inertial altitude and radar altitude are shifted to the
center of the VTH.
MAGIC VERTICAL WIDE SEARCH
3
1
2
4
4
MAGIC SUB-MODE (Mode MAGIC): Indicates that the VTH is in the MAGIC air-to-air
sub-mode. Flashes to indicate that the master arm is safe.
MAGIC SEARCH SECTOR (Secteur de recherche MAGIC): The double arrow indicates
the current scan mode for the magic. Here the MAGIC search is in vertical mode.
GUN CROSS (Croix canons): Represents the gun and MAGICs boresight.
MISSILES STATUS (Etat des missiles): Indicates the presence of the left (G – gauche)
and right (D – droit) missiles. Flashes when the missiles are not ready.
Page 172
SECTION 14
14–5
VTH
AIR-TO-AIR MODE
MAGIC VERTICAL NARROW SEARCH
1
2
MAGIC SEARCH SECTOR (Secteur de recherche MAGIC): The double arrow indicates
the current scan mode for the magic. Here the MAGIC search is in vertical mode.
MAGIC NARROW SEARCH (Secteur étroit MAGIC): The square corners indicate that
the MAGIC is in narrow search mode and its limits.
Page 173
SECTION 14
14–5
VTH
AIR-TO-AIR MODE
MAGIC HORIZONTAL SEARCH
1
MAGIC SEARCH SECTOR (Secteur de recherche MAGIC): The double arrow indicates
the current scan mode for the magic. Here the MAGIC search is in horizontal mode.
Page 174
SECTION 14
14–5
VTH
AIR-TO-AIR MODE
MAGIC HORIZONTAL NARROW SEARCH
1
2
MAGIC SEARCH SECTOR (Secteur de recherche MAGIC): The double arrow indicates
the current scan mode for the magic. Here the MAGIC search is in horizonal mode.
MAGIC NARROW SEARCH (Secteur étroit MAGIC): The square corners indicate that
the MAGIC is in narrow search mode and its limits.
Page 175
SECTION 14
14–5
VTH
AIR-TO-AIR MODE
MAGIC LOCKED
1
2
2
MAGIC LOCK (Direction d’accrochage MAGIC): Indicates the direction of the priority
MAGIC lock. If the lock direction is outside the VTH field of view a dashed circle will
be displayed in the direction of the lock.
MISSILES STATUS (Etat des missiles): The circle indicates that the missile is ready to
fire.
Page 176
SECTION 14
14–5
VTH
AIR-TO-AIR MODE
MAGIC AND RADAR COINCIDENCE
1
3
4
2
MAGIC AND RADAR COINCIDENCE (Coïncidence radar MAGIC): Replaces the radar
target position indicator, it indicates that the radar and magic are locked on the same
target.
SHOOT INDICATION (Conseil de tir): Indicates that the target is in the long limit with
defensive maneuvers (limite longue avec évasive) envelope for the MAGICs.
DOUBLING OF THE INTERCEPTION DIRECTOR CIRCLE (Dédoublage
du cercle du directeur
d’ordre): Indicates that the target is in the long limit without defensive maneuvers
(limite longue sans évasive) envelope for the MAGICs
LONG AND SHORT LIMITS (Limites longues et courtes): Relative to the radar range scale
symbology, represents the radar calculated range envelope for the MAGICs. The 2
top lines represents the long limits and the bottom line represent short limit. The long
limit without defensive maneuvers (limite longue sans évasive) line is thicker than the
long limit with defensive maneuvers (limite longue avec évasive).
Page 177
SECTION 14
14–5
VTH
AIR-TO-AIR MODE
MAGIC DURING RADAR SLAVING
1
MAGIC LOCK CIRCLE INSIDE RADAR TARGET (Direction d’accrochage MAGIC à
l’intérieur du carré BUT): When the MAGIC has been slaved to the radar (ralliement
MAGIC), the MAGIC lock circle will flash inside the radar target indicator until the
MAGIC is locked on the target.
Page 178
SECTION 14
14–5
VTH
AIR-TO-AIR MODE
AIR-TO-AIR GUN SUB-MODE
Displayed when the air-to-air gun is selected. In this mode, the calibrated airspeed,
mach number, baro-inertial altitude and radar altitude are shifted to the center of the
VTH.
AIR-TO-AIR GUN WITHOUT RADAR LOCK
3
5
1
2
6
4
7
7
AIR-TO-AIR GUN SUB-MODE (Mode canon air-air): Indicates that the VTH is in the gun
air-to-air sub-mode. Flashes to indicate that the master arm is safe.
MAGIC SEARCH SECTOR (Secteur de recherche MAGIC): In air-to-air gun sub-mode
the MAGIC missiles are also active in search mode. The scan modes are the same
than in MAGIC sub-mode.
GUN CROSS (Croix canons): Represents the gun and MAGICs boresight.
TRACER LINE AND SHELL MARKERS (Ligne de traceurs et repères cyclistes): Represents
the calculated flight path of a cannon shell stream. It starts at the gun cross and
finishes when the shell stream has traveled 1000 meters.
The shell markers represent the speed of 2 virtual shells along the tracer line.
WINGSPAN MARKER 300M (Barre stadimétrique 300m)
WINGSPAN MARKER 600M (Barre stadimétrique 600m)
These lines are present along the tracer line and are always parallel to the aircraft
plane. They are used to estimate the target distance without radar use, by comparing
the marker length to the target wingspan. The estimated target wingspan is set using
the target wingspan scale on the PCTH.
REMAINING SHELLS (Nombre d’obus restants): Displays the remaining shells count for
each DEFA 554 cannons.
Page 179
SECTION 14
14–5
VTH
AIR-TO-AIR MODE
AIR-TO-AIR GUN WITH RADAR IN PSIC
1
DISTANCE METER WITH SHOOTING RETICLE AND ANALOG CLOSING SPEED (Distancemètre
avec réticule de tir et vitesse de rapprochement analogique): The shooting reticle
(small center circle) is sliding along the tracer line to represent the “critical shell” (obus
critique) that is at the same range as the target.
The distance meter (outside circle) is centered on the shooting reticle. It unwinds
counterclockwise to provide radar range relative to the 4 distance markers. It is
displayed below 1nm to target and each circle quadrant represents 300m.
Relative to the distance meter, the analog closing speed (chevron) represents the
range at which the target will be in 5 seconds.
Page 180
SECTION 14
14–5
VTH
AIR-TO-AIR MODE
AIR-TO-AIR GUN WITH SHOOT INCITATION
2
1
DOUBLED RADAR TARGET POSITION (Dédoublement du carré but): The doubled square
represents the shoot incitation, present when the aircraft estimates that the current
gun solution will result in a hit. Only displayed when the gun shoot incitation switch
on the PCTH is in the PRED position.
If the target position symbology is replaced by the coincidence triangle, it will also be
doubled.
SALVO MARKERS (Notation pilote): The salvo markers (triangles along the tracer line)
represent the trajectory of the shell salvo along the tracer line. Presented when the
first or second stage of the MiCRoB trigger are pressed.
Page 181
SECTION 14
14–5
VTH
AIR-TO-AIR MODE
AIR-TO-AIR GUN WITH MAGIC AND RADAR COINCIDENCE
1
2
MAGIC AND RADAR COINCIDENCE (Coïncidence radar MAGIC): As MAGICs are active
when in air-to-air gun sub-mode, the MAGIC and radar coincidence symbology is
displayed instead of the radar target position indicator when the MAGICs are locked
on the same target as the radar.
MAGIC ENVELOPE (Domaine MAGIC): Indicates that the target is inside the MAGICs
most restrictive weapon envelope but outside the air-to-air gun employment range.
Only displayed if MAGICs missiles are loaded on the aircraft and locked on the target.
Page 182
SECTION 14
14–5
VTH
AIR-TO-AIR MODE
530 SUB-MODE
Displayed when the Super 530D missiles are selected. In this mode, the calibrated
airspeed, mach number, baro-inertial altitude and radar altitude stay at the top of the
VTH.
530 WITHOUT RADAR LOCK
1
2
2
530 SUB-MODE (Mode 530): Indicates that the VTH is in the 530 air-to-air sub-mode.
Flashes to indicate that the master arm is safe.
MISSILES STATUS (Etat des missiles): Indicates the presence of the left (G – gauche)
and right (D – droit) missiles. Flashes when the missiles are not ready.
Page 183
SECTION 14
14–5
VTH
AIR-TO-AIR MODE
530 WITH RADAR IN PSIC
2
3
1
4
4
SHOOT INDICATION (Conseil de tir): Indicates that the target is in inside the most
restrictive firing domain (domaine de tir le plus contraignant), meaning closer that the
long limit with defensive maneuvers (limite longue avec évasive) for the Super 530D.
DOUBLING OF THE INTERCEPTION DIRECTOR CIRCLE (Dédoublage
du cercle du directeur
d’ordre): Indicates that the target is in inside the least restrictive firing domain
(domaine de tir le moins contraignant), meaning closer than the long limit without
defensive maneuvers (limite longue sans evasive) for the Super 530D.
LONG AND SHORT LIMITS (Limites longues et courtes): Relative to the radar range scale
symbology, represents the radar calculated range envelope for the 530s. The 2 top
lines represent the long limits and the bottom line represent short limit. The long limit
without defensive maneuvers (limite longue sans évasive) line is thicker than the long
limit with defensive maneuvers (limite longue avec évasive).
The long limits can move above the range scale.
MISSILES STATUS AND MISSILES TIME OF FLIGHT (Etat des missiles et temps de vol
missiles): The circle indicates that the missiles are locked and ready to fire and that
the master arm is on.
The number above missile status indicates the time it would take to the missiles to
reach the target if they were to be launched now.
Page 184
SECTION 14
14–5
VTH
AIR-TO-AIR MODE
530 WITH RADAR IN PSIC SUPER 530
1
2
MEMORY MODE INDICATION (Indication mode mémoire): The M inside the interception
director circle indicate that the radar has lost the target and is in memory mode. In
PSIC Super 530 pointé, the radar memory mode lasts 8 seconds during which the
radar will continue to illuminate the last know trajectory of the target and try to
reacquire the lock.
TIME TO IMPACT (Temps avant impact): Once fired, the missile’s time of flight changes
to the missile’s time to impact, it indicates the remaining time before the missile
reaches the target as calculated by the aircraft.
If 2 missiles have been fired, only the last one will have an accurate time to impact
calculation, the first missile time to impact will switch to a count down from the last
calculated value.
Page 185
SECTION 14
14–5
VTH
AIR-TO-AIR MODE
530 WITH RADAR IN FORCED ILLUMINATION
2
1
FORCED ILLUMINATION INDICATION (Indication illumination forcée): Indicates that the
radar memory mode has run its course and the radar is in forced illumination mode.
The radar will continue to illuminate the last know trajectory of the target but won’t try
to reacquire it.
TIME TO AUTO-DESTRUCTION (Temps avant autodestruction): In forced illumination, the
rectangle around the time to impact indicates that it is replaced by the time remaining
before the missile runs out of battery and self-destructs.
Page 186
SECTION 14
14–5
VTH
AIR-TO-AIR MODE
530 WITH RADAR IN PSIC SUPER 530 POINTÉ
1
3
2
PSIC SUPER 530 POINTÉ ILLUMINATION SECTOR (Secteur illumination PSIC Super 530
pointé): Represents the position and size of the radar beam.
FORCED ILLUMINATION INDICATION (Indication illumination forcée): The forced
illumination indication is also present when the radar is in PSIC Super 530 pointé
mode.
TIME TO AUTO-DESTRUCTION (Temps avant autodestruction): Just like in forced
illumination, the rectangle around the time to impact indicates that it is replaced by
the time remaining before the missile runs out of battery and self-destructs.
Page 187
SECTION 14
14–5
VTH
AIR-TO-AIR MODE
POLICE SUB-MODE
In police sub-mode all the VTH radar symbology is present but no weapon is
selected.
1
2
3
POLICE SUB-MODE (Mode Police): Indicates that the VTH is in the Police air-to-air submode. Opposite to all other weapons, flashes to indicate that the master arm is
armed.
MAGIC SEARCH SECTOR (Secteur de recherche MAGIC): In air-to-air gun sub-mode
the MAGIC missiles are also active in search mode to allow quicker weapon
employment when switching from guns to MAGICs. The scan modes are the same
than in MAGIC sub-mode.
MAGIC LOCK CIRCLE INSIDE RADAR TARGET (Direction d’accrochage MAGIC a
l’intérieur du carré BUT): When the MAGIC has locked the same contact than the
radar, the MAGIC lock circle will be displayed inside the radar target indicator. The
radar and MAGIC coincidence symbology it not available in Police mode.
Page 188
SECTION 14
14–5
VTH
AIR-TO-AIR MODE
4
DISTANCE METER, ANALOG CLOSING SPEED AND POLICE RANGE (Distancemètre, vitesse
de rapprochement analogique et point clé):
The distance meter is fixed at the center of the VTH. It unwinds counterclockwise to
provide radar range relative to the 4 distance markers. It is displayed below 1 nm to
target and each circle quadrant represents 300m.
Relative to the distance meter, the analog closing speed (chevron) represents the
range at which the target will be in 5 seconds.
The police range (dash at 1 o’clock on the distance meter) indicates the mimimum
distance to keep while in police mode (166 m).
Page 189
SECTION 14
14–5
VTH
AIR-TO-AIR MODE
AUTO-ACQUISITION OPTIONS
The auto-lock options display information on the currently selected radar autoacquisition mode.
BORESIGHT
1
BORESIGHT AUTO-LOCK SECTOR (Secteur de recherche pointage axe): In this auto-lock
mode, the circle indicates the radar position and field of view.
Page 190
SECTION 14
14–5
VTH
AIR-TO-AIR MODE
VTH SCAN
1
AUTO-LOCK TYPE (Type d’accrochage radar): In this auto-lock mode, the name of the
auto-lock mode is displayed (SVI – Spirale viseur). In this auto-acquisition mode, the
area scanned by the radar is rougthly the size of the VTH.
VERTICAL SCAN OPTION
1
VERTICAL SCAN AUTO-LOCK SECTOR (Secteur de recherche plan de symétrie): In this
auto-lock mode, the line indicates the radar lowest elevation and vertical scan plane.
Page 191
SECTION 14
14–5
VTH
AIR-TO-AIR MODE
HORIZONTAL SCAN OPTIONS
2 horizontal scan options are available and they are using the same symbology.
1
1
2
2
AUTO-LOCK TYPE (Type d’accrochage radar): In this auto-lock mode, the name of the
auto-lock mode is displayed:
• BAH (Balayage acquisition en gisement type HFR): The radar uses HFR (
high PRF.
• BA2 (Balayage acquisition en gisement type MFR2): The radar uses MRF2
(medium PRF)
RADAR SCAN ELEVATION (Gisement radar): Indicates the position and limits of the radar
horizontal scan area. This area can be moved in azimuth and elevation using the
TDC and the HOTAS antenna elevation command.
Page 192
SECTION 14
14–5
VTH
AIR-TO-AIR MODE
RADAR SLAVE TO TDC/ELEVATION AUTO-ACQUISITION
1
RADAR TARGET POSITION (Carré but): In RRAS, the radar target position flashes and
its position indicates the direction of the radar antenna. The radar antenna can be
moved in azimuth and elevation using the TDC and the HOTAS antenna elevation
command.
Page 193
SECTION 14
14–5
VTH
AIR-TO-AIR MODE
DO TAF SYMBOLOGY
DO TAF symbology is displayed in any air-to-air mode.
1
TEL INDICATION (Réticule TEL): Indicates that a DO TAF target is available and that
the pilot should select the TAF PCA option.
Page 194
SECTION 14
14–5
VTH
AIR-TO-AIR MODE
2
DO TAF RULE OF ENGAGEMENT (Consigne de tir téléaffichage): Displayed when the
TAF PCA option is selected and a valid DO TAF target is received from the CDC.
Indicates the CDC rule of engagement regarding this target. Flashes to indicate that
the rule has changed.
The DO TAF rule of engagement stays displayed for 10 minutes when the aircraft is
no longer receiving valid TAF messages.
The possible rules of engagement are:
• LIB (Libre – Free): There is no friendly aircraft less than 15 nm from the target, only
positional correlation is need in order to shoot.
• IFF (Identification friend or foe): Friendly aircraft are located between 15 nm and 5
nm from the target, an IFF interrogation is needed in order to shoot.
• VIS (Visuel – Visual): Friendly aircraft are located between 5 nm and 2 nm from the
target, a visual identification is needed in order to shoot.
• INT (Interdit - Prohibited): Firendly aircraft are located closer than 2 nm from the
target, firing is prohibited.
NOTE
The rule of engagement can also be set manually by a player though
the LotAtc software.
For more information see the LotAtc TAF tutorial on LOTATC.COM.
Page 195
SECTION 14
14–6
VTH
AIR-TO-GROUND MODE
14 – 6 - AIR-TO-GROUND MODE
Air-to-ground mode is displayed when an air-to-ground weapon is selected and the
SNA is in air-to-ground selected sub-mode.
COMMON SYMBOLOGY
In every air-to-ground sub-mode, the following symbology will be displayed.
2
1
3
CURRENT AIR-TO-GROUND MODE (Mode Air/Sol en cours): Indicates the selected
weapon type. It flashes if the weapon is not ready to be released. Possible air-toground modes are: BL, BF, CAS and RK.
AIR-TO-GROUND RANGE (Distance Air/Sol): Indicates the slant range from the radar in
km. Only displayed if the radar is emitting and in TAS mode (TAS is selected on the
PCA top row) and the radar has a good lock on the ground.
AIRCRAFT LOAD FACTOR (Facteur de charge chasseur): Represents the current load
factor of the aircraft.
Page 196
SECTION 14
14–6
VTH
AIR-TO-GROUND MODE
BL SUB-MODE
Displayed when a low drag or guided bomb is selected and the SNA is in air-toground selected sub-mode. This sub-mode is used to deliver bombs using CCPL
(Calcul continu du point de largage – CCRP) delivery.
BL SUB-MODE BEFORE DESIGNATION
3
1
2
CURRENT AIR-TO-GROUND MODE (Mode Air/Sol en cours): Indicates the selected
weapon type: BL. It flashes if the weapon is not ready to be released.
DESIGNATION DIAMOND (Réticule de désignation): Indicates the aiming point for the
CCPL delivery.
WEAPON READY INDICATION (Armement prêt): The wings indicates that the weapon is
ready for release.
Page 197
SECTION 14
14–6
VTH
AIR-TO-GROUND MODE
BL SUB-MODE AFTER DESIGNATION
1
2
ROLL ORDER (Ordre de roulis): Guides the aircraft in roll to the release point.
RELEASE BAR (Barre de largage): Displayed when the aircraft is at a distance from
the release point where a 6G pull-up will result in a release at 40° of pitch. The bombs
are released when the bar reaches the center of the designation diamond, and is
displayed as long the bomb salvo is not finished.
Page 198
SECTION 14
14–6
VTH
AIR-TO-GROUND MODE
BL PI SUB-MODE
Displayed when a low drag or guided bomb is selected, the SNA is in air-to-ground
selected sub-mode, the PI PCA option is selected and the current DEST BUT has a
valid BAD. This sub-mode is used to deliver bombs using CCPL (Calcul continu du
point de largage – CCRP) delivery with prior nav fix using an initial point.
BL PI SUB-MODE BEFORE PI DESIGNATION
1
2
3
CURRENT AIR-TO-GROUND MODE (Mode Air/Sol en cours): Indicates the selected
weapon type: BL. It flashes if the weapon is not ready to be released.
DESIGNATION DIAMOND (Réticule de désignation): Indicates the aiming point for the PI
designation.
BUT POSITION INDICATOR (Réticule BUT): Indicates the position of the PI, since the
INS accumulates drift, it can be incorrect.
Page 199
SECTION 14
14–6
VTH
AIR-TO-GROUND MODE
BL PI SUB-MODE AFTER PI DESIGNATION
1
2
3
ROLL ORDER (Ordre de roulis): Guides the aircraft in roll to the release point.
BUT POSITION INDICATOR (Réticule BUT): Indicates the position of the target corrected
by the PI designation.
RELEASE BAR (Barre de largage): Displayed when the aircraft is at a distance from
the release point where a 6G pull-up will result in a release at 40° of pitch. The bombs
are released when the bar reaches the center of the designation diamond, and is
displayed as long the bomb salvo is not finished.
Page 200
SECTION 14
14–6
VTH
AIR-TO-GROUND MODE
BF SUB-MODE
Displayed when a high or very-high drag bomb is selected and the SNA is in air-toground selected sub-mode. This sub-mode is used to deliver bombs using CCPI
(Calcul continu du point d’impact – CCIP) delivery.
BF SUB-MODE BEFORE TRIGGER PRESS
2
1
3
4
6
5
CURRENT AIR-TO-GROUND MODE (Mode Air/Sol en cours): Indicates the selected
weapon type: BF. It flashes if the weapon is not ready to be released.
BOMB RELEASE DOMAIN (Domaine de largage): Indicates the altitude and vertical
speed release domain for the selected bombs relative to the FPM.
BOMB FALL LINE (Ligne de chute des bombes): Represents the bomb ground impact
line. It connects the aiming reticle to the FPM, the line is not drawn above the horizon
and is then connect to the projected FPM position on the horizon.
LAST BOMB INDICATOR (Trou dans la ligne de chute): Represents the last bomb impact
point considering the number of bombs and the release interval.
AIMING RETICLE (Réticule de visée): Indicates the first bomb inpact point.
WEAPON READY INDICATION (Armement prêt): The wings indicate that the weapon is
ready for release.
Page 201
SECTION 14
14–6
VTH
AIR-TO-GROUND MODE
7
TOO LOW/HIGH FOR BOMB DOMAIN (Domaine vers le bas/haut): Indicates that the
aircraft is outside the release domain for the selected bomb. The direction of the
arrow indicates the direction of the release domain.
Page 202
SECTION 14
14–6
VTH
AIR-TO-GROUND MODE
BF SUB-MODE AFTER TRIGGER PRESS
1
RELEASE BAR (Barre de largage): Displayed when the trigger is pressed, the bombs
are released when the bar reaches the center of the FPM, and is displayed as long
the bomb salvo is not finished.
Page 203
SECTION 14
14–6
VTH
AIR-TO-GROUND MODE
BF PI SUB-MODE
Displayed when a high or very-high drag bomb is selected, the SNA is in air-to-ground
selected sub-mode, the PI PCA option is selected and the current DEST BUT has a
valid BAD. This sub-mode is used to deliver bombs using CCPI (Calcul continu du
point d’impact – CCIP) delivery with prior nav fix using an initial point.
BF PI SUB-MODE BEFORE PI DESIGNATION
1
2
3
CURRENT AIR-TO-GROUND MODE (Mode Air/Sol en cours): Indicates the selected
weapon type: BF. It flashes if the weapon is not ready to be released.
DESIGNATION DIAMOND (Réticule de désignation): Indicates the aiming point for the PI
designation.
BUT POSITION INDICATOR (Réticule BUT): Indicates the position of the PI, since the
INS accumulates drift, it can be incorrect.
Page 204
SECTION 14
14–6
VTH
AIR-TO-GROUND MODE
BF PI SUB-MODE AFTER PI DESIGNATION
2
1
3
4
6
5
CURRENT AIR-TO-GROUND MODE (Mode Air/Sol en cours): Indicates the selected
weapon type: BF. It flashes if the weapon is not ready to be released.
BOMB RELEASE DOMAIN (Domaine de largage): Indicates the altitude and vertical
speed release domain for the selected bombs relative to the FPM.
BOMB FALL LINE (Ligne de chute des bombes): Represents the bomb ground impact
line. It connects the aiming reticle to the FPM, the line is not drawn above the horizon
and is then connect to the projected FPM position on the horizon.
LAST BOMB INDICATOR (Trou dans la ligne de chute): Represents the last bomb impact
point considering the number of bombs and the release interval.
AIMING RETICLE (Réticule de visée): Indicates the first bomb inpact point.
WEAPON READY INDICATION (Armement prêt): The wings indicate that the weapon is
ready for release.
Page 205
SECTION 14
14–6
VTH
AIR-TO-GROUND MODE
7
TOO LOW/HIGH FOR BOMB DOMAIN (Domaine vers le bas/haut): Indicates that the
aircraft is outside the release domain for the selected bomb. The direction of the
arrow indicates the direction if the release domain.
Page 206
SECTION 14
14–6
VTH
AIR-TO-GROUND MODE
BF PI SUB-MODE AFTER TRIGGER PRESS
1
RELEASE BAR (Barre de largage): Displayed when the trigger is pressed, the bombs
are released when the bar reaches the center of the FPM, and is displayed as long
the bomb salvo is not finished.
Page 207
SECTION 14
14–6
VTH
AIR-TO-GROUND MODE
CAS sub-mode
Displayed when the guns are selected in air-to-ground mode and the SNA is in airto-ground selected sub-mode. This sub-mode is used to fire the guns using CCPI
(Calcul continu du point d’impact – CCIP) delivery.
CAS SUB-MODE OUT OF RANGE
3
1
2
4
CURRENT AIR-TO-GROUND MODE (Mode Air/Sol en cours): Indicates the selected
weapon type: CAS. It flashes if the weapon is not ready to be released.
GUNS/ROCKETS FIRE DOMAIN (Domaine de tir canons/roquettes): Unwinds counter
clockwise to indicate the guns employment domain. A full circle indicates that the
aircraft is out of range for the guns and that the symbology is not yet indicating the
shells impact point.
GUNS/ROCKETS AIMING RETICLE (Réticule de visée canons/roquettes): Indicates the
shells impact point on the ground once the aircraft is in the employment domain.
REMAINING SHELLS (Nombre d’obus restants): Displays the remaining shells count for
each DEFA 554 cannons.
Page 208
SECTION 14
14–6
VTH
AIR-TO-GROUND MODE
CAS SUB-MODE AT MAXIMUM RANGE
2
1
SAFETY BAR (Barre de sécurité): Represents the remaining time before the aircraft
enters the blast zone or goes under the safety height. When it reaches the aiming
reticle, the pilot needs to do an immediate 6G pull up.
GUNS/ROCKETS FIRE DOMAIN (Domaine de tir canons/roquettes): Indicates the guns
employment domain:
• 12 o'clock: 2100m, out of range.
• 9 o’clock: 1800m, maximum range.
• 6 o’clock: 1200m, optimum range
• 3 o’clock: 600m, minimum range.
Page 209
SECTION 14
14–6
VTH
AIR-TO-GROUND MODE
RK sub-mode
Displayed when rockets are selected and the SNA is in air-to-ground selected submode. This sub-mode is used to fire rockets using CCPI (Calcul continu du point
d’impact – CCIP) delivery.
RK SUB-MODE OUT OF RANGE
3
1
2
CURRENT AIR-TO-GROUND MODE (Mode Air/Sol en cours): Indicates the selected
weapon type: RK. It flashes if the weapon is not ready to be released.
GUNS/ROCKETS FIRE DOMAIN (Domaine de tir canons/roquettes): Unwinds counter
clockwise to indicate the rockets employment domain. A full circle indicates that the
aircraft is out of range for the rockets and that the symbology is not yet indicating the
rockets impact point.
GUNS/ROCKETS AIMING RETICLE (Réticule de visée canons/roquettes): Indicates the
rockets impact point on the ground once the aircraft is in the employment domain.
Page 210
SECTION 14
14–6
VTH
AIR-TO-GROUND MODE
RK SUB-MODE AT OPTIMUM RANGE
2
1
SAFETY BAR (Barre de sécuritée): Represents the remaining time before the aircraft
enters the blast zone or goes under the safety height. When it reaches the aiming
reticle, the pilot needs to do an immediate 6G pull up.
GUNS/ROCKETS FIRE DOMAIN (Domaine de tir canons/roquettes): Indicates the rockets
employment domain:
• 12 o'clock: 2700m, out of range.
• 9 o’clock: 2400m, maximum range.
• 6 o’clock: 1800m, optimum range
• 3 o’clock: 1200m, minimum range.
Page 211
SECTION 14
14–7
VTH
OTHER SYMBOLOGY
14 – 7 - OTHER SYMBOLOGY
BACK-UP FIXED SIGHT
The backup fixed sight can be displayed in any mode using the backup fixed sight
switch on the PCTH. Its vertical position can be adjusted backup fixed sight wheel.
2
1
BACKUP FIXED SIGHT (Hausse manuelle): Used to employ air-to-ground ordinance
when the main mode is unavailable.
BACKUP FIXED SIGHT SETTING (Position hausse manuelle): The number indicate the
backup fixed sight position in mrad down from the aircraft waterline.
Page 212
SECTION 14
14–7
VTH
OTHER SYMBOLOGY
JAMMING SYMBOLOGY
The following jamming symbology indicates the status of the electromagnetic
environement of the aircraft as well as the status of the aircraft jammer.
1
JAMMING INDICATION (Ambiance brouillée): Flashing for 5 seconds when displayed,
then steady, indicates that the radar is being jammed. Displayed on the VTH when it
is in NAV or air-to-air mode.
Page 213
SECTION 14
14–7
VTH
OTHER SYMBOLOGY
2
2
PCM INDICATION (Réticule PCM):
• Steady and framed, indicates that the Sabre jammer is currently emitting in
countermeasure priority mode.
• Flashing, indicates the Sable jammer is inciting the pilot to switch to PCM
mode.
Page 214
SECTION 14
14–8
VTH
WARNING SYMBOLOGY
14 – 8 - WARNING SYMBOLOGY
WORK IN PROGRESS
Page 215
SECTION 15
WARNING SYSTEM
WARNING SYSTEM
Page 216
SECTION 15
15–1
WARNING SYSTEM
FAULT INDICATOR BUTTON
15 – 1 - FAULT INDICATOR BUTTON
The fault indicator button (Voyant-poussoir répétiteur de PANNE) is
located at the top left of the front dash. It consists of 2 lights, amber for
cautions and red for warnings.
It indicates the type of faults present on the alarm panel and allows to
acknowledge them to silence the warning tones.
There are 2 type of fault:
• CAUTION: Indicates a fault that is not an immediate danger to the aircraft or the pilot.
When a caution occurs, the corresponding light will light up on the
alarm panel as well as the amber caution light on the fault indicator
button.
20 seconds after the caution light turns on, a caution fault audio
warning (double chime) will be heard, repeating every 3.5 seconds.
• WARNING: Indicates a fault that require immediate action from the pilot.
When a warning occurs, the corresponding light will light up on the
alarm panel as well as the red warning light on the fault indicator button.
The warning fault audio warning will be heard as soon as the fault is
detected, it is a loud tone that repeats every second.
Page 217
SECTION 15
15–2
WARNING SYSTEM
ALARM PANEL
15 – 2 - ALARM PANEL
INTRODUCTION
The alarm panel is located on the right vertical panel and indicate the faults detected
by the aircraft. It indicates the fault name and type, amber for CAUTIONS and red for
WARNINGS. The light stays on as long as the caution/warning condition exists.
Each fault light is back lighted by 2 light bulbs for redundancy.
FAULT LIGHTS DESCRIPTION
ALARM PANEL
DESCRIPTION
LIGHT
BATT
TR
Main battery is disconnected or has failed.
Main or aux transformer is disconnected or has failed.
ALT.1
Alternator 1 is disconnected or has failed.
ALT.2
Alternator 2 is disconnected or has failed.
HUILE
Low oil pressure.
T7
CALC
Engine T7 temperature is above 850º Celsius.
Engine controller functionality compromised.
SOURIS
Engine inlet cones failure or forced retracted by the
inlet cones operation switch.
PELLE
Engine intakes scoops failure or forced retracted by
the scoops operation switch.
BP
Low fuel pressure.
BP.G
Left (Gauche) fuel pump is OFF.
BP.D
Right (Droite) fuel pump is OFF.
TRANS
A non-empty tank pressure is low, inducing fuel
transfer problems.
NIVEAU
Remaining fuel is below 500 kg.
HYD.1
Hydraulic system 1 pressure is below 195 bars.
HYD.2
Hydraulic system 2 pressure is below 195 bars.
HYD.S
Hydraulic system 2 pressure is below 140 bars or
emergency pump switch is set to OFF.
EP
emergency pump is active for more than 6 seconds.
BINGO
Remaining fuel is below the set BINGO level.
P. CAB
Canopy not sealed or cabin pressure > 30,000 ft.
TEMP
Overheat in the cockpit. NOT FUNCTIONAL
Page 218
MORE INFORMATION
SECTION 15
15–2
WARNING SYSTEM
ALARM PANEL
REG.O²
ECS Oxygen regulator fault. NOT FUNCTIONAL
5mn.O²
Only 5 minutes of oxygen supply remaining.
O²HA
ANEMO
CC
NO FUNCTION
Air Data Sensors heating is disabled or has failed.
Indicates a DC Low Voltage.
DC Sec. bus automatically switched Off, expect only
30 minutes of power on the DC buses.
DSV
Engine bypass ratio slats fault. NOT FUNCTIONAL
CONDIT
ECS Heat Exchanger overheat. NOT FUNCTIONAL
CONF
PA
The FBW mode switch is in the wrong position for the
current loadout.
Autopilot system failure.
MAN
Flight Controls single failure on a multi-redundant
system, restricting the maneuverability.
(manoeuvrabilité)
DOM
Flight Controls dual failure on a multi-redundant
system or an actuator, restricting the flight envelope.
(domaine de vol)
BECS
Slats failure.
U.S.EL
Last Emergency enabled for elevons.
(Ultime Secours Elevons)
ALPHA
Angle of Attack sensors fault (incoherent values or
total failure).
GAIN
FBW automatic gains calculation failure or emergency
gains switch is set to the emergency position.
RPM
Engine Low RPM alarm.
DECOL
PARK
Take-off configuration incorrect (not all the required
checks performed / systems on).
Parking brake is engaged.
Page 219
SECTION 16
LIGHTING
LIGHTING
Page 220
SECTION 16
16–1
LIGHTING
COCKPIT LIGHTING
16 – 1 - COCKPIT LIGHTING
INTRODUCTION
The Mirage 2000C cockpit is lit by green floodlights as well as white floodlights for
the front dash and all the panel and instruments are backlighted in red.
INTERNAL LIGHTING CONTROLS
The internal light control panel (boite de commande éclairage) is located at the rear
of the right console. It provides control over the green and white cockpit floodlights,
the front dash, vertical panels and consoles backlight and the indicator lights
intensity.
Just above it is the NVG switch (Inverseur JVN) that disable all back lighting to reduce
NVG glare.
5
1
2
3
4
FRONT DASH LIGHTING KNOBS (Potentiomètres éclairage planche de bord):
• FRONT DASH BACKLIGHT (Rétroéclairage planche de bord): Top knob, sets the
front dash indication and instrument backlighting.
• FRONT DASH GREEN FLOODLIGHT (Eclairage planche de bord): Bottom knob,
sets the front dash green floodlights.
CONSOLE LIGHTING KNOBS (Potentiomètres éclairage banquettes):
• CONSOLE BACKLIGHT (Rétroéclairage banquettes): Top knob, sets the console
indication and instrument backlighting.
• CONSOLE GREEN FLOODLIGHT (Eclairage banquettes): Bottom knob, sets the
consoles green floodlights.
INDICATOR LIGHTS INTENSITY KNOB (Potentiomètre luminositée voyants): Sets the
intensity of all the cockpit indicator lights and front dash segment displays (Alarm
Page 221
SECTION 16
16–1
LIGHTING
COCKPIT LIGHTING
panel, after-burner light, engine fire lights, auto-pilot control panel, configuration
panel, PCA, PPA, fuel flow indicator, V/UHF frequency repeater)
In the Jour (Day) position the knob is at the clockwise stop, in this position the knob
is in a notch and the indicator lights intensity is at its maximum. Turning the knob
counterclockwise past the notch into the Nuit (Night) reduces the indicator lights
intensity. The counterclockwise stop is just before the Jour (Day) position were the
indicator lights intensity is at its lowest.
FRONT DASH WHITE FLOODLIGHT (Potentiomètre éclairage blanc planche de bord): Sets
the front dash white floodlights.
NVG SWITCH (Inverseur JVN): Disable all panels, consoles and instruments backlight
for use with NVGs.
Page 222
SECTION 16
16–2
LIGHTING
EXTERIOR LIGHTS
16 – 2 - EXTERIOR LIGHTS
INTRODUCTION
The Mirage 2000C have all the standard navigation, anti-collision lights and
taxi/landing lights as well as formation lights, a night time identification (police) light,
a retractable refueling light and a refueling probe light.
EXTERNAL LIGHTS SWITCHES
1
2
3
4
ANTI-COLLISION LIGHTS SWITCH (Sélecteur feux anti-collision): Turns on or off the anticollision lights and sets their intensity:
• A. (Arret – OFF).
• FAIB. (Faible - Low).
• FORT (High).
NAVIGATION LIGHTS SWITCH (Sélecteur feux de navigation): Turns on or off the
navigation lights and sets their intensity:
• A. (Arret – OFF).
• FAIB. (Faible - Low).
• FORT (High).
FORMATION LIGHTS SWITCH (Sélecteur feux de formation): Turns on or off the formation
lights and sets their intensity:
• A. (Arret – OFF).
• FAIB. (Faible - Low).
• FORT (High).
REFUELING LIGHTS INTENSITY KNOB (Potentiometre luminosite phare ravitaillement en
vol): Sets the intensity of the retractable refuel light and refueling probe light. NOT
FUNCTIONAL
Page 223
SECTION 16
16–2
LIGHTING
EXTERIOR LIGHTS
7
5
6
POLICE LIGHT SWITCH (Interrupteur phare de police): When in the forward position,
allows the throttle police light switch/decoy panic release command to toggle on or
off the police light.
For the police light to turn on, the SNA needs to be in POL mode and the landing
light switch set to the A. position.
LANDING LIGHTS SWITCH (Sélecteur phare d’atterrissage et de roulage): Turns on or
off the landing lights and selects their position:
• A. (Arrêt – OFF): The landing lights are turned off.
• ROUL. (Roullage – taxi): The landing lights are turned on and lit up a wide
area in front of the aircraft.
• ATT. (Atterissage – landing): The landing light are turned on and lit up an area
about 14° below the aircraft waterline to illuminate the runway when landing.
INFLIGHT REFUELING SWITCH (Inverseur commande ravitaillement en vol): the top-most
RVT.N (ravitaillement nuit – night refueling) position turns on the retractable refueling
light and refueling probe light.
Page 224
SECTION 16
16–2
LIGHTING
EXTERIOR LIGHTS
EXTERIOR LIGHTS
The exterior lighting is composed of five separate systems with different purpose:
3
1
1
1
3
3
2
1
2
1
3
1
FORMATION LIGHT (Feux de formation): Formation lights are low intensity lights that
provide visual cues for night time formation flight. The Mirage have 6 of those, 3 on
each side.
ANTI-COLLISION LIGHTS (Feux anti-collidion): Anti-collision lights provides long
distance visual position indication by the mean of 2 white strobe lights. They are
located on middle of the aircraft spine and on the underside between the front gear
and the center pylon.
NAVIGATION LIGHTS (Feux de navigation): Navigations lights provides visual position
and orientation indication. 3 lights compose the navigation lights:
• Green the right wingtip.
• Red on the left wingtip.
• White at the top of the tail fin.
Page 225
SECTION 16
16–2
LIGHTING
EXTERIOR LIGHTS
9
8
RETRACTABLE REFUELING LIGHT (Phare de ravitaillement en vol): The retractable
refueling light provides illumination of the refueling basket during night time aerial
refueling operations. It is retractable to allow for a good position while maintaining
aerodynamism.
REFUELING PROBE LIGHT (Phare de la perche de ravitaillement en vol): The refueling
probe light provides illumination to the aircraft’s refueling probe during night time
aerial refueling operation.
10
POLICE LIGHT (Phare de police): The police light allows night time aircraft identification
by illumination during air policing duties. Located on the left side of the aircraft, behind
the air intake, is a high intensity floodlight oriented up and to the left.
Page 226
SECTION 16
16–2
LIGHTING
EXTERIOR LIGHTS
11
LANDING LIGHTS (Phare d’atterrissage et de roulage): The landing lights provide
forward illumination during ground operation, take-off and landing. The 2 head lights
are located on the front wheel strut and are automatically turned off when the gear is
not locked in the down position.
Page 227
SECTION 16
16–3
LIGHTING
NIGHT VISION GOGGLES
16 – 3 - NIGHT VISION GOGGLES
The Mirage 2000C can be equipped with NVGs (night vision goggles – jumelles de
vision nocturne). Most of the front dash instruments have Plexiglas plates covers to
reduce NVG glare.
The NVGs are installed on a mount at the front on the pilot’s helmet and are powered
by a battery pack installed on the back. The mount allows the NVG to be quickly
raised or lowered to the pilot’s eyes and are placed at a distance to allow to look
below them.
The NVG are stored in a bag at the back of the right console. There is also an NVG
mount on top of the left side of the front dash to store NVG when not in the bag.
The NVG bag is automatically installed at night and can otherwise be requested to
the ground crew.
The NVGs are focused to infinity to focus on objects outside the aircraft, this means
that the image will be blurred when looking inside the cockpit. In order to look at
instruments, the pilot needs to raise the NVG out of his field of view or look below
them. The only instrument that is in focus with the NVGs is the VTH as it is also
focused to infinity, only the luminosity needs to adjusted.
Page 228
SECTION 17
OTHER SYSTEMS
OTHER SYSTEMS
Page 229
SECTION 17
17–1
OTHER SYSTEMS
DRAG CHUTE
17 – 1 - DRAG CHUTE
INTRODUCTION
The Mirage 2000C is fitted with an emergency drag chute, it is a safety feature that
can be used to reduce the landing distance or during aborted take-off. The parachute
container is located on the underside of the aircraft, between the exhaust nozzle and
the centerline pylon.
If desired, the drag chute container can be replaced by the ÉCLAIR chassis. For
more information, see the ELECTRONIC WARFARE ÉCLAIR SUB-SECTION.
An emergency field hook assembly can also replace the drag chute but this feature
is not supported by DCS and is NOT FUNCTIONAL.
CONTROLS
The drag chute command lever (commande parachute frein) is located on the left
cockpit wall at the base of the windshield. When pulled full aft, the drag chute deploys,
when pushed back forward, the drag chute is separated from the aircraft.
CAUTION
The drag chute must not be deployed until the nose gear is on the
ground, in order not to damage the engine nozzle.
Page 230
SECTION 17
17–2
OTHER SYSTEMS
CANOPY
17 – 2 - CANOPY
INTRODUCTION
The Mirage canopy is a single piece of plexiglass hinged at the rear that opens by
pivoting upward. Its upward movement is helped by a hydraulic cylinder and has a
lock at its upmost position. When closed the canopy is secured by hooks located on
the aircraft frame.
In case of ejection or when opening the canopy is not possible, the plexiglass can be
detonated by two explosive cords located at the rear of the glass.
Page 231
SECTION 17
17–2
OTHER SYSTEMS
CANOPY
CANOPY LEVER
The canopy locking and pressurization mechanism is controlled via the canopy lever
(commande verrière) located on the right cockpit wall at the base of the windshield.
•
•
•
•
The canopy lever is composed of a 3 position lever and a red locking handle:
Lever in the rearward position: Unlocks the canopy from its raised position to rest
on the hydraulic cylinder. This position is spring loaded.
Lever in the center position: The canopy securing mechanism is unlocked and the
canopy can be lowered or raised.
Lever in the forward position: The canopy securing mechanism is locked, locking
the canopy down.
Lever in the forward position and handle up: The lever is locked in the forward
position and can’t move until the handle rotated downward.
Page 232
SECTION 17
17–2
OTHER SYSTEMS
CANOPY
HALF-OPENING HANDLE
The half-opening handle (Poignée entrebailleur) locks the canopy in a half-opened
position. This position can be used to reduce outside noise while keeping the air
fresh.
WARNING
The canopy must be closed and sealed before take-off, the canopy
could be ripped at high taxi speed.
CANOPY HANDLES
The canopy handles (Poignées ouverture verrière) are used to pull up or down the
canopy from the open or half-open position.
Page 233
SECTION 17
17–2
OTHER SYSTEMS
CANOPY
CANOPY FRACTURE LEVER
The canopy fracture lever (Commande de fragilisation verrière) activates the built-in
canopy detonation cords. This might be useful to exit a crashed aircraft with a stuck
canopy.
Page 234
SECTION 17
17–2
OTHER SYSTEMS
CANOPY
CANOPY OPERATION
CLOSING THE CANOPY
When starting with a cold aircraft, the canopy will be open and locked.
Unlock the canopy by pulling (right click) the canopy lever.
Pull the canopy down using the canopy handles until rests against the aircraft frame.
The canopy can be pulled down in two ways:
• Maintaining the left click on the handles and moving the mouse down.
• Right clicking the handles.
NOTE
While using the left click to move the canopy, the mouse should be
moved slowly to allow the canopy to travel the full distance to it closed
position.
The hydraulic cylinder will fight the pull of the canopy up to a point where it will fall
down or stay in its position.
Lock the canopy by pushing (left click) the canopy lever.
Lock the canopy lever by rotating (left click) its red handle upward.
OPENING THE CANOPY
Unlock the canopy lever by rotating (right click) its red handle downward.
Unlock the canopy by pulling the (right click) canopy lever.
Push the canopy up using the canopy handles until it is locked in its upmost position.
The canopy can be pushed down in two ways:
• Maintaining the left click on the handles and moving the mouse up.
• Right clicking the handles.
The hydraulic cylinder will help pushing up the canopy but will not push it enough to
hit the lock.
NOTE
While using the left click to move the canopy, the mouse should be
moved slowly to allow the canopy to travel the full distance to it open
position.
Page 235
SECTION 17
17–2
OTHER SYSTEMS
CANOPY
SETTING THE CANOPY IN THE HALF OPEN POSITION
The canopy can be set to the half open position from its closed but not locked and
opened but not locked position.
Pull down the half opening handle.
Push or pull (left click) the canopy using the handles until the handle snap on its
attachment point on the canopy arch.
While using the left click to move the canopy, the mouse should be
moved slowly to allow the canopy to travel the full distance to the halfopen position.
NOTE
For the canopy half opening handle to snap to its attachement point,
the canopy needs to move at some speed. If the canopy is moving too
slowly the handle might slip and not catch its attachement point.
Page 236
SECTION 18
RADIO NAVIGATION
RADIO NAVIGATION
Page 237
SECTION 18
RADIO NAVIGATION
INTRODUCTION
The Mirage 2000C is equipped with TACAN, VOR and ILS radio navigation systems.
The TACAN (Tactical air navigation) system is a military radio navigation system
similar to the VOR-DME system. Its operating frequencies are stored in preset
channels, consisting of a letter (X or Y) and numbers, providing for a total of 248
possible combinations. TACAN systems can be found on airbases, ships, and big
aircrafts like tankers.
The VOR (very high frequency omni-directional range) system is a civil radio
navigation beacon that provides direction and distance when the station is collocated
with a DME (distance measuring equipment). The Mirage 2000C VOR equipment
only supports bearing indication. VOR operating frequencies are from 108.0 MHz to
117.95 MHz.
The ILS (instrument landing system) system is a civil radio navigation system that
provides short range runway approach guidance for landing at night or in bad
weather. Its operating frequencies are the same than the VOR system, from 108.0
MHz to 117.95 MHz.
Page 238
SECTION 18
18–1
RADIO NAVIGATION
TACAN
18 – 1 - TACAN
INTRODUCTION
In the Mirage 2000C, TACAN bearing and distance is displayed on the IDN, for more
information see the see the AVIONICS NAVIGATION INDICATOR SUB-SECTION. The
station identification Morse code volume can be adjusted via the SIB panel.
TACAN can also be used to provide distance between 2 TACAN equipped aircrafts.
The system works with 1 leader and 1 or multiple followers, all the followers will have
the distance to the leader while the leader will have the distance to the more powerful
(closer) follower. To setup the system:
• The leader needs to set his TACAN to A/A mode and set an agreed upon channel.
• The followers need to set their TACAN to A/A mode and set the lead’s channel plus
63 (lead on channel Y14, followers on channel Y77).
TACAN PANEL
1
3
2
TACAN CHANNEL WINDOW (Fenêtre d’affichage canal TACAN): Displays the selected
TACAN channel. Ranges from 1 to 124, plus the X or Y band. Channel 0 is not active.
LEFT CONCENTRIC KNOBS (Rotateur concentrique gauche): The two-position outer rim
knob sets the X or Y band. The inner knob sets the tens and hundreds for the TACAN
channel.
RIGHT CONCENTRIC KNOBS (Rotateur concentrique droit): The four-position outer rim
knob or mode knob selects the TACAN operational mode:
• OFF: The TACAN system is not powered.
• REC (Receive): The TACAN system listens to the TACAN station to determine
its bearing. In this mode, the aircraft’s TACAN system is not emitting.
• T/R (Transmit/Receive): The TACAN system communicates with the TACAN
station to determine its bearing and range.
• A/A (Air-to-air): The TACAN system communicates with other aircraft TACAN
systems to determine range.
Page 239
SECTION 18
18–2
RADIO NAVIGATION
VOR AND ILS
18 – 2 - VOR AND ILS
INTRODUCTION
In the Mirage 2000C, VOR bearing is displayed on the IDN, for more information see
the AVIONICS NAVIGATION INDICATOR SUB-SECTION. The ILS localizer and glideslope
can be visualized on the IS and the VTH, the autopilot also uses the ILS in automatic
approach mode, for more information see the AVIONICS FLIGHT INSTRUMENTS SUBSECTION, HEAD-UP DISPLAY NAV MODE SUB-SECTION and AUTOPILOT SUB-SECTION
section. The ILS identification Morse code volume can be adjusted via the SIB panel.
VOR/ILS PANEL
1
2
3
VOR/ILS FREQUENCY WINDOW . Displays the selected operating frequency. ILS
frequencies range are 108.000 to 119.95 MHz.
LEFT CONCENTRIC KNOBS. The two-position outer rim knob sets the system to ON (M
- Marche) or OFF (A - Arrêt). The inner knob sets the frequency units, tens and
hundreds from 108 to 119.
RIGHT CONCENTRIC KNOBS. The two-position outer rim knob select the HG (hautgauche – high-left) or BD (bas-droite – low-right) test positions. The inner knob sets
the frequency tenths and hundredths from 00 to 95 by increments of 5.
Page 240
SECTION 19
INS
INS
Page 241
SECTION 19
19–1
INS
INS INTRODUCTION
19 – 1 - INS INTRODUCTION
INS OPERATING PRINCIPLE
The INS is an autonomous navigation system that requires no external
communication (VOR beacons, GPS satellites...) to operate. Based on a start
position (the exact latitude / longitude and altitude of the starting point needs to be
known) and using a very complex set of accelerometers and gyroscopes, it keeps
track of the aircraft movement in space and calculates in a continuous manner the
current position, route, speed, attitude and altitude.
SAGEM ULISS 52 UNI
The Sagem ULISS 52 UNI (unité de navigation intertielle – INS) is the heart of the
Mirage 2000C navigation system. This INS is composed of a computer that
commands the INS platform and allows communication with panels or instruments.
It also stores essential information used by the platform as well as navigation
information used by the aircraft like the flight plan. The INS provide the aircraft with
its position in the word as well as speed, heading, attitude and altitude. It can also
provide course to a geographical point and various information to help the pilot
perform navigation or weapon delivery.
The INS computer can store the following information:
• 20 BUTs that are navigation waypoints or ground attack targets. They can store the
following information:
• Latitude and Longitude (L/G).
• Altitude (ALT).
• Runway true heading (CP – Cap Piste).
• Runway approach glideslope (PD – Pente Désirée).
• Desired arrival time (TD – Temps Désiré).
• Desired arrival track (RD – Route Désirée).
Each BUT can also store a BAD (BUT Aditionnel) which is an offset waypoint or
offset ground attack target. They can store the following information:
• Latitude and Longitude offset (ΔL/ΔG).
• Altitude offset (ΔALT).
• 3 Marques (MRQ) that are mark-points. They store the following information:
• Latitude and Longitude.
• Creation time.
• The magnetic declination (DEC)
The INS provide the following information:
• Aircraft geographical position (Latitude and Longitude).
• Horizontal components (Vx, Vy) of the inertial speed.
• Ground Speed.
Page 242
SECTION 19
19–1
INS
INS INTRODUCTION
• Ground Track.
• Direction and Strength of the Wind.
• True Heading.
• Magnetic Heading.
• Acceleration components (Ax, Ay, Az).
• Bearing and distance to a waypoint.
• Track error.
• Magnetic lateral deviation from desired track.
• Track error from desired track.
• Approach glideslope.
• Remaining time to reach waypoint.
• Time difference between remaining time and desired arrival time in order to
maintain a constant speed.
• The aircraft load factor.
Interface with INS is done though 2 dedicated panels in the cockpit:
• The PCN (poste de commande navigation - navigation control panel)
• The PSM (poste sélecteur de modes - mode selector panel)
The INS computer provides information to the following instruments:
• VTH
• Radar
• VTB
• IS
• IDN
• PCN
The INS also support the insertion of data using a data cartridge called MIP (module
d’insertion des paramètres – parameter insertion module). This datacartridge can
insert 20 BUTs into the INS memory with all their parameters as well as their BADs.
Page 243
SECTION 19
19–1
INS
INS INTRODUCTION
PLATFORM DRIFT
The INS is not a perfect tool, and suffers from integration drift - accumulated small
errors in its velocity and orientation measurements. It will result in a difference
between the real position of the aircraft and were the INS thinks the aircraft is, this
error in position is growing with time. This drift can be measured by drift rate
commonly using the nautical mile per hour (nm/h) unit. Due to the earth being round
the drift rate is not linear or exponential in time but rather follows the Schuler period.
ALN drift rate
2,5
Drift (nm)
2
1,5
1
0,5
0
0,0
0,5
1,0
1,5
2,0
2,5
3,0
3,5
Time (hour)
Mirage 2000C INS mean drift rate after a normal alignment
As illustrated in the graphic above, the drift rate will be at its highest at 42 minutes
and its lowest at 84 minutes.
The experienced drift rate will rarely look like the above graph as any change in
attitude will influence the drift rate. The more changes, the more chaotic the drift will
become. It is even common that the accumulated drift decreases at some point during
long flight.
The ULISS 52 UNI is a class 1 INS, meaning that it can achieve less that 1nm/h of
drift rate on average. The real drift rate of this particular system is closer to 0,7nm/h
but keep in mind that the chaotic nature of the system allows for large differences
between flights. Even aircraft flying the same mission can have very different drift
patterns.
The accumulated drift can be corrected by performing an INS position fix, for more
information see the HEAD-UP DISPLAY NAV MODE SUB-SECTION.
Page 244
SECTION 19
19–2
INS
PSM
19 – 2 - MODE SELECTOR PANEL
The mode selector panel (PSM – Post sélecteur de modes) is located in the center
of the right console, it controls both the PCN and INS operational modes.
1
2
3
MODE SELECTOR KNOB (Sélecteur de mode): Sets the INS operating mode:
• AR (Arrêt - OFF): Turns Off both the INS and the PCN
• VEI (Veille - Standby): The gyros remain off but the system is powered and
•
•
•
•
•
•
thermal regulation is on. The PCN is available for data entry and visualization.
CAL (Calibration): Reserved for maintenance. NOT FUNCTIONAL
TST (Test): Reserved for maintenance. NOT FUNCTIONAL
ALN (Alignement normal - Normal alignment): Sets the INS to do a normal
alignment. (See INS ALIGNMENT SUB-SECTION for more information)
ALCM (Alignement sur cap mémorisé - Stored heading alignment): Sets the
INS to do a fast alignment. (See INS ALIGNMENT SUB-SECTION for more
information).
NAV (Navigation): Navigation mode.
SEC (Secours - Emergency): Emergency mode, the INS provides only
gyroscopic information (attitude and heading).
DATA CARTRIDGE SLOT (Trappe du module d’insertion de paramètres): Used by the
ground crew or the pilot to insert data into the INS using a MIP (module d’insertion
des paramètres – parameter insertion module) data cartridge.
OPERATIONAL MODE SELECTOR KNOB (Sélecteur de mise en œuvre): Sets the PCN
operating mode :
• N (Normal): Normal operating mode, for data entry and visualization.
• STS (Status): Used to display alignment status in ALN and ALCM modes and
to start maintenance tests in TST mode.
• DCI (Données codées inertielles - Inertial coded data): Used to visualize or
enter certain parameters into the INS memory. Maintenance only. NOT
FUNCTIONAL
• CRV (Compte-Rendu de vol - Flight report): Used to generate a flight report
for INS performance tracking. Maintenance only. NOT FUNCTIONAL
• MAIN (Maintenance): Used for maintenance only. NOT FUNCTIONAL
Page 245
SECTION 19
19–3
INS
PCN
19 – 3 - NAVIGATION CONTROL PANEL
The navigation control panel (PCN - poste de commande navigation) is located at
the front on the right console and it is responsible for the interface between the pilot
and the INS. It is the main tool used for navigation, creating waypoints (BUTs) and
displaying different flight parameters, including current aircraft position, ground speed
and true heading.
The main functions of the PCN are as follows:
• Visualization of the navigation data in the memory of the INS.
• Data input into the memory of the INS.
• Visualization of the INS alignment status.
• Selection of PREP and DEST BUT, BAD and MRQ waypoints.
• Creation, validation and rejection of MRQ mark-points.
• Creation, validation and rejection of INS position fixes.
Below you will find description of all the displays and buttons:
2
1
3
4
6
8
7
5
9
UPPER LEFT VISUALIZATION WINDOW : 6 digits separated by 5 points with symbols N, S,
+ and –. Displays INS data.
UPPER RIGHT VISUALIZATION WINDOW : 7 digits separated by 6 points with symbols E,
W, + and –. Displays INS data.
LOWER VISUALIZATION WINDOWS: Displays 2 numbers just above the PREP and DEST
buttons, they represent the selected BUT in PREP and DEST.
Page 246
SECTION 19
19–3
INS
PCN
STATUS LIGHTS: Displays the status of the INS system, operational mode, alignment
state and MRQ status.
• PRET (Prêt - Ready):
• Steady, indicates that the ALN or ALCM is finished and the INS is ready
•
•
•
•
•
to go into NAV mode or that a maintenance test was successful.
• Flashing, indicates that the ALN has reached the minimum class 4 and
can be interrupted by setting the INS into NAV mode.
ALN (Alignement – Alignment):
• Steady, indicates that the INS is aligning and is not ready to be set in
NAV mode.
• Flashing, indicates that the INS is not aligned and is ready to start the
currently selected alignment.
MIP (Module d’insertion de paramètres - Parameter insertion module):
• Steady, indicates that the data transfer is in progress.
• Flashing, indicates that the data transfer has failed.
N.DEG (Navigation dégradée - Degraded navigation): Flashing or steady,
indicates that the INS has detected a fault in the inertial assembly and is
warning the pilot that the navigation data might be inaccurate.
SEC (Secours - Emergency): Steady, indicates that the INS is in emergency
mode, commanded by the mode selector knob or by the INS built in tests. If
the light is turned on by the built in tests, the UNI light will also be turned on.
UNI (Unité de navigation inertielle - Inertial navigation system): Steady,
indicates that the INS has detected a major fault with the inertial assembly
and or that the mode selector knob in the AR position.
FUNCTION KEYS: They have different function described below and are composed of
a left green half with a yellow light bulb and a right orange half with an orange light
bulb and the key name. The orange bulb is always turned on at half intensity when
the panel in powered.
• BAD (But additionnel - Offset waypoint): Selects the BAD for the current
DEST BUT as the new DEST. The yellow and orange bulb turn on to indicate
that a BAD is selected.
• REC (Recalage - Navigation fix): Triggers or cancels the INS overfly position
update process. The yellow and orange bulb turn on to indicate that a recalage
is awaiting validation.
• MRQ (Marque - Mark-point): Triggers or cancels the creation of a marque
with the current aircraft coordinates. The yellow and orange bulb turn on to
indicate that a marque is awaiting validation.
• VAL (Validation): The yellow and orange bulb turn on to indicate that the key
can be used to validate a position fix or the creation of an MRQ and to start
the currently selected alignment process.
Page 247
SECTION 19
19–3
INS
PCN
BUT SELECTION KEYS: Used to select BUTs and have a yellow light bulb that turns on
when the button is pressed and the PCN is waiting for the pilot to input the desired
BUT number.
• PREP (Préparation
- Preparation): Selects the preparation BUT for data
display or entry on the PCN.
• DEST (Destination - Navigation): Selects navigation BUT that is going to
provide information for the VTH and IDN.
NUMERIC KEYPAD: Used to enter data into the INS. Consists of:
• NUMERIC KEYS: from 0 to 9. Including keys to designate North, South, East, West,
+ and -.
• EFF (Effacement - Delete): Restarts the current input process.
• INS (Insertion - Insert): Tries to insert the new data into the INS.
PARAMETER SELECTOR KNOB: Used to choose which data will be visualize or edit on
the upper visualization windows.
LIGHT INTENSITY KNOB: Used to test and increase or decrease the brightness of the
function keys, visualization windows, as well as EFF and INS keys on the numeric
keypad.
NOTE
The intensity of the backlight of the PCN keypad is set by the console
backlight knob on the interior lights panel.
Page 248
SECTION 19
19–4
INS
USING THE PCN
19 – 4 - USING THE PCN
INTRODUCTION
In order to be able to use the PCN:
• The INS have to be powered either by the ground power or the engine.
• The PSM mode selector needs to be in the VEI, ALN, ALCM or NAV position.
• The PSM operating mode selector needs to be in the N position.
Page 249
SECTION 19
19–4
INS
USING THE PCN
DATA VISUALIZATION
In order to visualize data on the PCN, the concerned BUT needs to be selected in
PREP, then the 11 position PCN parameter selector needs to be rotated to the
desired parameter. The data will then be displayed on the 2 windows of the PCN. If
2 data are under the same parameter selector position, they are displayed in the
same order as in the selector position name, otherwise the data is displayed in the
right window. The only exception is the altitude, the selector position name is ALT or
ΔALT the left window displays the altitude in feets while the right window displays
the altitude in meters.
The PCN can display 3 types of data: coordinates, signed values and unsigned
values.
Below is a table containing the summary for each of the positions and after that tables
detailing each position.
DATA SELECTION SUMMARY
NAME
EDITABLE DATA TYPE
BUT 00
BUT 01-20
L/G
BUT latitude / longitude
Can be
edited
Coordinates
Yes
Yes
ALT
BUT altitude
Can be
edited
Signed
Yes
Yes
CP/PD
Runway heading / Glideslope
Cap vrai piste / Pente désirée
Can be
edited
Unsigned
No
Yes
D/RLT
Range / Bearing
Distance / Relèvement
Read only
Unsigned
Yes
Yes
Remaining time / Ground speed
Read only
Temps restant / Vitesse sol
Unsigned
Yes
Yes
TR/VS
DV/FV
Wind direction / Wind speed
Direction vent / Force vent
Read only
Unsigned
Yes
Yes
DEC
Magnetic variation
Déclinaison magnétique
Can be
edited
Signed
Yes
Yes
Ρ /Θ
BAD offset using polar
Rho / Theta
Can be
edited
Unsigned
No
Yes
BAD altitude difference
Can be
edited
Signed
No
Yes
ΔL/ΔG
BAD offset using latitude /
longitude difference
Can be
edited
Signed
No
Yes
RD/TR
Desired heading / Desired time
Route désirée / Temps désiré
Can be
edited
Unsigned
Yes
Yes
ΔALT
Page 250
SECTION 19
19–4
INS
USING THE PCN
BUT (SECTEUR BUT - WAYPOINT)
Used for visualization and edition of BUT parameters.
L/G
BUT LATITUDE / LONGITUDE
MODE
BUT 00
LEFT WINDOW
Current latitude
(degrees)
N/S 90.00.0
RIGHT WINDOW
Current longitude
(degrees)
E/W 180.00.0
DESCR. Allow the visualization of the current coordinates of the aircraft.
CAN BE EDITED
SIGNED VALUE
BUT
01-20
BUT latitude
(degrees)
N/S 90.00.0
BUT longitude
(degrees)
E/W 180.00.0
DESCR. Allow the visualization or edition of the PREP BUT coordinates.
MORE INFORMATION
While the INS visualization windows can only display the coordinates
down to the tenth of a minute, the INS can save the hundreds and
thousands of a minute.
The input format is the following: N/S 90.00.000 or E/W 180.00.000
NOTES
ALT
BUT ALTITUDE
MODE
BUT 00
LEFT WINDOW
Aircraft altitude
(feet)
+/- 99 999
RIGHT WINDOW
Aircraft altitude
(meters)
+/- 30 480
DESCR. Allow the visualization of the current INS altitude of the aircraft.
CAN BE EDITED
SIGNED VALUE
BUT
01-20
BUT altitude
(feet)
+/- 99 999
BUT altitude
(meters)
+/- 30 480
DESCR. Allow the visualization or edition of the PREP BUT altitude.
MORE INFORMATION
NOTES
If entered in feet, the altitude is converted in meters.
This might result in a small difference between the entered and saved
altitude
Page 251
SECTION 19
19–4
INS
USING THE PCN
BUT (continued)
RUNWAY HEADING / GLIDESLOPE
CAP VRAI PISTE / PENTE DESIREE
CP/PD
MODE
BUT 00
LEFT WINDOW
Not used
RIGHT WINDOW
Not used
DESCR. Cannot be set for the BUT 00.
CAN BE EDITED
UNSIGNED
VALUE
BUT
01-20
Runway heading
(degrees)
min 0.0
max 359.9
Glideslope
(degrees)
Allow the visualization or edition of the PREP BUT runway heading
DESCR. and glideslope information, used by the approach symbology.
MORE INFORMATION
NOTES
min 0.0
max 90.0
The runway heading needs to be in true north.
Page 252
SECTION 19
19–4
INS
USING THE PCN
OTHER PARAMETERS
Used solely for data visualization.
RANGE / BEARING
DISTANCE / RELEVEMENT
D/RLT
MODE
BUT 00
LEFT WINDOW
RIGHT WINDOW
Aircraft true
heading (degrees)
Not used
min 0.0
max 359.9
Left window is blank while the right window displays the aircraft true
DESCR. heading.
READ ONLY
UNSIGNED
VALUE
BUT
01-20
Distance to the
PREP BUT (nm)
min 0.0
max 999.9
Bearing to the
PREP BUT
(degrees)
min 0.0
max 359.9
DESCR. Displays the distance and bearing to the PREP BUT.
MORE INFORMATION
NOTES
REMAINING TIME / GROUND SPEED
TEMPS RESTANT / VITESSE SOL
TR/VS
MODE
BUT 00
LEFT WINDOW
Not used
RIGHT WINDOW
Aircraft ground
speed (kt)
min 0
max 1990
Left window is blank while the right window displays the aircraft
DESCR. ground speed.
READ ONLY
UNSIGNED
VALUE
BUT
01-20
Remaining time to
min 0.0
the PREP BUT
max 719.59
(minute, second)
Aircraft ground
speed (kt)
min 0
max 1990
Displays remaining time to reach current PREP BUT if ground speed
DESCR. remains constant. Right window displays the aircraft ground speed.
MORE INFORMATION
NOTES
Page 253
SECTION 19
19–4
INS
USING THE PCN
Other parameters (continued)
WIND DIRECTION / WIND SPEED
DIRECTION VENT / FORCE VENT
DV/FV
MODE
BUT 00
LEFT WINDOW
Wind direction
(degrees)
min 0
max 359.9
RIGHT WINDOW
Wind speed (kt)
min 0
max 999
DESCR. Displays the current aircraft direction and speed
READ ONLY
UNSIGNED
VALUE
BUT
01-20
Wind direction
(degrees)
min 0
max 359.9
Wind speed (kt)
min 0
max 999
DESCR. Displays the current aircraft direction and speed
MORE INFORMATION
NOTES
MAGNETIC VARIATION
DEC
DÉCLINAISON MAGNÉTIQUE
MODE
BUT 00
LEFT WINDOW
Magnetic variation
(degrees)
+/- 99.9
RIGHT WINDOW
Not used
Displays the magnetic variation in degrees between true and
DESCR. magnetic north.
CAN BE EDITED
UNSIGNED
VALUE
BUT
01-20
Magnetic variation
(degrees)
+/- 99.9
Not used
Displays the magnetic variation in degrees between true and
DESCR. magnetic north.
MORE INFORMATION
NOTES
Page 254
SECTION 19
19–4
INS
USING THE PCN
BAD (SECTEUR BUT ADDITIONNEL - OFFSET POINT)
Used for visualization and edition of BAD parameters.
BAD OFFSET USING POLAR
RHO / THETA
Ρ /Θ
MODE
BUT 00
LEFT WINDOW
Not used
RIGHT WINDOW
Not used
DESCR. Cannot be set for the BUT 00.
CAN BE EDITED
UNSIGNED
VALUE
BUT
01-20
BAD distance from
PREP BUT (nm)
min 0.1
max 99.9
BAD bearing from
PREP BUT
(degrees)
min 0.0
max 359.9
Allow the visualization or edition of the BAD distance and bearing
DESCR. from the PREP BUT.
MORE INFORMATION
NOTES
ΔALT
BAD ALTITUDE DIFFERENCE
MODE
BUT 00
LEFT WINDOW
Not used
RIGHT WINDOW
Not used
DESCR. Cannot be set for the BUT 00.
CAN BE EDITED
UNSIGNED
VALUE
BUT
01-20
BAD altitude
difference from
PREP BUT (feet)
+/- 24 999
BAD altitude
difference from
PREP BUT
(meters)
+/- 7 619
Allow the visualization or edition of the BAD altitude difference from
DESCR. the PREP BUT.
MORE INFORMATION
NOTES
Page 255
SECTION 19
19–4
INS
USING THE PCN
BAD (CONTINUED)
ΔL/ΔG
BAD OFFSET USING LATITUDE / LONGITUDE DIFFERENCE
MODE
BUT 00
LEFT WINDOW
Not used
RIGHT WINDOW
Not used
DESCR. Cannot be set for the BUT 00.
CAN BE EDITED
UNSIGNED
VALUE
BUT
01-20
BAD latitude
difference from
PREP BUT
(meters)
N/S 99 997
BAD longitude
difference from
PREP BUT
(meters)
E/W 99 997
Allow the visualization or edition of the BAD coordinate difference
DESCR. from the PREP BUT.
MORE INFORMATION
NOTES
Page 256
SECTION 19
19–4
INS
USING THE PCN
COMMON TO BUT AND BAD
The RD and TD are parameters common to a BUT and its BAD.
DESIRED HEADING / DESIRED TIME
ROUTE DÉSIRÉE / TEMPS DÉSIRÉ
RD/TD
MODE
BUT 00
LEFT WINDOW
Ground track
(degrees)
min 0.0
max 359.9
RIGHT WINDOW
INS chronometer
(minute, second)
min 0.0
max 399.9
Displays the ground track of the aircraft and the time since the INS
DESCR. has been turned ON.
CAN BE EDITED
UNSIGNED
VALUE
BUT
01-20
Desired heading
(degrees)
min 0.0
max 359.9
Desired time
(minute, second)
min 0.0
max 399.9
Allow the visualization or edition of the desired heading and desired
DESCR. time for the current PREP BUT or BAD.
MORE INFORMATION
NOTES
Page 257
SECTION 19
19–4
INS
USING THE PCN
DATA EDITION
The PCN uses 3 types of data:
• COORDINATES: Data that needs a cardinal direction (North or South, East or West).
• SIGNED DATA: Data that needs its sign to be specified (+ or -).
• UNSIGNED DATA: Data that don’t need a sign or cardinal direction and is assumed
to be always positive.
To edit the data:
Select the BUT to edit as PREP.
Select the parameter to edit by rotating the parameter selector.
To select which top display window to edit:
• Left window: Press the 1 or 7 keys on the numeric keypad.
• Right window: Press the 3 or 9 keys on the numeric keypad.
Both the INS and EFF keys will light up, indicating that the PCN is in edit mode.
The selected window will show a series of dashes, indicating the number of digits to
be entered.
If the data type is signed, both signs will be displayed on the left. If the data type is
coordinates, the N/S for the left window and the E/W for the right window will be
displayed.
If the data is not unsigned, the sign or cardinality need to selected first.
To select a sign:
• 1 or 7 for negative (-).
• 3 or 9 for positive (+).
To select a cardinality:
• 2 for North (N).
• 8 for South (S).
• 6 for East (E).
• 4 for West (W).
The data can then be entered using the numeric keypad. Leading zeros are not
needed in most cases. Be careful for the decimal point, 1 or 2 trailing zeros might be
needed for round values.
NOTE
The L/G data is a special case, the displayed data is shorter than the
stored data. The PCN will display the coordinates up to a tenth of a
minute while the INS can store up to a thousand of a minute. In order
to input full coordinates, the hundred and thousand of a minute needs
to be typed in even if the PCN does not react to input.
Entering a full longitude is the only case where a leading zero is
needed when the degrees are under 100.
Full coordinate entry is not necessary.
Page 258
SECTION 19
19–4
INS
USING THE PCN
BUT
A BUT (But – waypoint) is navigation point composed of a latitude, a longitude, an
altitude and other parameters that represent a location in space. They can be used
for navigation, as a position fix point, as surface target, as a Bullseye or as a landing
point.
The Mirage 2000C INS can store 20 of them (from 01 to 20) in addition to the BUT
00 that represent the aircraft’s current position.
All BUTs can be selected at all times, by default if a BUT in not part of a flight plan or
has been edited, its coordinates will be at 00.00.0 and 000.00.0, the altitude will be
at the maximum value and other parameters will be at zero.
The PCN is the only interface where the pilot can visualize, input and edit BUTs
parameters.
BUT SELECTION
PREP VS DEST
The PCN allows to select 2 different BUTs at the same time for different purpose:
• PREP (Préparation – Setup): Setting a BUT in PREP allows for the visualization
and edition of its parameters. The PREP BUT informations are only displayed on
the PCN and does not affect any other systems.
The PREP BUT is also the BUT of which the coordinates and altitude are going to
be used when starting an alignment.
• DEST (Destination – Navigation): Setting a BUT in DEST allows for the navigation
to this BUT. The DEST BUT informations are sent to the VTH and IDN for navigation
use.
The selection of a BUT in PREP or DEST is done using the BUT selection keys:
Press the PREP or DEST key.
The pressed key will light up.
Use the numeric keypad to type the BUT number.
NOTE
The BUT number always need to be 2 digits. In order to select the BUT
06 in DEST, press the DEST key and press 0 then 6 on the numeric
keypad.
As you type the second number, the BUT will be selected and the pressed BUT key
will turn off.
Page 259
SECTION 19
19–4
INS
USING THE PCN
The BUTs can also be transferred between PREP and DEST and vice versa using
the following procedure:
Press the BUT key you wish to be copied on by the other BUT selection.
The BUT key will light up.
Press the same key again.
The BUT key turns off and the other selected BUT number will be copied on this BUT
selection.
NOTE
In order to copy the DEST BUT (06) in PREP, press the PREP key 2
times. The PREP BUT will now be the BUT 06.
The DEST BUT can be incremented or decremented using the DEST
BUT Increment/Decrement buttons on the left of the front dash
BUT 00 VS BUT 01 - 20
The BUT 00 is not a navigation BUT but rather the current position of the aircraft. Not
all of the data that is normally visualizable on the PCN can be viewed BUT 00. Also,
some parameters display different information in BUT 00. Its parameters are not
editable.
The BUT 00 can only be selected as a PREP BUT, it can never be selected in DEST.
Page 260
SECTION 19
19–4
INS
USING THE PCN
BUT SETUP
Select the desired BUT in PREP.
Set the PCN parameter selector to the L/G position.
To enter the latitude, press the 1 or 7 key to edit the left window. The INS and EFF
keys will light up.
Select the cardinality for the latitude using the 2 or 8 keys.
Type de latitude and press the INS key to insert the data into the INS memory.
To enter the longitude, press the 3 or 9 key to edit the left window. The INS and EFF
keys will light up.
Select the cardinality for the latitude using the 4 or 6 key.
Type de longitude and press the INS key to insert the data into the INS memory.
If the input contained an error, the edited window can be reset with the EFF key.
Pressing the EFF key with an incorrect value or no value will exit the edition mode
and reset the data to its previous value.
Pressing the PREP key or changing the parameter knob position will cancel the
edition.
Set the PCN parameter selector to the ALT position.
To enter the altitude in feet, press the 1 or 7 key to edit the left window. The INS and
EFF keys will light up.
Select the sign for the altitude using the 1 or 7 key.
Type the altitude in feet and press the INS key.
OR
To enter the altitude in meters, press the 3 or 9 key to edit the left window. The INS
and EFF keys will light up.
Select the sign for the altitude using the 3 or 9 key.
Type the altitude in meters and press the INS key.
Page 261
SECTION 19
19–4
INS
USING THE PCN
BAD
A BAD is (BUT Additionel – Offset Waypoint) is waypoint of which is position is in
reference to its parent BUT. A BAD cannot exist alone and is always linked to a BUT.
They are most commonly used as surface targets or divert airfield. Each BUT can be
parent to a BAD, that makes 20 BADs.
3 out of 11 positions on the PCN parameter selector are dedicated to setting up a
BAD, under the BAD bracket.
BAD SETUP
Select the parent BUT in PREP.
Set the PCN parameter selector to the ΔALT position.
To enter the altitude offset in feet, press the 1 or 7 key to edit the left window. The
INS and EFF keys will light up.
Select the sign for the altitude offset using the 1 or 7 key.
Type the altitude offset in feet and press the INS key.
OR
To enter the altitude offset in meters, press the 3 or 9 key to edit the left window. The
INS and EFF keys will light up.
Select the sign for the altitude offset using the 3 or 9 key.
Type the altitude offset in meters and press the INS key.
Set the PCN parameter selector to the ΔL/ΔG position.
To enter the latitude offset, press the 1 or 7 key to edit the left window. The INS and
EFF keys will light up.
Select the cardinality for the latitude offset using the 2 or 8 key.
Type the latitude offset in kilometers and press the INS key.
To enter the longitude offset, press the 1 or 7 key to edit the left window. The INS
and EFF keys will light up.
Select the cardinality for the longitude offset using the 4 or 6 key.
Type the longitude offset in kilometers and press the INS key.
OR
Set the PCN parameter selector to the ρ/θ position.
To enter the offset bearing, press the 1 or 7 key to edit the left window. The INS and
EFF keys will light up.
Type the offset bearing in degrees and tenths of degrees and press the INS key.
Page 262
SECTION 19
19–4
INS
USING THE PCN
To enter the offset distance, press the 3 or 9 key to edit the right window. The INS
and EFF keys will light up.
Type the offset distance in nm and tenths of nm and press the INS key.
BAD SELECTION
Select the parent BUT in DEST.
Press the BAD key.
The BAD key will light on to indicate that the DEST BAD is selected.
If the BAD is invalid, the BAD key will flash.
To deselect a BAD, press the BAD key again and the key will turn off.
Page 263
SECTION 19
19–4
INS
USING THE PCN
MRQ
The Mirage 2000C INS is capable of saving up to 3 mark-points (MRQ – Marques).
They take the BUT number 91, 92 and 93.
Once the 3 MRQs have been created they cannot be deleted or overwritten with a
new MRQ. MRQs can only store coordinates and cannot be set as PREP, they can
only be selected in DEST.
MRQ SETUP
Fly the aircraft over the point where you want to create the MQR.
Press the MRQ key on the PCN. It will light up with the VAL key to indicate that an
MRQ slot is available and the PCN is in MRQ creation mode.
If no MQR slot is available, the MRQ key will flash and the VAL key will stay off.
The PCN top window will show the MRQ coordinates for review.
To create the MQR press the VAL key. Both the MRQ and VAL keys will turn off
and the MQT will be created.
The MQR can be rejected by pressing the MRQ key a seconds time.
MQR SELECTION
An MRQ is selected just as a normal BUT using their number (91, 92 or 93) but they
can only be selected in DEST. Trying to select an MRQ in PREP will reset PREP to
the preciously selected BUT.
Page 264
SECTION 19
19–4
INS
USING THE PCN
VTB BUT DISPLAY
The VTB can display the position of BUT to provide better situational awareness and
help with INS navigation. A BUT can be displayed as navigation BUT or a tactical
BUT.
NAVIGATION BUT
The VTB navigation BUT is displayed when the SNA is in navigation or air-to-ground
mode and represents the position of the current DEST BUT. It is always displayed
unless the SNA is in air-to-air mode.
TACTICAL BUT
Up to 5 tactical BUTs can be displayed simultaneously on the VTB. They are
displayed in all modes and differentiated from the navigation BUT by the BUT number
displayed next to them.
TACTICAL BUT DISPLAY
Select the BUT to display on the VTB as a tactical BUT as PREP.
Press the VAL to display the tactical but.
Once a tactical BUT is displayed it can be removed by doing the same procedure.
Trying to add a sixth tactical BUT will replace the first.
All tactical BUTs can be removed at once using VTB declutter command.
Page 265
SECTION 19
19–5
INS
ALIGNMENT
19 – 5 - ALIGNMENT
INTRODUCTION
The core of the INS houses a small platform bearing accelerometers and 3
gyroscopes. This platform needs to be calibrated in order to give accurate data and
reduce drift rate. This calibration is called alignment.
The alignment process can be divided in 4 phases:
• PLATFORM
CAGING AND SETUP, consisting of roughly setting up the platform
horizontally and in azimuth, heating it up to operating temperature (70°) and
spinning up the gyroscopes. This phase lasts about 35 seconds.
• ROUGH ALIGNMENT, consisting of recording the horizontal and azimuth bias of the
platform and correcting them. This phase lasts about 20 seconds
• FAST GYROCOMPASS ALIGNMENT, same as the ROUGH ALIGNMENT but with a longer
sampling, allowing finer correction and calculation of the platform heading using the
earth rotation. This phase lasts about 80 seconds
• FINE GYROCOMPASS ALIGNMENT, consists of repeated FAST GYROCOMPASS
ALIGNMENT. This phase can be interrupted after the first FAST GYROCOMPASS
ALIGNMENT and lasts around 300 seconds.
Aligning an INS is a complex procedure that require a lot of precision. It is very
important that is aircraft is not moved during the INS alignment or the procedure will
be canceled and will need to be restarted.
CAUTION
Refueling and rearming the aircraft will not cancel the alignment
process, however hanging heavy ordinances (wing fuel tanks or bombs
on twin racks) will result in the aircraft moving on its suspensions due
to the added weight. This can be enough to stop the process so
refueling or rearming better be done before or after the alignment.
The INS allow 3 types of alignments:
• NORMAL
ALIGNMENT
(ALN - Alignement normal): Last 8 minutes and result in a
0,7nm/h drift rate.
• INTERRUPTED NORMAL ALIGNMENT (ALNI - Alignement normal interrompu): Last
between 4 and 8 minutes and result in a drift rate between 4nm/h and 2nm/h.
• STORED HEADING ALIGNMENT (ALCM - Alignment sur cap mémorisé): Last 1 minute
30 seconds and result in a 3nm/h drift rate
The alignment type is selected on the PSM mode selector and stated using the VAL
key on the PCN. When the alignment is in progress you can check its status using
the STS position on the PSM operating mode selector. In ALN and ALNI the
remaining time to the next class is also displayed.
The INS also need to know its initial location. This is done by setting a BUT with the
current aircraft’s coordinates and altitude and starting the alignment process while
having this BUT selected in PREP. BUT 00 to 20 can be used for this and as soon
as the alignment has started the PREP BUT can be changed.
Page 266
SECTION 19
19–5
INS
ALIGNMENT
NORMAL ALIGNMENT
The normal alignment (ALN – Alignment normal) is required at each cold start if the
aircraft has been moved since the last time it stopped. This alignment lasts 8 minutes
and results in a drift rate of about 0,7nm/h. This process combines all the available
phase in order to achieve the most accurate alignment possible.
This alignment process is selected by turning the PSM mode selector in the ALN
position, the ALN status light will flash to indicate that the alignment can be started.
During the first half of the alignment the ALN status light is steady to indicate that the
process is uninterruptible, after around 4 minutes and achieving the status 53, the
ALN light will turn off and the PRET light will flash to indicate that the alignment is
now interruptible. At the end of the 8 minutes and when the status reaches 00 the
PRET light will turn steady to indicate that the INS is ready to go into NAV mode.
When the ALN is finished the INS will restart the fine gyrocompass alignment phase
to reduce the drift rate until the PSM mode selector in turned to NAV mode. NOT
FUNCTIONAL
NORMAL ALIGNMENT TIMELINE
99
92
76
96
1
2 2
53
34
14
00
Status
72
3
2
4
4
T min
0
1
2
3
4
5
PLATFORM CAGING AND SETUP
ROUGH ALIGNMENT
FAST GYROCOMPASS ALIGNMENT
FINE GYROCOMPASS ALIGNMENT
Page 267
6
7
8
9
SECTION 19
19–5
INS
ALIGNMENT
PROCEDURE
Set the PSM Operational Mode to N.
Set the PSM Mode in VEI.
Select a BUT in PREP that contains the current aircraft’s coordinates and altitude.
In DCS, if the Mirage 2000C Special option “Fast alignment (ALCM) ready” is not
checked the BUT 00 coordinates won’t correspond to the aircraft position because it
is assumed that the aircraft has been moved since the last time it was stopped.
If such BUT does not exist, it has to be created. The alignment BUT needs to have
its coordinates and altitude set in order to have a precise alignment. The aircraft
coordinates and altitude can be found on the kneeboard “Pilot signout sheet” page.
NOTE
Any BUT can be used for alignment but the most convenient one would
be the BUT 20, as 20 waypoint flight plan is seldom used.
NOTE
The INS will accept values up to the hundredth and thousandth of a
minute. but display will only show tenth of minute. Nevertheless,
introduce full position into the system!
NOTE
An uninitialized BUT will have the maximum possible value for altitude,
don’t forget to set it too or the alignment quality will be reduced.
Set the PSM Mode to ALN when your PREP BUT is set to the correct coordinates.
Once the PSM is in ALN, the following will happen on the PCN:
• The ALN light will blink.
• The VAL key will light up.
Click on the VAL key to start the alignment process.
• The ALN light will become steady, indicating that the INS is aligning.
• The VAL key will revert to half lit.
At this time, you can switch your PREP BUT and insert or edit data.
Page 268
SECTION 19
19–5
INS
ALIGNMENT
The alignment process will abort if you turn the PSM Mode knob to another position.
The alignment process status can be checked by turning the PSM Operational Mode
knob on the STS position. The right window will display the alignment status, going
from 100 to 0. The right window will display the alignment class, from 4 to 1 after the
status reaches 53 and a timer counting down to the next class.
The ALN light will turn off when the status reaches 53 and the INS is in class 4. At
the same time the PRET light will start to flash indicating that the alignment can be
interrupted.
When the status reaches 00, the PRET light will turn steady, indicating that the ALN
is finished. The PSM Mode selector can now be turned to the NAV position.
Page 269
SECTION 19
19–5
INS
ALIGNMENT
INTERRUPTED NORMAL ALIGNMENT
The interrupted normal alignment (ALNI - Alignement normal interrompu), also called
fast alignment (ALR – Alignement rapide), is a normal alignment that is stopped
before its completion. This alignment lasts between 4 and 8 minutes and result in a
drift rate between 4nm/h and 2nm/h. This process combines all the available phase
in order to achieve the most accurate alignment possible.
This alignment process is selected by turning the PSM mode selector in the ALN
position, the ALN status light will flash to indicate that the alignment can be started.
During the first half of the alignment the ALN status light is steady to indicate that the
process is uninterruptible, after around 4 minutes and achieving the status 53, the
ALN light will turn of and the PRET light will flash to indicate that the alignment is
now interruptible. At the end of the 8 minutes and when the status reaches 00 the
PRET light will turn steady to indicate that the INS is ready to go into NAV mode.
When the ALN is finished the INS will restart the fine gyrocompass alignment phase
to reduce the drift rate until the PSM mode selector in turned to NAV mode. NOT
FUNCTIONAL
INTERRUPTED NORMAL ALIGNMENT TIMELINE
Can be interrupted
99
92
76
96
53
34
2 2
00
Status
72
Class 3
Class 4
1
14
3
Class 2
Class 1
4
2
4
T min
0
1
2
3
4
5
PLATFORM CAGING AND SETUP
ROUGH ALIGNMENT
FAST GYROCOMPASS ALIGNMENT
FINE GYROCOMPASS ALIGNMENT
Page 270
6
7
8
9
SECTION 19
19–5
INS
ALIGNMENT
PROCEDURE
Set the PSM Operational Mode to N.
Set the PSM Mode in VEI.
Select a BUT in PREP that contains the current aircraft’s coordinates and altitude.
In DCS, if the Mirage 2000C Special option “Fast alignment (ALCM) ready” is not
checked the BUT 00 coordinates won’t correspond to the aircraft position because it
is assumed that the aircraft has been moved since the last time it was stopped.
If such BUT does not exist, it has to be created. The alignment BUT needs to have
its coordinates and altitude set in order to have a precise alignment. The aircraft
coordinates and altitude can be found on the kneeboard “Pilot signout sheet” page.
NOTE
Any BUT can be used for alignment but the most convenient one would
be the BUT 20, as 20 waypoint flight plan is seldom used.
NOTE
The INS will accept values up to the hundredth and thousandth of a
minute. but display will only show tenth of minute. Nevertheless,
introduce full position into the system!
NOTE
An uninitialized BUT will have the maximum possible value for altitude,
don’t forget to set it too or the alignment quality will be reduced.
Set the PSM Mode to ALN when your PREP BUT is set to the correct coordinates.
Once the PSM is in ALN, the following will happen on the PCN:
• The ALN light will blink.
• The VAL key will light up.
Click on the VAL key to start the alignment process.
• The ALN light will become steady, indicating that the INS is aligning.
• The VAL key will revert to half lit.
At this time, you can switch your PREP BUT and insert or edit data.
Page 271
SECTION 19
19–5
INS
ALIGNMENT
The alignment process will abort if you turn the PSM Mode knob to another position.
You can check the alignment process status by turning the PSM Operational Mode
knob on the STS position. The right window will display the alignment status, going
from 100 to 0. The right window will display the alignment class, from 4 to 1 after the
status reaches 53 and a timer counting down to the next class.
The ALN light will turn off when the status reaches 53 and the INS is in class 4. At
the same time the PRET light will start to flash indicating that the alignment can be
interrupted.
When the status reaches 00, the PRET light will turn steady, indicating that the ALN
is finished. The PSM Mode selector can now be turned to the NAV position.
Page 272
SECTION 19
19–5
INS
ALIGNMENT
STORED HEADING ALIGNMENT
The stored heading alignment (ALCM – Alignment sur cap mémorisé) is a fast
alignment method that can be used if the aircraft has not been moved since the last
time its INS was stopped. The INS save its last heading when it is stopped and if the
aircraft has not been moved the gyroscopes won’t have moved too far from their
aligned position. This allows for less alignment phases resulting in a quicker
procedure at the cost of increased drift rate due to gyroscope and accelerator errors
not being canceled as well as in an ALN. This alignment lasts 1 minute 30 seconds
and the resulting drift rate is dependent on the quality and time since the last normal
alignment.
After a normal alignment followed by a standard flight and half a day rest for the
aircraft, the drift rate will be about 3 nm/h. Doing an ALCM just after a normal
alignment or at the end of QRA duty will result a drift rate equivalent to the previous
alignment rate.
This alignment process is selected by turning the PSM mode selector in the ALCM
position, the ALN status light will flash to indicate that the alignment can be started.
During the alignment the ALN status light is steady to indicate that the process is
uninterruptible, after 1 minute and 30 seconds and achieving the status 00, the ALN
light will turn of and the PRET light will turn steady to indicate that the alignment is
finished and that the INS is ready to go into NAV mode.
Alternatively, the ALCM can be started by turning the PSM mode selector directly in
the NAV position. NOT FUNCTIONAL
In DCS, ALCM can be made available on ramp start by checking the “Fast alignment
(ALCM) ready” special option checkbox. It will set the aircraft in à ALCM ready state
and set the aircraft current coordinates on the BUT 00. The aircraft is then assumed
to have been stopped a few hours before after an ALN followed by an uneventful
flight. This option can also be used to start a normal alignment on PREP 00 as its
coordinates will be correct.
STORED ALIGNMENT TIMELINE
99
34
67
1
00
Status
2 2 2
T min
0
1
2
PLATFORM CAGING AND SETUP.
ROUGH ALIGNMENT.
Page 273
SECTION 19
19–5
INS
ALIGNMENT
PROCEDURE
Set the PSM Operational Mode in N.
Set the PSM Mode in VEI.
Check in the kneeboard “Pilot signout sheet” page that ALCM is possible as indicated
by the red text “ALCM AVAILABLE” below the aircraft starting coordinates.
Set the BUT 00 in PREP and check that its coordinates and altitude are correct to
the aircraft current position.
Set the PSM Mode knob in ALCM position. Once the PSM is in this mode, the
following will happen:
• The ALN light will flash.
• The VAL key will light up.
Click on the VAL key to start the alignment process.
• The ALN light will become steady, indicating that the INS is aligning.
• The VAL key will go dark.
Alternatively, you can turn the PSM mode selector in NAV mode, this will start the
ALCM automatically without needing to press VAL. NOT FUNCTIONAL
The alignment process will abort if you turn the PSM mode selector from ALCM.
You can check the alignment process status by turning the PSM Operational Mode
knob on the STS position. The right window will display the alignment status, going
from 100 to 0. The right window will stay blank.
The ALN light will turn off and the PRET light will turn on when the alignment process
has ended.
If the ALCM was started by placing the PSM mode selector in NAV, the PRET light
will only turn on momentarily.
Now you can turn the PSM mode selector to NAV.
Page 274
SECTION 19
19–6
INS
DATA CARTRIDGE
19 – 6 - DATA CARTRIDGE
INTRODUCTION
The MIP (module d’insertion des paramètres – parameter insertion module) data
cartridge allows the insertion of BUTs and BADs into the Mirage INS.
Depending on how many BUTs the cartridge has be programed with:
• 11-20 BUTs: The MIP will override all (01-20) the BUTs.
• 01-10 BUTs: The MIP will override BUTs 11 to 20.
A MIP can store up to 20 BUTs each programmed with the following information:
• Latitude and longitude (L/G)
• Altitude (ALT).
• Runway true heading (CP).
• Runway approach glideslope (PD).
• Desired arrival time (TD).
• Desired arrival track (RD).
• Latitude and Longitude offset (ΔL/ΔG).
• Altitude offset (ΔALT).
Page 275
SECTION 19
19–6
INS
DATA CARTRIDGE
LOADING THE DATA
Loading the data from a MIP cartridge into the INS is done by inserting it into the MIP
slot on the PSM:
Open (left click) the data cartridge slot on the PSM.
Select (mouse wheel on the cartridge) the desired MIP cartridge based on the name
written on it.
Only the MIP cartridges that were created for the map the aircraft is on will be
selectable.
Place (left click on the cartridge) the MIP cartridge over the data cartridge slot and
insert it (left click on the cartridge). The MIP status light will turn on.
The loading off the MIP data to the INS takes 15 seconds. Once done, the MIP status
light will turn off. If the loading has failed, the MIP status light will flash
Remove the MIP cartridge from the cartridge slot (right click twice).
Close (right click) the the data cartridge slot on the PSM.
The MIP cartridge list is updated when the aircraft is rearmed or refueled, meaning
that a cartridge can be added to the list without restarting the game.
CREATING A DATA CARTRIDGE
A MIP data cartridge can be of 2 formats:
• A .miz mission file with a single Mirage 2000C inside it, programmed with the
desired flight plan.
• A .dtc data cartridge file in lua (lua is a programming language used by DCS)
consisting of a few configuration variables and an array containing the flight plan.
In order to find the newly created MIP cartridges in game, the mission or data
cartridge files needs to be placed in the “Datacartridges” folder at the root of your
DCS saved games folder. This folder will need to be created.
MISSION FILE
Creating a data cartridge from a mission file is the simplest method:
Create an empty mission in the editor on the map of your choice
Place a M-2000C aircraft anywhere on the map. Its initial position, loadout and livery
does not matter.
Create its flight plan with or without BADs.
Save the mission. The mission file name is what will be written on the MIP data
cartridge.
DATA CARTRIDGE FILE
An exemple named “EXAMPLE.dtc” of how to format a data cartridge file is available
in the “Mods\aircraft\M-2000C\Doc” folder in your DCS installation directory.
Page 276
SECTION 19
19–7
INS
POSITION FIX
19 – 7 - POSITION FIX
INTRODUCTION
INS drift can cause issues in all phases of a mission because as it is used for
navigation and weapon employment. In order to correct the accumulated drift, the
pilot can use a method called position fix (Recalage) that will provide the INS the
means of correcting itself.
This method consists of providing the INS with the real position of a point in space of
which it knows the coordinates. The INS can then compare the points real position
with its stored position, deduce by how much it drifted and in which direction, and
apply this difference to itself to correct the drift.
In the Mirage 2000 this is done using a BUT and a remarkable surface feature. The
BUT needs to be place on the coordinates of the feature and at the altitude of the
ground, then the pilot can use 2 methods to provide the position of this point to the
INS:
• OVERFLY
(Recalage vertical): Consist of triggering the position fix when the
aircraft is precisely over the surface feature.
• RADAR FIX (Recalage oblique): Consist of using the radar in TAS (Télémétrie AirSol – Radar ranging) to designate the surface feature through the VTH to get the
slant range.
FIX
Both methods precisions are dependent of the overfly and designation fix accuracy,
a moderate drift can be worsened by a fix on the wrong surface feature.
NOTE
The INS system will refuse to validate a position fix that is greater than
15nm. Such case should not happen but if it does, the only way to fix
the drift is to designate halfway between the BUT and the surface
feature to cut the distance between them in half and then designate the
surface feature.
Page 277
SECTION 19
19–7
INS
POSITION FIX
OVERFLY FIX
This method is viable for low altitude flying and on relatively flat terrain as it is easier
to estimate our position on the ground from low altitude.
To perform an overfly fix:
Select the fix BUT in DEST.
Fly the aircraft toward the fix BUT. As soon as the surface feature is in sight fly toward
it and ignore the navigation cues.
When the aircraft is precisely over the surface feature, press the
PCN.
REC key on the
If the PCA is in NAV mode and MAV is not selected, the "Magic Unlock / Position
update" HOTAS command will also trigger the fix procedure.
The REC key will turn on and depending on the parameter selector’s position, the
PCN will show the following information:
• ΔL/ΔG: the left window will show the difference in latitude and the right
window will show the difference in longitude between the aircraft’s position at
the time the procedure was triggered and the BUT position in kilometer.
• ρ/θ: The left window will show the distance in nm and the right window will
show the bearing of the aircraft’s position at the time the procedure was
triggered and the BUT position.
• ΔALT: The left window will show the altitude difference in meter and the right
window will show the altitude difference in feet of the aircraft’s position at the
time the procedure was triggered and the BUT position.
In any other position the information displayed on the PCN is relative to the PREP
BUT and not the navigation fix.
If the difference between aircraft and landmark position is less than 15 nautical miles,
the VAL key will turn on.
If the position difference between the fix and the BUT coordinate presented on the
PCN is coherent, press the VAL key to accept the fix. The INS will apply the fix,
the REC and VAL keys will turn off and the PCN will revert to normal operations.
If the difference between aircraft and landmark position is more than 15 nautical
miles, the VAL key will remain dark and the REC key will flash. In this situation the
only possible action is to reject the fix.
If the fix is not satisfactory, press the REC key. The INS will revert to normal
operations.
Page 278
SECTION 19
19–7
INS
POSITION FIX
RADAR FIX
This method is viable for high to low altitude and all kind of terrain. The only needed
condition is line of sight to the surface feature.
To perform a radar fix:
Select the fix BUT in DEST.
Select OBL on the PCA. Check that the radar is working in TAS mode.
Fly the aircraft toward the fix BUT. As soon as the surface feature is in sight fly toward
it and ignore the navigation cues.
Maneuver the aircraft to put the designation diamond over the surface feature.
Use the “Magic Slave/AG Designate/INS Position Update” HOTAS command to
trigger the fix procedure.
The REC key will turn on and the PCN top window will show the following
information:
• ΔL/ΔG: the left window will show the difference in latitude and the right
window will show the difference in longitude between the radar designated
position and the BUT position in kilometer.
• ρ/θ: The left window will show the distance in nm and the right window will
show the bearing of the radar designated position and the BUT position.
• ΔALT: The left window will show the altitude difference in meter and the right
window will show the altitude difference in feet of the radar designated
position and the BUT position.
In any other position the information displayed on the PCN is relative to the PREP
BUT and not the navigation fix.
If the position difference between the fix and the BUT coordinate presented on the
PCN is coherent, press the VAL key to accept the fix. The INS will apply the fix, the
REC and VAL keys will turn off, the PCN will revert to normal operations and the
radar will return to its previous mode.
If the difference between aircraft and landmark positions are more than 15 nautical
miles, the VAL key will remain dark and the REC key will flash. In this situation the
only possible action is to reject the fix.
If the fix is not satisfactory, press the REC key. The INS will revert to normal
operations and the radar will return to its previous mode.
The radar fix will be cancelled if:
• The Master ARM switch is set to ARM.
• The VTH is set in any other mode than radar fix sub-mode.
• The SNA is set in any other mode than NAV.
Page 279
SECTION 20
IFF
IFF
Page 280
SECTION 20
IFF
INTRODUCTION
IFF (identification friend or foe) is an identification system that allow military aircraft
to identify other aircraft as friendly using their radar. An IFF system is composed of 2
elements:
• An interrogator.
• A transponder.
IFF interrogator are mostly used on aircraft equipped with radars. The interrogator
sends an IFF interrogation and waits for its reply. Once the reply is received it is
decoded and if the code corresponds to the IFF code set on interrogator, the replying
aircraft is considered friendly.
Every aircraft can be equipped with an IFF transponder, they are similar to civilian
transponder and are often compatible with civilian identification systems. The
transponder listens to IFF interrogations sent by other systems. Once it receives one,
the transponder decodes it and if the code corresponds to the IFF code set on the
transponder it sends an encoded reply.
Once the transponder has received and decoded an interrogation, it will wait a set
time before sending a reply. This set time is known by the interrogator and can be
used to determine the range to the replying aircraft.
IFF can only be used to determine that an aircraft is friendly, not that it is hostile or
unfriendly.
Page 281
SECTION 20
20–1
IFF
IFF TRANSPONDER
20 – 1 - IFF TRANSPONDER
The IFF transponder (répondeur IFF) is located behind the stick, below the VTB. It is
the NRAI-7C IFF transponder that is used on multiple aircraft in the French air force.
The transponder panel allow the selection of the transponder master mode, the
MODE 1 and 3/A codes, the selection of which interrogation mode to reply to and the
MODE 4 settings.
NOTE
In DCS, IFF and transponder simulation is limited, none of the
transponder functions are simulated.
The external software SimpleRadio and LotAtc allows limited simulation
of the transponder with the GCI interface.
2
1
3
4
5
6
7
12
8
9
10
11
14
13
MODE 1 CODE SELECTOR (Molette d’affichage du code MODE-1): Sets the mode 1
transponder code. Used to set the mission type code. From 00 to 73. NOT
FUNCTIONAL
MODE 3A CODE SELECTOR (Molette d’affichage du code MODE-3/A): Sets the mode
3 transponder code. Used to set the flight and flight member code. From 0000 to
7777. NOT FUNCTIONAL
IDENT-MIC SWITCH (Sélecteur d’identifiaction de position): Selects the IFF
identification function: NOT FUNCTIONAL
• IDENT (Identification): Momentary, activates the transponder identification
feature.
• OUT: Stable, no function.
• MIC (Microphone): Stable, enables the emission of the identification reply for
30 seconds each time the microphone is keyed for UHF or V/UHF.
Page 282
SECTION 20
20–1
IFF
IFF TRANSPONDER
M-1 SWITCH (Interrupteur de mise en service MODE-1): Allows the transponder to
reply to military MODE 1 identification interrogations. NOT FUNCTIONAL
M-2 SWITCH (Interrupteur de mise en service MODE-2): Allows the transponder to
reply to military MODE 2 identification interrogations. NOT FUNCTIONAL
M-3/A SWITCH (Interrupteur de mise en service MODE-3/A): Allows the transponder
to reply to civilian MODE 3/A identification interrogations. NOT FUNCTIONAL
M-C SWITCH (Interrupteur de mise en service MODE-3/C): Allows the transponder to
reply to civilian MODE 3/C altitude reporting interrogations. NOT FUNCTIONAL
REPLY LIGHT (Voyant REPLY): Indicates a valid mode 4 interrogation and reply when
the MODE 4 AUDIO-LIGHT switch is set to the AUDIO or LIGHT position. NOT
FUNCTIONAL
CODE CONTROL KNOB (Commutateur code): Selects the MODE 4 code of the day:
NOT FUNCTIONAL
• HOLD: Momentary, prevents the zeroizing of the MODE 4 IFF codes when
the IFF transponder is turned off. To be used after the plane has weight on
wheels.
• A: Stable, selects the A MODE 4 IFF code set.
• B: Stable, selects the B MODE 4 IFF code set.
• ZERO: Momentary, starts the zeroizing procedure to erase the MODE 4 IFF
codes.
OUT-ON SWITCH (Interrupteur OUT-ON): The ON position allows the transponder to
decode a MODE 4 interrogation. NOT FUNCTIONAL
AUDIO-OUT-LIGHT SWITCH (Sélecteur AUDIO-OUT-LIGHT): Sets the MODE 4
monitoring mean: NOT FUNCTIONAL
• AUDIO: Valid MODE 4 interrogation and replies are signaled by an audio
warning and the REPLY light.
• OUT: No audio or light signal for a valid MODE 4 interrogation.
• LIGHT: Valid MODE 4 interrogation and replies are signaled by the REPLY
light.
MASTER MODE KNOB (Commutateur de fonction MASTER): Sets the transponder
master mode: NOT FUNCTIONAL
• OFF: The transponder is powered off.
• SBY (Standby): Sets the transponder to standby/warmup mode.
• N (Normal): Sets the transponder to normal operating mode where it can reply
to MODE 1, 2, 3/A, 3/C and 4 identification interrogations.
• EMER (Emergency): Sets the transponder to emergency mode where it will
transmit an emergency reply in MODE 1, 2 and 3/A.
TEST BUTTON (Bouton poussoir test): Initiates the IFF transponder self-test. NOT
FUNCTIONAL
Page 283
SECTION 20
20–1
IFF
IFF TRANSPONDER
FAULT LIGHT (Voyant de panne magnétique): Indicates that the transponder self-test
has failed or that it failed to reply to an identification interrogation. NOT
FUNCTIONAL
Page 284
SECTION 20
20–2
IFF
IFF INTERROGATOR PANEL
20 – 2 - IFF INTERROGATOR PANEL
The IFF interrogator panel (poste de commande interrogateur décodeur IFF) is
located on the right console, just below the PCN.
The interrogator panel allow the configuration of the radar IFF interrogation.
NOTE
In DCS, IFF and transponder simulation is limited, only the radar IFF
interrogation mode selector is simulated.
4
1
2
3
MODE SELECTOR (Commutateur de mode): Selects the IFF mode that will be used by
the radar for interrogation: NOT FUNCTIONAL
• 1: The interrogation will be done in MODE 1 on 2 digits of the selected IFF
•
•
•
•
•
code depending on the position of the IFF code selection switch.
4: The interrogation will be done in MODE 4 irrelevant of the selected IFF
code.
3/2: The interrogation will be done in MODE 3/A on the first 2 digits of the
selected IFF code.
3/3: The interrogation will be done in MODE 3/A on the first 3 digits of the
selected IFF code.
3/4: The interrogation will be done in MODE 3/A on the totality of the selected
IFF code.
2: The interrogation will be done in MODE 2 on the selected IFF code.
IFF CODE SELECTION SWITCH (Interupteur de sélection du code IFF): Selects which
digits to use for MODE 1 interrogation: NOT FUNCTIONAL
• G (Gauche – Left): Selects the 2 leftmost digits.
• D (Droite – Right) Selects the 2 rightmost digits.
IFF CODE SELECTOR (Roues de sélection du code IFF): Selects the IFF code for the
MODE 1, 2 and 3/A. NOT FUNCTIONAL
IFF INTERROGATION MODE SELECTOR (Sélecteur de mode d’intérrogation INTRG):
Selects the radar IFF antenna interrogation mode:
• OFF: The radar IFF interrogation system is powered off.
• SECT (Sectorié – Sectored): The radar IFF antenna will interrogate a 20° arc
around the TDC.
• CONT (Continue – Full): The radar IFF antenna will interrogate the full radar
search pattern.
Page 285
SECTION 21
RADAR
RADAR
Page 286
SECTION 21
21–1
RADAR
RDI
21 – 1 - RDI
INTRODUCTION
The Mirage 2000C is equipped with the RDI (radar doppler à impulsions) radar,
located in front of the cockpit inside the nosecone. The RDI has been developed in
parallel to the RDM (radar doppler multimodes) to provide the Armée de l’Air with a
dedicated high-performance air-to-air fire control radar.
CHARACTERISTICS:
• Waveband:
• Pulse repetition frequency:
• Transmitter output:
• Range:
•
•
•
•
•
•
•
•
I/J band
High PRF (100 kHz+)
4 kW
Maximum detection range of 80 nm and ~65 nm
against a fighter sized target (5 m² equivalent RCS) in HPRF
Range ambiguity error:
<2 nm in bar search and PSID
Range resolution:
20 meters
Angle resolution:
0,1°
Velocity interval:
-600 knots to +3600 knots
Radar beam:
3°
Gimbal limits:
60° in azimuth and 55° in elevation
Antenna maximum speed: 120 °/sec
Antenna bar search speed: 100 °/sec or 50 °/sec
Page 287
SECTION 21
21–1
RADAR
RDI
OPERATIONAL MODES
The RDI primary mission is to detect and track air targets at long range in clear sky
as well as in look down against targets flying as low as 30m. It has a secondary
capability to carry out ranging for air-to-ground weapon delivery as well as low altitude
navigation with ground mapping and terrain avoidance modes.
AIR-TO-AIR MODES
• RECH (Recherche en lignes – Bar search)
• PSID (Poursuite sur information discontinue – Track while scan)
• PSIC (Poursuite sur information continue – Single target track)
• PSIC Super 530 (Poursuite sur information continue Super 530D – Single target
•
•
•
•
•
•
track Super 530D)
SHB (Sécurité haut-bas – Terrain avoidance while track)
P. Axe (Pointage axe – Boresight auto-acquisition)
CH. Viseur (Champ viseur – VTH auto-acquisition)
PDS (Plan de symétrie – Vertical auto-acquisition)
BAG (Balayage acquisition en gisement – Horizontal auto-acquisition)
RRAS (Ralliement radar sur alidade/site – Radar slave to TDC/elevation autoacquisition)
AIR-TO-GROUND MODES
• TAS (Télémétrie air/sol – Air-to-ground ranging)
• VISU (Visualisation du sol – Ground mapping)
• DEC (Découpe terrain – Ground avoidance)
Page 288
SECTION 21
21–1
RADAR
RDI
RADAR THEORY
PRINCIPLE
A radar detects objects by emitting electromagnetic pulses at a given carrier
frequency in the X band (approximately 10GHz). These pulses travel at the speed of
light, and are reflected in all directions by the environment (terrain, aircraft, rainfall…).
A fraction of these reflections returns back to the antenna and are detected by the
radar electronics.
RANGE DETERMINATION
As the electromagnetic waves travel at the speed of light, they come back at the
antenna after a delay corresponding to twice the object distance. Measuring that
delay thus provides range estimation.
CLOSING VELOCITY DETERMINATION
If the radar and/or the observed object are moving, the frequency of the pulse return
may differ from the initial emitted frequency; this effect is commonly known as
Doppler shift. This means that by measuring this frequency shift, the radar can
measure the closing velocity of the observed objects. This has 3 main applications:
• Measuring the radial velocity of objects.
• Reducing confusion between multiple objects if they have different closing
velocities.
• Removing ground clutter.
ANGULAR RESOLUTION AND LOBES
Circular antennas emit a conical shaped primary beam, or primary lobe. Its angular
radius is mostly governed by the laws of diffraction and a direct function of
wavelength and dish radius.
The same laws of diffraction also tell us that the antenna will not emit only inside that
lobe. A fraction of the energy is radiated in various directions, distributed at wider
angles around the antenna axis. These secondary lobes are undesired, as they will
tend to detect more objects and ground clutter which interfere with the signal of
interest.
Page 289
SECTION 21
21–1
RADAR
RDI
LOOK DOWN AND MAIN GROUND CLUTTER REMOVAL
Removing ground clutter is the most important feature of Doppler radars in aircraft,
as it allows detecting and tracking objects that are below the horizon (“look-down”).
In that case, returns from the ground are much stronger than returns from the object
itself: without Doppler filtering, the signal to noise ratio of the object would be near
zero. But if the object is either moving towards the radar (“hot”) or away (“cold”),
returns from ground and object come back at a different frequency, allowing to filter
out the ground.
This is commonly done using a notch rejector, centered on the ground return Doppler
frequency. This also implies that an object moving tangent to the radar will be hidden,
as its return frequency will be the same as the ground. When done on purpose, this
is known as the notch or beam escape maneuver.
PULSE REPETITION FREQUENCY
Signal theory gives us the limits of what we can measure when looking at signal
frequency. If doppler closing velocity was measured on a single pulse, a typical pulse
length of 0.1 µs (30 m range resolution) would not allow measuring velocities with a
precision lower than about 10 000 m/s, which would make the system useless as a
fire control radar. In order to measure speed with a precision of 10 m/s or better, a 1
ms pulse length is necessary, but then, the range resolution becomes 300 km which
would also make the system useless.
For this reason, air-to-air doppler radars measure the Doppler frequency over several
consecutive pulses. This allows combining short pulses (typically under 1
microsecond) with high precision on velocity. It also introduces Doppler ambiguity:
for a given pulse repetition frequency (PRF), there is a velocity ambiguity. As an
example, for a 50 kHz PRF, corresponding to a 20 µs period, the velocity ambiguity
is 750 m/s. This means, that when measuring an object velocity of 450 m/s, the actual
object velocity could be 450m/s, but also:
• 450 + 750 = 1200 m/s
• 450 + 750 + 750 = 1950 m/s
• etc..
• 450 – 750 = -300 m/s
• 450 - 750- 750 = -1050 m/s
• etc...
So, the radar is only able to measure velocity in a 750 m/s interval that can be freely
chosen by design, for instance -200 m/s to 550 m/s. Any velocity outside this interval
will be measured inside, with an error equal to a multiple of 750 m/s.
A higher PRF will increase this interval, allowing to measure a broader velocity range.
For instance, doubling PRF to 100 kHz gives a 1500 m/s velocity interval. This is the
typical HPRF (High PRF) value used by fire control radars.
For range measurement, with a 50 kHz PRF, the pulses are emitted every 20 µs, so
they are spaced by 6 km at the speed of light. This means that when observing
Page 290
SECTION 21
21–1
RADAR
RDI
distances larger than 6000 m, several pulses are travelling at the same time between
the radar and the object. As these pulses can’t be individually identified by the
receptor, meaning that the absolute range can’t be measured directly; as for the
velocity, it’s only known modulo the 6 km range ambiguity. In other words, it can’t
make the difference between an object at 5 km, 11 km, 17 km, etc...
Improving the range measurement requires lowering the PRF, ideally to have a range
ambiguity higher than the typical distance of measured objects. For instance, a 5 kHz
PRF (typical LPRF) provides a range ambiguity of 60 km. This is generally favored
for terrain mapping.
For an air-to-air fire control radar, we generally want to detect objects from negative
closing velocities up to a few Mach closing velocities (typically -1M to +4M), this
requires about 1500 m/s of velocity ambiguity, or a PRF of at least 100 kHz. On the
other hand, we want to measure non-ambiguous ranges up to 100 km or more. This
requires a PRF of at most 3 kHz which is basically impossible without additional
techniques.
RANGE DISAMBIGUATION
There are several ways to solve the range ambiguity problem. This topic is too vast
to be fully covered here, we will only describe the simplest one: dual PRF
disambiguation.
The radar uses 2 PRFs at the same time, either by using dual carriers or fast PRF
switching. These PRFs are close but different meaning that they have different range
ambiguity.
For example, let’s consider a dual PRF system with 100 kHz and 93.75 kHz PRFs.
They have respectively a 3000 m and 3200 m range ambiguity:
We observe a target located at 10900 m.
The first PRF ranging gives us a measurement of 1900 m modulo 3000 m. This
means the actual distance can be: 1900 m, 4900 m, 7900 m, 10900 m, 13900 m,
etc...
The second PRF ranging gives us a measurement of 1300 m modulo 3200 m. This
means the actual distance can be: 1300 m, 4500 m, 7700 m, 10900 m, 14100 m,
etc...
The only possible distance matching both measurements is 10900 m, the actual
target distance.
There are actually other solutions used at longer range: 16900 m, 58900 m, etc...
every 48000 m. Using a dual PRF technique can increase the range ambiguity from
3000 m to 48000 m, and, by using closer PRFs, this absolute ambiguity can easily
be increased to be over our 100 km goal.
Page 291
SECTION 21
21–1
RADAR
RDI
The limits of multiple PRF disambiguation techniques are:
• They can only simultaneously deal with a small number of objects, when the
number of returns is too large (many aircraft, jamming pulses, etc...), the system
may fail to correlate the returns for one PRF with the returns of the other PRFs,
leading to random object distance after disambiguation. Using more simultaneous
PRFs can increase this limit.
Disambiguating objects after separating them by doppler frequency also increase
this limit by a lot, as only objects with the same closing velocity may interfere in the
disambiguation process.
• A very small error on a PRF return delay will cause a large error in the
disambiguated range. In our case, we can see that a 200 m error on one measure
will cause a 3000 m error on the final result. The closer the PRFs, the more often
this issue will arise.
Typical HPRF radars thus have a ranging error in search mode of a few thousand
meters that is a consequence of these small errors.
When tracking a target, the problem is simpler as the systems knows a good
estimation of the target distance from the previous measurement. So, amongst all
the possible ambiguous ranges, the closest to the previous measurement will be
chosen. Jammers or disturbances may cause large errors in range estimation,
causing the tracking to look at the wrong interval.
Also, if the tracked target closing velocity is small enough, a radar can adapt its PRF
to a lower value, allowing easier range extraction.
MONOPULSE RADAR
The Mirage’s RDI radar is in the monopulse radar family. This means that it is able
to locate the angular position of an object within the main lobe instantly, without any
scanning or temporal modulation. There are various monopulse techniques, all
involve splitting the beam into several (typically 4), off-axis lobes.
When receiving, the antenna does not produce a single signal but 4, in a up/down,
left/right pattern. By comparing the relative powers of the 4 signals, it is possible to
know the angular position of the object with a significantly higher precision than the
lobe angle itself.
Page 292
SECTION 21
21–1
RADAR
RDI
AIR-TO-AIR MODES
BAR SEARCH
The bar search (Recherche en lignes – Range while scan) mode is the main air
search mode. It is most useful when searching for aircrafts at long range in clean air
or in look down. In this mode the radar is gyro stabilized to the horizon in pitch and
roll.
In bar search the total number of contacts that the radar can display is dependent on
the selected bar number and persistence setting:
• 64 in 4 bars (16 per bar)
• 64 in 2 bars (32 per bar)
• 40 in 1 bar without persistence
• 20 in 1 bar with persistence
The displayed contacts provide the following information:
• Azimuth
• Distance
• Closing speed
The displayed contacts are not tracked, meaning that their position is not updated
with time, they are erased after being displayed for precisely 1 search pattern and a
new contact is displayed at the new position.
In order to scan the airspace, the radar follows a search pattern that is decomposed
in horizontal bars that are the width of the azimuth aperture. The bars are scanned
from top to bottom.
4 bar search
2 bar search
1 bar search
Page 293
SECTION 21
21–1
RADAR
RDI
The search pattern depends on 2 parameters:
• The bar number (Nombre de lignes balayées)
• The azimuth aperture (Amplitude de gisement)
Both can be set from the PCR (poste de commande radar – radar control panel).
This search pattern can be panned up and down as well as left and right if the azimuth
aperture is lower than 60°.
A smaller search pattern means that the scanned airspace is smaller, but this
airspace is scanned faster. A fast scan pattern allows for quicker detection and faster
contact refresh rate.
The bar search mode pattern size can be set the PCR as well as the display range,
PRF setting, the contact persistence setting and elevation control type. The search
pattern orientation in elevation and azimuth is set using the HOTAS joystick and
elevation commands.
BAR NUMBER
The bar number is the number of horizontal lines that the radar will execute during a
search pattern:
Antenna limits: 55°
4 bars:
10°
2 bars:
5°
1 bar:
3°
In 2 and 4 bars search the bars are overlapping each other, resulting in a 5° and 10°
vertical coverage. This overlap can lead to duplicated contacts.
Page 294
SECTION 21
21–1
RADAR
RDI
AZIMUTH APERTURE
The azimuth aperture is the width of the search pattern:
60° azimuth
30° azimuth
15° azimuth
3° radar beam
DISPLAY RANGE
The radar display range represents the range scale presented on the VTB. It is
changeable using the radar range switch on the PCR or “hitting” the top and bottom
of the VTB screen with the TDC.
Selectable range are 10, 20, 40, 80, 160 and 320 nm. In the 320 nm and 160 nm
setting, no radar image (HFR contacts/BFR returns) is displayed as these ranges is
intended to be used with a DO track.
Page 295
SECTION 21
21–1
RADAR
RDI
PRF SETTING
The PRF (pulse repetition frequency) setting sets the PRF used by the radar while
performing the search pattern:
• HFR (Haute fréquence de récurrence – High PRF): The radar will display HFR
contacts and no raw returns. The HFR contacts can then be locked in PSIC or PSID
using the TDC.
• ENT (Entrelacé – Interleaved): The radar will alternate between HFR and BFR in
the following pattern starting from to top bar and to the right side:
• 4 bars: HFR > HFR > BFR > HFR, restart to the top right bar, BFR > BFR >
HFR > BFR, restart to the top right bar and back to the beginning.
• 2 bars: HFR > HFR, restart to the top right bar, BFR > BFR, restart to the top
right bar and back to the beginning.
• 1 bar: The leftward scans are in HFR and the rightward scans are in BFR.
The BFR raw returns and HFR contacts are displayed simultaneously. The HFR
contacts can then be locked in PSIC or PSID using the TDC.
• BFR (Basse fréquence de récurrence – Low PRF): The radar will display the raw
returns. The radar gain can be adjusted using the BFR radar gain command on the
PCR. Since no HFR contacts are display, the only way to lock a contact is from this
mode it to enter RRAS auto-acquisition mode.
CONTACT PERSISTENCE
The contact persistence is only effective in 1 bar modes with HFR:
• N (Non – No): No contact persistence.
• R (Rémanence – Persistence): In 1 bar mode (bar search, PSID, SHB), HFR
contacts remain displayed for 2 search pattern after they are first displayed.
ELEVATION CONTROL TYPE
The elevation control type sets the way the HOTAS antenna elevation command
controls the antenna elevation position:
• S (SITE): The HOTAS elevation command directly moves the antenna elevation.
• Z (ZBUT): The HOTAS elevation command sets the center of the searched altitude
slice and the radar moves the antenna to match this elevation at the TDC position.
ELEVATION
The search pattern orientation in elevation is controlled using the HOTAS radar
elevation controls according to the elevation control type setting.
AZIMUTH
When the azimuth aperture setting is under 60°, the search pattern is centered
around the TDC position.
Page 296
SECTION 21
21–1
RADAR
RDI
PSID
The PSID or PID (poursuite sur information discontinue – track while scan) mode
allows the radar to focus on a single contact and provide additional information while
still scanning the airspace around the contact.
The radar will provide additional information on the focused or locked contact:
• Direction
• Speed
• Altitude
The radar will keep a 1 bar search pattern centered on the locked contact in azimuth
and elevation and be able to display 16 other contacts with the same info as in bar
search.
The bar setting is forced to 1 bar and the azimuth setting is free to be set at 60°, 30°
or 15°.
The radar will build a track of the locked contact, this means that the contact position
is updated in real time according to its movement and adjusted each time the contact
is scanned by the radar.
This mode allows to track a contact position but is not perfect, lock can be lost due
to erratic maneuvers. It also cannot be used to guide the Super 530D missile.
PSIC
The PSIC or PIC (poursuite sur information continue – single target track) mode
physically locks the radar on a single contact to provide additional information and
maintain maximum lock reliability.
The radar will provide the same additional information than in PSID mode, but the
update rate is almost instantaneous:
• Direction
• Speed
• Altitude
As the radar is physically locked on the target, the information provided has a greater
accuracy and is updated in real time. This lock is almost impossible to evade using
erratic maneuvers.
If the target is lost, the radar keeps illuminating the target trajectory and try to reacquire it for 5 seconds after which the radar will return to bar search.
Locked aircraft can also be made aware that they are targeted if they are equipped
with an RWR.
From this mode, the Super 530D missiles can be fired and guided on the radar target.
When a 530 is fired, the radar enters to a PSIC sub-mode: PSIC Super 530.
Page 297
SECTION 21
21–1
RADAR
RDI
PSIC SUPER 530
The PSIC Super 530 (poursuite sur information continue Super 530D – single target
track Super 530D) is a sub-mode of PSIC that is switched to automatically once a
Super 530D missile has been fired.
The radar stays in PSIC Super 530 for 50 seconds after the last missile fired. During
this time, if the target is lost, the radar will keep illuminating the target trajectory and
try to re-acquire it just like PSIC mode but for 8 seconds instead of 5. After those 8
seconds, the radar will continue to illuminate the target trajectory but won’t try to reacquire the lock. This forced illumination mode lasts as long as the radar is in PSIC
Super 530.
If the radar is unable to continue to illuminate the target, the PSIC Super 530 pointé
mode can be used to manually illuminate the target. This mode is only selectable
while the radar is in PSIC Super 530 and fixes the radar antenna to the aircraft axis,
allowing the radar to be aimed at the target by flying the aircraft.
SHB
The SHB (sécurité haut-bas – terrain avoidance while track) mode combine the DEC
and PSID mode. The radar performs a 2 bar search pattern alternates between the
2 modes, leftward scans for the DEC, rightward scans for the PSID.
The DEC radar image is displayed up to 10 nm and the display range setting can be
set to 10 or 20 nm. The PSID lock range is not more limited than in PSID.
In SHB, there is 20° limit in elevation difference between the tracked target and the
clearance height. If this limit is exceeded, the radar will drop the lock and switch to
DEC mode. There is a similar limit in azimuth if the azimuth aperture setting is under
60°, the radar needs to keep scanning 5° on each side of the aircraft axis line.
BORESIGHT AUTO-ACQUISITION
The boresight auto-acquisition (P.axe – pointage axe) mode is a close combat mode
for the radar. The radar is slaved to the aircraft boresight and will try to lock in PSIC
any contact within 10nm. The scanned area is equal to the antenna aperture, a 3°
cone.
Page 298
SECTION 21
21–1
RADAR
RDI
Antenna limits: 55°x60°
Boresight scan: 3°
This mode is most useful to lock a visual contact.
Page 299
SECTION 21
21–1
RADAR
RDI
VTH AUTO-ACQUISITION
The VTH auto-acquisition (CH. viseur – champ viseur) mode is a close combat mode
for the radar. The radar executes a spiral pattern that is roughly the size of the VTH
and will try to lock in PSIC any contact within 10nm. The scanned area is equal to a
20° cone.
Antenna limits: 55°x60°
VTH scan:
20°
Radar beam:
3°
This mode is most useful to re-acquire a lost contact whose approximate position is
known.
Page 300
SECTION 21
21–1
RADAR
RDI
VERTICAL AUTO-ACQUISITION
The vertical auto-acquisition (PDS – plan de symétrie) mode is a close combat mode
for the radar. The radar executes a pattern composed of 2 vertical lines relative to
the aircraft. The vertical lines are just left and right of the aircraft vertical axis and
goes from 10° under the nose to 50° above. The radar will try to lock any contact in
PSIC within 10nm.
Antenna limits: 55°x60°
Vertical scan: 60°x5°
Radar beam: 3°
This mode is useful in dogfights, when the hostile aircraft is in front and above.
Page 301
SECTION 21
21–1
RADAR
RDI
HORIZONTAL AUTO-ACQUISITION
The horizontal auto-acquisition (BAG – balayage acquisition en gisement) mode is a
close combat mode for the radar. The radar executes the same search pattern as the
2 bar/30° bar search pattern and will lock in PSIC any contact within 10nm. The
scanned area can be panned up, down, left and right using the HOTAS antenna
elevation command and by moving the TDC in the same way than in bar search.
Antenna limits: 55°x60°
Horizontal scan: 5°x30°
Radar beam:
3°
This mode is most useful to lock a close contact as is offers the biggest scan zone of
all auto-acquisition modes.
2 modes are available for horizontal auto-acquisition:
• BAH: The radar uses HFR (high PRF)
• BA2: The radar uses MRF2 (medium PRF)
Page 302
SECTION 21
21–1
RADAR
RDI
RADAR SLAVE TO TDC/ELEVATION
The radar slave to TDC/elevation (RRAS - Ralliement radar sur alidade/site ) mode
is a close combat mode for the radar. The radar executes the same search pattern
as in boresight mode and will lock in PSIC any contact within 10nm. The scanned
area can be panned up, down, left and right using the HOTAS antenna elevation
command and by moving the TDC in the same way than in bar search.
Antenna limits: 55°x60°
RRAS scan:
3°
This mode is most useful to achieve a HFR lock on a BFR contact.
Page 303
SECTION 21
21–1
RADAR
RDI
AIR-TO-GROUND MODES
TAS
The TAS (télémétrie air/sol – air-to-ground ranging) mode is the main ranging method
for air-to-ground weapon delivery. The radar is slaved to the weapon delivery point
or the designation diamond to provide slant range to the ground target.
Using a radar to range ground targets is not perfect due to the size of the radar beam.
In order to determine the center of the beam, the radar averages all the ground
returns it gets. This process is always occurring as long as the radar has a solid lock
on the ground, meaning that this average will most likely be incorrect if the terrain is
moving under the radar beam.
In order to achieve the most accurate ranging possible, a few precautions need to be
taken:
• Stabilize the weapon delivery point or designation diamond on the target for at least
1 second before weapon release or designation to allow the radar to determine the
center of the beam.
• Avoid uneven terrain or targets on top of ridges, the radar will have a hard time
finding the center of the beam if it sees multiple planes of terrain.
• Since the radar beam is a cone, a close and steep dive angle reduce the size the
area illuminated by the radar, allowing for a greater accuracy.
• Water absorbs radar waves a lot, radar ranging might be unpracticable on or near
water unless using a very steep angle.
VISU
The VISU (visualisation du sol – ground mapping) mode is a terrain visualization
mode. The radar displays the raw ground return to provide a radar map of the ground.
The radar gain can be adjusted using the BFR radar gain command on the PCR, this
command can be used to adjust intensity of the radar image. The antenna attitude is
set by the pilot.
In this mode the bar number can be set to 2 or 1 bars, the 4 bars position sets it to 2
bars, and the azimuth aperture to 60°, 30° or 15°. The display range can be set to
10, 20 and 40 nm.
DEC
The DEC (découpe – ground avoidance) mode is a terrain avoidance and
visualization mode. The radar displays the raw ground return in 2 colors depending
on the terrain altitude relative to the set clearance height. The antenna attitude is set
by the radar according to the clearance height which is set by the pilot.
In this mode the bar number can be set to 2 or 1 bars, the 4 bars position sets it to 2
bars, and the azimuth aperture to 60°, 30° or 15°.
Page 304
SECTION 21
21–1
RADAR
RDI
TARGET DESIGNATION
A target designation (DO – désignation d’objectif) is a fake radar target presented on
the VTB by the aircraft SNA. DOs can be generated using different methods, the
method used will determine its name:
• Manual target designation (DO MAN – désignation d’objectif mauelle): The DO
MAN is generated by manually inputing the target reference point, position, bearing,
altitude, speed and age.
• Radar target designation (DO RADAR – désignation d’objectif ralliée sur le radar):
The DO RADAR is generated from a radar PSID or PSIC target.
• Remote target designation (DO TAF – désignation d’objectif par téléaffichage): The
DO TAF is generated using the information provided by a CDC though the TAF link.
The DO fake radar target position is updated in real time based on its initial position,
bearing, speed and altitude to represent its new position. If the target changes its
course, speed or altitude, the DO will no longer be accurate.
This DO can be used by the pilot to visualize the position of a target at distances
beyond the radar detection range, execute nose cold interception or improve
situational awareness during combat.
The DO TAF works a bit differently from the other DO as it is generated by the TAF
link. Using the TAF link, the CDC broadcasts the position, bearing, altitude and speed
of the target every 5 seconds. This information is then used by the aircraft to display
the DO TAF on the VTB.
DO TAF has two sub-states depending on the validity of the TAF information:
• Ground trajectory remote target designation (DO TAF SOL – désignation d’objectif
par téléaffichage trajectographie sol): The aircraft is receiving valid TAF messages
from the CDC and is updating the DO TAF position.
In DO TAF SOL, additional information is displayed:
• VTB: DO TAF target type and computed interception information.
• VTH: DO TAF rule of engagement.
• Onboard trajectory remote target designation (DO TAF BORD – désignation
d’objectif par téléaffichage trajectographie de bord): The aircraft is no longer
receiving valid TAF messages form the CDC and the DO TAF position is updated
using its last known position, bearing, altitude and speed.
The target broadcasted by the CDC cannot be chosen and will be the same for all
aircraft on a TAF channel. The broadcasted target will be the hostile aircraft that will
be the closest to the CDC in 5 minutes.
While in DO TAF SOL, a change of the DO TAF target or rule of engagement is
indicated by the TAF tone: a 700 Hz signal lasting 150ms repeating 4 times with 150
ms spacing.
Page 305
SECTION 21
21–1
RADAR
RDI
RADAR EMISSION CHANNEL
When 2 radar emits in the vicinity of each other, they will receive each other radar
waves coming from the radar main lobe, side lobe or environment reflections. These
radar waves will not be expected by the radar and prevent it from operating properly.
Most of the time, these waves will be interpreted by the radar as very strong jamming
and will reduce its performance significantly.
In order to prevent this, radars will have different emission channels that allow
multiple aircraft to operate next to each other. In the Mirage 2000C, the RDI radar
has 144 emission channels that can be set on the PCR.
When flying with other Mirages, it is important to coordinate each aircraft radar
emission channels so there is no overlap.
Page 306
SECTION 21
21–2
RADAR
RADAR CONTROL PANEL
21 – 2 - RADAR CONTROL PANEL
The radar control panel (PCR – poste de commande radar) provides control over the
radar operational mode, options and configuration.
1
2
3
5
4
6
7
9
10
8
12
13
11
16
15
14
18
17
19
RADAR EMISSION CHANNEL SELECTOR 1 (Sélecteur pinceaux de fréquence radar 1):
Selects the first radar emission channel digit.
RADAR EMISSION CHANNEL VALIDATION BUTTON (Bouton de validation pinceaux de
fréquence radar): Saves the selected radar emission channel.
RADAR EMISSION CHANNEL SELECTOR 2 (Sélecteur pinceaux de fréquence radar 2):
Selects the second radar emission channel digit.
REAM BUTTON (Poussoir de réarmement): Resets the radar in case of malfunction.
Page 307
SECTION 21
21–2
RADAR
RADAR CONTROL PANEL
DOPPLER FILTER SWITCH (Sélecteur de rejection): Selects the doppler filter operation
mode for HFR:
• Avec (With): The radar main lobe filter is always activated. Will reduce the
spurious contact quantity and reduce the probability of the radar to track a
chaff but will increase the chance of losing lock due to notching.
• Auto: The radar main lobe filter is activated when the main lobe ground return
is too high. Will improve notching resistance but increase the chance of
spurious contact and the probability of the radar to track a chaff.
• Sans (Without): The radar main lobe filter is never activated. Result in a lot of
spurious contact but can decrease the chance of losing lock due to notching.
BFR RADAR GAIN (Gain radar BFR): Sets the radar BFR return gain in ENT, BFR and
VISU modes.
RADAR POWER MODE KNOB (Rotacteur d’état radar): Selects the radar power mode:
• A (Arrêt – OFF): The radar is not powered.
• P CH (Préchauffage – Pre-heating): The radar is in preparation mode, it preheats to operational temperature.
• SIL (Silence – Standby): The radar executes the selected search pattern but
it not emitting. In this mode, the radar can be forced to emit by selecting a
close combat or TAS mode.
• EM (Emission – Emitting): The radar is emitting.
RADAR TEST BUTTON (Poussoir de test radar): Starts the radar test sequence. NOT
FUNCTIONAL
DEC MODE SELECTION BUTTON (Boutton de sélection DEC): Selects and deselect the
DEC mode for the radar. The button is lit up red when the DEC mode is selected.
If the radar is in PSID, pressing the DEC button will select the SHB mode.
VISU MODE SELECTION BUTTON (Boutton de sélection VISU): Selects and deselects
the VISU mode for the radar. The button is lit up red when the VISU mode is selected.
RADAR PRESENTATION SWITCH (Sélecteur de visualisation): Selects between the 2
available radar presentation modes:
• PPI (Plan position indicator): The emitter is at the bottom center of the screen
and the contacts are displayed inside the radar cone coming from the emitter.
• B (B scope): The emitter is at the bottom of the screen but stretched to take
all the width. This way the vertical axis represents the distance and the
horizontal axis the azimuth. This presentation is distorted to allow easier
readings of contacts at close distance.
RADAR HARDENED NOISE GATE SELECTION BUTTON (Bouton de réduction du bruit):
Increases the background noise filter for the radar. Removes most of the spurious
contacts but reduces the maximum detection range. The button is lit up red when the
hardened noise gate is selected.
Page 308
SECTION 21
21–2
RADAR
RADAR CONTROL PANEL
ANTENNA ELEVATION TYPE SWITCH (Inverseur de mode site moyen): Selects the
antenna elevation movement type for bar search:
• S (SITE): The HOTAS elevation command moves the antenna elevation and
the searched altitude range will be displayed in thousands of feet right of the
TDC for the current TDC position.
• Z (ZBUT): The HOTAS elevation command sets the center of the searched
altitude slice as displayed right of the TDC and the radar moves the antenna
to match this elevation at the TDC position.
PERSISTENCE KNOB (Rotacteur de rémanence): Selects the contact persistence mode
in bar search:
• N (Non – No): No persistence.
• R (Rémanence – Persistence): In 1 bar mode (bar search, PSID, SHB), HFR
contacts remain displayed for 2 search patterns after they are first displayed.
PRF SELECTION SWITCH (Sélecteur de fréquence de récurrence): Selects the radar
pulse repetition frequency in bar search:
• HFR (Haute fréquence de récurrence – High PRF): Used to detect contacts
with a high radial (closing or opening) speed.
• ENT (Entrelacé – Interleaved): The radar alternates between HFR and BFR
to maximize the detection chance.
• BFR (Basse fréquence de récurrence – Low PRF): Used to detect contacts
with low radial speed without using doppler effects.
BAR NUMBER SELECTOR (Sélecteur du nombre de lignes): Selects the number of
horizontal bars for bar search, DEC and VISU modes. Possible number of bars is 1,
2 and 4.
RADAR RANGE SWITCH (Commande d’échelle radar): Increases or decreases the
displayed radar range.
PSIC BUTTON (Boutton PSIC): Toggles the PSID or PSIC pre-selection:
• Radar in PSID or PSIC: Commands the radar to switch between PSID and
PSIC mode unless the radar is in PSIC Super 530.
• Radar in bar search: Toggles the PSID/PSIC preselection.
AZIMUTH APERTURE SELECTOR (Sélecteur de l’amplitude de gisement): Selects the
azimuth aperture for the radar in bar search. Possible azimuth aperture are 15°, 30°
and 60°.
Page 309
SECTION 21
21–3
RADAR
VTB COMMANDS
21 – 3 - VTB COMMANDS
The radar display (VTB – visualisation tête basse) commands main purpose is to turn
on and off the display, to select the symbology luminosity, to declutter the display and
to chose the display type. It’s also used to set the parameter for a manual target
designation (DO MAN – désgnation d’objectif manuelle).
8
12
9
13
10
14
11
15
7
6
1
5
4
3
2
POWER SWITCH (Interrupteur marche/arrêt): Turns ON (M – Marche) or OFF (A –
Arrêt) the VTB display. The VTB will turn on after a 30 second delay during which the
system will heat up to operating temperature.
TDC BRIGHTNESS (Luminosité alidade): From 0 to 7, sets the TDC brightness.
RADAR VIDEO CONTRAST (Contraste vidéo radar): From 0 to 7, sets the contrast of the
video coming from the radar.
SYMBOLOGY BRIGHTNESS (Luminosité symbologie): From 0 to 7, sets the symbology
brightness.
MARKS BRIGHTNESS (Luminosité marqueurs): From 0 to 7, sets the marks brightness.
PRESENTATION SELECTION SWITCH (Inverseur CADR AV/AR): Selects the radar display
type:
• AV (Avant – Front): The VTB displays the standard PPI or B scope with all the
radar informations.
• AR (Arrière – Rear): The VTB displays the DO centrée mode where the
aircraft is placed at the center of the screen and no radar information is
displayed.
Page 310
SECTION 21
21–3
RADAR
VTB COMMANDS
DECLUTTER SWITCH (Poussoir ALLEG): Momentary switch, toggles the display of the
DO symbology present on the VTB and removes all the displayed tactical BUTs.
DEB/FIN SWITCH (Commande DEB/FIN): Used to visualize, edit and save DO MAN:
• DEB (Début – Start): Displays the DO MAN parameter insertion/visualization
bands.
• FIN (Fin – End): Insert the DO MAN parameters.
N SWITCH (Commande N): Selects the reference BUT for the DO MAN. Also selects
the reference BUT for the TDC distance/azimuth symbology.
RHO SWITCH (Commande ρ): Sets the DO MAN horizontal distance from the
reference BUT in nm.
THETA SWITCH (Commande θ): Sets the DO MAN target azimuth from the reference
BUT in true north. Also resets the target designation when RAZ (remise à zéro –
reset) is displayed next to it.
C SWITCH (Commande C): Sets the DO MAN target bearing in true north.
Z SWITCH (Commande Z): Sets the DO MAN target altitude barometric altitude.
M SWITCH (Commande M): Sets the DO MAN target speed in Mach.
T SWITCH (Commande T): Sets the DO MAN age, the time since it was at the inserted
position.
Page 311
SECTION 21
21–4
RADAR
VTB SYMBOLOGY
21 – 4 - VTB SYMBOLOGY
INTRODUCTION
Once the VTB ON/OFF switch is set to M (marche – ON), the VTB screen will display
symbology coming from the radar.
In this section the symbology will be explained and presented in PPI display mode,
most of the symbology works the same between PPI and B display mode and
differences will be explained in a dedicated B mode section.
COMMON SYMBOLOGY
In all radar modes, except in PRES (visualisation des présences – ordinance display)
mode, the VTB screen will display the following symbology:
9
8
10
1
2
3
6
7
4
5
AIRCRAFT MODEL (Maquette avion): Fixed, used as a reference for the horizon symbol.
HORIZON (Horizon): Indicates the aircraft pitch and roll relative to the aircraft model
symbol. Pitch is limited to ±30°.
AIRCRAFT VECTOR (Vecteur vitesse chasseur): Represents the ground speed of the
aircraft (1 cm = 200 m/s) and its bearing.
HEADING SCALE (Echelle de cap): The Heading Scale moves horizontally against the
base of the aircraft vector indicating aircraft heading from 0º to 360º. The scale is
numbered tens of degrees, with a short line every 10° and the azimuth in tens of
degrees every 30°.
The triangle Δ represents the aircraft bearing (route), meaning the direction where
the aircraft is flying. There might be a difference between the aircraft heading and
bearing due to the wind.
Page 312
SECTION 21
21–4
RADAR
VTB SYMBOLOGY
AIRCRAFT ALTITUDE (Altitude chasseur): Indicates the aircraft’s corrected barometric
altitude in hundreds of feet.
AIRCRAFT AIR SPEED (Vitesse conventionnelle chasseur): Indicates the current
aircraft’s airspeed in knots.
AIRCRAFT MACH (Mach chasseur): Indicates the aircraft’s Mach speed.
RANGE INDICATION (Repère de distance): Indicates the selected radar display range
scale at the range marker.
RANGE MARKER (Marqueur de distance): Represents the scale of the radar display
relative to the range indication.
AZIMUTH MARKERS (Marqueurs de gisement): Represents the 30° and 60° azimuth
relative to the aircraft heading.
Page 313
SECTION 21
21–4
RADAR
VTB SYMBOLOGY
RADAR OFF
With the radar power mode knob in the A (arrêt – off) position, the VTB will only
display the common symbology.
Page 314
SECTION 21
21–4
RADAR
VTB SYMBOLOGY
RADAR IN PRE-HEATING
With the radar power mode knob in the P CH (préchauffage – pre-heating) position,
the VTB will only display the fixed symbology as well as a flashing or steady preheating indication.
1
RADAR PRE-HEATING INDICATION (Radar en préchauffage): Indicates the condition of
the radar depending on the selected radar mode:
• P CH:
• Steady, indicates that the pre-heating sequence is finished.
• Flashing, indicates that the pre-heating sequence is ongoing.
The indicator also flashes as long as the aircraft has weight on wheels,
even if the sequence is finished.
• SIL or EM:
• Flashing, indicates that the pre-heating sequence is ongoing, only
displayed for 10 seconds after the radar is set to SIL or EM mode.
Page 315
SECTION 21
21–4
RADAR
VTB SYMBOLOGY
RADAR IN STANDBY
With the radar power mode knob in the SIL (silence – standby) position, the VTB will
display the common symbology with the addition of the TDC, antenna elevation scale
and antenna azimuth indicator.
4
2
1
3
5
RADAR IN STANDBY INDICATION (Radar en silence): Indicates that the radar is in
standby mode and not emitting.
TDC (Alidade – Target designation caret): Moved using the HOTAS radar designator
joystick, used to designate target for the radar.
ANTENNA ELEVATION SYMBOLOGY (Echelle de site): Indicates the position of the
antenna in elevation.
ANTENNA AZIMUTH INDICATOR (Gisement instantané de l’antenne): Indicates the
position on the antenna in azimuth.
TDC RANGE/AZIMUTH (Distance/relèvement alidate): Indicates the TDC range and
bearing relative to a reference point.
In this mode the radar is not emitting and will not display contacts, but IFF
interrogation and reply display is still possible.
Page 316
SECTION 21
21–4
RADAR
VTB SYMBOLOGY
BAR SEARCH
Bar search is the radar default air-to-air mode when the radar power mode knob is
set to the EM (émission – emit) position, the VTB will display the standby symbology
with the addition of the radar mode and PSIC/PSID preselection symbology without
the standby mode indication.
1
2
RADAR MODE (Mode radar): In bar search the radar mode indicates the PRF mode as
selected by PRF selection switch on the PCR. Possible modes are HFR, ENT and
BFR.
Flashes to indicate that the radar pre-heating sequence is still ongoing.
PSID/PSIC PRESELECTION (Présélection PSID/PSIC): Indicates what tracking type
will be selected when a manual lock is achieved. It is set to PID or PIC using the PCR
PSIC button or the HOTAS PSIC toggle command.
Page 317
SECTION 21
21–4
RADAR
VTB SYMBOLOGY
AZIMUTH MARKERS
The VTB azimuth marker are located at 30° and 60° from the aircraft centerline. They
are spaced evenly to also represent range.
When the radar range setting is at 320, 160, 80, 40 or 20 nm, 4 azimuth markers are
displayed per line while with the range setting at 10 nm, only 2 azimuth markers are
displayed.
Page 318
SECTION 21
21–4
RADAR
VTB SYMBOLOGY
RANGE MARKER
The range marker represents the scale of the radar display relative to the range
indication, it also indicates the search pattern size and position as well as the
instantaneous antenna azimuth.
The instantaneous antenna azimuth (gisement instantané de l’antenne) is indicated
by the hole in the range marker arc. It is only displayed when the radar power setting
knob is in the SIL or EM position with the radar in bar search, PSID, SHB, DEC or
VISU mode.
The search pattern size and position (amplitude et position du gisement moyen de
balayage) is indicated by the size and position of the range marker arc.
Page 319
SECTION 21
21–4
RADAR
VTB SYMBOLOGY
ANTENNA ELEVATION SYMBOLOGY
The antenna elevation is composed of the antenna elevation scale, the antenna
elevation indicator and the bar number.
1
2
3
ELEVATION SCALE (Echelle de site): Provides a reference for the antenna elevation
indicator relative to the horizon. Each dash is 10°, longer dashes at -30°, 0 and +30°
with a 3 next to the - 30° and +30°. The ±55° radar gimbal limit is not indicated.
ANTENNA ELEVATION INDICATOR (Repère de site): Indicates the instantaneous position
of the antenna in elevation relative to the elevation scale.
BAR NUMBER (Nombre de lignes): Indicates the number of horizontal bars for the
current search pattern as set with the bar number selector on the PCR. Its position,
relative to the elevation scale, indicates radar search pattern elevation. Only
displayed when the radar power setting knob is in the EM position with the radar in
bar search mode.
Page 320
SECTION 21
21–4
RADAR
VTB SYMBOLOGY
TDC
The TDC (alidade – target designation caret) is represented by a hollow plus and is
moved using the HOTAS radar designator joystick everywhere inside the VTB. It is
only displayed when the radar power mode knob is in the SIL or EM position and the
radar mode is bar search, PSID, PSIC, SHB, BAG or RRAS. It is used to orient the
antenna or antenna search pattern in azimuth and elevation as well as designate a
target for the radar.
1
2
3
4
TDC (Alidade – Target designation caret): Moved using the HOTAS radar designator
joystick, it is used to direct the antenna position in azimuth and designate contacts
for radar lock.
TDC RANGE (Distance alidade): Indicates the range of the TDC at its position. Only
displayed in bar search, BAG or RRAS radar mode.
TDC ALTITUDE RANGE (Tranche d’altitude): Indicates the searched altitude range at
the TDC position. Only displayed when the antenna elevation type switch is in the S
position on the PCR and the radar is in bar search, PSID, SHB, BAG or RRAS mode.
TDC AZIMUTH (Relèvement alidade): Indicates the azimuth of the TDC at its position
relative to the heading scale.
Page 321
SECTION 21
21–4
RADAR
VTB SYMBOLOGY
5
TDC MEAN ALTITUDE (Altitude ZBUT): Indicate the center of the searched altitude
slice. Only displayed when the antenna elevation type switch is in the Z position on
the PCR and the radar is in bar search, PSID, SHB, BAG or RRAS mode.
Page 322
SECTION 21
21–4
RADAR
VTB SYMBOLOGY
NAVIGATION SYMBOLOGY
The VTB can also display navigation information with the radar power mode knob in
any mode.
3
1
2
NAVIGATION BUT (BUT de navigation): Displayed in any SNA mode except air-to-air
mode, it displays the position of the currently selected DEST BUT, BAD or MRQ.
DESIRED HEADING (Route désirée d’arrivée): Displayed when the navigation BUT is
displayed, the PCA RD option is selected and the radar is in PPI mode. It displays
the desired heading arrival heading relative to the navigation BUT.
TACTICAL BUT (BUT tactique): Displayed in any mode except when the SNA is in airto-ground selected sub-mode, it displays the position of up to 5 BUTs with their
number.
For more information about the navigation BUT and tactical BUTs, see the INS USING
THE PCN SUB-SECTION.
Page 323
SECTION 21
21–4
RADAR
VTB SYMBOLOGY
HFR SYMBOLOGY
In bar search, PSID and SHB mode, contacts detected in HFR are displayed on the
VTB screen. In Bar search, HFR contact are displayed if the PRF selection switch on
the PCR is set to the HFR or ENT position.
1
2
RADAR MODE (Mode radar): In bar search the radar mode indicates the currently
selected PRF mode.
Flashes to indicate that the radar pre-heating sequence is still ongoing.
HFR RADAR CONTACT (Plot HFR): Indicates the position and closing speed in Mach
of the contact as well as the bar that detected the contact.
The tip of the V or inverted V shape is the position of the contact, not the center of
the shape.
Page 324
SECTION 21
21–4
RADAR
VTB SYMBOLOGY
HFR radar contacts symbology gives 2 information:
• The contact range is closing or opening, indicated by the contact V direction.
• Which bar scanned the contact, indicated by the horizontal bars at the top or bottom
of the contact symbol or lack thereof.
A single aircraft can be displayed multiple times on the VTB screen due to the bars
overlapping.
Closing
Radar cone
Opening
4 bar search
2 bar search
1 bar search
Page 325
SECTION 21
21–4
RADAR
VTB SYMBOLOGY
BFR SYMBOLOGY
In bar search, SHB, DEC and VISU mode the raw radar image is displayed on the
VTB screen. In Bar search, the raw radar image is displayed if the PRF selection
switch on the PCR is set to the BFR or ENT position.
The BFR radar image is only displayed up to 40 nm.
The raw radar image needs to be interpreted by the pilot to find contacts in the clutter.
1
3
2
4
RADAR MODE (Mode radar): In bar search the radar mode indicates the currently
selected PRF mode.
Flashes to indicate that the radar pre-heating sequence is still ongoing.
BFR CONTACT (Plot BFR): In BFR, aircraft are represented as arcs, its width
dependent on the closeness and size of the target.
BFR GROUND CLUTTER (Retours sol): In BFR, the radar displays the raw return without
any filter, if the radar search pattern is oriented toward the ground, a radar image
from the ground will be displayed on the VTB. The BFR radar image is all green, the
brighter the green the stronger the return.
The BFR radar gain knob can be used to adjust the intensity of the radar image.
ALTITUDE SIDE LOBE RETURN (Retour d’altitude du lobe secondaire): As the raw returns
are not filtered, the side lobe return coming from the ground directly below the aircraft
is displayed.
Its position in range correspond to the altitude of the aircraft over the ground.
Page 326
SECTION 21
21–4
RADAR
VTB SYMBOLOGY
TRACKED TARGET SYMBOLOGY
In PSID, PSIC and SHB the tracked target is represented by a separate symbology.
This symbology is composed of 4 elements:
• 2 vertical bars indicating the position of the tracked target.
• Left of the 2 vertical bars, the target range.
• Originating from the center of the 2 vertical bars, the arrow indicates the tracked
target ground velocity vector. The length of the velocity vector represents the target
speed where 1 cm equals 200 m/s.
• Right of the tip of the velocity vector, the B angle. It indicates the tracked target
reverse heading relative to the aircraft, 180 indicating that the tracked target is flying
at the same heading than the aircraft and 0 indicating that it’s flying the opposite
heading. From 0° to 180° and by 5° increments.
The tracked target is crossed by the aircraft target line that indicates the direction of
the tracked target.
In PSID and SHB, the contact quantity is displayed under the B angle. It represents
the number of HFR contacts detected around the tracked target. This number can
be as high as 7 and is displayed when above 1.
Page 327
SECTION 21
21–4
RADAR
VTB SYMBOLOGY
IFF SYMBOLOGY
The execution of an IFF interrogation and the display the IFF replies is represented
by a specific symbology depending on the radar mode.
The IFF antenna is placed on the radar antenna and thus follow its azimuth and
elevation. It’s field of interrogation is 10° wide.
With the radar in bar search (only with the PRF set to HFR or ENT) or PSID, the
execution of an interrogation is represented by a doubling of the radar range marker
arc. The size of the interrogation arc is dependent on the position of IFF interrogation
mode on the IFF interrogator panel:
• SECT (Sectorié – Sectored): The interrogation is sent in a 20° arc around the TDC.
• CONT (Continue – Full): The interrogation is sent in the full search pattern, within
the limits of its azimuth setting and orientation.
Page 328
SECTION 21
21–4
RADAR
VTB SYMBOLOGY
When an IFF interrogation is requested, the arc is dashed until the interrogation is
effective, when it is displayed full. With IFF interrogation mode in CONT, it lasts only
0,5 sec while in SECT, the interrogation is effective is only when the radar antenna
is oriented in the requested interrogation azimuth.
In bar search and PSID, the IFF replies are represented by a full diamond located at
the rough location of the IFF replying aircraft. The IFF diamonds are not correlated
to HFR contacts and are displayed for a full search pattern. The maximum number
of IFF diamonds that can be displayed is 64.
Page 329
SECTION 21
21–4
RADAR
VTB SYMBOLOGY
In PSIC, the interrogation arc is 20° wide, centered on the tracked target. The IFF
diamonds are no longer displayed, the 2 vertical bars indicating the position of the
tracked target are doubled if it replies the IFF interrogation. A diagonal line indicates
that the received reply is doubtful, meaning that the position of the IFF replying
aircraft does not totally correspond to the position of the tracked target.
Page 330
SECTION 21
21–4
RADAR
VTB SYMBOLOGY
PERSISTENCE MODE
The persistence mode (mode remanence) is selected by placing the persistence
knob in the R position. This mode in only effective when the radar is in searching 1
bar in HFR:
• Bar search with the bar number selector set to 1 and the PRF selection switch set
to HFR or ENT.
• PSID.
• SHB.
In persistence mode, HFR contacts remain displayed for 3 search patterns instead
of 1. During the first search pattern after the contact is detected, it is represented by
the normal HFR symbol. During the second search pattern, the normal HFR symbol
is replaced by an horizonal line, this same line is used during the third search pattern
but dimed. The contact disappear once the third search pattern is finished.
This mode is useful to spot spurious contacts and estimate the trajectory of detected
aircraft.
Page 331
SECTION 21
21–4
RADAR
VTB SYMBOLOGY
PSID
In PSID (poursuite sur information discontinue – TWS) mode, the radar will display
additional information relative to the tracked contact as well as specific symbology.
The radar will set itself in 1 bar search and center the searched pattern on the tracked
contact in azimuth an elevation
In addition to the PSID symbology, the radar will continue to display the bar search
symbology and HFR contacts, except the TDC range and preselection PSID/PSIC
symbology.
1
2
3
4
6
5
7
TARGET MACH (Mach cible): Indicates the tracked target speed in mach.
TARGET BEARING (Route cible): Indicates the tracked target bearing.
TARGET CLOSING SPEED (Vitesse de rapprochement cible): Indicates the tracked
target closing speed in knots. Can be positive (closing) or negative (opening).
TARGET ALTITUDE (Altitude cible): Indicates the tracked target altitude in flight level or
hundreds of feets. Always positive or null.
AIRCRAFT TARGET LINE (Droite chasseur cible): The line indicates the direction of the
tracked target. It starts from the bottom center of the display, where the aircraft is
positioned, passes by the tracked target and ends just above the range marker. It
flashes when the antenna is at less than 5° from its gimbal limits.
TRACKED TARGET (Plot poursuivi): Indicates the tracked target position, range,
velocity vector, B angle and contact quantity.
TARGET AZIMUTH (Relèvement cible): Replaces the TDC azimuth and indicates the
tracked target azimuth relative to the heading scale.
Page 332
SECTION 21
21–4
RADAR
VTB SYMBOLOGY
PSIC
In PSIC (poursuite sur information continue – STT) mode, the radar will display the
same additional information relative to the tracked contact than in PSID.
The radar will stop its search pattern and lock its azimuth and elevation on the tracked
contact. No bar search contact symbology is displayed.
1
2
TRACKED TARGET (Plot poursuivi): Indicates the tracked contact position just like in
PSID mode.
NCTR TYPE (RCNC – Reconnaissance de cibles non coopératives): Indicates the
tracked contact type as determined by the radar NCTR system. Replaced by
asterisks when the type cannot be determined.
Page 333
SECTION 21
21–4
RADAR
VTB SYMBOLOGY
SHB
In SHB (sécurité haut-bas – terrain avoidance while track) mode, the radar combines
the symbology from the PSID and DEC modes.
The radar will set itself in 2 bar search and center the searched zone on the tracked
contact in azimuth. In elevation the radar will alternatively scan the target and the
ground.
The range can only be set to 10 or 20 nm and the DEC ground returns are only shown
up to 10 nm.
1
2
3
4
5
RADAR MODE (Mode radar): Indicates the current radar mode.
TRACKED TARGET (Plot poursuivi): Indicates the tracked target position, range,
velocity vector and B angle.
RADAR ALTIMETER (Hauteur radio-sonde): Indicates the radar altitude of the aircraft.
Displayed in green when the radar altitude is above the minimum altitude as set on
the PCTH and red when below
CLEARANCE HEIGHT DEPRESSION (Dénivelé plan de garde): Indicates the altitude
difference below the aircraft at which the clearance height is set.
DEC GROUND RETURN (Retour sol DEC): The raw radar returns from the ground.
Displayed in green is the terrain that is below the clearance height, in red, the terrain
that is at or above the clearance height.
Page 334
SECTION 21
21–4
RADAR
VTB SYMBOLOGY
CLOSE COMBAT MODES
In close combat (recherche avec accrochage automatique) modes, the displayed
symbology is close to the bar search mode, but each mode has its differences. The
selection of a close combat mode force radar emission.
No contacts are displayed during close combat search and a PSIC lock will
automatically be attempted once a target is found.
BORESIGHT AUTO-ACQUISITION
The TDC is not displayed and the azimuth aperture setting and elevation symbology
indicate the position of the antenna.
VTH AUTO-ACQUISITION
The TDC is not displayed and the azimuth aperture setting and elevation symbology
represents the search area as well as the position of the antenna.
Page 335
SECTION 21
21–4
RADAR
VTB SYMBOLOGY
VERTICAL AUTO-ACQUISITION
The TDC is not displayed and the azimuth aperture setting and elevation symbology
represents the search area as well as the position of the antenna.
HORIZONTAL AUTO-ACQUISITION
The TDC is displayed flashing and the azimuth aperture setting and elevation
symbology represent the search area as well as the position of the antenna. The
search pattern can be moved using the TDC and antenna elevation commands.
The radar mode symbol indicates the horizontal search type, BAH for high PRF
(HFR) and BA2 for medium PRF (MFR2).
Page 336
SECTION 21
21–4
RADAR
VTB SYMBOLOGY
RADAR SLAVE TO TDC/ELEVATION AUTO-ACQUISITION
The TDC is displayed flashing and the azimuth aperture setting and elevation
symbology represent the position of the antenna. The antenna can be moved using
the TDC and antenna elevation commands.
Page 337
SECTION 21
21–4
RADAR
VTB SYMBOLOGY
AIR-TO-GROUND RANGING
In air-to-ground ranging (TAS – télémétrie air/sol) mode the radar displays minimal
symbology. In addition to the common symbology, only the azimuth aperture setting
and position as well as the elevation scale is displayed.
1
2
RADAR MODE (Mode radar): When displaying TAS, indicates that the radar is in airto-ground ranging mode.
Flashes to indicate that the radar pre-heating sequence is still ongoing.
RADAR ALTIMETER (Hauteur radio-sonde): Indicate the radar altitude of the aircraft.
Displayed in green when the radar altitude is above the minimum altitude as set on
the PCTH and red when below.
Page 338
SECTION 21
21–4
RADAR
VTB SYMBOLOGY
GROUND AVOIDANCE
In ground avoidance (DEC – découpe terrain) mode the radar displays minimal
symbology. In addition to the common symbology, only the azimuth aperture setting
and position, elevation scale and antenna elevation are displayed. A specific
clearance height symbology is displayed.
In this mode the radar operates in BFR and the TDC is not available. The range is
locked to 10 nm, the bar number to 2 or 1 and the azimuth aperture is free. The radar
BFR gain command has no effect and the gain is set to its maximum.
The radar displays return from the ground in 2 colors depending on the terrain altitude
relative to the clearance height:
• Green below the clearance height
• Red at and above the clearance height.
In this mode, the radar display is oriented to follow the aircraft bearing. This means
that the display is not oriented to where the aircraft is pointed to but where it’s going.
1
4
2
3
RADAR MODE (Mode radar): When displaying DEC, indicates that the radar is in
ground avoidance mode.
Flashes to indicate that the radar pre-heating sequence is still ongoing.
RADAR ALTIMETER (Hauteur radio-sonde): Indicates the radar altitude of the aircraft.
Displayed in green when the radar altitude is above the minimum altitude as set on
the PCTH and red when below.
CLEARANCE HEIGHT DEPRESSION (Dénivelé plan de garde): Indicates the altitude
difference below the aircraft at which the clearance height is set. Ranges from 0 to
5000 ft in 100 ft increments.
Page 339
SECTION 21
21–4
RADAR
VTB SYMBOLOGY
DEC GROUND RETURN (Retour sol DEC): The raw radar returns from the ground,
colored depending on its altitude relative to the clearance height.
Page 340
SECTION 21
21–4
RADAR
VTB SYMBOLOGY
GROUND MAPPING
In ground mapping (VISU – visualisation terrain) mode the radar displays minimal
symbology. In addition to the common symbology, only the azimuth aperture setting
and position, elevation scale and antenna elevation are displayed.
In this mode the radar operates in BFR and the TDC is not available. The range can
only be set to 10, 20 or 40 nm, the bar number to 2 or 1 and the azimuth aperture to
60° or 30°. The radar BFR gain command can be used to adjust the intensity of the
radar image.
The radar displays return from the ground in shades of green depending on the return
strength, the brighter the green the stronger the return.
In this mode, the radar display is oriented to follow the aircraft bearing. This means
that the display is not oriented to where the aircraft is pointed to but where it’s going.
As a consequence, the aircraft vector is always pointing strait up.
1
3
2
RADAR MODE (Mode radar): When displaying VIS, indicates that the radar is in ground
mapping mode.
Flashes to indicate that the radar pre-heating sequence is still ongoing.
RADAR ALTIMETER (Hauteur radio-sonde): Indicates the radar altitude of the aircraft.
Displayed in green when the radar altitude is above the minimum altitude as set on
the PCTH and red when below.
VISU GROUND MAPPING (Cartographie radar): The raw radar returns from the ground,
the brighter the green the stronger the return.
The BFR radar gain knob can be used to adjust the intensity of the radar image.
Page 341
SECTION 21
21–4
RADAR
VTB SYMBOLOGY
JAMMING SYMBOLOGY
While in bar search, the radar can encounter noise jammers that will try to confuse it
by providing it with false contacts.
In HFR, the radar will detect that it is being jammed and reduce its sensitivity to lower
its chance to display a false target from the jammer. It will also display the direction
of the jamming signal as well as its strength.
Against the RDI radar, noise jamming is only effective until around 20-25 nm, at this
range, the radar will burn-through the jam and will be able to detect the target. The
radar might still display jam contacts and will still have its sensitivity reduced.
When the radar is in PSID the jamming behavior is the same as the jammer technique
doesn’t change.
1
2
3
4
JAM INDICATION (Ambiance brouillié): Indicates that the radar is detecting a jammer.
JAMMING AZIMUTH AND STRENGTH (Gisement et force du brouillage): The astrisks are
positioned just below the range marker in the direction of the jammer.
Up to 3 asterisks can be stacked vertically to indicate the strength of the jamming
signal. Since the jamming signal is not a perfect beam, the asterisks will often be
displayed in the shape of a pyramid.
REAL HFR CONTACT (Plot HFR réel): This HFR contact is the real contact detected by
the radar.
JAM HFR CONTACT (Plot HFR brouillé): This HFR contact is a result of the noise
jamming. Jam contact will only be displayed along the azimuth of the jammer and
with the same closing speed. They can be distinguished from the real contact
because they will be displayed intermittently and at different range.
Page 342
SECTION 21
21–4
RADAR
VTB SYMBOLOGY
In BFR, the radar will continue to display the raw radar image including the noise
coming from the jammer.
5
NOISE JAMMING (Brouillage par bruit): In BFR, jammers will produce noise in a small
arc in the direction of the jammer. Contacts will be lost in the noise and most likely
impossible to detect even at close range.
Page 343
SECTION 21
21–4
RADAR
VTB SYMBOLOGY
When tracking an aircraft in PSIC, its jammer will switch to range gate and velocity
gate pull-off techniques. These techniques aim to confuse the radar ranging and
velocity determination by sending false returns with a different closing speed or
range.
When confronted to these jamming techniques, the radar will continue to track the
target in azimuth and elevation but won’t be able to provide a reliable range and
altitude information. The tracked target symbol will move along the jammer azimuth,
following the jamming signal.
This technique is also only effective until around 20-25 nm, at this range, the jammer
signal is not strong enough to confuse the radar.
7
6
JAMMED AIRCRAFT TARGET LINE (Droite chasseur cible brouillée): When the tracked
target is jamming, the aircraft target line is dashed.
JAM TRACKED TARGET (Plot poursuivi brouillé): Will indicate the position of the jamming
target according to the radar. If the radar is following the jamming signal, the tracked
target will change its range and closing speed continuously and it will be impossible
to determine the true range of the target.
Page 344
SECTION 21
21–4
RADAR
VTB SYMBOLOGY
The VTB will also indicate the status of the aircraft Sabre jammer.
8
PCM INDICATION (Réticule PCM):
• Steady, indicates that the Sabre jammer is currently emitting in
countermeasure priority mode. In this mode the radar is forced in standby.
• Flashing, indicates that the Sable jammer is inciting the pilot to switch to PCM
mode.
Page 345
SECTION 21
21–4
RADAR
VTB SYMBOLOGY
B DISPLAY MODE PARTICULARITIES
WORK IN PROGRESS
Page 346
SECTION 21
21–4
RADAR
VTB SYMBOLOGY
MANUAL TARGET DESIGNATION
A manual target designation (DO MAN – désignation d’objectif mauelle) is created
by inputing the target parameter into the system using the 8 switches around the VTB
screen. Once the target parameters are set, the system will display the DO MAN on
the VTB at its position and update it in real time.
All the information and symbology relative to the DO MAN is displayed in yellow on
the VTB to differentiate it from the green radar target information and symbology.
The DO MAN target parameters are set using the insertion/visualization bands, each
editable using the corresponding switch.
A special case is the DEB/FIN switch. The DEB position is used to display the
insertion/visualization bands, the FIN position is used to end the creation or edition.
If the DEB position is used while the fields are displayed, they will be reset to the
value they had the first time the DEB position was used.
A DO MAN can be displayed while the radar is in PSID or PSIC, in this case the radar
target information has priority over the DO target information.
1
5
2
6
3
7
8
4
ELAPSED TIME (Temps écoulé): Indicates the elapsed time since the start the DO MAN
creation or edition.
REFERENCE BUT NUMBER (Numéro BUT de réference): Indicates the BUT that will be
used as a reference for the DO MAN creation or edition, set using the N switch.
TARGET RANGE (Distance hostile): Indicates the horizontal distance of the target from
the reference BUT in nm.
The top number represent the initial value while the bottom number represent the
new value set using the RHO switch. When creating a new DO MAN the initial value
defaults to 000 while for a DO MAN edition, it represent the horizontal distance of the
target at the time the DEB button was pressed.
Page 347
SECTION 21
21–4
RADAR
VTB SYMBOLOGY
TARGET AZIMUTH (Relèvement hostile): Indicates the azimuth of the target from the
reference BUT in true north.
The top number represent the initial value while the bottom number represent the
new value set using the THETA switch. When creating a new DO MAN the initial
value defaults to 000 while for a DO MAN edition, it represent the azimuth of the
target at the time the DEB button was pressed.
TARGET BEARING (Cap hostile): Indicates the DO MAN target bearing in true north.
The top number represent the initial value while the bottom number represent the
new value set using the C switch. When creating a new DO MAN the initial value
defaults to 000 while for a DO MAN edition, it represent the target bearing in true
north.
TARGET ALTITUDE (Altitude hostile): Indicates the DO MAN target barometric altitude
in hundreds of feet.
The top number represent the initial value while the bottom number represent the
new value set using the Z switch. When creating a new DO MAN the initial value
defaults to 200 while for a DO MAN edition, it represent the target barometric altitude.
TARGET MACH (Mach hostile): Indicates the DO MAN target speed in Mach.
The top number represent the initial value while the bottom number represent the
new value set using the M switch. When creating a new DO MAN the initial value
defaults to 0.8 while for a DO MAN edition, it represent the speed in Mach.
DO MAN AGE (Age DO MAN): Indicates the DO MAN age. This value represent time
time since the target was at this position. Once the DEB/FIN switch is put in the FIN
position, this time is added to the elapsed time to compute the current position of the
target including its movement during the time of the insertion/edition.
The top number represent always defaults to 0.00 while the bottom number represent
the new value set using the T switch.
Page 348
SECTION 21
21–4
RADAR
VTB SYMBOLOGY
9
10
11
12
13
14
DO TARGET MACH (Mach DO): Indicates the DO target speed in mach.
DO TARGET BEARING (Route DO): Indicates the DO target bearing.
DO TARGET CLOSING SPEED (Vitesse de rapprochement DO): Indicates the DO target
closing speed in knots. Can be positive (closing) or negative (opening).
DO TARGET ALTITUDE (Altitude DO): Indicates the DO target altitude in flight level or
hundreds of feets. Always positive or null.
DO MAN TARGET (Plot DO MAN): Indicates the DO MAN target position, range,
velocity vector and B angle, represented by a dashed M.
DO RESET (Remise à zero DO): Indicates that the THETA command can be used to
resets the DO. Pressing the command up or down will hide all the DO symbology.
Page 349
SECTION 21
21–4
RADAR
VTB SYMBOLOGY
RADAR TARGET DESIGNATION
A radar target designation (DO RADAR – désignation d’objectif ralliée sur le radar)
is created using the radar PSID or PSIC target. With the RDO PCA option selected
and upon voluntary or unvoluntary target unlock, a DO RADAR is generated using
the target last known position, bearing, altitude and speed. It is then displayed on the
VTB and updated it in real time.
All the information and symbology relative to the DO RADAR is displayed in yellow
on the VTB for the same reason as the DO MAN.
A DO RADAR can be displayed while the radar is in PSID or PSIC, in this case the
radar target information has priority over the DO target information.
1
2
3
4
5
6
DO TARGET MACH (Mach DO): Indicates the DO target speed in mach.
DO TARGET BEARING (Route DO): Indicates the DO target bearing.
DO TARGET CLOSING SPEED (Vitesse de rapprochement DO): Indicates the DO target
closing speed in knots. Can be positive (closing) or negative (opening).
DO TARGET ALTITUDE (Altitude DO): Indicates the DO target altitude in flight level or
hundreds of feets. Always positive or null.
DO RADAR TARGET (Plot DO RADAR): Indicates the DO RADAR target position,
range, velocity vector and B angle, represented by two dashed vertical lines.
DO RESET (Remise à zero DO): Indicates that the THETA command can be used to
resets the DO. Pressing the command up or down will hide all the DO symbology.
Page 350
SECTION 21
21–4
RADAR
VTB SYMBOLOGY
REMOTE TARGET DESIGNATION
A remote target designation (DO TAF – désignation d’objectif par téléaffichage) is
generated using the information provided by a CDC trough TAF link. With the TAF
PCA option selected and provided the selected TAF channel CDC is broadcasting a
target, a DO TAF is generated using the information provided by the CDC.
If the aircraft is receiving valid TAF messages from the CDC, the DO TAF is in DO
TAF SOL (ground trajectory remote target designation – désignation d’objectif par
téléaffichage trajectographie sol) sub-state. In this state, the DO target position,
bearing altitude and mach are updated every 5 second by the CDC. In addition to the
DO target position and information, the CDC also provides the target type. In DO TAF
SOL, the aircraft will compute and display an intercept heading, altitude and speed
for the DO target.
If the aircraft is no longer receiving valid TAF messages from the CDC, the DO TAF
switches to the DO TAF BORD (Onboard trajectory remote target designation –
désignation d’objectif par téléaffichage trajectographie de bord) sub-state. In this
state, the information displayed is the same as in DO MAN or DO RADAR.
All the information and symbology relative to the DO TAF is displayed in yellow on
the VTB for the same reason as the DO MAN.
A DO TAF can be displayed while the radar is in PSID or PSIC, in this case the radar
target information has priority over the DO target information.
1
2
3
4
5
7
6
8
9
12
10
11
DO TARGET MACH (Mach DO): Indicates the DO target speed in mach.
DO TARGET BEARING (Route DO): Indicates the DO target bearing.
DO TARGET CLOSING SPEED (Vitesse de rapprochement DO): Indicates the DO target
closing speed in knots. Can be positive (closing) or negative (opening).
Page 351
SECTION 21
21–4
RADAR
VTB SYMBOLOGY
DO TARGET ALTITUDE (Altitude DO): Indicates the DO target altitude in flight level or
hundreds of feets. Always positive or null.
DO TARGET TYPE (Type DO): Indicates the DO target type, only displayed in DO TAF
SOL. The DO target type can be one of the following:
• 1-4: Indicates the aircraft group strength between 1 and 4, 4 meaning 4 aircraft
or more.
• T (Tanker): Indicates that the DO target is a friendly air-to-air refueling aircraft.
• B (Balise – Beacon): Indicates that the DO target is a beacon, used to
highlight a point of interest.
• R (Recueil – Rendezvous point): Indicates that the DO target is a rendezvous
point, used to indicate a holding or gathering point.
TAF INDICATION (Réticule TAF): Displayed when the TAF PCA option is selected,
indicates the status of the TAF link:
• Steady, indicates that the aircraft is receiving valid TAF messages.
• Flashing, indicates that the aircraft is not receiving valid TAF messages.
DO TAF SOL TARGET (Plot DO TAF SOL): Indicates the DO TAF SOL target position,
range, velocity vector and B angle, represented by a full T.
DO INTERCEPTION VECTOR (Vecteur de consigne): Indicates the computed aircraft
vector required to intercept the DO target. The pilot should fly the aircraft to match
the DO interception vector with the aircraft vector in orientation and length.
DO INTERCEPTION BREARING (Route de consigne): Indicates the computed aircraft
brearing required to intercept the DO target. The pilot should fly the aircraft to place
the aircraft bearing symbol over the DO interception brearing symbol.
DO INTERCEPTION MACH (Mach de consigne): Indicates the computed aircraft Mach
speed required to intercept the DO target. The pilot should fly the aircraft to match
the DO interception Mach.
DO INTERCEPTION ATLTITUDE (Altitude de consigne): Indicates the computed aircraft
barometric altitude required to intercept the DO target. The pilot should fly the aircraft
to match the DO interception altitude.
DO RESET (Remise à zero DO): Indicates that the THETA command can be used to
resets the DO. Pressing the command up or down will hide all the DO symbology.
Page 352
SECTION 21
21–4
RADAR
VTB SYMBOLOGY
13
DO TAF BORD TARGET (Plot DO TAF BORD): Indicates the DO TAF BORD target
position, range, velocity vector and B angle, represented by a dashed T.
14
TEL INDICATION (Réticule TEL): Indicates that a TAF target is available and that the
pilot should select the TAF PCA option.
Page 353
SECTION 21
21–4
RADAR
VTB SYMBOLOGY
RADAR EMISSION CHANNEL
The radar emission channel is used to allow two RDI radar to work in the same area.
If 2 Mirages use the same channel they will jam each other radar, greatly reducing
their performance.
The RDI has 144 available radar emission channels, they are identified by 2 numbers
each ranging from 1 to 12.
The radar emission channel is changed using the 2 radar emission channel selector
on the PCR, moving one of the knobs will display, flashing, the new radar emission
channel below the current radar emission channel. Once the channel is selected, is
is set using the PCR radar emission channel validation button.
1
2
CURRENT RADAR EMISSION CHANNEL (Pinceaux de fréquence radar): Displays the
current radar frequency channel. Each digit ranges from 1 to 12.
NEW RADAR EMISSION CHANNEL (Nouveau pinceaux de fréquence radar): Displayed
flashing, indicate the new selected radar frequency channel.
Page 354
SECTION 21
21–4
RADAR
VTB SYMBOLOGY
REAR PRESENTATION
The rear presentation (DO centrée) display mode is selected by placing CADR switch
(cadrage – presentation) located below the VTB screen on the AR (arrière – rear)
position.
In this presentation mode, the aircraft is at the center of the VTB display pointing at
the top of the display. The radar image and TDC and is not displayed in this mode.
This mode main use is to visualize the position of the navigation and tactical BUT as
well as the target designations when they are not in front of the aircraft.
Page 355
SECTION 21
21–4
RADAR
VTB SYMBOLOGY
STORES VISUALIZATION
The stores visualization screen (visualisation des présences) is displayed by
maintaining the stores PPA light test and stores visualization switch (Sélecteur de
test touches et visualisation des présences) in the PRES (Présences – Stores)
position.
The VTB will then display the aircraft silhouette with the stores loaded on each
hardpoint by type and quantity as well as the remaining gun ammunition. If a
hardpoint is not loaded the reserved space is blank.
The stores are identified by the same code as on the PCA, for more information, see
the WEAPONS LOADOUT CHART SUB-SECTION.
1
1
2
2
3
5
4
4
5
LEFT AND RIGHT GUN AMMO (Obus restants canon gauche et droite): The number of
remaining shells or the left and right guns followed by the word obus (shells).
FRONT AND REAR SIDE HARDPOINTS (Points d’emport latéraux avant et arrière): Store
quantity and type loaded on the front and rear side hardpoints.
FUSELAGE HARDPOINT (Point d’emport fuselage): Store quantity and type loaded on
the fuselage hardpoint.
INTERNAL WING HARDPOINTS (Points d’emport intérieur voilure): Store quantity and
type loaded on the internal wing hardpoints.
EXTERNAL WING HARDPOINTS (Points d’emport extérieur voilure): Store quantity and
type loaded on the external wing hardpoints.
Page 356
SECTION 21
21–5
RADAR
HOTAS CONTROLS
21 – 5 - HOTAS CONTROLS
INTRODUCTION
The Mirage 2000C radar is controlled through the PCR and HOTAS commands. The
HOTAS commands the TDC position, antenna orientation and contact lock though
the following commands:
STICK
• Weapon system command.
• PSIC toggle.
• NWS/IFF Interrogator.
THROTTLE
• Radar designator joystick.
• Antenna elevation control.
The radar allows different controls depending on the selected mode.
WEAPON SYSTEM COMMAND
The weapon system command (WSC - commande temps réel SNA) is a three-way
switch (forward, depress and aft) that has multiple functions depending on the SNA
mode.
SNA IN AIR-TO-AIR MODE
With an air-to-air weapon or police mode selected, the command set the radar into
different close combat modes. The selected mode depends on the selected
weapon/mode and the number of command presses:
• Forward:
• Odd presses: Sets the radar in boresight auto-acquisition mode.
• Even presses:
• Air-to-air guns or MAGIC: Selects the vertical auto-acquisition mode.
• 530 or Police mode: Selects the VTH auto-acquisition mode.
• Depress: Returns the radar to bar search mode, Active when the radar is in close
combat mode, PSID, PSIC and SHB.
• Aft:
• Odd presses: Sets the radar in horizontal BAH auto-acquisition mode.
• Even presses: Sets the radar in horizontal BA2 auto-acquisition mode.
The selection of a close combat mode force radar emission.
When the radar is in PSIC Super 530, the WSC forward command is used to switch
to PSIC S530 pointé mode. The command is inhibited for a few seconds after the
missile is fired to prevent a manipulation error. The WSC aft command is disabled
while the depress command is unchanged.
Page 357
SECTION 21
21–5
RADAR
HOTAS CONTROLS
SNA IN AIR-TO-GROUND MODE
• Forward: Sets the SNA in air-to-ground selected mode, forces the radar to TAS
mode if selected.
• Depress: No function.
• Aft: Each press will switch between the SNA pre-selected and memorized mode,
returns the radar to the previous mode if it was forced in TAS mode.
For more information on the weapon system command function in air-to-ground
mode, see the NAVIGATION AND WEAPON SYSTEM HOTAS SNA COMMANDS SUBSECTION.
PSIC TOGGLE
The PSIC toggle (fonction PSIC) command has the same function as the PSIC button
on the PCR:
• Radar in PSID or PSIC: Commands the radar to switch between PSID and PSIC
mode unless the radar is in PSIC Super 530.
• Radar in bar search: Toggles the PSID/PSIC preselection.
NWS/IFF INTERROGATOR
The NWS/IFF interrogator (DIRAV-sol/IFF-vol) command starts the radar IFF
interrogation sequence. The IFF interrogation is maintained as long as the command
is pressed and last at least a complete scan pattern.
IFF interrogation is only available with the radar in standby, bar search, PSID, PSIC
and SHB.
RADAR DESIGNATOR JOYSTICK
The radar designator joystick (manipulateur alidade/accrochage radar) is an
analogue joystick with a click function.
JOYSTICK MOVEMENT
The joystick controls the movement of the radar TDC. The radar TDC is available in
the following modes:
• Radar in standby mode
• Bar search
• BAH/BA2
• RRAS
• PSIC
• PSID
• SHB
Page 358
SECTION 21
21–5
RADAR
HOTAS CONTROLS
While in standby mode, bar search BAH/BA2 and RRAS, the TDC also commands
the radar search pattern position in azimuth. In standby and bar search, this is only
possible when the selected radar azimuth setting is lower than 60°.
In standby and bar search, moving the TDC to the top or bottom of the screen and
maintaining the movement for 0,2 second will change the radar range scale and move
the TDC to the center of the screen.
In VISU mode, while the TDC is not present, maintaining the joystick in one direction
fir 0,2 second will also change the radar range scale.
JOYSTICK DEPRESS
The joystick depress commands the radar to lock the closest contact to the TDC in
the pre-selected PSIC or PSID mode.
This function is only available when the radar is in bar search.
This command is also used to switch the radar to RRAS mode. For this, the radar
needs to be in bar search with the PRF selection switch in the ENT or BFR position.
From there, the joystick needs to be depressed while the TDC is under 10 nm and
not placed over a HFR contact.
ANTENNA ELEVATION CONTROLS
The antenna elevation controls (manipulateur calage antenne) is a two-way wheel
with buttons on each side. It controls directly or indirectly the radar antenna elevation
depending on the radar mode.
BAR SEARCH OR STANDBY MODE
The antenna elevation controls action depends on the antenna elevation type switch
position on the PCR:
• S (SITE): The elevation command directly moves the antenna elevation relative to
the horizon. The TDC searched altitude range symbology will display the maximum
and minimum searched altitude at the position of the TDC.
In this mode, the antenna will move up and down at 20°/s.
• Z (ZBUT): The elevation command sets the center of the searched altitude slice as
displayed by the TDC mean altitude symbology. The radar sets the antenna
elevation to match the selected mean altitude while the TDC is moved.
In this mode, the center of the searched zone will move up and down at 10000 ft/s.
VISU MODE
The elevation command directly moves the antenna elevation relative to the horizon.
The elevation of the antenna is represented by the antenna elevation indicator
relative to the elevation scale.
In this mode, the antenna will move up and down at 5°/s.
Page 359
SECTION 21
21–5
RADAR
HOTAS CONTROLS
DEC MODE
The antenna elevation controls set the clearance height for ground avoidance.
A short press of the elevation command will shift the clearance height by 100 ft, while
a long press will shift the clearance height at 1000 ft/s.
BAH/BA2 MODES
In horizontal scan mode, the antenna command works the same way as in bar search
S mode, the antenna elevation relative to the horizon is directly controlled by the
commands.
In this mode, the antenna will move up and down at 5°/s.
RRAS MODE
In horizontal scan mode, the antenna command works the same way as in bar search
S mode, the antenna elevation relative to the horizon is directly controlled by the
commands.
In this mode, the antenna will move up and down at 5°/s.
Page 360
SECTION 22
ELECTRONIC WARFARE
ELECTRONIC WARFARE
Page 361
SECTION 22
ELECTRONIC WARFARE
INTRODUCTION
The Mirage 2000C electronic warfare (EW) suite is highly integrated, all the systems
communicate with each other to increase survivability and situational awareness.
The Mirage EW systems are:
• SERVAL: Radar warning receiver.
• SPIRALE: Chaff and flare dispenser.
• SABRE: Defensive jammer.
• ÉCLAIR: Additional chaff and flare dispenser.
• D2M: Missile launch warning system.
These systems are configured by a single panel, the countermeasure panel, located
on the right console. The electronic, infrared and radar countermeasures
employment is done via commands on the HOTAS or automatically by the aircraft.
Page 362
SECTION 22
22–1
ELECTRONIC WARFARE
PCCM
22 – 1 - PCCM
The countermeasure panel (PCCM - Poste de commande contre-mesure) is divided
into 2 sections:
• Left: Sensors and emitters power, status and test.
• Right: Decoy dispensers power and setup.
JAMMER OPERATION MODE SWITCH (Sélecteur de mode d’opération brouilleur):
• VEI. (Veille – Intelligence gathering): The jammer is in standby and performs
background intelligence gathering.
• [] (Prioritée radar – Radar priority): The jammer will jam radar emitters that
are locking the aircraft at reduced power to allow radar operation.
• PCM (Priorité contre-mesures – Countermeasure priority): The jammer will
jam radar emitters that are locking the aircraft at full power, automatically
switching the radar off.
NOTE
DCS does not support targeted jamming or different jamming power
levels, radar priority and countermeasure priority will result in a similar
jamming behavior.
JAMMER POWER AND TEST SWITCH (BR – Brouilleur):
• A (Arrêt – OFF): The jammer system is not powered.
• M (Marche – ON): The jammer is powered and operates in accordance with
the operation mode switch position.
• T (Test): Starts the jammer self-test. NOT FUNCTIONAL
DA POWER AND TEST SWITCH (D.A. – Détecteur d’alerte):
• A (Arrêt – OFF): The RWR is not powered.
• M (Marche – ON): The RWR is powered and starts to display radar emitters.
• T (Test): Starts the RWR self-test. NOT FUNCTIONAL
Page 363
SECTION 22
22–1
ELECTRONIC WARFARE
PCCM
D2M POWER AND TEST SWITCH (D.2M. – Détecteur de départ missile):
• A (Arrêt – OFF): The D2M is not powered.
• M (Marche – ON): The D2M is powered and starts to watch for missile
launches.
• T (Test): Starts the D2M self-test.
DECOY DISPENSER OPERATION MODE SWITCH (L.L. – Lance-leurres):
• A. (Arrêt – OFF): The decoy dispenser system is not powered.
• S.A. (Semi-automatique - Semi-automatic): The decoy dispenser system is
powered, the release of the program selected on the decoy dispender
program selector is done with the HOTAS countermeasure switch and the
panic program with the HOTAC panic push button.
• AU. (Automatique – Automatic): The decoy dispenser system is powered and
the release of the program selected on the decoy dispender program selector
is done automatically when a radar emitter enters the high threat zone.
The system will also release the IR SAM countermeasure program when the
D.²M. system detects a missile launch.
DECOY DISPENSER PROGRAM SELECTOR (Sélecteur de programme lance-leurres):
• A (Automatique – Automatic): The automatically selects the countermeasure
program to counter the highest radar threat.
• 1-10: Manual selection of the release program.
Page 364
SECTION 22
22–2
ELECTRONIC WARFARE
COUNTERMEASURE DISPLAY
22 – 2 - COUNTERMEASURE DISPLAY
INTRODUCTION
The countermeasure display (VCM – visualisation contre-mesure) is located right of
the PCVTH, above the IDN. It consists of a threat display, 5 status lights and
brightness knob. This instrument serves 2 purposes:
• Display the detected radar and missile threats using the threat display.
• Indicate the electronic warfare systems status though the 5 status lignts.
THREAT DISPLAY
The threat display is a top view of the aircraft’s electromagnetic environment with the
aircraft at its center and the top of the display representing the front of the aircraft.
Radar emitters detected by the Serval are displayed on the screen relative to their
position in azimuth and their dangerousness, the higher the closer to the center. This
means that the display does not directly indicates the radar emitter range, a radar
emitter capable of long-range engagement can be displayed closer to the center of
the display than a closer, less capable emitter.
The Sabre can also detect radar emitters and display them on the threat display if
the Serval has not picked them up. Radar emitters can only be detected and
displayed directly in the front or rear of the aircraft.
Launch warning coming from the D.²M. are also indicated on the threat display.
The displayed radar threats are classified by comparing the signal to a database and
then displaying a symbol, number or letter corresponding to the classification.
The threat display is capable of displaying 8 distinct radar threat plus 2 D.²M. launch
warning at the same time.
Page 365
SECTION 22
22–2
ELECTRONIC WARFARE
COUNTERMEASURE DISPLAY
1
2
3
4
THE LOW THREAT ZONE: Threats displayed in this zone are considered a low threat to
the aircraft. This means that according to their type and signal strength, they are not
able to employ weapons.
THE HIGH THREAT ZONE: Threats displayed in this zone are considered an immediate
high threat to the aircraft, according to their type and signal strength they are within
weapon employment range.
OPERATION INDICATOR: Indicates the status of the display:
• + : Indicates that the threat display is powered and operating normally.
• PCM (Prioritée contre-mesure – Countermeasure priority):
• Steady: The Sabre jammer Is currently emitting in countermeasure
priority mode.
• Flashing: The Sable jammer is inciting the pilot to switch to PCM mode.
• M (Menace – Threat): Indicates that a hostile aircraft is less than 10 nm from
the aircraft. This information is provided by a CDC though the TAF link.
BRIGHTNESS KNOB: Controls the VCM display brightness.
Page 366
SECTION 22
22–2
ELECTRONIC WARFARE
COUNTERMEASURE DISPLAY
SYMBOLOGY
The threat display symbology consists of a theat type symbol, number or letter that
can be accompagnied by complementary symbology that will provide additional
information on the threat.
THREAT TYPE (CODE DE LA MENACE):
A radar emitter detected by the Serval or Sabre sytems is represented by
a symbol, number or letter indicating the threat type.
A D.²M. missile launch warning is represented by a X.
This letter is not reserved and can also be used to classify a radar emitter.
An active radar guided missile is represented by a W.
This letter is not reserved and can also be used to classify a radar emitter.
JAMMED THREAT (Menace brouillée):
Indicates that this radar emitter is currently being jammed by the Sabre
jammer.
JAMMER DETECTION (Détection brouilleur):
Indicates that the radar emitter has only been detected by the Sabre
jammer. This threat can only be displayed directly at the top or bottom of
the threat display.
STT THREAT (Menace PSIC):
Indicates that the radar emitter is locking the aircraft in STT (PSIC).
Flashes when the threat is supporting a semi-active radar guided missile.
Always displayed and flashes when the radar emitter is classified as an
active radar guided missile.
MISSILE ACTIVITY (Activitée missile):
Displayed flashing to indicates that the radar emitter is supporting a semiactive radar guided missile.
Always displayed and flashes when the radar emitter is classified as an
active radar guided missile.
Page 367
SECTION 22
22–2
ELECTRONIC WARFARE
COUNTERMEASURE DISPLAY
HIGH BAND AND LOW BAND (Bande haute et bande basse):
Indicates that the D.²M. has detected a missile coming from above the
aircraft.
Indicates that the D.²M. has detected a missile coming from below the
aircraft.
Page 368
SECTION 22
22–2
ELECTRONIC WARFARE
COUNTERMEASURE DISPLAY
THREATS CLASSIFICATION
The Serval and Sabre classification library allows the system to identify radar emitter
based on the radar signal frequency, shape, PRF… and then display the threat type
on the threat display.
Some threats like ships and bomber aircraft radars are regrouped under the same
symbol to ease situational awareness.
SURFACE THREATS
SYMBOL
DESCRIPTION
Anti-aircraft artillery (Guepard, Vulcan, Shilka)
Hawk/NASAMS
Patriot
Roland
Early warning
SA-13 Dog ear (SA-09, SA-13)
P-19 Flate face B (SA-02/SA-03 search radar)
SA-10 Grumble/SA-12 Gladiator
SA-11 Gadfly
SA-02 Guideline (Fan song)
SA-03 Goa (Low blow)
SA-5 Gammon
SA-06 Gainful
SA-08 Gecko/SA-15 Gauntlet
SA-19 Grison
Page 369
SECTION 22
22–2
ELECTRONIC WARFARE
COUNTERMEASURE DISPLAY
AIRBORNE THREATS
SYMBOL
DESCRIPTION
AWACS (E-2C, E3, A-50, KJ-2000)
F-4E
F-15C/F-15E
F/A-18C (APG-73)
F-16
F/A-18A (APG-65)
NATO Bomber/Subsonic attacker (S-3, A-6, B-1B, B-52)
NATO Supersonic attacker/Light fighter (F-5E, Tornado, AJS-37)
Mirage 2000C (RDI)
JF-17
F-14 (AWG-9)
Mirage 2000-5 (RDY)
MiG-21 Fishbed
MiG-23 Flogger
Mig-25 Foxbat
MiG-31 Foxhound
Su-30 Flanker-C/Su-34 Fullback
Warsaw pact heavy bomber (Tu-22, Tu-95, Tu-142, Tu-160)
Page 370
SECTION 22
22–2
ELECTRONIC WARFARE
COUNTERMEASURE DISPLAY
Su-27 Flanker/Su-33 Flanker-D/J-11 Flanker B+ (N001)
MiG-29A/S/G Fulcrum (N019)
Warsaw pact supersonic attacker (Su-17, Su-24)
OTHER THREATS
SYMBOL
DESCRIPTION
Ship
Unknown
Active radar guided missile
Page 371
SECTION 22
22–2
ELECTRONIC WARFARE
COUNTERMEASURE DISPLAY
AUDIO WARNINGS
The VCM in conjunction with the rest of the EW suite will provide different audio
warning to announce threats to the pilot.
NAME
TONE
DESCRIPTION
NEW THREAT
1 kHz for 500 ms
Indicates that a new radar emitter has
be detected. Also triggered once by
the D.A. test.
Nouvelle menace
STT THREAT
Menace PSIC
1 kHz chopped at 25 Hz for 500 ms
1 kHz chopped at 25 Hz for 500 ms
repeating after a 500 ms pause
MISSILE WARNING
Activitée missile
OR
Continuous 1 kHz chopped at 25 Hz
D.²M. MISSILE
WARNING
Alerte missile D.²M.
3 kHz for 500 ms repeating after a
500 ms for 5 seconds
Indicates that a radar emitter is
locking the aircraft in STT (PSIC).
Indicates that a radar emitter is
supporting a semi-active radar guided
missile or that an active radar guided
missile has been detected.
Indicates that a D.²M. sensor has
detected a missile launch.
The EW audio warnings volume is adjustable by the ground communications/maker
/electronic countermeasures volume control on SIB panel.
Page 372
SECTION 22
22–2
ELECTRONIC WARFARE
COUNTERMEASURE DISPLAY
SUITE STATUS INDICATORS
1
SUIT STATUS INDICATORS: Indicates the status of the electronic warfare systems:
• V (Veille – Intelligence gathering): Indicates that Sabre jamming system is
•
•
•
•
powered and recording the aircraft’s electromagnetic environment for ELINT
purpose.
BR (Brouillage - Jamming): Indicates that the Sabre jammer is actively
jamming.
DA (Détecteur d’alerte – Radar warning receiver): Indicates that the Serval
system is powered and operating normally.
D2M (Détecteur de dépat missile - Missile launch warning system):
• Steady, indicates that the D2M is powered and operating normally.
• Blinking, indicates that the D2M is powered but that the sensors are not
cooled yet. It can also indicate that the D2M system is not present, that
the coolant is depleted or that the system is damaged.
LL (Lance-leurres – Decoy dispencer): Indicates that the Spirale and Éclair
systems are powered and operating normally.
Page 373
SECTION 22
22–3
ELECTRONIC WARFARE
SERVAL
22 – 3 - SERVAL
The Serval (système d'ecoute radar et de visualisation de l'alerte) is the name of the
radar warning receiver (DA – détecteur d’alerte) system. This detection system is
passive, it uses signals emitted by other radar to classify and estimate their position
and crerate a picture of the electromagnetic environment of the aircraft.
The Serval system uses 6 antennas that provide a 360º horizontal and around ±60°
vertical coverage.
2
1
1
LEFT AND RIGHT ANTENNA UNITS (Blocs antennes gauche et droit): Each block is
composed of 2 antennas, one facing the front and one facing the back of the aircraft.
VERTICAL STABILIZER ANTENNA UNIT (Bloc antennes derive): Composed of 2 antennas,
one facing the front and one facing the back of the aircraft.
The radar emitter azimuth is determined using the difference of received power
between the difference antennas. This method can be inaccurate, particuraly when
the aircraft is not in level flight.
Radar emitter range is determined by comparing the power received against the
system known output power. This method is really inaccurate and can be countered
by some systems by reducing or increasing their output power.
Page 374
SECTION 22
22–4
ELECTRONIC WARFARE
SPIRALE
22 – 4 - SPIRALE
SPIRALE SYSTEM
The Spirale (système de protection infrarouge et radar par leurrage) system is
composed of 2 chaff dispensers and 2 flare dispensers located at the rear of the
aircraft. The dispensers are integrated into the airframe and add little to no drag.
The chaff and flare dispensers use incompatible storage and release methods, the
internal countermeasure loadout of the aircraft is fixed and cannot be changed, only
the Éclair pod can add countermeasures.
1
1
2
2
CHAFF DISPENSERS: The chaff dispensers hold up to 120 aluminum coated glass fiber
decoys called chaff. These chaffs are used to confuse radar systems by reflecting
radar waves and creating false targets.
The Spirale chaff dispensers work with the Sabre and Serval system to cut the chaffs
to a specific length corresponding to the threat radar’s wavelength, increasing their
efficiency.
FLARE DISPENSERS: The flare dispensers hold 16 infrared decoys called flares. These
flares are used to confuse infrared system by providing another heat source to track
and guide on.
The Mirage internal and external decoy quantity is fixed and not
changeable. The only way to change the decoy quantity is with the
installation of the Éclair and Éclair-M pods.
CAUTION
Due to a DCS limitation, the chaff and flare quantity sliders can still be
edited from the editor and rearm window. DO NOT change the default
values, it will always result in a fewer decoy quantity than expected.
The decoy slider values should set to 234 chaffs and 64 flares when
rearming and not match the actual load.
Page 375
SECTION 22
22–4
ELECTRONIC WARFARE
SPIRALE
DECOY LAUNCHER INDICATOR PANEL
The decoy launcher indicator panel (tableau de signalisation lance-leurre) is located
over the right sunshade. It shows the status of the Spirale system by indicating the
release of countermeasure as well as the rough decoy quantity.
This panel is powered by the decoy dispenser operation mode switch on the PCCM.
All the lights will turn on for 1 seconds when powered on to allow the pilot to check
for malfunctions.
1
2
3
4
5
LL LIGHT (Lance-leurres – Decoy dispenser): The light briefly turns on whenever any
decoy (flare or chaff) is released.
EM LIGHT (Electromagnétique - Electromagnetic):
• Steady, indicates that the chaff dispensers are empty.
• Blinking, indicates that chaff quantity is low (12 or less).
IR LIGHT (Infrarouge - Infrared):
• Steady, indicates that the flare dispensers are empty.
• Blinking, indicates that flare quantity is low (6 or less).
EO LIGHT (Electro-optique – Electro-optical): Reserve light for electro-optical decoys,
not available for our aircraft. Will remain off at all time when the Spirale system is
powered. NO FUNCTION
EFF. BUTTON: (Effacer – Remove): Turns off all the panel lights. Used to reduce glare
when looking through NVG.
Page 376
SECTION 22
22–4
ELECTRONIC WARFARE
SPIRALE
COUNTERMEASURE PROGRAMS
The countermeasures are released following a set program.
A program is decomposed in cycles themselves decomposed in a number of
individual countermeasure release at set interval. The cycles can be repeated at a
set interval.
PROGRAM
NAME
CHAFF
FLARE
INTERVAL
CYCLES
CYCLE INT.
1
BVR 1
6
0
0.5
1
-
2
BVR 2
6
0
0.5
2
2.0
3
BVR 3
6
0
0.5
3
2.0
4
CCM 1
0
1
-
1
-
5
CCM 2
1
1
-
1
-
6
SAM 1
12
0
0.75
1
-
7
SAM 2
20
0
0.25
1
-
8
IR SAM
0
6
0.25
1
-
9
AG Mix
20
6
0.25
1
-
10
Flare jettison
0
32
0.05
1
-
Panic
Panic
6
3
0.5
1
-
BVR 1 to BVR 3 programs are to be used when engaging in BVR combat when
expecting radar guided missiles. The 3 programs have the same cycle, the only
difference is the number of cycles executed.
CCM 1 is to be used in close combat scenario where infrared missile are expected.
CCM 2 is to be used in close combat scenario where the expected missile type is
unknown.
SAM 1 is to be used against older SAMs like the SA-02 or SA-06.
SAM 2 is to be used against newer SAMs like the SA-10 and higher.
IR SAM is to be used when flying at low altitude and expecting MANPAD of shortrange IR guided SAMs.
AG Mix is to be used during the low altitude penetration of a well defended area, it
combines the SAM 2 and IR SAM programs.
Flare Jett. dumps all the flares in a short-timed burst. Used in case of emergency,
not suitable to defend against missiles.
PANIC is to be used when the missile threat is unexpected or unknown. It releases
mix of chaff and flares to try and deal with the widest types of threats.
All the programs except the PANIC program can be edited.
Page 377
SECTION 22
22–4
ELECTRONIC WARFARE
SPIRALE
HOTAS CONTROLS
The Mirage HOTAS has 2 countermeasure commands, one on the stick, one on the
throttle.
The throttle command is the PANIC pushbutton, it releases the PANIC program.
The stick command is the countermeasure switch, it releases the program selected
by the decoy dispenser program selector on the PCCM. In order for this switch to
work, the decoy dispenser operation mode switch on the PCCM has to be in the S.A.
or A.U. position
The throttle command is the PANIC pushbutton, it release the PANIC program.
Page 378
SECTION 22
22–5
ELECTRONIC WARFARE
SABRE
22 – 5 - SABRE
INTRODUCTION
The Sabre (système d’autoprotection par brouillage électromagnétique) is a jamming
and deception system. The system is composed of an emitter and 2 antennas all
located in the tail-fin.
The Sabre can also display detected radar emitters on the VCM threat display if the
Serval was not able to detect them or is damaged. Due to the jammer having only
two antennas the system is unable to determine the emitters azimuth, only if it is in
front or behind the aircraft. Range is determined in the same way as for the Serval.
1
2
FORWARD ANTENNA: Sends the jamming signal in all directions around the aircraft.
This induces that all aircraft around the jammer will receive the jamming signal.
EMITTER AND REAR ANTENNA: Generates the jamming signal and transmits to the
antennas.
The Sabre system is highly sophisticated and provide defensive jamming against
radar threats. The pilot has minimal control over the system as the way it operates is
pre-programmed. Its main use is to protect the aircraft against active and semi-active
radar guided missiles by reducing the lock range and confusing the missile or missile
supporting system radar.
With the PCCM jammer operation mode switch in the [] or PCM position, the jammer
will automatically jam radar emitters that are locking the aircraft.
If the HOTAS jammer PCM override toggle command is pressed, the jammer is
forced to emit in all direction.
Page 379
SECTION 22
22–5
ELECTRONIC WARFARE
SABRE
HOTAS CONTROLS
The Mirage HOTAS has 1 electronic countermeasure command, the jammer PCM
override toggle, located on the throttle. This command forces the jammer to emit in
at full power in all direction irrelevant of the PCCM jammer operation mode switch
position. This mode, just like PCM, turns the radar off.
WARNING
Jammer are a formidable tool to improve survivability during combat,
but the radar waves emitted by the system can be detected by other
system and even be used as guidance by missiles. Use this system
with precaution.
Page 380
SECTION 22
22–6
ELECTRONIC WARFARE
ÉCLAIR
22 – 6 - ÉCLAIR
The Éclair pod is an addon countermeasure dispenser that is attached in place of the
drag chute. Two pods are available, the Éclair and the Éclair-M
The Éclair pod was developed as an emergency solution for the Mirage 2000C
deployment in Desert Storm to equip aircraft that were not fitted with the Spirale
system. It is composed of 3 countermeasure racks, 2 flares racks containing 8
cartridges and 1 chaff rack containing 16 cartridges. Its configuration fixed, 16 flares
and 16 chaffs.
The Éclair-M pod is a more refined version of the Éclair that is composed of 6
countermeasure racks. Each rack can hold either 16 chaffs or 8 flares and any
configuration is possible giving is a maximum capacity of 108 chaffs or 48 flares.
This addon is directly integrated with the Spirale system and does on require any
special configuration from the cockpit.
1
ÉCLAIR POD
WARNING
It is important to remember that the Éclair pod replaces the drag chute.
This needs to be considered when selecting main and divert landing
airbase and calculating maximum landing weight.
The Mirage internal and external decoy quantity is fixed and not
changeable. The only way to change the decoy quantity is with the
installation of the Éclair and Éclair-M pods.
CAUTION
Due to a DCS limitation, the chaff and flare quantity sliders can still be
edited from the editor and rearm window. DO NOT change the default
values, it will always result in a fewer decoy quantity than expected.
The decoy slider values should set to 234 chaffs and 64 flares when
rearming and not match the actual load.
Page 381
SECTION 22
22–7
ELECTRONIC WARFARE
D2M
22 – 7 - D2M
The D2M (détecteur de départ missile) is an optional missile launch warning system.
The system is composed of 2 infrared sensors located in an addon fairing at the back
of the MAGIC II pylon. The system is dedicated to MANPAD and short-range IR SAM
launch detection, the sensors only cover the area below the aircraft.
The D2M uses the infrared light emitted by rocket motors to detect missiles, this
means that for the system to detect a missile, its engine needs to be burning. It will
detect any burning rocket motor at close range and cannot determine if a missile is
aimed at the aircraft or not. This means that friendly missiles shot close might be
detected and trigger the system.
The system sensors are cooled by using the MAGIC II liquid nitrogen. The D2M
system consumption is about the same as the missiles, this means that when both
the MAGIC II and the D2M are cooled, the coolant lasts half as long as if only the
MAGIC II was cooled.
When turned on, the D2M starts a cooling sequence that lasts about 45 seconds and
is indicated by the blinking D.2M. light on the suite status indicator. During this time
the system is not operational.
1
D2M SENSOR
When the D2M detects a burning rocket motor, the VCM will display a line from its
center to the direction of the detected threat. It is accompanied by a continuous 3
kHz signal.
Page 382
SECTION 23
AIRCRAFT EMPLOYMENT
AIRCRAFT EMPLOYMENT
Page 383
SECTION 23
AIRCRAFT EMPLOYMENT
INTRODUCTION
This section is dedicated to the employment of the Mirage 2000C systems and
instruments for navigation, take-off, landing and ground operations.
The Mirage 2000C is an all-weather aircraft capable of autonomous and radio
navigation. The VTH is the main navigation instrument meaning that it can be relied
upon for IFR navigation. It is backed up by analogic instruments that provide
additional information for VFR or IFR flight.
Page 384
SECTION 23
23–1
AIRCRAFT EMPLOYMENT
GROUND OPERATIONS
23 – 1 - GROUND OPERATIONS
INTRODUCTION
The aircraft ground operations englobe the ramp-start and shutdown procedure.
Once strapped into the cockpit, the pilot should execute a quick pre-flight check of
the controls before doing anything, even before applying power.
After the pre-flight check is done, the ramp start can be done in 2 ways:
• With ground power
• Without ground power
Using the ground power is preferred as it will reduce the draw on the battery and
allow the INS to be aligned with the engine off, which will save fuel.
Page 385
SECTION 23
23–1
AIRCRAFT EMPLOYMENT
GROUND OPERATIONS
PRE-FLIGHT
The pre-flight check starts at left console, then the left wall, left vertical panel, front
dash, center pylon, right vertical panel, right wall and right console.
In DCS, the pre-flight check can be skipped as the aircraft is always
set correctly for the ramp-start.
NOTE
LEFT CONSOLE
19
10
1
4
3
7
2
5
6
8
20
21
13
15
16
11
9
14
17
12
18
22
23
FBW CHANNEL 5 SWITCH: Off (cover closed)
FBW AND AP TEST SWITCHES: Off (cover closed)
EMERGENCY AFTERBURNER CUT-OFF SWITCH: Off (cover closed)
EMERGENCY OIL SWITCH: Off (cover closed)
ENGINE COMPUTER RE-ARMING AND EMERGENCY SWITCH: Norm (cover closed)
EXTERNAL FUEL TANK DUMP SWITCH: Cover closed
RADAR GROUND EMISSION SWITCH: Off
EMERGENCY TRIM: N
AIRCRAFT SOUND CONFIGURATION PANEL: As desired
INFLIGHT RESTART MAGNETIC SWITCH: Off
THROTTLE: Stop position
RADAR POWER MODE KNOB: A
EMERGENCY FUEL SWITCH: Off
SWOOPS OPERATION SWITCH: Auto
INLET CONES OPERATION SWITCH: Auto
SLATS POSITION SWITCH: Auto
Page 386
SECTION 23
23–1
AIRCRAFT EMPLOYMENT
GROUND OPERATIONS
EXTERNAL LIGHT SWITCHES: A
BRAKE SYSTEM SWITCH: 1 (cover closed)
RECORDER SWITCH: A
LANDING AND TAXI LIGHT SWITCH: A
POLICE LIGHT SWITCH: Off
V/UHF RADIO OPERATION MODE SWITCH: 0
UHF RADIO OPERATION MODE SWITCH: AR
Page 387
SECTION 23
23–1
AIRCRAFT EMPLOYMENT
GROUND OPERATIONS
LEFT WALL
25
26
24
INFLIGHT REFUELING SWITCH: Arrêt
BRAKE CHUTE LEVER: Forward
CANOPY FRACTURE LEVER: Rearward
Page 388
SECTION 23
23–1
AIRCRAFT EMPLOYMENT
GROUND OPERATIONS
LEFT VERTICAL PANEL
31
30
27
29
28
GEAR HANDLE: Down
EMERGENCY FBW GAIN SWITCH: Norm (cover closed)
FBW MODE SWITCH: As desired
GUN SAFETY SWITCH: Safe (cover closed)
EMERGENCY GEAR HANDLE: Normal (vertical position)
Page 389
SECTION 23
23–1
AIRCRAFT EMPLOYMENT
GROUND OPERATIONS
FRONT DASH
36
35
38
39
37
33
32
34
40
SELECTIVE JETTISON SWITCH: Off (cover closed)
MASTER ARM SWITCH: Off
BACKUP ATTITUDE INDICATOR: Caged
SPIN SWITCH: Norm
MAIN ATTITUDE INDICATOR POLE SWITCH: N
VTB POWER SWITCH: A
VTH POWER SWITCH: A
PCTH RADAR ALTIMETER SWITCH: A
PPA FUSE SWITCH: INERT.
FEEDER TANKS INTERCOM CONTROL: Closed (vertical)
Page 390
41
SECTION 23
23–1
AIRCRAFT EMPLOYMENT
GROUND OPERATIONS
RIGHT VERTICAL PANEL
43
44
45
42
46
BATTERY SWITCH: A
TRANSFORMER-RECTIFIER SWITCH: M
ALTERNATOR 1 SWITCH: M
ALTERNATOR 2 SWITCH: M
QRA SWITCH: Off
Page 391
SECTION 23
23–1
AIRCRAFT EMPLOYMENT
GROUND OPERATIONS
RIGHT WALL
47
CANOPY LEVER: Open (middle position)
Page 392
SECTION 23
23–1
AIRCRAFT EMPLOYMENT
GROUND OPERATIONS
RIGHT CONSOLE
48
51
49
50
52
54
53
55
57
58
60
59
56
64
61
65
62
ELECTRIC PUMP SWITCH: Off
WARNING SOUND SWITCH: Off
PITOT HEAT SWITCH: Off (cover open)
IFF INTERROGATION MODE SELECTOR: Off
JAMMER OPERATION MODE SWITCH: VEI.
COUNTERMEASURE POWER AND TEST SWITCHES: A
DECOY DISPENSER PROGRAM SELECTOR: A
DECOY DISPENSER OPERATION MODE SWITCH: A.
VOR POWER SWITCH: A
TACAN MODE SWITCH: OFF
EMERGENCY ATTITUDE AND HEADING SWITCH: A
PSM MODE SELECTOR KNOB: AR
PSM OPERATIONAL MODE SELECTOR KNOB: N
STARTER FUEL PUMP SWITCH: Off (left)
STARTER BUTTON COVER: Closed
IGNITION/VENTILATION SWITCH: G or D
BOOST FUEL PUMP SWITCHES: Off (left)
FUEL SHUT-OFF VALVE SWITCH: Closed (left and cover open)
Page 393
63
SECTION 23
23–1
AIRCRAFT EMPLOYMENT
GROUND OPERATIONS
RAMP-START WITH GROUND POWER
For the ramp-start with ground power, the INS will be aligned using a normal
alignment.
Set the battery switch to the M position.
1
Turn on the V/UHF by setting its operation mode switch to the FF position.
Turn on the UHF by setting its operation mode switch to the M position.
3
2
Set the navigation lights switch to the FORT position.
4
Page 394
SECTION 23
23–1
AIRCRAFT EMPLOYMENT
GROUND OPERATIONS
Connect the ground power.
Start the normal alignment.
a. Set the PSM mode selector to the VEI position.
a
b. Insert the aircraft coordinates in a BUT.
NOTE
Any BUT (except BUT 00) can be used for alignment but the most
convenient one would be the BUT 20, as 20 waypoint flight plan is
seldom used.
c. Select the BUT with the aircraft coordinates as the PREP BUT.
d. Set the PSM mode selector to the ALN position.
d
Page 395
SECTION 23
23–1
AIRCRAFT EMPLOYMENT
GROUND OPERATIONS
e. Press the VAL function key.
e
f. The status of the alignmentcan be displayed on the PCN by placing the PSM
operational mode selector know in the STS position.
Turn on and uncage the back-up attitude indicator.
a. Set the Emergency attitude and heading switch to the AUTO position.
b. Uncage and set the back-up attitude indicator using the cage/aircraft symbol
adjustment knob (holding left click and mouse wheel down).
a
b
Page 396
SECTION 23
23–1
AIRCRAFT EMPLOYMENT
GROUND OPERATIONS
Turn on the VTH by setting the VTH power switch to the M position.
Turn on the radar altimeter by setting the radar altimeter switch to the M position.
Set the altitude display selector switch as desired.
Turn on the VTB by setting the VTB power switch to the M position.
9
8
10
Check and set the DETOT fuel amount counter to the value displayed on the
kneeboard pilot signout sheet page using the AFF DETOT switch.
11
Page 397
SECTION 23
23–1
AIRCRAFT EMPLOYMENT
GROUND OPERATIONS
Test the cockpit lights by setting the lights test switch to the 1 and 2 position.
12
Set the electric pump switch to TEST then to A position.
13
Wait until the alignment is complete (steady green PRET light on the PCN) and set
the PSM mode selector to NAV.
14
Page 398
SECTION 23
23–1
AIRCRAFT EMPLOYMENT
GROUND OPERATIONS
Close and secure the canopy using the canopy lever (backward then forward).
Set fuel shut-off valve switch to the open position and close the cover.
Set the 2 boost fuel pumps switches to the M position.
Open the starter button cover, this will set the starter fuel pump switch to on.
17
18
16
Press and hold the starter button for 1 second.
Close the starter button cover, leave the starter fuel pump switch to on.
19
Page 399
SECTION 23
23–1
AIRCRAFT EMPLOYMENT
GROUND OPERATIONS
Once the engine RPM reaches 10%, set the throttle to the idle position.
Watch that the engine Tt7 temperature stays below 950°C.
If the engine Tt7 exceed 950°C, abort the startup by setting the starter fuel switch to
off (left) and setting the throttle to the cut-off position by using the engine cut-off
button.
Once the engine PRM reaches around 48%, check that both the HUILE and T7
warning lights turns off.
Check that the HYD.1 and HYD.2 caution lights are off.
Page 400
SECTION 23
23–1
AIRCRAFT EMPLOYMENT
GROUND OPERATIONS
Disconnect the ground power.
Check that the ALT.1 and ALT.2 caution lights are off.
Set the emergency pump switch to the AUTO position.
Check that the HYDS warning light is off.
24
Set the IFF master mode knob to the SBY position.
Set the radar power mode knob to the SIL position.
Page 401
SECTION 23
23–1
AIRCRAFT EMPLOYMENT
GROUND OPERATIONS
Start the short CDVE (down) test, wait for the green light to turn on to indicate that
the test has passed.
Do the same for the PA test.
Set the anti-collision light switch to the FORT position and set the formation light
switch as desired.
Wipe the controls.
Test the air-brakes using the HOTAS command and checking the configuration
panel.
Test the slats by setting the slat switch to the SORTIS position, then the AUTO
position.
31
Page 402
SECTION 23
23–1
AIRCRAFT EMPLOYMENT
GROUND OPERATIONS
Set the pitot heat switch to the on position and close the cover.
Set the warning sound switch to the on position.
33
32
Check that all caution and warning lights on the alarm panel are off.
Page 403
SECTION 23
23–1
AIRCRAFT EMPLOYMENT
GROUND OPERATIONS
RAMP-START WITHOUT GROUND POWER
For the ramp-start without ground power, the INS will be aligned using a stored
heading alignment.
Set the battery switch to the M position.
1
Turn on the V/UHF by setting its operation mode switch to the FF position.
Turn on the UHF by setting its operation mode switch to the M position.
3
2
Set the navigation lights switch to the FORT position.
4
Page 404
SECTION 23
23–1
AIRCRAFT EMPLOYMENT
GROUND OPERATIONS
Close and secure the canopy using the canopy lever (backward then forward).
Set fuel shut-off valve switch to the open position and close the cover.
Set the 2 boost fuel pumps switches to the M position.
Open the starter button cover, this will set the starter fuel pump switch to on.
7
8
6
Press and hold the starter button for 1 second.
Close the starter button cover, leave the starter fuel pump switch to on.
9
Page 405
SECTION 23
23–1
AIRCRAFT EMPLOYMENT
GROUND OPERATIONS
Once the engine RPM reaches 10%, set the throttle to the idle position.
Watch that the engine Tt7 temperature stays below 950°C.
If the engine Tt7 exceed 950°C, abort the startup by setting the starter fuel switch to
off (left) and setting the throttle to the cut-off position by using the engine cut-off
button.
Once the engine PRM reaches around 48%, check that both the HUILE and T7
warning lights turns off.
Check that the HYD.1 and HYD.2 caution lights are off.
Page 406
SECTION 23
23–1
AIRCRAFT EMPLOYMENT
GROUND OPERATIONS
Start the alignment.
a. Set the PSM mode selector to the ALCM position.
a
b. Select the BUT 00 as the PREP BUT.
c. Press the VAL function key.
c
d. The status of the alignment can be displayed on the PCN by placing the PSM
operational mode selector know in the STS position.
Page 407
SECTION 23
23–1
AIRCRAFT EMPLOYMENT
GROUND OPERATIONS
Turn on and uncage the back-up attitude indicator.
a. Set the Emergency attitude and heading switch to the AUTO position.
b. Uncage and set the back-up attitude indicator using the cage/aircraft symbol
adjustment knob (holding left click and mouse wheel down).
a
b
Turn on the VTH by setting the VTH power switch to the M position.
Turn on the radar altimeter by setting the radar altimeter switch to the M position.
Set the altitude display selector switch as desired.
Turn on the VTB by setting the VTB power switch to the M position.
16
15
17
Page 408
SECTION 23
23–1
AIRCRAFT EMPLOYMENT
GROUND OPERATIONS
Check and set the DETOT fuel amount counter to the value displayed on the
kneeboard pilot signout sheet page using the AFF DETOT switch.
18
Test the cockpit lights by setting the lights test switch to the 1 and 2 position.
19
Page 409
SECTION 23
23–1
AIRCRAFT EMPLOYMENT
GROUND OPERATIONS
Set the electric pump switch to TEST then to AUTO.
Check that the HYDS warning light is off.
20
Start the short CDVE (down) test, wait for the green light to turn on to indicate that
the test has passed.
Do the same for the PA test.
Set the IFF master mode knob to the SBY position.
Set the radar power mode knob to the SIL position.
Set the anti-collision light switch to the FORT position and set the formation light
switch as desired.
Page 410
SECTION 23
23–1
AIRCRAFT EMPLOYMENT
GROUND OPERATIONS
Wipe the controls.
Test the air-brakes using the HOTAS command and checking the configuration
panel.
Test the slats by setting the slat switch to the SORTIS position, then the AUTO
position.
27
Set the pitot heat switch to the on position and close the cover.
Set the warning sound switch to the on position.
29
28
Check that all caution and warning lights on the alarm panel are off.
Page 411
SECTION 23
23–1
AIRCRAFT EMPLOYMENT
GROUND OPERATIONS
Wait until the alignment is complete (steady green PRET light on the PCN) and set
the PSM mode selector to NAV.
31
Page 412
SECTION 23
23–1
AIRCRAFT EMPLOYMENT
GROUND OPERATIONS
SHUTDOWN
Install the wheel chocks.
Turn off the landing light by setting the landing lights switch to the A. position.
2
Set the radar power mode knob to the A position.
3
Page 413
SECTION 23
23–1
AIRCRAFT EMPLOYMENT
GROUND OPERATIONS
Set the PSM mode selector to the AR position.
4
Turn off and cage the back-up attitude indicator.
a. Set the emergency attitude and heading switch to the A position.
b. Cage the back-up attitude indicator using the cage/aircraft symbol adjustment
knob (holding left click and mouse wheel up).
a
b
Set the warning sound switch to the off position.
Set the emergency pump switch to the A position.
Set the pitot heat switch to the off position.
6
7
8
Page 414
SECTION 23
23–1
AIRCRAFT EMPLOYMENT
GROUND OPERATIONS
Turn off the radar altimeter by setting the radar altimeter switch to the A position.
Set the altitude display selector switch to the ZB position.
Turn off the VTH by setting the VTH power switch to the A position.
Turn off the VTB by setting the VTB power switch to the A position.
9
10
11
Turn off the engine by setting the throttle in the cut-off position using the engine cutoff button.
12
Page 415
SECTION 23
23–1
AIRCRAFT EMPLOYMENT
GROUND OPERATIONS
Once the engine PRM reaches 0%, set the starter fuel pump switch to off.
Set fuel shut-off valve switch to the closed position.
Set the 2 boost fuel pumps switches to the off position.
13
15
14
Open the canopy as desired using the canopy lever and canopy handles.
Turn off the external lights by setting all the external lights switches to the A. position.
Page 416
SECTION 23
23–1
AIRCRAFT EMPLOYMENT
GROUND OPERATIONS
Turn off the V/UHF by setting its operation mode switch to the 0 position.
Turn off the UHF by setting its operation mode switch to the AR position.
19
18
Set the battery switch to the A position.
20
Page 417
SECTION 23
23–2
AIRCRAFT EMPLOYMENT
AIRPORT OPERATIONS
23 – 2 - AIRPORT OPERATIONS
INTRODUCTION
The Mirage 2000C is equipped with all necessary equipment to execute VFR and
IFR airport operations.
TAXI
WORK IN PROGRESS
VFR TAKE-OFF
WORK IN PROGRESS
IFR TAKE-OFF
WORK IN PROGRESS
VFR LANDING
WORK IN PROGRESS
VFR BREAK LANDING
WORK IN PROGRESS
IFR LANDING
WORK IN PROGRESS
Page 418
SECTION 23
23–3
AIRCRAFT EMPLOYMENT
AUTONOMOUS NAVIGATION
23 – 3 - AUTONOMOUS NAVIGATION
INTRODUCTION
The Mirage 2000C is equipped with an INS system that provides the aircraft with its
position as well as the position of points defined by coordinates. This system allows
the aircraft to perform autonomous navigation providing correct configuration and
alignment.
This system is not perfect and drifts with time, this drift needs to be considered when
performing autonomous navigation. Autonomous navigation should only be used for
rough navigation and never be relied upon for precision navigation. Visual, radio and
radar navigation should be used when precision is needed.
The INS use BUTs (waypoints) as reference points for navigation. These points are
defined by a number and configured with coordinates and an altitude. Multiple
instruments display navigation information from the DEST BUT.
BUTs are the primary autonomous navigation reference points, BAD and MRQ can
be also be used in the same way.
For more information on the INS system, see the INS SECTION.
Page 419
SECTION 23
23–3
AIRCRAFT EMPLOYMENT
AUTONOMOUS NAVIGATION
CREATING A BUT
The minmum data needed to create a BUT is its latitude and longitude in degrees
minute decimal format. Its altitude can also be added as the system has been
designed to have the altitude of the ground inserted for each BUT but is not required.
These coordinates can be found on the top left of the F10 map.
This example will insert Nellis Air Force Base coordinates into BUT 05:
Nellis Air Force Base: 36°14,129N 115°02,049W 1845 ft.
NOTE
Make sure that the F10 map coordinates are in the correct format, the
coordinate should look like this N/S00°00,000 E/W000°00,000.
The coordinate format can be changed using the ALT+Y command.
Page 420
SECTION 23
23–3
AIRCRAFT EMPLOYMENT
AUTONOMOUS NAVIGATION
SETTING BUT COORDINATES
Press the PREP key, it will light up.
Type 05 on the numeric keypad.
1
2
Set the PCN parameter selector to the L/G position.
3
To enter the latitude, press the 1 or 7 key to edit the left window. The left window will
display NS --.--.- and the INS and EFF keys will light up.
4
Page 421
SECTION 23
23–3
AIRCRAFT EMPLOYMENT
AUTONOMOUS NAVIGATION
The latitude cardinality first needs to be set. Since Nellis Air Force Base latitude
cardinality is north, press the 2 key on the numeric keypad. The left window will
display N --.--.-.
5
Then the latitude can be entered: type 3614129.
The left window will display N 36.14.1. The last 2 digits are saved by the system but
not displayed.
Press the INS key to insert the data into the INS memory.
6
7
To enter the longitude, press the 3 or 9 key to edit the right window. The right window
will display EW ---.--.- and the INS and EFF keys will light up.
8
Page 422
SECTION 23
23–3
AIRCRAFT EMPLOYMENT
AUTONOMOUS NAVIGATION
The longitude cardinality first needs to be set. Since Nellis Air Force Base latitude
cardinality is west, press the 4 key on the numeric keypad. The left window will
display W ---.--.-.
9
Then the longitude can be entered: type 11502049.
The right window will display
but not displayed.
W
115.02.0. The last 2 digits are saved by the system
Press the INS key to insert the data into the INS memory.
10
11
If the input contained an error, the edited window can be reset with the EFF key.
Pressing the EFF key with an incorrect value or no value will exit the edition mode
and reset the data to its previous value.
Pressing the PREP key or changing the parameter knob position will cancel the
edition.
Page 423
SECTION 23
23–3
AIRCRAFT EMPLOYMENT
AUTONOMOUS NAVIGATION
SETTING BUT ALTITUDE
Press the PREP key, it will light up.
Type 05 on the numeric keypad.
1
2
Set the PCN parameter selector to the ALT position.
3
To enter the altitude in feet, press the 1 or 7 key to edit the left window. The left
window will display +- ----- and the INS and EFF keys will light up.
4
Page 424
SECTION 23
23–3
AIRCRAFT EMPLOYMENT
AUTONOMOUS NAVIGATION
The altitude sign first needs to be set. Since Nellis Air Force Base is above sea level
press the 1 or 3 key on the numeric keypad. The left window will display + -----.
5
Then the altitude can be entered: type 1845.
The left window will display + -1845. The leading zero is not needed.
Press the INS key to insert the data into the INS memory. The altitude will be
displayed in feet in the left window as well as meters in the right window.
6
7
If the input contained an error, the edited window can be reset with the EFF key.
Pressing the EFF key with an incorrect value or no value will exit the edition mode
and reset the data to its previous value.
Pressing the PREP key or changing the parameter knob position will cancel the
edition.
Page 425
SECTION 23
23–3
AIRCRAFT EMPLOYMENT
AUTONOMOUS NAVIGATION
USING A BUT
The VTH and IDN are the primary means for autonomous BUT navigation, the BUT
needs to be selected as the DEST BUT, SNA in NAV or AG memorized and preselected sub-modes for the VTH and the IDN set to the CvNav or CmNav mode. The
VTH will display BUT direction, distance and number and the IDN distance and
direction.
The VTB will also display the position of the BUT with the NAV BUT symbol.
Additionally, the PCN can be used. The BUT needs to be set in PREP and the
parameter selector in the D/RLT position, the PCN will then display the distance and
azimuth to the BUT.
This example will navigate to BUT 05 which is located over Nelis Air Force Base.
NAVIGATION TO BUT 05 USING THE VTH AND PCN
Press the DEST key, it will light up.
Type 05 on the numeric keypad.
1
2
If the SNA is in NAV or AG memorized mode, follow the heading error indicator on
the VTH and the distance to the BUT using the VTH distance to BUT indication.
The VTB will also display the BUT position with NAV BUT symbol.
Page 426
SECTION 23
23–3
AIRCRAFT EMPLOYMENT
AUTONOMOUS NAVIGATION
If IDN selected mode indicator is in the CvNav or CmNav position, the wide needle
will indicate the direction and the distance window the distance to the BUT.
Page 427
SECTION 23
23–3
AIRCRAFT EMPLOYMENT
AUTONOMOUS NAVIGATION
NAVIGATION TO BUT 05 USING THE PCN
Press the PREP key, it will light up.
Type 05 on the numeric keypad.
1
2
Set the parameter selector knob to the D/RLT position.
The PCN upper visualization windows now displays distance and azimuth to the BUT
05 that can be used for navigation.
3
Page 428
SECTION 23
23–3
AIRCRAFT EMPLOYMENT
AUTONOMOUS NAVIGATION
CREATING A BAD
A BAD can be created by either using the bearing and distance or latitude and
longitude offset from the BUT to the BAD. Its altitude offset can also be added and is
necessary when using the BAD to perform an CCPL PI or CCPI PI stike.
As with every heading on the PCN, the BAD bearing needs to be set in true north.
The offset bearing and distance can be found on the F10 map using the ruler tool
between the BUT and BAD location.
The latitude and longitude offset can be found by comparing the BUT and BAD X
and Z coordinates. These distances are in meters.
The altitude offset is found by comparing the BUT and BAD altitudes.
Page 429
SECTION 23
23–3
AIRCRAFT EMPLOYMENT
AUTONOMOUS NAVIGATION
A BAD being a waypoint offset to a BUT, its parent BUT first needs to be set.
This example will create a surface target BAD while using BUT 03 as a PI:
Surface target:
• Offset bearing and distance: 162° 5.9 nm
• Latitude and longitude offset: S10.357 km E3.365 km
• Altitude offset: +15 ft
NOTE
Make sure that the F10 map coordinates are in the correct format, the
coordinate should look like this X+/-00000000 Z+/-00000000.
The coordinate format can be changed using the ALT+Y command.
Page 430
SECTION 23
23–3
AIRCRAFT EMPLOYMENT
AUTONOMOUS NAVIGATION
BAD CREATION USING OFFSET BEARING AND DISTANCE
Press the PREP key, it will light up.
Type 03 on the numeric keypad.
1
2
Set the PCN parameter selector to the Ρ/Θ position.
3
To enter the offset distance, press the 1 or 7 key to edit the left window. The left
window will display --.-- and the INS and EFF keys will light up.
4
Page 431
SECTION 23
23–3
AIRCRAFT EMPLOYMENT
AUTONOMOUS NAVIGATION
No cardinality or sign is need, the offset distance can be entered: type 590.
The left window will display -5.90. The leading zero is not needed but the trailing one
is necessary.
Press the INS key to insert the data into the INS memory.
5
6
To enter the offset bearing, press the 3 or 9 key to edit the right window. The right
window will display ---.- and the INS and EFF keys will light up.
7
Page 432
SECTION 23
23–3
AIRCRAFT EMPLOYMENT
AUTONOMOUS NAVIGATION
No cardinality or sign is need, the offset bearing can be entered, type 1620.
The right window will display 162.0. The training zero is necessary.
Press the INS key to insert the data into the INS memory.
5
6
If the input contained an error, the edited window can be reset with the EFF key.
Pressing the EFF key with an incorrect value or no value will exit the edition mode
and reset the data to its previous value.
Pressing the PREP key or changing the parameter knob position will cancel the
edition.
Page 433
SECTION 23
23–3
AIRCRAFT EMPLOYMENT
AUTONOMOUS NAVIGATION
BAD CREATING USING LATITUDE AND LONGITUDE OFFSET
Press the PREP key, it will light up.
Type 03 on the numeric keypad.
1
2
Set the PCN parameter selector to the ΔL/ΔG position.
3
To enter the offset latitude, press the 1 or 7 key to edit the left window. The left
window will display NS --.--- and the INS and EFF keys will light up.
4
Page 434
SECTION 23
23–3
AIRCRAFT EMPLOYMENT
AUTONOMOUS NAVIGATION
The latitude offset cardinality first needs to be set. Since the BAD is south of the BUT
the latitude offset cardinality is south, press the 8 key on the numeric keypad. The
left window will display S --.---.
5
Then, the latitude offset can be entered: type 10357.
The left window will display S 10.357.
Press the INS key to insert the data into the INS memory.
6
7
To enter the longitude offset, press the 3 or 9 key to edit the right window. The right
window will display EW ---.--- and the INS and EFF keys will light up.
8
Page 435
SECTION 23
23–3
AIRCRAFT EMPLOYMENT
AUTONOMOUS NAVIGATION
The longitude offset cardinality first needs to be set. Since the BAD is east of the BUT
the latitude offset cardinality is east, press the 6 key on the numeric keypad. The left
window will display E --.---.
9
Then, the longitude offset can be entered, type 3365.
The right window will display E -3.365. The leading zero is not needed.
Press the INS key to insert the data into the INS memory.
10
11
If the input contained an error, the edited window can be reset with the EFF key.
Pressing the EFF key with an incorrect value or no value will exit the edition mode
and reset the data to its previous value.
Pressing the PREP key or changing the parameter knob position will cancel the
edition.
Page 436
SECTION 23
23–3
AIRCRAFT EMPLOYMENT
AUTONOMOUS NAVIGATION
SETTING BAD ALTITUDE OFFSET
Press the PREP key, it will light up.
Type 03 on the numeric keypad.
1
2
Set the PCN parameter selector to the ΔALT position.
3
To enter the altitude offset in feet, press the 1 or 7 key to edit the left window. The
left window will display +- ----- and the INS and EFF keys will light up.
4
Page 437
SECTION 23
23–3
AIRCRAFT EMPLOYMENT
AUTONOMOUS NAVIGATION
The altitude offset sign first needs to be set. Since the BAD is above the BUT press
the 1 or 3 key on the numeric keypad. The left window will display + -----.
5
Then the altitude offset can be entered: type 15.
The left window will display + ---15. The leading zeros are not needed.
Press the INS key to insert the data into the INS memory. The altitude offset will be
displayed in feet in the left window as well as meters in the right window.
5
6
If the input contained an error, the edited window can be reset with the EFF key.
Pressing the EFF key with an incorrect value or no value will exit the edition mode
and reset the data to its previous value.
Pressing the PREP key or changing the parameter knob position will cancel the
edition.
Page 438
SECTION 23
23–3
AIRCRAFT EMPLOYMENT
AUTONOMOUS NAVIGATION
USING A BAD
The VTH and IDN are the primary means for autonomous BAD navigation, the BAD
hosting BUT needs to be selected as the DEST BUT then the BAD is selected using
the BAD button, SNA in NAV mode for the VTH and the IDN set to the CvNav or
CmNav mode. The VTH will display BAD direction, distance and number (as well as
an asterisk indicating that the BUT’s BAD is selected) and the IDN distance and
direction.
NAVIGATION TO BAD 03
Press the DEST key, it will light up.
Type 03 on the numeric keypad.
Select the BUT BAD by pressing the BAD function key on the PCN. The BAD function
key green light will light up.
If the current DEST BUT does not have a BAD, the BAD function key will flash.
1
3
2
If the SNA is in NAV or AG memorized mode, follow the heading error indicator on
the VTH and the distance to the BAD using the VTH distance to BUT indication. When
a BAD is selected, the VTH BUT number is followed by an asterisk.
The VTB will also display the BAD position with NAV BUT symbol.
Page 439
SECTION 23
23–3
AIRCRAFT EMPLOYMENT
AUTONOMOUS NAVIGATION
If IDN selected mode indicator is in the CvNav or CmNav position, the wide needle
will indicate the direction and the distance window the distance to the BAD.
Page 440
SECTION 23
23–3
AIRCRAFT EMPLOYMENT
AUTONOMOUS NAVIGATION
CREATING AN MRQ
Since an MQR is created from the position of the aircraft, no data is required.
This example will create an MRQ over an un-friendly concentration of forces.
CREATING MRQ 91
Fly the aircraft over the desired location for the MRQ.
Press the MRQ key, it will light up with the VAL key. The PCN upper visualization
windows now displays the MRQ latitude and longitude irrelevant of the PCN
parameter selector position.
If no MQR slot is available, the MRQ key will flash and the VAL key will stay off.
2
If the MRQ coordinates are satisfactory, press the VAL key to create the MRQ.
3
The MRQ can be rejected by pressing the MRQ key a second time.
The successful creation of an MRQ is not indicated on the PCN, it can only be
selected as DEST.
Page 441
SECTION 23
23–3
AIRCRAFT EMPLOYMENT
AUTONOMOUS NAVIGATION
USING AN MRQ
The VTH and IDN are the primary means for autonomous MRQ navigation, the MQR
needs to be selected as the DEST BUT, SNA in NAV mode for the VTH and the IDN
set to the CvNav or CmNav mode. The VTH will display MRQ direction, distance and
number and the IDN distance and direction.
NAVIGATION TO MQR 91
Press the DEST key, it will light up.
Type 91 on the numeric keypad.
1
2
If the SNA is in NAV or AG memorized mode, follow the heading error indicator on
the VTH and the distance to the BUT using the VTH distance to BUT indication.
Page 442
SECTION 23
23–3
AIRCRAFT EMPLOYMENT
AUTONOMOUS NAVIGATION
If IDN selected mode indicator is in the CvNav or CmNav position, the wide needle
will indicate the direction and the distance window the distance to the BUT.
Page 443
SECTION 23
23–3
AIRCRAFT EMPLOYMENT
AUTONOMOUS NAVIGATION
SETTING UP A RD
As with every heading on the PCN, the RD (desired heading) needs to be set in true
north. The F-10 map display headings in true north and the local magnetic
declinaison can be found on the PCN by setting the parameter selector to the DEC
p2ositon.
This example will set a 025.0° RD into BUT 02
SETTING UP BUT 02 RD
Press the PREP key, it will light up.
Type 02 on the numeric keypad.
1
2
Set the PCN parameter selector to the RD/TD position.
3
Page 444
SECTION 23
23–3
AIRCRAFT EMPLOYMENT
AUTONOMOUS NAVIGATION
To enter the desired heading, press the 1 or 7 key to edit the left window. The left
window will display ---.- and the INS and EFF keys will light up.
4
No cardinality or sign is need, the desired heading can be entered: type 250.
The left window will display --25.0. The leading zero is not needed but the trailing one
is necessary.
Press the INS key to insert the data into the INS memory.
5
6
Page 445
SECTION 23
23–3
AIRCRAFT EMPLOYMENT
AUTONOMOUS NAVIGATION
USING A RD
The RD mode, selected using the RD option on the PCA, guides the aircraft to arrive
at a BUT or BAD while flying at a desired heading. The PCA RD option is available
when SNA is in navigation mode or air-to-ground memorized sub-mode.
The VTH and VTB will display the RD symbology when the RD option is selected and
the SNA is in navigation mode or air-to-ground memorized sub-mode.
NAVIGATION TO THE BUT 02 WHILE FOLLOWING ITS RD
Press the DEST key, it will light up.
Type 02 on the numeric keypad.
1
2
If the SNA is in NAV or AG memorized mode, select the RD option on the PCA.
3
Page 446
SECTION 23
23–3
AIRCRAFT EMPLOYMENT
AUTONOMOUS NAVIGATION
Follow the lateral guidance indicator by placing the flight path marker inside the 2
vertical lines. Once close to the desired heading, the lateral guidance symbology will
behave like the heading error indicator
The arrival desired route will also be displayed on the VTB.
Page 447
SECTION 23
23–3
AIRCRAFT EMPLOYMENT
AUTONOMOUS NAVIGATION
SETTING UP A TD
A TD (desired time) needs to be set with the anticipation of the time the PCA TOP
button will be pressed, because it is when the speed guidance will start.
This example will set a 12 minute 30 seconds TD into BUT 04
SETTING UP BUT 04 TD
Press the PREP key, it will light up.
Type 04 on the numeric keypad.
1
2
Set the PCN parameter selector to the RD/TD position.
3
Page 448
SECTION 23
23–3
AIRCRAFT EMPLOYMENT
AUTONOMOUS NAVIGATION
To enter the desired time, press the 3 or 9 key to edit the right window. The right
window will display ---.-- and the INS and EFF keys will light up.
4
No cardinality or sign is need, the desired time can be entered: type 1230.
The left window will display -12.30. The leading zero is not needed but the trailing
one is necessary.
Press the INS key to insert the data into the INS memory.
5
6
Page 449
SECTION 23
23–3
AIRCRAFT EMPLOYMENT
AUTONOMOUS NAVIGATION
USING A TD
The TD mode, selected using the TOP option on the PCA, guides the aircraft in speed
to arrive at a BUT or BAD at the desired time. The PCA TOP option is available when
SNA is in navigation mode or air-to-ground memorized sub-mode.
The VTH and VTB will display the TD symbology when the TOP (literally GO) option
is selected and the SNA is in navigation mode or air-to-ground memorized sub-mode.
The TOP button starts the speed guidance to arrive to the destination at the time it is
pressed plus the TD value.
NAVIGATION TO THE BUT 04 WHILE FOLLOWING ITS TD
Press the DEST key, it will light up.
Type 04 on the numeric keypad.
1
2
If the SNA is in NAV or AG memorized mode, select the TOP option on the PCA.
3
Page 450
SECTION 23
23–3
AIRCRAFT EMPLOYMENT
AUTONOMOUS NAVIGATION
Follow the speed guidance indicators by placing placing the acceleration chevrons
inside the parentheses.
Page 451
SECTION 23
23–3
AIRCRAFT EMPLOYMENT
AUTONOMOUS NAVIGATION
EXECUTING A NAVIGATION FIX
WORK IN PROGRESS
Page 452
SECTION 23
23–4
AIRCRAFT EMPLOYMENT
RADIO NAVIGATION
23 – 4 - RADIO NAVIGATION
INTRODUCTION
The Mirage 2000C is equipped with 3 radio navigation systems, a TACAN
transceiver, a VOR/ILS receiver and a marker beacon receiver. These systems allow
the aircraft to perform precise navigation in IFR or VFR conditions.
Even if radio navigation is not perfect, these systems are not subject to drift, making
them a lot more accurate than an INS system.
TACAN stations are a military radio navigation system that is most of the time used
on airbases, aircraft and helicopter carriers as well as tankers. It provides direction
and distance information at up to 200nm but requires line of sight between the station
and the transceiver. This system is mainly used in NATO countries by NATO aircraft.
VOR beacons are a civil radio navigation system, it is mainly used for commercial
and general aviation aircraft navigation. It provides direction information at up to
200nm but requires line of sight between the beacon and the receiver. This system
is the radio navigation standard, used everywhere in the world and by most air-forces.
ILS stations are a civil and military radio navigation system that is used for precision
instrument approach on airports. It provides deviation information from the airport
glideslope and localizer. This system is mainly used in NATO countries but is also
present in most civil airports around the world. This radio navigation system usage
will be detailed in the AIRPORT OPERATIONS SECTION.
Page 453
SECTION 23
23–4
AIRCRAFT EMPLOYMENT
RADIO NAVIGATION
USING A TACAN
In order to navigate using a TACAN, its channel needs to be set on the TACAN
configuration panel and the TACAN operation mode selected depending on the
desired information and TACAN type.
The IDN is the only instrument that displays TACAN navigation information, for that,
it needs to be set to the CmTAC mode.
The Mirage 2000C can also navigate with what’s called a VAD (offset TACAN). A
VAD is a point in space at a set azimuth and distance from a TACAN station. It is
setup using the IDN Cmρ (rho) and Cmθ (theta) modes and displayed using the
CmVAD mode. More information on how to setup a VAD in the FLIGHT-PLAN
CREATION SECTION.
EXAMPLE
NAVIGATION TO THE TACAN STATION X21
Set the TACAN channel on the TACAN configuration panel.
Set the T/R operation mode.
The R operation mode could be used if only azimuth from the TACAN was desired.
The TAC knob on the SIB panel can be used to check the TACAN Morse identification
code.
If the IDN selected mode indicator is in the CmTAC position, the wide needle will
indicate the direction and the distance window the distance to the station.
Page 454
SECTION 23
23–4
AIRCRAFT EMPLOYMENT
RADIO NAVIGATION
REJOIN AN AIRCRAFT WITH THE TACAN Y04
Set the TACAN channel on the TACAN configuration panel.
Set the A/A operation mode.
The TAC knob on the SIB panel can be used to check the TACAN Morse identification
code.
If the IDN selected mode indicator is in the CmTAC position, the wide needle will
indicate the direction and the distance window the distance to the aircraft.
The aircraft movement can also be determined by watching the tip of the wide needle
moving left or right.
Page 455
SECTION 23
23–4
AIRCRAFT EMPLOYMENT
RADIO NAVIGATION
NAVIGATION TO THE VAD 270°/15NM OF THE TACAN STATION X21
Set the TACAN channel on the TACAN configuration panel.
Set the T/R operation mode.
The TAC knob on the SIB panel can be used to check the TACAN Morse identification
code.
Set the VAD using the IDN Cmρ and Cmθ modes.
Set the IDN mode to the CmVAD position, the wide needle will indicate the direction
and the distance window the distance to the TACAN VAD.
Page 456
SECTION 23
23–4
AIRCRAFT EMPLOYMENT
RADIO NAVIGATION
USING A VOR
In order to navigate using a VOR, its frequency needs to be set on the VOR/ILS
configuration panel and it needs to be turned on.
The IDN is the only instrument that displays VOR navigation information, for that, it
needs to be set to any mode except in CmTEL mode.
The VOR direction indication is displayed by the thin needle on the IDN, this is its
only use. This means that VOR direction information can be displayed at the same
time than TACAN or BUT information.
EXAMPLE
NAVIGATION TO THE VOR STATION 117.6MHZ
Set the VOR frequency on the VOR/ILS configuration panel.
Set the VOR/ILS system to ON.
The V/ILS knob on the SIB panel can be used to check the TACAN Morse
identification code.
If the IDN selected mode indicator is in any other position than CmTEL mode, the
thin needle will indicate the direction of the VOR station.
Page 457
SECTION 23
23–5
AIRCRAFT EMPLOYMENT
NIGHT OPERATIONS
23 – 5 - NIGHT OPERATIONS
INSTALLING NVGS
If the NVGs are not installed in the aircraft (no NVG bag over the parking brake), the
ground crew can be asked to install them using the radio.
The NVGs are installed when the NVG bag is present over the parking brake.
Page 458
SECTION 23
23–5
AIRCRAFT EMPLOYMENT
NIGHT OPERATIONS
USING NVGS
In order to be able to use the goggles, they first have to be installed on the night
vision google mount. To do so, click on the NVG bag.
Once the NVGs are placed on their mount a click on the mount will install them on
the pilot’s helmet.
Once installed on the pilot’s helmet, the NVG can be brought to the eyes of the pilot
using the default keybind.
Page 459
SECTION 23
23–6
AIRCRAFT EMPLOYMENT
FLIGHT-PLAN CREATION
23 – 6 - FLIGHT-PLAN CREATION
INTRODUCTION
WORK IN PROGRESS
FROM THE MISSION EDITOR
WORK IN PROGRESS
FROM THE COCKPIT
WORK IN PROGRESS
Page 460
SECTION 24
WEAPONS
WEAPONS
Page 461
SECTION 24
WEAPONS
INTRODUCTION
The Mirage 2000C can carry 2 types of air-to-air missile as well as a variety of guide
and unguided bombs and rockets in addition to its internal cannons. It can also carry
2 types of external fuel tanks for extended range.
Internal weapons:
• 2 DEFA 554: 30mm cannon.
External weapons:
• SUPER 530D: Semi-active radar guided missile.
• MAGIC II: Infrared guided missile.
• SAMP-250: Low drag bomb.
• MARK-82: Low drag bomb.
• SAMP-250 HD: High drag bomb.
• MARK-82 SNAKEYE: High drag bomb.
• MARK-82 AIR: High drag bomb.
• BGL-66 BELOUGA: High drag sub-munition dispenser.
• BAP-100: Anti-runway penetration bomb.
• GBU-12: Laser guided bomb.
• GBU-16: Laser guided bomb.
• GBU-24: Laster guided bomb.
• TYPE F4: Rocket pod.
External fuel tanks:
• RP-522: 1300 liters fuel tank.
• RP-541/542: 1700 liters fuel tank.
The external stores are loaded under the wings and fuselage on removable pylons.
Page 462
SECTION 24
WEAPONS
WEAPON PROFILES
The Mirage 2000C SNA weapon profiles are loaded by the ground crew when the
aircraft is rearmed, 2 weapon profiles are available:
• Air-to-air profile: Contains the Super-530D missile data needed for the weapon
employment and symbology.
• Air-to-ground profile: Contains the high and low drag bombs as well as rockets data
needed for the aircraft to display weapon symbology.
Only one weapon profile can be loaded at a time, this means that the Super 530D
missiles are incompatible with any underwing air-to-ground weapon. If 530D are
loaded at the same time as air-to-ground weapon, the PCA will display an error and
the weapons will be unusable.
The air-to-air and air-to-ground gun and MAGIC II missile profiles are stored
separately and don’t interfere with other weapons profiles.
AIR-TO-GROUND WEAPON MIX
While air-to-ground weapon mixing is possible, French Air Force does not employ
mixed loadouts. This is due to doctrine choices in the employment of the aircraft as
well as mixed loadout not having been tested for separation clearance, aerodynamic
instability or weight distribution.
The only factor that needs to be respected is the symmetry of the loadout, each half
plane should be loaded identically or the PCA will display an error and weapon
employment will be impossible.
The DCS Mirage 2000C allows mixed loadout and does not simulate possible
separation or aerodynamic problems to provide a broader possibility to the user. In
order to achieve better realism, only one type of air-to-ground weapon should be
loaded at a time.
Page 463
SECTION 24
WEAPONS
BOMBS DELIVERY MODE
The Mirage 2000C SNA provide 2 bomb delivery modes:
• Calcul continu du point d’impact – CCPI (Continuously calculated impact point –
CCIP): The aircraft provides the pilot with the instantaneous impact point for the
weapon and will release the bombs on the MiCRoB trigger press.
• Calcul continu du point de largage – CCPL (Continuously calculated release point
– CCRP): The pilot needs to designate the desired impact point and the aircraft will
provide symbology guiding the pilot to the release point. The MiCRoB trigger acts
as a release consent and the aircraft releases the bombs when the release point is
reached.
The bomb delivery mode is forced depending on the bomb type, all high drag bombs
use CCPI while low drag bombs use CCPL:
• CCPI:
• SAMP-250 HD
• Mark-82 Snakeye
• Mark-82 Air
• BGL-66 Belouga
• BAP-100
• CCPL:
• SAMP-250
• Mark-82
• GBU-12
• GBU-16
• GBU-24
This impossibility to select the bomb delivery mode is due to the Mirage 2000C
weapon employment doctrine in the French Air Force: High drag bombs are meant
to be released at low altitude and high speed while low drag bombs are meant to be
released at medium to high altitude or in low altitude toss.
Page 464
SECTION 24
24–1
WEAPONS
LOADOUT CHART
24 – 1 - LOADOUT CHART
The Mirage 2000C has 9 hardpoints:
Outboard wing (Extérieur voilure)
Inboard wing (Intérieur voilure)
Rear side (Latéral arrière)
4
4
Front side (Latéral avant)
Fuselage (Fuselage)
2
1
5
3
2
3
1
Page 465
SECTION 24
24–1
WEAPONS
LOADOUT CHART
The loadout chart indicates which weapon can be loaded on the aircraft hardpoints.
Hardpoints
Weapon
Air-to-air
weapons
Super 530D
530
MAGIC II
MAG
SAMP-250
BL2
Mk-82
BL1
SAMP-250
HD
Mk-82
Snakeye
Air-toground
weapons
External fuel
tanks
PCA
code
9
8
7
6
5
4
3
2
1
BF3
BF1
Mk-82 Air
BF2
BLG-66
BF4
BAP-100
BF8
GBU-12
EL2
GBU-16
EL6
GBU-24
EL4
Type F4
RK
RPL-522
RL
RPL541/542
RL
In addition to those hard points, the drag chute can be replaced by the Eclair pod on
hardpoint 10.
Page 466
SECTION 24
24–1
WEAPONS
LOADOUT CHART
Page 467
SECTION 24
24–2
WEAPONS
INTERNAL CANNON
24 – 2 - INTERNAL CANNON
DEFA 554
INTRODUCTION
The DEFA 554 is an aircraft revolver 30mm cannon. It is the last variant of the DEFA
550 cannon family, only mounted on the Mirage 2000. Its main use is for the
destruction of hostile aircraft in close combat and strafes against ground target in a
close air support context.
The cannon characteristics are the following:
• Introduction date: 1984
• Length: 195 cm
• Weight: 80 kg
• Caliber: 30x113 mm
• Shell mass: 240 g
• Maximum range: 1000 m
• Muzzle velocity: 830 m/s
• Rate of fire: 1200 to 1800 round/min
CONFIGURATION
The Mirage 2000C is equipped with 2 DEFA 554 30mm cannons located on the
underside of the airframe between the engine air intake.
The ammo boxes are located over the cannon action between the intakes and the
external fuselage. Each box contains a 125 round disintegrating belt.
The spent casings are ejected outside the aircraft while the belt links are collected in
a dedicated box.
On the fuselage, between the 2 cannons is the aerodynamic safety paddle, it is raised
on the ground by the ground crew and folds when the airspeed is above 150 knots.
Its purpose is to provide and additional safety to prevent the weapon from firing on
the ground.
Page 468
SECTION 24
24–2
WEAPONS
INTERNAL CANNON
OPERATION
The DEFA 554 5 chamber revolver action works just like a classic revolver action, it
is gas operated and use electrical ignition. The revolver action allows for high rate of
fire while obtaining a better accuracy as well as reducing the spun and total weight
compared to rotary cannons.
The fire rate of the cannon is adjustable by the pilot in flight. The higher 1800
round/min rate is intended to be used against air targets while the lower 1200
round/min rate is intended for ground targets.
The high weight (240 g compared to 105 g for 20 mm equivalent) and relatively low
velocity (830 m/s compared to 1050 m/s for 20 mm equivalent) of the shell increase
the bullet drop and time of flight, making the maximum range lower than aircraft
equipped with 20mm cannons. The low muzzle velocity also complicates air-to-air
employment by needing a bigger lead or closer range in high deflection shots.
AMMO TYPES
2 ammo belt type are available:
• AP: Armor piercing
• APT: Armor piercing tracer
Page 469
SECTION 24
24–3
WEAPONS
MISSILES
24 – 3 - MISSILES
SUPER 530D
INTRODUCTION
The Matra Super 530D is a semi-active radar guided missile. It is the last and most
advanced member of the Matra 530 missile family, specifically developed for the
Mirage 2000C equipped with RDI radars. It is considered as a medium range missile
(MRM) capable of engaging aircraft beyond visual range (BVR).
The missile characteristics are the following:
• Introduction date: 1987
• Dimensions:
• Length: 380 cm
• Wingspan: 62 cm
• Weight: 270 kg
• Maximum range: 30 nm
• Maximum speed: 4.5 Mach
• Maximum altitude: 80 000 ft
The Mirage 2000C can carry 2 Super 530D, 1 under each inboard wing hardpoint.
The missile is composed of 5 sections:
• Seeker section: Hosts the semi-active seeker under the radome with a gyroscope
•
•
•
•
used for the seeker just behind it.
Military payload section: Hosts the explosives, the armament safety device and the
electromagnetic proximity fuses.
Thruster section: Hosts the rocket engine solid fuel and nozzle.
Guidance section: Hosts the guidance unit, the power supply and the rear
antennas. The guidance unit is composed of a calculator, a gyrometer and the
servomotors. The power supply is powered by a primed battery.
The steering section: Composed of 4 wings and 4 control surfaces. The wings are
of high surface area and length to provide lift and smooth the airflow for the control
surfaces. The control surfaces provide pitch, yaw and roll control.
Page 470
SECTION 24
24–3
WEAPONS
MISSILES
PYLON
When attached to its 2153A pylon, the missile is set on a rail. It will slide off it by its
own thruster at launch.
The pylons host the aerodynamic safety paddle, it is raised on the ground by the
ground crew and folds when the airspeed is above 150 knots. Its purpose is to provide
an additional safety to prevent the weapon from firing on the ground.
PROPULSION
The missile thruster is a 2 stage solid fuel rocket engine that burns for 10 seconds.
The 1st stage, called boost, lasts 2 seconds and produce a higher trust than the 2 nd
stage, called sustain, that lasts 8 seconds. After the solid fuel is expended the missile
has no other means of propulsion and must use its stored energy (kinetic or potential)
to reach its target.
POWER SUPPLY
The missile is powered by an internal battery that is primed a launch, this battery can
only power the missile for about 45 seconds. When the battery runs out of power, the
missile self-destruct.
GUIDANCE
The Super 530D seeker is semi-active radar guided, meaning it homes on the shooter
aircraft radar waves reflected by the target. This guidance method requires that the
shooter aircraft illuminates the target during the totality of the missile flight. The
missile is lock on before launch (LOBL) meaning that it has to acquire its target before
it can be fired, this is done automatically when a target is locked in PSIC and the
missiles are selected.
The missile rear antenna purpose is to receive a reference wave from the shooter’s
aircraft radar and use them to calculate the expected doppler shift of the target’s
reflected radar waves.
A PSIC lock is required in order for the missile to track the target. The missile has the
capacity to reacquire its target after the lock is lost momentarily if the target is still in
its seeker field of view.
If the target is equipped with a radar warning receiver (RWR), it may be able to detect
the missile and warn the pilot. Most modern aircraft will be able to detect and react
to a Super 530D shot.
PAYLOAD
The missile’s military payload is 30 kg HE fragmentation that gives a lethal zone of
about 20 meters. The explosives are triggered by 2 electromagnetic proximity fuses
located on the side of the military payload section.
Page 471
SECTION 24
24–3
WEAPONS
MISSILES
RANGE
The Super 530D range is dependent on multiple factors:
• Shooter aircraft speed
• Shooter aircraft altitude
• Target speed
• Target altitude
• Target aspect
• Target angle from shooter aircraft
• Altitude difference
Target maneuvers during the missile flight can also affect the missile range.
Missile range is mostly affected by the altitude at which it will travel and the aspect
of the target.
By design, rocket engine get more efficient as the air density is reduced, meaning
that the missile thruster will produce more energy at altitude than sea level. In addition
to the engine thrust, the missile will generate less drag at high altitude also due to
the lower air density.
The target aspect will affect the target and missile closing speed. A head aspect
target will have its speed added to their combined closing speed, reducing the
distance to be traveled by the missile while a tail aspect target will have its speed
subtracted to their combined closing speed, increasing the distance to be traveled by
the missile.
The best conditions for missile employment are a fast shooting aircraft at high altitude
against a high and fast target flying head-on.
MANEUVERING
The Super 530D is a highly maneuverable missile, it is capable of up to 18G at supersonic speed. This high G capability means that it is almost impossible for a target to
evade it only by turning.
In order to maneuver to the target, the missile needs to have sufficient speed over its
wings and control surfaces to generate lift. It keeps significant maneuvering
capabilities down until 700 kt IAS, below this speed, the wings and control surfaces
don’t provide enough lift to maneuver the missile efficiently.
Page 472
SECTION 24
24–3
WEAPONS
MISSILES
MAGIC II
INTRODUCTION
The Matra R550 MAGIC II is an all-aspect infrared guided missile. It is the second
iteration of the French designed MAGIC infrared missile, in use for self-defense and
close combat on all French Air Force aircraft until its replacement by the MICA IR. It
is considered as a short-range missile (SRM) for engaging aircraft within visual range
(WVR). The name of the missile is an acronym: Missile auto-guidé d’interception et
de combat (Self-guided interception and combat missile).
The missile characteristics are the following:
• Introduction date: 1986
• Dimensions:
• Length: 275 cm
• Wingspan: 66 cm
• Weight: 89 kg
• Maximum range: 5 nm
• Maximum speed: 3 Mach
• Maximum altitude: 60 000 ft
The Mirage 2000C can carry 2 MAGIC II, 1 under each outboard wing hardpoint.
Additionally, the aircraft can be retrofitted to carry 2 more MAGIC II under the inboard
wing hardpoint. This configuration is not part of the French Air Force doctrine for the
Mirage 2000C but has been employed by other operators.
The missile is composed of 2 sections:
• Electronic section: Hosts the infrared seeker with its gyroscope, the guidance unit,
the fixed wings, the control surfaces, the power supply, the armament safety device
and the electromagnetic proximity fuse. The guidance unit is composed of a
calculator and 2 gyrometers. The power supply is powered by a primed battery.
• Pyrotechnic section: Hosts the explosives, the rocket engine solid fuel and nozzle
and the rotary wings.
PYLON
When attached to its 2255 or 2255A pylon, the missile is set on a rail. It will slide off
it by its own thruster at launch. The pylons host the aerodynamic safety paddle, it is
raised on the ground by the ground crew and folds when the airspeed is above 150
knots. Its purpose is to provide an additional safety to prevent the weapon from firing
on the ground.
Page 473
SECTION 24
24–3
WEAPONS
MISSILES
2 pylons are available for the MAGIC II:
• 2255 Pylon: Standard pylon with aerodynamic rear fairing.
• 2255A Pylon: Standard pylon capable of receiving the D2M sensor in place of the
rear fairing.
The pylons house the nitrogen bottles used to cool the missile to operating
temperature. The bottles can supply the missiles with coolant for 90 minutes after
which the seeker won’t be cooled anymore.
The D²M sensor also uses the nitrogen for cooling when operating. It consumes as
much as a MAGIC seeker, dividing the autonomy by 2 when both systems are cooled.
The initial cooling sequence for the MAGICs and the D²M consume about 10 minutes
of coolant.
PROPULSION
The missile thruster is a single stage solid rocket engine that burns for 2 seconds.
After the solid fuel is expended it has no other means of propulsion and must use its
stored energy (kinetic or potential) to reach its target.
POWER SUPPLY
The missile is powered by an internal battery that is primed a launch, this battery can
only power the missile for about 30 seconds. When the battery runs out of power, the
missile self-destruct.
GUIDANCE
The MAGIC II seeker is all-aspect infrared guided, meaning it homes on the heat
radiated by the target aircraft. Being all-aspect, the missile can detect the heat
coming from the engine (reactor, turbine or piston engine) or the skin of the aircraft.
This all-aspect capacity requires the missile to be cooled to very low temperature
(few degrees above absolute zero), this is done by using liquid nitrogen stored in the
missile pylon. The missile is lock on before launch (LOBL) meaning that it has to
acquire its target before it can be fired. The missile seeker can autonomously lock a
target or be slaved to the aircraft radar.
Even if the missile is considered all-aspect, the target type and orientation play a
great role in the lock range of the seeker. Aircraft equipped with reactor can be locked
from further out in rear aspect while for single piston or turboprop engine aircraft it’s
the front aspect.
Once the missile is fired, it is autonomous. The shooter aircraft can safely disengage
while the missile flies to its target.
The MAGIC II guidance system is passive, meaning that radar warning receivers
(RWR) cannot detect that a missile has been fired. The only systems able to detect
this type of missiles are missile warning system (MWS) that detects UV light
produced by the missile rocket engine (just like the Mirage D2M system).
Page 474
SECTION 24
24–3
WEAPONS
MISSILES
PAYLOAD
The missile’s military payload is 13 kg HE fragmentation that gives a lethal zone of
about 10 meters. The explosives are triggered by 8 electromagnetic proximity fuses
located around the missile fuselage behind the control surfaces.
RANGE
The MAGIC II range is dependent on multiple factors:
• Shooter aircraft speed
• Shooter aircraft altitude
• Target speed
• Target altitude
• Target aspect
• Target angle from shooter aircraft
• Altitude difference
Target maneuvers during the missile flight can also affect the missile range.
Missile range is mostly affected by the altitude at which it will travel and the aspect
of the target.
By design, rocket engine get more efficient as the air density is reduced, meaning
that the missile thruster will produce more energy at altitude than sea level. In addition
to the engine thrust, the missile will generate less drag at high altitude also due to
the lower air density.
The target aspect will affect the target and missile closing speed. A head aspect
target will have its speed added to their combined closing speed, reducing the
distance to be traveled by the missile while a tail aspect target will have its speed
subtracted to their combined closing speed, increasing the distance to be traveled by
the missile.
The best conditions for missile employment are a fast shooting aircraft at high altitude
against a high and fast target flying head-on.
MANEUVERING
The MAGIC is a highly maneuverable missile, it is capable of up to 30G at supersonic speed. This high G capability means that it is virtually impossible for a target to
evade it only by turning.
In order to maneuver to the target, the missile needs to have sufficient speed over its
wings and control surfaces to generate lift. It keeps significant maneuvering
capabilities down until 500 kt IAS, below this speed, the wings and control surfaces
don’t provide enough lift to maneuver the missile efficiently.
Page 475
SECTION 24
24–4
WEAPONS
LOW DRAG BOMBS
24 – 4 - LOW DRAG BOMBS
INTRODUCTION
Low drag bombs are designed to be released on targets from aircraft flying at medium
to high altitude, in level flight or in a dive. These bombs then follow a ballistic
trajectory to their target.
This delivery method precision relies on the aircraft following the correct parameter
for the altitude, speed and dive angle. The inherent imprecision of this method often
requires employing multiple bombs to hit one target.
Laser guided bombs are also considered low drag bombs. They differ from “dumb”
bombs by the addition of a guidance kit. The most common type of guided bombs
are laser guided bombs, they track their target by following a laser emitted by the
releasing aircraft or an external designator.
Low drag bombs can also be released using a toss delivery profile. In this profile the
aircraft releases the bombs while climbing to give the bomb a parabolic trajectory,
increasing their range at the cost of precision. This type of profile can be used from
low altitude to medium altitude.
Page 476
SECTION 24
24–4
WEAPONS
LOW DRAG BOMBS
SAMP-250
INTRODUCTION
The SAMP-250 type 25F1 is an unguided, low-drag general-purpose bomb (LDGP).
The bombs were designed and produced in France before their replacement by the
Mk-82 bomb.
The bomb characteristics are the following:
• Introduction date: 1973
• Dimensions:
• Length: 108 cm
• Diameter: 30.5 cm
• Weight: 245 kg
• Explosive mass: 100 kg
• Explosive type: Tritonal
The Mirage 2000C can carry up to 8 SAMP-250:
• 2 on the front side hardpoints.
• 2 on the rear side hardpoints.
• 2 or 4 on the internal wing hardpoints.
The forward half of the bomb body holds the explosives while the rearward half is an
addon aerodynamic assembly. At the forward end of the bomb is the nose fuse and
on the aerodynamic assembly left side the tail fuse with 4 stabilizing fins.
PYLONS
The bomb pylons contain the fuse arming mechanism. 2 bombs can be carried under
the internal wing hardpoint by using the AUF2 adaptor.
PRECISION
Since the SAMP-250 is unguided, its precision is entirely dependent on the releasing
aircraft. Additionally, the bomb has a circular error probable (CEP) of 30m, meaning
that if released perfectly, 50% of the bombs will impact within 30 meters of the aiming
point.
Page 477
SECTION 24
24–4
WEAPONS
LOW DRAG BOMBS
PAYLOAD
The bomb payload is 100 kg of tritonal HE under a thick steel casing case that
generate fragmentation on detonation. The weapon lethal zone is 60 to 100m against
infantry.
FUSING
The bomb explosives are triggered by 1 of the 2 fuses:
• Nose fuse: Will trigger the explosives as soon as the bomb hits hard surface,
exploding just above the ground and creating a large blast and fragment area. This
is effective against vehicle and soft target but will inflict minimal damage against
hardened targets like bunkers or infrastructure.
• Tail fuse: Will trigger the explosives after the bomb has penetrated a hard surface,
exploding inside it. This is effective against hardened targets like bunkers or
infrastructure but will have a reduced blast and fragment area. Penetration of
hardened or underground bunkers is still limited as the bomb is not equipped with
a dedicated penetrator kit.
Both fuses have a safety timer of 6 seconds to ensure that the releasing aircraft is
not in the blast and fragment area when the bomb impacts the ground.
Page 478
SECTION 24
24–4
WEAPONS
LOW DRAG BOMBS
MARK-82
INTRODUCTION
The Mark-82 (Mk-82) is an unguided, low-drag general-purpose bomb (LDGP). It is
the most common bomb in service in NATO countries and is the main LDGP bomb
in the French Air Force inventory. The bombs are produced in France under license
and replace the less aerodynamic French SAMP-250 bombs.
The bomb characteristics are the following:
• Introduction date: 1954
• Dimensions:
• Length: 222 cm
• Diameter: 27 cm
• Weight: 227 kg
• Explosive mass: 87 kg
• Explosive type: Tritonal
The Mirage 2000C can carry up to 8 Mark-82:
• 2 on the front side hardpoints.
• 2 on the rear side hardpoints.
• 2 or 4 on the internal wing hardpoints.
The bomb body holds the explosives. At the forward end of the bomb is the nose fuse
and at the rearward end the tail fuse with 4 stabilizing fins.
PYLONS
The bomb pylons contain the fuse arming mechanism. 2 bombs can be carried under
the internal wing hardpoint by using the AUF2 adaptor.
PRECISION
Since the Mark-82 is unguided, its precision is entirely dependent on the releasing
aircraft. Additionally, the bomb has a circular error probable (CEP) of 30m, meaning
that if released perfectly, 50% of the bombs will impact within 30 meters of the aiming
point.
Page 479
SECTION 24
24–4
WEAPONS
LOW DRAG BOMBS
PAYLOAD
The bomb payload is 89 kg of tritonal HE under a thick steel casing case that
generate fragmentation on detonation. The weapon lethal zone is 60 to 100m against
infantry.
FUSING
The bomb explosives are triggered by 1 of the 2 fuses:
• Nose fuse: Will trigger the explosives as soon as the bomb hits hard surface,
exploding just above the ground and creating a large blast and fragment area. This
is effective against vehicle and soft target but will inflict minimal damage against
hardened targets like bunkers or infrastructure.
• Tail fuse: Will trigger the explosives after the bomb has penetrated a hard surface,
exploding inside it. This is effective against hardened targets like bunkers or
infrastructure but will have a reduced blast and fragment area. Penetration of
hardened or underground bunkers is still limited as the bomb is not equipped with
a dedicated penetrator kit.
Both fuses have a safety timer of 6 seconds to ensure that the releasing aircraft is
not in the blast and fragment area when the bomb impacts the ground.
Page 480
SECTION 24
24–4
WEAPONS
LOW DRAG BOMBS
GBU-12
INTRODUCTION
The GBU-12 (guided bomb unit) is a laser guided bomb based on the Mark-82 LDGP.
It is the most common laser guided bomb in service in NATO countries and is the
main laser guided bomb in the French Air Force inventory.
The bomb characteristics are the following:
• Introduction date: 1976
• Dimensions:
• Length: 372 cm
• Diameter: 45 cm
• Weight: 273 kg
• Explosive mass: 87 kg
• Explosive type: Tritonal
The Mirage 2000C can carry up to 4 GBU-12:
• 2 on the front side hardpoints.
• 1 or 2 under the fuselage hardpoint.
The bomb is a standard Mark-82 mounted with a Paveway II guidance kit. The bomb
body holds the explosives. At the forward end of the bomb is the nose fuse, the laser
tracking system and control surfaces and at the rearward end the tail fuse with 4
stabilizing fins that deploy when the bomb is released.
PYLONS
The bomb pylons contain the fuse arming mechanism. 2 bombs can be carried under
the fuselage hardpoint by using the AUF2 adaptor.
The bombs are not cleared to be mounted on the front side or internal wing
hardpoints.
GUIDANCE
The GBU-12 uses the Paveway II guidance kit, it is composed of a laser seeker, 4
control surfaces and 4 deployable stabilizing fins.
The target needs to be designated by a laser pointer, it can be coming from a handheld device (generally from a JTAC), a vehicle or another aircraft. The Mirage 2000C
Page 481
SECTION 24
24–4
WEAPONS
LOW DRAG BOMBS
is unable to self-designate as it can’t carry a targeting pod. The bomb seeker
searches for a laser at a specific frequency set on the bomb guidance unit on the
ground, the designation laser needs to match this frequency or the bomb won’t track
the laser.
The bomb is lock on after launch (LOAL), the bomb is released conventionally on the
target and the seeker spot and track the laser once the bomb nose is pointing at the
target.
The Paveway II guidance is very simple, the bomb steers at its maximum capacity in
the direction of the laser. If the seeker overshoots the mark, it steers at its maximum
capacity in the opposite direction. This guidance method is less precise and use more
energy than proportional guidance but allows for a cheap and simple system.
PRECISION
The GBU-12 guidance system removes the dependence on precision from the
releasing platform and achieve a much better circular error probable (CEP) of 9 to 10
meters from the laser aiming point.
PAYLOAD
The bomb payload is 89 kg of tritonal HE under a thick steel casing case that
generate fragmentation on detonation. The weapon lethal zone is 60 to 100m against
infantry.
FUSING
The bomb explosives are triggered by 1 of the 2 fuses:
• Nose fuse: Will trigger explosives as soon as the bomb hits hard surface, exploding
just above the ground and creating a large blast and fragment area. This is effective
against vehicle and soft target but will inflict minimal damage against hardened
targets like bunkers or infrastructure.
• Tail fuse: Will trigger the explosives after the bomb has penetrated a hard surface,
exploding inside it. This is effective against hardened targets like bunkers or
infrastructure but will have a reduced blast and fragment area. Penetration of
hardened or underground bunkers is still limited as the bomb is not equipped with
a dedicated penetrator kit.
Both fuses have a safety timer of 6 seconds to ensure that the releasing aircraft is
not in the blast and fragment area when the bomb impacts the ground.
Page 482
SECTION 24
24–4
WEAPONS
LOW DRAG BOMBS
GBU-16
INTRODUCTION
The GBU-16 (guided bomb unit) is a laser guided bomb based on the Mark-83 LDGP.
The bomb bigger size and explosive filling allow for a larger lethal zone and bigger
damage on the target.
The bomb characteristics are the following:
• Introduction date: 1976
• Dimensions:
• Length: 370 cm
• Diameter: 66 cm
• Weight: 496 kg
• Explosive mass: 204 kg
• Explosive type: Tritonal
The Mirage 2000C can carry 1 GBU-16 under the fuselage hardpoint.
The bomb is a standard Mark-83 with a Paveway II guidance kit. The bomb body
holds the explosives. At the forward end of the bomb is the nose fuse, the laser
tracking system and control surfaces and at the rearward end the tail fuse with 4
stabilizing fins that deploy when the bomb is released.
PYLONS
The bomb pylons contain the fuse arming mechanism. Only the fuselage hardpoint
is cleared to carry the GBU-16.
GUIDANCE
The GBU-16 uses the Paveway II guidance kit, it is composed of a laser seeker, 4
control surfaces and 4 deployable stabilizing fins.
The target needs to be designated by a laser pointer, it can be coming from a handheld device (generally from a JTAC), a vehicle or another aircraft. The Mirage 2000C
is unable to self-designate as it can’t carry a targeting pod. The bomb seeker
searches for a laser at a specific frequency set on the guidance unit on the ground,
the designation laser needs to match this frequency or the bomb won’t track the laser.
Page 483
SECTION 24
24–4
WEAPONS
LOW DRAG BOMBS
The bomb is lock on after launch (LOAL), the bomb is released conventionally on the
target and the seeker spot and track the laser once the bomb nose is pointing to the
target.
The Paveway II guidance is very simple, the bomb steers at its maximum capacity in
the direction of the laser. If the seeker overshoots the mark, it steers at its maximum
capacity in the opposite direction. This guidance method is less precise and use more
energy than proportional guidance but allows for a cheap and simple system.
PRECISION
The GBU-16 guidance system removes the dependence on precision from the
releasing platform and achieve a much better circular error probable (CEP) of 9 to 10
meters from the laser aiming point.
PAYLOAD
The bomb payload is 204 kg of tritonal HE under a thick steel casing case that
generate fragmentation on detonation. The weapon lethal zone is 150 to 200m
against infantry.
FUSING
The bomb explosives are triggered by 1 of the 2 fuses:
• Nose fuse: Will trigger explosives as soon as the bomb hits hard surface, exploding
just above the ground and creating a large blast and fragment area. This is effective
against vehicle and soft target but will inflict minimal damage against hardened
targets like bunkers or infrastructure.
• Tail fuse: Will trigger the explosives after the bomb has penetrated a hard surface,
exploding inside it. This is effective against hardened targets like bunkers or
infrastructure but will have a reduced blast and fragment area. Penetration of
hardened or underground bunkers is still limited as the bomb is not equipped with
a dedicated penetrator kit.
Both fuses have a safety timer of 6 seconds to ensure that the releasing aircraft is
not in the blast and fragment area when the bomb impacts the ground.
Page 484
SECTION 24
24–4
WEAPONS
LOW DRAG BOMBS
GBU-24
INTRODUCTION
The GBU-24 (guided bomb unit) is a laser guided bomb based on the Mark-84 LDGP.
The improved guidance system allows for greater precision, reliability and range than
previous laser guided bombs.
The bomb characteristics are the following:
• Introduction date: 1983
• Dimensions:
• Length: 439 cm
• Diameter: 94 cm
• Weight: 1050 kg
• Explosive mass: 910 kg
• Explosive type: Tritonal
The Mirage 2000C can carry 1 GBU-24 under the fuselage hardpoint.
The bomb is a standard Mark-84 with a Paveway III guidance kit. The bomb body
holds the explosives. At the forward end of the bomb is the nose fuse, the laser
tracking system and control surfaces and at the rearward end the tail fuse with 4
stabilizing fins that deploy when the bomb is released.
PYLONS
The bomb pylons contain the fuse arming mechanism. Only the fuselage hardpoint
is cleared to carry the GBU-24.
GUIDANCE
The GBU-24 uses the Paveway III guidance kit, it is composed of a laser seeker, 4
control surfaces and 4 deployable stabilizing fins.
The target needs to be designated by a laser pointer, it can be coming from a handheld device (generally from a JTAC), a vehicle or another aircraft. The Mirage 2000C
is unable to self-designate as it can’t carry a targeting pod. The bomb seeker
searches for a laser at a specific frequency set on the guidance unit on the ground,
the designation laser needs to match this frequency or the bomb won’t track the laser.
Page 485
SECTION 24
24–4
WEAPONS
LOW DRAG BOMBS
The bomb is lock on after launch (LOAL), the bomb is released conventionally on the
target and the seeker spot and track the laser once the bomb nose is pointing to the
target.
The Paveway III guidance is more advanced than the older Paveway II kits, the bomb
will adjust its trajectory to impact the designated target while using the least energy
possible. This better guidance system gives the bomb a better range and greater
precision compared to older laser guided bombs.
The Mirage SNA is not able to take advantage of the bomb greater range as it is
designed to release the weapon on a ballistic trajectory to the target. This limitation
can be circumvented by selectively jettisoning the bomb when in range of the target.
PRECISION
The GBU-24 guidance system allows the bomb to optimize its trajectory and achieve
an even better circular error probable (CEP) of 1 meter from the laser aiming point.
PAYLOAD
The bomb payload is 429 kg of tritonal HE under a thick steel casing case that
generate fragmentation on detonation. The weapon lethal zone is 300 to 370m
against infantry.
FUSING
The bomb explosives are triggered by 1 of the 2 fuses:
• Nose fuse: Will trigger explosives as soon as the bomb hits hard surface, exploding
just above the ground and creating a large blast and fragment area. This is effective
against vehicle and soft target but will inflict minimal damage against hardened
targets like bunkers or infrastructure.
• Tail fuse: Will trigger the explosives after the bomb has penetrated a hard surface,
exploding inside it. This is effective against hardened targets like bunkers or
infrastructure but will have a reduced blast and fragment area. Penetration of
hardened or underground bunkers is still limited as the bomb is not equipped with
a dedicated penetrator kit.
Both fuses have a safety timer of 6 seconds to ensure that the releasing aircraft is
not in the blast and fragment area when the bomb impacts the ground.
Page 486
SECTION 24
24–5
WEAPONS
HIGH DRAG BOMBS
24 – 5 - HIGH DRAG BOMBS
INTRODUCTION
High drag bombs are designed to allow delivery at low altitude (300 ft) and high speed
by increasing the separation between the aircraft and the impact point. Low altitude
delivery is impossible with low drag bombs because the aircraft will be inside the
blast or fragmentation radius. Slowing down the bomb using high drag fins, a ballute
or a parachute allows the bomb to separate faster and explode “behind” the aircraft.
The bombs high drag devices are stowed when the bomb is loaded under the aircraft
to reduce the airframe drag.
For some high drag bombs the deployment of the high drag devices can be selected
at release, allowing a greater domain of employment for the bomb.
The trajectory of high drag bombs forces delivery profiles to be either at low altitude
and high speed or in a very steep dive. The increased time of flight also means that
they are more susceptible to wind and turbulences, resulting in a reduced precision.
Page 487
SECTION 24
24–5
WEAPONS
HIGH DRAG BOMBS
SAMP-250 HD
INTRODUCTION
The SAMP-250 type 25F1 empennage type 200 is an unguided, high-drag generalpurpose bomb (HDGP). The bombs were designed and produced in France before
their replacement by the Mk-82 Air bomb.
The bomb characteristics are the following:
• Introduction date: 1973
• Dimensions:
• Length: 108 cm
• Diameter: 30.5 cm
• Weight: 269 kg
• Explosive mass: 100 kg
• Explosive type: Tritonal
The Mirage 2000C can carry up to 8 SAMP-250 HD:
• 2 on the front side hardpoints.
• 2 on the rear side hardpoints.
• 2 or 4 on the internal wing hardpoints.
The forward half of the bomb body holds the explosives while the rearward half is an
addon aerodynamic assembly containing the deployable drag chute. At the forward
end of the bomb is the nose fuse and inside the aerodynamic assembly the tail fuse
with 4 stabilizing fins.
PYLONS
The bomb pylons contain the fuse arming mechanism. 2 bombs can be carried under
the internal wing hardpoint by using the AUF2 adaptor.
PRECISION
Since the SAMP-250 HD is unguided, its precision is entirely dependent on the
releasing aircraft. Additionally, the bomb has a circular error probable (CEP) of 30m,
meaning that if released perfectly, 50% of the bombs will impact within 30 meters of
the aiming point.
Page 488
SECTION 24
24–5
WEAPONS
HIGH DRAG BOMBS
PAYLOAD
The bomb payload is 100 kg of tritonal HE under a thick steel casing case that
generate fragmentation on detonation. The weapon lethal zone is 60 to 100m against
infantry.
FUSING
The bomb explosives are triggered by 1 of the 2 fuses:
• Nose fuse: Will trigger the explosives as soon as the bomb hits hard surface,
exploding just above the ground and creating a large blast and fragment area. This
is effective against vehicle and soft target but will inflict minimal damage against
hardened targets like bunkers or infrastructure.
• Tail fuse: Will trigger the explosives after the bomb has penetrated a hard surface,
exploding inside it. This is effective against hardened targets like bunkers or
infrastructure but will have a reduced blast and fragment area. Penetration of
hardened or underground bunkers is still limited as the bomb is not equipped with
a dedicated penetrator kit.
Both fuses have no safety timer, the releasing aircraft needs to use a profile that
guarantee sufficient separation from the explosion.
Page 489
SECTION 24
24–5
WEAPONS
HIGH DRAG BOMBS
MARK-82 SNAKEYE
INTRODUCTION
The Mark-82 Snakeye (Mk-82S) is an unguided, high-drag general-purpose bomb
(HDGP). The bombs are produced in France under license and replace the older
French SAMP-250 bombs.
The bomb characteristics are the following:
• Introduction date: 1967
• Dimensions:
• Length: 221 cm
• Diameter: 27 cm
• Weight: 241 kg
• Explosive mass: 87 kg
• Explosive type: Tritonal
The Mirage 2000C can carry up to 8 Mark-82 Snakeye:
• 2 on the front side hardpoints.
• 2 on the rear side hardpoints.
• 2 or 4 on the internal wing hardpoints.
The bomb body holds the explosives. At the forward end of the bomb is the nose fuse
and at the rearward end the tail fuse with 4 deployable high drag fins.
PYLONS
The bomb pylons contain the fuse arming mechanism. 2 bombs can be carried under
the internal wing hardpoint by using the AUF2 adaptor.
PRECISION
Since the Mark-82 Snakeye is unguided, its precision is entirely dependent on the
releasing aircraft. Additionally, the bomb has a circular error probable (CEP) of 30m,
Page 490
SECTION 24
24–5
WEAPONS
HIGH DRAG BOMBS
meaning that if released perfectly, 50% of the bombs will impact within 30 meters of
the aiming point.
PAYLOAD
The bomb payload is 89 kg of tritonal HE under a thick steel casing case that
generate fragmentation on detonation. The weapon lethal zone is 60 to 100m against
infantry.
FUSING
The bomb explosives are triggered by 1 of the 2 fuses:
• Nose fuse: Will trigger the explosives as soon as the bomb hits hard surface,
exploding just above the ground and creating a large blast and fragment area. This
is effective against vehicle and soft target but will inflict minimal damage against
hardened targets like bunkers or infrastructure.
• Tail fuse: Will trigger the explosives after the bomb has penetrated a hard surface,
exploding inside it. This is effective against hardened targets like bunkers or
infrastructure but will have a reduced blast and fragment area. Penetration of
hardened or underground bunkers is still limited as the bomb is not equipped with
a dedicated penetrator kit.
Both fuses have no safety timer, the releasing aircraft needs to use a profile that
guarantee sufficient separation from the explosion.
Page 491
SECTION 24
24–5
WEAPONS
HIGH DRAG BOMBS
MARK-82 AIR
INTRODUCTION
The Mark-82 Air (Mk-82Air) is an unguided, high-drag general-purpose bomb
(HDGP). The bombs are produced in France under license and replace the older
French SAMP-250 bombs.
The bomb characteristics are the following:
• Introduction date: 1986
• Dimensions:
• Length: 221 cm
• Diameter: 27 cm
• Weight: 241 kg
• Explosive mass: 87 kg
• Explosive type: Tritonal
The Mirage 2000C can carry up to 8 Mark-82 Air:
• 2 on the front side hardpoints.
• 2 on the rear side hardpoints.
• 2 or 4 on the internal wing hardpoints.
The bomb body holds the explosives. At the forward end of the bomb is the nose fuse
and at the rearward end the tail fuse with the deployable air ballute.
PYLONS
The bomb pylons contain the fuse arming mechanism. 2 bombs can be carried under
the internal wing hardpoint by using the AUF2 adaptor.
PRECISION
Since the Mark-82 Air is unguided, its precision is entirely dependent on the releasing
aircraft. Additionally, the bomb has a circular error probable (CEP) of 30m, meaning
that if released perfectly, 50% of the bombs will impact within 30 meters of the aiming
point.
PAYLOAD
Page 492
SECTION 24
24–5
WEAPONS
HIGH DRAG BOMBS
The bomb payload is 89 kg of tritonal HE under a thick steel casing case that
generate fragmentation on detonation. The weapon lethal zone is 60 to 100m against
infantry.
FUSING
The bomb explosives are triggered by 1 of the 2 fuses:
• Nose fuse: Will trigger the explosives as soon as the bomb hits hard surface,
exploding just above the ground and creating a large blast and fragment area. This
is effective against vehicle and soft target but will inflict minimal damage against
hardened targets like bunkers or infrastructure.
• Tail fuse: Will trigger the explosives after the bomb has penetrated a hard surface,
exploding inside it. This is effective against hardened targets like bunkers or
infrastructure but will have a reduced blast and fragment area. Penetration of
hardened or underground bunkers is still limited as the bomb is not equipped with
a dedicated penetrator kit.
Both fuses have no safety timer, the releasing aircraft needs to use a profile that
guarantee sufficient separation from the explosion.
Page 493
SECTION 24
24–5
WEAPONS
HIGH DRAG BOMBS
BLG-66 BELOUGA
INTRODUCTION
The BLG-66 Belouga (bombe lance-grenade 66mm – 66mm grenade launcher
bomb) is an unguided, high-drag, cluster bomb. The bombs are of French design and
are can be used by any aircraft fitted with standard NATO bomb suspension lugs.
The bomb characteristics are the following:
• Introduction date: 1979
• Dimensions:
• Length: 222 cm
• Diameter: 55 cm
• Weight: 290 kg
• Sub-munitions: 151x1.2 Kg
• Sub-munitions types:
• Anti-tank: GR-66-AC
• Fragmentation: GR-66-EG
• Interdiction: GR-66-IZ
The Mirage 2000C can carry up to 9 BLG-66 Belouga:
• 2 on the front side hardpoints.
• 2 on the rear side hardpoints.
• 1 on the fuselage hardpoint.
• 2 or 4 on the internal wing hardpoints.
The bomb body holds the 151 sub-munitions distributed in rings. At the forward end
of the bomb is the nose fuse and at the rearward end the deployable drag chute
assembly and the 4 stabilizing fins.
PYLONS
The bomb pylons contain the fuse arming mechanism. 2 bombs can be carried under
the internal wing hardpoint by using the AUF2 adaptor.
RELEASE SEQUENCE
Just after the bomb is released, the parachute is deployed, separating the bomb from
the aircraft. After about 1 second, the parachute is jettisoned and the sub-munitions
are released by rings from to back. Once all the sub-munitions are released the bomb
is inert and will continue on a ballistic trajectory.
Page 494
SECTION 24
24–5
WEAPONS
HIGH DRAG BOMBS
Each sub-munition has a small parachute that is deployed just after release to
improve the warhead effectiveness by making them impact vertically.
Page 495
SECTION 24
24–5
WEAPONS
HIGH DRAG BOMBS
SUB-MUNITION PATTERN
The bomb is capable of using 2 different sub-munition patterns by changing the delay
between each ring ejection:
• Long pattern: 240x40 meters.
• Short pattern: 120x40 meters.
The short pattern will have a higher sub-munition density.
The sub-munition pattern can be selected at weapon release by arming the nose or
tail fuse.
SUB-MUNITIONS
The bomb can be loaded with 3 sub-munition types:
• GR-66-AC (Anti-char): This sub-munition is a high explosive shaped charge
capable of piercing up to 300mm of steel.
• GR-66-EG (Grenade à fragmentation): This grenade type sub-munition holds 396
g of high explosive in a pre-fragmented case fitted with an instantaneous contact
fuse. It has a lethal zone of 15 meters against infantry and its fragment can
perpetrate up to 4 mm of steel. NOT FUNCTIONAL
• GR-66-IZ (Interdiction de zone): This sub-munition is the same as the GR-66-EG
but the contact fuse is replaced by a randomly delayed fuse adjustable to up to
several hours. NOT FUNCTIONAL
The bombs are only loaded with 1 type of sub-munition at a time.
FUSING
The bomb fuse selection sets the sub-munition patterns:
• Nose fuse: Short pattern.
• Tail fuse: Long pattern.
Both fuses have no safety timer, the releasing aircraft needs to use a profile that
guarantee sufficient separation from the explosion.
Page 496
SECTION 24
24–5
WEAPONS
HIGH DRAG BOMBS
BAP-100
INTRODUCTION
The BAP-100 (bombe anti-piste 100mm – 100mm anti-runway bomb) is an unguided,
high-drag, rocket assisted anti-runway bomb. The bombs are of French design and
are used mainly used by the French Air Force and the Royal Air Force.
The bomb characteristics are the following:
• Introduction date: 1980
• Dimensions:
• Length: 180 cm
• Diameter: 10 cm
• Weight: 66 kg
• Explosive mass: 3.5 kg
The Mirage 2000C can carry up to 18 BAP-100 under the fuselage hardpoint.
The forward half of the bomb holds the explosives, the penetrator and the fuse. The
aft half contains the booster, the 4 stabilizing fins and the deployable chute.
PYLONS
The bombs are mounted on the fuselage hardpoint using the 30-6-M2 adaptor. 6, 12
or 18 bombs can be loaded.
RELEASE SEQUENCE
Just after the bomb is released, the parachute is deployed, separating the bomb from
the aircraft and slowing it down. After 3.75 seconds and when the bomb is less than
40° from the vertical, the parachute is jettisoned and the booster is fired accelerating
the bomb to 260 m/s into the ground. After penetration is achieved the bomb explodes
creating a crater.
PAYLOAD
The bomb payload contains a penetrator which combined with the speed provided
by the booster can penetrate up to 40 cm of concrete. The 3.5 kg of high explosive
will create a 4 meter wide, 50 cm deep crater.
Page 497
SECTION 24
24–5
WEAPONS
HIGH DRAG BOMBS
FUSING
The bomb contains only 1 fuse in its nose. The bomb has an arming delay of 2.25
seconds after release for all the pyrotechnic components to ensure good separation
from the aircraft when the booster is fired.
Page 498
SECTION 24
24–6
WEAPONS
ROCKETS
24 – 6 - ROCKETS
TYPE F4
INTRODUCTION
The Type F4 is an 68mm rocket pod. It is of French design and is used by many
countries. It can carry a wide variety of SNEB rockets.
The pod characteristics are the following:
• Introduction date: 1984
• Dimensions:
• Length: 234 cm
• Diameter: 41 cm
• Weight: 180 kg
• Rockets: 18x68mm SNEB
• Rocket types:
• Fragmentation: Type 256P EAP
The Mirage 2000C can carry up to 4 Type F4:
• 2 on the internal wing hardpoints.
• 2 on the external wing hardpoints.
The pod nose contains the aerodynamic fairing, the body holds the 18 68mm rockets
and the rear contains a blast deflector.
ROCKETS
Only 1 rocket type is available, the type 256P EAP: It is an air-to-ground
fragmentation rocket to use against un-armored or lightly armored targets. Its
warhead contains 3Kg of high explosives. It has a lethal zone of 25 meters against
infantry.
Page 499
SECTION 24
24–6
WEAPONS
ROCKETS
FIRING SEQUENCE
The Type F4 rocket pod is capable of total and partial ripple as well as single shot
firing. This is set by the ground crew on the pod face, behind the aerodynamic fairing.
The options are:
• 1: Single shot, 1 rocket is fired per firing command.
• 3: Partial ripple, 3 rockets are fired per firing command.
• 6: Partial ripple, 6 rockets are fired per firing command.
• 18: Total ripple, the pod 18 rockets are fired per firing command.
Rockets are fired at an interval of 33 ms, giving it a rate of fire of 1800 rounds per
minutes. A rocket pod is empty after 0,6 second of firing.
Page 500
SECTION 24
24–7
WEAPONS
EXTERNAL FUEL TANKS
24 – 7 - EXTERNAL FUEL TANKS
RPL-522
INTRODUCTION
The RPL-522 is the centerline external tank for the Mirage 2000. It holds 1300 l of
fuel.
The fuel tank is capable of supersonic flight and is rated for 9 G (FBW mode switch
to air/air) when empty and 6 G (FBW mode switch to charge) when not. The tank can
be jettisoned from its pylon
The tank characteristics are the following:
• Dimensions:
• Length: 570 cm
• Diameter: 63 cm
• Empty weight: 200 kg
• Capacity: 1300 l or 990 kg
The Mirage 2000C can carry only 1 RPL-522 under the fuselage hardpoint.
Page 501
SECTION 24
24–7
WEAPONS
EXTERNAL FUEL TANKS
RPL-541/542
INTRODUCTION
The RPL-541/542 are the 2 wing external tank for the Mirage 2000, they hold 1700 l
of fuel each.
The fuel tanks are supposed to be subsonic only, but they can sustain transonic
speeds and are rated for 6 G (FBW mode switch to charge) full or empty.
The tank pylons are an integral part of the tank.
The tanks characteristics are the following:
• Dimensions:
• Length: 630 cm
• Diameter: 80 cm
• Empty weight: 260 kg
• Capacity: 1700 l or 1580 kg
The Mirage 2000C can carry 1 RPL-541 under the left internal wing hardpoint and 1
RPL-542 under the right internal wing hardpoint.
Page 502
SECTION 25
AIR-TO-AIR EMPLOYMENT
AIR-TO-AIR EMPLOYMENT
Page 503
SECTION 25
AIR-TO-AIR EMPLOYMENT
INTRODUCTION
This section is dedicated to the employment of the Mirage 2000C systems and
weapons against aerial targets.
The Mirage 2000C is an all-weather interceptor whose primary mission is to intercept,
identify and destroy hostile aircraft. It is capable of employing semi-active radar
guided missiles, infrared missiles and internal guns to carry out its mission.
The interception is done using the onboard radar or guidance from an AWACS or
GCI station. The aircraft is guided to a position that allows weapon employment or
identification depending on the target and rules of engagements.
The identification can be done multiple ways:
• Visually
• IFF
• Non-cooperative target recognition (NCTR)
• Radar signals
• AWACS/GCI declare
Most of the time, the rules of engagements will require that the identification of the
aircraft is corelated by at least 2 sources.
The destruction of hostile aircraft is done using the most appropriate weapon
depending on the target, the distance and the geometry between the aircrafts.
Page 504
SECTION 25
25–1
AIR-TO-AIR EMPLOYMENT
DEFA 554
25 – 1 - DEFA 554
SYMBOLOGY
The following symbology is relative to the air-to-air guns employment. It is
representative the symbology displayed on the VTH and VTB with and without a PSIC
lock, with the SNA in air-to-air mode and the air-to-air guns selected.
For more information on the VTH and VTB symbology, see the HEAD-UP DISPLAY AIRTO-AIR MODE SUB-SECTION and RADAR SECTION.
VTH
CAN SUB-MODE (Mode canon air-air):
Displayed when the VTH is in air-to-air gun sub-mode. Steady indicates
that the guns are ready, flashing that the master arm or gun safety are
off.
MAGIC SEARCH SECTOR (Secteur de recherche MAGIC):
Indicates the current scan mode for the MAGICs, vertical or horizontal.
MAGIC NARROW SEARCH (Secteur étroit MAGIC):
Indicates that the MAGICs are in narrow search and its limits.
RADAR TARGET POSITION (Carré but):
The square indicates the direction of the locked radar contact. It is flashing
during a MAGIC to radar slave.
The dashed square indicates the direction of the locked contact when it is
outside the VTH.
The square with the hollowed-out cross indicates that the radar is disturbed
by jammer signals.
The doubled square represents the shoot incitation, present when the
aircraft estimates that the current firing solution will result in a hit.
The radar target position symbols can be mixed.
Page 505
SECTION 25
25–1
AIR-TO-AIR EMPLOYMENT
DEFA 554
MAGIC LOCK (Direction d’accrochage MAGIC):
The circle indicates the direction of the priority MAGIC lock. It is flashing
during a radar to MAGIC slave.
The dashed circle indicates the direction of the locked contact when it is
outside the VTH.
MAGIC AND RADAR COINCIDENCE (Coïncidence radar MAGIC):
Indicates that the radar and MAGICs are locked on the same target.
The dashed triangle indicates the direction of the radar and MAGIC contact
when it is outside the VTH.
The triangle with the hollowed-out cross indicates that the radar is
disturbed by jammer signals.
The doubled triangle represents the shoot incitation, present when the
aircraft estimates that the current firing solution will result in a hit.
.
The radar and MAGIC target position symbols can be mixed.
INTERCEPTION DIRECTOR AND MEMORY MODE INDICATION (Directeur d’ordre et indication
du mode mémoire):
Displayed when the radar is locked, the point is positioned relative
to the fixed diameter circle and indicates the maneuvers necessary
to place the aircraft in the air-to-air gun employment zone. The pilot
needs to place the point at the center of the interception director
circle.
Displayed if the target range is over 1 nm.
The circle flashes when the target is performing evasive maneuvers
(aspect angle over 135°) or the radar antenna is close to its gimbal
limits (within 5°)
The memory mode indication is only displayed in PSIC when the
radar has lost the target to indicate that the radar keeps illuminating
on the target trajectory to try and reacquire it. This will last 5 seconds
after which the radar will return to bar search.
Page 506
SECTION 25
25–1
AIR-TO-AIR EMPLOYMENT
DEFA 554
RANGE SCALE (Echelle de distance):
Displayed when the radar is locked, the range scale provides a scale for
the target range symbology. Possible max scale distances: 80, 40, 20,
10 and 2 nm.
The target range indicates the distance to the target relative to the range
scale. The value is in nautical mile with tenths of nm under 10nm and in
hectometers under 2nm.
TARGET CLOSING SPEED (Vitesse de rapprochement cible):
Displayed when the radar is locked, represents the combined speed of
the aircraft and the target in knots. Positive when closing, negative when
opening.
TARGET ASPECT ANGLE (Angle de présentation cible):
Displayed when the radar is locked, represents the target aspect angle
(0 is nose hot, 180 is nose cold) from 0° to 180° and 5° by 5°.
REMAINING SHELLS (Nombre d’obus restants):
Indicates the remaining shell count for each DEFA 554
cannons.
SHOOT INDICATION (Conseil de tir):
Indicates that the radar target is inside most restrictive firing domain
(domaine de tir le plus contraignant) for the MAGIC II, but outside the
air-to-air gun employment range.
IFF INTERROGATION IN PROGRESS AND IFF CORRELATION (Interrogation IFF en cours et
Corrélation IFF):
Indicate that the radar target is being interrogated by the IFF
system.
Indicates that the radar target has replied as a friend to the IFF
interrogation.
Indicates that the radar as received a friendly reply from the target
but the position of the IFF replying aircraft does not correspond to
the target position.
Page 507
SECTION 25
25–1
AIR-TO-AIR EMPLOYMENT
DEFA 554
GUN CROSS, TRACER LINE, WINGSPAN MARKERS 300M, 600M AND SHELL MARKERS (Croix
canons, ligne de traceurs, barres stadimétriques 300m, 600m et repères cyclistes):
The gun cross represents the gun and MAGICs
boresight.
The tracer line represents the trajectory of a continuous,
virtual stream of shell. This line does not predict the
trajectory of the shells if they were to be fired now, it
represents the trajectory of the shell as if they were fired
up until now. It starts at the gun cross and finishes when
the shell stream has traveled 1000 meters.
The wingspan markers are placed along the tracer line
where the virtual stream of shells reaches 300m and
600m. They are always parallel to the aircraft plane and
there are used by comparing the marker width to the
target wingspan.
The shell markers represent the speed of two virtual
shells along the tracer line.
SHOOTING CIRCLE, DISTANCE METER, ANALOG CLOSING SPEED AND SALVO MARKERS
(Réticule de tir, distancemètre, vitesse de rapprochement analogique et notation
pilote):
The shooting reticle is sliding along the tracer line to
represent the “critical shell” (obus critique) that is at the
same range as the target.
The distance meter is centered on the shooting reticle. It
unwinds counterclockwise to provide radar range relative
to the 4 distance markers. It is displayed below 1nm to
target and each circle quadrant represents 300m.
Relative to the distance meter, the analog closing speed
represents the range at which the target will be in 5
seconds.
The salvo markers represent the trajectory of the shell
salvo along the tracer line. Presented when the first or
second stage of the MiCRoB trigger is pressed.
Page 508
SECTION 25
25–1
AIR-TO-AIR EMPLOYMENT
DEFA 554
VTB
TARGET INFORMATION (Infomations cible):
Presents the tracked target information.
From left to right:
Target speed in Mach
Target bearing
Target closing speed in knots
Target altitude in hundreds of feet
ELEVATION SCALE, ANTENNA ELEVATION INDICATOR AND MAGIC ELEVATION (ECHELLE DE
SITE, REPERE DE SITE ET SITE MAGIC):
The elevation scale provides a reference for the antenna elevation
indicator relative to the horizon. Each dash is 10°, longer dashes at -30°,
0° and +30° with a 3 next to the - 30° and +30°.
The antenna elevation indicator indicates the position of the tracked target
relative to the elevation scale.
The MAGIC elevation is displayed in yellow when the missile is locked and
indicates the direction of the lock relative to the elevation scale.
When the MAGIC and the radar are locked on the same target, the
antenna elevation indicator and the MAGIC elevation symbology are
merged.
Page 509
SECTION 25
25–1
AIR-TO-AIR EMPLOYMENT
DEFA 554
HEADING SCALE, TARGET AZIMUTH AND MAGIC AZIMUTH (ECHELLE DE CAP, RELÈVEMENT
CIBLE ET GISEMENT MAGIC):
The Heading Scale moves horizontally against the
base of the aircraft vector indicating aircraft heading
from 0º to 360º. The scale is numbered tens of
degrees, with a short line every 10° and the azimuth
in tens of degrees every 30°.
The target azimuth indicates the tracked target
azimuth relative to the heading scale.
The MAGIC azimuth is displayed in yellow when the
missile is locked and indicates the direction of the
lock relative to the heading scale.
When the MAGIC and the radar are locked on the
same target, the antenna and MAGIC azimuth
symbology are merged.
TRACKED TARGET (Cible poursuivie):
Indicates the position of the target, its velocity vector, its range in nm
and B angle (reverse heading relative to the aircraft: 0° is hot, 180° is
cold).
The doubling of the vertical bars indicates that the contact has replied
to an IFF interrogation.
A diagonal line indicates that the received reply is doubtful, meaning
that the position of the IFF replying aircraft does not totally correspond
to the position of the tracked target.
Page 510
SECTION 25
25–1
AIR-TO-AIR EMPLOYMENT
DEFA 554
AIRCRAFT TARGET LINE (DROITE CHASSEUR CIBLE):
The aircraft target line indicates the direction of the tracked target.
It starts from the bottom center of the display, where the aircraft
is positioned, passes by the tracked target and ends just above
the range marker. It flashes when the antenna is at less than 5°
from its gimbal limits.
Page 511
SECTION 25
25–1
AIR-TO-AIR EMPLOYMENT
DEFA 554
EMPLOYMENT
In order to destroy a target with the air-to-air gun, multiple steps have to be followed:
SALVO DURATION
The gun salvo duration is set by the ground crew. The salvo duration can be
visualized on the kneeboard “Ground adjustment option” page. It can be selected in
the mission editor or using the kneeboard key command (right shift + right alt + 2 by
default) while on the ground with the engine off.
SALVO SETTING
The salvo firing or the guns is set using the weapon salvo selection button on the
PPA.
2 yellow lights display the selected mode:
• TOT (Total): The guns fire as long as the trigger is pressed.
• PAR (Partiel – Partial): The guns fire in salvo of 0,5 or 1 second.
Page 512
SECTION 25
25–1
AIR-TO-AIR EMPLOYMENT
DEFA 554
WINGSPAN SETTING
The target wingspan is set on the PCTH, the rotator is used to set the expected target
wingspan that will set the width of the 300m and 600m wingspan marker. This setting
will also set the size of the target for the shoot incitation symbology. The target
wingspan can be set from 7m to 40m.
SHOOT INCITATION SETTING
The shoot incitation setting is set on the PCTH and toggles the display of the shoot
incitation symbology.
• CCLT (Calcul continu de la ligne de tir – Tracer line): No shoot incitation symbology
is diplayed.
• PRED (Prédictif – Shoot incitation): The shoot incitation symbology will be
displayed with a radar lock and the correct geometry between the aircraft and the
target.
Page 513
SECTION 25
25–1
AIR-TO-AIR EMPLOYMENT
DEFA 554
SELECTION
The air-to-air guns are selected by setting the CNM HOTAS command in the C
(canon air-air) position. Since the air-to-air gun selection is a priority selection, it can
always be selected, even in selective jettison mode.
The VTH will display the air-to-air gun sub-mode and show if how many rounds are
loaded per gun. For more information on the VTH air-to-air gun sub-mode, see the
HEAD-UP DISPLAY AIR-TO-AIR MODE SUB-SECTION.
FIRING RATE SELECTION
With the air-to-air guns selected, the PCA top row displays the weapons options.
These options allow the selection of the guns firing rate.
2 options are selectable:
• LEN (Lent – Low): 1200 round/min.
• RAP (Rapide – High): 1800 round/min.
The firing rate is initialized at high. High firing rate is preferred when using the guns
in air-to-air.
Page 514
SECTION 25
25–1
AIR-TO-AIR EMPLOYMENT
DEFA 554
MASTER ARM
In order to release the gun, the master arm and the gun safety switches needs to be
in the armed position.
If the master arm and gun safety are armed, the VTH CAN mode indication should
be steady.
TARGET ACQUISITION
The tracer line, wingspan markers and shell markers provide a weapon employment
solution that does not require the target to be locked by the radar. Since, if loaded
and prepared, the MAGIC missiles are executing a background search with the airto-air guns selected, a MAGIC lock can be used to keep a better track of the target
without having to use the radar.
A radar lock allows the display of the aiming circle, distance meter and analog closing
speed indicator. The radar also allows the display of the shoot incitation symbology.
At guns range, using the radar in bar search won’t be effective when searching for
targets, the close combat auto-acquisition modes are more appropriate.
As in MAGIC mode, the MAGIC can be slaved to the radar line of sight and vice versa
using the weapon system paddle on the HOTAS.
When the MAGIC has a good lock, the pilot will hear a continuous 650 Hz.
For more information on target acquisition using the radar, see the RADAR SECTION.
Page 515
SECTION 25
25–1
AIR-TO-AIR EMPLOYMENT
DEFA 554
AIMING
The air-to-air gun aiming solution depends on the solution being radar assisted or
not.
RADAR ASSISTED
With the target radar locked, the air-to-air gun aiming is done by placing the target
along the tracer line and making the aiming circle converge with it by closing the
distance or increasing the target lead.
Since the tracer line and aiming circle are relative to the already fired fictive stream
of shells, the guns firing needs to be done one time of flight before the aiming circle
is over the target, the time of flight being the time the shells need to reach the target.
This means that if the target is sliding along the tracer line, firing when the aiming
circle is over the target is too late.
With the shoot incitation setting activated, the radar target position or MAGIC and
radar coincidence symbology will be doubled when the aiming circle is at one time of
flight from the target.
Example:
The target is placed along the tracer line
Page 516
SECTION 25
25–1
AIR-TO-AIR EMPLOYMENT
DEFA 554
The aiming circle is made to converge with the target by closing the distance or
increasing the lead.
Once the aiming circle is at one time of flight from being over the target the guns are
fired. With the shoot incitation setting activated, the radar target position or MAGIC
and radar coincidence symbology will be doubled when it is time to shoot.
Page 517
SECTION 25
25–1
AIR-TO-AIR EMPLOYMENT
DEFA 554
Once the aiming circle is over the target, the stream of shells hit.
Page 518
SECTION 25
25–1
AIR-TO-AIR EMPLOYMENT
DEFA 554
WITHOUT RADAR
Without radar, the air-to-air gun aiming is done by placing the target along the tracer
line and under the 600m wingspan marker. The PCTH wingspan setting needs to be
set to the target wingspan.
The distance needs to be deceased until the target wingspan has at least the same
width as the 600m wingspan marker, the target is now in range. Since the tracer line
and wingspan markers are relative to the already fired fictive stream of shells, the
guns firing needs to be done one time of flight before the target is between the
wingspan markers, the time of flight being the time the shells need to reach the target.
In order to appreciate duration of this time of flight, the shell markers and salvo
markers can be used. The shell markers represent the speed of 2 shells along the
tracer line and are always displayed while the salvo markers are displayed when the
first MiCRoB detent is pressed and represents the full shell salvo.
Example:
The target is placed along the tracer line and the 600m wingspan marker is placed
next to the target to estimate the range, and the range is reduced by closing the
distance or increasing the lead.
Page 519
SECTION 25
25–1
AIR-TO-AIR EMPLOYMENT
DEFA 554
Once the target wingspan has at least the same width as the 600m wingspan marker,
the shell markers are used to estimate the shell time of flight to the target. With the
target being one time of flight of being between the 2 wingspan markers, the guns
are fired.
Since the range is estimated, it is better to fire a longer salvo and sooner than one
time of flight in order to maximize the hit chance.
Once the target is between the wingspan markers, the stream of shells hit.
Page 520
SECTION 25
25–1
AIR-TO-AIR EMPLOYMENT
DEFA 554
EMPLOYMENT DOMAIN
In order to employ the air-to-air guns symbology effectively, the target needs to be in
front of the aircraft and in a tail chase. The gun can be used from any other aspect
but the symbology won’t be usable.
The representation of the employment domain depends if the symbology is radar
assisted or not.
RADAR ASSISTED
When radar assisted, the employment domain is represented by the distance meter
centered around the aiming circle. It indicates the position of the target relative to the
guns firing domain:
• A full circle indicates that the target is out of range.
• The circle starts to unwind counter-clockwise when the aircraft enters the air-to-air
guns firing domain: 1200 meters.
• The 9 o’clock position indicates the maximum range: 900 meters.
• The 6 o’clock position indicates the optimum range: 600 meters.
• The 3 o’clock position indicates the minimum range: 300 meters.
Displayed relative to the distance meter is the analogue closing speed symbol, it
represents the range at which the target will be in 5 seconds.
Page 521
SECTION 25
25–1
AIR-TO-AIR EMPLOYMENT
DEFA 554
WITHOUT RADAR
Without the radar, the position of the target relative to the guns employment domain
needs to be estimated using the 300 m and 600 m wingspan markers.
First, the target wingspan needs to be set on the PCTH, then the target wingspan
needs to be compared to the 2 wingspan markers placed along the tracer line. If the
target wingspan is between the 600 m and 300 m wingspan markers, it is in range.
Page 522
SECTION 25
25–1
AIR-TO-AIR EMPLOYMENT
DEFA 554
GUNS FIRING
The guns are fired using the MiCRoB second stage trigger on the HOTAS. The guns
fire at the fire rate selected on the PCA and in a salvo depending on the PPA selection
and salvo length set by the ground crew.
Page 523
SECTION 25
25–2
AIR-TO-AIR EMPLOYMENT
SUPER 530D
25 – 2 - SUPER 530D
SYMBOLOGY
The following symbology is relative to the Super 530D missile employment. It is
representative the symbology displayed on the VTH and VTB with the target locked
in PSIC, the SNA in air-to-air mode and the Super 530D selected.
For more information on the VTH and VTB symbology, see the HEAD-UP DISPLAY AIRTO-AIR MODE SUB-SECTION and RADAR SECTION.
VTH
530 SUB-MODE (Mode 530):
Displayed when the VTH is in 530 air-to-air sub-mode. Steady indicates
that the missiles are ready, flashing that the master arm is off.
RADAR TARGET POSITION (Carré but):
The square indicates the direction of the locked radar contact.
The dashed square indicates the direction of the locked contact when it is
outside the VTH.
The square with the hollowed-out cross indicates that the radar is disturbed
by jammer signals.
The radar target position symbols can be mixed.
Page 524
SECTION 25
25–2
AIR-TO-AIR EMPLOYMENT
SUPER 530D
INTERCEPTION DIRECTOR, BREAK AWAY CROSS AND MEMORY MODE INDICATION (Directeur
d’ordre, croix de dégagement et indication mode mémoire):
Displayed when the radar is locked, the point is positioned relative
to the fixed diameter circle and indicates the maneuvers necessary
to place the aircraft in the Super 530D employment zone. The pilot
needs to place the point at the center of the interception director
circle.
The circle flashes when the target is performing evasive maneuvers
(aspect angle over 135°) or the radar antenna is close to its gimbal
limits (within 5°)
The circle is doubled when the locked contact is in the least
restrictive firing domain (domaine de tir le moins contraignant).
The break away cross is displayed around the interception director
5 seconds before the distance between the aircraft and the target
reaches zero.
The memory mode indication indicates that the radar has lost the
target but keeps illuminating on its trajectory and is trying to require
it.
In PSIC Super 530 this indication is displayed for 8 seconds after
which it is replaced by the illumination indication.
FORCED ILLUMINATION INDICATION (Illumination forcée):
Indicates that the radar is in forced illumination mode, selected after
the memory mode has run its course. In this mode, the radar will
continue to illuminate the target on its trajectory but won’t try to reacquire the lock again. Forced illumination lasts for the remainder of
the PSIC Super 530 mode duration.
Also displayed when the radar is in PSIC Super 530 Pointé mode.
Page 525
SECTION 25
25–2
AIR-TO-AIR EMPLOYMENT
SUPER 530D
PSIC SUPER 530 POINTE ILLUMINATION SECTOR (Secteur illumination PSIC Super 530
pointé):
Displayed when the radar is in PSIC Super 530 Pointé mode,
represents the position of the radar beam.
Used to aim the radar at the target.
RANGE SCALE, TARGET RANGE AND LONG AND SHORT LIMITS (Echelle de distance,
distance cible et limites longues et courtes):
Displayed when the radar is locked, the range scale provides a scale for
the target range symbology and limits symbology. Possible max scale
distances: 80, 40, 20, 10 and 2 nm.
The target range indicates the distance to the target relative to the range
scale. The value is in nautical mile with tenths of nm under 10nm and in
hectometers under 2nm.
The long and short limits represent the radar calculated range envelope
for the Super 530D missiles relative to the radar range scale. The two
top lines represents the long limits and the bottom line represent short
limit. The long limit without defensive maneuvers (limite longue sans
évasive) line is thicker than the long limit with defensive maneuvers
(limite longue avec évasive).
The long limits can move above the range scale.
TARGET CLOSING SPEED (Vitesse de rapprochement cible):
Displayed when the radar is locked, represents the combined speed of
the aircraft and the target in knots. Positive when closing, negative when
opening.
TARGET ASPECT ANGLE (Angle de présentation cible):
Displayed when the radar is locked, represents the target aspect angle
(0 is nose hot, 180 is nose cold) from 0° to 180° and 5° by 5°.
Page 526
SECTION 25
25–2
AIR-TO-AIR EMPLOYMENT
SUPER 530D
MISSILES STATUS AND MISSILES TIME OF FLIGHT (Etat des missiles et Temps de vol
missiles):
Indicates the presence of the left (G – gauche) and right (D –
droit) missiles. Flashes when the missiles are not ready.
Displayed when the radar is locked, the circle indicates that the
missiles are ready and locked on the PSIC target.
The number above indicates the planned missile time of flight if
they were to be launched now.
The missile status letter disappears to indicate that the missile
has been fired.
For the fired missiles, the time off flight indicates the time to
impact as calculated by the aircraft. If two missiles are fired at
the same time, only the time to impact of the last missile is
calculated, the time to impact of the first missile is replaced by
a countdown timer.
If the radar is in forced illumination or PSIC Super 530 Pointé,
the time to impact is replaced by the time to missile autodestruction, indicated by rectangle around the value.
SHOOT INDICATION (Conseil de tir):
Indicates that the radar target is inside the most restrictive firing domain
(domaine de tir le plus contraignant) for the Super 530D.
IFF INTERROGATION IN PROGRESS AND IFF CORRELATION (Interrogation IFF en cours et
Corrélation IFF):
Indicate that the tracked target is being interrogated by the IFF system.
Indicates that the radar target contact has replied to the IFF interrogation.
Indicates that the radar as received a friendly reply from the target but the
position of the IFF replying aircraft does not correspond to the target
position.
Page 527
SECTION 25
25–2
AIR-TO-AIR EMPLOYMENT
SUPER 530D
VTB
TARGET INFORMATION (Infomations cible):
Presents the tracked target information.
From left to right:
Target speed in Mach
Target bearing
Target closing speed in knots
Target altitude in hundreds of feet
ELEVATION SCALE AND ANTENNA ELEVATION INDICATOR (ECHELLE ET REPERE DE SITE):
The elevation scale provides a reference for the antenna elevation
indicator relative to the horizon. Each dash is 10°, longer dashes at -30°,
0° and +30° with a 3 next to the - 30° and +30°.
The antenna elevation indicator indicates the position of the tracked target
relative to the elevation scale.
HEADING SCALE AND TARGET AZIMUTH (ECHELLE DE CAP ET RELÈVEMENT CIBLE):
The Heading Scale moves horizontally against the
base of the aircraft vector indicating aircraft heading
from 0º to 360º. The scale is numbered tens of
degrees, with a short line every 10° and the azimuth
in tens of degrees every 30°.
The target azimuth indicates the tracked target
azimuth relative to the heading scale.
TRACKED TARGET (Cible poursuivie):
Indicates the position of the target, its velocity vector, its range in nm
and B angle (reverse heading relative to the aircraft: 0° is hot, 180° is
cold).
The doubling of the vertical bars indicates that the contact has replied
to an IFF interrogation.
A diagonal line indicates that the received reply is doubtful, meaning
that the position of the IFF replying aircraft does not totally correspond
to the position of the tracked target.
Page 528
SECTION 25
25–2
AIR-TO-AIR EMPLOYMENT
SUPER 530D
AIRCRAFT TARGET LINE, LONG AND SHORT LIMITS (DROITE CHASSEUR CIBLE, LIMITES
LONGUES ET COURTE):
The aircraft target line indicates the direction of the tracked target.
It starts from the bottom center of the display, where is aircraft is
positioned, passes by the tracked target and ends just above the
range marker. It flashes when the antenna is at less than 5° from
its gimbal limits.
The long and short limits represent the radar calculated range
envelope for the Super 530D missiles relative to the target
position along the aircraft target line. The two top lines represents
the long limits and the bottom line represent short limit. The long
limit with defensive maneuvers (limite longue avec évasive) line
is longer that the long limit without defensive maneuvers (limite
longue sans évasive) line.
Page 529
SECTION 25
25–2
AIR-TO-AIR EMPLOYMENT
SUPER 530D
EMPLOYMENT
In order to destroy a target with the Super 530D missile, multiple steps have to be
followed:
PREPARATION
Before they can be fired, the Super 530D missiles needs to be prepared. This
preparation sequence consists of:
• The missile startup: First the seeker frequency is synchronized with the aircraft
radar frequency after which the calculator, gyrometer and servomotors are
powered. The seeker gyroscope is powered and spinned-up, this lasts 40 seconds
after which the seeker antenna is slaved to it.
• The missile tests: The missile and missile pylon execute their self-test procedures
to determine if they are operating correctly. Those tests last 45 seconds and run in
parallel to the missile startup.
The missile preparation sequence lasts 45 seconds after which the missile is ready
to be selected and fired.
The missile preparation is controlled by the S530 preparation button on the PPA.
The button will start the preparation if the missiles are not ready and power them off
if they are in preparation or ready except if the SNA is in 530 mode. The preparation
automatically starts after a 30 seconds post engine startup delay, this can be
canceled if the S530 preparation button is pressed during the post engine startup
delay.
The Super 530D preparation status is indicated by the yellow P light located on the
S530 preparation button:
• Steady, indicates that at least 1 missile is ready.
• Flashing, indicates that the missiles are either in the post engine startup delay or
executing the preparation sequence.
Page 530
SECTION 25
25–2
AIR-TO-AIR EMPLOYMENT
SUPER 530D
SELECTION
The Super 530D missiles are selected by pressing the PCA weapon selection button
under the 530 window. In order to be able to select the 530 mode, the HOTAS CNM
command needs to be in the N (neutre – neutral) position and the selective jettison
switch in the N position.
The S light on the PCA weapon selection button under the 530 window indicates that
the 530 mode is selected.
The VTH will display the 530 sub-mode and show how many missiles are loaded as
well as their status. For more information on the VTH 530 sub-mode, see the HEADUP DISPLAY AIR-TO-AIR MODE SUB-SECTION.
MISSILE PRIORITY
The Super 530D missile priority can be set using the missile selection switch on the
PPA.
The switch has 3 positions:
• G (Gauche – Left)
• AUTO (Automatique – Automatic)
• D (Droite – Right)
The left and right missile priority is respected by the SNA as long as the selected
missile is present and not inhibited.
In automatic, the priority follows the following rules:
• The first locked missile has priority.
Page 531
SECTION 25
25–2
AIR-TO-AIR EMPLOYMENT
SUPER 530D
• If the 2 missiles are locked, the masking calculation sets the priority.
• If 1 missile is inhibited, the other one has priority.
• If only 1 missile is present, it has priority.
SALVO SETTING
If the aircraft is loaded with 2 Super 530D missiles they can be fired one after the
other in a salvo. This salvo mode is set using the weapon salvo selection button on
the PPA.
2 yellow lights display the selected mode:
• TOT (Total): Super 530: The 2nd missile will fire 2 seconds after the first if the trigger
is held pressed.
• PAR (Partiel – Partial): Super 530: Only 1 missile is fired per trigger press.
The salvo firing is only available if both missiles are not inhibited and locked on the
PSIC target. The salvo availability is indicated by the S530 salvo symbology on the
VTH.
MASTER ARM
In order to fire the Super 530D, the master arm switch needs to be in the armed
position.
The P light on the PCA weapon selection button under the 530 window indicates that
the master arm is armed, the missiles are ready and no failure prevent missile
employment.
Page 532
SECTION 25
25–2
AIR-TO-AIR EMPLOYMENT
SUPER 530D
TARGET ACQUISITION
The Super 530D missile is guided by a passive seeker that requires the radar to
illuminate the target for the seeker to acquire it. When the radar is in PSIC, the missile
seeker is slaved to the radar line of sight to attempt to lock the target aircraft.
When a missile seeker is locked the corresponding missile status symbology is
circled. When at least 1 missile has is locked, the pilot will hear a continuous 650 Hz
tone.
If the radar target is outside of the missiles seeker field of view, the pilot will hear a
650 Hz tone chopped at 1 Hz.
If the radar is in PSID and the MiCRoB trigger is pressed, the radar will attempt to
transition to PSIC and lock the missile seeker. If PSIC or seeker lock cannot be
achieved, the missiles won’t fire.
For more information on target acquisition using the radar, see the RADAR SECTION.
Page 533
SECTION 25
25–2
AIR-TO-AIR EMPLOYMENT
SUPER 530D
EMPLOYMENT DOMAIN
In order to employ the Super 530D effectively, the weapon needs to be fired in the
correct parameters. Those parameters are:
• Missile range for the target aspect, speed and altitude.
• Target angle of the nose of the aircraft.
The missile range is calculated in real time by the aircraft and presented to the pilot
on the VTH and VTB.
The employment domain is represented by 3 limits:
• Long limit without defensive maneuvers (Limite longue sans évasive): Represents
the maximum range at which the missile can be fired and will hit the target if it
maintains its course, speed and altitude.
• Long limit with defensive maneuvers (Limite longue avec évasive): Represents the
maximum range at which the missile can be fired and will hit the target even if it
flies directly away from the shooter aircraft.
• Short limit (Limite courte): Represents the minimum range at which the missile can
be fired and will have the time to arm itself and steer to the target.
When firing on a target flying away from the shooter aircraft, both long limits will
overlap.
Page 534
SECTION 25
25–2
AIR-TO-AIR EMPLOYMENT
SUPER 530D
When the target is between the long limit without defensive maneuvers and the
long limit with defensive maneuvers, called the least restrictive firing domain
(domaine de tir le moins contraignant) the interception director circle is doubled.
When the target is between the long limit with defensive maneuvers and the short
limit, called the most restrictive firing domain (domaine de tir le plus contraignant),
the shoot indication will be displayed on the VTH and the missile lock tone is replaced
by a 650/1000 Hz tone interleaved at 2 Hz.
Page 535
SECTION 25
25–2
AIR-TO-AIR EMPLOYMENT
SUPER 530D
The best firing conditions are achieved when the missile is fired while the target is in
the most restrictive firing domain and the interception director point is centered inside
the circle, this will result in the maximum probability of kill (PK) to the missile.
A missile fired with the target outside the most restrictive firing domain but still inside
the long limit without defensive maneuvers can still hit depending on the target
actions while the missile is in flight, the PK depends on the closeness of the target to
the most restrictive firing domain.
A missile fired while the target is outside the long limit without defensive maneuvers
will result in a very low PK as the missile might self-destruct or stall before reaching
the target. Firing closer that the short limit will also result in a low PK as the missile
most likely won’t have enough time to arm itself and/or maneuver to the target.
Additionally, the missile expected time of flight is displayed over the missile status
symbology. This information can give a cue about the missile employment domain
as the missile self-destruct 45 seconds after being fired.
Page 536
SECTION 25
25–2
AIR-TO-AIR EMPLOYMENT
SUPER 530D
MISSILE FIRING
The missile is fired using the MiCRoB second stage trigger on the HOTAS. The
command needs to be held during the 650ms firing sequence. The minimum time
between 2 missiles fire is 2 seconds.
If the salvo mode is selected on the PPA, the second missile firing sequence starts 2
seconds after the first missile is fired.
Missile firing will trigger engine hot gas ingestion protection system.
Page 537
SECTION 25
25–2
AIR-TO-AIR EMPLOYMENT
SUPER 530D
MISSILE GUIDANCE
The Super 530D missile uses semi-active radar guidance to fly to its target, this
guidance method requires the shooting aircraft to illuminate the target until the missile
reaches it. In the Mirage, this means that the shooter aircraft needs to maintain a
PSIC lock on the target until the missile hits or self-destructs.
Once a missile is fired the radar will switch to PSIC Super 530 sub-mode that lasts
50 seconds. During this time the radar is forced in PSIC and the only depressing the
weapon system command will return the radar to bar search.
If the target lock is lost, the memory mode will continue to illuminate the target’s last
known trajectory and try to re-acquire it for 8 seconds.
Page 538
SECTION 25
25–2
AIR-TO-AIR EMPLOYMENT
SUPER 530D
After 8 seconds of memory mode, the radar will switch to forced illumination mode
where it will continue to illuminate the target but won’t try to re-acquire the lock. This
will last for the remainder of the PSIC Super 530 mode duration.
If the radar has lost the target and is no longer illuminating in its direction, the radar
can be switched to PSIC Super 530 pointé mode using the weapon system forward
command. In this mode, the radar antenna position is fixed on the aircraft axis and
the pilot needs to steer the aircraft to illuminate the target. While in this mode, the
radar beam size and position are represented on the VTH by a full circle.
Page 539
SECTION 25
25–2
AIR-TO-AIR EMPLOYMENT
SUPER 530D
While the VTH is in PSIC Super 530 mode, it will display the estimated remaining
time of flight in seconds for the fired missile. This number is boxed if the value
indicates the remaining time before the missile self-destructs.
Page 540
SECTION 25
25–3
AIR-TO-AIR EMPLOYMENT
MAGIC II
25 – 3 - MAGIC II
SYMBOLOGY
The following symbology is relative to the MAGIC II missile employment. It is
representative the symbology displayed on the VTH and VTB with and without a PSIC
lock, with the SNA in air-to-air mode and the MAGIC II selected.
For more information on the VTH and VTB symbology, see the HEAD-UP DISPLAY AIRTO-AIR MODE SUB-SECTION and RADAR SECTION.
VTH
MAG SUB-MODE (Mode MAGIC):
Displayed when the VTH is in MAGIC air-to-air sub-mode. Steady
indicates that the missiles are ready, flashing that the master arm is off.
GUN CROSS (Croix canons):
Represents the gun and MAGICs boresight.
MAGIC SEARCH SECTOR (Secteur de recherche MAGIC):
Indicates the current scan mode for the MAGIC, vertical or horizontal.
MAGIC NARROW SEARCH (Secteur étroit MAGIC):
Indicate that the MAGIC are in narrow search and its limits.
RADAR TARGET POSITION (Carré but):
The square indicates the direction of the locked radar contact. It is flashing
during a MAGIC to radar slave.
The dashed square indicates the direction of the locked contact when it is
outside the VTH.
The square with the hollowed-out cross indicates that the radar is disturbed
by jammer signals.
The radar target position symbols can be mixed.
Page 541
SECTION 25
25–3
AIR-TO-AIR EMPLOYMENT
MAGIC II
MAGIC LOCK (Direction d’accrochage MAGIC):
The circle indicates the direction of the priority MAGIC lock. It is flashing
during a radar to MAGIC slave.
The dashed circle indicates the direction of the locked contact when it is
outside the VTH.
MAGIC AND RADAR COINCIDENCE (Coïncidence radar MAGIC):
Indicates that the radar and MAGICs are locked on the same target.
The dashed triangle indicates the direction of the radar and MAGIC contact
when it is outside the VTH.
The triangle with the hollowed-out cross indicates that the radar is
disturbed by jammer signals.
The radar and MAGIC target position symbols can be mixed.
INTERCEPTION DIRECTOR AND MEMORY MODE INDICATION (Directeur d’ordre et indication
du mode mémoire):
Dipslayed when the radar is locked, the point is positioned relative
to the fixed diameter circle and indicates the maneuvers necessary
to place the aircraft in the MAGIC II employment zone. The pilot
needs to place the point at the center of the interception director
circle.
The circle flashes when the target is performing evasive maneuvers
(aspect angle over 135°) or the radar antenna is close to its gimbal
limits (within 5°)
The circle is doubled when the locked contact is in the least
restrictive firing domain (domaine de tir le moins contraignant).
The memory mode indication is only displayed in PSIC when the
radar has lost the target to indicate that the radar keeps illuminating
on the target trajectory to try and require it. This will last 5 second
after which the radar will return to bar search.
Page 542
SECTION 25
25–3
AIR-TO-AIR EMPLOYMENT
MAGIC II
RANGE SCALE, TARGET RANGE AND LONG AND SHORT LIMITS (Echelle de distance,
distance cible et limites longues et courtes):
Displayed when the radar is locked, the range scale provides a scale for
the target range symbology and limits symbology. Possible max scale
distances: 80, 40, 20, 10 and 2 nm.
The target range indicates the distance to the target relative to the range
scale. The value is in nautical mile with tenths of nm under 10nm and in
hectometers under 2nm.
The long and short limits represent the radar calculated range envelope
for the MAGIC II missiles relative to the radar range scale. The two top
lines represents the long limits and the bottom line represents short limit.
The long limit without defensive maneuvers (limite longue sans évasive)
line is thicker than the long limit with defensive maneuvers (limite longue
avec évasive).
The long limits can move above the range scale.
TARGET CLOSING SPEED (Vitesse de rapprochement cible):
Displayed when the radar is locked, represent the combined speed of
the aircraft and the target in knots. Positive when closing, negative when
opening.
TARGET ASPECT ANGLE (Angle de présentation cible):
Displayed when the radar is locked, represents the target aspect angle
(0 is nose hot, 180 is nose cold) from 0° to 180° and 5° by 5°.
MISSILES STATUS (Etat des missiles):
Indicates the presence of the left (G – gauche) and right (D – droit)
missiles. Flashes when the missiles are not ready.
The circles indicate that the missiles are locked and ready to fire.
SHOOT INDICATION (Conseil de tir):
Indicates that the radar target is inside most restrictive firing domain
(domaine de tir le plus contraignant) for the MAGIC II.
Page 543
SECTION 25
25–3
AIR-TO-AIR EMPLOYMENT
MAGIC II
IFF INTERROGATION IN PROGRESS AND IFF CORRELATION (Interrogation IFF en cours et
Corrélation IFF):
Indicate that the radar target is being interrogated by the IFF
system.
Indicates that the radar target has replied as a friend to the IFF
interrogation.
Indicates that the radar as received a friendly reply from the target
but the position of the IFF replying aircraft does not correspond to
the target position.
Page 544
SECTION 25
25–3
AIR-TO-AIR EMPLOYMENT
MAGIC II
VTB
TARGET INFORMATION (Infomations cible):
Presents the tracked target information.
From left to right:
Target speed in Mach
Target bearing
Target closing speed in knots
Target altitude in hundreds of feet
ELEVATION SCALE, ANTENNA ELEVATION INDICATOR AND MAGIC ELEVATION (ECHELLE DE
SITE, REPERE DE SITE ET SITE MAGIC):
The elevation scale provides a reference for the antenna elevation
indicator relative to the horizon. Each dash is 10°, longer dashes at -30°,
0° and +30° with a 3 next to the - 30° and +30°.
The antenna elevation indicator indicates the position of the tracked target
relative to the elevation scale.
The MAGIC elevation is displayed in yellow when the missile is locked and
indicates the direction of the lock relative to the elevation scale.
When the MAGIC and the radar are locked on the same target, the
antenna elevation indicator and the MAGIC elevation symbology are
merged.
Page 545
SECTION 25
25–3
AIR-TO-AIR EMPLOYMENT
MAGIC II
HEADING SCALE, TARGET AZIMUTH AND MAGIC AZIMUTH (ECHELLE DE CAP, RELÈVEMENT
CIBLE ET GISEMENT MAGIC):
The Heading Scale moves horizontally against the
base of the aircraft vector indicating aircraft heading
from 0º to 360º. The scale is numbered tens of
degrees, with a short line every 10° and the azimuth
in tens of degrees every 30°.
The target azimuth indicates the tracked target
azimuth relative to the heading scale.
The MAGIC azimuth is displayed in yellow when the
missile is locked and indicates the direction of the
lock relative to the heading scale.
When the MAGIC and the radar are locked on the
same target, the antenna and MAGIC azimuth
symbology are merged.
Tracked target (CIBLE POURSUIVIE):
Indicates the position of the target, its velocity vector, its range in nm
and B angle (reverse heading relative to the aircraft: 0° is hot, 180° is
cold).
The doubling of the vertical bars indicates that the contact has replied
to an IFF interrogation.
A diagonal line indicates that the received reply is doubtful, meaning
that the position of the IFF replying aircraft does not totally correspond
to the position of the tracked target.
Page 546
SECTION 25
25–3
AIR-TO-AIR EMPLOYMENT
MAGIC II
AIRCRAFT TARGET LINE, LONG AND SHORT LIMITS (DROITE CHASSEUR CIBLE, LIMITES
LONGUES ET COURTE):
The aircraft target line indicates the direction of the tracked target.
It starts from the bottom center of the display, where is aircraft is
positioned, passes by the tracked target and ends just above the
range marker. It flashes when the antenna is at less than 5° from
its gimbal limits.
The long and short limits represent the radar calculated range
envelope for the MAGIC II missiles relative to the target position
along the aircraft target line. The two top lines represent the long
limits and the bottom line represents short limit. The long limit with
defensive maneuvers (limite longue avec évasive) line is longer
that the long limit without defensive maneuvers (limite longue
sans évasive) line.
Page 547
SECTION 25
25–3
AIR-TO-AIR EMPLOYMENT
MAGIC II
EMPLOYMENT
In order to destroy a target with the MAGIC II missile, multiple steps have to be
followed:
PREPARATION
Before they can be fired, the MAGIC II missiles need to be prepared. This preparation
sequence consists of:
• The missile startup: The infrared seeker cooling sequence is started using the
pylon’s liquid nitrogen, the gyrometer and servomotors are powered. The seeker
cooling sequence lasts 34 seconds.
• The missile tests: The missile and missile pylon execute their self-test procedures
to determine if they are operating correctly. Those tests last 1 second and run in
parallel to the missile startup.
The missile preparation sequence lasts 42 seconds after which the missile is ready
to be selected and fired.
The missile preparation is controlled by the MAGIC preparation button on the PPA.
The button will start the preparation if the missiles are not ready and power them off
if they are in preparation or ready except if the MAGICs are selected. The preparation
automatically starts after a 30 seconds post engine startup delay, this can be
canceled if the MAGIC preparation button is pressed during the post engine startup
delay.
The MAGIC II preparation status is indicated by the yellow P light located on the
MAGIC preparation button:
• Steady, indicates that at least 1 missile is ready.
• Flashing, indicates that the missiles are either in the post engine startup delay or
executing the preparation sequence.
Page 548
SECTION 25
25–3
AIR-TO-AIR EMPLOYMENT
MAGIC II
SELECTION
The MAGIC II missiles are selected by setting the CNM HOTAS command in the M
(MAGIC) position. Since the MAGIC selection is a priority selection, it can always be
selected, even in selective jettison mode.
The S light on the PCA weapon selection button under the MAG window indicates
that the MAGIC mode is selected.
The PCA weapon selection button under the MAG window is used to select MAV
mode and can’t be used to select MAGIC II missile for employment.
The VTH will display the MAGIC sub-mode and show if how many missiles are loaded
as well as their status. For more information on the VTH MAGIC sub-mode, see the
HEAD-UP DISPLAY AIR-TO-AIR MODE SUB-SECTION.
MASTER ARM
In order to fire the MAGIC II, the master arm switch needs to be in the armed position.
The P light on the PCA weapon selection button under the MAG window indicates
that the master arm is armed, the missiles are ready and no failure prevent missile
employment.
Page 549
SECTION 25
25–3
AIR-TO-AIR EMPLOYMENT
MAGIC II
TARGET ACQUISITION
The MAGIC missile is guided by an independent seeker and does not need help from
the radar to acquire its target. Therefore, target acquisition can be done using one
the MAGIC search sectors. For more information on the MAGIC search sector, see
the NAVIGATION AND WEAPON SYSTEM MAGIC SEARCH SECTION.
The radar can nonetheless be used for MAGIC target acquisition, the MAGIC can be
slaved to the radar line of site. This is done using the weapon system paddle on the
HOTAS. The opposite can also be done, if the magic is locked on a target, the radar
can be slaved to the MAGIC line of sight using the same command.
When the MAGIC has a good lock, the pilot will hear a continuous 650 Hz tone.
For more information on target acquisition using the radar, see the RADAR SECTION.
EMPLOYMENT DOMAIN
In order to employ the MAGIC effectively, the weapon needs to be fired in the correct
parameters. Those parameters are:
• Missile range for the target aspect, speed and altitude.
• Target angle of the nose of the aircraft.
The MAGIC missiles can’t determine target range or aspect alone, in order for the
aircraft to provide the missile employment domain, the radar needs to be locked on
the same target as the MAGIC missile.
The missile range is calculated in real time by the aircraft and presented to the pilot
on the VTH and VTB.
Page 550
SECTION 25
25–3
AIR-TO-AIR EMPLOYMENT
MAGIC II
The employment domain is represented by 3 limits:
• Long limit without defensive maneuvers (Limite longue sans évasive): Represents
the maximum range at which the missile can be fired and will hit the target if it
maintains its course, speed and altitude.
• Long limit with defensive maneuvers (Limite longue avec évasive): Represents the
maximum range at which the missile can be fired and will hit the target even if it
flies directly away from the shooter aircraft.
• Short limit (Limite courte): Represents the minimum range at which the missile can
be fired and will have the time to arm itself and steer to the target.
When firing on a target flying away from the shooter aircraft, both long limits will
overlap.
When the target is between the long limit without defensive maneuvers and the long
limit with defensive maneuvers, called the least restrictive firing domain (domaine de
tir le moins contraignant) the interception director circle is doubled.
Page 551
SECTION 25
25–3
AIR-TO-AIR EMPLOYMENT
MAGIC II
When the target is between the long limit with defensive maneuvers and the short
limit, called the most restrictive firing domain (domaine de tir le plus contraignant),
the shoot indication is displayed on the VTH the missile lock tone is replaced by a
650/1000 Hz tone interleaved at 2 Hz.
The best firing conditions are achieved when the missile is fired while the target is in
the most restrictive firing domain and the interception director point is centered inside
the circle, this will result in the maximum probability of kill (PK) to the missile.
A missile fired with the target outside the most restrictive firing domain but still inside
the long limit without defensive maneuvers can still hit depending on the target
actions while the missile is in flight, the PK depends on the closeness of the target to
the most restrictive firing domain.
A missile fired while the target is outside the long limit without defensive maneuvers
will result in a very low PK as the missile might self-destruct or stall before reaching
the target. Firing closer that the short limit will also result in a low PK as the missile
most likely won’t have enough time to arm itself and/or maneuver to the target.
Page 552
SECTION 25
25–3
AIR-TO-AIR EMPLOYMENT
MAGIC II
MISSILE FIRING
The missile is fired using the MiCRoB second stage trigger on the HOTAS. The
command needs to be held during the 200ms firing sequence. The minimum time
between 2 missiles fire is 2 seconds.
Missile firing will trigger engine hot gas ingestion protection system.
Page 553
SECTION 25
25–3
AIR-TO-AIR EMPLOYMENT
MAGIC II
MISSILE GUIDANCE
The MAGIC II missile user passive infrared guidance to fly to its target, this guidance
method does not require any action from the shooting aircraft after the missile have
been fired.
Page 554
SECTION 25
25–4
AIR-TO-AIR EMPLOYMENT
TACTICS
25 – 4 - TACTICS
BEYOND VISUAL RANGE
WORK IN PROGRESS
WITHIN VISUAL RANGE
WORK IN PROGRESS
TARGET DESIGNATION
MANUAL TARGET DESIGNATION
WORK IN PROGRESS
RADAR TARGET DESIGNATION
WORK IN PROGRESS
REMOTE TARGET DESIGNATION
WORK IN PROGRESS
Page 555
SECTION 25
25–5
AIR-TO-AIR EMPLOYMENT
COMMUNICATIONS
25 – 5 - COMMUNICATIONS
WITH THE AWACS/GCI
WORK IN PROGRESS
WITH A WINGMAN
WORK IN PROGRESS
Page 556
SECTION 26
AIR-TO-GROUND EMPLOYMENT
AIR-TO-GROUND EMPLOYMENT
Page 557
SECTION 26
AIR-TO-GROUND EMPLOYMENT
INTRODUCTION
This section is dedicated to the employment of the Mirage 2000C systems and
weapon against ground targets.
The Mirage 2000C has secondary air to ground capabilities that allows for strike and
limited CAS missions. It is capable of using high and low drag bombs, cluster bombs,
anti-runway bombs, rockets, internal guns and laser guided bombs with external
designation.
The Mirage air-to-ground weapons are classified by method of employment:
• BL (Bombe lisse – Low drag): The pilot designates the ground target and uses the
displayed symbology to reach the release point. All low drag and laser guided
bombs use this method of employment.
• BF (Bombe freinée – High drag): The pilot flies the aircraft level at low altitude and
uses the displayed symbology to release the weapons on the ground target. All
high drag, anti-runway and cluster bombs use this method of employment.
• RK or CAS (Roquettes ou canons air-sol – Rockets or air-to-ground guns): The
pilot uses the displayed symbology to fire the weapons on the ground target. The
rockets and guns employment method are very similar and can be treated as the
same.
SENSORS
For air to ground weapon employment, the aircraft needs to now the impact point
position relative to itself as well as its attitude and speed.
The attitude and speed information are provided by the INS system. A degraded or
turned off INS system will result in the impossibility of the aircraft to provide normal
weapon employment symbology.
The impact point position can be retrieved using different methods:
• Radar ranging (TAS – Télémétrie air-sol): The radar is used to determine the
distance to the impact point.
This method is the most accurate one as the range is directly calculated and radars
are good at ranging. Some precaution still needs to be followed to achieve the
highest accuracy possible.
• Radar altimeter ranging (RS – Radio-sonde): The radar altimeter is used to
determine the aircraft’s altitude over the ground. This information coupled with the
aircraft attitude is then used to determine the range to the impact point.
This method precision depends on the terrain altitude difference at the aircraft
position and the impact point, if there is a difference, the range determination will
be incorrect. Over flat or near flat terrain, this method can nonetheless result in a
good enough accuracy, even more over water.
• Baro-altimetric ranging (ZBI – Altitude barométrique): The altitude difference
between the aircraft and the impact point altitude is used to know the aircraft’s
altitude over the impact point. This information coupled with the aircraft attitude is
then used to determine the range to the impact point.
Page 558
SECTION 26
AIR-TO-GROUND EMPLOYMENT
This method require that the aircraft knows the impact point altitude. This can be
done with an INS BUT or by ranging the target a first time with another method.
The accuracy is directly dependent on the accuracy of the altitude information
source.
Page 559
SECTION 26
26–1
AIR-TO-GROUND EMPLOYMENT
LOW DRAG BOMBS
26 – 1 - LOW DRAG BOMBS
INTRODUCTION
Low drag designates all bombs that are not equipped with high drag devices, being
unguided or laser guided. On the Mirage 2000C those bombs are released using the
Calcul continu du point de largage – CCPL (Continuously calculated release point –
CCRP) delivery mode: The pilot designates the desired impact point through the VTH
or the INS and the aircraft will provide symbology guiding the pilot to the release
point. The MiCRoB trigger acts as a release consent and the aircraft releases the
bombs when the release point is reached.
This delivery mode is most appropriate for medium to high altitude release in a dive
or level as well as low altitude toss delivery.
For medium to high altitude, TAS ranging is required to determine the position of the
target while at low altitude, either TAS or RS can be used depending on the terrain.
2 delivery profiles are available and they differ in the way the desired impact point is
designated:
• CCPL: The impact point is designated by the pilot through the VTH.
• CCPL PI: The impact point is designated by the INS system.
CCPL
When using CCPL – Calcul continu du point de largage (CCRP – Continuously
calculated release point) the pilot must designate the intended impact point through
the VTH and then fly the aircraft to the release point by following the CCPL
symbology.
This designation requires the aircraft to enter a dive to place the impact point inside
the VTH, the resulting altitude loss needs to be taken into account in relation to the
bomb fuse delay, enemy ground defenses and the terrain.
This bomb release method can be inaccurate due to the ranging sensor limitations,
pilot inaccuracies during the designation and when following of the guidance
symbology. The short interval between designation and release virtually removes
inaccuracies linked to INS drift.
CCPL PI
When using CCPL PI – Calcul continu du point de largage point initial (CCRP IP –
Continuously calculated release point initial point) the impact point is designated
through the INS: The DEST BUT is the PI and its BAD is the impact point.
The pilot must fly the aircraft to the PI and execute a navigation fix on it, then follow
the symbology until the release point is reached.
This allows for low drag bomb delivery without visual contact to the target and/or low
altitude but it requires to know the precise location of the impact point and the PI to
Page 560
SECTION 26
26–1
AIR-TO-GROUND EMPLOYMENT
LOW DRAG BOMBS
be placed over a remarkable surface feature in order to achieve a precise navigation
fix.
This delivery method accuracy is mostly dependent on the INS drift and the pilot
following of the guidance symbology or navigation fix accuracy. The INS drift
accumulated during the navigation to the target can be fixed by executing a
navigation fix on the PI, but the drift accumulated between the PI and the impact point
can’t be fixed. The INS drift rate can be as high as 30 m/min or 100 ft/min.
Page 561
SECTION 26
26–1
AIR-TO-GROUND EMPLOYMENT
LOW DRAG BOMBS
SYMBOLOGY
The following symbology is relative to the low drag bomb employment. It is
representative the symbology displayed on the VTH and VTB with the SNA in air-toground selected sub-mode and a low drag bomb selected with or without PI.
For more information on the VTH and VTB symbology, see the HEAD-UP DISPLAY AIRTO-GROUND MODE SUB-SECTION and RADAR SECTION.
VTH IN CCPL
BL SUB-MODE (Mode BL):
Displayed when the VTH is in low drag bomb (BL – bombe lisse) air-toground sub-mode. Steady indicates that the bombs are ready, flashing that
the master arm is off.
AIR-TO-GROUND RANGE (Distance air/sol):
Displayed when the radar has a good lock on the ground in TAS mode,
indicates the slant range to the ground. Not displayed if radar altimeter
(RS) is the primary ranging sensor.
DESIGNATION DIAMOND, WEAPON READY INDICATION AND ROLL ORDER (Réticule de
désignation, indication armement prêt et ordre de roulis):
Displayed at the top of the VTH, the point inside the diamond indicates
the aiming point for the impact point designation. The designated impact
point represents the center of the bomb salvo.
The weapon ready indication wings are displayed when the bombs are
ready to release. They are absent if master arm is off, the bombs fuse
is set to INERT, the selected bomb quantity is set to 00 or the aircraft
load factor is under 0,5 G.
The roll order wings are displayed after the impact point designation
and guide the aircraft in roll to the release point. The pilot needs to align
the weapons ready indication wings with the roll order wings to reach
the release point.
RELEASE BAR (Bare de larguage):
Displayed at the bottom of the VTH when the aircraft is in range for a
42° toss release, it moves up to the designation diamond. The bombs
are released when the bar reaches the diamond, it stays displayed
above the diamond until the all the bombs of the bomb salvo are
released.
Page 562
SECTION 26
26–1
AIR-TO-GROUND EMPLOYMENT
LOW DRAG BOMBS
SAFETY BAR AND SAFETY CROSS (Bare de sécuritée et croix de sécurité):
The safety bar is displayed at the bottom of the VTH when the
aircraft approaches the weapon blast zone or the safety height, it
moves up to the designation diamond. It represents the remaining
time before the pilot needs to execute a 5G pull out of the blast
zone and above the ground safety height.
The safety cross is displayed when the safety bar reaches the
designation diamond, it indicates that the pilot needs to execute
an immediate 5G pull to stay out of the weapon blast zone and
above the ground safety height.
Page 563
SECTION 26
26–1
AIR-TO-GROUND EMPLOYMENT
LOW DRAG BOMBS
VTH IN CCPL PI
BL SUB-MODE (Mode BL):
Indicates that the VTH is in low drag bomb (BL – bombe lisse) air-to-ground
sub-mode. Steady indicates that the bombs are ready, flashing that the
master arm is off.
AIR-TO-GROUND RANGE (Distance air/sol):
Displayed when the radar has a good lock on the ground in TAS mode,
indicates the slant range to the ground. Not displayed if radar altimeter
(RS) is the primary ranging sensor.
Displayed after PI designation, indicates the slant range to the impact
point.
DESIGNATION DIAMOND (Réticule de désignation):
Displayed at the bottom of the VTH before PI overfly, the point inside
the diamond indicates the aiming point for the PI designation.
ROLL ORDER (Ordre de roulis):
The roll order wings are displayed after PI designation or PI overfly and
guide the aircraft in roll to the release point. The pilot needs to align
FPM wings with the roll order wings to reach the release point.
RELEASE BAR (Bare de larguage):
Displayed at the bottom of the VTH when the aircraft is in range for a
42° toss release, it moves up to the FPM. The bombs are released
when the bar reaches the FPM, it stays displayed above the FPM until
the all the bombs of the bomb salvo are released.
SAFETY BAR AND SAFETY CROSS (Bare de sécurité et croix de sécurité):
The safety bar is displayed at the bottom of the VTH when the
aircraft approaches the weapon blast zone or the safety height, it
moves up to the designation diamond. It represents the remaining
time before the pilot needs to execute a 5G pull out of the blast
zone and above the ground safety height.
The safety cross is displayed when the safety bar reaches the
designation diamond, it indicates that the pilot needs to execute
an immediate 5G pull to stay out of the weapon blast zone and
above the ground safety height.
Page 564
SECTION 26
26–1
AIR-TO-GROUND EMPLOYMENT
LOW DRAG BOMBS
VTB
RADAR ALTITUDE (Hauteur radiosonde):
Displayed if the radar is in air-to-ground mode, indicates the altitude
above the ground in feet. Moved at the center of the VTB, just under the
aircraft model.
Displayed in red if the radar altitude is under the selected minimum
altitude.
RADAR MODE (Mode radar):
Indicates that the radar is in TAS mode.
Flashes to indicate that the radar pre-heating sequence is still ongoing.
Page 565
SECTION 26
26–1
AIR-TO-GROUND EMPLOYMENT
LOW DRAG BOMBS
PROFILES
CCPL
In CCPL 3 release profiles exists:
• DIVE-DIVE (Piqué-piqué): The aircraft starts at medium to high altitude. The profile
starts by a steep to shallow dive to place the intended impact point inside the VTH,
the pilot then designates and executes a medium pull up to reduce the dive to a
shallow dive until release.
• DIVE-LEVEL (Piqué-palier): The aircraft starts at medium to high altitude. The profile
starts by a steep to shallow dive to place the intended impact point inside the VTH,
the pilot then designates and executes a medium pull up to level flight until release.
• DIVE-TOSS (Piqué-ressource): The aircraft starts at medium altitude, this is
important for the altitude to not be too high as the Mirage SNA does not support
long time of flight for the bombs. The profile starts by a medium dive to place the
intended impact point inside the VTH, the pilot then designates and executes a
maximum pull up until release.
Each of these profiles can be started from the initial dive altitude or by doing a popup maneuver:
A pop-up maneuver starts at low altitude and high speed, at a distance from the target
the aircraft enters a steep climb to the initial dive altitude. Once reached, the aircraft
rolls over to dive toward the target.
This maneuver reduces the time the aircraft is exposed to enemy fire coming from
the target area.
Page 566
SECTION 26
26–1
AIR-TO-GROUND EMPLOYMENT
LOW DRAG BOMBS
DIVE-DIVE
Using a dive-dive profile result in a better precision thanks to the longer time the pilot
has to adjust the aircraft’s trajectory and the gentler pull reducing the pilot induced
lateral error tendency. This profile offers a wide range of starting altitudes but a higher
minimum designation altitude. This profile trajectory brings the aircraft the closest to
the impact point, it is not appropriate if the target area is well defended.
CCPL DIVE-DIVE
1
2
10 000 ft – 40 000 ft
AGL
20° - 30°
3
>6 000 ft
AGL
4
5
5° - 15°
PROFILE
1. Starting between 10 000 ft and 40 000 ft level.
2. Execute a 20° to 30° dive toward the target.
Keep the speed high during the dive but no faster than Mach 0.95.
3. Designate the impact point no lower than 6 000 ft AGL.
4. Pull 2G to 3G to reduce the dive to 5° to 15° while following the release symbology.
5. Once all the bombs are released, pull out of the dive and execute a sharp turn out
of the target area.
DIVE DISTANCE
Altitude
10 000 ft
20 000 ft
30 000 ft
40 000 ft
10 000 ft
20 000 ft
30 000 ft
40 000 ft
Dive angle
20°
30°
Page 567
Distance
4,5 nm
9 nm
13,5 nm
18 nm
3 nm
5,5 nm
8,5 nm
11,5 nm
SECTION 26
26–1
AIR-TO-GROUND EMPLOYMENT
LOW DRAG BOMBS
CCPL DIVE-DIVE POP-UP
3
20° - 30°
4
500 ft
AGL
30° - 40°
5
>6 000 ft
AGL
1
>8 000 ft
AGL
2
6
5° - 15°
PROFILE
1. Starting around 500 ft AGL and 500 kt.
2. Execute a 30° to 40° climb, afterburner may be necessary to keep the speed high.
3. Roll over to pull into a 20° to 30° dive once above 8 000 ft AGL
Keep the speed high during the dive but no faster than Mach 0.95.
4. Designate the impact point no lower than 6 000 ft AGL.
5. Pull 2G to 3G to reduce the dive to 5° to 15° while following the release symbology.
6. Once all the bombs are released, pull out of the dive and execute a sharp turn out
of the target area.
POP-UP DISTANCE
Climb angle
30°
40°
30°
40°
Dive angle
20°
30°
Page 568
Distance
6,9 nm
6,2 nm
5,5 nm
5 nm
SECTION 26
26–1
AIR-TO-GROUND EMPLOYMENT
LOW DRAG BOMBS
DIVE-LEVEL
Using a dive-level profile is a result in greater separation between the aircraft and the
impact point. This profile offers a wide range of starting altitudes and can result in a
high-altitude delivery at the cost of designation precision and bomb dispersion. This
profile is the most adapted to laser guided bomb employment.
CCPL DIVE-LEVEL
1
2
10 000 ft – 40 000 ft
AGL
20° - 30°
3
5
>4 000 ft
AGL
4
PROFILE
1. Starting between 10 000 ft and 40 000 ft level.
2. Execute a 20° to 30° dive toward the target.
Keep the speed high during the dive but no faster than Mach 0.95.
3. Designate the impact point no lower than 4 000 ft AGL.
4. Pull 2G to 4G to level flight while following the release symbology.
5. Once all the bombs are released, execute a sharp turn out of the target area.
DIVE DISTANCE
Altitude
10 000 ft
20 000 ft
30 000 ft
40 000 ft
10 000 ft
20 000 ft
30 000 ft
40 000 ft
Dive angle
20°
30°
Page 569
Distance
4,5 nm
9 nm
13,5 nm
18 nm
3 nm
5,5 nm
8,5 nm
11,5 nm
SECTION 26
26–1
AIR-TO-GROUND EMPLOYMENT
LOW DRAG BOMBS
CCPL DIVE-LEVEL POP-UP
3
20° - 30°
4
6
5
500 ft
AGL
30° - 40°
>4 000 ft
AGL
1
8 000 ft
AGL
2
PROFILE
1. Starting around 500 ft AGL and 500 kt.
2. Execute a 30° to 40° climb, afterburner may be necessary to keep the speed high.
3. Roll over to pull into a 20° to 30° dive once above 8 000 ft AGL
Keep the speed high during the dive but no faster than Mach 0.95.
4. Designate the impact point no lower than 4 000 ft AGL.
5. Pull 2G to 4G to level flight while following the release symbology.
6. Once all the bombs are released, execute a sharp turn out of the target area.
POP-UP DISTANCE
Climb angle
30°
40°
30°
40°
Dive angle
20°
30°
Page 570
Distance
6,9 nm
6,2 nm
5,5 nm
5 nm
SECTION 26
26–1
AIR-TO-GROUND EMPLOYMENT
LOW DRAG BOMBS
DIVE-TOSS
Using a dive-toss profile result in the fastest designation to release time and the
longest separation between the aircraft and the impact point. The designation can
also be safely be done at a lower altitude but its maximum altitude is lower than other
profiles due to the SNA not working well with very long time of flight for the bombs.
This is the most appropriate profile to use in a well defended area as it offers the
quickest release time and greatest release range.
CCPL DIVE-TOSS
1
2
10 000 ft – 40 000 ft
AGL
30°
5
3
>4 000 ft
AGL
4
PROFILE
1. Starting between 10 000 ft and 40 000 ft level.
2. Execute a 30° dive toward the target.
Keep the speed high during the dive but no faster than Mach 0.95.
3. Designate the impact point no lower than 4 000 ft AGL.
4. Pull 5G to 6G with the wings level.
5. Once all the bombs are released, execute a sharp turn out of the target area.
DIVE DISTANCE
Altitude
10 000 ft
20 000 ft
30 000 ft
40 000 ft
Dive angle
30°
Page 571
Distance
3 nm
5,5 nm
8,5 nm
11,5 nm
SECTION 26
26–1
AIR-TO-GROUND EMPLOYMENT
LOW DRAG BOMBS
CCPL DIVE-TOSS POP-UP
3
20° - 30°
5
>4 000 ft
AGL
500 ft
AGL
30° - 40°
8 000 ft
AGL
2
1
6
4
PROFILE
1. Starting around 500 ft AGL and 500 kt.
2. Execute a 30° to 40° climb, afterburner may be necessary to keep the speed high.
3. Roll over to pull into a 20° to 30° dive once above 8 000 ft AGL.
Keep the speed high during the dive but no faster than Mach 0.95.
4. Designate the impact point no lower than 4 000 ft AGL.
5. Pull 5G to 6G with the wings level.
6. Once all the bombs are released, execute a sharp turn out of the target area.
POP-UP DISTANCE
Climb angle
30°
40°
30°
40°
Dive angle
20°
30°
Page 572
Distance
6,9 nm
6,2 nm
5,5 nm
5 nm
SECTION 26
26–1
AIR-TO-GROUND EMPLOYMENT
LOW DRAG BOMBS
CCPL PI
In CCPL PI 2 release profiles exist:
• LEVEL (Palier): The aircraft starts at medium to high altitude. The profile starts by a
steep to shallow dive to execute a navigation fix on the PI, the pilot then returns the
aircraft to level flight, overfly the PI and follow the guidance symbology until release.
• TOSS (Ressource): The aircraft starts at low altitude. The profile starts by a
navigation fix on the PI while in level flight, the pilot then overflies the PI, follow the
guidance symbology until the release bar is displayed and execute a maximum pull
up until release.
Page 573
SECTION 26
26–1
AIR-TO-GROUND EMPLOYMENT
LOW DRAG BOMBS
LEVEL
Using a level profile allows for medium to high altitude delivery, which will keep the
aircraft outside short range air defenses. If the release is done at high altitude, the
bomb dispersion will be very high due to wind, pilot error when executing the
navigation fix or while following the release symbology. INS drift is also a big accuracy
factor as the desired impact point is never designated directly, without a navigation
fix, the accumulated drift during the navigation phase can be as high as 1 nm/h. Even
if a navigation fix is done on the PI, the INS drift accumulated between the PI and the
release can be as high as 30 m/min or 100 ft/min. Due to these factors, laser guided
bombs are the most appropriate weapons for this profile.
Page 574
SECTION 26
26–1
AIR-TO-GROUND EMPLOYMENT
LOW DRAG BOMBS
CCPL PI LEVEL
1
2
20° - 30°
20 000 ft – 40 000 ft
AGL
3
5
>10 000 ft
AGL
4
PROFILE
1. Starting between 20 000 ft and 40 000 ft level.
2. Execute a 20° to 30° dive toward the PI.
Keep the speed high during the dive but no faster than Mach 0.95.
3. Designate the PI no lower than 10 000 ft AGL.
4. Pull 2G to 4G to level flight.
5. Overfly the PI and follow the release symbology.
6. Once all the bombs are released, execute a sharp turn out of the target area.
DIVE DISTANCE
Altitude
20 000 ft
30 000 ft
40 000 ft
20 000 ft
30 000 ft
40 000 ft
Dive angle
20°
30°
Page 575
Distance
4,5 nm
9 nm
13,5 nm
18 nm
3 nm
5,5 nm
SECTION 26
26–1
AIR-TO-GROUND EMPLOYMENT
LOW DRAG BOMBS
TOSS
Using a toss profile allows for long range, low altitude delivery, which can keep the
aircraft below the minimum altitude of medium and long range air defenses as well
as outside the short range air defenses. The release accuracy is mostly dependent
on pilot error when executing the navigation fix or while following the release
symbology. INS drift is also a big accuracy factor as the desired impact point is never
designated directly, without a navigation fix, the accumulated drift during the
navigation phase can be as high as 1 nm/h. Even if a navigation fix is done on the
PI, the INS drift accumulated between the PI and the release can be as high as 30
m/min or 100 ft/min.
CCPL PI TOSS
5
2
3
4
500 ft
AGL
1
PROFILE
1. Starting around 500 ft AGL and 500 kt.
2. Designate the PI while keeping the aircraft in level flight.
3. Overfly the PI and follow the release symbology.
4. As soon as the release bar is displayed, pull 5G to 6G with the wing level.
5. Once all the bombs are released, execute a sharp turn out of the target area.
Page 576
SECTION 26
26–1
AIR-TO-GROUND EMPLOYMENT
LOW DRAG BOMBS
EMPLOYMENT
In order to destroy a target with low drag bombs, multiple steps have to be followed.
CCPL
LASER CODE SELECTION
If the aircraft is loaded with laser guided bombs, their laser tracking code is set on
the guidance kit by the ground crew. The laser code can be visualized on the
kneeboard “Ground adjustment option” page. It can be selected in the mission editor
or using the kneeboard key command (right shift + right alt + 9, right shift + right alt
+ 0 and right shift + right alt + - by default) while on the ground with the engine off.
Page 577
SECTION 26
26–1
AIR-TO-GROUND EMPLOYMENT
LOW DRAG BOMBS
FUSE SELECTION
While loaded under the aircraft, bomb fuses are kept unarmed to prevent excessive
collateral damage in case of jettison or involuntary release. They are armed at
release when they separate from their pylon.
The armed fuse is determined by the position of the fuse selection switch on the PPA:
The switch has 3 positions:
• INST. (Instantané – Instantaneous): Arms the nose and tail fuse.
• RET. (Retardé – Retarded): Arms the tail fuse.
• INERT. (Inerte – Inert): No fuse is armed, the bombs won’t explode.
The instantaneous fuse is more adapted to soft target like infantry and lightly armored
vehicles while the retarded fuse is more adapted to hardened targets like bunkers or
infrastructure.
BOMB QUANTITY SELECTION
The number of bombs released per salvo is set by using the salvo bomb quantity
switch and visualized on the salvo bomb quantity display:
The switch will increase the displayed bomb quantity from 00 to 18.
The Mirage SNA is unable to determine if the selected bomb quantity is higher than
the number of bombs loaded on this aircraft. In this situation the bomb will be
released as if the selected number of bombs were available and the salvo will most
likely land short from the target.
Selecting 00 on the salvo bomb quantity will prevent bomb release.
Page 578
SECTION 26
26–1
AIR-TO-GROUND EMPLOYMENT
LOW DRAG BOMBS
BOMB INTERVAL SELECTION
The interval between the bombs in a salvo is set by using the salvo bomb interval
switch and visualized on the salvo bomb interval display:
The switch will increase the displayed bomb interval from 00 to 20.
The displayed interval is the distance in tens of meters between each bomb in the
salvo. To obtain the salvo length, multiply the salvo bomb quantity by the salvo bomb
interval quantity.
Selecting 00 on the salvo bomb quantity will revert the bomb interval to the minimum
bomb release separation time of 10 ms.
If the salvo bomb quantity is set to 01, the salvo bomb interval has no effect.
WEAPON SELECTION
The low drag bombs are selected by pressing the PCA weapon selection button
under the BLx window, this sets the aircraft SNA in the air-to-ground pre-selected
sub-mode. In order to be able to select the bombs, the HOTAS CNM command needs
to be in the N (neutre – neutral) position and the selective jettison switch in the N
position.
The S light on the PCA weapon selection button under the BLx window indicates that
the BL mode is selected.
As the SNA is in air-to-ground pre-selected sub-mode, the PCA top row displays the
weapons options and the VTH will stay in NAV mode.
Page 579
SECTION 26
26–1
AIR-TO-GROUND EMPLOYMENT
LOW DRAG BOMBS
RANGING SENSOR SELECTION
If the SNA is in air-to-ground pre-selected or selected sub-mode, the PCA top row
displays the weapons options. These options allow to select the ranging sensor used
to determine the slant range to the desingated impact point.
2 sensors are available:
• TAS (Télémétrie air-sol – Radar ranging): The radar is used to determine the
distance to the impact point.
• RS (Radio-sonde – Radar altimeter): The radar altimeter is used to determine the
aircraft’s altitude over the ground. This information coupled with the aircraft attitude
is then used to determine the range to the impact point.
2 ranging sensors can be selected at one time, priority order is the following: RAS
then RS. If the priority sensor is unable to provide the slant range the information
from the second sensor is used.
Page 580
SECTION 26
26–1
AIR-TO-GROUND EMPLOYMENT
LOW DRAG BOMBS
MASTER ARM
In order to release the bombs, the master arm switch needs to be in the armed
position.
The P light on the PCA weapon selection button under the BLx window indicates that
the master arm is armed, the bomb fuse is set to INST. or RET., the selected bomb
quantity is at least 01 and the aircraft load factor is greater than 0.4 G.
If the SNA is in selected sub-mode, the master arm is armed, the VTH BL mode
indication should be steady.
AIR-TO-GROUND SUB-MODES
Once a low drag bomb is selected on the PCA, the HOTAS weapon system forward
and aft commands are used to switch between the 3 BL sub-modes:
• Forward: Sets the SNA to selected sub-mode. The VTH is set to BL mode and the
PCA top row displays weapon options.
• Aft: If the SNA is in pre-selected or selected sub-mode, sets the SNA to memorized
sub-mode. The VTH is set to NAV mode and the PCA top row displays weapon
options.
If the SNA is in memorized sub-mode, sets the SNA to pre-selected mode. The
VTH is set to NAV mode and the PCA top row displays NAV options.
For more information about the SNA air-to-ground sub-modes and the HOTAS
weapon system command, see the NAVIGATION AND WEAPON SYSTEM HOTAS SNA
COMMANDS SUB-SECTION.
Page 581
SECTION 26
26–1
AIR-TO-GROUND EMPLOYMENT
LOW DRAG BOMBS
IMPACT POINT DESIGNATION
In order to designate the impact point the SNA needs to be in air-to-ground, selected
sub-mode.
The weapon system paddle needs to be pressed when the designation diamond is
over the target. The impact point can be designed as many times as desired to refine
its position.
Once the impact point as been designated, the SNA is locked in the selected submode, the only way to exit it is to de-select the bombs, select another weapon via the
PCA or the CNM HOTAS command.
The ranging systems limitation needs to be taken into account when performing the
designation. For more information, see the RADAR SECTION.
Page 582
SECTION 26
26–1
AIR-TO-GROUND EMPLOYMENT
LOW DRAG BOMBS
GUIDANCE SYMBOLOGY
Once the impact point is designated the roll order wings are displayed around the
designation diamond.
The wings will guide the aircraft in roll to the release point. The release point location
is wind correct relative to the wind the aircraft is subject to.
Page 583
SECTION 26
26–1
AIR-TO-GROUND EMPLOYMENT
LOW DRAG BOMBS
BOMB RELEASE
The MiCRoB second stage trigger act as a weapon release consent, it needs to be
held pressed as long as the release bar is displayed on the VTH.
The release bar is displayed at the bottom of the VTH when the aircraft is in range
for a 42° toss release and it climbs toward the designation diamond.
The first bomb is released when the release bar reaches the center of the designation
diamond. The bar moves just above the diamond and stays displayed until the last
bomb is released.
Once the last bomb is released, the impact point designation is reset and the SNA is
unlocked.
Page 584
SECTION 26
26–1
AIR-TO-GROUND EMPLOYMENT
LOW DRAG BOMBS
FLYING THE PROFILE
The profile flown here will be CCPL dive-toss starting a 22 000 ft with a 30° dive to
the target. The impact point should be designated above 15 000 ft.
Starting at 22 000 ft, fly to around 6 nm from the intended impact point.
Enter a 30° dive and press the HOTAS weapon system command forward to set the
VTH to BL mode.
Page 585
SECTION 26
26–1
AIR-TO-GROUND EMPLOYMENT
LOW DRAG BOMBS
Place the designation diamond over the target and press the HOTAS weapon system
paddle to designate the impact point.
As soon as the designation is correct, follow the roll order wings to correct the release
for wind.
Page 586
SECTION 26
26–1
AIR-TO-GROUND EMPLOYMENT
LOW DRAG BOMBS
When the wings are aligned, hold the MiCRoB second stage and pull 5 G to 6 G with
the wing level until the release bar is no longer displayed.
Execute a sharp turn away from the target area.
Page 587
SECTION 26
26–1
AIR-TO-GROUND EMPLOYMENT
LOW DRAG BOMBS
CCPL PI
LASER CODE SELECTION
If the aircraft is loaded with laser guided bombs, their laser tracking code is set on
the guidance kit by the ground crew. The laser code can be visualized on the
kneeboard “Ground adjustment option” page. It can be selected in the mission editor
or using the kneeboard key command (right shift + right alt + 9, right shift + right alt
+ 0 and right shift + right alt + - by default) while on the ground with the engine off.
Page 588
SECTION 26
26–1
AIR-TO-GROUND EMPLOYMENT
LOW DRAG BOMBS
FUSE SELECTION
While loaded under the aircraft, bomb fuses are kept unarmed to prevent excessive
collateral damage in case of jettison or involuntary release. They are armed at
release when they separate from their pylon.
The armed fuse is determined by the position of the fuse selection switch on the PPA.
The switch has 3 positions:
• INST. (Instantané – Instantaneous): Arms the nose and tail fuse.
• RET. (Retardé – Retarded): Arms the tail fuse.
• INERT. (Inerte – Inert): No fuse is armed, the bombs won’t explode.
The instantaneous fuse is more adapted to soft target like infantry and lightly armored
vehicles while the retarded fuse is more adapted to hardened targets like bunkers or
infrastructure.
BOMB QUANTITY SELECTION
The number of bombs released per salvo is set by using the salvo bomb quantity
switch and visualized on the salvo bomb quantity display.
The switch will increase the displayed bomb quantity from 00 to 18.
The Mirage SNA is unable to determine if the selected bomb quantity is higher than
the number of bombs loaded on this aircraft. In this situation the bomb will be
released as if the selected number of bombs were available and the salvo will most
likely land short from the target.
Selecting 00 on the salvo bomb quantity will prevent bomb release.
Page 589
SECTION 26
26–1
AIR-TO-GROUND EMPLOYMENT
LOW DRAG BOMBS
BOMB INTERVAL SELECTION
The interval between the bombs in a salvo is set by using the salvo bomb interval
switch and visualized on the salvo bomb interval display.
The switch will increase the displayed bomb interval from 00 to 20.
The displayed interval is the distance in tens of meters between each bomb in the
salvo. To obtain the salvo length, multiply the salvo bomb quantity by the salvo bomb
interval quantity.
Selecting 00 on the salvo bomb quantity will revert the bomb interval to the minimum
bomb release separation time of 10 ms.
If the salvo bomb quantity is set to 01, the salvo bomb interval has no effect.
WEAPON SELECTION
The low drag bombs are selected by pressing the PCA weapon selection button
under the BLx window, this sets the aircraft SNA in the BL mode, pre-selected submode. In order to be able to select the BL mode, the SNA needs to be in any other
mode than air-to-air gun or MAGIC priority mode and selective jettison mode.
The S light on the PCA weapon selection button under the BLx window indicates that
the BL mode is selected.
As the SNA is in air-to-ground pre-selected sub-mode, the PCA top row displays the
weapons options and the VTH will stay in NAV mode.
Page 590
SECTION 26
26–1
AIR-TO-GROUND EMPLOYMENT
LOW DRAG BOMBS
PI MODE SELECTION
If the SNA is in air-to-ground pre-selected or selected sub-mode, the PCA top row
displays the weapons options. These options allow to select the PI mode for the
bombs.
With this option selected and the SNA in air-to-ground selected sub-mode, the VTH
will show the BL PI mode.
If the current DEST BUT does not have a BAD set, “PI” will be displayed on the VTH
and the VTH will stay in BL mode.
RANGING SENSOR SELECTION
If the SNA is in air-to-ground pre-selected or selected sub-mode, the PCA top row
displays the weapons options. These options allow to select the ranging sensor used
to determine the slant range to the desingated impact point.
2 sensors are available:
• TAS (Télémétrie air-sol – Radar ranging): The radar is used to determine the
distance to the impact point.
• RS (Radio-sonde – Radar altimeter): The radar altimeter is used to determine the
aircraft’s altitude over the ground. This information coupled with the aircraft attitude
is then used to determine the range to the impact point.
Page 591
SECTION 26
26–1
AIR-TO-GROUND EMPLOYMENT
LOW DRAG BOMBS
• ZBI (Altitude barométrique – Baro-altimetric ranging): The altitude difference
between the aircraft and the impact point altitude is used to know the aircraft’s
altitude over the impact point. This information coupled with the aircraft attitude is
then used to determine the range to the impact point.
2 ranging sensors can be selected at one time, priority order is the following: TAS
then RS then ZBI. If the priority sensor is unable to provide the slant range the
information from the second sensor is used.
MASTER ARM
In order to release the bombs, the master arm switch needs to be in the armed
position.
The P light on the PCA weapon selection button under the BLx window indicates that
the master arm is armed, the bomb fuse is set to INST. or RET., the selected bomb
quantity is at least 01 and the aircraft load factor is greater than 0.4 G.
If the SNA is in selected sub-mode, the master arm is armed, the VTH BL mode
indication should be steady.
AIR-TO-GROUND SUB-MODES
Once a low drag bomb is selected on the PCA, the HOTAS weapon system forward
and aft commands are used to switch between the 3 BL sub-modes:
• Forward: Sets the SNA to selected sub-mode. The VTH is set to BL mode and the
PCA top row displays weapon options.
• Aft: If the SNA is in pre-selected or selected sub-mode, sets the SNA to memorized
sub-mode. The VTH is set to NAV mode and the PCA top row displays weapon
options.
If the SNA is in memorized sub-mode, sets the SNA to pre-selected mode. The
VTH is set to NAV mode and the PCA top row displays NAV options.
For more information about the SNA air-to-ground sub-modes and the HOTAS
weapon system command, see the NAVIGATION AND WEAPON SYSTEM HOTAS SNA
COMMANDS SUB-SECTION.
Page 592
SECTION 26
26–1
AIR-TO-GROUND EMPLOYMENT
LOW DRAG BOMBS
PI NAVIGATION FIX
In order to perform a navigation fix on the PI, the SNA needs to be in BL mode,
selected sub-mode.
The weapon system paddle needs to be pressed when the designation diamond is
over the PI surface feature. The PI can be designed as many times as desired to
refine the navigation fix.
NOTE
Due to INS drift, the position of the PI might have drifted from its origin
al position, the surface feature is what’s need to be designated, not the
where the INS is placing the PI.
The PI navigation fix in not necessary but will greatly improve the accuracy of the
attack by reducing the accumulated INS drift.
Once the once the navigation fix has been performed, or the PI has been overflown,
the SNA is locked in the selected sub-mode, the only way to exit it is to de-select the
bombs or select another weapon.
The ranging systems limitation needs to be taken into account when performing the
designation. For more information, see the RADAR SECTION.
Page 593
SECTION 26
26–1
AIR-TO-GROUND EMPLOYMENT
LOW DRAG BOMBS
GUIDANCE SYMBOLOGY
Once the once the navigation fix has been performed, or the PI has been overflown,
the roll order wings are displayed around the FPM.
The wings will guide the aircraft in roll to the release point. The release point location
is wind correct relative to the wind the aircraft is subject to.
BOMB RELEASE
The MiCRoB second stage trigger act as a weapon release consent, it needs to be
held pressed as long as the release bar is displayed on the VTH.
The release bar is displayed at the bottom of the VTH when the aircraft is in range
for a 42° toss release and it climbs toward the FPM.
Page 594
SECTION 26
26–1
AIR-TO-GROUND EMPLOYMENT
LOW DRAG BOMBS
The first bomb is released when the release bar reaches the center of the FPM. The
bar moves just above the FPM and stays displayed until the last bomb is released.
Once the last bomb is released, the impact point designation is reset and the SNA is
unlocked.
Page 595
SECTION 26
26–1
AIR-TO-GROUND EMPLOYMENT
LOW DRAG BOMBS
FLYING THE PROFILE
The profile flown here will be CCPL PI toss starting a 400 ft.
Starting at 400 ft, fly toward the PI.
Once the PI is in sight, press the HOTAS weapon system command forward to set
the VTH to BL PI mode.
Page 596
SECTION 26
26–1
AIR-TO-GROUND EMPLOYMENT
LOW DRAG BOMBS
Place the designation diamond over surface feature and press the HOTAS weapon
system paddle to execute a navigation fix.
Once satisfied with the navigation fix, follow the roll order wings to fly to the release
point.
Page 597
SECTION 26
26–1
AIR-TO-GROUND EMPLOYMENT
LOW DRAG BOMBS
When the wings are aligned and as soon as the release bar is displayed at the bottom
of the VTH, hold the MiCRoB second stage and pull 5 G to 6 G with the wing level
until the release bar is no longer displayed.
Execute a sharp turn away from the target area.
Page 598
SECTION 26
26–1
AIR-TO-GROUND EMPLOYMENT
LOW DRAG BOMBS
NAVIGATION FIX VALIDATION
Once the aircraft is out of the target area, the PI navigation fix can be accepted or
rejected. The navigation fix can be reviewed on the PCN just like a standard overfly
or radar navigation fix.
Page 599
SECTION 26
26–1
AIR-TO-GROUND EMPLOYMENT
LOW DRAG BOMBS
DEGRADED EMPLOYMENT
WORK IN PROGRESS
Page 600
SECTION 26
26–2
AIR-TO-GROUND EMPLOYMENT
HIGH DRAG BOMBS
26 – 2 - HIGH DRAG BOMBS
INTRODUCTION
High drag designates all bombs that are equipped with a high drag device: Parachute,
fins or ballutes. On the Mirage 2000C those bombs are released using the Calcul
continu du point d’impact – CCPI (Continuously calculated impact point – CCIP)
delivery mode: The pilot places the VTH symbology over the impact point and uses
the MiCRoB trigger to release the bombs.
This delivery mode is only appropriate for level, low altitude and high-speed delivery.
Either TAS or RS ranging methods can be used depending on the terrain.
2 delivery profiles are available, the difference is in the help in finding the intended
impact point that the INS will provide:
• CCPI: The pilot needs to acquire the intended impact point visually.
• CCPI PI: The position intended impact point is presented to the pilot by the INS but
the pilot still needs to acquire it visually.
CCPI
When using CCPI – Calcul continu du point d’impact (CCIP – Continuously calculated
impact point) the pilot must fly the aircraft to place the release symbology over the
desired impact point.
The overfly of the target as well as low altitude required by this delivery method
expose the aircraft to small arms fire and short-range air-defenses, it is important to
take them into account and avoid troop concentration as much as possible.
Careful planning of the approach is also needed to reduce the time the aircraft is
exposed to enemy fire.
This bomb release method inaccuracy will mainly come from pilot error at release
and weapon dispersion, since the target needs to be acquired visually, INS drift is
not a factor.
CCPI PI
When using CCPI PI – Calcul continu du point d’impact point initial (CCIP PI –
Continuously calculated impact point initial point) the pilot must fly the aircraft to place
the release symbology over the desired impact point but with the help of the INS: The
INS will display the position of desired impact point on the VTH. The DEST BUT is
the PI and its BAD is intended impact point.
The pilot must fly the aircraft to the PI and execute a navigation fix on, then fly to the
impact point with the help of the VTH symbology. In this mode, the INS will only
indicate the location of the intended impact point, the pilot still needs to use the aiming
reticle to release the bombs on the target.
Page 601
SECTION 26
26–2
AIR-TO-GROUND EMPLOYMENT
HIGH DRAG BOMBS
This allows for high drag bomb delivery in bad weather or in a dense area, but it
requires to know the precise location of the impact point and the PI to be placed over
a remarkable surface feature in order to achieve a precise navigation fix.
The overfly of the target as well as low altitude required by this delivery method
expose the aircraft to small arms fire and short-range air-defenses, it is important to
take them into account and avoid troop concentration as much as possible.
Careful planning of the approach is also needed to reduce the time the aircraft is
exposed to enemy fire.
This delivery method accuracy is mostly the pilot aiming pilot error at release since
the INS only provide an aid in locating the target. If the release is done on the
intended impact point without visual acquisition, then the INS drift is the main
inaccuracy factor The INS drift accumulated during the navigation to the target can
be fixed by executing a navigation fix on the PI, but the drift accumulated between
the PI and the impact point can’t be fixed. The INS drift rate can be as high as 30
m/min or 100 ft/min.
Page 602
SECTION 26
26–2
AIR-TO-GROUND EMPLOYMENT
HIGH DRAG BOMBS
SYMBOLOGY
The following symbology is relative to the high drag bomb employment. It is
representative the symbology displayed on the VTH and VTB with the SNA in air-toground selected sub-mode and a high drag bomb selected with or without PI.
For more information on the VTH and VTB symbology, see the HEAD-UP DISPLAY AIRTO-GROUND MODE SUB-SECTION and RADAR SECTION.
VTH IN CCPI
BF SUB-MODE (Mode BF):
Displayed when the VTH is in high drag bomb (BF – bombe freinée) air-toground sub-mode. Steady indicates that the bombs are ready, flashing that
the master arm is off.
AIR-TO-GROUND RANGE (Distance air/sol):
Displayed when the radar has a good lock on the ground in TAS mode,
indicates the slant range to the impact point. Not displayed if radar
altimeter (RS) is the primary ranging sensor.
BOMB RELEASE DOMAIN AND TOO LOW/HIGH FOR BOMB DOMAIN (Domaine de largage et
domaine vers le bas/haut):
Displayed in relation to the FPM, indicates the position of the release
domain relative to the aircraft. The bracket represents the release
domain relative to the aircraft altitude to the impact point as well as its
vertical speed. The bottom of the bracket represents the nominal
release altitude while to top of the bracket represents the maximum
release altitude
The too low/high for bomb domain arrows are displayed if the aircraft
is outside the release domain and indicate the direction of the release
domain.
If the release domain is too far away, the bomb release domain
bracket is not displayed, only the too low/high for bomb domain arrows
indicate the direction of the release domain.
Page 603
SECTION 26
26–2
AIR-TO-GROUND EMPLOYMENT
HIGH DRAG BOMBS
AIMING RETICLE AND WEAPON READY INDICATION (Réticule de visée et indication
armement prêt):
The point inside the hexagon indicates the instantaneous impact point
of the first bomb in the salvo.
The weapon ready indication wings are displayed when the bombs are
ready to release. They are absent if master arm is off, the bombs fuse
is set to INERT, the selected bomb quantity is set to 00 or the aircraft
load factor is under 0,5 G.
BOMB FALL LINE AND LAST BOMB INDICATOR (Ligne de chute des bombes et trou dans
la ligne de chute):
Represents the bomb ground impact line, it connects the aiming reticle
to the FPM. The hole in the bomb fall line represents the impact point
of the last bomb in the salvo.
The bomb fall line is not drown over the horizon line, when the FPM is
above it, the bomb fall line connect to the projected FPM position on the
horizon.
RELEASE BAR (Barre de largage):
Displayed just below the FPM on MiCRoB trigger press, it moves up
to the FPM. The bombs are released when the bar reaches the FPM,
it stays displayed above the FPM until the all the bombs of the bomb
salvo are released.
Page 604
SECTION 26
26–2
AIR-TO-GROUND EMPLOYMENT
HIGH DRAG BOMBS
VTH IN CCPI PI
BF SUB-MODE (Mode BF):
Displayed when the VTH is in high drag bomb (BF – bombe freinée) air-toground sub-mode. Steady indicates that the bombs are ready, flashing that
the master arm is off.
AIR-TO-GROUND RANGE (Distance air/sol):
Displayed when the radar has a good lock on the ground in TAS mode,
indicates the slant range to the ground. Not displayed if radar altimeter
(RS) is the primary ranging sensor.
Displayed after PI designation, indicates the slant range to the impact
point. Not displayed if radar altimeter (RS) is the primary ranging sensor.
DESIGNATION DIAMOND (Réticule de désignation):
Displayed at the bottom of the VTH before PI overfly, the point inside
the diamond indicates the aiming point for the PI designation.
BOMB RELEASE DOMAIN AND TOO LOW/HIGH FOR BOMB DOMAIN (Domaine de largage et
domaine vers le bas/haut):
Displayed in relation to the FPM, indicates the position of the release
domain relative to the aircraft. The bracket represents the release
domain relative to the aircraft altitude to the impact point as well as its
vertical speed. The bottom of the bracket represents the nominal
release altitude while to top of the bracket represents the maximum
release altitude
The too low/high for bomb domain arrows are displayed if the aircraft
is outside the release domain and indicate the direction of the release
domain.
If the release domain is too far away, the bomb release domain
bracket is not displayed, only the too low/high for bomb domain arrows
indicate the direction of the release domain.
Page 605
SECTION 26
26–2
AIR-TO-GROUND EMPLOYMENT
HIGH DRAG BOMBS
AIMING RETICLE AND WEAPON READY INDICATION (Réticule de visée et indication
armement prêt):
The point inside the hexagon indicates the instantaneous impact point
of the first bomb in the salvo.
The weapon ready indication wings are displayed when the bombs are
ready to release. They are absent if master arm is off, the bombs fuse
is set to INERT, the selected bomb quantity is set to 00 or the aircraft
load factor is under 0,5 G.
BOMB FALL LINE AND LAST BOMB INDICATOR (Ligne de chute des bombes et trou dans
la ligne de chute):
Represents the bomb ground impact line, it connects the aiming reticle
to the FPM. The hole in the bomb fall line represents the impact point
of the last bomb in the salvo.
The bomb fall line is not drown over the horizon line, when the FPM is
above it, the bomb fall line connect to the projected FPM position on the
horizon.
RELEASE BAR (Barre de largage):
Displayed just below the FPM on MiCRoB trigger press, it moves up
to the FPM. The bombs are released when the bar reaches the FPM,
it stays displayed above the FPM until the all the bombs of the bomb
salvo are released.
Page 606
SECTION 26
26–2
AIR-TO-GROUND EMPLOYMENT
HIGH DRAG BOMBS
VTB
RADAR ALTITUDE (Hauteur radiosonde):
Displayed if the radar is in air-to-ground mode, indicates the altitude
above the ground in feet. Moved at the center of the VTB, just under the
aircraft model.
Displayed in red if the radar altitude is under the selected minimum
altitude.
RADAR MODE (Mode radar):
Indicates that the radar is in TAS mode.
Flashes to indicate that the radar pre-heating sequence is still ongoing.
Page 607
SECTION 26
26–2
AIR-TO-GROUND EMPLOYMENT
HIGH DRAG BOMBS
PROFILES
CCPI
In CCPI, only 1 profile exists: The aircraft starts low altitude, the pilot flies the aircraft
to place the aiming reticle over the intended impact point and releases the bombs. If
the bombs are released in a salvo, the pilot needs to place the intended impact point
between the aiming reticle and the last bomb indicator.
CCPI
3
2
300 -650 ft
AGL
1
PROFILE
1. Starting around 300 ft and no more than 650 ft AGL and 500 kt.
2. Place the aiming reticle over the intended impact point.
3. Once all the bombs are released, execute a sharp turn out of the target area.
Page 608
SECTION 26
26–2
AIR-TO-GROUND EMPLOYMENT
HIGH DRAG BOMBS
CCPI PI
In CCPI PI, only 1 profile exists: The aircraft starts low altitude, the pilot executes an
navigation fix on the PI, overfly the PI and then follow the navigation symbology
toward the intended impact point. The pilot then needs to place the intended impact
point between the aiming reticle and the last bomb indicator.
CCPI PI
5
2
3
4
300 -650 ft
AGL
1
PROFILE
1. Starting around 300 ft and no more than 650 ft AGL and 500 kt.
2. Designate the PI while keeping the aircraft in level flight.
3. Overfly the PI and follow the release symbology.
4. Place the aiming reticle over the intended impact point.
5. Once all the bombs are released, execute a sharp turn out of the target area.
Page 609
SECTION 26
26–2
AIR-TO-GROUND EMPLOYMENT
HIGH DRAG BOMBS
EMPLOYMENT
In order to destroy a target with high drag bombs, multiple steps have to be followed.
CCPI
FUSE SELECTION
While loaded under the aircraft, bomb fuses are kept unarmed to prevent excessive
collateral damage in case of jettison or involuntary release. They are armed at
release when they separate from their pylon.
The armed fuse is determined by the position of the fuse selection switch on the PPA:
The switch has 3 positions:
• INST. (Instantané – Instantaneous):
• Mark-82 Snakeye and Mark-82 Air: Arms the nose and tail fuse.
• BAP-100: Arms the retarded fuse.
• BLG-66: Selects the short dispersion area.
• RET. (Retardé – Retarded):
• Mark-82 Snakeye and Mark-82 Air: Arms the tail fuse.
• BAP-100: Arms the retarded fuse.
• BLG-66: Selects the long dispersion area.
• INERT. (Inerte – Inert): No fuse is armed, the bombs won’t explode.
For the Mark-82s, the instantaneous fuse is more adapted to soft target like infantry
and lightly armored vehicles while the retarded fuse is more adapted to hardened
targets like bunkers or infrastructure.
For the BLG-66, the only difference is the length and concentration of the pattern.
For the BAP-100, there is no difference between the 2 fuse options.
Page 610
SECTION 26
26–2
AIR-TO-GROUND EMPLOYMENT
HIGH DRAG BOMBS
BOMB QUANTITY SELECTION
The number of bombs released per salvo is set by using the salvo bomb quantity
switch and visualized on the salvo bomb quantity display:
The switch will increase the displayed bomb quantity from 00 to 18.
The Mirage SNA is unable to determine if the selected bomb quantity is higher than
the number of bombs loaded on this aircraft. In this situation the bomb will be
released as if the selected number of bombs were available and the salvo will most
likely land short from the target.
Selecting 00 on the salvo bomb quantity will prevent bomb release.
BOMB INTERVAL SELECTION
The interval between the bombs in a salvo is set by using the salvo bomb interval
switch and visualized on the salvo bomb interval display:
The switch will increase the displayed bomb interval from 00 to 20.
The displayed interval is the distance in tens of meters between each bomb in the
salvo. To obtain the salvo length, multiply the salvo bomb quantity by the salvo bomb
interval quantity.
Selecting 00 on the salvo bomb quantity will revert the bomb interval to the minimum
bomb release separation time of 10 ms.
If the salvo bomb quantity is set to 01, the salvo bomb interval has no effect.
Page 611
SECTION 26
26–2
AIR-TO-GROUND EMPLOYMENT
HIGH DRAG BOMBS
WEAPON SELECTION
The low drag bombs are selected by pressing the PCA weapon selection button
under the BFx window this sets the aircraft SNA in the air-to-ground pre-selected
sub-mode. In order to be able to select the bombs the HOTAS CNM command needs
to be in the N (neutre – neutral) position and the selective jettison switch in the N
position.
The S light on the PCA weapon selection button under the BFx window indicates that
the BF mode is selected.
As the SNA is in air-to-ground pre-selected sub-mode, the PCA top row displays the
weapons options and the VTH will stay in NAV mode.
Page 612
SECTION 26
26–2
AIR-TO-GROUND EMPLOYMENT
HIGH DRAG BOMBS
RANGING SENSOR SELECTION
If the SNA is in air-to-ground pre-selected or selected sub-mode, the PCA top row
displays the weapons options. These options allow to select the ranging sensor used
to determine the slant range to the desingated impact point.
2 sensors are available:
• TAS (Télémétrie air-sol – Radar ranging): The radar is used to determine the
distance to the impact point.
• RS (Radio-sonde – Radar altimeter): The radar altimeter is used to determine the
aircraft’s altitude over the ground. This information coupled with the aircraft attitude
is then used to determine the range to the impact point.
2 ranging sensors can be selected at one time, priority order is the following: RAS
then RS. If the priority sensor is unable to provide the slant range the information
from the second sensor is used.
Page 613
SECTION 26
26–2
AIR-TO-GROUND EMPLOYMENT
HIGH DRAG BOMBS
MASTER ARM
In order to release the bombs, the master arm switch needs to be in the armed
position.
The P light on the PCA weapon selection button under the BFx window indicates that
the master arm is armed, the bomb fuse is set to INST. or RET., the selected bomb
quantity is at least 01 and the aircraft load factor is greater than 0.4 G.
If the SNA is in selected sub-mode, the master arm is armed, the VTH BF mode
indication should be steady.
AIR-TO-GROUND SUB-MODES
Once a low drag bomb is selected on the PCA, the HOTAS weapon system forward
and aft commands are used to switch between the 3 BF sub-modes:
• Forward: Sets the SNA to selected sub-mode. The VTH is set to BF mode and the
PCA top row displays weapon options.
• Aft: If the SNA is in pre-selected or selected sub-mode, sets the SNA to memorized
sub-mode. The VTH is set to NAV mode and the PCA top row displays weapon
options.
If the SNA is in memorized sub-mode, sets the SNA to pre-selected mode. The
VTH is set to NAV mode and the PCA top row displays NAV options.
For more information about the SNA air-to-ground sub-modes and the HOTAS
weapon system command, see the NAVIGATION AND WEAPON SYSTEM HOTAS SNA
COMMANDS SUB-SECTION.
Page 614
SECTION 26
26–2
AIR-TO-GROUND EMPLOYMENT
HIGH DRAG BOMBS
AIMING
In order to drop the high drag bombs on the target, the aircraft needs to be
maneuvered to place the target between the aiming reticle and last bomb impact
point.
If the last bomb impact point is not visible in the bomb fall line due to the bomb salvo
being too short, the target needs to be placed under the aiming reticle.
Page 615
SECTION 26
26–2
AIR-TO-GROUND EMPLOYMENT
HIGH DRAG BOMBS
BOMB RELEASE
Pressing the MiCRoB second stage trigger designates the position of the aiming
reticle as the first bomb impact point. The bomb will start to release after a short
delay:
• Mark-82s, BLG-66: 0,3 seconds.
• BAP-100: 2 seconds.
The release bar is displayed just under the FPM and climbs toward it. The first bomb
is release when the release bar reaches the center of the FPM.
After the first bomb is released, the release bar moves just above the FPM and stays
displayed until the last bomb is released.
Page 616
SECTION 26
26–2
AIR-TO-GROUND EMPLOYMENT
HIGH DRAG BOMBS
FLYING THE PROFILE
The profile flown here will be CCPI starting a 350 ft and 500 kt.
Starting at 350 ft and 500 kt, fly toward the target.
Once the target is in sight, press the HOTAS weapon system command forward to
set the VTH to BF mode.
Page 617
SECTION 26
26–2
AIR-TO-GROUND EMPLOYMENT
HIGH DRAG BOMBS
Press and hold the MiCRoB second stage when the target is between the aiming
reticle and the last bomb impact point.
Hold the MiCRoB until the release bar is no longer displayed.
Page 618
SECTION 26
26–2
AIR-TO-GROUND EMPLOYMENT
HIGH DRAG BOMBS
Execute a sharp turn away from the target area.
Page 619
SECTION 26
26–2
AIR-TO-GROUND EMPLOYMENT
HIGH DRAG BOMBS
CCPI PI
FUSE SELECTION
While loaded under the aircraft, bomb fuses are kept unarmed to prevent excessive
collateral damage in case of jettison or involuntary release. They are armed at
release when they separate from their pylon.
The armed fuse is determined by the position of the fuse selection switch on the PPA.
The switch has 3 positions:
• INST. (Instantané – Instantaneous): Arms the nose and tail fuse.
• RET. (Retardé – Retarded): Arms the tail fuse.
• INERT. (Inerte – Inert): No fuse is armed, the bombs won’t explode.
The instantaneous fuse is more adapted to soft target like infantry and lightly armored
vehicles while the retarded fuse is more adapted to hardened targets like bunkers or
infrastructure.
BOMB QUANTITY SELECTION
The number of bombs released per salvo is set by using the salvo bomb quantity
switch and visualized on the salvo bomb quantity display.
The switch will increase the displayed bomb quantity from 00 to 18.
The Mirage SNA is unable to determine if the selected bomb quantity is higher than
the number of bombs loaded on this aircraft. In this situation the bomb will be
released as if the selected number of bombs were available and the salvo will most
likely land short from the target.
Selecting 00 on the salvo bomb quantity will prevent bomb release.
Page 620
SECTION 26
26–2
AIR-TO-GROUND EMPLOYMENT
HIGH DRAG BOMBS
BOMB INTERVAL SELECTION
The interval between the bombs in a salvo is set by using the salvo bomb interval
switch and visualized on the salvo bomb interval display.
The switch will increase the displayed bomb interval from 00 to 20.
The displayed interval is the distance in tens of meters between each bomb in the
salvo. To obtain the salvo length, multiply the salvo bomb quantity by the salvo bomb
interval quantity.
Selecting 00 on the salvo bomb quantity will revert the bomb interval to the minimum
bomb release separation time of 10 ms.
If the salvo bomb quantity is set to 01, the salvo bomb interval has no effect.
WEAPON SELECTION
The low drag bombs are selected by pressing the PCA weapon selection button
under the BFx window this sets the aircraft SNA in the air-to-ground pre-selected
sub-mode. In order to be able to select the bombs the HOTAS CNM command needs
to be in the N (neutre – neutral) position and the selective jettison switch in the N
position.
The S light on the PCA weapon selection button under the BLx window indicates that
the BL mode is selected.
As the SNA is in air-to-ground pre-selected sub-mode, the PCA top row displays the
weapons options and the VTH will stay in NAV mode.
Page 621
SECTION 26
26–2
AIR-TO-GROUND EMPLOYMENT
HIGH DRAG BOMBS
PI MODE SELECTION
If the SNA is in air-to-ground pre-selected or selected sub-mode, the PCA top row
displays the weapons options. These options allow to select the PI mode for the
bombs.
With this option selected and the SNA in air-to-ground selected sub-mode, the VTH
will show the BL PI mode.
If the current DEST BUT does not have a BAD set, “PI” will be displayed on the VTH
and the VTH will stay in BL mode.
RANGING SENSOR SELECTION
If the SNA is in air-to-ground pre-selected or selected sub-mode, the PCA top row
displays the weapons options. These options allow to select the ranging sensor used
to determine the slant range to the desingated impact point.
2 sensors are available:
• TAS (Télémétrie air-sol – Radar ranging): The radar is used to determine the
distance to the impact point.
• RS (Radio-sonde – Radar altimeter): The radar altimeter is used to determine the
aircraft’s altitude over the ground. This information coupled with the aircraft attitude
is then used to determine the range to the impact point.
Page 622
SECTION 26
26–2
AIR-TO-GROUND EMPLOYMENT
HIGH DRAG BOMBS
• ZBI (Altitude barométrique – Baro-altimetric ranging): The altitude difference
between the aircraft and the impact point altitude is used to know the aircraft’s
altitude over the impact point. This information coupled with the aircraft attitude is
then used to determine the range to the impact point.
2 ranging sensors can be selected at one time, priority order is the following: RAS
then RS then ZBI. If the priority sensor is unable to provide the slant range the
information from the second sensor is used.
MASTER ARM
In order to release the bombs, the master arm switch needs to be in the armed
position.
The P light on the PCA weapon selection button under the BFx window indicates that
the master arm is armed, the bomb fuse is set to INST. or RET., the selected bomb
quantity is at least 01 and the aircraft load factor is greater than 0.4 G.
If the SNA is in selected sub-mode, the master arm is armed, the VTH BF mode
indication should be steady.
AIR-TO-GROUND SUB-MODES
Once a low drag bomb is selected on the PCA, the HOTAS weapon system forward
and aft commands are used to switch between the 3 BL sub-modes:
• Forward: Sets the SNA to selected sub-mode. The VTH is set to BL mode and the
PCA top row displays weapon options.
• Aft: If the SNA is in pre-selected or selected sub-mode, sets the SNA to memorized
sub-mode. The VTH is set to NAV mode and the PCA top row displays weapon
options.
If the SNA is in memorized sub-mode, sets the SNA to pre-selected mode. The
VTH is set to NAV mode and the PCA top row displays NAV options.
For more information about the SNA air-to-ground sub-modes and the HOTAS
weapon system command, see the NAVIGATION AND WEAPON SYSTEM HOTAS SNA
COMMANDS SUB-SECTION.
Page 623
SECTION 26
26–2
AIR-TO-GROUND EMPLOYMENT
HIGH DRAG BOMBS
PI NAVIGATION FIX
In order to perform a navigation fix on the PI, the SNA needs to be in air-to-ground
selected sub-mode.
The weapon system paddle needs to be pressed when the designation diamond is
over the PI surface feature. The PI can be designed as many times as desired to
refine the navigation fix.
NOTE
Due to INS drift, the position of the PI might have drifted from its origin
al position, the surface feature is what’s need to be designated, not the
where the INS is placing the PI.
The PI navigation fix in not necessary but will greatly improve the accuracy of the
attack by reducing the accumulated INS drift.
Once the once the navigation fix has been performed, or the PI has been overflown,
the SNA is locked in the selected sub-mode, the only way to exit it is to de-select the
bombs or select another weapon.
The ranging systems limitation needs to be taken into account when performing the
designation. For more information, see the RADAR SECTION.
Page 624
SECTION 26
26–2
AIR-TO-GROUND EMPLOYMENT
HIGH DRAG BOMBS
GUIDANCE SYMBOLOGY
Once the once the navigation fix has been performed, or the PI has been overflown,
the heading error indicator indicates the direction of the intended impact point.
The heading error indicator will guide the aircraft toward the impact point until 10 nm,
below that, the BUT position indicator displays the position of the intended impact
point.
AIMING
In order to drop the high drag bombs on the target, the aircraft needs to be
maneuvered to place the target between the aiming reticle and last bomb impact
point.
If the last bomb impact point is not visible in the bomb fall line due to the bomb salvo
being too short, the target needs to be placed under the aiming reticle.
Page 625
SECTION 26
26–2
AIR-TO-GROUND EMPLOYMENT
HIGH DRAG BOMBS
BOMB RELEASE
Pressing the MiCRoB second stage trigger designates the position of the aiming
reticle as the first bomb impact point. The bomb will start to release after a short
delay:
• Mark-82s, BLG-66: 0,3 seconds.
• BAP-100: 2 seconds.
The release bar is displayed just under the FPM and climbs toward it. The first bomb
is release when the release bar reaches the center of the FPM.
After the first bomb is released, the release bar moves just above the FPM and stays
displayed until the last bomb is released.
Page 626
SECTION 26
26–2
AIR-TO-GROUND EMPLOYMENT
HIGH DRAG BOMBS
FLYING THE PROFILE
The profile flown here will be CCPI PI starting a 400 ft and 500 kt.
Starting at 400 ft and 500 kt, fly toward the PI.
Once the PI is in sight, press the HOTAS weapon system command forward to set
the VTH to BF PI mode.
Page 627
SECTION 26
26–2
AIR-TO-GROUND EMPLOYMENT
HIGH DRAG BOMBS
Place the designation diamond over surface feature and press the HOTAS weapon
system paddle to execute a navigation fix.
Once satisfied with the navigation fix, follow the heading error indicator toward the
intended impact point.
Page 628
SECTION 26
26–2
AIR-TO-GROUND EMPLOYMENT
HIGH DRAG BOMBS
Press and hold the MiCRoB second stage when the target is between the aiming
reticle and the last bomb impact point.
Hold the MiCRoB until the release bar is no longer displayed.
Page 629
SECTION 26
26–2
AIR-TO-GROUND EMPLOYMENT
HIGH DRAG BOMBS
Execute a sharp turn away from the target area.
NAVIGATION FIX VALIDATION
Once the aircraft is out of the target area, the PI navigation fix can be accepted or
rejected. The navigation fix can be reviewed on the PCN just like a standard overfly
or radar navigation fix.
Page 630
SECTION 26
26–2
AIR-TO-GROUND EMPLOYMENT
HIGH DRAG BOMBS
DEGRADED EMPLOYMENT
WORK IN PROGRESS
Page 631
SECTION 26
26–3
AIR-TO-GROUND EMPLOYMENT
ROCKETS AND GUNS
26 – 3 - ROCKETS AND GUNS
INTRODUCTION
Since rockets and guns operate in the same way, they share the same delivery mode:
Calcul continu du point d’impact – CCPI (Continuously calculated impact point –
CCIP) delivery mode: The pilot places the VTH symbology over the impact point and
uses the MiCRoB trigger to fire the rockets or guns.
This delivery mode differs from high drag bombs CCPI in the way the symbology is
presented to the pilot, and in the domain of employment: Rocket and guns CCPI is
to be used in a dive at low altitude.
The overfly of the target as well as low altitude required by this delivery method
expose the aircraft to small arms fire and short-range air-defenses, it is important to
take them into account and avoid troop concentration as much as possible.
Careful planning of the approach is also needed to reduce the time the aircraft is
exposed to enemy fire.
The rockets and guns delivery method inaccuracy will mainly come from pilot error at
release and weapon dispersion. Since the target needs to be acquired visually, INS
drift is not a factor.
Either TAS or RS ranging methods can be used depending on the terrain.
Page 632
SECTION 26
26–3
AIR-TO-GROUND EMPLOYMENT
ROCKETS AND GUNS
SYMBOLOGY
The following symbology is relative to the rocket and air-to-ground guns employment.
It is representative the symbology displayed on the VTH and VTB with the SNA in
air-to-ground selected sub-mode and the rockets or air-to-ground guns selected.
For more information on the VTH and VTB symbology, see the HEAD-UP DISPLAY AIRTO-GROUND MODE SUB-SECTION and RADAR SECTION.
VTH
RK AND CAS SUB-MODE (Mode RK et CAS):
Displayed when the VTH is in rocket (RK – roquette) air-to-ground submode. Steady indicates that the rockets are ready, flashing that the master
arm is off.
Displayed when the VTH is in air-to-ground gun (CAS – canon air-sol) submode. Steady indicates that the rockets are ready, flashing that the master
arm is off.
AIR-TO-GROUND RANGE (Distance air/sol):
Displayed when the radar has a good lock on the ground in TAS mode,
indicates the slant range to the impact point. Not displayed if radar
altimeter (RS) is the primary ranging sensor.
Page 633
SECTION 26
26–3
AIR-TO-GROUND EMPLOYMENT
ROCKETS AND GUNS
GUNS/ROCKET FIRE DOMAIN AND AIMING RETICLE (Domaine de tir et réticule de tir
canons/roquettes):
The point inside the circle indicates the instantaneous impact point for
the rockets or guns.
The circle represents the firing domain for the rockets or guns. A full
circle indicate that the aircraft is out of range.
The circle starts to unwinds counter-clockwise when the aircraft enters
the firing domain for the weapon: 2700 m for the rockets, 2400 m for
the guns.
The 9 o’clock position indicates the maximum range for the selected
weapon: 2400 m for the rockets and 1800 m for the guns.
The 6 o’clock position indicates the optimum range for the selected
weapon: 1800 m for the rockets and 1200 m for the guns.
The 3 o’clock position indicates the minimum range for the selected
weapon: 1200 m for the rockets and 600 m for the guns.
SAFETY BAR AND SAFETY CROSS (Bare de sécuritée et croix de sécuritée):
The safety bar is displayed at the bottom of the VTH when the
aircraft approach the weapon blast zone or the safety height, it
moves up to the aiming reticle. It represents the remaining time
before the pilot needs to execute a 5G pull out of the blast zone
and above the ground safety height.
The safety cross is displayed when the safety bar reaches the
designation diamond, it indicates that the pilot needs to execute
an immediate 5G pull to stay out of the weapon blast zone and
above the ground safety height.
Page 634
SECTION 26
26–3
AIR-TO-GROUND EMPLOYMENT
ROCKETS AND GUNS
VTB
RADAR ALTITUDE (Hauteur radiosonde):
Displayed if the radar is in air-to-ground mode, indicates the altitude
above the ground in feet. Moved at the center of the VTB, just under the
aircraft model.
Displayed in red if the radar altitude is under the selected minimum
altitude.
RADAR MODE (Mode radar):
Indicates that the radar is in TAS mode.
Flashes to indicate that the radar pre-heating sequence is still ongoing.
Page 635
SECTION 26
26–3
AIR-TO-GROUND EMPLOYMENT
ROCKETS AND GUNS
PROFILES
The rockets and guns profiles are exactly the same, the only difference is the firing
range.
CCPI DIVE-DIVE
1
2
10 000 ft – 40 000 ft
AGL
20° - 30°
3
4
PROFILE
1. Starting between 10 000 ft and 40 000 ft level.
2. Execute a 20° to 30° dive toward the target.
Keep the speed high during the dive but no faster than Mach 0.95.
3. Fire the rockets or guns between the maximum and minimum range.
4. Before entering the blast area, pull out of the dive and execute a sharp turn out of
the target area.
DIVE DISTANCE
Altitude
10 000 ft
20 000 ft
30 000 ft
40 000 ft
10 000 ft
20 000 ft
30 000 ft
40 000 ft
Dive angle
20°
30°
Page 636
Distance
4,5 nm
9 nm
13,5 nm
18 nm
3 nm
5,5 nm
8,5 nm
11,5 nm
SECTION 26
26–3
AIR-TO-GROUND EMPLOYMENT
ROCKETS AND GUNS
EMPLOYMENT
In order to destroy a target rockets or the guns, multiple steps have to be followed.
ROCKETS
SALVO QUANTITY
The rocket salvo quantity is set on the pods by the ground crew. The salvo quantity
can be visualized on the kneeboard “Ground adjustment option” page. It can be
selected in the mission editor or using the kneeboard key command (right shift + right
alt + 1 by default) while on the ground with the engine off.
SALVO SETTING
The salvo firing for the rockets is set using the weapon salvo selection button on the
PPA.
2 yellow lights display the selected mode:
• TOT (Total): The rockets fire as long as the trigger is pressed.
• PAR (Partiel – Partial): The rockets fire in salvo of 1, 3 or 6 rockets.
Page 637
SECTION 26
26–3
AIR-TO-GROUND EMPLOYMENT
ROCKETS AND GUNS
WEAPON SELECTION
The rockets are selected by pressing the PCA weapon selection button under the RK
or RKF window, this sets the aircraft SNA in the air-to-ground pre-selected sub-mode.
In order to be able to select the bombs, the HOTAS CNM command needs to be in
the N (neutre – neutral) position and the selective jettison switch in the N position.
The S light on the PCA weapon selection button under the RK or RKF window
indicates that the RK mode is selected.
As the SNA is in air-to-ground pre-selected sub-mode, the PCA top row displays the
weapons options and the VTH will stay in NAV mode.
Page 638
SECTION 26
26–3
AIR-TO-GROUND EMPLOYMENT
ROCKETS AND GUNS
PYLON SELECTION
If the SNA is in air-to-ground pre-selected or selected sub-mode, the PCA top row
displays the weapons options. If the aircraft is loaded with the rocket pods of the
same type on the inboard and outboard wing pylons, these options allow the selection
of the pylons to be fired.
2 options are selectable:
• EXT (Exterieur – Outboard): The outboard pylons are selected for firing.
• INT (Intérieur – Inboard): The inboard pylons are selected for firing.
The pylon selection is initialized at inboard. Both pylons can be selected at the same
time and at least 1 needs to be selected.
Page 639
SECTION 26
26–3
AIR-TO-GROUND EMPLOYMENT
ROCKETS AND GUNS
RANGING SENSOR SELECTION
If the SNA is in air-to-ground pre-selected or selected sub-mode, the PCA top row
displays the weapons options. These options allow to select the ranging sensor used
to determine the slant range to the desingated impact point.
2 sensors are available:
• TAS (Télémétrie air-sol – Radar ranging): The radar is used to determine the
distance to the impact point.
• RS (Radio-sonde – Radar altimeter): The radar altimeter is used to determine the
aircraft’s altitude over the ground. This information coupled with the aircraft attitude
is then used to determine the range to the impact point.
2 ranging sensors can be selected at one time, priority order is the following: RAS
then RS. If the priority sensor is unable to provide the slant range the information
from the second sensor is used.
Page 640
SECTION 26
26–3
AIR-TO-GROUND EMPLOYMENT
ROCKETS AND GUNS
MASTER ARM
In order to fire the rockets, the master arm switch needs to be in the armed position.
The P light on the PCA weapon selection button under the RK or RKF window
indicates that the master arm is armed.
If the SNA is in selected sub-mode, the master arm is armed, the VTH RK mode
indication should be steady.
AIR-TO-GROUND SUB-MODES
Once a low drag bomb is selected on the PCA, the HOTAS weapon system forward
and aft commands are used to switch between the 3 RK sub-modes:
• Forward: Sets the SNA to selected sub-mode. The VTH is set to RK mode and the
PCA top row displays weapon options.
• Aft: If the SNA is in pre-selected or selected sub-mode, sets the SNA to memorized
sub-mode. The VTH is set to NAV mode and the PCA top row displays weapon
options.
If the SNA is in memorized sub-mode, sets the SNA to pre-selected mode. The
VTH is set to NAV mode and the PCA top row displays NAV options.
For more information about the SNA air-to-ground sub-modes and the HOTAS
weapon system command, see the NAVIGATION AND WEAPON SYSTEM HOTAS SNA
COMMANDS SUB-SECTION.
Page 641
SECTION 26
26–3
AIR-TO-GROUND EMPLOYMENT
ROCKETS AND GUNS
AIMING
In order to fire the rockets on the target, the aircraft needs to be maneuvered to place
the target under the aiming reticle.
Page 642
SECTION 26
26–3
AIR-TO-GROUND EMPLOYMENT
ROCKETS AND GUNS
EMPLOYMENT DOMAIN
In order to fire the rocket in the best condition, they need to be fired at the correct
range. The rocket employment domain is displayed around the impact point and
indicate the position of the aircraft relative to the rocket firing domain:
• A full circle indicates that the target is out of range.
• The circle starts to unwinds counter-clockwise when the aircraft enters the rockets
firing domain: 2700 meters.
• The 9 o’clock position indicate the maximum range: 2400 meters.
• The 6 o’clock position indicate the optimum range: 1800 meters.
• The 3 o’clock position indicate the minimum range: 1200 meters.
Page 643
SECTION 26
26–3
AIR-TO-GROUND EMPLOYMENT
ROCKETS AND GUNS
ROCKET FIRING
Pressing the MiCRoB second stage trigger instantly fires the rockets according to the
PCA salvo selection and the rocket pod salvo setting.
Page 644
SECTION 26
26–3
AIR-TO-GROUND EMPLOYMENT
ROCKETS AND GUNS
FLYING THE PROFILE
The profile flown here will be CCPI starting a 12 000 ft with a 30° dive to the target.
Starting at 12 000 ft, fly to around 3,5 nm from the target.
Enter a 30° dive and press the HOTAS weapon system command forward to set the
VTH to RK mode.
Page 645
SECTION 26
26–3
AIR-TO-GROUND EMPLOYMENT
ROCKETS AND GUNS
Place the aiming reticle over the target and wait for the employment domain circle to
reach the maximum range position.
Between the maximum and minimum range, press the MiCRoB second stage to fire
the rockets.
Page 646
SECTION 26
26–3
AIR-TO-GROUND EMPLOYMENT
ROCKETS AND GUNS
Execute a sharp turn away from the target area.
Page 647
SECTION 26
26–3
AIR-TO-GROUND EMPLOYMENT
ROCKETS AND GUNS
GUNS
SALVO DURATION
The gun salvo duration is set by the ground crew. The salvo duration can be
visualized on the kneeboard “Ground adjustment option” page. It can be selected in
the mission editor or using the kneeboard key command (right shift + right alt + 2 by
default) while on the ground with the engine off.
SALVO SETTING
The salvo firing or the guns is set using the weapon salvo selection button on the
PPA.
2 yellow lights display the selected mode:
• TOT (Total): The guns fire as long as the trigger is pressed.
• PAR (Partiel – Partial): The guns fire in salvo of 0,5 or 1 second.
Page 648
SECTION 26
26–3
AIR-TO-GROUND EMPLOYMENT
ROCKETS AND GUNS
WEAPON SELECTION
The air-to-ground guns are selected by pressing the PCA CAS selection button, this
sets the aircraft SNA in the air-to-ground pre-selected sub-mode. In order to be able
to select the bombs, the HOTAS CNM command needs to be in the N (neutre –
neutral) position and the selective jettison switch in the N position.
The S light on the PCA CAS selection button indicates that the CAS mode is selected.
As the SNA is in air-to-ground pre-selected sub-mode, the PCA top row displays the
weapons options and the VTH will stay in NAV mode.
FIRING RATE SELECTION
If the SNA is in air-to-ground pre-selected or selected sub-mode, the PCA top row
displays the weapons options. These options allow the selection of the guns firing
rate.
2 options are selectable:
• LEN (Lent – Low): 1200 round/min.
• RAP (Rapide – High): 1800 round/min.
The firing rate is initialized at high. Low firing rate is preferred when using the guns
in air-to-ground.
Page 649
SECTION 26
26–3
AIR-TO-GROUND EMPLOYMENT
ROCKETS AND GUNS
RANGING SENSOR SELECTION
If the SNA is in air-to-ground pre-selected or selected sub-mode, the PCA top row
displays the weapons options. These options allow the selection of the ranging
sensor used to determine the slant range to the desingated impact point.
2 sensors are available:
• TAS (Télémétrie air-sol – Radar ranging): The radar is used to determine the
distance to the impact point.
• RS (Radio-sonde – Radar altimeter): The radar altimeter is used to determine the
aircraft’s altitude over the ground. This information coupled with the aircraft attitude
is then used to determine the range to the impact point.
2 ranging sensors can be selected at one time, priority order is the following: TAS
then RS. If the priority sensor is unable to provide the slant range the information
from the second sensor is used.
Page 650
SECTION 26
26–3
AIR-TO-GROUND EMPLOYMENT
ROCKETS AND GUNS
MASTER AND GUN ARM
In order to fire the gun, the master arm and the gun safety switches need to be in the
armed position.
The P light on the PCA CAS selection button indicates that the master arm and gun
safety are armed and the SNA is in air-to-ground selected mode.
If the SNA is in selected sub-mode, the master arm and gun safety are armed, the
VTH CAS mode indication should be steady.
AIR-TO-GROUND SUB-MODES
Once the air-to-ground gun is selected on the PCA, the HOTAS weapon system
forward and aft commands are used to switch between the 3 CAS sub-modes:
• Forward: Sets the SNA to selected sub-mode. The VTH is set to CAS mode and
the PCA top row displays weapon options.
• Aft: If the SNA is in pre-selected or selected sub-mode, sets the SNA to memorized
sub-mode. The VTH is set to NAV mode and the PCA top row displays weapon
options.
If the SNA is in memorized sub-mode, sets the SNA to pre-selected mode. The
VTH is set to NAV mode and the PCA top row displays NAV options.
For more information about the SNA air-to-ground sub-modes and the HOTAS
weapon system command, see the NAVIGATION AND WEAPON SYSTEM HOTAS SNA
COMMANDS SUB-SECTION.
Page 651
SECTION 26
26–3
AIR-TO-GROUND EMPLOYMENT
ROCKETS AND GUNS
AIMING
In order to fire the guns on the target, the aircraft needs to be maneuvered to place
the target under the aiming reticle.
Page 652
SECTION 26
26–3
AIR-TO-GROUND EMPLOYMENT
ROCKETS AND GUNS
EMPLOYMENT DOMAIN
In order to fire the guns in the best condition, they need to be fired at the correct
range. The guns employment domain is displayed around the impact point and
indicate the position of the aircraft relative to the air-to-ground guns firing domain.
• A full circle indicates that the target is out of range.
• The circle starts to unwinds counter-clockwise when the aircraft enters the air-toground guns firing domain: 2100 meters.
• The 9 o’clock position indicate the maximum range: 1800 meters.
• The 6 o’clock position indicate the optimum range: 1200 meters.
• The 3 o’clock position indicate the minimum range: 600 meters.
Page 653
SECTION 26
26–3
AIR-TO-GROUND EMPLOYMENT
ROCKETS AND GUNS
GUNS FIRING
Pressing the MiCRoB second stage trigger instantly fires the guns according to the
PCA salvo and firing rate selection.
Page 654
SECTION 26
26–3
AIR-TO-GROUND EMPLOYMENT
ROCKETS AND GUNS
FLYING THE PROFILE
The profile flown here will be CCPI starting a 12 000 ft with a 20° dive to the target.
Starting at 12 000 ft, fly to around 5,5 nm from the target.
Enter a 20° dive and press the HOTAS weapon system command forward to set the
VTH to CAS mode.
Page 655
SECTION 26
26–3
AIR-TO-GROUND EMPLOYMENT
ROCKETS AND GUNS
Place the aiming reticle over the target and wait for the employment domain circle to
reach the maximum range position.
Between the maximum and minimum range, press the MiCRoB second stage to fire
the guns.
Page 656
SECTION 26
26–3
AIR-TO-GROUND EMPLOYMENT
ROCKETS AND GUNS
Execute a sharp turn away from the target area.
Page 657
SECTION 26
26–3
AIR-TO-GROUND EMPLOYMENT
ROCKETS AND GUNS
DEGRADED EMPLOYMENT
WORK IN PROGRESS
Page 658
SECTION 27
AIRCRAFT PROCEDURES
AIRCRAFT PROCEDURES
Page 659
SECTION 27
27–1
AIRCRAFT PROCEDURES
PILOT MEMO
27 – 1 - PILOT MEMO
STANDARD CONFIGURATIONS
CONFIGURATION
DETAILED PAYLOAD
Clean aircraft
Full internal fuel, gun ammo, drag chute and countermeasure (no éclair
pod)
Standard air-to-air
Clean + 2 Super 530, 2 MAGIC II and 1 RPL-522
Clean + 2 MAGIC II, 4 Mk-82 and 2 RPL-541/542
Standard air-to-ground
OR
Clean + 2 MAGIC II, 2 GBU-12 and 2 RPL-541/542
TAKE-OFF – ISA METEOROLOGICAL CONDITIONS
CONFIGURATION
FUEL (t)
GROSS
WEIGHT (t)
EXPECTED VMAXRTO
JX
(kt)
Clean aircraft
3.1
11.0
0.68
Standard air-to-air
4.1
13.2
0.55
Standard air-to-ground
6.3
16.0 or 15.7 0.44 – 0.46
VR (kt)
VLOF (kt)
145
120
155
140
125
155
130
150
175
Remarks: Vmaxrto is the go/no-go speed, the max speed up to which it is still
possible to reject take-off. Above Vmaxrto the pilot must either take off or eject.
Vmaxrto is not called V1 because it may occur above Vr. Vmaxrto values above
assume a dry standard NATO runway (2400m) without brake chute use.
Page 660
SECTION 27
27–1
AIRCRAFT PROCEDURES
PILOT MEMO
CLIMB – BEST EFFICIENCY
ECONOMIC
(MIL THRUST)
HIGH PERFORMANCE
(MAX AB THRUST)
CONFIGURATION
CLIMB UP TO
BEST CAS
(kt)
BEST MACH
BEST CAS
(kt)
BEST MACH
Clean aircraft
FL 400
500
0.90
600
0.95
Standard air-to-air
FL 350
460
0.85
550
0.90
Standard air-to-ground
FL 300
440
0.80
550
0.90
Remarks: use best CAS (IAS) until best Mach is reached; then use best Mach for
the remaining of the climb.
For MIL climb, cut AB off at 300kt after take-off (AB is mandatory for all take offs with
this aircraft, as per SOPs/safety consideration)
LANDING – REMAINING FUEL/MLW
MAXIMUM REMAINING FUEL (t)
CONFIGURATION
FOR NORMAL MLW
FOR UPRATED MLW
Clean aircraft
2.05
4.45
Standard air-to-air
0.85
3.25
Standard air-to-air (all missiles shot)
1.57
3.97
Standard air-to-ground (4 Mk-82)
< 0.5 (min. res.)
2.6
Standard air-to-ground (2 GBU-12)
0.5 (min. res.)
2.9
Standard air-to-ground (all bombs released)
1.1
3.5
Remarks: uprated MLW is a non-standard procedure which should be avoided to
minimize risks and aircraft wear (structural, gear, brakes, tyres...)
When an uprated MLW landing has to be performed, it REQUIRES extra precautions:
gentle sink rate at touch down, long runway, parachute use mandatory if > 1t over
normal MLW... etc.
Page 661
SECTION 27
27–2
AIRCRAFT PROCEDURES
CHECKLISTS
27 – 2 - CHECKLISTS
Below you will find the procedures that must be followed before and after a flight. The
procedures listed here are a subset of the ones followed by the pilots of the actual
aircraft.
PREFLIGHT
LEFT CONSOLE
DESCRIPTION
POSITION
1
FBW channel 5 switch
Off (cover closed)
2
FBW and AP test switches
Off (cover closed
3
Emergency afterburner cut-off switch
Off (cover closed)
4
Emergency oil switch
Off (cover closed)
5
Engine computer re-arming and emergency switch
Norm (cover closed)
6
External fuel tank dump button
Cover closed
7
Radar ground emission switch
Off
8
Emergency trim
N
9
Aircraft sound configuration panel
As desired
10 Inflight restart magnetic switch
Off
11 Throttle
Stop position
12 Radar power mode knob
A
13 Emergency fuel switch
Auto
14 Swoops operation switch
Auto
15 Inlet cones operation switch
Auto
16 Slats position switch
Auto
17 External light switches
A
18 Brake system switch
1 (cover closed)
19 Recorder switch
A
20 Landing and taxi light switch
A
21 Police light switch
Off
22 V/UHF radio operation mode switch
0
23 UHF radio operation mode switch
AR
Page 662
SECTION 27
27–2
AIRCRAFT PROCEDURES
CHECKLISTS
LEFT WALL
DESCRIPTION
POSITION
24 Inflight refueling switch
Arrêt
25 Brake chute lever
Forward
26 Canopy fracture lever
Rearward
LEFT VERTICAL PANEL
DESCRIPTION
POSITION
27 Gear handle
Down
28 Emergency FBW gain switch
Norm (cover closed)
29 FBW mode switch
As desired
30 Gun safety switch
Safe (cover closed)
31 Emergency gear handle
Normal (vertical position)
FRONT DASH
DESCRIPTION
POSITION
32 Selective jettison switch
Off (cover closed)
33 Master arm switch
Off
34 Backup attitude indicator
Caged
35 Spin switch
Norm
36 Main attitude indicator pole switch
N
37 VTB power switch
A
38 VTH power switch
A
39 PCTH radar altimeter switch
A
40 PPA fuse switch
INERT.
41 Feeder tanks intercom control
Closed (vertical)
RIGHT VERTICAL PANEL
DESCRIPTION
POSITION
42 Battery switch
A
43 Transformer-rectifier switch
M
44 Alternator 1 switch
M
45 Alternator 2 switch
M
46 QRA switch
Off
Page 663
SECTION 27
27–2
AIRCRAFT PROCEDURES
CHECKLISTS
RIGHT WALL
DESCRIPTION
POSITION
47 Canopy lever
Open
RIGHT CONSOLE
DESCRIPTION
POSITION
48 Electric pump switch
Off
49 Warning sound switch
Off
50 Pitot heat switch
Off (cover open)
51 IFF interrogation mode selector
Off
52 Jammer operation mode switch
VEI.
53 Countermeasure power and test switches
A
54 Decoy dispenser program selector
A
55 Decoy dispenser operation mode switch
A.
56 VOR power switch
A
57 TACAN mode switch
Off
58 Emergency attitude and heading switch
A
59 PSM mode selector knob
AR
60 PSM operational mode selector knob
N
61 Starter fuel pump switch
Off (left)
62 Ignition/ventilation switch
G or D
63 Boost fuel pump switches
Off (left)
64 Fuel shut-off valve switch
Closed (left and cover open)
NOTES
Page 664
SECTION 27
27–2
AIRCRAFT PROCEDURES
CHECKLISTS
RAMP-START WITH GROUND POWER
DESCRIPTION
POSITION
1
Battery switch
M
2
V/UHF radio operation mode switch
FF
3
UHF radio operation mode switch
M
4
External lights switches
Navigation to FORT
5
Ground power
Connect
6
INS
Start the normal alignment
7
Emergency attitude and heading switch
AUTO and uncage the backup attitude indicator
8
VTH power switch
M
9
PCTH radar altimeter switch
M and set the altitude display
selector switch as desired
10 VTB power switch
M
11 DETOT fuel amount
Set
12 Lights test switch
1 and 2
13 Electric pump switch
TEST then A
14 INS
Wait for alignment then set to
NAV
15 Canopy
Closed and secured (canopy
lever forward)
16 Fuel shut-off valve switch
Open (cover closed)
17 Boost fuel pump switches
M
18 Starter button cover
Open and starter fuel pump to
on
19 Start button
Press and hold for 1 second
then close the starter button
cover
20 Throttle
Once RPM reaches 10%, idle
position
21 Alarm panel
Once RPM reaches 48%,
check HUILE and T7 off
22 Alarm panel
Check HYD.1 and HYD.2 off
23 Ground power
Disconnect and check ALT.1
and ALT.2 off
24 Emergency pump switch
Auto, check HYDS off
25 IFF master mode knob
SBY
26 Radar power mode knob
SIL
Page 665
SECTION 27
27–2
AIRCRAFT PROCEDURES
CHECKLISTS
27 CDVE and PA tests
Execute short tests
28 External light switches
Anti-collision to FORT,
formation as desired
29 Controls
Wipe
30 Air-brakes
Test and check configuration
panel
31 Slat position switch
SORTIS then AUTO
32 Pitot heat switch
On (cover closed)
33 Warning sound switch
On
34 Alarm panel
All lights off
NOTES
Page 666
SECTION 27
27–2
AIRCRAFT PROCEDURES
CHECKLISTS
RAMP-START WITHOUT GROUND POWER
Description
Position
1
Battery
ON
2
Radios (both)
ON & Set
3
If MP flight, Radio Check
DONE
4
F2 view external preflight check - Payload & skin
DONE - CHECKED
5
Altimeter Pressure setting
SET to QFE (or QNH)
6
Alarm panel and Fire Warning Lights
TEST
7
IFF
SET (as briefed)
8
Emergency Hydraulic pump
TEST then OFF
9
FS emergency/parking brake pressure
CHECK > 80b (EP if req.)
10
"Ready for startup"
Radio CALL (Leader/ATC)
NOTES
Page 667
SECTION 27
27–2
AIRCRAFT PROCEDURES
CHECKLISTS
ENGINE START SEQUENCE (NO GROUND POWER)
Description
Position
1
Parking Brake
SET
2
NAV and ANTICOL Strob lights
ON
3
Throttle
CHECK STOP
4
RPM and CALC warning/caution lights
CHECK Both OFF
5
MASTER WARNING/CAUTION - PANNE/PANNE
ACKNOWLEDGED Indicat. OFF
6
Canopy
CLOSED or AJAR
7
Fuel Shut-Off Valve Switch
OPEN & Cover CLOSED
8
Ignition/Vent selector
G or D as requ. (odd/even
day)
9
Starting fuel pump 'POMPE DEM’ - BP warning light
ON - warning OFF
10
Starter button
PRESS 1 SEC.
11
When RPM 'N' > 11%, Throttle
IDLE
12
When RPM 'N' = Idle (~48%), HUILE and T7
warning lights
CHECK Both OFF
13
T7 temperature
CHECK < 950°C
/!\
If any incident occurs during start sequence, or Tt7
peaks > 950°C:
ABORT START UP
14
Alternators switches - ALT.1 & ALT.2 cautions lights
ONLINE - cautions OFF
15
Normal electric converter - TR caution light
ON - caution OFF
16
Fuel pumps “G” & “D” - BP.G & BP.D caution lights
ON - cautions OFF
17
HYD pressure gauge - HYD.1 & HYD.2 caution
lights
CHECK - cautions OFF
18
Emergency Hydraulic pump - HYD.S warning light
AUTO - warning OFF
NOTES
Page 668
SECTION 27
27–2
AIRCRAFT PROCEDURES
CHECKLISTS
POST ENGINE START SEQUENCE (NO GROUND POWER)
Description
Position
1
P MIS & P MAG (when appropriate)
Blinking - STOP if req.
2
HDD (Radar display)
ON
3
Payload
CHECK (PRES switch)
4
A/A-CHARGES Switch - CONF caution light
SET - OFF
5
INS (PSM panel)
SET to VEILLE
6
00 PREP WPT Position & Altitude
SET Proper Values
7
INS (PSM panel)
SET to ALN
8
INS Alignment
START (VAL button)
9
Fuel Panel Qty & Xfeed closed - BINGO value
CHECK - INSERTED
10
Radar main switch
PCH
11
Radar Warm-Up (HDD)
CHECK 'P' Blinking
12
HUD
ON
13
Defensive suite (incl. Eclair) & IFF Interrogator
SET (Pilot's discretion)
14
VOR/ILS
SET & ON
15
TACAN
SET & A/A or T/R
16
CAP/HORIZON GCS switch (right console)
CGM+H.SEC
(middle position)
17
Auxiliary Attitude Indicator
UNCAGED - No Flag
18
INS Waypoints 01 to 20 (depending on mission)
ENTER and/or CHECK
19
INS Alignment
CHECK Completed
('PRET' light)
20
INS (PSM panel)
SET to NAV
21
ANEMO heater switch - ANEMO caution light
ON - caution OFF
22
Flight Controls - Controls Surfaces
TEST - Check
23
AP BIT test
DONE & Green Result
24
FBW short ('C') BIT test
DONE & Green Result
25
SEC CALC & SEC CARB emergency modes tests
DONE & Passed OK
26
Airbrakes and Slats extension
TEST
27
Secondary brakes circuit & Antiskid loss
TEST
28
"Ready for taxi"
Radio CALL
(Leader/ATC)
Page 669
SECTION 27
27–2
AIRCRAFT PROCEDURES
CHECKLISTS
TAXIING
Description
Position
1
Parking Brake
RELEASE
2
PARK caution light
CHECK Off
3
Warning Sounds switch
ON
4
Caution/Warning Lights panel*
CHECK All Off
5
NWS
ACTIVATE
6
DIRAV advisory light
ON
7
NWS Travel
CHECK
8
Landing lights
TAXI
9
Formation lights
As req.
10
Radio-altimeter
ON ('SEL H')
11
Radio-altimeter warning value ('HG')
SET
* The CAB warning light, indicating that the canopy is open, may remain lit at this
stage.
You can now increase throttle until the aircraft rolls out. Do not exceed 20 knots
ground speed
NOTES
Page 670
SECTION 27
27–2
AIRCRAFT PROCEDURES
CHECKLISTS
TAKE-OFF
Description
Position
1
Canopy
Down and locked
2
CAB warning light
Off
3
Caution/Warning Lights panel
All Off
4
Landing Lights
Landing
5
Take Off parameters (speeds & expected Jx)
Review & Memorize
6
Throttle
Max afterburner
7
PC advisory light
On
8
At 80kt
Check Jx
8
Rotate at Vr speed
Place horizon on the
rotation pitch marker in the
HUD.
9
Retract and stow landing gear
Before 260 Knots.
NOTES
Page 671
SECTION 27
27–2
AIRCRAFT PROCEDURES
CHECKLISTS
LANDING
Description
Position
1
Landing Gear Down
Below 230 knots
2
Landing Gear warning lights
Green
3
Anti-Skid
Check
4
HUD
APP Mode
4
Landing Lights
On
6
AOA final approach
14º
7
Brake chute (after nose gear is on the ground)
As required
8
Wheel brakes
Below 130 knots*
9
NWS
Below 40 knots
* Whenever possible, use wheel brakes only when speed is below 100kt, to lessen
brakes wear.
NOTES
Page 672
SECTION 27
27–2
AIRCRAFT PROCEDURES
CHECKLISTS
RUNWAY VACATED
Description
Position
1
Landing Lights
Taxi
2
IFF
Off
3
VOR/ILS
Off
4
TACAN
Off
5
IFF interrogator, Countermeasures Panel & ÉCLAIR
control box
All Off
6
ANÉMO heater switch
Off
7
Warning Sounds switch
Off
PARKING
Description
Position
1
External power supply
Connected
2
HUD and HDD
Off
3
INS
Off
4
Radio Altimeter
Off
5
CAP/HORIZON GCS switch (right console)
Off
6
Auxiliary Attitude Indicator
Caged
4
Engine
Stop button
5
When engine has stopped: Fuel pumps G and D
Off
6
Fuel Shut-Off Valve Switch
Closed (cover open)
7
All air conditioning equipment
Off
8
All external lights
Off
9
Radios (V/UHF and UHF)
Off
BATT switch
Off
11
NOTES
Page 673
SECTION 28
CAMPAIGN
CAMPAIGN
Page 674
SECTION 28
28–1
CAMPAIGN
CAMPAIGN NOTES
28 – 1 - CAMPAIGN NOTES
INTRODUCTION
Welcome to the official campaign for the Mirage 2000C. Below you will find some
background information, basic facts about the campaign, things you should know and
remember while playing the campaign to make most of it and finally the credits part
with big thank you for all the voice actors and beta testers who helped to make these
13 missions what they are in their final form.
THE STORY SO FAR
8 AUGUST 2008
Short and intensive armed conflict starts first in the Georgian breakaway territory of
South Ossetia, and then within a few days is being brought by Russian troops at the
soil of Georgia proper.
12 AUGUST 2008
A ceasefire between Russia and Georgia is signed under the auspices of EU, led by
the French Presidency. A six point peace plan is adopted, envisaging non use of
force, cessation of hostilities, granting of access to humanitarian aid, return of
Georgian troops to usual quarters, withdrawal of Russian forces and opening of
international discussions of the modalities of security and stability of South Ossetia
and Abkhazia. UN is set to formalise the deal. EU call for international peacekeeping
mission is rejected by Russia.
15 AUGUST 2008
Russian forces bomb the highway connecting eastern and western Georgia, destroy
the railway bridge at Kaspi, a lifeline to Georgia’s economy. Moreover, the Russian
air force unleashes a series of air raids on Borjomi National Park, using fire bombs
to inflict serious damage on what is regarded as a national treasure. Georgian
government protest in the UN Security Council. Special resolution condemning
Russian actions is vetoed by Moscow. France, feeling especially responsible for
maintaining the ceasefire, sends a strongly worded warning to Russia.
31 AUGUST 2008
Russian troops begin erecting fences and checkpoints at the ABL with South Ossetia
and Abkhazia. Georgians protest again, but UNSC has no room of maneuver as it is
blocked by Moscow. France warns Russia for the second time, and is backed by all
EU-countries. NATO issues a strong statement, calling for immediate fulfilment of the
6-point plan.
Page 675
SECTION 28
28–1
CAMPAIGN
CAMPAIGN NOTES
10 SEPTEMBER 2008
US and France agree on the details of their next pilot exchange programme and
decide that the training will take place in Georgia, as a sign of good will for the
authorities and a warning to Russia. 2 USAF pilots will be flying Mirage-2000C's as
part of 12-ship squadron sent to Georgia during a deployment planned to start in
January 2009. Americans provide AWACS, C&C and transport planes.
11 NOVEMBER 2008
Exchange of fire between Georgian soldiers and Russians in Orsantia, part of
Georgia proper annexed and still controlled by the Russians. Russian jets overfly
Georgia on numerous occasions, dropping several bombs and destroying a pipeline
from Turkey. Ankara calls for establishing a "no-fly" zone over Georgia and
breakaway territories for Russian planes. This issue is raised at the extraordinary
NATO meeting, but no decisions are taken.
DECEMBER 2008
Russian planes enter air space over South Ossetia and Abkhazia numerous times,
although they are no longer stationed in Abkhazian bases. They also fly over Georgia
proper. NATO issues another warning, UNSC remains blocked.
20 JANUARY 2009
2/5 Squadron arrives in Georgia together with two US pilots taking part in the
exchange program.
25 JANUARY 2009
Today.
CAMPAIGN
The campaign puts you in the role of one of two US exchange pilots attached to
French 002.05 Squadron. You arrive in Georgia after the familiarisation training and
you are to go through more advanced exercise session in Vaziani, while flying
missions in support of the NATO operations there.
The campaign is roughly divided in two parts. First one is more focused on honing
your skills and expanding on the things you have learned in the dedicated training
missions (it is strongly advised that you fly these first). Therefore you can expect to
get additional information on systems that were already covered as well as on new
aspects of flying the Mirage 2000C. As the campaign progresses, the storyline
evolves with it and slowly changes focus from training to more substantial duties.
Page 676
SECTION 28
28–1
CAMPAIGN
CAMPAIGN NOTES
DIFFICULTY
The campaign is not excessively difficult if you talk about number of enemy assets
and tasks that are given to the player. However, it is very complex and will require
good preparation from your side, including reading the briefings, taking notes,
listening to the comms and following orders. Below you will find several pointers that
you should treat really seriously.
RADIO COMMS
The campaign uses an advanced radio system which means that you need to be
tuned to correct channel / frequency in order to hear other flights and assets. For
that, it is ESSENTIAL THAT YOU TURN EASY COMMUNICATIONS OFF,
otherwise some of the missions will not be playable.
Equally important, you should always pay attention to and follow your AMC calls
on changing radio frequencies, consult the notepad available as part of mission
briefing package (you will find it in the kneeboard as well) and always remember
to check if you are on correct radio channel for the thing you want to accomplish.
For instance, you may want to jump from your element frequency to another
channel to contact AWACS to get bearings to the enemy, but then you should
remember to switch back to the element, otherwise you won't hear your wingman.
I can't stress enough how important the radio discipline will be for accomplishing
the missions.
FLIGHT PLANS AND ORDERS
The campaign is quite complex and contains thousands of triggers, some of which
are linked to the location in which the player currently is. Therefore it is very
important that you keep to the given flight plans and - as much as possible - to the
fragged speeds. There are rare points in which you may even break a mission if
you don't follow these. So try to keep to the briefed parameters, just as you would
be expected to do in real life. Read carefully the FRAGO, briefing, notes and study
the map. If you do all these things, you will be OK.
INSTRUCTIONS
You will get a lot of information and instructions. If you have trouble understanding
something, I would suggest to use an active pause and then read the message
that someone (usually your Flight Lead / Instructor Pilot) wants to convey to you.
This campaign will require you to focus on what is happening around you and what
is being said, as it will be important for completing the missions!
INS ALIGNMENT
All the missions will start on the ground and will require a full INS alignment. In
most it won't be important how much time you spend on the ground, but at least
two (M11 i 13) do take into account the timing. Therefore I would recommend not
to disable the need for ground alignment in the options menu.
Page 677
SECTION 28
28–1
CAMPAIGN
CAMPAIGN NOTES
COMPLETING MISSIONS
In order to progress the campaign you not only need to fulfil at least part of the
objectives, you also need to land at one of two airports listed in the briefing - your
home base (Vaziani) or the backup one, which depends on the area in which most
of the given sortie will take place. So if you eject or land somewhere else, you will
be forced to repeat the mission. When you land, you will also be given a specific
parking spot - if you taxi there you will get extra points, though this is purely
optional.
AI DURING TAXI AND FORMATION FLYING
This campaign will quite often put you in the role of a wingman, which means that
you will be required to fly in formation with your lead. A word of advice - despite
hours spent on fine-tuning the AI behaviour it can be quite erratic, especially just
after take off and during the taxi. When taxiing behind number 1 don't come too
close to him, as he might just stop moving. If your IP stops during the taxi and
refuses to enter the runway (a rare occurence) try to turn around or take one of the
side taxiways, that should make him going. If you loose sight of the Instructor Pilot,
use radar or F10 map to locate him. Sometimes you won't be required to stay in
formation, this will be noted in the briefing or told during the flight.
Also, in very rare and exceptional situations, it may happen that the unpredictable
AI behaviour could ruin a mission. Don’t say you haven’t been warned.
SUPPORT AND FEEDBACK
Finally if you have any problems or feedback or if you just want to share your
thoughts about the campaign (which is strongly encouraged) please do so at the
DEDICATED PART OF THE RAZBAM'S M-2000C EAGLE DYNAMICS FORUMS.
Constructive criticism will be appreciated (praises even more so :)
Page 678
SECTION 28
28–2
CAMPAIGN
CREDITS AND THANKS
28 – 2 - CREDITS AND THANKS
First and foremost, huge thanks to the voice actors who did an outstanding job
recording a total of around 1200 lines:
Nicholas “Doughboy” Barnwell (the Player’s voice, there was tons of recording there),
Patrick Kasperczyk (one of the Instructor Pilots and all voiceovers for the training
missions), Olivier Raunier (Berger 1-1, for his creative approach to voice acting and
great mission ideas) and his wife, Kandy Sigritz - Raunier, Haley Flight (Athena and
Artemis voices), John 'Brixmis' and Sharon Dixon (for Rover, Zeus, Prowler and
Vaziani Ground voice, briefings proofreading, training missions testing, great spirit
and support throughout the campaign), Greg “Teeter” Smiddy (the second US pilot
and a RAZBAM dev), as well as other voice actors, for their work and support in
mission testing:
gabuzomeu, Philippe Gleize, Simon Pacotte, Maxime C., Nicolas Gutierrez, HiCKS,
Equinox Echo, Ookami Daisuke, Adrien Margiotta, Corsair, VJS-161, Daniel Mikuś,
Darkfire, Yurgon, Bryce Jackin, Kerlix, Jack Flash, Zilch, Apache500, Ivan Petrovic,
Datek, alieneye.
Also, huge thanks to the beta testers:
Gliptal (for insane amount of work put into this, including corrections to the briefings
and tracking down even the smallest bugs), Sryan (who was a spiritus movens for
adding M13 to the already finished campaign and had very valuable input in other
missions as well), Yurgon (usual precision in finding even the smallest bugs), as well
as Catseye, Divadov, Helljumper, JughedJones, The Almighty Snark, Typhoon,
[E69]Zaz0 and others.
Page 679
SECTION 29
ANNEXES
ANNEXES
Page 680
SECTION 29
ANNEXES
ABBREVIATIONS
DCS MIRAGE-2000C COCKPIT FRENCH/ENGLISH LEXICON
BY JEFX
Word/abbr.
Français
English
A
Arrêt (voir AR)
Off
530
Matra Super 530D
Matra Super 530D
3M
Mains sur Manche et Manette
HOTAS
AF
Aérofreins
Airbrakes
ALCM
Alignement sur Cap Mémorisé
Memory INS Alignment
ALL
Allègement
Symbology Dectlutter Switch (HUD)
ALN
Alignement
Alignment (yellow: INS is aligning)
ANEMO
Anémomètre
Pitot Heat Switch
APP
Approche
Approach Mode
AR
Arrêt
Off
ARME
Armé
Armed (Mater Arm On)
ATT.
Atterrissage
Landing (lights)
AU.
Automatique
Automatic
AV
Groupe Avant
Forward Fuselage Fuel Tanks
AV SON
Avertisseur Sonore
Audio Warning switch
B
B-Scope (Écran radar)
B-Scope (Radar display)
BAD
But Additionnel
Offset point
BALAYAGE
Angle de Balayage du Radar
Radar Scan Azimuth Selector
BANQUETTES Banquettes
Lateral Consoles
BD
Bas-Droit
Low Right
BF
Mode Air-Sol pour Bombes
Freinées
CCIP A/G Mode (for High Drag
Bombs)
BF
Bombes Freinées
High Drag Bombs
Mark 82 Snake-Eye, Bombe
Freinée (500 Lbs)
BLG-66 Bélouga, Bombe à
Fragmentation
Mark 82-SE High Drag Bomb (500
Lbs)
BLG-66 Bélouga Unguided Low drag
Cluster Bomb
Basse Fréquence
Low Frequency
BF1
BF4
BFR
Page 681
SECTION 29
ANNEXES
BIP
BIP (signal audio...)
BEEP! IRL signal sent by the pilot to
confirm gear is down
BL
Bombes Lisses
Free Fall Bombs
BL
Mode Air-Sol pour Bombes Lisses CCRP A/G Mode (for Free Fall Bombs)
BL1
Mark 82, Bombe Lisse (500 Lbs) Mark 82 Bomb (500 Lbs)
BLANC
Blanc
White (Cockpit Flood Light)
BP
Basse Pression
Low Pressure Boost Pumps
BR
Brouilleur
Radar Jammer (ECM)
CALC
Calculateur (pour le moteur)
Engine Computer
CAN
Canon (30 mm. Revolver x 2)
Cannon (30 mm. revolver cannon x 2,
125 rounds each)
CAN.
Canon
Guns
CAP SEC
Cap Secondaire
Secondary HSI/ADI
CARB
Carburant
Fuel
CAS
Canon Air-Sol
Air-to-ground canon
CCLT
Calcul Continu de la Ligne de
Traceurs
CCPI
CCPL
Continuous Computation of tracer line
(HUD GUN mode)
CCIP (continuously Computed Impact
Calcul Continu du Point d'Impact
Point)
Calcul Continu du Point de
CCRP (Continuously Computed
Largage
Release Point)
CDVE
Commandes de Vol Électriques
FBW
Cm
Cap Magnétique
Magnetic Heading (Inertial)
CME
Contre-mesures
Countermeasures
CNM
Canon Neutre Magic
Cannon, Neutral, Magic
COUPURE
Coupure Post-Combustion
Afterburner Shutdown
CP/PD
Cap de Piste (vrai), Pente Désirée
Runway Heading/Glide Slope
(au but)
CROSS
Crosse
Tail Hook
Cv
Cap Vrai
True Heading (Inertial)
D
Droite
Right
D/RLT
Distance/Relèvement
Distance/Bearing
D2M
Détecteur de Départ de Missile
IR Missile Launch Detector
DA.
Détecteur d'Alertes
RWR
Page 682
SECTION 29
ANNEXES
DEC
Déclinaison magnétique
Magnetic Variation
Defa 554
Canons 30 mm (x2)
30 mm Canons (x2)
DEMAR
Démarrage
Startup
DESCENTE
Descente (Verrière)
Down (Canopy)
DESEMB
Désembuage
Defogging switch
DEST
Destination
Destination
DETOT.
Détotalisateur de carburant
Total Fuel Quantity (Kg)
DIRA
Dirigeabilité Roue Avant
NWS
DIST
Distance
Bomb Drop Interval
DV/FV
Direction du Vent/Force du Vent
Wind Direction/Wind Speed
Module additionnel de LanceLeurres
GBU-12 (500Lbs) Bombe à
guidage laser
GBU-16 (1000 Lbs) Bombe à
guidage laser
GBU-24 (2000 Lbs) Bombe à
guidage laser
Additionnal Chaff and Flares Dispenser
Pod
EFF
Effacement
Erase
EM
Électromagnétiques
(Contremesures)
chaff
EM
Émission
On (Radar)
ENC
Enchaînement
Waypoint automatic change
ENT
Entrelacée
Interleaved
ENV
Envergure (sélecteur en mètres)
Target Wingspan Selector (in meters)
EP
Électropompe
Emergency Hydraulic Pump
EXT
Extérieur
Outer wing rocket pods (if installed)
FAIB
Faible
Low (lights intensity)
FEUX
Feux (FEUX FORMAT = Feux de
Ligths (Formation Lights)
Formation)
FORT
Fort
High (lights intensity)
FRAGILISATION
Fragilisation
Jettison (canopy)
FREINS
Freins Anti-dérapage
Anti-Skid Brake Switch
G
Gauche
Left
ÉCLAIR
EF1
EF1
EF1
Page 683
GBU-12 (500Lbs) Laser Guided Bomb
GBU-16 (1000Lbs) Laser Guided
Bomb
GBU-24 (2000Lbs) Laser Guided
Bomb
SECTION 29
ANNEXES
G
Guard (radio)
Guard (radio)
GAIN CDVE
Gain Commandes de Vol
Électriques
FBW Gain Mode
H
Hauteur (sur VTH)
Height (Radar Altimeter on HUD)
HAUSSE
Hausse (Canon)
Auxilliary Gunsight
HFR
Haute Fréquence
High Frequency
HG
Haut-Gauche
High Left
HUILE
Huile
Oil
IDN
Indicateur de Navigation
HSI (Horizontal Situation Indicator)
INERT
Inerte
Disarmed (Bombs)
INS
Insérer
Insert
INST
Instantané
Instantaneous (No delay)
INT
Intérieur
Inner wing rocket pods (if installed)
IR
Contremesures Infrarouges
Flares
JAUG.
Jauge de Carburant
Internal Fuel Quantity (Kg)
JOUR
Jour
Day
L G (AP)
Localiser, Glide Slope, Pilote
Automatique
Localiser and Glise Slope AP (ILS)
L/G
Latitude/Longitude (BUT)
Lat/Long (Waypoint)
LEN
Lent (1200 rounds per minute
GUNS only)
Slow, (1200 rounds/min. GUNS only)
best for Ground Atk.
LL
Lance-Leurres
Decoy Dispenser
LOX
Liquid Oxygen
Oxygen Quantity (Liters)
LUM
Luminosité
Brightness
LUMI
Luminosité
Brightness
M
Marche
On
M
Manuel (Mode radio)
Manual (radio mode)
M91
MAG
(M91, M92, M93) Points de Dest.
Markpoints (Max 3)
Marqués
MATRA R550 MAGIC II IR
MATRA R550 MAGIC II IR MISSILES
MISSILES
MAGNETO
Magnétophone
Video Recorder
MIP
Module d'Insertion de Paramètres
Data Cartridge Insertion Module (not
functional)
Page 684
SECTION 29
ANNEXES
MIS
Missiles Super 530D
Missiles Super 530D
MISS
Missiles
Missiles Magic II and S-530D
MRQ
Marquage
Mark point
N
Normal
Normal
N.DEG.
Dégradé (INS)
INS Degraded, needs alignment
NAV
Navigation
Navigation
NB
Nombre
Number (selected Quatity per trigger)
NUIT
Nuit
Night
OBL
Recalage Oblique de la Centrale Radar INS Calibration
OBUS
Obus (cartouches du canon)
Rounds (Gun)
OUVERTURE Ouverture (Verrière)
Open (Canopy)
P
Prêt
Ready
P
Pré-sélection (Mode radio)
Preset mode (radio)
P CH
Préchauffe
Radar Warm-up
PA
Pilote Automatique
Autopilot
PANNE
Panne
Failure (Main Caution Panel)
PAR
Partiel
(Fires a single 530D, Rockets and Gun
Burst mode)
PC
Post-Combustion
Afterburners
PCA
Poste de Commande Armements Weapons Management Panel
PCM
Priorité Contremesures
PCN
Poste de Commande Navigation Navigation Control Panel
PELLES
Pelles
Engine Scoops
PHARES
Phares
Lights (external)
PI
Point Initial
IP (displays only if offset point
set+BAD depressed on PCN)
PIC
PID
PL de BORD
POL
Poursuite sur Informations
Continues
Poursuite sur Informations
Discontinues
Planche de Bord (Tableau de
Bord)
Police
Jammer Priority mode (override own
radar)
STT
TWS
Main Instrument Panel
Police mode
Page 685
SECTION 29
ANNEXES
PPA
Poste de Préparation Armements Weapons Configuration Panel
PPI
Plan Position Indicateur
Plan Position Indicator (Polar radar
display)
PRED
Prédéfini (GUN HUD mode)
Preset Gun Hud Mode)
PREP
Préparer
Prepare
PRES
Présentation (armement sur VTB) Presentation (displayed on HDD)
PRET
Prêt
PSM
PTF, C/C
Ready (green) INS is ready
Poste de Sélecteur de Mode
(Navigation)
Sélecteur de Programmes du
module ÉCLAIR
Mode Selector Panel
ÉCLAIR Program Selector (not
Functional)
RALL VOL
Rallumage en vol
Engine Air Relight/Restart
RAP
Rapide (1800 rounds per minute, Fast (1800 rounds per minute, Guns
GUNS only)
only, AA engagements)
RAVIT.
Ravitaillement
Refueling (in flight)
RD/TD
Route Désirée/Temps Désiré
Selected Bearing/Selected Time (RD
not functional)
RDI
Radar Doppler à Impulsions
Pulse Doppler Radar
RDO
Ralliement Désignation Objectif
Target Pursuit Mode (auto. entered
when locking target)
REC
Recalage
INS Position Update
REMANENCE Rémanence (Radar)
Persistence (Radar screen) (not
functional)
RENTRES
Rentrés
Retracted
RET
Retardé
Delayed
RK
Roquettes
Rockets
RK3
MATRA LRF4 Roquettes 68
mm.(18)
Matra LRF4 Rockets Pod (18)
RL
Réservoir Largable
External Fuel Tanks
ROQ
Roquettes
Rockets
ROUL.
Roulage
Taxi (lights)
Réservoir Pendulaire RPL 522
1300 Litres
Réservoir Pendulaire RPL 541
2000 Litres
External Fuel Tank (Center line) 1300
liters
External Fuel Tanks (Under Wing)
2000 liters
Réservoir Pendulaire (Central)
Centerline Fuel Tank (1300 Kg)
RP
RP
RPL 522
Page 686
SECTION 29
ANNEXES
RPL 541
RS
Réservoirs Pendulaires (voilure x
Under-wing Fuel Tank (2000 Kg)
2)
Uses the radar altimeter to calculate
Radio-Sonde
slant range to target
RVT J
Ravitaillement en vol (Jour)
In Flight Air refuelling (Day)
RVT N
Ravitaillement en vol (Nuit)
In Flight Air refuelling (Night)
RVT VOL
Ravitaillement en Vol
Air-Refuelling
S
Selectionné
Selected
S.A.
Semi-Automatique
Semi-Automatic
SABRE
Brouilleur (voir BR)
Radar Jammer,ECM (see BR)
SEC
Secours
Emergency mode
SEL
Selective Jettison
Selective Jettison
SELH
Selection de la Hauteur
Selected Height Range
SERPAM
Serpam Enregistreur de Vol
Flight Recorder (not functional)
SERVAL
Détecteur d'Alertes (voir DA.)
RWR (see DA.)
SIL
Silence
Radio Squelch- Radar on Standby
SORTIS
Sortis
Extended
SOURIS
Souris
Inlet Cones
SPAD
Système Perfectionné AntiDérapant
Anti-Skid System
SPIRALE
Lance-Leurres (voir LL)
Chaff and Flares Dispenser (see LL)
STS
Status
Status
SVI
Spirale Viseur
HUD close combat mode only for 530D
missile
TAC
Tacan
Tacan Navigation
TAF
Téléaffichage
(not functional)
TAS
Télémétrie Air-Sol
Radar slant range to target
TIR
Tirez
SHOOT
TOP
Signal, départ du Chrono (mode
TD)
TOT
Total
Timer Start Button for TD (Selected
Time) Mode
Fires both 530D, keeps firing gun and
Rockets
TR
Transfo-Redresseur
Inverter Transformer
TR/VS
Temps Restant/Vitesse Sol
Remaining Time/Ground Speed
Page 687
SECTION 29
ANNEXES
TRIM DIRECT. Trim de Direction
Rudder Trim
UNI
Unité de Navigation Inertielle
Inertial Navigation System (INS)
V
Voilure (Carburant)
Wing Fuel Tanks
VAD
Vecteur Additionnel
Offset to Tacan
VAL
Validation
INS Validation Switch
VEI
Veille
Standby
VENT
Ventilation
Dry Crank
VERRIÈRE
Verrière
Canopy
VERROUILLAGE
Verrouillage
Lock
VIDE VITE
Vide vite (carburant)
(External Tanks) Fuel Dump
VOYANTS
Voyants (illumination)
Annunciators (Light intensity)
VR
Vitesse de rapprochement
Closure speed
VRIL
Vrille
Spin (FBW Limiter Override Switch)
VTB
Visualisation Tête Basse
Heands-down Display (HDD)
VTH
Visualisation Tête Haute
Head-up Display (HUD)
ZB
Axe Z (Altitude Barométrique sur
Barometric Altimeter (on HUD)
VTH)
ΔALT
Altitude (BAD: But Additionnel)
ΔL/ΔG
Latitude/Longitude (BAD: But
Additionnel)
Polar Rho/Tetha
(BAD:Distance/Relèvement)
ρ/θ
Offset Point by Altitude difference
Offset Point by LAT/LONG difference
Offset Point by Distance and Bearing
V. 1.3 November 2019
Page 688