/


Теги: science fiction board games strategy games role-playing games
ISBN: 978-1-80281-288-6
Год: 2022


Текст
                    Solo & Co-Op
Adventure Wargaming

CREDITS

5PFH COMPENDIUM
LEAD DESIGN & WRITING
Ivan Sørensen

EDITING

Richard L. Gale

GRAPHIC DESIGN

Virginia Garcia McShannock,
Mark Whittington, Richard L. Gale

COVER ART & INTERIOR ART
Christian Quinot

PROJECT MANAGEMENT
Chris Birch, Matt Timm

PRODUCTION MANAGEMENT
Matt Timm

Modiphius entertainment
CHIEF CREATIVE OFFICER

ART DIRECTOR

PRINCIPAL GRAPHIC DESIGNER

CHIEF OPERATIONS OFFICER

STUDIO COORDINATOR

GRAPHIC DESIGNERS

MANAGING DIRECTOR

PHOTOGRAPHER

Stephanie Toro, Chris Webb,
Mark Whittington, Leigh Woosey

HEAD OF BRAND

LEAD 3D DESIGNER

Steve Daldry

HEAD OF CREATIVE SERVICES

SENIOR 3D DESIGNERS

Richard L. Gale, Bryce Johnston

Chris Birch
Rita Birch

Cameron Dicks

Samantha Webb

Rocío Martín Pérez

Fátima Martín Pérez
Jonny La Trobe-Lewis

Michal E. Cross

AUDIO & VIDEO PRODUCER
EDITORS

GAMES DESIGNER

HEAD OF DEVELOPMENT

Joana Abbott, Domingo Díaz Fermín,
Chris 'Chrispy' Peacey

SENIOR 3D PLASTICS DESIGNER

HEAD OF FINANCE

Colin Grayson

COMMUNITY AND DESIGN
ASSISTANT

CREATIVE COORDINATOR

Ben de Bosdari, Sean Bullough

Kieran Street

STUDIO PAINTER

SCHEDULING AND DESIGN
ASSISTANT

LOGISTICS & PRODUCTION
MANAGER

Callum France

STUDIO TERRAIN DESIGNER

2D20 DEVELOPER

LEAD ART DIRECTOR

LEAD GRAPHIC DESIGNER

RPG DESIGN ASSISTANTS

Jon Webb

Sophie Williams

Luc Woolfenden

Peter Grochulski

Rocío Martín Pérez

2

Ariel Orea

3D DESIGNERS

Julian Jeratsch
Akha Hulzebos

Jack Caesar, James Hewitt
Dom Westerland
Justin Talsma

Nathan Dowdell

Andy Douthwaite, Jess Gibbs

CREDITS

PROJECT MANAGEMENT OFFICE
TEAM LEAD
Błażej Kubacki

SENIOR PROJECT AND
PROCESS MANAGER
Gavin Dady

PROJECT MANAGERS

Daniel Lade, Jamie MacKenzie,
Ben Maunder, Haralampos Tsakiris

PROJECT MANAGEMENT
ASSISTANT
Robert Hebblethwaite

LEAD PRODUCTION OPERATIVE

SALES ACCOUNT MANAGER

PRODUCTION OPERATIVES

MARKETING COORDINATOR

Jake Pink, Miles Turner

Thomas Bull, Rebecca Cartwright,
Louis Hartley-Edwards,
Jake Skinner-Guy, Christopher Leigh

ASSEMBLY TEAM

Elaine Elizabeth Hughes,
Nichola Jones, Michelle Richards

TOOL MAKERS

Luke Gill, David Hextall, Anthony Morris

OPERATIONS MANAGER

CUSTOMER SERVICE &
ACCOUNTS MANAGER

FACTORY MANAGER

COMMUNITY MANAGER

John Wilson

Martin Jones

SENIOR PRODUCTION
OPERATIVES

Drew Cox, Warwick Voyzey

Lloyd Gyan
April Hill

TRANSLATIONS & PUBLISHING
MANAGER
Matt Timm

DISTRIBUTION &
KEY ACCOUNTS MANAGER
Gary Moore

Matt Vann-Hinton
Shaun Hocking

MARKETING MANAGER
Shareef Dahroug

MARKETING ASSISTANT
Georgie Reeve

CUSTOMER SUPPORT
REPRESENTATIVE

Chris Dann, Jagdeep Thiara

OPERATIONS ASSISTANT
Stephanie Catala

WEBSTORE MANAGER
Apinya Ramakomud

FINANCIAL ANALYST
Valya Mkrtchyan

ACCOUNTS PAYABLE MANAGER
Ofelya Mnatsakanyan

ACCOUNTS RECEIVABLE
SPECIALIST & FINANCE
COORDINATOR
Hollie Shepperson

WITH THANKS TO
Modiphius Entertainment Ltd,
39 Harwood Road, London. SW6 4QP, United Kingdom

info@modiphius.com • www.modiphius.net

Everyone who purchased and
supported the game

PRODUCT CODE MUH084V041
ISBN 978-1-80281-288-6

Five Parsecs From Home is copyright Modiphius Entertainment Ltd. No part of this book may be reproduced or transmitted in any form or by any electronic or
mechanical means, including photocopying, recording or by any information storage and retrieval system, without the express written permission of the author
and publisher, except where specifically permitted by law. Artwork and graphics © Modiphius Entertainment Ltd. All Rights Reserved.
The Modiphius logo is a registered trademark of Modiphius Entertainment Ltd., 2022. Any unauthorised use of copyrighted material is illegal. Any trademarked
names are used in a fictional manner; no infringement is intended. This is a work of fiction. Any similarity with actual people and events, past or present, is purely
coincidental and unintentional.

3

CONTENTS

Contents
Introduction������������������������� 6 Movement������������������������������� 29 Special Unit Types ���������������� 47
What is Tactics?��������������������� 6
Tactics 101������������������������������� 9

Unified Space���������������������� 12
The Major Powers�������������������� 13
Anything but Unified ���������������� 14

Basic Movement��������������������� 29
Climbing and Scale ����������������� 29

Combat and Terrain ������������� 30

Lines of Sight������������������������� 30
Cover������������������������������������� 30
Terrain Types�������������������������� 31

Space Travel�������������������������� 16 Combat Fire��������������������������� 33
Eligibility��������������������������������� 33
Galactic Threats�������������������� 17 Target Selection��������������������� 33

Directed Scenario
Gaming ���������������������������������� 18
Characteristics ���������������������� 18
The Participants���������������������� 18
Conducting the Game���������������� 18
Stand Alone or Linked Together? 19
Compatibility with 5PFH������������ 19

Player Actions����������������������� 20

Combat Rules ������������������� 22
Core Concepts���������������������� 22
Terminology ���������������������������
Dice Rolling�����������������������������
Measurements�����������������������
Troop Profile �������������������������
Tests�������������������������������������
Extended Tests�����������������������
Units�������������������������������������
Absolute Timing ���������������������
The Mysterious GM�����������������
Squad Coherency �������������������

22
22
22
23
24
24
24
24
24
24

Play Sequence and
Activations����������������������������� 26
Round and Phases������������������� 26
Delaying���������������������������������� 27
GM-controlled Forces�������������� 27
Activation�������������������������������� 27
Mechanized Infantry ��������������� 28
Removing Suppression������������� 28
Individual Actions (optional)����� 28
Strict Overwatchs (optional)��� 28
Game Markers ����������������������� 29

4

Height Advantage ������������������� 33
Tactical Deployments (optional) 33
Weapon Selection������������������� 33
Rolling to Hit��������������������������� 34
Volley Firing��������������������������� 34
Area Weapons������������������������� 35
Stream Weapons��������������������� 35
Saving Throws ����������������������� 36
Rolling for Damage����������������� 36
Bonus Damage ����������������������� 36
Suppression���������������������������� 37
Flanking Fire���������������������������� 37

Indirect Fire��������������������������� 38
Off-map Units�������������������������
Communications���������������������
Firing�������������������������������������
Direct Fire�����������������������������

38
38
38
39

Observation��������������������������� 39

The Observation Roll��������������� 39
Observe per Target (optional)� 39

Hero���������������������������������������� 47
Leader������������������������������������ 47
Cavalry����������������������������������� 48
Gun Crews����������������������������� 48
Cross-training����������������������� 48

Vehicle Combat��������������������� 49
Vehicle Actions����������������������� 49
Vehicle Movement������������������� 49
Firing from Vehicles ��������������� 50
Firing at Vehicles �������������������� 51
Target the Tracks!������������������ 51
Vulnerable Angles������������������� 52
Close Assault and Vehicles������� 52
Exposed Crew������������������������� 52
Grav Vehicles������������������������� 53
Walkers and Close Assault������� 53
Transports����������������������������� 53
Dismounting��������������������������� 53
Other Actions and Activities���� 53

Story Points����������������������� 54
AI / Solo Combat ������������� 55
AI Core Principles������������������� 55
AI Activations������������������������� 55
The AI Roll ����������������������������� 56
Unit is at Risk������������������������� 56
Target Priority����������������������� 56
Unit Focus ������������������������������ 57
AI Actions�������������������������������� 57

AI Battle Plan System����������� 58
Close Assault������������������������� 40 Solo Game Difficulty
Accidental Contacts ��������������� 40 Adjustments���������������������������� 61
Suppression and Close Assault� 40
Terrain Effects����������������������� 40

Tactical Options�������������������� 42
Skulking��������������������������������� 42
Fall Back��������������������������������� 42
Overwatch����������������������������� 43

Morale������������������������������������ 44
Retreat (Optional)������������������� 44

Additional Troop Factors����� 45

Random Enemy Forces� 62
Friendly Unit Count����������������� 62
Generating Enemy Forces ������� 63
Using the System������������������� 64

Battlefield Support�������� 65
Determining Support Available� 65
Calling in Support������������������� 65
Support Types������������������������� 65

CONTENTS
Setting Up Game Types 69 Game Mastering ������������ 109 Army Builder �������������������� 132
Setting Up a Pick Up Game�������� 69
Setting Up a GM’d Game ���������� 70
Setting Up a Solo Game. . . . . �� 71
Setting Up Terrain������������������� 72
Victory Points�������������������������� 73

Scenario Types ���������������������� 74

The Skirmish Scenario�������������� 74
The Battle Scenario������������������ 76
The Grand Battle Scenario�������� 79
The Evolving Objective Battle���� 80
Secondary Objectives �������������� 82

100 Scenario Seeds�������������� 84

Campaign Play������������������� 89
Creating the Campaign Setup���� 90
Integrated Campaigns ������������ 90
Game Mastering the Campaign�� 91
Campaign Consequences���������� 91
Keeping an Army Roster ���������� 91
The Core Campaign������������������ 92

The Operational System�������� 92

Assign Cohesion Scores����������� 92
The Map���������������������������������� 93
Place the Opposing Forces�������� 94
Operational Zones�������������������� 94
Assign Army Strength�������������� 95
The Operational Turn���������������� 95
Battle Scale Option������������������ 96
Kicking off a Campaign������������� 96
Army Destruction�������������������� 98
Assault Option ������������������������ 98
Going Really Large�������������������� 99
Special Regions (optional)������ 100

Campaign Story Generation 101

Setting the Pace�������������������� 101
Generating a Story Event�������� 102
Player Actions����������������������� 104

Unit Losses �������������������������� 105
Campaign Progression�������� 106
Earning CP����������������������������
Spending CP��������������������������
Unit Upgrades������������������������
Roster Changes ��������������������
Battle Advantages������������������

106
107
107
106
106

Resolving Questions ��������������
Active or Passive? ����������������
Creating and Using Tests��������
The Luck Test������������������������
Actions in More detail������������
GM-controlled Forces������������

109
109
110
111
111
112

Preparing a Game Mastered
Scenario�������������������������������� 113
The Story������������������������������
Selecting Forces��������������������
The GM Army Process������������
The Battlefield ����������������������
The Objectives�����������������������
How Did I Do?������������������������
Deployments and Arrivals ������
Complications������������������������
Side Plots������������������������������

113
113
113
114
115
115
116
116
117

Deployment Methods ��������� 117
Scenario Components �������� 119

Clock Management ���������������� 120
Chemical Hazards������������������ 120
Communications�������������������� 120
Concealed Units �������������������� 121
Confusion������������������������������ 121
Construction������������������������� 122
Dangerous Terrain ���������������� 122
Demolitions���������������������������� 122
Doors and Other Entrances���� 123
Dwindling Ammo�������������������� 123
Encounter Reactions�������������� 123
Gas and Smoke Clouds������������ 124
Group Agendas���������������������� 125
Handling Items ���������������������� 126
Intuition�������������������������������� 126
Landmines ���������������������������� 127
Limited Visibility�������������������� 127
Long-distance Identification���� 128
Negotiating���������������������������� 128
Reinforcements �������������������� 128
Research������������������������������ 129
Rivalries�������������������������������� 130
Searching������������������������������ 130
Securing an Area ������������������ 130
Suspicious Things������������������ 130
Taming Beasts ���������������������� 130
Unreliable / Prototype Weapons 130

Index Card Armies������������������
There are Many Armies Like It
but this One is Mine������������
The Points System������������������
Using the Army Builder����������
Points Value Updates��������������
Freeform Army Building����������
Weapons in Unified Space ������
Infantry Platoon Organization��
Armored Platoon (optional)����
Company Organization������������
Characters����������������������������
Mixed Army Limitations����������
Weapon Selections and Costs��
Default Units ������������������������
Squad Selection ��������������������
Weapon Team Selection����������
Specialists����������������������������
Attachment����������������������������
Alternate Squad Types������������

132
133
133
133
133
133
134
134
135
135
136
136
136
136
137
138
138
138
140

Vehicles ������������������������������

141
Vehicles and Crew �������������� 142
Crew������������������������������������ 142
Vehicle Profiles���������������������� 142

Veteran Units ������������������ 148
Lifeforms���������������������������� 152

The Major Powers���������������� 153
The Minor Powers���������������� 161
Creatures ���������������������������� 168

Items and Costs�������������� 172

Weapons�������������������������������� 172
Master Points Costs Table���� 178

Appendices������������������������ 182
Converting Characters����������
Combining the Two Games������
Galactic Timeline��������������������
Starting a Minis Collection��������
Inspirations ��������������������������
Designer Notes����������������������
Game Markers ����������������������
Unit Cards����������������������������

Index������������������������������������

182
183
185
192
194
196
198
199

200

5

Introduction

Introduction
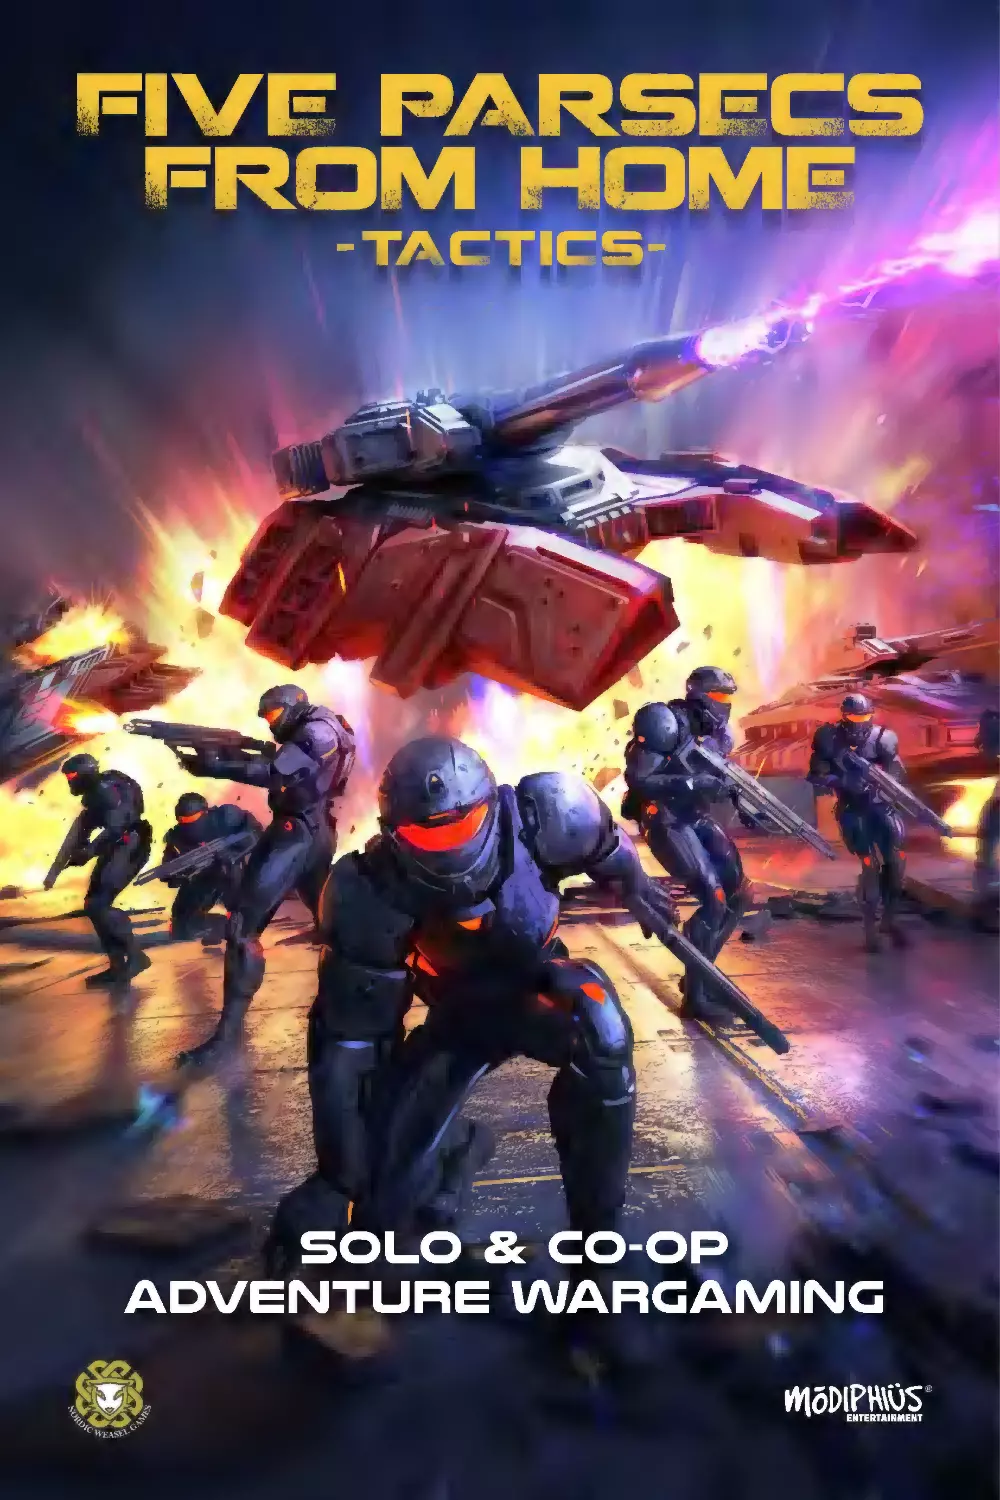
Welcome to Five Parsecs from Home: Tactics.
This book gives you everything you need
to play dramatic science fiction wargaming
campaigns in the worlds of Unified Space
(and beyond!)

Whether you intend to play solo, with a friend,
in a single game or campaign, and with or
without a Game Master, Tactics takes the
concept of adventure wargaming from the
starports and back alleys to the battlefields of
Unified Space.

What is Tactics?
There are (at least) three wings of miniatures
gaming. The two big ones are the competitive
style – with point values and army lists, aimed
at pick-up games – and the adventure style –
procedurally generated and typically solo, such
as Five Parsecs from Home.
The third style is scenario-driven, created
for the occasion, and featuring a wide array
of possible troops, characters, creatures, and
situations. Five Parsecs from Home: Tactics
is this third style, and is all about creativity,
making your own scenarios with your own
troops fighting in them, and playing games in
your own manner.
Tactics is often played with a Game Master (GM),
although that’s not a requirement. Like-minded
players can create a scenario and play together
without a GM, or you can opt to Game Master
for yourself if you prefer playing solo. Random
tables are included to help facilitate this.
While Five Parsecs from Home and Tactics
use the same troop and weapon profiles at
their core, in Tactics, creatures and weapons
do not have to be confined to the man-to-man
personal scale. Tactics can be about small

6
6

skirmishes, but you can also scale things
up: Big tanks, big monsters, big events, and
platoons of troops slugging it out. It’s all up
to you.
This is a standalone game, but fully compatible
with Five Parsecs from Home, allowing you
to cross over characters and events for a fully
featured space adventure. Tactics is also a
toolbox for you to employ however you see
fit. We’re keen to hear how you’re using it to
enhance your scenarios and campaigns.

Campaign Gaming

You can use Tactics for individual battles, but
it is best enjoyed for campaign gaming. A
campaign consists of a series of battles that
feed into each other, creating an overarching
storyline. Rules are included to cover both basic
advancement systems (allowing troops to gain
experience as well as your favorite characters)
and more involved systems which create an
exciting story with the potential to surprise you
at every turn.

Introduction
Solo Gaming

Five Parsecs from Home: Tactics can also
be played solo. This means the game system
handles the enemy while the player (or players
– you can easily play with two or more people
on the same side) commands their own forces.
In some ways, solo gaming can be thought
of as Game Mastering yourself, as you create
the context for the battles you play. In Tactics,
almost anything is possible and, when played
solo, you can try out ideas less suited to headto-head play, such as a suicide mission into
an enemy-held base or a scenario that utilizes
random figures you happen to have laying
around. A solo campaign can also form a long
sprawling story, ideal for documenting in blog
or video format.
As well as scenarios and play options aimed
specifically at the solo experience, the combat
rules supply mechanics needed for solo play,
collectively known as the system’s AI. We have
opted for a lighter touch, providing a series of
guidelines the AI will try to adhere to, rather
than more defined (yet more involved and time
consuming) systems of flow charts or dice rolls
used in other games to govern unit actions.

Pick-up Play

This is often the default way to approach a
miniatures game: Two (or more) players pick
their armies using a points system, then
play a battle for its own sake, unconnected
to anything else. This style of play is also
supported, with a points system and army
building guidelines to help keep things
reasonable. While we don’t anticipate the rules
being used for high-stakes competitive play,
you can run a friendly club tournament if that
strikes your fancy.

The Combined Game

Different play styles are not mutually exclusive.
Think of Tactics as a selection of options and
methods. You might play a head-to-head game
with a friend, which inspires you to start a solo
campaign. Down the road, you might play with
the same friend again with one of you running
a Game Mastered scenario in the same
storyline. A group of friends could even run a
shared story where each of you plays separate
parts of a much larger conflict, potentially
all playing in different ways and sharing the
results with each other.

7

Introduction
Is This a Military Game?
Military action is the focus of much miniature
gaming; futuristic soldiers are the most readily
available miniatures, and armies have a builtin focus on conflict. The game rules provide for
a wide range of military science fiction, with all
the hover tanks and rail guns you could want,
but this doesn’t always mean armies: Off-map
support might be an artillery battery, or a
super science weapon that converts matter to
energy. A unit dropping onto the table might
be spec ops troopers with anti-grav packs or a
predatory alien life form that materializes from
the seventh dimension.
However, the game isn’t limited to military
conflicts. Scenarios can also involve freelancers,
criminals, adventurers, and all manner of other
circumstances that might result in people
shooting at each other. Tactics is all about
customizing things to be exactly what you want
out of the game.

The Tone of the Game

Five Parsecs as a setting is that of “gritty space
opera”, functioning on rules of reality that make
sense to us: Infantry standing aimlessly in the
open will be shot to pieces, and you need a big

cannon to blow up a tank. At the same time,
it’s a place where heroes (even those carrying
swords) can make their mark. Whether your
games represent a “harder” science fiction
with tank platoons blasting each other, or
adventure-oriented games revolving around
heists and space pirates, the setting is broad
enough for both.

A Big Book of Stuff
This is a large rule set. Don’t feel like you must
take it all on board the first time. In fact, it’s not
intended for that. Read through everything and
get a feel for what’s available to you, what is
possible, and then think about what you want
your game to be.
Many rules are presented as optional. These
modify how parts of the game work and play
differently and are provided to help you tailor
the game to your liking. When playing a pickup game, discuss with your opponent which
options are in use, if any.

Providing Feedback

All comments, suggestions and ideas can be
sent to nordicweaselgames@icloud.com

Get Equipped!
To play, you will need the following items:
• Sets of miniatures for your armies; these
may of any type that suits you, but a
dedicated range is available (see page 205).
• Gaming terrain.
• Sets of dice, both D6 and D10. Having dice
in a couple of different colours is helpful.
• Measuring tape or ruler set in inches.
• A table on which to place your battlefield.
This should be at least 3 x 3 feet – some
scenarios are designed for a 4 x 4-foot
space. The terms battlefield and table are
used interchangably in these rules.

8
8

This book is dedicated to those we love
and those we lost.

Introduction

TACTICS 101
Is this your first miniatures game? If you’ve
played other games involving tactical combat,
such as video games, board games, or
roleplaying games, you’ll find similar
concepts to those presented below. If you
haven’t, what follows is the basics for the
playing Five Parsecs from Home: Tactics.
And even if you’re a veteran gamer, some the
definitions below are important for playing
the game. (All of these terms are explained in
greater detail later on in the rules.)
In Tactics you command troops represented
by miniature figures. Each figure stands in for
a single character or combatant, so when you
look at the table and see five soldiers, that’s the
number you’re dealing with in the game world.
(Of course, they may not be soldiers – they
might be space pirates, alien beasts, or robots –
but for now we’ll say they’re soldiers.)
Some of our soldiers are organized into
squads that move and fight together, while
others are individual characters that can act on
their own. So our five soldiers are a squad, but
they may be accompanied by a sniper who is a
single character. Each of these is a unit.

The figures you command are your army.
Players sometimes use this term to mean their
total collection but, in these rules, we always
mean “the units you have for use in this game
session”. Armies can be built in several different
ways, and each is explained in this rulebook.
For a quick pick-up game, it is common to use
a points system, meaning you receive a pool of
points to buy your troops. Usually, your army
has an array of different units ranging from
infantry to tanks to characters. Sometimes,
your army can be weirder, such as a swarm
of hungry alien monsters that want to eat the
colonists that your friend is playing.
To play, you need a scenario. This is an outline
for how the armies set up and what they are
trying to do. Scenarios can be generated by the
game rules or created by the players. Often, a
player is designated as the Game Master, in
which case they will do this, explaining how the
scenario works, and perhaps unleashing some
surprises on you.

9

Introduction
Sometimes the scenario means fighting troops
controlled by the Game Master. If you are
playing solo, however, the game system can
control the enemies while you command your
own army. As you can imagine, a scenario can
work in almost any way you can think of.
The game is played in a series of battle rounds
(or simply “rounds”) during each of which
every unit on the table has a chance to move,
fight, and take other actions. The game rules
explain how to determine when a unit acts and
what options it has when it does.
The game frequently requires measurements
for movement distances or weapon ranges. This
is exactly as it sounds: Put a ruler or measuring
tape at the forward edge of the figure you are
measuring from and then measure to see how
far they can move or shoot. As you play you
will learn to estimate these distances well. For
example, if you have a line of troops and they
all move at the same speed, it’s usually okay to
move one and then put the rest of them in the
same formation relative to the new position.
When you are starting out, just measure for each
soldier one at a time as they move and shoot.
Measuring is always done to and from the
closest point of the base that the figure is
mounted on. For example, if you are seeing if
you can shoot at a target, you measure from the
point of the shooter’s base closest to the target
and to the point of the target’s base closest to
the shooter. We never measure from the tips of
rifles and gun barrels!

Measurement Example:
A

When positioning figures on the table, make
sure their bases don’t overlap. When two
figures have touching bases, we say call this
base contact. One use for this designation
is to say when enemies can fight in a close
assault. Note: If the design of the figures
means they can’t be positioned exactly with
bases touching (they may have flailing limbs,
tails, or big gun barrels sticking out), close
enough will do.
Likewise, when figures move around your
tabletop terrain, you may have a situation
where you cannot place the actual figure
in a location it ought to be able to go. For
example, the base may be too large, or it
may fall down. In this case put a die or a
marker in the “true” location and just keep
track as best you can. Some groups prefer to
disallow such figure placement completely.
This also applies for base contact. Figures
standing behind a narrow barricade, sandbag
wall, or similar could obviously be engaged
in close assault across the obstacle, so a
figure moving exactly opposite them is still
considered to be in contact.

Base Contact Examples:

A

B

C

D

Figures (A) and (B) are in base contact.
Figures (C) and (D) are seperated by
a narrow barricade. As they can still
reasonably be engaged in close assault
across this obstacle, they are also
considered to be in base contact.

101
0

Introduction

To move or shoot with a squad of troops, go
through each in turn. Squads must remain
within a fixed distance of each other, which is
called Coherency. At the end of each move,
check to make sure they meet this requirement.
To target the enemy, your soldiers need to be
able to see them. We use something called
Line of Sight. When you draw a line from
one figure to another is it blocked by any
terrain features? If it is, you must determine
if that terrain completely prevents sight or if
you can see past it a little bit. If in doubt, you
can always try to lean down and look from
behind the figure. This may be a bit awkward,
but it can be very enlightening in realizing
just how limited visibility is down there on
the battlefield!
Actions in the game are usually resolved using
dice rolls (and lots of them). If a soldier tries
to hack into a computer terminal, you roll to
see if they succeed. Most of the dice are for
combat, whether shooting at people or fighting
hand-to-hand.
In most situations, you roll a single six-sided
die (or “D6”), and possibly add a number to
it. The rules tell you the number you need for
success, and if something happens if you fail

or roll specific numbers. For example, some
actions have something special happen if your
die shows a 1 or a 6.
The last thing to be aware of is that your
soldiers don’t always do exactly what you ask
them to. In addition to being vaporized by
laser guns or eaten by monsters, they might be
Suppressed and keeping their heads down, or
they may run away if they’re too scared. Unlike
a roleplaying game, you do not directly play
each figure. Instead, think of yourself as their
commander watching a computer monitor
from your bunker. You can give the soldiers
orders, but they may decide the odds are
stacked too heavily against them.
There is much more to miniatures gaming.
It’s a hobby you can spend a lifetime on and
still find new things to learn and to try out.
This chapter is just a starting point. Jump into
reading the rules, pay attention to all the basic
stuff like moving and shooting, and set up a
couple of figures on your desk. As you read
each section, move those figures around and
roll dice for them to see what happens. When a
section doesn’t seem to make sense yet, come
back to it later.

11

unified space

UNIFIED
SPACE
The galaxy is vast and teeming with life. A
multitude of sentient species have spread
across space and colonists have scattered yet
further, like seeds hurled into the black. Even
between the stars, it is not empty. Strange
phenomena and alien craft prowl the darkness
of deep space, occasionally intruding into
known space.
Among these stars, cultures trade, negotiate,
invent, co-exist, and fight. Colonies struggle
for independence, factions fight over resource
claims, and galactic-level political entities vie
for dominance.
Whether it is a Unity agent trying to organize a
defense against an invasion force, or an honor
war between K’Erin war-leaders, or corporate

121
2

mercenaries trying to contain an outbreak
of bio-engineered monsters, the burden of
fighting comes down to the ordinary trooper,
just as it has since the dawn of galactic history.
This is a vivid and dramatic time to be alive,
though it is also a complex and confusing
one. Space is so grand, and the major powers
that extend their control over hundreds of
worlds are so massive, that it can seem like
folly to generalize. Two major powers may be
engaged in brutal fighting for decades on a
contested world while also forming a military
alliance to engage a rival elsewhere. Those who
prosper in this galaxy must adapt to changing
circumstances, exploiting their personal
connections and capabilities.

Unified Space
The Major Powers
A few sapient species are major powers: They
have enough power and influence, whether
financially, militarily, or diplomatically, that
they can influence events on a grand scale.
These are usually Unity, the Precursors, the
K’Erin, and the Soulless. Other entities are
major players in their local regions but lack the
ability to dictate galactic-level events.
Of these, Unity is typically considered the
most powerful. Ostensibly representing all of
Humanity, Unity is a massive conglomerate
of worlds driven by a cohesive and consistent
philosophy, and a doctrinal outlook generated
by the iron-willed Bureaucracy. The reality
is rather more diffuse, but it is undeniable
that Unity is powerful enough to influence
decisions elsewhere. For example, most
equipment sold throughout the galaxy is made
to be Human-compatible, and diplomatic
translation devices often default to SVIM
(Standardized Vocal Interface Method).
Consisting predominantly of Humans (and
genetic derivatives such as Ferals and various
other gene-mods), Unity citizens are viewed as
stolid but courageous and strong-willed. “Fight
like a Human” is galactic slang for both a futile
last stand and a bitter refusal to die.
The Precursors are among the oldest of the
galactic civilizations, and often hold that
status quite dearly. They are a culture that
tends to eschew large-scale military action in
favor of diplomatic and mercantile solutions,
though they are no strangers to violence if
the need arises. Precursor culture is perceived
by some as self-absorbed and engaged in
vague mysticism anachronistic in a scientific
age. However, they are undeniably skilled
as scientists and philosophers, melding
disciplines that would not seem compatible;
for example, many current terraforming
techniques originated with the Precursor
practice of philosophical geology.

The K’Erin are often dismissed as simple
brutes, not without cause. Their reputation
for raiding, military expeditions, and hostile
incursions on settled worlds have done them
few favors, though it would be a mistake to
discount K’Erin culture as primitive. They have
excellent industries, a high technological
standard of living, and a strong adherence to
meritocracy over claims of birth or rank.
Fundamental to K’Erin culture is the concept of
struggle. Whenever an individual is engaged in
a contest with an equal opponent, the struggle
should be pushed to the final limits. Not doing
so would be dishonorable to the opponent.
As the K’Erin tolerate a large degree of factional
conflict within their borders, regions they
control are often viewed as chaotic. But it is
undeniable that they produce the largest
reserve of trained and experienced military
units in known space.
A recent arrival to the scene, the Soulless
originate from beyond the galaxy, though the
conditions of their departure are unknown.
They drifted through space for some time, yet
it is inconceivable that they could have covered
the entire journey between galaxies under
conventional travel.
The Soulless operate from massive ark-ships,
establishing outposts and bases as needed.
This makes them particularly mobile and,
despite a smaller “population”, they can exert
power widely. Uniquely, the Soulless are a
synthetic life form. The individuals encountered
as a Soulless-operated merchant or diplomat
are simply a mechanical shell, similar to a robot
body. Each individual is connected to a galactic
network that ensures consensus among the
individual units. A particular entity can be
detached from the network, but it is uncertain
exactly how this network functions, and it has
remained immune to disruption and intrusion
since their arrival.

13

Unified Space
These four major powers exist in a
complex state of interconnectedness, often
simultaneously in conflict and in cooperation.
Trade networks across space are extensive and
new technological advancements flow freely,
regardless of boundaries.
The major powers recognize that galactic-scale
conflicts would be devastating to everyone
involved: Any of them could mobilize on an
incomprehensible scale, and such a level
of armaments would result in widespread
devastation. The ensuing economic shocks
would likely set the galaxy back generations of
technological progress. Extensive treaties are in
place to prevent such an event. Consequently,
most warfare happens at a local level with a
clear eye towards avoiding escalation beyond
acceptable levels.

How Local is “Local?”

Many events in the galaxy are confined to a
single star system or even a single world. After
all, even a small star system has a vast amount
of real estate within it. When movers and
shakers on the galactic scene say “local” they
usually mean “within a single system”. The
term is also often used somewhat dismissively
as “not worth paying attention to,” though the
troops on the ground may certainly disagree!”

Anything but Unified
While the major powers are all identified by a
dominant species, the reality is far more mixed.
The Precursors are notable for having very little
variation and no known sub-species, while
the K’Erin are a range of closely related subspecies capable of interbreeding. Humanity
has created a bewildering array of genetic
sub-types through extensive use of genetic
manipulation, many of which are functionally
separate species.
Each power also has extensive non-native
populations among their borders. Some
of these are minor species that have been
uplifted technologically, to allow them to
join the galactic scene (though this often
does not come without strings attached),
while others are population groups that have
been incorporated into the polity. The K’Erin,
for example, maintain several protectorates
which range from functional hostages to
favored groups that the K’Erin fight on
behalf of.
On an everyday level, most worlds near the
edges of a political region have populations
that are 10-15% non-native. Starports tend to
have an extremely cosmopolitan vibe.

Fringe Space

While many independent systems exist, the
region known as Fringe Space is renowned for
its lawless and chaotic nature. This reputation
is sometimes played up by tall tales, but it is
a region of considerable interest to pirates,
explorers, adventurers, and those who simply
prefer to do things their own way.
Along the scattered worlds of Fringe Space you
can find independent settlements, prosperous
agri-worlds, military outposts, secretive
corporate research facilities, and pirate
warlords all rubbing shoulders and tussling
with each other.
Every galactic power of any worth has agents
prowling through the Fringe to assess dangers

141
4

Unified Space
and look for valuable opportunities. Incursions
to claim some particularly valuable chunk
of rock or beat up on the pirates and petty
warlords are not uncommon.

Technological Foundations

Individual worlds and cultures can vary in
technological development, particularly
regarding what can be maintained locally.
But once a culture is connected to the galactic
trade networks, it can approach the general
technological level of the galactic community.
This “galactic” level is typically slightly lower
than the heights of advancement in the core
worlds of a major power. It takes time for new
developments to propagate, be adapted and
find their place in a busy world.
Military technology is commonly conventional,
with infantry weapons firing physical
projectiles (propelled through chemical
reaction or magnetism) or relying on energy
transfer to superheat and burn through the
target. Military hardware should be hardy,
easy to maintain in the field, and amenable to
local resupply, which means that expeditionary
forces equipped in a low-tech fashion.
The typical infantry trooper carries a robust and
maintainable firearm such as an assault rifle or
laser rifle and is clad in lightweight body armor
that incorporates extensive communications,
scanning, and guidance computer suites.
Anti-gravity vehicles are mass produced
but most military vehicles remain tracked
or wheeled due to the comparatively high
maintenance requirements of anti-gravity
units. Grav-tanks are often used by elite
spearhead battalions, leaving the conventional
fighting to the “dirt grinders”.

allow the installation of upgrade packages:
Anything from color-changing skin to
functional wings or animal features can be
installed at the request of the discerning
(and very wealthy) customer. For the average
Unity citizen, such extravagances are often
out of reach, but all citizens are given genetic
treatments as children, allowing better
health, resilience to disease, and longevity
compared to their “natural” counterparts in
Fringe Space.
A wide range of AI systems are in use,
depending on the use case. High grade AI
systems can seem almost sapient, though
they are not considered entirely so under
Unity law. General purpose AI can often
function much like a typical human, though
it will occasionally reveal itself as being
somewhat more prosaic. The private market
offers a wide range of Emotional Modules
that can be installed in systems to tailor them
to particular use cases. Most AI systems in
practical use are specialist systems which
can exceed human capability but within a
narrow field such as gunnery or medical
diagnosis. Specialist systems are usually built
to function outside their specialty.
One of the most common consumer systems
is the Advisor built into most computers,
which interacts with the user to augment their
abilities and assist them in performing a range
of tasks. Few could imagine doing serious work
without such tools.
The cutting edge of esoteric technology
has allowed limited application of matter
displacement (teleportation), though the
process is limited in range and extremely
demanding on energy supplies.

Cybernetics are widespread and most
physical injuries or shortcomings are
alleviated by implants. Genetic engineering
has seen phenomenal breakthroughs,
allowing entire new species to be developed
and even “active” rewrites of genetic code to

15

Unified Space

SPACE TRAVEL
Ships progress through space using Weak
Points that can be used to tunnel across great
distances and traversed faster. The typical
rate is three days per light year of Weak Point
Tunnel (WPT or simply ‘Tunnels’), though
deviation can occur. Weak Points slowly move
through space, and extensive AI-operated
databases are used to predict safe departures
and arrivals. Tunnels are usually predictable out
to about 30 light years distance, though most
pilots prefer to make a series of shorter trips.
Tunnel failure is not unknown, leading to
the ship emerging some distance from the
intended location. In the event of emerging
without a Weak Point, the deviation could
be as much as a light year from the intended
location. While accidents are rare (space is
mostly empty, after all) they are not unknown.
Individual Weak Points appear to have
predictable travel paths and some regions of
space have Weak Points that travel very tight
routes, such as within a specific solar system.
Weak Points can also be forced into existence
through massive constructions known as
Karlenhertz generators. These allow a major
world to function as a hub world for travel,
trade, and military concentration.

161
6

There are other methods of travel among
the cosmos, but most ships default to the
above method.

The Nature of Warfare
The cost of operating a starship is great, and the
costs increase dramatically as ship sizes scale
up. Constructing a major warship is extremely
expensive and the fleets of major powers
require the industrial output of multiple worlds
to produce and maintain an active force.
This also means that moving major military
forces is an expensive process. Combined with
most conflict zones being thinly populated
border worlds, this has led to military actions
declining in scale. A colony world may not have
a population of more than a few million people
and field at most a few divisions of troops.
High tech expeditionary forces often consist of
an ad-hoc battlegroup of regimental size, but
detachments can be much smaller than this.
Invaders typically have the advantage of
surprise and initiative, and most hostile
incursions rely on establishing a foothold and
inflicting crippling damage before a defender
can mobilize local defense elements.

Unified Space
While planet-wide wars can grind on for years
and involve millions of combatants, the typical
military action tends to involve only a few
battalions far from home. High casualty rates
in modern warfare means that such forces can

burn out very quickly, and commanders often
seek to gain an advantage from decisive strikes
at the enemy’s ability to function, rather than
grind out an attritional conflict.

GALACTIC THREATS
While the major powers have enough
firepower in their arsenals to end a few
civilizations, there are more active threats that
can endanger entire worlds. The two most
prominent are the Converted and the Horde.
A cybernetic species of unknown origins,
the Converted strike worlds to obtain raw
materials: Minerals, fuel, and bio-matter. As
part of the fighting, the Converted implant
the casualties of enemy forces with crude
cybernetics to turn them into more troops for
their armies.
If the Converted has an overall goal beyond
conquest, it is unclear, but every month brings
new reports of attacks and new sightings of
war fleets. Attempts at surrender result in the
defenders being implanted and turned into
new recruits.

The Horde emerged onto the scene somewhat
recently, through newly detected alien portals.
Their point of origin is not known, though
leading Precursor scientists believe it lies
beyond our coordinates of time and space.
Horde troops – mutated, wildly alien, but
usually humanoid – refuse all attempts of
communication and no attempt at deciphering
their methods of communication has proven
effective. They attack relentlessly, with no
understandable rhyme or reason, and fight with
fanatical devotion. Military analysts estimate
that a crude form of religious fervor may
motivate them, as they often carry iconography
and symbolism common to such practices.
Horde troops bear heavy signs of genetic
engineering, often with forms that must
be intentionally crafted to cause terror
and discomfort.

17

Directed Scenario Gaming

Directed
Scenario
GaMING
The primary game style supported by this
book is something we term Directed Scenario
gaming. This chapter explains what this style
is and how it works. Even if you are a veteran
wargamer (and perhaps especially if you are),
it may be helpful to read this section.

Characteristics
A Directed Scenario game has two key features:
1. It uses a purposefully created scenario
rather than a generic set-up sequence or a
randomly generated scenario.
2. It is actively run or Game Mastered rather
than being strictly and only played by the
rulebook.
Philosophically, this means taking an active
investment in the set-up of the game and
creating an experience that you would like
to play. It may even be a scenario tailored
specifically to your miniatures collection. This
does not mean you cannot use pre-made
content if you like, but it means striving for a
game that is responsive to the players rather
than existing as an impersonal machine.

181
8

this just means resolving the odd question and
revealing any secrets discovered, but it can also
be more involved, with GM-controlled armies.
In a game with one player and one GM, the
player is usually fighting GM-controlled forces.
If you have two or more players, they may fight
against each other (the most common option)
or they may be on the same side and fight
against forces controlled by the GM. You may
also play the game solo. In this case, you are
effectively Game Mastering yourself, creating a
scenario, and then seeing how it turns out.
Of course, if everyone wants to command a
force, you may opt to play without a dedicated
GM and agree to resolve questions in good
faith as they come up. This works great if
you are in tune with each other, and can be
a tremendous amount of fun. Often in this
setup, players act as GM in a minor sense;
for example, one player writes the scenario,
and then all players play through it.

Conducting the Game

The Participants

The game unfolds like a normal miniatures
game with turns and actions and shooting at
each other.

A Directed Scenario uses two types of
participants: the players and the Game
Master (GM). Players are assigned forces by
the GM or by using the Army Builder system
(see page 132) and control them in battle.
They usually have no responsibility beyond
commanding their own forces. The GM creates
the scenario and runs the game. Sometimes

The scenario dictates any special circumstances
that apply and what each side needs to do to
win. Objectives may be quite specific (such
as holding a computer room for three rounds
while a download is completed) or can be
very open-ended (such as investigating a
facility to find out why the distress signal
was emitted).

Directed Scenario Gaming

During the battle, Players may request to
perform actions that are not specifically covered
by the rules, such as trying to weld a door shut,
using explosives to create a tree barricade, or
anything else you can think of. The GM judges
whether these things are reasonable and what
the chance of success might be.

Stand-alone or Linked Together?
A game can be played on its own, forming a
story that can be finished in a single sitting. To
use a literary term, we might consider this to
be a short story.
If you have particular miniatures you enjoy
using, you might also opt to link your games
together. This can simply be a narrative link
where the events of one game affect the
ongoing story, or it may be a campaign link
where the forces and rules are impacted.

Wait, this Sounds Familiar!

This is not really a new style of gaming: In fact,
it is arguably the original way many science
fiction miniatures games were played in the
1980s. It was never really given a name then
and has fallen by the wayside since. With a
return to form, it was time to coin a term, so
here we are: Directed Scenario gaming. I hope
you like it.

Compatibility with 5PFH
Tactics is an offshoot of the Five Parsecs
from Home (5PFH) rules and can be used
to create new scenarios that are part of your
campaign. This might take the form of your
characters participating in military actions,
creating custom scenarios for your crew to
fight through, or even filling in details around
your main campaign. For example, if a world is
invaded, you may opt to play out a few Tactics
battles set during the invasion, even if they do
not involve your regular 5PFH characters.

19

Directed Scenario Gaming

PLAYER ACTIONS
One of the biggest strengths of a Directed
Scenario game is that players can formulate
an idea and have it happen in the game. This
can range from talking to a character they
meet to booby trapping a door to hacking
into a communications facility to obtain
satellite footage of enemy positions. The GM
adjudicates whether the action is reasonable,

When Playing Solo

If you are playing solo, you can still ask the
GM, since the GM is you! A lot of players feel
hesitation about “breaking the rules” when
playing a game solo and, if so, this section
can be ignored if you don’t feel it works for
you. Of course, if you come up with a cunning
ploy, you can always let the enemy bring more
troops or otherwise add their own ploys as well.
Ultimately, this is something you do not have
to decide on when you are first setting out.

20
0
2

what actions are required, and what die rolls
may be needed. In general, the more the
player is hoping to achieve, the higher the
requirements will be.
Most actions require a die roll and need
to be performed in a specific location. If
something is especially complicated, it may
require multiple rounds to perform, require
a specific character (for example, if specialist
training or equipment is needed), or require
materials found on the battlefield (for example,
explosives to make a bomb).
Most player actions are minor affairs. Try to
avoid player actions that “solve” an entire
scenario in a single roll. If the players want to
cook up a chemical to kill the alien monster,
the GM should make them gather the
supplies, or move to the ventilation systems
to deliver the chemical, or hunt for research
papers that tell them what chemicals to use
(possibly all three).

Directed Scenario Gaming
Examples of Player Actions
• Building a device to do something (such as
distracting an enemy or scrambling their
computers).
• Talking a GM-controlled character into (or
out of) doing something.
• Hot-wiring a parked vehicle.
• Sealing an entrance or creating a new one.
• Leaping on top of a vehicle to ride it through
a checkpoint unseen.
• Disguising yourself.
• Finding chemicals to create a remedy
against the toxic waste in the facility
hallways.
Actions are meant to do things that are
interesting and feel natural in the game world,
not to squeeze out an additional +2 dice bonus
to something through some pedantic detail.
While groups and GMs have their own styles, we
strongly encourage the following guidelines:

Player Actions in Action

The scenario is proceeding, and alien hordes
are bearing down on the beleaguered
defenders while they try to find the documents
they came for. One of the players asks if they
can weld shut one of the doors into the bunker.
The GM considers for a moment: The request
is reasonable and, since it is a big lab, there
is probably some welding equipment in a
maintenance locker somewhere. The GM tells
the players one of the troopers saw some gear
back in the other room and if a soldier moves
there, they can pick up the welding kit and
automatically seal the door shut by moving
into base contact with it.
Of course, the door may not hold. The GM
might declare that the bad guys can knock
down the door in 3 rounds or by rolling a 6 on
a D6. Typically, your GM should rule this up
front, so nobody is upset later.

• Actions should rarely allow the destruction
of player-controlled troops directly.
• Actions rarely grant bonuses to rolls.
• (A player cannot gain a +1 to Hit simply by
saying “my guy takes care to aim real good”)
• A clever plan is only clever once. (A ploy to
create an ultra-powerful bomb from the
battery packs of a combat robot is cool, but
trying to do it every game is boring).
There is no expectation that the GM agrees
to let any given action go forward, though a
successful GM usually finds a balance between
being permissive and being strict.

21

Combat Rules

COMBAT
RULES
This chapter explains everything you need to
know to conduct table battles in Tactics. While
the concepts are not complex, make sure to
read everything carefully.

If you are a more practical learner, set up a
few soldiers on your table and roll dice as you
read along.

CORE CONCEPTS
Terminology
Scenarios are fought between two or more
sides, referred to as factions. Each faction is
usually controlled by a player, though in a
large game you could have multiple players on
the same side.
If a player is running the scenario, they are
generally referred to as the Game Master
(GM). The GM may also control a faction but
is then understood to be doing so to create
and run the scenario, not to gain a victory in a
competitive sense.
We refer to the individual models on the gaming
table as figures, though players often use the
term “miniatures” as well. A group of figures
that activates together is called a squad. A unit
can be a squad, individual figure, or vehicle.
We often refer to a figure or character doing
something or taking an action. This is shorthand
for the player doing so on their behalf.
You play Battles as a series of rounds during
which every unit on the table acts. Within
each round, the players take turns playing
out phases, during which they can activate a
number of units.

22
2
2

Campaign play takes place over multiple
campaign turns, each of which usually
has at least one tabletop battle played with
miniatures.
The rules are usually meant to be read literally:
• If a rule says you “can” or “may” do
something, you can generally opt not to.
• If a rule says you “will” or “must” do
something, you are required to do so.

Dice Rolling
All dice used during combat are plain six-sided
dice (D6). You usually compare the result to
a target number. For example, if the target
number is 4+, then a roll of 4 or higher is a
success while a 3 or lower is a failure. Rolls are
often modified, which means a score is added
to or subtracted from the roll. Multiple modifiers
may apply, in which case they are all cumulative.
Unlike other games, unless the rules
specifically state otherwise. there is no “1
always fails, 6 always succeeds” rule in Tactics.
Modifiers can make a roll impossible or
succeed automatically.

Combat Rules
A roll of 2D6, 3D6, etc. means you roll the dice,
adding them together, and any modifiers are
then applied to the total, NOT to individual dice.
If the rules say something happens on a
natural roll, it occurs when the die shows that
exact score. For example, if the rules say a
natural 6 creates a particular effect, a roll of a
6 with a +1 modifier counts, but a roll of a 5
with a +1 modifier does not.
If the rules permit a reroll, the die is picked up
and rolled again. The old score is ignored for all
purposes and the new score stands.
You will occasionally need to generate a
random direction. If so, roll a D10, and use the
raised tip to determine the direction.

8
3

7

0

4

If you must pick randomly from a number of
elements such as units, battlefield edges, or
terrain features, number them 1, 2, 3, and so
forth, then roll a suitable die (rerolling if you
roll too high).

Campaign and scenario play often uses the
D100. This is a D10 rolled twice: The first roll
is the 10s, the second is the 1s (or, you can roll
two D10s at the same time, the darker-colored
die is the 10s). For example, a 4 and 7 is a 47;
a 0 and 3 is a 3; a 3 and 0 is a 30. A 00 is 100.

Measurements
All game measurements are in inches.
Multiply by 2.5 for centimeters.
Weapon and movement ranges were initially
tested in 15mm. As the weapon ranges that
feel suitable in 15mm match closely what is
common when playing with 28mm figures, the
two scales use the same distances, so there is
no need to make adjustments.
If you wish to play on a smaller table, you may
choose to halve all ranges and distances. This
has the effect of “shrinking” the table and is a
popular option when using small scale figures.
When measuring between two figures,
measure between the closest points of the
bases the figures are mounted on, never from
the gun barrel or other extremity. If you have
figures with weird bases, you may prefer to
measure from the top of the head instead.

23

Combat Rules
Troop Profile

Compatibility

Every figure has a profile that indicates its
capabilities in the game world, using the
following ability scores:
ABILITY

DESCRIPTION

Speed

Mobility and agility. The movement
rate in tabletop inches.

Reactions

Initiative and battlefield awareness.
Used to determine when a unit
can activate.

Combat
Skill

A measure of fighting ability
and weapons training.
Added to attack rolls.

Toughness

Resilience to injury and damage.
When Hit, make rolls against
Toughness to produce casualties.

Kill Points

A measure of luck, survival skill,
or sheer mass. Damaging Hits
reduce this value until the figure
becomes a casualty at 0.

Savvy

Cunning, intelligence, and creativity.
Added to problem solving rolls.

Training

Discipline, morale, and
professionalism. Added to Morale
tests and some task rolls.

A sample soldier is provided below as an
example:

24
4
2

UNIT

Infantry Soldier

SPEED

4"

REACTION

2

COMBAT SKILL

+1

TOUGHNESS

4

KILL POINTS

1

SAVVY

+0

TRAINING

+1

Players of Five Parsecs from Home will
recognize that the profile is very similar,
allowing figures and characters to be transferred
over easily (see page 182).
Often, units and characters in Tactics have
more dramatic profiles and weapons than
characters in Five Parsecs from Home. When
crossing material over, you will have to decide
which versions to use in these cases. Such
adjustments are simple to make.

Tests
A variety of actions in the game require a die
roll. We call these tests. You can test Combat
Skill, Savvy, or Training. To carry out a test,
roll 1D6 and add the relevant ability score,
attempting to roll equal or above a particular
target number to succeed.
A test can also be purely based on luck, in
which case nothing is added to the roll.
Tests are usually employed when taking player
actions. They are also called for in some rules
subsystems. The table below gives suggested
target numbers:
SITUATION

TARGET
NUMBER

Routine

4+

Typical

5+

Challenging

6+

Difficult

7+

If a test can only be attempted once or causes a
risk or hazard on a failure, the GM must inform
the player of this before the test is attempted.
Example:
“To get across the chemical spill you need to
make a 5+ Training test. If you blow it, you
suffer exposure to the toxins in the puddle.”

Combat Rules
Extended Tests

An action may be an extended test.
If so, select a base difficulty as normal.
An extended test requires several
successful attempts which can be
accumulated over multiple rounds.
Unless the rules state otherwise,
assume two successful tests are
required. Any natural 6 on the test
completes it instantly.

Units
Non-vehicle units can either be an individual
or a squad.
Individual figures are simply figures that
move and fight on their own, as a single-figure
unit. They often represent officers, heroes, or
highly trained specialists.
Squads typically consist of 4-6 figures, though
there is no set minimum or maximum. Figures
in a squad move and fight as an entity and
must remain Coherent during the game (see
“Squad Coherency” boxout). Each squad is led
by a Sergeant. This figure acts as a focal point
for the unit and may have unique weaponry or
traits in the game.
Vehicle figures always act on their own.

Absolute Timing
The game rules use a principle we call Absolute
Timing to help manage things and resolve
complex situations. This means the following:
• Unless listed otherwise, events in the game
always resolve in the order they are created,
each event resolved completely before the
next event is considered.
• Whenever a rule is carried out, such as the
area of effect from an Area weapon or shot,
all figures occupy the exact position they are
currently in. They are never abstracted to be
“moving through” an area, for example.

This principle helps us resolve complex
situations. If several things are happening at
once, resolve them in the order they occur, and
things usually clear up.
Example:
On your go, you have two units that wish to
shoot. You resolve the first unit’s shooting and
carry out all outcomes of that (such as figures
being removed or any movement that might
occur as a result) before selecting the second
unit, picking its targets, and resolving its fire.
This could leave the second unit unable to do
what you had previously planned (for example,
the only visible targets were killed by the
fire from the first unit). You are free to pick a
different action with this unit instead, both
allowing and forcing it to respond to events as
they unfold.

The Mysterious GM
Many rules in the book defer to a GM for
decisions on edge cases. In a pick-up game
with no GM, such questions must be decided
between players. If you are playing solo, you are
the GM and can make decisions as they occur.

Squad Coherency

The figures in a squad must try to remain
within 1" of each other as they move and fight.
If there are no gaps greater than 1" between
groups of figures, the unit is Coherent. If a
squad is not Coherent when it is activated, it
may remain Coherent as long as it does not
move. Once it opts to move, it must move back
within Coherency distance if this is possible. If
the distance to do so is too great, it must move
as far as it capable of doing, though it is not
required to leave Cover to end in the open.

25

Combat Rules

PLAY SEQUENCE AND ACTIVATIONS
During each battle round, every unit on the
table can act, and once every unit has done
so, the round ends and the process begins
again with a new round. A scenario may dictate
that you play for a set number of rounds, or
the game may continue until one side has
been destroyed or retreated off the table, an
objective has been reached, or events dictate
that it should end.

Rounds and Phases
Each battle round consists of phases, with
players taking it in turns to carry out a phase:
• During a phase, one faction rolls for
initiative and acts with any eligible units.
• In a game with two factions, they alternate
phases until every unit has acted.
The initial order is usually set by the scenario or
can be determined randomly at the start of the
game. Once it has been established, it remains
the same for the rest of the game. If you can’t
decide, roll a die for each faction with the
highest score going first and then simply work
your way clockwise around the table.

26
6
2

When it is your phase, you may choose to
activate any one unit that is currently Ready.
After activating this unit (or choosing to not
activate a unit), roll three D6s and assign each
die to a Ready unit with a Reaction score (see
page 24) that is equal or higher than the die
roll. This allows the unit to act, after which point
it is no longer Ready. Dice are assigned one at
a time, activating a unit before assigning the
next die. Any dice that cannot be assigned (due
to no remaining Ready units with a suitable
Reaction score) are discarded. Please note that
dice cannot be intentionally unassigned (but
see Delaying, below).
Once activated, a unit is no longer Ready, and
cannot act again this phase. (You may choose
to use Activation markers to keep track – see
page 28.)
Once only one faction has units remaining,
its player activates all remaining units in the
faction in any order they like.

Combat Rules
Delaying

During a phase, you may opt to Delay a
single unit if it is assigned a die that would
allow it to activate. Use a marker to identify
the unit as Delaying. The Delaying unit
does NOT act this phase but is automatically
activated in your next phase. A unit cannot
be Delayed again in the same battle round,
though you could have a new unit Delay in
each phase if you wanted.

GM-Controlled Forces

If the GM is controlling any units in the
scenario, they have their own phase in the
sequence, typically after each player faction
has acted. GM-controlled forces may use
more or fewer dice.

ACTION

DESCRIPTION

Engage

Each figure may fire a weapon
or perform a scenario or
equipment action.

Dash

Each figure moves an additional 2".

Regroup

The unit removes 1 Suppression
marker per figure.

Scan

The unit receives a second
Observation roll after moving.

Fallback

The unit retreats from its current
position. This action is optional.

Skulk

The unit hides from observation.
This action is optional.

Overwatch

The unit can respond to enemy
movements by firing upon them.
This action is optional.

Notes:

Activation
If a Player can activate multiple units in a
phase, this is done one unit at a time, in any
order you like. All actions and rolls are carried
out before the next unit is selected.
Example:
I have a total of 3 activations this phase.
I activate a tank and shoot at some enemies.
After resolving that and removing any
casualties, I then select the next unit to act.
I don’t have to select all 3 units in advance.
When a unit is activated, it may Move and
perform ONE action from the list below.
The unit must select the same action for each
figure in the unit.

• Move each figure in the unit first, then carry
out any action with each figure in turn.
• A figure does not have to perform all the
available options but cannot swap one
out for another. For example, If I choose to
Engage, I might have one figure remain in
place and just fire, while another moves but
does not shoot. (Note: Throughout the rules,
we use the terms “firing” and “shooting”
interchangeably to mean a unit making
ranged attacks at another unit.)
• When Dashing, you can simply include
the bonus movement as part of the move,
instead of moving everyone twice.
• Overwatch and Skulk actions (see pages
42-43) require a relevant marker to be
placed by the unit.

27

Combat Rules
Individual Actions (Optional rule)

Carrying out actions by unit rather than
individual works well in a typical game and
keeps the decision-making process simple.
However, you may want more detail and
tactical choices in your game, especially if
playing a smaller game. If so, you may opt to
play with individual actions instead. This works
like the regular system, but each figure in a
squad can select a different action. The actions
can be carried out in any order desired.
Example:
A squad of five activates. I move all five,
then I have two figures fire, while one enters
Overwatch, and two Regroup.

Strict Overwatch (Optional Rule)

Mechanized Infantry
Infantry squads with an assigned transport
vehicle activate together as one unit, while
they are within 6" of each other. Both
units can perform different actions without
needing to remain within 6" of each other
during their actions.

Removing Suppression
When a unit has completed an activation, it
may remove Suppression markers (see page
37) equal to the Training score of the unit.
This is in addition to any removed by taking a
Regroup action. Units with a Training score of
+0 do not remove any markers automatically.
They must take the Regroup action.

You may find that there is too much reactive
fire going on for your tastes. If you find this
doesn't suit you, or hinders the game, require
units to be stationary to enter Overwatch.

Game Markers
When tracking activations, Delaying or Skulking
figures, and Suppression, use markers, dice,
or similar small objects to indicate which units
are in which state of action. A page of optional
markers is included at the back of this book.
Feel free to copy and reproduce them for your
Limited Ammo
personal gaming purposes.

Suppression

Activated

28
8
2

Overwatch

Delayed

Skulking

Overheat

Stun

Objective

Blip

Area of Effect
(place at the
center of the
effect area)

Targeting

Morale

Combat Rules

MOVEMENT
This section explains moving infantry-type units.

Basic Movement
Units may move when taking the Engage
or Dash actions. When a unit is permitted to
move, each figure can move up to their Speed
in tabletop inches. Units that are Dashing move
up to Speed+2".
Squad members are not required to move
the same distance and can turn as often as
desired. Some figures may carry weapons
that suffer penalties when the shooter moves.
This is always based on the movement of the
individual figure, so you can have some figures
move and, if the figure in question did not,
they will not be penalized.
While facing is not a factor in the rules, the
game looks best if you turn figures to face in
the direction they are moving.

Climbing and Scale

In smaller figure scales, climbing can
look a little ambitious. If you are using
6mm figures or similar, or the amount
of distance a figure can climb in a round
bothers you, halve the climb heights
and speeds.

Proximity to Enemies

Figures can move ‘through’ members of their
own squad but cannot otherwise pass through
other figures on the table.
A figure can only move into base contact with
an enemy if the unit is performing a Dash
action. This produces a close assault at the
conclusion of the unit movement (see page 40).
In all other circumstances, figures must be kept
at least half an inch apart from enemies.

Climbing and Jumping Down

A climb up to 2" in height costs 2" of
movement. A taller climb requires a full
activation. The figure may climb up to their
base movement rate (without hand holds) or
1.5 times base movement rate (on a ladder) in
one activation.
Stairs and ramps are considered standard
movement.
A figure may leap down from a height. This
has no movement cost, but if the drop is more
than 1", the figure must end their activation
immediately upon landing. If the drop was
longer than the height of a standing figure,
1 Hit is sustained with a damage rating of +0
(+1 per additional inch).

29

Combat Rules

COMBAT AND TERRAIN
Lines of Sight

Cover

To determine if two figures can see each other
at all, we use something called a Line of Sight
(LoS). This is an imaginary line drawn between
the two figures. If it is blocked by intervening
terrain, there may not be LoS, and the figures
may be unable to see each other.

A figure has Cover if it is partially obscured
from Observation. The rules do not distinguish
between obscuring terrain (such as a forest)
and terrain that blocks fire (such as rocks).
Almost any terrain feature counts as Cover,
from buildings and large rocks to freight
containers and wrecked cars.

Note that all figures block LoS. For example,
squad members cannot shoot through
each other.
If a terrain feature partially obscures LoS, the
target is visible but receives the benefits of
being in Cover (see below).

To determine if a particular figure has Cover,
you can generally just look at the table and
estimate. If necessary, you can use a “model’s
eye view” by leaning down and taking a look
from the position of the firer.

Be Generous
A

A good rule to keep the game moving
is this:

✘
B3
B1

B2

Example: In the diagram above, (A) has Line
of Sight to (B1) and (B2), but (B2) is partially
hidden behind a high wall and benefits from
Cover. There is no LoS to (B3).

30
0
3

• If you are uncertain whether a figure
is in Line of Sight or not, assume that
it can be seen.
• If you are uncertain whether a figure
is in Cover or not, assume that it is
in Cover.

Combat Rules
Terrain Types
Tabletop terrain features can take almost any
shape, form, and nature we can think of, from
industrial sites to alien jungles and beyond.
As a result, the terrain rules are focused on
broad, general principles rather than trying to
describe every specific type of feature.

Scatter Terrain
Scatter terrain is any individual terrain piece
that is roughly person-sized. These are often
pieces such as single trees, boulders and
smaller rocks, and urban features like signs or
small crates.
Movement: Scatter features do not affect
movement. If moving through an area with
multiple pieces of scatter, simply measure
movements normally, ignoring any scatter
pieces you move across even if a figure moves
‘through’ a piece.
Cover: A figure immediately behind a Scatter
feature is in Cover from weapons fire that
crosses the terrain piece.
Destroying Scatter terrain: Additionally, a
natural 6 on the Hit dice is deflected by the
terrain piece; the scatter terrain is destroyed
and removed from play, but the figure
avoids the Hit.

Area Features
Area features are those that cover an area
beyond that indicated by the physical terrain
features, and that can be entered, such as a
forest or jungle, swamp, and ruins. Typically,
these are mounted on some sort of base that
indicates the ground covered.
Movement: Units cannot move faster than
their base speed in any round in which they
intend to move into, out of, or within Area
features. This is judged on a per figure basis,
so a figure in a squad can still gain the Dash
bonus if that specific figure is not within the
feature. Note that the unit can still take the
Dash action in order to enter close combat.

Some area features may be Impassable (such
as a pool of lava) or incur some sort of risk
(such as an especially treacherous swamp).
Cover: Figures within Area features such as
forest are in Cover, even if the firer is within the
same feature. Height advantage has no benefit.
Line of Sight: Lines of Sight only extends up
to 2" within area terrain. For simplicity, just
measure along the ground, even if there is a
height difference. Individual features mounted
on the base (such as model trees are just for
show) and do not factor into Line of Sight.

Linear Features
Linear features are long and narrow, such as
fences, walls, and hedgerows, and are no taller
than 2".
Movement: Infantry may cross Linear features
at a cost of 2" of movement.
Cover: Linear obstacles that can be seen across
provide Cover if they lie between the shooter
and the target and the target is within 3" of the
terrain feature. Targets further back can be fired
on without a penalty.
If a firer is on higher ground (such as the roof
of a building or on a hill) the target must be
within 1" of a Linear feature to receive Cover
from it.
Line of Sight: If a Linear feature is particularly
tall, you need to check if the target can be seen
at all. Typically, this is simple enough: compare
the height of the obstacle to the height of the
firer and target miniature. If there are height
differences in the position of the figures, you
may have to check visually to see if the target
can be seen across the feature.

31

Combat Rules
Cover Example 1:

Cover Example 2:

Figure (B) is at the edge of a forested Area
feature while figure (A) is in the open.

Figure (A) is within 1" of a waist-high wall.
Figure (B) is 10" away from the wall.

Figure (B) receives Cover. Figure (A) does not
receive Cover when fired upon by (B).

When (B) fires on (A), (A) will receive
Cover as it crosses the obstacle. When (A)
fires on (B), (B) does not count as being
in Cover, as (B) is not within 1" of the
obstacle.

No Cover

A

B
Has Cover

B

Buildings

Movement: Moving through doors takes 1"
of movement. If the door is locked, it must be
bypassed or destroyed. If it is barricaded, it
must be destroyed. (See Doors, page 123.)
A figure can climb through a window at a cost
of 2" of movement.
Cover: Figures at a door or window can fire out
and be fired upon, but count as being in Cover.

32
2
3

A

Within 1" =
receives Cover

Up to two figures may fire pistols or rifles from
such a position, or a single figure can throw a
grenade or fire a support weapon.
The Area weapon effect: Add +1 to the roll for
an Area weapon effect inside a Building. When
using Area weapons indoors, the “it has to land
somewhere” rule should always be applied. If
a grenade would scatter through a wall, move
the landing point directly back towards the
intended impact point until it is in a plausible
location (usually hitting a wall).

Combat Rules

COMBAT FIRE
This chapter explains how infantry fires at
enemy forces.

Eligibility
A unit choosing the Engage action can have
figures fire as their task. Remember, shooting
happens after the unit has completed all
movement it intends to make with every
figure in the unit.
Units performing other actions cannot shoot.

Target Selection
Unless a rule permits otherwise, a unit must
choose to shoot at the closest infantry unit or
the closest vehicle target it can see. If the closest
target of either type is in Cover, the closest
target in the open may be selected instead.
Figures from the same unit must fire at the
same target unit. However, figures that cannot
see or target the unit’s primary target may fire
at something else.
If two units are within 1" of each other they are
targeted as a single unit.

A1

A2

Tactical Deployments
(Optional Rule)
The GM may permit splitting fire by turning
figures to face in differing directions. If so, a
90-degree arc of fire to the front of a figure
is used for visibility. Please note that if this is
used, it should ONLY be employed to increase
tactical flexibility, not to fudge whether a
figure happens to be, say, 0.2 degrees too far
to the left to see their target!

Height Advantage

Units on high ground (such as a hill or
upper floor or roof of a building) have
a height advantage. When shooting at
units below their height level, they may
shoot at one of the two closest infantry
or two closest vehicle targets if they
have Line of Sight (see page 30). When
targeting units on or above their own
height level, the normal rules apply.

Weapon Selection
Each infantry figure may use any one weapon
they are carrying. Different figures in a squad
may pick different weapons. If a squad has
grenades, only one figure in the unit may
throw a grenade each round and does so
instead of firing a weapon.

A3

✘

B2
B1

B3

Example: Unit (A) is firing. Figure (B1) is the
closest enemy, but in Cover, so (B2) is the next
closest option. (A1) and (A2) shoot, but (A3)
does not have Line of Sight, and may target the
more distant (B3) instead.

33

Combat Rules
Rolling to Hit

1. Special, Team or Crewed weapons

Each weapon has a number of shots listed on
its profile. This is the number of attack dice
rolled when firing. Each shot may represent
a single aimed bullet/beam/blast or a short
burst of fire. You can always choose to fire fewer
shots if desired.

2. rifle and pistol fire, and

To Hit with a shot, roll 1D6 and add the Combat
Skill of the firer. The modified score must equal
or exceed the target number in the table below:
CIRCUMSTANCE

TARGET NO.

Pistol and target is in
the open

4+

Other weapons and
target are in the open

5+

Target is in Cover

6+

Suppressed shooter

Natural 6

To benefit from Cover, a figure must be within
an Area terrain feature (such as woods) or
within 1" of and behind a Linear terrain feature
(such as a wall).

Volley Firing
When a squad fires, all the firing is resolved
before any follow-on effects such as status
effects from weapon traits are applied. Teams
resolve weapons in the order:

34
4
3

3. grenades.
When firing at an enemy unit with multiple
figures, assign Hits to the figures closest to the
firers first. All Hits from a particular weapon
type are assigned before any are resolved.
Example:
If a squad of soldiers fires their hyper blaster
and 3 rifles at a target, the hyper blaster is
resolved first. It scores 2 Hits which are assigned
to the 2 closest figures in the target unit. Next,
the rifles fire and score 1 Hit. It is applied to the
figure that is now the closest to the firers.
Typically, shots can be rolled as a batch, but if
you have a peculiar situation (such as specific
figures only capable of seeing one specific
enemy), roll the peculiar shots separately or
use separately colored dice.

Designer’s Note

This system is intended to simplify
things and keep the game moving.
It is not intended to create any
advantage due to exact figure
timings. If a situation feels like it
would be confusing or complicated
using volley firing, just roll the shots
out one figure at a time.

Combat Rules

Area Weapons

Stream Weapons

Weapons with the Area trait produce an
explosion that covers an area of effect.

Weapons with the Stream trait fire by
projecting a spray of acid, burning chemicals,
or similarly unpleasant substance. To fire a
Stream weapon, draw a straight line from the
firer and out to the full range of the weapon. It
is blocked by terrain features that are humanheight or greater. Stream weapons cannot
choose to fire at a reduced range.

To fire an Area weapon, select a target point
within range and Line of Sight. It does not have
to be centered on a specific figure, but the center
must be placed within the boundaries of the
target unit. If an Area weapon has multiple shots,
each produces a target point up to 2" apart.
The shooter makes a targeting roll by rolling 1D6
and adding the Combat Skill of the shooter.
A score of 5+ indicates the shell is on target. A
lower score indicates the shell explodes mid-air
or lands somewhere harmless with no effect.
Every figure within 2" of the final target point
is Hit on 4+ if in the open, 5+ if they are
partially obscured by terrain such as being
within a terrain feature. Area weapons do not
penetrate through solid obstacles that are as
tall as the figure.

Watch Out!

Area and Stream weapons affect both
friendly and enemy troops within the
affected area. Converted, Soulless, and
K’Erin may fire despite endangering
other troops. Other troops may not fire
them unless permitted by a scenario
rule or the GM.

Any figure that has its base touched by the
line is Hit. No attack roll is made, and Cover
provides no protection.
Stream weapons carry very limited ammunition.
A given weapon may be fired only twice per
battle. A small marker or token can be used to
track this.

It Has to Land Somewhere
(Optional Rule)

If you prefer, move the target point randomly
a number of inches equal to the number
of points you rolled short of 5 and have it
explode there. For example, if you roll a 2,
the shell lands 3" from the target point. If the
attack roll is a natural 1, the attack scatters a
full 5" regardless of modifiers.
This rule is optional because, while fun, it can
slow larger battles.

35

Combat Rules
Saving Throws

Rolling for Damage

Some rare creatures and troops have innate
defenses that let them avoid harm in unusual
ways. This provides a Saving Throw, which is
expressed as a target number such as 5+ or 6+.

Not every weapon’s Hit produces a casualty.
A Hit may produce only a minor wound or
graze or may have obliterated a nearby object,
sending the soldier diving for cover but
leaving them unharmed.

If a figure has a Saving Throw, roll 1D6 for each
Hit taken. If the die result is equal to or greater
than the Saving Throw target number, the Hit
has no effect on the figure at all (including if
the weapon would normally produce multiple
damage rolls, secondary effects such as Knock
Back, or Suppression markers).
A Saving Throw is made for each individual
Hit suffered. When struck by Area or Stream
weapons, the Saving Throw only protects the
figure in question. Other figures in the affected
area may still be struck normally.

Setting Note

While most troops wear some limited armor,
this is generally factored into the Toughness
scores and combat mechanics. Normal body
armor does not provide a Saving Throw.

Multiple Saving Throws

In the event a figure has more than one
source of Saving Throw, it is treated as a single
Saving Throw with a target number equal to
the single best score improved by one. For
example, a figure with access to a 5+, a 6+,
and another 6+ Saving Throw would be
treated as a single 4+ Saving Throw (a 5+
Saving Throw improved by one).

For each Hit that is not deflected by armor, roll
1D6 and add the damage value of the weapon.
If the roll exceeds the Toughness of the target,
the attack inflicts damage on the target.
Many figures are tougher, more resilient, or
luckier than the average trooper. Whether it is a
battle-hardened captain that knows to dodge at
the right moment or a huge reptile the size of
a tank, these figures can sustain large amounts
of punishment before they are out of action.
In the game we use Kill Points (KP) to track
this. Think of KP as equivalent to the number
of lives in a video game. Each damage die that
rolls above the Toughness of the target costs 1
KP and when they are reduced to 0 KP, remove
the figure from play as a casualty. A typical
infantry trooper has 1 KP while a leader or hero
may have 2-4 KP. Large monsters could have
even more. Damage rolls that fail to exceed
Toughness have no effect on the target figure.

Bonus Damage

Some weapons inflict bonus damage.
This is listed in the weapon profile as x2,
x3 (or more!) after the damage rating.
This means you roll for damage multiple
times, with each roll above Toughness
causing the loss of 1 KP. Excess damage
is lost with no effect.
Note that a single Saving Throw stops the
entire Hit. You do not roll Saving Throws
for each damage attempt.
Example: If a weapon with 1 (x2) Hits a
trooper with Toughness 4, the attacker
would roll D6+1 twice with each roll of
5+ causing the loss of 1 KP.

36
6
3

Combat Rules
Suppression

Suppression When Firing

Units under fire (or that have recently been
under fire) are hindered by this proximity of
danger when making their own attacks. This is
known as Suppression, and affects that unit in
a variety of situations explained elsewhere in
the rules.
Every time a unit is shot at, tally up the number
of Hits that did not produce a casualty. Place
a Suppression marker for every such Hit.
Suppression markers are placed on the unit,
not the specific figures that took the Hits.
Note that weapons with bonus damage only
produce a Suppression marker if the figure
survives the Hit.

✘+
Example:
If a squad takes 3 Hits and has 1 figure
removed as casualties, 2 Suppression markers
are placed on the squad.
Shots that miss do not produce Suppression
markers. This may seem counter-intuitive at
first, but Suppression markers represent how
many figures are hindered when they attack
(until the unit recovers). Meanwhile, casualties
are figures that are unable to do anything for
the rest of the game.

If the firing unit has any Suppression markers,
a number of figures equal to the number of
markers are considered to be Suppressed.
Suppressed figures only Hit on a roll of a
natural 6 regardless of target numbers,
Combat Skill, or modifiers.
The owning player may pick which figures are
Suppressed, and may pick figures that could
not otherwise fire (clearly they are keeping
their heads down in the back!)
Units with more Suppression markers than
they have figures are all Suppressed, but do
not suffer any additional penalties. If you are
playing using individual actions, Suppression
can only be applied to a figure taking an
Engage action.

Flanking Fire
Taking fire from multiple directions makes it
much harder to take cover and concentrate on
engaging the enemy effectively.
If a unit is in Cover behind a Linear terrain
feature such as a wall, and are fired on from the
flank or rear, they do not receive any benefits
from Cover. After resolving all damage and
suppression from the attack, the defenders
receive 1 additional Suppression marker.

37

Combat Rules

INDIRECT FIRE
Large, off-board artillery pieces carry out most
artillery fire. This is covered by the Support
system (see page 65). This section explains
how to fire indirectly (meaning at targets the
shooter cannot see themselves) with on-table
units or units located near the battlefield (such
as a mortar team located just off the player’s
edge). This sort of fire is usually done by light
mortars which are portable, easy to redeploy,
and under the direct command of the front-line
troops. However, off-board fire could also be
delivered via drones, low flying aircraft, or even
orbital platforms.

Off-map Units
A unit capable of indirect fire may be placed
off-map, representing the unit being set up
a few hundred yards behind the main line of
troops. Such units are still part of the force but
can contribute only through providing indirect
fire support.
A scenario may dictate that a unit begins
off-map. In a pick-up game, any unit with an
indirect fire weapon can be deployed off-map

38
8
3

when setting up. Such units are still known to
the opposing force as they are easily within
scanning range.

Communications
To fire indirectly, the firing unit must be in
communications. This is explained in the
Scenario Components section (see page 120).
By default, unless jamming is present, units
are assumed to be in radio communications
with each other.

Firing
On-table units wishing to conduct indirect fire
must remain stationary that phase and must be
in communication with friendly troops that have
a Line of Sight to the target point. Range for the
indirect fire attack is measured from the firing
unit to the target (not from the spotting unit).
An off-map unit is activated in the same way
as any other unit. It may fire at any point
that is visible to a friendly unit which is in
communications. Measure the range from the

Combat Rules
center of the player’s battlefield edge to the
target and add 12".
An Indirect Fire test is made: Roll
1D6+Combat Skill. A 3+ is required to be
able to fire. A failed roll means that the unit is
unable to fire, but is ready to do so, with no roll
required when it is next activated (provided
it targets the same point). Place a Targeting
marker to remind you.

Direct fire

An on-table indirect fire unit may shoot as a
normal Area weapon, applying all the standard
rules, provided the unit has a Line of Sight to
the target. This bypasses the normal Indirect
Fire test. This applies even if the weapon would
normally “lob” shells in an arch since the crew
can estimate the distances precisely.

To resolve the actual fire, use the procedure
given for Area weapons (see page 35).

OBSERVATION
The battlefield is a confusing place, and, under
realistic conditions, it would be difficult to keep
straight everything that’s going on at once. For
the purposes of playing a game, we assume
our troops have decent situational awareness
as well as the assistance of scanning devices
and scout drones. This is the default state of the
game: If figures are placed on the table, the
enemy forces can take them into account and
target them (assuming they are in sight and
within range).
In some cases, however, things may not be
so clear-cut. Skulking units (see page 42)
may hide from view, a scenario may involve
undetected forces in ambush, or an
approaching group may not be clearly
identified. These cases are designated as
either Uncertain (if they are not clearly
observed) or Hidden (if they are actively
trying to avoid detection, such as with
Skulking units).

The Observation Test
If a unit has Line of Sight to any Hidden or
Uncertain elements on the table when it
activates, it makes an Observation test. This
is a Free Action and does not prevent the unit
from taking actions normally.

Roll 2D6:
• Uncertain elements are spotted if they are
within a number of inches equal to both
dice added together plus the Training score
of the unit.
• Hidden elements are spotted if they are
within a number of inches equal to the
highest of the dice plus the Training score
of the unit.
Example:
A unit rolling a 5 and a 2 with +1 Training
would spot all Uncertain elements within 8"
and Hidden elements within 6".
Note that a single Observation test is made
for a unit and applied to every figure. All
Observation is measured from the position
of the unit before it moves. Figures taking
the Scan action (see page 27) make a second
Observation test after moving.

Observe per Target
(Optional Rule)

Instead of rolling once for the unit, you
may opt to roll once for each possible
target within Line of Sight that requires
an Observation test.

39

Combat Rules

CLOSE ASSAULT
Even in the far future, the best way to secure a
position is still a determined storming attack.
When units close to engage with pistols,
knives, and harsh language, we call it close
assault. A close assault occurs if a unit takes a
Dash action and at least one figure contacts an
opposing figure.
They have multiple steps which must be
completed in turn.

Step 1: Entering Close Assault

A Dashing infantry unit that makes physical
contact with at least one enemy infantry figure
has begun a close assault. Units can only enter
close assault during a Dash.

Accidental Contacts

In some cases, you may have two units end up
in contact with each other inadvertently, for
example if a unit arrives in a random location.
If so, a close assault occurs immediately, and
the arriving unit cannot take any other actions.

40
0
4

Initial Line of Sight is not required to launch a
close assault. It is assumed that a unit detects
an enemy unit in another way, such as hearing
them or detecting them with scanners, so, for
example, a close assault can occur after a Dash
around a corner.
The active unit is the attacker while any unit
that was contacted is the defender. You may
have more than one defender if multiple
units were contacted, typically if two units are
near each other or intermingled. In such a
case, treat the Defenders interchangeably: For
the purpose of making close assault attacks,
it does not matter which unit each was part of.
Any figure that is in contact with an enemy
figure is said to be Engaged. Any figure that
is not is said to be Unengaged.
Figures are never required to move into
contact when moving. For example, a unit
may have a few figures hang back instead of
joining the attack. Any figure that does move
to engage must attempt to contact an
Unengaged opponent, if possible. If all
enemies within range are Engaged, they

Combat Rules
may double up against an already Engaged
opponent. Tripling up on one figure is not
permitted. In some cases, some attackers
may not be able to engage. This applies to
both attackers and defenders when moving
into contact.

Step 2: Attacker conducts close assaults

Figures in contact with multiple enemies must
choose who they target.
Each Engaged figure in the attacking unit
rolls to Hit: This is a Combat Skill test with
the target number depending on the type of
weapon used.
WEAPON TYPE

TARGET
NO.

Melee or Natural weapon

4+

Melee or Natural across obstacle

5+

Pistol

5+

Basic attack

6+

Suppression and Close Assault

For every Suppression marker on a unit, one
figure from that unit must be selected who
can be Hit only on a natural 6 when making
a close assault in Steps 2 and 3. In both
cases, figures can be selected that are not
otherwise able to attack (after all, the ones
that are Suppressed would be more likely to
hang back).

Terrain Effects

Fighting across a Linear obstacle affects
Melee and Natural attacks as noted in the
table. Otherwise, terrain does not affect close
assault combat.
Once all moves are made, any defenders that
are still Engaged now conduct close assaults
exactly as explained in Step 2.

• If a figure has multiple eligible weapons, it
may choose which to use for each attack.

• If, at the conclusion of this step, there are
figures still Engaged, go to Step 4.

• Figures that do not carry a Melee or Pistol
weapon use the basic attack entry and will
Hit with a damage value of +0. Figures
with claws, fangs, or other built-in methods
of dealing damage use the Natural
weapon entry.

• If not, go straight to Step 5.

Resolve Saving Throws and damage normally
(see page 36), and remove any casualties.
No Suppression markers are placed from
close assaults.

No movement is made by either side, but
every Engaged figure makes new close assaults
exactly as before. As you apply these Hits
simultaneously, it does not matter which side
rolls first. Any survivors that remain Engaged
after this final exchange then each back up 1"
if possible, ending the assault. If one figure is
unable to move, the other figure backs up.

Step 3: Defender Counterattacks

Every figure in the Defending units may now
move up to 2", whether they were originally
Engaged or not. This move can be used to
Engage attackers, move out of engagement,
or otherwise move around. An Engaged
figure cannot leave contact to engage
another opponent.

Step 4: Both Sides Conduct Ongoing
Close Assaults

If there are figures Engaged at this point, it is
considered an ongoing close assault.

Then proceed to Step 5.

Step 5: Recovery

Each unit that had a figure Engaged at
any point of the close assault removes
1 Suppression marker.

41

Combat Rules

TACTICAL OPTIONS
This section provides additional options to
enhance tactical combat.

Skulking
The Skulk action allows a unit to hide. The unit
moves normally, and if it finishes the move
within or directly behind concealing terrain,
mark it as Skulking.
• To fire upon Skulking units, the firing unit
must make a successful Observation test
(see page 39).
• Skulking figures that are within the range for
an Uncertain target may be fired upon if they
are in the open or if using Area weapons.
• Skulking figures that are within the range
for a Hidden target may be fired upon using
all attack methods. These spotters can also
allow other units in communications to fire
Area weapons at the Skulking units, even
if the firer did not roll well enough on an
Observation test.
• When using individual actions, spotting
works on a per figure basis.

42
2
4

Skulking figures can be close assaulted
normally (see page 40). The unit loses its status
if it is close assaulted or takes an action other
than Skulk.

Fall Back
A unit may opt to Fall Back when activated.
The unit moves at double the normal pace but
must retreat towards their own battlefield edge
or towards the nearest terrain feature that is
both behind their current position and which
contains no enemy forces.
While performing the Fall Back action, the unit
cannot be targeted by Overwatch fire, and it
may remove 1 Suppression marker. No other
actions can be performed while Falling Back.
A unit that Falls Back cannot claim any sort of
objectives in the full game round it takes a Fall
Back action.

Combat Rules

Overwatch
A unit taking the Overwatch action gains the
Overwatch status and may fire upon enemies
as they move. Whenever an enemy moves or
fires within Line of Sight, the Overwatch unit
may opt to fire in response.
If responding to enemy movement, the unit
may fire either before the unit begins moving
or after it has completed the move. It cannot
fire part-way through the move or split fire. If
the unit is not visible before or after moving,
that unit cannot be fired at. For example, a unit
emerging from behind a building can only be
targeted after it moves.
If responding to enemy fire, the response
happens after the enemy unit has fired.
Once a unit has fired on Overwatch, it loses the
status, even if every figure in the unit did not
fire. If the unit activates again without having
fired, the status is removed with no effect (but
they no doubt looked very cool scanning the
horizon with their rifles).

Overwatch and Suppression

Units on Overwatch are affected by Suppression
when they fire, just like any other unit.

Quick Shooting

Overwatch shots do NOT add the Combat
Skill of the shooter. Other modifiers such
as from weapon traits apply as normal.
When using individual actions, part of a unit
may be on Overwatch, while the rest of the
unit isn’t. If fired upon, the unit must shoot
back with one firer per figure firing on them. A
vehicle firing requires the whole squad to fire
back if on Overwatch.

If a unit on Overwatch is fired upon, looking
cool is no longer an option – the unit must
fire back and lose their status after doing so
(even if unable to do damage to the attacker
in question).

43

Combat Rules

MORALE
At the end of each full game round, any
units that took casualties during the round
must test Morale. A casualty is defined as
any figure removed from play due to enemy
action. Casualties due to traps, dangerous
environments, landmines, and so forth do NOT
cause Morale tests. Morale tests can be done
in any order you like. If you find you are having
difficulties remembering which units should
test Morale and which should not, place a
Morale marker next to each unit.
Squads have an effective Morale value equal
to their current unit size in figures plus their
Training score. If the Morale score is 6 or more
the unit is in no danger of breaking.
Example:
A 4-figure unit with +1 Training has a Morale
value of 5.
If effective Morale is 5 or less, carry out a
Morale test:
• Roll two D6, and compare each die
individually to the unit’s effective Morale.
• If both dice score higher than the Morale
score, the squad breaks and is removed
from play.

Retreat (Optional Rule)

If this rule is in place, a player may opt
to Retreat a unit that is required to test
Morale. Make this decision before rolling
Morale dice. To Retreat, the closest terrain
feature behind the unit must be clear
of enemy forces and there must be no
enemies in the path between the unit
and this feature. The feature can be within
a 90-degree arc behind the unit.
The unit is immediately moved to the
terrain feature in question and foregoes
the Morale test. If there are no valid
features behind the unit, whether due to
enemy presence or the unit being near
the battlefield edge, it may not Retreat.

A

90° rear arc

B

Trees

Building

• On any other result the unit remains in play.
Units that break may not return to the battle,
though in a campaign game assume they
regroup and rejoin the army afterwards.

Exhaustion

Units that fail Morale tests are not always
running away screaming. They may be
exhausted or carrying back casualties, but they
take no further part in the battle.
It is possible for a close assault to end with
both sides failing Morale tests. Such desperate
fighting may well leave both sides too
exhausted and dispirited to continue.

44
4
4

Example: There are two terrain features
within the 90º arc behind Unit (A): Some
trees and a building. The trees are clear
of enemy forces, but enemy unit (B)
stands between A and part of the trees
terrain feature, blocking retreat. As the
building is further away than the trees,
Unit A has no retreat option.
A unit that Retreats does not count for
completing or holding any type of
objective in the round in which it
Retreats. Carried objects, such as items,
are dropped at the point the unit opts
to Retreat.

Combat Rules

ADDITIONAL TROOP FACTORS
Many figures have additional numerical factors
that modify or affect their ability to operate
on the battlefield. Some of the more common
ones are listed below but special units can have
a range of such abilities.

Multiple Attack Ratings
Some creatures are particularly ferocious in
close-quarter combat. Figures with an Attack
rating of 2x, 3x, etc., may attack that number
of times when conducting a close assault.
Each attack can be assigned to any opponent
engaged with the figure.

Morale Bonus
While Morale typically matches training, some
well-trained troops may be particularly shaky or
dispirited, and some untrained militia can fight
surprisingly stubbornly. Units with a Morale
bonus apply it when taking Morale tests.
Example:
A unit with 4 figures, +1 Training and
+1 Morale has a Morale of 6.

Fear
While most troops are used to encountering
dangerous wildlife and bizarre lifeforms,
some creatures are particularly frightening,
whether due to their size and aggression,
or factors such as psionic interference.
Regardless of the source, this is referred to
as Fear in game terms. As Fear is distinct
from normal combat stresses, the reactions
of victims are usually more unpredictable. A
trained special forces soldier may be more
unnerved by an extra-dimensional horror
than a xeno-biologist, for example.
A Fear test is made in the following situations:
• If a unit wishes to fire on Overwatch and the
target causes Fear.
• If a unit wishes to Close Assault a target that
causes Fear.
To make a Fear test roll 1D6 for each figure in
the unit:
• Add +1 for individual figures.
• Add +1 any figure with a Morale bonus.
A score of 4+ indicates the test is a success.

45

Combat Rules

A failed Fear test causes the figure to freeze in
place and be unable to perform the action. A
player may opt to reconsider an assault if too
many figures freeze up, but cannot change to a
different type of action.

• They cannot become Veterans or otherwise
receive benefits from campaign experience.

Fearless

• They are not affected by the Burn, Stun, and
Shock weapon traits.

Whether they have seen too much or simply
lack any appreciation of terror, some troops are
not shifted by bizarre horrors (they may still be
convinced to retreat in the face of heavy losses,
however). A Fearless figure is not affected by
Fear. They take Morale tests normally.

Synthetic
Robots, full conversion cyborgs and synthetic
lifeforms have several advantages in a hostile
environment. Synthetic units obey the
following rules, many of which are scenario
specific:
• They are not affected by gas, poison, disease,
or virus type attacks.
• They do not need to breathe, and are
unaffected by vacuum or drowning.
• They cannot benefit from Medics or any
similar mechanism or equipment.

46
6
4

• They are not affected by Fear but become
Suppressed and take Morale tests normally
(due to AI survival protocols)

Note that the rules for a specific troop type may
have modifications to the above rules.

Beasts
This trait covers wild animals and various
lifeforms that are not typically considered to be
sapient. Beasts obey the following rules:
• They cannot perform most tasks that
require interacting with terrain, equipment
and similar.
• They cannot pick up or use any type of
equipment or weapon.
• They cannot become Veterans or otherwise
receive benefits from campaign experience.
• They are not affected by Suppression. Units
of Beasts take Morale tests normally.
Note that the rules for a specific troop type may
have modifications to the above rules.

Combat Rules

SPECIAL UNIT TYPES
Hero
Heroes are the sort of larger-than-life
individuals that can defy the odds occasionally.
A Hero receives two advantages:
• They never receive or are affected by
Suppression markers. If a Hero is part of a
squad, they cannot be selected as a figure
for Suppression even if the combined squad
has more Suppression markers than it has
figures left.
• They receive a 6+ Saving Throw against
all Hits, regardless of source. This includes
Hits from traps or environmental threats, but
does not include sources of harm that do
not use the normal damage mechanic. For
example, falling into a volcano just kills you
outright, so no Saving Throw applies.

Leader
Leader figures can bolster the Morale of
nearby troops to keep them in the fight
longer. They do this through the mechanics of
Inspiration and Direct Command:

• Inspiration applies to any unit within 6"
and Line of Sight of the Leader. Add +1 to
the Morale score of the unit.
• A Leader may take Direct Command of a
unit by moving within 2". The unit activates
immediately if it has not already done so
this round. The Leader is now part of the unit
and cannot leave it, though they retain their
Inspiration ability and if the entire squad
become casualties, the Leader is freed again.
If a unit fails a Morale test while an
independent Leader is within 6", the Leader
may take Direct Command immediately. Move
the leader 6", ignoring terrain provided the
location picked is within Coherency of the
squad in question, then reroll the Morale test.
The reroll counts the Leader as part of the squad
and continues to receive the Inspiration bonus.
• If the reroll succeeds, the unit passes, and
the Leader is part of the unit going forward,
as indicated above. If either the Leader or
the unit had activated prior, the combined
unit is unable to activate again this round.
• If the reroll fails, the unit and Leader are
removed from play.

47

Combat Rules
Cavalry
While rather archaic on the futuristic
battlefield, animal mounts are common on
many frontier worlds where they can see use
by militia, scouts, nomads, and even some
military forces. Genetically modified horses
have spread across the galaxy, and various
other animals can be used as well. Large lizards
are popular on arid worlds, for example.
Cavalry figures move at the speed of the
animal. A typical mount has 8" movement
but cannot enter most terrain features. While
mounted, the rider receives +1 Combat Skill
when fighting in close assault combat. They
must halve the range of any weapons fired
since they lack a stable platform.
Cavalry does not receive the benefit of Cover
unless the terrain blocks the legs of the mount
completely.
Cavalry may dismount during battle: This takes
a standard move (if Dashing, the figure can
still move up to normal Speed afterwards),
and the unit is treated as infantry for the rest
of the battle. Cavalry cannot remount during
the game unless a scenario permits so. The
unit is assumed to have a drone or similar that
can hold the riding animals and guide them
away safely, so the unit does not have to detach
figures to do so.

Gun Crews
Crewed weapons are mounted on a tripod,
tracked platform, or other system. Each weapon
is manned by a gun crew of 3 figures which
act as a small squad, including all Morale and
Suppression rules.
Unlike regular units, a gun crew may either
Move OR Fire in their activation if they wish to
move or fire their Crewed weapon. A crew can
activate normally if they are intending to move
and fire their personal weapons or perform
other actions.

48
8
4

While moving the weapon, the crew can
perform no actions of any kind, and at least
one crew figure must be in contact with the
gun model. The gun and crew can be moved
a number of inches equal to the number of
crew figures.
To fire the weapon the unit must have at
least one figure in contact. If the crew fires
their Crewed weapon during an activation,
none of the crew members can fire any
personal weapons. Suppression markers can
be assigned to the “non firing” crew figures.
If a crew is reduced to a single crew member,
they may no longer add their Combat Skill
to attacks.
For simplicity, normal combat cannot damage
Crewed weapons. If a figure moves into contact
with a Crewed weapon that has no living crew,
it may destroy the weapon automatically if
armed with a melee weapon or any grenade
capable of inflicting damage.
A Crewed weapon that is run over by a tracked
vehicle is crushed and destroyed, but the
vehicle must halt in place. Other ground
vehicles must halt upon contact, with no
other effects.

Cross-training

All gun crews in a force are cross-trained
and can take over each other’s weapons.
When active, a gun crew may detach
one or more figures to become an
independent unit. They can join any gun
crew by moving into Coherency with it.

Combat Rules

VEHICLE COMBAT
This section explains the rules required to use
everything from combat robots to massive
tanks. These rules are not complicated, but
you may prefer to play without vehicles for
the first couple of battles until you have a firm
grounding in the game system.

The Basics

Vehicle Actions
Vehicles activate using the normal reaction
dice. When activated a vehicle may perform
one of the following actions:
• Engage: Move and then fire its weapons.
• Move Out: Move at double rate. Take no
other actions.

Vehicles are always single model units, treating
the vehicle and crew as a single element.
Even if your force includes vehicles that are
part of a larger unit, they activate individually
on the gaming table. For example, a tank
platoon may have three tanks, but it would
fight as three independent tanks during
a scenario. Remember that your gaming
table is well within “close range” for vehicle
communications.

• Overwatch: Remain in position and enter
Overwatch (see page 43).

Vehicles have the same profile as other units,
though some characteristics derive from the
crew instead of the vehicle hull itself.

Regardless of movement mode, the vehicle
may turn once per round, including while on
Overwatch. A turn can be up to 90 degrees to
either side and can be done before, part-way
through, or after the move. It does not incur
any sort of movement cost. Turning is always
done by pivoting the vehicle in place.

Vehicle Movement
When Engaging, a vehicle moves up to its
Speed score. If Moving Out, the vehicle may
move up to twice its Speed score. Note that
unlike infantry, vehicles must always remain
stationary to enter Overwatch.

49

Combat Rules
Vehicle turning
options

Pivot ≤90° + Move

Partial Move +
Pivot ≤90°+
Remaining Move
Move + Pivot ≤90°

Vehicles may reverse when Engaging only.
Each inch moved in reverse takes two inches of
Speed. A vehicle could combine reversing and
forward movement, for example to reverse out
of an enclosing space, turn, and advance in a
new direction.

Vehicle Movement and Terrain
• Ground vehicles cannot enter most Area
terrain features.
• Wheeled vehicles cannot cross any Linear
obstacles. Tracked vehicles can cross Linear
obstacles up to half the height of the
tracks on the model.
• Wheeled vehicles cannot cross scatter
terrain. Tracked vehicles crush Scatter
terrain as they move.

Firing from Vehicles
When taking an Engage action, a vehicle may
fire each of its weapon systems.
A weapon can only be fired if it can physically
be brought to bear:
• Forward-firing weapons can fire to the front
45 degrees of the vehicle.
• Sidecar-mounted weapons can fire within
an arc from straight head to a 90-degree
angle to the side of the sidecar.
• Turret-mounted weapons can fire in any
direction. Some turrets feature a coaxial
weapon mount, in which case, the vehicle
may fire either weapon but cannot fire two
as part of the same action.
• Arm-mounted weapons (on walkers) can
fire to the front 90 degrees.
• Shoulder-mounted weapons (on walkers)
can fire to the front 45 degrees.
Forward-firing and
shoulder-mounted

• Walking vehicles do not suffer a
movement reduction for “soft” terrain such
as forest and bush; instead, treat them like
infantry when in rubble or wet ground.
They can step over obstacles up to knee
height at no penalty.
“Anti-gravity” vehicles are called Drifters.
They ignore all terrain features when
moving and can move over any intervening
features. Simply count their movement as
taking place on a flat table. Drifters can end
a move on top of a feature, in which case
assume they hover 1" above the terrain. If a
particular position is a bit too precarious, put
a marker there to indicate the actual vehicle
location, rather than risking the model
falling over and being damaged.

50
0
5

Forward 45°

360°
Turret

Arm-mounted
(on walkers)

Forward 90°

Straight-ahead
to 90° to the
side
Sidecar-mounted

Combat Rules
Vehicles shoot the same way infantry does, and
the same game rules apply, without special
Hit modifiers for vehicle fire. While the vehicle
has more limited visibility, it also benefits from
stability and additional targeting systems.
Vehicles may conduct Overwatch fire by taking
the Overwatch action. They may fire only a
single weapon mounted in the vehicle. Decide
which weapon to fire when you opt to shoot.

Firing at Vehicles
When firing at vehicles, we do not apply any
special Hit modifiers. While a tank is an easy
target, many shots simply deflect off the hull
if they strike at a poor angle. Meanwhile a fast,
light vehicle is more vulnerable but can evade
many shots.
Ranged attacks against vehicles use the
normal combat system: Roll to Hit, and then
roll for damage, subtracting 1 KP for every
damage die that scores over the Toughness
rating of the vehicle.
Count every natural 6 on the damage dice that
exceeds Toughness as a Critical Hit: 1 KP is
lost as normal, and roll another damage die.
Continue until no more 6s are rolled.
Note that if the attack has an insufficient
damage rating to do damage at all, a 6 has
no effect.

Once a vehicle has lost all its KP, it is wrecked
and becomes combat-ineffective. All crew are
injured, slain, or slip away after bailing out. Do
not place them on the table.
Any vehicle caught in the effect of an Area or
Stream weapon takes 2 Hits automatically. Roll
for hull damage normally. These attacks cannot
target the tracks.
Non-attack sources of damage affect vehicles
the same as any other damage type.
Vehicles are never Suppressed and do not take
Morale tests.

Target the Tracks!

An attacker within 24" may attempt to target
the tracks, wheels, legs, or gravity lift units
(basically whatever makes the vehicle move).
This is declared before rolling to Hit. If the
attack Hits, it can inflict only a single KP worth
of damage (no matter how many damage dice
score above the Toughness value or roll a 6),
but a KP loss also indicates the vehicle is now
immobilized and cannot move for the rest of
the battle.
Once immobilized, a vehicle cannot have the
tracks (etc.) targeted again.

51

Combat Rules

Vulnerable Angles
An attack aimed at the rear of a vehicle receives
an additional +1 weapon damage. For
example, a weapon with +3 damage counts as
+4. The attack must originate from within the
rear 90-degree arc of the vehicle to qualify.
This bonus also applies if an attacker fires from
a position that is at least 3" above the vehicle,
such as the upper floor of a building, as such a
shot can Hit the thin roof armor of the vehicle.
Walkers do not have vulnerable roof armor,
and are not subject to this, but all vehicles are
vulnerable to the rear.

Close Assault and Vehicles
Infantry may strike a vehicle by moving into
contact with it. The unit may Dash but is not
required to do so. The figure expends their
action to attack the vehicle.
A Hit roll is made on 1D6+Combat Skill
with 4+ indicating a Hit. Figures armed with
multiple close combat attacks receive their
normal number of attacks.
The Hit may be resolved by any weapon with
the Pistol, Melee, or Grenade traits. Only

52
2
5

a single Hit is inflicted. The Shots rating is
ignored as is any Area effect.
At such close quarters, vehicles do not
generate enough speed to overrun enemies;
any infantry figures are simply pushed aside.
A vehicle that contacts another vehicle or
obstacle comes to a halt.

Exposed Crew
If a vehicle has an Exposed crew, the following
adjustments apply:
• Weapons that do not have a high enough
damage rating to beat the Toughness score
of the vehicle roll 1D6 per Hit. A 6 inflicts
1 KP of damage.
• Roll only a single die per Hit, regardless of
any other weapon characteristics, and such
Hits cannot inflict critical damage.
• The vehicle adds the Training score of the
crew (see page 142) to any Observation
rolls (in the case of special crews, use the
Observation of the commander, if present).
• When close assaulted, attackers add +1 to
the attack roll.

Combat Rules
Grav vehicles

Any vehicle with Grav mobility requires a
roll of 6+ to be Hit by close assault.

Walkers and Close Assault

Contrary to popular belief, walker-type
vehicles are as vulnerable to close assault
as any other vehicle. The size difference
and the limited range of movement of a
walker means it cannot effectively fight
infantry, and most walker pilots hope that
point blank autocannon fire will keep any
enterprising enemy infantry at bay.
While many popular walker designs
feature fearsome looking blades and
claws, these are typically for tasks such as
carving through dense forest. However,
this has not stopped hypernet military
nerds from creating stories of “assault
walkers” hacking their way through
infantry squads.

Transports
Transport vehicles can transport a certain
number of infantry figures as indicated in the
vehicle profile. These Infantry may embark by
moving into contact with a hatch, door, or other
entry point.
While embarked, infantry cannot perform
any actions. Embarked troops can disembark
when they are activated: Simply place them
in contact with a hatch or door, and move
normally according to their assigned actions.
If a vehicle is destroyed, any transported
infantry rolls 1D6 per figure:
• On a 1-4, the figure escapes unharmed.
• On a 5-6, it becomes a casualty, though any
available Saving Throw may be attempted.
Place Survivors in contact with the wreck; give
each unit 2 Suppression markers.

Transporting Guns

A gun crew may mount a transport as an action
if they activate in contact with the transport.
Dismounting takes a full activation. While
mounted, the gun counts as two additional
crew figures.

Dismounting
Vehicle crews normally cannot dismount
during a game. If the vehicle is destroyed, the
crew are all injured, evacuate the battlefield, or
are otherwise unable to fight.
However, a scenario may allow a vehicle crew
to dismount; for example, the scenario may
require the crew to investigate something on
foot. While dismounted, the crew can perform
any tasks normally. For simplicity, a crew can
be mounted or dismounted; a vehicle cannot
dismount only part of the crew.
Crew operate with the standard profile for
their type and are armed with handguns.
While dismounted, the crew is subject to
Morale and Suppression as normal. A crew
could conceivably mount another vehicle with
no crew, but this requires a 1D6+Savvy test
result of 5+ (friendly vehicle) or 6+ (enemy
vehicle) to do so.
The vehicle profile lists the crew size for each
vehicle.

Other Actions and Activities
Vehicles cannot perform most scenario
tasks, though the GM may make exceptions.
Typically, actions such as communication can
be performed by the crew, or the crew may
be permitted to dismount to perform
individual tasks.
Vehicles may Observe (see page 39), but do
not add their Training score to the roll unless
they have an Exposed crew.

53

Combat Rules

STORY
POINTS
A big part of narrative gaming is just that:
The narrative, the story we weave as we play
the game. Much of the story is created by the
actions on our gaming table or by connecting
things as they happen in the game world
through elements such as the campaign rules.
There are two schools of thought when it comes
to story in a miniatures game. Some believe
story is strictly an outcome of what happens on
the table and any narrative added should be
restricted to that. For example, if a particular
character dies, then that’s it – after all, in war
nobody is safe.
Others prefer to have a stronger story, which
occasionally means second-guessing fate.
Whichever you prefer (it’s your game after all),
simply declaring that something happens can
feel like cheating, and that you’re undermining
the game. After all, if you can simply declare
something happens this time, why not do it all
the time?
Story points are a sanctioned way to modify
outcomes to satisfy what you would like to have
happen or how you would like to see the story
develop. They are only used in solo games or
in games where the players are fighting GMcontrolled enemies.

Secondary Objectives

If you use the Secondary Objectives rules (see
page 82), these award one additional story
point upon completion.

54
4
5

Each player begins the game with 3 story
points. In a campaign, one additional
story point is earned every time you play a
tabletop battle.
A story point may be spent to do any of
the following:
• You may pick any result from one random
table instead of rolling the dice.
• If a character or unit would suffer a negative
consequence in the campaign such as
destruction, it may be avoided.
• During a tabletop battle, any die roll can be
rerolled. The rerolled score may be modified
up or down 1 point (D6 roll) or 2 points
(2D6 roll) after rolling.
• Have a narratively appropriate event
happen: Reinforcements arrive just in the
nick of time, an old ally happens to be in the
area, the enemy decides to focus on the
alien monsters instead of your troops, and
so forth. The event must be appropriate to
your story and tone.
• Receive a benefit appropriate to the story but
not specifically permitted in the rules. For
example, one of your characters might pick
up the weapon of a fallen enemy and use it,
or your favorite tank crew tweaks the laser
cannon on their tank to give it +1 damage.
Note that events that make life harder do NOT
cost a story point. If you decide that the enemy
really ought to have brought a whole tank
platoon with them, you don’t have to pay for
the privilege.

Combat Rules

AI / SOLO
COMBAT
The AI / Solo Combat System
AI Core Principles
When playing solo, an “AI” governs how enemy
forces behave. In this context, “AI” is a high-tech
way of referring to the rules which determine
where and how the enemy moves and fights –
a series of priorities for the enemy. Instead of
iron-clad flowcharts, these are principles you
use to determine what the enemy might do
in each situation. It is assumed that the player
will still provide some input and moment-tomoment decision making.
If you pick up an infantry figure from
its position on the table and want to do
something as simple as moving it to stand
near a pile of rubble, there are a lot of
exact locations you could place the figure,
depending on whether it is prioritizing Cover,
ability to fire, specific angles of attack, etc.
Multiply that by five for a squad of soldiers,
some of which carry different weapons, and
such a decision-making process quickly
becomes sprawling. Instead, in Tactics, it is
assumed that fine-grained decision making
by the player is made in accordance with the
best option for the unit in question, following
broader AI priorities.
The basic AI system works with as little dice
rolling as possible, to keep the game moving
quickly and easily. Once you have internalized
the priorities for the AI, you should be able
to play with very little reference to the book.
The AI can be used in any game, regardless of

scenario, though some adjustments may need
to be made to suit a particular scenario with
unusual objectives or conditions.
The AI is not intended to account for every
possible situation and is occasionally “dumb”
on purpose. If in doubt, players can still decide
based on their own priorities. For example, if a
position is so narrow that one squad member
must be left out of Cover, that should not be a
trooper with a valuable support weapon.
If you want to make the enemy feel more alive
and less predictable, you can supplement the
AI with the AI Battle Plan system (see page 58).
This system helps create a livelier experience
that remains focused on the combat aspects of
the game. The effect is to increase the feeling of
being engaged in a living, unpredictable battle
against an enemy trying to get the better of you
(as well as occasionally making mistakes).

AI Activations
• If the AI is only able to activate a single
unit during a phase, it always activates
the available unit closest to your
battlefield edge.
• If two units activate, the second unit picked is
the one furthest from your battlefield edge.
• If three or more units activate, any additional
units are the closest to your battlefield
edge, working your way backwards after
each activation.

55

Combat Rules
Example:
If the enemy activates three units during a
phase, it would activate the unit closest to
your battlefield edge, then the unit furthest
from your battlefield edge, and finally the unit
second-closest to your battlefield edge.
Note that the AI is limited by all normal
rules for activations. For example, it cannot
activate units multiple times during the
same battle round.

Unit is at Risk
The AI will consider a unit to be at risk in the
following cases:
• It is in the open and in Line of Sight of an
enemy that can fire upon it but is itself
unable to harm (typically a tank).
• It is an infantry unit, and the number of
Suppression markers equals or exceeds the
number of figures.
At-risk units prioritize moving to a position
with Cover. Infantry regroups once within
Cover, although if there are enemies within
Line of Sight and 12" range, make an AI roll to
see if the infantry opts to fire on them instead
of regrouping.

56
6
5

The AI Roll

Some situations may benefit from an AI
roll to decide exactly what the AI does.
This is very simple: Roll 1D6. A roll of
1-3 means the AI does not take action,
a 4-6 means it does. Similarly, to decide
between cautious or riskier options,
a 1-3 indicates the more cautious
option, and a 4-6 indicates the more
aggressive option.

Target Priority
When a unit has multiple targets to select from,
it tries to engage according to target priority.
Units within 12" of enemy forces always
prioritize the closest enemy it can harm. A unit
never prioritizes a target that it cannot damage.
Otherwise:
• Vehicles prioritize vehicle targets over
infantry targets.
• Infantry prioritize infantry targets over
vehicle targets.
• Crewed weapon teams prioritize vehicle
targets.

Combat Rules
• Vehicles and weapon teams with no
weapons capable of damaging a vehicle
target prioritize infantry targets instead.
• Units that cannot see a priority target fire on
a non-priority target instead.
Due to the normal target selection rules, in
most cases only one or two opposing units are
permitted targets, so it is usually clear what a
unit should shoot at.

Unit Focus
When a unit activates, evaluate the four clauses
below, in sequence, to determine its focus:
1. units that are on an objective always focus
on holding that objective.
2. units that have been attacked during
the current round always focus on their
attackers, using their target priority to
choose if multiple are applicable.
3. If the unit has not been attacked, it focuses
on the nearest objective within 18".
4. if no objectives are within 18", it focuses
on the nearest target that fits its target
priorities.

AI Actions
Units Focused on an Objective

Units that are focused on an objective will
move towards it. If the objective is held
by enemy forces, the units fire as they go.
Otherwise, they engage enemies that match
their target priority and are within 24".
Units with melee weapons move as quickly as
possible and attempt to enter close combat
with any enemy barring their path. If they
are going to move within weapons range of
enemies while en route to the objective, they
move at normal pace and fire at the enemies
closest to their path.
A unit holding an objective remains in place and
fires at priority targets. If they have no targets in
sight, they enter Overwatch, if that rule is used
(see page 43), or otherwise hold their position.

Units Focused on a Target

Units that are focused on a target will move to
bring the target within range and sight, then
fire on it with as many shots as possible. Units
will always try to stay in Cover, if possible. If
they are unable to establish a shot, they will
move as quickly as possible towards a position
that would allow them to fire on their focused
target, even if it means moving into the open.

Units’ Position Choices

If a unit has a choice between a more beneficial
but more exposed position and a safer but
less valuable position, make an Action roll to
determine which option it will use.

Attack Forms

By default, Units will prioritize the attack form
that is most likely to inflict damage on the
target in question. For example, a unit with
Pistols and Melee weapons will prioritize
Melee weapons over Pistols, and a tank would
prioritize firing its main gun at an enemy tank
instead of its machine gun.

57

Combat Rules
Vehicles

Vehicles ignore objectives and will always
attempt to engage priority targets at the
longest range possible for their weapons. A
vehicle will not approach within 6" of forward
terrain features (terrain features closer to the
opposing battlefield edge than the current
position of the vehicle) unless they have
friendly infantry within 6".

Transport Vehicles

Transport vehicles always try to remain
within 6" of and behind the squad they are
attached to (see page 138), while the squad
is dismounted. Transports do not have their

own focus. Instead, they will always attempt
to fire at any targets that attack or threaten
their squad.
While mounted, transports will attempt to
move towards whatever is the priority for the
infantry squad, dismounting once fired upon
or within 15".

Other Units

Crewed weapon teams, snipers, and similar
“weapons” units will stick to their initial
location and will fire from there. These units
use the Overwatch rule (see page 43), even if
you do not use it otherwise.

AI BATTLE PLAN SYSTEM
The Battle Plan system allows you to add an
element of uncertainty to your battles. Battle
Plan rolls can result in units being added to
the battle or additional actions being taken.
They can also result in units receiving new
orders – orders a unit will carry out until they

58
8
5

are completed or no longer applicable. If a
unit receives new orders a second time, they
override all previous orders.
At the beginning of every even-numbered
round (2, 4, 6, etc.) roll D100 on the table
below and apply the results immediately.

D100
ROLL

BATTLE
PLAN

NOTES

01-05

Defend in place

Randomly select an enemy unit within or on a terrain feature. It receives
new orders and will remain in place and defend the terrain feature. The
unit is immediately placed on Overwatch.

06-09

Sniper!

Randomly select one of your infantry units, then place an enemy sniper
specialist in the most distant terrain feature that has a Line of Sight to
the selected unit.

10-15

Pull back and
reform

Randomly select an enemy infantry unit that has taken casualties. Move
the unit back to the nearest terrain feature behind their current position.
It is restored to full strength and removes all Suppression markers.

16-23

Await orders

Randomly select an enemy unit. It will take no actions this round except
to return fire if fired upon. Next round it will act normally.

24-30

Command
confusion

Randomly select an enemy unit; it may not activate this round.

31-36

Outflanking

Randomly select a neutral battlefield edge and randomly select a terrain
feature within 6" of that edge. Place an enemy infantry squad within it.
The squad is assumed to have activated this round already.

Combat Rules
D100
ROLL

BATTLE
PLAN

37-41

Narrow focus

Randomly select one objective more than 6" from enemy troops. The
enemy will ignore this objective for the rest of the battle.

42-47

Armored focus

If you currently have more vehicles than the enemy, add a light tank
at their battlefield edge. Place the tank opposite one of your vehicles
(selected at random). The tank may activate normally this round.

Withdrawal

Randomly select an enemy infantry unit. They receive new orders to
withdraw to an objective behind their current position. If no objectives
apply, they will withdraw to the nearest terrain feature behind them.
Once they reach their destination they revert to operating normally.

48-56

NOTES

57-61

Assault group

Randomly select an objective, then determine the second nearest
terrain feature to that objective (skipping any features in which you have
troops). Place an enemy storm squad in that terrain feature. The squad
may activate this round.

62-68

Reinforce the
center

The enemy receives an additional infantry squad at the center of their
battlefield edge. This squad may activate this round.

69-76

Push forward

Randomly select any enemy unit. The unit receives new orders to
move into (or adjacent to) the nearest terrain feature forward of their
current position.

77-81

Light support

If you currently have more vehicles than the enemy, they receive an
armored car at their battlefield edge. Place it where the most open
path onto the table exists. It may act normally this round.

82-88

Reinforce position

Randomly select an enemy squad in Cover. Add 1 figure to the unit
and remove 1 Suppression marker.

89-93

94-00

Second wave

Remove from play any enemy infantry squads that are not within 12"
of an objective. Then place each unit with a new, identical unit at full
strength and with no Suppression markers. Place the new squads in
the terrain features nearest the enemy battlefield edge, one squad per
feature. The new units may act normally this round.

If an enemy unit of any kind is within 12" of an objective, randomly
select one such unit. Place an enemy infantry squad in the nearest
Concentrated push
terrain feature to the unit selected. The new unit cannot activate
this round.

Notes:
• If an event cannot be applied, it does not
take place and is ignored. For example, the
Sniper event cannot apply if you have no
infantry on the field.
• In Skirmish Scenarios (see page 74), replace
units with single figures, and ignore vehicles.

59

Combat Rules

Two-fisted Play
(Optional Rule)

Some solo gamers prefer to just play both
sides to the best of their abilities and forego
any AI system. If this is more your speed, you
don’t need any additional rules, though you
may still enjoy the Battle Plan system to add
unpredictability. In a truly neutral game, you
might even apply it to both sides.
In a two-fisted game, simply look at the table
and evaluate what makes the most sense and
then do that. This method works best if you
assign a little bit of personality to each army or
create a plan of attack before the game starts,
and then try to stick to that.

60
0
6

Overkill
The enemy unit count cannot exceed 1.5 units
for every unit you began the game with. For
example, if you deployed 6 units, the enemy
cannot receive more than 9 in total. Ignore any
instructions to place units past this point.
If playing for victory points (see page 73), you
receive 1 additional victory point in any
scenario where the enemy fields more units
than you do.

Combat Rules

SOLO GAME DIFFICULTY
ADJUSTMENTS
When playing Solo, you may want to adjust
the challenge posed by the game. This section
offers some basic ways to do so, whether you
are looking for the battles to be more difficult
or less so.

Using the Army Builder
The simplest place to start is the number of
troops that will be available to each side. If you
are using the points system, give the enemy
slightly more or fewer points’ worth of troops.
A 5% or 10% increase or reduction can modify
the outcome in subtle ways, while 20-25%
will tend to be noticeable. For example, in a
500-point game, a 10% increase would give
the enemy 550 points to spend.

Difficulty Increase:
Morale Failure Cap
When using this option, the enemy force can
only fail one Morale test per round. If multiple
enemies must test in the same round, begin
closest to your battlefield edge, and work your
way back. Once a unit fails a Morale test, take
no further tests for the enemy that round.

Difficulty Increase:
Stronger Enemy Squads
All enemy squads enter play with six figures
instead of five. This does not affect weapon
teams, only squads of infantry.

This can work well if you view the game as a
sort of challenge ladder. Start off facing an
enemy at -15%, and then increase the points
by 5% after each game you win and reduce
them by 5% every time you lose. See how high
you can push the enemy strength before it
becomes impossible to win.

Difficulty Decrease:
Heroic Activation

Using Random Enemy Forces

This can be done even if the figure already
activated this round. If the figure has not
activated yet, this bonus activation does not
hinder them in any way.

If you are using the Random Enemy Forces
Table (see page 62), determine the Unit Count
for your force as normal. To add difficulty, add
1 or 2 to the effective count when determining
a result on the Enemy Table. To decrease
difficulty, reduce the effective Unit Count by 1.

When using this option, the player receives
one bonus activation every round. This can
be used in any of your phases and allows any
Individual figure to immediately perform a
normal activation.

Difficulty Decrease: Free Targeting
You may always choose any visible target to
shoot at.

61

Combat Rules

RANDOM
ENEMY
FORCES
This system is used to determine what enemy
forces you will be facing in a battle. It can
be used both when setting up a game and
for revealing troops during a battle. The
same table is used in both cases. This is used
primarily in solo games.

Friendly Unit Count

Note: The Enemy Tables will not generate every
possible enemy unit choice. It is intended to
provide a typical military force. If your scenario
requires a different outlook, you can substitute
units as needed. For example, a pirate force
might replace tanks with assault infantry.

• Squads, weapon teams, and vehicles count
as 1 unit.

To use either version of the system you will
have to know your unit count: The number of
units in your army at the start of the battle.
• Individuals count as 0.5 units.

Note: Unit count even if off the table, in
reserve, etc. If you had it available, it counts. Do
not count any units on your Campaign Roster
that are not assigned to the battle.

The Enemy Table
D100
ROLL

01-10

If the enemy is outnumbered by 3 or more units, you encounter two infantry squads.
Otherwise, you encounter one infantry squad.

11-20

You encounter two infantry squads and one major character (Leader).

21-30

You encounter one recon squad.

31-40

You encounter one infantry squad + transport (even chance of APC or IFV)

41-45

You encounter one epic character (Leader and Hero). If the enemy is outnumbered by
3 or more units, add one infantry squad.

46-50

62
2
6

ENEMIES REVEALED

You encounter one weapons team. If you have a medium or heavy tank, you encounter a
heavy tank instead.

51-60

You encounter one armored car or walker. If the enemy already has 2+ vehicles, you encounter
one infantry squad instead.

61-70

You encounter one tank. If the enemy has no infantry, treat as two infantry squads instead.

71-80

You encounter one infantry squad + one tank.

81-90

If you have 2+ vehicles, you encounter a light tank. Otherwise, no enemy units.

91-00

If the enemy has objectives that must be captured or taken, you encounter one storm squad.
If the enemy is currently outnumbered in unit count, add one infantry squad as well. If there
are no objectives to capture, no enemy units are encountered.

Combat Rules

Generating Enemy Forces...
...Prior to a Battle

Using this method, you generate the enemy
forces before a scenario begins. This allows you
to play against the AI using the same approach
as a battle against another player. If you want
to paint up enemy forces ahead of time, this is
an ideal approach.
Roll on the Enemy Table, adding up enemy
forces as they are generated. Evaluate any
conditional entries based on the forces
generated so far. For example, if a result
varies depending on whether the enemy is
outnumbered, look at their unit count so far.
• If the enemy unit count is below yours after
the results of a roll, roll again on the table.
• If a roll would make the enemy unit count
more than one point above yours, do NOT add
the enemy units, and the enemy army is done.
• Otherwise, add the units, and the enemy
army is then complete.
In some edge cases you could end up with
no enemy forces at all. If so, they receive two
infantry squads.

...During a Battle

Using this method, the enemy does not set
up normally. Instead, you generate the enemy
force as you play. To use this, you must decide
upon an enemy force level you wish to
potentially engage with. This forms a maximum
number of units you can face in the battle.
• If the enemy force is Limited, it is limited to
your unit count plus 1.
• If the enemy force is Strong, it is limited to
your unit count times one and a half.
• If the enemy force is Unrestricted, there is
no potential limit other than the scenario
time limit. Good luck!
Once the maximum has been reached
during the battle, any roll that would result in
exceeding the maximum count is treated as
no troops arriving. A roll cannot be applied in
part. Note that this is based on the number
of enemies that have arrived in total, not the
current count. In other words, killing enemies
does not “free up” slots for more units.

Unit Specifics

You can use the default armaments in the Army
Builder (see page 132) and Vehicle Lists (page
142), or you can match the units to whatever
you happen to have in your collection.

63

Combat Rules
Using the System
At the start of each battle round, roll D100
on the Enemy Units Table to determine what
forces your troops have spotted coming in.
In games with a lot of troops (7+ units, for
example) you may have to roll twice per
round. Each round will provide 1-2 units to
face. If your unit count is very large, consider
adding additional rolls up front. For example,
a large battle might roll twice in the first three
rounds and once per round thereafter.
All units placed can act during the current
round.
Place units according to the following rules:
• For infantry and storm squads roll a
number of D6 equal to the round number
(1D6 in Round 1, 2D6 in Round 2, and so
forth). Select the most forward terrain feature
that is within that number of inches from the
enemy battlefield edge, and set the units
up there. They cannot set up in a feature
that contains your troops or features that are
immediately behind one of your units.
Set up all squads arriving from the same roll
in the same feature, if possible. If there is
insufficient space for both units, set one up
in that feature, and the next in the nearest
terrain feature that is behind the first.
• Set up Characters in Coherency with a
random squad (see page 24). If the enemy
has more than six infantry squads, select
randomly from the six squads nearest to the
player’s battlefield edge.
• Recon squads select a random neutral
battlefield edge. Roll 1D6 and starting
from the enemy battlefield edge, count
that number of terrain features near that
edge (‘near’ can be taken as within 3"
per foot of table width). Set up the recon
squad in the indicated feature. If the
feature is occupied by either side, move
the squad back one feature at a time until
you find an empty feature.

64
4
6

• To set up weapon teams, randomly select
a player squad or vehicle. Select the most
distant terrain feature that has a Line of
Sight to the selected player unit but is closer
to the enemy battlefield edge than the
player’s edge. Place the weapon team there.
• To set up vehicles, roll 3D6. Randomly select
an open space roughly that many inches
from the enemy battlefield edge and which
has a path from that edge to the location in
question. If vehicles and infantry arrive on
the same roll, set up the squad randomly
right before or right behind the vehicle.
In some cases, a unit may not be able to deploy
at all according to the above rules. If so, the
unit arrives at a random point along the enemy
battlefield edge. Divide the battlefield edge
into six sections and roll a D6 to determine in
which part the unit will arrive. Place the unit at
the center of that section of the edge.
Example of play:
I have a force with a unit count of 5, comprising:
• two individuals (2 x 0.5 units)
• three infantry squads (3 x 1 unit) and
• one tank (1 unit)
I have opt for a Limited enemy force.
In Round 1, I roll 91. As the enemy has both
objectives to take and less troops than me, they
receive a storm squad and an infantry squad.
Their unit count is 2.
In Round 2, I roll 44. The enemy receives an
epic character (0.5 units), bringing their unit
count to 2.5.
In Round 3, I roll 40. They receive an infantry
squad (1 unit) in a transport (+1 unit),
bringing the unit count to 4.5.
In Round 4, I roll 40 again. Since this would
take their unit count to 6.5, it is counted as
no arrivals. Note that it does not matter if I
killed any of the enemy troops. They still count
as having arrived.

Combat Rules

Battlefield
Support
The Basics
Sometimes the troops on the battlefield are
on their own, and the player must make do
with only what is on the table. Other times,
especially when dealing with military units, the
force on the ground is part of a larger operation
that can lend a hand, if needed.
For example, a platoon of infantry may have
artillery support from the battalion mortar
battery, or a raiding force may have an evac
ship on standby.
The Support system allows forces to call in
requests for assistance during a battle. It
consists of several support options, each of
which represents a specific way to influence the
battlefield. The use of support should always
be justified narratively: Obscuration might be
smoke shells from a nearby mortar, conjuring

up a psionic storm, or dispersing nano-bot
canisters into the air. Be creative!
The GM should feel free to modify support
options according to the needs of a particular
scenario.

Determining Support Available
The amount of support available should be
determined by the scenario. Typically, if support
is available, allow 2-3 options per faction.
Pick from the available options listed below
based on what the force might reasonably have
available to it, as well as what will make for a
fun scenario. Pay careful attention and avoid
things that would make a scenario too easy.
Each support option available is assigned a
target number based on how readily available

65

Combat Rules
it is. The odds can be set by the GM, the scenario
details, or agreed upon among the players:

Support Types

• Options that are nearly guaranteed should
have a target of 4+ or 5+.

Options marked as having a Duration last from
the moment they are called until the end of the
current round. This means if they are called in
the final phase, they would expire as soon as
that phase is concluded.

• Options that are dependable should have a
target of 6+, 7+, or 8+.
• Options that are unlikely should have a
target of 9+ or 10+.

SUPPORT OPTION

DURATION

Area Denial

Yes

Countermeasures

–

Engineers

–

Evac

–

Fire Support

–

Illumination

Yes

Intel Update

–

Calling in Support

Interdiction

–

A single support call can be made during any
player phase. Select which figure is calling
the support and which type they are calling.
This figure cannot fire. A vehicle can only call
for support if the vehicle commander does so
(preventing the vehicle from taking any other
actions), or it has a dedicated radio operator
(allowing the vehicle to take additional
actions).

Mine Laying

–

Obscuration

Yes

Resupply

–

Scanner Sweep

–

Scramble

Yes

Targeting Guidance

Yes

Try to avoid target numbers outside these
ranges. Note that the target numbers will
change as you play the game.

Simple Option

Each side has three support options. Rate
one at 6+, one at 7+, and one at 8+.

Roll 2D6+ Savvy for the figure calling in
support.
• If the roll is below the current value for the
support option, the support is not currently
available and cannot be attempted again
during the current round.
• If the roll is equal to or above the current
value for the support option, it arrives at the
end of the current phase.
The target number for a support option is
raised by 2 each time it is successfully called.
Eventually the target number will be so high
it cannot be successfully rolled by any units on
the table, making it effectively unavailable.

66
6
6

The following support options are available.

Some support types target a point or location.
This can be selected anywhere in Line of Sight
of the figure calling the support. If targeting
a terrain feature that obscures Line of Sight,
the target point must either be along the
visible edge or targeting the exact center of
the feature.
For a support option that targets a unit, the
figure calling the support must be able to see
at least one figure in the target unit that is
within squad Coherency (see page 24).

Combat Rules
Area Denial (Duration)

Target: Select a target point that has no troops
currently within 3".
Effect: The area within 3" of the target point
becomes Impassable for the rest of the
current round.

Countermeasures

Target: Select an enemy support option.
Effect: If the countermeasures are successful,
the target number of the targeted option is
raised by 2 for the rest of the game.

Engineers

Target: The target point must lie behind the
most forward friendly unit and cannot be
within 8" of an enemy unit.
Effect: At the target location you may do one of
the following:
• Bridge a gap, chasm, or obstacle up to 6"
across.
• Clear a path up to 6" long through
Difficult or Impassable terrain, or clear a
vehicle wreck.
• Remove a hazardous obstacle, trap, or
minefield.

Effect: Deliver an artillery strike aimed at
the target location. It scatters 1D6" from the
intended target in a random direction. The type
of strike should be selected from the options
below when the scenario is set up. Resolve
the attack using the Area weapon rules (see
page 35), and within the listed blast distance
from the final target point.
STRIKE

DMG.

BLAST
DISTANCE

Light

0

3"

Medium

1

3"

Heavy

1

4"

Focused (+1 when
rolling for Hits)

2

1.5"

Scattered (-1 when
rolling for Hits)

0

5"

Armor Kill

+4 (x2)

1.5"

Illumination (Duration)

Target: None required
Effect: All visibility reductions due to darkness,
fog, or weather are cancelled for all sides until
the end of the current round.

Intel Update

• Gain entrance through or block a door,
hatch, or other entryway.

This is only used in scenarios with hidden
information.

Evac

Target: Select a target faction.

Effect: The unit and any number of friendly
figures within squad Coherency (even if they
belong to different units) are removed safely
from the battlefield. Evac’ed troops cannot
return during the battle, but do not count as
destroyed for any victory or objective purposes.

• Support options (reveals all support options
for a faction, but not their target numbers).

Target: The target is an infantry unit that is not
within 6" of enemies.

Fire Support

Target: Choose a location within Line of Sight
of any friendly troops.

Effect: The player may ask for accurate
intelligence on a topic of their choosing. This is
usually something dependent on the scenario,
but general inquiries that can be made are:

• Reinforcements (reveals the number of
units of possible reinforcements available,
and whether any (and how many) units are
scheduled to arrive next round.
• Whether hidden troops are contained in a
particular building or terrain feature (yes/no).

67

Combat Rules
Interdiction

Resupply

Effect: Any reserves scheduled to arrive this
round are delayed by 1 round.

Effect: A target unit is resupplied with a full
load of all limited-use items and munitions.
For example, if the unit began the battle with
3 uses of a weapon with the Limited Supply
trait, it receives an additional 3. This can take a
unit above the initial amount.

Target: None required.

Mine Laying

Target: Select a target location, then move this
target 1D6" in a random direction.

Target: One unit.

Effect: An area 4" x 2" becomes a minefield
(see Landmines, page 127). The long side
is always placed parallel to the requesting
player’s battlefield edge The field is known
to both sides (treat as “detected” for game
purposes) and the mines have the effects of a
frag grenade (see page 175).

Scanner Sweep

Obscuration (Duration)

Target: All enemy factions.

Target: Area of effect as designated below.
Effect: When the support is called, the area
of effect can be nominated as 2", 4", or 6".
The area within that distance of the target
point is obscured and blocks Line of Sight for
the rest of the current round. The obscured
area is Area terrain for the purpose of
infantry movement, but vehicles can move
through it safely.

Target: As designated below.
Effect: Reveal an unexplored location,
suspected enemy position, undisclosed marker,
or blip within sight.

Scramble (Duration)

Effect: All enemy long range communications
including support calls are unusable until the
end of the current game round.

Targeting Guidance (Duration)

Target: Any enemy target unit within Line of
Sight of your own units.
Effect: The target can be fired on by all units
regardless of darkness, fog, or weather
conditions until the end of the current game
round. Weapons with the Lock On or Pinpoint
traits receive +1 to Hit against the target.

Setting Up Game Types

Setting Up
Game Types
The game is playable in several ways: The
pick-up game where two players select armies
(usually using the points system) and then
meet to play out a battle; the Game Mastered

game where a player is running a scenario;
and the solo game where the game is played
against the “system” either with a single player
or with the players all on the same side.

SETTING UP A PICK-UP GAME
This section offers you a quick reference for
starting a pick-up game. Pick-up games
assume two players are playing without a
GM present and are usually one-off battles
unconnected to a larger campaign.

Step 3: Scenario

Step 1: Determine Any Game Parameters

• The Battle Scenario (page 76)

• Determine what your game will be about
and if it will be part of a campaign or not.
• If you want to use any optional rules,
decide so in advance.

Do you have a scenario worked out that you
would like to play? If not, select which of the
rulebook scenarios you want to use:
• The Skirmish Scenario (page 74)
• The Grand Battle Scenario (page 79)
Notes:

• If you don’t have a plan for the scenario, you
can roll for a Scenario Seed (see page 84).

Decide if you will use Secondary Objectives
(see page 82 – not suitable for the Skirmish
Scenario).

• You will need to understand the AI
mechanics before you play (see page 55).

The Battle Scenario includes several options
you would like to use.

Step 2: Army Selection

You may also opt to modify any of the rulebook
scenarios; for example, by using Scenario
Components (see page 119) or giving one side
or both Support (see page 65).

Armies are usually composed using the
Army Builder system (see page 132) to an
agreed points total. Players should agree
in advance on any changes they will make
to the Army Builder system. They may add
additional limitations or conditions, allow
additions to the system, or choose to use a
different system entirely.
Players typically build their armies “blindly”
in advance.

69

Setting Up Game Types

SETTING UP A
GAME MASTERED GAME
This section offers a quick reference for starting
a Game Mastered game. This features the GM
and one or more players. This reference applies
to the individual battle. If it is intended as part
of a campaign, you should also consult the
Campaign Play (see page 89).

Step 1: Create the Scenario

To plan the scenario, consult the Preparing
a Game Mastered Scenario guidelines (see
page 113). Evaluate what additional tools
will be used, such as any elements from the
Scenario Components (page 119).
At this stage you will need to determine how
many players will be involved and whether
they will fight against each other or against
GM-controlled forces (or both!).
You may opt to roll for a Scenario Seed (see
page 84) if you are not sure what to come
up with.

70

Step 2: Player Briefings

Each player should be briefed in advance on
the general circumstances of the scenario, such
as what is expected from them. They don’t have
to receive the detailed scenario instructions
ahead of time, but you should prepare these
as well in whatever method the group finds
most fun.

Step 3: Player Armies

If the players are to build armies, they should
do so in advance, with clear guidelines from
the GM regarding what troop types must (or
cannot) be used, restrictions, special characters
they receive, and so forth.

Step 4: GM Preparation

Any additional preparation on the part of
the GM should be planned and carried out,
such as terrain setup and any GM-controlled
armies required.

Setting Up Game Types

SETTING UP A SOLO GAME
This section offers a quick reference to get you
started on a Solo game. While solo gaming
traditionally means a single player, the same
setup applies to a game where players are on
the same side and fighting enemies controlled
by the game system, without a GM being
present. This section assumes a stand-alone
game but is also generally applicable to games
played as part of a campaign.

Step 1: Determine Any Game Parameters
• Determine what your game will be about
and if it will be part of a campaign or not.
• If you want to use any optional rules,
decide so in advance.
• You may opt to roll for a Scenario Seed
(see page 84) if you are not sure what to
come up with.
• You will need to understand the AI
mechanics (see page 85) before you play.

Step 2: Army Selection

Determine how you will pick your forces
such as whether to use the Army Builder
(see page 132) and whether to use a points
system or not.

You should also determine how the enemy
will be selected: You may pick an army using
the same system you used or use the
Random Enemy Forces system (see page 62).
If using Random Enemies, you can generate
the enemy army in advance or generate it
during the battle.
You are free to build your army in any way you
like, including using options that would not
normally be permitted in the Army Builder.

Step 3: Scenario

As with a Pick-up game (see page 69), you may
opt to create a custom scenario, or you may
prefer using one of the rulebook options:
• The Skirmish Scenario (page 74)
• The Battle Scenario (page 76)
• The Evolving Objective Scenario (page 80)
• The Grand Battle Scenario (page 79)
You may opt to modify any of these
scenarios with special circumstances such
as Support (see page 65) or Scenario
Components (see page 119).
You may also wish to use the AI Battle
Plan system (see page 58) to make the game
less predictable.

71

Setting Up Game Types

SETTING UP TERRAIN
Most games can be played very well on a
3' x 3' table space. This allows room to
maneuver without a smaller force being lost
on the table. If you increase your armies, you
will need additional space to work with:
4' wide and 3' across or 4' x 4' are both
good sizes. Troops typically begin 18-24"
apart, so a table with more depth allows more
room to deploy within, rather than pushing
the armies further apart by default.
The table should be populated with terrain
before you do anything else. If your collection
permits, try to create a theme for your table
such as jungle, urban, or industrial. If you are
playing in a campaign, the story may dictate
the location you are fighting in.
Don’t be afraid of putting a lot of terrain on
the table. Ideally, every square foot of the table
should have at least one large feature (such
as a hill, forest, or building) or several smaller
ones. If you have scatter terrain such as pebbles
or trees, put a lot of that around the table.
More terrain means more things to move
around and through, climb up on, or get stuck

72

between. It also helps break up long lines of fire,
so troops must maneuver into position instead
of just slogging it out across open ground.
Bear in mind the movement rate of typical
troops. Big gaps of more than 12" usually take
more than one round to cross, which leaves
troops at risk of being mown down in the open.
Likewise, long open lanes from one battlefield
edge to the other are likely to become ‘kill
zones’. This can produce an interesting effect if
you do it intentionally, as it tends to create two
separate smaller battles that happen in parallel.
Be careful about this if you are not specifically
planning for it, though. It can be frustrating
when reaching an objective means an approach
path where you can only be shot to pieces.
If you enjoy more vehicle-heavy games, you
need some open space so your tanks can
move around.
Terrain features placed near the edges of the
table rarely feature in game play. Any especially
big or impressive terrain pieces should go near
the middle. Often, placing these first helps
develop the theme of the battlefield. If you

Setting Up Game Types
have a cool space port landing pad, it might
inspire you to fill the table with cargo crates,
machinery, and colony buildings. You could
then put plant and forest features near one
side of the table to show that you are at the
outskirts of the colony.
You can also create a focal point by clustering
a group of features such as several smaller
buildings, large rock formations, or similar.
This can give a sense of place and purpose
to your scenario. Even if you are just playing
a general patrol mission and there to fight
the enemy, having the table look like a space
colony in the middle of a desert will greatly aid
your imagination.
Big features that block Line of Sight, such
as forest, tend to work best as a few smaller
patches of such terrain grouped together rather
than one huge forest. This creates paths and
clearings naturally, without having to work for it.

Buildings benefit from having various smaller
features nearby or connected to them, such as
fences, barrels, cargo crates, and other such
things. Urban and industrial environments are
often quite cluttered. This makes your game
look more believable and makes the area more
fun to fight within.
When evaluating terrain features to purchase
or build, compare them to your typical
infantry figure. Ideally you want a mixture
of features that can be seen across, taller
features that are climbable, and a few
features that are Impassable.
Some cosmetic touches that can be applied at
this point include roads (you can use fine sand
if you have an easy way of collecting it again
without it getting everywhere) or scattering
small clumps of flock around the table to add
some green specks.

VICTORY POINTS
In battle, a force has both explicit and
implicit goals.
Implicit goals are things that occur naturally
through play, such as avoiding having your
units destroyed or taking that ruined building
so you can then move your stronger units
into position. It may even be something
deeply personal like making sure your favorite
character survives the battle.
Explicit goals are those defined by the
scenario. They can be open ended (“Push back
the enemy from their current positions”) or
they can be very specific, with rules for how
they are achieved and when. The scenarios
in the rulebook use objectives that are quite
specific to facilitate pick-up games.

The rulebook scenarios all use victory points
(VP) to determine progress. As an objective is
completed, it awards VP to the player. At the
end of the game the side with the most VP is
assumed to have won the game, with a greater
difference in VP indicating comparatively
greater degrees of victory.
Note that unlike some games, there are no
VP for things such as destroying enemy units
unless it is explicit to the scenario.
There are two sources of additional VP:
• If you play using Secondary Objectives,
you receive 1 bonus VP.
• In AI battles, if at the end of the battle
you encountered more enemy units that
you brought units yourself, you receive
1 bonus VP.
When you are creating your own scenarios, you
may opt to use VP or not.

73

Scenario Types

SCENARIO
TYPES
The Skirmish Scenario

Terrain is set up in any mutually agreeable
fashion using the guidelines on (see page 31).

Army Building

The army for each player is selected using any
method you like, such as the points system
(see page 133). Armies may not contain more
than 15 figures and may not contain any
vehicles or Crewed weapon teams. You can use
the random enemy tables if you like, but some
results must be rerolled.

The two sides are each assigned a deployment
area that is 18" apart.
• If your table is 2' x 2', this means you
would have a 3"-deep space to set up on.
• On a 3' x 3' table you would have a
9"-deep space to set up on.

74

If one player finishes before the other,
deployment continues to alternate. A player
with no remaining figures to deploy may
instead select one of their figures and move
it 3" in any direction. If desired, they can
move the figure into the 18" “no man’s land”
between the two sides.

18"
NEUTRAL ZONE

PLAYER #2 TABLE EDGE

Table Configuration

The player with the most figures begins
deployment (using a random roll if numbers
are equal). Players take it in turns to deploy one
figure of their choice. Once a player has begun
deploying figures from a squad, they must
continue deploying from that squad each time
it is their turn to deploy until every figure in the
squad has been placed.

DEPLOYMENT AREA

During the game, any squads are deployed
and fight as individual figures. This means
Morale tests are not taken.

Army Deployment

DEPLOYMENT AREA

Each player is given three random objectives
to complete, with only one known at the
beginning of the battle. If playing solo, only
the player is given objectives: The enemy is just
here to bother you!

Randomly assign the players to opposite
battlefield edges.

PLAYER #1 TABLE EDGE

The Skirmish Scenario is intended for smaller
battles with only a handful of figures on
each side and is well suited to individualistic
pursuits such as gang fights, commando
operations, and patrol actions.

Scenario Types

Objectives

Conducting the Battle

• After deployment, each side generates one
objective from the table below.

• Randomly determine who plays first, and
then begin the game.

• Each side generates a second objective at
the end of Round 1.

• The game is played for 6 rounds and does
not use the Clock (see page 120).

• A final objective is generated at the end of
the Round 2.

Victory Points

Several objectives require a target terrain
feature. The first time this is generated it is
the feature closest to the center of the table.
The second time, it is the second closest, and
so forth. If there are multiple choices, select at
random. A given feature can only ever be the
target for one objective.
D100
ROLL

SKIRMISH
OBJECTIVE

01-20

Kill Target

21-30

Score Kills

31-50

Kill Confirmed

51-60

Stay Alive

61-75

Capture

76-90

Scout

91-00

Each player receives 1 victory point for every
objective they complete.

NOTES

Randomly select an enemy figure currently on the table. The objective is
completed when that figure is killed.

Randomly select a figure from your own army. The objective is completed when
that figure kills two enemies.
The next time an enemy is killed, place a marker on the table at the figure’s
location. If a figure in your army moves into contact with the marker, the
objective is completed.

Randomly select a figure from your own army. If the figure survives the next
three rounds, the objective is completed.
At the end of two consecutive rounds, you must have troops within a target
terrain feature while no enemies are present.

Two target terrain features must both be contacted by any figure in your army to
complete the objective.

Sneak Through A figure must move off the opposing battlefield edge to complete the objective.

75

Scenario Types

The Battle Scenario

Terrain is set up in any mutually agreeable
fashion using the guidelines on page 31.

Table Configuration

The two sides are each assigned a deployment
area that is 24" apart.

• Large armies of 28mm miniatures may
feel cramped in that space, and you may
prefer a table that is 4' across, giving you
deployment into a 12"-deep space.

76

The first player deploys one of their two
groups, then the second player deploys a
group, then the first player deploys their
second group, and finally the second player
deploys their second group.
Up to half the units in each group may be left
in Active Reserve (see page 118).

24"
NEUTRAL ZONE

PLAYER #2 TABLE EDGE

• On a 3' x 3' table you have a 6"-deep space
to set up on.

Players divide their units into two groups with
roughly the same number of units in each.
Randomly pick who sets up first (if a player
picked a battlefield edge, they must also set
up first).

DEPLOYMENT AREA

• On a 2' x 2' table, this means all units arrive
from the battlefield edge on the first round
of the battle.

Army Deployment

DEPLOYMENT AREA

In this scenario, the two forces must close to
contact while trying to achieve their objectives.
Each side has the same randomly determined
objective. The scenario provides some mild
surprises for the players to contend with, but is
not overly random (consult the Options section
for variations, page 78).

Randomly assign the players to opposite
battlefield edges.

PLAYER #1 TABLE EDGE

The Battle Scenario is a basic setup method with
multiple possible objectives. It is replayable and
works well for unprepped scenarios. It can also
be played solo readily or used as a springboard
to build a custom scenario.

Scenario Types
Objectives

After deployment, roll a D6, and consult the
Objective Table below to determine what the
goal is. Each side has the same goal.
Notes:
• Units still off-table at the end of the game
count as destroyed for Break Point and
Engagement mission purposes.
• If an objective relies on entering a terrain
feature that cannot be entered, moving into
contact counts as entering the feature.
D6
ROLL

1

2

OBJECTIVE

Engagement

Vital Ground

Conducting the Battle
• Randomly determine who plays first, and
then begin the game.
• The game is played using the Clock
(see page 120), with the battle ending after
18 in-game minutes.

Victory Points

If you need to know the number of victory
points earned, a victory = 3 VPs, while a
draw = 1 VP.
NOTES

Each player is awarded 1 victory point for every Hero, Leader, squad, or
vehicle they destroy or drive off the table. The highest VP total wins at the end.
If the number of units is not equal, the player with the smaller unit count
must select units in their army to award 2 VP. Any unit can be selected until
the VP values of each army is equal.
Mark the exact center of the table, and any terrain feature that is partially
within 4" of the center. To win the battle, you must have troops within these
terrain features at the end of the game while your enemy has none. If there
are multiple target features, you must hold the majority to win.
Place 3 objective markers, evenly spaced, along the center line of the table,
equally far from each deployment area.

3

Hold the Field

To secure an objective you must have troops within 2" at the end of a round
with no enemies within 2".
Once secured, an objective stays secure until the enemy takes it. To win, you
must hold at least 2 objectives at the end of the game.

4

5

Recon in Force

Break Point

To win, you must have more infantry units in the enemy deployment area
than they have in yours by the end of the game.
To count, a unit must have two or more infantry left.
You must destroy or drive off 50% of the enemy units to win. The game
ends at the end of a round, if this is reached. If both sides reach this level of
casualties the same round, the game is a draw, as is the Clock running out
without either side reaching the goal.
Place a marker in each of the six terrain features nearest the center line of
the table between the two deployment areas.

6

Search and
Retrieve

The first infantry unit to enter a feature removes the marker and rolls a D6. If
the roll is equal to or below the number of markers removed so far (inclusive),
the target has been found. Use the Handling Items rules for transporting the
target (see page 126). The faction possessing the target at the end of the
game wins.

77

Scenario Types
Battle Scenario Options
• The default 18 minutes will last 5-6 rounds
on average. You might extend the time to
20 or 25 minutes if you want a megabattle, or reduce it to 15 minutes for a
shorter game.
• For a more competitive game, each player
rolls 1D6 when assigning battlefield edges,
rerolling on a draw. The player with the
higher score chooses if they want to select
their battlefield edge or force the opponent
to pick. Once an edge has been picked, the
player picking it begins deploying first.

78

• If one player is hosting the game, you
may prefer them setting up the terrain
in advance. In this case the guest picks a
battlefield edge and the host randomly
picks who deploys first.
• Competitive players may prefer not
allowing the use of reserves.
• If you have a lot of troops, require a third of
each player’s units to be placed in reserve.
They will arrive after 10 in-game minutes.
• Deploying without knowing your objective
is fun, but can sometimes feel unrealistic.
You may prefer to generate the objectives
before deploying.

Scenario Types

The Grand Battle Scenario
This scenario type is used when you want
a clash of two massive armies who smash
into each other until only smoking wreckage
remains. It is well suited to large armies with
lots of troops. As each side has symmetrical
objectives, it is also well suited for pick-up
games, each side trying to secure vital areas of
the battlefield while eliminating enemy forces.
Terrain is set up in any mutually agreeable
fashion using the guidelines on page 31. As
Grand Battles often feature a lot of vehicles,
you should have some open spaces so they can
move and fight.

Table Configuration

The grand battle scenario requires a 4' x 4' table,
though a wider table would help accommodate
more troops.
The two sides are each assigned a deployment
area that is 30" apart, giving each army a
deployment depth of 9".
Randomly assign the players to opposite
battlefield edges.

DEPLOYMENT AREA

48"
PLAYER #2 TABLE EDGE

30"
NEUTRAL ZONE

• Count any company-level elements as their
own platoon for deployment purposes.
• After deploying, each player must nominate
one figure with the Leader ability to be their
army commander.

Objectives

Each side tries to achieve multiple objectives.
Each objective is measured in victory points:
• Every building and every hill on the table is
designated as vital ground. Vital ground is
secured by the side that last had infantry in or
on the feature (even if the unit later moved
on). At the end of the game, features of vital
ground are worth 1 victory point each.
• If both quarters on your side of the table
are clear of enemy troops at the end of the
game, they are worth 1 victory point each.
• Every enemy squad or vehicle destroyed is
worth 1 victory point.

9"
DEPLOYMENT AREA

PLAYER #1 TABLE EDGE

9"

• Platoons must set up with no more than 6"
between each unit in the platoon, though
they do not have to remain near each other
during the battle.

MAXIMUM 6"
BETWEEN UNITS
48"

Army Deployment
• Randomly select which player begins
deployment first. Players alternate placing
a full platoon on the table. If you did not
use the army builder, deploy three units
at a time.

• If the enemy commander has been killed,
add 2 victory points.

Conducting the Battle
• Randomly determine who plays first, and
then begin the game. Note who played first.
• The game is played for 5 rounds.

Victory Conditions
• If the players end the game with an equal
number of victory points, the game is a draw.
• If the player that went first has only one
more victory point than the other player, the
game is a draw.
• Otherwise, the player with the most victory
points wins the battle.

79

Scenario Types

THE EVOLVING OBJECTIVE BATTLE
This setup offers a more unpredictable
approach to the scenario. The nature of the
objectives in front of the players are unknown,
and they are fighting to secure as many
victory points as possible to measure their
performance. For this reason, this scenario
is not always consistent in difficulty level: It
is intended for solo play, though it could be
adapted to pick-up play, if desired.

Deployment

The scenario can be played on a 3' x 3' table,
but benefits from additional space. A 4' x 4'
table is great if you have the option.

• The human player always takes the first
phase.

Objectives
• Divide the table into sectors stretching the
width of the table that are 12" in depth.
The first belt is nearest your battlefield edge.
• If your table is 3' deep, place 2 objectives
in the second, and 1 objective in the
third belt.
• If your table is 4' deep, place 1 objective in
each belt.

SECTOR 3*

12"

12"

12"

DEPLOYMENT AREA

SECTOR 2*

6"

OBJECTIVES*

SIX
EQUAL
ZONES

36"
* If using a 48" table, use 4 sectors, with one
objective in each belt

80

6"

36"
OPPOSING BATTLEFIELD EDGE

SECTOR 1*

DEPLOYMENT AREA

PLAYER #1 BATTLEFIELD EDGE

Place each objective randomly within the
belt. You can divide the width of the table into
six equal zones, then roll a D6 to determine
where to place the objective. If there is a terrain
feature in the zone, arrange the objective to be
within the feature, if possible.

Set up within 6" of the battlefield edge. Set
up the player’s forces first, then the opposing
forces within 6" of their battlefield edge
according to the AI guidelines (see page 55)
Infantry may set up embarked in transport
vehicles, if you like.

Conducting the Battle

• Success is earned by accumulating victory
points for the player. The enemy is strictly
here to prevent you from doing so, and
cannot earn VP themselves.
• If you are using the Campaign Progression
rules (see page 106), the bonus Campaign
Points earned is equal to the number of
VP accumulated. For every game, judge
whether it is worth trying to max out the
available VP or if the opposition is too heavy.
It may not be worth sacrificing your entire
command for one more VP.
• If you need a clear-cut result, such as when
using the Operational system (see page 92)
2 VP is considered to be a victory (3 VP if
you are playing with 6 objectives).
• You may opt to break off a battle at the end
of any round. The battle ends immediately,
and you claim any VP earned so far.

Bigger battles

If you want a larger battle, you may
prefer to place 4 objectives, especially if
you have a very wide gaming table you
like to get the most out of.

Scenario Types

Resolving Objectives
In the Evolving battle, the exact nature of an
objective is not known until an infantry figure
from your side comes within 2" of it (if in the
open) or enters the terrain feature (if within
a feature).
Roll 1D6 and consult the Objective Nature
Table below. When the Completion criteria
are met, remove the objective from play and
award 1 VP.
Then roll 1D6. If the roll is equal or greater than
the Follow-on score listed in the table, a new

objective is added to the battlefield. Tally up the
number of terrain features that do not have
friendly troops within 12" of them and place
the objective randomly in one of these (if no
features fit the bill, simply choose the one that
is furthest from friendly troops).
Follow-on objectives have their nature
determined immediately upon placement and
never produce additional follow-on objectives.
This allows a potential total of 6 VP to be
earned from a standard battle, one after each of
the original three objectives.

D6
ROLL

OBJECTIVE

COMPLETION

FOLLOWON

1

Scout

Automatically upon contact.

NA

2

Sweep

At the end of a round, there must be no enemy forces within 6".

6+

3-4

Capture

At the end of a round, there must be friendly infantry within
2"of or within the objective.

5+

5

Hold

At the end of a round, there must be friendly infantry within
2" of or within the objective and no enemies within 6".

5+

6

Interact

An infantry figure must move into contact / to the center of
the terrain feature and score 6+ on a 1D6 + Savvy test.

3+

81

Scenario Types

SECONDARY OBJECTIVES
Secondary objectives can be thought of as
side stories. They may be the personal goal
of a single character, or secondary objectives
designated by higher command. They are an
option that can be added to most scenarios
to add flavor, produce a more involved
experience, or provide an extra opportunity
to earn a victory point (whether for scenario
or campaign purposes). Several of the results
are not compatible with the Skirmish Scenario
and we do not recommend using them there.
To use this system, roll D100 on the table
opposite. If playing in an opposed game, each
player rolls. If playing solo, only the humancontrolled army receives a secondary objective.
If playing the Grand Battle scenario, generate
two secondary objectives.
Completing a secondary objective grants
1 additional victory point, if the scenario
uses them and for Campaign Progression
purposes. If it does not, it is mainly for
bragging rights, though you may feel satisfied
achieving the secondary objective if the game
would otherwise be a draw.

82

Notes:
• Many objectives depend on selecting a
random terrain feature. Nominate the six
terrain features closest to the center line
of the table and randomly select from
between them.
• To contact a feature, you must enter it, if
possible, or otherwise move into contact.
• Kill objectives work differently if the enemy
does not begin on the table. Instead, roll
1D6 each time a new unit is placed. If the
roll is equal to or below the number of
enemy units deployed so far, the newly
placed unit is the target. It is possible a
target is never discovered.
• Savvy tests count as a task for a figure to
perform.
• Some objectives are assigned to a specific
character. If so, select randomly from the
character figures in your force to see who
the objective is assigned to. The objective
can only be completed by that character,
and if they become a casualty before
achieving it, that prevents the objective
from being completed.

Scenario Types
D100
ROLL

SECONDARY
OBJECTIVE

SPECIFIC
CHARACTER?

NOTES

01-08

Reach Location

Yes

Select a random terrain feature to act as the
objective. The character must move into contact with
the feature to complete the objective.

09-14

Kill Target

No

Randomly select an enemy independent character
(an individual who isn’t a member of a squad) that
must be killed to complete the objective.

15-23

Reach Location and
Interact

No

Select a random terrain feature. Any figure must
move into contact with the feature and perform a
6+ Savvy test to complete the objective.

24-30

Locate

Special

Any figure may attempt a 6+ Savvy test to locate
the objective. If successful, select a random terrain
feature. Once it is located, the figure that passed
the test must move into contact with the feature to
complete the objective.

31-37

Leave Battle

Yes

The character must leave the battlefield across any
battlefield edge before the battle is over.

38-43

Hold Fast

Yes

The character must remain on the table at the end of
the battle.

44-49

Kill Unit

No

Randomly select an enemy unit that must be killed
to complete the objective.

50-55

Kill Confirmed

No

Randomly select an enemy character. If slain, an
infantry figure must move to the location where they
fell to complete the objective.

56-64

Capture

No

A random terrain feature must be captured by
moving into contact and ending the following round
with no enemy troops in contact with the feature.

65-71

Confront

Any character

Randomly select an enemy character. Any character
must move within 6" and Line of Sight to complete
the objective.

72-81

Search

No

The six terrain features closest to the center of the
table must be searched. When each is contacted,
roll a D6. On a roll equal to or below the number of
searched features, the mission is completed.

82-91

Secure

No

A random terrain feature must be clear of enemy
troops by the end of the battle.

82-00

Retrieve

No

A random terrain feature must be contacted. One
infantry figure then carries a package and must leave
the table to complete the objective.

83

Scenario Types

100 SCENARIO SEEDS
Sometimes we are stuck without an idea of
what to do or need to create a scenario on
the fly. Fear not! You can grab any of these
ideas and use them to get a quick battle
D100
ROLL

84

going or as the springboard for a longer
affair. A D100 table has been provided for
randomization, but feel free to jab your
finger at the screen instead.
SCENARIO SEED

1

The retreat was a deception, and now the attackers are facing a counterattack from two sides.

2

A strike force is raiding an enemy camp. The enemy is more numerous but scattered and confused.

3

A mysterious virus has infested the defense robots, and they appear to be constructing some sort
of portal.

4

Traitors have undermined the defenses, and enemy troops are bursting out of underground
entrances within the perimeter.

5

A vital hill must be taken/defended due to its importance as an artillery observation post.

6

Both armies spent the night sneaking forward and, as dawn breaks, assault troops from both
sides are right on top of the objective.

7

Ceasefire negotiations between faction leaders break down and both sides scramble for their
weapons.

8

Defenders must hold out long enough for the escape shuttle to be powered up.

9

Planetary nomads launch a retaliatory raid against the colonists that are defiling their planet.

10

A hill overlooking the drop zone has become a sniper’s nest. Light infantry must storm the
position, which is full of traps and enemy sharp shooters.

11

The rebellion succeeded but, after accusations of pro-government sympathies, two rival factions
are now fighting for dominance in the ruins.

12

Corporate troops are storming a research facility to secure valuable research from a competitor.

13

Multiple alien invaders have shown up at the same abandoned colony. Frustrated by the lack of
prey, they fall on each other instead.

14

The defenders are lacking in troops, but are well positioned with multiple mine fields, heavy
weapon positions, and sentry guns. Unfortunately, half of them are decoys and do not actually
work.

15

A routine battle turns complicated as the artificial gravity module on the star base starts
malfunctioning, resulting in fluctuations.

16

Two fighting patrols encounter each other unexpectedly in rough terrain.

17

Corporate troops clash for control of a valuable facility. Both sides are under strict orders to cause
absolutely no collateral damage, restricting everyone to light infantry weapons only.

18

A mechanized unit has become bogged down in swampy ground, just in time for an enemy
counterattack.

Scenario Types
D100
ROLL

SCENARIO SEED

19

An elite unit fitted with cutting edge biotech has gone haywire and must be destroyed before it
can commandeer a ship off-world.

20

Two corporations have both dispatched mercenaries to snatch the same scientist (with security
guards)

21

An attempt to tame the local giant reptiles turns out poorly during a demonstration at a weapons
sales conference.

22

The colonists were preparing their last stand when elite troops drop on their positions.

23

Two rival colonies are fighting over resources.

24

A mysterious beacon deep in the jungle has attracted rival groups of salvage teams.

25

Separatists and loyalists clash to determine the future path of the colony.

26

A spy was transporting a secret data module, but the vessel crashed. A hostile local alien species
intends to feed the spy to their pet dinosaur unless a strike force reach them in time.

27

A house-to-house street fight breaks out as each side tries to secure the vital factory complex for
the 5th time this week.

28

Elite forces square off against their hated rivals. Both sides opt to ignore their orders, and simply
fight to the last organism standing.

29

Two armies have collided with each other unexpectedly in an unlikely location. Neither side is
ready for a fight.

30

Enforcers have tracked down the base of a notorious pirate and arms dealer and must storm it.

31

As the two armies move to engage each other, a distant artillery battery begins shelling the
battlefield at random. Neither side can contact the battery.

32

An unidentified craft has crashed, and two factions are racing to claim it.

33

An exploratory unit has stepped through a strange portal, and is now stranded in a hostile world
until they can build a device to open the portal from the other side.

34

The attackers are attempting to stop a rocket launch. If they fail do so, they must storm the
control room to redirect it.

35

The defenders are spread along a long-fortified line. The attackers lack numbers but have the
advantage of secrecy in choosing where to attack to break through.

36

An officer has gone rogue and is defecting to the enemy. An elite detachment has been sent to
stop them at all costs.

37

Two rival crime lords have planned a heist at the same location on the same day. The security
guards are caught in the middle.

38

The attack was a success, but the worn-out assault force must now hold out against the inevitable
counter-attack.

39

A furious battle in a toxic chemical swamp. The slightest exposure means death.

40

An isolated unit has holed up in an urban area and assault troops must root them out.

85

Scenario Types
D100
ROLL

86

SCENARIO SEED

41

A space station is rapidly de-orbiting. Due to corporate greed, there are insufficient shuttles,
and two factions have seized the weapons lockers.

42

A heist goes awry as it turns out the cargo was full of bio-weapon monsters, and someone just
broke the containment fields.

43

Rival groups of hunters are trying to track down a precious but ferocious alien creature.

44

A new prototype tank is being deployed to destroy a vital enemy target.

45

The hostile atmosphere defeats any attempts at precautions. Only bots and cybernetics can
survive here. Today, robot battalion 39480-94854 launches an attack to inflict a telling blow
against robot battalion ∆81.2-73√31x

46

The attackers have superior numbers but are running low on ammunition, fuel, and supplies.
They must try to capture as many enemies in close assault combat as possible to resupply.

47

A series of air defense batteries must be knocked out before the scheduled air strikes arrive.

48

Base under siege, as powerful aliens menace the ragtag defenders trying to devise a solution to
the threat.

49

An unlikely force of mutually hostile factions must fend off a massive incursion of alien
monsters.

50

As the armies move to engage, a dense snowstorm obliterates all visibility. It could stop any
minute, however.

51

The massive orbital bombardment was meant to break the enemy positions but vaporized most
of both front lines. The shell-shocked survivors on each side try to rally, and win possession of the
smoldering rubble.

52

A routine patrol uncovers the staging grounds of an invasion force.

53

An orbital insertion has gone wrong, and detachments of drop troops are scattered across the
enemy positions.

54

Each army has sent forward a smaller detachment to pin down the enemy before the rest of the
force arrives.

55

Special operations teams are deployed to blow up critical infrastructure.

56

The military has created a doomsday weapon and lost track of it. An army patrol is sent to locate
it, but so are pirates who are convinced it is a crate full of loot.

57

The armies are both sweeping the battlefield to secure vital facilities, high ground, and other
terrain features.

58

Riots have turned into a popular uprising when it is revealed that the oppressive colonial
administration is controlled by outside forces.

59

Miners have had enough and are rebelling against their corporate overlords.

60

A commando raid is sent to destroy an enormous long-range cannon.

61

As the armies are preparing to do battle, a horde of hungry monsters bursts out of a cave nearby.

Scenario Types
D100
ROLL

SCENARIO SEED

62

Specialists are preparing to raid a POW camp to liberate an important army commander.

63

Tech cultists have decided to blow up the terraforming engines, destroying the planet.
Government forces are trying to storm the fortified plant.

64

A group of civilians must be escorted to their destination, but the area is full of hostile wildlife
and carnivorous plants.

65

An escalating battle as more and more troops arrive.

66

The rebels are trying to capture a heavily defended weapons transport.

67

The experiment went wrong, and now only a few scientists and whatever robots they could
reprogram have any hope of getting word out, as they dodge mutants and security forces sent to
silence them.

68

A remote outpost must fend off waves of attackers with the aid of distant artillery and air support.

69

A frontal assault to breach a defensive line.

70

Due to atmospheric interference, both armies are completely isolated from the outside world,
and can only communicate by visual signs or shouting.

71

A cybernetics experiment has gone wrong. Troops must breach the facility overrun with insane
cyborgs and kill-bots.

72

Two old rivals have finally come face to face on a muddy battlefield, while the war rages
around them.

73

Secret agents are aiding the rebels in a difficult sabotage mission.

74

Assault troops are dropping straight onto an enemy strongpoint to assassinate their leader
before reinforcements can arrive.

75

Mad science has resulted in a rapidly spreading virus, turning unprotected individuals into
dangerous (and infectious) maniacs. The maniacs just stormed the militia weapons depot and
now they are coming for the last government building.

76

A prototype tank has broken down and enemy troops are closing in, while the infantry supports
are trying to buy time for the engineers.

77

Corporate security troops are sweeping a site for dangerous mutants. Unfortunately, the mutants
have started mimicking the colonists.

78

An attack in force to repel defenders from a series of hasty defenses on high ground.

79

Rebellious miners have allied with an off-world force, but after winning the uprising, they realize
that their allies have no intention of ever leaving.

80

The armies have been fighting for years, and are completely exhausted with limited manpower
and equipment. Each side prepares for one final push.

81

A chemical weapon attack went haywire. The front is completely quiet until something terrible
staggers out of the fog.

82

As the forces fight, debris and stray bolts of energy rain down from the fleet battle happening
in orbit.

87

Scenario Types
D100
ROLL

88

SCENARIO SEED

83

Alien invaders emerge in the center of a city and only the militia and local security forces are
there to stop the attack.

84

Well-equipped treasure hunters have accidentally opened the alien portal they were
fighting over.

85

A team of elite operatives far behind enemy lines must fight off enemy grunts before they can
raise the alarm.

86

The battle takes place entirely inside a massive industrial facility with hardware and potential
hazards everywhere.

87

A convoy carrying vital supplies drives into an ambush.

88

Two military cruisers are locked together during a boarding action as squads of marines fight in
narrow, claustrophobic conditions.

89

A raid on the enemy fortification line in the middle of the night. It’s all knives and confusion at
close quarters.

90

Recon units clash in no man’s land. The objective is to sweep the battlefield and drive off the
enemy without bogging down in a prolonged firefight.

91

A megacity riot has turned into a downtown civil war.

92

A peaceful community is under attack from raiders/corporate exploiters/government oppression/
alien invaders. Only a hardened band of veteran soldiers can protect them.

93

As prescribed by planetary law, the children of the royal family shall lead their private armies to
do war in the jousting trenches. May the best grav-tank pilot win.

94

The two assault forces have taken their objectives with minimal difficulty before realizing that
everyone read the maps wrong, and they are each sitting on the objective of the opposing force.

95

The defenders of the starship must repel a boarding action. The fight takes place on the exterior
of the hull. Hope your magnetic boots don’t give out.

96

The two strongest gangs on the starport decide to finally settle their differences. Shoot fast
before the enforcers arrive.

97

The assault force must deliver a transmitter to the target location and then defend it against
waves of enemy reinforcements.

98

Commandos must plant the targeting beacon for the orbital strike force to land.

99

A small detachment has finally reached friendly lines after a betrayal, but the traitor is in
command of a defensive outpost in their way and is resolved to bury any witnesses.

00

Rumors of a time-traveling alien have caught the attention of several hostile parties who want to
acquire this individual for interrogation.

Campaign Play

Campaign
Play
Campaign play is often held to be the
most epic way to play a miniatures game,
but it can be daunting at first. This chapter
provides guidelines to help you run easy and
fun campaigns without requiring hours of
additional work.
A campaign can be a solo experience, run
by a GM, or organized between players.
In all cases you can take advantage of the
systems provided in these chapters. Use one
or multiple systems as you see fit. If you are
playing solo, it is likely you will want to use
all of them to create as deep an experience as
possible. Conversely, a Game Master running a
campaign may only use some of these tools, or
may use them only to start off the campaign.
When preparing to run your first campaign,
take a moment to look through each of these
systems carefully and think about what you
would like your experience to be like.

The Operational System

The Operational System offers a mechanical
system to resolve large-scale warfare, keeping
things moving while working your tabletop
efforts into a larger picture. See page 92.

Campaign Story Generation

For a story-oriented approach, the Story
Generator helps create exciting elements that
can take a campaign in wild directions. New
faces show up, the scenery changes, and you
may even end up playing for the opposing side
for a while! See page 101.

Campaign Progression

These simple and easy-to-use rules allow
your troops and characters to gain experience
and become hard-as-nails veterans over the
course of your games. If you use the Campaign
Progression system, you should also use Unit
Losses. See page 106.

89

Campaign Play
Creating the Campaign Setup
A campaign is in some ways a very long
scenario. The same concerns apply to a
campaign: Who is fighting? Where are they
fighting? What are they trying to achieve?
Campaigns can take place on a vast scale,
with armies clashing across front lines, or they
can be very small, as pirate gangs squabble
for control of starport facilities. This does
not always correspond directly to game size,
though they can be related. A campaign with
huge armies will probably feature games using
larger military forces, though it could also
include the occasional commando operation
deep behind enemy lines.
For your first campaigns, it is advisable to keep
it to two clear opposing sides for simplicity, but
as you become more experienced, you may
want to run a campaign that includes neutral or
third parties. Arms dealers, separatist factions,
off-world forces, and potential allies can all be
added in. You might even have a campaign
change its focus as it runs: A campaign
might go from a traditional war scenario to
an alien invasion, with a Converted war fleet
descending upon the warring factions.
Campaigns can be fought to a specific
conclusion or can be run in an open-ended
fashion. It is often preferable to have a set time
limit (in real-life time, in the number of battles
fought, or in campaign turns played) where
you then evaluate who won – if that matters
to you – rather than letting the campaign run
until people lose attention and it fizzles out.
A sharp campaign that runs for five tabletop
battles can be immensely satisfying and
allows plenty of scope for spinning off if you
want to play more. You might agree that you
want to continue the story arc, but the next
campaign will be fought entirely within a
starship in orbit as one side boards it and
fights for control. Be creative!

90

Integrated Campaigns

These systems can be combined for a
more extensive experience. Campaign
Progression can be used with any
campaign approach. The Operational and
Story systems are meant to be combined,
although each can be used individually,
if you find that the game becomes too
sprawling and chaotic.

The Solo Campaign

If you are playing the campaign solo, you
have a few more decisions to make. Do you
intend to follow a single unit throughout the
campaign and play from their perspective?
Are you interested in the overall conflict and
how it unfolds (which might mean swapping
perspectives and units frequently)? Do you
want to have a fixed end point (such as being
able to win the campaign) or are you after an
open-ended experience where you may be
surprised where it goes?
You can use as many or as few of the tools
provided as you like. In a way, the solo game
is the ultimate in tabletop customization as
you can adapt the game to be exactly what you
want it to be.
You are even free to change the format as
you go along. A campaign that begins with
commando operations in enemy-occupied
territory might be mostly narrative while you
follow the exploits of a stealth team. At some
suitable point, you then switch to the regular
army and add in the Operational System to
determine the outcome there. You might even
play out a few scenarios from the opposing
side to see what they do while trying to foil
your plans.

Campaign Play
Game Mastering the Campaign
Campaign play benefits greatly from a GM to
help tie everything together. Campaigns can
function on a purely narrative level, where the
GM ties each battle together in an ongoing
story, or can incorporate any of the mechanical
elements listed above.
As with running a scenario, the GM has a
broad leeway in how to conduct the campaign.
They might take a very active role, adding
special circumstances and events both within
the tabletop battles as well as the campaign
environment. Or they might be more passive
and rely on the game mechanics to handle
most aspects, filling in details and fleshing out
the story as it unfolds. Both are viable options.
Note that “active” and “passive” does not
correlate to the scale of events. A passive GM
might still interpret events in the game system
as having dramatic consequences for the story,
while an active GM may focus on the small
scale and personal scope.

Campaign Consequences
Traditional campaign systems tend to
emphasize consequences for winning and
losing. We have opted to not focus on
these as they can often produce a death
spiral effect where, once an army starts
losing, it will continue losing as failures
pile up and compound. As we assume the
tabletop force is only part of a larger army,
losses will be alleviated by additional
resources, replacements, and initiatives
by higher command.
If using the Operational System (see page 93),
player efforts contribute to the overall mapbased resolution of the campaign.
If you are interested in consequences on a
smaller scale, you may add them. A force that
achieves its objectives in a tabletop battle can
be granted one boon that can be “cashed in”
for any future battle. Each boon only affects one

battle, but they can be saved up and used at a
later point, if desired. It is possible for two sides
to both achieve their objectives (and therefore
receive boons).
Boons are usually assigned by the GM to fit
the circumstances. Examples might include
an additional support option, a unit upgrade,
increased Morale for all units, a special
deployment option, forcing some enemy
troops into reserve and so forth. The ideal
bonus should not be enough to be decisive
on its own.
Consider the size of game as well. A bonus
tank in a huge battle with 15 units on each
side is not a big advantage. A free tank in a
skirmish with 5 soldiers on each side would be
decisive. If in doubt, look through the Scenario
Components (see page 119) and pick one that
can be applied or negated, or apply a Support
option (see page 65).

Keeping an Army Roster
If a campaign follows a particular unit, you
may wish to use an Army Roster. The Roster
is created as a list of units. If using the Army
Builder (see page 132), the initial selections
on the Roster should form legal platoons, and
companies and can be made up to any points
total you want to use in the campaign.
If you use the points system but not the Army
Builder, simply pick units you like and outfit
them as you see fit, until the total reaches the
points value you have decided upon.
If you prefer to not use either system, your task
is easier, as you can simply pick any units you
like and write them down. Your Roster may
simply start out as “every unit I have painted”.
The Army Roster offers the list of units from
which you can pick during the campaign. When
you play a scenario, simply select from the units
on your Roster. Note that even if you use the
Army Builder to construct your Roster, you are
not required to field “legal” forces in a campaign

91

Campaign Play
battle. For example, you might deploy a force
with more vehicles than the platoon structure
normally permits as long as it does not exceed
the points value or other balancing factors you
have selected for the scenario.
Once the campaign begins, the Roster is only
changed when a campaign event, GM decision,
or Campaign Progression allows you to.
Otherwise, the Roster must remain as it is.
If you play multiple sides of a campaign, keep
a Roster for each.

The Core Campaign

The Core Campaign is the middle
ground between the rostered campaign
and a free campaign, where you may use
any troops you like. This uses the Army
Roster for a limited number of units,
typically 2-3, but not for the rest of the
army. For example, you might have two
favorite characters and a squad of troops
they fight with, using those in all your
games, but the rest of the army is picked
for each battle, and are whoever they
happen to be fighting alongside that day.

THE OPERATIONAL SYSTEM
If you want to make your tabletop battles
into part of a larger war, you can employ the
Operational System. This lets you resolve
actions in the context of a map-driven
campaign without excessive detail. This
system is particularly suitable to solo gamers
but can also be used in opposed games or
to help add context to a Game Mastered
campaign, letting the GM focus on the
individual battlefield scenarios.
This is not intended to be a detailed system
that tracks every battalion. Instead, it helps
generate the overall strategic picture and
contributes to your story. The battles played
on the tabletop influence this, though it also
assumes those actions are only a small part of
a much larger affair. It is very possible for an
area to experience strategic defeat even if your
battle was tactically successful.
In conclusion, this is a narrative system, not
a hard tactical one. It is concerned with the
outcomes of specific, dramatic contests in the
game world, and not with the hour-to-hour
deployment of units.

92

Assign Cohesion Scores
The will to fight is determined by the Cohesion
score of each faction. Cohesion represents the
will and ability of that faction to continue the
conflict. As the campaign goes on, a faction’s
Cohesion degrades until it reaches 0, at which
point the faction has been defeated. This
may mean they concede and retreat from the
battle, the armies scatter and become partisans
(possibly even forming a new faction), or a
peace agreement is reached.
Note that Cohesion accounts for the ability
and will of the entire faction to wage a war.
Individual armies are rated based on Army
Strength instead (see page 95).
If in doubt, begin Cohesion at 5 for each
side. As Cohesion acts partially as a pacing
mechanic, if you want a faster, snappier
campaign, you might start with only 3 or 4
points. Conversely, a long, grinding campaign
might start at 8 or even 10. If you prefer a
random value, you could roll two D6s and pick
the highest score for each faction.

Campaign Play

The Map
To use the Operational System, you need a
map. This can be as detailed or as simple as you
like. You might use map creation software, use
a real life or video game map turned sideways,
or draw your own. Fill in some interesting
features such as towns, Difficult terrain, a
mountain range, or anything else you like.
Note that the map does not have to be to
an exact scale. The size of the map often
corresponds roughly to the size of games
intended to be played on it: If you want your
battles to be between a few characters on each
side, your map might be a single city. If you
want platoons of tanks shooting each other up,
the map should represent a much bigger area.
And if you prefer a more epic sweep, assume
that the tabletop battles are a microcosm of the
larger action going on around them and make
the map as grand as you like!
Then divide the map into regions, each a
distinct space that can be fought over. The
exact size of a region is not important to the
campaign rules: Instead, they should fit both

the scale of the map and the scale of your
armies. There is no requirement for regions to
be identically sized, and the map size has no
bearing on the campaign rules.
The map should have at least as many regions
as the combined Cohesion scores of each
faction in the war (see above). For example, if
you have two sides with 5 Cohesion each, you
need at least 10 regions on the map. Typically,
the map looks best with some neutral regions
as well. For example, with 5 Cohesion you
might have 15 regions in total.

Regions and the Map

Some players will prefer drawing the map
with the regions already in place. Others will
prefer creating a natural map first and then
drawing in regions where they look like they
would fit.
Either version is perfectly fine.

93

Campaign Play
Placing Opposing Forces

Operational Zones

Each faction in the campaign should receive
control of a number of regions at least equal to
their Cohesion. You may assign more if you like
and if it fits the story. This will not confer any
real gameplay advantage but will feel more
appropriate if one faction should realistically
control more territory.

Once you have the main areas established,
determine where on the map the logical points
of conflict might be. These are typically neutral
regions between the warring factions or may
be border regions in places where the factions
are in contact.

You might place pins or markers on your map
to indicate the rough area covered, color it in,
or otherwise mark it in any way you like.
Assume that the controlled regions are ones
in which the army can move with relative
freedom, and deploy forces for combat. This
does not mean it is completely cleared of
enemy forces, but any such forces are likely to
be raiders, guerrillas, or remnants.
Once you have added the areas for each
faction, consider marking a couple of outposts,
military bases, and supply dumps on the map
to add a military flavor.

What if it is Not a War?

Your campaign may well involve lots of
fighting but not be an actual war zone.
A big turf war between mobsters to
determine who ends up controlling the
starport can be mapped out just fine, with
blocks or streets becoming Operational
Zones. Colonial militia fending off alien
infiltrators may use Operational Zones to
show suspected enemy nests while the
controlled areas are ones that the colonists
have or have not cleared respectively.

94

Each faction may attack one region adjacent
to their current territory. In a solo campaign,
the enemy picks at random. If you have
only two factions, randomly pick which side
currently has the initiative: they may attack a
third region. Target regions can be neutral or
enemy controlled.
Mark all three regions – the two adjacent zones
and the third determined by initiative – as
Operational Zones, sometimes referred to
simply as ‘Zones’ (note the capital Z). Active
fighting is ongoing in these areas.
Once the Operational Zones are assigned,
select one of the three Zones as the
Operational Focus. This is where both sides
are currently focusing most of their efforts. You
can pick one at random or consult the map to
see which appears most important.

Complex Geography

Make your campaigns as complex as you like,
with Operational Zones existing in different
locations (such as two different nations or
on land and in space). This usually does
not require additional rules. Army Strength
transferred from an orbital Zone to a ground
Zone might represent supporting fire,
allowing an advance, while the collapse of a
ground Zone could permit building antispaceship weapon batteries to aid the fight in
space, and so forth.

Campaign Play
Assign Army Strength
Each Operational Zone must have an Army
Strength for each faction in that Zone. Army
Strength encompasses both numerical
strength (a higher value might mean more
troops), troop morale and leadership (a higher
value might mean troops in better spirits
or under leadership of a charismatic and
experienced commander), and the general
tactical situation on the ground. A good force
that has been pushed back to a defensive
footing would have a lower value than a
weaker army on the offense.
Note: These rules use the term “Army Strength”
regardless of which kind of force it represents.
You may opt to call it “Mobster strength” or
“Corporate strength” to suit your campaign. The
concepts remain the same.
Each Operational Zone will have one army for
each of the two factions contesting it. So, in a
campaign with three Operational Zones, each
faction would have three armies. Additional
troops exist within the controlled areas but,
for game purposes, consider only the frontline armies.
The Army Strength is determined randomly in
each Operational Zone:
• If the Zone is in or adjacent to friendly
territory, roll two D6s and pick the
highest die.
• If the Zone is not connected directly to
friendly territory, roll one D6.
You can mark the Strength in any way you
like. Writing it next to the Zone on the map
works fine.

Alternatives

You may opt to give each side a certain amount
of Army Strength to distribute between the Zones
(4 per Zone, for example), you might give fixed
values to assign (such as one army at 5, two at
4, and one at 3), or any other system you like.
If you are preparing a very narratively driven
campaign (or one that is based on an existing
story you have been gaming out), you can also
assign whatever values will fit.

The Operational Turn
The Operational System is played in a series
of operational turns. Each campaign turn
consists of any number of tabletop battles,
followed by the steps listed below.
By default, one tabletop battle is played each
operational turn. If your campaign is only
expected to have a few tabletop battles, you
might progress through two or even three
campaign turns before playing your next battle.
If you want a slower campaign progression
with lots of tabletop action, or are playing with
multiple players, you may have multiple battles
per campaign turn.
The pace can change as you go along. For
example, you may choose to play a few
campaign turns before your first tabletop
battle, in order to develop the situation further.
Play all planned tabletop battles before doing
any of the operational campaign steps.

Integration with 5PFH

If you are using these rules alongside a Five
Parsecs from Home campaign, play out one
5PFH campaign turn per operational turn if
you are traveling, two if you remain on the
same planet. Operational campaign steps can
be resolved during the same step you would
resolve military actions.

95

Campaign Play
To conduct the operational turn, progress
through the following steps in order:
Step 1: Play all intended tabletop battles
Step 2: Apply tabletop battle effects
Step 3: Resolve Focus Battle
Step 4: Carry out Operational Orders
Step 5: Carry out Commando Raids
Step 6: Redeploy forces
Step 7: Open new Zones; select new Focus
Step 8: Choose player commitments

Step 1: Play all Intended Tabletop Battles

• Award 1 Player Battle Point (1 PBP)
for every tabletop battle victory in an
Operational Zone.
• If a battle was inconclusive or a draw, award
0 PBP.
• If both sides earned points in the same
Zone, they cancel out on a 1-for-1 basis. For
example, if Faction A earned 3 wins and
Faction B earned 1, the end result is that
Faction A earned 2 PBP.

Each player-controlled force will be assigned to
a particular Operational Zone. Make sure the
battles played are tracked for each Zone.

Player Battle Points are Zone- and army-specific
and can be saved up from operational turn to
operational turn.

Step 2: Apply Player Battle Points

When you have resolved every battle taking
place this operational turn, tally up; a specific
army cannot gain more than 2 PBP in a single
operational turn, and cannot have more than
3 saved up overall. Any excess points are
discarded without any effects.

Player Battle Points (PBP) are a resource
earned in combat to reflect situational
advantages, morale gains, and throwing the
enemy off balance. They are used to make gains

Battle Scale Option

Kicking off the Campaign

If you would like to have more distinction you
may assign each tabletop battle a size. You can
do this based on the army sizes or you can use
the scenarios played as a guideline. If using the
scenarios in this rulebook, the Skirmish scenario
is worth 0.5 PBP, the Battle scenario or Evolving
Objective scenario is worth 1 PBP, and the
Mass Battle is worth 1.5 PBP (see page 74 for
scenarios). Fractions are saved up but cannot
be spent.

If you already have the campaign map
created, pick a region you want to fight in
and play a game. You can choose randomly,
if you prefer. If you create the campaign map
after your battle, the battle always took place
in the Zone that is the Operational Focus.

By default, treat all tabletop battles equally.
A smaller battle is assumed to take place in a
vital location or moment in time, and thus can
influence the war as much as a large action
can. This also fits with the heroic nature of a
tabletop game.

96

in the wider campaign. Player Battle Points are
spent during Operational Combat, or can be
expended on Commando Raids; the effects for
doing either are discussed below.

A tabletop battle is a dramatic way to start
off a campaign. You might even do this
before you have set up the campaign at all
(particularly useful if you are not yet sure
you want to turn this specific battle into a
campaign).

If you have multiple player forces, they all
need to be assigned to an Operational Zone.
This determines where the efforts of their
actions will be applied.

Campaign Play
Step 3: Resolve Battles

• Add +1 Combat Die if Army Strength is
2+ higher than the opposing side.

A battle takes place in every Operational Zone,
resolved using the Operational Combat
system explained below. Additional battles may
take place during the campaign turn, resolving
them in the same fashion. If multiple battles
take place in a single Operational Zone, apply
any changes from one battle before resolving
the next.
Operational Combat represents battles that
takes place off-camera and involving far greater
forces than fit on a gaming table. To resolve an
Operational Combat:
1. Tally up how many Combat Dice each side
receives:
• Each faction in the battle begins with
1 Combat Die.
• Add +1 Combat Die if the enemy is not
adjacent to their own territory.
DICE RESULT

• Both sides may spend available PBP.
Each point spent grants +1 Combat Die.
• Various factors can grant extra Combat
Dice, such as events in the greater
narrative. The GM may also add dice as
desired.
2. Roll the dice for each side. If you have
two colors of dice, you can roll them all
simultaneously. We strongly suggest using
the same color consistently for an army
throughout the campaign.
3. Next, consult the table below, starting at
the top and working down until you find a
matching result dice roll. If your roll matches
multiple outcomes, use only the first
matching entry on the table.

OUTCOME

A devastating major battle
Both sides
rolled two or more 6s

• Both sides lose 1 Army Strength
• Fight again immediately. Adjust the number of Combat Dice for each
side by -1 to a (minimum of 1). PBP spent are used up, but additional
points can be spent, if available.
A grand tactical success

Only one side
rolled two or more 6s

• The side with multiple 6s gains +1 Army Strength while the other side
loses 1 Army Strength.
• If the winner now has higher Army Strength, fight again immediately:
Adjust the number of Combat Dice for each side by -1 to a
minimum of 1. PBP spent are used up, but additional points can be
spent, if available.

One side rolled a single-die
result higher than any of the
opponent’s dice

One side gains the upper hand

Highest die for both sides is
the same (whether a 5 or 6)

Brutal attrition fighting

Highest die for both sides
is the same (whether a
1, 2, 3, or 4)

• The losing side loses 1 Army Strength.

• Both sides lose 1 Army Strength.
Inconclusive fighting

97

Campaign Play
Step 4: Carry out Operational Orders

Army Destruction

Remember, if an army is reduced to 0 Army
Strength, they are no longer able to contest
the region. The Operational Zone ceases to
exist, and the area falls under control of the
survivors. In some cases, two armies may
destroy each other. If so, the Operational Zone
still ceases to exist and the region becomes
neutral.

Assault Option

An army with Army Strength 1 point higher
than the opposing side may opt to launch an
assault when conducting Operational Combat.
Roll an additional Combat Die, but if the
army fails to win, it loses 1 Army Strength in
addition to any outcomes from the combat.

Less Eventful Campaign

If you want the campaign to be less intense,
only carry out a single Operational Order each
campaign turn. Randomly select which faction
carries one out.

98

Each faction in the campaign rolls a D6 on the
table below to determine what their overall
strategy is for this campaign turn.
If an Operational Zone must be selected, do so
based on what seems to make the most sense,
or choose at random (for AI-controlled forces). A
player may select the target if they are fighting
for a particular army.
Carry out Operational Orders as follows:
• First, carry out any changes in Army
Strengths and Operational Zones.
• Next, carry out any Operational Combats
that occur.
• If two sides attack the same Zone, add
+1 Combat Die to each side in the first
Operational Combat that is resolved, as both
sides commit major reserves. The second
(and subsequent) Combats in the same
Zone are resolved normally.

D6
RESULT

ORDERS

EFFECTS

1

Construct Defense

One region in the faction’s territory becomes a Defensible region
(see page 100). If not using the optional terrain types,
increase Army Strength by +1 instead.

2

Continued Offensive

The faction immediately fights again in an Operational Zone
where it has equal or higher Army Strength.

3

New Offensive

The faction attacks any region adjacent to its territory, and fights
immediately. Generate Army Strength normally for each side.

4

Renewed Effort

Select an Operational Zone. Increase Army Strength by +1
and fight another battle.

5

Raiding

If the enemy has a higher Army Strength in any
Operational Zone, adjust it by -1.

6

Bolster Positions

The weakest army increases Army Strength by +1.

Campaign Play
Step 5: Carry out Commando Raids

Any unspent PBP may be committed to launch
Commando Raids in the same or any adjacent
region. Allocate any desired PBP and roll 1D6
for each point spent against a region:
• .If any of the dice roll 1-2, all PBP committed
to that region are lost.
• For every 6, adjust the Army Strength of the
target army by -1. This damage applies even
if the committed PBP are lost.
• Any other result has no effect.

Step 6: Redeploy Forces

Each faction may redeploy 1 point of Army
Strength provided both armies are connected
through a series of friendly territories (even if
any are under attack).
The AI will always try to reinforce an army
reduced to 1-2 Army Strength, drawing the
strength from the strongest army present.

Step 7: Open new Zones; Select new Focus.

Each faction that won an Operational Zone
attacks a region adjacent to its territory. The
AI picks at random from adjacent opposing
regions, and then from neutral regions if no
enemy territory is adjacent. The attacking army
receives an Army Strength of the highest
result from two D6s. The defending army is
generated with 1D6 Army Strength.

Step 8: Choose Player Commitments

Each player army must be assigned to an
Occupational Zone. If you are particularly
ambitious, you may be following the fates of
multiple formations, in which case they could
(and probably should) go to different Zones.
The GM may determine this for you, based
on the narrative. If you are using the Story
Generation system (see page 101), the choice
may be made for you.

Step 9: Adjust Cohesion scores

Each time a region is lost, the Cohesion score
of the losing faction is reduced by 1.
When Cohesion reaches 0, that faction has been
defeated and wil sue for peace, retreat, abandon
the planet, or otherwise cease to operate.
The campaign is won when only one faction
remains. In the event all remaining factions
reach 0 at the same time, the war is inconclusive,
with both sides completely exhausted.
Note: Cohesion is often lower than the number
of territories. You can lose while still having
territory or armies in the field.

Going Really Large
If you are especially ambitious, you may
run multiple Operational Campaigns
simultaneously. This can be used to create
events like playing out battles across multiple
planets in a star system or a ground campaign
that covers a huge swathe of territory, similar to
the fronts in the World Wars of history.
Each operational campaign unfolds on its own
and at the same pace. They might all have
different starting Morale scores.
Winning an operational campaign creates the
following effects:
• The winning side may select any two
armies in other Operational Campaigns and
increase them each by +1 Army Strength.
• The winning side may select one
operational campaign and increase
Cohesion by +1.
• The losing side may select any one army in
another operational campaign and increase
it by +1 Army Strength.

99

Campaign Play
Special Regions (Option)
You can add special regions to the campaign
map to reflect areas of particular interest.
This works best if you set up the map with
predetermined areas (such as hexes), but also
can be interpreted loosely as you go.
If you want to use these features, give
each side one Urban, one Critical and one
Defensible region to mark on the map within
their initial territory.
Other features can be added as you see fit and
to suit the map you have created.
A region can never contain more than one
special region option.

Defensible

Whether a mountain chain, fortified zone,
or military outpost, these defenses assist
an army if it held this area before it became
an Operational Zone. This army is always
considered to be the defender.
Each Defensible region must track its Defense
Quality. This starts at 2. Each time the
defending army loses Army Strength due to
Operational Combat (but no other reason),
the adjust the Defense Quality by -1 until it
is lost. Once lost, it cannot be regained under
normal circumstances.
An army with any Defense Quality remaining
may roll an additional Combat Die during
Operational Combat in this Zone.

Critical

Critical regions are viewed as important to
long-term success or public support. They
may be naturally rich regions, core areas of a
civilized world, a starport that serves as the link
off world or the royal palace of the pirate lord.
• If a Critical region begins under control
of a faction, reduce their Cohesion by 1
additional point.

100

• If a Critical region is not under control of
any faction, the first to capture it gains
+1 Cohesion.
Once a Critical region has been lost/
captured, it no longer influences game play.

Urban

Major population centers are key to holding
public support for the war but are also
extremely costly to win through assault.
If a faction loses control of an Urban region,
reduce their Cohesion by 1 additional
point. This can occur multiple times if the
region changes hands several times. Note
that capturing Urban regions does not
increase the Morale of the winner.
When fighting in Urban regions, whenever
the fighting is inconclusive, adjust Army
Strength by -1 for both sides, and fight
again immediately.

Resource

Resource regions provide a steady supply of
fuel, ammunition, food, or spare parts, and
are vital to keeping a war effort going.
If a faction controls any Resources, they
may select one Zone at the end of every
operational campaign turn and roll a D6:
• If the result is equal to or above the
current Army Strength, it is increased
by +1.
• However, on a result of a 1, one
Resource has become unavailable for
the rest of the campaign.
Note that holding multiple Resources does
not allow multiple rolls.

Inhospitable

Inhospitable regions are toxic hellholes,
frozen wastelands, or other terrain that
does not permit major forces to operate. No
Army Strengths can exceed 2 in this region.

Campaign Play

CAMPAIGN STORY GENERATION
The primary source of story in a campaign
is always the gameplay on the table: What
happened, who did it, and who did they do it
to? These story beats happen organically as
you play and are always connected directly to
your characters and troops. Often, events on
the table take on a life of their own as we bring
seemingly unconnected elements together.
However, you may want a narrative that extends
beyond the immediate local affairs on the table.
This chapter offers a different approach from
the Operational System, focusing instead on
emulating traditional story-telling techniques.
The two systems are designed to co-exist and
even integrate with each other.

What Are You Here For?

When using this system, take a few
minutes before you start to decide
exactly what kind of story you want.
Keep that story in mind as you use the
Story Generator. Some events in the
table can be quite dramatic, such as
changing sides or characters. If you want
to play a specific force in your campaign,
that may not work for you, and you will
need to adjust the result.

Setting the Pace
To use the system, you must determine a
pace. This is measured in terms of how many
tabletop battles you will play for each story
element being generated.
In a fast-paced story with lots of twists and
turns, you might employ the story event
table after every battle. In a slower game you
might play 2-4 battles between each check.
Or you can leave it open-ended and roll when
a dramatic moment occurs, such as one side
winning a grand victory or a beloved (or hated)
character dying.
The pacing is up to you and can be slowed or
sped up if you find that the initial pace does
not fit your game. You can also opt to introduce
a story roll only now and again, if you feel like
the campaign needs spicing up.
If you are integrating the Story Generator with
the Operational System, rolling every one or
two operational campaign turns is a good place
to start. Adjust the pace to meet your needs. Try
every three tabletop battles as a starting point
while you get to grips with the system.

101

Campaign Play
Generating a Story Event
To generate an event, roll D100 and consult
the table below. Results in the table are openended, so they will have to be interpreted
based on your situation and campaign.
Some events require random selection of
characters, units, or other factors. This can be
done in two ways:
• Method One: Pick the elements you want
to be eligible for the event, add them all
up, and roll an appropriate die type. For
example, if a random character is affected by
something you might pick 5 characters you
think fit and roll a D6 (rerolling on a 6).
• Method Two: Pick two eligible elements
that makes the most story sense, and
randomly choose from those two.

Each entry on the table provides an explanation
of what happens, and lists both player effects
and operational effects:
• ‘Player effects’ provides suggestions for how
this might affect the forces under control of a
given player, especially in a solo campaign.
• 'Operational effects’ explains how the
event works when used in conjunction with
the Operational System.
Results marked with an * are challenging in
that they can result in a dramatic change to
your campaign. If they do not fit the style you
are playing, you may opt to reroll.

STORY
EVENT

EXPLANATION

PLAYER
EFFECTS

OPERATIONAL
EFFECTS

Reinforcements

One side receives
reinforcements that either
grant significant additional
manpower or adds new
capabilities (such as armor,
specialist troops, or similar).

Justify adding a
new unit to your force
or add an additional
unit to the enemy
next mission.

One army gains
+1 Army Strength.

05-08

Critical Strike

One side launches an attack
against an important or
high priority target.

Play out the mission.

If the mission
succeeds, reduce an
army at 4+ Army
Strength by 1.

09-11

New Main
Character

The focal character of the
player’s forces changes.

Choose or create a
new character that
becomes your
main character.

NA

12-15

Flashback

Play out an event that took
place in the past for a character,
unit, or the current conflict.

Play through the
events.

NA

16-20

Balance is
Shifting

One side is gaining the upper
hand and making advances.

–

In one Zone, add +1
to Army Strength
and adjust enemy
Army Strength by -1.

D100

01-04

102

Events can be interpreted widely, though it
is often satisfactory to tie positive events to
the side that won the last tabletop battle, and
negative events to the side that lost. You may
use any method you like, however.

Campaign Play
D100

STORY
EVENT

EXPLANATION

PLAYER
EFFECTS

OPERATIONAL
EFFECTS

21-25

Shortfall

One side is short on a
resource such as fuel or
ammunition.

–

One army with
4+ Army Strength
is reduced by 1.

26-31

New Character

A new character is introduced
to the campaign story.

Add a new character to
your force.

NA

32-36

New Ally

37-42 Loss of Initiative

43-46*

Change of
Perspective

One side gains a new ally.

Add a new Zone to
Create a new force to
focus on, create a new the map. The ally has
Army Strength 4
operation off-world, or
add an unusual unit to while the enemy has
Army Strength 2.
your force.

The side that was on the
defensive manages to gain
the initiative and dictate
events in some manner.

–

Side with lowest
Morale may add
+1 Army Strength
and then conduct
Operational Combat
in that Zone.

The campaign shifts to a
new perspective.

Choose one side or
faction that you are
now playing as.

NA

47-52

Unconventional
Operation

One side launches a special
operations mission.

Play out the mission.

Select an enemy
army and roll 1D6. If
the roll is below the
Army Strength, it is
reduced by -1.

53-57

Loss of
Capability

One side loses a combat
capability (such as artillery, air
movement, etc.)

Unable to use that
capability next turn.

The target cannot
carry out an Order
this turn.

NA

58-62*

Side Story

A secondary story unfolds
during the conflict.

Play through the side
story. It may be tied
closely to the overall
story, or may simply
take place alongside it.

63-66

Unit
Reassignment

A unit is reassigned from the
current area and given new
duties elsewhere.

One unit leaves and
is replaced with a
new unit.

NA

67-72

Change in
Strategy

One side decides to adopt a new
strategy to gain the upper hand.

Reflect the change in
the next scenario.

The side carries out
two Orders this turn.

Change of
Focus

If the campaign has been
Choose a new area to
focused on fighting in a
play in. This may mean
particular area, the Operational playing a new force
Focus changes to a new area and main character if
you like.
of the conflict.

Change the
Operational Focus
(or create a new
operation, if you are
ambitious)

73-77

103

Campaign Play
D100

78-83

84-88

89-92

STORY
EVENT

EXPLANATION

PLAYER
EFFECTS

OPERATIONAL
EFFECTS

Transfer In

A unit is transferred in from
another formation or from
off-world.

Add a unit to your
force.

The Operational Zone
the player’s forces are
in gains +1 Army
Strength if currently
4 or less.

Front Transfer

The focal unit is transferred
to a different area
of the conflict.

Select what area you
will now be fighting in.
This can be a different
operation altogether
if you want.

Move the player’s
forces to a different
Operational Zone.

The focus unit is given a
chance to rest, recover and
be refitted.

Make any force
changes you feel are The Operational Zone
the player’s forces
appropriate, such
are in is raised to
as unit types, new
weapons, or vehicles. Army Strength 3 if
Recover casualties and currently 3 or less.
conduct repairs.
Add an Operational
Play out a battle on Zone. Both sides have
Army Strength 4.
the new front. Decide
if you want to shift the Conduct Operational
Combat there
campaign focus there.
this turn.

R&R

93-96

New Front
Opens

A new area is added to the
overall conflict.

97-00*

Remote
Conflict

A conflict breaks out in a
different country, planet, or
system altogether, but which is
tied to the current conflict.

Player Actions
After every campaign story event, each player
can attempt a player action. This can be any
action, outcome or possibility that is reasonably
plausible, based on events so far. Player actions
should drive the narrative but can have limited
mechanical or operational effects if the other
players agree.
The Story Events table (above) and the
Operational Orders table (see page 98) can be
used as a guideline. If playing with a GM, the
GM always has the final say.

104

Play out a battle in the
new conflict. Decide if
you want to shift the
campaign focus there.

Creates a new
Operational conflict.

For example, after one side wins an important
battle, you might decide that it would make
sense for them to adopt a defensive stance and
fortify that location as a base of operations.
When playing with a GM, players provide their
actions to the GM, who makes the rolls and
interprets any outcomes and overlaps. If you
play a multi-player campaign with no GM, you
will need to talk things out between you.
To resolve the action, roll 1D6, with 3-6
indicating that the event comes to pass, while
1-2 indicates it does not. If you need to know
why it did not happen, you can roll again:

Campaign Play
D6

REASON FOR FAILURE

1

The action was attempted but failed in some dramatic fashion, such as a new base being
constructed but suffering extensive damage from enemy fire.

2-3

The action failed or was prevented due to in-story challenges or enemy actions,
such as a counterattack.

4-6

The action was not attempted due to lack of resources or other difficulties,
such as ongoing fighting in the region.

UNIT LOSSES
We refer to units being removed from the table
as being “destroyed”, “killed”, or similar, but their
fate can be quite varied. If a squad all became
casualties in game terms, odds are a few were
killed or wounded, others slipped away to carry
back their comrades, one trooper was knocked
out, another was isolated from their squad and
so forth. Wrecked vehicles might have burned
out, or may be okay with some repairs, or
the crew may have simply bailed out and the
vehicle was not actually damaged.

When playing in a campaign game, you may
need to know the fate of a particular unit.
This can be used if you have a favorite unit or
are curious about that one squad that were
beat up the entire battle while trying to hold
the objective.
If you are playing using an Army Roster (see
page 91) or using Campaign Progression (see
page 106), you should use this system.
If a unit remains on the table at the end of the
game, we assume it recovers completely and
can be used normally in the future. Casualties
are replaced and equipment is repaired.

105

Campaign Play
Any unit that was completely destroyed must
roll a D6 on the table below:
D6
ROLL

CONDITION

EFFECTS

1

Lost

The unit is lost in action or captured. Remove them from your roster,
though the unit can be replaced with a new unit for 1 Campaign Point
if using the Campaign Progression rules (see page 106).

2

Devastated

The unit has suffered extensive damage or losses.
It is unusable for two campaign battles.

3

Weakened

An individual figure recovers just fine. For a squad or weapons team,
until the unit can sit out a campaign battle without being deployed,
it must deploy with one figure fewer than normal. For a vehicle,
it deploys with one fewer KP until it can be left out of battle.

4-6

Okay

The unit is okay. An individual survived with minor wounds, a vehicle
crew bailed out and have been reassigned to a new vehicle, a squad
replaces any losses, and they are quickly integrated into the unit.

CAMPAIGN PROGRESSION
Players use Campaign Points (CP) to track
their progression in a campaign game.
Campaign Points represent a mixture of tactical
advantages, command competence, and troop
experience. Each game you play awards you CP,
which you accumulate until you spend them
on bonuses and upgrades for your troops.
You may spend CP before or after any
campaign battle. Store unspent points as long
as you like. There is no ability to “trade back”
options once they have been purchased.

Are Points Tied to the Player or Army?

In some narrative campaigns, you may switch
between different forces, conflicts, or even sides.
You may opt to have CP tied to a specific
army you are playing. If so, and the campaign
switches to a different force, those points are
unavailable, as the new force will accumulate
a separate CP total. But if you prefer, you can
track CP for the player’s forces as a whole.

106

If you are continuing the same narrative arc,
the CP will be available. This also means you
are not starting from scratch if you decide to
swap to a different army to experience the
campaign from a different angle.
When playing solo with player CP, it does not
matter which army you earned the CP with, as
you apply them to the campaign as a whole.
If you like to play as one side and then as the
other side, CP earned from any game in the
campaign can be spent no matter which side
you are playing today.

Earning CP
CP are awarded after every campaign game
played. Roll three D6s and drop the lowest
result. The sum of the two remaining dice is the
base number of CP awarded.
If the scenario played uses victory points (see
page 73), 1 CP is awarded for every VP earned.

Campaign Play

If the scenario did not us victory points, award:
• 3 additional CP for a victory,
• 2 additional CP for a draw, and
• 1 additional CP for a defeat or inconclusive
battle where neither side achieved anything.
Example: If the roll is a 2, 3, and 5, the base
award is 8 CP.
If I earned 3 VP in the battle, I would receive a
total of 11 CP.

Spending CP

Once purchased, it may be saved indefinitely. If
you are playing with CP at the campaign level,
battle advantages are also campaign-level, and
can be used with any force. If you are tying your
CP to a specific army, any battle advantages are
also army-specific. Once a battle advantage is
used, it is gone.

Unit Upgrades
Gain Veteran Skill (4 CP)

A unit receives a veteran skill of choice (see
page 149).

Unit upgrades allow you to change or
enhance the forces you are using in the
campaign. These benefits are permanent and
“free” when using the Army Builder points
system. Unit upgrades are always tied to a
specific unit.

• Squads may have one squad skill and one
sergeant skill.

Roster changes are only used in campaigns
where you are using a fixed roster and allow
you to modify an Army Roster. The changes
are permanent (until points are spent to make
another change), and are a part of that specific
army, once spent.

Retrain Unit (2 CP)

Battle advantages grant you a single-use bonus
which can be spent in a battle when you wish.

• Individual characters may have one
individual skill.
• Vehicle crews may have one vehicle skill.
A unit with a veteran skill may replace it with
another pick from the list.

Gain Hero Trait (2 CP)

Any Individual figure that is not currently a
Hero may be upgraded to Hero status, even if it
already has the Leader troop type.

107

Campaign Play
Gain Leader Trait (4 CP)

Any Individual figure that is not currently a
Leader may be upgraded to Leader status, even
if it already has the Hero troop type.

Roster Changes
Unit Refit (1 CP)

You may make changes to a unit on your roster,
such as replacing weapon options. If using the
Army Builder, all changes must be correct for
the unit type. For example, a weapons team
can only select from the Crewed weapons
listed in the Army Builder. You can make
multiple changes such as adding, removing, or
swapping out options.

Unit Customization (1 CP)

You may add, replace, or remove one weapon
or option from a unit even if it is not listed in
the Army Builder. Use the points values in
the weapons section to calculate the new
points value.

Unit Replacement (1 CP)

A unit on your roster can be discarded and
replaced with a different unit of the same
general type (squad, vehicle, specialist,
individual). Discarded units are no longer
available. If the replaced unit has any
upgrades, modifications, or penalties, they are
lost with the unit.

Roster Addition (3 CP)

You may add a new unit to your roster. If using
the Army Builder, the unit must fit into an
existing platoon. If there are no existing slots
available, you may begin a new platoon instead.

Replace Destroyed Unit (1 CP)

If a unit has been permanently lost, you may
replace the lost unit with a new unit of the
same basic type (storm squad, medium tank
etc.). The new unit enters with no veteran skills.
It may use a different weapon load-out than the
original unit.

108

Battle Advantages
Battle Support (2 CP)

This allows the use of Support (see page 65) in
a single battle of your choosing.
Multiple Supports can be chosen for a single
scenario, but they must each be a different type.
If you select the Support option at the
beginning of the battle, it will require a 7+ roll
to call upon.
Once a battle has started, you may opt to bring
on Support that you have previously paid for.
Nominate what type you are after. It will be
called on an 8+.

Battle Finesse (1 CP)

This is usable in a scenario using the Clock
(see page 120) to determine when the game
ends. When used at the end of a round, you
may roll twice for the progress of the Clock, and
pick which of the dice you want to use.
You can use Battle Finesse multiple times per
battle, but only once per round.

Battle Luck (1 CP)

When any figure makes its attacks (whether by
firing or by making a close assault), you may
spend Battle Luck to have the figure roll for
two sets of attacks (including both Hit and
damage rolls) and then choose which set you
want to apply. This works on both friendly and
enemy attacks. When used on vehicles, it only
affects a single weapon.
You may use Battle Luck as many times as you
like, but each individual attack can only be
modified once.

Battle Initiative (1 CP)

You may use this to automatically choose
whether to take the first or second phase in the
first battle round.

Game Mastering

Game
Mastering
Game Mastering a scenario can be a tall
order the first few times. If you are about to
undertake this role, take time to read through
the advice in this section. Even if you are
playing without a GM, this chapter can help
you to make a game work smoothly and
handle unexpected events.

Resolving Questions
A key task for the GM is to resolve questions
as they occur during the game. Many of these
will be simple interpretations along the lines of
“How do these two things interact?” and “Is this
robot in Line of Sight?”. As the GM, you should
resolve these as fairly as possible, taking the
intentions of the players into account.
Miniatures games are fabulously complex
machines, with near-infinite combinations
of units, tabletop features, scenarios, and
random chance. It is inevitable that something
will occur that nobody anticipated. In most
cases, consulting the game rules will provide
you with an answer, and if needed, adjusting
the literal rules to suit a particular scenario,
considering the intention of the rules and the
situation at hand.

If a particular question seems likely to come up
again, evaluate it after the game, and decide
with the group how it is best handled in future
(and contact the author so we can clarify the
issue for a future edition!). In some groups,
one person is the “rules guru” (often the GM),
and they can be left to figure it out (usually
by emerging from an ancient computer vault,
clutching a cobwebbed computer chip).

Active or Passive?
Game Mastering can be both active or passive:
An active GM tends to administer the scenario
on the fly, making adjustments and adding (or
removing) new elements as the game unfolds.
This might mean adding reinforcements if
it looks like one side is being obliterated, or
adding some tension to a scenario that is
slowing down. This is similar to the GM in a
roleplaying game, where it is expected that
there is a frequent interplay between players
and GM.
Most scenarios that are “players vs GM” will be
somewhat of this nature. The players might ask
about something that was not expected, and
the GM answers this on the fly. For example, a
player sends a technician to search a computer
terminal, to see if they can just shut off the
power to those sentry guns. The GM thinks
about it and decides that they can, but if they
take too long it alerts the defense systems and
more robot soldiers will be deployed.

If you are still unsure, you can use a die roll to
resolve the issue and move on with the game,
but be careful not to relegate the reality of
the game to a series of dice rolls. The players
should feel that they have a reasonable
understanding of how things work. They 109
shouldn’t think they can fish for a random roll
A passive GM tends to set up the scenario
that eliminates a particular unit or challenge.
and run any active elements (such as GMcontrolled troops), but not otherwise make

109

Game Mastering
changes after the game has started. Using the
above example again, the GM might state that
the technician looks around but does not find
anything, unless the scenario details outlined
that cutting the power was an option.
The difference in approach is particularly
relevant when questions of difficulty arise.
An active GM might adjust the challenge to
make the scenario harder or easier as it goes
along. If the players blow through the initial
defenders quickly, you might (as an active
GM) add a few more at the rear of the enemy
complex to make the scenario more tense. A
passive GM would stick to the scenario as it
was intended: If the players do well, it just
means their force operated efficiently and can
celebrate that victory.
You will find that different scenarios require
different approaches. If in doubt, lean towards
the passive side, especially when starting out.
It is easy for players to become frustrated if
they feel they cannot anticipate unpredictable
elements in the game or that anything they do
is being countered.
Note that this is different from revealing
information during a game. A passive GM does
not have to lay out all the cards in advance,
though a similar warning applies here: Some
secret information will intrigue the players
because it gives them an incentive to explore
and be creative, but if every inch of table seems
to trigger something unforeseen, it becomes
difficult to conduct a battle. An active GM can
worsen the situation because players may feel
that the GM is just trying to mess with them.
The advantage of active Game Mastering is
that the game world can feel much more alive
and responsive, which can greatly increase
both investment and immersion in the setting
and scenario. In reality, most GMs combine
both methods, and even those who lean more
towards one side or the other will incorporate
elements of the other style.

110

Creating and Using Tests
If an action is not guaranteed to succeed,
the humble ability test can resolve many
questions in the game:
• .Pick which ability score is used and assign a
target number according to the table below.
• Apply modifiers to account for having or
lacking particular equipment or training.
Modifiers should typically be kept to +/-1
to keep the challenge focused on the
characters attempting it.
Examples:
Climbing is something anyone can reasonably
do, so having climbing equipment adds a +1
bonus. Picking a lock is something you usually
need specialised equipment for, so trying to do
it with improvised tools is a -1 penalty.
SITUATION

TARGET
NUMBER

Routine

4+

Typical

5+

Challenging

6+

Difficult

7+

All manner of tricks and effects can be applied
to tests, if your scenario needs them. A few
suggestions are listed below for inspiration:
• Each failure increases the target number
by +1.
• Failing the test grants a benefit to the
enemy (such as reinforcements or a bonus
to something).
• The test requires a specific item (carried or
found on the battlefield).
• The test requires two people to work on it
simultaneously.
• The test can only be attempted once.
• If the test fails, an item must be located
before making another attempt.

Game Mastering
• The test requires specialist tools (-1 penalty
or impossible without).
• The test benefits from specialist tools
(+1 bonus).

The Luck Test
If a situation would benefit from a die roll
but does not rely on any troop characteristic,
training, or skill, it can simply be a Luck test.
Roll the D6 aiming for a result above a target
number. The target number can be judged
quickly on the fly:
• Likely to happen, 3+ for success.
• Equally likely to succeed or fail, 4+.
• If success is against the odds, those odds
are 5+.
You can use an “anything but a 1" roll
for situations that have a small chance of
failure (often due to unexpected or external
circumstances, such as crossing a rickety
old bridge) but be careful not to call for that
constantly, or you will turn the game into a
comedic series of falls and accidents.

Conversely, long-shot plans might only succeed
on a 6. Again, exercise some discretion here, or
you may end up with players constantly asking,
"Can our orbiting battlecruiser wipe out the
enemy position on a 6?".

Actions in More Detail
Player actions (see page 104) can take all
manner of forms, with some groups using
them extensively, and others preferring to
keep things by-the-book. As a broad rule of
thumb, an action should allow the following
within reason:
• Accessing an area of the battlefield.
• Obtaining an item.
• Creating something moderately useful.
• Delaying or hindering a target.
• Wrecking something on the battlefield.
• Discovering a location or information.
Other uses – and especially more dramatic uses
– should depend greatly upon the scenario
and the desired tone. A scenario that is more
space opera in nature might benefit from more
dramatic actions, while a grittier war drama will
play better if kept firmly in the realistic.

111

Game Mastering
The character or unit attempting the action
should be considered; an infantry grunt
probably can’t hack into a security system at all.
Often, the GM may opt to limit player actions to
character figures (who can be assumed to have
a broad educational and skill background as
well as out-of-the-box thinking).
A player action is often going to require a test.
Something especially potent may require
two tests: One for research (such as figuring
out from parts of an alien space plant if it is
susceptible to any chemicals) and a second to
implement the action (mixing a substance to
destroy the plant).
When Game Mastering, remember the three
basic guidelines below, and try to keep your
games consistent:
• Actions should rarely allow the destruction
of player-controlled troops directly.
• Actions rarely grant bonuses to rolls.
• A clever plan is only clever once) and try to
keep your games consistent.
The game flows best when the players and
GM are in tune with each other about what is
acceptable, and it’s worth discussing this up
front, especially if a particular scenario differs
from how you usually do things. For example,
a group that usually plays tight, military
scenarios involving small-unit tactics plays an
infiltration scenario where a commando
team must breach a military research base.
The GM decides that this scenario would
benefit from a more open-ended approach,
and tells the players beforehand that the
scenario will be open to player actions that
interact with the environment.

GM-controlled Forces
If you have troops to control, you should strive
to either have them follow predictable patterns
(a guard robot follows a designated route until
it spots an intruder) or operate in a manner
that is appropriate to its orders and instincts

112

(soldiers advance tactically on a position, the
monster picks off isolated adventurers, etc.).
This also means GM-controlled forces should
behave realistically: If they have no reason to
suspect the ambush the players have set up, let
them walk right into it.
Always remember that while the characters
you control are trying to survive and achieve
their goals, you are not yourself trying to
win. The enemy should fight as fiercely as
they are capable of, but you should never be
emotionally invested in them doing so (though
it is permissible to have a favorite villain if you
accept it when the players finally nail them).
In the event a major enemy character is a
casualty, roll a D6 after the scenario (and make
sure the players witness the roll). On a 6, the
character may return as a villain later, though
it is up to you how long that takes. A returning
villain should be given a few upgrades, new
weapons, cybernetic body parts, or a cool new
ability. At the very least they should receive 1-2
KP extra. A villain will always seek revenge
on a character that delivered the ‘death blow’,
foiled their plans, or otherwise got in the way.
Enemy forces follow the Morale rules as usual,
though many monster types may not care
about casualties. This is good for “under siege”
scenarios where the players must accomplish
objectives before being overrun. Be careful
about having too many fearless foes, though.
The repetition can become dull, and it can turn
scenarios into a grind as the players have to
chase down and kill each and every opponent.
Think carefully about having very tough troops
that are also unaffected by Morale.
In a similar vein, if the players have solidly
beaten their opposition, consider skipping the
mop-up and just remove the last stragglers
from the table. It is rarely fun to chase the last
two space pirates from the corners they are
hiding in. A major villain will prefer to retreat
so they can plot their revenge, and you should
take the opportunity to monologue or do an
evil laugh as they do so.

Game Mastering

PREPARING A
GAME MASTERED SCENARIO
The Story
The core of a scenario is the story. (No, you
don’t have to write out a whole novel.) Since
this is a miniatures game, the narrative is
told primarily on the gaming table, so the
story needs to fill in the blanks about who’s
shooting, why they’re mad at each other, and
where the shooting happens.
You may already have a larger context for the
scenario, such as an ongoing campaign or
narrative. Otherwise, you will need to create
the context yourself. This can be as big or as
small as you like, but the best miniatures
scenarios tend to be lighter on the reading.
Determine in broad terms who is involved, why
they are coming into conflict, and where it will
take place, and then start the game. As you
play more games, the process will almost solve
itself, especially if you are playing multiple
games set in the same overall conflict.
The real enjoyment comes from connecting the
threads of multiple games such as having the
story of the next battle follow from (and depend
on) the events of the last one played. If the
invaders won the first battle, they now have a
foothold on the world, so maybe the defenders
are going to send in a commando team to
blow up the starship refueling facility. If the
Unity operative failed to apprehend the mad
scientist, the scientist succeeds in activating his
space dinosaur mind control device and now
there’s giant lizards everywhere.
If you can’t decide, simply pick the first two
or three things that come to mind, and then
roll randomly to see which one you want to go
with. The emphasis is on the story progression
rather than specifically game advantages
or disadvantages.

Example:
I want to create some sort of heist scenario.
A pirate leader has gathered a bunch of
intergalactic wasters and is looking to make off
with some prototype tech. The enemy will be
some hired mercenary guards.

Selecting Forces
Your story will dictate the forces that will be
fighting, with some scenarios being more
open-ended and some being very specific. Of
course, your selections will also be dictated
by the actual figures you have available. It is
common to design scenarios to fit particular
units. If you just bought and painted a new
unit of troops, then they deserve an outing on
the field of battle!
If players are bringing their own armies, they
will want some input on what forces they use. A
scenario can work with each player presenting
the troops they would like to use, and the
GM adjusting them to fit the scenario (and to
ensure each side will have a decent chance,
given their objectives).

The GM Army Process

The GM tells the players roughly what they
should bring. For example, three big squads
of infantry and a tank. When each player
presents their list to the GM, the GM can then
make any tweaks to ensure the scenario will
be as evenly matched as possible. This might
mean upgrading or downgrading a unit,
adding or removing a few figures, or throwing
in a few extra troops.

113

Game Mastering
The forces should be appropriate to the story
of the scenario, but you will usually have an
array of choices open to you.
In general, a player should have at least three
units on the table. Five or six is often more
satisfying, as units can die rather quickly; too
few troops and you run the risk of a player
being left without troops after a single volley
of particularly effective fire or a well-placed
artillery shell. Try to make sure a player has
variety as well. For example, instead of three
heavy firepower units, try giving them two
firepower units and a fast, light unit. A force
also tends to look best if it has a recognizable
core formation, typically some ordinary grunts
that set the theme.
You can use the Army Builder rules in the book
to set up the forces (see page 132). They make
for a good starting point, though you should
not be afraid to create completely new units,
creatures, and vehicles. A scenario featuring a
prototype tank (with a suitably cool call sign)
can be a lot of fun, after all!
Even if you do not intend to use the points
system, the general platoon structure (see
page 134) will help you to make sure a force
feels rational on the table. You can adapt this
based on your needs. Elite troops dropping
from orbit may not have any tanks to support
them, but might feature a lot more characters
to give them an array of snipers, demolition
experts, and more.

The Battlefield
Your gaming area needs to be organized
and laid out with terrain. While this can be
limited by the types of terrain you have in
your collection, you should strive to establish
a cohesive theme for your setup. This is not as
difficult as it sounds: By simply picking and
placing similar terrain pieces, a theme will
emerge automatically.

114

The usual caveats apply:
• Make sure there is enough cover to shelter
from fire, and that paths are available
so units can reach areas and interesting
locations to fight over.
• Try to avoid placing a wide-open space in the
center of the table where it will become a
‘kill zone’ (see page 72).
• Conversely, any particularly large or
impressive terrain features should be placed
in or near the middle, instead of along the
battlefield edges where they won’t feature
in the battle.
Try to encourage some verticality by having
things to climb up and reasons to do so. Good
examples include a tall platform overlooking
an area with Linear Cover, or an objective such
as a transmitter on the roof of a building.
Make sure to place a lot of scatter pieces
around the table so figures can have dramatic
firefights among them! Rubble, single trees,
small crystals, or anything else you can think
of will do.
Example:
Since this is a heist, it will feel more appropriate
to have a lot of buildings and industrial-type
terrain features. I have enough buildings
to make a small factory outpost, but it only
covers half the table. I decide that this is a
supply depot in a remote region and cover the
other half of the table with various rocks and
alien-looking plants to make it resemble an
otherworldly wilderness.
For scatter, I have a bag of clear plastic crystals
from a home decorating store. I spread them
around the outskirts of the facility and among
the wilderness terrain.
Finally, I realize that, if it is a heist, there should
be a clear target, so I put a shipping container
in the center of the facility.

Game Mastering

The Objectives
Each faction needs one or more goals they are
trying to achieve. This may be something very
specific and clear-cut, such as eliminating a
particular enemy or blowing up a target. Or it
may be open-ended, such as sweeping an area
or finding out what is really going on in the
research facility.
In a campaign, the players may have goals they
have created based on previous events.
Make sure you have a decent idea what
achieving each goal entails so that you can give
the players an account of how things went at
the end. The goals should always be realitychecked for problems: If a particular location
must be reached or a time-consuming action
performed, make sure that there is enough
time to do so. Remember that troops usually
cannot move in a straight line to the objective
and may not be able to advance every round,
so allow some flexibility of route and rate-ofprogress if you use a time limit.
If the factions have goals that are not in conflict,
they may end up not firing at each other at all!
Consider whether this is an issue. If it is, make
sure you have an answer in mind.
If a time limit will apply, consider how this will
work: A fixed number of rounds, a random roll
when time is running out, or a countdown once

a particular activity happens? Time limits are
most fun when they are tied to something in
the story, such as reinforcements arriving or a
super-bomb detonating on site and vaporizing
anyone that hasn’t evacuated yet.
Example:
I want to keep things simple, so the objectives
are simple: The pirates want to reach the
shipping container, take an action to search it,
and then make off with the tech treasure inside.
The corporates are trying to stop this from
happening. Easy peasy!
I decide that after Round 3 I will start a running
Clock by rolling 1D6 per round. When it
reaches 20, the corporates will receive an extra
fireteam as reinforcements.

How Did I Do?
Victory can be determined in several ways.
With a GM or when playing a friendly scenario,
you may keep things open-ended; simply
assess how each side did in comparison to their
objectives. It is fine if both sides claim a victory,
especially if the objectives did not contradict
each other. You may also decide that while the
goal was reached, casualties were too severe to
make it worth it.

115

Game Mastering
If you want more clear-cut resolution, it is
best to determine it up front, either through
a sudden-death objective (when achieved,
the game ends), or through a victory point
system (see page 73). A useful option for a
larger game is to give each side two major
objectives and one minor objective. Award
2 VP for each major objective that was
achieved, and 1 VP for the minor objective.
Note that some systems such as Campaign
Progression (see page 106) assume that VP will
be awarded, so try to fit them in if you need.
For military operations, you can always start
by declaring the capture of terrain features
or areas of ground as the objectives. As a
campaign develops, more personal objectives
may become clear.

Deployments and Arrivals
You will need to specify where initial forces
begin the game and how any additional troops
arrive on the battlefield. The options in the
Deployment Methods section (see page 117)
can be used to set this up.
Carefully consider deployments in relation to
the objectives the army has to achieve. A force
that must slog on foot across half the table is
unlikely to do it in 3 rounds. Conversely, having
half a battalion of assault troops beam down
directly on your position might not be all that
much fun to defend against.
If a player has forces arriving by multiple
methods, make sure they will work on the
table. Troops landing far from the rest of their
force will be in for a rough time, and having an
elite unit be immediately swarmed is not fun.
Isolated units will need the benefit of terrain
to shield them upon arrival. They should have
a clear role to play in the scenario that justifies
the danger they are placed in.

116

Complications
Scenarios can take place under almost any
circumstances you can imagine. Your scenario
is often improved by adding at least one
complication to the proceedings. Dangerous
ones such as third-party troops, monsters, or
environmental hazards are often the most fun,
but be careful not to go overboard (unless the
point of the scenario is for the players to gang
up on the monster horde that just showed up).
Other complications might involve a character
acting unpredictably, a terrain feature that is
hiding something interesting (or bothersome),
or an unexpected problem (such as a weapon
being low on ammunition). Complications that
seriously affect only one faction should be used
sparingly unless they have other advantages
to make up for it or have a way to overcome
it. Likewise, resist the temptation to add a
hindrance to every use of a cool, powerful unit
or weapon.
A complication may also be something
beneficial to a faction, such as a unit with
especially high Morale or a prototype weapon.
Each gaming group will have its own tolerance
for how sprawling they like their scenarios, but
1-3 complications is usually safe. More than
that, and it becomes difficult to remember
everything, and the players may feel like they
are constantly being surprised by things.
Example:
I want to have a little fun but still allow the
players to focus on shooting up bad guys. I
decide that any pirates within 6" of the captain
do not have to test Morale, while the mercs have
access to a spare Crewed weapon if one of them
moves into contact with a particular building.
The weapon is gene-locked to the merc units, so
the pirates can’t take advantage of it.
Finally, I decide that the crystals slowly spread:
At the end of each round, I’ll drop another
plastic crystal on the table.

Game Mastering
Side Plots

Objective Examples

A side plot is a secondary objective. This can
add more choices to a player and is perfectly
suited to a game where multiple players are
on the same side. Side plots can be particularly
fun if they might interfere with the primary
objectives, such as requiring a character to
move off to a remote location to achieve
something. A side plot can grant bragging
rights, carry an immediate reward in the
ongoing battle, or provide a future benefit in
the campaign.

If you are stuck trying to think of something,
steal from a book, film, comic book, TV show, or
video game. The list below can be used as well.
Just pick or roll a D10 and then fill in the blanks.

Example:
If my scenario was a larger battle with two
players on each team, I might have one of
the pirate characters be looking to secure
buried loot for themselves, and have a jealous
mercenary officer tasked with claiming all the
credit for the operation.

D10
ROLL

OBJECTIVE

1

Capture something

2

Steal something

3

Secure a location

4

Blow something up

5

Find something out

6

Eliminate someone

7

Reach a location

8

Do something at a location

9

Repair something

10

Rescue someone

DEPLOYMENT METHODS
Troops can arrive on the battlefield in several
different ways, depending on technology,
tactics, and circumstances. You can use these
options when setting up a scenario. Take a
moment to think about what deployment
methods fit a particular army or tactical
situation. As with Scenario Components (see
page 119), they can be used “as is” or modified
to fit the circumstances. A points value has
been assigned here for people who use the
Army Builder points system to create their
armies, but these are not standard battle
options for pick-up games.
It is possible to have units arriving through
different deployment methods in one scenario.
A 3' x 3' space (36" x 36") is a good size
for most games, though you can adjust to a
smaller table if you are looking to play with
fewer troops. Generally speaking, a 24" x 24"
table holds a reinforced platoon well (three

squads, a couple of vehicles, and a character
or two).

Conventional Method

This is the standard method and is well suited to
stand-up fights and pick-up games.
• The scenario dictates a deployment area
for each side, separated by 24". Typically,
deployment is done along the longer
battlefield edges to allow more room to
maneuver.
• On a smaller table, you can reduce the
distance of separation to 18", while a big
battle with lots of vehicles may benefit from
30" or even 36".
• Players alternate setting up one unit of
choice. Use a random roll to determine who
sets up first.

117

Game Mastering
Concealed Method

Drop Method

(Base cost +10)

(Base cost +10)

Concealed units are camouflaged, buried,
cloaked, or otherwise not visible.

The unit is arriving from an aircraft, through
teleportation, or using a similar means of
deployment.

• Concealed units do not begin on the table.
Instead, the player (or GM) notes down
which terrain feature the unit is within.
• The unit can be granted an activation die
at any point. Place the unit so that every
figure is within or in contact with the terrain
feature, and then carry out actions normally.
• The unit can be detected using the
Observation rules.
• A unit cannot employ any abilities of any
kind and cannot be affected or targeted
while it remains concealed. It is treated for
all intents and purposes as not being on the
table, including if the terrain feature is Hit
by Area weapons.

Teleport Option
(Base cost +5)
Units deploying using teleportation always
land on target, with no deviation. A teleporter
cannot lock on within 2" of a unit or within a
terrain feature.

Active Reserve Option
(Base cost +10)
The unit can be brought on at any time of
the players choosing.
This is used in the Battle Scenario
(see page 76).

Flexible Reserve Option
(Base cost +5)
When the unit does arrive, it may do so from
any point along a friendly battlefield edge.

118

• Drop units begin the game off the table
and arrive using the Reinforcement rules
(see page 128).
• When the unit arrives, select a target point
within Line of Sight of friendly troops. Move
the point 1D6+1" in a random direction. A
squad must set up entirely within 2" of this
target point.
• Any vehicle must be placed on the target
point. A vehicle can drop with troops inside.
• If multiple units drop at the same time, they
must be given separate points of arrival.
• In the event a vehicle lands in or on a terrain
feature, it is stuck in place.
• Any figure that lands on top of an enemy
unit is destroyed or shot down while
landing.

Reserve Method
(Base cost –10)
The unit begins the game off-table and arrives
using the Reinforcements rules (see page 128).
Reserves may be assigned to specific arrival
points including along the flanks.

Game Mastering

SCENARIO COMPONENTS
Scenario components are building blocks
you can use when creating a scenario to play.
They can be objectives in their own right,
complications that make life more difficult,
mechanics for how to handle a specific
situation, and more, and can be combined in
interesting ways. Think of them as a big toolbox
for you to play with and to inspire you.
They can also be modified to suit your needs.
All these components are written to be
usable as written without changing anything,
allowing you to swiftly put something
together by picking the parts you think sound
interesting and fun. However, any of them
can be modified to fit your situation further
by adding conditions, making an effect more
or less severe, or combining factors to create
something memorable.

These components are listed alphabetically, but
can be grouped into categories as follows:
Activities: Construction, communications,
demolitions, doors and other entrances,
handling items, intuition, long-distance
identification, research, searching, securing an
area, suspicion, taming beasts.
Encounters: Encounter reactions; group
agenda resolution; negotiating; rivalries
Environmental: Chemical hazards, dangerous
terrain, gas and smoke clouds, limited visibility.
Procedural: Clock management,
reinforcements.
Status: Concealed units, confusion, suspicion.
Weapons: Dwindling ammo, landmines,
unreliable and prototype weapons.

119

Game Mastering
Clock Management
If the passage of time is important, assume that
1D6 minutes pass at the end of every round.
This accounts for the fact that combat is often a
series of rapid events happening quickly after
each other, coupled with prolonged bouts of
waiting to see how the enemy responds or
anticipating their next move. If your scenario
dictates that events occur at a specific time slot,
it occurs if the Clock reaches or passes that slot.
Example:
A bomb will explode after 15 minutes, and the
Clock is already at 12 minutes. At the end of
the round, a D6 is rolled with the result being 4.
This takes the Clock to 16 minutes, exceeding
15. Boom!
Rather than give specific Clock times, count the
number of minutes that have passed, starting
the scenario Clock at 0.

• Particularly insidious threats modify the
roll by -1.
Figures with the Synthetic trait are not
affected by toxins. They are affected by
corrosive environments, but count as having
protective gear (2+ avoidance).

Communications
Military troops use communication systems
to transmit orders and intel efficiently
throughout a mission, allowing all standard
communications to succeed without any dice
rolling required.
If a unit attempts to communicate between
systems that are not meant to work together
(such as using a captured radio), hack into
communications, send a transmission
without detection, and so forth, a Savvy
test is required. The table on page 120 lists
suggested target numbers.

Chemical Hazards
Chemical hazards typically affect a specific
location (such as a terrain feature or room) or
Area of Effect marker (such as the cloud from
a poison gas grenade). Any figure that comes
into contact with a hazardous area at any point
during a round must make an Avoidance roll
on 1D6, consulting the table below for the
target for success.
• A roll below the required score means the
figure suffers the effects of the chemical,
typically a loss of 1 KP (even if chemicals are
rarely lethal outright, they are very likely to
incapacitate for the duration of a fight).

120

• A roll equal to or above the target means
the figure is not affected for the rest of
the current round. They may have been
able to hold their breath, found a pocket
of air, or fashioned some means of
temporary protection.

To jam a transmission requires an opposed
roll, with the higher score succeeding. If a
transmission succeeds but is actively being
jammed, a second opposed roll is made with
the transmitter getting through if they roll
equal or better.

PROTECTION

AVOIDANCE
ROLL

NOTES

Civilian, outlaw, etc.

6+

Average person.

Military equipment

4+

Typical military forces, Unity grunts.

Protective gear

2+

Gas masks and similar counter measures.

Environment suit

1+

Space suits and protective gear. Engineer alien species.

Swarm

2+

Swarm alien species.

Game Mastering
EQUIPMENT

TARGET
NUMBER

Standard kit

5+

Captured or alien

6+

System is hardened
against capture

7+

These can be modified. The table below offers
some suggestions.
GOAL IS

TARGET
NUMBER
ADJUSTMENT

Establish
communication

+0

Communicate without
detection or eavesdrop

+1

Jam signal

Opposed roll

The GM should enforce some restrictions
on troops that are unable to receive
communications. Troops will continue with the
orders they were generally operating under,
though they may respond to direct threats and
may abandon their orders to move towards the
sounds of combat instead.
Without radio (or futuristic equivalents), you
can get someone’s attention at a range of 12"
and exchange information and ideas at 6".

Concealed Units
Concealed units are not set up on the table.
Instead, they are marked secretly on a map or
through written instructions. Only infantry and
Crewed weapons may be Concealed; vehicles
may not be.
If a scenario allows troops to be concealed,
each unit must be assigned to a terrain feature
within the normal deployment area allowed
by the scenario. The unit does not have to be
placed in an exact location within the feature
itself; it is enough to know the unit is in the
terrain feature.

Unit Notes: Communications
• Swift always have a general idea of what
other Swift on the battlefield are doing and
can see (regardless of which side they are on).
• Precursors can communicate sufficiently to
coordinate in combat if within 12".
• Converted can communicate across the
battlefield. Their comms cannot be intercepted
or eavesdropped upon, and they receive a +1
bonus if rolling to resist jamming.
• Soulless communications cannot be jammed
or intercepted while connected to the network
(for example, if a Soulless military base or
orbital ship is at the world).
Concealed units can be activated at any time
just like any other unit. Place the unit anywhere
within or adjacent to the feature in question,
and then move and act normally.
If an enemy moves into a terrain feature, any
concealed troops in that feature must be placed
immediately. This interrupts the moving unit
temporarily.
Concealed units are Hidden. They are revealed
(and must be placed) if an Observation roll
reaches their terrain feature (see page 39).
Use of the Scanner Sweep Support option
(see page 68) will reveal concealed units in a
targeted terrain feature.

Confusion
Units may be confused due to a surprise
encounter, chemical or psionic attack,
contradictory orders, sabotage of their
communications, or several other reasons.
When a confused unit activates, it makes a
Training test: A score of 6+ indicates the
unit shakes off the confusion and can act
immediately. Otherwise, it remains in place
and cannot take any actions.

121

Game Mastering
If fired upon, or visible enemies approach
within 8" of them, the unit recovers
immediately.
A character figure moving within 2" of a
confused unit can attempt to clear things
up. Take an immediate Training test for the
character, with a 6+ indicating the unit is no
longer confused. A unit cannot receive help
from more than one character per round, and
a character can only attempt to help one unit
per activation.
Once a unit has shaken off a state of confusion
they act normally for the rest of the battle.

Construction
To build or construct something, set a difficulty
factor for how complex the build is. If it mainly
involves assembly or modifying an existing
item, a difficulty factor of 10 is typical. If it
involves building something from parts that
must be modified to fit, use a difficulty factor
of 20.
Building requires a roll of 1D6 every round,
with the cumulative tally. Troops trained in
engineering or characters with a suitable
skill set add +1 to the score. Once the score
equals or exceeds the difficulty factor, the
build is completed.
• Unlike Research, no special rules apply
when rolling a 1 or 6. Building tends to be
more a pragmatic process, with fewer dead
ends and leaps of logic.
• Building requires suitable materials which
may have to be found or acquired.
Examples of building include creating
barricades, modifying a satellite array to
broadcast a unique signal, or developing
something that was theorized through research.

Dangerous Terrain
Some terrain features, such as chemical spills
or treacherous swamps, may be hazardous to
the health of troops. Individual figures can
pick their way through these features safely.
Any squads must roll 1D6 if they try to enter
or move within a dangerous feature. On a 1,
a random trooper stumbles into a hazard and
must make a 6+ Savvy test, with failures
become casualties.
Such casualties do not die, but rejoin their
squads after the battle.
Note that one roll is made for the entire squad,
not per figure.
Swarms and any predator local to that region
of a world are not subject to natural hazards.
but are at risk for artificial hazards such as
industrial spills.
Additional options:
• Highly Hazardous: Teams risk injury on a
roll of 1-2.
• Corrosive: Armor saves cannot be
attempted.
Vehicles are not affected by Dangerous
terrain, though they must obey the normal
terrain restrictions for their type of mobility.
For example, a poisonous swamp is treated
as a swamp.

Demolition
Blowing things up requires explosives, and
these must be transported to the target,
usually by engineers. High-tech explosive
charges are light enough to be portable by an
infantry figure. Each figure can carry a single
charge, and a structure generally requires one
charge per 2" along its furthest dimension.
For example, a bridge that is 3" wide and 6"
across would require 3 charges.
A charge can be set by moving into contact with
the target.

122

Game Mastering
Once the charges are primed, set the timer to
a number of minutes. Remember that 1D6
minutes pass at the end of each round (see
Clock Management, page 120). When the timer
hits 0, the feature is destroyed and any figure
in, on, or adjacent to it becomes a casualty,
either buried in the rubble or blown to pieces.
Charges can be defused. Each figure working
on this rolls 1D6+Savvy with a 6+ disabling
one charge. To prevent this, you can set more
charges than you need to destroy the feature.
High-tech explosives are insulated and do not
detonate due to weapons fire. They cannot
be used for other combat purposes, unless
permitted to by the scenario or GM.

Doors and Entrances
Normal doors that are open to both sides
are handled by the movement rules. Use the
following rules for doors and entrances when
things are not that straightforward.
• A door may be locked from the inside
of a building. Interior doors lock on one
side. If you are uncertain, pick which side
at random. A figure with a suitable key (or
suitable electronic access) can lock doors
as well. Locking a door requires being in
contact during a move, but does not require
an action.
• Picking a lock requires an action and a
6+ Savvy test for a conventional lock,
7+ Savvy test for an electronic lock. If a
scenario dictates a figure has lockpicks or
similar equipment (or a background in
thievery) they receive a +1 bonus.
• Breaching a door requires an action and a
6+ roll. Figures with Melee weapons may
add the damage rating to the roll (ignore
damage bonuses). Figures with multiple
close combat attacks can try one time per
attack. A Penetrator grenade allows the door
to be breached automatically with no roll,
though it still requires an action.

• A door may be barricaded with an action
and a 5+ Savvy test. Once barricaded, the
door can only be opened from either side by
breaching it.

Dwindling Ammo
A scenario may dictate that a particular
weapon is not well supplied with ammunition
– typically a heavy (Crewed) weapon of some
sort. This limits the weapon to two attacks
during the battle, after which it is exhausted,
and cannot be used for the rest of the battle.
You can use the Limited Ammo marker for
keeping track of this.

Encounter Reactions
In more open-ended scenarios, you may have
third parties that player forces can encounter. If
the GM has not determined the goals of a third
party, use these rules.
Make a reaction roll when an infantry figure (or
a vehicle with a crew member or commander
sticking out the hatch) comes within 8" and
Line of Sight of a GM-controlled unit. Roll
2D6 and consult the table on page 124 to
determine the unit’s reactions. The GM may
grant a particular group a modifier to account
for their outlook. Criminal types generally react
at -1 while violent groups such as pirates react
at -2 at least. Your average friendly colonists
might react at +1.
Note that such third parties are not idiots. They
usually turn hostile to any force that threatens
them and flee or defend themselves according
to their abilities.
If a group makes enemies/friends with one
side, they will react at +/-2 to the other side.

123

Game Mastering
2D6
ROLL

REACTION

NOTES

2-3

Hostile

Attack immediately.

4-5

Aggravated

Will attack if given provocation. Next round, roll again counting a
6 or less as Hostile.

6

Suspicious

Avoid and refuse cooperation.

7-8

Neutral

Avoid. Must be persuaded to cooperate.

9-10

Cooperative

The characters aid and cooperate, but will not involve themselves in a
fight unless it is in their interest.

11-12

Friendly

Fully cooperate and assist.

Notes:
• Swarm react to all lifeforms with immediate
violence.
• K’Erin treat Aggravated as Hostile, but
treat Suspicious as Neutral.
• Everyone reacts to the Converted or Horde
with violence.

Gas and Smoke Clouds
Clouds of gas or smoke are easily represented
with a bead or marker and radiate out a certain
number of inches in every direction. The rules
give the area of effect of military weapons.
Otherwise, a generic cloud can be assumed to
extend 2" radius in every direction.

124

If operating indoors, clouds do not penetrate
through walls, but do penetrate through doors
unless they are environmentally sealed.
At the end of every game round, roll a D6 for
each cloud. If multiple clouds are on the table,
roll in a batch and assign the dice from left to
right as they fell.

Realism Note

In reality, many biological weapons are
designed to be invisible; however as this
is boring, the game rules assume all gas
weapons are a suitably dramatic bright
green, and therefore easy to spot.

Game Mastering
D6
ROLL

RESULT

1

The cloud dissipates immediately.

2-5

The cloud remains in place.

6

If outdoors, move 3" in the wind direction. If indoors, with anti-gas systems,
the cloud dissipates. Otherwise, it remains in place. (All starships, military facilities,
and chemical labs have anti-gas systems.)

Wind direction can be determined randomly
the first time it is required. The wind always
blows towards one of the four battlefield edges
and does not change during the game.
Any figure that is contacted by the cloud at any
point while the figure or the cloud is moving is
affected by it (if it has any effects). Both gas and
smoke clouds block lines of sight.

unrelated to the conflict that neither side has
reason to become involved with (though they
may well get in the way). A GM is encouraged
to use this as a springboard for further ideas
and scenarios.
Note that this system is intended for sapient
groups, not wild beasts.
A D100 roll is made.
Notes:

Group Agendas
This system is used to determine the goals
of an unexpected group arriving (or being
discovered) on the battlefield. Unlike the
Encounter Reactions rules, use this when a
group is first placed on the table to determine
what their purpose is in the battle area.
It is possible they will interfere with the
battle, or they may be trying to do something

• Encounter Reaction rolls can be made if it is
uncertain how a group might react to being
approached while carrying out its agenda.
• A group that is prevented from moving to
a desired location will halt 12" or so from
the units in their way. If they are still unable
to progress the following round, they will
attack to clear a path.

D100
ROLL

AGENDA

NOTES

01-25

Retrieve
Something

The group is trying to reach a specific terrain feature selected randomly
or by the GM. Once there, they will attempt to return to their original
location. They will fight to protect themselves or clear a path.

26-45

Reach and Secure

The group is trying to reach a specific terrain feature selected randomly
or by the GM. It will fight to reach this location and will fight to
capture or defend it.

46-65

Cross Battlefield

The group is trying to cross through the area by exiting across the table at
the most distant point. They will fight to protect themselves or clear a path.

66-80

Defend Location

The group is looking to defend the terrain feature closest to their initial
location and will attack anyone moving near.

81-90

Interested Party

The group is looking for possible allies or to be hired. If approached within
6" either side may attempt to Negotiate (see page 128)

91-00

Neutral Party

The group is neutral. If approached within 12" by either side, apply the
Encounter Reaction mechanic (see page 123).

125

Game Mastering
• A group that is attacked will fight
to defend itself until it is no longer
threatened, at which point it will resume
its agenda. This does not mean the
group considers themselves part of the
opposing army, however.
• The GM can and should modify these
reactions depending on the group.

Handling Items
A character can usually pick up a small item
off the ground automatically by moving into
contact with the location. If an item needs to
be handled in a scenario, a token or marker
should be placed to avoid confusion.
Most scenario-relevant items do not hinder
a figure carrying them, though for balance
purposes a figure can generally only carry a
single such item at a time. An item can be
placed on the ground or handed off to a figure
in contact, but an item can only be handed
off once per phase (to prevent a “bucket
brigade” from running the item off the table
immediately).
If a figure becomes a casualty, the item is
dropped where they fell. A figure removed due
to broken Morale rolls 1D6: On a 1-3, the item
is dropped; on a 4-6, they ran away with the
item. (Hope you didn’t need it later!) This does
count as retrieving it for the purpose of victory
conditions.
An Area weapon destroys any item on the
ground within its area of effect on a D6 result
of a 1.
Pushing, pulling, or handling an item that is
human-sized is done at half pace, and no other
actions can be taken at the same time. Two
people helping each other can do so at normal
speed but must still spend their full round
doing so.

126

Optional Handling Rules:
• Cumbersome: A figure carrying the item
cannot Dash.
• Complicated: The item can only be picked
up and handled by a character figure, a
figure trained in handling it, or a figure with
Savvy of +2 or greater.
• Fragile: If the item is put on the ground (or
dropped by a casualty or broken unit) roll a
D6. On a 1, it is destroyed.

Intuition
The Intuition test is made when a character
is trying to make a mental leap, using lateral
thinking, rather than using Research to answer
an isolated enquiry. This might mean solving
a riddle, putting some information together,
figuring out the villain’s master plan, or just
having a good idea. It is often used in scenarios
that combine roleplaying aspects with tactical
combat. A character actively trying to solve
something in this way can usually roll each
time the character activates.
If trying to decipher an enemy plan or plot,
a roll is made each time a clue is discovered,
a character is in a place where they can
do research, or the character arrives at an
important location (such as a murder scene).
If the players are not aware something is
significant, the GM can make a secret roll
for a suitable character to see if they notice
something out of the norm. Usually grant only
one such roll per clue to a particular character
per scenario.
Regardless of the method, intuition tests are
all done the same way: Roll 1D6 with a 5+
indicating that the character figured it out.
If a squad is permitted to roll, they usually
only roll once (as each squad probably has
one trooper that has the mindset for this sort
of thing).

Game Mastering
Optional Intuition Rules:
• Above your pay grade: Only characters can
attempt to figure out the problem.
• Dense problem: A roll of a 1 results in the
figure being unable to solve the problem
this scenario.

Landmines
All mined areas should be clearly marked in
the scenario or GM notes.
Minefields can be undetected (meaning they
are not known about) or detected (meaning
you should mark them on the gaming table).
Note that realistic minefields are often
intentionally identified to deter enemies. (And
a devious GM may even indicate that an area is
mined when it is not).
Any ground unit moving through a mined
area must make an avoidance roll, indicated
on the table below. Failure sets off a mine
and incurs damage. If the minefield was
undetected, roll for avoidance after the unit
has completed its movement. The minefield
is then marked on the table as detected, as
the grunts check the nearby area. Note that a
minefield that does not set off any mines is
still marked (one of the grunts spotted a halfburied mine).

Mine Clearance
Unless a scenario states otherwise, mine
clearance is not an option. The process
would take hours.

Aerial Mines (Optional Rule)
The minefield includes small hover mines
and affects grav vehicles.
An aerial minefield is always detected, as
the mines are quite easy to spot.

Limited Visibility
If an encounter takes place in the dark, in
dense fog, in industrial smoke, or in strange
atmospheres, an Observation roll is made
when a unit activates (see page 39). All targets
are Uncertain. Troops on Overwatch must test
for visibility range when they opt to fire.; if the
target is not visible, the firing misses.

Limited Visibility Options:
• Dawn: Poor visibility applies to the first
2 rounds, after which visibility becomes
normal.
• Dusk: Poor visibility applies from Round 4
onwards.

Troops with suitable mine detecting equipment
automatically detect any minefield that is
within 4" of their position at the END of
their move.
Mines mimic the effect of any grenade
type chosen.
UNIT TYPE

DETECTED
AVOIDANCE ROLL

UNDETECTED
AVOIDANCE ROLL

Single figure

2+

3+

Infantry squad

3+

4+

Walking vehicle

3+

4+

All other vehicles

5+

6+

127

Game Mastering
Long-distance Identification
A scenario may involve uncertain enemy
dispositions, unknown figures that must be
identified, or other things that are not clear. The
GM might use a Blip markers (see page 28)
or some generic infantry figures painted in
a featureless grey to indicate such unknown
groups. In general, figures can identify a unit
clearly with an Observation roll (see page 39).

Negotiating
If two characters are arguing about
something, make an opposed Savvy test.
If both characters are members of the same
organization, higher rank grants +1. The
higher score wins the argument. On a draw,
it drags on for another round.
Talking a neutral party into joining a conflict
requires successful tests in two consecutive
rounds.
The same system applies if trying to persuade
someone to do something. If the action is
something they are disinclined to do, you
must beat their score by 2 or more points,
with anything else considered to be a draw.
In such cases only two attempts can be made
against a particular character. If they resist
both attempts, they are digging their heels in
and cannot be persuaded.

Unit Notes: Negotiating
• Manipulators (Ystrik) view diplomacy
as one of the most important skills and
therefore are +1 to persuade any alien.
• Precursors have minor psychic abilities
and so are +1 to persuade anyone that is
friendly to them.
• Swift speech and thought patterns are
extremely chaotic; they cannot persuade
anyone except other Swift of anything.

128

The GM should strictly enforce who can be
talked into what. Soldiers will not defect from
their side unless they are in a very rough
situation, for example.

Reinforcements
Any troops arriving after the beginning of the
battle are set to be scheduled for general
arrival unless specific deployment options
are used (see page 117). Units scheduled for
general arrival are keyed to the round. At the
end of each round, roll a D6. A result below
the current round number indicates the
unit arrives.
General arrival reinforcements do not have
to be rolled for, but once a player has begun
rolling for a given unit, they must continue
attempting to arrive every round until it does.
Reinforcements must be assigned a point of
arrival by the scenario. This is usually along
the battlefield edge, but any deployment
method could be employed, such as troops
emerging from a building. In a pick-up game,
reinforcements arrive on any road exiting the
players battlefield edge (select the road when
the unit arrives), and otherwise on the center of
the battlefield edge.
Reinforcements always arrive at the end of
the round, and are ready to act from the next
round onwards.

Further Options:
• Linked units: Two or more units of
reinforcements may be linked together
by the scenario or by player choice. If so,
only a single roll is made per round, and
the linked units will arrive or be delayed
together. This is a common option for
infantry and their transport vehicle who
would arrive together. Linked arrivals may
be boarded on the transport.
• Piecemeal arrival: Only one unit can arrive
from general reinforcements each round.
The player can roll for their units in any order

Game Mastering

(and may change the order each round),
but once the dice indicate a unit arrives, no
more rolls are made this round.
• Timed arrival: The unit arrives when
the game Clock reaches a specific,
predetermined time (see page 120).

Research
If a scenario involves finding out a piece
of information or theorizing a solution to a
problem through research of specific data or
through experiment, the character in question
rolls 1D6+Savvy and notes down their total
from round to round. Once the accumulated
total equals or exceeds the difficulty factor, the
problem is solved. A scientist, journalist, or
other character that is specifically skilled in the
field in question adds +1 to all rolls.
• Rolling a natural 6 adds an additional +3
to the total.
• Rolling a natural 1 adds +0 to the total
and ignores any bonuses the character may
have.
Typical problems can be assigned a difficulty
factor of 10, while complex problems might
be a 15 or 20.

A scenario may dictate that a problem requires
special training to even attempt it. For
example, a typical army grunt cannot solve a
problem with a nuclear reactor, no matter how
hard they try. If the GM wants to allow a chance
“just in case”, roll a D6. On a 6, the unqualified
figure just happens to have studied this field in
college and can attempt the research without
any training.
Typically, only one character can research
a problem at a time, but if the GM judges
assistance would be of use, the presence of
any assistants adds +1 Savvy (regardless
of numbers). Note that assistants may be
able to help even if they are not qualified
themselves (fetching, translating, data input
or enquiry).
Examples of research may involve
understanding how a computer defense
network works, determining the weakness of
an alien species, or devising a cure against
a bio-weapon. Research may then require
finding materials (through the Search
mechanic), or constructing something (through
the Building Things mechanic).

129

Game Mastering
Rivalries

Searching

If two characters are rivals, they may attempt
to trip each other up during the mission.
Whenever the GM judges that the player wants
to take an action that would directly aid the
rival, roll a D6: A roll of a 6 indicates that the
character refuses and does something else
instead. The GM controls the character’s actions
this round.

Items may be difficult to find or hidden
intentionally. If an item is hidden it needs to
be searched for. This is best done when there
is only a limited number of possible locations.
A character can usually search anything within
4+Savvy inches, and cannot move or fire
while doing so.

The GM may forego a test if a character is in
great and immediate danger.
For characters that are particularly cut-throat,
the GM may call for a “sees their chance” roll
once during the game. A 2D6 result of 10-12
means the character takes their opportunity
to rid themselves of their rival for good in
whatever manner the GM decides. If the
result is 2-9, loyalty prevails for the rest of the
mission. This is strictly at the call of the GM.
This sort of action is only done if the character
thinks they can get away with it (no witnesses!).
Only test this if such an opportunity arises.
The Rivalries rule is usually applied only to
individual figures or sergeants, not squads.

Unit Notes: Rivalries
Soulless are not subject to rivalries, even
against non-Soulless. Converted and Horde
have no independent thought. As for the
Swarm? “You don’t see them screwing each
other over for a goddamn percentage”.

Items hidden during a battle will be less well
concealed. If someone is actively trying to hide
an item during a scenario, roll 1D6 to see how
well they hide it (counting a 1 as a 2), and use
the result as the target number.
Items that are simply not obvious (but were
not actively hidden) are not indicated on the
gaming table, but any figure within spotting
range and Line of Sight will detect it. Small
items (such as equipment) are spotted within
8" and Line of Sight.

Securing an Area

Feral add +1 to all search attempts.

For an area to be secured, it needs to be
currently occupied by friendly infantry and
no enemy forces must be within 2" of the
area. This status is only checked at the end of
a round.

Game Mastering Note

Further Options:

Playing a scenario and having no idea what
to do is not fun. If the scenario depends on
locating something hidden, alert the players
that this is the case.

• Report in: Once the area is secured, a radio
transmission must be relayed back to HQ.
This requires a full round to do.

Unit Notes: Searching

130

To find a hidden item, set a target number
for how well it was hidden. If uncertain, the
GM can roll two D6 and use the higher result.
To find the item, the searcher must roll equal
to or better than the target number on 1D6.
If multiple people are searching in the same
location, roll once but add +1 to the roll.
A character that is a trained bounty hunter,
investigator, or detective as defined by the
scenario or GM adds +1 to the roll.

• Confirm: A character must be present within
the area to consider it secured.

Game Mastering
Suspicion
A scenario may dictate that a character is
suspicious of someone such as another
character, troops of another faction that are
ostensibly friendly, an item, or anyone in a
particular area.
Every time a suspicious character is activated
while near the object of their suspicions
(typically within 12") a D6 roll is made.
A 6 indicates the character thinks they have
noticed something weird and will take
precautions or investigate (an even chance,
if playing solo). The GM should control the
character for this action.
A character that is investigating may make an
Intuition test (see page 126). If they succeed,
the GM should inform them (truthfully!)
that either something is definitely up or
that everything is fine. In the latter case, the
character is no longer suspicious, and neither is
anyone else that saw the incident.
The GM may forego a test if a character is in
great and immediate danger.
This rule is usually only applied to individual
figures and sergeants, not squads.

Taming Beasts
A scenario may include barely tamed predators.
Such beasts follow directions and act as a
normal unit, but at the end of each round, roll
2D6. Adjust the result by:

then succeed on a 7+ Savvy test. Success
means the beast halts and does not attack. The
character must then move into contact and
succeed on a 6+ Savvy test to encourage the
beast to be friendly.
A friendly beast follows the character around
and defends them but does not otherwise
act on its own volition. It activates with the
character.
If the character spends additional activations
and passes another 6+ Savvy test, a friendly
beast can be turned into a loyal one. Once
loyal, the beast can be used normally as any
other unit, but remains vulnerable to becoming
berserk, as above. A berserk beast cannot be
calmed down under any circumstances.

Unreliable or Prototype Weapons
While soldiers are trained to fix malfunctioning
or misbehaving weapons in the heat of
battle, prototype designs picked up in
secret weapons laboratories are often quite
temperamental (which is why they are still
under development).
Whenever such a weapon is fired, roll a
Malfunction die alongside the attack dice.
Resolve all effects of the weapon first. If the
Malfunction die scores a 1, the weapon is
defective and cannot be used again during
the scenario.

• -1 if the beast was attacked this round
(even if the attack missed),
• -1 if it was Hit by attacks, and
• -1 if it killed someone.
A final score of 2 or less means the beast goes
berserk and now attacks anything it can see,
regardless of former loyalties. Once berserk, a
beast remains that way for the rest of the battle.
If a character wants to tame a wild beast, they
must move within 6" and Line of Sight, and

131

Army Builder

Army
Builder
This chapter explains how to organize armies
for pick-up games. You may also use these
guidelines for scenarios and campaign play.
They are intended to provide a plausible
battle force.
Note that the organizational system described
in this chapter can be used on its own, even
if you prefer not to use points values (and
conversely, you could use the points system to
calculate the value of a force that does not use
the organizational system).
These are not intended to be all-encompassing
TRAITS
army lists for
tournament
play. Instead,
AGE
DAMthey
TRY:
N
SHOTS
A
e
F
g
n
Ra
focusIN
on providing
representative
units that fit
ns
Weapo
S military encounters.
T
IN
most
PO
ST
CO

peedcan also easily create your own variant
SYou
units
e
R actionby using the provided weapon and

vehicle
Skilltables (see pages 178--181). Every unit
Combat
choice
each option,
sslists the points valuesLSfor
KILLS
Toughne
SKIL S
n
Vetera
allowing
ts you to see transparently what went
Kill Poin
into they unit. This makes it easy to swap items
Savv
out when building your own
g
Trainincreations.
custom

LE:
VEHIC

ns
Weapo

TS
POIN T
COS

Speed

ss
Toughne
ts
in
o
P
Kill
ty
Capaci

SKILLS
n SKILLS
Vetera

Index Card Armies
If you have a large collection, you
may enjoy having units that are ready
to use, since they are always in a set
configuration. A very convenient way
to do this is to record each unit on an
index card (or digital equivalent). Then
you can flip through your cards when
you are creating an army for a scenario.
You could even create variations of
particular units if you have multiple
options available in your collection.
Simple variants can be noted on the
same card as the primary version of the
unit. More complex variants can have
their own cards, named appropriately.
For example, if Epsilon Squad is usually
armed with rifles, Epsilon-AT may be the
same squad issued several anti-tank
missile launchers.

ITS/ARC
E TRA
DAMAG
SHOTS
e
g
n
a
R
:

TRY
INFAN
pons
Wea

E
DAMAG
SHOTS
Range

TRAITS

TS
POIN T
COS

Speed

Reaction
Skill
Combat
ss
Toughne
ts
in
Kill Po
Savvy

SKILLS
n SKILLS
Vetera

Training

LE:
VEHIC

132

ns
Weapo

TS
POIN T
OS

See page 199 for blank
Infantry and Vehicle unit
cards
ARC
TRAITS/
E
DAMAG
SHOTS
Range

Army Builder
There are Many Armies Like it
but This One is Mine
While some troop types are inspired by
common science fiction tropes it is easy to find
figures for, others are more unique and will
require some work to model appropriately. The
results of that work will be very satisfying, as
the figures will be your particular army.
Each entry lists some suggestions if you are
having a difficult time envisioning what they
“should” look like. These are only suggestions,
and, in the end, the armies should look like
whatever you want them to look like.
Players who prefer to modify the setting, mix
it with elements of their own creation, or
adapt the rules to an existing science fiction
setting will want to tweak things. Often simply
renaming or reimagining things will do fine,
but it should be easy to also create your own
units and species.

The Points System
If you opt to use the points system, allot a total
number of points to each side. For example:
• 500 points is a good point total for a
platoon level game, or when starting out.
• 750 points gives you a sizable force to
play with.
• 1000 points should keep you busy for a
long evening.
You may select troops that add up to the
agreed points value. It is common to end up
being a couple of points under, as there may
not be anything to spend the points on.
Note that scenario play often has uneven
points values: For example, an attacker
generally needs 1.5 times the defender’s
points values for a fun game.

Using the Army Builder
The Army Builder provides unit types and
limitations allowing you to build a realisticfeeling army easily. Each army consists of
several platoons, in turn consisting of a
number of individual units.
For each unit:
1. Choose the element type it will be:
character, troop, support, or specialist.
2. Select an appropriate profile from your
faction’s section of the Lifeforms chapter
(see page 152).
3. Choose from the options for that
element type.
4. Find the total cost of the unit, adding up
the points for the profile and the options
selected.

Points Value Updates
The book provides points values for each
unit, so it is playable straight way. These
values should present a decent baseline
experience. While this is not intended to be
a tight competitive game, points systems do
benefit from adjustment over time, based on
player experiences. For this reason, we will
offer occasional points value updates in a
downloadable form.
You can download the most up-to-date points
value sheets at www.fiveparsecs.com.

Freeform Army Building
You may prefer to not use the Army Builder,
and instead select your troops freely. Select
any figures you like, organize them into
squads or designate them as individual
figures, and then outfit them with any
weapons you like. To determine the value of
each unit, simply add up the total points value
of the figures, weapons, and abilities selected.

133

Army Builder
Weapons in Unified Space

Infantry Platoon Organization

While there are cultural and doctrinal
influences on weapon choices, galactic
civilizations contain a near-infinite array of
variation. For every Precursor mercenary outfit
that prefers the classical energy weapons for
their elegance and precision, there is one that
favors ballistic projectile weapons for their
brute force (even if they may view said brutality
for its aesthetic appeal).

Tabletop forces are organized into platoons
(though the exact term varies a lot throughout
the galaxy).

The weapons listed in the army lists reflect
those used by first-line military units in the
primary armies. Those used by second-line,
reserve, and territorial/colonial forces can vary
significantly based on preferences, doctrine,
and availability. For example, a K’Erin world in
an otherwise Unity-controlled system might
adopt Unity-style armaments due to the ease of
local purchase.
Players are free to select the same weapon
choices for every squad (more common
in military outfits) or to pick and choose
(to represent a more disorganized or
individual force).

An infantry platoon consists of four types
of elements: Leader, troops, support, and
specialists.
Platoons are composed of troops of the same
faction unless a specific option lists otherwise.
A force can consist of multiple factions (each
forming their own platoons).

Leaders (1-2)
• A platoon must have one character, and
may include a second.
• Each character may be a minor, major, or
epic-level character (see page 152).

Troops (2-4)
• A platoon must have 2 squads, and may
take a total of 4.
• Each squad may be an infantry, recon, or
storm squad. The platoon does not have to
consist of all the same type.

Supports
(0-3; must be fewer than number of Troops)

Naming Conventions
Many alien creatures are known by practical
nicknames. These originate from Unity
trooper slang and have tended to stick
around as armed forces were often the first
to make contact with a given species. This
can occasionally give rise to confusion, such
as having to specify whether the engineer
you are looking for is a member of the
Engineer species, someone trained to be an
engineer, or perhaps an Engineer engineer.
The future, like the present and the past, is a
confusing place.

134

• A platoon may have support units if the
number does not equal or exceed the
number of troops. You are not required to
take any support units.
• Support units may be vehicles, weapon
teams, or auxiliary squads (any troop
choice from a different faction).

Specialists (0-1 per 2 Troops)
• A platoon may have 1 specialist unit per
2 troops selected.

Army Builder

Example:
If I take 4 squads of troops, I could then take up
to 3 support units.
If my choice of faction is Precursors, I could
include K’Erin squads as support choices, but
I could not take a K’Erin weapons team or
vehicle crew.

Company Organization
In a larger game, you will have more than one
platoon which you organize into a company.
In game terms, a company represents an ad
hoc field detachment which may contain an
array of troops selected for a specific mission.
A company consists of 2-4 platoons, each of
which may be a regular or armored platoon,
and may contain:

Leaders (0-4, may not exceed number of
platoons)
• You may take 1 additional character per
platoon.
• Each character may be of any level you like.
• One character may be of a different faction
(observer or military attaché)

Armored Platoon (Optional Rule)
An armored platoon is composed of slightly
different units. Note that armored units are
not usable in pick-up games without player
agreement. There are no weapon teams or
specialists in an armored platoon.
• Leader (1): One vehicle.
• Troops (2-5): Each troop is a vehicle.
The first 3 vehicles selected for this
section must be the same type, such as
3 light tanks.
• Supports (0-4, must be fewer in number
than troops): Each Support is a nonauxiliary infantry squad. All units must be
mounted in a transport vehicle.

Supports (0-4, may not exceed number of
platoons)
• You may take 1 additional support unit
per platoon.
• These may be weapon teams or squads.
One may be a vehicle.

135

Army Builder
Characters
(Base cost +5)
Characters are individual figures and must be
assigned a level: Either minor, major, or epic.
The Lifeforms lists (see page 152) use profiles
that apply to each level for a particular type
of creature.
The following upgrades may be selected:
• Hero (+5 cost)
• Leader (+10 cost)
Characters are armed with hand laser, glare
sword, and fog grenades.
• The hand laser may be swapped for a blast
pistol at no cost.
• The glare sword may be swapped for a
ripper sword or powered claw (+1 cost).

Mixed Army Limitations
Unified Space is a cosmopolitan place with
aliens (relative to the primary population)
being quite common on most worlds.
In pick-up games, armies are limited to
choosing from two army types; for example,
you might choose a Precursor/Soulless force or
a Human/K’Erin force.
For scenario play, anything that makes sense
in your story is fine. Note that too complicated
a force can make the game difficult to play, as
every unit has different profiles and abilities.
In mixed forces, infantry squads only qualify
for taking vehicles, characters, and specialists
from the same army. For example, a force
that includes a Soulless platoon with 3
squads and a Precursor platoon with 2
squads could take up to 2 Soulless vehicles
and 1 Precursor vehicle.
Note that some army types may have notes
prohibiting their usage in other armies.

136

• Both weapons may be swapped together for
a military laser at no cost.
• May choose any number of grenade picks
from frag (1 point), jinx (3), cling-fire (2),
and shock (1).
Example:
A human major character from the Creature
listings costs 20 points. If I want them to have
the basic equipment package (+5) and the
Hero ability (+5), they would cost a total of
30 points.

Weapon Selections and
Points Costs
All points values for equipment
choices are given in parenthesis after
each option. For example (2) indicates
a cost of 2 points. If the cost says for
the squad, it is for every figure noted
as carrying that item. Otherwise, it is
for a single figure.

Default Units
Each entry has a default load-out
listed, with alternatives given as
options. When generating enemy
forces in a solo campaign, you can
use the default loadouts to get units
quickly to your table.

Powered Armor
Any unit may be given Powered Armor
at a cost of 2 points per figure.
Any unit may be given Breach Armor at
a cost of 4 points per figure

Army Builder
Squad Selection

grenade launcher with frag and fog
grenades (+2), or plasma rifle (-2)

Each squad may be one of three types (infantry,
recon, or storm), which offers the equipment
packages listed below.

• The entire squad may be equipped with fog
grenades (+5 points for the squad).

Infantry

Recon

(Base cost +27)

(Base cost +23)

The standard combat unit, equipped to carry out
an array of battlefield tasks.

Lightly equipped units that harass the enemy
from the flanks.

Infantry squads consist of 4 soldiers + 1
sergeant (minor character).

Recon squads consist of 4 soldiers + 1
sergeant (minor character).

• The squad is armed with military rifles and
1 light machine gun.

• Recon squads add +1 to all Observation
distances.

• The entire squad is equipped with frag
grenades.

• The squad is armed with military rifles and
1 precision rifle.

• The entire squad may replace their rifles
with infantry lasers (+4 points for the
squad)

• One additional soldier may replace their rifle
with a precision rifle (+3).

• The sergeant may replace their weapon with
a shotgun and service pistol at no cost.
• The light machine gun may be replaced
with a hyper blaster (+4), fury rifle (+5),

• The entire squad may replace their military
rifles with infantry lasers (+4)
• The entire squad may be equipped with
service pistols (+5 points for the squad).

137

Army Builder
Storm
(Base cost +28)
Specialist troops for use in boarding operations
and street fighting.
Storm squads consist of 4 soldiers +
1 sergeant (minor character).
• The squad is armed with shotguns and
blades.
• One soldier carries a breaching axe in
addition to their weapon.
• The entire squad carries frag and fog
grenades.
• The entire squad may replace their shotguns
with blasters (+5 points for the squad).
• The sergeant may carry a glare sword
(+1 point) or powered claw (+2) in
addition to their weapon.
• 0-2 soldiers may replace their weapons
with a choice of flak gun (+3 each),
flame projector (+4 each) or fusion rifle
(+8 each).
• The entire squad may be equipped with
penetrator grenades (+10 points for
the squad)

Sergeants
Sergeants are invariably tough old
soldiers and always use the minor
character profile for their species.

Weapon Team Selection
(Base cost +5)
Weapon teams are squads of figures
manning a Crewed weapon. They follow the
rules for gun crews (see page 48).
The team consists of 3 soldiers. Note that
weapon teams do NOT include a sergeant.
• Weapon teams are devoted to keeping
their guns running and receive a +1
Morale bonus.
• Each figure carries a service pistol.
• The team crews a Crewed weapon picked
from the list below:
Laser cannon (35 points), 20mm auto
cannon (20), infantry mortar (15).

Specialists
Specialists always use the basic soldier profile.
They do NOT use the minor/major/epic profiles.

Tech
(Base cost +5)
While field manuals list a complex array of
technical personnel by area of specialization,
grunts universally just call them ‘Techs’.
• One soldier armed with a service pistol.
• +1 dice bonus to any task involving
hacking, repairs, construction, or
engineering.

Mechanized Infantry

Attachment

Any squad may be selected as
mechanized infantry. Select a
transport vehicle capable of carrying
the squad. Mechanized infantry activate
together as explained on page 28.

• A Specialist team may be attached
to any squad of choice during
deployment. Once attached, the
figures remain part of the squad for
the duration of the game.
• A squad may have only one
attachment.

138

Army Builder

• The pistol may be replaced with a hand
laser (+1 point).
• May be equipped with jinx grenades
(+3 points).

Sharpshooter
(Base cost +15)
Well-trained sniper for picking at enemy forces
from a remote vantage point.
• One soldier armed with sniper rifle and
service pistol.
• +1 to all Shooting Hit rolls.

• The plasma rifle may be replaced with a
light machine gun (+2 points), grenade
launcher (frag, fog) (+4), fury rifle (+7),
or hyper blaster (+6).

Comms
(Base cost +10)
When operating in complex high-tech
environments, a Comms specialist can be
invaluable for making sure the message gets
through.
• One soldier armed with a service pistol.

Fire Section

• +1 bonus to all rolls related to
communications and jamming.

(Base cost +15)

• +1 bonus when calling for support.

Additional weapons team to bolster firepower.

Medic

• Two-figure squad armed with service
pistols.

(Base cost +10)

• One team member is armed with a
plasma rifle.
• Fire sections are hand-picked to operate
semi-independently, and receive a +1
bonus to Morale tests. If attached, the
combined squad only uses Morale modifiers
the main squad has, and does not benefit
from the bonus of the fire section.

Additional medical attention can do wonders
for fighting readiness.
• One soldier armed with a service pistol.
• At the end of every medic activation,
remove 1 Suppression marker from a
friendly unit within 6". This bonus does not
apply to Synthetic units.

139

Army Builder
Scout
(Base cost +10)
An operative trained specifically in observation
and battlefield surveying.
• One soldier armed with an infantry laser.
• Speed +1"
• Scouts add +2 to all Observation
distances.

Alternate Squad Types
These additional units are intended for
particular scenario types, though they can also
be used in a pick-up game. If used in a platoon,
they simply take the place of a normal infantry
troop selection.

• One soldier may replace their rifle with a
precision rifle (+3) or light machine gun
(+7).

Pirate
(Base cost +22)
Includes both actual pirates and raiders, as
well as some more bloody-minded mercenary
groups.
• The squad consists of 4 soldiers + 1
sergeant (minor character)
• The squad is armed with blasters. One
carries a fusion rifle or light machine gun.

(Base cost +15)

• The sergeant may additionally be armed
with a blade (+1 point) or ripper sword
(+3).

A catch-all term for law enforcement, security
guards, and police units.

• The sergeant may be armed with cling-fire
grenades (+2).

The squad consists of 4 soldiers + 1 sergeant
(minor character).

• 0-2 soldiers may be armed with a
breaching axe in addition to their weapons
(+4).

Enforcers

• The squad is armed with shotguns and
shock grenades.
• The sergeant may additionally be armed
with a suppression maul (+1 point).
• One figure may replace their weapon with a
flak gun (+3 points) or grenade launcher
(shock grenades) (+8)

Militia
(Base cost +15)
Might be colonial defense forces, separatists, or
frontiers folk.
Militia squads consist of 5 soldiers. Militia do
not have sergeants.
• The squad is armed with military rifles.

140

• One soldier may carry penetrator grenades
(+2 points).

Cavalry
(Base cost +25)
Usually reserved for scouting duties on remote
worlds, some environments are conducive to
mounted actions.
• The squad consists of 4 soldiers + 1
sergeant (minor character).
• The squad is armed with military rifles
and blades.
• Cavalry use the rules for Cavalry (see
page 48).
• Cavalry have a movement rate of 8" while
mounted.

Vehicles

Vehicles
The vehicles listed in this section are organised
into general categories and types that are
widely used across known space. The specific
configuration of a vehicle will differ depending
on culture and manufacturer. Precursor
vehicles typically feature more advanced
targeting systems, while K’Erin manufacturers
put great emphasis on crew survival. In the
field, however, these differences are often
trivial within a particular vehicle class. To the
common infantry grunt, a medium tank is a
medium tank regardless of whether it’s the
ZjKK-5t or the Silverblade II.
Forces in the field often look more motley
than a state-of-the-art battalion on the
parade ground. Due to the time it takes
for new designs to reach armed forces (or
customers!), many units deploy with vehicles
several years out of date compared to the
cutting edge of technology. Additionally,
it is common for deployed forces to repair,
kit-bash, modify, and partially replace vehicles
to keep them running. Also, many fighting

vehicles are manufactured as modular kits with
interchangeable parts.
When building an army, any of the factions
may use any of the vehicles listed below. Think
about what a vehicle might look like for a
particular faction or owner.

Vehicles, Resilience, and Realism
Historically, combat vehicles responded
to incoming fire in a binary fashion: They
remained functional or died. The challenge was
typically in hitting the target. Once an anti-tank
gun was on target, a single Hit could destroy
the vehicle.
Vehicles in the world of Unified Space are both
built from more resilient materials and feature
extensive repair and damage control systems.
They can usually function despite multiple
weapon Hits. (This also means that your nicely
painted tank can act as a suitably impressive
centerpiece of the battlefield a lot longer).

141

Vehicles

The same may applies to light vehicles we
might expect to be vaporized by a hit from an
anti-tank weapon: Just assume the strike that
fails to eliminate the last KP struck near the

vehicle, shaking it, showering the crew with
rubble and debris, but the crew is clinging to
the vehicle… for now.

VEHICLES AND CREW
Crew
Vehicle profiles include a trained military crew.
To avoid printing a vast array of near-identical
vehicle profiles, it is assumed that the species
or type of the crew is not a factor.
Military crew have default stats of Reactions 2,
Combat Skill +1, Savvy +0, Training +1.
The costs listed assume a military crew. A
vehicle can have a Civilian crew instead, with
default stats of Reactions 1, Combat Skill
+0, Savvy +1, Training +0. A Civilian crew
reduces the cost by -10 points.

142

If dismounted, crew are armed with service
pistols.

Vehicle Profiles
The profile for vehicles includes the
characteristics in the table below.
Each vehicle entry lists the weapon options
for the vehicle and any special notes that
might apply. Each entry also lists the default
armaments pick with a standard points cost.

PROFILE

NOTES

Speed

The base speed in tabletop inches.

Toughness

When taking a Hit, the attacker must exceed this score on the damage roll.

Kill Points (KP)

How much damage the vehicle can take before it is destroyed.

Crew

How many crew members the vehicle has. Mainly useful if a scenario allows dismounting.

Capacity

The vehicle may carry this number of infantry figures. If this figure is 0, the vehicle cannot
carry any more than its crew. Cavalry and Crewed weapon teams cannot be carried.

Points Cost

The cost of the vehicle when using the points system.

Vehicles
Light Vehicles

This category covers fast, light, and often fragile
vehicles with a minimal crew. They are common
on frontier worlds for simple trips, but also find
use with pirates, raiders, and militia groups as
recon and strike vehicles. All vehicles on the
following list obey the following rules:

• They may turn twice per move.
• If they moved at least one full move on their
last activation, incoming shots do not add
the Combat Skill of the shooter to the Hit roll
due to their speed and agility.
• They have Exposed crew (see page 52).

VEHICLE

Nomad Bike

Scouter

Lancer

SPEED

12" Wheeled

16" Drifter

12" Drifter

TOUGHNESS

6

5

5

KP

2

2

2

CREW

1

1

1

CAPACITY

0

0

0

POINTS COST

15

35

30

Unarmed

Forward-firing light
machine gun

Forward-firing gun mount:
Plasma rifle

WEAPONS

NOTES

Option: May mount
a forward-firing light
machine gun
(+10 points)
A heavy, rugged bike
popularized by a hypernet
entertainment program.

Option: May replace
plasma rifle with a fury rifle
(upgrade cost: +7 points)
Typical drifter bike used by
recon units and outriders.

A variant of the common
Scouter, emphasizing
firepower over speed
and mobility.

VEHICLE

Frontier Trike

Raider Trike

SPEED

10" Wheeled

15" Wheeled

TOUGHNESS

6

5

KP

3

3

CREW

2

2

CAPACITY

0

0

POINTS COST

35

35

Forward and side firing gun mount:
Light machine gun

Forward and side firing gun mount:
Light machine gun

WEAPONS

NOTES

Option: May replace light machine gun
with a fury rifle (upgrade cost: +5 points)
An example of the heavy trikes common
on frontier colonies. Features a sidecar
gun mount operated by the passenger.

A faster, sleeker trike, optimized for
hit-and-run tactics. Features a single
sidecar gun mount.

143

Vehicles
Fighting Vehicles

This category covers the primary military
vehicles in general usage across the galaxy.
Note that the actual field employment of a
vehicle often differs significantly from what
was intended when the vehicle rolled off the
factory line.
VEHICLE

Armored Car

APC

SPEED

9" Wheeled

8" Tracked

TOUGHNESS

7

7

KP

5

5

CREW

2

2

CAPACITY

0

10

POINTS COST

60

50

WEAPONS

Turret mount: 20mm autocannon

Turret mount: Light machine gun

A fast, armored reconnaissance vehicle.

The Armored Personnel Carrier is a
standard vehicle for troop transport.

VEHICLE

APC – Grav

IFV

SPEED

9" Drifter

8" Tracked

TOUGHNESS

7

7

KP

4

5

CREW

2

3

CAPACITY

8

6

POINTS COST

55

70

Turret mount: Light machine gun

Front mount: Light machine gun
Turret mount: 20mm autocannon

NOTES

Option: May replace 20mm autocannon
with a heavy plasma gun
(no upgrade cost)

WEAPONS

Drifter version of the APC.
NOTES

144

The Infantry Fighting Vehicle is a
troop transport that also provides
considerable fire support.

Vehicles
VEHICLE

IFV – Grav

Light tank

SPEED

9" Drifter

8" Tracked

TOUGHNESS

7

8

KP

4

6

CREW

3

4

CAPACITY

5

0

POINTS COST

75

100

Front mount: Light machine gun
Turret mount: 20mm autocannon

Front mount: Light machine gun
Coaxial mount: Light machine gun
Turret mount: 40mm autocannon

WEAPONS

Option: May replace 20mm
autocannon with a heavy plasma gun
(no upgrade cost)

Option: May replace 40mm
autocannon with a pulse laser
(upgrade cost: +10 points)

Drifter version of the IFV.

Light tanks combine firepower with
reasonable armor protection.

VEHICLE

Light tank – Grav

Medium tank

SPEED

7" Drifter

7" Tracked

TOUGHNESS

8

9

KP

6

7

CREW

4

4

CAPACITY

0

0

POINTS COST

115

140

Front mount: Light machine gun
Coaxial mount: Light machine gun
Turret mount: 40mm autocannon

Front mount: Light machine gun
Coaxial mount: Light machine gun
Turret mount: 100mm cannon

Option: May replace 40mm autocannon
with a pulse laser
(upgrade cost: +10 points)

Option: May replace coaxial light machine
gun with a heavy plasma gun
(upgrade cost: +10 points)

NOTES

WEAPONS

Option: May replace 100mm cannon with
anti-tank laser (no upgrade cost)
NOTES

Grav version of the light tank.

Medium tanks often form the primary
tank of an armored battalion.

145

Vehicles
VEHICLE

Medium tank – Grav

Heavy tank

SPEED

8" Drifter

6" Tracked

TOUGHNESS

9

10

KP

6

8

CREW

4

5

CAPACITY

0

0

POINTS COST

150

200

Front mount: Light machine gun
Coaxial mount: Light machine gun
Turret mount: 100mm cannon

Front mount: Light machine gun
Coaxial mount: Light machine gun
Turret mount: 100mm cannon

Option: May replace coaxial light
machine gun with a heavy plasma gun
(upgrade cost: +10 points)

Option: May replace either light
machine gun with a heavy plasma gun
(upgrade cost: +10 points per gun)

WEAPONS

Option: May replace 100mm cannon with
anti-tank laser (no upgrade cost)
NOTES

This is the upper limit of what can be
turned into a drifter vehicle.

Strictly ground-based, heavy tanks pack
terrifying firepower and protection.

VEHICLE

Light walker

Heavy walker

SPEED

5" Walker

4" Walker

TOUGHNESS

8

8

KP

4

5

CREW

1

1

CAPACITY

0

0

POINTS COST

70

100

1 arm with 20mm autocannon
1 arm with flame projector

1 shoulder with pulse laser
1 arm with light machine gun

WEAPONS

NOTES

146

Option: May replace flame projector with
fusion rifle (upgrade cost: +4 points)
Walkers are favored in Difficult terrain
and when conducting combat at
close quarters.

The heavy walker acts as a long-range
and support version of the more flexible
light versions.

Walkers may fire both weapons
simultaneously.

Walkers may fire both weapons
simultaneously.

Vehicles

Heavy Combat Bots

AI-driven, uncrewed combat walkers have
several advantages, including fewer letters to
send home to a family when someone blows
up the walker. Heavy combat bots usually
have a remote operator connected to guide

the unit, leaving the moment-to-moment
activity to the computer.
Bots cannot obtain veteran skills.
They have no crew that can dismount.

VEHICLE

CIM-L

CIM-APP

SPEED

6" Walker

4" Walker

TOUGHNESS

7

8

KP

9

4

CREW

0

0

CAPACITY

0

0

POINTS COST

35

45

Hyper blaster

20mm autocannon

WEAPONS

NOTES

Option: May replace the hyper blaster
with a fury rifle (no upgrade cost)
The Combat Infantry Module
(nicknamed the ‘Demon’) is a standard
mass-manufactured combat bot used
across the galaxy.

The Advanced Purpose Platform
(nicknamed the ‘Troll’) is a heavier version
of the normal combat bot.

147

Veteran Units

Veteran
UNITS
Combat experience turns rank-and-file soldiers
into experts in a specific style of fighting. This
may mean stalking armored vehicles through
the rubble of a city, or holding a line regardless
of losses, but success as a commander often
comes from assigning the best troops to a
particular task. Veteran units can be used in
pick-up games, scenarios, and campaign play.

• Individuals can have a single veteran skill
from the Individual list.

In game terms, veterans receive a special
ability or bonus called a veteran skill. Different
skills are available for squads, sergeants,
individuals, and vehicles.

Veterans in Pick-up Games

• Squads may have a single veteran skill from
the squad list, and a single veteran skill from
the Sergeant list.

Players may agree on limits such as allowing
only one veteran unit per side, one veteran
unit for every three total units in the army, or
anything else that you agree on. The default
game assumes any unit may be upgraded

• Gun crews may have a single veteran skill
from the Gun Crew list.

148

• Vehicles may have a single veteran skill
from the Vehicle list.
Note: Beast and Synthetic units cannot
become Veterans unless a rule specifically
states otherwise.
Any unit may be given veteran skills according
to the bullet list above. Each skill lists the
points value associated with it.

Veteran Units
and a player is free to field a force entirely of
Veterans if they like.
It is recommended that you leave out veterans
for your first couple of games, and then
introduce them slowly.

Veterans in Scenarios

The GM can use veterans to tailor a force for
a scenario. Be careful about loading up the
armies with too many things to remember,
especially if you have several similar squads all
with different Skills. Often it is better to leave
each army with mostly regular troops and then
have a couple of veterans.
Assigning veterans that are connected to
the type of mission can be highly effective
in creating a sense of the world. If one side

is hunting down a prototype super tank,
they should have elite tank hunter units,
and so forth.

Veterans in the Campaign

When playing a campaign game, veteran skills
can be acquired as part of that campaign. It is
strongly recommended to begin a campaign
without any veteran units.

Veteran Skills
Veteran Skills for Squads

Every figure in the squad benefits from the
skill, including the sergeant. Such benefits do
not apply to an individual that joins the squad
or takes command of it.

VETERAN
SQUAD

NOTES

POINTS
COST

Brave

+1 to all Morale tests. This is cumulative with the Motivator
sergeant skill.

10

Tank hunters

One figure per activation may take a “Tank Killer” shot. Only one
shot may be fired from the weapon but add +1 to Hit and to
damage. Declare before firing.

15

Keen shots

All figures add +6" to range when firing rifles. One rifle shot per
activation may add +1 to Hit after rolling.

10

Die-hards

When deploying, the squad pick one figure other than the
sergeant that receives +1 KP. The same figure does not have to
be selected each game.

5

Fire drill

If the squad does not move when activating, it may add
Combat Skill to the Hit roll when firing on Overwatch. Use a
marker to remind you.

10

Brawlers

In close assault combat, any 1 on the attack dice may be
rerolled once.

5

Fearless

The squad becomes Fearless (see page 46).

5

Bombers

Two figures per activation may throw grenades (normally this is
limited to one), and the range of thrown grenades is +2". When
using grenades to assault a vehicle add +1 to damage rolls.

5

Guerillas

The squad may fire pistols and rifles while Dashing.
Shots Hit only on a natural 6.

10

Quick

The squad moves +4" when Dashing, instead of +2".

10

149

Veteran Units
Veteran Skills for Sergeants

Veteran sergeants are inevitably the toughest,
meanest soldiers for miles around. Any
sergeant receiving a veteran skill also becomes
Fearless (see page 46). Skills that benefit the
squad apply only if the sergeant is alive.
VETERAN
SERGEANT

NOTES

POINTS
COST

Rugged

Add +1 KP to the figure.

5

Parry

Once per close assault, you may force one incoming assault
that targets the sergeant to be rerolled.

5

Motivator

+1 to all Morale tests for the squad. This is cumulative with
the Brave squad skill.

5

Fighter

The sergeant receives two attacks in close assault combat.

5

Survivor

Any time a Hit is inflicted on the sergeant from any source,
roll 1D6. On a 5-6, it has no effect on the sergeant.

5

Tactics

The squad counts as +1 to Reactions.

10

Experience Eye

The sergeant receives +1 to Hit with all ranged attacks.

5

Alert

When making Observation rolls, the sergeant can spot at +3".

5

Veteran Skills for Individuals

If an individual figure is part of a squad, any
veteran skills are not shared.

150

VETERAN
INDIVIDUAL

NOTES

POINTS
COST

Gun-slinging

The character may use two pistols simultaneously. Both shots
must be fired at the same target unit.

5

Quick feet

The Dash move bonus is equal to the normal speed of the
character instead of +2".

5

Deadly accuracy

The character may reroll any 1 on the initial dice
when making any type of attack.

5

Lucky

The character receives a 6+ Saving Throw.

5

Skilled leader

The character must have the Leader unit type. Their Morale
bonus now applies within 9". This does not change the distance
for other Leader abilities such as taking Direct Command.

5

Expert fighter

The character receives one additional close combat attack.

5

Veteran Units
Veteran Skills for Gun Crews
VETERAN GUN
CREW

NOTES

POINTS
COST

Defend the guns

When defending against a close assault, each figure may strike
twice when rolling to hit during the assault.

5

Fortified positions

The gun crew receives a 6+ Saving Throw against all Hits.

5

Deploy hidden

Until the crew fires for the first time, they are Hidden and must
be spotted with an Observation roll.

5

Gun drill

The gun crew may reroll a single Hit die.

10

Redeployment

When moving, the crew may move 2" per crew figure,
to a maximum of 6".

5

Target selection

The Crew may ignore the normal target selection rules and fire
at any squad or vehicle in sight. This does not replace any other
limitations such as Observation.

5

Veteran Skills for Vehicles

A veteran vehicle crew cannot use their skill
while dismounted. Crews can only apply their
skill to the same broad class of vehicle they
were crewing when they became veterans.
For example, a tank crew could switch to
another type of tank but would not be able
to apply their skill if they ended up crewing a
personnel carrier.
VETERAN
VEHICLE CREW

NOTES

POINTS
COST

Gunnery

When the main weapon fires, one or more natural 6s on the
Hit dice allows a single additional shot to be fired at the
same targets. If the main weapon is not clear, the player may
choose when this Skill is obtained.

15

Command

Add +1 to the Reaction score.

10

Driving

The vehicle may turn one additional time per move.

10

Damage control

If the vehicle is immobilized, when it activates, roll 1D6.
On a 5-6, it regains mobility.

5

Improvised armor

Add +1 KP to the vehicle.

10

Defensive measures

Attempts to Hit the vehicle during close assault are at -1 to Hit.

5

151

Lifeforms

LIFEFORMS
This chapter provides profiles for all major and
many minor creatures around the galaxy. Each
entry provides a standard military profile, any
special rules or abilities, and the points cost for
one figure.
To build an infantry squad, take the cost of
5 figures and add the costs of the squad type
from the Army Builder (see page 137) OR use
the Master Points Costs (see page 178) to
design your own unit of any size.
Weapon teams use the 3-figure cost plus the
costs from the Army Builder.
There are no hidden adjustments for individual
or unit sizes. In other words, a unit with 5
figures costs the same as 5 individual figures.
Note that units in the Army Builder may
include additional abilities, and these are
already factored into the cost of the unit.
The list is split into Major Powers, Minor
Powers, and Creatures.

• Major Powers are the main movers and
shakers on the galactic scene.
• Minor Powers are more regional, act in
concert with other powers, or are less
common.
• The Creatures list provides all manner of
lifeforms that can show up in your games.
These are not typically fielded as units, and
most cannot use weapons at all. Points
values are provided if you need them for a
scenario, but they are usually wild beasts
or under the control of the GM. If fielded
on their own, they require scenario-specific
rules for behavior. Most just want to eat the
closest life forms to their position.
Both Major and Minor Powers are usable in
pick-up games. Creatures may not be selected
in such games as part of an army, although in a
more creative setup, feel free to add all kinds of
pets, mind-control devices, and covert military
research programs to put such beasts to use.

Profile Types
A Different Galaxy
If you prefer to create your own game setting
or adapt one from another science fiction
universe, simply use the profiles provided as
a starting point, and rename them as needed.
A very simple special rules tweak or modifying
an entry on the profile up or down a point can
be effective in giving you a creature or troop
type that feels unique. The descriptions are
provided to be as general

152

For sapient creatures, multiple profiles are
listed. Typically, the Civilian profile can be used
for general bystanders, criminals, and militia,
while the Military profile is used for soldiers,
mercenaries, and security troops. Some species
only have a single standard profile.
Minor, major, and epic character entries are
only used for individual characters such as
Heroes and officers. Note: When using the Army
Builder, major characters can be customized.
The profile suggested can be taken as a default.

Lifeforms

THE MAJOR POWERS
Humans

Social Notes:

Humans are generally open to cooperating
if a deal can be struck. Both mercenaries and
outlaws can be found in alien employ.

Human troops may be Unity military forces,
pirates, mercenaries, colonial militia, or any
number of other combatants.

Miniature:

Special Rules:
• Widely Skilled: Humans are renowned for
their communication skills. When making
any roll to communicate, such as persuasion
or negotiation (but NOT calling in Support),
add +1 to the roll.

Humans appear as you would expect, though
wealthy and eccentric humans often feature
highly unusual skin and hair colors due to
cosmetic gene-mods.

• Well Organized: If a force is at least 50%
human (including subtypes) you may select
one Support option and lower the arrival
score by 1.
UNIT

Civilian

Military

Sergeant
/ minor
character

Major
character

Epic character

SPEED

4"

4"

4"

4"

5"

REACTION

1

2

2

2

3

COMBAT SKILL

+0

+1

+1

+2

+2

TOUGHNESS

3

3

3

3

4

KILL POINTS

1

1

2

2

3

SAVVY

+0

+0

+0

+0

+1

TRAINING

+0

+1

+1

+2

+2

POINTS COST

5

10

15

20

30

153

Lifeforms
Ferals
Feral is the catch-all term applied to various
human-animal hybrids resembling a
humanoid version of a mammal, typically a
wolf or other canine.

Special Rules:
• Loping Run: Ferals add +3" when Dashing
instead of the normal +2.
• Keen Senses: Ferals may add +1 to the
final result of any Observation roll.

Social Notes:

As Ferals have full human status, they can
be found in any location with a human
population. Reactions can vary depending on
local beliefs, but typically they will be viewed
the same way as more conventional humans
would be.

Miniature:

The most common Ferals are humanoids with
the head of a canine and fur covering the body,
but a range of other forms is possible.

154

UNIT

Civilian

Military

Sergeant
/ minor
character

Major
character

Epic character

SPEED

4"

4"

4"

5"

5"

REACTION

1

2

2

2

3

COMBAT SKILL

+0

+1

+1

+2

+2

TOUGHNESS

3

4

4

4

5

KILL POINTS

1

1

2

2

3

SAVVY

+0

+0

+0

+0

+1

TRAINING

+0

+1

+1

+1

+2

POINTS COST

6

12

17

22

32

Lifeforms
Hulkers

Social Notes:

Huge, and brimming with muscle, the Hulker
was developed for military pursuits. While
their reputation for stupidity is a result of
prejudice, their reputation for violent rage is
well-founded, and their genetic construction
left them with a lack of patience.

Hulkers show up anywhere humans go, plus a
few places they don’t, as nobody is going to tell
them no.

Miniature:

Hulkers are grotesquely muscular humanoids
with blue or green skin.

Special Rules:
• Determined: Hulkers add +1 to all
Morale tests.

Human Sub-types

• Powerful Swings: Hulkers may use their
fists instead of a weapon, making two close
assault attacks per round and may use any
weapon carried with either attack, hitting
for damage +0, as if wielding a Melee
weapon. Hulkers using a Melee weapon
or Pistol may attack once with their main
weapon and once with their fists.

Extensive experimentation with genetic
modification has produced several human
variants that are functionally independent
species, while still being recognized as
humans for all legal purposes. These include
Ferals and Hulkers.

• Short Tempered: A Hulker failing a test
for a technical or engineering task cannot
attempt the task again.

UNIT

Standard

Sergeant / minor
character

Major character

Epic character

SPEED

5"

5"

5"

6"

REACTION

1

1

2

2

COMBAT SKILL

+1

+1

+2

+2

TOUGHNESS

5

5

5

6

KILL POINTS

2

3

3

4

SAVVY

+0

+0

+0

+1

TRAINING

+0

+0

+0

+1

POINTS COST

15

20

25

40

155

Lifeforms
Erekish (Precursors)
Tall and refined by human standards, the
Erekish, known as the Precursors in common
parlance due to the age of their civilization,
have achieved a high degree of technological
sophistication which they couple with
mysticism and cosmic philosophies.

Special Rules:
• Premonition: Precursor individuals and
Sergeants receive a 6+ Saving Throw
against all weapons fire and Area/Stream
weapon Hits.

Social Notes:

The Precursors often ally with Unity. However,
conflict is not unknown as they are always
willing to defend their interests. A great
number of Precursors roam the galaxy as
adventurers, explorers, or even exiles from
their regimented society.

Miniature:

Precursors are elegant humanoids with typical
human patterns of skin and hair color.

156

UNIT

Civilian

Military

Sergeant
/ minor
character

Major
character

Epic character

SPEED

5"

5"

5"

5"

6"

REACTION

2

3

3

4

4

COMBAT SKILL

+0

+1

+1

+2

+2

TOUGHNESS

3

3

3

3

4

KILL POINTS

1

1

2

2

3

SAVVY

+1

+1

+1

+1

+1

TRAINING

+0

+1

+1

+1

+1

POINTS COST

6

12

18

25

35

Lifeforms
K’Erin
A warlike species that thrives on conflict and
challenge, the K’Erin consider themselves the
premier military power in the galaxy, and few
disagree after facing their troops in combat.

Special Rules:
• Brawlers: K’Erin sergeants and individual
figures make two close assault attacks per
round and may use any weapon carried with
either attack.
• Disciplined: K’Erin add +1 to all Morale
tests.

Social Notes:

K’Erin are happy to fight alongside (and
against) most sapients, and many seek
mercenary service to grant them more
opportunities to hone their skills.
It is common for K’Erin to incorporate smaller
colonies into their domains as protectorates,
and such cultures are treated on an even
footing.

Miniature:

K’Erin are humanoids with powerful builds.
They have evidence of a predatory biological
origin, such as minor claws and fangs.
UNIT

Civilian

Military

Sergeant
/ minor
character

Major
character

Epic character

SPEED

4"

4"

4"

4"

5"

REACTION

1

2

2

2

3

COMBAT SKILL

+1

+1

+1

+2

+2

TOUGHNESS

4

4

4

5

5

KILL POINTS

1

1

2

2

3

SAVVY

+0

+0

+0

+0

+1

TRAINING

+0

+1

+1

+1

+2

POINTS COST

6

13

20

25

35

157

Lifeforms
The Soulless
Purely synthetic, the Soulless have a digital
hive mind that connects every unit, giving
them a great unity of purpose uncommon in
biological species. The physical shell people
interact with is just that: A physical shell that is
quite interchangeable.
The term Soulless is Unity trooper slang but has
become standard parlance across the galaxy. It
is not considered to be derogatory.
Soulless do NOT have distinct profiles. All
figures, whether civilian, military, or individual
characters use the standard profile.

Special Rules:
• Synthetic: Soulless follow all the rules for
Synthetic beings (see page 46).
• Machine Learning: Soulless cannot be
veterans in a pick-up game or when a
campaign initially begins but may acquire
veteran skills as normal for their unit type, as
the network adapts to local circumstances.
• Hardened Network: Soulless receive a
3+ Saving Throw against any attempt to
hack into, interfere with, or jam Soulless
communications and network connections.
A successful save means that the specific
source of intrusion is unsuccessful for
the duration of the encounter. Repeated

158

uses of the same method allows a Saving
Throw each time they are used, until one is
successful.

Social Notes:

Soulless are pragmatic and adjust their social
behavior to suit the needs of the situation.
Soulless do not operate as pirates but small
units can be deployed to interact with almost
any social circumstance to further some grand
strategic goal.

Miniature:

Soulless look like humanoid robots. Military
units have the individual run-time installed
in a physical body intended to intimidate and
menace their intended opposition.
UNIT

Standard

SPEED

4"

REACTION

2

COMBAT SKILL

+2

TOUGHNESS

4

KILL POINTS

2

SAVVY

+2

TRAINING

+1

POINTS COST

20

Lifeforms
The Converted

Social Notes:

Cybernetic horrors, the Converted collect the
living as well as the dead from the battlefield to
turn them into new troopers.
The Converted lack a civilian culture, but the
Worker profile can be used for non-combat
units.
While the Converted lack personality,
important units are given additional upgrades,
reflected in their increased profile, similar to
other characters.

Special Rules:
• Synthetic: The Converted follow the rules
for Synthetic beings (see page 146). They
can never be veterans.

• There is no Converted society. Any living
beings that fall into their hands are
implanted and added to their ranks.
• The Converted often create units intended
specifically for infiltration. These resemble
their original biological forms to a greater
extent: These use the profiles of their
original species, but lose all special rules
for that species. They gain the Mindless
Assault rule listed above.
• The Soulless do not under any circumstances
cooperate with the Converted.

Miniature:

Converted are corpse-like humanoids
maintained by cybernetic enhancements.
They often resemble their former species, but
are covered in blood stains and have rusted
equipment.

• Mindless Assault: The Converted do not
take Morale tests. They can be Suppressed
due to rudimentary survival routines (and
occasionally being blasted off their feet).
When taking the Dash action, they do not
gain any additional movement but may
enter close assault combat.

UNIT

Civilian

Military

Sergeant
/ minor
character

Major
character

Epic character

SPEED

4"

4"

4"

4"

5"

REACTION

1

2

2

2

3

COMBAT SKILL

+0

+1

+1

+1

+2

TOUGHNESS

4

4

4

5

5

KILL POINTS

1

1

2

3

3

SAVVY

+0

+0

+0

+0

+1

TRAINING

+0

+0

+1

+1

+2

POINTS COST

10

15

20

25

35

159

Lifeforms
The Horde

Social Notes:

A mysterious threat, the individual creatures
that make up the Horde are genetic anomalies
seemingly crafted by a malignant intelligence.

Miniature:

What a Horde civil society looks like can only
be guessed at; the Worker profile accounts for
various creatures occupying support roles for
the troops.

The Horde has no use for other lifeforms and
attack and destroy them on sight.
The Horde are mutated or wildly alien
humanoids, often in discordant and
unpleasant colors.

Special Rules:
• Fearsome: The Horde inflicts Fear (see
page 45) except in Synthetic beings.
• Horde Tactics: At the start of a round, any
number of Horde squads that are within
Coherency distance of each other may
be declared to use Horde tactics. They are
treated as a single squad going forward
and cannot be separated during the battle.
Squad special abilities such as recon squads
do not apply.
• Uncaring: A Horde squad with two or more
figures remaining is not destroyed when
failing a Morale test. Instead, remove one
figure from the squad.

160

UNIT

Civilian

Military

Sergeant
/ minor
character

Major
character

Epic character

SPEED

4"

4"

4"

4"

5"

REACTION

1

2

2

2

3

COMBAT SKILL

+0

+0

+0

+1

+1

TOUGHNESS

3

4

4

5

5

KILL POINTS

1

1

2

2

3

SAVVY

+0

+0

+0

+0

+1

TRAINING

+0

+0

+0

+0

+1

POINTS COST

6

10

15

20

30

Lifeforms

THE MINOR POWERS
Serian (Engineers)
The Serian have an innate ability to
understand, interact with and apply mechanical
and electronic hardware. This makes them
sought-after as employees.

Special Rules:
• Tech-savvy: Engineers making any kind
of test to use, research, modify, repair,
or apply technology may roll twice and
pick either result. This does not apply to
weapon attacks. Additionally, personal
equipment used or worn by an Engineer
never jams or malfunctions.
• Enviro-suits: Engineer suits are fully
insulated against the environment. They
are not affected by any hazards such as
gas and toxins. Such threats delivered
through an intrusive manner (such as
a dart gun or animal claws) affect them
normally, however.

Social Notes:

Engineers tend to be pragmatic and often act
as hired hands for others, though they are
fairly given to adventuring and freelancer
work as well.

Miniature:

Engineers are slender humanoids enclosed in
full environmental armor suits.

UNIT

Civilian

Military

Sergeant
/ minor
character

Major
character

Epic character

SPEED

4"

4"

4"

4"

5"

REACTION

1

2

2

3

3

COMBAT SKILL

+0

+1

+1

+2

+2

TOUGHNESS

3

3

3

3

4

KILL POINTS

1

1

2

2

3

SAVVY

+2

+2

+2

+2

+3

TRAINING

+1

+1

+1

+1

+2

POINTS COST

7

11

16

22

32

161

Lifeforms
The Swift
Short reptilians with wings, the Swift are
a mystery to most lifeforms. Their verbal
communications are frequently convoluted
gibberish to others, and they are prone to
obsessing about strange ideas.

Special Rules:
• Bonds of Inspiration: Every 6 on the
initiative dice allows 1 Suppression
marker to be removed from any Swift unit.
Note that if both sides field Swift and you
have no Suppression markers to remove,
you must remove a marker from an enemy
unit instead.
• Winged: Swift are not capable of full
flight but can dive down from any height
without taking damage. The figure may
land anywhere within a number of inches
equal to the height of the terrain feature.
They may not move after landing but can
otherwise act normally.

Social Notes:

Miniature:

Swift fight for all manner of strange reasons.
The Precursors say they understand why but
that the rationales are not rooted in threedimensional thinking.

162

Swift are small lizard people. Some groups lack
proper wings but have extendable membranes
under their arms that serve a similar purpose.

UNIT

Civilian

Military

Sergeant
/ minor
character

Major
character

Epic character

SPEED

5"

5"

5"

5"

6"

REACTION

1

2

2

32

3

COMBAT SKILL

+0

+1

+1

+1

+2

TOUGHNESS

3

3

3

3

4

KILL POINTS

1

1

2

2

3

SAVVY

+0

+0

+0

+1

+1

TRAINING

+0

+1

+1

+1

+2

POINTS COST

6

12

17

22

32

Lifeforms
Keltrin (Skulkers)
Often mistaken for Ferals, the rodent-like
Keltrin are a distinct species. They are a
common sight anywhere mercenaries and
hired hands show up, as they are both hardy
and practical-minded.

Special Rules:
• Agile: Skulkers do not suffer movement
penalties when moving in Difficult terrain
or Area terrain features, and reduce all other
movement cost reductions (such as doors,
Linear obstacles, and so forth) by 1".
• Resilient: Skulkers receive a 3+ Saving
Throw against any kind of toxin, virus,
or gas.

Social Notes:

Skulkers lack any kind of instinctual prejudice,
and thus work with anybody who hires them.
Consequently, they are popular as mercenary
and as part of ships’ crews.

Miniature:

Skulkers look like humanoid rodents.
UNIT

Civilian

Military

Sergeant
/ minor
character

Major
character

Epic character

SPEED

6"

6"

6"

6"

7"

REACTION

1

2

2

2

3

COMBAT SKILL

+0

+1

+1

+2

+2

TOUGHNESS

3

3

3

4

4

KILL POINTS

1

1

2

2

3

SAVVY

+1

+1

+1

+1

+2

TRAINING

+0

+1

+1

+1

+2

POINTS COST

6

12

17

22

32

163

Lifeforms
Hakshan
A humanoid species of great technical
sophistication, the Hakshan have emerged
on the galactic scene from the voids between
stars. Their culture appears to be searching for
something quite vital, and they are engaged
in energetic trade and military expeditions to
acquire any indications of it.

Special Rules:
• Determined: Hakshan receive +1 to
Morale tests when holding, carrying, or
defending any type of objective.

Social Notes:

The Hakshan are relatively peaceful, but their
quest may put them in conflict with an array of
groups.

Miniature:

Hakshan are humanoids with high-tech
equipment and a tendency towards brightly
colored armor and clothes.

164

UNIT

Civilian

Military

Sergeant
/ minor
character

Major
character

Epic character

SPEED

4"

4"

4"

4"

5"

REACTION

1

2

2

2

3

COMBAT SKILL

+0

+1

+1

+2

+2

TOUGHNESS

3

3

3

3

4

KILL POINTS

1

1

2

2

3

SAVVY

+1

+0

+0

+0

+1

TRAINING

+0

+1

+1

+2

+2

POINTS COST

5

10

15

20

30

Lifeforms
Clones (The Many)
Technically a human sub-set, The Many are
considered a completely independent species.
Through psionic experimentation, they have
developed into a psionically linked hive mind
that spans the cosmos.
While each can develop individual skills
and talents, The Many have no concept of
what an “individual” being is. To them, each
clone is simply one manifestation of the
whole. The titles of “civilian”, “military”, and
“character” are simply unit descriptions for
particular skill sets.

In all other circumstances they have
+1 Savvy and +1 Training.
• Group Tactics: When taking Morale tests,
take all your required Morale tests on clone
units by first counting how many KP of
figures are scheduled for removal due to
failed tests. You must then remove that
number of clone KP, but may do so from any
clone units you like. For example, if a clone
squad with 3 figures (1 KP each) fails a
Morale test, remove 3 KP of clones from any
units you like.

Social Notes:

The Clones pursue their own agenda on the
galactic stage. They rarely cooperate with others
for extended periods of time.

Special Rules:
• One Mind: If an epic character clone is
present on the battlefield, all clones have
+2 Savvy and +2 Training.

Miniature:

Clones are pale-skinned humans with the exact
same features and uniforms.

If a major character is present, they have
+1 Savvy, +2 Training.

UNIT

Civilian

Military

Sergeant
/ minor
character

Major
character

Epic character

SPEED

4"

4"

4"

4"

5"

REACTION

2

3

3

4

4

COMBAT SKILL

+0

+1

+1

+2

+2

TOUGHNESS

3

3

3

3

4

KILL POINTS

1

1

2

2

3

SAVVY

x

x

x

x

x

TRAINING

x

x

x

x

x

POINTS COST

8

15

20

30

40

165

Lifeforms
Ystrik (Manipulators)
These mysterious aliens were nicknamed
Manipulators due to their prehensile tentacles,
though this has given rise to a reputation
for cultural manipulation and deceit that is
occasionally exaggerated. The Ystrik relish the
reputation, however, and it has inspired them
to create an extensive intel and spy network
across space.

Special Rules:

• Rapid Analysis: When making any die roll
based on Savvy, Manipulators count any roll
of a natural 1 as a 6.

Social Notes:

The Manipulators are fond of travel and can
show up almost anywhere.

Miniature:

Manipulators are alien creatures with many
grasping tentacles.

• Dislike of Physical Combat: Manipulators
only Hit on a 5+ when using Melee
weapons or assaulting vehicles. They Fear
any figure with more KP than themselves.

166

UNIT

Civilian

Military

Sergeant
/ minor
character

Major
character

Epic character

SPEED

4"

4"

4"

4"

5"

REACTION

1

2

2

3

3

COMBAT SKILL

+0

+1

+1

+2

+2

TOUGHNESS

1

1

2

2

3

KILL POINTS

1

1

2

2

3

SAVVY

+1

+1

+1

+1

+2

TRAINING

+0

+1

+1

+1

+2

POINTS COST

5

8

13

18

27

Lifeforms
Krag (Dwarves)
Stocky humanoids who lost their homeworld,
the Krag are belligerent and prone to
squabbling.

Special Rules:
• Rivalry: Individuals shooting at or making
a close assault on an enemy individual unit
may add +1 to all attack rolls.

Social Notes:

Krag undertake the same array of adventuring,
mercenary work, and piracy as anyone else.

Miniature:

Krag are short but physically robust, with a
humanoid frame.

UNIT

Civilian

Military

Sergeant
/ minor
character

Major
character

Epic character

SPEED

3"

3"

3"

3"

4"

REACTION

1

2

2

2

3

COMBAT SKILL

+0

+1

+1

+2

+2

TOUGHNESS

4

4

4

5

5

KILL POINTS

1

1

2

2

3

SAVVY

+1

+0

+0

+0

+1

TRAINING

+0

+1

+1

+1

+2

POINTS COST

5

10

15

20

30

167

Lifeforms

CREATURES
Creatures typically only have a single profile.
GMs should feel free to vary up the profile
for a scenario, for example to make a tougher
version or to reflect a particular genetic
variation or alternate creature type.

Social Notes:

All creatures count as having Melee weapons
when making attacks in close combat.

An infestation can be anything from a single
creature to dozens of them.

The Swarm

Their method of reproduction is unknown.

A biological species that spawned the “ultradanger” Unity classification category, the
Swarm has spread across the galaxy through
a series of contamination incidents. Bristling
with fangs and claws, the Swarm is obsessively
aggressive when it deptects other lifeforms.
As a result, few studies have been successful,
though that has not stopped several ill-fated
weapons research facilities from attempting it.

Miniature:

Natural weapons: Damage +1, Melee,
Piercing.

Special Rules:
• Murder Frenzy: Swarm cannot usually
attempt tasks that involve manipulating
devices or problem solving. If a task can
be accomplished by brute force, such as
breaching a door or escaping a cage, they
can make appropriate tests with a +3 dice
bonus in place of a Savvy or Training score.

168

The Swarm reacts with relentless aggression
to the presence of any other lifeforms within a
few miles. Any attempts at communication and
interaction will fail.

Use any scary looking alien monster with
big claws.
UNIT

Swarm

SPEED

6"

REACTION

3

COMBAT SKILL

+2

TOUGHNESS

4

KILL POINTS

1

SAVVY

x

TRAINING

x

POINTS COST

15

Lifeforms
Razor Lizard

Gene-dog

Sometimes known as rock lizards due to
their referred habitats, the Razor is a large,
dangerous reptile with spikes and incredibly
sharp, needle-like fangs. Similar creatures can
be found throughout many hot, arid worlds,
however.

Genetically modified canines with improved
senses and cognitive abilities.

Needle fangs: Damage +0, Melee, ignore
Saving Throws.

Special Rules:

Dogs bred for guard duties have +1 Combat
skill. (Points cost: +3)
Bite: Damage +0, Melee.

Special Rules:

• Tracker: Dogs roll at +3 when tracking by
scent.

• Spikes: If attacking a Razor with a Melee
weapon, a roll of a natural 1 results in the
attacker taking a damage +0 Hit.

• Genetically Enhanced: Gene-dogs receive
a 5+ Saving Throw against any source of
toxin, virus, or gas.

Social Notes:

• Good Boy: Trained Gene-dogs are attached
to a handler. While the handler is within
12", the dog can be treated as a normal
figure and perform any desired actions
(though it obviously can only do things dogs
are able to do). If the handler is not within
12", the dog should behave as a dog. It
may attack threats, but otherwise guards its
location or runs away.

Razors are typical predators and hunt for things
to eat. They tend to gather in groups of 4-8
and hunt as a group. Razor eggs sell for a good
price to interested buyers though the animal is
not typically trainable.

Miniature:

A lizard with spikes and big teeth.

Social Notes:

UNIT

Razor Lizard

SPEED

6"

REACTION

2

COMBAT SKILL

+1

TOUGHNESS

3

UNIT

Gene-Dog

KILL POINTS

1

SPEED

6"

SAVVY

+0

REACTION

2

TRAINING

+0

COMBAT SKILL

+0

POINTS COST

8

TOUGHNESS

4

KILL POINTS

1

SAVVY

+0

TRAINING

+0

POINTS COST

6

It’s a dog.

Miniature:
It’s a dog!

169

Lifeforms
Sand Runner

Krorg

Fast predatory lizards. They can be trained
and are popular as guard animals, though
the training requires constant reinforcement
to stick.

The Krorg is a bear-like predator that has been
imported to many worlds due to the quality
of its fur. Unfortunately, it is also a belligerent
and surly creature, and capable of smashing
through steel plate.

Fangs: Damage +1, Melee.

Raking Claws: Damage +2, Piercing.

Special Rules:
• Leap: Sand Runners Dash at 2x Speed
instead of speed+2.

Social Notes:

In the wild, Sand Runners operate in packs of
4-5 individuals and are primarily concerned
with hunting for food. Trained Runners can
guard facilities and obey a range of commands
though they are usually best deployed
patrolling a perimeter.

Miniature:

Any lizards that look fast and agile can be used
for Sand Runners.

170

Extra attacks: x2

Special Rules:
• Smash: Krorg move in straight lines. Any
scatter terrain in the way is destroyed. A
Linear obstacle will have a hole knocked in
it on a D6 roll of a 4+, and building walls
on a 5+.

Social Notes:

Krorg are easily aggravated. Even if sedated,
the sight of humanoids within 12" applies
1D6 points of irritation every round. Once
Irritation reaches 10+, the Krorg goes berserk
and attacks. Once angry, it takes 1D6 days to
calm down.

UNIT

Sand Runner

SPEED

7"

REACTION

2

COMBAT SKILL

+0

TOUGHNESS

3

UNIT

1

Krorg

KILL POINTS

SPEED

+0

5"

SAVVY

REACTION

TRAINING

+0

2

COMBAT SKILL

8

+2

POINTS COST

TOUGHNESS

5

KILL POINTS

5

SAVVY

+0

TRAINING

+0

POINTS COST

25

Krorg are usually solitary.

Miniature:

Use the biggest bear you can find.

Lifeforms
Brute Lizard

Social Notes:

Massive reptiles seem inexplicably common
on worlds with a lot of jungle. The biggest can
fight off a tank.
These profiles can also be used for oversized
bugs and similar horrors. Many insects and
some lizards are capable of flying, allowing
them to ignore terrain as they move, though
they will land at the end of each move.
Increase the points cost by +10 points to
account for this.

Depending on their breed, brute lizards
may live individually, in hunting packs
of 2-4, or in huge herds of 10 or more.
They are mainly concerned with food, but
are quite territorial and view large, noisy
vehicles as a territorial challenge.

Miniature:

Any dinosaur toy will work just fine.

Massive jaw: Damage +3, Melee. Huge
lizards do x2 damage. Massive lizards do
x3 damage.
Extra attacks: x3.

Special Rules:
• Made of Meat: While they can sustain
frightening amounts of damage, they are
still biological creatures. For every KP lost by
the Lizard, roll 1D6. On a 6, an additional
+1 KP is lost due to blood loss or shock.
• Very Big: Brute Lizards cause Fear (see
page 45).
UNIT

Brute Lizard
Large

Brute Lizard
Huge

Brute Lizard
Massive

SPEED

6"

5"

4"

REACTION

1

1

1

COMBAT SKILL

+2

+2

+2

TOUGHNESS

5

6

7

KILL POINTS

5

6

8

SAVVY

+0

-1

-1

TRAINING

+0

+0

+0

POINTS COST

30

40

55

171

Items and Costs

Items
and CoSTS
Weapons
This section provides profiles for a wide array
of weaponry. Many more types exist: Each
entry on these tables represents a variety
of individual models, makes, and designs
with roughly comparable capabilities and
performance.

Crewed: Must be operated by a gun crew
(see page 48) unless mounted on a vehicle.

To keep the game playable, some factors
are not accounted for in these rules, such as
ammunition capacity (except where particularly
limited), reliability, or user friendliness.

Elegant: The figure may reroll 1s in close
combat.

Note that while many weapons give some
indication of their technological basis (such as
energy or projectile weapons), this should again
be taken as a core type. A ‘laser rifle’ may rely on
a range of other principles for inflicting damage
and a ‘machine gun’ might fire anything
from bullets using chemical propellant to
magnetically propelled slivers of metal. Be
creative. For game mechanics, what matters is
the weapon profile rather than the description,
which you can tailor to your imagination.

Weapon Traits
Ammo Choice: The weapon may fire in one of
the selected modes each round.
Area: The weapon uses the Area Weapon rules
(see page 35).
Burn: Any casualties must take a -1 penalty
when testing for Morale this round.
Clumsy: The weapon only Hits on a 5+ in
close assault.

172

Critical: If the Hit roll is a natural 6, the target
takes 2 Hits.
Destructive: Causes 2 Hits on any vehicle.

Focused: Resolve both shots against the same
target figure.
Fog: The area covered by the gas cloud cannot
be fired into, out of or through.
Gas: The weapon remains in place using the
gas rules.
Heavy: -1 Hit penalty if the firer moved during
the same activation. Does not apply when
vehicle-mounted.
Indirect Fire: The weapon may be fired
indirectly. Vehicle-mounted weapons must be
stationary to do so.
Knock Back: An infantry figure that is Hit is
pushed 2" away from the attacker.
Launcher: May fire any grenades carried by
the user.
Limited Supply: The weapon can be fired
only twice per battle. (You can use the Limited
Ammo marker to keep track of this.)
Lock on: Only vehicles can be targeted.
+1 to Hit.

Items and Costs
Melee: Usable in close combat.
Minimum Range: The weapon cannot select a
target within 12".
Overheat: If the shooter does not have an
Overheat marker, place one.
If the shooter has an Overheat marker, roll one
fewer shots and remove the marker.
If the shooter does not fire during their
activation, remove any Overheat marker.
Piercing: +1 damage versus vehicles.
Pin-point: +1 to Hit vs vehicles, -1 to Hit vs
infantry.
Pistol: Hits on a 4+ if the target is not in Cover.
Usable in close combat.
Shock: Each Hit automatically inflicts 1
additional Suppression marker before
rolling for damage.
Shrapnel: The weapon Hits on a 5+
regardless of Cover, Combat Skill, or Hit
modifiers.
Snap Shot: +1 Hit bonus within 6".
Sniping: +1 Hit bonus if stationary.
Stream: The weapon uses the Stream rules
(see page 35).
Stun: An infantry figure that is Hit receives a
Stun marker. When activated next, the figure
moves at half speed and cannot attack.
Team: Can be operated by a single figure, but
if the operator becomes a casualty, another
figure from the same squad can take over the
weapon if within 1". Simply remove that
figure and move the weapon figure to their
location. A given weapon
can only be picked up
once per squad.

The Infantry Soldier’s Guide to
Battlefield Firepower
The modern foot soldier’s weaponry comes
in two varieties: Ballistic weapons such as the
military rifle, which fires physical projectiles,
and energy weapons such as the infantry laser.
Which type is chosen is often a question of
preference. While advanced military forces
tend towards energy weapons, the reliability
and ease of manufacture of ballistics ensure
they remain a common sight.
Assault troops sometimes prefer blaster-type
weapons, which rely on a high powered bolt of
energy that dissipates quickly over range.
All of these designs can be minimised into
pistol size, sacrificing range for convenience.
Sidearms are mostly carried by officers and
other personnel who do not expect to engage
in front line combat.
The more style-conscious officer may opt to
complement their outfit with a sword. Sturdy
blade weapons are a mark of rank and the
energy based glare sword is considered to be a
more distinguished and elegant affair. Troops
engaged in boarding actions often carry heavy
energy-enhanced weapons for breaching, such
as the powered claw or breaching axe. These
weapons require fitting with an energy source
and are usually hooked into the soldier’s
armour, making them awkward to wield but
frightfully destructive.
Hand grenades are convenient, easy to carry,
and fun to use (according to the marketing
materials). A range is available, such as

Weak: Cannot affect
vehicles under any
circumstances.

173

Items and Costs
armor-piercing penetrator charges and antiinfantry frag and cling-fire options. The Jinx
grenade is a high-tech device that scrambles
electronics and melts vehicle armor, optimized
for anti-tank work.
Grenades are even useful in peacekeeping
operations and for law enforcement, where
the shock grenade (known as ‘dazzles’ to the
starport scum often found on the receiving
end) can disperse crowds with a mixture of
intense light and noise, as well as sub-psionic
vibration.

Team Weapons

Heavy firepower is provided by team weapons.
The standard remains the light machine gun,
a rapid fire ballistic weapon that acts as a more
professional counterpart to the rattle guns so
beloved by salvage teams and freelancers.
Others prefer the devastating firepower of the
plasma rifle or hyper blaster, accepting the
inhibiting effects of the cooling system as a
price to pay for superior punch.
Defence against armoured threats is usually
provided by either the fusion rifle or the longer
ranged fury rifle, suitable for deployment
against light vehicles as well as heavily
armoured infantry. The blast of a Fury rifle can
knock even heavily protected infantry clean off
their feet.

Five Parsecs from Home
Weapons are completely compatible between
the two systems, though 5PFH weapons
require an anti-tank rating to be added.
Please note that in some cases a weapon may
have a slightly different profile in the Tactics
rules. You may use either version in crossover
games, though it is recommended that
characters brought over retain their current
weapon profiles to keep things simple.

174

For flexibility, the grenade launcher cannot
be rated too highly. Capable of firing a variety
of grenade types, it can be tailored for any
battlefield role.

Crewed Weapons

The heaviest firepower comes from crewed
weapons operated either on weapons
platforms or as vehicle mounts. Laser weapons
are common here and can be configured for
a range of roles depending on the intended
target type, with the pulse laser being a dual
role weapon optimised for lighter targets
and anti-infantry use. Missiles provide solid
damage potential against enemy vehicles, but
the limited supply of ammunition makes them
a more situational choice.
Physical projectiles are in widespread use as
well, with a range of calibres of cannon and
rapid-fire auto-cannon being in service.
One of the most feared tank weapons is the
heavy plasma gun: A cousin of the infantry
version, this also projects blueish-white
bolts of energy, turning the target area into
an incandescent inferno upon striking.
This weapon has generally replaced the
vehicle-mounted flame thrower for close
quarters action.

Items and Costs
Weapon Tables
Melee Weapons

While the battlefield is dominated by
firepower, combatants operating in tight
confines often favor a more medieval approach.

As a bonus, a blade is less likely to put a hole
in a starship hull during a boarding action.

WEAPON

DAMAGE

TRAITS

POINTS COST

Blade

1

Melee

1

Glare sword

1

Melee, Elegant

2

Powered claw

3

Melee, Clumsy, Piercing

3

Breaching axe

3 (x2 vs vehicles)

Melee, Clumsy, Knock Back

4

Suppression maul

0

Melee, Stun

1

Ripper sword

2

Melee, Piercing

3

Grenades

Grenades are compact explosive devices
thrown by hand or fired from a suitable
launcher. A figure with a Launcher may fire
any grenade type carried. Grenades thrown
by hand have a range of 6". When a squad is
active, a single figure may throw a grenade
instead of firing their weapon.
WEAPON

DAMAGE

TRAITS

POINTS COST

Frag grenade

0

Area

1

Penetrator grenade

3

Piercing, Knock Back

2

Jinx grenade

5

Lock On, Destructive

3

Fog grenade

–

Area, Gas, Fog

1

Cling-fire grenade

0

Area, Burn

2

Shock grenade

–

Area, Shock

1

Sidearms

This list covers small firearms that can be fired
single-handedly, such as pistols. They are
usually light-weight and easy to use, though a
lack of accuracy limits them to close quarters.

In military use, they are often secondary or
defensive weapons only. Criminals, special
agents, and other clandestine individuals favor
them for concealment and personal defense.

WEAPON

RANGE

SHOTS

DAMAGE

TRAITS

POINTS COST

Service pistol

9"

1

0

Pistol

1

Hand laser

9"

1

0

Pistol, Snap Shot

2

Blast pistol

8"

1

1

Pistol

2

175

Items and Costs
Rifles

This category covers both full-sized rifles and
more compact carbine-type weapons. These
weapons are designed for two-handed use
and are the primary armament of the infantry
trooper.
WEAPON

RANGE

SHOTS

DAMAGE

TRAITS

POINTS
COST

Military rifle

24"

1

0

–

3

Infantry laser

30"

1

0

Snap Shot

4

Precision rifle

36"

1

1

Critical, Sniping

6

Blaster

18"

1

1

–

3

Primitive weapon

18"

1

0

Weak

1

Shotgun

12"

1

0

Critical

2

Team Weapons

These are heavier, more powerful, and often
more complicated weapons used to provide
support for infantry units. They are light
enough to be portable and can be operated
by a single soldier if needed. Typically, a
squad carries one or two such weapons to
supplement their firepower.

176

WEAPON

RANGE

SHOTS

DAMAGE

TRAITS

POINTS
COST

Light machine gun

30"

3

0

Heavy, Team

10

Flak gun

12"

2

1

Focused, Shrapnel,
Team

5

Grenade launcher

24"

–

–

Launcher, Heavy, Team

10 +
grenades

Fury rifle

24"

1

3 (x2)

Heavy, Piercing, Knock
Back, Team

15

Plasma rifle

20"

2

1

Focused, Piercing,
Overheat, Team

8

Sniper rifle

40"

1

1 (x2)

Heavy, Piercing,
Sniping, Team

10

Hyper blaster

24"

3

1

Overheat, Team

14

Flame projector

6"

–

1

Stream, Burn, Team

6

Fusion rifle

15"

1

3 (x2)

Piercing, Team

10

Items and Costs
Crewed Weapons

Crewed weapons are either operated on
ground mounts such as a tripod, or on
mounted on vehicles. They form the primary
firepower of heavy weapons batteries and
vehicle units.
WEAPON

RANGE

SHOTS

DAMAGE

TRAITS

POINTS
COST

Laser cannon

48"

1

5 (x3)

Crewed

35

Pulse laser

36"

2

4 (x2)

Crewed

35

Anti-tank laser

60"

1

6 (x3)

Pin-point, Crewed

45

Anti-tank missile

12"-96"

1

4 (x4)

Minimum Range,
Limited Supply, Lock
On, Crewed

30

20mm auto-cannon

36"

3

2

Crewed

20

40mm auto-cannon

48"

2

3

Crewed

25

Infantry mortar

12"-48"

1

1

Area, Indirect Fire,
Minimum Range,
Crewed

15

Heavy plasma gun

24"

1

4

Area, Burn, Crewed

20

75mm cannon

60"

1

–

Ammo Choice, Crewed

45

AP shell

–

–

5 (x3)

Pin-point, Knock back

Frag shell

–

–

1

Area

100mm cannon

72"

1

–

Ammo Choice, Crewed

AP shell

–

–

6 (x3)

Pin-point, Knock Back

Frag shell

–

–

2

Area

55

Powered Armor
While rare and expensive, fully powered suits
of armor are in use throughout Unified Space
and beyond.
WEAPON

SAVING
THROW

POINTS
COST

Powered

6+

2

Breach

5+

4

177

Items and Costs

MASTER POINTS COSTS TABLE
This table lists individual points costs for every
figure and weapon in the rulebook. You can
use this to create custom units, swap parts out,
or for any other purposes where you might find
it useful.
Pre-calculated figures are included for
weapon teams (3 military figures) and
squads (4 military figures + 1 sergeant).
UNIT

POINTS
COST

NOTES

HUMAN

Civilian

5

Military

10

Weapon Team

30

3 military

Squad

55

4 military
+ sergeant

Sergeant/Minor

15

Major

20

Epic

30

NOTES

EREKISH (PRECURSORS)

Civilian

6

Military

12

Weapon Team

36

3 military

Squad

66

4 military
+ sergeant

Sergeant/Minor

18

Major

25

Epic

35
K'ERIN

FERAL

Civilian

8

Military

13

Weapon Team

39

3 military

Squad

72

4 military
+ sergeant

Sergeant/Minor

20

Major

25

Epic

32

Civilian

6

Military

12

Weapon Team

36

3 military

Squad

65

4 military
+ sergeant

Sergeant/Minor

17

Major

22

Worker

10

Epic

32

Military

15

Weapon Team

45

3 military

Squad

80

4 military
+ sergeant

Sergeant/Minor

20

Major

25

Epic

36

SOULESS

Standard

20

Weapon Team

30

3 military

Squad

100

5 military

THE CONVERTED

HULKER

178

POINTS
COST

UNIT

Standard

15

Weapon Team

45

3 military

Squad

80

4 military
+ sergeant

Sergeant/Minor

20

Major

25

Epic

40

Items and Costs
POINTS
COST

UNIT

NOTES

POINTS
COST

UNIT

THE HORDE

NOTES

HAKSHAN

Worker

6

Civilian

5

Military

10

Military

10

Weapon Team

30

3 military

Weapon Team

30

3 military

Squad

55

4 military
+ sergeant

Squad

55

4 military
+ sergeant

Sergeant/Minor

15

Sergeant/Minor

15

Major

20

Major

20

Epic

30

Epic

30

SERIAN (ENGINEERS)

CLONES (THE MANY)

Civilian

7

Civilian

8

Military

11

Military

15

Weapon Team

33

3 military

Weapon Team

45

3 military

Squad

60

4 military
+ sergeant

Squad

80

4 military
+ sergeant

Sergeant/Minor

16

Sergeant/Minor

20

Major

22

Major

30

Epic

32

Epic

40

THE SWIFT

YSTRIK (MANIPULATORS)

Civilian

6

Civilian

5

Military

12

Military

8

Weapon Team

36

3 military

Weapon Team

24

3 military

Squad

65

4 military
+ sergeant

Squad

45

4 military
+ sergeant

Sergeant/Minor

17

Sergeant/Minor

13

Major

22

Major

18

Epic

32

Epic

27

KELTRIN (SKULKERS)

KRAG (DWARVES)

Civilian

6

Civilian

5

Military

12

Military

10

Weapon Team

36

3 military

Weapon Team

30

3 military

Squad

65

4 military
+ sergeant

Squad

55

4 military
+ sergeant

Sergeant/Minor

17

Sergeant/Minor

15

Major

22

Major

20

Epic

32

Epic

30

179

Items and Costs
Creatures

UNIT

UNIT

POINTS COST
CREATURES

Swarm

15

Razor Lizard

8

Gene-Dog

14

Sand Runner

8

Krog

25

POINTS COST

FIGHTING VEHICLES

Armoured Car

60

APC

50

APC – Grav

55

IFV

70

IFV – Grav

75

Light tank

100
+10

Large

30

Option: Replace 40mm
autocannon with a
pulse laser

Huge

40

Light tank – Grav

55

115

Massive

Option: Replace 40mm
autocannon with a
pulse laser

+10

Brute Lizard

Vehicles
UNIT

POINTS COST

LIGHT VEHICLES

Nomad Bike

15

Medium tank

140

Option: Replace coaxial
light machine gun with
a heavy plasma gun

+10

Medium – Grav

150
+10

Option: Mount a
forward-firing light
machine gun

+10

Scouter

35

Option: Replace coaxial
light machine gun with
a heavy plasma gun

Lancer

30

Heavy tank

200

Option: May replace
plasma rifle with a
fury rifle

+7

Option: Replace either
light machine gun with
a heavy plasma gun

+10 per gun

Frontier Trike

35

Light walker

70

Raider Trike

35

Option: Replace light
machine gun with a
fury rifle

+4

+5

Option: Replace flame
projector with
fusion rifle
Heavy walker

100

HEAVY COMBAT BOTS

180

CIM-L

35

CIM-APP

45

Items and Costs
Weapons

WEAPON

WEAPON

POINTS COST
MELEE

Blade

1

Glare sword

2

Powered claw

3

Breaching axe

4

Suppression maul

1

Ripper sword

3

GRENADES

Frag

1

Penetrator

2

Jinx

3

Fog

1

Cling-fire

2

Shock

1
SIDEARMS

Service pistol

1

Hand laser

2

Blast pistol

2
RIFLES

POINTS COST

SUPPORT WEAPONS

Light machine gun

10

Flak gun

5

Grenade launcher

10 + grenades

Fury rifle

15

Plasma rifle

8

Sniper rifle

10

Hyper blaster

14

Flame projector

6

Fusion rifle

10

CREWED WEAPONS

Laser cannon

35

Pulse laser

35

Anti-tank laser

45

Anti-tank missile

30

20mm auto-cannon

20

40mm auto-cannon

25

Infantry mortar

15

Heavy plasma gun

20

75mm cannon

45

100mm cannon

55

Military rifle

3

Infantry laser

4

Precision rifle

6

Blaster

3

WEAPON

POINTS COST

Primitive weapon

1

Powered

2

Shotgun

2

Breach

4

Powered Armor

181

Appendices

appendices
Converting Characters
If you wish to transfer characters or units
between Five Parsecs from Home and Tactics,
you can use the guidelines below. Note that a
points cost formula is not used; simply eyeball
the cost based on the closest equivalent figure.

Kill Points

Reactions

• Crew transferred to Tactics receive 1 Kill
Point for each point of Luck.

• Reaction scores remain the same.
• Enemy figures in 5PFH do not have Reaction
scores but can be assigned one by looking at
the closest equivalent Tactics unit.

Speed
• Speed remains the same.

Combat Skill
• Figures transferred from Tactics: No change.
• Figures transferred into Tactics keep their
score but are capped at +2.

Toughness
• Figures transferred from Tactics: No change.
• Figures transferred into Tactics keep their
score but are capped at 5.

Savvy
• Savvy scores remain the same.

Training
• Characters transferred into Tactics receive a
Training score of +1.
• Characters with a military-type background
receive a +2.

182

• When transferring from Tactics, each Kill
Point after the first becomes 1 point of Luck
(even if the figure type could not normally
have that many).

Abilities
• Interpret character abilities as needed.
• Abilities referring strictly to 5PFH campaign
rules are not usually converted over.
• Troops that apply a modifier to Seize the
Initiative rolls instead apply that modifier
to Spotting distances (penalties apply to
being Spotted, bonuses apply to Spotting
by the character).
• If there are differences in the base rules
between two character types, adopt the rules
as you see fit.

Weapons and Equipment
• Equipment must be interpreted as needed.
Treat adjustments to Seize the Initiative
rolls as indicated above.
• Carry weapons over as they are, though
for cases where the same weapon exists
but has a new profile, you can choose to
use the “native” profile or the original as
you see fit.

Appendices

Combining the Two Games
Since 5PFH does not use units, any squads
brought into that game simply become
individual figures. Conversely, your crew would
generally act as single figures in Tactics.
Injury rolls and XP are awarded normally
to crew figures, treating a Tactics battle as
a 5PFH scenario, including typical scenario
pay. If incorporating Tactics battles into your
campaign, they usually take the place of a
conventional scenario.
The creative player can no doubt find a ton
of uses for Tactics elements, whether you
prefer to use the new combat rules or want
to face off against new enemies selected
from this book.
One obvious case is vehicles. Adding vehicles
to 5PFH scenarios can be challenging because
a vehicle is likely to dominate any small
encounter it takes part in. Make sure that the
side facing it has some sort of weapon that can
damage it. A vehicle scenario might involve
reaching the vehicle before making a getaway,
destroying a prototype tank, or getting some
payback on those Converted jerks that have
been making your life difficult.

You might also incorporate Tactics battles
for specific circumstances. If your planet is
invaded, it can be a lot of fun to play out a few
infantry battles against the invaders. Your crew
might even take part in those battles. You could
also set up a military conflict and hire out as
mercenaries. If you use the Operational System
(see page 92), treating your crew missions as
a player mission works fine: As heroes, their
actions would no doubt have an outsized effect
on the war effort!
Another option is to transition from one style
of campaign to another. You may decide to
have an old and well-known character show
up on the battlefield as an officer or hero (or
villain!), which is a great way of adding a bit of
continuity across campaigns.
Take advantage of the tools provided to you
to build a grand, sweeping science fiction
epic. Once you start, you’ll discover that the
possibilities are close to endless.

183

Appendices

Galactic Timeline
The following is a timeline of the Unified
Space setting. Entries are generally from the
perspective of humanity / Unity and all years
are given using familiar Earth time-keeping.
Countless smaller conflicts, incidents, and
discoveries occured in addition to those
listed here.

2051: Advances in theoretical computing

The first, stumbling implementations of nonlinear computing principles spur significant
advances in technology.

2069: Solar system mining projects

Using automated systems and drones,
resource exploitation of the Moon and
several asteroids begins. While the rewards
rarely exceed the considerable cost, it spurs
widespread interest in the development and
exploitation of space and is accompanied by
the construction of long-term orbital habitats.

2074: Solar system colonization begins

Dramatic increases in propulsion allows the
creation of long-term habitation throughout
the solar system, as well as a renewed program

184

of interstellar probes with the prospect of
exploring beyond the solar system.
As technology advances, habitats are pushed
further and further out into the outer reaches
of the solar system.

2084: The Cosmos 9 disaster

A catastrophic chain of events leads to the
destruction of the Cosmos 9 far-system habitat
with a loss of all 163 individuals on board.
This gives fuel to a series of anti-deep-space
movements which begin to coalesce into the
Nearest Ground movement, advocating that
exploration beyond the asteroid belt is too
expensive and too dangerous.

2086: The Expedition 3 incident

A heavy probe is destroyed after launch from
the Cosmos 7 far-system habitat, resulting in
the habitat being decommissioned due to
extensive damage. Miraculously, nobody is
killed. It is long suspected that the incident
is a result of intentional sabotage, but no
conclusive evidence is presented. Nearest
Ground activists seize upon the incident.

Appendices
ca. 2097-2144: The stagnation

A prolonged period of scientific stagnation
on Earth characterized by risk-averse
policies and general economic malaise.
Commonly attributed to the Nearest Ground
movement gaining global acceptance
results in a near-complete stop to far-space
exploration projects and consequent
technological development. However, the
unravelling of unprofitable solar system
investments and undermining of public
confidence also play a role. As expenditures
grind to a halt, a series of global financial
recessions strike. Old social models struggle
to respond to the challenges.

ca. 2099-2147: Hegemony Wars

Wide-spread low-intensity conflicts occur on
Earth, as nation-states give way to regional
and corporate alliances of interest. As
resources grow scarcer and infrastructure
more battered, the economic effects of the
stagnation intensifies. By the end of the
period, the nation-state has effectively been
supplanted by doctrinal power-groups or
corporate-backed military organizations,
with the shambling global economy
primarily driven by the war economy of
increasingly independent corporate states.
By 2143, the hegemonies are exhausted,
and the global community seems poised for
a wide-spread technological collapse.

2132: Foundation of Sky-Reach project

A secret group of visionaries begin gathering
in an underground complex in the Ural
Mountains. It is comprised of scientists and
mathematicians plucked from all over the
world, funded by a syndicate of far-sighted
moneyed interests. The purpose of the project
is to find a technological path out of the global
malaise, but the focus quickly becomes a
breakthrough in star-travel.

2144: Sky-Reach probe launched

In secrecy, a high-tech probe is launched by
the Sky-Reach project, seeking confirmation of
mathematical calculations. If the theories prove
correct, faster-than-light travel could be within
reach of mankind in a matter of years.

2148-ca. 2168: FTL discovery /
Tech Era begins

Weak points in space are discovered – the first
step towards Tunnel technology, enabling
faster-than-light travel along reliable and
predictable principles. The first proof of concept
drive is tested in 2148 with development
rapidly proceeding afterwards.
As new avenues for expansion and profit
becomes viable, the Hegemony Wars come
to a close and the period retroactively titled
the Tech Era begins. This period sees massive
leaps in technological development and
prowess, which in turn kickstarts the ailing
global economy. As the technological progress
seems to provide salvation from mankind’s
decrepit state, the first tech cults begin to
emerge in society.

2152: 4th Generation AI developed

As technological development expands at
speed, adjacent research also accelerates.
This results in the universal integration of 4th
Generation AI, far beyond the early algorithmic
reproductions of human productivity or
subsequent emulations of sentient response.
While AI tech never becomes capable of
replacing humans in every possible pursuit,
it grants considerable advantages in many
fields of research, and lays the groundwork
for almost all of the technology a galactic
civilization requires. Tech cults explode in
popularity, with AI systems taking on mystical
associations, some claiming that the time has
come for human concession to the altruism of
a superintelligence. In some areas, this leads
to armed clashes and riots, before the cults
are forced underground in most corporatecontrolled sectors.

185

Appendices
Timeline of Wars
2100

Hegemony Wars

2150

First Colonial War

K’Erin Contact War
Separation Wars
2250

The Wayward Wars /
Second Wars of Separation
First Converted incursion
Precursor-K’Erin dominion war
Second K’Erin-Unity war

Renegade Wars
2350

2nd Converted War
K”Erin War of Steel Honor
3rd Converted War
First reports of Abductors
2400

Cybernetic War / 4th Converted War

Horde Dominion War
2450
2470

186

The first human colonies intended for
permanent settlement of civilians are
established. Early colonization is dangerous,
with high risk of failure, as many surveyed
worlds turn out to be non-viable. Casualties
are high, and early colonists receive a
reputation for being bitter survivors or foolish
optimists. On worlds with teeming ecosystems, some colonists abandon the often
oppressive, corporate-controlled colonies and
become Nomads.

2177-2179: First colonial War

2200

2300

2167: First colonization

Reclamation War

As interests between colonial selfdetermination and corporate profit-extraction
intensifies, in 2177 a trio of wealthy colonies
declare themselves an independent
political entity and demand renegotiation
of agreements with the owning megacorporations. Initial resistance leads to open but
inconclusive warfare as neither side can gain
an upper hand. Conflict ends with establishing
a model of colonial self-governance while
maintaining economic ties. This will form the
dominant system for the next 60 years.
The conflict is studied extensively by military
academies as the first practical experience in
galactic warfare.

2190: Karlenhertz generator developed

A technological breakthrough eventually
known as the Karlenhertz principle allows the
construction of Weak Point Generators. These
allow faster-than-light travel to be conducted
with increased stability, as a major planetary
system can now be travelled to and from
without having to wait for fluctuations in the
structure of space.
This also allows much faster inter-galactic
communications to be established.

Appendices
2204: Terraforming technology developed

With the aid of advanced AI systems, scientific
breakthroughs enable large-scale terraforming.
With time, this will enable planet-wide
manipulation of environmental systems to
create breathable atmospheres, adjusting
temperatures and similar factors. By the
present day, even some degree of gravity
adjustment can be done. The costs of these
measures are enormous, requiring exorbitant
amounts of funding to be viable, but this
promises to have profound impacts on human
success among the stars.

2211: The Star-Ward Leap begins

Human colonization efforts explode as more
and more worlds are surveyed, terraforming
processes are initiated and colonists begin to
settle. Ultra-corporations spanning multiple
global economies are formed during this
period. Large scale genetic editing begins
during this period and quickly becomes
standard, despite initial moral objections.

2213: Psionics discovered

The genetic basis for human psionic ability is
conclusively proven. Predictable application
remains elusive, but a range of experiments
are conducted across human space with a
wide range of legality and ethical concern. The
discovery gives rise to a series of post-human
and hyper-evolutionary cult groups.

2217-2236: Separation Wars

Widespread galactic conflicts erupt
throughout human space, as interests
diverge and independent polities begin to
assert themselves, resulting in a struggle for
domination. These are often referred to as the
Procyon Wars due to the approximate location
of the first battle, as Yellow Confederate ships
fire on Earth military patrols. While historians
often describe it as a distinct historical period,
it is ultimately a series of conflicts that are only
tenuously connected.

While the conflicts are ongoing, incessant
Human/K’Erin warfare continues in a series
of localized conflicts that further encroach on
Human-claimed space.
It is during the prolonged space battles of this
era that the first instances of Degenerative
Violence Syndrome (DVS) are recorded.
The isolated colony of Z-229 begins genetic
and psionic experimentation that will
culminate in the emergence of the post-human
type known as The Many.

2224: First K’Erin contact

A scout ship makes first contact between
human explorers and the alien species known
as the K’Erin. Initial communications show
promise, and the K’Erin withdraw from the
system without further actions. The news sends
shockwaves through human society as plans
must be reevaluated. A number of different
political movements arise advocating different
methods of interacting with this and an other
alien species.

2224: K’Erin Contact War

Within weeks of K’Erin contact, open warfare
breaks out, plunging mankind into galactic
war for the first time. The conflict is fairly
brief, though damage to fleets and military
infrastructure is extensive. Earth military forces
are revealed to be ill-prepared for warfare
on this scale. The results of the conflict is to
establish K’Erin territorial claims by treaty,
though many of the worlds claimed are of
relatively little value and several were not near
human-controlled space.
K’Erin historians will refer to this conflict as the
“War of Trials”, positioning it as a conflict they
initiated to test the newly encountered species.
The treaty documents include the designation
of humans as a Worthy Foe.

187

Appendices
2249: Unity founded

In light of the experiences from the K’Erin
Contact War and the Separation Wars,
Unity is founded to consolidate and defend
human interests across space. The first
member worlds are those with significant
political and economic power, forming the
Core Worlds of today.

2254-2285: The Wayward Wars / Second
Wars of Separation

A new series of conflicts take place, as Unity
extends its reach and brings most human
polities into its sphere through diplomacy,
economic pressure, or outright military action.
While most worlds join voluntarily, many of
the conflicts are particularly fierce and, even
200 years later, what position your family
took at the time can be a point of pride or
embarrassment.
The alien menace known as the Swarm is
encountered during these conflicts. The initial
encounters may have been lost to historical
records, but it is commonly accepted that the
Lukas-9 portal incident in 2257 allowed the
creatures to spread across populated worlds,
preventing any attempts at containment.

2258: First “Many” contact

Unity exploratory fleets regain contact with
Z-229. Through accelerated development, they
have attained a psionic hive-mind and have
become genetically incompatible with baseline
humanity. The Genetic Derivation laws are
passed to grant them Protected status under
Unity law, though they remain an independent
but affiliated political entity.

2259: First Engineer contact

Emissaries from the species known as the
Engineers are encountered, seeking to
establish diplomatic relations with Unity.

188

2288: First Precursor contact

The aliens known as Precursors initiate
contact with Unity. They present themselves
as diplomats warning of an imminent threat
to galactic stability, though the warnings are
frustratingly vague. Large-scale diplomatic,
technological, and economic ties are initiated.

2290: First Converted incursion

A threat of unknown origin, the cybernetic
species known as the Converted invade known
space with the initial fleets striking Unity and
Precursor territory in particular. Countless
independent human systems are overrun and
absorbed by the invaders. A rapid response by
combined Unity, Precursor, and K’Erin forces
shatters the initial invasion forces in a series of
quick battles, celebrated for establishing a new
doctrine in space battles.
As the invasion fleet command structure
crumbles, the invasion falters and while
smaller-scale operations will continue into
2291, major fighting ceases within 8 months
of the first attack.

2292-2299: Uplifts and gene-mods standardized
Extensive AI-guided experimentation
with uplifting animals, as well as genetic
modification comes to fruition, producing a
number of viable genetic variants. Stalkers
and Hulkers, as well as most Feral strains
are all created during this time period. 2279
marks the end of wide-spread creation of
post-human species after an activist group
uncovers evidence that technology acquired
from the Converted invaders has been used in
the uplift program.
While continued creation is outlawed, the
period sees massive development in genetic
modifications in record speeds, allowing
unprecedented modifications to be done.

Appendices
2298-2301: Precursor-K’Erin dominion war
After both sides declare protectorates over
low-tech local alien populations in border
territory, hostilities erupt into open warfare
between Precursors and K’Erin, while Unity
remains neutral.

Initial Precursor successes are reversed when
a K’Erin assault targets Precursor core worlds
with biological weapons. The war is brought
to a conclusion after Precursor forces threaten
solar detonation in a contested star system.

2305: First Swift contact

The diminutive aliens known as the Swift are
spontaneously discovered across hundreds of
worlds. Population groups are incorporated
into the K’Erin, Precursor, and Unity protective
spheres respectively. The Swift insist that they
have always been here, but until now the timediamonds did not line up correctly.

2306-2309: Second K’Erin-Unity war

Diplomatic missteps result in open warfare
with the K’Erin. Due to relative military
parity, results are inconclusive. As the conflict
threatens to spill over into Precursor space,
a ceasefire is reached. In 2309, border
restoration and global-level ordnance
limitation treaties are signed between all
three parties.

2329-2352: Renegade wars

A period characterized by widespread lowintensity warfare among worlds furthest from
Unity control. Many of these conflicts are purely
local affairs but frequently spill over, and result
in sector-wide conflict. While the major powers
often interfere, the results are modest. Most
historians point to this as the creation of the
uncontrolled region of space known as the
Fringe.

2370: First Manipulator contact

Precursor diplomats facilitate first contact
between Unity and the species that will come
to be known as the Manipulators. Large-scale
commercial treaties are signed, allowing for
high-tech imports, though Unity diplomats
largely sidestep Manipulator concerns about
Unity military bases and colonies near their
region of space.

2373-2374: Uplift rebellions

A series of violent rebellions break out at
Uplift-populated colonies near Manipulator
space. The Manipulators offer to provide peacekeeping forces in return for treaty concessions.
Due to a series of space anomalies, Unity
is hard-pressed to concentrate military
forces, though the rebellions are eventually
suppressed with K’Erin aid.
The ensuing treaties grant semi-autonomous
status to several colonies, relocating the 6th
Unity Strike Fleet base away from the region,
and grants official recognition of the Feral
genetic subtype as an independent, humanderived species.

2357-2369: 2nd Converted War

Converted invasion fleets strike across the
galaxy, seemingly from an array of staging
points previously undetected. While all
sentient species come under attack, Precursor
space is hit particularly hard.
The tide begins to turn in 2362 with the
establishment of multi-species strike forces
and, by 2369, the invasion is considered at an
end, though scattered fighting continues for
decades to come.

2367: First core signals detected

Strange transmissions of alien origin are
detected, emanating from the galactic core.
The regions of origin are widely suspected
to be inaccessible through conventional
interstellar travel. The Precursors and Swift
both warn against investigation for reasons
unrelated to the ongoing conflict, but the

189

Appendices

Precursors refuse to elaborate and the
information gained by the Swift is cryptic and
convoluted, even by their standards. A K’Erin
scout fleet is dispatched, but disappears
without trace.
The signals last for 40 Earth-days before
receding, but transmit thereafter at 22-year
intervals.

2368: Joint Defense worlds established

As the Converted War winds down, the
Precursors and Unity create a series of Joint
Defense worlds along their regional borders.
These will feature troops and ships from both
sides which are, by treaty, forbidden to be
employed off-world.

2372: First Soulless contact

The robotic species known as the Soulless are
encountered along the galactic edge. Initial
contacts are generally friendly, and cooperation
quickly ensues. The Soulless pledge
contribution to matters of galactic peace and
quickly integrate into economic networks in
return for a limited array of settlements.

2372-2374: K’Erin War of Steel Honor

The K’Erin pose a series of demands to the
Soulless, intending to provoke a conflict.

190

After 3 months of negotiations, the Soulless
break off all communications and mount an
expeditionary force into K’Erin space. The
ensuing conflict is primarily fought in space
and on orbital stations, and is occasionally
referred to as the Void War.
The conflict is inconclusive, with both sides
primarily striking at military assets, and a
mutual ceasefire is agreed upon when new
Converted threats emerge.

2374-2380: 3rd Converted war

A contested world from the 2nd Converted
War is revealed as a major production site and
staging ground. Within months, the entire
sector is aflame, and forces are rushed in
to contain the attack. Seventeen populated
worlds within the sector are lost before the
allied forces gain supremacy. Most of the sector
remains under Unity fleet interdiction to the
present day.

2383: First Skulker contact

The Skulkers approach Unity and K’Erin
space, requesting diplomatic recognition and
formal ties. Historians point out that trade
with the Skulker worlds had been ongoing
for some time, but the species had remained
relatively aloof and isolated. A change in

Appendices
public policy leads to the Great Exodus, as the
Skulkers spread across known space, quickly
integrating into Unity and K’Erin societies,
while their home worlds remain largely
independent from galactic affairs.

2386: First reports of Abductors

Multiple Unity worlds report attacks from
unidentified ships, later determined to be from
a minor alien species in unexplored galactic
space. The species, nicknamed Abductors, is
hesitant to engage in diplomacy but warns of a
coming galactic horror that they are hoping to
contain. Requests for entire galactic population
to submit to the Abductor psionic hierarchy are
not successful.

2390-2400: Cybernetic war /
4th Converted War

A new Converted assault begins from
within K’Erin space but quickly spills across
sector boundaries. Initial counterattacks in
2391 are disrupted, as stray weapons fire
causes planetary destruction in the K-204
system. The debris causes widespread
devastation to both fleets and severely
cripples K’Erin fleet resources.
The Soulless commit immediately and
dispatch major forces. These will form the
core of the military resources for the rest of
the conflict while Unity provides supplies and
military hardware.
The incursion is deemed contained by 2400,
as a number of lost colonies are bombarded
from orbit to destroy Converted production
facilities. Permanent interdiction is set up
with combined K’Erin/Soulless scout bases
positioned in the remains.

2403: First Horde contact

A trio of worlds abandoned during the
Wayward Wars sees an array of portals open.
As scout ships move to investigate, they come
under immediate fire. The newcomers use a
technological paradigm unlike any used by
known cultures, and refuse all attempts at

communication. They will later be nicknamed
“The Horde” by Unity troops.

2403-2454: Horde Dominion War

As Horde vessels continue to emerge, open
war breaks out. The ensuing conflict becomes
one of the largest military actions in galactic
history, involving most species. Unity bears
the brunt of the fighting, but expeditionary
forces are provided by all polities. Some of the
most enthusiastic fighting is carried out by
Skulker detachments eager to gain additional
recognition and privileges under Unity
government.
Historians sometimes sub-divide the Horde
Dominion War into distinct conflicts, but
fighting never completely ceases. The Horde
arrives in waves from the portals in seeminglyinexhaustible waves of military forces. A series
of desperate targeted strikes destroy two of the
portal facilities, in 2449 and 2451 respectively.
With the Horde switching to the defensive,
several assaults on the final portal world fail.
Eventually the Skyburn Conclave is signed
between the Precursors, K’Erin, and Unity,
authorizing the use of global-level ordnance
for the purpose of ending the conflict.
In 2454, the final portal world is destroyed,
ending the invasion and marking the formal
end point. Mopping up operations continue for
many years.

2461-2465: Reclamation war

A series of efforts are launched individually
by major powers to retake previously
Converted-held worlds. The campaigns lack
coordination and produce limited results
despite fierce fighting.

2467: First Hakshan contact

Hakshan emissaries arrive on the galactic scene
and begin integration into galactic affairs.

2468: Now

You are here.

191

Appendices

Starting a Miniatures
Collection
The Basics
If you are an old hand at miniatures gaming,
odds are you already have a stash of figures
that are ready to use. This chapter provides
some starting tips for newcomers. There is a
wealth of outstanding resources on the internet
for every aspect of the hobby, so think of this as
a crash course if you are a little uncertain about
how these games work.

Choosing a Starting Point

Before you rush out and buy anything, take a
moment to think about what you are trying to
achieve. Presumably you want to play some
games, but at what size? Do you want any
vehicles? Do you want to use specific types of
units or creatures? Do you want to play with
lots of Game Master-controlled creatures? Will
you play character-heavy games?
You will find your experience to be more
enjoyable if you make sure that your initial
investment is something useful to you on the
gaming table. If building armies along with
someone else, agree on the rough number
of units you are each going to provide: three
small squads of infantry and a single vehicle is
a great starting point. If you are building both
sides yourself, you will need to double things.
Focus on acquiring, building, and painting
those figures before you get too carried away.
If you are new to the hobby, miniatures
gaming is something you can build on for
years, so you will have ample opportunity later.

Choosing an End Point

In the same manner, you may want to think
about an end point. For an open-ended game
like Tactics, you may not have an end point.
You can always find a use for an unusual or
strange figure, after all. Many figure collections
develop organically over time. You may see a
figure or unit you really like and decide to add

192

it to the collection, or you may set out to find
something specific to fit a need.
Some players are very disciplined about this
and only buy things that fit into their specific
army or collect to reach a certain army size
before stopping (or building a different army!).
Your desired play style will inform this, and
it may change as you play. If your group gets
more into Game Mastered scenarios, you may
find yourself searching a toy store for many
strange critters before you know it!
You don’t have to have an end point in mind,
but having a rough plan can help avoid buying
stuff you end up regretting.

Coming from Five Parsecs
from Home
If you are already a Five Parsecs from Home
player, you will have figures to use on the table.
Many of your available enemies will do just
fine as squads on the battlefield. As a bonus,
you probably already have favorites you can
build out to form Tactics forces. For example, if
you already painted up a couple of mercenary
squads, add another squad and a couple of
tanks and you have a great strike force.
They may even represent the same people you
already scuffled with in your campaign.

Scale
When choosing miniatures, the first
question is scale. Scale refers to the height
of figures, usually given in millimeters with
a given scale being the height from the
top of the base to eye-level of a standing
human. Broadly speaking, figures of the
same scale are compatible, though different
manufacturers often differ in the exact height
and bulk. Slight differences typically fade on
the gaming table, however.

Appendices
The two most common scales for science fiction
miniatures are 15mm and 28mm (with some
figures referred to as 32mm or “heroic” 28mm
to account for their increased bulk compared to
older figures). Both scales are available online
in a wide array of styles and looks.

a unique set of figures to your vision of the
setting. Of course, any official Five Parsecs
miniatures would no doubt shoot better, be
braver, and shrug off hits that would bring
down any lesser unit!

28mm figures tend to be more finely detailed
on account of their size, as well as looking
more impressive. It is also the most common
scale for commercial wargames. 28mm is a
common scale for fantasy games as well, so it is
well-supplied with animal and monster figures,
which can be fun to adapt to science fiction.

Unexpected Sources

15mm figures benefit from being cheaper
and taking up far less table space. The range of
vehicle kits is also greater. They are not typically
associated with a specific game line. 15mm has
often been associated more with military-styled
games, and figures tend to have a more armyoriented look to them, with lots of sci-fi kit.
There are other scales available as well such as
6mm, 10mm, and 20mm, which are worth
considering, though those options are typically
more limited. Don’t be afraid to explore, though!
Your choice of scale may be predetermined
if you already have a figure collection you
would like to use or you are gaming with
someone who already has figures. Otherwise,
see what is available online and what you
prefer. It is not uncommon for players to build
armies in multiple scales (especially for a side
project), but the duplication of effort can be
discouraging. It is very easy to end up with an
array of disparate figures, and which do not
match each other of your terrain collections
well despite investing a lot of time, money,
and effort. When you are starting out, I strongly
suggest picking one scale and sticking to it.

Finding Suitable Figures
Once you are settled into a scale and what you
need, it’s time for the fun part – hunting for
figures! A big part of what makes the Unified
Space setting yours is being able to match

Sometimes you can find new miniatures in
places you least expect them. Toy stores often
have big bags of plastic insects, lizards, and
dinosaurs that can be modified, repainted, or
even used as they are to represent all manner
of alien lifeforms.
Fantasy figure ranges, especially those with
roleplaying gamers in mind, can provide a
huge array of cool monsters. Simply remove
or modify any elements that look too “fantasy”
and they can be popped right in. Even
creatures that are recognizable can be a lot of
fun. Futuristic soldiers fighting a big dragon is
a very cool and fun image, for example.
For low- and mid-tech troops, historical figure
ranges can be very helpful. Repainted cold war
troops and modified 20th century or modern
vehicles can add a nice rustic feel to a science
fiction gaming table, particularly when gaming
in smaller figure scales.

Alternatives to Miniatures
With the internet, there are now more options
than ever before. Paper miniatures are cheap
and let you print as many as you want. Flat RPG
“character tokens” also work fine for our
purposes. You could even draw or print character
portraits and laminate them for durability.
Digital tabletops are another way to go, of
which there are a number. They can take some
work to begin with, but the resources available
are increasing daily and they are a great option
for people with limited table space.
If you want physical miniatures, 3D printing is
an ever-expanding option as well, with a huge
array of futuristic soldiers available.

193

Appendices

Inspirations
Five Parsecs and the world of Unified Space
is something that has grown over the years as
an amalgamation of many things: First and
foremost, it was always intended as a place to
have adventures and it primarily exists for that
purpose. Many things are homages to science
fiction media that I am particularly fond of,
others were created specifically for the game
setting, and some were logical consequences of
prior work. If X works like this, then Y must work
like that, and so forth. A few decisions exist to
facilitate the use of available miniature figures.

Video Games

Film and Television

UFO Enemy Known / XCOM UFO Defense
(Commodore Amiga / DOS PC)

Blade Runner (film)

Sometimes it feels like all futuristic cities draw
inspiration from this film. The perpetual rain
and gloom is a perfect fit for a dramatic backalley gun battle between rival freelancers.
Soldier (film)

A good look at a corporate or government “super
soldier” program, and how such a character
could find themselves roaming the galaxy.
Firefly (television show)

A modern space opera with a high-tech look,
the games also spend a considerable amount
of time dealing with mercenary bands,
pirates, and criminal gangs in a believable
space setting.
Quake 2 and 4 (PC)

A straight forward “space soldiers shoot bad
guys” series, the cyborg-corpse armies were a
big inspiration for the Converted.

Few games have cemented the experience
of following your squad through battles and
watching them develop as well as this game did.
Hired Guns (Commodore Amiga)

An oldie, but the group of disparate characters
including pilots, mercenaries, and cyborgs
undertaking a near-suicidal mission on a world
full of hostile aliens is a near-perfect fit for
Five Parsecs.

Most “space adventure” games owe a debt
to this show. The worn-out look, and the
premise of spaceships-as-freedom in the
face of an overbearing government fits
Five Parsecs perfectly.

Alien Breed (Commodore Amiga and
modern systems)

Trigun (animated show)

Another good look at what a particularly
anarchic world on the Fringe may look like.

The manic insanity, outlandish gangs, and
people just trying to make it is a perfect image
of a world in Fringe space.
Star Wars: The Clone Wars (animated show)
In addition to being a fun show, this
portrays a wide range of strange aliens and
cultures among the stars, perfect for any
traveling freelancer.

194

The Mass Effect series (various systems).

Perfect inspiration for a few agents
investigating a derelict space station.
Borderlands (various systems)

Appendices
Tabletop Games

The Written Word

Warhammer 40.000 Rogue Trader and
2nd edition

Armor by John Steakley

The starting points for my gaming career. The
mixture of high technology and space magic of
these original versions still looms large in my
consciousness. The equipment lists of Rogue
Trader alone could inform an entire campaign.
Warzone 1st and 2nd edition

One of the best looks at what power-armored
troops might look like. Bleakly nihilistic to boot.
Elite troops abandoned in a hopeless struggle
for reasons that have ceased to mean anything
is a perfect Unity trooper theme.
Forever War by Joe Haldeman

While others had done it sooner, this game was
the first I played that did something other than
a conventional “I go U go” turn sequence.

While Five Parsecs is too space opera to
feature time distortion, the theme that you can
never go home is a poignant one for any game
of space adventure.

Laserburn

Foundation series by Isaac Asimov

An early game overlapping the RPG and
miniatures genres. You play as a gang of
weirdoes undertaking criminal jobs in the
outskirts of space. Sound familiar?
5150
A direct influence for the original Five Parsecs,
bringing the idea of campaign play to the
forefront.
Traveller and Mega-Traveller
All of science fiction gaming seems to owe a
heavy debt to this classic title. The idea of drifting
around space and seeing what trouble you can
get into has been done many times, but maybe
never as clearly as in the first black books.
Mutant: Rymd and Mutant Chronicles
Two Swedish roleplaying games (the latter
available in a new version from Modiphius)
that showcase corporate warfare in a spacefaring setting. The playstyle can easily mimic
that of Five Parsecs.

A series of vignettes of futuristic development,
this series has been inspirational for many
science fiction franchises. Many segments are
adaptable to scenarios.
Assorted 2000 AD comics, including Nemesis,
Strontium Dog, and Rogue Trooper
The look and manic fervor of these settings is
great Five Parsecs fodder, and Strontium Dog
mostly codified how sci-fi mutants work.

Music

Traveller – Slough Feg (heavy metal)
Warp Riders – The Sword (progressive metal)
Longhena – Gridlink (grindcore)
Gammageddon – Cytotoxin (tech-death)
Obsolete – Fear Factory (industrial metal)
Asheran – Dvne (progressive metal)
Exterminate! Annihilate! Destroy! –
Down Among the Dead Men (death metal)
The Mirroring Shadow – Miseration
(death metal)
Tactical Neural Implant – Front Line Assembly
(industrial electronic)
Welcome to Goodbye – Rotersand (electronic)
Delete Yourself – Atari Teenage Riot
(digital hardcore)

195

Appendices

Designer Notes
One of the things I set out to do with Five
Parsecs from Home originally was to push what
could be done with a more narrative approach
to miniatures gaming. While I think I’ve
succeeded, it always bothered me that there was
another angle: the scenario-driven game.
In a lot of ways, scenario-based play is the
oldest way to play a miniatures game. In the
early days of the hobby the scenario might
be about French Grenadiers fighting Russian
Cossacks in 1812, but the principle is the
same: Sitting down to create an exciting
story to play through miniature armies. This
approach never quite went away, but certainly
receded compared to the points-cost driven
pick-up game.
Tactics has been a chance to bring that
exact style to the modern gaming table in
a glossy book. That doesn’t mean ignoring
the points-cost driven pick-up game, but the
scenario is really what it is all about, whether
you are playing solo or with a friend. A lot
of the book has been presented as material
and tools to help build scenarios. You might
wonder why the Game Master or players
cannot simply invent such things, with the
page count devoted to official army lists or
something similar. The answer is that it both
offers examples of how this works in practice
and can serve as inspiration to get started. If
you are reading this and are still uncertain
about how a scenario might look (or you are
like me and read the designer notes first) pay
close attention to the rules for all the different
activities that do not look all that military in
nature. I have a feeling you will see at least one
thing that will get your creativity going.

196

Going Big

The other advantage of Tactics is that it allowed
us to make everything bigger. Five Parsecs
from Home functions on an individual scale
where a few characters are engaged in a
firefight. This limits the scale of weapons we
can include and was the reason vehicles have
never been featured in any scenario: When
you only have 5 or 6 combatants, any scenario
including a tank becomes a new scenario
called “don’t get killed by the tank”.
Scaling up to military actions – even when
operating at the platoon level – allows tanks,
artillery fire, heavy weapons, and all manner
of other things that just won’t fit within the
personal scale. You will notice that nothing
prevents you from still playing out games at
that exact scale if you like, but with Tactics you
have a lot more tools to create such a fight.
The question of pick-up games did present
some challenges. After all, at the time a
dedicated miniatures line did not exist plus
the spirit of Five Parsecs had always been
that you could use whatever figures you like.
In the end I settled on the 5-figure squad as
the baseline. This works pretty well with most
packs of figures (if your figures are packaged
8 to a pack as is common with 15mm figures,
that means 2 packs gives you 3 squads and
a spare to use as a sniper or officer, while
3 packs give you 4 squads and a 4 figure
command section.) You may find that this
is too small, but since the points system
is “honest” and does not have any hidden
bonuses or penalties, you can simply add the
relevant points cost per figure to arrive at an
8- or 10-figure squad if you like. An easy
solution is to just buy squads in pairs and
then field them individually or as a combined
squad depending on player preference.

Appendices
Suppression

The addition of Suppression adds a bit of gritty
flair that was not appropriate in Five Parsecs
from Home but which is needed in a more
military game. Players comparing systems will
notice that you roll above Toughness in Tactics
– a simple fudge to represent that military
troops are assumed to be wearing some
degree of armor as standard.
The campaign systems exist to likewise
showcase the different approaches to military
campaign games: The narrative system offers
you the twists and turns of a story-oriented
game, where you may not end the campaign
playing as the same characters (or even the
same army!) that you began with. Meanwhile
the people who enjoy a more tactile experience
can delve into a map-driven campaign.
Of course, you may not want to use either
system. Your mercenary band may just see a
number of battles in which the connecting
thread is the troops and characters, but each
battle is just another day on the job. This
works particularly well if you have a big figure
collection or just enjoy painting lots of random
science fiction figures.
As with everything else in this book, I’ve tried
to include many flavors of gaming to help
show you all the things that are possible. Even
then, many things had to be omitted because
there simply is not enough space to try to do
everything without producing an obscene
500-page rules tome. With the form factor we
use, the emphasis is on being accessible and
easy to use at the table.

Heavy weapons, rules-liight

With everything in the game, you may find
that it leans towards the rules-light side of
things in many cases. Vehicle rules are not
fantastically detailed for example. As the game
must still be playable solo, this is intentional;
after all a single player will not have an
opponent on hand to remind them when
they forgot something. But I think it is also
the correct choice for a scenario-driven game
that supports Game Mastering. With simpler
and straightforward mechanics, it should be
fairly easy to improvise your own answers and
responses, both when writing a scenario and
when running it. Players who desire more
detail will no doubt let me know, so we can
address that in future expansions.
Which I suppose is as good a place to end
these notes as any other: The future of Tactics.
What would you be most excited to see?
Pre-built units and vehicles? More weapons
and high-tech kit? Scenarios? More advanced
versions of particular systems?
I always feel a combination of dread, elation,
and anticipation when I finish writing
something. Once a rules set is done, it is no
longer the writer’s. Not really. It is now the
players’ world.
I hope you enjoy what we have created.
Peace and love
Ivan Sørensen

197

Appendices

Game Markers

198

Permission is granted to replicate this page for personal use only.

Appendices

UNIT CARDS

INFANTRY:
TRAITS

POINTS
COST

Speed

Range SHOTS DAMAGE

Speed

Toughness

Weapons

Reaction

Kill Points

POINTS
COST

Combat Skill

POINTS
COST

VEHICLE:

Weapons

Weapons

VEHICLE:

Veteran SKILLSSKILLS

Capacity
Veteran SKILLSSKILLS

Toughness
Kill Points
Savvy
Training

INFANTRY:
TRAITS

Speed

Range SHOTS DAMAGE

Speed

Toughness

Weapons

Reaction

Kill Points

POINTS
COST

Combat Skill

Veteran SKILLSSKILLS

Capacity
Veteran SKILLSSKILLS

Toughness
Kill Points
Savvy
Training

Range SHOTS DAMAGE TRAITS/ARC

Range SHOTS DAMAGE TRAITS/ARC

199

Permission is granted to replicate this form for personal use only.

Index

INDEX
A

ability see troop profile
ability test 110
accidental contacts 40
actions 27
AI unit actions 57
individual actions 28
player actions 104
vehicle actions 49
activation 27
AI activations 55
activities 119
agendas see group agendas
Aggravated (reaction) 124
Agile 163
AI 7, 15
AI activations 55
AI unit actions 57
AI battle plan system 58
AI core principles 55
AI roll 56
AI / solo combat 55
Alert (veteran skill) 150
Ammo
Ammo, Dwindling 123
Ammo Choice (trait) 172
		see also game markers,
			Limited Ammo marker
Anti-gravity 50
APC 144
APC – Grav 144
appendices 182
Area (trait) 172
Area Denial (support option) 67
Area features 31
Area weapons see weapons
Armor, Powered 136
armored car 144
Armored Focus (battle plan) 59
armored platoon 135

200

army 9
Army Builder 61, 132
		 army destruction 98
Army Roster 91
Army Strength 95
Freeform Army Building 133
mixed army limitations 136
Assault Group (battle plan) 59
Assault option 98
attachment 138
attacker 40
Attack ratings 45
Attack rating, multiple 45
Await Orders (battle plan) 58

B

Balance is shifting (story event)
102
base contact 10
accidental contacts 40
proximity to enemies 29
battle advantages 107, 108
Battle Finesse 108
Battle Initiative 108
Battle Luck 108
battle plan system see AI battle
plan system
battle round 10, 22, 26
Battle Scale option 96
Battle Scenario 76
Battle Scenario options 78
Battle Support 108
battlefield 8, 114
battlefield edge 117
battlefield firepower 173
Beasts 46
taming beasts 131
blip 28, 128
Bolster Positions (order) 98
Bombers (veteran skill) 149
Bonds of Inspiration 162
Brave (veteran skill) 149
Brawlers (veteran skill) 149, 157

Break Point (objective) 77
brute lizard 171
buildings 32
Burn (trait) 172

C

campaign gaming 6, 89
campaign consequences 91
campaign play 89
Campaign Points (CP) 106
		 spending CP 107
campaign progression
		89, 106
campaign story generation
		89, 101
campaign story event 102
campaign turns 22
campaign setup, creating 90
Core Campaign 92
integrated campaigns 90
going really large 99
less eventful campaign 98
Capture (objective) 75, 81, 83
Cavalry 48, 140
Change in Strategy (story event)
103
Change of Focus (story event)
103
Change of Perspective
(story event) 103
characters 136
chemical hazards 120
CIM-APP 147
CIM-L 147
civilian 152
climbing 29
Clock 120
Clones (The Many) 165
close assault 40
...and vehicles 52
...and walkers 53
...and suppression 41

Index
Clumsy (trait) 172
Coherency 11, 25
Cohesion 92
combat and terrain 30
combat fire 33
direct fire 39
firing at vehicles 51
firing from vehicles 50
indirect firing 38
volley firing 34
combat rules 22
AI / solo combat system 55
vehicle combat 49
Combat Skill 24, 34
Combat, Operational 97
combined game 7
Command (veteran skill) 151
Command Confusion
(battle plan) 58
Commando Raids 99
Comms (specialist) 139
communications
(scenario component) 120
company 135
complicated see items
complications 116
concealed units 118, 121
Concentrated Push (battle plan)
59
Confront (objective) 83
confusion/confused 121
Construct Defense (order) 98
construction 122
contact see base contact
Continued Offensive (order) 98
Converted 17, 159
Cooperative (reaction) 124
Core Campaign see campaign
gaming, Core Campaign
core concepts 22
counterattacks 41
Countermeasures (support
option) 67
Cover 30
Creatures 152, 168, 180
crew 142
Exposed crew 52
Crewed (trait) 172
Crewed weapons see weapons
Critical (trait) 100, 172
Critical Strike (story event) 102
Cross Battlefield (agenda) 125
cross-training 48

cumbersome see items
cybernetics 15

D

Damage 36
Damage Control (veteran skill)
151
Dangerous see terrain
Dash (action) 27
Deadly Accuracy (veteran skill)
150
Default Units 136
defender 40
counterattacks 41
defend in place (battle plan) 58
Defend Location (agenda) 125
Defend the Guns (veteran skill)
151
Defense Quality 100
Defensible 100
Defensive Measures (veteran
skill) 151
Delay / Delaying 27
demolition 122
Deploy Hidden (veteran skill)
151
Deployment Methods 116, 117
Active Reserve Option 118
Concealed Method 118
Conventional Method 117
Drop Method 118
Reserve Method 118
Teleport Option 118
Flexible Reserve Option 118
designer notes 196
Destructive (trait) 172
Determined 155, 164
Devastated (unit condition) 106
dice rolling 22
Die-hards (veteran skill) 149
difficulty adjustments 61
Direct Command 47
Directed Scenario 18
direct fire see combat fire
Disciplined 157
Dislike of Physical Combat 166
dismounting 53
doors and entrances 123
breaching a door 123
Drifters 50
Driving (veteran skill) 151
Duration 66
Dwarves see Krag

E

Elegant (trait) 172
encounters 119
encounter reactions 123
enemy
enemy force level 63
generating enemy forces 63
random enemy forces 61, 62
stronger enemy squads 61
Enforcers 140
Engage (action) 27
Engaged 40
Engagement (objective) 77
Engineers (support option) 67
Engineer (species) see Serian
environmental components 119
Enviro-suits 161
Erekish (Precursor) 13, 156
Evac (support option) 67
Evolving Objective Battle 80
exhaustion 44
Expert Fighter (veteran skill) 150
explicit goals 73
Experienced Eye (veteran skill)
150
Exposed see crew

F

factions 22
Fall Back (action) 27, 42
Fear 45
Fearless (veteran skill) 46, 149
Fearsome 160
feedback 8
Feral 154
Fighter (veteran skill) 150
figures 22
finding suitable figures 193
miniatures 192
miniatures scale 29, 192
Fire Drill (veteran skill) 149
Fire Section 139
Fire Support (support option) 67
firing see combat fire
Five Parsecs from Home 6, 174,
192
compatibility with 5PFH 19
converting characters 182
integration with 5PFH 95
flanking fire 37
Flashback (story event) 102
Focused (trait) 172
Fog (trait) 172

201

Index
Fortified Positions (veteran skill)
151
fragile see items
free targeting 61
friendly (reaction) 124, 131
Fringe Space 14
Frontier Trike 143
Front Transfer (story event) 104

G

Galactic threats 17
Galactic timeline 184
game markers 28, 198
Area of Effect marker 28, 35
Activated marker 26, 28
Blip marker 28, 128
Delayed marker 27, 28
Targeting marker 28, 39
Limited Ammo marker 28,
		123, 172
Morale marker 28, 44
Objective marker 28
Overheat marker 28, 173
Overwatch marker 28, 43
Skulking marker 28, 42
Stun marker 28, 172
Suppression marker 28, 37
Game Master 6, 9, 18, 22
active\passive GMs 109
Game Mastering 109
GM-ing the campaign 91
GM Army Process 113
GM-controlled Forces 27, 112
preparing a GM
		 scenario 113
selecting forces 113
mysterious GM 25
game types 6
campaign gaming 6
solo gaming 7
pick-up play 7
combined game 7
Gas (trait) 172
gas and smoke clouds 124
Gene-dog 169
Genetically Enhanced 169
goals 73
see also group agendas
Good Boy 169
Grand Battle Scenario 79
grenades 175
group agendas 125
Guerillas (veteran skill) 149

202

gun crew 48
Gun drill (veteran skill) 151
Gunnery (veteran skill) 151
Gun-slinging (veteran skill) 150

H

Hakshan 164
Hardened Network 158
Heavy (trait) 172
heavy combat bots 147
heavy tank 146
heavy walker 146
height advantage 33
Hero 47
gain Hero trait 107
heroic activation 61
Hidden elements 39
high ground 33
Hold (objective) 81
Hold Fast (objective) 83
Hold the Field (objective) 77
Horde 17, 160
Horde tactics 160
Hostile (reaction) 124
Hulkers 155
Humans 153
Human sub-types 155

I

IFV 144
IFV – Grav 145
Illumination (support option) 67
implicit goals 73
Improvised Armor (veteran skill)
151
index card armies 132
indirect fire 38
Indirect Fire (trait) 172
individual 9, 22, 25
individual actions 28
Infantry 137
platoon organization 134
Inhospitable 100
inspirations 194
Intel Update (support option) 67
Interdiction (support option) 68
Interact (objective) 81
Interested Party (agenda) 125
intuition 126
items and costs 172
handling items 126
complicated 126
cumbersome 126
fragile 126

J

jumping down 29

K

Keen Senses 154
Keen Shot (veteran skill) 149
Keltrin (Skulkers) 163
K’Erin 13, 157
Kill Confirmed (objective) 75, 83
Kill Points (KP) 24, 36
Kill Target (objective) 75, 83
Kill Unit (objective) 83
Knock Back (trait) 172
Krag (Dwarves) 167
Krorg 170

L

Lancer 143
landmines 127
aerial mines 127
minefields 127
mine clearance 127
Mine Laying (support option)
		68
Launcher (trait) 172
Leader 47, 134, 135
gain Leader trait 108
Leap 170
Leave Battle (objective) 83
level see characters
lifeforms 152
light support (battle plan) 59
light tank 145
light tank – Grav 145
light walker 146
Limited see enemy force
Limited Supply (trait) 172
limited visibility 127
Linear features 31
line of sight 11, 30
linked units 128
load-out 136
Locate (objective) 83
locked 123
Lock On (trait) 172
long-distance identification 128
Loping Run 154
Loss of Capability (story event)
103
Loss of Initiative (story event)
103
Lost (unit condition) 106
Luck test 111
Lucky (veteran skill) 150

Index
M

Machine Learning 158
Made of Meat 171
major powers 13, 152, 153
Malfunction die 131
Manipulators see Ystrik
Many, The see Clones
map 93
markers see game markers
massive jaw 171
measurements 23
measuring 10
mechanized infantry 28, 138
Medic 139
Medium tank – Grav 146
Medium tank 145
Melee (trait) 172
melee weapons see weapons
Military 152
Military technology 15
Militia 140
Mindless Assault 159
mines see landmines
miniatures see figures
Minimum Range (trait) 173
minor powers 152, 161
Morale 44
Morale Bonus 45
morale failure cap 61
Morale test 44
Motivator (veteran skill) 150
movement 29
vehicle movement 49
Move Out 49
Murder Frenzy 168

N

naming conventions 134
Narrow Focus (battle plan) 59
natural roll 23
nature of warfare 16
negotiating 128
Neutral (reaction) 124
Neutral Party (agenda) 125
New Ally (story event) 103
New Character (story event) 103
New Front Opens (story event)
104
New Main Character (story event)
102
New Offensive (order) 98
Nomad Bike 143

O

Objectives 81, 115
Battle Scenario objective 77
Evolving Objective Battle 80
objective examples 117
objective marker 28
secondary objectives 54, 82
side plots 117
skirmish objective 75
resolving objectives 81
see also Battle Plan
see also goals
see also group agendas
Obscuration (support option) 68
Observation 39
Okay (unit condition) 106
Operational System 89, 92
Operational Combat 97
Operational Focus 94
operational turn 95
Operational Zones 94
Operational Orders 98
Placing Opposing Forces 94
Outflanking (battle plan) 58
Overheat (trait) 173
overkill 60
Overwatch (action) 27, 43
strict Overwatch 28
Overwatch and Suppression 43

P

pace 101
Parry (veteran skill) 150
passive GM 109
phases 22, 26
picking a lock 123
pick-up play 7, 69
piecemeal arrival 128
Piercing (trait) 173
Pin-point (trait) 173
Pirate 140
Pistol (trait) 173
Player Actions 20, 104
Player Battle Points 96
players 18
Play Sequence 26
platoon
armored platoon 135
platoon organization 134
see also company
points system 133
master points costs table 178
Powerful Swings 155
Precursors see Erekish

procedural components 119
progression
see campaign progression
prototype see weapons
Pull Back and Reform (battle
plan) 58
Push Forward (battle plan) 59

Q

Quick (veteran skill) 149
Quick feet (veteran skill) 150

R

Raider Trike 143
Raiding (order) 98
random direction 23
Rapid Analysis 166
Razor lizard 169
Reach and Secure (agenda) 125
Reach Location (objective) 83
Reach Location and Interact
(objective) 83
Reactions 24, 26
Ready 26
Realism Note 124
Recon 137
Recon in Force (objective) 77
Recon squads 64
Redeployment (veteran skill)
151
Regions and the Map 93
Regroup (action) 27
Reinforcements (story event)
102
reinforcements (scenario
component) 128
reinforce position (battle plan)
59
reinforce the center (battle plan)
59
Remote conflict (story event) 104
Removing Suppression 28
Renewed effort (order) 98
Replace Destroyed Unit 108
Report in 130
research 129
Resilient 163
Resolving Questions 109
Resource 100
Resupply (support option) 68
Retrain Unit 107
Retreat (Optional Rule) 44
Retrieve (objective) 83

203

Index
Retrieve something (agenda)
125
reverse 50
Rifles 176
rivalries (scenario component)
130
Rivalry 167
Rolling for Damage 36
Rolling to Hit 34
Roster Addition 108
Roster changes 107, 108
round see battle round
R&R (story event) 104
Rugged (veteran skill) 150

S

Sand Runner 170
Saving Throws 36
Savvy 24
Scan (action) 27
Scanner Sweep (support option)
68
Scatter terrain 31
scenario
scenario componentss 119
scenario seeds 84
scenario types 74
		 Battle Scenario 76
		 Evolving Objective Battle 80
		 Grand Battle Scenario 79
		 Skirmish Scenario 74
preparing a Game Mastered
		 scenario 113
Score Kills (objective) 75
Scout (objective) 75, 81, 140
Scouter 143
Scramble (support option) 68
Search (objective) 83
searching 130
second wave (battle plan) 59
Secure (objective) 83
secured 130
securing an area 130
Search and Retrieve
(objective) 77
Sergeant 25, 138
Serian (Engineers) 161
setting up game types 69
setting up a Game Mastered
		 game 70
setting up a pick-up game 69
setting up a solo game 71
Sharpshooter 139

204

Shock (trait) 173
shooting see combat fire
Shortfall (story event) 103
Short Tempered 155
shots 34
Shrapnel (trait) 173
Sidearms see weapons
Side story (story event) 103
Skilled Leader (veteran skill) 150
Skulk (action) 27, 42
Skulkers see Keltrin
Smash 170
Snap Shot (trait) 173
Sneak Through (objective) 75
Sniper! (battle plan) 58
Sniping (trait) 173
solo campaign 90
solo combat 55
solo gaming 7
solo game difficulty
		 adjustments 61
Soulless 13, 158
space travel 16
specialists 134, 138
special regions 100
Speed 24, 29
Spikes 169
squad 9, 22, 25
alternate squad types 140
squad Coherency 25
squad selection 137
status components 119
Stay Alive (objective) 75
Storm 138
story 113
story event see campaign
story points 54
Stream (trait) 173
Strong see enemy force
Stun (trait) 173
support options 65
support 134, 135
calling in support 66
support system 65
support types 66
determining support
		 available 65
Suppression 37
...and close assault 41
...and Overwatch 43
Suppression marker 28, 37
Survivor (veteran skill) 150
suspicion 131

Suspicious (reaction) 124
Swarm 168
Sweep (objective) 81
Swift 162
Synthetic 46, 158, 159

T

table see battlefield
tactical deployments 33
tactical options 42
Tactics (veteran skill) 150
Tank Hunters (veteran skill) 149
Targeting Guidance (support
option) 68
target number 22, 65
target priority 56
Target Selection (veteran skill)
33, 151
Team (trait) 173
Tech 138
technological foundations 15
Tech-savvy 161
terminology 22
terrain 30
Corrosive terrain 122
Dangerous terrain 122
Highly Hazardous terrain 122
setting up terrain 72
terrain types 31
vehicle movement and
		 terrain 50
tests 24
creating and using tests 110
extended test 25
Fear test 45
Indirect Fire test 39
Instuition test 126
Luck test 111
Morale test 44
Observation test 39
timing
Absolute Timing 25
timed arrival 129
tone of the game 8
Toughness 24, 36
Tracker 169
Training 24
traits see weapon traits
Transfer In (story event) 104
transports see vehicles

Index
troops 134
additional troop factors 45
troop profile 24
turn
campaign turn 22
operational turn 95
two-fisted play 60

U

Uncaring 160
Uncertain elements 39
Unconventional Operation
(story event) 103
Unengaged 40
Unified Space 12
unit 22, 25
AI unit actions 57
concealed units 118, 121
default unit 136
off-map units 38
special unit types 47
unit count 62
unit conditions 106
unit customization 108
unit focus 57
		 see also target priority
unit losses 105
Unit Refit 108
Unit Replacement 108
Unit Reassignment (story
		 event) 103
unit upgrades 107
Unity 12, 13
unreliable or prototype weapons .
131
Unrestricted see enemy force
Urban 100

V

vehicle 22, 58, 141, 180
close assault and vehicles 52
fighting vehicles 144
firing at vehicles 51
firing from vehicles 50
grav vehicles 53
light vehicles 143
targeting tracks 51
transport vehicles 58
vehicle actions 49
vehicle combat 49
vehicle movement 49
vehicle profiles 142
vehicles and crew 142
vehicles, resilience, and
		 realism 141
vulnerable angles 52
transports 53
see also walkers
Very Big 171
veteran units 148
veterans in pick-up games
		148
veterans in scenarios 149
veterans in the campaign 149
veteran skills 149
		 ...for gun crews 151
		 ...for individuals 150
		 ...for Sergeants 150
		 ...for squads 149
		 ...for vehicles 151
		 gain veteran skill 107
victory 115
victory points (VP) 73
Vital Ground (objective) 77
volley firing 34

W

walkers 53, 146, 147
walkers and close assault 53
Weak (trait) 173
Weakened (unit condition) 106
Weak Point 16
weapons 119, 131, 172, 181
arm-mounted weapons 50
Area weapons 35
Crewed weapons 48, 174, 177
forward-firing weapons 50
Melee weapons 175
Team weapons 174, 176
shoulder-mounted weapons
		50
sidearms 175
sidecar-mounted weapons 50
stream weapons 35
turret-mounted weapons 50
unreliable or prototype
		 weapons 131
weapon selection 33
weapon selections and points .
		 costs 136
weapons in Unified Space 134
weapon tables 175
weapon team selection 138
weapon traits 172
Well Organized 153
Widely Skilled 153
Winged 162
Withdrawal (battle plan) 59

Y

Ystrik (Manipulators) 166

Z

Zones see Operational Zones

Five Parsecs Minis
Five Parsecs from Home is
K’Erin
proud to be a minis-agnostic
rule set, but if you prefer to use
figures specifically designed
to replicate the species and
enemies of the 5PFH setting, a
wide range of official 3D print
miniatures, vehicles, and
terrain is now available from
www.fiveparsecs.com

Psionic

Precursor

Krag

Unity Agent

205

• adventure wargaming
County Road Z: Rural Survival in the Zombie Apocalypse
Gather your survivors, build your community, and
battle the zeds! A solo game of tabletop combat and
resource management. Combat zeds (and worse)
across warehouses, graveyards, mansions, and
stores, then take it over! Upgrade your base and build
new weapons. Scavenge materials for watchtowers,
workshops, generators and more.
• Choose your next base to expand. A distillery?
A firehouse? A hydroelectric dam?
• Includes Viral, Cosmic Horror, and Magic
Apocalypses, 16 zombies, 29 missions,
10 base types, 39 facilities & upgrades.
• Road Trip campaign and Character advancement
• 184-page hardback core rulebook

Rangers of Shadow Deep: A Gathering of Heroes
With the evils of the Shadow Deep clawing at the
borders, spellcasters, mercenaries, knights-errant,
desert nomads and other heroes from the lands
surrounding Alladore have come to the aid of the
Rangers. Advanced Character Creation: new Traits
and Limitations to bring greater tactical and narrative
variation to your rangers.
• Ten ‘Archetypes’ to create the heroes that have
come from the lands around Alladore
• Collects five previously stand-alone supplements
for the game: Blood Moon, Temple of Madness,
Ghost Stone, Incinerator, and Menagerie
• Fifty-two unique enchanted weapons
• A bestiary featuring all the creatures from the core
rulebook and all the collected supplements
• Copious new artwork from the visionary of the
Shadow Deep, Barrett Stanley
• 192-page hardback core rulebook

Five Leagues from the Borderlands
In the third edition of Ivan Sorensen’s fantasy rule set,
you command a warband of adventurers fighting against
sinister forces threatening to envelop the land in darkness.
This RPG-lite adventure wargame gives you procedurally
generated fantasy campaigns, with skirmish battles where
you hunt down foes, sneak into enemy camps, crawl
through cavern complexes, track down terrifying monsters,
and engage in multi-stage quests.
• Miniature-agnostic skirmish rules
• Choice of human or five other origins
• Locations including ancient ruins, fearful villages,
brooding lairs, enemy camps, and cavern complexes
• Mechanics for enemy objectives and party quests
• Random tables providing unexpected challenges and
adventure seeds
• Written for solo play from the ground up, with optional
co-op play
• 232-page hardback core rulebook

Battlespace: Ultra-Modern Military Combat
Select your fire team, enter the combat zone, and target
your mission objectives. Be prepared for a multitude of
situations and increasing tactical depth with each game.
Play with ready-to-go soldier cards, or tailor the gear in
each of your soldiers’ loadouts. You can even build your
soldiers from scratch with optional advanced rules.
• 48-page rulebook, 10 missions, Basic & Advanced
Options plus Enemy AI
• 34 soldier cards, 5 military forces, from CIA and
Delta Force to British SAS
• 18 enemy cards: Criminal Syndicates, Insurgents,
Militia, Dark Lake Tactical Group
• 29 sitrep cards fog-of-war with a true sense of
battlefield uncertainties, adding unique twists to
the encounter
• 21 gear cards. Launches and Drones to Attack Dogs!
• Plus Maneuver Card and markers
Find out more about our latest Via Modiphius Adventure Wargames at:

https://www.modiphius.net/collections/adventure-wargame-winter-collection

Index

209

Scale up your campaign! Unleash bigger battles, wider conflicts, and new stories,
spanning solo, head-to-head, and campaign play in this completely stand-alone scenario-driven
variation of the popular Five Parsecs from Home tabletop game.
Tactics takes adventure wargaming from starports and back alleys to the battlefields of Unified Space.
This scenario-focused version of Five Parsecs from Home is all about creativity:
• Play solo or with friends, in single games or campaigns, with or without a Game Master.
• Make your own scenarios for the troops you choose, playing games your way.
• Tactics allow you to take Five Parsecs beyond small skirmishes to multi-unit battles:
Big tanks, big monsters, big events, and platoons of troops slugging it out.
• Features an array of troops, characters, creatures, and situations.
• Packed with random tables to keep you facing the unexpected.
• Tactics is also a stand-alone game, yet fully compatible with 5PFH
5PFH,,
with rules for transferring characters and events between the systems.
Multiple game modes include:
Campaign Gaming
Great for individual battles, Tactics is even
better for campaign gaming.
• Play battles that feed into each other,
creating an overarching storyline.
• Multiple scenario types, from skirmishes to
grand battles and evolving objectives.
• Story Event Generation table.
• 100 scenario seeds.
• Advancement system allowing troops to gain
experience as well as your favorite characters.
• More detailed advancement system to
create exciting stories with the potential to
surprise you at every turn.
Pick-up Play
Enjoy one-off battles between multiple players:
• Points-built armies.
• Army building guidelines.
• Suitable for friendly club tournament play.

Solo Gaming
Combat rules include ‘AI’ mechanics for solo
play, managing the enemy while you command
your own forces.
• Game Mastering advice for objectives, side
plots, complications and scenario components.
• Solo campaign rules to allow vast story arcs.
• Scenarios and options aimed specifically for
the solo experience.
• Expand solo play to two or more people
on the same side against the AI enemy.
The Combined Game
Or simply blend the options! Play a friend
head-to-head, continue your story in a solo
campaign, then join up again for a Game
Mastered scenario... all in the same storyline!
A group of friends could even run a shared story
in separate parts of a much larger conflict.

MUH084V041
Printed in Lithuania