


Автор: Evans V. Dooley J. Baranova K. Kopylova V. Millrood R.
Теги: english english grammar english language english for children english student`s book star english express publishing series
ISBN: 978-5-09-027646-7
Год: 2013


Teacher’s Book
Express Publishing
Virginia Evans - Jenny Dooley
Ksenia Baranova - Victoria Kopylova
Radislav Millrood
АНГЛИЙСКИЙ ЯЗЫК
Методические рекомендации
к учебнику для начинающих
Пособие для
общеобразовательных
учреждений и школ
с углублённым изучением
английского языка
Москва
Express Publishing
«Просвещение»
2013
УДК 373.167 1:811 111
ББК 81.2Англ-922
А64
Серия «Звёздный английский» основана в 2009 году.
Авторы: К. М. Баранова. Д Дули, В. В. Копылова, Р. П. Мильруд, В. Эванс
Authors: Virginia Evans, Jenny Dooley, Ksenia Baranova, Victoria Kopylova, Radislav Millrood
Acknowledgements
Authors' Acknowledgements
We would like to thank all the staff at Express Publishing who have contributed their skills to producing thisbook Thanks for their support and
patience are due in particular to: Megan Lawton (Editor-in-chief), Mary Swan and Sean Todd (senior editors). Michael Sadler and Steve Miller
(editorial assistants); Richard White (senior pioduction controller), the Express design team. Sweetspat (recording producers); and Kevin Harris,
Kimberly Baker. Steven Gibbs and Christine little We would also like to thank those institutions and teachers who piloted the manuscript, and
whose comments and feedback were invaluable in the production of the book
Every effort has been made to trace all the copyright holders. If any have been inadvertently overlooked, the publish-
ers will be pleased to make the necessary arrangements at the first opportunity.
Английский язык. Методические рекомендации к учебнику для начинающих / [К М Баранова.
А64 Д. Дули, В. В. Копылова и др.]. - М.: Express Publishing : Просвещение, 2013. - 160 с.: ил. -
(Звездный английский). - ISBN 978-5-09-027646-7.
Поурочные методические рекомендации являются обязательным компонентом УМК серии «Звёздный английский» для
начинающих Пособие включает методические советы по работе с учебником, описание целей, задач и содержания
уроков, подробное поурочное планирование, аудиоскрипты, ключи к упражнениям учебника и рабочей тетради, кар-
тинки и шаблоны для изготовления поделок, таблицы оценивания работы учащихся.
УДК 373.167.1:811.111
ББК 81.2Англ-922
Учебное издание
Серия «Звёздный английский»
Баранова Ксения Михайловна
Дули Дженни
Копылова Виктория Викторовна
Мильруд Радислав Петрович
Эванс Вирджиния
Английский язык
Методические рекомендации
к учебнику для начинающих
Центр группы германских языков
Руководитель Центра В В Копылова
Зам. руководителя Центра по проектам И. Н. Темнова
Руководитель проекта Ю. А Смирнов
Выпускающий редактор М. А. Семичев
Редактор Е В Щербакова
Корректоры И. Б Окунева, Н.Д Цухай
Налоговая льгота - Общероссийский классификатор продукции ОК 005 93 953000. Изд.лиц. Серия ИД № 05824 от
12 09 01 Подписано в печать с оригинал-макета 18.02 12 Формат 60x90/8 Бумага офсетная Гарнитура Прагматика
Печать офсетная. Уч. изд. л. 14,13. Тираж 1500 экз. Заказ № 218.
Открытое акционерное общество «Издательство «Просвещение». 127521. Москва, 3-й проезд Марьиной рощи, 41
Express Publishing Liberty House, New Greenham Park, Newbury, Berkshire RG19 6HW Tel : (0044) 1635 817 363 Fax:
(0044) 1635 817 463 e-mail: inquiries@expresspublishing.co.uk http;//www.expresspublishing.co.uk
Отпечатано в филиале «Тверской полиграфический комбинат детской литературы» ОАО «Издательство «Высшая
школа». 170040, г. Тверь, проспект 50 лет Октября, д. 46. Тел.: +7 (4822) 44 85-98. Факс: +7 (4822) 44-61-51
© Express Publishing, 2013
ISBN 978-5-09-027646-7 © Издательство «Просвещение», 201 3
Все права защищены
Teacher's Book
Introduction ......................... p. 4
Programme (Contents & Syllabus) ...... p. 14
Module 1 Hello!....................... p- 19
Module 2 My Schoolbag................. p. 27
Module 3 My Home ..................... P 35
Module 4 My Toys...................... p. 43
Module 5 My Face...................... P- 51
Module 6 My Food ..................... P- 59
Module 7 My Animals .................. P- 67
Modules My Senses .................... p. 75
Fun Time! ............................ P- 83
Season’s Greetings!................... P- 85
Mother’s Day! ........................ P 87
My Alphabet .......................... P- 89
Instruments for Evaluation............ p. 101
Templates ............................ P- 104
Alphabet Picture-Word Cards........... p. 120
Alphabet Worksheets................... P- 126
Workbook (Key & Instructions)......... p. 152
Starlight Is a course designed for Russian specialised language schools. It follows the Russian Standard of Education
and aims to Introduce young students to the English language. The course has been designed to be covered In
approximately 100-110 hours Young learners will be captivated by the adventures of Woody and Frosty as they enter
the Magic Forest and meet Ertlna. WBtowand Alvin. Through an array of activities such as stories, songs, games, sticker
activities and craftwork, the students will be introduced to theme-oriented vocabulary and some simple structures.
In this way. the students will find the learning process enjoyable as they embark on their Journey to discover the English
language.
Starlight Starter contains eight modules.
Components
a
Student’s Book
The Student 's Book has been I *“-• —....
designed to appeal to, as well as I
involve, the students in language
learning. New language Is presented
in a clear and effective way by
means of lively dialogues, songs,
games and listening activities. Each
module, comprised of eight lessons
including a consolidation section,
contains interesting and
captivating topics for young
learners, reinforced by meaningful
activities, which encourage
children to think and speak in
English Each page promotes
active participation and
interaction on their port, as weN as
the development of their receptive and productive skills.
• Our School
The OUR SCHOOL section in the Student's Book presents the new
language with cross-curricular material The students use English to
complete the tasks related to other subject areas, such as Art.
Maths. Health and Safety, etc. This reinforces their language
learning and promotes learner independence and peer
cooperation.
4
Go Green I
Our World/Му World
Dialogues
Students consolidate the language
learnt in simple, yet meaningful and
appealing dialogues.
The students are familiarised with
culture and ways of life In other
countries, as well as explore their
own. through the OUR WORLD/
MY WORLD section.
The GO GREEN! section gives
students the opportunity to learn
about the environment in a fun and
creative way.
5
Introduction
• Storyland
The Giant Turnip Is a story presented In
narrative form with lively songs to
provide maximum enjoyment and it
alms to get the young learners
acquainted with Russian folklore. The
story recycles key language while
introducing new language Items to
develop the students' comprehension
skills.
Checkpoint
The students have the opportunity to
recycle and consolidate the language
ot each module through the
CHECKPOINT section
My Alphabet
There is a section at the end of the
book that introduces the alphabet to
the students. It incorporates listening
and writing activities aimed at
introducing learners to the sounds of all
the letters of the alphabet as well as
practicing handwriting skills. It is at the
teacher's discretion as to when to
cover it. depending on the needs of
his/her class
6
The Student's Book also includes:
I Fun Tirnel
Students consolidate the language learnt In the course. The teacher can cover this section upon completion of
the course or upon completion of a module.
II Special Days (Season's Greetings!, Mother's Dayl)
There are two optional units at the back of the book, containing activities for Christmas and Mother's Day, which
should be covered as a lead-up to the respective celebrations
Workbook
The Workbook Is in fun colour and
contains fun activities, which
consolidate the language taught in
each module. The Workbook can be
used either in class or for homework.
The Workbook also Includes:
I Stickers
There are some exercises with stickers In the Workbook. The type and aim of these exercises vary to give students
the chance to practise the new language tn a motivating and appealing way. There ore also some reward
stickers to give a sense of achievement and satisfaction which can be used whenever the teacher feels that the
students should be praised, which should be all the timel
II Board Games
There are four board games one per two modules. The aim of the board games Is to provide an atmosphere of
relaxation while consolidating the language learnt.
How to play the board games
Divide the class into two teams, A and B, or into pairs Ask the students to use a coin, a pencil sharpener, a
rubber, etc., as a marker and place it on the Start sign Teams or pairs take it In turns to select a number by
throwing a dice, spinning a spinner, etc., and then move along the board according to the number. The
students must name the item in the square they land on. A correct answer allows the students to stay where they
are. whereas an incorrect one means that they must move one square backwards. If they land on an Oh nol
square, they must go back to the beginning. If they land on a Great! square, they play again
7
Introduction
III Character Cutouts
There are five full-body cutouts of the characters in the book, for students to use while acting out the dialogues,
playing games or in any other communicative activity the teacher wishes to Include In the lesson
My Junior Language Portfolio
My Junior Language Portfolio is used to keep material that the students collect and use, along with any extra
material given by the teacher throughout the course My Junior Language Portfolio has been designed to
stimulate and support the learning of the English language, its purpose is to help the students reflect on. realise
their progress in and improve their language learning.
My Junior Language Portfolio is the students’ property. It is a tool to accompany the students' language learning
throughout their school life and Is suitable for documenting their learning both inside and outside the classroom.
In practice. Language Portfolios may Include project work, computer diskettes (with work or drawings
completed inside or outside the class). DVDs (with the students' favourite story or with performances of songs,
school plays, etc ), certificates, reports from teachers, or even a collection of objects or pictures. It is a collection
of material that the learners want to keep as evidence of their learning The main emphasis is on the process of
learning. As a result, while compiling their Junior Language Portfolios, students learn how to work independently.
How to make a Junior Language Portfolio
During the first lesson, explain to the students that they should bring in a dossier, which they will have with them
at all times and in which they will keep their Junior Language Portfolio. For the next lesson, bring In self-adhesive
labels, write My Junior Language Portfolio on them and help your learners stick them onto their dossiers
Demonstrate how to store their material In their Junior Language Portfolios and make sure they update it
regularly.
• Certificate of Achievement
This is filled in upon completion of the course. The aim of this certificate is to reward the students, as well as give
them a sense of achievement
★ lest
Booklet
The Test Booklet contains eight photocopiable tests which are to be done upon completion of each
corresponding module.
Teacher’s Book
The Teacher's Book provides step-by-step lesson plans, as well as the answers to the exercises In both the
Student's Book and the Workbook. It also contains extra ideas on how to present new words and language
patterns, additional activities and gomes, as well as tapescripts for the listening activities.
The Teacher's Book also includes:
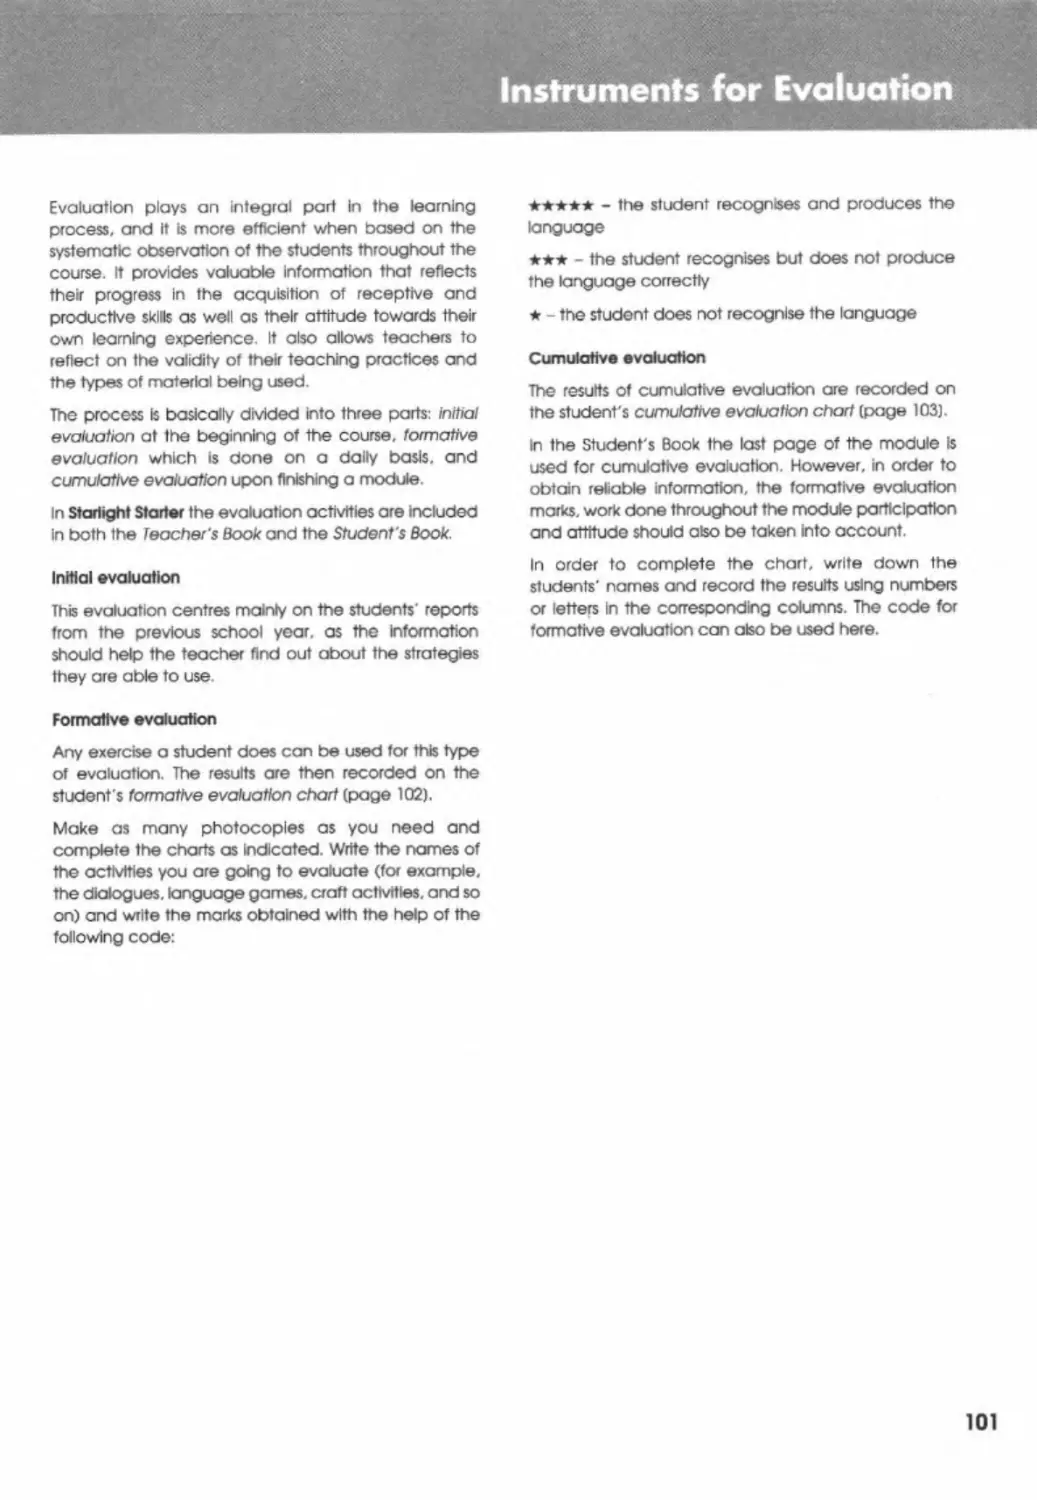
I Instruments for Evaluation
Evaluation is an essential part of the learning process It helps the learners become aware of their progress In
the target language, how much they have achieved and what areas need further practice Evaluation also
allows teachers to reflect on the validity of their teaching practices and the types of material being used
8
In the Instruments for Evaluation, the teacher can find:
• Formative Evaluation Chart; The teacher uses the chart to evaluate the students on an activity at any time
during the course and writes the marks obtained with lhe help of a code. (See p. 102 for further information.)
• Cumulative Evaluation Chart: The teacher uses the chart to evaluate the students at the end of each
module and writes the marks obtained with the help of a code. (See p. 103 for further information.)
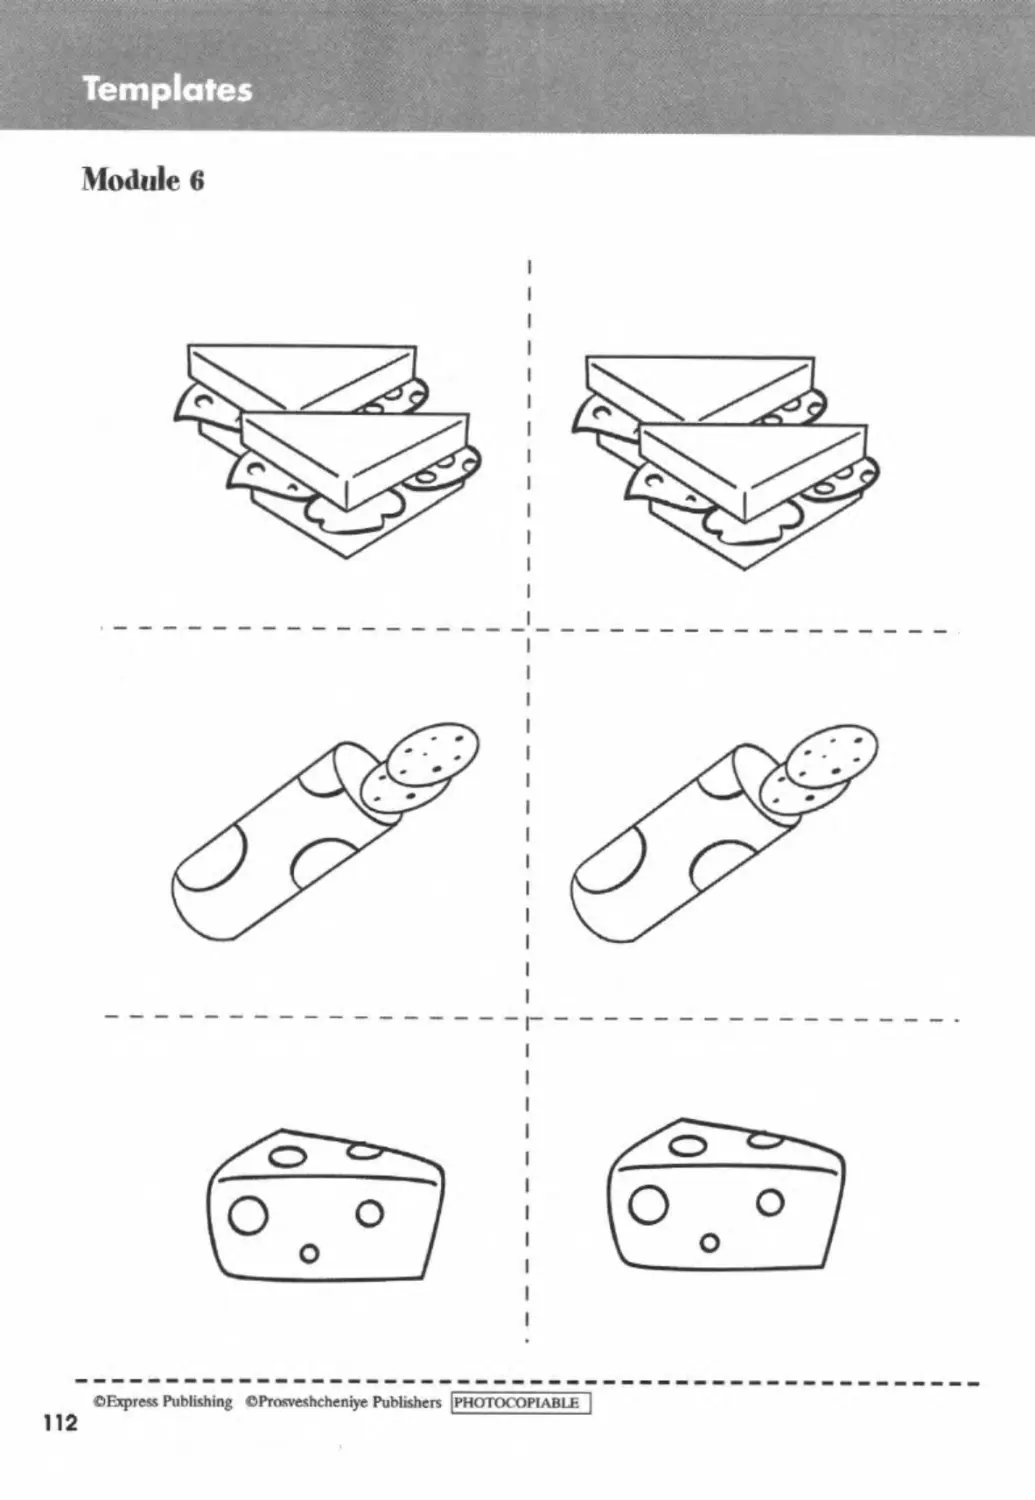
II Templates
The Templates are for the craftwork activities in the Student's Book
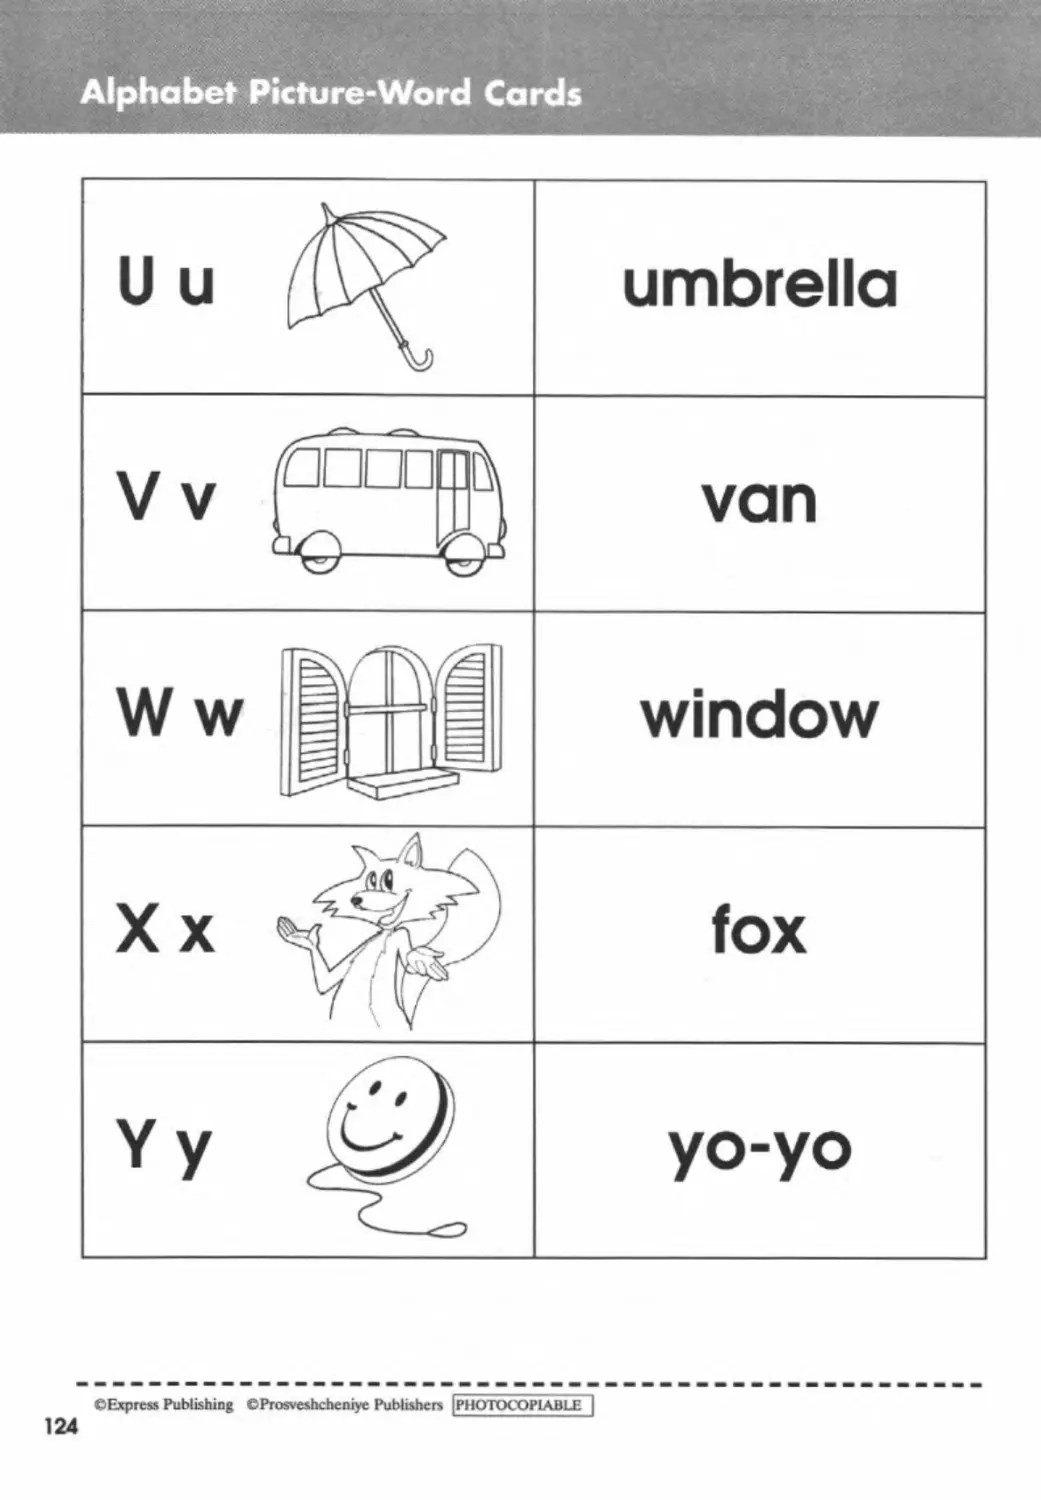
III Alphabet Picture-Word Cards
Alphabet Picture-Word Cards are used for activities In the Alphabet section.
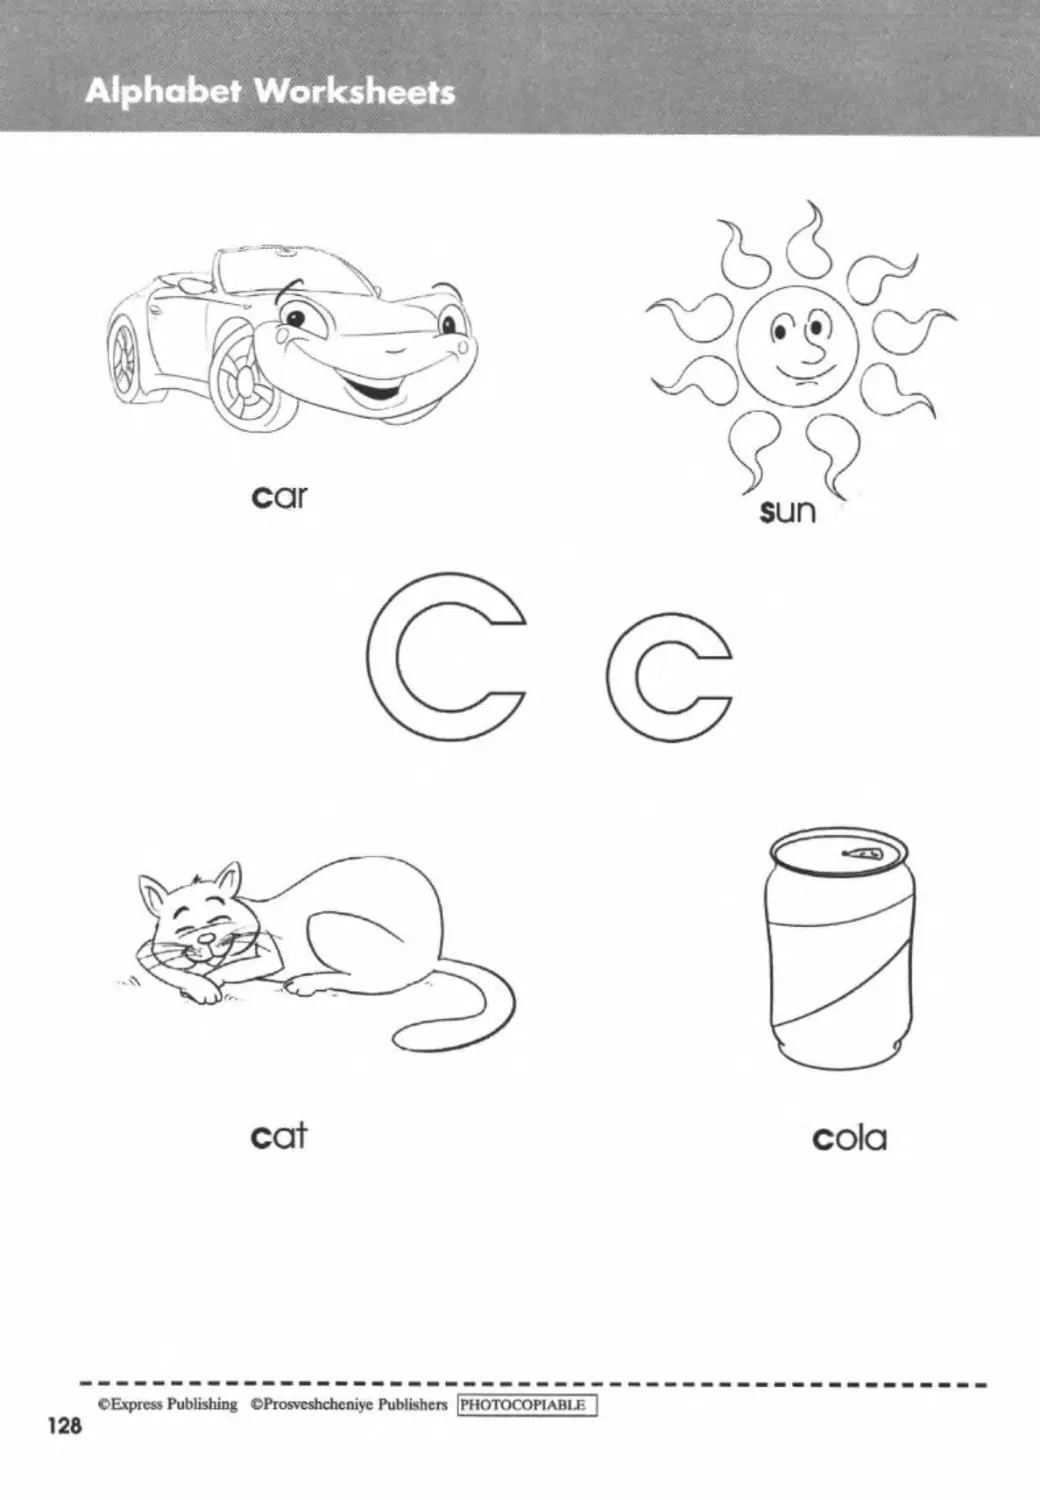
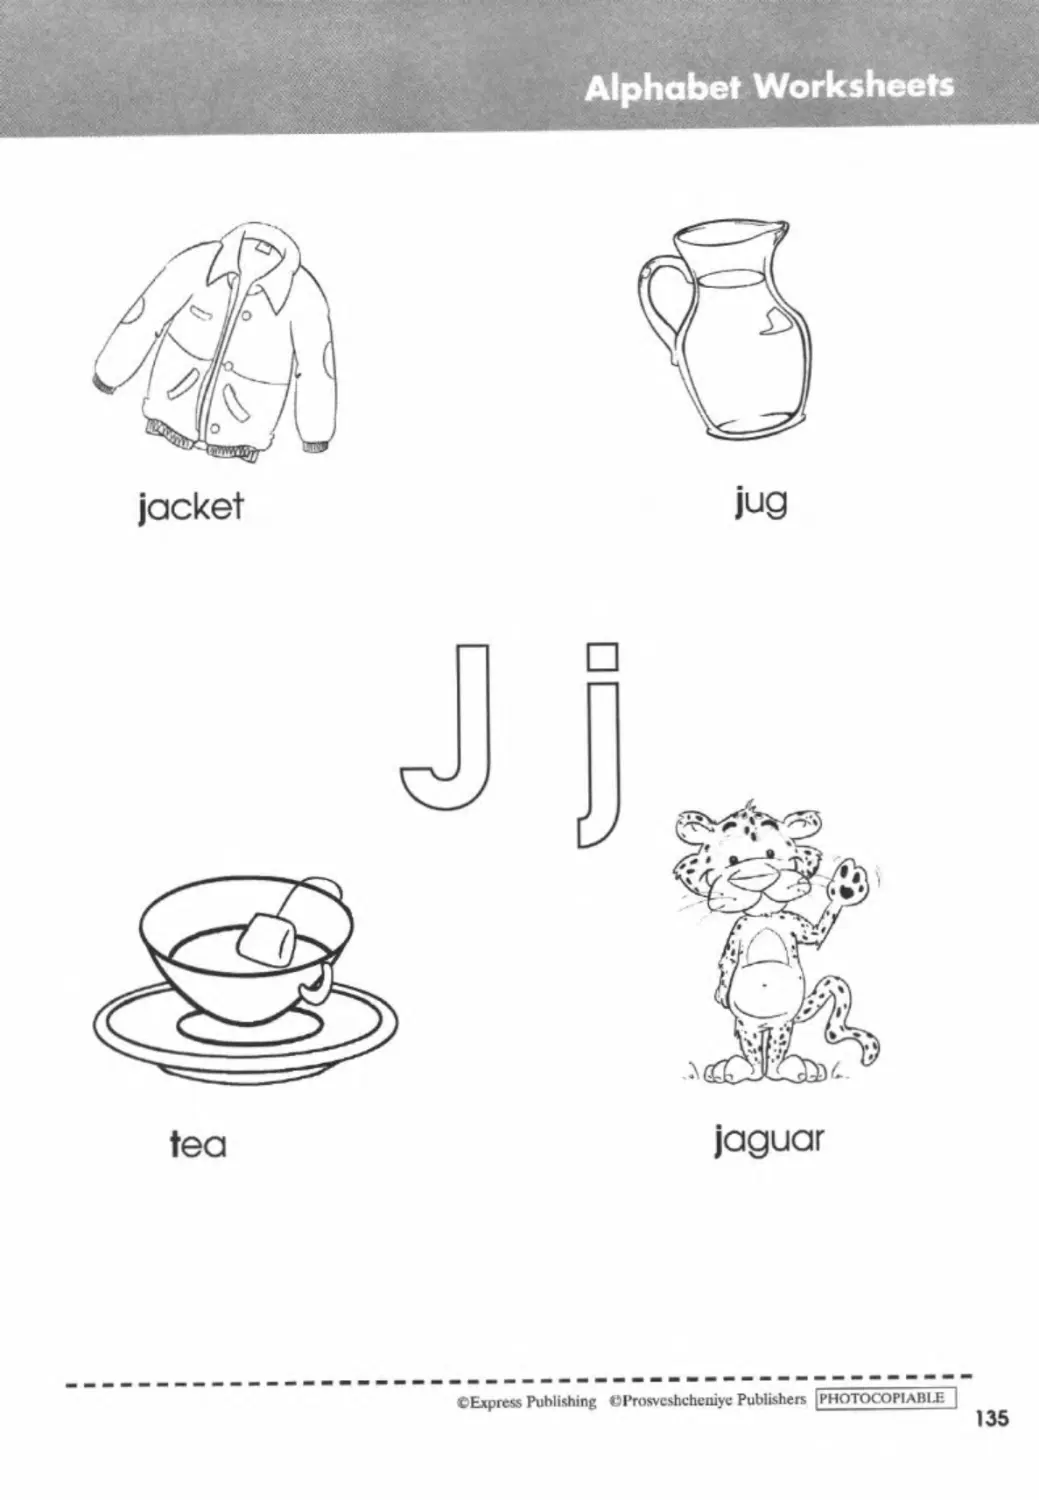
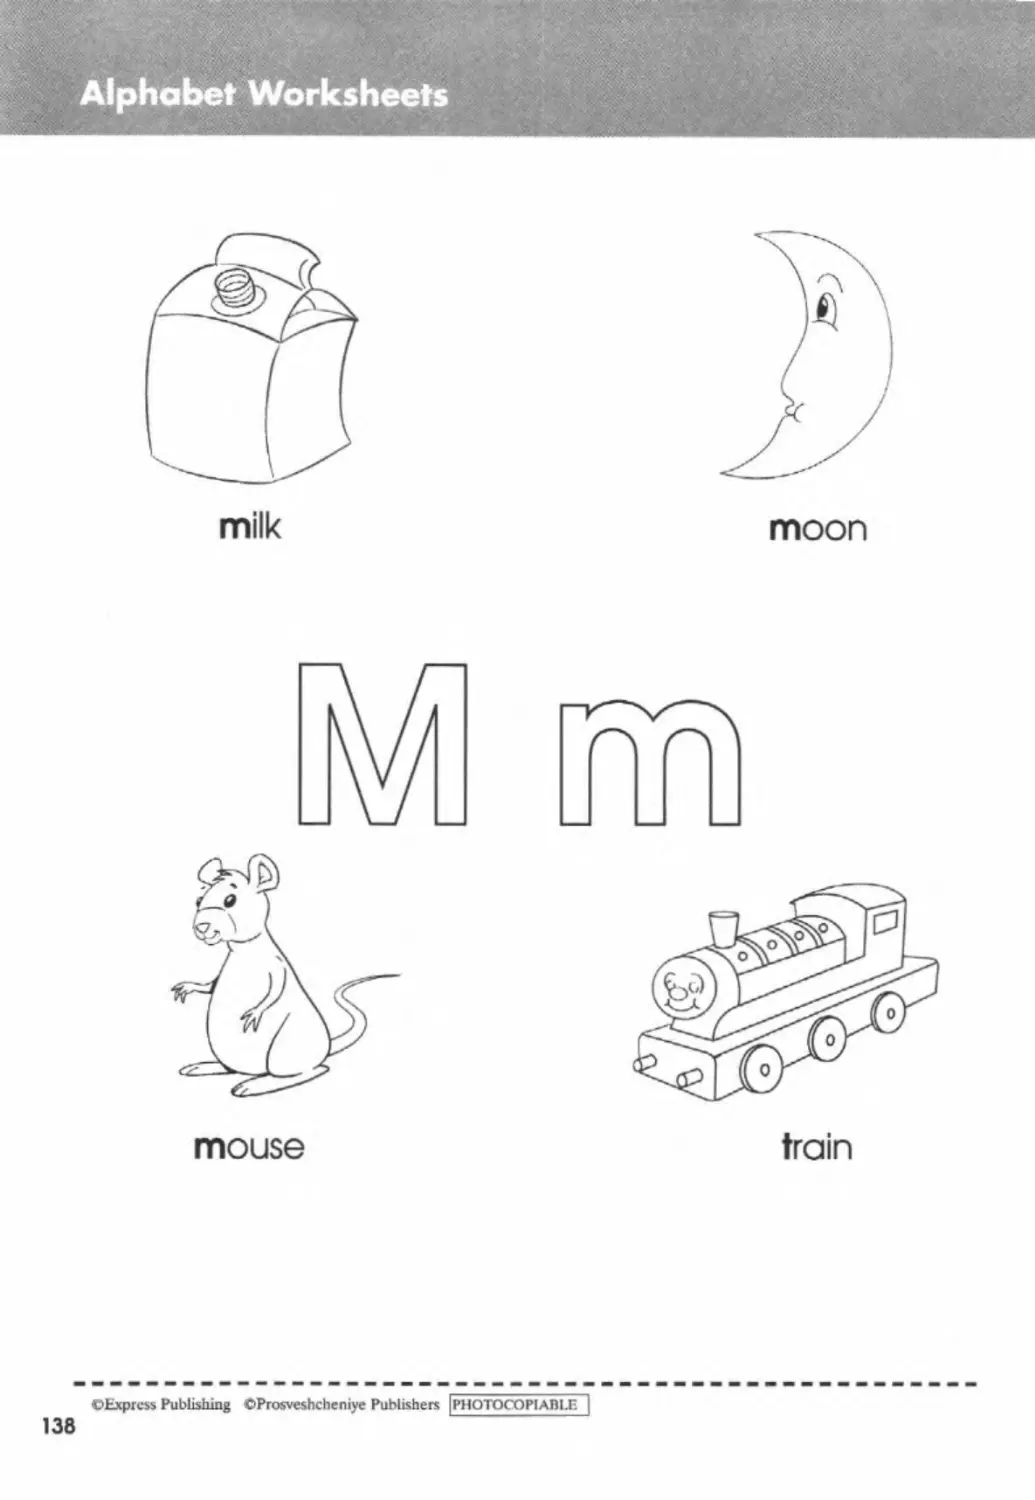
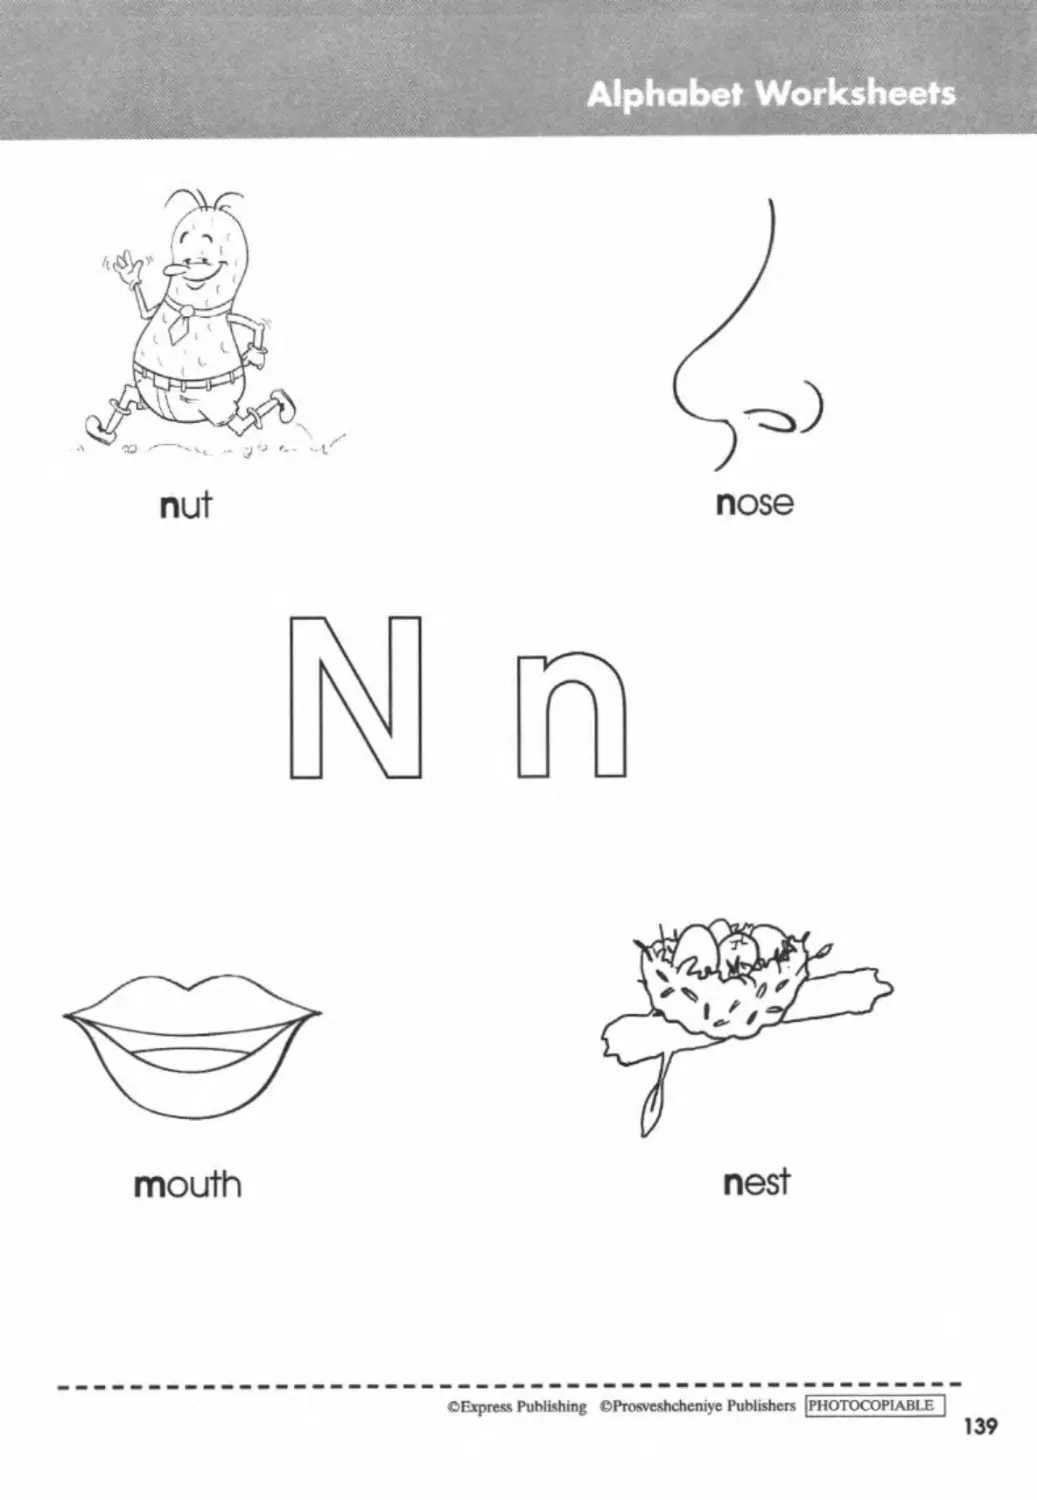
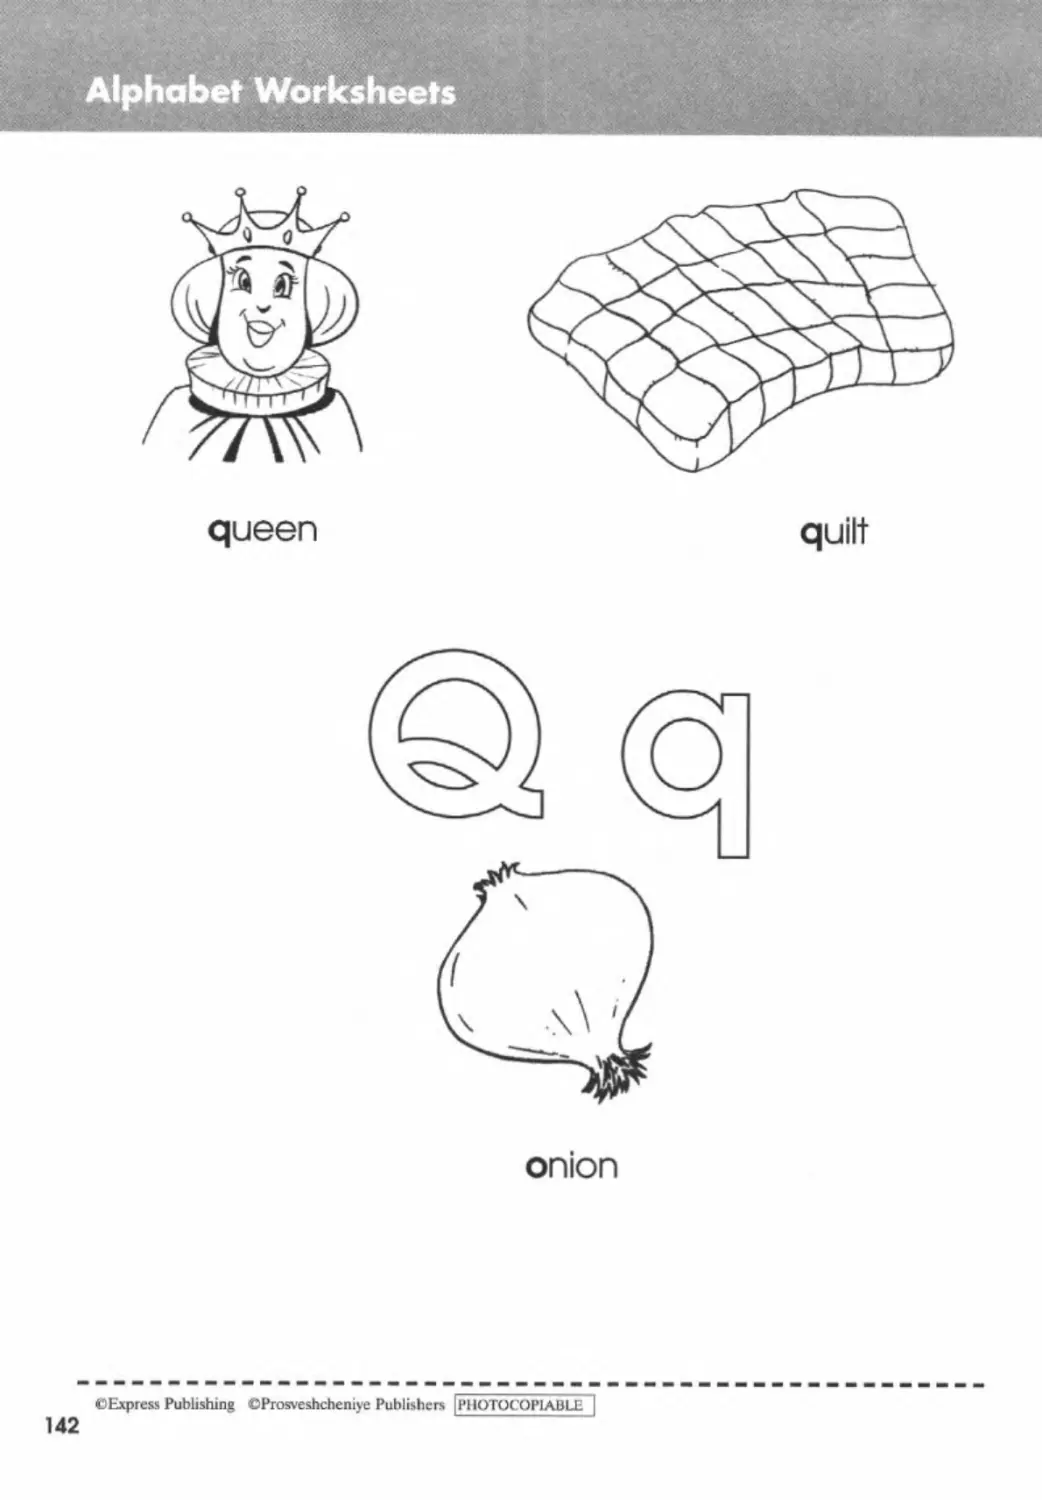
IV Alphabet Worksheets
The teacher can use these extras worksheets for further practice on the Alphabet.
V Key & Instructions to the Workbook
The teacher can use the key and instructions to the Workbook upon completion of each module,
Picture Flashcards
The picture flashcards Illustrate the new vocabulary Items and enable the teacher to use them for the
presentation of key words, revision, additional practice and memory games. Flashcards enable students to
make the connection between the visual prompts and the spoken words and help teachers avoid the use of
translation or lengthy explanations.
Posters
There are eight double-sided posters accompanying Starlight Starter. On
the front side, there is the vocabulary of the first spread as well as the
picture accompanying the song. On the bock side there is the dialogue
for those teachers who wish to present or practise the dialogue with
books closed. The book is also accompanied by an Alphabet Poster for
those teachers who wish to teach/consolidate the English alphabet. In
the Teacher's Book __________________________________
there are helpful — —BAw
guidelines as to ****
when and how
the posters can
be used to present |
and/or consolidate
the new language
9
Class CDs
The Class CDs include all the recordings for the listening activities in the Student's Book.
★ Student’s CD
The Student's CD Includes all the vocabulary, chants, songs, dialogues and story so that the students can listen
to them at home, thus improving their pronunciation and Intonation
★ DVD
The DVD brings the characters to life, ensuring that the students have fun while learning. It is suggested that you
view each module on the DVD upon completion of the corresponding module In the Student 's Book.
Interactive Whiteboard Software
An interactive Whiteboard is a type of touch-sensitive board, connected to a computer. It has the power to
transform any classroom into a truly stimulating learning environment. The coursebook activities are projected
onto the board and every activity is digitally enhanced by additional features such as:
• the audio of the activity,
• videos.
• songs.
• suggested answers and models.
Typical layout of a module
Each module consists of 8 lessons Including a consolidation section. It's up to the discretion of the teacher as to
how to teach the lessons depending on the needs of his/her students
• Key features of a module
I Presentation of the new language
The new language is presented by first listening to the new vocabulary. In each lesson plan the teacher will find
detailed guidance on how to vary the presentation of new vocabulary, as well as further reinforcement and
extension activities.
II Dialogues
The students are introduced to short dialogues, aimed at gradually improving their reading and listening skills In
this way. the students gain an appreciation for reading and are not Intimidated by the written word The
dialogues feature the new language which can be used for classroom acting out.
Ill Activities
There в a great variety of activities catering for all types of learners and learning styles colouring, pair and group
work, matching, gomes, craftwork. etc. In this way. the students use the new language in a meaningful context.
10
IV Gomes, Chants & Songs
Students at this level need a lot of opportunities to play and explore their surroundings. Playing games and
singing songs/chants provides a necessary outlet and ensures that the students ore learning while having fun. It
Is also a way of ensuring that the lesson always ends on a high note. In every module, there are songs, chonts
and gomes that add a creative and enjoyable element to the language classroom.
V Our School
In the OUR SCHOOL section, the students explore other fields of study (e g. Art, Maths, Health and Safety, etc.)
through English In this way. the students learn how to use English as a vehicle to approach other subject matter
VI Go Green)
The GO GREEN! section promotes an affinity with nature and makes the students more aware of the environment
they live in.
VII Our World/Му World
Through the OUR WORtD/MY WORLD section, the students have the opportunity to explore aspects of life in
other countries as well as their own.
VIII STORYLAND
In this section the students are introduced to the story of The Giant Turnip, a series of episodes aimed at providing
real language input, reading for pleasure, as well as getting the students acquainted with Russian folklore.
IX CHECKPOINT
This section includes exercises consolidating the module as well as preparing the students for the tests, which can
be found in the Test Booklet.
★ Teaching Young Learners
Teaching young learners Is an enjoyable experience. The teacher can take his/her time and repeat an activity as
many times os he/she feels Is necessary for the students to understand and have fun with It! Moreover, students at
this level do not have many inhibitions and can be very Imaginative. They are naturally Inquisitive, enthusiastic and
receptive to new input.
Л teacher at this level should always have the following In mind:
I Encouragement: Students need to be reassured all the time. Go around the classroom as they carry out the
various activities and praise them. Do not over-emphaslse their mistakes. Just repeat the correct word or phrase.
Criticism can be discouraging and produce poor results.
II Activities: At this level, the activities should be simple, as students are still developing their hand-eye
coordination On the other hand, students should acquire some basic language structures. Therefore, in the early
stages, our objective should be to provide an environment of fun and enjoyment for the young learners. This is
best achieved by a thematic approach to language teaching
III The fantasy element: Young students' Imagination is very vivid and they have the ability to immerse themselves
in a fantasy world, often creating Imaginary friends and sometimes pretending to be fictional characters (e g
Superman. Xena. etc.). This rich Imagination can be captured and encouraged by the teacher in order to act
out the dialogues from the lessons in Starlight Starter. Students are very quick to repeat dialogues that they have
heard and this ability should be utilised to Its fun capacity
IV Social Skills. Young students prefer to play on their own. The sense of being In a social group and obeying rules
Is not yet fully developed. Thus, the games promote the development of social skills.
11
V Students' need for attention: Young learners will constantly demand your attention In order to meet their needs,
the teacher should go around and talk to them about what they are doing and. at the same time, elicit some
vocabulary and language patterns. This is also a good time to see if they have understood everything they have
been told or whether there are things which need further explanation.
VI Attention span: A student's attention span is very short, so there Is a need for a variety of activities. The best way
to hold their attention is by changing activities every five to ten minutes. At the same time, they tend to love
what is familiar. Thus, you should let a favourite activity go on for as long os they are actively engaged
VII The 'silent' period: it Is possible that young students will not produce anything in the target language during the
Initial stages. This is a period of adjustment and should not alarm teachers What we should bear In mind is that
students are absorbing the new language and will reproduce it naturally In their own time.
VIII Pronunciation: Young students ore better at pronunciation than older students. That is because they are keener
listeners and they are not afraid to make mistakes. Thus, it is vital that teachers speak cleariy, but at a normal
pace The class should be drilled as a group before moving on to individual practice. In this way, teachers can
correct any pronunciation errors without embarrassing individual students, while at the same time giving them
time to get used to the new sound(s).
★ Classroom Management
Creating a pleasant environment In the classroom should be one of the teacher’s very first goals, it Is a good
idea for the teacher to arrive a few minutes earty to welcome the students and have something interesting for
the early comers to do They can listen to the song from the previous lesson, watch the DVD again or play with
the picture flashcards. Identifying the book's characters, as well as the vocabulary items already presented.
The teacher should establish his/her policies from the start. Remind students to:
• come to class on time.
• bring their Student's Book, etc.,
• raise their hands when they want to ask a question,
• wait for their classmates to answer the teacher's questions before they raise their hand to give their answer.
The teacher should empower his/her learners by;
• teaching classroom language, i.e. the teacher's instructions, such as open your books, close your books, etc
Classroom language is the language of communication between teacher and students in the classroom and
needs to be taught from day one.
• giving brief and clear oral Instructions The teacher should give or read the instructions. He/She reads them
at a slower pace, providing examples and eliciting examples from the students so he/she can be sure that
they know what to do.
Songs in the Language Classroom
Songs are of great value in language learning. They are vivid examples of how the language taught is used in a
real context and highlight both pronunciation and intonation. Furthermore, their rhythm enables the students to
remember the newly acquired language and stimulates learning
There are numerous ways to use songs In the language classroom. You can play the CD and Invite the students
to move and clap to the rhythm or hum to the melody If there are lyrics frequently repeated, students will soon
start joining in.
Here are some ways to animate the songs:
a Total Physical Response (TPR) Activities: Have the students stand in a circle and play the song once. Sing and
demonstrate the actions, encouraging the students to imitate you. Play the song again, this time asking the
students to listen to the song and repeat after you while doing the actions Play the song a third time and
lead the singing while the students join in.
b Using props: Bring visuals or realia to class. Hand out these props to your students and ask them to hold up
the prop as soon as they hear the equivalent word in the song.
12
c Song dramatisations: Hoving Interesting plots and characters, songs frequently offer themselves for further
exploitation through drama The teacher can dramatise the songs Into short sketches, thus motivating his/her
students. Assign roles and have the students sing their lines. Simple costumes and props can be prepared and
used to make the performance more realistic.
These are just a few suggestions on how to use the songs in the language classroom Be as inventive as you can.
since students love performing.
★ Types of learning styles
Over the years, teachers have noticed that some of their students learn by listening to new Information, some
students prefer to read about It. while others need to do something with the new information. There are many
different learning styles. Consequently, a coursebook should offer a variety of exercises and material to stimulate
all learning styles and help students learn In the way that suits them best.
• What are the types of learning styles?
- Visual Learners
These learners need to see the teacher's body language and facial expressions to fully understand the
content of the lesson. They think In pictures and learn best from visual displays Including: diagrams,
illustrations, transparencies, videos, flashcards and handouts
- Auditory Learners
These learners learn best through verbal lectures, discussions, talking things through and listening to what
others have to say. Written information may have little meaning until it is heard. They often benefit from using
a tape recorder.
Tactile/Kinaesthetic Learners
Tactile/KInaesthetlc people learn best through a hands-on approach, actively exploring the physical world
around them. They find It hard to sit still for long periods and may become distracted by their need for activity
and exploration. These learners express themselves through movement. They have a good sense of balance
and hand-eye coordination. By interacting with the space around them, they are able to remember and
process Information They have to do things on their own to be able to learn the new language.
13
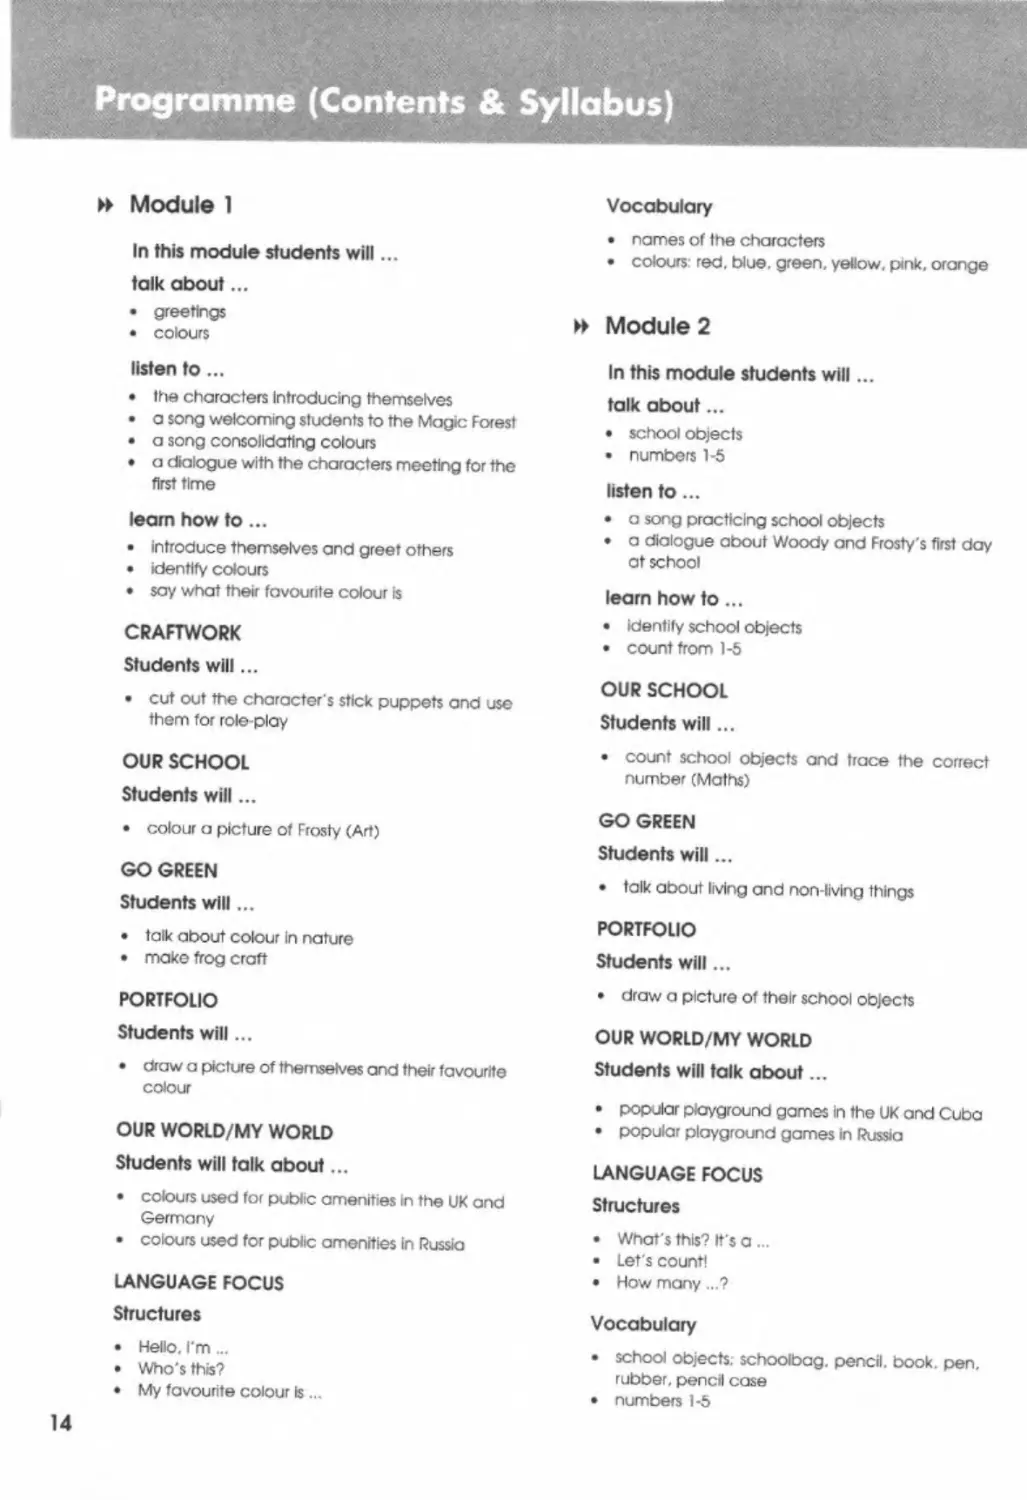
►> Module 1
In this module students will...
talk about...
• greetings
• colours
listen to ...
• the characters Introducing themselves
• a song welcoming students to the Magic Forest
• a song consolidating colours
• a dialogue with the characters meeting for the
first time
learn how to...
• introduce themselves and greet others
• identify colours
• say what their favourite colour is
CRAFTWORK
Students will...
• cut out the character s stick puppets and use
them for rote-play
OUR SCHOOL
Students will...
• colour a picture of Frosty (Art)
GO GREEN
Students will ...
• talk about colour In nature
• make frog craft
PORTFOLIO
Students will ...
• draw a picture of themselves and their favourite
colour
OUR WORLD/MY WORLD
Students will talk about...
• colours used for public amenities m the UK and
Germany
• colours used for public amenities in Russia
LANGUAGE FOCUS
Structures
• Hello. I'm ...
• Who's this?
• My favourite colour is...
Vocabulary
• names of the characters
• colours: red. blue, green, yellow, pink, orange
» Module 2
In this module students will...
talk about...
• school objects
• numbers 1-5
listen to...
• a song practicing school objects
• a dialogue about Woody and Frosty's first day
at school
learn how to ...
• identify school objects
• count from 1-5
OUR SCHOOL
Students will...
• count school objects and trace the correct
number (Maths)
GO GREEN
Students will...
• talk about living and non-living things
PORTFOLIO
Students will...
• draw a picture of their school objects
OUR WORLD/MY WORLD
Students will talk about...
• popular playground games In the UK and Cuba
• popular playground games in Russia
LANGUAGE FOCUS
Structures
• What's this? it's a ...
• Let's count!
• How many...?
Vocabulary
• school objects, schoolbag. pencil, book, pen,
rubber, pencil case
• numbers 1-5
14
Programme (Contents & Syllabus)
Ж
н Module 3
In this module students will...
talk about...
• parts of a house
• furniture
listen to...
• a song practising parts of a house
• a song presenting and practising prepositions
of place and furniture
• a dialogue about Woody and Frosty’s tree
house
learn how to...
• identify parts of a house
• talk about location
CRAFTWORK
Students will...
• make a house
OUR SCHOOL
Students will...
• make furniture items out of clay or plasticine
(Art)
GO GREEN
Students will...
• talk about animals and their homes
PORTFOLIO
Students will...
• draw a picture of their room
OUR WORLD/MY WORLD
Students will talk about...
• fairytale characters and their houses
• a Russian fairytale
LANGUAGE FOCUS
Structures
• This is the roof. It’s red.
• Little Woody’s on the chair
• Where s the blue book? On the table.
Vocabulary
• parts of a house: roof, window, floor, wall, door
• furniture: table, chair, bed. cupboard
►► Module 4
In this module students will ...
talk about...
• toys
• numbers 6-10
• size (big - small)
listen to ...
• a song practising toys
• a song practising numbers 1-10
• a dialogue about the characters playing with
their toys
learn how to...
• identify toys
• talk about their toys
• count from I to 10
• talk about size
CRAFTWORK
Students will...
• make number finger puppets
OUR SCHOOL
Students will...
• do sums and find the toys (Maths)
GO GREEN
Students will...
• talk about reusing coffee cons
PORTFOLIO
Students will...
• draw a picture of their favourite toy
OUR WORLD/MY WORLD
Students will talk about...
• toys from the UK and Russia
• Storyland
LANGUAGE FOCUS
Structures
• Here’s a doll.
• One train, four cars
• I’ve got a brown teddy bear.
• A big ball, a small ball
15
Programme (Contents & Syllabus)
Vocabulary
• toys: doll. ball. car. train, plane, teddy
• numbers 6-10
• size: big. small
и Module 5
In this module students will...
talk about...
• parts of the face
• how to keep clean
listen to...
• a song practising parts of the face
• a description of four monsters
• a song practising ways to keep clean and
healthy
learn how to ...
• rdentlfy parts of the face
• talk about keeping clean and healthy
CRAFTWORK
Students will...
• make a monster mask
OUR SCHOOL
Students will ...
• talk about ways to keep clean (Health & Safety)
GO GREEN
Students will...
• identify animals according to their facial
characteristics
PORTFOLIO
Students will...
• draw a picture of Mr/Mlss Potato
OUR WORLD/MY WORLD
Students will talk about...
• cartoon characters from the UK and Russia
LANGUAGE FOCUS
Structures
• Touch your eyes.
• I've got blue hair
• Brush your hair.
Vocabulary
• parts of the face: nose. hair. ears, eyes, mouth,
tongue
• commands: wash your hands, wash your face,
brush your teeth, brush your hair
» Module 6
In this module students will...
talk about...
• food
• food preferences
listen to...
• a song practising food preferences
• a song practising food Items
• a dialogue about the characters having a
picnic
learn how to...
• talk about food preferences
CRAFTWORK
Students will...
• make a lunchbox
OUR SCHOOL
Students will...
• talk about food that Is bod for our teeth
(Health & Safety)
GO GREEN
Students will ...
• talk about food we get from cows, hens and
trees
PORTFOLIO
Students will...
• draw a picture of their favourite food
OUR WORLD/MY WORLD
Students will talk about...
• tea tn the UK. China and Turkey
LANGUAGE FOCUS
Structures
• I like bananas. Give me some, please.
16
Programme (Contents & Syllabus)
• I don’t like apples. Yuk!
• Do you like Ice cream? Yes. Yummy I
Vocabulary
• food/drink items bananas, eggs. milk,
sandwiches, biscuits, cheese, tea. pizza,
apples, popcorn, ice cream, cola
►► Module 7
In this module students will...
talk about...
• animate
• abilities
listen to...
• a song practising farm animats
• a song practising abilities
• a dialogue about some forest animate helping
Woody and Frosty
learn how to ...
• Identify animate and the noises they make
CRAFTWORK
Students will ...
• make animal puppets
OUR SCHOOL
Students will...
• play a drama game (PE & Drama)
GO GREEN
Students will...
• talk about what some animals can do
PORTFOLIO
Students will...
• draw a picture of a farm
OUR WORLD/MY WORLD
Students will talk about...
• animals from Australia, Peru. China and Russia
LANGUAGE FOCUS
Structures
• It's a horse. It can jump.
• Can you Jump? Yes
• I can swim.
Vocabulary
• animate: cat. cow, hen, dog, sheep, horse
• actions: jump, climb, swim, fly. run
►> Module 8
In this module students will...
talk about...
• the five senses
listen to ...
• a song practising the five senses
• a song consolidating the concept of day and
night
• a dialogue about the characters having a fairy
party
learn how to...
• talk about the senses
CRAFTWORK
Students will...
• make a bat
• make a senses book
OUR SCHOOL
Students will...
• identify actions connected with day and night
(Science)
GO GREEN
Students will...
• talk about nocturnal animate
PORTFOLIO
Students will...
• draw a picture connected with day or night
OUR WORLD/MY WORLD
Students will talk about...
• things you can see. hear and taste in the UK.
Italy and Russia
The sheep goes baal
Look I Two yellow cowsl
17
Programme (Contents & Syllabus)
LANGUAGE FOCUS
Structures
• It's night! I can see the moon.
• I can smell a flower.
Vocabulary
• the five senses: see. hear, smell, touch, taste
• sun, moon. day. night, stars
►> Fun Time!
In this section students will...
• consolidate the key vocabulary of the course
►► Season’s Greetings!
In this unit students will...
• sing a Christmas song
• offer gifts to the characters
• make a card for the holidays
►> Mother’s Day!
In this unit students will...
• sing a Mother's day song
• make a bunch of flowers for their mums
►> My Alphabet
In this section students will...
• be introduced to the English Alphabet
16
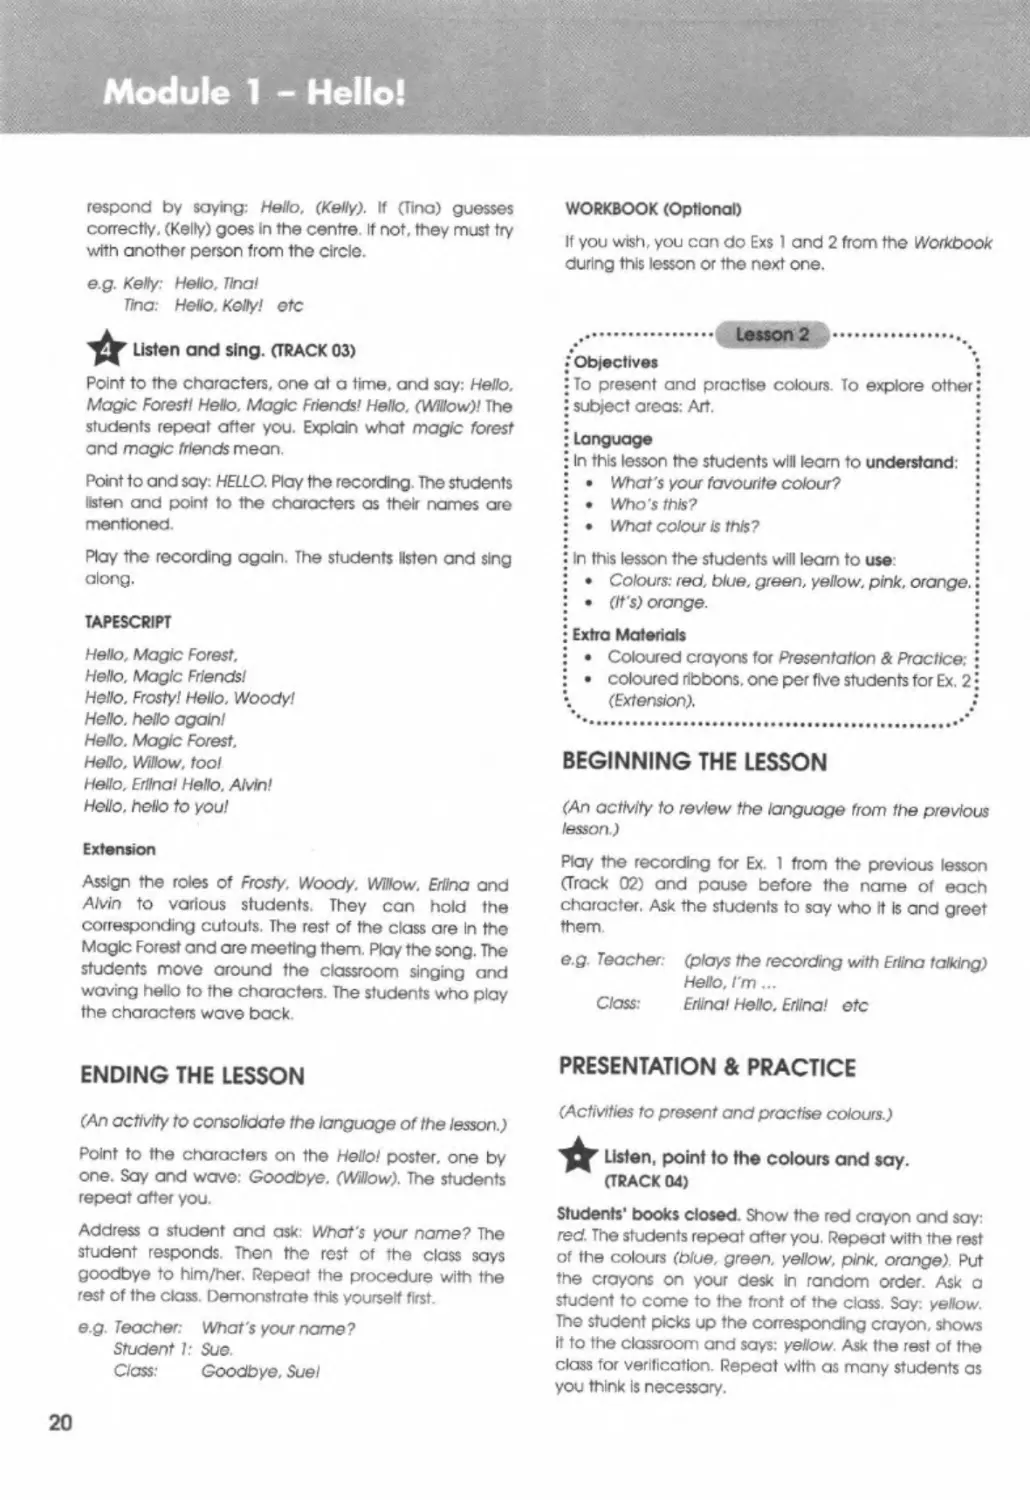
t................. Lesson 1 ?...............,
Objectives
To introduce the characters. To practise greetings!
and introductions. :
Language •
In this lesson the students will learn to understand •
• Who's this?
• This Is (Willow).
• Open/Close your books. •
• Who Is it?
• What's your name? •
In this lesson the students will learn to use
• Yes/No :
• Hello. I'm (KeBy). :
• Goodbye. (Sue). :
Extra Materials •
• The Hellol poster for Presentation & Practice; •
• character cutouts for Ex. 3.
BEGINNING THE LESSON
Welcome your class by saying Hello! several times. Point
to yourself and say; I'm (Mrs Smith).
Ask the students to look at the cover of their books and
invite them to comment on It. in LI. What can they
see? Read the title and explain what it means. Tell the
students that they are going to leam about a magic
forest with special creatures
Note: Use this opportunity to trigger the students' interest
in their books, and the English they are going to learn.
PRESENTATION & PRACTICE
(ActMttes to familiarise the students with the characters.)
\^ \ POSTER
Students' books closed. Put up the HeBo! poster on the
board Point to the characters (Willow. Ertina. AMn.
Woody. Frosty), one at a time, and present them. The
students repeat after you Point to the characters in
random order The students listen ond say yes or no.
Demonstrate this yourself first.
e g. Teacher: (pointing to Willow) This is Ertina.
Class: No!
Teacher- (pointing to Frosty) This is Frosty.
Class: Yes! etc
Students’ books open. Say; Open your books at page
four. Write the number 4 on the board and hold up
your book. Ask the students to look at the picture and
tell you what they can see in LI. Point to Willow and
ask; Who's this? Elicit the answer Repeat with the rest
of the characters.
Listen and point to the characters. Then, say:
Hello. I'm (Ertina). (TRACK 02)
Play the recording. The students listen and point to the
characters. Then students point to the characters and
say, eg. Hello. I'm (Ertina).
TAPESCRIPT
Hello. I'm Ertina.
Helio. I'm Willow
Hello. Гт AMn.
Hello, I'm Woody.
Hello. I'm Frosty.
yr Who are they? Find them in the picture and
say: This Is (Ertina).
(An activity to develop the students ' pre-reading skills.)
Do the first one with the students as an example. Point to
Eritna's mouth and say; Who is it? Let's see. is it AMn?
Elicit the response: No. Is it Ertina? Who is It? Ask a student
to give the answer Ask them to circle Ertlna's mouth in
the picture. Help them by holding up your book and
drawing an imaginary circle over Erlina's mouth. Allow
the students some time to look at the picture and
complete the activity. Check the students' answers.
(Activities to practise greetings.)
Cut out the stick puppets. Use them to talk
with your friend. Say: Hello, I'm (Willow).
Hello. I’m (Frosty).
Refer the students to the picture and explain the
activity. Ask the students to go to their Workbooks
(Cutout section p 74) and cut out the stick puppets.
Provide any necessary help. With the help of a student
demonstrate the following short dialogue.
e g Teacher: (in the role of Ertina) Hello. I'm Ertina
Student I: (in the role of Alvin) Hello. I'm AMn.
The students choose a character and go around the
classroom meeting and greeting the rest of the
characters.
Extension
The students sit In a circle. Explain the activity. One of
the students sits in the centre and covers his/her eyes.
Choose a student from the circle to say; Hello. (Tina).
The student In the centre has to guess who it is and
19
respond by saying: Hello. (Kelly). If (Tina) guesses
correctly, (Kelly) goes in the centre it not, they must try
with another person from the circle.
e g. KeHy: Hello. Tina!
Tina: Helio. Kelly! etc
Listen and sing. (TRACK 03)
Point to the characters, one at a time, and say: Hello,
Magic Forest! HeUo. Magic Friends! Hello. (Willow)! The
students repeat after you. Explain what magic forest
and magic friends mean
Point to and say: HELLO. Play the recording The students
listen and point to the characters as their names are
mentioned
Play the recording again. The students listen and sing
along.
TAPESCRIPT
Hello, Magic Forest.
Hello. Magic Friends!
Hello. Frosty! Hello. Woody!
Hello, hello again!
Hello. Magic Forest.
Hello. Willow, tool
Hello. Erlina! Hello. Alvin!
Hello, hello to you!
Extension
Assign the roles of Frosty. Woody. Willow. Erlina and
Alvin to various students. They can hold the
corresponding cutouts. The rest of the class are In the
Magic Forest and are meeting them Play the song. The
students move around the classroom singing and
waving hello to the characters. The students who play
the characters wave back
WORKBOOK (Optional)
If you wish, you can do Exs 1 and 2 from the Workbook
during this lesson or the next one.
................... Lesson 2 )..................
Objectives
To present and practise colours To explore other
subject areas: Art.
Language
In this lesson the students will learn to understand:
• What's your favourite colour'?
• Who's this?
• What colour is this7
In this lesson the students will learn to use
• Colours: red, blue, green, yellow, pink, orange.
• (It's) orange.
Extra Materials
• Coloured crayons for Presentation & Practice:
• coloured ribbons, one per five students for Ex. 2
(Extension).
BEGINNING THE LESSON
(An activity to review the language from the previous
lesson)
Play the recording for Ex. 1 from the previous lesson
(Track 02) and pause before the name of each
character. Ask the students to say who it Is and greet
them
e g Teacher: (plays the recording with Eriina talking)
Hello, Гт...
Class: Erlina! Hello. Erlina! etc
ENDING THE LESSON
(An activity to consolidate the language of the lesson.)
Point to the characters on the Hello! poster, one by
one. Say and wave. Goodbye. (Willow). The students
repeat after you.
Address a student and ask: What's your name? The
student responds Then the rest of the class says
goodbye to him/her. Repeat the procedure with the
rest of the class. Demonstrate this yourself first.
e g. Teacher: What's your name?
Student 1: Sue.
Class: Goodbye. Sue!
20
PRESENTATION & PRACTICE
(Activities to present and practise colours.)
Listen, point to the colours and say.
(TRACK 04)
Students’ books closed. Show the red crayon and say:
red. The students repeat after you. Repeat with the rest
of the colours (blue, green, yellow, pink, orange). Put
the crayons on your desk in random order. Ask a
student to come to the front of the class. Say; yellow.
The student picks up the corresponding crayon, shows
It to the classroom and says: yellow. Ask the rest of the
class for verification. Repeat with as many students as
you think Is necessary.
Students' books open. Say Open your books at page
six. Write the number 6 on the board and hold up your
book. Play the recording. The students listen, point to
the colours and repeat
Address a student and ask as you point to the colours:
What's your favourite colour? Elicit a response: (Blue).
Ask other students to point to and say their favourite
colours.
TAPESCRIPT
Red. blue, green, yellow, pink, orange.
Look and colour the picture.
Elicit the name of the character and the colours. Say:
Who's this? What colour is this? Explain the activity. The
students look at the coloured picture and colour the
big picture accordingly. Check the students' answers
by asking them to point to and say the colour, e.g. (It’s)
orange.
Listen and sing. (TRACK 05)
Point to the globe and say: world. The students repeal
after you. Soy as you point to the red ribbon: Colour my
world red. The students repeat after you. Say as you
point to the blue ribbon: Colour my world blue. The
students repeat after you. Repeat with the rest of the
colours (pink, yellow, green).
Play the recording. The students listen and point to the
coloured ribbons. Play the recording again. The students
listen and sing along.
TAPESCRIPT
Cotour my world.
Colour my world,
Colour rt red and blue!
Colour my world.
Colour my world.
Colour it yellow, too!
Colour my world.
Colour my world
Colour it pink and green!
Colour my world.
Colour my world.
Colour my world for me!
Extension
---- C ^cx* going into class)-------------
Divide the class into groups of five Hand a set of
coloured ribbons to each group. Help them tie the
ribbons together. Play the recording. The students, in
groups, walk in a circle as they sing along.
Play the Colour Bingo game.
Invite the students to colour In any five squares on their
Bingo card in any combination of colours Then call out
the colours (red. blue, yellow, green, orange, pink) in
random order. As you do so. the students cross out the
corresponding colour on their card (only one square
each time). The first student to cross out his/her squares
calls out BINGO and is the winner.
ENDING THE LESSON
(An activity to consolidate the language of the lesson )
Say a colour, e.g. blue. The students whose favourite
colour Is blue stand up and leave the classroom.
Encourage them to say Goodbyel as they leave.
Repeat with the rest of the colours and until all the
students have left the classroom.
WORKBOOK (Optional)
If you wish, you can do Exs 3. 4. 5 and 6 from the
Workbook during this lesson or the next one.
..................Lesson 3 >...............
• Objectives :
• To listen to a story about how Frosty and Woody •
; met Willow, Alvin and Erlina. To develop listening •
; comprehension skills through a dialogue. ;
: Language •
: In this lesson the students will learn to understand: j
: • Who's this?
e e
; In this lesson the students will learn to use •
• • Helio. (Frosty). •
; • Goodnight. ;
; • Hello. I'm (Frosty). •
; • Come with me! :
• • Welcome (to the Magic Forest)! •
• •
: Extra Materials
: • The Hello! poster for Presentation & Practice: :
: • A4 sheets of paper for each student for the:
\ Ending the Lesson activity. •
Bring sets of coloured ribbons, one per 5
students.
21
BEGINNING THE LESSON
(An activity to revise colours.)
Show students a coloured pencil, eg red Ask a
student to say the colour. Ask the rest of the class for
verification. Repeat with as many students as you think
is necessary.
PRESENTATION & PRACTICE
(Activities to present the story and develop students'
listening skills.)
Listen to the story and point to the pictures.
(TRACK 06)
POSTER
Students’ books closed. Use the Hello! poster to present
the story. Point to Frosty in the first picture and ask:
Who's this? Elicit: Frosty. Say as you wove: Hello, Frosty.
The students repeat after you. Repeat with the rest of
the pictures.
Explain to the students, in LI if necessary, that Frosty is
a snowman and Woody is a puppet They both came
to life magically and set out on a moglcal journey!
Students' books open. Say: Open your books at page
eight Write the number 8 on lire board and hold up your
book. Ask students to identify the characters they know.
eg. Student 1: (pointing to Frosty in Frame 1) (This is)
Frosty! etc
Play the recording and ask the students to point to
each picture in their book in turn. Show them what to
do by holding up your book and pointing. Play the
recording again with pauses for the students to listen
and repeat chorally.
Point to the first picture on the poster. Ask the students
to complete your sentences.
e g. Teacher. Hello....
Class: Frosty etc
Extension
Ask for a volunteer to come and point to the first picture
on the poster. Encourage him/her to say the dialogue.
Ask the rest of the class for verification Repeat with the
rest of the pictures.
TAPESCRIPT
Frame 1
Girt: Hello, Frosty.
22
Frame 2
Man: Hello. Woody.
Frame 3
Man: Goodnight.
Frame 4
Woody: Hurray!
Frame 5
Frosty: Hello, Гт Frosty.
Woody: Hello. I'm Woody.
Frame 6
Woody Come with me!
Frame 7
Willow: Hello, I'm Willow.
Frame 8
Eriina: Welcomel
Read the question at the bottom of page 9. Ask the
students to draw a happy face or a sad face,
depending on whether they like the story or not. Ask
them to tell you. in LI if necessary, what they like most.
ENDING THE LESSON
(An activity to consolidate the language of the lesson.)
Provide the students with a piece of paper Ask the
students to draw their own Magic Forest. They can
draw trees of different colours. Encourage them to
present their Mogk: Forest to the class by saying:
Welcome to the Magic Forestl
................. Lesson 4 4...................
• Objectives
: To talk about colours in nature. :
•
:Language •
• In this lesson the students will learn to understand •
: • What colour Is the (sun)?
: • sun, tree, apples, oranges, frog, flower
•
• In this lesson tho students will learn to use: :
• • (it's) green :
• • Hello. I'm (Max the frog). :
• Extra Materials •
: • Green & red construction paper, glue, scissors,•
markers for each student for Ex. 3.
BEGINNING THE LESSON
(An activity to review the language from the previous
lesson.)
Play the dialogue from the previous lesson (Track 06).
The students listen and follow In their books.
PRESENTATION & PRACTICE
(Activities to talk about colours In nature.)
Nature is full of colours! Colour the picture.
Then, point and say: (Green).
Students' books closed. Draw a simple sketch of the
sun on the board. Point to it and ask: What colour Is the
sun? Red? Blue? What colour is It? Elicit: Yellow. Follow
the same procedure with tree, apple, orange, frog and
flower.
Students' books open. Say: Open your books at page
ten. Write the number 10 on the board and hold up
your book. Tell students, in LI If necessary, that nature is
full of colours. Ask them to colour in the items. Then
students point to and say the colours.
e.g. Student 1: (pointing to the sun) It's yellow, etc
Complete the pictures. Then, colour them.
Explain the activity. Allow the students some time to
complete and colour in the drawings. Go around the
classroom as the students complete the activity.
Provide any necessary help.
Make your own frog!
_-------Q Before going into doss ------------
Bring green and red construction paper for
each student.
Hand out the green construction paper to the students.
Show your model and help the students make their own
frog.
Hand out the red paper to the
students. Ask them to cut out a long
tongue from the red paper and glue
it Into the frog's mouth. Their frog is
readyl
ENDING THE LESSON
(An activity to consolidate the language of the lesson )
The students name their frogs and present them to the
class.
e g. Student: HeUo. I'm Max the frog.
................. Lesson 5 ...................
Objectives
To consolidate the language learnt In the module
To draw a picture of oneself.
Language
n this lesson the students will learn to understand:
• What colour is the (sun)?
In this lesson the students will learn to use
• red. blue, green, yellow, pink, orange
• HeUo. I'm (AMn).
• My favourite colour is...
Extra Materials
• A4 sheets of paper for each student for the
Ending the Lesson activity.
(Activities to consolidate colours.)
BEGINNING THE LESSON
Draw a circlo on the board. Ask the students to do the
same in tnelr notebooks Say It's yellow The students
colour the circle yellow. Repeat with the rest of the colours.
1
Ask them to fold the paper in thkds.
Then, they fold It in fourths to make a
'w' shape.
This Is their frog. Ask them to draw a
pair of eyes on it.
PRACTICE
Find four mistakes in the picture.
Draw a picture of a sun on the board Point to It and
ask: What colour is the sun? Elicit responses (yellow).
Follow the same procedure with the frog, bananas and
water. Then, ask the students to go to the picture in their
books and look at the sun there Ask as you snake your
head: fe the sun in the picture yellow? Elicit a response
(no). Allow the students some time to find and circle the
rest of the mistakes. Check their answers.
Items to be circled: water, frog. sun. bananas
23
What colour is next? Colour, then say.
Explain the activity. Allow the students some time to
complete the activity. Then, the students point to and
name the colours. Ask the rest ol the class for
verification
I The students colour the circle red.
2 The students colour the circle yellow.
3 The students colour the circle green
What is their favourite colour? Listen and
circle. Then, say: Hello, I'm (Alvin).
My favourite colour is .... (TRACK 07)
Point to the buckets and elicit the colours. Play the
recording, twice If necessary. The students listen and
circle the correct colour.
Items to be circled:
Alvin - green
Ertlna - pink
Frosty - orange
Woody - blue
TAPESCRIPT
Hello, Гт Alvin. My favourite colour is green.
Hello. I'm Enina. My favourite colour is pink.
Hello. Гт Frosty. My favourite colour is orange.
Hello. Гт Woody My favourite colour is blue
Extension
Invite students to take the parts of Alvin, Erlina, Woody
and Frosty. If you wish, they can use the character stick
puppets The students, in role, say what their favourite
cofour is.
e g. Student 1: (In the role of Alvin) Helio. I'm Alvin. My
favourite colour is green, etc
☆ Portfolio: Draw a picture of yourself. Present
It to the class: Hello, I’m.... My favourite
colour is....
(An activity to develop fine motor skills and consolidate
the language of the module.)
Point to the picture and elicit the colour. Then say; HeHo.
I'm (John). My favourite colour is red. Ask the students to
draw a similar picture about themselves and their
favourite colour and present it to the class Make sure
you display their work somewhere In the classroom.
Then help them file their drawings In their Junior
Language Portfolios
ENDING THE LESSON
(An activity to consolidate the language of the lesson.)
Provide the students with a sheet of paper. Ask the
students In groups to choose a colour and make a
collage of plctures/drawings with this colour. Make sure
you display their work somewhere in the classroom
.-•••• Lesson 6 - Our Wodd/My World ..........
Objectives
To familiarise students with British and German
culture and compare it with their own. To talk about
things that are red/yellow In the UK/Germany/
Russia.
Language
In this lesson the students will learn to understand:
• UK. Germany. Russia.
• What colour Is this?
• bus. maH box. tram
In this lesson the students will learn to use
• (It 's) red.
• My favourite colour is (red).
Extra Materials
• A map of the world for Ex. 1 (Optional).
BEGINNING THE LESSON
(An activity to revise colours.)
Ask the students to present the drawing they made in
the previous lesson.
24
OUR WORLD
(Activities to familiarise students with aspects of British
and German culture.)
Look at the pictures. Point and say the
colours.
Students' books open. Say: Open your books at page
fourteen. Write the number 14 on the board and hold
up your book. Point to the British flag and say: UK. If you
have a map of the world, put It up on the board and
show where the UK is. Ask the students if they know
anything about the UK and have a class discussion in LI
(e.g. famous people, cities, etc). Explain to the students
that In this section they will be learning a lot of
interesting things about this country. Point to the items
and elicit the colour (red) Explain that the mail boxes
and the buses In London are red
Point to the German flog and say: Germany. If you have
a map of the world, put It up on the board and show
where Germany is. Elicit the colour of the items (yellow).
MY WORLD
(Activities for the students to explore and talk about
their own culture in English.)
What colour are they? Colour, point and say.
Point to the title and the flag and exploin in LI that in this
section they will be talking about their own country, city.
If estyle, etc. Explain the activity. Point to the tram and
ask: What colour Is it tn (Moscow)? Elicit the right
response Repeat with the mail box Allow the students
some time to colour In the pictures. Then students present
their complete pictures. Alternatively, the students draw
and colour similar pictures In their notebooks
Optional Activity
Ask the students to find pictures of things In public
places that are the same colour and bring them to
class. Have a class discussion.
Play the Musical Colours game.
Ask the students to make six strips of paper and colour
them (red. blue, green, yellow, pink, orange). Ask them
to place the strips of paper in front of them. Explain the
game. Play a song from the module Pause the song
and say a colour, e g. blue The students have to raise
the corresponding strip of paper.
ENDING THE LESSON
(An activity to consolidate the language of the lesson.)
Do a survey. Put up coloured pieces of paper (red.
blue, green, yellow, orange, pink) on the board. Ask
the students, one at a time, to come and tick (✓) their
favourite colour and say: My favourite colour Is (red)
Then, count the ticks and see which colour Is the most
popular one. Say: (Red) is our favourite colour.
......... Lesson 7 - Storyland .................
: Objectives •
• To listen to a Russian story in English. To develop •
• listening and speaking skills. •
• Language
j In this lesson the students will learn to understand: :
: • What's this? :
t • Yes. it's a little seed.
• In this lesson the students will leam to use:
• • seed. big. small, eat. grow, garden, plant, like •
; • Please grow very big. I like turnips!
• Extra Materials
: • Flashcards (1 -7) for Presentation & Practice, j
: • A4 sheets of paper for each student for the:
\ Ending the Lesson activity.
BEGINNING THE LESSON
(An activity to present fairy tales as a concept.)
Write the words fairy tale on the board and explain the
meaning. Ask the students to name some of their favourite
fairy tales in Ll. Then tell them they are going to listen to the
story of The Giant Turnip. Initiate a class discussion by
asking the students to say what they know about the taie
PRESENTATION & PRACTICE
(Activities to present the tale of 'The Giant Turnip'.)
Listen, point to the pictures and repeat.
(TRACK 08)
\ V FLASHCARDS (1-7)
Students' books closed. Put up the flashcards on the
board, one at a time. Point to the items on the flashcards
(seed. big/smaH. eat. grow, garden, plant) and present
them. The students repeat after you. Point to the flashcards
in random order and ask questions Ebert responses from
different students. Demonstrate this yourself first
25
Module 1 - Hello!
eg Teacher: (pointing to the seed flashcard)
What's this?
Class.' Seed etc
Students books open. Say; Open your books at page
sixteen Write the number 16 on the board and hold up
your book. Play the recording. The students listen, point
and repeat.
TAPESCRIPT
Seed. big. small, eat. grow, garden, plant.
Listen to the story. (TRACK 09)
Direct the students' attention to the picture. Point to
the characters and present them. Explaln/Ellcit the
English words for dog. cat and mouse
Play the recording for the students to listen to the story.
Play the recording again. The students listen and point
to the characters as they are mentioned. Play the CD
a third time with pauses. The students listen and repeat,
chorally and/or individually.
TAPESCRIPT
One day. an old man goes to his garden. He plants a
turnip seed. "Please grow very big!" the old man says.
"My wife likes turnips. Little Anna likes turnips. The dog
and the cat Hke turnipsl The mouse likes turnips, tool'
Listen and sing. (TRACK 10)
Ask the students to look at the pictures. Point to the little
seed and ask: What's this? Elicit responses (seed) Say:
Ves, it's a little seed Little seed, you look so sweet! The
students repeat after you. Follow the same procedure
to present the rest of the song.
Play the recording. The students listen Play the recording
again The students listen and sing along
TAPESCRIPT
Little seed.
You look so sweetl
Little seed
Little seed!
Turnip seed, very small
Grow, turnip, grow
Turnip seed, very small
We love turnips so!
Little turnip.
Nice and round!
Little turnip.
Little turnip.
Turnip seed. very small
Grow, turnip, grow
Turnip seed, very smalt
We love turnips so!
Giant turnip.
Look at you1
Giant turnip.
Giant turnip!
Turnip seed, very small
Grow, turnip, grow
Turnip seed, very small
We love turnips sol
ENDING THE LESSON
(An activity to consolidate the language of the lesson.)
Provide the students with a sheet of paper. Ask the
students to draw a picture of a turnip. Tell them to draw
a picture of themselves as well. Help them present their
drawing and say: Please grow very big! I like turnipsl
....... Lesson 8 -Checkpoint .......
: Objectives
•Jo consolidate the language of the module.
Listen and circle. (TRACK 11)
Explain the activity The students listen and circle the
characters mentioned. Check the students' answers
The students circle: Willow. Woody. Alvin.
TAPESCRIPT
1 This Is Willow. Hello. Willowl
2 This is Woody HeUo. Woody!
3 This is Alvin. HeUo. Alvin!
Listen and colour. (TRACK 12)
Explain the activity. The students listen and colour the
pictures. Check the students' answers.
TAPESCRIPT
I red
2 blue
3 green
4 yellow
5 orange
6 pink
Note: The students are now ready to do Module Test 1.
26
Module 2 - My Schoolbag
Z 9
................I Lesson 1 ).....................
Objectives
To present and practise the names at school items
Language
In this lesson the students will learn to understand:
• Show me (red)l
• Whats this?
• What colour Is It?
In this lesson the students will leam to use
• School objects schoolbag. pencil, book. pen.
rubber, pencil case.
• My (pen) is (blue).
• It's a (book)!
Extra Materials
• Crayons for the Beginning the Lesson activity;
• the My Schoolbag poster for Presentation &
Practice:
• a feely bag for Ex. 4.
BEGINNING THE LESSON
(An activity to revise colours.)
Welcome your class by saying *Hello!' to each student
and eliciting the some response.
Ask the students to put their crayons (red. blue, green,
yellow, pink and orange) on their desks. Say a colour at
random and ask them to hold up the corresponding
crayon. Vary the rhythm and speed of the instructions
to make the activity like a game.
e g. Teacher: Showme(red)!
Class: (holds up the red crayon) etc
PRESENTATION & PRACTICE
(Activities to present school objects.)
Listen, point to the school objects and say.
(TRACK 13)
POSTER
Students' books closed. Put up the My Schoolbag
poster on the board. Point to the school objects
(schoolbag. pencil, book. pen. rubber, pencil case).
one at a time, and say the word(s). The students repeat
after you. Point to the objects in random order. The
students repeat after you.
Students' books open. Say Open your books at page
twenty. Write the number 20 on the board and hold up
your book. Play the recording. The students listen, point
to the school objects and repeat
TAPESCRIPT
Schoolbag. pencil, book, pen, rubber, pencil case.
(Activities to practise school objects.)
Colour the school objects. Then, talk with
your friend: My (pen) is (blue).
Point to the items, one at a time, and efcit the words.
Revise the colours by pointing to different Items around
the classroom and eliciting the colour. Allow the students
time to colour the school items. Then, ask students, in
pairs, to talk about their pictures. Demonstrate this
yourself with a student first.
e.g. Teacher: My book is red.
Student 1: My book is yellow, etc
Listen and point. Then, sing. (TRACK 14)
Point to the schoolbag and say: What's In your
schoolbag? Let's take a took! The students repeat after
you Play the recording. The students listen and point to
the Items as they are mentioned.
Play the recording again. The students listen and sing
along.
TAPESCRIPT
What's in your schoolbag?
Let's take a look:
A pencil, a pen.
A rubber, a book/
Extension
Ask the students to put their schoolbag. a pencil, a
pen. a rubber and a book on their desks in random
order. Play the recording again. The students point to
the items in front of them in the order they hear them.
^FComplete the pictures. Then, point and say:
It's a (book).
Refer the students to the pictures and explain the
activity. Ask the students to use their pencils to trace
the pictures. The students can then colour the objects.
Then, point to each object individually and ask
students to say what it Is
e.g. Teacher: (pointing to book) What's this?
Student 1: It s a book
Teacher: What colour is it?
Student 2: Red. etc
27
Module 2 - My Schoolbag
Extension
The students close their books. Point to different school
objects around the classroom and elicit the words.
Play the Feely Bag game.
--------C Before going into class ~~)--------
Bring a feely bag Into class and put different
Items the students know in it (e g. a pencil, a
репей case, a book, a rubber, etc) without
letting the students see what is in the bog
Refer the students to the picture and explain the
game. Ask Individual students to put their hand In the
feely bag and feel an object. Ask: What's this? The
student says what the Item is and then takes It out of
the bag Elicit the response: It's a.... Ask the rest of the
class for verification. Demonstrate this yourself with a
student first. As an extension, you con have individual
students take your role and the game s repeated,
ENDING THE LESSON
(An activity to consolidate the language of the lesson.)
Tell the students they are going to play Bingo. Ask them
to draw simple sketches of a schoolbag, pencil, book,
pen. rubber and a pencil case on different slips of paper
and place them on their desks Say the objects at
random. The students listen and turn the corresponding
slips of paper face down. When they have turned all
their slips face down, they raise their hands. The game
ends when you have said all the words and al the
students have raised their hands.
WORKBOOK (Optional)
If you wish, you can do Exs 1 and 2 from the Workbook
during this lesson or the next one.
................i Lesson 2 ...................
Objectives
To present and practise numbers 1-5. To explore
other subject areas: Maths.
Language
In this lesson the students will learn to understand:
• Let's count!
• How many...?
• Two flowers!
In the lesson the students will learn to use
• numbers 1-5 (one. two. three, four. five).
Extra Materials
• A4 sheets of paper for each student for the
Ending the Lesson activity.
BEGINNING THE LESSON
(An activity to revise the language from the previous
lesson.)
Play the recording for Ex. 2 from the previous lesson
Grack 14) and pause before each school Item. Ask the
students to say the school item
eg. Teacher (plays the recording) What 's in your..
Class: schoolbag? etc
PRESENTATION & PRACTICE
(Activities to present and practise numbers 1-5.)
Listen and say the numbers. (TRACK 15)
Students' books closed. Hold up a finger and ask the
students to do the same All together soy: One Do the
same for all five fingers. Next, invite the students to
count aloud from 1 to 5. holding up their hands and
counting on their fingers at the same time. Say: Let's
countl
Extension
Say a number, eg. three. Ask a student to show the
corresponding number of fingers and repeat the
number. Ask the rest of the class for verification. Repeat
with as many students as you think is necessary.
Students’ books open. Say Open your books at page
twenty-two. Write the number 22 on the board and
hold up your book. Play the recording. The students
listen, point to the numbers and repeat.
28
Module 2 - Му Schoolbag
TAPESCRIPT
One. two. three, four, five
Extension
Collect different items and put them in groups (eg 1
schoolbag. 2 pencils, 3 pencil cases. 4 pens. 5 pencils).
Ask the students: How many (pencils)? and elicit
responses (e.g. Three (pencils)!). Repeat with as many
students as necessary.
Count the items and circle the correct
number.
Explain the activity. The students look at the pictures
and circle the appropriate number according to each
picture Check the students' answers by asking them to
point to and say the number of items, e.g. One. two.
three, four. Four (pens)!
3 books 2 schoolbags 5 rubbers
'♦ж Count and write the numbers. Then, draw
the correct number of flowers.
Draw 2 flowers on the board, point to them and say: two
flowers. The students repeat after you. Write number 2
underneath. Now draw 3 flowers, point to them and say:
three flowers. The students repeat after you. Write
number 3 underneath. Now point to all the flowers and
say: five flowers The students repeat after you. Draw 5
flowers and write number 5 underneath. Ask the
students to repeat the same procedure and do the
exercise. Allow them some time to complete the
activity. Check their answers and write them on the
board.
1+2 = 3 (draw three flowers)
3 + 2 = 5 (draw five flowers)
Play the Number game.
Refer the students to the picture. Tell the students they
are going to play a game. Have the students stand In
a circle, preferably with their chairs behind them.
Choose a student to be Number 1 and he/she says the
number out loud. The student on his/her left is Number
2. the next student is Number 3, etc. Students take turns
and say their numbers out loud. The student who is
Number 5 says his/her number out loud, introduces
him/herself to tne rest of the group (e.g. 5 - Hello. I'm
Jack.) and sits on his/her chair. The student next to
him/her starts the game again by saying 'One' and
the game continues The student who is already sitting
on the chair Is out of the counting process. The game
continues until all the students sit down.
ENDING THE LESSON
(An activity to review numbers 1-5.)
Provide the students with a sheet of paper. Ask them to
draw as many pencils (up to five) as they wish and
write the number below them. They hand In their
drawings as they leave the classroom. Make sure you
display their drawings In the classroom so that the
children can see them during the next lesson and feel
proud of their work. While the students are drawing,
feel free to play the song from the previous lesson.
WORKBOOK (Optional)
If you wish, you can do Exs 3. 4 and 5 from the
Workbook during this lesson or the next one.
г.................. Lesson 3 I...............
j Objectives ;
• To listen to a story about Frosty and Woody's first j
• day at school. To develop listening comprehension:
! skins through a dialogue.
:Language ;
• In this lesson the students will learn to understand ;
: • How many...? ;
• • Time for school! ;
• •
• In this lesson the students will learn to use
: • What s this? :
: • it's a...I :
• •
• •
; Extra Materials ;
• • The My Schoolbag poster for Presentation & •
• Practice; :
• • A4 sheets of paper for each student for the ;
* . Ending the Lesson activity.
• ee
BEGINNING THE LESSON
(An activity to review numbers 1-5.)
Draw some school items on the board (eg. 2 pens. 4
rubbers. 1 schoolbag. 3 books. 5 pencils) Ask individual
students to tell you how many Items of each kind they
can see and ask the rest of the class for verificatkxi.
Repeat with as many students as you think is necessary.
e g. Teacher: How many pens?
Student 1: Two (pens)l etc
29
PRESENTATION & PRACTICE
(Activities to present the story and develop students'
listening skills.)
Listen to the story and point to the pictures.
(TRACK 16)
POSTER
Students' books closed. Use the My Schoolbag poster
to present the story. Explain to the students, In LI If
necessary, that it’s Frosty and Woody's first day at
school. Erlina Is their teacher and she uses magic to
teach them new and exciting things. Point to Willow in
the first picture and ask: Who's this? Elicit: Willow. Say as
you mime ringing the bell: Time for school! The students
repeat after you. Point to Erlina in the second picture
and say Hellol lhe students repeat after you. Repeat
with the rest of the pictures.
Students' books open. Say: Open your books at page
twenty-four. Wrtte the number 24 on the board and
hold up your book. Ask students to Identify the
characters they know.
e g. Student 1: (pointing to Woody in Frame 1) (This Is)
Woody! etc
Play the recording and ask the students to point to
each picture In their books In turn Show them what to
do by holding up your book and pointing. Play the
recording again. The students listen and repeat,
chorally and/or individually.
Point to the first picture on the poster. Ask the students
to complete your sentences.
e g Teacher: Time for...
Class. school! etc
Extension
Ask for a volunteer to come and point to the first
picture on the poster. Encourage him/her to say the
dialogue. Ask the rest of the class for verification
Repeat with different students for the rest of the story.
TAPESCRIPT
Frame I
Willow:
Frame 2
Erlina:
Frame 3
Erlina:
Frosty:
Time for schooll
Hellol
What's this?
It's a pen!
Frame 4
Erlina: No. It Isn't, look again!
Frame 5
Erlina: What's this?
Woody: It's a book!
Frame 6
Erlina: No, it isn't. Look agalnl
Frame 7
Erlina: 1.2. 3 ...
Frame 8
Woody: Magic schoolbags!
Read the question at the bottom of page 25. Ask the
students to draw a happy face or a sad face,
depending on whether they like the story or not. Ask
them to tell you, in LI If necessary, what they like most,
ENDING THE LESSON
(An activity to consolidate the language of the lesson.)
Provide the students with a sheet of paper. Ask the
students to draw their own school. They can draw Items
of different colours. Encourage them to present their
school to the class by saying Time for schooll
...............< Lesson 4 .................
: Objectives •
; To talk about living and non-lrvlng things.
• Language :
• In this lesson the students will learn to understand: :
• • living things/non-kving things
• • eat. breathe, have babies, grow
• • ant. bat. tree :
; in this lesson the students will learn to use
; • It's (red). •
•
• Extra Materials :
* • • None. :
BEGINNING THE LESSON
(An activity to revise the dialogue.)
Play the dialogue from the previous lesson (Track 16).
The students listen and follow in their books.
30
В
>•
Module 2 - My Schoolbag
PRESENTATION & PRACTICE
(Activities to talk about living and non-living things.)
Look at the picture. Colour the living things.
Students’ books closed. Draw a simple sketch of a
book and a bat on the board. Point to the book and
ask: What's this? Elicit: it's a book. Follow the same
procedure with bat. Explain to the students that a book
is a non-living thing, whereas a bat is a living thing. Tell
students. In LI if necessary, that living things can eat,
breathe, grow and have babies.
Students’ books open. Say: Open your books at page
twenty-six. Write the number 26 on the board and hold
up your book. Point to the pictures at the bottom of the
page and explain the actions shown, which are typical
of living things (hove babies, eat. breathe, grow). Ask
the students to look at the picture and colour the IMng
things using the colours they already know. Allow them
time to complete the activity and check their answers
by having them point to and name the colour they
have used.
e g. Student I: (pointing to the bat) It's (red).
ants bat flowers tree
Draw in the right box.
Point to the pictures and elicit which are living and
which are non-living things. Explain the activity. The
students draw the living things In the box where the
baby is and the non-living things where the book Is.
Allow the students some time to complete the activity.
Check their answers. Alternatively, you can assign it as
homework.
ENDING THE LESSON
(An activity to consolidate the language of the lesson.)
The students think of one more living and non-living
thing and add It to the list.
(Suggested answers)
Living - flower, bat, ant. etc
Non-living - bus. pencil, school, etc
..............1 Lesson 5 ......................
Objectives
To consolidate the language learnt In the module.
To draw a picture of school objects.
Language
In this lesson the students will learn to understand
• How many (pencil cases)?
In this lesson the students will leam to use
• One. two. three, four five.
• This Is my (pencil). It's (yellow)
Extra Materials
• Flashcards (8-13) for the Ending the Lesson
. activity.
BEGINNING THE LESSON
(An activity to revise the language from the previous
lesson.)
Point to Items and people in the classroom. Elicit which
are IMng and which are non-living things.
PRACTICE
(Activities to consolidate numbers and school items.)
How many? Count. Write the right number.
Point to the pencil case and ask: What's this? Elicit
responses (a pencil case). Then, ask the students to
look at the table as you ask: How many pencil cases?
Elicit the correct response (four) Repeat with the rest of
the items. Allow the students some time to write the
right number Check their answers
sharpener: 2
rubber: 3
schoolbag: 1
pencil: 5
What’s next? Complete and say the
number.
Explain the activity Allow the students some time to
complete the activity. Then, students point to and say
the right number of stars. Ask the rest of the class for
verification.
Two green stars, three red stars, five red stars.
31
......
Module 2 - Му Schoolbag
..' ... . ________________ .. ___;.___..__.____
Listen and circle. Then, say: Five books,....
(TRACK 17)
Point to the pictures and elicit the school objects. Play
the recording, twice It necessary. The students listen and
circle the number of Items they hear on the recordmg.
Then point to each group and ask: How many? Have
individual students respond, e.g. five (books).
Items to circled: 5 books, 3 pens, 2 rubbers
TAPESCRIPT
Five books.
Three pens.
Two rubbers.
☆ Portfolio: Draw a picture of your school
objects. Present them to the class and say:
This Is my (pencil). It’s (yellow).
(An activity to consolidate the language of the module)
Point to the picture and elicit the items. Then say: This ts
my pencil It’s yellow. Ask the students to draw a similar
picture of their school objects and present It to the
class. Make sure you display their work somewhere in
the classroom. Then help them file their drawings in
their Junior Language Portfolios.
ENDING THE LESSON
(An activity to consolidate tho language of the lesson.)
FLASHCARDS (в-13)
Pick a school Item flashcard (e.g. schoolbag) but do
not reveal what it is. Show it to the students really
quickly Ask students to name the school Item. Do the
same with the remaining flashcards.
WORKBOOK (Optional)
If you wish, you can do Ex. 6 from the Workbook during
this lesson or the next one.
Lesson 6 - Our World/Му World .........
Objectives
To familiarise students with British. Cuban and Russian
culture. To talk about playground games in the UK
Cuba and Russia.
Language
In this lesson the students will leam to understand
• UK. Cuba. Russia
• playground games (tug of war, hopscotch)
• Correct! One point for Team A!
In this lesson the students will learn to use:
• Go to school! School is cool! Say your name
and go to schooll (Ma-ri-a)l
Extra Materials
• Flashcards (813) for Ex. 3 (Game):
• slips of paper with numbers 1-5 for the Ending
. the Lesson activity.
BEGINNING THE LESSON
(An activity to revise the language from the previous
lesson.)
Ask the students to present the drawings they made in
the previous lesson.
OUR WORLD
(Activities to familiarise students with aspects of British
and Cuban culture.)
Look at the pictures. Listen to the song.
Then, play a playground game popular in
the UK. (TRACK 18)
Students' books closed. Ask the students, in LI if
necessary, what games they usually play at school
during the break. Explain to them that today they are
going to leam about popular playground games in the
UK and Cuba
Students' books open. Say: Open your books at page
thirty. Write the number 30 on the board and hold up
your book. Point to the British flag and say: UK. Repeat
the same procedure with the flog of Cuba. Point to the
pictures and ask the students if they know the games.
Point to the first picture and say: Tug of war. Explain the
game If they do not know it. (Two parallel lines are
drawn or painted on the grass. The rope Is laid
perpendicular to these lines. A cloth flag is tied to the
middle of the rope. The two teams position themselves
along the rope on either side of one of the lines. The
32
Module 2 - My Schoolbag
- ..>W
referee makes certain the flag is positioned precisely
midway between the two lines. On his own command,
he releases the flag and shouts. 'Gol' Both teams then
pull on their end of the rope. The aim is to pull the flag
over the team's goal line )
Repeat the procedure with hopscotch. (The game
starts with the player throwing the marker to square
number 1. The player then hops from square to square
in sequence, skipping the square with the marker. The
player should hop with onty one foot in each square at
any one time.)
Play the recording. The students listen to the chant and
sing. Explain the game. Two students stand In the
middle and clap hands together and then clap their
partner's hands forming an archway. The rest of the
class passes under the archway as they chant.
TAPESCRIPT
Go to school!
School Is cooil
Say your name
And go to school!
Ma-rl-a!
Go to schooll
School Is cool!
Say your name
And go to school!
John-a-rhan!
MY WORLD
(Activities for the students to explore and talk about
their own culture In English.)
Look and say the names of the games.
Explain the activity. Point to the pictures and elicit. In L1,
the names of the games: Dodgeball, sea creatures
Ask students. In LI to tell you the rules of the games;
Dodgeball: Children in the middle of the playground try
to avoid the ball which Is thrown at them by two
children standing by two sides of the playground.
Those who are touched by the ball, leave the game.
The winner is the one who remains after all the players
left the game.
Sea creatures: Children in the middle make various
movements imitating sea-creatures while the leader
counts “The sea rolls once, the sea rolls twice, the sea
rolls thrice. The sea-creatures freeze!' After he/she says
“freeze", the children In the middle should freeze In the
position they were. The leader goes around them for
some time and if he sees that someone moves even a
bit. that person leaves the game.
Optional Activity
Ask the students to find or draw pictures of popular
playground games and bring them to class. Have a
class discussion.
Ptay the Memory game.
A \ FLASHCARDS (8-13)
Put up five of the six flashcards on the board. Write a
number 1 -5 below each one. Allow the students some
time to look at the school objects carefully and
memorise their place on the board before they close
their eyes. Then, flip the flashcards over so they face
the board. Divide the class Into two teams. A and B.
Soy a number. Ask a student from Team A to tell you
which school object corresponds to that number. Flip
the card over and ask the rest of the class for
verification. If the student finds the correct item. Team
A gets one point If not. the point goes to Team B. The
team with the most correct answers wins the game.
Rearrange the school items on the board and repeat
the game as many times as you wish.
e g. Teacher: 2
Student 1 Team A. A rubber!
Teacher: Correct! One point for Iearn AI
etc
ENDING THE LESSON
(An activity to consolidate the language of the lesson.)
------Before going Into class )---------
Write the numbers 1 to 5 on separate slips
of paper.
Hand out the slips to five students at random. Invite the
students to come to the front and tell them to arrange
themselves in a line from 1 to 5. depending on the
number they are holding. Then ask the whole class to
count from 1 to 5. The student holding the number rises
his or her slip when they hear the number
33
W* •
Module 2 - Му Schoolbag
........ Lesson/-ororyiana ...................
Objectives
To listen to a Russian story in English. To develop
listening and speaking skiis.
Language
In this lesson the students will learn to understand:
• What's this?
• Yes. it's a giant turnip.
In this lesson the students will learn to use:
• puff, caff
Extra Materials
. • Flashcards (14-15) for Presentation & Practice.
BEGINNING THE LESSON
(An activity to revise the story.)
Ask the students If they remember what the previous
episode of the story was about. If not. ask them to go
to the respective page (16) and look at the picture.
recording for the students to listen to the story. Play the
recording again. The students listen and point to the
characters as they are mentioned. Play the CD a third
time with pauses. The students listen and repeat,
chorally and/or individually.
TAPESCRIPT
The turnip grows and grows and grows. It's a big giant
turnip! The old man is very happy. He starts to pull the
turnip. He puHs and pulls. But he can't puH the turnip
out. ’I need help.' he says. So he calls his wife.
ENDING THE LESSON
(An activity to consolidate the language of the lesson.)
Narrate the story The students mime It.
........ Lesson 8 - Checkpoint ............
; Objectives •
•Jo consolidate the language of the module.
•
PRESENTATION & PRACTICE
(Activities to present the tale of ‘The Giant Turnip'.)
Listen, point to the pictures and repeat.
(TRACK 19)
FLASHCARDS (14-15)
Students' books closed. Put up the flashcards on the
board, one at a time. Point to the items on the
flashcards (puff, call) and present them. The students
repeat after you. Mime the actions. The students name
them.
Students' books open. Say: Open your books at page
thirty-two. Write the number 32 on the board and hold
up your book. Play the recording. The students listen,
point and repeat.
Use the code and colour the picture.
Explain the activity. The students use the code and
colour in the picture. Allow the students some time to
complete the activity. Check the students' answers by
asking what colour the items are.
e.g. Teacher: (pointing to the tree) What colour Is it?
Student Green.
Count the school objects. Trace the right
number.
Elicit the names of the school Items. Explain the activity.
The students count and trace the right number. Check
the students' answers.
2 pencils 3 schoolbags 4 rubbers
Note: The students are now ready to do Module Test 2.
TAPESCRIPT
Pull. call.
★ Listen to the story. (TRACK 20)
Direct the students’ attention to the picture. Point to
the characters and present them Point to the turnip
and say: What's mis'? Look! It's a giant turnip. Can me
old man pull the giant turnip? Let's seel Play the
34
.................. Lesson 1 ..................
Objectives
To present parts ot a house To revise colours
Language
In this lesson the students will leam to understand
• Whet s this?
• What colour Is the (door)?
In this lesson the students will leam to use
• Parts ot a house: house, roof, window. floor,
wall, door
• (This is the) roof.
• This is my house.
• The (window) is (green).
Extra Materials
• The My Home poster for Presen fatton & Practice
• photocopies of the house template (p. 104) for
each student for Ex. 4.
• flashcards (16-21) for the Ending the Lesson
activity.
BEGINNING THE LESSON
(Activities to review the language of the previous lesson.)
Ask a student to come to the board Say a school
object. The student draws a rough sketch of the object
on the board Ask the rest of the class for verification.
Repeat with all school objects.
Review the numbers by saying a number and having a
student write it on the board. Ask the rest of the class for
verification. Repeat with as many students as necessary.
PRESENTATION & PRACTICE
(Activities to present and practise the vocabulary of the
lesson.)
POSTER
Listen, point to the parts of the house and
say. (TRACK 21)
Students' books closed. Put up the My Home poster on
the board Point to the parts of the house (house, roof,
window, floor, wall. door), one at a time, and present
them. The students repeat after you.
Point to the different parts in random order and ask
questions. The students name them. Demonstrate this
yourself first.
e g. Teacher: (pointing to the roof) What's this?
Class: (This is the) roof, etc
Students’ books open. Say: Open your books at page
thirty-four. Write the number 34 on the board and hold
up your book. Play the recording. The students listen,
point and repeat.
TAPESCRIPT
House, roof, window, floor, wall. door.
Colour the parts of the house. Then, say:
This is the (roof). It's (red).
Revise the colours. Elicit the names of the different parts
of a house by pointing and asking: What's this? Explain
the activity The students look at the picture and colour
it in using any combination of colours they like. Once
they finish, ask the students to describe their pictures by
saying: This is the (door). It's (brown) etc
Listen and point. Then, sing and do. (TRACK 22)
Point to the tree house on the poster and say: This is my
house. The students repeat after you. Follow the same
procedure to present the rest of the song.
Play the recording. The students listen and point to the
parts of the house Play the recording again. The
students listen and sing along
TAPESCRIPT
This is my house.
This is the roof.
This is the window.
This is the door.
This is my house.
This is the roof
This is the wall.
This is the floor.
Extension
Mime the actions for the song
This is my house, (make a square with your hands)
This is the roof, (hands together and pointing upwards
over your head)
This is the window (mime opening a window)
This is the door, (mime opening a door)
This is my house, (make a square with your hands)
This is the roof, (hands together and pointing upwards
over your head)
This is the wall, (mime touching a wall)
This is the floor, (look down and stamp your feet)
Repeat again and this time ask the class to join In with
the mimes.
35
\ . .. Л";, .--..
**' •• .Ж ' ‘-T !’ Хл
Module 3 - My Home
Draw lines to match.
Point to the drawings and elicit the names Explain the
activity. The students look and match the missing parts
of the house.
Use the template to make your house.
Then, talk with your friend: This is my house.
The (wall) is (green).
p —( Before going Into class y-----------
Photocopy the house template, (p. 104) one
per student.
Tell the students that they are going to make a house
Show them your model. Guide them through the cutting
and colouring of their templates. Go round the
classroom as the students make their houses and ask
questions about the colours the students have used.
Upon completion of their craftwork, the students work
in pairs and talk about their houses, e.g. The window is
green etc Then they hand In their projects to be
displayed.
ENDING THE LESSON
(An activity to consolidate the language of the lesson.)
у Д FLASHCARDS (16-21)
Shuffle the flashcards and show them to the students,
one at a time, without looking at them as you say. e.g.
This Is the roof. If you guess correctly, the students raise
their hands and you put the flashcard aside. Otherwise,
you shuffle It back Into the pock. Continue playing until
you have guessed all the flashcards.
..................( Lesson 2 |......................
Objectives
To present pieces of furniture. To talk about location.
To explore other subject areas; Maths.
Language
In this lesson the students will learn to understand
• What's this?
• Where s the pencil?
• Where 's (Woody) ?
In this lesson the students will learn to use;
• furniture: table, chair, bed. cupboard.
• It's a (table).
• This is my (chair). It's (red).
• Woody's on the (table).
• Woody's In the (cupboard).
Extra Materials
• Flashcards (22-25) for Presentation & Practice
and the Ending the Lesson activity:
• clay or plasticine for Ex. 1.
•
BEGINNING THE LESSON
(An activity to review the language of the previous
lesson)
Draw a half-finished sketch of a house on the board.
Ask individual students to come to the board and finish
the sketch by drawing a roof, a window, a floor, a wan
and a door. Then point to the sketch of the roof and
ask: What's this? Elicit: This is the roof, etc
PRESENTATION & PRACTICE
(Activities to present and practise the vocabulary of the
lesson.)
WORKBOOK (Optional)
If you wish, you can do Exs 1 and 2 from the Workbook
during this lesson or the next one.
Listen, point to the furniture items and say.
(TRACK 23)
FLASHCARDS (22-25)
Students’ books closed. Put up the flashcards on the
board, one at a time. Point to the pieces of furniture
(table, chair, bed. cupboard) and present them. The
students repeat after you. Point to the pieces of furniture
in random order and ask questions. Elicit the responses
from different students. Demonstrate this yourself first.
e.g. Teacher: (pointing to the table) What's this?
Class: (It's a) table, etc
Students books open. Say: Open your books at page
36
Ж?
Module 3 - My Home
thirty-six. Write the number 36 on the board and hold
up your book. Play the recording. The students listen,
point and repeat.
TAPESCRIPT
Table, chair, bed, cupboard.
Match the furniture items to the silhouettes.
Then, use clay or plasticine to make one of
them. Then say: This is my (chair). It’s (red).
Elicit the names of the pieces of furniture by pointing and
asking: What's this? Explain the activity The students look
at the silhouettes and match them to the items.
Then tell the students to use clay or plasticine to make
one of the Items Once they finish, have the students
show their models to the class and soy: This is my
(chair). It's (red), etc. Make sure you display their work
somewhere In the classroom.
Trace. Then, say: Woody's (on) the (table).
Students’ books closed. Place a pencil on a book and
ask: Where's the pencil? Say: On the book. The students
repeat after you. Place the pencil in the book. Ask:
Where's the pencil now? Say: In the book. The students
repeat after you. Ask a student to come to the front of
the classroom. Give him/her the pencil and the book.
Say: In the book. The student places the pencil In the
book. Ask the rest of the class for verification. Repeat
with as many students as you think is necessary.
Students' books open. Explain the activity. AHow the
students some time to trace the Items Go round the
classroom as they are tracing and ask them to name
the items.
Once they finish. point to Woody sitting on the table and
ask: Where's Woody? Say Woody's on the table. The
students repeat after you. Then point to Woody sitting on
the chair and ask: Where's Woody? Elicit the response:
Woody's on the chair Then point to Woody in the house
and ask: Where's Woody? Elicit: Woody's in the house.
Finally, point to Woody sitting in the cupboard, ask and
elicit the answer: Woody's In the cupboard
Listen and point. Then, sing. (TRACK 24)
Point to the picture of Woody in the house mime and ask:
Where is Woody? Where is little Woody? Where ts Woody?
Woody, where are you? The students repeat after you.
Follow the same procedure for the rest of the song.
Play the recording. The students listen and point to the
correct picture of Woody. Play the recording again.
The students listen and sing along.
TAPESCRIPT
Where Is Woody?
Whore is little Woody?
Where is Woody?
Woody, where are you?
Little Woody 's in the house.
Little Woody 's in the house.
In the house.
In the house.
Where is Woody?
Where Is little Woody?
Where is Woody?
Woody, where are you?
Little Woody's on the table.
Little Woody's on the table.
On the table.
On the table.
Where is Woody?
Where is little Woody?
Where is Woody?
Woody, where are you?
Little Woody 's on the choir.
Little Woody's on the chair.
On the choir.
On the choir.
Where is Woody?
Where is tittle Woody?
Where is Woody?
Woody, where are you?
Little Woody 's in the cupboard.
Little Woody's in the cupboard,
tn the cupboard.
In the cupboard
ENDING THE LESSON
(Activities to consolidate the language of the lesson.)
FLASHCARDS (22-25)
Show the flashcards, one at a time, and ask the students
to name the items. Then put only throe of the four
flashcards on the board Ask tt\e students to name the
missing flashcard Repeat the activity
WORKBOOK (Optional)
If you wish, you can do Exs 3-6 from the Workbook
during this lesson or the next one.
37
.................. Lesson 3 ...................
Objectives
To listen to a story about Woody and Frosty’s tree
house To develop listening comprehension skills
through a dialogue.
Language
In this lesson the students will leam to understand
• What's In your house?
• Who's this?
• What's this?
• Where's... ?
n this lesson the students will leam to use
• Hello. (AMn).
• This Is my (table)
• Where's Frosty?
• Frosty's in bed!
• Wake up, Frostyl
Extra Materials
• the My Home poster for Presentation 8t Practice;
• slips of paper with simple sketches of furniture
for the Ending the Lesson activity.
BEGINNING THE LESSON
(An activity to review the language of the previous
lesson.)
Ask the students to name two Items they have In their
house Have the students report back to the class.
e.g. Teacher What's in your house?
Student 1: (A) table (and) (a) bed. etc
PRESENTATION & PRACTICE
(Activities to present the story and develop students'
listening skills)
Listen to the story and point to the pictures.
(TRACK 25)
'J. POSTER
Students’ books closed. Use the My Home poster to
present the story. Explain to the students. In LT if
necessary, that Woody is showing his house to Alvin
Point to Woody in the first picture and ask: Who's this?
Elicit: Woody. Say as you wove: Hello. AMnl The
students repeat after you. Point to Alvin in the second
picture and say: Hello, Woody! The students repeat
after you. Repeat with the rest of the pictures.
Students’ books open. Say: Open your books at page
thirty-eight. Write the number 38 on the board and hold
up your book Point to Alvin in the first picture and ask;
Who's this? Elicit: Alvin. Then point to the house and
ask: What's this? Elicit a response: eg (This is) a house!
Repeat with the remaining pictures.
Play the recording and ask the students to point to
each picture In their book in turn. Show them what to
do by holding up your book and pointing. Play the
recording again The students listen and repeat,
chorally and/or individually
Point to the first picture on the poster. Ask the students
to complete your sentences
e.g. Teacher: Hello ...
Class: Alvin! etc
Extension
Ask for a volunteer to come and point to the first picture
on the poster. Encourage him/her to say the dialogue.
Ask the rest of the class for verification. Repeat with
different students for the rest of the story.
TAPESCRIPT
Frame I
Woody: Hello. Alvinl
Frame 2
AMn: Hello. Woodyl
Frame 3
Woody: This 1$ my table.
Frame 4
Woody: This is my bed.
Frame 5
AMn: Where's Frosty?
Frame 6
Woody Frostys In bed I
Frame 7
Woody: Wake up. Frosty!
Read the question at the bottom of page 39. Ask the
students to draw a happy face or a sad face
depending on whether they like the story or not. Ask
them to tell you. in LT If necessary, what they like most.
38
ENDING THE LESSON
(An activity to consolidate the language of the lesson.)
------( Before going Into class )-----
Prepare slips of paper with simple sketches
of the furniture items, one for each pair of
students.
Prepare slips of paper with simple sketches of the
furniture items students have learned in this unit. Divide
the class into pairs. Tell the students that you are moving
house and they have to help you move the furniture.
Give each pair a slip of paper. The students look at the
picture on the slip of paper, name the piece of furniture
and mime moving the piece across the room to a
designated area where a supposed removal van is
................... Lesson 4 }..................
Objectives
To talk about animal homes.
Language
In this lesson the students will learn to understand
• This is a (doghouse).
• Animal homes: nest, basket, fish tank,
doghouse
In this lesson the students will learn to use
• dog, fish, bird, cat
Extra Materials
• Scissors, markers, paper bags for each student
for Ex. 3;
• A4 sheets of paper for each student for the
Ending the Lesson activity.
simple sketch of a doghouse on the board, point to it
and say: This is a doghouse The students repeat after
you. Invite students to tel! you which animal lives in it.
Repeat with the rest of the animal homes
Students’ books open. Say: Open your books at page
forty. Write the number 40 on the board and hold up
your book. Ask the students to follow the lines and draw
the homes as in the example.
Spot the mistakes.
Explain the activity. Ask the students to find and circle
the mistakes. Check their answers.
tterm to be circled:
fish. cat. bird
Make your own Pet House!
------C Before going mto class )--------
Bring in paper bags, one for each student.
Read the instructions and explain the activity. Show the
students your model Guide them through the cutting
and gluing of the pet house. Draw and cut around a
door frame. Then draw windows. Ask the students to
draw a picture of their pet inside the house.
Alternatively, they can attach a photo.
ENDING THE LESSON
(An activity to consolidate the language of the lesson.)
Provide the students with a sheet of paper The
students think of another animal and draw It and Its
home. Display their work somewhere In the classroom.
BEGINNING THE LESSON
(An activity to review the language of the previous lesson.)
Play the dialogue from the previous lesson (Track 25).
The students listen and follow In their books.
PRESENTATION & PRACTICE
(Activities to talk about animal homes.)
Follow and find the animal homes. Then,
draw them on the right sheet.
Students' books closed. Tell students, in LI if necessary,
that animals live in different types of homes. Draw a
...............4 Lesson 5 I*....................
Objectives
To consolidate the language learnt In the module.
To draw a picture of one’s room.
Language
In this lesson the students will ieam to understand
• Where s the (blue) book?
In this lesson the students will learn to use:
• (On) the (table).
• This Is room. Look/ This is my (bed)
Extra Materials
• Various furniture magazines for the Ending the
Lesson activity.
39
Module 3 - Му Home
нЯН
BEGINNING THE LESSON
(An activity to review the language of the previous lesson)
Draw simple sketches of furniture on the board. Elicit
their names.
PRACTICE
(Activities to consolidate furniture and parts of the house.)
listen and tick (✓). (TRACK 26)
Point to and elicit the parts of the house. Explain the
activity The students listen and tick the items they hear
Check their answers.
Items to be ticked: window, door, roof
TAPESCRIPT
Window, door, roof.
What's next? Look and draw.
Explain the activity. Allow the students some time to
complete the activity. Then, students point to and
name the items. Ask the rest of the class for verification.
Students draw a bed and a chair.
Students draw two tables
Students draw a house and a window.
Listen and colour. (TRACK 27)
(An activity to consolidate talking about location.)
Point to the blue book and elicit Its colour. Ask: Where's
the blue book? Elicit: On the table Play the recording,
twice if necessary The students listen and colour the
books.
a yellow book In the cupboard
a green book on the bed
a red book in the schoolbag
TAPESCRIPT
Where's the blue book? On the table
Where's the yellow book? tn the cupboard.
Where's the green book'’ On the bed.
Where's the red book? In the schoolbag.
Extension
Divide the class into two teams. Ask the students to look
at the picture of Ex. 3 for a minute, then close their
books. Ask questions about the location of each book.
Lach correct answer gets one point. The team with the
most points Is the winner.
e g. Teacher: Where 's the blue book?
Student I Team A: On the table
Teacher: Correct! Team A gets I point.
Where 's the red book?
Student 1 Team B: In the schoolbag etc
Portfolio: Draw a picture of your room.
Present it to the class. Say: Look! This is my
(bed).....
(An activity to develop fine motor skills and consolidate
the language of the module.)
Point to the picture and elicit the Items. Then say: This is
my room! Lookl This is my bed, my table and my chair
Ask the students to draw a picture of their room and
present it to the class. Make sure you display their work
somewhere In the classroom. Then help them file their
drawings in their Junior Language Portfolios
ENDING THE LESSON
(An activity to consolidate the language of the lesson.)
Bring in various furniture magazines
Divide the students in groups and assign a piece of
furniture (bed. table, chair, cupboard) to each group. Ask
the groups to look through magazines and find pictures of
their piece of furniture and make a collage. Make sure
you display their work somewhere in the classroom.
.... Letton 6 - Our Wortd/My Wortd —...
Objectives
To familiarise students with fairy tale characters and
their houses.
Language
n this lesson the students will learn to understand:
• UK. USA. Germany. France
• Belle. Hansel and Gretel. Pocahontas, Jack
n this lesson the students will learn to use
• Look at (Belle) s house Look at the (roof)
• (Is it) In the (cupboard)?
Extra Materials
• A map of the world for Ex. 1 (Optional):
• flashcards (16 25) for the Ending the Lesson
activity.
40
BEGINNING THE LESSON
(An activity to review the language of the previous
lesson.)
Ask the students to present the drawings they made In
the previous lesson.
OUR WORLD
(Activities to familiarise students with fairy tale characters
and their houses )
Look at the pictures and draw lines to match
the houses to the right fairy tale character.
Then, point and say: Look at (Jock's) house.
Look at the (roof).
Students books open. Say; Open your books at page
forty-four. Write the number 44 on the board and hold
up your book. Direct the students' attention to the flags
and the fairy tale characters Point to the French flag
and say; France. If you have a map of the world, put it
up on the board and show where France is. Then point
to the fairy tale character holding the French flag and
ask: Who's this? Elicit the name: Belle. Have a class
discussion about the fairy tale in LI. If the students ore
not familiar with the character tell them that Belle is a
character from Beauty and the Beast
Repeat by pointing to the remaining flags and fairy tale
characters and eliciting their names. (Hansel and Gretel
- Germany. Pocahontas - USA. Jack from Jack and the
Beanstalk - UK).
Explain the task. Tell the students to match the
characters to the houses. Once they finish, have
students say whose house it Is. Demonstrate this yourself
flrsl by pointing to the picture of the cottage and
saying: Look at Jack's house. Look at the roof.
Encourage the students to point to the parts of the
house that they know and name them.
MY WORLD
(Activities for the students to explore and talk about
their own culture in English.)
Look and say the name of the fairy tale.
Point to the picture and elicit, in LI, the name of the
fairy tale character (Snegurochka). Ask the students to
tell you. In LI. what the story Is about and If they like It.
Draw your favourite fairy tale character.
Explain the activity. Allow the students some time to
draw their favourite fairy tale character. Then they
present it. Alternatively, the students can make a
collage of pictures from their favourite fairy tale. You
can help them write the title In English.
Optional Activity
Ask the students to draw or find pictures of their
favourite fairy tale/cartoon character and his/her
house. Make sure you display their work somewhere in
the classroom
Play the Hide the Object game.
Ten the students they are going to play the Hide the
Object game. Explain the game. Ask a student to leave
the classroom while you hide an object. The student
returns to the classroom and asks questions In order to
find the object, eg. (Is it) in the cupboard? etc. Once
he/she finds the object, the game is repeated with other
students.
ENDING THE LESSON
(An activity to consolidate the language of the module.)
FLASHCARDS (16-25)
Hold up the flashcards, one by one. and ask the class
for verification.
eg Teacher: (holding roof flashcard) Roof.
Student 1: Yes.
Teacher: (holding cupboard flashcard) Table.
Student 2: No. etc
........ Lesson 7 - Storyland ...............
Objectives
To listen to a Russian story in English. To develop
listening and speaking skills.
Language
In this lesson the students will learn to understand
• Can they pull the turnip out?
In this lesson the students will leam to use
• come, hold
Extra Materials
• Flashcards (26-27) for Presentation & Practice.
BEGINNING THE LESSON
ENDING THE LESSON
(An activity to revise the story )
Ask the students If they remember what the previous
episode of the story was about. If not ask them to go to
the respective page (32) and look at the picture.
(An activity to consolidate the language of the lesson.)
Narrate the story The students mime it.
PRESENTATION & PRACTICE
........... Lesson 8 - Checkpoint ....
• Objectives
•Jo consolidate the language of the module.
(Activities to present the tale of The Giant Turnip'.)
Listen, point to the pictures and repeat.
(TRACK 28)
FLASHCARDS (26-27)
Students' books closed Put up the flashcards on the
board. one at a time. Point to the Items on the flashcards
(come, hold) and present them. The students repeat
after you. Mime the actions. The students name them.
Students' books open. Say: Open your books at page
forty-six Write the number 46 on the board and hold up
your book Play the recording. The students listen, point
and repeat.
TAPESCRIPT
Come. hold.
Listen to the story. (TRACK 29)
Direct the students’ attention to the picture. Point to
the characters and present them. Point to the turnip
and the characters and ask: Can they puli the turnip
out? Let's see! Play the recording for the students to
listen to the story. Play the recording again. The
students listen and point to the characters as they are
mentioned. Play the CD a third time with pauses. The
students listen and repeat, chorally and/or individually.
w Listen and circle. (TRACK 30)
Elicit the Items. Explain the activity. The students listen
and circle the item they hear. Check the students'
answers.
Items to be circled:
1 roof 3 door
2 chair 4 cupboard
TAPESCRIPT
One: roof
Two: chair
Three : door
Four: cupboard
Draw and say where the Items are.
Elicit the names of the school Items as well as the
furniture Explain the activity The students trace the
furniture. Then they point and soy where the Items are.
Check the students' answers.
1 The pencil case Is on the table.
2 The schoolbag is under the chair.
3 The table is in the tree house.
4 The schoolbag is under the table.
Note: The students are now ready to do Module Test 3.
TAPESCRIPT
"Please help me pull out the tumlpl" the old man soys
to his wife. "Alright. I'm coming. ' she says. So. she holds
the old man. The old man holds the turnip. They pull
and pull. But they can 't pull the turnip outl "We need
help." she says. So she calls Little Anna.
42
1МЫ
Module 4 - My Toys
-
................4 Lesson 1 ф......................
Objectives
To present and practise the names of toys.
Language
In this lesson the students will learn to understand
• How many (planes) ? Let's count I
• What have you got?
In this lesson the students will learn to use
• Yesl/No!
• toys: doll, ball, car. train, plane, teddy
• Here 's a (doll).
• I've got a (red teddy).
Extra Materials
• Flashcards (16-25) for the Beginning the Lesson
activity;
• the My Toys poster for Presentation & Practice.
• flashcards (28-33) for Ex. 4 and the Ending the
, Lesson activity.
BEGINNING THE LESSON
(An activity to review the language taught in the
previous module.)
FLASHCARDS (16-25)
Hold up the flashcards, one at a lime, and say the
word. Ask the students to answer yes or no
e g. Teacher: (holding up the house flashcard) House.
Student 1: Vest
Teacher: (holding up the floor flashcard) Table
Student 2: No! etc
PRESENTATION & PRACTICE
(Activities to present and practise toys.)
Listen, point to the toys and say. (TRACK 31)
POSTER
Students' books closed. Put up the My Toys poster on the
board. Point to the toys (doll, bail, car. train, plane,
teddy), one at a time, and say the word. The students
repeat after you. Point to the toys In random order and
say: Here's a (doll). Individual students name the toys.
Students’ books open. Say Open your books at page
forty-eight. Write the number 48 on the board and hold
up your book. Read the title and say/eliclt what It
means. Play the recording. The students listen, point to
the toys and repeat. Check their pronunciation and
intonation.
Point to the doll and say: Here s a doll. The students
repeat after you. For the remaining toys, ask the
students to point to a toy and say. e.g Here's a (ball)
TAPESCRIPT
Doll, ball. car. train, plane, teddy.
Listen to the song and circle the toys you
hear. Then, sing. (TRACK 32)
Point to the boy on the poster and say: boy The
students repeat after you. Do the same with the girl.
Then point to the train and say: I've got a train! The
students repeat after you. Then point to the boll and
encourage the students to finish your sentence: I've
got a (ball). Repeat with the teddy and the doll. Play
the recording Ask the students to listen to the song and
circle the toys they hoar. Check their answers. Play the
recording again, encouraging the students to sing
along, while pointing to the toys they have circled.
Items to be circled: train, ball, teddy, doll
TAPESCRIPT
I've got a train.
I've got a ball!
I've got a teddy,
I've got a doll!
AU the girts
And all the boys
Have got a lot of
Lovely toys!
Extension
Repeat the song without the recording. Point to the
pictures on the poster and encourage the students to
complete the sentences Keep the rhythm by clapping
your hands or snapping your fingers.
e g Teacher: l‘ve got a... (pointing to the train)
Class: train)
Find the toys in the picture, count them and
say: One plane.......
Refer the students to 1he picture, point to the toys and
elicit the words. Explain the activity Point to the plane and
ask: How many planes? Let's count! One. Repeat the
question: How many planes? Elicit the answer One piarye.
Repeat the procedure with the rest of the toys
one plane three balls
four cars two trains
Look and colour the toys you've got. Then,
say: I've got a (red teddy)......
Refer the students to the picture, point to different toys
and ask individual students to ten you what they are
Explain the activity. Ask the students to choose the toys
they’ve got and colour them using the colours they
know. Allow them some time to do the colouring. Then
individual students present their toys.
eg. Student 1: I've got a yeHow teddy bear. a red train
and a yellow doll, etc
Play the Gotcha! game.
FLASHCARDS (28-33)
Explain the game. The students sit. preferably in a
circle. Put the flashcards of the toys (doll, bail. cor.
train, plane, teddy) on the floor, in the middle of the
circle. Choose a student and ask him/her to sit with his
back to the rest of the students in the circle. The
remaining students choose one of the flashcards to be
the Gotcha! flashcard. The student then turns around
and points to the flashcards as he/she names them,
one by one As soon as the Gotcha1 flashcard is
pointed to and named, the remaining students shout
Gotcha! and the student returns to the circle, keeping
the Gotcha! flashcard. Another player is then chosen
and the game continues.
Note: if you wish, you can use the flashcards from the
previous modules, as well
ENDING THE LESSON
(An activity to consolidate the language of the lesson.)
FLASHCARDS (28-33)
Hand out the toy flashcards to different students. Ask
each student: What have you got? Encourage them to
answer. I've got a (ball). Repeat the activity so that all
the students participate.
WORKBOOK (Optional)
If you wish, you can do Exs 1 and 2 from the Workbook
during this lesson or the next one.
...............* Lesson 2 .....................
.'Objectives *.
: To present and practise numbers 6-10. To consolidate:
: numbers 1-5. To explore other subject areas Maths :
: Language •
• In this lesson the students will learn to understand •
• • Count six pencils. ;
• • И/haf is it? Is it a train? •
• •
: In this lesson the students will learn to use:
: • Numbers 1-10. :
: • (Three) and (three) is (six).
: • I've got a ....
• Extra Materials
• • Flashcards (28-33) for the Beginning the Lesson •
activity;
• • photocopies for the finger puppets templates •
(pp. 105-107) for each student for Ex. 3. .•
BEGINNING THE LESSON
(An activity to review toys.)
Д FLASHCARDS (28-33)
Put the flashcards 28-33 in a pack. Go around the
classroom showing individual students two or three toys
each and asking them to name them
PRESENTATION & PRACTICE
(Activities to present and practise numbers 6-10.)
Listen and say the numbers, (track 33)
Students' books closed. Collect ten penclls/pens from
the students Hold the pencils up. one by one, and
count them out loud. Ask the students to join in. Then
Invite individual students to come to the front of the
classroom, take your rote and repeat the activity.
Finally, say the numbers at random and ask the
students to count the pencils according to the
corresponding number.
e g. Teacher: Count six pencils.
Student 1: One. two. three, four. five, six pencils
etc
Students’ books open. Soy: Open your books at page
fifty. Write the number 50 on the board and hold up
your book Play the recording. The students listen, point
to the numbers and repeat.
TAPESCRIPT
Six. seven, eight, nine. ten.
Count and find the toys. Then, say: I've got
a (train).
Write the following on the board: 3 + 5 =.... Say: Three
and five Is.... Elicit the answer: eight. Write the number
on the board and ask the students to do the same In
the first speech bubble. Ask the students to do the rest
of the sums and write the numbers. Check around the
classroom, providing any necessary help. Ask the
students to tell you the sums.
e g Student 1: Three and three is six.
Student 2: Nine and one is ten.
Student 3: Five and two is seven
Student 4: Three and six is nine.
Then ask the students to find the corresponding toy
each child (1-5) has got
Point to the first child and say: I've got a train. The
students repeat after you. Follow the same procedure
for all the children in the pictures, inviting the students to
repeat after you.
2 I've got a teddy. 4 I've got a plane.
3 I've got a doll 5 I've got a ball
Memory game (Optional)
Ask the students to look at the toys for one minute
before they close their books Say a number. The
students name the corresponding toy.
e.g. Teacher: Tenl
Student 1: DoH! etc
Listen and join the dots. Then say what it is.
" (TRACK 34)
Point to the incomplete picture and ask: What is It? Is It a
train? Invite guesses as to what it Is. Explain the activity.
Play the recording, twice if necessary. The students listen
and join the dots. Point to the completed picture and
ask again: What Is it? Elicit: (It s) a plane.
TAPE SCRIPT
One. eight. six. four. nine, seven, two, ten, three, five, one
Extension
Allow the students time to colour the plane. Colour
your plane, hold up your book and say: I've got a (red)
plane. Ask Individual students to hold up their book and
present their plane to the rest of the class.
Make the number finger puppets and sing.
(TRACK 35)
<———-—;-----~----I---\
Before going into claw J-
Photocopy the finger puppets templates
and give one photocopy to each student,
the students make the finger puppets and
put them on their fingers.
Refer the students to the picture. Show them your
model and ask the students to cut out and colour their
finger puppets. Provide any necessary help.
Put on your finger puppets and say Count with me! The
students do the same and repeat after you. Then say:
Count with me to tenl The students repeat after you.
Say the numbers as you wiggle the corresponding
fingers. The students do the same. Play the recording.
The students listen and do the actions. Play the
recording again. The students sing and do the actions.
TAPESCRIPT
Count with me.
Count with me to ten:
One. two. three, four. five. six.
Seven, eight, nine and tenl
Extension
Ask the students, in pairs, to show a finger puppet to
their partner and he/she has to say which number is
shown each time. Monitor the activity around the
classroom.
ENDING THE LESSON
(An activity to review numbers I-10)
Ask the students to choose a number from 1-10. Ask
them to write It on a piece of paper and decorate their
paper with toys denoting that number, e g
45
Display their work grouping them by number, i.e. all the
1's are together, etc.
WORKBOOK (Optional)
If you wish, you can do Exs 3.4 and 5 from the Workbook
during this lesson or the next one.
................... Lesson 3 ?...............%
Objectives
To listen to a story about the characters playing
with their toys. To develop listening comprehension
skills through a dialogue
Language
In this lesson the students will learn to understand:
• Let's play!
In this lesson the students will leam to use
• Where's the ball?
• It's tn the tree!
• I've got a (dolt)!
Extra Materials
• A4 sheets of paper for each student for the
Beginning the Lesson activity.
• the My Toys poster for Presentation & Practice..
BEGINNING THE LESSON
(An activity to review numbers I-10.)
Provide each student with a sheet of paper. Ask them
to draw outlines of their hands on it and colour them in.
Write the numbers 1-10 on the board Ask the students
to write the numbers. In sequence, above each finger.
Then they present their drawings to the class.
PRESENTATION & PRACTICE
(Activities to present the story and develop students'
listening skills.)
Listen to the story and point to the pictures.
(TRACK 36)
POSTER
Students' books closed. Use the My Toys poster to present
the story. Explain to the students. In LI If necessary, that
the characters have got a lot of toys and want to play.
Point to the toys in the first pcture and elicit their names.
Then say: Let's playl The students repeat after you. Point
to Frosty in the second picture and soy: Lovely toysl The
students repeat after you. Repeat with the rest of the
pictures
Students' books open. Say: Open your books at page
fifty-two. Write the number 52 on the board and hold
up your book. Ask students to identify the characters
and the toys they know
eg. Student: (pointing to Alvin in Frame 1) (This is)
AMn! etc
Play the recording and ask the students to point to
each picture in their book in turn. Show them what to
do by holding up your book and pointing. Play the
recording again. The students listen and repeat,
chorally and/or individually.
Point to the first picture on the poster. Ask the students
to complete your sentences.
eg Teacher: Let's...
Class: play! etc
Extension
Ask for a volunteer to come and point to the first
picture on the poster. Encourage him/her to say the
dialogue Ask the rest of the class for verification.
Repeat with different students for the rest of the story.
TAPESCRIPT
Frame I
AMn: Let's playl
Frame 2
Frosty: Lovely toysl
Frame 3
Ertina: I've got a doll!
Frame 4
Woody: I've got a ball!
Frame 5
Woody: Let's playl
Frame 6
Frosty: Where's the ball?
AMn: It's In the tree.
Frame 7
Frosty: Lookl I've got a plane!
Read the question at the bottom of page 53. Ask the
students to draw a happy face or a sad face,
depending on whether they like the story or not. Ask
them to tell you, in L1 if necessary, what they like most.
46
л*:
ж
Module 4 - Му Toys
ENDING THE LESSON
(An activity to consolidate the language of the lesson.)
Ask indlviduol students to come to the board, say: I've
got a ... and mime a toy. The rest of the class has to
guess what It is.
eg. Student 1: I've got a... (mimes (tying)
Class: plane' etc
Note: For the next lesson, ask each student to bring on
empty coffee can to class.
...............* Lesson 4 >..................
: Objectives ;
• To talk about recycling, to talk about how we can •
: recycle an empty coffee can by using It for multiple;
: purposes. :
• •
Language
• In this lesson the students will leam to understand :
• • coffee can. money box. marbles
• In this lesson the students will leam to use: ;
; • recycle glass, paper, aluminium ;
• •
• Extra Materials
• • An empty coffee can for Ex. 2;
• • A4 sheets of paper for each student for the!
\ Ending the Lesson activity.
BEGINNING THE LESSON
(An activity to revise the dialogue )
Play the dialogue from the previous lesson (Track 36).
The students listen and follow In their books
PRESENTATION & PRACTICE
(Activities to talk about recycling )
Draw lines to match. Then, colour the
pictures.
Students' books closed. Draw a simple sketch of the
recycling symbol on the board Point to it and say:
Recycle. The students repeat after you. Have □ class
discussion, in LI if necessary, about recycling and what
we can recycle. During this stage present the words
glass, paper and aluminium.
Students' books open. Say: Open your books at page
fifty-four. Write the number 54 on the board and hold
up your book. Refer the students to the picture and
explain the activity. Allow the students some time to
draw lines from the items to the right recycling bin.
Check the students' answers.
Colour the pictures.
Have an empty coffee can ready to use.
Explain the activity. Hold up the coffee can and say
the word for it. The students repeat after you. Tell the
students that instead of throwing them away, we can
use empty coffee cans for multiple purposes. Point to
the pictures and explain to the students that we can
use an empty coffee can to keep marbles In It. or we
can use It as a money box to save money, or as a
pencil holder. Ask the students to colour the coffee
cans as they wish
Note: It Is Important that the students learn the
importance of recycling. The students should be
encouraged to go home and try and reuse cans to
make other things. This depends to a great extent on
how enthusiastic and eager we teachers are when we
present this activity. If the students see that we love
things made out of recycled cans, they will do it even
if it is just to please us.
Play the Coffee Can game.
Collect five empty coffee cans from tne students and
write numbers 1-5 on them Time permitting, ask the
students to decorate them. Put the cans in a row and
use a rubber to demonstrate the game. Stand
opposite the coffee cans and say the number (1 -5) you
will be aiming at. e g. 2. Try to throw the rubber in can
Number 2. If the rubber gets into the can, you get 1
point and you can play again. It the rubber taHs out ot
the can. you miss a turn and it is the other player s turn
to play. The students play the game in two teams. The
team with the most correct shots (points) wins the
game.
Note: Instead of a rubber, you can use other objects as
well, such as a coin, a marble, a button, etc.
ENDING THE LESSON
(An activity to consolidate the language of the lesson.)
Provide the students with a sheet of paper. The
students think of other ways of reusing a coffee can
(e g. a flower pot) and draw a picture Display their
work somewhere In the classroom.
47
Objectives
To consolidate the language leamt in the module
To distinguish between big and small Items. To draw
a picture of a toy.
Language
In this lesson the students will learn to understand
• How many?
In this lesson the students will learn to use:
• blg/small
• The (big ball is tn the (big) box.
• This is my favourite toy. It's a ...
Extra Materials
• Flashcards (28-33) for the Beginning the Lesson
. activity.
BEGINNING THE LESSON
(An activity to revise the language of the previous lesson.)
FLASHCARDS (28-33)
Put up the toy flashcards on the board. Ask a student
to come to the board. Name a toy Ask the student to
point to the corresponding flashcard. Ask the rest of
the class for verification. Repeat with as many students
as you think is necessary
PRACTICE
(Activities to consolidate toys and size.)
Listen and colour. (TRACK 37)
Say: Open your books at page fifty-six. Write the number
56 on the board and hold up your book. Refer the students
to the picture and explain the activity Elicit the names of
the toys. Play the recording, twice If necessary The
students listen and colour the items. Check their answers.
a red teddy
a pink doll
TAPESCRIPT
a blue plane a green train
a yellow ball
Woman: Can you see teddy?
Boy: The teddy? Yes / can see the teddy
Woman: Colour the teddy red.
Boy: A red teddy. OK.
Woman: Can you see doll?
Boy: The doll? Yes. I can see the doll. What colour
is the doll?
Woman: Colour the doll pink.
Boy: The don is pink. OK.
Woman: Colour the plane blue.
Boy: The plane? Blue?
Woman. Yes. Colour the plane blue.
Boy: A blue plane. OK.
Boy: What colour Is the ball?
Woman: The ball is yellow.
Boy: A yellow ban. OK.
Woman: Can you see train?
Boy: Yes What colour is the train?
Woman: Green. Colour the train green.
Boy: The train is green. OK.
Count and write the number.
Explain the activity. Allow the students some time to
complete the activity. Check the students' answers.
A 6 В 10 C 4
Put the big toys Into the big toy box and
the small toys into the small toy box. Then,
say: The (big ball) is in the (big box).
Draw a big and a small boll on the board. While you are
doing this, say: Look, a big ball. Look, a small ban.
Emphasise the words Ыд and small, and ask the students
to repeat after you. Then ask the students to draw big
and small balls in the air. according to your instructions
Explain the activity. The students have to put the big
toys In the big box and the small toys In the small box.
Allow them time to complete the activity. Then point to
the picture of the big teddy and say: a big teddy. Point
to the arrow and follow the course of the teddy into the
big box. Say: The big teddy is in the big box. The
students repeat after you. Invite individual students to
say similar sentences for the rest of the toys.
The small teddy is In the small box.
The big doU is in the big box.
The small doll Is In the small box.
The big train is in the big box.
The small train is in the small box
The big ball Is In the big box.
The small ball is in the small box
Portfolio: Draw a picture of your favourite
toy. Present it to your class: This Is my
favourite toy. It's a (teddy).
(An activity to consolidate the language of the module.)
Point to the picture and elicit the toy. Then say: This Is
my favourite toy. It's a teddy. Ask the students to draw
a picture of thetr favourite toy and present it to the
class. Make sure you display their work somewhere in
the classroom. Then help them file their drawings in
their Junior Language Portfolios.
ENDING THE LESSON
(An activity to consolidate the language of the lesson.)
Ask a student to come to the board. Say: A big ball.
The student draws a big ball on the board. Ask the rest
of the class for verification. Repeat with as many
students as you think is necessary.
WORKBOOK (Optional)
If you wish, you can do Exs 6 and 7 from the Workbook
during this lesson or the next one.
.... Lesson 6 - Our World/My Wohd .............
• Objectives •
• To familiarise students with British. Chinese and Russian •
; culture. To talk about popular toys in the UK. China •
• and Russia. ;
:Language !
: in this lesson the students will learn to understand :
: • UK. China. Russia :
: • toys (yo-yo. Matryoshka) j
• In this lesson the students will learn to use: •
• • (Three) and (two) is (five). (Five) is (blue)!
• • I've got a big car. Kelly's got a small car. •
: Extra Materials j
: • A map of the world for Ex. 1 (Optional);
• • A4 sheets of paper for each student for the:
Ending the Lesson activity.
BEGINNING THE LESSON
(An activity to review the language of the previous lesson.)
Ask the students to present the drawings they made in
the previous lesson.
OUR WORLD
(Activities to familiarise students with aspects of British
and Chinese culture.)
Look at popular toys from the UK and China.
Then, circle the odd one out.
Students’ books closed. Ask the students. In LI If necessary,
which toys are the most popular In their country. Explain to
them that today they are going to learn about popular
toys in the UK and China and tak about popular toys in
their country.
Students' books open. Say: Open your books at page fifty-
eight. Write the number 58 on the board and hold up your
book. Point to the British flag and say. UK if you have a
map of the world, put it up on the board and show where
the UK is. Repeat the same procedure with the flag of
China. Point to the first picture and elicit the toy (teddy).
Point to the second ptcfure and elicit that it is a yo-yo.
Point to the groups of pictures below Ask the students
to look carefully at each group of toys and circle the
odd one out.
Items to be circled: The 2nd teddy, the 3rd yo-yo. the
4th plane.
MY WORLD
(Activities for the students to explore and talk about
their own culture In English.)
Draw your favourite toy.
Explain the activity Allow the students some time to
draw their favourite toy. Then students present them.
Display the students' work somewhere in the classroom.
Count and colour. Then, say: (Three) and
(two) Is (five). (Five) Is (blue)l
Point to the picture of the train and the sums. Tell the
students to calculate the sums and colour each port of
the train according to the corresponding number
deriving from the sum. Then point to each sum and say:
e g. Three and two is five. Five is blue! etc.
Four and four is eight. Eight is yellow.
Four and three is seven. Seven Is green
Five and five Is ten. Ten Is pink.
Five and four is nine. Nine is orange.
Four and two Is six. Six is red.
ENDING THE LESSON
(An activity to consolidate the language of the lesson.)
The students work in pairs. Provide each student with a
sheet of paper. Hand out a toy flashcard to each pair
and ask them to draw the item given. One draws a big
toy and the other draws a small toy. e.g. a small car
and a big car Invite the students to tell you about their
pictures.
e g. Student J; I've got a big car. Kelly's got a small
car. etc
49
........... Lesson 7 - Storyland ..............
: Objectives •
• To listen to a Russian story In English To develop;
: listening and speaking skils. •
• •
• Language
• In this lesson the students will leam to understand: :
• • Can they pull the turnip out?
: In this lesson the students will learn to use
: • pull, turnip •
• Extra Materials j
* •. • None.
•e e*
BEGINNING THE LESSON
(An activity to revise the story.)
Ask the students if they remember what the previous
episode of the story was about. If not. ask them to go
to the respective page (46) and look at the picture.
PRESENTATION & PRACTICE
(Activities to present the tale of 'The Giant Turnip .)
Listen to the story. (TRACK Зв)
Students' books open Say: Open your Cooks at page
sixty Write the number 60 on the board and hold up
your book Direct the students' attention to the picture.
Point to the characters and elicit their names. Point to
the turnip and the characters and ask: Can they pull
the turnip out? Let’s seel Play the recording for the
students to listen to the story Play the recording again.
The students listen and point to the characters as they
are mentioned Play the CD a third time with pauses.
The students listen and repeat, chorally and/or
Individually.
TAPESCRIPT
'Alright. I’m coming.' she says. So. Little Anna holds the
old woman the old woman holds the old man. The old
man hotels the turnip They puli and pull. But they can’t
pull the turnip out! 'We need help. * says Little Anna. So
she calls the dog
ENDING THE LESSON
(An activity to consolidate the language of the lesson.)
Narrate the story. The students mime It.
............ Lesson 8 - Checkpoint ..........
: Objectives •
•Jo consolidate the language of the module.
•• »•*
What are they? Look, point and say.
Explain tt>e activity. The students look at the pictures and
name the toys Ask the rest of the class for verification.
Write the numbers.
If you wish, revise numbers 1-10. Explain the activity The
students count and write the correct number. Check
the students' answers.
A 9 В 6 C 8
Note: The students are now ready to do Module Test 4.
50
.
* А II М» * • - ' *•
Module 5 - Му Face
.................. Lesson 1 £.................
Objectives
То present and practise parts of the face
Language
In this lesson the students will learn to understand:
• What's this?
• Touch your eyes
• How many eyes?
• И/hof cotour is it?
In this lesson the students will learn to use:
• parts of the face: nose, hair, ears. eyes, mouth,
tongue.
• He s got (one Pig eye).
• Look at me! I ve got (five big eyes and one big
mouth).
Extra Materials
• Toys or pictures of toys for the Beginning the
Lesson activity;
• the My Face poster for Presentation & Practice:
• paper plates for Ex. 4. one for each student.
• A4 sheets of paper for each student for Ex. 2
, (Extension) and the Ending the Lesson activity..
BEGINNING THE LESSON
(An activity to revise the language from the previous
module)
Before the lesson, hide real toys (or pictures of toys) in
the classroom. Ask the students to look around the
classroom and see if they can find them Once they
do. they show the toy to the class and name It.
PRESENTATION & PRACTICE
(Activities to present and practise the vocabulary of the
lesson.)
’A Listen, point to the parts of the face and say.
(TRACK 39)
POSTER
Students' books closed. Put up the My Face poster on the
board. Point to the parts of the face (nose. hair. ears,
eyes, mouth, tongue), one at a time, and present them.
The students repeat after you. Then point to the different
parts of the face in random order and ask questions. EUctt
responses from the students. Demonstrate this yourself first.
Students’ books open. Say: Open your books at page
sixty two. Write the number 62 on the board and hold
up your book. Play the recording The students listen,
point and repeat.
TAPESCRIPT
Nose. hair. ears. eyes, mouth, tongue
5^ Listen and point. Then, sing and do.
(TRACK 40)
Elicit the names of the different ports of the face by
pointing and asking: What's this? Pre-teach the word
touch. Touch your nose with your finger and say: Touch
your nose The students mime the action and repeat
after you. Now pull your tongue out and say: Pull your
tongue out. The students mime the action and repeat
after you. Explain the activity. Play the recording, The
students listen, and do the actions.
Play the recording again. The students listen, point and
sing along.
TAPESCRIPT
Touch your nose.
Touch your hair.
Touch your ears.
There and there!
Touch your eyes.
Touch your mouth.
Pull your tongue
Right outl
Find the parts of the face in the picture.
Then, play the Touch game.
Tell the students to look at the pictures In their books.
Explain the activity. The students find the items in the
picture and point to the different parts of the face.
Then play the Touch game.
e.g. Teacher: Touch your eyes!
Students: (touch their eyes) etc
Extension
Provide each student with a sheet of paper. Draw an
oval shape on the board. Say: face Ask the students to
copy It onto their piece of paper and hand It to the
student on thoir right. Ask the students to draw a nose
on the face and pass it on to the student on their right.
Continue with the hair. eyes. ears, mouth and tongue.
When they have finished, collect the faces and show
them to the class.
e.g. Teacher: (pointing to the nose) What s this?
Class: (It's a) nose, etc
51
: —л, - . -:л ,,..л -:
''
Module 5 - Му Face
Listen and number. Then, point and say:
He's/She's got.... (TRACK 41)
Explain the listening activity. Tell the students they are
going to listen and number the characters. Point to the
first monster and ask: How many eyes? Elicit the
answer: One. Point to his hair and ask: What colour is it?
Elicit the answer: Orange. Follow the same procedure
with the rest of the monsters. Play the recording as
many times as you feel is necessary to do the task.
Check the students’ answers.
Then have the students describe the monsters. During
this stage, draw students' attention to the use of he for
men and she for women.
2 4 3 1
TAPESCRIPT
One. I've got green hair and three eyes.
Two: I've got one eye and one big mouth
Three: I've got three eyes and four ears.
Four: I've got pink hair and four eyes.
it Make a monster mask. Then, say: Look at
me! I've got....
-------Before going into doss )—
Bring In paper plates, one per student.
WORKBOOK (OptionaD
If you wish, you can do Exs 1 and 2 from the Workbook
during this lesson or the next one.
Objectives
To talk about how to keep clean. To explore other
subject areas: Health and Safety.
Language
In this lesson the students will learn to understand
• Woody is dirty.
• shampoo, brush, soap, toothpaste
• Now Woody is clean.
• What's this?
In this lesson the students will learn to use:
• wash your hands, wash your face, brush your
teeth, brush your hair
• It's a/an....
• (It's) orange.
Extra Materials
• Flashcards (40-43) for Presentation & Practice
and the Ending the Lesson activity.
• a scarf and photocopies (pp. 108-110) of the
ears, mouth, eyes and nose templates for Ex. 2.
Tell the students that they are going to make a monster
mask. Show them your model and hand out the paper
plates. Guide the students through the cutting and
colouring of their masks. Go around the classroom
while the students make their masks, point to the parts
of the face and ask the students to name them
Upon completion of their masks, the students hold their
masks over their faces and describe them Demonstrate
this yourself first, eg Look at mel I've got five big eyes
and one big mouth. Then they hand In their masks to be
displayed.
ENDING THE LESSON
(An activity to consolidate the language of the lesson)
Provide the students with a sheet of paper. Ask the
students to choose a facial feature (eg. nose). The
students draw and colour as many different shapes
and sizes of noses, hair, mouths, etc. as they can think
of. Go around the classroom providing any necessary
help. Display their work somewhere in the classroom.
BEGINNING THE LESSON
(An activity to revise the language of the previous lesson )
Ask a pair of students to come to the board. One
student names a part of the face and the other
touches the corresponding part. Ask the rest of the
class for verification. Resume the activity with as many
pairs as you think Is necessary.
PRESENTATION & PRACTICE
(Activities to present and practise the vocabulary of the
lesson)
Listen, point to the actions and say.
(TRACK 42)
FLASHCARDS (40-43)
Students’ books closed. Put up the flashcords (40-43) on
the board, one at a time. Point to the actions (wash your
hands, wash your face, brush your teeth, brush your
hair), one at a time, and present them. The students
repeat after you.
52
Hand out the flashcards to various students. Ask the
students to come to the board, one at a time, show
their flashcard and say the corresponding phrase or
action. Ask the rest of the class for verification.
Students’ books open. Say: Open your books at page
sixty-four. Write the number 64 on the board and hold
up your book. Play the recording. The students listen,
point and repeat.
TAPESCRIPT
Wash your hands, wash your face, brush your teeth,
brush your hair.
Look at the pictures. Tell Woody what to do
to get cleanl Say: (Wash) your (hair).
Point to the picture of Woody and say: Woody Is dirty.
Have the students tell him what to do to get clean.
Point to the shampoo In the picture and elicit the
action: Wash your hair. Next, point to the brush and
elicit; Brush your hair. Point to the soap and elicit: Wash
your hands/face. Finally, point to the toothpaste and
elicit: Brush your teeth. Say: Now Woody is clean.
Play the Make a Monster game.
- - -( Before going into class Л---------
Photocopy and cut out the templates of
the nose, eyes, ears and mouth.
Tell the students they ore going to play the Make a
Monster game. Draw a large circle on the board to
represent the face Cut out the ears, mouth, eyes and
nose. Show the students the cutouts of the ears and
elicit the corresponding word. Stick the cutouts on the
sides of the circle. Repeat with the remaining cutouts.
Explain the game. Tell the class that they are going to
stick the cutouts on the circle to form a face, but they
are going to do this blindfolded. Choose a student to
come to the board. Tie a scarf over his/her eyes.
Remove the cutouts from the board and give him/her
one of them. Ask: What's this? Elicit: It's a/an .... Tell the
student to stick It on the board In the correct place.
Remove the blindfold so the student can see where
he/she has placed the cutout. Repeat with another
student until all the cutouts have been placed and a
funny' face has emerged.
listen and point. Then, sing and do.
(TRACK 43)
Point to the actions, one at a time, and elicit: wash your
hands, wash your face, brush your teeth, brush your
hair. The students repeat after you.
Play the recording. The students listen and point to the
actions. Play the recording again. The students mime
the actions as they sing along.
TAPESCRIPT
Wash your hands
Up and down, up and down
Wash your hands
Round and round, round and round.
Wash your hands up and down.
Wash your hands round and round,
Wash your hands round and round like this!
Wash your face
Up and down, up and down.
Wash your face
Round and round, round and round.
Wash your face up and down.
Wash your face round and round.
Wash your face round and round like this!
Brush your teeth
Up and down, up and down
Brush your teeth
Round and round, round and round
Brush your teeth up and down.
Brush your teeth round and round.
Brush your teeth round and round Hke this!
Brush your hair
Up and down, up and down.
Brush your hair
Round and round, round and round.
Brush your hair up and down.
Brush your hair round and round,
Brush your hair round and round like this!
Extension
Mime one of the actions. Ask students to guess.
eg. Teacher: (mimes brushing teeth)
Class: Brush your teeth! etc
ENDING THE LESSON
(An activity to consolidate the language of the lesson.)
FLASHCARDS (40-43)
Hand out the flashcards to students. Play the song
again. While the music Is playing, students pass their
flashcard on to the next student. When you pause the
music, each student who is holding a flashcard has to
name the action or pay a forfeit, such as sing a song,
perform an action, etc.
53
WORKBOOK (Optional)
If you wish, you con do Exs 3 and 4 from the Workbook
during this lesson or the next one.
.................( Lesson 3 1....................
; Objectives i
: To listen to a story about Frosty and Woody meeting:
j Little Red Riding Hood and the Big Bad Wolf. To:
: develop listening comprehension skills through a:
: dialogue.
Language •
• In this lesson the students will learn to understand: •
• • Little Red Riding Hood, Big Bad Wolf
• • Who's this?
• • What's this?
• In this lesson the students will learn to use:
: • Hellol/Bye! :
j • Lovely flowers!
: • Thank you! :
: • You 've got big eyes! :
: • Smile! :
e e
• Extra Materials •
• • Flashcards (40-43) for the Beginning the Lesson •
; activity; •
", • the My Face poster for Presen tation& Practice J
BEGINNING THE LESSON
(An activity to revise the language from the previous
lesson.)
FLASHCARDS (40-43)
Hold up a flashcard (wash your hands, wash your face,
brush your teeth, brush your hair) and partially cover It
with a piece of paper. Invite the students to guess
what's on the flashcord.
PRESENTATION & PRACTICE
(Activities to present the story and develop students'
listening skills.)
if Listen to the story and point to the pictures.
(TRACK 44)
POSTER
Students' books closed. Use the My Face poster to
present the story. Explain to the students. In LI if
necessary, that Woody and Frosty are going to meet
Little Red Riding Hood and the Big Bad Wolf. Invite the
students to tell you what they remember from the story.
Point to Woody in the first picture and ask: Who's this?
Elicit: Woody. Say as you wave: Hello! The students
repeat after you. Point to the flowers In the second
picture and say: Lovely flowers! The students repeat
after you. Repeat with the rest of the pictures.
Students’ books open. Say: Open your books at page
sixty-six. Write the number 66 on the board and hold up
your book. Tell the class to look at the story and talk
about It with them.
Play the recording and ask the students to point to
each picture In their book in turn. Show them what to
do by holding up your book and pointing Play the
recording again. The students listen and repeat,
chorally and/or individually.
Point to the first picture on the poster. Ask the students
to complete your sentences.
e.g. Teacher: Lovely...
Student 1; flowers! etc
Extension
Ask for a volunteer to come and point to the first picture
on the poster. Encourage him/her to say the dialogue.
Ask the rest of the class for verification. Repeat with
different students for the rest of the story.
TAPESCRIPT
Frame I
Woody: Hello!
Girl: Hello!
Frame 2
Frosty: Lovely flowers!
Girl: Thank you!
Frame 3
Frosty: Bye!
Frame 4
Woody: You've got big eyesl
Frame S
Frosty: You 've got big ears!
Frame 6
Woody: You've got big teeth!
Frame 7
Frosty: Smile!
Read the question at the bottom of page 67. Ask the
students to draw a happy face or a sad face
54
depending on whether they like the story or not. Ask
them to tell you. in LI it necessary, what they like most.
ENDING THE LESSON
(An activity to consolidate the language of the lesson)
Ask a student to be the photographer’. He/She goes
around taking pictures’. Ask him/her to say Smilel
before he/she takes the picture. Alternatively, you can
use a real camera.
Workbook (Optional)
If you wish, you can do Ex. 5 from the Workbook during
this lesson or the next one.
................... Lesson 4 |..................
• Objectives
• To identify animals according to their facial
! characteristics.
• •
: Language ;
• In this lesson the students will learn to understand •
• • This is a (cat). It's got (smaH eyes) ;
• In this lesson the students will learn to use
• • cat, dog •
• •
: Extra Materials ;
• Pictures of different animals for Ex. 3.
9 9
BEGINNING THE LESSON
(An activity to revise the dialogue from the previous
lesson.)
Ptay the dialogue from the previous lesson (Track 44).
The students listen and follow in their books.
PRESENTATION & PRACTICE
(Activities to talk about animal parts of face.)
Look art the pictures and circle the correct
parts of their face.
Students' books closed. Draw a simple sketch of a cat
on the board. Point to it and say: This is a cat. The
students repeat after you. Elicit the cat’s parts of the
face: big eyes, small ears, small nose. Repeat with a
sketch of о dog
Students' books open. Say: Open your books at page
sixty-eight. Write the number 68 on the board and hold
up your book. Ask the students to circle the parts of the
face that pertain to each animal Check the students'
answers.
Cat: 1 2nd picture 2 1st picture 3 1st picture
Dog: 1 2nd picture 2 1st picture 3 1st picture
Colour. Then, find their pair.
Explain the activity. Allow the students some time to
colour the parts of the body and match them to their
pairs. If you wish, you can ask the students to identify
the animals in LI (rabbit, elephant, mouse, cat). Check
the students’ answers.
Make your own animal.
Bring In pictures of different animals.
Have a brief class discussion, in LI if necessary, about
animal body parts. Refer the students to the picture In Ex
3. The students, either on their own or in pairs/groups.
make their own unusual animal using the picture as a
guide. Alternatively. students are given pictures and
make an animal collage Go around the classroom
providing any necessary help. Make sure you display
their work somewhere In the classroom.
ENDING THE LESSON
(An activity to consolidate the language of the lesson.)
Do a class survey as to which animal (cat or dog) is the
most popular.
.................. Lesson 5 jh...............
Objectives
To consolidate the language leamt in the module.
To draw a picture of Mr/Miss Potato.
Language
In this lesson the students will learn to understand
• What colour?
• What's this?
In this lesson the students will learn to use:
• He's got (yellow hair).
• Look at (Miss) Potato. (She) 's got (red hair).
Extra Materials
. • A4 sheets of paper for each student for Ex. 3. .
55
з *;
Module 5 - My Face
BEGINNING THE LESSON
(An activity to review the language from the previous
lesson.)
Name a part of the face. Ask the students to point to It
and repeat.
eg. Teacher: Hair!
Students: (pointing to their hair) Hair! etc
PRACTICE
(Activities to consolidate parts of a face.)
Find the missing pieces.
Say: Open your books at page seventy. Write the
number 70 on the board and hold up your book Refer
the students to the pictures and explain the activity.
Allow the students some time to find the missing parts
of the monsters. Check their answers.
la 2b 3 e 4c 5 d
Listen and colour. Then, say: He’s got yellow
half, .... (TRACK45)
Point to the picture. Point to the shoes and ask: What
colour? Elicit: Blue. Revise the parts of the face by asking:
What's this? Play the recording, twice if necessary. The
students listen and colour in the picture. Once they finish,
they describe the picture, eg He's got yoHow hair... etc.
yellow hair red ears pink hands
blue eyes green nose
TAPESCRIPT
Colour the hair yellow.
Colour the eyes blue.
Colour the ears red
Colour the nose green.
Colour the hands pink.
Extension
Divide the class Into two teams Ask students to look at
the picture In Ex. 2 for a minute and then close their
books. Ask questions about the colour of each body
part. Each correct answer gets one point. The team
with the most points is the winner.
eg. Teacher What colour Is his hair?
Student I Team A: Yellow.
Teacher: Correct! Team A gets I point.
What colour Is his nose?
Student 1 Team B: Blue.
Teacher: Wrong! etc
Portfolio: Draw a picture of Mr/Miss Potato.
Present them to the class. Say: Look at
Mr/Mlss Potato. He/she’s got...
(An activity to develop fine motor skins and consolidate
the language of the module.)
Point to the picture of Mr Potato. Then say: This is Mr
Potato! Provide each student with a sheet of paper.
Ask the students to draw a similar picture of either Mr or
Miss Potato and present it to the class. Have them
present their drawing to the class and describe it, e.g.
Look at Miss Potato. She's got red hair, etc Make sure
you display their work somewhere in the classroom.
Then help them file their drawings In their Junior
Language Portfolios
ENDING THE LESSON
(An activity to consolidate the language of the lesson.)
Draw a simple sketch of Mr Potato on the board. Ask a
student to come to the board. Ask him/her to colour a
part of its face. Ask the rest of the class for verification.
Repeat with some more until Mr Potato is coloured.
WORKBOOK (Optional)
If you wish, you can do Ex. 6 from the Workbook during
this lesson or the next one.
... Lesson 6 - Our Wodd/My World ............
Objectives
To familiarise students with British. American and
Russian culture. To talk about cartoon characters In
the UK, USA and Russia.
Language
In this lesson the students will learn to understand
• UK. USA. Russia
• Stitch. Mickey Mouse. Pinocchio. Lightning
McQueen from Cars. Wallace and Gromit
In this lesson the students will leam to use
• He's got (a big nose).
Extra Materials
• A map of the world for Ex. 1 (Optional):
• A4 sheets of paper for each student for Ex. 2
(Optional):
• clay or plasticine for the Ending the Lesson
, activity,
56
Module 5 - My Face
BEGINNING THE LESSON
(An acfrvfry to renew the language from the previous
lesson.)
Ask th© students to present the drawings they made in
the previous lesson.
OUR WORLD
(Activities to familiarise students with aspects of British
and American culture.)
Look at the pictures. Point and say: He's got
.... Then, match and say: He’s got (big eyes).
Students’ books open. Say: Open your books at page
seventy-two. Write the number 72 on the board and
hold up your book Point to the American flag and say:
USA. If you have a map of the world, put It up on the
board and show where the USA is. Ask the students if
they know anything about the USA and have a class
discussion in LI (eg. famous people, cities, cartoon
characters, etc ). Explain to the students that in this
section they will learn about popular cartoon
characters Tell the students to took at the American
cartoon character. Point to It and say: This is Mickey
Mouse. Look! He's got big ears. Repeat, this time asking
the students to complete your sentences.
e g Teacher: He's got...
Class: big ears etc
Point to the British flag and say: UK. Point to the picture
of Wallace and Gromit and say: This is Wallace and
Gromit. Point to Wallace and say: Look! He's got a big
nose. Ask the students to describe the cartoon
characters.
Next, focus the students' attention on the remaining
cartoon characters and ask them to name the ones
they know (Pinocchio. Stitch. Lightning McQueen).
Point to Pinocchio's nose and elicit: He's got a big
nose Repeat with the rest of the cartoon characters.
Explain the task. Tell the students to match the parts of
the face on the puzzle pieces to the cartoon
characters Then point to each cartoon character and
have students describe them. e.g. (pointing to Mickey)
He's got big ears, etc
MY WORLD
(Activities for the students to explore and talk about their
own culture in EngHsh.)
Draw your favourite cartoon character.
Point to the picture of Cheburashka and say: This is
Cheburashka. Look! He has got big cars Ask students
to tell you their favourite cartoon character. Then allow
some time for the students to draw their favourite
cartoon character. Alternatively, provide the students
with a sheet of paper so they can draw their favourite
cartoon character. Make sure you display their work
somewhere in the classroom.
Play the Mirror Me game.
Tell the students they are going to play a game. Ask the
students. In pairs, to stand facing each other. One
student is the leader and mimes an action, e.g.
brushing his/her teeth, and his/her partner has to follow
as accurately as possible, as it looking In the mirror. The
rest of the class names the action.
ENDING THE LESSON
(An activity to consolidate the language of the lesson.)
Tell the students that they are going to make a face of
an animal or monster using plasticine or clay. Then they
report back to the class, e g. (a monster's face) Look!
Three eyes, two noses, etc.
.........4 Lesson 7 - Storyland ...............
Objectives
To listen to a Russian story In English. To develop
listening and speaking skills
Language
In this lesson the students will learn to understand
• Can they pull the turnip out?
In this lesson the students will learn to use
• pull, turnip
Extra Materials
. • None.
BEGINNING THE LESSON
(An activity to revise the story.)
Ask the students If thoy remember what the previous
episode of the story was about. If not. ask them to go
to the respective page (60) and look at the picture.
57
PRESENTATION & PRACTICE
(Activities to present the tale ot ‘The Giant Turnip .)
Listen to the story, (track 46)
Students’ books open. Soy: Open your books at page
seventy-four Write the number 74 on the board and
hold up your book. Direct the students' attention to the
picture. Point to the characters and elicit their names.
Point to the turnip and the characters and ask: Can
they pull the turnip out? Let's seel Play the recording for
the students to listen to the story. Play the recording
again The students listen and point to the characters
as they are mentioned. Play the CD a third time with
pauses. The students listen and repeat, choraly and/or
individually.
TAPESCRIPT
"Please help us pull out the turnip!" Utile Anna says to
the dog. "Alright, I'm coming." says the dog. So. the dog
holds Little Anna. Little Anna holds the old woman. The
old woman holds the old man The old man holds the
turnip. They puU and puU But they can't pull the turnip
out! "We need help.' says the dog So he calls the cat.
TAPESCRIPT
Wash your hands.
Comb your hair.
Brush your teeth.
Note: The students are now ready to do Module Test 5.
ENDING THE LESSON
(An activity to consolidate the language of the lesson.)
Narrate the story. The students mime It.
........ Lesson 8 - Checkpoint ......
• Objectives
‘.To consolidate the language of the module.
What’s missing? Draw. Then say.
Elicit the parts of the face Explain the activity. The students
draw the missing parts of the face and name them. Check
1he students' answers
1 ears 2 mouth 3 eyes
Listen and circle. (TRACK 47)
Explain the activity. Play the recording, twice if necessary.
The students fcien and circle the pictures. Check the
students' answers.
Items to be circled: 1.3.4
58
ф................... Lesson 1 )..................
Objectives
To present and practise the names ot food Items.
Language
In this lesson the students will learn to understand:
• What's this?
In this lesson the students will leam to use
• Food: bananas, eggs, milk, sandwiches, biscuits
cheese
• I like (biscuits). Give me some, please.
• Look! (Bananas, eggs and sandwiches)!
Extra Materials
• Flashcards (34-43) for the Beginning the Lesson
activity:
• the My Food poster for Presentation & Practice
• photocopies of the lunchbox and food items
templates (pp. 111-113) for each student to
Ex. 4 (Craftwork);
• flashcards (44-49) for the Ending the Lesson
activity.
BEGINNING THE LESSON
(An activity to revise the language from the previous
module.)
\ \ FLASHCARDS (34-43)
Display the flashcards on your desk. Ask a pair of
students to come to the front. Give them some Blu-Tack
and ask them to attach the cards on the board in the
order you call them out. Ask the rest of the class for
verification Repeat the procedure with more pairs.
PRESENTATION & PRACTICE
(Activities to present and practise the vocabulary ot the
lesson.)
POSTER
Listen, point to the food items and say.
(TRACK 48)
Students’ books closed. Put up the My Food poster on
the board. Point to the food items (bananas, eggs,
milk, sandwiches, biscuits, cheese), one at a time, and
present them. The students repeat after you. Point to
the different items in random order. Individual students
name the items.
Students' books open. Say: Open your books at page
seventy-six. Write the number 76 on the board and hold
up your book. Play the recording The students listen,
point and repeat.
TAPESCRIPT
Bananas, eggs, milk, sandwiches, biscuits, cheese.
Listen and circle the food items you hear in
the song. Then, point and say: / like
bananas......(TRACK 49)
Elicit the names of the food items by pointing and asking:
What's this? Point to the bananas and say: I like bananas.
Give me some, please The students repeat after you.
Repeat the procedure with the rest of the food Items. Play
the recording. The students listen and circle the (terns they
hear (bananas, biscuits, sandwiches). Then point to a
food Item, e g biscuits. rub your stomach and say: / like
(biscuits). Ask students to moke similar sentences about
the food items on the table.
Items to be circled: bananas, biscuits, sandwiches
TAPESCRIPT
I like bananas.
Bananas, bananas.
I like bananas.
Give me some, please.
I like biscuits.
Biscuits, biscuits.
I like biscuits,
Give me some, please
I like sandwiches.
Sandwiches, sandwiches.
I like sandwiches.
Give me some, please.
Listen and sing. (TRACK 50)
Play the recording The students listen and sing along.
Extension
Divide the class into three groups and assign a stanza
from the song. The students sing along every time their
stanza is heard.
Point to the pictures and name the food
items. Then, draw the two missing food
Items In the correct order.
Tel the students to look at the pictures of the food items
In their books Elicit their names Explain the activity. The
students draw the missing food items In the correct order.
59
Module 6 - My Food
First sequence: sandwich, biscuit
Second sequence: cheese, cheese
Third sequence: ogg. milk
Colour and cut to make the lunchbox.
Then, colour the food items. In pairs, ask for
the food you like and put it in your
lunchbox. Say: / like (sandwiches). Give
me some, please.
-------Before going into class
Photocopy the lunchbox and the food items
templates, one per student.
Tell the students that they are going to make a
lunchbox Show them your model. Guide them through
the cutting and colouring of their lunchboxes. Then ask
them to cut out. colour the food items and spread
them in front of them.
Upon completion, the students work in pairs. Students
take turns saying which food items they like Their
partner hands them the food Items to be put in their
lunchboxes
e.g. Student 1: I like bananas Give me some, please.
Student 2: (hands over the bananas for Student 1
to put In his/her lunchbox) etc
As an extension, the students can present the food
items in their lunchboxes, eg. Look! Bananas, eggs and
sandwiches! etc.
ENDING THE LESSON
(An activity to consolidate the language of the lesson.)
\ FLASHCARDS (44-49)
Show the food flashcards: bananas, eggs, milk,
sandwiches, biscuits, cheese Elicit the words Put up
the flashcards with the back showing on the board
Above them write the numbers 1 to 6 in sequence. Ask
a student to choose a number and guess what the
flashcard is. e.g. 2 - eggs. Turn the flashcard over If It Is
correct, leave it. If not, turn It over again and repeat
the procedure with another student.
WORKBOOK (Optional)
If you wish, you can do Exs 1 and 2 from the Workbook
during this lesson or the next one.
................| Lesson 2 )..................
Objectives
To present and practise the names of food/drink
Items To explore other subject areas: Health and
Safety.
Language
In this lesson the students will learn to understand
• What Is your favourite food?
• Is It (eggs)?
• (Six) students like (bananas).
In this lesson the students will learn to use:
• food/drink: tea. pizza, apples, popcorn, ice
cream, cola.
• My turn!
• I like .... Yummyl
• I don't like .... Yuki
• Picnics are yummy!
• Come on. everyone1
Extra Materials
• Flashcards (44-49) for the Beginning the Lesson
activity.
• flashcards (50-55) for Presentation & Practice;
• A4 sheets of paper for each student for Ex. 3
. (Extension).
BEGINNING THE LESSON
(An activity to review the language from the previous
lesson.)
FLASHCARDS (44-49)
Do a class survey Put up the flashcards of the food items
(bananas, eggs. mUk. sandwiches, biscuits, cheese) on
the board Ask the students: What is your favourite food?
Point to the flashcards, one at a time, and ask: Is It eggs?
The children raise their hands when you name their
favourite food. Count the hands and write the number
under the corresponding flashcard. When you finish the
survey, say. (Six) students Hke bananas, etc
PRESENTATION & PRACTICE
(Activities to present and practise the vocabulary of the
lesson.)
60
Module 6 - My Food
Шел, point to the food Items and say.
(TRACK 51)
ДД FLASHCARDS (50-55)
Students’ books closed. Put up the food flashcards
on the board. Point to the food Items (.tea. pizza,
apples, popcorn. Ice cream, cola), one at a time, and
present them. The students repeat after you.
Hand out the flashcards to various students. Ask the
students to come to the board, one at a time, show
their flashcard and say the corresponding word. Ask
the rest of the class for verification.
Students' books open. Say: Open your books at page
seventy-eight. Write the number 78 on the board and
hold up your book. Play the recording The students
listen, point and repeat.
TAPE SCRIPT
Tea, pizza, apples, popcorn, ice cream, cola.
Play the It's good/bad for your teeth game!
Tell the students that they are going to play a board
game. Point to the picture and elicit the names of the
Items. Ask the students, in LI If necessary, which
food/drink items are bad for our teeth and should be
avoided and which ones are good.
Explain the rules The students play in pairs and each
player needs a counter (any small object win do). They
place their counters on Start and throw the dice,
saying the number that comes up The student with the
highest number begins the gome by saying My turn!
and moves forward the number of spaces indicated
on the dice. If a student lands on a 'bad' food type
he/she colours the corresponding tooth black. The
game continues until both students reach the end.
When the students finish playing, have them show their
drawings to the class.
Listen and draw. Then, say: / like (ice cream)
Yummy!, I don't like... Yuki (track 52)
Point to the pictures of the food items and elicit their
names. Point to the ice cream and say: I like ice cream.
Yummy! The students repeat after you Point to the
picture of the apples and say: / don't Яке apples. Yuk! The
students repeat after you. Explain the activity. Play the
recording. The students listen and draw a smiley face or
a sod face. Then the students talk about the pictures by
saying: I Яке... Yummy! or I don't Kke ... . Yuki
TAPESCRIPT
1 I like Ice cream. Yummy!
2 / don 't like apples. Yuki
3 / don't like popcorn. Yuki
4 I like pizza Yummyl
Listen and sing. (TRACK 53)
Point to the picture and say: It's a picnic. Then say:
Picnics are yummy! The students repeat after you. Elicit
the food Items shown. Then beckon and say: Come on.
everyone! The students repeat after you.
Play the recording The students listen and point to the
food Items. Play the recording again The students
listen and sing along.
TAPESCRIPT
Picnics are yummy,
Picnics are fun!
Popcorn and pizza.
Come on. everyone!
Picnics are yummy.
Picnics are funl
Ice cream and cola.
Come on. everyone!
Extension
Provide each student with a sheet of paper. Tell the
class they are going to have a picnic with their friends.
Ask them to draw the food items they will take with
them. Ask Individual students to present their drawings
to the class. Make a class display.
e g Student 1: Picnics are yummy. Look! Ice cream
and cola. Come on, everyone!
ENDING THE LESSON
(An activity to consolidate the language of the lesson.)
ДД FLASHCARDS (44-55)
Put up the flashcards with the food items on the board.
Allow the students some time to look at them. Then ask
the students to dose their eyes. Remove one of the
flashcards. Ask the students to open their eyes and tell
you which food Item Is missing. Repeat the activity with
the other food Items.
WORKBOOK (Optional)
If you wish, you can do Exs 3 and 4 from the Workbook
during this lesson or the next one
61
Objectives
To listen to a story about the characters having a
picnic. To develop listening comprehension skills
through a dialogue.
Language
In this lesson the students win leam to understand
• Who's the?
• Let's have a picnic!
In this lesson the students will learn to use
• What's your favourite food?
• (Pizza), yum!
Extra Materials
• Flashcards (44-55) for the Beginning the Lesson
activity;
• the My Food poster for Presentation & Practice
BEGINNING THE LESSON
(An activity to review the language from the previous
lesson.)
FLASHCARDS (44 55)
Put up the flashcards on the board. Ask a pair to come
to the front. The students ask and answer questions
about their favourite food items using the flashcards.
Demonstrate this yourself first.
e.g Student I: What's your favourite food?
Student 2: (pointing to the pizza) Pizza, yum!
What's your favourite food?
Student 1: (pointing to the ice cream) Ice cream,
yuml etc
PRESENTATION & PRACTICE
(Activities to present the story and develop students'
listening skills.)
Listen to the story and point to the pictures.
(TRACK 54)
POSTER
Students' books closed. Use the My Food poster to
present the story. Explain to the students. In LI If
necessary, that Woody and his friends are having a
picnic. Point to Erlina In the first picture and ask: Who's
this? Elicit: Erlina. Say as you point to the basket: Let's
have a picnic! The students repeat after you. Point to
the food items in the second picture and say: Look!
Sandwiches, biscuits, tea! The students repeat after
you. Repeat with the rest of the pictures.
Students' books open. Say: Open your books at page
eighty. Write the number 80 on the board and hold up
your book Ask students to identify the characters and
the food items they know.
e g Student: (pointing to Woody in Frame 1)
(This is) Woody! etc
Play the recording and ask the students to point to
each picture in their book in turn. Show them what to
do by holding up your book and pointing. Play the
recording again. The students listen and repeat,
chorally and/or individually
Point to the first picture on the poster. Ask the students
to complete your sentences.
e g. Teacher: Let's have a...
Class: picnic! etc
Extension
Ask for a volunteer to come and point to the first
picture on the poster. Encourage him/her to say the
dialogue. Ask the rest of the class for verification
Repeat with different students for the rest of the story.
TAPESCRIPT
Frame 1
Erlina: Let's have a picnicl
Frame 2
AMn: Lookl Sandwiches, biscuits, teal
Frame 3
Woody: I like tea. Yummyl
Frame 4
Woody: Tea. Frosty?
Frosty: What's tea?
Frame 5
Frosty: I don't like tea!
Frame 6
Woody: Erlina! Help!
Frame 7
Frosty: Yummy! I like ice cream!
Frame в
Woody. Picnics are fun!
Read the question at the bottom of page 81 Ask the
students to draw a happy face or a sad face
depending on whether they like the story or not. Ask
them to tell you. In LI if necessary, what they like most.
62
. gt
Module 6 - Му Food
ENDING THE LESSON
(An activity to consolidate the language of the lesson )
Draw a tree on the board Tell the students that this is a
magic tree and any kind of food or drink can 'grow' on
it. Ask individual students to name a food/drink item.
Draw a simple sketch of it on the tree. Continue until all
students have had a turn and the tree is full.
....................Lesson 4 ).................
Objectives
To talk about food items and say where we get
them from.
language
n this lesson the students will learn to understand:
• We get apples from a tree.
n this lesson the students will learn to use:
• apples, mUk. eggs, cheese, bananas, cow. tree,
chicken
Extra Materials
• Ari sheets of paper for each student for the
Ending the Lesson activity.
BEGINNING THE LESSON
(An activity to revise the dialogue.)
Play the dialogue from the previous lesson Crock 54).
The students listen and follow in their books.
PRESENTATION & PRACTICE
(Activities to talk about food Items and where we get
them from.)
Trace the food items. Then, draw lines.
Students' books closed. Draw a simple sketch of two
apples on the board. Ask students In LI to tell you
where apples come from. Elicit the answer. Then point
to them and say: We get apples from a tree. The
students repeat after you. Draw simple sketches of a
chicken and a cow and present the words.
Students’ books open. Say: Open your books at page
eighty two. Write the number 82 on the board and hold
up your book. Point to the outline of the items and elicit
their names. Ask the students to trace them. Then ask
the students to draw lines to match. Check the
students' answers. Finally, the students say where we
get these food items from.
We get apples from a tree.
We get bananas from a tree
We get cheese from a cow
We get milk from a cow
We get eggs from a chicken.
As an extension, students can name other food items
and say where we get them from.
Spot the differences.
Explain the activity. Allow the students some time to
find and circle the differences. Then the students point
to and say the differences.
(Suggested answers)
Student I: (pointing to the eggs in picture A) Three
eggs
(pointing to the eggs in picture B) Two
eggs
Student 2: (pointing to the apples in picture A)
(Three) apples under the table.
(pointing to the apples in picture B)
(Three) apples In the cupboard
Student 3: (pointing to the chicken in picture A) A
(One) chicken on the table.
(pointing to the chicken in picture B) A
(One) chicken under the table
Student 4: (pointing to the pizza In picture A) A pizza
in the cupboard.
(pointing to the pizza in picture b) A pizza
under the table.
ENDING THE LESSON
(An activity to consolidate the language of the lesson.)
Provide each student with a sheet of paper. As an
extension, the students can draw a farm with animals,
trees and plants. They present, in LI if necessary, what
we get from them. Display their work somewhere in the
classroom.
63
•.
Module 6 - Му Food
в
____________________
Objectives
То consolidate the language learnt In the module
To draw a picture of one’s favourite food.
Language
In this lesson the students wiH learn to understand
• Does Frosty like Gee cream)?
In this lesson the students will learn to use:
• Do you like Gee cream). Frosty?
• Yes. Yummyl
• No. Yuk!
• I Hke (pizza)! Yummyl
Extra Materials
• The My Food poster for the Beginning the Lesson
activity.
• A4 sheets of paper for each student for Ex. 3;
• a round piece of paper for each student for the
Ending the Lesson activity.
likes/doesn’t like. Say: Does Frosty like milk? Elicit the
correct response Then the students use the character
puppets and act out the short exchanges. Check
around the classroom, providing any necessary help.
(Suggested answers)
A: Do you Hke milk. Frosty?
B: Yes. Yummyl
A: Do you like apples. Frosty?
B: Yes. Yummyl
A: Do you Hke ice cream. Frosty?
B: Yes Yummy!
A Do you like biscuits. Frosty?
B. Yes. Yummy!
A.- Do you like tea. Frosty?
B: No. Yuki
A Do you Hke eggs. Frosty?
B: No. Yuki
A: Do you like pizza. Frosty?
BEGINNING THE LESSON
(An actMty to revise the language of the previous lesson)
B: No. Yuk!
A Do you like bananas. Frosty?
B: No. Yuki
POSTER
Put up the My Food poster. Ask a student to come to
the board. Name a food item. He/She points to it and
names it. Ask the rest of the class for verification. Repeat
with as many students as you think is necessary.
PRACTICE
(Activities to consolidate food Items.)
Find the food items. Use the code and
colour them.
Say: Open your books at page elghty-four. Write the
number 84 on the board and hold up your book. Refer
the students to the picture and explain the activity.
Allow the students some time to find and colour the
food items. Check their answers
Look and talk with your friend: Do you like
(milk), Frosty? Yes. Yummy/No. Yuk!
Go through the pictures and elicit the names of the
Items. Explain the activity. Point to the child holding the
Alvin puppet ond say: Do you tike Ice cream. Frosty?
Then point to the child holding the Frosty puppet and
say: Yes. Yummy! Elicit which food/drink items Frosty
Portfolio: Draw a picture of your favourite
food. Present it to the class. Say: / like (pizza).
Yummy!
(An activity to develop fine motor skills and consolidate
the language of the module.)
Point to the picture of the pizza. Then soy: Pizza Is my
favourite foodl Provide each student with a sheet of
paper. Ask the students to draw a picture of their
favourite food and present It to the class by saying, eg.
I like (pizza). Yummyl Make sure you display their work
somewhere in the classroom. Then help them file their
drawings in their Junior Language Portfolios.
ENDING THE LESSON
(An activity to consolidate the language of the lesson.)
---------------------------.
Before going into class }---------
Bring In round pieces of paper, one for
each student.
Tell the students they are going to make a funny pizza.
Give each student a round piece of paper. Tell them to
make their own pizza by drawing the food items they
know in English When they finish, they report back to
the class.
64
Module 6 - My Food
e.g. Teacher: Chris, what's on your pizza?
Chris: Cheese and ice cream!
Class: Yummy!
WORKBOOK (Optional)
If you wish, you can do Exs 5 and 6 from the Workbook
during this lesson or the next one.
.... Lesson 6 - Our Worid/My World ...........
• Objectives •
; To familiarise students with British, Chinese. Turkish and;
; Russian culture. To talk about tea in the UK/Chlna/ •
• Turkey/Russio ;
e e
:Language :
: In this lesson the students will leam to understand :
: • UK. China. Turkey. Russia :
: • Do you drink tea?
: • Biscuits and milk, change places!
• In this lesson the students will leam to use
• • I like (apples). •
• e
: Extra Materials
: • A map of the world for Ex. 1 (Optional):
: • slips of paper with food/drink Items drawn on j
\ them for the Ending the Lesson activity. :
BEGINNING THE LESSON
(An activity to review the language from the prev>ous
lesson.)
Ask the students to present the drawings they made In
the previous lesson
OUR WORLD
(Activities to familiarise students with aspects of British.
Chinese and Turkish culture.)
Look at the pictures and talk about tea.
Circle the things you can eat with tea in the
UK.
Students’ books open. Say: Open your books at page
eighty-six. Write the number 86 on the board and hold
up your book. Point to the British flag and say: UK.
Explain to the students that In this section they will talk
about tea rime In Britain. Point to the picture of the tea
and tell students that dnnking afternoon tea Is very
popular in Britain.
Next, point to the Chinese and Turkish flags, one at a
time. If you hove a map of the world, put it up on the
board and show where China and Turkey are. Ask the
students if they know anything about Chlna/Turkey and
have a class discussion in Ll (e g. famous people, cities
etc).
Next, focus the students’ attention on the food items
and ten them to circle the ones that are usually eaten
with tea in the UK (biscuits. sandwiches).
MY WORLD
(Activities for the students to explore and talk about
their own culture in English.)
Do you drink tea in your country? What do
you eat with your tea? Draw or stick a
picture.
Ask students to tell you if they dnnk tea in their country
and if It is popular. Then, they draw a picture connected
with tea (e.g. teapot and tea cups, popular brands,
etc).
Play the Add to it game.
Ask the students to look at the pictures Point to the
picture of the boy and say: I like apples. The students
repeat after you. Then point to the picture of the girl
and say: / like apples and milk The students repeat
after you.
Tell the class they are going to play a game.
Demonstrate this yourself first Say: / like bananas.
Choose a student to continue by repeating what you
said and then saying what he/she likes, e g. I like
bananas and apples Continue the game until
everyone has hod a turn.
ENDING THE LESSON
(An activity to consolidate the language of the lesson.)
C Before going into class -----
Prepare slips of paper with simple drawings
of food and drink items.
Tell the students to form a circle with their chairs. Hand
out slips of paper with food/drink items drawn on them
Tell the students they must not tell anyone what
food/drink item they have. Explain the activity You
stand in the centre and call out a food and drink item.
eg Biscuits and milk, change places! The students with
the respective items stand up and change places.
65
Module 6 - My Food
......... Lesson 7-Stocyland ...............
Objectives •
♦To listen to a Russian story in EngSsh To develop;
; listening and speaking skills
• •
• Language
! In this lesson the students will learn to understand I
• •
j • Can they pull the turnip out? :
• •
; in this lesson the students will learn to use •
; • pull, turnip
• •
: Extra Materials
\ • None.
BEGINNING THE LESSON
(An activity to review the story.)
Ask the students if they remember what the previous
episode of the story was about If not. ask them to go
to the respective page (74) and look at the picture.
PRESENTATION & PRACTICE
(Activities to present the tale of The Grant Turnip.)
Listen to the story. (TRACK 55)
Students’ books open Say: Open your books at page
eighty eight Write the number 88 on the board and
hold up your book. Direct the students' attention to the
picture. Point to the characters and elicit their names.
Point to the turnip and the characters and ask: Can
they pull the turnip out? Let's seel Play the recording for
the students to listen to the story. Ptay the recording
again. The students listen and point to the characters
as they are mentioned. Play the CD a third time with
pauses. The students listen and repeat, chorally and/or
individually
TAPESCRIPT
"Please help us pull out the turnip!' the dog says to the
cat "Alright, I'm coming.' says the cat. So. the cat
holds the dog The dog holds Little Anna. Little Anna
holds the old woman The old woman holds the old
man. The old man holds the turnip. They puli and pull.
But they can't pull the turnip out. "We need help." says
the cat. So she calls the mouse.
ENDING THE LESSON
(An activity to consolidate the language of the lesson.)
Narrate the story. The students mime it.
.......иши.-ашм»...................
; Objectives •
♦.To consolidate the language of the module.
• . •
Listen and circle. (TRACK 56)
Revise the food items. Explain the activity. Play the
recording, twice if necessary The students listen and
circle the food items heard. Check the students'
answers.
Items to be circled: sandwich, cheese, eggs, biscuits,
pizza, bananas, tea
TAPESCRIPT
Sandwich, cheese, eggs biscuits, pizza, bananas, tea
Draw lines. Say,
Point fo and read the words, yummy and yuk. Hold up
your book point to milk and draw an imaginary line to
the yummy word. Say: I like mUk. Yummy! Point to cola,
draw an imaginary line to the yuk word and say: / don't
like cola Yuk! Explain the activity. The students draw
lines depending on whether they like the food items or
not Then, students report back to the class.
(Suggested answers)
Student 1: I tike pizza Yummy I / don't like tea Yuk!
Student 2. I like sandwiches. Yummy! I don't like
mHk. Yuk!
Student 3: I like cheese Yummyl I don t like
popcorn. Yuk!
Student 4: I tike biscuits Yummy! I don 't tike
bananas Yuk!
Student S: I like cola. Yummy! I don't like eggs. Yuk!
Student 6: I like ice cream Yummy! I don't tike
apples Yuk!
Note: The students are now ready to do Module Test 6.
66
Module 7 - My Animals
.................. Lesson 1 ..................
Objectives
To present and practise the names ot animals and
dentlfy the sounds they make.
Language
n this lesson the students will learn to understand;
• What's this?
• How many (cows)?
n this lesson the students will leam to use
• Animals: cat. cow. hen. dog. sheep, horse.
• The (sheep) goes (baa)l
• Look! Two (yellow cows)l
• This is a (cat). The (cat) goes (miaow) I
Extra Materials
• Flashcards (44-55) tor the Beginning the Lesson
activity;
• the My Animate poster for Presentation & Practice:
• flashcards for the Ending the Lesson activity.
BEGINNING THE LESSON
(An activity to review the vocabulary taught tn Module 6)
FLASHCARDS (44-55)
Put up the flashcards on the board. Name a food/drink
item at random. Ask students to come to the front,
point to and name the food/drink Item. Ask the rest of
the class for verification.
PRESENTATION & PRACTICE
(Activities to present and practise farm animats and the
sounds they make.)
Listen, point to the animals and say.
(TRACK 57)
POSTER
Students' books closed. Put up the My Animats poster on
the board. Point to the animals (cat. cow. hen, dog.
sheep. horse) one at a time, and say the word. The
students repeat after you Point to the animals in random
order. The students repeat after you.
Make an animal sound. Students Identify the animal.
eg. Teacher: Moo!
Class: Cow! etc
Students' books open. Say: Open your books at page
ninety. Write the number 90 on the board and hold up
your book. Play the recording. The students listen, point
to the animals and repeat Check their pronunciation
and intonation.
TAPESCRIPT
Cat. cow, hen. dog. sheep, horse
Listen and number the animals in the order
you hear them. Then, sing and do. (TRACK 55)
Hold up your book and point to the animals shown in
the picture, one at a time, asking the students: What's
this? and eliciting: it's a ... Then point to the dog and
say; The dog on the farm goes woof. woof, woof all
day! The students repeat after you. Follow the same
procedure with the rest of the animals.
Explain the activity to the students. Tell them to number
the animals in the order they hear them (1-6). while
listening to the song Play the recording. The students
listen and complete the activity. Play the recording
again, encouraging the students to sing along.
dog (1) cow (3) sheep (5)
cat (2) hen (4) horse (6)
TAPESCRIPT
The dog on the farm
Goes woof, woof. woof.
Woof. woof, woof.
Woof. woof, woof!
The dog on the farm
Goes woof, woof. woof.
Woof. woof, woof all day!
Cat... miaow
Cow... moo
Hen... cluck
Sheep... boa
Horse ... neigh
Look and find the animals. Then, say: The
(dog) goes (woof)!
Refer the students to the pictures, point to the animals
and elicit the names Ask the students to find the
corresponding animals in the picture and say. eg. The
sheep goes baa! etc.
Colour the picture.
Refer the students to the picture, point to the animals
and elicit the names. Point to the cows and ask: How
many cows? Elicit the correct response: Two. Repeat the
same procedure with the rest of the animals. Explain the
activity. Ask the students to colour the animals. Allow
them some time to complete the activity
67
☆ Present the picture to the class. Say: Lookl
(Two yellow cows)!
Ask individual students to hold up their book for the rest
of the students to see. and present their picture to the
class. Demonstrate this yourself first.
e.g. Student J: Look! Two yellow cows! Three green
horses! Three red dogs! Three blue
cats! Four orange hens! One pink
sheep! etc
ENDING THE LESSON
BEGINNING THE LESSON
(An activity to review animals and animal sounds.)
\ FLASHCARDS (56-61)
Place the animals flashcards In random places around
the classroom. Next to each flashcard place/write a
number from 1-6. Tell the students to walk around the
classroom while you play the song from the previous
lesson. When the music stops, the students should stand
next to the nearest animal flashcard. Call out a number
(1-6) and each group should name the animal and
make the corresponding animal sound.
(An activity to consolidate the language of the lesson.)
' FLASHCARDS (56-61)
PRESENTATION & PRACTICE
Show students one flashcard at a time. The class makes
the corresponding animal sound. Demonstrate this
yourself first.
e.g. This is a cat. The cat goes miaow! etc
WORKBOOK (Optional)
If you wish, you can do Exs 1 and 2 from the Workbook
during this lesson or the next one
.................... Lesson 2 ).................
Objectives
To present and practise actions and abilities. To
explore other subject areas: PE & Drama.
Language
n this lesson the students will learn to understand
• (Pips), (fly) like a (bat)l
• What can (you) do?
n this lesson the students will learn to use
• Actions: jump. cUmb. swim. fly. run.
• I'm a (horse) and I can (jump).
• It's a (bat), it can (fly).
Extra Materials
• Flashcards (56-61) for the Beginning the
Lesson activity.
• flashcards (62-66) for Presentation & Practice;
• photocopies of the animals templates
(pp. 114-118) and drinking straws for each
student for Ex. 3;
• flashcards (62-66) for the Ending the Lesson
activity.
(Activities to present and practise actions.)
Listen, point to the actions and say.
(TRACK 59)
FLASHCARDS (62-66)
Students' books closed. Put up the flashcards 62-66 on
the board Point to the actions (jump. climb, swim. fly.
run), one at a time, and say the word. The students
repeat after you. Point to the actions in random order.
Ask Individual students to name the actions.
Students' books open. Say: Open your books at page
ninety-two. Write the number 92 on the board and hold
up your book. Play the recording. The students listen,
point and repeat.
TAPESCRtPT
Jump, climb, swim. fly. run.
Play the Pip, Squeak, Wilfred game.
Ask the students to stand in a circle. Assign roles (Pip.
Squeak. Wilfred) by going around and patting the
students on their shoulders. Demonstrate the game.
Say: Pips, fly like a bat! The students that belong in that
group, mime flying Repeat the procedure using the
rest of the prompts (jump tike a horse, climb like a cat,
swim like a duck, run like a mouse), as many times as
you think is necessary
Point to each picture, mime the action and
say: I’m a (horse) and I can (jump). Then,
sing and do. (TRACK 60)
Say as you jump: I'm a horse and I can jump The
students repeat after you Follow the same procedure
68
- :
Module 7 - My Animals
_____
with the rest of the actions. Ask the students to point to
each picture, mime and soy the actions. Play the
recording. The students listen and do the actions Play
the recording again. The students sing and do the
actions.
TAPESCRIPT
I'm a horse and I can Jump.
I'm a horse and I can Jump.
I'm a horse and I can jump.
I can Jump like this!
I'm a cat and I can climb ...
I'm a duck and I can swim ...
I'm a bat and I can fly...
I'm a mouse and I con run ...
Use the template to make your animals.
Then, say: It's a (bat). It can (fly).
------C Before going into class )-----
Photocopy the animals templates and
give one photocopy to each student. The
students cut the templates and stick them
onto drinking straws.
Point to the picture of the boy holding the bat and say:
It's a bat. It can fly. Hand out the photocopies. Show
them your model and guide them through the cutting,
colouring and sticking of their animals onto the straws.
Invite individual students to hold up their animal and
present it to class by saying what the animal is and
what it can do
eg. Student 1: It's a (bat). It can (fly).
As an extension, you con play the song again and the
students hold up the animal puppets every time the
animals are mentioned.
ENDING THE LESSON
(An activity to review actions.)
FLASHCARDS (62-66)
Invite students, one by one. to the front of the
classroom. Hand them an animal flashcard and ask
them to mime the action. The rest of the class has to
guess what if is. The first student to answer correctly
takes the next turn.
WORKBOOK (Optional)
If you wish, you can do Exs 3 and 4 from the Workbook
during this lesson or the next one.
...............4 Lesson 3 ......................
Objectives
To listen to a story about some forest animals
helping Woody and Frosty. To develop listening
comprehension skills through о dialogue.
Language
In this lesson the students will learn to understand:
• Who 's this?
• Let’s play!
In this lesson the students will learn to use:
• Con you (swim)?
• No, but I can (Jump)!
• Yes. I can!
• / can (fly)!
Extra Materials
• The My Animals poster for Presentation &
Practice.
BEGINNING THE LESSON
(An activity to review actions.)
Ptay the song from the previous lesson (Track 60). The
students listen and do the actions.
PRESENTATION & PRACTICE
(Activities to present the story and develop students'
listening skills.)
Listen to the story and point to the pictures.
(TRACK 61)
'уЛ, POSTER
Students’ books closed. Use the My Animals poster to
present the story. Explain to the students. In Ll If
necessary, that Woody and Frosty’s ball is in the take
and they want their friends to help them get it back.
Point to Woody in the first picture and ask: Who's this?
Elicit: Woody. Say. as you point to the ball: Let's play!
The students repeat after you. Point to the ball in the
lake In the second picture and say: Oh, no! Can you
swim, Woody? The students repeat after you. Repeat
with the rest of the pictures.
Students’ books open. Say: Open your books at page
ninety-four. Write the number 94 on the board and hold
up your book Ask students to identify the characters
and the animals they know.
e g. Student 1: (pointing to Woody In Frame J) (This is)
Woodyl etc
Ploy the recording and ask the students to point to
each picture in their book In turn. Show them what to
do by holding up your book and pointing. Play the
recording again. The students listen and repeat,
chorally and/or Individually.
Point to the first picture on the poster. Ask the students
to complete your sentences.
eg Teacher: Let's ...
Class play! etc
Extension
Ask for a volunteer to come and point to the first
picture on the poster. Encourage him/her to say the
dialogue. Ask the rest of the class for verification.
Repeat with different students for the rest of the story.
TAPESCRIPT
Frame I
Frosty: Let's play!
Frame 2
Frosty: Oh. no! Can you swim. Woody?
Woody: No!
Frame 3
Woody: Can you swim. Ronny?
Ronny: No. but I can jump!
Frame 4
Woody: Can you swim. Bertie?
Bertie: No. but I can fty!
Frame 5
Frosty: Can you swim. Carla?
Carla: No. but I can ctlmbl
Frame 6
Frosty: Can you swim. Daisy?
Daisy: Yes. I can!
Frame 7
Woody: Thank you. Daisy!
Frame в
Woody: Let's all play!
Read the question at the bottom of page 95. Ask the
students to draw a happy face or a sad fdce.
depending on whether they like the story or not. Ask
them to tell you. In LI If necessary, what they like most.
ENDING THE LESSON
(An activity to consolidate the language of the lesson )
Mime an action (jump. climb, run. swim. fly). The
students call out the word. Change the actions quickly
70
to make the activity fun for the students. Invite a
student to come to the front of the classroom and take
your role.
............................. f..................
Objectives
To talk about animals and what they can do.
Language
In this lesson the students will learn to understand
• What can a (Hon) do?
• Can you (jump)?
n this lesson the students will learn to use
• It can (run).
• Yes. I can./No. I can't.
Extra Materials
• Pictures of animals (a lion, a polar bear, a
hippo, a parrot, a flamingo and a penguin) for
Presentation & Practice.
BEGINNING THE LESSON
(An activity to review the dialogue from the previous
lesson.)
Play the dialogue from the previous lesson (Track 61).
The students listen and follow In their books.
PRESENTATION & PRACTICE
(Activities to talk about animats and what they can do.)
Look at the animals. What can they do?
Colour. Then, point and say: It can....
------( Before going into class -----
Have the pictures of the animals ready to
use
Students' books closed. Put up the animal pictures (Hon.
polar bear, hippo, parrot, flamingo, penguin) on the
board. Elicit what the animals can do.
Students’ books open. Say: Open your books at page
ninety-six. Write the number 96 on the board and hold
up your book. Point to the actions and elicit the words
ond the colours Explain the activity. Ask the students:
What can a lion do? and elicit responses (It can run.).
Explain to the students that they colour In a petal using
the corresponding colour for run Ge. red). Repeat with
the rest of the animals in the pictures, allowing the
Module 7 - My Animals
students time to colour the corresponding petals
according to the colour ot the actions. Then, students
point to the animals In tum and say: It can (run).... etc.
lion: run - climb - swim
(polar) bear: run - climb - swim
parrot: run - climb - fly
hippo: run - swim
flamingo: run - fty - swim
penguin: run - swim
Look and spot the mistakes. Then, say:
A (lion) can't (fty).
Explain the activity. Point to and elicit the names of the
animals. Point to the animal and ask Can a lion fty? Elicit
the nght response (no). Answer: A Hon can f fly. Allow the
students some time to find and circle the mistakes. Then,
students say what the animals can t do.
items to be circled: lion. bear, parrot, hippo, penguin
A lion can't fly.
A bear can’t fly.
A parrot can't swim.
A hippo can't climb.
A penguin can't climb.
ENDING THE LESSON
(An activity to consolidate the language of the lesson )
Ask Individual students to come to the front of the
classroom. Say an action, e g climb The students
mime climbing. Repeat wtth other actions (e g run. fty.
swim) Repeat the activity with os many students as
you think Is necessary.
e................1 Lesson 5 |.....................
• Objectives *.
• To consolidate the language learnt in the module, j
• To draw a picture of a farm. j
:Language ;
: In this lesson the students will leam to understand: ;
• • How many animals are there on the farm? ;
: • Willow says, jumpl •
• In this lesson the students wHI learn to use:
• • Yes. I can./No, I can't.
• • This is my farm. Lookl A (horse)....
: Extra Materials •
; • Flashcards (56-61) for the Beginning the Lesson;
: activity;
\ • A4 sheets of paper for each student for Ex. 3.
BEGINNING THE LESSON
(An activity to review animals.)
FLASHCARDS (56-61)
Ask a student to come to the front of the classroom. Show
him/her an animal flashcard The student names the
animal and one thing it can do Ask the rest of the class
for verification. Repeat wtth as many students as you think
is necessary.
PRACTICE
(Activities to consolidate animals and abilities.)
Find the animals. Draw lines.
Say: Open your books at page ninety-eight. Write the
number 98 on the board and hold up your book. Refer
the students to the picture and explain the activity.
Alow the students some time to find the animals and
draw lines. Check their answers.
Look and circle. Then, talk with your friend:
Can you (jump)? Yes/No.
Refer the students to the pictures and elicit the actions.
Explain the activity. The students circle the happy face
or the sad face according to what they con/cannot
do. Then ask the students, in pairs, to ask and answer
these questions. Demonstrate this yourself first.
eg. Student 1: Can you Jump?
Student 2: Yes. I can./No. I can't, etc
Portfolio: Draw a picture of your farm.
Present it to the class. Say: This Is my farm.
Look! A (duck).....
Point to the picture and ask: What's this? Elctf: It's a farm
Ask: How many animals are there in the farm? Elicit Four
Then say: This Is my farm. Lookl A horse, a sheep and two
cows! Provide each student wtth a sheet of paper. Ask
the students to draw their own farm and present it to the
class Make sure you display their work somewhere in the
classroom. Then help them file their drawings in their
Junior Language Portfolios.
ENDING THE LESSON
(An activity to consolidate the language of the lesson.)
Play Willow says. Explain to the students that they should
do the actions only if they are preceded by the phrase
71
• -i''If' '
Module 7 - My Animals
Willow says. Demonstrate this yourself first.
e.g. Teacher: Willow says, jump!
Class: (students jump)
Teacher: Climbl
Class: (students remain stU!) etc
WORKBOOK (Optional)
If you wish, you can do Exs 5-6 from the Workbook
during this lesson or the next one.
... Lesson 6 - Our Wortd/My Wodd ............
Objectives
To famHiorise students with Australian, Peruvian.
Chinese and Russian culture. To talk about popular
animals in Austraiia/Peru/China/Russia.
Language
In this lesson the students will learn to understand
• Australia. Peru. China. Russia
• koala. Hama, panda
In this lesson the students will learn to use
• A (green) (koala)...
Extra Materials
• A map of the world for Ex. 1 (Optional):
• flashcards (56-61) for Ex. 4;
• flashcards (62-66) for the Ending the Lesson
activity.
BEGINNING THE LESSON
(An activity to review the language tram the previous
lesson.)
Ask the students to present the drawings they made in
the previous lesson.
OUR WORLD
(Activities to familiarise students with aspects of Australian.
Peruvian and Chinese culture.)
Look at the pictures and talk about the
animals. Colour the animals. Then, point
and say: A green koala....
Students' books closed. Ask the students, in LI If
necessary, what the most popular animals are In their
country. Explain to them that today they ore going to
learn about popular animals in Australia, Peru, China
and Russia.
Students’ books open. Say: Open your books at page a
hundred. Write the number 100 on the board and hold
up your book. Point to the Australian flag and say:
Australia. If you have a mop of the world, put it up on
the board and show where Australia is. Repeat the
same procedure with the flags of Peru and China. Point
to the pictures and ask the students to identify the
animals. Point to the first picture and say: koala. The
students repeat, chorally and individually. Continue
with the other animals: llama, panda. The students
repeat, chorally and Individually. Ask the students if
they have heard of these animals and what they know
about them.
Point to the groups of pictures below. Ask the students
to look carefully at each group of pictures and colour
the remaining ones according to the sequence the
other pictures form. Then students point to the animals
and say: A green koala, a yellow koala.........
The students colour: koalas - green, yellow, llamas -
blue, blue; pandas - orange, green
MY WORLD
(Activities for the students to explore and talk about
their own culture in English.)
Circle the animals that live in Russia.
Ask students to name, in LI If necessary, some wild
animals that live in Russia (e g. wolf. Siberian tiger, etc).
Point to the pictures and name the animals. Explain the
activity. Allow the students some time to complete the
activity. Check the students' answers.
Animals to be circled: Siberian tiger, wolf, bear
Draw and colour your favourite animal.
Then, say: This is....
Explain the activity. The students draw and present
their favourite animal. Alternatively, the students con
draw their favourite animal on a piece of paper. If you
wish, you can write the English name on the picture.
the Animals game.
FLASHCARDS (56-61)
Put the flashcards face down on your desk. Ask a
student to come to the front of the classroom and pick
a flashcard. The student says an action that this animal
can do. The rest of the class tries to guess the animal.
Whoever guesses correctly, comes to the front of the
classroom and the game continues.
72
Module 7 - Му Animals
e g. Student It (picks the cat flashcard) I can climb.
Student 2: You're a horse.
Student I: No!
Student 3: You’re a cat!
Student 1: Yes. etc
ENDING THE LESSON
(An activity to consolidate the language of the lesson.)
FLASHCARDS (62-66)
Hold up the action flashcards. Ask individual students
to answer your questions.
eg. Teacher: Peter, can you fly?
Peter: No. etc
Objectives
To listen to a Russian story in English. To develop
listening and speaking skills.
language
In this lesson the students will leam to understand
• Look at the big turnip!
In this lesson the students will leam to use
• pull, turnip, ground
Extra Materials
• Flashcard (67) for Presentation & Practice.
BEGINNING THE LESSON
(An activity to review the story.)
Ask the students if they remember what the previous
episode of the story was about. If not ask them to go to
the respective page (88) and look at the picture.
PRESENTATION & PRACTICE
(Activities to present the tale of "The Giant Turnip .)
Listen, point to the picture and repeat.
(TRACK 62)
FLASHCARD (67)
Students' books closed. Put up the flashcard on the
board Point to the item on the flashcard (ground) and
present it. The students repeat after you.
Students' books open. Say: Open your books at page a
hundred and two. Write the number 102 on the board
and hold up your book. Play the recording. The
students listen, point and repeat.
TAPESCRIPT
Ground
Listen to the story. (TRACK 63)
Direct the students' attention to the picture. Say: Win
the mouse help Anna to pull out the turnip? Let's seel
Play the recording for the students to listen to the story.
Play the recording again. The students listen and point
to the characters as they are mentioned. Play the CD
a third time with pauses. The students listen and repeat
chorally and/or individually.
TAPESCRIPT
'Please help us pul! out the turnip!' the cat says to the
mouse. 'Alright. I'm coming.' says the mouse. So. the
mouse holds me cat The cat holds the dog The dog
holds Little Anna. Little Anna holds me old woman. The
old woman holds me old man The old man holds the
turnip. They pull and pull. The giant turnip pops out of
me ground - POP!
ENDING THE LESSON
(An activity to consolidate me language of the lesson.)
Narrate the story. The students mime it.
........ Lesson 8 - Checkpoint ...........
: Objectives •
•Jo consolidate the language of the module.
•e •*
Listen and number. (TRACK 64)
Revise the animals. Explain the activity. Play the
recording, twice if necessary. The students listen and
number the animals. Check the students' answers.
Order of animals: 1 cat. 2 horse. 3 cow, 4 sheep. 5 dog
TAPESCRIPT
1 cat
2 horse
3 cow
4 sheep
5 dog
73
Listen and circle, (track 65)
Revise the actions Explain the activity. Play the
recording, twice if necessary. The students listen and
circle the actions they hear Check the students'
answers
Actions to be circled: jump, fly, run, swim
TAPESCRIPT
Jump. fly. run. swim
Note: The students are now ready to do Module Test 7.
74
Module 8 - My Senses
...............4 Lesson 1 .....................
Objectives
To present and practise the five senses.
Language
In this lesson the students will learn to understand
• What can you (smell)7
In this lesson the students will learn to use
• Senses: see. smell, hear, taste, touch
• snail, rabbit
• I can (see) with my (eyes)!
• I can (see) a (snail)!
• I can (smell) the .... but I can't (smell) the ....
Extra Materials
• Flashcards (56-66) for the Beginning the Lesson
activity:
• the My Senses poster for Presentation & Practice;
• flashcards (68-72) for the Ending the Lesson
. activity.
BEGINNING THE LESSON
(An activity to review the vocabulary taught in Module 7.)
FLASHCARDS (56-66)
Hold up an animal flashcard, eg. horse, and say
incorrect statements about the animal. Invite the
students to respond.
e g. Teacher: A horse can fly.
Student 1: No! (A horse can't fty!) etc
PRESENTATION & PRACTICE
TAPESCRIPT
See. smell, hear, taste, touch.
Draw lines and match. Then, sing. (TRACK 67)
Hold up your book, point to the symbol of the senses
and elicit the parts of the face. Then point to the eyes
and say: I can see with my .... Invite the students to
finish your sentence: eyes. Repeat wtth the rest of the
symbols. Explain the activity to the students. Tell them
to match the symbols to the corresponding child in the
picture. Check the students' answers.
Play the recording. The students listen and point to the
parts of their face every time they are mentioned. Play
the recording again. The students listen and point to
the parts of their face.
TAPESCRIPT
I can see with my eyes.
I can smell with my nose.
I can taste wtth my tongue.
Yummedy. yummedy. yum!
I can touch with my hands
I can hear with my ears.
I can do lots of things.
Ylppeedee. yippeedee, dee!
Look and find. Then say: / can (see) a (snail).
Refer the students to the pictures, point to the Items
and eBcIt the words. Explain the activity. Ask the
students to locate these Items in the picture. Point to
the picture of the snail and say: I can see a snail. The
students repeat after you. Then point to the rest of the
pictures and elicit similar sentences involving the five
senses, l.e. I can smell a flower l can touch a cat. I can
taste a banana. I can hear a dog
(Activities to present and practise the five senses.)
Listen, point to the senses and say. (TRACK 66}
Look and circle the odd one out. Then, say:
/ can (smell) the .... but I can't (smell) the ....
POSTER
Students' books closed. Put up the My Senses poster on
the board. Point to the pictures of the senses, one at a
time, and say the words, eg see a snaH, smell a flower,
etc. The students repeat after you. Point to the senses
in random order. The students repeat after you.
Students' books open. Say: Open your books at page a
hundred and four Write the number 104 on the board
and hold up your book. Play the recording. The students
listen, point to the senses and repeat, chorally and/or
individually. Check their pronunciation and Intonation.
Explain the activity. Elicit the names of the items and
mime the senses. Ask the students to circle the Item we
can t smell, hear or taste. Check their answers Point to
the first group of pictures and say: / can smell the flower
and the pizza, but I can't smell the wall. The students
repeat after you. Ask the students to make similar
sentences orally in class.
smell: wall
hear: pencil
taste: green
75
(Suggested answers)
/ can hear the cat and the train, but I can't hear the
pencil.
I can taste the Ice cream and the apple, but I can't
taste green
☆ Draw something you can hear, touch, smell,
taste and see. Tell the class.
Refer the students to the picture and ask them to draw
something they can hear. see. smell, touch, taste in the
corresponding box. Then ask them to present their
picture to the class. Demonstrate this yourself first.
Variation
The students can make a My Senses poster On a big
piece of construction paper students draw things they
can see. hear, taste, touch and smell.
ENDING THE LESSON
(An activity to consolidate the language of the lesson.)
FLASHCARDS (68-72)
Put up the flashcards on the board. Point to each one
and invite individual students to say which of the five
senses they depict.
e g. Teacher: (pointing to the smell' flashcard)
Student I: Smelll etc
WORKBOOK (Optional)
if you wish, you can do Exs 1 and 2 from the Workbook
during this lesson or the next one.
................< Lesson 2 >....................
• Objectives •
: To present and practise the concept of day and;
; night. To explore other subject areas: Science. ;
• •
• Language
• In this lesson the students will learn to understand :
• • Is it (day) or Is It (night)? :
; In this lesson the students will leam to use:
: • sun. moon. day. night, stars
; • It's day/nightl
; Extra Materials ;
• • Flashcards (73-77) for Presentation & Practice: :
• • A4 sheets of paper for each student tor the:
\ Ending the Lesson activity
BEGINNING THE LESSON
(An activity to review the five senses.)
Mime one of the five senses. The students have to guess
what it is.
e.g. Teacher: (mimes tasting)
Student 1: tastel etc
PRESENTATION & PRACTICE
(Activities to present and practise the concept of day
and night.)
Listen, point to the Items and say. (TRACK 68)
FLASHCARDS (73-77)
Students' books closed. Put up the flashcards on the
board. Point to the Items (sun. moon. day. night, stars),
one at a time, and say the word. The students repeat
after you. Point to the items in random order. The
students repeat after you.
Students’ books open. Say: Open your books at page a
hundred and six. Write the number 106 on the board
and hold up your book. Play the recording. The
students listen, point and repedt.
TAPESCRIPT
Sun, moon, day, night, stars.
DAY or NIGHT? Look at the pictures and
draw. Then, say: It’s day/nlght.
Refer the students to the picture, point to the
corresponding part and elicit day and night - sun and
moon. Explain the activity. The students look at the
pictures and draw a sun (if the action usually takes
place during the day) or a moon (If It usually takes
place at night). Then, students point to the pictures
and say. e.g. It's day.
ride a bike: It's day.
sleep: It's night
go to school: It's day,
take a bath: it's night,
watch TV: It's night.
go swimming: It's day.
Listen and sing. (TRACK 69)
Hold up your book and ask as you point to the
corresponding part of the picture and say: Is it dark or
is it light? The students repeat after you. Then ask: Is It
76
Module 8 - My Senses
day or is it night? The students repeat after you. Repeat
with the rest of the lyrics. Play the recording. The
students listen and look. Play the recording again. The
students listen and sing along.
TAPESCRIPT
Is it dark or is it light?
Is it day or is it night?
Sun or moon.
Moon or sun.
Looking down at everyone
Play the Guessing game.
Explain the game. Ask a student to come to the front
and mime an action that takes place during the day or
at night. The rest of the class has to guess whether it is
day or night. The first student to answer correctly takes
the next turn.
ENDING THE LESSON
(An activity to review the concept of day/nlght.)
Provide each student with a sheet of paper and ask
them to draw an action that takes place during the
day or night and present It to the class by saying: It's
day/nightl Demonstrate this yourself first
WORKBOOK (Optional)
If you wish, you can do Exs 3 and 4 from the Workbook
during this lesson or the next one.
..............4 Lesson 3 .................,
Objectives •
• To listen to a story about the characters enjoying •
•themselves at a fairy party. To develop listening;
; comprehension skills through a dialogue. ;
• •
• Language
j In this lesson the students will learn to understand :
: • Who's this? :
• e
• In this lesson the students will learn to use ;
; • I can (see the moon)! ;
; • it's a fairy party! •
: • This is fun! •
; • / love the Magic Forest! •
• Extra Materials !
*, • The My Senses poster for Presentation & Practice.!
BEGINNING THE LESSON
(An activity to review the concept of day/night.)
Ptay the song from the previous lesson (Track 69). The
students listen and sing along
PRESENTATION & PRACTICE
(Activities to present the story and develop the students'
listening skills.)
Listen to the story and point to the pictures.
(TRACK 70)
POSTER
Students' books closed. Use the My Senses poster to
present the story. Explain to the students. In LI If
necessary, that Woody and Frosty are going to a fairy
party. Point to Woody in the first picture and ask: Who's
this? Elicit: Woody. Say. as you point to the moon: Look.
Frosty! I can see the moon! The students repeat after
you. Point to the music notes in the second picture and
say: Listen! I can heat music! The students repeat after
you. Repeat with the rest of the pictures.
Students' books open. Say: Open your books at page a
hundred and eight. Write the number 108 on the board
and hold up your book. Ask the students to identify the
characters and any items they know.
e g. Student 1: (pointing to the moon In Frame 1) (This is)
the moon! etc
Play the recording and ask the students to point to
each picture in their book In turn. Show them what to
do by holding up your book and pointing. Play the
recording again. The students listen and repeat,
chorally and/or Individually.
Point to the first picture on the poster. Ask the students
to complete your sentences.
e.g. Teacher: Look. Frosty! I can see the ...
Class: moon! etc
Extension
Ask for a volunteer to come and point to the first picture
on the poster. Encourage him/her to say the dialogue
Ask the rest of the class for verification. Repeat with
different students for the rest of the story.
TAPESCRIPT
Frame I
Woody: Look. Frosty! I can see the moon!
77
Module 8 - My Senses
Frame 2
Frosty: Listen! I can hear music!
Frame 3
Woody: I can smell popcorn!
Frame 4
Frosty: I can see Ertlnal
Frame 5
Frosty: Wow! It's a fairy party!
Frame 6
AMn: Frosty! Woody! Come on!
Frame 7
Willow: This is fun!
Frame 8
Woody: I love the Magic Forest!
Read the question at the bottom of page 109. Ask the
students to draw a happy face or a sad face
depending on whether they like the story or not Ask
them to tell you. in LI If necessary, what they like most.
ENDING THE LESSON
(An activity to consolidate the language of the lesson.)
Tell the students to make an invitation for the fairy
party. If you wish, you con write the following on the
board and ask the students to copy it on a piece of
paper and decorate the invitation.
Dear..
Please come to our fairy party!
Love.
Objectives
To talk about animals we can see at night
Language
In this lesson the students will learn to understand:
• What can you see?
• koala, snail, bat. mouse, lion
In this lesson the students will learn to use:
• / can see a (bat) at night
Extra Materials
• Egg cartons and some elastic for each student
for Ex. 2 (refer to Before going Into class):
• pictures of day & night animals for the Ending
the Lesson activity
BEGINNING THE LESSON
(An activity to revise the language from the previous
lesson.)
Play the dialogue from the previous lesson (Track 70).
The students listen and follow In their books.
PRESENTATION & PRACTICE
(Activities to talk about animals we can see at night.)
Look at the animals and say: I can see a
(snail at night).
Students' books closed. Draw a simple sketch of a bat
and a moon on the board. Ask students in LI to tell you
what they con see. Elicit the answer Then point to the
bat and soy: I can see a bat at night. Students repeat
after you. Ask students, in LI if necessary, what other
animals they know that they can see at night.
Students’ books open. Say: Open your books at page a
hundred and ten Write the number 110 on the board
and hold up your book. Point to the picture of the
koala and say: koala Then say: I can see a koala at
night. The students repeat after you. Then students look
at the pictures and make similar sentences orally In
class.
I can see a bat at night.
I can see a mouse at night.
I can see a lion at night.
I can see a snail at night.
Let’s make a ball
-------Q Before going into class'^)--------
You need 3 sections of an egg carton for
each bat
Guide the students in making their bats.
Directions
Cut the cartons up Using a pair of scissors,
make a small hole into the head of the
bat Thread the
elastic through
and tie a knot.
This will enable
the bat to
bounce
around!!
Then draw a pair of
eyes and a mouth. The bat is ready!
78
. .... —
Module 8 - Му Senses
Note: You can show the students how to make the bat
and ask them to do It at home and bring it to the class
for the next lesson.
Colour the animals you can see at night
blue.
Explain the activity. Point to and elicit the names of the
animals. Point to the bat and ask: Day or night? Elicit
the right response (night). Allow the students some time
to colour In the bat blue. Go through the rest of the
animals and elicit the night-time animals. Allow the
students some time to colour them blue. Check the
students’ answers.
Animals to be coloured: bat. lion, cat
ENDING THE LESSON
(An activity to consolidate the language of the lesson.)
------С )-------
Bring in pictures of day-time and night-time
animals.
Show the students the pictures of the animals you have
brought, one at a time. The students look at them and
say day If they are day -time animals or night if they are
night-time animals.
.................. Lesson 5 ►...............
Objectives
о consolidate the language learnt In the module
To make a collage of things connected with day or
night.
Language
n this lesson the students will leam to understand
• (AMn). what can you see?
• Is It day or night?
n this lesson the students will leam to use;
• It's (night). I can see (the (moon, the stars, a
bat).
Extra materials
• A4 sheets of paper for each student for Ex. 4.
• • •
BEGINNING THE LESSON
(An activity to review the senses.)
Say a sentence. If it's Incorrect, the students correct It.
e g. Teacher: I can touch the sun.
Students: No.
Teacher: I can see the sun.
Students: Yes. etc
PRACTICE
(Activities to consolidate the vocabulary of the module.)
Listen and draw lines. (Track 71)
Say: Open your books at page a hundred and twelve
Write the number 112 on the board and hold up your
book. Refer the students to the picture and elicit the
items and the senses Play the recording, twice if
necessary. The students listen and draw lines to match
the items to the corresponding senses. Check their
answers.
Dog - hear
Apple - taste
Snail - see
Rower - smell
Ice cream - touch
TAPESCRIPT
I can hear a dog.
I can taste an apple.
I can see a snail.
I can smell a flower.
I can touch an Ice cream.
Make your Senses Book.
Point to and explain the craftwork. Guide the students
through the following steps;
79
Students attach a photo
or a drawing in each
column.
WORKBOOK (Optional)
If you wish, you can do Exs 5-6 from the Workbook
during this lesson or the next one.
Allow the students some time to make their Senses
Book. Alternatively, explain the activity and assign it as
homework.
Listen and draw lines. Then, say: (AMn), what
can you see? I can see the .... (TRACK 72)
Elicit the names of the items by pointing and asking:
What's this? Ptay the recording, twice if necessary. The
students listen and draw lines. Then students take roles
and ask and answer.
TAPESCRIPT
1 Boy: AMn. what can you see?
Alvin: I can see the cat.
2 Boy: Edina, what can you see?
Erttna: I can see the stars
3 Boy: Woody. what can you see?
Woody: I can see the bat.
4 Boy: Frosty, what can you see?
Alvin: I can see the moon.
Portfolio: Draw a picture of day or night.
Present it to the class. Say: It's (night). I can
see (the moon, the stars, a bat).
(An activity to develop fine motor skills and consolidate
the language of the module.)
Point to the picture and ask: Is It day or night? Elicit the
answer (It's night). Then ask. What can you see? Elicit: /
can see the moon, the stars, a bat Provide each
student with a sheet of paper. Ask the students to draw
a similar picture of night or day and present ft to the
class. Make sure you display their work somewhere in
the class. Then help them file their drawings In their
Junior Language Portfolios.
ENDING THE LESSON
(An activity to consolidate the language of the lesson.)
Have the students stand up Say It's day. The students
think of an action that usually takes place in the day
and mime doing it. Repeat with It's night.
Lenon 6 - Our Worid/My World ..........
: Objectives •
: To familiarise students with British. Italian and Russian;
•culture To talk about things you can see. taste.;
: hear in the UK/ltaly/Russta. •
• e
• Language
• In this lesson the students will learn to understand :
: • UK. Italy. Russia :
• • Big Ben. fish and chips, bagpipes. Coliseum.:
violin. St Basil's Cathedral, balalaika :
• e
• e
; In this lesson the students will learn to use:
; • I can see..., I can taste..., I can hear.... ;
• •
• Extra Materials
• • A map of the world for Ex. 1 (Optional):
• • A4 sheets of paper for each student for the!
*•, Ending the Lesson activity. .*
BEGINNING THE LESSON
(An activity to review the senses.)
Ask the students to present the drawings they made in
the previous lesson.
OUR WORLD
(Activities to famiHartse students with aspects of British
and Italian culture.)
Trace the pictures. Then say: / can see ....
I can taste .... I can hear....
Students' books open. Say: Open your books at page a
hundred and fourteen. Write the number 114 on the
board and hold up your book. Point to the British flag
and elicit the country: UK. Explain to the students that
in this section they will talk about famous landmarks
(things we can see), food (things we can taste) and
musical instruments (things we can hear) In Britain Ask
them to trace the picture of Big Ben with their pencils.
Point to the picture and tell students that this is one of
Britain's best-known landmarks. Then say: / can see Big
Ben. The students repeat after you. Then point to the
picture of the fish and chips and tell the students that
this Is a popular food In Britain. Say: I can taste fish and
chips. The students repeat after you. Hnalty, show them
80
Module 8 - My Senses
the bagpipes and say: I can hear the bagpipes. The
students repeat after you
Next, point to the Italian flag If you have a map of the
world, put It up on the board and show where Italy is.
Ask the students If they know anything about Italy and
have a class discussion in LI (eg. famous people,
cities, landmarks, food, etc). Point to the picture of the
Coliseum and say: I can see the Coliseum Then point
to the pictures of the pizza and the violin and ask the
students to trace the pizza with their pencils. Then
encourage students to say: I can taste pizza. I can hear
the violin.
MY WORLD
(Activities for the students to explore and talk about
their own culture in English.)
What can you see/hear/taste in your country?
Complete the pictures, point and say
Point to St Basil's Cathedraland elicit its name in LI and
then say Its name In English. Repeat with balalaika and
schi. Allow the students some time to complete the
picture and then say what they con see. hear and
taste in their country. Check the students' answers. As
on extension, the students can say more things they
can see/hear/taste In their country and even make a
collage
Play the Chinese Whispers game.
Tell the students they are going to play Chinese
Whispers. Explain the rules. Ask the students to form a
circle and begin the game by whispering a word to a
student. Tell him/her to whisper the word to the student
next to them. Then he/she passes It on to the student
next to them In the same way as before, around the
circle of students. When it gets to the Iasi person to
have the word whispered to them, they have to say
what they think the word was. If it is correct, then you
may do some kind of fun activity to celebrate the fact
that the students got It right. Repeat the game with
other words.
ENDING THE LESSON
(An activity to consolidate the language ot the lesson.)
Provide each student with a sheet of paper. Ask them
to choose one of the five senses and draw it. Then they
present their drawings to the class.
» 40 > * »
.......... Lesson 7-Storyland ...................
Objectives
To listen to a Russian story In English. To develop
listening and speaking skills.
Language
In this lesson the students will learn to understand:
• Look at the big turnip!
In this lesson the students will learn to use:
• pull, turnip, ground
Extra Materials
•„ • Flashcard (78).
e _•
BEGINNING THE LESSON
(An activity to review the story.)
Ask the students if they remember what the previous
episode of the story was about. If not. ask them to go
to the respective page (102) and look at the picture.
PRESENTATION & PRACTICE
(Activities to present the tale of 'The Giant Turnip )
Listen, point to the picture and repeat.
(TRACK 73)
FLASHCARD (78)
Students' books closed Put up the flashcard on the
board. Point to the Item on the flashcard (fait) and
present It. The students repeat after you.
Students' books open. Say: Open your books at page a
hundred and sixteen. Write the number 116 on the
board and hold up your book. Play the recording. The
students listen, point and repeat.
TAPESCRIPT
Fall.
Listen to the story. (TRACK 74)
Direct the students' attention to the picture. Point to
the characters and present them.
Play the recording for the students to listen to the story.
Play the recording again. The students listen and point
to the characters as they are mentioned. Play the CD
a third time with pauses. The students listen and repeat,
chorally and/or Individually.
81
Module 8 - My Senses
TAPESCRIPT
The old man tofts on the old woman The old woman
faits on Little Anna. Little Anna falls on the dog. The dog
tails on the cat The cat falls on the mouse! It is very
funny! 'Thank you for your help,' says the old man.
‘Let's all eat the great big turnip!'
Listen and sing. (TRACK 75)
Ask the students to look at the pictures Ask the
students to say. In LI If necessary, what the story is
about (helping others) Say: A little help goes a long,
long way. The students repeat after you Follow the
same procedure and present the rest of the song.
Play the recording. The students listen. Play the
recording again. The students listen and sing along.
TAPESCRIPT
A Httle help
Goes a long long way
A long long way. a long long way I
A little help
Goes a long long way
Give a little help today!
Hold on tight
To help a friend
Hold on tight, hold on tight1
Hold on tight
To help a friend
Give your friends a helping handl
TAPESCRIPT
I can hear music.
I can smell a flower.
I can touch a cat
Look at the pictures and (✓) or (Л). Then,
say.
Explain the activity. Allow the students some time to
complete the activity. Check the students’ answers.
ENDING THE LESSON
(An activity to consolidate the language of the lesson.)
Ask the students to form a circle. If you wish, you can
provide them with a piece of rope. Play the song The
students sing along as they move around In the circle.
Objectives
Jo consolidate the language of the module.
Listen and circle, (track 76)
Explain the activity. Play the recording, twice if
necessary. The students listen and number the actions
heard. Check the students' answers.
Pictures to be circled: 2,3, 5
82
/Objectives
: To consolidate the key vocabulary of the course.
• Vocabulary
• apples, ball, bananas, bed. biscuits, book. car. cat.
• cheese, chair, climb, cola. cow. cupboard, dog.
• doll. door. ears. eggs. eyes, floor, fty. hair, hear, hen,
• horse, house, ice cream. Jump. milk, moon, mouth.
• nose. pen. pencil, pencil case, pizza, plane
• popcorn, roof, rubber, run. sandwiches, schoolbag
• see, sheep, smell, stars, sun, swim, table, taste, tea
\teddy. teeth, tongue, touch, train, wan. window.
Ask the students to work in palrs/groups and find more
items in the picture that can go with the ones given.
They can circle the items In the picture, put a tick or
draw simple sketches In their notebooks. Ask the
pairs/groups to report back to the class.
e g apples: bananas, sandwiches, biscuits, cheese,
tea... (food/drink items)
pen: schoolbag. pencil, pencil case, rubber,
book... (school items)
bed: cupboard, table, chair, roof... (things in a
house and parts of the house)
III. Mime the word
Note: Fun Timel aims to consolidate the vocabulary of
the course. The teacher can spend some time at the
end of the school year on this section. Alternatively, the
teacher can cover the section gradually upon
completion of every module.
PROCEDURE
Have a class discussion Hold up your book, point to an
item, eg bananas, and ask: What colour are they? Heit;
Yellow. Then ask: What are they? Elicit Bananas etc.
Here are some suggested games/octivities the teacher
con do with the students
I. I SPY ...
Ask the students to look at the picture. Divide the class
into two teams. A and B. Explain the game. You say a
letter and the students in teams take turns finding an
item In the picture Each correct answer gets one
point. The team with the most points wins.
e g. Teacher:
Student 1 Team A
Teacher
I spy with my little eye.
something beginning with (a)
/&/.
Apples!
Correct) I point for Team A.
etc
II. Categories
Ask the students to look at the picture Divide the class
Into two teams, A and B. Explain the game Mime one
of the Items in the picture and the students in teams
take turns finding which item it is. Each correct answer
gets one point. The team with the most points wins.
e.g. Teacher: (mimes sleeping)
Student 1 Team A: Bed!
Teacher: Correct! 1 point for Team A.
etc
IV. Words in a heart
Draw a big heart on the board Ask the students to do
the same in their notebooks Ask the students to draw
In the hearts the items they like, want to have, etc. Then
the students present their drawings.
V. Number the words
-----Л Before going into class )----
Prepare sheets of paper, one per
group, with different items from the
picture on pages 120-121. e.g.
Sheet 1
Sheet 2
Draw some columns on the board, e g.
83
Fun Time!
• ... • -
Divide the class into groups. Give a sheet of paper to
each group. Explain the activity. The groups find the
items on their sheets in the picture and number them
The group that finishes first is the winner.
VI. Telepathy
Divide the class Into two teams, A and B. Think of an item
and say the name of the module, eg. My Schoolbag. The
teams fake turns finding which Item it is. Each correct
answer gets one point. The team wtth the most points wins.
e.g. Teacher; (thinks of pen) My Schoolbog
Student 1 Team A: (Is It) a book?
Teacher: Not
Student 1 Team B: (Is tt) a pen?
Teacher: Yes! 1 point for Team B. etc
84
e
Season's Greetings!
Objectives
To talk about Christmas. To sing a Christmas song.
To make Christmas decorations
Language
n this lesson the students will learn to understand
• It's Christmas rime! Merry Christmas!
• Santa, reindeer. Christmas tree, presents, sleigh
• What's this?
In this lesson the students will learn to use:
• Merry Christmas!
• Jingle Bells!
• It's a (ball).
• A (ball) for (AMn)!
• Thank you!
Extra Materials
• A big Christmas tree made out of green paper
for the class for the Beginning the Lesson activity;
• plctures/photographs related to Christmas
(Santa, reindeer. Christmas tree, presents,
sleigh) for Presentation & Practice:
• AA sheets of paper for each student for Ex. 4;
• photocopies of the Christmas decorations
template (p. 119) for each student for Ex. 4
(Extension).
Note: This unit is optional. It is designed to be taught just
before Christmas.
BEGINNING THE LESSON
(An activity to present Christmas.)
-----Q Before going into class )---------
Make a big Christmas tree out of green
paper.
Put up the big Christmas tree you have prepared on the
board and say: A Christmas tree The students repeat,
chorally and/or individually. Tell them: It's Christmas time!
Merry Christmas! The students repeat after you.
PRESENTATION & PRACTICE
(Activities to present and practise a Christmas song.)
Sing. (TRACK 77)
------Before going Into class )-------------
Bring in pictures related to Christmas.
Students’ books closed. Put up the plctures/photographs
related to Christmas on the board Point to the pictures
(Santa, reindeer, Christmas tree, presents, sleigh), one at
a time, and say the word(s). The students repeat after
you. Point to the pictures In random order. The students
repeat after you.
Students’ books open. Say: Open your books at page a
hundred and twenty-two. Write the number 122 on the
board and hold up your book. Hold up your book,
point to the pictures and elicit the words. Play the
recording as many times as you think necessary for the
students to start singing along.
TAPE SCRIPT
Jingle Beils.
Jingle Bells.
Jingle alt the way!
Oh, what fun it is to ride
On a one-horse open sleight
Find the items in the picture and colour
them.
Refer the students to the pictures, point to the Items
and elicit the words Exploin the activity. Ask the
students to find these Items in the picture (Ex. 1) and
colour them.
yf Choose a present for each character. Then
say: A (ball) for (Alvin).
Point to each present and say: What s this? Elicit: It's a
(ball). Explain the activity. Write on the board: Erlina.
AMn. Woody. Frosty, Willow (alternatively, put up the
Hellol poster). Tell the students that they win choose a
present for each character in the book. Demonstrate
this yourself first. Point to the ball and say: A ban for
AMn. The students repeat after you. Then ask individual
students to say for which character each present is.
Extension
Point to a present, then to a student and say: A (don) for
you! Merry Christmas! Elicit: Thank you! Ask the students,
in pairs, to choose a present for their partner and repeat
the same pattern.
e g. Student I: A teddy for you! Merry Christmas!
Student 2: Thank youl etc
☆ Make a card for the holidays. Offer it to
your mum and dad.
Refer the students to the Christmas card. Provide each
student with a sheet of paper. Ask the students to fold
the paper in half to make a cord. Ask them to decorate
their cards for their mum and dad. Alternatively, assign
It as homework. During the activity, you may play the
Jingle Bells song
Extension
------( Befofe in>o cta*s )-----------
Have the photocopies of the Christmas
template, one per student, ready to use.
Ask the students to colour and cut the Christmas
decorations. Once they have finished, tell them to use
their decorations to decorate the Christmas tree that Is
on the board, or take them home and decorate their
room, etc. During the activity, you may play the Jingle
Bells song as many times as you wish
ENDING THE LESSON
(An activity to consolidate the language related to
Christmas.)
As the students leave, invite them to say Merry Christmas!
86
Objectives
To talk about Mother's Day.
language
In this lesson the students will learn to understand
• Mother's Day
• love, kisses, hugs
In this lesson the students wlH learn to use
• This flower Is for you. Mum.
• Happy Mother 's Day!
• Oh. thank you!
• heart
Extra Materials
• A4 sheets of paper for each student for Ex. 2
(Extension);
• a straw and two sheets of cotoured paper (one
of them green) for each student for Ex. 4.
Note: This unit Is optional. It Is designed to be taught just
before Mother's Day.
BEGINNING THE LESSON
(Activities to present Mother's Day.)
Write the date of the Mother s Day celebration on the
board and encourage the students to guess why that
date is special. Have a general discussion. In LI. about
how they usually celebrate Mother's Day.
PRESENTATION & PRACTICE
(Activities to present the concept of Mother's Day.)
Listen and sing. (TRACK 78)
Students' books closed. Draw a picture of a woman's
face on the board and say the word(s) Mummy/Mum/
Mother. Ask the students to tell you what words come
to mind when they think of their mums This is a good
opportunity to teach the students some new words.
e.g love, kisses, hugs, etc
Students' books open. Say: Open your books at page a
hundred and twenty-four. Write the number 124 on the
board and hold up your book Read the title and
say/eilcit what it means Hold up your book, point to
the pictures and elicit the words (butterfly, snail, flower,
boy, mum).
Ploy the recording as many times as you think necessary
for the students to start singing along Encourage the
students to do the actions.
TAPESCRIPT
Oh. Mother. Mother, (hug yourself)
Mummy, Mum!
Your love to me (make an imaginary circle with both
hands)
Is like the sun!
It's worm and happy
With a smiling facet (mime painting an imaginary smile
on your face)
No other, Mother
Can take your placet (stretch both arms in front of you)
Look and match the hearts.
Point to one of the hearts and say: heart. The students
repeat after you. Explain the activity. The students took
and match the hearts. Check their answers
Extension
Provide each student with a sheet of paper Write the
word 'LOVE' on the board and ask the students to
copy It. Encourage the students to draw all the things
that come to mind when they think about love. Go
around the classroom asking the students questions
about their pictures.
Help the child get to her mother.
Point to the girl and ask the students to say what she is
holding. Elicit: flowers. Explain the activity Tell the
students they have to help the child get to her mum.
The students solve the maze by finding the correct path
to the finish point Check the students' answers.
☆ Make a bunch of flowers for your mum.
-------Before going Into class -----------
Bring a straw and two sheets of coloured
paper (one of them green) for eoch
student.
Tell the students that they are going to moke a bunch
of flowers for their mums. Show them your model.
Guide them through the cutting and colouring of their
templates. Go around the classroom os the students
make their flowers and ask questions about the colours
the students have used.
Materials for each student:
- two sheets of coloured paper (one of them green)
- a straw
-glue
-scissors
87
Mother's Day!
ENDING THE LESSON
(An activity to consolidate the language of the lesson.)
Invite the students to show their flowers to the class. Ask
a student to take on the role of ‘Mother’ and ask the
rest of the students to offer a flower to her.
Demonstrate this yourself first.
e.g Student 1: This flower is for you. Mum. Happy
Mother's Day!
Mother: Oh. thank you! etc
Curl each of
the fingers
around a
pencil.
Glue both sides
together and
stick the flower
onto a straw.
Then, stick the leaves onto
the straw.
............................................
Objectives
Introducing the alphabet (Aa-Bb)
Language
apple, bed
Extra Materials
• The My Alphabet poster;
• photocopies of the word cards apple and
bed;
• photocopies of the Aa-Bb Alphabet
Worksheets.
PRESENTATION & PRACTICE
ENDING THE LESSON
(An activity to revise the alphabet.)
------Q Before going into class у-
Photocopy the word cards; apple, bed.
Write the letters A, 8 on the board. Hand out the
photocopies of the word cards. Ask the students to
come to the board and stick their word card under the
correct letter. Ask the rest of the class for verification.
Note: For further practice on the alphabet, you can
hand out the photocopies of the corresponding
Alphabet Worksheets
(Activities to present the letters AB.)
POSTER
Objectives
Introducing the alphabet (Cc-Dd)
Listen and repeat. Then, colour. (TRACK 79)
Students’ books closed. Put up the My Alphabet poster
on the board. Point to the letters A. В and say the
appropriate sounds. The students repeat chorally and
individually. Point to the pictures and say the words.
The students repeat chorally and/or Individually.
Students' books open. Play the recording The students
listen to the letter sounds and the words and repeat
choralty and Individually. Individual students read the
letters and the words. Then, the students colour in the
letters in the pictures.
Write the letters.
(Activities to practise writing the letters of the alphabet.)
Refer the students to the letters in Ex. 2. Hold up your
book and demonstrate how to use the arrows as
guides to write each letter Explain that they have to
copy each letter twice, upper and lower case. Allow
the students some time to complete the task. Go
around the classroom, giving help where necessary.
Draw lines.
Ask the students to look at the picture. Read the
Instructions and explain the task Allow the students
enough time to complete the activity. Go around the
classroom, giving help where necessary. Check the
students' answers
Vocabulary
cat. dog
Extra Materials
• The My Alphabet poster;
• photocopies of the word cards apple, bed.
cat, dog;
• photocopies of the Cc-Dd Alphabet
Worksheets.
PRESENTATION & PRACTICE
(Activities to present the letters C-D.)
Listen and repeat. Then, colour. (TRACK 80)
POSTER
Students' books closed. Put up the My Alphabet paster
on the board. Revise letters A, В and the corresponding
words. Then, point to the letters C. D and say the
appropriate sounds. The students repeat chorally and
Individually. Point to the pictures and say the words.
The students repeat chorally and individually.
Students' books open. Play the recording. The students
listen to the letter sounds and the words and repeat
choralty and individually. Individual pupils read the
letters and the words. Then, the students colour In the
letters In the pictures.
89
My Alphabet
Write the letters.
(Activities to practise writing the tetters of tho alphabet.)
Refer the students to the letters in Ex. 2. Hold up your
book and demonstrate how to use the arrows os
guides to write each letter Explain that they hove to
copy each letter once, upper and lower case. Allow
th© students some time to complete rhe task. Go
around the classroom, giving help where necessary
Listen and circle the words that begin with
cand d. (track 81)
Read the instructions and explain the task. Point to the
first letter and say: C. The students repeat after you
chorally Repeat the procedure with D. Play the
recording The students listen and circle the words that
start with c or d. Allow the students some time to
complete the task Go around the classroom, giving
help where necessary. Check the students' answers.
c: cat. cow
d: duck
☆ Find and circle the letters a, b, c and d.
Ask the students to look at the picture. Read the
instructions and explain the task. Alow the students
enough time to complete the activity. Go around the
classroom, giving help where necessary. Check lhe
students' answers
ENDING THE LESSON
(An activity to revise the alphabet.)
------( Before going lnto~cta»s~)---------
Photocopy the word cards: apple, bed,
cat, dog.
Write the letters А-D on the board. Hand out the
photocopies. Ask the students to come to the board
and stick their word card under the correct letter. Ask
the rest of the class for verification.
Note: For further practice on the alphabet, you can
hand out the photocopies of the corresponding
Alphabet Worksheets.
.•...............GED......................•,
Objectives
Introducing the alphabet (Ee-Ff)
Vocabulary
egg. fish
Extra Materials
• The My Alphabet poster;
• photocopies of the word cards apple, bed.
cat. dog. egg. fish:
• photocopies of the Ee-Ff Alphabet
Worksheets.
PRESENTATION & PRACTICE
(Activities to present the letters E-F.)
Listen and repeat. Then, colour. (TRACK 82)
О «»,е'
Students' books closed. Put up the My Alphabet poster
on the board. Revise letters А-D and the corresponding
words. Then, point to the letters E. F and say the
appropriate sound. The students repeat chorally and
individually. Point to the pictures and say the words.
The students repeat chorally and individually.
Students’ books open. Play the recording. The students
listen to the letter sounds and the words and repeat
chorally and individually. Individual pupils read the
letters and the words. Then, the students colour In the
letters in the pictures.
'fa Write the letters.
(Activities to practise writing the letters of the alphabet)
Refer the students to the letters In Ex. 2. Hold up your
book and demonstrate how to use the arrows as
guides to write each letter. Explain that they have to
copy each letter twice, upper and lower case. Allow
the students some time to complete the task. Go
around the classroom, giving help where necessary
Circle the odd one out.
Read the Instructions and explain the task. The students
read the letters and circle the odd one out. Allow the
students some time to complete the task Go around
the classroom, giving help where necessary Check the
students' answers
IF 3 F 5 f 7 F
2E 4 A 6A 8A
90
☆ Find the letters to complete the words. Then,
draw a picture.
Read the instructions and explain the task. The students
find the tetters and complete the words (fish, egg)
Then they draw an egg and a fish. Allow the students
some time to complete the task. Go around the
classroom, giving help where necessary Check the
students’ answers
1 fish 2 egg
ENDING THE LESSON
(An activity to revise the alphabet.)
< Before going Into class )------
Photocopy the word cords: apple, bed.
cat. dog. egg. fish.
Write the letters A-F on the board Hand out the
photocopies. Ask the students to come to the board
and stick their word card under the correct tetter. Ask
the rest of the class for verification.
Note: For further practice on the alphabet, you can
hand out the photocopies of the corresponding
Alphabet Worksheets.
................................................
Ob|ectlves
Introducing the alphabet (Gg-Hh)
Vocabulary
glass, hen
Extra Materials
• The My Alphabet poster:
• photocopies of the word cards apple, bed.
cat. dog. ogg. fish, glass, hen;
• photocopies of the Gg-Hh Alphabet
Worksheet.
PRESENTATION & PRACTICE
(Activities to present the letters G-H.)
Listen and repeat. Then, colour. (TRACK S3)
POSTER
Students' books closed. Put up the My Alphabet poster
on the board Revise letters A-F and the corresponding
words. Then, point to the tetters G. H and say the
appropriate sound. The students repeat chorally and
Individually Point to the pictures and say the words
The students repeat chorally and individually.
Students' books open. Play the recording. The students
listen to the tetter sounds and the words and repeat
chorally and Individually Individual pupils read the
tetters and the words. Then, the students colour in the
tetters in the pictures.
Write the letters.
(Activities to practise writing the letters of the alphabet.)
Refer the students to the letters In Ex. 2. Hold up your
book and demonstrate how to use the arrows as
guides to write each letter. Explain that they have to
copy each letter twice, upper and lower case. Allow
the students some time to complete the task. Go
around the classroom, giving help where necessary.
Match the upper case with the lower case.
Read the instructions and explain the task. The students
match the upper case with the lower case tetters.
Allow the students some time to complete the task. Go
around the classroom providing help where necessary.
Check the students' answers
Aa Bb Cc Dd Ее Ff Gg Hh
Use the code to colour the picture.
Read the Instructions and explain the task. The students
read the code and colour in the picture. Allow the
students some time to complete the task. Go around
the classroom, giving help where necessary. Check the
students' answers.
ENDING THE LESSON
(An activity to revise the alphabet.)
-------C Before going into eta» )--------
Photocopy of the word cards: apple, bed.
cat. dog. egg. fish, glass, hen.
Write the letters A-H on the board. Hand out the
photocopies. Ask the students to come to the board
and stick their word card under the correct letter. Ask
the rest of the class for verification.
Note: For further practice on the alphabet, you can
hand out the photocopies of the corresponding
Alphabet Worksheets.
91
Objectives
Introducing the alphabet (li-jj)
Vocabulary
iguana. )ug
Extra Materials
• The My Alphabet poster:
• photocopies of the word cards apple, bed.
cat. dog. egg. fish, glass, hen, iguana. Jug;
. • photocopies of the h-JJ Alphabet Worksheet.
• »*
’^^’Look at the pictures and complete the
words. Read them to your friend.
Refer the students to the pictures and elicit the words.
Read the instructions and explain the task. The students
write the missing letters. Allow the students some time
to complete the task. Go around the classroom, giving
help where necessary Then, the students point to and
say the words. Check the students' answers.
2 egg 4 hen
3 fish 5 iguana
6 Jug
PRESENTATION & PRACTICE
(Activities to present the letters l-J.)
Listen and repeat. Then, colour. (TRACK 84)
POSTER
Students' books closed. Put up the My Alphabet poster
on the board. Revise letters A-H and the corresponding
words. Then, point to the letters I, J and say the
appropriate sound. The students repeat chorally
and/or individually. Point to the pictures and say the
words. The students repeat chorally and individually.
Students' books open. Play the recording The students
listen to the letter sounds and the words and repeat
chorally and individually, individual pupils read the
letters and the words. Then, the students colour in the
letters in the pictures.
Write the letters.
(Activities to practise writing the letters of the alphabet.)
Refer the students to the letters In Ex. 2. Hold up your
book and demonstrate how to use the arrows os
guides to write each letter Explain that they hove to
copy each letter twice, upper ond lower case Allow
the students some time to complete the task Go
around the classroom, giving help where necessary
Match. Colour.
Read the instructions and explain the task. The students
match the letters Then they colour in the jugs
accordingly. Allow the students some time to complete
the task. Go around the classroom, giving help where
necessary. Check the students' answers.
ENDING THE LESSON
(An activity to revise the alphabet.)
------( Before going'into class )---
Photocopy the word cards: apple, bed.
cat. dog. egg. fish, glass, hen. iguana. Jug.
Write the letters A-J on the board. Hand out the
photocopies. Ask the students to come to the board
and stick their word card under the correct letter. Ask
the rest of the class for verification.
Note: For further practice on the alphabet, you can
hand out the photocopies of the corresponding
Alphabet Worksheets
Objectives
Introducing the alphabet (Kk-LD
Vocabulary
kitten, lion
Extra Materials
• The My Alphabet poster.
• photocopies of the word cards apple, bed.
cat. dog. egg. fish, glass, hen. iguana. Jug.
kitten, lion;
• photocopies of the Kk-LI Alphabet
Worksheet.
PRESENTATION & PRACTICE
(Activities to present the letters K-L.)
II JJ
92
Listen and repeat. Then, colour. (TRACK 85)
ENDING THE LESSON
(An activity to revise the alphabet.)
J POSTER
Students' books closed. Put up tho My Alphabet poster
on the board. Revise letters A-J and the corresponding
words. Then, point to the letters K. L and soy the
appropriate sounds. The students repeat chorally and
individually. Point to the pictures and say the words.
The students repeat chorally and individually.
Students' books open. Play the recording. The students
listen to the letter sounds and the words and repeat
chorally and individually. Individual pupils read the
letters and the words. Then, the students colour in the
letters in the pictures.
'fa Write the letters.
(Achwftes to practise writing the letters of the alphabet.)
Refer the students to the letters in Ex. 2. Hold up your
book and demonstrate how to use the arrows as
guides to write each letter. Explain that they have to
copy each letter twice, upper and lower case. Allow
the students some time to complete the task. Go
around the classroom, giving help where necessary
Listen and circle. (TRACK 86)
Read the instructions and explain the task. Play the
recording The students circle the letters. Allow the
students some time to complete the task. Go around
the classroom, giving help where necessary. Check the
students' answers.
------{^ Beiore golng into class -----
Photocopy the word cards: apple, bed.
cat. dog. egg. fish, glass, hen, iguana, jug.
kitten. Hon.
Write the letters A-L on the board. Hand out the
photocopies. Ask the students to come to the board
and stick their word card under the correct letter. Ask
the rest of the class for verification.
Note: For further practice on the alphabet, you can
hand out the photocopies of the corresponding
Alphabet Worksheet.
................-Q Mm-Nn ...................
Objectives
Introducing the alphabet (Mm-Nn)
Vocabulary
milk. nest
Extra Materials
• The My Alphabet poster.
• photocopies of the word cards apple, bed.
cat. dog. egg. fish, glass, hen. iguana, jug.
kitten. Hon. milk, nest,
• photocopies of the Mm-Nn Alphabet
Worksheet.
TAPESCRIPT
PRESENTATION & PRACTICE
ID 3 G 5 A
2 F 4 К 6 1
Look at the pictures and put a tick (/) or a
cross (X).
Read the instructions and explain the task. The students
look at the pictures and put a tick or a cross
accordingly. Allow the students some time to complete
the task. Go around the classroom, giving help where
necessary Check the students' answers
3 ✓ 6 X
4 ✓ 7 ✓
5 X 8 X
(Activities to present the letters M-N.)
Listen and repeat. Then, colour. (TRACK 87)
POSTER
Students' books closed. Put up the My Alphabet poster
on the board. Revise letters A К and the corresponding
words Then, point to the letters M. N and say the
appropriate sounds. The students repeat chorally and
individually. Point to the pictures and say the words.
The students repeat chorally and individually.
Students' books open. Play the recording. The students
listen to the letter sounds and the words and repeat
chorally and Individually. Individual pupils read the
letters and the words. Then, the students colour in the
letters In the pictures.
My Alphabet
Write the letters.
(Activities to practise writing the letters of the alphabet.)
Refer the students to the letters in Ex. 2. Hold up your
book ond demonstrate how to use the arrows as
guides to write each letter Explain that they have to
copy each letter twice, upper and lower case. Allow
the students some time to complete the task. Go
around the classroom, giving help where necessary.
Listen and join the letters, (track 88)
Read the instructions and explain the task The students
listen and join the letters Allow the students some time
to complete the task. Go around the classroom, giving
help where necessary. Check the students’ answers
TAPESCRIPT
B. A. N. M, L. K. J. I. H. G. F, E, D. C
☆ Look and complete the words.
Refer the students to the picture. Elicit the words. Read
the instructions ond explain the task. Allow the students
some time to complete the task Go around the
classroom, giving help where necessary. Check the
students' answers.
2 BED bed 5 FISH fish 8 NEST nest
3 CAT 6 IGUANA
cat Iguana
4 DUCK 7 MILK
duck milk
ENDING THE LESSON
(An activity to revise the alphabet.)
------( Before going into class --
Photocopy the word cards apple, bed.
cat. dog. egg. fish, glass, hen. iguana, jug.
kitten, lion. milk. nest.
Write the letters A-N on the board. Hand out the
photocopies. Ask the students to come to the board
and stick their word under the correct letter Ask the
rest of the class for verification.
Note: For further practice on the alphabet, you can
hand out the photocopies of the corresponding
Alphabet Worksheets.
...................(Oo-Pp).................
Objectives
Introducing the alphabet (Oo-Pp)
Vocabulary
orange, pen
Extra Materials
• The My Alphabet poster.
• photocopies of the word cords apple, bed.
cat. dog. egg, fish, glass, hen. Iguana. Jug.
kitten. Hon. mHk. nest, orange, pen.
• photocopies of the Oo-Pp Alphabet
Worksheets.
PRESENTATION & PRACTICE
(Activities to present the letters O-P.)
Listen and repeat. Then, colour. (TRACK 89)
POSTER
Students’ books closed. Put up the My Alphabet poster
on the board Revise letters A-N and the corresponding
words Then, point to the letters О. P and say the
appropriate sounds. The students repeat chorally and
Individually. Point to the pictures ond say the words.
The students repeat chorally and individually.
Students’ books open. Play the recording. The students
listen to the letter sounds and the words and repeat
chorally and individually Individual pupils read the
letters and the words. Then, the students colour in the
letters in the pictures.
Write the letters.
(Activities to practise writing rhe letters of the alphabet.)
Refer the students to the letters in Ex. 2. Hold up your
book and demonstrate how to use the arrows as
guides to write each letter. Explain that they have to
copy each letter twice, upper ond lower case. Allow
the students some time to complete the task. Go
around the classroom, giving help where necessary.
Listen and write the beginning letter. Then,
use the code and colour the pictures.
(TRACK 90)
Read the instructions and explain the task. Play the
recording. Allow the students some time to complete
the task. The students listen and write the beginning
letter. Then they use the code and colour in the
94
.*’• • " г-
Му Alphabet
pictures. Go around the classroom, giving help where
necessary. Check the students’ answers.
pen: green
orange: orange
pizza: green
octopus: orange
☆
Look, read and match.
Read the instructions and explain the task. The students
match the pictures to the words. Allow the students
some time to complete the task Go around the
classroom, giving help where necessary. Check the
students' answers
ENDING THE LESSON
(An activity to revise the alphabet.)
Photocopy the word cards: apple, bed.
cat. dog. egg. fish, glass, hen. iguana, jug.
kitten, lion. mUk. nest, orange, pen.
Write the letters А-P on the board. Hand out the
photocopies. Ask the students to come to the board
and stick their word card under the correct letter. Ask
the rest of the class for verification.
Note: For further practice on the alphabet, you can
hand out the photocopies of the corresponding
Alphabet Worksheets.
Listen and repeat. Then, colour. (TRACK 91)
POSTER
Students' books closed. Put up the My Alphabet poster
on the board. Revise letters A-Pand the corresponding
words. Then, point to the letters Q. R and say the
appropriate sounds. The students repeat chorally and
individually. Point to the pictures and say the words.
The students repeat chorally and individually.
Students’ books open. Play the recording. The students
listen to the letter sounds and the words and repeat
chorally and Individually Individual pupils read the
letters and the words. Then, the students colour in the
letters in the pictures.
Write the letters.
(Activities to practise writing the letters of the alphabet.)
Refer the students to the letters in Ex. 2. Hold up your
book and demonstrate how to use the arrows as
guides to write each letter. Explain that they have to
copy each letter twice, upper and lower case. Allow
the students some time to complete the task. Go
around the classroom, giving help where necessary.
What's next? Write.
Read the Instructions and explain the task. The students
look at the patterns and guess the next letter. Allow the
students some time to complete the task. Go around
the classroom, giving help where necessary. Check the
students' answers
.................С5**)...................•
Objectives
Introducing the alphabet (Qq-Rr)
Vocabulary
queen, rabbit
Extra Materials
• The My Alphabet poster:
• photocopies of the word cards apple, bed,
cat. dog. egg. fish, glass, hen, iguana, Jug.
kitten, lion. milk. nest, orange, pen. queen,
rabbit.
• photocopies of the Qq-Rr Alphabet
Worksheets.
PRESENTATION & PRACTICE
(Activities to present the letters Q-R.)
q Q R r
Look, read and match.
Read the instructions and explain the task. The students
match the pictures to the words. Allow the students
some time to complete the task Go around the
classroom, giving help where necessary. Check the
students' answers.
ENDING THE LESSON
(An activity to revise the alphabet.)
------( Before going into class ---
Photocopy the word cards: apple, bed.
cat. dog. egg. fish, glass, hen. Iguana, jug.
kitten, lion. milk. nest, orange, pen. queen,
rabbit.
95
My Alphabet
Write the letters A-R on the board. Hand out the
photocopies. Ask the students to come to the board
and stick their word card under the correct letter Ask
the rest of the class for verification.
Note: For further practice on the alphabet, you can
hand out the photocopies of the corresponding
Alphabet Worksheets.
,..................(.")..........................
• Objectives •
; Introducing the alphabet (Ss-Tt)
: Vocabulary
: snake, tree :
•
; Extra Materials •
• • The My Alphabet poster;
: • photocopies of the word cards apple, bed. •
; cat. dog. egg. fish, glass, hen. iguana, jug. ;
kttten. Hon. milk. nest, orange, pen. queen. ;
• rabbit, snake, tree: •
•«. • photocopies of the Ss-Tt Alphabet worksheet.
PRESENTATION & PRACTICE
(Activities to present the letters S-T.)
Listen and repeat. Then, colour. (TRACK 92)
> p°ster
Students' books closed. Put up the My Alphabet poster
on the board. Revise letters A-R and the corresponding
words. Then, point to the letters S. T and say the
appropriate sounds The students repeat chorally and
Individually. Point to the pictures and say the words.
The students repeat choraBy and individuolty.
Students' books open. Play the recording. The students
listen to the letter sounds and the words and repeat
chorally and individually. Individual pupils read the
letters and the words. Then, the students colour In the
letters in the pictures.
Write the letters.
(Activities to practise writing the letters of the alphabet )
Refer the students to the tetters In Ex. 2. Hold up your
book and demonstrate how to use the arrows as
guides to write eoch tetter. Explain that they have to
copy eoch letter twice, upper and lower case. Allow
the students some time to complete the task. Go
around the classroom, giving help where necessary
Find and circle the words. Then, match
them to the pictures.
Read the instructions and explain the task. The students
find and circle the words. Then, they match the words
to the pictures Allow the students some time to
complete the task. Go around the classroom, giving
help where necessary. Check the students’ answers
jug. kitten, queen, rabbit, snake. Hon. milk. nest,
orange, pen. tree
Look at the pictures and complete the
crossword puzzle.
Read the instructions and explain the task. The students
look at the pictures and complete the crossword puzzle.
Allow the students some time to complete the task. Go
around the classroom, giving help where necessary.
Check the students' answers.
1 rabbit 4 nest
2 pen 5 tree
3 apple 6 kitten
i egg
ENDING THE LESSON
(An activity to revise the alphabet.)
------Q Before going into class )--
Photocopy the word cards: apple, bed.
cat. dog. egg. fish, glass, hen. Iguana, jug.
kitten. Hon. mUk. nest, orange, pen. queen,
rabbit, snake, tree.
Write the letters A-T on the board. Hand out the
photocopies. Ask the students to come to the board
and stick their word card under the correct letter. Ask
the rest of the class for verification.
Note: For further practice on the alphabet, you can
hand out the photocopies of the corresponding
Alphabet Worksheets.
96
Objectives
Introducing the alphabet (Uu-Vv)
Vocabulary
umbrella, van
Extra Materials
• The My Alphabet poster;
• photocopies of the word cards apple, bed.
cat, dog, egg. fish, glass, hen, iguana, jug.
kitten, lion. milk. nest, orange, pen. queen,
rabbit, snako. tree, umbrella, van.
• photocopies of the Uu-Vv Alphabet
Worksheets.
1 bed 5 lion
2 duck 6 nest
3 hen 7 snake
4 iguana 8 van
w Trace the words. Then, match them to the
pictures.
Read the Instructions and explain the task. I he students
trace the words and match them to the pictures. Allow
the students some time to complete the task. Go
around the classroom, giving help where necessary
Check the students answers.
ENDING THE LESSON
PRESENTATION & PRACTICE
(Activities to present the letters U-V.)
Listen and repeat. Then, colour. (TRACK 93)
j POSTER
Students' books closed. Put up the My Alphabet poster
on the board Revise letters A-T and the corresponding
words. Then, point to the letters U. V and say the
appropriate sounds. The students repeat chorally and
Individually. Point to the pictures and say the words
The students repeat chorally and indlvidualty.
Students' books open. Play the recording The students
listen to the letter sounds and the words and repeat
chorally and individually, individual pupils read the
letters and the words. Then, the students colour in the
letters in the pictures.
Write the letters.
(Activities to practise writing the letters of the alphabet.)
Refer the students to the letters in Ex. 2. Hold up your
book and demonstrate how to use the arrows as
guides to write each letter. Explain that they have to
copy each letter twice, upper and lower case. Allow
the students some time to complete the task Go
around the classroom, giving help where necessary.
Look, read and circle the right word.
Read the instructions and explain the task. The students
look at the pictures and circle the correct words. Allow
the students some time to complete the task. Go
around the classroom, giving help where necessary.
Check the students' answers.
(An activity to revise the alphabet )
------C ***** Qdng into class )----
Photocopy the word cards: apple, bed,
cat, dog, egg. fish, glass, hen. iguana, jug.
kitten, lion. milk. nest, orange, pen. queen,
rabbit, snake, tree, umbrella, van.
Write the letters A-V on the board. Hand out the
photocopies. Ask the students to come to the board
and stick their word card under the correct letter. Ask
the rest of the class for verification.
Note: For further practice on the alphabet, you can
hand out the photocopies of the corresponding
Alphabet Worksheets.
Objectives
Introducing the alphabet (Ww-Xx)
Vocabulary
window, fox
Extra Materials
• The My Alphabet poster;
• photocopies of the word cards apple, bed.
cat. dog. egg. fish, glass, hen. Iguana, jug.
kitten, lion, rrnlk. nest, orange, pen. queen,
rabbit, snake, tree, umbrella, van, window,
fox,
• photocopies of the Ww-Xx Alphabet
Worksheets.
97
PRESENTATION & PRACTICE
ENDING THE LESSON
(Activities to present the letters W-X.)
(An activity to revise the alphabet.)
Listen and repeat. Then, colour. (TRACK 94)
\l \ POSTER
Students' books closed. Put up the My Alphabet poster
on the board Revise letters A-Vand the corresponding
words. Then, point to the letters W. X and say the
appropriate sounds. The students repeat chorally and
individually. Point to the pictures and say the words.
The students repeat chorally and Individually.
Students' books open. Play the recording The students
listen to the letter sounds and the words and repeat
chorally and individually. Individual pupils read the
letters and the words Then, the students colour In the
letters In the pictures.
------(
Photocopy the word cards: apple, bed.
cat. dog. egg. fish, glass hen. iguana, jug.
kitten, lion, milk, nest, orange, pen, queen,
rabbit, snake, tree, umbrella, van. window,
fox.
Write the letters A-X on the board. Hand out the
photocopies. Ask the students to come to the board
and stick their word card under the correct letter. Ask
the rest of the class for verification.
Note: For further practice on the alphabet, you can
hand out the photocopies of the corresponding
Alphabet Worksheets.
Write the letters.
(Activities to practise writing the letters of the alphabet.)
Refer the students to the letters in Ex. 2. Hold up your
book and demonstrate how to use the arrows as
guides to write each letter. Explain that they have to
copy each letter twice, upper and lower case. Allow
the students some time to complete the task Go
around the classroom, giving help where necessary.
Write the word» in upper case.
Read the instructions and explain the task The students
write the words in upper case letters Allow the students
some time to complete the task. Go around the
classroom, giving help where necessary. Check the
students' answers.
Objectives
Introducing the alphabet (Yy-Zz)
Vocabulary
yo-yo, zebra
Extra Materials
• The My Alphabet poster;
• photocopies of the word cards apple, bed.
cat. dog. egg. fish, glass, hen. Iguana. Jug.
kitten, lion. milk. nest, orange, pen. queen,
rabbit, snake, tree, umbrella, van, window,
fox. yo-yo. zebra;
• photocopies of the Yy-Zz Alphabet
Worksheets.
2 CAT 7 KITTEN 12 SNAKE
3 DUCK 8 UON 13 WINDOW
4 FISH 9 NEST 14 FOX
5 GLASS 10 ORANGE
6 JUG 11 QUEEN
PRESENTATION & PRACTICE
(Activities to present the letters Y-Z.)
w Find and circle 14 words. Then, match them
to the pictures.
Read the instructions and explain the task The students
circle the words and match them to the pictures. Allow
the students some time to complete the task. Go
around the classroom, providing help where
necessary. Check the students' answers
FOX, BED. IGUANA. EGG. FISH. HEN, JUG. KITTEN. DON.
MILK, NEST. PEN. TREE
Listen and repeat. Then, colour. (TRACK 95)
A \ POSTER
Students' books closed. Put up the My Alphabet poster
on the board. Revise letters A-X and the corresponding
words. Then, point to the letters Y. Z and say the
appropriate sounds. The students repeat chorally and
Individually Point to the pictures and say the words.
The students repeat chorally and Individually.
Students’ books open. Play the recording. The students
98
My Alphabet
listen to the letter sounds and the words and repeat
chorally and individually, individual pupils read the
letters and the words. Then, the students colour in the
letters in the pictures.
Write the letters.
(Activities to practise writing the letters of the alphabet )
Refer the students to the letters in Ex. 2. Hold up your
book and demonstrate how to use the arrows as
guides to write each letter. Explain that they have to
copy each letter twice, upper and lower case Allow
the students some time to complete the task. Go
around the classroom, giving help where necessary.
Correct the mistakes.
Reod the Instructions and explain the task. The students
read the words and correct the mistakes. Allow the
students some time to complete the task Go around
the classroom, giving help where necessary. Check the
students' answers.
Objectives
Alphabet revision
Vocabulary
Aa-Zz
Extra Materials
• The My Alphabet poster;
• slips of paper with the lower case Alphabet
Letters.
PRESENTATION & PRACTICE
(Activities to revise the alphabet.)
Listen and repeat. (TRACK 96)
\ \ POSTER
2 cat 5 milk
8 zebra
3 duck 6 snake
4 fish 7 van
☆
Read and colour.
Read the instructions and explain the task. The students
read and colour in the pictures accordingly. Allow the
students some time to complete the task. Go around
the classroom, providing help where necessary. Check
the students' answers.
ENDING THE LESSON
(Ah activity to revise the alphabet.)
Photocopy the word cards: apple, bed, cat.
dog. egg. fish, glass, hen. iguana, jug, kitten,
lion, milk, nest, orange, pen. queen, rabbit,
snake, tree, umbrella, van, window, fox. yo
yo. zebra.
Write the letters A-Z on the board. Hand out the
photocopies. Ask the students to come to the board
and stick their word card under the correct letter Ask
the rest of the class for verification.
Students' books closed. Put up the My Alphabet poster
on the board Revise letters A-Z and the corresponding
words. Then, point to all the letters and say the
appropriate sounds. The students repeat chorally and
individually Point to the pictures and say the words.
The students repeat chorally and individually.
Students' books open. Play the recording. The students
listen to the letter sounds, and repeat chorally and
Individually. Individual students read the letters out
loud.
Find and join.
Reod the Instructions and explain the task. The students
join the letters to make words and match them to their
corresponding words below. Allow the students some
time to complete the task. Go around the classroom,
providing help where necessary. Check the students'
answers.
Circle the letters. Then, write the word.
Read the instructions and explain the task. The students
circle the letters. Then they write the words. Allow the
students some time to complete the task. Go around
the classroom, providing help where necessary. Check
the students' answers.
1 window 3 kitten
2 rabbit 4 orange
Note: For further practice on the alphabet, you can
hand out the photocopies of the corresponding
Alphabet Worksheets.
99
Let’s singl (TRACK 97)
Read the Instructions and explain the task. The students
listen and point to the letters. Play the recording again
pausing at certain letters and elicit the letters from the
students
ENDING THE LESSON
(An activity to revise the alphabet.)
Bring in slips of paper with the lower case
letters of the alphabet, one letter on each
slip of paper.
Distribute the slips of papers wtth the alphabet letters.
Write the alphabet letters on the board. The student
that has the corresponding lower case letter must
come to the board and stick his/her paper next to the
upper case letter.
100
Evaluation plays an integral part in the learning
process, and It is more efficient when based on the
systematic observation of the students throughout the
course. It provides valuable information that reflects
their progress In the acquisition of receptive and
productive skills as well as their attitude towards their
own learning experience It also allows teachers to
reflect on the validity of their teaching practices and
the types of material being used.
The process Is basically divided into three parts: Initial
evaluation at the beginning of the course, tonnative
evaluation which is done on a dally basis, and
cumulative evaluation upon finishing a module.
In Starlight Starter the evaluation activities are included
In both the Teacher's Book and the Student's Book
Initial evaluation
This evaluation centres malnty on the students' reports
from the previous school year, as the Information
should help the teacher find out about the strategies
they are able to use
Formative evaluation
Any exercise a student does can be used for this type
of evaluation. The results are then recorded on the
student s formative evaluation chart (page 102).
Make as many photocopies as you need and
complete the charts as Indicated. Write the names of
the activities you are going to evaluate (for example,
the dialogues, language games, craft activities, and so
on) and write the marks obtained with the help of the
following code:
***** - the student recognises and produces the
language
★★★ - the student recognises but does not produce
the language correctly
★ - the student does not recognise the language
Cumulative evaluation
The results of cumulative evaluation ore recorded on
♦he student's cumulative evaluation chart (page 103).
in the Student's Book the last page of the module is
used for cumulative evaluation. However, in order to
obtain reliable information, the formative evaluation
marks, work done throughout the module participatton
and attitude should also be taken into account.
In order to complete the chart, write down the
students' names and record the results using numbers
or letters in the corresponding columns. The code for
formative evaluation can also be used here.
101
Evaluation chart for games and activities
(formative evaluation)
Name of game/activity:......................................................
Aim of game/activity: ......................................................
Module:..................... Lesson: .............. Course: ...............
Student's name Mark and comments
0
*
0
0
0
0
Ъ
0
0
0
0
0
0
0
0
0
0
0
0
0
0
йк
02
Evaluation criteria: ★★★★★ ★★★
102 ©Express Publishing ©Prosvcsbchcniyc Publishers |PHOTOCOP1ABLE
Evaluation chart for each module (cumulative evaluation)
:ss Publishing CProsveshchcniyc Publishers |PHOTOCOPIABLE ~| 103
</» Module: c & </*' □ Date: ф Course:
Aims: The student is able to ... В 2 3 В 5 6 1 8 9 10 11 12 13 14 15 16 18 19 20 21 22 23 24 25
1
2
3
4
5
6
7
8
9
Marking criteria: ★★★★★ ★★★ ★
Attitudes:
1
2
3
^Marking criteria:✓ Yes X No I Improving
Module 3
©Express Publishing ©Prosveshcheniye Publishers |PHOTOCOPIABl.F.
104
Module 4
©Express Publishing CProsveshcheniye Publishers |PHOTOCOP1ABL£ ]
105
Module 4
©Express Publishing ©Prosveshchcniyc Publishers |pho 1 CKOPIABLE~|
106
Module 4
©Express Publishing ©Prosveshcheniye Publishers |РНОТОСОР1АВ1Г. ~|
107
Module 5
^Express Publishing CProsvesbcheniye Publishers |PHOTOCOPIABLE |
108
Module 5
©Express Publishing ©Prosveshcheniye Publishers [PHOTOCOPIABLE |
109
Module 5
©Express Publishing ©Prosveshcheniye Publishers [PHOTOCOPIABLE |
110
©Express Publishing ©Prosvcshchcniye Publishers [PHOTOCOPIABLE
111
Module 6
©Express Publishing ©Prosveshcheniye Publishers |PHOTOCOPI ABLE
112
Templates
hhmhhhbi
Module 6
из
Module 7
©Express Publishing ©Prosveshcheniye Publishers |PHOTOCOPIABLE |
114
Templates
©Express Publishing ©Prosveshchcniyc Publishers [PHOTOCOPIABLE ~|
115
Templates
Module 7
© Express Publishing ©Prosvcshchcniye Publishers IPHOTOCOPIABLE
116
Module 7
©Express Publishing ©Prosveshcheniye Publishers |PHOTOCOPIABLE |
117
Module 7
©Express Publishing ©Prosveshcheniyc Publishers |PHOTOCOP1ABLE
118
©Express Publishing ©Prosveshcheniye Publishers |PHOTOCOPIABLE ~]
119
©Express Publishing ©Prosveshchcniye Publishers [PHOTOCOPIABLE |
120
Alphabet Picture-Word Cards
©Express Publishing ©Prosveshcheniye Publishers |PHOTOCOPIABLE
121
©Express Publishing ©Prosveshcheniye Publishers [PHOTOCOPIABLE ~|
122
Alphabet Picture-Word Cards
Pp /X pen
© queen
R r A rabbit
/ев Ss snake
Tt Л tree
©Express Publishing ©Prosveshcheniye Publishers |PHOTO€OPTABLE |
123
Alphabet Picture-Word Cards
©Express Publishing CProsveshcheniye Publishers |PHOTOCOP1ABLE |
124
Я®*®?
Alphabet Picture-Word Cards
- -
©Express Publishing ©Prosveshchcniye Publishers | PHOTOCOPIABLE |
125
Alphabet Worksheets
ant
apple
arm
©Express Publishing ©Prosvesbcheniye Publishers |PHOTOCOP1ABLE ~|
126
boll
pen
bed
bat
©Express Publishing ©Prosveshchcniye Publishers |PHOTOCOPIABLE~~]
127
Alphabet Worksheets
sun
©Express Publishing ©Prosveshcheniye Publishers |PHOTOCOPIABl.F. |
128
banana
©Express Publishing ©Prosveshcheniye Publishers |PHOTOCOPIABLE ~]
129
во
©Express Publishing ©Prosveshchcniye Publishers |PHOTOCOPIABI.E |
ж
Alphabet Worksheets
____________________
teddy
fish
five
floor
©Express Publishing CProsveshchcnive Publishers |PHOTOCOPIABLE~|
131
glass
cupboard
©Express Publishing ©Prosveshchcnive Publishers |PHOTOCOP1 ABLE~]
132
Alphabet Worksheets
hat horse
hen
nine
©Express Publishing ©Prosveshcheniye Publishers |PHOTOCOPIABLE~]
133
Alphabet Worksheets
Indian
igloo
four
iguana
©Express Publishing ©Prosveshcheniye Publishers [PHOTOCOPIABLE |
134
Alphabet Worksheets
jacket
jug
tea
jaguar
©Express Publishing ©Prosveshcheniye Publishers |PHOTOCOP1ABLE ~|
135
Alphabet Worksheets
.Г
kitten
©Express Publishing ©Prosveshcbeniye Publishers [PHOTOCOPIABLE |
136
lion
biscuit
©Express Publishing ©Prosveshcheniye Publishers I PHOTOCOPIABLE ~j
137
ж
W /?
Alphabet Worksheets
в
? ••
moon
mouse train
CExpress Publishing ©Prosveshcheniye Publishers |PHQTOCOPIABI.F. ~|
138
mouth
nest
©Express Publishing ©Prosveshchcniye Publishers [PHOTOCOPIABLE |
139
Alphabet Worksheets
orange
climb
©Express Publishing ©Prosveshcheniye Publishers |PHOTOCOP1ABLE ]
140
• ч':. ' • . '••••
Alphabet Worksheets
pen
pizza
plane
flower
©Express Publishing ©Prosveshcheniye Publishers |PHOTOCOPIABI.F~|
141
-
-
Alphabet Worksheets
queen quilt
onion
©Express Publishing ©Prosveshcheniye Publishers |PHOTOCOPIABLE-]
142
Alphabet Worksheets
roof house
©Express Publishing ©Prosveshcheniye Publishers |PHOTOCOPIABLE ~]
143
Alphabet Worksheets
snake
star
teeth sandwich
CExpiess Publishing CProsveshcheniyc Publishers | PHOTOCOPIABLE ~|
144
.'л#..;.
Alphabet Worksheets
_______
run
table
tree
©Express Publishing ©Prosveshcheniye Publishers |PHOTOCOPIABLE |
145
unicorn
umbrella
uniform
popcorn
©Express Publishing ©Prusvcsbchcniye Publishers [PHOTOCOPIABLE
146
violin " swim
vase
©Express Publishing CProsveshcheniyc Publishers | PHOTOCOPIABLE ’
147
window
pencil case
wizard
wall
©Express Publishing ©Prosvcshcheniyc Publishers (PHOTOCOPIABLE
148
X-ray box
fly fox
©Express Publishing ©Prosveshcheniye Publishers |PHOTOCOPIABLE |
149
Alphabet Worksheets
yogurt
yacht
©Express Publishing ©Prosveshcheniye Publishers il’HOTOCOPIABI-F.
150 ---------
Alphabet Worksheets
zip
swim
zebra
zero
©Express Publishing ©Prosveshchcniye Publishers |РНОТОСОР1АВи~]
151
Workbook (Key & Instructions)
MODULE 1 - Hello!
Complete the picture. Then colour.
Revise the chorocters' names Point to each character
in turn and elicit the names. Explain the activity and
allow the students some time to complete and colour
In the picture.
Join the characters to their hats. Then
colour.
Revise the colours. Hold up a green coloured pencil
and ask the students to say the correct colour, eg.
green. Read the instructions and explain the activity.
The students match the characters to their hats and
then colour them In. Allow them some time to
complete the activity. Check their answers
Then point to the first hat ond ask the students to tell
you who It belongs to. Elicit: Frosty. Then elicit the
colour: orange Repeat for Alvin s hat (green) and
Woody's hat (blue).
Colour the boxes. Then point and say:
(yellow), (blue)...
Direct the students' attention to the colour sequence in
each row. Explain the activity Allow the students some
time to colour In the boxes. Then point and elicit:
yellow, blue Point to the second sequence of colours
and elicit: green, green, red Finally, point to the third
sequence and elicit the answer: pink. pink.
Colour In and say: My favourite colour is ...
Ask individual students to say what their favourite
colour Is Next, direct the students' attention to the
circle ond tell them to colour It In using their favourite
colour. Then they present their colours and say: My
favourite colour Is (red).
Look and find the stickers. Then point and
say: This Is (Eriina).
Read the instructions and explain the task. Ask the
students to find the corresponding stickers from the
sticker section, and show them to you for verification
before sticking them In the appropriate spaces. Check
their answers. Then point to the characters, one at a
time, and elicit, eg. This is Eriina. etc.
☆ Find and colour the squares in the picture.
Tell the students to look at the coloured parts of the
picture and use them as a colour guide in order to colour
the corresponding squares in the big picture. Go around
the classroom, asking the students to Identify the colours.
MODULE 2 - My Schoolbag
Find the school objects and draw lines.
Revise the school objects by pointing to realla in the
classroom. Read the instructions and explain the
activity. Point to the puzzle pieces of the Items around
the picture and elicit their names. Point to the example.
Allow the students some time to find these Items in the
picture and draw lines. Check their answers
Complete the pictures. The point and say:
It’s a rubber.
Explain the activity. Allow the students some time to
finish drawing the items. Then point to the items, one at
a time, and ask individual students to say, 'It's a...' etc
Join. Then trace the numbers.
Revise the numbers 1 to 5. Ask the students to look at
the numbers Eriina is holding and say them out loud.
Then ask them to look at the mushrooms and count the
circles on each one. Elicit the answers orally. Point to
the example and explain the activity. The students Join
and trace the numbers. Check their answers.
Colour the school objects. Then count them
and write the correct number.
Point to the book. Ask: What's this? Elicit the answer: It's
a book. Repeat for the rest of the items. Ask the
students to colour the school objects. Once they finish,
tell the students to count the number of each item in
the tree and to write the correct number in the space
provided. Check their answers.
books - 2 pencils - 3 rubbers 5
pens - 4 pencil case - 1
Count and find the stickers. Then point and
say: one (pencil), two (pencils),...
Read the Instructions and explain the activity. Tell the
students to count the Items in each box. e g. one
pencil, three pencils, etc. Then ask them to find the
number of items missing from each sequence. Elicit the
answers. Ask the students to find the corresponding
stickers from the sticker section, and show them to you
for verification before sticking them In the appropriate
spaces Check their answers Once they finish, students
point to the pencils and say: one pencil, two pencils,
three pencils, four pencils, five pencils. Repeat for the
remaining items (rubbers, books and pens).
Use the code and colour In the picture.
Then point and say: It's (a red) ....
Point to number 1 and the colour and ask: What colour
152
is this? Elicit: Red. Do the same for the remaining
numbers and colours. Explain the activity. The students
use the code and colour in the picture. Then students
point and say: It's a red book. etc.
1 It’s a red book
2 It's a blue pencil.
3 It's a green pen.
4 It's a yellow pencil case.
5 It's an orange rubber.
MODULE 3 - My Home
Look. Find the correct part of the house
and circle it.
Revise the parts of the house. Point to the pictures of the
wall In the first picture and ask: What's this? Elicit: It's a
wall Repeat for door, window. roof. Explain the activity
Allow the students some time to find the correct part of
the house and circle it. Check their answers.
Follow and colour the items. Then point and
say: Th/s is the (door), It's (Ыие).
Go through the items and elicit their names. Explain the
activity. The students follow the paths that lead from
the paintbrushes and use the colours to colour In the
items. Then point to each item and elicit, e g. This is the
door. It's blue. etc.
Look and draw the correct furniture item.
Then point and say: (bed), (chair),....
Direct the students' attention to the pieces of furniture.
Go through and elicit their names. Explain the activity.
Allow the students some time to look at the order in
which the furniture items appear in each row and draw
the correct one in the space provided. Then point and
elicit their names, e.g. table.
table, chair, chair, bed
☆ Look at the pictures and circle the ones
that are the same. Then point and say:
(Alvln)'s in the (house).
Read the Instructions and explain the activity. Allow the
students some time to complete the task. Check their
answers. Then point to each picture and elicit: AMn's In
the house etc.
Pictures to be circled:
Alvin's In the house
Woody's in the cupboard.
Erlina s in the schoolbag.
Alvin's on the chair.
Woody's on the table.
Frosty's on the bed.
Frosty's on the table.
Erilna's In the pencil case.
Look at the picture and find the stickers.
Then point and say: It’s a (pink chair).
Tell the students to look at the hatf-pictured items inside
the tree house and name them. Explain the task. Ask
the students to find the corresponding stickers from the
sticker section, and show them to you for verification
before sticking them in the appropriate spaces Then
point to each Item and elicit, e g. It's a pink chair, etc.
Colour the pictures. Then say: Frosty’s (on)
the (chair).
Explain the activity. Ihe students colour In the pictures
of Frosty. Then point to the picture of Frosty sitting on
the chair and elicit: Frosty's on the chair. Repeat for the
other two pictures.
MODULE 4 - My Toys
Colour the pictures. Then point and say: It’s
a (plane).
Revise the names of the toys. Direct the students'
attention to the pictures and tell them to colour them
In using the dots as a guide. Allow the students some
time to complete the task. Then point to the first picture
and ask: What's this? Elicit: It's a plane. Point to the
second picture and elicit It's a train. Repeat the same
procedure for ban and teddy.
Use the code and colour the pictures. Then
point and say: I’ve got a (yellow plane).
Read the instructions and explain the activity. The
students use the key to colour In the toys. Allow them
some time to complete the task. Check their answers.
Once they finish, they point to eoch picture and say:
I've got a (yellow plane), etc.
Trace the numbers. Then match them to the
pictures. Then point and say: 1 teddy, 2 ....
Revise the numbers 1 to 10. Read the instructions and
explain the activity. The students trace the numbers and
match them to the correct picture. Then point to eoch
picture and say. 1 teddy. 2 trains. 3 rubbers, 4 planes. 5
cars. 6 dolis. 7 books, 8 chairs, 9 balls, 10 pencils
☆ Colour the planes. Count and use the key
to help you.
Read the instructions and explain the activity The
153
Workbook (Key & Instructions)
students colour in the planes with the help of the key.
Allow the students some time to complete the task.
Once they finish, the students point to eoch plane and
say: 6 - orange. 7 - green, etc.
Count the dots and circle the correct
number.
Practise addition by writing some simple sums on the
board and eliciting the correct answers. Ask the
students to count the dots and circle the correct
answers. Check their answers.
17 3 6
2 10 4 8
Look at the picture and find the stickers.
Then point and say: I've got a (doll).
Point to the pictures of the toys and elicit their names
Explain the activity. Ask the students to find the
corresponding stickers from the sticker section, and
show them to you for verification before sticking them
In the appropriate spaces. Then point to the toys, one
at a time, and ask the students to say what they have
in their boxes, e g I've got a doll.
Look at the picture and colour in the cars.
Then match the big items to the big car
and the small items to the small car.
Revise the meaning of big/smali. Explain the activity
and allow some time for the students to colour in the
cars. Then have them match the big items to the big
car and the small items to the small cor. Check their
answers
boll - big don - small
train - small plane - big
teddy - big
MODULE 5 - My Face
Look and find the stickers. Then point and
say: (Frosty)'s got a (mouth).
Revise the parts of the face. Ask the students to find the
corresponding stickers from the sticker section, and
show them to you for verification before sticking them
in the appropriate spaces Then point to each
character and elicit, e.g (Frosty)'s got a (mouth), etc.
Draw the part of the face that is missing in
each picture.
Reod the instructions ond explain the activity. Point to
each picture and ask the students to say what port of
the face is missing, e g. a nose. etc. Ask the students to
draw what's missing in each picture. Have students
show their drawings to the class once they finish.
Draw lines to match. Then point and say:
(Wash) your (hands).
Explain the activity. The students draw lines to match
the pictures to their silhouettes. Check their answers.
Then point to eoch picture ond say the actions (wash
your hands, wash your face, brush your teeth, brush
your hair).
Look and colour the picture. Then say: He's
got (blue hair).
Reod the Instructions and explain the activity. Allow the
students some time to use the code and colour In the
picture. Then students point to and say. e g. He's got
(blue hair) etc.
Look at the pictures and say: You've got
big (eyes).
Read the instructions and explain the activity. Point to
eoch picture and elicit what the character is saying,
e.g. You've got big eyes. etc.
Look at the pictures. Circle the differences.
Then point and say: He’s got (blue hair).
He's got (green hair).
Ask the students to look at the two pictures ond elicit
the differences. Allow the students some time to circle
the differences. Then individual students point to each
of the differences and say, e.g. He's got blue hair. He's
got green hair etc.
A
He's got a big nose.
He's got big ears
He's got blue hair.
She's got a small nose.
She's got a big mouth.
She’s got blue eyes
В
He's got о small nose.
He's got small ears
He's got green hair.
She's got a big nose.
She's got a small mouth.
She’s got pink eyes
MODULE 6 - My Food
Draw lines to match the food items to the
silhouettes.
Revise the names of the food items. Explain the activity.
Allow the students some time to match the food items
to their silhouettes by drawing lines. Check their
answers
154
Look at the shopping list. Draw the food
items. Then, say: Give me some (cheese),
please
Read the Instructions and explain the activity. Point to
the shopping list ond elicit the names of the items. Tell
the students to draw the food items on their list In the
basket Allow them some time to finish their drawings.
Then they say: Give me some (cheese), please, etc.
Match the children to the food items.
Direct the students' attention to the pictures of the
children. Then point to each food Item and elicit the
correct name. Tell the students to match the children
to their food items.
1 cola 3 popcorn 5 ice cream
2 banana 4 egg
☆ Use the key and draw. Then say: / like/don’t
like (pizza).
Point to each face and say: I Hke ... .1 don't like.... Go
through the pictures and elicit the names of the food
items Explain the activity. The students draw a smiley
face or a frown face depending on whether they like
the food Items or not Once they finish, they say which
food items they like and which ones they don't.
Look at the picture and find the stickers.
Then point and say: I llke/don‘t like apples.
Tell the students to look at the picture of the characters
having tea and name the half pictured items. Ask the
students to find the corresponding stickers from the sticker
section, and show them to you for verification before
sticking them in the appropriate spaces Then point to
each item and elicit, e.g. I Hke/don't Hke (apples), etc.
Draw what you like/don't like. Then say: /
like.... Yummy I/I don’t like .... Yuk!
Go through the food Items and elicit their names
Explain the activity Tell the students to draw the food
Items they Hke/don't like on the trays. Then the students
present their drawings to the class and say: / like (Ice
cream). Yummyl I don t like (eggs). Yuk!
MODULE 7 - My Animals
Colour the animals. Then point and say: It’s
a yellow horse.
Revise the names of the animals. Explain the activity
The students colour In the pictures using a colour of
their choice. AMow them some time to complete the
task. Then point to the horse and elicit: It's a (yellow)
horse, etc.
Count the animals and write the numbers.
Read the instructions and explain the activity Ask the
students to count the animats and write the numbers in
the spaces provided. Check their answers.
cats - 4 cows - 3
hens-5 sheep-1
dogs - 2 horse - 1
Complete the pictures. Then colour.
Revise the verb can. Read the instructions and explain
the activity. The students trace the items and colour
them in. Then point to each picture ond ask the students
to say what each child can do. Elicit their answers.
I can jump. I can run.
I can fly. I can swim.
I can climb.
Look at the picture and say: / can (fly).
Point to the pictures of the animals, one at a time, ond
elicit the actions. Then ask the students to point to
each animal ond say. e.g. I can fty. etc. As an
extension, you can ask the students to colour in the
picture.
Look at the pictures and find the stickers.
Then play with your friend. Name the
animals.
Tell the students to look at the pictures of the animals
and elicit their names Ask the students to find the
corresponding stickers from the sticker section, and
show them to you for verification before sticking them
In the appropriate spaces.
Explain the game. The students play the game In pairs.
Ask the students to use a coin, a sharpener, etc as a
marker and place It on the Start sign The pairs take it In
turns to select a number by throwing a dice and then
move along the board according to the number. The
students must name the Item In the square they land
on. A correct answer allows the students to stay where
they are. whereas on incorrect one means that they
must go back to the Start sign. If they land on a Oh, nol
square, they must go back to the start. If they land on
a Greatl square they play again.
Draw lines to show what you can do and
what you can’t do. Then talk with your
friend: / can (jump). Can you (jump)?
Point to the picture of the two children talking and the
speech bubble of the horse Say: I can jump Can you
155
Workbook (Key & Instructions)
_______ _ _____________:_________;___
Jump? The students repeat after you. Explain the
activity. In pairs, the students draw lines to the smiley
face or the frown face, depending on what they can
do and what they can t do. Then they ask and answer.
eg. i can climb. Can you climb? etc.
MODULE 8 - My Senses
Circle the odd one out. Then point and say:
(smell), (touch),....
Revise the senses Read the instructions and explain the
activity. The students circle the odd one out. Ask them
to justify their answers.
picture of look picture of hear
picture of touch picture of touch
picture of smell
Look at the pictures, point and say: / can
(see a mouse).
Read the instructions and explain the activity. Point to
the pictures, one at a time, and ask the students to say
what they can see. e g I can see a mouse, etc.
Count and write the correct number.
Ask the students to look at the picture of Frosty. Explain
the activity. Tell them to count the items and write the
correct number in the spaces provided. Check their
completed work.
sun - 7 moon - 9 star - 10
Complete the pictures for day and night.
Then colour and say: It's (day).
Point to the incomplete pictures. Ask the students to
complete the pictures for day and night by drawing
things that apply to each picture Then have them
colour in their drawings Once they finish, the students
present their drawings to the class and say: It's dayl
Look at the sunl Look at the flowers! etc
Look and find the stickers.
Direct the students' attention to the picture. Explain the
activity. Ask the students to find the corresponding
stickers from the sticker section, and show them to you
tor verification before sticking them In the appropriate
spaces
☆ Follow the path and draw Then say: (Willow)
can (see) a (star).
Explain the activity. The students follow the lines, look at
the pictures and say what things they can see. hear.
smell, touch and taste, eg Willow can see the stars,
etc.
Alvin can hear a cat.
Erlina can smell popcorn.
Woody can touch a ball.
Frosty can taste an ice cream.
MY ALPHABET
A-B
Trace the letters. Then write the letters.
Read the Instructions and explain the task. The students
trace and write the letters.
Circle the apples and the beds.
Read the instructions and explain the task. Students
look at the words and circle the words apple and bed.
C-D
Trace the letters. Then write the letters.
Read the instructions and explain the task. The students
trace and write the letters.
Match the upper case to the lower case
letters. Then, colour in the pictures.
Read the instructions and explain the task. The students
draw lines and match the letters. Then they colour in
the pictures accordingly. Allow students some time to
complete the task. Go around the classroom, giving
help where necessary.
E-F
Trace the letters. Then write the letters.
Read the instructions and explain the task. The students
trace and write the letters.
Draw lines to match the pictures to the letters.
Then point and say: (a) Is for (apple).
Read the instructions and explain the task. Students
draw lines to match the letters to the pictures. Then,
they point and say the letters and the words.
a - apple: A Is for apple
b - bed: В for bed
c - cat: C is for cat
d - dog: D is for dog
e - egg: E Is for egg
f - fish: F is for fish
156
;
Workbook (Key & Instructions)
G-H
Trace the letters. Then write the letters.
Read the instructions and explain the task. The students
trace and write the letters.
yK Match the upper case to the lower case
letters.
Read the instructions and explain the task. Students
match the upper case with the lower case letters.
Allow students some time to complete the task. Go
around tho classroom providing help where necessary.
I-J
Trace the letters. Then write the letters.
Read the instructions and explain the task. The students
trace and write the letters.
Trace the words. Then circle the right
pictures.
Read the instructions and explain the task. Students
look at the pictures and the upper case letters and
circle the corresponding lower case letter
1 students circle the Iguana
2 students circle the Jug
3 students circle the fish
4 students circle the bed
K-L
Trace the letters. Then write the letters.
Read the instructions and explain the task. The students
trace and write the letters.
Circle the right lower case letter.
Read the instructions and explain the task Students
look at the pictures and the upper case letters and
circle the corresponding lower case letter
А-a D-d F-f G-g K-k L-l
M-N
Trace the letters. Then write the letters.
Read the Instructions and explain the task. The students
trace and write the letters
Find the words then match them to the
pictures.
match the words to the pictures. Allow students some
time to complete the task. Go around the classroom
giving help where necessary.
O-P
Trace the letters. Then write the letters.
Read the instructions and explain the task. The students
trace and write the letters.
Trace the words. The circle the right
pictures.
Read the instructions and explain the task The students
trace the words and circle the corresponding pictures.
1 students circle the orange
2 students circle the pen
3 students circle the cat
4 students circle the glass
Q-R
Trace the letters. Then write the letters.
Read the instructions and explain the task. The students
trace and write the letters.
Write the letters.
Read the Instructions and explain the task. Students
write the letters In upper or lower case accordingly.
Allow students some time to complete the task. Go
around the classroom, giving help where necessary.
S-T
Trace the letters. Then write the letters.
Read the instructions and explain the task. The students
trace and write the letters.
Read the Instructions and explain the task. Students
157
Look at the pictures and trace the right
words.
Read the Instructions ond explain the task. Students
look at the pictures ond trace the correct word.
1 snake 2 tree 3 queen 4 rabbit
U-V
Trace the letters. Then write the letters.
Read the Instructions ond explain the task. The students
trace and write the letters.
Write the missing letters.
1 umbrella 3 iguana 5 lion
2 car 4 glass 6 kitten
W-X
Trace the letters. Then write the letters.
Read the instructions and explain the task. The students
trace and write the letters
Unscramble the letters and write the words.
Read the instructions and explain the task. Students
unscramble the letters and write the letters Allow
students some time to complete the task. Go around
the classroom, giving help where necessary.
1 dog 3 hen 5 fish
2 cat 4 fox 6 rabbit
Y-Z
Trace the letters. Then write the letters.
Read the instructions and explain the task The students
trace and write the letters.
Write the missing letters.
Read the instructions ond explain the task Students
write the missing letters.
b, c, d, e, h. 1.1,1, n, o, p, q, t, w, v, z
A-Z
Follow the alphabet.
Read the Instructions and explain the task. Student
draw lines to follow the alphabet.
BOARD GAMES (1-4)
For rules on how to play the board games, see the
Introduction, p. VI.
158
Notes
Notes