/


Теги: sewing handicrafts patchwork sewing techniques handicrafts and creativity quilling
Год: 1988


Текст
ONDORI
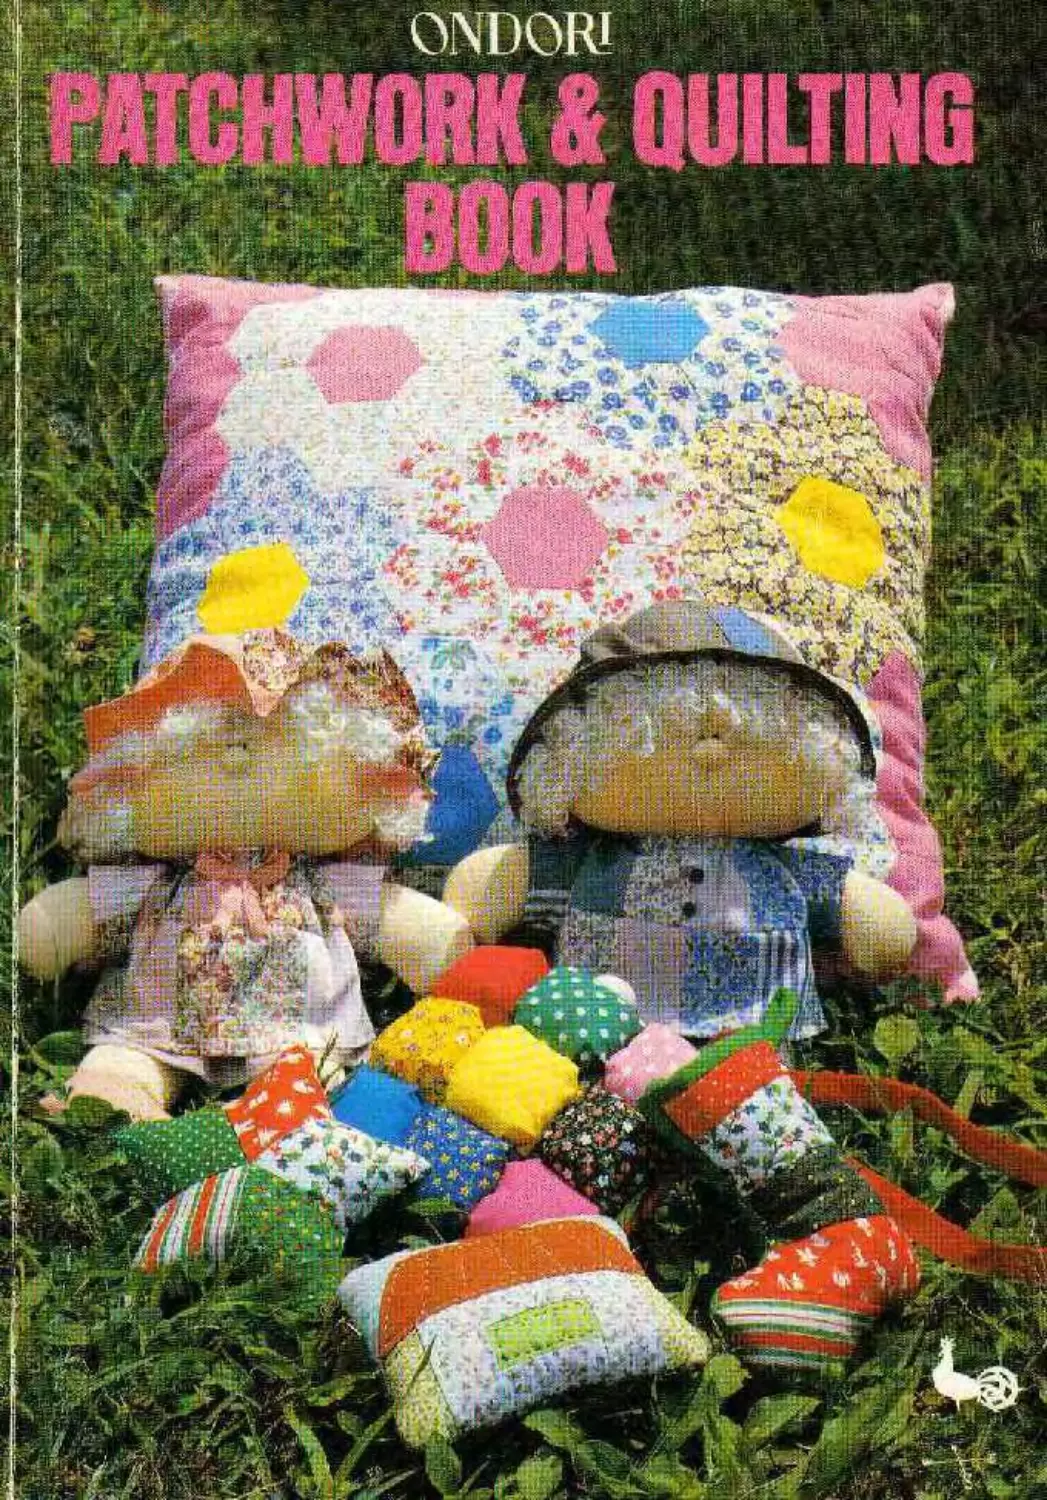
APPLIQUED PILLOWS
Directions on page 49..
COSMETIC CASES, PEN CASE,
GLASSES CASE AND SACHETS
POCHETTES AND TOTE BAGS
Directions for 10 on pane 58, for 1 1 on раке 59, for 12 on page 60.
for 13 and 14 on page 62. for 15 on page 64. for 16 on page 65.
TRAY MAT, POTHOLDERS, TEA COZY,
PLACEMAT AND NAPKIN
; - ctions for 17 on page 65. for 18 on page 66, for 19 on page 68.
_ and 21 on page 69, for 22 and 23 on page 70.
7
LOG CABIN BED SPREAD
Directions on page 10.
pr. *
1
• • 1
1 1 1
24 Log Cabin Bed Spread shown on pages 8 and 9
MATERIALS: Cotton fabrics: charcoal gray, 90
cm by (570cm; dark pink with wine floral design,
90cm by 190cm; pink with white floral design,
90cm by 125cm; black with white floral design,
90cm by 105cm; light pink, 90cm by 85cm;navy
with gray floral design, 90cm by 65cm; fabric for
interlining, 68cm by 615cm. White silk sewing
thread.
FINISHED SIZE: 170cm by 234cm
DIRECTIONS: 1. Cut patch pieces adding 0.7
cm seam allowance. Sew each piece to interlining
in numerical order from 1 through 12. 'Гор-stitch
by hand as shown in the illustration. 2. Following
the illustration, assemble blocks together by
machine taking care of placement of each block
3. Sew pieces for lining together to make 182 cm
by 226cm. With right sides of pieced top and
lining together and edges even, stitch along edges
of each side. Turn to right side. Sew strips to top
and bottom for binding.
Patterns
Cut 13 pieces altogether for 1
Block A Make 35 blocks.
Cut out 35 pieces for interlining 34 cm square
= Dark pink with wine floral design (a)
v vv
°0 0
О О
X
X
X
X
= Navy with gray floral design (b)
= Light pink (c)
= Black with white floral design (d)
- Pink with white floral design (e)
Charcoal gray (f)
to
To make inner pillow
Cut fabric for inner pillow, adding 2cm to the
finished size of outer pillow plus seam allowance.
Fold in half with right sides facing. Stitch three
sides leaving opening for turning. Turn to right
side. Stuff with kapok. Slip-stitch opening closed.
09
Ф
3
о
£
ф
Add 2 cm to I
the finished size I
S of outer pillow.
Fold |
I
1 1 I
I / I
^Opening for stuffing J
>
I
l
*
I
Basics in patchwork
Winter
Piecing by machine
Cardboard
Traditional method
Time and care may be required when you
piece patches using this method, but you
may have a neater finish.
Stitch
fabric only
Fabric
(Wron
Pin
' /Cardboard
Make patterns from
cardboard or used
postcard. Place
cardboard shape on
wrong side of each
patch piece.
Piecing by hand
IOO
Turn over
seam allow-
ance and
tack flat.
Baste.
With right sides of
backed pieces
together, over-
cast edges with
tiny stitches.
To piece patches by
sewing machine is time-
saving when you are
making a big project.
Seams are usually press-
ed open, but some-
times turned to one
After assembling pieces,
press on wrong side. Re-
move basting stitches and
cardboard shapes.
It is easier to get tiny points to
meet by hand than by ma-
chine. When you piece dark
patch to light one, turn seams
to dark side for a neater finish.
Turn seams to
dark side for
a neater finish.
Stitch
QUILT
9INDI
SLEP-STITCH (SIDE STITCH)
i
to'
ENLARGING
01
To make Log Cabin block
Sew patch pieces to interlining in numerical order from 1 through 12.
® ® ®
Center piece (a) on interlining.
Place piece (b) on piece (a) with
right sides together and stitch
with 0.7cm seams.
© ®
Diagram
Border strip 5
-
32 A ^32 V A V A 5 СЛ 0 ZT •0 0 0 CD CL О u CO Z) CL 5 Э (O 0 (O Ф zr Ф
V A V A V
A V A V A
V A V A V
l' A V A V A
V A V A V
A V A V A
With right sides of top
and lining together and
edges even, stitch along
edges of each side.
Sew pieces for lining together to make
182 cm by 226 cm.
Г
to
1.
Border strip Cut 2 from (f)
Seam allowance
To bind edges
Turn to right side.
Stitch in the ditch.
Turn to right side.
Machine-stitch in the
ditch. Place
strip on top
piece with right
sides together Stitch.
25 Mosaic Small Coverlet shown on pages
MATERIALS; Cotton fabrics: (see
next page for colors and amounts for
top) white with blue floral design for
lining, 80cm by 110cm. #25 six-strand
embroidery floss in cobalt blue, dark
pink, white, yellow, purple and orange.
Quilt baiting, 78cm by 216cm. White
cotton lace edging, 6cm by 6 m.
FINISHED SIZE; 89.5cm by 119.5
cm
DIRECTIONS; 1. Cut out patch pieces
adding 0.7cm seam allowance. Overcast
patch pieces together, placing cardboard
shape on wrong side of each piece. 2.
To make ruffle, run a gathering stitch
along raw edge of lace. Stitch short ends
together to make a circle. Sew ruffle to
pieced lop. 3. Place tw’o pieces of
batting and lining on wrong side of
pieced top. Turn in 1 cm seam allowance
of lining and top-stitch along folded edge.
Continued from page 27.
Diagram
Use white with orange floral design for back.
Cut one piece for back the size of front plus 0.7 cm se
1 I
Diagram
Quilt on each hexagon with three strands of embroidery floss in cobalt blue.
Cut two pieces 78cm by 108cm each from batting.
Color Key and Required Amounts of Fabrics
Color key у/ \ zOD Required amounts.
light olive green wi white floral design 8/c/n*40c/n
। cream with floral design J 23 4
light gray-green print 15 14 z t Cut 2 e^ch #2c/nX42c/n
• pink with white dot; 14 2 64 cm X 30cm
I X ] blue with white floral design 12 *
ЗГ ivory with red . floral design 67c/nX 20 cm
Fo 1 orange with white dots 4 2
navy with purple floral design
~jf J white with red floral design 6 64 cm* 10 cm
{ у J white with cobalt blue floral design
Г- —» й — yellow with white dots 7 4-6cmx20cm
ip-—. dark pink 2 ЗЬст* 10cm
у t! red with floral design 2 23cm X t Ocm
blue
purple
4_aJ red with white floral design 1 I2cmx 1 Ocm
Uj cobalt blue with white dots
To finish Coverlet
f-
* • • • -• » л» ~ —
2. Place two pieces of batting
and lining on wrong side of
pieced top Turn in raw edge
of lining and top-stitch along
folded edge.
r-
QuiHbatting^pieces)
Front piece
1. Sew ruffle to pieced top.
F PUFFED Л
PATCHWORK
CRIB QUILT
v Directions on page 18
Puffed Patchwork Crib Quilt shown on pages 16 and
MATERIALS: Cotton fabrics: (see next page
for colors and amounts for lop) rosepink for lining
74cm by Im; back pieces for puff, 90cm by 145
cm. Polyester fiberfill.
FINISHED SIZE: 83.5cm by 109.5cm
DIRECTIONS: 1. Cut out required number of
pieces for puff from top and back fabrics. With
wrong sides of lop and back pieces together, fold
extra fabric for top into a pleat and stitch d
around. Following Piecing Diagram, assembi
puffs by hand. Make a slash on back of each pufl
Insert polyester fiberfill through slash. Overcal
opening closed. 2. Stitch short ends of strips 1
make a circle. Fold in half lengthwise. Sew rufcfl
to pieced top. 3. Turn in 1cm seam allowance fl
lining. Slip-stitch folded edge to ruffle.
Diagram
& V V V V V V V V V V Vv* V V V v V V I V * vv v V V V V Ruffle v v V v У 6 1 V V V V _ v у у V V V V _V V V v V V lv I i V ] •> 1 • »
V V V V V V V V V V V V V 4 V v' 15 v V V V V V V V V V V V v V v V c £> 0 & p V 7 V v V • • • X X X X X о X X X X X • • • • • V V V V У 0 О о о
о 0 о о о V v V > V • • • К x X X X о 4 1 , • . 1 о X X X X X • • • • *9 V V V V V G С С о ©
V у V V V . . . • . • • * • • * • X X X X X о X X X X X • • V V \ V V
• • • X X X X X ж? V V V V v • X X X X X • • • • •
• • • • • X X X x X 1' V’’ V V V 7 V c> e» V V V V V о x x X X X • • • • • • .
• fl X X X X X & • • • • • * • V V V V v О P 4? G О О 0 P 0 c V V V V V • " * о X X X К X •
* • • • • • • • X X X X x о • • _ _ '• 1 V V V V V l О G V V V v v ;. о X X X X X • • • •
• • • • • X X X X X О • • • * "• / V V V V *4^ X X X X X • • • * * • •
V v V V V • • • • • X x X x X X x X X X • • • • • 4 V V V V V
о о О 0 V V V V v • • • ♦ • • x X X X x z s • •1 • • * , • • — . • • X X X X X • • • • * * a • • У V V V V о □ о
0 t> r c c V V V V V e . • a - • • • • • X * © X X X X x • • • • • V V V V v а о 15 О 0 1
V V VVvvVVVvvv VVVVV VVV V v v v V V V t V V V V У У V’ V V V V V у > V v V_ v V у V_ v V V v у v V V v v у V
i
U--------------------------------------------- --------109.5
Ruffle
1 Seam allowance
18
See cf puff
Color Key and Required Amounts of Fabrics
Color key “Required- pieces, Required .amounts .
V . V V I V v pink with rosepink floral design 20 pieces lot lop Ruffle 90c/n x
lavender 36 pieces for top 8Tcm x бЯст
pink 28 pieces
* X 4 L2L- JU pistachio green 22 pieces 8 Icm x 46c/n
• • • • • gray with floral design 22 pieces
green with floral design (a) 20 pieces 90 cm x 80c/n
loo о ° rosepink with pink JUoiaLdesign, 12 pieces 81 cm x 23c/n
rosepink with floral design (b) 5 pieces ЦОст к 20cm
Cut out pieces from (a) and (b), showing flower in the center of fabric.
With wrong sides of top
and back together, stitch
all around Remove basting
stitches.
With right sides of two puffs
together, stitch by hand
with 1 cm seams.
2' sack of each puff
“ssen oolyester
'Wa. s* •ле slash.
Fold strip for ruffle in half Run a gathering
stitch along raw edges. Sew gathered ruffle
to pieced top Press seams to one side.
Slip-stitch lining to ruffle.
19
GIRL PILLOW AND BIRD PILLOW
Directions for 27 on page 22, for 28 on page 72.
27 Girl Pillow
MATERIALSzCotton fabrics: white with pink
floral design. 90cm by 36cm; pink with rosepink
floral design. 90cm by 30cm; pink and mustard.
63 cm by 7 cm each; pale grayish wine red, 45 cm
by 7cm; pistachio green, 42cm by 7cm; grayish
wine red, 41cm by 37cm; rosepink with pink
floral design, and rosepink with floral design.
30cm by 10cm each; lavender, 18cm by 11cm;
gray, 12cm by 7cm; mauve, 10cm square; beige,
8cm square. #25 six-strand embroidery floss in
lavender, navy, black and matching colors with
applique pieces. 30 cm long zipper. Cotton fabric
for inner pillow, 76cm by 39cm. Kapok. 350g.
FINISHED SIZE: 35cm square (except ruffle)
shown on page 20
DIRECTIONS: 1. Cut out squares adding si
allowance. Overcast squares together by hi
placing cardboard shape on wrong side of -s
square. 2. Enlarge appliqu6 patterns. Cut
applique pieces adding 0.7cm seam allow; -
Overcast strips for dress together, placing a
board pattern on wrong side of each strip. 3. Ti
in seam allowance of appliques and slip-stitci
pieced front with matching embroidery floss;
Embroider as indicated. Cut pieces for back. S
zipper to back. Stitch short ends of strips tog- '3
to make a circle. Make two circles. Sew ruffle
front. Make up for pillow and insert inner pj
stuffed with kapok.
Diagram
Add 1 cm seam allowance unless otherwise indicated.
Pattern
I I -White with pink
floral design (10 pieces)
FT] -Pink with rosepink ,
floral design (10 pieces)!
Front
Back
Bow
LI] - Pink (9 pieces)
Cut out 1 piece
□ = Pale grayish wine-red Ruffle Sewstrjps (ogether
(5 pieces) >.i
□] = Pistachio green 5.5 ’ ''
(6 pieces) f • : . Г-. ....-_____
I I ~ Mustard (9 pieces) J--------------- 215---------------*4
Cut 2 pieces.
0.5cm
allo.
Opening for turning
ЙЗ-900
Turn to right side
at
Lavender
Applique Patterns
Chain stitch
Outline stitch
sOut
Satin stitch
with pink floral design
Open-buttonhole stitch
with floral
—
Satin stitch
with 3 strands
in black x
Mauve
Gray
Chain stitch with
3 strands in navy
2 Place short ruffle
on long one. Run
a gathering stitch
through both layers.
Finished Diagram
Back
Insert small ,4.5cm
of kappfcC^v*"
Cm
Tack bow here
ecge twice
: top-stitch.
Turn in seam allowance of lining
and slip-stitch to ruffle.
cm
Slip-stitch using matching colors with fabrics
Open-buttonhole stitch using three
strands of embroidery floss in lavender.
23
PIN CUSHIONS, SEWING BOX, SCISSO
AND SEWING CASE
Directions for 29 on page 26, for 30 and 31 on page
for 32 on page I I. for 33 on page 76, for 34 and 35 on ]
29—32 PinCushions shown on page 24
MATERIALS: Cotton fabrics: for 29: golden
brown, light blue, white with floral design and
navy with floral design, 11 cm square each; navy
with white floral design, 12cm by 6cm; fabric
for lining, 12 cm square: for 30: yellow with white
floral design, 21cm by 12cm: white with green
leaf design. 16cm bylOcm; green with white floral
design. 14cm by 7cm; brown with floral design,
5cm square; fabric for lining, 11.5cm square: tor
31: brown with floral design, 14 cm by 12 cm;
red-brown, 18 cm by 5 cm; white with light brown
floral design. 15cm by 7cm; gray-green. 14cm
square; light yellow-green with leaf design, 8cm
square; scrap of yellow-green; fabric for lining.
14cm by 12cm: for 32: white with orange floral
design, 22cm by 13cm; red-brown, 16cm square;
white with yellow floral design, 9cm by 11c
fabric for lining, 12.5 cm square. #30 cod
sewing thread: white; navy for 29; brown for i
Quilt batting: 12cm square for 29; 11.5cm sqts
for 30; 14cm by 12cm for 31; 12.5cm square:
32. Cotton for stuffing.
FINISHED SIZE: see diagrams.
DIRECTIONS: 1. Add 0.7cm seam allowas
to each piece. Sew pieces together by haa
2. Place pieced top on batting and lining. Q.
as indicated. 3. With right sides of front and •
together, stitch all around leaving opening
turning. Turn to right side. Stuff with cotton a
slip-stitch opening closed. For 29, make bad
for front. Cross-stitch at center using navy th:
and tighten thread.
Patterns (Actual size)
Cut 2 pieces from navy
with white floral design
fabric.
Golden brown
Light blue
White with floral design
Navy with floral design
• Cut 4 eac •
Diagram
and slip-stitch in place.
Finished Diagram
of circle x
Zi
26
Patterns
(Actual size)
Diagram
White
Brown
Cut 4 pieces from white fabric
G'ay-green
i Red-brown
Cut 1 piece form
brown fabric.
Cut 4 pieces from
yellow fabric.
Yellow-green ।
* v v I x 4 V I
Quilt with brown cotton thread.
Quilt with white cotton thread.
See page 14 for 32. 2‘
36—40 Quint
shown on page 28
MATERIALS: Cotton fabrics: beige for each
doll, 12 cm square each: for 36: purple with white
dots, 20cm by 6cm, pink with white dots, 14 cm
by 6cm; pink, 13cm by 5cm: for 37: navy with
floral design, 13cm by 7 cm; blue, 10 cm square;
dark blue with floral design, 8 cm square: for 38:
olive green with floral design, 13 cm by 7cm;
green, 10 cm square; white with floral design,
8cm square: for 39: mustard with floral design
and wine with floral design, 16cm by 8cm
each; yellow. 13cm by 5cm: for
Directions for Girls:
1. Cut out pieces for head, hands
and sleeves adding 0.7 cm seam
allowance. With right sides together,
stitch all around leaving opening for
Slip-stitch turn'n9- Turn to nghl Side
opening closed kapok.
floral design and red with floral design, 1?
by 8cm each; white, 13cm by 5cm. 3-ply i
pink for 36; blue for 37; powder green for
bright yellow for 39; dark pink for 40. #25
strand embroidery floss: blue for 37; green f -
Black beads (medium), 2 for each doll. K.<
Glue. Rouge.
FINISHED SIZE: Girls of 36, 39 and 40,
tall. Boys of 37 and 38, 9.5cm tall.
40: white with
2
Cut out pieces for body adding 0 7cm
seam allowance Sew pieces together
by hand. Make from and back.
Sew sleeves to body.
Head
Sleeve
00 z?
Ф
<
Ф
C/>
co
co
CD
CD
В
CD
О
$
CD
Finished Diagram
cm
<D
3 Make hair with 3-ply yarn and sew to head.
4. Makefeatu —
cm
sd
co r
(Back)
W5
wind 20 times. £$,syam.
Back
Front and back hair
Make 4 pieces of curled hair.
Front
Tack hair at center.
Wind 20 times.
Tack 2 pieces of curled hair. Glue hair to head
Sew beads to- -
to face
3cm
(Front)
Fasten
Directions for Boys:
1. Make head, sleeves and hands in same manner as for girls.
2. Sew pieces for body together.
Make front and back. Sew front
and back together
Insert kapok.
Finished Diagram
French kn:X
3. Make hair with 3-ply yarn 4
as for girls bangs. Tack hair
to head. Trim hair as shown.
Glue hair around face
Make features.
4.
^r^Attach/
- embroidery threalds
French knot with
6 strands of
embroidery floss
/ Rouge
Sew beads to face.
Turn in seam allowance
of face and head.
Sew face and hands
to body securely. Back
3<>
Patterns (Actual size)
Qtf Z "'em beige.
Hand lOpening ofr
'‘V’ (stuffing
Sleeve//
Opening forY
stuffing /? , , _ _____
/ Pmk lor No. 36
. Yellow for No. 39 Cut 2 pairs
White for No. 40 eac”-
each.
Cut 2 pairs from
beige.
3c.d> ’Z' No. 36
mate 2 pieces.
Body for No. 37, No. 38
Make 2 pieces.
Opening
for stuffing
Blue
Green
acts /
37 Navy A
with floral design
38 Olive g re,en
vyilH floral <jesi<
37 Navy
with floral
design
37 Dark blue
with floral design
38 Olive
-. -green with-
Jlpr-a-l design-
38 White
with floral desi
' 2 ' NO. 39
Make 2 pieces.
Body for No. 40
Make 2 pieces.
Opening
.for stuffinc
White witha
ufloral desigr
° о
О о о
о а
О
° о о
о
3 I
CHRISTMAS TREE ORNAMENTS AND WREATH
Directions for 43 and 44 on page 34. for 45 and 46 on page 35.
for 47 on page 82. for 48 on page 83.
43 and 44 Christmas Stockings shown on page 32
MATERIALS: Cotton fabrics: for 43: green. 70
cm by 16cm; small amount each of six different
prints in red shades and green shades (see photo):
for 44: green. 55cm by 16cm; red with white
stripes, 14cm square. Quilt batting for one stocking.
28cm by 16cm. Polyester fiberfill.
FINISHED SIZE:Seediagram.
Patterns (Actual size)
DIRECTIONS: 1. Cut out pieces adding 0.7cm
seam allowance. Place batting on lining. Place two
patch pieces on batting and machine-stitch through
all thicknesses. Place third piece on second and
machine-stitch in same manner. Continue in this
way until all pieces are joined. 2. Bind top edges
of front piece with bias-cut strip. Make a binding
for back piece, too. 3. With right sides of two
pieces together, and loop for hanging in between,
stitch along raw edges. Clip into curved seams.
Turn to right side. Stuff with polyester fiberfill.
See photo for placement of colors for No. 43.
See photo for
placement of colors
for No. 44. \
Red with '
white stripes
Attach loop
for hanging.
Green
Add 0.7cm seam a
Top piece of front side
Lining of front side
•wing pieces,
wance.
q Red with white
J stripes & green
Green
3 1
ce of back side
ming of back side
Quilt batting
1 each
Strip for binding
Cut2 from green.
Loop for hanging
Cut 1 from green.
Seam allowance
Insert
Stitch
with right sides quilt batting thinly,
of two pieces
together.
How to Piece
Star
shown on page 32
Pattern (Actual size)
16.5
cm
AT Attach thread
loop for hanging.
-» co
Ф
—
°3
_ (O —
2o
c/>
5.“
9 о
Attach thread
> loop forhanging.
Tie ribbon
to bow.
fabric. 25 cr
cm. Pol
FINI
stitch
46 Cane shown on page 32
DIALS: Cotton fabrics: yellow-green
uh: :s. 15cm square; small amount each
t prints in red shades and green
o). Polyester fiberfill.
MfiBEZD SIZE: See diagram.
it pieces adding 0.7cm
together by hand. 2.
I and\ack together, stitch
ening fo\turning. Clip into
urn to right-side. Stuff with
jfl. Slip-stitch owning closed.
e Sew pjfc
leaving
>p for hanging.
Cut 5 pieces
from five
different
prints.
^.agram
cseii’- a owanceol wrong side,
anc turn to right side.
- 'or back the size ot front
wance from dotted
;abnc
Finished Diagram
Finished Diagram Bl?5Ji°P-ed9es
53 with bisa-cut strip.
Stuff with polyester (Seepage 101)
fiberfill shapely
Clip into sea
allowance.
turn to right
side.
cm
- 4cm -
Stitch along
raw edges with
loop for
Changing
in between.
MATERIALS:
DI
18cm. Green ribbon, Г
ster fiberfill.
turning. Clip into
to rigliK side. Slip-stitch
. Attach thread
TtficT~wtTT
riped cotton
ED SIZE: See diagram.
ACTIONS: 1. Cut out two pieces adding 01
c seam allowance, reversing pattern for the
s/cond piece. 2. With right sides together, stitch
all around leaving optyai
urved seams. Tu
pening closed. Tir/ribbon to bo
oop for hanging.
Cut 1 piece.
Cut 1 piece
symmetrically.
J
||Ж
A Ж /a
CATHEDRAL
WINDOW
WALL
50
Cathedral Window Coverlet shown on pages 36 and
MATERIALS: Unbleached sheeting. 84cm by
17cm. Cotton fabrics: gray with design, 36cm by
3m; navy with design, brown with white and
black checks, light plum print with maple pattern,
beige with garnet red design, 36cm by 66cm each.
FINISHED SIZE: 134 cm by 224 cm
DIRECTIONS: 1. Cut out pieces for window
patches, base and border as indicated. 2. Fold
fabric for base as shown in the illustration, tacking
each corner to center securely. Sew four folded
pieces together to make one block. Place four
window patches in different colors in place. Slip-
stitch in place. Make 66 blocks. 3. Join blocks into
6 strips of 11 blocks each, overcasting edges
together as shown in the illustration. Add window
patches to cover all diamonds and half-diamonds
with gray fabric with design. Slip-stitch in place.
4. Fold one-third of strip for border lengthwise.
Refold the strip and bind raw edges of pieced top.
Slip-stitch folded edges to top and base.
Cut the following pieces.
For Base Window Pa-
Cut out 298 p
Cut out 264 pieces from sheeting, from gray w"
fabric.
Navy with design
Checks
Print with
maple pattern
Beige with game!
red design
20
6
6 -
Strip for border
Sheeting
42 cm by 137 cm for side
42 cm by 227 cm for top or bottom
To bind edges
Cut 2 pieces
Diagram
co
CD
3
CD
О
$
CD
kn
..k
CO
" 3
CL'
CD
Icm
i3 14
Ф
With right soj
for top and
together, st •СЯ
Fold one-third
of strip lengthwise
Turn in seam allowance of strd
Bind raw edges of pieced top
Slip-stitch.
33
.z Cathedral Window
Take a stitch at comer (C)
Repeat in this way for
remaining corners.
baste
Bring the needle from corner (A)
to center (B) and take a stitch
toward corner (C).
It center,
out
5
b
7
q
Cm
~~ Qcm
Wiih right sides of folded
pieces together, overcast
along one edge.
Turn piece over Refold corners
so they meet at center, tacking
corners together in same manner
rn
18cm —
Make 66 blocks in same manner
es in same
- :• four squares
-es in place.
Fold edges ol diamond over
onto window patch as shown
and slip-stitch
18
cm
feige with
Kr'nel^|
?d design
tr
3<>
41—
DECORA
ASSORTED
Directions for 51 and
for 55 on page 88. for
THOUSAND PYRAMIDS TABLECLOTH
Directions on page 90.
12
MOSAIC TABLE CENTER
Directions on paj?e 91.
13
44
,r tifjb
SUPPERS
Directions on page 97.
. ^ <PIU&W CASE AND
MATCHING BORDER FOR TOP SHEET
"\ \ ' ' Directions on page 95,
FRAMED
PATCHWORK
PICTURES
Directions for 68 on page 96. for 69 on page 97,
for 70 on page 99.
48
— 3 Appliqued Pillows shown on page 1
*_i_- Cotton fabrics: for Pillow 1:
- 4 - cm; light turquoise, 30 cm by 20
23cm by 12cm; pink and olive, 18
«w*- ellow, 16cm by 8cm; white,
fc- Pillow 2: ivory, 90cm by 55cm;
square; blue, 20cm by 10cm;
~r imnder, 13 cm by 10cm each: for
4-Г- я85 cm by 42cm; turquoise. 28
. jar -: 23 cm square; white, 22 cm by
-яЬ17cm by 13cm; olive, 14cm
iw a.- : blue. 10cm square each. For
4 25 six-strand embroidery floss in
ae* to match appliqu6s; 31cm long
for inner pillow, 78cm by 40
mu
FINISHED SIZE: 36cm square
DIRECTIONS: 1. Cut out front pieces following
Piecing Diagram. Place folded edge of second
piece on seam line of first piece and stitch. Join
pieces in this way to make front. 2. Enlarge ap-
plique patterns. Cut out applique pieces adding 0.7
cm seam allowance. Cut strips on the bias. Make a
curve as shown with warm iron. Turn in raw
edges of applique pieces and appliqu6 to front with
two strands of embroidery floss in matching color.
3. Cut out two pieces for back. Sew zipper to back.
With right sides of front and back together, stitch
all around. Turn to right side. Insert inner pillow
stuffed with kapok.
Appliqud Patterns
Add 1 cm seam allowance.
Diagram
How to join pieces and applique
Cut out back pieces for 2 and 3 from remain
for front in same manner as for Pillow 1.
.о "o 5
8.-5^
_. C CD
Z) Ф- OJ
П В J
CD Ф CD
О О =
ф Ф о
CD
using running stitch.
£ /Turn in seam allowance and place on the first piece,
у Sew pieces together in running stitch
'/ with twp strands of embroidery floss in white.
50
. osmetic Case with zipper shown on page 2
Сот эп fabrics: red, 90cm by 15
'oral design, 70cm by 6cm;
with leaf design, and ivory
tac?. 48cm by 6cm each; dark
?: .ral design, red with floral
--ГЗ white floral design, 27 cm by 6
bwi m:ng, 56cm by 22cm. 28.5cm
•oax bias binding tape. 1.2 cm by 170
’vZ? See diagram.
DIRECTIONS: 1. Cut out pieces adding 0.7cm
seam allowance. Join four pieces together, placing
cardboard shape on wrong side of each piece. 2.
Cut out joining strips from red fabric. Assemble
pieced blocks with red strips, following Piecing
Diagram. 3. Join pieces for lining together with
wrong sides facing. Tuck at each end of gusset.
Sew end of zipper to gusset. With wrong sides of
front and gusset together, bind raw edges using
bias binding tape. Bind top edge and zipper with
bias binding tape. Bind edges of back section in
same manner.
51
Diagram
(Add 0.5cm seam allowance)
Front and Back Cut 2 pieces.
Color key and required pieces
Color key Required * piece:
V V V V Emerald green 8 piece.
• • Cream with leaf design 8 piece
Navy with gray floral design 12 piece-:
za Dark pink with wine floral design 4 pieces
X X X X Ivory with red floral design 8 pieces
о a 0 о Red with floral design 4 pieces
|*э о Gray with white floral design 4 pieces
Strips fortop, bottom and sides.
----------1
2 [Cut 6 pieces.
'*-*—5.5—^
Cut 8 pieces.
T
2
---------13--------
2 Cut 4 pieces.
•-----------------24.5
Cut out 2 pieces from lining fabric, 25.5cm by 18cm each.
Gusset Cut 1 piece from red.
Cut out 1 piece for lining, 55.5cm by 4cm.
Finished diagram
Bind top edge and zipper
5 Cosmetic Case shown on page 2
MATERIALS: Cotton fabrics: pistachio green
with white floral design, 50cm by 24cm: red with
floral design, 40cm by 17cm; navy with gray
floral design, 27cm by 13 cm. Red bias binding
tape, 1.2cm by 78cm.
FINISHED SIZE:See diagram.
DIRECTIONS: 1. Cut out patch piece- и
0.7 cm seam allowance. Join pieces tog ae
machine. 2. Fold raw edge of pocket xene
twice and top-stitch. With wrong sides c
lining and pocket together, bind raw ec. z
bias binding tape.
52
lu, H'l
WtHlBhr.|r.h»tv.M|l<J
Red with floral design
Navy with
gray floral design
Bind raw edges
with bias binding tape.
(See page 101)
Finished Diagram
'S о з
Cut out one piece for lining, the size of front from pistachio green with white floral design.
Cut out pocket from remaining fabric for lining, adding 3 cm seam allowance to top edge.
ГТ Ф Ф
CO Ф 2.
Fold twice and
machine-stitch
cu □
Glasses Case shown on page 3
MATERIALS: Cotton fabrics: emerald green,
35cm square; cream with leaf design, 25cm by 18
cm; pistachio green with white floral design, 20
cm by 9 cm; heavyweight cotton fabric for lining,
20cm by 18cm.
FINISHED SIZE: 10cm by 17.5cm
DIRECTIONS: 1. Cut out patch pieces for front
adding 0.7cm seam allowance. Join patch pieces
together by machine. 2. With wrong sides of front
and lining together, incase top edges with bias
binding tape. Incase top edges of back in same
manner. 3. With wrong sides of lined front and
lined back together, bind raw edges of sides and
bottom with bias binding tape.
Diagram
Front Back
Bind raw edges with bias binding tape (See page 101).
0.5*
’ CD
CL'
CD
о
CD
13
о
CD
Cut out 2 pieces from lining fabric 10cm by 17.5cm each.
Cut 2 pieces. Strips for binding
0.5 Seam allowance Cut 1 piece.
co
CD
3'7
OJ
£
CD
Ф
r
I
-10—
1
Г 0.5
Finished D- i
17.5
cm
I Cream with leaf design
гтгпп =Pistachio green with /
white floral design /
Emerald green
---44-
6 Pen Case shown on page 2
MATERIALS: Cotton fabrics: gray with white
floral design, 16 cm by 24 cm; ivory with red floral
design, 30cm by 10cm; red with floral design, 20
cm by 7 cm; heavyweight cotton fabric for lining,
27cm by 16cm. Red bias binding tape, 1.2cm by
60 cm. One pair of snap fasteners (small).
FINISHED SIZE: 7cm by 18.5cm
DIRECTIONS: 1. Cut out pieces for :
and flap adding 0.7cm seam allowance
pieces together by machine. 2. With r.c l
pieced front and lining together, stitc i «
edges. Turn to right side. With wr
lined front and lined back together. 1
edges with bias binding tape. Sew on - s
ers in place.
Patterns (Actual size)
Opening side
Red with
floral design
•» " .vhne
z- : design
' . Ivory with
red floral design ??
.._
Front
(Cut out back pieces same size as
front from gray with white floral design)
Cut out lining for front, back and flap
sam size as top pieces.
Finished Diagram
zr
Ф
55
9 Square Sachet shown on page з
MATERIALS: Cotton fabrics: cream with leaf
design, 18cm by 12cm; pink, 21cm by 7cm; scrap
of apple green. White lace edging, 1.8cm by 65
cm. Pink ribbon, 0.4 cm by 80 cm. Potpourri.
FINISHED SIZE: See diagram.
DIRECTIONS: 1. Cut out patch pieces for front
adding 0.7cm seam allowance. Overcast patch
pieces together by hand, placing cardboard shape
on wrong side of each piece. 2. With right sides of
front and back together, stitch all around leaving
opening for turning. Turn to right side. Insert
potpourri. Slip-stitch opening closed. 3. Place
gathered lace edging for ruffle all around. Stitch
along center line of lace edging. Insert ribbon
through lace and tie ribbon to bow at comers.
Patterns (Actual size)
Diagram
Cut out 1 piece for back,
11,5cm square form cream
with leaf design.
Finished Diagram
Machine-stitch gathered lace edging for ruffle. y>
8 Sachet
MATERIALS: Cotton fabrics: pink, 22cm by 13
cm; cream with leaf design and ivory with red
floral design, 13 cm by 7 cm each; pistachio green
with white floral design, 11cm by 6cm. #25 six-
strand embroidery floss in pink. White lace
edging, 1.8cm by 70cm. Light pink ribbon, 0.6cm
by 50cm. Potpourri.
FINISHED SIZE: See diagram.
shown on page 3
DIRECTIONS: 1. Cut out patch pieces :
adding 0.7cm seam allowance. Overcas
pieces together by hand, placing cardboar
on wrong side of each piece. 2. Attack
carriers to front and back. With right
front and back together, stitch sides and I
3. Turn to right side. Sew gathered lace ec. j
ruffle around top opening, sides and
Insert ribbon through carriers and tie to b
56
- S (Actual size)
Cut 2 each.
Cream
Ivory
рас '0 green
Diagram
Ribbon Carriers
(Bullion stitch with 2 strands in pink)
Cut out one piece for back 10.5cm by 12.5cm
from pink fabric. (Attach ribbon carriers to back.)
ssAed Diagram
Fold raw edge twice at top.
Gather 30cm long lace
edging for ruffle.
Place ruffle on double
fold hem Top-stitch.
C cm long lace edging for ruffle
Йся -file to front.
Bullion stitch
Э 4
10 Puffed Pochette shown on page 4
MATERIALS: Cotton fabrics: red with white
dots, green with white dots, pink with white dots,
bright yellow with floral design, yellow, balck
with floral design, blue, navy with floral design,
dark pink. 16cm by 8cm each; back pieces for
puffs, 54cm by 12cm; fabric for lining, 26cm by
13cm. Red bias binding tape, 1.2cm by 212cm.
White button, 2 cm in diameter. Adhesive inter-
lining, 1 cm by 70cm. Polyester fiberfill.
FINISHED SIZE: See diagram.
DIRECTIONS: 1. Cut out pieces for ; . r-
lowing directions for making puff on ; u-
make puffs and
sew them
together.
edges of front and lining with bias bind -g
Bind top edges of back and lining in same
With wrong sides of lined front and back '
bind sides and bottom with bias binding
Make handle and loop for button with bi-.-
tape. Attach handle and loop in place. - я
button.
Size for Puff
Diagram
Make 2 pieces for Frc 4
Front
Cut 2 pieces each
from each color.
6
Lining
Cut 18 pieces.
Red
/2
BngtU-
yellow
with
floral
I I
How to tuck for front piece
I
*4
4Bule
/2
Yellow
Greer
with
white
dQts_
Navy
with
floral
desiar
Following directions of making p
make puffs, stuff with polyester :
puffs together. Trim off extra fabr
stitching. Cut out two pieces from
13cm sc.
_. . . . гч- Handle
Finished Diagram
Cut two 70 cm long bias
binding tape.
Sew handle
to front piece
Fold 8cm long
bias binding tape
in half lengthwise
Stitch along
folded edges.
ID T- CD
“ s-o
— CD
О) О
О Ф
CD CD
•
и □ 5
СП CL <
Bind top edges of
front and lining with
bias binding tape.
(See page 101)
Button
cm
13
cm
13cm
Jkdhesive interlining
Press adhesive interlining to wrc' ;
of bias binding tape. Place anothe
on interlined tape and top-stitch
Loop for bu
58
11
Pochette shown on page 4
L '• LS: Cotton fabrics: yellow with floral
by 20cm; green, 25cm by 7cm;
by 9cm; red with floral design.
Г cm; brown with floral design, 7cm
it for lining, 33cm by 16cm. #30
- bread. Quilt batting, 17cm square,
on cord. 0.5cm in diameter and 87cm
в I 1'.ton, 2cm in diameter.
«££ > SIZE: See diagram.
DIRECTIONS: 1. Cut out patch pieces for front
adding 0.7cm seam allowance. Sew patch pieces
together by hand. 2. Pin and baste pieced top,
batting and lining together. Quilt as indicated. 3.
Place back section on lining with wrong sides
together. With right sides of front and back
together, stitch sides and bottom. 4. Turn in raw
edges at top and slip-stitch to wrong side. Sew
handle and loop for button in place. Sew on
button.
Patterns (Actual size)
о ° °
Margin
□ о о
О
Fold line
о
о °
ellow with floral design
о
о о °
Green
иг withN
i resign
Orange
Red with
floral design
Finished Diagram
Handle
/77 cm long cotton cord
15
crv
/5cm
о
$
GO
Cl
Ф
CO
r—♦
*—*
о
Cut out one piece for back, 16.5cm by 17.5cm
from cream with floral design.
Cut out two pieces from lining fabric, 16.5 cm
by 15.5 cm each.
59
12 Girl Tote Bag shown on page 4
MATERIALS: Green denim, 49cm by 93cm.
Unbleached canvas, 23cm by 31cm. Cotton
fabrics: yellow with floral design, 36cm by 6cm;
brown with white checks, 13cm by 10cm; white,
12cm by 8cm; black with red floral design, black
with orange floral design, 15cm by 5cm; white
with floral design, brown with floral design, red
with floral design, 10 cm by 5cm each; brown,
8cm by 6 cm; fabric for lining, 37cm by 73 cm.
#25 six-strand embroidery floss in gray-brown,
black, pink and wine red.
FINISHED SIZE: See diagram.
DIRECTIONS: 1. Cut out patch pieces a
0.7cm seam allowance. Sew patch pieces • r
together by hand. 2. Braid hair and insertI
braid between hair and brim. Slip-stitch a
to panel. 3. Stitch appliqued panel in pla e
in top edge of front and sew handle in ta
Stitch each side of outer bag. Make ir.res
With wrong sides of outer and innet
together, slip-stitch folded edge to o»-'-l
around top.
Diagram
Front Cut 1 from denim.
J.5
5 Margin
Fold line
Attach :
appliqued panel:
(For front) j
3
CD
В о
8“
cn
о
"Г-------
Fold (Boltom)l
Finished Diagram
Seam
. allowance
28
Appliqu6
Cut 1 from canvas.
f.5
СЛ
о
CD
co
ф-
« t
О
CD
I I Q)
— 20------------~ “
CD
Order of appliques to panel
Hat, hands, skirl —Blouse —Face
— Head (Insert braid)—Sleeve
43
<Z>
CD
CD
3
CD
O
$
<x>
Handle
Cut 2 from dec и
3.
allow:
mac*
Straight stitch
CD
О
CD
CD
GO
60
Brown
White
White
White
Brown with
white checks
Yellow with •
• floral design
Black with
red floral design
Straight-stitcfjx^
i in wine red.
Black(o .. ...
pjnk । Satin stitch
. Cross-stitch in black
Brown with
floral design
^White with
floral design
* x1
Red with
x floral design
о ° О
„ v c
° о
0 Black with
orange floral design
о
Use 4 strands.
61
13 Ohio Star Tote Bag shown on page 4
MATERIALS: Unbleached canvas, 90cm by 49
cm. Cotton fabrics: pink, 86cm by 25cm; white
print, 72cm by 23cm; pink print, 14cm by 7cm;
fabric for lining, 61 cm by 45cin.
FINISHED SIZE: See diagram.
DIRECTIONS: 1. Cut out patch pieces adding
0.7cm seam allowance. Sew patch pieces together
by hand. 2. Sew strips for border to canvas, with
right sides together and 0.7cm seams. 3. Slip-
stitch pieced blocks to canvas in place. 4. With
right sides of front and back together, stitch sides
and bottom. Make inner bag. Insert inner bag and
slip-stitch to outer bag, with handles in between.
Machine-stitch handles to bag.
Pattern (Actual size)
Diagram
Sew strips
to canvas with right
sides together, and
turn to the right side.
Handle
Cut 2 from canvas.
3.5
Front side
1.5 Margin
42
Cut out one piece for back the size of front plus seam
allowance from canvas.
Cut out one piece for front 45cm by 35cm from canvas
СП
ф
• ф
а
ф
о
ф
о
о
ф
Finished Diac
\Sew handles
3.5cm
О
ф
30.5
СП)
Slip stitch inner bag
to outer ba
Fold in half, turn
in seam allowance
and machine-stitch.
о
о.
ф
о
$
Ф
Э
о
ф
14 Blue and Brown Tote Bag shown on page
MATERIALS: Cotton fabrics: blue-gray, 90cm
by 46cm; dark brown, 28cm by 24cm; 30 pieces
of 8cm by 6 cm (see photo for colors and designs);
fabric for lining, 62 cm by 38 cm. #40 white cotton
thread. 4-ply yarn. Quilt batting, 74cm by 35cm.
FINISHED SIZE: See diagram.
62
' ’.RECTIONS: 1. Cut out patch pieces for hexagons add-
= / 0.7cm seam allowance. Sew six triangles together by
a nd to make hexagon. Make five hexagons. 2. Cut out
:angles adding 1cm seam allowance. Slip-stitch hexagon
each blue-gray rectangle, matching centers. Join appliqu£d
9 .e-gray rectangles and dark brown rectangles together. 3.
ace pieced front on batting. Quilt along quilting lines. Quilt
i back section in same manner. With right sides of front
: back together, stitch sides, bottom and corners. 4. Place
tig on wrong side of strip for top border and quilt. Stitch
is of strip to make a circle. Make inner bag. With wrong
s :es of outer and inner bags together, run a gathering stitch.
11 thread to fit joined strip. Place joined strip on gathered
nt and stitch. Fold joined strip in half lengthwise and slip-
я ch to lining. 5. Make handles and insert 4-ply yam. Attach
-i idles in place.
Patterns
•|Ohh| Wh ДыП нПМFTiJ ФТьЧНи
pur lopiobo) GU|BuUH| XIS M<>S
a
Fold line
61
io:
e-gray Pieced front
Diagram
(Add 1 cm seam allowance)
Strip for top border Cut 1 piece from blue-gray.
Place batting on wrong side of strip and quilt.
„.„Wrong sjdfi..TF_
""Right side
Pieced back
"" ,4
Handles
Cut 2 from blue-gray.
- Cut out one piece
- for batting
J 63 cm by 3 cm"
о
CD
36 —
-36---
CD
cd
ф
В
ф
?
C/>
С/Э
Ф
CD
GO
CL
Ф
CD
СЛ
Ф
В
CD
•
—i
CD
out one piece for batting 38cm by 32cm. Cut out one piece for batting 36cm by 31 cm.
How to sew strip
Lining for top border
eg T
Ф rm
Q
О
ф
I Blue-gray
Strip
^Attach
handle
315
cm
(Do not add seam allowance
al sides and bottom)
Finished Diagram
4.5 cm
- With wrong sides of front piece,
batting and lining together, run a
gathering stitch, and sew strip for
top border to bag with right sides
Detail of corners together.
top borde
- to Imino
Quilt batting
о
63
15 Striped Tote Bag shown on page 5
MATERIALS: Cotton fabrics: (see list for colors
and amounts) fabric for lining, 76 cm by 48 cm.
#40 white cotton thread. Quilt batting, 76cm by
64 cm.
FINISHED SIZE: See diagram.
DIRECTIONS: 1. Cut out patch pieces adding
seam allowance. Join patch pieces together by ma-
chine. Trim off extra fabric 1cm beyond stitching
at each side and bottom. 2. Make another pit =
back in same manner. Place pieced top on
and quilt. With right sides of quilted fror
back together, stitch sides and bottom. 3. M
inner bag. Insert inner bag. Bind top edg
outer and inner bags with binding strip. 4. S
stuffed strips for handle. Attach handles in
Diagram
(Add 0.7 cm seam allowance unless otherwise indicated)
f.S
. 15
v
35 g.
1
18---------
— to—
— 18
2.5
Color key and
Required amounts of • в
Cut out rectangles. Stitck
together and press sear
Trim oft extra fabric
same size as
front.
25-----------
Cut out pieces from lining fabric and quilt batting
Seam _______Tern
allowance seam
allowance
to
17
о
о
----12
22
/4
14----
14 -
8
Strip for binding
/ zSeam allowance
- 21
13
Color key
Old rose_____________________
White with floral design
Wine with floral design
Wine with star design___________
Ivory with floral design
Wine red with floral design________
Olive green with floral desigr
White with floral design
3
TU
Cut 1 piece.
Mauve with floral design_______
Brown with white checks
(Light red-bean with floral des
Bind top edges Finished Dia:
with binding strip,
Handle (See page 101).
<>l
16 Satin Pochette shown on page 5
. -LS: Lightweight satin: pale blue, 48
k; - pink and lavender, 17cm by 8cm
к print, 17 cm by 23 cm. Silver metallic
s hite cotton thread. Quilt batting, 34
Idb. Blue bias binding tape, 1.8 cm by
л₽ n cord, 0.5cm in diameter and 117
• xir heart-shaped buttons, 1cm in
»> . pair of snap fasteners (large).
• 1 SIZE: See diagram.
DIRECTIONS: 1. Cut out patch pieces for front
adding seam allowance. Sew patch pieces
together by hand. 2. Insert batting between pieced
front and lining. Quilt along quilting lines with
silver metallic thread. Quilt on back through all
thicknesses with cotton sewing thread. 3. With
wrong sides of front and back together, bind raw
edges with bias binding tape. Make handle and
sew it in place. Sew on buttons and snap fasteners
in place.
Diagram
OU z atch pieces adding 0.9cm seam allowance)
34cm
Finished Diagram
2.5cm
44с»
Sew bias binding /
tape together, and
insert cotton cord.
Handle оЯст
Sew on
buttons.
Cut out pieces from lining fabric (Blue) and
quilt batting same size as front.
Cm
co
Sew on buttons.
)
s
cm
5w on sha
fasteners'.
Я! i
With wrong
sides ot front
and back together,
16.5c»>-^ bind raw edges
with bias binding tape.
(See page 101)
17 Tray Mat shown on page 6
EX1ALS: Cotton fabrics: blue, 90 cm by 50
with floral design, 66cm by 20cm;
^•= by 45cm; pink, 26cm by 13cm. #25
зна or broidery floss in beige. Quilt batting,
Э SIZE: 37cm in diameter
DIRECTIONS: 1. Cut out patch pieces adding
0.7 cm seam allowance. Overcast patch pieces
together by hand, placing cardboard shape on
wrong side of each piece. 2. Insert batting
between pieced top and lining and quilt as
indicated. Bind raw edges with bias binding
tape.
65
Patterns
(Actual size)
Beige | pu. д рЯГь
Beige with floral design J
Cut 8 pieces from beige
with floral design/
Cui 1 from beige
_. -л fabric.
Diagram
ut 4 fr
Blue
Pink
fco'Z ?A' r/r
^w-eages
ias binding tape.
Bind r
wjP<6
"(See page 101)
-JxH1 < ill
<Z”\p i»
9 A4 % // ‘
Quilt with 2 strands of
embroidery floss in beige.
h.-----------------37--------------------m
i fi=
Cut out pieces from lining fabric (beige) and j < ;
quilt batting 37cm in diameter. *-*•
Strip for binding
.05
Seam allowance
— I l&(Sew strips together)—-/
18 Hot Mitt shown on page 6
MATERIALS: Cotton fabrics: lavender, 58cm
by 20cm; cream with floral design, 29cm by 12cm;
lavender with white stripes, 18cm by 8.5 cm;
lavender with white checks. 10 cm by 4 cm; fabric
for lining, 40cm by 27 cm. #25 six-strand
embroidery floss in lavender. Quilt batting, 40
cm by 27cm. Lavender bias binding tape, 1.2cm
by 81cm.
FINISHED SIZE: See diagram.
DIRECTIONS: 1. Cut out patch piece
0.7cm seam allowance. Join patch piece?
by machine. 2. With right sides of piece
lining together, stitch along wrist edg;
right side. Stitch wrist edges of back
lining in same manner. Insert batting br-
and lining. Quilt as indicated. 3. With wr
of two pieces together, and loop for han
tween, bind raw edges with bias binding
66
A
Lavender with white stripes
у
Quilt with 2 strands of
embroidery floss in lavender.
i
19 Handle Cover shown о
e 6
MATERIALS: Cotton fabrics: mauve
with floral design, 46cm by 8cm; dark
mauve and beige with white floral design.
20cm by 8cm each; fabric for lining. 18
cm by 13 cm. #25 six-strand embroidery
floss in light brown. Quilt batting, 18cm
by 13 cm. Lavender bias binding tape,
1.2 cm by 50 cm.
FINISHED SIZE: See diagram.
DIRECTIONS: Make Handle Cover in
same manner as for 18. Mitt. Quilt along
quilting lines on back. Attach loop for
hanging to top of Cover.
Loop for hanging
tape in half lengthwise,
turn in seam allowances
and stitch.
Turn in seams and stitch.
Back (Mauve
with floral design) 1
Lining (2 pieces)
Quilt batting (2 pieces),
Opening
6
Cut out pieces
same size as
front.
68
20 Square Potholder shown on page 6
E3I ALS: Cotton fabrics: mauve with floral
l-; tm by 22cm; cream with floral design,
s t» - cm; light mauve. 22cm by 19cm. Silk
4® ±-ead in lavender. Quilt batting, 22 cm
Lavender bias binding tape, 1.2 cm by 91
*IK ' -.ED SIZE: 21.5cm square.
DIRECTIONS: 1. Cut out patch pieces adding
0.7 cm seam allowance. Join patch pieces together
by machine. 2. Place batting on lining. Place
pieced top on batting. Quilt along quilting lines
using double strands of silk sewing thread in
lavender. Bind raw edges with bias binding tape.
Attach loop for handging.
Patterns
(Actual size)
euve)Cut4 each‘
Cut 4 pieces from light mauve.
Diagram
Bind raw edges with bias
binding tape. (See page 101)
ф
0J
CD
<
Ф
Cut out 1 piece for back 21,5cm square
from mauve with floral design fabric.
ГО
СЛ
—’'
co
о
Quilt along seam line
in same way.
Loop for hanging
0.6 cm
Back /
Fold 9cm long binding
tape in half, and sew
together
Attach loop for hanging
to potholder.
21 Tea Cozy shown on page 7
l ALS: Cotton fabrics: pink, 88cm by 16
with floral design, 76cm by 14cm; pink
bir design, 75cm by 11cm; light pink, 47
► .'.cm; fabric for lining, 72cm by 27cm.
-’tec— Toerfill.
- ED SIZE: See diagram.
DIRCTIONS: 1. Cut out patch pieces adding 1
cm seam allowance. Join patch pieces together by
machine. 2. With right sides of two pieces
together and loop for hanging in between, stitch
all around leaving bottom open. Turn to right side.
3. Make lining in same manner. Place polyester
fiberfill all over lining piece. 4. Place pieced top
over polyester fiberfill. Turn in seam allowance of
lining and slip-stitch in place.
69
лс Patterns
0.5 cm.
Cutting Layout
Loop 'Of
Pin»
0.Б
Lining
| Cut 2 pieces.
Add 1 cm seam
I allowance.
<3 ~
Sew piec -1 ч
sides teg- "
Stuff W ‘ go*
fiberfill
Pj,nk with floral design
Finished Diagrs-
With lc : ®
in betweer
all aro.nc
Gray with floral design
Ir
Hi
31.5
cm
Pink
V V V V* V Fold line v
V V v V V v v v
v Margin
v v
36 cm
Finishing for
2
cm
Lining '4-
2cm
Mar;
/
Slip-str.: ‘
22
Place Mat
23 Matching Napkin
shown on page 7
MATERIALS: For 22: cotton fabrics: pink. 38
cm by 29cm; gray with floral design, 90cm by 21
cm; green with white checks, 10cm square; gray.
26cm by 6cm; dark pink. 20cm by 10cm; lightgray-
green. 18cm by 10cm; fabric for lining. 38cm by
29cm. #25 six-strand embroidery floss in pink.
For 23: cotton fabrics: pink, 42 cm square; gray
with floral design, 32cm by 5cm; green with white
checks. 9 cm square.
FINISHED SIZE: 22: 42cm by 32.5cm. 23: 40
DIRECTIONS: For 22: 1. Cut out «г
pieces adding 0.7 cm seam allowance
appliqud pieces together by hand, pl ;
board shape on wrong side of each ies
stitch pieced appliqu£s to backgroun nw
Place appliqudd piece on lining with wa|
together. Stitch in running stitch as- — _
Sew strips for border all around.
cm square.
70
te " S (Actual size)
---------•
Green with white checks
Cut 1 each for No. 23
Cut 1 piece
from light gray-green
fabric.
Cut 1 piece
from light gray-green
fabric symmetrically.
Gray with
floral design
Cut 2 each for No. 22
Cut 1 each.
—. . . <
Gray
'Slip-stitc
Dark pink
Diagram
Background /
fabric /
<z>
—'
CD
СЛ
—
18 —
I cut one piece
zackground
by 28.5cm from
м fabric.
Strips for border
Cut 2 each from gray wit^h floral design fabric.
{ I —“ ~Seam allowance
1 a.
ъ----------------—_—_ — —
’
________a__________________
4 Fold line
26.5—
Binding
- Fold line
42
Machine-stitch
in theditch.
Background fabric
Running stitch Machine-stitcl'TilB
in the ditch
‘ <=э ° ^3 Bind edges with strips (a) and (b). (See page 101)
InOutlnOut
7 I
For 23: 1. Join appliqu£ pieces in same manner as
for Place Mat. 2. Make double hem and top-stitch.
Finished Diagram
28 Bird Pillow shown on page 21
MATERIALS: Cotton fabrics: grayish wine red,
60cm by 37cm; pink, 90cm by 30cm; rosepink
with pink floral design, 90cm by 24cm; blue-gray
and gray-brown, 45cm by 10cm each; gray with
floral design, 45cm by 8cm; pink with rosepink
floral design, ivory with floral design, 23cm by
8cm each; pistachio green and yellow-brown, 21
cm by 10cm each; mustard, 17cm by 15cm. #25
six-strand embroidery floss in navy and colors to
match appliqu£s. 30 cm long zipper. Cotton fabric
for inner pillow, 76cm by 39cm. Kapok, 350g.
FINISHED SIZE: 35cm square (except ruffle)
DIRECTIONS: 1. Cut out patch pieces for front
adding 0.7 cm seam allowance. Overcast patch
pieces together by hand, placing cardboard shape
on wrong side of each piece. 2. Enlarge appliqu6
patterns. Cut out appliqu£ pieces adding 0.7cm
seam allowance. Sew appliqu£ pieces together in
same manner as for ptach pieces. 3 and 4. Make
up for pillow as for 27.
Diagram
Use grayish wine red for back,
rosepink with pink floral design for 5.5 cm
wide ruffle and
pink for 7.5cm wide ruffle.
Appliqu6 Patterns
lent
with 2 strands
of embroidery
floss in navy.
(See page 23)
Outline-stitchl
Satin-stitch I
\ Mustard . x
+
+
+
4-
2 cm
2cm
Quilt with 2 strands_
of embroidery floss
in navy
Pistachio green
Color key
* p =Gray-brown - Rosepink with pink floral
(a) design (f)
= Blue-gray (b) <3 = Ivory with floral design (g)
D
- Pink (c)
- Pink with rosepink floral
design (h)
= Grayish wine red (d)
X
X
= Gray with floral design (e)
Cut out pieces in
same way as for
pillow (No. 27).
Finished Diagram
co
СЛ
о
CD
СЛ
CD
CD
CL
СЛ
У о
о
о
—л
СП
г—*
о
3
CD
5.5
cm
73
34 Scissors Case shown on page 24
MATERIALS: Cotton fabrics: brown, 23cm by
12cm; white with light brown floral design, yellow
with white floral design, light yellow-green with
leaf design, 20cm by 12cm each; fabric for lining,
23cm by 16cm.
FINISHED SIZE: See diagram.
DIRECTIONS: 1. Cut out triangles adding seam
allowance. Sew triangles together in horizontal
rows. Then sew rows together as shown. 2. Over-
cast bottom edges together. 3. Cut out one piece
for lining the size of outer case plus seam allow-
ance. Stitch sides and bottom. Insert lining into
outer piece. Slip-stitch lining to outer piece.
Pattern
Brown 11 pieces
White with light brown
floral design
Yellow with while floral
design
Light yellow-green
with leaf design
Diagram
Cut 9
pieces
each.
Join horizontal rows together, matching marks.
Cut out one piece from lining fabric adding 0.7 cm
seam allowance same size as top piece.
Finished Diagram
Overcast
35 Sewing Case shown on page 25
MATERIALS: Cotton fabrics: brown with white
checks, 90 cm by 15 cm; red-brown, 15cm by
10cm; olive green, 12cm by 6cm; white with
floral design, 9cm by 10cm; fabric for lining, 24
cm by 12cm. #30 white cotton thread. Quilt
batting, 24cm by 12cm. Adhesive interlining,
12cm by 11cm. Cardboard, 20cm by 22cm. Glue.
FINISHED SIZE: See diagram.
DIRECTIONS: 1. Cut out pieces adding seam
allowance or margin as indicated. Join pieces for
front as shown in the illustration. АррНдиё pieced
flower to front in slip stitch. Sew strip in place. 2.
Pin and baste front, batting and lining together.
Quilt as indicated. Glue quilted front to cardborad.
3. Place adhesive interlining on wrong side of
pocket and press. Fold pocket as shown. Sew
pocket in place. Sew strip for holder in place. Glue
inner piece to cardboard. 4. Sew another strip to
outer piece. With wrong sides of inner and outer
pieces together, slip-stitch folded edge to outer
piece all around.
71
Diagram
Add 0.7 cm seam allowance unless otherwise indicated.
Pocket
Outer piece
Inner piece
Strips
Cut 2 pieces from checks.
0.7COT
Turnin seam allowances
and machine-stitch.
Olive green
1 cm intervals.
Finished Diagram
Glue outer piece
to cardboard,
and slip-stitch
inner piece to
outer piece.
Sew strip.
11cm.
pocket
lOcrn
Opening
I
33 Sewing Box shown on page 25
MATERIALS: Cotton fabrics: brown with floral
design, 84cm by 40cm; dark brown with floral
design, 80cm by 30cm; mint ivory, 16cm by 7cm;
white, 13cm square; green with white floral
design. 10cm by 7cm; small amount each of brick,
brown, cream, beige, yellow-green, mustard,
yellow with white floral design, white with green
ieaf design, beige with white floral design, white
with red leaf design; fabric for lining, 26cm square.
#30 cotton thread: white; brown. #50 cotton
thread in colors to match appliques. Cardboard
box (see diagram for size). Quilt batting, 80cm by
35cm. Cardboard, 60cm by 32cm. Glue.
FINISHED SIZE: Same size as box.
DIRECTIONS: 1. Cut out applique pieces
adding 0.7cm seam allowance. Sew pieces
together using slip stitch in numerical order. 2.
Cut out pieces for border adding seam allowance.
Overcast pieces together by hand, placing card-
board shape on wrong side of each piece. 3. Make
up for lid, following directions 1 through 3. 4. Cut
out pieces from lining fabric, batting and card-
board. Make up for box. following directions for
box.
Appliqu6 Patterns (Actual size)
Quilt with cotton thread
Mint ivory
White
Cream
I Brick
hite
White
ellow-green
Yellow with white floral desigPi
Beige with white floral design
Cream
White with green leaf design
White with red leaf design
Brown wiFFi"
floral design
Mustard
Green with white
floral design
t Green with white
"\ floral design
- Brown with
floral design
1 strand in white 1
2 strands in brown |
7 6
out 1 piece from cardboard 20cm square.Cut out 1 piece each from quilt batting and lining fabric 25cm square.
To make lid
9
(a) Slip-stitch.
Quilt batting
(c) Place batting on lining.
Place pieced top on batting.
Quilt as indicated.
Cover cardboard with fabric
for lining. Turn extra fabric
to wrong side and glue
to cardboard
Lining
(d) Glue.
ardboarcb
Glue wrong side of
covered cardboard
о wrong
side of lid
3fue wrong sid
(b) Place pieced applique on lop of lid.
Slip-stitch folded edges to side strip.
Fum in seam allowances of applique pieces
and slip-stitch in numerical order
iv<th cotton thread in matching color.
of covered
77
Outer box and inner box
How to cut
Outside Margin
Bottom of outer box
Bottom of inner box
u---------------------80----------------------
Cut out 1 piece from quilt batting 80cm by 6.5cm.
Inside
Brown with
floral design
floral design
-----78-------
।
-----19.5--------
Cou out 1 piece from
cardboard 20cm squares
Cut out 1 piece each
from cardboard and
quilt batting 19.5cm
square.
Cut out 1 piece from quilt batting 78cm by 6cm.
Cut out 4 pieces from cardboard 19.5cm by 6cm.
To make box
Inside
(D Outer box
Glue batting to
four sides of box
Cardboard
Place covered cardboard on the bottom of the box.
with wrong side glued Place batting on fabric for inside
Place cardboard on batting and glue. Fold margin
with side piece. of fa^rjC ovj^cardboard and glue
Fold margin and glue to inside of box
Cover cardboard for bottom with fabric
Glue margin to wrong side.
Sew ends
together.
batting to cardboard
for bottom. Place cardboard
with batting on fabric for bottom
Fold margin over cardboard
and glue.
Glue covered piece to the bottom of the box.
41 and 42 Twins shown on page 29
MATERIALS: For each doll: apricot pink
jersey, 82cm by 14cm; unbleached sheeting, 44
cm by 12cm; white looped yam; two black beads
(large); two pairs of snap fasteners (medium);
polyester fiberfill; orange felt-tipped pen. For 41:
Cotton fabrics: pink, 48cm by 15cm; old rose with
floral design, 44cm by 16cm; red-brown, 38cm
by 8cm; beige with floral design, ivory with floral
design, white with pink stripes, 27cm by 8cm each;
white. 18cm by 9cm; salmon pink, 18cm by 8cm.
ОЛцгцЬу 40cm. Elastic tape, 0.3cm
l/У 82cm. Eor 42: Cottffn’fafeHcs: charcoal gray, 45
fm by 22pn-frhi<ygray. 39cm by 16cm; navy-wrHr
white stripes, blue beige with
’floral design, 27cm by 8cm each; whTt^iy^loral
design and gray, 18 cmi by Saw-rffTH
0.3cm by lluii. TWo black buttons,
FINISHED SIZE: 25cm tall
Back
Under
crotch
Fold
lastic tape
5 cm in dia
Patterns
(Actual size)
Opening for stuffing
Fold
Head
Cut 2 from jersey
Pants (42)
Cut 1 from charcoal gray fabric
Cut 1 symmetrically.
Hat (42)
Cut 1 for back crown
from charcoal gray fabric
Cut l tor front crown
from charcoal gray fabric
Opening mzstuffi
Fold
Cut2forbri
Hand
Cut 2 from jersey
Cut 2 symmetrically
Front and back piece
Cut 1 tor front.
4. Cut 1 for back
Cut 1 symmetrically
\ for back.
X Sleeve
Fold Cut 2 pieces
Body (back)
Cut 1 from sheeting
Body (front)
Cut 1 from sheeting
Opening for stuffing
Legs
Cut 4 from jersey
Front
Under
crotch
Body (bottom)
Cut 1 from sheeting
____... I or (41). cut 2 pairs fro
Qhnpq fabric.
For (42). cut 2 pairs fronibjH
/ fabric.
-gray
79
HO
Directions: For 41:
(?)Cut out pieces adding 0.7cm seam @ Turn to right side,
allowance. With right sides facing. Stuff with polyester fiberfill.
Sew opening
' closed.
(§)With right sides of front and
' back of the body together
and arms in between, stitcr
each side. Sew bottom
iece to boc-
Run a gathering stitch
along top edges
ol arms
and legs.
allowance. With right sides facing,
stitch pieces together to make head,
arms and leas.
(g) Sew head to body.
Shoe
Sew together.
Head
Opening
for stuffing
Leg
Pull thread of gathering stitch
a little and turn in seam allowances
oj legs. Sew legs to body.
@ Stuff body with polyester fiberfill.
Turn in seam
llowance of body.
@ Make skirt in same manner as
for bloomers.
Г’
6
1 fabric.
17
Skirt
Cut 2 from red brown
Turnin seam allowance.
and machine-stitch.
(§) Cut out pieces (a) through (f) adding seam allowance.
Join pieces together by machine. Place patterns for
dress on patched piece. Cut out one front, two back
pieces, right and left sleeves adding 0.7cm seam allowance.
Front piece
Seam allowance
2.5
cm
Bottom^
CmV
л?) Cut out two pieces for bloomers
adding 0.7cm seam allowance.
With right sides together, stitch
each side. Sew elastic tape to
top and bottom.
Г
7
16
Bloomers
Cut 2 from white
fabric.
8
16cm long Turnin seam allowance
and machine-stitc*
elastic tape
Sew 18 cm long elastic tape in
same manner as bloomers.
4.5cm long
elastic tape
side
Sew elastic tape
by machine.
Sleeves
a« Red brown
be Beige with floral design
c - Salmon pink
d s Old-rose with floral design
e« ivory with floral design
f = Pink with white stripes
Cut out pieces for hat adding
0.7cm seam allowance. Join pieces
together. Sew hat to head.
Sew 14 cm long elastic
tape by machine.
м »es to front and back.
Cjc*' nobon t
/
13
„ Turn in seam allowance,
and machine-stitch.
Make 12 loops and sew them
around forehead.
Hat
Cut 2 from pink fabric.
Cut 2 from oldrose
with floral desian gew 4
fabric.________j
13
о
ф
Ф
СЛ **
о
ф
•О
ф
Turn in seam allowance,
and machine-stitch.
Pink
Floral
go
ф
Tack 25cm long elastic tape
to inside of hat, and machine-stitch.
Floral
ф
о
' ZT
’ Ф
•
1 Q
* Ф
design
reces together.
Pink
Finished Diagram
pw • nair with looped yarn. Sew hair to head.
Dowel
.►asten
w
О
Rouge
25
ctn
Ф
(/)
Ф
*<
co
о
3
ф
„ Sew on beads.
Polyester
Nose fiberfill
Ф
ф
d’
(O
из
о
Make in same manner C(Jt out p)eCes for blouse as for 41.
for 41.
with polyester fiberfill.
-is to body.
Back
to body as for 41.
p eces for pants adding 0.7 cm
ance. Stitch center seams
±nd back. Stitch inner leg seams.
• ems at top and bottom.
Put pants on doll
and sew to body.
sleeves
Right
Ф
В
ф
Ф
Lett
a ₽ White with floral design
b = Navy with white stripes
c - Blue with floral design
d • Gray
e^Beige with floral design
f’ Blue-gray
® Stitch pieces together. (Do not sew bow.)
81
(§) Cut out pieces for hat adding 0.7cm seam
allowance. Stitch pieces together to make hat.
Put hat on head. pronl
Finished Diagram
bew to neao. э
о
ф
@ Make 19 loops with white looped
yarn for hair. Sew them to head
47 House shown on page 32
MATERIALS: Cotton fabrics: green, 27cm by
13cm; small amount each of five different prints in
red shades and green shades (see photo). Polyester
fiberfill.
FINISHED SIZE: See diagram.
DIRECTIONS: Make House in same manner as
for 45: Star (see page 35).
Cut out patch pieces for back from green fabric same size as front.
H2
48 Christmas Wreath shown on page зз
<. TER I ALSjC^tr6TT fabrics: r&R^ith white
<4cm Ь^ЛЙст; ivory, 65cm by 17crhsGreen
binding tape, 4.5cm by 150cm. Reobjas
binding t;
uj, l.Ouu by Kapok.
D SIZE: 37 cmrnTfc^meter
Patterns (Actual size)
Wreath (;
i^T^trom red
white
its fabric
Bows
Cut Ю pieces from ivory fabric.
Finished Diagram
Loop for hyiging
IRed bias binding tape
I £}.9cm /
* ф>/
Sew v>ith/ight sides together,
nd turn to right side.
I
f\Fold ends to inside
|and slip-stitch.
31 SECTIONS: 1. Qut out pieces for wreath and
»tts adding 0.7 cm seam allowance. With right
я s of two pieces together, stitch all around
*ss ng opening for turning. Turn to right side,
fcr: with kapok. Slip^stitch opening closed.
Serf wreath fully and bowV thinly. 2. Sew bows in
sa t Make loop for hanging with bias binding
Sew loop in place. Tie green ribbon into bow
• i sew in place. \
Tie green bia
binding tapeK
bow/ j v
Leave this
patUree.
ЕГО?
О Hi
Q)
<O и
° 1
ф <
2 о
5 ст
__
5 °
2.0
О CL
<o
GO
CL
CD
о
Cathedral Window Wall Hanging
MATERIALS: Cotton fabrics: navy, 46cm by
*2 m; ivory with big purple floweres, 31cm
□cc-ire: ivory with small purple flowers, 90cm by
ienn: unbleached sheeting, 90cm by 18cm;
a-avyweight cotton fabric in navy for
SB'kground, 54cm square. Polyester fiberfill.
T> den dowel, 1.2cm in diameter and 55cm long.
Gbe,
NISHED SIZE: 52cm square
DIRECTIONS: 1. Cut out pieces for Cathedral
Wr.dow blocks and puffs. 2. Following directions
making Cathedral Window on page 39, make
shown on page 36
four blocks of 4 squares. Glue pieced blocks to navy
cotton fabric. 3. With wrong sides of front and
back pieces for puff together, stitch all around,
making pleats on each side. Make a slash on back
of each puff. Stuff with polyester fiberfill. Over-
cast the slash closed. 4. Place Cathedral Window
blocks on navy for background, matching centers.
Slip-stitch in large stitches. Slip-stitch puffs
around Cathedral Window blocks. Turn in seam
allowance of background fabric. Slip-stitch pieced
top to background. Attach wooden dowel.
83
Diagram
Cathedral window -Seepage39
Background fabric
Cut 4 pieces 46cm square each from na\y
fabric.
Window patches
Cut 4 pieces 15.5cm square each from
Puffs floral des’9h (Lar9e) fabnz.
For front piece, cut 9.4 cm )
square from floral design f |
(small) fabric?
For lining, cut 5.4 cm square
from sheeting.
Cut 48
pieces ea 1
To make puff
Make box pleats at center
on four sides and baste
as shown.
With right sides of front
and lining together, stitch
all around. Remove basting
stitches.
Make a slash on lining with
scissors. Turn to right side
through the slash.
Overcast the slash closed.
Make second puff in
same manner. With
right sides together,
overcast edges of
two pieces.
Finished Diagram
Turn in 1 cm seam
allowance of lining
ano г”. "
rigHt side.
55cm---
slip-stitch to
51—52 Pieced Star Pillows shown on page 40
MATERIALS: For 51: Cotton fabrics: red. 46
cm by 42 cm; red with dots and vermilion with
floral design. 52 cm by 26 cm each. For 52: Cotton
fabrics: yellow-brown, 85cm by 42cm; navy with
white floral design, 52cm by 26cm. 34cm long
zipper. Inner pillow stuffed with kapok, 43cm
square.
81
ВISHED SIZE: 40cm square.
CTIONS: 1. Cut out 16 patch pieces each
— rotted red and vermilion print adding seam
ak-wmee. Overcast patch pieces together by
лес. placing cardboard shape on wrong side of
each piece. 2. Cut out two pieces for back. Sew
zipper to back. With right sides of front and back
together, stitch all around. Turn to right side.
Insert inner pillow.
Diagram
Back
- ern
-ech for
pik>w.
Use colors in [ ] for No. 52 pillow.
53 Mosaic Pillow shown on page 40
%TERIALS: Cotton fabrics: pink, 87cm by 26
zsl ark pink, 90 cm by 18cm; white with red and
«г floral design, white with dark blue floral
4r gn, brown with floral design, white with red
deral design, white with blue floral design, white
> pale blue floral design, white with tulip
zn, 45cm by 7cm each; blue and yellow, 15
zr :y 7cm each. 36cm long zipper. Cotton fabric
fer ner pillow, 90cm by 46cm. Kapok, 600g.
Fl XTSHED SIZE: 41.5cm by 42cm
24 R ECTIONS: 1. Cut out hexagons and half-
Srrigons adding 0.7 cm seam allowance. Follow-
т. Piecing Diagram, overcast patch pieces
together by hand, placing cardboard shape on
art g side of each piece. 2. Cut out two pieces for
and back from pink fabric. Stitch pieces
tou-’her. Place pieced hexagons on front and slip-
igf h. Sew zipper to back. 3. With right sides of
r r: and back together, stitch all around. Turn to
rrg side. Insert inner pillow stuffed with kapok.
r mg Diagram is shown on next page.)
Patterns (Actual size)
Cut 21 pieces from dark pink fabric.
Cut 6 pieces each from a - g.
Cut 2 pieces each from blue
and yellow fabric.
«5
Diagram
Add 1 cm seam allowance unless otherwise indicated.
Dark pink
a = White v
green fie
b=White wt "
floral de :
c = Brown v ~
d = White *r
e--White v.
f = Whiter
floral de -•
g- White v.
Cut out 2 pi-. -
43.5 cm eac
54 Dresden Plate Pillow shown on page 41
MATERIALS: Unbleached sheeting, 90cm by
49cm. Cotton prints (see photo for colors and
designs), 20 pieces of 14cm by 6.5cm. #40 white
cotton thread. 37cm long zipper. Inner pillow
stuffed with kapok. 45 cm square.
FINISH El) SIZE: 43cm square
DIRECTIONS: 1. Cut out patch pieces adding
0.7cm seam allowance. Overcast patch pieces
together by hand, placing cardboard
wrong side of each piece. 2. Cut out on»
front from sheeting. Slip-stitch pieced
front. Hand-stitch on each patch piece
thread. 3. Cut out two pieces for back. St
to back. With right sides of front
together, stitch all around. Turn to
Insert inner pillow.
Diagram
Add 1 cm seam allowance unless otherwise indicated.
86
Pattern (Actual size)
56 Octagon and Square Pillow shown on page 41
MATERIALS: Cotton fabrics: blue, 76cm by 48
cm; navy with white leaf design, 85cm by 15cm;
navy with white floral design, 70cm by 25cm. 40
cm long zipper. Cotton fabric for inner pillow, 50
cm by 97cm. Kapok, 600g.
FINISHED SIZE: 45.5cm square
DIRECTIONS: 1. Cut out patch pieces adding
seam allowance. Overcast patch pieces together
by hand, placing cardboard shape on wrong side
of each piece. 2. Sew blue strips around pieced
patches. Press seams to one side. 3. Sew back
pieces together. Sew zipper to back. With right
sides of front and back together, stitch all around.
Turn to right side. Insert inner pillow stuffed with
kapok.
Patterns
Cut 12 pieces from leaf design
fabric.
Diagram
Add 1 cm seam allowance unless otherwise indicated.
Front
Back Blue
87
55 Star Pillow shown on page 41
MATERIALS: Cotton fabrics: emerald green.
stitch. 3. Cut out strips from fabrics (a) and (b).
90cm by 49cm; bright yellow with dots. 64cm by
adding 1cm seam allowance. Sew strips in
Emerald green
merald green
Slip-stitch
ow to sew piece*
atches
Cut 4 pieces from (b)
Cut 4 pieces from (b)
Cut 4 pieces from (a)
along seams of
Sew back pieces
(h right sides op
Xround. Turryfo
Patterns
(Actual size)
numerical order. 4. Hand-stitch
each piece with embroidery floss,
together. Sew zipper to back. W
front and back together. stitCMll
right side. Insert inner pillow/
Cut 8 pieces from bright
yellow with dots /
fabric. /
!>Cut4r ^ces
from (a)\ /
16cm; emerald green with design (see photo), 38
cm by 19cm for (a) and 32cm by 16cm for (b).
#25 six-strand embroidery floss in yellow. 37cm
long zipper. Inner pillow stuffed with kapok,
45cm square.
FINISHED SIZE: 43cm square
DIRECTIONS: 1. Cut out pieces for star from
bright yellow fabric, adding 0.7 cm seam
allowance. Overcast patch pieces together by
hand, placing cardboard shape on wrong side of
each piece. 2. Center pieced star on front and slip-
Diagram •
Add 1 cm seam allowance unless otherwise indicated
Front Back
57 Log Cabin Pillow shown on page 41
MATERIALS: Cotton fabrics: (see next page
for colors and amounts.) 36cm long zipper. Inner
pillow stuffed with kapok, 45cm square.
FINISHED SIZE: 42cm square
DIRECTIONS: 1. Cut out patch pieces adding
0.7cm seam allowance. Following directions for
making Log Cabin on page 11, sew pieces 1
88
through 16 to 23cm square interlining. 2. Follow-
ing Piecing Diagram for placement of colors, sew
pieces together by hand. 3. Cut out two pieces for
back from black fabric. Stitch together and sew
zipper to back. With right sides of front and back
together, stitch all around. Turn to right side.
Insert inner pillow.
Front
Block
b
Diagram
Back
Add 1 cm seam allowance unless otherwise indicated.
Black
0)
о
CJ L________
D •
О •
ф u------21
Color кеу and required amounts of
Patterns (Actual size)
Cui out 4 pieces each.
।
u.- 21
Cut out 4 pieces 23cm square each
from lining fabric.
I Color key Required amounts
I г I ЭГ П C О L & 1 a Biack with green and red flowers 24 cm X 6cm
b Navy with white flowers 36cm x 12cm
Black with red flowers 52cm x 12 cm
d Olive green with w )ite lowers 70cm x 12 cm
e Black with while flowers 86c mx 12cm
Pl nils in llaht colors f Mustard with flowers 28cm x I2ctn
g Gray with flowers 44cm x 12cm
h While with pink flowers Ы cm X I2cm
White with gray Howers 78cm x |2cm
Black 48 cm x 44 Cm
Lining | Unbleached sheeting 46cm square
«9
58 Thousand Pyramids Tablecloth shown on page 42
MATERIALS: Cotton fabrics: prints in dark and
light colors (see photo for colors and designs), 243
pieces of 14 cm by 11.5 cm; olive green with floral
design, 70cm by 25cm; dark gray-purple with
floral design, 60cm square; fabric for lining, 90cm
by 314cm. #30 white cotton thread. Quilt batting,
90cm by 314 cm.
FINISHED SIZE: 157cm by 174cm
DIRECTIONS: 1. Cut out patch pieces adding
0.7 cm seam allowance. Cut out 36 half-triangles
from olive green print, reversing pattern for 18
pieces. Arrange dark print and light print alter-
nately as shown. Overcast patch pieces together
by hand, placing cardboard shape on wrong side
of each piece. 2. Pin and baste pieced top, batting
and lining together. Quilt on each triangle. Bind
raw edges with bias-cut strips, mitering corners.
Diagram Strips for bind i
Bind raw edges with bias binding tape. Cut 2 pieces each fro-
Sew pieces to make 157
To miter corner
Ф
Liping Quilt batting
iff—
22r^*0*'P’as bindincfstn
With right sides of
top and strip together,
stitch along r^ffjes
Pattern^/
174
—
bcm
0.7cm
fih right sidesol str
together, stitch
diagonally.
<
co
CO
—i
Ф
Ф
Fold line IS™
Continue to
stitch from
corner.
~ Д --
- Quilt with cotton thread.
3
о
ф
a *
ф
о
GO —-
о
О О
? -J
о о
3
Cut 243 pieces each from prints dark
colors and light colors
—— fWrong side)//
Top piece
(Right side)
Fold line
piece
l side)
gray-purple with flora :
ilted
Turn strip to nglM\ide.
t Fold seam
Allowance, ant;
sUip-stitch.
1 Lining
(Right side)
|Fold strip over wrong si
and slip-stitch.
\\ Slip-stitch.
! Cut 18 pieces from olive
green with floral design fabric^
i\Vut 18 pieces symmetrically. \
90
59 Mosaic Table Center shown on page 43
MATERIALS: Cotton fabrics and unbleached
sheeting for top (see list below for colors and
amounts); fabric for lining, 87cm by 39cm. #40
white cotton thread. Quilt batting, 87cm by 39cm.
FINISHED SIZE: 87cm by 39cm
DIRECTIONS: 1. Cut out patch pieces adding
seam allowance. Overcast patch pieces together
by hand, placing cardboard shape on wrong side
of each piece. Trim off extra fabric of four sides
leaving seam allowance. 2. Pin and baste pieced
top, batting and lining together. Quilt on each
piece. 3. Bind raw edges with bisa-cut strips.
Sew long strips to top and bottom, then short ones
to sides.
Patterns
Diagram
Bind raw edges with bias binding tape.
(seepage 101)___________________
0 c
ООО
с
/о о
о о
о 6
I о о
о о/
О С
«О О
Quilt with cotton thread along seams of each peice. 1
Cut out 1 piece each from lining fabric and quilt batting. 87cm by 39cm.
Color key and required amounts
Color key Required pieces [^xtiiireo 3 1 3
Navy with white Howers 0 Cut 15 pieces Gut 2 each for binding
Unbleached Q Cut 31 pieces Л Cut 6 pieces
Rad with white flowers О Cut 18 pieces 6 If hl * /b'V/
0 Cut 6 pieces
1 Yellow with wnite Howers Q Cut 17 pieces 0 Cut 4 pieces
t Gray wilh flowers О Cut 17 pieces 0 Cut 4 pieces
- . * Blue with light blue Howers C»Cul 18 pieces 8!Itvn A ir6rrr?
White witn pink 1lowers ф Cut 9 pieces SJr/n x
ЕЙ ivory with red Howers
L-ZJ White with blue flowers
L Cream witn leaves 0 Cut 6 pieces /З.'.ТП x :?CfTl
E-' Olive Qroon
.0.7
Strips for binding _ .. . .
K a Cut 2 pieces To finish corner
each
07 Seam allowance
0?
Wrong P"
side S
о
№
ocm
-84
39
91
60
Thousand Pyramids Wall Hanging ? ^how^on page 44
MATERIALS: Cotton fabrics (see list for colors
and amounts); fabric for lining, 81cm by 95cm.
FINISHED SIZE: 79cm by 93cm
DIRECTIONS: 1. Cut out patch pieces adding
0.7 cm seam allowance. Sew pieces together by
hand, following Piecing Diagram. 2. Place pieced
top on lining, turn in seam allowance and slip-
stitch lining to hem 2-3 mm in from folded edge.
Pattern
(Actual size;
Diagram
Color key and required amounts
Color keyMeg^|^ Requires ambunts
□ Navy 34 Lo^op 'll cm *3bcn
Black 36 12 cm* 21 cr
L_J Green 34
L.J Yellow-green 33 66cm x 27сж
' A J Turquoise 24 88с/ях 18 er
[ & ] Cobalt blue 24 12 cm'* 18 ce
L*J Mauve 22 66cm * I8cr:
L®J Pink with white dots.
Purple 21
1 7^ Pink
L°J Blue with white riots 18 55cm x I8c~
LoJ Cherry pink 4 55cm * 1cm
LoJ Red with flowers 8 50cm *lcm
Red 7 44 cm x 1cm
Ltd Vermilion 6 31cm x 1cm
J Orange e4 28 cm x 1cm
□О □range with whi| -dots
ud Г z~) Mandarin^ Bright yellow witt 3 22cmx 1cm
Ш WFtlttf Civttr Yellow 2 11cm* 1cm j
Loop for hanging
Cut 4 pieces.
Finishing for lining
Slip-stitch lining to hem
2-3 mm in from floded edge
I4.bcm
Fold margin of motifs
to wrong side.
СЛ__
O 3
о =
“* о
£
<8
Э Ф
CO
«>2
61 Ohio Star Quilt
MATERIALS: Cotton fabrics: olive green, 90
cm by 182cm; brown with white flowers, 60cm by
15 cm; fabrics for A (see samples below for place-
ment of colors); fabric for lining, 92cm by 252cm.
#40 white cotton thread. Two pieces of polyester
batting.
FINISHED SIZE: 126cm by 182cm
DIRECTIONS: 1. Cut out patch pieces for A
adding 0.7cm seam allowance. Sew pieces
together by hand, following photo and samples for
placement of colors. Make 24 blocks. 2. Cut out
pieces for В and C adding 0.7 cm seam allowance.
Join A blocks together with В and C, following
Piecing Diagram. 3. Sew strips for border around
pieced top. Pin and baste pieced top, batting and
lining together. Quilt on each patch piece of block co
A. 4. Bind raw edges with olive green strips. g.
Diagram $
0 0 = 14cm X 7 cm each
E)'44cmx 8 cm
f~)=48cm x 8 cm
B-58onx 8 cm
---------126—
Sew pieces for lining 126cm by 182cm.
Strips for border
Cut 2 pieces each from olive green fabric.
Strips for binding
0? Cut 2 pieces each from olive green fabric.
-II
w---------124-------*4
A7
ЛГ1------- .1,
j.--------iso—————м
-44 cm x 8cm
=48 cm x 8 cm
3= 58cm x 8 cm
Cut 15 pieces
from brown with
white floral design
fabric
6
93
62 Wall Pockets shown on page 46
MATERIALS: Heavyweight cotton fabric in
light brown, 40cm by 50cm. Cotton fabrics:
purple and green, 70cm by 26cm each; yellow-
green with floral design and gray-purple print, 29
cm by 10cm each; orange, orange with white dots,
white with design, red, pink with white dots, pink,
wine red, red with floral design, 19cm by 10cm
each; fabric for lining, 80cm by 50 cm. #25 six-
strand embroidery floss in colors to match
patches. Non-woven interlining, 63cm by 18cm.
Adhesive interlining, 40 cm by 49 cm.
FINISHED SIZE: 40cm by 48.5cm
DIRECTIONS: 1. Cut out patch pieces for
pockets Л and В adding 0.7 cm seam allowance.
Sew pieces together by hand. 2. Place pockets A
on non-woven interlining and quilt’ on each tri-
angle. Quilt in same manner as for B. Place quilted
pocket on lining and slip-stitch along top edge.
Bind raw edges with strip. 3. Place background
fabric on adhesive interlining and press. Place
pocket В on background, turn over seam allow-
ance of bottom to wrong side. Slip-stitch lining to
m allowance. 4. Turn over seam allowance of
wrong side. Slip-stitch lining to seam allow-
dnceXBind raw edges of each side with strip, ex-
tpndin nd of strips to make loop for hanging. 5.
r of pocket В to background. Slip-
''ack ce
.(Actual size)
Pattern
Quilt with 2 strands ol
embroidery floss in matching c
j rttch pockeXA to background.
Diagram
Pocket A
"Purple
12.7
CD
Ф
07 сг Го Го) fellow green
5 Jzz; with floral disign
Gray-purple
print
Ф э I—
СЛ Q. |_0
CT -t
o*
Q. <
ZJ Ф
Ю Q-
^(O
ф Ф
*O сл
p 1
q Orange with
Cut 5 pieces^ white dots
each White print
|~o~| Pink with white
[a] Pink d0,s
piea
CO
I Ф
13.4—о
Cut out 2 pieces each from lining 13.5cm
square and from non-woven interlining
13.5cm by 12.7cm. Round corners.
0.6 St rips for 2llLL^^Lseam allowance
/ If binding
[~a~] Red with floral
design
Loop for hanging
Background
125 fabric
To make loop for
> hanging
5
cd’
GO
Ф
Q.
Q
Ф
сл
g
a-—J
o •
4-0-------
0)
o‘
Cut out 1 piece each from lining fabric 37.5cm
by 19.5cm and from non-woven interlining 36cm
by 18cm.
5? Slip-stitch
cd lining
g о to hem.
ю
•o
ф
-34
Finishing for pocket opening
Slip-stitch lining to hem
2-3 mm in from folded edge.
5‘ о
§ I
2 §
О ф
(О о
ining
Slip-stitch at
Tack center
8
cm
co
сл
CL
£
s
”4
(O 9
ST g
o —
сл -* —
О Э
Cut out 1 piece each from background fabric (pale brown)
and lining 40cm by 50cm (including 0.7cm seam allowance of too
and bottom), from adhesive interlining 40cm by 48.5cm.
^Strips for binding Seama|
* «Cut 1 each/f |
-55.5----------н
owance
63 Pillow Case and 64 Matching Border
for Top Sheet shown on page 47
MATERIALS: For 63: Cotton fabrics: white, 72
cm by 112cm; light blue, 90cm by 49cm. For 64:
Cotton fabrics: light blue. 90cm by 166cm; white,
90 cm by 27cm. #25 six-strand embroidery’ floss
in pale blue and blue.
FINISHED SIZE: 63: 57cm by 42cm 64: 1
cm by 88 cm
DIRECTIONS: For 63: 1. Cut out appliqu6
patch pieces adding 0.7cm seam allowance,
patch pieces together, placing white piece on ligfct
blue. Appliqu6 and embroid
Make double hem for ope
Overlap back pieces and pla
sides together. Stitch all a
side. Stitch in the ditch along^ieced bord
Appliqu6 Patterns
(Actual size)
Pattern
(Actual size)
Light blue 1
White I uul L
1 each.
While
Outline stitch
Outline stitch
with 6 strands in blue
s indicated.
ck pieces’
ith right
о right
ОиП\,зОи1
4 3 2 1
InOlnOut
on front
Running stitch
with 2 strands
in pale blue
Running stitch
Add 1 cm
Diagram
unless otherwise indicated.
Back
Opening side
(Add 2 cm seam al
White
seam allowance)
White
-61
Cut out 1 piece from background fabric 59cm by 44cm.
How to make
Overlapped t v
—20 cm long—- Ja) J~hght side
-28e/n-
Wrong side
(b) With right
sides ol pieces
together
machine-stitch
Turn to right side,
and machine-stitch
in the ditch along
pieced patches.
Diagram
Attach with 2 strands of running stitch in pale blue (Cut 50 pieces each from white and light blue fa
How to sew pieced patches
— ISO
Cut out 1 piece from background fabric in light blue 90cm by
For 64: 1. Cut out appliqud and patch pieces add-
ing 0.7cm seam allowance. Join pieces in same
manner as for 63. 2. Make double-fold hem at sides.
Sew pieced patches in place using ninning stitch.
3. Applique and embroider as indicated.
(3) Fold 1 cm seam allowance oi_J
background fabric to right side.
place pieced patches
stitch using 2 strands
embroidery floss in pa
blue and rui
(1) Join pieces in same
manner as for 63.
68 Framed Patchwork Picture shown on page 48
MATEIRALS: Cotton fabrics: ivory print, 47 cm
by 11cm; green print, 20cm by 12cm; brown with
floral design, 14cm by 7cm; fabric for lining, 16
cm in diameter. #50 white cotton thread. Quilt
batting, 16cm in diameter. Frame, 14cm in inner
diameter.
FINISHED SIZE: Same size as frame.
DIRECTIONS: 1. Cut out patch pieces adding
0.7 cm seam allowance. Sew pieces together by
hand. 2. Pin and baste pieced top, batting and
lining together. Quilt on each wedge piece along
How to join pieces
Diagram
Quilt on each wed<;
iece along seam
lines with cotte
thread.
96
65 — 67 Slippers shown on page 47
MATERIALS: • !* : ' u j fibc s
plain. 46cm by 34 m r art. 3 о by Quil:
batting, 53cm by 21 cm.
FINISHED SIZE: F - : la . 2 ic i
DIRECTIONS: 1. Cut out pieces from plain and
print fabrics adding 0.7cm seam allowance. Sew
each piece to quilt batting one after another,
.iming seams to one side. Make another upper
piece, reversing placement of patches. 2. Cut out
v- soles from plain fabric. You may need a
processional help fora finished slippers.
69 Framed Crazy Quilt shown on page 48
MATERIALS: Cotton fabrics k. 12
cm by 6cm; lavender. 10cm by n r print, 9
cm by 7cm; olive green. 8( m by 5cm; beigt
5cm square; fabric for lining. 16 r by Hem
Purple crepe, 12cm by 5cm. #25 six-strand
embroidery floss in golden brown, wine red, navy,
brown, drak brown, powder green, pink and olive
green. Ivory cotton lace trim. 4cm by 8cm. 16
small beads in white. Quilt
batting, 16 cm by 11cm.
Frame, 14cm by 9cm (inside
measurement).
FINISHED SIZE: Same
size as frame.
DIRECTIONS: 1. Cut out
pieces adding 0.7cm seam
allowance. Place batting on
lining. Sew each piece to bat-
ting, stitching through all
thicknesses. Place lace trim
as indicated. 2. Embroider
as indicated. Sew on beads
in place.
Use 3 strands of
embroidery floss.
Patterns (Actual size)
Ф
(O
Ф
Purple crepe
о
Ф
Ф
о
$
FRU
Ф
Ф
s f (Pink)
1 (Olive green)
To piece patches
Place batting on lining. Place olive green fabric
Place apricot pink fabric on beige and stitch
Open buttonhole
Basket filling
variation (B)
French knot (FR)
98
Chain stitch C
Hernngoone stitch (H)
Herringbone variation (HV)
Straight stiKr 'Si
In In
Bacfr stitch variation (BA)
Ou’ InOut
Feather
stitch (FE)
70 Framed Patchwork Picture shown on page 48
MATERIALS: C ’aorics . r
brown, 16cm square; gree: square. pr.
(see photo), 8 pn : 7cm b
brown, 4 cm in diametc ric for lining.
DIRECTIONS: 1. Cut out pieces adding 0.7cm
seam allowance. Applique stem, petals and
' _r x-г c light yellow-brown background.
Arr;ir.i> prints for petals, considering color
cm square, tf 5fl while . Thread Qmi: har na, Наяаоду of tho whole 2 Pin and bact» appliqu£d
16cm square. Frame. 14 rm square (inside meas-
urement).
;я:ring and lining together. Quilt along
quilting lines.
FINISHED SIZE: Same size as frame.
Patterns
(Actual size)
Print
//Light yellow brown
//
h
Slip-stitch
л
Golden brown
Quilt along each
petal with cotton
Athread.
Green
ow to sew petals
Seam
allowance
Overlai
,, -andslij
pee this /
г open / .
Jnsert l^st petal
\into underneath
petal, and slip-si
upeninh(«)closi
99