/


Автор: Clark A. Moravik J. Jimenez M. Repetto F. Walachowski A.
Теги: magazine magazine the weathering
ISBN: 978-84-945130-6-0
Год: 2016


Текст
Alex Clark
Jan Moravik
Mig Jimenez
Fabrizio Repetto
Artur Walachowski
Leonid Postny
Sergey Golikov
SPECIAL
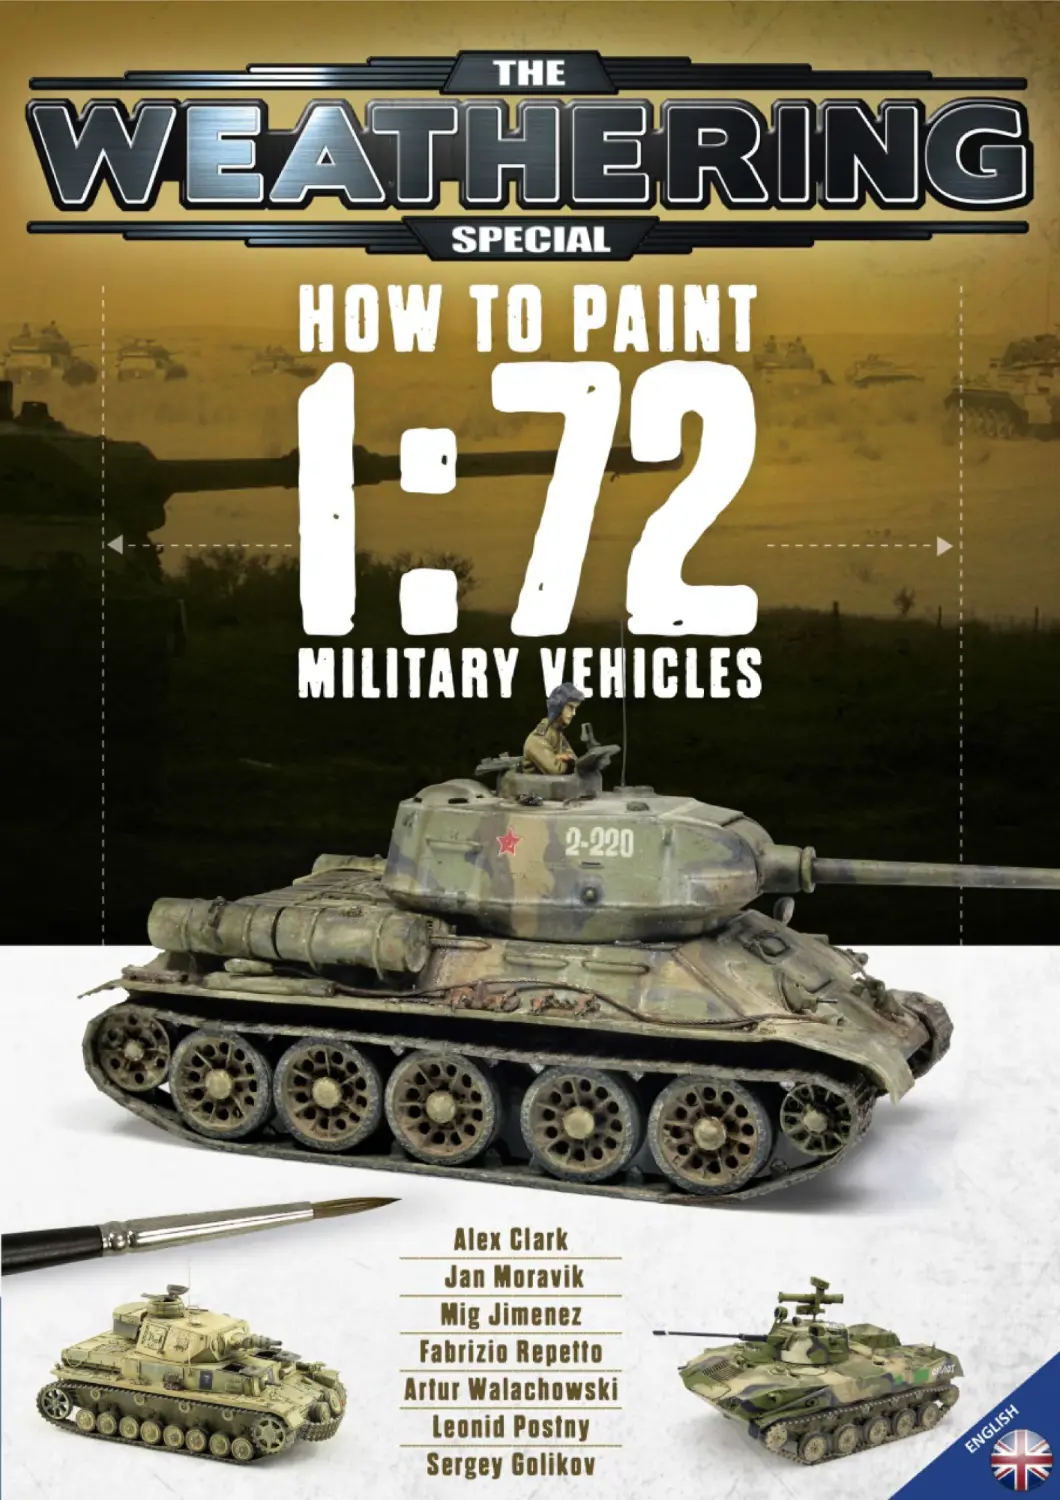
HOW TO
Editor AMMO of Mig Jimenez S.L
Original Idea and Concept: Mig Jimenez
Introduction: Ricardo Merino
Models Mig Jimenez, Alex Clark, Jan Moravik, Fabrizio Repetto,
Artur Walachowski, Leonid Postny and Sergey Golikov
Texts: Mig Jimenez, Alex Clark, Jan Moravik, Fabrizio Repetto,
Artur Walachowski, Leonid Postny and Sergey Golikov
Project Manager: Carlos Cuesta
Coordination: Guillaume Dilly
Cover Design: Antonio Alonso
Layout and Graphic Design: Omar Andres and Antonio Alonso
Translations Cesar Oliva
English Correction Greg Neufeldt and lain Hamilton
Dedicated to:
Justo Mira Paya
Published in Spain
Printed in Spain
ISBN 978-84-945130-6-0
© 2016 AMMO of Mig Jimenez 5. L. All rights reserved. No part of this
publication may be reproduced or transmitted in any form or by any
means, electronic or mechanical, present or future, including photo-
copy, recording or any information storage or retrieval system without
permission in writing from the publishers.
For many AFV modelers around the world 1/72 is the scale of choice.
One can find a multitude of brands, accessories, figures, conversions, and
upgrades, just like 1/35. This scale may not be stocked as well in general
hobby shops; however, there are shops that specialize in this scale, offer-
ing a wide range of products dedicated to 1/72, Making much less noise
than its bigger cousin 1/35, it has come to be known as the "silent scale".
always on the backstage of the modeling scene, Interestingly, 1/72 is en-
joyed by more modelers than either 1/48 or 1/35 One of the main reasons
is space; 1/72 models occupy only half the amount of space than 1/35
kits. This means that dioramas and small scenes are also proportionally
smaller, allowing for the development of scenes with increased interest
and complexity that include more vehicles, figures and scenery.
2
HOW TO PAINT 1:72 VEHICLES
Another consideration is price, many modelers with limited budgets find a
true hfesaver building "Braille scale" kits. In some cases these builders en-
joy spending 1/3 the amount of money than their fellow 1 /35th modelers.
This savings is not only in money, it is also enjoyed in time. It takes a lot
less time painting a small scale model compared to a larger one For this
reason, small scale modelers usually are more productive and tend to tack-
le more involved and complex projects. What's more, the average level in
this scale is far less demanding than weТе used to in larger models, where
even a small mistake on a single rivet will not pass the scrutiny of fellow
modelers and judges. Braille modelers tend to be more tolerant, as they
are more interested in the simple pleasure of assembling and painting the
model quickly, focusing on achieving a nice visual representation of the
real vehicle in miniature. For this very reason some people find the smaller
scales more attractive, and 1/72 scale is for many the perfect compromise
between detail and size.
Many young modelers take their first steps in this scale, due to time and
cost considerations, as well as not having to force themselves into over-
complicated and agonizing super-detailing jobs. This scale can be enjoyed
without preconditions, not worrying about other people's opinions and
with a relaxed attitude. Maybe here is the true joy and bliss in modeling,
while offering at the same time almost endless possibilities; techniques,
detailing, figures, accessories and complements,., and do not forge that
its that it can be easily combined with the plethora of aircraft models
available in the same scale. There exist many different brands for every
skill level and pocket.
1/72 offers a wide range of kits. There are easy to paint and assemble
kits all the way through to models for the adventurous hobbyist; the
choice is yours
The impressive selection of both modelers and models included in this
book has two purposes: One, to show a large variety of different paint-
ing techniques to be able to face any challenge we could face, and sec-
ond, to encourage modelers unwilling to give this amazing scale a try;
they are miniatures in every sense of the word. But we can't but warn
you: once you give it a go. you'll be hooked for life on the small scale.
HOWTO PAINT 1:72 VEHICLES
3
We ll give now a quick overview of the scale for those with no previous knowledge of 1/72
scale, a small sample of the huge array of brands in the market with one example in each
different skill level.
Some of the most popular and easiest
to assemble kits are those produced
by ARMOURFAST. This maker's name
is a statement in itself: very simple
models with good details, perfect for
inexperienced modelers or wargam-
ers. With just 5 or 6 parts in each kit,
they can be assembled in a heart-
beat. The finished models are attrac-
tive and a good overall replica of the
real vehicles. What's more: there are
two complete models included in the
box, making them a very interesting
option, especially for board games.
If you are looking for a quick assem-
bly offering excellent detail and ac-
curacy look no further than S-Model.
These kits offer great detail and
photo etch parts. As a result, these
kits are more challenging to build;
however, the perfect balance has
been struck between detail ease of
assembly, price and last but not least,
an amazing final result.
HOW TO PAINT 1:72 VEHICLES
Modelcollect has revolutionized the
scale. Although relatively new, it has
positioned itself as one of the best
kit producers. They offer a variety
of subjects, but especially modern
Russian and Soviet vehicles as well
as Late WWII German vehicles and
Paper Panzers. These are high-quality
kits with amazing details, good part
fit, and very onginal vehicles Some
of these models can have a more
involved assembly, especially due to
the great number of photo etched
parts in some references. But if you
want to command attention in mod-
el shows, these models are for you.
ARMADA HOBBY is just one example of the plethora of Eastern
European small scale model producers, from countries like Hungary,
Czech Republic. Russia or Ukraine. These brands make limited-run
kits in resin and photos etch. In most cases these are extremely
good models, highly detailed and quite complex; so they are better
reserved for more experienced modelers who want something
special, as they tend to do very original vehicles not available in
styrene: perfect for those who value originality and quality above
everything else. They are not cheap, but this type of kit can keep
us occupied for quite some time.
Now its your turn: choose a kit according to your needs and enjoy!
HOWTO PAINT 1:72 VEHICLES
5
DARE TO MAKE A MODEL IN 1/72
Ricardo Merino
Technically, 1/72, corresponds to one sixth of an meh which cor-
responds to a foot. Put another way. the object is 72 times smaller
than reahty. For many years 1/72 was considered the Queen of
scale modeling, as the vast majority of models produced at the
time were 1/72 scale planes.
1/72 first emerged in the realm of model airplanes (wood and
metal or acetate/cellulose) of the «Skybirds» and «Frog / Pen-
guin» brand, produced in the United Kingdom, during the 1930s,
and were used for aircraft recognition by the allies of World War
II. In this regard, in the memoirs of CpI Leslie Whitfield (school
instructor Beggin Hill RAF for antiaircraft gunners, framed in the
Army Aircraft Recognition Wing) it is reported that the Air Min-
istry awarded £ 5 sterling, to buy materials (books, photographs,
drawings, films or sound recordings) for the school. But this was
quickly spent the money on models of «Frog / Penguin»: Hur-
ricanes, Lysanders. Miles Magisters, etc.
It was common for aviators during World War II to give their chil-
dren models of their aircraft or the aircraft of their adversaries.
Later when model railroad became more popular, specific scales
were designated with alphanumeric codes ( Z, N, HO, 00, S, etc
). Each scale has an equivalent numerical designation which varies
in some countries. So HO scale in Australia, Europe, Japan and
the United States corresponds to 1 87. While in the UK it had its
own scale of 00, which is 1:76, but using the same gauge as HO
(16.5mm) scale. Hence the term HO / 00.
Many manufacturers, especially in the United Kingdom, produce
1:76 scale models, which were labeling containers as 1:72 be-
cause the scales were historically considered equal. One example
is the Airfix and Matchbox series of vehicles labeled as 1 76,
which were finally relabeled as 1:72nd. Currently, for example
Airfix correctly label their models to 1:76 scale. And this scale is
becoming popular for wargaming.
In this golden age of modeling which we live, this scale has also
gained popularity not only for military vehicles, figures and acces-
sories that go with them, also science fiction, Japanese anime,
cars, and ships. While many specialized brands have focused on
1:72, traditional brands of larger scales now include an extensive
range of 1:72 scale kits.
Thus we can find both brand new brands as well as traditional
brands: MODELCOLLECT. OBK TRACKS, COLIBRI, BALATON
MODELL, ARM0, MODEL-MINIATURE, BLACK DOG, HAULER.
CMK / PLANET, ATTACK, MINAIRONS, D-DAY MINIATURE, PREI-
SER, ARM0. REVELL. EDUARD, etc.
The options are unlimited with the availability of plastic or resin
models or gravure, improvements and upgrades, decals or trans-
fers, accessories, accessories for scenery, figures of plastic or resin
or metal, metal guns, chains, wheels, tarps, etc.,It is so wide that
we can find many models that do not even exist in larger scales
Even models where we already include different materials (plastic,
resin and metal).
Undoubtedly, the appeal and advantage of this scale is the small
size, which allows us to collect many different models in a much
smaller space. This is most evident at the level of aeronautical
models, but also for performances of large land battles, or the
great Japanese wicks.
The short coming of 1/72 scale is the simplicity of fine details;
this creates a toy-hke appearance. Today, there are many bartends
that carry kits with such detail (as MODELCOLLECT), that have
nothing to envy to higher levels With complex cuts, link by link
chains, decals for many markings, resin and photo-etch enhance-
ments with hundreds of pieces. You simply have to check the
references for the subjects that interest us, as we do with other
scales.
As the son of a modeler this scale came into my life thanks to
my father who loved to ride in airplanes Although undoubtedly
what made my greatest memories are the sets with Matchbox
scenarios; a vehicle with a simple bit of land. The hours spent in
the garden playing with soft plastic soldiers, recreating imaginary
battles
Once grown, and my hormones cairned, I began to acquire some
technical knowledge. My modeling evolved from «out of the
box» (OOTB) to «advanced modelers syndrome» (AMS) This has
led me to make my models with great detail of which I am ca-
pable, no matter how small the pieces, adding: resin parts, pho-
toetched soldiers, scratch built components, figures, accessones,
etc But I'm a mere apprentice alongside other bigger names that
I admire
1/72 is a scale that allows me to build numerous models, and cre-
ate scenes that otherwise could not be done in 1/35 due to the
space required. Our time is valuable, for some of us 1/35 simply
takes too long. Therefore, braille scale is a dream come true for
those modelers with hectK lives living in small spaces. The level of
detail that can be achieved is proportional to the ability of each
person. 1/72 scale is easy to build and paint; it is a fun, versatile
scale offering a huge selection.
Dare to make a 1/72 scale model.
6
HOW TO PAINT 1:72 VEHICLES
HOWTO PAINT 1:72 VEHICLES
7
THE SCALE OF THE KNIGHTS
In this book, AMMO has decided to enter the world of 1/72 scale modeling through
the front door. For it has assembled an excellent cast of collaborators who will de-
light us with painting works of the highest quality demonstrating the latest paint-
ing techniques. With all of the detail and realism, you will be shocked that the
vehicles being shown are so small that they fit in the palm of your hand.
The models featured represent vehicles of both the Second World War and modern,
with different degrees of wear and camouflage.
SCRAPYARD T-72A
What can be said of Alex Clark and his incredible work. Mr. Clark
is a reference for those who dare with this small scale. Not only
because his work is documented with great depth, where he is
able to create scratch built pieces on microscopic levels, bring
kit improvements to new levels, and create copies of kit parts
in resin, etc. Rounded out by stunning levels of painting and
weathering in this tiny scale. This time Alex brings an article of a
complete Scrapyard T-72A (1978 to 1983 with ubgrades ) based
on the Revell kit. With not one piece left unimproved and de-
tailed to the fullest, and ultimately abandoned. Using the most
realistic and inovative techniques, we are tought how to paint
a vehicle that has been abandoned to the elements for a quite
some time.
PZIV
Jan Moravek, presents a Panzer IV Ausf. D in the desert the-
atre. With a base coat in yellow showing paint wear typical of
the abrasive sandy environments. A great example showing the
previous layers of color exposed by the harsh environment.
BMD-2
Mig Jimenez is one of the best known modelers, but who would
have guessed that 1/72 was one of his favorite scales? With this
BMD-2 S-Model brand, it brings us the example of a vehicle in re-
cent fighting condition, wearing a camouflage complex appear-
ance, but this article will show us how to reach a realistic and
visually appealing results. Complex and realistic camouflage ef-
fect does not mean complicated to achieve, thanks to the wide
availability of references pictures on the subject The detailed
study of these many pictures is the essence of the talent of Mig
and it shares with us his passion for details and painting.
8
HOW TO PAINT 1:72 VEHICLES
М1А1 (НА)
The Italian Fabrizio Repetto, leads to the 2003 Iraq war with a
scene of a M1A1 (HA) Dragon next to a defeated Type 59 ACE.
The Type 59 is treated to improved handles, while the Abrams
has been upgraded with scratch built realism and adding resin
details from Black Dog. Fabrizio is a great tallent, capable of
alterations and scrathbuilt improvements to such a small scale.
TIGER l-KURSK
Polish author Artur Wachowski, a great modeler who repre-
sents a wide genre of scales and genres and allways choosing
interesting subjects, provides a Tiger I «Kursk», representing
the well-known commander Michael Wittmann's vehicle. Start-
ing with a Zvezda kit and adding a few improvements with
scratch built details and RB Model cannon.
3...2...1... LAUNCH AND E-75 88MM
Leonid Postny, Ukrainian modeler that between cups of tea.
has created this is E-75 with 88mm, from the emerging Chinese
brand Modelcollect. The kits of this brand are completely thor-
ough and are finely detailed; and this is a clear example, since
it comes with a photogravure plate and a beautifully turned
metal canyon. And after many more cups Leonid brings us an-
other great article for the Scud-D on MAZ-543 chassis, a model
with fine exterior features and detailed interior released from
the Hong Kong brand Toxso Model. A rare three-color scheme of
the Iranian Army highlights this little masterpiece.
SMALL SCALE 7-34/85
The Russian from North Ossetia, Sergey Golikov, brings a T-34/85
from Trumpeter. This example has been enhanced with a variety
of aftermarket details. This modeler performs a very detailed
step by step, based on various commercial kits and adding a lot
of scracthbuilt details where needed.
HOWTO PAINT 1:72 VEHICLES
9
By Alex Clark
The Russian T-72 tank is one of the most widely produced vehicles
of the post-war era. Since the mid-1970s it has been exported to numer-
ous countries throughout the world and has seen action in many of these, no-
tably those in the Middle East such as Iraq, Libya and Syria. Along with some of the
earlier versions, the latest incarnations such as the T-72B3 and the T-90 are still presently
in use with the Russian army. Prior to making this model. I'd built many different variants of the
T-72, but for this one I decided to do something a bit different. I’d seen a number of online photos of
derelict Cold War era vehicles, abandoned in scrapyards in both Russia and Ukraine. I was fascinated by the
appearance of these, showing varying degrees of rust, faded paint effects and dirt and grime. This gives a lot of
scope to go for a heavily weathered finish - to almost any degree desired!
THE KIT
The Revell kit represents a T-72M1 which is the export equivalent
of the T-72A. It's generally good, but the weakest part is the turret
which is inaccurately shaped. Russian cast tank turrets are usually
more complex in shape than they first appear, with various subtle
curves and angle changes. The turret has an overly-simplified ap-
pearance around the front and needs more bulk added and a more
complex, angular look. The turret rear should be more pointed in
plan view giving a teardrop appearance. It should also have an an-
gled slope downwards when viewed from the side rather than being
completely vertical.
As I wanted to build a Russian T-72A, rather than an export M1,
some minor conversion work was required. Externally these two vari-
ants are very similar, with the mam differences being reduced armour
levels in the export tank on both the hull and turret The turrets look
the same as the differences are internal, but the glacis of the M1 is
always fitted with a plate of applique armour. The A usually doesn't
have this as most of them were built with extra armour integrated di-
rectly into it. The A also has additional fittings for engineering equip-
ment along the bow plate that aren't present on the M1.
Along with making the converted parts. I corrected the turret shape
For this I used Milliput putty, lots of sanding and constant referral
to many reference photos. I also refined and improved many of the
smaller details. Once done, I cast some resin copies to use for this
and other builds. Having built several fairly standard variants previ-
ously, I decided this time to model a slightly unusual version. This
being a T-72A from an early batch (initially produced from around
1978) that had since been upgraded with features of later versions
Replacement of parts with updated versions is a common practice
with Russian tanks but it can make identification a little more dif-
ficult These upgrades included using 6-mdent style road-wheels
(rather than the original 8-indent type) and the addition of anti-radi-
ation cladding bolted over the top and sides of the turret. This anti-
radiation covering started appearing on vehicles from around 1983
and is a polymeric material with a flexible, fabric like appearance. I
took one of the resin turret copies and modelled it using thinly rolled
sheets of Magic Sculp putty draped over the top and trimmed to fit.
Being a derelict vehicle, there were many parts I left off as they are
usually seen stripped down of the removable external fittings. For
example, the turret mounted stowage boxes, fording snorkel, fender
stowage boxes and fuel cells are often missing. This did mean that I
needed to add details usually obscured by these items on operational
vehicles. One of the trickier bits was to create the fenders. These are
sheet metal with pressed parallel lines running along the length of
each section I used thin plastic sheet for these, scribing the indents
with an Olfa Panel cutter tool.
Model Collect has recently release this kit, a model of the highest quality with cutting edge design and injection.
12
HOW TO PAINT 1:72 VEHICLES
ASSEMBLY AND MODIFICATIONS
1 -1 improved and added many small details to the kit. Some areas
that would usually be hidden on operational vehicles would be more
exposed on the finished model. Often the standard removable fittings
are missing from vehicles sitting in scrapyards.
2 - Some parts were extremely small indeed. This is one of the fender
parts, modelled with the front mudguard missing. This required the
replacement of the kit hinges.
3 - I wanted to model the vehicle with the various fuel cells and
stowage boxes missing from the hull. This required new fenders thatl
made fabricated from thin plastic sheet with the stamped indents
scribed with an Olfa P-Cutter.
4 - The kit turret is poorly shaped. I corrected it with a mix of Milliput
Putty and plenty of sanding, and then stippled on a coat of Mr Surfa-
cer liquid putty to simulate a rough cast texture.
5 -1 used the corrected turret as a master and cast some resin copies.
In plan view the kit turret is too circular and should be more tear drop
shaped
6 - Using one of the resin copies, I added the anti-radiation cladding
over the top and sides. For this I used Magic Sculp putty, rolled into
thin sheets. I also removed the wiring for the smoke grenade laun-
chers from the turret front as the early version I was modelling didn’t
have these.
HOWTO PAINT 1:72 VEHICLES
13
7 - The completed model ready for painting. The wheels are just tem-
porarily attached for test fitting as it’s easier to paint them separately
from the hull
8 - I used a turned brass gun barrel from the Russian company, Ze-
9 Zedval also make a grey resin engine deck piece, with the usual
rectangular sheet metal cover missing. The exhaust is a resin copy of
a scratch-built master.
10 - The glacis plate details on the ’A' variant are different from those
of the Ml I made a new piece from plastic card, the grey being a
resm copy. For the headlight guards I used parts from the Extratech
photo-etched detail set.
14
HOW TO PAINT 1:72 VEHICLES
RUST AND CHIPPING
11 - These are the various paints I used to finish the model. I
used acrylics for the mam colours and enamels and a number of
other products for the weathering.
fchurnbr^11
КЖЗ
TAM! YA COLOR
ACRYLIC PAINT
12-1 gave the whole model a couple of
undercoats of Humbrol Rust (113).
13-1 applied 2 moderately heavy coats of
AMMO Heavy Chipping fluid. Following this
a patchy coat of a pale green mixed from
Tamiya Yellow-Green (XF4) and Olive Drab
(XF62) in a 2 : 1 ratio I further lightened this
with more Yellow-Green and mottled this
over the original colour.
14 - The green is carefully worn away by
applying water to small areas at a time and
lightly scrubbing a brush over the surface,
Having a number of different brushes is
useful as they can help achieve different
types of worn effects. Itrs important to take
time with this and not scrub too hard as it
may damage the paint underneath.
HOWTO PAINT 1:72 VEHICLES
15
WEATHERING THE MARKINGS
15-1 kept the markings simple, just using some plain white turret num-
bers taken from a generic Archer Dry Transfer set. I also added a couple
of numbers to the glacis. Number like this can sometimes be seen and are
added to the vehicle at.
16 - Being a heavily worn vehicle, the markings also have to show the
effects of age and weather. I carefully chipped and scraped away at the
turret numbers, being careful not to damage the paint underneath.
DEEP IN THE WEATHERING
We recommend to use an old flat or filbert
brush for drybrushing. The reason is that this
painting technique is very hard on the brush-
es and ruin the bristles very quickly.
17-1 dry-brushed the base Rust enamel lightly over the whole model
to give more intensity on the edges and corners. These usually suffer
the most from being worn and chipped away.
16
HOW TO PAINT 1:72 VEHICLES
«. u. ©
REAL RUST EXAMPLES
HOWTO PAINT 1:72 VEHICLES
17
18-1 airbrushed a thin coat of Klear Acrylic Floor Varnish over the
whole model to seal the marking and give a tough, shiny surface to
work with. This will gradually flatten down to a more matt f inish after
the later weathering steps. Following this I gave the model a dilute
dark green wash of Humbrol Forest Green (150) mixed with a little
black.
19 - To represent dust and pale dirt, I lightly airbrushed a mix of dilute
Humbrol Dark Earth (29) and Pale Stone (121) over some of the ho-
rizontal areas of the model. Once touch-dry I flooded the areas with
neat thinner, working it into the edges and crevices.
20 - The model looks a little flat at this point so I applied a black
enamel pin wash around the details. I kept a clean brush to hand to
help remove excess wash. I actually repeated this more than once in
some areas to give strong shadowing, something especially important
in smaller scales.
21 - Gently dry-brushing Pale Stone over horizontal areas helps soften
and blend the effects, also adding a bit of tonal variety to the finish.
18
HOW TO PAINT 1:72 VEHICLES
RUST STREAKS AND RUST PITTING
22 - To represent dots and very small
patches of rust, I flicked a rust wash
onto the model using an old brush
and cocktail stick I also used various
other shades of greenish brown ena-
mel over other areas. Different effects
can be achieved by varying the dilution
of these mixes. More dilute gives larger
but more subtle spatters. If slightly thic-
ker, the co tour is more vibrant but ge-
nerally gives smaller spatter The key is
to test out the mix first before applying
it to the model, although any mistakes
can easily be cleaned off.
23 -1 used the rust mix to paint carefully along vanous edges and ridges.
Paint in these areas tends to get chipped and damaged first and so usually
also rust first.
24 - In vertical or sloped areas such as the hull rear and glacis, I created
rust streaks by painting small areas with the rust wash and dragging
downwards using another brush dipped in neat thinners.
HOWTO PAINT 1:72 VEHICLES
19
SMALL SCRATCHES
25 - A sharp black pencil is
good for reproducing very
small scratches It’s important
to be subtle with this effect
as it's easy to overdo it. Fol-
lowing this I painted and at-
tached the remaining details
including the wheels and cu-
pola mounted machine gun.
TURRET AND RUST
26 - The anti-radiation cladding on the turret roof is a polymeric mate-
rial and doesn’t rust. Photos show that it often tends to weather and
fade to a different shade than the rest of the vehicle. I flicked dilute
Humbrol Pale Stone over it, keeping the effect subtle and controlled.
I cleaned up the areas around that received any accidental overspill it
with a clean brush and thinners
27-1 returned to the rusty metal areas and with a dark purple enamel
mix I carefully dotted over the centre of the more rusty regions. This
give good contrast with the lighter rust shades
28 -1 strengthened the rust effects at the turret rear by jabbing and
stippling enamel rust shades with a cut down brush. I’d removed
most of the paint from the brush, giving something inbetween dry
brushing and a fully wet brush.
20
HOW TO PAINT 1:72 VEHICLES
FINAL DETAILS
29 -1 ground up some cat litter and sprinkled it along the inner sides of
the fenders over some dilute white PVA glue. Scrapyard vehicles tend to
collect all sorts of dirt and grime in these areas,
30 - After this I painted it with several mixes of brown-grey enamel and
sealed it with a light coat of Humbrol matt varnish. A dilute black enamel
wash helped give some contrast and highlight the grrttiness of it
31 -1 painted the rubber portions of the wheels with black enamel fol-
lowed by a light overspray of Humbrol Dark Earth to give a more natural
worn rubber look. I then dry brushed Pale Stone with a small brush onto
random areas around the tyre.
32 -1 painted the insides of the exhaust with a black wash and followed
this by working some black pigments into it to give a stronger dark shad-
ow effect.different weathering techniques.
33 - Whenever I paint a model, I keep
some spare parts from other kits to hand
to test various effects before applying
them to the model. This is an old hull
from another kit that I’ve reused a num-
ber of times to test out different weathe-
ring techniques.
HOWTO PAINT 1:72 VEHICLES
2‘
22
HOW TO PAINT 1:72 VEHICLES
There is no more evocative phrase to emerge from World War II than "Afrika Korps." The name conjures up a unique the-
ater of war, a hauntingly beautiful empty quarter where armies could roam free, liberated from the confines of towns and
hills, choke points, and blocking positions. It calls forth a war of near-absolute mobility, where tanks could operate like
ships at sea, "sailing" where they wished. Setting out on bold voyages hundreds of miles into the deep desert, then loop-
ing around the enemy flank and emerging like pirates of old to deal devastating blows to an unsuspecting foe. Finally,
it implies a hero, in this case Field Marshal Erwin Rommel, a noble commander who fought the good fight as he led his
heroic troops into battle. Everything about the Desert Fox attracts us—the manly poses, the out-of-central-casting good
looks, even the goggles perched just so on his hat. Placing Rommel and his elite Afrika Korps at the fore allows us to view
the desert war as a clean fight against a morally worthy opponent It was war, yes, but almost uniquely in World War II,
it was a "war without hate," as Rommel famously called it.
24
HOW TO PAINT 1:72 VEHICLES
Unfortunately, practically all of this narrative is a fabrication as the desert was hardly a haven of beauty or romance. The
fighting was a nightmare for both sides. Far from letting the respective tank fleets roam free, the desert chained them
irresistibly to their supply lines, and a single failed convoy or a lost column of trucks could stop a whole offensive dead in
its tracks. Contrary to the dreamed mobility of desert warfare, both sides would spend far more time in static defensive
positions, often quite elaborate, than they would launch tank charges.
In this article I showcase a battle weary warrior of the Afrika Korps, a Panzer IV. Operating in the harsh desert environ-
ment, this Panzer IV certainly shows the strain of desert operations. Rocks, sand, desert sun, and combat all combine to
tear at the paint and damage the most hardened surfaces. And then, of course, there is the inescapable dust and sand, a
choking layer that at times blocks the sun and seemingly threatens to snuff out the very existence of machine and crew.
HOWTO PAINT 1:72 VEHICLES
25
PRIMER WORK
1 - The model is constructed and now I am ready for painting. I have pre-
pared the hull and the turret onto small stands so that I will be able to hold
them while painting without my fingers touching the surfaces
2 - Painting begins with an a acrylic black primer layer. I chose this color as
it will add a level of pre-shade, or shadowing, to the overall appearance
3 - I airbrush the same primer color onto the turret. This foundation is
important and should be built-up by spraying multiple thin layers of the
pnmer,
4 - And of course the wheels and other separate details receive the same
treatment. An overall layer of pnmer, and then left to the side until need-
ed later in assembly.
5 - Over the black primer I painted the model in a German Grey color; a
dark grey color with just a drop of black added. This color is just slightly
lighter in tone than the black pnmer
26
HOW TO PAINT 1:72 VEHICLES
BASE COLOR EFFECTS
6 - As was the situation for the Afrika Korps, vehicles arriving to the desert
theater came painted in their dark, European colors - Panzer Grey. Once
in theatre, they were painted over in desert camouflage. In this case, I am
using A.MIG 106, washable (water soluble) paint in desert RAL 8020 sand
color applied over the dark German Grey base color.
7 - Clean tap water and a stiff brush are used to scrub away areas of
the desert yellow paint. Remember to remove the paint only in logical
areas; areas where natural use and movement would create wear on the
surfaces.
9 - Once I am satisfied with the appearance, I fix the colors in place by
8 - Once I have scrubbed away the layer of washable paint, some of
the transitions between the sand and grey colors seem a little harsh.
To remedy this situation, I lightly mist the RAL 8020 Desert Yellow
color over the surfaces to help create smoother transitions.
airbrushing a layer of satin varnish over the entire model. Not only does
this layer of varnish protect my poor work, it also provides the ideal foun-
dation for applying the decals and emblems.
10 - The decals are applied over the layer of satin varnish. I like to use de-
cal solutions to help in the setting and fixing of the decals.
11 - Once the decals have dried, a final layer of satin varnish over the
decals helps to protect them and unify the finish for the next steps in my
finishing process.
HOWTO PAINT 1:72 VEHICLES
27
WEATHERING
12-1 prepared for the next stage of weathering by applying a light
misted layer of A.MIG 1404 North African enamel dust effects over
the entire model.
13 -1 used enamel thinner to remove areas of the enamel dust ef-
fects in order to produce irregular patterns m the accumulated dust
effects. Enamel effects take a number of hours to completely dry so
there is enough working time to complete this type of removal tech-
nique without too much hurry.
14 - Downward steaks of Engine Grime enamel effect are applied
onto the lower hull. Although the name indicates use for engines,
the dark grey/brown color rs very versatile and is ideal for producing
darker stains over the lighter dust colored surfaces.
15 - After allowing the Engine Grime streaks to dry for a period of
time (10 - 30 minutes), they are blended and diffused using a soft
brush moistened with Odorless Thinner. Again, a downward stroke
is used.
16 - Once the enamel effects have dried, next comes a light dust-
ing of pigments onto the lower hull The pigments are distributed
onto the surfaces using a dry soft brush and allowed to accumulate
around surface details and highpoints such as the suspension.
17 - A light spray of Pigment Fixer is used to fix the pigments m place
upon the surfaces. As usual, airbrushing the fixer is best performed
using several light layers versus a single heavy application.
28
HOW TO PAINT 1:72 VEHICLES
18-1 find Filters to be a great tool for creating depth to the base
colors and provide slight tonal variations between different areas of
the vehicle. In this case I am using an Ochre colored filter to enhance
broad areas of the base desert sand camouflage color, adding a slight
orange tint to the base color
19 - Wishing to add variation and interest to the appearance of the
vehicle, I choose to use a brown tinted filter on the fenders.
20 -1 used very localized applications of a grey colored filter to help
enhance the underlying German Grey color of the vehicle. I applied
this color only in those areas of highest wear and exposure to the
grey color underneath The filters are allowed to completely dry for
at least 24 hours before moving onto the next steps.
21 - Very precise, or pm wash applications of Wash for Desert Yel-
low vehicles were applied around the surface details and along pan-
el lines. This type of application is necessary to create contrast and
depth so that details can be better seen.
22 - The wash is allowed to set for at least 10 minutes, and then the
excess is blended or brushed away using clean enamel thinner.
HOWTO PAINT 1:72 VEHICLES
29
WEATHERING WITH OILS AND PIGMENTS
23 -1 used artist's oils to further enhance the depth of the finish and visual
appearance of the model. Small dots of color; (yellow, white and cream)
were placed onto to specific panels and then blended into the surfaces.
Whites and yellows are used to enhance the brighter or sun-faded aspects
of the finish.
24 - Darker oil colors, such as this brown, are used around hatches and
other areas of high wear lends to the appearance of ground in dirt and
stains. Darker oil colors can also be blended into the recesses to increase
the depth of intensity of the shadows.
25 - Nearing completion of the hull. I spend a few moments to paint the
tools and other accessory details using acrylic paints.
26 - The same pigment color choices I used on the lower hull are again
used on the upper hull and fenders. As seen in this photo. I am depositing
a fair amount of dry pigment onto the fenders
27 - And then, with a soft brush loaded with thinner,
I dampen the pigments and blend them into the sur-
faces. The thinner not only aids in the blending pro-
cess, but once dry, the flow of the pigment within the
liquid over the surfaces will give the appearance of
wind-blown dust Any unwanted or excess pigments
can be brushed away using a soft brush.
HOW TO PAINT 1:72 VEHICLES
WEATHERING LAST STEPS
28 - I added a few small scrapes and chips using a dark
grey colored acrylk: paint and a very fine tipped brush
Although fun to do, always remember to use restraint
when adding these types of effects.
29 - With a steady hand I added just a touch of Streak-
ing Rust to a few of these newly added paint chips. The
rust color is drawn downward following the contour of
the surface and then nearly blended away using a clean
brush moistened with thinner.
30 -1 also applied rust streaks in certain areas along the
edges of the hull But again, unless you are portraying
a heavily damages or abandoned vehicle these type of
effects should be used with great restraint.
31 - Fuel and grease stains were added to
the engine deck, Just a small drop of the
Effect is all that is required, followed by a
drop of thinner over top of the effect to aid
in its spread and soften the edges.
REAL LIGHTS
32 - The smallest details should not be ig-
nored. The real lights of the little Pz.IV are
given their colored lenses using AMMO red
and green clear crystal colored paints.
HOWTO PAINT 1:72 VEHICLES
31
WEATHERING THE TURRET
33 - Using a fine tipped brush, I applied Afrika Korps wash around the
surface details, along the edges, and into the panel lines. The use of
the darker wash as an enhancement is important as it helps to define
the surface details and creates shadows and depth to the finish.
34 - Using a fine tipped brush, I applied Afnka Korps wash around the
surface details, along the edges, and into the panel lines. The use of
the darker wash as an enhancement is important as it helps to define
the surface details and creates shadows and depth to the finish.
35 - Notice that I have applied the wash with some precision, keeping
only to those areas that I wish to enhance. I let this application dry for
30 minutes before proceeding to the next step.
36 - At the end of the 30 minutes of drying, I used a clean brush
moistened with thinner to clean-up any excess wash and blend away
any harsh brush strokes.kkkk
37 - Dark Streaking Grime enamel effects are drawn downward over
vertical sides of the turret. When working with a lighter colored vehicle
we generally use darker colors to represent rainmarks or dirt stains that
have washed down the sides. If this were a darker surface we might
want to use lighter, dust colored effects.
32
HOW TO PAINT 1:72 VEHICLES
38 - The Dark Streaking Grime effects are allowed to dry for a period
of time and then blended away using a brush moistened with thin-
ner. When finished, the surfaces should have light, subtle downward
streaks that represent water and dirt running down the sides of the
turret.
39 - As was the case on the hull, artists oils were again used to
enhance the finish on the turret. In this photo you can see that I am
applying light colors onto the horizontal roof surfaces in order to gam
contrast against the darker vertical surfaces
40 - The dots of oil colors are nearly
blended away, leaving only the most
subtle hint of color.
41 - Again, areas of rust and rust
streaks are added. Notice that the
direction of this streak is toward the
front, sloping away from the mid-
roof high point.
WEATHERING THE TRACKS
42 • The tracks for the Pz IV were painted
and weathered separately following com-
mon methods. I began with a base layer
of dark colors from the AMMO Tires and
Tracks set, and then proceeded to add lay-
ers of weathering though paint and finally
pigments. Once the tracks are installed on
the vehide, I give the guide teeth a light
touch of pencil graphite to provide a pol-
ished metal appearance
HOWTO PAINT 1:72 VEHICLES
33
34
HOW TO PAINT 1:72 VEHICLES
HOWTO PAINT 1:72 VEHICLES
35
вин
By MIG Jimenez
.•лЛЗ
V
The recent conflicts of the last years offer almost end-
less possibilities to model odd and extravagant camou-
flages and paint schemes. The Ukrainian and Syrian wars
have inspired many modelers, especially due to the huge
amount of photo and video references available on the
Internet. The 1/72 scale allows for an easier alternative to
represent some of the more complex camouflages. Some
of these schemes could be really difficult and laborious
to do in larger scales; but our favorite scale allows us to
paint a great number of scale models in some of the more
attractive and complex camouflages. The tiny BMD-2 pro-
duced by S-Model will be used as an example to paint an
elaborate hard-edge camouflage, a scheme based in the
classic Russian patterns of the last decades. Although the
BMD is set in the Ukrainian conflict, you can use the same
techniques to reproduce similar camouflages, be it an ex-
ample from 1943 or more modern ones. We II see a simple
and quick method to do this complex camouflage using a
mixed media combining brush and airbrush.
The Ukrainian conflict can be extremely appealing from a
modeling point of view, especially due to the abundance
of information and reference material mentioned above.
The vehicles that took part in the war have endured the
most severe combat conditions; were captured and recap-
tured by both sides; and many have also been covered
by slogans, symbols, and names. Besides this, the com-
bat damage and wear have caused all kind of effects, like
chipping, dirt, dust and mud. We ll study how to repro-
duce these effects in an effective way in such a small mod-
el. 1/72 vehicles can be tiny, but this BMD-2 may appear
to be reproduced in an even smaller scale like 1/87, as the
real subject isn't much bigger than a car. But this only adds
interest to the painting, because it's during the painting
stage when the modeler can enjoy to a fuller extent the
characteristics and benefits of this wonderful scale.
HOWTO PAINT 1:72 VEHICLES
37
1, 2, 3 The- it,г. n d -T rii-ivr fu.jrijv- ut rh i -i
I >- b£rC l.:j
and qh у detailed <its- s that two models are
nciuded in the box. that means we can hu Id
two replicas, in a small scene or diorama, pamt
two different versions, or just give one to a
friend. Additionally, they include a small photo
etched fret for the smaller and finer details. Gen’
erally speaking, I consider it an almost perfect
brand, with a huge variety of subjects, with an
easy and fast assembly. The running gear can
be left unglued and painted separately too for
easier access. It s also interesting that, contrary
to most models in this scale, some S-Model kits
come with tracks and running gear reproduced
in a single part, but very well detailed.
S-MODEL, SIMPLE MODELS WITH GREAT DETAIL
38
HOW TO PAINT 1:72 VEHICLES
COMPLEX CAMOUFLAGE, SIMPLE TECHNIQUE
4 - First thing to do. as with any other model, is to apply a good
primer that creates a good, tough surface for the paint to grab on.
Apply it in light, thin layers, without flooding the surface to break the
surface tension of the plastic.
S - After a 24 hours drying period, we start applying the Russian base
color with acrylic paints.
HOWTO PAINT 1:72 VEHICLES
39
6 - Now, the first camouflage tone is airbrushed free-hand. It is not
necessary to be extremely precise during this step.
7 - As you can see, the airbrushed camouflage patches have soft
edges, but we need are trying to replicate a hard-edge scheme.
8 - The hard edge is painted on with the same color applied with a
fine brush along the edges of the camouflage.
9 - The black patches are smaller, so they can be painted directly by
brush. It's very easy to do with AMMO s acrylic paints.
40
HOW TO PAINT 1:72 VEHICLES
FILTERS
Green A
13, 14 - Once the filters have dried after
allowing to dry for 24 hours we start ap-
plying the dark washes to enhance vol-
umes and surface details.
10, 11, 12 - Now comes the time to
apply filters. They add variety to the sur-
face, and also unify and blend the dif-
ferent camouflage colors together. Try
not to flood the surface, but spread the
filter very uniformly instead, brushing on
a very thin coat that just moisten the sur-
face.
HOWTO PAINT 1:72 VEHICLES
41
15,16 - Using a lighter color than the base, we paint some small de-
tails, edges and rivets to create a more 3D effect and visual contrast.
This will create a more defined look, especially important on 1/72
scale, as it avoids the model losing details and becoming too dark
17.18 - Using the same green color as before, we mix it now with
aluminum in a 50/50 ratio to create the chipping. Doni use pure
aluminum -although the real vehicle is almost entirely built from this
metal- as it gives a too stark and unrealistic appearance.
42
HOW TO PAINT 1:72 VEHICLES
PAINTING STENCILS
19, 20, 21, 22, 23 • One of the most
interesting parts is deciding the paint
scheme and tactical symbols for our
model. At the time, there wasn't de-
cals or dry transfers available for the
chosen decoration, so we have to re-
sort to paint them freehand. You can
see that is actually quite difficult to
paint such small symbols comparing
them with the tiny bristles of a 4/0
brush. A challenge not for the faint-
hearted, but sometimes is the only
option.
HOWTO PAINT 1:72 VEHICLES
43
24 - Luckily for anyone attempting it now.
a Russian brand currently produces decals
for this version, but we got them a little too
late, when we have already painted them.
In any case, the final result was quite good
and not too far from the decals.
REALISTIC WEATHERINC
25, 26 - Using a mix of gray and brown enamels we start to weather some areas of the vehicle. Apply the paint, allow drying to the touch for
a few minutes and then blend it with a brush slightly moistened in enamel thinners.
27, 28 - Once dryr the BMD begins to take a more realistic appear-
ance, and the camouflage colors starts blending together in a more
natural way.
44
HOW TO PAINT 1:72 VEHICLES
29 - The last step is applying pigments to create dust effects. We have
used three colors to add more variation.
30, 31 - Apply the dust pigments randomly, insisting tn recesses and
the more hidden areas of the model, and then moisten the surface
with a few drops of enamel thinner to fix the pigments in place Once
dry, the excess is easily removed with a stiff sponge.
The only remaining thing to do ts adding some small touches to fin-
ish the model; we add wet effects, fresh mud, as well as painting the
tracks and the rubber of the tires. Generally speaking, is quite a fast
process; drying periods notwithstanding. In this scale, it's really im-
portant to use good quality brushes, especially to paint the ultrafine
chips. But the most important consideration is that now you have a
method to paint complex camouflages at your disposal; a fast proce-
dure which doesn’t require masking and produces spectacular results.
1/72 scale models look especially attractive in these kind of schemes.
HOWTO PAINT 1:72 VEHICLES
45
г1
By Fabrizio Repetto
/
4
Without a doubt the M1 Abrams has become the Icon of the modern us tank.
Born in the darkness of the cold war after the failure of the overly complex
MBT-70, highly criticized at its operational debut, this tank soon proved to be
a formidable fighting machine. When the US forces launched during Opera-
tionlraqi Freedom on March, the 20th 2003, the M1A1 again, like 12 years be-
fore in the First Gulf War, were the spearhead of the mechanized assault to the
hearth of Iraq.
One of the units involved in the "thunder run” towards Baghdad was the 1st
Marine Expeditionary Force comprising also the 1st Tank Battalion, equipped
with M1A1 (HA) Abrams: this unit reached Baghdad and then pushed further
north, to Tikrit, Saddam Hussein's hometown. The 1st Tank battalion's Abrams
came from various sources, including depot in the US or pre-positioned on ships
in the Indian Ocean. Some tanks were painted with the ubiquitous CARC sand
scheme, many were "NATOflaged", as the marine slang called the NATO
three tone camouflage and a few were in plain forest green! Almost
all, at the end of their race to the heart of Iraq, show signs of tear,
combat and a solid coating of dirt making them a very intriguing
modelling subject. Dragon offers a good reproduction of one of
the 1st tank battalion M1A1 in 1/72, even completed by a mine
plough. Although a good kit. Dragon's Abrams could be improved
by a photoetched set from Part and Black Dog external loads
(and a few scratch details on the mine plough!). As I wrote be-
fore, many tanks of the unit were painted in the NATO three
tone camouflage of green, brown and black, a perfect back-
ground for a heavy coat of dust and dirt, along with
prominent tactical markings. In the setting of the
model I finally opted for placing it in a scene with
one of its victims: an unlucky and upturned
Iraqi Type 59 (Chinese copy of the T54). I used
an ACE kit, a very basic but correct short run
kit from Ukraine thatnevertheless proved
perfect for the purpose.
48
HOW TO PAINT 1:72 VEHICLES
1 - My project begins with the construction of the M1 Al kit from
Dragon To this, I added photoetch details, a little wiring, chains
and resin storage items from Black Dog.
2 • I begin painting with the tracks, beginning with an overall layer of
AMMO Rubber and Tires color as this will represent the MIAI's rubber
track pads.
3 - Using a triple "0" fine brush, I then carefully paint the metal parts of
the tracks, being careful not to “metalize" the rubber pads. For this I used
A. MIG-034 Rust Track acrylic color.
4 - The surfaces of the model are prepared for painting with an overall
layer of sand colored primer.
5 - In real life the Abrams tanks are made up of many types of materi-
als, and so it's not only important to study reference to be accurate in
the portrayal, but these different surface allow for the opportunity to
create interesting finishes. Here you can see that I am applying a base
layer of aluminum color onto the fenders.
6 - In a similar manner the mine plough is airbrushed in a base of
Rust Track color.
50
HOW TO PAINT 1:72 VEHICLES
ACRYLIC
THINNER
NATO CAMOUFLAGE
7 - The entire model was sealed with a layer
of matte finish, and then followed by a layer of
hairspray. I then applied broad patches of NATO
Green to the model the paint being slightly
thinned usmg acrylic thinner.
8 - A few drops of Flat White were added to
the NATO Green to lighten the color slightly and
then airbrushed over the green areas to create a
slight modulation effect.
9 - I continue with the camouflage pattern, now adding patches of
NATO Brown color; again this colors slightly lightened with Flat White.
10 - And finally I apply the Flat Black to complete the NATO camou-
flage scheme.
11 - Tamiya Smoke is lightly airbrushed overtop to achieve shadows
and increase the depth of the NATO finish. A quick mask made from
cardstock helps to create more precise shadows along panel lines
HOWTO PAINT 1:72 VEHICLES
51
WEATHERING
12 - Now, with the base colors in place I begin with the first stages of
weathering. I begin on the mine plow where, using a stiff brush moist-
ened with water, I activate the hairspray and remove small flakes of the
green color - revealing the Rust Track color underneath.
13 - This same technique is used on the fenders, however, this time re-
vealing the aluminum color underneath. Impressive.
14 -1 continue toapply scratches and scuff marks over the entire surface
of the vehicle by caretully painting a lightened green (50:50 green/white)
using a very fine brush. As always, apply scratches only where it makes
sense, and use restraint in how many you apply.
15-1 step back for a moment to evaluate my progress; the over-
all paintwork looks good and the chipping appears balanced and
appropriate. Satisfied, I seal and protect my work thus far with a
layer of satin varnish. This layer of satin varnish also allows me the
opportunity to apply the decals.
52
HOW TO PAINT 1:72 VEHICLES
PAINTING THE STOWAGE
16 - Now for the real fun part, painting all of that stowage All of the
various packs and tarps are individually painted from an assortment
of green and khaki colors. This can be a slow process, but in the end
these items will add a lot of interest and color to the scene.
17-1 prepare a palette of artist's oil, and then with a fine brush I add
lights and shadows to the items in the load.
18 - As you can see, the artist's oils really add a level of depth and texture to these items. Due to the long drying time for the oils this stage
may take some extra time, but I believe the results are well worth it.
WASHES
19 - Returning to the vehicle itself, I apply NATO Camouflage Wash to
the model, concentrating on the panel lines and around the surface de-
tails.
20 - I allow the wash to set in place for a period of time, at least 15
minutes, and then wipe away the excess using a cotton swab moistened
with thinner.
HOWTO PAINT 1:72 VEHICLES
53
DUST EFFECTS
21 - After allowing the wash and oils to dry completely, at least one full
day, I seal the work with another layer of satin varnish.
22 - This Abrams will be working in a desert environment, so a nice layer
of dust is a necessity. I begin by airbrushing a light base using A.MlG-072
Dust acrylic paintover the surfaces Notice the random nature of the ap-
plication.
23 - Now, turning the enamel weathering effects, I apply Light Dust and
Africa Dust to certain areas where I want to show the greatest accumula-
tions.
24 - And then, before the enamel effect dries completely I blend them
into their surroundings using a flat brush.
25 - This process is repeated, adding additional effects to areas of greatest
accumulations, as in this case around the turret ring Rainmarks and other
dust features should also be added during this time as well, building layer
upon layer of interesting effects.
26 • It's difficult to notice in the pictures, but it's worth noting that while I
add the dust effects I am also changing the colors I am using I began with
Light Dust, and now I am using Middle East Dust. The colors are similar,
but even the slightest variations help to add interest to the finish.
54
HOW TO PAINT 1:72 VEHICLES
27 - I continue to add different types of dust
effects over the model. In this case I am adding
small drops of the enamel dust effects to the tops
of the side skirts, and then drawing them down-
ward to replicate rain-wash and grime running
down the sides.
28 - A tanks edges often become
scuffed and worn through heavy
use, revealing the metal under-
neath. I use a pencil to highlight
these metal areas.
29 - The graphite from the pencil is
then buffed and polished to a met-
al sheen using a trunked old brush.
30 - This process is repeated, adding additional effects to areas of greatest
accumulations, as in this case around the turret ring Rammarks and other
dust features should also be added during this time as well, building layer
upon layer of interesting effects.
31 - It's difficult to notice in the pictures, but it’s worth noting that while I
add the dust effects I am also changing the colors I am using I began with
Light Dust, and now I am using Middle East Dust. The colors are similar,
but even the slightest variations help to add interest to the finish.
HOWTO PAINT 1:72 VEHICLES
55
32 • Of course the mine plow would be prone to massive amounts of
accumulated dust and dirt and is a great place to really let loose with
the techniques. Неге, I add liberal amounts of enamel dust effects to
the surfaces, concentrating in areas were dirt would be prone to collect,
and then add pigments into the effect. Once dry, the combination of the
enamel effects and pigment creates a realistic, textured appearance.
33 - I continue with a few finishing touches using the pigments using
black pigment around the exhaust vents to represent smoke stains.
35 - Finally, I refine the rubber track pads with a little touch up color.
34 - And brushing Middle East Dust pigment enhances the dusty appear-
ance of the tracks.
THE SECOND PLAYER
36 - The second player in my scene is this Type
59 from the company ACE. Built mostly from
the box, although I did replace the handles with
fine wire.
56
HOW TO PAINT 1:72 VEHICLES
37 - I give the model an overall dark green base using AMMO
Russian Dark Base color. The interior of the stowage box is paint-
ed a reddish primer color
38 - The green color is then over-sprayed using AMMO Desert
Sand.
39 - In a twist on the hairspray technique, for this model I decide
to use lacquer thinner to remove paint - rather than water &
hairspray. The technique is to moisten the brush with the lac-
quer thinner and then remove (or dissolve) the sand color as you
would if using paint thinner.
Г / j
40 - This is a delicate process
as it is very easy to remove too
much of the paint or dissolve all
of the layers of paint all that way
down to the plastic. But, as you
can see the results can be quite
interesting and realistic - and
different in appearance than if
using the hairspray technique.
41 - As you will certainly notice I really don't need to spend a lot of
time detailing the upper surfaces of the tank, as it will be displayed
upside-down. The underside of the tank is given liberal amounts of
pigments and then fixed in place using white spirits.
42 - The tracks are painted m the appropriate dusty and rusty colors
using A.MIG-072 and A.MIG-073. As with the Abrams, I spend some
time looking over the T59 and correcting, or enhancing details as I
prepare my vignette The tanker shown in the scene is from the Black
Dog range of products.
HOWTO PAINT 1:72 VEHICLES
57
> " *»/л
I —
By Artur Walachowski
The day is the 12th of July 1943, near an obscure hamlet called Prokhor-
ovka, on the Kursk salient some 300 miles south of Moscow. This was the
eighth day of the Battle of Kursk, or Operation Citadel, Hitler's desperate
bid to pre-empt the anticipated Russian Summer Offensive and so to sta-
bilize the worsening situation on the Eastern Front. A success here would
eliminate the Kursk Salient, and stiffen the resolve of his wavering allies
after the recent disaster at Stalingrad and the loss of North Africa.
Thunderstorms have raged overnight and a few rainsqualls still linger, but
now the sun is rising in the east and the ground is firming-up under the
tracks of the German armour advancing across the broken, late summer
wheat fields. Panzers from Germany's three premier SS Panzer Divisions
the 3rd SS Totenkopf on the left, the 1st SS Leibstandarte in the center and
the 2nd SS Das Reich to the right, Wittmann and his platoon will take their
place in the front ranks of the Leibstandarte. The massive battle waxed and
waned all day; a huge, confused melee where individual tanks fought for
survival. By nightfall, the entire battlefield is littered with broken and burnt
out hulks; thick, black, oily columns of smoke drifting upward blackening
the summer stars. It is estimated that some 700 tanks on both sides have
been destroyed this day.
Michael Wittmann survived this battle. In the 10 days of fighting from its
launch on the 4th July to its curtailment on the 13th July, Michael Wittmann
and his crew had destroyed 30 enemy tanks and 32 anti-tank guns. For this,
and earlier achievements, he would be awarded the Knight's Cross.
It seems quite the juxtaposition that I would portray the largest armored
battle in history, and Germany's greatest tank ace in such a small sale, but
that is precisely my intent. Small scale doesn't mean small impact, in fact,
quite the opposite. In this article I will demonstrate some of the techniques
and materials that I use to create a tiny Tiger with big impression.
H0WT0PAIN1 1:72 VEHICLES
61
1 - The Zvezda Tiger I Tiger I kit in 1/72nd scale is used to represent the
vehicle of panzer ace Michael Wittmann from the period of the Battle of
Kursk, 1943 I added a few small enhancements to the basic kit including
a replacement barrel and photo etch details from RB Model.
2 - Along with the addition of the aftermarket items, I also provided the
Tiger with a bit of battle damage and individuality by cutting, and then
removing fender sections on either side of the tank.
3 - These are the various paints I used to finish the
model. I used acrylics for the main colours and
enamels and a number of other products for the
weathering.
4 -1 apply the base color of A MIG-ШО Dunkel-
gelb to the model, applied in several light coats.
Notice that the coverage is intentionally not
complete, that the underlying black remains to
be seen showing through the yellow color. This
interplay between colors in useful in establish-
ing richness and depth to the final finish.
5 - Now I work to add more depth and volume
onto the model by adding a little Matt White
A.MIG- 050 to the base DunkelgelbColor. As a
rule, lighter colors reflect light and tend to make
objects look larger. As before, this lightened
Dunkelgelb color is applied in several transpar-
ent layers.
6 - Once againl lighten the Denkelgeib color
by continuing to add Matt White to the yellow
colored paint. This lightest color is applied as a
soft cloud, reserved to only to the centers of the
larger panels and surfaces.
62
HOW TO PAINT 1:72 VEHICLES
CAMOUFLAGE PATTERNS
7 - Even at 1:72nd scale fine camouflage lines are possible! It takes a little experimenting, but
I find that the key to painting fine camouflage lines at this scale is finding the correct balance
between thinned paints and reduced air pressure.
When painting fine camouflages, air pressure and thinness of my colors к critical. With the
correct combinations of air pressure and acrylic colors, fine lines are possible even in 1:72 scale.
^Irv9tun opt. 2
8 - The line camouflage pattern is applied following picto-
rial references that show Wittmann’s vehicle during this
period. The color choice of Olivegrun, A.MIG-002 RAL
6003 Option 2 is a perfect color match for the camouflage
the colors issued dunng the period of the Kursk Offensive.
9 -1 use a round brush and the same lightestmix of Dun-
kelgelb and White to highlight the vehicles raised details
and the defining surface features of the tiny Tiger.
HOWTO PAINT 1:72 VEHICLES
63
WASH TIME
10 - Now, with the base color and camouflage colors applied I begin
the work of bringing life to the model by applying washes. I choose
A.MIG-1002 Track Wash for its medium brown/red color as I feel it
is an appropriate color and tone for this small scale. I begin at the
11 - After allowing for a period of drying, I remove the excess wash
using a soft cotton bud or round brush moistened with enamel thin-
ner. The wash remains in the corners and recesses, adding depth and
definition to the surface features
commander's copula, applying the wash and then allowing it to set
for at least 5 minutes.
12-1 continue this simple process of adding, and then removing
the wash over the entire vehicle. As you can see here, the model has
indeed come to life with every feature and detail clearly defined. Ad-
mittedly, at this moment the appearance of the Tiger is a little harsh,
but 111 take care of that in this the next step.
13 - After allowing the previous steps to dry completely, I apply an
overall Filter layer to the Tiger. In my work, I find that a filter layer is a
useful tool in unifying the base colors, bringing the Dunkelgelb high-
lights into range and toning down the effects produced by the wash.
64
HOW TO PAINT 1:72 VEHICLES
TIRES AND TRACKS
14 - Satisfied with my work thus far, I seal and protect the paintworkusing
a layer of Satin Varnish
15 - My focus now shifts to the running gear where I use paints from
AMMO's Tire & Tracks acrylic set. A small round brush is used to paint the
rubber portion of each road wheel using Rubber & Tires color A MIG-033.
16 - The Tiger4 distinctive tracks are also painting using colors form the
Tire & Track set. The Dark Tracks color is a good choice when portraying
tracks that are in service, a dark oxidized metal color, but not rusty. I follow
the Dark Tracks base colors with weathering, applying washes of brown
colored acrylic colors to simulate accumulated dust and mud to the tracks.
WEATHERING WITH OILS
17 - Returning to the upper Tiger’s upper sur-
faces. I prepare a selection of artist's oils to add
fading and weathering effects. Small dabs of
paint are loaded onto a piece of cardstock and
left to sit Over time, the cardstock will absorb
the excess linseed oil out from the paints, thus
removing any glossiness inherent in the paints
and providing for a matte finish.
18-1 dab small amounts of the oils onto the
vertical surface and then draw the colors down-
ward using a flat brush that is moistened with
thinner, I work these streaks until the colors
nearly disappear; once dry the paint becomes
more pronounced, producing subtle paint fad-
ing, rainmarks and dirt trails.
HOWTO PAINT 1:72 VEHICLES
65
FINAL STEPS
19-1 place the proper markings to portray Michael Wittman^
Tiger and then seal and protect the entire surface with Acrylic
Matt Varnish (A.MIG-089).
20-1 paint the toois and onboard equipment using colors from
the 6 pcs acrylic Tool Colors set (A.MIG-7112). This set includes
the proper colors for Bakelite handles as found on the cutters,
along with multiple wood tones for the shovel and pick handles.
21 - The steel parts of the tools are painted using Gun Metal
A.MIG-045. This same color can also be used to highlight the
polished metal portions of the tracks.
22 - Finally, the really fun part, it’s time to add the surface chips
and scratches. As with all weathering, the best results are ac-
complished in layers using a variety of methods. In this case I
will be using soft sponges, tweezers and fine tipped brushes.
23 - Chipping action in progress! As you can see, using a combination
of tools has resulted in a very convincing appearance.
The keys to chipping are patience and restraint,
go slow and when in doubt always
remember that less is more.
т *
66
HOW TO PAINT 1:72 Vr
By Leonid Postny
If we talk about weathering of vehicles in the European theater of actions we al-
ways think of mud, dust, splashes, streaks of wet mud after rain etc. However, in
the Middle East region the conditions are totally different; there is no heavy rain,
no mud, nor streaks of wet earth -only the sand and dust. This dust is always in
the air and settles on horizontal surfaces whether the vehicle is moving or not. For
a class of vehicle like this mobile missile complex we don't see heavy scratches, im-
pacts or other heavy stains as we might usually see on tanks or APCs. In this article I
will build the Toxso Scud-D on MAZ-543 chassis. These vehicles often stand on their
positions and wait, and then after a launch they quickly retire from position. Main
focus on weathering for them is the fading of paint under the sun and layer of dust.
I will be painting the vehicle in a Iranian Army camouflage scheme that is a bit rare.
ASSEMBLY
2 - In the real world, the SCUD is a big and very heavy machine, and as
such the large wheels always show the weight and are sagged. To make
thrs effect I just cut or sand down the bottom of wheels where they
contact the ground. I believe that it's the dose attention to these type of
details that help make the even our small-scale models look very realistic.
3 - To make complicated masks, you can do a little trick. Stick a piece of
masking tape over the part, and using a pencil, draw along the edges of
the raised details. Once the tape is removed the masking tape will have
clear edge of the window on which the mask can be easily cut.
70
HOW TO PAINT 1:72 VEHICLES
4 - The model assembled laid out for a final inspection; ready for painting.
PRIMER
5 - The model is painted with AMMO Gray Primer Note that primer bet-
ter works in several thin layers Allow these layers dry completely before
adding the next. Thick and heavy coat of primer can spoil details and PE
parts.
6 - I will be painting a three-color camouflage on the SCUD, and with
each of the three colors I will use 2 tones of paint, dark and light. I'm
not a fan of deep modulation on camouflage with lot of colors. The first
color is red brown shadow and ГН use this as a base for the entire vehicle
HOWTO PAINT 1:72 VEHICLES
71
7 - After applying the darker base color I lighten the up-
per surfaces and panel centers using Rotbraun RAL 8012.
No need to be shy with this step as these contrasts and
highlights will tone down quite a bit during the painting
process.
8 - For such complicated pattern it's a good
idea to use putty to make sticky masks. Pa-
tafix is quite good for this. Also you can use
Blu-Tack.
9 - The next camouflage color is light green
and will border to the red brown. Again, I
put a darker shade using as base RAL 6011
В RE5EDAGRUN and then lighten it up
with white mixed with it at a ratio of 80/20
10 - Now add the second masking layer.
This step can be quite difficult asyou must be
meticulous during masking, the dark green
stripes should be thin, and follow the shape
of dark brown spots.
(Green/White).
72
HOW TO PAINT 1:72 VEHICLES
FINISHING CAMMO
11 - Again, repeat the process of paint-
ing. For dark base I use A.MIG-056
GREEN KHAKI.
13 - As I paint the model in it’s base
colors I always try to remember the fin-
ish that I will be trying to attain, dirty or
dean, and how many layers of weath-
ering I might apply to the model. The
more layers of weathenng, the lighter
the primary base colors. As this photo
shows, at the beginning the colors are
quite bright, but after weathering it all
comes together.
12 - For highlights of the green base
it's not a good idea to just add white
as I have done with the other colors
as it tends to produce a cold shade of
green, and in the process of further
weatheringthe green color can turn a
grey shade and completely lose satura-
tion. For this reason, I used RAL 6011
В RESEDAGRUN as the highlight color.
Be careful when removing the masking, as we
may damage the paint underneath. A good tip
to prevent this is to remove some of the adhesive
from the tape by repeatedly sticking it to your
hand before putting it in place.
HOWTO PAINT 1:72 VEHICLES
73
WEATHERING
14-1 open the weathering steps by
adding a fine layer of dust onto the
model, concentrating on the lower
areas. This is just a first layer, subse-
quent weathering layers and finishing
techniques will re-establish definition
and unify the appearance.
15 - The Before applying wash, I seal the model
with glossy varnish. Now it's time to add a wash
in order to re-establish the surface features For
this camouflage scheme. AMMO Brown Wash
for Green Vehicles works perfectly.
16 - Thanks to the glossy surface the wash flows easily around
the surface details,and any excess can be removed very easily
with a clean brush.
V
17 • As you can see, thewash brings out a lot of details on
the model. This is very important step, specially in 1/72nd
scale.
18 - Using enamel effects I apply stains of dust as if
washed off by the rain (rainmarks). To do this I paint lines
of varying lengths and intensities to the vertical surfaces
of the vehicle
19 -Next, with flat brush dampened in white spirit I feath-
er the lines, or streaks, to make them softer and more
random I find that it is usually not necessary to repeat the
feathering more than once, as the enamel effects tend
to lighten when dries up. Also, I must keep in mind that
this is not the last step of weathering and I we to try and
maintain the brightness of base colors.
20 - The result after the rainwash step and as you can see
the model has a faded appearance - and a slightly desert
look, the result of long days under the sun.
i Si
HOWTO PAINT 1:72 VEHICLES
DUSTING WHEELS
22 - After drying, erase some of the excess pigment using your fin-
gers, leaving deposits within the treads and around the center hub.
21 - Dusting of wheels is very important step,and luckily achieving
a realistic effect is pretty simple. I mix water with several shades
of pigments then brush this mixture onto the wheel and let it dry.
23 - Using the same colors as used before, I add pigments to those parts
of the model that would accumulate dust and sand raised by the wind of
driving. The excess is removed using a cotton bud or soft brush.
24 -1 use Dark Streaking Grime applied in thin lines and then immediately
washed away while still fresh. This is very important - make these stains
local and random, as dark streaks of dirt are not usual on desert vehicles.
Dark grime and dirt can accumulate in the corners or other areas hidden
from the wind.
76
HOW TO PAINT 1:72 VEHICLES
25 - To give more volume to the previous layers of weathering. I make
half-transparent lines using very fine brush. For thisl mix 90% solvent and
10% of Fresh Engine oil.Don’t mind the name on the bottle; use what
works for a particular situation and this works for me
26 - As you can see in this photo,after these steps the texture on the side
surfaces become more complex and rich.
FINAL WEATHERING
27 - As I wrote in the beginning, chips are not
usual for vehicles of this dass. but remember a
littlegoes a long way and should be used spar-
ingly. For this I use AMMO Streaking Rust Ef-
fect. Cokx of this liquid is perfectly suites for
rust shade and for streaks from chips.
28 - After using pigments and dust effects,
some parts lose their volume. To regain it again
I go back and add areas of post-wash around
certain features For this I use the same Dark
Brown Wash, but add a little Fresh Engine Oil
(90%/10%). Adding Engine Oil keeps our wash
from spreading on the matte surface. This should
be done with a fine brush and very gently.
29 - Final touch of our weathering will be rust
stains. For this I mix Streaking Rust Effect at
30% and 70% of White Spirit. Put this wash
on logical places - hinges, open gears, handles
This effect is better to add locally becauseif over-
done it can turn the vehicle into rust bucket.
HOWTO PAINT 1:72 VEHICLES
77
PAINTING AND WEATHERING THE MISSILE
30 - Now it's time to work with the mis-
siles, treating them in many ways similar
to the launch vehicle LeT’s start with a
31 - The center area of each of the rockets
panels are lightened using 4B0 Russian Green.
32 - The warhead of the missile was
masked and then painted using 6011
Resedagrun shade of green
dark green shade as the base color - for
this I use AMMO Russian Dark Green Base
color.
33 - And of course the missile would be prone to the same environmental
conditions as the launcher, and so similar weathering effects were added
to the rocket as was done on the vehicle.
78
HOW TO PAINT 1:72 VEHICLES
34 - And of course the missile would be prone to the same environmental conditions as the launcher, and so similar weathering effects
were added to the rocket as was done on the vehicle.
LAST STEPS
35 - And finally the missile and the launcher are placed together and a few last minute
touch-ups are done in order to present a unified appearance.
HOWTO PAINT 1:72 VEHICLES
80
HOW TO PAINT 1:72 VEHICLES
HOWTO PAINT 1:72 VEHICLES
81
^Ber'’nO
^nsterdatno
OresdeC
x'Ant^TpO
Г-
By Leonid Postny
/ Vj Cologne^
I .
One of my favorite themes in modelling is always the "Panzerwaffe'46". Main reason why I
love it is for free imagination. All these tanks were just on paper drawings and never went to
production. This moment gives freedom for our ideas in painting. In this article we will build
Modelcollect E-75 with 88mm gun. Our model will be without any "PW46" Red Primer colors
or unpainted "out from factory" styles. I decided to make regular paint scheme of later war
period with "ambush" pattern.
HOW TO PAINT 1:72 VEHICLES
1 - As with all of my models the first step is
primer, and in this instance I am using AMMO
Grey Primer. I advise care when spraying small
pieces such when working at 1/72nd scale,
don't hold the brush too dose to the model
MODULATION BASE COLOR
so as to avoid too much paint which can easily
hide the surface details.
2 - The first color added is Rotbraun. As you
can see, in certain areas I darkened the Rot-
braun with black to provide shadowing and
contrast between surfaces. The mixture is ap-
proximately 80/20 Rotbraun/Black.
3 - Thanks to previous step with the darken-
ing I don't add white to Rotbraun to lighten up
it. I can just use base Rotbraun color straight
from the bottleandis lightenough, and as we
can see on photos the contrast is still pretty vis-
ible. Upper surfaces such as on the hull are not
lightened as there will be no camouflage on
these areas.
84
HOW TO PAINT 1:72 VEHICLES
AMBUSH САМО
A. MIG-8012
r9rOn opt 1
5 - With the masksready and I go ahead and spray the model in a
green base color using AMMO Olivegrun opt. 1. As you can see I
didn't bother masking the upper surfaces as later these will be paint-
ed in the Dunkelgelb color.
4 - Now it's time to prepare for the first element of the camouflage pat-
tern. At this small scale masks are a very useful too. and for thrs type of
work I prefer Patafix (Masking Putty), but BluTac is also an option When
using these types of masking putty's don't forget to press down along
edges of mask so as to avoid any under spray.
6 - Now I add a lightening color for the green base using AMMO
Resedagrun. Note that I have dictated the direction of light as com-
ing from the top; simple vertical or zenithal lighting effect Again
notice that the lightening is done without the addition of white
HOWTO PAINT 1:72 VEHICLES
85
9 I finish by spraying a layer of Dunkengel-
baus '44 DG III as the lightening colorTo
emphasize the contrast between the light
and dark colors I mask along certain panels
in order to create some hard transition lines.
8 - I now paint model in Dunkelgelb color,
using the same process as in the prior steps
by starting with a darker shade of yellow;
using AMMO Dunkelgelbaus '44 DG. This
color is airbrushed over all of the surfaces,
especially concentrating on covering the up-
per without the masking.
7 - In a repeat of the masking step I once
again use Masking Putty to mask the green
areas.
86
HOW TO PAINT 1:72 VEHICLES
FINISHING САМО
10 - And now for the moment of truth, re-
moving the masks to reveal the colorful
camouflage pattern. At this point it's worth
noting how clearly visible are the shaded
colors within the camouflage are, and the
harder transition lines on the horizontal
surfaces.
11 - For the "ambush* style camo I need
a nice round brush. I have found an "0”
size brush with the end cut off gives me a
round, but flat type of brush that is perfect-
ly suited for 1/72 scale patterns. I use mini-
mal amount of pamt straight from the bottle,
not diluted with thinner.
HOWTO PAINT 1:72 VEHICLES
87
12 - With all of the little dots added I can take a moment
to enjoy my paintwork overall. I’m phased to see that the
color shading is doing its job by creating interesting shad-
ows and highlights, I know that this in important to creat-
ing an interesting final presentation.
CHIPPING
13 - Chippingtime. A chip as usual, will
expose the base color underneath and
so in this example it will be Dunkelgelb
under both the brown and green camo
colors. I'm using the sponge technique
with paint straight from the bottle, and
be sure to remove most of the paint
from the sponge on a clean paper tow-
el before dabbing it onto the model. I
only want to make the smallest flecks of
paint possible.
14 - Continuing with chips. Now I need
to add some chips and scratches to
show damage that has gone through
the paint and is exposing the metal a
dark color such as AMMO Dark Tracks is
perfectly suited for this. Use logic while
dcwng chips. The most natural areas will
be crew hatches, engine area, mud-
guard, screens. Please, don’t do them
over whole vehicle as this is simply un-
realistic.
88
HOW TO PAINT 1:72 VEHICLES
15 - At this moment the colors on the model look very stark and bright.
The chips seem to be only on the surface, and the base colors have very
little depth or interest to them. So now is a good time to add a Filter
layer. A Filter is a highly thinned enamel color that is painted over the
surfaces that help to unify the colors and add depth to the finish.
16 - I'll be using a couple of Filter color to cover this model. For those
areas on the top surfaces painted in Dungelkelb I use Brown for Dark
Yellow, and for sides with camouflage pattern I use Tan for 3 tone Camo.
Compare this photo after the Filters with one before and you will see the
difference, the colors appear much more in harmony.
PAINTING DETAILS
17 - Mow I switch my attention to painting some of the small wood-
en details. I create various wood tones by mixing New Wood and
Shadow Rust colors m various combinations to paint the handles. I
use the same Shadow Rust color to also paint the tow cables and
tracks.
18-1 continue to work on the accessories, using the same Shadow
Rust color to paint the tracks and tow cables. Take your time while
working on these items as a nice model can be ruined by poorly
painted details.
HOWTO PAINT 1:72 VEHICLES
89
19 - Next. I airbrush a layer of dust over the lower surfaces. This is fol-
lowed by a layer of gloss or semi-gloss varnish that will help protect these
layers of paint and also provide a nice, slick surface that I can apply my
washes.
20 - Once the gloss varnish is dry I can go ahead and apply my washes.
These washes are generally a little thicker in consistency than a Filter and
are intended to be used to profile the vehicles surface details Apply the
wash near the surface features and then allow it to stand for a period of
time - at least 5 minutes. When ready remove any of the excess wash
with a clean brush slightly moistened with thinner.
21 - Again, please compare this photo of the vehicle after the washes
to those from before. There is quite a difference as now we can see the
volume and all of the small details.
HOW TO PAINT 1:72 VEHICLES
STREAKING
22 - For a first step with the weathering, I want to create some light toned streaks
that can represent rainmarks, dust trails or even concrete stains. For the dots I
am using AMMO Light Dust Effects and Damp Earth Effects, mixed to different
consistencies with thinner, and then applied to the surfaces. The dots are drawn
downward where they are left to dry for a few minutes.
23 - After a few minutes of drying, I then use a flat brush dampened with thinner
to feather the streaks to my desired look.
WEATHERING MUDDY TRACKS
24 - I plan on adding some mud to my E75r but I
know that paint alone won’t have the effect I am
looking for, it needs volume. In a cup I crush kitty litter
to small grains that, when added to the mud effects
will provide me with just the right amount of texture
and volume.
25 - I’ll use matte varnish as a glue, moistening an
area and then sprinkling on some of the kitty sand. Af-
ter the varnish is dry the sand will be fixed in place and
I can freely paint it or move onto a different weather-
ing step.
26 -1 continue weathering by adding pigments I mix pigment and
thinner together into a thick paste, load it onto my brush and flick
particles onto the chassis, front hull and road wheels. This step can
be repeated if necessary to build more colors or volume.
HOWTO PAINT 1:72 VEHICLES
91
27 -1 continue to work with the pigments, now concentrating on add-
ing definition and stains. I use Dark Brown wash for Green Vehicles for a
moist appearance and deep shadows. These effects are applied without
any additional thinning.
28 -1 continue the processby adding wash to bring out the details again
to the tracks.
29 - In the same manner that I created light colored steaks and discolor-
ation, I now add dark streaks in order to give more color and richness to
the finish. I use AMMO Winter Steaking Grime, adding lines of varying
lengths to the surface and the allowed to dry for at least 5 minutes.
30 - And then the lines are feathered and faded using a flat brush moist-
ened with thinner. These dark streaks provide contrast and depth to the
surface stains.
92
HOW TO PAINT 1:72 VEHICLES
MORE STREAKING
31 • An important step rs adding rust streaks. However, they must
be done with restraint unless you are creating an abandoned vehicle
Use logic as to where to apply the rust, choosing to add them under
a big chip or scratch. As with the other enamel effects, Rust effects
32 - Now we can see how the vehicle is turning into real warrior.
are made by drawing fine vertical lines and then feathering down-
ward to desired look.
33 - I've spent some time adding mud effects to the lower hull and sides,
now it's time to intensify the appearance on the upper surfaces. As al-
ways I try to use logic on where to place the mud and dirt accumulation,
concentrating near the crew hatches and deposits near the corners of
panels To begin, I deposit large drops of Kursk Soil and Damp Earth in
my chosen areas.
34 - Now I dampen surface with thinner and blend it together directly on
surface. This is easy process.
35 - As you can see after drying the effects on surface have be come
more complex If you want to add intensity, or tone it down a bit, you can
do it easily due to the long drying times of the enamel effects
HOWTO PAINT 1:72 VEHICLES
93
36 - An important finishing touch I like to make is to show a few wet or
moisture marks from rain. For this use 90% Wet Effectsand 10% Dark
Brown Wash. The Brown Wash is needed to create a move visible outline
of wet areas.
37 - Another important touch is to add a few fuel and oil stains in limited
areas. I apply them in layers, adding different amounts of thinner to cre-
ate different densities. This gives me perfect control.
RUSTY TRACKS
38 - One last accessory item to take care of, the spare tracks.To achieve more rich
color shades its best to paint them separately from model. Rust Tracks and Dark Tracks
mixed together and painted by layers give them a nice rusty look.
39 - After the track colored acrylicsl use tempera paints, mixingshadesofyellow, orange
andred for some bright rusty tones This type of paint is nice to work with due to its
long drying time allowing you the time to easily blend tones for better results.
40 - The colors are added to the track in what looks like a very chaotic manner, and at
this point they are not very attractive, but don't worry.
41 - After drying fully, the tempera colors have totally matte surface and perfectly
depicts rust effects
FINISHING
HOW TO ft
42 - Finally. I place the spare tracks onto the
turret racks and add some metallic sheen this
E-monster. Use graphite pencil on most worn
areas such as sharp edges, joints, hatches and
areas where the crew might often walk.
96
HOW TO PAINT 1:72 VEHICLES
HOWTO PAINT 1:72 VEHICLES
97
98
By Sergey Golikov
T-34 is the most famous Soviet tank of WWII. Throughout its production run (1940-1946)
the basic design went through numerous updates aimed at improving its capabilities.
Starting in early 1944 the up-armoured and up-gunned version known as the T-34/85
was simultaneously produced at three different factories. By April 1945 15,527 examples
were produced.
This iconic tank is popular with modelers around the world, and accordingly there is a
wide variety of 1/72 kits. The purpose of the current project is to build a T-34/85 that
took part in the liberation of Lvov while serving with 10th Guards Tank Corps in August
1944. It is an early Zavod 183 production example with a complicated camouflage pat-
tern and rather beat-up look.
My starting point was one of the Trumpeter kits. To improve the end product I used a
number of aftermarket sets from various companies.
My article describes the painting and weathering process I've used to finish the model
step by step.
ASSEMBLY
1 - The assembled model - after much time and quite a bit of detail
work, the model is looking much better detailed than the base kit.
2 - Before painting the model I've removed the OVM tools since they
would prevent my reaching all areas. I'll finish the tools separately
and add them back later on.
HOWTO PAINT 1:72 VEHICLES
99
PRIMER AND MODULATION
4 -1 airbrush Color Modulation effects over the primer
base, using acrylic set (A.Mig 7107) intended specifi-
cally for Sowt armor. Notice the slightly lighter upper
edges to the surfaces, and contrast between certain
panel surfaces.
3 - I give the model a base primer color using Russian
green (4BO), thinned slightly with acrylic thinner
A MIG 7107
CAMO
5 -1 used UHU Tac Patafix (a product similar
to Blue Tac) to mask the spots for the first
color of the disruptive pattern, and then air-
brushed lightened 7K Russian Tan.
100
HOW TO PAINT 1:72 VEHICLES
6 - The second color - Russian Brown - was painted on using brush
7 - Third color - black - was added with an even finer brush.
Profile from AMMO'S book EASTERN FRONT RUSSIAN VEHICLES 193S-1945 CAMOUFLAGE GUIDE
A.MIG 6007
DECALS
8 - To individualize this particular vehicle. I ordered custom decals from
my friends from DEKA72, and used Tamiya's decal adhesive to apply it...
9 -1 mixed Tamiya’s clear flat and clear gloss, and coated the entire model.
This will protect the paintjob and decals during the weathering process.
HOWTO PAINT 1:72 VEHICLES
101
10-1 used tan filter (A Mig 1507) over the entire model to blend the colors to-
gether. Some areas were treated with a brown filter (A.Mig 1506) as well.
V
Never flood the surface with the filter, as we re only trying to slightly
alter the tone of the base color
'*> Green
flLT
Dark
PAINTING ROAD WHEELS
A.MIG 7105
11 - To simulate the worn rubber on the road
wheels I used the Rubber Tires color (A,Mig 033)
This color can be found as the acrylic Tires &Tracks
set (A.Mig 7105).
102
HOW TO PAINT 1:72 VEHICLES
12-1 used earth tone pigments lightly dropped
onto the hull that I have pre-moistened with
enamel thinner. This is a good method for add-
ing an overall dust or thin dirt layer
13 - To simulate caked mud I brushed white
glue on the appropriate areas, and then sprin-
kled fine sand over them.
14 - The dark Brown Wash provided additional
depth to the excellent detail of the resin wheels
by OKB Grigorov.
15-1 added various earth tone pigments where dust would accumulate
on the wheels, Fixer is used to permanently hold the pigments in place
16 - The areas where driving sprockets and the idlers contact the track
were painted with a mix silver and darker gun metal colors to simulate
polished metal
} i
17-1 add wet earth effect and oil streaks onto the hull
side walls. These types of effects are particularly attrac-
tive when applied over the pigments, as the pigment
powder wicks and absorbs the moisture in much the
same way as real dirt.
.72 VEHICLES
103
PAINTING TRACKS
18-1 used OKB Gigorov’s resin "waffle" tracks (set 72093), which can be
bent by hand I airbrushed Revell steel enamel as a base coat.
19-1 then followed by using various Gunze metallic paints to simulate
multiple metal shades
20 - I placed strips of masking tape over the areas where the wheels
run over the tracks.
22-1 placed strips of masking tape over the areas where the wheels
run over the tracks.
21 - And then, "Dark tracks" acrylic paint (part of the A.Mig7105
set) was airbrushed over the track runs.
104
HOW TO PAINT 1:72 VEHICLES
WEATHERING TRACKS
23 -1 follow the metallic painting with applications of Black and Gun
Metal pigment colors to give a more saturated metal sheen to the
bare metal areas.
24 - Adding fine rusty spatter to the tracks will provide a more re-
alistic look
25 - And then then the outer surfaces of the tracks receive a layer of
dust; a lighter tone towards the edges, darker shade in the middle.
26 - The recesses on the tracks are treated with dark brown wash.
You can also use this effect on individual links so as to avoid ending-
up with a uniform weathering pattern.
27 -1 used silver paint to simulate worn metal on the guide teeth.
HOWTO PAINT 1:72 VEHICLES
105
FINISHING TRACKS
28 - Since the tracks I am using are not made of individual links, I
need to simulate the wrapping effect over the sprockets and idlers.
I used a sharpened screwdriver to make parallel indentations in the
track band. Do not push too hard in order to avoid damaging the
track
29 - A view of the completed track section. The bent effect is a result
from the screwdriver trick.
31 - The spare track links were painted using Rust Tracks acrylic paint
30 -1 glued the completed track run onto the running gear using super
glue, working top-down, and clockwise.
31
106
HOW TO PAINT 1:72 VEHICLES
JERRY CAN
32 - Weathering progress steps on a
Jerry Can -from left-to-right you can
see the unpainted resin part, then the
iron color applied to it, a light 4BO
shade and finally the finished article.
33 - A local wash (two color tones) on various areas and recesses around the upper hull in order to
add definition to the surface details. .
34 - The canvas handle on the commander's cupola were painted Khaki Grey, lightened with white.
Note this was done after the wash was completed so as not to mute the color.
CHIPPING
HOWTO PAINT 1:72 VEHICLES
107
36 - Then, using a fine brush, I apply the rusty-brown Chipping shade
m the spots created in the previous step The darker color painted
within the spots of light color
37 - To enhance the chipping effect I am using a sponge to create
even finer chips in a more random pattern. I vary the color tones
slightly using two dark brown paint colors.
CREATING DUST
38 - Now add dust effect to the areas where dirt deposits would
accumulate; along edges, between panels and corners.
39 - Now I "soften” the edges of the dust deposits using a wide flat
brush that is moistened with enamel thinner.
40 - For an overall dusty effect I use several tones of dry earth col-
ored pigments over the entire model. I realize that this looks pretty
bad at the moment, so let's get to the next step and make it look
better.
108
HOW TO PAINT 1:72 VEHICLES
41 - To retain some of the pigments on the model surfaces
I lightly spray droplets of thinner over the model using a
big round brush
42 - And then the excess dust is removed from the sur-
faces using a dry cotton swab.
BETWEEN STEPS
43 - Before gluing together the hull tub and the upper hull, I applied
Pigment Fixer on the inside of the fenders and then apply the weath-
ering pigments over the fluid.
44 - Some areas on the model need a more saturated dust effect. To
simulate this, I mixed together two shades of Tamiya acrylic paint and
diluted that with vodka instead of the regular thinner as the Vodka
dries much quicker.
HOWTO PAINT 1:72 VEHICLES
109
MORE DUST
47 - You can also use your fingers to remove excess pigments.
45 - I apply a thin layer of the Vodka/paint mix from the previous step
over selected areas of the model.
46 - Now, dip a wide flat brush in water and hghtly drag it over the model
surface, working only from top to bottom.
48 - Applying the ram marks over the model is done with a very fine
brush. I am using the Light Mud acrylic color thinned with water. Just a
drop at the origin and the draw the effect downward.
49 - At this point the many layers of weathering and pigments may
have caused some loss of definition around some of the surface de-
tails. I can easily restore these areas using thinned artist oils.
50 And, of course, I also can use a ready-made wash for dark green
AFV to reinforce details as well
110
HOW TO PAINT 1:72 VEHICLES
FINAL DETAILS
51 - I will finish with the dirt effects by adding
some dark mud, a mix of Fresh Mud effects and
plaster
52 - Heavy wear and dirt trails are added to
the rear of the engine deck. The dark colored
Streaking Grime provides nice contrast against
the dusty surfaces.
53 - The smoke and grime around the exhaust
pipes was simulated with black pigment applied
with a trimmed brush.
54 - To enhance the appearance of the oil leaks
you can add artist oils to the Fresh Engine Oil ef-
fect to give the liquid a little more body.
HOWTO PAINT 1:72 VEHICLES
111
55 - The worn metal effect on the weld seams was created using a stan-
dard pencil lead The brighter chipped spots are Humbrol 11.
56 • The retaining straps for the growsers and spare tracks were painted
with light leather tone
57 - The completed tarpaulin. It was base coated with Tamiya XF-5S, then
washed with dark Khaki, and finally the edges and folds dry-brushed us-
ing a lightened Khaki color.
58 - I flick a brush loaded with Streaking Rust Effects to produce fine
rust effects on the fenders. Any excess can be removed with clean brush
and thinner.
112
HOW TO PAINT 1:72 VEHICLES
59 By adding tiny amounts of wet earth effect to wheels and track link I can
create nice contrast and added visual interest
60 - In the end I add a spray of lighter-color mud and combine it with the
darker tones already applied. Note, that to deliver the proper effect the size of
the spray must be to scale.
61 - A figure from MiG's set "WWII Soviet tank crew"
(now sadly OOP) was painted using acrylics and artists’oil
paints.
62 - A base for the model and a small data plate are an important
finishing touch for your work. Must be to scale.
113
114
HOW TO PAINT 1:72 VEHICLES
116
HOW TO PAINT 1:72 VEHICLES
HOWTO PAIN1 1:72 VEHICLES
117
BRANDS Ь PRODUCTS:
5 STAR (resins)
A CALL TO ARMS (figures)
ABER (ohotoetched & gun barrels)
ACADEMY (kits)
ACE (kits & photoedges)
AIR CZECH (resins)
AIRFIX (kits, scenery & figures)
ALERAN (decals)
ALEXMINIATURES (figures)
AMC (resina)
ANDREA (figures)
ARCHER TRANSFERS (decals)
ARMADA HOBBY (resins)
ARMO (resins, scenary, decals, upgrades, barrels & figures)
ARMORSCALE (barrels)
ARMORY (resins, upgrades, scenery, figures & photoedges)
ARMOURFAST (scenery, kits & figures)
АТАК (upgrades)
ATTACK (resins, upgrades, kits, barrels & decals)
AUTHENTIC (decals)
AVALON (photoetched)
BALATON MODELL (resins, upgrades & scenery)
BECK RMK (resins)
BESTFONG (decals)
BISON DECALS (decals)
BLACK DOG (scenery, upgrades, figures & resins)
BLACK LION DECALS (decals)
BP RESIN (decals, upgrades, scenery & resins)
BRACH MODEL /MR.PANZER (decals, resins, scenery, upgrades)
BRASSICA (decals, upgrades & resins)
BRENGUN (photoedges, scenery & figures)
BRIGA (resins, upgrades, scenery & figures)
BUM (figures)
CAESAR (figures & kits)
CALIBRE 72 (upgrades, scenery & figures)
CHOROSZY MODELBUD (resins)
СМК/ PLANET (barrels, upgrades, scenery, figures & resins)
COLIBRI (decals)
CONDOR (kits)
CROMWELL (upgrades, resins, figures & scenery)
D-DAY MINIATURE (figures)
DAN MODELS (decals)
DAN TAYLOR (figures, upgrades, photoedges & decals)
DEN BELS MODELS (resins)
DIO72 (scenery)
DOC MODELS (scenery, figures, kits & decals)
DRAGON (kits)
E.T. MODEL (photoetched & scenery)
EDUARD (photoetched, scenery & figures)
EGYS (resins & decals)
EL VIEJO DRAGON (figures)
EMHAR (kits & figures)
EUREKA XXL (tow cables)
EXTRATECH (scenery, figures, upgrades, resins, decals & photoedges)
FAN KIT (resins)
FBMINIS (scenery, figures & upgrades)
FIRST TO FIGHT (kits)
FLYHAWK (photoetched, upgrades & kits)
FPW MODEL (photoetched, resins & scenery)
GER-MAN (figures)
GERMANIA (figures, resins & scenery)
GIESBERS MODELS (resins, upgrades & figures)
GOFFY (resins)
GREEN-LINE (figures & scenery)
HAD (decals)
HARON (figures)
HASEGAWA (kits, scenery & figures)
HAT (figures, kits & scenery)
HAULER (photoetched, scenery, upgrades & resins)
HELLER (kits)
HOBBY BOSS (kits & scenery)
HQ72 (scenery)
HR MODEL (resins)
HUNOR (resins & figures)
IBG (kits & upgrades)
ICM (kits)
IMEX (figures)
ITALERI (figures, scenery & kits)
ITALIAN KITS (resins, upgrades, scenery & decals)
JMPK (resins)
JUWEELA (scenery & figures)
KORA (resins, scenery & upgrades)
LANCER (figures, upgrades & photoedges)
LF MODELS (resins)
118
HOW TO PAINT 1:72 VEHICLES
LIMES (scenery & upgrades)
MAC (kits), MACO (kits)
MAESTRO MODELS (resins)
MANTIS MINIATURES (figures)
MARITIME LINE (scenery & figures)
MARS / MARS FIGURES (resins, scenery & figures)
MASTER BOX (kits)
MGM (figures, scenery & resins)
MH MODELS (scenery)
MID (scenery)
MIG PRODUCTIONS (scenery, decals & figures)
MIL1CAST (upgrades & figures)
MINAIRONS (decals, figures & kits)
MINI WORLD (upgrades)
MINIART (scenery)
MINIMALI (scenery)
MIRAGE (kits, upgrades & photoetched)
MISTER X (upgrades)
MK72 (kits, decals & upgrades)
MODEL DREAM (scenery)
MODEL-MINIATURE (scenery, decals, upgrades, resins & figures)
MODEL-SCENE (scenery)
MODELCOLLECT (kits), MODELKRAK resins)
MODELLTRANS (upgrades, resins, scenery & figures)
MPO (scenery)
MR MODELS (upgrades, figures, barrels & scenery)
MV (scenery)
MW (kits)
NEW PENGUIN (decals)
NH DETAIL (photoetched)
NIKOLAI (scenery & figures)
NINIVE (scenery)
NORTH STAR (upgrades, resins & figures)
O3D MINIATURES (upgrades & scenery)
OKB GRIGOROV (scenery, photoetched, resins & upgrades)
OMEGA (resins & scenery)
ORION (figures)
PANZER GARAGE (resins)
PART (photoedges & kits)
PAVLA (upgrades)
PEDDINGHAUS DECALS (decals)
PEGASUS (scenery, figures & kits)
PJ PRODUCTION (figures & resins)
PLASTIC SOLDIER (figures & decals)
PREISER (figures)
PRINT SCALE (decals)
PROFIKIT (resms & photoetched)
PROFILINE (kits)
PST(kits)
RB MODEL (barrels & scenery)
REAL MODEL (scenery)
RED BOX (figures)
RETROKIT FR (resins, figures & scenery)
RETROTRACKS (resms, scenery, upgrades & figures)
REVELL (figures & kits)
RODEN (kits)
ROP SAMEK (scenery, figures & upgrades)
ROYAL MODEL (photoedges & scenery)
RPM (kits & scenery)
S-MODEL (kits & barrels)
SCHATTON (barrels, scenery, resins & scenery)
SCHILLING FIGUREN (figures)
SCIBOR (figures & upgrades)
SCRATCH MILITARY (resins & decals)
SHARKIT (resins)
SPECIAL ARMOUR (kits)
STEELWORK (resms, upgrades, scenery & figures)
STRELETS (figures)
SUPER EUROMODELLER (scenery)
T&T (resins, upgrades, decals, scenery & figures)
TANKOGRAD (upgrades)
ТВ MODELS (decals)
TECH MOD (decals)
THOR HOBBY (scenery)
TOLOLOKO (decals)
TORCH (figures)
TORO (decals, scenery & resins)
TOXSO (kits, figures & scenery)
TP MODEL (resms, scenery & upgrades)
TRIUMPH DES WILLENS (resins & scenery)
TRUMPETER (kits)
ULTIMA RATIO (figures)
UM (kits, upgrades & scenery)
UNICORN (scenery)
VALDEMAR (scenery)
VALIANT (figures)
VALUE GEAR (scenery)
VEPA MINIATURES (figures)
VICTORY (figures & scenery)
WATERLOO 1815 (figures)
WESPE (resins, upgrades & scenery)
WSW (resins)
Z+Z (scenery & resins)
ZEBRANO (kits, figures & upgrades)
ZEDVAL (barrels & upgrades)
ZVEZDA (kits & figures)
HOWTO PAINT 1:72 VEHICLES
119
THE NEWEST AND MOST INNOVATIVE MODELING TECHNIQUES EXPLAINED LIKE NEVER BEFORE BY...
MEG JIMENEZ
------The definitive Encyclopedia-
THE DEFINITIVE COLLECTION OF WEATHERING AND ASSEMBLING TECHNIQUES FOR MILITAUY VEHICLES 5 VOLUMES 10 BE RELEASED MORE THAN PAGES WITH ALL
OF THE NECESSARY INFORMATION FOR ALL LEVELS OF MODELERS WITH PHOTO REFERENCES AND HOLT DETAILED STEP BY STEP INSTRUCTIONS. ALL NECESSARY TECHNIQUES
FOR ASSEMBLY AND PAINTING ANY KIT ARE INCLUDED MORE THAN LARGE HIGH DUALITY IMAGES IN FULL COLOR WWI VMII AND MODERN VEHICLES
Total price of full encyclopedia: Ш€
Vol. 1: CONSTRUCTION - 152 pages. 25 €
Vol. 2: INTERIORS & BASE COLOR - 160 pages. 31 €
Vol. 3: CAMOUFLAGE- 160 pages. 31 €
Vot. 4: WEATHERING - 160 pages, 31 €
VOI. 5: FINAL TOUCHES - 160 pages. 31 €
Plus a Special Vol. 6: “FULL PROCESS" on tanks. 48 pages,
FREE , JUST for subscribers! (To be leteaseb Ounng 2016).
Special NEW Release Subscription Offer:
Enjoy the full collection now and obtain
for FREE:
VOL.1 - CONSTRUCTION
in addition to a speoai limited Vol. 6 book
just for subscribers.
Subscription offer:
124 €
★
you save 25 €
Vol. 1 book (FREE) ♦ Special Vol. 6 (FREE)
(My in our Wftl) Strop
* Shipping cost not included
www.migjimenez.com
A MIG 6019
8 432074 060192