/


Теги: firefighting emergencies


Текст
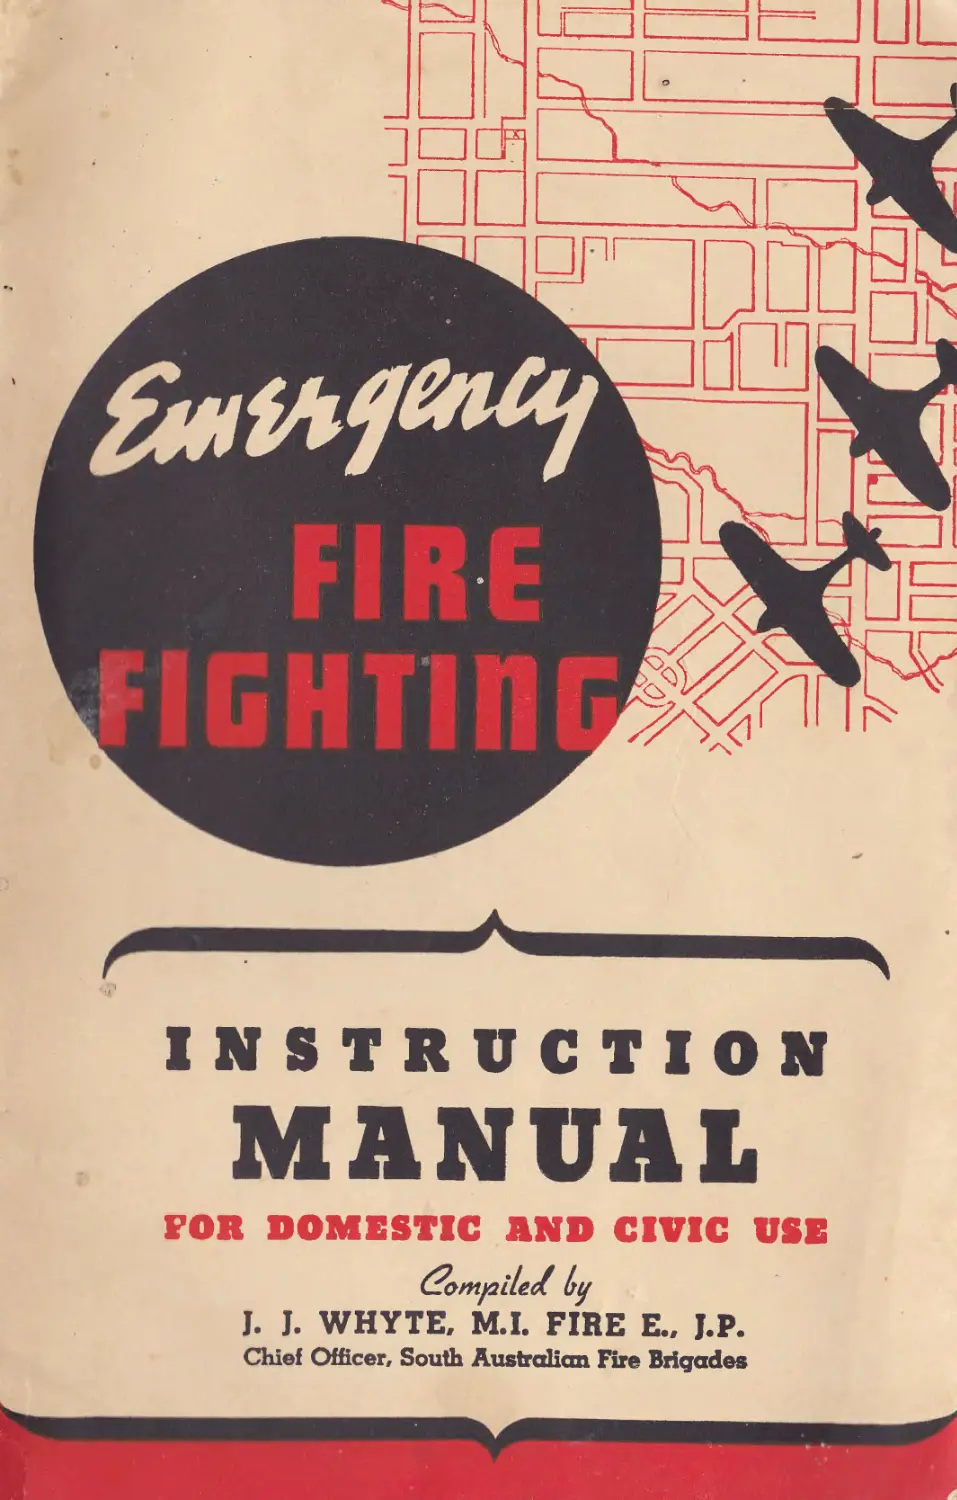
                    MANUAL
FOR DOMESTIC AND CIVIC USE
Compiled. I)у
J. J. WHYTE, M.I. FIRE E., J.P.
Chief Officer, South Australian Fire Brigades
OFFICER IN CHARGE FIRE BRIGADE -
Fire Extinction
CALL THE FIRE BRIGADE
It cannot be too strongly emphasised that if a Fire, other than a very minor
one, occurs at your home, the Fire Brigade should be called immediately it
is discovered, either through fire alarm, the local telephone exchange, or
messenger to the Fire Station.
The Fire Brigade will respond to your call within a few minutes, and if you
have succeeded in extinguishing the blaze prior to the arrival of the Brigade
you will be complimented on your action.
If you have a telephone installed, have the number of the local Fire Station
placed in a handy position. If you are not connected by ’phone, make
yourself conversant with the location of the nearest fire alarm or fire station
Many people are of the opinion that a charge is made for Brigade attendance
at a fire. This is not so. The Brigade attends all fires within the area
protected, free of charge.
It is, however, wise for every householder and citizen to become familiar
with the emergency measures which could be adopted in the event of fire,
and also with the appliances which may be purchased or improvised for
dealing with an outbreak of fire, pending the arrival of the Fire Brigade.
The action taken in the first few minutes following the discovery of a fire
is of the greatest importance. In many instances widespread destruction
and loss of life could have been prevented by the prompt application of
correct measures on the discovery of the fire.
MEANS OF EXTINGUISHING SMALL FIRES
On the discovery of a fire, and pending the arrival of the Firemen, the most
accessible of the following means should be employed:
(a)	A bucket of water, sand or earth; if a bucket is not handy, use a jug,
bowl or similar article.
(b)	A mat or similar article which can be used to beat out or smother the
flames.
(c)	A chemical fire extinguisher.
(d)	A hand pump or garden syringe.
(e)	A garden hose.
The wise householder will see that one or more of the foregoing are always
readily available, particularly in situations where there is a definite possibility
of fire, such as the kitchen, laundry, etc.
If a fire occurs, arrange for all persons on the premises to be apprised of the
danger. Do all that is possible to ensure a continuous attack on the fire,
do not wait to see if one bucket or extinguisher will prove sufficient. If
you are driven away by fire or smoke, be sure to close the door of the room
involved to prevent the fire spreading.
Extinguishers and Hand Pumps. A small fire can easily be extinguished
by means of a fire extinguisher or hand pump, and types are available which
1
are capable of being easily handled by practically every person. Chemical
fire extinguishers are now most extensively installed in buildings, and are
classified principally under three headings:—
(a)	Soda-acid, for general use on small fires.
(b)	Foam, for fires involving inflammable liquids.
(c)	Carbon-tetrachloride, for electrical fires.
Garden Hose. If a length of garden hose is available, and is adapted for
use on a domestic tap, it makes an effective fire fighting appliance, provided,
of course, that the water is under sufficient pressure.
Smoky Fires. If a fire has been burning for some time before being dis-
covered, dense smoke may be encountered, and in this case it may prove
difficult to employ any of the means detailed above. It may be impossible,
however, to enter the room in order to rescue a person or to extinguish
a small fire, and in this event it should be remembered that the air is usually
purer near the floor. The room should, therefore, be entered on the hands
and knees; any attempt to cross such a room in an upright position might
result in suffocation.
Special caution should be exercised in opening the door of a room suspected
of being on fire. Such doors should be opened very carefully. In the
case of a door opening outwards it should be opened against the pressure
of the foot placed a few inches from the doorway, so that it may be imme-
diately closed again in case of necessity. It should be realised that the
consequences of inhaling hot smoke or flame may be very serious. The
covering of the mouth and nostrils with a damp handkerchief (silk, if
available) and breathing through the nostrils will prove effective in smoke-
laden atmospheres.
Fire in a Neighbour's House. If you are called to a fire in a neighbour’s
house and are thinking of breaking or forcing the front door, it is important
to visualise the consequences of such action. The opening of a door will
most likely create a strong draught and perhaps convert a small or
smouldering fire into a blaze.
No hard and fast rule of conduct can be laid down. In favourable cir-
cumstances you may be able to enter a house through a window, closing it
after you enter, and extinguish an incipient fire with a bucket of water or
any other device at hand, or you may be able to rescue a child or baby from
its bed. The most improper thing to do is to open the front door, do
nothing with regard to fire extinction or rescue, and leave the building with
the front door still open, so that a small fire could be fanned into a large
one.
In all circumstances, your proper course is to call the Brigade or detail some
responsible person to do so, and to keep the doors leading into the house
closed, if you are not in a position to do useful work inside the building.
Clothing Fires. If your clothes catch fire, lie down immediately and roll
yourself in a rug, thick tablecloth, coat or similar article; otherwise the
flames will rise around your head and face and inflict serious injury. At the
same time call loudly for help. If none of the articles mentioned are
2
available, the mere fact of rolling on the floor may extinguish the flames,
while if help is available the flames should be beaten out while you are in a
recumbent position. Many lives have been lost through persons with their
clothes on fire running about in search of help, as such movements inevitably
increase the flames. The after effects of extensive burns are, as is well
known, very serious, but the results of inhaling hot air are even more grave.
The mouth and nostrils should, therefore, be protected as much as possible.
If you see another person’s clothing on fire, adopt the same measures. The
best course is to trip the person up and smother the flames with a coat, rug,
blanket, or anything that is handy. If a person’s clothing is on fire,
endeavour to lay the patient flat on the ground with the ignited portion of
the clothing uppermost, as in this position the fire will burn more slowly
than if the patient is placed on the ground with the flames on the underpart
of clothing. This will also tend to prevent serious burns to the body.
When approaching a person whose clothing is on fire with a rug, blanket,
etc., it should be held open to keep the flames away from your own clothing.
Chimney Fires. If a chimney catches fire the doors and windows of the
room involved should be closed, the fire raked out and sand or salt, prefer-
ably damp, should be applied to the cinders. If salt or sand are not
available, water in small quantities should be poured in the fireplace, and
the resultant steam will assist in subduing the flames. If a register is
provided over the fireplace, shut it: the fire will then burn itself out.
Chimney fires may also be extinguished with a soda-acid fire extinguisher,
or a hand pump using water if such is available.
In all cases of chimney fires, the Fire Brigade should be summoned, owing
to the possibility of the heat from the flue setting fire to the constructed
woodwork of the building. A careful examination of flooring, skirting
boards and cupboards adjacent to the flue on all floors, and particularly in
the roof spaces, should be made during and after a chimney fire.
FIRES INVOLVING PETROL, OILS, FAT, ETC.
Fires involving petrol, oil, fat, etc., should be smothered with sand or earth
applied with a scoop from a bucket. A foam extinguisher is the best
machine to use if one is available. Water is almost certain to spread the
fire, as the burning oil being lighter will float upon the surface of the water.
In the case of small fires involving alcohol, methylated spirits, etc., the best
plan, if practicable, is to smother the flames with a mat or blanket, earth
or sand. Water may be used for the purpose of dilution, but will not
extinguish the fire.
In such cases carbon-dioxide fire extinguishers might be usefully applied.
Refrain from using inflammable spirits as cleansers. There are many non-
inflammable compounds which give equally effective results.
If inflammable spirits are required for household purposes, see that the
containers are fitted with tight-fitting corks, and that the containers are
plainly marked with the name of the contents, such as ° methylated spirits,"
" kerosene." Store in a safe place well away from naked light or flame.
3
Fires in Kitchens. If the contents of an oven (meat, fat, etc.) ignite,
and the oven is heated by gas or electricity, turn off the supply at once. Close
the oven door, using a broom handle or other suitable article if necessary,
and keep the oven shut until the fire has burned itself out. Don’t try to
save the joint in the oven.
Should a pan of boiling fat catch fire, apply sand, earth or damp sawdust
with great caution. Remember that if burning fat is spilled there is a
danger of the fire spreading to surrounding objects, and be especially careful
to avoid splashing yourself and thus causing burns. If in doubt of your
ability to deal with the fire, call the Fire Brigade at once.
Never attempt to throw a pan of ignited fat out of a door or window. If
removal is deemed possible, close the window and carry the pan well
extended away from the body and move with your back towards the draught
from the doorway, so that the flames will be blown away from your clothing,
until the open air is reached, be extremely careful that you do not trip
backwards.
FIRES ON CURTAINS, BEDS, ETC.
In the event of curtains, blinds, etc., becoming ignited, they should be pulled
down to the floor and the flames either stamped out or smothered with a
mat or similar article, care being taken that the fire is not communicated
to personal clothing or any other combustible materials.
Fires in kapok bedding require careful handling, as the burning kapok
generates considerable heat, and smoulders, giving off acrid smoke which
becomes very distressing to persons endeavouring to extinguish or remove
the burning bedding.
If possible, a kapok mattress on fire should be placed on a rug, blanket,
canvas, etc., and removed into the yard before the ticking is burned through,
otherwise the loose kapok quickly becomes scattered about the floor, and
difficulty may be experienced in thoroughly extinguishing it. Another
method is to fill the bath and submerge the mattress. The shower might
also be used with good effect.
The Fire Brigade should always be summoned immediately for all such fires.
Escape of Gas. A point to remember is that an electric hand lamp or an
ordinary electric light switch can produce, when switched on or off, a spark
of sufficient intensity to ignite an explosive mixture of gas and air. A loose
electrical connection may also produce a similar result.
Should you detect the slightest leakage or smell of gas, extinguish all naked
lights, turn off the supply at the meter, open the windows and notify the
gas company at once.
Never search for an escape of gas with a naked light.
The use of flexible rubber tubing should be avoided whenever possible. The
supply to gas rings, stoves, bath heaters, etc., should always be carried in
rigid metal piping. The use of flimsy rubber tubing is especially
dangerous, since in the event of a Back Fire or a leak developing owing
to the rubber being perished, or any other cause, it will melt readily and burn
4
with possible serious consequences. All gas rings and certain other
heating devices should be supported on incombustible bases of fireproof
materials, such as slate, concrete, or metal, preferably not less than 2
inches in thickness, and where possible should be raised at least 2 feet above
the floor. A couple of bricks securely bound together with wire also make
a good base for gas heating devices.
When it is necessary to turn off gas at the meter, all burners in the house
should be examined to see that the taps have been turned off, and again
examined when the supply is turned on.
PRECAUTIONS
(a)	Make sure you understand how to light your gas appliances, particularly
bath heaters, laundry coppers, etc. Always have a match or taper ready and
lighted before turning on gas.
(b)	See that it is impossible for curtains, clothing, or other inflammable
materials to blow on to a gas lighting burner, gas stove, gas ring, etc. Gas
burners should always be fitted with globes or wire guards.
(c)	Do not hang clothes, paper decorations, etc., above gas lights or stoves.
(d)	If you have young children, provide proper guards for your gas fi;
(e)	Do not place a source of heat below or near your gas meter, or allow
inflammable materials to be placed or accumulate near it.
(f)	All gas rings should be at least 2 feet above the floor level.
(g)	All gas stoves, fires, heaters, etc., should, where required, be connected
to a proper flue to carry off the products of combustion.
(h)	Exercise care to ensure that taps to gas fires and appliances are not
turned on accidentally. Remember, leaking gas often causes explosion.
ELECTRICITY
Electricity causes many fires, and if the following rules for safety are observed
by householders, the risk of fire arising from electrical installations will be
very small.
(a)	In an emergeny, switch off the whole installation at the main switch,
and either notify the Electricity Suppliers, or send for a competent electrician.
(b)	Do not allow anyone to tamper or experiment with your electrical
installation or equipment, this also applies to yourself, unless, of course, you
are qualified.
(c)	Nails, screws, or staples should never be driven into woodcasing or
capping containing electrical wires, as they might easily damage the wires
inside.
(d)	Lamp shades, curtains, or decorations of inflammable material should
never be allowed to touch electric lamps, some of which become very hot.
5
(e)	Renew as soon as possible all damaged or defective flexible wiring.
(f)	Make it a rule to switch off all portable fittings (electric irons, toasters,
infusers, etc.) immediately they are finished with, and, if practicable,
disconnect them by pulling out the plug.
All power points for portable electric appliances should be provided with
a red " Pilot ” lamp to indicate when the current is on or off. Test the
” Pilot ” lamps periodically, as they are likely to burn out.
(g)	Never handle electrical switches or apparatus while you are in the
bath or wet, as this involves risk of serious or even fatal shock.
(h)	Never touch ” Neon ” or other electric signs, as some of them carry
very high voltage. A " Neon ” or similar sign may still be “ alive " even
after the lighting has gone out.
(i)	Many electrical fires are caused by the faulty workmanship of amateurs
and the use of incorrect material, especially in the choice of fuse wire.
CHILDREN, AGED PERSONS, ETC.
It is the duty of all concerned with the care or education of children to
instil in their minds a healthy respect for fire. The following rules are of
first importance.
(a)	Never allow a child to be left in a room with open fuel fires, gas or
electric fires, unless a protective guard is fitted, and in such a manner that
it cannot be pulled away by children. It should be of such a type that
it is impossible for a child either to fall into or against the fire, or for its
clothing to become ignited.
(b)	Never allow matches to be within the reach of children, as they exercise
a fascination for some children, with sometimes fatal results.
(c)	Keep lighted candles and oil lamps of all kinds well out of the reach
of children.
(d)	Never allow young children to light or turn off the jets of gas stoves,
rings, or other similar apparatus, or to tamper with electrical appliances,
cords or plugs.
(e)	The danger of celluloid toys should be appreciated. These are highly
inflammable, and are likely to cause accidents.
Never allow children to use naked lights for the purpose of melting wax
or plastic substances.
(f)	Children should not be permitted to handle fireworks, except under
strict adult supervision.
It must be remembered that fireworks, bonfires and the like are from time
to time the cause of serious injury and even death among children.
Aged Persons. Many fatalities due to fire arise from aged and enfeebled
persons being left alone and falling into the fire, or igniting their clothing
by gas rings, gas fires, candles and the like. Although such persons must
necessarily at times be left alone, every possible precaution should be taken
6
to avoid the risks to which they are subject. Obvious precautions are to
provide guards to open fires, to eliminate naked lights as far as possible, and
to ensure that gas rings are not placed in positions near the floor level.
Domestic Animals. Domestic animals have frequently been the indirect
cause of fires and fatalities. Cats and dogs left in a room have been known
to jump on gas taps and turn them on, and to overturn electric fires and
lamps by the trailing flexible wiring.
In all cases of severe scalds or burns, skilled medical attention should be
obtained at the earliest possible moment.
The best fire fighter is he who prevents fire.
Create in yourself a fire consciousness, and adopt the hints and suggestions
outlined in this article in connection with your housekeeping.
SPONTANEOUS IGNITION
Through better understanding of its principles and consequent simple
precautions, the danger may largely be eliminated. This phenomenon may
be defined as ” ignition by the internal development of heat without
the aid of an external agent.” All combustion is a form of rapid oxidation,
that is, the energetic combining of oxygen with the burning substance.
Under other conditions, in material subject to oxidation, so subdivided
as to present a maximum surface, and at the same time so protected as to
prevent the escape of heat, the temperature rises, and oxidation, like all
chemical action, proceeds faster, in turn further raising the temperature
until the point of ignition is eventually reached. Spontaneous ignition is
only possible because of some special favourable condition or quality.
Three conditions are necessary. One is that air must be present. The
second is that the material be finely divided so as to present a relatively
large surface subject to oxidation. The third is that the material be so
placed that the heat cannot readily escape: moisture is always a factor in
spontaneous ignition. Bacteria, micro-organism or enzymes are respon-
sible under certain conditions. The so-called ” unsaturated ” vegetable
oils, notably linseed oil, are specially liable, because of their property of
absorbing oxygen in drying. This drying, the property which makes the
linseed oil valuable in paints, is not a process of evaporation, but is an
absorption of oxygen due to a natural affinity.
When cotton rags are saturated with linseed oil and covered over by other
material, the ideal conditions are prepared for internal heating and even-
tually fire. Vegetable oil will not cause spontaneous ignition unless it
has the property of drying by reason of absorbing oxygen, and no animal
oil will cause spontaneous ignition unless it has the property of becoming
rancid or taking up oxygen.
The danger of causing fire is directly proportionate to the degree that an oil
may have either the one or the other of these properties.
Generally, mineral oils at normal temperatures are harmless, but it is well
to remember that all fabrics which are saturated with oil are dangerous.
Finally, I would add that the list of materials, chemicals, and compounds
subject to spontaneous ignition are listed over the hundred mark.
7
Information for Members of Emergency Fire
Service
DESCRIPTION AND DEFINITIONS OF ACCESSORIES
Appliance. Any vehicle, motor, etc., used for the carrying the means of
extinguishing fires.
Accessories. The various things carried on an appliance for fire extinction.
Branchpipe. A copper pipe tapering from 2| inches to inches and used
for directing the stream of water issuing from the hose and increasing its
velocity by decreasing the area of the waterway. It has a top and bottom
boss. The top boss is threaded externally to receive the nozzle, the bottom
boss is threaded internally, so that the branchpipe may be connected to the
male coupling of the hose.
Breechings. Of which there are two, viz.:—dividing and collecting
breeches. The dividing breeching is used for dividing one stream into
two and consists of a Y-shaped connection made of gunmetal having one
female coupling and two males.
The collecting breeching also is Y-shaped and is used for concentrating two
streams into one, therefore, has two females and one male coupling.
Couplings. Are known as male and female. The male coupling is
threaded externally and consists of threading, shank and lugs, the lugs
being used for hardening the joint. The female coupling consists
of a shank on which is retained a swivel attachment threaded
internally, so that it may receive the male coupling. Lugs are
attached to the swivel for hardening purposes.
The couplings weigh per pair about 7 lb. and are made of gunmetal. Thej
are for coupling lengths of hose together and must be treated carefully, so
that the threads do not become damaged.
Elbows. Are used for altering the lead of water, such as fires between
floors and ceiling or any situation that requires a bent lead. Made of gun-
metal it is threaded internally at one end for attachment to the branch and
at the other end externally, so that the nozzle may be attached.
Hand Pump. A single acting force pump encircled by an outer casing
which acts as an air vessel and giving a double acting effect. It has a
piston similar to a bicycle pump and two valves, delivery and suction.
Usually constructed of brass and supplied with a short length of 1-inch
diameter hose, its chief use is for chimney fires, the pump being placed in
a bucket of water and the jet directed up the chimney.
Hose. Delivery hose of the S.A.F.B. is of 2| inches diameter, of best flax
canvas, and some are rubber lined. Used for conveying water from and to
pumps and to the scene of the fire from the source of supply, it is usually
cut to lengths of 100 feet and its quality depends on the quality of the raw
material used. The stronger the material the thinner the threads and the
closer the weave and, therefore, the more watertight the hose. The threads
8
which run longitudinal and are termed the weft, determine the hydraulic
strength of the hose. The threads which run in a longitudinal direction
are termed the warp and take the external wear, whilst the threads that
are woven across the warp are termed the weft and determine the hydraulic
strength of the hose.
Hose Suction. Suction hose in use at present in the S.A.F.B. is of 8, 5 and
3| inches diameter, the 8-inch diameter hose is for salvage use from the
fire float, Fire Queen, stationed at Birkenhead.
The 5-inch hose is carried on the Dennis Pumps and the 3j-inch hose on
the D.T. Hale pumps, also on the Garford Hale.
Suction hose is constructed of alternate layers of rubber and canvas over a
metal spiral, the spiral prevents the hose from collapse when a partial
vacuum is created.
Suction hose is constructed to withstand external pressure.
Hydrants. Of the pillar type, consists of barrel, valve, spindle and outlet.
The outlet is threaded to take the female coupling of the delivery hose.
When not in use, the outlet is proteceted by a blank cap.
Most hydrants of the pillar type are single headed, but there are double
headed hydrants in use.
Hydrants, Portable. Portable hydrants or standpipes are used to obtain
water from mains where pillar hydrants are not available and are screwed
to fire plugs.
A standpipe consists of seven component parts, viz.:—head, ferrule, gland,
stuffing box, shank, lug-ring, and shoe. The shoe is counter-sunk to take
a leather washer which forms a watertight joint when the standpipe is
shipped.
Lines. Are of various lengths and sizes. Those in common use are:—
Long lines 100 feet of Manilla—2 inch.
Short lines of 50 feet of Manilla—2 inch.
Pocket lines of approximately 18 feet of three stranded cord.
Other lines in use are signal and suction lines. These are of varying length
and size.
Plate Cover. The cast iron protection over a fire plug.
Plate Cover Key. A tee-shaped key used to remove the plate cover.
Nozzles. Are made of gun-metal and threaded internally for attachment
to the branch. They are used to increase the velocity of the water issuing
from the branch by decrease of the area of the waterway. The orifice is
countersunk to protect it from damage and the outside is usually threaded
to take the female coupling of the finishing hose. Nozzles vary in size
from | inch to 1| inches, larger sizes are in use on the Fire Float.
Reducing Couplings. Are used to reduce the area of the waterway from
one diameter to another, as in the case of the D.T. pumps where the pump
inlet may be reduced to 2| inches or the suction hose be reduced to enable
it to be coupled direct to a hydrant.
Purncock Key. A tee-shaped key, which, when shipped on the spindle of
a fire plug, will turn on or off the supply of water.
9
Shut Off Coupling. Consists of a cylindrical-shaped casting of gun-metal,
the ends of which form a male and female coupling, to which are attached
respectively the branchpipe and the male coupling of the working length
of the line of hose. A semi-circular lever operates a butterfly valve which
controls the flow of water.
The valve must be opened and shut slowly, otherwise serious damage will
be done to hose or mains.
HOSE DRILL
All hose drill will be carried out at a smart double and drill must be
accurate. Speed will come with practice.
Always be sure that couplings are tight, water lost through leaking couplings
means so much less at the fire.
A line of hose consists of one or more lengths, the first length is that next
to the source of supply, the second is next to the first, and so on to the last,
which is termed the working length.
To Coil a Length of Hose. Start by laying the hose out in a straight line,
then bend the male coupling over the hose and, maintaining pressure, coil
the hose towards the female. Continue to coil over the female until the
coupling rests on top of the hose.
To Pick Up a Coiled Length of Hose. Stand with the female coupling
facing towards you, then grasp the lugs of the male coupling and rising
place the coil on the shoulder, allowing the female to rest on the chest.
To Lay Out a Length of Hose When Coiled. Place a foot on the hose
near the female coupling, hold the coil breast high by the lugs of the male
coupling, and walk towards the direction required, allowing the coil to
revolve, finally placing the male coupling on the ground. When handling
rubber-lined hose, it is permissible to unroll hose along the ground until
halfway and then unroll as for canvas hose.
To Connect Coiled Hose to a Delivery. Place the coil on ground with the
female on top and facing you. Hold the coil between the legs and connect
the female to the delivery by holding the shank of the coupling in the left
hand and turning the swivel to the right with the right hand, then harden
joint by means of a coupling key.
To Connect Two Lengths of Hose Together. Place the shank of the female
between the knees, grasp the shank of the male with the left hand, marry the
two and turn the swivel of the female to the right with the right hand and
harden joint.
To Disconnect Two Lengths of Hose. As for connecting, except that the
swivel of the female is turned to the left.
To Make Up a Length of Hose When Wet. Under-run the hose by raising
it over the shoulder and walk along, passing the hose over the hands,
allowing it to fall to the ground behind, then place the hose in a straight
line and coil as described before.
10
To Connect a Branch. Place the foot on the leather cuff at the lower end
of the male coupling and apply pressure until face of coupling rises off the
ground, then, grasping the branch with the right hand above top boss and
the left hand below the shank, turn to the right until tight.
To Disconnect a Branch. As for connecting a branch, except that the right
hand is slipped below the top boss and the branch is screwed to the left.
To Add a Length of Hose. Procure a length of hose from the hose box
and with the couplings in each hand proceed to branch end, knock off, dis-
connect branch and connect to new length, make joint to hose and turn on.
To Take Off a Length. Knock off, disconnect branch and double back with
it to the other end of the length, break the joint, connect the branch and
then turn on.
To Add a Length at a Special Place. Procure a length from the hose box
and with couplings in hand double to point of connection, lay hose out in
circular direction, bringing couplings to within 10 feet of each other, knock
off, break joint and connect in the length supplied, harden joints and turn
on.
To Take Off a Length at a Special Place.—Knock off, break inner joint of
the length to be removed, haul it in by the female coupling, then break joint
of length hauled in, connect to the next length and turn on.
To Replace a Damaged Length. Provide a fresh length and run it out
beside the damaged length, knock off, disconnect the joints of the damaged
length and connect in the fresh and turn on.
An overhand knot is tied in each end of the damaged length to denote that
it is damaged and if made up it will be coiled the reverse way—that is,
by coiling from the female end.
To Convert One Stream Into Two by Means of a Breeching. Place breeching
close to point of connection and attach the necessary hose and branch, knock
off, break the joint of the line of hose, connect to breeching, and turn on.
To Convert Two Streams Into One. Place breeching close to couplings
where new line is to be connected, provide the necessary hose and couple
to the nearest available supply and to the breeching.
When ready, knock off, break joint of line of hose, couple to breeching and
turn on.
This may also be done when two lines are at work by knocking off one line
removing the branch, coupling hose to breeching and then to the other line.
Getting to Work on a Roof, Etc. One man will mount to the place selected
taking a long line and lowers the line to the ground, the line is secured to
hose by means or a clove hitch and the branch is brought to the knot and
secured by a half hitch below the top boss. The branch and hose is then
hauled up, the branch laid down and the line made fast to some convenient
object.
The clove hitch is made about 15 feet back from the branch.
11
To Lower Hose From a Roof, Etc. The branch is lowered until the weight
is taken by the line, the line is then freed and the hose is lowered to the
ground. Care must be taken that the г izzle does not become damaged whilst
lowering or with contact with the ground.
To Stow Hose in Hose Box Ready for Running. Before flaking hose in a
hose box see that the couplings are clean and in good order, that the washer
seated in the female coupling is soft and pliable, then lay the female
coupling in the box at the far end and flake the hose to ride bight on bight
coupling up each length and flaking until the box is full. The box should
have sufficient ventilation and care must be taken to see that the hose does
not chafe when riding.
To Flake Hose on the Bollard. Lay the male coupling between the bollard
and with the hose clear of turns flake around uprights of bollard in a figure
of eight manner. When completed, strap securely. Should the female
overlap, turn back and make a bight and then secure as before.
HOSE DRILL.
DRILL. GETTING TO WORK WITH A LINE OF HOSE.
Crew. Consists of Four Men.
Fall In. At this order the crew will fall in two paces in rear of hose cart
standing properly at ease.
Squad, Shun. Right Dress. Eyes Front. Number.
Take Post. On receiving this order the crew will take up the following
position:—
No. 1 Right side rear.
No. 2 Left side rear.
No. 3 Right side front.
No. 4 Left side front.
Duties
No. 1 will take charge of branch.
No. 2 will clear hose from hose box, harden couplings and assist No. 1.
No. 3 will assist No. 4 with the hose cart, taking same to the nearest water
supply, secure standpipe and turncock key and lay them in position for No.
4, then disconnect hose and couple to standpipe.
No. 4 will secure plate-cover key, remove plate-cover, see that the plug is
clear and free of any obstruction and ship standpipe and turncock key, always
hardening the joint of the standpipe to ensure a watertight joint.
The head of the standpipe is always turned towards the scene of the fire
;nd when being turned always turn the head right handed.
12
Get to Work.
No. 1 will take charge of the branch at the scene of the fire, making sure
that he has sufficient hose to work with.
No. 2 will clear the hose from the hose box, harden couplings and assist
No. 1.
No. 3 will lay down the standpipe for No. 4, also the turncock key, then
break coupling and connect the female to the standpipe.
No. 4 will ship the standpipe and turncock key, and when ready will call
out " All ready, No. 1,” who will reply if ready, " Turn on.”
To Knock Off
On receiving the signal to knock off, No. 1 will shout, ” Knock off,” and
No. 4 will immediately do so.
To Make Up
On the signal to make up, No. 1 will disconnect the branch and return it
to the appliance and connect it to the remaining hose.
Nos. 2 and 3 will break couplings and under-run the hose.
No. 4 will disconnect the hose and make up standpipe, etc.
The hose is then made up by the crew, and the cart returned to its starting
position.
To Add a Length
No. 3 will procure a length of hose from the hose box and with a coupling
in each hand proceed to the branch end.
No. 1 anticipates his arrival by about 20 feet and shouts, " Knock off,”
disconnects branch and couples to the new length supplied.
No. 3 couples new length to the line of hose and as soon as he has a turn
of the female on the male will shout, " Already, No. 1,” who will reply, if
ready, ” Turn on,” and smartly gain the distance of the added length.
No. 2 assists to clear the hose and backs up No. 1.
To Replace a Damaged Length Branch End.
No. 3 provides a new length from the hose box and runs towards the branch,
lays female coupling at point of connection and takes male to the branch.
No. 2 leaves No. 1 and runs to point of connection.
No. 1, anticipating arrival of No. 2 at point of connection, shouts " Knock
off,” disconnects branch and couples it to fresh length. No. 2 disconnects
damaged length and couples in the fresh length and shouts, " Already,
No. 1,” who, if ready, replies, "Turn on.”
An overhand knot will be tied in each end of the damaged length and the
crew resume their original positions.
13
To Add a Length Supply End
No. 3, assisted by No. 4, supplies a length of hose and lays it out in a
circular direction, bringing the couplings to within 10 feet of each other.
When ready, ” Knock off,” couple in the fresh length and “Turn on.”
To Replace a Length Supply End
No. 3 supplies a fresh length and proceeds to point of connection with
male coupling, No. 4 retaining the female.
When ready, ” Knock off,” couples in the fresh length and ” Turn on.”
GETTING TO WORK WITH A LINE OF HOSE
Crew. Consists of Three Men
Duties
No. 1 will take charge of the branch.
No. 2 clears the hose, lays the standpipe and turncock key in position for
No. 3, breaks joint of hose and couples the hose to the supply and assists
No. 1.
No. 3 ships standpipe and turncock key and stands by to turn on the water.
To Get to Work
No. 1 takes branch to scene of fire.
No. 2 assists No. 3 with the hose cart and clears the hose, places the gear
in position for No. 3, breaks the hose coupling and couples the female to
the standpipe, then assists No. 1.
No. 3 secures the plate-cover key, removes the cover, ascertains that the plug
is clear and ships the standpipe and turncock key. When ready, ” All
ready, No. 1,” who, if ready, will reply, " Turn on.”
To Knock Off
As for drill for four men.
To Make Up
As for four men.
To Add a Length Branch End
No. 3 will provide a length of hose from the hose box and with a coupling
in each hand run towards the branch.
No. 2 leaves No. 1 and runs to the standpipe and takes charge of same.
No. 1 anticipates the arrival of No. 3 and calls, ” Knock off,” transfers
branch to added length. No. 3 couples in the new length and shouts, ” All
ready, No. 1,” who replies, ’’Turn on,” and smartly gains the distance of
the added length.
14
To Replace a Damaged Length Branch Eni
No. 3 provides length of hose and proceeds to branch, laying the female at
point of connection en route, and returns to connecting point.
No. 2 leaves No. 1 and takes charge of standpipe.
No. 1 anticipates arrival of No. 2 at hydrant, calls " Knock off.” No. 1
then transfers branch to fresh length. No. 3 disconnects damaged length
and connects the fresh length. When ready,, calls ” All ready, No. 1,”
who will reply, ” Turn on.”
An overhand knot will be tied in the damaged length at each end.
To Add a Length Supply End
No. 3 provides length of hose and runs it out in a circular direction, bringing
the couplings to within 10 feet of each other. When ready, ” Knock off,”
couple in the fresh length and ” Turn on.”
If branch is within easy distance, No. 2 will assist No. 3.
No. 2 will assist No. 1 to gain added length.
To Replace a Length Supply End
No. 3 provides fresh length and laying female at source of supply proceeds
with male to the point of connection.
No. 2 will take charge of supply and, anticipating No. 3’s arrival, will
knock off.
No. 3 will disconnect damaged length and couple in the fresh length.
No. 2 disconnects from the supply and connects the fresh length.
GETTING TO WORK WITH A LENGTH OF HOSE
Crew. Consists of Two Men
Duties
No. 1 will take charge of the branch.
No. 2 will take cart to the nearest source of supply, ship standpipe and
turncock key, break joint of hose, couple to delivery and stand by to Turn
on.”
To Get to Work
Nos. 1 and 2 will take cart to nearest available supply.
No. 1 will clear sufficient hose to reach scene of fire and then proceed with
branch to same.
No. 2 will secure plate-cover key, remove cover and ship standpipe and turn-
cock key, then couple hose to delivery.
When ready, No. 2 will shout, ” All ready, No. 1,” who replies, *’ Turn on.”
To Add a Length Branch End
No. 2 provides a length of hose and with a coupling in each hand runs
smartly to the branch, lays couplings down and returns to the hydrant.
15
No. 1 anticipates No. 2’s return, shouts, " Knock off,” disconnects branch
and couples it to the new male supplied, then couples added length in.
When ready, No. 1 will call, ” Turn on,” and gain distance of added
length.
To Add a Length Supply End
No. 2 provides a length of hose and lays it out in a circular direction,
bringing the couplings to within 10 feet of each other. When ready,
” Knock off,” couples in the fresh length and " Turn on.”
No. 2 will then assist No. 1 to gain added length.
To Replace a Damaged Length Branch End
No. 2, as before, provides a fresh length and takes it to the branch end,
laying the female coupling at point of connection en route and then return
to source of supply.
No. 1 anticipates No. 2’s return, shouts " Knock off,” disconnects branch
and couples it to the fresh length, disconnects damaged length and couples
in fresh length.
The coupling in of the fresh length at the female end may be carried out
by either No. 1 or No. 2, according to the length of the line of hose.
To Replace a Damaged Length Supply End
No. 2 provides a fresh length and leaving female at supply end runs with
male coupling to connecting point. No. 2 will then ” Knock off,” disconnect
damaged length and couple in the fresh length.
As before, No. 1 may assist No. 2 if close enough.
GETTING TO WORK WITH LINE OF HOSE
Crew. Consists of One Man
To Get to Work
The man will take the hose cart to the scene of the fire, place branch in a
secure position, and then proceed with cart to nearest available supply.
Remove plate-cover and ship standpipe and turncock key, couple hose to
delivery, ” Turn on,” and run back to the branch, securing same, if possible,
before the arrival of the water.
To Knock Off
The branch will be secured as in getting to work, the man will then race
to the supply and turn off the water.
To Make Up
As for other drills.
14
Chemical Extinguishers
SODA AND ACID
This type of extinguisher is used for the extinguishment of small fires and
is regarded as an excellent first aid accessory on account of its ease of
manipulation, portability and quickness of action. It is of two gallons
capacity and consists of a metal cylinder, a screwed cap, which seats the
inlet and elbow joint, to which is attached a discharge hose and nozzle.
Seated in the inlet is a metal cage which contains a glass acid bottle and
stopper.
To Charge. Cleanse the cylinder thoroughly and fill with two gallons of
water, add to the water 20 oz. of bicarbonate of soda and stir thoroughly.
Charge the acid container with 3| oz. of sulphuric acid, insert stopper, place
bottle in the cage and then place cage in the inlet of the cylinder and screw
down cap.
To Discharge. Grasp the hose and handle in one hand, invert extinguisher
(turn over type) and direct discharge at the seat of the fire. If the
material on fire is of a loose nature, the discharge may be sprayed by placing
the thumb over the nozzle. A handle across the bottom of the extinguisher
enables the operator to hold the cylinder whilst it is in operation.
Action of the Extinguisher. By inverting the extinguisher, the sulphuric
acid is allowed to mix with the soda solution and generate carbon-dioxide
gas at a pressure of approximately 100 tb. per square inch, the pressure so
created is sufficient to discharge the liquid through the nozzle to a distance
of approximately 30 feet, the discharge lasting about 1 to minutes.
This type of extinguisher may be said to act in three ways. They are:—
1.	The force of the jet bringing about the displacement of oxygen.
2.	By the heat absorbing properties of the liquid used.
3.	By the dilution of the atmosphere immediately surrounding the fire with
C.O.2; this gas is about 1^ times heavier than air and does not support
combustion. A certain portion of the gas issues with the discharge, the
remainder exerts a pressure to expel the liquid.
There are various methods for releasing the sulphuric acid, the most common
being:—
1.	Screw top or spindle release.
2.	Fracture bottle (reversible and upright).
3.	Turnover.
Break or fracture bottle type carried on the Brigade appliances is the Gold
Medal, which has to be reversed before fracturing the bottle.
FOAM EXTINGUISHERS
Foam extinguishers are used chiefly for the extinguishing of liquid fires,
such at petrol, oils and varnish. It is difficult to extinguish fires of this
nature with water alone, due to the fact that most inflammable liquids float
on the surface of the water and the effect of these extinguishers is to provide
a thick coat of foam which excludes the oxygen from the surface of the
17
ООО
Contents 10 ib.
Liquified C.O.2.
CARBON
DI-OXIDE PORTABLE
EXTINGUISHER
FOAM EXTINGUISHER
OUTER CYLINDER
Soda bi-carb.
Foam Producing Agent.
Water.
INNER CYLINDER.
Aluminium Sulphrte.
Water.
SODA ACID FRACTURE
BOTTLE TYPE
18
burning liquid, thereby smothering the fire. The operation of the extin-
guisher involves the use of two chemical compounds, which must be kept
separate until required for use. When mixed, they combine chemically
to produce a heavy foam, having a volume about eight times that of the
combined liquids. This increase is due to the generation of carbon-dioxide
gas, which is enclosed in the bubbles of foam. The chemicals used are
bicarbonate of soda and foam-producing agents, such as glue, glucose, or
licorice root, dissolved together in water in an outer cylinder and a water
solution of aluminium sulphate contained in an inner cylinder. These
cylinders are charged according to the directions on the tins containing the
dry charges, and is as follows:—
Empty the powder from the tin into a dry pail.
Fill the tin seven times with warm water and pour on to the powder, then
stir thoroughly until dissolved and pour into outer cylinder.
To charge the inner cylinder:—
Empty the contents of the tin on to a clean sheet of paper. Pour one tin
of boiling water into a clean ungalvanised pail and gradually add powder,
stirring thoroughly until all is dissolved, and then pour into the inner
cylinder adding water, if necessary, to bring the liquid to the proper level,
that is to say, | inch from the top. Replace inner cylinder and screw down
top cap. The liquid capacity of the hand type of foam extinguisher is two
gallons and the pressure does not exceed 100 lb. to the square inch, which
is sufficient to project the contents a distance of about 20 feet. To operate,
use the method laid down for the soda acid spindle release type.
THE PYRENE EXTINGUISHER
This type of extinguisher is charged with carbon tetrachloride and is used
chiefly for the extinguishing of fires concerning electrical equipment. The
liquid used is non-inflammable, non-conductive and does not form any
explosive mixture. When ejected on to any hot surface it vaporises into
a gas which is about times heavier than air, which descends on to the
fire and acts as a fire extinguisher by smothering. Under certain conditions
the decomposition of the liquid will give rise to toxic and poisonous fumes,
but under ordinary conditions where there is ample ventilation the extin-
guisher can be used with safety. The type carried on appliances in the
S.A.F.B. is the Pyrene fire gun, which contains one quart of fire extinguishing
liquid having a base of C.T.C., and the liquid is ejected by direct displace-
ment.
To Charge. Unscrew filling nut and pour one quart of the special liquid
used into cylinder and replace.
THE PORTABLE C.O.2 (CARBON-DIOXIDE) EXTINGUISHER
To extinguish fire, this type of accessory relies on the fact that the gas
(carbon-dioxide) is slightly heavier than air; it displaces and dilutes the
oxygen in the atmosphere immediately surrounding the fire, thereby placing
a blanket of inert gas between the fire and the atmosphere.
The extinguisher consists of a steel cylinder tested to 3,360 lb. per square
inch and containing 10 tb. of liquid carbon-dioxide under pressure. The
pressure in the cylinder varies with the temperature; at ordinary room
temperature this pressure will be between 800 to 900 tb. per square inch.
19
SODA-АСЮ REVERSIBLE TYPE
EXTINGUISHER
PYRENE LIQUID VAPORISING
TYPE EXTINGUISHER
20
One pound of liquid C.O.2 when converted into gas at ordinary room
temperature and normal atmospheric pressure will occupy about 8 cubic
feet. Through the centre of the cylinder there is fitted a siphon tube
which, when the extinguisher is operated, allows the liquid C.O.2 to be
expelled through the hose to be vaporised at the directing horn. A
sealing disc encloses the C.O.2 in the cylinder and this is cut when the
wheel valve at the head of the extinguisher is turned to the left. This
allows the C.O.2 to escape and it leaves the horn in the form of a fine
snow. This snow vaporises into gas and since C.O.2 does not support
combustion, acts as an extinguishing agent. The closing of the wheel
valve affords temporary stoppage only, but it does enable a fireman to
change his position if desired. The temperature of the contents varies
from 60 degrees Farht. to 100 degrees Farht. below freezing point,,
therefore, firemen should take care that no discharge comes in contact
with the person or frostbite will occur. The maximum range of the
extinguisher is about 8 feet and the method of testing is by weight alone.
If no loss is shown, they need not be discharged and refilled, as the
C.O.2 does not deteriorate with age. This type of extinguisher may be
used with safety on " electrical ” fires, as the gas is non-conductive and
will not damage the most intricate wiring or fabric.
To Operate. Take extinguisher to the scene of fire.
Release directing horn and direct towards fire.
Withdraw pin from wheel valve and turn valve to left.
Spray discharge on the fire, starting from the bottom or base of the flames.
To stop discharge, turn wheel to the right.
THE KILO MAGNESIUM ALLOY BOMB
Introduction. As the name implies, an incendiary bomb is one which
is designed for the purpose of causing and spreading fires. Several types
have been tried at one time or another by different countries, but the
type which is most likely to be used on account of its effectiveness, is a
bomb commonly referred to as the magnesium alloy bomb, probably
weighing no more than one kilo (about 2 tb. 3 ounces).
Construction. The magnesium alloy bomb consists of a thick walled
tube, 9 inches in length and 2 inches in diameter, the walls of which
have a thickness of .4 inch. On end of the tube there is fitted a tail
of sheet metal 5 inches in length which steadies the bomb during its
flight, this makes the overall length approximately 14 inches. An igniter
set is situated in the nose of the bomb, this consists of a striker, spring,
percussion cap and igniter mixture which may be composed of 88%
barium peroxide and 12% magnesium powder or 72% potassium perman-
ganate and 28% aluminium powder. A safety pin, inserted through the
bomb at its base, prevents it from functioning during transportation.
Surrounding the lower portion of the tube are vent holes which allow
ignited gases to escape to the outer atmosphere.
With the exception of a few ounces in weight of the tail and igniter set,,
the whole of the bomb is constructed of incendiary material.
21
The bomb casing is constructed of magnesium alloy consisting of approxi-
mately 90% magnesium, 5% aluminium and 5% zinc. The aluminium
is imposed for several reasons: (1) for greater safety in smelting and
machining; (2 ) reducing the cost of metal; and ( 3 ) magnesium will oxidize
readily in certain atmospheres and is progressive, whilst aluminium is much
more stable and is not so progressive after the first skin is attacked by
oxygen, therefore a mixture of the two helps to retard the oxidation consider-
ably. The zinc is added to the alloy for hardening purposes.
In air the rate of combustion of magnesium alloy is comparatively slow
and cannot be claimed as explosive. Combustion begins at the melting
temperature and special care has to be taken in the smelting of this metal
for castings. When burning, the maximum temperature reached is in
the region of 2,372 degrees Farht.
The core of the casing is filled with thermite, which has two ingredients,
granulated aluminium and black iron oxide. The oxide is procured in
large quantities from iron or steel rolling mills or other such places,
and it is mixed with the aluminium in the portions of 30 aluminium to
70 iron oxide (FE3 04). When ignited the aluminium obtains the
necessary oxygen to support its combustion from the iron oxide, the product
being aluminium oxide and iron. In the process the temperature may
reach a maximum of 4,500 degrees Farht., thus, by the reaction already
stated, the thermite can operate in a closed vessel and be completely
converted whilst excluded from air.
The resulting melted iron remains in a fluid and hot state for some time,
according to the bulk of powder, in the case of the 1 kilo bomb, the time
for propagation of sufficient heat to ignite the magnesium alloy is about
40 seconds. The time factor can be adjusted by the degree of granulation
of the powder and also by the addition of a retarding agent.
Like many other elements these two powders are harmless by themselves
and perfectly safe at ordinary temperatures when mixed. It requires
a high temperature to produce chemical reaction.
It can be seen that a certain amount of delay takes place before the
magnesium begins to burn, this is necessary since if the action is too quick
expansion takes place at a greater rate than the casing can withstand
and a blow-out would occur, and most likely all the heat and most of
the thermite would be discharged into the air and the effectiveness of the
bomb lost.
Fires caused by this type of bomb are entirely designed to take place from
the magnesium, though, of course, if the bomb landed on a suitable place
the initial flame through the vent holes from the thermite could start a
fire.
The amount of thermite in the casing is balanced with the work it has to
do to melt the magnesium alloy, that is to say that by the time the mag-
nesium alloy is ready to burst into flame the thermite has spent its fiercest
heat and would be turning solid. Once a portion of the alloy has become
fluid, propagation of combustion takes place by itself, and is accompanied
by intense glare, high temperature and scatteration of molten metal.
22
The effect of magnesium burning on various surfaces produces a variety
of results. For instance, a bomb burning on a sheet of iron, provided
the thermite has spent itself, burns slowly and rather rapidly produces
a casing of magnesium oxide on the outside exposed to the air, which
causes it to become a glowing mass of molten metal. Great care must
be exercised against throwing a solid stream of water on the magnesium
alloy when in this state.
Apparently the sheet iron radiates the heat produced for combustion away
too quickly to allow proper combination with the oxygen of the air.
On concrete and plaster sheet and such like materials the effect is quite
the opposite, and the alloy burns fiercely throughout its existence. In this,
instance it apparently extracts oxygen from the cement, silicon and calcium;
if the concrete is wet the action is very much accelerated, and on the
removal of the resulting calx it is found that the concrete is deeply pitted.
On asphalt, particularly if welt treated with bitumen or tar, the burning
action is almost similar to the effect as on iron; in this instance the bitumen
surrounding the bomb becomes ignited and since both need oxygen, to<
support their combustion, the one tends to smother the other.
How the Bomb Functions. Action takes place on impact, the safety pin
is sheered through, and the needle-pointed striker causes the detonation
of the percussion cap which in turn inflames the igniter mixture, and the
resulting temperature brings about the ignition of the thermite.
The action of the thermite causes the fusion and ignition of the magnesium
alloy with the results already described, the molten magnesium alloy
will burn for a period of from 10 to 20 minutes if uncontrolled and the
sparks of molten metal will cause the ignition of any inflammable material
within a radius of 20 feet.
During the first minute or so the bomb looks extremely violent; jets of
flame are emitted from the vent holes and sparks of molten metal are
thrown in all directions. After this initial action the bomb becomes less
active because the magnesium casing melts and the pressure within is.
released and the bomb settles to a mass of glowing metal.
Methods of Control. We have seen that under certain circumstances the
bomb operates fiercely; in others it is sluggish and seems less dangerous.
In the initial combustion it can be of a semi-explosive nature or it may
have a fairly fierce flare and then become apparently dead for some seconds
and then quietly or fiercely come to life.
It is understood that the initial heat comes from the thermite, and since
the thermite has sufficient oxygen to support its own combustion no.
smothering will put it out; douching it with water would be more or less,
dangerous since it would be tantamount to throwing a bucket of water
on a ladel of molten steel with the result that can well be imagined.
However, one would not have sufficient time to attempt the extinction of
the thermite since it lasts just sufficiently long to produce combustion in
the alloy, so that the secondary process of the bomb is that which can
reasonably be got under control.
Magnesium alloy requires oxygen to carry on its combustion and, like
all combustible material, the more oxygen the more fiercely it burns.
23
There are only two ways of extinguishing fire: (1) by the exclusion or
dilution of the oxygen which supports the combustion of the material;
or (2) reducing the temperature of the burning material to below its
ignition point. Therefore if we apply either of the two methods stated
above we must finalise any extinction of fire.
The two main methods of dealing with the magnesium alloy bomb are:
(a)	Water method.
(b)	Sand method.
(a)	Water Method. Where there is inflammable material about» which
will usually be the case, the bomb will have always started a fire, and
therefore close approach to the bomb will be difficult if not impossible.
A stream of water from a suitable hand pump will effectively deal with the
fire if tackled within the first few minutes, and it therefore is a matter
of importance that personnel of factories, business houses, hospitals, etc.,
be organised, trained and suitably equipped. The householders also, with
the equipment recommended and a little training, can handle any situation
that may arise in their homes.
The conditions on entering a room where a bomb is burning would be
such that it would be unwise to contemplate using an appliance which
required the operator to stand upright or undertake any physical exertion.
When water is applied to the burning bomb, the effect is not to extinguish
the bomb but to cause an accelerated combustion of the alloy so that
instead of burning in the ordinary way by combining with the oxygen
in the atmosphere, it obtains an increased supply from the decomposition
of the water, hydrogen (the other component part of water) is set free
and burns in the air.
If a jet or solid stream of water is directed on to the burning bomb it
will cause intensification of burning and increased scatteration which may
be harmful to the operator, but, water in the form of a fine spray does
not produce this scatteration but intensifies the burning and causes the
alloy to be consumed in from one to two minutes, the spray at the same
time keeps the immediate surroundings below ignition temperature.
To enable the above method to be carried out it is necessary to be equippd
with a hand stirrup pump (constructed to Government specifications) and
capable of delivering, at least, If gallons of water per minute to a
distance of about 50 feet. The pump should be fitted with 30 feet of
hose and a dual-purpose nozzle having an orifice of Y$ (one-eighth) inch.
The length of the jet should be about 30 feet and when adjusted to
spray it should have a throw of 15 feet. Buckets of water or other suit-
able containers are required, it is well to remember that, due to fire brigade
operations or fracture of mains, domestic supplies may not be available
and therefore static supplies must be on hand.
The personnel required for operation should consist of three persons: one
for the operation of the nozzle, another to work the pump whilst the third
would be used for the maintenance of supplies of water.
The method of attack would be to apply water in the form of a jet to
any fires caused by the bomb, and occasionally spray the bomb to quicken
24
its combustion. After the bomb has expended itself the jet can be used
to finalise the extinction of fires.
During this operation, the man controlling the nozzle would be in the
prone position and taking advantage of any cover present, such as an
overturned chair or table.
Many chemical extinguishers are excellent for the purpose for which they
are designed, but would have certain disadvantages in meeting the situation
caused by an incendiary bomb.
The average soda-acid extinguisher is of two gallons capacity and this
would in many cases be insufficient to deal with the bomb and the resultant
fires. In thick smoke it would be necessary to keep close to the ground
which mould make an extinguisher difficult to handle, moreover it would
be extremely dangerous to use some of the extinguishers designed for
special purposes. For example, carbon tetra-chloride used in some types,
would probably generate phosgene gas perhaps with explosive violence
when in contact with burning magnesium alloy.
(b)	Sand Method. As previously stated, the exclusion of oxygen from
a burning substance is a recognised method of fire control, this method
can easily be applied to a burning magnesium alloy bomb.
Magnesium depends on oxygen from some external source for its com-
bustion, therefore if the supply of oxygen is cut off the combustion will
cease. For this purpose sand or foamed slag, a form of blast furnace
slag which is used extensively in the manufacture of concrete, can be used.
The equipment required consists of a sand container constructed of hard-
wood, a hardwood shovel or scoop and a hoe of the same material.
The method of operation is to cover the bomb with sand and with the
aid of the hoe, draw the bomb and sand on to the scoop and place the
whole into the container for removal. Any fires caused by the initial
functioning of the bomb can then be extinguished by means of water.
The covering of the bomb shields the operator from scatteration and
radiated heat, but it is well to remember that the heat is deflected towards
the floor, therefore, if the floor is combustible, the bomb must be removed
as soon as possible or it may burn through to the floors below.
If the floor is incombustible the covering of sand may be left and removed
when the metal has cooled off.
Sandbag Method. Where the bomb has lodged on an incombustible
surface the sandbag method is the easiest way of dealing with it. Sand-
bags may be made from an ordinary standard sandbag, one of which will
provide two bags for this purpose, each holding about 20 tb. of sand.
One is tufted similar to a bed mattress and should be made so that at
least 4 inches thickness of sand is retained, the advantage of this is that
it retains its shape better when held up as a covering to the face, the method
of application being to rush forward and deposit the sandbag on the bomb,
the fabric is soon burned through and the sand is allowed to spill over
and around the burning bomb.
The other half is made up pudding fashion and can easily be handled with
one hand.
25
Sand Mat. The application of sand, in the form of a mat, becomes a very-
simple matter. The mat shall be made as per diagram and when brought
into operation it should be held up so as to protect the face, the operator,
when approaching the bomb being in a crouching position.
Remember, do not throw the mat but lay it over the bomb as accurately
as possible. This has the effect of smothering the scatteration of molten
metal and making the removal of bomb (if necessary) easy.
Methods of Attack. Due to the weight of the kilo bomb, a modern war-
plane could carry between 1,000 to 2,000 of these bombs, the number
depending largely on the weight of petrol carried. The bombs would
probably be dropped from a considerable height as they do not reach their
maximum velocity (about 350 feet per second) and therefore their greatest
power of penetration until they have fallen about 5,000 feet. They
would not be dropped singly but released from containers, each container
holding from 10 to 20 bombs and the contents of several containers may
be released simultaneously.
Owing to its lightness, lack of weight, preponderance in the nose and lack
of streamlining, the bomb has very poor ballistics and cannot be aimed
accurately. The bombs spread out as they fall and a group of bombs
dropped simultaneously from 5,000 feet would cover an area of about 100
yards square.
For special targets it is quite possible that heavier bombs or those of
a different type may be used.
Penetration. In spite of its poor ballistics the bomb is capable of penetrat-
ing any ordinary roofing material such as slate, tile and in most cases,
roofing iron (depending on the angle of impact) and to become lodged
in the upper floors or in the ceiling spaces between the top floor and the
roof and cause fires.
If there is a boarded floor immediately below the roof the bomb may
fail to penetrate the floor on impact but, in all probability, would burn
through to the ceiling and floor below in a few minutes, or the molten alloy
may run through the crevices in the floor.
If, however, there is only a lath and plaster ceiling below the roof the
bomb would penetrate this at once; if not, it would burn through very
quickly and start a fire below, in which event it may not have been
26
in situ long enough to have started a fire of any consequence in the roof
space. Roofing timbers a few feet away from the bomb may, however,
be ignited within a very short space of time by the radiated heat.
The magnitude of the fires caused in roof spaces and top floors will
depend largely on the amount of combustible material in this area, time
taken for the bomb to burn through and the quickness of action of the
squads of the particular building who are responsible for its protection.
Protection Against Impact. The following are among the materials which
have found to be proof against impact of the kilo bomb:—
Mild steel plate, one-quarter inch thick.
One layer of sandbags, laid as close as possible.
3| to 4 inches of good reinforced concrete.
Hardwood of 1 inch thickness.
Protection Against Burning. The action of the burning bomb on floor-
boards has been found to vary greatly. Sometimes boards % inch thick
are burned through in four or five minutes, but on other occasions the
time has been considerably longer.
It is worth noting, however, that on test Australian hardwoods have been
found to possess greater heat resisting properties than any imported soft
timbers.
Lead would be melted almost at once. Corrugated iron (20 gauge) at
times, may be just proof against burning, but, if during the burning of the
thermite, a vent-hole of the bomb casing is against the metal, the blow-pipe
effect may create a hole, also the metal will get red hot and if in contact
with the roofing timbers or other combustibles it will certainly set them
on fire.
The following materials, among others, provide protection against
burning:—
Dry sand, two inches thick.
Foamed slag, two inches thick.
Household ash, two and a half inches thick.
Earth, reasonably free from vegetable matter, two inches.
Preparations of the plaster type made up mainly of ground rock anhydrite,
about three-quarters of an inch.
Asphalt (certain types), about three-quarters of an inch.
Note.—A loose covering, such as sand, will be disturbed and the protect-
ing covering diminished by the fall of the bomb, this can hardly be avoided
except by providing a further cover for the sand or increasing the thick-
ness of the sand. It must be remembered, moreover, that sand is heavy
and the floors might not support the added weight.
Incidence о J Fires. In large towns the average proportion of open spaces
to built up areas may be taken to be of the order of five to one or about
15% built over; accordingly for every six bombs dropped one might be
expected to hit a building and the remaining five to fall in streets, gardens,
yards, etc., where they would burn out without doing any serious damage.
Supposing, therefore, that only one bomber carrying 1,000 bombs has
reached such a district, one hit in six would mean about 166 hits, but of
27
these half might glance off sloping roofs and not penetrate or penetrating
might fail to function. The remaining 83 or 8% of the bombs dropped
would probably cause fires.
The size of the area in which these fires might occur would depend
on the speed at which the bomber was flying, how quickly the bombs
were released and the height of the plane. For instance, flying in a
straight line at 200 miles per hour at a height of 5,000 feet or more and
releasing 20 bombs per second, the bomber would drop its 1,000 bombs
in a little under 3 miles and would start a fire every 60 or 70 yards. If
flying at 100 miles per hour and dropping 100 bombs at every two
seconds it would drop them all in 1,000 yards and start about one fire
in every 12 or 13 yards.
In practice, there is little doubt that attacks would be made in formation,
which means, that the number of fires would be many times multiplied.
This clearly shows the necessity of educating the general public in methods
of fire control and enlistment of emergency firemen.
Precautions. Personnel should be trained by a certificated instructor and
equipment obtained.
Easy access to attics and roof spaces must be provided if it does not already
exist.
The amount of inflammable material in roof spaces, attics and upper storeys
should be reduced to a minimum.
Floors to be protected with one of the materials recommended.
Constructional roof timbers such as rafters, trusses, purlins and most
dangerous of all, boarded trimmings below slates or matchboard partitions
can be given a certain amount of resistance to radiated heat and actual
flame by treatment with certain makes of flame resisting paint or other
protective covering. Constructional timber can be given protection by
the application of certain preparations of the plaster type, the degree of
protection depending on the thickness applied.
No external treatment of any kind of paint will render wood incombustible
or protect the timber from the action of the bomb in actual contact with
it, consequently treating the surface of a floor with any paint would only
slightly retard the fire.
Means of communication with the fire brigade is a matter of importance,
telephonic communication may be impossible, therefore it necessary to
have messengers ready for emergency.
Fire watchers must be posted on rooftops for the location of any bombs
dropped, communications must be maintained between the fire watchers’
post and the squads on the floors below.
All bombs dropped in the open may provide a guide to enemy raiders,
therefore it is essential that they be covered as soon as possible.
Other Incendiary Bombs
HEAVIER BOMBS
As has been explained already, the main objective of an attack by light
incendiary bombs is the starting of more fires than can be dealt with bv
the available fire brigade services. This objective is the more likely to*
28
INCENDIARY BOMB
/^/f7A7/A'& COATZW/rZO'Y'-
/Жаг7//^/</А7 /яол/ оглгм^
С^/лМыт/с	Z?'Z? &.
76vrv??//' /£-6~<2o >
^cr^wom /7%>y&7Z7^
d~ 7 /’''/urr’/'nttJr^
Х8'/<з /Z/urmr-ifurn
S/yr&r/ Z^//V
J 7zVZ

^OZ>y-Mtoy
/&/Y/7~£Z? /7/XTWtt

Z'fc гпс^У
29
be achieved the greater the number of bombs dropped, and it is therefore
to be expected that attacking aircraft will employ the smallest size of
bomb which can be relied on to start a fire. The one kilo magnesium
(electron) bomb fulfils this requirement as regards ordinary houses and
many types of industrial buildings, but bombs of similar type weighing
2, 12, and 25 kilos are known. The larger bombs are likely to be aimed
only at special targets, but it is possible that 2 kilo bombs might be used
in indiscriminate bombing.
The 2 kilo bomb can be dealt with by the same methods as the kilo bomb.
It would, however, usually penetrate to a lower floor.
MULTIPLE-EFFECT BOMB
For use against certain kinds of target, e.g., store yards, large factories,
building and ammunition dumps, bombs have been designed containing
a number of separate incendiary units (magnesium or phosphorus) which
are expelled from the bomb on functioning and scattered over a relatively
wide area.
These bombs will usually weigh at least 12 kilos and are provided with
a steel nose enabling them to penetrate strongly constructed roofs. The
separate incendiary units are small and have little penetrating power after
ejection from the main bomb. The magnesium units can be dealt with
in the same manner as magnesium bombs. As regards phosphorus, see
under that heading.
THERMITE
As previously explained, compositions of the thermite type are used as
priming material in the magnesium (electron) bomb, and types of bomb
were used in the last war in which the entire incendiary charge consisted
of thermite; they were not, however, considered efficient.
Thermite is a mixture of iron oxide and powdered aluminium which on
burning liberates molten iron. Although thermite produces a very high
temperature (about 2,500 cent.) which enables it to melt through a
considerable thickness of steel, it burns much more rapidly than mag-
nesium and generates only about one-eighth the amount of heat that would
be generated by the burning of an equal weight of magnesium alloy. Its
generally incendiary effect therefore is much smaller than that of mag-
nesium.
A number of materials will protect steel against the melting action of
thermite bombs. For instance, J inch of asphalt will give such protection
against thermite bombs up to 5 kilos in weight.
The thermite bomb, or what remains of it, can be dealt with by means,
of the hand pump. The same technique as recommended for the 1 kilo
magnesium (electron) bomb will apply.
THE KILO MAGNESIUM ALLOY BOMB WITH EXPLODER
CHARGE
The efforts of the enemy to demoralise the public of England by incendiary
means, failed because of the prompt action on the part of the fire squads,,
therefore to prevent such action and to employ more fully the purposes
of the bomb an explosive has been incorporated in the later type.
30
THE KILO” MAGNESIUM ALLOY
—INCENDIARY BOMB—
SIDE VIEW
В
SECTION
Mixture t.^teet Contamer
of Lead	-A
Azide and_
"1
,P.E.T. N^WAX
y77i\
jS^TT^yy^Aa^^rC
The bomb, after release, is кер/ от
a vertical course by /he vanes (A).
Mben the nose of the casing (B)
strikes the objective, the force of
impact sheers the safety pin(C)
and overcomes the tension of the
spring (D) thus allowing the
percussion cap (E) to contact the
striker (F).
The detonation of the percussion
cap causes the ignition of the
Igniter mixture (G)
(88% Banum Peroxide л
/2% Magnesium Powder or
72% Potassium permanganate
and 28 % A/uminium Powder) л
in turn the priming composition
(HJ known as' Thermite and
consisting of 77% Black Iron Oxide
and 23% granulated Aluminium),
the action being accompanied by
flame emitted through the vent
holes (/). The temperature set
up by rhe priming composition is
sufficient to fuse and ionite the
magnesium alloy (J) (80% Mag-
nesium, 5% Aluminium £ 5%Zinc)
The combustion of the ai/oy is
characterised by intense heat,
glare and scatteration of moden
meta!
Enlarged Section showing
High Explosive Bursting Charge
FOR INCORPORATION WITHIN
INCENDIARY BOMB.
-Cardboard Collar
Aluminium Container
OMPRISING - PENTA-EHYTH«tlTOU-T«TltA- MITKA'
„ Ca rd boa rd Washers
Issued by the Dept, of C/vd Defence. S'. Aur.
31
They are identical in construction with the one kilo magnesium alloy
bomb already described except with the addition of the explosive, which
is fitted into the base of the bomb.
The filling plug at the base of the bomb is removed and a steel adaptor
screwed into its place and into the adaptor is screwed a steel container
which holds the explosive (see diagram).
The action on impact is similar to the kilo bomb, and the thermite burns
towards the base of the bomb and penetrates the steel container.
The temperature and pressure so created are sufficient to cause the detonation
of the lead azide and styphnate mixture and, in turn, the detonation of
the explosive.
The explosive functions with a loud report and the brisance of the
explosive used is sufficient to cause fragmentation of the steel container
with some danger to anyone in the near vicinity and greater scatteration of
the magnesium alloy.
Bombs of this type explode within two minutes after ignition, and since
there is no distinguishing mark between this type and the non-explosive,
all kilo magnesium alloy bombs must be treated as explosive type and
no control action must be attempted until two minutes after ignition,
unless a substantially constructed shield is used to protect the person from
flying fragments, or where there is danger of a serious fire when the risk
that the bomb may be of the explosive type must be accepted.
Other than the above, the method of control is the same as that adopted
for the control of the kilo magnesium alloy bomb.
THE JAPANESE MAGNESIUM ALLOY BOMB
The type of bomb used by the Japanese is somewhat similar to the kilo
magnesium bomb, with the exception that it is much heavier. It consists
of a casing with end plates made of magnesium alloy measuring about 8.4
inches in length and 5.4 inches in diameter at the widest part and 3.4 inches
at the narrow end.
An analysis of the alloy showed the following percentages of metals:—
Aluminium.....................................3.34%
Zinc..........................................2.80%
Manganese	.16%
Silicon ---------	.07%
Iron -	.	-	-..........................07%
Copper..........................._	.	. Traces
Magnesium --------	93-0% approx.
The casing is fitted with tail fins which in turn are supported by strips of
steel. The interior of the casing is chromatised to prevent corrosion, and
contains a paper tube about 7.4 inches in length and about .9 inch in
diameter.
The tube and the spaces between it and the inner walls of the casing are
filled with thermite, the ignition of which is slightly delayed.
32
RECONSTRUCTION OF GERMAN OIL BOMB WITH H.E. BURSTER
S& '	~ ХХГ^/З"
33
Initial action, in all probability, takes place on impact by means of a fuze
fitted into the nose of the bomb, and this action brings about the ignition
of two short pieces of fuze extending from the central tube to the thermite,
the fusion of the magnesium alloy from then on being similar to the
kilo magnesium alloy type.
Penetration, both by impact and burning, would be greater with this type
of bomb owing to the increased weight and the amount of alloy in com-
bustion, therefore protection would have to be increased and additional
safeguards provided.
THE GERMAN OIL BOMB WITH H.E. BURSTER
It is well known that the heat value of oils generally is greater in value
than metals, and this fact is made use of in the German oil bomb.
In order to show the approximate amounts of heats disengaged by the
combustion of various substances the following table has been compiled..
The unit used is the calory, which means the amount of heat necessary
to raise the temperature of 1 gram of water from 0° to 1° Centigrade.
Coal -.............................................. 5,000-	8,000 calories
Wood charcoal....................................8,080
Petroleum -	-..............................10,500
Paraffin........................................-	11,140
Cellulose from wood wool -	4,100- 4,200
Magnesium wire	------	6,080
Oils, various	------	9,300-11,000
Therefore with ignition, scatteration of the burning oil and selection of
targets the oil bomb must command respect.
Incendiary Oil Bombs Marked kc 250 gb. The external dimensions
of this bomb are the same as for the 250 kg., H.E.G.P. bomb, but it
weighs only about 110 kg! It consists of a sheet-iron body, a central
steel tube 29 in. long x 4| in. dia., a tail unit, and one Rheinmetall fuse
No. 26.
The bomb contains 14 gallons of heavy oil or oil-petrol mixture. The
fuse is fitted with an impact and pressure switch, the object of the latter
being to burst and ignite the bomb before it reaches the ground: it is
intended to function by means of the pressure set up in a tube attached
to one end of the fuse, and open to the air flow at the other end where it
enters the nose plug of the bomb. If the bomb functions on impact, the
crater formed will be about 3 ft. dia. x 2 ft. deep. The action of the
bomb is as follows: When either of the switches is closed the bridge
in the fuse fires the detonator in the picric acid exploder, which detonates
a 2^ tb. charge of T.N.T. The explosion of the T.N.T. pellet breaks up
the bomb and two tubes of charcoal-magnesium composition contained in
the central tube of the bomb. The burning charcoal and magnesium
ensure ignition and continued burning of the main oil filling, which is
scattered by the explosion over an area about 20 yards in diameter.
Control. When the bomb functions, either by impact, air pressure or
delay-action fuse, the burster charge of T.N.T. shatters the casing, and the
34
body of oil is scattered over a wide area, covering adjacent combustibles
with a thin layer of oil. The extinguishing of fires so caused requires
the use of water—gas, foam or sand being inadequate.
PETROL OR OIL
Although these materials, on burning liberate nearly twice as much heat
as magnesium, they are not suitable incendiaries for use in small bombs
on account of their lightness, which makes it necessary to add heavier
materials to the bomb in order to obtain the weight necessary to enable
it to penetrate roofs, a 1 kilo petrol bomb, for instance, would contain
less than 1 pint of petrol, and its heat value would be very little greater
than that of the 1 kilo magnesium (electron) bomb. Five kilo and 10
kilo petrol bombs were used in the Great War, but were not found very
effective.
The incendiary effect of petrol works almost entirely upwards. Quite
a large amount can be burned on a floor without more than scorching it,
and the fire can be smothered with sand or similar material, whereas
burning thermite will continue to burn through a floor even when completely
covered by sand, unless there is at least 3 inches of sand underneath.
The most effective extinguisher for petrol is a foam appliance, but small
quantities can be extinguished with water alone. Water, however, if
directed on to a pool of burning petrol, is liable to float the petrol and
spread the fire. In these circumstances it is better to use the water to
keep any surrounding combustible material wet until the petrol burns out
or can be smothered with sand.
Phosphorous. As already mentioned, bombs of the multiple unit type
including phosphorous units may be employed. Phosphorous burns rather
slowly, with a very cool flame, and is therefore not a very good incendiary
agent. It can easily be extinguished with sand or water, but re-ignites
again on drying. After a phosphorous fire has been extinguished with
water, therefore, it is necessary to keep all contaminated material wet until
it can be removed. This removal should be effected with great care because
phosphorous is poisonous and causes dangerous burns on coming in contact
with the skin. A phosphorous bomb would be recognisable by the dense
white smoke produced and by the smell.
Sodium and Sodium-potassium Alloys. These materials have been sug-
gested as possible fillings for incendiary bombs on account of the explosions
which occur when attemps are made to extinguish them with water.
They are, however, poor incendiary agents and can be easily extinguished
with dry sand. The best method of dealing with a sodium or sodium-
potassium alloy bomb would be (a) to prevent any fire which it had
started from spreading by cautious use of the stirrup hand pump—taking
care to keep the water away from the bomb, and (b) either to cover the
bomb with sand or allow it to burn itself out.
35
ADELAIDE
HE ADVERTISER PRINTING OFFICE
ADELAIDE