


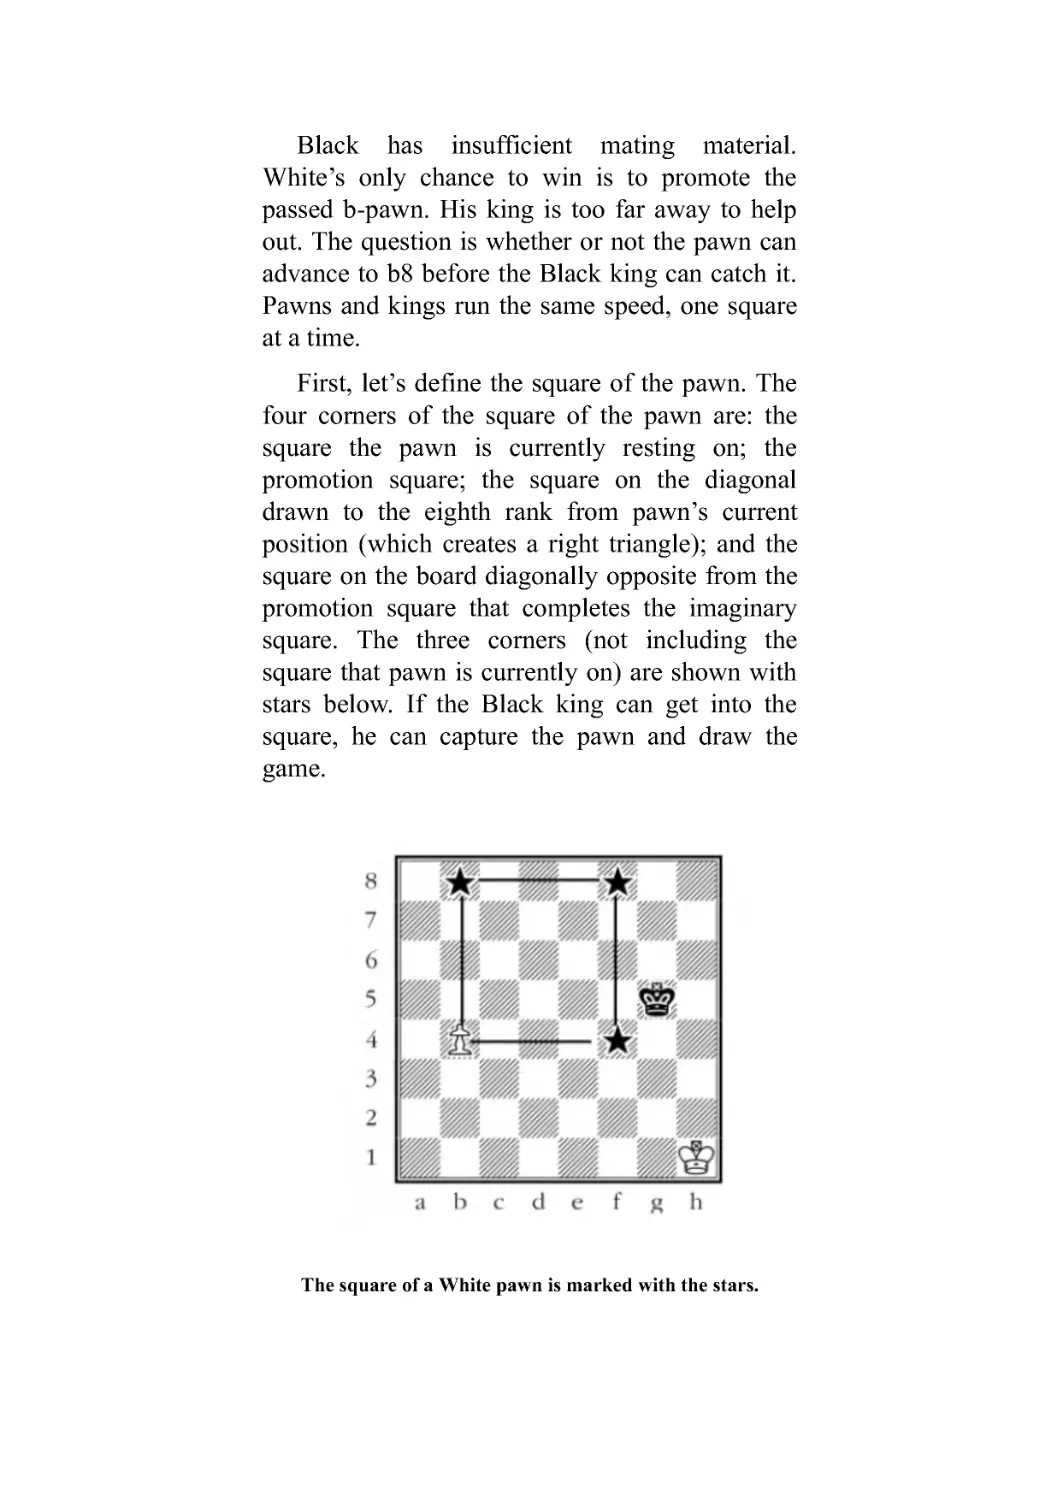

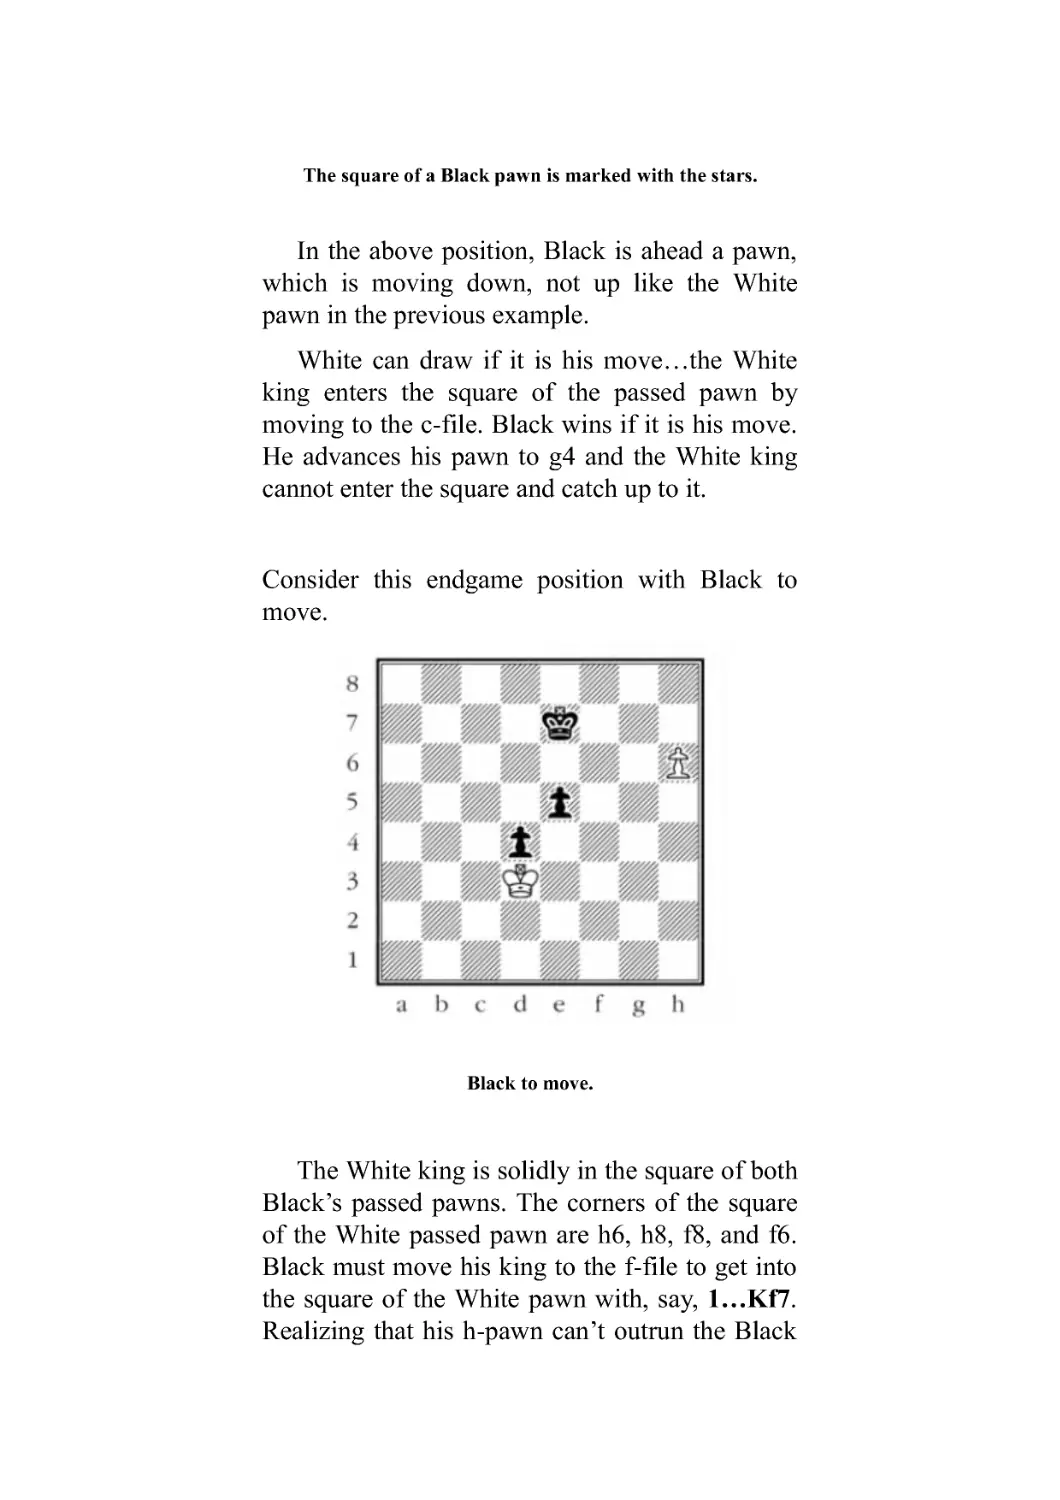


Текст
Chess Detective Press
Illustrations by Kevin Hempstead
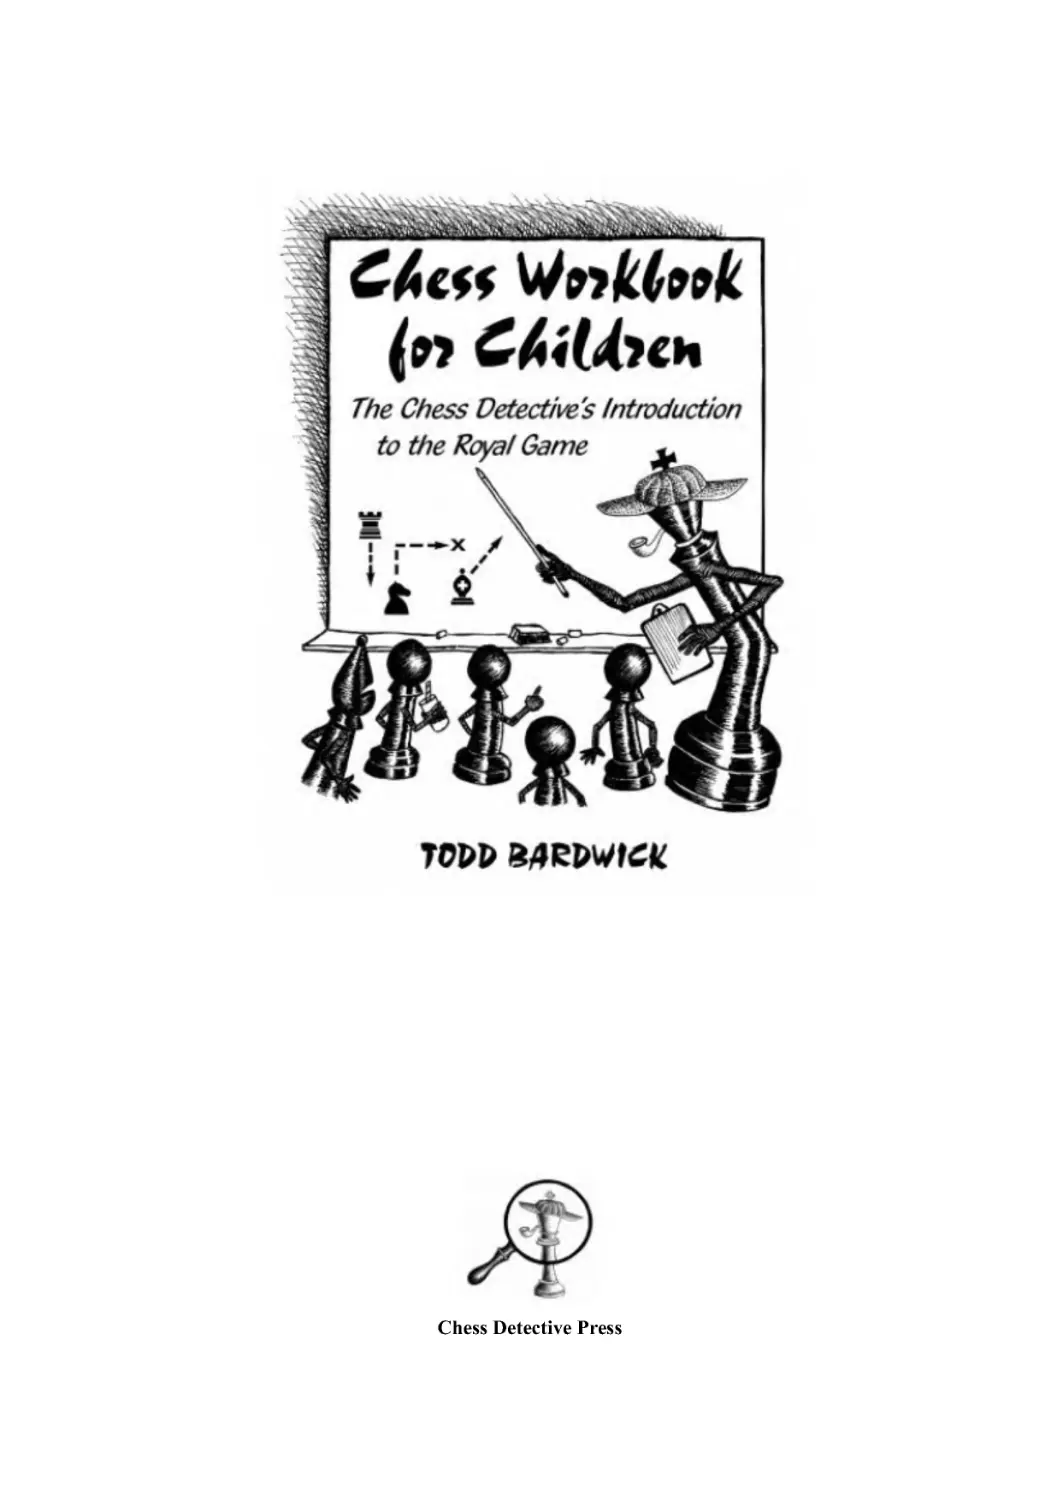
Chess Workbook for Children
The Chess Detective’s Introduction to the Royal
Game
Copyright © 2006 by Todd Bardwick. Printed
and bound in the United States of America. All
rights reserved. No part of this book shall be
reproduced in any form or by any electronic or
mechanical means including information storage
and retrieval systems without permission in
writing from the publisher, except by a reviewer,
who may quote brief passages in a review.
Included in these reserved rights are publishing
on the Internet or in annotated databases.
Published by Chess Detective Press, 1 Red Fox
Lane, Englewood, Colorado 80111. 303-770-
6696. First Edition.
Fourth printing: 2016
www.ColoradoMasterChess.com
ISBN-13: 978-0-9761962-1-1
Library of Congress Control Number:
2006903602
Library of Congress Cataloging-in-Publication
Data available upon request
DEDICATION
This book is dedicated to chess students everywhere
with the sincerest wish that chess will enrich your life in
whatever endeavors you choose to pursue in the future.
Have fun learning how to play the Royal Game!
CONTENTS
INTRODUCTION FOR PARENTS
INTRODUCTION FOR CHILDREN
LESSON 1: CHESS BASICS
Problems
LESSON 2: OPENINGS
Problems
LESSON 3: SCOREKEEPING
Problems
LESSON 4: BASIC CHECKMATES
Problems
LESSON 5: BASIC TACTICS
Problems
LESSON 6: DRAWS
Problems
LESSON 7: FREE STUFF!
Problems
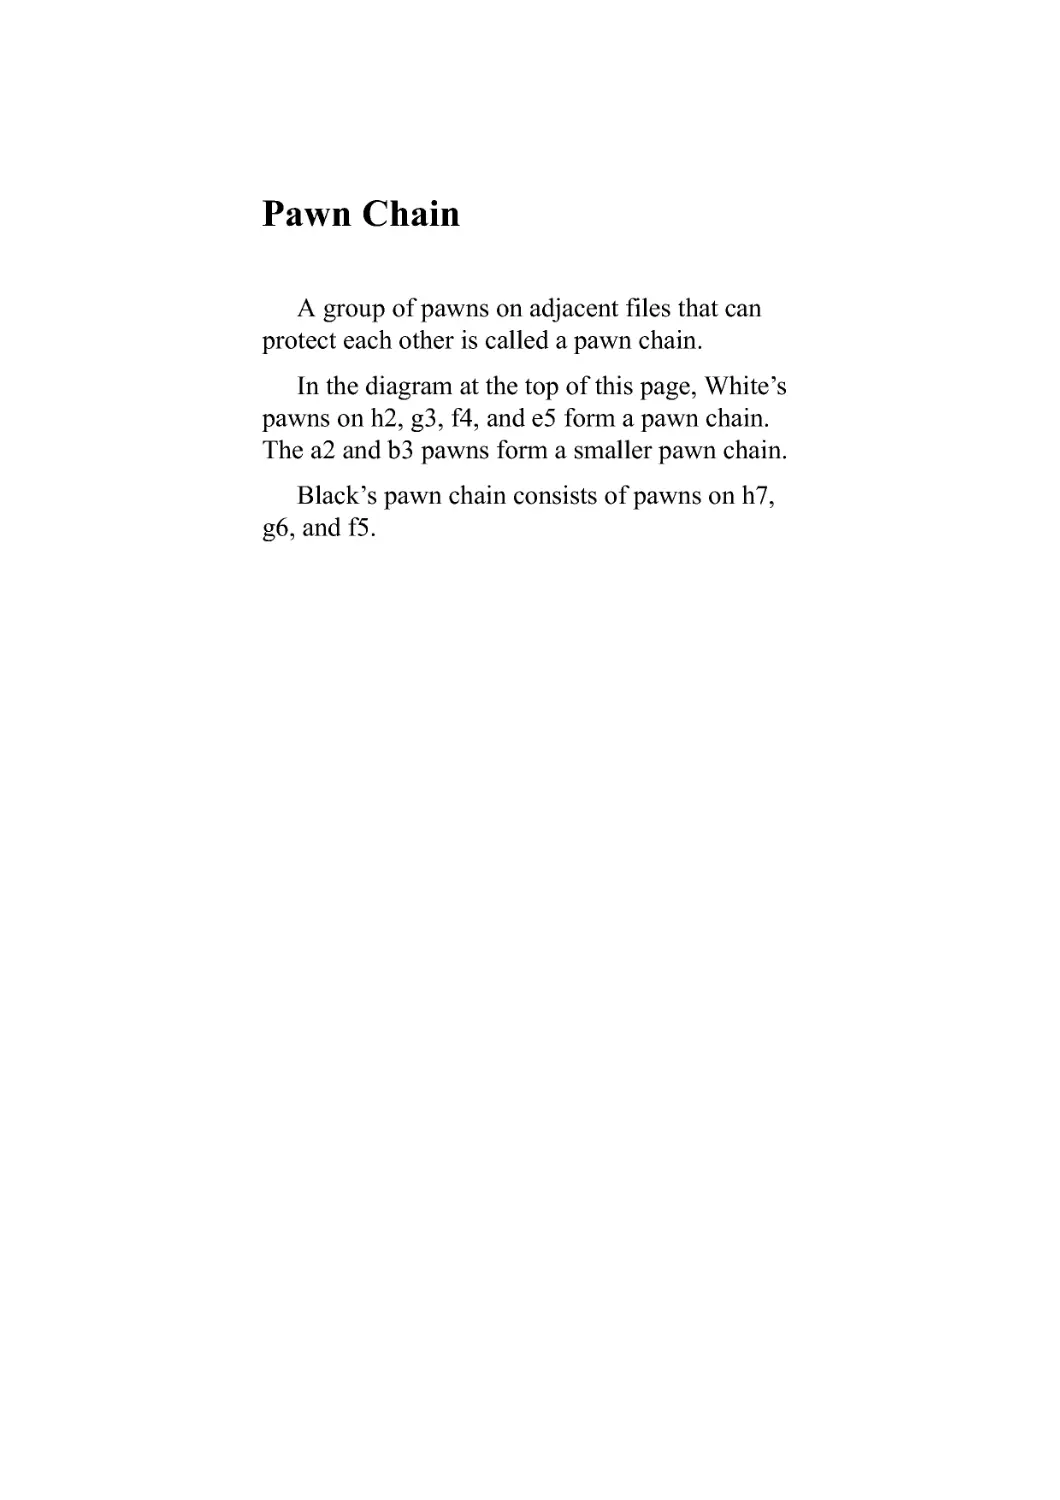
LESSON 8: PAWN STRUCTURE
Problems
LESSON 9: SQUARE OF THE PAWN
Problems
LESSON 10: CHECKMATE PATTERNS
Problems
APPENDIX - SOLUTIONS TO PROBLEMS
GLOSSARY
ABOUT THE AUTHOR
INTRODUCTION FOR
PARENTS
Chess has been the ultimate game of strategy
for generations. Played by adults and children for
centuries as a fun and entertaining way to
challenge the mind, chess is one of the most
popular games in the world.
Benjamin Franklin wrote in 1779 that the
game of chess “is not merely an idle amusement
(since) life is a kind of chess, in which we have
often points to gain, and competitors or
adversaries to contend with, and in which there is
a vast variety of good and evil events that are in
some degree the effects of prudence or the want
of it.” Franklin suggested that playing chess
develops foresight, circumspection, perseverance,
and sportsmanship.
Today, educators and parents have discovered
that chess is a wonderful way to teach young
children mathematical concepts and important
thinking skills they can use their entire life.
Here is a summary of some benefits of
learning to play chess:
Improves cognitive skills (including
concentration,
pattern
recognition,
decision making, algebraic and geometric
thinking, problem-solving,
spatial
reasoning, and critical-thinking skills)
Improves self-confidence and self-worth
Increases attention span
Increases memory capacity
Encourages understanding of choice and
consequences for problem- solving - helps
students realize that they are responsible
for their actions and must accept the
consequences of those actions
Provides competition, fosters interest and
promotes mental alertness
Teaches good sportsmanship
Improves communication through written
and oral presentation skills
Many studies (see www.uschess.org) show
chess helps children with cognitive development
and increases math and verbal test scores.
Educators have also noted chess helps to raise
self-esteem.
Chess also lays a solid foundation for the
student’s real-world business success later in life
and overlaps strategies used in the world of
sports.
Time-management skills, in particular, are
developed through chess. The chess player has a
limited amount of time to complete the game and
must budget this time carefully by picking the
correct points in the game to spend his thinking
time. As in life, and in the classroom when taking
tests, the student needs to learn how to use his
time efficiently.
A chess problem also forces the student to
look at both sides of a situation. This is a
breakthrough concept for most young children
who are mainly focused on themselves. In chess,
a young student learns that his opponent’s moves
and pieces are just as important as his own.
Debating skills, where the debater must consider
both sides of an argument, are developed through
chess. Both time-management skills and the
ability to assess a problem from different
perspectives
are
critical for
attorneys,
businessmen, and salesmen.
From a pure calculation perspective, chess can
help develop logical and critical-thinking skills
needed for engineering, which I can personally
attest to as a civil engineer.
You will definitely observe that children who
are good at math also tend to be good chess
players. Most good math students will pick up
chess quickly. Chess is also an effective teaching
tool for the students who have difficulty with
math, because it teaches math concepts in the
context of a game, making it more fun and
interesting.
Chess Workbook for Children is designed as a
companion workbook to the teacher’s book,
Teaching Chess in the 21st
Century – Strategies
and Connections to a Standards-Based World.
Teaching Chess in the 21st
Century outlines a
beginner chess course for classroom use by the
teacher and compares chess with a sample 2nd
grade math curriculum, emphasizing the overlap
with National Council of Teachers of
Mathematics Standards.
The same ten basic chess lessons from
Teaching Chess in the 21st
Century are presented
in this workbook. Both of these books can stand
on their own or be used together and contain real-
life analogies that children will easily relate to.
At the end of each lesson in the workbook,
there are two problem sets of varying difficulty -
Basset Hound problems are the easiest; the Chess
Detective problems are tougher.
Finally, I would like to thank the people who
helped make Chess Workbook for Children a
success.
First, to my students over the years who
helped to develop the stories presented here and
for giving me the opportunity to gain experience
as to how to effectively present a chess
curriculum to children.
For proofreading and making suggestions on
how to improve the book, I would like to thank
my father, Alan Bardwick, an Expert strength
tournament player and retired business professor
at the Community College of Aurora; Richard
Cordovano, a software engineer, Class B strength
tournament player, and part-time chess coach;
and Gary Bagstad, a middle school teacher in
Denver Public Schools, Class A/B strength
tournament player, and school chess coach.
I greatly appreciate the time and effort from
Gordon Pierce for his advice and consultation in
educating me about the details of the publishing
industry.
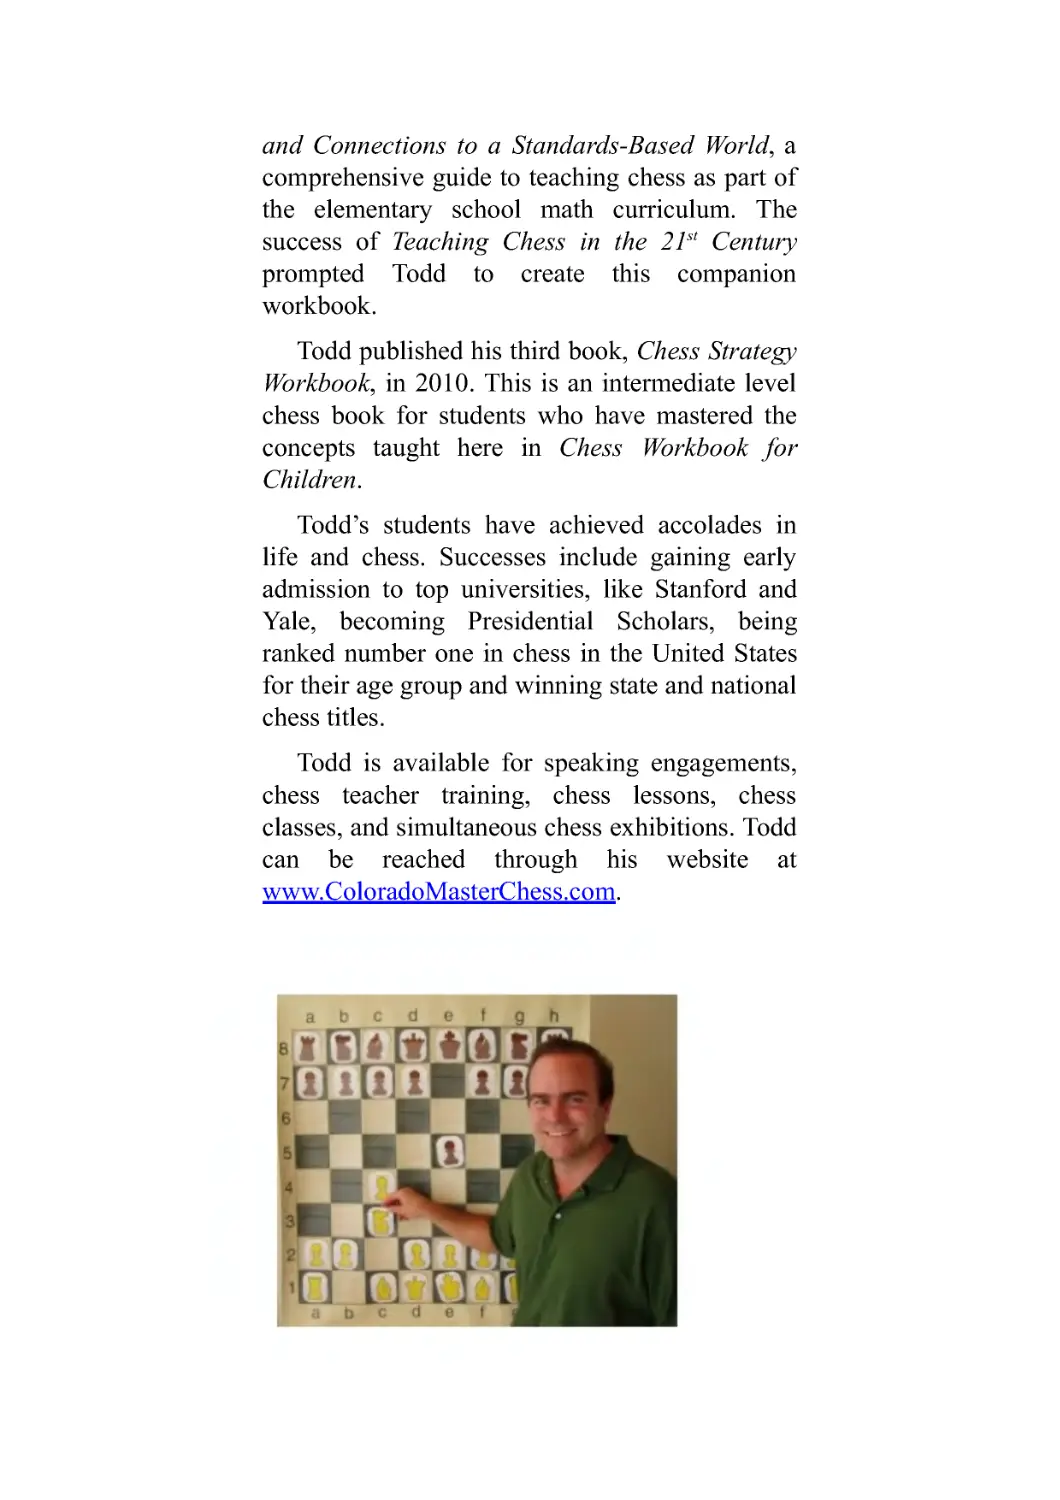
Finally, I would like to thank the artist, Kevin
Hempstead, for the clever and entertaining
illustrations that he created for the book.
Once you have completed Chess Workbook
for Children, you are ready to learn more
advanced chess strategies found in the
continuation book, Chess Strategy Workbook,
which I wrote for the intermediate level chess
player.
Best wishes in your chess endeavors,
Todd Bardwick
National Chess Master
INTRODUCTION FOR
CHILDREN
Chess is the ultimate strategy game and lots of
fun! This is a workbook for children who are
learning how to play chess. Reading all the
chapters should be easy and fun; you will enjoy
the stories and the large chess diagrams. You may
want to have a chess set nearby to play out some
of the moves that are in the workbook.
The glossary in the back of the book gives a
quick reference for chess terms and words that
you may not know. Throughout the chapters of
the book, the first time more difficult words are
used their definitions will be given in brackets [
] after the word.
At the end of each chapter, you can test your
new chess skills with two groups of problems.
If you are brand new to chess, start with the
Basset Hound problems.
Intermediate students can move on and try the
Chess Detective problems.
The answers to the problems are in the
Appendix in the back of the book.
LESSON 1
CHESS BASICS
“You sit at the board and suddenly your heart leaps. Your
hand trembles to pick up the piece and move it. But what
chess teaches you is that you must sit there calmly and
think about whether it’s really a good idea and whether
there are other, better ideas.”
Stanley Kubrick (1928-1999)
filmmaker, producer
Chess started in India hundreds of years ago
and is played all over the world today. It is an
easy game to learn, but a tough game to master!
If you have never played before, this lesson will
teach you the basics.
There are pawns and five types of pieces in a
game of chess. Each has different moves and
powers. There are white pieces and black pieces.
Here are the names of the pieces and their
symbols:
The battlefield for a chess game is called a
chessboard. Each army starts out with the same
eight pieces and eight pawns.
A chessboard has 64 squares.
If you are good at multiplication, you will notice that 8 x 8 =
64. (8 squares top to bottom and 8 squares left to right)
32 squares are white (or light) and 32 squares are black (or
dark).
The lower right hand square for each player is white. To help
you remember how the board is rotated there is a famous
chess saying, “White on Right.”
Each square has a first and a last name. The
square’s first name is a small letter, and its last
name is a number. If you have ever played the
game Battleship, the naming system is similar.
The White king is on e6.
The Black king is on a2.
The White knight is on g7.
The White pawn is on f3.
The Black queen is on e1.
The Black bishop is on b7.
The White rook is on c5.
Ranks and Files
Ranks are rows. The ranks are named 1 through 8.
Files are columns. The files are named a through h.
Ranks are numbered from each player’s side,
starting with the 1st rank closest to the player.
The 8th rank is defined as the rank furthest away
from the player. In other words, on the diagram at
the bottom of page 3, the Black king on a2 is on
White’s 2nd rank, which is Black’s 7th rank.
Piece Movements, Captures and
Values
Each piece moves in a special way and has its
own value. Neither player can capture his own
pieces. The following pages show how the pawns
and each of the chess pieces move. White and
Black take turns moving.
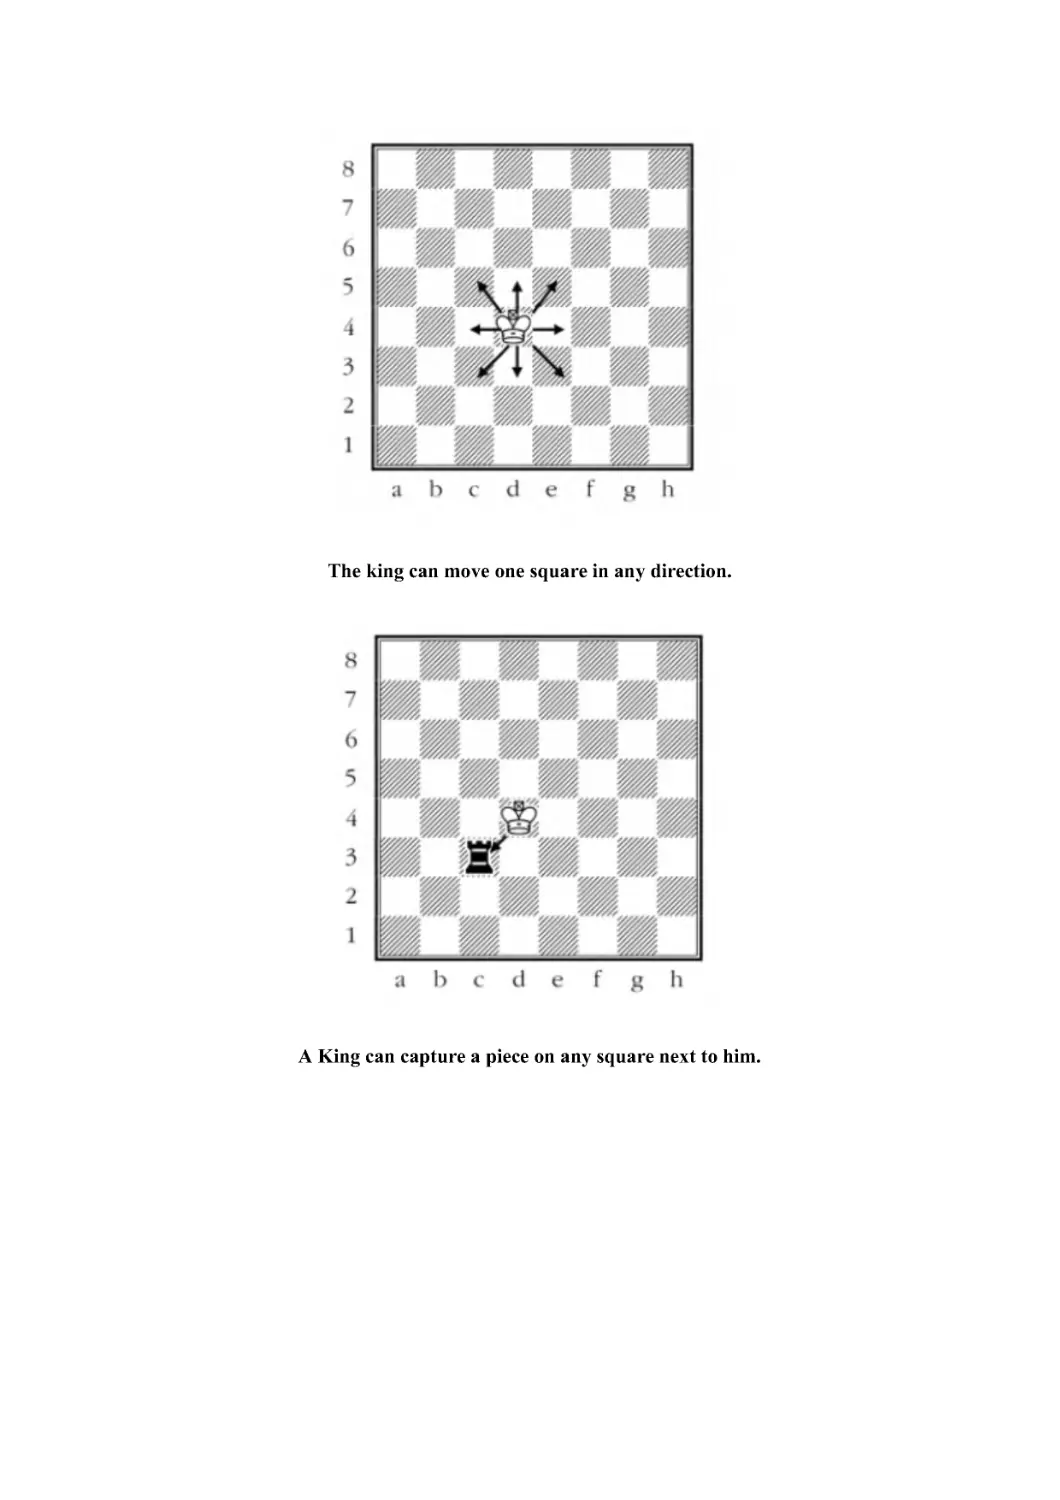
King
The king can only move one square at time in
any direction. You can only have one king (unlike
checkers) and he is worth the entire game and
cannot be traded. Pretend he is valuable because
he is carrying all the gold of the kingdom, and he
is slow, because gold is heavy! Your opponent
wants to capture the king and take away his gold.
The king can move one square in any direction.
A King can capture a piece on any square next to him.
He captured the rook on c3.
Pawn
The Pawn can move either one square or two
squares forward, but only if no piece is blocking
its path. It can only move two squares forward if
it is on its starting square. Pawns are the only
piece that cannot move backwards. Each player
begins the game with eight pawns.
Starting position for the pawns.
White’s pawn moves forward two squares.
Black’s pawn moves one square forward.
The pawn is the only piece that captures
differently than it moves. Pawns capture one
square forwards in a diagonal direction. When
chess was invented many years ago, the pawn
was a foot soldier, holding a shield in front of
him, for protection. The soldier would stab at his
opponent diagonally out to the front, not directly
forwards because his shield would block his
sword.
The White pawn can either move to d4, capture the bishop, or
capture the knight.
The pawn captured the bishop.
The first special move in chess is when the
pawn gets to the eighth rank (and scores a
touchdown!); it promotes into a queen, rook,
bishop, or knight.
The queen is usually selected as the promotion
piece because she is the most powerful. Usually
pawns promote at the end of the game since this
is when the opponent has the fewest pieces
available for defense. The greatest number of
queens possible in a game for either player is nine
(you start the game with one queen and eight
pawns). Two queens is usually all you need.
The Black pawn moves forward and promotes to a queen.
Pawns have the lowest value of any piece and are
worth one, or one pawn.
Knight
The knight looks like a horse and is the only
piece that can jump over other pieces. Knights
move in a capital “L” shape, two squares in one
direction, then one square to either side.
On each move, the knight changes the color of
its square from light to dark or from dark to light.
A knight can move to every square on the board,
but is a slow-moving piece.
The knight can move to eight squares, e2, g2, h3 ,h5, g6, e6,
d5, or d3.
A knight on the rim can only move to four squares: b2, c3, c5
or b6.
Knights capture by landing on an opponent’s
piece, not by jumping over it. If a horse jumps
over your head, you are okay. If a horse lands on
your head, you are not okay!
Because knights are slow-moving pieces, they
like to be located near the center of the board so
that they can move to any part of the board
quickly. A knight on the edge of the board takes
several moves to get to the other side of the
board. There is an old chess rhyme, “A knight on
the rim is dim.” The rim is the outer edge of the
board and dim means bad or weak. A knight is
worth three pawns or three points.
The Black knight jumps over the pawns and captures the
White queen on e5.
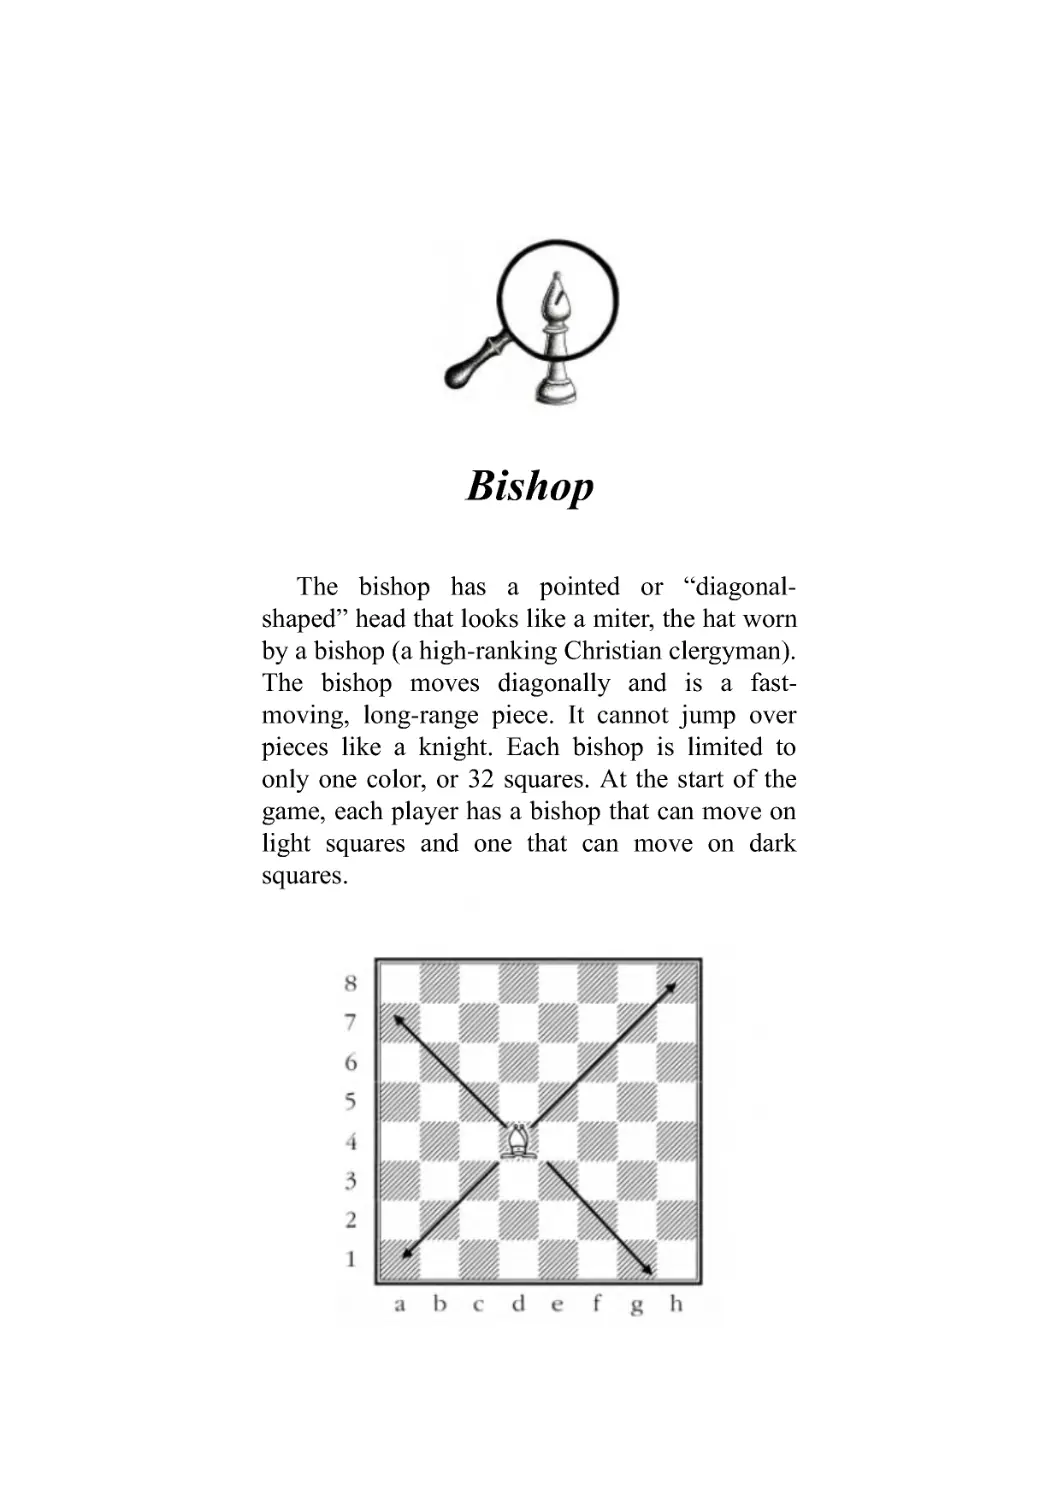
Bishop
The bishop has a pointed or “diagonal-
shaped” head that looks like a miter, the hat worn
by a bishop (a high-ranking Christian clergyman).
The bishop moves diagonally and is a fast-
moving, long-range piece. It cannot jump over
pieces like a knight. Each bishop is limited to
only one color, or 32 squares. At the start of the
game, each player has a bishop that can move on
light squares and one that can move on dark
squares.
Bishops can move to any square along a diagonal.
Unlike the knight, a bishop cannot jump over other pieces.
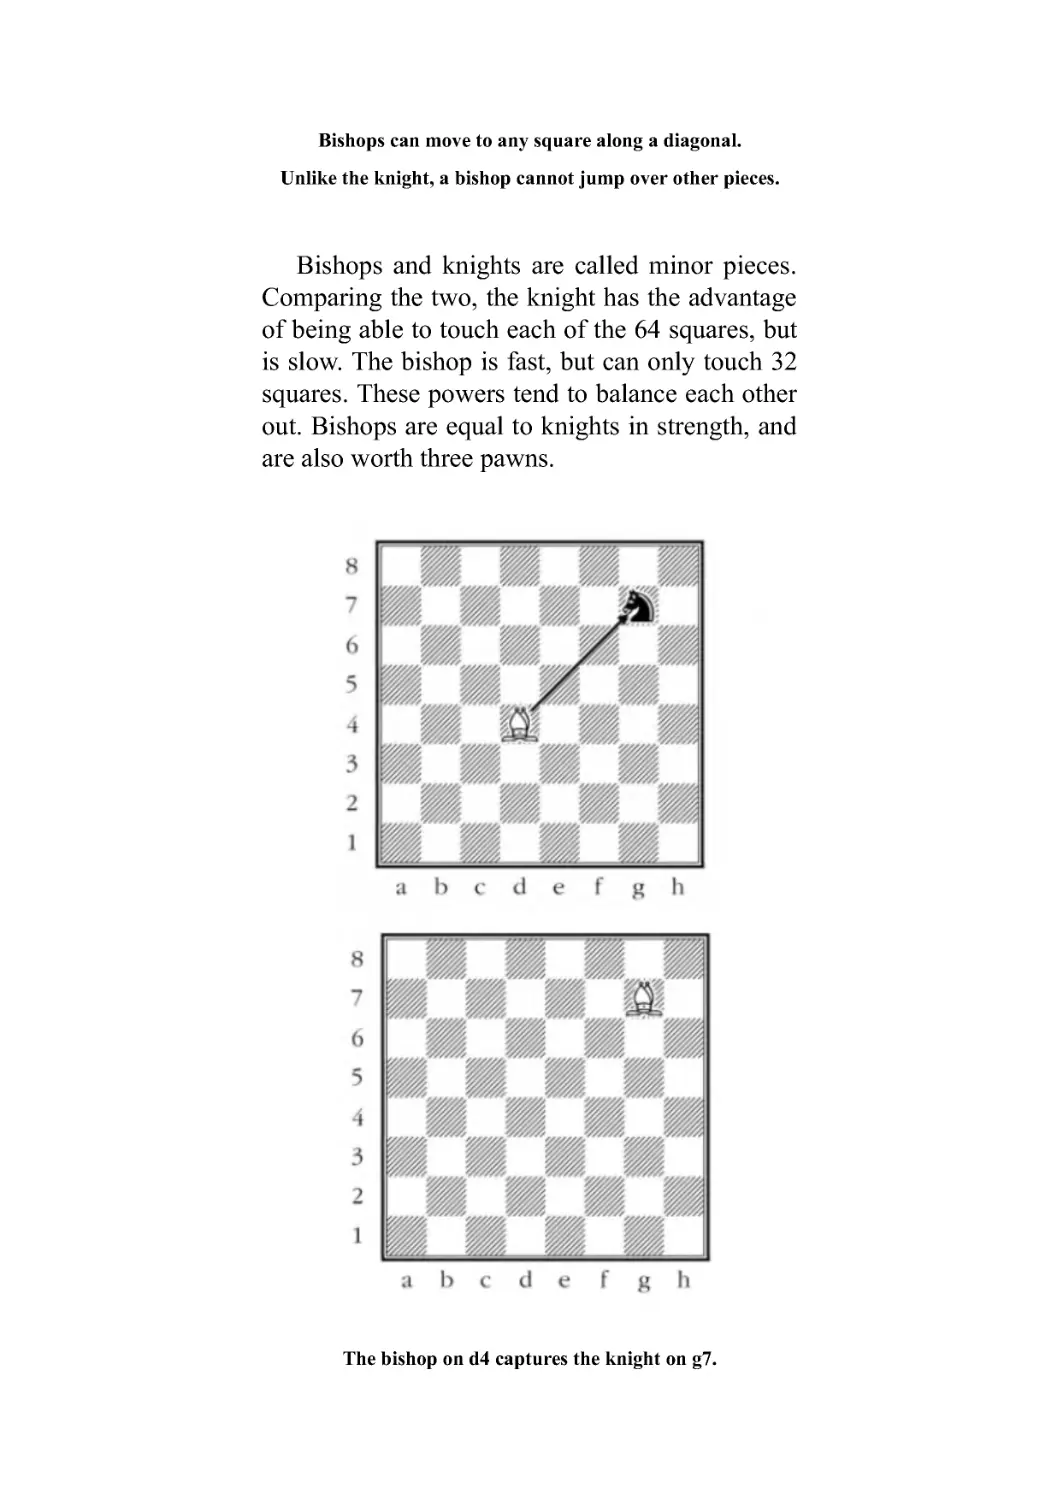
Bishops and knights are called minor pieces.
Comparing the two, the knight has the advantage
of being able to touch each of the 64 squares, but
is slow. The bishop is fast, but can only touch 32
squares. These powers tend to balance each other
out. Bishops are equal to knights in strength, and
are also worth three pawns.
The bishop on d4 captures the knight on g7.
Rook
Rooks move horizontally [left or right] and
vertically [up or down] like the cutout portion of
the top of the castle on their head. Rooks are fast-
moving, long-range pieces that can move to all 64
squares. Rooks, like bishops, cannot jump.
Comparing a rook to a knight, both can move
to any of the 64 squares, but the rook is fast and
the knight is slow. Therefore, the rook is more
valuable than the knight.
Comparing a rook to a bishop, both are fast.
The rook can move to any of the 64 squares,
while the bishop is limited to 32 squares. Again,
the rook has the advantage. The rook is worth
five pawns .
Rooks can move to any square forwards, backwards, left, or
right.
The rook captures the pawn on g4.
Queen
The queen moves horizontally and vertically
like a rook, and diagonally like a bishop. She is
both pieces rolled into one! The queen has a
crown that points out in all directions (a clue to
how she moves) and is worth nine pawns.
Queens and rooks are called major pieces.
Queens are a combination of the rook and bishop, all rolled
into one piece.
Because the queen is most powerful piece,
most of the time when a pawn is promoted, it is
promoted to a queen. When the pawn isn’t
promoted to a queen, a knight is typically chosen
because a knight moves differently than a queen,
which may prove useful in certain situations.
If your queen has been captured, you can
place the captured queen back on the board on the
square where the pawn promotes. If the original
queen is still on the board, and a pawn promotes
to give a player a second queen, either flip a
captured rook upside down or borrow a queen
from another chess set. A pawn placed on its side
or two pawns crisscrossed on their side (so they
don’t roll around) can also represent a promoted
queen.
The queen can capture either the pawn or the knight.
She captures the knight.
Trading Pieces
Now that we know what the pieces are worth,
it is easy to decide what is a good trade...just do
the math!
Here are the piece values again:
pawn=1
knight = 3
bishop = 3
rook=5
queen = 9
king - cannot be traded
Would you trade a rook for a bishop and a
knight?Yes,since5islessthan3+3=6.Itis
almost always a good idea to trade a piece of
lesser value for a piece or pieces of greater value.
How about two rooks for a queen? No, because
10 is greater than 9.
Would you trade a bishop for three pawns?
Maybe, since they are both worth three points.
If you have more points than your opponent,
you have what is called a material advantage. It is
normally a good idea to trade equal value pieces
when you have a lead in material because with
less total pieces on the board, the game is simpler
and usually easier to win.
Check
Check occurs when a king is attacked by an
opposing piece. The rules of chess state that when
a player attacks the king and puts him in check,
his opponent MUST make a move to escape the
check. There are three possible ways to escape
check: capture the checking piece, block the
check by interposing [put in between] one of your
pieces, or move the king to a square that isn’t
attacked.
You don’t have to say “check”. You are not
allowed to capture kings. If a player’s king is in
check after he moves, he made an illegal move.
He must then undo the illegal move and make a
move that gets his king out of check.
Black’s king is in check from the bishop on c3.
Black can move the king to g8 or h7, interpose with the
bishop by playing ...Bg7, or capture the bishop with the rook.
Capturing the bishop is the best move because Black would
gain three points.
Checkmate
Checkmate is when the king is in check, and
there is no way to escape the check by moving
the king to a safe square, blocking the check with
a piece, or capturing the piece that checks the
king. The object of the game is to put your
opponent’s king in checkmate.
In this position, Black is checkmated. The White queen is
attacking the Black king, putting him in check. The king
cannot move safely to e8, e7, g8, or g7 because the White
queen also attacks these squares.
The Black king cannot capture the White queen because
the White knight protects her and would then capture the
king.
Because the Black king is in check and has no way to
escape check, he is checkmated.
The game is over and White has won.
“Touch move” and “Touch take”
rules
“Touch move” means that if you touch a
piece, you have to move it - if you can move it
legally. “Touch take” means that if you touch an
opponent’s piece, you must take it - if the piece
can be legally captured. Finally, a move is
completed when you take your hand off the piece.
These rules are all strictly enforced in chess
tournaments. It is best to think with your head,
not your fingers! If you have a problem touching
the pieces, sit on your hands or put them in your
pockets.
If one of the pieces is not centered on its
square, the player whose move it is can say, “I
adjust,” and then center the piece on the correct
square. The player must say, “I adjust,” before
touching the piece to undo the “touch move” rule.
The “touch move” and “touch take” rules are like
table manners at dinner. Do your parents allow
you to touch all the pieces of bread on a plate at
the dinner table. No! You have to eat the piece
you touch. This table manners rule would be
called “touch eat!”
Starting position for a new game
The board is set up the same way for every
game, with a white square in the lower right hand
corner of the board. Remember the chess saying,
“White on Right.”
White’s pieces always start on rows 1 and 2.
Black’s pieces line up symmetrically [the mirror
image] on the other side of the board on rows 7
and 8. On the back rank, the pieces are lined up
with the tallest (king and queen) in the center and
the shortest (rooks) in the corners. The height of
the pieces decreases as you go from the center to
the corner.
The queen starts on her own color; the White
queen on a white square (d1) and the Black queen
on a black square (d8). You can also think of it as
the White queen wears a white dress and the
Black queen wears a black dress.
Starting position for a new game. White always moves first.
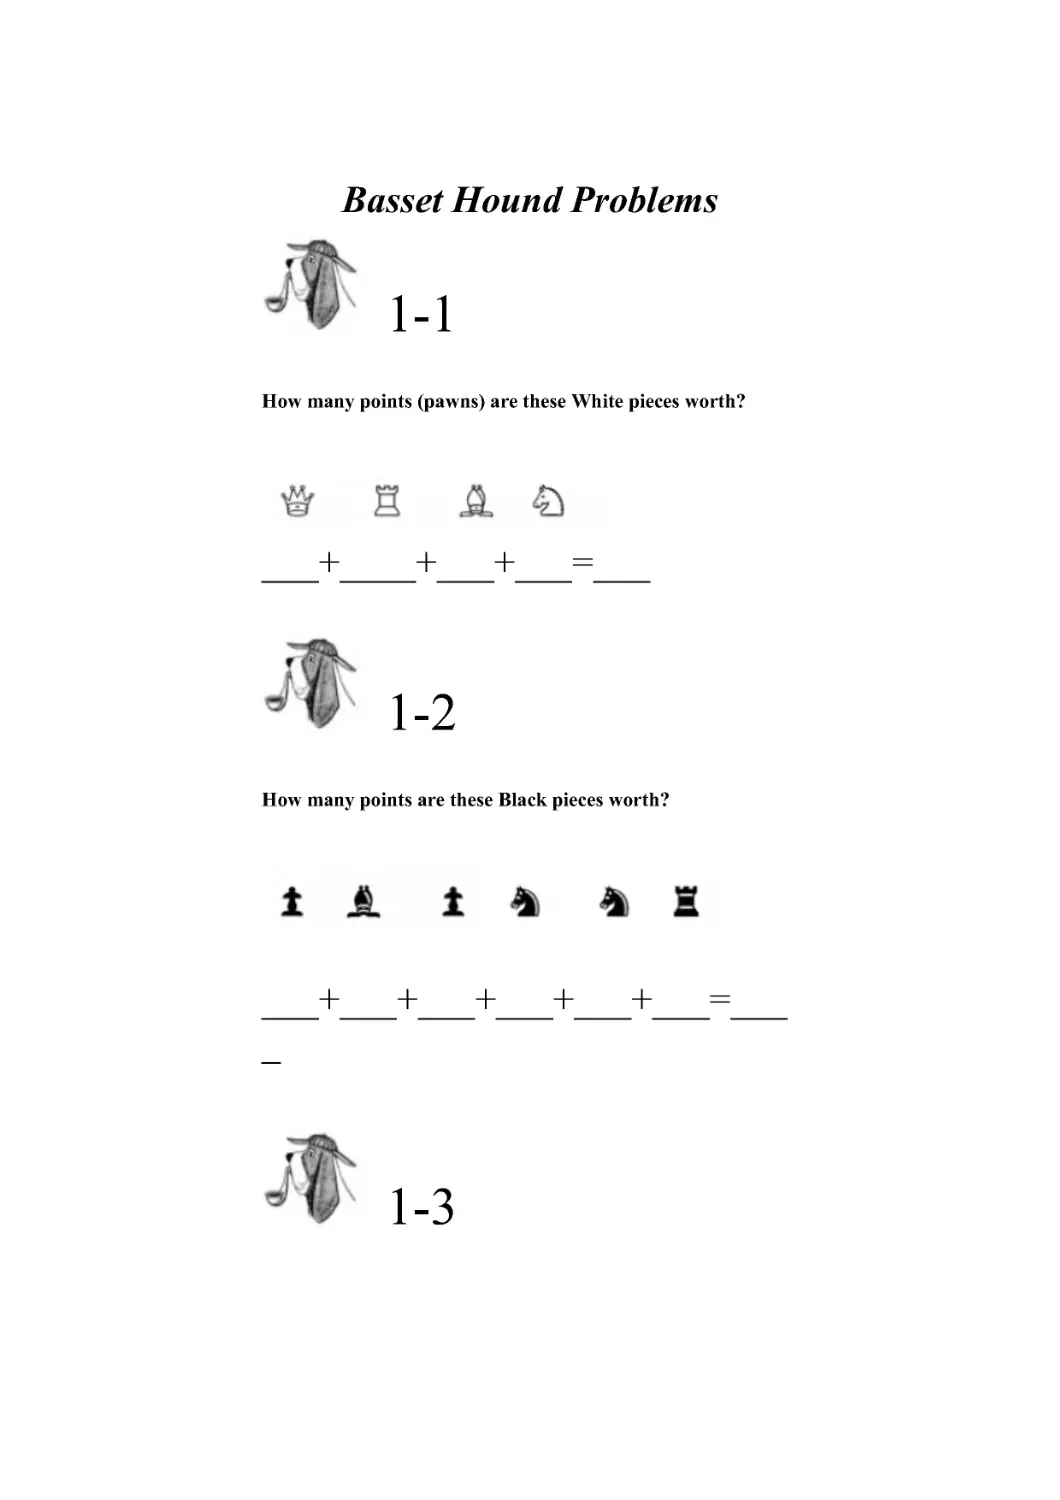
Basset Hound Problems
1-1
How many points (pawns) are these White pieces worth?
___+____+___+___=___
1-2
How many points are these Black pieces worth?
___+___+___+___+___+___=___
_
1-3
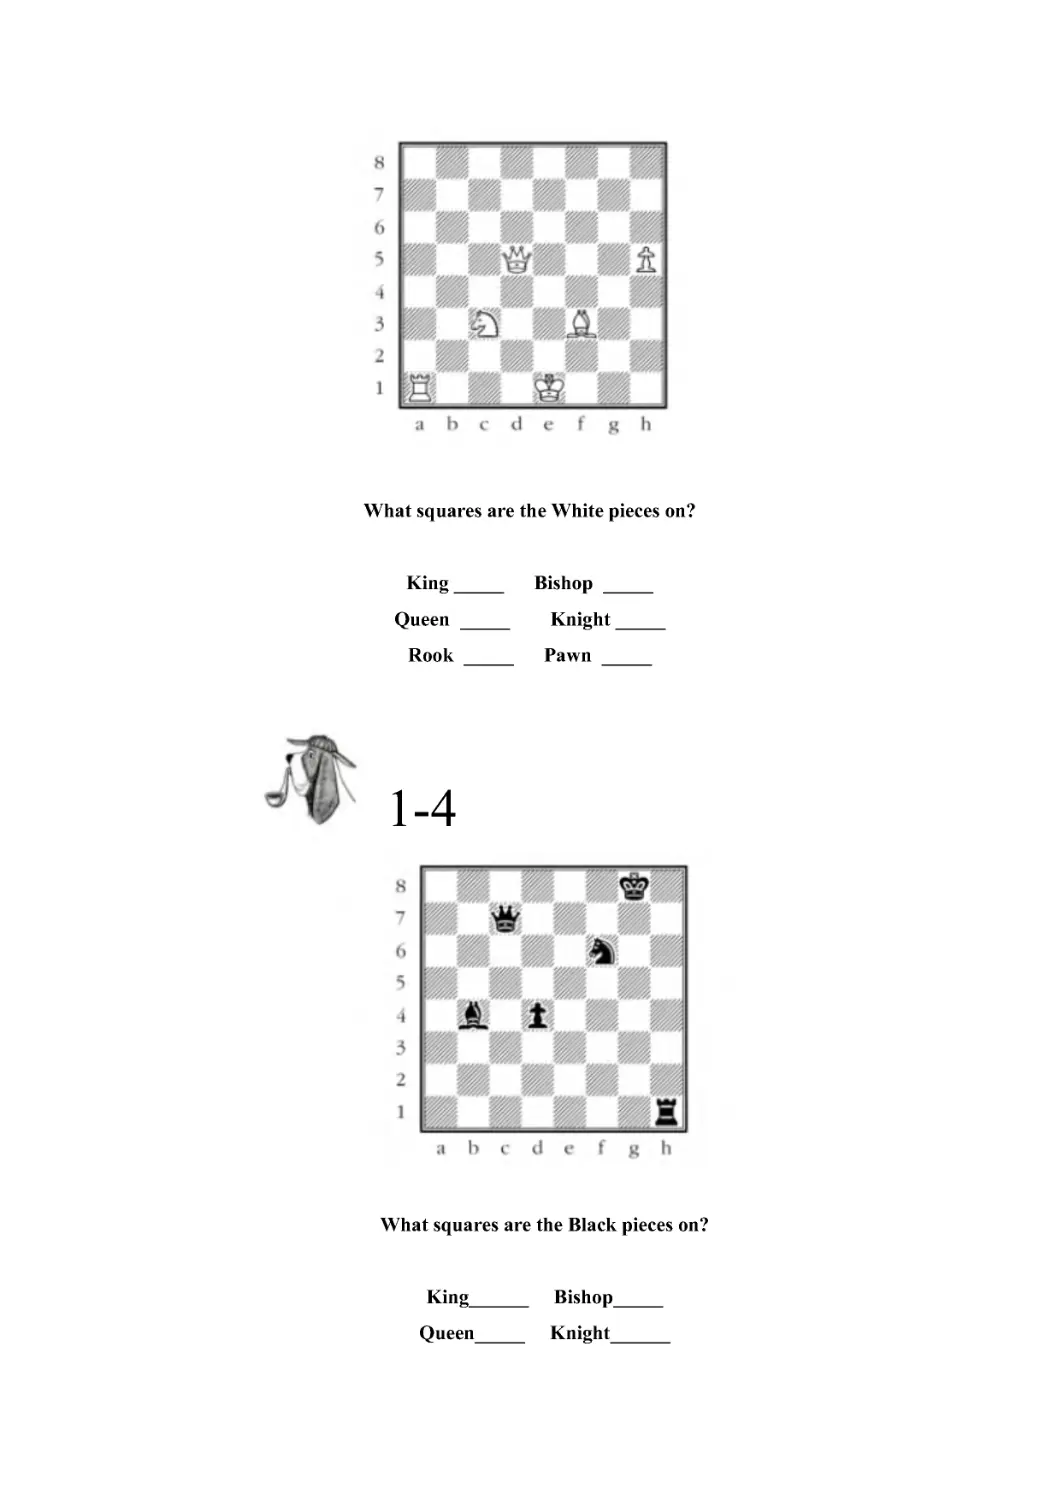
What squares are the White pieces on?
King _____ Bishop _____
Queen _____
Knight _____
Rook _____ Pawn _____
1-4
What squares are the Black pieces on?
King______ Bishop_____
Queen_____ Knight______
Rook______ Pawn______
1-5
What squares can the bishop move to?
____,
__ __,
____,
____,
____,
__ __,
__ __
1-6
What pieces can the knight capture?
_______
______
1-7
Which piece is checking the Black king?
_________________
1-8
Is White in checkmate? Why?
__ ___ __
, ___________________
1-9
It is White’s move and he touched his king. What are his legal
moves?
________,
_______,
________
1-10
It is Black’s move. He picks up the White pawn on c4 and then
puts it back down.
What move must he make?
________
Chess Detective Problems
1-11
Who has more material? How much more?
____________,
_________
1-12
After White’s next move, who will have more material?
How much more?
____________,
_________
1-13
What is the most valuable piece White can capture with a
bishop?
What square is it on?
_________,
_____
1-14
What is the total value of all the pieces the Black queen is
attacking?
_______________________
1-15
It is White’s move. Is it a good move to
trade the bishop for the knight? Why?
_______________________________
1-16
List all of the moves that Black can
make to put the White king in check.
________________________________
1-17
List all the moves that White can
make to put the Black king in check.
________________________________
1-18
Is Black in checkmate? Why?
_______________________________
1-19
With White to move, he touches his king and then says,
“I adjust.” Is he allowed to capture the Black queen? Why?
_______________________________
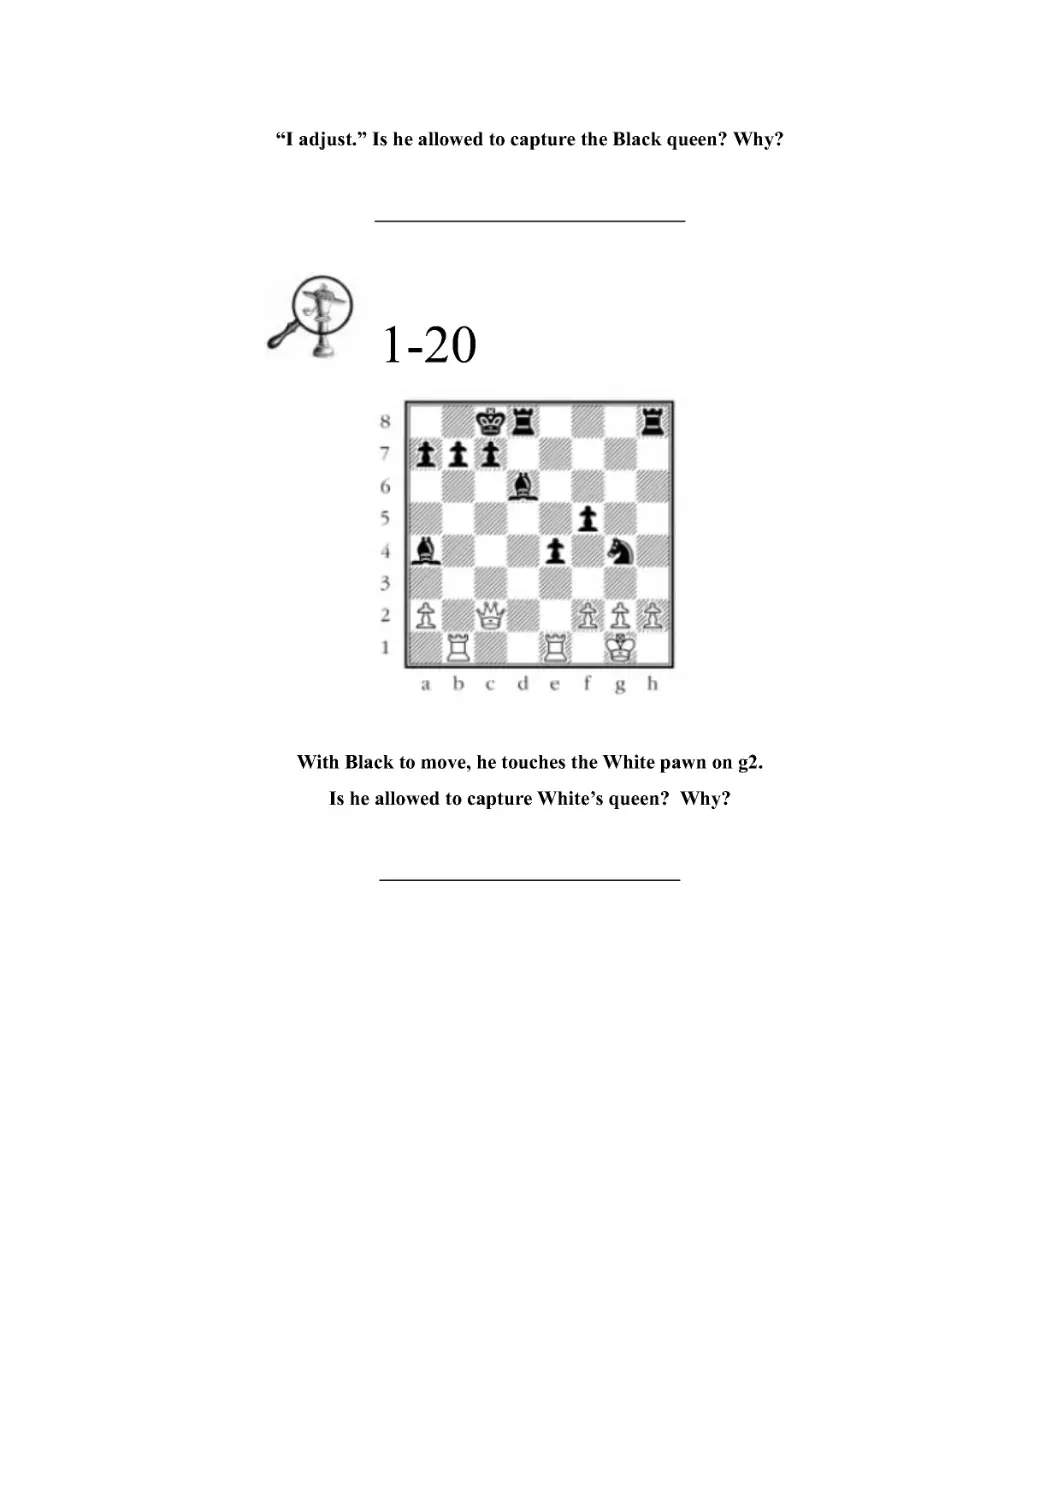
1-20
With Black to move, he touches the White pawn on g2.
Is he allowed to capture White’s queen? Why?
______________________________
LESSON 2
OPENINGS
“Once a pawn a time...”
Every chess game starts with the same
position. White always moves first; after that, the
two players alternate taking turns for the rest of
the game. In master games, White has an
advantage because he has the first move.
However, for beginners, having the first move is
only a very slight advantage.
The opening is typically the first eight to ten
moves of the game. Although thousands of books
have been written on chess openings, all you need
to know about the opening when you are learning
to play is the basic principles:
Control the center
Develop your pieces
Castle early
Control the center
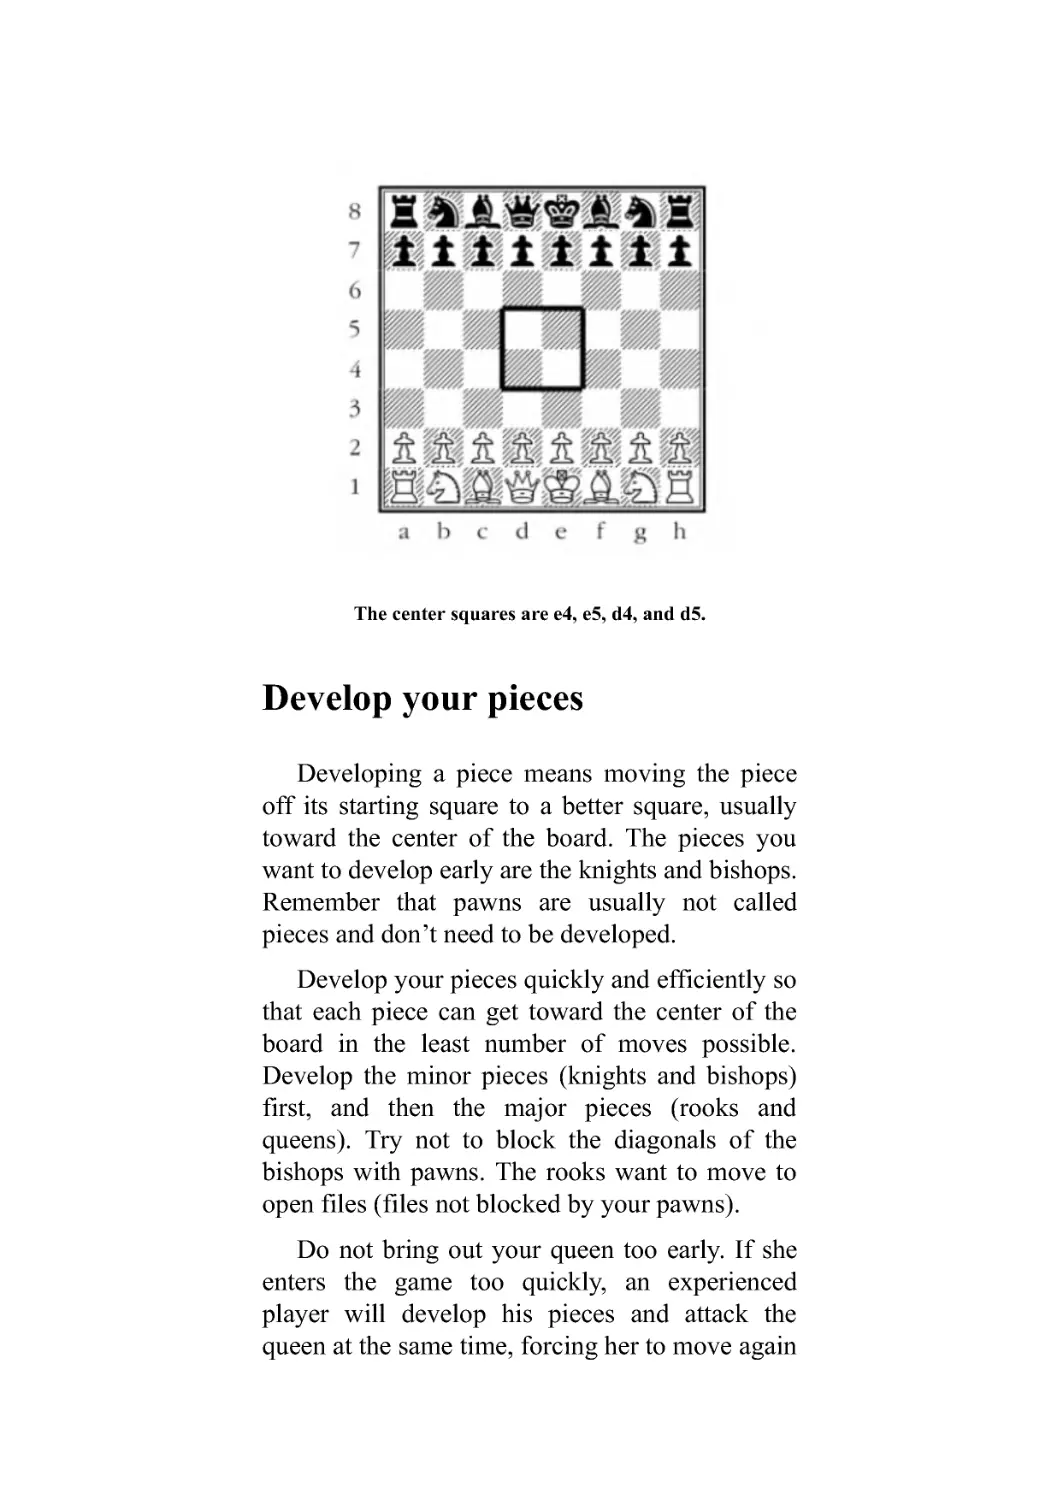
The squares in the center (e4, e5, d4, and d5)
are the most important on the board. By gaining
control of these squares, you control more of the
board and can launch an attack in any direction.
Try to control the center squares with pawns and
protect the pawns with your pieces. The squares
on the edge of the board, or the rim, are the least
important.
The center squares are e4, e5, d4, and d5.
Develop your pieces
Developing a piece means moving the piece
off its starting square to a better square, usually
toward the center of the board. The pieces you
want to develop early are the knights and bishops.
Remember that pawns are usually not called
pieces and don’t need to be developed.
Develop your pieces quickly and efficiently so
that each piece can get toward the center of the
board in the least number of moves possible.
Develop the minor pieces (knights and bishops)
first, and then the major pieces (rooks and
queens). Try not to block the diagonals of the
bishops with pawns. The rooks want to move to
open files (files not blocked by your pawns).
Do not bring out your queen too early. If she
enters the game too quickly, an experienced
player will develop his pieces and attack the
queen at the same time, forcing her to move again
and waste time. If the player who brought the
queen out early isn’t looking at his opponent’s
threats, the queen usually gets captured quickly.
Castle early
Castling is the second of the special moves
(promoting a pawn was the first). This is the only
time that two pieces (king and rook) can be
moved in one turn. A player can only castle once
per game.
Castling allows you to safeguard the king by
getting him out of the center of the board and to
develop the rook by bringing the rook toward the
center and into the game.
Try not to push pawns forward in front of a
castled king because this opens up space in front
of him, making him more open to attack.
Remember that pawns cannot move backwards
later to defend the important squares in front of
the king.
The king hides near the edge of board, out of
the action for most of the game. However, the
king is a powerful piece. The time to centralize
the king is in the endgame (when most of the
pieces are captured), because he is not likely to
get checkmated when there are only a few pieces
left on the board.
How to castle
You can castle on either the kingside or the
queenside. The kingside is the side of the board
where the kings start out the game (e-h files). The
queenside is the side where the queens begin the
game (a-d files).
In order to castle kingside, the king knight and
king bishop must move first so that the squares
between the king and rook are open. When
castling, you must touch the king first because of
the “touch move” rule (moving the rook first
would be a complete, legal rook move). First,
move the king two squares to the g-file (g1 for
White and g8 for Black) and then, with the same
hand, pick up the rook and put it on the f-file (f1
for White and f8 for Black).
To castle queenside, the queen, queen bishop,
and queen knight, must first be moved off of their
starting squares. After that, pick up the king and
move it two squares to the c-file (c1 for White
and c8 for Black) and then, with the same hand,
pick up the rook and put it on the d-file square
(d1 for White and d8 for Black).
A simple way to remember this is that king
moves two squares when castling on either side
and the rook jumps over him.
Besides having all the pieces cleared out so
that the king can “see” the rook, it is also a
requirement that the king has not already moved
in the game and that the rook that he is castling
with also has not previously moved.
You are also not allowed to castle to escape
check, castle through check, or castle into check.
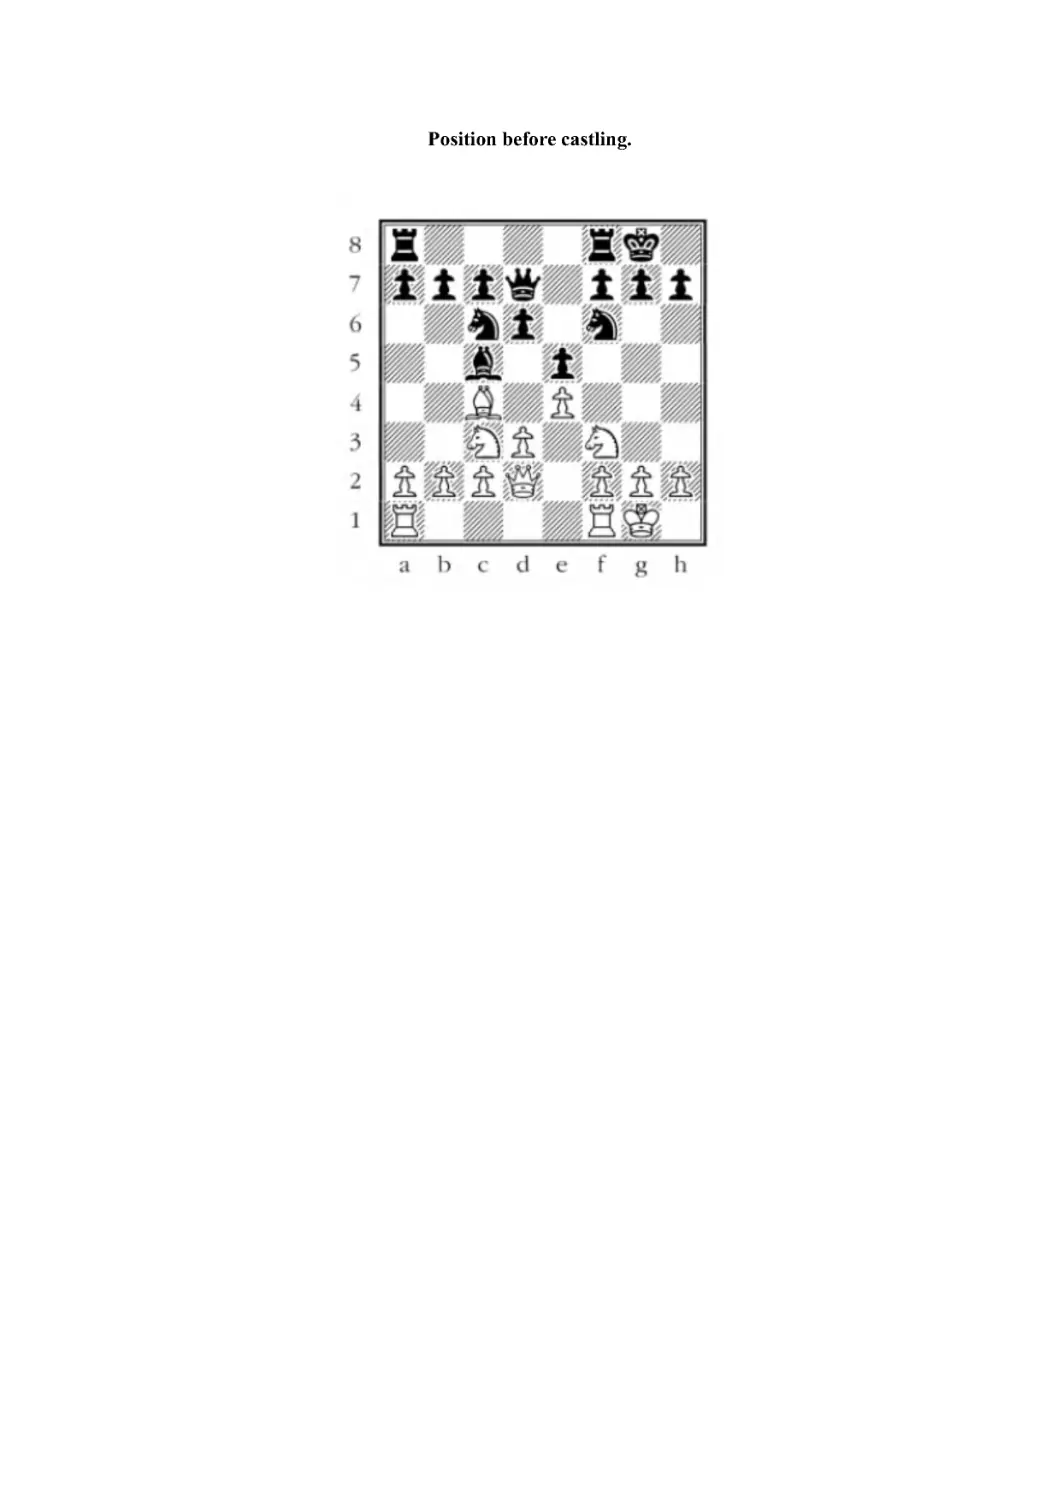
Castling Kingside
Castling Queenside
The diagrams on the next page show a
position before castling, with both sides castled
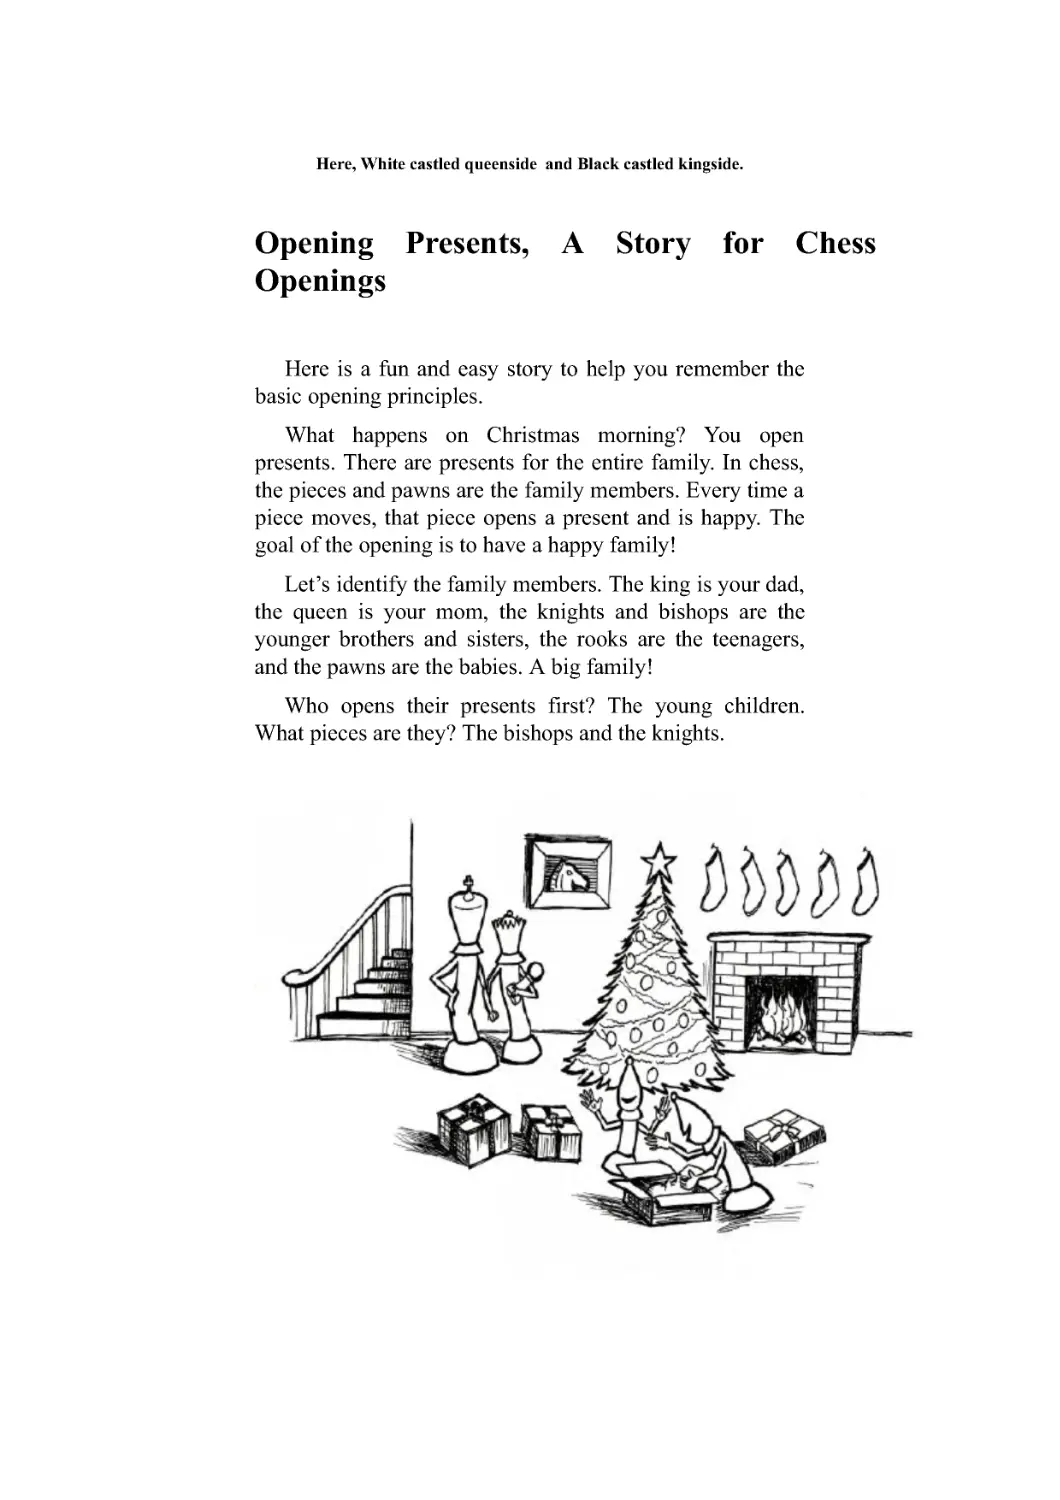
kingside, and with White castled on the
queenside and Black castled on the kingside. In a
real game, each player has the choice of which
side to castle on, or to not castle at all. You can
only castle once in the game.
Position before castling.
In this position, both players castled kingside.
Here, White castled queenside and Black castled kingside.
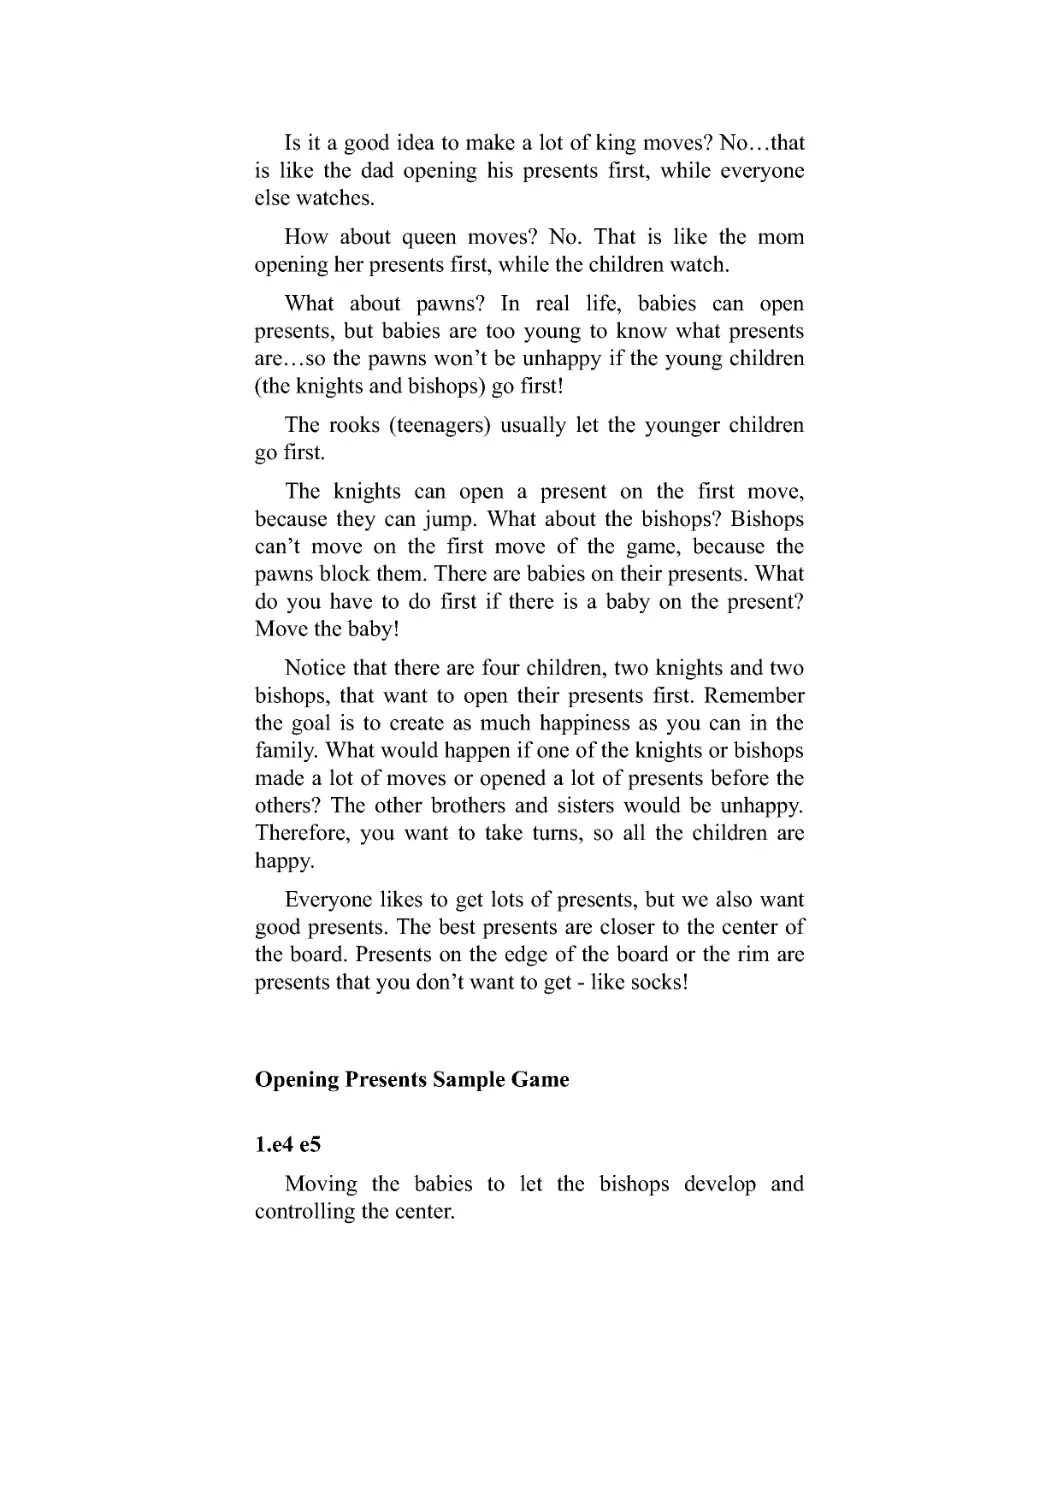
Opening Presents, A Story for Chess
Openings
Here is a fun and easy story to help you remember the
basic opening principles.
What happens on Christmas morning? You open
presents. There are presents for the entire family. In chess,
the pieces and pawns are the family members. Every time a
piece moves, that piece opens a present and is happy. The
goal of the opening is to have a happy family!
Let’s identify the family members. The king is your dad,
the queen is your mom, the knights and bishops are the
younger brothers and sisters, the rooks are the teenagers,
and the pawns are the babies. A big family!
Who opens their presents first? The young children.
What pieces are they? The bishops and the knights.
Is it a good idea to make a lot of king moves? No...that
is like the dad opening his presents first, while everyone
else watches.
How about queen moves? No. That is like the mom
opening her presents first, while the children watch.
What about pawns? In real life, babies can open
presents, but babies are too young to know what presents
are...so the pawns won’t be unhappy if the young children
(the knights and bishops) go first!
The rooks (teenagers) usually let the younger children
go first.
The knights can open a present on the first move,
because they can jump. What about the bishops? Bishops
can’t move on the first move of the game, because the
pawns block them. There are babies on their presents. What
do you have to do first if there is a baby on the present?
Move the baby!
Notice that there are four children, two knights and two
bishops, that want to open their presents first. Remember
the goal is to create as much happiness as you can in the
family. What would happen if one of the knights or bishops
made a lot of moves or opened a lot of presents before the
others? The other brothers and sisters would be unhappy.
Therefore, you want to take turns, so all the children are
happy.
Everyone likes to get lots of presents, but we also want
good presents. The best presents are closer to the center of
the board. Presents on the edge of the board or the rim are
presents that you don’t want to get - like socks!
Opening Presents Sample Game
1.e4 e5
Moving the babies to let the bishops develop and
controlling the center.
Now we want to develop (open a present with) the
knight on g1. The choices are 2.Nh3, 2.Nf3, and 2.Ne2.
2.Nh3: Remember the old chess rhyme? “A knight on
the rim is dim.” The rim of the board is the outer edge.
Because knights are slow-moving pieces, they want to be in
the center of the board where most of the action is and they
can get to any other part of the board quickly. A knight on
h3 would have a long journey to get to the queenside.
2.Ne2: This attacks the d4 center square. But let’s think
of everyone’s happiness. The bishop on f1 was happy when
the baby (pawn) on e2 moved off his present. Now his
brother, the knight, jumped onto his present and made him
sad again. A good strategy is to avoid blocking the bishops,
especially with pawns, so that they can develop toward the
center.
2.Nf3: The best knight move because it develops toward
the center, attacking d4 and the pawn on e5. 2.Nf3 also
doesn’t block the bishop on f1.
2.Nf3
Always remember to ask yourself after your opponent
makes his move,
“What is he threatening?” Figure out
what your opponent is trying to do to you before you start
thinking about what to do to him. Remember, his pieces are
as important as yours. He is also trying to keep his family
happy.
Black should notice that his pawn on e5 is attacked by
White’s knight. The pawn needs to be protected. Can this
be achieved while opening a present with one of the young
children? Yes, by either 2...Nc6 or 2...Bd6. Which move is
better? The problem with 2...Bd6 is that the bishop blocks
the d7 pawn (a center pawn), which also blocks in the
bishop on c8. Black plays...
2...Nc6
White asks himself, “What is Black threatening?”
Nothing, he is protecting the pawn on e5 and developing
the knight. Okay, let’s open a present with the bishop on f1.
3.Be2 is passive [holding back], 3.Bd3 blocks the d2 pawn,
which blocks the bishop on c1, and 3.Ba6 leaves the bishop
open to capture by Black’s a6 pawn. 3 .Bc4 or 3.Bb5 are
both normal opening moves. For this example, White
plays...
3.Bc4
3.Bc4 is a good move because it controls a center square
(d5) and develops the bishop. What does it threaten? The f7
pawn is now attacked, but is also protected by the Black
king. The bishop is worth 3 and pawn is worth 1, so taking
the pawn on f7 would be a mistake for White even though
it is a check and partially opens up the Black king because
it gives up material (points). Let’s say Black will now
develop his f8 bishop. 3 ...Be7 is passive, 3...Bd6 blocks
the d7 pawn, 3...Ba3 loses the bishop (to the pawn or
knight), 3...Bb4 is okay, but 3...Bc5 looks like the best
move since it also controls the d4 square (a center square).
3...Bc5
This attacks the f2 pawn, which is defended by the king.
What should White play? Good moves are 4.Nc3 because it
develops another piece, 4.d3 because it opens up the
diagonal for the dark-squared bishop on c1, and 4.c3 since
it threatens 5.d4, trying to control the center squares with
pawns. Castling may be the best move because it is
important to get the king out of the center of the board as
soon as possible.
4.0-0
Castling has the double benefit of getting the king to
safety and developing the rook. Remember the rook is a
teenage brother or sister. When you castle, not only does
your dad (the king) get a present, but the teenager also gets
a present. What is the best present for a teenager? A
CAR!! Why? Because it gives them freedom to go where
they want. Castling gives rooks a car so they can speed
towards the center.
Many years ago the children in one of my kindergarten
classes suggested that if you don’t castle, your teenagers
get a worm! Of course, the car is a much better present than
a worm.
It is normally best to castle as early in the game as you
can. Most teenagers want to get a car when they are as
young as possible.
4...Nf6
This is a good move because it opens another present
and prepares to castle or get Black’s teenagers a car. Black
threatens the pawn on e4. So White opens a present and
defends the pawn at the same time by playing...
5.Nc3
Black can now get a car for his teenagers by playing...
5...0-0
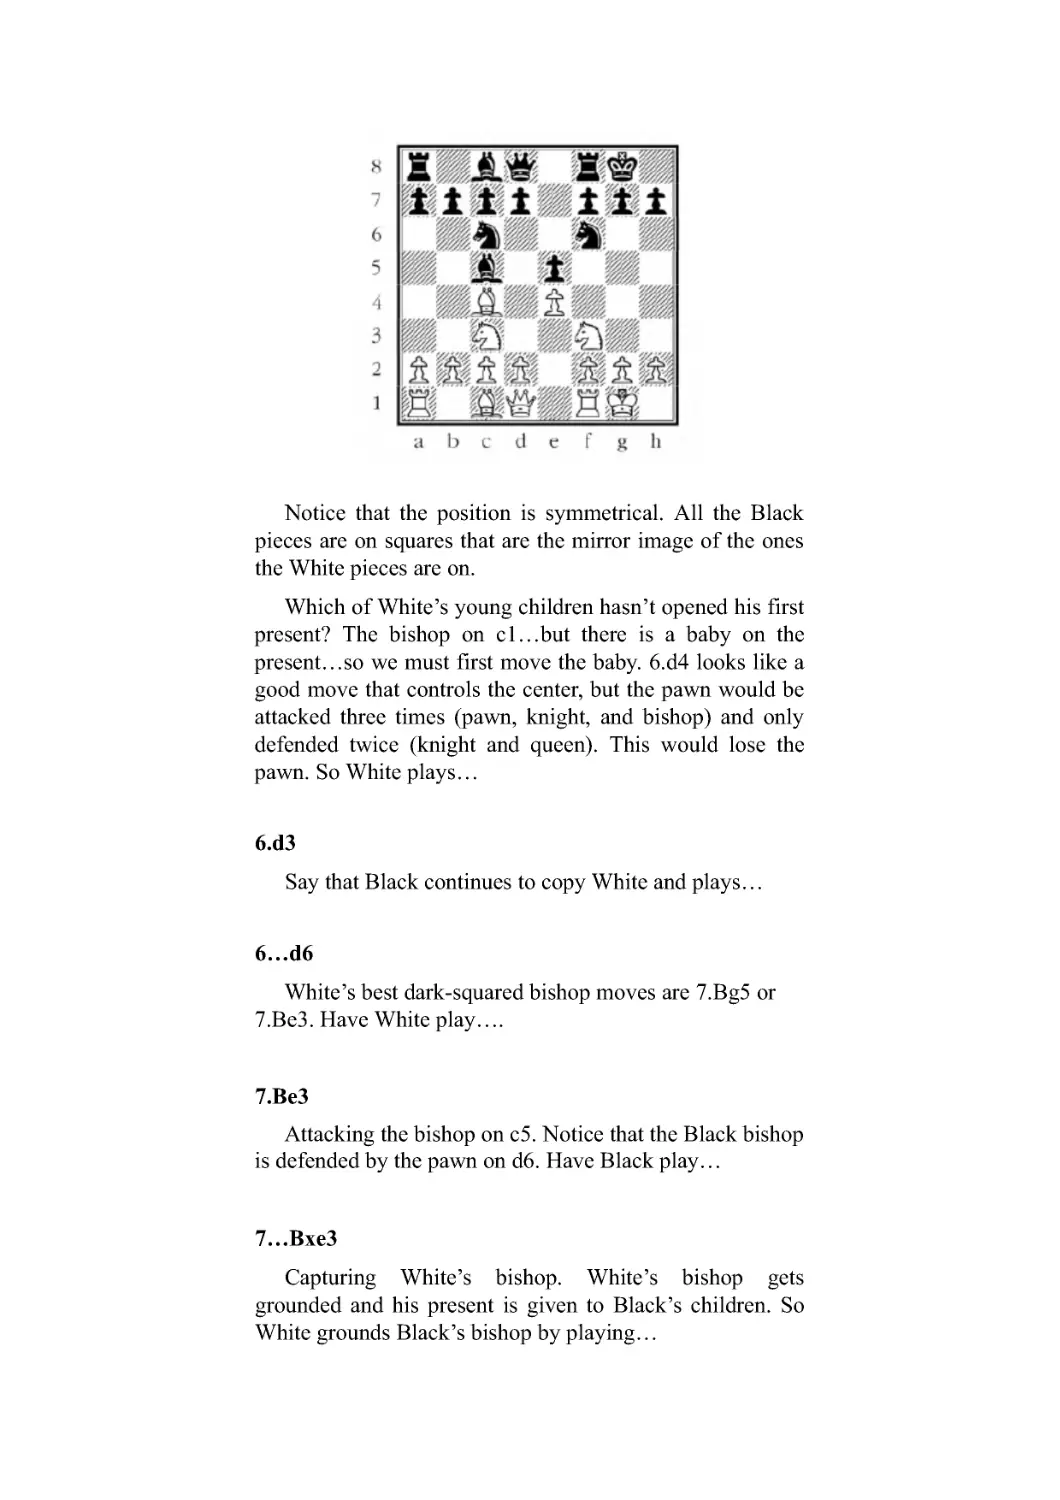
Notice that the position is symmetrical. All the Black
pieces are on squares that are the mirror image of the ones
the White pieces are on.
Which of White’s young children hasn’t opened his first
present? The bishop on c1...but there is a baby on the
present...so we must first move the baby. 6.d4 looks like a
good move that controls the center, but the pawn would be
attacked three times (pawn, knight, and bishop) and only
defended twice (knight and queen). This would lose the
pawn. So White plays...
6.d3
Say that Black continues to copy White and plays...
6...d6
White’s best dark-squared bishop moves are 7.Bg5 or
7.Be3. Have White play....
7.Be3
Attacking the bishop on c5. Notice that the Black bishop
is defended by the pawn on d6. Have Black play...
7...Bxe3
Capturing White’s bishop. White’s bishop gets
grounded and his present is given to Black’s children. So
White grounds Black’s bishop by playing...
8.fxe3
Now Black can have his last child open a present by
playing...
8...Bg4
All the younger children have opened their first present
and are happy. Now, after letting her children go first,
White’s mom can open her first present. Both 9.Qd2 and
9.Qe2 are fine here. Say White plays...
9.Qd2
Black’s queen now opens her first present, so...
9...Qd7
The rooks work best when they are connected with each
other and no other piece is between them. Rooks also like
open files (a file not blocked by pawns) because they can
move into the opponent’s territory. When you are a
teenager (rook), do you think you would rather hang out
with adults (king and queen), babies (pawns), young
children (knights and bishops), or other teenagers (rooks)?
Other teenagers, of course! Rooks like to be together. Say
the game continues...
10.Rad1 Rad8
Since both of the rooks can move to the d-file, you must
designate which one moved when you record the score (See
Scorekeeping, Lesson 3). In this case, both players moved
the rook on the a-file.
This completes the opening and we are headed into the
middlegame. The opening goals are usually accomplished
in the first ten moves or so of the game. Here we can say
that White and Black both did a good job accomplishing
their opening goals: control of the center; all the young
children (knights and bishops) opened at least one present;
and the teenagers (rooks) got cars (castled), not worms, and
are hanging out together.
Notice that the queens (moms) didn’t open their
presents before the children and the pawns in front of both
castled kings haven’t moved and are providing protection
for the kings. Also, equal-valued children got grounded
(the dark-squared bishops).
Beating the Scholar’s Mate
Some children have been exposed to the Scholar’s Mate,
or what some children call the “Four-Move Checkmate.”
The Scholar’s Mate is not good chess because one side
(usually White) brings the queen out early. He is trying to
checkmate Black quickly on f7 with the aid of a bishop.
This only works if Black doesn’t see the threat (because he
didn’t ask himself, “What is White threatening?”). If Black
sees the threat, the queen move is bad because she is in
danger of being attacked and chased all over the board by
the other player’s knights and bishops.
It may look good at first to bring your queen out early,
but you should ALWAYS assume the other player will
make the best move.
Here is a typical Scholar ’s Mate pattern.
1.e4 e5 2.Bc4 Nc6 3.Qf3? (or 3.Qh5? g6 4.Qf3 Nf6)
Bringing out the queen early and threatening checkmate
on f7.
3...Bc5?? 4.Qxf7 mate.
If Black plays 3...Nf6 (instead of 3...Bc5??) and then
4...0 -0, White wasted a queen move and placed her on a
square where she soon may be chased away (by say ...Nc6-
d4). Bringing out the queen early also prevents White’s
knight from developing to its natural f3 square.
Even though you may win some quick games by
bringing the queen out early, it is recommended that you
follow good chess principles and develop her later. After
all, you will usually beat an opponent who doesn’t ask
himself what you are threatening, so follow good chess
principles when you play.
Basset Hound Problems
2-1
Was 1.Nh3 a good move for White? Why?
___________________________
2-2
Was Black’s pawn move 1...a5 a good move? Why?
___________________________
2-3
Which of the starred squares is the most important in the
opening? Why?
___________________________
2-4
Is it better for White to move his bishop to d3, c4, or a6?
Why?
___________________________
2-5
Is it a better move for White to move his pawn on d2 to d3 or
d4? Why?
___________________________
2-6
Black touches his knight on g8. Is it better to move it to h6, f6,
or e7? Why?
___________________________
2-7
Is 2.Qf3 a good move? Why?
___________________________
2-8
Black played 2...Bb4+. Which of these moves is best for White
- 3.Ke2, 3.Qd2, or 3.c3? Why?
___________________________
2-9
White played 2.d3. Is it a good move? Why?
___________________________
2-10
White moved his knight from f3 to e5. Is this a good move?
Why?
___________________________
Chess Detective Problems
2-11
White played 3.Qh5. What is he threatening?
___________________________
2-12
Which of these is White’s best move - 2.Bd3, 2.Bb5, 2.Be2, or
2.d4?
___________________________
2-13
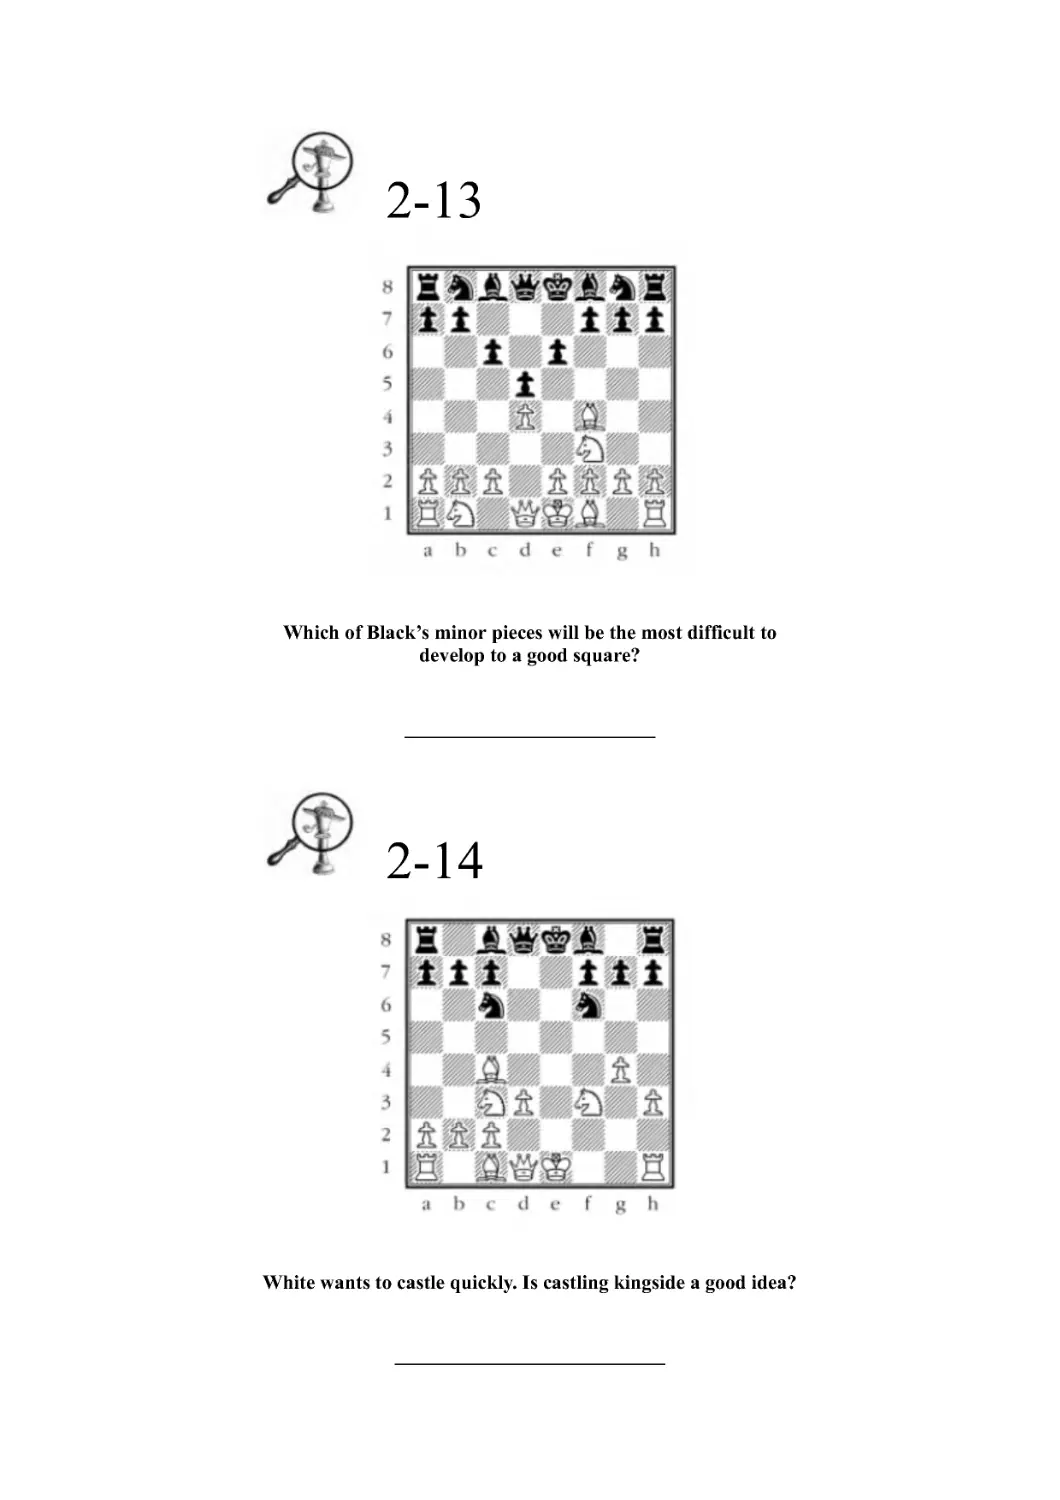
Which of Black’s minor pieces will be the most difficult to
develop to a good square?
_________________________
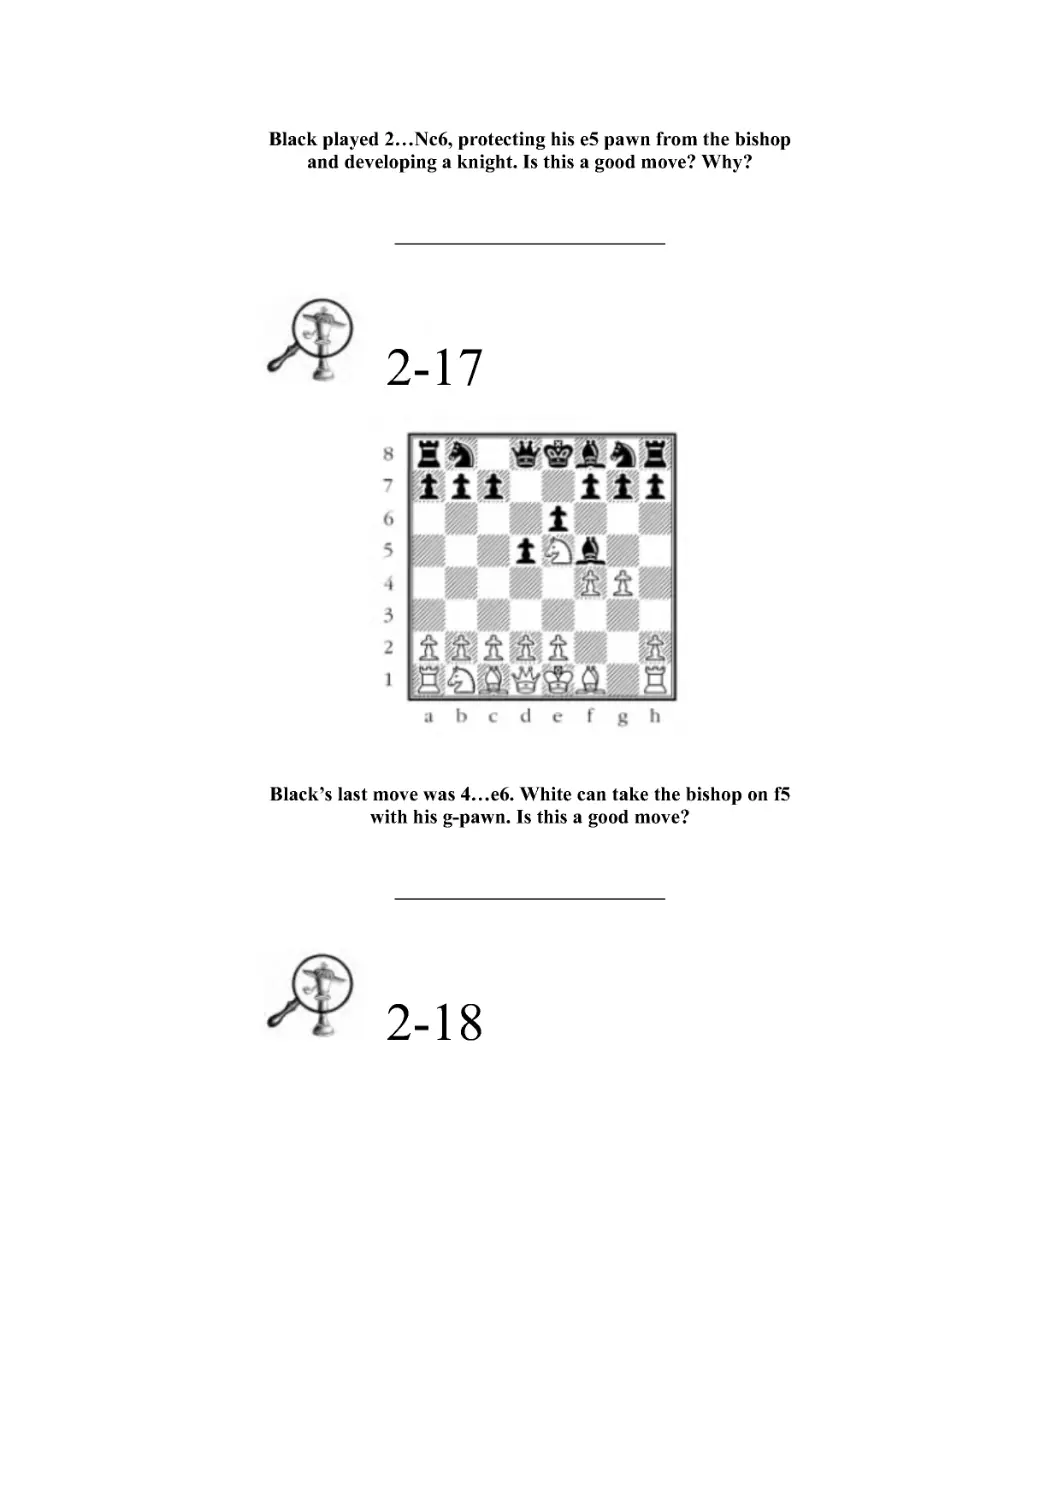
2-14
White wants to castle quickly. Is castling kingside a good idea?
___________________________
2-15
Which of these developing moves is best for White: 3.Nf3,
3.Qf3, 3.Nc3, or 3.Bf4? Why?
___________________________
2-16
Black played 2...Nc6, protecting his e5 pawn from the bishop
and developing a knight. Is this a good move? Why?
___________________________
2-17
Black’s last move was 4...e6. White can take the bishop on f5
with his g-pawn. Is this a good move?
___________________________
2-18
White played 4.Nc3. Which is Black’s best response – 4 ...
Nxc3, 4...Nc5, 4...Bd6, or 4...d5? Why?
___________________________
2-19
Black just played 2...d5 to try to control the center. Is this a
good move?
___________________________
2-20
Is it a good move for White to capture the Black queen with
his queen?
___________________________
LESSON 3
SCOREKEEPING
“...I have come to the personal conclusion that
while all artists are not chess players, all chess
players are artists.”
Marcel Duchamp (1887-1968)
French artist
The language we read and write chess in is called
algebraic notation. You can record the moves of a game in
algebraic notation so that you can go back and play it over
again later. Recording games is called scorekeeping.
Algebraic notation has two parts to it: the piece that
moves and the square it moves to. A White move is
written after the move number and a period. A Black move
is written after the move number and three periods.
Remember the symbols for each piece – K is for king,
Q for queen, R for rook, B for bishop, N for knight, and no
letter or a blank is for the pawn.
On the first move of the game, say that White moves
the pawn in front of his king two squares forward. This
would be scored 1.e4.
Castling kingside is designated 0-0, and castling
queenside is 0-0 -0. The number of 0’s is equal to the
number of squares that the rook moves. Therefore, 0-0-0
for White would mean that the king moves from e1 to c1
and the queen’s rook moves three squares from a1 to d1.
When a piece is captured, an x is placed between the
piece making the capture and the square that the captured
piece was resting on.
To show that a pawn has promoted, write the square the
pawn promotes on, followed by an equal (=) sign, and the
symbol for the promoted piece.
When a king is placed in check, a + sign is written after
the move.
Sometimes a punctuation mark is placed after the move
to explain how good or bad the move is.
!! is a brilliant move
! isagoodmove
!? is a move deserving attention
?! is a questionable move
? is a mistake
?? is a blunder
Here are some examples. Each example uses the
diagram below:
Pawn captures: Say it is Black’s 32nd move and he
captures the bishop with his g-pawn. It would be scored,
32...gxh4
Promoting a pawn: It is White’s 45th move and he
promotes the pawn to a queen, while putting the Black
king in check. 45.a8=Q+ is how this move would be
scored.
Two pieces of the same type can move to the same
square: In this case the specific piece that is moving must
be identified. It is preferred to identify the moving piece
by the file (letter) instead of the rank (number), if possible.
Pretend that on White’s 37th move and he moves his rook
on a1 to c1. This move would be scored 37.Rac1 (as
opposed to 37.Rfc1, which would be the case if the f1 rook
moved to c1).
Let’s say it is Black’s 40th move and he moves the knight
on c2 to d4. Since either knight can move to d4, the move
should be written 40...N2d4. Note that 40...Ncd4 doesn’t
tell which knight moved, since they are both on the c-file.
Here is what a blank score sheet looks like. When you
play a chess game, you want to fill it out as completely as
possible. The space for Round is the game number and
Board is the board number.
Here is one of the most famous chess games ever played.
If they didn’t keep score, we wouldn’t be able to enjoy it
today. The game took place at the Paris Opera House
during the Barber of Seville opera in 1858. The great Paul
Morphy of the United States played White against the
Duke of Brunswick and Count Isouard.
Here are the moves of the game with a chess diagram
showing each move.
1.e4
1...e5
2.Nf3
2...d6
3.d4
3...Bg4
4.dxe5
4...Bxf3
5.Qxf3
5...dxe5
6.Bc4
6...Nf6
7.Qb3
7...Qe7
8.Nc3
8...c6
9.Bg5
9...b5
10.Nxb5!
10...cxb5
11.Bxb5+
11...Nbd7
12.0-0 -0
12...Rd8
13.Rxd7!
13...Rxd7
14.Rd1
14...Qe6
15.Bxd7+
15...Nxd7
16.Qb8+!!
16...Nxb8
17.Rd8 mate (or checkmate)
Basset Hound Problems
Write the move shown by the arrow on the line below each
problem. Include the proper move number and the number of
periods after the move number. (Remember that there are
three periods after the move number for a Black move.)
3-1
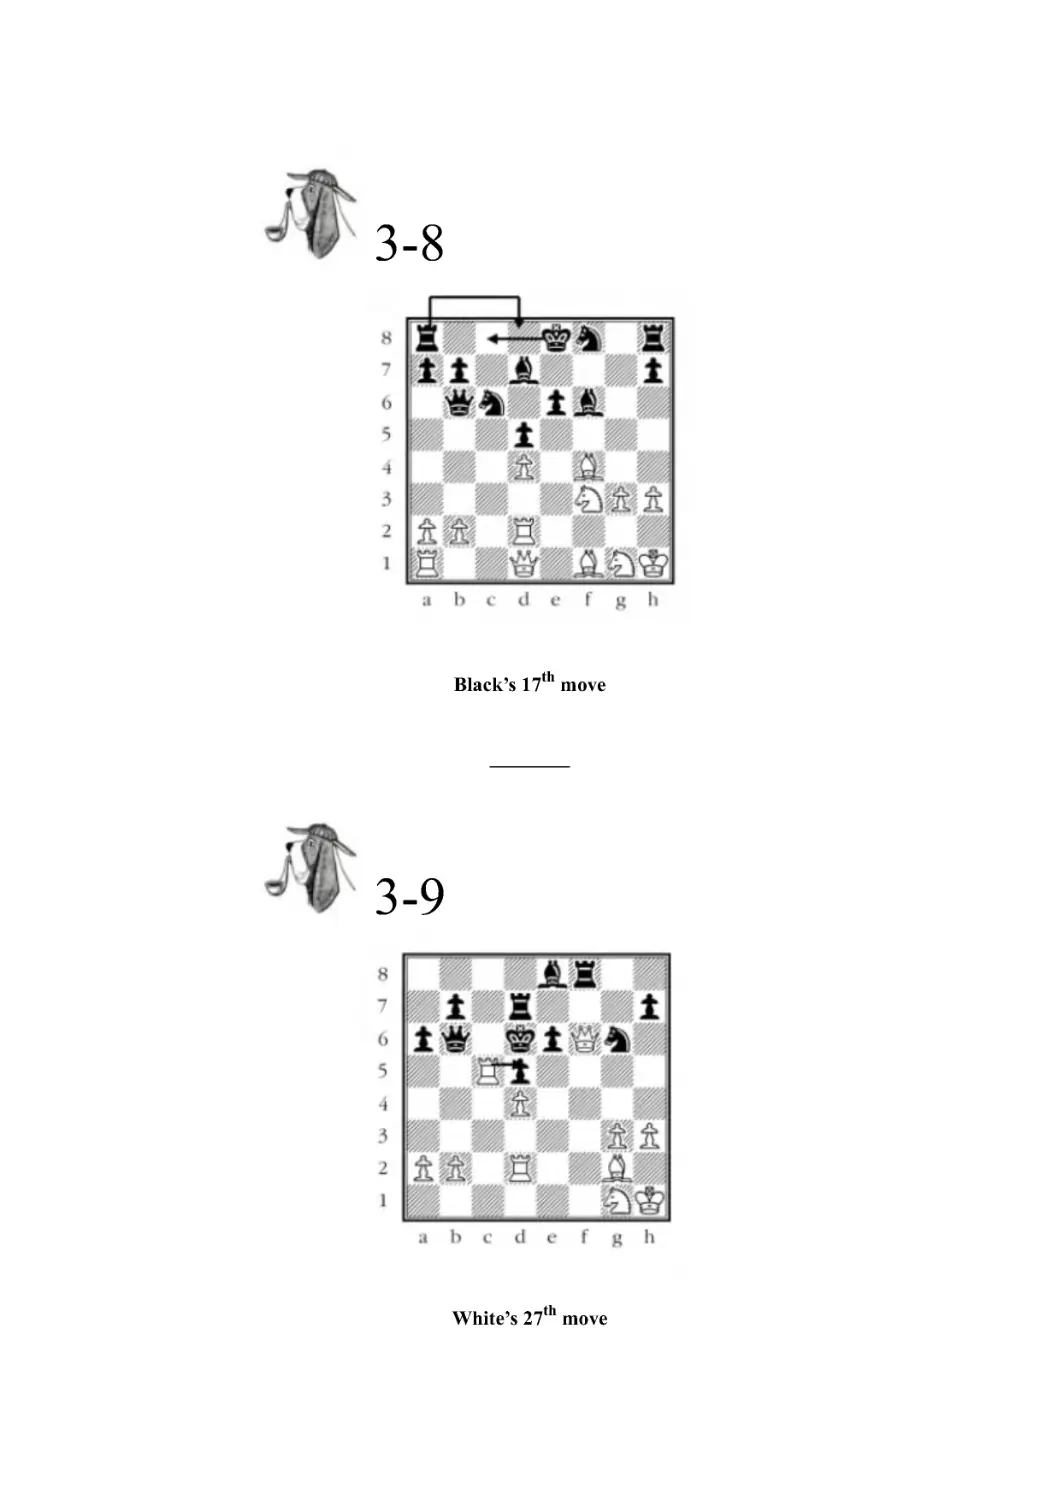
Black’s 7
th
move
________
3-2
White’s 12
th
move
________
3-3
Black’s 25
th
move
________
3-4
Black’s 42
nd
move
________
3-5
White’s 65th
move
________
3-6
Black’s 73rd
move
________
3-7
Black’s 8
th
move
________
3-8
Black’s 17
th
move
________
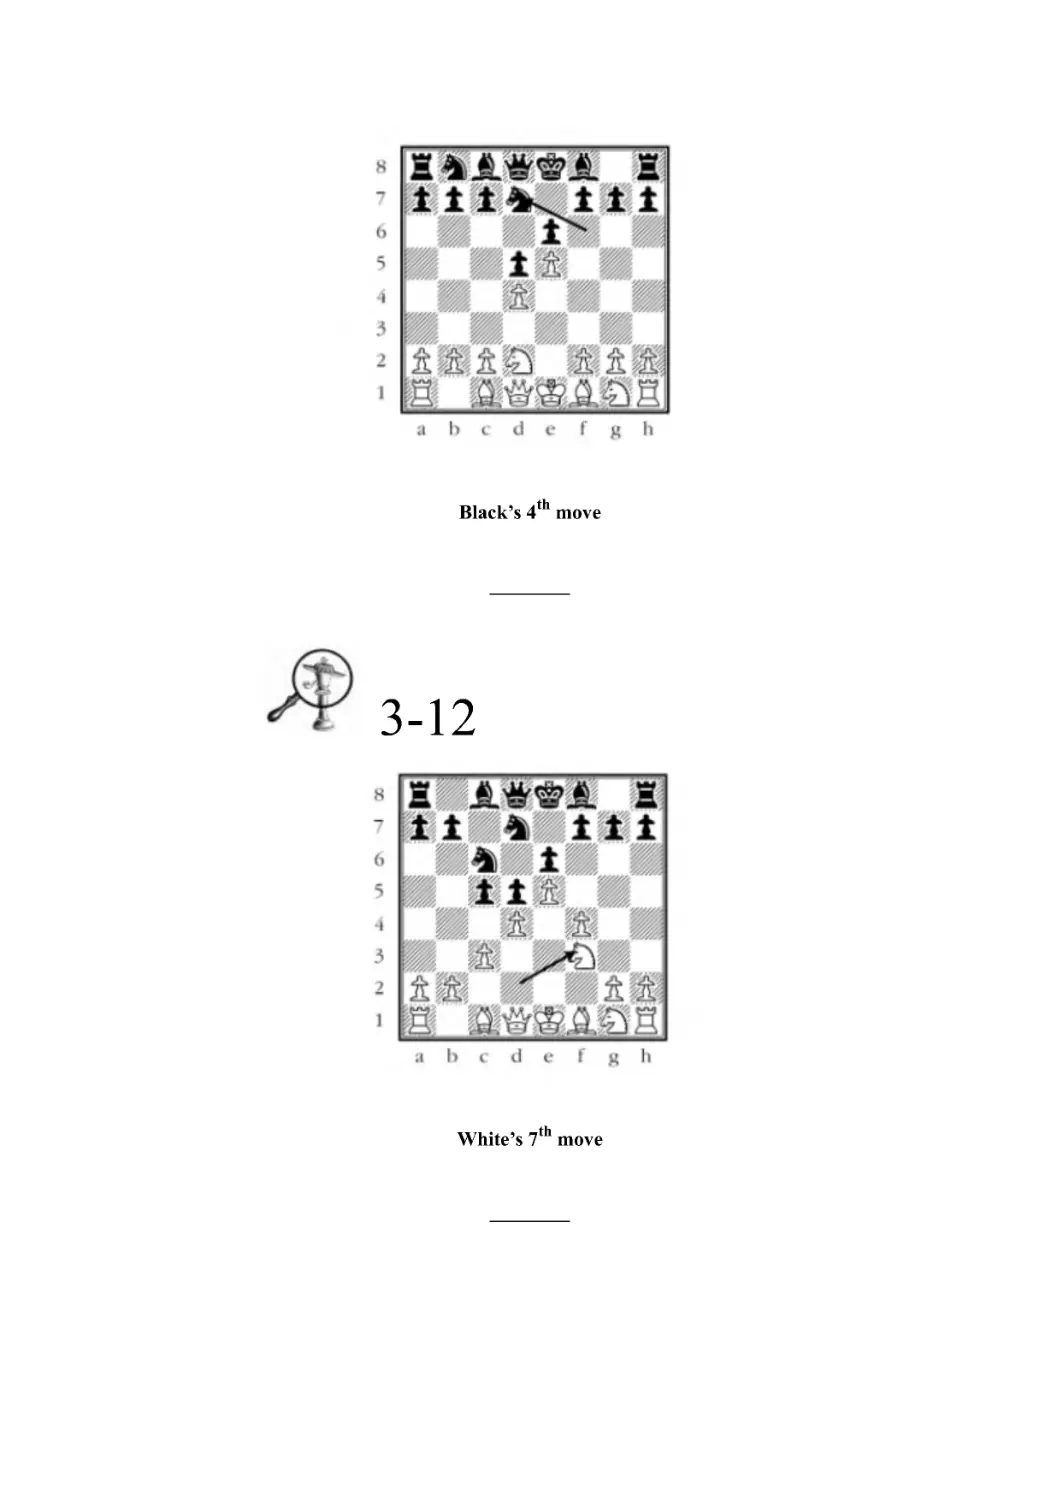
3-9
White’s 27
th
move
________
3-10
White’s 39
th
move
________
Chess Detective Problems
Write the move shown by the arrow on the line below each
problem. Include the proper move number and the number of
periods after the move number. These are trickier!
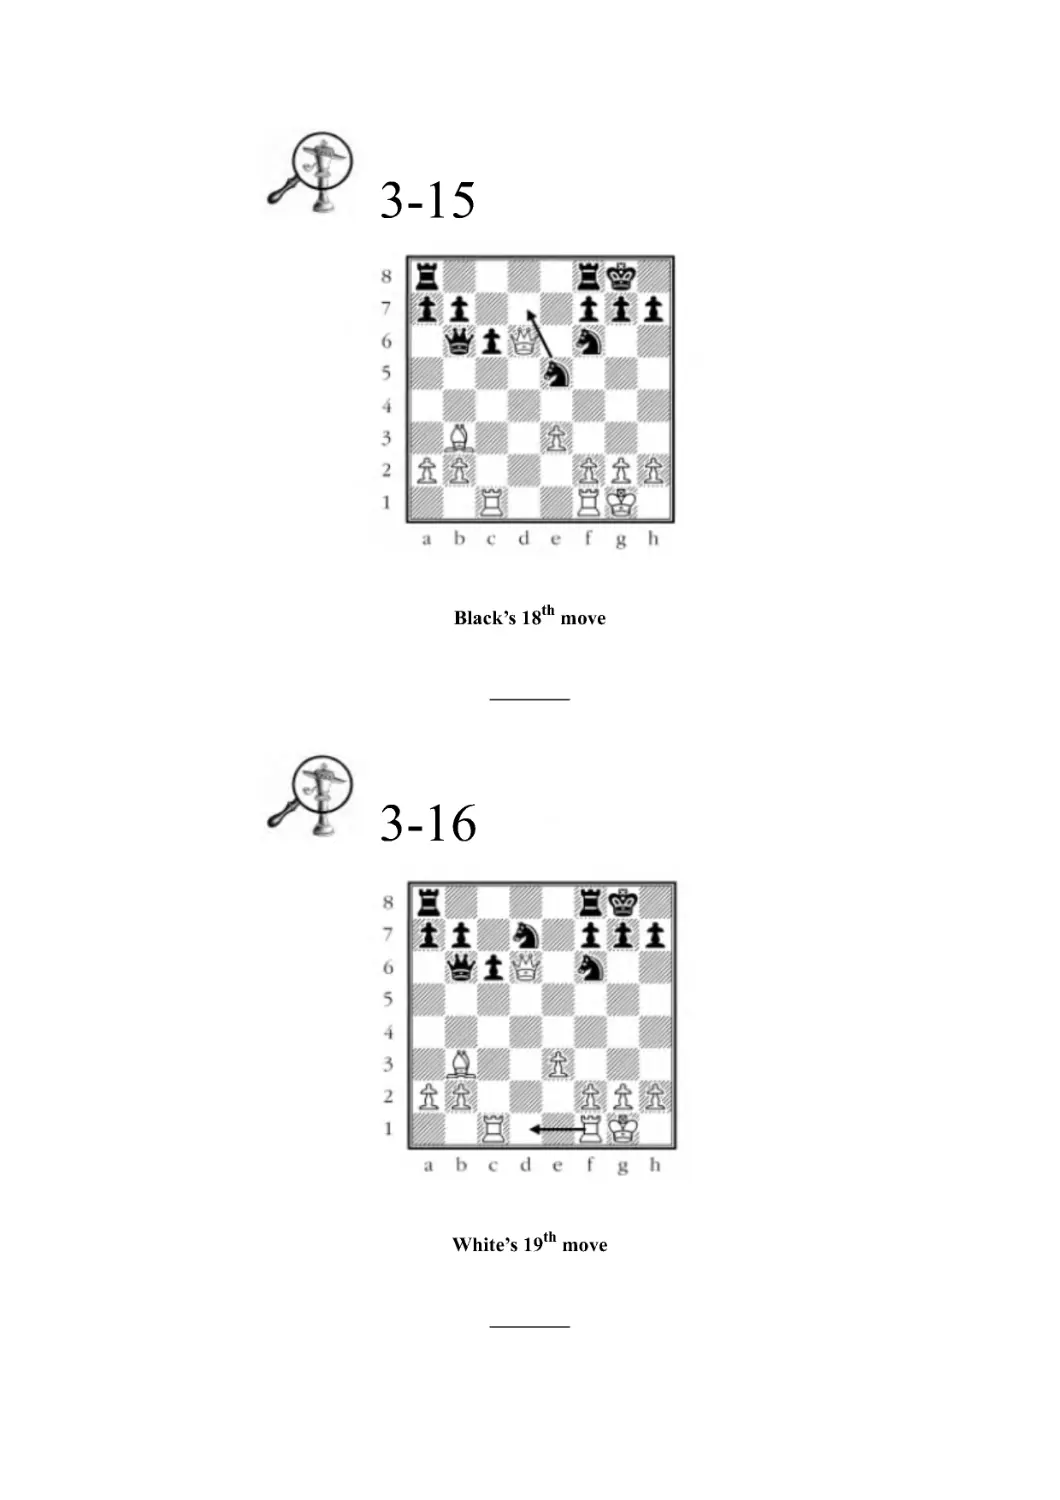
3-11
Black’s 4
th
move
________
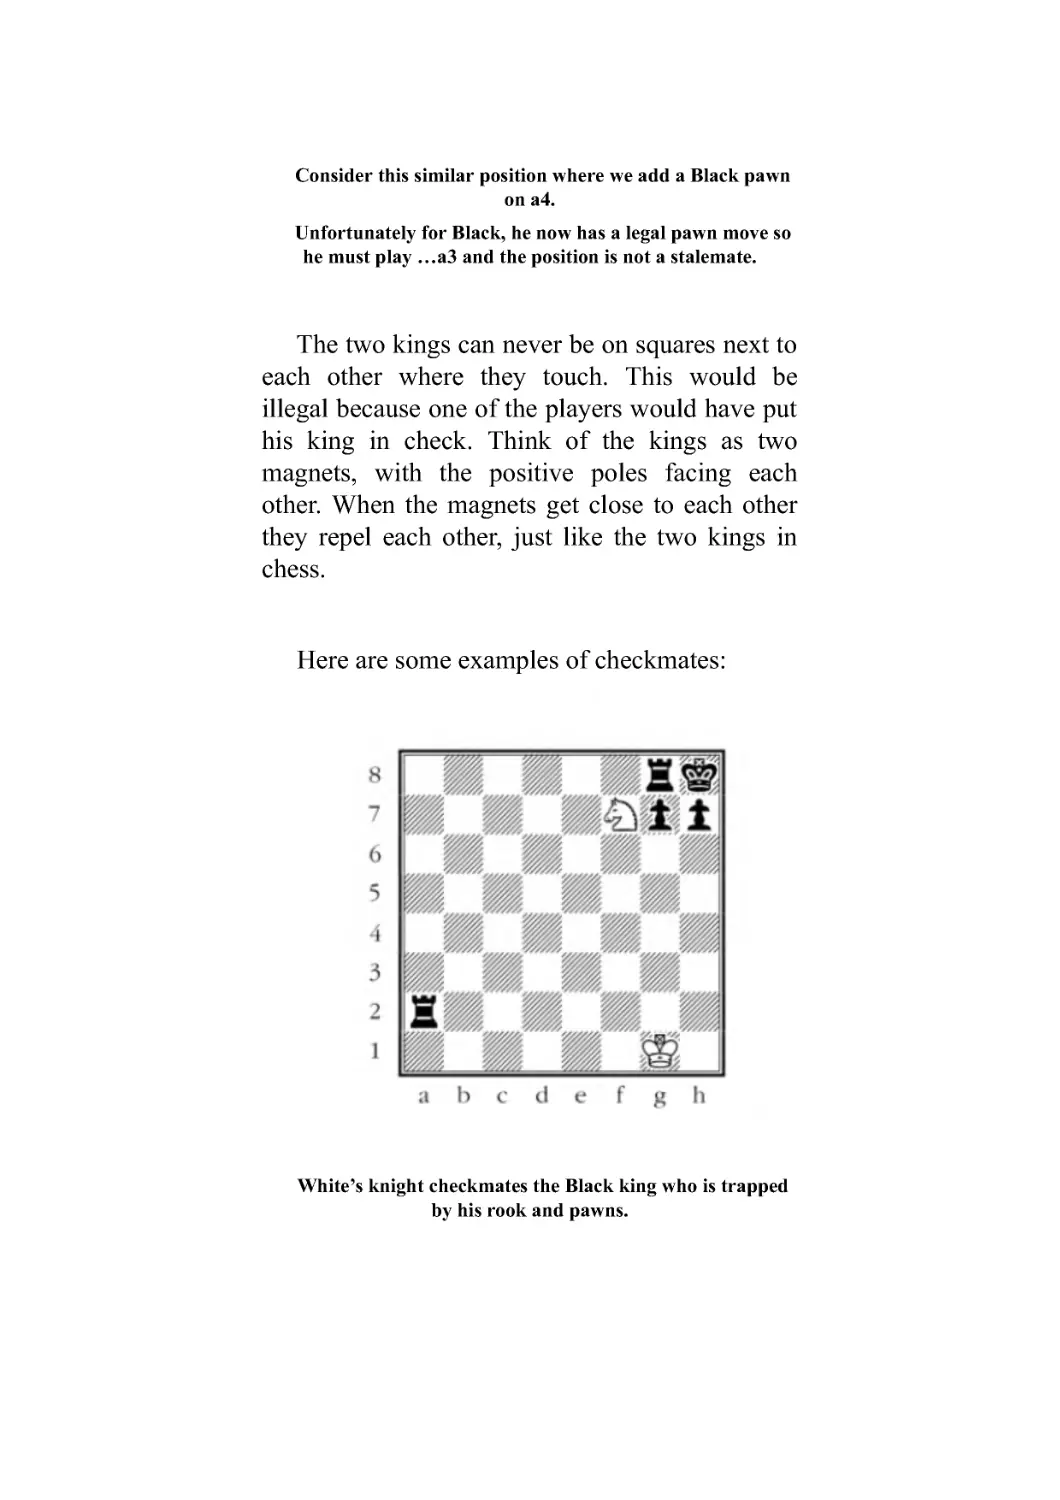
3-12
White’s 7
th
move
________
3-13
Black’s 11
th
move
________
3-14
White’s 15
th
move
________
3-15
Black’s 18th
move
________
3-16
White’s 19th
move
________
3-17
Black’s 38
th
move
________
3-18
White’s 48th
move
________
3-19
White’s 51
st
move, promoting to a queen
________
3-20
A Black pawn move that puts White in check (7th
move)
________
LESSON 4
BASIC CHECKMATES
“I play chess about four hours a day in training camp.
You have to decide what move to use, or what
combination of moves. I think less when I box because
the reaction time is a lot quicker, but some people call me
the chess boxer because they say I think too much in the
ring.”
Lennox Lewis
World Heavyweight Boxing Champion
The object of a chess game is to checkmate
your opponent’s king. This is achieved by
attacking the king in a position where he cannot
escape the check by moving (no available flight
squares), capturing the checking piece, or
interposing one of his own pieces in the line
between the king and the attacker.
A position that can be similar to a checkmate
is a stalemate.
By the rules of chess, when it is your turn to
move, you must move. You are also not allowed
to move your king into check where he can be
captured.
Pretend that White’s last move was Qf7 (from a7).
Now Black must move.
Black cannot move to either g7 or h7 because the king
would move into check from either the White queen or king.
Black also cannot move to g8 since the queen attacks it.
Because Black is not allowed to move into check, he has no
legal moves.
Black has been stalemated by White and can claim a draw.
Draw is a chess word for a tie.
Instead of playing Qf7, White could have
played one of four moves that would have
checkmated the Black king. What are they? Qa8,
Qb8, Qg7, and Qh7.
Qa8 and Qb8 are checkmate because the
queen attacks the king and controls the g8 square.
The White king controls the g7 and h7 squares.
Qg7 and Qh7 are checkmate because the
queen attacks the king and controls the g8 flight
square while the White king protects the queen.
Remember that a stalemate is when you have
no legal moves with ANY of your pieces, not just
when the king has no legal moves.
Consider this similar position where we add a Black pawn
on a4.
Unfortunately for Black, he now has a legal pawn move so
he must play ...a3 and the position is not a stalemate.
The two kings can never be on squares next to
each other where they touch. This would be
illegal because one of the players would have put
his king in check. Think of the kings as two
magnets, with the positive poles facing each
other. When the magnets get close to each other
they repel each other, just like the two kings in
chess.
Here are some examples of checkmates:
White’s knight checkmates the Black king who is trapped
by his rook and pawns.
White’s queen checkmates Black’s king and controls the h8
square. The bishop defends the queen.
The White pawn checkmates the Black king and is
protected by the White king who also prevents the escape to
g8.
The White rook checkmates the Black king and controls the
g8 and h6 flight squares. The White bishop protects the rook
and controls g7.
The Black rook checkmates the White king and controls f1
and h1. This is called a back rank checkmate because the king
is on the rank in back of the pawns.
The Black rook checkmates the White king and prevents
escape on a1 and a3. Black’s knight controls the b1 and b3
flight squares.
Black’s light-squared bishop checkmates White’s king. The
dark-squared bishop controls g1 and the king attacks g2 and
h2.
Black’s knight checkmates White’s king.
The Black bishop controls g2 and h1.
Mating with a King and Queen vs. a King
The most basic checkmate to learn is the queen and
king against a king. Often the queen is a promoted pawn.
In order to checkmate the king, he must be put in
check and have all his flight squares taken away. On what
part of the board is it easiest to checkmate the king...
center, edge, or corner? Consider these positions.
In order to checkmate the king, White must attack eight flight
squares (marked by the stars) as well as e4, for a total of nine squares.
In this position with the king on the edge of the board, White only
has to eliminate five flight squares plus h5, for a total of six squares.
With the king in the corner, White only has to eliminate three flight
squares plus h8, for a total of four squares.
It turns out the king can be checkmated both on the
edge of the board or in a corner. Therefore, White’s goal
is to use his king and queen to force the Black king to one
of these locations.
In order to do this, White uses his queen and king to
form a “box” around the Black king. He then must shrink
the box. It is important to make sure that you don’t lose
your queen and that the opposing king has a legal move
when it is his turn up until the actual checkmate so that
he will not be stalemated.
The “Box”
In the diagram at the bottom of the last page, the edges of the
box (the way a queen moves) are marked with arrows. Notice
that we are only defining the outer edges of the box, not the
diagonals inside the box.
White begins by shrinking the box by playing 1.Qc4+.
Defining a different box and playing 1.Qf4, is another possible
solution.
The goal is to checkmate the king as quickly as possible.
The Black king wants to stay near the center of the
board, so he plays, 1...Ke5. There are other possible
solutions than the one given below. This solution will
force the Black king toward the h8 corner. 2.Kc3 Kf5
3.Qd4 (shrinking the box) 3...Ke6 4.Kd3 Kf5 5.Qe4+
Kf6 6.Ke3 Kg5 7.Kf3 Kf6 8.Kf4 Kf7 9.Qe5 Kg6
10.Qf5+ Kg7 11.Qe6 Kf8 The goal is to first trap the
opposing king against the edge of the board and then
advance your king to help set up the checkmate. White
continues, 12.Qd7 Kg8 13.Kg5 Kf8 14.Kg6 Kg8
15.Qd8 mate (Note that 15.Qc8, 15.Qe8, and 15.Qg7 are
all also checkmate).
A king and rook can also checkmate a lone king using
the same procedure. While shrinking the box in this case,
the king may have to protect the rook from the opposing
king. The rook defines the box. The method for
checkmating with a king and rook is the same as for a
king and queen: shrink the box, trap the king against the
edge of the board, and checkmate the king.
Queen and Rook Roller Mate
Here is another important basic mating pattern. If a
player has a queen and a rook, his king is not needed to
help force a checkmate since the queen and rook have the
power to form a mating net on their own. Two queens or
two rooks checkmate in a similar fashion. The idea is to
shrink the box by alternating moves with the rook and
queen.
1.Rc3+ Kd4 2.Qb4+ Kd5 3.Rc5+ Kd6 4.Qb6+ Kd7 5.Rc7+ Kd8 6.Qb8
mate.
Notice that White could even blunder away his queen or rook and
still have sufficient [enough] mating material to checkmate the Black
king by shrinking the box.
You can think of shrinking the box like tossing a net
over the king and pulling it tight to squeeze and capture
him. A mating net is a chess term that describes when the
king is under attack and checkmate cannot be avoided.
The “net” controls the square the king is on and the flight
squares around him to keep him from running away.
Back Rank Checkmate
A common type of checkmate, called a back rank
mate, occurs when a king is attacked by a rook or queen
on the first (or back) rank and is trapped by his own
pawns on the second rank. A back rank checkmate is like
a queen and rook roller mate, except that the king’s
pawns do the job of either the rook or queen that prevents
the king’s escape. A way to avoid a back rank check-mate
is to keep your rooks on the first rank or to move up one
of the pawns in front of the king to create a flight square.
Here is a memorable position against a girl I played
against in my second chess tournament, when I was ten
years old. I was White and it was my move.
Things are looking good for our hero (me!)
since White is safely ahead a bishop and a pawn.
I couldn’t resist the temptation to capture the
pawn on f5 and played 32.Rxf5??
She back rank mated me by playing 32...Re1
mate! Remember it is always important to ask
yourself what your opponent is threatening to do
to you after each move!
Basset Hound Problems
4-1
What queen move does the best job of shrinking the box
around the Black king?
_________
4-2
What queen move does the best job of shrinking the box
around the White king?
_________
4-3
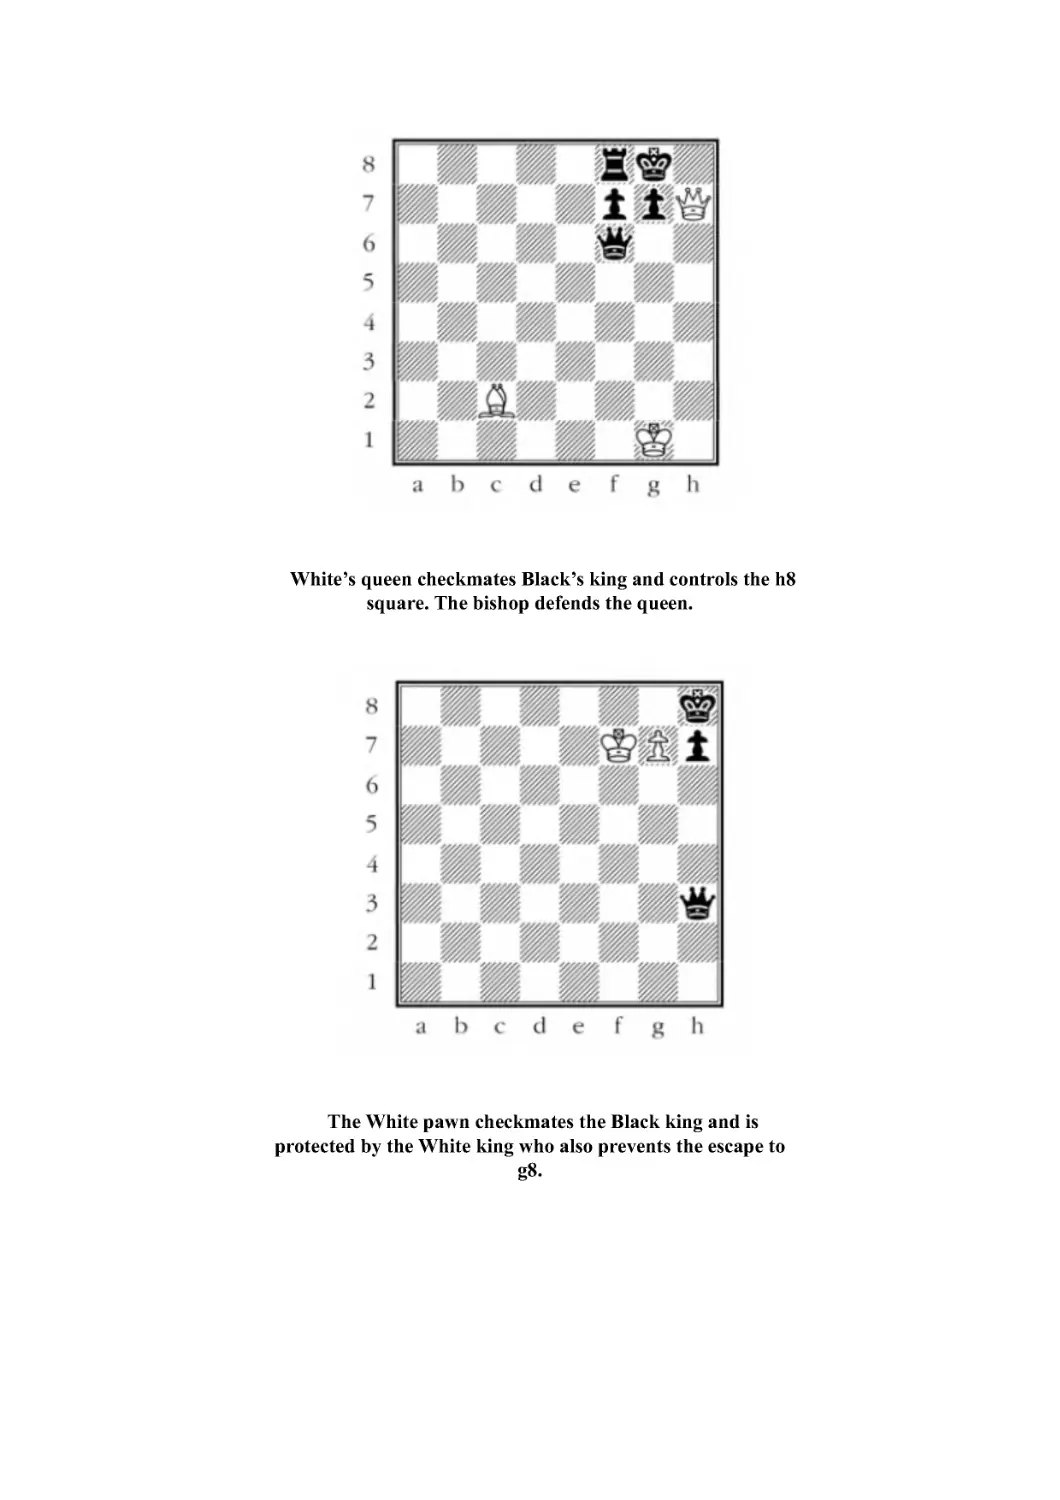
What rook move does the best job of shrinking the box around
the Black king?
_________
4-4
What rook move does the best job of shrinking the box around
the White king?
_________
4-5
Which is a better queen move Qb8+ or Qb7+? Why?
_________________________
4-6
Which is the best rook move - Ra2+, Rb2, or Rg1+? Which is
the worst of these moves? Why?
_______________________
4-7
What is the best rook move for White?
_________
4-8
What is the best rook move for White?
_________
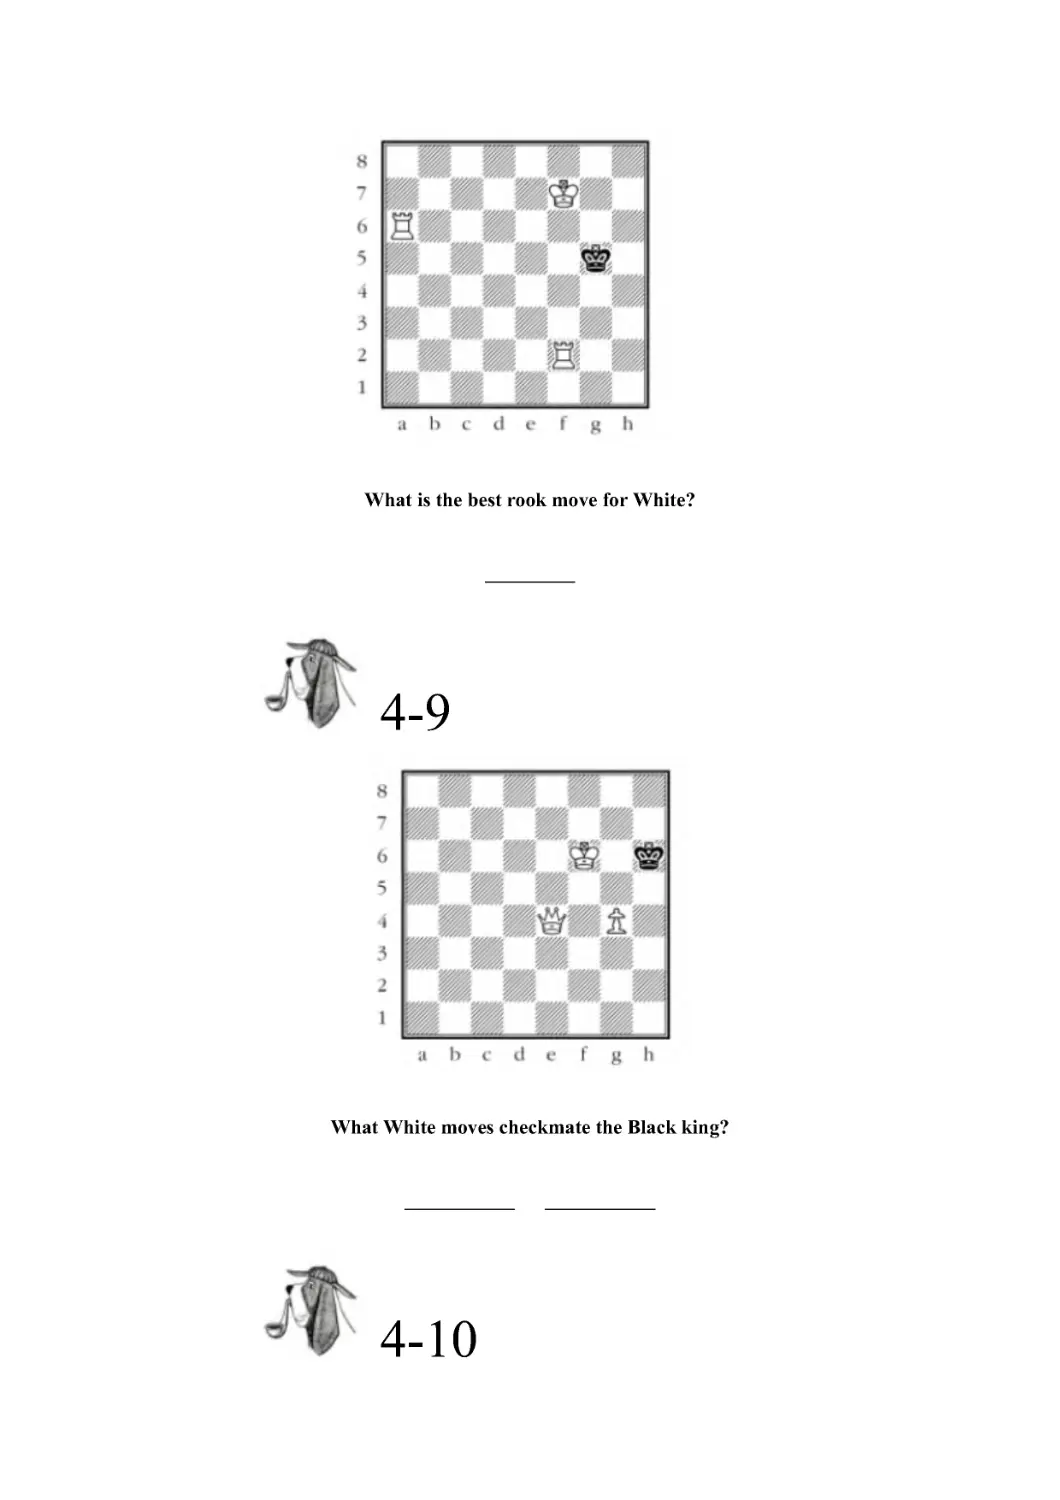
4-9
What White moves checkmate the Black king?
___________
___________
4-10
What Black move checkmates the White king?
________________________
Chess Detective Problems
4-11
White to move. Is 43.Rxf7 a good move? Why?
_________________________
4-12
What is Black’s best move? Why?
________________________
4-13
How many ways can Black checkmate White on the next
move? What are the checkmate moves?
_________________________
4-14
How many ways can White checkmate Black on the next
move? What are the checkmate moves?
________________________
4-15
How many ways can Black checkmate White on the next
move? What are the checkmate moves?
_________________________
4-16
How many ways can White checkmate Black on the next
move? What are the checkmate moves?
________________________
4-17
How many ways can Black checkmate White on the next
move? What are the checkmate moves?
_________________________
4-18
How many ways can White checkmate Black on the next
move? What are the checkmate moves?
________________________
4-19
How many ways can Black checkmate White on the next
move? What are the checkmate moves?
_________________________
4-20
How many ways can White checkmate Black on the next
move? What are the checkmate moves?
________________________
LESSON 5
BASIC TACTICS
“The game of baseball between pitcher and hitter sets up
like a game of chess in that you have to anticipate several
moves or pitches ahead to set up your opponent.”
Brad Lidge
All-Star Major League Baseball Pitcher
Tactics are battles between pieces and involve
short-term, immediate threats and attacks. The
different types of elementary tactics are:
pin
skewer
fork
discovered check
discovered attack
double check
double attack
All of these tactics are different kinds of
double threats. Sometimes it is difficult to defend
two threats at once with only one move. Pins and
forks are the most common types of tactics.
Combinations are a series of moves used to
improve your position that include some or all of
these tactical themes and can vary greatly in
degrees of complexity.
In all of the examples in this chapter, the piece
that performs the tactic can also do the same
tactic from any of the starred squares.
Pin
A pin is when a long-range piece (queen,
rook, or bishop) attacks a piece that shields
another piece of greater value. If the pinned piece
moves, the piece behind it would then be
vulnerable to attack. It is a metaphor [a
comparison] for a real pin: a thin, long, pointed
piece of metal that can poke through different
layers of clothing, in a straight line.
The White bishop pins the Black knight to the Black king.
In this case, the less valuable piece, the knight, is positioned in
front of the more valuable piece, the king.
In order for the knight to move again, the king must break
the pin by first moving to g8 or h7.
When a piece is pinned to the king, it is called
an “absolute pin” because the pinned piece
absolutely cannot move, since the king would be
placed in check.
Examples of pins with a rook.
If the bishop moves, the rook will capture the queen.
The bishop is pinned to the queen.
The rook will able to trade itself for the queen.
The queen is in an absolute pin.
Since the queen has the powers of both the
rook and the bishop, she can pin on ranks, files,
and diagonals. Once again, a pin would occur if
the queen were placed on any of the starred
squares.
The White queen pins the knight to the king.
The White queen pins the knight to the rook.
In this position, the White knight is pinned to the h1-
square. If the knight were to move to either f4 or g5, Black
would play...Qh1 mate.
Skewer
Skewers work the same way as pins, except
now the more valuable piece is in front of the less
valuable one. A skewer is the stick in a shish-ka-
bob. Skewers, also known as x-rays, are less
common than pins. The less valuable hidden
piece usually ends up getting captured after the
more valuable piece in front of it moves to safety.
The bishop skewers the rook to the knight.
If the rook moves, the bishop can capture the knight.
The rook skewers the king to the queen.
When the king moves, the rook can capture the queen.
Fork
A fork is when a piece attacks two or more
pieces. This is like at dinner when you are eating
beans with a fork and the fork is used to stab two
or more beans at once. Since the other player
only gets one move, he has to choose which piece
to save.
All the pieces have the potential to fork. Here
are examples of each type of White piece forking
two Black pieces. The starred squares represent
other places where the White piece could also
fork the Black pieces.
The pawn on c4 forks the knight and rook.
Black should move the rook to save it and White’s pawn
can capture the knight.
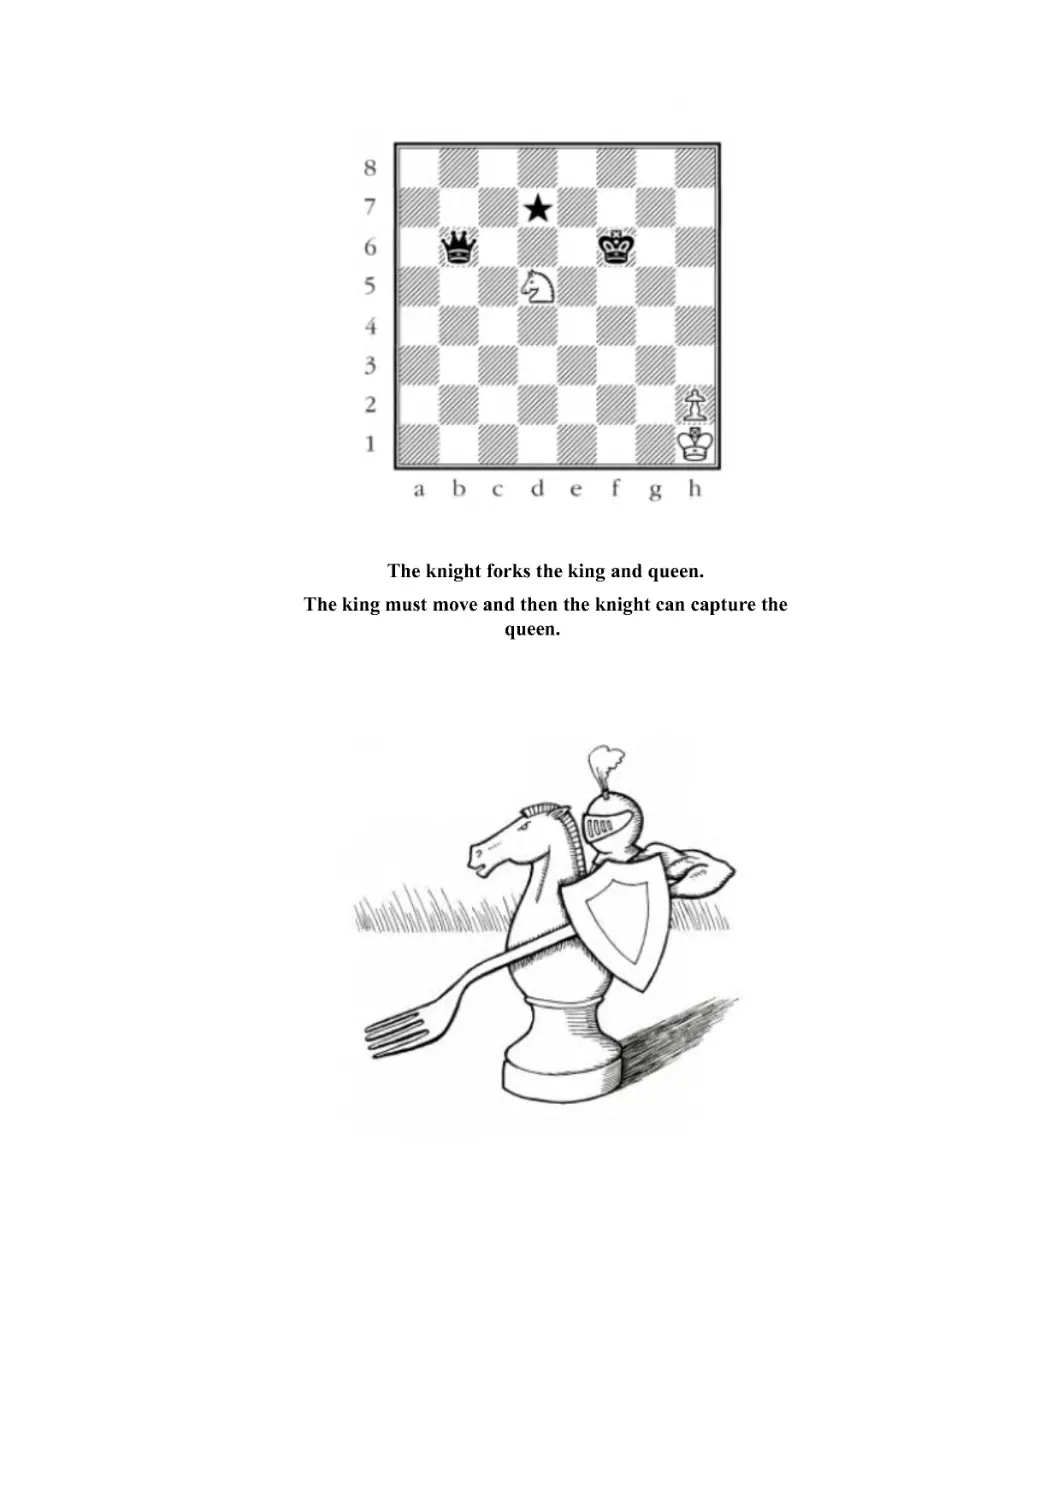
The knight forks the king and queen.
The king must move and then the knight can capture the
queen.
The bishop forks the king and knight.
The king must move and the bishop can capture the knight.
The rook forks the king and pawn. The Black king must
move and the rook can capture the pawn. If the rook was on
b5, the king could capture it.
The queen forks the two pawns.
White can win one of the pawns on the next move.
The king forks the two knights.
White can win one of the knights on the next move.
Discovered Check
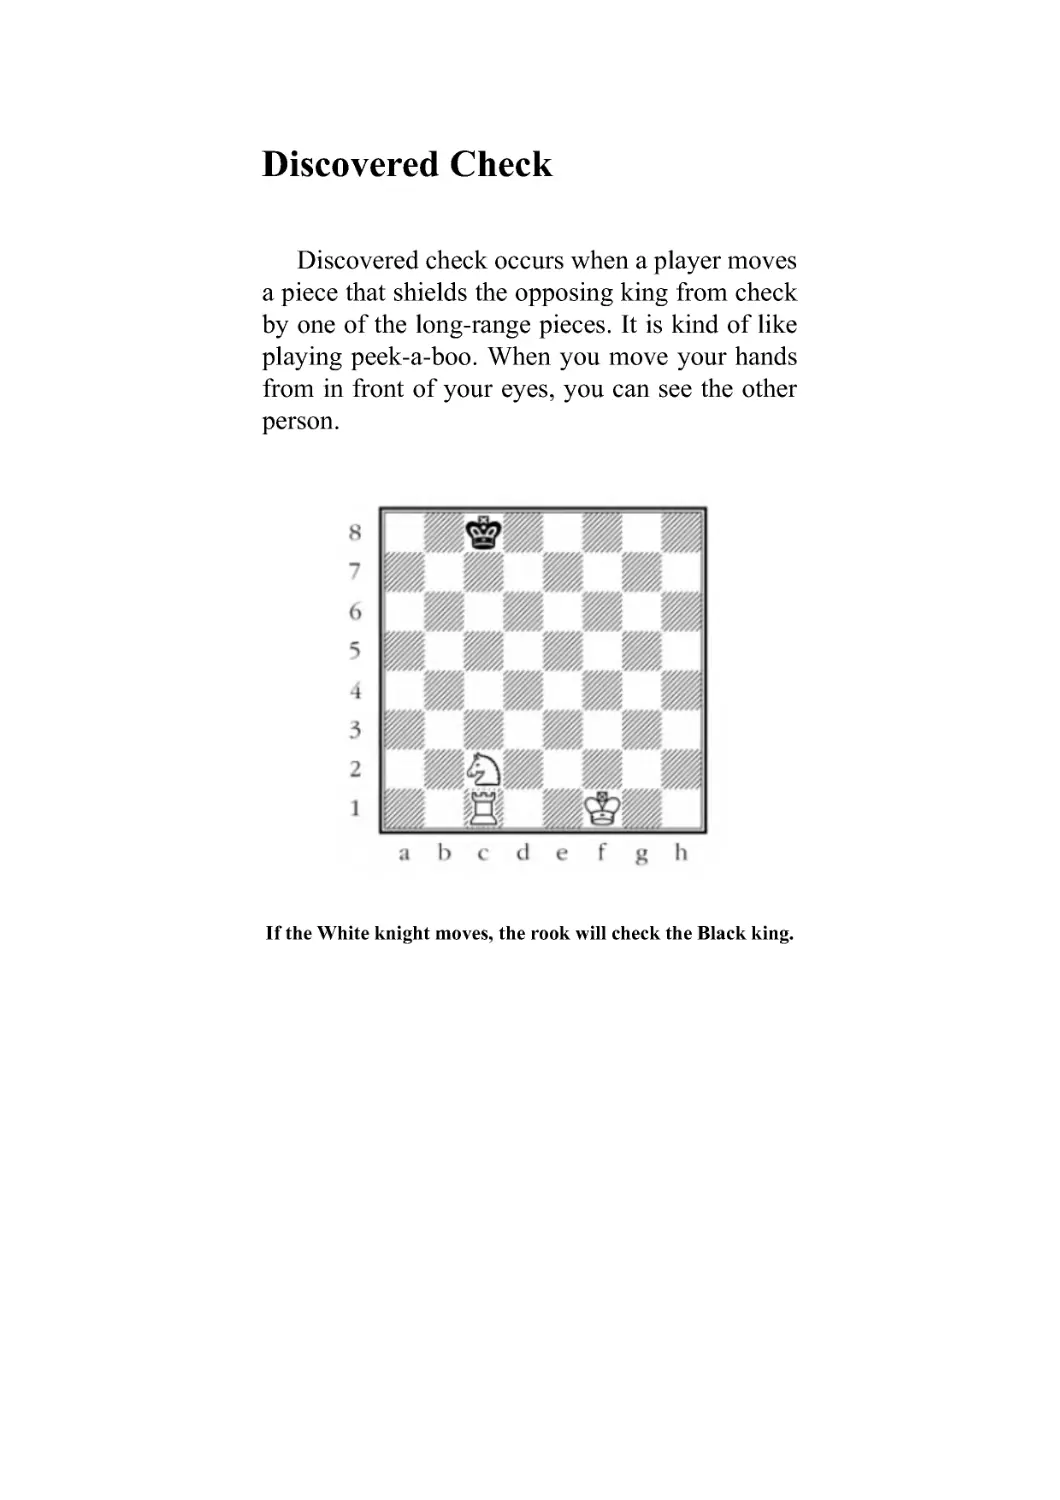
Discovered check occurs when a player moves
a piece that shields the opposing king from check
by one of the long-range pieces. It is kind of like
playing peek-a -boo. When you move your hands
from in front of your eyes, you can see the other
person.
If the White knight moves, the rook will check the Black king.
Discovered Attack
A discovered attack is the same concept as a
discovered check, except the attacked piece is not
the king.
If White moves his bishop, he will make a discovered attack
on the knight with the queen.
Double Check
Double check occurs when a piece moves to
put the king in check while uncovering a long-
range piece behind it that also attacks the king. A
double check forces a king move because both of
the attacking pieces cannot be captured or
blocked in only one move.
If White moved the knight to either c5 or d6, the Black king
would be in double the check from both the knight and the
queen.
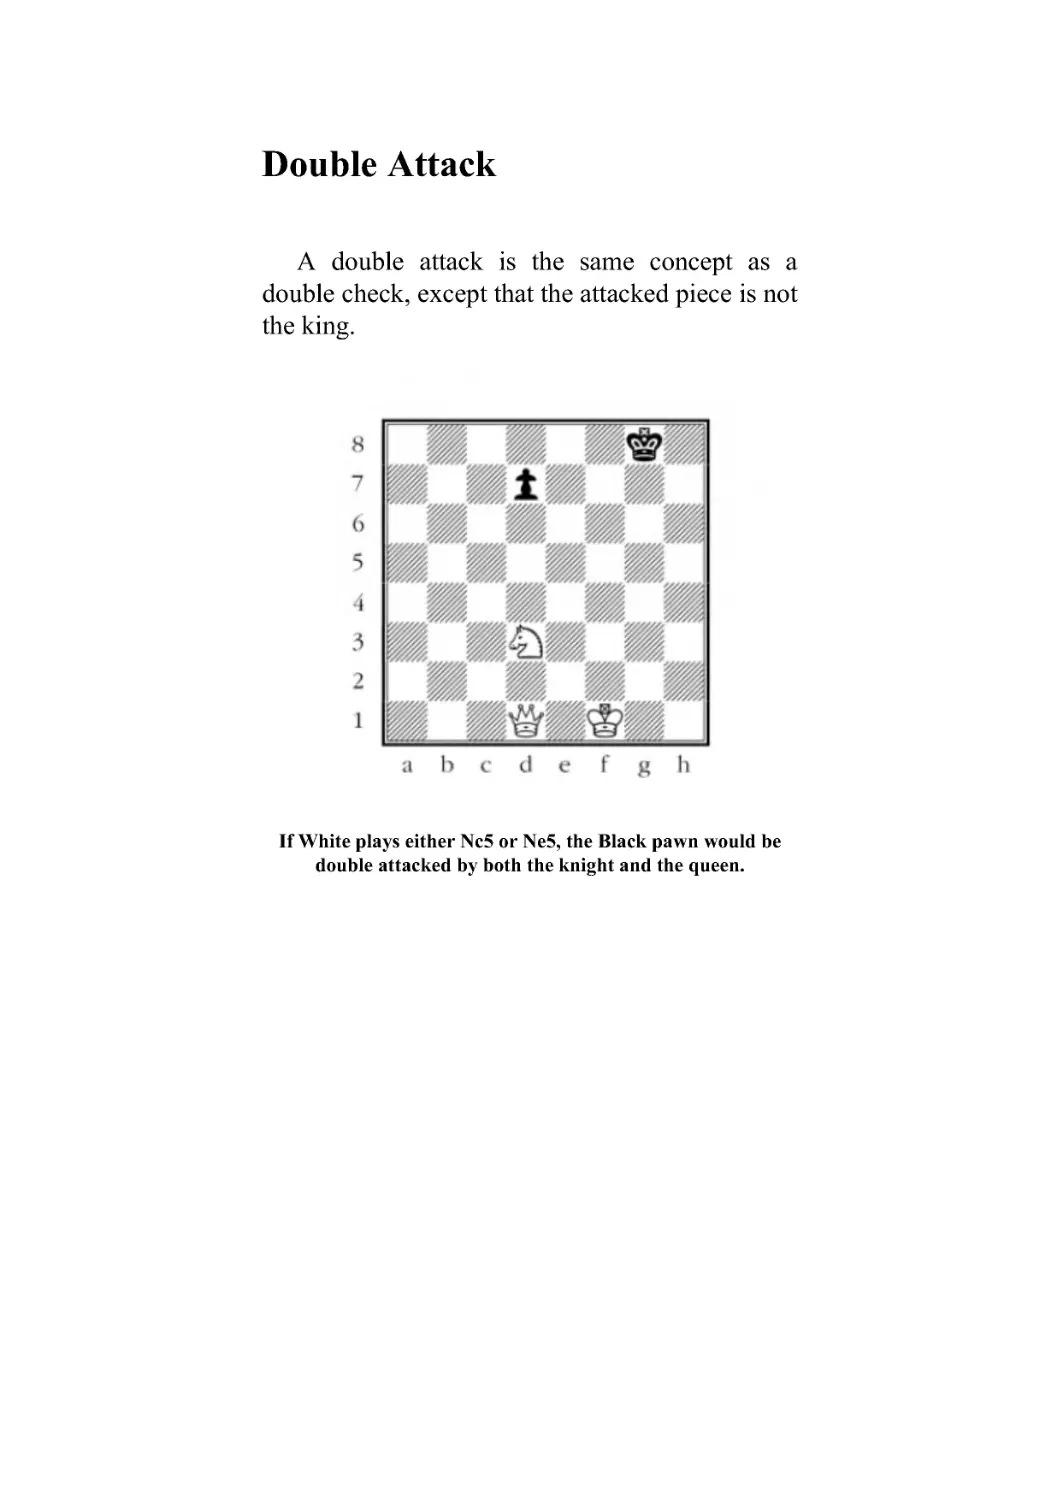
Double Attack
A double attack is the same concept as a
double check, except that the attacked piece is not
the king.
If White plays either Nc5 or Ne5, the Black pawn would be
double attacked by both the knight and the queen.
Basset Hound Problems
5-1
Find the pin for White that wins the Black queen.
1.________
5-2
Find the skewer for White that wins the Black queen.
1.________
5-3
Find the move for Black that forks the king and queen.
1...________
5-4
Find the best skewer move for Black that wins the White
queen.
1...________
5-5
Find the move for White that forks the king and knight.
1.________
5-6
Find the move for White that pins the rook to the king.
1.________
5-7
Find the moves for Black that fork White.
1...________
1...________ 1...________
5-8
Find the skewer move for Black.
1...________
5-9
Find the move for White that forks the king and queen.
1.________
5-10
Find the moves for White that pin the bishop to the king.
1.________
1.________
Chess Detective Problems
5-11
Find the fork that wins back a piece for a pawn for White.
1.________
5-12
Find the move that wins the Black knight.
1.________
5-13
What move wins material for White?
1. ________
5-14
Black to move and win!
1...________
5-15
White is behind a rook for a pawn. What is his best move?
1.________
5-16
The Black knight is pinned to the king. What move should
White play?
1.________
5-17
Black threatens ...Qf2 mate. What is White’s only move that
doesn’t lose material or get checkmated?
1.________
5-18
White can take the knight with his pawn. Is this a good idea?
Why?
_________________________
5-19
Black’s bishop on d7 is pinned to the queen. How can Black
save it?
1...________
5-20
White to move and win the Black queen for a less valuable
piece.
1.________
LESSON 6
DRAWS
“Chess is a good way to learn, to keep your brain fit and
the ego in check, a mental form of your local
gymnasium.”
Abelard (1079-1142)
dialectician, philosopher, theologian
A chess game that ends in a tie is called a
draw. Similar to sporting events that may end in a
tie with a final score of zero to zero, or one to
one, these types of draws can occur in chess:
Insufficient mating material
Stalemate
Threefold repetition
50-move draw
Draw by agreement (the draw offer)
Chess Clock draws:
Both flags are down
Flag is down, but player has insufficient
mating material
In a chess tournament, the player who wins the
game gets one point and the losing player gets
zero points. Both players receive half a point for
a draw.
Insufficient mating material
An insufficient [not enough] mating material
draw occurs when neither player has enough
material remaining on the board to force
checkmate. An endgame where only the kings are
left on the board would be an example of a draw
by insufficient mating material. King + knight vs.
king and king + bishop vs. king are also draws by
insufficient mating material.
To show that a king and bishop are insufficient mating
material, let’s say that Black tried to lose the game by moving
his king into the corner.
The White king in this position is as close as he can get to
the Black king and he controls both g7 and h7.
If White’s bishop is moved to f6, it puts the Black king in
check.
Notice that White cannot control the g8 flight square.
Therefore, it is impossible for White to checkmate Black
with only a bishop and a king. The game is drawn by
insufficient mating material. A king and knight also lack
enough power to mate a lone king.
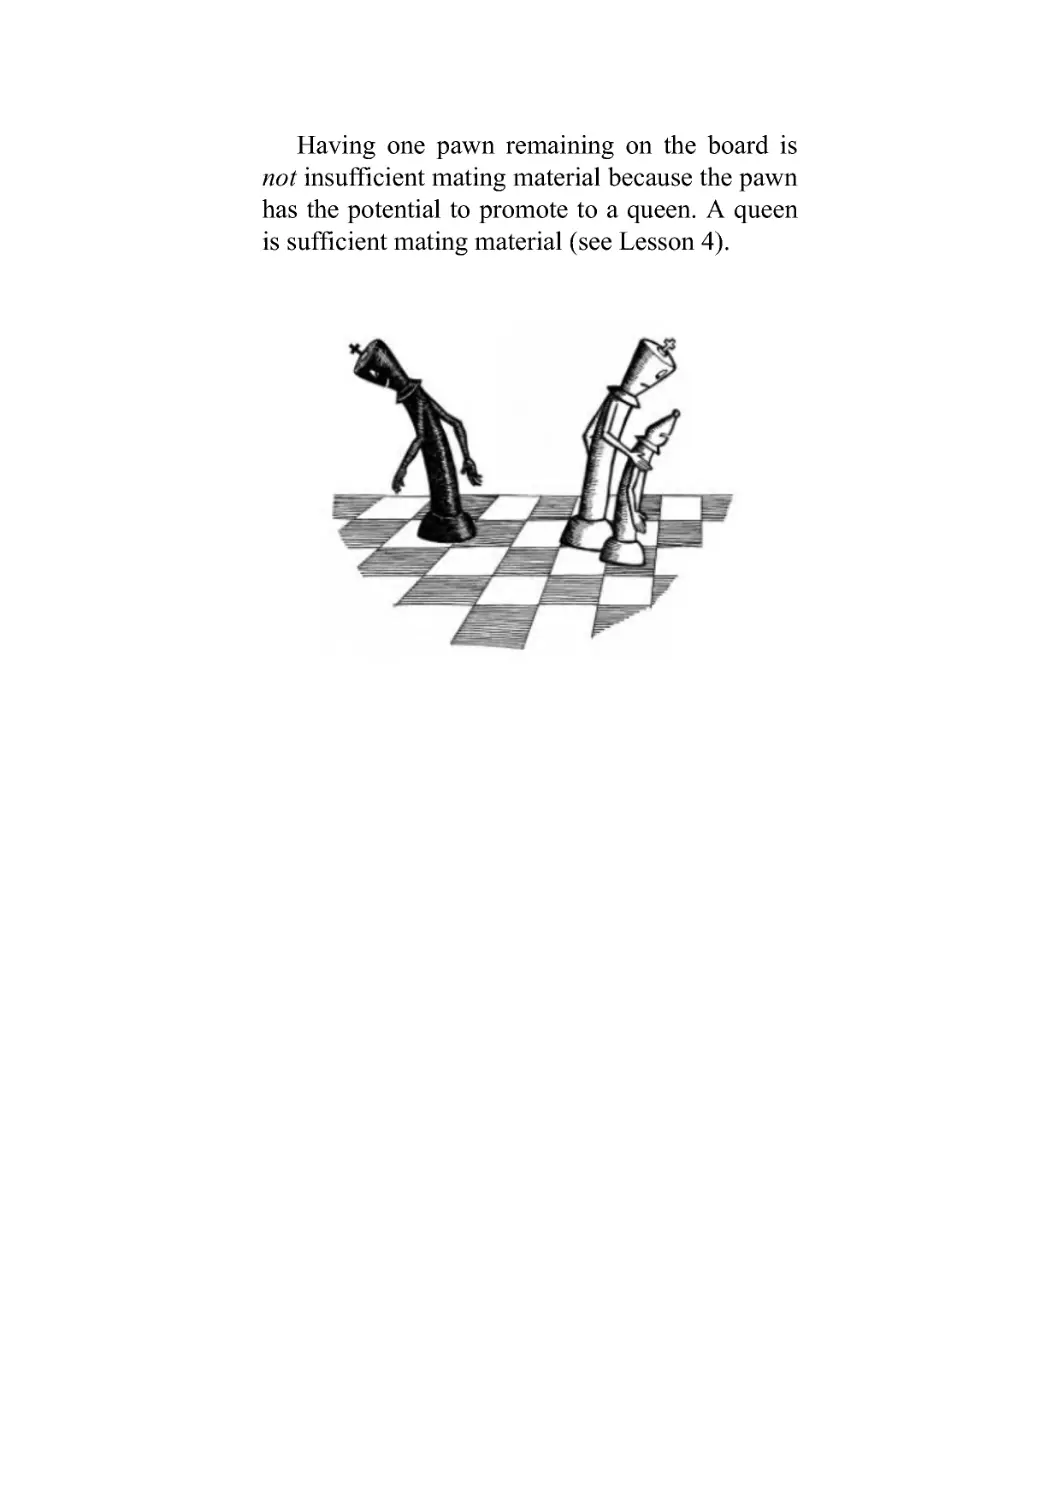
Having one pawn remaining on the board is
not insufficient mating material because the pawn
has the potential to promote to a queen. A queen
is sufficient mating material (see Lesson 4).
Stalemate
The rules of chess require that players must
take turns moving. What if the player to move is
not in check and has no legal moves available?
This is called a stalemate and the game ends in a
draw.
White is trying to win in this position. Let’s say White’s
last move was Rg7.
Now it is Black’s turn. Where can he move?
All the possible king moves (...Kg8, ...Kxg7, and ...Kh7)
are illegal because he can’t move into check.
Since it is his turn and Black has no legal moves, the game
is declared a draw by stalemate.
Here is the same position, but Black now has a pawn on h4.
Unfortunately for Black, he cannot claim a stalemate with
his turn to move because the pawn can move to h3.
Threefold repetition
If the same position (for both the White and Black
pieces) occurs three different times, the game is drawn by
threefold repetition. The moves do not have to repeat
consecutively [one immediately following another], but
usually do. The purpose of the threefold repetition draw is
so the game doesn’t repeat and go on forever.
The most common type of threefold repetition is
perpetual [never ending] check. This occurs when one
player, typically the one who is losing the game, finds a
position where he can check the opposing king back and
forth forever, with no way for the king to escape.
Black is way ahead in material and it looks like he is easily winning the
game. Normally capturing the queen on b5 would be a good move, except
that White needs a lot more material than a queen in order to have a
chance.
But White can play 1.Qg6+. Black is then forced to play 1...Kh8. White
can then continue 2.Qh6+ Kg8 3.Qg6+ (the second time for this position)
3...Kh8 4.Qh6+ Kg8 5.Qg6+ Now that the position has repeated the third
time, White can claim a draw by threefold repetition.
Another way to look at a threefold repetition draw is to
imagine that after every move, you take a photograph of the
board. You then compare the photos. If three of the photos
are identical with the same player to move, a threefold
repetition draw can be claimed.
50-move draw
If fifty moves take place (a complete move is when both
players have moved one time) and no pieces have been
captured and no pawns have been moved, then the game is
declared a draw. Fifty moves gives the player who is ahead
a long time to figure out how to win; but the game cannot
go on forever.
If a piece is captured or a pawn is moved, the fifty move
count starts over again. A pawn move is progress toward
promoting to a queen and a piece capture changes the
position enough to justify starting over with the count.
The average length of a chess game between masters is
about forty or fifty moves. The 50-move draw rarely occurs
because the count to fifty moves usually starts after this
point, late in the endgame. The 50-move draw would
typically occur at the beginner level when the player with
the advantage does not know how to checkmate the king.
Draw by agreement (the draw offer)
Either player can offer a draw. It is proper etiquette
[manners] to offer a draw when you make your move, just
before starting your opponent’s clock. The draw offer
stands for only one move. The opponent can accept the
draw offer or decide to play on. If he chooses to continue
the game, the draw offer goes away.
It is considered bad sportsmanship to continuously
annoy your opponent by offering draws, which he has
already refused (usually because he is ahead and is trying to
win). Offering a draw on each move is like asking your
mom for a cookie over and over again (and she keeps
saying no)...she gets annoyed with you...usually pretty
quickly! It is a better idea to wait a while and then say,
“Mom, you look very pretty today. May I have a cookie?!”
Chess Clocks
A chess clock is two separate clocks in one
housing, with a button above each clock. Only one
clock runs at a time. When a player makes a move,
he pushes the button above his clock, which stops
his clock and starts his opponent’s clock. It is
proper chess etiquette to push the button with the
same hand you used to move the piece.
Digital clocks are a newer invention and count
down every second left in the game. Time runs out
when the clock reads 0:00:00. Digital clocks have a
time-delay feature that is useful in tournaments.
Analog clocks have a flag that is raised by the
big hand a few minutes before the top of the hour.
It is proper to set the clock so that the end of the
time control is at 6:00. [For a 30 minute game
(G/30), set the clocks at 5:30 at the start of the
game. For a 60 minute game (G/60), set the clocks
at 5:00.] At exactly 6:00 the flag will fall and the
player will run out of time. In a tournament, only
the players involved in the game are allowed to call
the flag to claim a win on time. Even the
tournament director cannot call the flag.
On this analog chess clock, the clock is running for the player
on the left because the button on top of his clock is up. His flag is
being lifted by the clock’s big hand and in about two minutes, at
6:00, it will fall. The player on the right has about eight minutes
left on his clock.
When the player on the left makes his move, he will push
down his button, which will stop his clock and start the clock for
the player on the right. The button above the clock of the player
on the right will pop up when the left side button is pushed
down.
In chess tournaments, you will be told how
much time you have to make all of your moves in
the game. In scholastic tournaments [tournaments
for children], the time control is normally a game
in 30 minutes for each player or a total game time
of an hour. If a player runs out of time, his
opponent can claim a win, provided he has
sufficient mating material on the board.
You can use as much or as little time on each
move as you like, but don’t run out! It is best to pace
yourself. If you move too fast, chances are you will
make a mistake. If you move too slowly, the quality
of your moves usually goes up, but you may run out
of time and lose the game that way.
Using a clock in a chess game is like taking a
test in school. If you spend all your time on the first
problem, you may get it right, but you will do
poorly on the test because you didn’t answer the
other questions. If you answer each question too
quickly, the answers are usually wrong and
incomplete. As both a student and a chess player,
you must learn to find a balance.
Both flags are down
When both player’s flags have fallen, they are
both out of time. This is another type of draw, as
long as one of the players notices that time has run
out. Usually this occurs when both players are short
of time, with their attention focused on the board
when the first player runs out of time.
Flag is down, but player has insufficient mating
material
If the player who claims a win on time has
insufficient mating material, he can only claim a
draw because a win is impossible on the board. All
he needs is a pawn (the possibility to win) to claim
a win on time because a pawn can promote to a
queen, which is mating material.
Basset Hound Problems
6-1
Which is the best move for White: 1.Qe3, 1.Qd6, or 1.Qb8+?
Why?
__________________________
6-2
Which is the best move for Black: 1...Kc3, 1...Bc3, or 1...
Rb5? Why?
__________________________
6-3
Which is the best move for Black: 1...Re6+, 1...Ra6, or 1...
Rxf2? Why?
__________________________
6-4
Which is the best move for White: 1.Nb5+, 1.Nxc6, or 1.Nxe6?
Why?
__________________________
6-5
Which of these moves is the best move for White: 1.Be8,
1.Bd6, or 1.Ka6? Why?
__________________________
6-6
Which is the best move for White: 1.Bc4+, 1.Bxg2, or 1.Bxf7?
Why?
__________________________
6-7
Which of these moves is the best move for Black: 1...Rh2+,
1...Ra1, or 1...Rd5? Why?
__________________________
6-8
Which is the best move for White: 1.Rxb2, 1.Ra3, or 1.Kc4?
Why?
__________________________
6-9
Which is the best move for White: 1.Nf4+, 1.Nxf2, or 1.Kxh7?
Why?
__________________________
6-10
Which is the best move for White: 1.h5 or 1.Kxc7? Why?
__________________________
Chess Detective Problems
6-11
What is Black’s best move?
1..._______
6-12
What is White’s best move?
1.________
6-13
What is White’s best move?
1.________
6-14
What is Black’s best move?
1...________
6-15
White is ahead in material. He played Kh2 and offered Black
a draw. Should Black accept it? Why?
__________________________
6-16
What is White’s best move?
1.________
6-17
What is Black’s best move?
1... ________
6-18
What is Black’s best move?
1... ________
6-19
What is White’s best move?
1.________
6-20
Black played ...Qxa2 and offered a draw. Should White accept
it?
_____________________
LESSON 7
FREE STUFF!
“You must not, when you have gained a victory, use any
triumphing or insulting expressions, nor show too much
of the pleasure you feel; ...”
Benjamin Franklin (1706-1790)
statesman, philosopher, inventor, scientist, musician,
economist
The biggest mistake made by young chess
players is hanging (leaving a piece open to
capture, or in chess terms, en prise) their pieces.
Of course, you should also look for pieces that
your opponent hasn’t protected. Most young
players are only involved in their own plans and
don’t spend any time considering what their
opponent is threatening. Always look to see what
your opponent can do to you. In chess, remember
that your opponent’s pieces are as important as
your own.
Counting the number of times a piece is
attacked and defended is one of the most
important concepts in chess. The most common
form of “free stuff” at the beginner level is a
piece that is attacked once and has no defender,
making it possible to be captured the next move.
The reason why you don’t leave your toys in
the park is that some other kid may come, take
them, and claim them as “free stuff.” Try not to
leave “free stuff” lying around on the chessboard.
What do you do before you cross the street? Look
both ways so that you don’t get run over by a car.
In chess, double-check your move so that you
don’t get run over by an opponent’s piece! In
other words, look before you leap!
It is White to move.
Notice that the Black pawn on d5 is attacked twice (by the
knight on c3 and the rook on d1). It is only defended once (by
the rook on d8).
Since he has an extra attacker, White can safely capture the
pawn with either the knight or rook to win material.
Think of it like two-on-one drills that you may have
practiced in soccer.
White’s two attacking pieces can over-power the Black
pawn.
In a similar position, remove Black’s bishop from h5 and
place it on e6.
Now Black has two defenders for the d5 pawn.
White still has two attackers and would now lose material
if he tried to capture the pawn.
If White plays 1.Nxd5? Rxd5 2.Rxd5 Bxd5, he would then
lose a knight and a rook for a pawn and a rook (a loss of two
points).
If Black responds 1...Bxd5 2.Rxd5? Rxd5, Black then wins
a knight and rook for a bishop and pawn (a gain of 4 pawns).
It is usually best to make a capture with your
least valuable piece first so that you have the
most material remaining at the end of the
captures.
Now put the bishop back on h5 and place the Black queen
on d7 instead of c7.
Again the Black pawn is defended twice, this time by the
queen on d7 and the rook on d8.
Even though Black’s pawn is only attacked twice, White
can safely capture the pawn with either the knight or the rook
because Black would have to re-capture with the queen first.
The capture sequence could go 1.Rxd5 Qxd5? 2.Nxd5
Rxd5. Black does end up with the last piece standing on d5,
but he gave up a queen and a pawn (10) for a knight and a
rook (8).
Sample Game Looking for “Free Stuff”
Set up your chessboard so that you can play
along. Some of the moves in this game are bad
because they leave “free stuff” for the opponent.
1.e4 b5?
The b5 pawn is hanging.
2.Bxb5 a6 3.Nf3?
The bishop is hanging.
3...axb5 4.d4 e6 5.Qe2 Ba6
Protecting the pawn.
6.h3 Nf6
7.Qxb5?
The queen is now hanging, White forgot that
Black defended the pawn when he played 5...
Ba6.
7...Bxb5 8.Bg5 Nxe4?
The pawn is hanging...but the knight is
pinned to the queen...oops!
9.Bxd8 Kxd8
It is important to recapture the bishop, so that
at least Black gets something back for the queen.
This is like getting change back after buying
something at a store.
10.Nc3 Ba6?
Black noticed that the bishop is under attack,
but the knight is too! Better moves that won’t
lose a piece are 10...Nxc3, 10...Nd6, 10...Bc6,
or 10...Bb4.
11.Nxe4 Be7 12.0-0-0 Bb7
Attacking the knight on e4 with bishop and
making a discovered attack on the a2 pawn by the
rook. How can White defend them both?
12.Nc3!
12.Nc5? attacks the bishop on b7. Black can
then win free stuff by playing 12...Bxc5 13.dxc5
Rxa2.
12...Bg5+?
Giving away the bishop. Remember you don’t
win the game by putting your opponent in check.
Make sure each move has a purpose.
13.Nxg5
Taking the free bishop.
Basset Hound Problems
7-1
White to move. Where is the free stuff?
________________
7-2
White to move. Where is the free stuff?
________________
7-3
Black to move. Where is the free stuff?
________________
7-4
Black to move. Where is the free stuff?
________________
7-5
White to move. Where is the free stuff?
________________
7-6
White to move. Where is the free stuff?
________________
7-7
Black to move. Where is the free stuff?
________________
7-8
Black to move. Where is the free stuff?
________________
7-9
White to move. Where is the free stuff?
________________
7-10
White to move. Where is the free stuff?
________________
Chess Detective Problems
7-11
White to move. Where is the free stuff?
________________
7-12
White to move. Where is the free stuff?
________________
7-13
Black to move. Where is the free stuff?
________________
7-14
Black to move. Where is the free stuff?
________________
7-15
White to move. Where is the free stuff?
________________
7-16
White to move. Where is the free stuff?
________________
7-17
White to move. Where is the free stuff?
__________________________
7-18
Black to move. Where is the free stuff?
__________________________
7-19
White to move. How do you win free stuff?
________________
7-20
White to move. How do you win free stuff?
________________
LESSON 8
PAWN STRUCTURE
“But the enemy has the move, and he is about to open his
full game. And pawns are as likely to see as much of it as
any. Sharpen your blade!”
J. R. R. Tolkien (1892-1973)
Oxford professor, author of The Lord of the Rings
Pawn structure is an important element in
chess. Pawns can be strong or weak depending on
their position in relationship to the other pawns
on the board. Since pawns must capture an
opposing piece to change files (which usually
requires the opponent’s help) and change their
structure, strong or weak pawns may last for the
entire game.
Each player is trying to create a strong pawn
structure for himself while, at the same time,
trying to weaken his opponent’s structure.
Don’t help out your opponent’s pawn
structure. Think of the story of the Three Little
Pigs. The big, bad, wolf didn’t go to the little pig
that was making his house out of straw and say,
“You silly little pig. Straw doesn’t make a strong
structure. I ordered you some bricks to build your
house out of, so that when I huff and puff, I won’t
be able to blow your house down!”
Pawns are stronger if they are side-by-side
because they can protect each other. Weak pawns
are typically lined up in front of one another on
the same file, unable to protect each other. It is
good to have friends to protect you.
In master-level chess, losing a pawn because it
is weak can be the difference between winning
and losing the game.
Here are the different types of pawns:
passed pawns
protected passed pawns
pawn chain
isolated pawns
doubled isolated pawns
tripled isolated pawns
isolated passed pawns
base pawns
backward pawns
doubled pawns
tripled pawns
Passed Pawns
A passed pawn is a pawn that can move to the
other side of the board and promote without an
opponent’s pawn blocking it or guarding squares
in its path. Passed pawns are strong pawns
because one of the opponent’s pieces must guard
against the pawn’s attempt to promote to a queen.
Rather than allowing the pawn to promote, often
the defending player must give up a piece, say a
bishop or knight, for the passed pawn. The further
up the board a passed pawn is, the more
dangerous it becomes.
The pawns on a5 and d3 are passed pawns.
Protected Passed Pawns
A protected passed pawn is a passed pawn that
is protected by a friendly pawn. Protected passed
pawns are the strongest pawns.
The pawn on e5 is a protected passed pawn.
The pawn on f4 protects it.
Pawn Chain
A group of pawns on adjacent files that can
protect each other is called a pawn chain.
In the diagram at the top of this page, White’s
pawns on h2, g3, f4, and e5 form a pawn chain.
The a2 and b3 pawns form a smaller pawn chain.
Black’s pawn chain consists of pawns on h7,
g6, and f5.
Isolated Pawns
Isolated pawns are sad or weak pawns that are
all alone because they have no other friendly
pawns on adjacent [next to] files. Isolated pawns
can be especially weak if they are on a half-open
file (a file where one player has a pawn and the
other player doesn’t have a pawn) because the
opposing rooks can line up and attack them.
Doubled Isolated Pawns
Doubled isolated pawns are two pawns lined
up on the same file with no friendly pawn on an
adjacent file to provide protection.
Tripled Isolated Pawns
Tripled isolated pawns are three pawns lined up
on the same file with no friendly pawn on an
adjacent file to provide protection. Tripled isolated
pawns are somewhat rare.
The pawn on b2 is an isolated pawn. The pawns on g2 and g3
are doubled isolated pawns and the pawns on c7, c6, and c4
are tripled isolated pawns.
Isolated Passed Pawns
An isolated passed pawn has the good trait of
being passed and the bad trait of being isolated.
The g5 pawn is an isolated passed pawn.
Base Pawns
A base pawn is the pawn that is at the base of
a pawn chain (pawns lined up diagonally on files
next to each other) and has no pawn to protect it.
The pawns on a6 and c3 are base pawns.
Backward Pawns
A backward pawn is a base pawn on an
opponent’s half-open file. Often a backward pawn
is weak because it can be easily attacked by the
opponent’s rooks on the half-open file.
The pawns on a2, g2, b7, and f7 are base pawns.
The pawn on d6 is a backward pawn.
Doubled Pawns
Doubled pawns are two pawns on the same
file that have a pawn on an adjacent file that
could provide protection. Doubled pawns are
much stronger than doubled isolated pawns, but
usually not as strong as having the pawns side-
by-side.
Tripled Pawns
Tripled pawns are three pawns on the same
file that have a pawn on an adjacent file that
could protect them. Tripled pawns are fairly rare.
White’s b-pawns are doubled pawns.
Black’s d-pawns are tripled pawns.
Adding other pieces to the board has no effect
on how pawns are defined.
The h6 pawn is a protected passed pawn.
The a3 pawn is an isolated passed pawn.
The g6 pawn is an isolated pawn.
The base pawns are on g3 and d7.
Black’s pawns on d7 and e6 form a pawn chain.
White has a pawn chain on g3-f4-e5 and g3-f4 -g5-h6.
The pawns on a3, a6, and a7 are tripled isolated pawns.
The b3 and b4 pawns are doubled isolated pawns.
The d7 pawn is a backward pawn because it is on a half-
open file for White.
The g3 and g5 pawns are doubled pawns (not doubled
isolated pawns because of the f4 and h6 pawns).
Playing for Pawn Structure advantages
From a pawn structure point of view, what is
White’s best move in this position? 1.Bxf6+,
exchanging the bishop for the knight. Because
Black does not want to end up behind a piece, he
must recapture with 1...gxf6. Now the pawn on
h7 is isolated and the pawns on f7 and f6 are
doubled isolated pawns. In one move, White was
able to wreck Black’s entire kingside pawn
structure, making these pawns harder to defend
later on in the game.
In this position, lets say White plays 1.Bxf6.
Black needs to recapture the bishop with either 1...exf6 or
1...gxf6.
Which is better?
In either case Black will have doubled f-pawns.
1...exf6 is the correct move because if Black plays 1...gxf6,
White’s h2 pawn would become a passed pawn.
With 1...exf6, the h2 pawn is not a passed pawn because
Black’s g7 pawn can still prevent it from promoting.
Always look for ways to weaken your
opponent’s pawn structure and improve your
own. Of course, your opponent has the same
strategy!
EN PASSANT
The third special move in chess is capturing
en passant (the first two were promoting a pawn
and castling). This tricky move doesn’t happen
often.
En passant means “in passing” in French and
only involves the pawns.
En passant capturing can only happen if a
pawn is on the fifth rank and an opposing pawn on
an adjacent file advances two squares forward
from its original square. The pawn moving two
squares forward can be captured by the pawn on
the fifth rank as if it had moved only one square
forward. This capture opportunity, however, only
exists for one move, the move immediately after
the opposing pawn advances two squares.
Assume it is White’s move.
If he plays c4, Black can capture him en passant by
responding ...dxc3 (see diagram arrows).
If White plays h4, Black can capture the h-pawn en passant
by playing ...gxh3.
Now say it is Black’s move.
If he plays ...a5, White can play bxa6.
If Black plays ...c5, White can take en passant by bxc6.
The en passant capture opportunity is fairly rare, unlike
this example with multiple en passant possibilities that was
chosen only to show how this special pawn move works.
Remember that because you may have the
opportunity to capture en passant does not mean
that you should automatically do so. You should
always try to make moves that make sense and
improve your position.
Basset Hound Problems
8-1
Which pawns are protected passed pawns?
_____________________
8-2
Which pawns are isolated?
_____________________
8-3
Which pawns are backward pawns?
__________________
8-4
Which pawns are base pawns?
__________________
8-5
What type of pawn is the pawn on a4?
__________________
8-6
How many sets of doubled isolated pawns are on the board?
__________________
8-7
Which pawn is the strongest?
__________________
8-8
Black to move. Which pawn is the weakest?
__________________
8-9
Which pawn is the strongest?
__________________
8-10
Which pawn is the weakest?
__________________
Chess Detective Problems
8-11
What is White’s best move?
1.____________
8-12
What is Black’s best move?
1...____________
8-13
What is White’s best move?
1.____________
8-14
What is Black’s best move?
1...____________
8-15
What is White’s best move?
1.____________
8-16
Which pawn should Black capture?
1...____________
8-17
With which pawn should Black capture the bishop on c6?
1...____________
8-18
White moved his h2 pawn to h4. What is Black’s best move?
1...____________
8-19
What is White’s best move?
1.____________
8-20
What is Black’s best move?
1...____________
LESSON 9
SQUARE OF THE PAWN
... Chess is “a lot like football because you have to set up your
offense and your defense, every once in a while you need to give
up a piece of your team in order to make the big play. It’s a game
of patience, and that pretty much defines how I run the ball. I’m
patient, always looking for the opportunity and always trying to
capitalize on the other person’s mistake.”
Priest Holmes
All-Pro National Football League Running
Back
The square of the pawn is a basic chess
concept that applies to most chess endgames. The
goal and dream of every pawn is get to the other
side of the board and promote, usually to a queen.
The pawns become more valuable in the endgame
since most of the opponent’s pieces that can
block or capture the pawns on their way to their
promotion square have been captured. The square
of the pawn is an imaginary square that the
opposing king must get into in order to win a race
with a passed pawn that is trying to promote. The
square is defined on the side of the pawn where
the defending king is.
Black has insufficient mating material.
White’s only chance to win is to promote the
passed b-pawn. His king is too far away to help
out. The question is whether or not the pawn can
advance to b8 before the Black king can catch it.
Pawns and kings run the same speed, one square
at a time.
First, let’s define the square of the pawn. The
four corners of the square of the pawn are: the
square the pawn is currently resting on; the
promotion square; the square on the diagonal
drawn to the eighth rank from pawn’s current
position (which creates a right triangle); and the
square on the board diagonally opposite from the
promotion square that completes the imaginary
square. The three corners (not including the
square that pawn is currently on) are shown with
stars below. If the Black king can get into the
square, he can capture the pawn and draw the
game.
The square of a White pawn is marked with the stars.
If it is White’s move, he plays 1.b5, shrinking
the square. The new corners of the square of the
pawn are at b5, b8, e8, and e5. Black can play
1...Kf6, but he can’t make up time and get into
the square of the pawn. White will win the race,
promote the pawn and checkmate with the king
and queen.
If it is Black to move, he plays 1...Kf6 (or
1...Kf5 or 1...Kf4) and he gets into the square of
the passed pawn, runs down the pawn and
captures it, and then claims a draw by insufficient
mating material.
The square of a Black pawn is marked with the stars.
In the above position, Black is ahead a pawn,
which is moving down, not up like the White
pawn in the previous example.
White can draw if it is his move...the White
king enters the square of the passed pawn by
moving to the c-file. Black wins if it is his move.
He advances his pawn to g4 and the White king
cannot enter the square and catch up to it.
Consider this endgame position with Black to
move.
Black to move.
The White king is solidly in the square of both
Black’s passed pawns. The corners of the square
of the White passed pawn are h6, h8, f8, and f6.
Black must move his king to the f-file to get into
the square of the White pawn with, say, 1...Kf7.
Realizing that his h-pawn can’t outrun the Black
king to h8, White responds 2.Ke4. Notice that the
White king cannot capture the pawn on e5
because he would leave the square of the Black
pawn on d4. Black can respond by playing 2...
Kg6. White is lost. The Black king can walk over
and capture the White pawn and then come back
toward the center of the board and help escort his
pawns up the board. The White king can only
watch as his pawn gets captured, since he cannot
leave the square of the d4 pawn (d4, d1, g1, g4).
Another way to think about it is the White
king must stay and baby-sit the Black pawns.
Pretend the square of the passed pawn is a house.
What happens if the babysitter leaves the house...
she gets in big trouble when mom and dad come
home!
Consider this position with Black to move.
Black to move.
First let’s pick up the clues in the position.
Black has isolated passed pawns on a6 and h6.
White has two connected passed pawns on d4 and
e4. At the moment both kings are in the square of
the other player’s pawns.
1...a5 The White king is still in the square
of the a5 pawn. Note that there are several ways
for Black to win this position by advancing his
pawns. Black could also play 1...h5.
2. e5 White pushes his passed pawn.
2...a4
Now the White king is out of the
square of the a-pawn.
3.Kd2 Getting back into the square.
3...h5! The White king is about to have a big
problem...he cannot stay in the square of both
Black pawns and one of them will promote to a
queen. The Black king can stop the White pawns,
if they make a run for it.
Basset Hound Problems
Make a star on the corners of squares of the passed pawns in the
positions below. You don’t need to star the corner that the pawn is
on.
9-1
9-2
9-3
9-4
9-5
9-6
9-7
9-8
9-9
9-10
Chess Detective Problems
9-11
What is White’s winning move?
1._________
9-12
What is White’s winning move?
1._________
9-13
What is Black’s winning move?
1..._________
9-14
What is Black’s winning move?
1..._________
9-15
Black moved his pawn from g7 to g5. What is White’s winning
move?
1._________
9-16
What is White’s winning move?
1._________
9-17
What is Black’s winning move?
1..._________
9-18
What is Black’s winning move?
1..._________
9-19
What is Black’s winning move?
1..._________
9-20
What is White’s winning move?
1._________
LESSON 10
CHECKMATE PATTERNS
“...and they lived happily ever
after.”
Back Rank Mate (a review of Lesson 4)
Remember that ranks are rows, numbered by
counting from your side of the board, and that
from Black’s perspective this numbering system
is the opposite of that used for algebraic notation.
Pawns start on the second rank and promote to
queens on the eighth rank. The first rank (where
your pieces start) is commonly called the back
rank. A back rank checkmate occurs when the
king is on the back rank, trapped by his own
pawns since they prevent him from escaping to
the second rank in the event of a check. The
opponent’s rook or queen then moves to the
eighth rank, and puts the king in checkmate.
With White to move, he plays 1.Rd8 mate.
Normally a back rank mate occurs when one of the players
doesn’t look at his opponent’s threats.
Remember, before you make your move, always check to
see what your opponent can do to you.
If it were Black to move, he could avoid mate
by playing ...Rc8 to protect the back rank or ...
Kf8 so that the king could escape to e7. It is a
good idea to centralize the king in the endgame
because the king is a powerful piece and most of
the opposing pieces are traded off, so the chances
of a checkmate in the middle of the board are
slim. Black could also move any of the pawns in
front of his king to create a flight square.
Smothered Mate
Although the smothered mate does not occur as often as
the back rank mate, it is a common enough mating pattern to
have its own name.
With Black to move he will back rank White by playing 1...Re1 mate.
Let’s pretend it is White to move. Black is way ahead in
material (a seven-pawn advantage...two rooks for a knight).
White looks to be in trouble, but notice that the White queen,
knight, and Black king are all lined up on the same diagonal.
If the knight moves, there will be a discovered check
from the White queen to the Black king. Can you find a
double check? 1.Nh6+ The White queen and the White
knight both put the Black king in check. When a player is
in double check, he must move his king because capturing
either piece or blocking one of the checks doesn’t work
since there are two attackers. Black is forced to play 1...
Kh8. Now White sacrifices his queen by playing 2.Qg8+!
A sacrifice is when you give up material voluntarily in
order to gain a greater advantage. In this case the queen is
sacrificed to force checkmate. The Black king cannot
capture the queen because the knight defends her. The only
other choice for Black that gets him out of check is 2...
Rxg8.
Now White plays 3.Nf7 mate. This is called a
smothered mate because Black’s king is smothered by his
other pieces and cannot escape.
Here is a collection of other checkmate patterns. Find
the checkmate move in each diagram below. It is White to
move in each of these examples. The answer and an
explanation of mate is given below each diagram.
Rh1 mate
The White queen controls the g7, g8, and h7 flight squares. The rook
attacks and checkmates the Black king.
Qh8 mate
The White queen puts the Black king in check and controls the flight
squares e8, g7, and g8.
The White king attacks the e7 and f7 flight squares.
Qg7 mate
The White queen attacks the king and controls the flight squares g8 and
h7.
The pawn on h6 protects her.
Qe5 mate
The White queen attacks the king and controls the flight squares c5, c7,
d5, e6, and e7. The king protects her.
Ra7 mate
The White rook attacks the king and controls the b7 flight square.
The knight protects the rook and attacks b8.
Bf6 mate
The White bishop attacks the king and controls the g7 flight square.
The knight attacks g8.
b6 mate
The pawn checks the king and is protected by the knight. The White
rook attacks a8 and b8.
The White bishop attacks a6.
Nf6 mate
The knight attacks the king and the d7 square.
The Black pawn on e7 cannot capture the knight because it is pinned to
the king by the White queen.
Basset Hound Problems
Mate in 1 problems
10-1
What Black move checkmates White?
1..._________
10-2
What White move checkmates Black?
1.__________
10-3
How many ways can Black checkmate White on the next
move? What are the moves?
_________________________
10-4
How many ways can White checkmate Black on the next
move? What are the checkmate moves?
________________________
10-5
How many ways can Black checkmate White on the next
move? What are the moves?
_________________________
10-6
How many ways can White checkmate Black on the next
move? What are the checkmate moves?
________________________
10-7
What Black move checkmates White?
1..._________
10-8
White has not moved his king or rooks. What White move
checkmates Black?
1.__________
10-9
What White move checkmates Black?
1.__________
10-10
What White move checkmates Black?
1.__________
Chess Detective Problems
Mate in 2 problems
10-11
White to move and mate in two.
1._____ +
_____
2._ __ ___ _mate
10-12
White to move and mate in two.
1._____ +
_____
2._ __ ___ _mate
10-13
Black to move and mate in two.
1... _____+ 2._____ _____ mate
10-14
White to move and mate in two.
1._____ +
_____
2._ __ ___ _mate
10-15
White to move and mate in two.
1._____+
_____
2._ __ ___ _mate
10-16
White to move and mate in two.
1._____+
_____
2._ __ ___ _mate
10-17
Black to move and mate in two.
1... _____+ 2._____ _____ mate
10-18
Black to move and mate in two.
1... _____+ 2._____ _____ mate
10-19
White to move and mate in two.
1._____+
_____
2._ __ ___ _mate
10-20
White to move and mate in two.
1._____ +
_____
2._ __ ___ _mate
or 2._______mate
APPENDIX
SOLUTIONS TO PROBLEMS
Lesson 1
Basset Hound Solutions
1-1 9+5+3+3=20
1-2 1+3+1+3+3+5=16
1-3 King
e1 Bishop f3
Queen d5 Knight c3
Rook a1 Pawn h5
1-4 King g8 Bishop b4
Queen c7 Knight f6
Rook h1 Pawn d4
1-5 The bishop can move to h5, g4, h1, g2, e4,
d5, or capture the Black pawn on c6.
1-6 The knight can capture either the rook on
d6 or the bishop on c3. Note that when the knight
is on b5, it is attacked by both the pawn on a4 and
the queen on b8.
1-7 The bishop on a2 is checking the Black
king.
1-8 No. White’s king can move safely to g1.
Black could then checkmate him on the next
move by playing ...Re1 mate.
1-9 White’s king can move to f1, f2, or g2.
1-10 Because Black touched the pawn on c4,
he must capture it, since he can legally.
Therefore, he must play 1...Qxc4. White can then
recapture with 2.bxc4 and win the Black queen.
Chess Detective
Solutions
1-11 White has more material. He is
ahead by one point (a bishop plus a knight
is worth six points and a rook is worth
five).
1-12 White cannot move his king to f1
because of the bishop on a6. Therefore,
his only choice is to capture the queen on
h2 with his king. After capturing the
queen, White will then be ahead by two
points (queen minus bishop, knight, and
pawn,or9–3
–
3–1 =2).
1-13 The rook, on a8
1-14 12 (Rook + Bishop + Knight +
Pawn)
1-15 Yes, trading the bishop for the
knight is a good idea because White is 3
points up in material and it is usually a
good idea to trade pieces when you are
ahead.
1-16 ...Bb7+,
...Bf5+,
... Rd4+,
...
Re8+, ...f5+, ...Nf6+
1-17 Qa2+, Qb3+, Bc4+, Bg6+, Rf1+,
Rf3+
1-18 No, because he can play ...b3,
blocking the check from the a2 bishop. On
the next move, White could then play
Bxb3 mate because none of the other
Black pieces can block the check and the
Black king has no escape squares.
1-19 No, he cannot capture the Black
queen with 1.Qxc5. He must play 1.Kh2,
his only king move. If he said, “I adjust”,
before touching the king, he wouldn’t be
forced to move it and could instead
capture the Black queen.
1-20 Because Black cannot legally
capture the pawn on g2, he is free to play
something else like 1...Bxc2, capturing
the White queen. He should be careful in
the future what he touches...next time he
may not be so lucky!
Lesson 2
Basset Hound Solutions
2-1 No, 1.Nh3 is not a good move
because “A knight on the rim is dim.” The
f3 square is a much better square for the
knight because it attacks the center.
2-2 No, because a5 is on the edge of the
board, not the center, and it does not help
a bishop develop.
2-3 The e5 square is the most important
of these squares because it is one of the
four center squares.
2-4 The bishop is best placed on the c4
square since it controls the center. If the
bishop moves to d3, it blocks the d2 pawn
from moving toward the center. If it
moves to a6, it can be captured by Black’s
b7 pawn or b8 knight.
2-5 Moving the pawn to d4 is the best
because it attacks the center. White will
not lose material because the pawn is
attacked twice and protected twice.
Moving the pawn to d3, is a bit passive
and partially blocks in the bishop on f1.
2-6 Moving the knight to f6 is best
because it attacks two center squares (e4
and d5). If the knight moves to e7, it
blocks the bishop on f8. Remember that if
it moves to h6, “A knight on the rim is
dim.”
2-7 Moving the queen to f3 is a bad
move because it brings the queen out too
early and blocks the knight on g1 from
developing to its best square on f3.
2-8 The best move of these choices is
3.c3 because it blocks the check and
chases away the bishop gaining time (a
tempo, in chess terms). 3 .Ke2 moves the
king so White will lose the right to castle
later and blocks the bishop on f1 from
developing. 3.Qd2 is a really bad move
because Black could then play 3...Bxd2+,
winning the queen for a bishop.
2-9
No, 2.d3 is not a good move
because it blocks in the bishop on f1 from
developing to an active square. It would
be better to play d3 after the bishop
developed to either c4 or b5.
2-10 Ne5 is not a terrible move, but it
isn’t a good move either because the
knight moved a second time before White
developed his other minor pieces.
Chess Detective
Solutions
2-11 White is threatening both 4.Qxf7
mate and 4.Qxe5+, winning the e5 pawn.
Black can play 4...Qe7 or 4...Qf6 to
defend both threats.
2-12 2.d4 is the best move of these
choices because it controls the center.
2.Bd3 is bad because it blocks the d2
pawn. 2.Bb5 is okay, but the bishop will
likely get chased back by one of Black’s
pawns. 2.Be2 is passive.
2-13 The light-squared bishop on c8 will
be the most difficult to develop to a good
square because it is blocked in by pawns.
The knight on b8 won’t have problems
developing because it can jump over the
Black pawns.
2-14 Usually castling kingside is a good
idea, but not in this case because White
has moved up his pawns on the kingside
and the king will be open to direct attack
from the Black pieces if he tries to live
there. White’s best plan is to develop his
queen and his bishop on c1 and then castle
queenside, using the queenside pawns
(which haven’t moved) for protection.
2-15 3.Nc3 is the best of these choices
for White because it develops a piece and
protects the e4 pawn which is being
attacked by the pawn on d5. 3.Nf3 and
3.Bf4 will both lose the pawn on e4.
3.Qf3 defends the pawn on e4, but brings
the queen out too early and blocks the
knight from moving to f3.
2-16 At first glance, 2...Nc6 looks like
a good move. But notice that White can
play 3.b5 to chase the knight away so he
can then capture the e5 pawn with the
bishop. Then Black’s only way to try to
save the pawn is 3...Nd4, blocking the
bishop’s threat while attacking White’s b-
pawn. White could then play 4.e3
attacking the knight again and protecting
the b5 pawn with the bishop on f1. After
the Black knight moves, White would
then win the pawn on e5. Chess masters
must think several moves ahead like this
to see possible future positions.
2-17 Playing 5.gxf5 would win a
bishop, but White has opened up his king
and Black could then play 5...Qh4 mate!
2-18 Black has won a pawn, but is
quickly falling behind in development. He
should play 4...Nxc3 to trade off one of
White’s developed pieces and not lose
more time. After 4...Nc5, White plays
5.Nxe5 with a lead in development and an
attack. 4...Bd6 defends the pawn, but
loses the knight to 5.Nxe4. 4...d5 protects
the knight, but White has two attackers on
the d5 pawn with only the queen to
defend it. White could comfortably play
either 5.Nxd5 or 5.Bxd5 regaining the
pawn with an attack.
2-19 No, 2...d5 is not a good move
because if White plays 3.exd5 and Black
were to recapture with 3...Qxd5, White
could gain a tempo by developing a piece
and attacking the queen at the same time
with 4.Nc3.
2-20 Yes, because Black would have to
respond ...Kxd8 and wouldn’t be able to
castle later in the game because his king
has moved.
Lesson 3
Basset Hound Solutions
3-1 7...0-0
3-2 12.Nd3
3-3 25...Re8
3-4 42...Rxg3+
3-5 65.Rg3+
3-6 73...Qxa6+
3-7 8...cxd4
3-8 17...0-0-0
3-9 27.Rxd5+
3-10 39.axb5
Chess Detective
Solutions
3-11 4...Nfd7
3-12 7.Ndf3
3-13 11...N5f6 (both knights are on the
d-file...so 11...Ndf6 doesn’t work)
3-14 15.N3xd4 (both knights are on the f-
file...so 15.Nfxd4 doesn’t work)
3-15 18...Ned7
3-16 19.Rfd1
3-17 38...R8a6 (both rooks are on the a-
file...so 38...Raa6 doesn’t work)
3-18 48.Rcxa4
3-19 51.a8=Q
3-20 7...fxg1=N+
Lesson 4
Basset Hound Solutions
4-1 Qe7
4-2
...Qd4
4-3 Rg3
4-4
...Rc3
4-5 Qb7 checkmate is best. If White plays
Qb8+, Black can play ...Ka6 and lives for at
least one more move.
4-6
Rg1 checkmate is the best move. If
Ra2+, Black plays ...Kb1. Rb2 is the worst of
the three moves because it is stalemate.
4-7 Ra8 mate
4-8 Rg6+ is the best move. Black will have
to move his king to h4 or h5. White can then
play Rh2 mate.
4-9 Qg6 mate and Qh1 mate
4-10 Rd1 mate (the knight guards a2)
Chess Detective
Solutions
4-11 3.Rxf7 is a bad move because Black is
stalemated. White is trying to win because he
is ahead in material. 43.Rxb6 is the best
move, winning a pawn and giving the Black
king more possible moves to reduce the
chance of stalemate.
4-12 Black is way behind in material. He can
play...Qxg2+! and White must recapture with
the king. Notice the Black king can’t move
legally to any square...Stalemate!
4-13 There are 3 moves for Black that
checkmate White: ...Qa1 mate, ...Qb1 mate,
and ...Qf2 mate.
4-14 There are 4 moves for White that
checkmate Black: Qe5 mate, Qb2 mate, Qb8
mate, and Bc3 mate.
4-15 The only checkmate move for Black is
... Rh1 mate. If Black plays ...Qh2+, White
can play Kf1.
4-16 White has two moves to checkmate
Black: Qa5 mate and Qg5 mate.
4-17 Black cannot checkmate White on the
next move. The White queen defends the b2
square from the attempt at mate with ...Qxb2.
White can play Na3 to defend against ...Ra8+
or ...Qa6+.
4-18 White has only one way to checkmate
Black on this move: Bh5 mate.
4-19 Black can checkmate White on this
move two different ways: ...Qg2 mate and ...
Qh1 mate.
4-20 White can only checkmate Black one
way: Qxh7 mate.
Lesson 5
Basset Hound Solutions
5-1 1.Bf3
5-2 1.Ra6+
5-3 1...Nd4+
5-4 1...a1=Q+ (1...a1=B+ is also a skewer,
but Black would rather have the queen)
5-5 1.Rc6+
5-6 1.Bc3
5-7 1...Qf1+, 1...Qf3+, 1...d5
5-8 1...Rg7
5-9 1.b8=N+
5-10 1.Qe4, 1.Re1
Chess Detective
Solutions
5-11 1.d4
5-12 1.Bd3+
5-13 1.Bf3 (the bishop attacks the rook on a8
and the rook makes a discovered attack on the
queen)
5-14
1...d6+! (the bishop makes a
discovered attack on the queen)
5-15 1.Qg4+ (forking the king and both
rooks)
5-16 1.f5. The knight is pinned to the king
and is attacked three times and defended three
times. 1.f5 attacks it fourth time with the
pawn, which is even less valuable than the
knight.
5-17 1.Qe1. If 1.Be1, then 1...Qxf4+. If 1.g3
or 1.Be3, then 1...Nxg3+ works for Black
because the pawn on h2 is pinned to the rook
by the Black queen (2.hxg3 Qxh1). If 1.Nh3,
then 1...Bxh3 wins the knight and renews the
mate threat on f2.
5-18 Taking the knight with 1.gxf3 is a bad
idea because Black could play 1...Rh2 mate
(the g2 pawn is pinned to the h2 square).
5-19 1...Bf5+ saves the bishop. White
doesn’t have time to take the queen because
of the check by the bishop. After White gets
out of check, Black has time to save his
queen.
5-20 White can play 1.Rxg7+! followed by
2.Qxh4 winning a queen and a pawn for a
rook.
Lesson 6
Basset Hound Solutions
6-1 1.Qe3 is the best of the three moves for
White. If 1.Qd6, Black is stalemated. After
1.Qb8+, Black is forced to play 1...Kxb8 and
it is a draw by insufficient mating material.
6-2 1...Bc3 is the best of the three choices.
White then must play 2.Ka3 and Black can
play 2...Ra5 mate. 1...Kc3 and 1...Rb5 are
both stalemate.
6-3
Taking the White rook off the board
with 1...Rxf2 is the best move for Black
because after White recaptures the rook, the
game is drawn by insufficient mating
material. With the rooks on the board, White
has an advantage and may be able to win the
game.
6-4 Taking Black’s pawn with 1.Nxc6 is
the best move. The pawn is the only
remaining Black piece with the potential to
checkmate White (if the pawn where to
promote to a queen). After taking the pawn,
the game is drawn by insufficient mating
material.
6-5 1.Be8 is White’s best choice. After 1...
h5 (Black’s only move), White can play
2.Bc6 mate. The other choices, 1.Bd6 and
1.Ka6 are stalemate since Black has no king
or pawn moves.
6-6 1.Bxg2 is the best move, eliminating
Black’s potential mating material. Taking the
more valuable bishop with 1.Bxf7 loses to
1...g1=Q. 1 .Bc4+ can be met by 1...Bxc4
and 2...g1=Q.
6-7 1...Rh2+ is the best move of the three
choices as Black is only a few moves away
from completing a rook and rook roller mate.
Black is ahead in material and playing to win.
Both 1...Ra1 and 1...Rd5 result in a
stalemate.
6-8 1.Rxb2 is the best move because it is
the only way White can stop the pawn from
promoting and turning into a queen. After
1.Ra3 or 1.Kc4, Black plays 1...b1=Q.
6-9 1.Nxf2 is the best move because White
must eliminate the f2 pawn before it
promotes. On the second move, White can
play 2.Kxh7 and the game is drawn by
insufficient mating material. If 1.Nf4+, Black
can play a king move like 1...Kf5 and
promote the pawn the next move. If 1.Kxh7,
1...f1=Q wins for Black.
6-10 White should play 1.Kxc7 stalemate. If
he tries to win by promoting the pawn by
playing 1.h5, Black saves the bishop and
stops the pawn by playing 1...Bf4. The Black
king will then escape from the corner and
start winning the White pawns.
Chess Detective
Solutions
6-11 1...Rc5 pins the White rook to the king
and Black can trade rooks the next move. The
game will be drawn by insufficient mating
material.
6-12 1.Rb2! draws which is good for White
because he is behind three pawns. 1...Rxb2 is
stalemate and any other move by Black loses
his rook. White can win the endgame if he is
ahead a rook.
6-13 White is in trouble because he cannot
stop the pawn on b2 from promoting without
giving up the queen. He can save the game
with a threefold repetition draw by playing
1.Qe8+ Kh7 2.Qh5+ Kg8 3.Qe8+ Kh7
4.Qh5+ Kg8 5.Qe8+
6-14 Black’s best move is 1...Nd6+ forking
the king and pawn. On the next move he can
capture the pawn, leaving White with
insufficient mating material. If Black goes for
more material by playing 1...Ne7+ 2.Kd7
Nxg6 winning the bishop, the pawn promotes
to a queen and White is winning.
6-15 Even though at the moment Black is
behind in material, he should refuse the draw
offer and play 1...b2 or 1...a2. He will soon
promote a pawn to a queen and be ahead in
material with a winning position.
6-16 White is behind a queen to a knight and
a pawn and is, therefore, in big trouble. He
can continuously check Black’s king from d5,
a5, or d8. For example, White can get a
threefold repetition draw by playing 1.Qd5+
Qab7 2.Qa5+ Q8a7 3.Qd8+ and so on.
6-17 Black can go for checkmate by playing
1...Nd6 (or 1...Ne7 and 2...Ng6 mate). No
matter which pawn White moves on the next
turn, Black can play 2...Nf7 mate. If White
captures the pawn on b6 with 1...Nxb6, then
2.c8=Q+ Nxc8 stalemate. Of course Black
would be in trouble if he allows White to
promote one of the pawns and have time to
start checking him with the new queen.
6-18 Black is behind a bishop and his king
and pawns cannot move. Instead of risking
the loss, he can play 1...Rf7+!. White is
forced to play 2.Rxf7 stalemate. If he moves
the king with say, 2.Kg6, Black plays 2...
Rxd7 and is ahead in material with a winning
position.
6-19 White can force an insufficient mating
material draw by playing 1.Rd1+ Kc5 2.Rxd6
Kxd6 3.Kxc4.
6-20 White, who is behind in material,
should refuse the draw and play 1.Bh6
threatening 2.Qg7 mate which cannot be
stopped (For example, 1.Bh6 Qb2 2.Qxb2 e5
3.Qxe5 f6 4.Qxf6 and 5.Qg7 mate). 1.Bb2
also threatens 2.Qg7 mate, but Black can play
1...Qxb2 giving up the queen for a bishop,
avoiding mate, and remaining ahead in
material.
Lesson 7
Basset Hound Solutions
7-1 The pawn on a6 can be captured by the
White knight. The knight on b7 isn’t “free
stuff” because the bishop on g2 protects it.
7-2 The White queen can capture the pawn
on h7. The other attacked pieces are
defended. Note that if it were Black’s move,
he could play ...Qxd3 winning a free queen.
7-3
Black can play ...axb4 and win the
pawn. The other attacked pawns are all
defended.
7-4
Black can play ...Bxb2 and win the
pawn. The other attacked pawns are all
defended.
7-5
White can play Rxh6 and win the
pawn. The other attacked pawns are all
defended.
7-6
White can play Qxa4 and win the
pawn. Everything else that White attacks is
defended.
7-7
Black can play ...Rxh2 and win the
pawn. Everything else that Black attacks is
defended.
7-8 There isn’t any “free stuff” for Black.
White has everything protected.
7-9 White can win “free stuff” by playing
either Rxf7+ or Bxg5. Both immediately win
a pawn. Don’t take the first thing you see, you
may find better “free stuff.”
7-10 White can either play Bxc6 winning a
pawn or Qxb6 winning the knight. He should
take the knight with Qxb6 because it is more
valuable.
Chess Detective
Solutions
7-11 White should play 1.Bxd6 winning the
pawn. Black shouldn’t play 1...Rxd6 because
the White queen protects the bishop.
7-12 The c5 pawn is attacked twice,
defended once. White wins “free stuff” by
playing 1.dxc5 dxc5 2.Bxc5.
7-13 The h3 pawn is attacked twice,
defended once. Black wins “free stuff” by
playing 1...Bxh3 and White cannot capture
the bishop with his king because the queen
defends it.
7-14 There is no “free stuff” for Black.
White has all his pieces defended (the pawn
on d4 is attacked three times, defended three
times). Remember to win “free stuff” you
usually must have more pieces attacking than
your opponent has defending.
7-15 White can win the knight by playing
1.Bxf6. The pawn on g7 cannot recapture the
bishop because it is pinned to the king by the
White queen.
7-16 White can win the Black rook by
playing 1.Qxc6. Black cannot recapture with
1...Rxc6 because of 2.Re8 mate.
7-17 White can win a pawn by playing
1.bxa3. Note that the Black pawn on d5 is
attacked three times, defended only once. But
White would lose material with 1.Rxd5 Nxd5
2.Qxd5 because the rook is worth more than a
pawn and a knight.
7-18 Black can win “free stuff” by capturing
the undefended queen with 1...Qxc2, the
knight with 1...bxc3, the pawn on d4 with
1...Rxd4, or the pawn on a5 with 1...Bxa5.
But the best move is 1...Qxg2 mate! (After
all, the king is the best “free stuff” of all!)
7-19 White can play 1.Bxf7+!, forcing Black
to play 1...Kxf7. White then wins the queen
with 2.Qxd8. 1.bxc3 recaptures a pawn, but
leaves White behind a knight.
7-20 White wins the knight after 1.Qd5,
forking the knight and the pawn on f7, which
can be captured by the queen with mate! If
1...Ng5 protecting f7, White just plays
2.Bxg5 capturing the knight for free by
renewing the mate threat on f7. Forking two
pieces is a way to win “free stuff.” Note that
1.Qf3 does not work because Black can play
1...d5. Notice that 1.Bxf7+ Kxf7 2.Qd5+
wins back the piece and leaves White up a
pawn.
Lesson 8
Basset Hound Solutions
8-1 The protected passed pawns are on b4
and g3.
8-2 The isolated pawns are on a3, f5, g3,
and h7.
8-3 The backward pawns are on b5, f6, and
g3.
8-4 The base pawns are on a2, f4, and g2.
8-5 The pawn on a4 is an isolated passed
pawn.
8-6 There are three sets of doubled isolated
pawns: a2 and a6; e2 and e3; g5 and g7. The
pawns on c4 and c5 are not isolated because
of the pawn on d7.
8-7 The pawn on c4 is the strongest pawn
because it is a protected passed pawn. The
pawn on a4 is an isolated passed pawn.
8-8
The weakest pawn on the board is
Black’s isolated pawn on g4. The White king
can move up and take it. The pawn on b5 is
also isolated, but the Black king is close
enough to defend it.
8-9
The strongest pawn on the board is
Black’s isolated passed pawn on h4. It is
ready to move forward and promote to a
queen.
8-10 The weakest pawn on the board is the
backward pawn on d3. Black’s rooks can
double up on the d-file to attack it. His other
pieces can also attack it.
Chess Detective
Solutions
8-11 White’s best move is 1.b6 creating a
passed pawn. 1.b6 axb6 2.a7 and White’s
passed a-pawn will promote. If Black doesn’t
capture the pawn, White can play either
2.bxa7 or 2.b7 and promote the pawn the next
move.
8-12 Black’s best move is 1...Bxh3. White
will have to recapture the bishop with 2.gxh3
and White is left with doubled isolated pawns
on the h-file.
8-13 White’s best move is 1.Nxc6 and Black
will have to recapture with 1...bxc6. This
leaves Black with doubled isolated c-pawns.
White’s pawn on a2 is now a dangerous
passed pawn.
8-14 Black should play 1...Bxc3 and when
White recaptures with 1...bxc3, he will have
doubled isolated c-pawns. More importantly,
the Black pawn on b3 will be a passed pawn
and can promote to a queen in two moves.
8-15 White best move is 1.Rxe5. After 1...
dxe5, White has a protected, passed pawn on
d5.
8-16 The best pawn for Black to capture is
the pawn on e5 because the c5 pawn is
isolated. It is better to leave White with the
weaker of the two pawns.
8-17 Black should recapture with the d-
pawn. The bishop on c8 can then develop. If
Black plays 1...bxc6, although the b-pawn
now attacks a square in the center, the a6
pawn is now isolated.
8-18 Black’s best move is capturing the h-
pawn en passant with 1...gxh3, creating a
passed h-pawn.
8-19 White’s best move is capturing the
knight on f6 with 1.Bxf6. If Black recaptures
with 1...gxf6, he doubles his f-pawns and
also opens up the Black king. White can take
advantage by playing 2.Qg4+ Kh8 3.Qg7
mate. If Black doesn’t recapture, he loses the
knight for free and still has an exposed king.
8-20 Black’s best move is 1...a3 threatening
to create a passed pawn with 2...axb2. If
2.bxa3, Black can create a passed pawn by
playing 2...b3 or 2...bxc3. Both players will
get passed pawns on the queenside, but Black
will win because his pawn is closer to
promoting. Notice that the Black king blocks
White’s passed pawn on h6.
Lesson 9
Basset Hound Solutions
9-1 Stars on d8, g8, and g5.
9-2 Stars on d8, a8, and a5.
9-3 Stars on h1, d1, and d5.
9-4 Stars on c1, e1, and e3.
9-5 Stars on g8, b8, and b3.
9-6 Stars on h1, c1, and c6.
9-7
For the White pawn: stars on c8, f8,
and f5.
For the Black pawn: stars on g1, d1, and d4.
9-8
For the White pawn: stars on a8, f8,
and f3.
For the Black pawn: stars on d1, h1, and h6.
Notice that the square of the Black pawn is
actually a rectangle. Technically, the corners
would be d1, i1, and i6. Since there isn’t an
i-file, replace i1 and i6 with h1 and h6.
9-9
There are no passed pawns in this
position.
9-10 For the White pawn on c4: stars on
c8, g8, and g4.
For the Black pawn on h6: stars on h1, c1,
and c6.
Chess Detective
Solutions
9-11
White’s winning move is 1.Rxc6!
After 1...bxc6, the b6 pawn is a passed
pawn. White will win because the Black king
is not in the square of the b6 pawn.
9-12 The White king is not in the square
of the Black pawn on h4 and the Black king
is not in the square of White’s pawn. It is a
race to the promotion squares. White should
play 1.a6 h3 2.a7 h2 3.a8=Q which protects
the h1 promotion square. If 1.axb6?, then
1...h3 2.b7 h2 3.b8=Q h1=Q. White got the
first queen, but there aren’t any squares he
can use to skewer the Black king and queen
to win the queen.
9-13 Black should play 1...Kd5! to get
into the square of the pawn. He will have
time to run over and capture the a-pawn and
then come back to help his passed pawns.
With the black pawns on f6 and g5, the
White king will not be able to capture the f6
pawn while the Black king is on the
queenside because he will leave the square of
the g5 pawn.
9-14
Black should play 1...Bxf3. If
White captures the bishop with 2.Kxf3, his
king leaves the square of Black’s passed
pawn on b4. If instead of capturing the
bishop, the White king goes after the pawn,
the bishop can protect it.
9-15
White should capture the pawn en
passant by playing 1.fxg6+. When Black
recaptures with 1...Kxg6, his king will leave
the square of the passed c-pawn.
9-16 White’s winning move is 1.Qxb5+!
(not 1.Nxb5? Qf1 mate). Then 1...Qxb5
2.Nxb5 Kxb5 3.h4 (moving two squares
forward!) and the Black king can not get into
the square of the pawn.
9-17 Black wins with 1...fxg6 2.h6 gxh6
3.f6 Kd6 and the Black king is in the square
of the passed White f-pawn. Losing is 1...
hxg6? 2.f6 gxf6 3.h6 and the Black king is
not in the square of White’s passed h-pawn.
9-18
The Black king is in the square of
the White pawn, but the White king can help
escort in the c-pawn if Black’s king tries to
stop it. Therefore, Black must race one of his
passed pawns. He should play 1...f4!
because the f-pawn will promote with check.
After 2.c5 f3 3.c6 f2 4.c7 f1=Q+ 5.Kb7
Black can play 5...Qc1 and take the pawn
(or queen) the next move. Black will then
win because the White king is not in the
square of the g-pawn.
9-19 1...e3+! 2.Kxe3 h2 and the White
king is outside the square of the h-pawn. If
the White king doesn’t take the e-pawn, he
still can’t stop both pawns. 1...h2 doesn’t
work because 2.Kg2 e3 3.Nb4 (or 3.Nc5)
3...e2 4.Nc2 (or 4.Nd3) and the knight can
stop the pawn on e2 in time.
9-20 White wins by pinning the rook to
the king with 1.Bh3. After Black breaks the
pin with, say, 1...Ke5, White plays 2.Rxf5+
Nxf5 3.Bxf5 Kxf5 4.a5 and the pawn
promotes because the Black king isn’t in the
square of the pawn. 1.Rxf5 doesn’t work
because of 1...Kxf5! 2.a5 Ne8 3.a6 Nc7 4.a7
Ke5 and the Black king walks over and
captures the pawn.
Lesson 10
Basset Hound Solutions
10-1
1...Ne5 mate (The knight also
attacks d3.)
10-2
1.Nbd4 mate (1.Nfd4+ isn’t mate
because of 1...Kxe5)
10-3 Black can checkmate White in one
move only one way by playing 1...Qxb2
mate. 1...Ra1+ isn’t mate because of 2.Nb1.
10-4
White can checkmate Black two
ways: 1.Nf7 mate and 1.Qh7 mate.
10-5
Black can checkmate White two
ways: 1...c3 mate and 1...Bd4 mate.
10-6 White can checkmate Black in one
move only one way by playing 1.Nf7 double
checkmate (with the knight on f7 and the
bishop on c1). 1 .Qh3+ isn’t mate because of
1...Kg6.
10-7
1...Nd3 is mate because the e2
pawn is pinned to the king by the Black
queen.
10-8
White must put the king in check
and take away the g2 flight square in order to
checkmate Black. The only checkmate move
is 1.0 -0 mate.
10-9 1.Qd6 mate
10-10 1.Rh7 mate
Chess Detective
Solutions
10-11 1.Qe8+ Qe7 (or 1...Nge7 or 1...
Nce7) 2.d5 mate
10-12 1.c3+ Kb3 2.Qd1 mate
10-13 1....Nh3+ 2.Kf1 Nh2 mate
10-14 1.Rxc6+ bxc3 2.Qc7 mate
10-15 1.Rc7+ Kb8 2.Na6 mate
10-16 1.Qg6+! fxg6 2.fxg6 mate
10-17 1...h6+ 2.Kh4 Bf2 mate
10-18 1...Nh3+ 2.Kh2 Ng4 mate
10-19 1.Bf1+ Bg2 2.Nf2 mate
10-20 1.Rh2+ Kg1 2.0-0-0 mate or 2.Kd2
mate
GLOSSARY
absolute pin when a piece is pinned to the king and cannot move
because the king would be placed in check
adjacent next to
algebraic notation chess language that describes a move by
giving the moving piece and the square it moves to
analog clock a chess clock with a traditional clock face with
hands and a flag which falls at the top of the hour to show that a
player has run out of time
attacker a piece that attacks an opposing piece
back rank another name for the first rank, the rank closest to the
player behind the pawns in the game’s starting position
back rank mate a checkmate that occurs when the king is
attacked on the back rank by a queen or rook and his escape is
blocked by his own pawns
backward pawn a typically weak base pawn on a half-open file
that may be easily attacked by the opponent’s pieces, especially
the rooks
base pawn the pawn in a pawn chain that is closest to the player
and has no pawn to protect it
bishop (symbol – B) a piece worth three pawns that moves
diagonally in any direction until it runs into another piece or the
edge of the board
Black player with the dark-colored pieces who moves second in
the game
Black move written in algebraic notation by giving the move
number, followed by three periods, and then the move; for
example 1...Nf6
capture when a piece moves to a square where an opposing piece
is resting and removes that piece from the board
castling a special move that usually occurs in the opening, getting
the king out of the center and developing a rook, and the only time
a player can move two pieces in one turn
center the middle of the board that includes the squares e4, e5,
d4, and d5
check when the king is placed under attack
checkmate the object of the game which occurs when the king is
put in check and there is no way for the king to escape
combination a series of moves that are played in an exact
sequence to gain an advantage
consecutively one immediately following another
defender a piece that defends one of its own pieces
developing a piece (also called development) when a piece
(knight, bishop, rook, or queen) moves off its starting square to a
better square, increasing its power
digital clock a chess clock with a digital face (showing numbers
only, no clock hands)
discovered attack moving a piece and attacking an opponent’s
piece with a bishop, rook, or queen hiding behind the piece that
moved
discovered check moving a piece and checking the opponent’s
king with a bishop, rook, or queen hiding behind the piece that
moved
double attack a discovered attack where the moving piece also
attacks an opponent’s piece
double check a discovered check where the moving piece also
checks the king
doubled isolated pawns two pawns lined up vertically on the
same file with no pawn on a file next to them that can protect
them
doubled pawns two pawns lined up vertically on the same file
that have a pawn on a file next to them that can provide protection
draw a chess game ending in a tie
draw offer when one of the players makes his move and verbally
offers a draw to his opponent
endgame the part of the game when only a few pieces are still on
the board
en passant (“in passing” in French) a special pawn capture that
exists for only one move and occurs when a pawn on the fifth rank
captures an opposing pawn on an adjacent file that advanced two
squares forward as if it only moved one square forward
en prise (“in take” in French) refers to piece that can be captured
50-move draw a rare type of draw where 50 moves have taken
place with no pieces being captured and no pawns moved
files columns on the chessboard identified by a letter from a to h
flag the part of an analog chess clock that falls at the top of the
hour when a player has run out of time
flight square (or escape square) a square that a king can move to
in order to escape checkmate
forcing move a move, like a check, giving the opponent little or
no choice in his response
fork a common tactic that occurs when a piece attacks two or
more pieces at once
free stuff another way to say hanging pieces
etiquette manners
half-open file a file where one player has a pawn and his
opponent doesn’t have a pawn
hanging a piece or pawn left unguarded and exposed to capture
“I adjust” what a player says when he wishes to center a piece
on its square and not be forced to move it because of the “touch
move” rule
horizontally left or right
illegal move moving a piece improperly or leaving the king in
check after making a move
insufficient not enough
insufficient mating material when a player does not have
enough material left on the board to force checkmate
isolated passed pawn a pawn that has the weakness of being
isolated but the strength of being passed
isolated pawn a weak pawn that has no pawn on a file next to it
interpose to block or put in between
king (symbol – K) the most valuable piece that cannot be
captured and moves one square at a time in any direction
kingside the half of the board where the kings begin the game
(the e-, f-, g-, and h-files)
knight (symbol – N) worth three pawns and the only piece that
can jump over other pieces, moving in the shape of a capital “L”
“knight on the rim is dim” a chess rhyme saying a knight is
poorly placed on the edge of the board due to its limited short-
range powers
major pieces rooks and queens
mate another word for checkmate
material the sum of the values of the pieces
mating material having enough material to force checkmate
mating net when the king’s flight squares are eliminated, making
checkmate possible
middlegame the middle part of the game after the pieces have
been developed, usually beginning around move ten and lasting
until only a few pieces remain on the board
minor pieces knights and bishops
open file a file not blocked by any pawns
opening the first ten or so moves of the game when most of the
pieces are developed and the kings castle
passed pawn a pawn that can move all the way up the board to
its promotion square without being blocked or captured by an
enemy pawn
passive holding back
pawn (symbol – left blank) the least valuable piece on the board
that can only move in a forward direction, captures diagonally,
and can promote to another piece, usually the queen, when it
reaches the other side of the board
pawn chain pawns on files next to each other that are connected
in a diagonal line, so they protect each other
perpetual never ending or repeating forever
perpetual check the most common type of threefold repetition,
when the player who is usually losing the game forces a position
where he can check the other king back and forth forever
pieces knights, bishops, rooks, queens, or kings (pawns are
referred to as pawns)
pin when a long-range piece (queen, rook, or bishop) attacks an
opponent’s piece that is shielding another piece of greater value
promotion or promoting a pawn when a pawn gets across the
board to the eighth rank and turns into another piece, usually a
queen
protected when a piece is defended by another piece, usually
making it a bad idea for the opponent to capture it
protected passed pawn a passed pawn that is protected by a
friendly pawn
queen (symbol – Q) the most powerful piece on the board that
moves in any direction in a straight line until it runs into another
piece or the edge of the board and is worth nine pawns
queenside the half of the board where the queens begin the game
(the a-, b-, c-, and d-files)
ranks the chess name for rows that run horizontally across a
chess board
resigning when a player loses the game by giving up
roller a type of checkmate where a rook and queen (or two rooks
or two queens) take turns moving past each other in order to
shrink the box around the opposing king, eventually leading to
checkmate
rook (symbol – R) the piece worth five pawns that moves up and
down and left and right until it runs into another piece or the edge
of the board
sacrifice giving up material in order to gain some other type of
advantage or a checkmate
scholastic tournament a chess tournament for children
Scholar’s Mate (also known as the four-move checkmate) a
quick, easily avoided check-mate where one player wins by
bringing his queen out early in the game
score sheet a special piece of paper with spaces for usually 60
moves for each player to record a chess game
skewer a type of tactic like a pin, but where the more valuable
piece is in front of the less valuable piece
smothered mate when the king is checkmated by a knight while
surrounded by his own pieces (usually a rook and two pawns)
which prevent his escape
square of the pawn an imaginary square the defending king must
get into in order to win the race to the promotion square with a
pawn
stalemate a type of draw where the player to move has no legal
moves
starting position the beginning of the game with White to move
sufficient enough
symmetrical mirror image
tactics immediate threats and attacks that make up the battles
between pieces
threefold repetition a type of draw that occurs when the same
identical position repeats three different times
tempo a single move, relating to time
threat an aggressive move that attacks an opposing piece
“touch move” rule if a player touches his piece, he must move it,
if he can legally
“touch take” rule if a player touches an opponent’s piece, he
must capture it, if he can legally
tripled isolated pawns three pawns lined up vertically on the
same file with no pawn on a file next to them to provide
protection
tripled pawns three pawns lined up vertically on the same file
with a pawn on a file next to them that can provide protection
vertically up or down
White player with the light-colored pieces who moves first in the
game
White move written in algebraic notation by giving the move
number, followed by a period, and then the move; for example,
15.Nf3
ABOUT THE AUTHOR
At age six, Todd Bardwick learned how to
play chess from his father, Alan, an expert
strength tournament chess player. Alan utilized
many of the chess teaching ideas presented in this
book.
Back in the early 1970’s when few children
played in rated tournaments, Todd consistently
improved his game and was nationally ranked
most of his youth for his age group.
After leading his high school chess team to
several state titles, Todd went to college and
graduated first in his class from the University of
Colorado at Boulder in 1985 with a B.S . in Civil
Engineering. After college, he moved to San
Diego for five years where he worked as a rocket
scientist (structural analyst).
Moving back to Denver in late 1989, Todd
worked as an entrepreneur and continued his
chess-playing career. In 1993, Todd achieved the
National Master title awarded by the United
States Chess Federation (USCF).
Of
Todd’s
numerous
tournament
achievements, most notable was winning the
Denver Open Championship for five consecutive
years (1992-1996). His average performance
rating in these tournaments was over 2400.
In the early 1990’s, Todd discovered his
passion for teaching chess to adults and children.
From 1993-2009, he wrote a popular monthly
chess column in the Rocky Mountain News, one
of the nation’s largest newspapers.
In 1995, Todd founded the annual Rocky
Mountain Chess Camp, one of the oldest and
most popular children’s chess camps in the
United States. Students come from across the
nation to participate in the camp.
In 2002, The Chess Detective ® column was
born in School Mates, the national children’s
chess magazine published by the United States
Chess Federation. School Mates later became
Chess Life for Kids magazine. Visit
www.ColoradoMasterChess.com to see additional
columns that Todd has written for the Colorado
Chess Informant.
Having taught over 10,000 chess classes, Todd
has been one of the country’s leading full-time
chess-teaching masters for many years. His
logical and fun approach to the game and
reputation as an excellent teacher inspired Todd
to form the Chess Academy of Denver where he
teaches well over 750 students per year through
private lessons, school classes, chess camps, and
year-round camp workshops for adults and
children. Todd also regularly trains elementary
school teachers who want to learn how to
incorporate chess and its educational benefits into
their classrooms.
Educationally, Todd runs school district chess
programs, teaches in Gifted and Talented
programs, and trains parents and teachers how to
effectively teach chess to children in their school
enrichment programs. Todd accepted an
invitation to speak at the 2002 National Gifted
and Talented conference for teachers and parents
about the benefits of chess and how to improve a
child’s math skills using chess as a vehicle.
In 2004, Todd completed his first book,
Teaching Chess in the 21st
Century – Strategies
and Connections to a Standards-Based World, a
comprehensive guide to teaching chess as part of
the elementary school math curriculum. The
success of Teaching Chess in the 21st
Century
prompted Todd to create this companion
workbook.
Todd published his third book, Chess Strategy
Workbook, in 2010. This is an intermediate level
chess book for students who have mastered the
concepts taught here in Chess Workbook for
Children.
Todd’s students have achieved accolades in
life and chess. Successes include gaining early
admission to top universities, like Stanford and
Yale, becoming Presidential Scholars, being
ranked number one in chess in the United States
for their age group and winning state and national
chess titles.
Todd is available for speaking engagements,
chess teacher training, chess lessons, chess
classes, and simultaneous chess exhibitions. Todd
can be reached through his website at
www.ColoradoMasterChess.com.